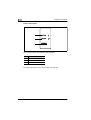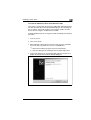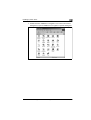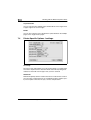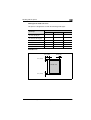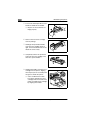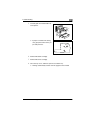
1
PagePro 1250E
User’s Guide
®
1800690-001A
EDNord - Istedgade 37A - 9000 Aalborg - telefon 96333500
Trademarks
The following are registered trademarks of MINOLTA-QMS, Inc.: QMS and the
MINOLTA-QMS logo. Minolta, Fine-ART, and PagePro are trademarks of Minolta
Co., Ltd. Other product names mentioned in this guide may also be trademarks or
registered trademarks of their respective owners.
Proprietary Statement
The digitally encoded software included with your printer is Copyrighted © 2002
by MINOLTA-QMS, Inc. All Rights Reserved. This software may not be reproduced,
modified, displayed, transferred, or copied in any form or in any manner or on
any media, in whole or in part, without the express written permission of MINOLTAQMS, Inc.
Copyright Notice
This manual is Copyrighted © 2002 by MINOLTA-QMS, Inc., One Magnum Pass,
Mobile, AL 36618. All Rights Reserved. This document may not be copied, in whole
or part, nor transferred to any other media or language, without written permission
of MINOLTA-QMS, Inc.
Manual Notice
MINOLTA-QMS, Inc. reserves the right to make changes to this manual and to the
equipment described herein without notice. Considerable effort has been made to
ensure that this manual is free of inaccuracies and omissions. However, MINOLTAQMS, Inc. makes no warranty of any kind including, but not limited to, any implied
warranties of merchantability and fitness for a particular purpose with regard to this
manual. MINOLTA-QMS, Inc. assumes no responsibility for, or liability for, errors
contained in this manual or for incidental, special, or consequential damages
arising out of the furnishing of this manual, or the use of this manual in operating
the equipment, or in connection with the performance of the equipment when so
operated.
ii
EDNord - Istedgade 37A - 9000 Aalborg - telefon 96333500
Contents
1
2
3
Introduction
1.1
Welcome ........................................................................................1-1
1.2
Roadmap of this manual ..............................................................1-2
Brief explanation of special type styles and method of
presentation ....................................................................................1-3
Setting up the printer
2.1
Overview of the printer .................................................................2-1
Exterior............................................................................................2-1
Interior .............................................................................................2-2
Optional accessories.......................................................................2-3
Printer control panel ........................................................................2-4
2.2
Installing your laser printer..........................................................2-5
Place of installation .........................................................................2-5
Storage of consumables and accessories ......................................2-5
Ambient conditions..........................................................................2-5
Space requirements ........................................................................2-6
2.3
Setting up your laser printer ........................................................2-7
Loading paper in Tray 1 ..................................................................2-7
Loading paper in the manual feed tray............................................2-8
Connecting the power cord .............................................................2-9
Turning the printer on and off........................................................2-10
Printing a configuration page ........................................................2-11
Connecting the printer to a computer............................................2-12
Parallel interface (Windows XP/2000/Me/98/95/NT 4.0)...............2-12
USB interface (Windows XP/2000/Me/98) ....................................2-13
Installing a printer driver
3.1
Minimum system requirements ...................................................3-1
Windows..........................................................................................3-1
Macintosh........................................................................................3-1
3.2
Notes on installing the printer driver ..........................................3-2
Don’t be afraid of the installation!....................................................3-2
General information on the printer driver ........................................3-2
Information on installation using “Add Printer” (for Windows) .........3-2
3.3
Installing the USB device driver (Windows) ...............................3-3
EDNord - Istedgade 37A - 9000 Aalborg - telefon 96333500
iii
To install the USB device driver under Windows 98....................... 3-3
To install the USB device driver under Windows Me...................... 3-5
To install the USB device driver under Windows 2000................... 3-7
To install the USB device driver under Windows XP.................... 3-11
4
iv
3.4
Installing the printer driver using the installer (Auto Run)
under Windows........................................................................... 3-15
3.5
Installing the printer driver under Windows 95 ....................... 3-16
To install the printer driver using Plug-and-Play ........................... 3-16
To install the printer driver using the Add Printer Wizard ............. 3-17
3.6
Installing the printer driver under Windows 98/Me ................. 3-19
To install the printer driver using Plug-and-Play under
Windows 98 .................................................................................. 3-19
To install the printer driver using Plug-and-Play under
Windows Me ................................................................................. 3-20
To install the printer driver using the Add Printer Wizard under
Windows Me/98 ............................................................................ 3-22
3.7
Installing the printer driver under Windows NT 4.0 ................ 3-24
To install the printer driver using the Add Printer Wizard ............. 3-24
3.8
Installing the printer driver under Windows 2000 ................... 3-26
To install the printer driver using Plug-and-Play ........................... 3-26
To install the printer driver using the Add Printer Wizard ............. 3-29
3.9
Installing the printer driver under Windows XP ...................... 3-31
To install the printer driver using Plug-and-Play ........................... 3-31
To install the printer driver using the Add Printer Wizard ............. 3-33
3.10
Installing the PostScript printer driver under Mac OS............ 3-36
To install the PostScript printer driver under Mac OS .................. 3-36
To specify the USB printer settings .............................................. 3-37
3.11
Uninstalling the PCL printer driver and USB device driver .... 3-38
To uninstall the PCL printer driver under Windows
Me/98/95/2000/NT 4.0.................................................................. 3-38
To uninstall the printer driver under Windows XP ........................ 3-42
Working with the Windows PCL printer drivers
4.1
Displaying printer driver settings
(Windows Me/98/95/2000/NT 4.0)................................................. 4-1
4.2
Displaying printer driver settings (Windows XP) ...................... 4-2
4.3
Paper tab ....................................................................................... 4-3
4.4
Page Layout tab............................................................................ 4-4
4.5
Quality tab ..................................................................................... 4-5
4.6
Device Option tab ......................................................................... 4-6
EDNord - Istedgade 37A - 9000 Aalborg - telefon 96333500
5
6
7
Working with the Windows PostScript printer drivers
5.1
Displaying printer driver settings
(Windows Me/98/95, 2000, NT 4.0) ...............................................5-1
5.2
Displaying printer driver settings (Windows XP).......................5-2
5.3
Paper tab (Windows Me/98/95).....................................................5-3
5.4
Device Options tab (Windows Me/98/95) ....................................5-4
Available printer memory ................................................................5-4
Printer features................................................................................5-4
Installable options ...........................................................................5-5
5.5
Page Setup tab (Windows NT 4.0) ...............................................5-6
5.6
Advanced tab (Windows NT 4.0)..................................................5-7
5.7
Device Settings tab (Windows NT 4.0) ........................................5-8
5.8
Layout tab (Windows 2000)..........................................................5-9
5.9
Paper/Quality tab (Windows 2000) ............................................5-10
Advanced Options (Windows 2000)..............................................5-11
5.10
Device Settings tab (Windows 2000).........................................5-12
Working with the Windows printer tools
6.1
Environment ..................................................................................6-1
6.2
Opening the Status Monitor .........................................................6-2
Altering the size of the Status Monitor window ...............................6-2
6.3
Monitoring print jobs with the Status Monitor ...........................6-3
6.4
Opening the Printer Control Panel ..............................................6-4
6.5
Paper tab........................................................................................6-5
6.6
Printer Setting tab .........................................................................6-6
6.7
Test Print tab .................................................................................6-7
6.8
Counter tab ....................................................................................6-8
6.9
Configuration tab ..........................................................................6-9
Working with the Macintosh printer driver
7.1
Page Attributes settings...............................................................7-1
Paper...............................................................................................7-1
Orientation.......................................................................................7-1
Scale ...............................................................................................7-1
Custom Page ..................................................................................7-2
7.2
General settings ............................................................................7-2
Copies .............................................................................................7-3
EDNord - Istedgade 37A - 9000 Aalborg - telefon 96333500
v
Collated .......................................................................................... 7-3
Paper Source.................................................................................. 7-3
8
9
7.3
Layout settings ............................................................................. 7-3
Pages per sheet ............................................................................. 7-3
Layout direction .............................................................................. 7-4
Border............................................................................................. 7-4
7.4
Printer-Specific Options 1 settings............................................. 7-4
Fit to Page ...................................................................................... 7-4
Watermark ...................................................................................... 7-4
7.5
Printer Specific Options 2 settings............................................. 7-5
Toner Saving .................................................................................. 7-5
Media Type..................................................................................... 7-5
Fine Art ........................................................................................... 7-5
Resolution....................................................................................... 7-5
Tray 2 ............................................................................................. 7-5
Working with the printer
8.1
Please note the following points................................................. 8-1
What should I watch out for when loading paper?.......................... 8-1
What should I watch out for when loading envelopes? .................. 8-1
Which media sizes can I use? ........................................................ 8-2
What types of media can I use? ..................................................... 8-3
Printable area ................................................................................. 8-3
8.2
Using the panel button................................................................. 8-4
Printing special pages .................................................................... 8-4
Continuing a print job after an error message ................................ 8-5
Cancelling a print job ...................................................................... 8-5
8.3
Loading media .............................................................................. 8-6
Loading media in Tray 1 ................................................................. 8-6
Loading media in the manual feed tray .......................................... 8-7
Loading media in the lower feeder unit (Tray 2) ............................. 8-7
8.4
Determining the direction of printed sheets .............................. 8-9
Installing printer options
9.1
Installing the lower feeder unit (Tray 2)...................................... 9-1
9.2
Installing the face-up tray ............................................................ 9-3
9.3
Installing a DIMM (Dual In-Line Memory Module)...................... 9-4
10 Maintaining the printer
10.1
vi
Replacing the toner cartridge.................................................... 10-2
EDNord - Istedgade 37A - 9000 Aalborg - telefon 96333500
Resetting the counter for the toner cartridge.................................10-5
10.2
Replacing the drum cartridge ....................................................10-7
Resetting the counter for the drum cartridge...............................10-10
10.3
Cleaning the printer ..................................................................10-11
Cleaning the outside of the printer ..............................................10-11
Cleaning the paper feed roller.....................................................10-11
11 Troubleshooting
11.1
Clearing media jams ...................................................................11-2
Clearing a media jam inside the printer.........................................11-2
Clearing a media jam in the output tray ........................................11-4
Clearing a media jam at Tray 1 .....................................................11-5
Clearing a media jam in the manual feed tray...............................11-6
Clearing a media jam in the lower feeder unit (Tray 2) .................11-7
11.2
General printing problems .........................................................11-8
11.3
Print quality problems ................................................................11-8
11.4
Printer messages ......................................................................11-11
Indicator functions .......................................................................11-11
Status messages.........................................................................11-12
Error messages...........................................................................11-12
Service message.........................................................................11-13
12 Specifications
12.1
Safety specifications ..................................................................12-1
12.2
Technical specifications.............................................................12-1
Printer............................................................................................12-1
Lower feeder unit (option) .............................................................12-2
SDRAM-DIMM expansion memory (option)..................................12-3
Parallel interface connectors and cables ......................................12-3
USB interface connectors and cables ...........................................12-3
12.3
Our concern for environmental protection...............................12-4
What is an ENERGY STAR® product?.........................................12-4
12.4
FCC Part 15 - Radio Frequency Devices...................................12-5
For US Users ................................................................................12-5
12.5
Interference-Causing Equipment Standard
(ICES-003 ISSUE 3) .....................................................................12-6
For Canadian users.......................................................................12-6
12.6
CE Marking (Declaration of Conformity)...................................12-6
For European users ......................................................................12-6
EDNord - Istedgade 37A - 9000 Aalborg - telefon 96333500
vii
12.7
CISPR 22 and local rules ........................................................... 12-6
12.8
Acoustic Noise............................................................................ 12-6
12.9
Safety information ...................................................................... 12-7
Warning and precaution symbols ................................................. 12-7
Meaning of symbols...................................................................... 12-7
WARNING .................................................................................... 12-8
CAUTION ..................................................................................... 12-9
12.10 Working safely with your laser printer ................................... 12-10
Notes on your safety and operating safety ................................. 12-10
Laser safety ................................................................................ 12-12
Internal laser radiation ................................................................ 12-12
Laser caution label ..................................................................... 12-12
Laser safety label ....................................................................... 12-13
For United States users.............................................................. 12-13
For users in all countries ............................................................ 12-14
For Denmark users..................................................................... 12-14
For Norway users ....................................................................... 12-14
For Finland, Sweden users......................................................... 12-14
Ozone release ............................................................................ 12-15
Dégagement d’ozone ................................................................. 12-15
Index
viii
EDNord - Istedgade 37A - 9000 Aalborg - telefon 96333500
Introduction
1
1
Introduction
1.1
Welcome
Thank you for purchasing a PagePro 1250E.
So you can use your new laser printer effectively and achieve the best
possible results, this manual provides you with information on the following topics:
G
Installing the printer driver
G
Working with the printer drivers and tools
G
Working with the printer
G
Caring for and maintaining the printer
G
Troubleshooting
Read this manual carefully before operating your printer for the first time,
and always keep the manual within easy reach.
EDNord - Istedgade 37A - 9000 Aalborg - telefon 96333500
1-1
Introduction
1
1.2
Roadmap of this manual
The following table is designed to help you find the information you need.
Alternatively, to find information on a specific problem quickly and precisely, refer to the index at the end of this manual.
No.
1-2
Title of chapter
Contents of chapter
1
Introduction
Overview of this manual.
2
Setting up the printer
Information on how to set up the printer as well as an
introduction to its features.
3
Installing a printer driver
A step-by-step explanation of the procedure for
installing a printer driver.
4
Working with the Windows
PCL printer drivers
Overview of the Windows PCL printer drivers.
5
Working with the Windows
PostScript printer drivers
Overview of the Windows PostScript printer drivers.
6
Working with the Windows
printer tools
Details of how to use the Status Monitor and Printer
Control Panel.
7
Working with the Macintosh
printer drivers
Details of how to use the Macintosh printer driver to
control the printer.
8
Working with the printer
General information on how to use your printer,
including supported media sizes and types, loading
media, monitoring print jobs, and canceling print jobs.
9
Installing printer options
Detailed instructions on installing printer options:
lower feeder unit, face-up tray, and SDRAM-DIMMs
(Dual In-line Memory Modules).
10
Maintaining the printer
Information on how to replace consumables and
clean the printer.
11
Troubleshooting
Information on identifying and solving printer
problems.
12
Specifications
Technical specifications, safety information, and
regulatory information.
Index
Index of the contents of this manual.
EDNord - Istedgade 37A - 9000 Aalborg - telefon 96333500
Introduction
1
Brief explanation of special type styles and method of presentation
Special type styles and methods of presentation are used in this manual
to highlight various circumstances. The following examples will help you
recognize and deal with the most important of these.
CAUTION OR WARNING
This is a caution or warning!
A caution alerts you to damage that could result to the printer by treating
it improperly while a warning alerts you to the potential for bodily harm.
➜
The arrow refers you to safety measures that must be taken to prevent
the hazard.
[MENU]
button on the printer driver with the description “Menu”
➜
Single action to be performed (there are no other steps)
1 Step 1 of a series of actions
2 Step 2 of a series of actions.
? Help is available here.
➜
The approach that is suggested
here is sure to get you to your
desired result.
Here you can see what has to be done.
✎
This is a helpful tip
Text passages that are identified in this manner provide you with tips
and tricks that make it even easier to work with the printer.
EDNord - Istedgade 37A - 9000 Aalborg - telefon 96333500
1-3
EDNord - Istedgade 37A - 9000 Aalborg - telefon 96333500
Setting up the printer
2
2
Setting up the printer
2.1
Overview of the printer
Exterior
3
4
5
1
6
7
8
2
9
12
13
10
11
No.
Description
No.
Description
1
Top cover release button
8
Tray cover
2
Power switch (ON/OFF)
9
Tray 1 (universal tray)
3
Face-down tray (printed side down)
10
USB interface connector
4
Control panel
11
Parallel interface connector
5
Top cover
12
Face-up/face-down selection switch
(printed side up/down)
6
Paper guides for manual feed tray
13
Power cord socket
7
Manual feed tray
EDNord - Istedgade 37A - 9000 Aalborg - telefon 96333500
2-1
Setting up the printer
2
Interior
1
2
No.
2-2
3
Description
No.
1
Fusing unit
3
2
Toner cartridge
Description
Drum cartridge
EDNord - Istedgade 37A - 9000 Aalborg - telefon 96333500
Setting up the printer
2
Optional accessories
1
2
No.
1
Description
Face-up tray
(printed side up)
No.
2
Description
Lower feeder unit (Tray 2)
(500-sheet capacity)
EDNord - Istedgade 37A - 9000 Aalborg - telefon 96333500
2-3
Setting up the printer
2
Printer control panel
1
2
3
The control panel has two indicators and one button.
No.
Description
1
Error indicator (orange)
2
Ready indicator (green)
3
Panel button
For further information on the control panel, see page 8-4.
2-4
EDNord - Istedgade 37A - 9000 Aalborg - telefon 96333500
Setting up the printer
2.2
2
Installing your laser printer
Place of installation
Set up the printer in a place that is
G
dry and free from dust
G
on a stable surface
G
well ventilated
G
near an easily accessible power socket
G
away from objects which might obstruct the printer’s ventilation grille
G
away from highly flammable items (such as curtains)
G
away from splashing liquids
G
away from organic gases (such as ammonia)
G
away from direct sunlight
G
away from severe temperature fluctuations
G
away from exhaust-air from heating, ventilation, and air-conditioning
systems
Storage of consumables and accessories
Printing consumables and accessories should be kept
G
sealed in their original packaging
G
protected from direct sunlight or heat
G
protected from fluorescent light
G
in a cool, dry, and dust-free place
G
out of reach of children
WARNING
Toner poses a health hazard!
Toner is harmful if swallowed.
➜
If you swallow toner, consult a doctor immediately.
➜
If you get toner on your hands, wash them immediately with cold water
and soap.
Ambient conditions
The optimum ambient conditions for your printer are as follows:
G
Temperature range: 50°F–95°F/10°C–35°C with maximum fluctuations of 18°F/10°C per hour
G
Humidity range: 15%–85% with maximum fluctuations of 20% per hour
EDNord - Istedgade 37A - 9000 Aalborg - telefon 96333500
2-5
Setting up the printer
2
Space requirements
Be sure to provide enough space around the printer to ensure easy printer
operation, paper and toner replacement, and maintenance.
5.9 in.
(150 mm)
11.8 in.
(300 mm)
3.9 in. (100 mm)
21.7" (550 mm)
15.6" (395 mm)
11.2" (285 mm)
35.1 in. (891 mm)
17.4 in. (441 mm)
19.9 in. (505 mm)
2-6
EDNord - Istedgade 37A - 9000 Aalborg - telefon 96333500
23.6 in. (600 mm)
3.9 in. (100 mm)
Setting up the printer
2.3
2
Setting up your laser printer
Loading paper in Tray 1
1 Remove the tray cover.
2 Squeeze the right media guide and
open the media guides.
3 Place a stack of paper in the tray.
many sheets may I place in
? How
the tray?
➜
Tray 1 has a capacity of 250
sheets of plain paper. The stack
of paper should not rise above
the media limit mark.
if I am loading legal-size
? What
paper?
➜
Open the cover at the front of
the tray.
4 Squeeze the right media guide and adjust the media guides so that
both the left and right sides of the paper stack are secure.
5 Replace the tray cover.
6 Open the face-down tray.
EDNord - Istedgade 37A - 9000 Aalborg - telefon 96333500
2-7
Setting up the printer
2
❍
If you installed an optional faceup tray and you want the sheets
to come out face up, then open
the face-up tray instead of the
face-down tray, and set the
face-up/face-down selection
switch as shown.
Loading paper in the manual feed tray
1 Make sure that the tray cover is properly attached to Tray 1.
2 Open the paper guides.
3 Insert a sheet of paper as far as
possible into the manual feed tray
with the side to be printed facing up,
and then adjust the paper guides so
that both sides of the paper are secure.
many sheets may I place in
? How
the tray?
➜
2-8
Load only one sheet of paper at
a time.
EDNord - Istedgade 37A - 9000 Aalborg - telefon 96333500
Setting up the printer
2
Connecting the power cord
WARNING
Use only the power cord shipped with the printer. Using the wrong
power cord may lead to a short-circuit!
The use of a power cord of inadequate cross-section can lead to a shortcircuit.
➜
Only use an extension cable which has a higher rating than the current
consumption of the printer.
➜
Only use grounded cords.
➜
Always observe the relevant local regulations regarding the connection of electrical equipment to the main network.
This laser printer requires a non-fluctuating power supply. If necessary,
ask an electrician for advice.
✔
Voltage:
110V - 10%, 127V + 6%, or 220-240V ± 10%
✔
Frequency:
50-60Hz ± 3Hz
1 Make sure that the printer’s power
switch is in the “O” (OFF) position.
2 Connect one end of the power cord
to the power cord socket on the
back of the printer, and plug the other end into a power outlet.
EDNord - Istedgade 37A - 9000 Aalborg - telefon 96333500
2-9
Setting up the printer
2
Turning the printer on and off
✎
Note
Improper handling may damage the printer!
- Never turn off the printer while a print job is in progress, the printer is
receiving data from the computer (blinking green “Ready” indicator on
control panel), or the printer is being reset.
➜
Set the power switch to the “I” (ON)
position to turn on the printer.
The printer is ready to use in approximately 20 seconds. The green
“Ready” indicator should be on (but
not blinking) and the orange “Error”
indicator off.
➜
Set the power switch to the
“O” (OFF) position to turn off the
printer.
✎
Saving energy is sensible!
When the printer has been inactive for a certain length of time, it automatically switches to the POWER SAVE mode. This time period can
be adjusted via the Windows printer tools (see chapter 6).
When the printer receives a new print job while in POWER SAVE
mode, it automatically switches to the warmup phase and is ready to
print within 7 seconds.
2-10
EDNord - Istedgade 37A - 9000 Aalborg - telefon 96333500
Setting up the printer
2
Printing a configuration page
After you have set up and turned on the printer, you should print a configuration page to ensure that the printer is operating correctly.
1 Make sure that
❍
❍
the orange “Error” indicator is off
the green “Ready” indicator is on (but not blinking).
2 Briefly press the panel button.
❍
All indicators blink rapidly.
Panel
button
3 Press the panel button two more times.
❍
A configuration page is printed.
EDNord - Istedgade 37A - 9000 Aalborg - telefon 96333500
2-11
Setting up the printer
2
Connecting the printer to a computer
Parallel interface (Windows XP/2000/Me/98/95/NT 4.0)
1 Turn off both the printer and PC.
2 Connect one end of the interface cable to the parallel port of the PC.
3 Connect the other end of the interface cable to the parallel interface
connector on the back of the printer.
Secure the interface cable using the
two clips.
4 Turn on the printer and then, when
it’s ready, turn on the PC.
the Windows operating
? Does
system detect the new device?
➜
If you are using Windows XP/Me/2000/98, plug-and-play printer
driver installation should start automatically. Follow the instructions on the screen. See chapter 3 for more information.
➜
If you’re using Windows XP/Me/2000/98 and plug-and-play driver
installation doesn’t start automatically, leave the printer on, unplug
both ends of the interface cable, and the reconnect the cable. If this
does not work, use the instructions in chapter 3 to install the printer
driver manually.
➜
If you’re using Windows 95/NT 4.0, use the instructions in chapter
3 to install the printer driver manually.
For technical specifications of the parallel cable, see chapter 12.
✎
Note
Using the wrong type of cable can damage the socket on the
printer.
- Use only an IEEE 1284 type B shielded interface cable.
2-12
EDNord - Istedgade 37A - 9000 Aalborg - telefon 96333500
Setting up the printer
2
USB interface (Windows XP/2000/Me/98)
✎
Note
Windows 95/NT4.0 do not support USB connections.
1 Turn off both the PC and the printer.
2 Turn on the PC.
3 Turn on the printer.
4 When Windows and the printer are both ready, connect one end of the
interface cable to the PC’s USB port.
5 Connect the other end of the interface cable to the USB interface connector on the back of the printer.
the Windows operating
? Does
system detect the new device?
➜
Plug-and-play driver installation
should start automatically. Follow the instructions on the
screen. See chapter 3 for more
information.
➜
If plug-and-play driver installation doesn’t start automatically, leave
the printer on, unplug both ends of the interface cable, and the reconnect the cable. If this does not work, use the instructions in
chapter 3 to install the printer driver manually.
For technical specifications of the cable, see chapter 12.
✎
Note
Using the wrong type of cable can damage the socket on the
printer.
- Use only a USB Revision 1.1 compliant cable for connecting the
printer to your computer.
EDNord - Istedgade 37A - 9000 Aalborg - telefon 96333500
2-13
EDNord - Istedgade 37A - 9000 Aalborg - telefon 96333500
Installing a printer driver
3
Installing a printer driver
3.1
Minimum system requirements
3
Windows
G
IBM-compatible PC with a Pentium 133 MHz processor
G
Microsoft Windows XP/Me/2000/98/95/NT 4.0
G
64 MB of RAM
G
15 MB free hard disk space
G
IEEE 1284 Type B parallel port or USB port
G
CD-ROM drive
Macintosh
G
Apple Macintosh computer with a PowerPC 604 processor
G
Mac OS 9/OS X
G
128 MB of RAM
G
15 MB free hard disk space
G
USB port
G
CD-ROM drive
EDNord - Istedgade 37A - 9000 Aalborg - telefon 96333500
3-1
Installing a printer driver
3
3.2
Notes on installing the printer driver
Don’t be afraid of the installation!
The installation program is designed so that even people not accustomed
to working with computers can easily install a printer driver. You will be led
step-by-step through the installation process. All you need to do is follow
the installation program.
Before you begin the installation, you should know the following information:
G
What operating system is running on your computer (for example,
Windows XP)?
G
What is the letter of your CD-ROM drive (for example, D)?
G
Which optional accessories are installed on your printer (for example,
a lower feeder unit)?
G
Is your printer connected directly to your computer via a parallel interface cable or a USB cable?
General information on the printer driver
The printer driver is delivered on a CD-ROM along with the printer.
✎
No CD-ROM drive?
You can download the printer driver from the Internet. You can find the
latest version of the printer driver at http://www.minolta-qms.com
(choose "Online Help & Drivers").
Information on installation using “Add Printer” (for Windows)
When installing the printer driver using “Start>Settings>Printer>Add Printer,” note the following points:
G
The dialog box for installing options is not displayed. Adjust the additional options after you have completed the installation in the printer
driver.
G
The Status Monitor will not be installed.
G
The uninstaller utility will not be installed.
✎
Installing the PostScript printer driver
- The PostScript printer driver can be installed under Windows only by
using the Add Printer Wizard.
3-2
EDNord - Istedgade 37A - 9000 Aalborg - telefon 96333500
Installing a printer driver
3.3
3
Installing the USB device driver (Windows)
When connecting the printer to your PC with a USB cable, install the USB
device driver according to the following instructions before installing the
printer driver.
✎
Windows 95/NT 4.0 do not support USB connections.
To install the USB device driver under Windows 98
1 Turn on your PC.
2 Turn on the printer.
3 When Windows and the printer are both ready, insert the CD-ROM
that came with your printer into your PC’s CD-ROM drive.
? What if the installation program starts up automatically?
➜
Close the dialog box by clicking the X in the upper-right corner.
4 Connect the printer to the PC with the USB cable (see chapter 2) to
display the Add New Hardware Wizard dialog box.
5 Choose [Next] to display the next dialog box.
6 Check the “Search for the best driver for your device. (Recommended).” option button, and then choose [Next].
EDNord - Istedgade 37A - 9000 Aalborg - telefon 96333500
3-3
Installing a printer driver
3
7 When the next dialog box displays, check the “Specify a location” box,
and then choose [Browse].
8 Browse the CD-ROM and navigate to “drivers\winMe,9x\usb.” Then
choose [OK].
9 Follow the instructions on the screen to complete the installation.
10 When the following dialog box displays, choose [Finish] to finish the installation.
This completes the installation of the USB device driver for the
PagePro 1250E printer.
11 When the Add New Hardware Wizard dialog box displays, continue
with step 2 of “To install the printer driver using Plug-and-Play under
Windows 98” on page 3-19.
3-4
EDNord - Istedgade 37A - 9000 Aalborg - telefon 96333500
Installing a printer driver
3
To install the USB device driver under Windows Me
1 Turn on your PC.
2 Turn on the printer.
3 When Windows and the printer are both ready, insert the CD-ROM
that came with your printer into your PC’s CD-ROM drive.
? What if the installation program starts up automatically?
➜
Close the dialog box by clicking the X in the upper-right corner.
4 Connect the printer to the PC with the USB cable (see chapter 2) to
display the Add New Hardware Wizard dialog box.
5 Check the “Specify the location of the driver (Advanced)” option button, and then choose [Next].
6 Check the “Search for the best driver for your device. (Recommended)”. option button, check the “Specify a location” box, and then
choose [Browse].
7 Browse the CD-ROM and navigate to “drivers\winMe,9x\usb.” Then
choose [OK].
EDNord - Istedgade 37A - 9000 Aalborg - telefon 96333500
3-5
Installing a printer driver
3
8 Follow the instructions on the screen to complete the installation.
9 When the following dialog box displays, choose [Finish] to finish the installation.
This completes the installation of the USB device driver for the
PagePro 1250E printer.
10 When the Add New Hardware Wizard dialog box displays, continue
with step 2 of “To install the printer driver using Plug-and-Play under
Windows Me” on page 3-20.
3-6
EDNord - Istedgade 37A - 9000 Aalborg - telefon 96333500
Installing a printer driver
3
To install the USB device driver under Windows 2000
If the printer is connected to the PC using a USB cable, USB Printing Support may automatically be incorporated, depending on the operating system. In order to activate all functions of the PagePro 1250E, the USB
device driver for PagePro 1250E must be installed.
Install the USB device driver for PagePro 1250E according to the following
procedure.
1 Turn on your PC.
2 Turn on the printer.
3 When Windows and the printer are both ready, insert the CD-ROM
that came with your printer into your PC’s CD-ROM drive.
? What if the installation program starts up automatically?
➜
Close the dialog box by clicking the X in the upper-right corner.
4 Connect the printer to the PC with the USB cable (see chapter 2) to
display the Found New Hardware Wizard dialog box.
EDNord - Istedgade 37A - 9000 Aalborg - telefon 96333500
3-7
Installing a printer driver
3
5 Choose [Cancel] to close the “Found New Hardware Wizard” dialog
box.
6 Right-click the “My Computer” icon on the desktop, and then choose
“Properties” in the shortcut menu that displays. The System Properties
dialog box displays.
7 Choose the “Hardware” tab of the System Properties dialog box, and
then choose the [Device Manager] button.
8 Double-click “USB Printing Support” below “Universal Serial Bus controllers.” The USB Printing Support Properties dialog box displays.
9 Choose the “Driver” tab of the USB Printing Support Properties dialog
box, and then choose [Update Driver].
3-8
EDNord - Istedgade 37A - 9000 Aalborg - telefon 96333500
Installing a printer driver
3
10 Choose [Next] to display the next dialog box.
11 Check the “Search for a suitable driver for my device (recommended)”
option button, and then choose [Next].
12 When the next dialog box displays, check the “Specify a location” box,
and then choose [Next].
13 Choose [Browse].
14 Browse the CD-ROM and navigate to “drivers\winMe,9x\usb.” Then
choose [Open].
15 Choose [OK], and then choose [Next].
16 Follow the instructions on the screen to complete the installation.
EDNord - Istedgade 37A - 9000 Aalborg - telefon 96333500
3-9
Installing a printer driver
3
17 When the following dialog box displays, choose [Finish] to finish installing the USB device driver.
18 Choose [Yes] to restart your PC.
19 When the following dialog box displays after restarting your PC, continue with step 4 of “To install the printer driver using Plug-and-Play”
on page 3-26.
3-10
EDNord - Istedgade 37A - 9000 Aalborg - telefon 96333500
Installing a printer driver
3
To install the USB device driver under Windows XP
If the printer is connected to the PC using a USB cable, USB Printing Support may automatically be incorporated, depending on the operating system. In order to activate all functions of the PagePro 1250E, the USB
device driver for PagePro 1250E must be installed.
Install the USB device driver for PagePro 1250E according to the following
procedure.
1 Turn on your PC.
2 Turn on the printer.
3 When Windows and the printer are both ready, insert the CD-ROM
that came with your printer into your PC’s CD-ROM drive.
? What if the installation program starts up automatically?
➜
Close the dialog box by clicking the X in the upper-right corner.
4 Connect the printer to the PC with the USB cable (see chapter 2) to
display the Found New Hardware Wizard dialog box.
EDNord - Istedgade 37A - 9000 Aalborg - telefon 96333500
3-11
Installing a printer driver
3
5 Choose [Cancel] to close the “Found New Hardware Wizard” dialog
box.
6 Choose [Start], and then choose “My Computer.”
7 Choose “View system information” in the System Tasks list.
8 Choose the “Hardware” tab of the System Properties dialog box, and
then choose the [Device Manager] button.
9 Double-click “USB Printing Support” below “Universal Serial Bus controllers.” The USB Printing Support Properties dialog box displays.
3-12
EDNord - Istedgade 37A - 9000 Aalborg - telefon 96333500
Installing a printer driver
3
10 Choose the “Driver” tab of the USB Printing Support Properties dialog
box, and then choose [Update Driver...].
11 Choose the “Install from a list or specific location (Advanced)” option
button, and then choose [Next].
EDNord - Istedgade 37A - 9000 Aalborg - telefon 96333500
3-13
Installing a printer driver
3
12 When the next dialog appears, check the “Don’t search. I will choose
the driver to install” box, and then choose [Next].
13 Choose [Have Disk...].
14 Choose [Browse...].
15 Browse the CD-ROM and navigate to “drivers\winMe,9x\usb.” Then
choose [Open].
16 Choose [OK], and then choose [Next].
17 Follow the instructions on the screen to complete the installation.
18 When the following dialog box displays, choose [Finish] to finish installing the USB device driver.
This completes the installation of the USB device driver for the
PagePro 1250E printer.
19 When the Found New Hardware Wizard dialog box displays, continue
with “Installing the printer driver under Windows XP” on page 3-31.
3-14
EDNord - Istedgade 37A - 9000 Aalborg - telefon 96333500
Installing a printer driver
3.4
3
Installing the printer driver using the installer (Auto
Run) under Windows
The CD-ROM supplied with the printer starts automatically after being
loaded into the CD-ROM drive of your PC. You are guided step-by-step
through the installation procedure.
1 Turn on the PC.
2 After Windows starts, insert the CD-ROM in the CD-ROM drive of your
PC.
The installation program starts automatically.
? What if the installation program does not start up automatically?
➜
In Windows Explorer browse to the CD-ROM directory. Then
double-click “setup.exe” to start the installation program.
3 Follow the instructions for the installation program.
❍
❍
❍
If a dialog box allowing you to select whether to install printer tools
displays, check the “Printer tools” box if you want to install the Status Monitor and the Printer Control Panel. Then choose [OK] to display the next step.
Once the printer driver has been successfully installed, the
“MINOLTA-QMS PagePro 1250E” printer icon displays in the
Printers dialog box.
If Printer tools was installed, restart the PC.
EDNord - Istedgade 37A - 9000 Aalborg - telefon 96333500
3-15
Installing a printer driver
3
3.5
Installing the printer driver under Windows 95
For a simple way of installing the printer driver, we recommend using the
Auto Run installer. (See “Installing the printer driver using the installer (Auto Run) under Windows” on page 3-15.)
However, there are other ways of installing the printer driver without using
the installer. This section provides information on installing the PagePro
1250E printer driver under Windows 95.
✎
Installing the PostScript printer driver
The PostScript printer driver can be installed under Windows only by
using the Add Printer Wizard.
To install the printer driver using Plug-and-Play
1 After connecting the printer to your PC with the parallel cable, turn on
the printer.
2 Turn on the PC.
After Windows starts, the Update Device Driver Wizard dialog box displays.
3 Insert the CD-ROM that came with your printer into your PC’s CDROM drive, and then choose [Next].
4 Choose [Other Locations], and then choose [Browse].
5 Browse the CD-ROM and navigate to “drivers\winMe,9x\pclx\english.”
Then choose [OK].
3-16
EDNord - Istedgade 37A - 9000 Aalborg - telefon 96333500
Installing a printer driver
3
6 Follow the instructions on the screen to complete the installation.
7 Check that the “MINOLTA-QMS PagePro 1250E” printer icon is displayed in the Printers dialog box. To display the Printers dialog box,
choose [Start], point to [Settings], and then choose [Printers].
8 Remove the CD-ROM from your PC’s CD-ROM drive. This completes
the installation of the printer driver.
To install the printer driver using the Add Printer Wizard
1 Turn on the PC.
2 After Windows starts, insert the CD-ROM that came with your printer
into your PC’s CD-ROM drive.
3 Choose [Start], point to [Settings], and then choose [Printers].
4 Double-click the “Add Printer” icon.
EDNord - Istedgade 37A - 9000 Aalborg - telefon 96333500
3-17
Installing a printer driver
3
5 Choose [Next].
6 Select “Local Printer.”
7 Choose [Next].
8 Choose [Have Disk], and then choose [Browse].
9 Browse the CD-ROM and navigate to “drivers\winMe,9x\pclx\english”
(for the PCL printer driver) or “drivers\winMe,9x\ps\english” (for the
PostScript printer driver). Then choose [OK].
10 Choose [OK], and then choose [Next].
11 Follow the instructions on the screen to complete the installation.
12 Check that the “MINOLTA-QMS PagePro 1250E” printer icon is
displayed in the Printers dialog box.
13 Remove the CD-ROM from your PC’s CD-ROM drive. This completes
the installation of the printer driver.
3-18
EDNord - Istedgade 37A - 9000 Aalborg - telefon 96333500
Installing a printer driver
3.6
3
Installing the printer driver under Windows 98/Me
For a simple way of installing the printer driver, we recommend using the
Auto Run installer. (See “Installing the printer driver using the installer (Auto Run) under Windows” on page 3-15.)
However, there are other ways of installing the printer driver without using
the installer. This section provides information on installing the PagePro
1250E printer driver under Windows 98 or Windows Me.
✎
Installing the PostScript printer driver
The PostScript printer driver can only be installed under Windows by
using the Add Printer Wizard.
To install the printer driver using Plug-and-Play under Windows 98
The Plug-and-Play installation with a parallel connection is described below. For details on the installation with a USB connection, see “To install
the USB device driver under Windows 98” on page 3-3.
1 After connecting the printer to your PC with the parallel cable, turn on
the printer.
2 Turn on the PC.
After Windows starts, the Add New Hardware Wizard dialog box displays.
3 Insert the CD-ROM that came with your printer into your PC’s CDROM drive, and then choose [Next].
EDNord - Istedgade 37A - 9000 Aalborg - telefon 96333500
3-19
Installing a printer driver
3
4 Choose the “Display a list of all the drivers in a specific” button, and
then choose [Next].
5 Check “Printer,” and then choose [Next].
6 Choose [Have Disk], and then choose [Browse].
7 Browse the CD-ROM and navigate to “drivers\winMe,9x\pclx\english.”
Then choose [OK].
8 Choose [OK], and then choose [Next].
9 Follow the instructions on the screen to complete the installation.
10 Check that the “MINOLTA-QMS PagePro 1250E” printer icon is displayed in the Printers dialog box. To display the Printers dialog box,
choose [Start], point to [Settings], and then choose [Printers].
11 Remove the CD-ROM from your PC’s CD-ROM drive. This completes
the installation of the printer driver.
To install the printer driver using Plug-and-Play under Windows Me
The Plug-and-Play installation with a parallel connection is described below. For details on the installation with a USB connection, see “To install
the USB device driver under Windows Me” on page 3-5.
1 After connecting the printer to your PC with the parallel cable, turn on
the printer.
3-20
EDNord - Istedgade 37A - 9000 Aalborg - telefon 96333500
Installing a printer driver
3
2 Turn on the PC.
After Windows starts, the Add New Hardware Wizard dialog box displays.
3 Insert the CD-ROM that came with your printer into your PC’s CDROM drive, and choose the “Specify the location of the driver (Advanced)” button. Then choose [Next].
4 Check the “Display a list of all the drivers in a specific location, so you
can select the driver you want” option button, and then choose [Next].
5 Check “Printer,” and then choose [Next].
6 Choose [Have Disk], and then choose [Browse].
7 Browse the CD-ROM and navigate to “drivers\winMe,9x\pclx\english.”
Then choose [OK].
8 Choose [OK], and then choose [Next].
9 Follow the instructions on the screen to complete the installation.
EDNord - Istedgade 37A - 9000 Aalborg - telefon 96333500
3-21
Installing a printer driver
3
10 Check that the “MINOLTA-QMS PagePro 1250E” printer icon is displayed in the Printers dialog box. To display the Printers dialog box,
choose [Start], point to [Settings], and then choose [Printers].
11 Remove the CD-ROM from your PC’s CD-ROM drive. This completes
the installation of the printer driver.
To install the printer driver using the Add Printer Wizard under
Windows Me/98
1 Turn on the PC.
2 After Windows starts, insert the CD-ROM that came with your printer
into your PC’s CD-ROM drive.
3 Choose [Start], point to [Settings], and then choose [Printers].
4 Double-click the “Add Printer” icon.
3-22
EDNord - Istedgade 37A - 9000 Aalborg - telefon 96333500
Installing a printer driver
3
5 Choose [Next].
6 Select “Local Printer.”
7 Choose [Next].
8 Choose [Have Disk], and then choose [Browse].
9 Browse the CD-ROM and navigate to “drivers\winMe,9x\pclx\english”
(for the PCL printer driver) or “drivers\winMe,9x\ps\english” (for the
PostScript printer driver). Then choose [OK].
10 Choose [OK], and then choose [Next].
11 Specify the appropriate port.
If you are using a parallel connection, select “LPTx:” (x=1, 2, etc.).
If you are using a USB connection, select “USB001.”
Then choose [OK].
12 Follow the instructions on the screen to complete the installation.
13 Check that the “MINOLTA-QMS PagePro 1250E” printer icon is displayed in the Printers dialog box.
14 Remove the CD-ROM from your PC’s CD-ROM drive. This completes
the installation of the printer driver.
EDNord - Istedgade 37A - 9000 Aalborg - telefon 96333500
3-23
Installing a printer driver
3
3.7
Installing the printer driver under Windows NT 4.0
For a simple way of installing the printer driver, we recommend using the
Auto Run installer. (See “Installing the printer driver using the installer (Auto Run) under Windows” on page 3-15.)
However, there are other ways of installing the printer driver without using
the installer. This section provides information on installing the PagePro
1250E printer driver under Windows NT 4.0.
To install the printer driver using the Add Printer Wizard
1 Turn on the PC.
2 After Windows starts, insert the CD-ROM that came with your printer
into your PC’s CD-ROM drive.
3 Choose [Start], point to [Settings], and then choose [Printers].
4 Double-click the “Add Printer” icon.
5 Select “My Computer.”
6 Choose [Next].
7 Specify the ports you want to use and the choose [Next].
8 Choose [Have Disk], and then choose [Browse].
9 Browse the CD-ROM and navigate to “drivers\winnt\pclx\english” (for
the PCL printer driver) or “drivers\winnt\ps\english” (for the PostScript
printer driver). Then choose [Open].
3-24
EDNord - Istedgade 37A - 9000 Aalborg - telefon 96333500
Installing a printer driver
3
10 Choose [OK], and then choose [Next].
11 Follow the instructions on the screen to complete the installation.
12 Check that the “MINOLTA-QMS PagePro 1250E” printer icon is displayed in the Printers dialog box.
13 Remove the CD-ROM from your PC’s CD-ROM drive. This completes
the installation of the printer driver.
EDNord - Istedgade 37A - 9000 Aalborg - telefon 96333500
3-25
Installing a printer driver
3
3.8
Installing the printer driver under Windows 2000
For a simple way of installing the printer driver, we recommend using the
Auto Run installer. (See “Installing the printer driver using the installer (Auto Run) under Windows” on page 3-15.)
However, there are other ways of installing the printer driver without using
the installer. This section provides information on installing the PagePro
1250E printer driver under Windows 2000.
✎
Installing the PostScript printer driver
The PostScript printer driver can be installed under Windows only by
using the Add Printer Wizard.
To install the printer driver using Plug-and-Play
For a parallel connection:
1 After connecting the printer to your PC, turn on the printer.
2 Turn on the PC.
After Windows starts, the Found New Hardware Wizard dialog box
displays.
❍
3-26
Continue with step 5 on the following page.
EDNord - Istedgade 37A - 9000 Aalborg - telefon 96333500
Installing a printer driver
3
For a USB connection:
1 Turn on your PC.
2 Turn on the printer.
3 When Windows and the printer are both ready, connect the printer to
the PC with the USB cable (for details, refer to chapter 2) to display the
Found New Hardware Wizard dialog box.
4 Insert the CD-ROM that came with your printer into your PC’s CDROM drive, and then choose [Next].
5 Check the “Display a list of the known drivers for this device so that I
can choose a specific driver” option button, and then choose [Next].
6 Choose “Printers,” and then choose [Next].
7 Choose [Have Disk], and then choose [Browse].
8 Browse the CD-ROM and navigate to “drivers\win2k\pclx\english.”
Then choose [Open].
9 Choose [OK], and then choose [Next].
10 Follow the instructions on the screen to complete the installation.
EDNord - Istedgade 37A - 9000 Aalborg - telefon 96333500
3-27
Installing a printer driver
3
11 Check that the “MINOLTA-QMS PagePro 1250E” printer icon is displayed in the Printers dialog box. To display the Printers dialog box,
choose [Start], point to [Settings], and then choose [Printers].
12 Remove the CD-ROM from your PC’s CD-ROM drive. This completes
the installation of the printer driver.
✎
Note
With a USB connection, the USB device driver for the PagePro 1250E
must be installed. Leave the CD-ROM in the CD-ROM drive and install
the USB device driver. See “To install the USB device driver under
Windows 2000” on page 3-7.
3-28
EDNord - Istedgade 37A - 9000 Aalborg - telefon 96333500
Installing a printer driver
3
To install the printer driver using the Add Printer Wizard
1 Turn on the PC.
2 After Windows starts, insert the CD-ROM that came with your printer
into your PC’s CD-ROM drive.
3 Choose [Start], point to [Settings], and then choose [Printers].
4 Double-click the “Add Printer” icon.
5 Choose [Next].
6 Select “Local printer.”
❍
Do not check the “Automatically detect and install my Plug and
Play printer” box.
7 Choose [Next].
8 Choose the “Use the following port:” button, and specify the ports you
want to use and then choose [Next].
If you are using a parallel connection, select “LPTx:” (x=1, 2, etc.).
If you are using a USB connection, select “USB001.”
9 Choose [Have Disk], and then choose [Browse].
10 Browse the CD-ROM and navigate to “drivers\win2k\pclx\english” (for
the PCL printer driver) or “drivers\win2k\ps\english” (for the PostScript
printer driver). Then choose [Open].
11 Choose [OK], and then choose [Next].
EDNord - Istedgade 37A - 9000 Aalborg - telefon 96333500
3-29
Installing a printer driver
3
12 Follow the instructions on the screen to complete the installation.
13 Check that the “MINOLTA-QMS PagePro 1250E” printer icon is displayed in the Printers dialog box.
14 Remove the CD-ROM from your PC’s CD-ROM drive. This completes
the installation of the printer driver.
3-30
EDNord - Istedgade 37A - 9000 Aalborg - telefon 96333500
Installing a printer driver
3.9
3
Installing the printer driver under Windows XP
For a simple way of installing the printer driver, we recommend using the
Auto Run installer. See “Installing the printer driver using the installer
(Auto Run) under Windows” on page 3-15.
However, there are other ways of installing the printer driver without using
the installer. This section provides information on installing the PagePro
1250E printer driver under Windows XP.
✎
Installing the PostScript printer driver
The PostScript printer driver can be installed under Windows only by using the Add Printer Wizard.
To install the printer driver using Plug-and-Play
For a parallel connection:
1 After connecting the printer to your PC, turn on the printer.
2 Turn on the PC.
After Windows starts, the Found New Hardware Wizard dialog box
displays.
❍
Continue with step 5 on the following page.
EDNord - Istedgade 37A - 9000 Aalborg - telefon 96333500
3-31
Installing a printer driver
3
For a USB connection:
1 Turn on your PC
2 Turn on the printer.
3 When Windows and the printer are both ready, connect the printer to
the PC with the USB cable (for details, refer to chapter 2) to display the
Found New Hardware Wizard dialog box.
4 Insert the CD-ROM that came with your printer into your PC’s CDROM drive, and then choose [Next].
5 Check the “Install from a list or specific location (Advanced)” option
button, and then choose [Next].
6 Check the “Don’t search, I will choose the driver to install” option
button, and then choose [Next].
7 Select “Printers” in the Common hardware types list, and then choose
[Next].
8 Choose [Have Disk], and then choose [Browse].
9 Browse the CD-ROM and navigate to “drivers\win2k\pclx\english.”
Then choose [Open].
10 Choose [OK], and then choose [Next].
3-32
EDNord - Istedgade 37A - 9000 Aalborg - telefon 96333500
Installing a printer driver
3
11 Follow the instructions on the screen to complete the installation.
✎
Note
With a USB connection, the USB device driver for the MINOLTA-QMS
PagePro 1250E must be installed. Leave the CD-ROM in the CDROM drive and install the USB device driver. See “To install the USB
device driver under Windows XP” on page 3-11.
To install the printer driver using the Add Printer Wizard
1 Turn on the PC.
2 After Windows starts, insert the CD-ROM that came with your printer
into your PC’s CD-ROM drive.
3 Choose [Start], and then Choose “Control Panel.”
EDNord - Istedgade 37A - 9000 Aalborg - telefon 96333500
3-33
Installing a printer driver
3
4 In “Pick a category” choose “Printers and Other Hardware.”
5 In “Pick a task” choose [Add a printer].
6 Choose [Next].
7 Select “Local printer attached to this computer.”
❍
3-34
Do not check the “Automatically detect and install my Plug and
Play printer” box.
EDNord - Istedgade 37A - 9000 Aalborg - telefon 96333500
Installing a printer driver
3
8 Choose [Next].
9 Choose the “Use the following port:” button, and specify the ports you
want to use and then choose [Next].
If you are using a parallel connection, select “LPTx:” (x=1, 2, etc.).
If you are using a USB connection, select “USB001.”
10 Choose [Have Disk], and then choose [Browse].
11 Browse the CD-ROM and navigate to “drivers\win2k\pclx\english” (for
the PCL printer driver) or “drivers\win2k\ps\english,” and then choose
[Open].
12 Choose [OK], and then choose [Next].
13 Follow the instructions on the screen to complete the installation.
14 Remove the CD-ROM from your PC’s CD-ROM drive. This completes
the installation of the printer driver.
EDNord - Istedgade 37A - 9000 Aalborg - telefon 96333500
3-35
Installing a printer driver
3
3.10
Installing the PostScript printer driver under Mac OS
✎
Note
If Mac OS X or later is being used, switch to the Classic environment
before performing the following procedure.
To install the PostScript printer driver under Mac OS
Use the following procedure to install the PostScript printer driver under
Mac OS.
1 After connecting the printer to your Macintosh with the USB cable, turn
on the printer.
2 Turn on the Macintosh.
3 When the Macintosh is ready, insert the CD-ROM that came with your
printer into your computer’s CD-ROM drive.
4 Double-click on “MINOLTA-QMS” icon to start the installation program.
5 Double-click the “install” icon.
6 Follow the instructions on the screen to complete the installation.
7 After the printer driver is installed, continue with the following section
to specify the USB printer settings.
3-36
EDNord - Istedgade 37A - 9000 Aalborg - telefon 96333500
Installing a printer driver
3
To specify the USB printer settings
Use the following procedure to specify the USB printer settings in order to
print through the USB port.
Note
✔
To use this USB software for printing with PagePro 1250E, Apple
LaserWriter 8.3 or later must be installed. First, check the version of
LaserWriter installed on the Macintosh.
1 Open the Macintosh Hard Disk icon on the desktop.
2 Open the “Apple Extras” folder.
If your Macintosh is running Mac OS 9.1 or later, open the Applications
folder.
3 Open the “Apple LaserWriter Software” folder.
If your Macintosh is running Mac OS 9.1 or later, open Utilities folder.
4 Double-click “Desktop Printer Utility.”
5 Choose “Printer (USB)” from the “Create Desktop” list, and then
choose [OK].
6 Choose [Change] from the “PostScript Printer description (PPD) file”
section to select a specific driver.
7 Choose “MINOLTA-QMS PagePro 1250E,” and then choose [Select].
8 Choose [Change] from the “USB Printer Selection” section to select
the USB printer.
9 Choose “PagePro 1250E,” and then choose [OK].
10 Choose [Create].
11 Select the location and name for your printer, and then choose [Save].
This completes the installation of the printer driver and the specification of the USB printer settings.
EDNord - Istedgade 37A - 9000 Aalborg - telefon 96333500
3-37
Installing a printer driver
3
3.11
Uninstalling the PCL printer driver and USB device
driver
This section describes how to uninstall the PagePro 1250E printer driver
when necessary.
✎
Note
If the uninstallation program is used to remove the printer driver, the
USB device driver is also removed.
✎
Note
If you used Add Printer to install the printer driver, there is no
uninstaller utility. To remove the printer, select it and delete it in the
Printers folder.
✎
Note
The screen images that appear in this section show the examples of
uninstallation under Windows 98. Your screen may differ slightly.
To uninstall the PCL printer driver under Windows Me/98/95/2000/
NT 4.0
1 Choose the [Start] button, point to [Settings], and then choose [Control
Panel].
3-38
EDNord - Istedgade 37A - 9000 Aalborg - telefon 96333500
Installing a printer driver
3
2 Double-click the “Add/Remove Programs” icon in the Control Panel
dialog box to open the Add/Remove Programs Properties dialog box.
EDNord - Istedgade 37A - 9000 Aalborg - telefon 96333500
3-39
3
Installing a printer driver
3 For Windows Me/98/95/NT 4.0, select “MINOLTA-QMS PagePro
1250E Printer,” and then choose [Add/Remove] to uninstall the printer
driver.
For Windows 2000, select “MINOLTA-QMS PagePro 1250E Printer,”
and then choose [Change/Remove] to uninstall the printer driver.
3-40
EDNord - Istedgade 37A - 9000 Aalborg - telefon 96333500
Installing a printer driver
3
4 Choose [Uninstall] to proceed with the uninstallation or [Cancel] to
abort.
5 After the PagePro 1250E printer driver has been removed, choose
[OK].
6 Choose [Yes] to close the window.
✎
Note
It is recommended that you restart your computer after uninstallation.
EDNord - Istedgade 37A - 9000 Aalborg - telefon 96333500
3-41
Installing a printer driver
3
To uninstall the printer driver under Windows XP
1 Choose the [Start] button, and then choose“Control Panel.”
2 In “Pick a category” choose “Add or remove Programs” to open the
Add or Remove Programs dialog box.
3 Select “MINOLTA-QMS PagePro 12050E,” and then choose [Change/
Remove] to uninstall the printer driver.
3-42
EDNord - Istedgade 37A - 9000 Aalborg - telefon 96333500
Installing a printer driver
3
4 Select “MINOLTA-QMS PagePro 1250E” in the Uninstall dialog box.
5 Choose [Uninstall] to proceed with the uninstallation or [Cancel] to
abort.
6 When the following dialog box displays, choose [Yes] to restart the PC.
✎
Note
If is recommended that you restart your computer after uninstallation.
EDNord - Istedgade 37A - 9000 Aalborg - telefon 96333500
3-43
3
3-44
Installing a printer driver
EDNord - Istedgade 37A - 9000 Aalborg - telefon 96333500
Working with the Windows PCL printer drivers
4
4
Working with the Windows PCL
printer drivers
4.1
Displaying printer driver settings (Windows Me/98/
95/2000/NT 4.0)
1 From the Start menu, choose Settings and then Printers to display the
Printers directory.
2 Select the MINOLTA-QMS PagePro 1250E printer icon.
3 Display the printer driver settings:
G
Windows Me/98/95—From the File menu choose Properties. The
following window displays.
✎
The operating system also uses tabs!
The “General” and “Details” tabs are automatically determined by the
operating system and are therefore not described in this manual.
EDNord - Istedgade 37A - 9000 Aalborg - telefon 96333500
4-1
Working with the Windows PCL printer drivers
4
4.2
G
Windows 2000—From the File menu choose Printing Preferences. The following window displays.
G
Windows NT 4.0—From the File menu choose Document Defaults. A window similar to the Windows 2000 window shown
above displays.
Displaying printer driver settings (Windows XP)
1 From the Start menu, choose Control Panel.
2 In Pick a Category choose Printers and Other Hardware.
3 In Pick a task choose View installed printers or fax printers.
4 Select the MINOLTA-QMS PagePro 1250E printer icon.
5 To display the printer driver settings, from the File menu choose
Printing Preferences...
4-2
EDNord - Istedgade 37A - 9000 Aalborg - telefon 96333500
Working with the Windows PCL printer drivers
4.3
4
Paper tab
The Paper tab allows you to
G
Select a media size
G
Define custom media sizes
G
Fit printed documents to a specified media size
G
Specify the orientation of the media
G
Specify paper feed from different trays
G
Define the type of paper/media
G
Scale (enlarge/reduce) documents
G
Specify the number of copies
G
Turn on/off the printer’s sorting function
G
Turn on/off the Proof Print function
Refer to the printer driver’s online help for information on all of these functions.
EDNord - Istedgade 37A - 9000 Aalborg - telefon 96333500
4-3
Working with the Windows PCL printer drivers
4
4.4
Page Layout tab
The Page Layout tab allows you to
G
Specify manual duplex printing (you cannot duplex from the manual
feed tray)
G
Print several pages of a document on the same page (n-up printing)
G
Provide a watermark on printed documents
G
Design custom watermarks
G
Adjust the printable area
Refer to the printer driver’s online help for information on all of these functions.
4-4
EDNord - Istedgade 37A - 9000 Aalborg - telefon 96333500
Working with the Windows PCL printer drivers
4.5
4
Quality tab
The Quality tab allows you to
G
Turn on/off Toner Save mode
G
Optimize the print quality of text and graphics (Fine-Art)
G
Specify the toner density
G
Optimize the exchange of text and graphics data with the printer
(All Raster)
G
Specify the resolution
G
Activate/deactivate the use of TrueType Fonts
G
Turn on/off the photo enhancement function
Refer to the printer driver’s online help for information on all of these functions.
EDNord - Istedgade 37A - 9000 Aalborg - telefon 96333500
4-5
Working with the Windows PCL printer drivers
4
4.6
Device Option tab
The Device Option tab allows you to
G
Activate the optional lower feeder unit (Tray 2)
G
Define the total amount of memory installed in the printer
Refer to the printer driver’s online help for information on all of these functions.
Windows 2000/NT 4.0 only!
The Device Option tab for Windows 2000/NT 4.0 is integrated in a different system sector and must be called up separately.
1 From the Start menu choose Settings and then Printers to display the
Printers dialog.
2 In the Printers dialog, select the MINOLTA-QMS PagePro 1250E
printer icon.
3 From the File men choose Properties to display the Properties dialog
box.
4 Choose the Device Option tab.
4-6
EDNord - Istedgade 37A - 9000 Aalborg - telefon 96333500
Working with the Windows PostScript printer drivers
5
5
Working with the Windows PostScript
printer drivers
5.1
Displaying printer driver settings (Windows Me/98/
95, 2000, NT 4.0)
1 From the Start menu choose Settings and then Printers to display the
Printers window.
2 In the Printers window, select the MINOLTA-QMS PagePro 1250E PS
printer icon.
3 Display the printer driver settings:
G
Windows Me/98/95—From the File menu choose Properties. The
Properties window displays.
EDNord - Istedgade 37A - 9000 Aalborg - telefon 96333500
5-1
Working with the Windows PostScript printer drivers
5
5.2
G
Windows 2000—From the File menu choose Printing Preferences... The Printing Preferences window displays.
G
Windows NT 4.0—From the File menu choose Document Defaults... The Default Document Properties window displays.
Displaying printer driver settings (Windows XP)
1 From the Start menu, choose Control Panel.
2 In Pick a Category choose Printers and Other Hardware.
5-2
EDNord - Istedgade 37A - 9000 Aalborg - telefon 96333500
Working with the Windows PostScript printer drivers
5
3 In Pick a task choose View installed printers or fax printers.
4 Select the MINOLTA-QMS PagePro 1250E printer icon.
5 To display the printer driver settings, from the File menu choose
Printing Preferences...
5.3
Paper tab (Windows Me/98/95)
The Paper tab allows you to
G
Specify a media size (see appendix A for a list of supported media
sizes)
G
Define custom media sizes
❍
❍
minimum size:
maximum size:
3.0" × 5.0"
8.5" × 14.0"
76 × 127 mm
216 × 356 mm
G
Print several pages of a document on the .same page (n-up printing)
G
Specify the orientation of the media
G
Specify a media source
➜
G
To feed media manually, place a sheet of media in the manual feed
tray and then press the panel button.
Specify the number of copies
Refer to the printer driver’s online help for information on all of these
functions.
EDNord - Istedgade 37A - 9000 Aalborg - telefon 96333500
5-3
Working with the Windows PostScript printer drivers
5
5.4
Device Options tab (Windows Me/98/95)
Available printer memory
This item allows you to specify the amount of memory (in KB) installed in
your printer.
Printer features
The items in this list box allow you to fine-tune the general features of the
printer for a specific document.
5-4
G
Collate—Controls whether collation of multiple printed copies should
be performed by the printer (On) or by the application (Off)
G
Fine-Art—Improves the appearance of text and graphics by smoothing
jagged edges by using fewer (Light) or more (Dark) dots
G
Fit to Page—Scales the printed document to fit on the specified media
size
G
ImageShift—Allows you to adjust the horizontal (X) and vertical (Y)
printable area on the physical page (use this item with X-Image Shift
and Y-Image Shift)
G
Media Type—Identifies the type of media to be printed
G
MultiBit—Controls multibit printing
G
Print Watermark—Specifies whether the watermark should be printed
on all pages of the document or on just the first page
EDNord - Istedgade 37A - 9000 Aalborg - telefon 96333500
Working with the Windows PostScript printer drivers
5
G
Proof Print—Stops printing after the first copy of a multi-copy print job
so that you can confirm print quality
G
Toner Density—Adjusts the density of the toner used during printing
G
Toner Save—Allows you to conserve toner when printing rough drafts
or sample documents
G
Watermark—Specifies the text of the watermark to be printed
G
Watermark Angle—Specifies the angle of the watermark on the page
G
Watermark Font—Specifies the font used to print the watermark
G
Watermark Size—Specifies the size (in points) of the watermark
G
X-Image Shift—Specifies the amount (in points) to move the printable
area horizontally on the physical page
G
Y-Image Shift—Specifies the amount (in points) to move the printable
area vertically on the physical page
To modify a feature, first select the item and then select one of the corresponding settings in the Change Setting For list box.
Installable options
This list box displays the options that are available for installation on your
printer.
To change the setting for an option, first select the option and then select
one of the corresponding settings in the Change Setting For list box.
G
VMOption—Allows you to specify the amount of memory installed in
your printer.
EDNord - Istedgade 37A - 9000 Aalborg - telefon 96333500
5-5
Working with the Windows PostScript printer drivers
5
5.5
Page Setup tab (Windows NT 4.0)
The Page Setup tab allows you to
G
Specify a media size
G
Specify a media source
➜
To feed media manually, place a sheet of media in the manual feed
tray and then press the panel button.
G
Specify the number of copies
G
Specify the orientation of the media
Refer to the printer driver’s online help for more information on the Page
Setup tab.
5-6
EDNord - Istedgade 37A - 9000 Aalborg - telefon 96333500
Working with the Windows PostScript printer drivers
5.6
5
Advanced tab (Windows NT 4.0)
The Advanced tab allows you to control and fine-tune many of the advanced features of your printer driver. The features are organized in a tree
format with three main branches:
G
Paper/Output
G
Graphic
G
Document Options
To change the setting for a feature, first select the feature in the top window and then select one of the corresponding settings in the bottom window.
Refer to the printer driver’s online help for more information on the Advanced tab.
EDNord - Istedgade 37A - 9000 Aalborg - telefon 96333500
5-7
Working with the Windows PostScript printer drivers
5
5.7
Device Settings tab (Windows NT 4.0)
The Device Settings tab for Windows NT 4.0 is integrated in a different
system sector and must be called up separately.
1 From the Start menu, choose Settings, and then choose Printers to
display the Printers window.
2 In the Printers window, select the MINOLTA-QMS PagePro 1250E PS
printer icon.
3 From the File menu choose Properties. The Properties window displays.
4 Choose the Device Settings tab.
The Device Settings tab consists of two windows that allow you to specify
and manage the options that have been installed on your printer. The top
window displays the features and current settings. The bottom window allows you to change the settings. The contents of the bottom window are
determined by the item that is selected in the top window.
To change the setting for a feature, first select the feature in the top window and then select one of the corresponding settings in the bottom window.
Refer to the printer driver’s online help for more information on the Device
Settings tab.
5-8
EDNord - Istedgade 37A - 9000 Aalborg - telefon 96333500
Working with the Windows PostScript printer drivers
5.8
5
Layout tab (Windows 2000)
The Layout tab allows you to
G
Specify the orientation of the media
G
Specify the order in which the pages of the document should be printed
G
Print several pages of a document on the same sheet of media
EDNord - Istedgade 37A - 9000 Aalborg - telefon 96333500
5-9
Working with the Windows PostScript printer drivers
5
5.9
Paper/Quality tab (Windows 2000)
The Paper/Quality tab allows you to
G
Specify a media source
➜
5-10
To feed media manually, place a sheet of media in the manual feed
tray and then press the panel button.
EDNord - Istedgade 37A - 9000 Aalborg - telefon 96333500
Working with the Windows PostScript printer drivers
5
Advanced Options (Windows 2000)
Choose the Advanced... button on either the Layout tab or the Paper/
Quality tab to open the Advanced Options window.
The settings in this window allow you to control and fine-tune many of the
advanced features of your printer driver. The features are organized in a
tree format with three main branches: Paper/Output, Graphic and Document Options.
Refer to the printer driver’s online help for more information on the Advanced Document Settings.
EDNord - Istedgade 37A - 9000 Aalborg - telefon 96333500
5-11
Working with the Windows PostScript printer drivers
5
5.10
Device Settings tab (Windows 2000)
The Device Settings tab for Windows 2000 is integrated in a different system sector and must be called up separately.
1 From the Start menu, choose Settings, and then choose Printers to
display the Printers window.
2 In the Printers window, select the MINOLTA-QMS PagePro 1250E PS
printer icon.
3 From the File menu choose Properties. The Properties window displays.
4 Select the Device Settings tab.
The Device Settings dialog box appears.
The Device Settings tab allows you to view and change the setup of the
printer and its options. To change a setting, select the item that you want
to change, and then select the desired setting from either the box or dropdown list that appears.
Refer to the printer driver’s online help for more information on the Device
Settings tab.
5-12
EDNord - Istedgade 37A - 9000 Aalborg - telefon 96333500
Working with the Windows printer tools
6
6
Working with the Windows printer
tools
The Windows printer tools include the following:
G
Status Monitor
G
Printer Control Panel
✎
Automatic startup of Status Monitor!
If ,when you installed the printer driver, you activated the option to automatically start the printer driver, then the Status Monitor also automatically starts when you start the computer.
6.1
Environment
The Status Monitor and Printer Control Panel can be used with the following operating systems and interfaces.
IEEE 1284 Parallel
USB
Windows XP
2
2
Windows Me
2
2
Windows 2000
2
2
Windows 98
2
2
Windows 98 SE
2
2
Windows 95
2
—
Windows NT 4.0
2
—
EDNord - Istedgade 37A - 9000 Aalborg - telefon 96333500
6-1
Working with the Windows printer tools
6
6.2
Opening the Status Monitor
The Status Monitor allows you to monitor the printer and the progress of
current print jobs. Use one of the following steps to open the Status
Monitor.
➜
Windows Me/98/95/2000/NT 4.0—From the Start menu, choose Programs, then MINOLTA-QMS PagePro 1250E, and then MINOLTAQMS PagePro 1250E Printer Tools to display the Status Monitor.
➜
Windows XP—Choose Start, choose All Programs, then MINOLTAQMS PagePro 1250E, and then MINOLTA-QMS PagePro 1250E
Printer Tools to display the Status Monitor.
Altering the size of the Status Monitor window
6-2
➜
From the View menu choose Expand to increase the size of the
window.
➜
From the View menu choose Reduce to decrease the size of the
window.
EDNord - Istedgade 37A - 9000 Aalborg - telefon 96333500
Working with the Windows printer tools
6.3
6
Monitoring print jobs with the Status Monitor
G
When the background of the printer graphic is green, the printer is in
Stand-by mode or a job is printing normally.
G
When the background to the printer graphic is red, there is an error
and the job has been interrupted. The status of the printer and the
error message are shown in the dialog boxes on the left.
EDNord - Istedgade 37A - 9000 Aalborg - telefon 96333500
6-3
6
6.4
Working with the Windows printer tools
Opening the Printer Control Panel
The Printer Control Panel lets you check and/or alter the basic settings of
the printer. Use the following steps to open the Control Panel:
1 From the Start choose Programs, then MINOLTA-QMS PagePro
1250E, and then MINOLTA-QMS PagePro 1250E Printer Tools to display the Status Monitor.
2 Choose the Printer Setting... button
or
from the Setup menu choose Printer Setting to display the Control
Panel.
6-4
EDNord - Istedgade 37A - 9000 Aalborg - telefon 96333500
Working with the Windows printer tools
6.5
6
Paper tab
The Paper tab allows you to
G
Specify how the printer should respond to a media size error (the requested media size is not available)
G
Specify whether Tray 1 is to be used as a multipurpose (universal) tray
or as a tray set to a single media size
Refer to the Printer Control Panel’s online help for information on all of
these functions.
✎
Turn on “Auto continue”!
The Auto Continue option on the Printer Setting tab allows you to
specify whether a print job is to continue after a certain amount of time
has elapsed despite a paper size error.
✎
Settings
The settings for Tray 1 on the Paper tab may be overridden by the settings in other printing applications!
EDNord - Istedgade 37A - 9000 Aalborg - telefon 96333500
6-5
Working with the Windows printer tools
6
6.6
Printer Setting tab
The Printer Setting tab allows you to
G
Turn on/off the Power Save mode
G
Turn on/off the automatic continuation in case of a format or memory
overflow error
G
Switch between fast and normal printing modes
G
Turn on/off printing of a PostScript error report
G
Define the length of time the printer waits for the end of a print job before timing out
G
Turn on/off detection of media size errors
G
Activate the page protection function (the printer waits until the data for
a page has been completely loaded into memory before printing)
G
Define the printer personality (PostScript, PCL, or auto-switching)
Refer to the Printer Control Panel’s online help for information on all of
these functions.
6-6
EDNord - Istedgade 37A - 9000 Aalborg - telefon 96333500
Working with the Windows printer tools
6.7
6
Test Print tab
The Test Print tab allows you to
G
Print a demonstration page, an overview of all printer functions
G
Print a configuration page, listing current printer settings
G
Print a list of PCL-resident fonts with designations and samples
G
Print a list of PostScript-resident fonts with designations and samples
G
Print an overview of the most important LED indicator light patterns
EDNord - Istedgade 37A - 9000 Aalborg - telefon 96333500
6-7
Working with the Windows printer tools
6
6.8
Counter tab
The Counter tab allows you to
G
Check the status of a counter
G
Reset a counter (when starting a new media count in one of the trays
or after replacing a consumable)
➜
Click [Reset] adjacent the counter you want to reset.
The associated counter is reset to zero.
6-8
EDNord - Istedgade 37A - 9000 Aalborg - telefon 96333500
Working with the Windows printer tools
6.9
6
Configuration tab
The Configuration tab summarizes the most important printer settings for
quick reference.
No settings can be altered on this tab.
EDNord - Istedgade 37A - 9000 Aalborg - telefon 96333500
6-9
EDNord - Istedgade 37A - 9000 Aalborg - telefon 96333500
Working with the Macintosh printer driver
7
Working with the Macintosh printer
driver
7.1
Page Attributes settings
7
The Page Setup dialog contains settings that affect the format and output
of your printed documents.
Paper
The Paper setting allows you to specify a media size. See the list of supported media sizes in chapter 12, "Specifications."
Orientation
The Orientation setting allows you to specify how your document is positioned on the printed page.
Scale
You can adjust the area of a document through the Scale setting. The
maximum percentage of enlargement is 400. The maximum percentage
of reduction is 25.
EDNord - Istedgade 37A - 9000 Aalborg - telefon 96333500
7-1
Working with the Macintosh printer driver
7
Custom Page
1 Enter the dimensions for the custom width and height into the appropriate boxes.
G
minimum size:
3.0" × 5.0"
76 × 127 mm
G
maximum size:
8.5" × 14.0"
216 × 356 mm
2 Specify either inches or centimeters, and then choose OK.
7.2
General settings
This section describes specific settings that you can make with this printer
driver.
7-2
EDNord - Istedgade 37A - 9000 Aalborg - telefon 96333500
Working with the Macintosh printer driver
7
Copies
Specify the number of copies to be printed. You can specify any value
from 1 to 999.
Collated
When you are printing more than one copy of a document, you can enable
the Collated feature to sort documents as they are sent to the output tray
(pages 1,2,3... , 1,2,3..., 1,2,3).
Paper Source
Select “All pages from” to print all pages of the document onto paper from
the same tray.
Select “First page from” to print only the first page of a document onto paper from a specified tray.
To print the remaining pages of the document from a tray other than the
“First page from:” tray, specify the appropriate tray from the “Remaining
from:” options.
If the paper source is set to “Auto Select,” the printer automatically selects
the paper source according to the specified paper size.
7.3
Layout settings
Pages per sheet
This setting allows you to print more than one page of your document on
a single sheet of paper. From the drop-down list you can select 1, 2, 4, 6,
9, or 16.
EDNord - Istedgade 37A - 9000 Aalborg - telefon 96333500
7-3
Working with the Macintosh printer driver
7
Layout direction
You can select how the multiple pages will be laid out on the single sheet
of paper: right to left or left to right.
Border
You can also select the type of border that is placed between the multiple
pages on the single sheet of paper.
7.4
Printer-Specific Options 1 settings
Fit to Page
The “Fit to Page” setting allows you to fit your document to a certain paper
size when it is printed. Your document will be automatically enlarged or
reduced so that it will fit on the paper size you have selected.
Watermark
Watermarks quickly alert the reader to the nature of a document’s content.
You can select a watermark (such as Confidential or Draft,) and also specify several options that affect its style, content, and placement.
7-4
EDNord - Istedgade 37A - 9000 Aalborg - telefon 96333500
Working with the Macintosh printer driver
7.5
7
Printer Specific Options 2 settings
Toner Saving
Turning on this option uses less toner, but produces lighter printing.
Media Type
Use this drop-down list to specify the type of media you are printing on:
Plain Paper, Transparency, Thick paper, Envelope, or Postcard.
Fine Art
The “Fine Art” settings allow you to optimize the print quality of the text and
graphic images of a document.
Resolution
The “Resolution” setting determines the number of dots per inch used
when a document is printed. Documents printed in higher resolution are
sharper; however, they may take longer to print.
Tray 2
Set the "Tray2" setting to Installed if the optional lower feeder unit (Tray 2)
is installed.
EDNord - Istedgade 37A - 9000 Aalborg - telefon 96333500
7-5
EDNord - Istedgade 37A - 9000 Aalborg - telefon 96333500
Working with the printer
8
Working with the printer
8.1
Please note the following points
8
What should I watch out for when loading paper?
To avoid paper misfeeds, observe the following points:
G
Do not use any paper with the following features:
❍
❍
❍
❍
❍
❍
❍
❍
G
Paper that has already been used in a thermal or ink-jet printer.
Creased or wavy paper.
Paper with a surface that is too smooth, too rough, or irregular.
Specially coated paper such as carbon paper or paper with an adhesive surface.
Paper that is not cut at right-angles.
Paper that is held together by glue, adhesive, or clips.
Paper with labels that detach easily.
Warped or curled-up postcards.
Do not allow the stack of paper in the paper tray to exceed the media
limit mark.
What should I watch out for when loading envelopes?
To avoid envelope misfeeds in the laser printer, observe the following
points:
G
Do not use self-adhesive envelopes or those with a tear-off strip, closures, or a window.
G
Place the envelopes in the tray with the flap down and facing to the left.
G
Make sure that the flaps are neatly folded back.
✎
Test envelopes before buying large quantities!
Some types of envelopes crease easily when they are run through a
printer. Test a brand of envelope before purchasing large quantities.
EDNord - Istedgade 37A - 9000 Aalborg - telefon 96333500
8-1
Working with the printer
8
Which media sizes can I use?
This printer is designed for use only with these media sizes.
Media size
Media source
Tray 1
Tray 2* (optional)
Manual feed tray
Letter
8.5" x 11.0"
Yes
Yes
Yes
Legal
8.5" x 14.0"
Yes
Yes
Yes
Executive
7.25" x 10.5"
Yes
Yes
Yes
Half Letter
5.5" x 8.5"
Yes
No
Yes
A4
210 x 297 mm
Yes
Yes
Yes
A5
148 x 210 mm
Yes
No
Yes
B5 JIS
182 x 257 mm
Yes
Yes
Yes
Chinese 16K
185 x 260 mm
Yes
No
Yes
Chinese 32K
130 x 185 mm
Yes
No
Yes
Standard sizes
Envelopes, postcards, and custom paper sizes
Envelope Monarch
3.875" x 7.5"
Yes
No
Yes
Envelope COM10
4.125" x 9.5"
Yes
No
Yes
Envelope DL
110 x 220 mm
Yes
No
Yes
Envelope C5
162 x 229 mm
Yes
No
Yes
Envelope C6
114 x 162 mm
Yes
No
Yes
Envelope B5
176 x 250 mm
Yes
No
Yes
Choukei-3Gou
120 x 235 mm
Yes
No
Yes
Choukei-4Gou
90 x 205 mm
Yes
No
Yes
Postcard
100 x 148 mm
Yes
No
Yes
Custom
3.0"– 8.5" x 5.0"–14.0"
(76–216 mm x 127–
356 mm)
Yes
No
Yes
* The optional lower feeder unit (Tray 2) is shipped with either a letter or A4 tray. Legal and
executive/B5 JIS trays are available as optional accessories.
8-2
EDNord - Istedgade 37A - 9000 Aalborg - telefon 96333500
Working with the printer
8
What types of media can I use?
This printer is designed for use with the following media types.
Media source
Media type
Tray 1
Tray 2 (optional)
Manual feed tray
Plain paper
16–24 lbs (60–90 g/m2)
Yes
Yes
Yes
Thick paper
24–43.25 lbs (90–163 g/m2)
Yes
No
Yes
Envelopes
Yes
No
Yes
Letterhead
Yes
No
Yes
Postcard
Yes
No
Yes
Transparencies
Yes
No
Yes
Printable area
0.2" (4 mm)
0.2" (4 mm)
0.2" (4 mm)
Printable area
0.2" (4 mm)
EDNord - Istedgade 37A - 9000 Aalborg - telefon 96333500
8-3
Working with the printer
8
8.2
Using the panel button
1
2
3
The control panel has two indicators and one button.
No.
Description
1
Error indicator (orange)
2
Ready indicator (green)
No.
Description
3
Panel button
The panel button allows you to
G
Print special pages (configuration page, PCL font list, PostScript font
list)
G
Continue a print job after an error message
G
Cancel a print job
G
Reset the counter
Printing special pages
1 Make sure that
❍
❍
The green “Ready” indicator is on (but not blinking)
The orange “Error” indicator is off
2 Briefly press the panel button.
All indicators blink rapidly.
3 Press the panel button again:
8-4
Press the panel key this many more
times...
to print this special page
2
Configuration page
3
PCL font list
4
PostScript font list
EDNord - Istedgade 37A - 9000 Aalborg - telefon 96333500
Working with the printer
8
Continuing a print job after an error message
You can continue the print job after correcting the following types of errors:
✔
When the print job is too complex and the memory capacity of the
printer is inadequate
✔
When there is no more paper in the trays
✔
When paper of a different format than that set in the printer driver was
fed into the printer
1 Check that one of the above errors has occurred.
2 Press the panel button to operate the media feed.
The print job continues.
✎
Check your printed document!
If you have continued a print job after an error message, be sure to
check your printed document. Not all pages may have printed.
Cancelling a print job
You can cancel a print job that is currently being processed.
1 While data is being processed or printed (the green “Ready” indicator
is blinking), hold down the panel button for more than 5 seconds.
2 Release the panel button after both indicators light up.
The current print job has now been cancelled.
EDNord - Istedgade 37A - 9000 Aalborg - telefon 96333500
8-5
Working with the printer
8
8.3
Loading media
Loading media in Tray 1
Note the following points:
✔
Refill the tray only when it is completely empty.
✔
Refer to the advice on loading media on page 8-1.
1 Remove the tray cover.
2 Squeeze the right media guide and
open the media guides.
3 Place the media in the tray.
many sheets of paper may
? How
I place on the tray?
➜
Tray 1 has a capacity of 250
sheets of plain paper. The stack
of paper should not rise above
the media limit mark.
? How is letterhead fed in?
➜
Load letterhead with the side to
be printed facing up and the preprinted letterhead at the top (facing
the printer).
? What if I am loading legal-size paper?
➜
Open the cover at the front of the tray.
4 Squeeze the right media guide and adjust the media guides so that
both the left and right sides of the media are secure.
5 Replace the tray cover.
8-6
EDNord - Istedgade 37A - 9000 Aalborg - telefon 96333500
Working with the printer
8
Loading media in the manual feed tray
1 Make sure that the tray cover is properly attached to Tray 1.
2 Open the media guides.
3 Insert the piece of media as far as
possible into the manual feed tray
(with the side to be printed facing
up).
many pieces of media can
? How
be fed at one time?
➜
Insert only one sheet of paper or
type of media at a time.
? How are envelopes fed in?
➜
Place the envelope in the tray with the side to be printed facing up.
The flap of the envelope should be facing down and to the left.
? How is letterhead fed in?
➜
Load letterhead with the side to be printed facing up and the preprinted letterhead at the top (facing the printer).
4 Adjust the media guides so that both sides of the media are secure.
Loading media in the lower feeder unit (Tray 2)
Note the following points:
✔
The optional lower feeder unit (Tray 2) is shipped with either a letter or
A4 tray. Legal and executive/B5 JIS trays are also available as optional accessories.
✔
Refill the tray only when it is completely empty.
✔
Paper must be loaded short edge first.
✔
Refer to the advice on loading media on page 8-1.
EDNord - Istedgade 37A - 9000 Aalborg - telefon 96333500
8-7
Working with the printer
8
1 Remove the tray 2 from the lower
feed unit by pulling it out as far as it
will go, gently raising up the front,
and sliding it the rest of the way out.
2 Remove the cover from the tray.
3 Press down on the paper lifting
plate until it locks into place.
4 Place a stack of paper into the tray.
many sheets of paper may
? How
I place on the tray?
➜
Tray 2 has a capacity of 500
sheets of plain paper. The stack
of paper should not rise above
the media limit mark.
? How is letterhead fed in?
➜
Load letterhead with the side to be printed facing up and the preprinted letterhead at the top (facing the printer).
5 Replace the tray cover and insert
the tray into the lower feeder unit.
8-8
EDNord - Istedgade 37A - 9000 Aalborg - telefon 96333500
Working with the printer
8.4
8
Determining the direction of printed sheets
Printed sheets can be output in two ways:
G
Face down
G
Face up
The printer is fitted with a tray for face-down output. A tray for face-up output is available as an option. This tray is especially suitable for thick paper
and envelopes because the path through the printer is straighter.
The face-down output tray can hold up to 100 sheets while the optional
face-up output tray holds 20 sheets.
1
2
2
1
3
4
5
No. Description
No. Description
1
Face-down output tray
4
Output switch location for face-up output
2
Face-up output tray
5
Output switch location for face-down output
3
Output switch
EDNord - Istedgade 37A - 9000 Aalborg - telefon 96333500
8-9
Working with the printer
8
Note the following points:
8-10
✔
Do not change the output direction while a print job is in progress.
✔
Make sure that the output switch is in the correct position when the optional face-up output tray is not installed.
EDNord - Istedgade 37A - 9000 Aalborg - telefon 96333500
Installing printer options
9
9
Installing printer options
The following options are available for your printer:
9.1
G
Lower feeder unit (Tray 2, 500-sheet capacity)
G
Legal and exective/B5 JIS trays for the lower feeder unit
G
Face-up tray
G
SDRAM DIMM (Dual In-line Memory Module)
Installing the lower feeder unit (Tray 2)
The lower feeder unit can hold up to 500 sheets of plain paper. It is supplied with either a letter (US) or A4 (Europe) tray (Tray 2).
1 Remove the lower feeder unit from its carton, and then remove the
plastic bag and all shipping materials.
2 Turn the printer off, and then disconnect the power cord and interface
cable from the printer.
3 Place the printer onto the lower feeder unit.
❍
Make sure to align the holes on
the bottom of the printer with the
coupling pins on the lower feeder unit.
4 Fill the tray with paper. (For details see chapter 8.)
? How many sheets of paper may I place on the tray?
➜
Tray 2 has a capacity of 500 sheets of plain paper. The stack of
paper should not rise above the media limit mark.
EDNord - Istedgade 37A - 9000 Aalborg - telefon 96333500
9-1
Installing printer options
9
5 Replace the tray cover.
6 Insert the tray into the lower feeder
unit.
❍
Be sure to use both hands
whenever you are inserting the
tray into or removing it from the
lower feeder unit.
7 Reconnect the power cord and interface cable, and turn on the printer.
9-2
EDNord - Istedgade 37A - 9000 Aalborg - telefon 96333500
Installing printer options
9.2
9
Installing the face-up tray
The printer is fitted with a tray for face-down output. A tray for face-up output is available as an option. This tray is especially suitable for thick paper
and envelopes because the path through the printer is straighter. The
face-up output tray holds 20 sheets.
1 Remove the face-up output tray from its carton.
2 Attach the face-up output tray by inserting the pins into the holes on the
printer, one side at a time. Do not
force both sides in at the same time.
❍
The face-up tray must be bent
slightly to insert it.
✎
Face-up or face-down output?
You can set the output direction with
the output switch. (For details see
chapter 8.)
1
No. Description
1
Output switch location for face-up
output
2
Output switch location for face-down
output
EDNord - Istedgade 37A - 9000 Aalborg - telefon 96333500
2
9-3
Installing printer options
9
9.3
Installing a DIMM (Dual In-Line Memory Module)
This printer is shipped with 16 MB of memory. However, printer memory
can be expanded to a maximum of 144 MB by installing commercially
available PC/100-compatible SDRAM DIMMs (64 MB or 128 MB).
CAUTION
Your DIMM could be destroyed!
➜
DIMMs are very sensitive. Handling them improperly can damage
them and render them unusable.
➜
Before you unpack a DIMM, touch a metal part of the printer to discharge the static electricity from you.
➜
Hold the DIMM only by the edges.
➜
Avoid touching the DIMM connections.
➜
Always place the DIMM on an anti-static mat when working with it.
➜
Do not touch any printed circuit boards in the printer.
WARNING
Risk of electric shock!
The printer contains electrical parts.
➜
Always turn the printer off and unplug it before installing a DIMM.
➜
When installing a DIMM, follow the instructions exactly.
➜
Remove only the printer covers which are specifically referred to in the
step-by-step instructions.
1 Turn the printer off and disconnect the power cord and the interface
cable from the printer.
2 Close the face-down output tray.
9-4
EDNord - Istedgade 37A - 9000 Aalborg - telefon 96333500
Installing printer options
9
3 Press the top cover release button
and open the top cover.
4 Facing the right side of the printer,
use a Phillips screwdriver to remove
the two screws holding the side cover in place.
5 Remove the side cover by pulling it
toward you.
6 Insert the DIMM in the slot.
❍
Press the DIMM carefully into
the socket until it snaps into
place.
✎
Would you like to remove a
DIMM?
To remove a DIMM, press the tabs
on both sides of the installation slot
outwards. This releases the DIMM
and allows you to remove it.
EDNord - Istedgade 37A - 9000 Aalborg - telefon 96333500
9-5
Installing printer options
9
7 Replace the side cover and secure
it with the two screws.
8 Close the top cover.
9 Open the face-down output tray.
9-6
EDNord - Istedgade 37A - 9000 Aalborg - telefon 96333500
Installing printer options
9
10 Enter the printer’s new total memory capacity in the printer driver (see
the printer driver’s online help).
11 Print a configuration page (see chapter 8).
The new total memory capacity should be shown correctly.
? Is the total amount of memory displayed correctly? If not,
➜
Ensure that the DIMMs were installed correctly.
➜
Ensure that the correct total memory was entered in the printer
driver.
EDNord - Istedgade 37A - 9000 Aalborg - telefon 96333500
9-7
EDNord - Istedgade 37A - 9000 Aalborg - telefon 96333500
Maintaining the printer
10
10
Maintaining the printer
CAUTION
You could damage the unit by using incorrect accessories and parts!
If you use accessories and parts from manufacturers other than MINOLTA-QMS, we cannot guarantee that the laser printer will operate properly.
➜
Use only MINOLTA-QMS accessories and parts unless specified otherwise.
WARNING
Toner poses a health hazard!
Toner is harmful if swallowed.
➜
If you swallow toner, consult a doctor immediately.
➜
If you get toner on your hands, wash them immediately with cold water
and soap.
EDNord - Istedgade 37A - 9000 Aalborg - telefon 96333500
10-1
Maintaining the printer
10
10.1
Replacing the toner cartridge
Replace the toner cartridge when it is empty or when the printed documents are too light.
Two toner cartridges are available:
G
The regular toner cartridge has a capacity of about 3000 letter/A4 pages at about 5% toner coverage.
G
The high-capacity toner cartridge has a capacity of about 6000 letter/
A4 pages at about 5% toner coverage.
✎
Note:
The toner cartridge that comes with the printer has a capacity of about
1500 letter/A4 pages at about 5% toner coverage.
WARNING
The fusing unit can become very hot!
The fusing unit, which is located beneath the top cover, can become very
hot when the printer is in operation.
➜
To prevent injuries, avoid contact with this area.
Fusing unit
10-2
EDNord - Istedgade 37A - 9000 Aalborg - telefon 96333500
Maintaining the printer
10
✎
What precautions should I take
when handling the toner cartridge?
Never touch the developing roller
under the flap; otherwise, print quality may decline.
1 Turn off the printer and disconnect the power cord from the printer.
2 Close the face-down tray.
3 Press the top cover release button
and open the top cover.
4 Remove the old toner cartridge.
EDNord - Istedgade 37A - 9000 Aalborg - telefon 96333500
10-3
Maintaining the printer
10
5 Press in the marked positions of the
handle to fold down the handle.
❍
Dispose of the used toner cartridge properly.
6 Remove the new toner cartridge
from its package.
7 Holding it firmly with both hands,
rock the toner cartridge left and
right, forward and backward, to distribute the toner evenly.
8 Completely remove the protective
seal from the toner cartridge, and
then raise up the handle.
9 Holding the handle, lower the toner
cartridge into the printer, aligning
the four pins (two on each side) with
the grooves inside the printer.
❍
10-4
Color coordinated “2” labels
have been affixed to the toner
cartridge and to the inside of the
printer. Install the toner cartridge
by aligning these labels.
EDNord - Istedgade 37A - 9000 Aalborg - telefon 96333500
Maintaining the printer
❍
10
The toner cartridge clicks into
place when it is completely installed.
10 Close the top cover and press it
down gently but firmly until it locks
into place.
Resetting the counter for the toner cartridge
After you have replaced the toner cartridge, reset the counter for the toner
cartridge.
✎
The counter can also be reset via the Counter tab in the Printer
Control Panel!
See chapter 6 or the Printer Control Panel’s online help.
1 Turn off the printer.
EDNord - Istedgade 37A - 9000 Aalborg - telefon 96333500
10-5
Maintaining the printer
10
2 While holding down the panel button, turn on the printer.
The green “Ready” indicator begins to blink.
3 Continue holding down the panel button, and the green “Ready” indicator starts to blink.
4 After the green “Ready” indicator has blinked for about 5 seconds, release the panel button.
Both indicators begin to blink.
5 After confirming that both indicators are blinking, press and hold down
the panel button again for at least 5 seconds.
Both indicators light up for about 5 seconds, and then both indicators
begin to blink again.
The counter for the toner cartridge has now been reset.
6 Turn the printer off and then on again.
Once the green “Ready” indicator remains on, the printer is again in
Stand-by mode.
10-6
EDNord - Istedgade 37A - 9000 Aalborg - telefon 96333500
Maintaining the printer
10.2
10
Replacing the drum cartridge
Change the drum cartridge when the printed documents become faint or
blurred.
The drum cartridge has a capacity of about 16,000 (one-page jobs) to
20,000 (continuous printing) letter/A4 pages (at an average of 5% or less
coverage).
WARNING
The fusing unit can become very hot!
The fusing unit, which is located beneath the top cover, can become very
hot when the printer is in operation.
➜
To prevent injuries, avoid contact with this area.
Fusing unit
✎
What precautions should I take
when handling the drum cartridge?
Never touch the drum under the
flap; otherwise, print quality may decline.
1 Turn off the printer and disconnect the power cord.
2 Close the face-down tray.
EDNord - Istedgade 37A - 9000 Aalborg - telefon 96333500
10-7
Maintaining the printer
10
3 Press the top cover release button
and open the top cover.
4 Remove the toner cartridge and the
old drum cartridge.
5 Remove the new drum cartridge from its carton.
10-8
EDNord - Istedgade 37A - 9000 Aalborg - telefon 96333500
Maintaining the printer
10
6 Install the drum cartridge in the
printer, aligning the guides of the
cartridge with the grooves inside the
printer.
❍
Color coordinated “1” labels
have been affixed to the drum
cartridge and to the inside of the
printer. Install the drum cartridge
by aligning these labels.
7 Place the toner cartridge back into
the printer, aligning the four pins
(two on each side) with the grooves
inside the printer.
❍
Color coordinated “2” labels
have been affixed to the toner
cartridge and to the inside of the
printer. Install the toner cartridge
by aligning these labels.
❍
The toner cartridge clicks into
place when it is completely installed.
EDNord - Istedgade 37A - 9000 Aalborg - telefon 96333500
10-9
Maintaining the printer
10
8 Close the top cover and press it
down gently but firmly until it locks
into place.
Resetting the counter for the drum cartridge
After you have replaced the drum cartridge, reset the drum cartridge
counter.
✎
The counter can also be reset via the Counter tab in the Printer
Control Panel!
See chapter 6 or the Printer Control Panel’s online help.
1 Turn off the printer.
2 While holding down the panel button, turn on the printer.
The green “Ready” indicator begins to blink.
3 Continue holding down the panel button, and the green “Ready” indicator starts to blink.
4 After the green “Ready” indicator has blinked for about 5 seconds, release the panel button.
Both indicators begin to blink.
5 After confirming that both indicators are blinking, briefly press the panel button.
Both indicators light up for about 5 seconds, and then both indicators
begin to blink.
The counter for the drum cartridge has now been reset.
6 Turn the printer off and then on again.
Once the green “Ready” indicator remains on, the printer is again in
Stand-by mode.
10-10
EDNord - Istedgade 37A - 9000 Aalborg - telefon 96333500
Maintaining the printer
10.3
10
Cleaning the printer
Clean the printer at regular intervals to prevent dust, dirt ,and paper residue from accumulating in and on the printer.
Cleaning the outside of the printer
1 Turn off the printer and disconnect the power cord.
2 Wipe the outside of the printer with a soft cloth. You may moisten the
cloth with a little neutral household cleaner.
Cleaning the paper feed roller
Clean the paper feed roller if media feed problems occur frequently.
WARNING
The fusing unit can become very hot!
The fusing unit, which is located beneath the top cover, can become very
hot when the printer is in operation.
➜
To prevent injuries, avoid contact with this area.
➜
After turning off the printer, wait at least 10 minutes before cleaning the
inside of the printer.
Fusing unit
1 Turn off the printer and disconnect the power cord.
2 Close the face-down tray.
EDNord - Istedgade 37A - 9000 Aalborg - telefon 96333500
10-11
Maintaining the printer
10
3 Press the top cover release button
and open the top cover.
4 Remove the toner cartridge and the
drum cartridge.
Wrap the drum cartridge with a cloth
to protect it from exposure to light.
5 Wipe the paper feed roller with a
soft, dry cloth.
10-12
EDNord - Istedgade 37A - 9000 Aalborg - telefon 96333500
Maintaining the printer
10
6 Reinstall the drum cartridge and the
toner cartridge.
7 Close the top cover and press it
down gently but firmly until it locks
into place.
EDNord - Istedgade 37A - 9000 Aalborg - telefon 96333500
10-13
EDNord - Istedgade 37A - 9000 Aalborg - telefon 96333500
Troubleshooting
11
11
Troubleshooting
WARNING
The fusing unit can become very hot!
The fusing unit, which is located beneath the top cover, can become very
hot when the printer is in operation.
➜
To prevent injuries, avoid contact with this area.
Fusing unit
EDNord - Istedgade 37A - 9000 Aalborg - telefon 96333500
11-1
Troubleshooting
11
11.1
Clearing media jams
Clearing a media jam inside the printer
1 Turn off the printer.
2 Close the face-down tray.
3 Press the top cover release button,
and then open the top cover.
4 Remove the toner cartridge and the
drum cartridge.
11-2
EDNord - Istedgade 37A - 9000 Aalborg - telefon 96333500
Troubleshooting
11
5 Carefully pull the misfed media out
of the printer.
❍
If paper is misfed at the fusing
unit, grasp the bottom of the paper and pull it out.
6 Reinstall the drum cartridge.
7 Reinstall the toner cartridge.
8 Close the top cover, and then open the face-down tray.
❍
Printing automatically restarts from the page that was misfed.
EDNord - Istedgade 37A - 9000 Aalborg - telefon 96333500
11-3
Troubleshooting
11
Clearing a media jam in the output tray
1 Carefully pull the misfed media out
of the tray.
2 Open the top cover and close it again in order to reset the printer.
11-4
EDNord - Istedgade 37A - 9000 Aalborg - telefon 96333500
Troubleshooting
11
Clearing a media jam at Tray 1
1 Remove the tray cover and any media in Tray 1.
2 Carefully pull the misfed media out
of Tray 1.
3 Reload the media in Tray 1, and replace the tray cover.
❍
Do not reload curled or wrinkled media.
4 Reinstall Tray 1 in the printer.
5 Close the face-down tray, and then open the top cover.
6 Remove any pieces of media that may have torn off or are remaining
in the printer.
7 Close the top cover, and then open the face-down tray.
8 Open the top cover and close it again in order to reset the printer.
❍
Printing automatically restarts from the page that was misfed.
EDNord - Istedgade 37A - 9000 Aalborg - telefon 96333500
11-5
Troubleshooting
11
Clearing a media jam in the manual feed tray
1 Remove the Tray 1 cover and the
plate at the inlet of the manual feed
tray.
2 Remove the misfed media.
3 Reinstall the plate at the inlet of the
manual feed tray and the Tray 1
cover.
11-6
EDNord - Istedgade 37A - 9000 Aalborg - telefon 96333500
Troubleshooting
11
Clearing a media jam in the lower feeder unit (Tray 2)
1 Slide the tray out of the lower feeder
unit.
2 Remove any folded or misfed media
from the inside of the lower feeder
unit.
3 Remove the tray cover and any media in the tray.
4 Carefully pull the misfed media out of the tray.
5 Reload the media in the tray.
❍
❍
Make sure the paper is evenly
aligned and that the top sheet is
below the maximum paper
mark.
Do not reload curled or wrinkled
media.
6 Replace the tray cover and insert the tray into the lower feeder unit.
7 Open the printer’s top cover and close it again in order to reset the
printer.
❍
Printing automatically restarts from the page that was misfed.
EDNord - Istedgade 37A - 9000 Aalborg - telefon 96333500
11-7
Troubleshooting
11
11.2
General printing problems
Problem
Possible cause
Action
No output
The printer is not connected to
the power supply, or the cable is
not connected to the printer.
Check the power connection and
the interface connection to the
printer.
The printer is not turned on.
Turn on the printer.
You are using the wrong type of
interface cable.
Check whether the interface
cable type conforms to the
specifications (see chapter 12).
The computer’s communication
port settings are not correct for
your printer.
Check the computer’s
communication port settings.
Refer to the documentation that
comes with your computer and
check if its current
communication port settings are
correct.
The parallel port on your
computer is also being used for
other equipment (for example, a
scanner or ZIP drive).
Disconnect the other equipment
and operate the printer via this
port.
✎
Further information and assistance...
can be found on the Internet at www.minolta-qms.com/support
11.3
Print quality problems
If you are having problems with print quality, follow these steps:
11-8
G
Remove the toner cartridge and shake it back and forth carefully to distribute the remaining toner evenly.
G
Remove the toner cartridge and check it for damage. If necessary, replace it with a new cartridge. (See chapter 10.)
G
Remove the drum cartridge and check it for damage. If necessary, replace it with a new cartridge. (See chapter 10.)
G
Clean the inside of the printer. (See chapter 10.)
G
Deactivate the Toner Save feature in the printer driver. (See
chapter 4.)
EDNord - Istedgade 37A - 9000 Aalborg - telefon 96333500
Troubleshooting
11
Problem
Possible cause
Action
Blank pages
The toner cartridge is empty or
damaged.
Remove the toner cartridge and
check it for damage. If
necessary, replace the toner
cartridge. (See chapter 10.)
Black pages
The toner cartridge is damaged.
Remove the toner cartridge and
check it for damage. If
necessary, replace the toner
cartridge. (See chapter 10.)
Pages are too light
The Toner Save mode has been
activated.
Check the setting in the printer
driver. Change the setting and
try printing again. (See chapter
4.)
The toner density is not set
correctly in the printer driver.
Set the toner density to the
desired level and try printing
again. (See chapter 4.)
The toner cartridge may be
running out of toner.
Remove the toner cartridge and
rock it in order to improve the
distribution of the remaining
toner. If the problem persists,
replace the toner cartridge. (See
chapter 10.)
The toner cartridge is damaged.
Remove the toner cartridge and
check it for damage. If
necessary, replace the toner
cartridge. (See chapter 10.)
EDNord - Istedgade 37A - 9000 Aalborg - telefon 96333500
11-9
Troubleshooting
11
Problem
Possible cause
Action
Pages are too dark
The toner cartridge is damaged.
Remove the toner cartridge and
check it for damage. If
necessary, replace the toner
cartridge. (See chapter 10.)
The toner density is not set
correctly in the printer driver.
Set the toner density to the
desired level. (See chapter 4.)
Blurred
background
The toner cartridge is damaged.
Remove the toner cartridge and
check it for damage. If
necessary, replace the toner
cartridge. (See chapter 10.)
Uneven toner
density
The toner cartridge is damaged.
Remove the toner cartridge and
check it for damage. If
necessary, replace the toner
cartridge. (See chapter 10.)
The drum cartridge is damaged.
Remove the toner cartridge and
check it for damage. If
necessary, replace the drum
cartridge. (See chapter 10.)
The toner may be unevenly
distributed inside the toner
cartridge.
Remove the toner cartridge and
rock it in order to improve the
distribution of the remaining
toner. If the problem persists,
replace the toner cartridge. (See
chapter 10.)
The paper is moist because of
high humidity in the air or from
being splashed with water.
Replace the paper you are using
with dry paper and try printing
again.
Blank spots, text
missing
11-10
EDNord - Istedgade 37A - 9000 Aalborg - telefon 96333500
Troubleshooting
11
Problem
Possible cause
Action
White or black lines
The toner cartridge is damaged
(white lines).
Remove the toner cartridge/
drum cartridge and check it for
damage.
If necessary, replace the toner
cartridge/drum cartridge.
The drum cartridge is damaged
(black lines).
Toner smudges
11.4
The toner cartridge is damaged.
Remove the toner cartridge and
check it for damage. If
necessary, replace the toner
cartridge. (See chapter 10.)
The toner may be unevenly
distributed inside the toner
cartridge.
Remove the toner cartridge and
rock it in order to improve the
distribution of the remaining
toner. If the problem persists,
replace the toner cartridge. (See
chapter 10.)
The paper feed roller is dirty.
Clean the paper feed roller. (See
chapter 10.)
Printer messages
Indicator functions
The control panel has two indicators
and one button. The control panel indicators provide information on the
status of the printer.
1
No.
Description
1
Error indicator (orange)
2
Ready indicator (green)
3
Panel button
2
3
The indicators have five types of signals:
G
Off
G
On
G
Slow blinking—1 blink every 2 seconds
G
Blinking—1 blink per second
G
Rapid blinking—2 blinks per second
EDNord - Istedgade 37A - 9000 Aalborg - telefon 96333500
11-11
Troubleshooting
11
Status messages
Status messages indicate the current condition of the printer.
Ready indicator
(green)
Error indicator
(orange)
Printer condition
Action
Off
Off
Off
None
On
Off
Ready to print
None
Rapid blinking
Off
Warming up
None
Blinking
Off
Receiving data
None
Processing data
Printing
On
On
Initializing
None
Cancelling a print job
Resetting a counter
Slow blinking
Off
Power save mode
None
Rapid blinking
Rapid blinking
Reset mode
None
Demo page/Configuration page
select mode
Error messages
These messages indicate errors which you must correct before a print job
can continue or the printer status returned to “Ready.”
Ready indicator
(green)
Error indicator
(orange)
Printer condition
Action
Blinking
Blinking
Memory overflow or print
job is too complex.
Expand the printer’s
memory capacity
(DIMMs) or reduce the
size of the print job.
If the “Auto Continue”
function has been
activated in the printer
tools, the sheet already
fed in is automatically
ejected after a
predetermined time. (See
chapter 6.)
11-12
EDNord - Istedgade 37A - 9000 Aalborg - telefon 96333500
Troubleshooting
Ready indicator
(green)
11
Error indicator
(orange)
Rapid blinking alternately
Printer condition
Action
No media in the tray
specified in the printer
driver.
Load media into the
appropriate tray.
Paper size error
Load paper with the
appropriate size into the
paper feed tray.
Waiting for paper to be
loaded into Tray 1 during
manual duplex printing.
Correctly load paper
printed on one side, with
the blank side facing up,
into Tray 1. (Note: You
cannot duplex from the
manual feed tray.)
Off
Slow blinking
Tray empty
Load media into the
appropriate tray.
Off
Blinking
Media jam
Clear the jam and then
continue with the print job.
Off
On
Top cover is open
Close the top cover
Service message
This message indicates a serious fault that can be corrected only by an
authorized service technician. If this message is signalled, turn the printer
off and then on again. If the problem persists, contact your vendor or authorized service provider.
Ready indicator
(green)
Error indicator
(orange)
Condition
Action
Off
Rapid blinking
Fatal error
Turn the printer off, then
on again. If the problem
persists, contact your
technical customer
service.
EDNord - Istedgade 37A - 9000 Aalborg - telefon 96333500
11-13
EDNord - Istedgade 37A - 9000 Aalborg - telefon 96333500
Specifications
12
12
Specifications
12.1
Safety specifications
Printer
12.2
Safety standards
U.S. model:
UL 60950, CSA C22.2 No. 60950
European model: EU Directive 73/23/EEC
EN 60950 (IEC 60950)
China model:
GB 4943
EMC standards
U.S. model:
FCC part 15 subpart B class B
ICES-003
European model: EU Directive 89/336/EEC
EN 55022 (CISPR Pub. 22) class B
EN 61000-3-2
EN 61000-3-3
China model:
GB 9254 class B
Australian model: AS/NZS 3548 class B
Technical specifications
✎
To check on the availability of third-party options, such as an
Ethernet network adapter...
go to www.minolta-qms.com/products
Printer
Type
Desktop laser beam printer
Print system
Electrostatic dry powder imaging system
Exposure system
Laser diode + polygon mirror scanning
Developing system
Electrophotographic printing system
Resolution
1200 dpi × 1200 dpi (at half speed),
600 dpi × 600 dpi
Rasterize method
PCL 6 and PostScript Level 2 emulation
Print speed
600 dpi: 16 pages per minute (Letter/A4)
1200 dpi:8 pages per minute (Letter/A4)
First print
600 dpi: Within 15 seconds (Letter/A4)
1200 dpi:Within 24 seconds (Letter/A4)
Warm-up time
7 seconds or less
Media sizes
• Paper—Letter, Legal, Executive, Half Letter, A4, A5, B5 JIS,
Chinese 16K, Chinese 32K, custom paper sizes
• Envelopes—Commercial 10, Monarch, DL, C5, C6, B5,
Choukei-3Gou and Choukei-4Gou
• Postcard
EDNord - Istedgade 37A - 9000 Aalborg - telefon 96333500
12-1
Specifications
12
Plain paper (16 to 24 lbs; 60 to 90 g/m2)
Transparencies
Envelopes
Thick paper (24 to 43 lbs; 90 to 163 g/m2)
Postcard
Paper/Media
•
•
•
•
•
Paper feeding
• Tray 1 (Universal tray)
• Manual feed tray
• Lower feeder unit (Tray 2) (Option)
Input capacity
• Tray 1 (Universal tray): 250 sheets
• Manual feed tray: 1 sheet
• Lower feeder unit (Option): 500 sheets
Output capacity
• Face-down tray: 100 sheets
• Face-up tray (Option): 20 sheets
Operating temperature
50° to 95°F (10° to 35°C)
(with fluctuation of 18°F (10°C) per hour)
Operating humidity
15 to 85 % (with fluctuation of 20% per hour)
Drum cartridge
20,000 Letter/A4-size prints with a black-to-white ratio of 5% or
more.
Toner cartridge
6,000 (type 1) or 3,000 (type 2) Letter/A4-size prints with a
black-to-white ratio of 5% or more.
The enclosed cartridge is for 1,500 prints.
Power supply
110-127V, 50-60Hz
220-240V, 50-60Hz
Power consumption
120V: 840W or less
220-240V: 850W or less
Amperage
120V: 7.2A or less
220-240V: 3.8A or less
External dimensions (with
the face-down tray closed)
Height:10.2" (259 mm)
Width: 15.3" (389 mm)
Depth: 17.4" (441 mm)
Weight
Printer: approximately 3.2 lbs (7 kg)
Drum cartridge: approximately 0.1 lbs (0.3 kg)
Toner cartridge: approximately 0.2 lbs (0.5 kg)
Interface
IEEE 1284 Parallel (Compatible/Nibble/ECP)
USB (Revision 1.1 compliant)
CPU
Destiny ASIC D8401 75MHz
Standard memory
16 MB (expandable up to 144 MB)
Options
•
•
•
•
Lower feeder unit (Tray 2)
Legal and executive/B5 JIS trays for the lower feeder unit
Face-up tray
Expansion memory (SDRAM-DIMM)
Lower feeder unit (option)
12-2
Paper tray
Standard tray: Letter or A4
Optional trays: Legal and executive/B5 JIS
Paper/Media
Plain paper (16–24 lbs; 60–90 g/m2)
Capacity
Up to 500 sheets
EDNord - Istedgade 37A - 9000 Aalborg - telefon 96333500
Specifications
12
External dimensions
(without paper cassette)
Height:5.2" (132 mm)
Width: 15.0" (382 mm)
Depth: 12.0" (305 mm)
Weight
Approximately 1.8 lbs (4 kg)
SDRAM-DIMM expansion memory (option)
Capacity
64, 128 MB
Function type
Burst mode
CAS Latency
2 or 3
ECC
None (Usable even with ECC)
Access speed
10 ns
Number of pins
168
Module type
SDRAM-DIMM (Double In-line Memory Module)
Operating voltage
3.3 V
Parallel interface connectors and cables
Connectors
Printer:
Computer:
Parallel 36-pin connector
EIA 25-pin connector
Cable type
Shielded
Each signal and earth pair should be twisted
Pin assignments
IEEE 1284, type-B connector
USB interface connectors and cables
Connectors
Printer:
Computer:
Series B plug
Series A plug
Cable type
Require twisted data conductors or a shielded
Pin assignments
1: VBUS
2: D+
3: D4: GND
Shell: Shield
CAUTION
Danger of fire from cable!
➜ MINOLTA-QMS undertakes no guarantee for any specific cable. The
user is responsible for the quality and performance of the cable.
EDNord - Istedgade 37A - 9000 Aalborg - telefon 96333500
12-3
Specifications
12
12.3
Our concern for environmental protection
As an ENERGY STAR® Partner, we have determined that this machine
meets the ENERGY STAR® Guidelines for energy efficiency.
What is an ENERGY STAR® product?
An ENERGY STAR® product has a special feature that allows it to automatically switch to a “low-power mode” after a period of inactivity. An ENERGY STAR® product uses energy more efficiently, saves you money on
utility bills and helps protect the environment.
12-4
EDNord - Istedgade 37A - 9000 Aalborg - telefon 96333500
Specifications
12.4
12
FCC Part 15 - Radio Frequency Devices
For US Users
FCC: Declaration of Conformity
Product Type
Laser Beam Printer
Product Name
PagePro 1250E
Options
• Lower feeder unit (4198)
• Face-up Tray
• Expansion Memory
This device complies with Part 15 of the FCC Rules
Operation is subject to the following two conditions:
• This device may not cause harmful interference, and this device must accept any
interference received, including interference that may cause undesired operation.
NOTE: This equipment has been tested and found to comply with the limits for a Class B digital device, pursuant to Part 15 of the FCC Rules.
These limits are designed to provide reasonable protection against harmful interference in a residential installation. This equipment generates,
uses and can radiate radio frequency energy and, if not installed and used
in accordance with the instructions, may cause harmful interference to radio communications. However, there is no guarantee that interference will
not occur in a particular installation. If this equipment does cause harmful
interference to radio or television reception, which can be determined by
turning the equipment off and on, the user is encouraged to try to correct
the interface by one or more of the following measures:
G
Reorient or relocate the receiving antenna.
G
Increase the separation between the equipment and the receiver.
G
Connect the equipment into an outlet on a circuit different from that to
which the receiver is connected.
G
Consult the dealer or an experienced radio/TV technician for help.
WARNING: The design and production of this unit conform to FCC regulations, and any changes or modifications must be registered with the
FCC and are subject to FCC control. Any changes made by the purchaser
or user without first contacting the manufacturer will be subject to penalty
under FCC regulations.
This device must be used with a shielded parallel interface cable and
shielded USB interface cable.
The use of non-shielded cables is likely to result in interference with radio
communications and is prohibited under FCC rules.
EDNord - Istedgade 37A - 9000 Aalborg - telefon 96333500
12-5
Specifications
12
12.5
Interference-Causing Equipment Standard (ICES003 ISSUE 3)
For Canadian users
This Class B digital apparatus complies with Canadian ICES-003.
Cet appareil numérique de la classe B est conforme à la norme NMB-003
du Canada.
12.6
CE Marking (Declaration of Conformity)
For European users
This product complies with the following EU directives: 89/336/EEC,
73/23/EEC, and 93/68/EEC directives.
This declaration is valid for the area of the European Union (EU) only.
This device must be used with a shielded parallel interface cable and
shielded USB interface cable. The use of non-shielded cables is likely to
result in interference with radio communications and is prohibited under
89/336/EEC rules.
12.7
CISPR 22 and local rules
This device must be used with a shielded parallel interface cable and
shielded USB interface cable.
The use of non-shielded cables is likely to result in interference with radio
communications and is prohibited under CISPR 22 and local rules.
12.8
Acoustic Noise
Machine Noise Regulation 3 GSGV, 18.01.1991: The sound pressure level at the operator position according to EN27779 is equal to or less than
70dB (A).
12-6
EDNord - Istedgade 37A - 9000 Aalborg - telefon 96333500
Specifications
12.9
12
Safety information
This section contains detailed instructions on the operation and maintenance of this machine. To achieve optimum utility of this device, all operators should carefully read and follow the instructions in this manual.
Please keep this manual in a handy place near the machine.
Please read the next section before using this device. It contains important information
related to user safety and preventing equipment problems.
Make sure you observe all of the precautions listed in this manual.
* Note that some parts of the contents of this section may not correspond with the purchased
product.
Warning and precaution symbols
WARNING
CAUTION
Ignoring this warning could cause serious injury or even
death.
Ignoring this caution could cause injury or damage to
property.
Meaning of symbols
A triangle indicates a danger against which you should take precaution.
This symbol warns against cause burn.
A diagonal line indicates a prohibited course of action.
This symbol warns against dismantling the device.
A black circle indicates an imperative course of action.
This symbol indicates you must unplug the device.
EDNord - Istedgade 37A - 9000 Aalborg - telefon 96333500
12-7
Specifications
12
WARNING
• Do not modify this product, as a fire, electrical shock, or breakdown could
result. If the product employs a laser, the laser beam source could cause
blindness.
• Do not attempt to remove the covers and panels which have been fixed to
the product. Some products have a high-voltage part or a laser beam
source inside that could cause an electrical shock or blindness.
• Only use the power cord supplied in the package. Failure to use this cord
could result in a fire or electrical shock.
• Use only the specified power source voltage. Failure to do that could result
in a fire or electrical shock.
• Do not use a multiple outlet adapter to connect any other appliances or
machines. Use of a power outlet for more than the marked current value
could result in a fire or electrical shock.
• Do not unplug and plug in the power cord with a wet hand, as an electrical
shock could result.
• Plug the power cord all the way into the power outlet. Failure to do this
could result in a fire or electrical shock.
• Do not scratch, abrade, place a heavy object on, heat, twist, bend, pull on,
or damage the power cord. Use of a damaged power cord (exposed core
wire, broken wire, etc.) could result in a fire or breakdown.
Should any of these conditions be found, immediately turn OFF the power
switch, unplug the power cord from the power outlet, and then call your
authorized service representative.
• In principle, do not use an extension cord. Use of an extension cord could
cause a fire or electrical shock. Contact your authorized service
representative if an extension cord is required.
• Do not place a flower vase or other container that contains water, metal
clips or other small metallic objects on this product. Spilled water or metallic
objects dropped inside the product could result in a fire, electrical shock, or
break-down.
• Should a piece of metal, water, or any other similar foreign matter get inside
the product, immediately turn OFF the power switch, unplug the power cord
from the power outlet, and then call your authorized service representative.
• If this product becomes inordinately hot or emits smoke, or unusual odor or
noise, immediately turn OFF the power switch, unplug the power cord from
the power outlet, and then call your authorized service representative. If
you keep on using it as is, a fire or electrical shock could result.
• If this product has been dropped or its cover damaged, immediately turn
OFF the power switch, unplug the power cord from the power outlet, and
then call your authorized service representative. If you keep on using it as
is, a fire or electrical shock could result.
• Do not throw the toner cartridge or toner into an open flame. The hot toner
may scatter and cause burns or other damage.
• Connect the power cord to an electrical outlet that is equipped with a
grounding terminal.
12-8
EDNord - Istedgade 37A - 9000 Aalborg - telefon 96333500
Specifications
12
CAUTION
• Do not use flammable sprays, liquids, or gases near this product, as a fire
could result.
• Do not leave a toner unit or drum unit in a place within easy reach of
children. Licking or ingesting any of these things could injure your health.
• Do not let any object plug the ventilation holes of this product. Heat could
accumulate inside the product, resulting in a fire or malfunction.
• Do not install this product at a site that is exposed to direct sunlight, or near
an air conditioner or heating apparatus. The resultant temperature changes
inside the product could cause a malfunction, fire, or electrical shock.
• Do not place the product in a dusty place, or a site exposed to soot or
steam, near a kitchen table, bath, or a humidifier. A fire, electrical shock, or
breakdown could result.
• Do not place this product on an unstable or tilted bench, or in a location
subject to a lot of vibration and shock. It could drop or fall, causing personal
injury or mechanical breakdown.
• After installing this product, mount it on a secure base. If the unit moves or
falls, it may cause personal injury.
• Do not store toner units and PC drum units near a floppy disk or watch that
are susceptible to magnetism. They could cause these products to
malfunction.
• Do not place any objects around the power plug as the power plug may be
difficult to pull out when an emergency occurs.
• Do not touch the electrical contacts that are located inside the top cover
and underneath the cartridge as an electrostatic discharge may damage
the printer.
• The inside of this product has areas subject to high temperature, which may
cause burns. When checking the inside of the unit for malfunctions such as
a paper misfeed, do not touch the locations (around the fusing unit, etc.)
which are indicated by a “Caution! High Temperature!” warning label.
• The socket-outlet shall be installed near the machine and shall be easily
accessible as the power plug may be difficult to pull out when an
emergency occurs.
• Always use this product in a well ventilated location. Operating the product
in a poorly ventilated room for an extended period of time could injure your
health. Ventilate the room at regular intervals.
• Whenever moving this product, be sure to disconnect the power cord and
other cables. Failure to do this could damage the cord or cable, resulting in
a fire, electrical shock, or breakdown.
• When moving this product, always hold it by the locations specified in the
user manual or other documents. If the unit falls it may cause severe
personal injury. The product may also be damaged or malfunction.
• Remove the power plug from the outlet more than one time a year and
clean the area between the plug terminals. Dust that accumulates between
the plug terminals may cause a fire.
• When unplugging the power cord, be sure to hold onto the plug. Pulling on
the power cord could damage the cord, resulting in a fire or electrical shock.
EDNord - Istedgade 37A - 9000 Aalborg - telefon 96333500
12-9
Specifications
12
12.10 Working safely with your laser printer
Notes on your safety and operating safety
Working improperly with the printer can result in health hazards, electric
shocks and even fires. Before you unpack the laser printer, you should
make yourself familiar with this information on your safety and operating
safety.
CAUTION
Observe the following information:
➜ Make sure that the power cord is correctly plugged into the socket and
that the socket is at all times visible and readily accessible.
12-10
➜
Do not pull on the cord to pull the power plug out of the socket as this
may damage the cord. The result could be an electric shock or a fire.
➜
Remove the power plug from the socket if the machine will not be in
use for an extended period of time.
➜
Do not remove the power cord from the socket with wet hands as this
may result in an electric shock.
➜
Do not move the unit unless the power cord has been removed from
the socket. Otherwise you may damage the cord. The result could be
a short-circuit or a fire.
➜
Do not place any heavy objects on the power cord. Do not pull or kink
the cord as this can result in damage to the cord. The result could be
an electric shock or a fire.
➜
Make sure that the machine is not standing on a cord to another machine as this can result in damage to that cord. The result could be a
fire or improper functioning of the unit in question.
➜
Make sure that the power supply to the unit has the correct voltage.
Otherwise the result could be a fire or an electric shock.
➜
Switch off the unit immediately and unplug the power cord if the power
supply cord is damaged. Failure to do so could result in a fire or an
electric shock. Inform your customer support technical specialist.
➜
Use only extension cords that are designed for at least the maximum
power rating of the machine. Extension cords with lower ratings can
result in the unit overheating and can even lead to a fire.
➜
Perform only the procedures that are described in this manual. Using
the machine improperly can result in a fire or an electric shock.
EDNord - Istedgade 37A - 9000 Aalborg - telefon 96333500
Specifications
12
➜
Do not place any heavy objects on the machine.
➜
Do not open any covers on the machine while printing is in progress.
➜
Do not switch off the unit while printing is in progress.
➜
Do not place any magnetic objects near the machine.
➜
Do not use any flammable sprays, liquids or gases in the vicinity of the
machine.
➜
Do not remove any safety devices and do not alter the construction of
the machine. The unit is equipped with high-voltage components. Using the machine improperly can result in a fire or an electric shock.
➜
Do not insert any paper clips, staples or other small metal objects into
openings on the machine. The result could be an electric shock or a
fire. If metal pieces are fed into the machine, switch it off immediately,
disconnect the power cord and inform your customer support technical
specialist.
➜
Do not place coffee cups, drink bottles, or other containers with liquids
in them on the machine. If liquid enters the machine, the result could
be an electric shock or a fire. If liquid does get into the machine, switch
it off immediately, disconnect the power cord and inform your customer support technical specialist.
➜
If the machine becomes unusually hot, or if you notice smoke or an unusual odor coming from the machine, switch it off immediately and remove the power cord from the socket. Inform your customer support
technical specialist.
EDNord - Istedgade 37A - 9000 Aalborg - telefon 96333500
12-11
Specifications
12
Laser safety
This is a page printer which operates by means of a laser. There is no possibility of danger from the laser, provided the printer is operated according
to the instructions in this manual.
Since radiation emitted by the laser is completely confined within protective housing, the laser beam cannot escape from the machine during any
phase of user operation.
Internal laser radiation
Maximum average radiation power: 35 µ W at the laser aperture of the
print head unit.
Wavelength: 770-795 nm
This product employs a Class 3b laser diode that emits an invisible laser
beam. The laser diode and the scanning polygon mirror are incorporated
in the print head unit.
The print head unit is NOT A FIELD SERVICEABLE ITEM. Therefore, the
print head unit should not be opened under any circumstances.
Laser caution label
A laser caution label is attached inside the machine as shown below.
Do not dispose of the printer or consumables other than directed in the
manual. This product has a laser beam source inside that could cause
blindness if the safeguard is damaged.
Laser aperture of the
print head unit
The above figure shows the internal view of the printer when the top cover
is open.
12-12
EDNord - Istedgade 37A - 9000 Aalborg - telefon 96333500
Specifications
12
Laser safety label
A laser safety label is attached to the outside of the machine as shown below.
110-127 V area:
THIS PRODUCT WITH 21 CFR
CHAPTER I, SUBCHAPTER J
220 V area:
CLASS 1 LASER PRODUCT
For United States users
CDRH Regulations
This machine is certified as a Class 1 Laser product under the Radiation
Performance Standard according to the Food, Drug and Cosmetic Act of
1990. Compliance is mandatory for Laser products marketed in the United
States and is reported to the Center for Devices and Radiological Health
(CDRH) of the US Food and Drug Administration of the US Department of
Health and Human Services (DHHS). This means that this device does
not produce hazardous laser radiation. The label shown above indicates
compliance with the CDRH regulations and must be attached to laser
products marketed in the United States.
CAUTION
Use of controls, adjustments or performance of procedures other than
those specified in this manual may result in hazardous radiation exposure.
This is a semiconductor laser. The maximum power of the laser diode is
5 mW and the wavelength is 770-795 nm.
EDNord - Istedgade 37A - 9000 Aalborg - telefon 96333500
12-13
Specifications
12
For users in all countries
CAUTION
Use of controls, adjustments or performance of procedures other than
those specified in this manual may result in hazardous radiation exposure.
This machine is certified as a Class 1 laser product. This means that the
machine does not produce hazardous laser radiation.
This is a semiconductor laser. The maximum power of the laser diode is
5 mW and the wavelength is 770-795 nm.
For Denmark users
ADVARSEL
Usynlig laserstråling ved åbning, når sikkerhedsafbrydere er ude af funktion. Undgå udsættelse for stråling.
Klasse 1 laser produkt der opfylder IEC60825 sikkerheds kravene.
Dansk: Dette er en halvlederlaser. Laserdiodens højeste styrke er 5 mW
og bølgelængden er 770-795 nm.
For Norway users
ADVERSEL
Dersom apparatet brukes på annen måte enn spesifisert i denne bruksanvisning, kan brukeren utsettes for unsynlig laserstråling som overskrider
grensen for laser klass 1.
Dette en halvleder laser. Maksimal effekt till laserdiode er 5 mW og bølgelengde er 770-795 nm.
For Finland, Sweden users
LOUKAN 1 LASERLAITE
KLASS 1 LASER APPARAT
VAROITUS!
Laitteen käyttäminen muulla kuin tässä käyttöohjeessa mainitulla tavalla
saattaa altistaa käyttäjän turvallisuusluokan 1 ylittävälle näkymättömälle
lasersäteilylle.
Tämä on puolijohdelaser. Laserdiodin suurin teho on 5 mW ja aallonpituus
on 770 – 795 nm.
12-14
EDNord - Istedgade 37A - 9000 Aalborg - telefon 96333500
Specifications
12
VARNING!
Om apparaten används på annat sätt än i denna bruksanvisning specificerats, kan användaren utsättas för osynlig laserstrålning, som överskrider gränsen för laserklass 1.
Det här är en halvledarlaser. Den maximala effekten för laserdioden är 5
mW och våglängden är 770 – 795 nm.
VARO!
Avattaessa ja suojalukitus ohitettaessa olet alttiina näkymättömälle lasersäteilylle. Älä katso säteeseen.
VARNING!
Osynlig laserstrålning när denna del är öppnad och spärren är urkopplad.
Betrakta ej strålen.
Ozone release
During printer operation, a small quantity of ozone is released. This
amount is not large enough to harm anyone adversely. However, be sure
the room where the machine is being used has adequate ventilation, especially if you are printing a high volume of materials, or if the machine is
being used continuously over a long period.
Dégagement d’ozone
L’imprimante dégage une faible quantité d’ozone durant son utilisation.
Cette quantité n’est pas suffisamment importante pour être dangereuse.
Cependant, veillez à ce que la pièce dans laquelle la machine soit
adéquatement ventilée, surtout en cas d’impression de gros volumes ou
en cas d’utilisation continue pendant un laps de temps très long.
EDNord - Istedgade 37A - 9000 Aalborg - telefon 96333500
12-15
EDNord - Istedgade 37A - 9000 Aalborg - telefon 96333500
Index
Index
A
Advance options (PostScript printer driver)
Windows 2000 .............................................................................5-11
Advanced (PostScript printer driver)
Windows NT 4.0 .............................................................................5-7
Ambient conditions ..............................................................................2-5
Auto Run under Windows ..................................................................3-15
B
Border (Macintosh printer driver) .........................................................7-4
C
Cable specification ............................................................................12-3
Care of the paper feed roller ............................................................10-11
Care of the printer ............................................................................10-11
Collated (Macintosh printer driver) ......................................................7-3
Configuration page ............................................................................2-11
Connector ..........................................................................................12-3
Control Panel
calling up ........................................................................................6-4
configuration ..................................................................................6-9
counter ...........................................................................................6-8
paper ..............................................................................................6-5
printer setting .................................................................................6-6
test print .........................................................................................6-7
Copies (Macintosh printer driver) ........................................................7-3
Custom page (Macintosh printer driver) ..............................................7-2
D
Device options (PostScript printer driver)
Windows 95/98/Me ........................................................................5-4
Device Settings (PostScript printer driver)
Windows NT 4.0 .............................................................................5-8
Device settings (PostScript printer driver)
EDNord - Istedgade 37A - 9000 Aalborg - telefon 96333500
I-1
Index
Windows 2000 ............................................................................. 5-12
Drum cartridge .................................................................................... 2-2
Drum cartridge counter reset ...................................................8-6, 10-10
E
Envelopes ........................................................................................... 8-1
External features ................................................................................. 2-1
F
Face-up tray ........................................................................................ 9-3
Features ............................................................................................ 12-1
Fine art (Macintosh printer driver) ....................................................... 7-5
Fit to page (Macintosh printer driver) .................................................. 7-4
I
Installable options (PostScript printer driver) ...................................... 5-5
Installer under Windows .................................................................... 3-15
L
Layout (PostScript printer driver)
Windows 2000 ............................................................................... 5-9
Layout direction (Macintosh printer driver) .......................................... 7-4
Loading paper ..................................................................................... 8-1
manual feed tray .....................................................................2-8, 8-7
tray 1 ......................................................................................2-7, 8-6
tray 2 ............................................................................................. 8-7
Lower feeder unit ................................................................................ 9-1
M
Macintosh printer driver settings
custom page .................................................................................. 7-2
general settings ............................................................................. 7-2
layout settings ............................................................................... 7-3
page attributes ............................................................................... 7-1
printer specific options 1 ................................................................ 7-4
printer specific options 2 ................................................................ 7-5
Maintenance ..................................................................................... 10-1
Media type (Macintosh printer driver) .................................................. 7-5
I-2
EDNord - Istedgade 37A - 9000 Aalborg - telefon 96333500
Index
Memory module ...................................................................................9-4
N
Notes on installation ............................................................................3-2
O
Optional accessories ...........................................................................2-3
DIMM memory module ...................................................................9-4
face-up tray ....................................................................................9-3
tray 2 ..............................................................................................9-1
Orientation (Macintosh printer driver) ..................................................7-1
Overview of printer ..............................................................................2-1
P
Page setup (PostScript printer driver)
Windows NT 4.0 .............................................................................5-6
Pages per sheet (Macintosh printer driver) .........................................7-3
Panel button ........................................................................................2-4
Panel button functions .........................................................................8-4
cancelling a print job ......................................................................8-5
error message ................................................................................8-5
test page ........................................................................................8-4
Paper (Macintosh printer driver) ..........................................................7-1
Paper (PostScript printer driver)
Windows 95/98/Me ........................................................................5-3
Paper misfeed clearing
manual feed tray ..........................................................................11-6
output tray ....................................................................................11-4
printer ...........................................................................................11-2
tray 1 ............................................................................................11-5
tray 2 (option) ...............................................................................11-7
Paper size ............................................................................................8-2
Paper size (PCL printer driver) ............................................................4-4
Paper source (Macintosh printer driver) ..............................................7-3
Paper source (PostScript printer driver) ............................................5-11
Paper type list ......................................................................................8-3
Paper/Quality (PostScript printer driver)
Windows 2000 .............................................................................5-10
PCL printer driver
EDNord - Istedgade 37A - 9000 Aalborg - telefon 96333500
I-3
Index
device options ............................................................................... 4-6
installing under Windows 2000 .................................................... 3-26
installing under Windows 95 ........................................................ 3-16
installing under Windows 98/Me .................................................. 3-19
installing under Windows NT 4.0 ................................................. 3-24
page layout .................................................................................... 4-4
paper ............................................................................................. 4-3
quality ............................................................................................ 4-5
uninstalling the printer driver ....................................................... 3-38
Place of installation ............................................................................. 2-5
PostScript printer driver settings ......................................................... 5-1
Windows NT 4.0 ............................................................................ 5-2
Power cord .......................................................................................... 2-9
Power save (Printer tool) .................................................................... 6-7
Power switch ..................................................................................... 2-10
Print problems (general) ................................................................. 11-11
Print quality problems ....................................................................... 11-8
Printable area ...................................................................................... 8-3
Printer control panel ............................................................................ 2-4
Printer driver under Windows XP ...................................................... 3-31
Printer error (Printer tool) .................................................................... 6-5
Printer features (PostScript printer driver) ........................................... 5-4
Printer messages ............................................................................ 11-11
service messages ...................................................................... 11-13
status messages ....................................................................... 11-12
user messages .......................................................................... 11-12
Printer tools (Windows) ....................................................................... 6-1
R
Replacing drum cartridge .................................................................. 10-7
Replacing the toner cartridge ............................................................ 10-2
Resolution (Macintosh printer driver) .................................................. 7-5
S
Scale (Macintosh printer driver) .......................................................... 7-1
Space requirements ............................................................................ 2-6
Status Monitor ..................................................................................... 6-3
Storage of accessories ....................................................................... 2-5
Storage of consumables ..................................................................... 2-5
I-4
EDNord - Istedgade 37A - 9000 Aalborg - telefon 96333500
Index
System requirements ...........................................................................3-1
T
Technical specification ......................................................................12-1
expansion memory (SDRAM-DIMM) (option) ..............................12-3
interface connections and cables .................................................12-3
lower feeder unit ..........................................................................12-2
Toner cartridge ....................................................................................2-2
Toner cartridge counter reset ............................................................10-5
Toner saving (Macintosh printer driver) ...............................................7-5
Tray 2 (optional accessories) ..............................................................9-1
Troubleshooting .................................................................................11-1
U
USB device driver
installing under Windows 2000 ......................................................3-7
installing under Windows 98 ..........................................................3-3
installing under Windows Me .........................................................3-5
installing under Windows XP .......................................................3-11
W
Watermark (Macintosh printer driver) ..................................................7-4
EDNord - Istedgade 37A - 9000 Aalborg - telefon 96333500
I-5
EDNord - Istedgade 37A - 9000 Aalborg - telefon 96333500