1
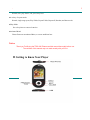
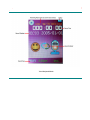
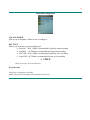
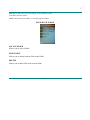
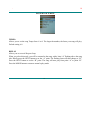
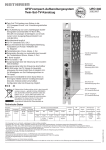
-
1
Mach Speed Technologies presents the next generation in personal music devices, the TRIO 819.
We hope this unit will bring you many hours of enjoyment!
Functions:
●Movie Function
●JPEG Picture Viewing
●High Fidelity Sound
●Elegant Design
●Supports various audio frequency formats
MP1, MP2, MP3, WMA, WMV, and ASF
●FM high fidelity radio
Auto search for a broadcasting station or manually tune to the broadcasting station of your choice.
Save up to 40 different stations!
●Record From Radio
Record the station that you are listening to!
●Voice Recording
Record in WAV and ACT formats at 32Kbps for high quality or 8Kbps for long recordings!
●7 Equalizer Settings
1
-
2
Natural, rock, pop, classic, soft, jazz, heavy bass
●A variety of repeat modes
Normal, single song repeat, Play Folder, Repeat Folder, Repeat all, Random, and Intro modes
●Sleep Mode
Set a sleep timer to conserve batteries.
●Animated Menu!
Choose Between an animated Menu, or a more traditional one
Notice:
Thank you For Buying the TRIO 819! Please read this manual thoroughly before use.
The contents of this manual may not match exactly with your unit.
z Getting to Know Your Player
2
-
3
-
Charging the Player
Charging the Player with the included Charger
Connect the unit to the charger using the included USB cable. Plug the charger in to a power outlet. The green
and red lights will both be on while the unit is charging. Once the unit is fully charged, the green light will go
out.
Charging the unit with your computer
Connect the unit to your computer using the included USB cable. While the unit is connected to your computer,
it will be charging. The unit stops charging once the battery is full.
3
-
4
-
MAIN MENU
Music mode
Movie mode
Record mode
4
Voice mode
FM Radio
-
5
-
Picture Browser
Setup
Electronics text file
Music Mode:
5
Game
-
6
-
Record Sound Mode:
6
-
7
-
Voice/Playback Mode:
7
-
8
-
FM Mode:
8
-
9
-
9
-
10
Changing Volume
Briefly Press the Volume Button and then the PREVIOUS or NEXT Buttons to adjust volume.
Once volume has been selected, the volume window will go away after several seconds of inactivity.
Power On/Power Down
Press and hold down the PLAY button when the unit it powered on to power the unit off.
Press and hold down the PLAY button when the unit is powered off to power the unit on.
Return to Main Menu (at any time)
Press and hold down the MODE Button.
Key Operations
1.
2.
3.
4.
5.
6.
"PLAY" key: Power on/off / play / pause.
"MODE": Select or enter mode or menu
"ON/OFF key" power switch. (located on the rear of the unit)
"VOLUME key" Opens Volume Screen.
"NEXT key": Press Briefly to skip a track/ raise volume, press and hold to fast forward
"PREVIOUS key" Press Briefly to skip backwards a track/lower volume
10
-
11
-
z
MUSIC
Operation
1. Insert the headphones into the headphone Jack.
2. Press MODE to enter Music Mode
3. Press Play to begin playing music
MUSIC MODE KEY FUNCTIONS
PLAY: Play/Pause music
NEXT: Skip to next track, fast forward, raise volume
PREVIOUS: Skip to previous track, rewind, lower volume
MENU: return to main menu, enter play music menu, enter paused music menu
11
-
12
1. Play Music Menu
REPEAT
Allows you to set several repeat options, including
Normal, Repeat One, Folder, Repeat Folder, Repeat All, Random and Intro
EQUALIZER
Allows you to set several Equalizers including
Natural, rock, pop, classic, soft, jazz, heavy bass
TEMPO
Allows you to set the song Tempo from -8 to 8.
The larger the number, the faster your song will play.
Default setting is 0.
REPLAY
Allows you to set an A/B repeat Loop
When you select this mode, you will be returned to the song, with a letter “A” flashing above the
song title. Briefly press the NEXT button to set the “A” point. The flashing letter will then change to
12
-
13
“B”. Press the NEXT button to set the “B” point. The song will now play from point “A” to point “B”.
Press the MODE button to return to normal replay mode
REPLAY TIMES
Allows you to set the number of times the song will replay from “A” to “B” before returning to normal
play mode.
REPLAY GAP
Allows you to set the gap between when the song gets to point “B” before returning to point “A”
2. Paused Music Menu
LOCAL FOLDER
Allows you to choose between folders on the unit
FILE SELECT
Allows you to choose between files on the folder
13
-
14
DELETE
Allows you to delete files in the current folder
REPEAT
Allows you to set several repeat options, including
Normal, Repeat One, Folder, Repeat Folder, Repeat All, Random and Intro
MOVIE
Play video files in .AMV format
KEY FUNCTIONS ARE IDENTICAL TO THOSE ON THE MUSIC MODE, ABOVE.
14
-
15
-
RECORD
z
z
z
Allows you to record sound with various qualities and bitrates
You can have up to 99 recorded files
Please ensure that the battery is fully charged if you plan on recording
Key Functions
PLAY: Begin recording/pause recording. Press and hold to save the recording
NEXT: No function
PREVIOUS: No function
VOLUME: No function
MODE: Enter Paused Recording Menu. Press and hold to save recording and return to the Main Menu
15
-
16
Paused Recording Menu
LOCAL FOLDER
Allows you to designate a folder to save recordings to
REC TYPE
Allows you to choose several recording types
¾ Fine REC - .WAV 32kbps- recommended for quality sound recording
¾ Long REC - .ACT 8kbps- recommended for long sound recording
¾ Fine VOR - .WAV 32kbps- recommended for quality voice recording
¾ Long VOR- .ACT 8kbps- recommended for long voice recording
1. VOICE
Allows you to play .ACT and .WAV files
Key Functions
PLAY: Play recording/pause recording
NEXT: Skip to the next recording. Press and hold to fast forward
16
-
17
PREVIOUS: Skip to the previous recording. Press and hold to rewind
VOLUME: Open the Volume
MODE: Enter Paused Voice Menu, or enter Playing Voice Menu
PAUSED VOICE MENU
LOCAL FOLDER
Allows you to select a folder
FILE SELECT
Allows you to choose between files on the folder
DELETE
Allows you to delete files in the current folder
17
-
18
PAUSED VOICE MENU
TEMPO
Allows you to set the song Tempo from -8 to 8. The larger the number, the faster your song will play.
Default setting is 0
REPLAY
Allows you to set an A/B repeat Loop
When you select this mode, you will be returned to the song, with a letter “A” flashing above the song
title. Briefly press the NEXT button to set the “A” point. The flashing letter will then change to “B”.
Press the NEXT button to set the “B” point. The song will now play from point “A” to point “B”.
Press the MODE button to return to normal replay mode.
18
-
19
-
RADIO
Allows you to tune in to local radio stations
Key Functions
PLAY: toggle through saved stations
NEXT: tune 1 channel forward. Press and hold to scan forward
PREVIOUS: Tune 1 channel backwards. Press and hold to scan backwards
VOLUME: Open the Volume
MODE: Enter Radio Menu
19
-
20
RADIO MENU
SAVE
Saves current station to saved stations list
DELETE
Removes the Current station from the saved stations list
DELETE ALL
Removes all stations from the saved stations list
NORMAL BAND
Allows you to listen to stations 87 to 108
JAPAN BAND
Allows you to listen to stations 76 to 90
FINE REC
Records station you are listening to in WAV 32kbps- recommended for quality recordings
LONG REC
Records the station you are listening to in .ACT 8kbps- recommended for long recordings
AUTO SEARCH
Scans through all channels, and saves all receptive channels in the saved channel list
SEARCH LEVEL
Sets the amount of reception required to be saved by the auto search feature
20
-
21
-
PHOTO
View your JPEG files
When you select Photo, a list of JPEG files stored on the unit appears.
Choose the item you wish to view and briefly press PLAY.
Key Functions
PLAY: Select Picture
NEXT: Move to the next item on the selection
PREVIOUS: Move to the previous item on the selection
VOLUME: No function
MODE: Enter Picture Menu
21
-
22
PICTURE MENU
LOCAL FOLDER
Allows you to select a folder
PLAY SET
Play all pictures in the current folder as a slideshow
DELETE
Allows you to delete files
SETUP
22
-
23
SETUP MENU
DISPLAY STYLE
Allows you to choose from one of two Main Menu styles
CLOCK
Allows you to set the system clock. PREVIOUS and NEXT buttons allow you to choose the next value
in the selected item, PLAY selects the next item, and MODE saves all current values and returns to the
Setup Menu
LCD SET
Allows you to set the darkness level on the LCD screen
LANGUAGE
Allows you to select your language.
POWER OFF
Off time- Allows you to set the time (in seconds) it takes for the unit to power off after inactivity.
Sleep time- Allows you to set the time (in seconds) that tit takes for the screen to power down to
conserve battery life when music is playing, and there is button inactivity.
23
-
24
REPLAY MODE
Manual replay- Sets each mode’s replay values manually, in each mode
Auto Replay- When you set a replay mode for a mode, the same replay mode is applied to all play
modes
ONLINE MODE
Multi Drive- Used to access a partitioned section of the drive
Normal only- Accesses the unit as normal
Encrypted only- Accesses an encrypted partition on the unit
MEMORY INFO
Shows how much memory is used on the unit
FRIMWARE VERSION
Information on the firmware version
FIRMWARE UPDATE
Used to Update the firmware on the unit
24
-
25
-
E-BOOK
View your.TXT files
Key Functions
PLAY: Return to list of .TXT files
NEXT: Move to the page
PREVIOUS: Move to the previous page
VOLUME: No function
MODE: Press and hold to return to main menu
25
-
26
-
Games
1.
BoxMan
Start
Map
Return
2.
3.
Bricks
Start
Speed
Open Grid
Close Grid
Return
Color Bead
Start
Highest Score
Return
Begin Playing
Select map to play (there are 41 maps)
Returns to main game selection
Begin Playing
Sets game speed (0 is slowest 12 fastest)
Creates a grid on screen
Removes Grid from screen
Return to main game selection
Begin playing
Shows the highest attained score so far
Return to main game selection
26
-
27
4. Winmine
Start
Line number
Row number
Mine Number
Begin Playing
Number of lines in the game
Number of rows in the game
Number of mines in the game
GAME EXPLANATIONS
1.
BoxMan:
Control the BoxMan (flashing green block) using the MENU, PREV, NEXT, and VOL keys, Push the boxes
(blue and white blocks) into the fires (red and white diamonds). Once all boxes are pushed into the fires,
advance to next level
2. Bricks
Move the colored blocks to fill the screen from left to right to score points and eliminate that line. Do not let the
screen fill from top to bottom or you will lose
3. Color Bead
Line the colored beads up to make a set of 3 or more in a horizontal or vertical row to eliminate those beads and
score points. You can move only beads which will create a row of three or more
4. Winmine
Isolate the mines by clearing the safe squares around them. Each square with a number tells you how many
mines are in the 8 square box around your sweeper
Key Functions
1. BoxMan:
Move left:
PREV
27
-
28
Move Right:
NEXT
Move up:
MENU
Move Down:
VOL
Restart Map:
Quit:
2. Bricks
Move down:
Move Right:
Move Left:
Spin Piece:
Quit:
4. Color Bead
Move up:
Move down:
Move Right:
Move Left:
Choose Bead:
Withdraw:
5. Winmine
Move up:
Move down:
Move Right:
Move Left:
Choose Bead:
PLAY
Press and hold MENU
VOL
NEXT
PREV
MENU and PLAY
Press and Hold MENU
Menu
VOL
NEXT
PREV
PLAY
MENU
Menu
VOL
NEXT
PREV
PLAY
28
-
29
Withdraw:
MENU
USING THE PLAYER AS A USB DRIVE
This unit is supported as a standard USB device by Windows 2k and later without any driver installations, as well as
MAC OS 10.3, and Linux Redhat 8.0
1.
Specifications
Shape size
Weight
Screen
TFT,CSTN screen
Connections
High-speed USB2.0 (FS)Flash disk!
Memory
Flash memory:512mb to 1G
29
-
30
Power supply
Recording
MP3,WMA,OGG,WMV,ASF,WAV
Up to 10 hours
Sample rate
8KHz
Record sound a format
WAV(32 K bps),ACT(8 K bps)
Record sound time
35Hours(ACT, 128 M Flash)
headphones
(L)10 mWs+(R)10 mWs(32 Ohms)
The MP3 ratios and rates
8K bps – 320 K bps
WMA,WMV,ASF,OGG,the
5K bps – 384 K bps
MAV ratio and rates
frequency
up to 20 KHzs
30
-
31
-
Receive frequency scope
76 - 96 MHzs/87 MHz – 108 MHzs
Saved stations
Up to 20
headphones
(L)10 mWs+(R)10 mWs(32 Ohms)
FM radio
Music format
MP1,MP2,MP3,WMA,WMV,ASF,WAV
Use temperature
-5 to 40 degrees Celsius
17 national languages
Simplified Chinese character, English, French, German...etc.17 national
languages
The operating system support
Windows98/SE/ME/2 Ks/XP, Mac OS 10.3 ,Linux 2.4.2
Note: Specifications can change without notice.
31
-
32
-
Using the software that came with the player
AMV movie converter
1. Summary
This converts movie files into AMV format which can be viewed on your unit files and include:
1) AVI format
2) Windows Media format (.asf, .wmv)
3) MPEG1 format (.mpg, mpeg)
4) Realplay format (.rm)
5) Quicktime format (.mov)
6) MPEG2 format (.vob)
Compatible with: Windows98SE, Windows Me, Windows2000, Windows XP. Requires Windows Media player
9.0 or later and DirectX 9.0 or later
2. Install software
Insert the TRIO Driver CD into the CDROM. Open the “Driver Folder”. Open the folder “The AMV movie
conversion tool”. Open the folder “MP3set3_68”. Run the setup.exe file found, and follow onscreen instructions.
NOTE- Installing this will also install the AMV movie player, the MP3 disk tool, and the sound converter tool.
3. Using the software
1) Button Explanation
32
-
33
-
While using this tool, you can hover your mouse over a button for 2 seconds to display the button name
33
-
34
2) Choosing the file to convert
After starting the software, click the "add file" button on the “input file” line and direct the program to
the file you wish to convert, as seen below:
34
-
35
You can change the type of file you are looking for by clicking on the “file type” dropdown menu button,
as seen below:
35
-
36
After adding the file, it will display in the “Input file” field as well as the state column below. To add
more files to convert, repeat the above steps.
36
-
37
3.3 Play the media file
This tool has the ability to play video files you have added to the state column. Once you have a video
file added to the state column, click on it to highlight and press the play button to play the file:
37
-
38
After the file starts playing, the progress bar (below the viewer) will begin to move, and the status in the
state column will change from" uconvert" into "success"; time will change from"0:00" to the actual file
length. The Pause and Stop buttons are both active at this time and perform their common functions.
38
-
39
-
4. Converting files
4.1 Choose the file(s) that you wish to convert
In the state column, on the left side of each media file is a select box and a file number. The select box is
used to choose several media files to convert. If the select box is not checked, the file will not be
converted.
39
-
40
To cancel the conversion (either before or during the process) you can either uncheck the select box, or
right click on the file and select “Unselect”
40
-
41
4.1.2 Removing files from the list
If you wish to remove one of the files already added to the list, right click on the desired file and select
“Delete”. It will be removed from the list.
41
-
42
4.2 Specify the save path of the AMV file
The default save path for this tool is C:\. Before converting files, click the "AMV Path" button on the
right hand side of the Output File line. Point the program to where you wish the files to be saved to:
42
-
43
Once you have chosen the path you wish to save please click "ok":
43
-
44
After you have chosen the save path, it will display in the “Output File” line:
44
-
45
4.3 Property Settings
This tool can set video properties, such as how much of a video clip to convert, video size, etc.
a. Choose one or more media files, then click "setting button"
in the “output Info” section
b. Choose one or more media files, then right click, choose "setting" the picture below is of the default
settings
45
-
46
4.3.1 Cut Source Video Snippet
If you only need to convert a clip of a media file, this is where you set the start and stop point.
Above shows the user selecting a clip from 1 min 10 seconds to 3 min 20 seconds of the video
46
-
47
4.3.1.2 While the file is playing the buttons below allows you to set a start and end point of video
playback, as well as letting you repeat from those points:
47
-
48
When you click the "start position" button, the play bar will show a start point arrow, as shown below:
48
-
49
When you click the "end position" button, the play bar will show an end time point as shown below:
After the two points are selected, click "select" button (looks like a checkmark), this will convert only
the selected clip.
49
-
50
-
Shown above, only from 1 min 41 sec to 2 min 26 sec will be converted, for a total 45 sec time.
If you want to cancel the clip, press the "cancel" button (looks like an X). At this time, the play bar will
reset and the whole file will be reselected for conversion.
50
-
51
4.3.2 Choose video height and width of AMV file
51
-
52
4.3.3 AMV Frames per second
There are three options for frames per second –high. Middle. and low. The higher frame rate, the larger
the file will be and the higher quality the video. The player’s default is middle:
52
-
53
4.3.4 Image quality
The image quality has three settings- low, middle, and high. The player’s default is high.
53
-
54
4. 3.5 Image focus
The image focus has mode0, mode1, mode2, and mode3. The tool default is mode2 and adjusts the
image focus.
4. 3.6 Replace the old audio file with the new audio file
Allows you to replace the file’s current audio with a .WAV file of your choice, while the file still uses
the original video file. You can click the "Substitute new audio for old audio" button to open a dialog
box:
54
-
55
-
Click the
icon to choose the new audio file path. After you have selected the audio file, click on “open” as
shown below:
55
-
56
Once you have selected the new audio file, "Substitute new audio for old audio" dialog box will display
the new path, click the "OK" button, as shown below:
56
-
57
After choosing your audio file, it will display in the audio setting as shown below:
57
-
58
4.3.7 Miscellaneous settings:
4.3.9.1 “overwrite file” replaces the current file with the converted .AMV file.
4.3.9.2 “play after converting” plays the .AMV file after it is converted
4.3.9.3 “try other codec” allows you to try to convert the file with a different codec. We recommend the
default.
4.4. Convert file
4.4.1 convert
After setting your options, please check one or more files in the state column window and click the
“begin” button:
58
-
59
4.4.2 Play
After converting the file, the AMV player will play the file. If the file plays correctly, then it means that
the file was converted correctly:
4.4.3 Completely converted
59
-
60
-
5. Attention proceeding
If you want to convert Realplay, Quicktime, or MPEG2 format files, please first install the
corresponding Codec.
When you convert Realplay, Quicktime, or MPEG2 (DVD) format files, if your Windows Media player
cannot play this file, then you need to install corresponding compatible codec for Windows Media
player, until the Media Player will play this
MP3 Player disk tool quick start
Summary
The program is used to format the disk, repartition the disk, or set (or modify) a password for an encrypted
partition, when MP3 Player is used as a removable disk. Before executing the program, please confirm that only one
MP3 Player is connected to the PC. When the program runs, it will show a dialog box which has two property pages,
"Format" and "Partition and encrypt".
System platform: Windows98, Windows ME, Windows 2000, Windows XP.
Format
The following is the interface of the program, after running.
60
-
61
-
"Drive" is the list of removable disks' assigned letter.
"Format type" has 3 types. They are "quick format", "Full format", and "Low format".
61
-
62
If the check button "Make bootable disk" has been checked, the current logical disk will be formatted to a USB
bootable disk (if the disk is an encrypted partition, bootable function will be ineffective).
Partition and encrypt
The following is the interface:
62
-
63
"Disk physical capacity" is the actual capacity of the removable disk. "Encrypted disk capacity" is the capacity of the
encrypted partition. If encrypted disk capacity is zero, there will be only the normal partition. By adjusting the capacity
of encrypted disk, it will be repartitioned. The adjusted capacity is the capacity of encrypted disk.
If the encrypted disk has been assigned a password, click the "Set username and password" button. At this time, if you
don't repartition, you can modify the password through inputting the old use name and password and new user name
and password. If old user name and password are correct, new user name and password which you input will be set. If
you repartition it (adjust the capacity of the encrypted disk), edit boxes "Old username" and "Old password" will be
disabled. When you input new username and password, its will be set after the repartition step is completed.
Notice
The min capacity of normal disk is 17 Mb, so the max capacity of encrypted disk is less than the total disk capacity.
The removable disk maybe be removed after the format or repartition is executed. If your system is Windows ME or
Windows 2000, a dialog box will pop up telling you the removable device has been removed. Don't worry. Just close it.
The following is the dialog popped by system (Windows ME).
63
-
64
Sound conversion tool
This tool is designed for format conversion from rcd/rec/act to WAV, with the function of file playback in WAV,
and MP3 formats.
The definition of buttons on the interface is as follows:
[Open]Open a file.
If the file is in WAV or MP3 format, it can be played at once.
If the file is in rcd/rec/act format, it should be converted first and then played.
[Convert]Start converting.
This button is not available unless the file is in rcd/rec/act format.
[Help]Open the help window.
[Exit]Exit this tool
64