1
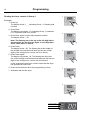
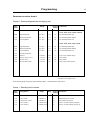
Programming manual Selecta II Control T4290, T4530, T4650, T4900, T41200, T4300S, T4420S TD30, TD50, TD75, TD100, TD135, TD30x30, TD45x45 WD4130, WD4240 T4250 from machine no. 23350/0006970 T4350 from machine no. 23250/0003715 487 05 40 01/EN 2011.01.11 Contents Contents Safety precautions......................................................................................5 Programming...............................................................................................7 Gas reset button.....................................................................................7 Operating panel......................................................................................8 Quick-diagram........................................................................................9 Changing of parameters in Group 0.....................................................10 Reading the hour counter in Group 1...................................................12 Parameter overview- Area A.................................................................13 Error codes overview............................................................................14 The manufacturer reserves the right to make changes to design and component specifications. 3 Safety Precautions Safety Precautions Do not dry unwashed items in the machine The machine is not to be used if industrial chemicals have been used for cleaning. Do not allow minors to use the machine. Do not hose down the machine with water. The machine's door lock must under no circumstances be bypassed. Items that have been soiled with substances such as cooking oil, acetone, alcohol, petrol, kerosene, spot removers, turpentine, waxes and wax removers should be washed in hot water with an extra amount of detergent before being dried in the machine. Items such as foam rubber (latex foam), shower caps, waterproof textiles, rubber backed articles and clothes or pillows fitted with foam rubber pads should not be dried in the machine. Fabric softeners or similar products should be used as specified by the fabric softener instructions. The machine may not be used to dry floor mops that contain polypropylene. The final part of a drying cycle occurs without heat (cool down cycle) to ensure that the items are left at a temperature that ensures that the items will not be damaged. WARNING. Never stop the machine before the end of the drying cycle unless all items are quickly removed and spread out so that the heat is dissipiated. Remove garments from the machine as soon as they are dried. This prevents them from becoming creased and reduces the risk of spontaneous ignition. If the machine develops a fault, this must be reported to the person in charge as soon as possible. This is important both for your safety and that of others. The machine must not be located where a door, sliding door, etc., can block the machine's door The machine is not intended to be used by people (including minors) with reduced physical or mental capacity or lack of experience and knowledge. Such people must be instructed in the use of the machine by a person who has responsibility for their safety. Minors must be supervised to ensure that they do not play with the machine. Adequate ventilation has to be provided to avoid the back flow of gases into the room for appliances burning other fuels, including open fires. Gas heated tumble dryer: The machine is not to be installed in rooms containing cleaning machines with perchloroethylene, TRICHLOROETHYLENE or CHLOROFLUOROCONTAINING HYDROCARBONS as cleaning agents. If you can smell gas, • Do not switch on any equipment • Do not use electrical switches • Do not use telephones in the building • Evacuate the room, building or area • Contact the person responsible for the machine In order to prevent damage to the electronics (and other parts) that may occur as the result of condensation, the machine should be placed in room temperature for 24 hours before being used for the first time. 5 Programming Programming To enter the programming mode press service button A. 1 After pressing the service button A the display shows: 0 -- = Group 0. Program the dryer, see Service Manual for Selecta Control from ver. 4.xx for programming details. Gas reset button The button B is the gas reset button. 1 High voltage on the printed circuit board Note that there is high voltage on the circuit board. Never touch high voltage parts without first breaking the current at the main power switch. 1 . A B High voltage 7 Programming 8 Operating panel There are different types of operating panels. On the dryer operating panel the buttons might not have any symbols in which case they are only usable when the dryer is in service mode. In service mode the 4 buttons are used for changing the parameters. 2 Selected temperature Light emitting diode is lit at the selected temperature or show the defaulttemperature setting. Default temperature can be set in Group B in parameter A 05. 2 SELECTA CO N TRO L High Medium Down Low Up No heat Return Enter 487 09 10 01.00 Programming 9 Quick-diagram Area A Main groups Subgroups Group 0 - Temperature / drying time 0 01 - 0 08 Group 1 - Reading total counters 1 01 - 1 05 Group 2 - Code to area B Area B Area B see service manual Selecta Control from ver. 4.01 Group 0 Group 1 Adjustable parameters: Readable parameters: 0 01 High temperature 1 01 Hour counter - permanent 0 02 Medium temperature 1 02 Hour counter - resettable 0 03 Low temperature 1 03 Hours until next service 0 04 No heat (option) 1 04 Total coins inserted, coin 1 0 05 Discount (coin only) 1 05 Total coins inserted, coin 2 0 06 Time per push or coin 1 0 07 Time per coin 2 0 08 Min. time before start (coin only) Note! If a mistake is made or confusion arises while programming the dryer, press the service button and start again. During the programming process, Enter is used to save new settings. If you leave programming mode before pressing Enter to save a new setting, the original value will be retained. Programming 10 Changing of parameters in Group 0 1. SELECTA CO N TRO L Adjusting drying time 1. Press Enter. The display shows 0 01, indicating Group 0, parameter location 01 = High temperature. 2. Press Up to reach parameter location 0 06. This is the parameter location for the Time per coin or push value. The value in this location is the number of drying minutes that will be added when a coin is deposited (coin machines) or Up is pushed. 487 48709 2210 9300.00 40.00 2. SELECTA CO N TRO L 3. Press Enter to enter this location and view its contents. 487 22 93 40.00 Note: The flashing bar at the bottom of the left digit indicates that this is a two-digit parameter (0 to 99 minutes). 4. Press Enter again to select this value for editing. The current value 10 will begin to flash. 3. SELECTA CO N TRO L 5. Press Down to lower the value or Up to increase it. Here the value has been reduced to 8 minutes per coin. 487 48709 2210 9300.00 40.00 6. Press Enter to save the new value. 7. Press service button A when the programming is done. 8. Assemble and test the dryer. 4. SELECTA CO N TRO L 487 48709 2210 9300.00 40.00 5. SELECTA CO N TRO L 487 48709 2210 9300.00 40.00 6. SELECTA CO N TRO L 487 48709 2210 9300.00 40.00 Programming Adjusting operating temperatures 1. Press Enter. The display shows 0 01, indicating Group 0, parameter location 01 = High temperature. 11 1. SELECTA CO N TRO L 2. Press Enter again to enter this parameter location. The display shows _ 70 (°C). Note: The flashing bar at the bottom of the left digit indicates that this is a two-digit parameter. 487 48709 2210 9300.00 40.00 2. SELECTA CO N TRO L 3. Press Enter key to edit this parameter value. The “70” will begin to flash. 4. Press Down to lower the value or Up to increase it. Note: The Up and Down may be pressed and held to make more rapid value changes. 487 48709 2210 9300.00 40.00 3. SELECTA CO N TRO L 5. Press Enter key to save the new value In this example, the High temperature has been changed to 65°C. The value is saved when the parameter stops flashing and the flashing _ reappears in the left digit. 487 48709 2210 9300.00 40.00 6. Press Return to leave this parameter. 7. To adjust the Medium or Low temperature, press Up to go to the proper parameter location. 4. SELECTA CO N TRO L Location 0 02 is the Medium drying temperature (factory set to 60°C). Location 0 03 is the Low drying temperature (factory set to 50°C). Press Down to go back if you pass the desired location. Press Enter to enter and edit the Medium or Low temperature, as described in steps 3-5. 487 48709 2210 9300.00 40.00 5. SELECTA CO N TRO L 8. Press service button A when the programming is done. 9. Assemble and test the dryer. 487 48709 2210 9300.00 40.00 6. SELECTA CO N TRO L 487 48709 2210 9300.00 40.00 7. SELECTA CO N TRO L 487 22 93 40.00 Programming 12 Reading the hour counter in Group 1 1. SELECTA CO N TRO L Example: 1. Press Up. The display shows 1 _ _ indicating Group 1 = Reading total counters 2. Press Enter. The display now shows 1 01 indicating Group 1, parameter 01 = Permanent total hour counter. 487 22 93 40.00 2. SELECTA CO N TRO L 3. Press Enter again to enter this parameter location. The display shows - 00. Note: The flashing bar in the top of the left digit indicates that these are the first two digits of a six-digit parameter value (00 xx xx hours). 4. Press Down. The display shows - 02. The flashing bar at the middle of the left digit now indicates that these are the two middle digits of the six-digit hour counter (00 02 xx hours). 487 48709 2210 9300.00 40.00 3. SELECTA CO N TRO L 5. Press Down again. The display now shows - 08. The flashing bar at the bottom of the left digit now indicates that these are the last two digits of the six-digit hour counter (00 02 08 hours). 487 48709 2210 9300.00 40.00 In this example the total hour counter shows that the dryer has operated for 208 hours. 6. Press service button A when the programming is done. 4. SELECTA CO N TRO L 7. Assemble and test the dryer. 487 48709 2210 9300.00 40.00 5. SELECTA CO N TRO L 487 48709 2210 9300.00 40.00 First two digits Middle two digits Last two digits Programming 13 Parameter overview- Area A Group 0 - Setting temperatures and drying time Parameter Designation Step Range Factory setting Comments T4190, T4250, T4350, T4300S, T4300LE 0 01 High temperature 30 - 70°C 1°C 70 Air outlet temperature High 0 02 Medium temperature 30 - 70°C 1°C 60 Air outlet temperature Medium 0 03 Low temperature 30 - 70°C 1°C 50 Air outlet temperature Low T4290, T4530, T4650, T4900, T41200 0 01 High temperature 30 - 80°C 1°C 80 Air outlet temperature High 0 02 Medium temperature 30 - 80°C 1°C 70 Air outlet temperature Medium 0 03 Low temperature 30 - 80°C 1°C 50 Air outlet temperature Low 0 04 No heat temperature - - 0 05 Discount 0 - 99 mins. 1 min. 5 Only on coin operated dryers 0 06 Time per push or coin 1 1 – 90 mins. 1 min. 15 Time interval 0 07 Time per coin 2 1 – 90 mins. 1 min. 30 Time interval 0 08 Min. time before start 0 – 90 mins. 1 min. 0 Only on dryers with payment - The outlet temperature in parameters 0 01 - 0 03 must have a max. setting of 70°C To move from group 0 to group 1 press <Return> till 0 -- and then press <Up> until 1 -- Group 1 - Reading total counters Factory setting Parameter Designation Range Step 1 01 Hour counter 0 – 999999 hrs. - 0 Permanent total hour counter 1 02 Hour counter 0 – 999999 hrs. - 0 Resettable trip hour counter 1 03 Service hour counter 0 – 999999 hrs. - 0 Hours before next service 1 04 Coin counter 1 0 – 999999 coins - 0 Total no. of coins inserted (coin type1) 1 05 Coin counter 2 0 – 999999 coins - 0 Total no. of coins inserted (coin type 2) Comments Programming 14 Error codes overview Error code Description E 01 Not in use E 02 Not in use E 03 The input sensor has short circuited The thermistor that measures air temperature at the drum inlet or the wires running to the sensor has short circuited. E 04 The output sensor has short circuited The thermistor that measures air temperature at the drum outlet or the wires running to the sensor has short circuited. E 05 The fan motor has overheated (Motor 1) The heat protection contact in the motor, or its cable stem, is open. E 06 The drum motor has overheated (Motor 2) The heat protection contact in the motor, or its cable stem, is open. E 07 External error E 08 Machine overheated Protection thermostats for inlet and outlet air. One of the protection thermostats has opened due to overheating. E 09 Filter lid open E 10 Incorrect programming One or more parameters are incorrect or is missing. E 11 Drying error with RMC program The longest permitted RMC time has been exceeded. (Applies only to machines with RMC). E 12 Drying error with autostop program The longest permitted automatic stop time has been exceeded. (Applies only to machines with automatic stop). E 13 Drying error with time program The set drying time is longer than longest permitted. (Applies to tumble dryers that are connected to a payment system). E 14 Gas error, push gas reset button No flame has been detected. (Applies only to gas heated tumble dryers). E 15 No vacuum detected The vacuum/pressure switch does not close within 12 seconds of the tumble dryer starting. E 16 Vacuum sensor has short circuited The vacuum/pressure switch was already closed when an attempt was made to start the tumble dryer. E 17 The input sensor has disconnected The inlet thermistor, or its wires, is open. E 18 The output sensor has disconnected The outlet thermistor, or its wires, is open. Programming Error codes overview Error code Description E 19 Not in use E 20 Machine is out of operation The tumble dryer has been deactivated by the PC software. E 21 Network error, no polling CMIS The computer has not called the tumble dryer during the timeout period. E 22 Network error, no polling CBT The computer has not called the tumble dryer during the timeout period. E 23 Not in use E 24 Condensate container is full The condensate container is full and the pump is not operating. E 25 Damper output air is not closed correct (Applies only to Clean Room tumble dryers). E 26 Damper output air is not open correct (Applies only to Clean Room tumble dryers). E 27 Hepa filter pressure warning (Applies only to Clean Room tumble dryers). E 28 Input temperature oscillating 15 Electrolux Laundry Systems Sweden AB 341 80 Ljungby, Sweden www.electrolux.com/laundrysystems Share more of our thinking at www.electrolux.com