1
DM8
HIGH-DEFINITION DRUM MODULE
WITH DYNAMIC ARTICULATION
OPERATOR'S MANUAL
TABLE OF CONTENTS
INTRODUCTION.............................................................................................................................................3
GETTING STARTED.......................................................................................................................................4
RESETTING THE MODULE TO FACTORY DEFAULTS ..........................................................................4
CHECK FOR UPDATES ...........................................................................................................................4
CALIBRATE YOUR HI-HAT PEDAL..........................................................................................................4
DEACTIVATE WRITE PROTECTION .......................................................................................................4
THE BASICS...................................................................................................................................................5
NAVIGATING MENUS & ADJUSTING SETTINGS ...................................................................................5
KITS ..........................................................................................................................................................5
VOICES: LAYERS & INSTRUMENTS.......................................................................................................6
VOLUME ...................................................................................................................................................6
SEQUENCES............................................................................................................................................6
STORING DATA .......................................................................................................................................7
UTILITY.....................................................................................................................................................7
REAR PANEL FEATURES .............................................................................................................................8
TOP PANEL FEATURES................................................................................................................................8
KITS, VOICES, ACCOMPANIMENT & INSTRUMENTS...............................................................................10
SELECTING A KIT ..................................................................................................................................10
EDITING INSTRUMENTS IN A KIT.........................................................................................................10
EDITING ACCOMPANIMENT IN A KIT...................................................................................................11
EDITING VOICE & ACCOMPANIMENT PARAMETERS.........................................................................12
EDITING MIDI PARAMETERS................................................................................................................14
EDITING EFFECTS PARAMETERS .......................................................................................................15
DRUM KIT SETUP ..................................................................................................................................18
SEQUENCES................................................................................................................................................19
PLAYING SEQUENCES .........................................................................................................................19
RECORDING SEQUENCES ...................................................................................................................20
EDITING SEQUENCES (DRUMS) ..........................................................................................................20
EDITING SEQUENCES (ACCOMPANIMENT)........................................................................................21
SETTING UP THE CLICK TRACK ..........................................................................................................22
EDITING QUANTIZATION SETTINGS....................................................................................................23
STORING & COPYING DATA ......................................................................................................................24
NAMING..................................................................................................................................................24
STORING & COPYING KITS ..................................................................................................................24
COPYING INSTRUMENTS .....................................................................................................................25
STORING SEQUENCES.........................................................................................................................25
STORING TRIGGER SETTINGS ............................................................................................................25
EXT. TRIG MENU .........................................................................................................................................26
TRIGGER INPUT PARAMETERS ...........................................................................................................26
TRIGGERING PARAMETERS ................................................................................................................27
VELOCITY CURVE .................................................................................................................................28
MODE (RIDE BOW & BELL) ...................................................................................................................28
HI-HAT CALIBRATION............................................................................................................................29
STORING EXT. TRIG SETTINGS...........................................................................................................29
EXPLORING OPTIMAL SENSITIVITY AND THRESHOLD SETTINGS ..................................................29
UTILITY MENU .............................................................................................................................................30
GENERAL ...............................................................................................................................................30
METRONOME (F1) .................................................................................................................................30
MIDI (F2) .................................................................................................................................................32
TRIG (F3) ................................................................................................................................................33
SYS (F4) .................................................................................................................................................33
UPDATING THE MODULE ...........................................................................................................................34
MIDI SETUP..................................................................................................................................................35
RESTORING BACKUP SYSEX FILES .........................................................................................................36
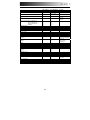
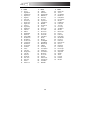
MIDI IMPLEMENTATION CHART ................................................................................................................37
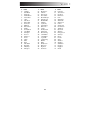
DM8 KITS .....................................................................................................................................................38
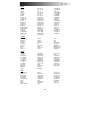
DM8 SEQUENCES .......................................................................................................................................39
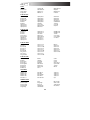
DM8 INSTRUMENTS ....................................................................................................................................40
INTRODUCTION
Welcome to the Alesis DM8 drum module! The DM8 includes lots of high-fidelity drum, percussion, and accompaniment
sounds giving you the sonic realism of acoustic drums but with the convenience and flexibility of electronic drums.
This manual details all the DM8 module's features. If you want to learn fast so you can dive right into playing, refer to the
included Quickstart Guide. Or, for a brief overview of the module's features, see the BASICS chapter. Of course, we also
recommend reading through this manual so you can take full advantage of all the amazing functions of the DM8.
Happy drumming!
The Alesis Team
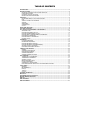
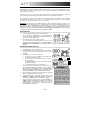
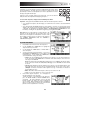
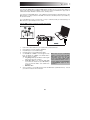
CONNECTION DIAGRAM
MIDI KEYBOARD
iPod*
octave
og a m
r
se
tu ps
hy
at
tern
pr
-
m1
s
HEADPHONES
s
DRUM KIT
+
push
tap
m2
pitch
x
y
co
store
accomp
nf ig
z
r
latch
th m
a n a l o g
p
phrase
m o d e l i n g
s
volume
s y n t h
POWER
WARNING: Use only the
included Alesis power supply
with the DM8 module.
COMPUTER
HOUSE AMP
Headphones, iPod*, keyboard, amp, and computer not included.
* iTunes and iPod are trademarks of Apple, Inc., registered in the U.S.A. and other countries.
•
•
•
•
•
Connect the 1/4" cables of your kit's cable snake to the drum pads and cymbal pads of your kit. Each cable is labeled
with its proper trigger.
If you have additional drum pads, cymbal pads, or other triggers, you can use standard 1/4" cables to connect them to
the "RIDE 2/PERC1" or "PERC2" TRIGGER INPUTS on the module's rear panel. Dual-zone pads or cymbals (e.g., a
drum with head and rim triggers or a cymbal that can produce bow and bell sounds) will require TRS cables to trigger
both zones.
Plug 1/4” TRS cables from the MAIN OUT to an amplifier, mixer, or speaker system. (For mono sound, connect a cable
to the Left output.)
You can connect a set of 1/4” TRS headphones to the PHONES output.
You can connect another audio device to the AUX IN using a standard 1/8" stereo cable.
Refer to your electronic drum kit's assembly manual for more information on connecting it to the DM8 module.
IMPORTANT:
•
Always turn down your volume level(s) to zero before plugging or unplugging your cables from your triggers or the
module.
•
The DM8 module may be affected by static electricity. If this occurs, simply turn the module off and wait at least a
few seconds before turning it on again.
3
GETTING STARTED
Please read the following instructions to set up your DM8 module for its first use!
RESETTING THE MODULE TO FACTORY DEFAULTS
If you ever need to return the module to its original default factory settings, press and hold the EXIT and STORE
buttons simultaneously while turning it on.
CHECK FOR UPDATES
Since the initial release of this module, we may have released new firmware or sound ROM files. To ensure your
DM8 module has the latest sounds and software features, we recommend checking the "Docs & Downloads" tab of
www.alesis.com/dm8 for available updates. See the UPDATING THE MODULE chapter for more information.
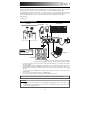
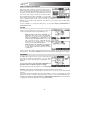
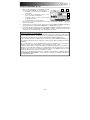
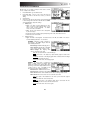
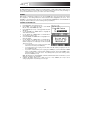
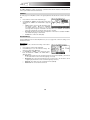
CALIBRATE YOUR HI-HAT PEDAL
The first time you connect a hi-hat pedal to the DM8 module, we recommend
Note: The module's HI-HAT
calibrating it so the module can "read" the pedal's movement optimally. If you
CONTROL TRIGGER INPUT
use the same hi-hat each session (even if you have disconnected and
does not support keyboardreconnected it), then you shouldn't need to calibrate each time as long as you
style expression pedals.
store your trigger settings after calibrating (see STORING TRIGGER SETTINGS
in the STORING & COPYING chapter for more information). However, anytime
you connect a different hi-hat from the previously connected one, you should calibrate it.
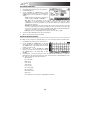
To calibrate the hi-hat pedal:
1.
Connect the hi-hat pedal to the module but do not press it down.
2.
On the module, press EXT TRIG.
3.
Use the CURSOR UP / DOWN buttons to highlight the "Input" field at the
top of the screen then use the VALUE UP / DOWN buttons or VALUE
DIAL to select "HiHat."
4.
Press CAL (F1).
5.
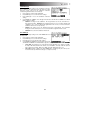
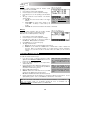
With the hi-hat pedal completely raised ("open"),
Open
press OPEN (F1) and wait for a message saying the
Pedal (side view)
process is complete.
Closed
6.
With the hi-hat pedal completely pressed ("closed"),
press CLOS (F2) and wait for a message saying the
process is complete.
7.
If you want to fine-tune how the module detects your
pedal's "open" and "closed" positions, press TRIM
(F3). Use the CURSOR UP / DOWN buttons to select "Open" or "Closed" and use the VALUE UP / DOWN
buttons or VALUE DIAL to adjust the setting. (Tip: Increasing the "Closed" value makes it easier to close the
hi-hat or "choke" it.)
8.
If you want to adjust the response curve of the pedal, press CURV (F4). Use the VALUE UP / DOWN buttons
or VALUE DIAL to select the curve that best suits your playing style. (Tip: We recommend using LINEAR,
LOG1 or LOG2 for conventional hi-hat performance.)
9.
When you have adjusted the hi-hat settings to your preference, press EXIT to exit the calibration page (or press
DRUM KIT to return to the main screen).
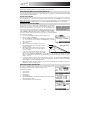
DEACTIVATE WRITE PROTECTION
Out of the box, the DM8 module is write-protected, so you will be unable to save
any changes you make to the Kits, Instruments, Sequences, etc.
To turn write protection off:
1.
Press UTILITY.
2.
Press SYS (F4).
3.
Press O/S (F3).
4.
Press MEM (F4).
5.
Press VALUE DOWN or move the VALUE DIAL counterclockwise until the
"WriteProt" field says "OFF."
6.
Press DRUM KIT to return to the main page.
4
THE BASICS
This section of the manual outlines the basic features and concepts of the DM8. Each section below refers
to another part of this manual that will explain the features in greater depth.
NAVIGATING MENUS & ADJUSTING SETTINGS
We designed the DM8's user interface to be as simple and as easy to use as possible.
•
DRUM KIT – Press this button to select the Main Screen, where you can select the current Kit.
(From this page, you can press CURSOR DOWN to enter the Drum Kit Setup Menu, where you
can adjust the overall Kit volume level, MIDI Program Change settings, or restore the current Kit's
factory settings.)
•
SEQ – Press this button to enter the sequencer, where you can select a Sequence to play and
adjust overall settings for the module's sequencer.
•
EDIT INST or EDIT ACCOMP – Press one of these buttons to reassign the sound for a trigger or
to edit the sound of the Accompaniment track. You can also adjust other settings such as effects,
velocity-related parameters, MIDI settings, and more.
•
EXT TRIG – Press this button to adjust sensitivity, crosstalk, thresholds, velocity curves, and
other settings for the triggers.
•
UTILITY – Press this button to enter the Utility Menu, where you can adjust metronome and MIDI
settings, update or reset the module, and more.
You can navigate the menus and adjust settings and parameters shown on the module's LCD with the
following controls:
•
F-BUTTONS – Pressing the F1, F2, F3, and F4 buttons will select whatever "tab" is displayed
above it on the LCD.
•
CURSOR UP / DOWN – Press either of these buttons to move up or down through the menu on
the screen. (Pressing the CURSOR DOWN button while on the Main Screen will call up the Kit
Setup screen where you can adjust the volume and MIDI settings of the current Kit.)
•
VALUE DIAL – Turn the wheel clockwise or counterclockwise to adjust the selected menu item
(usually highlighted). This allows for quick adjustment of settings and parameters – the faster you
turn the wheel, the faster it will scroll through the options.
•
VALUE UP / DOWN – Press the VALUE UP or VALUE DOWN buttons to adjust the selected
menu item (usually highlighted) one increment at a time. These buttons are better for more
precise adjustment of settings than the VALUE DIAL.
•
EXIT – Press this to return to the previous menu.
See the TOP PANEL FEATURES chapter for more information about these and other controls.
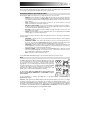
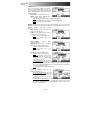
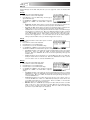
KITS
The DM8 module includes 100 Preset Kits and 100 empty User Kits. A Kit
is a set of sounds that you can select in the module that will be triggered
by your drums when you play them. The Preset Kits come preprogrammed so you can start playing with premium sounds right away.
The empty User Kits are for you to create your own by assigning individual
sounds to each trigger in the Kit. Furthermore, you can save over the
Preset Kits in user memory, allowing for even more creative space. (The
defaults can be easily restored by reinitializing the module).
To select a Kit, simply press DRUM KIT to enter the Main Screen,
then use the VALUE UP / DOWN buttons or VALUE DIAL to select a
new Kit number.
For more information on selecting and editing Kits, see the KITS, VOICES, ACCOMPANIMENT &
INSTRUMENTS chapter.
Important: At any given time, the DM8 module has a Kit selected and a Sequence selected. If you change
the Sequence, this will change your current Kit to the one that is associated with that Sequence. If you
change the Kit, this will NOT change the current Sequence. However, if you then play the current Sequence,
the chords or "hit groups" may sound unusual. In this case, we recommend muting Layer B of that Kit's
Accompaniment (see EDITING VOICE & ACCOMPANIMENT PARAMETERS for more information) or
muting the Accompaniment altogether by pressing MUTE ACCOMP.
5
VOICES: LAYERS & INSTRUMENTS
Whenever you strike a trigger on your electronic drum set (e.g., a
cymbal, a drum pad, etc.), it will trigger a Voice in the module. A
Voice is the sound assigned to that trigger. Each Voice consists of
two Layers, and each Layer has its own Instrument (a drum sound
such as a tom, snare, hi-hat, etc.) which can be selected or edited.
We created the dual-layer feature in the DM8 so you can play with
more powerful composite and layered sounds and timbres using your electronic drum kit. You can make
subtle or dramatic changes to the sound of your Kits by changing the Instruments in each Layer.
Furthermore, you can adjust certain parameters of the drum Voices (e.g., tuning, velocity, reverb, panning,
etc.) in the module.
For more information on selecting and editing Voices, see the KITS, VOICES, ACCOMPANIMENT &
INSTRUMENTS chapter.
VOLUME
You may have noticed that there are several ways to adjust the
volume of your performance when using the DM8. You can:
•
•
Adjust the levels of the Voices in the Kit: Press
DRUM KIT to enter the main screen then EDIT INST.
Select the Voice to edit (top of the LCD) with the
VALUE UP / DOWN buttons or VALUE DIAL (or by
striking the trigger with NOTE CHASE on). Press LVL
(F2) to enter the Level page. (Remember that each
Voice has two Layers, A and B, which you can toggle
between by pressing the EDIT INST button.)
Adjust the level of the entire Kit: Press DRUM KIT
to enter the main screen then CURSOR DOWN to
enter the Drum Kit Setup Menu, where you can set the
overall Kit level.
Please note the module's trigger sensitivity, threshold, velocity curve settings can also affect the dynamics of
your performance. See the EXT. TRIG MENU chapter for more information on adjusting these other settings.
SEQUENCES
The DM8's built-in sequencer lets you record, overdub, edit, play
back, and loop Sequences (drum patterns). You can adjust
settings like the tempo, time signature, and quantization for a
Sequence.
To access the sequencer, press the module's SEQ button and
navigate the menus or adjust the settings accordingly.
For more information on using the sequencer, see the SEQUENCES chapter.
Important: At any given time, the DM8 module has a Kit selected and a Sequence selected.
If you change the Sequence, this will change your current Kit to the one that is associated with that
Sequence.
If you change the Kit, this will NOT change the current Sequence. However, if you then play the current
Sequence, the chords or "hit groups" may sound unusual. In this case, we recommend muting Layer B of
that Kit's Accompaniment (see EDITING VOICE & ACCOMPANIMENT PARAMETERS for more information)
or muting the Accompaniment altogether by pressing MUTE ACCOMP.
6
STORING DATA
The DM8 module can store the information you enter for use in
future sessions. This includes Kits you edit or record, Sequences
you edit or record, Instrument or Kit parameters, and more.
Furthermore, while there are several slots for User Kits and
Sequences, you can also save over the Presets (the first 100 Kits
or the first 75 Sequences).
To store a Kit, Instrument, or Sequence, press the DRUM KIT
or SEQ button (respectively) to select the item you want to
store, then press the STORE button. (If you are storing a Kit or
Instrument, you will be asked to specify which.)
Use the CURSOR UP / DOWN buttons and VALUE UP / DOWN
buttons or VALUE DIAL to select the "From" Kit or Sequence (the
one you want to save) and the "To" Kit or Sequence (where you
want to save it to).
For more information on using storing data, see the STORING & COPYING DATA chapter.
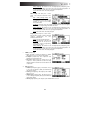
UTILITY
The Utility Menu lets you control global settings such as the output
routing as well as metronome, MIDI, and tempo settings. You can
also transmit SysEx data in this menu as well as re-initialize the DM8
(i.e., return it to its factory settings).
To access the Utility Menu, press the module's UTILITY button
and navigate the menus or adjust the settings accordingly.
For more information, see the UTILITY MENU chapter.
7
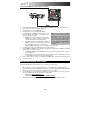
REAR PANEL FEATURES
1.
2.
POWER SWITCH – Turns the module
on and off.
POWER IN – Connect the included AC
adapter to this input, then connect the
adapter to a power source.
9
3
3
4
8
8
6
5
2 1
WARNING: Use only the included
Alesis power supply with the DM8
module.
3.
4.
5.
6.
7.
8.
9.
7
MAIN OUT – Use 1/4" TRS cables to
connect these outputs to an amplifier or speaker system. The volume of these outputs is controlled by
the VOLUME knob on the top panel.
AUX IN – Connect an external sound source, such as a CD player, to this input using a stereo 1/8"
cable.
USB – Use a standard USB cable to connect the module to your computer via this USB port. This
connection allows the module to send MIDI messages via USB to an external drum software module.
You can also transmit SysEx files over this connection.
MIDI IN – Use a standard five-pin MIDI cable to connect this input to the MIDI OUT of an external MIDI
device.
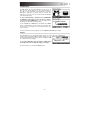
CABLE SNAKE CONNECTION – Connect the included
Note: The module's HI-HAT CONTROL
cable snake to this connector, then connect the cables
TRIGGER INPUT does not support
to their respective triggers.
keyboard-style expression pedals.
TRIGGER INPUTS – If you have additional drum pads,
cymbal pads, or other triggers, you can use standard 1/4" cables to connect them to the "RIDE
2/PERC1" or "PERC2" TRIGGER INPUTS. Dual-zone pads or cymbals (e.g., a drum with head and
rim triggers or a cymbal that can produce bow and bell sounds) will require TRS cables to trigger both
zones.
HEADPHONES OUTPUT – Connect your 1/4" headphones to this output. You can adjust the volume
of this output with the VOLUME knob on the module's top panel.
TOP PANEL FEATURES
1.
2.
3.
4.
5.
6.
7.
8.
VOLUME – Adjusts the volume level of
the MAIN OUT and HEADPHONES
OUTPUT.
METRONOME ON / OFF – Turns the
metronome on or off.
3
6
1
LCD – Displays system menus,
parameters, and other settings as you
use the DM8.
4 4 4 4 8
F-BUTTONS (1-4) – These buttons allow
you to navigate the menus shown in the
10 11 12
LCD. Press an F-BUTTON to select the
5 17 18 19
"virtual" button or tab shown above it in
13 14 15 16 5 20 21 22
the LCD.
CURSOR UP / DOWN – Use these
9
23
2
7 7
buttons to move (vertically) through the
available parameters shown in menus in
the LCD.
Note: Pressing CURSOR DOWN from
the Main Screen allows you to adjust
overall parameters for the current Kit.
VALUE DIAL – Turn this wheel to increase and decrease values and settings shown in the LCD.
VALUE UP / DOWN – Use these buttons to increase and decrease values and settings shown in the
LCD. These may be easier to use than the VALUE DIAL when making incremental adjustments to your
parameters.
EXIT – Press this button to return to the previous menu shown in the LCD.
8
9.
10.
11.
12.
13.
14.
15.
16.
17.
18.
19.
20.
21.
22.
23.
DRUM KIT – Returns the LCD to the Main Screen. From here, you can select the current Kit with the
VALUE DIAL or VALUE UP / DOWN buttons.
UTILITY – Enters the Utility Menu, which allows you to set certain "global" parameters that affect the
DM8's overall operation (e.g., tempo, MIDI, output routing, trigger sensitivity, etc.). (See the Reference
Manual for more information.)
EXT TRIG – Allows you to adjust parameters related to triggering. Customizing these parameters
changes the feel and responsiveness of the Kit.
Note: Changes to these parameters will affect ALL Kits.
NOTE CHASE – Turns Note Chase on or off. When Note Chase is on, striking a trigger automatically
selects it for editing. Alternatively, you can select a trigger by highlighting the trigger field in the LCD
with the CURSOR UP / DOWN buttons then using the VALUE UP / DOWN buttons or VALUE DIAL.
EDIT INST – Press this button to edit the Instrument assigned to a trigger input. While editing, pressing
it toggles between the two Layers of the trigger. The current Layer (A or B) will be highlighted on the
top-right corner of the LCD.
EDIT ACCOMP – Press this button to adjust the settings for your Accompaniment. The adjustable
parameters will be shown in the LCD.
PREVIEW – Press this button to preview the sound of the current trigger. This can be useful when
programming the DM8 if it is not connected to your drum kit, if it is not convenient to strike the pads,
etc.
STORE – Press this button to save changes made to the current Kit, Sequence, trigger settings, or
global settings. Use the VALUE DIAL or VALUE UP / DOWN buttons to select a destination where the
current Kit or Sequence will be stored. When saving a Kit, its Instruments and all its parameters will
also be stored. When saving a Sequence, it will remember its corresponding Kit and Accompaniment.
SEQ – Press this button to access the module's Sequencer where you can create and edit drum and
accompaniment patterns.
MUTE DRUMS – Press this button to mute the drum track of a Sequence.
MUTE ACCOMP – Press this button to mute the Accompaniment track of a Sequence.
STOP – Stops playback of the current Sequence. Hold down STOP and turn the VALUE DIAL to
"scrub" forwards and backwards through the Sequence. Hold down STOP and press VALUE UP /
DOWN to "step" forwards or backwards through each "event" in the Sequence. While navigating the
Sequence in these ways, you will hear the Sequence play as you move through it.
PLAY / – Plays the current Sequence. You can also hold down STOP and press this button to move
back to the previous bar in the Sequence.
RECORD / – Records a new Sequence. You can also hold down STOP and press this button to
move to the next bar in the Sequence.
TAP TEMPO – Tap this button at the desired rate to enter a new tempo for the Sequence. You can
also change the tempo by holding down the TAP TEMPO button and using the VALUE DIAL or VALUE
UP / DOWN buttons.
9
KITS, VOICES, ACCOMPANIMENT & INSTRUMENTS
The DM8 Module has 100 Preset Kits and 100 User Kits, which you can select from the Main Screen. Each
Kit is a collection of Voices – or drum sounds – that are assigned to each trigger on the DM8. When a trigger
is struck, that Voice will sound.
Each Voice consists of two Layers, each with its own Instrument. Both Layers sound together, helping to
create powerful composite and layered sounds and timbres for a more dynamic performance.
You can change the sound of your performance by selecting different Kits or by editing the Kits by changing
the Instruments that make up each Voice. You can also edit various parameters of each Instrument
themselves (e.g., level, panning, decay, reverb, etc.) in each Kit.
IMPORTANT: At any given time, the DM8 module has a Kit selected and a Sequence selected. If you
change the Sequence, this will change your current Kit to the one that is associated with that Sequence. If
you change the Kit, this will NOT change the current Sequence. However, if you then play the current
Sequence, the chords or "hit groups" may sound unusual. In this case, we recommend muting Layer B of
that Kit's Accompaniment (see EDITING VOICE & ACCOMPANIMENT PARAMETERS for more information)
or muting the Accompaniment altogether by pressing MUTE ACCOMP.
SELECTING A KIT
1.
2.
3.
Press the DRUM KIT button to bring up the Main Screen.
Use the VALUE UP / DOWN buttons or the VALUE DIAL to
select a Kit. The Kit number, name, and graphic will change as
you move through the different Kits.
Hit the triggers to try out the sounds of the Kit.
To set levels that can be recalled with the Kit, set the "Level"
parameters for the individual triggers (see EDITING VOICE &
ACCOMPANIMENT PARAMETERS in this chapter) and/or the entire Kit (see DRUM KIT SETUP in this
chapter).
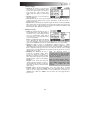
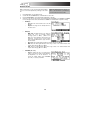
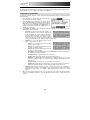
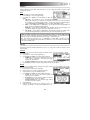
EDITING INSTRUMENTS IN A KIT
1.
2.
3.
4.
5.
6.
7.
Press DRUM KIT to go to the Main Screen.
Press EDIT INST. The top of the screen will show the number
and name of the Kit whose Instruments (drum voices) you will
be editing.
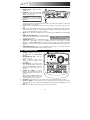
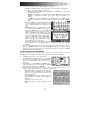
Select INST (F1). The new screen will show:
a.
the trigger Voice you are editing (the Kit number and
name of the Voice will be shown)
b.
the Layer (each Voice consists of two layers, each with
its own Instrument)
c.
the Category (the type or "class" of drum sound currently
assigned to that Layer)
d.
the Instrument (the drum sound for that Layer)
Select the Voice whose Instrument you want to change by
pressing NOTE CHASE then striking the desired trigger.
Alternatively, you can highlight the Voice (next to the Kit number)
using the CURSOR UP / DOWN buttons to highlight it and use
the VALUE UP / DOWN buttons or VALUE DIAL to change it.
Select which Layer of that Voice you will edit by pressing EDIT
INST. It will toggle between Layer A and B.
Select the Category you want to assign to that Voice by pressing
CURSOR UP / DOWN to highlight the Category field, then use
the VALUE UP / DOWN buttons or VALUE DIAL to change it.
Select the Instrument for that Layer by pressing CURSOR UP /
DOWN to highlight the Instrument field, then use the VALUE UP
/ DOWN buttons or VALUE DIAL to change it. To hear the
currently selected sound, strike the corresponding trigger or
press PREVIEW on the module.
10
a
b
c
d
Note: The available Instruments
for the hi-hat and ride cymbal
Categories are pre-defined sets
of sounds designed to work
together (e.g., the hi-hat can
produce open, closed, "chick" or
splash sounds). You can assign
any Category or Instrument you
like for the hi-hat and ride cymbal
triggers, but because other
Instruments are designed to
work differently, the results will
vary.
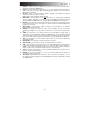
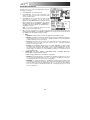
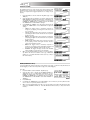
EDITING ACCOMPANIMENT IN A KIT
1.
2.
3.
4.
When you are in the Kit whose Accompaniment you want
a
b
to edit, press EDIT ACCOMP. The screen will show:
a.
the number of the Kit whose Accompaniment you
will be editing
c
b.
the Layer (the Accompaniment consists of two
layers, each with its own Instrument)
d
c.
the Category (the type or "class" of sound currently
assigned to that Layer)
d.
the Instrument (the sound for that Layer)
Select which Layer of the Accompaniment you will edit by pressing EDIT ACCOMP. It will toggle
between Layer A and B.
Select the Category you want to assign to that Voice by pressing CURSOR UP / DOWN to highlight the
Category field, then use the VALUE UP / DOWN buttons or VALUE DIAL to change it.
Select the Instrument for that Layer by pressing CURSOR UP / DOWN to highlight the Instrument field,
then use the VALUE UP / DOWN buttons or VALUE DIAL to change it. To hear the currently selected
sound, strike the corresponding trigger or press PREVIEW on the module.
Useful information about Accompaniment:
The Accompaniment track includes the bass line and other synthesizer sounds that you hear when the
module is playing a Sequence. The drum track and Accompaniment track play simultaneously, and you
can mute either of the tracks as they play with the MUTE DRUMS or MUTE ACCOMP buttons.
Just as each drum Instrument of a Kit belongs to a Category (e.g., KICKS, SNARES, LATIN PERC, etc.)
Accompaniment Instruments are also grouped into several Categories: BASS, SYN BASS, FX, and HIT
GROUPS.
Also, just like drum Voices, the Accompaniment has two Layers of Instruments. Layer A is usually the
bass line. Layer B is often something different – another melodic line, chords, or "hits."
Instrument changes within or between the BASS and SYN BASS Categories may sometimes be
desirable – the bass will have a different tone or quailty while the bass line itself (the notes you hear)
remains the same. However, if you edit the Instruments in the FX or HIT GROUPS Categories, it may
dramatically change the way a Sequence sounds if it uses that Kit.
In this case, we recommend muting that Layer of that Kit's Accompaniment (see EDITING VOICE &
ACCOMPANIMENT PARAMETERS for more information) or muting the Accompaniment altogether by
pressing MUTE ACCOMP.
11
EDITING VOICE & ACCOMPANIMENT PARAMETERS
While editing your Kits by changing the Instruments in a
Note: The DM8 will retain any changes you
drum Voice or the Accompaniment, you can also edit
make to the Instruments or parameters as
various parameters that affect each Layer and, therefore,
you move between the various Kits.
the Instrument on that Layer. You can do this for the drum
Voices or the Accompaniment, though some parameters below may only be editable for one of these.
1.
2.
3.
4.
5.
Press DRUM KIT to go to the Main Screen.
Press EDIT INST to edit drum Voice parameters or EDIT
ACCOMP to edit Accompaniment parameters. The top of
the screen will show the number and name of the Kit
whose Instruments (drum Voices or Accompaniment) you
will be editing.
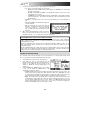
Select INST (F1). The new screen will show:
a.
the trigger Voice you are editing (the Kit number and
name of the Voice will be shown). If you are editing
a
b
the Accompaniment, this will read "Accomp."
b.
the Layer (each trigger sound or Accompaniment
track consists of two Layers, each with its own
c
Instrument)
d
c.
the Category (the type or "class" of drum sound or
Accompaniment currently assigned to that Layer)
d.
the Instrument (the drum or Accompaniment sound
for that Layer)
If you are editing a Voice, select the Voice whose Instrument you want to change by pressing NOTE
CHASE then striking the desired trigger. Alternatively, you can highlight the Voice (next to the Kit
number) using the CURSOR UP / DOWN buttons to highlight it and use the VALUE UP / DOWN
buttons or VALUE DIAL to change it. (This step is not necessary when editing Accompaniment.)
Note: You can also change the current Voice in this fashion in any of the subsequent menus. You can
also toggle between Layers by pressing EDIT INST whenever the "Layer: A B" selector is shown on the
upper right corner of the LCD.
Select any of the options at the bottom of the LCD using the
F-BUTTONS. Use CURSOR UP / DOWN to move through
the menu items and VALUE UP / DOWN or the VALUE
DIAL to adjust the settings.
•
LVL (F2, 1st page):
Level: The volume level for the selected Layer (0199 or "OFF").
Pan: The panning for the selected Layer ("L50" to "MID" to "R50").
Attack: The volume level of the initial attack of the note (00-99). This parameter is only
available when editing Accompaniment.
Decay: How long the sound can be heard before decaying to silence (00-99 or "OFF").
Note: Setting this parameter to "OFF" disables the Decay parameter and the sound will be
heard for its entire duration with no "shaping."
•
FX (F3, 1st page):
Reverb: The amount of reverb on the Voice (0099).
Effects: The Voice volume level sent to the DM8's
effects processor (00-99).
EQ/Comp: This sends the Voice to the DM8's
equalizer and compressor ("ON" or "OFF").
•
TONE (F1, 2nd page):
Semitone: Tunes the Instrument ±12 semitones.
Fine Tune: Tunes the Instrument ±50 cents.
Filter: The cutoff frequency for the type of filter (see
below) (00-99).
Type: The type of filter ("LOPASS" or "HIPASS").
12
•
DYN (F2, 2nd page):
Vel>Decay: The velocity of a note will control
the decay time of its sound (±00-99). With a
positive value, higher-velocity notes will have a
longer decay time. With a negative value,
higher-velocity notes will have a shorter decay
time.
Vel>Filtr: The velocity of a note will control the
filter cutoff (±00-99).
Vel>Level: This lets you set how velocity-sensitive the Instrument is (00-99). The higher the
setting, the greater the dynamic range you'll have while playing. At "00," there will be no
dynamic variation at all.
Vel>Pitch: The velocity with which you strike the trigger will control the sound's pitch (±00-99).
With a positive value, stronger hits will increase the pitch. With a negative value, stronger hits
will decrease the pitch. (This parameter is not available for anything in the BASS or SYN
BASS Categories when editing the Accompaniment.)
•
OTHR (F3, 2nd page):
Output: The output through which the Voice or
Accompaniment will be sent. When "MAIN" is
selected, the Voice or Accompaniment will be
sent out of the MAIN OUT. When "AUX" is
selected, the Voice or Accompaniment will be
sent out of the AUX OUT.
Note: If your Utility Menu setting for the "Output"
is set to "Main>Aux," the "AUX" option here will
show up as "AUX (N/A)." This is because the AUX OUT signal is "mirroring" the MAIN OUT
signal. See the GENERAL menu part of the UTILITY MENU section for more information.
Priority: How high the Voice's or Accompaniment's "polyphony priority" is – "LOW,"
"MEDIUM," or "HIGH." "Polyphony" is the simultaneous sounding of Instruments (e.g., if you
strike multiple triggers at the same time, like the hi-hat, snare, and kick drum). The DM8 has
64-voice polyphony, meaning up to 64 voices can sound at the same time. After exceeding
that limit, Voices or Accompaniment with lower polyphony priority may be silenced so the ones
with higher priority can sound.
MuteGroup: The MuteGroup the Voice is
Note: The MuteGroup function is
assigned to, if any (01-09 or "OFF"). When
especially useful for setting up multiple
two or more triggers are assigned to a
sounds shared by the same instruments,
MuteGroup, a Voice that is currently sounding
like "open" vs. "closed" triangle sounds or
will be silenced when another Voice from that
struck vs. stroked güiros.
MuteGroup begins. There are nine available
MuteGroups.
Note: The default Playback setting is
Example: If your "Kick1" (kick drum) and
POLY, which is more natural for acoustic
"SnrHd" (snare drum head) are assigned to
drums. MONO is a useful setting for synth
the same MuteGroup, the decay of your snare
drums or for emulating older drum
drum will be cut off when you hit the kick drum
machines.
and vice versa.
Playback: Indicates whether repeated strikes of the same trigger will be considered
polyphonic (POLY) or monophonic (MONO). When set to "POLY" (the default), successive
strikes of the same trigger will be allowed to sound simultaneously as polyphony (see
"Priority" above). When set to "MONO," successive strikes of the same trigger will silence
previous ones.
13
EDITING MIDI PARAMETERS
This page allows you to edit various MIDI-related settings for
each trigger. To edit them,
1.
2.
3.
4.
Press DRUM KIT to go to the Main Screen.
Press EDIT INST. The top of the screen will show the
number and name of the Kit whose Instruments (drum
voices) you will be editing.
Select MIDI (F2). The top of the new screen will show the
trigger Voice you are editing. You can select another
trigger by pressing NOTE CHASE then striking the desired
trigger. Alternatively, you can highlight the Voice (next to
the Kit number) using the CURSOR UP / DOWN buttons
to highlight it and use the VALUE UP / DOWN buttons or
VALUE DIAL to change it.
Note: You can also change the current Voice in this
fashion in any of the subsequent menus.
When you have selected the Voice you want to edit, select either of the options at the bottom of the
LCD using the F-BUTTONS. Use CURSOR UP / DOWN to move through the menu items and VALUE
UP / DOWN or the VALUE DIAL to adjust the settings:
a.
MIDI
MIDI Chan: The MIDI channel over which the trigger will transmit MIDI messages.
MIDI Note: The MIDI note that will be transmitted. The number is the MIDI Note number; the
corresponding musical note is shown next to it. (Note: The MIDI note for the hi-hat and ride
cymbals is fixed and can not be reassigned.)
Gate Time: The duration of the note sent from the trigger when struck. The available range is
from 00-99 ms, then note values (1/32, 1/16, 1/8, 1/4, and 1/2 – with regular and triplet
divisions for each value), or "OFF."
Note Off: How the MIDI Note Off message is sent. When "NOT SENT" is selected, a MIDI
Note Off will not be transmitted. When "SENT" is selected, a MIDI Note Off will be sent after
the length of time specified by the Gate Time (above). When "ALTERNATE" is selected,
striking a trigger once will cause it to send its MIDI Note; striking it a second time will cause it
to send a MIDI Note Off.
b.
CHORD / ARP: Select "OFF," "CHORD," or "ARPEGGIO." (Note: The CHORD / ARP function
is not available for the hi-hat and ride cymbals.)
OFF: The trigger will transmit only the MIDI note assigned to it.
CHORD: The trigger will transmit up to four MIDI notes simultaneously whenever it is struck.
You can select the additional three notes here. The number is the MIDI Note number; the
corresponding musical note is shown next to it in parentheses.
ARPEGGIO: The trigger will transmit up to four MIDI notes but will "rotate" through them with
each strike (e.g., the first time the trigger is struck, it will send its first MIDI note; the next time,
it will send Note #2; the next time, it will send Note #3). You can select the three additional
notes here. The number is the MIDI Note number; the corresponding musical note is shown
next to it in parentheses.
14
EDITING EFFECTS PARAMETERS
On this page, you can apply a variety of effects such as reverb,
chorus, or delay to the entire Kit:
1.
2.
3.
4.
Press DRUM KIT to go to the Main Screen.
Press EDIT INST. The top of the screen will show the
number and name of the Kit whose effects you will be
editing.
Select FX (F4).
Select any of the options at the bottom of the LCD using the F-BUTTONS. Use CURSOR UP / DOWN
to move through the menu items and VALUE UP / DOWN
or the VALUE DIAL to adjust the settings:
a.
RVB (reverb)
Type: The kind of reverb applied (most often,
types of reverb are named after the kind of room
whose reverb is being emulated). To disable
effects on the Kit, select "OFF."
Size: The size of the virtual "room" as designated
by the reverb Type.
Color: The amount of high-frequency dampening of the reverb, which affects its tone.
Level: The level of the reverb.
b.
FX (other effects)
Type: The kind of effect applied. To disable effects on the Kit, select "OFF." The effects –
and their editable parameters – are as follows:
FLANGER: Flanging is a kind of phasing or
phase-shifting. The DM8's flangers have the
same editable parameters.
Mono Flanger: Traditional flanging effect.
Stereo Flanger: Flanger with a simulated
stereo effect, creating a "wider" sound.
XOver Flanger: The flanging effect
"moves" around the stereo field.
Rate: The speed at which the sound will "flange."
Depth: How much of the delayed (or phase-shifted) signal is added to the
original.
Feedback: How much of the flanging signal will be routed back into the flanger
again, which intensifies the effect.
Level: The volume level of the flanging signal.
CHORUS: A chorus effect is produced by
adding a slightly delayed and slightly pitchshifted "wet" signal to the original ("dry") signal,
producing a sound with a depth similar to that of
a string section or choir. The DM8's chorus
effects have the same editable parameters.
Mono Chorus 1: Traditional chorus effect.
Mono Chorus 2: A variation of the traditional chorus effect.
Stereo Chorus: Chorus with a simulated stereo effect, creating a "wider" sound.
XOver Chorus: The chorus effect "moves" around the stereo field.
Rate: The speed of the modulation of the chorus (or how much the signal is
delayed).
Depth: How much the chorus's delay varies.
Feedback: How much of the delayed signal will be routed back into the
processor again, which creates a thicker chorus effect.
Level: The volume level of the chorus signal.
15
VIBRATO: Vibrato is produced by causing the
pitch of a note to "waver" slightly back and forth,
creating a subtle pulsing effect. This effect is
often created by players of string instruments and
horns. The DM8's vibrato effects have the same
editable parameters.
Mono Vibrato: Traditional vibrato effect.
Vibrato: Vibrato with a simulated stereo
effect, creating a "wider" sound.
Rate: The speed of the vibrato (how quickly the pitch wavers).
Depth: How much the pitch wavers from the center/original pitch.
Level: The volume level of the vibrato.
DELAYS: A delay effect is a kind of echo, which varies depending on the size of the room it
emulates and the rate, volume, and decay of the echo. The DM8's delay effects have some
common parameters with some notable
differences.
Mono Doubler: A very quick delay that
creates a "double-hit" effect.
Doubler: A very quick delay that creates a
"double-hit" effect in a stereo field.
Delay: The speed of the delay/echo.
Level: The volume level of the
delayed signal.
Mono Slapback: A quick – almost
immediate – delay.
Slapback: Quick delay with a simulated
stereo effect, creating a "wider" sound.
Delay: The speed of the delay/echo.
Level: The volume level of the
delayed signal.
Mono Delay: A traditional delay effect.
Delay: The speed of the delay/echo.
Feedback: How much of the echo will
be routed back into the processor
again, which creates a longer-lasting,
intensified echo effect.
Damp (dampening): The amount of
low- and high-frequency dampening of the echo. At negative values, the sound
of the echo gets progressively duller, which is the most "natural" echo effect.
This is also useful for simulating tape echo. At positive values, the sound of the
echo gets progressively thinner.
Level: The volume level of the delayed signal.
Delay: A traditional delay with two
independent delay lines.
LDly / RDly (left/right delay): The speed
of the delay/echo. This can be set
independently for the left and right
channels to create an even wider, more
varied sound.
LFBk / RFBk (left/right feedback): How much of the echo will be routed back into
the processor again, which creates a longer-lasting, intensified echo effect.
This can be set independently for the left and right channels to create an even
wider, more varied sound.
16
Damp (damping): The amount of low- and high-frequency dampening of the
echo. At negative values, the sound of the echo gets progressively duller. At
positive values, the sound of the echo gets progressively thinner.
Level: The volume level of the delayed signal.
XOver Delay: This delay has a stereo
effect. The echo pans around the stereo
field.
LDly / RDly (left/right delay): The
speed of the delay/echo. This can be
set differently for the left and right
channels to create an even wider,
more varied sound.
Feedback: How much of the echo will be routed back into the processor again,
which creates a longer-lasting, intensified echo effect.
Damp (damping): The amount of low- and high-frequency dampening of the
echo. At negative values, the sound of the echo gets progressively duller. At
positive values, the sound of the echo gets progressively thinner.
Level: The volume level of the delayed signal.
PingPong: This delay has a stereo effect,
but instead of echoing in both lft and right
channels
simultaneously,
the
echo
alternates between them.
Delay: The speed of the delay/echo.
Feedback: How much of the echo will
be routed back into the processor
again, which creates a longer-lasting,
intensified echo effect.
Damp (damping): The amount of low- and high-frequency dampening of the
echo. At negative values, the sound of the echo gets progressively duller. At
positive values, the sound of the echo gets progressively thinner.
Level: The volume level of the delayed signal.
c.
COMP (compression)
Type: The kind of compression applied. To disable
the dynamic processor on the Kit, select "OFF."
Compress (compression): The compression ratio
applied to the signal from the Kit.
Out Level (output level): The output level of the
compressor. This is parameter is useful for boosting
the Kit's signal if its volume has decreased due to the
compression.
d.
EQ (equalization)
LF Gain (low-frequency gain): The amount of boost
or cut of the low frequency band (as determined by
the LF Freq setting).
LF Freq (low frequency): The frequency the LF Gain
will boost or cut.
HF Gain (high-frequency gain): The amount of boost
or cut of the high frequency band (as determined by
the HF Freq setting).
HF Freq (high frequency): The frequency the HF Gain will boost or cut.
17
DRUM KIT SETUP
While selecting Kits, you can enter the Drum Kit Setup Menu
to access a few useful parameters pertaining to the current
Kit.
1.
2.
3.
4.
Note: The DM8 will retain any changes you
make to the Instruments or parameters as
you move between the various Kits.
Press DRUM KIT to go to the Main Screen.
Use the VALUE UP / DOWN buttons or VALUE DIAL to select a Kit.
Press CURSOR DOWN to enter the Drum Kit Setup Menu for that Kit.
Select any of the options at the bottom of the LCD using the F-BUTTONS. Use CURSOR UP / DOWN
to move through the menu items and VALUE UP / DOWN or the VALUE DIAL to adjust the settings.
•
MAIN (F1):
o
Kit Level: The overall volume level for the Kit
(00-99)
o
Graphic: The image used to identify the Kit on
the main screen.
•
MIDI (F2):
o
MIDI Chan: The MIDI channel over which the
module will send out Program Change
messages (01-16 or "OFF"). (When set to
"OFF," the other parameters below will not be
displayed.) You will need to set this properly
when using the DM8 module to play sounds on
another module.
o
Ext Prog#: The Program Change number the module will send out (00-99).
o
MSB: Sets the Most Significant Byte when using sounds on an external module that
requires bank changes (00-127 or "OFF").
o
LSB: Sets the Least Significant Byte when using sounds on an external module that
requires bank changes (00-127 or "OFF").
•
RESTORE (F3 or F4):
o
Restore: Returns the Kit to its original factory
settings. Any edits you made to its Instruments,
Accompaniment, etc. will be discarded. To
restore the original settings, press RESTORE
(F1 or F2). To cancel, press EXIT.
18
SEQUENCES
A Sequence is a recorded pattern stored in the DM8 module that includes drums
and Accompaniment. The drum part of the Sequence includes the Kit sounds
(Instruments) as well the recorded pattern itself. The Accompaniment is the music
that plays along with the drum part.
SEQ
DRUMS
ACCOMP
REC
Sequences can be recorded, edited, looped, and stored. You can also mute the
drum part and/or Accompaniment while playing a Sequence.
To hear a demo Sequence, simply hold down SEQ and press PLAY.
TAP
TEMPO
Important: At any given time, the DM8 module has a Kit selected and a Sequence selected.
• If you change the Sequence, this will change your current Kit to the one that is associated with that
Sequence.
• If you change the Kit, this will NOT change the current Sequence. However, if you then play the current
Sequence, the chords or "hit groups" may sound unusual. In this case, we recommend muting Layer B
of that Kit's Accompaniment (see EDITING VOICE & ACCOMPANIMENT PARAMETERS for more
information) or muting the Accompaniment altogether by pressing MUTE ACCOMP.
Note: Whenever you edit a Sequence or make changes to any
paraeters, an "E" will appear in the upper-right corner of the
main screen of the Sequencer to indicate this. In order to retain
these settings for future sessions, you must store the Sequence
(see STORING SEQUENCES under the STORING &
COPYING DATA chapter).
PLAYING SEQUENCES
1.
2.
3.
4.
Press SEQ to enter the main screen of the Sequencer.
Use the CURSOR UP / DOWN buttons to highlight the
"Seq" field at the top of the LCD.
Use the VALUE UP / DOWN buttons or VALUE DIAL to
select a Sequence.
You can press PLAY to play the Sequence, or you can use
the CURSOR UP / DOWN buttons to select settings to edit
for that Sequence. Use the VALUE UP / DOWN buttons
or the VALUE DIAL to change the settings:
• Tempo: The speed (in BPM or beats per minute) of the sequence. You can set the tempo here,
or you can press the TAP TEMPO button several times at the desired tempo to enter a new one.
The range is 30 – 300 BPM.
Note: If the Tempo field of the Utility Menu's main page is set to "GLOBAL," the letter "G" will be
shown. If the Clock In field of the Utility Menu's MIDI page is set to "RECEIVE," the letter "E" will
be shown.
• Time Sig (Time Signature): The time signature of the sequence. The first number indicates how
many beats there are in a measure; the second number indicates the note value of those beats.
(Example: "3/4" means one measure is three quarter notes long. "12/8" means one measure is
twelve eighth notes long.)
• #Bars: The number of bars in the Sequence, which you can set from 1 to 99.
5.
• Loop: You can set the Sequence to loop or to play only once.
Press PLAY to play the Sequence. A "" will appear on
the upper right-hand corner of the LCD.
To mute the drums or Accompaniment in the Sequence,
press the MUTE DRUMS or MUTE ACCOMP button,
respectively. The upper right-hand corner of the LCD
indicates whether the drums ("D") and Accompaniment
("A") are muted. When unmuted, the letter is highlighted.
(This is a useful tool when you want to play your own drum
patterns to the Accompaniment or vice versa.)
19
RECORDING SEQUENCES
1.
2.
3.
Press SEQ to enter the main screen of the Sequencer.
Press the REC tab (F1).
Use the CURSOR UP / DOWN buttons to select
settings to edit for that Sequence. Use the VALUE UP
/ DOWN buttons or the VALUE DIAL to change the
settings:
• Track: The track of the Sequence over which you
will be recording – "DRUMS" or "ACCOMP."
• Rec Type: How the performance will be recorded. When "RECORD" is selected, the
performance you record will replace the recording on that Track of the Sequence. When
"OVERDUB" is selected, the performance you record will be added to the existing recording on
that Track of the Sequence.
• Quantize: The quantization level of the recording. When on, this function will "snap" all recorded
notes to the nearest interval of that measure, which you select. (For instance, if you select "1/8,"
any notes you record that do not fall on an eighth-note pulse will be shifted automatically to the
nearest one.) The range is 1/4 – 1/64 (regular or triplet) and "OFF."
6.
7.
• Swing: The amount of swing applied to the recording – 54%, 58%, 62%, or "OFF."
Press the module's REC button and record your performance.
When you are finished recording, press STOP.
EDITING SEQUENCES (DRUMS)
The editing screen for a Sequence's drum part allows you to see a visual representation of the drum pattern.
1.
2.
3.
4.
Press SEQ to enter the main screen of the Sequencer.
Use the CURSOR UP / DOWN buttons to select the
"Seq" field at the top of the LCD, then use the VALUE
UP / DOWN buttons or the VALUE DIAL to select the
Sequence you want to edit.
Press REC (F1).
Use the CURSOR UP / DOWN
buttons to select the "Track" field, then use the VALUE
UP / DOWN buttons or the VALUE DIAL to select
"DRUMS."
Press EDIT (F2). You will see a grid on the screen. The diamonds indicate MIDI notes or "events"; the
black diamond is the currently selected event. Each column represents an interval/subdivision of the
bar. Each row of the grid represents a drum Voice:
• K = kick drum
• S = snare drum
• HH = hi-hat
• T1 = 1st tom
• T2 = 2nd tom
• T3 = floor tom
• C = crash cymbal
• R = ride cymbal
• P1 = Ride2 / Perc1
• P2 = Perc2
• The numbered rows correspond to available MIDI note numbers.
20
5.
You can use the following controls to edit your Sequence in this screen:
• CURSOR UP / DOWN scrolls up or down, allowing you to view other parts of the editing grid.
• You can move through the Sequence in several ways:
o by bar: Press and hold STOP and press either PLAY / or RECORD / to step through
the Sequence bar by bar.
o by event: Use CURSOR < / > (F3 and F4) or press and hold STOP and use the VALUE UP
/ DOWN to step through the Sequence event by event. Each event will play as it is
selected.
o "scrubbing": Press and hold STOP and turn the VALUE DIAL to move fluidly through the
Sequence. The Sequence will play back at the speed with which you rotate the VALUE
DIAL.
• VALUE UP / DOWN or the VALUE DIAL will either shift
the event in time (earlier or later) or adjust its velocity
(higher or lower), depending on the setting of the F2
button.
• TIME / VELO (F2) lets you toggle between two views
of the editing grid. When TIME is selected, using the
VALUE UP / DOWN buttons or the VALUE DIAL will
adjust the timing of the selected event, moving it
forward or backward in the Sequence (the current
"click" * number will be shown in the upper right-hand
corner of the LCD). When VELO is selected, using the
VALUE UP / DOWN buttons or the VALUE DIAL will
adjust the velocity of the selected event, moving it
higher or lower (the current velocity will be shown in
the upper right-hand corner of the LCD).
6.
• DEL (F1) will delete the selected event from the Sequence. A window will ask you to confirm this
choice before deleting it – select YES (F4), NO (F3), or TRAK (F1), which will delete the entire
Sequence.
When you have finished making your edits, you can press EXIT or any button that will enter another
screen (e.g., DRUM KIT, UTILITY, etc.). Your edits will be retained in the Sequence for this session. If
you want to save your changes for future sessions, though, you will need to store them (see STORING
& COPYING DATA for more information).
EDITING SEQUENCES (ACCOMPANIMENT)
The editing screen for a Sequence's Accompaniment is different from the one used to edit drums.
1.
2.
3.
4.
Press SEQ to enter the main screen of the Sequencer.
Use the CURSOR UP / DOWN buttons to select the "Seq"
field at the top of the LCD, then use the VALUE UP / DOWN
buttons or the VALUE DIAL to select the Sequence you
want to edit.
Press REC (F1). Use the CURSOR UP / DOWN buttons to
select the "Track" field, then use the VALUE UP / DOWN
buttons or the VALUE DIAL to select "ACCOMP."
Press EDIT (F2). You will see a table of values. Each row represents a note or "event" in the
Sequence. Each column represents the events' positions and parameters:
• Bar / Beat / Clk * : The position of that event in the
Sequence by bar, beat (within that bar), and click (within
that beat). As you move down the table, you move
through the Sequence.
• Note: The MIDI note being sent. (See next page for an
explanation of how the sequencer refers to MIDI note
numbers.)
• Velo: The velocity of the note (1-127).
• Dur: The duration of the note, measured in clicks (19999).
21
* Note: A "click" is just a
subdivision of a quarter note in the
DM8's sequencer, which defines its
resolution. The DM8's resolution is
96 PPQN (pulses per quarter note),
meaning
each
quarter
note
contains 96 clicks. This is helpful
to know while editing Sequences'
Accompaniment tracks if you are
trying to shift a note into a precise
position within a beat.
5.
You can use the following controls to edit your Sequence in this screen:
• You can move through the Sequence in several ways:
o by bar: Press and hold STOP and press either PLAY / or RECORD / to step through
the Sequence bar by bar.
o by event: Use CURSOR UP DOWN to step through the Sequence event by event. Each
event will play as it is selected.
o "scrubbing": Press and hold STOP and turn the VALUE DIAL to move fluidly through the
events in the Sequence. The Sequence will play back at the speed with which you rotate
the VALUE DIAL.
• CURSOR < / > (F3 and F4) moves the cursor left or right, allowing you to select parameters to
edit.
• VALUE UP / DOWN or the VALUE DIAL adjusts the
selected parameter.
6.
• DEL (F1) will delete the selected event from the
Sequence. A window will ask you to confirm this
choice before deleting it – select YES (F4), NO
(F3), or TRAK (F1), which will delete the entire
Sequence.
When you have finished making your edits, you can press
EXIT or any button that will enter another screen (e.g.,
DRUM KIT, UTILITY, etc.). Your edits will be retained in the Sequence.
How the DM8 module's sequencer refers to MIDI note numbers:
When editing the Accompaniment track of a Sequence, you may notice the "Note" column contains the
names of musical notes – A4, D#5, etc. However, the name of the note shown here may not be the
actual musical note you hear.
On the Accompaniment tracks, the bass notes are mapped chromatically to MIDI notes A0 to A3. In
other words, when the "Note" column shows a note from A0 to A3, which is the actual note you are
hearing the bass play.
The Accompaniment tracks also contain other (non-bass, non-drum) samples, such as chords, "hits," and
other sounds. These samples are mapped to MIDI notes C#4 and above – but not in chromatic order,
and the collection of samples usually does not contain all chromatic notes.
SETTING UP THE CLICK TRACK
The "click track" is the metronome that plays as you record a Sequence. It is an aid to help you keep steady
time. You can edit the click track settings from the Sequence page.
1.
2.
3.
Press SEQ to enter the main screen of the Sequencer.
Press CLIK (F3). The top of the LCD will show the
number of the Sequence but with the title "Click Track" to
indicate you are editing the click track settings for the
Sequencer. (Note: The click track settings apply to all
Sequences.)
Use the CURSOR UP / DOWN buttons to select settings
to edit. Use the VALUE UP / DOWN buttons or the
VALUE DIAL to change the settings:
• Count In: Indicates when the click track will be heard before the Sequence records or plays. The
number of bars can be specified in the "#Bars" parameter. When set to "REC ONLY," the countin clicks will only be heard while recording a Sequence. When set to "REC + PLAY," the count-in
clicks track will be heard while recording a Sequence and while playing back a Sequence.
• #Bars: The number of bars (2-16) that will be counted by the click track before the module
actually begins recording. When set to "OFF," the Sequence will begin recording as soon as you
press the module's REC button with no count-in. When set to "NOTE ON," the Sequence will
begin recording from the first note that is sent to it (e.g., when you strike the first trigger, the
Sequence will immediately start to record) with no count-in.
22
5.
• Metro (Metronome): Indicates when the click track will be heard. When set to "REC ONLY," the
click track will only be heard while recording a Sequence. When set to "REC + PLAY," the click
track will be heard while recording a Sequence and while playing back a Sequence. When set to
"MANUAL," the click track will be enabled or disabled by the module's METRONOME button.
• Sound: The sound of the click track. When set to "AS METRO," the click track will use the
Metronome settings from the Utility Menu (see the METRONOME (F1) part of the UTILITY MENU
section for more information). When set to "SIMPLE," the click track will use the default
metronome sound.
When you are finished, you can press EXIT or any button that will enter another screen (e.g., DRUM
KIT, UTILITY, etc.).
EDITING QUANTIZATION SETTINGS
If the notes of a Sequence are not precisely aligned with a bar's subdivisions (e.g., eighth notes, 16th notes,
etc.), quantization allows you to "snap" them into place automatically. This page lets you configure the
quantization settings for your Sequences:
1.
2.
3.
4.
5.
6.
Press SEQ to enter the main screen of the Sequencer.
Use the CURSOR UP / DOWN buttons to select the "Seq"
field at the top of the LCD, then use the VALUE UP / DOWN
buttons or the VALUE DIAL to select the Sequence you
want to edit.
Press QUAN (F4). The top of the LCD will show the
number of the Sequence but with the title "Quantize" to
indicate you are editing the quantization settings for that
Sequence.
Use the CURSOR UP / DOWN buttons to select settings to
edit for that Sequence. Use the VALUE UP / DOWN
buttons or the VALUE DIAL to change the settings:
• Track: The track of the Sequence – "DRUMS" or
"ACCOMP" (Accompaniment) – to which quantization
will be applied.
• Value: The subdivision of a bar to which all notes will
be quantized. For example, if this set to 1/16, all notes will be "snapped" to the nearest 16th
note. The range is 1/4 – 1/64 (regular and triplet) and "OFF," which will turn quantization off.
• Swing: The amount of swing applied to the quantization – 54%, 58%, 62%, or "OFF."
To apply quantization to the Sequence, press QUANTIZE (F1 or F2). A window will appear to ask you
to confirm this choice. Quantization can not be undone, so consider this before confirming. Press FIX
(F4) to apply quantization or CANCEL (F2 or F3) to cancel it.
When you are finished, you can press EXIT or any button that will enter another screen (e.g., DRUM
KIT, UTILITY, etc.).
23
STORING & COPYING DATA
The DM8 module will "remember" changes to your Kit, Sequence, or Utility settings during a single session,
but you will lose changes you have made once you turn the module's power off. To save your settings so
you can recall them in future sessions, you need to "store" them accordingly.
NAMING
When storing or copying Kits or Sequences, you can press NAME (F1) to enter a new name for the selected
Kit or Sequence. In a naming window, the selected character will be highlighted by the cursor. Press
CURSOR < / > (F3 and F4) to move the cursor. Use the VALUE UP / DOWN buttons or the VALUE DIAL to
change the character. When you are done entering a name, press OK (F1).
STORING & COPYING KITS
1.
2.
3.
4.
5.
6.
7.
8.
Press DRUM KIT to enter the main screen.
Press STORE. A new page will ask you to select DRUM
KIT (F1 or F2) or INSTRMENT (F3 or F4).
Press DRUM KIT (F1 or F2). A new page titled "Store Kit"
will appear.
Use the CURSOR UP / DOWN buttons to highlight the
"From" field of the window.
Use the VALUE UP / DOWN buttons or VALUE DIAL to
select the Kit you want to store.
Use the CURSOR UP / DOWN buttons to highlight the "To"
field of the window.
Use the VALUE UP / DOWN buttons or VALUE DIAL to
select a location to store the Kit. You can store it in any Kit
number, though there are 100 empty User Kit slots (#100199) to choose from.
•
If you want the Kit you are copying to keep the same
name in its new location, press COPY (F2).
•
If you want the Kit you are copying to use the name of the Kit currently occupying the "To" slot,
press STORE (F3 or F4).
•
If you want to rename the Kit you are copying, press NAME (F1). Use the VALUE UP / DOWN
buttons or VALUE DIAL to scroll through the available characters, and use the CURSOR < and >
(F3 and F4) buttons to move the cursor. Press OK (F1) when you are done entering a name,
then press STORE (F3 or F4).
Note: By default, the "To" field will initially contain the same Kit number as the "From" field so you can
quickly store changes to the current Kit.
A window will appear asking you to confirm your choice. Press CANCEL (F2 or F3) to cancel
storing/copying the Kit. Press YES (F1) to store/copy it.
24
COPYING INSTRUMENTS
This page allows you to copy an Instrument from one Kit to an Instrument in another Kit. (You can also copy
it to the same Kit, which effectively stores that Instrument in that Kit.)
Use the CURSOR UP / DOWN buttons to select the field you want to edit, and use the VALUE UP / DOWN
buttons or VALUE DIAL to select a new entry in that field.
1.
2.
3.
4.
5.
6.
7.
8.
9.
10.
11.
Press DRUM KIT to enter the main screen.
Press STORE. A new page will ask you to select DRUM KIT (F1
or F2) or INSTRMENT (F3 or F4).
Press INSTRMENT (F3 or F4). A new page titled "Copy
Instrument" will appear.
Make sure the "Copy" field is selected then select the trigger
whose Instrument you want to copy.
Select the "From" field.
Select the Kit that contains the Instrument you want to copy.
Select the "To" field.
Select the trigger where you want to copy the Instrument in the
"Copy" field.
Select the "To" field then select the Kit where you want to copy the
Instrument in the "Copy" field. You can copy it to any Kit, though
there are 100 empty User Kit slots (#100-199) to choose from. Copying an Instrument over an existing
one will overwrite it.
Note: By default, the "Copy" and "To" fields and "From" and "User" fields will initially contain the same
settings so you can quickly store changes to the Instruments in your current Kit.
Press STORE (F3 or F4).
A window will appear asking you to confirm your choice. Press CANCEL (F2 or F3) to cancel storing
the Kit. Press YES (F1) to store it.
STORING SEQUENCES
1.
2.
3.
4.
5.
6.
7.
8.
Press SEQ to enter the main Sequence page.
Press STORE. A new page titled "Store Sequence" will appear.
Use the CURSOR UP / DOWN buttons to highlight the "From"
field of the window.
Use the VALUE UP / DOWN buttons or VALUE DIAL to select
the Sequence you want to store.
Use the CURSOR UP / DOWN buttons to highlight the "To" field
of the window.
Use the VALUE UP / DOWN buttons or VALUE DIAL to select a
location to store the Sequence. You can store it in any
Sequence number, though there are 25 empty User Sequence
slots (#75-99) to choose from. Storing a Sequence over an
existing one will overwrite it.
Note: By default, the "To" field will initially contain the same Sequence number as the "From" field so
you can quickly store changes to the current Sequence.
Press STORE (F3 or F4).
A window will appear asking you to confirm your choice. Press CANCEL (F2 or F3) to cancel storing
the Sequence. Press YES (F1) to store it.
STORING TRIGGER SETTINGS
Any changes you make to the parameters in the Ext. Trig Menu will remain for the current session but will
return to their defaults if you turn off the module. We recommend storing your settings when you change
them so you can use them in future sessions.
To store Ext. Trig settings:
1.
Be sure you are in the Ext. Trig Menu by pressing EXT TRIG.
2.
Press STORE.
3.
A window will appear asking you to confirm your choice. Press
CANCEL (F2 or F3) to cancel storing your Ext. Trig settings.
Press YES (F1) to store them.
25
EXT. TRIG MENU
The DM8's Ext. Trig Menu contains several pages of parameters related to triggering (striking pads, cymbals,
trigger sensitivity, etc.). The settings in these pages affect ALL Kits.
TRIGGER INPUT PARAMETERS
The INP page of the Ext. Trig Menu contains some parameters that affect the triggers' sensivity and function
within the module.
1.
Press EXT TRIG to enter the main Ext. Trig Menu page.
The first page shown should be INP (F1).
2.
Select the trigger whose parameters you want to edit by
pressing NOTE CHASE then striking the desired trigger.
Alternatively, you can highlight the trigger name at the top
of the screen using the CURSOR UP / DOWN buttons to
highlight it and use the VALUE UP / DOWN buttons or
VALUE DIAL to change it.
3.
Use CURSOR UP / DOWN to move through the menu items and VALUE UP / DOWN buttons or the
VALUE DIAL to adjust the settings:
•
•
Sensitvty: The gain control for the trigger (00-99). The
Note: The Utility Menu allows you
higher the setting, the easier it will be to trigger louder
to set the rough "global" sensitivity
sounds with lighter hits. When setting this parameter,
of all triggers in the Kit ("Trig
strike the trigger and watch the level meter in the upperSens"). See the UTILITY MENU
right hand corner of the LCD. If it is "clipping" or maxing
chapter for more information.
out too soon, reduce this setting. The meter should only
reach its maximum when you are striking the trigger at your hardest.
Function: You can assign different functions for the
trigger to execute when you strike it:
Note: When assigning a function
o
Trigger: The associated drum Voice will sound
other than "Trigger," be sure that
when you strike the trigger.
the physical (hardware) trigger is
placed in such a way that it will not
o
Next Kit: The current Kit number will increase by
receive "crosstalk" or otherwise
one when you strike the trigger.
accidentally trigger as you perform.
o
Prev Kit: The current Kit number will decrease by
o
o
o
o
o
o
one when you strike the trigger.
Tap Tempo: The trigger will function as the TAP TEMPO button, entering a new tempo for
the sequencer when struck repeatedly.
Seq Play: Striking the trigger will play the current Sequence.
Seq Stop: Striking the trigger will stop the currently playing Sequence.
Play/Stop: The trigger will function alternately as a "play/stop" button for the current
Sequence. Striking the trigger once will start playback; striking it during playback will stop
the Sequence.
Record: The trigger will function as a "record" button for the sequencer.
Rec/Stop: The trigger will function alternately as a "record/stop" button for the sequencer.
Striking the trigger once will start recording; striking it during recording will stop it.
•
4.
InputType: Select the type of trigger you have connected to the input. Select "PIEZO" for
triggers like pads or cymbals. Select "SWITCH" if you are using a drum pad with a rim switch, a
cymbal with an edge switch, or a footswitch. (Note: This parameter is only seen on certain
pages.)
When you have finished making your edits, you can press EXIT or any button that will enter another
screen (e.g., DRUM KIT, UTILITY, etc. Your edits will remain for that session (i.e., until you turn off the
module).
26
TRIGGERING PARAMETERS
The TRIG page of the Ext. Trig Menu contains some parameters
that affect the triggers' sensivity and function within the module.
1.
Press EXT TRIG to enter the main Ext. Trig Menu page.
Press TRIG (F2).
2.
Select the trigger whose parameters you want to edit by
pressing NOTE CHASE then striking the desired trigger.
Alternatively, you can highlight the trigger name at the top of
the screen using the CURSOR UP / DOWN buttons to
highlight it and use the VALUE UP / DOWN buttons or VALUE
DIAL to change it.
3.
Use CURSOR UP / DOWN to move through the menu items
and VALUE UP / DOWN buttons or the VALUE DIAL to adjust
the settings:
•
Xtalk Rcv * : How susceptible the trigger is to
"crosstalk" from other triggers (00-07). The higher the value, the less likely crosstalk from other
triggers will affect it.
•
Xtalk Snd * : How likely the trigger will cause "crosstalk" in other triggers (00-07). The higher the
value, the less likely it will be a source of crosstalk on other triggers.
•
Retrigger: How quickly the module processes repeated strikes of the same trigger (00-99). This
is the minimum amount of time needed between successive strikes of the same trigger for the
second one to produce a sound. (For instance, if your Retrigger setting is 50 and you strike the
trigger once, it will produce a sound if the next strike is at least 50 milliseconds later. Otherwise,
it will be silent.) (Note: This parameter is only seen on certain pages since it already affects both
zones of a drum pad or cymbal that "share" the same TRIGGER INPUT.)
•
Threshold: How much velocity (force) is required for a Voice to sound (00-99). At lower settings,
very light strikes of the triggers will produce sounds. At higher settings, you will need to strike the
triggers harder to produce a sound. (Note: This parameter is only seen on certain pages since it
already affects both zones of a drum pad or cymbal that "share" the same TRIGGER INPUT.)
•
ZoneXTalk: This setting adjusts how susceptible triggers on a "shared" input (e.g., the bell and
bow of a ride cymbal, or the head and rim of a the same drum pad) are to "crosstalk" from each
other. The higher the setting, the less likely these trigger pairs will cause each other to trigger
unintentionally. (Note: We recommend increasing this setting for drum pads on which you want
to produce "rimshots" by striking the head and rim simultaneously.)
4.
When you have finished making your edits, you can press EXIT or any button that will enter another
screen (e.g., DRUM KIT, UTILITY, etc. Your edits will remain for that session (i.e., until you turn off the
module).
* A note about crosstalk:
"Crosstalk" occurs when a trigger is struck and the vibration from that strike is also "read" as a strike by
an adjacent trigger. For instance, if you strike the snare drum hard enough, it is possible for the crash
cymbal to sense the vibration of your hit (especially if they are mounted on the same rack) and trigger as
well. This unintentional triggering can be reduced or elimintated by adjusting the DM8 module's crosstalk
("Xtalk") settings.
•
When you increase a trigger's "Xtalk Rcv" ("Crosstalk Receive") setting, you are making that
trigger less susceptible to crosstalk from other triggers' vibrations.
•
When you increase a trigger's "Xtalk Snd" ("Crosstalk Send") setting, you are making that
trigger less likely to be interpreted by the module as a cause of crosstalk.
In a general sense, these two settings essentially do the same thing: reduce crosstalk. However, there
are cases where adjusting one is better than adjusting the other:
Example:
While playing, if you find the first tom is unintentionally triggering as you play heavily on the
snare drum, you should increase the first tom's "Xtalk Rcv" setting to reduce its sensitivity to
strikes on the snare drum (as well as other triggers).
On the other hand, if you find playing heavily on the snare drum is unintentionally causing
several triggers to sound, you should increase the snare drum's "Xtalk Snd" setting so the
module interprets vibrations from the snare drum more strictly to reduce errant triggering on
the rest of the kit.
27
VELOCITY CURVE
The CURV page lets you set the velocity curve for the triggers, which
determines how a sound's volume is affected by how hard you strike it –
that is, how responsive the triggers' dynamics are to changes in your
playing.
1.
2.
3.
4.
Press EXT TRIG to enter the main Ext. Trig Menu page. Press
TRIG (F2).
Select the trigger whose parameters you want to edit by pressing
NOTE CHASE then striking the desired trigger. Alternatively, you
can highlight the trigger name at the top of the screen using the
CURSOR UP / DOWN buttons to highlight it and use the VALUE
UP / DOWN buttons or VALUE DIAL to change it.
Use CURSOR UP / DOWN to move through the menu items and
VALUE UP / DOWN buttons or the VALUE DIAL to adjust the
settings:
•
Linear: The triggers will be consistently responsive to
changes in your playing, increasing at the same rate as the
force of your hits.
•
Log 1-4: The triggers will be more responsive to changes in
your playing at lower velocities and become less responsive
at higher velocities.
•
Exp 1-4: The triggers will be more responsive to changes in
your playing at higher velocities and become less responsive
at lower velocities.
•
Spline 1-4: The triggers will be more responsive to changes
in your playing at lower and higher velocities and less
responsive at moderate velocities.
•
Offset: The triggers will be consistently responsive to
changes in your playing at lower and medium velocities and
play sounds at the maximum volume at high velocities.
•
Constant: The triggers will play sounds at the maximum
volume regardless of how hard or soft you hit them.
When you have finished making your edits, you can press EXIT or
any button that will enter another screen (e.g., DRUM KIT,
UTILITY, etc. Your edits will remain for that session (i.e., until you
turn off the module).
MODE (RIDE BOW & BELL)
You should adjust this setting for the kind of ride cymbal you are using – a dual-zone ride (which has bow
and bell triggers) or a three-zone ride (which has edge, bow, and bell triggers).
To do this:
1.
Press EXT TRIG to enter the main Ext. Trig Menu page.
2.
Select the ride's bow or bell by pressing NOTE CHASE then
striking that zone on your cymbal trigger. Alternatively, you can
highlight the trigger name at the top of the screen using the
CURSOR UP / DOWN buttons to highlight it and use the VALUE
UP / DOWN buttons or VALUE DIAL to select either "RideBell" or
"RideBow."
3.
Press MODE (F4).
4.
Use VALUE UP / DOWN buttons or the VALUE DIAL to select "2 Zones" if your ride cymbal is a dualzone or "3 Zones" if your ride cymbal is a three-zone.
5.
When you have finished making your edits, you can press EXIT or any button that will enter another
screen (e.g., DRUM KIT, UTILITY, etc. Your edits will remain for that session (i.e., until you turn off the
module).
28
HI-HAT CALIBRATION
The first time you connect a hi-hat pedal to the DM8 module, we recommend
Note: The module's HI-HAT
calibrating it so the module can "read" the pedal's movement optimally. If you
CONTROL TRIGGER INPUT
use the same hi-hat each session (even if you have disconnected and
does not support keyboardreconnected it), then you shouldn't need to calibrate each time as long as you
style expression pedals.
store your trigger settings after calibrating (see STORING TRIGGER SETTINGS
in the STORING & COPYING chapter for more information). However, anytime
you connect a different hi-hat from the previously connected one, you should calibrate it.
To calibrate the hi-hat pedal:
1.
Connect the hi-hat pedal to the module but do not press it down.
2.
On the module, press EXT TRIG.
3.
Use the CURSOR UP / DOWN buttons to highlight the "Input" field at the
top of the screen then use the VALUE UP / DOWN buttons or VALUE
DIAL to select "HiHat."
4.
Press CAL (F1).
5.
With the hi-hat pedal completely raised ("open"),
Open
press OPEN (F1) and wait for a message saying the
Pedal (side view)
process is complete.
Closed
6.
With the hi-hat pedal completely pressed ("closed"),
press CLOS (F2) and wait for a message saying the
process is complete.
7.
If you want to fine-tune how the module detects your
pedal's "open" and "closed" positions, press TRIM
(F3). Use the CURSOR UP / DOWN buttons to select "Open" or "Closed" and use the VALUE UP / DOWN
buttons or VALUE DIAL to adjust the setting. (Tip: Increasing the "Closed" value makes it easier to close the
hi-hat or "choke" it.)
8.
If you want to adjust the response curve of the pedal, press CURV (F4). Use the VALUE UP / DOWN buttons
or VALUE DIAL to select the curve that best suits your playing style. (Tip: We recommend using LINEAR,
LOG1 or LOG2 for conventional hi-hat performance.)
9.
When you have adjusted the hi-hat settings to your preference, press EXIT to exit the calibration page (or press
DRUM KIT to return to the main screen).
STORING EXT. TRIG SETTINGS
Any changes you make to the parameters in the Ext. Trig Menu will remain for the current session but will return to
their defaults if you turn off the module. We recommend storing your settings when you change them so you can use
them in future sessions.
To store Ext. Trig settings:
1.
Be sure you are in the Ext. Trig Menu by pressing EXT TRIG.
2.
Press STORE.
3.
A window will appear asking you to confirm your choice. Press CANCEL
(F2 or F3) to cancel storing your Ext. Trig settings. Press YES (F1) to
store them.
EXPLORING OPTIMAL SENSITIVITY AND THRESHOLD SETTINGS
We created the DM8 module's default settings to allow for great playability right out of the box, but we recommend
experimenting with different triggers settings – particularly sensitivity and threshold – so you can find the settings that
best suit your playing style. Here is one recommended way to explore these settings:
1.
2.
3.
4.
5.
6.
7.
8.
Press EXT. TRIG to access the trigger settings.
Make sure NOTE CHASE is activated (the LED should be lit).
Strike a trigger on your electronic drum kit whose settings you want to adjust. The name of the trigger will be
displayed at the top of the module's LCD.
On the INP page, adjust the "Sensitvty" setting to an appropriate level as you strike the trigger with moderate
force, typical of how you play. The resulting sound should be neither too loud nor too quiet. (Make sure the
"Function" setting is set to "TRIGGER.") If the level meter in the upper-right hand corner is "clipping" or maxing
out too soon, reduce the sensitivity.
On the TRIG page, adjust the "Threshold" setting to an appropriate level as you strike the trigger as lightly as
you would while playing. You can use the level meter in the upper right-hand corner of the module's LCD to
see whether the module is detecting your hits.
After setting the threshold, return to the INP page and readjust the "Sensitvty" setting as you strike the trigger
with varying force.
Repeat this process for other triggers in your electronic drum kit.
Press STORE to save these changes.
Note that you can also adjust the velocity curve for each trigger, which can help in the "shaping" of the triggers'
volume levels relative to the range of force you use while playing. Also, the Utility Menu allows you to set the rough
"global" sensitivity of all triggers in the Kit. ("Trig Sens") See the UTILITY MENU chapter for more information.
29
UTILITY MENU
The DM8's Utility Menu contains several pages of parameters that affect the module's overall operation as
well as system-related information and functions.
GENERAL
The main page of the Utility Menu contains some global parameters that affect the kit as well as the module
itself.
1.
2.
Press UTILITY to enter the main Utility Menu page.
Use CURSOR UP / DOWN to move through the menu items
and VALUE UP / DOWN or the VALUE DIAL to adjust the
settings:
•
Tempo: Indicates how the module determines tempo
from pattern to pattern. When set to "PATTERN,"
each Pattern will have its own tempo (i.e., the tempo
can change when moving from one Pattern to the next). When set to "GLOBAL," the module will
follow a fixed, global tempo, ignoring the tempo specific to a pattern.
•
Acc Pitch: The tuning of the module's Accompaniment. The default is a standard "A=440Hz."
The available tuning range is 430 – 450 Hz.
•
Contrast: The contrast of the LCD (0-99).
METRONOME (F1)
Pressing MTRO (F1) from the main Utility Menu lets you access pages that contains the settings for the
module's metronome.
MEASURE (F1)
This page controls the sound and level settings of the module's
metronome.
1.
Press UTILITY to enter the main Utility Menu.
2.
Press MTRO (F1) to access the metronome settings. The
first page to appear will be MEAS (F1).
3.
Use CURSOR UP / DOWN to move through the menu
items and VALUE UP / DOWN or the VALUE DIAL to
adjust the settings:
•
MeasLvl: The volume level of the first metronome beat of every measure (00-99). (The first beat
is often louder than the others to mark the beginning of each bar.)
•
MeasSound: The sound of the first metronome beat of every measure. (The first beat is often at
a slightly higher pitch than the others to mark the beginning of each bar.)
•
BeatLevel: The volume level of the overall metronome beat (00-99).
•
BeatSound: The sound of the metronome beat.
30
SUBDIVISION (F2)
This page lets you adjust settings for the subdivision metronome.
This is similar to the regular metronome but while the regular
metronome sounds every beat, the subdivision metronome
sounds during smaller intervals of each measure.
1.
Press UTILITY to enter the main Utility Menu.
2.
Press MTRO (F1) to access the metronome settings.
3.
Press SUBD (F2) to access the subdivision metronome
settings.
4.
Use CURSOR UP / DOWN to move through the menu items and VALUE UP / DOWN or the VALUE
DIAL to adjust the settings:
•
SubDvsn: The length of each subdivision. The range includes 1/2, 1/4, 1/8, and 1/16 notes –
both regular and triplet. (Example: If the regular metronome is set to a 4/4 time signature and
"SubDvsn" is set to "1/8," you will hear the regular metronome on every 1/4 note as well as the
subdivision metronome on every 1/8 note.)
•
SubDLvl: The volume level of the subdivision metronome sound (00-99). We recommend
keeping this volume relatively low so it is not confused with the regular metronome sound.
•
SubDSnd: The sound of the subdivision metronome.
TAP TEMPO (F3)
This page lets you adjust settings for the TAP TEMPO button and
the tempo LED.
1.
Press UTILITY to enter the main Utility Menu.
2.
Press MTRO (F1) to access the metronome settings.
3.
Press TAP (F3) to access the Tap Tempo settings.
4.
Use CURSOR UP / DOWN to move through the menu items
and VALUE UP / DOWN or the VALUE DIAL to adjust the settings:
•
Tempo LED: This setting lets you control when the tempo LED will be seen. When set to "ON,"
the tempo LED will flash all the time. When set to "PAT ONLY," the tempo LED will only flash
when a Sequence is playing. When set to "OFF," the tempo LED will never be seen.
•
Tap Tempo: Enables or disables the TAP TEMPO button. Disabling it may be useful if you do
not want to make any unintentional changes to a Sequence's tempo.
31
MIDI (F2)
Pressing MIDI (F2) from the Main Utility menu lets you access pages that contains the module's MIDI
settings.
INPT (F1)
This page controls the module's MIDI input settings.
1.
Press UTILITY to enter the main Utility Menu.
2.
Press MIDI (F2) to access the MIDI settings. The first page to
appear will be INPT (F1).
3.
Use CURSOR UP / DOWN to move through the menu items
and VALUE UP / DOWN or the VALUE DIAL to adjust the
settings:
•
•
•
Drum Chan: The MIDI channel number over which the drum sounds will be received (01-16 or
"OMNI," which sends it over all 16 channels) when played by an external MIDI device.
Acc Chan: The MIDI channel number over which the Accompaniment will be received (01-16 or
"OMNI," which sends it over all 16 channels) when played by an external MIDI device.
LocalCont: This "Local Control" setting determines whether the module receives MIDI messages
from the triggers or an external source. When set to "ON" (the default), the module's sounds will
receive MIDI messages from your connected triggers. Switch this setting to "OFF" when you are
using an external MIDI sequencer. (When using an external sequencer, if this setting is "ON,"
each note will be triggered twice – once in the module and once via the external sequencer.
Turning Local Control "OFF" ensures you will hear the triggered note only once.)
EXT (F2)
This page's settings determine how the module responds to external
MIDI controllers.
1.
Press UTILITY to enter the main Utility Menu.
2.
Press MIDI (F2) to access the MIDI settings.
3.
Press EXT (F2) to access the external MIDI settings.
4.
Use CURSOR UP / DOWN to move through the menu items
and VALUE UP / DOWN or the VALUE DIAL to adjust the settings:
•
Prog Chng: Determines if the module will recognize Program Change messages from external
MIDI sources. When set to "OFF" (the default), the module will ignore Program Change
messages. When set to "RECEIVE," Kits can be selected via Program Change messages from
external sources.
•
Clock In: Determines if the module will sync to an external MIDI clock. When set to "OFF" (the
default), the module will run off its internal clock. When set to "RECEIVE," the module's clock will
sync to the "master" clock of a connected external MIDI source.
OUT (F3)
This page controls the module's MIDI output settings.
1.
Press UTILITY to enter the main Utility Menu.
2.
Press MIDI (F2) to access the MIDI settings.
3.
Press OUT (F3) to access the MIDI output settings.
4.
Use CURSOR UP / DOWN to move through the menu items
and VALUE UP / DOWN or the VALUE DIAL to adjust the
settings:
•
Prog Chng: Determines if the module will send out Program Change messages to an external
USB-MIDI device. When set to "NOT SENT" (the default), the module will not send any Program
Change messages. When set to "SENT," the module will send Program Change messages to a
connected USB-MIDI device.
•
Clock Out: Deteremines if the module's internal clock will serve as the "master" clock for a
connected USB-MIDI device. When set to "NOT SENT" (the default), the module will not send
out any MIDI clock information to a connected device. When set to "SENT," a connected USBMIDI device will sync to the module's internal clock.
•
MIDI Thru: When set to "ENABLED" (the default), the module's USB port functions as a MIDI
THRU. In this case, a device connected to the module's MIDI IN can send data through the
module to a device connected to the module's USB port. When set to "OFF," the module's USB
port functions only as a MIDI output for the module itself.
32
TRIG (F3)
Pressing TRIG (F3) from the Main Utility menu lets you access a page that contains the various trigger
settings for the module.
TRIG
1.
Press UTILITY to enter the main Utility Menu.
2.
Press TRIG (F3) to access the trigger settings.
3.
Use VALUE UP / DOWN or the VALUE DIAL to adjust the
settings:
a.
Trig Sens: The sensitivity of all the connected triggers – "LOW," "MEDIUM," or "HIGH."
Adjusting this setting lets you roughly set the sensitivity of the entire Kit but conveniently keeps
the proportions of your individual trigger settings. (To adjust the sensitivity of individual triggers,
see the TRIGGER INPUT PARAMETERS section of the EXT. TRIG MENU chapter.)
b.
HiHat * : Select "NOTE+CC#4" or "NOTE ONLY." This determines whether the hi-hat MIDI note
will be sent with or without CC information (CC#4).
c.
HH Splash * : Select "SENT" or "NOT SENT." This determines whether the hi-hat "splash" note
(generated by quickly pressing then releasing the pedal) will be sent or not.
d.
Cym Choke * : Select "SENT" or "NOT SENT." This determines whether the cymbal "choke"
note (generated by grabbing the cymbal and touching the choke strip) will be sent or not.
* Note: The "HiHat," "HH Splash," and "Cym Choke" parameters allow you to tailor the MIDI output of
these notes, which is useful when using the module with an external hardware or software drum module
that does not support a variable hi-hat pedal, the hi-hat "splash," cymbal choking, etc.
Also, even when these parameters are set to "NOTE ONLY" or "NOT SENT," the MIDI notes and
information you have "disabled" will actually still be recorded when you record a Sequence, but they will
not be sent to the MIDI output.
SYS (F4)
Pressing SYS (F4) from the Main Utility menu lets you access a page that contains the module's various
system settings.
SYSX (F1)
This page lets you send out the module's settings as a SysEx (.syx) file
to be recalled later.
1.
Press UTILITY to enter the main Utility Menu.1).
2.
Use CURSOR UP / DOWN to move through the menu items:
a.
All Memory: All of the module's memory that can be saved
will be saved as a SysEx file. This includesyour trigger
settings, Kits, and Sequences.
b.
All Trigger Settings: Only the module's trigger settings will be saved as a SysEx file.
3.
Press SEND (F4) to send the selected settings from the module as a SysEx file.
INIT (F2)
This page lets you reinitialize different settings in the module, restoring
them to their factory defaults.
1.
Press UTILITY to enter the main Utility Menu.
2.
Press SYS (F4) to access the Accompaniment settings.
3.
Press INIT (F2) to access the reinitialization page.
4.
Use CURSOR UP / DOWN to move through the menu items:
a.
All Kits: All of the module's Kits and their settings will
return to their factory defaults.
b.
All Sequences: All of the module's Sequences and their
settings will return to their factory defaults.
c.
All Trigger Settings: All of the module's trigger settings
will return to their factory defaults.
5.
Press EXEC (F4).
6.
A window will appear asking you to confirm your choice. To confirm and reinitialize the selected
settings, press YES (F1). To cancel, press CANCEL (F2 or F3).
33
O/S (F3)
This page contains information about the module's current
operating systems and sound ROM.
1.
Press UTILITY to enter the main Utility Menu.
2.
Press SYS (F4) to access the Accompaniment settings.
3.
Press O/S (F3) to access the operating system information
page.
4.
This page contains the version numbers of the module's
current software:
Note: Be sure to register your DM8
a.
Trig OS: The current version number of the trigger
module at www.alesis.com to be
firmware.
notified if new software becomes
available.
b.
Sound ROM: The current version number of the
sound ROM – the library of sounds read by the
module.
c.
Sound OS: The current version number of the module's own firmware.
MEM (F4)
This page contains information about the module's available
memory and lets you enable or disable write protection.
Note: There are no editable parameters on this page.
1.
2.
3.
4.
5.
Press UTILITY to enter the main Utility Menu.
Press SYS (F4) to access the Accompaniment settings.
Press INIT (F2) or O/S (F3) to change the available FBUTTON tabs. MEM (F4) will become available.
Press MEM (F4) to access the memory page.
This page contains two items:
a.
Memory: The amount of currently available module memory.
b.
WriteProt: Use the VALUE UP / DOWN buttons or VALUE DIAL to enable or disable write
protection. When set to "ON" (the default), you can make changes to the Kits, Instruments,
Sequences, etc., but will not be able to store them. When set to "OFF," you can store these
settings.
UPDATING THE MODULE
To update the module, follow these steps:
1.
2.
3.
4.
5.
6.
If you have not done so already, download the updater
Note: Third party sound ROMs are
application from www.alesis.com/dm8 (under the "Docs &
also considered updates and can be
Downloads" tab.)
loaded to the DM8 module in this
Connect the module's USB port to your computer with a
fashion.
standard USB cable.
Press and hold the module's REC button while turning it on.
Note: If you encounter an error
(Windows users: If you see a message that says Windows
message while switching on the
was unable to install a driver, ignore it.)
module, it is possible the sound ROM
cannot be read correctly. In this case,
Open the DM8 Updater application.
reload the sound ROM file and try
Windows users: Select "USB Audio Device" (the DM8
again.
module) from the "MIDI Interface" dropdown menu.
Mac users: The DM8 module will be automatically selected.
Drag the appropriate file onto the application, or click "File" then "Open" and select the file. You can
upload SysEx (.syx) files – such as sound ROM files or firmware files – in this fashion.
Note: Since the release of this module, we may have released new firmware or sound ROM files. To
keep your module current, we recommend checking the "Docs & Downloads" tab of
www.alesis.com/dm8 for available updates for your DM8 module.
34
MIDI SETUP
You can use the DM8 module as a trigger-to-MIDI interface, allowing you to use your electronic drum kit to
trigger sounds from external sound libraries. This means you can use your hardware kit to play sounds in
software drum modules like BFD, Toontrack, Reason, and many others.
You can also use external MIDI devices – such as MPCs, the Alesis ControlPad or PerformancePad, or other
MIDI controllers – to trigger sounds from the DM8's own extensive sound library instead of (or in addition to)
the electronic drum kit.
To use the DM8 in these ways, you will need to set it up to communicate with your external device(s) via
MIDI. Here are a couple examples of how to do this.
Using the DM8 to trigger sounds from a software drum module:
1.
2.
3.
4.
5.
6.
Connect the module's USB port to your computer with a standard USB cable.
Press UTILITY to access the module's Utility Menu.
Press MIDI (F2) to access the MIDI settings.
Press OUT (F3) to access the MIDI output settings.
Note: These are just recommended
Use CURSOR UP / DOWN to move through the menu
settings. You may configure the DM8's
items and VALUE UP / DOWN or the VALUE DIAL to
MIDI settings however best suits your
adjust the settings accordingly:
performance needs.
See the MIDI
a.
Prog Chng: "SENT" (so the DM8 can send Program
section of the UTILITY MENU chapter
Change messages to the software).
and the DRUM KIT SETUP section of
b.
Clock Out: "SENT" (if you want the DM8's MIDI
the KITS, VOICES, ACCOMPANIMENT
clock to the be the "master" clock) or "NOT SENT" (if
& INSTRUMENTS chapter for more
you do not want the DM8 to send out MIDI clock
information.
information).
c.
MIDI Thru: "OFF."
Set your software to receive MIDI messages from the DM8 module ("USB Audio Device"). Consult
your software's manual for more information.
35
Using an external MIDI device with the DM8's sound library:
1.
2.
3.
4.
5.
6.
7.
8.
Connect the DM8's MIDI IN port to your external device's MIDI OUT port using a standard MIDI cable.
Press UTILITY to access the module's Utility Menu.
Press MIDI (F2) to access the MIDI settings.
Press INPT (F1) to access the MIDI input settings.
Use CURSOR UP / DOWN to move through the menu
Note: These are just recommended
items and VALUE UP / DOWN or the VALUE DIAL to
settings. You may configure the DM8's
adjust the settings accordingly:
MIDI settings however best suits your
performance needs.
See the MIDI
a.
Drum Chan: Set this to the MIDI channel (01-16 or
section of the UTILITY MENU chapter
"OMNI") over which the drum sounds will be
and the DRUM KIT SETUP section of
received when played by your external device.
the KITS, VOICES, ACCOMPANIMENT
b.
Acc Chan: Set this to the MIDI channel (01-16 or
& INSTRUMENTS chapter for more
"OMNI") over which the Accompaniment sounds will
information.
be received when played by your external device.
c.
LocalCont: "OFF" (otherwise, each note you trigger will be heard twice)
Press EXT (F2) to set how the DM8 will respond to the external device.
Use CURSOR UP / DOWN to move through the menu items and VALUE UP / DOWN or the VALUE
DIAL to adjust the settings accordingly:
a.
Prog Chng: "RECEIVE" (so the DM8's Kits can be selected via Program Change messages from
the external device).
b.
Clock In: "OFF" (if you want the DM8 to run off its own internal clock) or "RECEIVE" (if you want
to sync the DM8's clock to the clock of your external device).
Set your external device's settings to send MIDI to the DM8 module. Consult your software's manual
for more information.
RESTORING BACKUP SYSEX FILES
To load a backup SysEx file to the module from your computer, follow these steps:
1.
2.
3.
4.
With the module off, connect the module's USB port to your computer with a standard USB cable.
Press and hold the module's STORE button and turn it on. The LCD should display, "MIDI RESTORE
Waiting..." This means it is ready to receive a SysEx file from your computer.
Use a MIDI utility to send the appropriate SysEx file to the module (which will need to be selected as
the receiving MIDI device). We recommend the following utilities:
MIDI-OX (PC): http://www.midiox.com
SysEx Librarian (Mac): http://www.snoize.com/SysExLibrarian/
The LCD will indicate when the process is complete. Once it is complete, restart the module.
36
MIDI IMPLEMENTATION CHART
Transmit/Export
Recognize/Import
Remarks
1-16
1-16
Drums: 10 (default)
Accomp: 1 (default)
Note numbers
0-127
Drums: 28-91
Accomp: 0-127
Program change
0-99
0-99*
Bank Select response?
Yes
Yes*
Modes supported: Mode 1: Omni-On, Poly
Mode 2: Omni-On, Mono
Mode 3: Omni-Off, Poly
Mode 4: Omni-Off, Mono
Multi Mode
Note-On Velocity
Note-Off Velocity
Channel Aftertouch
Poly (Key) Aftertouch
Pitch Bend
Active Sensing
System Reset
Tune Request
Universal System Exclusive
Yes
Yes
Yes
Yes
Yes
Yes
No
No
No
Yes
No
No
No
No
Yes
Yes
Yes
Yes
Yes
Yes
No
No
No
Yes
No
No
No
No
Manufacturer or Non-Commercial System
Exclusive
Yes
Yes
1. Basic Information
MIDI channels
NRPNs
No
Yes
RPNs
2. MIDI Timing and Synchronization
MIDI Clock
Song Position Pointer
Song Select
Start
Continue
Stop
MIDI Time Code
MIDI Machine Control
MIDI Show Control
3. Extensions Compatibility
No
No
Yes
Yes
No
Yes
Yes
Yes
No
No
No
Yes
No
No
Yes
Yes
Yes
No
No
No
General MIDI compatible?
No
Partial
DLS compatible?
Standard MIDI Files
XMF Files
SP-MIDI compatible?
No
No
No
No
No
No
No
No
37
*Used for selecting
active kit
*0: Kits 0-99, 1: Kits
100-199
For Basses Only
Used for backup /
restore and loading new
sound sets
See MIDI
Implementation
Supplement
GM Drum Sounds
compatible
DM8 KITS
#
0
1
2
3
4
5
6
7
8
9
10
11
12
13
14
15
16
17
18
19
20
21
22
23
24
25
26
27
28
29
30
31
32
33
Name
Fusion
Big Mellow
CableSnare
Bop Brush
Big Wet
Clav Jam
Wood Pop
Dry Rocker
Big Rocker
Crank It
Trig Samp
Evil Drums
Absolute
Ballad
Big BackBt
Dry Honk
ClassicR&B
Dead Snare
Deep Dish
Rocker Jam
JungleVerb
Deli World
Trash Funk
Fat Back
Africa
Latin Set
NuAge Perc
Latin Kit
Keystone
Rnd Latin
Elec Tech
Elec Hop
Electro
Ethno Tek
#
34
35
36
37
38
39
40
41
42
43
44
45
46
47
48
49
50
51
52
53
54
55
56
57
58
59
60
61
62
63
64
65
66
67
Name
9 OH 9
Flim Flam
SquareBdge
Old SKool
Hiss Hop
Nu Jack
Pop Brush
PingySnare
Mini Me
Thick Rock
Levee
Deep Jam
Picc Verb
Slick Jazz
Picc Funk
Thick Thin
Indo Ethno
Studio
World 1
FunkBigKik
RingyMetal
Mello Snap
8 OH 8
Trad Hop
CountryRok
Handrums
PowerBlues
Orchestra
Picc Punk
Reggae
Piano Rock
Comedy FX
Fat Attack
OG SIM
38
#
68
69
70
71
72
73
74
75
76
77
78
79
80
81
82
83
84
85
86
87
88
89
90
91
92
93
94
95
96
97
98
99
Name
Guitar Jam
Techno
VocalDrums
Med Room
Funky Drmr
ConcertTom
World 2
FunkRinger
Latin Jazz
12" Funk
Fuse Hop
ThickBlues
World 3
Orch Traps
Paisley
Funk Pop
Funk Snap
80s Stndrd
Hi Fusion
Hi Round
Brush Room
Cavern
Kick Click
Funk Bop
Phi Gospel
NoFrontHd
Super Kik
Samba
Thonk
Pop Idol
Far East
World 4
DM8 SEQUENCES
#
0
1
2
3
4
5
6
7
8
9
10
11
12
13
14
15
16
17
18
19
20
21
22
23
24
Name
Jalapeño
Slow Metal
Surf Punk
70sHardRock
Texas Blues
J-Bon
Indie Rock
Blues Shuff
Funk Jazz
BigBand
Bossa Nova
Stanky
CountryRock
Jazz Waltz
Get Uppa!
Fusion 1
Hip Hop 1
House
Urban
R&G
Nails
16th Shuffl
One Drop
Philly Hop
Swinger 5
#
25
26
27
28
29
30
31
32
33
34
35
36
37
38
39
40
41
42
43
44
45
46
47
48
49
Name
Med House
Industro
Discotron 6
Afro-Cuban
Mozambesque
BassGroover
MedSlowBlu
ChaCha
Up County
Cntry Swing
Ethno Tek
Jungle
Sneaky Funk
ElectricFsn
Blues Swing
Jazz Waltz2
Jazz Waltz3
Log Cabin
LateEvening
Mambo
SOS
Slinky Rock
Want me?
Big Rock
Surf Rock
39
#
50
51
52
53
54
55
56
57
58
59
60
61
62
63
64
65
66
67
68
69
70
71
72
73
74
Name
Funx Rox
Jbass Groov
Idol Rock
Dark Rock
Punx
Shuff Drive
Shuffle On
Shuff Rock
Funk It
Surf Rocker
Round Rock
16th Rock
Mysterock
SD Rock
Energy Rock
Surf Pop
Mover
Picante
Salsa
Samba 1
Samba 2
Subdivider
Reggae 1
Reggae 2
World
DM8 INSTRUMENTS
KICKS
70s Rock
80s Rock
90s Rock
Ambient
Ambient Rock
Banger
Bass N Kick
Big 26"
Big Butt
Big Punch
Big Smack
Blastbeat
Blues 1
Blues 2
Country
Crescent
Crunch
Cust Tiny16"
Deep
Double Head
Dry
Dry Bop 18"
Dry Room
EastRoom
Energizer
Flabby
Floppy
Funk 1
Funk 2
Funk Head
FunkPlus
Fusion
Gr 90s 20"
Garage
Growl
HR16 Rock
Hard Head
Hard Rock 1
Hard Rock 2
Hardware
High N Tite
Hmm
Jazz Kick
Jazzy
Kuma 1
Kuma 2
LD Dmpnd 26"
Lo Fi
Lo N Tite
Loose Batter
Louie Kick
Low 24"
Lud 60s 22"
Metal Head
Modern
Narrow
Noisy
Piano Rock
Pillow
Pop 1
Pop 2
Quarter Head
RocKik
Rocker
Room
Round
Round Blues
Single Head
Slap
Snare & Kick
Solid 1
Solid 2
Solid 3
Splat
Stage
Standard 22"
Studio Kick
Thick Head
Thud Head
Thump
Thumpy
Thunk
Thunky
Tight 20"
Tight Funk
Tighter 20"
Tite Room
Warm
Y RecCus 24"
Funk Plus
Low Snare 1
Low Snare 2
Lu5x14 AcoRS
Lu5x14 AcoRd
Lu5x14 SBrRS
Lu5x14 SBrsh
Lu5x14 SS
Lu5x14 SS RS
Lu5x14BBDamp
Lu5x14BBOfCn
Lu5x14BBOpCn
Lu5x14BBRS
Lu5x14BBXStk
MarchingBand
McD6x14Stk
McD6x14StkRS
Meaty
P6x14 FFS
P6x14 FFS RS
Pc3x14SnOfRS
Pc3x14SnrOff
Philly Funk
Piccolo 1
Piccolo 2
Piccolo 3
Piccolo 4
Piccolo 5
Piccolo 6
Present
R5x14DynRS
R5x14DynRdRS
R5x14DynStk
RK7x14 Damp
RK7x14 OpCnt
RK7x14 RSDmp
Ringer
Round Blues
Shred RS
Shred Snare
Side Snare
Snare Brush
Steel
Studio Rim
Studio Snare
Thin Beauty
Thonk Dry
Tight
Wood Rim
Wooden
Woody 1
Woody 2
Y4x14 OffCnt
Y4x14 OpCen
Y4x14 RS
SNARES
70's Rock
80's Rock
90's Rock
BL 65x14 Opn
BL 65x14 RS
Balt6x13
Balt6x13 RS
Balt6x13XStk
BlastbeatSnr
Blues Club
Bright 1
Bright 2
Brush Jazz
Brush JazzRS
Brush Lite
Brush LiteRS
Brush Snr
Brush Snr RS
Chrome 5x14
Clap Snare
CrescentSnr
Crisp
DB Funk
Deadwood
Deep Snare
East Room
Flanged
Full
40
TOMS
70s 10"
70s 12"
70s 14"
70s 16"
G 14x14
G 8x10
G 8x12
G Brsh 14"
G Brush 12"
G Damp 10"
G M 14"
G Mute 10"
G Mute 12"
G Mute 13"
G Mute 16"
G MuteRim10"
G MuteSn 10"
G Rim 12"
G Rim 14"
Lud16x16 60s
Lud9x13 60s
Roto 12"
Roto 12" Dn
Roto 12" Up
Roto 14"
Roto 14" Dn
Roto 14" Up
Roto 16"
Roto 16" Dn
Roto 16" Up
Snr+BrshHi 1
Snr+BrshHi 2
Snr+BrshLo 1
Snr+BrshLo 2
Snr+BrshMid
StSnare Hi 1
StSnare Hi 2
StSnare Lo 1
StSnare Lo 2
StSnare Mid
Temp 10x14
Temp 16x16
Temp 16x18
Temp Mute14"
Temp Mute16"
Temp Mute18"
Temp Rim
Y 12x14 MCA
Y 14x16 MCA
Y 7x8 MCA
Y 8x10 MCA
Y 9x12 MCA
Y Damp 10"
Y Damp 8"
Y DampSn 10"
Y DampSn 8"
Y Mute 10"
Y Mute 12"
Y Mute 14"
Y Mute 16"
Y Mute 8"
Y PinStrp10"
Y PinStrp12"
Y PinStrp14"
Y PinStrp8"
Heavy 2
Hybrid 1
Hybrid 2
Jazz Hat
Lite
Orchestral
Raspy
SFusion 13"
Techno
Thick
Thin
Tiny
VintageElect
Vocal Hat
Z60sNB 15"
ZBrush60s14"
ZManhatn 14"
ZReMix 12"
Dark Mallet
Dark Splash
Flange Sizzl
Flange Cym
H Xtreme 17"
HHX Splash
Mallet Crash
Raspy Crash
S Fierce 16"
Sizzle
Small Crash
Splashy
StFl Crash
Stereo Crash
Vintage
Vocal Crash
Z AC Stk 16"
Z KCon 18"
Z KDrkBsh17"
Z KDrkMlt17"
Z Kdark 16"
Z Kdark 17"
ZCon Splash
ZSplash 10"
Flange
Glass Ride
H HvyStk 21"
H JzBrsh 22"
H MdSizzl18"
Jazz Brush
Large
Mark Tree FX
Piatti Ride
Stub
Vocal Ride
Z HVCrsh 20"
Z HVCrsh 22"
Z K Thin 22"
Z KHiDef 20"
Z KHiDef 22"
Z KIstnbl20"
Z KZ 18"
Z Kthin 20"
HI-HATS
08 HiHat
09 HiHat
China Hat
Chunky
Crazy Hat
Electro 1
Electro 2
Ethnic
Heavy 1
CRASH
16" Darker
16" Thin
17" AC Stick
17" DarkStik
17" KD Dark
17" KD Lite
17" KDBrshLt
17" Thin
18" Mallet
20" Crash
Big Crash
Big Mallet
Choke
RIDE
B HVCrsh 20"
Big Stick
BosAntiq 20"
BosAntiq 22"
China Ride
CrashRid 20"
Crazy
Electro
Ethno
EthnoTekRide
41
CHINA
Big China
China China
Flange China
Gong China
Hi China Stk
SChnaMal 18"
SSplash 12"
WChina 17"
WChnaRvt 18"
WSplash
WSplash 10"
Z Stick 8"
HipHop Kik 4
HipHop Kik 5
HipHop Kik 6
HipHop Kik 7
HipHop Kik 8
Hmm Kik
House Kick
SDS Deep Kik
SDS Kick 1
SDS Kick 2
SDS Kick 3
SDS Kick 4
Shred Head
SolidSDSKik
Tek Kick
Vocal Kik
Zap Kick
HipHop Snr 3
HipHop Snr 4
LoFi Snare
SDS Crack
SDS Crak Snr
SDS Snare 1
SDS Snare 2
SDS Snare 3
SDS08 Snare
SDS09 Snare
Tek Stk
Vocal Snare
Vocal SnrRS
Vox Snare
Hex Tom 1 Hi
Hex Tom 1 Lo
Hex Tom 1 Md
Hex Tom 2 Hi
Hex Tom 2 Lo
Hex Tom 2 Md
Hex Tom 3 Hi
Hex Tom 3 Lo
Hex Tom 3 Md
Oil Can
SDS Tom 1
SDS Tom 2
SDS Tom 3
SDS Tom Hi
SDS Tom Lo
SDS Tom Md
09 Rim
78 Metal
C1SynHat
ClTekHat
Mtek Hi Hat
Op Syn Hit
Robot Snare
SciFi 1
SciFi 2
SciFi 3
SciFi 4
Shape Noise
Synth Tamb
Tek Hat
Whack
Orch Bass 2
Orch Bell
Orch Cymbal
Orch Snare
Orch Snr Rim
Tympani 1
Tympani 2
Tympani 3
Tympani 4
Xylo
Gong
Gong High
Gong Low
HiraTaiko36"
HiraTaiko60"
Okedo Taiko
Shime Taiko
Temple Block
Wood Block
ELECTRC KICK
08 Kick Long
08 Kick Shrt
09 Kick Long
09 Kick Shrt
EleKick 1
EleKick 2
HipHop Kik 1
HipHop Kik 2
HipHop Kik 3
ELECTRC SNR
08 Clap Sn
08 Snare
09 Snare
Dance Snare
Grunge Snare
HRB Snare
HipHop Snr 1
HipHop Snr 2
ELECTRC TOMS
08 Tom Hi
08 Tom Lo
08 Tom Md
09 Tom Hi
09 Tom Lo
09 Tom Md
Flng Tom Hi
Flng Tom Lo
Flng Tom Md
ELECTRC PERC
08 Clap
08 Clave
08 Conga Hi
08 Conga Lo
08 Conga Md
08 Cowbell
08 Cymbal
08 Maracas
ORCH PERC
Marimba C3
Marimba C4
Marimba G2
Marimba G3
Orch Bass 1
ORIENTAL PERC
Chinese Cym1
Chinese Cym2
Chinese Drum
FingerCymbal
FingrTriangl
42
LATIN PERC
2way Cowbell
Agogo
Agogo Hi
Agogo Lo
Agogo Lo 2
Bead Shaker
BellTree Dn
BellTree Up
Block 1
Block 2
Block Mallet
BoLanGoo
Bongo HiOpen
Bongo HiSlap
Bongo LoOpen
Bongo LoSlap
Breketa
Cabasa 1
Cabasa 2
Cast Roll
Claves
Conga HiMute
Conga HiOpen
Conga HiSlap
Conga LoMute
Conga LoOpen
Conga LoSlap
Cowbell 1
Cowbell 2
Cowbell 3
Crasher
Cuica Dn
Cuica Up
Drum Stix
Guiro 1
Guiro 2
Low Tamb
LrgTriangleM
LrgTriangleO
Maracas
NativeAmrcan
Paah
PandeiroMute
PandeiroOpen
PandeiroTap
Rattle
Reco Reco
Shaker 1
Shaker 2
Shaker 3
Shaker 4
Shaker 5
Shaker 6
Shaker Hi
Shaker Lo
SmTriangleM
SmTriangleO
Stick Click
Surdo 1
Surdo 2
Syn Shakr
Tamb Mute
Tamb Open
Tambourine
TimbaleHi 1
TimbaleHi 2
TimbaleHi 3
TimbaleHiRim
TimbaleLo 1
TimbaleLo 2
TimbaleLoRim
TmbourneMte1
TmbourneMte2
TmbrmFngrMte
TmbrmFngrOpn
TmbrmStckMte
TmbrmStckOpn
Triang Mt Hi
Triang Op Hi
Triangle Cl
Triangle Op
Vibraslap
Whistle Long
Whistle Shrt
Steel Pan G3
Tabla 1
Tabla 2
Tabla 3
Tabla 4
Tabla 5
Tabla 6
Tabla Ga
Tabla Ka
Tabla Na
Tabla Te
Tabla Tin 1
Tabla Tin 2
Tabla Tin 3
Talk Drum
Tavil
Udu Hole 1
Udu Hole 2
Udu Slap 1
Udu Slap 2
Udu SlapHole
Udu Top
Funk Synth
Funky Gtr
Gtr Chunks
Gtr Comp
Hi Conga Rnd
Hi Timb Rnd
HipHop Voc 1
HipHop Voc 2
Indian Rnd
Indo Pan
Lo Conga Rnd
Lo Timb Rnd
Metal GtrSeq
Pan Timb
Punk Gtr
Rock Cmp
Scratch Rnd
Shaker Rnd
Timbal Rnd
Udu Seq
Zep Gtr
Lo Timb Rnd
ETHNIC PERC
Djembe 1
Djembe 2
Djembe 3
Djembe 4
Doumbek 1
Doumbek 2
Doumbek 3
Ghatam
Nagara
Steel Pan A3
Steel Pan E3
RANDOM
Agogo Rnd
Bongo Rnd
Clavlick
Conga Seq
Congo Bongo
CowBell Rnd
Deep Gtr
Djembe Seq
Funk Gtr 1
Funk Gtr 2
Funk Horns
43
BASS
Bass Harm
Ch Pick
ChrsFretless
Crunch Bass
Damp Pick
ElectrcBass1
ElectrcBass2
Fretless
Jazz Upright
MellowUprght
Open Jazz
Pick Bass 1
Pick Bass 2
Pick Bass 3
Pick Bass 4
Pick Bass 5
Rattle Bass
Rattle VSw
Slap Bass 1
Slap Bass 2
Slap Bass 3
SlapNPop 1
SlapNPop 2
Upright Bass
Mini Bass 6
Mini Bass 7
Mini Bass 8
Mini Bs1 Ch
Mini Bs2 Ch
Mini Bs3 Ch
Mini Bs4 Ch
Mini Bs5 Ch
Oct Bass
Pro Phat
Series 900
Silver Box
Sine Bass
Snick Attack
Syn Bass 1
Syn Bass 2
Syn Bs1 Ch
Syn Bs2 Ch
TB Three
Trance
Ha
Jyeah
Lite Snap
Muscle 5th
Power Snap
Rev Crash
Rev Crash Fl
Rev PicSnare
Rev Ride
Rev Ride Fl
Rev Snare
Scratch 1
Scratch 2
Scratch 3
Scratch 4
Sleigh Bell
Slo Yeh
Stereo Clap
Tek Hit 1
Tek Hit 2
Tek Hit 3
Tek Hit 4
Tek Hit 5
Tek Hit 6
Tek Hit 7
Thunder
Ugh
VocalTom 1
VocalTom 2
VocalTom Lo
VocalTom Mid
Wah Gtr 1
Wah Gtr 2
Yeah
All Vibes Lo
All Xylophne
Blues Shuffl
Bossa Nova
Country Gtrs
Funk 8
Funk Jazz
Fusion 1
Get Uppa!
Hip Hop 1
Hip Hop 2
House 1
House 2
Indie Rock
J-Bon
Jalapeño
Jazz
Jazz Waltz
Punk
RnB 5
Slow Metal
Stanky
Strait Blues
Urban
SYNTH BASS
And Mogue
Bassic
Drum Bass
ElectrolytCh
Electrolyte
Mazzo
Mini Bass 1
Mini Bass 2
Mini Bass 3
Mini Bass 4
Mini Bass 5
FX/OTHER
Bulb Horn
Car Crash
Car Skid
CarHornLong
CarHornShort
Dog Bark
Door Slam
Duck Call
Duck Snort
E Piano
Finger Snap
Flextone
Fresh
GM Mod
Glass
Grunt
Gun Shot
HR Snap
HIT GROUPS
5-4 Jazz
70sHardRock
All AcGuitar
All CleanGtr
All EPs
All HeavyGtr
All Horns
All MarimbaH
All MarimbaL
All OrchBell
All Slides
All SteelDrm
All Vibes Hi
44
HITS
70sHR Gtr 1
70sHR Gtr 2
70sHR Gtr 3
70sHRcombo 1
70sHRcombo 2
70sHRcombo 3
70sHRcombo 4
70sHRcombo 5
70sHRcombo 6
A Gtr Chk 1
A Gtr Chk 2
A Gtr Chk 3
A Gtr Chk 4
A Pwr Gtr 1
A Pwr Gtr 2
A Pwr Gtr 3
A Pwr Gtr 4
A Pwr Gtr 5
A Pwr Gtr 6
Bass Slide 1
Bass Slide 2
Bass Slide 3
Bass Slide 4
Bass Slide 5
Bass Slide 6
Bass Slide 7
Blues Gtr 01
Blues Gtr 02
Blues Gtr 03
Blues Gtr 04
Blues Gtr 05
Blues Gtr 06
Blues Gtr 07
Blues Gtr 08
Blues Gtr 09
Blues Gtr 10
Blues Gtr 11
Blues Gtr 12
BosNovaEP 01
BosNovaEP 02
BosNovaEP 03
BosNovaEP 04
BosNovaEP 05
BosNovaEP 06
BosNovaEP 07
BosNovaEP 08
BosNovaEP 09
BosNovaEP 10
BosNovaEP 11
BosNovaEP 12
BosNovaEP 13
BosNovaEP 14
C Ac Gtr 01
C Ac Gtr 02
C Ac Gtr 03
C Ac Gtr 04
C Ac Gtr 05
C Ac Gtr 06
C Ac Gtr 07
C Ac Gtr 08
C Ac Gtr 09
C Ac Gtr 10
C Ac Gtr 11
C El Gtr 01
C El Gtr 02
C El Gtr 03
C El Gtr 04
C El Gtr 05
C El Gtr 06
C El Gtr 07
FJ EP 01
FJ EP 02
FJ EP 03
FJ EP 04
FJ EP 05
FJ EP 06
FJ EP 07
FJ Guitar 01
FJ Guitar 02
FJ Guitar 03
FJ Guitar 04
FJ Guitar 05
FJ Guitar 06
FJ Guitar 07
FJ Guitar 08
FJ Guitar 09
FJ Guitar 10
Fusion Gtr 1
Fusion Gtr 2
Fusion Gtr 3
Fusion Gtr 4
Fusion Gtr 5
Fusion Gtr 6
Fusion Gtr 7
Fusion Gtr 8
Fusion Gtr 9
FusnEP Amin
FusnEP BbMaj
FusnEP Bmin
FusnHrn4th1
FusnHrn4th2
FusnHrn4th3
FusnHrn4th4
FusnHrnMn3d
FusnHrnOctB
FusnHrnOctBb
FusnHrnOctC
FusnHrnOctD1
FusnHrnOctD2
FusnHrnOctF
FusnHrnOctF#
FusnHrnOctG
GetUppa!Gtr1
GetUppa!Gtr2
GetUppa!Gtr3
GetUppa!Gtr4
GetUppa!Gtr5
GetUppa!Gtr6
GetUppa!Gtr7
GetUppa!Gtr8
GetUppa!Org1
GetUppa!Org2
GetUppa!Org3
GetUppa!Org4
GetUppa!Org5
GetUppa!Org6
HipHp1 Gtr01
HipHp1 Gtr02
HipHp1 Gtr03
HipHp1 Gtr04
45
HipHp1 Gtr05
HipHp1 Gtr06
HipHp1 Gtr07
HipHp1 Gtr08
HipHp1 Gtr09
HipHp1 Gtr10
HipHp1 Gtr11
HipHp1 Gtr12
HipHp1 Gtr13
HipHp1 Gtr14
HipHp1 Gtr15
HipHp1 Gtr16
HipHp1 Gtr17
HipHp1 Syn01
HipHp1 Syn02
HipHp1 Syn03
HipHp1 Syn04
HipHp1 Vox01
HipHp1 Vox02
HipHp1 Vox03
HipHp1 Vox04
HipHp1 Vox05
HipHp1 Vox06
House EP 1
House EP 2
House EP 3
House EP 4
House EP 5
House Gtr 1
House Gtr 2
House Gtr 3
House Gtr 4
House Gtr 5
House Gtr 6
House Syn 1
House Syn 2
House Syn 3
J-Bon Gtr 1
J-Bon Gtr 2
J-Bon Gtr 3
J-Bon Gtr 4
J-Bon Gtr 5
J-Bon Gtr 6
J-Bon Gtr 7
JW Vibes A2
JW Vibes Ab2
JW Vibes Ab3
JW Vibes Bb2
JW Vibes Bb3
JW Vibes C3
JW Vibes D3
JW Vibes Eb3
JW Vibes F3
JW Vibes G2
JW Vibes G3
Jal Gtr 01
Jal Gtr 02
Jal Gtr 03
Jal Gtr 04
Jal Gtr 05
Jal Gtr 06
Jal Gtr 07
Jal Gtr 08
Jz GtHn EbM7
Jz GtHn Emin
HITS (cont.)
Jz GtHn F#m
Jz GtHn FMj7
Jz GtrHrn A
Jz GtrHrn Bb
Jz GtrHrn C
Jz GtrHrn D
Jz GtrHrn E
Jz GtrHrn Eb
Jz GtrHrn F
Jz GtrHrn G1
Jz GtrHrn G2
Jz Pno BassC
Jz Pno BbMj7
Jz Pno Bmin7
Jz Pno DMaj
Jz Pno DMaj7
Jz Pno EbMj7
Jz Pno Emin7
Punk Gtr 01
Punk Gtr 02
Punk Gtr 03
Punk Gtr 04
Punk Gtr 05
Punk Gtr 06
Punk Gtr 07
Punk Gtr 08
Punk Gtr 09
Punk Gtr 10
R&G Sfx 1
R&G Sfx 2
R&G Sfx 3
R&G Sfx 4
R&G Sfx 5
R&G Sfx 6
R&G Sfx 7
R&G Sfx 8
R&G Sfx 9
R&G Syn 1
R&G Syn 2
R&G Syn 3
R&G Syn 4
R&G Syn 5
R&G VSyn 1
R&G VSyn 2
R&G VSyn 3
R&G VSyn 4
R&G VSyn 5
R&G Vox 1
R&G Vox 2
R&G Vox 3
SB Gtr Fx 01
SB Gtr Fx 02
SB Gtr Fx 03
SB Gtr Fx 04
SB Gtr Fx 05
SB Gtr Fx 06
SB Gtr Fx 07
SB Gtr Fx 08
SB Gtr Fx 09
SB Gtr Fx 10
SB Gtr Fx 11
SB Gtr Fx 12
SB Gtr Fx 13
SB Gtr Fx 14
SB Gtr Fx 15
SB Gtr Fx 16
SB Gtr Fx 17
SB Gtr Fx 18
SB Gtr Fx 19
SB Gtr Fx 20
SM Gtr 01
SM Gtr 02
SM Gtr 03
SM Gtr 04
SM Gtr 05
SM Gtr 06
SM Gtr 07
SM Gtr 08
SM Gtr 09
SM Gtr 10
SM Gtr 11
SM Gtr 12
SM Gtr 13
SM Gtr 14
SM Gtr 15
StankyClav 1
StankyClav 2
StankyClav 3
StankyClav 4
StankyClav 5
StankyGtr 01
StankyGtr 02
StankyGtr 03
StankyGtr 04
StankyGtr 05
StankyGtr 06
StankyGtr 07
StankyGtr 08
StankyGtr 09
StankyGtr 10
StankyGtr 11
StankyGtr 12
StankyGtr 13
StankyHrns 1
StankyHrns 2
StankyHrns 3
StankySyn 1
StankySyn 2
StankySyn 3
StankySyn 4
StankySyn 5
StankySyn 6
UrbnGtr Bb2
UrbnGtr C3
UrbnGtr Cmi7
UrbnGtr D3
UrbnGtr Eb3
UrbnGtr G2
UrbnGtr G3
UrbnGtr Gmin
UrbnSyn Cmin
UrbnSyn D
UrbnSyn Eb
UrbnSyn F
UrbnSyn Gmin
46
THIS DEVICE COMPLIES WITH PART 15 OF THE FCC RULES. OPERATION IS SUBJECT TO THE
FOLLOWING TWO CONDITIONS: (1) THIS DEVICE MAY NOT CAUSE HARMFUL INTERFERENCE, AND
(2) THIS DEVICE MUST ACCEPT ANY INTERFERENCE RECEIVED, INCLUDING INTERFERENCE THAT
MAY CAUSE UNDESIRED OPERATION.
www.alesis.com
7-51-0333-A