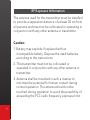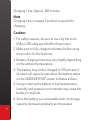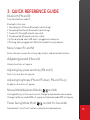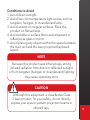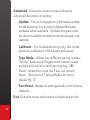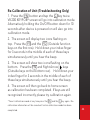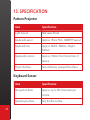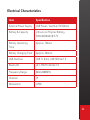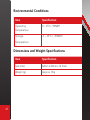
1
VK200 KEYFOB®
User Guide
• VK200 KEYFOB ® are trademarks or registered trademark of CTX Virtual Technologies Inc.
• All other products are trademarks or registered trademarks of their respective companies.
• Please refer to host device instruction manual for Bluetooth pairing information.
Copyright 2013 All Rights reserved by CTX Virtual Technologies Inc.
1
CONTENTS
1. Product Features. . . . . . . . . . . . . . . . . . . . . . . . . . . . . . 2
2. Package Contents. . . . . . . . . . . . . . . . . . . . . . . . . . . . . 2
3. Quick Reference Guide. . . . . . . . . . . . . . . . . . . . . . . 10
4. Identifying Parts and their Functions. . . . . . . . . . . . 13
5. Using the Projection Keyboard. . . . . . . . . . . . . . . . . 17
5.1 Keyboard Typing Modes . . . . . . . . . . . . . . . . . . . 17
5.2 Connecting via USB . . . . . . . . . . . . . . . . . . . . . . 19
5.3 Connecting via Bluetooth . . . . . . . . . . . . . . . . . 20
6. Adjusting the Sensitivity. . . . . . . . . . . . . . . . . . . . . . 33
7. Adjusting Keyboard Brightness . . . . . . . . . . . . . . . . 35
8. Adjusting Volume Settings. . . . . . . . . . . . . . . . . . . . 36
9. Power Saving Mode. . . . . . . . . . . . . . . . . . . . . . . . . . 37
10. Keyboard and Mouse Mode Switching. . . . . . . . . 38
11. Mouse Clicking. . . . . . . . . . . . . . . . . . . . . . . . . . . . . 40
1
12. Menu System. . . . . . . . . . . . . . . . . . . . . . . . . . . . . . . 41
13. Specification. . . . . . . . . . . . . . . . . . . . . . . . . . . . . . . 45
1. PRODUCT FEATURES
•English QWERTY keyboard layout.
•Compact size for portability – perfect for on-the-go
•Function icons and shortcut keys for ease of
operation
•Last three keystrokes are displayed on VK200
KEYFOB® screen with a full menu display for settings
•Superior Durability (No moving component inside)
•Built-in Lithium-ion Polymer rechargeable battery for mobility and convenience
•Compatible with latest devices: Windows XP & later,
Windows Phone 7 & later, iOS4 (iPhone 3GS & later,
iPad), Android 2.0 and later, Mac OS X & later.
2. PACKAGE CONTENTS
•VK200 KEYFOB®
•USB Cable
•User’s Guide
2
SAFETY PRECAUTIONS
1. A
void exposing this product to direct sunlight for
extended periods of time, and keep it away from
heat sources.
2. T
here is a risk of malfunction if product is used
in places where sudden or extreme temperature
changes occur.
3. A
pplying excessive force or impact to this product
may result in product damage, and will void
warranty.
4. To ensure safety and prevent damage, use only the
dedicated micro-USB to USB cable supplied with
this product.
5. N
ever attempt to disassemble or service this
product yourself. Doing so can result in electrical
shock and will void the warranty.
6. T
his Class 2 laser product is certified by FDA
safety regulation. For your safety, please do not
stare directly into the laser source. Doing so could
damage your eyes.
3
7. Avoid placing any object within the space between
the main unit and the laser projection keyboard
layout.
8. Please do not use this product on uneven or
irregular surfaces. Place the product on a flat
surface. Avoid table or surface that is as transparent
or reflective as glass or mirror.
FCC Compliance Information
This device complies with Part 15 of the FCC Rules.
Operation is subject to the following two conditions:
1. T
his device may not cause harmful interference to
another device, and
2. T
his device must accept any interference received,
including interference that may cause undesired
operation.
4
FCC Class B Notice
This equipment has been tested and found to comply
within the limits for a Class B digital device, pursuant to
Part 15 of the FCC Rules.
These limits are designed to provide reasonable
protection against harmful interference when the
equipment is operated in a residential environment.
This equipment generates, uses, and radiates radio
frequency energy, and if not installed and used in
accordance with the instructions, may cause harmful
interference to radio communications.
However, there is no guarantee that interference will
not occur with special installation. If this equipment
does cause interference to radio or television reception,
which can be determined by turning the equipment
off and on, the user is encouraged to correct the
interference by one of the following measures:
• Reorient or relocate the receiving antenna.
• Increase separation between the equipment and
receiver.
5
• Connect the equipment to an outlet on a circuit
different from which the receiver is connected.
• Consult the dealer or an experienced radio/TV
technician
FCC Warning
This equipment generates and uses radio frequency
energy. If this equipment is changed or modified
in any way except for modifications approved in
this manual, it may cause harmful interference.
Any unauthorized changes or modifications to this
equipment could void the user’s authority to operate
this device.
Industry Canada Statement
This device complies with Industry Canada licenseexempt RSS standard(s).
Operation is subject to the following two conditions:
(1) This device may not cause interference, and
(2) This device must accept any interference, including
interference that may cause undesired operation of
the device
6
RF Exposure Information
The antenna used for this transmitter must be installed
to provide a separation distance of at least 20 cm from
all persons and must not be collocated or operating in
conjunction with any other antenna or transmitter.
Caution:
1. B
attery may explode if replaced with an
incompatible battery. Dispose the used batteries
according to the instructions.
2. This transmitter must not be collocated or operated in conjunction with any other antenna or transmitter.
3. A
ntenna shall be mounted in such a manner to
minimize the potential for human contact during
normal operation. The antenna should not be
touched during operation to avoid the possibility of
exceeding the FCC radio frequency exposure limit.
7
Environmentally Friendly Disposal and Recycling
This product does not contain any substances known
to be hazardous to human health. To protect the
environment, dispose of this product separately from
household waste once it has reached its end of life,
or take it to your nearest electronics recycling service
center.
About the Built-in Battery
Rechargeable Lithium-ion Polymer Battery :
Battery Operating Time: Approx. 120 minutes (with
continuous use)
Capacity: 500mAh (Max) @ 3.7V
Charging the Battery: Use supplied USB cable to
begin charging the battery.
When charging is complete and VK200 KEYFOB®
all battery status bars will be filled in on the VK200
KEYFOB® screen.
The Battery icon will scroll indicating remaining
charging bars still required for full charge.
When VK200 KEYFOB® is off and charging is
completed “Charged” will be displayed.
8
Charging Time: Approx. 240 minutes
Note
Charging time increases if product is used while
charging.
Cautions
1. F
or safety reasons, be sure to use only the micro
USB to USB cable specified for this product.
2. M
ake sure to fully charge the battery before using
the product for the first time.
3. B
attery charging times may vary slightly depending
on the ambient temperature.
4. The battery may not be charged to 100 percent of
its rated cell capacity even when the battery status
on the VK200 KEYFOB® screen indicates all bars.
5. U
sing or storing the battery in high temperature,
humidity and pressure environments may cause the
battery to explode.
6. S
ince the battery is a consumable item, its storage
capacity decreases gradually as time passes.
9
3. QUICK REFERENCE GUIDE
Bluetooth (FN and B)
Turns Bluetooth on and off.
Bluetooth status icon:
1. Searching Last 3 Device (Bluetooth icon blinking).
2. Searching New Device (Bluetooth icon blinking).
3. Successful Pairing (Bluetooth icon solid).
4. Disconnected (Bluetooth icon not visible).
U will be displayed when USB cord is plugged into computer.
U Flashing when plugged into USB but bluetooth has precedence
Menu Screen (Fn and M)
Enters the menu screen for settings adjustments and advanced functions.
Adjusting sound (FN and V)
Volume level bars will appear.
Adjusting key-press sensitivity (FN and S)
Sensitivity level bars will appear.
Adjusting brightness (FN and F5 down, FN and F6 up )
Brightness level bars will appear.
Mouse Mode/Keyboard Mode (
and Alt)
clicking both keys at the same time will change to keyboard or mouse mode
Changes to Mouse mode MSE will appear or Keyboard mode KBD will appear.
Power Saving Mode (Hold
and Alt for 3 seconds)
Keyboard will turn off until motion is detected in keyboard area
10
HOW THIS PRODUCT WORKS
11
This product emits infrared light from the lower end
of the product to detect objects such as fingers. When
an object passes through the area illuminated by
the infrared light source, any infrared light reflecting
off the object is detected by the sensor. Information
on the position and movement of the object is then
analyzed to perform the product’s role as a keyboard.
Sensitivity: difference in thickness, shape, and color of
the user’s fingers or operating environment result in
differences in the amount of reflected infrared light. If
the amount of reflected infrared light is appropriate,
the sensor will have no problem detecting objects
such as fingers. However, if the amount of reflected
infrared light becomes low because of the causes
mentioned above or some other cause, the keystroke
recognition rate may decrease or your keystrokes
may not be recognized at all. On the other hand, if
the amount of reflected infrared light is too high, the
keystroke recognition may become too sensitive or
a “hovering Effect” may occur where a keypress may
occur when you have not yet touched the projected
surface. See section “Adjusting the Sensitivity” for
corrective steps.
Conditions to Avoid
1. Avoid direct sunlight.
2. Avoid low color temperature light source, such as
tungsten, halogen, or incandescent lamp.
3. A
void uneven or irregular surfaces. Place the
product on flat surfaces.
4. Avoid a table or surface that is as transparent or
reflective as glass or mirror.
5. A
void placing any objects within the space between
the main unit and the laser projected keyboard
layout.
NOTE
Because this product uses infrared rays, strong
infrared radiation from direct or reflected sunlight
or from tungsten (halogen or incandescent) lighting
may cause operating error.
CAUTION
Although this equipment is classified as Class
2 laser product, for your safety, do not directly
expose your eyes to pattern projection beams or
infrared rays.
12
4. IDENTIFYING PARTS AND
THEIR FUNCTIONS.
1. P
rojector: Uses a red laser to project the image of a
keyboard onto a flat surface in front of the typist.
2. S
ensor: Picks up the infrared light reflected off the
typist’s fingers and triangulates the location of the
reflected light to determine which key was pressed.
This sensor provides a keyboard function.
3. IR Light Window: Uses an infrared laser to emit an
invisible plane of light a few millimeters above the
projection surface so that the infrared light can be
reflected off of the typist’s fingers to the sensor.
FUNCTION IS INCORRECT
If one or more of the above modules are blocked
by some cause, the projected keyboard image
may not be displayed correctly or, the location
and movement of the typist’s fingers may not be
recognized correctly. Use only a completely flat
surface.
13
FRONT VIEW
Power Switch
Keyboard Pattern
Projector
Sensor
Display Screen Showing:
Battery / Bluetooth/
Keyboard/ Mouse/
Charging/ Operating
Settings
Infrared invisible
Beam
DANGER
Never point the laser projection or the infrared
invisible beam into your eyes. The IR beam is an
14
SIDE VIEW
Key Ring Strap
Micro USB Port
15
USB Connection Terminal
1. Purpose: USB device connection or power supply.
2. USB Connector: Standard USB Micro type
3. Interface Specification: Compliant with USB HID
class specification version 1.11
4. Input Power: 0.5A 5V dedicated DC adapter or USB
Bus power from a host device.
SIDE VIEW
16
5. U
SING THE PROJECTION KEYBOARD
This product is used as a keyboard and mouse via
Bluetooth HID and USB HID.
5.1 KEYBOARD TYPING MODES
There are two keyboard modes available:
All Up
Factory default keyboard mode is “All Up” meaning
all fingers need to be raised above the key press
activation level in order to type.
Palms can rest behind the keyboard but all fingers
should be high enough so that ‘phantom’ key presses
are not recognized generally at least 4mm above the
table surface.
NOTE
If 3 or more fingers are detected at once a buzzing
sound will occur to let you know your fingers are
too low.
17
J&F Down
“J&F Down” mode allows the J and the F key fingers
to remain on the table. The other fingers must remain
raised above the trigger point for key activation.
To send an J or an F key raise and then lower your
finger on that key while the other finger (on the J or
the F) remains on the surface. If your finger is not on
the other key it will not give you the J or the F. For
example; if you want a J key. Make sure both fingers
are down on the J and the F then raise and lower your
J finger. Do the opposite for the F key. All other keys
work the same way as the “All Up” mode”.
Finding the Home Row in J&F Down Mode
After pressing the space bar if you miss the home row
with either the J or the F key fingers a buzzing sound
will occur until you move to the proper keys alerting
you of the home row misalignment.
Changing Typing Modes
Go into the menu mode by pressing the Fn and the
M key. Choose “Advanced” by using the space bar
then pressing enter . Next Choose “Type Mode”.
Use the space bar and select “All Up” or “J&F Down”.
Press ESC to exit.
18
5.2 CONNECTING VIA USB
This device is compatible with all USB HID capable
operating systems. USB HID connection allows plugn-play without installing a separate driver.
1. C
onnect VK200 KEYFOB® and host device using
supplied USB cable. Host device must support USB
HID. Note: Most Windows devices support USB HID.
2. Turn on VK200 KEYFOB®.
3. Display
Screen of the VK200 will have the U
displayed. If no U is displayed please check the
connection.
BLUETOOTH PRIORITY OVER USB
Bluetooth has priority over USB. If Bluetooth is
connected and a U is displayed and flashing then
click FN and B or use the menu system to turn
Bluetooth off allowing USB HID to take over.
19
5.3 CONNECTING VIA BLUETOOTH
VK200 KEYFOB® supports Bluetooth HID:
•Connection via Bluetooth HID does not require
installation of separate driver as long as the host
device has HID compatibility.
Bluetooth 2.1 or higher required for connecting to
some devices.
NOTE
The VK200 KEYFOB® will automatically attempt to
re-connect to the last 3 most recently connected
devices. If no previous device is found then it will
listen for a new connection with any available HID
compatible device.
20
Bluetooth HID Compatible Devices
•iOS4 (iPhone 3GS/4/iPad/iPad 2 and later versions)
•Android 2.0 and later
* Some restrictions apply to Android devices. Please
visit our website www.ctxtechnologies.com.
* Please refer to the Android driver installation info
card included in your retail package to ensure your
device is HID compatible. If not, HID drivers can
be downloaded online from third party software
providers.
•Windows XP/Vista/7/8 or higher
•Windows Phone 7/8 or higher
•Mac OS (using Keyboard only)
Bluetooth Connection Instruction
1. Power on VK200 KEYFOB®
21
2. will be Blinking on VK200 KEYFOB® screen
indicating the VK200 KEYFOB® is searching for a
new device or last 3 previously paired devices within
its proximity . This search will last 120 seconds when
using battery power in order to save power if no
previous device or new device is found.
This feature is added for convenience, assuming
there is a single host device.
Upon successful pairing, the Bluetooth icon will stop
blinking and become solid.
If VK200 KEYFOB® cannot locate the last 3
previously paired host device or a new device within
120 seconds, it will disable the Bluetooth and the
Bluetooth icon will disappear when using only
battery power. Turn the device off and on in order to
re-start the pairing or press FN and B on the VK200
KEYFOB® Keyboard or go into the menu screen then
settings screen and turn it back on.
3. Upon successful pairing, the Bluetooth icon will stop
blinking and become solid.
Please refer to the host device manual for pairing
instructions.
4. After successful pairing to the host device the
keyboard function is the default mode.
22
Connecting to iPhone and iPad
iPhone and iPad connects to VK200 KEYFOB® via
Bluetooth HID and a driver is not required.
1. T
urn on VK200 KEYFOB® by holding the power
button . Blinking Bluetooth icon on the VK200
screen indicates that the device is ready to pair.
2. O
n iPhone/iPad, tap on Settings-GeneralBluetooth.
23
3. T
urn Bluetooth on by tapping
the ON button.
4. iPhone/iPad will now search
for pairing device.
24
5. L ocate “CTX - VK200” under
Device.
6. S
elect “CTX - VK200 ” by
tapping “CTX - VK200”.
25
8. Successful pairing is indicated
by “Connected” message,
and the Bluetooth icon on the
VK200 screen becoming solid.
9. To turn off VK200 KEYFOB®, press power button.
10. With iPhone/iPad Bluetooth on, VK200 KEYFOB®
will connect automatically upon power on once
connected.
11. W hen VK200 KEYFOB® is on after initial
connection, iPad/iPhone will connect automatically
when Bluetooth is turned on from host device.
26
12. P
lease turn off VK200 KEYFOB® when keyboard is
not in use.
If the VK200 KEYFOB® does not find your device in
the first 120 seconds it will stop searching and turn
off Bluetooth if the unit is not connected to a USB or
charging in order to conserve battery life. Turn the
VK200 KEYFOB® off and then back on to re-activate
pairing mode, press FN and B or enter the menu
screen ( FN and M ) and in settings menu turn the
bluetooth back on. The Bluetooth icon should appear
on the VK200 KEYFOB® screen and start blinking.
NOTE
iPhone/iPad OS (iOS4) does not support mouse
function. When keyboard does not function with
successful pairing, please make sure the device is in
keyboard mode. If device is in mouse mode, press
and Alt to change back to keyboard mode.
27
Connecting to Android Devices
Some Android 2.0 and later devices support Bluetooth
HID and do not require installation of separate driver.
Please visit the website www.ctxtechnologies.com for
more information on Android drivers.
Pairing your Android device
1. T
urn on VK200 KEYFOB® by holding the power
button for 2 seconds. A blinking `Bluetooth icon
on the VK200 KEYFOB® screen indicates that the
device is ready to pair.
* The following pairing instruction is based on a
Samsung Galaxy running on Android operating
system. Other Android interfaces may vary
depending on the device manufacturer. Please refer
to Quick Guide for more information on pairing your
Android device.
28
2. N
avigate through Android as
follows:
Home » Main Menu » Settings
» Wireless & Network »
Bluetooth setting
3. T
urn on Bluetooth on Android
by checking the box.
29
4. From the same screen, with
Bluetooth ON, tap on Scan
devices.
5. A
ndroid device will detect
“CTX - VK200” and display
message “Pair with this
device”.
6. Tap on “Pair with this device”.
30
7. T
he Android device will show on the screen that it is
now paired with the CTX - VK200.
KEYBOARD AND MOUSE MODE
If your Android OS supports mouse function. To
switch from keyboard to mouse mode, press the
key and the Alt key at the same time. To change
back to keyboard mode press this key combination
again. The VK200 screen will show the current
mode: ``KBD`` for keyboard mode or ``MSE`` for
31
Connecting to a PC via Bluetooth
Windows 7 and higher support Bluetooth HID and the
installation of a separate driver is not required.
Connecting via Bluetooth HID
1. T
urn on VK200 KEYFOB® by holding the power
button for 2 seconds. The blinking Bluetooth icon
on the VK200 KEYFOB® display indicates that the
device is ready to pair.
2. Please check your PC and make sure Bluetooth is
on.
3. W
ith Bluetooth on, click the Bluetooth icon on the
task bar. Windows will search and locate “CTX VK200.” Highlight ``CTX - VK200`` by clicking on
found device and press next.
4.. Successful pairing will be indicated by the solid
Bluetooth icon present on the VK200 display.
5. To turn off VK200 KEYFOB®, Press the power
button.
6. V
K200 KEYFOB® will connect to host PC
automatically when turned back on.
32
NOTE
If 120 seconds has elapsed since you started the
VK200 and the VK200 is operating on battery
power and no Bluetooth connection is established
with the PC then you will need to restart the VK200,
press FN and B or go into the Menu under settings
to restart Bluetooth pairing mode.
6. ADJUSTING THE SENSITIVITY
VK200 KEYFOB® features sensitivity adjustment for
better accuracy. There are two ways to adjust the
sensitivity:
1. Press Fn and M to go into menu mode. Next
select Settings by clicking the enter key then use the
space bar to choose Sensitivity and press enter. Next,
select the sensitivity desired. Click ESC to exit menu
mode.
2. Quick change mode allows increasing or
decreasing the sensitivity, by pressing the FN key and
the S key. To lower sensitivity, keep pressing this key
combination to cycle through all settings.
33
The change in settings will be shown on the VK200
KEYFOB® screen. Sensitivity can also be adjusted
through the menu. Please see the menu system for
details on adjusting brightness using the menu.
Setting Number 1 Low Sensitivity - Should be used
for high light conditions.
Setting Number 2 Normal Sensitivity - Should be
used for normal lighting conditions.
Setting Number 3 High Sensitivity - Should be used
for dark painted nails where keystrokes are not being
detected.
RESETTING
If keystrokes are not recognized after adjusting
sensitivity to the highest setting, hold the on/off
button for 5 seconds while the unit is off or press
FN and M and select menu item Advanced then
choose the menu item “Fact Reset”. This restores
the sensitivity and all settings back to factory
default settings.
34
7. ADJUSTING KEYBOARD
BRIGHTNESS
The VK200 KEYFOB® features brightness adjustment
for better accuracy and viewing. There are two ways to
adjust the sensitivity:
1. Press Fn and M to enter menu mode. Next select
“Settings” by clicking the enter key then use the space
bar to choose “Bright” and press enter. Next, select
the desired brightness level. Click ESC to exit menu
mode.
2. Press and hold FN key and press F6 key to
increase brightness, this activates the backlight
decrease icon
. Press and hold the FN key
and press F5 key to decrease the brightness, this
activates the backlight increase icon
. Continually
pressing the key combination will cycle through all
brightness levels.
35
here are four levels of brightness. Factory default
T
brightness is the highest level during power on. The
current brightness level will be displayed on the VK200
KEYFOB® screen.
8. KEYBOARD VOLUME ADJUSTMENT
The VK200 KEYFOB® features volume adjustment for
better accuracy using key click feedback. There are
two ways to adjust the volume:
1.Press Fn and M to enter menu mode. Next select “Settings” by clicking the enter key then use the space bar to choose “Volume” and press enter. Next,
select the desired volume level. Click ESC to exit
menu mode.
2.Press and hold the FN key and tap the V key to raise then lower and turn off the volume. This key combination will cycle through all sound setting including mute. Each adjustment requires repeated
steps.
There are 4 stages of adjustments including mute.
Factory default is the highest level during power on.
The current volume level will be displayed on the
VK200 KEYFOB® screen.
36
9. POWER SAVING MODE
1. H
old down the
and the Alt key for 3 seconds
to turn off the laser Projection and reduce camera
intake speed. Double beeps will confirm the 3
seconds period is being detected.
2. T
o reactivate laser projection and return operation
to normal, tap or swipe anywhere in the keyboard
operational area.
If there is no motion detected for 5 minutes the unit
will automatically turn the keyboard display off and
reduce the camera intake speed to save battery. Any
motion in the keyboard area will return the unit to
normal function. Automatic power saving mode will
only occur when the VK200 KEYFOB® is operating
under battery power.
BATTERY LIFE
To increase the battery life try using a lower
brightness setting.
37
10. CHANGING BETWEEN KEYBOARD
AND MOUSE MODE
To change keyboard mode to the mouse mode on
the keyboard, press the
key and the Alt key
simultaneously. The VK200 KEYFOB® screen will
display “MSE” indicating change to mouse mode has
been successful.
To Change mouse mode to keyboard mode, on the
keyboard, press and hold the
key and the Alt
key simultaneously. A double beep will confirm the
switch and the screen will display ``KBD`` indicating the
change to keyboard mode has been successful.
SPECIAL KEYS
Please note that not all keys displayed on
projection keyboard layout correspond to input
keys on host device. For example, ``MENU`` key will
not function on a host device that does not support
the ``MENU`` function. Same applies to ``FN`` and
``ALT`` function keys.
38
Control the Cursor
Drag & Scroll
39
Click & Right Click
Forward & Back
Zoom In & Out
11. MOUSE CLICKING
1. Left click by lifting and lowering your finger used for
moving the mouse anywhere in the keyboard area.
2. Double click by lifting and lowering your finger
used for moving the mouse twice quickly in the
keyboard area.
3. To hold down the left button keep your finger on
the caps lock key while moving your pointer finger as
a mouse.
4. caps lock and the enter key function as left and
right mouse click buttons when in mouse mode.
MOUSE MODE
Mouse function is only available on devices that
support cursor/mouse function.
Default mode on power on is keyboard function.
40
12. MENU SYSTEM
To access the VK200 KEYFOB®’s menu system there
are two methods:
1. Press and hold the power on/off button for 5
seconds when the device was previously off.
2. Press the Fn and the M key to enter menu mode.
Use the space bar or up and down arrow keys to scroll
through the selections and the enter key to choose a
selection.
Settings - Enters into a menu screen to adjust the
setting on the VK200 KEYFOB® including:
Volume - Adjusts the volume for the key presses
(see volume settings section of manual for more
details Pg. 34)
41
Brightness - Adjusts the brightness of the
keyboard image (See brightness settings section
of manual for more details Pg. 33)
Sensitive - Adjusts the sensitivity settings for
different lighting conditions (See sensitivity
settings section of manual for more details Pg. 31)
Bluetooth - Turns on and off the Bluetooth
functionality (See Bluetooth section of manual for
more details Pg. 18)
Unit Info - Displays the current firmware version and
serial number of the VK200 KEYFOB®. (Press the enter
key or ESC key to exit and return to keyboard mode).
Games - VK200 has installed games to practice typing.
The games display directly on the units screen. New
games can be downloaded as updates are available.
Games can be selected in this menu.
EXITING THE MENU
Pressing the ESC key exits menu mode
42
Advanced - Goes into a menu screen allowing
advanced functions including:
Update - The unit changes to a firmware update
mode allowing it to accept software/firmware
updates when available. Update program must
be downloaded from www.ctxtechnologies.com
website.
Calibrate - For troubleshooting only, this mode
allows re-calibration of the keyboard layout.
Type Mode - Allows two different typing modes,
“All Up” meaning all fingers must remain raised
and the second is for ten finger typing, “J&F
Down” where the J and the F key can remain
down. (See section Typing Modes for more
details Pg. 17)
Fact Reset - Resets all settings back to the factory
defaults.
Exit- Exits the menu and returns to keyboard mode.
43
Re-Calibration of Unit (Troubleshooting Only)
1. Press the FN button and tap the C key twice.
VK200 KEYFOB® screen will go into calibration mode.
Alternatively holding the On/Off button down for 10
seconds after device is powered on will also go into
calibration mode.
2. The screen will display two icons flashing on
top. Press the F1 and the F12 (Outside function
keys on the first row). Hold down your index finger
for 3 seconds in the middle of each of these keys
simultaneously until you hear the beep.
3. The screen will show two icons flashing on the
bottom. Press the FN and Right Arrow
keys
(Outside keys on the bottom row). Hold down your
index finger for 3 seconds in the middle of each of
these keys simultaneously until you hear the beep.
4. The screen will then go back to home screen
as calibration has been completed. If keys are still
recognized incorrectly please try calibration again.
*To exit calibration mode at any time press the FN and the C key again. No
calibration information will be saved until entire calibration mode has been
completed.
44
13. SPECIFICATION
Pattern Projector
Item
Specification
Light Source
Red Laser Diode
Keyboard Layout
Approx. 19mm Pitch, QWERTY Layout
Keyboard Size
Approx. Width : 280mm, Height:
102mm
Keyboard Location
Approx. 100mm from the bottom of
device
Project Surface
Non-reflective, opaque flat surface
Keyboard Sensor
45
Item
Specification
Recognition Rate
Approx. up to 350 characters per
minute
Operating Surface
Any firm flat surface
Electrical Characteristics
Item
Specification
External Power Supply
USB Power / less than 5V 500mA
Battery & Capacity
Lithium-ion Polymer Battery,
500mAh(MAX) @ 3.7V
Battery Operating
Time
Approx. 120min
Battery Charging Time
Approx. 240min
USB Interface
USB 1.1 & 2.0, USB HID Ver 1.0
Bluetooth
v2.1, HID Profile Ver 1.0
Frequency Range
2402-2480MHz
Channel
79
Modulation
GFSK
46
Environmental Conditions
Item
Specification
Operating
Temperature
0 ~ 35°C / 90%RH
Storage
-5 ~ 35°C / ~90%RH
Temperature
Dimensions and Weight Specifications
47
Item
Specification
Size (mm)
62mm x 42mm x 16.5mm
Weight (g)
Approx. 78 g
CTX Virtual Technologies Inc.
Keeping you in touch with Mobile Technology
www.ctxtechnologies.com
Sales enquiry: [email protected]
Technical support: [email protected]