1
IBM Tivoli Netcool Performance Manager
Wireline Component
Document Revision R2E1
Alcatel-Lucent 5620 SAM LogToFile
2.3.0.0 Technology Pack Installation
and User Guide
Note
Before using this information and the product it supports, read the information in “Notices” on page 83.
© Copyright IBM Corporation 2014.
US Government Users Restricted Rights – Use, duplication or disclosure restricted by GSA ADP Schedule Contract
with IBM Corp.
Contents
Installing and Using Alcatel-Lucent 5620
SAM LogToFile 2.3.0.0 Technology Pack . v
Intended audience . . . . . . . . . .
Tivoli Netcool Performance Manager - Wireline
Component. . . . . . . . . . . . .
Service Management Connect . . . . . .
Tivoli technical training . . . . . . . .
Support information . . . . . . . . .
Conventions used in this publication . . . .
Typeface conventions . . . . . . . .
.
. v
.
. v
. . vi
. . vii
. . vii
. . vii
. . vii
Chapter 1. Alcatel-Lucent 5620 SAM
LogToFile 2.3.0.0 Technology Pack
overview . . . . . . . . . . . . . . 1
UBA structure . . . .
Dynamic models . . .
Data collection model .
.
.
.
.
.
.
.
.
.
.
.
.
.
.
.
.
.
.
.
.
.
.
.
.
.
.
.
. 1
. 1
. 2
Chapter 2. Devices and services . . . . 5
Alcatel-Lucent 5620 SAM
Supported devices . .
Alcatel-Lucent 5620 SAM
Bulk input file formats .
Bulk adapter design files
server compatibility
. . . . . . .
LogToFile services .
. . . . . . .
. . . . . . .
.
.
.
.
.
.
.
.
.
.
.
.
.
.
.
5
5
6
7
8
Chapter 3. Installation and configuration
of IBM InfoSphere Information Server
and related components. . . . . . . . 9
Planning for IBM InfoSphere Information Server
software installation . . . . . . . . . . .
Installing IBM InfoSphere Information Server 8.7
software . . . . . . . . . . . . . . .
Installing IBM InfoSphere Information Server by
using the wizard (graphical mode) . . . . .
Installing IBM InfoSphere Information Server
client by using the wizard (graphical mode) .
Installing Apache ActiveMQ . . . . . . . .
Installing Oracle 11g client . . . . . . . .
. 9
. 9
. 9
. 13
. 18
. 19
Chapter 4. Configure the InfoSphere
Information Server components . . . . 21
Opening the IBM InfoSphere Information Server
web console . . . . . . . . . . . . .
Configuring web browser to open the IBM
InfoSphere Information Server web console. . .
Configuring Microsoft Internet Explorer to open
the IBM InfoSphere Information Server web
console . . . . . . . . . . . . . .
Configuring Mozilla Firefox to open the IBM
InfoSphere Information Server web console. .
Creating dsadm users in the IBM InfoSphere
Information Server web console . . . . . .
© Copyright IBM Corp. 2014
. 21
. 21
. 22
. 23
. 23
Chapter 5. Deploying Alcatel-Lucent
5620 SAM LogToFile 2.3.0.0 DataStage
jobs . . . . . . . . . . . . . . . . 25
Alcatel-Lucent 5620 SAM LogToFile 2.3.0.0
Technology Pack job design . . . . . . . . .
Setting up a project . . . . . . . . . . . .
Extracting the job archive file . . . . . . . .
Updating the operator.apt file . . . . . . . .
Importing an IBM InfoSphere DataStage job . . .
Configuring the DataStage job . . . . . . . .
Configuring the CSV files in the cfg directory . . .
Enabling the firewall on the IBM InfoSphere
Information Server and WebSphere Application
Server . . . . . . . . . . . . . . . .
Compiling the job . . . . . . . . . . . .
Running the job . . . . . . . . . . . . .
Viewing the JMS message flow from SAM server
in Apache ActiveMQ . . . . . . . . . .
Gracefully shutting down the job . . . . . . .
Starting the daemon manually . . . . . . .
Data flow in the data subdirectories . . . . . .
Configuring the DataStage job for Secure File
Transfer support . . . . . . . . . . . . .
25
26
26
27
27
28
29
31
32
32
33
33
34
35
35
Chapter 6. Installing the Alcatel-Lucent
5620 SAM LogToFile 2.3.0.0
Technology Pack . . . . . . . . . . 37
Prerequisite software . . . . . . . . . .
Prerequisite software for Alcatel-Lucent 5620
SAM LogToFile 2.3.0.0 Technology Pack
installation . . . . . . . . . . . .
Additional information . . . . . . . .
Preinstallation setup tasks . . . . . . . .
Preparing the Alcatel-Lucent 5620 SAM LogToFile
2.3.0.0 Technology Pack installation directory . .
Installing the technology pack by using the
launchpad . . . . . . . . . . . . . .
Populating the family dictionary table . . . .
UBA collectors . . . . . . . . . . . .
Adding a UBA collector for a UBA pack . . .
Log files . . . . . . . . . . . . . .
. 37
. 37
. 38
. 39
. 39
.
.
.
.
.
40
42
43
43
44
Chapter 7. Configuring the technology
pack . . . . . . . . . . . . . . . . 45
Verifying resources . . . . . . . . .
Configuring Secure File Transfer support in
Alcatel-Lucent 5620 SAM LogToFile 2.3.0.0
Technology Pack. . . . . . . . . .
.
.
. 50
.
.
. 51
Chapter 8. Upgrading the technology
pack . . . . . . . . . . . . . . . . 53
Upgrading the Alcatel-Lucent 5620 SAM 2.14.0.0
Technology Pack to Alcatel-Lucent 5620 SAM
LogToFile 2.3.0.0 . . . . . . . . . . . .
. 53
iii
Upgrading the Alcatel-Lucent 5620 SAM LogToFile
2.2.0.0 Technology Pack to Alcatel-Lucent 5620 SAM
LogToFile 2.3.0.0 . . . . . . . . . . . . . 54
Chapter 9. Setting up the
Alcatel-Lucent 5620 SAM servers to
support LogToFile . . . . . . . . . . 57
Install SAM on the primary and redundant servers
Synchronize the clocks. . . . . . . . . . .
Install the Alcatel-Lucent 5620 SAM Client GUI . .
Configure an OSS user account . . . . . . . .
Configure the SAM accounting and polling statistics
Enable the MIBs for the SAM statistics classes . .
Setting up ping tests . . . . . . . . . . .
57
57
57
57
58
59
60
Chapter 10. Modifying the collection
strategy . . . . . . . . . . . . . . 63
Specifying what inventory and metrics to collect .
Configuring multiple UBA collectors instances.
Changing the collection period for SAM statistics.
General guidelines on changing the collection
period for SAM statistics . . . . . . . .
List of classes that are enabled or disabled . . .
Disabling or enabling a class . . . . . .
. 63
. 64
. 66
. 66
. 68
. 71
Chapter 11. Troubleshooting
Alcatel-Lucent 5620 SAM LogToFile
Technology Pack . . . . . . . . . . 73
Specifying parameter values . . . . . . . .
Inventory issues . . . . . . . . . . . .
Metric data collection issues . . . . . . .
General Alcatel-Lucent 5620 SAM LogToFile 2.3.0.0
Technology Pack issue . . . . . . . . . .
Data for Near End Unavailable (per second)
metric is not calculated correctly . . . . .
iv
. 73
. 73
. 73
. 76
General Alcatel-Lucent 5620 SAM LogToFile 2.2.0.0
Technology Pack issues . . . . . . . . .
Data for the Inbound Errors might not be
displayed . . . . . . . . . . . . .
SAM server generates the XML file that contains
more than one datapoint . . . . . . . .
The description property is not updated in the
Resource Editor . . . . . . . . . . .
SQL error occurs during the Fulldump process
The subelement time changes on several
unexpected occasions . . . . . . . . .
Subelement state is not updated to OFF when
you change the SAP Ingress or Egress Policy .
Synchronize the time on the IBM InfoSphere
Information server and the SAM server . . .
Data is not displayed properly in the Volume
and Utilization report . . . . . . . . .
Partitioning must be done at the element level
The CSV file name changes when you map
another class that does not correspond to its
collector . . . . . . . . . . . . .
The OAM data exists at the SAM server but is
not transferred to DataStage . . . . . . .
General IBM InfoSphere Information Server related
issues . . . . . . . . . . . . . . .
Troubleshooting IBM InfoSphere Information
Server installations . . . . . . . . . .
DataStage job stops running because of
insufficient buffer size . . . . . . . . .
How to turn off the keepAlive message flag .
Verifying that the ports are enabled for all the
components required for Alcatel-Lucent 5620
SAM LogToFile 2.3.0.0 Technology Pack . . .
. 77
. 77
. 77
. 77
77
. 78
. 78
. 78
. 78
. 79
. 79
. 79
. 81
. 81
. 81
. 81
. 82
Notices . . . . . . . . . . . . . . 83
. 76
Alcatel-Lucent 5620 SAM LogToFile 2.3.0.0 Technology Pack Installation and User Guide
Installing and Using Alcatel-Lucent 5620 SAM LogToFile
2.3.0.0 Technology Pack
Installing and Using Alcatel-Lucent 5620 SAM LogToFile 2.3.0.0 Technology Pack
describes how to install and configure the various components such as:
v IBM InfoSphere Information Server
v IBM InfoSphere Information Client
v Apache ActiveMQ
Apart from these installations, this guide also talks about the following topics:
v Job related tasks
v The devices and technologies that operate in the Alcatel-Lucent 5620 SAM
LogToFile 2.3.0.0 Technology Pack environment.
Intended audience
The audiences are the network administration engineers at IBM customer sites who
install, configure, and use the Alcatel-Lucent 5620 SAM LogToFile 2.3.0.0
Technology Pack as part of their installation.
To install and use the Alcatel-Lucent 5620 SAM LogToFile 2.3.0.0 Technology Pack,
you must have a working knowledge of the following subjects:
v Tivoli Netcool Performance Manager DataMart
v Tivoli Netcool Performance Manager administration
v Internet Protocol networks
v Tivoli Netcool Performance Manager Wireline Technology Pack
The audiences must also be familiar with the specific technology that the
Alcatel-Lucent 5620 SAM LogToFile 2.3.0.0 Technology Pack deals with.
Tivoli Netcool Performance Manager - Wireline Component
IBM® Tivoli Netcool Performance Manager consists of a wireline component
(formerly Netcool/Proviso) and a wireless component (formerly Tivoli® Netcool®
Performance Manager for Wireless).
Tivoli Netcool Performance Manager - Wireline Component consists of the
following subcomponents:
v DataMart is a set of management, configuration, and troubleshooting GUIs. The
Tivoli Netcool Performance Manager System Administrator uses the GUIs to
define policies and configuration, and to verify and troubleshoot operations.
v DataLoad provides flexible, distributed data collection and data import of SNMP
and non-SNMP data to a centralized database.
v DataChannel aggregates the data collected through Tivoli Netcool Performance
Manager DataLoad for use by the Tivoli Netcool Performance Manager
DataView reporting functions. It also processes online calculations and detects
real-time threshold violations.
v DataView is a reliable application server for on-demand, web-based network
reports.
© Copyright IBM Corp. 2014
v
v Technology Packs extend the Tivoli Netcool Performance Manager system with
service-ready reports for network operations, business development, and
customer viewing.
The following figure shows the different Tivoli Netcool Performance Manager
modules.
Tivoli Netcool Performance Manager documentation consists of the following:
v Release notes
v
v
v
v
v
Configuration recommendations
Installation and upgrade information
User guides
Technical notes
Online help
The documentation is available for viewing and downloading on the information
center at http://publib.boulder.ibm.com/infocenter/tivihelp/v8r1/topic/
com.ibm.tnpm.doc/welcome_tnpm.html.
Service Management Connect
Connect, learn, and share with Service Management professionals: product support
technical experts who provide their perspectives and expertise.
Access Network and Service Assurance community at https://www.ibm.com/
developerworks/servicemanagement/nsa/index.html. Use Service Management
Connect in the following ways:
v Become involved with transparent development, an ongoing, open engagement
between other users and IBM developers of Tivoli products. You can access early
designs, sprint demonstrations, product roadmaps, and prerelease code.
v Connect one-on-one with the experts to collaborate and network about Tivoli
and the Network and Service Assurance community.
v Read blogs to benefit from the expertise and experience of others.
v Use wikis and forums to collaborate with the broader user community.
Related information:
vi
Alcatel-Lucent 5620 SAM LogToFile 2.3.0.0 Technology Pack Installation and User Guide
Tivoli Netcool Performance Manager Wiki on developerWorks
Tivoli technical training
For Tivoli technical training information, see the following Tivoli Netcool
Performance Manager Training website at https://tnpmsupport.persistentsys.com/
training.
Support information
If you have a problem with your IBM software, you want to resolve it quickly. IBM
provides the following ways for you to obtain the support you need:
Online
Access the IBM Software Support site at http://www.ibm.com/software/
support/probsub.html .
IBM Support Assistant
The IBM Support Assistant is a free local software serviceability workbench
that helps you resolve questions and problems with IBM software
products. The Support Assistant provides quick access to support-related
information and serviceability tools for problem determination. To install
the Support Assistant software, go to http://www.ibm.com/software/
support/isa.
Troubleshooting Guide
For more information about resolving problems, see the problem
determination information for this product.
Conventions used in this publication
Several conventions are used in this publication for special terms, actions,
commands, and paths that are dependent on your operating system.
Typeface conventions
This publication uses the following typeface conventions:
Bold
v Lowercase commands and mixed case commands that are otherwise
difficult to distinguish from surrounding text
v Interface controls (check boxes, push buttons, radio buttons, spin
buttons, fields, folders, icons, list boxes, items inside list boxes,
multicolumn lists, containers, menu choices, menu names, tabs, property
sheets), labels (such as Tip:, and Operating system considerations:)
v Keywords and parameters in text
Italic
v Citations (examples: titles of publications, diskettes, and CDs)
v Words defined in text (example: a nonswitched line is called a
point-to-point line)
v Emphasis of words and letters (words as words example: "Use the word
that to introduce a restrictive clause."; letters as letters example: "The
LUN address must start with the letter L.")
v New terms in text (except in a definition list): a view is a frame in a
workspace that contains data.
Installing and Using Alcatel-Lucent 5620 SAM LogToFile 2.3.0.0 Technology Pack
vii
v Variables and values you must provide: ... where myname represents....
Monospace
v Examples and code examples
v File names, programming keywords, and other elements that are difficult
to distinguish from surrounding text
v Message text and prompts addressed to the user
v Text that the user must type
v Values for arguments or command options
Bold monospace
v Command names, and names of macros and utilities that you can type
as commands
v Environment variable names in text
v Keywords
v Parameter names in text: API structure parameters, command
parameters and arguments, and configuration parameters
v Process names
v Registry variable names in text
v Script names
viii
Alcatel-Lucent 5620 SAM LogToFile 2.3.0.0 Technology Pack Installation and User Guide
Chapter 1. Alcatel-Lucent 5620 SAM LogToFile 2.3.0.0
Technology Pack overview
The LogToFile feature is added to the SAM server to allow downstream systems to
retrieve metric data as it arrives and without any filtering. The data is fed to the
downstream systems in a streaming fashion. The downstream system must do the
filtering with caution and as necessary.
In the earlier releases of Alcatel-Lucent 5620 SAM Technology Pack, FindToFile is
used to obtain the metric data from SAM Server for any time period you want.
Though this feature is convenient, FindToFile feature adds extra computational
burden to the SAM Server. The new LogToFile feature relieves the SAM server of
the burden of querying and filtering for the subset of data that the downstream
system needs.
UBA structure
An array of UBAs is divided into UBAs for accounting and performance. There can
be multiple UBAs. However, the UBAs must be in a set of accounting and
performance. These UBAs processes the inventory and metric data that is
presented to them by IBM InfoSphere Information Server DataStage.
The metrics (XML files) and inventory (XML files/JMS messages) from the SAM
server are parsed by DataStage and converted to CSV files for the UBAs. DataStage
produces one file per UBA per period.
The record types in the incoming CSV files are heterogeneous. The inventory data
is added to the CSV file only under the following conditions:
v When there is a full dump.
v When a JMS inventory message is received.
Dynamic models
In the previous versions of Alcatel-Lucent 5620 SAM Technology Pack, the SAMIF
and BLB communicate directly with SAM server. SAMIF acquires and processes
inventory via bulk transfer (full dump) and JMS messages (changes). BLB issues
periodic SOAP FindToFile requests for metric data and acquires that data over
SFTP and makes it available to the UBAs. SAMIF communicated via JMS, SOAP,
and SFTP to acquire and process inventory. The BLB communicated via SOAP and
SFTP to export and acquire bulk metric data files. One UBA processes performance
metrics and another UBA processes accounting metrics. This design does not
accommodate more than two UBAs. In the current design SAMIF and BLB are
removed and IBM InfoSphere DataStage is used to interface with the SAM server
by using JMS, SOAP and SFTP. You can have an array of UBAs that are subdivided
into UBAs for accounting metrics and UBAs for polled metrics.
Currently, in Alcatel-Lucent 5620 SAM LogToFile 2.3.0.0 Technology Pack,
DataStage interfaces with the SAM server and provides metric and inventory data
to the UBAs. Rather than having a separate component to process inventory for the
entire system, inventory is processed inline by the UBAs. DataStage performs the
following functions:
v Acquires and processes inventory and metrics from SAM in XML format.
© Copyright IBM Corp. 2014
1
v Filters the inventory and metric data. This function was previously handled by
SAM server.
v Partitions data by UBA-based partition key. This information is taken from
Proviso DB.
v Waits for complete data for a window period.
v Merges metrics and inventory into one CSV file per period per UBA.
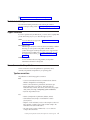
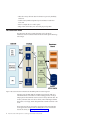
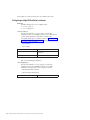
Data collection model
The performance data and accounting data metrics are for the network
infrastructure and services that the Alcatel-Lucent 5620 SAM LogToFile Technology
Pack manages.
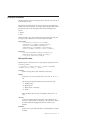
Figure 1. Data collection model for the Alcatel-Lucent 5620 SAM LogToFile 2.3.0.0 Technology Pack
DataStage parses the SOAP/XML files and JMS messages from the SAM server
and transfers the data to the UBAs as CSV files. DataStage produces one file per
UBA per period. These XML files contain records of inventory and metric data. The
inventory and metrics data are in the CSV format, with an initial integer identifier
that specifies a record type, and the subsequent fields contain the actual data of the
record.
The incoming CSV files are processed by a single input schema in the UBA. The
record types in the incoming CSV files are heterogeneous. For more information
about the file formats, see “Bulk input file formats” on page 7.
2
Alcatel-Lucent 5620 SAM LogToFile 2.3.0.0 Technology Pack Installation and User Guide
The UBAs handle processing of both inventory and metric data. Any number of
UBAs can be configured to handle this process with each UBA designated either as
accounting UBA or performance UBA. The number of UBAs are best scaled up to
load.
These XML files are then collected and processed, with the results presented in a
set of web-based reports. These reports are listed and described in Alcatel-Lucent
5620 SAM LogToFile 2.3.0.0 Technology Pack Reference.
Inventory
The Alcatel-Lucent 5620 SAM contains an object database that represents
the network resources and their relationships to other network resources. It
also represents some abstract resources and relationships. Services and
their subscribers are represented, along with their relationships to each
other and to the Service Access Point Queues.
Metrics
DataStage periodically receives the metrics file. The DataStage is notified
on every period about the metrics file availability. The SAM statistics are
then passed to the UBA for parsing and processing into Tivoli Netcool
Performance Manager metrics.
Figure 1 shows that the Alcatel-Lucent 5620 SAM LogToFile 2.3.0.0 Technology
Pack manages the inventory of the resources and metrics, real, and abstract, in two
ways:
v Complete data collection for inventory
v Event-driven data collection for inventory
Complete data collection
In the complete data collection, DataStage sends SOAP/XML requests to
the Alcatel-Lucent 5620 SAM server for each SAM object type that is
needed to run the inventory and metric data collection. Specifically, the
request is for XML files that contain information about all instances of that
object type and metrics. The requests from DataStage specify result filter of
property values that are returned for each SAM object type. This filter
operation limits the set of property values to the values that matter to the
technology pack inventory.
DataStage partitions the Proviso database on IP address and merge metrics
and inventory into one CSV file per period per subchannel that is then
delivered to the UBAs in CSV format.
When the inventory and metrics are in separate bulk input files (as is the
case in the Alcatel-Lucent 5620 SAM environment), a technology pack
developer typically implements several types of bulk adapter design files,
as described in “Bulk adapter design files” on page 8.
Event-driven data collection for inventory
The Alcatel-Lucent 5620 SAM LogToFile uses the JMS to view real-time
events and alarm feed information from the managed network. For more
information, see the Alcatel- Lucent 5620 SAM-O OSS Interface Developer
Guide. DataStage establishes a JMS connection with SAM to receive
inventory updates and notices of metric data file availability. SAM JMS
client daemon listens for JMS messages from SAM and passes them to
Apache ActiveMQ queue. DataStage job reads the messages from the
queue and processes them.
Chapter 1. Alcatel-Lucent 5620 SAM LogToFile 2.3.0.0 Technology Pack overview
3
Note: Alcatel-Lucent 5620 SAM-O is an open interface on the
Alcatel-Lucent 5620 SAM. An OSS client application can access information
through the Alcatel-Lucent 5620 SAM-O.
Figure 1 shows that in the event-driven inventory, DataStage processes JMS
create, delete, and update messages.
DataStage resynchronizes the element names that are based on IP address
and subchannel affiliations from the Tivoli Netcool Performance Manager
database on startup. For newly encountered elements, a hash of the
element name IP address is used to assign it to a subchannel. It is not
necessary for DataStage to write the element to the Tivoli Netcool
Performance Manager database. The UBAs generate the elements and other
inventory. By default, the hash function is used and applied to the entire
set of accounting or metric subchannels.
However, it is possible through configuration to restrict the assigned
subchannels to a subset of the accounting or metric subchannels. This is
provided in the event one subchannel starts to approach capacity. In
addition, the user might explicitly override the subchannel affiliation for
individual IP addresses. Intended to all for the case that a network has a
handful of large devices that they want to ensure are evenly distributed
across the available subchannels. Metrics and inventory are merged
together and appended to a file destined for a subchannel with the IP
address that determines the destination subchannel. After the data for a
period is complete, the file is cut and staged atomically for UBA
acquisition.
When the DataStage is started, it establishes the SAM metric data by using
the new LogToFile feature. Availability of metric file is notified to the
DataStage through JMS connection. DataStage then retrieves the file.
DataStage uses SFTP connections for multiple downloads rather than
establish new connections for every download.
DataStage also establishes a JMS connection with SAM to receive inventory
updates, file available messages and control messages. The JMS process is
running continuously. The Monitor stage in job periodically checks and
restarts the JMS daemon if the daemon is not running. JMS daemon buffers
messages and passes the messages to DataStage.
DataStage also processes the full inventory dump by using the existing
FindToFile SOAP requests. Full dump on inventory is run on need basis.
There is no automated full dump on startup. Warnings can be found in the
logs that show missed JMS messages. These warnings can be monitored to
initiate a full dump if required.
Finally, DataStage requires that all inventory update messages have
information to help determine the IP address. DataStage requires the IP
address to determine to which subchannel an inventory update must be
routed.
4
Alcatel-Lucent 5620 SAM LogToFile 2.3.0.0 Technology Pack Installation and User Guide
Chapter 2. Devices and services
Details about Alcatel-Lucent SAM 5620 LogToFile server compatibility, supported
devices, Alcatel-Lucent SAM 5620 LogToFile services, data collection model, bulk
input file formats, and bulk adapter design files.
Alcatel-Lucent 5620 SAM server compatibility
Currently, the Alcatel-Lucent 5620 SAM LogToFile 2.3.0.0 Technology Pack runs on
the Alcatel-Lucent 5620 SAM Server Release 10 and Release 11.
Supported devices
The list of devices that are supported by the Alcatel-Lucent 5620 SAM LogToFile
Technology Pack depends on the version of the technology pack.
Devices supported in this release
The Alcatel-Lucent 5620 SAM LogToFile 2.3.0.0 Technology Pack supports the
following devices:
v Alcatel-Lucent 7750 Service Router
v Alcatel-Lucent 7710 Service Router
v Alcatel-Lucent 7705 Service Aggregation Router
v
v
v
v
v
v
v
Alcatel-Lucent
Alcatel-Lucent
Alcatel-Lucent
Alcatel-Lucent
Alcatel-Lucent
Alcatel-Lucent
Alcatel-Lucent
7450 Ethernet Service Switch
7210 Service Access Switch
OmniSwitch 6850
OmniSwitch 6250
7750 MG
9471 WMM
9500 MPR
For more information about these devices, see http://www.alcatel-lucent.com.
How the devices are supported
The Alcatel-Lucent 5620 SAM LogToFile Technology Pack supports these devices in
the following ways:
Defines data generation, data storage, and data collection methods
The Alcatel-Lucent 5620 SAM LogToFile Technology Pack communicates
with the device through the SOAP/XML interface, and uses JMS for
notification of inventory changes. For more information about the
SOAP/XML interface and other components that are associated with the
data collection model, see “Data collection model” on page 2.
Defines Tivoli Netcool Performance Manager properties
The Alcatel-Lucent 5620 SAM defines and manages all of the relevant
objects that are associated with the device in the Alcatel-Lucent XML-based
equipment package. The Alcatel-Lucent 5620 SAM LogToFile Technology
Pack maps the appropriate set of SAM object properties that are defined in
the equipment package to Tivoli Netcool Performance Manager properties.
Typically, the Netcool Performance Manager property name is the same as
© Copyright IBM Corp. 2014
5
the SAM object property name, except that the Netcool Performance
Manager property name also has the prefix sam. For information about the
properties that are currently supported by the Alcatel-Lucent 5620 SAM
LogToFile Technology Pack, see the IBM Tivoli Netcool Performance Manager:
Alcatel-Lucent 5620 SAM LogToFile 2.3.0.0 Technology Pack Reference.
Alcatel-Lucent 5620 SAM LogToFile services
Alcatel-Lucent 5620 SAM users can configure services such as VPRN, VPLS, and
customer or subscriber sites to the core network at the SAPs.
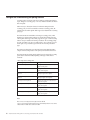
A user might also configure a set of policies to manage different classes of traffic at
the SAPs. A SAP can have one policy that is applied for ingress traffic, and another
for egress (to the customer site). Alcatel-Lucent 5620 SAM has a predefined set of
eight traffic classes:
be
l2
af
l1
h2
ef
h1
nc
In addition, the Alcatel-Lucent 5620 SAM LogToFile supports unicast, multicast,
and broadcast IP traffic.
A user can define a policy to manage each combination of traffic classes and cast
types uniquely. With eight classes and four types, 32 different combinations are
possible. On a SAP, each unique combination is supported by a separate queue,
which means up to 32 queues to be managed. On ingress, the SAPs support
separate queues for the different casts of traffic. However, on egress, the SAPs do
not support separate queues. Therefore, on egress, there is a maximum of eight
queues.
The Alcatel-Lucent 5620 SAM represents these entities in the following objects:
SAPs
SAP object represents a SAP. The SAP object has a PolicyId property.
Policies
Policy object represents the policy.
ForwardingClasses
ForwardingClass object represents one of the eight possible classes of
traffic. This object has a PolicyId property that indicates the policy to
which it belongs. If the object is an ingress ForwardingClass, it has four
queue IDs, one each for Unicast, Multicast, Broadcast, and Other. If the
object is an egress ForwardingClass, it has one queue ID.
Service queues
Egress Service Queue object or an Ingress Service Queue object represents a
service queue on a SAP.
6
Alcatel-Lucent 5620 SAM LogToFile 2.3.0.0 Technology Pack Installation and User Guide
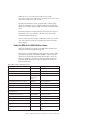
Bulk input file formats
DataStage produces one file for each UBA per period. These files contain records of
inventory and metric data.
The inventory and metrics data records are in the CSV format. The initial integer
identifier of the CSV files specifies a record type, and the subsequent fields contain
the actual data of the record. The output CSV file from the DataStage has two
sections:
1. Header
2. Data
Header starts with 0 (zero), and is called as the 0-record schema. Data starts with
record type, which is identical to the one that is defined in the header.
Sample Header
0,"{""recordType"":17,""dataType"":""C"",""className"":
""equipment.Shelf"",""fieldNames"":[""administrativeState"",
""deviceState"",""displayedName"",""equipmentState"",
""numberOfCardSlots"",""objectFullName"",""operationalState"",
""shelfId"",""shelfName"",""shelfType"",""siteId"",""siteName""]}"
Sample data
17,"noop","deviceStateUnknown","sim242_60","indeterminate","12",
"network:138.120.242.60:shelf-1","unknown","1","sim242_60",
"sr_shelf_12Slot","138.120.242.60","sim242_60"
Bulk input file schema
The UBA input has a schema that works on CSV input files. The general format of
a CSV file is as follows:
0, "{“recordType”: 1, ”dataType”:”input source”, “className”: “TheClassName”,
“fieldNames”: [“field1”, “field2”, ... “fieldn”]}"
recordType
Specifies an integer that is used to identify the record format.
dataType
Specifies the source of the record data. The sources can be "A", "D", "C", or
"M".
The following list contains the definition of 0-Record CSV data type:
v A - Attribute Change
v D - Object Deletion
v C - Object Creation or Full dump
v M - Metrics
Note: The JMS inventory messages are identified by data types of A, D
and C.
className
Specifies the Alcatel-Lucent class name that is used to identify the class
(inventory or metric) that this record belongs to. The class name is used by
the UBA to identify the mapping between the class and the record
identifier.
fieldNames
Specifies an array of the field names that is available within the record that
is defined.
Chapter 2. Devices and services
7
Bulk adapter design files
Tivoli Netcool Performance Manager bulk adapters support bulk input files in the
CSV format. The DataStage server produces data in CSV format and uses JMS for
notification of inventory changes.
Each UBA technology pack provides at least one bulk adapter design file to define
the data format supported by that technology pack. Technology pack developers
implement bulk adapter design files using JavaScript®. Some technology packs
provide several bulk adapter design files.
Typically, a bulk adapter design file can process both inventory and metrics data
from the same bulk input file, and provides a function that creates the bulk
collection formula names. When the inventory and metrics are located in separate
bulk input files (as is the case in the Alcatel-Lucent 5620 SAM environment), a
technology pack developer implements several types of bulk adapter design files.
The Alcatel-Lucent 5620 SAM LogToFile Technology Pack provides the UBA design
files.
UBA design files
UBA is a DataChannel application that interprets and parses bulk input files that
contain inventory and metrics data, or (as is the case in the Alcatel-Lucent 5620
SAM environment) metrics data only. A technology pack developer implements
UBA design files that tell the UBA application how to interpret and parse these
bulk input files.
The current version of the Alcatel-Lucent 5620 SAM LogToFile Technology Pack
supports two UBA Bulk Collectors. The two main UBA design files are as follows:
v The SAMUBAAdaptor_polled.js file is used by the first UBA Bulk Collector and
handles most of the metrics.
v The SAMUBAAdaptor_accounting.js file is used by the second (accounting) UBA
Bulk Collector and handles the accounting metrics. These metrics are
service-oriented metrics.
You can find the UBA design files in the Alcatel-Lucent 5620 SAM LogToFile
Technology Pack from the following location:
datachannel/scripts/alcatel_5620_sam_log2file
8
Alcatel-Lucent 5620 SAM LogToFile 2.3.0.0 Technology Pack Installation and User Guide
Chapter 3. Installation and configuration of IBM InfoSphere
Information Server and related components
Describes how to install and configure the various IBM InfoSphere Information
Server and other related components that are required for Alcatel-Lucent 5620
SAM LogToFile 2.3.0.0 Technology Pack such as:
Components
v IBM InfoSphere Information Server 8.7
v IBM InfoSphere Information Server Client 8.7
v Apache ActiveMQ 5.5.1
v Oracle Client 11g
Planning for IBM InfoSphere Information Server software installation
Ensure that hardware and software requirements for the product modules that you
want to install are met on your computers.
For latest information about the installation requirements, see these resources:
v System Requirements
Restriction: You can install the IBM InfoSphere Information Server on a
computer that has Red Hat Enterprise Linux x86_64 version 5.5 or later.
v Release Notes
Installing IBM InfoSphere Information Server 8.7 software
IBM® InfoSphere™ Information Server includes a set of collaborative product
modules and components that you can distribute across multiple computers. This
section describes how to install and remove the InfoSphere Information Server and
InfoSphere Information Server client software.
Installing IBM InfoSphere Information Server by using the
wizard (graphical mode)
You can run the installation program locally by using a web browser on the target
computer. Alternatively, you can use a web browser on any system in a distributed
environment.
Before you begin
During the initial installation session, install the required product modules that
you plan to use either now or in future. If you install only some of the product
modules now, and then install fixes and service packs, you must reinstall the fixes
and service packs as you add the product modules later.
Note: Ensure that the system has only RHEL 5.5 or later installed and no other
components on it. You can install the other components as and when required.
Ensure that you disable the firewall by using the following step:
© Copyright IBM Corp. 2014
9
v Click System > System Firewall > Disable Firewall to disable the firewall.
Disable the firewall temporarily until the installation is complete.
About this task
When you first start the installation program, it presents a non-graphical interface.
The program starts a self-contained web server on the computer. You can then start
a web browser on the computer or on a remote computer and access the graphical
interface. After you enter your settings in the wizard pages, the program stores
your settings in a response file. If you run the installation program again, you can
load your settings from this file into the program instead of entering them again.
Procedure
1. Extract the InfoSvr_v8.7_Linux64.tar.gz file to a location of your choice.
The installation media is in the is-suite directory.
2. Change to the is-suite directory and run the installation program as root
user by using the following command:
./setup [-verbose]
The -verbose option is optional. The option causes the installation program to
display log messages to the console and also write them to the log file. If the
-verbose option is not specified, log messages are written to the log file only.
Several messages are displayed. The program then displays a message about
how to access the installation wizard:
======> Enter one of the following URLs to your web browser to begin the installation process:
http://localhost:8080/ISInstall
https://localhost:8443/ISInstall
3. Open a web browser on the computer or on a remote computer, and go to one
of the addresses that is listed in the messages from starting the installation
program.
4. Select a language from the menu for the installation program to use and click
Login. This selection applies only to this installation session. Later in the
installation process, you can select the language to apply to the InfoSphere
Information Server installation.
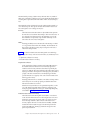
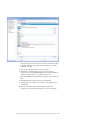
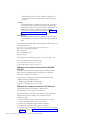
5. Click Next on the prompts in the installation program to continue to install
the product. The installation program runs an Early Requirements Check to
ensure that your installation is configured correctly as shown in the figure:
10
Alcatel-Lucent 5620 SAM LogToFile 2.3.0.0 Technology Pack Installation and User Guide
The page displays the results of the check as PASSED or FAILED. If the check
found issues that might cause problems with the installation, it is marked as
WARNING on the page.
For more information about resolving the failed installation prerequisites, see
http://pic.dhe.ibm.com/infocenter/iisinfsv/v8r7/topic/
com.ibm.swg.im.iis.productization.iisinfsv.install.doc/topics/
wsisinst_install_prereq_check_fails.html.
6. When all early requirements checks are passed, click Next.
7. Click the default path where you want to install the Information Server in the
Installation directory field, and then click Next. By default, the installation
directory is /opt/IBM/InformationServer.
8. Click New installation in the "Installation Type Selection" page, and then click
Next.
9. Click to select all the tiers in the "Tier Selection" page and click Next.
10. Enter the password for the root user in the Password for root field and click
OK.
11. Click Select All in the "Product Selection" page and click Next.
12. Accept the terms and conditions in the "Software License Agreement" page
and click Next.
13. Select the IBM InfoSphere DataStage (Select this edition to develop parallel
and server jobs) check box and clear the IBM InfoSphere DataStage
Balanced Optimization check box in the "IBM InfoSphere DataStage
Installation Options" page and click Next.
14. Click Next in the "High Availability Server Cluster Configuration" page as
there is no support for High Availability Server in the present context.
Chapter 3. Installation and configuration of IBM InfoSphere Information Server and related components
11
15. Click Install WebSphere Application Server in the "Application Server
Options" page and click Next.
16. Click Browse to select the installation directory for the WebSphere Application
Server. By default, the installation directory is /opt/IBM/WebSphere/AppServer.
17. Select the Customize WebSphere Application Server profile ports check box
in the "IBM WebSphere Application Server Installation" page, and then click
Next.
18. Verify that each port number is unique in the "IBM WebSphere Application
Server Profile Ports Assignment" page and click Next.
19. Enter the Application Server administrator user name and password and click
Next.
20. Enter the InfoSphere Information Server administrator user name and
password and click Next.
21. Click Install IBM DB2 9.7 Enterprise Server Edition to install and create the
databases within DB2 and click Next.
22. Specify the default directory where you want to install the DB2 database
system. By default, the installation directory is /opt/IBM/db2/v9.
23. Click Create a user as an instance owner in the "IBM DB2 Instance User"
page and enter the user information, and then click Next. Also, enter a port
number for the new instance. You receive a conformation after the user is
created. Click OK.
24. Click Create a new user as a fenced user in the "DB2 Fenced User
Information" page and enter the DB2 fenced user information and then click
Next.
25. Click Create the user as administrator user in the "DB2 Administrator User
information" page and enter the administrator user information, and then click
Next
26. Enter the metadata repository owner information, database name, database
instance name, and database location in the "Metadata Repository
Configuration" page, and then click Next.
27. Enter the metadata repository owner information, database name, database
instance name, and database location in the "Staging Area Configuration"
page, and then click Next. The default agent port settings that are displayed
in the "IBM InfoSphere Information Server Agent Ports Configuration" page
work in most configurations.
28. Click Next.
29. Enter the two TCP/IP port numbers to use for the IBM InfoSphere DataStage
and QualityStage job monitor in the "Job Monitor Ports Configuration" page,
which takes snapshots of job performance. The job monitor uses one port to
request job information and the second port to report job information. The
default port settings are acceptable in most configurations. The default settings
are 13400 and 13401 for the first and second ports.
30. Enter the unique tag information for the engine in the ITAG field and port
number in the RPC port number field. If you are not installing multiple
engine instances on the same computer, you can skip this step.
31. Click Create user as the IBM InfoSphere DataStage Administrator in the
"IBM InfoSphere DataStage Administrator" page and enter the user
information, and then click Next.
32. Clear the SAS check box and click Next. The existing job does not use SAS
and you can ignore this step.
12
Alcatel-Lucent 5620 SAM LogToFile 2.3.0.0 Technology Pack Installation and User Guide
33. Click Add Projects and enter the InfoSphere DataStage projects to create in
the "IBM InfoSphere DataStage Projects" page. You must create at least one
project during installation. By default, a project by name dstage1 is created.
Remove the dstage1 project and add the UDM project.
34. Click Next. The installation program runs a system requirements check for the
selections that are made. The page displays the results of the check as PASSED
or FAILED. If the check found issues that might cause problems with the
installation, it is marked as WARNING on the page. To resolve the issues that
are found during this check, see http://publib.boulder.ibm.com/infocenter/
iisinfsv/v8r7/topic/com.ibm.swg.im.iis.productization.iisinfsv.install.doc/
topics/wsisinst_install_prereq_check_fails.html
35. Click Next if all the system requirements checks are passed.
36. Click Install IBM InfoSphere Information Server and save my settings in a
response file in the "Response File Review" page and click Next to begin the
installation.
Or, enter a name and location for the response file in the Response file
location field in the "Response File Review" page. By default, it is available in
the following location: /opt/IBM/InformationServer/response.txt and click
Next to begin the installation. You can choose to cancel the installation and
use the saved response file in a later session. The "Post Installation Summary
for Current Computer" page is displayed that contains the product, tiers, and
product components that you installed, and information about how long the
installation program ran and whether the installation was successful.
37. Click Install.
38. Click Finish.
What to do next
If you face any installation problems, resolve them with this installation
troubleshooting information from here:
http://publib.boulder.ibm.com/infocenter/iisinfsv/v8r7/topic/
com.ibm.swg.im.iis.productization.iisinfsv.install.doc/topics/
wsisinst_ts_is_container.html.
You can find more troubleshooting information in the information centers and
customer support technical notes for various product modules and components.
Installing IBM InfoSphere Information Server client by using
the wizard (graphical mode)
You can run the installation program locally by using a web browser on the target
computer. Alternatively, you can use a web browser on any system in a distributed
environment.
Before you begin
During the initial installation session, install all of the product modules that you
plan to use either now or in the future unless explicitly stated otherwise. If you
install only some of the product modules now, and then install fixes and service
packs, you must reinstall the fixes and service packs if you add product modules
later. Ensure that you disable the firewall by using the following step:
v Click Control Panel > System and security > Windows Firewall to disable the
firewall. Disable the firewall temporarily until the installation is complete.
Chapter 3. Installation and configuration of IBM InfoSphere Information Server and related components
13
About this task
When you first start the installation program, it presents a non-graphical interface.
The program starts a self-contained web server on the computer. You can then start
a web browser on the computer or on a remote computer and access the graphical
interface. After you enter your settings in the wizard pages, the program stores
your settings in a response file. If you run the installation program again, you can
load your settings from this file into the program instead of entering them again.
Procedure
1. Extract the Infosvr_Client_v8.7_Win.zip file to a location of your choice. For
example, C:\is-client
2. Double-click the installation program, setup.exe. Several messages are
displayed. The program then displays a message about how to access the
installation wizard:
======> Enter one of the following URLs to your web browser to begin the installation process:
http://localhost:8080/ISInstall
https://localhost:8443/ISInstall
The installation program automatically starts the default web browser on the
local computer to display the graphical interface.
3. Select a language from the menu for the installation program to use and click
Login. This selection applies only to this installation session. Later in the
installation process, you can select the language to apply to the InfoSphere
Information Server installation.
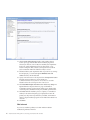
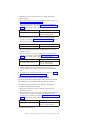
4. Click Next on the prompts in the installation program to continue to install
the product. The installation program runs an Early Requirements Check to
ensure that your installation is configured correctly as shown in the figure:
14
Alcatel-Lucent 5620 SAM LogToFile 2.3.0.0 Technology Pack Installation and User Guide
The page displays the results of the check as PASSED or FAILED. If the check
found issues that might cause problems with the installation, it is marked as
WARNING on the page.
5. When all early requirements checks are passed, click Next.
6. Click Browse to select the directories where you want to install the
Information Server in the Installation directory field, and then click Next. By
default, the installation directory is C:\IBM\InformationServer
7. Click New installation in the "Installation Type Selection" page, and then click
Next.
8. Click Select All in the "Product Selection" page and click Next.
9. Accept the terms and conditions in the "Software License Agreement" page
and click Next.
10. Enter the port numbers in the "Metadata Interchange Agents Ports
Configuration" page. The default port numbers are as shown in the figure:
Chapter 3. Installation and configuration of IBM InfoSphere Information Server and related components
15
11. Select the Create desktop shortcuts check box in the "Desktop shortcut
creation option" page and click Next. After the installation program has
collected your selections, it runs another, more detailed system requirements
check in the "System Requirements Check" page that is based on your
selections. During this check, it analyzes your computer resources and file
system to determine whether the installation is likely to succeed.
12. Click Next if all the system requirements checks are passed. For any warnings
that are displayed, you can select the Ignore "WARNING" items and
continue check box, and then click Next.
13. Specify a name and location for the response file in the Response file location
field in the "Response File Review" page. By default, it is:
C:\IBM\InformationServer\response.txt. You can choose to cancel the
installation and use the saved response file in a later session.
14. Click Install IBM InfoSphere Information Server and save my settings in a
response file in the "Response File Review" page and click Next. A
"Preinstallation Summary for the Current Computer" page is displayed that
contains the product, installation directory, tiers, and disk space information.
15. Click Install. When the installation process is complete, a "Post Installation
Summary for the Current Computer" page is displayed that contains the
product, tiers, and product components that you installed, and information
about how long the installation program ran and whether the installation was
successful.
16. Click Finish.
What to do next
If you face any installation problems, resolve them with this installation
troubleshooting information from here:
16
Alcatel-Lucent 5620 SAM LogToFile 2.3.0.0 Technology Pack Installation and User Guide
http://publib.boulder.ibm.com/infocenter/iisinfsv/v8r7/topic/
com.ibm.swg.im.iis.productization.iisinfsv.install.doc/topics/
wsisinst_ts_is_container.html.
You can find more troubleshooting information in the information centers and
customer support technical notes for various product modules and components.
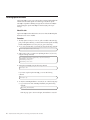
Verifying and testing the installation
After you install and configure InfoSphere DataStage and InfoSphere
QualityStage™, test the installation by logging in to the Administrator and Designer
clients.
About this task
For example, open the IBM InfoSphere DataStage and QualityStage Administration
client by providing the information as follows and click Login:
Chapter 3. Installation and configuration of IBM InfoSphere Information Server and related components
17
Installing Apache ActiveMQ
Apache ActiveMQ is an open source software that is customized and bundled with
Alcatel-Lucent 5620 SAM LogToFile 2.3.0.0 Technology Pack JAR file. Apache
ActiveMQ is responsible for buffering messages that are received from SAM JMS
for the DataStage Job. Apache ActiveMQ is an interface to JMS poller to pass
messages.
About this task
Apache ActiveMQ must be installed on the same server where the IBM InfoSphere
Information Server server is installed.
Procedure
1. The tnpm-apache-activemq-5.5.1-bin.tar.gz file is available in the technology
pack jar. After pack installation, you must be able to find the Apache ActiveMQ
bundle at $PVM_HOME/APFiles/alcatel_5620_sam_log2file/datastage/.
2. As root user, extract the file to /opt directory by using the following command:
tar zxvf tnpm-apache-activemq-5.5.1-bin.tar.gz
3. Add activemq.rc file as a system service by linking the file in /etc/init.d by
using the following commands:
ln-s /opt/apache/activemq/5.5.1/bin/activemq.rc /etc/init.d/activemq.rc
/sbin/chkconfig --add activemq.rc
/sbin/chkconfig activemq.rc on
/sbin/chkconfig service active
4. Start Apache ActiveMQ by using the following command:
./activemq.rc start
If you want to stop the Apache ActiveMQ, you can use the following
command:
./activemq.rc stop
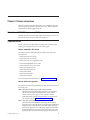
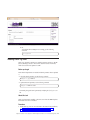
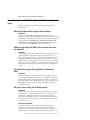
5. To verify that ActiveMQ installation is successful, do one of the following steps:
a. Log in to the server where ActiveMQ is installed by using the following
command:
http://<host_name>:8161/admin/
If the web page opens as shown in the figure, the installation is successful:
18
Alcatel-Lucent 5620 SAM LogToFile 2.3.0.0 Technology Pack Installation and User Guide
b. Or
To check that the ActiveMQ service is running, give the following
command:
ps -ef |grep active
Installing Oracle 11g client
Oracle 11g is required for DataStage to establish connection with Proviso DB. On
Job start, DataStage connects to Proviso DB to obtain all collector information,
which can be used for data partition for UBA.
Before you begin
Ensure that all dependencies are installed and kernel parameters that are updated
so.
v To check the kernel parameter, use the following command:
/sbin/sysctl -a | grep <PARAMETER>
v To update the kernel parameter, use the following command:
/sbin/sysctl -w <PARAMETER>="<VALUE>"
Permanently, change the kernel parameter by modifying the /etc/sysctl.conf
file.
About this task
Oracle 11g client must be installed on the same server where the IBM InfoSphere
Information Server server is installed.
Procedure
1. Install Oracle 11g client. For more information about Oracle client installation,
see http://publib.boulder.ibm.com/infocenter/tivihelp/v8r1/topic/
com.ibm.tnpm.doc/oracle/ctnpm_ora_installora10gclient.html.
Chapter 3. Installation and configuration of IBM InfoSphere Information Server and related components
19
Note: The 64-bit Oracle client must be installed.
2. Configure the tnsname.ora file that is located in $ORACLE_HOME/network/admin to
connect to Tivoli Netcool Performance Manager wireline.
3. Update the DataStage dsenv file that is located in $DS_HOME. By default, the
$DS_HOME is /opt/IBM/InformationServer/Server/DSEngine.
4. Create a soft link to libccora11g.so by using the following command:
cd $ORACLE_HOME/lib
ln -s /opt/IBM/InformationServer/Server/StagingArea/Installed/OracleConnector/Server/linux/libccora11g.so
licccora11g.so
Typically, The libccora11g.so is located in the following path:
/opt/IBM/InformationServer/Server/StagingArea/Installed/OracleConnector/
Server/linux/libccora11g.so.
5. Update the $DSHOME/dsenv as dsadm user. The following parameters must be
included:
export
export
update
update
export
update
ORACLE_HOME
TNS_ADMIN
LD_LIBRARY_PATH to include $APT_ORCHHOME/bin, $ORACLE_HOME/lib and $ORACLE_HOME/rdbms/lib
PATH
to include $APT_ORCHHOME/bin and $ORACLE_HOME/lib
ORACLE_BASE
LIBPATH
to include $ORACLE_HOME/rdbms/lib & $ORACLE_HOME/lib
6. Run the install.liborchoracle script by using the following steps:
a. Source the environment by using the following commands:
export DSHOME=/opt/IBM/InformationServer/Server/DSEngine
export APT_ORCHHOME=/opt/IBM/InformationServer/Server/PXEngine
b. Run the install.liborchoracle script by using the following command:
/opt/IBM/InformationServer/Server/StagingArea/Installed/PxOracle/install/install.liborchoracl
7. Restart the DataStage as root by using the following commands:
/etc/init.d/ds.rc stop
/etc/init.d/ds.rc start
20
Alcatel-Lucent 5620 SAM LogToFile 2.3.0.0 Technology Pack Installation and User Guide
Chapter 4. Configure the InfoSphere Information Server
components
Describes the configuration tasks.
Opening the IBM InfoSphere Information Server web console
Use the InfoSphere Information Server web console to manage security, view
scheduled tasks, work with reports, or perform tasks that are related to IBM®
InfoSphere® Business Glossary or the Information Services catalog.
Before you begin
To access the web console, determine the URL to use, configure your browser, and
go to the console window.
About this task
The URL for the IBM® InfoSphere® Information Server web console differs
depending upon the IBM WebSphere® Application Server communication protocol
and configuration. The syntax of the URL is as follows:
protocol://host:port/ibm/iis/console
protocol is the communication protocol: either http or https. host and port differ
depending upon the communication protocol and WebSphere Application Server
configuration (clustered or non-clustered).
For example, in a configuration where clustering is not set up, the HTTPS URL
might be:
https://<myhost.example.com>:9443/ibm/iis/console
Configuring web browser to open the IBM InfoSphere Information
Server web console
The IBM® InfoSphere® Information Server web console is supported by both
Microsoft Internet Explorer and Mozilla Firefox. You must do these steps in your
preferred web browser before you use the IBM InfoSphere Information Server web
console.
About this task
v For information about supported browsers, see the InfoSphere Information
Server system requirements at http://www-01.ibm.com/software/data/
infosphere/info-server/overview/requirements.html.
v For more information about IBM InfoSphere Information Server, see
http://publib.boulder.ibm.com/infocenter/iisinfsv/v8r7/topic/
com.ibm.swg.im.iis.found.moz.rc.common.doc/topics/
iisinfsrv_mcom_overview.html.
v Determine the URL to use as described in “Opening the IBM InfoSphere
Information Server web console.”
v If HTTPS is enabled in the URL, follow the browser prompts to accept the
certificate and proceed to the login page.
© Copyright IBM Corp. 2014
21
Procedure
1. Open a web browser, and go to the console. The URL to use depends upon the
IBM WebSphere Application Server communication protocol and configuration
in use.
2. Type your user name and password. By default, use wasadmin user and
password.
3. Click OK to open the Home tab.
Configuring Microsoft Internet Explorer to open the IBM
InfoSphere Information Server web console
Procedure
1. Enable JavaScript:
a. Click Tools > Internet Options .
b. On the Security tab, click Custom Level.
c. In the Security Settings window, select Scripting > Active Scripting >
Enable.
2. Set the browser to accept cookies for the InfoSphere Information Server host
site.
a. Click Tools > Internet Options.
b. On the Privacy tab, click Sites.
c. In the Address of Web site field, enter the InfoSphere Information Server
host name.
d. Click Allow.
e. Click OK.
3. Enable pop-up windows for the URL of the IBM InfoSphere Information Server
web console:
a. Click Tools > Pop-up Blocker > Pop-up Blocker Settings or turn off the
pop-up window blocker.
b. If you selected the settings, type the URL and click Add.
4. Specify that the pages are refreshed every time that you visit the site:
a. Click Tools > Internet Options and on the General tab, click Settings.
Select Settings in the Browsing history section.
b. Select Every time I visit the webpage or Automatically and click OK.
5. Optional: Disable the display of friendly HTTP error messages. Follow these
steps:
a. Click Tools > Internet Options.
b. On the Advanced tab, clear Browsing > Show friendly HTTP error
messages.
22
Alcatel-Lucent 5620 SAM LogToFile 2.3.0.0 Technology Pack Installation and User Guide
Configuring Mozilla Firefox to open the IBM InfoSphere
Information Server web console
Procedure
1. Enable JavaScript:
a. Click Tools > Options in the Content tab.
2. Set the browser to accept cookies for the InfoSphere Information Server host
site.
a. Click Tools > Options.
b. On the Privacy tab, click the Accept cookies from sites option or click
Exceptions and add the site to the allowed site list by entering the host
name and click Allow.
3. Enable pop-windows for the URL of the web console.
a. Click Tools > Options.
b. Select the Contents tab and either clear the Block pop-up windows option
or click Exceptions and add the site to the allowed list by entering the host
name and click Allow.
Creating dsadm users in the IBM InfoSphere Information Server web
console
You must create a user for each person that must log in to IBM InfoSphere
Information Server.
About this task
Ensure that you have suite administrator authority. To create a user, follow these
steps:
Procedure
1. In the IBM InfoSphere Information Server web console as wasadmin user, click
the Administration tab.
2. In the Navigation pane, select Users and Groups > Users.
3. In the Users pane, click New User.
4. In the Create New User pane, provide information about the user. Give the
following information:
Option
Description
User name
dsadm.
Note: You must create a dsadm user. The
dsadm user is required for all operations on
DataStage job in Alcatel-Lucent 5620 SAM
LogToFile 2.3.0.0 Technology Pack.
Password
Give the same password as you set for dsadm
UNIX user.
First/Last Name
dsadm
5. In the Roles pane, specify all roles.
6. In the Suite Component pane, select whether the user has any suite component
roles. To log in to any of the product modules, a user must have the suite user
role. Also, add at least one suite component role for each suite component that
you want the user to access. For example, if you are creating a user that
Chapter 4. Configure the InfoSphere Information Server components
23
accesses IBM InfoSphere Information Analyzer, you must assign the suite user
role, and also the Information Analyzer Project Administrator, Data
Administrator, or User role.
7. Link the dsadm user to Server Engine by using these steps:
a. Expand Domain Management from Navigation pane.
b. Click Engine Credentials.
c. Select the server.
d. Open Configuration.
e. Select the Share User registry between Infosphere Information Server and
its engine option.
f. Click Save and Close.
8. Click Save and Close to save the user information in the metadata repository.
24
Alcatel-Lucent 5620 SAM LogToFile 2.3.0.0 Technology Pack Installation and User Guide
Chapter 5. Deploying Alcatel-Lucent 5620 SAM LogToFile
2.3.0.0 DataStage jobs
You can design InfoSphere DataStage Administrator jobs by using the IBM
InfoSphere DataStage and QualityStage Designer client.
To deploy DataStage LogToFile, the following clients are used:
Administrator Client
You can create and configure the UDM project.
Designer Client
You can import, configure, and compile the UDM project.
Director Client
You can run and monitor a job.
The Designer client uses a repository where you can store the objects that you are
creating as part of the design process. These objects can be reused by other job
designers.
Note: You must not modify the job design.
Jobs and their associated objects are organized in projects. DataStage
administrators create projects by using the Administrator client. When you start
the Designer client, you specify the project that you work, and everything that you
do is stored in that project.
When your job designs are finished, they are run in the Director client. No data is
moved or transformed until you actually run the job. When you start the Director
client, you specify the project that contains the jobs to run.
Alcatel-Lucent 5620 SAM LogToFile 2.3.0.0 Technology Pack job
design
The features of Alcatel-Lucent 5620 SAM LogToFile 2.3.0.0 Technology Pack job
design are as follows:
LogTofile interface to SAM server
LogToFile solution relieves loads from SAM server thus allowing SAM
server to support higher performance load.
Class record filter option
Data from SAM server are not filtered. Filtering the class records reduces
loads from DataStage and UBA processing.
Multiple UBA Partition
This solution supports multiple sets of Accounting and Performance UBAs
to support UBA and Data Channel scalability.
Period window handling
Class Data from LogToFile might not arrive within the period interval. To
ensure data completeness, job waits for late data files and merge the data
into its correct period interval.
© Copyright IBM Corp. 2014
25
CSV output for UBAs
CSV file requires less processing effort that is compared to XML. Multiple
small files are bundled in single UBA input to improve I/O utilization.
Setting up a project
A project is a container that organizes and provides security for objects that are
supplied, created, or maintained for data integration, data profiling, quality
monitoring, and so on. Projects are a method for organizing your work. You define
data files, stages, and build jobs in a specific project. A project can contain one or
more jobs. Any of the metadata objects in a project (such as jobs or table
definitions) can be grouped logically and organized into folders. You can define
security at the project level. Only users who are authorized for your project can
access your jobs.
Procedure
1. Log in to the Administrator client as dsadm.
2. Click the Projects tab in the Administrator window.
3. Click the Add button.
4. Enter the project name in the Name field. The project name must be given as
UDM. You must create the UDM project only if you have not created in Step 35
of “Installing IBM InfoSphere Information Server by using the wizard
(graphical mode)” on page 9. UDM is automatically appended to the default
location for the new project. You cannot add a project to a location that exists.
5. Click OK. You can see the project that you created in the following directory:
/opt/IBM/InformationServer/Server/Projects/UDM
6. Create a directory by name udm inside the project that you created by using the
following commands:
cd /opt/IBM/InformationServer/Server/Projects/UDM
umask 002
mkdir udm
You can install and import the job in this directory.
Extracting the job archive file
Before you begin
Ensure that you have created a project by name UDM and a subdirectory by name
udm inside the project directory. The ds_job_vm.n.0.0.b.dsx is packaged inside the
alcatel_5620_sam_ds_vm.n.0.0_build_b.tar.gz file from the technology pack JAR
file. Note that m denotes version number, n denotes major build number, and b
denotes minor build number.
Procedure
1. Extract the alcatel_5620_sam_ds_vm.n.0.0_build_b.tar.gz file in
/opt/IBM/InformationServer/Server/Projects/UDM/udm by using the following
command:
tar zxvf alcatel_5620_sam_ds_vm.n.0.0_build_b.tar.gz
2. Open IBM InfoSphere DataStage and QualityStage Administrator on your
desktop.
3. Log in with the user name and password of dsadm with the DataStage and
QualityStage Administrator.
26
Alcatel-Lucent 5620 SAM LogToFile 2.3.0.0 Technology Pack Installation and User Guide
4. Click the Projects tab to list the Projects.
5. Select the project UDM, and then click Properties.
6. In the Project Properties window, click Environment. The Environment
Variables window opens.
7. Expand General and change the value for LD_LIBRARY_PATH variable to:
/usr/lib:.:/opt/IBM/InformationServer/Server/Projects/UDM/udm/lib
This is the path where the custom libraries are located.
8. Optional: Expand Parallel and change the value for APT_CONFIG_FILE variable
to other than default (/opt/IBM/InformationServer/Server/Configurations/
default.apt) with appropriate numbers of DataStage nodes that are required.
9. Click OK.
10. Click Close to save the new project and to exit the InfoSphere DataStage and
QualityStage Administrator.
Updating the operator.apt file
An extra configuration step.
Procedure
1. Go to the operator.apt file from this location:
/opt/IBM/InformationServer/Server/PXEngine/etc/operator.apt
2. Edit the operator.apt file to add the following lines:
CSVWriterOp
libCSVWriterOperator 1
FeedbackOp
libWaveOperator 1
ReceiverOp
libWaveOperator 1
WindowOp
libWindowOperator 1
PerlizeOp
libPerlizeOperator 1
CombineOp
libCombineOperator 1
AuditOp
libAuditOperator 1
HousekeeperOp libHousekeeperOperator 1
XMLChunkerOp libXMLChunkerOperator 1
DeduplicateOp libDeduplicateOperator.so 1
These are the custom libraries that are specific to Alcatel-Lucent 5620 SAM
LogToFile 2.3.0.0 Technology Pack.
Importing an IBM InfoSphere DataStage job
You must import the SAM LogToFile job into the project. The project and its job
are created and then imported into the metadata repository by using IBM®
InfoSphere™ DataStage® and QualityStage™ Designer.
Before you begin
Before you import the ds_job_v2.2.0.0.6.dsx that is available in the technology
pack JAR file, close all the existing jobs that are open in the Designer from the
previous JAR file. This is not required on a fresh installation.
Procedure
1. Log in to IBM InfoSphere DataStage and QualityStage Designer as dsadm and
password, and select your project from the Project list.
2. Transfer the ds_job_v2.2.0.0.6.dsx file from the DataStage Server machine
(/opt/IBM/InformationServer/Server/Projects/UDM/udm/jobs) to the designer
client machine.
Chapter 5. Deploying Alcatel-Lucent 5620 SAM LogToFile 2.3.0.0 DataStage jobs
27
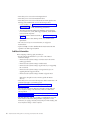
3. On the menu bar, click Import > DataStage Components.
4. In the DataStage Repository Import window, browse to the directory where you
transferred the job files. Select ds_job_v2.2.0.0.6.dsx as the import file.
5. Select Import selected radio button and Perform impact analysis check box.
6. Click OK to import the job. You see the Import load progress window that
shows the number of items that are loaded.
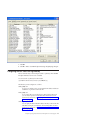
7. In the "DataStage Import" window, select all the items that are loaded and click
OK.
8. Click Jobs > 5620sam > J02main5620sam You can see the job design flow
diagram in the canvas.
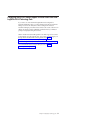
Configuring the DataStage job
Procedure
1. In the IBM InfoSphere DataStage and QualityStage Designer, click Routines >
5620sam > checksum from the Repository pane.
2. Optional:
Note: This step is needed only if you created a project with a name other than
UDM.
Change the Library path for all routines to /opt/IBM/InformationServer/
Server/Projects/UDM/udm/lib/libroutines.so and click Save. The compiled
custom libraries are available in this path.
3. Repeat step 1 through step 2 for all the routines.
4. Click Close.
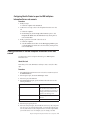
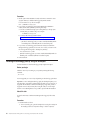
5. Click the Job Properties button and then click the Parameters tab.
6. Change the default value for the following parameters:
Option
Description
DS_HOME
/opt/IBM/InformationServer/Server/
DSEngine
DS_WORKSPACE
/opt/IBM/InformationServer/Server/
Projects/UDM
SAM_PRIMARY_SERVER
<sam_primary_server>
SAM_SECONDARY_SERVER
<sam_secondary_server>
SAM_USER
<SAM_USER>
SAM_PASSWORD
<SAM_PASSWORD>
SAM_FTP_USERNAME
<SAM_FTP_USERNAME>
SAM_FTP_PASSWORD
<SAM_FTP_PASSWORD>
For the remaining parameters, accept the default values.
28
Alcatel-Lucent 5620 SAM LogToFile 2.3.0.0 Technology Pack Installation and User Guide
7. Click OK.
8. Click File > Exit to close IBM InfoSphere DataStage and QualityStage Designer.
Configuring the CSV files in the cfg directory
The four CSV files that you must configure from the cfg directory where the IBM
InfoSphere Information Server server is installed.
You can access the cfg directory from this location:
/opt/IBM/InformationServer/Server/Projects/UDM/udm/cfg
The files that you must configure are as follows:
server_lookup.csv
If you have an auxiliary server, you must enter the IP address and the user
credentials to log in to the server in this file.
filter_lookup.csv
If you want to filter some records that are coming from the SAM server,
you can write an expression for the filter criteria in this file. For more
information about this file, see “Specifying what inventory and metrics to
collect” on page 63.
collector_lookup.csv
You can specify the UBAs with their collector IDs that you have in this file.
The UBAs exist in pairs of Performance and Accounting UBAs. For more
information about this file, see “Specifying what inventory and metrics to
collect” on page 63.
Chapter 5. Deploying Alcatel-Lucent 5620 SAM LogToFile 2.3.0.0 DataStage jobs
29
collector_mapping.csv
When you want to provision a new element and you have the load
balancing criteria, you can specify the family, IP address of the element
and collector ID it must be mapped to. There are 37 families and the
families are as follows:
v 5620_SAM_AingrAengrQueue
v 5620_SAM_Aosqos_Policy
v 5620_SAM_BaseCard
v 5620_SAM_CardSlot
v 5620_SAM_CfmEthTest
v
v
v
v
v
v
5620_SAM_CfmOneWayDelay
5620_SAM_CfmSingleEndedLoss
5620_SAM_CfmTwoWayDelay
5620_SAM_Channel
5620_SAM_ControlProcessor
5620_SAM_DaughterCard
v 5620_SAM_DHCP6_Address
v 5620_SAM_DS1_E1
v 5620_SAM_Hw_Environment
v 5620_SAM_IMALink
v 5620_SAM_ISA_Mda
v 5620_SAM_ISA_Member
v 5620_SAM_LAGInterface
v 5620_SAM_MCMCard
v 5620_SAM_MME
v 5620_SAM_MPLS_Site
v 5620_SAM_MPLSInterface
v 5620_SAM_MSS
v
v
v
v
v
5620_SAM_NQueue
5620_SAM_OAM_Test
5620_SAM_PhysicalPort
5620_SAM_PPP_Interface
5620_SAM_PPP_Protocol
v 5620_SAM_S11Peer
v 5620_SAM_S1UPeer
v
v
v
v
v
v
v
30
5620_SAM_S5Peer
5620_SAM_S8Peer
5620_SAM_SdpBinding
5620_SAM_ServiceAccessInterface
5620_SAM_Shelf
5620_SAM_Subnet_Address
5620_SAM_Virtual_Router
Alcatel-Lucent 5620 SAM LogToFile 2.3.0.0 Technology Pack Installation and User Guide
Enabling the firewall on the IBM InfoSphere Information Server and
WebSphere Application Server
Open and make the TCP ports available through firewall for InfoSphere
Information Server and WebSphere Application Server.
Procedure
1. Activate the firewall on the DataStage server by using the following steps:
a. Click System > Administration > Security Level and Firewall.
b. In the Security Level Configuration window, click Firewall list and select
Enabled.
c. Click the SELinux tab and select Permissive from the SELinux Setting list.
2. Enable the ports for the DataStage server by using the following steps:
a. Log in to https:/<hostname>:<port>/ibm/console. InfoSphere Information
Server web-based client opens.
b. Click Servers > Server Types > Websphere application servers.
c. Select your server name from the Application Server panel.
d. On the Communications section, click Ports. A page that displays the list of
ports opens.
3. Additionally, you must enable all the was.* ports and dsrpc.port port. To do
this, follow these steps:
a. Open the response.txt file and add the port number with this command:
Note: The default location for response.txt file is:
/opt/IBM/InformationServer/Server/Projects
$ cat /opt/IBM/InformationServer/response.txt | grep -i port
A list of ports are displayed in the console.
b. Open the ports with this command:
iptables -I INPUT -p tcp --dport <port_number> -j ACCEPT
c. Enable the ports was.* ports and dsrpc.port port.
d. Save the setting and restart the iptables with these commands:
service iptables save
service iptables restart
e. List the opened ports with this command:
iptables –L
f. Save this setting to a file by using the following command:
iptables-save > /root/ds_firewalls
g. Append the following lines to /etc/rc.local file so that setting is restored
upon restart:
iptables-restore > /root/ds_firewalls
Note: For more information about verifying the network and opening ports,
see
http://publib.boulder.ibm.com/infocenter/iisinfsv/v8r7/index.jsp?topic=
%2Fcom.ibm.swg.im.iis.productization.iisinfsv.install.doc%2Ftopics
%2Fwsisinst_pln_networks.html
Chapter 5. Deploying Alcatel-Lucent 5620 SAM LogToFile 2.3.0.0 DataStage jobs
31
Compiling the job
You must compile the job to prepare it to run on your system on the IBM
InfoSphere DataStage and QualityStage Designer.
Before you begin
Ensure that the job named J02main5620sam that you created is open and active in
the job design area.
Procedure
1. Select File > Compile.
) button from the toolbar. The "Compile Job"
Or, click the Compile (
window opens. As the job is compiled, the window is updated with messages
from the compiler.
2. When the "Compile Job" window displays a message that the job is compiled
successfully, click OK.
Results
The job is now compiled and ready to run. For more information about getting
your jobs ready to run, see http://publib.boulder.ibm.com/infocenter/iisinfsv/
v8r7/topic/com.ibm.swg.im.iis.ds.design.doc/topics/gettingjobsreadytorun.html
Running the job
You can use the Director client to run the job and to view the log that the job
produces as it runs.
About this task
You run the job from the Director client. The Director client is the operating
console. You also can use the Director client to monitor the jobs and troubleshoot
the job by any error log that you receive when you run the job.
Procedure
1. Click Start > All Programs > IBM InfoSphere Information Server > IBM
InfoSphere DataStage and QualityStage Director. The IBM InfoSphere
DataStage and QualityStage Director opens. In the Director client, your job
status is compiled, which means that the job is ready to run.
2. Select your job in the right pane of the Director client, and select Job > Run
Now. Ensure that the job parameters are set correctly.
3. In the "Job Run Options" window, click Limits tab and select No limit in
Warnings pane.
4. Optional: In the "Job Run Options" window, click the General tab, and then
click Record job performance data option to enable performance data.
5. Click Run.
6. When the job status changes to Running, select View > Log.
) button to open the job in log mode.
Or, click the Log (
7. Examine the job log to see the type of information that the Director client
reports as it runs a job. The messages that you see are either control or
information type. Jobs can also have Fatal and Warning messages.
32
Alcatel-Lucent 5620 SAM LogToFile 2.3.0.0 Technology Pack Installation and User Guide
8. Select File > Exit to close the Director client.
What to do next
You see many warning messages at the time of a job startup. These warning
messages can be ignored. These warnings are thrown by DataStage checks. But pay
attention to the warnings that you might see while the job is running. These
warnings are displayed to alert the user.
The job starts a daemon. This daemon is connected to SAM JMS and directs all the
messages to ActiveMQ. The DataStage job reads from the ActiveMQ. To check the
daemon process, follow these steps:
1. Go to /opt/IBM/InformationServer/Server/Projects/UDM/udm/logs directory.
2. Open the sam-jms-daemon.log file to see the messages that are flowing in. By
default, the KeepAlive messages appear every 30 seconds. This time interval
can be configured on the SAM server.
Attention: It is recommended to restart the DataStage job once in every few days.
When the job is restarted without restarting the JMS client daemon, the full dump
is not started.
Viewing the JMS message flow from SAM server in Apache
ActiveMQ
You can view the results of your job execution by opening the Apache AciveMQ
from the Web browser. You can see the JMS message flow from SAM server in
Apache ActiveMQ.
Procedure
1. Open the Apache ActiveMQ console from the web browser:
http://<Server_IP_Address>:8161/admin/
<Server_IP_Address> is the server where Apache ActiveMQ is installed.
2. Click the Queues tab. You can see the Number Of Consumers, Messages
Enqueued and Messages Dequeued. You can also perform maintenance from
here.
Gracefully shutting down the job
The stages are shut down one after the other. Job continues to run until its process
is complete and then shuts down. To stop a job, you must wait until the job is
completed.
Procedure
1. Go to /opt/IBM/InformationServer/Server/Projects/UDM/udm/bin directory.
2. Run the sendDoneMessage.sh file by using the following command:
cd /opt/IBM/InformationServer/Server/Projects/UDM/udm/bin
./sendDoneMessage.sh
Ideally, when you stop the Job, the daemon process must be running. Check the
status of the daemon by using the following command:
./daemon.sh status
If for some reason the status gives the following output:
Chapter 5. Deploying Alcatel-Lucent 5620 SAM LogToFile 2.3.0.0 DataStage jobs
33
UDMD_STATUS=STOPPED
UDMD_REASON=’daemon no longer running’
DS_DIR=${DS_DIR-/opt/IBM/InformationServer/Server/DSEngine}
SAM_JMSURL1=${SAM_JMSURL1-10.0.0.56}
SAM_JMSURL2=${SAM_JMSURL2-10.0.0.79}
DS_WORKSPACE=${DS_WORKSPACE-//opt/IBM/InformationServer/Server/Projects/UDM}
SAM_UNIQUE_ID=${SAM_UNIQUE_ID-devds_J01main5620sam}
SAM_USERNAME=${SAM_USERNAME-sam-o}
SAM_PASSWORD=${SAM_PASSWORD-5620Sam!}
Look at the sam-jms-daemon.log file from the /opt/IBM/InformationServer/
Server/Projects/UDM/udm/logs directory. You can troubleshoot and start the
daemon manually. For more information about starting the daemon, see
“Starting the daemon manually”
Starting the daemon manually
At the time of job start, it checks whether the daemon process is running or not. If
the daemon is not running, the job starts the daemon. You can run the daemon
manually.
About this task
To run the daemon manually, follow these steps:
Procedure
1. Go to /opt/IBM/InformationServer/Server/Projects/UDM/udm/bin directory.
2. Start the daemon process by using the following command:
./daemon.sh start
STATUS:SUCCESS
3. To check the status of the daemon, use the following command:
./daemon.sh status
The following output is displayed:
UDMD_STATUS=RUNNING
UDMD_REASON=’daemon is running’
UDMD_PID=6505
DS_DIR=${DS_DIR-/opt/IBM/InformationServer/Server/DSEngine}
SAM_JMSURL1=${SAM_JMSURL1-10.0.0.56}
SAM_JMSURL2=${SAM_JMSURL2-10.0.0.79}
DS_WORKSPACE=${DS_WORKSPACE-//opt/IBM/InformationServer/Server/Projects/UDM}
SAM_UNIQUE_ID=${SAM_UNIQUE_ID-devds_J01main5620sam}
SAM_USERNAME=${SAM_USERNAME-sam-o}
SAM_PASSWORD=${SAM_PASSWORD-5620Sam!}
Note: You can start the daemon manually only after the job is run successfully
at least once.
34
Alcatel-Lucent 5620 SAM LogToFile 2.3.0.0 Technology Pack Installation and User Guide
Data flow in the data subdirectories
Access the data directory from here: /opt/IBM/InformationServer/Server/
Projects/UDM/udm/data.
The data directory contains all the data files. The different subdirectories in the
data directory are as follows:
in
When there is a file available message from the SAM server, DataStage job
fetches the XML files and places it in the in directory.
done
After the DataStage job processes these XML files, it moves them into the
done directory. You must clean these XML files to free the space for storage.
cache
This directory contains the temporary data that is required by the job for
its processing. This directory contains a set of socket files for
intercommunication, map files for sharing the memory among the different
stages, and litedb files are where the data is buffered and stored
temporarily even when the job is shut down to avoid data loss.
out
The CSV files are created in the out directory that is based on the
information in the XML files and JMS messages if any.
Important: The files from the cache directory are used by the DataStage job for
internal use. You must not delete or alter any file from the subdirectory while the
job is running. Otherwise, the job might fail.
Configuring the DataStage job for Secure File Transfer support
About this task
To add Secure File Transfer support for DataStage job, follow these steps:
Procedure
1. In the IBM InfoSphere DataStage and QualityStage Designer, click the Job
Properties button, and then click the Parameters tab.
2. Change the default value for the SECURE_FILE_TRANSFER to TRUE.
3. Create the SSH private key file by name sshkey_file.
4. Copy the SSH private key file to this location:
/opt/IBM/InformationServer/Server/Projects/UDM/udm/cfg/sshkey_file
5. Or, link the sshkey_file to the target private key file by using the following
commands as dsadm:
$ pwd
/opt/IBM/InformationServer/Server/Projects/UDM/udm/cfg
$ ls -l sshkey_file
lrwxrwxrwx 1 dsadm dstage 23 Nov 7 21:47 sshkey_file ->
/home/dsadm/.ssh/id_rsa
Chapter 5. Deploying Alcatel-Lucent 5620 SAM LogToFile 2.3.0.0 DataStage jobs
35
36
Alcatel-Lucent 5620 SAM LogToFile 2.3.0.0 Technology Pack Installation and User Guide
Chapter 6. Installing the Alcatel-Lucent 5620 SAM LogToFile
2.3.0.0 Technology Pack
The Topology Editor was introduced at the same time as the 4.3-U technology pack
release. All 4.3-U or higher UBA technology pack installations require the Topology
Editor to configure the technology pack.
Configuration details are described in the Pack Installation and Configuration Guide.
You can install the Alcatel-Lucent 5620 SAM LogToFile 2.3.0.0 Technology Pack
either from a launchpad or by using the command line.
Tivoli Netcool Performance Manager supports the 4.3-U or higher technology pack
installation procedures.
All technology packs, both legacy bundle and stand-alone packs, require the
Technology Pack Installer. Always use the latest Technology Pack Installer,
regardless of the version of the technology pack.
Important: A new Technology Pack Installer is released in 1.3-G release with the
version 3.3.1.0. This version has no feature enhancements but is released for license
text changes.
All technology packs require that the Starter Kit or the Pack Bundle Prerequisite
Pack to be installed.
Prerequisite software
Ensure that you fulfill these prerequisites before you install and configure the
Alcatel-Lucent 5620 SAM LogToFile 2.3.0.0 Technology Pack.
Prerequisite software for Alcatel-Lucent 5620 SAM LogToFile
2.3.0.0 Technology Pack installation
You must have all the prerequisite software and required information before you
install and configure a technology pack.
v IBM Tivoli Netcool Performance Manager 1.3.2. Additionally, you require the
1.3.2.0-TIV-TNPM-IF0019 fix pack.
Note: This fix pack contains the DataChannel fixes to support IBM InfoSphere
Information Server for Alcatel-Lucent 5620 SAM LogToFile 2.3.0.0 Technology
Pack.
v Oracle 11g client 64 bit
v UBA collectors. You can add UBA collectors as described in Add a Collector in
Installing Tivoli Netcool Performance Manager - Wireline Component and associate it
with a UBA pack as part of this technology pack installation.
v Ensure that you have access to the Tivoli Netcool Performance Manager
DataMart server that is running an X Window System server.
Note: If there is no graphics card on the DataMart server, the Xvfb virtual frame
buffer package that provides X Window System services is automatically
installed. For more information, see Setting Up a Remote X Window Display in
Installing Tivoli Netcool Performance Manager - Wireline Component.
© Copyright IBM Corp. 2014
37
v Ensure that you have access to the Tivoli Integrated Portal.
v Ensure that you have access to the DataChannel server.
v Ensure that you have access to the Alcatel-Lucent 5620 SAM LogToFile 2.3.0.0
Technology Pack installation files on one of the following locations:
– Product distribution site: https://www-112.ibm.com/software/howtobuy/
softwareandservices. On the product distribution sites are the
ProvisoPackInstaller.jar file, and technology pack JAR files.
– Tivoli Netcool Performance Manager CD distribution, which contains the
ProvisoPackInstaller.jar file, technology pack JAR files, and the JAR files
for the Starter Kit components.
For more information about the Starter Kit, see “Preinstallation setup tasks”
on page 39.
For more information about obtaining software, see your IBM customer
representative.
v The correct version of Java. For more information, see Configuration
Recommendations.
v Apache ActiveMQ v5.5.1 that is bundled with the Alcatel-Lucent 5620 SAM
LogToFile 2.3.0.0 Technology Pack JAR file.
Additional information
Before configuring a technology pack, ensure that you:
v Have the following documentation for your version of Tivoli Netcool
Performance Manager:
– IBM Tivoli Netcool Performance Manager: Pack Release Notes for the current
technology pack release
– IBM Tivoli Netcool Performance Manager: Installation Guide
– IBM Tivoli Netcool Performance Manager: Upgrade Guide (if you are upgrading
the core software)
– IBM Tivoli Netcool Performance Manager: Pack Upgrade Guide (if you are
upgrading the technology-pack software)
– IBM Tivoli Netcool Performance Manager: DataMart Configuration Guide
Note: Refer to this guide to create an inventory profile and initiate a
discovery.
v Ensure that you have access to the following site to check for interim fixes or fix
packs that might apply to your technology pack:
http://www-306.ibm.com/software/sysmgmt/products/support/
NetcoolProviso.html
v The Tivoli Netcool Performance Manager documentation and the IBM Tivoli
Netcool Performance Manager: Pack Release Notes, which are available on the
following website:
http://publib.boulder.ibm.com/infocenter/tivihelp/v8r1/topic/com.ibm.netcool
_pm.doc/welcome_tnpm.html
v The Oracle TNS name of the server on which you installed Oracle server with
the Tivoli Netcool Performance Manager database configuration. For more
information, see Specifying a Basename for DB_USER_ROOT in the Installing Tivoli
Netcool Performance Manager - Wireline Component.
38
Alcatel-Lucent 5620 SAM LogToFile 2.3.0.0 Technology Pack Installation and User Guide
Preinstallation setup tasks
Ensure that all necessary configuration steps are completed on the prerequisite
software.
v Completed the following tasks:
– Reviewed the release notes for the current technology pack.
Note: Release notes contain important information that you must consider
before you install a technology pack. They also contain information about
specific patches that must be installed before you configure a technology pack
– Installed the 1.3.2 version of the Tivoli Netcool Performance Manager
components, as described in the IBM Tivoli Netcool Performance Manager:
Installation Guide.
– Configured at least one DataChannel.
– Created a user on the server with permission to FTP and delete files.
v Open a terminal emulator and log on to the DataMart server as pvuser.
v Change your working directory to the DataMart home directory (/opt/datamart,
by default).
v Load the shell with the DataMart environment by sourcing the dataMart.env
file, as follows:
. /opt/datamart/dataMart.env
Note: After you load the DataMart environment into the shell, the PVMHOME
variable is set to the DataMart home directory, /opt/datamart, by default. These
instructions assume that this variable is set.
v Set and export the DISPLAY environment variable (see Setting Up a Remote X
Window Display in the Installing Tivoli Netcool Performance Manager - Wireline
Component), so that the Technology Pack Installer GUI displays back on your
system.
v Installed the Technology Pack.
Note: Localization is done automatically during installation of the technology
pack.
Preparing the Alcatel-Lucent 5620 SAM LogToFile 2.3.0.0 Technology
Pack installation directory
You can obtain technology pack installation files from the IBM product distribution
website, or from the Tivoli Netcool Performance Manager technology pack CD.
Before you begin
If you are installing the packs by using an instance of the Tivoli Netcool
Performance Manager launchpad on the local file system, you can install directly
from the CD. Otherwise, you must create a temporary directory and copy the
technology pack files to the local system before you begin the installation. You
cannot run the launchpad from the Tivoli Netcool Performance Manager DVD, and
then install technology packs directly from the CD distribution.
Note: If you are using a local instance of the launchpad and you want to install
directly from the technology pack CD, you can skip this step and proceed to
Chapter 6, “Installing the Alcatel-Lucent 5620 SAM LogToFile 2.3.0.0 Technology
Pack,” on page 37.
Chapter 6. Installing the Alcatel-Lucent 5620 SAM LogToFile 2.3.0.0 Technology Pack
39
Procedure
1. On the system where DataMart is located, use the mkdir command to create
app-packs directory to hold the technology pack JAR files and the
ProvisoPackInstaller.jar file. For example:
mkdir -p $PVMHOME/version/app-packs
2. If you want to use technology packs from the IBM product distribution
website, download the JAR files by following these steps:
a. Use the cd command to change your working directory to the app-packs
directory that you created in Step 1. For example:
cd $PVMHOME/version/app-packs
b. Download the following from this website:
https://www-112.ibm.com/software/howtobuy/softwareandservices
v ProvisoPackInstaller.jar file
v JAR files for technology packs you want to install (the bundled JAR file
for bundled packs or individual JAR files for stand-alone packs)
3. If you want to use technology packs from the Tivoli Netcool Performance
Manager technology pack CD, browse to the /Proviso/AP/jar location on the
CD and copy the following files to the temporary directory:
v ProvisoPackInstaller.jar file
v JAR files for technology packs you want to install (the bundled JAR file for
bundled packs or individual JAR files for stand-alone packs)
4. Unmount the CD.
Installing the technology pack by using the launchpad
Use this information to install a technology pack by using the launchpad.
Before you begin
Check the version of Java running on your system by entering the following
command:
java -version
You must upgrade your version of Java depending on the technology pack release.
Important: For 4.3-U and higher technology packs, the launchpad requires you to
enter the path to supported Java runtime binary files. Only version 1.5.0_b(14+) is
supported. The Tivoli Netcool Performance Manager topology editor provides a
supported version of the Java binary files. Using the older Java version might
result in an error detailing that it is not possible to proceed with the installation.
About this task
To install a Tivoli Netcool Performance Manager technology pack, follow these
steps:
Procedure
1. Start the installer as follows:
a. If it is not already open, open the launchpad (see Starting the Launchpad in
the Installing Tivoli Netcool Performance Manager - Wireline Component).
40
Alcatel-Lucent 5620 SAM LogToFile 2.3.0.0 Technology Pack Installation and User Guide
Note: Open a terminal emulator and log on to the DataMart server as
pvuser. You must su to root. Otherwise, the launchpad fails to start.
b. On the launchpad, click Install Technology Pack.
c. On the Install Technology Pack window, enter the following information:
v The DataMart home directory (for example,/opt/datamart, by default).
v The Java run time environment home directory (for example,
/opt/IBM/proviso/topologyEditor/jre/bin).
Note: For information about supported JRE versions, see the IBM Tivoli
Netcool Performance Manager: Configuration Recommendations.
v The Tivoli Netcool Performance Manager user (for example, pvuser).
d. Click the Install Technology Pack link.
A window prompts you to select the technology pack installation setup
directory.
e. Click Browse to locate the temporary directory ($PVMHOME/version/apppacks) that you created in “Preparing the Alcatel-Lucent 5620 SAM
LogToFile 2.3.0.0 Technology Pack installation directory” on page 39, or the
directory on the Tivoli Netcool Performance Manager CD where the pack
JAR files are located (by default, /Proviso/AP/jar).
The technology pack can be loaded to the server where the Tivoli Netcool
Performance Manager database is installed.
f. Click the directory, and then click Select to display the specified directory
in the window.
g. Click OK.
When the Technology Pack Installer starts, it displays a Tivoli Netcool
Performance Manager Technology Packs Welcome window.
2. Click Next.
3. Accept the license agreement, and then click Next.
The Technology Pack Installer displays the Database Access Parameters
window with the parameter values that you specified when installing and
configuring Oracle, the Tivoli Netcool Performance Manager database, and
Tivoli Netcool Performance Manager DataMart. For more information, see
Installing and configuring the prerequisite software and Installing in a distributed
environment in the Installing Tivoli Netcool Performance Manager - Wireline
Component.
4. Reenter the password of the database user, which is PV by default.
5. Click Next to continue.
The Technology Pack Installer displays the Tivoli Integrated Portal access
parameter values that you specified when installing and configuring Tivoli
Netcool Performance Manager DataView as described in Installing in a
distributed environment in the Installing Tivoli Netcool Performance Manager Wireline Component.
Note: The Technology Pack Installer GUI always displays 16315 as the default
port number for Tivoli Integrated Portal. If you want to use a different port
number, you must give the port number at the time of Tivoli Netcool
Performance Manager installation. Otherwise, the Technology Pack Installer
displays an error message and you cannot proceed with the installation.
6. Reenter the password, which is tipadmin for the Tivoli Integrated Portal user.
The Technology Pack Installer displays a Feature Selection window, which lists
all the packs you downloaded to the directory created in “Preparing the
Chapter 6. Installing the Alcatel-Lucent 5620 SAM LogToFile 2.3.0.0 Technology Pack
41
Alcatel-Lucent 5620 SAM LogToFile 2.3.0.0 Technology Pack installation
directory” on page 39 in the left panel. All the packs are automatically
selected for installation.
7. Clear any technology packs in the list that you do not want to install, and
then click Next.
Note: The prerequisites for technology packs item in the Feature Selection
window is always installed. You cannot clear this item. The Starter Kit is not
included in this item.
Depending on the type of packs you install, you might be presented with
slightly different windows.
8. Click Next to start the installation.
As the stand-alone packs are installed, the Technology Pack Installer displays
the name of each pack and indicates the progress. When the installation
completes, the Technology Pack Install Complete window is displayed.
9. Click Finish to exit the Technology Pack Installer.
10. Go to What to do next section to perform post-installation tasks.
What to do next
After the installation completes, do the following tasks:
Important: A technology pack does not work until it is configured. After you
configure the technology pack, data is collected and reports are populated.
v Populate the family dictionary table as described in “Populating the family
dictionary table.”
v Add a UBA collector as described in“Adding a UBA collector for a UBA pack”
on page 43.
v Configure the technology pack as described in Chapter 7, “Configuring the
technology pack,” on page 45.
Populating the family dictionary table
Use this information to populate the family dictionary table for any new
Alcatel-Lucent 5620 SAM LogToFile 2.3.0.0 installation.
Procedure
1. Change your working directory to the standard directory by using the
following command:
cd $PVMHOME/APFiles/alcatel_5620_sam_log2file/datamart/standard/
2. Provide the run permission to the importLogToFileFamilyDictionary.rmg script
file by using the following command:
chmod +x importLogToFileFamilyDictionary.rmg
3. Source the DataMart environment by using the following command:
.$PVMHOME/dataMart.env
4. Run the importLogToFileFamilyDictionary.rmg script file by using the
following command:
./importLogToFileFamilyDictionary.rmg
Initially, you receive the $Import has started message. When the import is
completed, you see the $Completed import message.
42
Alcatel-Lucent 5620 SAM LogToFile 2.3.0.0 Technology Pack Installation and User Guide
UBA collectors
The UBA collector is associated with two DataChannel components:
Complex Metric Engine (CME)x.x
Performs calculations on the collected data.
File Transfer Engine (FTE)x.x
Transfers files from the collector output directories and places them in the
input directory of the CME.
Note: Topology Editor includes the channel and collector numbers in the
component names. For example, Data Channel 1 can have Collector UBA
1.1, with Complex Metric Engine 1.1 and File Transfer Engine 1.1.
The FTE writes data to the file /var/adm/wtmpx on each system that hosts a
collector. As part of routine maintenance, check the size of this file to
prevent it from growing too large. For more information about Disk Quota
Management, see Installing Tivoli Netcool Performance Manager - Wireline
Component.
Note: The Solaris version can be configured with strict access default
settings for secure environments. Strict FTP access settings might interfere
with automatic transfers between a DataChannel subchannel and the
DataLoad server. Check for FTP lockouts in /etc/ftpd/ftpusers, and check
for strict FTP rules in /etc/ftpd/ftpaccess.
Follow the instructions in “Adding a UBA collector for a UBA pack.”
Adding a UBA collector for a UBA pack
Use this information to add a UBA collector.
Procedure
1. Load the pack XSD file into an existing topology, as follows:
a. If it is not already open, open the Topology Editor (see Starting the Topology
Editor in the Installing Tivoli Netcool Performance Manager - Wireline
Component).
b. Open a deployed topology (a topology.xml file) (see Opening an Existing
Topology File in the Installing Tivoli Netcool Performance Manager - Wireline
Component).
c. In the Technology Pack view, right-click the Technology Packs folder and
select Load Technology Pack from the menu.
The Load the technology pack configuration metadata window displays.
There are two radio buttons: XSD file and JAR file.
d. Click the JAR file radio button and select Browse.
There is a known issue and a workaround for opening an XSD file from a
UBA pack. For more information, see UBA pack XSD file inside a JAR file
cannot be loaded into the Topology Editor section in IBM Tivoli Netcool
Performance Manager: Pack Release Notes.
e. Using the Directory: field, the up and down arrows, and the Folders pane
on the configuration metadata window, go to the directory where the
technology pack JAR files exist. For example, $PVMHOME/APFiles or a
directory on the Tivoli Netcool Performance Manager CD
f. Select a technology pack JAR file, and then click OK. The pack JAR file is
displayed in the configuration metadata window.
Chapter 6. Installing the Alcatel-Lucent 5620 SAM LogToFile 2.3.0.0 Technology Pack
43
g. Click Finish. The Topology Editor adds the selected stand-alone technology
pack to the list of technology packs displayed in the Technology Packs
view.
2. After you load a UBA pack XSD file, you must add a UBA collector and
associate it with a UBA technology pack as follows:
a. In the Logical view, right-click the DataChannel x folder and select from
the Add collector UBA menu.
The Configure Collector window opens.
b. Select the technology pack. For example, Alcatel-Lucent 5620 SAM
LogToFile from the list of technology packs, and then click Next.
c. Using the list of available hosts on the Configure Collector window, select
the workstation that hosts the collector. For example, corinth
d. Accept the default collector number. For example, 2.
e. Click Finish.
The Topology Editor displays the new collector under the DataChannel x
folder in the Logical view.
f. Highlight the collector to view its properties. The Topology Editor displays
both the UBA collector core parameters and the UBA technology
pack-specific parameters. The core parameters are configured with all UBA
technology packs. Review the values for the parameters to make sure that
they are valid. For information about the core parameters, see the Properties
Reference. For information about the pack-specific parameters, see the
Topology Editor Help.
g. To add extra UBA collectors for a UBA technology pack, repeat Step 2-a
through Step 2-f.
h. Redeploy the updated topology. See Starting the Deployer in the Installing
Tivoli Netcool Performance Manager - Wireline Component.
3. Configure the UBA technology packs.
Log files
The Technology Pack Installer writes log files to the /usr/tmp directory.
Log files in this directory contain a detailed history of the tasks the Technology
Pack Installer performs as it installs technology packs. You can check this log file
to help solve any issues that might occur during technology pack installation. For
example, a log file might contain a message that indicates that the Technology Pack
Installer GUI cannot display back on your system because the DISPLAY
environment variable was not set. For more information, see Setting Up a Remote X
Window Display in the Installing Tivoli Netcool Performance Manager - Wireline
Component.
Log files for bulk technology packs are named installer<timestamp>.log, where
timestamp is the time that the file was created in seconds since the UNIX epoch.
Log files for stand-alone packs are named: APInstall<timestamp>.log.
For technology packs, log file names have the format APInstall<number>.log. For
example: APInstall1311248677586.log.
44
Alcatel-Lucent 5620 SAM LogToFile 2.3.0.0 Technology Pack Installation and User Guide
Chapter 7. Configuring the technology pack
Configure the Alcatel-Lucent 5620 SAM LogToFile 2.3.0.0 Technology pack.
Before you begin
Ensure that you:
v Have the following software and documentation for your version of Tivoli
Netcool Performance Manager:
– IBM Tivoli Netcool Performance Manager: Pack Release Notes for the current
technology pack release
– Installing Tivoli Netcool Performance Manager - Wireline Component.
– IBM Tivoli Netcool Performance Manager: Pack Installation and Configuration
Guide.
– Configuring and Operating DataMart
Important: Refer to this guide to run a bulk inventory profile.
– Access to the Tivoli Netcool Performance Manager DataMart server
Note: Alcatel-Lucent 5620 SAM LogToFile 2.3.0.0 Technology pack is
supported on Tivoli Netcool Performance Manager 1.3.2.
– An X Window server on the DataMart server
– Access to the Tivoli Integrated Portal
– Access to the DataChannel server.
v Ensure that you completed the following tasks:
– Reviewed the release notes for the current technology pack.
Note: Release notes contain important information that you must consider
before you install a technology pack. They also contain information about
specific patches that must be installed before you configure a technology
pack.
– Installed the current version of the Tivoli Netcool Performance Manager
components, as described in the Installing Tivoli Netcool Performance Manager Wireline Component.
– Installed the Alcatel-Lucent 5620 SAM LogToFile 2.3.0.0 Technology Pack.
– Configured at least one DataChannel.
– Configured two UBA Bulk Collector subchannels.
– Created a user on the Alcatel-Lucent 5620 SAM server with permission to FTP
and delete files.
v Configured the XSD file. To configure the XSD file,
1. Open the Topology Editor, and click Topology > Open existing topology to
load existing topology from database
2. On the Technology Packs pane, load the Alcatel-Lucent SAM 5620 LogToFile
XSD file.
3. In the Logical View, create the following collectors on any new or existing
channels, and configure their corresponding parameters:
– Performance UBA
© Copyright IBM Corp. 2014
45
– Accounting UBA
4. Click Run > Run Deployer for Installation to deploy the topology that you
configured.
To configure the Alcatel-Lucent 5620 SAM LogToFile 2.3.0.0 Technology Pack,
follow these steps:
Procedure
1. Load the DataMart environment. To load the shell with the DataMart
environment, follow these steps:
a. Log in to the DataMart server as pvuser.
b. Create new folder DATA_CHANNEL_HOME/scripts/alcatel_5620_sam_log2file.
c. Change your working directory to the DataMart home directory
(/opt/datamart, by default), by using the following command:
$ cd /opt/datamart
d. Load the shell with the DataMart environment, by sourcing the
dataMart.env file, as follows:
$ . /opt/datamart/dataMart.env
Note: After you load the DataMart environment into the shell, the
PVMHOME variable is set to the DataMart home directory, /opt/datamart
by default. These instructions assume that this variable is set.
2. Copy technology-specific files from the DataMart server to the DataChannel
server. Technology-specific files are used to associate a UBA technology pack
with a specific instance of the UBA.
Note: While it is possible to install DataMart and DataChannel on the same
server, in a typical installation these modules are installed on separate servers.
If so, use FTP to copy the technology-specific files. Otherwise, if DataMart and
DataChannel are on the same server, use the cp command to copy the files to
the appropriate DataChannel directory.
To copy technology-specific files to the DataChannel server, follow these steps:
a. Log in to the Tivoli Netcool Performance Manager DataChannel server by
entering the user name and password that you specified when you install
and configuring a DataChannel. The default user name and password are
pvuser and PV.
b. Change your working directory to the DATA_CHANNEL_HOME/scripts/
alcatel_5620_sam_log2file directory by entering the following command,
replacing DATA_CHANNEL_HOME with the DataChannel home directory
(/opt/datachannel, by default):
$ cd DATA_CHANNEL_HOME/scripts/alcatel_5620_sam_log2file
c. Using the FTP utility in text mode, log in to the DataMart server by using
the appropriate user name and password (pvuser and PV, by default).
d. Using the cd subcommand, change your working directory to the
$PVMHOME/APFiles/alcatel_5620_sam_log2file/datachannel/scripts/
alcatel_5620_sam_log2file directory.
e. By using the get subcommand, copy the bulk adapter design files (*.js),
scripts (if any), and other files (if any) from the DataMart server to the
DataChannel server.
f. Exit the FTP utility by entering the bye subcommand.
g. Verify that the technology-specific files are now in the target directory as
follows:
46
Alcatel-Lucent 5620 SAM LogToFile 2.3.0.0 Technology Pack Installation and User Guide
v Verify that the bulk adapter design files (*.js), scripts, other files (if any)
are now in the $ cd DATA_CHANNEL_HOME/scripts/
alcatel_5620_sam_log2file directory.
3. Copy the samOss.jar file to the IBM InfoSphere Information Server. The
samOss.jar file is distributed on a SAM distribution DVD referred to as the
5620 SAM software DVD-ROM, and is in the following directory:
<SAM_ROOT_RELEASE_DIR>/nms/integrations/SAM_O,
You must copy the samOss.jar file from the directory on the DVD to the
/opt/IBM/InformationServer/Server/Projects/UDM/udm/jar directory.
4. Activate data collection requests. During installation of the technology pack, all
predefined data collection requests are promoted to the database and set to
inactive (that is, idle displays in the Active column of the Tivoli Netcool
Performance Manager DataMart Request Editor). You must activate these
predefined data collections requests by using the Request Editor. To set data
collection requests to active, follow these steps:
a. Change your working directory to $PVMHOME/bin (/opt/datamart/bin, by
default) on the DataMart server.
b. Start the DataMart GUI by entering the following command and pressing
Enter:
$ pvm
c. Click the Configuration tab, then click Request Editor to open the Request
Editor.
d. Click the Collection tab.
e. Click Refresh. The predefined data collection requests are loaded into the
Request Editor from the database.
f. Click the Inactive button in the Filter group box to display only idle
requests.
g. In the Sub-Element Groups pane, select all idle data collection requests in
the following group or groups: Root->Sub-Element Collect->AlcatelLucent 5620 SAM
h. Click the Active box under Details. The Request Editor toggles the idle
setting for these data collection requests from idle to active in the Active
column.
i. Click Save.
5. Load the DataChannel environment. In subsequent steps, you can run the
dccmd commands. To ensure that you can run these commands, load the shell
with the DataChannel environment by following these steps:
a. Log in to the DataChannel server as pvuser.
b. Change your working directory to the DataChannel home directory
(/opt/datachannel, by default), by using the following command:
$ cd /opt/datachannel
c. Load the shell with the DataChannel environment, by sourcing the
dataChannel.env file, as follows:
$ . /opt/datachannel/dataChannel.env
6. Restart the DataChannel to activate the UBA and read in changes to the
deployed topology.
a. Open a terminal emulator on the DataChannel server.
b. Use the dccmd command to stop all DataChannel applications:
$ dccmd stop all
c. Use the dccmd command to release all daemons that are running in the
DataChannel:
Chapter 7. Configuring the technology pack
47
$ dccmd forget all
d. Use the following command to find the process identifiers (pids) associated
with the DataChannel visual processes:
$ findvisual
e. Use the following commands to stop each DataChannel visual process:
$
$
$
$
kill
kill
kill
kill
-9
-9
-9
-9
<cnsw_pid>
<logw_pid>
<amgrw_pid>
<cmgrw_pid>
f. Use the following commands to restart each DataChannel visual process:
$
$
$
$
cnsw
logw
amgrw
cmgrw
g. Use the dccmd command to start all DataChannel applications:
$ dccmd start all
h. Use the dccmd command to verify that all of the DataChannel applications
started properly:
$ dccmd status all
More specifically, make sure that the UBA application associated with the
DataChannel that you configured for the Alcatel-Lucent SAM 5620
LogToFile Technology Pack is running.
i. Watch the output of the status switch to verify that all the necessary
processes are running. If these processes are running, run the tail utility on
the log file for the UBA by issuing a command similar to the following
command:
tail -f DATA_CHANNEL_HOME/log/proviso.log | grep UBA.<channel_number>.
<collector_number> | more
where:
Variable
Meaning
<channel_number>
Specifies the channel number.
<collector_number>
Specifies the collector number (for example,
100) that you specified when you configure
this UBA Bulk Collector.
The trailing dash (–) after <collector_number> Removes extraneous log messages from your
view. That is, the trailing dash guarantees
that the command displays only those
messages that are generated by your
application. The first set of messages relate
to syntax checks.
The following table identifies some events to watch for during the syntax
check:
48
Event
Meaning
The UBA application starts successfully, but
then stops running.
Typically, this event occurs because of a
licensing issue.
The bulk adapter design file might be
corrupted.
This event causes a syntax error before the
UBA application connects to the database.
Alcatel-Lucent 5620 SAM LogToFile 2.3.0.0 Technology Pack Installation and User Guide
Event
Meaning
The UBA application connects to the
database.
This event causes a message similar to the
following example to display: DB_CONNECT
Connecting to <sid> as <user> If you see
this database connection message without
prior errors, the UBA application passed the
syntax check.
7. Run the bulk inventory profile. The UBA application handles the inventory and
metrics according to the instructions provided in the technology pack design
file or files. The UBA application inserts the created elements, subelements, and
metrics into the database. However, the UBA application does not handle the
grouping of these elements and subelements. To handle the grouping of the
elements and subelements that were inserted into the database, UBA
technology packs supply a bulk inventory profile. This bulk inventory profile is
automatically created when the pack is installed. Bulk inventory profiles use
the following name syntax: bulk_N where:
Syntax item
Meaning
bulk_
Identifies as a bulk inventory profile for a
UBA technology pack.
N
Specifies the collector number (for example,
100) that the user specified when you
configure this UBA Bulk Collector.
You must use the Inventory Tool to run a bulk inventory profile. To run the
bulk inventory profiles for this technology pack, perform the following steps:
a. In the command window where you loaded the DataMart environment,
change your working directory to $PVMHOME/bin (/opt/datamart/bin, by
default) on the DataMart server.
b. Start the DataMart GUI:
$ pvm
c. Click Inventory Tool in the Resource tab. The Inventory Tool window
appears. This window displays a list of the existing inventory profiles on
the Configuration tab. The names of the inventory profiles to run are
bulk_N1 and bulk_N2, where N1 and N2 are the collector numbers that are
configured for this pack.
d. On the Configuration tab, click the bulk inventory profiles for this
technology pack and then select Run Profile from the Action menu. The
Live Information tab displays messages about the status of the profiles. For
more information about running an inventory profile, see Configuring and
Operating DataMart.
e. Every time the UBA technology pack design file creates new elements,
subelements, and metrics, you must perform the previous steps to group
the elements and subelements. One way to accomplish this task regularly is
to create a cron entry that uses the inventory command. The following
example shows the cron entries that periodically perform the grouping
operation for the bulk inventory profiles that are called bulk_100 and
bulk_101:
0 * * *
-action
0 * * *
-action
* . /opt/datamart/dataMart.env && inventory -name bulk_100
pregrouping -reload -noX
* . /opt/datamart/dataMart.env && inventory -name bulk_100
grouping -reload -noX
Chapter 7. Configuring the technology pack
49
0 * * *
-action
0 * * *
-action
* . /opt/datamart/dataMart.env && inventory -name bulk_101
pregrouping -reload -noX
* . /opt/datamart/dataMart.env && inventory -name bulk_101
grouping -reload -noX
For more information about the inventory command, see Command Line
Interface Reference.
8. Deploy reports. After the technology pack installation completes, the rules for
the new device are automatically loaded into the database. The inventory
process uses those rules to group elements and subelements. You must
manually deploy (auto-group) the reports by associating them with groups in
the NOC Reporting tree in the DataMart Resource Editor. To deploy the
Alcatel-Lucent SAM 5620 LogToFile Technology Pack reports, follow these
steps:
a. Open the Tivoli Netcool Performance Manager DataMart Resource Editor.
b. Click the ReportSEGroup tab.
c. Move the cursor to the left pane and scroll up to select any group under the
SUB-ELEMENTS > NOC Reporting tree.
d. Right-click and select the AutoGrouping option from the menu. The
AutoGrouping option places the reports in dynamically generated groups
that are created during inventory.
e. Click Yes to continue.
f. Click Close to exit the message box, or click Details to view a description of
any errors.
g. You can also deploy reports regularly by creating a cron entry that uses the
inventory CLI command and the
-reportGrouping
option. This option instructs the inventory command to run the report
grouping rules and update the deployed reports that are stored in the
database. Report grouping rules must first are created before this option can
be used. For information about creating report grouping rules, see
Configuring and Operating DataMart. The following example shows a cron
entry that periodically performs the deployment report operation:
0 * * * * . /opt/datamart/dataMart.env && inventory -noX -reportGrouping
For more information about the inventory command, see Command Line
Interface Reference.
Verifying resources
Use the Tivoli Netcool Performance Manager DataMart Resource Editor to
determine whether the technology pack resources (elements, subelements,
properties, and so on) were successfully discovered and created in the database
during inventory.
For information about using the DataMart Resource Editor, see the IBM Tivoli
Netcool Performance Manager DataMart Configuration and Operation Guide.
50
Alcatel-Lucent 5620 SAM LogToFile 2.3.0.0 Technology Pack Installation and User Guide
Configuring Secure File Transfer support in Alcatel-Lucent 5620 SAM
LogToFile 2.3.0.0 Technology Pack
If you want to use Secure File Transfer, OpenSSH must be configured for
key-based authentication when you connect from the Tivoli Netcool Performance
Manager account on the client (the host that is running the Tivoli Netcool
Performance Manager process that must use SFTP) to the account on the server. In
addition, the host keys must be established such that the host key confirmation
prompt is not displayed during the connection.
UBAs in Alcatel-Lucent 5620 SAM LogToFile 2.3.0.0 Technology Pack can connect
to the DataStage server by using FTP alone. If you want to use SFTP support, use
the steps that are described in the following technical note:http://
publib.boulder.ibm.com/infocenter/tivihelp/v8r1/topic/
com.ibm.netcool_proviso.doc_4.4.2/tech_notes/NetcoolProvisoTechNote-sftp.pdf
For more information about SSH login without password, see http://
www.linuxproblem.org/art_9.html
Chapter 7. Configuring the technology pack
51
52
Alcatel-Lucent 5620 SAM LogToFile 2.3.0.0 Technology Pack Installation and User Guide
Chapter 8. Upgrading the technology pack
Describes how to upgrade Alcatel-Lucent 5620 SAM 2.14.0.0 Technology Pack and
Alcatel-Lucent 5620 SAM LogToFile 2.2.0.0 Technology Pack to Alcatel-Lucent 5620
SAM LogToFile 2.3.0.0 Technology Pack.
Upgrading the Alcatel-Lucent 5620 SAM 2.14.0.0 Technology Pack to
Alcatel-Lucent 5620 SAM LogToFile 2.3.0.0
You can upgrade the Alcatel-Lucent 5620 SAM 2.14.0.0 Technology Pack to
Alcatel-Lucent 5620 SAM LogToFile 2.3.0.0.
About this task
To upgrade the Alcatel-Lucent 5620 SAM 2.14.0.0 Technology Pack to
Alcatel-Lucent 5620 SAM LogToFile 2.3.0.0:
Procedure
1. Stop the DataChannel:
a. Start a terminal emulator on the DataChannel server
b. Run the dccmd command to stop all the DataChannel applications:
$ dccmd stop all
c. Run the dccmd command to release all daemons that are running in the
DataChannel:
$ dccmd forget all
d. Run the following command to find the process identifiers (pids) that are
associated with the DataChannel visual processes:
$ findvisual
e. Run the following commands to stop each DataChannel visual process:
$
$
$
$
kill
kill
kill
kill
-9
-9
-9
-9
<cnsw_pid>
<logw_pid>
<amgrw_pid>
<cmgrw_pid>
2. Start the Topology Editor, and delete the Performance and Accounting UBAs:
a. Open the Topology Editor, and click Topology > Open existing topology
to load existing topology from database.
b. In the Logical View, select the UBA collector, right click and Remove
Collector channels.
c. Repeat for the same step for all existing UBA collectors in system.
d. Click Topology > Save Topology.
e. Click Run > Run Deployer for Uninstallation to deploy the topology that
you configured.
3. Run the following commands to remove the files:
v /opt/proviso/datachannel/bin
rm –rf *_visual
v /opt/proviso/datachannel/state
rm –rf *pid
rm -rf *_visual
© Copyright IBM Corp. 2014
53
4.
5.
6.
7.
8.
9.
v /opt/proviso/datachannel/log
rm –rf *log
Create backup of the DataChannel directories and do not delete them from the
original location except UBA directories.
Install the Alcatel-Lucent 5620 SAM LogToFile 2.3.0.0 Technology Pack. For
more information, see “Installing the technology pack by using the
launchpad” on page 40.
Copy the core patches to/opt/proviso/datachannel/state.
Start the Topology Editor and load the technology pack from the JAR file.
Configure the Accounting and Performance UBAs with the same collector
numbers that you deleted in step 2.
Set the APP.FILE_PERIOD parameter value same as the data file polling time.
For example, if the data file polling is at the cycle of every 5 Minutes, set the
value to 300.
Save the topology.
Run the deployer to complete the installation.
Start the Request Editor, set to inactive, and then save.
Update the polling time to 5 Minutes or 15 Minutes, set to active, and then
click Save.
14. Run the following commands to restart each DataChannel visual process:
10.
11.
12.
13.
$
$
$
$
cnsw
logw
amgrw
cmgrw
15. Run the dccmd command to start all the DataChannel applications: .
$ dccmd start all
16. Compile the uba profiles.
17. Run the auto-grouping again after the full dump process is completed for the
first time.
Upgrading the Alcatel-Lucent 5620 SAM LogToFile 2.2.0.0 Technology
Pack to Alcatel-Lucent 5620 SAM LogToFile 2.3.0.0
You can upgrade Alcatel-Lucent 5620 SAM LogToFile 2.2.0.0 Technology Pack to
Alcatel-Lucent 5620 SAM LogToFile 2.3.0.0 Technology Pack.
Before you begin
Before you upgrade Alcatel-Lucent 5620 SAM LogToFile 2.2.0.0 Technology Pack to
Alcatel-Lucent 5620 SAM LogToFile 2.3.0.0 Technology Pack, you must first remove
the linking for timeCaptured metric and then remove the timeCaptured metric. The
timeCaptured metric is available in bulk groups InterfaceAdditionStats and
InterfaceStats.
To remove the linking for timeCaptured metric, follow these steps:
1. Source the dataMart.env file by using the following command:
source /opt/datamart/dataMart.env
2. Start the DataMart GUI by using the following command:
pvm &
3. Click the Configuration tab, and then click Request Editor to open the
Request Editor.
54
Alcatel-Lucent 5620 SAM LogToFile 2.3.0.0 Technology Pack Installation and User Guide
4. Click the Collection tab.
5. From the Formulas pane, expand the following group:
AP > Specific > Alcatel > 5620 SAM > Bulk > Equipment >
InterfaceAdditionalStats > timeCaptured
6. Right-click timeCaptured, select Apply as filter, and click Refresh. The
metrics are displayed in the pane for the timeCaptured filter.
7. Right-click within the pane and click Select All. All the metrics are selected.
8. Right-click within the pane and click Remove Selection.
9. Again, from the Formulas pane, expand the InterfaceStats > timeCaptured
group.
10. Repeat steps 6 – 8 to remove the linking for timeCaptured metric.
11. Click Save.
12. Click File > Exit.
After the linking is removed, you can now remove the metrics.
To remove metrics, follow these steps:
1. From the Tivoli Netcool Performance Manager DataMart GUI, click File >
Selectors > Formula Selector.
2. From the Formulas pane, expand the following group:
AP > Specific > Alcatel > 5620 SAM > Bulk > Equipment >
InterfaceAdditionalStats
The metrics are displayed in the right pane.
3. Right-click the timeCaptured metric and click Delete. The timeCaptured metric
is deleted.
4. Similarly, select InterfaceStats from the Formulas pane. The metrics are
displayed in the right pane.
5. Right-click the timeCaptured metric and click Delete. The timeCaptured metric
is deleted.
6. Click Edit > Apply.
7. Click File > Close.
Complete the upgrade procedure by following these steps:
Procedure
1. Stop the DataChannel:
a. Start a terminal emulator on the DataChannel server.
b. Run the dccmd command to stop all the DataChannel applications:
$ dccmd stop all
c. Run the following command to find the process identifiers (pids) that are
associated with the DataChannel visual processes:
$ findvisual
d. Run the following commands to stop each DataChannel visual process:
$
$
$
$
kill
kill
kill
kill
-9
-9
-9
-9
<cnsw_pid>
<logw_pid>
<amgrw_pid>
<cmgrw_pid>
2. Run the following commands to remove the files:
v /opt/proviso/datachannel/bin
rm –rf *_visual
Chapter 8. Upgrading the technology pack
55
v /opt/proviso/datachannel/state
rm –rf *pid
rm -rf *_visual
3.
4.
5.
6.
7.
v /opt/proviso/datachannel/log
rm –rf *log
Create backup of the DataChannel directories and do not delete them from the
original location.
Install the Alcatel-Lucent 5620 SAM LogToFile 2.3.0.0 Technology Pack. For
more information, see “Installing the technology pack by using the
launchpad” on page 40.
Copy the core patches to/opt/proviso/datachannel/state.
Start the Topology Editor and load the technology pack from the JAR file.
Check the properties set in the UBA Collectors. Modify the value accordingly
for the upgrade environment, if needed.
Save the topology.
Run the deployer to complete the installation.
Start the Request Editor, set to inactive, and then save.
Update the polling time to 5 Minutes or 15 Minutes, set to active, and then
click Save.
12. Run the following commands to restart each DataChannel visual process:
8.
9.
10.
11.
$
$
$
$
cnsw
logw
amgrw
cmgrw
13. Run the dccmd command to start all the DataChannel applications: .
$ dccmd start all
14. Compile the uba profiles.
15. Run the auto-grouping again after the full dump process is completed for the
first time.
Note: When you upgrade Alcatel-Lucent 5620 SAM FindToFile 2.14.0.0
Technology Pack to Alcatel-Lucent 5620 SAM LogToFile 2.3.0.0 Technology
Pack, you do not need to remove linking and timeCaptured metrics. You must
follow the upgrade steps.
56
Alcatel-Lucent 5620 SAM LogToFile 2.3.0.0 Technology Pack Installation and User Guide
Chapter 9. Setting up the Alcatel-Lucent 5620 SAM servers to
support LogToFile
The SAM server administrator must set up the appropriate SAM servers
environment so that the Alcatel-Lucent SAM 5620 LogToFile Technology Pack
operates correctly.
About this task
Setting up the Alcatel-Lucent 5620 SAM servers includes the following tasks:
Install SAM on the primary and redundant servers
The SAM server administrator must have installed SAM on primary and
redundant servers. The DataStage job accesses the SAM servers to request the
inventory and metrics.
Synchronize the clocks
Use the appropriate tool to ensure that the clocks on the SAM server and the
server on which the DataStage is installed are synchronized.
For example, make sure that the Coordinated Universal Time (UTC) on the server
on which DataStage is operating matches the UTC time on the server on which
Alcatel-Lucent 5620 SAM is operating.
Install the Alcatel-Lucent 5620 SAM Client GUI
The SAM server administrator must have installed the Alcatel-Lucent 5620 SAM
Client GUI on some client computer or server.
During the installation, the SAM server administrator must configure the IP
addresses of the SAM primary and redundant servers.
Configure an OSS user account
The SAM server administrator uses the Alcatel-Lucent 5620 SAM Client GUI to
configure an OSS (operational support system) user account from the client
computer or server.
This user account consists of a user name and password that allows the user to
access the SAM primary and redundant servers. This OSS user account must not
have administrative privileges. The SAM server administrator must record the user
name and password for this OSS user account and keep it in a secure place.
The IBM InfoSphere Information Server needs access to this OSS account.
© Copyright IBM Corp. 2014
57
Configure the SAM accounting and polling statistics
Accounting policies are relevant to the Access Interfaces and the metrics that they
report. The type of accounting policy on an Access Interface determines the metrics
that are reported.
When inventory is collected, Tivoli Netcool Performance Manager learns the
accounting policy for each Access Interface. From these accounting policies, the
Alcatel-Lucent 5620 SAM LogToFile Technology Pack can determine the accounting
policy type.
The Alcatel-Lucent 5620 SAM defines and manages accounting policies, which
determine how SAM accounting statistics are collected. The Alcatel-Lucent 5620
SAM LogToFile Technology Pack currently supports two types of SAM accounting
statistic: access-port statistics and network-port statistics. The accounting package
provides a maximum of 13 active accounting policies, one for each type of record
for the eight access-port statistics types and for the five network-port statistics
types.
The SAM server administrator uses the Alcatel-Lucent 5620 SAM Client GUI to
configure SAM accounting statistics on the primary and redundant SAM servers.
The Alcatel-Lucent 5620 SAM LogToFile Technology Pack supports the accounting
policies that are listed in the Table, depending on the type of nodes that are
monitored.
Table 1. Supported accounting policies
Accounting policy
Description
CombinedNetworkEgressOctetsLogRecord
Manages the collection of octet activity for
egress network queues.
CombinedNetworkIngressOctetsLogRecord
Manages the collection of octet activity for
ingress network queues.
CompleteServiceEgressPacketOctets
LogRecord
Manages the collection of packet and octet
activity for egress service queues.
CompleteServiceIngressPacketOctets
LogRecord
Manages the collection of packet and octet
activity for ingress service queues.
ServiceEgressOctetsLogRecord
Manages the collection of octet activity for
egress service queues.
ServiceEgressPacketsLogRecord
Manages the collection of packet activity for
egress service queues.
ServiceIngressOctetsLogRecord
Manages the collection of octet activity for
ingress service queues.
ServiceIngressPacketsLogRecord
Manages the collection of packet activity for
ingress service queues.
Note:
The service.ServiceEgressOctetsLogRecord class and the
service.ServiceEgressPacketsLogRecord class are mutually exclusive. You cannot
collect metrics for both classes at the same time.
58
Alcatel-Lucent 5620 SAM LogToFile 2.3.0.0 Technology Pack Installation and User Guide
Similarly, the service.ServiceIngressOctetsLogRecord class and the
service.ServiceIngressPacketsLogRecord class are mutually exclusive. You cannot
collect metrics for both classes at the same time.
The SAM server administrator uses the appropriate utility to configure polling
statistics for SAM statistics classes. To configure polling statistics for these SAM
statistics classes, enable the appropriate MIBs on the primary and redundant SAM
servers.
The default Tivoli Netcool Performance Manager collection period for all types of
SAM statistics is set to every 15 minutes, so the SAM server policies must be
configured to match this default value.
Note: The collection period for any type of SAM statistics must be set to the same
value as the collection period for the corresponding Tivoli Netcool Performance
Manager requests.
Enable the MIBs for the SAM statistics classes
SAM server administrator must enable all of the MIBs listed in the table for the
Alcatel-Lucent 5620 SAM LogToFile Technology Pack.
The first column of the table identifies the SAM statistics class on which to enable
polling statistics; the second column identifies the MIBs to enable for the SAM
statistics classes; and the third column identifies the object types to enable. The
SAM server administrator can enable more object types, but the Alcatel-Lucent
5620 SAM LogToFile Technology Pack expects at a minimum the ones that are
listed in the third column.
Table 2. MIBs to enable for SAM statistics classes
SAM statistics class
MIB
Object types
equipment.AllocatedMemoryStatsLogRecord
TIMETRA-SYSTEMMIB
sgiMemoryPoolAllocated
equipment.AvailableMemoryStatsLogRecord
TIMETRA-SYSTEMMIB
sgiMemoryAvailable
equipment.InterfaceAdditionalStatsLogRecord
IF-MIB
ifXEntry
equipment.InterfaceStatsLogRecord
IF-MIB (in the file
named rfc2233IF-MIB)
ifEntry
equipment.MediaIndependentStatsLogRecord
HC-RMON-MIB
mediaIndependentEntry
equipment.SystemCpuStatsLogRecord
TIMETRA-SYSTEMMIB
sgiCpuUsage
equipment.SystemMemoryStatsLogRecord
TIMETRA-SYSTEMMIB
sgiMemoryUsed
mpls.MplsInterfaceStatsLogRecord
TIMETRA-MPLS-MIB
vRtrMplsIfStatEntry
ppp.PppStatsLogRecord and
ppp.PppControlProtocol
TIMETRA-PPP-MIB
tmnxPppEntry
svt.SdpBindingBaseStatsLogRecord
TIMETRA-SERV-MIB
sdpBindBaseStatsEntry
ethernetequipment.Dot3StatsLogRecord
EtherLike-MIB
dot3StatsEntry
mpls.SiteStatsLogRecord
TIMETRA-MPLS-MIB
vRtrMplsGeneralStatEntry
service.PppoeSapStatsLogRecord
TIMETRA-PPPOEMIB
tmnxPppoeSapStatsEntry
svq.CustMultiSvcSiteIngSchedPlcyPortStatsLog TIMETRA-SERV-MIB
Record
custMultiSvcSiteIngSchedPlcyPortStats
Entry
svq.CustMultiSvcSiteEgrSchedPlcyPortStatsLog TIMETRA-SERV-MIB
Record
custMultiSvcSiteEgrSchedPlcyPortStats
Entry
Chapter 9. Setting up the Alcatel-Lucent 5620 SAM servers to support LogToFile
59
Table 2. MIBs to enable for SAM statistics classes (continued)
SAM statistics class
MIB
Object types
aosqos.QoSIngressPolicyStatsLogRecord
ALCATEL-IND1QOS-MIB
alaQoSRuleEntry
equipment.CardHealthStatsLogRecord
ALCATEL-IND1HEALTH-MIB
healthModuleEntry
Setting up ping tests
The SAM server enables SAM server administrators to run ping tests to receive
information about traffic latency and jitter.
The results from the tests can include SAM statistics such as round-trip time,
one-way trip time, jitter. These test results can be collected as metrics against OAM
Test object subelements representing the tests.
Note: This section describes one method of creating OAM (ping) tests. This
method uses the Alcatel-Lucent 5620 SAM Client GUI to set up the OAM test to
run periodically by using the scheduler on the SAM server. To run the OAM test
on the SAM server, you must set the NE schedulable setting to off. This is only one
method for running OAM tests and is provided for users who have no knowledge
about how to run OAM tests. In other methods for running OAM tests, the NE
schedulable setting can be set to on. In any method that is employed to run the
OAM tests, the period of the tests must be set to the same value as the period for
the metric requests. The default value is 15 minutes.
A SAM server administrator can create ping tests in two ways:
Alcatel-Lucent 5620 SAM Client GUI
The Alcatel-Lucent 5620 SAM Client GUI allows a SAM server
administrator to set up a ping test, specifying the period of the test, the
type of test, and so on.
OSS requests
The SAM server administrator might also establish OSS requests that
creates ping tests on the SAM server.
Although the two methods are available, the Alcatel-Lucent SAM 5620 LogToFile
Technology Pack expects that a SAM server administrator manually set up ping
tests by using the Alcatel-Lucent 5620 SAM Client GUI. For more information
about setting up these ping tests, see the Alcatel-Lucent 5620 Service Aware Manager
Release 7.0 User Guide.
To collect ping-related SAM statistics that are meaningful within Tivoli Netcool
Performance Manager, multiple consecutive data points must be collected for any
particular OAM Test object subelement. Thus, it is recommended that ping tests be
set up to run on a schedule that lasts for a significant duration (minimum three
hours).
This section summarizes the steps to follow. For more information, see the
Alcatel-Lucent 5620 Service Aware Manager Release 7.0 User Guide.
v Create a test suite. Make sure the NE Schedulable option is selected and Test
Result Storage is set to Both Database and File
v Create one or more ping tests. The Alcatel-Lucent 5620 SAM LogToFile
Technology Pack supports several types of ping tests. Remember to select the
60
Alcatel-Lucent 5620 SAM LogToFile 2.3.0.0 Technology Pack Installation and User Guide
NE Schedulable option and set the Test Result Storage to Both Database and
File. Make sure the tests run without errors.
v Add the ping tests to the test suite.
v Create a schedule to run the test suite. Set the schedule to run at the same
frequency as the Tivoli Netcool Performance Manager collection requests for
jitter and latency. For example, if Tivoli Netcool Performance Manager collection
requests occur every 15 minutes, then set the schedule to run the ping test suite
every 15 minutes.
Note: Ensure that you set the frequency to a value that is consistent with the
other collection periods.
v Apply the schedule to the test suite and run the tests that are contained in the
suite. Each time a test completes, Tivoli Netcool Performance Manager collects a
set of metrics.
SAM server administrators can run several types of ping tests to measure traffic
characteristics at different levels of the network stack. Each ping test is represented
by its own SAM class and associated ping result class. For more information about
these classes, see the Alcatel-Lucent 5620 SAM XML Reference - Release 7.0
documentation.
Chapter 9. Setting up the Alcatel-Lucent 5620 SAM servers to support LogToFile
61
62
Alcatel-Lucent 5620 SAM LogToFile 2.3.0.0 Technology Pack Installation and User Guide
Chapter 10. Modifying the collection strategy
Describes how to modify the amount of data that is managed by the Alcatel-Lucent
5620 SAM LogToFile Technology Pack. You can modify by changing the types of
data that are collected, or by changing the collection period for the SAM statistics,
or both.
Specifying what inventory and metrics to collect
The types of inventory and metrics that must be collected from SAM server is
specified in the configuration files. These configuration files are found on the
DataStage server. The configuration files specify which inventory class and metrics
classes must be requested from the SAM server. The SAM server then creates the
necessary files that are received by DataStage.
About this task
There are three different configuration items:
Filter
Drops the records.
Partition
Enables multiple UBAs.
Window
Handles different periods. For example, 5, 15.
Filter:
The name of the filter file is filter_lookup.csv, and has the configuration level as
User. No match for this file is not available.
Fields
Steps to get the information
Class name
Name of the SAM Class. For metric classes,
use <class name>LogRecord names.
Expression
Set it as '1' (TRUE) if no filter is needed.
The Expression field accepts full blown Perl expressions with special variables
enclosed with '{}' to refer to attributes within the class. There is a special
'{DEFAULT}' to refer to the partition key attribute of the class.
For example, equipment.PhysicalPort,{DEFAULT} eq "1.1.1.1"
This expression means that the DataStage filter allows only the
equipment.PhysicalPort class objects that have "1.1.1.1" value for its siteId.
equipment.PhysicalPort,{cardSlotId} != 2
This expression means that the DataStage filter allows only the
equipment.PhysicalPort class objects other than the card slot id of 2.
equipment.PhysicalPort,{DEFAULT} eq "1.1.1.1" && {cardSlotId} != 2 logical
operator is supported.
equipment.PhysicalPort,{DEFAULT} =~ /^1.1/ Regular expression is supported. It
allows site key that starts with "1.1".equipment.PhysicalPort,0
© Copyright IBM Corp. 2014
63
It is the simple way to filter out all records of class equipment.PhysicalPort.
Configuring multiple UBA collectors instances
Partitioning
The UBA partitioning involves two configuration files:
1. collector_lookup.csv
2. collector_mapping.csv
collector_lookup.csv
The name of the filter file is collector_lookup.csv, and has the
configuration level as User. No match for this file is not available. This file
is used to specify the number of UBAs that are available in the
environment, and the type of each UBA. For details, see “Specifying what
inventory and metrics to collect” on page 63. Following is an example for
the collector_lookup.csv format:
v 100, Performance
v 101, Accounting
Fields
Steps to get the information.
Collector id
Id for the collector that is based on the UBA
configuration.
Class category
Performance or Accounting.
Note: You must update this configuration.
collector_mapping.csv
The name of the filter file is collector_mapping.csv, and has the
configuration level as User. No match for this file is not available.
Following is an example for the collector_mapping.csv format:
v 5620_SAM_Channel,10.1.241.76,100
v 5620_SAM_Shelf,38.120.242.185,100
Fields
64
Steps to get the information.
Alcatel-Lucent 5620 SAM LogToFile 2.3.0.0 Technology Pack Installation and User Guide
Class Family
Possible family classes are as follows:
v 5620_SAM_AingrAengrQueue
v 5620_SAM_Aosqos_Policy
v 5620_SAM_BaseCard
v 5620_SAM_CardSlot
v 5620_SAM_CfmEthTest
v 5620_SAM_CfmOneWayDelay
v 5620_SAM_CfmTwoWayDelay
v 5620_SAM_CfmSingleEndedLoss
v 5620_SAM_Channel
v 5620_SAM_ControlProcessor
v 5620_SAM_DaughterCard
v 5620_SAM_DHCP6_Address
v 5620_SAM_DS1_E1
v 5620_SAM_Hw_Environment
v 5620_SAM_IMALink
v 5620_SAM_ISA_Mda
v 5620_SAM_ISA_Member
v 5620_SAM_LAGInterface
v 5620_SAM_MCMCard
v 5620_SAM_MME
v 5620_SAM_MPLSInterface
v 5620_SAM_MPLS_Site
v 5620_SAM_MSS
v 5620_SAM_NQueue
v 5620_SAM_OAM_Test
v 5620_SAM_PhysicalPort
v 5620_SAM_PPP_Interface
v 5620_SAM_PPP_Protocol
v 5620_SAM_S11Peer
v 5620_SAM_S1UPeer
v 5620_SAM_S5Peer
v 5620_SAM_S8Peer
v 5620_SAM_SdpBinding
v 5620_SAM_ServiceAccessInterface
v 5620_SAM_Shelf
v 5620_SAM_Subnet_Address
v 5620_SAM_Virtual_Router
Key value
The value for key. The key is from the
relation lookup configuration. Most of these
keys are based on the IP address. The
objectFullName can also be used as a key.
Collector id
Id for collector that is based on the UBA
destination.
Note: This configuration is intended for new elements from SAM that the
user wants to overwrite the default hash key rule. For example, a user can
force the element to go to a specific collector or UBA for better load
Chapter 10. Modifying the collection strategy
65
balance. However, this configuration does not overwrite mapping that the
Job gathers from Proviso. Therefore, following is the partition rule:
Mapping from Priviso DB → collector_mapping.csv → Job key hash.
Changing the collection period for SAM statistics
This section provides general guidelines on how to change the collection period for
SAM statistics:
v “General guidelines on changing the collection period for SAM statistics”
General guidelines on changing the collection period for SAM
statistics
The default collection period for all SAM statistics is 15 minutes. If you change the
collection period, ensure that you follow these guidelines:
1. You must set the APP.FILE_PERIOD parameter on each UBA component and the
WINDOW_PERIOD parameter on the IBM InfoSphere Information Server to
equivalent values.
For example, if you set the APP.FILE_PERIOD parameter to 300 (that is, 300
seconds, or 5 minutes), then you must set the WINDOW_PERIOD parameter to 300.
Note: The APP.FILE_PERIOD parameter is specified in seconds, and the
WINDOW_PERIOD parameter is specified as a series of values that are expressed in
minutes.
2. The collection period for any type of SAM statistics must be set to the same
value as the collection period for the corresponding Tivoli Netcool Performance
Manager requests.
DataStage settings
You can configure the SAM classes for 5 minutes, 15 minutes, or in mix periods.
This configuration is done at the SAM Server. However, you must specify this
period information in the Job parameter to enable Job, which produces the CSV file
at the correct period interval.
In the mix periods, you can configure some Alcatel-Lucent SAM 5620 classes at 15
minutes, and the remaining classes at 5 minutes. You can use the mix period to
increase the collection frequency for some classes that you want, while you can
keep the other classes at the default collection period, which is 15 minutes. As a
result, the
v Processing load on the DataStage and UBA is reduced
v Resource usage efficiency of the underlying machine is improved
DataStage receives and processes the metric XML files both at 5 minutes and 15
minutes at the respective frequency. However, the output CSV files are generated
after every 15 minutes. These CSV files contain one datapoint for the classes that
are at 15-minutes period, and 3 datapoints for the classes that are at 5-minutes
period. The UBA can receive the CSV files, and process the single and three
datapoints accordingly.
Restriction: This configuration is useful when you want a higher collection
frequency to obtain detailed reporting. However, you will experience an additional
latency of 5 minutes because the data is collected for 15 minutes, and then it is
passed to the UBA. If you want to achieve minimum latency at higher collection
66
Alcatel-Lucent 5620 SAM LogToFile 2.3.0.0 Technology Pack Installation and User Guide
frequency, then you must increase the collection period for all the metrics classes.
However, you must ensure that you have adequate machine resource.
WINDOW_PERIOD is measured in seconds. The values are 900 (default) and 300 for
15-Minutes and 5-Minutes periods respectively. However, on special mix period,
you must set the value at 900 (15 Minutes)
WAVE_PERIOD is an internal window sliding period that is measured in seconds. This
value must be non-zero integer, and a denominator value for WINDOW_PERIOD. The
default value is 300 for 5 Minutes. The default value is recommended for most of
the scenarios. Therefore, you change the default value only when you have a
strong reason.
ACCOUNTING_WAIT_DURATION or PERFORMANCE_WAIT_DURATION is the amount of time to
wait for complete records for a period before writing to the CSV file. The
ACCOUNTING_WAIT_DURATION parameter is used for the accounting classes and the
PERFORMANCE_WAIT_DURATION parameter is used for the performance classes.
However, both the parameters function the same way. This value must be divisible
by WAVE_PERIOD. The default value is 300 for 5 Minutes.
For example, if ACCOUNTING_WAIT_DURATION and WAVE_PERIOD is 300, then the job
will buffer records for one sliding window period (ACCOUNTING_WAIT_DURATION and
WAVE_PERIOD), while the WINDOW_PERIOD is 900
Scenario 1
01:31
Received 100 accounting records with timestamp of 01:01 (Rounded down
to its window period: 01:00)
01:32
Received 200 accounting records with timestamp of 01:01 (Rounded down
to its window period: 01:00)
01:40
WAVE_PERIOD is triggered.
01:42
Received 200 accounting records with timestamp of 01:17 (Rounded down
to its window period: 01:15)
01:45
WAVE_PERIOD is triggered. There are no new records for the 01:00 period
because the wait period is 1 sliding window. The records for the 01:00
period will be written to the CSV file.
Scenario 2
01:31
Received 100 accounting records with timestamp of 01:01 (Rounded down
to its window period: 01:00)
01:32
Received 200 accounting records with timestamp of 01:01 (Rounded down
to its window period: 01:00)
01:40
WAVE_PERIOD is triggered.
01:42
Received 200 accounting records with timestamp of 01:17 (Rounded down
to its window period: 01:15)
01:45
WAVE_PERIOD is triggered. There are no new records for the 01:00 period.
The records for the 01:00 period will not be written to the CSV file.
01:46
Received 200 accounting records with timestamp of 01:19 (Rounded down
to its window period: 01:15)
01:50
WAVE_PERIOD is triggered. There are no new records for the 01:00 period
because the wait period is 1 sliding window. The records for the 01:00
period will be written to the CSV file.
Chapter 10. Modifying the collection strategy
67
Tivoli Netcool Performance Manager 1.3.2 settings
The Alcatel-Lucent 5620 SAM LogToFile Technology Pack supplies these
parameters that are based on the Tivoli Netcool Performance Manager platforms.
These parameters are supplied in the pack XSD file. You specify values for these
parameters as part of adding a UBA Bulk Collector and associating it with the
Alcatel-Lucent SAM 5620 LogToFile Technology Pack. For more information, see
the section on adding a UBA Bulk Collector in the IBM Tivoli Netcool Performance
Manager: Installation Guide.
List of classes that are enabled or disabled
List of classes that are enabled or disabled in the DataStage requestxml_lookup.csv
file. The requestxml_lookup.csv file is in /opt/IBM/InformationServer/Server/
Projects/UDM/udm/cfg directory. Some classes are disabled. However, you can
enable a disabled class.
Classes that are enabled
v aengr.ForwardingClass
v aengr.Policy
v aengr.Queue
v aingr.ForwardingClass
v aingr.Policy
v aingr.Queue
v
v
v
v
v
aosqos.Policy
aosqos.QoSIngressPolicyStatsLogRecord
dhcp.Dhcp6AddressPrefix
dhcp.LocalDhcp6ServerPrefixStats
dhcp.LocalDhcpServerSubnetStats
v dhcp.Subnet
v epipe.Epipe
v
v
v
v
v
equipment.AllocatedMemoryStatsLogRecord
equipment.AvailableMemoryStatsLogRecord
equipment.BaseCard
equipment.CardHealthStatsLogRecord
equipment.CardSlot
v equipment.ControlProcessor
v equipment.DaughterCard
v
v
v
v
v
equipment.HardwareTemperature
equipment.HwEnvironment (metrics)
equipment.HwEnvironment
equipment.InterfaceAdditionalStatsLogRecord
equipment.InterfaceStatsLogRecord
v equipment.MCMCard
v equipment.MediaIndependentStatsLogRecord
v equipment.PhysicalPort
v equipment.Shelf
68
Alcatel-Lucent 5620 SAM LogToFile 2.3.0.0 Technology Pack Installation and User Guide
v
v
v
v
v
equipment.SystemCpuMonStats
equipment.SystemCpuStatsLogRecord
equipment.SystemMemoryStatsLogRecord
ethernetequipment.AggrMaintRxStats
ethernetequipment.AggrMaintTxStats
v
v
v
v
v
v
v
ethernetequipment.Dot3StatsLogRecord
ethernetoam.CfmEthTest
ethernetoam.CfmLoopback
ethernetoam.CfmOneWayDelayTest
ethernetoam.CfmTwoWayDelayTest
ethernetoam.Mep
icmp.IcmpPing
v
v
v
v
v
v
ies.L3AccessInterface
ies.ServiceAccessPoint
ipipe.L2AccessInterface
lag.Interface
lte.S11AgwPeerStats
lte.S11Peer
v lte.S1uAgwPeerStats
v lte.S1uPeer
v lte.S5AgwPeerStats
v
v
v
v
lte.S5Peer
lte.S8AgwPeerStats
lte.S8Peer
ltegw.S11FailureCodeStats
v ltegw.S5AgwFailureCodeStats
v ltegw.S8AgwFailureCodeState
v ltemme.MAFConnection
v
v
v
v
v
ltemme.MmeServiceMemberMaf
mpls.Interface
mpls.LspPing
mpls.MplsInterfaceStatsLogRecord
mpls.Site
v mpls.SiteStatsLogRecord
v mpr.IMALink
v
v
v
v
v
v
v
mpr.IMALinkCurrentStats
nat.IsaMda
nat.IsaMember
nat.IsaMemberUsageStats
nqueue.Entry
nqueue.ForwardingClass
nqueue.Policy
v ppp.Interface
v ppp.PppControlProtocol
v ppp.PppControlProtocol (metrics)
Chapter 10. Modifying the collection strategy
69
v
v
v
v
v
radioequipment.PdhFrameHopHistoryDataStats15Min
radioequipment.PdhFrameLinkHistoryDataStats15Min
radioequipment.RadioAnalogueMeasure
rtr.RouteStatsLogRecord
rtr.VirtualRouter
v
v
v
v
v
v
v
sasqos.AccessIngress
sasqos.Meter
sasqos.PortAccessEgress
sasqos.PortAccessEgressQueue
service.CombinedNetworkEgressOctetsLogRecord
service.CombinedNetworkIngressOctetsLogRecord
service.CompleteServiceEgressPacketOctetsLogRecord
v
v
v
v
v
v
service.CompleteServiceIngressPacketOctetsLogRecord
service.PppoeSapStatsLogRecord
sonetequipment.Sts12Channel
sonetequipment.Sts1Channel
sonetequipment.Sts48Channel
svq.AggregationScheduler
v svt.MeshSdpBinding
v svt.MirrorSdpBinding
v svt.SdpBindingBaseStatsLogRecord
v
v
v
v
svt.SpokeSdpBinding
svt.TunnelPing
svt.VccvPing
vll.L2AccessInterface
v vpls.L2AccessInterface
v vpls.Vpls
v vprn.ServiceAccessPoint
v
v
v
v
v
ethernetoam.CfmLoopbackResult
ethernetoam.CfmTwoWayDelayTestResult
ethernetoam.CfmSingleEndedLossTest
icmp.IcmpPingResult
svt.TunnelPingResult
v svt.VccvPingResult
v tdmequipment.DS1E1PortSpecifics
v
v
v
v
v
v
v
70
tdmequipment.DS1HistoryStats15minIn
tdmequipment.DS1HistoryStats15minOut
tdmequipment.E1HistoryStats15minIn
tdmequipment.E1HistoryStats15minOut
service.SitePing
svq.CustMultiSvcSiteEgrSchedPlcyPortStatsLogRecord
svq.CustMultiSvcSiteIngSchedPlcyPortStatsLogRecord
Alcatel-Lucent 5620 SAM LogToFile 2.3.0.0 Technology Pack Installation and User Guide
Classes that are disabled
v
v
v
v
equipment.DigitalDiagnosticMonitoring
ethernetoam.CfmEthTestResult
ethernetoam.CfmOneWayDelayTestResult
ethernetoam.CfmSingleEndedLossTestResult
v
v
v
v
v
v
v
mirror.L2AccessInterface
ppp.PppStats
sasqos.AccessIngressForwardingClass
sasqos.PortAccessEgressForwardingClass
service.NetworkEgressPackets
service.NetworkIngressPackets
service.ServiceEgressOctets
v service.ServiceEgressPackets
v service.ServiceIngressOctets
v
v
v
v
v
service.ServiceIngressPackets
service.SitePingResult
sonetequipment.Sts192Channel
sonetequipment.Sts3Channel
sonetequipment.TributaryChannel
v sonetequipment.TributaryGroup
v sonetequipment.Tu3Channel
v sonetequipment.Tug3Group
v
v
v
v
tdmequipment.DS0ChannelGroup
tdmequipment.DS1E1Channel
tdmequipment.DS3E3Channel
vprn.L3AccessInterface
Disabling or enabling a class
How to enable or disable a class.
About this task
The requestxml_lookup.csv is comma-separated file with the following fields:
1. Request type
2. Request (in the XML format)
Procedure
To disable a class:
v Add a dot before the Request type. Notice that a dot is added before findToFile
in the following example:
.findToFile,<?xml version="1.0" encoding="UTF-8"?>...
<fullClassName>equipment.DigitalDiagnosticMonitoring</fullClassName>...
</SOAP:Envelope> .registerLogToFile,
<?xml version="1.0" encoding="UTF-8"?>...
<fullClassName >service.NetworkEgressPackets</fullClassName>...
</SOAP:Envelope>
To enable a class:
Chapter 10. Modifying the collection strategy
71
v Remove the dot that is available before Request type. Notice that the dot that
was added before findToFile is removed in the following example:
findToFile,<?xml version="1.0" encoding="UTF-8"?>...
<fullClassName>equipment.DigitalDiagnosticMonitoring</fullClassName>...
</SOAP:Envelope> .registerLogToFile,
<?xml version="1.0" encoding="UTF-8"?>...
<fullClassName >service.NetworkEgressPackets</fullClassName>...
</SOAP:Envelope>
72
Alcatel-Lucent 5620 SAM LogToFile 2.3.0.0 Technology Pack Installation and User Guide
Chapter 11. Troubleshooting Alcatel-Lucent 5620 SAM
LogToFile Technology Pack
Troubleshooting tips for issues related to Alcatel-Lucent 5620 SAM LogToFile
Technology Pack and its related components.
Specifying parameter values
Several of the tips to tell you to make sure that the correct values were specified
for parameters in the deployed topology.
You specify the values for these parameters depending on the Tivoli Netcool
Performance Manager platform.
Tivoli Netcool Performance Manager 1.3.2
These parameters are supplied in the pack XSD file. You used the Topology Editor
to specify a value for these parameters as part of adding a UBA Bulk Collector and
associating it with the Alcatel-Lucent 5620 SAM Technology Pack. For more
information, see Adding a UBA Bulk Collector in the IBM Tivoli Netcool Performance
Manager: Installation Guide.
Inventory issues
If you do not see the expected inventory in your Tivoli Netcool Performance
Manager instance, use this information. Complete the steps in each subsection, to
verify that you have configured your instance correctly.
Metric data collection issues
If you do not see the expected metrics in your Tivoli Netcool Performance
Manager instance, use this information. Complete the steps in each subsection, to
verify that you have configured your instance correctly.
The following sections provide an overview of metric data, and describe
troubleshooting tips for issues related to the metric data collection:
Overview of metric data
The SAM server supports the following types of metric data:
Polled
Polled metric data is collected by the SAM server from the routers using
SNMP. To collect this data, MIBs must be enabled on the SAM server, and
polling periods must be set. For more information about the MIBs that are
needed, see “Enable the MIBs for the SAM statistics classes” on page 59.
Exception to the Rule: The exception is the HwEnvironmentTemperature files.
These files are in effect inventory files in which the temperature properties
are read in as metrics. For a variety of reasons related to this data not
being real metrics, the temperature data is only available for a subelement
under the following conditions:
v The CPU utilization metric for that subelement is available.
© Copyright IBM Corp. 2014
73
v The data being processed is “current”: the UBA has caught up to the
wall-clock time as much as is possible, and no backlog of data is being
processed.
Accounting
Accounting metric data is collected by the routers into files. These files are
retrieved by the SAM server, and read into its database. To get this data,
the accounting and file policies must be configured on the SAM server and
distributed to the routers. Accounting data is the data collected for
services. For more information about accounting data, see “Configure the
SAM accounting and polling statistics” on page 58.
Availability data
The availability data is collected from the SAM Server and is converted
into CSV datafile records. This CSV datafile records are then picked by the
UBAs.
The Alcatel-Lucent 5620 SAM LogToFile Technology Pack uses the following syntax
for metric-data file names:
proviso<type of Class>_<date>_<time>_<collector number>.csv
type of Class = Performance, Accounting
date = yyyy.mm.dd
time = Hour.Minutes.Seconds
Collector = 100, 101
Note: 100 and 101 are the default values. However, you can change this value.
Here is an example file name for a metric-data file:
provisoPerformance_2013.02.25-01.00.00_100.csv
provisoAccounting_2013.02.25-01.05.00_101.csv
SAM metrics do not display in the Alcatel-Lucent 5620 SAM
Client GUI
The SAM server administrator uses the Alcatel-Lucent 5620 SAM Client GUI to
display metrics for the different objects (for example, services and network
elements) in a SAM network environment.
If SAM metrics do not display in the Alcatel-Lucent 5620 SAM Client GUI,
complete the following troubleshooting steps:
1. Enable the appropriate MIBs for the polled data.
2. Enable an accounting policy for the service data.
SAM metric files are empty or do not exist in the SAM server
Typically, SAM metric files are transferred to a directory, such as
/opt/5620sam/nms/server/xml_output, on the SAM server.
If the SAM metric files are empty (that is, the XML file has left and right angle
brackets with no data, and is 60 bytes or less), complete the following
troubleshooting steps:
1. Determine whether the absence of data is because there are no inventory
elements and subelements from which to receive metrics.
2. Ensure that you enabled the appropriate MIBs for polled data.
3. Ensure that you enabled an accounting policy for service data.
4. Ensure that you have set your filter parameters correctly. For more information
about filter parameters, see “Specifying what inventory and metrics to collect”
on page 63.
74
Alcatel-Lucent 5620 SAM LogToFile 2.3.0.0 Technology Pack Installation and User Guide
If SAM metric files do not exist in the SAM server, complete the following
troubleshooting steps:
1. Make sure that an OSS user account is configured. For more information, see
“Configure an OSS user account” on page 57.
2. Make sure that the correct values were specified for the SAM.USERNAME and
SAM.PASSWORD parameters, as described in “Specifying parameter values” on
page 73, based on the Tivoli Netcool Performance Manager platform:
Platform
Parameter
Tivoli Netcool Performance Manager 1.3.2
ALCATEL_5620_SAM.SAM.USERNAME
ALCATEL_5620_SAM.SAM.PASSWORD
3. Make sure that the correct value was specified for the SAM.SAM_VERSION
parameter, as described in “Specifying parameter values” on page 73 based on
the Tivoli Netcool Performance Manager platform:
Platform
Parameter
Tivoli Netcool Performance Manager 1.3.2
ALCATEL_5620_SAM.SAM.SAM_VERSION
The SAM.SAM_VERSION parameter refers to the JMS protocol version, not the
SAM server version.
4. Make sure that the correct values were specified for the SAM.SOAP_URI and
SAM.SOAP_URI_2 parameters, as described in “Specifying parameter values” on
page 73, based on the Tivoli Netcool Performance Manager platform:
Platform
Parameter
Tivoli Netcool Performance Manager 1.3.2
ALCATEL_5620_SAM.SAM.SOAP_URI
ALCATEL_5620_SAM.SAM.SOAP_URI_2
5. Check the UNIX file permissions. Ensure that the permissions on the
xml_output directory are set to allow read, write, and run by the SAM FTP
user.
6. Ensure that you have enough disk space. For more information, see “Metrics
collection fails due to lack of disk space” on page 76.
BOF files do not exist in the FTE output directory
Typically, the DataChannel File Transfer Engine (FTE) application transfers BOFs
(Binary Object Files) to the DataChannel FTE application output directory.
If the BOF files are not transferred to the FTE application output directory,
complete the following troubleshooting steps:
1. Make sure that an FTP user account is configured on the primary and
redundant SAM servers.
2. Make sure that the user exists on the SAM server and that the correct FTP user
name and password values were specified for the SAM.EXPORT_URI and
SAM.EXPORT_URI_2 parameters, as described in “Specifying parameter values” on
page 73, based on the Tivoli Netcool Performance Manager platform:
Platform
Parameter
Tivoli Netcool Performance Manager 1.3.2
ALCATEL_5620_SAM.SAM.EXPORT_URI
ALCATEL_5620_SAM.SAM.EXPORT_URI_2
3. Check the UNIX permissions.
Chapter 11. Troubleshooting Alcatel-Lucent 5620 SAM LogToFile Technology Pack
75
4. Ensure that you have enough disk space. For more information, see “Metrics
collection fails due to lack of disk space”
BOF files do not exist in the CME output directory
Typically, the DataChannel File Transfer Engine (FTE) application transfers BOFs
(Binary Object Files) to the DataChannel Complex Metric Engine (CME) application
output directory.
If the BOF files are not transferred to the CME application output directory,
complete the following troubleshooting steps:
1. Make sure that you imported the Alcatel-Lucent 5620 SAM LogToFile
Technology Pack predefined collection requests.
2. Check the UNIX permissions.
3. Ensure that you have enough disk space. For more information, see “Metrics
collection fails due to lack of disk space.”
Metrics collection fails due to lack of disk space
If the metric-collection operation fails on the SAM server, make sure that you have
enough disk space on the computer or server on which Tivoli Netcool Performance
Manager is installed.
The amount of space that is required depends on the following points:
v Size of the SAM network
v Values that are set for the following retention parameters in the dc.cfg file:
Platform
Parameter
Tivoli Netcool Performance Manager 1.3.2
FC_RETENTION_HOURS
It is possible, in a SAM networking environment, that several gigabytes worth of
data files can be collected and transferred to the UBA application done directory
each day. These data files accumulate according to the values specified for the
retention parameters. Therefore, it is possible to use the maximum disk space
before the retention period expires and the DataChannel deletes the data files
from the done directory.
You must monitor the size of the data files that are transferred to the done
directory during metric collection, and determine whether adjustments must be
made to the retention parameters.
General Alcatel-Lucent 5620 SAM LogToFile 2.3.0.0 Technology Pack
issue
This is a general issue for Alcatel-Lucent 5620 SAM LogToFile 2.3.0.0 Technology
Pack.
Data for Near End Unavailable (per second) metric is not
calculated correctly
Symptoms
If you run the Error Management Near-End report on Dashboard Application
Services Hub, data for Near End Unavailable (per second) metric is not calculated
correctly.
To run this report, browse to the following path on Dashboard Application Services
Hub: NOC Reporting > Alcatel-Lucent 5620 SAM > SAM Router Health > 9500
76
Alcatel-Lucent 5620 SAM LogToFile 2.3.0.0 Technology Pack Installation and User Guide
MPR > IMA Link > Error Management Near-End.
General Alcatel-Lucent 5620 SAM LogToFile 2.2.0.0 Technology Pack
issues
These are the general issues for Alcatel-Lucent 5620 SAM LogToFile 2.2.0.0
Technology Pack.
Data for the Inbound Errors might not be displayed
Symptoms
If you run the Packet Health for LAG interface Group report on the Tivoli
Integrated Portal, data for the Inbound Errors might not be displayed. To run the
Packet Health for LAG interface Group report, browse to the following path on the
Tivoli Integrated Portal: NOC Reporting > Alcatel-Lucent 5620 SAM > SAM
Router Health > Link Aggregation Groups (LAG Interfaces). On this report, in
the table, the data for the Inbound Errors might not be displayed.
SAM server generates the XML file that contains more than
one datapoint
Symptoms
In the Alcatel-Lucent 5620 SAM LogToFile 2.3.0.0 technology pack, the SAM server
generates the XML file that contains more than one datapoint for the same
resource. For example, at the SAM server, if you configure the OAM classes for 5
minutes, the OAM XML file is generated after every five minutes. However, this
XML file contains more than one datapoint for the same resource. As a result, the
CSV file that is received by the UBA also contains more than one datapoint. Only
the first datapoint is processed properly while the remaining two datapoints are
ignored.
The description property is not updated in the Resource
Editor
Symptoms
In the Alcatel-Lucent 5620 SAM LogToFile 2.3.0.0 technology pack, on the SAM
server, you modify the Description property for SAP, SAP Queue, and Network
Queue. The JMS update event is triggered, and the modifications are reflected in
the CSV files that are produced by DataStage. However, these modifications in the
Description property are not reflected in the Resource Editor after the UBA
processes the CSV files.
SQL error occurs during the Fulldump process
Symptoms
After you install the Alcatel-Lucent 5620 SAM LogToFile 2.3.0.0 Technology pack
for the first time, you configure multiple UBA collectors. For example, you set
collectors that are numbered 100 and 102 for the Performance metrics, and
collectors that are numbered 101 and 103 for the Accounting metrics. When both
the Performance or Accounting collectors process the Fulldump file at the same
time, SQL error occurs.
Resolving the problem
To avoid this problem, you must not start more than one Performance or
Accounting collector during the resource provisioning. You must start one
Performance and one Accounting collector, and wait until the corresponding
Fulldump files are processed. You can then start the remaining Performance and
Chapter 11. Troubleshooting Alcatel-Lucent 5620 SAM LogToFile Technology Pack
77
Accounting collectors.
The subelement time changes on several unexpected
occasions
In the Resource Editor, the subelement date must change when:
v A subelement is added, updated, or deleted.
v JMS event is triggered.
However, in the Alcatel-Lucent 5620 SAM LogToFile Technology Pack, the
subelement date also changes when:
v A full dump file is processed by the UBA even if a subelement is not inserted,
updated, or deleted.
v Performance or Accounting CSV file is created by DataStage.
v Alcatel-Lucent 5620 SAM is upgraded to Alcatel-Lucent 5620 SAM LogToFile.
Subelement state is not updated to OFF when you change the
SAP Ingress or Egress Policy
Symptoms
When you change the Ingress and Egress Policy for the existing SAPs, the new
SAP Queues associated with the new Policy are created correctly in Resource
Editor with State = ON. However, the old SAP Queues associated with the old
Policy remain as state = ON, and they are not updated to state = OFF.
Synchronize the time on the IBM InfoSphere Information
server and the SAM server
Symptoms
Typically, there is a time difference on the IBM InfoSphere Information server and
the SAM server. This may result in incorrect timestamps on the generated reports.
Causes
Time at the IBM InfoSphere Information server and the SAM server is not
synchronized.
Resolving the problem
To resolve this issue, set the SAM server time to be same as the IBM InfoSphere
Information server even if both servers are at different timezone. To verify whether
both servers are synchronized, run the date +%s command, and make sure that the
value that is returned for both servers is same.
Data is not displayed properly in the Volume and Utilization
report
Symptoms
You browse to the following path on the Tivoli Integrated Portal to run the Volume
and Utilization report: NOC Reporting > Alcatel-Lucent 5620 SAM > SAM
Router Health > Link Aggregation Groups (LAG Interfaces) > Volume &
Utilization Group Summary. The report is displayed on the right. In the Inbound
Utilization and Outbound Utilization fields, --, 0, and No Data Available, are
displayed in the following tables:
v Group Summary
v Resource Summary
v Detail Chart
78
Alcatel-Lucent 5620 SAM LogToFile 2.3.0.0 Technology Pack Installation and User Guide
Partitioning must be done at the element level
Symptoms
DataStage collector mapping configuration provides fine level of partitioning at the
subelement level. However, some subelements must be configured to the same
collector. Because this rule is not verified by the DataStage job, mistakes might be
introduced in the relation lookup configuration file.
Resolving the problem
To avoid this problem, you must create the partition at the element level only. You
must configure all family names for an element to a single set of collectors.
The CSV file name changes when you map another class that
does not correspond to its collector
Symptoms
On DataStage, the CSV file in the out directory is not correctly named. For
example, the provisoAccounting_2013.02.18-08.05.00_101.csv file is incorrectly
named as provisoPerformance_2013.02.18-08.05.00_101.csv.
Causes
This problem occurs when you map one more class that does not correspond to its
collector in the collector_mapping.csv file. For example, in the
collector_lookup.csv file, you set the 101 collector as Accounting. However, in the
collector_mapping.csv file, instead of the Accounting class, you map one or more
Performance classes to the 101 collector. As a result, the Accounting 101 collector
gets mixed with the Performance classes, and you find the
provisoPerformance_2013.02.18-08.05.00_101.csv file instead of
provisoAccounting_2013.02.18-08.05.00_101.csv file in the out directory.
The OAM data exists at the SAM server but is not transferred
to DataStage
Symptoms
The OAM data exists at the SAM server in the xml_ouput directory. However, this
data is not transferred to DataStage at DS/done.
Diagnosing the problem
To identify the cause of the problem, follow these steps:
1. Run this command to verify if the registerSasLogToFile requests are sent to
the SAM server:
$ grep -q "^registerSasLogToFile" ./data/responsexmls.csv && echo "yes, there is a response for
the request!"
2. Run this command to identify if an exception has occurred:
$ grep "^registerSasLogToFile"
$
# None - all ok
./data/responsexmls.csv | grep -i "exception"
3. Check if the logFileAvailable message is received from the SAM JMS for these
sasLogToFile:
$ grep "/oam/" ./logs/sam-jms-daemon.log
$
# None - No message is received.
Note: /oam/ is the parent directory for these classes.
4. Check if there is a problem with the register sasLogToFile:
Chapter 11. Troubleshooting Alcatel-Lucent 5620 SAM LogToFile Technology Pack
79
$ grep "^registerSasLogToFile" ./data/responsexmls.csv | perl -e
’while (<>){m/<fullClassName >(.*)<\/fullClassName>/; print $1."\n"}’ |
sort | uniq ethernetoam.CfmLoopbackResult
ethernetoam.CfmTwoWayDelayTestResult
icmp.IcmpPingResult
mpls.LspPingResult
svt.TunnelPingResult
svt.VccvPingResult
$ grep "^registerSasLogToFile" ./data/responsexmls.csv | wc -l
222
# Unexpected logs of registerSasLogToFile - you must expect up to 6 lines,
which means 6 classes.You notice 222 lines that is not correct.
Note: You can view logs after you run the command as explained in Step 1.
5. Check the number of times SasLogToFile is unregistered and registered:
$ grep registerSasLog
./data/responsexmls.csv | cut -d, -f1
6. Check times when the SasLogToFile is unregistered and registered:
$ grep deregisterSasLogToFile ./data/responsexmls.csv | perl -e
’while (<>){m/responseTime>(.*)<\/responseTime>/; print $1."\n"}'
You can see the following output:
Feb
Feb
Feb
Feb
Feb
Feb
Feb
Feb
Feb
Feb
Feb
22,
22,
22,
22,
22,
22,
22,
22,
22,
22,
22,
2013
2013
2013
2013
2013
2013
2013
2013
2013
2013
2013
11:30:56 AM Feb 22, 2013 11:32:33 AM Feb 22, 2013 11:37:33 AM
11:42:33 AM Feb 22, 2013 11:47:33 AM Feb 22, 2013 11:52:33 AM
11:57:33 AM Feb 22, 2013 12:02:33 PM Feb 22, 2013 12:07:33 PM
12:12:33 PM Feb 22, 2013 12:17:33 PM Feb 22, 2013 12:22:33 PM
12:27:33 PM Feb 22, 2013 12:32:33 PM Feb 22, 2013 12:37:33 PM
12:42:33 PM Feb 22, 2013 12:47:33 PM Feb 22, 2013 12:52:33 PM
12:57:33 PM Feb 22, 2013 1:02:33 PM Feb 22, 2013 1:07:33 PM
1:12:33 PM Feb 22, 2013 1:17:33 PM Feb 22, 2013 1:22:33 PM
1:27:33 PM Feb 22, 2013 1:32:33 PM Feb 22, 2013 1:37:33 PM
1:42:33 PM Feb 22, 2013 1:47:33 PM Feb 22, 2013 1:52:33 PM
1:57:33 PM Feb 22, 2013 2:02:33 PM Feb 22, 2013 2:07:33 PM
Note: The register cycle happens every 5 minutes, which is same as the
window period.
7. Verify whether the keepalive event is sent by SAM:
$ grep KeepAliveEvent ./logs/sam-jms-daemon.log | grep -v "Connected to JMS"
# no keepalive events. This indicates that SAM does not send the keepAlive
message but the Monitor stage, which expects keepalive message per period is
falsely indicated that the daemon is not functioning properly, and restarts the
daemon in cycle.
Resolving the problem
To turn off the keepAlive check, follow the steps in “How to turn off the keepAlive
message flag” on page 81
80
Alcatel-Lucent 5620 SAM LogToFile 2.3.0.0 Technology Pack Installation and User Guide
General IBM InfoSphere Information Server related issues
These are the general issues for IBM InfoSphere Information Server that is required
for Alcatel-Lucent 5620 SAM LogToFile 2.3.0.0 Technology Pack.
Troubleshooting IBM InfoSphere Information Server
installations
You can resolve all installation problems, with this information.
For all troubleshooting problems with installation, see http://
publib.boulder.ibm.com/infocenter/iisinfsv/v8r7/topic/
com.ibm.swg.im.iis.productization.iisinfsv.install.doc/topics/
wsisinst_ts_is_container.html. You can find more troubleshooting information in the
information centers and customer support technical notes for various product
modules and components.
DataStage job stops running because of insufficient buffer
size
Symptoms
When the buffer size is insufficient, you might encounter a unrecoverable error and
the job stops running. You receive the following error:
The record is too big to fit in a block; the length requested is: 131952, the max block
length is: 131072
Causes
You receive this error if the record length exceeds the block size.
Resolving the problem
To resolve this issue, increase the APT_DEFAULT_TRANSFER_BLOCK_SIZE accommodate
the size. For more information about how to increase the size of this parameter, see
http://www-01.ibm.com/support/docview.wss?uid=swg21386618.
How to turn off the keepAlive message flag
By default, the keepAlive message flag is turned on. You can manually turn off this
flag.
Symptoms
When you do not see the keepAlive messages that are coming in, the daemon
process might get restarted. To avoid that, you can turn off the keepAlive message
flag.
Resolving the problem
To turn off the keepAlive message flag, follow these steps:
1. In the IBM InfoSphere DataStage and QualityStage Designer. Double-click the
Job. The job opens in canvas.
2. Stop the Job.
3. Right-click the Monitor_Stage and select Properties.
4. In the Monitor_Stage -JTransformerPX stage window, click the Properties tab.
5. Update the parameter sam_keepalive_max_missed from 1 to 0.
6. Click OK.
7. Compile and restart the Job.
Chapter 11. Troubleshooting Alcatel-Lucent 5620 SAM LogToFile Technology Pack
81
Verifying that the ports are enabled for all the components
required for Alcatel-Lucent 5620 SAM LogToFile 2.3.0.0
Technology Pack
Enabling the ports for all the components that are required for Alcatel-Lucent 5620
SAM LogToFile 2.3.0.0 Technology Pack. This is applicable for Apache ActiveMQ
also.
Symptoms
If you cannot access the IBM InfoSphere Information Server server or client
components, verify that the component ports are enabled. To check the status of
the ports, use the following command:
iptables -L
Resolving the problem
For more information about enabling the ports, see “Enabling the firewall on the
IBM InfoSphere Information Server and WebSphere Application Server” on page
31.
82
Alcatel-Lucent 5620 SAM LogToFile 2.3.0.0 Technology Pack Installation and User Guide
Notices
This information was developed for products and services offered in the U.S.A.
IBM may not offer the products, services, or features discussed in this document in
other countries. Consult your local IBM representative for information on the
products and services currently available in your area. Any reference to an IBM
product, program, or service is not intended to state or imply that only that IBM
product, program, or service may be used. Any functionally equivalent product,
program, or service that does not infringe any IBM intellectual property right may
be used instead. However, it is the user's responsibility to evaluate and verify the
operation of any non-IBM product, program, or service.
IBM may have patents or pending patent applications covering subject matter
described in this document. The furnishing of this document does not give you
any license to these patents. You can send license inquiries, in writing, to:
IBM Director of Licensing
IBM Corporation
North Castle Drive
Armonk, NY 10504-1785 U.S.A.
For license inquiries regarding double-byte (DBCS) information, contact the IBM
Intellectual Property Department in your country or send inquiries, in writing, to:
Intellectual Property Licensing
Legal and Intellectual Property Law
IBM Japan, Ltd.
19-21, Nihonbashi-Hakozakicho, Chuo-ku
Tokyo 103-8510, Japan
The following paragraph does not apply to the United Kingdom or any other
country where such provisions are inconsistent with local law :
INTERNATIONAL BUSINESS MACHINES CORPORATION PROVIDES THIS
PUBLICATION "AS IS" WITHOUT WARRANTY OF ANY KIND, EITHER
EXPRESS OR IMPLIED, INCLUDING, BUT NOT LIMITED TO, THE IMPLIED
WARRANTIES OF NON-INFRINGEMENT, MERCHANTABILITY OR FITNESS
FOR A PARTICULAR PURPOSE.
Some states do not allow disclaimer of express or implied warranties in certain
transactions, therefore, this statement might not apply to you.
This information could include technical inaccuracies or typographical errors.
Changes are periodically made to the information herein; these changes will be
incorporated in new editions of the publication. IBM may make improvements
and/or changes in the product(s) and/or the program(s) described in this
publication at any time without notice.
Any references in this information to non-IBM Web sites are provided for
convenience only and do not in any manner serve as an endorsement of those Web
sites. The materials at those Web sites are not part of the materials for this IBM
product and use of those Web sites is at your own risk.
© Copyright IBM Corp. 2014
83
IBM may use or distribute any of the information you supply in any way it
believes appropriate without incurring any obligation to you.
Licensees of this program who wish to have information about it for the purpose
of enabling: (i) the exchange of information between independently created
programs and other programs (including this one) and (ii) the mutual use of the
information which has been exchanged, should contact:
IBM Corporation
2Z4A/101
11400 Burnet Road
Austin, TX 78758 U.S.A.
Such information may be available, subject to appropriate terms and conditions,
including in some cases payment of a fee.
The licensed program described in this document and all licensed material
available for it are provided by IBM under terms of the IBM Customer Agreement,
IBM International Program License Agreement or any equivalent agreement
between us.
Any performance data contained herein was determined in a controlled
environment. Therefore, the results obtained in other operating environments may
vary significantly. Some measurements may have been made on development-level
systems and there is no guarantee that these measurements will be the same on
generally available systems. Furthermore, some measurement may have been
estimated through extrapolation. Actual results may vary. Users of this document
should verify the applicable data for their specific environment.
Information concerning non-IBM products was obtained from the suppliers of
those products, their published announcements or other publicly available sources.
IBM has not tested those products and cannot confirm the accuracy of
performance, compatibility or any other claims related to non-IBM products.
Questions on the capabilities of non-IBM products should be addressed to the
suppliers of those products.
All statements regarding IBM's future direction or intent are subject to change or
withdrawal without notice, and represent goals and objectives only.
All IBM prices shown are IBM's suggested retail prices, are current and are subject
to change without notice. Dealer prices may vary.
This information is for planning purposes only. The information herein is subject to
change before the products described become available.
This information contains examples of data and reports used in daily business
operations. To illustrate them as completely as possible, the examples include the
names of individuals, companies, brands, and products. All of these names are
fictitious and any similarity to the names and addresses used by an actual business
enterprise is entirely coincidental.
COPYRIGHT LICENSE:
This information contains sample application programs in source language, which
illustrate programming techniques on various operating platforms. You may copy,
modify, and distribute these sample programs in any form without payment to
84
Alcatel-Lucent 5620 SAM LogToFile 2.3.0.0 Technology Pack Installation and User Guide
IBM, for the purposes of developing, using, marketing or distributing application
programs conforming to the application programming interface for the operating
platform for which the sample programs are written. These examples have not
been thoroughly tested under all conditions. IBM, therefore, cannot guarantee or
imply reliability, serviceability, or function of these programs. You may copy,
modify, and distribute these sample programs in any form without payment to
IBM for the purposes of developing, using, marketing, or distributing application
programs conforming to IBM's application programming interfaces.
Each copy or any portion of these sample programs or any derivative work, must
include a copyright notice as follows:
© (your company name) (year). Portions of this code are derived from IBM Corp.
Sample Programs. © Copyright IBM Corp. _enter the year or years_. All rights
reserved.
If you are viewing this information in softcopy form, the photographs and color
illustrations might not be displayed.
Trademarks
IBM, the IBM logo, and ibm.com are trademarks or registered trademarks of
International Business Machines Corp., registered in many jurisdictions worldwide.
Other product and service names might be trademarks of IBM or other companies.
A current list of IBM trademarks is available on the web at “Copyright and
trademark information” at www.ibm.com/legal/copytrade.shtml.
Adobe, Acrobat, PostScript and all Adobe-based trademarks are either registered
trademarks or trademarks of Adobe Systems Incorporated in the United States,
other countries, or both.
IT Infrastructure Library is a registered trademark of the Central Computer and
Telecommunications Agency which is now part of the Office of Government
Commerce.
Intel, Intel logo, Intel Inside, Intel Inside logo, Intel Centrino, Intel Centrino logo,
Celeron, Intel Xeon, Intel SpeedStep, Itanium, and Pentium are trademarks or
registered trademarks of Intel Corporation or its subsidiaries in the United States
and other countries.
Linux is a registered trademark of Linus Torvalds in the United States, other
countries, or both
Microsoft and Windows are trademarks of Microsoft Corporation in the United
States, other countries, or both.
ITIL is a registered trademark, and a registered community trademark of The
Minister for the Cabinet Office, and is registered in the U.S. Patent and Trademark
Office.
UNIX is a registered trademark of The Open Group in the United States and other
countries.
Notices
85
Java and all Java-based trademarks and logos are trademarks or
registered trademarks of Oracle and/or its affiliates.
Cell Broadband Engine is a trademark of Sony Computer Entertainment, Inc. in the
United States, other countries, or both and is used under license therefrom.
Linear Tape-Open, LTO, the LTO Logo, Ultrium, and the Ultrium logo are
trademarks of HP, IBM Corp. and Quantum in the U.S. and other countries.
86
Alcatel-Lucent 5620 SAM LogToFile 2.3.0.0 Technology Pack Installation and User Guide
Printed in USA