1
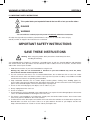
IMPORTANT
Do not return this product to the store.
Simply call our customer service department for any questions or concerns:
1-800-890-4076
(8:30am - 5:30pm E.S.T.)
DATED PROOF OF PURCHASE REQUIRED FOR WARRANTY SERVICE.
IMPORTANTE
No devuelva este producto a la tienda.
Sólo hay que llamar nuestro departamento de servicio
al cliente en caso de tener preguntas o inquietudes:
1-800-890-4076
(8:30am - 5:30 p.m. E.S.T.E.)
SE REQUIERE PRUEBA DE COMPRA CON FECHA PARA SERVICIO BAJO GARANTÍA.
COLONIAL ELECTRIC HEATER
CALENTADOR ELÉCTRICO COLONIAL
Due to constant improvements to our products, images may differ slightly from actual product.
Debido a la mejora continua de nuestros productos, las imágenes pueden variar ligeramente
del producto real.
TABLE OF CONTENTS
SECTION 1: QUICK REFERENCE GUIDE
1.1
1.2
Special Characteristics ................................................................................................................................3
Unpacking and Installing Your Electric Fireplace ........................................................................................3
SECTION 2: WARNINGS & PRECAUTIONS
2.1
2.2
2.3
Important Safety Instructions...................................................................................................................4-5
Specifications ..............................................................................................................................................6
Testing the Unit............................................................................................................................................6
SECTION 3: UNDERSTANDING YOUR ELECTRICAL FIREPLACE
3.1
Parts list .......................................................................................................................................................7
SECTION 4: OPERATING INSTRUCTIONS
4.1
4.2
Grounding Instructions ................................................................................................................................8
Control Panel Operation Procedures .......................................................................................................8-9
SECTION 5: MAINTENANCE
5.1
5.2
5.3
Cleaning Your Fireplace.............................................................................................................................10
Cleaning the Front Window Panel .............................................................................................................10
Replacing Flame Bulbs..............................................................................................................................11
SECTION 6: TROUBLESHOOTING ................................................................................................................................12-14
CAUTION: BEFORE OPERATING THIS EQUIPMENT PLEASE READ THESE INSTRUCTIONS CAREFULLY.
Version 1
1
READ ALL INSTRUCTIONS BEFORE USING THIS APPLIANCE
1. Before permanently setting up your fireplace, make sure to plug it into a convenient outlet and verify
the circuit breakers operate correctly.
2. The electric fireplace may emit a slight, harmless odor when first used. This odor is normal and is caused
by the initial heating of internal fireplace parts. This odor occurs only at the time of set-up.
3. If your electrical fireplace does not emit heat, consult the User Manual for further information.
CAUTION
RISK OF ELECTRIC SHOCK
DO NOT OPEN
NO USER - SERVICEABLE PARTS INSIDE
HIGH TEMPERATURE
SA 1965A
CAUTION:
HIGH TEMPERATURES!
KEEP DRAPERIES, ELECTRICAL CORDS AND OTHER FURNISHINGS AT LEAST 3’/0.9 M
FROM THE FRONT AND AWAY FROM THE SIDE AND REAR OF THE HEATER.
WARNING:
1. RISK OF FIRE - KEEP COMBUSTIBLE MATERIAL AWAY FROM THE FRONT
OF THE ELECTRICAL FIREPLACE.
2. SERVICING SHOULD BE DONE ONLY WHILE THE ELECTRICAL FIREPLACE IS DISCONNECTED
FROM THE POWER SUPPLY.
2
SECTION 1
QUICK REFERENCE GUIDE
1.1 SPECIAL CHARACTERISTICS
A) The smoldering glow of the flames are similar those observed in a real fireplace.
This heater is ideal for year round use even when the central heating has been turned off.
B) This fireplace produces a hot air current.
1.2 UNPACKING AND INSTALLING THE ELECTRIC FIREPLACE
•
•
•
•
•
•
Open the packaging carefully and remove the fireplace.
Remove and discard the plastic bag.
BE RESPONSIBLE WHEN HANDLING THE PACKING MATERIALS.
WARNING: KEEP PLASTIC WRAPPING AWAY FROM CHILDREN.
Keep the original packaging for future transport and/or storage.
Keep the front of the unit, through which the heat is radiated, at least 3’/0.9 m away from furniture,
curtains and other flammable objects/materials at all times.
Ensure there is a grounded socket nearby (back of the appliance).
NOTE:
A dedicated power circuit is recommended for the unit but not required. Additional electrical appliances on the same
circuit may exceed the current (amperage) rating for that circuit. If after the installation of your unit, the circuit breaker trips
or the fuse fails on a repeated basis, then a dedicated circuit will likely be required.
Any new wiring must be done in compliance with local and national codes and other applicable regulations in order
to reduce the risk of fire, electric shock or other injuries. It is strongly recommended that you hire a licensed electrician
to complete any such work.
3
WARNINGS & PRECAUTIONS
SECTION 2
2.1 IMPORTANT SAFETY INSTRUCTIONS
This symbol alerts you to potential hazards that can kill or hurt you and/or others.
DANGER
WARNING
You can be killed or seriously injured if you donʼt immediately follow these instructions.
All safety messages will tell you what the potential hazard is, tell you how to reduce the chance of injury,
and tell you what can happen if the instructions are not followed.
IMPORTANT SAFETY INSTRUCTIONS
SAVE THESE INSTRUCTIONS
Warning: When using this product, basic precautions should always be taken,
including the following:
Your Cambridge Electric Fireplace is classified as a moveable heater. As with any electrical appliance and particularly
with electric heaters, basic precautions must be followed in order to reduce the risk of fire, burns, electrical shocks
and/or other serious injuries or death.
1. Read all the instructions in your User’s Manual before using this unit.
Warning: Any other use not recommended or described in your User’s Manual may cause fire, burns,
electric shock and other serious injuries or death.
2. The unit can become hot when in use. To avoid accidental burns, do not allow bare skin to come into contact
with the hot surfaces of the unit. Extreme caution is necessary when any heater is used by or near children or invalids
and whenever the heater is left operating and unattended.
3. Keep combustible materials, such as: curtains, drapes, furniture, pillows, clothing, linens, bedding, paper, etc.,
at least 3’/0.9 m from the front and away from side and rear of the heater. Do not use this unit in areas where gasoline,
paint or other flammable liquids or their associated vapors may be present.
4. Do not use this unit for drying any wet objects, such as clothes, toys, etc.
5. Always unplug heater when not in use.
6. Do not use outdoors.
7. Do not operate the unit if it is damaged or has malfunctioned. If you suspect the unit is damaged, please call customer
service at 1-800-890-4076 before returning this unit to the store.
8. This heater is not intended for use in bathrooms, laundry areas and similar indoor locations. Never locate heater
where it may fall into a bathtub or other water container.
9. To reduce the risk of fire, do not place or install this unit in areas where the ventilation or circulation ducts may become
blocked. Make sure there are at least 4”/10.15 cm of space between the back of your fireplace and the wall.
Keep a minimum distance of 2”/5.08 cm on each side of your fireplace free.
4
SECTION 2
WARNINGS & PRECAUTIONS
2.1 IMPORTANT SAFETY INSTRUCTIONS (CONTINUED)
10. Do not insert or allow foreign objects to enter any of the ventilation or circulation ducts as this may cause
electric shock, fire or otherwise damage the unit.
11. The unit’s power cord must be connected to a properly grounded and protected, 120 V electrical outlet.
Always use ground fault protection where required by the electrical code. To reduce the risk of fire, do not run cord
under carpeting. Do not route the excess power cord in front of the hot air outlet of the heater, instead route it behind
the fireplace. Do not cover cord with throw rugs, runners, or similar coverings. Arrange cord away from traffic area
and where it will not be tripped over.
12. Avoid the use of an extension cord, which may overheat and cause a fire. Always plug heaters directly into a wall
outlet/receptacle. Never use with an extension cord or relocatable power tap (outlet/power strip).
13. Always disconnect the unit from the power supply before performing any cleaning, maintenance, relocating the electric
fireplace or when the unit is not in use for long periods of time.
14. When transporting or storing the unit, keep it in a dry location, free from dust, excessive vibration or other factors,
which may damage the unit.
15. Do not operate any heater with a damaged cord or plug or after the heater malfunctions, has been dropped
or damaged in any manner. Return heater to authorized service facility for examination, electrical or mechanical
adjustment, or repair.
16. To disconnect heater, turn controls to off, then remove plug from outlet.
17. To prevent a possible fire, do not block air inlets or exhaust in any manner. Do not use on soft surfaces,
like a bed, where openings may become blocked.
18. A heater has hot and sparking parts inside. Do not use it in areas where gasoline, paint, or flammable liquids
are used or stored.
19. Use this heater only as described in this manual. Any other use not recommended by the manufacturer may cause fire,
electric shock, or injury to persons.
Warning: This appliance is not intended for use by persons (including children) with reduced physical,
sensory or mental capabilities, or lack of experience and knowledge, unless they have been given supervision
or instruction concerning use of the appliance by-a person responsible for their safety.
Warning: Children should be supervised to ensure that they do not play with the appliance.
Warning: If the supply cord is damaged, it must be replaced by the manufacturer or its service agent
or a similarly qualified person in order to avoid a hazard.
SAVE THESE INSTRUCTIONS
5
WARNINGS & PRECAUTIONS
SECTION 2
2.2 SPECIFICATIONS
TECHNICAL SPECIFICATIONS
ITEM (MODEL)
VOLTAGE
FREQUENCY
POWER
NET WEIGHT
UNIT DIMENSIONS
16496 (HBL-15SDBP/M40)
120V AC
60 Hz
1500 W
20 kg / 44 lbs
23.23” L x 14.13” W x 25.59” H
59 cm L x 35.9 cm W x 65 cm H
2.3 TESTING THE UNIT
Carefully remove the unit from the box. Prior to permanently installing the unit, test to make sure the unit operates properly
by plugging the unit’s power cord into a conveniently located 120 V grounded outlet.
CAUTION:
The unit’s power cord must be connected to a properly grounded and protected 120 V outlet.
Always use ground fault protection where required by the electrical code.
WARNING:
Do not operate the unit if it is damaged or has malfunctioned. If you suspect the unit is damaged,
please call customer service at 1-800-890-4076 before returning this unit to the store.
Refer to the Operating Instructions regarding the various controls and features of the unit.
6
SECTION 3
UNDERSTANDING YOUR ELECTRICAL FIREPLACE
3.1 PARTS LIST
Top plate
Door with
transparent
window
Handle
Foot
Fig. 1
Pilot light
Hot air
outlet
2 spare replacement
bulbs stored in the
packaging foam
Back plate
Fig. 2
Room air inlet
Control panel
Fig. 3
7
SECTION 4
OPERATING INSTRUCTIONS
4.1 GROUNDING INSTRUCTIONS
This fireplace is for use on 120 V outlets. The cord has a 3-prong plug (See Figure 4-A). An adapter is available
for connecting 3-prong grounded-type plugs to two-slot receptacles (See Figure 4-C). The green grounding
plug extending from the adapter must be connected to a permanent ground such as a properly grounded outlet box.
The adapter should not be used if a three-slot grounded receptacle is not available.
A
B
C
Figure 4
Metal Screw
Cover of Grounded
Outlet Box
Grounding Pin
Grounding Means
4.2 CONTROL PANEL OPERATING PROCEDURES
Once the unit has been properly connected to a grounded electrical outlet, it is ready to operate.
Note: Make sure the circuit breakers for the power supply are turned on.
•
Pilot Light for Heater: Pilot light goes on when heater is in use.
Note: The Flame and Heating system are controlled by separate power switches and can work independent
from each other. The Flame system can be on while the Heating element is off and the Heating element
can be on while the Flame system is off. We suggest that you should turn the Flame system and Heating system
on at the same time when you turn on the electrical fireplace.
Figure 5
Temperature
Control Knob
Power Switch
Heater Low Switch
Flame Adjust Knob
FLAME
TEMPERATURE
CONTROL
POWER
HEATER
I
Flame Power Switch
HEATER
II
8
FLAME
POWER
Heater High Switch
OPERATING INSTRUCTIONS
SECTION 4
4.2 CONTROL PANEL OPERATING PROCEDURES (CONTINUED)
Flame Operation:
1. To switch on the flame, flip the POWER rocker switch on. The red LED light
turns on.
2. To switch on the flame effect of your fireplace, flip the POWER rocker switch
to on. The flame goes on when the red LED light on the switch turns on.
3. To adjust the brightness of the flame, turn the right-hand dial marked FLAME,
clockwise until it reaches the brightness you desire
FLAME
Fig. 6
Heater Operation:
1. To switch on the heater, flip the POWER rocker switch on.
The red LED light turns on
2. Flip the second rocker switch from the left, marked Heater I.
This switch gives you approximately 675 W of power to your heater.
This switch is for low-level heating. For high-level heating, make sure
the POWER, HEATER I and HEATER II switches are all turned on.
3. To adjust the temperature, turn the left-hand dial marked
TEMPERATURE CONTROL clockwise, until it reaches the temperature you desire.
9
TEMPERATURE
CONTROL
Fig. 7
SECTION 5
MAINTENANCE
5.1 CLEANING YOUR FIREPLACE
WARNING:
Before cleaning the exterior of the appliance, disconnect the unit from the power supply
and leave until cooled off.
You can clean the exterior of the heater with a soft, damp, lint-free cloth. Do not use cleaning or polishing products.
5.2 CLEANING THE FRONT WINDOW PANEL
WARNING:
Before cleaning the exterior of the appliance, disconnect the unit from the power supply
and leave until cooled off.
The window panel may become dirty or dusty. Dust can be removed by lightly rubbing the surface with a clean, lint-free cloth
or paper towel. To remove fingerprints or other marks, use a soft, damp, lint-free cloth with a mild household glass cleaner.
The front window panel should always be completely dried with a clean, lint-free cloth or paper towel.
Storage: When not in use, unplug the unit from the power supply and store in a dry, dust-free location.
CAUTION:
Do not use abrasive cleaners on the window panel.
Do not spray liquids directly onto any surface of the unit.
WARNING:
An authorized service representative should perform any other servicing.
Do not remove back panel. Any tampering with main back panel voids warranty.
Only small panel should be opened to replace flame bulbs.
Risk of electrical shock may cause severe injury or death.
Any tampering with back panel voids warranty.
10
MAINTENANCE
SECTION 5
5.3 REPLACING FLAME BULBS
Tools needed: Phillips screw driver
Before you replace the flame bulbs, make sure that the unit is turned off and the power cord is unplugged
from the wall. Replacing flame bulbs should be carried out only by adults, children should not be allowed
to do this operation.
Bulbs needed: Type E12, 120 V, 40 W
Opening the bulb replacement panel:
Before you start, make sure that the heater
is cooled down to avoid burning yourself.
The back of the unit has a small panel
located at the bottom of the main panel unit
in the center. This small panel is installed
by 4 screws, one in each corner.
Using a Phillips screw driver, remove all
4 screws one by one. When the 4 screws
a re re m o v e d t h e p a n e l i s re a d y
to be removed. Gently pull it away.
Inside the panel you will see 2 sockets with two bulbs installed. Remove the faulty bulb by gently unscrewing
counter clockwise. Install the new bulb by screwing the bulb clockwise.
Install the small panel back on the main panel by the 4 screws using the screwdriver. To test the flames,
plug the unit into the power outlet, turn it on and put the flame knob to maximum.
If you experience any difficulty call customer service at 1-800-890-4076
11
TROUBLESHOOTING
Problem
Heater doesn’t
turn on with
the power switch.
Heater is on,
but no flame
or low flame intensity.
Flames are frozen.
SECTION 6
Cause
Solution
Main power supply switch is off.
Turn the main power supply switch
to ON position.
Circuit breaker has tripped.
Too many appliances on this circuit,
be sure that electrical supply
for this unit is an individual circuit.
Heater is unplugged
from wall outlet.
Plug the cord into an outlet.
Power cord or power plug
are damaged.
Contact a qualified electrician
to replace power cord.
Power outlet for power plug
prong is loose.
Check the power outlet and replace
with a new one.
Loose wiring.
Check all wiring for loose connections.
Contact a qualified electrician.
Heater switch is on,
but Flame power switch is not on.
Turn the Flame Power switch.
Flame Adjusting knob
is at low setting.
Turn the knob to maximum setting.
Burnt bulb(s)
Replace bulb(s)
See 5.3 - Replacing Flame Bulbs
Loose wiring.
Check all wiring for loose connections.
Contact a qualified electrician.
Loose wiring.
Check all wiring for loose connections.
Contact a qualified electrician.
Flame element is not attached
to the motor.
Call customer service
1-800-890-4076.
Rotation motor is defective.
Call customer service
1-800-890-4076.
12
SECTION 6
Problem
Excessive noise
in the lower portion
of the heater.
TROUBLESHOOTING
Cause
Solution
Flame element isn’t seated
properly.
Call customer service
1-800-890-4076.
Motor is defective.
Call customer service
1-800-890-4076.
Heater power switch is off.
Turn the heater power switch
to the ON position.
Thermostat is set too low.
Move the thermostat slide
to a higher setting.
Heater system is overheated.
The heater is covered or air inlet
or air outlet are blocked; remove
the cloth or the blockage and turn off
the power switch and unplug it.
Wait five minutes,
then turn the heater on again.
Loose wiring.
Check all wiring for loose connections.
Contact a qualified electrician.
The air inlet or air outlet is
blocked completely.
Move the unit, make sure to leave
adequate space around the unit.
Remove the blockage,
on or in front of the air outlet.
The heater system is overheated.
Temperature Limit thermostat
is cut off.
Check the air inlet and outlet.
Turn off the power switch
and unplug it. Wait five minutes,
then turn the heater on again.
Fan motor is defective.
Call customer service
1-800-890-4076.
Fan blower is unbalanced.
Call customer service
1-800-890-4076.
Heater system
doesn’t come on.
HEATER POWER
switch has been
flipped
in the ON position,
but there is
no airflow.
13
TROUBLESHOOTING
Problem
Fan runs but no
heat comes out.
Excessive noise
in upper portion
of the heater.
There is an odor
coming from the
heater.
SECTION 6
Cause
Solution
The HEATER I and HEATER II
switches are not turned on.
Turn these two switches on.
TEMPERATURE CONTROL
thermostat is set at low position.
Adjust this thermostat to High
position.
Loose wiring.
Call customer service
1-800-890-4076.
Bad heating element.
Call customer service
1-800-890-4076.
Build up of dirt on the fans.
Clean all fans.
Heater fan is defective.
Call customer service
1-800-890-4076.
The heater may emit a slight,
harmless odor when first used.
This is a normal condition
caused by initial heating
of the internal parts
and will not occur again.
14
ÍNDICE
SECCIÓN 1: GUÍA DE REFERENCIA RÁPIDA
1.1
1.2
Características especiales .........................................................................................................................17
Desempaquetada e instalación de su chimenea eléctrica........................................................................17
SECCIÓN 2: ADVERTENCIAS Y PRECAUCIONES
2.1
2.2
2.3
Importantes instrucciones de seguridad..............................................................................................18-19
Especificaciones ........................................................................................................................................20
Ensayo de la unidad ..................................................................................................................................20
SECCIÓN 3: CONOZCA SU CHIMENEA ELÉCTRICA
3.1
Lista de partes ...........................................................................................................................................21
SECCIÓN 4: INSTRUCCIONES DE OPERACIÓN
4.1
4.2
Instrucciones para conexión a tierra .........................................................................................................22
Procedimientos de operación a partir del panel de control ...............................................................22-23
SECCIÓN 5: MANTENIMIENTO
5.1
5.2
5.3
Limpieza de la chimenea ...........................................................................................................................24
Limpieza del panel de la ventanilla delantera ...........................................................................................24
Reemplazar los bombillos de flama ..........................................................................................................25
SECCIÓN 6: SOLUCIÓN DE PROBLEMAS ...................................................................................................................26-28
ATENCIÓN: ANTES DE OPERAR ESTE EQUIPO, POR FAVOR LEA CUIDADOSAMENTE
ESTAS INSTRUCCIONES.
15
LEA TODAS LAS INSTRUCCIONES ANTES DE USAR ESTE APARATO
1. Antes de instalar permanentemente su chimenea, enchúfela en una toma de corriente adecuado para verificar
que los cortacircuitos de esa toma de corriente estén encendidos.
2. Al usarpor primera vez la chimenea eléctrica puede emitir un ligero olor que no implica peligro. Este olor es normal
y es causado por el calentamiento inicial de las piezas internas de la chimenea y no volverá a ocurrir.
3. Si su chimenea eléctrica no emite calor, consulte el manual del usuario para más información.
PRECAUCIÓN
RIESGO DE DESCARGA ELÉCTRICA
NO ABRA
NO CONTIENE PIEZAS QUE EL USARIO PUEDA REPARAR
TEMPERATURA ALTA
SA 1965A
PRECAUCIÓN:
¡ALTA TEMPERATURA!
MANTENGA LOS CORDONES ELECTRICOS, COLGADURAS Y OTROS MOBILIARIOS
A NO MENOS DE 3 PIES (0.9M) DE DISTANCIA DEL FRENTE Y LEJOS DE LOS COSTADOS
Y LA PARTE TRASERA DEL CALENTADOR .
ADVERTENCIA:
1. RIESGO DE INCENDIO – MANTENGA TODO MATERIAL COMBUSTIBLE LEJOS
DE LA PARTE DELANTERA DE LA CHIMENEA ELÉCTRICA.
2. EL MANTENIMIENTO SE DEBE HACER SÓLO CUANDO LA CHIMENEA ELÉCTRICA
ESTÁ DESCONECTADA DE LA FUENTE DE CORRIENTE.
16
SECCIÓN 1
GUÍA DE REFERENCIA RÁPIDA
1.1 CARACTERÍSTICAS ESPECIALES
A) El brillo ardiente de las llamas se puede distinguir difícilmente de aquel de una chimenea real.
Este calentador es ideal para usar durante todo el año, incluso cuando se ha apagado la calefacción central.
B) Esta chimenea produce corriente de aire caliente.
1.2 DESEMPAQUETADA E INSTALACIÓN DE SU CHIMENEA ELÉCTRICA
•
•
•
•
•
•
Abra el empaque con cuidado y saque la chimenea.
Retire y deseche la bolsa de plástico.
SEA RESPONSABLE AL MANIPULAR LOS MATERIALES DE EMPAQUE.
ADVERTENCIA: MANTENGA LA ENVOLTURA DE PLÁSTICO FUERA DEL ALCANCE DE LOS NIÑOS.
guarde el empaque original para transporte y/o almacenamiento en el futuro.
Mantenga la parte delantera de la unidad, a través de la cual se irradia el calor, al menos a 3 pies/0.9 metro
de muebles, cortinas y otros objetos/materiales inflamables en todo momento.
Asegúrese que haya una toma de corriente con conexión a tierra cerca (detrás del aparato).
NOTA:
Se recomienda un circuito de corriente dedicado para la unidad, pero no se exige. El uso de aparatos eléctricos
adicionales sobre el mismo circuito puede exceder la demanda de corriente (amperaje) de ese circuito. Si después
de la instalación de la unidad el cortacircuitos salta y falla el fusible repetidamente, entonces lo más seguro
es que se requerirá un circuito dedicado.
Cualquier instalación nueva que se haga debe ser de conformidad con los códigos locales y nacionales y otras normas
pertinentes con el fin de reducir el riesgo de incendios, electrocución u otras lesiones.
Se recomienda firmemente que contrate un electricista certificado para realizar tal trabajo.
17
ADVERTENCIAS Y PRECAUCIONES
SECCIÓN 2
2.1 IMPORTANTES INSTRUCCIONES DE SEGURIDAD
Este símbolo le alerta sobre los peligros potenciales que le pueden causar
la muerte y lesiones a usted y a otros.
PELIGRO
ADVERTENCIA
Usted puede estar en peligro de muerte o sufrir lesiones si no sigue inmediatamente estas instrucciones.
Todos los mensajes de seguridad le informarán cuál es el peligro potencial, cómo reducir los riesgos de lesiones
y qué puede suceder si no se siguen las instrucciones.
IMPORTANTES INSTRUCCIONES DE SEGURIDAD
GUARDE ESTAS INSTRUCCIONES
Advertencia: Al usar este producto, siempre se debe seguir las precauciones básicas,
incluyendo las siguientes:
Su chimenea eléctrica Cambridge está clasificada como un calentador movible. Como con cualquier aparato eléctrico
y particularmente con calentadores eléctricos, se deben seguir las precauciones básicas para reducir riesgos
de incendios, quemaduras, electrocución y /o lesiones graves o la muerte.
1. Lea todas las instrucciones en el Manual del usuario antes de usar la unidad.
Advertencia: Cualquier otro uso no recomendado o descrito en el Manual del usuario puede causar incendio,
quemaduras, electrocución y otras lesiones graves o muerte.
2. La unidad puede estar caliente durante el uso. Para evitar quemaduras accidentales, no deje que la piel entre
en contacto con las superficies calientes de la unidad. Se requiere precaución extrema cuando el calentador
es usado por niños o personas discapacitadas o cerca de éstos o cuando el calentador se deja en funcionamiento
y sin supervisión.
3. Mantenga todo material combustible, como cortinas, colgaduras, muebles, almohadas, ropa, telas, ropa de cama,
papeles, etc. a no menos de 3’/0.9 m de la parte delantera de la unidad. No use esta unidad en áreas donde
puedan estar presente gasolina pinturas o líquidos inflamables o los vapores de los mismos.
4. No use esta unidad para secar ningún objeto mojado, como ropa, juguetes, etc.
5. Desenchufe el calentador cuando no esté en uso.
6. No lo use en exteriores.
7. No use la unidad si está dañada o funciona mal. Si tiene sospecha que la unidad está dañada, por favor,
llame el servicio al cliente al 1-800-890-4076 antes de devolverla a la tienda.
8. Esta unidad no está destinada al uso en baños, áreas de lavandería y otros sitios interiores similares.
No coloque el calentador en sitios donde pueda caer en una bañera u otro recipiente con agua.
9. Para reducir el riesgo de incendios, no coloque ni instale esta unidad en áreas donde se pueden bloquear ductos
de ventilación o circulación. Asegúrese que haya al menos 4”/10.15 cm de espacio entre la parte posterior
de la chimenea y la pared. Mantenga una distancia mínima libre de 2”/5.08 cm a cada lado de la chimenea.
18
SECCIÓN 2
ADVERTENCIAS Y PRECAUCIONES
2.1 IMPORTANTES INSTRUCCIONES DE SEGURIDAD (CONTINUADO)
10. No inserte ni deje que entre objetos extraños en los ductos de ventilación o circulación puesto que esto puede causar
electrocución, incendios u otros daños a la unidad.
11. El cordón de corriente de la unidad debe estar conectado a una toma de corriente de 120 V conectada a tierra
correctamente. Use siempre protección contra protección contra pérdida a tierra donde el código de electricidad
lo exija. Para reducir el riesgo de incendio, no poner el cable debajo de alfombras. No coloque ninguna sección
del cable de poder en frente de la salida de aire caliente del elemento calentador, colóquelo en la parte posterior
de la chimenea. No cubrirlo con tapetes o cualquier otro tipo de cubiertas similares. Acomode el cable lejos de áreas
de tráfico y de donde este pueda enredarse.
12. Evite usar cables de extensión que puedan sobrecalentarse y causar incendios. Conecte siempre los calentadores
directamente en el enchufe de pared/receptáculo. Nunca lo utilice con un cable de extensión o un cable de extensión
de varios enchufes (Enchufe múltiple).
13. Desconecte siempre la unidad de la fuente de suministro de corriente antes de hacer limpieza, reemplazar bombillas,
mantenimiento, reubicar el calentador o cuando la unidad no está en uso durante un largo periodo de tiempo.
14. Al transportar o guardar la unidad, manténgala en un lugar seco, libre de polvo, vibraciones excesivas u otros factores
que puedan dañar la unidad.
15. No use ningún calentador con un cordón o un enchufe dañado o después de que el calentador se haya funcionado
mal o se haya caído o dañado de alguna manera. Devuelva la unidad a un centro de mantenimiento autorizado
para una revisión eléctrica o mecánica, ajustes o reparación.
16. Para desconectar el calentador, apague los controles, luego retire el enchufe de la toma de corriente.
17. Para prevenir posibles incendios, no obstruya las ranuras de entrada de aire de ninguna manera.
No lo use sobre superficies blandas, como camas, donde se pueden bloquear las ranuras.
18. Un calentador tiene piezas calientes y chispeantes dentro. No lo use en áreas donde se utiliza o se almacena gasolina,
pintura o líquidos inflamables.
19. Use este calentador sólo según las descripciones de este manual. Cualquier otro uso no recomendado
por el fabricante puede causar incendio, electrocución o lesiones personales.
Advertencia: Este aparato no está destinado a aquellas personas (incluidos niños) cuyas capacidades físicas,
sensoriales o mentales estén de alguna manera reducidas o no cuenten con la suficiente experiencia
o con el conocimiento necesario del producto, a menos que estén supervisadas por una persona competente
durante la utilización del mismo.
Advertencia: Deberán supervisarse los niños para asegurarse de que no juegan con este aparato.
Advertencia: Si el cable de alimentación se daña, debe sustituirse imperativamente por el centro de servicio
autorizado o una persona de calificación similar con el fin de evitar todo peligro.
GUARDE ESTAS INSTRUCCIONES
19
ADVERTENCIAS Y PRECAUCIONES
SECCIÓN 2
2.2 ESPECIFICACIONES
ESPECIFICACIONES TÉCNICAS
ITEM (MODELO)
VOLTAJE
FRECUENCIA
ENERGÍA
PESO NETO
DIMENSIONES DE LA UNIDAD
16496 (HBL-15SDBP/M40)
120 V CA
60 Hz
1500 W
20 kg / 44 lb
23.23” L x 14.13” A x 25.59” A
59 cm L x 35.9 cm A x 65 cm A
2.3 ENSAYO DE LA UNIDAD
Saque la unidad de la caja con cuidado. Antes de instalarla permanentemente, verifique si la unidad funciona
correctamente enchufando el cordón de corriente en una toma de 120 V con conexión a tierra convenientemente ubicada.
ATENCIÓN:
El cordón de corriente de la unidad debe estar conectado a una toma de corriente de 120 V correctamente
conectada a tierra. Use siempre protección contra pérdida a tierra donde el código de electricidad la exija.
ADVERTENCIA:
No use la unidad si está dañada o funciona mal. Si tiene sospecha que la unidad está dañada,
por favor, llame el servicio al cliente al 1-800-890-4076 antes de devolverla a la tienda.
Consulte las Instrucciones de Operación sobre los distintos controles y características de la unidad.
20
SECCIÓN 3
INSTRUCCIONES DE OPERACIÓN
3.1 INSTRUCCIONES PARA CONEXIÓN A TIERRA
Placa superior
Puerta con
ventanilla
transparente
Manija
Pie
Fig. 1
Luz del piloto
Salida de aire
caliente
2 bombillos de
repuesto adicionales
empacados en bolsa
de espuma
Placa posterior
Fig. 2
Entrada de aire
ambiente
Panel de control
Fig. 3
21
SECCIÓN 4
INSTRUCCIONES DE OPERACIÓN
4.1 INSTRUCCIONES PARA CONEXIÓN A TIERRA
Esta chimenea es para usar en 120 voltios. El cordón tiene un enchufe (Vea la Figura 4-A). Hay un adaptador disponible
para conectar los enchufes de 3 dientes con conexión a tierra a receptáculos de dos ranuras (Vea Figura 4-C).
El enchufe verde que se extiende del adaptador debe conectarse a una puesta a tierra permanente como una caja
de empalmes correctamente conectada a tierra. No se debe usar el adaptador si hay disponible un receptáculo
de tres ranuras conectado a tierra.
Figura 4
A
B
C
Tornillo
de metal
Metal Screw
Cabeza
de
Grounding Means
conexión a tierra
Tapa
deofcaja
exterior
Cover
Grounded
Outlet aBox
conectada
tierra
Pata de conexión
a tierra
Grounding
Pin
4.2 PROCEDIMIENTOS DE OPERACIÓN A PARTIR DEL PANEL DE CONTROL
Una vez enchufada unidad a una toma de corriente correctamente conectada a tierra, ya está lista para operar.
Una vez enchufada unidad a una toma de corriente correctamente conectada a tierra, ya está lista para operar.
Nota: Asegúrese de que los cortacircuitos del suministro de corriente estén encendido.
•
Luz del piloto para el calentador: La luz del piloto estara encendida cuando el calenta dor este en uso.
Nota:
El sistema de llamas y el de calefacción son controlados por interruptores de encendido diferentes y pueden
funcionar independientemente el uno del otro. El sistema de llamas puede estar encendido mientras
que el elemento calefactor está apagado. Sugerimos que encienda el sistema de llamas y el sistema
de calefacción al mismo tiempo que enciende la unidad.
Figura 5
Termostato de control
de temperatura
Interruptor de encendido
Interruptor de bajo
del calentador
Ajuste de llamas
FLAME
TEMPERATURE
CONTROL
POWER
HEATER
I
HEATER
II
22
FLAME
POWER
Interruptor de encendido
(ON/OFF) de las llamas
Interruptor de alto
del calentador
INSTRUCCIONES DE OPERACIÓN
SECCIÓN 4
4.2 PROCEDIMIENTOS DE OPERACIÓN A PARTIR DEL PANEL DE CONTROL (CONTINUADO)
Operación de las llamas:
1. Para encender las llamas, bascular el interruptor POWER a ON.
El DEL rojo se encenderá.
2. Para encender el efecto de llamas de su chimenea,
mueva el interruptor basculador POWER a ON.
3. Para ajustar el brillo de las llamas, gire el dial de mano derecha,
marcado FLAME (Brillo de llamas) hasta que se alcance el brillo deseado.
FLAME
Fig. 6
Operación del calentador:
1. Para encender el calentador, mueva el interruptor basculante (POWER) en ON.
Ud. Sabrá que hay corriente en el ventilador cuando se enciende el DEL
(Diodo electroluminiscente).
2. Mueva el segundo interruptor basculante desde la izquierda, marcado
HEATER I (Calentador BAJO). Este interruptor le da 675 W de corriente
al calentador. Este interruptor es para calefacción de baja intensidad.
Para calefacción de alta intensidad, asegúrese que los interruptores
POWER, HEATER I y HEATER II estén encendidos.
3. Para ajustar la temperatura, gire el dial a la izquierda marcado
TEMPERATURE CONTROL (Control de temperatura) hacia arriba
para obtener la temperatura deseada.
23
TEMPERATURE
CONTROL
Fig. 7
SECCIÓN 5
MANTENIMIENTO
5.1 LIMPIEZA DE LA CHIMENEA
ADVERTENCIA:
Antes de limpiar la parte exterior de la unidad, desconecte la unidad de la fuente de corriente
y deje que se enfríe.
Ud. Puede limpiar la parte exterior del calentador con un trapo suave, húmedo, libre de pelusas.
No use productos de limpieza o para brillar.
5.2 LIMPIEZA DEL PANEL DE LA VENTANILLA DELANTERA
ADVERTENCIA:
Antes de limpiar la parte exterior de la unidad, desconecte la unidad de la fuente de corriente
y deje que se enfríe.
Con el tiempo, el panel de la ventanilla delantera puede acumular suciedad o polvo. Se puede limpiar la ventanilla
frotándo la superficiete con un trapo sin pelusas o toalla de papel. Para quitar las huellas digitales u otras marcas,
use un trapo húmedo con un limpiador suave de vidrio casera de buena calidad. Se debería secar el panel
de la ventanilla delantera con un trapo sin pelusas limpio o con una toalla de papel.
Almacenamiento: Cuando la unidad no está en uso, desenchúfela de la fuente de corriente y guárdela
en un lugar seco y libre de polvo.
ATENCIÓN:
No utilizar limpiadores abrasivos en el panel de la ventanilla.
No rociar líquidos directamente sobre cualquier parte del aparato.
ADVERTENCIA:
Cualquier otra clase de mantenimiento debe ser realizado por un representante de servicio autorizado.
No retire el panel posterior. Cualquier intento de acceder a través del panel principal en la parte
posterior anula la garantía. Para remplazar los bombillos de flama, se debe acceder únicamente
a través del pequeño panel. El riesgo de electrocución puede causar lesiones graves o la muerte.
Cualquier manipulación del panel posterior invalida la garantía.
24
SECCIÓN 5
MANTENIMIENTO
5.3 REEMPLAZAR LOS BOMBILLOS DE FLAMA
Herramientas necesarias: Destornillador de estrella tipo “Phillips”
Antes de reemplazar los bombillos de flama, asegúrese que la unidad esté apagada y que el cable de corriente
esté desconectado del tomacorriente. El cambio de los bombillos de flama debe ser efectuado únicamente por adultos.
Ningún niño debería efectuar esta operación.
Bombillo requerido: Tipo E12, 120 Voltios, 40 Vatios
Apertura del panel de cambio
del bombillo
Antes de empezar asegúrese que
el elemento calentador se haya enfriado
para evitar que usted sufra quemaduras.
La parte trasera de la unidad tiene un
pequeño panel ubicado en la parte inferior
del panel principal de la unidad ubicado
en centro. Este pequeño panel esta
provisto de cuatro (4) tornillos, uno en cada
esquina del panel. Remueva cada uno
de los tornillos utilizando un destornillador
de estrella tipo “Phillips”. Cuando todos
los tornillos hayan sido removidos, el panel
puede ser desprendido de la unidad.
Remuévalo gentilmente.
En la parte interior del panel usted podrá ver dos (2) zócalos con dos bombillos instalados. Remueva gentilmente
el bombillo defectuoso desenroscándolo en contra del sentido de las agujas del reloj. Instale el nuevo bombillo
enroscándolo en el sentido de las agujas del reloj.
Instale el pequeño panel en la parte trasera en el panel principal utilizando los cuatros (4) tornillos y el destornillador.
Para probar los bombillos de flama, conecte la unidad al tomacorriente, enciéndala y coloque la perilla de flama
en la posición máxima.
Si usted experimenta algún problema o dificultad, llame a servicio al cliente al 1-800-890-4076
25
SOLUCIÓN DE PROBLEMAS
Problema
El calentador
no se enciende
con el interruptor
de corriente.
El calentador
está encendido,
pero no hay llamas
o éstas están bajas.
Las llamas
están congeladas.
SECCIÓN 6
Causa
Solución
El interruptor principal
de corriente está apagado.
Coloque el interruptor principal
de corriente en la posición ON
(Encendido).
El cortacircuitos está saltado.
No conecte demasiados aparatos
a este circuito; asegúrese
que la corriente eléctrica para esta
unidad venga por un circuito individual.
El calentador está
desenchufado de la toma
de corriente de la pared.
Enchufe el cordón de corrientes
en una toma de corriente.
El cordón de corriente
o el enchufe está dañado.
Llame un electricista calificado para
remplazar el cordón de corriente.
La toma de corriente o las patas
del enchufe están flojas.
Verifique la toma de corriente
y remplácelo con uno nuevo.
El cableado está suelto.
Verifique toda la instalación
por conexiones flojas.
Llame un electricista calificado.
El interruptor del calentador está
encendido, pero el interruptor
de las llamas no está encendido.
Gire el interruptor de encendido
de las llamas.
La perilla de ajuste
de llamas está en bajo.
Gire la perilla al ajuste máximo.
Bombillo(s) quemado(s)
Remplace el(los) bombillo(s)
Vea 5.3 - Reemplazo de Bombillos
de Flama
El cableado está suelto.
Verifique todo el cableado
por conexiones sueltas.
Llame un electricista calificado.
El cableado está suelto.
Verifique todo el cableado
por conexiones sueltas.
Llame un electricista calificado.
El elemento de las llamas
no está fijado al motor.
Llame el servicio al cliente
1-800-890-4076.
La rotación del motor
está defectuosa.
Llame el servicio al cliente
1-800-890-4076.
26
SECCIÓN 6
Problema
Ruido excesivo
en la parte baja
del calentador.
El sistema
del calentador
no enciende.
El interruptor
HEATER POWER
(corriente del
calentador) está
colocado en posición
de encendido, pero
no hay flujo de aire.
SOLUCIÓN DE PROBLEMAS
Causa
Solución
El elemento de las llamas
no está encajado correctamente.
Llame el servicio al cliente
1-800-890-4076.
El motor es defectuoso.
Llame el servicio al cliente
1-800-890-4076.
El interruptor de corriente
del calentador está apagado.
Coloque el interruptor de corriente
en la posición ON (Encendido).
El termostato está fijado
demasiado bajo.
Deslice el control del termostato
a un ajuste más alto.
El sistema del calentador
está recalentado.
Es posible que el calentador esté
cubierto o las ranuras de entrada
o de salida de aire estén bloqueadas;
retire el obstáculo o el atasco
y apague el interruptor de corriente
y desenchufe la unidad. Espere cinco
minutos, luego vuelva a encender
el calentador.
El cableado está suelto.
Verifique todo el cableado
por conexiones sueltas.
Llame un electricista calificado.
Las ranuras de entrada
o de salida de aire
están complemente bloqueadas.
Mueva la unidad; asegúrese que
haya suficiente espacio alrededor
de la unidad. Retire el obstáculo
que está sobre o delante
de las ranuras de la salida de aire.
El sistema del calentador
está sobrecargado.
El termostato de limitación
de temperatura
esté desconectado.
Verifique las ranuras de entrada
o de salida de aire.
Apague el interruptor de corriente
y desenchufe la unidad.
Espere durante cinco minutos,
luego vuelva a encender
el calentador de nuevo.
El motor del ventilador
está defectuoso.
Llame el servicio al cliente
1-800-890-4076.
El ventilador centrífugo
está mal balanceado.
Llame el servicio al cliente
1-800-890-4076.
27
SOLUCIÓN DE PROBLEMAS
Problema
El ventilador
funciona,
pero no sale calor.
Ruido excesivo
en la parte superior
del calentador.
Hay un olor
que sale
del calentador.
SECCIÓN 6
Causa
Solución
Los interruptores
de HEATER I (Calentador en bajo)
y HEATER II (Calentador en alto)
no están encendidos.
Encienda estos dos interruptores.
El termostato
TEMPERATURE CONTROL
(Control de temperatura)
está fijado en la posición baja.
Ajuste este termostato
en la posición alta.
El cableado está suelto.
Llame el servicio al cliente
1-800-890-4076.
Elemento calefactor defectuoso.
Llame el servicio al cliente
1-800-890-4076.
Acumulación de suciedad
en los ventiladores.
Limpie todos los ventiladores.
El ventilador del calentador
está defectuoso.
Llame el servicio al cliente
1-800-890-4076.
El calentador puede emitir
un ligero olor inofensivo cuando
se usa por primera vez.
Esta es una condición normal
causada por el calentamiento
inicial de las piezas internas
y no volverá a suceder.
28