1
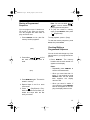
42-5056.fm Page 1 Thursday, August 12, 1999 9:25 AM
Cat. No. 42-5056
OWNER’S MANUAL
Please read before using this equipment.
CD-3445
Portable Compact Disc Player
42-5056.fm Page 2 Thursday, August 12, 1999 9:25 AM
FEATURES
Your Optimus CD-3445 Portable Compact Disc Player uses the latest digital
audio technology to give you clean,
crisp compact disc sound. You can
connect the CD player to your home
audio system with the supplied connection cable or connect a pair of stereo headphones to the CD player for
private listening. The CD-3445's advanced technology makes it simple to
operate. You can power your CD player from two AA alkaline or rechargeable batteries, or from standard AC
power or your vehicle’s battery power.
The CD player’s features include:
Automatic Search Music System —
lets you rapidly skip forward or backward through a CD.
Bass Boost — lets you enhance the
bass frequencies when using headphones.
Intro Scan — lets you play the first 10
seconds of each track on a CD.
Random Play — lets you play the
tracks on a CD in a random order.
Repeat Play — lets you automatically
repeat a single track, an entire CD, or
a programmed sequence.
Memory Function — lets you program up to 21 tracks on a CD to play in
any order.
Rechargeable Battery Adapter —
lets you recharge nickel-cadmium rechargeable batteries while they are in
the CD player's battery compartment.
Important: You need a pair of stereo
headphones or amplified speakers to
use your CD-3445. Your local Radio
Shack store carries a complete line of
headphones and speakers.
Be sure you read this Owner's Manual
completely so you can take advantage
of all the CD-3445's advanced features.
For your records, we suggest you
record the serial number of the CD
player in the space provided. The serial number is on the CD player's bottom
panel.
Serial Number __________________
© 1995 Tandy Corporation.
All Rights Reserved.
Optimus and Radio Shack are registered trademarks used by Tandy Corporation.
2
42-5056.fm Page 3 Thursday, August 12, 1999 9:25 AM
CONTENTS
Choosing a Power Source ..................................................................................
Using Batteries ................................................................................................
Installing Batteries ....................................................................................
Charging Nickel-Cadmium Batteries ........................................................
Charging Tips ...........................................................................................
Using AC Power ..............................................................................................
Using Vehicle Battery Power ...........................................................................
4
4
4
5
6
6
7
Connections .........................................................................................................
Connecting Headphones ................................................................................
Listening Safely ........................................................................................
Traffic Safety .............................................................................................
Connecting Amplified Speakers ......................................................................
8
8
8
9
9
Operation ............................................................................................................
Playing a CD .................................................................................................
Special Features ...........................................................................................
Track Skipping/Searching .......................................................................
Intro Scan ...............................................................................................
Random Play ..........................................................................................
Repeat Playback ....................................................................................
Storing a Programmed Sequence ..........................................................
Checking/Editing a Programmed Sequence ...........................................
CD Player Tips ..............................................................................................
Caring For Compact Discs ............................................................................
10
10
11
11
12
12
12
13
13
14
14
Care And Maintenance ...................................................................................... 15
FCC Information ............................................................................................ 16
Laser Safety .................................................................................................. 16
Specifications .................................................................................................... 17
3
42-5056.fm Page 4 Thursday, August 12, 1999 9:25 AM
CHOOSING A POWER SOURCE
You can power your CD player from:
• Internal battery power (using two
AA alkaline or rechargeable
nickel-cadmium batteries, not supplied)
2. Insert two AA batteries into the
battery compartment according to
the polarity symbols (+ and –) in
the compartment.
• Standard AC power (using an
optional AC adapter, not supplied)
(illus)
• Vehicle battery power (using an
optional DC adapter, not supplied)
USING BATTERIES
You can power your CD player from
two AA batteries. For the best results,
we recommend alkaline batteries,
such as Radio Shack Cat. No. 23-552/
557. Or, you can use rechargeable
nickel-cadmium batteries, such as Cat.
No. 23-125, and charge them in the
CD player with the supplied battery
adapter.
Installing Batteries
1. Slide off the battery compartment
cover in the direction of the arrow.
(illus)
Notes:
• Use only fresh batteries of the
required size and type.
• Never mix fresh and old, alkaline and nickel-cadmium batteries, or nickel-cadmium batteries
of different capacities.
• To help you remove the batteries later, place them across the
ribbon.
3. Replace the cover.
Notes:
• Replace the batteries when BATT
appears on the display, the sound
distorts, or the volume weakens.
• Always dispose of old batteries
promptly and properly.
• Never leave dead, old, or weak
batteries in the CD player. They
can leak chemicals and corrode or
damage electronic circuits.
4
42-5056.fm Page 5 Thursday, August 12, 1999 9:25 AM
• If you do not plan to use the CD
player from battery power for a
month or more, remove and store
the batteries. They might leak
chemicals and corrode or damage
electronic circuits.
Charging Nickel-Cadmium
Batteries
Nickel-cadmium batteries come fully
discharged. You can charge the batteries while they are in the battery compartment using the supplied battery
adapter and an optional AC adapter
(such as Cat. No. 273-1663, not supplied), or you can use an optional external battery charger (such as Cat.
No. 23-133, not supplied).
Warning: Do not try to charge nonrechargeable batteries. They might
get very hot and possibly explode.
Follow these steps to recharge nickelcadmium batteries in the battery compartment.
2. Insert the battery adapter into the
battery compartment according to
the polarity symbols (+ and –)
inside the compartment.
3. Plug the AC adapter’s barrel plug
into the CD player’s DC 6V jack.
Then plug the other end of the
adapter into a standard AC outlet.
(illus)
Note: With the CD player turned
off, it takes about 15 hours to
charge fully discharged nickelcadmium batteries.
4. When the batteries are fully
charged, unplug the AC adapter
from the AC outlet.
1. Put two rechargeable batteries
into the supplied battery adapter
according to the polarity symbols
(+ and –) on the adapter.
(illus)
5
42-5056.fm Page 6 Thursday, August 12, 1999 9:25 AM
Charging Tips
• Fully discharge the batteries occasionally by playing the CD player
until it no longer plays. Then fully
recharge the batteries. This helps
restore the batteries’ full charging
capacity.
• Avoid charging the batteries in a
hot environment (higher than
113°F). Doing so can permanently
reduce the batteries’ charging
capacity.
• Do not overcharge batteries.
Overcharging can severely reduce
the batteries’ useful life.
Important: This CD player is capable
of using nickel-cadmium batteries. At
the end of the batteries’ useful life, they
must be recycled or disposed of properly. Contact your local, county, or
state hazardous waste management
authorities for information on recycling
or disposal programs in your area.
Some options that might be available
are municipal curb-side collection,
drop-off boxes at retailers, recycling
collection centers, and mail-back programs.
USING AC POWER
You can power your CD player with
standard AC power using a 6-volt AC
adapter such as Cat. No. 273-1663.
Caution: The recommended AC
adapter supplies regulated 6 volts and
delivers at least 600 milliamps. Its
center tip is set to positive, and its plug
correctly fits the CD player’s DC 6V
jack. Using an adapter that does not
meet these specifications could seriously damage the CD player or the
adapter.
To connect to AC power, insert the AC
adapter’s barrel plug into the CD player’s DC 6V jack, then plug the other end
of the adapter into a standard AC outlet.
(illus)
Note: When you connect an AC adapter, the CD player automatically switches to external power, even if batteries
are installed.
6
42-5056.fm Page 7 Thursday, August 12, 1999 9:25 AM
USING VEHICLE
BATTERY POWER
3. Plug the other end of the adapter
into your vehicle’s cigarette-lighter
socket.
You can power your CD player from
your vehicle’s battery power using a 6volt DC adapter such as Cat. No. 2701563.
Caution: The recommended DC
adapter supplies regulated 6 volts and
delivers at least 600 milliamps. Its
white adaptaplug correctly fits the CD
player’s DC 6V jack and you can set its
center tip to positive. Using an adapter
that does not meet these specifications
could seriously damage the CD player
or the adapter.
Follow these steps to connect your CD
player to your vehicle’s battery power.
(illus)
Note: When you connect a DC adapter, the CD player automatically switches to external power, even if batteries
are installed.
1. Insert the white adaptaplug into
the adapter’s wire socket so TIP
and + line up.
2. Insert the DC adapter’s barrel
plug into the CD player’s DC 6V
jack.
7
42-5056.fm Page 8 Thursday, August 12, 1999 9:25 AM
CONNECTIONS
You can listen to your CD-3445 by
connecting stereo headphones to the
CD player’s PHONES jack or by connecting amplified speakers or a home
audio or autosound system to the LINE
OUT jack using the supplied Y-adapter
cable.
CONNECTING
HEADPHONES
For private listening, plug a pair of stereo headphones with a 1/8-inch plug
into the CD player’s PHONES jack.
Notes:
• The CD player’s PHONES jack is a
high-level audio output, and its
volume is controlled by the CD
player’s VOLUME control. Use this
jack with headphones or amplified
speakers that do not have a volume control.
• The CD player’s LINE OUT jack is
a low-level audio output, and its
volume is controlled by the volume control of the amplified
speakers, home audio system, or
autosound system.
• Your local Radio Shack store carries a variety of headphones and
amplified speakers.
(illus)
Listening Safely
To protect your hearing, follow these
guidelines when you use headphones.
• Set the volume to the lowest setting before you begin listening.
After you begin listening, adjust
the volume to a comfortable level.
• Do not listen at extremely high
volume levels. Extended high-volume listening can lead to permanent hearing loss.
• Once you set the volume, do not
increase it. Over time, your ears
adapt to the volume level, so a
volume level that does not cause
discomfort might still damage your
hearing.
8
42-5056.fm Page 9 Thursday, August 12, 1999 9:25 AM
Traffic Safety
Do not wear headphones while operating a motor vehicle or riding a bicycle.
This can create a traffic hazard and is
illegal in some areas.
Even though some headphones are
designed to let you hear some outside
sounds when listening at normal volume levels, they still present a traffic
hazard.
CONNECTING
AMPLIFIED SPEAKERS
(illus)
To listen to your CD player through
speakers, plug a pair of amplified
speakers with a 1/8-inch plug into the
CD player’s LINE OUT jack using either:
• The supplied Y-adapter cable.
• The amplified speakers’ built-in Ycable
9
42-5056.fm Page 10 Thursday, August 12, 1999 9:25 AM
OPERATION
Warning: This CD player has a wide
dynamic range. If you turn up your amplifier’s volume too high during soft
(low volume) parts of the music, you
might damage your hearing when a
sudden loud passage occurs.
3. Press OPEN and lift the disc compartment cover. OPEN appears on
the display.
(illus)
PLAYING A CD
Follow these steps to play a CD.
1. Set POWER to ON. 00 briefly
appears on the display, then
disc appears.
4. Carefully place the CD, label side
up, over the disc compartment’s
center hub.
(illus)
(illus)
2. Set VOLUME to the minimum
level.
6. Press
(Play/Pause). Track 1
begins to play while , 01, and
the track’s elapsed playback time
appear on the display.
t
t
(illus)
5. Gently press down on the CD until
it clicks in place, then close the
disc compartment cover. The display briefly shows 00 then the
total number of tracks and the
total playing time.
(illus)
10
42-5056.fm Page 11 Thursday, August 12, 1999 9:25 AM
7. If you connected headphones to
the CD player’s PHONES jack,
adjust the CD player’s VOLUME
control to set the desired volume
level.
If you connected amplified speakers or a home audio or autosound
system to the CD player’s LINE
OUT jack, adjust the volume controls on those units to set the
desired volume level.
8. If you are using headphones, set
BASS BOOST to ON to enhance
bass frequencies.
(illus)
When the last track finishes playing,
the CD player automatically stops.
To stop playing the CD before it automatically stops, press n (Stop). The
display shows the total number of
tracks and the CD’s total playing time.
SPECIAL FEATURES
Track Skipping/Searching
Use
or
(Skip/Search) to
rapidly search forward or backward to
locate a specific track or section of the
CD.
(illus)
To skip forward through the tracks,
press
. To skip backward, press
. The current track number appears on the display.
To search within a track, press and
hold either button. You hear the track
play rapidly and at a lower volume. Release the button to resume normal
play.
(illus)
11
42-5056.fm Page 12 Thursday, August 12, 1999 9:25 AM
Intro Scan
Repeat Playback
Press INTRO SCAN to play the first 10
seconds of each track on the CD. INTRO, the track number, and the
elapsed time appear on the display.
Your CD player can repeat:
• A single track
• The entire CD
• A programmed sequence
• Randomly selected tracks
(illus)
If you hear a track you want to listen to,
press INTRO/SCAN again. INTRO disappears from the display, and normal
playback resumes.
To cancel intro/scan play, press n
(Stop).
Random Play
To play the tracks on a CD in random
order, press RANDOM, then PLAY .
RANDOM appears on the display, and
the CD player randomly plays all the
tracks once, then stops.
(illus)
To repeat a single track, while your desired track is playing, press REPEAT.
REPEAT 1 appears on the display,
and the track plays repeatedly.
(illus)
To repeat an entire CD, press REPEAT
until REPEAT ALL appears on the
display. When the CD player reaches
the end of the CD, it returns to the first
track and replays all of the tracks.
To repeat all tracks randomly, while
RANDOM appears on the display,
press REPEAT until REPEAT ALL appears on the display. All tracks on the
CD play repeatedly in a random order.
To repeat a programmed sequence,
after you program a sequence (see
“Storing a Programmed Sequence”),
press REPEAT until REPEAT ALL appears. After the last track finishes, the
programmed tracks play repeatedly.
To cancel random play, press RANDOM again.
12
To cancel repeat play, press n (Stop).
42-5056.fm Page 13 Thursday, August 12, 1999 9:25 AM
You can program up to 21 tracks on a
CD to play in any order you choose.
You can program the same track to
play more than once.
1. Press MEMORY. P:01 (the first
memory location) appears.
or
Note: You can use either
to move to another track in
the programmed sequence.
6. To play the tracks in memory
again, press MEMORY, then press
(Play/Pause).
t
Storing a Programmed
Sequence
To stop playback, press n (Stop).
To clear the memory sequence, press
STOP, then press OPEN.
(illus)
2. Press either
or
to find
the track number you want to
store.
Checking/Editing a
Programmed Sequence
You can check and change any of the
stored tracks in your programmed sequence.
1. Press MEMORY. The memory
location and the track stored in it
appear on the display.
Notes:
(illus)
3. Press MEMORY again. The track is
stored in memory.
4. Repeat Steps 2 and 3 to store
more tracks.
t
5. Press
(Play/Pause). Playback starts with the first track you
stored and stops after the last
track you stored.
• Repeatedly press MEMORY to
see the next stored track.
• When you store less than 21
tracks, if you continue to press
MEMORY after the last stored
track appears, the display
returns to 00.
• When you store 21 tracks, if
you continue to press MEMORY
after P:21 appears on the display, the display returns to 01.
13
42-5056.fm Page 14 Thursday, August 12, 1999 9:25 AM
2. When the track you want to
change appears on the display,
press either
or
to find
the track number you want to
replace it with.
(illus)
3. Press MEMORY again. The track
is stored in memory.
4. Repeat Steps 2 and 3 to change
more tracks.
CD PLAYER TIPS
• CDs that can be played on this
player have this mark on them:
LOGO
• If you move the player from a very
cold room to a warmer one, moisture can condense on the pickup
lens, preventing proper disc play.
If this happens, wait 30 minutes
before resuming play.
• Do not place foreign objects in the
disc tray. This can damage the
drive mechanism.
14
CARING FOR COMPACT
DISCS
Even though CDs are very durable,
treat them with care.
• Do not write on either side of a
CD, particularly the non-label
side. (Signals are read from the
non-label side.)
• Do not store CDs in high-temperature, high-humidity locations. The
CDs might warp.
• Keep the CD dry. A water drop
can act as a lens and affect the
laser beam’s focus.
• Always keep the CD in its protective case or sleeve when it is not
in use.
• Always handle a CD by the edges
to avoid fingerprints or scratches
on the playing surface which can
prevent the laser beam from correctly reading the digital information or create a “skipping” sound.
• To remove fingerprints and clean
the CD surface, use a CD cleaner
kit (such as Cat. No. 42-226).
• To repair scratches on the CD surface, use a CD scratch repair kit
(such as “Scratch ’n Fix”, Cat. No.
42-127).
42-5056.fm Page 15 Thursday, August 12, 1999 9:25 AM
CARE AND MAINTENANCE
Your CD-3445 Portable Compact Disc Player is an example of superior design and
craftsmanship. The following suggestions will help you care for the CD player so you
can enjoy it for years.
Keep the CD player dry. If it gets wet, wipe it dry immediately. Liquids
might contain minerals that can corrode the electronic circuits.
Handle the CD player gently and carefully. Dropping it can damage
the circuit board and case, and can cause the player to work improperly.
Use and store the CD player only in normal temperature environments. Temperature extremes can shorten the life of electronic devices, damage batteries and distort or melt plastic parts.
Keep the CD player away from dust and dirt, which can cause premature wear of parts.
CLEANER
Wipe the CD player with a damp cloth occasionally to keep it looking
new. Do not use harsh chemicals, cleaning solvents, or strong detergents to clean the CD player.
Use only fresh batteries of the required size and type. Always remove
old or weak batteries. They can leak chemicals that destroy electronic
circuits.
Modifying or tampering with the CD player’s internal components can cause a malfunction and might invalidate the CD player’s warranty and void your FCC authorization to operate it. If your CD player is not performing as it should, take it to your
local Radio Shack store for assistance.
15
42-5056.fm Page 16 Thursday, August 12, 1999 9:25 AM
FCC INFORMATION
LASER SAFETY
This equipment complies with the limits for a Class B digital device as specified in Part 15 of FCC Rules. These
limits provide reasonable protection
against radio and TV interference in a
residential area. However, your equipment might cause TV or radio interference even when it is operating
properly. To eliminate interference,
you can try one or more of the following corrective measures:
This unit employs a laser light beam.
Only a qualified service person should
remove the cover or attempt to service
this device, due to possible eye injury.
• Increase the distance between the
equipment and the radio or TV.
• Use outlets on different electrical
circuits for the equipment and the
radio or TV.
Consult your local Radio Shack store
or an experienced radio/TV technician
if the problem still exists.
16
Warning: The use of controls or adjustments, or the performance of procedures other than specified herein,
can result in hazardous exposure to laser light.
42-5056.fm Page 17 Thursday, August 12, 1999 9:25 AM
SPECIFICATIONS
Format ..............................................................Compact Disc, Digital Audio System
Pickup..................................................................................3-Beam, Semiconductor
Laser Decoding (D/A) .............................................................................. 1 Bit Linear
Frequency Response ........................................................... 20 Hz to 20 kHz, ±3 dB
Total Harmonic Distortion ...................................................Less Than 0.02%, 1 kHZ
Signal-to Noise Ratio (A-Weighted).............................................. Better Than 85 dB
Wow & Flutter. ..................................................................Below Measurement Limit
Power Requirement.................................................. Internal 3VDC (2 AA Batteries)
or, External 6VDC
(AC adapter, Cat. No. 273-1663, or
DC adapter, Cat. No. 270-1563)
Power Consumption ...................................................................................... 2 Watts
Dimensions (HWD) .................................................................11/8 ¥ 51/8 ¥ 61/8 inches
(27 ¥ 130 ¥ 154 mm)
Weight .............................................................................................. 10.6 oz. (300 g)
Included Accessories..................................Y-Cable, Rechargeable Battery Adapter
Specifications are typical; individual units might vary. Specifications are subject to
change and improvement without notice.
17
42-5056.fm Page 18 Thursday, August 12, 1999 9:25 AM
NOTES
18
42-5056.fm Page 19 Thursday, August 12, 1999 9:25 AM
19
42-5056.fm Page 20 Thursday, August 12, 1999 9:25 AM
RADIO SHACK LIMITED WARRANTY
This product is warranted against defects for 90 days from date of purchase from Radio Shack company-owned stores and authorized Radio
Shack franchisees and dealers. Within this period, we will repair it without charge for parts and labor. Simply bring your Radio Shack sales
slip as proof of purchase date to any Radio Shack store. Warranty does
not cover transportation costs. Nor does it cover a product subjected to
misuse or accidental damage.
EXCEPT AS PROVIDED HEREIN, RADIO SHACK MAKES NO
EXPRESS WARRANTIES AND ANY IMPLIED WARRANTIES ARE LIMITED IN DURATION TO THE DURATION OF THE WRITTEN LIMITED
WARRANTIES CONTAINED HEREIN. Some states do not permit limitation or exclusion of implied warranties; therefore, the aforesaid limitation(s) or exclusion(s) may not apply to the purchaser.
This warranty gives you specific legal rights and you may also have other rights which vary
from state to state.
We Service What We Sell
9/94
RADIO SHACK
A Division of Tandy Corporation
Fort Worth, Texas 76102
7A5
Printed in Hong Kong