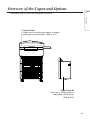
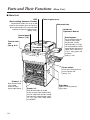
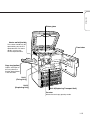
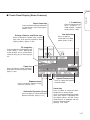
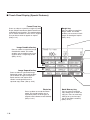
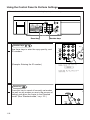
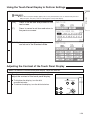
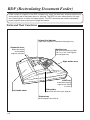
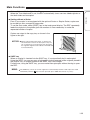
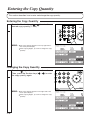
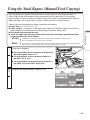
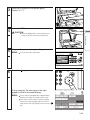
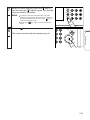
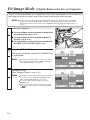
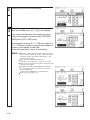
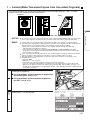
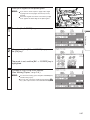
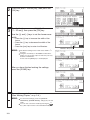
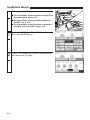
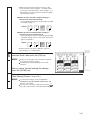
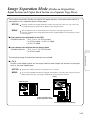
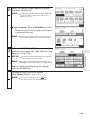
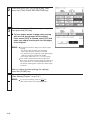
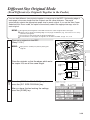
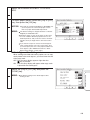
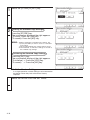
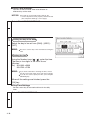
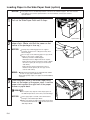
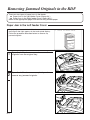
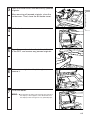
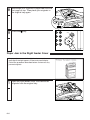
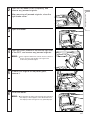
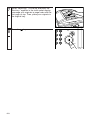
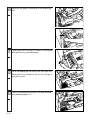
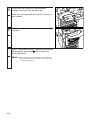
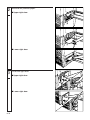
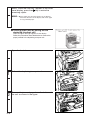
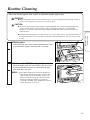
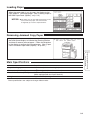
1
This copier model meets the
ENERGY STAR®
Program for energy efficiency.
The International ENERGY STAR® Office Equipment Program is an international program that promotes energy
saving through the use of computers and other office equipment. The program backs the development and
dissemination of products with functions that effectively reduce energy consumption. It is an open system in which
business proprietors can participate voluntarily. The targeted products are office equipment such as computers,
displays, printers, facsimiles, and copiers. Their standards and logos are uniform among participating nations.
Notes: • The “1→2-sided copy mode” is set as the standard mode (see p. 2-51) in this copier.
• This Operator's Manual describes how to perform “1→1-sided copying”. Select the One-sided
mode before making “1→1-sided copying”. (See “One-sided mode” on p.2-58.)
PREFACE
Thank you for purchasing the Canon NP6551. This Operator’s Manual describes the NP6551, its
functions, and its method of use. It also describes various precautions to be observed in order to
ensure safe operation. Please read this manual thoroughly before operating the NP6551, in order
to familiarize yourself with its capabilities, and to make the most of its many functions. After
reading this manual, store it in a safe place for future reference.
CAUTION:
In this manual, CAUTION MESSAGES with this symbol indicate that neglecting the
suggested procedure or practice could result in personal injury.
NOTICE:
Considerable effort has been made to ensure that this manual is free of inaccuracies and
omissions. However, as we are constantly improving our products, some of the data
contained herein may not exactly reflect the current model of the particular product with
which this manual has been included. If you have a need for an exact specification, please
contact Canon for the current specification.
Note:
This equipment has been tested and found to comply with the limits for a
Class A digital device, pursuant to Part 15 of the FCC Rules. These
limits are designed to provide reasonable protection against harmful
interference when the equipment is operated in a commercial
environment. This equipment generates, uses, and can radiate radio
frequency energy and, if not installed and used in accordance with the
Operator’s Manual, may cause harmful interference to radio
communications. Operation of this equipment in a residential area is
likely to cause harmful interference in which case the user will be
required to correct the interference at his own expense.
Do not make any changes or modifications to the equipment unless
otherwise specified in the manual. If such changes or modifications
should be made, you could be required to stop operation of the
equipment.
1
Table of Contents
■ Illustrated Function Summary ..................................................................... 7
■ How to Use This Operator’s Manual .......................................................... 11
Chapter 1 Introduction
Safety Considerations ............................................................................ 1-2
Installation Precautions .......................................................................... 1-10
Handling Precautions .............................................................................. 1-12
Overview of the Copier and Options ...................................................... 1-13
Parts and Their Functions ....................................................................... 1-14
• Main Unit ................................................................................................. 1-14
• Control Panel ........................................................................................... 1-16
• Touch Panel Display (Basic Features) .................................................... 1-17
• Touch Panel Display (Special Features) ................................................. 1-18
■ Touch Panel Display and Keying Operations ........................................ 1-20
• Touch Panel Display ............................................................................... 1-20
• Using the Control Panel to Perform Settings ........................................... 1-22
• Using the Touch Panel Display to Perform Settings ................................ 1-23
• Adjusting the Contrast of the Touch Panel Display ................................. 1-23
■ RDF (Recirculating Document Feeder) .................................................. 1-24
• Parts and Their Functions ....................................................................... 1-24
• Main Functions ........................................................................................ 1-25
■
■
■
■
Chapter 2 Basic Copying
■ Turning the Power ON ............................................................................... 2-2
■ Making Copies ............................................................................................ 2-4
• Using the Platen Glass .............................................................................. 2-4
• Using the RDF ........................................................................................... 2-7
• Using the SADF Tray of the RDF ............................................................ 2-10
• Common Functions ................................................................................. 2-12
■ Original Placement .................................................................................. 2-16
• Orientation of Originals ............................................................................ 2-16
• Placing an Original on the Platen Glass .................................................. 2-17
• Placing Originals in the RDF ................................................................... 2-18
• Placing an Original in the SADF Tray of the RDF .................................... 2-19
■ Entering the Copy Quantity..................................................................... 2-20
• Entering the Copy Quantity ..................................................................... 2-20
• Changing the Copy Quantity ................................................................... 2-20
■ Adjusting the Copy Exposure ................................................................. 2-21
• Manual Exposure (Standard Copy Setting) ............................................. 2-21
• Automatic Exposure ................................................................................ 2-21
■ Selecting the Copy Paper Size ................................................................ 2-22
• Automatic Paper Selection (Standard Copy Setting) ............................... 2-22
• Manual Paper Selection .......................................................................... 2-24
2
■ Copy Output ............................................................................................. 2-25
• Output to the Copy Tray (option) ............................................................. 2-25
• Output to the Sorter ................................................................................. 2-26
■ Auto Start.................................................................................................. 2-27
■ Using the Stack Bypass (Manual Feed Copying) .................................. 2-29
■ Interrupt Mode (Use to Interrupt the Current Copy Job to
Make Priority Copies) .............................................................................. 2-32
• Placing an Original on the Platen Glass .................................................. 2-32
• When Placing an Original in the SADF Tray of the RDF ......................... 2-35
■ Entering an Access-control ID Number ................................................. 2-38
• Entering an ID Number After Turning the Power ON ............................... 2-38
• When You Finish Copying ....................................................................... 2-39
■ Using Preset Copy Ratios (Enlarge/Reduce Originals
from One Standard Paper Size to Another) ........................................... 2-40
■ Fit Image Mode (Slightly Reduces the Size of Originals) ..................... 2-42
■ Zoom Mode (Reducing/Enlarging Originals to the Desired Size) ....... 2-43
• Zoom (Use to Freely Reduce/Enlarge 49 - 204%) ................................... 2-43
• Zoom Program (Calculates the Copy Ratio Based on
the Original and Copy Paper Sizes) ........................................................ 2-45
• Auto Zoom (Automatically Selects the Copy Ratio Based on
the Original and Copy Paper Sizes) ........................................................ 2-48
■ Two-sided Mode (Copies on Both Sides of Copy Sheets).................... 2-50
• 1 → 2-sided (Make Two-sided Copies from One-sided Originals) .......... 2-51
• 2 → 2-sided (Make Two-sided Copies from Two-sided Originals) .......... 2-53
• 2 → 1-sided (Make One-sided Copies from Two-sided Originals) .......... 2-55
• Book → 2-sided (Make Two-sided Copies from Facing Pages
in a Book in One Step) ............................................................................ 2-56
■ One-sided Mode (To Make One-sided Copies of One-sided Originals) .. 2-58
Chapter 3 Special Features
■ Frame Erase Mode (Erase Shadows from Copies) ................................. 3-2
• Sheet Frame Erase (Erase Shadows from the Edge of Copies) .............. 3-4
• Original Frame Erase (Erase Shadows Around the Original Image
on Copies) ................................................................................................. 3-5
• Book Frame Erase (Erase Shadows from the Center Line/Edge
of Copies) .................................................................................................. 3-6
• Binding Erase (Erase Binding Holes on Copies) ....................................... 3-7
■ Margin Mode (Creates a Margin on Copies) ............................................ 3-9
• Left/Right Margin ..................................................................................... 3-10
• Top/Bottom Margin .................................................................................. 3-12
■ Cover/Sheet Insertion Modes (Add Front and Back Covers
and Insertion Sheets to Copy Sets) ........................................................ 3-14
■ Image Combination Mode (Automatically Reduces Two/Four
Originals to Fit on a Single Copy Sheet) ................................................ 3-18
• Using the RDF ......................................................................................... 3-20
• Using the Platen Glass ............................................................................ 3-23
■ Image Separation Mode (Divides an Original Into Equal Sections
and Copies Each Section on a Separate Copy Sheet) .......................... 3-25
■ Transparency Interleaving Mode (Interleaves Sheets of
Paper Between Transparencies) ............................................................. 3-30
3
■ Two-page Separation Mode (Copy Facing Pages in a Book
onto Two Separate Copy Sheets in One Step) ...................................... 3-33
■ Overlay Mode (Superimposes Two Original Images on
a Single Copy Sheet) ............................................................................... 3-35
• Sheet Overlay (Superimposes Two Originals) ......................................... 3-36
• Book Overlay (Superimposes Facing Pages in a Book) .......................... 3-37
■ Different Size Original Mode (Feed Different-size Originals
Together in the Feeder) ........................................................................... 3-39
■ Photo Mode (Use to Copy Photos) ......................................................... 3-41
■ Mode Memory (Use to Store Often Run Copy Jobs in Memory) ......... 3-42
• Storing a Copy Job .................................................................................. 3-42
• Recalling a Copy Job .............................................................................. 3-44
Chapter 4 Additional Functions
■ Additional Functions (Select or Adjust Various Functions
to Meet Your Specific Copying Needs) .................................................... 4-2
• Standard Key Settings (Displaying Frequently Used Modes in the Basic
Features Screen) ....................................................................................... 4-3
• Custom Settings ........................................................................................ 4-5
Auto Sort ................................................................................................... 4-6
Front Access Sorter Unloading .................................................................. 4-7
High Speed 1 → 2-sided ........................................................................... 4-7
SADF Auto Feed ....................................................................................... 4-8
Drawer Eligibility for APS/ADS .................................................................. 4-8
Stack Bypass Size Setting......................................................................... 4-9
Inch Entry ................................................................................................ 4-10
Job Duration Display ............................................................................... 4-10
Audible Tones ......................................................................................... 4-11
Fit Image Adjustment .............................................................................. 4-12
Energy Saver Adjustment ........................................................................ 4-13
Change Standard Copy Settings ............................................................. 4-13
Initialize Custom Settings ........................................................................ 4-14
• Timer Settings ......................................................................................... 4-15
Auto Clear Time ...................................................................................... 4-16
Low-Power Mode Time............................................................................ 4-16
Auto Power-off Time ................................................................................ 4-17
Daily Timer Settings ................................................................................ 4-18
Day/Time Settings ................................................................................... 4-18
• Adjustment/Cleaning ............................................................................... 4-19
Zoom Fine Adjustment ............................................................................ 4-20
Feeder Cleaning ...................................................................................... 4-21
Wire Cleaning .......................................................................................... 4-22
Chapter 5 Loading Paper and Adding Toner
■ Loading Paper ............................................................................................ 5-2
• Remaining Paper Quantity ........................................................................ 5-2
• Loading Paper in a Paper Drawer 1, 2 ...................................................... 5-3
• Loading Paper in a Paper Drawer 3, 4 ...................................................... 5-4
• Loading Paper in the Side Paper Deck (option) ........................................ 5-6
• Adjusting a Paper Drawer to Hold a Different Paper Size ......................... 5-7
■ Adding Toner.............................................................................................. 5-9
4
Chapter 6 Clearing Paper Jams
■ Clearing Paper Jams ................................................................................. 6-2
■ Removing Jammed Originals in the RDF ................................................. 6-4
• Paper Jam in the Left Feeder Cover ......................................................... 6-4
• Paper Jam in the Right Feeder Cover ....................................................... 6-6
■ Removing Jammed Copy Paper ............................................................... 6-9
• Paper Jam in Unit 1 ................................................................................... 6-9
• Paper Jam in Unit 2 ................................................................................. 6-16
• Paper Jam in Unit 3 ................................................................................. 6-19
• Paper Jam in the Stack Bypass Area ...................................................... 6-21
• Paper Jam Behind the Right Door ........................................................... 6-22
• Paper Jam in Drawer 1, 2 ........................................................................ 6-27
• Paper Jam in Drawer 3, 4 ....................................................................... 6-30
• Paper Jam in the Side Paper Deck (option) ........................................... 6-31
Chapter 7 Maintenance and Troubleshooting
■
■
■
■
Self-diagnostic (Error) Messages ............................................................. 7-2
Service-call Message ................................................................................. 7-4
Routine Cleaning ....................................................................................... 7-5
Consumables/Accessories ....................................................................... 7-6
• Consumables ............................................................................................ 7-6
• Accessories ............................................................................................... 7-6
■ NP6551 Main Specifications...................................................................... 7-7
• Main Unit ................................................................................................... 7-7
• RDF (standard equipment) ........................................................................ 7-8
Chapter 8 Optional Accessories: Functions and
Method of Use
■ Paper Deck-A1 ............................................................................................ 8-2
• Parts and Their Functions ......................................................................... 8-2
• Loading Paper ........................................................................................... 8-3
• Removing Jammed Copy Paper ................................................................ 8-3
• Main Specifications ................................................................................... 8-3
■ Control Card V ............................................................................................ 8-4
■ ID Mode ........................................................................................................... i
■ Index
5
Illustrated Function Summary
This section provides simplified descriptions of the NP6551’s various functions. Since
reference pages are provided, you can utilize this section as an index.
(The * mark indicates functions that require optional accessories.)
■ Copy
■
Quantity (see p. 2-20)
Copies
Original
■
Copy
Original
CITY
CITY
Automatic Exposure Control (see p. 2-21)
The copier pre-scans each original and
automatically adjusts the copy exposure to the
most appropriate level. (You can also adjust
the copy exposure manually. See p. 2-13.)
You can program up to 999 copies of an
original per copy job.
CITY
Auto Paper Selection (see p. 2-22)
■
The copier automatically selects the right
paper size, based on the size of the original
and the selected copy ratio. (You can also
select copy paper manually. See p. 2-15.)
LTR original
LTR copy
CITY
CITY
Stack Bypass (see p. 2-29)
Up to 50 sheets of copy stock can be placed
here to be automatically fed into the copier.
The stack bypass is convenient for copying
onto special copy stock, such as
transparencies and colored paper.
11"x17"
Copy
CITY
Y
CIT
CITY
STMT
■
Copy Output Selection* (see p. 2-25)
■
■ Auto
Start (see p. 2-27)
While waiting for the copier to warm up, you
can program the copy settings for the first copy
job and press the Start key. When the copier
warms up, copying begins automatically.
■ Interrupt
Mode (see p. 2-32)
Enables you to temporarily stop the current
copy job to make priority copies.
6
Guide function (see p. 2-12)
In the Guide mode, you can display
explanations for any of the functions that are
available with your copier. This is a very quick
and easy way to become familiar with the
capabilities of your copier while you are in the
process of programming the copier to make
copies.
If your copier is equipped with the optional
Sorter, you can program the copier to group all
copies of a single page together (GROUP),
sort copies in page order (SORT) or sort and
staple copies (STAPLE-SORT).
■
Energy Saver Mode (see p. 2-13)
If the copier will not be used for a prolonged
period of time, putting it into the Energy Saver
mode will reduce the temperature of the fixing
unit, and the amount of energy used by the
main unit.
■ Preset
Copy Ratios (see p. 2-40)
Use preset copy ratios when you want to
enlarge or reduce a standard-size original to a
standard-size copy.
11" x 17" copy
■
Reduction/Enlargement (see p. 2-43)
● Zoom (see p. 2-43)
Enables you to select any copy ratio between
49 and 204%, in 1% increments.
LGL original
Copies
CITY
CITY
CITY
Original
CITY
CITY
CITY
CITY
LTR copy
■
Fit Image Mode (see p. 2-42)
When copying an original where the image fills
the page, parts of the image may be cut off on
copies. Using the Fit Image mode, the image is
slightly reduced before copying so that the
entire original image is reproduced on copies.
Original
Copy
CITY
■
You can feed different-size originals together in
one group in the RDF, provided that the
leading edge of each page is the same length.
Copy
CITY
CITY
Width of the
original image
Width of the
copy image
CITY
● Auto Zoom (see p. 2-48)
The copier automatically selects the
appropriate copy ratio, based on the size of the
originals and the selected copy paper.
Original
11"x17"original
Original feeding
direction
Original
CITY
Different Size Original Mode (see p. 3-39)
LTR original
● Zoom Program (see p. 2-45)
The copier automatically calculates the copy
ratio based on measurements for the original
and desired copy images.
CITY
CITY
CITY
Copy
CITY
Leading edge length
■
One-sided Mode (see p. 2-58)
Makes one-sided copies from one-sided
originals.
Original
CITY
Copy
CITY
7
■ Two-sided
■
Mode (see p. 2-50)
● 1 → 2-sided (see p.
● Sheet Frame Erase (see p.
2-51)
Makes two-sided copies from one-sided
originals.
Originals
Copy
CITY
CI
TY
3-4)
Makes clean copies of originals with ragged
edges by eliminating the dark border around
the edge of copy sheets.
Original
CITY
CITY
● 2 → 2-sided (see p.
Frame Erase Mode (see p. 3-2)
Copy
CITY
CITY
● Original Frame Erase (see p.
2-53)
Makes two-sided copies from two-sided
originals.
3-5)
Eliminates the dark border area and lines that
appear around the original image when the
original is smaller than the selected paper size.
Copy
Original
CITY
CITY
CI
TY
CI
TY
Original
Copy
CITY
● 2 → 1-sided (see p.
● Book Frame Erase (see p.
2-55)
Makes one-sided copies from two-sided
originals.
Original
CITY
CITY
CI
TY
Copy
CITY
CITY
● Book → 2-sided (see p. 2-56)
Original
Copy
CITY
CITY
● Binding Erase (see p.
Makes two-sided copies from facing pages in a
book.
8
3-6)
Eliminates the dark border and center line
which appear when copying facing pages in a
book onto a single sheet.
Copies
Original
CITY
CITY
CITY
CI
TY
CITY
CITY
3-7)
When copying an original with binding holes,
this mode erases the shadows of the holes so
that they are not reproduced on copy sheets.
Original
CITY
Copy
CITY
■ Margin
■ Two-page
Mode (see p. 3-9)
Shifts the entire original image to the left, right,
top or bottom by 0-20 mm (0"-3/4") to create a
margin on copies.
Original
Copy
CITY
Separation Mode (see p. 3-33)
Copies facing pages in a bound original in one
step.
Copies
Original
CITY
CITY
CITY
CITY
CITY
Margin
■
Cover/Sheet Insertion Modes (see p. 3-14)
Using the RDF, you can program the copier to
add front and back covers to copy sets. The
copy stock which you use for the covers can
be different from the rest of the copies.
You can also specify a page number at which
to have a sheet of different paper inserted.
■ Overlay
Mode (see p. 3-35)
● Sheet Overlay
Superimposes two original images onto a
single copy sheet.
● Front/Back Cover
Originals
CITY
Front cover
Copy
CITY
CITY
CIT Y
CIT Y
CIT Y
Back cover
● Book Overlay
Superimposes images from facing pages in a
bound original onto a single copy sheet.
● Insertion Sheet
Original
CITY
Insertion
sheet
CITY
CIT Y
CIT Y
Copy
CITY
CIT Y
CIT Y
■
Photo Mode (see p. 3-41)
This mode enables you to reproduce photos or
other types of originals with halftones more
faithfully.
■
Mode Memory (see p. 3-42)
Enables you to store the copy settings for often
run copy jobs in memory for later use. This
feature eliminates the need to program copy
settings each time you run a routine copy job.
9
■ Image
Combination Mode (see p. 3-18)
■
Reduces two or four originals to fit on a single
copy sheet.
Image Separation Mode (see p. 3-25)
Divides an original into equal sections and
outputs each section in enlarged form on a
separate copy sheet.
Copies
Originals
Copy
CITY
CITY
CITY
Original
CITY
CITY
CITY
CITY
CITY
CITY
CITY
CITY
CITY
CITY
■ Transparency
CITY
CITY
Interleaving Mode
■
(see p. 3-30)
CITY
Additional Functions (see p. 4-2)
These functions enable you to adjust various
settings to meet your specific copying needs.
For example, you can adjust the custom
settings, Auto Clear Time, the standard copy
settings or other settings. You can also
perform Zoom Fine Adjustment and Feeder
and Wire Cleaning.
When copying onto transparencies, you can
program the copier to automatically insert a
copy sheet between each transparency.
Copies
CITY
CITY
CITY
■
You can program the copier so that only users
with an ID number can make copies. You can
store up to 300 numbers in the copier’s
memory. This feature also enables you to keep
track of the copy quantity made under each ID
number.
Interleaf
sheet
■
Standard Key Settings (see p. 4-3)
The Standard Key Settings feature enables
you to select a mode from either the Twosided, Sorter or Special Features modes and
have the key for these modes displayed in the
Basic Features screen. This is very useful
since it gives you easy access to a frequently
used mode.
10
ID Mode (see p. i)
■
Job Duration Display (See p. 4-10)
When Job Duration Display is set to ON in
Additional Functions and the appropriate
modes are set, the remaining time necessary
to complete the copy job can be displayed.
How to Use This Operator’s Manual
The descriptions in this manual are presented using the following general format:
Function Name (Title)
Operational Instructions
Numbered steps describe how to set and
operate various functions.
Two-page Separation Mode (Copy Facing Pages in
a Book onto Two Separate Copy Sheets in One Step)
Notes
Notes and restrictions regarding the
use of a function are provided.
This feature enables you to copy facing pages in a book or magazine on separate sheets of
copy paper in one step; there is no need to reposition the original during copying.
Original
Copies
1
1
2
Select the desired Image Separation feature
and press the [OK] key.
MEMO:
● The display (available features) differs depending
on the placement location of the original. For
details, see p. 3-25.
Two-page Separation mode selected
●
Set the One-sided mode before copying in the Two-Page Separation mode.
Place your original on the platen glass.
(See p. 2-17.)
1
● Place the original face down so that the top of it is
against the top edge of the platen glass.
MEMO:
● If you select the layout of the last page, then the
copier will not output blank sheets of copy paper.
ABC
3
Press the [1-SIDED] key.
Press the [PAPER SELECT] key to manually
select the copy paper size. (See “Manual Paper
Selection,” on p. 2-16.)
Special Features
MEMO:
■ If you selected 1 TO 4 / TWO-SIDED or 1 TO 4
Select the layout of the last page of the originals
and press the [OK] key.
Special Features
NOTICE:
NOTICE:
MEMO:
● You cannot set Auto Paper Selection; manually
select a paper size (see p. 2-16).
(The copier returns to the Standard mode.)
● The copier automatically selects the copy ratio
depending on the selected paper size (Auto Zoom).
After you have finished making the settings,
press the [DONE] key.
Proceed to copy in the usual way.
(See “Making Copies,” on p. 2-4.)
MEMO:
● To cancel the settings, press the
Reset
key.
3-33
Description of Function and Sample
Copy
Copy output is simply described
using illustrations.
3-29
Refer to page (0-0)
Indicates related pages.
Illustrations
Illustrations help you identify
keys and parts of the copier.
Supplementary Instructions (Reference)
Supplementary instructions and reference pages
are provided.
Symbols Used in This Operator’s Manual
WARNING: Indicates a warning concerning operations that may lead to death or injury to
persons if not performed correctly. In order to use the machine safely,
always pay attention to these warnings.
CAUTION: Indicates a caution concerning operations that may lead to injury to persons
or damage to property if not performed correctly. In order to use the machine
safely, always pay attention to these cautions.
REQUEST: Indicates important items or prohibited actions that should always be
NOTICE:
MEMO:
followed when operating the machine. These should always be read to avoid
damage to the machine or injury to persons.
Indicates operational warnings. Be certain to read these items so that you
operate the copier correctly.
Indicates notes for operation or additional explanations. Reading these is
recommended.
11
Chapter 1
Introduction
This chapter describes various items which you should understand before operating the
copier, such as the handling precautions and the names of the parts and their functions.
Safety Considerations ..............................................................1-2
■ Installation Precautions ..........................................................1-10
■ Handling Precautions .............................................................1-12
■ Overview of the Copier and Options ...................................... 1-13
■ Parts and Their Functions ......................................................1-14
• Main Unit ...............................................................................1-14
• Control Panel ........................................................................1-16
• Touch Panel Display (Basic Features) ................................. 1-17
• Touch Panel Display (Special Features) .............................. 1-18
■ Touch Panel Display and Keying Operations ........................ 1-20
• Touch Panel Display .............................................................1-20
• Using the Control Panel to Perform Settings ........................ 1-22
• Using the Touch Panel Display to Perform Settings ............ 1-23
• Adjusting the Contrast of the Touch Panel Display .............. 1-23
■ RDF (Recirculating Document Feeder) .................................. 1-24
• Parts and Their Functions ..................................................... 1-24
• Main Functions......................................................................1-25
Safety Considerations
Installation
WARNING
CAUTION
1-2
●
Do not install the copier near alcohol,
paint thinner or other inflammable
substances. If inflammable
substances come into contact with
electrical parts inside the copier, this
may result in fire or electrical shock.
●
Do not place the following items on
the copier. If these items come into
contact with a high-voltage area inside
the copier, this may result in a fire or
electrical shock.
• Necklaces and other metal objects
• Cups, vases, flowerpots and other
containers filled with water or liquids
If these items are dropped or spilled
inside the copier, immediately turn
OFF the power switch and unplug
the power plug from the outlet.
Then, contact your service
representative.
●
Do not install the copier in unstable
locations such as on unsteady
platforms or in tilted places, or in
locations which are subject to
excessive vibrations, as this may
cause the copier to fall or tip over,
resulting in personal injury.
●
Do not install the copier so that the
ventilation ports are blocked by
objects. If the ventilation ports are
blocked, heat will build up inside the
copier and may result in a fire.
●
Do not place heavy objects on the
copier, as they may tip over or fall
resulting in personal injury.
Do not install the copier in the
following locations.
• A damp or dusty location
• A location which is exposed to
direct sunlight
• A location with high temperatures
• A location that is subject to open
flames
●
Do not remove the copier’s fixing
stopper after the copier has been
installed, as this may cause the
copier to fall or tip over, resulting in
personal injury.
Introduction
●
Power Supply
WARNING
●
Do not damage or modify the power
cord. Also, do not place heavy
objects on the power cord, or pull on
or excessively bend it. This could
cause electrical damage and result in
a fire or electrical shock.
●
Do not insert or unplug the power
plug with wet hands, as this may
result in electrical shock.
●
Do not plug the copier into a multiplug, power strip, as this may cause
fire or electrical shock.
1-3
CAUTION
1-4
●
Do not bundle up or tie the power cord
in a knot, as this may result in a fire or
electrical shock.
●
Insert the power cord completely into
the outlet. Failure to do so may result
in a fire or electrical shock.
●
Do not use power cords other than the
provided power cord, as this may
result in a fire or electrical shock.
●
As a general rule, do not use
extension cords. Using an extension
cord may result in a fire or electrical
shock. If an extension cord must be
used, however, untie the cord binding
and insert the power plug completely
into the extension cord outlet to
ensure a firm connection between the
power and extension cords.
●
Do not use power supplies with
voltages other than AC 120 V, as this
may result in a fire or electrical shock.
●
Always grasp the plug portion when
unplugging the power plug. Pulling on
the power cord may expose or snap
the core wire, or otherwise damage
the power cord. This could cause an
electricity leak and result in a fire or
electrical shock.
●
Leave sufficient space around the
power plug so that it can be
unplugged easily. If objects are placed
around the power plug, you will be
unable to unplug it in an emergency.
WARNING
●
Do not attempt to disassemble or
modify the copier. There are high
temperature and high voltage
components inside the copier which
may result in a fire or electrical shock.
●
If the copier makes strange noises, or
emits smoke, heat or unusual smells,
immediately turn OFF the power
switch and unplug the power plug
from the outlet. Then, contact your
service representative. Continued use
of the copier in this condition may
result in a fire or electrical shock.
●
Do not use highly flammable sprays
near the copier. If gas from these
sprays comes into contact with the
electrical components inside the
copier, this may result in a fire or
electrical shock.
●
Do not drop paper clips, staples or
other metal objects inside the copier.
Also, do not spill water, liquids or
inflammable substances (alcohol,
benzene, paint thinner, etc.) inside the
copier. If these items come into
contact with a high-voltage area inside
the copier, this may result in a fire or
electrical shock. If these items are
dropped or spilled inside the copier,
immediately turn OFF the power
switch and unplug the power plug
from the outlet. Then, contact your
service representative.
Introduction
Handling
1-5
CAUTION
1-6
●
Close the RDF gently to avoid
catching your hand, as this may result
in personal injury.
●
Do not touch the Sorter while making
copies, as this may result in personal
injury.
●
Do not press down hard on the platen
cover or feeder when using the platen
glass to copy thick books. This may
damage the platen glass and/or result
in personal injury.
●
Turn OFF the power switch for safety
when the copier will not be used for a
long period of time such as at night.
Also, unplug the power plug for safety
when the copier will not be used for an
even longer period of time such as
during consecutive holidays.
●
Do not place your hand in the part of
the bin where stapling is performed
while a Stapler Soter is attached, as
this may result in personal injury.
WARNING
●
When cleaning the copier, first turn
OFF the power switch and unplug the
power plug. Failure to observe these
items may result in a fire or electrical
shock.
●
Clean the copier using a firmly wrungout cloth dampened with a mild
cleansing detergent. Do not use
alcohol, benzene, paint thinner or
other inflammable substances. If
inflammable substances come into
contact with a high-voltage area inside
the copier, this may result in a fire or
electrical shock.
●
Do not throw used toner bottles into
open flames. This may ignite the toner
remaining inside the bottles and result
in burns or a fire.
Introduction
Maintenance and Inspections
1-7
CAUTION
1-8
●
Unplug the power plug from the outlet
at least once a year, and clean the
area around the base of the plug's
metal pins to ensure all dust is
removed. If dust accumulates in this
area, it may result in a fire.
●
There are some areas inside the
copier which are subject to high
voltages and high temperatures. Take
adequate precaution when performing
internal inspections, to avoid burns or
electrical shock.
●
When removing jammed paper or
when inspecting the inside of the
copier, do not allow necklaces,
bracelets or other metal objects to
touch the inside of the copier, as this
may result in burns or electrical shock.
●
When removing copy paper which has
become jammed from inside the
copier, take care not to allow the toner
on the jammed copy paper to come
into contact with your hands or
clothing, as this will dirty your hands or
clothing. If they become dirty, wash
them immediately with cold water.
Washing with warm water will set the
toner and make it impossible to
remove the toner stains.
●
When removing copy paper which has
become jammed from inside the
copier, remove the jammed copy
paper gently to prevent the toner on
the paper from scattering and entering
your eyes or mouth. If toner enters
your eyes or mouth, wash immediately
with cold water and consult a
physician.
●
When loading copy paper or removing
jammed originals or copy paper, take
care not to cut your hands on the
edges of the original or copy paper.
When removing used toner bottles
from the toner supply port, remove the
bottles carefully to prevent toner from
scattering and entering your eyes or
mouth. If toner enters your eyes or
mouth, wash immediately with cold
water and consult a physician.
Introduction
●
Consumables
WARNING
CAUTION
●
Do not throw toner bottles into open
flames, as this may cause the toner to
ignite and result in burns or a fire.
●
Do not store toner bottles or copy
paper in places exposed to open
flames. This may cause the toner or
copy paper to ignite and result in
burns or fire.
●
Keep toner and other consumables out of the reach of small children. If
these items are ingested, consult a physician immediately.
1-9
Installation Precautions
Observe the following precautions when
selecting a site to install the copier:
• Avoid locations which are subject to low
temperatures and low humidity, or high
temperatures and high humidity.
For example, avoid installing the copier near water faucets,
hot water heaters, humidifiers, air conditioners, heaters and
stoves.
• Do not install the copier in front of a window
which receives direct sunlight.
(If unavoidable, shade the copier using curtains.)
• Avoid locations where a considerable amount
of dust accumulates.
• Avoid locations where ammonia gas is
emitted.
• Avoid locations near volatile flammables, such
as alcohol or paint thinner.
• Avoid locations which are subject to vibration.
Avoid locations with an unstable floor or foundation.
•Avoid rapid changes in temperature.
If the room in which the copier is located is rapidly heated
from a low temperature, condensation may form inside the
copier. This can adversely affect copy quality or result in an
inability to obtain copy images.
• Do not install the copier near computers or
other precision electronic equipment.
Electrical interference and vibrations generated by the copier
during copying can adversely affect the operation of such
equipment.
• Do not install the copier near televisions,
radios or other similar electronic equipment.
The copier might interfere with sound and picture signal
reception, etc. Plug the copier into a dedicated power outlet
and maintain as much space as possible between the copier
and other electronic equipment.
1-10
About the copier’s fixing stoppers
Introduction
• Do not remove the copier’s fixing stoppers
after the copier has been installed.
• If you put weight on the front of the copier
while the paper drawers or units within the
copier are pulled out all the way, the copier
might fall forward. To prevent this from
happenning, make sure that the copier’s fixing
stoppers are set in place.
Select a safe power supply
• Plug the copier into a 120V AC outlet.
• Do not plug other electrical equipment into the
outlet to which the copier is connected.
• Do not plug the copier into a multi-plug power
strip. Doing so might cause a fire.
• The power cord may become damaged if it is
often stepped on or heavy objects are placed
on it. Continued use of a damaged power cord
can lead to an accident.
Provide adequate installation space
• Provide enough space on each side of the
copier for unrestricted operation.
<Copier equipped with the
optional Stapler Sorter
and the Paper Deck-A1>
59-7/8"
50-3/8"
48-7/8"
48-7/8"
Moving the copier
• If you intend to move the copier, contact your
service representative beforehand.
1-11
Handling Precautions
• Do not attempt to disassemble or modify the
copier.
• There are some areas inside the copier which
are subject to high voltages and temperatures.
Take adequate precaution when performing
internal inspections. Never perform any
operation not specified in this Operator’s
Manual.
• Be careful not to drop any foreign objects
(e.g., paper clips) inside the copier. Never spill
liquids of any kind on or into the copier. If a
foreign object or liquid should come in contact
with a high voltage area inside the copier, it
could cause a short and result in a fire or
electrical shock.
• If the copier fails to operate normally, see
pp. 7-2 through 7-4. If there is an unusual
noise, smoke or anything which causes
concern, immediately turn the power OFF, and
unplug the copier. Then, call your service
representative. Always allow enough space in
front of the power outlet so that you can easily
unplug the copier.
• Do not turn the power OFF or open the front
door during copying. Doing so may cause a
paper jam.
• To avoid danger of ignition, do not use
flammable aerosol products, such as spray
adhesives, near the copier.
• If the copier will not be used for a prolonged
period of time, such as at night, turn the power
OFF.
• After turning the power OFF, the copier’s fan
will operate for approximately 10 minutes to
enable the copier to cool down.
1-12
Overview of the Copier and Options
Introduction
The NP6551 and its options are configured as follows:
Control Card
Allows you to monitor the number of copies
made by each card holder. (See p. 8-4.)
Paper Deck-A1
Holds up to 3,500 sheets of
copy paper (20-lb bond).
(See p. 8-2.)
1-13
Parts and Their Functions
(Main Unit)
■ Main Unit
RDF
(Recirculating Document Feeder)
Toner supply cover
Automatically feeds sets of up to 100
originals to the platen glass for copying.
Also automatically turns over two-sided
originals to make two-sided copies.
(See p. 1-24.)
Control panel
(See p. 1-16.)
Document tray
Holder for
Operator’s Manual
Stack bypass
Up to approximately 50
sheets of copy paper
(20-lb bond, a stack
approximately 3/16" high)
can be placed here to be
automatically fed into the
copier. Post card-size to
11”x17” copy papers are
available.
(See p. 2-29.)
Control card
slot
(See p. 8-4.)
Power switch
Press to the ON position to
turn the power ON.
(See p. 2-2.)
Drawer 1, 2
Each drawer holds
up to 1,500
sheets of copy
paper (20-lb bond).
Right door
Drawer 3, 4
Each drawer holds up to 550
sheets of copy paper (20-lb bond).
You can adjust the drawers to hold
the following standard paper sizes:
11" x 17", LGL, LTR, LTRR, STMT,
and STMTR.
1-14
Open to remove jammed
copy paper.
Introduction
Platen glass
Heater switch(inside)
This switch should only be
operated by your service
representative. For more
details, contact your
service representative.
Front door
Copy tray(option)
Copies are output to
this tray when the
Stapler Sorter/Sorter
is not attached.
Unit 1
(Fixing Unit)
Unit 2
(Duplexing Unit)
Unit 3(Duplexing Transport Unit)
Counter
Shows the total copy quantity made.
1-15
Parts and Their Functions
(Control Panel/Touch Panel)
■ Control Panel
Number keys
Display Contrast dial
Press to enter the desired copy quantity and
other numerical values such as ID numbers.
(See p. 1-22.)
Turn it to adjust the contrast of the
touch panel display. (See p. 1-23.)
Energy Saver key
Reset key
If the copier will not be used for
a while, press to place the copier
in the Energy Saver mode.
Press it again to cancel the Energy
Saver mode. (See p. 2-13.)
Press to return the copier to the
Standard mode. (See p. 1-22.)
Guide key
Press to display explanations
of modes. (See p. 2-12.)
Stop key
Press to stop the copier before
copying is completed.
(See p. 2-6.)
Touch panel display
Display Contrast Energy Saver
Reset
Stop
Guide
Addiitional Functions
Interrupt
Clear
Start
Additional Functions key
Press to select or cancel additional
functions. These functions enable
you to change the custom settings and
standard copy settings, or perform
other operations. (See p. 4-3.)
Power indicator
Lights green when the power is
turned ON.
Interrupt key
Press to interrupt a continuous copying
job when you need to make priority copies.
(See p. 2-32.)
ID key
Press when you want to store new ID numbers in
memory and after you have entered your ID number.
(See pp. i-v.)
1-16
Start key
Press to begin copying. (See p. 2-6.)
Clear key
Press to return the copy quantity to one,
or to clear an incorrect value entered when
setting a mode. (See p. 2-20.)
1 ’ 2-sided key
Paper Select key
Press to select or cancel
the 2 → 2-sided, 2 → 1sided, or Book → 2-sided
mode. (See p. 2-50.)
Press to select Auto Paper Selection,
a paper drawer, or the stack bypass.
(See p. 2-22.)
Enlarge, Reduce, and Direct keys
Press to enlarge or reduce using a preset
copy ratio, or to return the copier to direct
copying (100%). (See p. 2-40.)
One-sided key
Press to select or
cancel the One-sided
mode. (See p. 2-58.)
Fit Image key
Press to select or cancel the Fit Image
mode. (See p. 2-42.) Setting this
mode enables you to make copies
without having any of the image cut
off.
Zoom key
Press to select or cancel the Zoom,
Auto Zoom, or Zoom Program mode.
(See p. 2-43.)
Special Features key
Exposure keys
Press to manually adjust the copy
exposure. (See p. 2-21.)
Press to select the Special
Features mode.
Sorter key
Automatic Exposure (A) key
Press to select or cancel Automatic
Exposure Control. (See p. 2-21.)
Press to select or cancel the Sort,
Staple-Sort, or Group mode.
You can select the Staple-Sort mode
when your copier is equipped with
the Stapler Sorter, and the Group
mode when it is equipped with the
Sorter or Stapler Sorter.
(See pp. 1-25, 2-26.)
1-17
Introduction
■ Touch Panel Display (Basic Features)
■ Touch Panel Display (Special Features)
Frame Erase key
Margin key
Press to select or cancel the Original Frame
Erase, Sheet Frame Erase, Book Frame Erase,
or Binding Erase functions. This mode enables
you to erase shadows or lines on an original
that you do not want to appear on copies.
(See p. 3-2.)
Press to select or cancel the
Margin mode. This mode
enables you to create a blank
margin at the edge of copies.
(See p. 3-9.)
Image Combination key
Press to select or cancel the Image
Combination mode. This mode
enables you to combine two or four
originals onto a single copy sheet.
(See p. 3-18.)
Image Separation key
Press to select or cancel the Image
Separation mode. This mode enables
you to divide an original image into
equal sections and output each
section in enlarged form onto a
separate copy sheet. (See p. 3-25.)
Photo key
Press to select or cancel the Photo
mode. This mode enables you to
reproduce photos or other types of
originals with halftones more faithfully.
(See p. 3-41.)
1-18
Mode Memory key
Press to store or recall the
copy settings for an often run
copy job. You can store copy
settings for up to nine copy
jobs in the copier’s memory.
(See p. 3-42.)
Introduction
Transparency Interleaving key
Press to select or cancel the Transparency Interleaving
mode. This mode enables you to insert a copy sheet
between transparencies. You can copy onto interleaf
sheets or leave them blank. (See p. 3-30.)
Cover/Sheet Insertion key
Press to select or cancel the Cover/Sheet Insertion mode.
This mode enables you to add a front and back cover of
different paper stock (for example colored paper). You can
also insert up to 20 copy sheets at a specified page
number. (See p. 3-14.)
Two-Page Separation key
Press to select or cancel the Two-page Separation mode.
This mode enables you to copy bound originals such as
books, in one step. If necessary, you can have copies
output face down. (See p. 3-33.)
Different Size Original key
Press to select or cancel the Different Size Original mode.
This mode enables you to feed different-size originals
together in one group in the RDF providing that the leading
edge of each page is the same length. (See p. 3-39.)
Overlay key
Press to select or cancel the Sheet Overlay or Book
Overlay functions. This mode enables you to superimpose
two original images onto a single copy sheet. (See p. 3-35.)
1-19
Touch Panel Display and Keying Operations
This section describes the different types of messages that appear in the touch panel
display. It also describes how to use the Control Panel keys together with the touch panel
display to perform settings.
Touch Panel Display
The following types of messages appear in the touch panel display:
■
■
■
■
Messages which show the current copy settings
Messages which describe the procedure for setting a mode
Messages concerning copier self-diagnostics and inspection
Messages which provide an explanation of copier functions (Guide messages)
Messages which show the current copy settings
Messages which show
the current copy settings
Paper size
Copy ratio
Selected copying modes appear in the touch
panel display as follows:
In this example the Sorter and Two-sided
modes have been selected, and the Staple-sort
and 2→2-sided functions have been set.
Special features (modes selected using keys in
the Special Features section of the touch panel
display)
In this example, the Transparency Interleaving
mode and the One-sided mode have been
selected and set.
MEMO:
1-20
● If more than one mode is set, the one with the
highest display precedence is displayed first.
● When copying in the Transparency Interleaving
mode, select the One-sided mode beforehand.
(See “One-sided Mode” on p. 2-58.)
Copy quantity
Messages which describe the procedure for
setting a mode
Introduction
In this example, the Zoom Program mode has
been selected.
The display at the right appears while setting the
Zoom Program mode.
Messages concerning copier self-diagnostics
and inspection
In this example, a paper jam has occurred.
If a paper jam occurs, the display at the right
appears.
Messages which provide an explanation of
copier functions (Guide messages)
(In the example, the Transparency Interleaving
mode has been selected.)
Guide
Press the ? key while the Special Features
screen is displayed. The screen to the right will
appear.
If you press the [TRANSP.INTERLVNG] key, the
screen to the right will appear.
1-21
Using the Control Panel to Perform Settings
This section describes how to use the following keys to perform settings:
Display Contrast Energy Saver
Reset
Stop
Guide
Addiitional Functions
Interrupt
Clear
Start
Reset key
Number keys
1
-
Number keys
0
Use these keys to enter the copy quantity, and
ID numbers.
Stop
Guide
Additional Functions
Clear
Interrupt
(Example: Entering the ID number)
Reset key
Reset
Press this key to cancel all currently set modes
(as well as any modes you are in the process of
setting) and return the copier to the Standard
mode. (See “Standard mode,” on p. 2-2.)
Reset
Guide
1-22
Dis
Using the Touch Panel Display to Perform Settings
The keys below have the same function in any mode.
REQUEST:
[OK]
Press to set an item and proceed to the
next screen.
[C]
Press to cancel a set item and return to
the previous screen.
Introduction
● Press the touch panel display lightly. Do not use pointed items such as mechanical pencils or
ball-point pens; they may scratch or damage the touch panel display.
[DONE] Press to complete the setting process
and return to the Standard mode.
Adjusting the Contrast of the Touch Panel Display
When it is difficult to read the touch panel display, adjust the contrast.
Turn the contrast dial on the control panel to
adjust the contrast of the touch panel display.
■
■
To brighten the display, turn the dial
counterclockwise.
To darken the display, turn the dial clockwise.
Display Contrast Energy Saver
Stop
1-23
RDF (Recirculating Document Feeder)
Place a stack of originals in the RDF’s original tray, press the Start key, and the originals are
automatically fed to the platen glass for copying. The RDF can also automatically turn over
two-sided originals to make two-sided copies. The RDF eliminates the need to repeatedly
place originals when copying multi-page documents.
Parts and Their Functions
Original Set indicator
Lights when originals are placed in the original tray.
Separation lever
Auxiliary tray
Keeps the copies
and uncopied
originals separate.
Flip open when placing LTRR,
LGL, or 11"x17"-size originals
in the originals tray.
Right feeder cover
SADF tray
Used when copying
originals one sheet
at a time.
Left feeder cover
Slide guides
Adjust to fit the size of your originals.
Original tray
Place originals here face up.
1-24
Main Functions
Automatic two-sided original feeding
When the Two-sided mode is set, the RDF automatically turns over two-sided originals so
that both sides can be copied.
■
Sorting without a Sorter
Even if your copier is not equipped with the optional Sorter or Stapler Sorter, copies can
be sorted into sets arranged in page order.
To set the Sort mode, select [SORT] key in the touch panel display. The RDF repeatedly
feeds the originals to the platen glass the number of times necessary to make the
requested number of copies.
Copies are output to the copy tray as shown in the
figure to the right.
NOTICE: ●
■
When sorting without the Sorter, in general you
should make no more than 50 copies of any one
set of originals. If you make more than 50 copies,
the originals might become folded or wrinkled and
not feed smoothly.
1
2
3
4
1
2
3
4
Introduction
■
1
2
3
4
1
2
3
4
SADF tray
When an original is inserted into the SADF tray, it is automatically fed in and copied.
Using the SADF tray you can copy a lightweight original because unlike originals placed in
the original tray, an original placed in the SADF tray is fed straight.
Furthermore, using the SADF tray, you can make interrupt copies without having to open
the RDF.
MEMO:
● The SADF tray can be set so that originals are automatically fed into it and copies are made
immediately after the
key has been pressed. (See “SADF Auto Feed,” on p. 4-8.)
Start
1-25
■
How Originals Feed Through the RDF
With the RDF, originals will feed through it differently depending on their size.
There are two types of feeding and the type of feeding that is used will be automatically
chosen based upon the original size.
When the originals are LTR-size they will
feed through the right side of the RDF.
➀
➃
q Original tray lowers.
w Original feeds into the RDF.
e Original is scanned.
r Original is returned to the tray.
➁
➂
MEMO:
● If the auxiliary tray is open, then LTR-size originals will feed through the left side of the RDF.
When the originals are 11" x 17", LGL, STMTor LTRR-size they
will feed through the right side of the RDF.
q Original feeds into the RDF.
w Original is scanned.
e Original is moved in the opposite direction q (in the
illustration) and then returned to the tray.
➂
➀
➁
■
Accelerated Mode
In the Accelerated mode the scanning unit is fixed and the original is scanned as it is
moved through the RDF.
The Accelerated mode speeds up the copy speed of LTR-size originals from 50 cpm to 60
cpm and is automatically set under the following conditions:
•
•
•
•
•
Original size: LTR
1 → 1-sided copying
Number of sets of copies: 1
Copy ratio: 70% to 115%
Paper feeding: from any drawer other than the lowest one, from the Side Paper Deck, or from the stack
bypass
• Auxiliary tray closed
MEMO:
1-26
● When the Accelerated mode is in effect, originals will feed through the right side of the RDF.
● Make sure to stack your originals neatly, otherwise, no copy job may be done in the Accelerated
mode.
Chapter 2
Basic Copying
This chapter describes the steps necessary to perform basic copying with the NP6551,
including turning the power ON, original placement, loading copy paper, and other basic
operations.
■ Turning the Power ON ................................................................................... 2-2
■ Making Copies ............................................................................................... 2-4
• Using the Platen Glass ................................................................................. 2-4
• Using the RDF .............................................................................................. 2-7
• Using the SADF Tray of the RDF ............................................................... 2-10
• Common Functions .................................................................................... 2-12
■ Original Placement ....................................................................................... 2-16
• Orientation of Originals .............................................................................. 2-16
• Placing an Original on the Platen Glass .................................................... 2-17
• Placing Originals in the RDF ...................................................................... 2-18
• Placing an Original in the SADF Tray of the RDF ..................................... 2-19
■ Entering the Copy Quantity .......................................................................... 2-20
• Entering the Copy Quantity ........................................................................ 2-20
• Changing the Copy Quantity ...................................................................... 2-20
■ Adjusting the Copy Exposure ...................................................................... 2-21
• Manual Exposure (Standard Copy Setting) ............................................... 2-21
• Automatic Exposure ................................................................................... 2-21
■ Selecting the Copy Paper Size .................................................................... 2-22
• Automatic Paper Selection (Standard Copy Setting) ................................ 2-22
• Manual Paper Selection ............................................................................. 2-24
■ Copy Output ................................................................................................. 2-25
• Output to the Copy Tray (option) ............................................................... 2-25
• Output to the Sorter .................................................................................... 2-26
■ Auto Start ..................................................................................................... 2-27
■ Using the Stack Bypass (Manual Feed Copying) ........................................ 2-29
■ Interrupt Mode (Use to Interrupt the Current Copy Job to
Make Priority Copies) ................................................................................... 2-32
• Placing an Original on the Platen Glass .................................................... 2-32
• When Placing an Original in the SADF Tray of the RDF ........................... 2-35
■ Entering an Access-control ID Number ....................................................... 2-38
• Entering an ID Number After Turning the Power ON ................................ 2-38
• When You Finish Copying .......................................................................... 2-39
■ Using Preset Copy Ratios (Enlarge/Reduce Originals from
One Standard Paper Size to Another) ......................................................... 2-40
■ Fit Image Mode (Slightly Reduces the Size of Originals) ............................ 2-42
■ Zoom Mode (Reducing/Enlarging Originals to the Desired Size) ............... 2-43
• Zoom (Use to Freely Reduce/Enlarge 49 - 204%) .................................... 2-43
• Zoom Program (Calculates the Copy Ratio Based on the Original
and Copy Paper Sizes) .............................................................................. 2-45
• Auto Zoom (Automatically Selects the Copy Ratio Based on
the Original and Copy Paper Sizes) .......................................................... 2-48
■ Two-sided Mode (Copies on Both Sides of Copy Sheets) .......................... 2-50
• 1 → 2-sided (Make Two-sided Copies from One-sided Originals) ................. 2-51
• 2 → 2-sided (Make Two-sided Copies from Two-sided Originals) ................. 2-53
• 2 → 1-sided (Make One-sided Copies from Two-sided Originals) ................. 2-55
• Book → 2-sided (Make Two-sided Copies from Facing
Pages in a Book in One Step) .................................................................... 2-56
■ One-sided Mode (To Make One-sided Copies of One-sided Originals) ..... 2-58
Turning the Power ON
This section describes how to turn ON the copier and the steps to be followed until “Ready
to copy,” appears in the touch panel display.
1
Make sure that the power plug is firmly inserted
into a power outlet. (See “Select a safe power
supply,” on pp. 1-3, 1-11.)
WARNING:
● Do not insert or unplug the power plug with wet
hands, as this may result in an electrical shock.
2
Press the power switch to the ON position.
MEMO:
● The power switch is located on the right side of the
main unit.
● To turn the power OFF, press the power switch to
the OFF position.
During warm-up, the display at the right appears
in the touch panel display.
MEMO:
● You can program the copy settings for the first copy
job while the copier is warming up. (See “Auto Start,”
on p. 2-27.)
After approximately 5 minutes (at a room
temperature of 68°F), the message to the right
appears in the touch panel display, indicating
that the copier is ready to copy. At this time, the
copier is in the Standard mode and the standard
copy settings are in effect.
MEMO: ● The standard copy settings are as follows:
• Copy ratio:
Direct (100%)
• Paper selection:Auto Paper Selection
• Copy exposure: Manual Exposure Control
• Copy quantity: 1
• Copy function: 1→2-sided copy
● You can change the standard copy settings. (See
“Change Standard Copy Settings,” on p. 4-13.)
2-2
If the message to the right appears, insert a
Control Card. (See p. 8-22.)
Basic Copying
If the message to the right appears, enter an
access-control ID number. Then, press the ID
key. (See “Entering an Access-control ID
Number,” on p. 2-38.)
2-3
Making Copies
The way a copy is taken depends on which of the following three locations is chosen for the
setting of the original.
1. Using the Platen Glass (See p.2-4)
2. Using the RDF (See p.2-7)
3. Using the SADF Tray of the RDF (See p.2-10)
The 1→2-sided mode is set as the standard mode in this copier. Please note the following
points when making copies.
NOTICE:
● Be certain to place the original horizontally when copying LTRR, STMTR and other horizontal
sizes. If the original is placed vertically, the back of the copy will be copied upside down.
● Select the One-sided mode when making “1→1-sided copies”. (See “One-sided Mode” on p.2-58).
MEMO:
● Non-standard paper sizes cannot be used to make two-sided copies.
● In the Two-sided mode, you can enter up to 50 copies for any one copy job, regardless of the
paper size. (This limit is the same as the capacity of the duplexing unit.) If your copier is
equipped with the Stapler Sorter, you can set up to 999 copies.
● Copy paper used to make two-sided copies must conform to the following specifications:
• Paper size: STMT to 11" x 17" (STMTR-size cannot be used.)
• Paper weight: 17 to 20-lb bond (64 to 80 g/m2)
There are some types of paper which may meet the above specifications, but cannot be used
to make two-sided copies.
● The High Speed 1→2-sided mode, in which the Auto Count function is canceled, is only
available when you are:
• Using the RDF,
• Making 1 or 2 sets of copies, and
• Using LTR-size originals (originals cannot be placed horizontally).
If you are copying an odd number of originals with copy paper that has right and left side
differences, then you should set the High Speed 1→2-sided mode to OFF to prevent copies
from being output with the right and left sided reversed. (See “Additional Functions/High
Speed 1→2-sided,” on p. 4-7.)
Using the Platen Glass
1
2-4
Lift the RDF.
2
Place your original on the platen glass.
MEMO:
● Place your original on the platen glass. The surface
that you want to copy must be placed face down.
Align the corner of the original with the V mark in the
upper-left corner of the platen.
V
Basic Copying
CBA
3
Gently lower the RDF.
CAUTION:
● Close the RDF gently to avoid catching your
hand, as this may result in personal injury.
WARNING:
● Do not press down hard on the platen cover or
feeder when using the platen glass to copy thick
books. This may damage the platen glass and/or
result in personal injury.
NOTICE:
4
● When placing originals on the platen glass,
original size recognition is performed after the
RDF has been lowered. Be sure to lower the RDF
before copying.
Program the copy settings.
MEMO:
● Press the Number keys ( 1 – 0 ) to enter the
copy quantity. (See “Entering the Copy Quantity,”
on p. 2-20.)
● Press the [DARK] and [LIGHT] keys to adjust the
copy exposure. (See “Adjusting the Copy
Exposure,” on p. 2-21.)
● Press the [PAPER SELECT] key to select the copy
paper size. (See “Selecting the Copy Paper Size”
on p. 2-22.)
● Press the [REDUCE] and [ENLARGE] keys to
select a preset copy ratio. (See “Using Preset Copy
Ratios” on p. 2-40.)
Display Contrast Energy Saver
Reset
Stop
Guide
Additional Functions
Interrupt
Clear
Start
2-5
5
Press the
key.
When Job Duration Display is set to ON in
Additional Functions and the appropriate modes
are set, the remaining time necessary to
complete the copy job can be displayed.
Start
Stop
Clear
CAUTION:
● Do not touch the Sorter bins while making copies as
this may result in personal injury.
MEMO:
Start
● After copying begins, you cannot change the copy
quantity, paper size, copy ratio or other copy
settings.
● Job Duration Display can be set to ON or OFF in
Additional Functions. (See "Job Duration Display,"
on p.4-10.)
● When 1→2-sided copy or 2 ON 1/Two-sided copy,
requiring original change, is made by combining with
other mode, the remaining time necessary to complete
the copy job is respectively displayed for the 1st and
2nd copies. When the 1st copy is completed, the
message appears in the touch panel display. Then,
set the 2nd original, and press the
key.
Start
After the first original is copied, the message to
the right appears in the touch panel display.
Place the second original, then press the
key.
Start
■
●
Stopping before copying is completed
If you want to stop theStopcopier before copying is
completed, press the
key.
Display Contrast Energy Saver
MEMO:
● Several sheets might be output even after the Stop
key has been pressed. Remove any paper remaining
in the duplexing unit by referring to the section on
“Clearing Paper Jams”, on pp. 6-2 to 6-32.
Stop
Clear
2-6
Using the RDF
Acceptable Originals
■
Original weight:
Original tray: LTR, vertically placed: 15-lb bond to 110-lb index (52 g/m2 to 200 g/m2)
LGL, 11" x 17", LTRR and STMT: 15 to 32-lb bond (52 g/m2 to 128 g/m2)
Original size: STMT to 11" x 17" (STMT-size cannot be placed horizontally.)
Original tray capacity: LGL or 11" x 17": 50 sheets (20-lb bond or 80 g/m2)
STMT, LTR or LTRR: 100 sheets (20-lb bond or 80 g/m2)
NOTICE:
●Do not place the following types of originals in the RDF:
• Originals with tears or large binding holes
• Severely curled originals or originals with sharp folds
• Clipped or stapled originals
• Carbon-backed paper or other originals which might not feed smoothly
• Transparencies and other highly transparent originals
● Check the condition of originals which have been fed through the RDF many times. When
copying the same original repeatedly using the RDF, do not allow the original to circulate
more than about 50 times in a single job. Originals which have been fed through the RDF
many times can become folded or wrinkled and might not feed smoothly.
1
Adjust the slide guides to fit the size of the
originals.
2
Neatly stack originals face up in the original tray.
Basic Copying
■
■
C
AB
NOTICE:
● Flip open the auxiliary tray when feeding LTRR,
LGL, or 11" x 17"-size originals.
2-7
In general, you should use originals which are
all the same size.
When the Different Size Original mode is set
(see p. 3-39), you can feed different-size
originals together in one group. The leading
edge of each page must be the same length and
the originals must all be the same thickness.
The following sizes can be fed together:
• LTR and 11" x 17" • STMT and LGL
• STMT and LTRR • LTRR and LGL
• STMT, LTRR, and LGL
Leading edge
length
LTR
11"x17"
Original feeding direction
Leading edge
length
STMT
LTRR LGL
Original feeding direction
Place the originals as shown in the figure to the
right so that the edges which will enter the
copier first are all the same length.
NOTICE:
● When feeding different-size originals in the RDF,
select Auto Paper Selection.
Place originals in page order with the first page
on top. Whether using vertical or horizontal
placement, align the top edges of the originals
with the back edge of the original tray.
Place STMT-size originals vertically. You can
place LTR-size originals either vertically or
horizontally.
NOTICE:
MEMO:
3
2-8
● After copying begins, do not add or remove
originals.
● You can place up to 50 LGL or 11"x17"-size
originals (20-lb bond) in the original tray. You can
place up to 100 STMT, LTR or LTRR size originals
(20-lb bond) in the original tray.
Program the copy settings.
MEMO:
● Press the Number keys ( 1 - 0 ) to enter the copy
quantity. (See “Entering the Copy Quantity,” on p.
2-20.)
● Press the [DARK] and [LIGHT] keys to adjust the
copy exposure. (See “Adjusting the Copy
Exposure,” on p. 2-21.)
● Press the [PAPER SELECT] key to select the copy
paper size. (See “Selecting the Copy Paper Size, ”
on p. 2-22.)
● Press the [REDUCE] and [ENLARGE] keys to select
a preset copy ratio. (See “Using Preset Copy
Ratios,” on p. 2-40.)
Display Contrast Energy Saver
Reset
Stop
Guide
Additional Functions
Interrupt
Clear
Start
Press the
Start
key and proceed to copy.
If the Job Duration Display is set to ON in
Additional Functions and the appropriate modes
are set, the screen for entering the number of
originals will be displayed. When the number of
originals is entered with the Number keys ( 1 –
0 ), the remaining time necessary to complete
the copy job is displayed.
Stop
Clear
Start
CAUTION:
● Do not touch the Sorter bins while making copies as
this may result in personal injury.
MEMO:
■
● After copying begins, you cannot change the copy
quantity, paper size, copy ratio or other copy
settings.
● Job Duration Display can be set to ON or OFF in
Additional Functions. (See “Job Duration Display,”
on p. 4-10.)
Basic Copying
4
Accelerated Mode
In the Accelerated mode the scanning unit is fixed and the original is scanned as it is
moved through the RDF.
The Accelerated mode speeds up the copy speed of LTR-size originals from 50 cpm to
60 cpm and is automatically set under the following conditions:
•
•
•
•
•
Original size: LTR
1 → 1-sided copying
Number of sets of copies: 1
Copy ratio: 70% to 115%
Paper feeding: from any drawer other than the lowest one, from the Side Paper Deck, or from the stack
bypass
• Auxiliary tray closed
MEMO:
■
● When the Accelerated mode is in effect, originals will feed through the right side of the RDF.
● Make sure to stack your originals neatly, otherwise, no copy job may be done in the Accelerated
mode.
Stopping before copying is completed
If you want to stop theStopcopier before copying is
completed, press the
key.
MEMO:
Display Contrast Energy Saver
● Several sheets might be output even after the Stop
key has been pressed.
● Remove any paper remaining in the duplexing unit
by referring to the section on “Clearing Paper
Jams”, on pp. 6-2 to 6-32.
Stop
Clear
If your originals have black streaks or appear
dirty after feeding them through the RDF, the
feeder roller might be dirtied with pencil lead.
Follow the procedure described on p. 4-21 to
perform feeder cleaning.
2-9
Using the SADF Tray of the RDF
Acceptable Originals
■
■
Original weight: 12-lb bond to 110-lb index (38 g/m2 to 200 g/m2)
• 32-lb bond to 110-lb index paper (129 g/m2 to 200 g/m2) may only be used when
making copies of LTR vertical originals.
Original size: STMT to 11" x 17" (STMT-size cannot be placed horizontally.)
NOTICE:
● Do not place the following types of originals in the RDF:
• Originals with tears or large binding holes
• Severely curled originals or originals with sharp folds
• Clipped or stapled originals
• Carbon-backed paper or other originals which might not feed smoothly
• Transparencies and other highly transparent originals
● Only 1-sided copy can be made with the SADF tray of the RDF.
1
Open the SADF tray.
2
Press the [1-SIDED] key.
3
Program the necessary copy settings.
2-10
MEMO:
● Press the Number keys ( 1 - 0 ) to enter the copy
quantity. (See “Entering the Copy Quantity,” on
p. 2-20)
● Press the [DARK] and [LIGHT] keys to adjust the
copy exposure. (See “Adjusting the Copy
Exposure,” on p. 2-21.)
● Press the [PAPER SELECT] key to select the copy
paper size. (See “Selecting the Copy Paper Size, ”
on p. 2-22.)
● Press the [REDUCE] and [ENLARGE] keys to select
a preset copy ratio. (See “Using Preset Copy
Ratios,” on p. 2-40.)
Display Contrast Energy Saver
Reset
Stop
Guide
Additional Functions
Interrupt
Clear
Start
NOTICE:
5
● Make the necessary copy settings before
inserting the original.
Place the side to be copied face down and
insert the original. The original is pulled in and
copying starts automatically. When the Job
Duration Display is set to ON in Additional
Functions and the appropriate modes are set,
the remaining time necessary to complete the
copy job can be displayed.
CBA
Basic Copying
4
Adjust the slide guides to fit the size of the
original.
CAUTION:
● Do not touch the Sorter bins while making copies as
this may result in personal injury.
MEMO:
● After copying begins, you cannot change the copy
quantity, paper size, copy ratio or other copy
settings.
● Job Duration Display can be set to ON or OFF in
Additional Functions. (See “Job Duration Display,”
on p. 4-10.)
● The original returns to the SADF tray after it has
been copied.
NOTICE:
■
● You can only insert one original at a time into the
SADF tray. If you insert two or more a paper jam
occurs.
● If the original is curled, smooth it out completely
before inserting it.
● If copying does not start after inserting the original
in the SADF tray, press the
key. To start
Start
copying automatically after inserting the original,
you must change the “Additional Functions”
setting. (See “Additional Functions/SADF Auto
Feed,” on p. 4-8.)
Stopping before copying is completed
If you want to stop the copier before copying is
completed, press the
key.
Stop
MEMO:
Display Contrast Energy Saver
● Several sheets might be output even after the Stop
key has been pressed.
● Remove any paper remaining in the duplexing unit
by referring to the section on “Clearing Paper
Jams”, on pp. 6-2 to 6-32.
Stop
Clear
2-11
Common Functions
Auto Drawer Switching (ADS)
If the copy paper in one paper drawer runs out
during copying, the copier automatically locates
another paper supply loaded with the same paper
size and begins feeding copy paper from that paper
drawer.
MEMO: ● You can cancel the Auto Drawer Switching. (See
“Drawer Eligibility for APS/ADS,” on p. 4-8.)
Auto Clear function
If the copier is not in operation for a period of
approximately two minutes, it automatically
returns to the Standard mode (see p. 2-2). This
time period is called the “auto clear time.”
MEMO: ● You can set the auto clear time from 0 to 9 minutes, in
10-second increments from 0 to 50 seconds, and 1minute increments from 1 to 9 minutes. (See “Auto
Clear Time,” on p. 4-16.)
Guide function
Guide
Press the ? key and a mode key of your choice.
A description of that mode then appears in the
display. While you are in the process of
selecting the copy settings, you can use this
function to find out information about the various
copying features that are available with your
copier. (In this example, the Transparency
Interleaving mode has been selected.)
Press the ? key while the Special Features
screen is displayed. The screen to the right will
appear.
Guide
2-12
Guide
Additional Functions
Interrupt
Clear
Press the [TRANSP. INTERLVNG] key and the
Guide display at the right will appear. Press the
[DONE] key and the display returns to the initial
Special Features screen.
If you will not be using the copier for a while,
you can press the
key to put the copier in
the Energy Saver mode. In the Energy Saver
mode, only the
key and Power indicator are
lit, and the temperature of the fixing unit is
lowered to reduce energy consumption.
To begin making copies again, press the
key again. The standard copy settings (see
p. 2-2) will be in effect.
Energy Saver
Basic Copying
Energy Saver mode
Display Contrast Energy Saver
Energy Saver
Stop
Energy Saver
REQUEST:
● If the copier will not be used for an extended period
of time, such as at night, turn the power OFF.
MEMO:
● You can select an Eenergy Saver setting of –10%,
–25%, or –50% for the Energy Saver mode. The
amount of time that it takes for the copier to return
to the Standard mode after the Energy Saver mode
has been canceled will vary depending on the
Energy Saver setting that has been set. In the
Energy Saver mode, there is also a setting so you
can return directly to the Standard mode without
having to wait.
(See “Additional Functions/Energy Saver Adjustment,”
on p. 4-13.)
2-13
Auto Energy Saver function
If the copier is not operated for a period of
approximately 15 minutes (default), the copier
automatically enters the Low-Power mode.
To begin making copies again, press the
key.
Energy Saver
MEMO:
● The Low-Power Mode Time can be set from 10
minutes to 4 hours: in 5-minutes increments from 10
minutes to 20 minutes, in 10-minute increments from
30 minutes to 50 minutes, in 30-minute increments
from 1 hour to 2 hours, and hourly increments from 3
hours to 4 hours. (See "Low-Power Mode Time," on
p.4-16)
If the copier is not operated for a period of
approximately one hour, the power switch
automatically moves to the OFF position, and
the main power is cut. (Auto Power-off)
To turn the power back ON, press the power
switch to the ON position.
MEMO:
2-14
● The Auto Power-Off Mode Time can be set from 10
minutes to 4 hours: in 5-minutes increments from 10
minutes to 20 minutes, in 10-minute increments from
30 minutes to 50 minutes, in 30-minute increments
from 1 hour to 2 hours, and hourly increments from 3
hours to 4 hours. (See "Auto Power-Off Time," on
p.4-17)
Job Duration Display function
When the Job Duration Display is set to ON in
Additional Functions and the appropriate modes
are set, the remaining time necessary to
complete the copy job can be displayed. Job
Duration can only be displayed when the
following modes are set. (However, this function
cannot be used in combination with the Different
Size Original mode.)
Two-page Separation
2 ON 1*
2 ON 1/Two-sided
Cover/Sheet Insertion
Basic Copying
1→1-sided
1→2-sided*
2→1-sided
2→2-sided
Book→2-sided
* When copying originals on the platen glass, the
Job Duration Display message appears
individually for each original since originals must
be placed one at a time.
■
When using the Interrupt mode
If the
key is pressed, the Job Duration Display
message disappears. Once the copy job using the
Interrupt mode begins, the time necessary for it to
be completed is displayed. After the Interrupt mode
has been canceled and the
key has been
pressed to restart the previous copy job, the
previous Job Duration Display message returns.
Interrupt
Start
■
When paper jam or paper loading messages
appear in the display
The Job Duration Display countdown will stop.
Once the instructions displayed in the error
key
message have been carried out, press the
and the Job Duration Display countdown will
continue.
Start
■
When using Unlimited Sorting
The necessary time interval between each round of
copies is displayed.
MEMO:
● Job Duration Display can be set to ON or OFF in
Additional Functions. (See “Job Duration Display,”
on p. 4-10.)
● The time displayed is only a rough estimate.
Depending on the modes that are set and the
conditions of use, the time displayed may differ from
the actual time.
2-15
Original Placement
There are three methods for placing originals for copying. The original placement method
that you select depends on the size and type of originals you are using, and the copy
settings you have programmed.
■ Platen glass
Use when copying books, originals on heavy paper, lightweight paper, and
transparencies, etc.
■ RDF (Recirculating Document Feeder)
Place a stack of originals in the RDF, and they are automatically fed to the platen glass for
copying. The RDF can also turn over two-sided originals to make two-sided copies.
■ SADF (Semi-Automatic Document Feeder) tray
Use when copying a heavy or lightweight original.
Orientation of Originals
You can place originals vertically or horizontally. Always align the top edge of your original with
the back edge of the platen.
NOTICE:
● LTR and STMT-size originals can be placed vertically or horizontally. However, the copy
speed for vertically placed paper is somewhat faster than that for horizontally placed paper.
Place originals horizontally when using preset copy ratios to convert one standard paper size
to another (e.g. when converting an LTR-size original to an 11" x 17"-size copy).
(“LTRR” and “STMTR”-sizes refer to horizontally placed LTR and STMT-size paper.)
● 11" x 17"-size originals must be placed horizontally.
● STMT-size originals must be placed vertically in the RDF.
● Be certain to place the original horizontally when copying LTRR, STMTR and other horizontal
sizes. If the original is placed vertically, the back of the copy will be copied upside down.
[Platen glass]
V
V
CBA
CBA
Vertical placement
Horizontal placement
Vertical placement
Horizontal placement
[RDF/SADF tray]
2-16
Placing an Original on the Platen Glass
You should use the platen glass when copying books, originals on heavy paper, and
transparencies, etc.
2
Place your original on the platen glass.
The surface that you want to copy must be
placed face down. Align the corner of the
original with the V mark in the upper-left corner
of the platen glass.
MEMO:
3
Basic Copying
1
Lift the RDF.
● Place books and other bound originals on the platen
glass in the same way.
● When enlarging a LTR or STMT-size original to
LGL or 11" x 17"-size, place the original horizontally
on the platen glass and align it with the LTRR or
STMTR marks.
V
CBA
Gently lower the RDF.
REQUEST:
● Do not press down hard on the RDF when using
the platen glass to copy thick books, since this
may damage the platen glass.
NOTICE:
● When placing originals on the platen glass,
original size recognition is performed after the
RDF has been lowered. Be sure to lower the RDF
before copying.
2-17
Placing Originals in the RDF
Place a stack of originals in the RDF, and they are automatically fed to the platen glass for
copying.
NOTICE:
● Do not place the following types of originals in the RDF:
• Originals with tears or large binding holes
• Severely curled originals or originals with sharp folds
• Clipped or stapled originals
• Carbon-backed paper or other originals which might not feed smoothly
• Transparencies and other highly transparent originals
● Check the condition or originals which have been fed through the RDF many times.
When copying the same original repeatedly using the RDF, do not allow the original to
circulate more than about 50 times in a single job.
Originals which have been fed through the RDF many times can become folded or wrinkled
and might not feed smoothly.
1
Adjust the slide guides to fit the size of your
originals.
2
Neatly stack your originals face up in the original
tray.
The capacity of the original tray is as follows:
• LGL or 11" x 17"-size originals
50 sheets
• STMT, LTR or LTRR-size originals 100 sheets
NOTICE:
● After copying begins, do not add or remove
originals.
● You cannot place STMT-size originals
horizontally.
● When enlarging from LTR to 11" x 17"-size,
place your originals horizontally.
● Before placing the following types of originals in
the RDF, flip open the auxiliary tray:
• LTRR, LGL or 11" x 17"-size originals
(horizontal placement)
• Different-size originals (see p. 3-39).
MEMO: ● You can feed different-size originals together in one
group in the RDF, if the leading edge of each page
is the same length and the originals are the same
thickness. (See p. 3-39.)
● If you place a stack of LTR-size originals in the RDF
for 1→1-sided copy with the auxiliary tray closed,
the originals will be copied with the Accelerated
mode. (See “Accelerated Mode,” on p. 1-26.)
● If more than one-sided original is placed in the RDF,
the number of originals will be automatically counted
before copying begins. The Auto Count function can
be cancelled if you specify whether you loaded an
odd or even number of originals into the RDF.
• When you use the Auto Count function, the
originals are fed through the RDF and
automatically counted before copying.
• If you specify the number of originals (EVEN
NUMBER or ODD NUMBER), automatic counting
is not performed. Cancelling automatic counting
saves time and also reduces the wear and tear on
originals.
2-18
C
AB
Placing an Original in the SADF Tray of the RDF
2
Adjust the slide guides to fit the size of your
original.
NOTICE:
3
Basic Copying
1
Open the SADF tray.
● Make the necessary copy settings before
inserting the original.
Place the side to be copied face down and
insert the original. The original is pulled in and
copying starts automatically.
NOTICE:
● You can only insert one original at a time into the
SADF tray. If you insert two or more, a paper jam
may occur.
● If the original is curled, smooth it out completely
before inserting it.
● If copying does not start after inserting the original
in the SADF tray, press the
key. To start
copying automatically after inserting the original,
you must change the “Additional Functions”
setting. (See “Additional Functions/SADF Auto
Feed,” on p. 4-8.)
CBA
Start
MEMO:
● The original returns to the SADF tray after it has
been copied.
2-19
Entering the Copy Quantity
This section describes how to enter and change the copy quantity.
Entering the Copy Quantity
Press the Number keys ( 1 – 0 ) to enter the
desired copy quantity (1-999).
Stop
Guide
Additional Functions
Clear
Interrupt
MEMO:
● The copy quantity appears in the top right side of
the touch panel display.
● After copying begins, you cannot change the copy
quantity.
Changing the Copy Quantity
Stop
Clear
Press the C key to clear the entered number.
Then, press the Number keys ( 1 – 0 ) to enter
the copy quantity again.
uide
al Functions
errupt
Clear
Start
MEMO:
2-20
● The copy quantity appears in the right side of the
touch panel display.
● After copying begins, you cannot change the copy
quantity.
Adjusting the Copy Exposure
The following two methods are available for adjusting the copy exposure:
■ Manual Exposure Control
You can manually adjust the copy exposure to the desired level using the Exposure
([LIGHT] [DARK]) keys.
■ Automatic Exposure Control
The copier automatically adjusts the copy exposure to the most appropriate level for the
original.
Manual Exposure (Standard Copy Setting)
MEMO:
Basic Copying
Press the [LIGHT] [DARK] keys to adjust the
copy exposure.
● Move the indicator above the [LIGHT] [A] [DARK]
keys to the left to make the exposure lighter or to
the right to make the exposure darker.
● If you press the [LIGHT] or [DARK] keys while
Automatic Exposure Control is in effect (i.e., the [A]
key is highlighted), the [A] key returns to normal
and Manual Exposure Control goes into effect.
Automatic Exposure
To select Automatic Exposure Control, press the
[A] key. The [A] key becomes highlighted and
the copier automatically adjusts the copy
exposure to the most appropriate level for the
original.
MEMO:
● Press the [A] key again to return to Manual
Exposure Control. Pressing either the [LIGHT] or
[DARK] key will also return the copier to Manual
Exposure Control.
● If the original is a transparency, you may not be able
to use Automatic Exposure Control. If so, adjust the
copy exposure using Manual Exposure Control.
● Manual Exposure Control cannot be changed to
Automatic Exposure during copying.
2-21
Selecting the Copy Paper Size
The following two methods are available for selecting the copy paper size:
■ Automatic Paper Selection
The copier automatically selects the appropriate paper size, based on the size of the
original and the selected copy ratio.
■ Manual Paper Selection
Using the Paper Select key, you can freely select the paper size.
■ In this manual and the messages that appear in the touch panel display, the
following abbreviations are used to express standard paper sizes:
Abbreviation
STMT
LTR
LGL
11 x 17
Standard paper size
statement
letter
legal
ledger
Dimensions
5 1/ 2 " x 8 1/ 2"
8 1/2" x 11"
8 1/2" x 14"
11" x 17"
Automatic Paper Selection (Standard Copy Setting)
The copier automatically selects the appropriate paper size, based on the size of the original and
the selected copy ratio.
The paper sizes that can be used with Auto Paper Selection are as follows:
• For an original placed on the platen glass:
LTR, LTRR, LGL and 11"x17"
• For originals placed in the RDF:
STMT, LTR, LTRR, LGL and 11"x17"
• For an original placed in the SADF tray of the RDF: STMT, LTR, LTRR, LGL and 11"x17"
2-22
NOTICE:
● When copying the following types of originals, you cannot use Auto Paper Selection:
• Non-standard size originals
• Highly transparent originals such as transparencies
• Originals with an extremely dark background
• Originals smaller than STMT in size
Use Manual Paper Selection with these types of originals.
MEMO:
● Auto Paper Selection is the standard copy setting.
● If you place copy stock in the stack bypass and enter its size, the copier will automatically
select it. (See “Additional Functions/ Stack Bypass Size Setting,” on p. 4-9.)
● You cannot use Auto Paper Selection with Auto Zoom (see p. 2-48).
● Copy paper used to make two-sided copies must conform to the following specifications:
• Paper size: STMT to 11" x 17" (STMTR-size cannot be used.)
• Paper weight: 17 to 20-lb bond (64 to 80 g/m2)
There are some types of paper which may meet the above specifications, but cannot be
used to make two-sided copies.
If a paper size is shown in the center of the
touch panel display, press the [PAPER
SELECT] key to select [AUTO].
Basic Copying
1
Since Auto Paper Selection is the standard copy
setting, normally no operation is necessary to
set this feature.
Proceed to copy in the usual way.
(See “Making Copies,” on p. 2-4.)
MEMO:
● When using Auto Paper Selection, the selected
paper size is indicated as follows:
• If you place your original on the platen
glass, the paper size appears in the touch panel
display after the platen glass cover is lowered.
• If you place your originals in the RDF, the paper
size appears in the touch panel display after you
press the Start key.
• If you place your original in the SADF tray, the
paper size appears in the touch panel display
when the original is fed onto the platen glass.
2-23
Manual Paper Selection
1
2
Press the [PAPER SELECT] key.
Select the paper size (or paper drawer/Side
Paper Deck).
MEMO:
● The paper sizes shown in the display vary depending
on which paper sizes are loaded in the paper drawers
or the Side Paper Deck.
Proceed to copy in the usual way.
(See “Making Copies,” on p. 2-4.)
2-24
Copy Output
Copies are output as follows:
■ If your copier is equipped with a Sorter: Copies are output into the Stapler Sorter/
Sorter bins or to the top tray.
■ If your copier is equipped with a Copy Tray*: Copies are output to the copy tray.
When originals are placed in the RDF and the Sort mode is set, your copier can
automatically sort copies into sets arranged in page order even if the Stapler Sorter or the
Sorter is not attached.
* The Copy Tray is optional.
If your copier is equipped with a Copy Tray,
copies are output to the copy tray as shown in
the figure to the right.
2
2
2
2
4
4
4
4
■ When originals are placed in the RDF and
the Sort mode is set
Your copier can automatically sort copies into
sets arranged in page order, even if the Sorter
is not attached.
Press the [SORT] key to set the Sort mode.
MEMO:
● Place your originals in the RDF. Then, press the
[Start] key. The RDF repeatedly feeds the originals
to the platen glass the number of times necessary to
make the desired number of copy sets. Copies are
output to the copy tray as shown in the figure to the
right.
● For more details, see “Sorting without a Sorter,” on
p. 1-25.
1
2
3
4
1
2
3
4
Basic Copying
Output to the Copy Tray (option)
1
1
1
1
3
3
3
3
1
2
3
4
1
2
3
4
2-25
Output to the Sorter
If your copier is equipped with the Sorter, the location where copies are output depends on the
mode set (Sort, Staple-sort, Group, or Non-Sort).
MEMO: ● When using the RDF, the copier automatically selects the sort bin or non-sort bin (the highest bin
of the Stapler Sorter) depending on the original and copy quantity. (To change this setting, see
“Auto Sort,” on p. 4-6.)
■ When the Sort mode is set
Copies are sorted into sets arranged in page
order, and output into the bins as shown in the
figure to the right.
1
2
3
4
1
2
3
4
1
2
3
4
■ When the Staple-sort mode is set
Copies are sorted into sets arranged in page
order, output into the bins as shown in the figure
to the right, and then automatically stapled.
1
2
3
4
1
2
3
4
1
2
3
4
■ When the Group mode is set
4
4
4
All copies of the same original page are grouped
together, and output into the bins as shown in
the figure to the right.
3
3
3
2
2
2
1
1
1
■ When none of the above modes are set
(Non-Sort mode)
If neither the Sort, Staple-sort, nor Group mode
is set, all copies are output to the top tray as
shown in the figure to the right.
2
2
2
2
4
4
4
4
2-26
1
1
1
1
3
3
3
3
Auto Start
After turning the power ON, while waiting for the copier to warm up, you can program the
copy settings for the first copy job and press the [Start] key. After the copier has warmed up,
copying begins automatically.
Auto Start is available at the following times:
● While you are waiting for the copier to be able to make copies after you have turned
the power ON
● While you are waiting for the copier to warm up after you have checked it for
jammed copy paper (You cannot change the copy settings at this time.)
Basic Copying
When the message to the right appears in the touch
panel display, you can use Auto Start.
Place your originals.
■
■
■
1
For instructions on how to place an original on
the platen glass, see p. 2-17.
For instructions on how to place originals in
the RDF, see p. 2-18.
For instructions on how to place an original in
the SADF tray of the RDF, see p.2-19.
C
AB
Program the copy settings. (See p. 2-4.)
MEMO:
● If you are using Auto Start then you cannot change
the copy settings after you have checked the copier
for jammed paper.
Display Contrast Energy Saver
Reset
Stop
Guide
Additional Functions
Interrupt
Clear
Start
2-27
2
Program the copier to begin copying
automatically by pressing the
key.
Stop
Start
Clear
Start
When the copier is programed to begin copying
automatically, the message to the right appears
in the touch panel display and the
key lights
red.
Start
MEMO:
● You cannot use the Interrupt mode
with Auto Start.
Stop
Reset
● To cancel Auto Start, press the
key or the
key.
When the copier is ready to copy, copying
begins automatically.
■
If you placed your original on the platen glass
After the first original is copied, the message to
the right appears in the touch panel display.
Place the second original, then press the
key.
Start
2-28
Using the Stack Bypass (Manual Feed Copying)
Please note the following points when using the stack bypass:
■ Paper size: 41/8" x 51/8" to 11" x 17"
■ Paper weight: 17-lb bond to 110-lb index (64 to 200 g/m2) (However, keep in mind that the
paper weight that can be used varies depending on the Sorter being used.)
■ Curl down copy stock before use.
■ There are some types of copy stock which may meet the above specifications but
cannot be fed in the stack bypass.
NOTICE:
● STMTR-size copy paper cannot be used to make two-sided or overlay copies.
● Do not set different size paper at the same time.
MEMO:
● If you want the copy stock placed in the stack bypass to be selected when using Auto Paper
Selection, you must enter the copy size before copying. (See p. 4-8.)
Place your originals.
■ For instructions on how to place an original on
the platen glass, see p. 2-17.
■ For instructions on how to place originals in
the RDF, see p. 2-18.
■ For instructions on how to place an original in
the SADF tray of the RDF, see p.2-19.
1
C
AB
Program the copy settings. (See p. 2-4.)
2-29
Basic Copying
You can place up to approximately 50 sheets of copy paper [a stack approximately 3/16"
(5mm) high] in the stack bypass to be automatically fed into the copier. Use the stack
bypass when you want to copy onto special copy stock, such as transparencies or labels, or
when the paper size that you want to copy on does not fit into a paper drawer.
2
3
Open the stack bypass.
Adjust the slide guides to fit the size of the copy
stock.
NOTICE:
4
● Make sure that the slide guides are adjusted
properly to fit the size of the copy stock.
● When feeding LTRR, LGL, or 11" x 17" copy
stock, pull out the auxiliary tray.
Align the required number of sheets of copy
stock with the slide guides. The surface that you
want to copy on must be placed face up. Insert
the copy stock into the copier until it stops.
After inserting the copy paper into the stack
bypass, the
key will be selected as shown
on the right display.
MEMO:
2-30
● After inserting the copy paper, readjust the slide
guides to fit the size of the copy paper.
● The stack bypass can hold up to 50 sheets (20-lb
bond) of copy paper.
Press the
Start
key.
Stop
Clear
Start
■ If you placed your original on the platen glass
After the first original is copied, the message as
shown on the right appears in the touch panel
display.
Place the second original, then press the
key.
Basic Copying
5
Start
If you set the Two-sided, Overlay, Image
Combination or Image Separation mode in step
1 without setting the stack bypass size, the
stack bypass size entry screen will appear. If
this screen appears, select the copy size placed
in the stack bypass. Then, press the [OK] key.
MEMO:
● After the copy paper has been placed, you can
program the copier to display the stack bypass size
entry screen. If you enter the copy size before
copying, Auto Paper Selection and Auto Zoom can
be used with the copy stock placed in the stack
bypass. (See “Stack Bypass Size Setting,” on p. 4-9.)
2-31
Interrupt Mode
(Use to Interrupt the Current Copy Job to Make Priority Copies)
The Interrupt mode enables you to stop the current copy job long enough to make up to 999
priority copies. After you finish making your copies, the copier resumes the interrupted copy
job.
MEMO: ● When using the Interrupt mode, place your originals on the platen glass or in the SADF tray of the RDF.
● Only one-sided copies can be made when the Interrupt mode is set.
● There are 5 modes or settings which can be set in the Interrupt mode.
• Preset Copy Ratios (See p. 2-40.)
• Zoom Mode (See p. 2-43.)
• Fit Image mode (See p. 2-42.)
• Auto Zoom (See p. 2-48.)
• Photo mode (See p. 3-41.)
Placing an Original on the Platen Glass
Interrupt
1
Press the
key.
key begins flashing.
The
Guide
Interrupt
Additional Functions
Interrupt
Interrupt
After the current copy job has stopped, the
key lights continuously. The message to the
right appears in the touch panel display,
indicating that you can begin copying.
MEMO:
2
2-32
● When the copier is programmed to Auto Start, you
cannot use the Interrupt mode.
● If an ID number was being
used to run the current
Interrupt
key is pressed the ID
copy job, then, after the
number entry screen is displayed and an ID number
must be entered in order to make interrupt copies.
After entering the ID number, you can proceed to
copy. (See “Entering an Access-control ID Number,”
on p. 2-38.)
Lift the RDF.
MEMO:
● If the Interrupted copy job was being run using the
platen glass, temporarily remove the original from
the platen glass.
● If the interrupted copy job was being run using the
RDF, slowly lift the RDF so that none of the originals
fall out of the original tray.
Clear
3
4
Place your original on the platen glass.
(See p. 2-17.)
Lower the RDF.
CAUTION:
Basic Copying
● Close the RDF gently to avoid catching your
hand, as this may result in personal injury.
5
Program the necessary copy settings.
MEMO:
● You can enter up to 999 copies.
Display Contrast Energy Saver
Reset
Stop
Guide
Additional Functions
Interrupt
Clear
Start
6
Press the
Start
key.
Stop
Clear
Start
During copying, the message to the right
appears in the touch panel display.
MEMO:
● If your copier is equipped with a Stapler Sorter
(option), the copies are output to the top tray.
● If you want to make copies of another original,
replace the existing original with the new one.
Program the new copy settings. Then, press the
key.
Start
2-33
Interrupt
7
When you finish copying, press the
key so
that the Interrupt ( ) indicator goes out, and
the Interrupt mode is canceled.
MEMO:
8
9
Guide
Interrupt
Additional Functions
● If you do not cancel the Interrupt mode, you cannot
perform normal copying. After you finish copying
in
Interrupt
the Interrupt mode, be sure to press the
key to
cancel the Interrupt mode.
Reset
● Pressing the
key will not cancel the Interrupt
mode.
Clear
Interrupt
Lift the RDF. Then, remove your original from
the platen glass.
Lower the RDF.
If the interrupted copy job was being run using
the platen glass, place the original (that you
removed in step 2) back on the platen glass.
Press the
key.
10 The copier resumes the interrupted copy job.
Start
Stop
Clear
Start
2-34
When Placing an Original in the SADF Tray of the RDF
If the interrupted copy job was being run using the RDF, and you use the SADF tray for interrupt
copying, then you do not need to lift or lower the RDF to remove an original from the platen glass.
Interrupt
1
Press the
key.
key begins flashing.
The
Guide
Interrupt
Additional Functions
Clear
Basic Copying
Interrupt
Interrupt
After the current copy job has stopped, the
key lights continuously. The message to the
right appears in the touch panel display,
indicating that you can begin copying.
MEMO:
● When the copier is programmed to Auto Start, you
cannot use the Interrupt mode.
● If an ID number was being used to run the current
copy job, then, after the
key is pressed the ID
number entry screen is displayed and an ID number
must be entered in order to make interrupt copies.
(See “Entering an Access-control ID Number,” on
p. 2-38.)
Interrupt
2
3
Open the SADF tray of the RDF.
MEMO:
● If the interrupted copy job was being run using the
platen glass, temporarily remove the original from
the platen glass.
Program the necessary copy settings.
MEMO:
● You can enter up to 999 copies.
Display Contrast Energy Saver
Reset
Stop
Guide
Additional Functions
Interrupt
Clear
Start
2-35
4
Adjust the slide guides to fit the size of the
original.
5
Place the side to be copied face down, and
insert the original. The original is pulled in and
copying starts automatically.
CBA
During copying, the message to the right
appears in the touch panel display.
NOTICE:
● You can only insert one original at a time into the
SADF tray. If you insert two or more, a paper jam
occurs.
● If the original is curled, smooth it out completely
before inserting it.
● If copying does not start after inserting the original
in the SADF tray, press the
key. To start
copying automatically after inserting the original,
you must change the “Additional Functions”
setting. (See “Additional Functions/SADF Auto
Feed,” on p. 4-8.)
Start
MEMO:
6
2-36
● The original returns to the SADF tray after it has
been copied.
● If your copier is equipped with a Stapler Sorter/
Sorter, the copies are output to the top tray.
● If you want to make copies of another original,
programme the new copy settings and insert your
original in the tray again.
Close the SADF tray.
If the interrupted copy job was being run using
the platen glass, place the original (that you
removed in step 2) back on the platen glass.
Interrupt
7
When you finish copying, press the
key so
that the Interrupt ( ) indicator goes out, and the
Interrupt mode is cancelled.
Guide
Interrupt
MEMO:
Additional Functions
● You must cancel the Interrupt mode, to be able
perform normal copying. After you finish copying in
the Interrupt mode, be sure to press the
key to
cancel the Interrupt mode.
Reset
● Pressing the
key will not cancel the Interrupt
mode.
Clear
Interrupt
Interrupt
Start
key.
Stop
The copier resumes the interrupted copy job.
Basic Copying
8
Press the
Clear
Start
2-37
Entering an Access-control ID Number
If the ID mode is set on your copier, it is necessary to enter a six-digit ID number after
turning the power ON. If an ID number is not entered, the copier cannot be operated. The
following procedure describes how to enter an ID number.
Entering an ID Number After Turning the Power ON
Press the power switch to the ON position to
turn the power ON.
MEMO:
● If your copier is equipped with the Control Card,
“Insert a control card” will appear in the touch panel
display after turning the power ON. Insert a Control
Card. (See p. 8-22.)
If the message to the right appears in the touch
panel display, copies cannot be made until an
ID number is entered. Follow the procedure
described below to enter an ID number.
1
Enter a valid ID number with the Number keys
( 1 – 0 ).
If you make a mistake during entry, press the
key and enter the ID number again.
2-38
Clear
C
2
Press the
ID
key.
Guide
Additional Functions
Interrupt
Clear
Basic Copying
Proceed to copy in the usual manner.
(See “Making Copies,” on p. 2-4.)
When You Finish Copying
1
When you finish copying, press the
ID
key.
Guide
Additional Functions
Interrupt
Clear
After pressing the ID key, the message to the
right appears in the touch panel display.
MEMO:
● After the ID key is pressed, an ID number must be
entered again in order to make copies.
● If you do not press the ID key after finishing your
copy job, any additional copies are totaled under the
same ID number which you previously entered.
● If you forget to press the ID key after finishing your
copy job and the copier is not operated for a certain
period of time, the Auto Clear function (see p. 2-12)
goes into effect and the display automatically
returns to the ID number entry screen.
2-39
Using Preset Copy Ratios
(Enlarge/Reduce Originals from One Standard Paper Size to Another)
The NP6551 is equipped with the preset copy ratios shown below. These ratios were
chosen so that standard-size originals could easily be converted from one standard size to
another.
[ENLARGE]
● LGL → 11"x17"(121%)
● LTR → 11"x17"(129%)
● STMT → 11"x17"(200%)
NOTICE:
[REDUCE]
● LGL → LTR (78%)
● 11"x17" → LGL/11"x15" → LTR (73%)
● 11"x17" → LTR (64%)
● 11"x17" → STMT (50%)
● Place your originals horizontally in following
cases:
• When enlarging LTR-size originals to LGL or
11"x17"-size
• When enlarging STMT-size originals to 11"x17"size
● When reducing 11" x 17" or LGL-size originals to
LTR-size, select LTRR-size copy paper.
V
CBA
Place your originals.
■ For instructions on how to place an original on
the platen glass, see p. 2-17.
■ For instructions on how to place originals in
the RDF, see p. 2-18.
■ For instructions on how to place an original in
the SADF tray of the RDF, see p. 2-19.
1
Press [ENLARGE] or [REDUCE] to have the
preset copy ratios appear in the touch panel
display.
To make larger copies on a standard paper size,
press [ENLARGE]. To make smaller copies on a
standard paper size, press [REDUCE].
2-40
C
AB
MEMO:
● To return to direct copying (100%), press the
[DIRECT] key.
Basic Copying
2
Select a preset copy ratio.
Proceed to copy in the usual way.
(See “Making Copies,” on p. 2-4.)
MEMO:
● To return to direct copying (100%), press the
[DIRECT] key.
● You can also return to direct copying by pressing
Reset
the
key. (The copier returns to the Standard
mode.)
2-41
Fit Image Mode
(Slightly Reduces the Size of Originals)
The Fit Image mode enables you to reduce the size of the original slightly so that no parts of
the image are cut off on copies, even if the original image covers the entire page.
MEMO: ● You cannot set the Fit Image mode together with the Zoom, or Zoom Program and Margin
modes. The Fit Image mode can be used with only the Margin mode if Center Shift in the
Additional Functions is set to “OFF”. (See “Additional Functions/Fit Image Adjustments,” on
p. 4-12.)
Place your originals.
■ For instructions on how to place an original on
the platen glass, see p. 2-17.
■ For instructions on how to place originals in
the RDF, see p. 2-18.
■ For instructions on how to place an original in
the SADF tray of the RDF, see p. 2-19.
1
Press the [FIT IMAGE] key.
The mode is selected, and the [FIT IMAGE] key
is highlighted.
MEMO:
● The preset Fit Image reduction ratio is 93%, but can
be changed as desired. (See “Additional Functions/
Fit Image Adjustments,” on p. 4-12.)
Proceed to copy.
(See “Making Copies,” on p. 2-4.)
MEMO:
2-42
● If shadows or lines from the original are reproduced
on copies then, set LOSE BIT OF IMAGE to ON.
(See “Fit Image Adjustments,” on p. 4-12.)
● To return to direct copying (100%), press the
[DIRECT] key.
● You can also return to direct copying by pressing
Reset
the
key. (The copier returns to the Standard
mode.)
C
AB
Zoom Mode (Reducing/Enlarging Originals to the Desired Size)
There are three Zoom functions.
■ Zoom:
You can enlarge or reduce images by a copy ratio of your choice, selectable in 1%
increments.
■ Zoom Program:
You can make copies with a copy ratio, by specifying the copy size and original size.
■ Auto Zoom:
You can copy from a standard size original to a different standard size copy.
Basic Copying
Zoom (Use to Freely Reduce/Enlarge 49 - 204%)
You can reduce or enlarge images by any copy ratio between 49 and 204%, selectable in 1%
increments.
Original
Copy (75%)
Zoom mode selected
Place your originals.
■ For instructions on how to place an original on
the platen glass, see p. 2-17.
■ For instructions on how to place originals in
the RDF, see p. 2-18.
■ For instructions on how to place an original in
the SADF tray of the RDF, see p. 2-19.
C
AB
2-43
1
2
Press the [ZOOM] key.
Enter the copy ratio.
You can enter the copy ratio with the [+] [–] keys
or the Number ([1] – [0]) keys in the touch panel
display.
• To increase the copy ratio, press the [+] key.
• To decrease the copy ratio, press the [–] key.
• To enter the copy ratio directly, press the
Number ([1] – [0]) keys in the touch panel
display.
MEMO:
3
2-44
● If you enter the copy ratio with the Number keys in
the display, you can increase or decrease the
entered value with the [+] [–] keys.
● If you enter an incorrect value, press the [C] key and
enter the value again.
Press the [DONE] key.
The mode is set, and the [ZOOM] key is
highlighted.
Proceed to copy in the usual way.
(See “Making Copies,” on p. 2-4.)
MEMO:
● To return to direct copying (100%), press the
[DIRECT] key.
● You can also return to direct copying by pressing
Reset
the
key. (The copier returns to the Standard
mode.)
Zoom Program (Calculates the Copy Ratio Based on the
Original and Copy Paper Sizes)
If you enter measurements for the original and desired copy images (or sheets), the copier will
automatically calculates and sets the appropriate copy ratio.
Basic Copying
Copy
Original
Zoom Program mode
selected
57/8"(150mm)
31/8"(80mm)
Place your originals.
■ For instructions on how to place an original on
the platen glass, see p. 2-17.
■ For instructions on how to place originals in
the RDF, see p. 2-18.
■ For instructions on how to place an original in
the SADF tray of the RDF, see p. 2-19.
1
C
AB
Press the [ZOOM] key.
2-45
2
3
Press the [ZOOM PROGRAM] key.
Enter the original size and the desired copy size
with the Number keys ([1] – [0]) in the display.
You can switch between the original size and
copy size settings by pressing the [ORIGINAL
SIZE] and [COPY SIZE] keys.
For example, to make a 3 1/8" (80 mm) copy of a
5 7/8" (150 mm) original, program the settings as
shown in the display on the right.
Press the [mm] key to enter in millimeters.
MEMO:
2-46
● When the copier calculates a copy ratio at less than
49%, it sets the copy ratio to 49%. When the copier
calculates a copy ratio at more than 204%, it sets
the copy ratio to 204%.
● Copy ratios are calculated as follows:
copy ratio (%) = (copy size ÷ original size) x 100
● If you enter an incorrect value, press the [C] key and
enter the value again.
● Using the Inch Entry under Additional Functions,
you can set the copier so that entry can only be
done in millimeters.
In this case the [INCH] key is not displayed.
● Enter [1] [–] [1] [/] [2] for 1-1/2".
Settings are completed and the [ZOOM] key is
highlighted.
Basic Copying
4
Press the [OK] key.
Proceed to copy in the usual manner.
(See “Making Copies,” on p. 2-4.)
MEMO:
● To return to direct copying (100%), press the
[DIRECT] key.
● You can also return to direct copying by pressing the
Reset
key. (The copier returns to the Standard mode.)
2-47
Auto Zoom (Automatically Selects the Copy Ratio Based on the
Original and Copy Paper Sizes)
In this mode, the copier automatically selects the appropriate copy ratio, based on the size of the
originals and the selected copy paper. To use this mode, your originals must conform to a
standard paper size. The paper sizes that can be used with Auto Zoom are as follows:
• For an original placed on the platen glass:
LTR, LTRR, LGL and 11"x17"
• For originals placed in the RDF:
STMT, LTR, LTRR, LGL and 11"x17"
• For an original placed in the SADF tray of the RDF: STMT, LTR, LTRR, LGL and 11"x17"
Copy (11" x 17")
Original (LTRR)
Auto Zoom mode
selected
MEMO: ● You cannot copy highly transparent originals, such as transparencies, in the Auto Zoom mode.
Use either the Zoom mode or preset copy ratios with such originals.
● You cannot use the Auto Zoom mode with Automatic Paper Selection (see p. 2-22).
● To use the Auto Zoom mode, your originals must conform to a standard paper size.
Place your originals.
■ For instructions on how to place an original on
the platen glass, see p. 2-17.
■ For instructions on how to place originals in
the RDF, see p. 2-18.
■ For instructions on how to place an original in
the SADF tray of the RDF, see p. 2-19.
1
2-48
Press the [PAPER SELECT] key.
C
AB
2
Press the [ZOOM] key.
Basic Copying
3
Select the copy paper size.
4
Press the [AUTO ZOOM] key and then, press
the [DONE] key.
The mode is set and the [ZOOM] key is
highlighted.
■ If you placed your original on the platen glass
When you close the RDF, the selected copy ratio
appears in the touch panel display.
■ If you placed your original(s) in the RDF
After you press the Start key to begin copying, the
selected copy ratio appears in the touch panel
display.
■ If you placed your original in the SADF tray of
the RDF
After you have placed the original in the tray and
it has been pulled into the copier, the selected
copy ratio appears in the touch panel display.
MEMO:
● When the copier calculates a copy ratio at less than
49%, it sets the copy ratio to 49%. When the copier
calculates a copy ratio at more than 204%, the copy
ratio is automatically set to 204%.
Proceed to copy in the usual manner.
(See “Making Copies,” on p. 2-4.)
MEMO:
● To return to direct copying (100%), press the
[DIRECT] key.
● To cancel the setting, press the [ZOOM] key and
then the [C] key.
● You can also return to direct copying by pressing
Reset
the
key. (The copier returns to the Standard
mode.)
2-49
Two-sided Mode
(Copies on Both Sides of Copy Sheets)
The following two-sided copying features are available:
■ 1 → 2-sided (Standard Setting):
Makes two-sided copies from one-sided originals.
■ 2 → 2-sided:
Makes two-sided copies from two-sided originals.
■ 2 → 1-sided:
Makes one-sided copies from two-sided originals.
■ Book → 2-sided:
Makes two-sided copies from facing pages in a bound original.
MEMO: ● Non-standard paper sizes cannot be used to make two-sided copies.
● In the Two-sided mode, you can enter up to 50 copies for any one copy job, regardless of the
paper size. (This limit is the same as the capacity of the duplexing unit.) If your copier is
equipped with the Stapler Sorter/Sorter (option), you can set up to 999 copies when making
copies using the feeder.
● Copy paper used to make two-sided copies must conform to the following specifications:
• Paper size: STMT to 11" x 17" (STMTR-size cannot be used.)
• Paper weight: 17 to 20-lb bond (64 to 80 g/m2)
There are some types of paper which may meet the above specifications, but cannot be used to
make two-sided copies.
● The 1 → 2-sided mode is set as the standard mode in this copier.
2-50
1 → 2-sided (Make Two-sided Copies from One-sided Originals)
This feature enables you to make two-sided copies from one-sided originals. The 1→2-sided
mode is set as the standard mode in this copier.
Originals
1→2-sided selected in the Two-sided mode
NOTICE:
● Be certain to place the original horizontally when copying LTRR, STMTR and other horizontal
sizes. If the original is placed vertically, the back of the copy will be copied upside down.
MEMO:
● If more than one one-sided original is placed in the RDF, the number of originals will be
automatically counted before copying begins. The Auto Count function can be canceled if you
specify whether you loaded an odd or even number of originals into the RDF.
• When you use the Auto Count function, the originals are fed through the RDF and
automatically counted before copying.
• If you specify the number of originals (EVEN NUMBER or ODD NUMBER), automatic
counting is not performed. Canceling automatic counting saves time and also reduces the
wear and tear on originals.
● If you use automatic counting when there are an odd number of originals, the back of the last
page is left blank. (The copier’s counter does not count a blank page as a copy.)
● The High Speed 1→2-sided mode, in which the Auto Count function is canceled, is only
available when you are:
• Using the RDF
• Making 1 or 2 sets of copies
• Using LTR-size originals (originals cannot be placed horizontally)
If you are copying an odd number of originals with copy paper that has right and left side
differences, to prevent copies from being output with the right and left sides reversed, you
should set the High Speed 1→2-sided mode to OFF. (See “Additional Functions/High Speed
1→2-sided,” on p.4-7.)
Place your originals.
■ For instructions on how to place an original on
the platen glass, see p. 2-17.
■ For instructions on how to place originals in
the RDF, see p. 2-18.
C
AB
1
Press the [1→2-SIDE] key.
2-51
Basic Copying
Copy
Proceed to copy in the usual manner. (See
"Making Copies," on p.2-4.)
■ If you placed your original on the platen glass
After the first original is copied, the message to the
right appears in the touch panel display.
key.
Place the second original, then press the
Start
MEMO:
● To cancel the setting, press the [1→2-SIDED] key
and then the [C] key.
Reset
● You can also cancel the mode by pressing the
key.
(The copier returns to the Standard mode.)
■ If you placed your original in the RDF
The copier automatically counts the number of
originals before copying beings. If you want to
cancel the Auto Count function, follow the
directions described below to make the settings.
MEMO:
2
3
Press the [1→2-SIDED] key.
Press the [CANCEL COUNT] key.
Specify the number of originals by pressing
[EVEN NUMBER] or [ODD NUMBER], then
press the [OK] key.
MEMO:
2-52
● If there are an odd number of originals, the back of
the last page is left blank. (The copier’s counter
does not count the blank page as a copy.)
● If you specify the number of originals, automatic
original counting is canceled.
2 → 2-sided (Make Two-sided Copies from Two-sided Originals)
This feature automatically turns over two-sided originals placed in the RDF to make two-sided
copies.
Copy
Original
Basic Copying
2→2-sided selected
in the Two-sided mode
Place your originals in the RDF.
(See p. 2-18.)
C
AB
1
Press the [1→2-SIDED] key.
2-53
2
After pressing the [2 → 2-SIDED] key, press the
[OK] key.
The mode is specified, and the [2 → 2-SIDED]
key is highlighted.
Proceed to copy in the usual way.
(See “Making Copies,” on p. 2-4.)
MEMO:
2-54
● To cancel the setting, press the [2→2-SIDED] key
and then the [C] key.
Reset
● You can also cancel the mode by pressing the
key. (The copier returns to the Standard mode.)
2 → 1-sided (Make One-sided Copies from Two-sided Originals)
This feature automatically turns over two-sided originals placed in the RDF to make one-sided
copies.
Copies
Basic Copying
Original
2→1-sided selected
in the Two-sided mode
NOTICE:
● Be certain to place the original horizontally when copying LTRR, STMTR and other horizontal
sizes. If the original is placed vertically, the back of the copy will be copied upside down.
Place your originals in the RDF.
(See p. 2-18.)
C
AB
1
Press the [1→2-SIDED] key.
2-55
2
After pressing the [2 → 1-SIDED] key, press the
[OK] key.
The mode is set, and the [2 → 1-SIDED] key is
highlighted.
Proceed to copy in the usual manner.
(See “Making Copies,” on p. 2-4.)
MEMO:
● To cancel the setting, press the [2→1-SIDED] key
and then the [C] key.
Reset
● You can also cancel the mode by pressing the
key. (The copier returns to the Standard mode.)
Book → 2-sided (Make Two-sided Copies from Facing
Pages in a Book in One Step)
This feature enables you to make two-sided copies from facing pages in a bound original, such
as a magazine. There is no need to reposition the original during copying.
Original
Copy
1
Book→2-sided selected
in the Two-sided mode
MEMO: ● When using this feature, select LTR or STMT-size copy paper.
2-56
Place your original on the platen glass.
MEMO:
ABC
Press the [1→2-SIDED] key.
Basic Copying
1
● If you want to make copies in page order, begin
copying from the last pages and work your way
forward.
● Place the original face down so that the top edge
rests against the back edge of the platen glass.
2
After pressing the [BK → 2-SIDED] key, press
the [OK] key.
The mode is set, and the [BK → 2-SIDED] key is
highlighted.
Proceed to copy in the usual manner.
(See “Making Copies,” on p. 2-4.)
MEMO:
● To cancel the setting, press the [BK→2-SIDED] key
and then the [C] key.
Reset
● You can also cancel the mode by pressing the
key. (The copier returns to the Standard mode.)
2-57
One-sided Mode
(To Make One-sided Copies of One-sided Originals)
The 1→2-sided mode is set as the standard mode in this copier. Select the One-sided mode
when making One-sided copies from One-sided originals.
NOTICE:
1
● When copying in the Transparency Interleaving mode, always set the copier to the One-sided
mode.
Press the [ONE-SIDED] key.
Proceed to copy in the usual manner.
(See “Making Copies,” on p. 2-4.)
MEMO:
2-58
Reset
● To cancel the setting, press the
key.
(The copier returns to the Standard mode.)
Chapter 3
Special Features
This chapter describes the modes that can be selected from the Special Features screen
in the touch panel display.
■ Frame Erase Mode (Erase Shadows from Copies) ........................... 3-2
• Sheet Frame Erase (Erase Shadows from the Edge of Copies) ...... 3-4
• Original Frame Erase (Erase Shadows Around the
Original Image on Copies)................................................................ 3-5
• Book Frame Erase (Erase Shadows from the
Center Line/Edge of Copies) ........................................................... 3-6
• Binding Erase (Erase Binding Holes on Copies) .............................. 3-7
■ Margin Mode (Creates a Margin on Copies)...................................... 3-9
• Left/Right Margin ............................................................................ 3-10
• Top/Bottom Margin ......................................................................... 3-12
■ Cover/Sheet Insertion Modes (Add Front and Back Covers
and Insertion Sheets to Copy Sets) ................................................. 3-14
■ Image Combination Mode (Automatically ReducesTwo/Four
Originals to Fit on a Single Copy Sheet).......................................... 3-18
• Using the RDF ................................................................................ 3-20
• Using the Platen Glass ................................................................... 3-23
■ Image Separation Mode (Divides an Original Into Equal Sections
and Copies Each Section on a Separate Copy Sheet) .................... 3-25
■ Transparency Interleaving Mode (Interleaves Sheets of Paper
Between Transparencies) ................................................................ 3-30
■ Two-page Separation Mode (Copy Facing Pages in a Book onto
Two Separate Copy Sheets in One Step) ........................................ 3-33
■ Overlay Mode (Superimposes Two Original Images on a
Single Copy Sheet) .......................................................................... 3-35
• Sheet Overlay (Superimposes Two Originals) ............................... 3-36
• Book Overlay (Superimposes Facing Pages in a Book) ................ 3-37
■ Different Size Original Mode (Feed Different-size Originals
Together in the Feeder) ................................................................... 3-39
■ Photo Mode (Use to Copy Photos) .................................................. 3-41
■ Mode Memory (Use to Store Often Run Copy Jobs in Memory) ..... 3-42
• Storing a Copy Job ......................................................................... 3-42
• Recalling a Copy Job ..................................................................... 3-44
Frame Erase Mode
(Erase Shadows from Copies)
This mode erases shadows and lines that appear when copying various types of originals.
The following Frame Erase features are available:
■ Sheet Frame Erase
Creates a blank border approximately 1/4" (7 mm) in width around the edge of copy sheets.
Copy
Original
Sheet Frame Erase mode
selected
■ Original Frame Erase
Erases the dark border and frame lines that appear around the original image when the
original is smaller than the selected paper size.
Copies (LGL)
Original Frame Erase mode
selected
Original (LTR)
Original Frame Erase mode
not selected
3-2
■ Book Frame Erase
Erases the dark border as well as center and contour lines that appear when copying
facing pages in a bound original onto a single copy sheet.
Copies
Book Frame Erase mode
selected
Original
Special Features
Book Frame Erase mode
not selected
■ Binding Erase
Erases the shadows that can appear in copies from binding holes in originals.
Copies
Binding Erase mode
selected
Original
Binding Erase mode
not selected
3-3
Sheet Frame Erase (Erase Shadows from the Edge of Copies)
This feature creates a blank border approximately 1/4" (7mm) in width around the edge of copy
sheets.
Place your originals.
■ For instructions on how to place an original on
the platen glass, see p. 2-17.
■ For instructions on how to place originals in
the RDF, see p. 2-18.
■ For instructions on how to place original in the
SADF tray of the RDF, see p. 2-19.
1
Press the [SPECIAL FEATURES] key, then
press the [FRAME ERASE] key.
2
Check to see that the [SHEET FRAME ERASE]
key is selected, then press the [OK] key.
After you have finished making the settings,
press the [DONE] key.
Proceed to copy in the usual manner.
(See “Making Copies,” on p. 2-4.)
MEMO:
3-4
● To cancel the settings, press the [SPECIAL
FEATURES], [FRAME ERASE], and [C] keys in that
order.
Reset
● You can also cancel the mode by pressing the
key. (The copier returns to the Standard mode.)
C
AB
Original Frame Erase (Erase Shadows Around the
Original Image on Copies)
This feature eliminates the dark border and frame lines that appear around the original image
when the original is smaller than the selected paper size.
Place your originals.
1
Press the [SPECIAL FEATURES] key, then
press the [FRAME ERASE] key.
2
Press the [ORIG. FRAME ERASE] key, then
press the [OK] key.
3
Select the size of the originals, then press the
[OK] key.
MEMO:
C
AB
Special Features
■ For instructions on how to place an original on
the platen glass, see p. 2-17.
■ For instructions on how to place originals in
the RDF, see p. 2-18.
■ For instructions on how to place original in the
SADF tray of the RDF, see p. 2-19.
● You can only use Original Frame Erase with those
original sizes shown in the touch panel display.
After you have finished making the settings,
press the [DONE] key.
3-5
Proceed to copy in the usual manner.
(See “Making Copies,” on p. 2-4.)
MEMO:
● To cancel the settings, press the [SPECIAL
FEATURES], [FRAME ERASE], and [C] keys in that
order.
Reset
● You can also cancel the mode by pressing the
key. (The copier returns to the Standard mode.)
Book Frame Erase (Erase Shadows from the
Center Line/Edge of Copies)
This feature eliminates the dark border as well as center and contour lines that appear when
copying facing pages in a bound original onto two copy sheets.
MEMO:
● The copier is set to erase a line 3/4" (20 mm) in width down the center of the copy sheet. This
width can be changed by your service representative.
Place your original on the platen glass.
(See p. 2-17.)
ABC
1
Press the [SPECIAL FEATURES] key, then
press the [FRAME ERASE] key.
2
Press the [BOOK FRAME ERASE] key, then
press the [OK] key.
3-6
3
Select the size of the book when opened, then
press the [OK] key.
After you have finished making the settings,
press the [DONE] key.
Proceed to copy in the usual manner.
(See “Making Copies,” on p. 2-4.)
MEMO:
● To cancel the settings, press the [SPECIAL
FEATURES], [FRAME ERASE], and [C] keys in that
order.
Reset
● You can also cancel the mode by pressing the
key. (The copier returns to the Standard mode.)
Binding Erase (Erase Binding Holes on Copies)
Erases the shadows that can appear in copies from binding holes on originals.
NOTICE:
1
Special Features
Place your original on the platen glass.
(See p. 2-17.)
● Place the original on the platen glass so that the
binding holes are on the right side of the original.
Press the [SPECIAL FEATURES] key, then
press the [FRAME ERASE] key.
3-7
2
Press the [BIND. ERASE] key, then press the
[OK] key.
3
Specify the frame erase width [1/8"-3/4"
(1 ~ 20 mm)], then press the [OK] key.
Use the [+] and [–] keys to set the frame erase
width.
• Press the [+] key to increase the width of the
frame.
• Press the [–] key to decrease the width of the
frame.
• Press the [mm] key to enter in millimeters.
Millimeter Entry key
MEMO:
● The default setting for the frame erase width is 3/4"
(18 mm).
● Using the “Inch Entry” in the Additional Functions
mode, you can set the copier so that entry can only
be done in millimeters.
In this case the [INCH] key is not displayed.
After you have finished making the settings,
press the [DONE] key.
Proceed to copy in the usual manner.
(See “Making Copies,” on p. 2-4.)
MEMO:
3-8
● To cancel the settings, press the [SPECIAL
FEATURES], [FRAME ERASE], and [C] keys in that
order.
Reset
● You can also cancel the mode by pressing the
key. (The copier returns to the Standard mode.)
Margin Mode
(Creates a Margin on Copies)
This mode enables you to shift the entire original image slightly to the left, right, top or
bottom to create a margin on copy sheets. Use this mode to make copies ready for
placement in ring binders or files. The width of the margin is adjustable from 0" to 3/4" (0 to
20 mm).
Copy
3
/8" (10 mm) left
margin selected in
the Margin mode
Copy
3
/8" (10 mm) right
margin selected in
the Margin mode
Special Features
Original
Copy
3
/8" (10 mm) top
margin selected in
the Margin mode
Copy
3
/8" (10 mm) bottom
margin selected in
the Margin mode
MEMO: ● When the Margin mode is set, the entire original image is shifted to the left, right, top or bottom
by a selected width and copied. When copying an original image that extends to the edge of the
sheet, part of that image will be cut off.
3-9
Left / Right Margin
Place your originals.
■ For instructions on how to place an original on
the platen glass, see p. 2-17.
■ For instructions on how to place originals in
the RDF, see p. 2-18.
■ For instructions on how to place an original in
the SADF tray of the RDF, see p. 2-19.
1
Press the [SPECIAL FEATURES] key, then
press the [MARGIN] key.
2
Press [LEFT MARGIN] or [RIGHT MARGIN],
then press the [OK] key.
3-10
C
AB
Use the [+] and [–] keys to set the width of the
margin.
• Press the [+] key to increase the size of the
margin.
• Press the [–] key to decrease the size of the
margin.
• Press the [mm] key to enter in millimeters.
MEMO:
● The default setting for the margin width is 3⁄8" (10 mm).
● You can create a margin for front and back sides of
the copy in one step.
● If you are using the Margin and Two-sided modes
together and copying an original that already has a
margin, then follow the instructions listed below
depending on the two-sided copying feature which
you have set.
1→1-sided: You do not need to set the margin.
Proceed to copy in the usual way.
1→2-sided: Set the margin for the back only. Set
the margin for the front to 0" (0 mm).
2→2-sided: You do not need to set the margin.
Proceed to copy in the usual way.
2→1-sided: Set the margin for the back only. Set
the margin for the front to 0" (0 mm).
● Using the “Inch Entry” in the Additional Functions
mode, you can set the copier so that entry can only
be done in millimeters.
In this case the [INCH] key is not displayed.
Special Features
3
Specify the width of the margin [0" - 3/4"
(0 ~ 20 mm)], then press the [OK] key.
After you have finished making the settings,
press the [DONE] key.
Proceed to copy in the usual manner.
(See “Making Copies,” on p. 2-4.)
MEMO:
● To cancel the settings, press the [SPECIAL
FEATURES], [MARGIN], and [C] keys in that order.
Reset
● You can also cancel the mode by pressing the
key. (The copier returns to the Standard mode.)
3-11
Top/Bottom Margin
Place your originals.
■ For instructions on how to place an original on
the platen glass, see p. 2-17.
■ For instructions on how to place originals in
the RDF, see p. 2-18.
■ For instructions on how to place an original in
the SADF tray of the RDF, see p. 2-19.
1
Press the [SPECIAL FEATURES] key, then
press the [MARGIN] key.
2
Press [TOP MARGIN] or [BOTTOM MARGIN],
then press the [OK] key.
3-12
C
AB
• Press the [+] key to increase the width of the
margin.
• Press the [–] key to decrease the width of the
margin.
• Press the [mm] key to enter in millimeters.
MEMO:
● The default setting for the margin width is 3/8" (10 mm).
● Using the “Inch Entry” in the Additional Functions
mode, you can set the copier so that entry can only
be done in millimeters.
In this case the [INCH] key is not displayed.
After you have finished making the settings,
press the [DONE] key.
Special Features
3
Specify the margin width [0" - 3/4" (0 ~ 20 mm)],
then press the [OK] key.
Use the [+] and [–] keys to set the width of the
margin.
Proceed to copy in the usual manner.
(See “Making Copies,” on p. 2-4.)
MEMO:
● To cancel the settings, press the [SPECIAL
FEATURES], [MARGIN], and [C] keys in that order.
Reset
● You can also cancel the mode by pressing the
key. (The copier returns to the Standard mode.)
3-13
Cover/Sheet Insertion Modes
(Add Front and Back Covers and Insertion Sheets to Copy Sets)
This mode enables you to program the copier to automatically add front and back covers
and insertions sheets to copy sets. The copy stock which you use for the covers and
insertion sheets can be different from the rest of the copies; you can select printed or blank
insertion sheets. Also if you use this mode together with the 1 → 2-sided mode, you can
perform the “Chapterization” of your copy sets.
The following features are available with this mode:
■ Front Covers
Adds a front cover sheet to each set of copies. You can select printed or blank front
covers.
Originals
REPORT
Copies
REPORT
Printed front covers selected in the
Cover/Sheet Insertion mode
■ Back Covers
Adds a back cover sheet to each set of copies. You can select printed or blank back
covers.
Originals
REPORT
Copies
REPORT
Printed front and back covers
selected in the Cover/Sheet
Insertion mode
3-14
■ Insertion Sheet
This mode enables you to automatically add up to 20 printed or blank insertion sheets of a
different type of copy stock between the pages of copy sets. It is very useful when you
want to divide your copy sets into different sections. When using this mode together with
the 1 → 2-sided copy mode you can perform the “Chapterization” of your copy sets.
“Chapterization,” means that you can have copy stock inserted as a chapter heading
sheet to identify a chapter within your copy set. The new chapter then automatically
begins on the front of a new page; the back of the previous page is left blank or printed on
if necessary. (See p. 3-14.)
Originals
Copies
REPORT
REPORT
Special Features
Printed insertion sheets selected
in the Cover/Sheet Insertion mode
MEMO: ● You cannot use the following modes with the Cover/Sheet Insertion mode: Book → 1-sided,
Book → 2-sided, Image Combination, Image Separation, Sheet Overlay, Book Overlay,
Transparency Interleaving, and Different Size Original.
● Printed cover and insertion sheets are counted as copies.
● When the Cover/Sheet Insertion mode is set, Auto Drawer Switching is automatically set to
“OFF”.
Place your originals in the RDF. (See p. 2-18.)
C
AB
1
Press the [SPECIAL FEATURES] key, then
press the [COVER/SHEET INSERTION] key.
3-15
2
Select the [FRONT COVER/BACK COVER/
SHEET INSERTION] mode, then press the [OK]
key.
MEMO:
3
To copy onto the cover/insertion sheet, select
the paper to be copied onto and then press the
[OK] key.
MEMO:
4
● The [FRONT COVER], [BACK COVER] and
[SHEET INSERTION] modes can all be selected at
once.
● You can cancel the selection by pressing the
corresponding mode key again.
● The display will change depending on what you
selected in step 2.
Make the following settings depending on the
mode selected.
MEMO:
● The display will vary depending on the selected
mode.
■ When selecting “BACK COVER” and “1-sided”
copy mode
Select the side to be copied onto, then press the
[OK] key.
■ When selecting “SHEET INSERTION”
Set all the positions to be inserted into the
copies, then press the [OK] key.
For the insertion positions, scroll the highlighted
display up and down with the [▲] or [▼] key and
enter the settings with the Number keys ( 1 - 0 ).
MEMO:
3-16
● You can insert up to 20 insertion sheets.
● When specifying “SHEET INSERTION PRINTED”,
the display changes to “SECTION 0 → PAGE 0”
● To cancel a specific sheet insertion page setting,
scroll the highlighted display up and down with the
Clear
[▲] or [▼] key and then press the C key to cancel
the setting.
● When using the Sheet Insertion function to add
sheet insertions when making 2 → 2-sided copies*
or using it for “Chapterization” when making 1 → 2sided copies, the sheet insertions/chapter headings
are inserted as follows:
■ When the sheet insertion /chapter heading is
inserted at an odd numbered page
(In the example the insertion sheet/chapter heading
is inserted at page 5.)
Copies
1
2
3
4
Insertion
sheet
5
6
■ When the sheet insertion/chapter heading is
inserted at an even numbered page
(In the example the insertion sheet/chapter heading
is inserted at page 4. As a result of this, the back of
page 3 is left blank.)
Copies
1
2
3
Insertion
sheet
4
5
* Sheet insertions can also be added to copy sets
when making 1 → 1-sided copies.
Select the paper feeding locations for each
insertion sheet, then press the [OK] key.
MEMO:
Special Features
5
● Select the same paper size for the front and back
cover and the insertion sheets.
● The display will vary depending on the mode
selected.
After you have finished making the settings,
press the [DONE] key.
Proceed to copy in the usual manner.
(See “Making Copies,” on p. 2-4.)
MEMO:
● To cancel the settings, press the [SPECIAL
FEATURES], [COVER/SHEET INSERTION], and
[C] keys in that order.
Reset
● You can also cancel the mode by pressing the
key. (The copier returns to the Standard mode.)
3-17
Image Combination Mode
(Automatically Reduces Two or Four Originals to Fit on a Single Copy Sheet)
The mode automatically reduces two or four originals to fit on one or both sides of a selected
paper size.
NOTICE: ●
Set the One-sided mode before copying in the Image Combination mode.
● Originals copied in the Image Combination mode must all be the same size. (You cannot use
the Image Combination mode with the Different Size Original mode.)
MEMO:
●
●
●
●
You cannot copy the front and back of two-sided originals in the Image Combination mode.
The reduction ratio is automatically set to match the selected copy paper size.
The Image Combination features that are available will vary depending on the original size.
In 2 ON 1 mode, originals of "11 x 17" or LTRR size, and originals placed on the platen glass
can be copied onto LTR-size copy paper only.
● LTR, STMT-size originals and copy paper can be used in 4 ON 1 mode.
The following Image Combination features are available:
■ 2 ON 1
Reduces two originals to fit on one side of a single copy sheet.
11" x 17" selected (direct copying)
1
2
LGL selected (73% Auto Zoom)
LTR originals
1
2
LTRR selected (64% Auto Zoom)
1
2
2 ON 1 selected in the
Image Combination mode
1
2
STMTR selected (50% Auto Zoom)
1
2
11" x 17" originals
LTR selected (50% Auto Zoom)
1
1
2
2
2 ON 1 selected in the Image
Combination mode
3-18
■ 4 ON 1
Reduces four originals to fit on one side of a single copy sheet.
LTR Originals
LTR selected (50% Auto Zoom)
1
2
3
4
1
2
3
4 ON 1 selected in the
Image Combination mode
Special Features
4
■ 2 ON 1 / Two-sided
Reduces four originals to fit on both sides of a single copy sheet.
LTR Originals
LGL selected (73% Auto Zoom)
1
1
2
LTRR selected (64% Auto Zoom)
2
3
1
2
4
2 ON 1 / Two-sided selected in the
Image Combination mode
Please read the instructions on the following pages according to the placement of the original.
● When using the RDF, see p. 3-20.
● When using the platen glass, see p. 3-23.
3-19
Using the RDF
You can select the following three features:
■ 2 ON 1 ...Reduces two originals to fit on one side of a single copy sheet.
■ 4 ON 1 ...Reduces four originals to fit on one side of a single copy sheet.
■ 2 ON 1 / Two-sided ...Reduces four originals to fit on both sides of a single copy sheet.
MEMO: ● When using the RDF to copy, the originals are counted automatically before copying. If you do
not want Auto Count to be performed, specify the number of originals.
• When you use the Auto Count function, the originals are fed through the RDF and automatically
counted before copying.
• If you specify the number of originals, automatic counting is not performed. Canceling
automatic counting shortens copy time and reduces wear and tear on originals caused by
repeated feeding.
Place your originals in the RDF. (See p. 2-18.)
NOTICE:
1
2
3-20
● You cannot place STMTR-size originals in the
RDF. Place STMTR-size originals on the platen
glass.
Press the [ONE-SIDED] key.
Press the [SPECIAL FEATURES] key, then
press the [IMAGE COMBINATION] key.
C
AB
MEMO:
4
● This display will not appear depending on the size of
the original.
Select the desired Image Combination feature.
The available features vary depending on the
size of the original.
■ If your originals are LTR or STMT-size
(vertically placed)
Select the desired feature (2 ON 1, 4 ON 1, or
2 ON 1/TWO-SIDED), and press the [OK] key.
NOTICE:
● When using the RDF, be sure to close the
auxiliary tray. You cannot set the 4 on 1 and 2 on
1/Two-sided modes if the auxiliary tray is open.
Special Features
3
Select the size of the originals, then press the
[OK] key.
■ If your originals are 11" x 17", LGL, LTRR, or
STMTR-size (horizontally placed)
Select the 2 ON 1 feature and press the [OK]
key.
MEMO:
● For horizontally placed originals, only 2 ON 1 is
available.
3-21
5
Select the Auto Count function or specify the
number of originals.
■ If you want the originals to be counted
automatically, press the [OK] key.
MEMO:
● If you place your originals in the RDF, the originals
are counted automatically. Counting is performed to
ensure that Image Combination is performed from
the first page of the originals.
■ Specifying the number of originals
Press the [CANCEL COUNT] key.
Specify the number of originals using the [+] and
[–] keys, or the Number keys ( 1 - 0 ), then
press the [OK] key.
• Press the [+] key to increase the number of
originals.
• Press the [–] key to decrease the number of
originals.
• To directly enter the number of originals, press
the Number keys ( 1 - 0 ).
MEMO:
6
● You can change the number of originals entered
with the Number keys, using the [+] and [–] keys.
Press the [PAPER SELECT] key to manually
select the copy paper size. (See “Manual Paper
Selection,” on p. 2-24.)
NOTICE:
MEMO:
● You cannot set Auto Paper Selection; manually
select a paper size (see p. 2-16).
● The copier automatically selects the copy ratio
depending on the selected paper size (Auto Zoom).
After you have finished making the settings,
press the [DONE] key .
Proceed to copy in the usual way.
(See “Making Copies,” on p. 2-4.)
MEMO:
3-22
Reset
● To cancel the settings, press the
key.
(The copier returns to the Standard mode.)
Using the Platen Glass
You can select “2 ON 1” Image Combination only. This feature reduces two originals to fit on one
side of a single copy sheet.
MEMO: ● This feature is suitable for copying horizontally placed originals, such as 11" x 17", LGL, LTRR,
or STMTR-size, etc.
Place the first original on the platen glass.
(See p. 2-17.)
MEMO:
● You can perform “4 ON 1” Image Combination by
placing two originals of the same size (STMT and
LTR only) side by side on the platen glass. After the
first two originals have been copied, place the next
two originals on the platen glass.
● This example is a vertical “2 ON 1”.
V
Special Features
CBA
LTRR
1
2
Press the [ONE-SIDED] key.
Press the [SPECIAL FEATURES] key, then
press the [IMAGE COMBINATION] key.
3-23
Select the size of the Originals, then press the
[OK] key.
MEMO:
● When not using the RDF, place horizontal originals
(11"x17", LGL, LTRR, STMTR) on the platen glass.
Place the first original as in the figure on the right.
3
Press the [2 ON 1] key, then press the [OK] key.
Afterwards, press the [DONE] key.
4
Press the [PAPER SELECT] key to manually
select the copy paper size. (See “Manual Paper
Selection,” on p. 2-24.)
NOTICE:
MEMO:
● You cannot set Auto Paper Selection; manually
select a paper size (see p. 2-24).
● The copier automatically selects the copy ratio
depending on the selected paper size (Auto Zoom).
Proceed to copy the first original.
(See “Making Copies,” on p. 2-4.)
MEMO:
● You can enter up to 50 copies for any one copy job.
After the first original has been copied, the
message shown as the right appears in the
touch panel display. Place the second original,
then press the
key again.
Start
MEMO:
3-24
Reset
● To cancel the settings, press the
key.
(The copier returns to the Standard mode.)
Image Separation Mode (Divides an Original Into
Equal Sections and Copies Each Section on a Separate Copy Sheet)
The mode automatically divides an original into equal sections, and copies each section in
enlarged form on a separate sheet of copy paper.
NOTICE:
● Originals copied in the Image Separation mode must all be the same size. (You cannot use
the Image Separation mode with the Different Size Original mode.)
MEMO:
● The enlargement ratio is automatically set to match the selected copy paper size.
● Features available in the Image Separation mode vary depending on the placement location
of the original.
■ If you placed your original(s) in the RDF
Available features: 1 to 2, 1 to 4, 1 to 2/Two-sided
1 to 4/Two-sided, 1 to 2/2→1-sided,
1 to 2/2→2-sided
Special Features
■ If you placed your original on the platen glass
Available features: 1 to 2, 1 to 4, 1 to 2/Two-sided,
1 to 4/Two-sided
The following Image Combination features are available:
■ 1 TO 2
Divides a one-sided original into two equal sections and outputs the sections in enlarged
form as two one-sided copies.
NOTICE:
● Set the One-sided mode before copying in the 1 to 2 mode.
MEMO:
● You can place STMT and LTR-size originals horizontally or vertically when using this feature.
When placed vertically, each page is divided into upper and lower sections.
Copies
LTRR Original
1
2
1
1 TO 2 selected in the
Image Separation mode
2
LTR selected (129% Auto Zoom)
3-25
■ 1 TO 4
Divides a one-sided original into four equal sections and outputs the sections in enlarged
form as four one-sided copies.
NOTICE:
● Set the One-sided mode before copying in the 1 to 4 mode.
Copies
LTR Original
1
2
1
2
4
3
1 TO 4 selected in the
Image Separation mode
3
4
LTR selected (200% Auto Zoom)
■ 1 TO 2 / Two-sided
Divides a one-sided original into two equal sections and outputs the sections in enlarged
form as a single two-sided copy.
Copy
LTRR Original
1
2
1 TO 2 / Two-sided selected in
the Image Separation mode
1
LTR selected (129% Auto Zoom)
MEMO: ● You can place STMT and LTR-size originals horizontally or vertically when using this feature.
When placed vertically, each page is divided into upper and lower sections.
3-26
■ 1 TO 4 / Two-sided
Divides a one-sided original into four equal sections and outputs the sections in enlarged
form as two two-sided copies.
Copies
1
2
3
4
1
1 TO 4 / Two-sided selected in
the Image Separation mode
3
LTR selected (200% Auto Zoom)
■ 1 TO 2 / 2Æ1-sided
Divides a two-sided original into four equal sections and outputs the sections in enlarged
form as four one-sided copies.
Copies
LTRR Original
1
1
2
2
1 TO 2 / 2→1-sided selected in
the Image Combination mode
3
4
LTR selected (129% Auto Zoom)
MEMO: ● You can place STMT and LTR-size originals horizontally or vertically when using this feature.
When placed vertically, each page is divided into upper and lower sections.
3-27
Special Features
LTR Original
■ 1 TO 2 / 2→2-sided
Divides a two-sided original into four equal sections and outputs the sections in enlarged
form as two two-sided copies.
Copies
LTRR Original
1
2
1
1 TO 2 / 2→2-sided selected in
the Image Separation mode
3
LTR selected (129% Auto Zoom)
MEMO: ● You can place STMT and LTR-size originals horizontally or vertically when using this feature.
When placed vertically, each page is divided into upper and lower sections.
Place your originals.
■ For instructions on how to place an original on
the platen glass, see p. 2-17.
■ For instructions on how to place originals in
the RDF, see p. 2-18.
■ For instructions on how to place an original in
the SADF tray of the RDF, see p. 2-19.
1
Press the [SPECIAL FEATURES] key, then
press the [IMAGE SEPARATION] key.
NOTICE:
3-28
● Set the One-sided mode before copying in the
1 to 2 or 1 to 4 mode. (See “One-sided Mode,”
on p. 2-58.)
C
AB
2
Select the desired Image Separation feature
and press the [OK] key.
MEMO:
● The display (available features) differs depending
on the placement location of the original. For
details, see p. 3-25.
■ If you selected 1 TO 4 / TWO-SIDED or 1 TO 4
Select the layout of the last page of the originals
and press the [OK] key.
MEMO:
Press the [PAPER SELECT] key to manually
select the copy paper size. (See “Manual Paper
Selection,” on p. 2-24.)
NOTICE:
MEMO:
Special Features
3
● If you select the layout of the last page, then the
copier will not output blank sheets of copy paper.
● You cannot set Auto Paper Selection; manually
select a paper size (see p. 2-24).
● The copier automatically selects the copy ratio
depending on the selected paper size (Auto Zoom).
After you have finished making the settings,
press the [DONE] key.
Proceed to copy in the usual manner.
(See “Making Copies,” on p. 2-4.)
MEMO:
Reset
● To cancel the settings, press the
key.
(The copier returns to the Standard mode.)
3-29
Transparency Interleaving Mode
(Interleaves Sheets of Paper Between Transparencies)
Use this mode when copying onto transparencies fed from the stack bypass. The copier
automatically interleaves a sheet of copy paper between each transparency. The interleaf
sheets protect the copied surface of the transparencies. The interleaf sheets can either be
printed with the same images as the transparencies or left blank.
Transparency
Originals
REPORT
Copies
REPORT
Blank interleaf sheets selected in
the Transparency Interleaving mode
Blank interleaf sheet
Transparency
Originals
REPORT
Copies
REPORT
REPORT
Printed interleaf sheets selected in
the Transparency Interleaving mode
Printed interleaf sheet
NOTICE:
MEMO:
3-30
● Set the One-sided mode before copying in the Transparency Interleaving mode.
● You cannot make more than one set of copies at a time in the Transparency Interleaving
mode.
● You cannot use the Transparency Interleaving mode with the Two-page Separation, Image
Combination, Image Separation, Cover/Sheet Insertion, Sheet Overlay, Book Overlay, 1→2sided, 2→2-sided or Book→2-sided modes.
● Even if your copier is equipped with a Stapler Sorter, you cannot use any of the Sorter modes
with the Transparency Interleaving mode.
● When copying interleaf sheets, those sheets are included in the count of the total number of
copies.
Place your originals.
■ For instructions on how to place an original on
the platen glass, see p. 2-17.
■ For instructions on how to place originals in
the RDF, see p. 2-18.
■ For instructions on how to place an original in
the SADF tray of the RDF, see p. 2-19.
1
Press the [ONE-SIDED] key.
Press the [SPECIAL FEATURES] key, then
press the [TRANSP. INTERLVNG] key.
Special Features
2
C
AB
3
Place the transparencies in the stack bypass.
MEMO:
● Adjust the slide guides in the stack bypass to fit the
size of the transparencies.
● You can place a stack of transparencies of up to 1⁄4"
(5 mm) high in the stack bypass.
3-31
4
Select the size of the transparencies and then,
press the [OK] key.
MEMO:
5
● In the Transparency Interleaving mode, the
transparencies are fed from the stack bypass and
the copy paper is fed from the paper drawer or the
Side Paper Deck. Make sure that one of the paper
drawers is loaded with paper that is the same size
as the transparencies.
● If the message to the right appears in the touch
panel display, adjust the slide guides and select the
size of the transparencies again.
Select [PRINTED] or [BLANK], then press the
[OK] key.
MEMO:
● When copying interleaf sheets, those sheets are
counted in the total number of copies.
After you have finished making the settings,
press the [DONE] key.
Proceed to copy in the usual manner.
(See “Making Copies,” on p. 2-4.)
MEMO:
3-32
● Interleaf sheets are output before Reset
transparenies.
● To cancel the settings, press the
key.
(The copier returns to the Standard mode.)
Two-page Separation Mode (Copy Facing Pages in
a Book onto Two Separate Copy Sheets in One Step)
This feature enables you to copy facing pages in a book or magazine on separate sheets of
copy paper in one step; there is no need to reposition the original during copying.
Original
Copies
1
1
Two-page Separation mode selected
● Set the One-sided mode before copying in the Two-Page Separation mode.
Special Features
NOTICE:
Place your original on the platen glass.
(See p. 2-17.)
MEMO:
1
● Place the original face down so that the top of it is
against the top edge of the platen glass.
ABC
Press the [ONE-SIDED] key.
3-33
2
Press the [SPECIAL FEATURES] key, then
press the [TWO-PAGE SEPERATION] key.
3
Select how you would like your copies output,
then press the [OK] key.
■ To have copies output in page order starting
with the first facing pages of the original,
either select [YES] or instead, select [NO] and
make your copies starting with the last pages
of the original.
MEMO:
● The follow restrictions apply to face down output
copying:
• You must select the paper size manually;
Auto Paper Selection cannot be selected.
• You must place your original(s) on the platen glass;
originals cannot be placed in the feeder.
• You cannot make LGL or 11” x 17”-size copies.
● If you staple copies that have been output face
down, then the staple position will be the opposite of
the usual position. It is recommended that you do
not perform stapling when copies have been output
face down.
After you have finished making the settings,
press the [DONE] key.
Proceed to copy in the usual manner.
(See “Making Copies,” on p. 2-4.)
MEMO:
3-34
Reset
● To cancel the settings, press the
key.
(The copier returns to the Standard mode.)
Overlay Mode
(Superimposes Two Original Images on a Single Copy Sheet)
The following overlay copying features are available:
■ Sheet Overlay
Superimposes two sheet originals onto a single sheet of copy paper.
Originals
SCENE
Copy
SCENE
Special Features
Sheet Overlay selected in the Overlay mode
■ Book Overlay
Superimposes facing pages in a bound original onto a single sheet of copy paper.
Original
Copy
Book Overlay selected in the Overlay mode
NOTICE:
● Set the One-sided mode before copying in the Overlay mode.
MEMO:
● Non-standard paper sizes cannot be used to make overlay copies.
● In the Overlay mode, you can enter up to 50 copies for any one copy job, regardless of the
paper size. (This limit is the same as the capacity of the duplexing unit.) If your copier is
equipped with the Stapler Sorter or the Sorter, you can set up to 999 copies when making
copies using the feeder.
● Copy paper used to make overlay copies must conform to the following specifications:
• Paper size: STMT to 11" x 17" (STMTR-size cannot be used.)
• Paper weight: 17 to 20-lb bond (64 to 80 g/m2)
There are some types of paper which may meet the above specifications, but cannot be
used to make overlay copies.
3-35
Sheet Overlay (Superimposes Two Originals)
This feature enables you to superimpose the images from two sheet originals onto a single sheet
of copy paper.
Place your originals.
■ For instructions on how to place an original on
the platen glass, see p. 2-17.
■ For instructions on how to place originals in
the RDF, see p. 2-18.
1
Press the [ONE-SIDED] key.
2
Press the [SPECIAL FEATURES] key, then
press the [OVERLAY] key.
3
Press the [SHEET OVERLAY] key, then press
the [OK] key.
After you have finished making the settings,
press the [DONE] key.
3-36
C
AB
Proceed to copy in the usual manner.
(See “Making Copies,” on p. 2-4.)
■ If you place your originals on the platen glass
After the first original has been copied, the
message shown as the right appears in the touch
panel display. Place the second original, then
key.
press the
Start
MEMO:
Reset
● To cancel the settings, press the
key.
(The copier returns to the Standard mode.)
Book Overlay (Superimposes Facing Pages in a Book)
This feature enables you to superimpose the images from facing pages in a book or magazine
onto a single sheet of copy paper; there is no need to reposition the original during copying.
Place your original on the platen glass.
(See p. 2-17.)
Special Features
ABC
1
2
Press the [ONE-SIDED] key.
Press the [SPECIAL FEATURES] key, then
press the [OVERLAY] key.
3-37
3
Press the [BOOK OVERLAY] key, then press
the [OK] key.
After you have finished making the settings,
press the [DONE] key.
Proceed to copy in the usual manner.
(See “Making Copies,” on p. 2-4.)
MEMO:
3-38
Reset
● To cancel the settings, press the
key.
(The copier returns to the Standard mode.)
Different Size Original Mode
(Feed Different-size Originals Together in the Feeder)
You can feed different-size originals together in one group in the RDF if the leading edge of
each page is the same length and the originals are the same thickness. The copier
automatically selects the appropriate paper size for each original. If you set the Auto Paper
Selection/Auto Zoom mode, the copier automatically selects the appropriate copy ratio for
each original.
MEMO: ● All originals placed together in the RDF must be the same weight and the same type.
● Papers sizes in which the leading edge of each page are different (e.g., LGL and 11" x 17"-size)
cannot be fed together.
● You cannot use this mode with the Image Combination.
● For information on what types of originals can be fed in the RDF, see pp. 2-7, 2-18.
Place your originals in the RDF.
(See p. 2-18.)
● Flip open the auxiliary tray before placing the
originals.
C
Special Features
MEMO:
AB
Place the originals so that the edges which enter
the copier first are all the same length.
Leading edge
length
LTR
11"x17"
Original feeding direction
Leading edge
length
STMT
LTRR LGL
Original feeding direction
1
Press the [SPECIAL FEATURES] key, then
press the [DIF. SIZE ORIGINAL] key.
After you have finished making the settings,
press the [DONE] key.
3-39
Proceed to copy in the usual manner.
(See “Making Copies,” on p. 2-4.)
MEMO:
3-40
● To cancel the settings, press the [SPECIAL
FEATURES] and [DIF. SIZE ORIGINAL] keys in that
order.
Reset
● You can also cancel the mode by pressing the
key. (The copier returns to the Standard mode.)
Photo Mode (Use to Copy Photos)
This mode enables you to reproduce photos or other types of originals with halftones more
faithfully.
Place your originals.
■ For instructions on how to place an original on
the platen glass, see p. 2-17.
■ For instructions on how to place originals in
the RDF, see p. 2-18.
■ For instructions on how to place an original in
the SADF tray of the RDF, see p. 2-19.
Press the [SPECIAL FEATURES] key, then
press the [PHOTO] key.
After you have finished making the settings,
press the [DONE] key.
MEMO:
Special Features
1
C
AB
● If the Photo mode is selected, Automatic Exposure
Control is automatically canceled; manually adjust
the copy exposure.
Proceed to copy in the usual manner.
(See “Making Copies,” on p. 2-4.)
MEMO:
● To cancel the settings, press the [SPECIAL
FEATURES] and [PHOTO] keys in that order.
Reset
● You can also cancel the mode by pressing the
key. (The copier returns to the Standard mode.)
3-41
Mode Memory
(Use to Store Often Run Copy Jobs in Memory)
You can store up to nine different copy jobs in memory for later use. A stored copy job can
include settings for the copy quantity, copy ratio and copy exposure, etc. Stored copy jobs
can be easily recalled with the touch of a key. This function is convenient for storing often
run copy jobs.
MEMO: ● The copy jobs stored in memory will not be erased even if you turn OFF the power.
● You can store any type of setting except for Timer and Adjustment / Cleaning settings made in
the Additional Function mode and Interrupt mode copy settings.
Storing a Copy Job
1
Program the copy job (copy settings) which you
want to store.
MEMO:
2
3
3-42
● In the display at the right, MARGIN and IMAGE
COMBINATION and a reduction ratio of 50% has
been selected.
Press the [SPECIAL FEATURES] key, then
press the [MODE MEMORY] key.
Press the [STORE] key.
4
Select the desired memory location.
MEMO:
● Memory locations that contain a stored copy job are
highlighted.
● In the display at the right, modes are registered in
the M1-M5 keys.
Special Features
■ If you have pressed a key which has already
been registered
The message at the right appears asking you to
confirm that you want to change the registered
settings.
If you want to change the settings for a key:
Press the [OK] key. The registered copy settings
are replaced by the new settings.
To cancel registration:
Press the [C] key, and select another key.
5
When you have finished registering settings, the
message to the right is displayed.
MEMO:
● After about two seconds the screen returns to the
display for step 2.
3-43
Recalling a Copy Job
1
Press the [SPECIAL FEATURES] key, then
press the [MODE MEMORY] key.
2
Select the key for the copy job that you want to
recall, then press the [OK] key.
MEMO:
3
● In the display at the right, modes are registered with
the M1-M5 keys.
Check the registered contents of a key.
If the contents are correct:
Press the [OK] key.
If the contents are incorrect:
Press the [C] key. Select another key.
MEMO:
● Recalling a copy job from memory cancels the
current copy settings, and replaces them with the
copy settings of the recalled job.
● After recalling a copy job from memory, you can
change the copy settings.
After you have finished making the settings,
press the [DONE] key.
After recalling a copy job, proceed to copy in the
usual manner. (See “Making Copies,” on p. 2-4.)
3-44
Chapter 4
Additional Functions
You can change or adjust the factory settings for the various functions described in this
chapter to meet your specific copying needs. This chapter also describes how you can
make adjustments to the copier.
■ Additional Functions (Select or Adjust Various Functions
to Meet Your Specific Copying Needs) .............................................. 4-2
• Standard Key Settings (Displaying Frequently Used Modes in the
Basic Features Screen) .................................................................... 4-3
• Custom Settings ............................................................................... 4-5
Auto Sort .......................................................................................... 4-6
Front Access Sorter Unloading ........................................................ 4-7
High Speed 1 → 2-sided .................................................................. 4-7
SADF Auto Feed .............................................................................. 4-8
Drawer Eligibility for APS/ADS ......................................................... 4-8
Stack Bypass Size Setting ............................................................... 4-9
Inch Entry ....................................................................................... 4-10
Job Duration Display ...................................................................... 4-10
Audible Tones ................................................................................ 4-11
Fit Image Adjustment ..................................................................... 4-12
Energy Saver Adjustment............................................................... 4-13
Change Standard Copy Settings .................................................... 4-13
Initialize Custom Settings ............................................................... 4-14
• Timer Settings ................................................................................ 4-15
Auto Clear Time ............................................................................. 4-16
Low-Power Mode Time .................................................................. 4-16
Auto Power-off Time ....................................................................... 4-17
Daily Timer Settings ....................................................................... 4-18
Day/Time Settings .......................................................................... 4-18
• Adjustment/Cleaning ...................................................................... 4-19
Zoom Fine Adjustment ................................................................... 4-20
Feeder Cleaning ............................................................................. 4-21
Wire Cleaning ................................................................................. 4-22
Additional Functions
(Select or Adjust Various Functions to Meet Your Specific Copying Needs)
You can change or adjust the factory settings for various functions to meet your specific
copying needs. You can also perform cleaning and make adjustments to the copier.
You can change or adjust the settings for the following items:
■ Standard Key Settings
The Standard Key Settings feature enables you to select a mode from either the Twosided, Sorter or Special Features modes and have the keys for these modes displayed in
the Basic Features screen.
■ Custom Settings
Function
Auto Sort
Front Access Sorter Unloading
Default Setting
ON
Sort
Group
Staple-sort
Double Stapling/
Stack Delivery
High Speed 1 → 2-sided
SADF Auto Feed
Drawer Eligibility for APS/ADS
Stack Bypass Size Setting
Inch Entry
Job Duration Display
Audible Tones
Fit Image Adjustment
Energy Saver Adjustment
Change Standard Copy Settings
Initialize Custom Settings
■ Adjustment/Cleaning
• Zoom Fine Adjustment
• Feeder Cleaning
• Wire Cleaning
4-2
ON
ON
ON
ON
OFF
ON
OFF
Entry tone
Error tones
Ready tone
Job Done tone
Copy Ratio
Center Shift
Lose Bit of Image
–10%
—
—
■ Timer Settings
Function
Auto Clear Time
Low-Power Mode Time
Auto Power-off Time
Daily Timer Settings
Day/Time Settings
ON
ON
ON
Default Setting
2 min.
15 min.
1 hr.
—
—
ON
ON
ON
ON
93%
ON
OFF
Standard Key Settings (Displaying Frequently Used Modes in
the Basic Features Screen)
The Standard Key Settings feature enables you to select a mode from either the Two-sided,
Sorter or Special Features modes and have the keys for these modes displayed in the Basic
Features screen.
1
Press the
Additional Functions
key.
Guide
Additional Functions
Interrupt
3
Press the [STANDARD KEY SETTINGS] key.
Select the function that you want to register
under your Standard key.
In addition to the modes which are shown in the
display on the right, you can also register
specific functions within that mode that you
selected as a Standard key.
Additional Functions
2
Clear
■ The following features may only have the
mode name registered:
Image Combination, Transparency Interleaving,
Two-page Separation, Different Size Original,
Photo
Select the mode that you want to register.
The selected mode key is highlighted.
4-3
■ Items which may be registered with more
detailed functions
Mode
Sorter
Two-sided
Frame Erase
Margin
Cover/Insertion Sheet
Image Separation
Overlay
Mode Memory
Functions
Sort, Staple-sort, Group
1→2-sided, 2→2-sided,
2→1-sided, Book→2-sided
Sheet Frame Erase, Original
Frame Erase, Book Frame
Erase, Binding Erase
Left Margin, Right Margin,
Top Margin, Bottom Margin
Cover, Back Cover, Insertion
Sheet
1 to 2, 1 to 4, 1 to 2 / Twosided, 1 to 4 / Two-sided,
1 to 2 / 2→1-sided, 1 to 2 /
2→2-sided
Sheet Overlay, Book Overlay
M1-M9
When you select the mode key that you want to
register, the display on the right appears.
To register a function name
Select the function name, then press the [OK]
key.
To register a mode name
Press the [NO SETTING] key, then press the
[OK] key.
MEMO:
4-4
● If NO SETTING is selected, then only the mode
name is displayed in the Basic Features screen. To
set a function within that mode, you can select that
function just as you would normally if you were making
settings from the modes in the Special Features
screen.
4
Press the [DONE] key.
MEMO:
● When you are finished setting Additional Functions,
press the [DONE] key again.
When the Standard keys are set, a Basic
Features screen similar to the one on the right is
displayed.
MEMO:
● The display on the right is with PHOTO set as a
Standard key 1.
Custom Settings
You can change the settings for various functions as necessary to meet your specific copying
needs.
1
Press the
Additional Functions
key.
Guide
Additional Functions
2
Clear
Additional Functions
Interrupt
Press the [CUSTOM SETTINGS] key.
4-5
3
Press the [▲] and [▼] keys to display the mode
to be changed.
Follow the procedures described below to make
changes to various functions.
4
Press the [DONE] key.
MEMO:
● When you are finished setting Additional Functions,
press the [DONE] key again.
■ Auto Sort
This setting is only available when your copier is
equipped with the optional Stapler Sorter/Sorter.
When using the RDF, the copier automatically selects the
sort bin or non-sort bin (the highest bin of the Sorter)
depending on the original and copy quantity.
ON: Automatically sorts and outputs copies.
OFF: Outputs copies to the non-sort bin.
Sorting can be manually selected if necessary.
Select the [ON] or [OFF] key, then press the
[DONE] key.
MEMO:
4-6
● The default setting is “AUTO SORT: ON”.
■ Front Access Sorter Unloading
This setting is only available when your copier is
equipped with the optional Stapler Sorter. This function
automatically outputs copies to the front of the copier
after sorting is finished.
ON: Automatically outputs copies to the front of the
copier.
OFF: Does not output copies to the front of the copier.
Select FRONT ACCESS SORTER
UNLOADING.
the copier.
● The Front Access Sorter Unloading Function default
settings are as follows:
• Sort: ON
• Group: ON
• Staple-sort: ON
• Double Stapling/Stack Delivery: ON
● If you want to do manual stapling after copying with
the Sort mode , then set SORT to OFF.
● If you are making 21 or more sets of copies with
LTR-size copy paper and Double Stapling selected
in the Staple-sort mode as a default setting, then the
21st set and others afterwards are not output
immediately. After you remove the 20 sets that
have already been output to the front of the copier,
the 21st set and other remaining sets are
automatically output to the front.
■ High Speed 1→2-sided
Additional Functions
1
Select the [ON] or [OFF] key for each setting,
then press the [OK] key.
MEMO: ● Only LTR-size paper can be output to the front of
Under the following conditions, the pages of the original are
not counted, and copying is done in the High Speed 1→2sided mode: when the RDF is used, for 1 or 2 sets of
copies, original size is LTR. (Horizontal size LTRR is not
possible.)
ON: Copies with the High Speed 1→2-sided mode.
OFF: Copies after counting the number of pages in the
RDF. (The count may also be canceled.)
4-7
Select the [ON] or [OFF] key, then press the
[DONE] key.
MEMO: ● With the High Speed 1→2-sided mode, you can skip
the page count and shorten the copying time by
doing the following:
1. Copying alternate pages of the original from the
last page and counting the number of sheets at
the same time.
2. Matching the number of sheets in the original,
copy the remaining pages so that the first page of
the original comes first.
(Example) If the original is 5 pages.
After copying the 5th page, then the 3rd page,
then the 1st page, copy the 2nd page on the back
of the 1st page, the 4th page on the back of the
3rd page, and nothing on the back of the 5th
page.
● If you are copying an odd number of originals with
copy paper that has right and left side differences,
to prevent copies from being output with the right
and left sides reversed, you should set the High
Speed 1→2-sided mode to OFF.
● The default setting is “High Speed 1→2-sided: ON.”
■ SADF Auto Feed
With the default setting, when you feed an original into
the SADF tray, it is automatically pulled in and copied.
ON: Copying starts automatically.
OFF: Copying starts when you press the Start key.
Select the [ON] or [OFF] key, then press the
[DONE] key.
MEMO:
● The default setting "SADF AUTO FEED : ON".
■ Drawer Eligibility for APS/ADS
With the default setting, all paper drawers and the Side
Paper Deck are set to ON for Auto Paper Selection(APS)
and Auto Drawer Selection(ADS). With APS, the copier
automatically selects the appropriate paper size(paper
drawer or the Side Paper Deck) for the size of the original
and the set copy ratio. With ADS, if a paper drawer or the
Side Paper Deck runs out of paper during a continuous
copy job, the copier automatically selects another paper
drawer or the Side Paper Deck with the same paper size
and begins feeding paper from it.
Using Drawer Eligibility for APS/ADS, you can set which
drawers or the Side Paper Deck you would like to have
eligible for APS and ADS.
ON: A drawer is eligible for APS/ADS.
OFF: A drawer is not eligible for APS/ADS and must be
manually selected.
4-8
Select the DRAWER ELIGIBILITY FOR APS/
ADS.
For each paper drawer, select the [ON] or [OFF]
key, then press the [OK] key.
NOTICE:
MEMO:
● In order to set Drawer Eligibility for APS/ADS, first
you must place the same sized paper in more
than one paper drawer/Side Paper Deck.
● The default setting for all paper drawers is “Drawer
Eligibility for APS/ADS: ON.”
● If different types of copy stock which are the same
size are loaded in different paper drawers or the
Side Paper Deck, and you do not want to mix them
together, then you might want to turn this function
OFF.
● If you want the copier to choose the stack bypass
when a paper drawer runs out of copy paper, then
you must specify the size of the paper loaded in the
stack bypass. (See “Additional functions / Stack
Bypass Size Setting,” on this page.)
■ Stack Bypass Size Setting
When making two-sided and overlay copies, etc. on copy
stock placed in the stack bypass, you must enter the size
of the copy stock.
OFF: The size entry display appears right after the
key is pressed.
Start
ON: The size entry display will appear when copy stock
is placed in the stack bypass.
Select the [ON] or [OFF] key and press the
[DONE] key.
● The default setting for the Stack Bypass Size
Setting is OFF.
Additional Functions
MEMO:
4-9
■ Inch Entry
This function displays an Inch Entry key so that in modes
where numerical entry is performed, inches as well as
millimeters can be entered.
ON: mm/inch (both can be entered)
OFF: mm entry only
MEMO:
● Inch Entry can be performed in the following modes.
• Margin (setting the width of the margin)
• Frame Erase (setting the width to be erased for
the binding holes)
• Zoom Program (setting the ratio)
● The default setting is “INCH ENTRY: ON.”
Select the [ON] or [OFF] key, then press the
[DONE] key.
MEMO:
● The default setting is “INCH ENTRY: ON.”
■ Job Duration Display
When Job Duration Display is set to ON and the
appropriate modes are set, the remaining time necessary
to complete the copy job can be displayed.
ON: When the appropriate modes are set, Job Duration
can be displayed.
OFF: Job Duration cannot be displayed.
Job Duration can only be displayed when the following
modes are set. (However, this function cannot be used in
combination with the Different Size Original mode.)
1→1-sided
Two-page Separation
1→2-sided
2 ON 1
2→1-sided
2 ON 1/Two-sided
2→2-sided
Cover/Sheet Insertion
Book→2-sided
MEMO:
● The default setting is “Job Duration Display: OFF.”
● The time displayed is only a rough estimate.
Depending on the modes that are set and the
conditions of use, the time displayed may differ from
the actual time.
Select the [ON] or [OFF] key, then press the
[DONE] key.
MEMO:
4-10
● The default setting is “Job Duration Display: OFF.”
■ Audible Tones
Four types of tones can be turned ON or OFF to meet
your needs. These tones sound at the following times.
• Entry tone:
When pressing keys on the touch panel
display.
• Error tones:
When a copier malfunction occurs
(e.g. paper jam or operational error).
• Ready tone:
When the warm-up time has ended,
when the copier is turned ON, or when
opening and closing the doors.
• Job done tone: After the last copy has been made
(outputting or stapling is finished).
ON: The tone sounds.
OFF: The tone does not sound.
Select AUDIBLE TONES.
MEMO:
● The default setting for all the tones is ON.
Additional Functions
1
Select the [ON] or [OFF] key for each tone, then
press the [OK] key.
4-11
■ Fit Image Adjustment
The Fit Image mode selection can be changed and
registered.
• Copy ratio:
Changes how much copies are
reduced.
• Center shift:
Set to “ON” to shift the copied image
to the center of the paper.
• Lose bit of image: If copies made with the Fit Image
mode have shadows or lines around
them, set this to “ON”.
Select FIT IMAGE ADJUSTMENT.
1
Set each:
Copy Ratio
Set the ratio by pressing the [+] and [–] keys.
Center Shift
Select the [ON] or [OFF] key.
Lose Bit of Image
Select the [ON] or [OFF] key.
When all the settings are finished, press the
[OK] key.
MEMO: ● The copy ratio can be set from 90% - 99% in 1%
●
●
●
●
4-12
increments. Note that even if you set “LOSE BIT OF
IMAGE” to “OFF,” the image may be cut off if the
ratio is set to enlarge.
Usually when copying, a few inches(millimeters)
around the edges of originals are not copied and
may appear blank on copy sheets.
If the Fit Image mode has been selected with the
default value (Lose Bit of Image OFF), the image on
the original will be completely scanned from edge to
edge. By slightly reducing the original’s image and
copying it, there will be no missing parts in the copy.
However, if the reduction ratio is increased, the
image is completely scanned but some parts of the
original image may be cut off.
The default settings for the Fit Image mode are as
follows:
• Copy Ratio:
93%
• Center Shift:
ON
• Lose Bit of Image: OFF
When Center Shift is “OFF” the Fit Image mode can
be specified together with the Margin mode.
Even if Center Shift is set to “ON,” it may not take
effect, depending on the size of the image and copy
paper. In this case, the copy will be made so that
there will be a blank area of up to 3/4"(20 mm) to the
right of the copied image.
ABC
Up to
3/ 4"
■ Energy Saver Adjustment
In the Energy Saver mode, the temperature of the fixing
unit is lowered to reduce energy consumption. The
amount of energy saved can be changed.
Select ENERGY SAVER ADJUSTMENT.
MEMO:
● The default setting is an Energy Saver setting of
–10%.
● If you select –10%, then the copier will consume
10% less energy than normal.
● If you select –25%, then the copier will consume
25% less energy than normal.
● If you select –50%, then the copier will consume
50% less energy than normal.
● If you select RETURN DIRECTLY TO STANDARD
MODE, then the copier will consume 8% less
energy than normal. You can make copies
immediately because when this setting is selected, it
puts the copier in the same condition as when the
copier is ON and “Ready to copy,” appears in the
display.
● The amount of time that it takes before the copier
can return to the “Ready to copy,” condition and you
can make copies once again varies depending on
which Energy Saver setting you have chosen.
The approximate amount of time that it takes for the
Energy Saver settings is as follows:
(The amount of time it takes the copier to return to
the “Ready to copy” condition may vary depending
on environmental conditions.)
–10% mode: Approx. 50sec., –25% mode: Approx.
1min. 40sec.,
–50% mode: Approx. 2min. 50sec.
■ Change Standard Copy Settings
Additional Functions
1
Select the Energy Saver setting, then press the
[OK] key.
The standard copy settings are those copy settings which
Reset
the copier returns to after the
key is pressed. You
can freely change and store the standard copy settings.
You can also restore changed standard copy settings to
the factory-preset (initial) settings.
The factory-preset (initial) standard copy settings are as
follows:
• Copy exposure : Manual Exposure Control
• Paper selection : Auto Paper Selection
• Copy quantity : 1
• Copy ratio
: Direct (100%)
• Copying
: 1 → 2-sided
Select CHANGE STANDARD COPY SETTINGS
after specifying the mode you want to store as
the standard copy settings.
4-13
1
2
Select the [STORE] or [INIT.] key.
Storing the Standard Copy Settings
Press the [STORE] key.
The confirmation display at the right appears.
(To store): Press the [YES] key.
(To cancel): Press the [NO] key.
MEMO:
● When changing the standard copy settings, first
specify the mode you want to store as a standard
copy setting.
● The stored standard copy settings will be stored
until initialized, or until other settings are stored as
the standard copy settings.
Initializing the Standard Copy Settings
Press the [INIT.] key.
The confirmation display at the right appears.
(To initialize) → Press the [YES] key.
(To cancel) → Press the [NO] key.
■ Initialize Custom Settings
In a single operation, custom settings can be returned to
the default values they had at the time of factory
shipment.
Select INITIALIZE CUSTOM SETTINGS.
4-14
1
The confirmation display on the right appears.
To initialize: Press the [YES] key.
To cancel: Press the [NO] key.
Timer Settings
1
Press the
Additional Functions
key.
Guide
Additional Functions
2
Press the [TIMER SETTINGS] key.
3
Select the desired function.
4
Clear
Additional Functions
Interrupt
Follow the procedures described below to make
changes to various functions.
Press the [DONE] key.
MEMO:
● When you are finished setting Additional Functions,
press the [DONE] key again.
4-15
■ Auto Clear Time
If the copier is not operated (no keys are pressed) for a
certain period of time after copies have been made, the
copier automatically returns to the Standard mode. This
time period is called the “auto clear time.” You can freely
change the auto clear time.
Select AUTO CLEAR TIME.
1
Enter the desired time period with the [+] or [–]
key. Then, press the [OK] key.
MEMO:
● The Auto Clear Time can be set from 10 seconds to
9 minutes, in 10 second increments from 0 seconds
to 50 seconds, and 1 minute increments from 1
minute to 9 minutes.
● If you set the Auto Clear Time to 0 seconds, this
function will be canceled.
● The default setting for the auto clear time is two
minutes.
■ Low-Power Mode Time
If the copier is not operated (no keys are pressed) for a
certain period of time after copies have been made or
key operations done, the copier automatically enters the
Low-Power Mode.
This time period is called the "low-power mode time." You
can easily change the low-power mode time.
Select LOW-POWER MODE TIME.
1
Enter the desired time period with the [+] or [–]
key. Then, press the [OK] key.
MEMO:
4-16
● The Low-Power Mode Time can be set from 10
minutes to 4 hours: in 5-minutes increments from 10
minutes to 20 minutes, in 10-minute increments from
30 minutes to 50 minutes, in 30-minute increments
from 1 hour to 2 hours, and hourly increments from 3
hours to 4 hours.
● The default setting for the low-power mode time is
15 minutes.
● If the Low-Power Mode Time setting is longer than
the Auto Power-Off Time, the Auto Power-Off Time
will be set.
● It takes about 120 seconds to return from the LowPower Mode to a ready-to-copy state.
■ Auto Power-off Time
If the copier is not operated (no keys are pressed) for a
certain period of time, the power switch automatically
moves to the OFF position. This time period is called the
“auto power-off time.” You can freely change the auto
power-off time.
Select AUTO POWER-OFF TIME.
Enter the desired time period with the [+] or [–]
key. Then, press the [OK] key.
MEMO:
● The Auto Power-Off Mode Time can be set from 10
minutes to 4 hours: in 5-minutes increments from 10
minutes to 20 minutes, in 10-minute increments from
30 minutes to 50 minutes, in 30-minute increments
from 1 hour to 2 hours, and hourly increments from 3
hours to 4 hours.
● The default setting for the Auto Power-off time is 1
hour.
Additional Functions
1
4-17
■ Daily Timer Settings
You can set the Power-off Time to be different on
different days of the week.
NOTICE:
● In order to use the Daily Timer settings, the
current day/time must be properly set beforehand.
(See “Day/Time Settings,” on this page.)
Select DAILY TIMER SETTINGS.
1
Setting the day of the week
Select the day to be set from [SUN] - [WED] [SAT].
MEMO:
● Be sure to set the day of the week before setting the
time.
Setting the time
Using the Number keys ( 1 - 0 ), enter the time.
The time is four digits in the form ‘Hours’
‘Minutes’.
Ex.) 8:30 AM→0830
9:54 PM→2154
MEMO:
● If you make a mistake in entering the time, choose
the day of the week again, then enter the four digits.
● If you do not want to specify the time, press the [NO
SETTING] key.
When all the settings are finished, press the
[OK] key.
■ Day/Time Settings
Set the current day of the week and time for the daily
timer.
Select DAY/TIME SETTINGS.
4-18
1
Setting the day of the week
Select the day to be set from [SUN] - [WED] [SAT].
MEMO:
● Be sure to set the day of the week before setting the
time.
Setting the time
Using the Number keys ( 1 - 0 ), enter the time.
The time is four digits in the form ‘Hours’
‘Minutes’.
Ex.) 8:30 AM→0830
9:54 PM→2154
MEMO:
● If you make a mistake in entering the time, choose
the day of the week again, then enter the four digits.
When all the settings are finished, press the
[OK] key.
Adjustment / Cleaning
You can perform Zoom Fine Adjustment, and Feeder and Wire Cleaning as necessary to meet
your specific copying needs.
1
Press the
Additional Functions
key.
Guide
Interrupt
2
Clear
Press the [ADJUSTMENT/CLEANING] key.
4-19
Additional Functions
Additional Functions
3
4
Select the mode to be changed.
Follow the procedures described below to make
changes to various functions.
Press the [DONE] key.
MEMO:
● When you are finished setting Additional Functions,
press the [DONE] key again.
■ Zoom Fine Adjustment
If there is a slight difference in size between the original
and output copy images when the copy ratio is set to
100% (direct), use this function to correct the error.
Adjustments can be made independently in the X and Y
directions. You can perform adjustments to ±1%, in 0.2%
increments.
Select ZOOM FINE ADJUSTMENT.
1
Press the [ ] or [
] key to make fine
adjustments. Then, press the [OK] key.
To increase the copy ratio, press the [
To decrease the copy ratio, press the [
MEMO:
4-20
] key.
] key.
● Confirm fine adjustments by making copies and
comparing them with the original.
Y
Copy
X
■ Feeder Cleaning
This function enables automatic cleaning of the
RDF’s feeding roller when it becomes dirtied with
pencil lead, etc. If your originals have black streaks
or appear dirty after feeding them in the RDF,
perform Feeder Cleaning. Cleaning is
accomplished by repeatedly feeding blank originals
(copy sheets) through the RDF.
Select FEEDER CLEANING.
NOTICE:
2
● Use only LTR-size copy sheets to clean the
feeder.
● Make sure that the auxiliary tray is closed.
Press the [START] key.
Additional Functions
1
Place 10 blank LTR-size copy sheets in the
RDF.
While cleaning the feeder, the message to the
right appears in the touch panel display.
Feeder cleaning is completed after approximately
25 seconds and the screen returns to the Basic
Features screen.
NOTICE:
MEMO:
●The blank originals used for cleaning pick up the
dirt on the feeder roller.
● To stop Feeder Cleaning before it is completed,
press the [STOP] key.
4-21
■ Wire Cleaning
If dirt appears on copies, the corona wire can be cleaned
if necessary.
Select WIRE CLEANING.
1
Press the [START] key.
While wire cleaning is being performed, the
message to the right appears in the touch panel
display.
Wire cleaning is completed after approximately
40 seconds and the screen returns to the Basic
Features screen.
4-22
Chapter 5
Loading Paper and Adding Toner
This chapter describes how to load copy paper in a paper drawer, and how to add toner
when it runs out.
■ Loading Paper ..........................................................................5-2
• Remaining Paper Quantity Display ......................................... 5-2
• Loading Paper in a Paper Drawer 1,2 .................................... 5-3
• Loading Paper in a Paper Drawer 3,4 .................................... 5-4
• Loading Paper in the Side Paper Deck (option) ..................... 5-6
• Adjusting a Paper Drawer to Hold a Different Paper Size ...... 5-7
■ Adding Toner ............................................................................5-9
Loading Paper
When the copy paper in the selected paper drawer or
the Side Paper Deck runs out, the message to the
right appears in the touch panel display. Confirm
which paper drawer is out of paper by checking the
touch panel display. Then, follow the procedure
described below to load copy paper.
CAUTION:
● When loading copy paper, take care not to cut
your hands on the edges of the copy paper.
MEMO: ● The above message also appears if the selected
paper drawer or the Side Paper Deck is not fully
inserted into the copier.
● If the above message appears before copying is
complete, load copy paper and press the
key
Start
again. The copier makes the remaining copies.
Remaining Paper Quantity Display
1
You can check the remaining quantity of paper
in the selected paper drawer or the Side Paper
Deck (option).
Sufficient quantity of
paper remains.
Only a small quantity of
paper remains.
5-2
Loading Paper in a Paper Drawer 1, 2
NOTICE:
● The paper sizes for the paper drawers can be set for LTR-size paper. The sizes must be
changed by your service representative. For more details, contact your service
representative.
1
Grip the handle on the front of the paper drawer
in which you want to load paper. Pull out the
paper drawer until it stops.
2
Open a package of copy paper, and remove the
paper stack. (Make sure that the seam on the
center of the package is face up.)
NOTICE:
MEMO:
● Drawer 1, 2 each holds up to approximately 1,500
sheets of copy paper (20-lb bond).
● For high-quality copies, use paper recommended by
Canon.
Place the paper stack in the paper drawer.
Even out the edges of the paper stack. Load the
paper stack against the right wall of the paper
drawer or paper deck.
REQUEST:
● Do not place any objects in the empty space of
the drawer, as this may cause damage.
NOTICE:
● If the copy paper is curled, curl it down before
placing it in the paper drawer.
● Make sure that the height of the paper stack does
not exceed the limit mark (
) at the back of the
paper drawer.
● Make sure that the paper size setting in the paper
drawer matches the size of the paper to be
loaded.
Loading Paper and
Adding Toner
3
● Rewrap any remaining paper in its original
package, and store it in a dry place away from
direct sunlight.
● Do not copy on the following types of copy stock;
doing so may cause a paper jam.
• Severely curled or wrinkled paper
• Transparencies for digital full-color copiers
• Paper which has been copied on using a digital
full-color copier (do not copy on the reverse side
either)
• Paper which has been printed on using a
thermal transfer printer (do not copy on the
reverse side either)
5-3
4
Grip the handle on the front of the paper drawer.
Gently slide the paper drawer back into the
copier until it clicks into place in the closed
position.
CAUTION:
● When closing the paper drawer, be careful not to
get your fingers caught in it, as this may result in
personal injury.
Loading Paper in a Paper Drawer 3, 4
If you want to load a new paper size in a paper drawer, you must first adjust the paper drawer
guides to fit the new paper size (see p. 5-6).
NOTICE:
1
● The paper sizes loaded in the lowest drawer can be changed as necessary to meet your
copying needs.
● The sizes loaded in the other drawers must be changed by your service representative. For
more details, contact your service representative.
Press the open button of the paper drawer in
which you want to load paper.
Open button
2
5-4
Grip the handle on the front of the paper drawer.
Pull out the paper drawer until it stops.
3
Open a package of copy paper, and remove the
paper stack. (Make sure that the seam on the
center of the package is face up.)
NOTICE:
MEMO:
4
● Rewrap any remaining paper in its original
package, and store it in a dry place away from
direct sunlight.
● Do not copy on the following types of copy stock;
doing so may cause a paper jam.
• Severely curled or wrinkled paper
• Transparencies for digital full-color copiers
• Paper which has been copied on using a digital
full-color copier (do not copy on the reverse side
either)
• Paper which has been printed on using a
thermal transfer printer (do not copy on the
reverse side either)
● Drawer 3, 4 each holds up to approximately 550
sheets of copy paper (20-lb bond).
● For high-quality copies, use paper recommended by
Canon.
Place the paper stack in the paper drawer.
Even out the edges of the paper stack. Load the
paper stack against the right wall of the paper
drawer or paper deck.
REQUEST:
● Do not place any objects in the empty space of
the drawer, as this may cause damage.
NOTICE:
Grip the handle on the front of the paper drawer.
Gently slide the paper drawer back into the
copier until it clicks into place in the closed
position.
CAUTION:
● When closing the paper drawer, be careful not to
get your fingers caught in it, as this may result in
personal injury.
Loading Paper and
Adding Toner
5
● If the copy paper is curled, curl it down before
placing it in the paper drawer.
● Make sure that the height of the paper stack does
not exceed the limit mark (
) at the back of the
paper drawer.
● Make sure that the paper size setting in the paper
drawer matches the size of the paper to be
loaded. (See “Adjusting a Paper Drawer to Hold a
Different Paper Size,” on p. 5-7.)
5-5
Loading Paper in the Side Paper Deck (option)
NOTICE:
1
● The paper size for the Side Paper Deck can be set for LTR-size paper. The size must be
changed by your service representative. For more details, contact your service
representative.
Press the open button to open the paper deck.
Pull out the Side Paper Deck until it stops.
Open button
2
Open a package of copy paper, and remove the
paper stack. (Make sure that the seam on the
centre of the package is face up.)
NOTICE:
MEMO:
3
● Rewrap any remaining paper in its original
package, and store it in a dry place away from
direct sunlight.
● Do not copy on the following types of copy stock;
doing so may cause a paper jam.
• Severely curled or wrinkled paper
• Transparencies for digital full-colour copiers
• Paper which has been copied on using a digital
full-colour copier (do not copy on the reverse
side either)
• Paper which has been printed on using a
thermal transfer printer (do not copy on the
reverse side either)
● Side Paper Deck holds up to approximately 3,500
sheets of copy paper (20-lb bond).
● For high-quality copies, use paper recommended by
Canon.
Place the paper stack in the Side Paper Deck.
Even out the edges of the paper stack. Load the
paper stack against the right wall of the paper
drawer or paper deck.
REQUEST:
● Do not place any objects in the empty space of
the Side Paper Deck, as this may cause damage.
NOTICE:
5-6
● If the copy paper is curled, curl it down before
placing it in the Side Paper Deck.
● Make sure that the height of the paper stack does
not exceed the limit mark (
) at the back of the
Side Paper Deck.
4
Grip the handle of the paper drawer. Gently
slide the Side Paper Deck back into the copier
until it clicks into place in the closed position.
CAUTION:
● When closing the Side Paper Deck, be careful not to
get your fingers caught in it, as this may result in
personal injury.
Adjusting a Paper Drawer to Hold a Different Paper Size
If you want to load a new paper size in a paper drawer, follow the procedure described below to
adjust the paper drawer guides.
You can adjust the paper drawers to hold the following standard paper sizes: 11" x 17", LGL,
LTR, LTRR, STMT, and STMTR.
NOTICE:
● The paper sizes loaded in the lowest drawer can be changed as necessary to meet your
copying needs.
● The sizes loaded in other drawers must be changed by your service representative. For more
details, contact your service representative.
Length guide
When loading 11" x 17" -size copy paper, slide
the length guide all the way to the left, and drop
it downward.
Loading Paper and
Adding Toner
1
Squeeze the lever on the length guide as shown
in the figure. Without releasing the lever, slide
the length guide to align it with the mark for the
desired paper size.
5-7
2
Squeeze the lever on the width guide as shown
in the figure. Without releasing the lever, slide
the width guide to align it with the mark for the
desired paper size.
NOTICE:
3
● If the length and width guides are not adjusted
properly for the paper size loaded in the paper
drawer, then the correct paper sizes might not
appear in the display. Also, not adjusting the
guides correctly might cause paper jams, dirty
copies or make the inside of the copier dirty.
To prevent these problems from occurring, make
certain that the guides are adjusted correctly for the
loaded paper size.
Width guide
Change the paper drawer’s size plate so that it
matches the new paper size that you loaded.
Size plate
5-8
Adding Toner
When there is only a small amount of toner remaining,
the message to the right appears in the display.
Copies can still be made, but at this time you should
purchase new toner so that you have it on hand when
it is needed. If you press the [ADD TONER] key, a
message appears describing how to add toner.
MEMO:
● When this message appears, aproximately 200 copies
can still be made. However, since this number may vary
depending upon the original, it is recommended that the
toner be replaced as soon as possible.
When the toner has run out and copies can no longer
be made, the message describing how to add toner
appears in the display. Add toner following the
described procedure.
Use only the toner which is intended for use with the
NP6551.
2
Hold the toner bottle with both hands and turn it
up and down a few times as shown in the figure,
to evenly distribute the toner inside the bottle.
REQUEST:
●
●
Only use the toner which has been approved for use
with the NP6551.
Never add more than one bottle of toner.
Loading Paper and
Adding Toner
1
Open the toner supply cover.
5-9
3
Align the protrusions of the toner bottle with the
slots on the toner supply port. Gently press the
toner bottle down onto the toner supply port until
you hear a click.
MEMO:
● The toner bottle is now locked onto the toner supply
port.
4
Press down lightly on the toner bottle with one
hand, and pull out the black shutter of the toner
box slowly as far as it will go.
5
Grip the shutter of the toner bottle, and pull it out
slowly until it stops.
Toner flows into the toner box.
6
Lightly tap the top of the toner bottle to make
sure that all of the toner empties into the toner
box.
7
After the toner bottle shutter has been pushed
back in all the way, push the toner box shutter
back in as far as the
position.
5-10
Make sure you hear a click when the Toner box
shutter has been pushed back in as far as the
position.
NOTICE: ●
When the toner bottle starts to come loose from
the toner supply port, lightly hold it so that it does
not fall over.
REQUEST:
● Never try to remove the toner bottle before you hear
the click, doing so can damage the toner supply
port.
8
Remove the empty toner bottle from the toner
supply port.
WARNING:
● Do not throw used toner bottles into open flames,
as this may ignite the toner remaining inside the
cartridge and result in burns or a fire.
CAUTION:
● When removing used toner bottles from the toner
supply port, remove the bottles carefully to prevent
toner from scattering and entering your eyes or
mouth. If toner enters your eyes or mouth, wash
immediately with cold water and consult a
physician.
Press the [OK] key in the display and the copier
will return to the Standard mode.
MEMO:
● If copying was interrupted to add toner, press the
key again. The copier will make the remaining
Start
copies.
■ Waste toner
Since the copier is equipped with a large-size
waste toner container. Waste toner disposal is
performed by your service representative.
MEMO:
● Waste toner cannot be used again.
Loading Paper and
Adding Toner
9
Close the toner supply cover.
5-11
Clearing Paper Jams
Chapter 6
Clearing Paper Jams
This chapter describes how to clear paper jams from the main unit.
■ Clearing Paper Jams ................................................................6-2
■ Removing Jammed Originals in the RDF ................................. 6-4
• Paper Jam in the Left Feeder Cover ...................................... 6-4
• Paper Jam in the Right Feeder Cover .................................... 6-6
■ Removing Jammed Copy Paper .............................................. 6-9
• Paper Jam in Unit 1 ................................................................6-9
• Paper Jam in Unit 2 ..............................................................6-16
• Paper Jam in Unit 3 ..............................................................6-19
• Paper Jam in the Stack Bypass Area ................................... 6-21
• Paper Jam Behind the Right Door ........................................ 6-22
• Paper Jam in Drawer 1, 2 ..................................................... 6-27
• Paper Jam in Drawer 3, 4 ..................................................... 6-30
• Paper Jam in the Side Paper Deck (option) ......................... 6-31
6-1
Clearing Paper Jams
If a paper jam occurs, a message similar to the one
shown to the right appears in the touch panel display.
The numbers that appear in this message are called
area numbers. Area numbers indicate the locations of
jammed copy paper. Confirm which area numbers
have appeared and how to clear the paper jam. Then,
follow the procedure described in the corresponding
pages to remove the jammed paper.
CAUTION:
●
●
●
●
●
There are some areas inside the copier which are
subject to high voltages and high temperatures.
Take adequate precaution, to avoid burns or
electrical shock.
When removing jammed paper or otherwise
inspecting the inside of the copier, do not allow
necklaces, bracelets or other metal objects to
touch the inside of the copier, as this may result
in burns or electrical shock.
When removing copy paper which has become
jammed from inside the copier, take care not to
allow the toner on the jammed copy paper to
come into contact with your hands or clothing, as
this will dirty, then wash them immediately with
cold water. Washing with warm water sets the
toner and make it impossible to remove toner
stains.
When removing copy paper which has become
jammed from inside the copier, remove the
jammed copy paper gently to prevent the toner on
the paper from scattering and entering your eyes
or mouth. If toner enters your eyes or mouth,
wash immediately with cold water and consult a
physician.
When removing jammed originals or copy paper,
take care not to cut your hands on the edges of
the original or copy paper.
MEMO: ● Display graphics vary depending on the attached
options.
6-2
■
RDF
Clearing Paper Jams
1 Inspect all areas which appeared in the touch panel
display, and remove any jammed paper. See the
appropriate pages for instructions on how to find
and remove jammed paper.
Unit 1
Unit 2
Jammed Copy Paper
Paper Jam in Unit 1 (Fixing Unit)...see p. 6-9
● Paper Jam in Unit 2 (Duplexing Unit)...see p. 6-16
● Paper Jam in Unit 3 (Duplexing Transport Unit)...see
p. 6-19
● Paper Jam in the Stack Bypass Area...see p. 6-21
● Paper Jam Behind the Right Door...see p. 6-22
● Paper Jam in Drawer 1, 2...see p. 6-27
● Paper Jam in Drawer 3, 4...see p. 6-30
● Paper Jam in the Side Paper Deck (option)...see
p. 6-31
●
■
Jammed Originals in the RDF...see p. 6-4
NOTICE:
● If jammed paper tears while removing it, be
sure to remove any remaining pieces from
inside the copier.
Unit 3
Paper drawer
Stack bypass
Upper right door
Lower right door
Paper drawer
2 When the message to the right appears in the touch
panel display, press the
key to make the
remaining copies.
Start
MEMO: ● If the paper jam message remains in the display,
follow the directions in the display and check
again for any jammed paper.
● It is not necessary to enter the copy quantity
again after removing jammed paper. The copier
automatically determines the number of jammed
sheets, and adjusts the copy quantity accordingly.
● If the message to the right appears in the touch
panel display, see the appropriate pages listed
below.
• Side Paper Deck: See p. 8-2.
● Display graphics vary depending on the attached
options.
6-3
Removing Jammed Originals in the RDF
There are two types of paper jams in the feeder.
■ Paper Jam in the Left feeder Cover (See p.6-4.)
■ Paper Jam in the Right feeder Cover (See p.6-6.)
Refer to the appropriate pages and remove any jammed paper.
Paper Jam in the Left feeder Cover
If a paper jam occurs in the left feeder cover, the
message to the right appears in the touch panel display.
Follow the procedure described below to remove any
jammed originals.
1
Open the left feeder cover, and remove all
originals from the original tray.
2
Open the left feeder cover completely, and
remove any jammed originals.
6-4
C
AB
3
Open the inside cover, and remove any jammed
originals.
4
5
6
7
Clearing Paper Jams
After removing all jammed originals, close the
inside cover. Then, close the left feeder cover.
Lift the feeder.
Open the cover located on the bottom-left side
of the RDF, and remove any jammed originals.
If there is an original on the platen glass,
remove it.
Close the feeder.
MEMO:
● Occasionally the paper jam message may remain in
the display. If this happens, follow the directions in
the display and check again for any jammed paper.
6-5
8
9
Rearrange your originals in page order with the
first page on top. Then place your originals in
the original tray again.
Press the
C
AB
key.
Stop
Start
Clear
Start
Paper Jam in the Right feeder Cover
If a paper jam occurs in the right feeder cover, the
message to the right appears in the touch panel display.
Follow the procedure described below and remove any
jammed originals.
1
Open the right feeder cover, and remove all
originals from the original tray.
A BC
6-6
2
Open the left feeder cover completely, and
remove any jammed originals.
3
4
Clearing Paper Jams
After removing all jammed originals, close the
right feeder cover.
Open the feeder.
Open the cover located on the bottom-right side
of the RDF, and remove any jammed originals.
MEMO:
● If the original is difficult to remove, then as shown in
step 2, open the right feeder cover again and
remove the jammed original.
5
If there is an original on the platen glass,
remove it.
6
Close the feeder.
MEMO:
● Occasionally the paper jam message may remain in
the display. If this happens, follow the directions in
the display and check again for any jammed paper.
6-7
7
8
When “Return pg. 1 to the top and press the
Start key.” appears in the touch panel display,
rearrange your originals in page order with the
first page on top. Then, place your originals in
the original tray.
Press the
Start
C
AB
key.
Stop
Clear
Start
6-8
Removing Jammed Copy Paper
Clearing Paper Jams
Paper Jam in Unit 1
A paper jam has occurred in Unit 1. There are two kinds of paper jams that may occur in the
fixing unit.
■
■
A paper jam in the fixing unit (See p. 6-9.)
A paper jam in the space between Unit 1 and another unit. (See p. 6-11.)
Remove the jammed paper following the procedures described below.
■ If a paper jam has occurred in the fixing
unit
The message to the right appears in the display. Follow
the procedure to remove the jammed paper from the unit.
Open the front door.
1
Move the green lever in the direction of the
arrow.
2
While gripping the lever, pull out Unit 1 (fixing
unit).
MEMO:
● If Unit 1 (fixing unit) and Unit 2 (duplexing unit) are
pulled out together, see “If a paper jam has
occurred in the space between units,” on p. 6-11.
6-9
3
Open the left cover.
4
Turn the green knob in the direction of the
arrow, and remove any jammed paper.
CAUTION:
● The parts located in the area around the green knob
are subject to high temperatures. When removing
jammed paper, take care not to touch anything in
this area except the green knob.
5
Close the left cover.
6
Remove any remaining paper from the unit.
7
Push the fixing unit back into the main unit.
6-10
8
Return the green lever to its original position.
9
After removing all the jammed paper, close the
front door.
Clearing Paper Jams
When the lever is pushed in as far as it will go, a
tone will sound.
When “Press the Start key” appears in the touch
panel display, press the
key to make the
remaining copies.
Start
MEMO:
● If the paper jam message remains in the display,
follow the directions in the display and check again
for any jammed paper.
■ If a paper jam has occurred in the space
between units
After pulling out Unit 1 (fixing unit), Unit 2 (duplexing unit)
and Unit 3 (duplexing transport unit) can be pulled out
together. Follow the directions to remove the paper that is
jammed in each unit.
Open the front door.
6-11
1
Move the green lever in the direction of the
arrow.
2
While gripping the lever, pull out Unit 1 (fixing
unit).
Pull out Unit 2 (duplexing unit) and Unit 3
(duplexing transport unit) together.
3
Open the left cover.
4
Remove the jammed paper in the cover.
CAUTION:
● The parts located in the area around the green
knob are subject to high temperatures. When
removing jammed paper, take care not to touch
anything in this area except the green knob.
5
6-12
Close the cover.
7
Following the directions in the display, turn the
knob on the duplexing unit in the direction of the
arrows.
Clearing Paper Jams
6
Remove the paper remaining in the fixing unit.
MEMO:
● Perform this procedure when paper is jammed
between the fixing unit and the duplexing unit. Be
sure to follow the directions in the display.
8
Push the fixing unit back into the main unit.
9
Return the green lever to its original position.
When the lever is pushed in as far as it will go, a
tone will sound.
6-13
10
Remove any paper remaining in the duplexing
unit.
11
Push down the left cover as shown in the figure,
and remove any jammed paper.
Push the duplexing unit back into the main unit.
12 When the unit is pushed in as far as it will go, a
tone will sound.
Open the duplexing transport unit and remove
13 any jammed paper in it.
6-14
14
Push the duplexing transport unit back into the
main unit.
15
Clearing Paper Jams
When the unit is pushed in as far as it will go, a
tone will sound.
After removing all jammed paper, close the front
door.
When “Press the Start key” appears in the touch
panel display, press the
key to make the
remaining copies.
Start
MEMO:
● If the paper jam message remains in the display,
follow the directions in the display and check again
for any jammed paper.
6-15
Paper Jam in Unit 2
A paper jam has occurred in the unit (duplexing unit)
which appears in the display. Follow the procedures
described below to remove the jammed paper.
Open the front door.
1
6-16
Pull out the duplexing unit.
3
Push down the left cover as shown in the figure,
and remove the jammed paper.
4
Turn the knob on the duplexing transport unit in
the direction of the arrow, until the paper sticks
out slightly from the right of the unit.
Clearing Paper Jams
2
Remove any jammed paper remaining in the
unit.
Duplexing transport unit knob
5
Push in the top part of the duplexing unit.
6-17
6
Open the cover as shown in the figure, and
remove the jammed paper.
7
Close the cover and push the unit back in.
8
After removing all the jammed paper, close the
front door.
When the unit is pushed in as far as it will go, a
tone sounds.
When “Press the Start key” appears in the touch
panel display, press the
key to make the
remaining copies.
Start
MEMO:
6-18
● If the paper jam message remains in the display,
follow the directions in the display and check again
for any jammed paper.
Paper Jam in Unit 3
Clearing Paper Jams
A paper jam has occurred in the unit (duplexing transport
unit) which appears in the display. Follow the procedures
described below to remove the jammed paper.
Open the front door.
1
Pull out the duplexing transport unit.
2
Open the cover as shown in the figure, and
remove the jammed paper.
6-19
3
Close the cover and push the duplexing
transport unit back into the main unit.
When the unit is pushed in as far as it will go, a
tone sounds.
4
After removing all the jammed paper, close the
front door.
When “Press the Start key” appears in the touch
panel display, press the
key to make the
remaining copies.
Start
MEMO:
6-20
● If the paper jam message remains in the display,
follow the directions in the display and check again
for any jammed paper.
Paper Jam in the Stack Bypass Area
1
Open the cover of the stack bypass area.
2
Remove any jammed paper.
3
Close the cover of the stack bypass area.
Clearing Paper Jams
A paper jam has occurred in the stack bypass area.
Follow the procedures described below to remove the
jammed paper.
6-21
When “Press the Start key” appears in the touch
panel display, press the
key to make the
remaining copies.
Start
MEMO:
● If the paper jam message remains in the display,
follow the directions in the display and check again
for any jammed paper.
Paper Jam Behind the Right Door
A paper jam has occurred behind the right door.
MEMO:
● There are two types of paper jams behind the right
door, a jam behind the upper right door, and a jam
behind the lower right door.
Follow the procedures described below to remove the
jammed paper.
If the copier is equipped with the optional Side
Paper Deck, push down the Release Lever to
remove it from the copier.
Release Lever
6-22
■ Upper right door
Clearing Paper Jams
1
Open the right door.
■ Upper right door : When equipped with the
optional Side Paper Deck
■ Lower right door
■ Lower right door : When equipped with the
optional Side Paper Deck
6-23
2
Remove the jammed paper.
■ Upper right door
■ Lower right door
3
Close the right door.
■ Upper right door
■ Lower right door
6-24
Clearing Paper Jams
If you removed the optional side paper deck,
return it to the original position.
4
Follow the directions in the display. If it indicates
paper drawer 3 or 4, press the open button.
5
Pull out the indicated paper drawer and remove
any jammed paper.
6-25
6
Return the paper drawer to its original position.
When “Press the Start key” appears in the touch
panel display, press the
key to make the
remaining copies.
Start
MEMO:
6-26
● If the paper jam message remains in the display,
follow the directions in the display and check again
for any jammed paper.
Paper Jam in Drawer 1, 2
A paper jam has occurred in Drawer 1 or 2.
There are two ways to clear paper jams that occur in Drawer 1 or 2.
Clearing paper jams by pullling out Drawer 1 or 2 (See p. 6-27.)
Clearing paper jams by pulling out the duplexing transport unit (See p. 6-28.)
Clearing Paper Jams
■
■
Follow the procedures described below to remove the jammed paper.
■ Clearing paper jams by pulling out Drawer
1 or 2
The message to the right appears in the touch panel
display.
Follow the procedures described below to remove
jammed paper from Drawer 1 or 2.
1
Pull out the paper drawer indicated in the
display.
2
Remove the jammed paper.
3
Return the paper drawer to its original position.
6-27
When “Press the Start key” appears in the touch
key to make the
panel display, press the
remaining copies.
Start
MEMO:
● If the paper jam message remains in the display,
follow the directions in the display and check again
for any jammed paper.
■ Clearing paper jams by pulling out the
duplexing transport unit
The message to the right appears in the display.
Follow the procedures described below to remove the
paper jammed in the duplexing transport unit.
Open the front door.
1
Pull out the duplexing transport unit.
2
Remove the jammed paper from the bottom of
the unit as shown in the figure.
6-28
4
Follow the directions in the display, pull out the
indicated paper drawer and remove any jammed
paper.
5
Return the paper drawer to its original position.
Clearing Paper Jams
3
Return the duplexing transport unit to its original
position.
When “Press the Start key” appears in the touch
key to make the
panel display, press the
remaining copies.
Start
MEMO:
● If the paper jam message remains in the display,
follow the directions in the display and check again
for any jammed paper.
6-29
Paper Jam in Drawer 3, 4
A paper jam has occurred in Drawer 3, 4.
The paper drawer with the jam is shown in the display to
the right. Follow the procedures described below to
remove the jammed paper.
1
Press the open button of the paper drawer
indicated in the display.
Open button
2
Grip the handle on the front of the paper drawer.
Pull out the paper drawer until it stops.
3
Remove the jammed paper.
6-30
Clearing Paper Jams
4
Return the paper drawer to its original position.
When “Press the Start key” appears in the touch
panel display, press the
key to make the
remaining copies.
Start
MEMO:
● If the paper jam message remains in the display,
follow the directions in the display and check again
for any jammed paper.
Paper Jam in the Side Paper Deck (option)
A paper jam has occurred in the Side Paper Deck
(option).
MEMO:
● There are two types of paper jams in the Side
Paper Deck.
• Paper Jam in the Paper Deck
• Paper Jam in the top cover
Follow the procedures described below to remove the
jammed paper.
1
Pull out the paper deck or open the top cover
indicated in the display.
■ Paper deck
Press the open button to open the paper deck.
Open button
■ Top cover
Grip the lever to open the top cover.
6-31
2
Remove the jammed paper.
■ Paper deck
■ Top cover
3
Return the paper deck or the top cover to its
original position.
■ Paper deck
CAUTION:
● Take care to protect your fingers when returning the
paper deck.
■ Top cover
When “Press the Start key” appears in the touch
key to make the
panel display, press the
remaining copies.
Start
MEMO:
6-32
● If the paper jam message remains in the display,
follow the directions in the display and check again
for any jammed paper.
Chapter 7
Maintenance and Troubleshooting
This chapter describes the procedures to be followed when a self-diagnostic message or
service-call message appears in the touch panel display. It also describes how to perform
routine cleaning of the copier.
Maintenance and
Troubleshooting
■ Self-diagnostic (Error) Messages ............................................. 7-2
■ Service-call Message ...............................................................7-4
■ Routine Cleaning ......................................................................7-5
■ Consumables/Accessories ....................................................... 7-6
• Consumables ..........................................................................7-6
• Accessories .............................................................................7-6
■ NP6551 Main Specifications .................................................... 7-7
• Main Unit .................................................................................7-7
• RDF (standard equipment) ..................................................... 7-8
7-1
Self-diagnostic (Error) Messages
Self-diagnostic (error) messages appear in the touch panel display at the following times:
■ When copying cannot be performed because of an operational error.
■ When you need to make a judgment or take some action during the copying process.
If a self-diagnostic message appears, follow the instructions in the touch panel display.
Messages which require further explanation are described below.
Message/Cause
Remedy
Load LTR-size paper.
A paper drawer loaded with the most
appropriate paper size is not inserted in
the copier.(Appears when using Auto
Paper Selection.)
Load the indicated paper size in a paper
drawer.
● If you press the
key while this
message appears, copying is performed
with the currently selected paper size.
Start
Part of the image will not be
reproduced on the copy.
The entire original image does not fit on
the selected paper size, even if reduced
with the minimum copy ratio (49%).
(Appears when Auto Zoom is set.)
Program the copy settings again.
key while this
● If you press the
Start
message appears, part of the original
image is cut off.
Return pg. 1 to the top and
press the Start key.
Copying was stopped due to a problem
with the RDF.
Arrange the originals in page order with
the first page on top. Place the originals
back in the RDF original tray, then press
key.
the
Start
Remove paper from the sorter
and press the Start key again.
Copies from the previous copy job
remain in the Sorter.
Remove the copies from all of the bins,
then press the
key.
Start
7-2
The Side Paper Deck (Option) is out of order.
Remedy
Contact your service representative.
(You can use paper drawers 1, 2, 3, 4.)
Maintenance and
Troubleshooting
Message/Cause
The feeder is out of order.
The RDF is out of order.
Contact your service representative.
(You can use the platen glass to perform
copying.)
Two-sided copies cannot be
made with this mode.
Overlay copies cannot be
made with this paper size.
The copy paper size that you selected
cannot be used to make copies in the
set mode (e.g., STMTR in the
Two-sided mode or STMTR in the
Overlay mode.)
Select a different paper size, or cancel
the mode and program the copy settings
again.
Place 2 or more originals.
Because 1→2-sided copying is set as
the standard mode, copying is not
possible if only one sheet of paper has
been placed in the RDF.
Either place two or more originals in the
RDF or select the One-sided mode
before copying.
Replace the originals and resume
copying.
Place the 2nd original and press
the Start key again.
Copying of one side is completed, and
the copy paper is stored in the
duplexing unit.
• Load the next original and press the
Start key.
• If this message is displayed after the
last original has been copied, remove
the paper from the duplexing unit.
7-3
Service-call Message
If a malfunction occurs and the copier will not operate
normally, the message to the right (the service call
message) appears in the touch panel display.
If this message appears, follow the procedure
described below.
Press the power switch to the OFF position, and
then back to the ON position.
If the copier still does not operate normally,
press the power switch to the OFF position and
unplug the copier. Then, contact your service
representative.
7-4
Routine Cleaning
Clean the following parts once a week or whenever copies appear dirty.
WARNING:
● When cleaning the copier, first turn OFF the power switch and unplug the power plug. Failure to
observe these items may result in fire or electrical shock.
CAUTION:
●Unplug the power plug from the outlet at least once a year, and clean the area around the base of
the plug's metal pins to ensure all dust is removed. If dust accumulates in this area, it may result
in a fire.
■ Platen glass
Clean the platen glass with a cloth dampened with water
or a mild cleaning agent, then wipe with a dry cloth.
■ Bottom of the RDF (Feeding belt)
Move the feeding belt with your hand as you wipe it with
a cloth dampened with water or a mild cleaning agent,
then wipe with a dry cloth.
MEMO:
● If the RDF’s feeding roller becomes dirtied, your
originals may have black streaks or appear dirty
after feeding them in the the RDF. In this case,
perform Feeder Cleaning. Also perform Feeder
Cleaning if feeding problems are frequently
occurring in the RDF. (See “Additional Functions /
Feeder Cleaning,” on p. 4-21.)
7-5
Maintenance and
Troubleshooting
● Clean the copier using a firmly wrung-out cloth dampened with a mild cleansing detergent. Do
not use alcohol, benzene, paint thinner or other inflammable substances. If inflammable
substances come into contact with a high-voltage area inside the copier, this may result in fire or
electrical shock.
Consumables/Accessories
The following consumables and accessories are available from Canon for the NP6551. For
details, consult your service representative.
WARNING:
●
●
Do not store toner bottles or copy paper in places exposed to open flames, as this may cause the
toner or copy paper to ignite resulting in burns or fire.
Keep toner, waste toner, oil and other consumables out of the reach of the small children. If
these items are ingested, consult a physician immediately.
Consumables
■ Copy stock
In addition to plain paper (11"x 17", LGL, LTR, STMT
size), transparencies, labels and other types of copy
stock are available. For details, consult your service
representative.
NOTICE:
● For high-quality copies, use paper recommended
by Canon.
● To prevent moisture build up, store any remaining
copy paper tightly wrapped in its original package.
■ NP6551 Black Toner
When “Add toner” appears in the touch panel display,
add toner which has been approved for use with this
copier. Only black toner can be used with this copier.
Use the NPG-14A Toner.
WARNING:
● Do not throw toner bottles into open flames, as this
may cause the toner to ignite and result in burns or a
fire.
CAUTION:
● Store toner in a cool location away from direct sunlight.
The recommended storage conditions are as follows:
temperature below 86°F, and humidity below 80%.
It is recommended that you order toner and copy stock
from your service representative before running out of them.
Accessories
■ Paper drawers
There are two types of paper drawers: adjustable and
non- adjustable. For instructions on how to set adjustable
paper drawers for copy paper sizes, see p. 5-6.
You can set paper drawers for the following sizes:
11" x 17", LGL, LTR, LTRR, STMT, STMTR.
7-6
NP6551 Main Specifications
Main Unit
Canon NP6551
Type:
Console
Platen:
Stationary
Photoconductive material:
Amorphous Silicon
Copying system:
Electrostatic transfer system
Developing system:
Toner projection system
Fixing system:
Heat roller system
Acceptable copy stock:
Paper drawer:17 to 24-lb bond (64 to 90 g/m2); plain paper
Stack bypass:17-lb bond to 110-lb index (64 to 200 g/m2); plain paper
(However, Keep in mind that the paper weight that can be used varies
depending on the type of the Sorter being used.
SADF tray : transparencies and labels
Acceptable originals:
Sheets, books, and three-dimensional objects (up to 4.4-lb or 2 kg)
Maximum original size:
11" x 17"
Copy sizes:
Paper drawer: STMT, STMTR, LTR, LTRR, LGL, and 11" x 17"
Stack bypass: 4 1/8" x 5 7/8" (horizontal placement) to 11" x 17"
Non-image areas:
Leading edge: 1/8" (4 mm)
Left and right side: 1/16" (3 mm)
Trailing edge: 1/16" (2 mm)
Warm-up time:
Approx. 5 minutes (at temp. of 68°F)
First copy time:
Max. 3.0 seconds
[LTR size, direct copying, Manual Exposure Control, Drawer 1 (top drawer)
selected 1→1-sided mode]
Direct (100%)
LTR
50 cpm
60 cpm (Accelerated mode)
LTRR
41 cpm
11"X 17"
25 cpm
LGL
34 cpm
STMT
50 cpm
STMTR
50 cpm
Reduction
11"x 17" → STMT 43 cpm (50%)
11"x 17" → LTR
38 cpm (64%)
11"x 17" → LGL
33 cpm (73%)
11"x 15" → LTR
39 cpm (73%)
LGL → LTR
39 cpm (78%)
Enlargement
LGL → 11"x 17"
25 cpm (121%)
LTR → 11"x 17"
25 cpm (129%)
STMT → 11"x 17" 24 cpm (200%)
Copy speed:
Magnification:
Direct
Reduction
Enlargement
Zoom
Maintenance and
Troubleshooting
Name:
1:1.000
1:0.500 (11" x 17"→STMT)
1:0.647 (11" x 17"→LTR)
1:0.733 (11" x 17"→LGL/11" x 15"→LTR)
1:0.786 (LGL→LTR)
1:1.214 (LGL→11" x 17")
1:1.294 (LTR→11" x 17")
1:2.000 (STMT→11" x 17")
1:0.490-1:2.040
7-7
Paper feeding system:
Drawer 1, 2 (1,500 sheets x 2)
Drawer 3, 4 (550 sheets x 2)
Stack bypass (50 sheets; stack approx. 1/4" high)
Multiple copies:
1-999
Power source:
120 V, 60 Hz
Max. power consumption:
Dimensions (H x W x D):
Less than 1.5 kW
46" x 25 3/8" x 28 1/2"
(1169 x 643 x 725 mm)
Installation Space (W x D):
40 5/8" x 28 1/2"
(1030 x 725 mm)
50 3/8" x 28 1/2" (1280 x 725 mm)
[With copy tray (option) attached and stack bypass auxiliary tray extended]
Weight:
Approx. 462 lb (210 kg)
RDF (Standard equipment)
Originals:
STMT to 11" x 17" size (STMT-size cannot be placed horizontally.)
Original tray: LTR 15-lb to 110-lb bond (52 to 200 g/m2)
11" x 17", LGL, LTRR, or STMT
15-lb to 32-lb bond (52 to 128 g/m2)
SADF tray: 11" x 17" to STMT
11-lb to 110-lb bond (38 to 200 g/m2)
Max. power consumption:
120 W
Original tray capacity:
Original tray: 11" x 17" or LGL
50 sheets (20-lb bond or 80g/m2)
LTR, LTRR, or STMT
100 sheets (20-lb bond or 80g/m2)
SADF tray: 11" x 17" to STMT
1 sheet
Original replacement speed:
60 sheets/minute (LTR, horizontally placed)
Power supply:
24 V (supplied from main unit)
Dimensions (H x W x D):
6 7/8" x 25 3/8" x 21 1/4"
(174 x 643 x 539 mm)
Weight:
Approx. 56.3 lb (25.5 kg)
These specifications are subject to change without notice.
7-8
Chapter 8
Optional Accessories:
Functions and Method of Use
This chapter describes the optional accessories which can be attached to the NP6551,
their functions, and method of use.
■ Paper Deck-A1 .........................................................................8-2
• Parts and Their Functions ....................................................... 8-2
• Loading Paper .........................................................................8-3
• Removing Jammed Copy Paper ............................................. 8-3
• Main Specifications .................................................................8-3
■ Control Card V..........................................................................8-4
Option Accessory:
Functions and Method of Use
■ ID Mode ........................................................................................ i
• Storing ID Numbers .................................................................... i
• Canceling the ID Mode: Clearing All ID Numbers ..................... ii
• Copy Totals (Check Totals) ...................................................... iv
• Copy Totals (Clear All Totals) ................................................... iv
■ Index
8-1
Paper Deck-A1
If you install the optional Paper Deck-A1 in the copier, one additional paper size can be used
as well as the paper sizes of the drawers provided as standard.
■ Maximum 3500 sheets (20 lb-bond) can be stacked in the paper deck.
Parts and Their Functions
Top Cover
Open to check for paper jam.
(see p. 6-31.)
Lever
Open button
Press to load copy paper
(see p. 5-6.) or
to check for paper jam.
(see p. 6-31.)
Release Lever
Push down to remove
the paper deck from the copier.
(see p.6-22.)
8-2
Paper Deck
Max. 3500 copy sheets (20-lb bond) can be stacked.
(see p.5-6.)
Loading Paper
When the paper deck is out of paper, the display to the
right appears. Load copy paper. (See “Loading Paper in
the Side Paper Deck (Option),” on p. 5-5.)
NOTICE:
● The paper size for the Side Paper Deck can be
set for LTR-size paper. The size must be
changed by your service representative.
Removing Jammed Copy Paper
Option Accessory:
Functions and Method of Use
If a paper jam has occurred, the message will appear in
the touch panel display to indicate the jamming location
and how to remove jammed paper. Follow the directions
in the display to remove the jammed paper. (See “Paper
Jam in the Side Paper Deck (Option),” on p. 6-31.)
Main Specifications
Name:
Paper Deck-A1
Paper feeding system:
3500 sheets (20-lb bond or 80 g/m2) x 1
Dimensions (H x W x D ):
26 3/4" x 13" x 23" (680 x 329 x 583 mm)
Installation location (W x D):
37 1/2" x 28 1/2" (954 x 725 mm)
(When equipped with the Paper Deck-A1)
Weight:
Approx. 73.9-lb (33.5 kg)
These specifications are subject to change without notice.
8-3
Control Card V
The Control Card V enables you to manage copier usage more efficiently. The Control Card
V can monitor the copy quantity made by each card holder as well as all card holders, and
prevent unauthorized use of the copier.
■
Checking the Control Card
If the message to the right appears in the touch
panel display, make sure that a Control Card is
correctly inserted.
If a Control Card is correctly inserted, make sure
that the inserted Control Card is not a damaged
card, a card on which the copy total has reached
the maximum limit, or a card to which access
has been denied.
For information on how to operate the Control
Card V, see the “Control Card V Instruction
Manual.”
If this message does not disappear after
correctly inserting a valid Control Card, contact
your service representative.
■
8-4
Control Card Printer-A1
Connect the Controll Card Printer-A1 to the
Control Card V and records of copier usage can
be produced for administrative purposes such as
cost-per-copy, cost-per-user, billing and
inventory.
✂
ID Mode
The pages regarding the use and operation of the ID mode, should be cut out of the
manual by the copier supervisor or administrator.
✂
The ID mode prevents unauthorized use of the copier. In this mode, only operators with a
six-digit ID number can make copies. You can store up to 300 ID numbers in the copier’s
memory and keep track of the copy quantity made under each ID number. You can view the
total for each ID number in the touch panel display.
Storing ID Numbers
✂
1
Press the
order.
Additional Functions
,
ID
,
Stop
, and
Additional Functions
keys in that
Display Contrast
Reset
Energy Saver
Stop
Guide
Additional Functions
Clear
✂
Start
3
Highlight the ID number to be stored.
✂
2
After pressing the [STORE USER ID#] key,
press the [OK] key.
✂
■ Use the [▼] and [▲] keys.
Press the [▲] or [▼] key to scroll the display to
the department that you want to store.
■ Highlight the department number
✂
1. Press the [DEPT#] key.
2. Enter a four digit department number with the
Number keys ( 1 - 0 ).
3. Press the [ID#] key.
●
The ID number for the department appears at the top of the
display.
✂
i
✂
MEMO:
0
)
● If you make a mistake entering an ID number, press
Clear
the C key. Then, enter the ID number again.
● You cannot enter two identical ID numbers.
● If you enter and store “000000” in place of a current
ID number, that ID number is canceled.
● You can store up to 300 ID numbers.
Press the [OK] key.
If you want to store another ID number, repeat
steps 3 to 5.
✂
After entering all the ID numbers to be stored,
press the ID key. The display returns to the ID
entry screen.
✂
6
-
✂
5
1
✂
4
Enter a ID number with the Number (
keys.
Guide
Additional Functions
Clear
Interrupt
✂
Canceling the ID Mode: Clearing All ID Numbers
1
Press the
order.
Additional Functions
,
ID
,
Stop
, and
Additional Functions
keys in that
Display Contrast
Reset
✂
If you clear all the ID numbers then you can make copies without having to enter an ID
number.
Energy Saver
Stop
Guide
✂
Additional Functions
Clear
Start
✂
ii
✂
✂
2
Press the [STORE USER ID#] key, then press
the [OK] key.
✂
3
Press the [CLEAR ALL ID#s] key.
✂
✂
4
Press the [OK] key.
MEMO:
● If you want to stop all the ID#s from being cleared,
press the [C] key.
✂
All the ID#s are cleared.
If you press the [OK] key, you will return to the
Standard mode.
✂
MEMO:
● Storing all the ID#s under “000000” will also clear all
the ID#s.
✂
✂
iii
✂
✂
Copy Totals (Check Totals)
In the ID mode, the copier keeps track of the copy quantity made under each ID number (up to
999,999). You can view the copy total for each ID number in the touch panel display.
Additional Functions
,
ID
,
Stop
, and
Additional Functions
keys in that
Display Contrast
Reset
Energy Saver
✂
1
Press the
order.
Stop
Guide
Additional Functions
Clear
After pressing the [COPY TOTALS] key, press
the [OK] key.
3
Press the [▲] or [▼] key to check the copy totals
for a department. The copy totals can also be
displayed by entering the department number.
Press the Number keys ( 1 - 0 ) for a four digit
department number and it appears at the top of
the display. When you finish checking the copy
totals, press the [OK] key.
✂
2
✂
Start
✂
✂
Copy Totals (Clear All Totals)
The following procedure describes how to clear the copy totals for all ID numbers to zero.
Additional Functions
,
ID
,
Stop
, and
Additional Functions
keys in that
Display Contrast
Reset
Energy Saver
✂
1
Press the
order.
Stop
Guide
Additional Functions
Clear
✂
Start
iv
✂
✂
3
Press the [CLEAR ALL TOTALS] key.
4
Press the [OK] key.
✂
2
After pressing the [COPY TOTALS] key, press
the [OK] key.
✂
✂
MEMO:
● To cancel clearing all totals, press the [C] key.
✂
The copy totals for all ID numbers are cleared to
zero. If you press the [OK] key the display
requesting the entry of an ID number appears.
✂
MEMO:
● You cannot clear the copy totals for ID numbers
individually.
✂
✂
v
✂
Index
A
Accelerated mode ----------------------------------------------------------------- 1-26, 2-9
Accessories --------------------------------------------------------------------------------- 7-6
Adding toner --------------------------------------------------------------------------------- 5-9
Additional functions ----------------------------------------------------------------------- 4-2
Additional Functions key --------------------------------------------------------------- 1-16
Adjusting a paper drawer to hold a different paper size ------------------------ 5-7
Adjusting the Contrast of the Touch Panel Display ---------------------------- 1-23
Adjusting the copy exposure ---------------------------------------------------------- 2-21
Adjustment/Cleaning -------------------------------------------------------------------- 4-19
AE (Automatic Exposure Control) --------------------------------------------------- 2-21
Audible tones ----------------------------------------------------------------------------- 4-11
Auto Clear function ---------------------------------------------------------------------- 2-12
Auto Clear Time -------------------------------------------------------------------------- 4-16
Auto Drawer Switching (ADS) -------------------------------------------------------- 2-12
Auto Paper Selection (APS) ---------------------------------------------------------- 2-22
Auto Energy Save function ------------------------------------------------------------ 2-14
Auto Power-off Time -------------------------------------------------------------------- 4-17
Auto Sort ------------------------------------------------------------------------------------- 4-6
Auto Start -----------------------------------------------------------------------------------2-27
Auto Zoom ----------------------------------------------------------------------------------2-48
B
Binding Erase ------------------------------------------------------------------------------- 3-7
Book Frame Erase ------------------------------------------------------------------------ 3-6
Book Overlay -------------------------------------------------------------------------------3-37
Book → 2-sided -------------------------------------------------------------------------- 2-56
C
Cancel [C] key ---------------------------------------------------------------------------- 1-23
Chapterization --------------------------------------------------------------------- 3-15, 3-17
Clear key ------------------------------------------------------------------------------------1-16
Clearing paper jams
Main unit ----------------------------------------------------------------------------------- 6-7
Consumables ------------------------------------------------------------------------------- 7-6
Control card printer A1 ------------------------------------------------------------------- 8-4
Control Card V ------------------------------------------------------------------------------ 8-4
Control panel -------------------------------------------------------------------------------1-16
Copy exposure --------------------------------------------------------------------------- 2-21
Copy job -------------------------------------------------------------------------------------3-42
Recalling a -------------------------------------------------------------------------------3-44
Storing a ----------------------------------------------------------------------------------3-42
Copy output (to the copy tray,option) ---------------------------------------------- 2-25
Copy output (to the Stapler Sorter) ------------------------------------------------- 2-26
Copy quantity
Changing the --------------------------------------------------------------------------- 2-20
Entering the ----------------------------------------------------------------------------- 2-20
Copy stock ----------------------------------------------------------------------------------- 7-6
Copy totals (Check totals) ----------------------------------------------------------------- iv
Copy totals (Clear all totals) -------------------------------------------------------------- iv
Cover/Sheet Insertion mode ---------------------------------------------------------- 3-14
Custom settings ---------------------------------------------------------------------------- 4-5
D
Daily timer settings ---------------------------------------------------------------------- 4-18
Day/Time settings ----------------------------------------------------------------------- 4-18
Different Size Original mode ---------------------------------------------------------- 3-39
DONE key ----------------------------------------------------------------------------------1-23
Drawer Eligibility for APS/ADS --------------------------------------------------------- 4-8
E
Energy Saver mode --------------------------------------------------------------------- 2-13
Energy Saver adjustment -------------------------------------------------------------- 4-13
Error messages ---------------------------------------------------------------------------- 7-2
F
Feeder cleaning -------------------------------------------------------------------------- 4-21
Fit Image mode --------------------------------------------------------------------------- 2-42
Adjusting the ---------------------------------------------------------------------------- 4-12
Frame Erase mode ------------------------------------------------------------------------ 3-2
Front Access Sorter Unloading -------------------------------------------------------- 4-7
G
Group mode --------------------------------------------------------------------------------2-21
Guide function ---------------------------------------------------------------------------- 2-12
H
Handling precautions ------------------------------------------------------------------- 1-12
High Speed 1 → 2-sided mode ------------------------------------------------------- 4-7
I
ID mode ------------------------------------------------------------------------------------------ i
ID number -----------------------------------------------------------------------------------2-38
Canceling the -------------------------------------------------------------------------------- ii
Entering the ----------------------------------------------------------------------------- 2-38
Storing the ------------------------------------------------------------------------------------- i
Image Combination mode ------------------------------------------------------------- 3-18
Image Separation mode --------------------------------------------------------------- 3-25
Installation precautions ----------------------------------------------------------------- 1-10
Inch Entry -----------------------------------------------------------------------------------4-10
Interrupt mode ---------------------------------------------------------------------------- 2-32
J
Job Duration Display -------------------------------------------------------------------- 4-10
L
Loading paper ------------------------------------------------------------------------------ 5-2
Low-Power Mode Time ----------------------------------------------------------------- 4-16
M
Making copies ------------------------------------------------------------------------------ 2-4
Manual Exposure Control ------------------------------------------------------------- 2-21
Manual feed copying -------------------------------------------------------------------- 2-29
Manual Paper Selection --------------------------------------------------------------- 2-24
Margin mode -------------------------------------------------------------------------------- 3-9
Mode Memory ---------------------------------------------------------------------------- 3-42
Recalling settings from the --------------------------------------------------------- 3-44
Storing settings in the ---------------------------------------------------------------- 3-42
N
Non-sort mode ---------------------------------------------------------------------------- 2-26
Number keys -------------------------------------------------------------------------------1-22
O
OK key ---------------------------------------------------------------------------------------1-23
One-sided mode ------------------------------------------------------------------------- 2-58
1 → 2-sided copies ---------------------------------------------------------------------- 2-51
Original Frame Erase --------------------------------------------------------------------- 3-5
Original placement ---------------------------------------------------------------------- 2-16
in the RDF --------------------------------------------------------------------------------2-18
on the platen glass -------------------------------------------------------------------- 2-17
Orientation of originals --------------------------------------------------------------- 2-16
Overlay mode ----------------------------------------------------------------------------- 3-35
P
Paper Deck-A1 ----------------------------------------------------------------------------- 8-2
Paper selection --------------------------------------------------------------------------- 2-22
Photo mode --------------------------------------------------------------------------------3-41
Power supply ------------------------------------------------------------------------ 1-11, 2-2
Preset Copy Ratios ---------------------------------------------------------------------- 2-40
R
RDF (Recirculating Document Feeder) -------------------------------------------- 1-24
Removing jammed originals in the RDF --------------------------------------------- 6-4
Reset key -----------------------------------------------------------------------------------1-22
Routine cleaning --------------------------------------------------------------------------- 7-5
S
Self-diagnostic (error) messages ------------------------------------------------------ 7-2
Service-call message --------------------------------------------------------------------- 7-4
Sheet Frame Erase ----------------------------------------------------------------------- 3-4
Sheet Overlay ----------------------------------------------------------------------------- 3-36
Sort mode -----------------------------------------------------------------------------------2-26
Stack bypass -------------------------------------------------------------------------------2-29
Stack bypass size setting ---------------------------------------------------------------- 4-9
Standard copy settings ------------------------------------------------------------------- 2-2
Change the -------------------------------------------------------------------------------4-13
Initializing the --------------------------------------------------------------------------- 4-14
Storing the --------------------------------------------------------------------------------4-14
Standard Key Settings ------------------------------------------------------------------- 4-3
Staple-sort mode ------------------------------------------------------------------------- 2-26
T
Timer settings ----------------------------------------------------------------------------Touch panel display --------------------------------------------------------------------Transparency Interleaving mode ---------------------------------------------------Two-page Separation mode ---------------------------------------------------------Two-sided mode ------------------------------------------------------------------------2 → 1-sided copies ---------------------------------------------------------------------2 → 2-sided copies ----------------------------------------------------------------------
4-15
1-17
3-30
3-33
2-50
2-55
2-53
U
Using the RDF ------------------------------------------------------------------------------ 2-7
Using the stack bypass (manual feed copying) --------------------------------- 2-29
W
Wire cleaning ----------------------------------------------------------------------------- 4-22
Z
Zoom -----------------------------------------------------------------------------------------2-43
Zoom Fine Adjustment ----------------------------------------------------------------- 4-20
Zoom program ---------------------------------------------------------------------------- 2-45