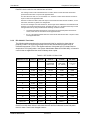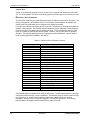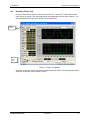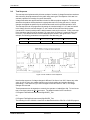
1
Revision P
June 2007
Copyright © 1997-2007
By California Instruments.
All rights reserved.
P/N 5004-984
Compliance Test System
User Manual
CTS 3.0
TEL: +1 (858) 677-9040
FAX: +1 (858) 677-0940
Email: [email protected]
Web Site: http://www.calinst.com
Compliance Test System 3.0
User Manual
SAFETY SUMMARY
These power system components contain high voltage and current circuits that are potentially
lethal. The following safety guidelines must be followed when operating or servicing this
equipment. These guidelines are not a substitute for vigilance and common sense. California
Instruments assumes no liability for the customer's failure to comply with these requirements.
APPLYING POWER AND GROUNDING
Verify the correct voltage is applied to the equipment.
Verify that the input power cord to the PACS-X unit is plugged into a properly grounded utility
outlet.
Verify that the input power line to the AC power source used is connected to a properly
grounded utility outlet.
FUSES
Use only fuses of the specified current, voltage, and protection speed.
Do not short out the fuse holder or use a repaired fuse.
DO NOT OPERATE IN A VOLATILE ATMOSPHERE
Do not operate the system in the presence of flammable gases or fumes.
DO NOT TOUCH ENERGIZED CIRCUITS
Disconnect power cables before servicing this equipment. Even with the power cable disconnected,
high voltage can still exist on some circuits. Discharge these voltages before servicing. Only qualified
service personnel may remove covers, replace components or make adjustments.
DO NOT SERVICE ALONE
Do not remove covers, replace components, or make adjustments unless another person, who can
administer first aid, is present.
DO NOT EXCEED INPUT RATINGS
Do not exceed the rated input voltage or frequency. Additional hazards may be introduced because of
component failure or improper operation.
DO NOT MODIFY INSTRUMENT OR SUBSTITUTE PARTS
Do not modify these instruments or substitute parts. Additional hazards may be introduced because of
component failure or improper operation.
MOVING THE POWER SOURCE
When moving the power source, observe the following:
1. Remove all AC power to system components.
2. Use two people to prevent injury.
2
Revision N
California Instruments
User Manual
Compliance Test System 3.0
CTS 3.0 Software License
Your CTS Test System was shipped with one copy of the CTS 3.0 software. This software model number CIC 629- is owned by California Instruments and is protected by United States
copyright laws and international treaty provisions. Therefore, you must treat the software like any
other copyrighted material.
Software Revisions
Revision codes in the Help About screen of the CTS 3.0 software indicate the current revision.
Minor changes to the software such as bug fixes usually do not require a change to the manual.
Therefore, the revision number of the software you received with the CTS system may be higher
than the software revision number shown below. In this case, the information in the manual still
applies.
Software changes that require a manual change will be accompanied either by a new edition of
the manual or an errata sheet documenting the changes.
This manual applies to software revision 3.2.0.0 (revision 3.2.0.0 includes the higher speed A/D
M Series card from National Instruments and from Exacq Technologies). If you are using a
software revision less than 3.2.0.0, contact [email protected] for upgrade information. The
CTS software revisions can be shown by selecting the Help, About screen.
Printing History
The manual printing date indicates the current edition. The printing date changes with each new
edition or update. Update packets or change sheets may be issued between editions to correct or
add information. Minor corrections incorporated at reprint do not cause a new edition.
June 2007
Revision P
Trademarks
Windows 2000™, Windows XP™, Windows Vista and MS Excel™ are registered trademarks of
Microsoft Corporation.
Contacting California Instruments
To contact California Instruments, use any of the communication channels listed here:
Mail:
California Instruments
9689 Towne Centre Drive
San Diego, CA 92121-1964
USA
Phone:
858 677 9040
7:00 AM - 4:00 PM Pacific Standard Time
Voice Mail 24 hours
Fax:
858 677-0940
Email:
[email protected]
Web site:
www.calinst.com
California Instruments
Revision N
3
Compliance Test System 3.0
User Manual
WARRANTY INFORMATION
CALIFORNIA INSTRUMENTS CORPORATION warrants each instrument manufactured by them
to be free from defects in material and workmanship for a period of one year from the date of
shipment to the original purchaser. Excepted from this warranty are fuses and batteries that
carry the warranty of their original manufacturer where applicable. CALIFORNIA
INSTRUMENTS will service, replace, or adjust any defective part or parts, free of charge, when
the instrument is returned freight prepaid, and when examination reveals that the fault has not
occurred because of misuse, abnormal conditions of operation, user modification, or attempted
user repair. Equipment repaired beyond the effective date of warranty or when abnormal usage
has occurred will be charged at applicable rates. CALIFORNIA INSTRUMENTS will submit an
estimate for such charges before commencing repair, if so requested.
SERVICE PROCEDURE
If a fault develops, notify CALIFORNIA INSTRUMENTS at [email protected] or its local
representative, giving full details of the difficulty, including the model number and serial number.
On receipt of this information, service information or a Return Material Authorization (RMA)
number will be given. Add the RMA number furnished to the shipping label. Pack the instrument
carefully to prevent transportation damage, affix label to shipping container, and ship freight
prepaid to the factory. CALIFORNIA INSTRUMENTS shall not be responsible for repair of
damage due to improper handling or packing. Instruments returned without RMA No. or freight
collect may be refused at California Instruments discretion. Instruments repaired under Warranty
will be returned either via prepaid surface freight or low cost airfreight at California Instruments
discretion. Instruments repaired outside the Warranty period will be returned freight collect,
Ex Works CALIFORNIA INSTRUMENTS 9689 Towne Centre Drive, San Diego, CA 921211964. If requested, an estimate of repair charges will be made before work begins on repairs not
covered by the Warranty.
DAMAGE IN TRANSIT
The instrument should be tested when it is received. If it fails to operate properly, or is damaged
in any way, a claim should be filed immediately with the carrier. The claim agent should obtain a
full report of the damage, and a copy of this report should be forwarded to us by fax or email
(Fax: 858 677 0940, Email: [email protected]). CALIFORNIA INSTRUMENTS will prepare an
estimate of repair cost and repair the instrument when authorized by the claim agent. Please
include model number and serial number when referring to the instrument.
SPARE PARTS
To order spare parts, user manuals, or determine the correct replacement part for your California
Instruments products, please contact the Customer Service department by phone at + 1 858 677
9040, press 2 or by email [email protected].
4
Revision N
California Instruments
User Manual
Compliance Test System 3.0
LIMITATION OF WARRANTY
California Instruments believes the information contained in this manual is accurate. This document has
been carefully reviewed for technical accuracy. In the event that technical or typographical errors exist,
California Instruments reserves the right to make changes to subsequent editions of this document
without prior notice to holders of this edition. The reader should consult California Instruments if errors
are suspected. In no event shall California Instruments be liable for any damages arising out of or related
to this document or the information contained in it.
CALIFORNIA INSTRUMENTS PROVIDES NO WARRANTIES, EXPRESS OR IMPLIED, AND
SPECIFICALLY DISCLAIMS ANY WARRANTY OF MERCHANTABILITY OR FITNESS FOR A
PARTICULAR PURPOSE OF THIS SOFTWARE AND DOCUMENTATION. CALIFORNIA
INSTRUMENTS WILL NOT BE LIABLE FOR DAMAGES RESULTING FROM LOSS OF DATA,
PROFITS, USE OF PRODUCTS, OR INCIDENTAL OR CONSEQUENTIAL DAMAGES, EVEN IF
ADVISED OF THE POSSIBILITY THEREOF.
This limitation of liability of California Instruments will apply regardless of the form of action, whether in
contract or tort, including negligence. The warranty provided herein does not cover damages, defects,
malfunctions, or service failures caused by owner’s failure to follow California Instruments’ installation,
operation, or maintenance instructions; owner’s modification of the product; owner’s abuse, misuse, or
negligent acts; and power failures, surges, fire, flood, accident, actions of third parties, or other events
outside reasonable control.
SOME STATES DO NOT ALLOW LIMITATIONS ON THE LENGTH OF AN IMPLIED WARRANTY OR
THE EXCLUSION OR LIMITATION OF INCIDENTAL OR CONSEQUENTIAL DAMAGES, SO THE
ABOVE LIMITATION OR EXCLUSIONS MAY NOT APPLY TO YOU. THIS WARRANTY GIVES YOU
SPECIFIC LEGAL RIGHTS, AND YOU MAY ALSO HAVE OTHER RIGHTS WHICH VARY FROM
STATE TO STATE.
If any part of this Agreement shall be determined by a court to be invalid, illegal or unenforceable, the
remaining provisions shall in no way be affected or impaired thereby.
GOVERNING LAW. This Agreement and Limited Warranty are governed by the laws of the state of
California without regard to conflict of law provisions.
INSTALLATION AND / OR USE OF THIS PROGRAM CONSTITUTES ACCEPTANCE OF THESE
TERMS AND RESTRICTIONS BY THE USER.
© 1997 - 2007 COPYRIGHT
Under the copyright laws, this publication may not be reproduced or transmitted in any form, electronic or
mechanical, including photocopying, recording, storing in an information retrieval system, or translating, in
whole or in part, without the prior written consent of California Instruments Corporation.
California Instruments Corporation, © 1997 - 2007
Warning regarding Medical and Clinical use of California
Instruments products.
California Instruments products are not designed with components and testing intended to ensure a level
of reliability suitable for use in the treatment and diagnosis of human beings. California Instruments
products are NOT intended to be used to monitor or safeguard human health and safety in medical or
clinical treatment and California Instruments assumes no responsibility for this type of use of its products
or software.
California Instruments
Revision N
5
Compliance Test System 3.0
User Manual
Table of Contents
1. Introduction ........................................................................................................................................... 11
1.1
1.2
Manual Organization ................................................................................................................................11
Compliance Test System Description.......................................................................................................12
2. IEC Testing ........................................................................................................................................... 17
2.1
2.2
2.3
2.4
2.5
2.6
2.7
2.8
2.9
2.10
2.11
2.12
2.13
2.14
About This Chapter ..................................................................................................................................17
The EMC Directive ...................................................................................................................................17
The IEC 61000-3-2:2000 Standard ..........................................................................................................18
The IEC 61000-3-2 Ed 2.2:2004 Standard ...............................................................................................21
The IEC 61000-3-2 Ed 3.0:2005 Standard ...............................................................................................24
IEC 61000-3-3 Flicker ..............................................................................................................................24
IEC 61000-4-11 Voltage Dips and Variations ...........................................................................................25
IEC 61000-4-13 Interharmonics and Harmonics Immunity Test ...............................................................26
IEC 61000-4-14 Voltage Fluctuations.......................................................................................................26
IEC 61000-4-17 DC Ripple.......................................................................................................................27
IEC 61000-4-27p Three Phase Voltage Unbalance .................................................................................27
IEC 61000-4-28 Voltage Frequency Variations ........................................................................................27
IEC 61000-4-29p DC Voltage Dips, Interruptions and Variations .............................................................27
References ...............................................................................................................................................28
3. System Installation ............................................................................................................................... 29
3.1
3.2
3.3
3.4
3.5
3.6
3.7
3.8
3.9
3.10
3.11
3.12
About This Chapter ..................................................................................................................................29
Hardware Installation................................................................................................................................29
PC Requirements .....................................................................................................................................30
PACS Unit ................................................................................................................................................32
Functional Test.........................................................................................................................................33
Front Panel Connections and Controls.....................................................................................................40
Rear Panel Connections and Controls .....................................................................................................44
Data Acquisition Card Installation - PCI Card Version..............................................................................45
Data Acquisition Card Installation – Legacy ISA Card Version.................................................................56
CTS 3.0 Software Installation ...................................................................................................................61
AC Source Control Software Installation ..................................................................................................62
Upgrading from a CTS 1.X or CTS 2.0 System ........................................................................................64
4. Program Menus .................................................................................................................................... 66
4.1
4.2
4.3
4.4
4.5
4.6
4.7
About this Chapter....................................................................................................................................66
Main Menus..............................................................................................................................................66
File Menu .................................................................................................................................................66
Edit Menu .................................................................................................................................................67
View Menu................................................................................................................................................68
Options Menu ...........................................................................................................................................68
Test Menu ................................................................................................................................................69
5. Harmonics Testing................................................................................................................................ 70
5.1
5.2
5.3
5.4
5.5
5.6
5.7
5.8
5.9
5.10
5.11
5.12
6
About This Chapter ..................................................................................................................................70
Test Standard Selection ...........................................................................................................................70
Device Classes.........................................................................................................................................70
Stationary or Transitory Harmonics Test ..................................................................................................73
Running a Harmonics Test .......................................................................................................................74
Additional Setup Parameters for Harmonics.............................................................................................76
Main Harmonics Test Window Operation .................................................................................................78
Running the Harmonics Test ....................................................................................................................81
Printing Results ........................................................................................................................................82
Harmonics Test Data Files .......................................................................................................................82
Three Phase Testing ................................................................................................................................82
Replay Mode ............................................................................................................................................83
Revision N
California Instruments
User Manual
Compliance Test System 3.0
6. Flicker Testing ...................................................................................................................................... 85
6.1
6.2
6.3
6.4
6.5
6.6
About This Chapter ..................................................................................................................................85
Principle of Operation...............................................................................................................................85
Flicker Test Options .................................................................................................................................85
Running a Flicker Test .............................................................................................................................87
Printing Results ........................................................................................................................................91
Flicker Replay Mode.................................................................................................................................91
7. IEC 61000-4-11 Voltage Dips and Variations Immunity Testing.......................................................... 94
7.1
7.2
7.3
7.4
7.5
7.6
7.7
7.8
About This Chapter ..................................................................................................................................94
Standard Revisions and EUT Classes .....................................................................................................94
Compliance Statement .............................................................................................................................94
Specifying Test Sequences for Dips and Variations .................................................................................95
Test Setup................................................................................................................................................98
Test Options.............................................................................................................................................99
Test Results .............................................................................................................................................99
Report Format- 411 Test Files ............................................................................................................... 100
8. IEC 61000-4-13 Harmonics and Interharmonics Immunity Test ........................................................ 101
8.1
8.2
8.3
8.4
8.5
8.6
8.7
About this Chapter.................................................................................................................................. 101
Tab Controls........................................................................................................................................... 102
Test Setup.............................................................................................................................................. 102
Test Sequence ....................................................................................................................................... 104
Test Results ........................................................................................................................................... 107
Measurements........................................................................................................................................ 108
IEC 61000-4-13 Test Reports................................................................................................................. 108
9. IEC 61000-4-14 Voltage Fluctuations Immunity Testing.................................................................... 109
9.1
9.2
9.3
9.4
9.5
9.6
9.7
9.8
9.9
9.10
About This Chapter ................................................................................................................................ 109
Test Setup.............................................................................................................................................. 110
Test Options........................................................................................................................................... 110
Test Sequence ....................................................................................................................................... 111
Test Levels............................................................................................................................................. 112
Voltage Fluctuation................................................................................................................................. 113
Test Execution........................................................................................................................................ 114
Test Parameter File Creation and Limits ................................................................................................ 114
Test Results ........................................................................................................................................... 114
Report Format- 414 Test Files ............................................................................................................... 115
10. IEC 61000-4-17 DC Ripple Immunity Testing .................................................................................... 116
10.1
10.2
10.3
10.4
10.5
10.6
10.7
10.8
About This Chapter ................................................................................................................................ 116
Test Setup.............................................................................................................................................. 117
Test Sequence ....................................................................................................................................... 117
Waveform Display .................................................................................................................................. 118
Test Results ........................................................................................................................................... 118
User Observations.................................................................................................................................. 119
Report Format- 417 Test Files ............................................................................................................... 119
Saving and Loading Test Setups............................................................................................................ 119
11. IEC 61000-4-27p Voltage Unbalance Immunity Testing .................................................................... 120
11.1
11.2
11.3
11.4
11.5
11.6
11.7
11.8
11.9
11.10
About This Chapter ................................................................................................................................ 120
Test Setup.............................................................................................................................................. 122
Equipment Classifications ...................................................................................................................... 123
Test Levels............................................................................................................................................. 124
Waveform Display Tab ........................................................................................................................... 124
Operator Observations Tab.................................................................................................................... 124
Source Regulation.................................................................................................................................. 125
Test execution ........................................................................................................................................ 125
Test Implementation and Test Sequence............................................................................................... 125
Test Reports........................................................................................................................................... 126
California Instruments
Revision N
7
Compliance Test System 3.0
User Manual
12. IEC 61000-4-28 Frequency Variations Immunity Testing .................................................................. 127
12.1
12.2
12.3
12.4
12.5
12.6
12.7
About This Chapter ................................................................................................................................ 127
Test Setup.............................................................................................................................................. 128
Test Sequence ....................................................................................................................................... 129
Test Levels............................................................................................................................................. 130
Test Options........................................................................................................................................... 130
Test Results ........................................................................................................................................... 130
Test Reports........................................................................................................................................... 131
13. IEC 61000-4-29p DC Dips and Interruptions Immunity Test (Pre-compliance) ................................. 132
13.1
13.2
13.3
13.4
13.5
13.6
13.7
13.8
Test Setup.............................................................................................................................................. 133
Setting nominal values ........................................................................................................................... 134
Test sequence........................................................................................................................................ 134
Test Options........................................................................................................................................... 136
Test Execution........................................................................................................................................ 136
Test Results ........................................................................................................................................... 136
IEC 61000-4-29 Test Reports................................................................................................................. 137
Source Requirements............................................................................................................................. 138
14. Customizing IEC 61000-4 Test Parameters....................................................................................... 139
14.1
14.2
14.3
14.4
About This Chapter ................................................................................................................................ 139
IEC 61000-4-11 Implementations........................................................................................................... 139
Sample File IEC411.411 ........................................................................................................................ 141
Sample File IEC413.413 ........................................................................................................................ 142
15. Specifications ..................................................................................................................................... 143
15.1
15.2
15.3
15.4
15.5
15.6
About This Chapter ................................................................................................................................ 143
Measurement System Specifications ..................................................................................................... 143
PACS Specification ................................................................................................................................ 145
Environmental ........................................................................................................................................ 146
Regulatory .............................................................................................................................................. 146
Flicker Reference Impedance................................................................................................................. 147
16. Configuration Options......................................................................................................................... 149
16.1
16.2
About this Chapter.................................................................................................................................. 149
Accessing the Calibration and Configuration Database.......................................................................... 149
17. Calibration........................................................................................................................................... 152
17.1
17.2
17.3
17.4
17.5
17.6
About This Chapter ................................................................................................................................ 152
Calibration .............................................................................................................................................. 152
Install A/D Card in PC ............................................................................................................................ 153
PACS-x Calibration Setup ...................................................................................................................... 153
Configuration Procedure......................................................................................................................... 154
Installing New CTS 3.0 Calibration Data ................................................................................................ 157
18. Principle Of Operation ........................................................................................................................ 158
18.1
18.2
18.3
18.4
General .................................................................................................................................................. 158
AC Power ............................................................................................................................................... 158
PACS1 or PACS3 Measurement Unit .................................................................................................... 158
CTS 3.0 Software ................................................................................................................................... 158
19. Service................................................................................................................................................ 160
19.1
19.2
19.3
19.4
Cleaning ................................................................................................................................................. 160
General .................................................................................................................................................. 160
Basic Operation...................................................................................................................................... 160
Advanced Troubleshooting..................................................................................................................... 163
Index.......................................................................................................................................................... 165
8
Revision N
California Instruments
User Manual
Compliance Test System 3.0
List of Tables
Table 1-1: CTS AC Source Models ................................................................................................ 13
Table 2-1: IEC 61000-3-2 Class Limits........................................................................................... 19
Table 2-2: Harmonics Amendment 14 Test Times......................................................................... 20
Table 2-3: IEC 61000-3-2 Class Descriptions ................................................................................ 22
Table 2-4: Average public utility disturbances per annum in Europe ............................................. 25
Table 3-1: PC Pentium/Athlon Processor Clock Speed Requirement ........................................... 31
Table 3-2: Reserved PC I/O Address Locations ............................................................................ 58
Table 5-1 : IEC Harmonics Setup Parameters ............................................................................... 75
Table 5-2 : IEC Harmonics Advanced Setup Parameters .............................................................. 77
Table 5-3 : IEC Harmonics Replay Settings ................................................................................... 84
Table 6-1 : IEC Flicker Replay Settings.......................................................................................... 93
Table 15-1 PACS Specifications................................................................................................... 145
Table 17-1: Required Calibration Equipment ............................................................................... 152
California Instruments
Revision N
9
Compliance Test System 3.0
User Manual
List of Figures
Figure 3-1: EUT Connection distance and wire gauge................................................................... 32
Figure 3-2: Functional Test Setup .................................................................................................. 34
Figure 3-3: Single-phase configuration 5001iX-CTS...................................................................... 35
Figure 3-4: Single-phase configuration 1251RP-CTS .................................................................... 36
Figure 3-5: Power Connections for PACS-1 for a single-phase CTS............................................. 37
Figure 3-6: Three-phase configuration 15003iX-CTS .................................................................... 38
Figure 3-7: Power Connections for PACS-3 in a three-phase CTS. .............................................. 39
Figure 3-8: Switch Settings for Remote Impedance Control (Factory Default) .............................. 41
Figure 3-9: Switch Settings for Manual Impedance Control ........................................................... 41
Figure 3-10: Front and Rear Panel Views of the PACS-1 Module. ................................................ 42
Figure 3-11: Front and Rear Panel Views of the PACS-3 Module. ................................................ 43
Figure 3-12: Exacq Control Center Screen. ................................................................................... 48
Figure 3-13: Exacq Card Device Number....................................................................................... 49
Figure 3-14: Exacq Test Panel ....................................................................................................... 50
Figure 3-15: Exacq DMM Screen ................................................................................................... 51
Figure 3-16: Exacq Scope Test Panel............................................................................................ 52
Figure 3-17: NI E Series Explorer Panel ........................................................................................ 53
Figure 3-18: Figure 3 18: NI M Series Explorer Panel.................................................................. 53
Figure 3-19: Jumper and DIP switch location on the A/D Card...................................................... 56
Figure 3-20: A/D Card JMP 11 Settings ......................................................................................... 57
Figure 3-21: A/D Card JMP 13 Settings ......................................................................................... 57
Figure 3-22: A/D Card Base I/O Address DIP ................................................................................ 59
Figure 5-1: Class D Current Wave Shape Template...................................................................... 71
Figure 5-2: EUT Class Determination Flowchart............................................................................ 72
Figure 5-3: Typical Class A test setup............................................................................................ 74
Figure 5-4: Additonal Settings for Harmonics Test......................................................................... 76
Figure 5-5: Harmonics Test Window .............................................................................................. 78
Figure 6-1: Flicker Test Window ..................................................................................................... 87
Figure 7-1: IEC 61000-4-11 Test Window ...................................................................................... 95
Figure 7-2: IEC 61000-4-11 Voltage Variation specification- Edition 1.0 ....................................... 96
Figure 7-3: IEC 61000-4-11 Voltage Variation specification- Edition 2.0 ....................................... 96
Figure 7-4: IEC 61000-4-11 Setup screen...................................................................................... 98
Figure 8-1: IEC 61000-4-13 Test Window .................................................................................... 101
Figure 8-2: IEC 61000-4-13 Flow Chart Class 1 and 2. ............................................................... 104
Figure 8-3: IEC 61000-4-13 Flow Chart Class 3. ......................................................................... 105
Figure 9-1: IEC 61000-4-14 Test Window .................................................................................... 109
Figure 9-2: IEC 61000-4-14 Test Sequence................................................................................. 111
Figure 10-1: IEC 61000-4-17 Test Window .................................................................................. 116
Figure 10-2: IEC 61000-4-17 Waveform Acquisition Window ...................................................... 118
Figure 10-3: IEC 61000-4-17 User Observation Data Entry Window........................................... 119
Figure 11-1: IEC 61000-4-27 Test Window .................................................................................. 120
Figure 12-1: IEC 61000-4-28 Test Window .................................................................................. 127
Figure 12-2: IEC 61000-4-28 Test Sequence .............................................................................. 129
Figure 13-1: IEC 61000-4-29 Test Window .................................................................................. 132
Figure 17-1 : CTS 3.0 Calibration Program Main Screen............................................................. 153
Figure 17-2: Single Phase Calibration Setup ............................................................................... 155
Figure 17-3: Three Phase Calibration Setup ................................................................................ 156
Figure 19-1: Location of AC Sensor Assy. 5004-700 in PACS-x ................................................. 162
10
Revision N
California Instruments
User Manual
Compliance Test System 3.0
1.
Introduction
1.1
Manual Organization
This manual describes the operation of the California Instruments Compliance Test System
Software when used in conjunction with the CTS hardware. Its primary function is as a reference
manual. If you have a question about a specific screen or how to perform a certain task, turn to
the appropriate section of the manual. The manual is organized in accordance with the normal
test procedure you would follow when testing for IEC compliance.
Some assumptions were made when producing this documentation. Specifically, it is assumed
that you are familiar with the IEC 61000-3-2 and IEC 61000-3-3 standards and their
requirements. Some background information on the IEC standards covered by the CTS system is
included in chapter 2. This information is subject to change however as standards do change. We
recommend you stay current with evolving test standards and regulations. Furthermore, it is also
assumed that you are familiar with operating a personal computer under the Microsoft
Windows™ environment.
The manual is organized as follows:
Chapter 1
describes the organization of the user manual and provides a brief overview
of the CTS system components.
Chapter 2
provides an overview of the relevant IEC regulations and how compliance
testing to these regulations is implemented in the CTS 3.0 Software.
Chapter 3
covers installation of the hardware and software components required to
operate the CTS system. Proper installation of both hardware and software
is essential. This chapter walks the user through the hardware setup and
the software installation, process one step at a time.
Chapter 4
Overview of the program's menu structure
Chapter 5
covers IEC 61000-3-2 harmonics testing. This chapter provides step by step
instructions on how to set up the correct test mode and perform the
necessary steps to perform a quasi-stationary or transitory Harmonics test
on the EUT.
Chapter 6
covers IEC 61000-3-3 Voltage fluctuations testing. This chapter provides
step by step instructions on running a voltage fluctuation or flicker test.
Chapter 7
covers IEC 61000-4-11 Voltage Dips and Variations immunity testing.
Chapter 8
covers IEC 61000-4-13 standard Voltage Fluctuations immunity testing.
[Draft version]
Chapter 9
covers IEC 61000-4-14 standard Voltage Fluctuations immunity testing.
Chapter 10 covers IEC 61000-4-17 standard DC Ripple immunity testing.
Chapter 11 covers IEC 61000-4-27p standard Voltage Unbalance immunity testing.
Chapter 12 covers IEC 61000-4-28 standard Frequency Variations immunity testing.
Chapter 13 covers IEC 61000-4-29p DC Voltage dips and Variations immunity testing.
Chapter 14 covers IEC 61000-4 customization to allow for future revisions of these
standards and to accommodate different product categories.
California Instruments
Revision N
11
Compliance Test System 3.0
User Manual
Chapter 15 provides the technical specifications for the Power Analysis and
Conditioning System (PACS) unit, which is a key component of the CTS
system. For technical specifications on the AC source supplied with the
CTS system, refer to the AC source manual provided.
Chapter 16 overview of available configuration options.
Chapter 17 overview of calibration procedures
Chapter 18 provides theory of operation information.
Chapter 19 provides service and troubleshooting procedures.
1.2
Compliance Test System Description
The California Instruments Compliance Test System is a complete IEC AC power test system
that covers many of the IEC regulatory test standards involving AC and/or DC powered
equipment.
To ensure maximum flexibility of both the hardware and the software required to create a turnkey system, the CTS system uses a modular structure consisting of the following components:
•
Programmable AC power source. The AC source provides precise, isolated and low
distortion AC power at the user specified frequency and voltage. The AC source also offers
over current protection to avoid damaging a load that exhibits a failure. The AC source can
either be a single-phase or three-phase unit. For some DC tests, iX Series based CTS
systems also provide DC output.
•
Power Analysis and Conditioning System unit. The PACS unit creates the electrical and
mechanical interface between the AC source, the Equipment Under Test (EUT) and the PC
based data acquisition system. It provides the necessary signal conditioning and isolation for
the acquisition system.
•
PC Based data acquisition system. The data acquisition system uses a fast Analog to Digital
conversion card that plugs into an available card slot in the user’s PC. The CTS 3.0 software
controls all aspects of the A/D card and processes the data for IEC test purposes.
•
CTS 3.0 Software. The CTS 3.0 software implements the harmonics and flicker IEC tests. In
addition to the CTS 3.0 Software, the California Instruments CIGUI32 (Series I iX) or CIGuiSII
(Series II iX) Windows program is used to control the AC and DC source used and to
implement those IEC tests that run on the AC source, specifically the IEC 61000-4 immunity
tests.
The AC source output is connected to the rear of the PACS unit. For single-phase applications
the user only needs to connect the EUT to the IEC/77 connector located on the front panel of the
PACS unit to set up his test hardware. For three phase applications the rear terminals are used.
All user interactions with the CTS system are accomplished through the CTS 3.0 and CIGUI32 or
CIGuiSII software. There are virtually no front panel controls required to operate the CTS system.
12
Revision N
California Instruments
User Manual
1.2.1
Compliance Test System 3.0
AC Source Models
The CTS system is supplied with different programmable AC power sources depending on the
configuration. The following AC sources are supplied with each CTS system:
Table 1-1: CTS AC Source Models
Model
VA Power
AC Source
IEC
61000-4
PACS
model
Single Phase Systems
100-CTS
AC Line
none
-
PACS-1
1251RP-CTS
1250 VA
1251RP
-
PACS-1RP
3001iX-CTS
3000 VA
3001iX
√
PACS-1
5001iX-CTS (-400)
5000 VA
5001iX (-400)
√
PACS-1
10001iX-CTS (-400)
10000 VA
10001iX (-400)
(See note below)
√
PACS-1-75
AC Line
none
-
PACS-3-75
15003iX-CTS (-400)
15000 VA
15003iX
√
PACS-3
30003iX-CTS (-400)
15000 VA
30003iX-400
(See note below)
√
PACS-3-75
Three Phase Systems
300-CTS-75
If you plan to use the AC line and are using a PACS-1 or PACS-3 system, you can skip this
paragraph as there is no AC source included with the system. If you are using any of the other
CTS configurations, the AC source includes its own user manual. We recommend you familiarize
yourself with the operation of the AC source and the included Windows Graphical User Interface
(CIGUI32 or CIGuiSII) for it before you start using the CTS system.
Note:
PACS-1 and PACS-3 based CTS systems are rated for a maximum current of 40 amps
rms per phase. Higher current versions, PACS-1-75 and PACS-3-75, are available.
Existing 10001iX-CTS and 30003iX-CTS systems may not have been shipped with these
-75 model versions however. Damage to the standard PACS units can occur if higher
currents are present. Care must be taken to not exceed this rating when using the
system directly with the utility line or with the higher power sources. When using a
10001iX-CTS or 30003iX-CTS system, the lower voltage/higher current output range
should not be used unless the AC source’s current limit has been set to 40 amps or less
or the system was supplied with the -75 version of the PACS.
California Instruments
Revision N
13
Compliance Test System 3.0
1.2.2
User Manual
PACS Unit
The Power Analysis and Conditioning System provides the required electrical and mechanical
interface between the AC source, the user’s equipment under test and the data acquisition PC
system. This allows all signal connections to be made easily and conveniently. The PACS can be
single phase or three phase, depending on the CTS system configuration in use. Single phase
PACS units may also contain the required reference impedance for making flicker measurements
when a power source without programmable impedance is used. PACS units with the reference
impedance built-in have a Bypass and Flicker mode that is controlled through the A/D card digital
I/O from the CTS 3.0 software. The front panel controls for Bypass and Flicker mode are
disabled. The mode of operation (Bypass for harmonics measurements and Flicker for flicker
measurements) is indicated with a set of LED’s.
The PACS unit has several AC power input and output connections as well as an interface
connector to the PC based data acquisition system.
For higher power systems, the CTS system can be configured with the 75 A per phase versions
of the PACS unit. (Standard on 30003iX-CTS system).
14
Revision N
California Instruments
User Manual
1.2.3
Compliance Test System 3.0
PC Based Data Acquisition System (updated for new PCI data acquisition)
All measurements required for IEC testing are performed by the data acquisition system that
resides on the user’s PC. The measurement card needs to be installed in an available slot and
the software needs to be installed. All signal connections between the PC and the PACS unit are
made with a single 37-pin cable supplied with the system.
The following data acquisition cards are supported by the CTS 3.0 software:
CI400PCI
PCI card
NI 6032/4E. No longer provided on new system shipments but
still supported by CTS30 software revision 3.2.X
CI401PCI
PCI card
Exacq Technologies CM2110 PCI A/D card, 250 Ks/sec for
single phase systems (P/N 250803)
CI403PCI
PCI card
Exacq Technologies CM2210 PCI A/D card, 1 Ms/sec for three
phase systems (P/N 250797)
All CTS systems are delivered with a PCI bus A/D card. Older systems may use the –ISA or -MC
cards. The CTS 3.0 software installation differs for each of these legacy A/D cards. For new
installations, only the PCI card should be used however.
The data acquisition system samples all voltage and current channels at a high sampling rate
and provides the data to the CTS 3.0 software for further processing. The PACS provides a
single voltage input channel and three current input channels for each phase, to the PC. This
allows for current range changing on the fly. There is no need for the user to select a current
range as the software automatically uses the most suitable range available for the current signal.
1.2.4
CTS 3.0 Software Functions
The CTS 3.0 software application supports IEC 61000-3-2 and IEC 61000-3-3 compliance testing
requirements using an intuitive graphical user-interface from which you can:
1.2.5
•
Set up and run compliance-level tests. The setting up of many IEC details is facilitated
through the use of embedded standards expertise.
•
Collect real-time test data from the CTS System.
•
Display and monitor real-time test results.
•
Save test results to disk for analysis using other programs.
•
Replay previously recorded test data and single step through the data frame by frame.
•
Print reports and graphs in MS Word™ formats.
AC Source GUI Functions
If the CTS system in use was supplied with an AC source, it also includes an AC source control
software package. This Graphical User Interface program can be used to control the AC source
from the same PC using either the RS232C or IEEE-488 interface. An IEEE-488 interface is not
included with the CTS system. The PC must have an available RS232C port to use the RS232C
control interface to the source.
In the absence of a suitable interface, the user can operate the AC source from the front panel.
This does not affect the ability to run harmonics and flicker tests. It does however preclude the
use of the IEC 61000-4 immunity tests, which are only available through the CIGUI321 or
CIGuiSII AC source control program.
1
IEC 61000-4 tests are pre-compliance only on the 1251-CTS.
California Instruments
Revision N
15
Compliance Test System 3.0
User Manual
Note on Interface conflicts:
If the CIGUI32 or CIGuiSII program is set up to use the same serial or IEEE-488 port (any
address) to communicate with the AC source as the CTS 3.0 software, it is not possible to have
both the CTS 3.0 Software and the CIGUI32 or CIGuiSII software running at the same time. This
is due to the fact that both programs would attempt to use the same interface to control the AC
source. If this is the case, close one program before opening the other.
If IEEE-488 is used to control the AC source with the CIGUI32 or CIGuiSII and RS232C is
selected on the CTS 3.0 or vice versa, both programs can be open at the same time but care
should be taken not to control the source from both programs at the same time. This setup is not
recommended however.
For best results, use either program in turn depending on the task at hand (CTS 3.0 for IEC
61000-3 and CIGUI32 or CIGuiSII for IEC 61000-4)
16
Revision N
California Instruments
User Manual
Compliance Test System 3.0
2.
IEC Testing
2.1
About This Chapter
This chapter provides some background information on the various IEC test standards that apply
to AC powered products. It also reviews some of the test equipment requirements that are
important when testing for IEC compliance. Note that this information is subject to change as IEC
standards change over time. This overview is by no means comprehensive and is only provided
for reference. If the reader is not familiar with IEC test requirements for AC powered products, we
strongly recommend consulting information on this subject that is available through other
sources. References are provided at the end of this chapter.
The standards covered in this chapter include those, which the CTS system is capable of testing,
specifically:
2.2
•
IEC 61000-3-2 Quasi Static and Transitory Harmonics
•
IEC 61000-3-3 Flicker
•
IEC 61000-4-11 Voltage Dips and Variations (requires option -411 and EOS1 or EOS3)
•
IEC 61000-4-13 Interharmonics and Harmonics Immunity Test [Draft standard] (requires
option -413)
•
IEC 61000-4-14 Voltage Fluctuations
•
IEC 61000-4-17 DC Ripple
•
IEC 61000-4-27p AC Voltage Unbalance (pre-compliance)
•
IEC 61000-4-28 Frequency Variations
•
IEC 61000-4-29p DC Voltage Dips and Variations (pre-compliance)
The EMC Directive
As the world population grows and the overall energy consumption increases, industrialized
nations have become increasingly concerned with the future availability of energy. Reducing
energy consumption by using more energy efficient lighting and motor drive systems is one
approach being taken by European, US and Japanese governments. The need of more efficient
electrical systems however typically requires the use of sophisticated semi-conductor based
electronic circuits that produce current harmonics. This in turn effects power quality which is an
increasing problem on public utility networks. As lighting systems with electronic ballasts and
equipment with switching power supplies such as computers, TV’s, fax machines and printers
proliferate, power quality deteriorates. The same is true for PWM controller motor drives. The
International Electrical Committee (IEC) has released standards dealing with the low frequency
public supply system. Initial standards were 555.2 (Harmonics) and 555.3 (Flicker) which have
since been refined and are now available as IEC 61000-3-2 and IEC 61000-3-3 respectively.
Effective January 1, 1996, most electrical devices sold within the member countries of the
European Union (EU) must meet these standards as governed by the EMC directive.
California Instruments
Revision N
17
Compliance Test System 3.0
2.2.1
User Manual
Why do you have to test?
In general, these IEC directives do not have the legal force of law. However, the European Union
(EU) has issued Euro Norms in the context of these IEC directives that are legally binding and
are enforced by the EMC Police. The relevant enforceable standards are IEC 61000-3-2 and IEC
61000-3-3, which supersede EN60555.2 and EN60555.3 respectively. These standards are also
known under the IEC designator IEC 61000-3-2 and IEC 61000-3-3. Recently, the universal IEC
61000 convention has been adopted for all IEC standards.
Individual member countries have issued identical national norms, either in their native language
or in English, which carry the same legal enforceability. Other countries such as Japan and the
USA are in the process of adopting similar standards. Penalties for violating these norms range
from hefty fines to jail time. In cases where the manufacturer is not located in the EU, his
distributor or authorized agent will be held liable. Local customs agencies can stop equipment
that does not meet these IEC norms at the border. Compliance testing of equipment is performed
by accredited laboratories run by European government agencies assigned with enforcing these
norms. Also, competing vendors have been known to submit failing test results on competitors'
products to local governments to force prosecution and gain a competitive advantage in the
market place.
Conformance to the EMC low voltage directive is indicated by the CE mark. Note however, that
the CE mark includes MORE than just IEC 61000-3-2 and IEC 61000-3-3.
2.3
The IEC 61000-3-2:2000 Standard
This standard is often referred to as Amendment 14. It is less stringent for class C and D
products compared to the 1998 standard. Effective January 2001, products may be evaluated
against this standard.
2.3.1
Test Classes
CENELEC-A14 changes the definition of Class-D products. Per the amendment, only TV’s, PC’s
and PC monitors are to be tested per Class-D limits. This means that many products migrate to
Class-A. Note that there is no change in classification for Class-A, B, and C products, but the
harmonic analysis method for products with fluctuating power is affected by A-14 for these
products as well.
The limits for Class-C & D are proportional. Whereas this doesn’t cause any difficulties for
products with a constant current/power level, the situation was less clear for products with
fluctuating load levels. Most test systems implemented so-called dynamic limits, with the limits
constantly being adjusted per the measured power (or the fundamental current for Class-C) while
others used some average power level to set the limits. The latter systems determine this
average power/current using some arbitrary method, and pre-test period. Thus different test
systems implement different limits for the same (fluctuating power) products, which can result in
one system PASSING a product while the other REJECTS it.
A second issue for fluctuating loads is the way the existing standard (1998 edition) defines
criteria for passing and failing the harmonics test. The existing standard permits the unit under
test to occasionally exceed the 100 % limit, provided the harmonics never exceed 150 % of the
limit. In fact, the unit under test is allowed to exceed the 100 % level for 10 % of the test time. The
test time for fluctuating loads is to be at least 2.5 minutes, i.e. the harmonics can exceed the 100
% limit for 15 seconds in every 150-second (2.5 min) period. For longer test times, one can
perform this test in 2.5 minutes “time blocks” but another interpretation is to just take 10 % of the
overall test time. Thus, the testing method for fluctuating loads was somewhat subject to
interpretation by the test equipment manufacturer.
18
Revision N
California Instruments
User Manual
Compliance Test System 3.0
Pass/Fail criteria under the new standard are as follows:
The average value for the individual harmonic currents, taken over the entire test observation
period shall be less than or equal to the applicable limits.
For each harmonic order, all 1,5 s smoothed r.m.s. harmonic current values shall be less than or
equal to 150% of the applicable limits.
Harmonic currents less than 0,6% of the input current measured under the test conditions, or less
than 5 mA, whichever is greater, are disregarded.
For the 21st and higher odd order harmonics, the average values obtained for each individual odd
harmonic over the full observation period, calculated from the 1,5 s smoothed values may exceed
the applicable limits by 50% provided that the following conditions are met:
2.3.2
•
The measured partial odd harmonic current does not exceed the partial odd harmonic
current, which can be calculated from the applicable limits.
•
All 1,5 s smoothed individual harmonic current values shall be less than or equal to 150%
of the applicable limits.
IEC 61000-3-2 Test Limits
The following table summarizes the current harmonic limits for each device class that are
presently in effect. The limits are generally built into IEC test software programs such as
California Instruments’ CTS 3.0 Test System software. If the power level of a class D device
drops below 75 W (configurable - see System Administrator Manual P/N 5004-985), no harmonic
current limits are applied and the result will always show a pass.
Table 2-1: IEC 61000-3-2 Class Limits
Harmonic no. (n)
Class A
Class B
Class C
Class D
IEC 555-2
A RMS
A RMS
% of
fundamental
RMS current
mA/Watt of
input power
(75 - 600 W)
TV Receivers
> 165 W
A RMS
2
1.080
1.620
2
-
0.300
3
2.300
3.450
30 x PF
3.400
0.800
4
0.430
0.645
-
-
0.150
5
1.140
1.710
10
1.900
0.600
6
0.300
0.450
-
-
-
7
0.770
1.155
7
1.000
0.450
8
0.230
0.345
-
-
-
9
0.400
0.600
5
0.500
0.300
10
0.184
0.276
-
-
-
11
0.330
0.495
3
0.350
0.170
12
0.153
0.230
-
-
-
13
0.210
0.315
3
0.296
0.120
Even 14-40
1.84 / n
2.760 / n
-
-
-
Odd 15-39
2.25 / n
3.338 / n
3
3.850 / n
1.500 / n
The actual class limits for all classes have not changed with amendment 14. The power levels for
Class D on which these limits are calculated however and the fundament current and power
factor for class C have been changed however.
California Instruments
Revision N
19
Compliance Test System 3.0
User Manual
First of all, the manufacturer is required to declare the rated power (the fundamental current and
Power Factor for Class-C) for the product. This “rated power” (current & PF) will be used as the
basis for the limit calculation of Class-D (Class-C). Thus, a “rated power” of 150 Watt for
example, will yield a third harmonic limit of 150 x 3.4 = 510 mA. Similarly, a rated fundamental
current of 0.4 Amp, and a rated PF of 0.98 for an electronic ballast will result in a third harmonic
limit of 0.4 x 0.3 x 0.98 = 117.6 mA. Thus, the amendment requires that an automated
compliance test system must allow the user to enter this rated power or rated current. Also, the
test system must verify the power (fundamental current and PF) because these “rated vales” as
declared by the manufacturer must be within +/- 10 % of the actual values. If not, the actually
measured values are to be used for the limit calculation. The method to measure these actual
power, fundamental current and PF differ from the “average method” used in existing test
systems, and of course differ also from the “dynamic limit method”.
The Pass/Fail criterion is given above. The “10 % of the time over 100 % of the limits” no longer
exists. The average harmonic level during the whole test must simply be below the limit, and
individual values in each acquisition window (after 1.5 sec filtering) must be below 150 % of the
limit. There is also an extra allowance for the higher harmonics from H 21 - H 39 .
The CTS fully supports and implements Amendment 14.
2.3.3
IEC 61000-3-2:2000 Test Time
Under the new test standard, four test times (observation periods) are allowed depending on the
nature of the EUT. All are aimed at ensuring repeatability of test results when tests are
performed under the same conditions and on the same test system. Repeatability for this
purpose is defined as results that are within 5 %. Available observation periods shown in the
table below.
Table 2-2: Harmonics Amendment 14 Test Times
20
Type of equipment
behavior
Observation period
Quasi-stationary
Tobs of sufficient duration to meet the requirements for repeatability.
Short cycles (Tcycle < 2.5
min)
Tobs > 10 cycles (reference method) or Tobs of sufficient duration
or synchronization to meet the requirements for repeatability.
'Synchronization' means that the total observation period is
sufficiently close to including an exact integral number of
equipment cycles such that the requirements for repeatability are
met.
Random
Tobs of sufficient duration to meet the requirements for repeatability.
Long cyclic (Tcycle > 2.5
min)
Full equipment program cycle (reference method) or a
representative 2.5-min period considered by the manufacturer as
the operating period with the highest total harmonic content.
Revision N
California Instruments
User Manual
2.4
Compliance Test System 3.0
The IEC 61000-3-2 Ed 2.2:2004 Standard
This section covers the 2004 standard which incorporates amendments 1 and 2 and amendment
14. This standard must be to test products since January 2004..
The purpose of enforcing the IEC 61000-3-2 standard is to limit the amount of current harmonics
produced by electronic loads. Since harmonic currents caused by a load in turn produce voltage
harmonics across the public utilities impedance, they affect other equipment connected to the
same circuit. In fact, most public utilities exhibit voltage distortion caused by non-linear loads.
Because harmonics can have serious effects on many electrical devices, efforts to set standards
to limit their presence date back to the 1930’s. This resulted in the IEC’s Technical Committee
(TC) setting standards dealing with current harmonics as far back as 1977. These standards
became the basis for IEC standards 1000-3-2 and 1000-3-3 adopted in 1993. Because of their
long history, many people still refer to these standards as 555.2 and 555.3 although there are
some differences between the older and newer versions and tests performed today should be
done according to the new standards, not the old ones.
Another confusing issue that is rooted in history is the nature of the products that fall under these
IEC norms. While the original 555 specifications focused primarily on consumer products and
excluded many professional and industrial products, the new IEC 1000-3 norms expanded
coverage to include all electrical products with a rated input current up to 16 A rms per phase.
Presently, only products with a line input voltage of 220 V and above are included. Japan and the
US are working towards similar requirements that would cover products that require 100 Volts
and up. Due to the original scope of the IEC 555 norms, many manufacturers are still under the
impression that their products are exempt since they are not considered consumer products.
Especially manufacturers of switching power supplies - some of the worst “offenders” when it
comes to generating harmonics currents - have been caught off guard.
California Instruments
Revision N
21
Compliance Test System 3.0
2.4.1
User Manual
Test Classes
The standard divides products to be tested in to four classes, A, B, C and D. Each class has its
own harmonic current limits. Class A is the default class, meaning if a product does not fall into
the categories for class B, C or D, it is by default class A. The product classes are defined as
follows:
Table 2-3: IEC 61000-3-2 Class Descriptions
Class
Description
A
All motor driven equipment, most “domestic” appliances and
virtually all 3 phase equipment (<16 A rms per phase)
B
All portable electric tools
C
All lighting products, including dimmers, with an active input
power above 25 Watts.
D
Products having a power range from 75 to 600 Watts AND a
current waveform that has a special wave shape.
Test limits are most stringent for Class-C and Class-D equipment. These classes were
established to cover the wide range of products that uses “cheap” switching power supplies with
a rectifier capacitor input. These units typically exhibit relatively high odd harmonics. Since this
type of supply is so commonly used, the effect of a large quantity of products like this can add up
to significant problems. To limit this effect, the current harmonic limits for class-D equipment are
specified in mA/W instead of an absolute current value as is done for class A and B. Many
consumer and professional devices such as TV’s, VCR’s, stereos, PC’s, fax machines, printers
etc. may fall into the more stringent class D category.
Class-C limits are not specified in absolute values either but rather as a percentage of the
fundamental current. The third harmonic limit is also a function of the power factor so is harder to
meet as the power factor decreases. Neither class C nor D devices have to meet even current
harmonics limits.
Since class C and D limits are load dependent, the power level and power factor have to be
determined for each test. In case of fluctuating power levels, it may be necessary to measure the
power level during the test and adjust the limits used to pass or fail the unit under test
dynamically.
This dynamic nature of the class C and D limits has resulting in some confusion and a possible
problem of inconsistent test results when using IEC test systems for different vendors. The
Standards body working group for harmonics is in the process of clarifying some of the class and
limit issues and these efforts are likely to result in a revision of classes and limit calculations
sometime in the year 2001. Until a new standard is established, the CTS 3.0 software maintains
a database of test limit values than can be updated over time if needed without changing the core
program.
CTS 3.0 software makes dynamic classification for Classes A and D. The classification follows
the following principle. If during either a Class A or D test the EUT becomes a Class A device,
the EUT will be considered a Class A device. If the EUT is a Class D device through out the test,
then the device is a Class D device. In other words, Class A is a latching classification. Please
note that even though the classification may change during a test, a Class A (or D) test will still be
performed according to Class A (or D) specification.
22
Revision N
California Instruments
User Manual
2.4.2
Compliance Test System 3.0
Steady State versus Transitory Harmonics
Two types of harmonics testing are called for in the IEC 61000-3-2:1998 standard, a quasi steady
state and a transitory one. The transitory harmonics tests allow for equipment that has power
demands that vary over time to temporarily exceed the harmonic current limits by as much as 50
%, as long as such elevated levels do not occur for more than 10 % of the test period. Since the
minimum test time required is 2.5 minutes or 150 seconds, this means the current harmonics can
be as high as 150% of the standard limits for no more than 15 seconds in any 150 second period.
This requirement imposes more demands on the power analyzer being used than it does on the
AC power source.
Steady state harmonics are those exhibited by equipment that has a constant current draw such
as a fluorescent lighting fixture. Many pieces of equipment, such as Laser printers that have a
heating element that kicks in any time a page is printed, have fluctuating power demands and
may require transitory harmonics testing.
Note that Amendment 14 does away with the distinction between stationary and transitory
harmonics.
2.4.3
IEC 61000-4-7 Inter Harmonics Evaluation.
IEC61000-3-2 Edition 2.2 (2004-11) references measurement methods per IEC61000-4-7 and
Edition 2.0 of this measurement standard specifies the inclusion of inter harmonics. For the
assessment of harmonics, the harmonic and inter-harmonic current levels are grouped to be the
sum of squared intermediate lines between two adjacent harmonics according to the equation
below, as visualized also in the accompanying figure. The resulting harmonic group component
of order n (corresponding to the center line in the hatched area) has the magnitude C (rms
value).
In these equations, “c” is the modulus of the spectral component corresponding to an output bin
of the Fourier Transform of the data obtained from the 200 ms acquisition period , and “C” is the
resulting modulus of the harmonic which is to be compared against the limits in IEC61000-3-2 for
the selected test class.
This inter harmonics measurement is not mandatory as of this writing, as the use of equipment
meeting the previous version of IEC61000-4-7 (the older Edition 1) is permitted for a short period
(until the existing IEC61000-4-7 Edition 2 has gone through its maintenance cycle). Therefore the
user has the option to either disregard inter harmonics, or to group them into the assessment by
selecting the appropriate field in the “Test Category” settings.
California Instruments
Revision N
23
Compliance Test System 3.0
User Manual
It should be noted that selecting this “inter harmonics grouping” has little impact on the
measurement results for the vast majority of products. Only products with active power factor
correction AND highly fluctuating power consumption will produce inter harmonic levels that
would add to the level of “C” as given above. Most products do not produce inter harmonics, and
therefore the measured harmonic currents will be the same either way.
2.5
The IEC 61000-3-2 Ed 3.0:2005 Standard
The newer standard allows Class A test to exceed 150% limit and less than or equal to 200% of
the applicable limits under the following conditions, which apply all together:
1) The EUT belongs to Class A for harmonics.
2) The excursion beyond 150% of the applicable limits lasts less then 10% of the test
observation period or in total 10 min (within the test observation period), whichever is
smaller, and
3) The average value of the harmonic current, taken over the entire test observation period,
is less than 90% of the applicable limits.
2.6
IEC 61000-3-3 Flicker
Flicker standards are imposed to limit voltage variations caused by loads connected to the low
voltage supply network that would cause lights connected to the same circuit to flicker. A complex
measurement approach outlined in IEC 868, was devised to correlate voltage fluctuations to a
human perceptibility factor (P). The IEC 61000-3-3 standard sets limits for voltage fluctuations
caused by electrical apparatus with a current level up to 16 Amps per phase. The standard
describes a human flicker perceptibility curve that defines the upper limit for acceptable flicker.
This curve plots the percentage of voltage fluctuation against the amount of voltage fluctuations
per minute.
As is the case for the Harmonics standards, the Flicker standard dates back several years and
was rooted in the IEC 555.3 specification. Today however, the IEC 61000-3-3 standard should be
used to evaluate equipment. Note that low power equipment generally does not cause Flicker
and therefore often can be exempted from this requirement. The standard permits the equipment
manufacturer to prove via analysis that their products are unlikely to cause voltage fluctuations.
This analysis becomes part of a Technical Construction File (TCF) which in turn may be used to
obtain product certification.
2.6.1
IEC 61000-3-3 Flicker Test AC Source Requirements
As is the case with Harmonics testing, the IEC 61000-3-3 standard imposes requirements on the
AC source that is used. Some of these requirements are similar and less severe than those
imposed under IEC 61000-3-2. For example, total harmonic distortion of the voltage can be 3 %
for Flicker testing as opposed to only 1.25% for harmonics testing. The voltage regulation needs
to be better than 2 % which is not a problem for most AC sources. In rare cases, the line voltage
may even be used for this purpose. More often than not, however, the use of an AC source with
well-defined specifications is recommended to obtain repetitive test data and eliminate the
possibility of flicker caused by line fluctuations, not load current fluctuations. California
Instruments offers AC power sources in both single and three phase configurations that meet
these requirements. The same AC power source described under IEC 61000-3-2 (Harmonics)
AC source requirements can be used for Flicker test applications.
To simulate the resistance and inductance of the low voltage distribution systems, the IEC
61000-3-3 requires a specific AC source output impedance to be used. This reference
impedance, as specified in IEC-725, is defined in such a way that it approximates a typical
distribution network impedance. Individual countries may require the use of a different reference
impedance that more closely resembles the actual impedance of that countries’ specific
24
Revision N
California Instruments
User Manual
Compliance Test System 3.0
distribution network. Most European countries use the specified reference impedance value
however.
The required reference impedance for Flicker testing is either built into the PACS unit of the
single phase CTS systems or provided through a programmable output impedance of the AC
Source. This is determined by the AC Source model used. Optionally, a lumped reference
impedance option is available for customers who prefer to use this approach over the
programmable output impedance method.
Note that the lumped reference impedance option for the CTS system is exactly matched to the
California Instruments’ power source output impedance with which they are used. Do not use
third party reference impedance networks with the CTS system as the combined AC source and
network impedance may not match the IEC 61000-3-3 requirement. The 1251RP-CTS is always
supplied with a lumped reference impedance built in to the PACS-1 unit as these AC Source
models do not offer programmable output impedance.
In general, programmable output impedance of the AC Source yields higher accuracy compared
to a physical lumped impedance. It also allows testing against other national flicker standards
such as those in Japan where different reference impedance values are called out.
2.6.2
When to Test for IEC 61000-3-3
As mentioned, it may not be necessary to test every product for IEC 61000-3-3. If it can be shown
that maximum power consumption of the unit under test is low, and the surge current level at
turn-on is limited, it can be shown that the product causes insignificant Flicker levels across the
reference impedance. For loads having an rms current draw of more than 5 Amps, it is generally
recommended to verify conformance to IEC 61000-3-3 however.
2.7
IEC 61000-4-11 Voltage Dips and Variations
The IEC 61000-4-11 is an immunity test for low voltage equipment to ensure reliable operation
when connected to the public distribution system. This test requires an AC source that is capable
of generating specific voltage variations and voltage dips. The unit under test must not sustain
any damage from such occurrences nor cause unsafe conditions.
Table 2-4: Average public utility disturbances per annum in Europe
DEPTH
DURATION
(Voltage drop in % of
nominal Ut)
10 to < 100 ms
100 to < 500
ms
500 ms to 1
sec
1 sec to > 3
sec
10 %o < 30 %
61
66
12
6
30 % < 60 %
8
36
4
1
60 % < 100 %
2
17
3
2
100 %
0
12
24
5
Number of disturbances per year
The need to test for immunity of products against voltage dips and interruptions was prompted by
studies of electric utility availability. The results shown in Table 2-4 were found in this study
(UNIPEDE study 91 en 50.02). From this data it is clear that most disruptions are short in nature
(about 5 to 10 periods) and no more than 60 % below nominal. Occasionally however, extended
periods of complete power loss occur. It is suggested that this test data also be used as a guide
in selecting appropriate test levels.
California Instruments
Revision N
25
Compliance Test System 3.0
2.7.1
User Manual
Why Do You Have to Test?
The IEC 61000-4-11 affects a large set of products, specifically; "Electrical and electronic
equipment having a rated input current not exceeding 16 A per phase." Thus, most single and
three phase AC powered equipment used in domestic and light industrial settings fall in this
category. In fact, around 95 % of all electrical equipment in household and light industrial
applications, require no more than 16 A per phase. In Europe, this implies real apparent levels of
230 V * 16 A = 3680 VA, with real power either at the same or a lower level. Specifically excluded
are all DC powered products (battery operated devices) and 400 Hz AC equipment. (Avionics)
These products will be covered in future IEC standards. At this time meeting the IEC 61000-4-11
standard is required for most products to obtain the CE Mark, required to market products in the
European Union.
California Instruments’ CTS system supports IEC 61000-4-11 testing using an iX Series AC
power source. For full AC Source compliance, the EOS1 or EOS3 Electronic Output Switch
option is required. Non iX Series based CTS systems offer pre-compliance testing of IEC 610004-11 only. The test sequencer and report generation for IEC 61000-4-11 is provided through the
CIGUI32 or CIGuiSII Windows® software. To accommodate changes in the specification, test
levels and duration can be set by the operator or loaded from disk if needed.
2.8
IEC 61000-4-13 Interharmonics and Harmonics Immunity Test
The IEC413 option is capable of performing IEC 61000-4 section 13 Harmonics and inter
harmonics low frequency immunity tests. The tests are based on IEC 61000-4-13:2002-03, First
Edition. It is assumed that the user has a copy of the test standard available. This manual
section only cover operation of the –413 option from the front-panel of the iX Series power
source.
Note 1: The initial release of the –413 option for the iX Series power sources was based on a
draft version (CDV) of the IEC 61000-4-13 standard. Minor changes were made between the
CDV draft and the final released version. Units with firmware revision 2.37 or higher conform to
the official released IEC standard. Units with older firmware conform to the draft version. A
firmware upgrade can be ordered through California Instruments’ service department by
contacting [email protected] and requesting part number CIC463. Provide the model and
serial number of the unit (master unit in multi-box systems) to ensure the correct firmware is
provided. The firmware revision is displayed on the LCD screen immediately after power up for a
few seconds. It can also be queried over the bus using the “*IDN?” command.
Where relevant, the requirement for the correct firmware revision to obtain specific test modes is
indicated in this manual.
Note 2: The –413 option is only available on iX Series AC power sources, not i Series. It is
possible to upgrade most i Series AC source to an iX Series and add the –413 option. Contact
the California Instruments service department for information. [email protected]
2.9
IEC 61000-4-14 Voltage Fluctuations
The IEC 61000-4-14 is aimed at testing a product for immunity against voltage fluctuations that
can occur on the public utility. The nature of the voltage fluctuations is different from those tested
under IEC 61000-4-11 however. The fluctuations covered in this standard are less severe and
involve typical high and low line conditions.
California Instruments’ CTS system supports full compliance IEC 61000-4-14 testing on all iX
Series based CTS systems. The IEC 61000-4-14 test is implemented in the CIGUI32 or CIGuiSII
Windows® software. To accommodate changes in the specification, test levels and duration can
be changed by the operator or loaded from disk if needed. Non iX Series based CTS systems
offer pre-compliance testing of IEC 61000-4-14 only.
26
Revision N
California Instruments
User Manual
2.10
Compliance Test System 3.0
IEC 61000-4-17 DC Ripple
The IEC 61000-4-17 is aimed at testing a DC powered product for immunity against voltage
ripple. Ripple is often caused by feed-through from the AC input section of a DC supply and
exhibits itself as a small AC signal riding on the DC output. The IEC 61000-4-17 standards
covers test levels and frequencies for testing the immunity of DC products against such
phenomena.
The CTS system supports full compliance IEC 61000-4-17 testing (iX Series based CTS systems
only). The IEC 61000-4-17 test is implemented in the CIGUI32 or CIGuiSII Windows® software.
To accommodate changes in the specification, test levels and duration can be changed by the
operator or loaded from disk if needed. Non iX Series based CTS systems do not offer this test.
2.11
IEC 61000-4-27p Three Phase Voltage Unbalance
Three phase CTS systems support pre-compliance IEC 61000-4-27 testing. The IEC 61000-4-27
test is implemented in the CIGUI32 OR CIGUISII Windows® software. To accommodate changes
in the specification, test levels and duration can be changed by the operator or loaded from disk if
needed.
2.12
IEC 61000-4-28 Voltage Frequency Variations
The CTS system supports full compliance IEC 61000-4-28 testing (iX Series based CTS systems
only). The IEC 61000-4-28 test is implemented in the CIGui32 OR CIGuiSII Windows® software.
To accommodate changes in the specification, test levels and duration can be changed by the
operator or loaded from disk if needed. Non iX Series based CTS systems offer pre-compliance
testing of IEC 61000-4-28 only.
2.13
IEC 61000-4-29p DC Voltage Dips, Interruptions and Variations
The CTS system supports pre-compliance IEC 61000-4-29 testing (iX Series based CTS systems
only). The IEC 61000-4-29 test is implemented in the CIGui32 or CIGuiSII Windows® software.
To accommodate changes in the specification, test levels and duration can be changed by the
operator or loaded from disk if needed. Non iX Series based CTS systems do not support testing
to IEC 61000-4-29.
California Instruments
Revision N
27
Compliance Test System 3.0
2.14
User Manual
References
Additional information on IEC norms and requirements may be obtained from the following
sources. You may also check for the latest IEC related information on California Instruments'
web site at www.calinst.com.
Document Number
Date of
Publ.
Title
IEC 725
(1981)
“Considerations on reference impedances for use in
determining the disturbance characteristics of household
appliances and similar electrical equipment.”
IEC 868
(1986)
“Flicker meter, Functional and design specifications.”
IEC 868 Amendment 1
(1990)
“Flicker meter, Functional and design specifications.”
IEC 868-0
(1991)
“Part 0: Evaluation of flicker severity.”
IEC 61000-3-2
(1995)
“Part 3: Limits - Section 2: Limits for harmonic current
emissions (equipment input current < 16 A per phase.)”
IEC 61000-3-3
(1994)
“Part 3: Limits - Section 3: Limitation of voltage fluctuations
and flicker in low-voltage supply systems for equipment
with rated current < 16 A.”
IEC 61000-4-7
1996
“General guide on harmonics & inter-harmonics” New
version expect early 2002.
Copies of complete IEC standards
may be obtained from at:
International Electrotechnical Commission (IEC)
P.O. Box 131
1211 Geneva 20
Switzerland
Phone: +41 22 919 0300
Fax: +41 22 919 0228
Web: www.iec.ch
or in the USA:
American National Standards Institute (ANSI)
Sales Department
11 West 42nd Street
New York, NY 10036
Phone: +212 642 4900
Fax: +212 302 1286
28
Revision N
California Instruments
User Manual
3.
System Installation
3.1
About This Chapter
Compliance Test System 3.0
This chapter provides information on system installation and covers both the hardware
connections that need to be made between the various components and the software setup.
Proper installation of all hardware components and software modules is required to successfully
use the CTS system. Some experience with AC power systems and PC’s running Windows is
assumed.
3.2
3.2.1
Hardware Installation
Unpacking
Inspect the unit for any possible shipping damage immediately upon receipt. If damage is
evident, notify the carrier. DO NOT return an instrument to the factory without prior approval. Do
not destroy the packing container until the unit has been inspected for damage in shipment.
3.2.2
AC Source
Refer to the User Manual provided with the AC Source.
The main power requirements for the CTS are dictated by the AC power sources used and the
power levels that the Equipment Under Test will demand. Consult the AC Power source manual
for input current and input wiring requirements.
California Instruments
Revision N
29
Compliance Test System 3.0
3.3
User Manual
PC Requirements
The CTS system requires a PC to operate. The included CTS 3.0 software must be installed on a
PC capable or acquiring and processing data in real-time to ensure no-gap acquisition as
required by both the harmonics and flicker test standards.
NOTE: It is recommended to purchase the required PC from California Instruments using the CICPC-PCX option. This ensures a suitable PC with the software pre-installed and tested will be
furnished with the system for turnkey operation. This option also includes a monitor and
printer. If this option is not ordered, the PC to be used with the system should be shipped to
California Instruments prior to delivery for integration and test. In this case, it is the
customer’s responsibility to ensure the provided PC meets the performance criteria outlined
below.
The PC requirements will depend to some extend on the following factors:
•
The phase mode. Three phase systems require more CPU power than single-phase
systems.
•
The type of A/D card used. Three phase systems based on the ISA are unable to
process interharmonics.
•
The version of Windows operating system used.
From time to time, a newer version of the CTS 3.0 software may be released. New
versions are tested only with contemporary operating systems. As such, it may be
required to upgrade to a newer operating system to support the latest version of the CTS
3.0.XX software. Presently, CTS 3.0.XX is tested only on Windows XP and Windows
Vista platforms.
•
For report generation, a copy of MS Word is required. The MS Word version supported is
Word 9.0 (Word 2000). Older versions of MS Word may no longer work when upgrading
to the latest CTS 3.0.XX software version. In that case, a newer version of MS Word may
have to be installed.
The matrix below shows the required minimum process clock rate. These clock rates apply to
either Celeron, Pentium 4 or AMD Athlon and Klamath based PC's. The values shown are
minimum values, not recommended values. To allow future expansion, it may be advisable to
plan on using a faster PC.
Other minimum PC requirements are:
•
Windows XP, Windows 2000 or Windows Vista. Other versions of Windows operating
systems are no longer supported.
•
RAM size 512 Mbytes minimum.
•
SVGA (800 x 600 resolution, 16 or more colors).
•
IDE or SCSI hard disk drive of 20 GByte size or more.
PC Processor speed matrix shown minimum clock speeds, not recommended clock speeds for
the PC. A faster PC can be used. This assumes other applications and/or screen savers that
take up processor time are generally closed.
30
Revision N
California Instruments
User Manual
Compliance Test System 3.0
Table 3-1: PC Pentium/Athlon Processor Clock Speed Requirement
Mode
A/D Card
Single phase
PCI
2.6 GHz
Three phase
PCI
3.2 GHz
California Instruments
Win XP / 2000
Revision N
31
Compliance Test System 3.0
3.4
User Manual
PACS Unit
The PACS measurement module can be operated on either 115V or 230 V. It requires less than
0.5 Amps to function.
3.4.1
Mechanical Installation
The PACS unit can be used free standing on a bench and may be placed on top of the AC power
source. Rack handles are standard, and if the optional rack slides are ordered, then the entire
CTS system may be mounted in a standard 19 inch cabinet. The units are fan cooled, drawing
air in from the sides and exhausting at the rear. The sides of the unit must be kept clear of
obstruction and a 6 inch (152 mm) clearance must be maintained to the rear for proper cooling.
3.4.2
EUT Connection Wiring
For single phase wiring diagrams see Figure 3-3, Figure 3-4 and Figure 3-5. For three phase
systems, see Figure 3-6 and Figure 3-7. The wire size used is dictated by the measured currents
and voltages. Any wire used must be rated for the maximum expected current and voltage. The
PACS unit is rated for 40A RMS maximum per phase when the rear power terminals are used
and therefore AWG 8 is recommended if currents >30A and up to 40A are expected. For currents
in the 15 to 30A range AWG 10 is sufficient.
The PACS-3-75 used on 10001iX-CTS and 30003iX-CTS systems is rated for 75 A and as such
requires the use of at least AWG 6 wire gauge or larger diameter.
Caution:
It is important to keep the distance between the PACS output and the EUT
as short as possible to avoid adding additional wiring impedance to the test setup.
This is particularly important for flicker test measurements, as the wire impedance will affect the
level of any voltage fluctuations caused by the EUT. Try to limit any output wiring to no more than
5 feet (1.5 meters) or use larger diameter wire as the distance to the EUT increases. Refer to
Figure 3-1.
PACS 1 - Rear Panel View
AC OUT AC IN
Keep Wire Length
short. (< 5 ft)
Use proper wire
gauge
Line
To AC Source
or OMNI Load
Connection
Neutral
Equipment
Under Test
Figure 3-1: EUT Connection distance and wire gauge.
32
Revision N
California Instruments
User Manual
Compliance Test System 3.0
In addition, when doing compliance testing from the front panel outlet on a single phase PACS
unit, bear in mind the rating of the IEC/77 outlet socket is 16A RMS max.
Caution:
Be sure to replace the small rear top cover on the PACS unit after the
wiring has been installed, otherwise insufficient cooling of internal components may
result.
3.5
Functional Test
If it is desired to perform a functional test of the system upon receipt the following procedure can
be used. However, the AD signal card and the CTS 3.0 Software must first be installed for
proper operation. See installation instructions later in this section.
CAUTION:
Work carefully when performing this test, hazardous voltages will be present on the
AC input and output connections during this test.
Refer to Figure 3-2 for the test setup. See also Figure 3-3 through Figure 3-7 for detailed
installation diagrams.
1. Connect a current transformer to the neutral wire going into the AC input port at TB4 on the
rear of the PACS unit. Connect the CT output to a DMM to read the actual input current.
2. Connect a DMM to the line and neutral connections at TB4 inside the rear panel.
3. Connect a 10 Ω load to the front panel outlet, or, use the rear panel AC outlet port at TB3.
4. Enable the AC power input to the PACS unit, whether from the line or from a power source.
Apply 120Volts AC at 60Hz.
5. Start the CTS 3.0 software in harmonics mode and measure the load current and voltage
from the GUI. Verify the GUI readings and the external DMM readings for current and
voltage are within 1% of each other.
In the unlikely event the power source does not pass the functional test, refer to the calibration
procedure in section 0, or, refer to the service procedure in Section 19. If the problem cannot be
resolved, call California Instruments’ customer satisfaction department for further assistance.
California Instruments
Revision N
33
Compliance Test System 3.0
User Manual
Figure 3-2: Functional Test Setup
34
Revision N
California Instruments
User Manual
Compliance Test System 3.0
Figure 3-3: Single-phase configuration 5001iX-CTS
California Instruments
Revision N
35
Compliance Test System 3.0
User Manual
RS232 or
IEEE-488
Figure 3-4: Single-phase configuration 1251RP-CTS
36
Revision N
California Instruments
User Manual
Compliance Test System 3.0
Figure 3-5: Power Connections for PACS-1 for a single-phase CTS.
California Instruments
Revision N
37
Compliance Test System 3.0
User Manual
RS232
Figure 3-6: Three-phase configuration 15003iX-CTS
38
Revision N
California Instruments
User Manual
Compliance Test System 3.0
Figure 3-7: Power Connections for PACS-3 in a three-phase CTS.
California Instruments
Revision N
39
Compliance Test System 3.0
3.6
User Manual
Front Panel Connections and Controls
The front panel incorporates three functional areas:
3.6.1
•
Output Sockets/Connectors
•
Status Indicator lights
•
Switch/Button controls
Output Sockets/ Connectors
PACS-1, PACS-3 and PACS-3-75
PC Interface Connector located on front panel is in parallel with the rear panel connector. Use
front panel interface connector if rear panel access is difficult.
PACS-1 ONLY
The Output Socket is located on the right side of the front panel. It provides connection to a
European CEE7/7 plug. This socket is connected to the same point as the rear panel AC output
connector TB3. Keep in mind that this socket is rated for 16A only, while the rear terminals at
TB3 are rated for 40A.
3.6.2
Status Indicator Lights
PACS-1 and PACS-3
The “ON “ LED indicates The PACS module is powered up. Note: Even if the PACS unit is
powered down, the AC input terminals may still be live if the applied source has not been shut
down.
PACS-1 and PACS-1RP
The BYPASS LED indicates the internal test impedance network is bypassed with relays.
The FLICKER LED indicates the internal test impedance is connected to the output for
compliance testing.
Note: If the PACS-1 does not have the optional reference impedance installed, then the bypass
LED will stay lit permanently and the flicker/bypass button will have no effect.
3.6.3
Switch/Button Controls
PACS-1 and PACS-3
The front panel power switch located on the left hand side of the PACS unit energizes the
measurement circuits.
PACS-1
The Flicker/Bypass button toggles the internal impedance on and off, the FLICKER and BYPASS
LEDs indicate which state the circuit is in.
Keep in mind that the internal impedance network can be switched in or out manually from the
front panel, or, remotely by the flicker software. The default setting for the flicker relay control is
remote via the DB37 connector.
Should it be desired to enable the front panel flicker control, it will be necessary to remove the top
cover of the PACS-1 unit and set selector switches S1-1and S1-2. This light blue switch
assembly is located on the AC Sensor board towards the front and left hand side of the PACS
unit. See Figure 33 on page 105 for circuit board orientation . See figures on next page for
proper switch orientation.
40
Revision N
California Instruments
User Manual
Compliance Test System 3.0
S1
NO
1
2
Figure 3-8: Switch Settings for Remote Impedance Control (Factory
Default)
S1
NO
1
2
Figure 3-9: Switch Settings for Manual Impedance Control
California Instruments
Revision N
41
Compliance Test System 3.0
User Manual
Figure 3-10: Front and Rear Panel Views of the PACS-1 Module.
42
Revision N
California Instruments
User Manual
Compliance Test System 3.0
Figure 3-11: Front and Rear Panel Views of the PACS-3 Module.
California Instruments
Revision N
43
Compliance Test System 3.0
3.7
User Manual
Rear Panel Connections and Controls
The rear panel incorporates three functional areas
3.7.1
•
PACS AC input supply.
•
Measurement input/output connections.
•
PC interface, Clock and Lock interface.
PACS AC Input Supply
The AC input to the PACS unit is on the right side of the rear panel. The molded cord plugs into
the combination range change/ fuse holder assembly.
The AC power input module has a red plastic fuse holder that also serves as the input voltage
range selecting device. The selected voltage range (115V or 230V) is displayed through a small
rectangular window.
To change the fuse:
1.
Remove power cord from input module.
2.
Pry cover loose with a small screwdriver.
3.
Pull out fuse holder, prying with a screwdriver will be necessary.
4.
Replace ½ A fuse and reassemble in reverse order.
To change input range: 1. Remove power cord from input module.
2.
Pry cover loose with a small screwdriver.
3.
Pull out fuse holder, prying with a screwdriver will be necessary.
Orient the red fuse holder so that the desired voltage shows through
the window. While holding the two fuses in the holder, reinsert the
fuse module and close the cover.
3.7.2
Measurement Input / Output Connections
The AC power input to be measured must pass through the cable strain relief clamp at AC INPUT
and then to connector TB4, located just behind the rear panel. Similarly, the wires from TB3 are
routed through the cable clamp at AC OUTPUT to the Equipment Under Test. To gain access to
power connectors TB3 and TB4 the access panel located on the top rear of the unit must be
removed. Remove the four screws holding the connector access panel in place and remove the
panel. Once input and output wiring is complete, reattach the connector access panel.
3.7.3
PC Interface, Clock and Lock Interface
The PC interface connector accepts the DB-37 interface cable that goes to the PC with the AD
Card and the CTS 3.0 Software.
Note:
When connecting the high density 68 pin connector to the back of the A/D card in
the PC, make sure to align the cable plug with the A/D card connector carefully so
as not to bent any pin. The connector should insert easily. If undue force is
needed, the plug may not be aligned properly or one or more pins may be bent.
Check the plug and connector carefully before installing the supplied cable
between the PACS and the PC.
The CLOCK and LOCK BNC connectors are available for future interface capabilities to CI power
sources.
44
Revision N
California Instruments
User Manual
3.8
Compliance Test System 3.0
Data Acquisition Card Installation - PCI Card Version
All measurements in the CTS System are performed through a dedicated data acquisition card
that needs to be installed in the host PC. The PC that this card is being installed in must have at
least 512 Mbyte of RAM memory for the card and software program to work correctly. This
section provides the necessary installation procedure for both hardware and software of the PCI
version A/D Card. The PCI card is a Windows compliant Plug-n-Play card that requires a single
PCI slot in the test system PC. The card driver is installed along with the CTS 3.0 software.
3.8.1
Unpacking and Handling
The following items are included as part of the CTS System A/D Card kit:
1. A/D conversion board, Exacq PCI card (CI401PCI P/N 250803 for PACS1 or CI403PCI P/N
250797 for PACS3).
or
A/D conversion board, National Instruments M Series PCI-6220 (P/N 250821) for PACS1 or
PCI-6250 (P/N 250822) for PACS3.
2. 68 to 37 pin adapter cable, HD68 (High Density) male to DB37 male connector. For Exacq
card, supplied cable is P/N 250798. For NI M Series A/D card, supplied cable is P/N 5004229-1.
3. CIC632 CD ROM with CTS30 software and Exacq card drivers. NI M Series card drivers are
supplied on NI CD ROM included.
4. CD ROM with calibration data.
Verify that all components are available. The CTS system will not operate if any of these items
are missing. If any item is missing or visibly damaged, contact California Instruments customer
service department immediately. Refer to page 3 for details on contacting California Instruments.
Retain the original packaging material for the card and its accessories in the event you ever need
to return the PCI A/D card to California Instruments.
Keep the PCI card in its protective anti-static bag until you are ready to install it in an available
PCI slot of the host PC. This will minimize the chance of damage due to electrostatic discharge.
When you finally do remove the card from the bag, make sure you are wearing a wrist ground
strap and hold the card by its edge to avoid touching any of the components.
There are no jumpers of DIP-switch settings on the PCI A/D card as all configuration data is
retained in EEPROM.
The correct order of installation is:
1. Install the PCI Card drivers from the CIC632 (Exacq Technologies driver) CD ROM.
2. Turn off the PC and install the PCI A/D card in an available PCI slot.
3. Reboot the PC and let Windows find the A/D card and complete installation of the drivers.
4. Install the CTS30 software from the CIC632 CD ROM.
Note: For systems furnished with (National Instruments E Series or M Series) A/D card type, do
not install the Exacq card drivers from the CIC632 CD ROM but use the supplied National
Instruments CD ROM to install the A/D card driver first.
California Instruments
Revision N
45
Compliance Test System 3.0
3.8.2
User Manual
Installing the PCI Card Driver Software
Insert the National Instruments NI-DAQ distribution or the CIC632 (Exacq Technologies driver)
CD-ROM in the CD ROM drive. The setup.exe program should start if the CD ROM drive is
configured for AutoStart. If not, double click on the Setup.exe program to launch the installation
wizard.
Follow the installation prompts for the Driver installation to install the A/D Card drivers.
46
Revision N
California Instruments
User Manual
3.8.3
Compliance Test System 3.0
Installing the PCI A/D Card
Following the procedure outlined below to install the PCI card in the test system PC:
1. Disconnect your PC from any main power.
2. If possible, wear a grounded wrist strap to prevent ESD damage to the PC and the A/D Card
and place the PC cabinet on a firm ESD safe working surface.
3. Remove the cover of the PC cabinet following the directions provided by the PC
manufacturer.
4. Locate the PC’s PCI bus expansion slots. The CI40nPCI requires a single 32 bit PCI slot.
5. Using a suitable screwdriver (typically Phillips #2), remove the cover plate for the slot you
opted to use in step 4. The A/D card has its own cover plate so the one you remove may be
saved or discarded at your own discretion. You will need to re-use the screw however, so
make sure you do not loose it.
6. Carefully remove the PCI card from its protective bag and hold it along the top edge. Take
care not to touch the gold finger edge connectors at the bottom.
7. Insert the card carefully in the selected slot making sure the DB68 connector clears the slot in
the back of the PC. Press down firmly along the top edge of the board to make sure the
board is seated properly in the PCI slot connector. It may help to rock the board gently or
start from one end of the edge connector.
8. Install the screw you removed in step 5 and secure the PCI board to the PC slot by its cover
plate.
9. If you plan to use an IEEE-488 Controller to communicate with the AC Source and have not
installed one in the host PC yet, now would be a good time to do so. Follow the Bus
Controller manufacturer’s instructions for installation.
10. Replace the PC’s cover following the directions provided by the PC manufacturer.
Note:
When connecting the high density 68 pin connector to the back of the A/D card in the PC,
make sure to align the cable plug with the A/D card connector carefully so as not to bent
any pin. The connector should insert easily. If undue force is needed, the plug may not be
aligned properly or one or more pins may be bent. Check the plug and connector carefully
before installing the supplied cable between the PACS-3-75 and the PC.
California Instruments
Revision N
47
Compliance Test System 3.0
3.8.4
User Manual
Testing the Exacq Technologies PCI card (CI401PCI, CI403PCI)
Note: If the CTS system was supplied with the National Instruments E Series A/D card, refer to
section 3.8.5 instead.
Card Reference numbers:
CI Designation
Exacq P/N
System
CI401PCI
CM2110
Single phase systems
CI403PCI
CM2210
Three phase systems
After installing the A/D card in an available PCI slot, you must configure the card for operation in
the CTS. Generally, the PCI card will be the only A/D card to be used in your PC, but in case
there are more cards present, contact the factory for details concerning multi-card configuration.
After installing the PCI card, turn the computer back on. When Microsoft Windows starts up, it
should discover the new Exacq A/D device.
Next, you need to test the A/D card in your computer, and configure the A/D card for use with the
CTS software. After the PC starts up, you will have a new Program Group, called Exacq. Start the
application called Exacq Control Center from this new Exacq program group on the Windows
Start menu. See Figure 3-12 below.
Figure 3-12: Exacq Control Center Screen.
48
Revision N
California Instruments
User Manual
Compliance Test System 3.0
The new data acquisition card will appear as a node in the LocalSystem | Hardware | Exacq |
PCI/PXI branch of the System tree.
Click on this node. The serial number and logical device number will display in the Configuration
pane. The logical device number is the identification that application software such as the CTS
uses to specify which hardware device will be used. This device number should only be changed
if you have multiple A/D cards in the PC. See Figure 3-13 below).
Otherwise, leave the number as is. In the event this is necessary, you may change the assigned
device number by clicking on the configuration tab and selecting a new number using the device
number edit control. Only knowledgeable users should make changes to these settings.
Figure 3-13: Exacq Card Device Number
California Instruments
Revision N
49
Compliance Test System 3.0
User Manual
You are now ready to verify that the A/D card functions properly in your PC. To do so, select the
“Test” tab in the Configuration panel. This will bring up the test panel (see illustrations Figure
3-14, Figure 3-15 and Figure 3-16 on following pages). This test panel can be used to test all
analog input channels and analog output channels as well as the digital IO lines. You can test
Channel 0 (zero) as shown below. Assuming you have connected the interface cable to the
PACS signal-conditioning unit, and the PACS receives the supply from the power source, the
display will look similar to the figure below. Assuming the card functions properly, installation and
configuration of the Exacq data acquisition hardware and software is now complete.
Figure 3-14: Exacq Test Panel
You can run the Exacq Bench software to do a further functional check of the CTS hardware, and
interconnect cable between the A/D card and the PACS (CTS signal conditioning unit). Close the
Exacq Control Center window. Start the application called Exacq Bench from this new Exacq
program group on the Windows Start menu.
Make sure the PACS is powered up, and the A/D card cable is properly attached to both the card,
and the PACS. Of course, the power source needs to be operating, and must supply an
appropriate voltage to the measurement system.
50
Revision N
California Instruments
User Manual
Compliance Test System 3.0
You may now apply a load to the CTS. Typically, this will be the 230 Volt – 50 Hz supply voltage
that is used to power the products to be tested. This voltage is routed to logical channel 0 of the
A/D card, via a differential input amplifier and a 100: 1 attenuation factor in the PACS. On the
Exacq Bench menu bar, select “Instrument”, “Volt Meter”. Thus, the Exacq Bench DVM function
will display approximately 1.00 volt for a 100 Volt AC voltage setting of the power source, such as
may be used in Japan (see the example of the DVM function below). The display should be about
2.30 Volt rms for a 230 Volt – 50 Hz input voltage. Note that the system calibration will eliminate
small errors due to hardware tolerances. Thus, the ratio is not necessarily exactly 100:1.
Figure 3-15: Exacq DMM Screen
California Instruments
Revision N
51
Compliance Test System 3.0
User Manual
Of course, you may also use the oscilloscope function of the Exacq Bench to display the time
domain signals. Refer to the appropriate section of this manual to identify all the signals and
channel numbers, but for this example, channel 0 is for voltage, and channels 1,2,3 are the
(parallel) three current signals. In the figure below, channel 0 and 3 are displayed (channel 3 is
the most sensitive current channel). The CTS power source was set to 230 Volt – 50 Hz, and a
resistive load with a dimmer set to approximately 90 degrees firing angle was applied. The
(yellow) current signal was 2.0 Amp rms and the (red) voltage was 230 Volt. The settings for the
scope channels and time base function were adjusted to obtain the display as shown in the
figure.
Upon completion of the above tests, you may proceed with installing the CTS software modules
that were supplied with your system.
Figure 3-16: Exacq Scope Test Panel
52
Revision N
California Instruments
User Manual
3.8.5
Compliance Test System 3.0
Testing the National Instruments PCI Card
E-Series DAQ Board
CTS 3.0 must be installed first before performing a A/D card testing. After CTS 3.0 is installed,
the PC must be rebooted. The new hardware should be detected automatically at boot by the
Windows™ operating system. Follow the on-screen prompts to finish installation of the A/D card.
Once the PCI A/D card is installed and the PC has been re-booted, you should see a
“Measurement and Automation” icon on the desktop. Double click on it and expand the Devices
and Interfaces tree, you will now see the PCI card you installed as shown in the screen below.
Figure 3-17: NI E Series Explorer Panel
M-Series DAQ Board
Launch Measurement and Automation, select NI-DAQmx Devices, NI PCI-6250: “Dev1”.
Figure 3-18: Figure 3 18: NI M Series Explorer Panel
California Instruments
Revision N
53
Compliance Test System 3.0
User Manual
Select “Self-Test” and you should get the pop-up message below.
You can run “Test Panels…” to do a further functional check of the CTS hardware, and
interconnect cable between the A/D card and the PACS (CTS signal conditioning unit).
Highlight NI PCI-6250: “Dev1”, select “Test Panels…”, set Channel Name to “Dev1/ai0”, set
Mode to continuous, set Input Configuration to RSE, set Rate(Hz) to 10000.
Make sure the PACS is powered up, and the A/D card cable is properly attached to both the card,
and the PACS. Of course, the power source needs to be operating, and must supply an
appropriate voltage to the measurement system.
Set the power source to 230 Volt – 50 Hz. This voltage is routed to logical channel 0 of the A/D
card, via a differential input amplifier and a 100: 1 attenuation factor in the PACS. The display
should be about 2.30 Volt rms for a 230 Volt – 50 Hz input voltage. (See below picture for detail)
3.8.6
CTS / GPIB Software Setting Conflict
Each time the CTS is run, a function is called to initialize the A/D card. This call, "Init_DA_brds",
actually does more than A/D initialization. It also sends some commands to the instrument with
GPIB address #1 when using a NI GPIB controller. The AC source if used over the IEEE-488
bus is factory set to address 1. This may cause a problem unless the IEEE-488 address on the
power source is changed to an address other than 1.
The address can be left at 1 on the power source if needed by changing the visaconf.ini file. This
file is typically residing in "c\vxipnp\win95\nivisa" directory. (If not located in this directory, use
the Windows Explorer Find function to locate this file.) This file is not distributed with the CTS
54
Revision N
California Instruments
User Manual
Compliance Test System 3.0
software. It is installed when the National Instruments GPIB software is installed. There is a line
under [GPIB-VXI-CONFIG]: DisableAutoFind=0. The 0 needs to be changed to 1.
California Instruments
Revision N
55
Compliance Test System 3.0
3.9
User Manual
Data Acquisition Card Installation – Legacy ISA Card Version
The ISA A/D card is no longer supported by the CTS30 software version 3.0.16 and higher. If
you are upgrading to CTS30 revision 3.0.16 or higher, you MUST upgrade to one of the
supported PCI data acquisition cards. The information in this section is provided for users of
older systems only that have not yet upgraded.
All measurements in the CTS System are performed through a dedicated data acquisition card
that needs to be installed in the host PC. This section provides the necessary installation
procedure for both hardware and software of the ISA version A/D Card.
Note:
3.9.1
The ISA card is no longer supplied with new CTS systems as the ISA bus is obsolete. This
information is provided to support existing CTS system installations that were originally
purchased with the ISA bus A/D card.
Unpacking and Handling
The following items are included as part of the ISA CI400AD:
•
•
A/D conversion board, 3/4 size ISA card.
37 pin cable, DB37 male to DB37 female connector.
Verify that all components are available. The CTS system will not operate if any of these items is
missing. If any item is missing or visibly damaged, contact California Instruments customer
service department immediately. Refer to page 3 for details on contacting California Instruments.
Retain the original packaging material for the card and its accessories in the event you ever need
to return the ISA CI400AD A/D card to California Instruments.
Keep the ISA CI400AD card in its protective anti-static bag until you are ready to install it in an
available ISA slot of the host PC. This will minimize the chance of damage due to electrostatic
discharge. When you finally do remove the card from the bag, make sure you are wearing a wrist
ground strap and hold the card by its edge to avoid touching any of the components.
3.9.2
ISA A/D Card Configuration
The CI400AD card has two jumpers that must be set in the correct position before the board is
installed in the host PC. Also, the base I/O address of the CI400AD card is set by means of a
DIP switch. This switch must be set to a suitable I/O address that does not conflict with any other
I/O peripherals in the host PC.
The location of the jumpers and the I/O address DIP-switch are shown in Figure 3-19.
Figure 3-19: Jumper and DIP switch location on the A/D Card
56
Revision N
California Instruments
User Manual
Compliance Test System 3.0
JP13 JP11
1
1
Address DIP
JP11
JP11
4
4
1
1
Normal Mode
Diff. Mode
(Factory Setting)
Figure 3-20: A/D Card JMP 11 Settings
JP13
JP13
3
3
1
1
Pin 19 = DAC
Pin 19 = Ground
(Factory Setting)
Figure 3-21: A/D Card JMP 13 Settings
Jumper JP11
Jumper JP11 selects between differential or single ended input channel mode and should be set
to single ended mode for the CTS system. The correct setting is shown in Figure 3-20. Pin 1
and 2 are jumpered together as are pins 3 and 4. This is the setting in which the board is
shipped from the factory and you should not have to change it.
California Instruments
Revision N
57
Compliance Test System 3.0
User Manual
Jumper JP13
Jumper JP13 affects the purpose of pin 19 on the 37-pin connector that interfaces to the PACS
unit. For CTS operation, this pin must be analog ground and this jumper must connect pin 2 and
3.
DIP Switch - Base I/O Address
The DIP switch located on the CI400AD sets the base I/O address in the host PC I/O space. The
factory configuration is port address 0x180. In most cases, this port address is available (not
used by other PC peripherals) and no changes to this setting are needed.
If you do have a conflict with another device in your PC, you will have to reconfigure the base I/O
address of the CI400AD. The CI400AD uses 8 contiguous I/O port addresses. Each peripheral
must have a unique I/O address and no overlap can exist. The PC architecture reserves 1024
bytes of I/O space for general purpose I/O boards. However, not all of this space is generally
available. The following table shows a list of commonly used I/O addresses. Use this table to
locate an I/O space that is available in the host PC.
Table 3-2: Reserved PC I/O Address Locations
Hex I/O Range
170-177
1F0-1F7
200-207
238-23C
23C-23F
278-27F
2B0-2DF
2E0-2E7
2E8-2EF
2F8-2FF
300-31F
320-32F
360-36F
370-377
378-37F
380-38F
3A0-3AF
3B0-3BB
3BC-3BF
3C0-3CF
3D0-3DF
3E8-3EF
3F0-3F7
3F8-3FF
Typically used by
Fixed disk controller #2
Fixed disk controller #1
Joystick Game Port
Bus Mouse
Alternate Bus Mouse
Parallel Printer Port (LPT)
EGA Display Adapter.
GPIB Controller card
Serial Port (COM)
Serial Port (COM)
Prototype Card
Hard Disk Controller (PC-XT)
Reserved
Floppy Disk Controller #2
Parallel Printer Port (LPT)
Serial Data Link Controller
Serial Data Link Controller
Monochrome Display Adapter
Parallel Printer Port (LPT)
VGA, EGA Display Adapter
CGA Display Adapter
Serial Port (COM)
Floppy Disk Controller #1
Serial Port (COM)
The CI400AD base I/O address is set using the DIP switch. The DIP switch positions 1 through 7
correspond to bits 9 through 3 of the I/O address. This allows a range of 0x100 to 0x3F8 in eight
byte increments. A switch in the ON position signifies the address line is 0 for the bit it
represents. A switch in the OFF position signifies a 1 for the bit it represents. The following
figure shows the bit mapping and the default factory setting of 0x180.
58
Revision N
California Instruments
User Manual
Compliance Test System 3.0
HEX:
VALUE:
1
8
0
0
1
1
0
0
0
0
X
X
X
BIT: 9
8
7
6
5
4
3
2
1
0
MSB
LSB
ON
1
2
3
4
5
6
7
Figure 3-22: A/D Card Base I/O Address DIP
If you need to change the factory default I/O address to a different value to avoid conflicts with
other I/O boards in your PC, you must note down the new address and pass it as a parameter
when setting up the software driver later.
California Instruments
Revision N
59
Compliance Test System 3.0
3.9.3
User Manual
Installing the ISA A/D Card
After you have configured the jumpers and the DIP switch on the A/D card (if factory defaults are
not usable), you are ready to install the CI400AD in your PC. Following the procedure outlined
below:
1. Disconnect your PC from any main power.
2. If possible, wear a grounded wrist strap to prevent ESD damage to the PC and the A/D Card
and place the PC cabinet on a firm ESD safe working surface.
3. Remove the cover of the PC cabinet following the directions provided by the PC
manufacturer.
4. Locate the PC’s ISA bus expansion slots. The CI400AD requires a single 16 bit ISA slot.
Note that these slots have two edge connectors.
5. Using a suitable screwdriver (typically Phillips #2), remove the cover plate for the slot you
opted to use in step 4. The CI400AD has its own cover plate so the one you remove may be
saved or discarded at your own discretion. You will need to re-use the screw however, so
make sure you do not loose it.
6. Carefully remove the CI400AD from its protective bag and hold it along the top edge. Take
care not to touch the gold finger edge connectors at the bottom.
7. Insert the card carefully in the selected slot making sure the DB37 connector clears the slot in
the back of the PC. Press down firmly along the top edge of the board to make sure the
board is seated properly in the ISA slot connectors. It may help to rock the board gently or
start from one end of the edge connector.
8. Install the screw you removed in step 5 and secure the CI400AD board to the PC slot by its
cover plate.
9. If you plan to use an IEEE-488 Controller to communicate with the AC Source and have not
installed one in the host PC yet, now would be a good time to do so. Follow the Bus
Controller manufacturer’s instructions for installation.
10. Replace the PC’s cover following the directions provided by the PC manufacturer.
This completes the board installation. You are now ready to install the CTS 3.0 Software.
60
Revision N
California Instruments
User Manual
3.10
Compliance Test System 3.0
CTS 3.0 Software Installation
Once the card drivers have been installed, the CTS 3.0 software can be installed next. This
requires the use of the CTS 3.0 installer program provided on CD ROM CIC632.
To install the CTS 3.0 software, the CD ROM or floppy disk containing the calibration coefficients
must be inserted in the relevant PC's drive first. If either of these disks is not available, the
installation can still be performed but the system may not be in calibration.
The CTS 3.0 system software is supplied on a CD-ROM, P/N CIC632. The CD-ROM contains
compressed files that are needed to operate the CTS system properly. Since these files are in
compressed form, they should not be copied to your PC’s hard disk since they will not function in
this form. Instead, the setup program that is included on the CD-ROM should be used to install
all the files.
An additional CD ROM is provided containing the system calibration data. Please note that if the
CTS 3.0 is to upgrade an existing CTS system, the calibration CD ROM will not be included as
the system was calibrated before.
For CTS systems supplied with the National Instruments E Series A/D card, the NI-DAQ driver is
provided on a separate CD ROM.
3.10.1 Installing the CTS 3.0 Software Under Windows™
This section covers installation of the CTS 3.0 software under Window™.
To install the CTS 3.0 software, proceed as follows:
1. Insert the CIC632 CD-ROM into your CD-ROM drive and wait a moment for the drive
to recognize the CD.
2. The program should start automatically. If not, select Start->Run… from the
Windows Start menu and type D:\setup.exe, assuming your CD-ROM is the D drive.
3. If this is a PCI A/D card based system, the card and drivers for the card should have
been installed already at this point. If not, go back and do so now.
4. Remove the CIC632 installation CD and replace it with the Calibration Data CD that
came with the CTS system.
5. Select “CTS 3.0 System Software
Installation for PCI A/D Card and click
on the Run Setup button.
6. The program will now copy the
calibration data from the CD ROM to
you PC’s root directory.
7. You will now be prompted to re-insert
the CIC632 installation CD ROM.
8. Remove the Calibration CD and
replace it with the CIC632 installation
CD. The CI browser may reappear
when you close the CD drive door as
your CD drive may be set to autorun. You can either ignore or close the second
instance of the CI Browser program.
9. Click the OK button to confirm that the CIC632 CD is back in the CD ROM drive. This
will launch the CTS 3.0 installation program.
10. Follow the on screen installation program prompts to complete the CTS 3.0 system
software setup.
California Instruments
Revision N
61
Compliance Test System 3.0
User Manual
11. Once completed, you can remove the CD-ROM. You may have to reboot the
computer after the software installation. This will be indicated at the end of the
installation program.
12. Before launching the CTS software, run the “DAQ Card Selector” module to choose
the correct A/D card for the CTS. The “DAQ Card Selector” module is located in the
application directory (C:\Program Files\California Instruments\CTS30). You can also
run this module from the program group by selecting “Start”, “All Programs”,
“CTS30”, and then “DAQ Card Selector”. You only have to run this module once to
select the correct A/D card for the system. If you happen to select a wrong card then
run the module again to choose the correct A/D card.
The installation program will create a new entry in the Programs Menu called Compliance Test
System. This menu has several sub-menu entries, one for the main test program and several for
the calibration and configuration programs as well as a few utility programs. We recommend you
keep the calibration disk and CD-ROM in a safe place in case you ever need to re-install the CTS
3.0 software.
Note:
To operate the AC source through the IEEE-488 interface, it may be necessary to install the
IEEE-488 controller card drivers on the same PC. Refer to the setup instructions supplied
with the IEEE controller card.
3.10.2 Calibration Data distributed on Floppy Disk
On older CTS systems, the calibration data for each system was distributed on Floppy disk. As
this old medium is rapidly disappearing, CD ROM is used on newer systems.
If the calibration data you received was provided on floppy disk instead of CD ROM, you will have
to copy the following file from this floppy to your hard drive root directory (Usually C:\) using
Windows Explorer:
CTS Calibration.dat
3.11
AC Source Control Software Installation
If the CTS system you purchased contains a California Instruments AC power source, it will have
included additional AC source control software as well. If you purchased a 100-CTS or 300-CTS,
you can skip this section of the manual and proceed to the next chapter.
Note:
The AC source control software is not required to perform harmonics and flicker tests. It
is required to perform any of the IEC 61000-4 tests however. This software is supplied
with its own user manual and we recommend you familiarize yourself with this user
manual also when electing to use the AC source control software.
The AC source control software is supplied on either a set of standard 1.44 MB, 3.5 inch floppy
disks or a CD-ROM. The actual software included depends on the AC source model included
with the system. For 1251RP-CTS systems, the PGUI32 program is included. All other CTS
configurations include the CIGui32 or CIGuiSII program.
These distribution disks contain compressed versions of all the programs and files needed to
operate the AC source. Since these files are in compressed form, they should not be copied to
your PC’s hard disk since they will not function in this form. Instead, the setup program that is
included on this first disk should be used to install all the files.
To install the AC source control software, proceed as follows:
1. Insert the GUI CD-ROM in the PC's CD-ROM drive. If the drive is configured for autoboot,
the CI CD-ROM Browser program should pop up on screen. If not, run the CI_SWCD.EXE
program.
62
Revision N
California Instruments
User Manual
Compliance Test System 3.0
2. In the left window of the CD browser, locate the AC Source series for the AC source supplied
with the CTS system.
3. Click on the Programs Tab on the right and select Windows 32 bit.
4. Click on the Install button at the bottom center to run the setup program.
5. Follow the on-screen prompts of the installation program.
6. The setup program will now run and display a dialog box that shows the default directory for
the AC source control software that is CIGUI on the current drive. At this time you can
accept the default directory by clicking on the OK button or enter a different directory. If the
directory you enter does not already exist, it will be created.
7. At the end of the installation process, a message will be displayed indicating the installation is
complete.
8. You can now remove the CD-ROM.
California Instruments
Revision N
63
Compliance Test System 3.0
3.12
User Manual
Upgrading from a CTS 1.X or CTS 2.0 System
If you are upgrading from a prior version of the CTS system, you can take full advantage of the
enhanced capabilities of the CTS 3.0 software while retaining access to your existing revision
software and data files. Since the data formats between CTS 1.X, 2.0 and CTS 3.0 are not
compatible, we recommend you retain your original CTS version program disks and data files.
The CTS 3.0 program installs in different directories and will not replace your existing CTS
software installations.
Since the A/D card is already installed on an existing CTS system, you can proceed to the CTS
3.0 software installation section directly.
Note:
Since version 3.0 supports additional data processing requirements dictated by new test
standards, the PC may no longer be fast enough to process all the data in real-time. In that
case, it may be necessary to upgrade the PC as well. For CTS 3.0 to run with the Inter
harmonics per the future EN/ IEC 61000-4-7, a 667 MHz Celeron PC or better is needed for a
single phase system and a 733 MHz Celeron or better is needed for a three phase system.
Note: For three phase CTS systems that use the ISA A/D card, the inter harmonics capability cannot
be supported. An upgrade to the PCI A/D card will be required.
3.12.1 Transferring existing Calibration Data
Before using the new CTS 3.0 software, it is important to transfer the existing CTS 1.X calibration
data to the CTS 3.0 calibration database. This will eliminate the need to recalibrate the system
when upgrading. If the CTS system has not been calibrated in the past 12 months however, it is
recommended to perform a calibration. In that case, there is no need to transfer the existing CTS
1.X calibration data. Also, systems operating with CTS 2.0 will automatically transfer their
calibration data to CTS 3.0.
To transfer the CTS 1.X calibration data, proceed as follows:
1. Run the Configuration program in the Compliance Test System menu.
2. The first time the Configuration program is run and it detects the presence of the cal3c.dat
file in the c:\iec1000 directory, it will automatically read in the data contained in this file and
convert it to the CTS 3.0 calibration database.
3. A message will be displayed to inform the operator that the conversion has been completed.
Select Yes to continue using the Configuration program for display of the calibration data.
You will be presented with a log in screen. If you don’t have the right password, you can still
continue to view (but not edit) the calibration entries. Select No to close the Configuration
program. There is no user password required when you select No. Once converted, the
existing calibration data is automatically saved.
64
Revision N
California Instruments
User Manual
Note:
Compliance Test System 3.0
The CTS 3.0 system has the added capability of calibrating out any DC component on the
input channels. This capability did not exist in CTS 1.X so no calibration coefficients are
converted for DC offset. The CTS 3.0 will assume a 0 DC offset. If there is any concern
about DC offset, a DC offset calibration can be performed if needed.
3.12.2 Checking Configuration Settings
Once the new software has been installed, it is important to check the configuration settings for
the flicker reference impedance. This can be done by running the Configuration program located
in the Compliance Test System program group.
Start the configuration program. A user name and password entry box will appear. The user
name is used to track changes made to the calibration and configuration data. To check the
settings, no user name or password is needed. Click on the View/Update Calibration information
button to display the current settings.
Check the selection of the System Configuration in the lower right hand corner. Make sure this
selection reflects the actual impedance method used.
If the setting is incorrect, close the configuration screen and re-launch the configuration program.
This time you will have to unlock the settings so you can make the relevant change. Enter your
user name and the following password:
CAL_LOCK followed by the Enter Key.
You can now open the configuration screen again and change the flicker impedance setting to
the correct one.
When done, close the screen to save the new settings.
California Instruments
Revision N
65
Compliance Test System 3.0
4.
Program Menus
4.1
About this Chapter
User Manual
This chapter provides an overview of the CTS 3.0 program menus. You may read this chapter to
familiarize yourself with the menus available in the program for harmonics and flicker testing or
proceed directly to the relevant chapter for the test you want to run and use this chapter only as a
reference.
4.2
Main Menus
Many of the CTS system capabilities are accessible through the menus located at the top of the
main window. These menus are organized in the following groupings. Click on any menu to view
the sub menu items.
MENU
DESCRIPTION
File
Open, close and save test setups and data files. Also allows printing of test
reports
Edit
Used to cut and paste graphs to other Windows programs or edit the report
header text.
View
Allows test setups or a list of all tests performed with the system to be
displayed. A link to the California Instruments' web site is provided on this
menu as well.
Options
Several run-time and replay settings can be controlled from this menu.
Test
Starts a new test, allows replay of a previously recorded test, or display
harmonics information of the most recent test.
Help
On line help and Program information.
Note:
4.3
When a test is in progress, the menus are not available until after the test is completed.
This prevents the test from being suspended while the user pulls down a menu, which is
a unavoidable Windows issues.
File Menu
The File menu offers the following sub-menu choices.
66
SUB MENU
DESCRIPTION
New Test
Clears all data and brings up the test setup screen to start a new harmonics
or flicker test.
Open Data File
Opens a previously recorded data file from disk. The data file can be either
created on this computer or created on another computer.
Open Setup File
Opens a setup file. This allows a new test to be run with the exact same
setup parameters. The setup file can either be created through “Save Test
Setup” menu action or extracted from an existing test data.
Revision N
California Instruments
User Manual
Compliance Test System 3.0
SUB MENU
DESCRIPTION
Save Test Setup
Saves only the setup information in effect. The setup file name depends on
the setup. For example, a steady state Class D test would have a name of
Steady_D.cts_setup.
Save Test Data
Saves all data from the most recent test run. A test must be run first with
data saving enabled. When data saving is enabled, a test will produce a
binary file H-xxxxxx.cts_data (harmonics) or F-xxxxxx.cts_data (Flicker)
where xxxxxx is the test number. Save test data menu action actually make
a copy of that binary file to the specified file name and location.
The file name used will be the same as used for the previous save operation
unless this is the first save after a test run. In that case, the user will be
prompted for a file name.
Save Test Data As
Saves a copy of the most recent test run binary data to a new file name. The
user will be prompted for a name to use.
Report
Generate data needed for a test report and if MS Word is installed on the
PC used, allows producing/viewing/printing a test report in MS Word.
The MS Word version supported is Word 9.0 (Word 2000). Older
versions of MS Word may no longer work when upgrading to the
latest CTS 3.0.XX software version. In that case, a newer version of
MS Word may have to be installed.
4.4
Report Preview
Previewing a test report in MS Word. MS Word must be installed on the PC
used.
Print Report
Printing a test report in MS Word. MS Word must be installed on the PC
used.
Exit
Terminates and exits the CTS 3.0 program
Edit Menu
The Edit menu offers the following sub-menu choices.
SUB MENU
DESCRIPTION
Copy Top Graph
Copies a bitmap image of the top graph displayed to the Windows
Clipboard. From there, it can be pasted into other Windows programs.
Copy Bottom Graph
Copies a bitmap image of the bottom graph displayed to the Windows
Clipboard. From there, it can be pasted into other Windows programs.
Edit Header
The Header is printed at the top of each report page. This sub menu brings
up a dialog box that allows the header to be edited. For testing on behalf of
a third party, this feature allows the test lab name to be printed on each
report page.
California Instruments
Revision N
67
Compliance Test System 3.0
4.5
User Manual
View Menu
The View menu offers the following sub-menu choices.
4.6
SUB MENU
DESCRIPTION
Test Setup
Brings up a overview of all selected test setting for the current test. This is a
display window only and no fields can be changed in this mode. To change
setup option, close the active test window and select Perform a new Test
from the Test menu.
Test List
Brings up a display grid showing all tests ran to date on the test system PC.
For each test, a time stamp, test type and pass fail result is shown. Any test
for which data was recorded can be played back by selecting it and clicking
on the replay button at the bottom of the screen.
Calibration Info
Displays a summary window of the Card serial number, PACS serial number,
frequency calibration and last calibration date.
Options Menu
The Options menu offers the following sub-menu choices.
68
SUB MENU
DESCRIPTION
Get a new reference for
each test
For Harmonics tests with a limit set that is a function of the power level or
current of the EUT, a new reference can be established for each test run.
Alternatively, the last used reference can be preserved for subsequent test.
This menu entry toggle between these two available modes.
Generate ASCII Files at
the end of test
When selected, this option causes tab delimited ASCII files to be generated
at the end of the test from the binary data files recorded during the test run.
ASCII files take up more space but can be opened using other application
programs. All the ASCII files will be in the sub directory “ASCII_files”. Please
note that even if this item is not selected, conversion from a binary test file to
ASCII files can also be accomplished using the ASCII converter program
(Convert data to ASCII) supplied as part of the CTS 3.0 program suite.
Show Banner at the end
of test
When selected, this option causes a large banner (Green when PASS, Red
when FAIL) to appear on the screen of the PC. This banner can be seen
from across the room to notify a lab operator that the test run has been
completed.
Recall Type
Valid for data replay only. This option offers four choices for playback of
data. Data is stored in acquisition windows or buffers. For Harmonics,
acquisition windows are either 10, 12 or 16 cycles. For Flicker, acquisition
windows are 1 second. Available recall choices are:
Every Window:
Every acquisition window is shown
Every
failed/distorted
Window
Only acquisition windows with current failure or
distorted source are shown.
Every Failed Source
Window
Only acquisition windows with high AC source
distortion are shown.
Revision N
California Instruments
User Manual
SUB MENU
Compliance Test System 3.0
DESCRIPTION
Every Failed Current
Window
4.7
Only acquisition windows with current failure are
shown.
Recall Size
Amount of acquisition buffers or windows to be loaded from disk to memory
during playback. The more windows are loaded, the further the user can
back up in the data stream during playback. Thus, when selecting 100
buffers, the replay can be stopped and reversed up to 100 buffers.
The recall size ranges from 0 to 1000 buffers.
Replay Delay
Selects the time to wait between display data buffers during replay mode. On
a fast PC, it may be useful to increase this time or the replay will run by too
fast to see anything meaningful.
Available delay times between buffers are 0.0 seconds for the fastest speed
to 5.0 seconds for the slowest speed.
Display Rate
This setting determines how many buffers are skipped for display purposes.
While all data buffers are read from disk, only the selected buffer interval set
here is displayed in the graphs.
Available rates range from Every Acquisition to All the way to the End. The
last setting means the data is read from disk all at once and only the last
buffer is displayed at the end of replay. The user can then back up (recall)
using the VCR style keys in the lower left corner of the screen.
Test Menu
The Test menu offers the following sub-menu choices.
SUB MENU
DESCRIPTION
Perform a new test
Clears the existing test data from memory and brings up the test setup
screen for both Harmonics and Flicker test.
Replay an existing test
Brings up the list of tests that can be replayed.
Select a test setup from
Test List
Allows test setup information from any test in the test list to be copied to a
new test setup.
Edit/View Fixed
references
Allows editing of power level or current for test limits that are a function of
EUT power and or EUT current. See Get new reference entry under Options
menu.
Current Harmonics
Displays a table with current harmonics data of the most recent test.
Voltage Harmonics
Displays a table with voltage harmonics data of the most recent test.
Parameters Data
Displays a table with parameters of the most recent test.
California Instruments
Revision N
69
Compliance Test System 3.0
User Manual
5.
Harmonics Testing
5.1
About This Chapter
This chapters covers testing a device for compliance with the IEC 61000-3-2 Harmonics
standard. A review of the possible EUT classes is provided to assist the user in determining the
appropriate device class to use. Once the device class has been established, the appropriate
test module is used to perform the tests.
5.2
Test Standard Selection
Before running any Harmonics test, you must decide if you want to test to the old harmonics
standard (IEC 61000-3-2:1998, includes Amendments 1 and 2) or the new one. (IEC 61000-32:2000, Amendment 14). Both may be used up to January 2004 after which time only the new
standard should be used. The standard selection is made in the lower right hand corner of the
setup screen. Once selected, some options may be grayed out. For example, the new test
standard only considers transitory harmonics so the quasi-stationary selection is disabled. Note
that the acquisition window over which the evaluation of current harmonics is made differs under
both standards. Per the IEC 61000-4-7 referenced in Amendment 14, which replaces the Annex
B of the 1998 standard, the evaluation window for Amendment 14 is 10 cycles at 50 Hz or 12
cycles at 60 Hz. The 1998 standard is based on an evaluation window of 16 cycles for 50 Hz.
(same 16 cycles is used when the frequency is set to 60 Hz). Selecting the desired test
standard automatically configures the CTS for the correct acquisition window.
5.3
Device Classes
The IEC 61000-3-2 categorizes products in one of four product classes. Using the correct class is
important as the harmonic current limits for each class are different. Choosing the wrong class
can mean rejecting a product that otherwise would have passed (False Negative) or passing a
product that normally would have failed (False Positive). Either outcome is undesirable.
The following device classes are defined:
70
Class A
All motor driven equipment, most “domestic” appliances and virtually all 3
phase equipment (<16 A rms per phase).
Class B
All portable electric tools.
Class C
All lighting products, including dimmers, with an active input power
above 25 Watts.
Class D
Products having a power range from 75 to 600 Watts AND a current
waveform that has a special wave shape. For testing to IEC 61000-32:2000, Amendement 14, the special waveshape does not apply and
only TV's PC's and PC Monitors with power levels between 75 and 600
W are considered class D. All other products are class A.
Revision N
California Instruments
User Manual
5.3.1
Compliance Test System 3.0
Class D Special Current Waveshape
If you elected to test to the IEC 61000-3-2:1998
standard, a unit is considered to be class D
equipment if it meets the power consumption
limits listed above and its current waveform
matches at least 95 % of a specified wave
shape template. This template is aimed at
‘capturing’ high crest factor loads that are known
to generate high harmonic currents. The wave
shape template consists of three time domain
sections, one for each 1/3 period of the signal
during a positive or negative half-cycle of the
input voltage. The center section is normalized
to, and centered around the peak current value.
The other two sections have a 0.35 times Ipeak
amplitude limit. The actual template is shown in
Figure 5-1.
California Instruments
π
3
π
3
π
3
i
ipk 1
M
0.35
0
0
½π
π
Figure 5-1: Class D Current Wave Shape
Template
Revision N
71
Compliance Test System 3.0
User Manual
The exact IEC 61000-3-2:1998 standard text is
as follows:
Start here
“..equipment shall be deemed to be Class D if, under
the test conditions given in Annex C, the input current
waveshape of each half period - referred to its peak
value ipk - is within the envelope shown in the following
figure for at least 95 % of the duration of each half
period; this implies that waveforms having small peaks
outside the envelope are considered to fall within the
envelope. The center line M, coincides with the peak
value of the input current.”
Yes
No
Portable
Power
Tool?
Yes
CLASS B
No
A device that does not meet these class D
requirements defaults to a class A device and
should be tested against the class A limits.
Lighting
Equipment?
The flowchart shown in Figure 5-2 can be used
to determine the class of the device to be tested.
When selecting IEC 61000-3-2:1998 mode with a
Class D device, the CTS Software will display the
current waveshape and the special waveform
template. The percentage that fails within the
template is displayed as well. If the waveform is
not class D, the user will be given an indication.
The test can still be run however. In Class A
testing, the special waveform check is also
performed to prevent a “False Positive”.
Balanced
Three Phase
Equipment?
Yes
CLASS C
No
No
P<600W
& special
waveshape
Yes
Yes
CLASS A
Motor
Driven?
No
CLASS D
Figure 5-2: EUT Class Determination Flowchart
If the CTS software indicates that the current waveform does not meet the Class D requirements,
the user should switch to Class A instead.
5.3.2
Dynamic Class C and D Limits
Harmonic current limits for Class D are a function of the EUT power level. This poses an
interesting problem, especially if the device has a fluctuating power draw pattern. This means the
test limits change with the power consumption of the EUT. While there is some discussion in the
IEC community regarding the practicality of using such dynamic test limits, the CTS software is
fast enough to dynamically recalculate the test limits applied to the current harmonics for each
acquisition window of 16 signal periods. As such, the CTS system fully implements the IEC
standard with respect to class D.
The same issue applies to the third harmonic limit for Class C products, which is a function of the
fundamental current and power factor (λ). The CTS software determines the fundamental current
and power factor of the load for each acquisition window and dynamically determines the correct
3rd harmonic current limit for Class C devices.
If you select to test to Amendment 14, you will have to enter the manufacturer rated power for
Class D (TV's, PC's and PC Monitors) or the fundamental current and power factor for Class C
(lighting products) instead. The rated values will be used to calculate the Class C and D limits as
long as the actual measured values do not differ from the rated values by more than 10 % during
the test.
72
Revision N
California Instruments
User Manual
5.4
Compliance Test System 3.0
Stationary or Transitory Harmonics Test
The older IEC 61000-3-2:1998 standard distinguished between two types of tests, stationary for
equipment that exhibits constant power consumption and transitory for equipment that exhibits
fluctuating power consumption patterns.
Under the revised 2004 test standards, all tests are done by evaluating transitory harmonics so
this selection is not longer relevant. Evaluation of current harmonics is always done using the
transitory method so no user selection is provided. See section 2.3.3 for details on selecting the
correct test time.
It should be noted that the user must ensure that the total test time applied is sufficient to cover a
complete operating cycle of the EUT. Many devices are stationary in nature but notable
exceptions exist. For example, a laser printer that periodically draws higher currents to heat the
fuser may exhibit fluctuating harmonics and may require a test time that is sufficiently long to
cover such an event. The same applies to microwave cookers and washing machines.
California Instruments
Revision N
73
Compliance Test System 3.0
5.5
User Manual
Running a Harmonics Test
Starting the CTS 3.0 main program brings up the test setup screen. This CTS 3.0 main program
window automatically sizes to a SVGA display resolution of 800 x 600 pixels. Larger screen
resolutions are supported but the controls on the main window will not size to any resolution
above 800 x 600.
For correct harmonics and flicker measurement operation, please note the following setup
guidelines:
1. Make sure that the PACS and PC are operated from the same supply line.
2. Make sure that the power source is operated from the same basic supply circuit as the
PC and PACS unit.
A harmonics test is always started by setting the desired type and EUT class. Other settings
involve the desired nominal voltage and frequency and test window size. The figure below shows
the typical settings for a class A test.
Please note the six fields at the bottom of the set up screen are grouped as Default user input.
The values you entered in these fields are not necessarily for the particular test you are about to
perform. When you click OK, you will be presented with a measurement screen where you can
enter similar information that is specific for the test. The Default User Input here is intended to
facilitate the situations where a group of tests are to be performed where the information in
Default User Input are applicable to all the tests in the group.
Figure 5-3: Typical Class A test setup
74
Revision N
California Instruments
User Manual
Note:
Compliance Test System 3.0
If both the CTS 3.0 program and the CIGui32 or CIGuiSII are configured to use the same
Com port or IEEE-488 bus controller to control the AC source, it is important that both
programs not be active at the same time. Having both programs open at the same time
could cause an interface conflict.
The following checklist shows all available setup options for a Harmonics test.
Field
Description / Purpose
Test Type
Select between Harmonics and Flicker test. If you select Harmonics test, you can also
enable or disable inter harmonics evaluation. With the pending new revision of IEC
61000-4-7, current inter-harmonics have to be evaluation in addition to the harmonics.
Frequency
Choose 50 Hz or 60 Hz. This choice will be used to program the AC source output
frequency. If no AC source is available or the AC source control option has not been
selected, the measured frequency is checked against the user setting and an error
message is generated if a discrepancy is detected. For IEC compliance testing, 50 Hz
should be selected.
Test Class
Select the appropriate test class for the equipment under test. See paragraph 2.4.1
for test class selection.
Voltage
Select the correct line voltage. Default choices are 115 and 230 V RMS Line to
neutral. A user-defined value may be entered by selecting the "Other" option. This
setting is used to program the AC power source output voltage. If no AC source is
available or the AC source control setting in the advanced setup screen has not been
selected, the operator is responsible for ensuring the correct line voltage is applied to
the EUT.
Load
Selects single or three phase mode. On single-phase CTS systems, the three phase
selection is not available. For three-phase CTS systems, a wye connection to the
PACS-3 must be used.
Test Limit
The CTS 3.0 retains a database of harmonic current test limits. This setting selects
the limit set to use. Available options are European and Japanese. For normal IEC
testing, the European option should be selected.
IEC Standards
This option may be used to select the inclusion of Amendment 14 which includes the
evaluation of inter harmonics. Harmonics are always evaluated over 10 periods at 50
Hz and 12 periods at 60 Hz for a 200 msec at either line frequency.
EUT
This field may be used to enter information about the equipment under test. This field
is used to hold a default value.
Tested by
This field may be used to enter operator information. This field is used to hold a default
value.
Comment
Comment field for general use. This field is used to hold a default value.
Customer
If the test is performed on behalf of a third party, information about the entity for which
the test is performed may be entered here. This field is used to hold a default value.
Test Margin
Determines at what scale factor the harmonic test limits will be applied. For most
situations, this value should be set to 100 %. If testing is done for pre-compliance,
setting a lower margin will provide an extra margin of safety against system tolerances
of different test systems. This field is used to hold a default value.
Test Duration
Enter the total test time. For Steady State Harmonics, the default test time is 1.0
minute. For Transitory Harmonics, the default test time is 2.5 minutes. For flicker
tests, the default time is 10 minutes. Maximum test time is 1440 minutes or 24 hours.
This field is used to hold a default value.
Table 5-1 : IEC Harmonics Setup Parameters
California Instruments
Revision N
75
Compliance Test System 3.0
5.6
User Manual
Additional Setup Parameters for Harmonics
If this is first time using the CTS 3.0 system, it may be necessary to check the Additional Setup
settings. These settings can be displayed by clicking on the "Additional Setup" button on the right
hand side of the main setup window.
Figure 5-4: Additonal Settings for Harmonics Test
The following settings are available from this dialog window:
76
Setting
Description
Pre test time
This is the time during which to apply power to the EUT before staring the
harmonics measurements. This capability may be used to skip any startup
behavior of the EUT that may affect the outcome of the test. High EUT inrush
currents that exceed the AC Source's maximum peak current capability can result
in high voltage distortion. This would invalidate the test. The Pre-test time setting
can be used to hold off measurements until after the EUT has reached a steady
state condition.
Source Control
The CTS system is normally supplied with a suitable AC power source to provide
stable and low distortion AC power to the EUT. The Source Control section of the
additional setup dialog is used to configure the CTS system for the AC Source
used. Available options are:
Use the AC source
from its front panel
only
This option may be needed if the AC Line is used or the AC
source used does not offer remote control capabilities. This
way of operating puts more responsibility on the operator to
ensure the correct power is applied during the test.
RS232C control
Used with AC Sources that have RS232C control
capability. The Verify Source must be used to make sure
the AC Source can be found. The AC source must be
connected using the serial cable provided and must be
powered up. The View Bus button may be used to bring up
the command trace for trouble shooting purposes if the
presence of source cannot be verified. When using remote
control, the user can select to have the front panel locked
or not by setting the Disable checkbox.
Note that support for the Pacific Power Source AMX with -
Revision N
California Instruments
User Manual
Setting
Compliance Test System 3.0
Description
1UP or -3UP controllers is provided as well.
IEEE-488 control
This selection requires the presence of a National
Instruments IEEE-488 controller card or compatible card in
the PC. This interface is not supplied as part of the CTS
system but may be added as an option. The Verify Source
must be used to make sure the AC Source can be found.
The AC source must be powered up. The View Bus button
may be used to bring up the command trace for trouble
shooting purposes if the presence of source cannot be
verified. When using remote control, the user can select to
have the front panel locked or not by setting the Disable
checkbox.
Note that support for the Pacific Power Source AMX with 1UP or -3UP controllers is provided as well.
Test Data
Test data for each test can be saved to disk for later replay or report generation.
If this option is not selected, the test cannot be replayed later or printed. For most
situations, it is recommended to save the test data. For debugging sessions, it
may be acceptable to turn off this option to preserve disk space.
Class C and D Test
Limits
Test limits for class C and D are not fixed but rather depend on the EUT power
level and or power factor. The CTS 3.0 uses the generally accepted dynamic test
limit calculation method to determine the correct limits for each acquisition
window.
Using the settings in this frame however, the operator may override this
implementation and set a fixed limit for Class D and C. The time for which to
acquire power and or power factor data from the EUT can be set in the Duration
field in seconds. For three-phase mode, the power can be averaged over all three
phases.
Sample and Hold
This option allows CTS systems with and without sample and hold circuitry to be
used. In the absence of a S/H circuit, the CTS 3.0 software will perform phase
correction between voltage and current channels.
Time filter duration
for transitory
harmonics filtering.
This value should be set for 1.5 seconds to comply with the IEC 61000-3-2
standard. Future standard changes may require this value to be changed.
Table 5-2 : IEC Harmonics Advanced Setup Parameters
California Instruments
Revision N
77
Compliance Test System 3.0
5.7
User Manual
Main Harmonics Test Window Operation
Upon closing the Main setup window, the harmonics test window will appear. Tests are executed from
this window and test results are displayed in real-time. This main harmonics test window has a limited
number of controls, the function of which are explained in the table below.
Figure 5-5: Harmonics Test Window
78
Field / Control
Location
Description
Start button
Upper left
corner
Stop button
Upper left
corner
Starts harmonics test using presently selected parameters. Once a test
is running, parameters cannot be changed. Starting a test also causes
data to be written to the test data file if data recorded is enabled. Each
time a test is run, a new sequential 'Test Number' is assigned. Results
for each test are automatically logged. Data for each test is only
recorded if this option is selected in the Additional Setup screen.
Once a test is running, the Start button changes to a Stop button. Also,
any menus will be disabled while a test is in progress as pulling down a
menu under Windows will cause the application to halt which would
result in data loss.
Stop the acquisition process. The Stop button can be used to abort a
test prematurely. The data files will be closed and will only contain data
up to the point at which the test was aborted. Test log will indicate if the
test completed normally or was aborted by the user.
Revision N
California Instruments
User Manual
Compliance Test System 3.0
Field / Control
Location
Description
Report button
Upper left
corner
Power
Buttons
Upper left
corner
The Print Summary button generates a test report in an MS Word doc
file. This report contains both the voltage and current waveform and the
harmonics display graph. It also includes the current and voltage
harmonics in absolute values and as a percentage of the applied IEC
limits.
These button controls may be used to turn the AC power source output
on or off. The configuration can be set to use automatic power on/off,
automatic on / manual off or manual on and off control of the AC
source. If no AC source control option is selected, the operator has to
use the front panel of the AC source instead and this button will not be
available. In manual mode, the operator must click on the Power On
button to turn on power to the EUT.
WINDOW
DATA
Frequency - Hz
Left panel
Voltage - RMS
Left panel
Current - RMS
Left panel
I peak
Left panel
I Fund
Left panel
Crest Factor
Left panel
VA Power
Left panel
Power - Watts
Left panel
Power Factor
Left panel
Window Result
Left panel
VTHD
Left panel
Test Number
Bottom Left
Test Result
Bottom Left
California Instruments
The data in the Window Data frame on the left side of the main
harmonics screen applies to successive acquisition buffers. Acquisition
buffers are 320 ms for 50 Hz EUT’s and 266.67 ms for 60 Hz EUT’s if
the 16 Cycle window size is selected. If the 10/12 cycle window size is
selected, the buffer size is 200 msec.
Displays the AC signal frequency in Hz. If the frequency is not 50 or 60
HZ, “F???” will appear in the field of VTHD and Source Qual. The test
will continue however but the results may not be valid.
Displays the Root Mean Square voltage of the AC source output for
each acquisition buffer.
Displays the Root Mean Square current to the EUT for each acquisition
window.
Displays the peak current value of the EUT current. If the EUT
produces no harmonic currents, the peak current is √2 times the RMS
current.
Displays the value of the fundamental current of the EUT for each
acquisition window. The fundamental current is the current at 50 Hz or
60 Hz only, without any contributions from higher order harmonic
currents. If the EUT produces no harmonic currents, the fundamental
current will be the same as the rms current.
Displays the crest factor of the EUT current. Crest factor is the ratio
between the peak current and the RMS current.
Displays the apparent power consumption of the EUT for each
acquisition window.
Displays the real power consumption of the EUT for each acquisition
window.
Displays the ratio between real power and VA power of the EUT for
each acquisition window.
Indicates if the present acquisition buffer current harmonics exceed the
selected EUT current limits. If one or more acquisition buffers report a
failure, the overall test result will fail. This field will typically toggle
between good and fail during the test run.
Indicates if the present acquisition buffer has a voltage distortion that
exceeds the IEC limit.
Each test run is assigned a sequential test number. The number for the
current test is displayed in this field. This allows individual test results
to be tracked.
This field provides a visual indication of the test result. A Green field
with Pass indicates the EUT current harmonics are below the limit, a
Red field with Fail indicates the EUT current harmonics are above the
limit. Note that the condition of this field is affected by the user selected
test margin. To use the actual IEC test limits, the test margin should be
Revision N
79
Compliance Test System 3.0
Field / Control
Location
Source
Qualification
Bottom Left
Start Time
Bottom Left
% of test
completed
Left panel
Test Margin
Bottom
Test Duration
Bottom
EUT
Bottom
Comments
Bottom
Tested by
Bottom
Customer
80
Voltage and
Current Graph
Top right
panel
Harmonics
Graph
Bottom
right panel
Legend buttons
Graph
panels
User Manual
Description
set to 100 %. This field depends on the “Window results” of all the
windows up to this test time and if any “Window result” is failed during a
test, Test result will be “Fail”. In other words, this field is “Fail” latching.
This field displays overall AC Source voltage distortion status for the
test so far. At the end of the test, this field indicates if the AC Source
failed the voltage distortion test at any time during the test.
The VTHD indication is given to notify the user of a possible problem
with the AC source voltage distortion, which may invalidate the test
results. The test will not be aborted however if the voltage distortion is
too high.
This field always shows the start time of the test in progress. The test
duration is shown in the bottom panel. See also the “% of test
completed” indication and the progress bar below the Start Time field.
During test execution, this field displays the percentage of the test that
has been completed. Once this number reaches 100 %, the test will
terminate normally. If the user clicks on the Stop button instead, it will
display the point at which the test was aborted.
The test margin can be set by the user if a pre-compliance test is
needed and the user wants to set more stringent limits. The test margin
number defaults to 100 % to use the exact IEC limits. A lower
percentage will means the EUT has to pass lower test limits (more
stringent). The value of this field ranges from 50 % to 150 %.
Note that the limit lines in the Graph always display the 100 % IEC
limits. The test margin is only used for Pass or Fail determination.
The test duration is the total test time selected by the user. This value
can be set from 0 to 1440 minutes (24 hours). This value should be set
before starting the test as it cannot be changed while a test is in
progress. If the duration is 0 minutes, then only one window will be
acquired.
This field can be used to enter information about the unit under test.
The EUT field contents will be included in the test data file and in any
reports that are printed.
This field can be used to enter any information about the test. The
Comments field contents will be included in the test data file and in any
reports that are printed.
This field can be used to enter information about the operator. The
“Tested by” field contents will be included in the test data file and in any
reports that are printed.
This field can be used to enter information on a customer if you are
running tests for a third party. The “Customer” field contents will be
included in the test data file and in any reports that are printed.
This graph displays the AC voltage and current waveforms. At all times,
two periods of the AC signal are displayed. The voltage is shown in
yellow, the current in green. For Class D tests, the special waveshape
template is displayed in the same graph using red. The percentage of
the EUT current outside the template is shown directly below the graph.
The Harmonics graph panel can be used to display the current
harmonics (green) and test limits (red) during the test. It is also possible
to toggle this display to show the AC voltage harmonics. The drop down
control located at the top of the Harmonics graph panel can be used to
select alternate display modes.
The Legend buttons can be used to display a pop-up window that
shows the color coding used in each graph.
Revision N
California Instruments
User Manual
5.7.1
Compliance Test System 3.0
Entering User and/or Customer Data
Prior to running a test, you should enter information concerning the EUT, the person or
department performing the test and any other information that may be relevant to interpreting or
using the test results obtained from the CTS system. Several fields are provided for this purpose
along the bottom of the main test window. If the test is performed on behalf of a third party, the
customer data field may be used to document the customer name.
The information entered in these fields is added to the test data file and any reports that are
printed. The date and time of the test run are automatically added based on the PC’s real-time
clock.
5.7.2
Selecting the Test Period
The test period should be set appropriately for the test mode selected and the EUT at hand. For
details on setting the correct harmonics test time, refer to paragraph Error! Reference source
not found. for IEC 61000-3-2:1998 mode or paragraph 2.3.3 for IEC 61000-3-2:2000 mode. For
flicker tests, the default is 10 minutes. You can increase the test time up to 24 hours if needed.
5.7.3
Setting the Test Margin
The CTS system offers the user the choice of setting a test margin around the IEC limits. This
means a user specified factor can be applied to the IEC test limits. The default value used is 100
% which essentially means the actual IEC limits are applied to determine a pass or fail result.
This is the mode to use for actual compliance testing.
Setting this margin to a value below 100 % can be useful for pre-compliance testing. Selecting a
lower margin means the test is more stringent. If the EUT can pass the more stringent test, it is
more than likely to pass when submitted to an independent test lab. Setting the margin above
100 % means you are “loosening” the limits allowing EUT’s to pass that would normally fail. This
mode is not recommended.
5.8
Running the Harmonics Test
Before starting a test, make sure all user fields are set correctly. Changes to these fields are no
longer possible once a test is in progress. Also make sure the EUT is connected to the AC output
of the PACS unit and the correct AC line voltage is programmed on the AC source.
A test run is started by clicking on the Start button. During test execution, the “% of test
completed” field on the left of the main window displays the percentage of the test that has been
completed. Once this number reaches 100 %, the test will terminate normally. If you click on the
Stop button instead, it will display the point at which the test was aborted.
During the test execution, the CTS 3.0 software will continuously evaluate the EUT current
harmonics against the appropriate class limits. The Pass or Fail indication is updated in real-time.
If the test fails early in a long test period, you may elect to abort the test prematurely rather than
waiting till the end.
5.8.1
Voltage and Current Waveform Graphs
The top graph continuously displays two signal periods of the AC voltage (yellow) and current
(green) waveforms. For Classes A and D tests, it also shows the special current wave shape
template in red. Alternate display modes can be selected from the drop down combo at the top of
the graph.
5.8.2
Voltage and Current Harmonics Graphs
The bottom graph serves a dual purpose. During the test run, it can be used to show either the
current or the voltage harmonics. In either mode, the IEC test limits are displayed using a red line
for the current harmonic limits and a green line for the voltage harmonic limits.
California Instruments
Revision N
81
Compliance Test System 3.0
Note:
User Manual
The voltage harmonic limits apply to the AC source qualification and may indicate that
the current harmonics are affected due to excessive AC voltage distortion. In this case, a
red Source Qual. label is shown on the left hand side of the main window.
When displaying the current harmonics, the actual harmonic currents from the second through
the fortieth for each acquisition window are shown in green. The IEC test limits are shown using a
red line. Note that this red line always displays the 100 % IEC test limits during Steady State
testing, regardless of the user specified test margin which is used for the Pass or Fail
determination. (see "Setting the Test Margin" , found in paragraph Error! Reference source not
found.).
Note:
5.8.3
The fundamental current is not shown in the harmonics graphs as there is no test limit for
the fundamental.
Aborting a Test
Tests in progress can be aborted at any time by clicking on the Stop button. Aborted test data
files will be marked as incomplete.
5.9
Printing Results
The Report button allows you to print both on-screen graphs displays and current and voltage
harmonics test result data to an MS Word document. This provides a test report that displays the
test setup, the Pass or Fail result and a graph of the voltage and current waveform as well as the
worst case values for each of the current harmonics. The Report button is available at the end of
a test run or any time a test is aborted with the Stop button.
Note: The MS Word version supported is Word 9.0 (Word 2000). Older versions of MS Word
may no longer work when upgrading to the latest CTS 3.0.XX software version. In that case, a
newer version of MS Word may have to be installed.
5.10
Harmonics Test Data Files
The CTS 3.0 Software can be configured to log test data to a file. The file format used is
proprietary but can be converted at the end of the test to an ASCII text file with tab delimited
fields for voltage, current, power, peak current and all the current harmonics. This data is
recorded in real-time or three to four times a second.
Longer test times will result in larger test data files and reports. If you increase the test time,
make sure you have sufficient hard disk space available to accommodate these long test files.
The rate at which data is written to disk can be decreased to avoid excessive file sizes. The point
at which the program will reduce the rate of data storage can be set in the configuration. Should
a test failure occur while the CTS 3.0 program is in this reduced data rate recording mode, full
rate data recording resumes for a specified number of acquisition buffers. This always provides
detailed information around the time of the failure. These recording rate settings can be set in
the miscellaneous section of the configuration program.
5.11
Three Phase Testing
Three phase testing is similar to single phase testing described above except that three line
voltages and three line currents are being measured simultaneously and displayed in the CTS
3.0 software GUI.
The three phase mode screens are virtually identical in function and form to the single-phase
screens. The user can view one phase at a time, or all three phases simultaneously.
82
Revision N
California Instruments
User Manual
5.12
Compliance Test System 3.0
Replay Mode
The CTS 3.0 Software can be used to replay previously recorded test data. This replay can be
done on the same test system that was used to record the original data or on an altogether
different PC.
In order to replay a test, the data acquired during the test needs to be saved to a CTS native data
file. If the save data option is not enabled in the additional setup window for Harmonics, there is
no way to replay a test later. The Pass or Fail result of any run on the actual test system PC is
always logged however. If a different PC is used to play back data, the data files have to be
transferred to this PC first. The test data files are stored in the following directory:
C:\Program Files\California Instruments\CTS\Data_files
5.12.1 To play back test on the actual test system PC, proceed as follows:
1. From the Test Menu, select 'Replay an existing test'. This will bring up a table showing all
tests ever run on this system.
2. Select the test you want to replay by clicking on its row. If data for this test was stored and is
available, the Replay Test button at the bottom will be enabled.
3. Click on the Replay Test button to start the replay process. This will bring up a standard
Harmonics or Flicker test screen.
4. To start the replay process, click on the Start button. The data displayed will be taken from
the stored data files. The replay mode is indicated in the lower right corner on the status bar.
5. The buffer rate and speed at which data is replayed can be controlled using the various
settings in the Options menu. This may be required to adjust to the speed of the PC used.
6. The replay process can be halted at any time by clicking on the Stop button. This will stop
the data at the buffer number shown in the lower left corner.
7. Once stopped, the data can be stepped forward or backward at various rates using the VCR
style buttons in the lower left corner.
8. A test report can be printed from stored data in this mode. The actual date and time the data
was recorded will be shown on the report in addition the report print date and time.
5.12.2 To play back test on a different PC from the test system PC, proceed as follows:
1. If not already done, install a copy of the CTS 3.0 software on the other PC. When launched,
the absence of a data acquisition system will be detected and flagged. This is normal.
2. Transfer the data files to the PC used for replay, either using a network connection or disk.
3. From the File menu, select the Open Data File entry, This brings up the standard file open
dialog box.
4. Locate and select the file to be replayed. Harmonics files start with the letter H, flicker files
start with the letter F.
5. Click on the Open button to open the test data file. This will bring up the test window.
6. To start the replay process, click on the Start button. The data displayed will be taken from
the stored data files. The replay mode is indicated in the title of the CTS software.
7. The buffer rate and speed at which data is replayed can be controlled using the various
settings in the Options menu. This may be required to adjust to the speed of the PC used.
8. The replay process can be halted at any time by clicking on the Stop button. This will stop
the data at the buffer number shown in the lower left corner.
California Instruments
Revision N
83
Compliance Test System 3.0
User Manual
9. Once stopped, the data can be stepped forward or backward at various rates using the VCR
style buttons in the lower left corner.
10. A test report can be printed from stored data in this mode. The actual date and time the data
was recorded will be shown on the report in addition the report print date and time.
5.12.3 Harmonics Replay Options
Data replay capability is an important diagnostic feature of the CTS 3.0 system. The end user
has a great deal of control over the replay process. These user settings are located in the
Options menu. The following options are available to control the replay process:
Menu Item
Description
Recall Type
This option offers four choices for playback of data. Data is stored in acquisition
windows or buffers. For Harmonics, acquisition windows are either 10, 12 or 16
cycles. For Flicker, acquisition windows are 1 second each. Available recall
choices are:
Every Window:
Every acquisition window is shown
Every failed/distorted
Window
Only acquisition windows with one or more failures are
shown.
Every Failed Source
Window
Only acquisition windows with high AC source
distortion are shown.
Every Failed Current
Window
Only
Recall Size
Amount of acquisition buffers or windows to be loaded from disk to memory during
playback. The more windows are loaded, the further the user can back up in the
data stream during playback. Thus, when selecting 100 buffers, the replay can be
stopped and reversed up to 100 buffers.
The recall size ranges from 0 to 1000 buffers.
Replay Delay
Selects the time to wait between display data buffers during replay mode. On a
fast PC, it may be useful to increase this time or the replay will run by too fast to
see anything meaningful.
Available delay times between buffers are 0.0 seconds for the fastest speed to 5.0
seconds for the slowest speed. During delay, you can click on the pause button to
pause.
Display Rate
This setting determines how many buffers are skipped for display purposes. While
all data buffers are read from disk, only the selected buffer interval set here is
displayed in the graphs.
Available rates range from Every Acquisition to All the way to the End. The last
setting means the data is read from disk all at once and the last buffer is displayed
right away. The user can then back up using the VCR style keys in the lower left
corner of the screen.
Table 5-3 : IEC Harmonics Replay Settings
84
Revision N
California Instruments
User Manual
6.
Flicker Testing
6.1
About This Chapter
Compliance Test System 3.0
This chapter covers testing a device for compliance with the IEC 61000-3-3 Flicker standard. The
relevant IEC Flicker test part is described in detail.
6.2
Principle of Operation
The CTS Flicker software acquires, stores, processes and analyzes the EUT data in real-time
and provides continuous display updates on all Flicker parameters. Voltage time domain data is
collected, the rms voltage value is calculated for each half period of the signal or every 10
mseconds, and the measurement data is written to disk for 100 consecutive acquisition periods
or once every second.
This allows the operator to monitor the progress of the flicker test and, should a failure occur
before the end of the test run, abort the test if needed. Since flicker test can run for several hours,
this will avoid needless waiting for tests to finish on a EUT that already failed the IEC
requirements.
In order to run the real-time Flicker test, you need a 2.0 GHz Pentium PC or better. This is
caused by the amount of data that needs to be processed to perform flicker evaluation. Slower
PC’s will not be able to process the data in real-time.
6.3
Flicker Test Options
The CTS Flicker test mode supports several test modes. These modes allow the user to select
the flicker parameters that shall be used to determine a PASS or FAIL result. Some types of EUT
may not need to be evaluated for Plt since they are unlikely to cause long-term flicker. This is
largely a function of the operating cycle of the equipment being evaluated. Consult Annex A of
the IEC 61000-3-3 test standard to determine which test option is most appropriate for the EUT
under evaluation. The following options are available
Mode
Description
Test all Flicker parameters
This is the default test mode and should be used if you are
unsure about the typical operating cycle of the unit under
test.
Test dc, dt, dmax and Pst only
This mode only tests for compliance to the dc and dt
specifications.
Test dc, dt and dmax only
This mode only tests for short-term flicker. It can be used to
test equipment that has operating cycles less than 2 hours.
Several levels of dmax may be permissible depending on
the EUT. The selection criteria are as follows:
The maximum relative voltage change d max , shall not
exceed
a) 4 % without additional conditions;
b) 6 % for equipment which is
– switched manually, or
– switched automatically more frequently than twice per
California Instruments
Revision N
85
Compliance Test System 3.0
Mode
User Manual
Description
day, and also has either a delayed restart (the delay being
not less than a few tens of seconds), or manual restart,
after a power supply interruption.
NOTE: The cycling frequency will be further limited by the
Pst and Plt limit. For example: a dmax of 6 % producing a
rectangular voltage change characteristic twice per hour
will give a Plt of about 0,65.
c) 7 % for equipment which is
– attended whilst in use (for example: hair dryers,
vacuum cleaners, kitchen equipment such as mixers,
garden equipment such as lawn mowers, portable tools
such as electric drills), or
– switched on automatically, or is intended to be switched
on manually, no more than twice per day, and also has
either a delayed restart (the delay being not less than a few
tens of seconds) or manual restart, after a power supply
interruption.
In the case of equipment having several separately
controlled circuits in accordance with 6.6, limits b) and c)
shall apply only if there is delayed or manual restart after a
power supply interruption; for all equipment with automatic
switching which is energized immediately on restoration of
supply after a power supply interruption, limits a) shall
apply; for all equipment with manual switching, limits b) or
c) shall apply depending on the rate of switching.
86
Inrush Current and Dmax Test
It may be necessary to determine, by examination of the
circuit diagram and specification of the equipment and by a
short functional test, whether significant voltage fluctuations
are likely to be produced. For voltage changes caused by
manual switching, equipment is deemed to comply without
further testing if the maximum r.m.s. input current (including
inrush current) evaluated over each 10 ms half-period
between zero-crossings does not exceed 20 A, and the
supply current after inrush is within a variation band of 1,5
A.
Select this option to perform this test.
24 x Dmax Test
Select this option to determine the Dmax test in accordance
with Annex B of IEC 61000-3-3 Amendment 1. The
program will guide the user through the required steps for
taking 24 startup readings. The default current threshold for
detecting an EUT is 500 mA. If the EUT draws less current
than 500 mA in the on state, this threshold value may have
to be lowered in the configuration screen.
Revision N
California Instruments
User Manual
6.4
Compliance Test System 3.0
Running a Flicker Test
Running a flicker test is similar to running a harmonics test. Launch CTS 3.0 and select flicker
test in the set up screen. Then select appropriate test parameters and click OK to continue. You
will be presented with a test screen similar to that of harmonics.
Test Start
and Stop
Enter test
margin
here
Figure 6-1: Flicker Test Window
The flicker test window has several user accessible fields and controls. The following table briefly
describes the purpose of each field and control.
California Instruments
Revision N
87
Compliance Test System 3.0
Field /
Control
Power
button
Description
Upper left
corner
Click on Power to toggle the power source output voltage, unless
power source is already programmed to 230V. The Flicker module
can be configured to turn off the power after every test, in that case
therefore, the user will have to click Power On before starting the
test.
Starts the flicker test using presently selected parameters. Once a
test is running, parameter cannot be changed. Starting a test also
causes data to be written to the test data file.
Stop the acquisition process. The Stop button can be used to abort
a test prematurely. The data files will be closed and will only
contain data up to the point at which the test was aborted.
Used to produce a test report in WORD. A WORD must be
installed to generate the report.
Can manually toggle the power on/off. A PC to power source
communication is needed before it is enabled.
Displays signal frequency
Displays Voltage rms value
Upper left
corner
Stop button
Upper left
corner
Report Button
Upper left
corner
Upper left
corner
Left Panel
Left Panel
Frequency
V-rms (volt)
88
Location
Start button
Power Button
User Manual
Test Start
Time
Highest dc %
Left panel
Highest dmax
%
Left panel
Highest dt %
Left panel
Highest Psti
Left panel
Highest Plt
Left panel
Test Status
Center
panel
Left panel
This field always shows the start time of the test in progress. The
test duration is shown in the bottom panel.
Displays the highest Relative Steady State voltage change (dc) in
% found so far during the test. This represents the difference
between two adjacent steady-state voltages relative to the nominal
voltage. The standard requires that dc must be less than or equal to
3 % for the EUT to PASS.
Displays the highest Maximum relative voltage change (dmax) in %.
found so far during the test. This represents the difference between
the maximum and minimum rms values of the voltage change
characteristic relative to the nominal voltage. The standard requires
that dmax must be less than or equal to 4 % for the EUT to PASS.
Displays the highest Relative voltage change characteristic (dt).
This value represents the change in rms voltage, relative to the
nominal voltage, as a function of time and between periods when
the voltage is a steady state condition for at least 1 second. The
standard requires that dt must be less than 3 % for the EUT to
PASS, although it is permitted to be between 3 and 4 % for less
than 200 msec.
Displays the highest Short Term Flicker value found so far during
the test. Each Short Term Flicker severity is evaluated over period
of 10 minutes. The threshold of irritability is Pst = 1 and this value
is used as the PASS/FAIL limit.
Displays the highest Long Term Flicker value (Plt) found so far
during the test. The Plt period is 120 minutes and is calculated
using successive Psti values. The threshold of irritability for long
term flicker is 0.65 and this value is used as the PASS/FAIL limit.
This field provides a visual indication of the test result. A Green
field with Pass indicates the EUT passes the Flicker test, a Red
field with Fail indicates the EUT causes too much flicker. Note that
Revision N
California Instruments
User Manual
Field /
Control
Compliance Test System 3.0
Location
Voltage - rms
(Ut)
Center
panel
dmax %
Center
panel
dc in %
Center
panel
Plt # n
Center
panel
Instant. Pst
Center
panel
Center
panel
Psti #n
Select Test
Test
selection
Test Margin
Test
Margin
Graph Display
Graph
panel
Graph mode
Display
mode /
Print
panel
Test File
Bottom
panel
California Instruments
Description
the condition of this field is affected by the user selected test
margin. To use the actual IEC test limits, the test margin should be
set to 100 %.
Displays the Root Mean Square voltage of the AC source output
for each acquisition window. Acquisition windows are 10 ms for 50
Hz EUT’s and 8 ms for 60 Hz EUT’s.
Displays the present Maximum relative voltage change (dmax) in %.
This represents the difference between the maximum and
minimum rms values of the voltage change characteristic relative to
the nominal voltage. The standard requires that dmax must be less
than or equal to 4 % for the EUT to PASS.
Displays the present Relative Steady State voltage change (dc) in
%. This represents the difference between two adjacent steadystate voltages relative to the nominal voltage. The standard
requires that dc must be less than or equal to 3 % for the EUT to
PASS.
Displays the present Long Term Flicker value for Pst period
number n. The Plt period is 120 minutes and is calculated using
successive Psti values. The threshold of irritability for long term
flicker is 0.65 and this value is used as the PASS/FAIL limit.
Displays the instantaneous Short Term Flicker value. At the end of
each 10 minute period, this value will be the Pst for the period.
Displays the present Short Term Flicker value for period n. The
Short Term Flicker severity is evaluated over a period of 10
minutes. The threshold of irritability is Pst = 1 and this value is used
as the PASS/FAIL limit.
This combo box allows one of three test modes to be selected:
• Test all Flicker parameters
• Test dc and dt only
• Test Pst only
This field allows the user to set the test margin from 50 % to 150
%. Additional information on setting a test margin is shown later in
this chapter.
The graph panel is used to display either dc and dt or Ut rms as a
function of time. The user can change display modes using the
Graph mode drop down box located directly above the graph itself.
The Flicker module allows the user to toggle between two display
modes. One mode shows the dc and dt as a function of time. The
other mode shows the Ut rms value as a function of time. Each
mode shows a time windows of about 2 seconds and is updated
once every 2 seconds.
This fields shows the currently selected test data file. It also
provides a File button which can be used to change the selected
test data file. The test data file is the file to which new data will be
written while a test is running. Once a test is started, this button in
disabled as the test data file cannot be changed while it is in use by
the program. Note that the actual file name may be too long to fit in
Revision N
89
Compliance Test System 3.0
Field /
Control
6.4.1
Location
Test Duration
Bottom
panel
EUT
Bottom
panel
Comments
Bottom
panel
Tested by
Bottom
panel
User Manual
Description
the space provided on screen. If this is the case, use the File
button to display the file dialog box which will allow you to see the
entire path and file name.
The test duration is the total test time selected by the user. This
value can be set from 0.5 minutes (30 seconds) to 1440 minutes
(24 hours). Note that a Pst and/or All parameter test requires a test
time of at least 10 minutes. The default test time is set to 10
minutes.
This field can be used to enter information about the unit under
test. The EUT field contents will be included in the test data file and
in any reports that are printed.
This field can be used to enter any information about the test. The
Comments field contents will be included in the test data file and in
any reports that are printed.
This field can be used to enter information about the operator. The
“Tested by” field contents will be included in the test data file and in
any reports that are printed.
Entering User Data
Prior to running a test, you should enter information concerning the EUT, the person or
department performing the test and any other information that may be relevant to interpreting or
using the test results obtained from the CTS system. Several fields are provided for this purpose
along the bottom of the main test window.
The information entered in these fields is added to the test data file and any reports that are
printed. The date and time of the test run is automatically added based on the PC’s real-time
clock.
6.4.2
Selecting the Test Period
The default test time for Flicker tests is 120 minutes which provides 12 short term flicker values of
10 minutes each. The user can set the test time anywhere from 0.5 minutes to 1440 minutes or
up to 24 hours if needed. The test period needs to be set long enough to cover the entire
operating cycle of the unit under test. If a test time less than 120 minutes is entered, the Plt will
be evaluated using 12 Psti values and deeming the non measured 10-minute periods to have a
zero Psti.
Equipment that is unlikely to produce long-term flicker based on its typical operating cycle need
not be tested for Plt. This can significantly reduce the test time. If you are unsure however of the
EUT’s behavior, you are advised to perform a 2 hour test (120 minutes) to verify compliance with
IEC 61000-3-3.
6.4.3
Test Data Files
The CTS 3.0 Software can save the flicker test waveform and result during the test if the saving
option is enabled. The file will be saved in the data_files subdirectory. For test #25, the file will
be F-000025.cts_data. This file can be replayed later with the same software.
6.4.4
Setting the Test Margin
The CTS system offers the user the choice of setting a test margin around the IEC limits. This
means a user specified factor can be applied to the IEC test limits. The default value used is 100
90
Revision N
California Instruments
User Manual
Compliance Test System 3.0
% which essentially means the actual IEC limits are applied to determine a pass or fail result.
This is the mode to use for actual compliance testing.
Setting this margin to a value below 100 % can be useful for pre-compliance testing. Selecting a
lower margin means the test is more stringent. If the EUT can pass the more stringent test, it is
more than likely to pass when submitted to an independent test lab.
Setting the margin above 100 % means you are “loosening” the limits allowing EUT’s to pass that
would normally fail. This mode is not recommended.
6.4.5
Running the Flicker Test
Before starting a test, make sure all user fields are set correctly. Changes to these fields are no
longer possible once a test is in progress. Also make sure the EUT is connected to the AC output
of the PACS unit and the correct AC line voltage is programmed on the AC source.
A test run is started by clicking on the Start button.
During the test execution, the CTS 3.0 Software will continuously evaluate EUT Flicker against
the appropriate IEC limits. The Pass or Fail indication is updated in real-time. If the test fails early
in a long test period, you may elect to abort the test prematurely rather than wait till the end.
6.5
Printing Results
The CTS 3.0 Software can produce a WORD based report. At the end of test, the report button
will be enabled. Clicking on the Report button will generate information needed for a report and
present an option to generate a report in WORD.
6.6
Flicker Replay Mode
The CTS 3.0 Software can be used to replay previously recorded test data. This replay can be
done on the same test system that was used to record the original data or on an altogether
different PC.
In order to replay a test, the data acquired during the test needs to be saved to a CTS native data
file. If the save data option is not enabled in the additional setup window for Flicker, there is no
way to replay a test later. The Pass or Fail result of any run on the actual test system PC is
always logged however. If a different PC is used to play back data, the data files have to be
transferred to this PC first. The test data files are stored in the following directory:
C:\Program Files\California Instruments\CTS\Data_files
6.6.1
To play back test on the actual test system PC, proceed as follows:
1. From the Test Menu, select 'Replay an existing test'. This will bring up a table showing all
tests ever run on this system.
2. Select the test you want to replay by clicking on its row. If data for this test was stored and is
available, the Replay Test button at the bottom will be enabled.
3. Click on the Replay Test button to start the replay process. This will bring up a standard
Harmonics or Flicker test screen.
4. To start the replay process, click on the Start button. The data displayed will be taken from
the stored data files. The replay mode is indicated in the lower right corner on the status bar.
5. The buffer rate and speed at which data is replayed can be controlled using the various
settings in the Options menu. This may be required to adjust to the speed of the PC used.
6. The replay process can be halted at any time by clicking on the Stop button. This will stop
the data at the buffer number shown in the lower left corner.
California Instruments
Revision N
91
Compliance Test System 3.0
User Manual
7. Once stopped, the data can be stepped forward or backward at various rates using the VCR
style buttons in the lower left corner.
8. A test report can be printed from stored data in this mode. The actual date and time the data
was recorded will be shown on the report in addition the report print date and time.
6.6.2
To play back test on a different PC from the test system PC, proceed as follows:
1. If not already done, install a copy of the CTS 3.0 software on the other PC. When launched,
the absence of a data acquisition system will be detected and flagged. This is normal.
2. Transfer the data files to the PC used for replay, either using a network connection or disk.
3. From the File menu, select the Open Data File entry, This brings up the standard file open
dialog box.
4. Locate and select the file to be replayed. Harmonics files start with the letter H, flicker files
start with the letter F.
5. Click on the Open button to open the test data file. This will bring up the standard setup
screen showing the settings that were used to acquire this data.
6. Click on OK to proceed to the main test window.
7. To start the replay process, click on the Start button. The data displayed will be taken from
the stored data files.
8. The buffer rate and speed at which data is replayed can be controlled using the various
settings in the Options menu. This may be required to adjust to the speed of the PC used.
9. The replay process can be halted at any time by clicking on the Stop button. This will stop
the data at the buffer number shown in the lower left corner.
10. Once stopped, the data can be stepped forward or backward at various rates using the VCR
style buttons in the lower left corner.
11. A test report can be printed from stored data in this mode. The actual date and time the data
was recorded will be shown on the report in addition the report print date and time.
92
Revision N
California Instruments
User Manual
6.6.3
Compliance Test System 3.0
Flicker Replay Options
Data replay capability is an important diagnostic feature of the CTS 3.0 system. The end user
has a great deal of control over the replay process. These user settings are located in the
Options menu. The following options are available to control the replay process:
Menu Item
Description
Recall Type
This option offers four choices for playback of data. Data is stored in
acquisition windows or buffers. For Harmonics, acquisition windows are
either 10, 12 or 16 cycles. For Flicker, acquisition windows are 1 second.
Available recall choices are:
Every Window:
Every acquisition window is shown
Every failed/distorted
Window
Only acquisition windows with one or more
failures are shown.
Every Failed Source
Window
Only acquisition windows with high AC source
distortion are shown.
Every Failed Current
Window
Only
Recall Size
Amount of acquisition buffers or windows to be loaded from disk to
memory during playback. The more windows are loaded, the further the
user can back up in the data stream during playback. Thus, when
selecting 100 buffers, the replay can be stopped and reversed up to 100
buffers.
The recall size ranges from 0 to 1000 buffers.
Replay Delay
Selects the time to wait between display data buffers during replay mode.
On a fast PC, it may be useful to increase this time or the replay will run by
too fast to see anything meaningful.
Available delay times between buffers are 0.0 seconds for the fastest
speed to 5.0 seconds for the slowest speed.
Display Rate
This setting determines how many buffers are skipped for display
purposes. While all data buffers are read from disk, only the selected
buffer interval set here is displayed in the graphs.
Available rates range from Every Acquisition to All the way to the End.
The last setting means the data is read from disk all at once and the last
buffer is displayed right away. The user can then back up using the VCR
style keys in the lower left corner of the screen.
Table 6-1 : IEC Flicker Replay Settings
California Instruments
Revision N
93
Compliance Test System 3.0
User Manual
7.
IEC 61000-4-11 Voltage Dips and Variations Immunity Testing
7.1
About This Chapter
This chapters covers testing a device for compliance with the IEC 61000-4-11 Voltage Dips and
Variations test standard. This test is supported through the CIGui32 or CIGuiSII AC source
control program. If you purchased a 100-CTS or 300-CTS test system, which does not include a
California Instruments AC source, you will not be able to perform these tests.
The CIGui32 or CIGuiSII supports two implementations of the IEC 61000-4-11 test standard, one
based on the firmware option available for the i/iX Series and one implemented in the CIGui32 or
CIGuiSII program itself that can be used with any supported AC source. If you are using an i/iX
Series AC source, check your configuration window to see if this option is installed. The CIGui32
or CIGuiSII will automatically choose the correct implementation. This section covers the
implementation that relies on the presence of the -411 firmware option. This is also the version
that supports the -EOS (Electronic Output Switch) option required for AC source compliance. If
the AC source you are using does not have this option or is a 1251RP, refer to the AC source
manual instead.
7.2
Standard Revisions and EUT Classes
The–411 option supports both the first (1994-06) and the second edition (2004-03) of the IEC
61000-4-11 test standard as of firmware revision 2.38. Older firmware revisions only support the
first edition. Contact [email protected] for upgrade information. If Edition 2.0 is supported, the
standard revision can be selected when using the Cigui32 or CIGuiSII Windows program. From
the front panel, there is no need to select the revision but data values can be set that support
either version of the standard.
Generic tests files are distributed with the CIGui32 or CIGuiSII program for both editions of the
test standard. Files applicable to Edition 2.0 have ED20 in their file name. Do not mix these files,
as the data setup will not be correct if you do. To load a test file, select the Mode (Dips or Vars)
and test standard revision first, then use the File, Open menu to load the test parameters. Test
parameters can be a function of the EUT class. The different files provided with the program
cover the various EUT classes. The relevant EUT class 1, 2, 3 or X is listed in the file names.
When using front panel operation, the user has to set levels for each individual test step in
SINGLE mode.
7.3
Compliance Statement
Based on the hardware specifications of the AC source in use, not all requirements for IEC
61000-4-11 test generators may be met. In particular, the 1 to 5 microsecond rise and fall time
called out in the specification is not met by most AC sources. This is unlikely to have any effect
on the outcome of the test however. A unit that fails a voltage dropout with a 80 microsecond rise
and fall time will not likely pass the same dropout performed at 5 microseconds rise and fall times
and vice versa.
However, the -EOS option available for the iX Series AC sources may be added to meet the IEC
61000-4-11 source’s rise and fall times.
Also, the 500 Amps inrush current capability is not met. This requirement does not have to be
met if the unit under test does not draw more inrush current than the AC source can deliver. The
peak current pre-test option may be used to verify inrush capability of the source for the unit
under test.
94
Revision N
California Instruments
User Manual
7.4
Compliance Test System 3.0
Specifying Test Sequences for Dips and Variations
Figure 7-1: IEC 61000-4-11 Test Window
California Instruments
Revision N
95
Compliance Test System 3.0
User Manual
The IEC 61000-4-11 test suite consists of two types of tests:
Dips and Interruptions
Simulates short interruptions in AC supply
Voltage Variations
Simulates slow changes in AC supply
The user must select the desired test type before executing the test. Since both test types require
a number of test parameters, the test sequence parameters must be entered in the data entry
grid or loaded from disk using the File, Open menu entry.
The timing of voltage variations is different between editions 1.0 and 2.0 of the IEC 61000-4-11
test standard. While the original standard used voltage ramps on both sides of the variation test
level, the Edition 2.0 standard calls out an abrupt drop to the test level, followed by a voltage
ramp back to the nominal voltage. Thus, for Edition 2.0, the fall time must be set to 0 cycles. This
requires firmware revision 2.38 or higher. Older firmware revision will not accept 0 cycles for fall
time. The shortest allowable fall time for older revision firmware is 0.02 sec.
Furthermore, where under Edition 1.0 rise and fall times were specified in seconds, they are
specified in number of cycles in Edition 2.0. This is an effort to normalize both 50 Hz and 60 Hz
voltage variations. The data entry mode used by the Cigui32 or CIGuiSII program will be a
function of the edition selected by the user.
Refer to Figure 7-2 and Figure 7-3 for an illustration of how these parameters affect the V RMS
output under the different standard revisions.
Figure 7-2: IEC 61000-4-11 Voltage Variation specification- Edition 1.0
Figure 7-3: IEC 61000-4-11 Voltage Variation specification- Edition 2.0
96
Revision N
California Instruments
User Manual
Compliance Test System 3.0
Note that the generic IEC 61000-4-11 specifications are based on common types of AC line
disturbances found on the European utility network. The test voltage levels and dip durations
required to perform a IEC 61000-4-11 tests is not uniquely defined. Instead, different test levels
and durations are allowed for various product categories. Product committees set these test
levels. For this reason, the test parameters used by the CIGui32 or CIGuiSII for the IEC 61000-411 test sequences can be specified by the user or loaded from disk. This allows unlimited
customization of both voltage interruptions and voltage variations tests. Up to 100 sequences of
voltage dips at various levels, phase angles and durations can be specified. Voltage variations
can be defined by level, rise time or td, fall time or ti and hold time or ts depending on the standard
revision selected.
California Instruments
Revision N
97
Compliance Test System 3.0
7.5
User Manual
Test Setup
The following parameters and controls are available for executing the IEC 61000-4-11 test:
Parameter
Description
Nominal frequency
Opening this window will set this parameter to the present steady state
frequency setting of the AC source. If required, a new value can be entered
to be used during the test. At the end of the test, the AC source will remain
at this frequency.
Test mode
Available test types are Dips and Variations..
Phase
The phase mode used is shown below the class selection. This mode
cannot be changed from this window. To change phase mode, close this
window and use the main front panel control window to select the desired
phase mode first.
Peak Current Mode
User can select this option to verify that the test is valid. If the peak current
is over the limit of the power source, a message will appear and the user
can select abort or continue running the test
Run menu
Start Button
Starts the IEC 61000-4-11 test using the parameters set by the user. Test
progress is shown at the bottom of the window. The sequence numbers
shown correspond to those in the illustration.
Stop
Aborts test in progress.
Figure 7-4: IEC 61000-4-11 Setup screen
98
Revision N
California Instruments
User Manual
7.6
Compliance Test System 3.0
Test Options
The operator may select one or more of the following options before starting the test:
Include Peak Current Test
The test standard requires that the AC generator used has the ability
to deliver 500 Amps of inrush current to the EUT. This is neither
economical nor practical. Instead, the EUT inrush current can be
determined using a prescribed test method. If the EUT inrush current
is 70 % or less of the AC sources' capability, the AC source may be
used for full compliance testing. Setting this option determines the
EUT inrush current using the standard method. The test takes about
12 minutes to complete. At the end, the program will inform the
operator of the result and match this against the AC source's
capability. See paragraph 7.3.
Use only EOS option levels
This option can only be selected if the Electronic Output Switch (EOS)
option is present. When set, the test levels entered in the Dips test
sequence or loaded from disk are automatically rounded to the nearest
available discrete EOS voltage Dip level. If this option is not selected,
any test level may be set but the EOS will be bypassed. In this case,
the voltage rise and fall time required for full compliance will not be
met. See compliance statement below.
If the EOS-1 or EOS-3 has a dual tap setting for the 70/80 % tap,
indicate the setting of this tap in the EOS Hardware Setting box as
there is no way for the program to determine the setting in effect. For
information on changing between 70 and 80% taps on the
EOS1/EOS3, refer to the iX Series User Manual, P/N 7000-970,
Revision Q or higher.
See paragraph 7.3.
7.7
Test Results
There is no way for the CIGUI to determine the outcome of this test as a clear definition of a
failure can not be given. The draft standard called out the following possible test results:
“The test results shall be classified on the basis of the operating conditions and functional
specifications of the equipment under test, as in the following, unless different specifications are
given by product committees or product specifications.
a) Normal performance within the specification limits
b) Temporary degradation or loss of function or performance which is self-recoverable.
c) Temporary degradation or loss of function or performance which requires operator intervention or
system reset.
d) Degradation or loss of function which is not recoverable due to damage of equipment
(components) or software, or loss of data.
As a general rule, the test result is positive if the equipment shows its immunity, for the duration of
the application of the test, and at the end of the tests the EUT fulfills the functional requirements
established in the technical specification.”
The user has to make this determination by observing the unit under test.
California Instruments
Revision N
99
Compliance Test System 3.0
7.8
User Manual
Report Format- 411 Test Files
The IEC 61000-4-11 test module produces a test report when the Print Report button is clicked.
Reports can also be printed from the File, Print menu. Test reports include all selected test
parameters and options. A sample test report is shown below. The report format used can be
direct output to a printer, output to a text file or generation of an MS Word report. The desired
report format can be selected from the Options menu, under IEC Report Setup. MS Word reports
are automatically saved in the C:\Program Files\California Instruments\Cigui32\Reports or
C:\Program Files\California Instruments\CiguiSII\Reports directory.
100
Revision N
California Instruments
User Manual
Compliance Test System 3.0
8.
IEC 61000-4-13 Harmonics and Interharmonics Immunity Test
8.1
About this Chapter
The IEC413 option is capable of performing IEC 61000-4 section 13 Harmonics and inter
harmonics low frequency immunity tests. The tests are based on IEC 61000-4-13:2002-03, First
Edition. It is assumed that the user has a copy of the test standard available. This manual
section only cover operation of the –413 option from the front-panel of the iX Series power
source.
Note 1: The initial release of the –413 option for the iX Series power sources was based on a
draft version (CDV) of the IEC 61000-4-13 standard. Minor changes were made between the
CDV draft and the final released version. Units with firmware revision 2.37 or higher conform to
the official released IEC standard. Units with older firmware conform to the draft version. A
firmware upgrade can be ordered through California Instruments’ service department by
contacting [email protected] and requesting part number CIC463. Provide the model and
serial number of the unit (master unit in multi-box systems) to ensure the correct firmware is
provided. The firmware revision is displayed on the LCD screen immediately after power up for a
few seconds. It can also be queried over the bus using the “*IDN?” command.
Where relevant, the requirement for the correct firmware revision to obtain specific test modes is
indicated in this manual.
Note 2: The –413 option is only available on iX Series AC power sources, not i Series. It is
possible to upgrade most i Series AC source to an iX Series and add the –413 option. Contact
the California Instruments service department for information. [email protected].
Figure 8-1: IEC 61000-4-13 Test Window
California Instruments
Revision N
101
Compliance Test System 3.0
8.2
User Manual
Tab Controls
The IEC 1000-4-13 Harmonics and Interharmonics test offers range of sub-tests and user
options. We recommend you familiarize yourself with the actual standard document. IEC
standards are available through www.iec.ch.
The following help screens contain information on setting test options using the available 413 tab
controls located along the top of the IEC 1000-4-13 test window.
Tab
Description
Test Setup
User selected test options, EUT classes and test steps
Waveforms
Flat top curve and Over swing curve definitions
Test Levels
Sweep frequency ranges and test levels
Voltage Distortion
AC Source voltage distortion monitor display
Waveform Display
AC Source measured output waveform display
Resonance Points
EUT current as a function of frequency and resonance point summary.
The buttons on the left-hand side of the window may be used to start and stop a test run and print
a test report.
Test parameters for Class X EUT's may be stored on and loaded from disk. This can be done
using the File, Save and File, Open menus.
The results of a frequency sweep may be saved to disk for later recall as well. Data files have a
.dat extension to distinguish them from a test setup file. (.413 extension) The Load and Save
Data entries in the File menu are used for this purpose.
8.3
Test Setup
The Test Setup Tab contains several controls that allow the user to configure the IEC 61000-4-13
test to be run on the EUT. The various settings are as follows:
102
Parameter
Description
Phase mode
The available phase mode is shown in the top right corner and cannot be
changed. For single-phase systems, phase A is always used as it is the only
phase. For three phase systems, all stimuli are applied to all three phases.
EUT EMC Class
The test standard distinguishes between four classes of EUT, class 1 through 3
and a user defined class X. The user must select class 1, 2, 3 or X. Class X
levels can be set in the Test levels Tab but must be equal than or higher than
class 3 levels.
Nominal Settings
These values are normally obtained from the AC source's steady state setting
when the test window is opened. They can be changed before running a test if
needed. Note however than frequencies other than 50 or 60 Hz are not covered
by the test standard.
Test Step Selection
There are four main test categories that may be selected. Consult the test
standard for details on each step. Any combination of these four choices can be
made.
Test Options
Prompt for EUT status: When checked, the program will prompt the operator for
a Pass or Fail determination after each test step selected in the Test Step
Selection box has been run. If this option is turned off, all test will be run and this
dialog will only appear when all test are completed.
IEC 725 Reference Impedance: If needed, the IEC 725 Flicker reference
impedance may be used during the IEC 61000-4-13 test. When this option is
checked, the iX Series will use its programmable impedance to implement the
Revision N
California Instruments
User Manual
Parameter
Compliance Test System 3.0
Description
required reference impedance. Note that this capability may not be supported on
all iX Series configurations.
Voltage THD: When checked, the test program performs an AC Source voltage
distortion pre-test and displays the result in the Voltage THD Tab.
Source Regulation: When checked, the test program will checked the AC
Source output voltage regulation with the EUT connected to ensure the AC
source meets the test standard requirements.
User Data
The fields at the bottom of the Tab may be used to enter information on the
person or entity performing the test, the EUT and any other comments that may
be relevant. This information will be incorporated in the test report.
User selected EUT Class, test steps, options and nominal values are all included on the IEC
61000-4-13 test reports.
California Instruments
Revision N
103
Compliance Test System 3.0
8.4
User Manual
Test Sequence
The IEC 61000-4-13 standard specifies the following test flow diagram.
Figure 8-2: IEC 61000-4-13 Flow Chart Class 1 and 2.
104
Revision N
California Instruments
User Manual
Compliance Test System 3.0
Figure 8-3: IEC 61000-4-13 Flow Chart Class 3.
California Instruments
Revision N
105
Compliance Test System 3.0
User Manual
The IEC 61000-4-13 test suite consists of five types of tests:
Test type
Description
Flat top Curve
Simulates specific waveform at the nominal voltage and frequency
OverSwing Curve
Simulates specific waveform at the nominal voltage and frequency
Frequency Sweep
Simulates frequency swept or stepped at a rate no less than 5 minutes per
decade
Individual harmonics &
Interharmonics
Simulates sinusoidal voltage superimposed on the fundamental voltage for 5
second at each frequency in a range from 2X to 40X fundamental.
Meister Curve
Special frequency sweep test to be used in countries where mains signaling
and /or ripple control is applied.
The user must select the desired EMC Class and test type before executing the test. If choosing
class X, the user can change any parameters but the levels have to be at least as high as those
for Class 2.
The total test time using the default dwell times are as follows:
Test Step
Test Time
Flat Top Curve test:
Dwell time = 120 sec
Pause time = 5 sec
OverSwing Curve test:
Dwell time = 120 sec
Pause time = 5 sec
Frequency Sweep test:
Dwell time = 300 sec (per decade) *2.5 = 750 sec
Individual harmonics:
Dwell time = 5 sec (per harmonic) * 40 = 200 sec
Pause time = 1 sec (per harmonic * 40 = 40 sec
Interharmonics:
Dwell time = 5 sec (per harmonic) * 147 = 735 sec
Pause time = 1 sec (per harmonic) * 147 = 147 sec
Meister Curve:
Dwell time = 10 sec (per frequency step) * 147 = 1470 sec
Pause time = 0 sec
Changes made to dwell times and test levels can be saved using the File, Save menu.
There are two .413 files distributed with the CIGui32 or CIGuiSII program. The Class2.413 and
Class3.413 files are read-only files and can not be edited or changed. These files contain all
parameters, which are determined by the product standard. When changing the Dwell and Pause
times for Class 2 or Class 3, the user has to save the file under a different name.
8.4.1
Test Waveform Settings
The Waveforms Tab may be used to preview the Class 2 and Class 3 Flat top and Overswing
waveforms. For class X, the waveform parameters may be entered in the controls to the left of
the waveform display. Dwell times and pause times may be set for all classes.
Note that this Tab is only relevant if either the Flat Top or Overswing test steps are selected in
the Test Setup tab.
8.4.2
Test Level Settings
The Test Levels Tab may be used to preview the Class 2 and Class 3 frequency ranges and test
levels. For class X, this information may be edited. Dwell times and pause times may be set for
106
Revision N
California Instruments
User Manual
Compliance Test System 3.0
all classes. The following minimum and maximum values (in seconds) for dwell and pause times
apply. Note that these values are queried from the AC source if present and may change if the
firmware on the AC source is updated. As default, these times are set to their minimum values.
Test Type
Parameter
Minimum
Maximum
Sweep Frequency
Dwell
300
3600
Interharmonics
Dwell
5
600
Pause
1
60
Dwell
5
600
Pause
1
60
Dwell
10
600
Pause
0
60
Harmonics
Meister Curve
Note that this Tab is only relevant if either the Flat Top or Over Swing test steps are selected in
the Test Setup tab.
8.5
Test Results
There is no way for the CIGui32 or CIGuiSII to determine the outcome of this test, as a clear
definition of a failure can not be given. The draft standard calls out the following possible test
results:
“The test results shall be classified on the basis of the operating conditions and functional
specifications of the equipment under test, as in the following, unless different specifications are
given by product committees or product specifications.
a) Normal performance within limits specified by the manufacturer, requestor or purchaser
b) Temporary loss of function or degradation of performance which ceases after the disturbance
ceases, and from which the equipment under test recovers its normal performance, without
operator intervention.
c) Temporary loss of function or degradation of performance, the correction of which requires
operator intervention.
d) Loss of function or degradation of performance which is not recoverable, owing to damage to
hardware or software, or loss of data.
As a general rule, the test result is positive if the equipment shows its immunity, for the duration of
the application of the test, and at the end of the tests the EUT fulfills the functional requirements
established in the technical specification.”
The user has to make this determination by observing the
unit under test. At the end of the test, the GUI will pop up
a dialog box asking the operator to assess the state of the
EUT. This prompt can be selected to appear after each
sub-test as by setting the "Prompt operator for EUT Status
after each test step" option. The operator may answer
Yes when prompted. If not, he should answer no. The
response to this query is incorporated as a PASS or FAIL result in the test report.
California Instruments
Revision N
107
Compliance Test System 3.0
8.6
User Manual
Measurements
The following measurements are performed during the IEC 1000-4-13 test run.
8.6.1
Voltage Distortion Check
This is a data display Tab only. When selected in the test options, this Tab display the voltage
distortion of the AC voltage supplied by the AC Source as measured at the EUT. The individual
voltage harmonics must be below the IEC test standard levels set forth in IEC 61000-4-13. The
test software checks against these limits and displays a PASS or FAIL result in both the Test
Setup Tab and this Tab.
The result of the V THD check is included in the IEC 61000-4-13 Test report. Test results may
be printed to the default Windows printer using the print button or the File, Print menu.
8.6.2
Voltage Waveform Time Domain
This Tab displays the voltage waveform as captured at the EUT by the iX Series' data acquisition
system. This information is updated every couple of seconds and allows the user to monitor the
stimulus applied to the EUT. This TAB is only used for display purposes and contains no user
controls.
8.6.3
Resonance Points
During the test run, the voltage waveform is captured and displayed in the Waveform display Tab
page. This allows the user to determine if the EUT continues to operate. There may be effects on
the EUT such as reboots or processor lockups that cannot be seen by observing the EUT load
current. Frequency is not measured as it remains at the nominal frequency specified.
The resonance points Tab displays the EUT current as a function of the harmonic and
interharmonic frequencies applied to the EUT during the test. This information is displayed both
numerically in the table on the left and graphically in the chart on the right. Those points that
meet the criteria for a resonance point are listed in the table directly below the graph. Note that
there may not be any resonance points on a given EUT. In that case, this table will be empty.
The total number of resonance points found is shown between the graph and the resonance point
table.
The are no user controls or settings on this Tab as it is used for data display only. Test results
may be printed to the default Windows printer using the print button or the File, Print menu.
8.7
IEC 61000-4-13 Test Reports
The IEC 61000-4-13 test module produces a test report when the Print Report button is clicked.
Reports can also be printed from the File, Print menu. Test reports include all selected test
parameters and options. The report format used can be direct output to a printer or generation of
an MS Word report. The desired report format can be selected from the Options menu, under IEC
Report Setup. A sample section of an IEC 61000-4-13 test report is shown below. MS Word
reports are automatically saved in the C:\Program Files\California Instruments\Cigui32\Reports or
C:\Program Files\California Instruments\CiguiSII\Reports directory.
108
Revision N
California Instruments
User Manual
Compliance Test System 3.0
9.
IEC 61000-4-14 Voltage Fluctuations Immunity Testing
9.1
About This Chapter
This chapters covers testing a device for compliance with the IEC 61000-4-14 Voltage
Fluctuations test standard. This test is supported through the CIGUI AC source control program.
If you purchased a 100-CTS or 300-CTS test system, which does not include a California
Instruments AC source, you will not be able to perform these tests.
Figure 9-1: IEC 61000-4-14 Test Window
The IEC 61000-4-14 implementation in the CIGUI32 or CIGuiSII is based on the IEC 61000-4-14
standard dated 1999-02 and Amendment 1 dated 2001-07. Test levels and times can be
changed if needed through the use of one or more filename.414_Fluc files in the IEC_Test
directory.
California Instruments
Revision N
109
Compliance Test System 3.0
9.2
User Manual
Test Setup
The following parameters and controls are available for executing the IEC 61000-4-14 test:
9.3
Control / Field
Description
Nominal voltage
Opening this window will set this parameter to the present steady state
voltage setting of the AC source. If required, a new value can be
entered for use during the test. At the end of the test, the AC source will
remain at this voltage level. If needed, the program will switch the AC
source to the high voltage range and close the output relay when the
test is started.
Nominal frequency
Opening this window will set this parameter to the present steady state
frequency setting of the AC source. If required, a new value can be
entered for use during the test. At the end of the test, the AC source will
remain at this frequency.
Source Regulation
See under Test Options below
EUT Class
The EUT class determines the test levels used. Class selection is done
by loading the correct class file from disk..
Phase Mode
The phase mode is determined by the AC source configuration. This
mode cannot be changed from this window. To change phase mode,
close this window and use the main front panel control window to select
the desired phase mode first.
Start
Starts the IEC 61000-4-14 test using the parameters set by the user.
Test progress is shown at the bottom of the window. The sequence
numbers shown correspond to those in the illustration.
Stop
Aborts test in progress.
Test Options
The IEC 61000-4-14 test can be preceeded by a voltage regulation check. This check will check
the output voltage regulation of the AC source driving the EUT at Vnom and at Vnom ± 10 %.
There are no other options selections that need to be made by the user.
110
Revision N
California Instruments
User Manual
9.4
Compliance Test System 3.0
Test Sequence
The test sequence implemented by this test consists of a series of voltage fluctuations consistent
with commonly found phenomena on the public utility power grid. The objective of this test is to
evaluate a product for immunity from such fluctuations.
Voltage fluctuations are applied at different levels for different product categories. The user must
determine the product class and select the appropriate test level. During the test run, voltage
changes are applied as specified by the selected test mode and for specified periods of time.
The test sequence can be programmed by setting the nominal voltage in %, the test level which
is the change from the nominal voltage in %, the number of times each test level repeats
(consecutive 5 second periods) and the delay between each set of test levels. Finally, each step
in the sequence data grid can be repeated 1 or more times. (A Delay of 1 means the set it only
run once.) The various columns in the test data setup are shown in the figure below. In this
example, the following parameters were specified in the data entry grid:
Unom (%)
100
Test Level (%)
Level Repeat
8
Delay
3
Repeat
60
1
Figure 9-2: IEC 61000-4-14 Test Sequence
Note that the sequence of voltage changes is different if the Unom is at 100 % than at any other
value. At 100 % Unom, the voltage changes occur in both positive and negative directions
(alternating). If the test level (%) is set to a negative value and Unom is 100 %, the voltage
changes are reversed.
These parameters can be entered on screen by the operator or loaded from disk. To load a new
test or test class, select the File, Open menu. The default location for IEC test files is:
C:\Program Files\California Instruments\Cigui32\IEC_Test
Or
C:\Program Files\California Instruments\CiguiSII\IEC_Test
The following four IEC 61000-4-14 test files are distributed with the CIGui32 or CIGuiSII program:
File Name
Test Class
Generic IEC 1000-4-14 Test Class 2.414_Fluc
Class 2
California Instruments
Revision N
111
Compliance Test System 3.0
User Manual
File Name
Test Class
Generic IEC 1000-4-14 Test Class 3.414_Fluc
Class 3
The user may create as many test files as desired using the data entry grid. Changes made can
be saved using the File, Save As… menu entry.
9.5
Test Levels
In Annex B of the draft standard, the EUT operating environment classifications are defined
based on IEC 1000-2-4. The classifications are as follows:
Class
Environment
Class 1
Applies to protected supplies with compatibility levels lower than public network
levels. It relates to the use of equipment, which is very sensitive to disturbances in
the power supply, for instance the instrumentation of technological laboratories, some
automation and protection equipment, some computers etc. This equipment is
normally supplied by protected supplies such as uninterruptible power supplies, filers
or surge suppressors.
Class 2
Applies to points of common coupling (PCCs for consumer systems) and in-plant
points of common coupling (IPCs) in the industrial environment in general. The
compatibility levels in this class are identical to those of public networks.
Class 3
Applies only to IPCs in industrial environments. It has higher compatibility levels than
those of class 2 for some disturbance phenomena. This class should be considered
when any of the following conditions are met:
- a major part of the load is fed through converters
- welding machines are present
- large motors are frequently started
- loads vary rapidly
Test levels are specified for class 2 and 3 only. Class X test levels may be defined by specific
product standards.
112
Environment Class
Unom (Nominal Voltage)
Unom + 10 %
Unom - 10 %
Class 1
no test required
no test required
no test required
Class 2
± 8 % Unom
- 8 % Unom
+ 8 % Unom
Class 3
± 12 % Unom
-12 % Unom
+ 12 % Unom
Class X
Open but must be higher than
Level 2
Open but must be
higher than Level 2
Open but must be
higher than Level 2
Revision N
California Instruments
User Manual
9.6
Compliance Test System 3.0
Voltage Fluctuation
The IEC 61000-4-14 test standard specifies a specific voltage fluctuation methods for changing
the voltage between test levels. This fluctuation is a combination of a series of 5 single period
fluctuations, each having a 0.25 period slew starting at 270° phase angle of the voltage
waveform. Thus, the complete rise (tr) and fall (tf) time of the voltage fluctuation includes the
following two items:
a) Single Period Fluctuation
Lasts for one period of the fundamental frequency. The voltage changes starts at the 270° phase angle
and changes linearly for one quarter period until it reaches the next voltage level (delta Unom / 5) at 0°.
This is illustrated in the figure below.
b) Complete Fluctuation
Five single period fluctuations as shown above combine into the complete voltage fluctuation to the test
level. [Unom ± delta Unom] The test level is held for a 2 second period and then stepped back up or
down to its nominal value. This is illustrated in the figure below which combines figures 1b and 1c of the
IEC 61000-4-14 test standard.
Note: Prior versions of the Cigui32 (< 1.20.0.1) required a user selection between a slew or a
stepped voltage fluctuation. Both have been combined per above description to more closely
follow the IEC 61000-4-14 test standard.
California Instruments
Revision N
113
Compliance Test System 3.0
9.7
User Manual
Test Execution
The selected test mode can be started by pulling down the Run menu and selecting All or by
clicking on the Start button. During test execution, no changes to test parameters are allowed.
The test progress can be monitored at the bottom of the window in the status bar.
9.8
Test Parameter File Creation and Limits
New tests can be created by editing the data entry grid. The following test parameters are
available for each test step. Note that the number of test steps is limited to 100 steps which
should be more than adequate to cover any possible product standard.
9.9
Field
Description
Range
Unom (%)
Specifies the percentage of Unom to use for this test step.
Typical values are 100 %, 110 % and 90 % for a 0, +10 and
-10 change.
50 to 150 %
Test Level (%)
Specifies the percentage change from Unom to apply for this
test step. Test levels are defined for different product
classes.
-20 to +20 %
Level Repeats
Number of times specified test level is applied at this step.
Normally, this value is set to 3. Each test level is applied for
2 seconds and repeats in 5 second window. The rise and
fall times are set to 5 cycles each.
1 to 100
Delay (s)
Time is seconds between successive repeats of this test
step.
0.1 to 999.9 sec.
Repeats
Number of times this test step is repeated. Normally, this
value is set to 3.
1 to 100
Test Results
There is no way for the CIGUI to determine the outcome of this test as a clear definition of a
failure can not be given. The draft standard called out the following possible test results:
“The test results shall be classified on the basis of the operating conditions and functional specifications
of the equipment under test, as in the following, unless different specifications are given by product
committees or product specifications.
a) Normal performance within limits specified by the manufacturer, requestor or purchaser
b) Temporary loss of function or degradation of performance which ceases after the disturbance
ceases, and from which the equipment under test recovers its normal performance, without
operator intervention.
c) Temporary loss of function or degradation of performance, the correction of which requires
operator intervention.
d) Loss of function or degradation of performance which is not recoverable, owing to damage to
hardware or software, or loss of data.
As a general rule, the test result is positive if the equipment shows its immunity, for the duration of the
application of the test, and at the end of the tests the EUT fulfills the functional requirements established
in the technical specification.”
The user has to make this determination by observing the
unit under test. At the end of a test run, the following
dialog box is displayed. Click on the Help button to
display the pass/fail criteria shown above.
114
Revision N
California Instruments
User Manual
9.10
Compliance Test System 3.0
Report Format- 414 Test Files
The IEC 61000-4-14 test module produces a test report when the Print Report button is clicked.
Reports can also be printed from the File, Print menu. Test reports include all selected test
parameters and options. A sample test report is shown below. The report format used can be
direct output to a printer, output to a text file or generation of an MS Word report. The desired
report format can be selected from the Options menu, under IEC Report Setup. MS Word reports
are automatically saved in the C:\Program Files\California Instruments\Cigui32\Reports or
C:\Program Files\California Instruments\CiguiSII\Reports directory.
California Instruments
Revision N
115
Compliance Test System 3.0
10.
User Manual
IEC 61000-4-17 DC Ripple Immunity Testing
Figure 10-1: IEC 61000-4-17 Test Window
10.1
About This Chapter
This chapters covers testing a device for compliance with the IEC 61000-4-17 DC Voltage Ripple
test standard. This test is supported through the CIGui32 or CIGuiSII AC source control program.
If you purchased a 100-CTS or 300-CTS test system which does not include a California
Instruments AC source or the CTS system uses an RP Series AC source, you will not be able to
perform these tests.
The IEC 61000-4-17 implementation in the CIGUI32 or CIGuiSII is based on the IEC 61000-4-17
standard dated 1999-06. Test levels and ripple frequency can be changed if needed or set to
one of the pre-defined test levels.
116
Revision N
California Instruments
User Manual
10.2
Compliance Test System 3.0
Test Setup
The following parameters and controls are available for executing the IEC 61000-4-17 test:
10.3
Control / Field
Description
Nominal DC voltage
This is the rated nominal DC supply voltage to the EUT. Both a high
and low DC voltage range can be specified as well. When selected, the
test will run at the selected voltage levels. This can any combination of
nominal, high and low.
Line frequency
This sets the nominal AC line frequency. The ripple frequency will be a
multiple of the AC Line frequency.
Output Select
For three phase systems, the output select enables one of three
outputs or all three. The default is channel (phase) A.
EUT Test Levels
The test levels used are determined by the EUT class. Available levels
are 2, 5, 10 or 15 %. A user defined test level from 0 to 25 % may be
set as well.
Ripple Frequency
This fields sets the multiplier for the ripple frequency. Available settings
are 1, 2, 3 and 6. A user defined multiplier is available as well.
Test Time
The default test time is 10 minutes. If more than one DC Voltage level
is selected, the test time increases with this amount for each selected
level. The test time can be set as low as 1 minute or as high as 9999
min.
Start
Starts the IEC 61000-4-14 test using the parameters set by the user.
Test progress is shown at the bottom of the window. The sequence
numbers shown correspond to those in the illustration.
Stop
Aborts test in progress.
Test Sequence
The test sequence implemented by this test consists of the application of an AC ripple of
specified peak to peak value in percent of the DC voltage at a frequency determined by the
multiplier times the AC Line frequency for a set period of time.
The ripple waveform consists of a sinusoidal linear waveshape as shown below. The objective of
this test is to evaluate a product for immunity from such ripple.
California Instruments
Revision N
117
Compliance Test System 3.0
10.4
User Manual
Waveform Display
The DC output waveform is acquired at regular intervals during the test and can be displayed by
selecting the Waveform Display tab.
Figure 10-2: IEC 61000-4-17 Waveform Acquisition Window
10.5
Test Results
There is no way for the CIGUI to determine the outcome of this test as a clear definition of a
failure can not be given. The draft standard called out the following possible test results:
“The test results shall be classified on the basis of the operating conditions and functional specifications
of the equipment under test, as in the following, unless different specifications are given by product
committees or product specifications.
a)
Normal performance within the specification limits
b)
Temporary degradation or loss of function or performance which is self-recoverable.
c)
Temporary degradation or loss of function or performance which requires operator intervention or
system reset.
d)
Degradation or loss of function which is not recoverable due to damage of equipment (components)
or software, or loss of data.
As a general rule, the test result is positive if the equipment shows its immunity, for the duration of the
application of the test, and at the end of the tests the EUT fulfills the functional requirements established
in the technical specification.”
The user has to make this determination by observing the unit under test. At the end of a test run,
the following dialog box is displayed. Click on the Help button to display the pass/fail criteria
shown above.
118
Revision N
California Instruments
User Manual
10.6
Compliance Test System 3.0
User Observations
Figure 10-3: IEC 61000-4-17 User Observation Data Entry Window
The CIGUI32 or CIGuiSII provides a data entry window for the operator. Observations made
about the EUT can be entered in this window before, during and after a test run. Any information
entered by the operator in this window will be incorporated in the test report when printed.
10.7
Report Format- 417 Test Files
The IEC 61000-4-17 test module produces a test report when the Print Report button is clicked.
Reports can also be printed from the File, Print menu. Test reports include all selected test
parameters and options. A sample test report is shown below. The report format used can be
direct output to a printer or generation of an MS Word report. The desired report format can be
selected from the Options menu, under IEC Report Setup. MS Word reports are automatically
saved in the C:\Program Files\California Instruments\Cigui32\Reports or C:\Program
Files\California Instruments\CiguiSII\Reports directory.
10.8
Saving and Loading Test Setups
Frequently used test setups can be save to disk by using the File, Save or File Save As menu
entries. Setup files for IEC 61000-4-17 tests have a ".417" file extension.
To select a previously saved test setup, use the File, Open menu entry and select the desired file
from the file open dialog.
California Instruments
Revision N
119
Compliance Test System 3.0
User Manual
11.
IEC 61000-4-27p Voltage Unbalance Immunity Testing
11.1
About This Chapter
This chapters covers testing a device for compliance with the IEC 61000-4-27 Voltage Unbalance
in three phase AC power systems. test standard. This test is supported through the CIGUI32 or
CIGuiSII AC source control program. If you purchased a 100-CTS or 300-CTS test system, which
does not include a California Instruments AC source, you will not be able to perform these tests.
This test is only available on three-phase CTS Systems as it involves voltage and phase
Figure 11-1: IEC 61000-4-27 Test Window
120
Revision N
California Instruments
User Manual
Compliance Test System 3.0
unbalance between three phases of a three phase supply network. The IEC 61000-4-27
implementation in the CIGUI32 or CIGuiSII is based on the IEC 61000-4-27 standard dated 200008. Test levels and durations can be changed if needed through use of one or more
filename.427 files in the IEC_Test directory.
California Instruments
Revision N
121
Compliance Test System 3.0
11.2
User Manual
Test Setup
The required IEC 61000-4-27 test parameters must be entered in the test data entry grid before
running a test. Previously stored test files can be loaded from the File, Open menu. Test files
use a .427 file extension and only files with this extension can be loaded.
The CIGUI32 or CIGuiSII is distributed with a pre-defined test parameter files for the generic IEC
61000-4-27 product classes 2 and 3. Additional test parameter files e.g. for test level x, can be
created by the user by editing the data entry grid and saving the new data under a user specified
name.
The following parameters and controls are available for executing the IEC 61000-4-27 test:
Field / Control
Description
Nominal voltage
Opening this window will set this parameter to the present steady state
voltage setting of the AC source. If required, a new value can be entered
for use during the test. At the end of the test, the AC source will remain at
this voltage level. If needed, the program will switch the AC source to the
high voltage range and close the output relay when the test is started.
Nominal frequency
Opening this window will set this parameter to the present steady state
frequency setting of the AC source. Available selections are 50 Hz or 60
Hz. At the end of the test, the AC source will remain at this frequency.
EUT Class
The EUT class determines the test levels used.
Test number
Allows selection of one or more test numbers. If all test numbers are
selected, they will be executed in sequential order.
Performance Criterion
This selection will be used to indicate in the test report how the outcome
of the test was evaluated. The criteria are explained here.
Execution Parameters
Number of sequences to run:
A number of one indicates that the test level selected will be run one time
per phase rotation for a total of 3 times. A number greater than one will
result in repeating the same phase rotation that many times.
Delay between sequences in minutes:
A delay of 3 minutes minimum is required between tests. This value may
be extended if desired.
Pre-test delay in seconds:
Time to wait in seconds between applying power to EUT and starting the
first test sequence.
Phase Mode
This test is only valid when the power system is in three-phase mode so
no phase mode selection is available. The phase mode is always three
phase.
Start
Starts the IEC 61000-4-27 test using the parameters set by the user. Test
progress is shown at the bottom of the window. The sequence numbers
shown correspond to those in the illustration.
Stop
Aborts test in progress.
All IEC 61000-4 tests require setting of the rated nominal voltage and frequency of the EUT. The
nominal values must be entered in the Test Setup Vnom and Fnom data fields before starting a
test. When the IEC 61000-4 test windows is first opened, the present AC source settings are
automatically loaded as the nominal values. These values are overridden by selecting each data
entry field and typing in a new value or by loading a test parameter file from the File, Open menu.
Thus, test data file also contain the nominal voltage and frequency values to be used.
122
Revision N
California Instruments
User Manual
11.3
Compliance Test System 3.0
Equipment Classifications
In Annex B of the standard, the EUT operating environment classifications are defined based on
IEC 61000-2-4. The classifications are as follows:
Class 1
Applies to protected supplies with compatibility levels lower than public network
levels. It relates to the use of equipment, which is very sensitive to disturbances
in the power supply, for instance the instrumentation of technological
laboratories, some automation and protection equipment, some computers etc.
This equipment is normally supplied by protected supplies such as
uninterruptible power supplies, filers or surge suppressors.
Class 2
Applies to points of common coupling (PCCs for consumer systems) and inplant points of common coupling (IPCs) in the industrial environment in general.
The compatibility levels in this class are identical to those of public networks.
Class 3
Applies only to IPCs in industrial environments. It has higher compatibility levels
than those of class 2 for some disturbance phenomena. This class should be
considered when any of the following conditions are met:
- a major part of the load is fed through converters
- welding machines are present
- large motors are frequently started
- loads vary rapidly
Testing is not recommended for Class 1 equipment. Test level X specifications are to be agreed
upon by the manufacturer and user. Test Levels for environmental Class 2 and 3 equipment are
defined by the generic standard. A user class X (user) with test level equal or higher than those
of level 2 may be set as well.
California Instruments
Revision N
123
Compliance Test System 3.0
11.4
User Manual
Test Levels
The test sequence implemented by this test consists of a series of voltage and phase unbalance
variations consistent with commonly found phenomena on the public utility power grid. The
objective of this test is to evaluate a product for immunity from such variations.
Voltage unbalances are applied at different levels for different product categories. The user must
determine the product class and select the appropriate test level. During the test run, voltage and
phase changes are applied. The voltage levels and phase shifts are determined by the values set
in the data entry grid. The various columns in the test data setup are as follows:
Parameter
Description
Range
Test #
Number of the test. There are three possible tests, 1, 2 and 3.
Fixed
Output
Indicates phase voltage for which level and phase is to be applied.
For each test number, the test will be repeated three time using the
following phase rotations: ABC, BCA, CAB
Fixed
% of Unom
Indicates voltage level to change to in % of nominal voltage.
50 to 150
Angle
Phase angle to shift to for each test number and phase in degrees.
0 to 360
Ku2
Unbalance factor. This value is shown for reference only and is
based on the test levels and phase shifts. It is not directly used to
program the AC source.
Time (s)
Time in seconds to hold the unbalance condition
0.0 to 9999
These parameters can be entered on screen by the operator or loaded from disk. To load a new
test or test class, select the File, Open menu. The default location for IEC test files is:
C:\Program Files\California Instruments\Cigui32\IEC_Test.
Or
C:\Program Files\California Instruments\CiguiSII\IEC_Test.
The following four IEC 61000-4-27 test files are distributed with the CIGui32 or CIGuiSII program:
File Name
Test Class
Class2.427
2
Class3.427
3
ClassX.427
X
The user may create as many test files as desired using the data entry grid. Changes made can
be saved using the File, Save As… menu entry.
11.5
Waveform Display Tab
This tab displays the three phase output voltage waveforms and their respective phase angles.
Each phase is shown in a different color. This waveform capture is started 10 msec prior to each
voltage and phase change and covers a period of about 100 msec. The last unbalance data
display is incorporated in the test report.
11.6
Operator Observations Tab
This tab may be used to enter any comments concerning the EUT behavior. Any text entered on
this page will become part of the test report. Note that this information is not saved any where
other then as part of the test report.
124
Revision N
California Instruments
User Manual
11.7
Compliance Test System 3.0
Source Regulation
The voltage regulation of the AC Source is always verified. The voltage regulation check verifies
AC source voltage regulation at the beginning of each test under load as called out in the test
standard. The voltage regulation must be less than 2 %. The measured output voltage must be
within the source regulation limits specific in the IEC 61000-4-27 standard. If the source
regulation check fails, check the system connections. For higher power loads, make sure the
external sense lines are used to sense the voltage at the EUT terminals.
11.8
Test execution
The selected test mode can be started by pulling down the Run menu and selecting All or by
clicking on the Start button. During test execution, no changes to test parameters are allowed.
The test progress can be monitored at the bottom of the window in the status bar.
Note that the default phase rotation of the iX Series AC power systems is A = 0, B = 240 and C =
120 (counter clock wise). For the IEC 61000-4-27, the phase rotation must be set to A = 0, B =
120 and C =240. This is best done with the power to the EUT off. If the test is started and the iX
phase rotation is not A = 0, B = 120 and C =240, a warning will appear prompting the operator to
confirm the change in phase rotation. Selecting No will abort the test with no change to the
source output. Selecting Yes will result in the phase rotation being changed before the test starts.
If the phase rotation is already correct, no message appears.
11.9
Test Implementation and Test Sequence
For each test step, the specified voltage and phase angles will be applied for the time specified. At the
onset of each voltage/phase step, the source voltage is captured by the power source's data acquisition
system. Once the specified time has elapsed, the voltage and phase angles are set back to their nominal
values and the captured waveform data is transferred and displayed. This data will be visible until the
next step when it is updated. Each step (number) will be applied for a different phase rotation in the
sequences shown below. This means the operator does not have to reconnect the EUT three times using
a different phase connected at each test number.
The phase rotations used are as follows:
Sequence
First
Ua to L1
Ub to L2
Uc to L3
Second
Ua to L2
Ub to L3
Uc to L1
Third
Ua to L3
Ub to L1
Uc to L2
The test numbers executed are determined by the test selection in the main setup screen. Any
combination of test number 1, 2 and 3 may be selected by placing a check mark in the appropriate box.
California Instruments
Revision N
125
Compliance Test System 3.0
User Manual
11.10 Test Reports
The IEC 61000-4-27 test module produces a test report when the Print Report button is clicked or
the File, Print menu is selected. Test reports include all selected test parameters and options.
Note that IEC reports can be generated using one of three alternative methods. See the options
menu for details. The IEC 61000-4-27 report generator supports direct printer output or output to
a MS Word document. The waveform display that is included in the report is the one that was
captured at the last unbalance applied to the EUT.
126
Revision N
California Instruments
User Manual
Compliance Test System 3.0
12.
IEC 61000-4-28 Frequency Variations Immunity Testing
12.1
About This Chapter
This chapters covers testing a device for compliance with the IEC 61000-4-28 Frequency
Variations test standard. This test is supported through the CIGui32 or CIGuiSII AC source
control program. If you purchased a 100-CTS or 300-CTS test system which does not include a
California Instruments AC source, you will not be able to perform these tests.
Figure 12-1: IEC 61000-4-28 Test Window
The IEC 61000-4-28 implementation in the CIGui32 or CIGuiSII is based on the IEC 61000-4-28
standard dated 1999-11 and Amendment 1, dated 2001-07. Test levels and durations can be
changed if needed through use of one or more filename.428_Vars files in the IEC_Test directory.
California Instruments
Revision N
127
Compliance Test System 3.0
12.2
User Manual
Test Setup
The following parameters and controls are available for executing the IEC 61000-4-28 test:
128
Control / Field
Description
Nominal voltage
Opening this window will set this parameter to the present steady state
voltage setting of the AC source. If required, a new value can be entered
for use during the test. At the end of the test, the AC source will remain
at this voltage level. If needed, the program will switch the AC source to
the high voltage range and close the output relay when the test is
started.
Nominal frequency
Opening this window will set this parameter to the present steady state
frequency setting of the AC source. If required, a new value can be
entered for use during the test. At the end of the test, the AC source will
remain at this frequency.
Source Regulation
See under Test Options below
EUT Class
The test levels used are determined by the EUT class. Class selection is
done by loading the correct class file from disk.
Phase Mode
Note that there is no Phase selection in this test as the programmed
frequency always applies to all available phases.
Start
Starts the IEC 61000-4-28 test using the parameters set by the user.
Test progress is shown at the bottom of the window. The sequence
numbers shown correspond to those in the illustration.
Stop
Aborts test in progress.
Revision N
California Instruments
User Manual
12.3
Compliance Test System 3.0
Test Sequence
The test sequence implemented by this test consists of a series of frequency variations
consistent with commonly found phenomena on the public utility power grid. The objective of this
test is to evaluate a product for immunity from such variations.
Frequency variations are applied at different levels for different product categories. The user
must determine the product class and select the appropriate test level. During the test run,
frequency changes are applied at the zero degree phase angle of the waveform. Both up and
down shifts of the frequency are performed. Test levels and test times are displayed in the test
parameter data entry grid. The various columns in the test data setup are shown in the figure
below. In this example, the following parameters were specified in the data entry grid:
Freq. Change
Transition
-15
1
Hold
Level Repeat
120
Delay
2
Repeat
60
3
Repeat = 3
Delay =
60 secs
Fnom =50 Hz
Test
Level =
-15 %
Level
Repeat = 2
Delay =
60 secs
Ttrans =
1 sec
Hold Time=
120 secs
Figure 12-2: IEC 61000-4-28 Test Sequence
These parameters can be entered on screen by the operator or loaded from disk. To load a new
test or test class, select the File, Open menu. The default location for IEC test files is:
C:\Program Files\California Instruments\Cigui32\IEC_Test
or
C:\Program Files\California Instruments\CiguiSII\IEC_Test.
The following four IEC 61000-4-28 test files are distributed with the CIGUI32 or CIGuiSII
program:
File Name
Test Class
Generic IEC 1000-4-28 Freq Vars Test Level 2.428_Vars
Level 2
Generic IEC 1000-4-28 Freq Vars Test Level 3.428_Vars
Level 3
Generic IEC 1000-4-28 Freq Vars Test Level 4.428_Vars
Level 4
The user may create as many test files as desired using the data entry grid. Changes made can
be saved using the File, Save As… menu entry.
California Instruments
Revision N
129
Compliance Test System 3.0
12.4
User Manual
Test Levels
In Annex B of the draft standard, the EUT operating environment classifications are defined
based on IEC 1000-2-4. The classifications are as follows:
Class
Environment
Class 1
Applies to protected supplies with compatibility levels lower than public network
levels. It relates to the use of equipment, which is very sensitive to disturbances in
the power supply, for instance the instrumentation of technological laboratories, some
automation and protection equipment, some computers etc. This equipment is
normally supplied by protected supplies such as uninterruptible power supplies, filers
or surge suppressors.
Class 2
Applies to points of common coupling (PCCs for consumer systems) and in-plant
points of common coupling (IPCs) in the industrial environment in general. The
compatibility levels in this class are identical to those of public networks.
Class 3
Applies only to IPCs in industrial environments. It has higher compatibility levels than
those of class 2 for some disturbance phenomena. This class should be considered
when any of the following conditions are met:
- a major part of the load is fed through converters
- welding machines are present
- large motors are frequently started
- loads vary rapidly
Testing is not recommended for Class 1 equipment. Test level X specifications are to be agreed
upon by the manufacturer and user. Test Levels 2, 3 and 4 defined in the standard are applied to
environmental Class 2 and 3 equipment. Test Level 3 is defined for interconnected networks and
Level 4 for non-interconnected networks (islands for example) where the frequency variations
can be much higher. The following table summarizes the EMC classes and test level
relationships.
12.5
Test Level
Environment classification
Frequency Variation
Level 1
Class 1
No test required
Level 2
Class 2
± 3 % of Fnom
Level 3
Class 3 and 4 used in interconnected networks
+ 4 % and - 6 % of Fnom
Level 4
Class 3 and 4 used in non-interconnected networks
± 15 % of Fnom
Level X
Product class specific
Open but must be higher
than test level 2.
Test Options
The voltage regulation of the AC Source can be verified by selecting the "Include Source
Regulation Check" check box. This will cause the AC load to measure its output using the built in
measurement system at all the frequency extremes that will be applied to the EUT during the test.
The measured output voltage must be within the source regulation limits specific in the IEC
61000-4-28 standard. If so, a PASS indication will be shown in green to the right of the option
box. If not, a FAIL indication will be shown in red. If the source regulation check fails, check the
system connections. For higher power loads, make sure the external sense lines are used to
sense the voltage at the EUT terminals.
Tests are started using the Start button or the Run, All menu.
12.6
Test Results
There is no way for the CIGUI to determine the outcome of this test as a clear definition of a
failure can not be given. The draft standard called out the following possible test results:
130
Revision N
California Instruments
User Manual
Compliance Test System 3.0
“The test results shall be classified on the basis of the operating conditions and functional
specifications of the equipment under test, as in the following, unless different specifications are given
by product committees or product specifications.
a)
Normal performance within limits specified by the manufacturer, requestor or purchaser
b)
Temporary loss of function or degradation of performance which ceases after the disturbance
ceases, and from which the equipment under test recovers its normal performance, without
operator intervention
c)
Temporary loss of function or degradation of performance, the correction of which requires
operator intervention
d)
Loss of function or degradation of performance which is not recoverable, owing to damage to
hardware or software, or loss of data.
As a general rule, the test result is positive if the equipment shows its immunity, for the duration of the
application of the test, and at the end of the tests the EUT fulfills the functional requirements
established in the technical specification.”
The user has to make this determination by observing the
unit under test. At the end of a test run, the following dialog
box is displayed. Click on the Help button to display the
pass/fail criteria shown above.
12.7
Test Reports
The IEC 61000-4-28 test module produces a test report when the Print Report button is clicked.
Reports can also be printed from the File, Print menu. Test reports include all selected test
parameters and options. A sample test report is shown below. The report format used can be
direct output to a printer, output to a text file or generation of an MS Word report. The desired
report format can be selected from the Options menu, under IEC Report Setup. MS Word reports
are automatically saved in the C:\Program Files\California Instruments\Cigui32\Reports or
C:\Program Files\California Instruments\CiguiSII\Reports directory.
California Instruments
Revision N
131
Compliance Test System 3.0
13.
User Manual
IEC 61000-4-29p DC Dips and Interruptions Immunity Test
(Pre-compliance)
The IEC 61000-4-29 implementation in the CIGui32 or CIGuiSII is based on the IEC 61000-4-29
Figure 13-1: IEC 61000-4-29 Test Window
standard dated march 24, 2000. This test is offered as a pre-compliance level test only. Not
all the DC supply rise and fall time and maximum current requirements can be met under all
conditions. (See paragraph 13.8 for details.) Test parameters can be changed if needed using
the parameter data entry grid. Several generic test parameter files are distributed with the
CIGui32 or CIGuiSII program. These files can be edited as well. IEC 61000-4-29 Test setup
parameter files use a “.429” extension. More than one .429 file may reside in the IEC_Test
directory or any other directory. The operator may select the one to run from the File, Open
dialog.
132
Revision N
California Instruments
User Manual
13.1
Compliance Test System 3.0
Test Setup
The following parameters and controls are available for executing the IEC 61000-4-29 test:
Parameter / Control
Description
Nominal DC voltage
Opening this window will set the upper voltage range parameter to the
present steady state voltage setting of the DC supply. If required, a
new value can be entered for use during the test. At the end of the
test, the DC Supply will remain at this voltage level. The upper voltage
range value entered cannot exceed the selected voltage range. Note
that DC voltage variations to levels above 100 % of Unom may require
selection of the high voltage range.
The lower voltage range must be set to the lowest EUT rated Vdc. If
the EUT voltage range is less than 20 % of its low range value, a
single Vdc level may be used.
Sequence
Available sequences for selection are:
Voltage Dips and Interruptions
Voltage Variations.
Either one or both sequences can be selected for execution.
Output Select
The output selection is shown to the left. If a 3 phase AC/DC power
source model is used, this field allows selection of output channel A, B,
C or all three channels (outputs). The same test sequence is applied
to all selected outputs. For single phase power systems, this field
defaults to channel A.
Start
Starts the IEC 61000-4-29 test using the parameters set by the user.
Test progress is shown at the bottom of the window.
Abort
Aborts test in progress.
The required IEC 61000-4-29 test parameters must be entered in the test data entry grid before
running a test. Previously stored test files can be loaded from the File, Open menu. Test files
use a .429 file extension and only files with this extension can be loaded.
The CIGUI32 or CIGuiSII is distributed with pre-defined test parameter files for the generic IEC
61000-4-29 test sequences. Additional test parameter files e.g. for specific product categories,
can be created by the user by editing the data entry grid and saving the new data under a userspecified name. The following parameters and controls are available for executing the IEC
61000-4-29 test:
Field / Control
Description
Nominal DC voltage
Opening this window will set the upper voltage range parameter to the
present steady state voltage setting of the DC supply. If required, a
new value can be entered for use during the test. At the end of the
test, the DC Supply will remain at this voltage level. The upper voltage
range value entered cannot exceed the selected voltage range. Note
that DC voltage variations to levels above 100 % of Unom may require
selection of the high voltage range.
The lower voltage range must be set to the lowest EUT rated Vdc. If
the EUT voltage range is less than 20 % of its low range value, a
single Vdc level may be used. If the user selects only one of the two
DC levels and the delta between them exceeds 20 % of the low DC
range, a warning message will appear notifying the user of this
condition. As a rule, both voltage must be selected for testing when
this prompt appears.
Sequence Select
Available sequences for selection are:
California Instruments
Revision N
133
Compliance Test System 3.0
Field / Control
User Manual
Description
Voltage Dips and Interruptions
Voltage Variations.
Either one or both sequences can be selected for execution.
13.2
Output Select
The output selection is shown to the left. If a 3 phase AC/DC power
source model is used, this field allows selection of output channel A, B,
C or all three channels (outputs). The same test sequence is applied
to all selected outputs. For single phase power systems, this field
defaults to channel A.
Start
Starts the IEC 61000-4-29 test using the parameters set by the user.
Test progress is shown at the bottom of the window.
Abort
Aborts test in progress.
Setting nominal values
The IEC 61000-4-29 test requires setting of the rated nominal DC voltage of the EUT. The
nominal values must be entered in the Test Setup Nom. Vdc data field before starting a test.
When the IEC 61000-4 test windows is first opened, the present DC voltage setting is
automatically loaded as the nominal Vdc value. This value is overridden by selecting each data
entry field and typing in a new value or by loading a test file from the File, Open menu. Thus, test
data files also contain the nominal Vdc voltage to be used.
13.3
Test sequence
The test sequence implemented by this test consists of a series of DC voltage dips (to less than
DC nominal) or interruptions (dip to zero volt). It is also possible to select voltage variations
which cause the DC voltage to change at a programmed rate to a specified level and then return
at the same or a different rate to the nominal DC level. The objective of this test is to evaluate a
product for immunity from such dips, interruptions and variations.
These dips and variations can be applied at different levels and durations for different product
categories. The user must determine the product class and select the appropriate test file. The
selected levels and durations are visible on screen and can be edited and saved to a new setup
file if needed. This allows a library of test files for specific product categories to be created. The
.429 file loaded determines the test levels and DC nominal values used. It can also contain
information on the EUT and operator. The maximum number of steps that can be defined is 100
for both Dips/Interruptions and Variations.
These parameters can be entered on screen by the operator or loaded from disk. To load a new
test or test class, select the File, Open menu. The default location for IEC test files is:
C:\Program Files\California Instruments\Cigui32\IEC_Test.
Or
C:\Program Files\California Instruments\CiguiSII\IEC_Test.
The following duplicate sets of IEC 61000-4-29 test files are distributed with the CIGui32 or
CIGuiSII program:
For PC's using US Windows Settings (period as decimal separator), use the following files:
Generic IEC 1000-4-29 Voltage Variations.429
Generic IEC 1000-4-29 Voltage Dips.429
Generic IEC 1000-4-29 Voltage Dips Ints and Vars.429
Generic IEC 1000-4-29 Voltage Dips and Interruptions.429
134
Revision N
California Instruments
User Manual
Compliance Test System 3.0
For PC's using US Windows Settings (period as decimal separator), use the following files:
Generic IEC 1000-4-29 Short Interruptions.429
California Instruments
Revision N
135
Compliance Test System 3.0
User Manual
For PC's using European Windows Settings (comma as decimal separator), use the following
files:
Euro Generic IEC 1000-4-29 Voltage Variations.429
Euro Generic IEC 1000-4-29 Voltage Dips.429
Euro Generic IEC 1000-4-29 Voltage Dips Ints and Vars.429
Euro Generic IEC 1000-4-29 Voltage Dips and Interruptions.429
Euro Generic IEC 1000-4-29 Short Interruptions.429
The user may create as many test files as desired using the data entry grid. Changes made can
be saved using the File, Save As… menu entry.
13.4
Test Options
Nominal Voltage Mode
The IEC 61000-4-29 test standard allows testing at a single nominal Vdc value if the voltage
range of the EUT is less than 20 % of the low range value. Thus, if an EUT has a nominal input
range from 100 to 110 Vdc, the range is 10 V which is only 10 % of the low range value (10/100 =
10 %). In this case, either the upper or lower limit value or a value in between may be used to test
the EUT. If the range exceeds 20 %, the test has to be performed at both upper and lower range
settings. The CIGui32 or CIGuiSII will allow the operator to select single value testing but will
prompt a warning if the values entered represent a greater than 20 % range.
Pre-Test Delay
For both Dips/Interruptions and Variations runs, it is possible to specify a pre-test delay. This is a
period expressed in seconds during which the Vdc nominal value will be applied to the EUT
before the actual test sequence starts.
13.5
Test Execution
The selected test mode can be started by pulling down the Run menu and selecting All or by
clicking on the Start button. During test execution, no changes to test parameters are allowed.
The test progress can be monitored at the bottom of the window in the status bar. The progress
through each sequence can be monitored as well as each test step currently executing is
highlighted.
13.6
Test Results
There is no way for the CIGui32 or CIGuiSII to determine the outcome of this test as a clear
definition of a failure can not be given. The draft standard called out the following possible test
results:
“The test results shall be classified on the basis of the operating conditions and
functional specifications of the equipment under test, as in the following, unless
different specifications are given by product committees or product specifications.
a) Normal performance within the specification limits
b) Temporary degradation or loss of function or performance which is selfrecoverable.
c) Temporary degradation or loss of function or performance which requires operator
intervention or system reset.
d) Degradation or loss of function which is not recoverable due to damage of
equipment (components) or software, or loss of data.
136
Revision N
California Instruments
User Manual
Compliance Test System 3.0
As a general rule, the test result is positive if the equipment shows its immunity, for
the duration of the application of the test, and at the end of the tests the EUT fulfills
the functional requirements established in the technical specification.”
The user has to make this determination by observing the unit under test. At the end of the test,
the GUI will pop up a dialog box asking the operator to assess the state of the EUT. If the EUT is
still functional, the operator may answer Yes when prompted. If not, he should answer no. The
response to this query is incorporated as a PASS or FAIL result in the test report.
13.7
IEC 61000-4-29 Test Reports
At the end of a test run, the operator can generate a test report by clicking on the “Print report”
button. IEC 61000-4-29 test reports include all test setup information and test results. User
provided information at the bottom of the 4-29 screen is included as well.
The report format and test report headers can be selected from the Option, IEC Test Report
menu but needs to be done before opening the IEC 429 test screen. The selected format (Printer,
Text File or MS Word) applies to all IEC immunity tests. MS Word reports are automatically saved
in the C:\Program Files\California Instruments\Cigui32\Reports or C:\Program Files\California
Instruments\CiguiSII\Reports directory.
California Instruments
Revision N
137
Compliance Test System 3.0
13.8
User Manual
Source Requirements
The IEC 61000-4-29 imposes certain requirements on the DC test generator used. Not all of
these requirements can be met with the iX Series AC/DC power source. The following
restrictions apply:
Capability
Standard Requirement
iX Series
Output voltage range
0 - 360 Vdc
0 - 300 Vdc
Output voltage variations under load
<5%
<1%
Ripple content
< 1 % of output voltage
< 1 V rms
Rise and fall time into 100 Ohm resistive
load
between 1 and 50 usec
0.3 V/usec
Over/undershoot into 100 Ohm resistive
load
< 10 %
<2%
Output current, steady state
up to 25 A
3001iX
5001iX
10001iX
10 A
18.5 A
37.0 A
Note: The use of a test generator with higher or lower voltage or current capability is allowed
provided that the other specifications are preserved. The test generator steady state
power/current capability shall be at least 20 % greater than the EUT power/current ratings.
This means that for many EUT's a 25 A capable generator is not needed. However, since the rise
and fall time requirements may not be met under all circumstances, this is a pre-compliance test
only.
For full compliance test applications, the test generator must be tested for compliance with the
test generator requirements.
138
Revision N
California Instruments
User Manual
Compliance Test System 3.0
14.
Customizing IEC 61000-4 Test Parameters
14.1
About This Chapter
This chapters covers describes how to modify aspects of IEC 61000-4 immunity testing to
accommodate different product committee requirements.
The available 61000-4 tests implemented in the CIGui32 or CIGuiSII program are based on the
most recent officially published test standard. Future changes in test levels can be
accommodated without the need to upgrade the CIGui32 or CIGuiSII program. To allow for some
level of customization, the CIGui32 or CIGuiSII will accept different test parameters that can be
edited by the user.
14.2
IEC 61000-4-11 Implementations
There are two versions of the IEC 61000-4-11 test in the CIGui32, one for iX Series AC Sources
with the -411 and / or the EOS option and one for iX Series that lack the -411 option. The .411
file shown below applies to the latter implementation. The -411 firmware option based
implementation uses files with extension .411_Dips and .411_Vars. Both test file formats can be
edited on screen within the CIGUI32 program and saved back to disk.
Note that the CIGuiSII only support the –411 option based IEC 61000-4-11 tests.
14.2.1 IEC411.411 File
[IEC-1000-4-11]
SeqRepeat = 3
SeqDuration = 10
InterSeqDelay = 1
UserPromt=
MeasUpdateRate =
1000
SeqNumberDips = 21
CycleTime0 = 0.5
StartPhase0 = 0
TestLevel0 = 0
GapDelay0=-1
FallTimeVar = 2
HoldTimeVar = 1
RiseTimeVar = 2
VarLevel0 = 40
VarLevel1 = 0
California Instruments
IEC 61000-4-11 section header
Parameters that apply to both Dips and Variations
Number of times each voltage fluctuation is repeated. Range 1 to 60.
Time between successive dips and variations. The standard specifies this
time to be no less than 10 seconds.
Time between each run of dips or variations. This time should be at least
1 second and no more than 60 seconds.
“User intervention required. Press OK when ready to continue”(message
displayed when GapDelay0 <0)
Interval for updating measurement data in milliseconds. Range 100 to
60000 milliseconds.
Parameters that apply only to Voltage Dips
Number of sets of dips. Each set consists of SeqRepeat dips. Each set
has its own set of three parameters which follow. each parameter has a
sequence number from 0 through SeqNumberDips-1. They do not have to
be entered in any order.
For each set number 0 through SeqNumberDips-1, the duration of the dip
in AC cycles.
For each set number 0 through SeqNumberDips-1, the start phase angle
of the dip
For each set number 0 through SeqNumberDips-1, the voltage level to dip
to in % of U nominal
-1 sets the user prompt. If >0 it sets the delay between dips.
Parameters that apply to Voltage Variations
Voltage fall time in seconds. Must be between 1 and 999 seconds
Voltage hold time in seconds. Must be between 1 and 999 seconds
Voltage rise time in seconds. Must be between 1 and 999 seconds
First voltage level to change to in percent of U nominal
Second voltage level to change to in percent of U nominal
Revision N
139
Compliance Test System 3.0
User Manual
User Prompts
Some EUT's will require resetting and readjustment when the power dips or is interrupted for a
long period. If this is the case, then set GapDelay0 = -1. This will cause the test sequence to halt
and wait for user intervention. When ready to resume test press “OK”.
14.2.2 IEC413.413 File
[IEC-1000-4-13]
Fcurv_lev = 90
Fcurv_dwe = 120
Fcurv_pau = 5
Oswcurv_dwe = 120
Oswcurv_pau = 5
Oswcurv3_lev = 6
Oswcurv3_phs = 180
Oswcurv5_lev = 4
Oswcurv5_phs = 0
Swefreq1_lev = 3
Swefreq2_lev = 10
Swefreq3_lev = 5
Swefreq4_lev = 5
Swefreq5_lev = 2
Swefreq_dwe = 300
Swefreq1_stp = 5
Swefreq2_stp = 10
Swefreq3_stp = 10
Swefreq4_stp = 10
Swefreq5_stp = 25
Indharm2_lev = 3
Indharm2_phs = 0
Indharm_dwe = 5
Indharm_pau = 5
Interharm1_lev = 2.5
Interharm2_lev = 5
Interharm3_lev = 3.5
Interharm4_lev = 2
Interharm5_lev = 1.5
Interharm_dwe = 5
Interharm_pau = 1
140
IEC 61000-4-13 section header
Parameters that apply only to Flat Top Curve
Flat Curve Level at 90%
Flat Curve Dwell time in seconds
Flat Curve Pause in seconds
Parameters that apply only to Over Swing Curve
Over Swing Curve Dwell time in seconds
Over Swing Curve Pause in seconds
Over Swing Curve of third harmonic level at 6%
Over Swing Curve of third harmonic phase test of 180 degrees
Over Swing Curve of fifth harmonic level at 4%
Over Swing Curve of fifth harmonic phase test of 0 degree
Parameters that apply to Frequency Sweep
Sweep Frequency Level of first range at 3%
Sweep Frequency Level of second range at 10%
Sweep Frequency Level of third range at 5%
Sweep Frequency Level of fourth range at 5%
Sweep Frequency Level of fifth range at 2%
Sweep Frequency Dwell time in seconds
Sweep Frequency Step size of first range in Hz
Sweep Frequency Step size of second range in Hz
Sweep Frequency Step size of third range in Hz
Sweep Frequency Step size of fourth range in Hz
Sweep Frequency Step size of fifth range in Hz
Parameters that apply only to Individual Harmonics
Individual harmonics Level for nth (second) harmonic in %
Individual harmonics Phase for nth (second) harmonic in degree
Individual harmonics Dwell time in second
Individual harmonics Pause in second
Parameters that apply only to Interharmonics
Interharmonics Level for first range at 2.5%
Interharmonics Level for second range at 5%
Interharmonics Level for third range at 3.5%
Interharmonics Level for fourth range at 2%
Interharmonics Level for fifth range at 1.5%
Interharmonics Dwell time in second
Interharmonics Pause in second
Revision N
California Instruments
User Manual
14.3
Compliance Test System 3.0
Sample File IEC411.411
The CIGUI32 program supports two different implementations of the IEC 61000-4-11 standard.
One is based on the -411 firmware option. This version does not use an ini file but stored test
sequences in a proprietary format instead. If your system uses an iX Series AC power source but
does not have the -411 option installed, the following IEC411.411 file is used to store the test
sequence. You can create additional files with the .411 extension and save them in the
C:\Program Files\California Instruments\Cigui32\IEC_Test directory.
Note that the CIGuiSII program only supports the –411 option based tests.
Following is a listing of the default IEC411.411 file shipped with the CIGUI32 program. If for some
reason your 411 file is lost or you would like to restore it to its original condition, use the values
shown here.
[IEC-1000-4-11]
PreTest = 3
SeqRepeat = 3
SeqDuration = 10
InterSeqDelay = 1
UserPrompt = User
intervention required. Press OK
when ready to continue
SeqNumberDips = 21
MeasUpdateRate = 1000
CycleTime0 = 0.5
StartPhase0 = 0
TestLevel0 = 0
GapDelay0 = 2
CycleTime1 = 0.5
StartPhase1 = 180
TestLevel1 = 0
GapDelay1 = 2
CycleTime2 = 1
StartPhase2 = 0
TestLevel2 = 0
GapDelay2 = 5
CycleTime3 = 5
StartPhase3 = 0
TestLevel3 = 0
GapDelay3 = 2
CycleTime4 = 10
StartPhase4 = 0
TestLevel4 = 0
GapDelay4 = 2
California Instruments
CycleTime5 = 25
StartPhase5 = 0
TestLevel5 = 0
GapDelay5 = 2
CycleTime6 = 50
StartPhase6 = 0
TestLevel6 = 0
GapDelay6 = 2
CycleTime7 = 0.5
StartPhase7 = 0
TestLevel7 = 40
GapDelay7 = 2
CycleTime8 = 0.5
StartPhase8 = 180
TestLevel8 = 40
GapDelay8 = 2
CycleTime9 = 1
StartPhase9 = 0
TestLevel9 = 40
GapDelay9 = 2
CycleTime10 = 5
StartPhase10 = 0
TestLevel10 = 40
CycleTime11 = 10
StartPhase11 = 0
TestLevel11 = 40
CycleTime12 = 25
StartPhase12 = 0
TestLevel12 = 40
CycleTime13 = 50
Revision N
StartPhase13 = 0
TestLevel13 = 40
CycleTime14 = 0.5
StartPhase14 = 0
TestLevel14 = 70
CycleTime15 = 0.5
StartPhase15 = 180
TestLevel15 = 70
CycleTime16 = 1
StartPhase16 = 0
TestLevel16 = 70
CycleTime17 = 5
StartPhase17 = 0
TestLevel17 = 70
CycleTime18 = 10
StartPhase18 = 0
TestLevel18 = 70
CycleTime19 = 25
StartPhase19 = 0
TestLevel19 = 70
CycleTime20 = 50
StartPhase20 = 0
TestLevel20 = 70
FallTimeVar = 2
HoldTimeVar = 1
RiseTimeVar = 2
VarLevel0 = 40
VarLevel1 = 0
141
Compliance Test System 3.0
14.4
User Manual
Sample File IEC413.413
Following is a listing of the default IEC411.413 file shipped with the CIGUI32 program. If for some
reason your 413 file is lost or you would like to restore it to its original condition, use the values
shown here.
[IEC-1000-4-13 / Class 2]
INDHARM17_LEV=3
INDHARM17_PHS=No test
INDHARM18_LEV=No test
INDHARM18_PHS=No test
INDHARM19_LEV=2
INDHARM19_PHS=No test
INDHARM20_LEV=No test
INDHARM20_PHS=No test
INDHARM21_LEV=No test
INDHARM21_PHS=No test
INDHARM22_LEV=No test
INDHARM22_PHS=No test
INDHARM23_LEV=2
INDHARM23_PHS=No test
INDHARM24_LEV=No test
INDHARM24_PHS=No test
INDHARM25_LEV=2
INDHARM25_PHS=No test
INDHARM26_LEV=No test
INDHARM26_PHS=No test
INDHARM27_LEV=No test
INDHARM27_PHS=No test
INDHARM28_LEV=No test
INDHARM28_PHS=No test
INDHARM29_LEV=1.5
INDHARM29_PHS=No test
INDHARM30_LEV=No test
INDHARM30_PHS=No test
INDHARM31_LEV=1.5
INDHARM31_PHS=No test
INDHARM32_LEV=No test
INDHARM32_PHS=No test
INDHARM33_LEV=No test
INDHARM33_PHS=No test
INDHARM34_LEV=No test
INDHARM34_PHS=No test
INDHARM35_LEV=1.5
INDHARM35_PHS=No test
INDHARM36_LEV=No test
INDHARM36_PHS=No test
INDHARM37_LEV=1.5
INDHARM37_PHS=No test
INDHARM38_LEV=No test
INDHARM38_PHS=No test
INDHARM39_LEV=No test
INDHARM39_PHS=No test
INDHARM40_LEV=No test
INDHARM40_PHS=No test
INDHARM_DWE=5
INDHARM_PAU=1
[Flat Curve test]
FCURV_LEV=90
FCURV_DWE=120
FCURV_PAU=5
[Over Swing Curve test]
OSWCURV_DWE=120
OSWCURV_PAU=5
OSWCURV3_LEV=6
OSWCURV3_PHS=180
OSWCURV5_LEV=4
OSWCURV5_PHS=0
[Sweep Frequency test]
SWEFREQ1_LEV=3
SWEFREQ2_LEV=10
SWEFREQ3_LEV=5
SWEFREQ4_LEV=5
SWEFREQ5_LEV=2
SWEFREQ_DWE=300
SWEFREQ1_STP=5
SWEFREQ2_STP=10
SWEFREQ3_STP=10
SWEFREQ4_STP=10
SWEFREQ5_STP=25
[Individual Harmonic test]
INDHARM2_LEV=3
INDHARM2_PHS=0
INDHARM3_LEV=8
INDHARM3_PHS=0
INDHARM4_LEV=1.5
INDHARM4_PHS=No test
INDHARM5_LEV=9
INDHARM5_PHS=0
INDHARM6_LEV=No test
INDHARM6_PHS=No test
INDHARM7_LEV=7.5
INDHARM7_PHS=0
INDHARM8_LEV=No test
INDHARM8_PHS=No test
INDHARM9_LEV=2.5
INDHARM9_PHS=No test
INDHARM10_LEV=No test
INDHARM10_PHS=No test
INDHARM11_LEV=5
INDHARM11_PHS=No test
INDHARM12_LEV=No test
INDHARM12_PHS=No test
INDHARM13_LEV=4.5
INDHARM13_PHS=No test
INDHARM14_LEV=No test
INDHARM14_PHS=No test
INDHARM15_LEV=No test
INDHARM15_PHS=No test
INDHARM16_LEV=No test
INDHARM16_PHS=No test
142
[Interharmonics test]
INTERHARM1_LEV=2.5
INTERHARM2_LEV=5
INTERHARM3_LEV=3.5
INTERHARM4_LEV=2
INTERHARM5_LEV=1.5
INTERHARM_DWE=5
INTERHARM_PAU=1
Revision N
California Instruments
User Manual
Compliance Test System
15.
Specifications
15.1
About This Chapter
This chapters provides the technical specifications of the CTS measurement system and the
Power Analysis and Conditioning System unit (PACS-1. PACS-3 and PACS-3-75). If the CTS
system you have includes an AC power source, refer to the separate AC source user manual that
shipped with the AC source.
Note:
15.2
All specifications listed in the manual are valid at an ambient temperature of 23° ± 5° and
apply after a 15 minute warm-up period.
Measurement System Specifications
The CTS measurement system is implemented using a high speed Analog to Digital ISA plug in
board. This board needs to be installed properly in order to function according to the specification
listed here.
Measurement
Specification
Unit
Bandwidth
Anti Aliasing
> 60 dB at 5 KHz
Bandpass ripple
< 2 % up to 2.5 KHz
%
Volts
Range
Max. input
Max. crest factor
0.01 - 312.00
V rms
1000
Vpeak
5:1
Accuracy
± 0.1 % ± 0.05 % FS ± 3 mV
mV
Resolution
10
mV
Voltage CMRR
80
dB
RMS Current
Current ranges (Auto ranging)
4,16,40
A rms
Current ranges (Auto ranging) -75
4,16,75
A rms
Highest range PACS-1 / PACS-3
40.00
A rms
Highest range PACS-3-75
75.00
A rms
Max. input [permanent, no damage if
< 200 Apeak] PACS-1 / PACS-3
40.00
A rms
Max. input [permanent, no damage if
< 200 Apeak] PACS-3-75
75.00
A rms
Max. Crest Factor [High Range]
5:1
Max. Crest Factor [High Range] -75
2.5:1
Max. Crest Factor [Low Range]
20:1
Accuracy
Resolution
Revision E
± 0.1 % ± 0.05 % FS ± 3 mA
mA
1
mA
143
Compliance Test System 3.0
User Manual
Measurement
Specification
Unit
Power
Range PACS-1 / PACS-3
Range PACS-3-75
Accuracy
0.1 - 12,500
W/ph
0.1 - 22,500
W/ph
± 0.25 % ± 0.25 % FS ± 20mW
Resolution
0.1
mW
W
Apparent Power
Range PACS-1 / PACS-3
Range PACS-3-75
Accuracy
0.01 - 12,500
VA/ph
0.01 - 22,500
VA/ph
± 0.15% ± 0.15% FS ± 20
Resolution
0.01
mVA
VA
Power Factor
Range
0.00 - ± 1.00
Accuracy
± 0.05
Resolution
0.01
Crest Factor
Range
20:1
Accuracy
± 0.005
Resolution
0.001
Frequency
Range
Accuracy
Resolution
45 - 65
Hz
0.1 % of reading
Hz
0.1
Hz
Harmonic Analysis
Fundamental to 40th
Range
Accuracy Fundamental
Accuracy Harmonics
±0.05% FS±0.05%/kHz
±0.1 %±0.1%/kHz
Measurement window
Smoothing filter
10, 12 or 16 periods
1.5
sec
0.1 - 10
Pst
Flicker
Pst
Range
Accuracy
Resolution
Integration time
144
3
%
0.01
10
min
Plt
Range
0.1 - 10
dmax
Range
0 - 100
%
dc
Range
0.1 - 100
%
dt
Range
0.1 - 100
%
dt over3%(4%)
Range
0 - 1000
ms
Revision N
California Instruments
User Manual
15.3
Compliance Test System 3.0
PACS Specification
The PACS unit creates the mechanical and electrical interface between the AC source, the EUT
and the PC. It provides the necessary isolation and signal conditioning to perform the
measurements needed.
PACS units are available in single and three phase configurations. Single phase CTS systems are
supplied with a PACS-1 single phase unit, three phase CTS systems are supplied with a PACS-3
or PACS-30-75 three phase unit.
The following specifications apply to the PACS units.
PACS Model:
PACS-1
Number of phases
PACS-1-75
PACS-3
PACS-3-75
1
1
3
3
2
2
6
6
Channels
Voltage and
Current
Connector Style
Front panel
CEE/77 front
none
none
none
Rear panel
terminal block
terminal block
terminal block
terminal block
Front panel
240 Vac
n/a
n/a
n/a
Rear panel
312 Vac
312 Vac
480 Vac
480 Vac
Maximum Voltage
Maximum Current
Built-in Reference
Impedance
Front panel
16A rms
n/a
n/a
n/a
Rear panel
40A rms
75A rms
40A
rms/phase
75A
rms/phase
1251RP-CTS
internal
n/a
n/a
n/a
5001iX-CTS
option
115V / 230V
Nominal ± 10%
115V / 230V
Nominal ±
10%
115V / 230V
Nominal ±
10%
Input Voltage
Rear panel
Input Frequency
IEC 320
Input Current
Dimensions
Weight
115V / 230V
Nominal ± 10%
50 / 60Hz
50 / 60Hz
less than .6A
(115v)
less than .3A
(230v)
less than .6A
(115v)
less than .3A
(230v)
50 / 60Hz
less than .6A
(115v)
less than .3A
(230v)
50 / 60Hz
less than .6A
(115v)
less than .3A
(230v)
HxWxD (inch)
3.5 x 16.8 x 22
3.5 x 16.8 x 22
3.5 x 16.8 x 22
3.5 x 16.8 x 22
HxWxD (mm).
89 x 427 x 560
89 x 427 x 560
89 x 427 x 560
89 x 427 x 560
12 / 5.4
21 / 9.5
12 / 5.4
12 / 5.4
12 / 5.4
Lbs / kg
with Ref Imp.
Table 15-1 PACS Specifications
Voltage Range:
The input voltage range is 0 to 312V rms.
The 1-phase or 3-phase voltage is applied to input terminal block TB4.
Current Range: The max. input current is 40A rms for PACS-1 and PACS-3.
The max. input current is 75 A rms for PACS-1-75 and PACS-3-75.
PACS-1
California Instruments
Front panel outlet current rating is 16A rms. only.
Voltage can be 0 to 312V rms.
Revision N
145
Compliance Test System 3.0
User Manual
Frequency may not be 50Hz depending on power source used and
application.
15.4
Environmental
Parameter
Specification
Operating Temp:
0 degrees to +40 degrees Celsius.
Storage Temp:
0 degrees to +70 degrees Celsius.
Humidity:
Operating:.
Storage:
≤90% RH up to 40° C
≤90% RH up to 40° C, ≤75% RH up to 70° C.
Creepage and
15.5
Clearance:
Rated for Pollution Degree 2.
Insulation:
Rated to Installation Category(Overvoltage Category) II
Vibration:
Designed to meet NSTA 1A transportation levels.
Shock:
Designed to meet NSTA 1A transportation levels.
Regulatory
Parameter
Specification
Electromagnetic Emissions and
Immunity:
Designed to meet EN50081-1 and EN50082-1
European Emissions and Immunity standards as
required for the “CE” mark.
Acoustic Noise:
60 dBA maximum. Measured at one meter. (PACS-X
or 1251RP)
75 dBA maximum. Measured at one meter. (5001iX)
Safety:
146
Designed to meet EN61010-1 European safety
standards as required for the “CE” mark.
Revision N
California Instruments
User Manual
15.6
Compliance Test System 3.0
Flicker Reference Impedance
Flicker measurements require the use of a reference impedance according to IEC 725. Since this
reference impedance has to be matched to the output of the AC source used, the PACS-1 is
available in different versions to accommodate the different AC sources that may be part of the
CTS system. The following reference impedances are available:
Model
Phases
Flicker Impedance
PACS-1RP
1
For RP Series based CTS system. Single phase
lumped impedance built into PACS-1 cabinet.
PACS-1
1
For 3001iX-CTS and 5001iX-CTS using programmable
impedance. (Standard)
Option -LR1
1
For 3001iX-CTS and 5001iX-CTS using optional
lumped impedance. (Single phase lumped impedance
built into PACS-1 cabinet.)
PACS-3
3
For 15003iX-CTS using programmable impedance.
(Standard)
Option -LR3
3
For 15003iX-CTS using optional lumped impedance.
(Three phase lumped impedance provides through
OMNI-3-18i cabinet.)
Option -LR4
3
For 30003iX-CTS using lumped impedance. (Threephase lumped impedance provides through OMNI-337i cabinet.)
Option -LR5
3
For single phase testing of EUT's at 100 V L-N for the
Japanse flicker test standard, an OMNI-1-37iJ is
available as option -LR5.
California Instruments
Revision N
147
Compliance Test System 3.0
User Manual
15.6.1 Single Phase Reference Impedance
The CTS systems based on the ix Series use a programmable output impedance to meet the
flicker reference impedance requirements. All non-ix Series based CTS systems require the use of
an external reference impedance. Consult the factory for configuration information.
If the CTS system was supplied with a PACS-1RP (1251RP-CTS), the required single phase
reference impedance is built into the PACS-1RP unit. In this case, you can select the reference
impedance by putting the PACS unit in the Flicker mode by pressing the Mode switch on the front
panel of the PACS unit. The LED will indicate Flicker (for Flicker testing) or Bypass (for Harmonics
testing) mode. If the PACS-1 unit is configured for remote actuation of the flicker function, then the
CTS 3.0 Software will switch from bypass to flicker automatically depending on what test is being
run.
Reference Impedance
Phases
1
Flicker Mode:
Max. Current
18.5 A
Useable range
2.0 - 18.5 A
Bypass Mode:
Max. Current
40.0 A
Impedance @ 50 Hz in Flicker Mode:
Phase
0.24 + j0.15 Ω
Neutral
0.16 + j0.10 Ω
Accuracy
<5%
Controls and Indicators
Flicker On/Off push button
Power Led
Bypass mode Led
Flicker mode Led
15.6.2 Three Phase Reference Impedances
The 15003iX-CTS three phase system by
default uses the programmable impedance .
Optionally, the OMNI-3-18i lumped impedance
can be used. This separate 3.5 inch / 89 mm
tall rack mount unit needs to be connected
between the output terminals of the AC source
and the input terminals of the PACS-3 unit.
The OMNI-3-18i can be controlled from its
front panel but is normally under control of the CTS 3.0 software.
The 30003iX-CTS system does not provide programmable impedance and therefore must be
ordered with the OMNI-3-37i lumped reference impedance in order to support Flicker testing. The
OMNI-3-37i is housed in a 5.25 inch / 133 mm tall 19 inch / 483 mm wide rack mount cabinet.
Refer to the OMNI or iX AC/DC Power Source user manual for details.
148
Revision N
California Instruments
User Manual
16.
Configuration Options
16.1
About this Chapter
Compliance Test System 3.0
The CTS 3.0 software allows many parameters and operational characteristics to be customized to
meet changing test standards and standard interpretations. Rather than providing a rigid
programmed method, most of the operational characteristics such as IEC test limits, test window
times and filter characteristics are data base driven.
A skilled operator may access the data in this data base and customize the system to his or her
specific needs. Furthermore, if changes occur in one or more of the applicable test standards, it is
possible to incorporate such changes without the need to upgrade the software version.
The Calibration and Configuration module is a separate program utility which is distributed as part
of the CTS 3.0 software suite and may be used to access the configuration data base. It is located
in the CTS 3.0 program directory. This chapter covers the configuration parameters only. For
information on calibration settings and period calibration, refer to chapter 0.
16.2
Accessing the Calibration and Configuration Database
The Configuration utility is provided to allow the operator to view calibration and configuration
parameters contained in this database. Only authorized users can change any of these values if
properly logged in. Upon launching the Configuration.exe program, you will be prompted for your
name and password. A history of all users and dates at which the configuration data has been
changed is retained for audit purposes.
The correct password is "cal_lock". If no password or an incorrect password is specified, the
operator can only view configuration data but not change any of it. After entering the correct name
and password, the data can be both viewed and changed if needed. Click on the View/Update
Limit Information button to access the configuration database.
California Instruments
Revision N
149
Compliance Test System 3.0
User Manual
16.2.1 Calibration and Configuration Data
The following calibration and configuration data is available to the user. If the correct password
has been entered, this information can be updated. If not, it can only be viewed. Any changes will
be logged and time stamped so an audit trail is available.
150
Field
Description
Main
Displays information on the A/D card and base sampling frequency.
Calibration
information
Individual voltage and current channels have calibration coefficients, which
are calculated automatically when running the Calibration module. (See
section 0) Normally, there is no need to edit these values.
Maximum
Current Limits
The CTS system uses three current ranges for maximum resolution and
accuracy of current harmonics measurements. The range coefficients are
used to set the cross over points of these current ranges. These values
should not be change by the user.
Revision N
California Instruments
User Manual
Compliance Test System 3.0
Field
Impedance
Description
These fields set the flicker reference impedance values when using an iX
Series with programmable impedance. Values used may differ between
European and Japanese standards. The Japanese standard presently
requires the use of the reference impedance for both harmonics and flicker
tests. During harmonics tests, this will result in high voltage distortion. This
conflict has not been resolved at this time. The programmable impedance
values are different for single and three phase modes. This setting is only
relevant if you select " CI Source with programmable impedance" in the
System Configuration setting.
If the AMX power source is used, the output impedance may have to be set
to a value other than 0 using the Z (Ohms) field at the bottom of this
section.
System
Configuration
This setting determines if a reference impedance is used and if so, which
type. Available choices are:
No CI power
source
Select this option if you are not using a CI AC Source or have no OMNI
impedance.
OMNI
included with
PACS
Select this option if you have a 1251RP-CTS system, a PACS-1RP or a
PACS-LR1
External OMNI
Select this option if you have a OMNI-1-18I / LR1, OMNI-1-37 / LR2, OMNI3-18I / LR3, OMNI-3-37I / LR4 or OMNI-1-37iJ / LR5.
CI Source with
programmable
impedance
Select this option if you have a standard iX Series CTS system with
programmable impedance.
AMX Source
Select this option if you have a PPS AMX power source model. Use of this
model requires that the programmable impedance values are set to match
any lumped impedance that may be part of the system or to the correct IEC
60725 reference impedance values. This may require on-site calibration.
The value must be set in the Z(Ohms) field of the Impedance section.
Original
Calibration
Information
Shows original calibration date of CTS system.
Calibration Data
Update
Information
Shows the last date the system calibration data was changed and by
whom.
California Instruments
Revision N
151
Compliance Test System 3.0
17.
Calibration
17.1
About This Chapter
User Manual
This chapter covers two basic functions: System calibration and system configuration. Single
phase calibration is covered first and additional steps for three phase calibration are also covered.
System configuration is then covered detailing the steps to properly set up the AC power source.
If the CTS system you have includes an AC power source, refer to the separate user manual that
shipped with the AC source for service and calibration information.
17.2
Calibration
The CTS system uses a precision measurement system that requires periodic calibration. The
recommended calibration interval is one year. All CTS systems are factory calibrated before
shipment, so adjustment should not be needed until after the first year of use.
Note: For calibration at the factory, the A/D card must be returned with the PACS.
A special calibration program is included in the CTS 3.0 Software suite to facilitate calibration and
store the calibration constants. This module is called “Calibration” and is available by clicking on
the Compliance Test System menu selection. The program screen is shown on the next page.
Make appropriate selection before clicking on the Calibrate button. Upon Clicking the Calibration
button, you will be given step-by-step instructions to complete the calibration. At the end of a
calibration, the Accept button will be available. Clicking on it will cause the software to save the
calibration data and printout a calibration log file.
17.2.1 Required Calibration Equipment
To perform the CTS measurement system calibration, the following equipment is required:
Equipment
Description
Digital AC Multimeter
Agilent 34401A DMM or equivalent with traceable calibration.
Resistive Load Bank
Avtron K565 or equivalent. The load resistor range must be able to
handle 2 - 30A rms (or higher for PACS-3-75) and be rated for the
power levels used.
Current Shunt
50A Current shunt 0.05 % accuracy or better, e.g. Isotek.
Table 17-1: Required Calibration Equipment
152
Revision N
California Instruments
User Manual
Compliance Test System 3.0
Figure 17-1 : CTS 3.0 Calibration Program Main Screen
17.3
Install A/D Card in PC
The PACS must be calibrated with the A/D PCI card that was supplied with the system. If the card is
replaced, the system must be re-calibrated.
Install the PCI card into the test computer and connect it to the rear terminal of the PACS with the
DB37-DB68 cable provided.
17.4
PACS-x Calibration Setup
To calibrate the CTS measurement system, proceed as follows:
1. For a single phase CTS system, configure the test set-up as shown in Figure 17-2. For a
three-phase CTS system with or without a three-phase CI source, configure the test set-up as
shown in Figure 17-3. Please note that only a single-phase A/C source is needed to calibrate
a three-phase PACS unit.
2. Connect the current shunt or current transformer in series with the neutral wire between the
PACS unit and the load bank.
3. Connect the Voltage DMM at the AC IN terminals on the PACS unit. (TB4)
California Instruments
Revision N
153
Compliance Test System 3.0
17.5
User Manual
Configuration Procedure
1. Start the Calibration module located in the Compliance Test System Program group called
Calibration (See Figure 17-1).
2. Fill in the information for PACS serial #, Power source to be used for the calibration, and your
name or ID. Make all other appropriate selections before clicking on the Calibrate button.
3. Once the Calibrate button is clicked, the software will prompt you to fill in a table recording the
equipment and measurement instruments to be used for this calibration. When this is
completed, the program will provide you with the step-by-step instructions. Follow these
instructions until the Accept button is enabled. If you did not follow the instructions during the
calibration or the software is aborted for some other reason, you may have to redo the entire
calibration. Please note that the calibration data is not saved until the Accept button is
pressed.
4. Please note that when calibrating a three-phase PACS, all three channels will be calibrated
together. The software will do all three-voltage channels, all high current range channels, all
mid-range channels, and then all low range channels.
5. When calibrating the voltage channels, you will be asked to provide a 230V/50Hz input.
However, when calibrating the current channels, it is not necessary to keep the voltage input at
the same level. In addition, the calibration on current channels is in the sequence of
40Arms/200App, 8Arms/40App, and 2Arms/10App. The software does not do auto ranging in
the process. This means that even if you apply 2 Arms when you are doing 40Arms/200App
range channel(s), the software will still perform the corresponding calibration. The drawback of
doing so is that the calibration accuracy may be compromised.
6. When the Accept button becomes available and is clicked at the end of calibration, the
software will save the data in text file with the name of “C:\CTS calibration.dat”. In addition, it
will generate “calibrate.log” in the CTS directory and print out a hardcopy of this file
automatically. It will also save the calibration information in a database. Further, it will ask you
if you want to copy the calibration data to floppy. If you answer yes, it will perform all the
copying for you automatically.
7. If you copied the calibration data to the floppy, remove disk from drive and write the PACS serial
number on the floppy disk and keep for backup purposes.
154
Revision N
California Instruments
User Manual
Compliance Test System 3.0
Figure 17-2: Single Phase Calibration Setup
California Instruments
Revision N
155
Compliance Test System 3.0
User Manual
Figure 17-3: Three Phase Calibration Setup
156
Revision N
California Instruments
User Manual
17.6
Compliance Test System 3.0
Installing New CTS 3.0 Calibration Data
If you have send in the CTS 3.0 system for calibration at a remote calibration lab or at California
Instruments, the PC normally used to run the CTS system will typically not have the new calibration
on it when you receive the PACS and A/D card back. The new calibration data will be received on
a removable medium such as a CD ROM or floppy disk or emailed to you as an alternative.
To install the new calibration data, proceed as follows:
1. Insert the calibration disk received into CD ROM or floppy drive as appropriate.
2. Open your Windows Explorer and select the drive.
3. Copy the CTS_Calibration.cts file located on the removable medium’s root directory
4. Paste this file to the C:\ root of the PC that operates the CTS system.
5. Run the CTS 3.0 program. Upon launch, the CTS 3.0 program will detect the calibration data
file which should have a newer date and time stamp that the calibration data currently in use. If
so, the program will automatically read the new cal file and update its calibration data base.
6. You can verify that the new calibration data has been loaded by selecting the "View,
Calibration Info" menu.
You can save the calibration disk if needed although annual re-calibration of the system is
recommended.
California Instruments
Revision N
157
Compliance Test System 3.0
18.
Principle Of Operation
18.1
General
User Manual
The Compliance Test System is a power measurement and power analyzer system. The three
basic building blocks are:
18.2
•
AC power, either line power or, typically, a CI power source to provide the proper voltage and
frequency for the test at hand.
•
PACS-1 or PACS-3 measurement unit. This device measures the actual current and voltages
under test and conditions the signals to be compatible with the Analog to Digital data
conversion card.
•
CTS 3.0 Software. The software is the final link to the user. It translates the data from the AD
card into viewable and readable measurements in a GUI format.
AC Power
The AC power is the most flexible of the building blocks. It can be 1-phase or 3-phase and in
some cases the users available line power is adequate. However, if more precise control of
voltage and frequency is needed, as in IEC regulatory testing, the California Instruments mating
power sources provide the proper accuracy and programmability for this task.
18.3
PACS1 or PACS3 Measurement Unit
The PACS measurements module uses Hall Effect current sensors to isolate and scale a sense
voltage that is an accurate and linear function of the current being measured. The sensing
amplifiers uses differential sensing to reduce common mode noise pick-up before it is sent to the
interface connector for transmission to the host PC.
To sense the applied voltage, another set of differential amplifiers are used together with high
precision sense resistors to provide high CMRR. The sense resistors are of high enough
impedance to limit any leakage current to under 0.5mA.
The PACS-1 module also has circuits that switch the built in impedance in and out of circuit for
flicker compliance testing. If this optional impedance is not installed, the “flicker/bypass” button
control has no function.
18.4
CTS 3.0 Software
The CTS 3.0 Software is designed to work with the data acquisition card’s digital samples of
voltage and current. Numerous data channels are scanned sequentially and the software then
calculates many parameters using Fast Fourier Transforms and displays them in the Graphical
User Interface. In addition to numerical outputs of voltage current, power etc., the software also
displays real time graphics of voltage and current.
158
Revision N
California Instruments
User Manual
Compliance Test System 3.0
CAUTION
VOLTAGES UP TO 480 VAC AND 650 VDC MAY BE PRESENT
IN CERTAIN SECTIONS OF THE COMPANION POWER
SOURCES. THIS EQUIPMENT GENERATES POTENTIALLY
LETHAL VOLTAGES.
DEATH
ON CONTACT MAY RESULT IF PERSONNEL FAIL TO
OBSERVE SAFETY PRECAUTIONS. DO NOT TOUCH
ELECTRONIC CIRCUITS WHEN POWER IS APPLIED.
California Instruments
Revision N
159
Compliance Test System 3.0
19.
Service
19.1
Cleaning
User Manual
The exterior of the power source or the PACS unit may be cleaned with a cloth dampened with a
mild detergent and wrung out. Disconnect mains power before cleaning. Do not spray water or
other cleaning agents directly at the equipment.
19.2
General
This section describes the suggested maintenance and troubleshooting procedure. The
troubleshooting procedure is divided into two sections. The first section deals with basic operation
and connection of the equipment. The second section requires opening the PACS unit and using
the Test Points and a simple Digital Multimeter to troubleshoot the unit down to the circuit level.
Only a qualified electronic technician should attempt this level of troubleshooting.
CAUTION:
VOLTAGES UP TO 312 VAC MAY BE PRESENT IN CERTAIN SECTIONS OF THE
PACS MEASUREMENT UNIT.
WARNING:
THIS EQUIPMENT CONTAINS POTENTIALLY LETHAL VOLTAGES. DEATH ON
CONTACT MAY RESULT IF PERSONNEL FAIL TO OBSERVE SAFETY PRECAUTIONS. DO NOT
TOUCH ELECTRONIC CIRCUITS WHEN POWER IS APPLIED
19.3
Basic Operation
19.3.1 No Power To EUT
160
CONDITION
POSSIBLE CAUSE, REMEDY
No power to EUT
Line voltage or power source not at expected value.
Verify power line voltage is correct. Verify power
source voltage is at programmed value
AC source voltage OK.
No power to EUT.
Incorrect input wiring at TB4. Check for wrong
terminals or poor connections.
AC source voltage OK.
Input wiring is OK.
Still no power to EUT
Incorrect output wiring from TB3. Defective plug
and cable from front panel outlet on PACS 1.
Check output wiring from TB3, or, verify cable and
plug going to EUT is good
Revision N
California Instruments
User Manual
Compliance Test System 3.0
19.3.2 Power Source Shuts Down
CONDITION
POSSIBLE CAUSE, REMEDY
The power source shuts down when the EUT load is
applied
If the companion power source shuts down when the
EUT load is applied, it is very likely that the power
source is being severely overloaded. Any severe
overload will cause the 1251RP or the 5001iX to
immediately program itself to zero volts
The power source shuts down immediately when it is
programmed to the test voltage
Another possible cause of shutdown is a short circuit
in the EUT wiring or EUT load. Make sure neutral and
line wires don’t form a short circuit.
19.3.3 Power Source Overload Light On
CONDITION
POSSIBLE CAUSE, REMEDY
Overload light on power source is on
When the overload light is on, the power source is close
to faulting or folding back the output voltage. Adjust
EUT loading if possible to keep power source within its
ratings.
19.3.4 No Signal To PC Interface
CONDITION
POSSIBLE CAUSE, REMEDY
EUT is being driven properly and voltage and current is
present, but the CTS 3.0 Software GUI shows zero
current or zero voltage.
The PACS front panel power switch is not on. Turn on
switch, check ON LED.
The ½ Amp input fuse is open. Replace fuse.
The DB-37 interface cable is not seated in its mating
connectors. Reinsert connectors.
The Sensor Circuit board assembly inside the PACS
module is defective. See next section.
California Instruments
Revision N
161
Compliance Test System 3.0
User Manual
Figure 19-1: Location of AC Sensor Assy. 5004-700 in PACS-x
162
Revision N
California Instruments
User Manual
19.4
Compliance Test System 3.0
Advanced Troubleshooting
If it is suspected that the AC sensor circuit board inside the PACS unit is defective it will be
necessary to remove the top cover of the unit and perform some basic tests to determine if the
circuit is functioning properly. See Figure 33 for location.
CAUTION:
VOLTAGES UP TO 312 VAC ARE PRESENT IN CERTAIN SECTIONS OF THIS POWER
EQUIPMENT.
WARNING:
THIS EQUIPMENT CONTAINS POTENTIALLY LETHAL VOLTAGES. DEATH ON
CONTACT MAY RESULT IF PERSONNEL FAIL TO OBSERVE SAFETY PRECAUTIONS. DO NOT
TOUCH ELECTRONIC CIRCUITS WHEN POWER IS APPLIED
19.4.1 Switch Off Unit, Disconnect High Voltage
Switch off the PACS unit with the front panel power on/off switch. Also disconnect or remove any
AC voltage applied to the rear connection terminals TB3 and TB4.
19.4.2 Removing Top Cover
Remove the screws securing the top cover and remove the top cover.
19.4.3 Initial Inspection
Perform a visual inspection of the unit and ensure all the connectors are properly mated and there
are no loose or broken wires. Check the interface cable going from the AC sensor assembly 5004700 to the front and rear panels.
19.4.4 Power-On Troubleshooting - DC Supplies
WARNING:
Do not touch any parts inside the unit during these tests as they will
be live and dangerous. Always wear safety glasses.
1. Connect a DMM common test lead to TP1 on the 5004-700 AC sensor assembly. TP1 is the
circuit common for all DC supplies and test signals. Connect the other DMM lead to the
cathode of diode CR4.
2. Switch on the PACS unit with the front panel switch.
3. Verify the DC voltage at CR4-cathode is +15V.
4. Connect the other DMM lead to the anode of diode CR5.
5. Verify the DC voltage is -15V.
6. If either of these voltages are not as specified, the board will not function properly and will need
to be serviced.
California Instruments
Revision N
163
Compliance Test System 3.0
User Manual
19.4.5 Power-On Troubleshooting - Voltage Sense
1. Connect the DMM common to TP1.
2. Connect the other DMM lead to TP2. This is the phase A voltage sense output.
3. Apply a test voltage to the PACS input terminals TB4. Use Neutral and ph- A
4. The reading at TP2 should be 1/100 of the input voltage. For example, if 120 V rms is applied
at TB4, then there should be 1.20V rms at TP2.
PACS-3 ONLY
5. Connect the other DMM lead to TP3. This is the phase B voltage sense output
6. Apply a test voltage to the PACS input terminals TB4. Use Neutral and ph- B
7. The reading at TP3 should be 1/100 of the input voltage. For example, if 120 V rms is applied
at TB4, then there should be 1.20V rms at TP3.
8. Connect the other DMM lead to TP4. This is the phase C voltage sense output
9. Apply a test voltage to the PACS input terminals TB4. Use Neutral and ph- C
10. The reading at TP4 should be 1/100 of the input voltage. For example, if 120 V rms is applied
at TB4, then there should be 1.20V rms at TP4.
11. If any of these test points do not have the correct voltage on them, the board is malfunctioning
and it must be serviced.
19.4.6 Power-On Troubleshooting - Current Sense
1. Connect the DMM common to TP1.
2. Connect the other DMM lead to TP6. This is the phase A current sense output.
3. Apply a 4A test current to the PACS input terminals TB4. Use Neutral and ph- A.
4. The reading at TP6 should be 496mV/ Amp of input current. For example, with 4.0A rms
applied at TB4, then there should be 1.984V rms at TP6.
PACS-3 ONLY
5. Connect the other DMM lead to TP8. This is the phase B current sense output.
6. Apply a 4A test current to the PACS input terminals TB4. Use Neutral and ph- B.
7. The reading at TP8 should be 496mV/ Amp of input current. For example, with 4.0A rms
applied at TB4, then there should be 1.984V rms at TP8.
8. Connect the other DMM lead to TP10. This is the phase C current sense output.
9. Apply a 4A test current to the PACS input terminals TB4. Use Neutral and ph- C.
10. The reading at TP10 should be 496mV/ Amp of input current. For example, with 4.0A rms
applied at TB4, then there should be 1.984V rms at TP10.
11. If these sense voltages are not obtained then the board is malfunctioning and it must be
serviced.
164
Revision N
California Instruments
User Manual
Compliance Test System 3.0
Index
2
D
24 x Dmax Test............................................... 86
description
CTS.............................................................. 12
device class..................................................... 70
disks
distribution ................................................... 61
display
resolution ..................................................... 74
distribution disks.............................................. 61
A
A/D card ........................................................ 152
A/D Card
I/O address.................................................. 58
abort ................................................................ 82
AC Source....................................................... 13
control program ........................................... 15
Acoustic ........................................................ 146
acquisition system........................................... 15
acquisition window .......................................... 70
AD card
specifications............................................. 143
AMX .............................................................. 151
AMX Power Source ...................................... 76, 77
assumptions.................................................... 11
C
calibration...................................................... 152
procedure .................................................. 153
required equipment ................................... 152
CE mark ........................................................ 146
CI400PCI ........................................................ 15
CI401PCI ........................................................ 15
CI403PCI ........................................................ 15
CIGui32 or CIGuiSII
software installation..................................... 62
class A devices ............................................... 70
class B devices ............................................... 70
class C devices ............................................... 70
class D devices ............................................... 70
Class D wave shape ....................................... 71
Classes
IEC 1000-2-3 ......................................... 18, 22
compliance
IEC 61000-4-11 ........................................... 94
components .................................................... 12
Configuration
Changing ................................................... 149
CTS 3.0 ..................................................... 149
contents ............................................................. 6
controls
flicker window .............................................. 87
copyright ........................................................... 5
CTS
components................................................. 12
description ................................................... 12
software....................................................... 11
current
fundamental................................................. 82
California Instruments
E
Electronic Output Switch ..................................... 99
Emissions ...................................................... 146
EOS1 ................................................................ 99
EOS3 ................................................................ 99
ESD ........................................................... 45, 56
European Union .............................................. 18
F
fields
flicker window .............................................. 87
flicker
impedance ................................................. 147
three phase impedance ............................. 148
Flicker .............................................................. 24
standard....................................................... 24
fluctuations
voltage ....................................................... 109
frequency
variations ................................................... 127
front panel ....................................................... 40
G
graph
current harmonics........................................ 81
voltage and current ...................................... 81
voltage harmonics ....................................... 81
GUI .................................................................. 15
H
harmonic current limits
dynamic ....................................................... 72
harmonics
device class ................................................. 70
fluctuating .................................................... 23
quasi stationary............................................ 23
stationary ............................................... 23, 73
testing .......................................................... 70
transitory ................................................ 23, 73
Harmonics
IEC61000-4-7 .............................................. 23
Revision N
165
Compliance Test System 3.0
User Manual
JP11............................................................. 57
JP13............................................................. 58
I
I/O address ..................................................... 58
IEC .................................................................. 17
address........................................................ 28
ANSI address .............................................. 28
directive ....................................................... 17
IEC 555-2 ........................................................ 21
IEC 555-3 ........................................................ 24
IEC 61000-3-2................................................. 21
IEC 61000-3-3................................................. 24
IEC 61000-4-11......................................... 25, 94
compliance .................................................. 94
Edition 1.0 ................................................... 94
Edition 2.0 ................................................... 94
test results ................................................... 99
test setup ..................................................... 98
IEC 61000-4-14....................................... 26, 109
test results ................................................. 114
test sequence ............................................ 111
test setup ................................................... 110
IEC 61000-4-17....................................... 27, 116
test results ................................................. 118
test sequence ............................................ 117
test setup ................................................... 117
IEC 61000-4-27....................................... 27, 120
IEC 61000-4-28....................................... 27, 127
test results ................................................. 130
test sequence ............................................ 129
test setup ................................................... 128
IEC 61000-4-29....................................... 27, 132
IEC Tests
INI File ....................................................... 139
test parameters ......................................... 139
IEC61000-4-7
Inter Harmonics ........................................... 23
IEEE-488
Bus Controller........................................ 47, 60
Immunity........................................................ 146
impedance
flicker ................................................... 24, 147
reference ............................................. 24, 147
specifications............................................. 147
three phase ............................................... 148
INI File
IEC Tests................................................... 139
installation ....................................................... 29
CIGui32 ....................................................... 62
CTS 3.0 Software ........................................ 61
ISA A/D Card
configuration................................................ 56
DIP switch ................................................... 56
Jumpers....................................................... 56
J
jumpers
166
Revision N
L
LED indicators ............................................... 160
limits
dynamic ....................................................... 72
harmonic current.......................................... 19
IEC 61000-3-2 ............................................. 19
M
main window
flicker............................................................ 87
maintenance.................................................. 160
manual
history ............................................................ 3
organization ................................................. 11
measurements
specifications ............................................. 143
N
new .................................................................... 3
P
Pacific Power Source
AMX ........................................................... 151
PACS......................................................... 12, 14
specifications ............................................. 145
parameters
IEC 1000-4 tests ........................................ 139
PPS
AMX ................................................76, 77, 151
printing............................................................... 3
reports.......................................................... 82
R
reference impedance ...................................... 24
references ....................................................... 28
resolution
display.......................................................... 74
Ripple
DC.............................................................. 116
S
Safety ............................................................ 146
sample CI-INI file...................................141, 142
Shock............................................................. 146
software
license ............................................................ 3
revision .......................................................... 3
software installation
CIGui32 or CIGuiSII..................................... 62
Windows™................................................... 61
software license .................................................. 3
specifications................................................. 143
measurements ........................................... 143
California Instruments
User Manual
PACS......................................................... 145
status............................................................... 40
T
Temperature
operating,storage ...................................... 146
template .......................................................... 71
test
classes .................................................. 18, 22
test data file
harmonics.................................................... 82
test margin
flicker ........................................................... 90
harmonics.................................................... 81
test parameters
IEC Test .................................................... 139
test reports
IEC 61000-4-13 ......................................... 108
IEC 61000-4-29 ......................................... 137
test results
IEC 61000-4-11 ........................................... 99
IEC 61000-4-14 ......................................... 114
IEC 61000-4-17 ......................................... 118
IEC 61000-4-28 ......................................... 130
test sequence
IEC 61000-4-14 ......................................... 111
IEC 61000-4-17 ......................................... 117
IEC 61000-4-28 ......................................... 129
test setup
IEC 61000-4-28 ......................................... 128
test time
flicker ........................................................... 90
harmonics.................................................... 81
top cover
removal...................................................... 163
California Instruments
Compliance Test System 3.0
troubleshooting.............................................. 160
U
unbalance
voltage ....................................................... 120
upgrading
CTS 1.X or 2.0 to CTS 3.0........................... 64
user data
flicker ........................................................... 90
harmonics .................................................... 81
V
variations
frequency ................................................... 127
VGA
resolution ..................................................... 74
Vibration ........................................................ 146
voltage
DC Ripple .................................................. 116
dips .............................................................. 94
fluctuations................................................. 109
interruptions ................................................. 94
unbalance .................................................. 120
variations ..................................................... 94
W
warranty .............................................................. 5
wave shape
class D ......................................................... 71
window
flicker ........................................................... 87
Windows
software installation ..................................... 61
Word version ................................................... 67
Revision N
167