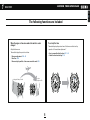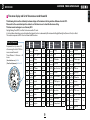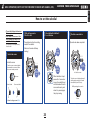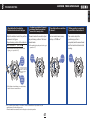
1
READ FIRST CONTENTS Complete User Guide 7X52 GPS SOLAR WATCH CONTENTS ASTRON 7X52 GPS SOLAR Thank you very much for choosing a SEIKO watch. For proper and safe use of your SEIKO watch, please read carefully the instructions in this Complete User Guide before using it. Keep this Complete User Guide handy for easy reference. Length adjustment service for metallic bands is available at the retailer from whom the watch was purchased. If you cannot have your watch repaired by the retailer from whom the watch was purchased because you received the watch as a gift, or you moved to a distant place, please contact SEIKO WORLDWIDE SERVICE NETWORK. The service may also be available on a chargeable basis at other retailers, however, some retailers may not undertake the service. If your watch has a protective film for preventing scratches, make sure to peel it off before using the watch. If the watch is used with the film on it, dirt, sweat, dust, or moisture may be attached under the film and may cause rust. 1 READ FIRST ASTRON 7X52 GPS SOLAR CONTENTS 1 HANDLING CAUTIONS CAUTIONS WARNING To indicate the risks of serious consequences such as severe injuries unless the following safety regulations are strictly observed. To indicate the risks of light injuries or material damages unless the following safety regulations are strictly observed. • Immediately stop wearing the watch in the following cases. • Avoid wearing or storing the watch in the following places. If the watch body or band becomes edged by corrosion etc. • Keep the watch and accessories out of the reach of babies and children. Places where volatile agents (cosmetics such as polish remover, bug repellent, thinners etc.) are vaporizing Places where the temperature drops below 5 ºC or rises above 35 ºC for a long time Care should be taken to prevent a baby or a child accidentally swallowing the accessories. • If you observe any allergic symptoms or skin irritation If a baby or child swallows the battery or accessories, immediately consult a doctor, as it will be harmful to the health of the baby or child. Stop wearing the watch immediately and consult a specialist such as a dermatologist or an allergist. If the pins protrude from the band. Immediately consult the retailer from whom the watch was purchased or SEIKO WORLDWIDE SERVICE NETWORK. Places of high humidity Places affected by strong magnetism or static electricity Dusty places Places affected by strong vibrations • Other cautions • Do not remove the secondary battery from the watch. Replacement of the metal band requires professional knowledge and skill. Please ask the retailer from whom the watch was purchased for replacement of the metal band, as there is a risk of hand or finger injury and fear of losing parts. About the secondary battery Power Source P. 40 Replacement of the secondary battery requires professional knowledge and skill. Please ask the retailer from whom the watch was purchased for replacement of the secondary battery. Do not disassemble or tamper with the watch. Installation of an ordinary silver oxide battery can generate heat that can cause bursting and ignition. Keep the watch out of the reach of babies and children. Extra care should be taken to avoid risks of any injury or allergic rash or itching that may be caused when they touch the watch. When disposing of used batteries, follow the instructions of your local authorities. If your watch is of the fob or pendant type, the strap or chain attached to the watch may damage your clothes, or injure the hand, neck, or other parts of your body. 2 READ FIRST ASTRON 7X52 GPS SOLAR CONTENTS 1 CAUTIONS WARNING Do not use the watch in scuba diving or saturation diving. Do not turn or pull out the crown when the watch is wet. The various tightened inspections under simulated harsh environment, which are usually required for watches designed for scuba diving or saturation diving, have not been conducted on the water-resistant watch with the BAR (barometric pressure) display. For diving, use special watches for diving. Water may get inside of the watch. If the inner surface of the glass is clouded with condensation or water droplets appear inside of the watch for a long time, the water resistant performance of the watch is deteriorated. Immediately consult the retailer from whom the watch was purchased or SEIKO WORLDWIDE SERVICE NETWORK. Do not leave moisture, sweat and dirt on the watch for a long time. CAUTIONS Be aware of a risk that a water resistant watch may lessen its water resistant performance because of deterioration of the adhesive on the glass or gasket, or the development of rust on stainless steel. Do not pour running water directly from faucet. The water pressure of tap water from a faucet is high enough to degrade the water resistant performance of a water resistant watch for everyday life. Do not wear the watch while taking a bath or a sauna. Steam, soap or some components of a hot spring may accelerate the deterioration of water resistant performance of the watch. 3 READ FIRST ASTRON 7X52 GPS SOLAR CONTENTS 1 Features This is a GPS* solar watch. GPS is an abbreviation for Global Positioning System. For details, see P. 27 This watch has the following features. This watch can be set to the precise local time by just one button operation anywhere in the world. This watch quickly adjusts the time by receiving GPS signals from GPS satellites. Place where GPS signals can be easily received/ cannot be received P. 13 This watch responds to a total of 39 time zones around the world Time Zone P. 28 This watch operates by solar charging. Expose the dial to light to charge the watch. Once fully charged, the watch runs for approximately 6 months. When the energy stored in the watch runs out completely, it takes time to fully charge the watch, so please keep in mind to charge the watch regularly. How to charge the watch P. 11 Standard charging time P. 11 When the region or time zone where the watch is used is changed, please carry out operation of “time zone adjustment.” How to adjust the time zone P. 14 ~ 16 This watch automatically adjusts the time in accordance with action patterns during use. When the watch has sensed sufficient brightness under an open sky, it automatically receives GPS signals from GPS satellites. This function enables the watch to automatically adjust the time precisely even while you are using the watch. Automatic time adjustment P. 23 This watch is unable to receive GPS signals when the energy stored in the watch is low. Check the Charging Status P. 10 7th 6th Unlike navigation equipment, this GPS solar watch is not designed to constantly receive GPS signals from GPS satellites without any operation. This watch receives GPS signals only in the time zone adjustment mode, automatic or manual time adjustment mode. 4 READ FIRST ASTRON 7X52 GPS SOLAR The following functions are included When the region or time zone where the watch is used is changed To set only the time The watch displays the precise time of the time zone that is set by operation of “manual time adjustment.” Adjust the time zone. The watch displays the precise local time. How to manually adjust the time P. 21 ~ 22 Check the time zone setting P. 16 Time zone adjustment P. 14 ~ 16 Time Zone P. 28 Time zone display and list of time zones around the world P. 9 Los Angeles 7:00 pm on 6th London 1:00 pm on 7th 5 CONTENTS 1 CONTENTS ASTRON 7X52 GPS SOLAR CONTENTS 2 CONTENTS 1. READ FIRST… …………………………………………………………………… 2 2. CONTENTS………………………………………………………………………… 6 5. DETAILED INFORMATION……………………………………………………… Mechanism by which the GPS watch sets time and date……………… Time zone… …………………………………………………………………… GPS signal reception… ……………………………………………………… Leap second (Automatic leap second reception function)… ………… 3. BEFORE USE……………………………………………………………………… 7 Names of the parts… ………………………………………………………… 7 Indicator hand display and reception result display… ………………… 8 Time zone display and list of time zones around the world… ……… 9 Check the charging status… ………………………………………………… 10 About charging………………………………………………………………… 11 4. BASIC OPERATION (HOW TO SET THE TIME/HOW TO RECEIVE GPS SIGNALS, ETC.)…………………………………………………………………… Basic operation flow……………………………………………………………… Place where GPS signals can be easily received/cannot be received…………………………………………………………………………… Time Zone Adjustment (When the region or time zone where the watch is used is changed )…………………………………………………… Check the time zone setting… ……………………………………………… Set Daylight Saving Time (DST)… ………………………………………… In-flight mode ( ) (When boarding)………………………………………… Manual time zone setting (To set the watch to the local time of the destination in an airplane, etc. )… ………………………………………… manual time adjustment (To set only the time)… ……………………… Automatic time adjustment… ……………………………………………… Reception result display (Check that reception was successful)………………………………………………………………………… Dual time display… …………………………………………………………… How to set the sub-dial… …………………………………………………… 27 27 28 29 30 6. IN CASE OF AN UNUSUAL MOVEMENT OF THE SECOND HAND………… 31 Energy depletion forewarning function (second hand movement and watch state )… …………………………………………………………… 31 12 12 13 14 16 18 19 20 21 23 24 25 26 7. TO PRESERVE THE QUALITY OF YOUR WATCH…………………………… Daily care… …………………………………………………………………… Performance and caliber / case number…………………………………… Screw-lock type crown… …………………………………………………… Water resistance… …………………………………………………………… Magnetic resistance (Magnetic influence)………………………………… Band……………………………………………………………………………… How to use an adjustable three-fold clasp… …………………………… Lumibrite………………………………………………………………………… Power source…………………………………………………………………… After-sale service……………………………………………………………… 33 33 33 34 35 36 37 38 39 40 41 8. TROUBLESHOOTING… ………………………………………………………… When the watch is unable to receive GPS signals… …………………… When the time/date or indicator hand position is misaligned………… In case of an abnormal movement (resetting the built-in IC )… ……… Troubleshooting… …………………………………………………………… 42 42 45 48 51 9. FUNCTION LIST/SPECIFICATIONS… ………………………………………… 56 6 BEFORE USE ASTRON 7X52 GPS SOLAR CONTENTS 3 Names of the parts Main-Dial Hour hand Minute hand Second hand Date Button B Button A Crown (Screw lock type) Indicator hand P. 34 P. 8 Keep the crown locked while you are wearing the watch. Sub-dial P. 25 ~ 26 Button C 7 Continued on the following page BEFORE USE ASTRON 7X52 GPS SOLAR CONTENTS 3 Indicator hand display and reception result display Display of charging status Hand position F (full) Level position (middle) Display of receiving process Receiving process E (low) 1 (time adjustment) 4+ (time zone adjustment) Receiving leap second data Display Display Check the reception result P. 24 Automatic time adjustment P. 23 Manual time adjustment P. 21 ~ 22 Check the charging status. P. 10 How to charge the watch P. 11 Receive leap second data P. 30 Time zone adjustment P. 14 ~ 16 Display of in-flight mode ( ) Hand position In-flight mode ( ) status Display Display of reception result Reset in-flight mode It is displayed only while the in-flight mode is set. Y … Reception successful (12-second position) Display of Daylight Saving Time (DST) Hand position ON N … Reception failed (18-second position) [Checking the reception result] P. 24 OFF In-flight mode ( ) P. 19 Display Check Daylight Saving Time (DST) P. 17 Set Daylight Saving Time (DST) P. 18 8 Position of each display may differ depending on the model (design). Continued on the following page BEFORE USE ASTRON 7X52 GPS SOLAR CONTENTS 3 Time zone display and list of time zones around the world The following lists show the relationship between displays of the bezel and dial ring and time difference from the UTC. Please refer to the second hand positions below to set the time zone or to check the time zone setting. The time zone of each region is as of January 2012. Daylight Saving Time (DST) is in effect in time zones with a mark. In the Lord Howe Island time zone in Australia with a mark, the time is advanced by 30 minutes while Daylight Saving Time (Summer Time) is in effect. This watch corresponds to DST in the Lord Howe Island time zone. Display of time zone Representative city names…26 cities among the total of 39 time zones around the world Time difference…+14 hours ~ –12 hours [Check the time zone] P. 16 [Time Zone Adjustment] P. 14 ~ 15 City code Position of the second hand 0 UTC/LON second City name London City code Position of the second hand 0 BJS 17 second Beijing UTC ± hours City name City code Position of the second hand +8 HNL 37 second Honolulu +9 — 39 second Marquesas Islands +9.5 ANC 41 second Anchorage –9 +10 LAX 43 second Los Angeles –8 +10.5 DEN 45 second Denver –7 +11 CHI 47 second Chicago –6 NYC 49 second New York –5 — 50 second Caracas SCL 51 second Santiago UTC ± hours City name UTC ± hours –10 PAR 2 second Paris/Berlin +1 TYO 19 second Tokyo CAI 4 second Cairo +2 — 20 second Adelaide JED 6 second Jeddah +3 SYD 21 second Sydney — 7 second Tehran — 22 second Lord Howe Island DXB 8 second Dubai +4 NOU 23 second Nouméa — 9 second Kabul +4.5 — 24 second Norfolk Island +11.5 KHI 10 second Karachi WLG 25 second Wellington +12 DEL 11 second Delhi +5.5 — 27 second Chatham Islands +12.75 — 12 second Kathmandu +5.75 TBU 28 second Nuku'alofa +13 — 52 second St. John's DAC 13 second Dhaka +6 — 30 second Kiritimati +14 RIO 53 second Rio de Janeiro –3 — 14 second Yangon +6.5 — 33 second Baker Island –12 Bangkok MDY 35 second Midway islands –11 55 second Fernando de Noronha –2 BKK 15 second FEN PDL 57 second Azores –1 +3.5 +5 +7 9 –9.5 –4.5 –4 –3.5 BEFORE USE ASTRON 7X52 GPS SOLAR CONTENTS 3 Check the charging status The indicator hand position shows whether this watch is able or unable to receive GPS signals. In addition, for the low charging state, the movement of the second hand shows the energy depletion state in further detail. GPS signal reception requires a lot of energy. Keep in mind to regularly charge the watch by expose to light. About charging P. 11 Reception is allowed Indicator display Charging status F (full) Solution Reception is Indicator display Movement of second hand not allowed 1-second interval movement Reception is allowed. Proceed to P. 12 2-second interval movement 5-second interval movement Reception is allowed, but keep Level position in mind to charge (middle) the watch. About charging P. 11 — 10 Charging status The watch is unable to receive GPS signals, but has energy to operate. Solution Charge the watch at least until the indicator hand points to the level position so that the watch is able to receive GPS signals. About charging P. 11 E The watch is unable to receive Continue to charge the watch (low) GPS signals, at least until the indicator hand and does not have energy to operate. (The energy depletion forewarning function is activated. P. 31) points to the level position so that the watch is able to continuously operate and receive GPS signals. About charging P. 11 Reset the in-flight mode ( ) as long as possible. The charging status is Reset the in-flight mode not displayed for the ( ) P. 19 When the indicator hand in-flight mode ( ). points to “E,” charge the watch following the above. BEFORE USE ASTRON 7X52 GPS SOLAR CONTENTS 3 About charging How to charge the watch Standard Charging Time Expose the dial to light to charge the watch. For an approximate time required to charge the watch, refer to the table below. GPS signal reception consumes a lot of energy. Keep in mind to charge the watch by expose to light so that the indicator hand points to the “level position (middle)” or “F (full).” (If the charging status is displayed as “E (low),” the reception will not start even with operation of GPS signal reception.) Check the charging status. P.10 To ensure optimal performance of the watch, make sure that the watch is kept sufficiently charged at all time. Illumination lx (LUX) Under the following situations, the energy of the watch is likely to be depleted, resulting in stoppage of the watch. • The watch is concealed under a sleeve. 700 • The watch is used or stored under conditions where it cannot be exposed to light for a long time. When charging the watch, make sure that the watch is not heated to a high temperature. (The operational temperature range is between –10 °C and +60 °C.) When first using the watch or starting to use the watch after it has stopped because of the energy depletion, sufficiently charge the watch referring to the table on the page at the right. Light source Condition (Example) Fluorescent light General offices 3,000 Fluorescent light 10,000 Fluorescent light Sunlight 100,000 Sunlight 30W 20cm Cloudy day 30W 5 cm Sunny day (Under the direct sunlight on a summer day) From the state where the watch is stopped (not charged) To fully charged — In the state where the hand moves (the watch is charged) To one-second interval To move for one day movement is secured — 6.5 hours 530 hours 32 hours 1.4 hours 135 hours 5 hours 22 minutes 65 hours 1.5 hours 6 minutes The figures of “Time required for charging the watch to start moving at onesecond intervals” are estimations of time required to charge the stopped watch by exposing it to light until it moves at steady one-second intervals. Even if the watch is partially charged for a shorter period, the watch will resume one-second- interval movement. However, it may shortly return to two-second-interval movement. Use the charging time in this column as a rough guide for sufficient charging time. The required charging time slightly varies depending on the design and the dial color of the watch. 11 BASIC OPERATION (HOW TO SET THE TIME/HOW TO RECEIVE GPS SIGNALS, ETC.) ASTRON 7X52 GPS SOLAR CONTENTS 4 Basic operation flow 1. Check the place where GPS signals can be easily received 2.Set the time zone and set the time and date Place where GPS signals can be easily received/Place where GPS signals cannot be received P. 13 < Setting by GPS signal reception > Place where GPS signals can be easily received • When the region or time zone where the watch is used is changed Outdoors under an open sky with good visibility • To set only the time Place where GPS signals cannot be received • Receive GPS signals, set the time zone and set the time and date How to adjust the time zone P. 14 ~ 16 • Set Daylight Saving Time (DST) as necessary Set Daylight Saving Time (DST) P. 17 ~ 18 Set only the time How to manually adjust the time P. 21 ~ 22 < Manual setting > Time zone setting is not correct How to manually set the time zone P. 20 Time zone setting is correct How to manually set the time and date P. 42 ~ 44 Check the time zone setting P. 16 Example: Within a subway station 12 BASIC OPERATION (HOW TO SET THE TIME/HOW TO RECEIVE GPS SIGNALS, ETC.) ASTRON 7X52 GPS SOLAR Place where GPS signals can be easily received/Place where GPS signals cannot be received There are places where GPS signals can be easily received and places where GPS signals cannot be received. Easy to receive •Outdoors under an open sky with good visibility Difficult to receive • The smaller the sky, the more difficult it is to receive GPS signals. In addition, it will also be difficult to receive GPS signals, if there is something that obstructs the GPS signals during reception (in particular, during time zone adjustment). Examples: • Between tall buildings • Near wooded area • Station/Airport • Indoors with windows GPS signals cannot be received depending on window glass type. Refer to the “× Cannot receive.” 13 Cannot receive •The sky cannot be seen or only part of the sky can be seen. •There is something hindering the reception. Examples: •Indoors without windows •Underground •During passage of a tunnel •Through special glass with thermal emission shield effect, etc. •Close to equipment generating noise or performing wireless communications CONTENTS 4 BASIC OPERATION (HOW TO SET THE TIME/HOW TO RECEIVE GPS SIGNALS, ETC.) ASTRON 7X52 GPS SOLAR CONTENTS 4 When the region or time zone where the watch is used is changed (Time Zone Adjustment) Time zone adjustment The time zone where you are is localized to adjust the watch to the precise current time by receiving GPS signals. The watch can be arbitrarily set to the local time by just one button operation at any time. How to adjust the time zone P. 15 Failure or success of reception depends on the reception environment. Place where GPS signals can be easily received/Place where GPS signals cannot be received P. 13 Even when the reception is successful, Daylight Saving Time (DST) cannot be automatically set. Set DST manually. Set Daylight Saving Time (DST) P. 17 ~ 18 GPS signal reception consumes a lot of energy. Keep in mind to regularly charge the watch by expose to light so that the indicator hand points to the “level position (middle)” or “F (full).” How to charge the watch P. 11 If the charging status is displayed as “E (low),” the reception will not start even with operation of GPS signal reception. Check the charging status. P. 10 14 Precautions on time zone adjustment If the time zone is adjusted near a time zone boundary, the time of the adjacent time zone may be displayed. In some areas the boundaries observed by the watch may not exactly correlate to the actual time zone markers on the land. This does not indicate a malfunction. In this case, set the time zone in the manual time zone setting mode. How to manually set the time zone P. 20 When the time zone is adjusted while traveling on land, avoid time zone boundaries to carry out time zone adjustment in the representative cities in the time zone whenever possible. In addition, when the watch is used near time zone boundaries, make sure to check the time zone setting, and manually set the time zone as necessary. Continued on the following page BASIC OPERATION (HOW TO SET THE TIME/HOW TO RECEIVE GPS SIGNALS, ETC.) ASTRON 7X52 GPS SOLAR CONTENTS 4 How to adjust the time zone 1 Go to a place where GPS signals can be easily received Move to the outdoors under an open sky with good visibility. 2 Continue to press Button B (6 seconds), and then release it when the second hand moves to the 30-second position. Although the second hand moves to the 0-second position 3 seconds after pressing Button B, continue to press it. 3 Direct the watch face upward and wait Please note that it may be difficult to receive GPS signals while you are in motion. It takes a maximum of 2 minutes to complete reception. When the second hand has reached the 30-second position, reception is started. The indicator hand points to “4+.” Press for 6 seconds. It depends on the receiving conditions. < Display during reception (= satellites acquisition status) > The second hand indicates ease of receiving (= number of GPS satellites from which GPS signals are received). Place where GPS signals can be easily received/Place where GPS signals cannot be received P. 13 Check whether the watch is able/unable to receive GPS signals Check the charging status P. 10 When the hand points to , reset the in-flight mode ( ). How to reset in-flight mode ( ) P. 19 4 units eiv e 5 units ・・ ・ 6 units ec r When the hand points to “E,” charge the watch by expose to light. How to charge the watch P. 11 3 units May receive to Second hand position 25-second Number of satellites 5 units Even when the hand points to 4 units or more, reception may not be allowed. To cancel the reception, press Button A. 15 e eiv JJ & % 3 -< - E as y While the indicator hand points to “E” or , reception is not started even with operation for reception. 0 units ・ Cannot ・・ rec 2 units The larger the number of acquired satellites there are, the easier it is to receive GPS signals. Press Button A. 4 When the second hand points to “Y” or “N,” reception is completed. The reception result is displayed for 5 seconds. Then, the hour and minute hands move, and the time and date are adjusted. (The time zone is also adjusted to the local time zone.) Reception result Y: Successful display Display State C BP JY J Use the watch as it is. N: Failed C BP JY J When the reception result is displayed as “N” P. 42 Check that the reception is successful after the watch returns to the time display mode. Check that the reception was successful P. 24 Check the time zone setting P. 16 During movement of the date, the buttons and crown cannot be operated. Manually set Daylight Saving Time (DST). Set Daylight Saving Time (DST) P. 17 ~ 18 BASIC OPERATION (HOW TO SET THE TIME/HOW TO RECEIVE GPS SIGNALS, ETC.) ASTRON 7X52 GPS SOLAR CONTENTS 4 Check the time zone setting. The currently set time zone is displayed for 5 seconds. Button C once and 1 Press then release it the time zone setting (within 5 2 Check seconds) The second hand indicates the currently set time zone. [Example] Time zone setting: +2 hours CAIRO The indicator hand indicates the ON/OFF setting of Daylight Saving Time (DST). Press once and release it By continuing to press Button C, the watch enters operation of the manual time zone setting. After 5 seconds have elapsed or when Button A is pressed, the watch returns to the time display mode. To change the time zone setting • When you are in a place where GPS signals can be easily received (P. 13) How to adjust the time zone P. 14 ~ 15 • When you are in a place where GPS signals cannot be received How to manually set the time zone P. 20 16 Press Button A. For the relationship between the second hand position and time zone Refer to the “Time zone display and list of time zones around the world P. 9.” BASIC OPERATION (HOW TO SET THE TIME/HOW TO RECEIVE GPS SIGNALS, ETC.) ASTRON 7X52 GPS SOLAR CONTENTS 4 Check Daylight Saving Time (DST) setting Daylight Saving Time (DST) Daylight Saving Time (DST) setting is displayed for 5 seconds. 1 then release it Press Button A once and 2 (within 5 seconds) Check Daylight Saving Time (DST) setting The indicator hand indicates Daylight Saving Time (DST) setting. Press once and release it Depending on the area, Daylight Saving Time (DST) is individually set. Daylight Saving Time means summer time, which is a system to lengthen daylight time by advancing 1 hour when daylight time is long in summer. Daylight saving time has been adopted in about 80 countries, mainly in Europe and North America. The adoption and duration of daylight saving time vary depending on the country. Daylight Saving Time is subject to change owing to circumstances of the country or region. [Example] Daylight Saving Time setting: ON Set Daylight Saving Time (DST) P. 18 After 5 seconds have Press elapsed or when Button A. Button A is pressed, the watch returns to the time display mode. 17 BASIC OPERATION (HOW TO SET THE TIME/HOW TO RECEIVE GPS SIGNALS, ETC.) ASTRON 7X52 GPS SOLAR CONTENTS 4 Set Daylight Saving Time (DST) Daylight Saving Time (DST) is not automatically changed. ON/OFF of the DST is not automatically changed over even with operation of time zone adjustment/manual time zone setting. When traveling to a region where Daylight Saving Time (DST) is not adopted from a region where it is adopted, turn off the DST setting. Turn ON Daylight Saving Time (DST) Daylight Saving Time (DST) can be manually set. Start operation of 2 within approximately 5 seconds after operation of 1. When the state of 1 continues for approximately 5 seconds or longer, the watch automatically returns to the time display mode. When the watch has returned to the time display mode, restart operation from 1. When the hour and minute hands stop 1 Press Button A to press Button C (3 seconds) within 5 seconds 2 Continue after operation of 1 the DST setting mode is automatically 3 moving, completed after approximately 5 seconds. The indicator hand moves to indicate the current Daylight Saving Time (DST) setting. The indicator hand moves to point to “ON,” and the hour and minute hands advance by one hour. The watch returns to the time display mode. < When Daylight Saving Time (DST) setting is OFF > The indicator hand returns to display the charging status. The time at which the watch returns to the time display mode varies depending on the position of the indicator hand. Press Button A Press for 3 seconds Turn OFF Daylight Saving Time (DST) Carry out operation of 1 to 3 in the state where Daylight Saving Time (DST) setting is ON. In operation of 2, adjust the indicator hand to the “OFF” position as shown in the figure at the right. The hour and minute hands return by one hour. 18 Press The watch returns to Button A. the time display mode even by pressing button A within five seconds after the hour and minute hands stop moving. BASIC OPERATION (HOW TO SET THE TIME/HOW TO RECEIVE GPS SIGNALS, ETC.) ASTRON 7X52 GPS SOLAR CONTENTS 4 When boarding (in-flight mode ( )) In-flight mode ( ) Set to the in-flight mode ( ). Set to the in-flight mode ( ) Start operation of 2 within 5 seconds after operation of 1. where the reception may influence When 5 seconds or longer have elapsed after operation of 1, the watch automatically returns to the time display mode. When the watch returned to the time display mode, restart operation from 1. operation of other electronics devices in an airplane, etc. Continue to press Button C (3 seconds) Press Button B and then release within approximately 5 seconds after In the in-flight mode ( ), the it. operation of 1. GPS signal reception (time zone The second hand indicates the The second hand stops at the 40-second adjustment, manual time adjustment, reception result (Y or N), and the position, and the indicator hand points to . and automatic time adjustment) does indicator hand points to the type not work. of reception (1 or 4+). < In-flight mode ( ) state > 1 < In-flight mode ( ) > The indicator hand points to 2 The indicator hand points to . . Press once and release it. Press for 3 seconds. When the in-flight mode ( ) is reset, the indicator hand indicates the charging status. In-flight mode ( ) setting 3 automatically ends after 5 seconds The watch returns to the time display mode. When the in-flight mode ( ) is brought about, the indicator hand points to even after the watch has returned to the time display mode. To set the watch to the local time of the destination in an airplane, etc. (Manual time zone setting) P. 20 Reset the in-flight mode ( ). Carry out operation of 1 to 3. In 2, when the indicator hand points to “● ON” in the figure at the right, the in-flight mode ( ) can be reset. ボタンC 3秒押し 19 BASIC OPERATION (HOW TO SET THE TIME/HOW TO RECEIVE GPS SIGNALS, ETC.) ASTRON 7X52 GPS SOLAR To set the watch to the local time of the destination in an airplane, etc. (Manual time zone setting) Manual time zone setting In places where the time zone cannot be adjusted, the time zone can be set manually. Place where GPS signals can be easily received/Place where GPS signals cannot be received P. 13 Set the time zone with reference to the “Time zone display and list of time zones around the world P. 9,” to set the watch to the local time and date. Refer to “Set Daylight Saving Time (DST) P. 17 ~ 18,” to set Daylight Saving Time (DST). How to manually set the time zone 1 Continue to press Button C ( 3 seconds ), and when the second hand has stopped, release it. The second hand moves to display the currently set time zone. 2 Press Button B or Button C to adjust the second hand to the time zone of the destination When the button is pressed once, the second hand moves to the next zone. For the relationship between the position of the second hand and the time zone, refer to the “Time zone display and list of time zones around the world P. 9.” 3 < Display of the indicator hand > Displays ON/OFF setting of Daylight Saving Time (DST). DST ON If the time for pressing is short, the watch will enter operation for checking the time zone setting (P. 16), so make certain to press the button for 3 seconds. Button B clockwise Button C counterclockwise If Daylight Saving Time (DST) is not correct, change over ON/OFF with reference to “Set Daylight Saving Time (DST) P. 17 ~ 18” after operation of 3. If the second hand is stopped for one minute or longer, the watch will automatically return to the time display mode. 20 The second hand starts moving. During movement of the date, the buttons and crown cannot be operated. OFF Display Press for 3 seconds When the hour and minute hands stop moving, press Button A Press Button A. CONTENTS 4 BASIC OPERATION (HOW TO SET THE TIME/HOW TO RECEIVE GPS SIGNALS, ETC.) ASTRON 7X52 GPS SOLAR CONTENTS 4 To set only the time (manual time adjustment) Manual time adjustment The watch can be set to the precise current time of the currently set time zone. (The time zone is not changed.) How to manually adjust the time P. 22 Check the time zone setting P. 16 In the manual time adjustment, the precise time of the currently set time zone is displayed. When the region or time zone where the watch is used is changed, adjust the time zone. How to adjust the time zone P. 14 ~ 16 (If the time zone is adjusted, the time zone setting, time and date will be adjusted, so it is not necessary to manually adjust the time immediately thereafter.) Daylight Saving Time (DST) is not automatically set. Carry out the setting manually. Set Daylight Saving Time (DST) P. 17 ~ 18 Failure or success of reception depends on the reception environment. Place where GPS signals can be easily received/Place where GPS signals cannot be received P. 13 At the time when the reception was successful by manually adjusting the time, automatic time adjustment may be performed. For details, refer to “Automatic time adjustment P. 23 <When it is difficult to exposure to light>.” GPS signal reception consumes a lot of energy. Keep in mind to charge the watch regularly by expose to light so that the indicator hand points to the “level position (middle)” or “F (full).” How to charge the watch P. 11 (When the charging status becomes “E (low),” the reception will not start even with operation of GPS signal reception.) Check the charging status. P. 10 21 Continued on the following page BASIC OPERATION (HOW TO SET THE TIME/HOW TO RECEIVE GPS SIGNALS, ETC.) ASTRON 7X52 GPS SOLAR CONTENTS 4 How to manually adjust the time 1 Go to a place where GPS signals can be easily received Move to the outdoors under an open sky with good visibility. 2 Continue to press Button B (3 seconds), and then release it when the second hand moves to the 0-second position. 3 4 Direct the watch face upward and wait When the second hand has reached the 0-second position, reception is started. The indicator hand points to “1.” It takes up to one minute to complete reception. The reception time depends on the reception conditions. Press for 3 seconds. < Display during reception (= satellites acquisition status) > The second hand indicates ease of receiving (= number of GPS satellites from which GPS signals are received). Place where GPS signals can be easily received/Place where GPS signals cannot be received P. 13 To acquire only time information, the number of satellites necessary for reception is one. While the indicator hand points to “E” or , reception is not started even with operation for reception. When the hand points to “E,” charge the watch by expose to light. How to charge the watch P. 11 Check the charging status. P. 10 Number of acquired satellites 1 Display When the hand points to , reset the in-flight mode ( ). How to reset in-flight mode ( ) P. 19 State C BP JY J The reception result is displayed for 5 seconds. Then, the hour and minute hands move, and the time and date are adjusted. Reception result display Display State Y: Successful N: Failed C BP JY J Use the watch as it is. C BP JY J When the reception result is displayed as “N” P. 42 Check that the reception is successful after the watch returns to the time display mode. C BP JY J Easy to receive To cancel the reception, press Button A. 22 0 When the second hand points to “Y” or “N,” reception is completed. Cannot receive Check that the reception was successful P. 24 When the time is not correct even if “Y” is displayed, the time zone may not correspond to the region where you are. Check the time zone setting. Set the time zone P. 14 ~ 16 Press Button A. During movement of the date, the buttons and crown cannot be operated. Manually set Daylight Saving Time (DST). Set Daylight Saving Time (DST) P. 17 ~ 18 BASIC OPERATION (HOW TO SET THE TIME/HOW TO RECEIVE GPS SIGNALS, ETC.) ASTRON 7X52 GPS SOLAR CONTENTS 4 Automatic time adjustment This watch can be set to the precise current time by automatically receiving GPS signals by exposure to bright light outdoors under an open sky to adjust the time. In addition, when the watch is concealed under a sleeve and the dial is not exposed to sufficient light even if outdoors under an open sky, the watch stores the time of the previous successful manual time adjustment (or time zone adjustment), and automatically starts time adjustment at the same time. In a place without good visibility, GPS signals cannot be received. Place where GPS signals can be easily received/Place where GPS signals cannot be received P. 13 If the energy is sufficiently charged, automatic reception will be performed every day. The automatic time adjustment is performed at most once per day. Therefore, even if automatic time adjustment has failed, the next automatic time adjustment will be performed the next day or thereafter. During reception, the hands move in the same manner as the manual time adjustment. How to manually adjust the time P. 21 ~ 22 The time zone is not adjusted in the automatic time adjustment. When the region where the watch is used is changed, please carry out time zone adjustment. How to adjust the time zone P. 14 ~ 16 < When it is difficult to expose to light sufficiently > Even if outdoors under an open sky, when the watch is concealed under a sleeve in winter time, etc., in an area where the daylight hours are short, or when the watch is not likely to be exposed to sufficient light for a long time due to bad weather, the watch is designed to allow for automatic time reception at the time when the manual time adjustment was successful the last time. When the watch is exposed to the operating environment above, automatic time adjustment is likely to be successful by making manual time adjustment successful in time periods where the watch is frequently used in a place where GPS signals can be easily received under an open sky. How to manually adjust the time P. 22 However, as the watch judges to start automatic time adjustment taking into consideration the following conditions, the watch does not necessarily start automatic time adjustment by exposure to bright light. •Charging status •Past reception status When the indicator hand points to “E (low),” or in the in-flight mode ( ), automatic time adjustment does not work. When the indicator hand points to “E,” charge the watch by expose to light. How to charge the watch P. 11 Check the charging status P. 10 When the energy is reduced, the period for which automatic time adjustment is not performed becomes longer. Keep in mind to charge the watch regularly. If the time zone adjustment or manual time adjustment is performed before the automatic time adjustment is started, the automatic time adjustment is not performed on that day. 23 7th 6th BASIC OPERATION (HOW TO SET THE TIME/HOW TO RECEIVE GPS SIGNALS, ETC.) ASTRON 7X52 GPS SOLAR CONTENTS 4 Check that reception was successful (reception result display) The type of reception and reception result (success or failure) of the last GPS signal reception is displayed for 5 seconds. 1 Press Button B once and then release it The second hand and indicator hand display the reception result. Press once and release it When the reception result is Y 2 Check that reception was successful (within 5 seconds) The second hand displays the reception result (success/failure). The indicator hand displays which of the last GPS signal reception was performed for time adjustment or time zone adjustment. When Button B is kept pressed, the watch enters the Manual time adjustment operation. Second hand: Reception result (success/failure) Result Display Position Successful C BP JY J Y 12-second position Failed C BP JY J N 18-second position Indicator hand: Reception method (manual time adjustment or time zone adjustment) Type Press Button A. 1 (Manual time adjustment) 4+ (Time zone adjustment) Display The time at which the watch returns to the time After 5 seconds have elapsed or when Button A is pressed, the watch display mode varies depending on the position of the indicator hand. returns to the time display mode. •The reception was successful. Use the watch as it is. When the reception result is N •Move to the outdoors where GPS signals can be easily received as necessary to receive GPS signals. Place where GPS signals can be easily received/Place where GPS signals cannot be received P. 13 When approximately five days have elapsed after successful reception, the reception result display becomes “N.” Even under a state where GPS signal cannot be received, the watch operates with quartz accuracy (at loss/gain ±15 seconds per month). When the reception has failed in any way, manually set the time and date. How to manually set the time P. 43 How to manually set the date P. 44 24 BASIC OPERATION (HOW TO SET THE TIME/HOW TO RECEIVE GPS SIGNALS, ETC.) ASTRON 7X52 GPS SOLAR CONTENTS 4 Dual time display Respective times of two regions can be displayed by the dial and sub-dial. Example: Honolulu time and Japan time are respectively displayed by the dial and sub-dial. Dial: Local time (Honolulu) Honolulu time (UTC -10 hours): 15:10:42 Date: Day of 6th Sub-dial: Home time (Japan) Japan time: 10:10 (UTC +9 hours) How to set the sub-dial P. 26 25 Continued on the following page BASIC OPERATION (HOW TO SET THE TIME/HOW TO RECEIVE GPS SIGNALS, ETC.) ASTRON 7X52 GPS SOLAR CONTENTS 4 How to set the sub-dial • The sub-dial displays the time in a 24-hour system. • Even when the time zone of the dial is changed, the time of the sub-dial is not changed. The sub-dial moves independently from the dial. 1 Unlock the crown Unlock the crown Turn the crown counterclockwise (downward) to unscrew it. Now the crown can be operated. Unscrew Crown locked out the crown to 2 Pull the first click Button B or Button C 3 Press to set the time The watch enters the time setting mode of the sub-dial. 4 Push the crown back in Operation has been completed. (Hands on the main-dial keep moving.) Press once to advance 1 minute 0 1 2 0 1 2 Press once to set back 1 minute Pull out to the first click When the button is kept pressed for 2 seconds or longer, the sub-dial hour/ minute hands will start to move continuously, and when it is pressed again, they stop moving. Crown unlocked Push back in Lock the crown Turn the crown clockwise (upward) while gently pressing it in toward the watch body until it stops. While pressing the crown in Screw Screw-lock type crown P.34 26 DETAILED INFORMATION ASTRON 7X52 GPS SOLAR CONTENTS 5 Mechanism by which the GPS watch sets time and date What GPS is GPS stands for Global Positioning System, a satellite positioning system for determining the current position on the earth. 24 satellites cover the earth, and at present, the system is operated by approximately 30 GPS satellites. Wherever you are in the world, the position can be determined (positioned) by information from more than 4 GPS satellites. GPS satellite This is a satellite operated by the United States Department of Defense (official name is NAVSTAR), and orbits the earth at an altitude of 20,000 km. Initially, this was a military satellite, but at present, information is partially disclosed to the public and used in various equipment including car navigation systems and cellular phones. The GPS satellite is mounted with a high-accuracy atomic clock with an accuracy deviation of 1 second per 100,000 years. 27 Mechanism by which this watch sets the time and date This watch receives GPS signals from GPS satellites to set the time and date based on the following information. • Precise time and date based on the atomic clock • Information about a time zone where you are (The current location is basically positioned by more than 4 GPS satellites, and which zone of the total of 39 time zones around the world you are in is identified.) To receive information about a time zone where you are, it is necessary to adjust the time zone. How to adjust the time zone P. 14 ~ 16 Unlike navigation equipment, this GPS solar watch is not designed to constantly receive GPS signals from GPS satellites without any operation. This watch receives GPS signals from GPS satellites only in the time zone adjustment mode, automatic or manual time adjustment mode. DETAILED INFORMATION ASTRON 7X52 GPS SOLAR CONTENTS 5 Time zone Time zone Based on Coordinated Universal Time (UTC), the standard time commonly used is adopted by countries and regions around the world. The standard time is determined by each country or region, and the region where the same standard time is adopted is referred to as the time zone, and presently, the time zone is divided into 39 zones. Further, Daylight Saving Time (DST) is individually adopted in countries and regions. Coordinated Universal Time (UTC) UTC is the universal standard time coordinated through an international agreement. This is used as the official time for recording time around the world. The time obtained by adding a leap second to the “International Atomic Time (TAI)” determined based on the atomic clock around the world and coordinated in order to compensate for deviations from universal time (UT) which is astronomically determined is the UTC. Each time zone is based on data as of January 2012. Please be advised that regions for which the time zone is changed thereafter cannot be reflected. 28 The time differences and use of daylight saving time in each city are subject to change according to the governments of the respective countries or regions. DETAILED INFORMATION ASTRON 7X52 GPS SOLAR CONTENTS 5 GPS signal reception GPS signal reception includes three types. Features for each type are as follows. Reception method Display Time adjustment How to manually adjust the time P. 21 ~ 22 Automatic time adjustment P. 23 Time adjustment Features Precise current time of the set time zone is displayed Check the set time zone P. 16 GPS signal reception Q & A Leap second data reception Time zone adjustment How to adjust the time zone P. 14 ~ 16 Time zone identification and time adjustment Time zone where you are is identified, and the precise current time is displayed Leap second reception Ready for leap second data reception and receiving lead second data P. 30 Number of acquired satellites necessary for reception One unit (to obtain only time information) Basically more than 4 units (to obtain time information and time zone information) Time taken for reception 6 seconds to 1 minute 30 seconds to 2 minutes Up to 18 minutes When the watch is used in a different time zone This is automatically displayed after time zone adjustment or time adjustment is performed around June or December What kind of situation To set the watch to the precise time while it is used in the same time zone 29 Q:When the watch is moved to a different time zone, does the watch automatically display the local time? A:The watch does not automatically display the local time just by being moved. If you are in a place where GPS signals can be easily received, adjust the time zone. The watch automatically displays the local time. When you are in a place where GPS signals cannot be received, manually set the time zone. Manual time zone setting P. 20 (The watch can be set to a total of 39 time zones around the world.) Q:Is Daylight Saving Time (DST) automatically changed by receiving GPS signals? A:Manually set Daylight Saving Time (DST). Set Daylight Saving Time (DST) P. 17 ~ 18 (GPS signals from GPS satellites do not include information about Daylight Saving Time (DST).) Even in the same time zone, some countries and regions do not adopt Daylight Saving Time (DST). Daylight Saving Time (DST) P. 17 Q:Is it necessary to carry out special operation for years in which a leap second is added? A:No special operation is necessary. Since the watch receives leap second data at the same time of receiving GPS signals around June or December, a leap second is automatically added by periodically receiving GPS signals. For details, refer to “Leap second (automatic leap second reception function) P. 30.” DETAILED INFORMATION ASTRON 7X52 GPS SOLAR CONTENTS 5 Leap second (Automatic leap second reception function) Leap second The leap second is to compensate for deviations from the universal time (UT) which is astronomically determined and the “International Atomic Time (TAI). “1 second” may be added (deleted) once a year or every few years. Automatic leap second reception function A leap second is automatically added by receiving “leap second data” from GPS signals at the time of leap second addition. Reception of leap second data The indicator hand displays as shown at the right when GPS signals are received (time zone adjustment or time adjustment) around June or December (display of being ready for leap second data reception or receiving leap second data). At this time, the second hand points to any of the 0 to 18-second positions to indicate the waiting time until the leap second data reception by minutes. The waiting time is subtracted for each minute, and when the second hand points to the 0-second position, the leap second data reception is started. It is recommended you move to a place where GPS signals can be easily received. Place where GPS signals can be easily received/Place where GPS signals cannot be received P. 13 The position of the second hand is an indication of the time until the leap second data reception is started. (When the second hand points to the 6-second position, it means that the reception will be started approximately 6 minutes later.) At this time, the second hand does not move at one-second intervals, however, it does not mean a failure. The second hand moves in the same manner as the manual time adjustment during the leap second data reception. How to manually adjust the time P. 21 ~ 22 When the leap second data reception is completed, after the reception result is displayed, the second hand starts moving at 1-second intervals. The indicator hand also returns to display the charging status. Use the watch as it is. The leap second data reception is performed every half a year regardless of leap second addition. “Leap second data” includes information about future leap second addition and current leap second data. When GPS signals are received under the following conditions, the leap second data reception is also started. • GPS signals are received after the system reset • GPS signals have not been received for a long time • Leap second data reception has failed (Leap second data reception is performed again during the next GPS signal reception. It is repeated until the leap second data reception is successful.) 30 IN CASE OF AN UNUSUAL MOVEMENT OF THE SECOND HAND ASTRON 7X52 GPS SOLAR CONTENTS 6 Second hand movement and watch state (energy depletion forewarning function) Movement of the second hand shows the state of the watch (working functions). 2-second interval movement/5-second interval movement are brought about When the energy stored in the watch runs low, the energy depletion forewarning function will work. When the energy stored in the watch runs low, charge the watch by expose to light. How to charge the watch P. 11 When the energy depletion forewarning function works, the watch does not operate even with operation of the buttons and crown. (Be assured that it does not mean a failure) 2-second interval movement 5-second interval movement The second hand moves at 2-second intervals. The second hand moves at 5-second intervals. • Reception is not started even with operation of GPS signal reception. • Automatic time adjustment does not work. • The hour hand, minute hand, date, and sub-dial stop. • Reception is not started even with operation of GPS signal reception. • Automatic time adjustment does not work. (1) First, charge the watch by expose to light until the second hand moves at 1-second intervals. How to charge the watch P. 11 (2) Keep in mind to charge the watch until the indicator hand points to the “level position (middle)” or “F (full).” (If the indicator hand points to “E,” GPS signals cannot be received.) Check the charging status P. 10 (1) Charge the watch until the indicator hand points to the “level position (middle)” or “F (full).” Check the charging status P. 10 (2) Carry out time zone adjustment to set the time. How to adjust the time zone P. 14 ~ 16 State Restriction on function/ display Solution 31 Continued on the following page IN CASE OF AN UNUSUAL MOVEMENT OF THE SECOND HAND ASTRON 7X52 GPS SOLAR The second hand stops at the 15-second position/45second position (Power save function) When the watch is not exposed to light for a long time, the power save function will work. Power Save 1 The second hand stops pointing at the 15-second position. Power Save 2 The second hand stops at the 0-second or 5-second position (automatic time adjustment) Automatic time adjustment is being performed. Automatic time adjustment P. 23 The indicator hand points to “1.” The second hand stops pointing at the 45-second position. It takes up to 1 minute to complete reception. Use the watch with reference to the “Place where GPS signals can be easily received P. 13.” State The second hand is stopped between the 0-second to 18-second positions (Ready for leap second data reception) Restriction • The hour hand, minute hand, on date, and sub-dial stop. function/ • Automatic time adjustment is not performed. display Cause Solution • The hour hand, minute hand, date, and sub-dial stop. (Date displays “1.”) • Reception is not started even with operation of GPS signal reception. • Automatic time adjustment is not performed. • The indicator hand points to “E.” When the watch is exposed to a state without receiving an adequate light source for 72 hours or longer. When the watch is in an insufficient charging state for a long time. When the watch is exposed to an adequate light source for more than 5 seconds, or when any button is pressed, it displays the current time again after the second hand is rapidly advanced. (1)Charge the watch sufficiently until the charging status is displayed as the “level position (middle)” or “F (full).” P. 10 ~ 11 (2)Carry out time zone adjustment to set the time. P. 14 ~ 16 Power Save 2 While the watch is being charged, the second hand moves at “ 5-second Intervals.” During the “5-second Interval Movement,” neither the buttons nor the crown can be operated. If the “ Power Save 2” mode is prolonged, the stored power amount drops and the internal current time information stored will be lost. Displays the watch ready for leap second data reception. At this time, the second hand is stopped between the 0-second to 18-second positions to indicate the waiting time until the leap second data reception by minutes. The waiting time is subtracted for each minute, and when the second hand points to the 0-second position, the leap second data reception is started. It is recommended that you move to a place where GPS signals can be easily received. Place where GPS signals can be easily received/Place where GPS signals cannot be received P. 13 The position of the second hand is an indication of the time when the leap second data is started. (When the second hand points to the 6-second position, it means that the reception will be started approximately 6 minutes later.) At this time, the second hand does not move at 1-second intervals, however, it does not mean a failure. Automatic leap second reception function P. 30 The display of being ready for leap second data reception continues up to 18 minutes, and then the watch starts receiving the leap second data. During the reception, the second hand moves in the same manner as the manual time adjustment. How to manually adjust the time P. 21 ~ 22 When the leap second data reception is completed, the second hand moves at one-second intervals. Use the watch as it is. The leap second data reception is performed every half a year regardless of leap second addition. 32 CONTENTS 6 TO PRESERVE THE QUALITY OF YOUR WATCH ASTRON 7X52 GPS SOLAR CONTENTS 7 Daily care Performance and caliber / case number The case back shows the performance and caliber / case number of your watch ●The watch requires good daily care • Do not wash the watch when its crown is at the extended position. • Wipe away moisture, sweat or dirt with a soft cloth • After soaking the watch in seawater, be sure to wash the watch in clean pure water and wipe it dry carefully. Water resistance Refer to P. 35 If your watch is rated as “non-water resistant” or “water resistant for daily use,” do not wash the watch. Performance and caliber / case number P. 33 Water resistance P. 35 Magnetic resistance Refer to page P. 36 ●Turn the crown from time to time • In order to prevent corrosion of the crown, turn the crown from time to time. • The same practice should be applied to a screw lock type crown. P. 34 Caliber/case number The number to identify the type of your watch ●Press the buttons once in a while. • Press the buttons once in a while to prevent corrosion of the buttons. If the display is changed by pressing any button, wait and leave it as is. The above figures are examples. Both of them may be different from the figure on the case back of your watch. 33 TO PRESERVE THE QUALITY OF YOUR WATCH ASTRON 7X52 GPS SOLAR CONTENTS 7 Screw-lock type crown The screw-lock type crown features a mechanism that can securely lock the crown when they are not being operated in order to prevent any operational errors and to improve its water resistant property. ●It is necessary to unlock the screw-lock type crown before operating it. ●Once you have finished operating the crown, make sure to relock it. [ To unlock the crown ] [ To lock the crown ] Turn the crown counterclockwise (downward) to unscrew it. Now the crown can be operated. Turn the crown clockwise (upward) while gently pressing it in toward the watch body until it stops. Unlock the crown before operating it. Crown locked Crown unlocked Unscrew After operating the crown, lock it. While pressing the crown in Screw When locking the crown, turn it slowly with care, ensuring that the screw is properly engaged. Be careful not to forcibly push it in, as doing so may damage the screw hole in the case. 34 TO PRESERVE THE QUALITY OF YOUR WATCH ASTRON 7X52 GPS SOLAR CONTENTS 7 Water resistance Refer to the table below for the description of each degree of water resistant performance of your watch before using. Indication on the case back No indication Water Resistant Water Resistant 5 BAR Water Resistant 10 (20) Bar Water resistant performance Conditions of Use Non-water resistance Water resistance for everyday life Avoid drops of water or sweat The watch withstands accidental contact with water in everyday life Water resistance for everyday life at 5 barometric pressures Not suitable for WARNING swimming The watch is suitable for swimming. Water resistance for everyday life at 10 (20) barometric pressures The watch is suitable for diving not using an air cylinder. 35 TO PRESERVE THE QUALITY OF YOUR WATCH ASTRON 7X52 GPS SOLAR CONTENTS 7 Magnetic resistance (Magnetic influence) Examples of common magnetic products that may affect watches This watch may be affected by nearby magnetism and temporarily gain or lose time or stop operating. Even when the watch gains or loses time due to magnetic influence, the hand positions are automatically adjusted by the “automatic hand position adjustment function.” (P. 50) This watch has magnetic resistance which complies with ISO “Magnetic resistant watches” . Smartphone, cellular phone, tablet terminal (speaker) AC adapter Bag (with magnet buckle) Caution Keep the watch more than 5cm away from magnetic products. AC-powered shaver If the watch becomes magnetized and its accuracy deteriorates to an extent exceeding the specified rate under normal use, there will be a charge for demagnetization and accuracy readjustment even if it occurs within the guarantee period. The reason why this watch is affected by magnetism The built-in motor is provided with a magnet, which may be influenced by a strong external magnetic field. 36 Magnetic cooking device Portable radio (speaker) Magnetic necklace Magnetic healt pillow TO PRESERVE THE QUALITY OF YOUR WATCH ASTRON 7X52 GPS SOLAR CONTENTS 7 Band The band touches the skin directly and becomes dirty with sweat or dust. Therefore, lack of care may accelerate deterioration of the band or cause skin irritation or stain on the sleeve edge. The watch requires a lot of attention for long usage. ●Metallic band ●Polyurethane band • Moisture, sweat or soil will cause rust even on a stainless steel band if they are left for a long time. • Lack of care may cause a yellowish or gold stain on the lower sleeve edge of shirts. • Wipe off moisture, sweat or soil with a soft cloth as soon as possible • To clean the soil around the joint gaps of the band, wipe it out in water and then brush it off with a soft toothbrush (Protect the watch body from water splashes by wrapping it up in plastic wrap etc.) • Because some titan bracelets use pins made of stainless steel, which has outstanding strength, rust may form in the stainless steel parts. • If rust advances, pins may poke out or drop out, and the watch case may fall off the bracelet, or the clasp may not open. • If a pin is poking out, personal injury may result. In such a case, refrain from using the watch and request repair. ●Leather band • A leather band is susceptible to discoloration and deterioration from moisture, sweat and direct sunlight. • Wipe off moisture and sweat as soon as possible by gently blotting them up with a dry cloth. • Do not expose the watch to direct sunlight for a long time. • Please take care when wearing a watch with light-colored band, as dirt is likely to show up. • Refrain from wearing a leather band watch other than Aqua Free bands while bathing, swimming, and when working with water even if the watch itself is water-resistant enforced for daily use (10-BAR/20-BAR water resistant). 37 • A polyurethane band is susceptible to discoloration from light, and may be deteriorated by solvent or atmospheric humidity. • Especially a translucent, white, or pale colored band easily adsorbs other colors, resulting in color smears or discoloration. • Wash out dirt in water and clean it off with a dry cloth. (Protect the watch body from water splashes by wrapping it up in plastic wrap etc.) • When the band becomes less flexible, have the band replaced with a new one. If you continue to use the band as it is, the band may develop cracks or become brittle over time. ●Silicone band • As for material characteristics, the band is easily dirtied, and may be stained and discolored. Wipe off dirt with a wet cloth or cleaning tissue. • Unlike bands of other materials, cracks may result in the band being cut. Take care not to damage the band with an edged tool. Notes on skin irritation and allergy Skin irritation caused by a band has various reasons such as allergy to metals or leathers, or skin reactions against friction on dust or the band itself. Notes on the length of the band Adjust the band to allow a little clearance with your wrist to ensure proper airflow. When wearing the watch, leave enough room to insert a finger between the band and your wrist. TO PRESERVE THE QUALITY OF YOUR WATCH ASTRON 7X52 GPS SOLAR CONTENTS 7 How to use an adjustable three-fold clasp ●How to adjust the length of the leather band Some bands are provided with an adjustable three-fold clasp. If the clasp of the watch you purchased is as follows, please refer to the following instructions. 1 With pressing buttons on both sides of the flap, pull the leather band out of the moveable loop and fixed loop. Then open the clasp. ●How to wear or take off the watch 1 Press the button on both sides of the flap ; pull the buckle up. The band will automatically come out of the loop. 2 Buckle Place the tip of the band into the moveable loop and fixed loop, and fasten the clasp by pressing the frame of the buckle. Buckle Fixed loop Moveable loop the push buttons again to 2 Press unfasten the flap. 3 Push button Flap Push button Fixed loop Moveable loop Flap Pull the pin out of a adjustment hole of the band. Slide the band to adjust its length and find an appropriate hole. Place the pin into the hole. Pin 4 Fasten the flap. Adjustment hole The above illustrations are provided as examples. Some details may differ depending on the model. 38 TO PRESERVE THE QUALITY OF YOUR WATCH ASTRON 7X52 GPS SOLAR CONTENTS 7 Lumibrite If your watch has Lumibrite Lumibrite is a luminous paint that is completely harmless to human beings and natural environment, containing no noxious materials such as radioactive substance. Lumibrite is a newly-developed luminous paint that absorbs the light energy of the sunlight and lighting apparatus in a short time and stores it to emit light in the dark. For example, if exposed to a light of more than 500 lux for approximately 10 minutes, Lumibrite can emit light for 3 to 5 hours. Please note, however, that, as Lumibrite emits the light it stores, the luminance level of the light decreases gradually over time. The duration of the emitted light may also differ slightly depending on such factors as the brightness of the place where the watch is exposed to light and the distance from the light source to the watch. In general, when you enter a dark place from a bright environment, your eye cannot adapt to the change in light levels quickly. At first, you can hardly see anything, but as time passes, your vision gradually improves. (Dark adaptation of the human eye) < Reference data on the luminance > Condition Illumination Fine weather 100,000 lux Cloudy weather 10,000 lux Sunlight Fine weather Indoor (Window-side during daytime) Lighting apparatus (Distance from 40-watt daylight fluorescent light) more than 3,000 lux Cloudy weather 1,000 to 3,000 lux Rainy weather less than 1,000 lux 1m 1,000 lux 3m 500 lux (average room luminance) 4m 250 lux 39 TO PRESERVE THE QUALITY OF YOUR WATCH ASTRON 7X52 GPS SOLAR CONTENTS 7 Power Source The battery used in this watch is a special secondary battery, which is different from ordinary batteries. Unlike an ordinary silver oxide battery, the secondary battery does not require periodic replacement. Overcharge prevention function When the secondary battery is fully charged, the overcharge prevention function is automatically activated to avoid further charging. There is no need to worry about damage caused by overcharging no matter how much the secondary battery is charged in excess of the "time required for fully charging the watch". The capacity or charging efficiency may gradually lower due to long-term use or operating environment. In addition, long-term use may shorten the charge duration due to wear, contamination, lubricant deterioration of mechanical parts, etc. Request repair when the performance lowers. Refer to "Standard charging time" on page 11 to check the time required for fully charging the watch. WARNING Notes on charging the watch WARNING • When charging the watch, do not place the watch in close proximity to an intense light source such as lighting equipment for photography, spotlights or incandescent lights, as the watch may be excessively heated resulting in damage to its internal parts. • When charging the watch by exposure to direct sunlight, avoid places that easily reach high temperatures, such as a car dashboard. • Always keep the watch temperature under 60°C. Notes on replacing the second battery • Do not remove the secondary battery from the watch. Replacement of the secondary battery requires professional knowledge and skill. Please ask the retailer from whom the watch was purchased for replacement of the secondary battery. • Installation of an ordinary silver oxide battery can generate heat that can cause bursting and ignition. When the watch has not been charged for a long time If the watch has not been charged for a long time, the watch will be completely discharged and no longer able to be charged. In this case, consult the retailer from whom the watch was purchased. 40 TO PRESERVE THE QUALITY OF YOUR WATCH ASTRON 7X52 GPS SOLAR CONTENTS 7 標準化 After-sale service ●Notes on guarantee and repair ●Inspection and adjustment by disassembly and cleaning (overhaul) • Contact the retailer from whom the watch was purchased or SEIKO WORLWIDE SERVICE NETWORK for repair or overhaul. • Within the guarantee period, present the certificate of guarantee to receive repair services. • Guarantee coverage is provided in the certificate of guarantee. Read carefully and retain it. • For repair services after the guarantee period has expired, if the functions of the watch can be restored by repair work, we will undertake repair services upon request and payment. • Periodic inspection and adjustment by disassembly and cleaning (overhaul) is recommended approximately once every 3 to 4 years in order to maintain optimal performance of the watch for a long time. According to use conditions, the oil retaining condition of your watch mechanical parts may deteriorate, abrasion of the parts may occur due to contamination of oil, which may ultimately lead the watch itself to stop. As the parts such as gasket may deteriorate, water-resistant performance may be impaired due to intrusion of perspiration and moisture. Please contact the retailer from whom the watch was purchased for inspection and adjustment by disassembly and cleaning (overhaul). For replacement of parts, please specify “SEIKO GENUINE PARTS.” When asking for inspection and adjustment by disassembly and cleaning (overhaul), make sure that the gasket and push pin are also replaced with new ones. • When your watch is inspected and adjusted by disassembly and cleaning (overhauled), the movement of your watch may be replaced. ●Replacement parts • SEIKO makes it a policy to typically keep a stock of replacement parts for this watch for 7 years. Replacement parts are those which are essential to maintaining the functional integrity of the watch. • Please keep in mind that if original parts are not available, they may be replaced with substitutes whose outward appearance may differ from the originals. 41 TROUBLESHOOTING ASTRON 7X52 GPS SOLAR CONTENTS 8 When the watch is unable to receive GPS signals ● The second hand stops at the 45-second position before the reception is completed (The watch enters the power save 2 state) Points to be checked When the watch does not start receiving or is unable to receive GPS signals even with operation of GPS signal reception, the following can be considered. • If GPS signal reception is performed under low temperatures (0°C or less) in a state where the charging capacity and/or charging efficiency are lowered, the reception will be stopped, and the watch may enter the power save 2 state. If this occurs frequently, consult the retailer from whom the watch was purchased. GPS signal reception consumes a significant amount of energy. Keep in mind to charge the watch regularly by expose to light. ● Reception is not started even with operation of GPS signal reception (time zone adjustment/manual time adjustment). • Check the indicator hand position. Reception is not allowed Indicator display How to charge the watch P. 11 Charging status E (low) In-flight mode ( ) Adjust the time under a condition in which the watch is unable to receive GPS signals (Manual time/date setting) Display Manual time/date setting Solution Charge the watch by expose to light until the indicator hand points to the “level position (middle)” or “F (full).” (P.11) When a problem cannot be solved even by carrying out the “ Points to be checked,” or time is gained or lost under a condition in which the watch is unable to receive GPS signals and the watch is unable to receive GPS signals continuously, set the time and date manually. Reset the in-flight mode ( ). P. 19 ● Reception is not possible even with operation of GPS signal reception (time zone adjustment/manual time adjustment) (The reception result is displayed as “N.”) • Move to a place where GPS signals can be easily received. Place where GPS signals can be easily received/Place where GPS signals cannot be received P. 13 42 Continued on the following page TROUBLESHOOTING ASTRON 7X52 GPS SOLAR CONTENTS 8 How to manually set the time • When using the watch again under a condition in which the watch is able to receive GPS signals, receive GPS signals to set the time. • When adjusting the time, the date will be accordingly adjusted. 1 3 Unlock the crown Unlock the crown Screw-lock type crown P.34 Unscrew out the crown to the 2 Pull second click Continue to press Button A (3 seconds) and then release it when the hand moves to the 0-second position The second hand moves to stop at the 0-second position. The watch enters the manual time setting mode. 4 Press Button B or Button C to set the time Press once to advance 1 minute 5 Push the crown back (in simultaneously with a time signal) Operation has been completed. The watch resumes its normal movement. When the button is kept pressed for 2 seconds or longer, the hour/ minute hands will start to move continuously, and when it is pressed again, they stop moving. Press for 3 seconds 0 1 2 Press once to set back 1 minute Push back in The second hand moves to the 13-second position and stops. 0 1 2 The hands will not move by turning the crown. When the watch enters the manual time setting mode, the reception result will be displayed as “N,” since the reception results data will be lost. Lock the crown. While pressing the crown in The point in which the date changes is at 0:00 AM (12:00 PM). Set the time taking into consideration AM or PM. Pull out the crown to the second click Screw Even if GPS signals cannot be received, the watch can be used with the same accuracy as a normal quartz watch. (at loss/gain ±15 seconds per month on average) If the watch receives GPS signals after manual time setting, it displays the received time. 43 TROUBLESHOOTING ASTRON 7X52 GPS SOLAR CONTENTS 8 How to manually set the date When the date is not automatically changed under a condition in which the watch is unable to receive GPS signals (when changing from months with 30 days or less to months with 31 days), set the date manually. • The date can be set independently regardless of the time. • When using the watch again under a condition in which the watch is able to receive GPS signals, receive GPS signals to set the time and date. out the crown to the 2 Pull second click Button B or Button C 3 Press to set the date The second hand moves to the 13-second position and stops. Operation has been completed. Press once to advance the date 1 day. 0 1 2 When the button is kept pressed for 2 seconds or longer, the date will start to move continuously. Press the button again to stop. 0 1 2 How to adjust the time zone P. 14 ~ 16 When the date is not correct even when the watch has successfully received GPS signals, the preliminary position of the date may be misaligned. Adjust the preliminary positions of the date, indicator hand and hour/minute hands P. 45 ~ P. 47 4 Push the crown back in Pull out to the second click Press once to return the date 1 day. 1 Unlock the crown Push back in Lock the crown. When the watch enters the manual time setting mode, the reception result will be displayed as “N,” since the reception results data will be lost. Unlock the crown Screw-lock type crown P. 34 The date will not move by turning the crown. Unscrew During movement of the date, the buttons cannot be operated. 44 While pressing the crown in Screw TROUBLESHOOTING ASTRON 7X52 GPS SOLAR CONTENTS 8 When the time/date or indicator hand position is misaligned The preliminary position is misaligned due to the following reasons. Points to be checked ●Reception was successful (the reception result is displayed as “Y”), but time has gained or lost. •Check the time zone setting. Check the time zone setting P. 16 Strong impact such as dropping or hitting If the currently set time zone does not correspond to the region where you are, set the time zone by either of the following operations. Place where GPS signals can be easily received How to adjust the time zone P. 14 ~ 16 Place where GPS signals cannot be received How to manually set the time zone P. 20 Things around you which generate magnetism Examples of common magnetic products that may affect watches P. 36 When comparing the state of “Misaligned Preliminary Hand Position” to that of a weight scale, it is like “a scale which is unable to display the correct weight because its needle is not set to the zero position before weighing.” •Check Daylight Saving Time (DST) setting Check Daylight Saving Time (DST) setting P. 17 If Daylight Saving Time (DST) setting does not correspond to the addition conditions of Daylight Saving Time (DST) of the region where you are, set Daylight Saving Time (DST) with reference to “Set Daylight Saving Time (DST) P. 18.” •Automatic time adjustment function may not have been activated for a few days. Automatic time adjustment P. 23 Automatic hand position alignment function The hour, minute, and second hands have an “automatic hand position adjustment function,” which automatically corrects an incorrect preliminary position. The automatic hand position adjustment function is activated once a minute for the second hand and at 12:00 both for the AM and PM for the hour and minute hands. This function works when the preliminary hand position is misaligned due to external factors such as strong impact or magnetic influence. It does not work to adjust accuracy of the watch or slight misalignment which may occur during the manufacturing process. The automatic time adjustment function is unlikely to be activated due to low energy stored in the watch or depending on the environment. To immediately adjust the time, refer to the “How to adjust the time zone P. 14 ~ 16.” The preliminary positions of the hour/minute hands can be manually adjusted. Adjust the preliminary position of the date, indicator hand, and hour/minute hands P.46 ~ 47 Adjusting the preliminary position of the date and indicator hand Preliminary position Since the preliminary position of the date and indicator hand is not automatically adjusted, it must be adjusted manually. When the watch is unable to display the precise time or date even when it has successfully received GPS signals, the preliminary position may be misaligned. Adjust the preliminary position of the date, indicator hand, and hour/minute hands P.46 ~ 47 45 TROUBLESHOOTING ASTRON 7X52 GPS SOLAR Preliminary position of this watch The preliminary position of the date is “1” (1st). The preliminary position of the indicator hand is between “E” (low) and . The preliminary position of the hour/minute hands is “00:00 am.” Adjust the preliminary position of the date, indicator hand, and hour/minute hands 1 Continue to press Button B and C simultaneously (3 seconds), and then release it when the second hand moves to the 13-second position 2 The watch enters the mode to adjust the preliminary position of the date. The date moves, and stops at the preliminary position. Press Button B or C to set the date to “1.” Adjust the date so that the position of “1” will locate at the center of the window. 3 Continue to press Button A (2 seconds) and release it when the second hand moves to the 55-second position The watch enters the mode to adjust the preliminary position of the indicator hand. If “1” is displayed, go to operation of 3. Button B Pressing once advances the date slightly Press simultaneously for 3 seconds Button C Pressing once returns the date slightly Never pull the crown out. When the date is continuously stopped for 1 minute or longer, the watch returns to the time display mode. When the watch has automatically returned to the time display mode, restart operation. Press for 2 seconds If the button is kept pressed for two seconds or longer, the date will move continuously. Press the button again to stop the date. During movement of the date, the buttons cannot be operated. If no operation is performed for more than 1 minute or when Button A is pressed once, the watch returns to the time display mode. When the watch has returned to the time display mode, restart operation. 46 Continued on the following page CONTENTS 8 TROUBLESHOOTING ASTRON 7X52 GPS SOLAR CONTENTS 8 4 Press Button B or C to adjust the indicator hand as shown in the figure Adjust the indicator hand to the position as shown in the figure. The preliminary position of the indicator hand is between “E” (low) and . If the indicator hand points as shown in the figure, go to operation of 5. Slightly moves the hand clockwise 5 Continue to press Button A (2 seconds) and release it when the second hand moves to the 0-second position. The watch enters the mode to adjust the preliminary position of the hour/ minute hands. Button B once and then 6 Press release it The hour/minute hands move, and stop at “00:00 am.” If the watch displays the precise time, go to operation of 7. Press for 2 seconds Button B If the button is kept pressed for 2 seconds or longer, the hand will move continuously. Press the button again to stop the hand. Slightly moves the hand counterclockwise The indicator hand makes one complete turn, but this does not mean a failure. If no operation is performed for more than 1 minute or when Button A is pressed once, the watch returns to the time display mode. When the watch has returned to the time display mode, restart operation. 47 operation is completed, 7 When press Button A and release it The mode to adjust the preliminary position is completed, and the second hand and the hour/minute hands start moving. Button A TROUBLESHOOTING ASTRON 7X52 GPS SOLAR CONTENTS 8 In case of an abnormal movement (resetting the built-in IC) In the case that the watch moves abnormally or that the watch does not move at 1-second intervals even after fully charging the battery, perform the procedures from 1 to 9 to re-establish normal function. Reset the system (2 ~ 4) 2 3 Pull out the crown to the second click The second hand stops at the 13-second position. When the buttons are released, the second hand makes one complete turn, and stops at the 0-second position. After that, the hour/minute hands move and stops at 00:00. The watch can be recovered to the initial state by the system reset when trouble occurs. (2 ~ 4) After that, adjust the preliminary position of the date and indicator hand (5 ~ 0) and set the time (0) before use. 1 Unlock the crown 0 1 Continue to press Button A and C simultaneously for 2 seconds, and then release them the hands stop at 00:00:00, 4 When push the crown back in The second hand moves from 00:00:00. Push back in 2 0 1 2 Press for 2 seconds Pull out to the second click Lock the crown. P.34 While pressing the crown in Unlock the crown Screw-lock type crown P.34 Press for 2 seconds Screw Unscrew After the system reset, the time zone is set to UTC/LON. 48 Continued on the following page TROUBLESHOOTING ASTRON 7X52 GPS SOLAR Set the date to “1” (1st) (5, 6) Set the indicator hand to “E” (7 ~ 9) If the date is stopped continuously for 1 minute or longer, the watch automatically returns to the time display mode. When the watch has returned to the time display mode, restart operation. 5 Continue to press Button B and C simultaneously (3 seconds) and release them when the second hand moves to the 13-second position The watch enters the mode to adjust the preliminary position of the date. 6 Press Button B or C to set the date to “1” Adjust the date so that the position of “1” will locate at the center of the window. 7 Continue to press Button A (2 seconds), and release it when the second hand moves to the 55-second position The watch enters the mode to adjust the preliminary position of the indicator hand. If “1” is displayed, go to operation of 7. Button B Never pull the crown out. Pressing once advances the date slightly Press for 3 seconds simultaneously Button C Press for 2 seconds If the button is kept pressed for 2 seconds, the date moves continuously. Press the button again to stop the date. Pressing once returns the date slightly During movement of the date, the buttons cannot be operated. If no operation is performed for more than 1 minute or when Button A is pressed once, the watch returns to the time display mode. When the watch has returned to the time display mode, restart operation. 49 Continued on the following page CONTENTS 8 TROUBLESHOOTING ASTRON 7X52 GPS SOLAR CONTENTS 8 Set the time (0) 8 Press Button B or C to adjust the indicator hand as shown in the figure Adjust the indicator hand to the position as shown in the figure. If the indicator hand points as shown in the figure, go to operation of 9. Slightly moves the hand clockwise 9 When operation is completed, press Button A and then release it The mode to adjust the preliminary position is completed, and the second hand and hour/ minute hands start moving. After operation of 1 to 9 is completed, make sure to set the time. When you are in a place where GPS signals can be easily received (P. 13), adjust the time zone. How to adjust the time zone P. 14 ~ 16 If GPS signals are received after the system reset, leap second data are also received. P. 30 Button A When you are in a place where GPS signals cannot be received 1 Carry out manual time zone setting How to manually set the time zone P. 20 2 Manually set the time How to manually set the time P. 43 3 Manually set the date How to manually set the date P. 44 If the button is kept pressed for 2 seconds, the hand moves continuously. Press the button again to stop the hand. Slightly moves the hand counterclockwise When the time and date are set, operation is completed. The indicator hand makes one complete turn, but this does not mean a failure. If no operation is performed for more than 1 minute or when Button A is pressed once, the watch returns to the time display mode. When the watch has returned to the time display mode, restart operation. 10 Set the time by receiving GPS signals 50 TROUBLESHOOTING ASTRON 7X52 GPS SOLAR CONTENTS 8 Troubleshooting At trouble The second hand moves at 2-second intervals. The second hand moves at 5-second intervals. Hand Movement Possible causes Reference pages Solutions The energy depletion forewarning function is activated. (P. 31) If the second hand moves at 2 or 5-second intervals while you wear the watch everyday, the watch is in a condition where it cannot acquire sufficient light, for instance, the watch is concealed under a long sleeve shirt. Charge the watch sufficiently until the second hand moves at 1-second intervals and the indicator hand points to the “level position (middle)” or “F (full).” level position (middle) Be careful not to conceal the watch under a sleeve, etc., while wearing it. When taking off the watch, place it in as bright a location as possible. P. 10 P. 11 The stopped second hand pointing to the 15-second position started operating. The power save function 1 has been activated (P. 32) When the watch has not been exposed to sufficient light continuously, the power save function 1 to limit energy consumption is automatically activated. When the watch is exposed to light, the hand will rapidly advance and return to the current time. When the watch returns to the current time, use it as is. (This is not an abnormal movement.) The stopped second hand pointing to the 45-second position started operating. The power save function 2 has been activated (P. 32) When the watch is not sufficiently charged for a certain period of time, the power save function 2 is automatically activated. 1 Charge the watch until the indicator hand points to the “level position (middle)” or “F (full).” 2 After that, when the time is incorrect, adjust the time zone as necessary. The watch hands advance rapidly unless a button is pressed. After the rapid advancement is completed, the watch resumes its normal 1-second interval movement. The power save function has been activated. (P. 32) The automatic hand position alignment function was activated. When the hand positions deviate to display incorrect time as a result of external influences, etc., the watch automatically corrects the hand misalignment by the automatic hand position alignment function. No operation is needed (this is not an abnormal movement). The second hand has stopped at the 0-second or 5-second position Automatic time adjustment is being performed (P. 23) The indicator hand points to “1.” It takes up to 1 minute to complete reception. Use the watch with reference to the “Place where GPS signals can be easily received P. 13.” P. 23 The second hand has stopped between the 0-second to 18-second positions. The automatic leap second reception function has been activated (P. 30) The indicator hand has pointed to the right side of “4+.” It takes up to 18 minutes to complete reception. Use the watch with reference to the “Place where GPS signals can be easily received P. 13.” P. 30 51 — P. 10 P. 11 P. 14 ~ 16 — TROUBLESHOOTING ASTRON 7X52 GPS SOLAR At trouble Reference pages Solutions The charging status has been displayed as “E (low).” (P. 10) Charge the watch sufficiently until the charging status is displayed as the “level position (middle)” or “F (full).” The in-flight mode ( (P. 19) After relocation from a place under restriction on use of GPS signals (in an airplane, etc.), reset the in-flight mode ( ). P. 19 You are in a place where GPS signals cannot be received. (P. 13) Receive GPS signals in a place where GPS signals can be easily received. P. 13 The time zone that does not correspond to the region where you are has been set. Check the time zone setting. If the time zone does not correspond to the region where you are, adjust the time zone. • When you are in a place where GPS signals can be easily received How to adjust the time zone • When you are in a place where GPS signals cannot be received How to manually set the time zone Daylight Saving Time (DST) setting does not correspond to the addition conditions of Daylight Saving Time (DST). Check Daylight Saving Time (DST) setting. P. 17 Daylight Saving Time (DST) setting does not correspond to the addition conditions of Daylight Saving Time (DST). Check Daylight Saving Time (DST) setting. P. 17 The position of the hands is misaligned due to external factors. The preliminary position of the hands is misaligned. Preliminary position P. 45 ~ 46 1 <Hour/minute hand misalignment> The automatic hand position adjustment function is activated to automatically adjust the positions. Please use the watch as it is. The automatic hand position alignment function is activated once a minute for the second hand and at 12:00 AM and PM for the hour and minute hands. <Date misalignment> Since the preliminary position is not automatically adjusted, manually adjust the position. 2 When misalignment of the hand is not adjusted, refer to the “In case of an abnormal movement” to carry out operation. 3 When misalignment of the hand is not adjusted even with operation of 2, consult the retailer from whom the watch was purchased. The reception result is displayed as “Y,” but the time is gained or lost by one to two seconds. The automatic time adjustment function has not been activated for a few days. If the energy stored in the watch is insufficient, the automatic time adjustment function may be activated once in 3 days. P. 23 The automatic time adjustment function is not activated every day Conditions to activate the automatic time adjustment function are not prepared. Sufficient energy is necessary to activate the automatic time adjustment function. The time adjustment function is automatically activated by exposure to bright light. P. 23 Reception is not started even with operation of time zone adjustment/ manual time adjustment GPS signals cannot be received even by carrying out GPS signal reception (The reception result is displayed as “N.”) GPS signal reception Possible causes GPS signals have been received successfully (the reception result is displayed as “Y,”) but the time and date are gained or lost (when the reception result of time adjustment is displayed) The reception result is displayed as “Y,” but the time and date are gained or lost (when the reception result of time zone adjustment is displayed) ) has been set. 52 level position (middle) P. 11 P. 16 P. 14 ~ 15 P. 20 P. 46 P. 48 CONTENTS 8 TROUBLESHOOTING ASTRON 7X52 GPS SOLAR CONTENTS 8 At trouble The position of the second hand showing “reception result” and “number of acquired satellites from which GPS signals are received” is misaligned. Misalignment of time and hands The watch temporarily gains or loses time. The time is gained (lost) 1 hour Possible causes Solutions Reference pages The preliminary position of the second hand is misaligned. (This occurs when the position of the second hand is misaligned due to external factors.) Preliminary position P. 45 ~ 46 1 The automatic hand position alignment function is activated to automatically adjust the position. Please use the watch as it is. The automatic hand position alignment function is activated once a minute for the second hand. 2 When misalignment of the hand is not adjusted, refer to the “In case of an abnormal movement” to carry out operation. 3 When misalignment of the hand is not adjusted even with operation of 2, consult the retailer from whom the watch was purchased. The automatic time adjustment function has not been activated for a few days. (P. 23) If the energy stored in the watch is insufficient, the automatic time adjustment function may be activated once in 3 days. To adjust the time immediately, carry out “manual time adjustment.” P. 23 P. 14 ~ 16 The watch received an incorrect time due to external factors (erroneous reception). 1 Receive GPS signals in a place where GPS signals can be more easily received. 2 Adjust the time zone as necessary. P. 13 P. 14 ~ 16 The watch is left in an extremely high or low temperature place for a long time. 1 If the watch is returned to a normal temperature place, the accuracy will be recovered. 2 If the time is incorrect after that, manually adjust the time as necessary. 3 If the watch is not recovered, consult the retailer from whom the watch was purchased. P. 14 ~ 16 Daylight Saving Time (DST) is ON (or OFF). Check Daylight Saving Time (DST) setting. 53 P. 43 P. 48 P. 17 TROUBLESHOOTING ASTRON 7X52 GPS SOLAR CONTENTS 8 Solutions Reference pages The amount of exposed light is too weak. The time for charging the watch is not sufficient. The time required for charging the watch depends entirely on the amount of exposed light the watch receives. Refer to“ Standard charging time” to charge the watch. P. 11 The built-in IC of the watch has fallen into an unstable condition. Refer to “In case of an abnormal movement” to reset the built-in IC. P. 48 The second hand is stopped even when the watch is charged for longer than the time required to fully charge the watch (P. 9). The watch was not charged for a long time and has been discharged completely. Contact the retailer from whom the watch was purchased. After successful reception, the time is correct but the date is incorrect The preliminary position of the date is misaligned. This occurs when the preliminary position of the date is misaligned due to external factors or system reset. Adjust the preliminary position of the date to the correct position “1” (1st). P. 46 The sub-dial has been adjusted to the dial, but the time is incorrect. The sub-dial is not provided with the preliminary position adjustment function. This occurs when the time is gained or lost due to external factors. Adjust the sub-dial. P. 26 GPS signal reception has been performed, but the sub-dial does not display the current time. The time of the sub-dial is not changed even when the watch has received GPS signals. The sub-dial operates independently from the dial. Manually adjust the sub-dial with reference to P. 26. At trouble Charging the solar battery Misalignment of the date Sub-dial misalignment The stopped watch was exposed to an adequate light for longer than the time required to fully charge the watch, however, it does not resume its normal 1-second interval movements. Possible causes 54 — — TROUBLESHOOTING ASTRON 7X52 GPS SOLAR CONTENTS 8 At trouble Indicator hand misalignment The position of the hand showing the reception type, charging status, inflight mode ( ), and DST is misaligned The crown or buttons cannot be operated. Possible causes Solutions The automatic leap second reception function has been activated. (The second hand is stopped between the 0-second to 18-second positions.) It takes up to 18 minutes to complete the leap second reception. Use the watch with reference to the “Place where GPS signals can be easily received P. 13.” The preliminary position of the indicator hand is misaligned. This occurs when the preliminary position of the indicator hand is misaligned due to external factors or system reset. Adjust the preliminary position of the indicator hand to the correct position. The stored electric power is running short Sufficiently charge the watch until it starts moving at 1-second intervals. Date is moving right after a setting is carried out by the crown or button operation. Wait without doing anything. After the date stops, the crown and buttons can be operated. — When the crown is pulled out 1 Push the crown back in. 2 The second hand will start to move within 9 minutes. 3 After that, restart operation. — When the crown is not pulled out 1 Press Button A. 2 The second hand will start to move within 2 minutes. 3 After that, restart operation. — Contact the retailer from whom the watch was purchased. — Operation You get lost in the middle of the operation. Other trouble Blur on the dial glass persists. Reference pages P. 30 P. 46 ~ 47 P. 11 — — — Small amount of water has got inside the watch due to deterioration of the gasket, etc. 55 FUNCTION LIST/SPECIFICATIONS ASTRON 7X52 GPS SOLAR CONTENTS 9 Index Functions to adjust the time Solar Charging Function… ………………… A solar cell underneath the dial converts any form P. 11 of light into electrical energy to power the watch and the power is stored in a secondary battery. Once fully charged, the watch continues to run for approximately 6 months. GPS signal reception P. 29 Time zone adjustment function…………… Identifies the time zone corresponding to the P. 14 ~ 16 region where you are by button operation by receiving GPS signals from GPS satellites to display the precise current time. Use this function when you travel to a region corresponding to another time zone. Charging status display function… ……… Roughly displays the energy charged in the watch. P. 10 Also shows whether the watch is able to receive GPS signals. Manual time adjustment function………… Displays the precise current time of the currently P. 21 ~ 22 set time zone by receiving GPS signals from GPS satellites. Use this function to adjust the time to the precise time during normal use. Power Save Function………………………… The Power Save mode can be activated in order P. 32 to reduce unnecessary energy consumption when the watch is left without an adequate light source. Automatic time adjustment function… … Judges inside the watch the timing suitable for P. 23 GPS signal reception from GPS satellites and automatically starts reception. Displays the precise current time of the currently set time zone. Manual time zone setting…………………… The time zone can be changed manually in a place P. 20 where the time zone adjustment is not allowed. Daylight Saving Time (DST) setting… …… Daylight Saving Time (DST) can be set manually. P. 17 ~ 18 56 FUNCTION LIST/SPECIFICATIONS ASTRON 7X52 GPS SOLAR CONTENTS 9 Function for reception SPECIFICATIONS In-flight mode ( )… ………………………… Function to prevent the GPS signal reception function from working. Set this mode when P. 19 boarding an airplane, etc. 1. Basic function………………………… Main-dial; three hands (hour/minute/second hands), date display, indicator hand, sub-dial; two hands (hour/ minute hands) Satellites acquisition status display function… … Displays by the second hand the number of GPS P. 15 satellites from which GPS signals are received during GPS signal reception. 2. Frequency of crystal oscillator… … 32,768 Hz (Hz = Hertz ... Cycles per second) Reception result display function… ……… Displays the latest reception result (success/ P. 24 failure). 3. Loss/gain (monthly rate)…………… Loss / gain ±15 seconds on a monthly rate (Except the case when the watch is used without an automatic time setting by receiving GPS signal and when it is worn on the wrist within a normal temperature range between 5°C and 35°C ). Time zone setting check function………… Displays the currently set time zone P. 16 4. Operational temperature range…… Between −10°C and +60°C 5. Driving system… …………………… Step motor (hour/minute/second hands of main-dial, date, indicator hand, hour/minute hands of sub-dial) Other functions 6. Power source… ……………………… Secondary battery, 1 piece Dual time display… ………………………… Displays at the sub-dial located on the 6:00 P. 25 position (in 24-hour display) the time of a region different from the time of the dial. 7. Duration of operation… …………… Approximately 6 months (Fully charged, and the Power Save is not activated). If the Power Save is activated after it is fully charged, the watch continues to run for approximately 2 years at maximum. Automatic hand position alignment function… … Automatically corrects misalignment when the P. 52 hands are misaligned due to external factors such as magnetic influence. 8. GPS signal reception function… … Time zone adjustment, manual time adjustment, automatic time adjustment Automatic leap second reception function…… Automatically receives leap second data when P. 30 leap second data reception is necessary. 9. IC (Integrated Circuit)… …………… Oscillator, frequency divider and driving circuit C-MOSIC, 4 pieces The specifications are subject to change without prior notice for product improvement. Declaration of Conformity 57 Copyright ©2012 by SEIKO WATCH CORPORATION