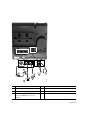
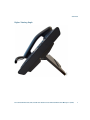
1
Cisco Unified IP Phone 6921, 6941,
and 6961 User Guide for
Cisco Unified Communications
Manager 7.1 (SCCP)
Americas Headquarters
Cisco Systems, Inc.
170 West Tasman Drive
San Jose, CA 95134-1706
USA
http://www.cisco.com
Tel: 408 526-4000
800 553-NETS (6387)
Fax: 408 527-0883
Common Phone Tasks
Softkeys
Place a call
Go off-hook before or
after dialing a number.
All Calls
Lists all missed, placed, and
received calls.
Redial a number
Press Redial.
Answer
Answer a call.
Switch to handset
during a call
Pick up the handset.
Apply
Confirm a ringtone selection.
Call
Initiate a call.
Switch to speaker or Press
or
,
headset during a call then hang up the handset.
Callback
Receive notification when a busy
extension becomes available.
Mute and un-mute a Press
call
Cancel
Cancel an action or exit a screen
without applying changes.
Clear
Clear all values.
Delete
Delete an entry from Call History.
Del Call
Delete a call from Call History.
Details
Opens the Details for a multiparty
call in the Missed, Placed, and
Received Call records.
Dial
Dial a selected number.
Divert
Send or redirect a call to voicemail
or to a predetermined phone
number.
Edit
Modify a name or email address.
EditDial
Modify a number.
Exit
Return to the previous screen.
Fwd
All/Fwd
OFF
Setup/cancel call forwarding.
GPickup
Answer a call that is ringing in
another group or on another line.
Log Out
Sign out of Personal Directory.
Meet Me
Host a Meet Me conference call.
Missed
Open the record of missed calls.
more
Display additional softkeys.
View call history
Hold and resume a
call
Press
History.
.
> Call
Press
, to hold.
Press Resume to resume
the held call.
Transfer a call to new Press
, enter the
number
number, then press it
again.
Place an intercom
call
Start a standard
conference call
QUICK REFERENCE
Press the Intercom button,
then enter a number if
necessary. Speak after you
hear the tone.
Press
, dial the
participant, then press it
again.
Silence the ring for an Press the Volume button
incoming call
down once.
Cisco, Cisco Systems, the Cisco logo, and the Cisco Systems logo are
registered trademarks or trademarks of Cisco Systems, Inc. and/or its
affiliates in the United States and certain other countries. All other
trademarks mentioned in this document or Website are the property of their
respective owners. The use of the word partner does not imply a partnership
relationship between Cisco and any other company. (0705R)
© 2009 Cisco Systems, Inc. All rights reserved.
OL-20187-01
Cisco Unified IP Phone
6921, 6941, and 6961 for
Cisco Unified
Communications
Manager 7.1 (SCCP)
Softkeys
Phone Screen Icons
Buttons
Common Phone Tasks
Phone Screen Icons
New Call
Make a new call.
OK
Confirm a selection.
OPickup
Answer a call that is ringing in an
associated group.
Park
Store a call.
Play
Play ringtone.
Connected call
PickUp
Answer a call that is ringing on
another phone in your group.
Incoming call
Redial
Redial the most recently dialed
number.
Missed call
Remove
Remove a conference participant
or an entry.
Received call
Buttons
Off-hook
Applications
On-hook
Contacts
Messages
Transfer
Hold
Conference
Volume
Placed call
Resume
Resume a call on hold.
Save
Save the chosen settings.
Search
Search for a directory listing.
Select
Select the highlighted option.
Set
Set a ringtone.
Submit
Enter user information.
Swap
Toggle between two existing calls.
Shared line in use
Update
Update an entry in Personal
Directory.
Speed dial line
>>
Move through entered characters.
Call on hold
Feature Icons
Speakerphone
(If available on your phone)
Mute
Message waiting
Backspace to delete characters.
Line Status indicator–monitored line is
in-use
Back.
Line Status indicator–monitored line is
idle
Line Status indicator–monitored line is
ringing (Call Pickup only)
Line Status indicator-monitored line is in
do not disturb (DND)
Idle intercom line
One-way intercom call (whisper)
Two-way intercom call (connected)
Headset
Navigation bar and Select button
For the Cisco Unified IP Phone Quick Start
Guides, go to this URL:
http://www.cisco.com/en/US/products/ps10326/
products_user_guide_list.html
Contents
Your Phone 1
Cisco Unified IP Phone 6921 1
Phone Connections 1
Buttons and Hardware 3
Phone Screen 5
Footstand 5
Higher Viewing Angle 7
Lower Viewing Angle 8
Handset Rest 9
Cisco Unified IP Phone 6941 10
Phone Connections 10
Buttons and Hardware 12
Phone Screen 15
Footstand 15
Higher Viewing Angle 17
Lower Viewing Angle 18
Handset Rest 19
Cisco Unified IP Phone 6961 20
Phone Connections 20
Buttons and Hardware 22
Phone Screen 24
Footstand 24
Higher Viewing Angle 26
Lower Viewing Angle 27
Handset Rest 28
Applications 29
Phone Applications 29
Call History 29
Cisco Unified IP Phone 6921, 6941, and 6961 User Guide for Cisco Unified Communications Manager 7.1 (SCCP)
iii
View Call History 30
View Call Record Details 30
Filter Call History 30
Dial From Call History 30
Clear Call History 31
Delete Call Record From Call History 31
Preferences 32
Ring Tones 32
Contrast 32
Services 33
Access Services 33
Phone Information 33
View Phone Information 33
Administrator Settings 34
Contacts 35
Phone Contacts 35
Corporate Directory 35
Search for and Dial a Contact 35
Search for and Dial a Contact While on a Call 36
Personal Directory 36
Personal Directory Options 37
Fast-Dial Codes with Personal Directory 39
Messages 40
Voice Messages 40
Personalize Your Voicemail 40
Check for Voice Messages 40
Listen to Voice Messages 41
Calling Features 42
Feature Buttons and Softkeys 42
Auto Answer 43
Auto Answer with Your Headset 43
Auto Answer with Your Speakerphone 43
Call Back 43
iv
OL-18397-01
Set up a Call Back Notification 44
Call Forward All 44
Forward Calls on a Primary Line 45
Call Park 45
Park and Retrieve a Call Using Park 46
Park and Retrieve a Call Using Assisted Directed Call Park 46
Park and Retrieve a Call Using Manual Directed Call Park 46
Call Pickup 47
Answer a Call Using Pickup 47
Answer a Call Using Group Pickup and a Group Pickup Number 47
Answer a Call Using Group Pickup and a Phone Number 48
Answer a Call Using Other Pickup 48
Call Waiting 48
Respond to a Call Waiting Notification 48
Codes 49
Place a Call Using a Client Matter Code 49
Place a Call Using a Forced Authorization Code 49
Conference 49
Add Another Party to Your Call to Create a Conference 50
Combine Calls Across Lines to Create a Conference 50
Swap Between Calls Before Completing a Conference 50
End a Conference 50
View Conference Participants 50
Remove Conference Participants 50
Divert 51
Divert a Call 51
Do Not Disturb 51
Turn DND On and Off 51
Extension Mobility 52
Enable Extension Mobility 52
Fast Dial 52
Place a Call with a Fast-Dial Button 52
Hold 53
Hold and Resume a Call 53
Cisco Unified IP Phone 6921, 6941, and 6961 User Guide for Cisco Unified Communications Manager 7.1 (SCCP)
v
Swap Between Held and Active Calls on Multiple Lines 53
Put a Call on Hold by Answering a New Call on Another Line 53
Determine if a Shared Line is on Hold 53
Hold Reversion 53
Respond to a Hold Reversion Notification 54
Hunt Groups 54
Sign In and Out of a Hunt Group 54
Intercom 54
Place an Intercom Call 54
Receive an Intercom Call 55
Line Status 55
Line Status Indicators 55
Malicious Call Identification 56
Trace a Suspicious Call 56
Meet Me 56
Host a Meet-Me Conference 56
Join a Meet-Me Conference 56
Mobile Connect 57
Turn On or Off Mobile Connect to All Your Remote Destinations From Your Desk Phone 57
Switch an In-Progress Call on Your Desk Phone to a Mobile Phone 57
Switch an In-Progress Call From a Mobile Phone to Your Desk Phone 58
Mute 58
Mute Your Phone 58
On-hook Dialing 58
Dial a Number On-hook 58
Privacy 58
Enable Privacy on a Shared Line 59
Quality Reporting Tool 59
Report Problems on Your Phone 59
Redial 59
Redial a Number 59
Shared Lines 60
Speed Dial 60
Place a Call with a Speed-Dial Button 61
vi
OL-18397-01
Place a Call with a Speed-Dial Code 61
Transfer 61
Transfer a Call to Another Number 61
Use Direct Transfer to Connect Calls Across Lines 62
Swap Between Calls Before Completing a Transfer 62
Web Dialer 62
Use Web Dialer with Cisco Directory 62
Use Web Dialer with Another Online Corporate Directory 62
Set Up, View, or Change Web Dialer Preferences 63
Sign Out of Web Dialer 63
User Options 64
User Options Web Pages 64
Sign In and Out of User Options Web Pages 64
Device 65
Select a Device From the User Options Web Pages 65
Customize Do Not Disturb Options 65
Line Settings 66
Set Up Call Forwarding Per Line 66
Change the Voice Message Indicator Setting Per Line 66
Change the Audible Voice Message Indicator Setting Per Line 67
Change the Ring Settings Per Line 67
Change or Create a Line Text Label for Your Phone Display 67
Speed Dial on the Web 68
Set Up Speed-Dial Buttons 68
Set Up Speed-Dial Codes 68
Phone Services 68
Subscribe to a Service 69
Search for Services 69
Change or End Services 69
Change a Service Name 70
Add a Service to an Available Programmable Feature Button 70
User Settings 70
Change Your Browser Password 70
Change Your PIN 71
Cisco Unified IP Phone 6921, 6941, and 6961 User Guide for Cisco Unified Communications Manager 7.1 (SCCP)
vii
Change the Language for Your User Options Web Pages 71
Change the Language for Your Phone Display 71
Directory 71
Personal Address Book 72
Add a New PAB Entry 72
Search for a PAB Entry 72
Edit a PAB Entry 72
Delete a PAB Entry 72
Assign a Feature Button for Personal Address Book 72
Fast Dials 73
Assign a Feature Button for Fast Dial 73
Assign a Fast Dial Code to a PAB Entry 73
Assign a Fast Dial Code to a Phone Number Without Using a PAB Entry 74
Search for a Fast Dial Entry 74
Edit a Fast Dial Phone Number 74
Delete a PAB Entry 74
Mobility Settings 75
Add a New Remote Destination 75
Create an Access List 76
Plugins 76
Access Plugins 76
FAQs and Troubleshooting 77
Frequently Asked Questions 77
Troubleshooting Tips 77
Conference 77
Personal Directory 78
Shared Lines 78
User Options 79
Product Safety, Security, Accessibility, and Related Information 80
Safety and Performance Information 80
Power Outage 80
External Devices 80
Cisco Product Security 81
viii
OL-18397-01
Accessibility Features 81
Hearing Impaired Accessibility Features 81
Vision Impaired and Blind Accessibility Features 85
Mobility Impaired Accessibility Features 87
Additional Information 90
Warranty 91
Cisco One-Year Limited Hardware Warranty Terms 91
Cisco Unified IP Phone 6921, 6941, and 6961 User Guide for Cisco Unified Communications Manager 7.1 (SCCP)
ix
x
OL-18397-01
Your Phone
Cisco Unified IP Phone 6921
The Cisco Unified IP Phone 6921 provides these features:
• Phone connections
• Buttons and hardware
• Phone screen
• Footstand
• Handset rest
Phone Connections
For your phone to work, it must be connected to the corporate IP telephony network. Your system
administrator can help you connect your phone.
Cisco Unified IP Phone 6921, 6941, and 6961 User Guide for Cisco Unified Communications Manager 7.1 (SCCP)
1
1
3
7
2
6
192762
5
4
1
DC adaptor port (DC48V).
5
Access port (10/100 PC) connection.
2
AC-to-DC power supply (optional).
6
Handset connection.
3
AC power wall plug (optional).
7
Analog headset connection (optional).
4
Network port (10/100 SW)
connection. IEEE 802.3af power
enabled.
2
OL-18397-01
Your Phone
Buttons and Hardware
1
2
17
3
16
4
15
5
14
6
7
1
/.@
2
ABC
DEF
3
1
6
2
8
4
13
GHI
7
PQRS
5
JKL
8
TUV
MNO
9
9
WXYZ
0
192525
10
12
11
1
Handset light strip
Indicates an incoming call (flashing red) or new voice message (steady
red).
2
Phone screen
Shows information about your phone such as directory number, active
call and line status, softkey options, speed dials, placed calls, and
phone menu listings.
3
Softkey buttons
Depending on how your system administrator sets up the phone,
enable softkey options displayed on your phone screen.
Cisco Unified IP Phone 6921, 6941, and 6961 User Guide for Cisco Unified Communications Manager 7.1 (SCCP)
3
4
Transfer button
Transfers a call.
5
Conference button
Creates a conference call.
6
Hold button
Places an active call on hold.
7
Navigation bar and
Select button
The Navigation bar allows you to scroll through menus and highlight
items. When phone is on-hook, displays phone numbers from your
Placed Call listing (up arrow) or your speed dials (down arrow).
The Select button (in the middle of the Navigation bar) allows you to
select a highlighted item.
8
Line 1 and Line 2
buttons
1
2
Line 1 selects the primary phone line.
Depending on how your system administrator sets up the phone, Line
2 may provide access to:
• Secondary phone line
• Speed-dial number (speed-dial button)
• Web-based service (for example, a Personal Address Book button)
Buttons illuminate to indicate status:
• Green, steady—Active call
• Green, flashing—Held call
• Amber, flashing—Incoming call or reverting call
• Red, steady—Remote line in use (shared line)
• Red, flashing—Remote line on hold
9
Headset button
Toggles the headset on or off. When the headset is on, the button is lit.
10 Speakerphone button
Toggles the speakerphone on or off. When the speakerphone is on, the
button is lit.
11 Keypad
Allows you to dial phone numbers, enter letters, and select menu items
(by entering the item number).
12 Mute button
Toggles the microphone on or off. When the microphone is muted, the
button is lit.
4
OL-18397-01
Your Phone
13 Volume button
Controls the handset, headset, and speakerphone volume (off-hook)
and the ringer volume (on-hook).
14 Messages button
Auto-dials your voicemail system (varies by system).
15 Applications button
Opens/closes the Applications menu. Use it to access call history, user
preferences, phone settings, and phone model information.
16 Contacts button
Opens/closes the Directories menu. Use it to access personal and
corporate directories.
17 Handset
Phone handset.
Phone Screen
1
Header
Displays date, time, and directory number.
2
Line details and other phone
information
During a call, displays details for the active line. If not on a
call, displays line text label and other information such as
placed calls, speed dials, and phone menu listings.
3
Softkey labels
Display softkeys for available features or actions.
Footstand
If your phone is placed on a table or desk, the footstand can be connected to the back of the phone for
a higher or lower viewing angle, depending on your preference.
Cisco Unified IP Phone 6921, 6941, and 6961 User Guide for Cisco Unified Communications Manager 7.1 (SCCP)
5
2
1
194407
CISCO
1
6
Footstand slots for a higher viewing angle
2
Footstand slots for a lower viewing angle
OL-18397-01
Your Phone
Higher Viewing Angle
Cisco Unified IP Phone 6921, 6941, and 6961 User Guide for Cisco Unified Communications Manager 7.1 (SCCP)
7
Lower Viewing Angle
8
OL-18397-01
Your Phone
Handset Rest
Your system administrator may have mounted your phone on a wall. With a wall-mounted phone, you
might need to adjust the handset rest to ensure that the receiver will not slip out of the cradle.
2
3
192897
1
1
Remove the handset from the cradle and pull the plastic tab from the handset rest.
2
Rotate the tab 180 degrees.
3
Hold the tab between two fingers, with the corner notches facing you. Make sure the tab lines
up evenly with the slot in the handset cradle.
4
Press the tab evenly into the slot. An extension protrudes from the top of the rotated tab. Return
the handset to the handset rest.
Cisco Unified IP Phone 6921, 6941, and 6961 User Guide for Cisco Unified Communications Manager 7.1 (SCCP)
9
Cisco Unified IP Phone 6941
The Cisco Unified IP Phone 6941 provides these features:
• Phone connections
• Buttons and hardware
• Phone screen
• Footstand
• Handset rest
Phone Connections
For your phone to work, it must be connected to the corporate IP telephony network. Your system
administrator can help you connect your phone.
10
OL-18397-01
Your Phone
1
3
7
2
6
192762
5
4
1
DC adaptor port (DC48V).
5
Access port (10/100 PC) connection.
2
AC-to-DC power supply (optional).
6
Handset connection.
3
AC power wall plug (optional).
7
Analog headset connection (optional).
4
Network port (10/100 SW)
connection. IEEE 802.3af power
enabled.
Cisco Unified IP Phone 6921, 6941, and 6961 User Guide for Cisco Unified Communications Manager 7.1 (SCCP)
11
Buttons and Hardware
1
2
3
17
4
16
5
15
6
14
7
8
1
/.@
4
13
GHI
7
PQRS
2
ABC
5
JKL
8
TUV
3
DEF
6
MNO
9
9
WXYZ
0
192526
10
12
12
11
OL-18397-01
Your Phone
1
Handset light strip
Indicates an incoming call (flashing red) or new voice message (steady
red).
2
Phone screen
Shows information about your phone such as directory number,
active call and line status, softkey options, speed dials, placed calls,
and phone menu listings.
3
Programmable feature
buttons
Depending on how your system administrator sets up the phone,
programmable feature buttons (on each side of the phone screen)
provide access to:
• Phone lines and intercom lines
• Speed-dial numbers (speed-dial buttons, including the Line Status
speed-dial features)
• Web-based services (for example, a Personal Address Book
button)
• Call features (for example, a Privacy button)
Buttons illuminate to indicate status:
• Green, steady—Active call or two-way intercom call
• Green, flashing—Held call
• Amber, steady—Privacy in use, one-way intercom call, DND
active, or logged into Hunt Group
• Amber, flashing—Incoming call or reverting call
• Red, steady—Remote line in use (shared line or Line Status)
• Red, flashing—Remote line on hold
4
Softkey buttons
Depending on how your system administrator sets up the phone,
enable softkey options displayed on your phone screen.
5
Transfer button
Transfers a call.
6
Conference button
Creates a conference call.
7
Hold button
Places an active call on hold.
Cisco Unified IP Phone 6921, 6941, and 6961 User Guide for Cisco Unified Communications Manager 7.1 (SCCP)
13
8
Navigation bar and
Select button
The Navigation bar allows you to scroll through menus and highlight
items. When phone is on-hook, displays phone numbers from your
Placed Call listing (up arrow) or your speed dials (down arrow).
The Select button (in the middle of the Navigation bar) allows you to
select a highlighted item.
9
Headset button
Toggles the headset on or off. When the headset is on, the button is
lit.
10 Speakerphone button
Toggles the speakerphone on or off. When the speakerphone is on,
the button is lit.
11 Keypad
Allows you to dial phone numbers, enter letters, and select menu
items (by entering the item number).
12 Mute button
Toggles the microphone on or off. When the microphone is muted,
the button is lit.
13 Volume button
Controls the handset, headset, and speakerphone volume (off-hook)
and the ringer volume (on-hook).
14 Messages button
Auto-dials your voice messaging system (varies by system).
15 Applications button
Opens/closes the Applications menu. Use it to access call history, user
preferences, phone settings, and phone model information.
16 Contacts button
Opens/closes the Directories menu. Use it to access personal and
corporate directories.
17 Handset
Phone handset.
14
OL-18397-01
Your Phone
Phone Screen
1
Header
Displays date, time, and directory number.
2
Line text label with icon
Displays text label and icon for phone or intercom line, speed-dial
numbers, or services, depending on your configuration.
3
Primary line details and
other phone information
Displays line label and call details for the primary line, and other
phone information such as placed calls, speed dials, and phone
menu listings.
4
Secondary line details and
other phone information
Displays line label and call details for the secondary line, and other
phone information such as placed calls, speed dials, and phone
menu listings.
5
Softkey labels
Display softkeys for available features or actions.
Footstand
If the phone is placed on a table or desk, the footstand can be connected to the back of your phone for
a higher or lower viewing angle, depending on your preference.
Cisco Unified IP Phone 6921, 6941, and 6961 User Guide for Cisco Unified Communications Manager 7.1 (SCCP)
15
2
1
194407
CISCO
1
16
Footstand slots for a higher viewing angle
2
Footstand slots for a lower viewing angle
OL-18397-01
Your Phone
Higher Viewing Angle
Cisco Unified IP Phone 6921, 6941, and 6961 User Guide for Cisco Unified Communications Manager 7.1 (SCCP)
17
Lower Viewing Angle
18
OL-18397-01
Your Phone
Handset Rest
Your system administrator may have mounted your phone on a wall. With a wall-mounted phone, you
might need to adjust the handset rest to ensure that the receiver will not slip out of the cradle.
2
3
192897
1
1
Remove the handset from the cradle and pull the plastic tab from the handset rest.
2
Rotate the tab 180 degrees.
3
Hold the tab between two fingers, with the corner notches facing you. Make sure the tab lines
up evenly with the slot in the handset cradle.
4
Press the tab evenly into the slot. An extension protrudes from the top of the rotated tab. Return
the handset to the handset rest.
Cisco Unified IP Phone 6921, 6941, and 6961 User Guide for Cisco Unified Communications Manager 7.1 (SCCP)
19
Cisco Unified IP Phone 6961
The Cisco Unified IP Phone 6961 provides these features:
• Phone connections
• Buttons and hardware
• Phone screen
• Footstand
• Handset rest
Phone Connections
For your phone to work, it must be connected to the corporate IP telephony network. Your system
administrator can help you connect your phone.
20
OL-18397-01
Your Phone
1
3
7
2
6
192617
5
4
1
DC adaptor port (DC48V).
5
Access port (10/100 PC) connection.
2
AC-to-DC power supply (optional).
6
Handset connection.
3
AC power wall plug (optional).
7
Headset connection (optional).
4
Network port (10/100 SW)
connection. IEEE 802.3af power
enabled.
Cisco Unified IP Phone 6921, 6941, and 6961 User Guide for Cisco Unified Communications Manager 7.1 (SCCP)
21
Buttons and Hardware
1
2
17
3
16
4
15
5
14
6
7
1
/.@
4
13
GHI
7
PQRS
2
ABC
5
JKL
8
TUV
8
3
DEF
6
MNO
9
9
WXYZ
0
192527
10
12
11
1
Handset light strip
Indicates an incoming call (flashing red) or new voice message (steady
red).
2
Phone screen
Shows information about your phone such as directory number, active
call and line status, softkey options, speed dials, placed calls, and
phone menu listings.
3
Softkey buttons
Depending on how your system administrator sets up the phone,
enable softkey options displayed on your phone screen.
22
OL-18397-01
Your Phone
4
Transfer button
Transfers a call.
5
Conference button
Creates a conference call.
6
Hold button
Places an active call on hold.
7
Navigation bar and
Select button
The Navigation bar allows you to scroll through menus and highlight
items. When phone is on-hook, displays phone numbers from your
Placed Call listing (up arrow) or your speed dials (down arrow).
The Select button allows you to select a highlighted item.
8
Programmable feature
buttons
Depending on how your system administrator sets up the phone,
programmable feature buttons provide access to:
• Phone lines and intercom lines
• Speed-dial numbers (speed-dial buttons, including the Line Status
speed-dial features)
• Web-based services (for example, a Personal Address Book
button)
• Call features (for example, a Privacy button)
Buttons illuminate to indicate status:
• Green, steady—Active call or two-way intercom call
• Green, flashing—Held call
• Amber, steady—Privacy in use, one-way intercom call, DND
active, or logged into Hunt Group
• Amber, flashing—Incoming call or reverting call
• Red, steady—Remote line in use (shared line or Line Status)
• Red, flashing—Remote line on hold
9
Headset button
Toggles the headset on or off. When the headset is on, the button is lit.
10 Speakerphone button
Toggles the speakerphone on or off. When the speakerphone is on, the
button is lit.
11 Keypad
Allows you to dial phone numbers, enter letters, and select menu
items (by entering the item number).
Cisco Unified IP Phone 6921, 6941, and 6961 User Guide for Cisco Unified Communications Manager 7.1 (SCCP)
23
12 Mute button
Toggles the microphone on or off. When the microphone is muted, the
button is lit.
13 Volume button
Controls the handset, headset, and speakerphone volume (off-hook)
and the ringer volume (on-hook).
14 Messages button
Auto-dials your voice messaging system (varies by system).
15 Applications button
Opens/closes the Applications menu. Use it to access call history, user
preferences, phone settings, and phone model information.
16 Contacts button
Opens/closes the Directories menu. Use it to access personal and
corporate directories.
17 Handset
Phone handset.
Phone Screen
1
Header
Displays date, time, and directory number.
2
Line details and other
phone information
During a call, displays details for the active line. If not on a call,
displays line text label and other information such as placed calls,
speed dials, and phone menu listings.
3
Softkey labels
Display softkeys for available features or actions.
Footstand
If the phone is placed on a table or desk, the footstand can be connected to the back of your phone for
a higher or lower viewing angle, depending on your preference.
24
OL-18397-01
Your Phone
2
1
194406
CISCO
1
Footstand slots for a higher viewing angle
2
Footstand slots for a lower viewing angle
Cisco Unified IP Phone 6921, 6941, and 6961 User Guide for Cisco Unified Communications Manager 7.1 (SCCP)
25
Higher Viewing Angle
26
OL-18397-01
Your Phone
Lower Viewing Angle
Cisco Unified IP Phone 6921, 6941, and 6961 User Guide for Cisco Unified Communications Manager 7.1 (SCCP)
27
Handset Rest
Your system administrator may have mounted your phone on a wall. With a wall-mounted phone, you
might need to adjust the handset rest to ensure that the receiver will not slip out of the cradle.
2
3
192897
1
1
Remove the handset from the cradle and pull the plastic tab from the handset rest.
2
Rotate the tab 180 degrees.
3
Hold the tab between two fingers, with the corner notches facing you. Make sure the tab lines
up evenly with the slot in the handset cradle.
4
Press the tab evenly into the slot. An extension protrudes from the top of the rotated tab. Return
the handset to the handset rest.
28
OL-18397-01
Applications
Phone Applications
Phone applications allow you to access the following:
• Call History
• Preferences
• Services
• Phone Information
• Administrator Settings (For system administrators only.)
Call History
Call History allows you to view information about the last 150 calls on your phone. A call icon is
displayed to indicate the type of call:
• Received
• Placed
• Missed
The caller ID is displayed with the call icon. If the caller ID is unavailable, then the phone number is
displayed. If the phone number is unavailable, then “Unknown” is displayed. All Call History items
are integrated into one list and are ordered by time (latest to oldest). There is 150 call limit per phone
and not per line. For example, if a phone has multiple lines, the 150 call limit is for all lines combined.
You can sort the Call History list by all lines, each line, or by missed calls. You can also dial a number
directly from the Call History list.
Cisco Unified IP Phone 6921, 6941, and 6961 User Guide for Cisco Unified Communications Manager 7.1 (SCCP)
29
View Call History
1. Press the Applications button
.
2. Select Call History. (Use the Navigation bar and button to scroll and select.)
3. Select All Lines or the line that you want to view.
4. Press the
softkey to return to the Call History screen.
View Call Record Details
1. Press the Applications button
.
2. Select Call History. (Use the Navigation bar and button to scroll and select.)
3. Select All Lines or the line that you want to view.
4. Select a call record and press the Details softkey (you may need to press the more softkey first).
5. Press the
softkey to return to the Call History list.
Filter Call History
1. Press the Applications button
.
2. Select Call History. (Use the Navigation bar and button to scroll and select.)
3. Select All Lines or the line that you want to view.
4. The Call History list displays only the missed calls on the selected line.
5. To view all calls in the Call History list, press the All Calls softkey.
6. Press the
softkey to return to the Call History screen.
Dial From Call History
1. Press the Applications button
.
2. Select Call History. (Use the Navigation bar and button to scroll and select.)
3. Select All Lines or the line that you want to view.
4. From the Call History list, select the call you want to dial and do one of the following:
– Press the Call softkey.
– Press the line key.
– Pick up the handset.
– Press the speakerphone or headset button.
30
OL-18397-01
Applications
Edit Number From Call History
1. Press the Applications button
.
2. Select Call History. (Use the Navigation bar and button to scroll and select.)
3. Select All Lines or the line that you want to view.
4. Select the call you want to edit.
5. Press the EditDial softkey (you may need to press the more softkey first).
6. Press the >> softkey to move the cursor to the right and press the << softkey to move the cursor
to the left.
7. Press the
softkey to delete numbers.
8. Press the Dial softkey to dial the edited number (you may need to press the more softkey first).
9. Press the
softkey to return to the Call History list.
Clear Call History
1. Press the Applications button
.
2. Select Call History. (Use the Navigation bar and button to scroll and select.)
3. Select All Lines or the line that you want to view.
4. Press the Clear softkey (you may need to press the more softkey first).
5. Press the Delete softkey to delete the Call History list, or press the Cancel softkey to go back to
the Call History screen.
Delete Call Record From Call History
1. Press the Applications button
.
2. Select Call History. (Use the Navigation bar and button to scroll and select.)
3. Select All Lines or the line that you want to view.
4. Select the call you want to delete.
5. Press the Del Call softkey (you may need to press the more softkey first).
6. Press the Delete softkey to delete the call, or press the Cancel softkey to go back to the Call History
screen.
Cisco Unified IP Phone 6921, 6941, and 6961 User Guide for Cisco Unified Communications Manager 7.1 (SCCP)
31
Preferences
Preferences allows you to set these user preferences:
• Ring Tone
• Contrast
Ring Tones
You can customize how your phone indicates an incoming call and a new voice mail message. You can
also adjust the ringer volume for your phone.
Change Ringtone for a Line
1. Press the Applications button
.
2. Select Preferences. (Use the Navigation bar and button to scroll and select.)
3. Select Ringtone.
4. Select a ringtone.
5. Press the Play softkey to play a sample.
6. Press the Set softkey to select the ringtone.
7. Press the Apply softkey to confirm your selection, or press the Cancel softkey to go back to the
Ringtone screen.
8. Press the
softkey to return to the Preferences screen.
Contrast
You can adjust your phone screen contrast level. The default contrast level setting is 50%.
Adjust the Contrast
1. Press the Applications button
.
2. Select Preferences. (Use the Navigation bar and button to scroll and select.)
3. Select Contrast.
4. To increase contrast, press the up arrow on the Navigation bar. To decrease contrast, press the
down arrow.
5. Press the Save softkey to set the contrast level, or press the Cancel softkey to exit.
32
OL-18397-01
Applications
Services
Phone services can include special phone features, network data, and web-based information (such as
stock quotes and movie listings). The services available for your phone depend on the phone system
configuration and the services you are subscribed to. For more information, see your system
administrator.
Access Services
1. Press the Applications button
.
2. Select Services. (Use the Navigation bar and button to scroll and select.)
3. Select the service you want to access.
4. Press the Select softkey, or press the Exit softkey to return to the Applications screen.
Phone Information
Phone Information allows you to view the following model information for your phone:
• Model Number
• IP Address
• MAC Address
• Active Load
• Inactive Load
• Last Upgrade
• Active Server
• Stand-by-Server
• Backlight On Time
• Backlight On Duration
• Backlight Idle Timeout
View Phone Information
1. Press the Applications button
.
2. Select Phone Information. (Use the Navigation bar and button to scroll and select.)
3. Press the Exit softkey to return to the Applications screen.
Cisco Unified IP Phone 6921, 6941, and 6961 User Guide for Cisco Unified Communications Manager 7.1 (SCCP)
33
Administrator Settings
For information on accessing and changing the Administrator Settings, see your system administrator.
34
OL-18397-01
Contacts
Phone Contacts
The Cisco Unified IP Phones 6921, 6941, and 6961 provide you with access to corporate and personal
contacts using these directories:
• Corporate Directory
• Personal Directory
Corporate Directory
The corporate directory contains corporate contacts that you can access on your phone. Your system
administrator sets up and maintains the directory.
You can dial calls from your corporate directory in two ways:
• When you are not on another call.
• When you are on another call.
Search for and Dial a Contact
1. Press the Contacts button
.
2. Select Corporate Directory. (Use the Navigation bar and button to scroll and select.)
3. Select any of these criteria to search for a co-worker:
– First name
– Last name
– Number
4. Enter the search criteria information, press the Submit softkey, and select a contact.
5. To dial a contact, use one of these options:
– Press the Dial softkey.
– Press the Select button.
– Press the contact label number.
– Press a line button.
Cisco Unified IP Phone 6921, 6941, and 6961 User Guide for Cisco Unified Communications Manager 7.1 (SCCP)
35
– Press the Speakerphone button
– Press the Headset button
.
.
– Pick up the handset.
Search for and Dial a Contact While on a Call
1. Press the Contacts button
.
2. Select Corporate Directory. (Use the Navigation bar and button to scroll and select.)
3. Select any of these criteria to search for a co-worker:
– First name
– Last name
– Number
4. Enter the information, then select Search > Dial.
5. Select one of these to handle the original call:
– Hold button
—Puts the first call on hold and dials the second.
– Transfer button
—Transfers the first party to the second and drops you from the call. To
complete the action, press the Transfer button again after dialing.
– Conference button
—Creates a conference call with all parties, including you. To
complete the action, press the Conference button again after dialing.
– End Call softkey—Disconnects the first call and dials the second.
Personal Directory
The personal directory contains a list of your personal contacts. You can assign fast-dial codes to your
personal directory entries for fast-dialing.
There are two ways you can set up and maintain your personal directory:
• Phone—Using your phone, you can:
– Set up and use Personal Directory
– Assign and use fast-dial codes
• User Options Web Pages—Using User Options web pages, you can also set up and use your
personal directory.
Related Topics
User Options, page 64
36
OL-18397-01
Contacts
Personal Directory Options
From your phone, you can use personal directory options to:
• Sign in and out
• Add an entry
• Search for an entry
• Dial a number
• Delete an entry
• Edit an entry
Sign In and Out of Personal Directory
1. Press the Contacts button
.
2. Select Personal Directory. (Use the Navigation bar and button to scroll and select.)
3. Enter your user ID and PIN (provided by your system administrator), then press the Submit
softkey.
4. Select the Exit softkey, twice, to sign out.
If you do not sign out, you are automatically signed out. For more information, see your system
administrator.
Add a Personal Directory Entry
1. Sign in to Personal Directory.
2. Press the New softkey (you may need to press the more softkey first).
3. Enter the name information.
4. Press the Phones softkey and enter the phone numbers.
Include any required access codes such as a 9 or 1.
5. Press the Submit softkey to add the entry to your personal directory.
Search for an Entry in Personal Directory
1. Sign in to Personal Directory.
2. Select Personal Address Book. (Use the Navigation bar and button to scroll and select.)
Cisco Unified IP Phone 6921, 6941, and 6961 User Guide for Cisco Unified Communications Manager 7.1 (SCCP)
37
3. Choose any of the following criteria to search for an entry. (Use the Navigation bar and button to
scroll and select.)
– First name
– Last name
4. Enter the search criteria information, then press the Submit softkey.
The name displays.
5. Press the Select softkey.
Dial a Number from Personal Directory
1. Sign in to Personal Directory and search for an entry. (Use the Navigation bar and button to scroll
and select.)
2. Select the number that you want to dial.
3. To dial a contact, use one of these options:
– Press the Dial softkey.
– Press a line button.
– Press the Speakerphone button
– Press the Headset button
.
.
– Pick up the handset.
Delete a Personal Directory Entry
1. Sign in to Personal Directory and search for an entry. (Use the Navigation bar and button to scroll
and select.)
2. Press the Edit softkey.
3. Press the Delete softkey. (You may need to select the more softkey first.)
4. Press the OK softkey to confirm the deletion.
Edit a Personal Directory Entry
1. Sign in to Personal Directory and search for an entry. (Use the Navigation bar and button to scroll
and select.)
2. Press the Edit softkey to modify the name or email address.
3. Modify the name or email address.
4. Press the Phones softkey to modify a phone number.
5. Press the Update softkey.
38
OL-18397-01
Contacts
Fast-Dial Codes with Personal Directory
Using the phone, you can:
• Assign a fast-dial code to a Personal Directory entry
• Place a call using a fast-dial code
• Delete a fast-dial code
Assign a Fast-Dial Code to a Personal Directory Entry
1. Sign in to Personal Directory. (Use the navigation bar and button to scroll and select.)
2. Enter the name information and press the Submit softkey.
3. Select the name, then press the FastDial softkey.
4. Select a number and press the Select softkey.
5. Press the Next softkey.
6. Press the Assign softkey for a new fast-dial code that you want to assign to the number.
Place a Call Using a Fast-Dial Code
1. Sign in to Personal Directory and search for a fast-dial code. (Use the Navigation bar and button
to scroll and select.)
2. Select the fast-dial code you want to dial.
3. Press the Dial softkey.
Delete a Fast-Dial Code
1. Sign in to Personal Directory and search for a fast-dial code. (Use the Navigation bar and button
to scroll and select.)
2. Select the fast-dial code that you want to delete.
3. Press the Remove softkey.
Cisco Unified IP Phone 6921, 6941, and 6961 User Guide for Cisco Unified Communications Manager 7.1 (SCCP)
39
Messages
Voice Messages
Voice messages are stored on your voicemail system. Your company determines the voicemail system
your phone uses.
You can:
• Personalize your voicemail
• Check for voice messages
• Listen to voice messages
Personalize Your Voicemail
Press the Messages button
, then follow the voice prompts.
Check for Voice Messages
Check for voice messages in any of these ways:
• Look at the visual message indicator lamp on your handset.
You can configure the visual message indicator lamp using your User Options web pages.
• Look for:
– (For Cisco Unified IP Phone 6941 only.) A message waiting icon
.
– (For Cisco Unified IP Phones 6921 and 6961 only.) A text message.
• Listen for a stutter tone from your handset, headset, or speakerphone when you place a call.
The stutter tone is line-specific. You hear it only when using the line that has a waiting message.
You can configure the audible message indicator using your User Options web pages.
Cisco Unified IP Phone 6921, 6941, and 6961 User Guide for Cisco Unified Communications Manager 7.1 (SCCP)
40
Messages
Related Topics
• Change the Voice Message Indicator Setting Per Line, page 66
• Change the Audible Voice Message Indicator Setting Per Line, page 67
Listen to Voice Messages
There are two ways you can listen to voice messages:
• Press the Messages button
to listen to voice messages left on any line.
• Press a line button, then press Messages to hear only the voice messages for that line.
Cisco Unified IP Phone 6921, 6941, and 6961 User Guide for Cisco Unified Communications Manager 7.1 (SCCP)
41
Calling Features
Feature Buttons and Softkeys
Depending upon how your system administrator sets up your phone, some features included in this
guide might not be available to you.
This table provides information about some of the features that are available on dedicated feature
buttons, and some of the features that are set up by your system administrator either on programmable
feature buttons or softkeys.
Programmable
Feature Button
Softkey
Call Back
X
X
Call Forward All
X
X
Call Park
X
X
Call Park Line Status
X
Call Pickup
X
Call Pickup Line Status
X
Feature Name
Conference
Dedicated
Feature Button
X
Directed Call Park
X
X
Divert
X
Do Not Disturb (DND)
X
Group Pickup
X
Hold
X
X
X
Hunt Groups
X
Intercom
X
Malicious Call Identification
(MCID)
X
Meet Me
X
Mobile Connect
X
X
Cisco Unified IP Phone 6921, 6941, and 6961 User Guide for Cisco Unified Communications Manager 7.1 (SCCP)
42
Calling Features
Feature Name
Dedicated
Feature Button
Programmable
Feature Button
Softkey
Mute
X
Other Pickup
X
X
Privacy
X
Quality Reporting Tool (QRT)
X
Redial
X
X
Speed Dial
X
X
Speed Dial Line Status
X
Transfer
X
X
Auto Answer
Auto Answer prompts your phone to automatically answer incoming calls after one ring.
Your system administrator sets up Auto Answer to work with either your speakerphone or headset.
Auto Answer with Your Headset
Keep the headset button
illuminated when the phone is idle. Otherwise, calls ring normally and
you must manually answer them.
To keep the headset button illuminated, use a line button or softkeys (instead of the headset button)
to go off-hook and on-hook, and to place and end calls.
Auto Answer with Your Speakerphone
Keep the handset in the cradle and the headset button
you must manually answer them.
unlit. Otherwise, calls ring normally and
Call Back
Call Back allows you to receive an audio and visual notification on your phone when a busy or
unavailable party becomes available.
Cisco Unified IP Phone 6921, 6941, and 6961 User Guide for Cisco Unified Communications Manager 7.1 (SCCP)
43
Set up a Call Back Notification
1. Press the Callback softkey while listening to the busy tone or ring sound.
A confirmation screen displays on the phone.
2. Press the Exit softkey to return to the main screen, if desired.
Your phone alerts you when the line is free.
3. Press the Dial softkey to place the call again, if desired.
Call Forward All
Call Forward All allows you to forward calls on your phone to another number.
For your primary line, you can set up Call Forward All directly on your phone. For all other lines—or
to access Call Forward All remotely—go to your User Options web pages.
There are two types of call forwarding features that your system administrator might set up on your
phone:
• Unconditional call forwarding (Call Forward All)—Applies to all calls that you receive.
• Conditional call forwarding (Call Forward No Answer, Call Forward Busy, Call Forward No
Coverage)—Applies to certain calls that you receive, according to conditions, and is accessible
only from your User Options web pages.
When forwarding calls from your phone:
• Enter the call forward target number exactly as you would dial it from your phone. For example,
enter an access code or the area code, if necessary.
• Call forwarding is phone-line specific. If a call reaches you on a line where call forwarding is not
enabled, the call will ring as usual.
• Your system administrator can set up other call forward options that:
– Allow calls placed from the call forward target number to your phone to ring through, rather
than be forwarded.
– Prevent you from creating a call forward loop or exceeding the maximum number of links in
a call forwarding chain.
Related Topics
Set Up Call Forwarding Per Line, page 66
44
OL-18397-01
Calling Features
Forward Calls on a Primary Line
1. Press the Fwd All softkey.
2. Enter the target phone number. (Depending on how your voicemail system is set up, you may be
able to press the Messages button
to forward all calls to voicemail.)
Visual confirmation displays on your screen for as long as the feature is enabled.
3. To cancel call forwarding, press Fwd OFF.
To forward calls on other lines, go to your User Options Web pages.
Call Park
Call Park allows you to park (temporarily store) a call you receive on your phone, and which you can
then retrieve from another phone (for example, a phone at a co-worker’s desk or in a conference
room).
There are two ways you can park a call:
• Park—Allows you to park an active call that you answered on your phone, and retrieve it using
another phone in the Cisco Unified Communications Manager system.
• Directed Call Park—Allows you to park and retrieve an active call in two different ways:
– Assisted Directed Call Park—Allows you to park an active call by pressing a line button,
which your system administrator sets up as a speed dial line.
With this type of directed call, you can monitor the status of the line (in-use, idle, or in Do
Not Disturb state) using Line Status indicators.
– Manual Directed Call Park—Allows you to park an active call by transferring it to a Directed
Call number, which your system administrator sets up.
You retrieve the call at another phone by dialing a park retrieval prefix number (provided by
your system administrator), then dialing the Directed Call number you used to park the call.
Your system administrator sets up either the Directed Call Park or Park feature on your phone, but
not both.
Related Topics
Line Status, page 55
Cisco Unified IP Phone 6921, 6941, and 6961 User Guide for Cisco Unified Communications Manager 7.1 (SCCP)
45
Park and Retrieve a Call Using Park
1. During a call, press the Park softkey.
Your phone displays the call park number where the system stored your call.
2. Note the call park number displayed on your phone screen.
You will use the number to retrieve the call.
3. Hang up.
You have a limited time to retrieve a parked call before it reverts to ringing at the original number.
4. From any other Cisco Unified IP Phone in your network, enter the call park number to retrieve the
call.
Park and Retrieve a Call Using Assisted Directed Call Park
1. During a call, press a Directed Call Park button displaying an idle Line Status indicator.
You have a limited time to retrieve the parked call before it reverts to ringing at the original
number.
2. Retrieve the call, from any other Cisco Unified IP Phone in your network as follows:
a. Enter the park retrieval prefix.
b. Dial the Directed Call number.
For example, if the park retrieval prefix is “99” and the Directed Call number is “1234”, enter
991234.
Park and Retrieve a Call Using Manual Directed Call Park
1. During a call, press the Transfer button
.
2. Enter the Directed Call number where you will park the call.
3. Press Transfer again to finish parking the call, then hang up.
You have a limited time to retrieve a parked call before it reverts to ringing at the original number.
4. Retrieve the call, from any other Cisco Unified IP Phone in your network as follows:
a. Enter the park retrieval prefix.
b. Dial the Directed Call number.
For example, if the park retrieval prefix is “99” and the Directed Call number is “1234”, enter
991234.
46
OL-18397-01
Calling Features
Call Pickup
Call Pickup allows you to answer a call that is ringing on a co-worker’s phone by redirecting the call
to your phone.
You might use Call Pickup if you share call-handling tasks with co-workers.
There are three ways you can pick up a call:
• Pickup—Allows you to answer a call that is ringing on another phone within your call pickup
group.
If multiple calls are available for pick up, your phone picks up the oldest call first (the call that
has been ringing for the longest time).
• Group Pickup—Allows you to answer a call on a phone that is outside your call pickup group by:
– Using a group pickup number (provided by your system administrator).
– Dialing the ringing phone’s number.
• Other Pickup—Allows you to answer a call that is ringing on another phone within in your call
pickup group or in an associated call pickup group.
Your system administrator sets up the call pickup group you are in, and the call pickup softkeys
depending on your call-handling needs and work environment.
You can also monitor and pick up ringing calls using Line Status indicators if your system
administrator has set up Line Status indicators on speed-dial buttons for you. Line Status indicators
allow you to see if a line associated with a speed-dial button is idle, in-use, in a Do Not Disturb state,
or ringing.
Related Topics
Line Status, page 55
Answer a Call Using Pickup
1. Press the PickUp softkey to transfer a ringing call within your pickup group to your phone.
If you have multiple lines and want to pick up the call on a non-primary line, first press the desired
line button, then press PickUp.
If your phone supports auto-pickup, you are connected to the call.
2. If the call rings, press the Answer softkey to connect to the call.
Answer a Call Using Group Pickup and a Group Pickup Number
1. Press the GPickup softkey to answer a call on a phone outside your pickup group.
If you have multiple lines and want to pick up the call on another line, first press the desired line
button, then press GPickup.
Cisco Unified IP Phone 6921, 6941, and 6961 User Guide for Cisco Unified Communications Manager 7.1 (SCCP)
47
2. Enter the group pickup number.
If your phone supports auto-pickup, you are now connected to the call.
3. If the call rings, press the Answer softkey to connect to the call.
Answer a Call Using Group Pickup and a Phone Number
1. Press the GPickup softkey.
If you have multiple lines and want to pick up the call on a non-primary line, first press the desired
line button, then press GPickup.
2. Enter the number of the phone line with the call that you want to pick up. For example, if the call
is ringing on line 12345, enter 12345.
If your phone supports auto-pickup, you are now connected to the call.
3. If the call rings, press the Answer softkey to connect to the call.
Answer a Call Using Other Pickup
1. Press the OPickup softkey to transfer a call in your pickup group or in an associated group to your
phone.
If your phone supports auto-pickup, you are now connected to the call.
2. If the call rings, press the Answer softkey to connect to the call.
Call Waiting
Call Waiting provides cues to notify you that a new call is ringing on your phone when you are talking
on another call, including:
• A call waiting tone (single beep)
• An amber flashing line button
Respond to a Call Waiting Notification
(Your system administrator must set up multiple lines on your phone before you can use this feature.)
To answer the ringing call, press the flashing amber line button. Your phone puts the original call on
hold automatically and connects the ringing call.
48
OL-18397-01
Calling Features
Codes
Codes allow you to place a call using a billing or tracking code. Your phone supports two types of
codes (provided by your administrator):
• Client Matter Codes (CMC) require you to enter a code to specify that the call relates to a specific
client matter. Your administrator can assign client matter codes to customers, students, or other
populations for call accounting and billing purposes.
• Forced Authorization Codes (FAC) allow you to manage call access and accounting. The Forced
Authorization Codes feature requires that the user enter a valid authorization code before the call
connects.
Place a Call Using a Client Matter Code
1. Dial a number.
2. After the tone, enter a client matter code (CMC).
Place a Call Using a Forced Authorization Code
1. Dial a number.
2. After the tone, enter a forced authorization code (FAC).
Conference
Conference allows you to talk simultaneously with multiple parties.
When you are talking on a call, use Conference to dial another party and add them to the call.
If you have multiple phone lines, you can alternately use Conference to combine two calls across two
lines. For example, if you have a call on Line 1 and a call on Line 2, you can combine the calls into a
conference.
Before completing a conference procedure, you can press the Cancel softkey to cancel the procedure
or you can press the Swap softkey to toggle between calls, allowing you to speak privately with each
party.
As the conference host, you can remove individual participants from the conference.
The conference ends when all the participants hang up.
Cisco Unified IP Phone 6921, 6941, and 6961 User Guide for Cisco Unified Communications Manager 7.1 (SCCP)
49
Add Another Party to Your Call to Create a Conference
1. Verify that you are on an active call (not on hold).
2. Press the Conference button
.
3. Enter the phone number for the party you want to add (or press a speed-dial button).
4. Wait for the party to answer (or skip to step 5 while the call is ringing).
5. Press the Conference button again.
The conference begins.
Repeat these steps to add more parties, if desired.
Combine Calls Across Lines to Create a Conference
This task requires multiple phone lines.
1. Verify that you have two connected calls and that one of the calls is active (not on hold).
2. Press the Conference button
.
3. Press the line button for the other (held) call.
The conference begins. (The conference is established on the line with the active call.)
Swap Between Calls Before Completing a Conference
After calling a new conference participant, but before adding the participant to the conference, press
the Swap softkey to toggle between the two calls. This allows you to consult privately with the party
or parties on each call before combining the calls into a conference.
End a Conference
The conference ends when all participants hang up.
View Conference Participants
While in a conference, press the Details softkey to view a list of participants.
Remove Conference Participants
1. While in a conference, press the Details softkey to view a list of participants.
2. Highlight the participant that you want to remove, then press the Remove softkey.
50
OL-18397-01
Calling Features
Divert
Divert allows you to send an active or ringing call to your voicemail system or to a predetermined
phone number (set up by your system administrator).
Divert a Call
Press the Divert softkey to send an active, ringing, or held call to your voicemail system or to a
predetermined phone number (set up by your system administrator).
Do Not Disturb
Do Not Disturb (DND) allows you to turn off either the ringer on your phone, or the ringer and any
other audible or visual notification that you have an incoming call.
When the ringer and notifications are turned off, the call is sent directly to your voicemail system.
Your system administrator sets up a line button on your phone for DND, but you can change your
DND options from your User Options web pages.
DND interacts with other types of calls:
• If both DND and Call Forward All are enabled, calls are forwarded without any visual or audible
confirmation.
• DND does not affect intercom calls or non-intercom priority calls.
• If both DND and auto-answer are enabled, only intercom calls are auto-answered.
Related Topics
User Options, page 64
Turn DND On and Off
1. Press the DND button to turn on DND.
Visual confirmation displays briefly.
2. Press the button again to turn off DND.
Visual confirmation displays briefly.
Cisco Unified IP Phone 6921, 6941, and 6961 User Guide for Cisco Unified Communications Manager 7.1 (SCCP)
51
Extension Mobility
Cisco Extension Mobility (EM) allows you to temporarily configure a Cisco Unified IP Phone as your
own. After you sign in to EM, the phone adopts your user profile, including your phone lines, features,
established services, and web-based settings. Your system administrator sets up EM for you.
Enable Extension Mobility
1. Press the Applications button
.
2. Select Services. (Use the Navigation bar and button to scroll and select.)
3. Select EM Service (name can vary).
4. Enter your user ID and PIN (provided by your system administrator).
5. If prompted, select a device profile.
6. To sign out, press the Applications
button.
7. Select Services.
8. Select EM Service (name can vary).
9. When prompted to sign out, press the Yes softkey.
Fast Dial
Fast Dial allows you dial a phone number from the Fast Dial service on your phone. Before you can
use Fast Dial on your phone, you must set up Fast Dial on your User Options Web pages.
Related Topics
Fast Dials, page 73
Place a Call with a Fast-Dial Button
(Before you can use Fast Dial on your phone, you must set up Fast Dial on your User Options Web
pages.)
1. Press the Fast-Dial button.
2. Sign in to Personal Directory.
3. Select Personal Fast Dials.
4. Select a fast-dial code and then press the Dial softkey.
52
OL-18397-01
Calling Features
Hold
Hold allows you to put an active call into a held state.
Hold and Resume a Call
1. To put a call on hold, press the Hold button
The Hold icon
.
displays and the line button flashes green.
2. To resume the call, press the Resume softkey or the flashing green line button.
Swap Between Held and Active Calls on Multiple Lines
If your phone supports multiple lines, use line buttons to swap between held and active calls.
For example, if you have a held call on Line 1 and an active call on Line 2, press the Line 1 button to
make the Line 1 call active (resume it from hold) and to automatically put the Line 2 call on hold.
Put a Call on Hold by Answering a New Call on Another Line
If your phone supports multiple lines, and you are already on a call when a new call rings, answering
the new call puts the first call on hold automatically.
To answer the new call in this case, press the flashing amber line button or the Answer softkey.
Determine if a Shared Line is on Hold
Look for a flashing red line button and the hold icon
. When these indicators display, a call on the
shared line has been put on hold remotely by the other user.
Hold Reversion
Hold Reversion notifies you when a call is left on hold.
A Hold Reversion notification is similar to a new call notification and includes these cues:
• Single ring, repeating at intervals
• Flashing amber line button
• Flashing message indicator on the handset
• Visual notification on the phone screen
Cisco Unified IP Phone 6921, 6941, and 6961 User Guide for Cisco Unified Communications Manager 7.1 (SCCP)
53
Respond to a Hold Reversion Notification
Press the flashing amber line button or the Answer softkey to resume the call from hold.
Hunt Groups
Hunt groups are used to share the call load in organizations that receive a large number of incoming
calls.
Your system administrator sets up a hunt group with a series of directory numbers. When the first
directory number in the hunt group is busy, the system hunts for the next available directory number
in the group, then directs the call to that phone.
If you are a member of a hunt group, you can sign in to a hunt group when you want to receive calls,
and you can sign out of the group when you want to prevent calls from ringing on your phone.
Sign In and Out of a Hunt Group
1. Press the Hunt Group button to sign in.
Visual confirmation displays briefly.
2. Press the button again to sign out.
Signing out of a hunt group does not prevent non-hunt group calls from ringing your phone.
Intercom
Intercom allows you to place and receive one-way calls using a dedicated intercom line.
When you place an intercom call, the recipient’s phone auto-answers with mute activated (whisper)
and broadcasts your message through the recipient’s speakerphone—or through the headset or
handset, if one of these devices is active.
After receiving the intercom call, the recipient can initiate two-way audio (connected) to continue the
call.
Place an Intercom Call
1. Press the Intercom button.
If your phone auto-dials the intercom code, begin speaking after the alert tone. Otherwise, go to
Step 2.
2. Enter the intercom code and begin speaking after the alert tone.
54
OL-18397-01
Calling Features
Receive an Intercom Call
When you receive an intercom call, you hear an intercom-alert tone and your phone auto-answers the
call. Any current call activity that you are engaged in continues simultaneously, but the intercom caller
cannot hear you.
To speak to the intercom caller, press the active Intercom button.
Line Status
Line Status indicators allow you to view the state of a phone line that is associated with a speed-dial
button.
Your system administrator sets up Line Status indicators on your phone.
Line Status Indicators
Line Status indicators show the state of a line.
Icon
Indicator
Line is in use.
Line is idle.
Line is in Do Not Disturb (DND) state.
Line is ringing. (Only for Call Pickup.)
Line Status indicators can be set up on speed dial buttons by your system administrator, and can be
used with these features:
• Speed Dial—Allows you to monitor the status of (and dial) a specific number on a speed-dial
button.
• Call Park—Allows you to monitor the line status of (and dial) an Assisted Directed Call Park
number on a speed-dial button.
• Call Pickup—Allows you to monitor the line status of (and pick up a ringing call on) a speed-dial
button.
Your system administrator can also set up your phone to play an audible alert when a call is
ringing on the monitored line
Cisco Unified IP Phone 6921, 6941, and 6961 User Guide for Cisco Unified Communications Manager 7.1 (SCCP)
55
Related Topics
• Speed Dial, page 60
• Call Park, page 45
• Call Pickup, page 47
Malicious Call Identification
Malicious Call Identification (MCID) allows you to identify an active call as suspicious, which initiates
a series of automated tracking and notification messages.
Trace a Suspicious Call
Press the Malicious Caller ID button to send a silent notification message to your system administrator.
When the silent notification message is sent, your phone provides both a visual and audible
confirmation.
Meet Me
Meet Me allows you to call a predetermined number at a scheduled time to host or join a conference.
The conference begins when the host connects. Participants who call the conference before the host
has joined hear a busy tone and must dial again.
The conference ends when all participants hang up; the conference does not automatically end when
the host disconnects.
Host a Meet-Me Conference
1. Obtain a Meet-Me phone number from your system administrator.
2. Distribute the Meet-Me phone number to participants.
3. When you are ready to start the meeting, go off-hook to get a dial tone, then press the Meet Me
softkey.
4. Dial the Meet-Me phone number.
Join a Meet-Me Conference
Dial the Meet-Me phone number (provided by the conference host).
If you hear a busy tone, the host has not yet joined the conference. In this case, try your call again.
56
OL-18397-01
Calling Features
Mobile Connect
Mobile Connect allows you to use your mobile phone to handle calls associated with your desk phone
number.
To set up Mobile Connect, use the User Options web pages to set up remote destinations and create
access lists to allow or block calls from specific phone numbers from being passed to the remote
destinations.
When you enable Mobile Connect:
• Your desk phone and remote destinations receive calls simultaneously.
• When you answer the call on your desk phone, the remote destinations stop ringing, are
disconnected, and display a missed call message.
• When you answer the call on one remote destination, the other remote destinations and desk
phone stop ringing, are disconnected, and a missed call message is shown on the other remote
destinations.
Related Topics
• Create an Access List, page 76
• Add a New Remote Destination, page 75
Turn On or Off Mobile Connect to All Your Remote Destinations From
Your Desk Phone
1. Press the Mobility button to display the current remote destination status (Enabled or Disabled).
2. Press the Select button to change the status.
3. Press the Exit softkey.
Related Topics
Add a New Remote Destination, page 75
Switch an In-Progress Call on Your Desk Phone to a Mobile Phone
1. Press the Mobility button.
2. Select Send call to mobile.
3. Answer the in-progress call on your mobile phone.
The desk phone line button turns red and handset icons and the calling party number appear on
the phone display. You cannot use the same phone line for any other calls, but if your desk phone
supports multiple lines, you can use another line to make or receive calls.
Cisco Unified IP Phone 6921, 6941, and 6961 User Guide for Cisco Unified Communications Manager 7.1 (SCCP)
57
Switch an In-Progress Call From a Mobile Phone to Your Desk Phone
1. Select a line on your desk phone.
2. Hang up the call on your mobile phone to disconnect the mobile phone, but not the call.
3. Press the Resume softkey on your desk phone within five to 10 seconds and start talking on the
desk phone.
Mute
Mute allows you to block audio input for your handset, headset, and speakerphone, so that you can
hear other parties on the call but they cannot hear you.
Mute Your Phone
1. Press the Mute button
to turn Mute on.
Visual confirmation displays.
2. Press the Mute button again to turn Mute off.
On-hook Dialing
On-hook dialing allows you to enter a phone number before getting a dial tone and to complete the
call by going off-hook.
Dial a Number On-hook
1. Enter or speed-dial a phone number.
2. Go off-hook.
Privacy
Privacy allows you to prevent others who share your line from seeing information about your calls.
Privacy applies to all shared lines on your phone. If you have multiple shared lines and Privacy is
enabled, others cannot view any of your shared lines.
If the phone that shares your line has Privacy enabled, you can make and receive calls using the shared
line as usual.
58
OL-18397-01
Calling Features
Related Topics
Shared Lines, page 60
Enable Privacy on a Shared Line
1. Press the Privacy button to enable the feature.
Visual confirmation displays on your phone screen for as long as the feature is enabled.
2. Press the button again to turn off the feature.
Quality Reporting Tool
Your system administrator may temporarily configure your phone with the Quality Reporting Tool
(QRT) to troubleshoot performance problems. Depending on configuration, use the QRT to:
• Immediately report an audio problem on a current call.
• Select a general problem from a list of categories and choose reason codes.
Report Problems on Your Phone
1. Press the Quality Reporting Tool button.
2. Select the item that most closely matches your problem. (Use the Navigation pad and Select button
to scroll and select.)
3. Press the Select softkey.
The information is sent to your system administrator.
Redial
Redial allows you to call the most recently dialed phone number by pressing a button.
Redial a Number
Press the Redial softkey.
To place the call on a particular phone line, get a dial tone on that line, then press the Redial softkey.
Cisco Unified IP Phone 6921, 6941, and 6961 User Guide for Cisco Unified Communications Manager 7.1 (SCCP)
59
Shared Lines
Shared lines allow you to use one phone number for multiple phones.
You might have a shared line if you have multiple phones and want one phone number, share
call-handling tasks with co-workers, or handle calls on behalf of a manager.
For example, if you share a line with a co-worker:
• When a call comes in on the shared line:
– Your phone rings and the line button flashes amber.
– Your co-worker’s phone rings and the line button flashes amber.
• If you answer the call:
– Your line button turns green.
– Your co-worker’s line button turns red.
When button is red, that line cannot be used to barge in on the call or used to make another
call.
• If you put the call on hold:
– Your line button flashes green
– Your co-worker’s line button flashes red.
When the line flashes red, your co-worker can pick up the call.
Speed Dial
Speed-dial features allow you to place a call by pressing a button, entering a code, or selecting an item
from the Call History list. Before you can use speed-dial features on your phone, you must set up
speed-dial on your User Options Web pages.
Depending on setup, your phone can support these speed-dial features:
• Speed-Dial Buttons—Allow you to quickly dial a phone number from one or more line buttons set
up for speed dialing.
• Speed-Dial Codes—Allow you to dial a phone number from a code (sometimes referred to as
abbreviated dialing).
If your system administrator has set up the Line Status feature, you can monitor the status of a
speed-dial line by using the line status indicators.
Related Topics
• Speed Dial on the Web, page 68
• Line Status Indicators, page 55
60
OL-18397-01
Calling Features
Place a Call with a Speed-Dial Button
(Before you can use speed-dial buttons on your phone, you must set up speed dial on your User
Options Web pages.)
To place a call, press a speed-dial button
.
Place a Call with a Speed-Dial Code
(Before you can use speed-dial codes on your phone, you must set up the codes on your User Options
Web pages.)
To place a call, enter the speed-dial code and press the SpeedDial softkey.
Transfer
Transfer allows you to redirect a connected call from your phone to another number.
You can use Transfer or Direct Transfer:
• Transfer allows you to redirect a single call to another number that you specify.
• Direct Transfer allows you to connect two calls on two different lines to each other (without
remaining on the line yourself).
Before completing a transfer procedure, you can press the Cancel softkey to cancel the procedure or
you can press the Swap softkey to toggle between calls, allowing you to speak privately with each
party.
Transfer a Call to Another Number
1. Verify that you are on an active call (not on hold).
2. Press the Transfer button
.
3. Enter the transfer recipient’s phone number (or press a speed dial button).
4. Wait for the recipient to answer. (Or, skip to Step 5 while the call is ringing.)
5. Press the Transfer button again.
The transfer is complete.
Cisco Unified IP Phone 6921, 6941, and 6961 User Guide for Cisco Unified Communications Manager 7.1 (SCCP)
61
Use Direct Transfer to Connect Calls Across Lines
This task requires multiple phone lines.
1. Verify that you have two connected calls and that one of the calls is active (not on hold).
2. Press the Transfer button
.
3. Press the line button for the other (held) call.
The transfer completes (the two calls are connected to each other).
Swap Between Calls Before Completing a Transfer
After you connect to the transfer recipient—but before you transfer a call to this party—you can press
the Swap softkey to toggle between the two calls. This allows you to consult privately with the party
on each call before you complete the transfer.
Web Dialer
Web Dialer allows you to click-to-dial contacts from the Cisco Unified CM Directory. Your system
administrator sets up this feature for you.
Use Web Dialer with Cisco Directory
1. Sign in to your User Options web pages.
2. Select User Options > Directory and search for a co-worker.
3. Select the number that you want to dial.
4. If this is your first time using Web Dialer, review the preferences on the Make Call page.
5. Select Dial.
The call is now placed on your phone.
6. To end a call, select Hang up or hang up from your phone.
Use Web Dialer with Another Online Corporate Directory
1. Sign in to a Web Dialer-enabled corporate directory and search for co-workers.
2. Select the number that you want to dial.
3. When prompted, enter your user ID and password.
4. If this is your first time using Web Dialer, review the preferences on the Make Call page.
62
OL-18397-01
Calling Features
5. Select Dial.
The call is now placed on your phone.
6. To end a call, select Hang up or hang up from your phone.
Set Up, View, or Change Web Dialer Preferences
1. Initiate a call using Web Dialer to access the Make Call page.
The Make Call page displays the first time that you use WebDialer (after you select the number
that you want to dial).
2. Select one of the following options from the Make Call page:
– Preferred language—Determines the language used for Web Dialer settings and prompts.
– Use preferred device—Identifies the Cisco Unified IP Phone (Calling device) and directory
number (Calling line) that you will use to place Web Dialer calls. If you have one phone with
a single line, the appropriate phone and line are automatically selected. Otherwise, choose a
phone and/or line. If you have more than one phone of the same type, it will be specified by
device type and MAC address. (To display the MAC address on your phone, select the
> Phone Information.)
Applications button
If you have an Extension Mobility profile, you can select Extension Mobility from the Calling
Device drop-down menu from the Make Call page.
– Do not display call confirmation—If selected, the Web Dialer Make Call page will not display
the next time Web Dialer is used. Calls will automatically be dialed after clicking on a contact
from the Cisco Directory.
– Disable Auto Close—If selected, the call window does not close automatically after fifteen
seconds.
Sign Out of Web Dialer
Select the sign out icon
in the Make Call or Hang Up page.
Cisco Unified IP Phone 6921, 6941, and 6961 User Guide for Cisco Unified Communications Manager 7.1 (SCCP)
63
User Options
User Options Web Pages
Your Cisco Unified IP Phone is a network device that can share information with other network
devices in your company, including your personal computer.
You can use your computer to sign in to your Cisco Unified CM User Options web pages, where you
can control features, settings, and services for your Cisco Unified IP Phone. For example, you can set
up speed-dial buttons from your User Options web pages.
After you have signed in to your User Options web pages, select User Options to access the following:
• Device
• User Settings
• Directory
• Personal Address Book
• Fast Dials
• Mobility Settings
• Plugins
Related Topics
• Contacts, page 35
• Call Forward All, page 44
Sign In and Out of User Options Web Pages
Before you can access any of your user options, such as speed-dial settings or personal address book,
you must sign in. When you are finished using the user options web pages, you must sign out.
1. Obtain the User Options URL, user ID, and default password (provided by your system
administrator).
2. Open a web browser on your computer and enter the URL.
3. If prompted to accept security settings, select Yes or Install Certificate.
4. Enter your userid in the Username field.
5. Enter your password in the Password field.
Cisco Unified IP Phone 6921, 6941, and 6961 User Guide for Cisco Unified Communications Manager 7.1 (SCCP)
64
User Options
6. Select Login.
The Cisco Unified CM User Options home page displays. From this page you can select User
Options to select a device, access User Settings, Directory features, your Personal Address Book,
and Fast Dials.
7. To sign out of user options, select Logout.
Device
You can make changes to your device settings on your phone from the User Options web pages. You
can make changes to these device settings on your phone:
• Do not disturb options
• Line settings
• Speed dials
• Phone services
Related Topics
Speed Dial, page 60
Select a Device From the User Options Web Pages
1. After you have signed in to your User Options web pages, select User Options > Device.
The Device Configuration page displays. Toolbar buttons located at the top of the Device
Configuration page are specific to the selected device type.
2. If you have multiple devices assigned to you, select the appropriate device (phone model,
Extension Mobility profile, or Remote Destination profile) from the Name drop-down menu.
Customize Do Not Disturb Options
1. Sign in to your User Options web pages. Your system administrator sets up the Do Not Disturb
(DND) feature for your phone.
2. From the drop-down menu, select User Options > Device.
3. Set the following options:
– Do Not Disturb—Check the check box to enable or disable DND.
– DND Option—Select either None or Ringer Off (to turn off only the ringer).
– DND Incoming Call Alert (applies to either DND option set)—Set the alert to Beep Only,
Flash Only, Disable, or select “None” (to use the “Alert” setting set up by your system
administrator).
Cisco Unified IP Phone 6921, 6941, and 6961 User Guide for Cisco Unified Communications Manager 7.1 (SCCP)
65
Related Topics
Do Not Disturb, page 51
Line Settings
Line settings affect a specific phone line (directory number) on your phone. Line settings can include
call forwarding, visual and audio message-waiting indicators, voice-message indicators, ring patterns,
and other line-specific settings.
You can set up other line settings directly on your phone:
• Set up call forwarding for your primary phone line
• Change rings, display, and other phone-model specific settings
Related Topics
• Call Forward All, page 44
• Ring Tones, page 32
Set Up Call Forwarding Per Line
1. Sign in to your User Options web page.
2. Select User Options > Device.
3. Select a phone from the Name drop-down menu.
4. Select Line Settings.
5. If you have more than one directory number (line) assigned to your phone, select a line from the
Line drop-down menu.
6. In the Incoming Call Forwarding area, select call forwarding settings for various conditions.
7. Select Save.
Related Topics
Call Forward All, page 44
Change the Voice Message Indicator Setting Per Line
1. Sign in to your User Options web page.
2. Select User Options > Device.
3. Select a phone from the Name drop-down menu.
4. Select Line Settings.
5. If you have more than one directory number (line) assigned to your phone, select a line from the
Line drop-down menu.
66
OL-18397-01
User Options
6. In the Message Waiting Lamp area, choose from various settings. Typically, the default message
waiting setting prompts your phone to display a steady red light from the handset light strip to
indicate a new voice message.
7. Select Save.
Change the Audible Voice Message Indicator Setting Per Line
1. Sign in to your User Options web page.
2. Select User Options > Device.
3. Select a phone from the Name drop-down menu.
4. Select Line Settings.
5. If you have more than one directory number (line) assigned to your phone, select a line from the
Line drop-down menu.
6. In the Audible Message Waiting Lamp area, choose from various settings.
7. Select Save.
Change the Ring Settings Per Line
1. Sign in to your User Options web page.
2. Select User Options > Device.
3. Select a phone from the Name drop-down menu.
4. Select Line Settings.
5. If you have more than one directory number (line) assigned to your phone, select a line from the
Line drop-down menu.
6. In the Ring Settings area, set the option for Ring Setting (Phone Idle) and Ring Setting (Phone
Active) from the drop-down menus. The options are:
– Use System Default
– Disable
– Flash Only
– Ring Once
– Ring
– Beep Only [this option is only available for Ring Setting (Phone Active)]
7. Select Save.
Change or Create a Line Text Label for Your Phone Display
1. Sign in to your User Options web page.
2. Select User Options > Device.
Cisco Unified IP Phone 6921, 6941, and 6961 User Guide for Cisco Unified Communications Manager 7.1 (SCCP)
67
3. Select a phone from the Name drop-down menu.
4. Select Line Settings.
5. If you have more than one directory number (line) assigned to your phone, select a line from the
Line drop-down menu.
6. In the Line Text Label area, enter a text label.
7. Select Save.
Speed Dial on the Web
Depending on how your phone has been set up, you can use speed-dial buttons and speed-dial codes,
which you can set up on your User Options Web pages.
Set Up Speed-Dial Buttons
1. Sign in to your User Options Web pages.
2. Select User Options > Device.
3. Select a phone from the Name drop-down menu.
4. Select Speed Dials.
5. In the Speed Dial Settings area, enter a number and label for a speed-dial button on your phone.
6. Select Save.
Set Up Speed-Dial Codes
1. Sign in to your User Options Web pages.
2. Select User Options > Device.
3. Select a phone from the Name drop-down menu.
4. Select Speed Dials.
5. In the Abbreviated Dial Settings area, enter a number and label for a speed-dial code.
6. Select Save.
Phone Services
Phone services can include special phone features, network data, and web-based information (such as
stock quotes and movie listings). You must first subscribe to a phone service before accessing it on your
phone. You can subscribe, search, or assign a service to a speed-dial button from the User Options web
page.
The services available for your phone depend on how the system administrator set up the phone system
and which services you are subscribed to. For more information, see your system administrator.
68
OL-18397-01
User Options
If only one service is set up, the service opens by default. If more than one service is set up, select an
option from the menu on the phone display.
Select a service by using one of these feature buttons:
(a feature button that your system administrator sets up)
Messages
Application
Contacts
Subscribe to a Service
1. Sign in to your User Options web page.
2. Select User Options > Device.
3. Select a phone from the Name drop-down menu.
4. Select Phone Services.
5. Select Add New.
6. Select a service from the drop-down list and select Next.
7. Change the service label and/or enter additional service information, if available (optional).
8. Select Save.
Search for Services
1. Sign in to your User Options web page.
2. Select a device.
3. Select Phone Services.
4. Select Find.
Change or End Services
1. Sign in to your User Options web page.
2. Search for services.
3. Select one or more entries.
4. Select Delete Selected.
Cisco Unified IP Phone 6921, 6941, and 6961 User Guide for Cisco Unified Communications Manager 7.1 (SCCP)
69
Change a Service Name
1. Sign in to your User Options web page.
2. Search for services.
3. Select a service name.
4. Change the information and select Save.
Add a Service to an Available Programmable Feature Button
1. Sign in to your User Options web page.
2. Select User Options > Device.
3. Select a phone from the Name drop-down menu.
4. Select Service URL. Your system administrator sets up a service URL button for your phone.
5. Select a service from the Button Service drop-down list.
6. If you want to rename the service, edit the label fields.
7. Select Save.
8. Select Reset to reset your phone (necessary to see the new button label on your phone).
User Settings
Your PIN and password allow you to access different features and services. For example, use your PIN
to sign in to Cisco Extension Mobility or Personal Directory on your phone. Use your password to
sign in to your User Options web pages and Cisco Web Dialer on your personal computer. For more
information, see your system administrator.
User settings include your browser password, PIN, and language (locale) settings.
Change Your Browser Password
1. Sign in to your User Options web pages.
2. Select User Options > User Settings.
3. Enter your Current Password.
4. Enter your New Password.
5. Reenter your new password in the Confirm Password field.
6. Select Save.
70
OL-18397-01
User Options
Change Your PIN
1. Sign in to your User Options web pages.
2. Select User Options > User Settings.
3. Enter your Current PIN.
4. Enter your New PIN.
5. Reenter your new PIN in the Confirm PIN field.
6. Select Save.
Change the Language for Your User Options Web Pages
1. Sign in to your User Options web page.
2. Select User Options > User Settings.
3. In the User Locale area, select an item from the Locale drop-down list.
4. Select Save.
Change the Language for Your Phone Display
1. Sign in to your User Options web page.
2. Select User Options > Device.
3. Select an item from the User Locale drop-down list.
4. Select Save.
Directory
To get a list of co-workers in your corporate directory, select User Options > Directory.
The Directory features that you can access on your computer consist of:
• Personal Address Book (PAB), which can also be accessed from your phone
• Fast Dials, which can also be accessed from your phone
• Cisco Unified Communications Manager Address Book Synchronizer
Related Topics
• Personal Directory, page 36
• Corporate Directory, page 35
Cisco Unified IP Phone 6921, 6941, and 6961 User Guide for Cisco Unified Communications Manager 7.1 (SCCP)
71
Personal Address Book
You can add, delete, or update personal address book entries from the User Options web page.
Add a New PAB Entry
1. Sign in to your User Options web page.
2. Select User Options > Personal Address Book.
3. Select Add New.
4. Enter information for the entry.
5. Select Save.
Search for a PAB Entry
1. Sign in to your User Options web page.
2. Select User Options > Personal Address Book.
3. Specify search information and select Find.
Edit a PAB Entry
1. Sign in to your User Options web page.
2. Search for a PAB entry.
3. Select a nickname.
4. Edit the entry as needed and select Save.
Delete a PAB Entry
1. Sign in to your User Options web page.
2. Search for a PAB entry.
3. Select one or more entries.
4. Click Delete Selected.
Assign a Feature Button for Personal Address Book
1. Sign in to your User Options web page.
72
OL-18397-01
User Options
2. Select User Options > Device.
3. Select a phone from the Name drop-down menu.
4. Select Service URL.
Your system administrator sets up your phone to display services. For more information, see your
system administrator.
5. Select the Personal Address Book service from the Button drop-down list box.
6. Enter a phone label for the button.
7. Select Save.
8. Select Reset and then select Restart to refresh the phone configuration.
You can now press the button to access PAB codes.
Fast Dials
You can add, delete, or update fast dial entries from the User Options web page.
You can create up to 500 Fast Dial and PAB entries. You can create a new Fast Dial entry without using
a PAB entry. Such Fast Dial entries are labeled “raw” in the User Options web pages and do not display
a configurable text label.
Assign a Feature Button for Fast Dial
1. Sign in to your User Options web page.
2. Select User Options > Device.
3. Select Service URL (provided by your system administrator).
4. Select the Fast Dial service from the Button drop-down list box.
5. Enter a phone label for the button.
6. Select Save.
7. Select Reset and then select Restart to refresh the phone configuration.
Assign a Fast Dial Code to a PAB Entry
1. Sign in to your User Options web page.
2. Select User Options > Fast Dials.
3. Select Add New.
4. Use the Search Options area to find the appropriate PAB entry.
5. Select a phone number in the Search Results area.
Cisco Unified IP Phone 6921, 6941, and 6961 User Guide for Cisco Unified Communications Manager 7.1 (SCCP)
73
6. Change the Fast Dial code, if desired.
7. Select Save.
Assign a Fast Dial Code to a Phone Number Without Using a PAB
Entry
1. Sign in to your User Options web page.
2. Select User Options > Fast Dials.
3. Select Add New.
4. Change the Fast Dial code, if desired.
5. Enter a phone number.
6. Select Save.
Search for a Fast Dial Entry
1. Sign in to your User Options web page.
2. Select User Options > Fast Dials.
3. Specify search information and select Find.
Edit a Fast Dial Phone Number
1. Sign in to your User Options web page.
2. Select User Options > Fast Dials.
3. Search for the Fast Dial entry that you want to edit.
4. Select a component of the entry.
5. Change the phone number.
6. Select Save.
Delete a PAB Entry
1. Sign in to your User Options web page.
2. Search for a Fast dial entry.
3. Select one or more entries.
4. Select Delete Selected.
74
OL-18397-01
User Options
Mobility Settings
When using Cisco Mobile Connect, you must add your mobile and other phones that you want to use
to make and receive calls using the same directory numbers as your desk phone. These phones are
called remote destinations. You can also define access lists to restrict or allow calls from certain
numbers to be sent to your mobile phone.
Related Topics
Mobile Connect, page 57
Add a New Remote Destination
1. Sign in to your User Options web page.
2. Select User Options > Mobility Settings > Remote Destinations.
3. Select Add New.
4. Enter the following information:
– Name—Enter a name for the mobile (or other) phone.
– Destination Number—Enter your mobile phone number.
5. Select your remote destination profile from the drop-down list box. Your remote destination
profile contains the settings that apply to remote destinations that you create.
6. Select the Mobile Phone check box to allow your remote destination to accept a call sent from
your desk phone.
7. Select the Enable Mobile Connect check box to allow your remote destination to ring
simultaneously with your desk phone.
8. Select one of the following options in the Ring Schedule area (the ring schedule drop-down list
boxes include only the access lists that you have created):
– All the time—Select this option if you do not want to impose day and time restrictions on
ringing the remote destination.
– As specified below—Select this option and select from the following items to set up a ring
schedule based on day and time:
a. Select a check box for each day of the week you want to allow calls to ring the remote
destination.
b. For each day, select All Day or select the beginning and ending times from the drop-down lists.
c. Select the time zone from the drop-down list box.
9. Select one of these ringing options:
– Always ring this destination.
– Ring this destination only if the caller is in the allowed access list that you select.
Cisco Unified IP Phone 6921, 6941, and 6961 User Guide for Cisco Unified Communications Manager 7.1 (SCCP)
75
– Do not ring this destination if the caller is in the blocked access list that you select.
10. Select Save.
Create an Access List
1. Sign in to your User Options web page.
2. Select User Options > Mobility Settings > Access Lists.
3. Select Add New.
4. Enter a name to identify the access list and a description (optional).
5. Select whether the access list will allow or block specified calls.
6. Select Save.
7. Select Add Member to add phone numbers or filters to the list.
8. Select an option from the Filter Mask drop-down list box. You can filter a directory number, calls
with restricted caller ID (Not Available), or calls with anonymous caller ID (Private).
9. If you select a directory number from the Filter Mask drop-down list box, enter a phone number
or filter in the DN Mask field. You can use the following wild cards to define a filter:
– X (upper or lower case)—Matches a single digit. For example, 408555123X matches any
number between 4085551230 and 4085551239.
– !—Matches any number of digits. For example, 408! matches any number starts with 408.
– #—Used as a single digit for exact match.
10. To add this member to the access list, select Save.
11. To save the access list, select Save.
Plugins
Plugins on your User Options web pages allow you to download and access applications that your
system administrator sets up for you.
For more information, see your system administrator.
Access Plugins
1. Sign in to your User Options web page.
2. Select User Options > Plugins.
You can view plugins only if your system administrator has set them up for you.
76
OL-18397-01
FAQs and Troubleshooting
Frequently Asked Questions
Q. Why don’t I see the icons shown in the documentation on my phone screen?
A. Many of the phone screen icons are applicable only to the Cisco Unified IP Phone 6941.
Q. Can I use the second line on my Cisco Unified IP Phone 6921 as a feature button?
A. Yes. If you do not require two phone lines, your system administrator can set up a feature on your
second line.
Q. When I put a call on hold by pushing the Hold button, why doesn’t pushing the button again resume
the call?
A. The Hold button is only used to put a call on hold. To resume a call, press the Resume softkey or
the flashing green line button.
Troubleshooting Tips
Troubleshooting tips are available for these topics:
• Conference
• Personal Directory
• Shared Lines
• User Options
Conference
Problem: Conference Button and Softkey Unresponsive
You have set up a conference call, and the Conf softkey is no longer available and the Conference
button is unresponsive.
Possible Cause
You have reached the maximum number of conference participants.
Solution
Ask one of the participants to drop, or drop a conference participant.
Cisco Unified IP Phone 6921, 6941, and 6961 User Guide for Cisco Unified Communications Manager 7.1 (SCCP)
77
Problem: Meet-Me Conference Busy Tone
You hear a busy tone after dialing into a Meet-Me conference.
Possible Cause
The conference host has not yet joined the conference.
Solution
Try calling back again.
Personal Directory
Problem: Cannot Sign In to Personal Directory
You are unable to sign in to your personal directory.
Make sure you are using your personal identification number (PIN) to sign in, and not your password.
Possible Cause
Your PIN needs to be reset.
Solution
See your system administrator.
Shared Lines
Problem: No Caller ID on Remote Hold
You have a shared line on your Cisco Unified IP Phone 6921, and cannot see the caller ID when the
remote line is on hold.
Possible Cause
This works as designed.
Solution
None.
78
OL-18397-01
FAQs and Troubleshooting
User Options
Problem: Cannot Access User Options Web Pages
You are unable to access your user options web pages.
Possible Cause
Your password needs to be reset.
Solution
See your system administrator.
Cisco Unified IP Phone 6921, 6941, and 6961 User Guide for Cisco Unified Communications Manager 7.1 (SCCP)
79
Product Safety, Security, Accessibility, and Related
Information
Safety and Performance Information
Power outages and other devices can affect your Cisco Unified IP Phone.
Power Outage
Your accessibility to emergency service through the phone is dependent on the phone being powered.
If there is an interruption in the power supply, Service and Emergency Calling Service dialing will not
function until power is restored. In the case of a power failure or disruption, you may need to reset or
reconfigure equipment before using the Service or Emergency Calling Service dialing.
External Devices
Cisco recommends using good quality external devices (such as headsets) that are shielded against
unwanted radio frequency (RF) and audio frequency (AF) signals.
Depending on the quality of these devices and their proximity to other devices such as mobile phones
or two-way radios, some audio noise may still occur. In these cases, Cisco recommends that you take
one or more of the following actions:
• Move the external device away from the source of the RF or AF signals.
• Route the external device cables away from the source of the RF or AF signals.
• Use shielded cables for the external device, or use cables with a better shield and connector.
• Shorten the length of the external device cable.
• Apply ferrites or other such devices on the cables for the external device.
Cisco cannot guarantee the performance of the system because Cisco has no control over the quality
of external devices, cables, and connectors. The system will perform adequately when suitable devices
are attached using good quality cables and connectors.
Caution
In European Union countries, use only external speakers, microphones, and headsets that
are fully compliant with the EMC Directive [89/336/EC].
Cisco Unified IP Phone 6921, 6941, and 6961 User Guide for Cisco Unified Communications Manager 7.1 (SCCP)
80
Product Safety, Security, Accessibility, and Related Information
Cisco Product Security
This product contains cryptographic features and is subject to United States and local country laws
governing import, export, transfer and use. Delivery of Cisco cryptographic products does not imply
third-party authority to import, export, distribute or use encryption. Importers, exporters, distributors
and users are responsible for compliance with U.S. and local country laws. By using this product you
agree to comply with applicable laws and regulations. If you are unable to comply with U.S. and local
laws, return this product immediately.
Further information regarding U.S. export regulations may be found at:
http://www.access.gpo.gov/bis/ear/ear_data.html.
Accessibility Features
The Cisco Unified IP Phones 6921, 6941, and 6961 provide accessibility features for the blind, and the
visually, hearing, and mobility impaired.
Hearing Impaired Accessibility Features
Accessibility features for the hearing impaired are supported on the Cisco Unified IP Phones 6921,
6941, and 6961.
Although the illustration shows the Cisco Unified IP Phone 6941, the accessibility features described
in this section also apply to the Cisco Unified IP Phones 6921 and 6961.
Cisco Unified IP Phone 6921, 6941, and 6961 User Guide for Cisco Unified Communications Manager 7.1 (SCCP)
81
1
6
5
1
/.@
4
4
GHI
7
PQRS
2
3
ABC
DEF
5
6
JKL
MNO
8
9
TUV
WXYZ
0
192900
OPER
3
2
82
OL-18397-01
Product Safety, Security, Accessibility, and Related Information
Accessibility Feature
Description
Set Up Requirement
1. Visual Message
Waiting Indicator
(Handset)
Viewable from 360 degrees, this visual
indicator also provides an audible message
waiting indicator. Users change the voice
message light on their handset and the
audible voice message indicator on their
phone by logging in to their User Options
web pages and accessing the message
indicator settings. Users change the setting to
on or off.
Standard on all phones;
users and system
administrators can make
changes.
2. Visual Notification
of Phone State
For visual notification of the phone state:
Standard on all phones; no
set up is required.
• Toggle the Mute and Speakerphone
buttons on and off to indicate the state
of the phone.
• Use the Mute button to toggle the
microphone on or off. When the
microphone is muted, the button is lit.
• Use the Speakerphone button to toggle
the speakerphone on or off. When the
speakerphone is on, the button is lit.
3. Inline Amplifier
Support (Handset)
Cisco Unified IP Phone handsets support
third-party inline amplifiers, which users
attach to the handset and cord and sit
between the handset and the IP phone. Cisco
Unified IP Phones support the following
third-party inline amplifiers:
Standard on all phones; no
set up is required.
• Clarity HA-40 Inline Amplifier for
Corded Phone.
• Plantronics EHA40 Inline Amplifier.
4. Adjustable Volume
Users can adjust the volume by:
• Selecting the Applications > Preferences
menu on their phone.
• Adjusting the volume level for the phone
ringer: while the handset is in the cradle,
and the headset and speakerphone
buttons are off, press the Volume button
to increase the volume.
Standard on all phones;
users and system
administrators can make
changes.
Cisco Unified IP Phone 6921, 6941, and 6961 User Guide for Cisco Unified Communications Manager 7.1 (SCCP)
83
Accessibility Feature
Description
Set Up Requirement
5. Hearing Aid
Compatible (HAC)
Handset
Cisco Unified IP Phone handsets support the
following accessibility features:
Standard on all phones; no
set up is required.
• Hearing-aid compatible.
• Magnetic coupling of the hearing aid.
• Federal Communications Commission
(FCC) loudness requirements for the
Americans with Disabilities Act (ADA).
• Section 508 loudness requirements,
which are achieved by using
industry-standard inline handset
amplifiers.
6. Acoustic Coupled
TTY and TDD
Support (Handset)
Cisco Unified IP Phones support the
following TTY and TDD features:
• Acoustic or direct connect TTYs from
industry-leading manufacturers.
• Real-time text transmission over phone
lines.
Standard on all Cisco
Unified IP Phones.
For information about
setting up TTY, see your
system administrator.
• Hearing and voice carry over phones
(HCO/VCO).
• VoIP network operating at G.711.
Third-Party
Accessibility
Applications for the
Hearing Impaired
Cisco Unified IP Phones provide an interface
for third-party accessibility applications
from companies such as NexTalk that
support the following features:
For more information about
third-party applications, see
your system administrator.
• Paging.
• Visual notification.
• Ability to provide single number services
to support Video Relay, Text Relay, TTY
Traffic or voice services.
Information about NexTalk is available at:
http://www.nextalk.com/products/overview
84
OL-18397-01
Product Safety, Security, Accessibility, and Related Information
Vision Impaired and Blind Accessibility Features
Accessibility features for the vision impaired and blind are supported on the Cisco Unified IP Phones
6921, 6941, and 6961.
Although the illustration shows the Cisco Unified IP Phone 6941, the accessibility features described
in this section also apply to the Cisco Unified IP Phones 6921 and 6961.
1
2
3
4
1
2
3
ABC
/.@
4
DEF
5
GHI
6
JKL
7
MNO
8
PQRS
9
TUV
WXYZ
0
192899
OPER
6
5
Cisco Unified IP Phone 6921, 6941, and 6961 User Guide for Cisco Unified Communications Manager 7.1 (SCCP)
85
Accessibility Feature
Description
Set Up Requirements
1. High-Contrast
Visual and Audible
Alert of Incoming
Call
Cisco Unified IP Phones provide an audible alert,
and the handset provides a visual alert when the
phone receives an incoming call. The handset light
strip flashes during incoming calls and stays lit
when a voice-mail message is received.
Standard on all
phones; set up is
required.
2. Back-Lit LCD
Screen and
Programmable
Contrast
Users with low vision can adjust the contrast.
Standard on all
phones; no set up is
required.
3. Line and Feature
Buttons
Users can use the line buttons to initiate, answer, or
switch to a call on a particular line. Features, such
as speed dial, Line Status, Privacy, DND, and
Service URLs, can be assigned to feature buttons.
Set up is required.
Your system
administrator sets up
programmable
feature buttons to
your phone.
4. Large Buttons to
Large buttons provide to easy access to phone
Access
applications, voice messages, corporate and
Applications, Voice personal directories, and calling features.
Messages,
Contacts, Hold,
Transfer, and
Conference
Standard on all
phones; no set up is
required.
5. Audible
Notification of
Phone State
Standard on all
phones; no set up is
required.
For audible notification of the phone state, users
can:
• Toggle the Mute and Speakerphone buttons on
and off to indicate the state of the phone.
• Use the Mute button to toggle the microphone
on or off. When the microphone is muted, the
button is lit.
• Use the Speakerphone button to toggle the
speakerphone on or off. When the
speakerphone is on, the button is lit.
6. Standard 12-Key
Layout
86
Cisco Unified IP Phone keypads provide standard
Standard on all
12-key layout, which enables users to use existing or phones; no set up is
familiar key positions (including a nib on Key 5).
required.
OL-18397-01
Product Safety, Security, Accessibility, and Related Information
Accessibility Feature
Third-Party
Accessibility
Applications for
the Vision
Impaired
Description
Set Up Requirements
Cisco Unified IP Phones 6921, 6941, and 6961
provide an interface for third-party accessibility
applications such as Tenacity accessaphone and the
IPblue Virtual Telephone/Global Office (VTGO)
508-compliant.
For more
information about
third-party
application, see your
system administrator.
• VTGO 508-Compliant softphone is a
standalone software endpoint that integrates
speech application programming interface
(SAPI) and which provides audible notification
(text-to-speech) of the core functions and
features of the Cisco Unified IP Phones. VTGO
is also compatible with assistive technology.
Information is available at the following URL:
http://www.ipblue.com/
• Tenacity accessaphone (AAP) is an assistive
technology to the Cisco Unified IP Phones.
Through the telephony application
programming interface (TAPI) and the
computer technology integration (CTI) plug-in,
AAP enhances the ability to monitor and
control the functions of the Cisco endpoint.
Core enhancements are full access through the
keyboard and text-to-speech, AAP provides
audible notification of the incoming caller ID,
full access of call history information, status of
the phone and more. Information about
Tenacity is available at the following URL:
http://www.tenacitycorp.com/products.as
Adjustable
Footstand
Users can easily manipulate an adjustable footstand
from flat to 60 degrees to provide optimum phone
display viewing and comfortable access to all
buttons and keys.
Standard on all
phones; no set up is
required.
Mobility Impaired Accessibility Features
Accessibility features for the mobility impaired are supported on the Cisco Unified IP Phones 6921,
6941, and 6961.
Although the illustration shows the Cisco Unified IP Phone 6941, the accessibility features described
in this section also apply to the Cisco Unified IP Phones 6921 and 6961.
Cisco Unified IP Phone 6921, 6941, and 6961 User Guide for Cisco Unified Communications Manager 7.1 (SCCP)
87
1
2
1
2
ABC
/.@
4
5
GHI
JKL
7
8
PQRS
TUV
3
DEF
6
MNO
9
WXYZ
0
192901
OPER
4
88
3
OL-18397-01
Product Safety, Security, Accessibility, and Related Information
Accessibility Feature
Description
Set Up Requirements
1. Well-Spaced,
Illuminated
Buttons Enable
Easy Operation
Depending on set up, programmable feature Standard on all phones; no
buttons allow users to access:
set up is required.
• Phone lines and intercom lines (line
buttons)
• Speed-dial numbers (speed-dial buttons,
including the speed-dial Line Status
feature)
• Web-based services (for example, a
Personal Address Book)
• Phone features (for example, Privacy)
Buttons illuminate to indicate status:
• Green, steady—Active call or two-way
intercom call
• Green, flashing—Held call
• Amber, steady—Privacy in use, one-way
intercom call, Do Not Disturb (DND)
active, or signed in to Hunt Group
• Amber, flashing—Incoming call or
reverting call
• Red, steady—Remote line in use (shared
line or Line Status)
2. Large Buttons to
Access
Applications, Voice
Messages,
Contacts, Hold,
Transfer, and
Conference
Large buttons provide to easy access to
phone applications, voice messages,
corporate and personal directories, and
calling features.
Standard on all phones; no
set up is required.
3. Built-In
Speakerphone
Users can toggle the speakerphone button on Standard on all phones; no
and off to indicate the state of the phone.
set up is required.
When the speakerphone is on, the button is
lit.
4. Tactile Discernible
Buttons and
Functions
(including a nib on
Key 5)
Cisco Unified IP Phone keypads provide the
tactile discernible locator, which enables
users to use existing or familiar key
positions that can be easily located from the
“bump” on the Key 5. Users do not have to
learn new key positions.
Standard on all phones; no
set up is required.
Cisco Unified IP Phone 6921, 6941, and 6961 User Guide for Cisco Unified Communications Manager 7.1 (SCCP)
89
Accessibility Feature
Description
Set Up Requirements
Dedicated Headset
Jack that Enables
Auto-Answer
Function
Users can use a dedicated headset jack that
enables auto-answer feature support on
either the speakerphone or headset.
Incoming calls are then automatically
connected after a ring or two.
Standard on all phones; set
up is required.
Adjustable
Footstand
Users can easily manipulate an adjustable
footstand from flat to 60 degrees to provide
optimum phone display viewing and
comfortable access to all buttons and keys.
Standard on all phones; no
set up is required.
Additional Information
Access the most current Cisco Unified IP Phone documentation using these URLs:
• Cisco website:
http://www.cisco.com/
• International Cisco websites:
http://www.cisco.com/public/countries_languages.shtml
• Quick start guides for the Cisco Unified IP Phones:
http://www.cisco.com/en/US/products/ps10326/products_user_guide_list.html
• Licensing Information:
http://www.cisco.com/en/US/products/ps10326/products_licensing_information_listing.html
90
OL-18397-01
Warranty
Cisco One-Year Limited Hardware Warranty Terms
There are special terms applicable to your hardware warranty and various services that you can use
during the warranty period.
Your formal Warranty Statement, including the warranties and license agreements applicable to Cisco
software, is available on Cisco.com at the following URL:
http://www.cisco.com/en/US/docs/general/warranty/English/1Y1DEN__.html
Cisco Unified IP Phone 6921, 6941, and 6961 User Guide for Cisco Unified Communications Manager 7.1 (SCCP)
91
92
OL-18397-01
Index
DND 51
A
Hold Reversion 53
AAP. See accessibility features
line state 4
access
MCID 56
plugins 76
services 33
answer
Auto Answer with headset 43
access list, create 76
Auto Answer with speakerphone 43
accessibility features
hearing impaired 81
with Group Pickup and Group Pickup
number 47
mobility impaired 87
with Group Pickup and phone number 48
vision impaired and blind 85
with Other Pickup 48
add
with Pickup 47
PAB entry 72
Applications
personal directory contact 37
Administrator Settings 34
phone services to button 70
button
remote destination for Mobile Connect 75
Cisco Unified IP Phone 6921 5
administrator settings 34
Cisco Unified IP Phone 6941 14
alerts
Cisco Unified IP Phone 6961 24
audible
Call History 29
accessibility 84
Phone Information 33
call waiting 48
Preferences 32
DND 51
Services 33
Hold Reversion 53
MCID 56
assign
fast-dial button 73
silent 56
fast-dial code 74
visual
fast-dial code in Personal Directory 39
accessibility 83, 86
fast-dial code to PAB entry 73
call waiting 48
PAB to feature a button 72
Cisco Unified IP Phone 6921, 6941, and 6961 User Guide for Cisco Unified Communications Manager 7.1 (SCCP)
93
Assisted Directed Call Park 46
Contacts 14
audible alert. See alerts, audible
Headset 14
audible message indicator. See message
indicators
Hold 13
Auto Answer
Mute 14
Messages 14
description 43
Navigation bar 14
with headset 43
programmable feature 13
with speakerphone 43
Select 14
softkeys 13
Speakerphone 14
B
Transfer 13
BLF. See Line Status
blind accessibility features. See accessibility
features, vision impaired
Volume 14
Cisco Unified IP Phone 6961 22
Applications 24
browser password, change 70
Conference 23
Busy Lamp Features. See Line Status
Contacts 24
buttons
Headset 23
Cisco Unified IP Phone 6921 3
Hold 23
Applications 5
Messages 24
Conference 4
Mute 24
Contacts 5
Navigation bar 23
Headset 4
programmable feature 23
Hold 4
Select 23
line 4
softkeys 22
Messages 5
Speakerphone 23
Mute 4
Transfer 23
Navigation bar 4
softkeys 3
Speakerphone 4
Volume 24
feature table 42
Transfer 4
Volume 5
Cisco Unified IP Phone 6941 12
Applications 14
Conference 13
94
C
Call Back
description 43
OL-18397-01
set up notification 44
Call Forward All
conditional 44
description 44
set up
Call Waiting
description 48
respond to notification 48
calling features
Auto Answer 43
on all lines 66
Call Back 43
on primary line 45
Call Forward All 44
unconditional 44
Call History 29
Call Park 45
Call Pickup 47
clear 31
Call Waiting 48
delete call record 31
Codes 49
dial from 30
Conference 49
edit number 31
Divert 51
filter 30
DND 51
view 30
EM 52
call log. See call record
Fast Dial 52
Call Park
Hold 53
description 45
Hold Reversion 53
Directed Call Park
Hunt Group 54
assisted 46
Intercom 54
manual 46
Line Status 55
Line Status indicator 55
MCID 56
Park 46
Meet Me 56
reversion 46
Mobile Connect 57
Call Pickup
Mute 58
description 47
On-hook Dialing 58
Group Pickup number 47
Privacy 58
Group Pickup phone number 48
QRT 59
Other Pickup 48
Redial 59
Pickup 47
Shared Lines 60
call record
Speed Dial 60
delete 31
Transfer 61
view details 30
Web Dialer 62
Cisco Unified IP Phone 6921, 6941, and 6961 User Guide for Cisco Unified Communications Manager 7.1 (SCCP)
95
caution, external devices 80
change
Cisco Unified IP Phone 6961
buttons and hardware 22
browser password 70
connections 20
contrast 32
footstand 24
language
handset rest 28
phone display 71
user options web pages 71
locale
screen
description 24
location 22
phone display 71
clear call history 31
user options web pages 71
Client Matter Codes. See CMC
phone line label 67
CMC
phone service name 70
description 49
phone services 69
using 49
ringtones 32
conference
check voice messages 40
add a party 50
Cisco Mobile Connect. See Mobile Connect
button
Cisco Unified CM User Options. See user
options
Cisco Unified IP Phone 6921
Cisco Unified IP Phone 6921 4
Cisco Unified IP Phone 6941 13
Cisco Unified IP Phone 6961 23
buttons and hardware 3
combine calls across lines 50
connections 1
description 49
footstand 5
end 50
handset rest 9
Meet Me 56
screen
remove participants 50
description 5
swap between calls 50
location 3
view participants 50
Cisco Unified IP Phone 6941
confirmation. See alerts
buttons and hardware 12
connecting calls. See Transfer
connections 10
connections
footstand 15
Cisco Unified IP Phone 6921 1
handset rest 19
Cisco Unified IP Phone 6941 10
screen
Cisco Unified IP Phone 6961 20
description 15
connectors. See connections
location 13
96
OL-18397-01
contacts 35
D
button
Cisco Unified IP Phone 6921 5
delete
Cisco Unified IP Phone 6941 14
call history record 31
Cisco Unified IP Phone 6961 24
fast-dial code from personal directory 39
corporate directory 35
dial a contact 35
PAB entry 72
personal directory contact 38
dial a contact while on a call 36
device settings. See user options
search for a contact 35
dial
search for a contact while on a call 36
personal directory 36
corporate directory contact 35
fast-dial code from personal directory 39
add a contact 37
from call history 30
delete a contact 38
on-hook 58
dial a contact 38
personal directory contact 38
edit a contact 38
Direct Transfer 61
fast-dial codes 39
Directed Call Park
search for a contact 37
assisted 46
sign in and out 37
description 45
contrast 32
corporate directory 35
dial 35
manual 46
directory 35
corporate 35
dial a contact while on a call 36
dial a contact 35
search for a contact 35
dial a contact while on a call 36
search for a contact while on a call 36
search for a contact 35
create
access list for Mobile Connect 76
conference call 50
phone line label 67
search for a contact while on a call 36
with Web Dialer 62
personal 36
add a contact 37
CTI. See accessibility features
delete a contact 38
customize voicemail 40
dial a contact 38
edit a contact 38
fast-dial codes 39
search for a contact 37
sign in and out 37
Cisco Unified IP Phone 6921, 6941, and 6961 User Guide for Cisco Unified Communications Manager 7.1 (SCCP)
97
user options 71
F
Divert
description 51
redirect a call 51
DND
FAC
description 49
using 49
customize 65
FAQs 77
description 51
fast dials 73
turn on and off 51
assign a code 74
Do Not Disturb. See DND
assign a code to PAB entry 73
documentation, related 90
assign to a feature button 73
description 52
edit 74
E
place a call
edit
call history number 31
fast dials 74
PAB entry 72
personal directory contact 38
EM
description 52
enable 52
enable
EM 52
Privacy 59
end
conference 50
phone services 69
Extension Mobility. See EM
external devices
caution 80
information 80
98
with a fast-dial button 52
search 74
fast-dial codes
assign to Personal Directory 39
delete from personal directory 39
fast-dials
place a call with a fast-dial code 39
feature buttons and softkeys table 42
features. See calling features
filter call history 30
flashing. See alerts, visual
footstand
Cisco Unified IP Phone 6921 5
Cisco Unified IP Phone 6941 15
Cisco Unified IP Phone 6961 24
Forced Authorization Codes. See FAC
forward. See Call Forward All
frequently asked questions. See FAQs
OL-18397-01
Cisco Unified IP Phone 6961 23
G
hearing impaired accessibility features 81
Group Pickup
Hold
answer 47
button
answer with number 48
Cisco Unified IP Phone 6921 4
description 47
Cisco Unified IP Phone 6941 13
Cisco Unified IP Phone 6961 23
description 53
H
on shared lines 53
HAC. See accessibility features
swap between calls 53
handset
Cisco Unified IP Phone 6921
with a new call 53
Hold Reversion
light strip 3
description 53
location 5
notification 53
rest 9
Cisco Unified IP Phone 6941
responding to notification 54
Hunt Group
light strip 13
description 54
location 14
sign in and out 54
rest 19
Cisco Unified IP Phone 6961
light strip 22
I
location 24
icons, Line Status 55
rest 28
iDivert. See Divert
hardware
Intercom
Cisco Unified IP Phone 6921 3
description 54
Cisco Unified IP Phone 6941 12
place a call 54
Cisco Unified IP Phone 6961 22
receive a call 55
warranty 91
whisper 54
header. See screen
Headset
Auto Answer 43
K
button
keypad
Cisco Unified IP Phone 6921 4
accessibility
Cisco Unified IP Phone 6941 14
Cisco Unified IP Phone 6921, 6941, and 6961 User Guide for Cisco Unified Communications Manager 7.1 (SCCP)
99
mobility impaired 89
visually impaired and blind 86
Line Status
description 55
Cisco Unified IP Phone 6921 4
icons 55
Cisco Unified IP Phone 6941 14
indicators 55
Cisco Unified IP Phone 6961 23
listen to voice messages 41
locale
change for user options web pages 71
L
change phone display 71
language
change for user options web pages 71
log in and out. See sign in and out
logs. See Call History
change phone display 71
Web Dialer settings 63
LED. See lights
licensing information 90
lights
amber, flashing 4
green
M
MAC address
phone information 33
Web Dialer 63
Malicious Caller ID. See MCID
flashing 4
Manual Directed Call Park 46
steady 4
MCID
handset 3
description 56
red
trace a call 56
flashing 4
steady 4
line
conference
host 56
buttons, Cisco Unified IP Phone 6921 4
settings 66
Call Forward 66
join 56
description 56
menu
DND 65
Applications 14
ring 67
Directories 14
voice message indicator 66, 67
text label
change 67
create 67
100
Meet Me
message indicators 40
audible, change 67
voice, change 66
messages
OL-18397-01
button
Call Back 44
Cisco Unified IP Phone 6921 5
Call Waiting 48
Cisco Unified IP Phone 6941 14
Hold reversion 53
Cisco Unified IP Phone 6961 24
See also alerts
check for 40
listen to 41
personalize voicemail 40
missed calls 29
O
On-hook Dialing
Mobile Connect
description 58
add remote destination 75
create access list 76
dial a number 58
Other Pickup
description 57
answer 48
switch
description 47
from Desk to Mobile Phone 57
from Mobile Phone to Desk 58
turn on and off 57
mobility impaired accessibility features 87
P
PAB
model information 33
add 72
mute
assign to a feature button 72
button
delete 72
Cisco Unified IP Phone 6921 4
edit 72
Cisco Unified IP Phone 6941 14
search 72
Cisco Unified IP Phone 6961 24
park. See Call Park
description 58
password. See browser password
turn on and off 58
personal address book. See PAB
personal directory 36
N
add a contact 37
delete a contact 38
Navigation bar
dial a contact 38
Cisco Unified IP Phone 6921 4
edit a contact 38
Cisco Unified IP Phone 6941 14
fast-dial codes 39
Cisco Unified IP Phone 6961 23
search for a contact 37
notification
sign in and out 37
Cisco Unified IP Phone 6921, 6941, and 6961 User Guide for Cisco Unified Communications Manager 7.1 (SCCP)
101
personalize voicemail 40
description 59
phone display
report phone problem 59
change language 71
change line label 67
create line label 67
R
phone information, model 33
received calls 29
phone problem, report with QRT 59
Redial
phone services
a number 59
access 33
description 59
add to button 70
redirect a call 51
change name 70
related documentation 90
search for 69
remote destination. See user options
subscribe to 69
remove participants from conference 50
pickup. See Call Pickup
report phone problem 59
placed calls 29
revert, call
plugins 76
on hold 53
power outage 80
parked 46
preferences 32
contrast 32
ring setting, change 67
ringtones 32
ringtones 32
Web Dialer 63
Privacy
description 58
enable on a shared line 59
problem report with QRT 59
product security 81
programmable feature buttons
Cisco Unified IP Phone 6941 13
Cisco Unified IP Phone 6961 23
S
safety and performance
external devices 80
power outage 80
screen
Cisco Unified IP Phone 6921
description 5
location 3
Cisco Unified IP Phone 6941
Q
description 15
location 13
QRT
102
Cisco Unified IP Phone 6961
OL-18397-01
description 24
Auto Answer with 43
location 22
button
search
Cisco Unified IP Phone 6921 4
corporate directory 35
Cisco Unified IP Phone 6941 14
fast dials 74
Cisco Unified IP Phone 6961 23
PAB 72
Speed Dial
personal directory 37
buttons 68
phone services 69
description 60
security, product 81
place a call 61
Select button. See Navigation bar
set up 68
services. See phone services
codes
set
description 60
contrast 32
place a call 61
ringtones 32
set up 68
set up
speed-dial buttons 68
Line Status indicator 55
status
speed-dial codes 68
Web Dialer preferences 63
shared lines
buttons 4
stutter tone 40
subscribe to phone services 69
description 60
suspicious call, trace 56
enable Privacy 59
swap
on hold 53
conference calls 50
sign in and out
held calls 53
Hunt Group 54
transfer calls 62
personal directory 37
user options 64
Web Dialer 62, 63
softkeys
T
To Voicemail. See Divert
Cisco Unified IP Phone 6921 3
trace a suspicious call 56
Cisco Unified IP Phone 6941 13
Transfer
Cisco Unified IP Phone 6961 22
button
feature table 42
Speakerphone
Cisco Unified IP Phone 6921 4
Cisco Unified IP Phone 6941 13
Cisco Unified IP Phone 6921, 6941, and 6961 User Guide for Cisco Unified Communications Manager 7.1 (SCCP)
103
Cisco Unified IP Phone 6961 23
search for entry 72
description 61
plugins 76
Direct Transfer 62
sign in and out 64
swap 62
user settings
troubleshooting tips 77
change browser password 70
TTY. See accessibility features
change phone display language 71
turn on and off
DND 51
change user options web pages language 71
user preferences. See preferences
Mobile Connect 57
mute 58
V
view
U
call history 30
user options
device
call record details 30
conference participants 50
line settings 66
missed calls 29
select 65
phone information 33
speed dial 68
placed calls 29
directory 71
fast dials 73
received calls 29
Web Dialer preferences 63
assign a code 74
viewing angle. See footstand
assign a code to PAB entry 73
vision impaired and blind accessibility features
85
assign to a feature button 73
edit 74
visual alert. See alerts, visual
search 74
voice messages. See messages
mobility 75
add remote destination 75
create access list 76
PAB 72
add entry 72
voicemail. See messages
Volume
Cisco Unified IP Phone 6921 5
Cisco Unified IP Phone 6941 14
Cisco Unified IP Phone 6961 24
assign to a feature button 72
delete entry 72
W
edit entry 72
warranty 91
104
OL-18397-01
Web Dialer
change preferences 63
description 62
MAC address 63
set up preferences 63
sign in 62
sign out 63
view preferences 63
with Cisco Directory 62
with corporate directory 62
whisper 54
Cisco Unified IP Phone 6921, 6941, and 6961 User Guide for Cisco Unified Communications Manager 7.1 (SCCP)
105
106
OL-18397-01
Americas Headquarters
Cisco Systems, Inc.
San Jose, CA
Asia Pacific Headquarters
Cisco Systems (USA) Pte. Ltd.
Singapore
Europe Headquarters
Cisco Systems International BV
Amsterdam, The Netherlands
Cisco has more than 200 offices worldwide. Addresses, phone numbers, and fax numbers are listed on the
Cisco Website at www.cisco.com/go/offices.
,
CCDE, CCENT, CCSI, Cisco Eos, Cisco HealthPresence, Cisco Ironport, the Cisco logo, Cisco Lumin, Cisco Nexus, Cisco Nurse Connect
Cisco Stackpower,
Cisco StadiumVision, Cisco TelePresence, Cisco Unified Computing System, Cisco WebEx, DCE, Flip Channels, Flip for Good, Flip Mino, Flip Video, Flip Video (Design),
Flipshare (Design), Flip Ultra, and Welcome to the Human Network are trademarks; Changing the Way We Work, Live, Play, and Learn, Cisco Store, and Flip Gift Card are
service marks; and Access Registrar, Aironet, AsyncOS, Bringing the Meeting To You, Catalyst, CCDA, CCDP, CCIE, CCIP, CCNA, CCNP, CCSP, CCVP, Cisco, the
Cisco Certified Internetwork Expert logo, Cisco IOS, Cisco Press, Cisco Systems, Cisco Systems Capital, the Cisco Systems logo, Cisco Unity, Collaboration Without Limitation,
EtherFast, EtherSwitch, Event Center, Fast Step, Follow Me Browsing, FormShare, GigaDrive, HomeLink, Internet Quotient, IOS, iPhone, iQuick Study, IronPort, the
IronPort logo, LightStream, Linksys, MediaTone, MeetingPlace, MeetingPlace Chime Sound, MGX, Networkers, Networking Academy, Network Registrar, PCNow, PIX,
PowerPanels, ProConnect, ScriptShare, SenderBase, SMARTnet, Spectrum Expert, StackWise, The Fastest Way to Increase Your Internet Quotient, TransPath, WebEx, and the
WebEx logo are registered trademarks of Cisco Systems, Inc. and/or its affiliates in the United States and certain other countries.
All other trademarks mentioned in this document or website are the property of their respective owners. The use of the word partner does not imply a partnership relationship
between Cisco and any other company. (0907R)
The Java logo is a trademark or registered trademark of Sun Microsystems, Inc. in the U.S. or other countries.
.
© 2009 Cisco Systems, Inc. All rights reserved