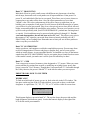
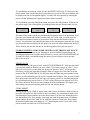
1
OPERATING INSTRUCTIONS FOR THE
SGX NIGHTBASS SE
ADDENDUM TO THE SGX NIGHTBASS REFERENCE MANUAL
A.R.T. has increased the power of the SGX NIGHTBASS SE by 400% and
kept the ease of use factor unchanged. There are some variations between
the two units which will be explained in this addendum. All other functions
remain the same.
Included in the are:
* Hundreds of new presets!
* Enhanced reverb algorithms!
* More gain!
* Dual pitch transposer
* Expanded digital tuner
* Space Phaser!
* Regenerated delay time increased
* Refined acoustic environment simulator!
* Expanded MIDI implementation!
Use this manual to reference all features and functions of your new SGX
NIGHTBASS SE processor. Refer to the large reference manual for hookup diagrams and "getting started" suggestions.
495-5004-100
Included in this addendum:
Enhanced user interface
Preset bank selection
Recalling presets
Storing presets
Creating presets
Banks
Organizing Presets
Preset hints
Preset list
Dual Pitch Transposer
Space Phaser
Expanded Digital Tuner
Changes in the main reference manual:
Page Number Section
Explanation
3
PWR OUT
Power out jack
3
LCD
Liquid crystal display
5
PRESET
Preset selection
6
EDIT MODE Preview presets
7
STORE
Storing presets
7
TITLE EDIT Characters in title
7
Utility
Addition of utilities
8
X-15
How to use with
11
SWEPT
Addition of Phaser
13
REGEN DDL Delay time longer
15
TUNER
Expanded parameters
17
MISC.
About the presets
19
HELP
More helpful hints
20
COPY
Copying a preset
27
WARRANTY Amended warranty
28-30
PRESET
New preset list
Refer to New Section
No new section
Throughout this text
Throughout this text
Throughout this text
Throughout this text
Throughout this text
Throughout this text
ART X-15
Space Phaser
Refined Algorithms
Digital Tuner
Throughout this text
Preset Hints
Throughout this text
Warranty
End of text
A word about refined Algorithms:
All reverb algorithms, natural and fabricated (halls, rooms, gated) have been redone
allowing you to experience great sounding effects. No change to the user interface for
creating patches with reverb was necessary. When creating patches, just listen to the
reverb type to determine which space is right for you.
We have expanded the Digital Tuner to accommodate a wider range of tuning options.
Included in the new options are a reference oscillator which produces a reference tone at
the outputs to speed your tuning (or to give someone else in the band a tone to tune to)
and the option of tuning to 12th fret harmonics. The delay length of the Regenerated
Delay has been increased from a maximum delay time of 1150ms to 1300ms.
2
ENHANCED USER INTERFACE
PRESET BANKS, WHAT'S IN THEM
When hundreds of presets are available in a device, you must make it effortless to access
them all, as well as group them, in an intelligent fashion. A.R.T. has created "banks" of
presets to supply you with every possible need. Four banks of factory presets, with a total
of 430 patches, have been created for the SGX NIGHTBASS SE . The first bank, titled
CLASSIC and designated by the letter "A", contains 115 instant use presets for the bass
guitar. In bank two, the "B" bank, you will find 103 LIBRARY presets. These presets
give you a starting foundation to build your own sounds, and also emulate different types
of amplifiers. Bank "C", the third bank is the PRODUCTION bank of the SGX
NIGHTBASS SE . This bank contains 111 patches you would use in a studio/recording
situation. The last bank "D", CONTRIBUTION, contains 104 patches created by
recording engineers and artists worldwide.
Bank "A" CLASSIC
We've put together a small sample of the multitudes of sound capabilities the SGX
NIGHTBASS SE has waiting inside for you to experience! The first 30 presets start off
with patches created to be "played" (1-19). Solo, slap, snap, distortion, and subtle effects
are all portrayed here. Presets 21-22 feature the Digital tuner. The first one is silent,
allowing you to tune in private using twelfth fret harmonics. The second one is set up to
automatically detect the string you are tuning and put out a tone of that frequency through
your amp! Even if you don't need an "A", perhaps someone without a NIGHTBASS SE
does! X-15 ready patches (23-29) show off just what the SGX NIGHTBASS SE Express
is capable of when used with the ART X-15 MIDI Controller pedal.
It doesn't stop there, starting at preset 30 and continuing to preset 100 are 70 (this box
does everything) presets! Everything from warm mellow chorus, types of bass sounds,
wild overdriven ripping lead sounds, "effected" leads, milder dirty leads and "clean" lead
patches. Be sure to check out presets 101-115 for some outrageous effects! Buried leads,
various wah-wah, tremolo, sampling, pitch shifting, delay, panning and phasing are all
featured here. Not enough?, it doesn't stop here, you still have three more banks of
exciting sounds to go!
Bank "B" LIBRARY
The first 10 patches are "front end" sounds. Use these to set the bass (pun intended!)
sound you want and then start adding effects as you like them. We suggest you copy the
"preamp" sound up to the top preset numbers and create your patches there. From preset
11 to 70, we took the preamp sounds and added one effect to them. These presets are
excellent for building straight ahead sounds. Starting at preset 71 and continuing to preset
85, are rooms we built and put a bass in. Straight stereo delays are found in presets 86-89.
Preset 90-94 are just what they say with slight effect variations. Emulations of bass amp
sounds are found in presets 95-103.
3
Bank "C" PRODUCTION
Individual effects in a patch, small rooms with different mic placements, clean/dirty
miced amps, drum and vocal reverb patches are all represented here. From preset 1 to
preset 29, each individual effect has its own patch. This allows you to just use chorus or
compression or any other effect alone. Also, the effects parameters are set at their
"default" value. The value each parameter of the effect comes up with when you are
building your own patches. From preset 30 to 68 listen to all the different types of rooms
you can have for your bass sounds. Dirt, clean, close miced, not-so-close miced, effected,
bright, warm and muddled; the possibilities seem endless. The next set of presets were set
up to be used specifically with your SGX NIGHTBASS SE patched into a mixing board
or console. Vocals and drums may be processed with patches 69 through 111. For the
vocal and drum patches, the mix has been set for all "wet". This allows you to mix in
the amount of "dry" signal to your needs from whatever board (preferably an A.R.T.
PHANTOM) you are working from. Remember not to limit your use of these patches to
what we say they were built for!
Bank "D" CONTRIBUTION
Artists, producers, and engineers worldwide compiled these presets. Presets range from
rock lead, interpretations of basses and players, straight, dirty, and of course presets
which are totally bizarre. As an extra added benefit, we installed over forty of the hottest
sounds from the SGX 2000 EXPRESS! Just let your guitar player friends check out some
of the smokin' sounds, just make sure it still in your rack when they're done!
Bank "U" USER
Your own presets are stored in memory slots designated as "U" presets. When you create
presets whether by starting from scratch, or modifying an existing factory preset, that
preset is stored in "User" memory. Though there is no actual bank "U" assessable through
the Utility function, the preset is labeled "U" in the title bar when you store a preset.
PRESET BANKS, HOW TO USE THEM
WHERE AM I?
To find out which bank of presets you are in, look at the title in the LCD window. The
last space on the top line of the LCD (the title bar) is reserved to show you the bank
designator. A capital letter "A", "B", "C", "D", or "U" will be visible in reversed text.
SNAP HAPPY 2
A
9 CMP+EXP+EQL>
This diagram displays a preset in bank "A". The top line shows the preset title and the
bank designator (last character space). Look at the numeric display to the right of the
LCD for the actual preset number.
4
To switch between presets in a bank, be sure the PRESET LED is lit. If it isn't, press the
Preset button. Now use the Encoder to select the preset you wish. The preset number will
be displayed by the seven segment display. You may also select presets by entering the
preset with the alphanumeric keypad (see main reference manual).
To switch banks, press the Edit Mode button, now press the Utility button. This puts you
into utility mode. One of the utilities is switching banks, turn the Encoder until you see:
"CLASSIC"
BANK =
"LIBRARY"
or
BANK =
"PRODUCTION"
or
BANK =
"CONTRIBUTION"
or
BANK =
The name of the bank is on the top and the bank designation letter is on the bottom. Now
press the value button and turn the Encoder until you see the bank you wish to access.
Press the Preset button to return to preset select mode and use the encoder to select
presets. You will notice the bank indicator letter as the last character in the title bar. After
you first switch between banks, the last preset you used will still be displayed in the LCD.
This is normal, just turn the Encoder or use the keypad to select your next preset.
STORING PRESETS, I LIKE SOME, HOW DO I GET THEM IN ONE PLACE?
Having hundreds of presets at your fingertips is great! Switching between banks and
scrolling through presets is not the most efficient way to use your SGX NIGHTBASS SE!
To make life easier, you should arrange the presets you are going to use in one spot.
Here's how to do it.
PRESET SLOTS
First of all there are 200 preset "slots" in the SGX NIGHTBASS SE . Each slot may hold
a preset permanently in RAM if you store it there. If you store a preset in "slot 1", every
time you access preset 1 in any bank, the preset you stored in "slot 1" will be present.
Obviously you may not want that to happen. What we suggest is to first listen to all the
presets in the SGX NIGHTBASS SE and write down the bank and preset number of the
presets you like and think you will use on a separate sheet of paper. Now, it's time to store
those presets into slots which will not copy over factory presets. As an added precaution
to overwriting factory presets, there is a "Lock" utility which you can turn on or off. See
the Utility section in the main reference manual for more information. We suggest you
start storing your presets beginning with slot 200 and working down.
STORE PRESET
Storing presets is easy. While in preset mode, find a preset in whichever bank you are in,
press the Edit button, use the Encoder to select a memory slot, (the numeric display will
start flashing the preset number) press the Store button. You have now stored the preset
into that memory slot. If no changes were made, the bank designator letter will indicate
which bank the preset came from. If you modified a preset or created one from scratch,
the bank designator letter will change to a "U" indicating the preset is your work. If the
preset location was blank, the LCD will look like:
5
BLANK PRESET
<no effects>
NOTE: If you store any preset over an existing factory preset in any bank, that
preset will overwrite each existing factory preset in each bank! We suggest you start
storing your presets starting with slot 200 and working down.
WHERE DID THE PRESET COME FROM
If you juggle and shift presets around as well as making your own and then store them in
user memory slots, you may lose track of which preset number in the bank you chose. In
the Utility Mode, there is an easy way to find out where the preset came from. At any
time, press the Edit button, and then the Utility button. You will see a display in the LCD
which looks like:
OPEN
USER RAM
SLOT
= 19
(U)
SLOT
or
BANK A,
= 19
# 91
SLOT
or
= 19
The first window indicates no preset is stored into the memory slot and it is "open", ready
to have information stored into it. In the second window, the display indicates a user
preset (a preset you created) is stored into that memory slot location. The last display
indicates preset 91 from bank "A" is stored in memory slot 198.
RECALLING A FACTORY PRESET
If you store over a factory preset memory slot, you do not lose the four factory presets in
that location forever. You may recall any factory preset from any bank at any time. Again
you enter Utility Mode to access this function.
To recall a factory preset first press the Edit Mode button and then the Utility button.
Press the Value button until the display looks like:
"CLASSIC"
BANK =
"LIBRARY"
or
BANK =
"PRODUCTION"
or
BANK =
"CONTRIBUTION"
or
BANK =
Select the bank you which to recall a preset from with the Encoder. Now, press the Value
button until you see
HIT RECALL FOR
A.R.T. PRESET
##
in the LCD window. Use the Encoder to select
the preset number and then press the Recall button. the preset then becomes active at the
memory slot you are currently in. You now have the option to store the preset in this
memory slot or transfer it to another. To store in the current slot, just press Store now. If
you want to store it elsewhere, press the Edit button and select a preset slot with the
Encoder and then press Store.
6
USING THE ART X-15 WITH YOUR SGX NIGHTBASS SE
RECALLING PRESETS
You can access all two hundred memory slots of the SGX NIGHTBASS SE with your X15. The MPT of the SGX NIGHTBASS SE may be re configured to select the preset of
your choice to correspond with the X-15's preset number. Operate the X-15 by selecting
a "bank of ten" using the Arrow Up/Down pads, then select one of the numbered pads to
recall the preset. Press the Mode pad to enable you to turn on and off the individual
effects in the preset you've selected.
USING THE CONTROLLER PEDALS
You will notice some of the presets have MIDI controllers assigned to control an effects
parameter in the preset. Use the controller pedals on the X-15 to control the parameters. If
you set up a preset in the SGX NIGHTBASS SE , remember, you do not have to
program the X-15, all programming is done with the SGX. Refer to the main manual for
instructions to add MIDI controllers to presets.
HINTS FOR PRESETS
The first thing you should do is check out all the presets in your SGX NIGHTBASS SE .
Sure it will take time, but you really should find all the sounds we have created for you.
All presets were developed with the front panel knobs at twelve o'clock except for the
Drive and Master Output which were set at 3 o'clock. The sliders were centered. Each
preset has a Programmable Level utility built into it. Use this utility to adjust the preset's
master level to your taste. Refer to the main reference manual for hints on setting your
levels.
Organize the presets you will use in the upper memory slots starting with slot 200 and
then working down. This will help you keep them from being overwritten and in one spot
for easy reference. Access the presets you store in the upper memory slots with a preset
select pedal via the MIDI Program Table (MPT). You may assign any preset to a MIDI
Program Number. See the main reference manual for examples of editing the MIDI
Program Table.
NEW ALGORITHMS
DUAL PITCH TRANSPOSER
[DUAL PTr], [2PT]
Parameters:
:TYPE= [SMOOTH] OFF, SMOOTH, NORMAL, QUICK
:PITCH 1 = [0] (-)12 to (+)12 half steps in 1 half step increments
:FINE 2 = [0.00] (-)4.00 to (+)4.00 half steps in 0.06 (six cents) increments
:PITCH 2 = [0] (-)12 to (+)12 half steps in 1 half step increments
:FINE 2 = [0.00] (-)4.00 to (+)4.00 half steps in 0.06 (six cents) increments
:REG-FD = [PRE] PRE, POST
7
:LEVEL = [100%] 0 to 100 percent level in % increments
:POSTN1 = [31] 0 to 63 in on step intervals
:POSTN2 = [31] 0 to 63 in on step intervals
Pitch Transposing or pitch shifting can be used to develop helpful second harmonies or
other effects for vocals, instruments and even mixed material.
There are three "types" of pitch transposing to choose from in the SGX NIGHTBASS SE
: Smooth, Normal and Quick. Smooth relates directly to processing and splicing the
signal more slowly, resulting in a cleaner more precise sound. Use the Smooth setting
when you are shifting pitch more than a fifth with lower frequency inputs such as the low
strings on a guitar. Normal should be used for virtually all other applications of pitch
shifting. There is a little less delay than the Smooth setting and qualitative processing is
achieved. When you select the Quick setting, a shorter delay time is used causing faster
splicing.
Generally you should use the Normal Type for most applications. If you encounter
problems relating to delay time, use the Quick Type, and if detuning becomes a problem,
use the Smooth Type.
The PITCH control lets you set the range of pitch change in half steps. The FINE
parameter lets you adjust the pitch in 6 cent intervals. Use the fine tune parameter to
create or adjust micro pitch shifting or fat chorusing effects.
REGENeration is useful when you stack the Pitch Transposer with the MONO DDL
algorithm. Each time a repeat is done it is shifted up or down by the pitch selected.
The Base Key parameter should be used when triggering the Pitch Transposer from a
MIDI keyboard. The amount of pitch shift may be set by MIDI Note On messages. The
values selected in the Base Key parameter correspond to the MIDI Key Number.
Example: BASE KEY = 60, (= middle C) if a D above middle C is played, the shift
amount will be set to (2). If base key is set to OFF, Note On messages will not affect
pitch.
The Dual Pitch Transposer allows you to assign two separate intervals of pitch shifting at
once. Interesting pitch combinations like a fifth combined with an octave (7 and 12 halfsteps), really fat chorusing (+0.12 and -0.12 half-step), and chorusing with pitch shifting
(+0.18 and any half-step interval) can be accomplished with this algorithm.
The parameters of the Dual Pitch Transposer algorithm are pretty much the same as the
normal Pitch Transposer. New Pitch and Fine parameters have been added for the second
interval. The two Pitch and Fine parameters are labeled as 1 and 2 (i.e. Pitch1, Fine 2).
Regeneration Feed ([RGN-FD]) controls where the digital delay's (if used) regeneration
comes from. The insert point is either before (PRE) or after (POST) the first voice. When
8
the Stereo Digital Delay is used with the Dual Pitch Transposer and the RGN-FD is set to
POST, the glissando effect of the normal Pitch Transposer is the result. Use the PRE
setting, for a simple pre delay before the pitch shift occurs. Only the Short Stereo Delay is
available for use with the Dual Pitch Transposer.
The Position ([POSTN1 and 2]) parameter lets you set where in the sound field each
individual pitch is heard. The default setting is center field. When the value is 0, the
signal appears full right. A value of 63 is full left.
SPACE PHASER
[PHASER], [PSR]
Parameters:
TYPE= [POST] OFF, POST, PRE
WIDTH= [65%] 0 to 100% in % increments
SPEED= [0.84Hz] 0.04Hz to 27.3Hz
REGEN= [50%] 0 to 100% in % increments
DEPTH= [100%] 0 to 100% in % increments
The Phaser algorithm recreates classic phaser sounds from the past. A three notch
design is used to develop stunning effects, killer sounds, and of course, pure sonic
destruction!
The sweep WIDTH and SPEED is user controlled. REGENeration may be adjusted to
vary the "strength" of the processed signal. The DEPTH parameter controls the intensity
of the effect in the preset. When the TYPE= POST the phaser is positioned last in the
chain. This is to assure that maximum effect and presence is maintained in all effects
combinations. Using TYPE= PRE positions the Phaser in parallel with any Reverb or
DDL effect. By positioning the Phaser like this, the processed signal is not delayed or
reverberated and then phased.
DIGITAL TUNER
[TUNER], [TNR]
Parameters:
TYPE = [GUITAR] BASS, GUITAR, BASS12F, GTR12F
REFRNC (guitar) = [OFF] OFF, E 82, A 110, D 147, G 196, B 247, E 330, A 440,
AUTO (gtr12f) = [OFF] OFF, E 164, A 220, D 284, G 392, B 494, E 659, A 440, AUTO
(bass) = [OFF] OFF, B 31, E 41, A 55, D 73, G 98, C 131, A440, AUTO
(bass12f) = [OFF] OFF, B 62, E 82, A 110, D 146, G 196, C262, A 440, AUTO
DETUNE = [0.00] (-)2.00 to (+)2.00 in 0.04 (four cent) intervals
LEVEL = [0%] 0 to 100% in 2% increments
Type allows you to choose what instrument you are going to tune. There are four choices,
two for Guitar and two for Bass. Open string tuning can be done when you select either
9
the GUITAR or BASS TYPE. Select TYPE GTR12F or BASS 12F to tune your
instrument to the twelfth fret. After you choose what "type" of instrument, the Reference
frequency (Refrnc) parameter defaults to the appropriate Guitar or Bass tuning
frequencies. The strings start low and go high. The frequency A 440 is included for
tuning keyboards, or checking the intonation of your neck. When you select Refrnc to
equal Off, it allows you to access the preset and display the preset number instead of [- - ]. The Tuner at this point is inactive, you must change the Refrnc parameter to a string
value to
activate the Tuner. When you set the Refrnc parameter to Auto, tuning is simplified even
more. Auto enables the SGX NIGHTBASS SE to know which string you are trying to
tune and automatically switch the Reference parameter to the correct string/frequency.
The Auto range has a frequency window of 2.5 half steps.
Detune will let you change the reference frequency A 440 plus or minus 2 half steps. This
allows you to detune up to 50Hz. As a rule of thumb 4 cents, displayed as [0.04] equals
1Hz. So, to detune A440 to A435 you would set the Detune parameter to [-0.20]. To
detune a full half step, set the Detune parameter to = [1.00] (plus or minus). Level sets the
signal output level of the Tuner in a preset.
TUNER NOTES:
1) If you do not wish anyone to hear you tune up when you realize you're out of tune, set
the Tuner Level and the ANFX level of the Mix to [0%] in the preset.
2) If you want signal to pass through the tuner, set the Tuner Level and the ANFX Level
to the desired output level. The tuner is designed to respond to open string tuning only, no
harmonics. For best results, tune your guitar in the position you will be playing in.
Plucking the string at or near the 12th fret will help the tuner lock on to the signal.
3) Accuracy of the SGX NIGHTBASS SE Tuner is better than .5 cents!
4) 100 cents = 1 semitone = 1 half step.
Select presets 21 and 22 in Bank "A" 12th FRET TUNER and TUNERTONE for quick
tuning while on stage. These presets are set up to auto detect which string you are playing
and display the tuning scale on the front panel.
10
THINGS TO NOTE:
PWR OUT
There is no (+)9 Volt power out jack on the SGX NIGHTBASS SE .
UTILITY
Two new Utilities are present when the Utility Mode is accessed:
1) "SLOT" Information
2) "BANK" Information
WARRANTY INFORMATION
LIMITED WARRANTY
Warranty service for this unit will be provided by Applied Research & Technology, Inc.
in accordance with the following warrant statement.
Applied Research & Technology, Inc. warrants to the original purchaser that this product
and the components thereof, will be free from defects in workmanship and materials for a
period of one year from the date of purchase. Applied Research & Technology, Inc.
(ART) will, without charge, repair or replace, at its option, defective product or
component parts upon prepaid delivery to the factory service department or authorized
service center, accompanied by proof of purchase date in the form of a valid sales receipt.
EXCLUSIONS: This warranty does not apply in the event of misuse or abuse of the
product or as a result of unauthorized alterations or repairs. This warranty is void if the
serial number is altered, defaced, or removed.
ART reserves the right to make changes in design or make additions to or improvements
upon this product without any obligation to install the same on products previously
manufactured.
ART shall not be liable for any consequential damages, including without limitation
damages resulting from loss of use. Some states do not allow limitation of incidental or
consequential damages, so the above limitation or exclusion may not apply to you. This
warranty gives you specific rights and you may also have other rights which vary from
state to state.
For units purchased outside The United States, service will be provided by an authorized
distributor of Applied Research & Technology, Inc.
11