1
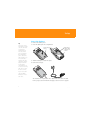
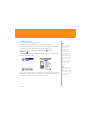
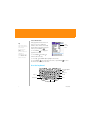
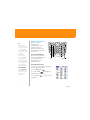
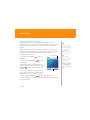
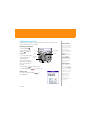
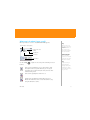
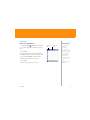
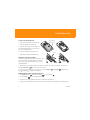
Getting Started Guide
Palm® Treo™ 680 smart device
Table of Contents
Welcome to Cingular
Overview: Your Palm® Treo™ 680 smart device
1
1
Setup
Insert the battery
Complete setup
2
2
3
Navigation
Wake up the touchscreen and turn it off
Move around the touchscreen
Use the keyboard
Open applications
4
4
5
6
8
Your phone
Turn your phone on and off
Open the Phone application
Make and receive calls
Set up voicemail
What can I do when I’m on a call?
9
9
10
11
12
13
Your Push To Talk application
How Push To Talk works
Set up PTT
Create a PTT contact list
Create a group
Responding to Invitations
Make a PTT call
15
15
15
17
18
18
19
Your email
Choose the best email option
20
20
Treo 680
i
Set up personal email
Set up corporate email
ii
20
23
Synchronization
Why synchronize information?
Synchronize for the first time
29
29
29
Your Contacts, Calendar, messages, and web
Contacts
Calendar
Messaging
Web browser
31
31
33
34
35
Your music and pictures
Listen to music
Take pictures
37
37
40
Troubleshooting
42
Tips and tricks
Keyboard
Phone
Data
Typing
Browser
Navigation
General
44
44
44
45
45
46
46
46
Status indicators
47
Treo 680
Welcome to Cingular
Overview: Your Palm® Treo™ 680 smart device
5-way navigator and
Center button
Stylus
Earpiece
Power/End
Indicator light (phone
and charge indicator)
Applications
Volume
Xpress Mail
Side button
Menu
Send
Microphone
Phone
Multi-connector
Calendar
Headset jack
Stylus
Infrared (IR) port
Treo 680
Ringer switch
1
Setup
Insert the battery
Tip
Your phone won't
work without a SIM
card. The SIM card
is usually preinstalled in your
Treo 680, unless
you’re upgrading
from a Cingular
phone. Check the
SIM card tray to see
if the SIM card is
installed. The SIM
card tray is tucked
away in a drawer
in the battery
compartment. See
"I need to insert my
SIM card" on page
42 for more info.
1. Remove the battery door.
2. Insert the battery into the compartment.
Press battery door
release
Align battery
contacts with
compartment
contacts
3. Slide the battery door back into place.
4. Connect the charger.
If you need a SIM
card, call AT&T
Wireless at 1-800331-0500.
The touchscreen on your Palm® Treo™ 680 smart device turns on. Wait
for the progress bar to fill and the language selection screen to appear.
2
Treo 680
Complete setup
1. Select the language you want to use.
2. Follow the onscreen instructions to set the date and time.
Note: If you want your Treo 680 to obtain the date, time, and time zone from the
local network, accept the default setting on the Date & Time screen.
3. When the setup is complete, press Applications
Quick Tour
.
and select
4. Recommended: Review the Basics and Phone sections of the Quick Tour
before using your Treo 680.
Note: If your Treo 680 doesn’t turn on after you charge it, do a soft reset by removing
the battery and reinserting it. For more information on resetting your Treo 680, see
User Guide: Your Palm® Treo™ 680 Smart Device on the CD.
Treo 680
Tip
You need a highspeed data plan for
email, web
browsing, and
multimedia
messaging. Find
out if you have a
plan by checking
your AT&T Wireless
bill or calling AT&T
Wireless: dial 611
from your Treo 680
or call 1-800-3310500 from any
phone.
Tip
Need help setting
up your Treo 680?
Call the Palm Setup
Help desk for AT&T
Wireless customers
at 1-800-3310500.
3
Navigation
Wake up the touchscreen and turn it off
Tip
Press Phone,
Calendar, or Xpress
Mail to wake up the
touchscreen and
open the
corresponding app.
Press Applications
to wake up the
touchscreen and
open Applications
View.
Did You Know?
You can set how
long the
touchscreen stays
on. Press
Applications, select
Preferences, select
Power, and then
adjust the Auto-off
after setting.
4
The phone and the touchscreen of your Palm® Treo™ 680 smart device can
be turned off and on separately. When you wake up the touchscreen and
leave the phone off, you can continue to use the other wireless features;
for example, when you’re on a plane, you can still manage your calendar,
play MP3 files, or write email offline.
If you’re taking your Treo 680 out of the box and turning it on for the first
time, the phone is already on. You just need to wake up the touchscreen.
1. Press and release
Power/End
to
wake up the touchscreen.
2. Press Center
turn off Keyguard.
to
Power/End
Center
3. Press and release
Power/End
to turn
off the touchscreen and
lock the keyboard.
Treo 680
Move around the touchscreen
To move around the touchscreen on your Treo 680, you can use the 5-way
navigator, or you can tap items on the touchscreen with the stylus. The 5-way
includes the following buttons:
Center
Up
Left
Right
Down
Highlight and select items
The highlight identifies which item is affected by
your next action. Use Left , Right , Up ,
and Down on the 5-way to move the
highlight from one item to another. The
highlight can take two forms: A border glow
around an entire screen, an onscreen button, or
a pick list; and light text on a dark background.
Did You Know?
On most screens,
one item—a button,
a list entry, or a
check box—is
highlighted by
default.
Tip
If the item you want
doesn’t appear on
the touchscreen, try
tapping the
onscreen scroll
arrows to view
more info.
After highlighting an item, you can select
(activate) it by pressing Center
or by
tapping it with the stylus. When an entire screen
is highlighted, switch the highlight to the first
item by pressing Center
.
Treo 680
5
Select menu items
Tip
Most menu items
have a shortcut. To
use a menu
shortcut, press
Menu + the
shortcut letter. For
example, in
Calendar, you can
press Menu + D to
delete an event.
Many applications have menus to
give you access to additional
features. These menus are usually
hidden from view, but they appear
when you press Menu
.
Menu
shortcut
letter
1. Press Menu
to display an
application’s menus.
2. Press Right and Left
switch between menus.
to
3. Press Up
to highlight a menu item.
and Down
4. Press Center
to select the menu item, or press Menu
the menu and cancel your selection.
to close
Use the keyboard
Backlight (Option
+ P)
Backspace
Option
Return
Shift/Find
Menu
Space
6
Alt
Treo 680
Enter lowercase and uppercase letters
• To enter lowercase letters, press the key you want.
• To enter an uppercase letter, press Shift/Find
and then press a letter
key—no need to hold Shift/Find
while entering the letter.
• To turn Caps Lock on, press Shift/Find
twice. The following symbol
appears . To turn it off, press Shift/Find
once.
Enter numbers, punctuation, and symbols
Numbers, punctuation, and symbols appear above
the letters on the keys. To enter these characters,
do one of the following:
• Press Option
hold Option
Symbol
Letter
, and then press the key with the character—no need to
while pressing the second key.
• To turn Option Lock on, press Option
appears . To turn it off, press Option
twice. The following symbol
once.
Enter more symbols and accented characters
1. Enter the character that corresponds to the character you want.
2. Press Alt
.
3. Highlight the character you want on the pop-up list, and then press
Center
to select the highlighted character.
Note: To enter characters such as _ • \ % =, press Alt
the beginning or end of a line.
Treo 680
by itself, after a space or at
Did You Know?
Some application
views automatically
default to Option
Lock, such as the
Dial Pad in the
Phone application.
In this case, you do
not need to press
Option to enter
numbers.
Tip
Alternate
characters are
grouped by their
similarity to the
base key. For
example, the
alternate
characters for the
E key are: É, È, Ë,
and Ê. You can find
a complete table of
the alternate keys
in the User Guide.
7
Open applications
Tip
In Applications
View, you can enter
the first few letters
of an application
name to highlight it.
For example, if you
press P,
you highlight
Phone; if you
quickly press PR,
you highlights
Prefs. If you pause
and then press R,
you highlight the
first application
that starts with R.
Did You Know?
Press Applications
repeatedly to cycle
through various
categories of
applications.
8
When you open an
application, you
automatically close the
application you were
previously using and save
any information you created
in that app.
Use the quick buttons
The front of your Treo 680
has three quick buttons that
open applications. The
fourth button opens
Applications View.
Calendar
Phone
Xpress Mail
Applications
Use Applications View
You can access all available applications
through Applications View.
1. Press Applications
.
2. Use the 5-way
to highlight the
application you want to use.
3. Press Center
application.
to open the selected
Treo 680
Your phone
Turn your phone on and off
When your phone is on, it is connected to the AT&T Wireless network
(provided you’re in a coverage area) so that you can make and receive phone
calls and use wireless services, such as email, messaging, and the web
browser.
During initial setup, your phone is automatically turned on, so you can use
wireless services right away. If you turn off your phone, you can still use the
organizer and media features such as Calendar and Pics&Videos.
1. Wake up the touchscreen.
2. If prompted, press Center
Keyguard.
3. Press and hold Power/End
on your phone.
Signal-strength icon
to turn off
to turn
You know your phone is on and that you’re
inside a coverage area when you see the signalstrength
icon at the top of the Main tab of
the Phone app.
Note: If you’re prompted for a PIN code, your SIM
card is locked. If you don’t know your PIN code, ask
AT&T Wireless to provide you with the PIN code.
4. Press and hold Power/End
Tip
If you’re outside a
coverage area, the
name Cingular does
not appear in the
upper-left corner
and the indicator
light flashes red.
Tip
Don’t remember
your mobile phone
number? To find
your phone
number, press
Phone, press Menu,
select Options, and
then select Phone
Info.
Main tab
again to turn off your phone.
You know your phone is off when you see Phone Off at the top of the Main
tab of the Phone app.
Treo 680
9
Open the Phone application
Press Phone
has five tabs.
to open the Phone application. The phone application
Status icons
Dial Pad
Call Log
Main
Favorites
10
Contacts
Treo 680
Make and receive calls
To make and receive calls, your phone must be on. When your phone is off,
your incoming calls go to voicemail.
Dial using the keyboard
1. Press Phone
.
2. If prompted, press
Center
to turn off
Keyguard.
Phone
3. Use the number keys
on the keyboard to
enter the phone
number. (You must be
on the Main or Dial Pad
tab to enter the phone
number.)
4. Press Send
Power/End
Send
Center
Number
keys
to end the call.
Answer calls
To answer a call, press Send
select Answer.
Treo 680
You can set which
tab of the Phone
app appears when
you open the
application. In the
Phone app, press
Menu, select
Options, and then
select Phone
Display Options.
Set the default
view to the tab
you want.
Did You Know?
to make the call.
5. Press Power/End
Did You Know?
or
If the headset is
attached, you can
press the headset
button to answer a
call and to end a
call. (The headset
button may work
differently on
headsets other
than the one
provided with your
Treo 680.)
11
Ignore calls
To ignore a call, do one of the following:
Tip
Pressing Phone
silences the ringer,
but it does not
answer the call.
Tip
You can also access
the AT&T voicemail
system by selecting
the Favorites tab
and then selecting
the Voicemail
favorite.
Tip
If you can’t connect
to the AT&T
Wireless voicemail
system, contact
AT&T Wireless for
assistance:
dial 611 from your
Treo 680 or call
1-800-331-0500
from any phone.
12
Send the call to voicemail: Press Power/End
or select Ignore.
Send the caller a text message: Select Ignore with Text. This option
sends the call to voicemail and opens a text message addressed to the
caller. (Sending text messages to land-line phones may not be supported.)
Silence the ringer
To silence the phone while it is ringing, do one of the following:
• Press any key except Send, Power/End, or the 5-way.
• Slide the Ringer switch to Sound Off
.
Set up voicemail
Your AT&T Wireless service includes voicemail. Keep in mind that airtime
and other charges apply when using voicemail from your Treo 680.
1. Press Phone
.
2. Press and hold 1 to dial the AT&T Wireless automated voicemail system.
3. Follow the voice prompts to set up your voicemail.
To retrieve your voicemail later, press Phone
hold 1.
and then press and
Treo 680
What can I do when I’m on a call?
When you make or receive a call, Active Call View appears.
Caller ID photo (if assigned)
Caller’s name and
number
Call duration
Call status
Button label
Use the 5-way
buttons:
or stylus to select any of the following onscreen
0
Turns on the speakerphone so you can hear the caller
through the device’s speaker. This lets you check your
calendar, look up contact info, take notes, and use other
features during a call.
Tip
While a call is in
progress, press the
Volume button on
the side of your
Treo 680 to adjust
the call volume.
Did You Know?
You can add a
picture to a contact
entry. See the User
Guide for details.
Tip
If you’re using a
wired headset,
simply unplug the
headset to switch
to holding your Treo
to your ear.
Turns off the speakerphone when it is on.
Replaces the Speakerphone button when you use a
Bluetooth® hands-free device. Select this button to stop
using the hands-free device.
Treo 680
13
0
Did You Know?
If the touchscreen
dims during a call,
press any key
except Send or
Power/End to
restore the
touchscreen
brightness.
Puts a call on hold. To take the call off hold, select this
button again.
Lets you make another call while the first call is on hold.
Opens the Dial Pad so you can dial additional numbers, for
example, another phone number or an extension.
Dials any extra digits, such as phone-tree selections, if you
assigned these to a speed-dial favorite button. See the User
Guide for more information on assigning extra digits to a
speed-dial favorite button.
Mutes the microphone so that you can’t be heard on the
other end. When you want to speak, select this button again.
14
Treo 680
Your Push To Talk application
How Push To Talk works
Push To Talk from AT&T Wireless is a service that enables you to talk to as
many as 29 people at one time so long as they are members of the AT&T
Wireless Push To Talk service and they are available. It is a walkie-talkie type
of service, which means that only one person at a time can be heard by the
others on the call. When finished speaking, the speaker must signal that the
microphone is open and available for another person to begin speaking.
Set up PTT
To use PTT, you must first subscribe to the AT&T Wireless Push to Talk service
and then set up the Push To Talk application on your Palm® Treo™ 680 smart
device.
Tip
Find out more
about Push To Talk
in the User Guide
by selecting My
Treo on your device
or selecting the
User Guide on your
computer.
Get ready to use PTT
To set up the Push To Talk application, do the following:
1. Press Applications
.
2. Select Push To Talk.
3. Select Yes to set up Push To Talk.
4. Enter the name you want people to see
when you’re available to talk, and then select
OK.
5. Wait for the Welcome to Push To Talk screen
to appear. If an error appears instead, contact
AT&T Wireless for assistance.
6. Select Done.
Treo 680
15
When you first set up Push To Talk, your availability is automatically set to
Available. You can change your availability setting at any time.
a
Change your availability
1. Press the Side button to go to PTT.
Tip
To check your
availability setting,
just glance at the
availability icon in
the upper-right
corner of the PTT
screen. Your
availability status
also appears in the
main views of the
Phone application.
Tip
Remember, to
contact a person or
group via PTT, they
must also subscribe
to the AT&T
Wireless Push To
Talk service.
2. Select the availability pick list in the
upper-right corner, and then select the icon
that describes your availability.
Here are the icons:
0
Available: Your Ringer switch is set to Sound On
automatically hear incoming PTT calls.
, and you
Silent: Your Ringer switch is set to Sound Off
. When a PTT call
comes in, you get an alert. You can choose whether to answer or
ignore the PTT call.
Do Not Disturb: You can make PTT calls, but you cannot receive
them.
Log Out: You cannot make or receive PTT calls.
Note: The Available option appears in the availability pick list only when the
Ringer switch is set to Sound On
. Similarly, the Silent option appears in the
availability pick list only when the Ringer switch is set to Sound Off
.
16
Treo 680
Create a PTT contact list
To add a contact, do the following:
1. Press the Side button to go to PTT.
2. Select New, and then select New Contact from the pop-up menu.
3. Select Lookup.
4. Select the contact you want to add, and then select Add.
5. (Optional) Select the name and change it to the name you want to see in
your PTT list, for example, a nickname. You can use up to 20 characters for
the name.
6. Select OK to send the contact an invitation
to join your PTT list.
The contact’s name appears in your PTT list, and
the
icon indicates that the contact has not
responded to the invitation. This icon changes
to reflect the contact’s current availability status
once they accept the invitation.
Treo 680
[insert screen ptt_newcontact here]
Tip
If a contact is not
listed in your
Contacts
application, you can
add a contact on
the spot by
entering the
person’s name and
mobile phone
number. Be sure to
include the area
code, but you don’t
need to enter
hyphens or
punctuation; PTT
enters those for
you.
Tip
Need to add a
group member who
is not already a
contact in your PTT
list? After the group
is created, you can
add new members
and contacts.
17
Create a group
Tip
You can send a text
message to up to
ten recipients at a
time. To send a text
message to a group
of more than ten
members, select
the group, and then
select Dynamic call
in the
accompanying pick
list. Select up to ten
members. Send
your text message.
Repeat this process
until you have sent
your text message
to all the recipients
in the group.
Groups are an easy way to make calls or to send voice or text messages to
multiple PTT contacts at the same time. You can create up to 30 groups.
Each group can include up to 29 contacts.
1. Press the Side button to go to PTT.
2. Select New, and then select New Group from the pop-up menu.
The New Group dialog box shows you all the contacts in your PTT list.
3. Enter a name for the group (up to 20 characters).
4. Check the box next to each contact you want to add to the group, and
uncheck any contacts you do not want to include in this group.
5. Select OK.
Responding to Invitations
When you’re invited to join someone else’s PTT list, you receive an
invitation. Select one of the following to respond to an invitation:
Accept: Sends an acceptance message to the contact or group owner. The
group’s name appears in your PTT list and your name appears in the
requester’s PTT list or group.
Decline: Sends a message to the contact or group owner indicating that
you don’t want to join the PTT list or group.
Defer: Places the invitation in your Pending list so that you can respond
later by selecting the Pending invitation
icon in the title bar or by
responding to an invitation reminder.
18
Treo 680
Make a PTT call
To make a PTT call, press the Side button to go to Push To Talk. Select the
people you want to talk to (up to seven individuals at one time or up to 29 in
a group); an icon next to each name tells you whether they’re available. Then
press and hold the Side button to make the call.
Since the speakerphone is automatically on, hold your Treo 680 like a walkietalkie, a few inches away from your mouth, and listen for the tone that signals
that you can start to speak.
Like a walkie-talkie, PTT allows only one person to speak at a time. No one
else can speak until you give up control by releasing the Side button. A tone
signals that you gave up control. Now somebody else on the call can have a
turn speaking.
Treo 680
19
Your email
Choose the best email option
Key Term
Email provider The
service you use to
exchange email.
Your provider’s
name is between
the @ symbol and
the dot in your
email address.
Tip
To access webbased email, such
as Hotmail, use the
web browser.
Tip
Can’t find the
User Guide for
VersaMail? Install
the CD and do one
of the following:
Windows: Start>
Programs>Palm
Mac: Click the
link in the
Documentation
folder.
20
Before You Begin: You must have a data plan with AT&T to use email on
your Palm® Treo™ 680 smart device.
You can use your Treo 680 to access email from both personal and
corporate email accounts.
• A personal email account is an account with an Internet service
provider (ISP) such as AOL, Comcast, and Gmail.
• A corporate email account is an account on a corporate mail server
such as a Microsoft Exchange or Lotus Domino server.
Set up personal email
You have two options for setting up a personal email account on your Treo
680:
• The VersaMail® application enables you to access up to eight personal
email accounts.
• Xpress Mail enables you to access a personal email account with a
simple setup process; email for this account is then sent automatically
to your Treo 680.
Set up VersaMail® to work with a personal email account
Before You Begin: If you used VersaMail on your previous Palm OS® device,
and you want to transfer those settings to your Treo 680, see the User
Guide for the VersaMail Application on the CD for upgrade instructions.
1. Press Applications
application.
and select Email
to open the VersaMail
Treo 680
2. If prompted to select an initial setup option, select Continue.
3. Make up a descriptive name for this account
and enter it in the Account Name field. For
example, Personal Email.
Tip
4. Select the Mail Service pick list, select your
email provider, such as AOL, and then select
Next.
If your email
provider’s name is
not listed, select
Other and
5. Enter the username for your email account.
Your username usually appears before the @
symbol in your email address.
Note: For some email providers, such as Gmail, your username is your entire email
address. Check with your email provider if you are not sure what to enter as your
username.
6. Select the Password box, enter your email account password, select OK,
and then select Next.
7. Select Next, and then select Done.
Create and send email in the VersaMail application
1. From the Inbox, select New.
2. Enter the addressee’s email address. For
multiple addresses, enter a semicolon (;) and
then a space between recipients’ names.
3. Enter the subject and message text.
4. Select Send to connect and send the
message. If the message cannot be sent, it is
stored in your Outbox.
Treo 680
manually enter
your provider’s
settings. See the
User Guide for
the VersaMail
Application on the
CD for details.
Tip
You can also enter
an addressee’s first
or last name. If a
name or email
address matches
one of your
contacts, VersaMail
displays the
matching contacts.
To accept a
suggestion, select
the correct contact.
21
Set up Xpress Mail to work with a personal email account
Tip
If you select More
and your email
provider still does
not appear on the
list, go to att.com/
WirelessTutorials.
Before You Begin: Make sure your phone is on and that you are in an area
where a data connection is available. You can tell a data connection is
available when either a black triangle
or green arrows
appear in
the signal-strength icon in the title bar of the Main tab of the Phone
application.
1. Press Applications
, and then select XpressMail
.
2. Select Install Now. If prompted, select Yes
to connect to the Internet.
3. Select Download Now, and then select Yes
to begin downloading.
4. Select Save, and then select Yes to accept
the application.
5. Select Reset.
6. Press Applications
, and then select XpressMail
.
7. Select OK to accept the license agreement.
8. Confirm your 10-digit mobile phone number and press Next.
9. Select your email provider name, and then press Next. If your email
provider is not listed, select More to view additional provider names.
10.Enter the username and password you use to access your email
account, and then press Next.
11.To begin service with your provider, select Register.
12.When the AT&T Xpress Mail home screen appears, select your email
account to go to its Inbox.
22
Treo 680
Set up corporate email
There are two types of applications you can use to access corporate email on
your Treo 680:
Self-service Xpress Mail is a self-service option for accessing your
corporate email from your Treo 680 without support from IT. Using Xpress
Mail with a corporate account also enables wireless synchronization of
calendar appointments and contacts, as well as wireless corporate directory
lookup.
IT-managed IT-managed email means that your company uses Good
Mobile Messaging™ or VersaMail to access corporate email. You need your IT
department to establish an account on a corporate server to use these
applications.
• Good Mobile Messaging provides wireless push synchronization of email,
calendar, contacts, and more when your company has a Good Mobile
Messaging Server installed (server license sold separately). For setup
instructions, see User Guide: Your Palm® Treo™ 680 Smart Device.
• VersaMail can provide direct access to Exchange mail, calendar, and
contacts using Exchange ActiveSync or access to Exchange or Lotus
Domino mail using IMAP. For setup instructions, see the User Guide for the
VersaMail Application on the CD.
Treo 680
23
Set up Xpress Mail on your computer
Did You Know?
The Xpress Mail
software you use to
access your
corporate email is
called the
Professional
Edition.
Before You Begin: You need the following:
• Your work email address
• The type of mail server your company uses: Microsoft Exchange, Lotus
Notes, or IMAP
• The computer you use to access your corporate email (Internet
connection required)
1. On your computer, open your web browser.
2. Go to xpressmailpe.wireless.att.com and click Register Now.
3. Enter all the required info, keeping the following in mind:
• In the Email Address field, enter the work email address you want to
use with Xpress Mail.
• Your Xpress Mail username and password can be anything you want;
they don’t need to match your email username and password.
Note: Jot down your Xpress Mail username and password exactly as you enter
them. You need this information later in the Xpress Mail setup process.
24
Treo 680
Tip
Need additional
help setting up
Xpress Mail? Visit
att.com/
WirelessTutorials.
4. Click Next.
5. Click Download to copy Xpress Mail desktop software to your computer.
6. When the File Download dialog box appears, click Open.
7. Click Yes to install Xpress Mail Professional Edition.
8. Follow the onscreen instructions to finish the installation. On the
Completing the Xpress Mail Professional Edition Setup Wizard screen,
uncheck Show Readme, and make sure Run Xpress Mail Professional
Edition is checked. Click Finish.
9. Enter the Xpress Mail username and password you made up in step 3, and
then click Next.
10.Select your company’s mail server from the list, and then click Next.
Treo 680
25
11.If you want to access files on your computer from your Treo 680, check
the Enable access to documents box, and then click Finish.
Your web browser displays the Congratulations! page to confirm that
Xpress Mail is connected to your corporate email account.
You have finished installing Xpress Mail on your computer. To complete
setup, you now need to install the application on your Treo 680.
Important: To access corporate mail on your Treo 680 using your Xpress Mail
account, the computer you used to set up your account must be on and
connected to the Internet.
26
Treo 680
Install Xpress Mail on your Treo 680
Before You Begin: Make sure your phone is on and that you are in an area
where a data connection is available. You can tell a data connection is
available when either a black triangle
or green arrows
appear in the
signal-strength icon in the title bar of the Main tab of the Phone application.
1. Press Applications
, and then select XpressMail
.
2. Select Install Now. If prompted, select Yes to
connect to the Internet.
Tip
If you select Save
instead of Save and
open, you can finish
the setup process
later by pressing
Applications and
selecting Xpress
Mail.
3. Select Download Now, and then select Yes to
begin downloading.
4. Select Save, and then select Yes to accept the
application.
5. Select Reset.
6. Press Applications
, and then select XpressMail
7. Select OK to accept the license agreement.
8. Confirm your 10-digit mobile phone number and press Next.
9. If prompted, select Yes to connect to the Internet.
10.Select Work, and then press Next.
11.Select Professional Edition, and then press Next.
12.Select Register Device, and then press Next.
13.Enter the username and password you selected when you created your
Xpress Mail account on your computer, and then press Next.
14.Press Register.
Treo 680
27
15.When the registration process has finished, press OK.
Tip
If you have trouble
sending messages,
you need to enter
AT&T’s outgoing
mail server name.
Open the
Messaging tab in
the Xpress Mail
desktop and click
Server Setting. In
the Outgoing mail
SMTP server field,
enter cwmx.com,
and then click OK.
16.When the Account Information screen appears, press Xpress Mail to go
to the Inbox of your account.
Create and send email in Xpress Mail
1. From the Inbox, select New
.
2. Enter the addressee’s email address, a
subject, and your message. Separate
recipients’ names with commas (for example:
[email protected],
[email protected]).
3. Select Send Now to send the email right
away; select Send to send it later. (Send is
useful if you’re not currently connected to the
Internet.)
Tip
To save a draft of
the message you
are composing—for
example, if you
need to finish it
later—select
Cancel, and then
select Save.
28
Treo 680
Synchronization
Why synchronize information?
Synchronizing means that information you enter in one place—your
Palm® Treo™ 680 smart device or your computer—is automatically entered in
the other; so there’s no need to enter the information twice. Sync your Treo
680 and your computer frequently to keep your information up-to-date (and
backed up) in both locations.
The information from the following applications is updated by default each
time you sync:
Tip
You must install
Palm Desktop
software from the
CD that came with
your Treo 680 even
if you sync with
Outlook or with
another third-party
application.
Synchronize for the first time
When you install Palm® Desktop software, you sync for the first time.
Before You Begin: If you’re installing the software on a computer at work,
make sure your company allows you to install new software. Contact your
company’s IT department for help.
1. Close all programs on your computer.
2. Insert the Palm Software Installation CD into your computer’s CD drive.
Mac only: Double-click the CD icon on the desktop, and then doubleclick the PalmSoftware.pkg icon.
Treo 680
29
3. Select the same language you selected on your Treo 680, and then
follow the onscreen instructions.
Tip
Problems
synchronizing? See
"Synchronization
isn't working" on
page 43 for
troubleshooting
suggestions.
4. When the install program asks you to sync, connect the USB sync cable
to a USB port on your computer and to the socket on the bottom of your
Treo 680.
5. Press the sync button.
USB sync
cable
Sync button
Messages on both your computer and your Treo indicate that
synchronization is in progress. Do not disconnect the sync cable until you
see the message on your Treo saying that the HotSync® operation is done.
Next time you want to sync, just connect your Treo 680 to your computer
(using the sync cable) and then press the sync button.
30
Treo 680
Your Contacts, Calendar, messages, and web
Contacts
Enter names and phone numbers
1. Press Phone
2. Select the Contacts
3. Press Menu
Did You Know?
The fastest way to
enter lots of
contacts is to enter
them in your
desktop software
and then sync to
transfer them to
your Treo 680 (see
.
tab.
.
4. Select New Contact from the Record menu.
5. Use the 5-way
as you enter info.
to move between fields
Why synchronize
information? on
6. Do any of the following:
page 29 ).
Add a caller ID photo: Select the Picture
box and select Camera to take a photo (if
your Palm® Treo™ 680 smart device includes
a camera), or select Photos and select an
existing photo.
Tip
You can import
contacts from your
SIM card. In the
Contacts list, open
the Record menu
and select Import
from SIM.
Add a caller ID ringtone: Select the
Ringtone pick list and select a ringtone for this contact.
Add a note to an entry: Select Note
.
Display additional fields for this contact: Select Plus
.
7. After you enter all the info, select Done.
Treo 680
31
Dial by contact name
1. Press Phone
Tip
To see more
information for a
contact, highlight
the name and press
Center on the
5-way to view the
address, company,
and other details.
Did You Know?
You can access
your contact
information from
the Phone,
Messaging, and
email applications
32
Letters appear here
as you enter them
.
2. Select the Contacts
tab.
3. Use the keyboard to start entering one of
the following for the contact you want to call:
• First name (JOH for John)
• Last name (SMI for Smith)
• First initial and last name (JSM for John
Smith)
For example, entering SM displays Smilla Anderson, John Smith, and
Sally Martin. Entering JSM finds only John Smith.
4. Select the number you want to dial.
5. Press Send
to make the call.
Treo 680
Calendar
Enter a new appointment
1. Press Calendar
until Day View appears.
2. Select Go To and then select the desired
day.
3. Select New.
4. Using the keyboard, enter a starting hour
and minute for the event, such as 545 for 5:45.
5. Select the End Time box and enter the
ending hour and minute for the event.
6. Select OK.
7. Enter a description for the event.
Treo 680
Did You Know?
Selected
date
Selected
day
You can also
schedule
repeating
meetings or a
block of vacation
time by creating
an event that
repeats at an
interval you
specify, and you
can color-code
your
appointments by
category.
33
Messaging
Tip
If you see numbers
instead of letters (or
the reverse), you
need to turn Option
Lock on by pressing
Option twice or
turn it off by
pressing Option
once.
Tip
Sending text
messages to landline phones may
not be supported.
Before You Begin: Consult AT&T Wireless for pricing and availability of text
and multimedia messaging services.
Send a text or multimedia message
1. Press Applications
and select Messaging
.
2. Select New.
3. Select the To field and do one of the following:
• Enter the first initial and last name (no spaces), and then select the
recipient’s mobile phone number or email address from your
Contacts list.
• Enter the recipient’s mobile phone number or email address.
• Press Center
and select the
recipient’s name from the list of recent
addressees.
4. Enter your message.
5. (Optional) Do any of the following:
• Insert predefined phrases by selecting
QuickText
.
• Insert emoticons by selecting
.
• Insert pictures, videos, and sounds to create a multimedia message.
Select Add media.
6. Select Send.
34
Treo 680
Web browser
Before You Begin: You must have a data plan on your AT&T Wireless account
to browse the web on your Treo 680.
1. Press Applications
and select Web
to open the Blazer® web browser. If necessary,
select Yes to turn on your phone, and Yes to
connect to the Internet.
Tip
If you browse to a
secure web page, a
lock icon appears in
the Address Bar.
Tip
To adjust the font
size, open the
Options menu and
select Font.
Note: To connect to the Internet, you must be in an
area where a data connection is available. You can
tell a data connection is available when either a
black triangle
or green arrows
appear in
the signal-strength icon in the title bar of the
Blazer web browser application.
2. Enter a web page address (URL) in the Address Bar and select Go.
Do any of the following to navigate within the web page:
Scroll through the page: Press Up
or Down
.
Follow a link to another web page: Highlight the link by pressing Left
or Right and then press Center
to go to the selected page.
Submit a form: Enter the information and then select the onscreen button
to submit the form. If the form doesn’t have an onscreen button, press
Return .
Treo 680
35
Use the 5-way
to access any of the following icons in the title bar:
0
Did You Know?
After you configure
an email
application on your
Treo 680, you can
select an email
address link from a
web page to create
a message to the
selected address.
Goes to your home page.
Opens a dialog box where you can enter a web address or view
a list of recently viewed web pages.
Goes back in order through pages you viewed.
Goes forward in order through pages you viewed.
Gets the latest version of the current web page. This is
sometimes called refreshing the web page.
Opens a list where you can select Fast mode (no images or
style sheets) or Normal mode (with images and style sheets).
36
Treo 680
Your music and pictures
Listen to music
To listen to music on your Palm® Treo™ 680 smart device, you need to convert
the music files into MP3 format using Windows Media Player (Windows
computers) or iTunes (Mac computers), and then transfer the music files to
your Treo 680 or an expansion card. After you transfer the music files, you can
play them using Pocket Tunes™ on your Treo 680.
Set up Windows Media Player for MP3
1. Connect your Treo 680 to your computer with the sync cable.
2. Press Applications
and select pTunes
.
3. On your computer, open Windows Media Player, and then click the fullscreen icon in the upper-right corner to maximize the window.
4. Click Tools, and then click Options.
5. Click the Rip Music tab, click the Format pick list, and then select mp3.
Click OK.
6. Click Tools, and then click Options.
7. Click the Devices tab, select Palm Handheld from the Devices list, and
then click Properties.
8. Click the Quality tab and uncheck the Convert files as required by this
handheld (recommended) box. Click Apply.
9. Click OK and then click OK again.
Treo 680
Tip
You can upgrade
Pocket Tunes to a
version that
supports more
music file formats
(such as WMA),
supports
subscription music,
and includes
additional features.
For more
information, visit
www.pockettunes.com/palm.
Did You Know?
If a call comes in
when you’re
listening to music,
you can take the
call and the music
pauses
automatically. After
you finish the call,
the music starts
again.
37
Set up iTunes for MP3
1. On your Mac, open iTunes.
Tip
If you want greater
control over the file
size and sound
quality of your MP3
files, select Custom
from the Setting
pop-up menu.
Tip
You can also use a
card reader
accessory (sold
separately) to
transfer MP3 files
from your computer
to your expansion
card. Create a
Music_Audio folder
in the root directory
of the card, and
store your MP3 files
in this folder.
2. Select Preferences.
3. Click the Advanced button at the top of the window, and then click
Importing.
4. Click the Import Using drop-down box and select MP3 Encoder.
5. Click the Setting drop-down box and select Good Quality.
Transfer MP3 files from your computer
If your MP3 files are already on your computer’s hard drive, you just need
to transfer them to your Treo 680 to listen to them with Pocket Tunes.
If an expansion card is inserted into the Treo 680, Windows Media Player
copies the MP3 files to the expansion card. If you don’t have an expansion
card inserted, the MP3 files are copied to your Treo.
Important: You must synchronize your Treo 680 with your computer at least
once before you can transfer MP3 files from your computer.
Before You Begin: On a Mac, you need an expansion card (sold separately)
to listen to music on your Treo. You cannot transfer MP3 files from your
Mac directly to your Treo.
1. Connect your Treo to your computer with the USB sync cable.
2. On your Treo 680, press Applications
and select pTunes
.
3. If you are transferring MP3 files from a Mac, insert an expansion card
into your Treo. This step is optional for Windows users.
38
Treo 680
4. Do one of the following:
Windows: Open Windows Media Player on your computer. Select the Sync
tab, and then select Palm Handheld from the drop-down list. Select Start
Sync. The files are transferred to your Treo 680.
Note: Do not press the sync button on your cable. Windows Media Player transfers
the files, so there’s no need to do anything.
Mac: Drag and drop the MP3 files onto the Send To Handheld droplet in the
Palm folder. Select your device name, the file name, and the destination
(card). Click OK. Synchronize your Treo with your computer. Be patient;
transferring music to an expansion card can take several minutes.
Listen to music on your Treo
Caution: Protect your hearing. Listening to this device on full volume for a long
period of time can damage your hearing.
1. Make sure the Ringer switch is set to Sound On. See “Overview: Your
Palm® Treo™ 680 smart device” for more information.
2. Press Applications
3. Use the 5-way
and select pTunes
.
Tip
You can change the
settings on your
Treo so that
pressing and
holding the Side
button opens
Pocket Tunes. See
the User Guide for
details.
Did You Know?
You can also press
Space to pause and
resume playback,
as well as use the
5-way to navigate
among songs or
pause and resume
playback.
to access any of the following icons:
Play: Plays or resumes playback of the current song.
Next song: Plays the next song.
Previous song: Plays the previous song.
Choose song: Displays a list of songs to choose from.
Pause: Pauses playback.
Treo 680
39
Note: To adjust the volume during playback, press the Volume button on the side
of your Treo.
Tip
The default camera
resolution is VGA
(640 x 480); QVGA
(320 x 240)
resolution is also
supported. To view
these settings
before you take a
picture, press
Menu.
See your User Guide for more information about playing music on your
Treo.
Take pictures
You can use the built-in camera that comes with your Treo 680 (camera
version only) to take and view pictures and videos and send them to your
friends and family. You can store pictures on your Treo 680 or on an
expansion card.
1. Press Applications
and select Camera
.
2. By default, the Camera application stores pictures you take in the PALM
folder on your expansion card (if a card is inserted). Otherwise, Camera
stores pictures in the PALM album on your Treo. To store a picture in a
different location, select one of the following:
<Album name>: Stores the picture in the selected album. The storage
location is based on the location of the album (Treo 680 or expansion
card).
New Albums: Opens a dialog box where you
can enter an album name and select the
storage location (Treo 680 or expansion card).
3. Find your subject in the screen on your
Treo (the lens is on the back of your Treo).
4. (Optional) To get a close-up of your
subject, press Up
to select 2x. Press Down
to return to 1x.
40
Treo 680
5. Press Center
to capture the picture.
6. Do any of the following:
0
Saves the picture in the location you
selected in step 2.
Deletes the picture.
Opens a dialog box where you can
select how you want to send the picture:
Messaging, Bluetooth, or Email. The receiving
device must support the method you select.
Tip
To add an audio
caption later, open
the picture and
then select Audio
Caption from the
Photo menu.
Lets you add a voice caption.
See User Guide: Your Palm® Treo™ 680 Smart Device for more information about
taking and viewing photos and videos on your Treo.
Treo 680
41
Troubleshooting
I need to insert my SIM card
1. Remove the battery door and battery.
Press battery
door release
2. Slide the SIM tray out of the slot.
3. Insert the notched end of the SIM card
into the SIM tray, and then press the other
end of the card into place.
4. Slide the SIM tray back into the slot.
Notch
5. Reinsert the battery and battery door.
My touchscreen appears blank
1. When a call lasts longer than two minutes, the
touchscreen dims and may appear to be blank.
Press any key (except Power/End) to restore the
normal brightness.
2. When a period of inactivity lasts longer than one minute, the touchscreen turns off. Press and
release Power/End
to wake up the touchscreen.
3. If you can see a dim image on the touchscreen, press Option
Left and Right to adjust the brightness.
+ Backlight
and then press
Nothing happens when I tap the touchscreen
1. Press Applications
2. Use the 5-way
and use the 5-way
to select Prefs
.
to select Touchscreen.
3. Follow the onscreen alignment instructions, and then select Done.
4. If your Treo™ 680 still doesn’t respond, do a soft reset by removing the battery and reinserting it.
42
Treo 680
Nothing happens when I press a key
Do a soft reset by removing the battery and reinserting it.
I don't want Keyguard to turn on automatically
1. Press Applications
and select Prefs
.
2. Select Keyguard.
3. Select the Auto-Keyguard pick list, and then select Disable.
4. Select Done.
5. (Optional) To manually turn Keyguard on, press Option
touchscreen is on.
+ Power/End
when the
Synchronization isn't working
Try to sync after each of the following steps. If the sync is successful, you don’t need to do the rest
of the steps. If you still can’t sync after finishing the steps, check User Guide: Your Palm® Treo™ 680
Smart Device on the CD for more troubleshooting tips.
1. Make sure the USB sync cable is securely connected to your Treo and to a built-in USB port on
your computer (not on a USB hub). See "Synchronize for the first time" on page 29 for details.
2. Make sure that HotSync manager is running:
Windows: Right-click HotSync manager
in the taskbar in the lower-right corner of your
computer screen, and make sure that Local USB is checked. If you don’t see the HotSync
manager icon, click Start > Programs > Palm > HotSync Manager.
Mac: Go to the Palm folder on your Mac hard drive and double-click HotSync manager
In the Connection Settings panel, set the Local Setup port to Palm USB.
.
3. Do a soft reset by removing the battery and reinserting it.
Treo 680
43
Tips and tricks
Keyboard
0
TO:
DO:
Lock the keyboard
Press Option
Unlock the keyboard
Press Center
+ Power/End
Adjust the brightness
Press Option
+P
; press Left
brightness or Right to increase it
to decrease the
Phone
0
TO:
DO:
Turn speakerphone on and off during a
call
Select
it off
to turn on speakerphone and
to turn
Change volume during a call
Press the Volume button on the side of your Treo 680
Switch from the ringer to vibrate
Slide the Ringer switch to Sound Off
Make a conference call
Make a second call, and then select
Check voicemail
Press and hold 1
Use the phone while out of the country
Contact AT&T Wireless to enable international voice
and data roaming
44
Treo 680
Data
0
TO:
DO:
Use your Palm® Treo™ 680 smart device
with your PC as a wireless modem
Make sure your computer has Bluetooth® wireless
technology and your Treo 680 has a data plan that
allows tethered use. Call 1-800-331-0500 to check on
your data plan. Then, see User Guide: Your
Palm® Treo™ 680 Smart Device on the CD for setup
instructions.
Typing
0
TO:
DO:
Capitalize a letter
Press Shift/Find
+ letter key
Turn on Caps Lock
Press Shift/Find
twice
Turn off Caps Lock
Press Shift/Find
Enter a number or symbol
Press Option
+ key with character above letter
Turn on Option Lock
Press Option
twice
Turn off Option Lock
Press Option
once
Enter other symbols and accented
characters
Press letter + Alt
list
Highlight text
Tap and drag the stylus across the text
Highlight a word
Double-tap the word
Highlight a paragraph
Triple-tap the paragraph
Treo 680
once
, and then select character from
45
Browser
0
TO:
DO:
Move to wide page mode
Press Menu
+W
Move to optimized mode
Press Menu
+O
Jump to the toolbar
Press Space
Toggle between fast and normal mode
Select
Switch between Bookmark and Page View
Press Menu
+V
Navigation
0
TO:
DO:
Page up one screen
Press and hold Option
+ Up
Page down one screen
Press and hold Option
+ Down
General
0
TO:
DO:
Do a soft reset
Remove the battery and reinsert it
Access menus
Press Menu
Access Preferences
Press Applications
46
46 :: Browser
and select Prefs
Treo 680
Status indicators
0
Phone on with wireless
coverage
Wireless services off
Call forwarding on
Signal strength without data
coverage
Signal strength with data
coverage available
Signal strength with active
data connection
Voicemail message
Partial battery
Low battery
Battery charging
Full battery, charger
connected
Unread text or multimedia
message
Unread Email message
Upcoming appointment
New alert
Bluetooth feature off
Available for Push to Talk
calls
Bluetooth feature on
Ringer switch off; PTT call
triggers alert
Communicating with
Bluetooth device
Do not disturb on; PTT calls
not received
Bluetooth hands-free device
connected
Unavailable for PTT calls
Dial-up networking (DUN) on
Full battery
Treo 680
47
Intellectual property notices
© 2006–2007 Palm, Inc. All rights reserved. Trademark, copyright, patent, and other intellectual property
notices are set forth on page ii within User Guide: Your Palm® Treo™ 680 Smart Device installed on the CD.
© AT&T Wireless, AT&T Wireless logo, Cingular and Cingular logos are trademarks of AT&T Wireless
Knowledge Ventures and/or AT&T Wireless affiliated companies. The Bluetooth word mark and logos are
owned by the Bluetooth SIG Inc. and any use of such marks by Palm, Inc. is under license. Lotus Notes and
Lotus Domino are either trademarks or registered trademarks of International Business Machines
Corporation in the United States and/or other countries. Microsoft, ActiveSync, Windows, and Outlook are
registered trademarks or trademarks of Microsoft Corporation in the United States and/or other countries.
All other brands, product names, company names, trademarks and service marks are properties of their
respective owners.
Disclaimer and limitation of liability
Palm, Inc. and its suppliers assume no responsibility for any damage or loss resulting from the use of this
guide. Palm, Inc. and its suppliers assume no responsibility for any loss or claims by third parties that may
arise through the use of this software. Palm, Inc. and its suppliers assume no responsibility for any damage
or loss caused by deletion of data as a result of malfunction, dead battery, or repairs. Be sure to make
backup copies of all important data on other media to protect against data loss.
This document is provided “as is” and AT&T Mobility LLC and/or Palm, Inc. (collectively on the CD, AT&T/
Palm) assumes no responsibility for any typographical, technical or other inaccuracies in this document.
AT&T/Palm reserves the right to periodically change information that is contained in this document;
however, AT&T/Palm makes no commitment to provide any such changes, updates, enhancements or other
additions to this document to you in a timely manner or at all.
AT&T/PALM MAKES NO REPRESENTATIONS, WARRANTIES, CONDITIONS OR COVENANTS, EITHER EXPRESS
OR IMPLIED (INCLUDING WITHOUT LIMITATION, ANY EXPRESS OR IMPLIED WARRANTIES OR CONDITIONS
OF FITNESS FOR A PARTICULAR PURPOSE, NON-INFRINGEMENT, MERCHANTABILITY, DURABILITY, TITLE, OR
RELATED TO THE PERFORMANCE OR NON-PERFORMANCE OF ANY SOFTWARE REFERENCED HEREIN OR
PERFORMANCE OF ANY SERVICES REFERENCED HEREIN). IN CONNECTION WITH YOUR USE OF THIS
DOCUMENTATION, NEITHER AT&T/PALM NOR ITS AFFILIATED COMPANIES AND THEIR RESPECTIVE
DIRECTORS, OFFICERS, EMPLOYEES OR CONSULTANTS SHALL BE LIABLE TO YOU FOR ANY DAMAGES
WHATSOEVER BE THEY DIRECT, ECONOMIC, COMMERCIAL, SPECIAL, CONSEQUENTIAL, INCIDENTAL,
EXEMPLARY OR INDIRECT DAMAGES, EVEN IF PALM HAS BEEN ADVISED OF THE POSSIBILITY OF SUCH
DAMAGES, INCLUDING WITHOUT LIMITATION, LOSS OF BUSINESS REVENUE OR EARNINGS, LOST DATA,
DAMAGES CAUSED BY DELAYS, LOST PROFITS, OR A FAILURE TO REALIZE EXPECTED SAVINGS.
PN: 406-11091-00
48
48 ::
v. 1.0
Treo 680
Setup help resources
On the Web
Tutorial + Support: att.com/WirelessTutorials
Need help with setup?
Call 1-800-331-0500 to reach the Palm Setup Help desk for AT&T customers.
Our support staff can help you set up your Palm® Treo™ 680 smart device and get you
up and running.
Hours: Mon - Fri 6 a.m.- 8 p.m. Pacific; Sat and Sun, 8 a.m. - 5 p.m. Pacific
This service is FREE within 90 days of purchase. Offer subject to change without notice.
On your Treo™ 680 smart device
User Guide: The whole story with lots of illustrated info, steps, and tricks.
Press Applications and select MyTreo.
Quick Tour: An introduction to common Treo 680 features.
Press Applications, and select Quick Tour.
On your computer
User Guide: Insert the CD, install the software, and then on your computer double-click
the Treo 680 User Guide icon.
© 2007 Palm, Inc. All rights reserved. Palm and Treo are among the trademarks or registered
trademarks owned by or licensed to Palm, Inc. AT&T and the AT&T logo are trademarks of AT&T
Knowledge Ventures and/or AT&T affiliated companies. Subsidiaries and affiliates of AT&T Inc. provide
products and services under the AT&T brand.
Palm® Treo™ 680 smart device
P/N: 406-11090-00 A/N: 185-10569-00
04062007