1
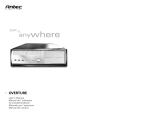
User’s Manual
PLUS1000 Series
SOHO File Server Case
Disclaimer
This manual is intended only as a guide for Antec's Computer Enclosures. For more
comprehensive instructions on installing your motherboard and peripherals, please refer
to the user's manuals which come with your components and drives.
PLUS1000 Series - SOHO File Server Case
The Antec TruePower power supply that comes with this case is equipped with TruePower
circuitry which, among other features, allows the power supply fans to be constantly
monitored and controlled. Based on the demands of your system, the fans will rotate as
slowly as possible to keep noise at an absolute minimum and overall noise will be much
lower than in power supplies equipped with traditional thermally-controlled fans.
Antec Low Noise Technology is a new approach that achieves optimum balance between
noise reduction and necessary cooling. The power supply fans run at the lowest speed
appropriate to load and conditions determined by an advanced temperature response system.
Additionally, your TruePower power supply can monitor the system case fans. There are
two dedicated fan connectors marked Fan Only from the power supply to connect system
case fans to. You may connect your case fans to it and have the TruePower circuitry control
the speed of the case fans.
Note: Please do not connect more than three external fans to the Fan Only connectors in
any combination. For maximum cooling you may choose to connect the case fans to the
4-pin peripheral connectors, but in this fashion noise will not be reduced.
The power supply comes with a main power switch. Make sure you turn the switch to the
ON ( I ) position before you boot up your computer for the first time. In normal operation
there is no need to turn the switch to the OFF (O) position since the power supply is
equipped with a soft on/off feature which turns your computer on and off through the soft
switch on your computer case. You may need to turn the switch to the OFF position
occasionally should your computer crash and you cannot shut it down through use of the
soft switch.
Set Up
1.
Take the case out of the box.
2.
Remove the Styrofoam.
3.
Remove the plastic bag.
4.
Place the case upright on a stable flat surface with the power supply fan at the back
facing you .
5.
Remove the screws from the side panel with the latch, unlatch the panel, and swing
it out to remove.
Note: Please doesn't try to use your fingernails to pry or lift the panels.
6.
Inside the case you should see the power supply, some wiring with marked connectors
(USB, IEEE1394, PWR etc.), an installed I/O panel, a power cord and a plastic bag
containing more hardware (screws, brass standoffs, plastic stands, etc.), and ten Drive
Rails.
Motherboard Installation
This manual is not designed to cover CPU, RAM, or expansion card installation. Please
consult your motherboard manual for specific mounting instructions and troubleshooting.
1.
Lay the case down so that the open side is up. You should be able to see the drive
cage and power supply.
2.
Make sure you have the appropriate I/O panel for your motherboard. If the panel
provided is not suitable for your motherboard, please contact your motherboard
manufacturer for the correct I/O panel.
3.
Line up the motherboard with the standoff holes, determine which ones line up and
remember where they are. Not all motherboards will match with all of the provided
screw holes, and this is not necessary for proper functionality. (In other words there
will likely be extra holes.) Some standoffs may be pre-installed for your convenience.
4.
Lift up and remove your motherboard.
5.
Screw in the brass standoffs to the threaded holes that line up with your motherboard.
6.
Place your motherboard on the brass standoffs.
7.
Screw in your motherboard to the standoffs with the provided metallic Phillips- head
screws.
8.
Your motherboard is now installed.
Power/LED Connections
The Antec TruePower power supply is an ATX12V form factor power supply. An ATX12V
power supply has a single 20-pin Main Power Connector, a 6-pin AUX Power Connector,
and a 4-pin +12V Power Connector for the motherboard. It also comes with five to seven
4-pin Peripheral Power Connectors and one to two 4-pin Floppy Drive Power Connectors for
your drives. It is backwards-compatible to previous ATX form factor power supplies. If
your motherboard does not support the AUX Power Connector or the +12V Power
Connector, you can still use this power supply.
The TruePower power supply is also equipped with a 3-pin fan signal connector. Connect it
to one of the fan connectors on your motherboard. You may monitor the speed of the power
supply rear fan through your motherboard BIOS or through the monitoring software that
comes with your motherboard.
Note: The speed of the fan may be as low as 1500 RPM when temperatures are low. At
these speeds some motherboards may not be able to properly detect the fan speed and may
generate false warnings of fan failure. Please refer to your motherboard manual for proper
fan monitoring set up.
1.
Connect the 20-pin ATX power connector (and AUX or +12V connectors if
appropriate) to your motherboard.
2.
Reset (labeled RESET SW) connects to your motherboard at the RST connector.
The label should be facing the front of the case, and for all of the following connectors
as well.
3.
Power LED (labeled POWER LED) connector is located behind the Reset connector.
1
2
4.
5.
6.
7.
Power Switch (labeled POWER SW) connects to the PWR connector on the
motherboard.
Speaker (labeled SPEAKER) connector is behind the PWR connector.
Hard Drive LED (labeled H.D.D. LED) connects to the IDE connector.
LED I, LED II connectors: This case comes with two extra LED marked LED I,
LED II. You may use these LED for various purposes such as SCSI LED, Message
LED (blinks when your modem received fax or mail), etc.
USB Connection
There are 8 wires with connectors coming from the front mounted USB ports of the case.
1.
Locate the internal USB header pins on your motherboard. They should consist of
10-pins in two rows.
Note: On some motherboards one or two pins may be marked as NC. This indicates
no contact. It is an empty pin. You don't need to use it. On some motherboards one
pin may be missing on either one or both rows. Don't worry about it. You only need
8 pins to connect to.
2.
Consult your motherboard manual to get each of the pin-out positions.
3.
Power Pins: There are two power pins, one on each row. They are usually marked as
Power, Vcc or +5V. Connect the two +5V connectors to the two power pins. Each
connector can go to either pin.
4.
Ground Pins: There are two ground pins, one on each row. They are usually marked
as GROUND or GND. Connect the two GROUND connectors to the two ground pins.
Each connector can go to either pin.
Note: On some motherboards, there may be two ground pins on one row. You don't
need to use all of them. Make sure to connect one ground pin on each row.
5.
Data Pins: There are two plus data pins, one on each row, and two minus data pins,
one on each row. They are usually marked as USBD2+, USBD3+ and USBD2-,
USBD3- or USBP2+, USBP3+, and USBP2-, USBP3- respectively.
a. Connect the 1 +D connector to any of the two plus data pins. It can go to either
of the plus pins.
b. Connect the 1 -D connector to the minus data pin in the same row as the plus
data pin that 1 +D connector has just connected to.
c. Repeat the same procedures to connect the 2 +D and 2 -D to the motherboard.
Make sure they are in the same row.
IEEE1394 (FireWire, I-Link) Connection
There are six wires with connectors coming from the front mounted IEEE1394 port of your
case. They consist of 2 sets of twisted pair cables; TPA (Twisted Pair A) and TPB (Twisted
Pair B), a power cable (VP), and a ground cable (VG).
1.
Locate and identify the pin-out of the IEEE1394 port on your motherboard.
2.
Power Pin: Connect the VP connector to it.
3.
Ground Pin: Connect the VG connector to it.
4.
Data Pins: There are two sets of data pins. Each set consists of a plus and a minus pin.
They are usually marked as TPA+ and TPA-, TPB+ and TPB-.
a. Connect the TPA+ connector to the TPA+ data pin and TPA- connector to the
TPA- data pin.
b. Connect the TPB+ connector to the TPB+ data pin and TPB- connector to the
TPB- data pin.
3
3.5" Device Installation
With the front bezel facing you, swing the plastic bezel cover out. You can see there are
four 5.25" and two 3.5" external drive bays.
Inside the case there are two 3.5" drive cages.
1.
Pull the quick release lever towards the rear of the case and release the top cage first.
Looking from the rear of the case you can see some metal grills over the exposed
(external) drive bays. Carefully put a screwdriver through the metal grill and gently
push the plastic drive bay cover until it comes off. Carefully use your hands to twist
the metal plate back and forth until it breaks off.
Note: Don't take off the covers and plates for the drive bays that you are not using
now. Be careful of the newly exposed metal where the grills were attached, as these
areas are likely to be sharp.
2.
Install your floppy drive into the top drive bay.
3.
Mount your other 3.5" device into the drive cage.
4.
Slide and lock the drive cage back into the case.
5.
Release the second cage.
Note: Inside the cage you will find a fan bracket. This is for one of the optional
80mm cooling fans. If you want to install the optional fan you should do it now.
For fan installation please see the Fan Installation section of this manual.
6.
Mount your other 3.5" devices into the drive cage.
7.
Slide and lock the drive cage back into the case.
8.
Find a small 4-pin white connector on the power supply and connect it to the male
4-pin connector on the floppy drive.
9.
Connect a large 4-pin white connector from the power supply to the male 4-pin
connector on each of the other devices.
5.25" Device Installation
1.
Take off the plastic drive bay covers and metal plates as described above.
2.
Take two of the Drive Rails and mount them to the sides of the 5.25" device.
Make sure the metal portion is angled away from the device and facing forward.
3.
Slide the device into the drive bay until you hear a click.
4.
Mount the other devices accordingly. Connect a large 4-pin white connector from the
power supply to the male 4-pin connector on each of the devices.
Data Cable Connection
After you have connected the devices to the power supply, you need to connect the data
cables between the devices and the motherboard. The data cables are not included with the
case; we include this information only as an aid.
1.
For hard drives and CD-ROM's, use the 40-pin IDE ribbon cables. For floppy drives,
use the 34-pin IDE ribbon cables. These should come with your motherboard and
have a red strip on one side indicating pin number 1. When you connect a ribbon
cable to a device, make sure that the red strip is on pin 1, usually toward the power
connector.
2.
The end that attachs to devices should be the side that has 2 connectors. This will
enable you to connect another device if you wish.
3.
Connect the far end of the cable to your motherboard on the IDE port, either IDE 1
or IDE 2, or the FLOPPY port.
Fan Installation
The case comes preinstalled with two 80mm cooling fans in the rear. The fans are installed
so that the air is blowing out of the case. Connect a large 4-pin white connector from the
power supply to the male 4-pin connector on each of the fans.
4
Optional Cooling fans: The case has two optional 80mm cooling fans that can be installed
in the front of the case. One of the optional fans is located inside the 3.5" drive cage. You
should install the fan first before you mount your drives into the cage. Install the fans so
that the air is blowing into the case from the front.
1.
Drop the fan into the fan bracket and push it in until it snaps in.
2.
Connect a large 4-pin white connector from the power supply to the male 4-pin
connector on each of the fans.
Washable Air Filter Maintainence
From time to time it will be necessary to wash the installed air filter. Not washing the air
filter will result in higher system temperatures and possible stability problems. We
recommend checking the air filter at least once a month initially. The frequency will change
depending on system usage (users whose systems run 24/7 will likely have to check/wash
more often than those who don't use their systems every day) and on environmental
conditions.
Antec Quality 3-Year parts and labor warranty (AQ3)
See details at:
http://www.antec-inc.com/support_warranty.html
http://www.antec-europe.com/warranty_uk.html
5