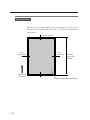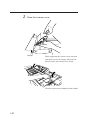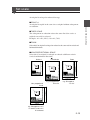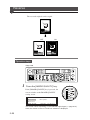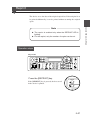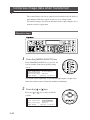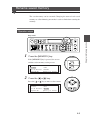
1
User's Guide (Copy Part)
Network Multi-Function Plotter
LP-1020-MF
LP-1020L-MF
Read this User's Guide to use the plotter safely and
properly. Keep this manual in a place where you
can quickly access it at any time.
Seiko I Infotech Inc.
U00107747800
November 2007
©Seiko I Infotech 2007
Reprinting of this manual without permission is prohibited.
The content of this manual may be changed without notice.
D-SCAN is a registered trademark of Seiko Instruments, Inc.
Ethernet is a registered trademark of Xerox, Inc.
HP is a registered trademark of Hewlett-Packard (U.S.A.)
MICRO CADAM is a trademark of CADAM, Inc. (U.S.A.)
This equipment has been tested and found to comply with the limits for a Class A digital device,
pursuant to Part 15 of the FCC Rules. These limits are designed to provide reasonable protection
against harmful interference when the equipment is operated in a commercial environment.
This equipment generates, uses, and can radiate radio frequency energy and, if not installed and
used in accordance with the instruction manual, may cause harmful interference to radio
communications. Operation of this equipment in a residential area is likely to cause harmful
interference in which case the user will be required to correct the interference at his own expense.
Durch die Kennzeichnung dieses Produktes mit dem CE-Zeichen erklärt Seiko den folgenden
Direktiven der Europäischen Union zu entsprechen (mit Wirkung vom siehe Datum):
Januar 1996:- EG-Direktive 73/23/EEC ergänzt durch EG-Direktive 93/68/EEC, Angleichung der
Gesetze der einzelnen Mitgliedsstaaten bezüglich Geräten mit niedriger Betriebsspannung.
Januar 1996:- EG-Direktive 89/336/EEC, Angleichung der Gesetze der einzelnen Mitgliedsstaaten
bezüglich elektromagnetischer Kompatibilität.
Den vollständigen Text dieser Erklärung einschließlich der Definition der entsprechenden
Direktiven sowie der jeweiligen Standards erhalten Sie von Ihrem Seiko Colorgrafx Systems
Kundendienst oder Ihrem Seiko Engineering Systems Kundendienst.
This Perchlorate warnig applies ONLY in California USA
“Perchlorate Material - special handling may apply,
See www.dtsc.ca.gov/hazardouswaste/perchlorate”
Introduction
Thank you for purchasing our LP-1020-MF, LP-1020L-MF Network
Multi- Function Plotter (here referred to as “this device”).
This manual describes an operating method of the copy function, delivery
function, and file function provided by this device.
For the print function, paper loading, replacement of consumables, and
paper jam clearings, see the "User's Guide (Plotter Unit)" separately
prepared.
Before using this device, please read the “Safety Precautions” so that you
may operate this device safely and correctly. Keep this manual in a place
where you can quickly access it at any time.
This device employs either one of the following feeders: 1-roll paper
feeder for standard sheet drawings with output up to 2.5 m, or 2-rolls
paper feeder for long sheet drawings with output up to 10 m.
This manual explains how to use the 2-rolls paper feeder devices, but also
accomodates the 1-roll paper feeder devices.
i
Safety precautions
The following symbols are used in this manual to ensure the proper use of
the plotter and to prevent the plotter from being damaged.
Please follow these guidlines:
WARNING
Warnings must be followed carefully to avoid serious
bodily injury or death.
CAUTION
Cautions must be observed to avoid damage to your
equipment and bodily injury.
Example of symbols:
This symbol (
) denotes items that require special care while
executing a certain procedure or operation.
This symbol (
) denotes items that are forbidden.
This symbol (
) denotes items you should follow to prevent
accidents or injury.
ii
Warning
DO NOT touch any of the parts inside the plotter with a "HIGH
VOLTAGE" label attached as it may result in electric shock.
DO NOT touch any of the parts inside the plotter with a "HIGH
TEMPERATURE" label attached as it may result in severe burns.
DO NOT disassemble or modify the plotter. DO NOT repair the plotter
by yourself. Doing so may cause fire, electric shock or other accidents.
DO NOT throw the toner cartridge or waste toner bottle into fire or
place them near heat as they could explode or catch fire leading to
serious accidents and/or bodily injury.
NEVER use the plotter in a place of extreme humidity or any place
where it can possibly be splashed by any liquids. If any liquids get into
the plotter, it could lead to fire, electric shock, or other serious
accidents.
DO NOT allow metal to touch the internal parts of the plotter. Doing so
may cause fire, electric shock, or other accidents.
DO NOT disconnect or connect the power cable with wet hands. Doing
so may lead to electric shock.
Power OFF the plotter and unplug the power cable from the power
outlet in any of the following cases:
◆ When putting your hands inside the plotter.
◆ Smoke, strange noise or smells erupt from the plotter.
◆ A piece of metal or any liquid touches the internal parts or slots of
the plotter.
◆ An error requiring service from a service center occurs.
Using the plotter in any manner other than for which it was designed may
cause accidents or fire.
iii
Caution
DO NOT disassemble, modify the toner cartridge. If toner gets on your
skin or clothes, wash off the affected area immediately with soap and
water.
Handle the toner cartridge with extreme care. Should any toner get into
your eyes, do not rub them, flush them immediately with water, and see
a physician immediately.
Handle the paper rolls with care because they are very heavy. Dropping
them may lead to personal injury.
Use care when cutting the paper rolls with a scissors or knife.
DO NOT unplug the electric cable by pulling on the cable. Doing so
may cause the cable to fray or break which could lead to electric shock
and/or fire.
In order to ensure the safe operation of the plotter heed all of the cautions
and warnings contained throughout this manual.
iv
How to read this manual
Notation method
Markings
Warning
◆ This mark indicates warnings that must be followed
carefully to avoid serious bodily injury or death.
Caution
◆ This mark indicates cautions that must be observed to
avoid damage to the equipment and bodily injury.
Note
◆ Contain important information.
This is a “Tip” mark.
Contain additional hints for better use.
⇒
This is a “See” mark.
A reference section and page is indicated after this mark.
v
Key/LCD/LED notations
Indicates a control
panel key.
1
Press the [ZOOM] key.
If the [ZOOM] key is pressed, the screen switches over to
the ZOOM setting screen.
Z o om ( %)
100 . 0
( 25 . 0 - 400 . 0 )
Indicates the control
panel screen.
[ En t e r ] t o Se t
Expresses the selected item.
vi
TABLE OF CONTENTS
Introduction
i
Safety precautions .............................................................................. ii
How to read this manual ..................................................................... v
Chapter 1 Getting started
1-1
Restrictions on Copying ................................................................... 1-2
Control panel ................................................................................... 1-3
Multi-functions .................................................................................. 1-7
Print function ....................................................................... 1-7
Copy function ...................................................................... 1-7
Delivery function .................................................................. 1-7
File function ......................................................................... 1-8
Main functions .................................................................................. 1-9
Original .......................................................................................... 1-12
Acceptable original size and thickness .............................. 1-12
Originals that require a document carrier .......................... 1-12
Unacceptable originals ...................................................... 1-13
Scanning Area ................................................................... 1-14
How to input an original ................................................................. 1-15
How to input an original ..................................................... 1-15
Removing original reject guide .......................................... 1-17
How to scan originals with a crease. ................................. 1-19
Cancel the scanning of original ......................................... 1-21
CONTENTS-1
Routine maintenance ..................................................................... 1-22
Cleaning the scanning are and scanner glass .................. 1-22
Chapter 2 Copy function
2-1
Flow of copy operation ..................................................................... 2-2
Flow of manual feed copy ................................................................ 2-4
Copy function overview.................................................................... 2-6
Select original size ........................................................................... 2-7
Operation steps ................................................................. 2-12
Select original type ........................................................................ 2-13
Operation steps ................................................................. 2-14
Adjust background ......................................................................... 2-15
Operation steps ................................................................. 2-16
Adjust density ................................................................................ 2-17
Operation steps ................................................................. 2-18
Set scale ........................................................................................ 2-19
Operation steps (SCALE ¥1) ............................................. 2-20
Operation steps (FIXED SCALE) ...................................... 2-21
Operation steps (ZOOM) ................................................... 2-23
Operation steps (NON-PROPORTIONAL SCALE) ........... 2-24
Performing auto reduction ............................................................. 2-26
Operation steps ................................................................. 2-26
CONTENTS-2
Select paper fed location ............................................................... 2-28
Operation steps ................................................................. 2-28
Selecting paper type ...................................................................... 2-29
Operation steps ................................................................. 2-29
Enter number of copies.................................................................. 2-31
Operation steps ................................................................. 2-31
Add margin .................................................................................... 2-32
Operation steps ................................................................. 2-32
Move original position .................................................................... 2-35
Operation steps ................................................................. 2-36
Partial copy .................................................................................... 2-40
Operation steps ................................................................. 2-40
Erase frame ................................................................................... 2-44
Operation steps ................................................................. 2-45
Select the size of the original ......................................................... 2-48
Operation steps ................................................................. 2-48
Select original reject direction ........................................................ 2-50
Operation steps ................................................................. 2-50
Adjust sharpness of original........................................................... 2-52
Operation steps ................................................................. 2-52
Adjust contrast of original .............................................................. 2-54
Operation steps ................................................................. 2-54
CONTENTS-3
Mirror ............................................................................................. 2-56
Operation steps ................................................................. 2-56
Reverse ......................................................................................... 2-58
Operation steps ................................................................. 2-58
Copying long original ..................................................................... 2-60
Operation steps ................................................................. 2-61
Sorting ........................................................................................... 2-63
Operation steps ................................................................. 2-63
Reset ............................................................................................. 2-66
Operation steps ................................................................. 2-66
Reprint ........................................................................................... 2-67
Operation steps ................................................................. 2-67
Force print ...................................................................................... 2-68
Operation steps ................................................................. 2-68
Chapter 3 Delivery function
3-1
Delivery function .............................................................................. 3-2
Preparation before using delivery function ...................................... 3-3
Checking network connection of the device ........................ 3-3
Preparing delivery host computer ........................................ 3-3
Connecting delivery host computer ..................................... 3-4
CONTENTS-4
Flow of delivery operation ................................................................ 3-7
Delivery function overview ............................................................. 3-10
Select original size ......................................................................... 3-11
Operation steps ................................................................. 3-15
Select original type ........................................................................ 3-16
Operation steps ................................................................. 3-17
Adjust background ......................................................................... 3-18
Operation steps ................................................................. 3-19
Adjust density ................................................................................ 3-20
Operation steps ................................................................. 3-21
Select media series used for original ............................................. 3-22
Operation steps ................................................................. 3-22
Select original eject direction ......................................................... 3-24
Operation steps ................................................................. 3-24
Adjust sharpness of original ........................................................... 3-26
Operation steps ................................................................. 3-26
Adjust contrast of original .............................................................. 3-28
Operation steps ................................................................. 3-28
Reverse ......................................................................................... 3-30
Operation steps ................................................................. 3-30
CONTENTS-5
Designate resolution ...................................................................... 3-32
Operation steps ................................................................. 3-32
Compress image data when transferred........................................ 3-34
Operation steps ................................................................. 3-34
Reset ............................................................................................. 3-36
Operation steps ................................................................. 3-36
Chapter 4 Memory function
4-1
Memory function overview ............................................................... 4-2
Save settings to memory ................................................................. 4-3
Operation steps ................................................................... 4-3
Call settings from save memory ...................................................... 4-5
Operation steps ................................................................... 4-5
Set as default ................................................................................... 4-7
Operation steps ................................................................... 4-7
Rename saved memory ................................................................... 4-9
Operation steps ................................................................... 4-9
CONTENTS-6
Chapter 5 File function
5-1
File function ..................................................................................... 5-2
Preparation before using file function .............................................. 5-3
Checking network connection of the device ........................ 5-3
Installing exclusive application ............................................ 5-3
Screens of file function .................................................................... 5-4
Busy wait screen ................................................................. 5-4
Occupancy display screen .................................................. 5-4
Scan start wait screen ......................................................... 5-4
Scanning screen .................................................................. 5-5
Processing ........................................................................... 5-5
Sending screen ................................................................... 5-5
Original ejecting screen ....................................................... 5-6
Chapter 6 Troubleshooting
6-1
Copy/scan cannot be performed clearly .......................................... 6-2
Copy/scan cannot be performed satisfactorily ................................. 6-4
Copy function ...................................................................... 6-4
Delivery function .................................................................. 6-8
Color scanning function ....................................................... 6-9
Delivery failed ................................................................................ 6-10
CONTENTS-7
Getting started
Chapter 1 provides necessary information to operate this device. Read
this chapter to understand the basics of this device before proceeding to
the following chapters.
Contents of this chapter
Restrictions on copying
Control panel
Multi-functions
Main functions
Original
How to input an original
Routine maintenance
1-1
Chapter 1 Getting started
Chapter 1
Restrictions on Copying
Note that the copying of some items may be limited or prohibited by law.
Copying of the following items is prohibited by law.
• Bank bills, coins, securities, government-issued marketable
securities, government bond securities, municipal securities
(including those stamped “sample”).
• Bills, coins and securities circulated in foreign countries.
• Unused postage stamps and postcards for which copying is not
allowed by the government.
• Government stamps and securities that are subject to regulation by
law.
• Other materials for which copying is prohibited by applicable laws.
Some exercise caution when copying the following items
• Be aware that the government allows copying of private valuable
securities (stocks, bills, checks, etc.), commuter passes and
commutation tickets, in which only minimum copying is necessary to
carry out the operating companies’ businesses.
• Passports issued by governmental authorities, licenses driver’s issued
by public authorities and private organizations, permissions, IDs,
passes, meal coupons and other tickets cannot be copied without prior
permission.
Responsible use of copyrighted materials
• Copying of copyrighted books, music, pictures, prints, maps,
drawings, movies, photographs and other copyrighted materials are
prohibited except for personal, domestic or other limited usage.
Unless actions on the advice of a knowledgeable attorney, be
responsible and respectful by obtaining the permission of the
copyright holder before copying published material.
1-2
Control panel
The keys, LEDs and LCD are laid out on the control panel as illustrated in
the following diagram.
1
2
WARNING LIGHT
3
4
MENU
COPY
PRINT
MEMORY
RESET
POWER
SAVING
DELIVERY
FILE
REPRINT
STOP
5
POWER
SCAN STOP
ORIGINAL
SIZE
TONER
PROCESS
WASTE
TONER
AUTO
ORIGINAL
TYPE
BACKGROUND
REMOVAL
DENSITY
PAPER
FEED
DARK
MANUAL FEED
FIXED-SIZE
PORTRAIT
TEXT/PHOTO
FIXED-SIZE
LANDSCAPE
PHOTO
SYNCHRO
BLUE PRINT
NORMAL
LIGHT
DATA
SCALE x1
TEXT/LINE
FIXED SCALE
ZOOM
NON-PROPORTIONAL
ORIGINAL
START
IMAGE
QUALITY
SORT
SCALE
ERROR
6
FUNCTION
7
8
9
10
1
WARNING LIGHT
This LED indicates the print mode or standby status of
the device.
ON (green): Normal
ON (orange): A warning event occurred
Flashing (orange): An error occurred
OFF: A status other than print mode and standby (OFF also in
power saving status)
2
MENU
COPY
PRINT
● [MENU] key
POWER
SAVING
DELIVERY
FILE
The MENU mode is selected and the
LED on the side of the key turns on. In
this mode, various settings of the device
can be made. For details, see the separate volume “User's Guide, Plotter
Unit”.
● [POWER SAVING] key
The POWER SAVING mode is selected and the LED on the side of the
key turns on. In this mode, the screen display becomes blank. If any key
is pressed, the POWER SAVING mode is cancelled.
◆ This device has been set so that the POWER SAVING mode is
selected automatically if no operation is performed for the
specified time. This time can be changed. For details, see the
separate volume “User's Guide, Plotter Unit”.
1-3
Chapter 1 Getting started
▼Control panel
● [COPY] key
The COPY mode is selected and the LED on the side of the key turns
on. For details, see Chapter 2.
● [DELIVERY] key
The DELIVERY mode is selected and the LED on the side of the key
turns on. For details, see Chapter 3.
● [PRINT] key
The PRINT mode is selected, and the printing is enabled. For details,
see the separate volume “User's Guide, Plotter Unit”.
● [FILE] key
The FILE mode is selected. For details, see Chapter 5.
3
This screen displays a
status of the device.
4
Convenient functions
● [MEMORY] key
Various settings used frequently can be
registered in the memory.
MEMORY
RESET
REPRINT
STOP
● [REPRINT] key
The print outputted last can be reprinted.
For the reprint, only the number of copies can be changed.
● [RESET] key
The settings are reset to default values.
● [STOP] key
The print can be stopped.
5
This button turns on/off the power supply to the device.
1-4
POWER
▼Control panel
6
TONER
PROCESS
WASTE
TONER
MANUAL FEED
● [TONER] LED
Indicates the toner status.
On: There is sufficient toner.
DATA
ERROR
Flashing: Toner is running low.
Off: There is no toner (plots cannot be produced without
replacement.)
● [WASTE TONER] LED
Indicates the toner waste bottle status.
On: Normal
Flashing: Replace soon.
Off: plots cannot be produced without replacement
● [PROCESS] LED
Indicates the process cartridge status.
On: Normal
Flashing: Replace soon.
Off: Process cartridge needs to be replaced before plotting.
● [MANUAL FEED] LED
This LED indicates whether the paper to be fed manually has been
loaded.
ON: Paper has been loaded.
OFF: No paper
● [1], [2] LEDs
These LED indicate whether the paper has been loaded in the roll 1 and
roll 2 drawers respectively.
ON: Paper has been loaded.
OFF: No paper
● [DATA] LED
This LED indicates the data receiving status.
ON: A job is waiting for the processing.
Flashing: Data is being received.
OFF: No received data
1-5
Chapter 1 Getting started
These LEDs indicate the status of the device.
● [ERROR] LED
This LED indicates whether an error condition has occurred.
ON: An error exists.
OFF: No error
7
ORIGINAL
SIZE
AUTO
ORIGINAL
TYPE
BACKGROUND
REMOVAL
SCALE x1
DENSITY
PAPER
FEED
TEXT/LINE
DARK
FIXED-SIZE
PORTRAIT
TEXT/PHOTO
FIXED-SIZE
LANDSCAPE
PHOTO
SYNCHRO
BLUE PRINT
FIXED SCALE
NORMAL
LIGHT
ORIGINAL
IMAGE
QUALITY
ZOOM
SORT
NON-PROPORTIONAL
SCALE
FUNCTION
These keys are used for copy or delivery. Currently set items are
indicated with the LED ON.
8
These keys change, enter, or cancel the set value.
● [Enter] key
This key enters the set value.
● [ ], [ ], [ ], [ ], keys
These keys are used to shift or change the set values.
● [Cancel] key
This key cancels the set value.
9
These keys are used to enter the number of copies
or input numbers.
10
SCAN STOP
These keys start the reading of original or stop the
operation.
START
1-6
This device provides the print, copy, delivery, and file functions. Any of
these functions can be selected by a single key operation.
Print function
Graphic data created by a workstation or personal computer (hereinafter
called the computer) are received and printed.
For details, see “User's Guide, Plotter Units.”
Copy function
An original can be copied according to the type and image quality of the
original.
For details, see Chapter 2.
Delivery function
From the host computer for delivery connected via network, image data
scanned by this device can be saved in the host computer for delivery
using the exclusive application, and further the data can be delivered to
other computers.
For details, see Chapter 3.
1-7
Chapter 1 Getting started
Multi-functions
File function
From a computer connected via network, image data scanned by this
device can be received using the exclusive application.
For details, see Chapter 5.
1-8
Main functions
▼Main functions
Text/Line
Text/Photo
3
Photo
Blue print
1
4
A
A
B
B
K
2
国名(日本語)
ハワイ(アメリカ合衆国・ハワイ州)
国名(英語)
ハワイ州 State of Hawaii
首都
ホノルル(州都)
面積
1万6634平方キロメ−トル
人口
121万1537人(2000年)
時差
日本時間マイナス19時間。
A
B
B
K
日本は月曜日の午前7時
C
C
D
D
C
50.0
50.0
D
D
XXXXXXXXX
XXXXXXXXX
MODEL
APPROVED BY
Tanaka
CHECKED BY
Shimano
MODEL
XXXXXXXXXXXXXXXXXXXX
TITLE
SIGNED BY
Ioka
DRAWN BY
Oyama
Seiko I Infotech Inc. Design Department
SCALE
UNIT
1/1
1/1
APPROVED BY
PART NO.
123456789
DRAWING NO.
123456789
A4
XXXXXXXXXXXXXXXXXXXX
TITLE
CHECKED BY
SIGNED BY
DRAWN BY
SHEET
Tanaka
PAGE
Seiko I Infotech Inc. Design Department
Shimano
Ioka
Oyama
PART NO.
123456789
DRAWING NO.
123456789
SHEET
A4
PAGE
Original having
colored background
■ Copy/Delivery by
erasing background
color of original
(⇒ pages 2-15, 3-18)
1
2
3
1
4
A
2
3
A
4-R2.0
B
K
B
B
C
C
B
K
C
C
50.0
50.0
D
D
D
D
XXXXXXXXX
XXXXXXXXX
MODEL
UNIT
1/1
APPROVED BY
Tanaka
MODEL
XXXXXXXXXXXXXXXXXXXX
TITLE
CHECKED BY
SIGNED BY
Shimano
DRAWN BY
Ioka
Oyama
PART NO.
123456789
DRAWING NO.
123456789
A4
2
3
2
3
123456789
DRAWING NO.
123456789
SHEET
PAGE
A4
Light
1
B
B
C
C
XXXXXXXXX
UNIT
1/1
1/1
APPROVED BY
PART NO.
123456789
DRAWING NO.
123456789
A4
CHECKED BY
C
B
C
50.0
D
D
XXXXXXXXX
DRAWN BY
SHEET
Tanaka
PAGE
Seiko I Infotech Inc. Design Department
Shimano
2
3
Ioka
SCALE
UNIT
1/1
1/1
APPROVED BY
Oyama
PART NO.
123456789
DRAWING NO.
123456789
A4
XXXXXXXXXXXXXXXXXXXX
TITLE
CHECKED BY
SIGNED BY
DRAWN BY
SHEET
Tanaka
PAGE
Seiko I Infotech Inc. Design Department
Shimano
Ioka
Oyama
PART NO.
123456789
DRAWING NO.
123456789
SHEET
A4
Fixed scale
1
4
A
MODEL
XXXXXXXXXXXXXXXXXXXX
TITLE
SIGNED BY
Scale x1
1
C
XXXXXXXXX
SCALE
4
A
MODEL
XXXXXXXXXXXXXXXXXXXX
TITLE
Oyama
B
D
MODEL
Ioka
B
K
D
DRAWN BY
Seiko I Infotech Inc. Design Department
3
50.0
D
SIGNED BY
2
4-R2.0
K
D
Shimano
PART NO.
A
A
50.0
Tanaka
Oyama
4
A
50.0
K
CHECKED BY
Ioka
4-R2.0
C
1/1
Shimano
Normal
1
4
B
UNIT
DRAWN BY
Seiko I Infotech Inc. Design Department
4-R2.0
APPROVED BY
SIGNED BY
Tanaka
A
1/1
XXXXXXXXXXXXXXXXXXXX
TITLE
CHECKED BY
PAGE
Dark
SCALE
1/1
SHEET
A
■ Copy/Delivery by
adjusting density
(⇒ pages 2-17, 3-20)
UNIT
1/1
APPROVED BY
Seiko I Infotech Inc. Design Department
1
SCALE
50.0
SCALE
1/1
4
A
A
4-R2.0
50.0
1/1
50.0
UNIT
1/1
50.0
SCALE
4
4-R2.0
例えば、ハワイが日曜日の正午だとすると
C
3
A
4-R2.0
50.0
■ Copy/Delivery
according to the
original type (⇒ pages
2-13, 3-16)
2
50.0
1
2
3
Zoom
1
4
A
PAGE
2
3
4
A
A
A
A
4-R2.0
4-R2.0
B
B
B
D
K
C
C
50.0
C
D
B
K
B
C
50.0
C
D
D
50.0
113.5%
50.0
K
C
50.0
4-R2.0
50.0
■ Enlarged or reduced
copy (⇒ page 2-19)
B
XXXXXXXXX
MODEL
SCALE
UNIT
1/1
1/1
APPROVED BY
XXXXXXXXXXXXXXXXXXXX
TITLE
CHECKED BY
Tanaka
SIGNED BY
Shimano
Ioka
D
DRAWN BY
Oyama
Seiko I Infotech Inc. Design Department
PART NO.
123456789
DRAWING NO.
123456789
D
XXXXXXXXX
MODEL
SHEET
A4
PAGE
SCALE
UNIT
1/1
1/1
APPROVED BY
Tanaka
CHECKED BY
Shimano
XXXXXXXXXXXXXXXXXXXX
TITLE
SIGNED BY
Ioka
DRAWN BY
Oyama
Seiko I Infotech Inc. Design Department
PART NO.
123456789
DRAWING NO.
123456789
SHEET
A4
PAGE
XXXXXXXXX
MODEL
SCALE
UNIT
1/1
1/1
XXXXXXXXXXXXXXXXXXXX
TITLE
APPROVED BY
Tanaka
CHECKED BY
Shimano
SIGNED BY
Ioka
DRAWN BY
Oyama
Seiko I Infotech Inc. Design Department
PART NO.
123456789
DRAWING NO.
123456789
SHEET
A4
PAGE
113.5%
A4➔A3(141%)
Non-proportional scale
1
2
3
4
A
A
4-R2.0
B
50.0
K
C
C
50.0
D
110%
B
D
XXXXXXXXX
MODEL
SCALE
UNIT
1/1
1/1
APPROVED BY
Tanaka
CHECKED BY
Shimano
XXXXXXXXXXXXXXXXXXXX
TITLE
SIGNED BY
Ioka
DRAWN BY
Oyama
Seiko I Infotech Inc. Design Department
PART NO.
123456789
DRAWING NO.
123456789
SHEET
A4
PAGE
130%
1-9
Chapter 1 Getting started
This section describes the main functions for copy and delivery.
Non-fixed size original
1
2
3
Top
1
4
A
A
A
B
B
C
C
D
D
E
E
2
4-R2.0
D
100.0
K
K
C
B
K
K
50.0
E
XXXXXXXXX
XXXXXXXXX
MODEL
UNIT
1/1
1/1
APPROVED BY
MODEL
XXXXXXXXXXXXXXXXXXXX
TITLE
CHECKED BY
Tanaka
SIGNED BY
Shimano
Ioka
DRAWN BY
SCALE
UNIT
1/1
1/1
APPROVED BY
Oyama
Seiko I Infotech Inc. Design Department
D
50.0
E
SCALE
C
100.0
B
direction
4
A
4-R2.0
■ Copy with a margin
added to top and
trailing bottom
Paper feed
(⇒ page 2-32)
3
PART NO.
123456789
DRAWING NO.
123456789
A4 long
XXXXXXXXXXXXXXXXXXXX
TITLE
CHECKED BY
SIGNED BY
DRAWN BY
SHEET
Tanaka
PAGE
Seiko I Infotech Inc. Design Department
Shimano
Ioka
Oyama
PART NO.
123456789
DRAWING NO.
123456789
SHEET
A4 long
PAGE
Bottom
Vertical direction
Horizontal direction
2
3
4
1
2
3
4-R2.0
A
A
B
1
3
4
50.0
K
2
4-R2.0
A
C
4-R2.0
A
B
B
C
C
D
D
C
4-R2.0
B
B
K
D
50.0
K
50.0
C
50.0
C
XXXXXXXXX
MODEL
SCALE
UNIT
1/1
1/1
APPROVED BY
Tanaka
CHECKED BY
Shimano
50.0
XXXXXXXXXXXXXXXXXXXX
TITLE
SIGNED BY
Ioka
DRAWN BY
Oyama
Seiko I Infotech Inc. Design Department
PART NO.
123456789
DRAWING NO.
123456789
SHEET
D
PAGE
A4
D
XXXXXXXXX
XXXXXXXXX
MODEL
MODEL
XXXXXXXXXXXXXXXXXXXX
TITLE
KED BY
imano
SIGNED BY
Ioka
DRAWN BY
Oyama
h Inc. Design Department
SCALE
UNIT
1/1
1/1
APPROVED BY
PART NO.
123456789
DRAWING NO.
123456789
SHEET
XXXXXXXXXXXXXXXXXXXX
TITLE
CHECKED BY
Tanaka
PAGE
A4
SIGNED BY
Shimano
Ioka
1
2
3
UNIT
Distanced
from top edge
(“Position”)
4
A
A
B
B
B
B
4-R2.0
4-R2.0
C
C
K
K
Length
100.0
K
K
D
C
E
D
D
E
E
100.0
C
D
E
50.0
50.0
Paper feed
direction
XXXXXXXXX
MODEL
UNIT
1/1
1/1
APPROVED BY
XXXXXXXXXXXXXXXXXXXX
TITLE
CHECKED BY
Tanaka
SIGNED BY
Shimano
Ioka
DRAWN BY
Oyama
Seiko I Infotech Inc. Design department
PART NO.
123456789
DRAWING NO.
123456789
SHEET
A4 long
PAGE
1
1
2
3
3
4
A
A
A
4-R2.0
4-R2.0
B
B
B
K
B
K
50.0
■ FrameErase copy
(⇒ page 2-44)
2
4
A
C
50.0
SCALE
C
C
C
50.0
50.0
D
D
D
D
XXXXXXXXX
XXXXXXXXX
MODEL
MODEL
1/1
UNIT
XXXXXXXXXXXXXXXXXXXX
1/1
APPROVED BY
Tanaka
SCALE
UNIT
1/1
1/1
TITLE
CHECKED BY
SIGNED BY
Shimano
Ioka
APPROVED BY
XXXXXXXXXXXXXXXXXXXX
TITLE
CHECKED BY
SIGNED BY
DRAWN BY
DRAWN BY
Oyama
PART NO.
123456789
DRAWING NO.
123456789
Tanaka
SHEET
Shimano
Ioka
Oyama
Seiko I Infotech Inc. Design Department
Seiko I Infotech Inc. Design Department
A4
Dark
1
2
3
A
B
B
C
C
50.0
D
Tanaka
Shimano
Ioka
Oyama
SCALE
UNIT
1/1
1/1
APPROVED BY
PART NO.
123456789
DRAWING NO.
123456789
A4
CHECKED BY
C
C
B
50.0
C
50.0
D
D
XXXXXXXXX
DRAWN BY
SHEET
Tanaka
PAGE
Seiko I Infotech Inc. Design Department
Shimano
MODEL
XXXXXXXXXXXXXXXXXXXX
TITLE
SIGNED BY
Ioka
4
A
XXXXXXXXX
DRAWN BY
Seiko I Infotech Inc. Design Department
B
MODEL
XXXXXXXXXXXXXXXXXXXX
TITLE
SIGNED BY
B
D
XXXXXXXXX
CHECKED BY
3
K
D
MODEL
1/1
2
50.0
D
UNIT
PAGE
4-R2.0
K
C
SCALE
SHEET
A4
A
4-R2.0
B
1/1
123456789
Light
1
4
A
4-R2.0
K
123456789
DRAWING NO.
Normal
1
4
A
APPROVED BY
1-10
3
A
50.0
■ Copy/Delivery by
adjusting contrast of
original
(⇒ pages 2-54, 3-28)
2
PART NO.
PAGE
Oyama
50.0
SCALE
SCALE
UNIT
1/1
1/1
APPROVED BY
PART NO.
123456789
DRAWING NO.
123456789
A4
DRAWN BY
Oyama
Seiko I Infotech Inc. Design Department
XXXXXXXXX
MODEL
SCALE
■ Partial copy
(⇒ page 2-40)
50.0
K
50.0
D
50.0
■ Copy by shifting
original position
(⇒ page 2-35)
B
CHECKED BY
XXXXXXXXXXXXXXXXXXXX
TITLE
SIGNED BY
DRAWN BY
SHEET
Tanaka
PAGE
Seiko I Infotech Inc. Design Department
Shimano
Ioka
Oyama
PART NO.
123456789
DRAWING NO.
123456789
SHEET
A4
PAGE
PART NO.
123456789
DRAWING NO.
123456789
A4
▼Main functions
OFF
2
3
4
A
A
B
B
C
C
D
D
3
1
2
A
4-R2.0
0.2R-4
B
50.0
K
B
K
0.05
■ Copy by mirroring
the original
(⇒ pages 2-56)
ON
4
C
C
50.0
0.05
D
D
XXXXXXXXX
XXXXXXXXX
MODEL
SCALE
UNIT
1/1
1/1
APPROVED BY
LEDOM
TINU
XXXXXXXXXXXXXXXXXXXX
XXXXXXXXXXXXXXXXXXXX
TITLE
CHECKED BY
Tanaka
SIGNED BY
Shimano
YB NWARD
Oyama
PART NO.
123456789
DRAWING NO.
123456789
A4
SHEET
TEEHS
PAGE
EGAP
4A
987654321
.ON TRAP
987654321
.ON GNIWARD
YB DENGIS
amayO
YB DEKCEHC
akoI
2
3
1/1
YB DEVORPPA
onamihS
akanaT
tnemtrapeD ngiseD .cnI hcetofnI I okieS
OFF
1
ON
1
4
A
ELACS
1/1
ELTIT
DRAWN BY
Ioka
Seiko I Infotech Inc. Design Department
2
3
4
A
A
A
4-R2.0
4-R2.0
B
B
B
B
K
C
50.0
K
50.0
■ Copy/Delivery by
reversing the original
(⇒ pages 2-58, 3-30)
Chapter 1 Getting started
1
A
C
C
C
50.0
50.0
D
D
D
D
XXXXXXXXX
XXXXXXXXX
MODEL
MODEL
UNIT
1/1
XXXXXXXXXXXXXXXXXXXX
SCALE
UNIT
1/1
1/1
CHECKED BY
Tanaka
XXXXXXXXXXXXXXXXXXXX
TITLE
TITLE
APPROVED BY
APPROVED BY
SIGNED BY
Shimano
CHECKED BY
SIGNED BY
DRAWN BY
DRAWN BY
Ioka
Oyama
Seiko I Infotech Inc. Design Department
PART NO.
123456789
DRAWING NO.
123456789
A4
SHEET
Tanaka
PAGE
Seiko I Infotech Inc. Design Department
Shimano
Ioka
Oyama
PART NO.
123456789
DRAWING NO.
123456789
SHEET
A4
PAGE
1
2
3
2
3
A
1
3
4
1
2
C
1
2
3
B
A
K
A
50.0
4-R2.0
K
C
D
B
50.0
B
C
C
B
50.0
K
K
C
D
D
50.0
C
B
C
4-R2.0
B
C
C
D
C
D
50.0
XXXXXXXXX
UNIT
1/1
APPROVED BY
Tanaka
XXXXXXXXX
MODEL
D
D
XXXXXXXXXXXXXXXXXXXX
TITLE
CHECKED BY
SIGNED BY
Shimano
DRAWN BY
Ioka
SCALE
UNIT
1/1
APPROVED BY
Tanaka
SHEET
DRAWING NO.
123456789
A4
PAGE
1/1
SIGNED BY
Shimano
DRAWN BY
Ioka
Oyama
Seiko I Infotech Inc. Design Department
SCALE
UNIT
1/1
1/1
APPROVED BY
Tanaka
CHECKED BY
Shimano
D
SIGNED BY
Shimano
XXXXXXXXX
123456789
A4
SCALE
UNIT
1/1
1/1
Ioka
Oyama
Seiko I Infotech Inc. Design Department
123456789
DRAWING NO.
123456789
123456789
A4
A4
PAGE
XXXXXXXXXXXXXXXXXXXX
TITLE
SIGNED BY
DRAWN BY
Seiko I Infotech Inc. Design Department
Shimano
Ioka
Oyama
SCALE
UNIT
1/1
1/1
APPROVED BY
PART NO.
D
SHEET
MODEL
DRAWING NO.
CHECKED BY
Tanaka
PAGE
XXXXXXXXXXXXXXXXXXXX
TITLE
DRAWN BY
XXXXXXXXX
123456789
PART NO.
Oyama
SHEET
MODEL
DRAWING NO.
DRAWN BY
Ioka
APPROVED BY
123456789
PART NO.
SIGNED BY
XXXXXXXXXXXXXXXXXXXX
TITLE
CHECKED BY
Seiko I Infotech Inc. Design Department
XXXXXXXXXXXXXXXXXXXX
TITLE
CHECKED BY
UNIT
Tanaka
MODEL
Seiko I Infotech Inc. Design Department
1/1
SCALE
1/1
APPROVED BY
XXXXXXXXX
123456789
PART NO.
Oyama
D
D
MODEL
SCALE
B
K
C
C
D
50.0
1/1
4
B
50.0
50.0
4
A
4-R2.0
4
A
4-R2.0
B
3
A
3
50.0
K
2
4
2
4-R2.0
B
3
1
A
3
B
A
2
A
A
4-R2.0
B
50.0
■ Sorting multiple
originals and copy
(⇒ page 2-63)
1
2
4
A
1
50.0
1
A
50.0
SCALE
1/1
CHECKED BY
123456789
PART NO.
123456789
SHEET
A4
PAGE
XXXXXXXXXXXXXXXXXXXX
TITLE
DRAWN BY
SHEET
Tanaka
PAGE
Seiko I Infotech Inc. Design Department
Shimano
XXXXXXXXX
MODEL
DRAWING NO.
SIGNED BY
Ioka
Oyama
PART NO.
123456789
DRAWING NO.
123456789
SHEET
A4
PAGE
■ Copy/Delivery by adjusting sharpness of original (⇒ pages 2-52, 3-26)
■ Delivery by selecting scan resolution (⇒ page 3-32)
■ Delivery by compressing the scanned image (⇒ page 3-34)
1-11
Original
This paragraph describes the original size and thickness applicable to this
device, as well as readable range.
Acceptable original size and thickness
Maximum width: 914.4 mm (36 inches)
Minimum width: 182 mm (7.2 inches)
Maximum length: 2,500 mm (98.4 inches) (LP-1020-MF)
10,000 mm (393.7 inches) (LP-1020L-MF)
(LP-1020-MF+Functional extension kit LP-815)
Minimum length: 210 mm (8.3 inches)
Thickness: 0.05 - 0.2 mm (0.002 - 0.008 inches), non-transparent or semitransparent
Condition: · Original free of a fold, wrinkle, tear, or hole
· Diameter larger than 40 mm (1.6 inches) if original is
rolled.
· If original is rolled, stretch it so that the curls at the leading
and trailing edges exceed 80 mm (3.2 inches) and the
height is 10 mm (0.4 inches) or less.
Originals that require a carrier sheet
Note
◆ Use a carrier sheet for glazed-paper or important originals
to protect them.
Otherwise, originals could be damaged by jams or with
the feeder rollers traces.
Use a carrier sheet for the originals listed below.
·
·
·
·
·
·
·
1-12
Original with 2 or more sheets pasted, or overlapped original
Folded original
Wrinkled or torn original
Curled or waved original
Torn, ripped, or holed original
Original with clip margin
Stapled original
·
·
·
·
Taped or glued original
Original with poor straightness at the top
Original such as photo that easily sticks to the glass
Original written with a pencil that may soil the glass by being rubbed
In addition, use a carrier sheet if non-fixed size original is to be read in the
fixed size.
Unacceptable originals
The use of the following originals may cause a paper jam or damage to
the original.
·
·
·
·
·
·
·
·
·
·
·
·
·
·
·
·
·
·
Originals other than those mentioned in “Acceptable original size and
thickness” (⇒ page 1-12)
Stapled or clipped original
Torn, ripped, or holed original
Wrinkled or torn original
Curled or waved original
Folded original
Original with 2 or more sheets pasted, or overlapped original
Surface-treated originals such as thermal paper, art paper, silver
paper, carbon paper, and conductive paper
Original with protrusion such as an index and tag
Thin and soft original (such as a register)
Bound original (such as a book)
Wet original or sticky original
Original having partially different thicknesses
Taped or glued original
Original with a thick sheet pasted at the top
Original on which the ink or correction fluid has not dried yet
Original with the carbon attached
Originals other than paper (PCBs, glass products, metallic products,
etc.)
1-13
Chapter 1 Getting started
▼Original
Scanning Area
This device can scan the original except for a border area of 5 mm (0.2
inches) at the top and bottom and 3 mm (0.12 inches) on both sides
respectively.
5mm (0.2 inches)
3mm
(0.12 inches)
Paper feed
direction
3mm
(0.12 inches)
Maximum
1219.2 mm
(48 inch)
5mm (0.2 inches)
Image reading guaranteed range
1-14
How to input an original
▼How to input an original
How to input an original
1
Adjust the position of the original width guide.
Adjust the original width guide to the applicable line according to the
original size.
Original width guide
Note
◆ This device allows you to select whether the original is
returned to the front or the rear of the scanner. In case of
front return, the original could be damaged if the original
width guide is in its way. Accordingly, move the original
width guide to the right end if selecting this option.
◆ In this device, the original must be positioned in the
center. The non-fixed size original must also be
positioned in the center.
1-15
Chapter 1 Getting started
This paragraph describes how to input an original.
2
Input the original.
Input the original facedown along the original width guide. The inserted
original is automatically pulled in the device.
◆ Butt the original against the front
roller and give it some slack, so
Slack
Roller
that the original can be inserted
straight.
◆ In scanning a long original, set
the original so that it is rolled
on the front side for straight
feeding.
◆ The time until the original is automatically pulled in the device
and set in position can be changed. For details, see Chapter 6
in the separate volume “User's Guide, Plotter Unit.”
Note
◆ If you selected the front reject of the original, set the
original, aligning with correct size line.
◆ If a carrier sheet is used, do not select the front outlet of
the original. The carrier could get stuck, causing the
original to be damaged.
1-16
Removing original reject guide
■Removing scanner exit guide
When scanning a long original or rounded original, remove the scanner
exit guide before scanning.
1
Open the scanner cover.
Lift the scanner cover up to its stop position. Pull the stopper towards the
arrow direction and raise the scanner cover. The scanner cover will be
held.
2
Remove the scanner exit guide.
Lift and pull the guide toward the rear to remove.
1-17
Chapter 1 Getting started
▼How to input an original
3
Close the scanner cover.
Stopper
While supporting the scanner cover with your
right hand, release the stopper with your left
hand and close the scanner cover slowly.
Close the scanner cover completely until it
clicks.
1-18
▼How to input an original
If the return of the original is changed between front and rear exit
frequently, remove the original width guide in advance.
Hook your finger on the claw at the bottom and while opening the claw,
pull towand you, and the original width guide will be removed.
Note
◆ Take care that you pull toward you. Pulling down on the
claw could damage the claw.
How to scan originals with a crease
If a creased original is scanned, switch the lever in advance.
1
Move the lever toward the rear of the device.
Open the scanner cover, and switch each lever on both sides toward the
rear.
Lever
Lever
1-19
Chapter 1 Getting started
■Removing the original width guide
2
Close the scanner cover.
Stopper
While supporting the scanner cover with your
right hand, release the stopper with your left
hand and close the scanner cover slowly.
Close the scanner cover completely until it clicks.
1-20
▼How to input an original
Input the original.
Chapter 1 Getting started
3
Close the scanner cover, and set the original facedown.
◆ If the shadow of the crease still appears in the scanned output,
the shadow may be reduced by reversing the inputting
direction of the original.
Cancel the scanning of original
To cancel the scanning because of the feed isn’t straight or the original
jams, do the following:
1
Press the [SCAN STOP] key
Press the [SCAN STOP] key on the control panel, and the scanning is
then stopped.
WARNING LIGHT
MENU
COPY
PRINT
MEMORY
RESET
POWER
SAVING
DELIVERY
FILE
REPRINT
STOP
POWER
SCAN STOP
ORIGINAL
SIZE
TONER
PROCESS
WASTE
TONER
AUTO
ORIGINAL
TYPE
BACKGROUND
REMOVAL
DENSITY
PAPER
FEED
DARK
FIXED-SIZE
PORTRAIT
TEXT/PHOTO
FIXED-SIZE
LANDSCAPE
PHOTO
SYNCHRO
BLUE PRINT
NORMAL
LIGHT
DATA
2
SCALE x1
TEXT/LINE
MANUAL FEED
ERROR
FIXED SCALE
ZOOM
NON-PROPORTIONAL
ORIGINAL
IMAGE
QUALITY
START
SORT
SCALE
FUNCTION
Remove the original.
Open the top cover and remove the original. Then, close the scanner
cover, and the device will become ready for operation.
1-21
Routine maintenance
The scanning area may become soiled by originals, thus requiring regular
cleaning.
Note
◆ Never use volatile solvents such as thinner, benzine, and
alcohol.
Cleaning the scanning are and scanner glass
Wipe the shading guide and scanner glass with a dry cloth. If extremely
dirty, use the cloth dampened with water or neutral detergent diluted with
water and then wrung dry.
Shading guide
Scanner glass
1-22
Copy function
This section describes the copy function of the device.
Contents of this chapter
Flow of copy operation
Flow of manual feed copy
Copy function overview
Select original size
Select original type
Adjust background
Adjust density
Set scale
Performing auto reduction
Select paper fed location
Selecting paper type
Enter number of copies
Add margin
Move original position
Partial copy
Erase frame
Select the size of the original
Select original reject direction
Adjust sharpness of original
Adjust contrast of original
Mirror
Reverse
Copying long original
Sorting
Reset
Reprint
Force print
2-1
Chapter 2 Copy function
Chapter 2
Flow of copy operation
This paragraph describes the basic operation flow when an original is
copied.
1
Select the original size.
Select the original size.
(For details, see page 2-7.)
2
Select the original type.
Select what image type the original is.
(For details, see page 2-13.)
3
Adjust the background.
Adjust the background color if the original has uneven density.
(For details, see page 2-15.)
4
Adjust the density.
Adjust the copy density.
(For details, see page 2-17.)
5
Set the scale.
Set the scale if the original is enlarged or reduced.
(For details, see page 2-19.)
6
Select the location of paper feed.
Select which paper loaded into the device is to be used for printing.
(For details, see page 2-28.)
2-2
▼Flow of copy operation
7
Enter the number of copies.
Enter the desired number of copies.
8
Chapter 2 Copy function
(For details, see page 2-31.)
Input the original.
Input the original to the device.
(For details, see page 1-15.)
9
Press the [START] key.
Press the [START] key.
If the SCAN START has been set to the ORIGINAL SET in the system
menu, the copy/delivery starts automatically without pressing the
[START] key.
(For details, see Chapter 11 in “User's Guide, Plotter Unit” prepared
separately.)
2-3
Flow of manual feed copy
This paragraph describes a basic operation flow when an original is
copied on the manually fed paper.
1
Select the original size.
Select the original size.
(For details, see page 2-7.)
2
Select the original type.
Select what image type the original is.
(For details, see page 2-13.)
3
Adjust the background.
Adjust the background color if the original has uneven density.
(For details, see page 2-15.)
4
Adjust the density.
Adjust the copy density.
(For details, see page 2-17.)
5
Set the scale.
Set the scale if the original is enlarged or reduced.
(For details, see page 2-19.)
6
Load the paper to the manual paper feeding holder.
Open the manual paper feeding holder, and load the paper.
(For details, see “User's Guide (Plotter Unit”) prepared separately.)
2-4
▼Flow of manual feed copy
7
Set the location of paper feed to “MANUALS.”
8
Chapter 2 Copy function
Set so that the original can be copied on the paper set on the manual paper
feeding holder of the device. (For details, see “User's Guide ( Plotter
Unit)” prepared separately.)
Input the original.
Input the original into the device.
(For details, see page 1-16.)
9
Press the [START] key.
Press the [START] key.
If the SCAN START has been set to the ORIGINAL SET in the system
menu, the copy/delivery starts automatically without pressing the
[START] key.
(For details, see Chapter 11 in “User's Guide, Plotter Unit” prepared
separately.)
2-5
Copy function overview
The copy functions provided by this device are as listed below. Detailed
setting steps are described on the following pages.
Function list
Description
Original Size
Sets the original size.
Original Type
Selects the image type according to the original.
Background Removal
Removes the background color.
Density
Adjusts the copy density.
Scale
Enlarges or reduces the original.
Auto
Reduces the original automatically so that it can
be accommodated in the paper.
Paper Location
Selects which paper among the paper loaded into
the device is used for copy.
Paper Type
Selects what type of paper is used for copy
among those set in the device.
Copy Count
Selects the number of copies.
Margin
Sets the margin at the top and bottom edges of an
original.
Move
Adjusts the position where an original is copied.
Partial copy
The original can be partially copied.
FramErase
Takes a copy by erasing the surrounding of an
original.
Original Series
Selects the media series of an original.
Original Reject Direction Sets the location to which an original is output.
Sharpness
Adjusts the sharpness of outline of an original.
Contrast
Adjusts the contrast of an original.
Mirror
Copies the mirrored original.
Reverse
Copies the reverse original.
Long Original
Copies a long original.
Sort
Sorts multiple originals and copies them.
◆ Normally, the following settings need not be changed. Use them
as set at the factory.
Threshold, Line Guarantee, Line Threshold, Photo Type.
2-6
Select original size
■AUTO
Whether an original is fixed size (portrait or landscape) or non-fixed
size is detected automatically.
■FIXED-SIZE PORTRAIT
Select this if an original is a fixed-size portrait.
■FIXED-SIZE LANDSCAPE
Select this if an original is a fixed-size landscape.
■SYNCHRO
Select this if an original is non-fixed size. If this size is selected, the paper is cut
to the same length as the original length (synchronous cut).
Fixed-Size Landscape
50.0
123456789
XXXXXXXXXXXXXXXXXXXX
XXXXXXXXX
123456789
C
3
4
A
50.0
B
A4
4
SHEET
PAGE
K
K
C
100.0
K
MODEL
TITLE
DRAWING NO.
PART NO.
D
3
Oyama
D
B
2
4-R2.0
DRAWN BY
C
50.0
2
Ioka
SIGNED BY
C
A
4-R2.0
B
K
1
Shimano
CHECKED BY
1/1
UNIT
Seiko I Infotech Inc. Design department
Tanaka
APPROVED BY
SCALE
4-R2.0
B
1/1
A
A
Synchro
1
A
4
B
3
C
2
D
1
50.0
Fixed-Size Portrait
D
D
A
B
C
D
50.0
XXXXXXXXX
E
MODEL
SCALE
UNIT
1/1
1/1
E
XXXXXXXXXXXXXXXXXXXX
TITLE
APPROVED BY
Tanaka
CHECKED BY
Shimano
SIGNED BY
Ioka
DRAWN BY
Oyama
Seiko I Infotech Inc. Design department
PART NO.
123456789
DRAWING NO.
123456789
SHEET
A4
PAGE
XXXXXXXXX
MODEL
SCALE
UNIT
1/1
1/1
XXXXXXXXXXXXXXXXXXXX
TITLE
APPROVED BY
Tanaka
CHECKED BY
Shimano
SIGNED BY
Ioka
DRAWN BY
Oyama
Seiko I Infotech Inc. Design department
PART NO.
123456789
DRAWING NO.
123456789
SHEET
A4 long
PAGE
Notes
◆ If the original size is set to “AUTO”, the MARGIN (⇒ page
2-32), FramErase (⇒ page 2-44), and MOVE (⇒ page 235) settings are ineffective.
◆ For the LP-1020-MF without optional HDD, if the original
size is set to “AUTO” or “SYNCHRO”, continuous scanning
of the original cannot be performed.
◆ If the Original Series (⇒ page 2-48) is set to “China Series”,
the original size is treated as “SYNCHRO”, even if FIXEDSIZE PORTRAIT or FIXED-SIZE LANDSCAPE is set.
2-7
Chapter 2 Copy function
Select the original size.
The following four kinds of original size are selectable.
The original sizes applicable to this device are as listed below:
A series fixed form original
Name of
fixed form
Lengthwise length
A0
1189 mm (46.8 inches)
841 mm (33.1 inches)
Portrait
A1
841 mm (33.1 inches)
594.5 mm (23.4 inches)
Portrait/Landscape
A2
594.5 mm (23.4 inches) 420.5 mm (16.6 inches)
Portrait/Landscape
A3
420.5 mm (16.6 inches) 297.3 mm (11.7 inches)
Portrait/Landscape
A4
297.3 mm (11.7 inches)
Portrait/Landscape
Widthwise length
210.3 mm (8.3 inches)
Settable direction
A series width original
Name of
width
Paper width
A0 width
841 mm (33.1 inches)
A1 width
594.5 mm (23.4 inches)
A2 width
420.5 mm (16.6 inches)
A3 width
297.3 mm (11.7 inches)
A4 width
210.3 mm (8.3 inches)
Original min. length Original max. length
*LP-1010-MF
2,500 mm
(98.4 inches)
210 mm (8.3 inches)
*LP-1010L-MF
*LP-1010-MF+
Functional extension
kit LP-815)
10,000 mm
(393.7 inches)
9× 12 series fixed form original
Name of
fixed form
Lengthwise length
Widthwise length
Settable direction
E
1219.2 mm
(48 inch)
914.4 mm
(36 inch)
Portrait
D
914.4 mm
(36 inch)
609.6 mm
(24 inch)
Portrait/Landscape
C
609.6 mm
(24 inch)
457.2 mm
(18 inch)
Portrait/Landscape
B
457.2 mm
(18 inch)
304.8 mm
(12 inch)
Portrait/Landscape
A
304.8 mm
(12 inch)
228.6 mm
(9 inch)
Portrait/Landscape
9× 12 series width original
2-8
Name of
width
Paper width
E width
914.4 mm
(36 inch)
D width
609.6 mm
(24 inch)
C width
457.2 mm
(18 inch)
B width
304.8 mm
(12 inch)
A width
228.6 mm
(9 inch)
Original min. length Original max. length
*LP-1010-MF
2,500 mm
(98.4 inches)
210 mm (8.3 inches)
*LP-1010L-MF
*LP-1010-MF+
Functional extension
kit LP-815)
10,000 mm
(393.7 inches)
▼Select original size
Name of
fixed form
Lengthwise length
Widthwise length
Settable direction
E
1117.6 mm
(44 inch)
863.6 mm
(34 inch)
Portrait
D
863.6 mm
(34 inch)
558.8 mm
(22 inch)
Portrait/Landscape
C
558.8 mm
(22 inch)
431.8 mm
(17 inch)
Portrait/Landscape
B
431.8 mm
(17 inch)
279.4 mm
(11 inch)
Portrait/Landscape
A
279.4 mm
(11 inch)
215.9 mm
(8.5 inch)
Portrait/Landscape
8.5× 11 series width original
Name of
width
Paper width
E width
863.6 mm
(34 inch)
D width
558.8 mm
(22 inch)
C width
431.8 mm
(17 inch)
B width
279.4 mm
(11 inch)
A width
215.9 mm
(8.5 inch)
Original min. length Original max. length
*LP-1010-MF
2,500 mm
(98.4 inches)
210 mm (8.3 inches)
*LP-1010L-MF
*LP-1010-MF+
Functional extension
kit LP-815)
10,000 mm
(393.7 inches)
30× 42 series fixed form original
Name of
fixed form
Lengthwise length
Widthwise length
Settable direction
30× 42
1066.8 mm
(42 inch)
762.0 mm
(30 inch)
Portrait
30× 42 series width original
Name of
width
Paper width
Original min. length Original max. length
*LP-1010-MF
2,500 mm
(98.4 inches)
30"
762.0 mm
(30 inch)
210 mm
(8.3 inches)
*LP-1010L-MF
*LP-1010-MF+
Functional extension
kit LP-815)
10,000 mm
(393.7 inches)
2-9
Chapter 2 Copy function
8.5× 11 series fixed form original
Map series fixed form original
Name of
fixed form
Lengthwise length
Widthwise length
Settable direction
B1
1000.0 mm
(39.4 inches)
700.0 mm
(27.6 inches)
Portrait
B2
700.0 mm
(27.6 inches)
500.0 mm
(19.7 inches)
Portrait/Landscape
Map series width original
Name of
width
Paper width
B1 width
700.0 mm
(27.6 inches)
Original min. length Original max. length
*LP-1010-MF
2,500 mm
(98.4 inches)
210 mm
(8.3 inches)
B2 width
500.0 mm
(19.7 inches)
*LP-1010L-MF
*LP-1010-MF+
Functional extension
kit LP-815)
10,000 mm
(393.7 inches)
DIN series fixed form original
Name of
fixed form
Lengthwise length
Widthwise length
Settable direction
B1
1000.0 mm
(39.4 inches)
707.0 mm
(27.8 inches)
Portrait
B2
707.0 mm
(27.8 inches)
500.0 mm
(19.7 inches)
Portrait/Landscape
B3
500.0 mm
(19.7 inches)
353.0 mm
(13.9 inches)
Portrait/Landscape
DIN series width original
2-10
Name of
width
Paper width
B1 width
707.0 mm
(27.8 inches)
B2 width
500.0 mm
(19.7 inches)
B3 width
353.0 mm
(13.9 inches)
Original min. length Original max. length
*LP-1010-MF
2,500 mm
(98.4 inches)
210 mm
(8.3 inches)
*LP-1010L-MF
*LP-1010-MF+
Functional extension
kit LP-815)
10,000 mm
(393.7 inches)
▼Select original size
China series width original
Paper width
914 mm width
914 mm (36 inches)
910 mm width
910 mm (35.8 inches)
900 mm width
900 mm (35.4 inches)
880 mm width
880 mm (34.6 inches)
620 mm width
620 mm (24.4 inches)
610 mm width
610 mm (24 inches)
450 mm width
450 mm (17.7 inches)
440 mm width
440 mm (17.3 inches)
310 mm width
310 mm (12.2 inches)
297 mm width
297 mm (11.7 inches)
Original min. length Original max. length
*LP-1010-MF
2,500 mm
(98.4 inches)
210 mm
(8.3 inches)
*LP-1010L-MF
*LP-1010-MF+
Functional extension
kit LP-815)
10,000 mm
(393.7 inches)
Note
◆ If the ScanMedia is set to “Memory” and an original
exceeding 1,250 mm (49.2 inches) is copied, the scale,
margin, move, FrameErase, and mirror functions are
disabled. Also, a copy error will occur unless the settings are
set as follows:
SCALE (⇒ page 2-19)
SCALE × 1
Scale mode (⇒ Page 2-26)
Manual
MARGIN (⇒ page 2-32)
All “0”
MOVE (⇒ page 2-35)
All “0”
FRAMEERASE (⇒ page 2-44) All “0”
MIRROR (⇒ page 2-56)
OFF
2-11
Chapter 2 Copy function
Name of
width
Operation steps
Keys used
WARNING LIGHT
MENU
COPY
PRINT
MEMORY
RESET
POWER
SAVING
DELIVERY
FILE
REPRINT
STOP
POWER
SCAN STOP
ORIGINAL
SIZE
TONER
PROCESS
WASTE
TONER
AUTO
ORIGINAL
TYPE
BACKGROUND
REMOVAL
DENSITY
PAPER
FEED
DARK
MANUAL FEED
FIXED-SIZE
PORTRAIT
TEXT/PHOTO
FIXED-SIZE
LANDSCAPE
PHOTO
SYNCHRO
BLUE PRINT
NORMAL
LIGHT
DATA
SCALE x1
TEXT/LINE
FIXED SCALE
ZOOM
NON-PROPORTIONAL
ORIGINAL
START
IMAGE
QUALITY
SORT
SCALE
ERROR
FUNCTION
Select the original size.
Press the [ORIGINAL SIZE] key, and the LED
light shifts. Press the [ORIGINAL SIZE] key
until the the LED of the desired size turns on.
SCN : 0 0 C P Y : 0 0 / 0 0
SET : 01
AU TO A 0 A 1 Ma n u a l F e e d
1 0 0 . 0%
ORIGINAL
SIZE
TE
R
2-12
TEXT/LINE
FIXED-SIZE
PORTRAIT
TEXT/PHO
FIXED-SIZE
LANDSCAPE
PHOTO
SYNCHRO
BLUE PRIN
ED
Cop y Read y
The screen display does not change.
ORIGINAL
TYPE
AUTO
ROR
Select original type
■TEXT/LINE
Select this for an original having mixed characters and line drawings.
■TEXT/PHOTO
Select this for an original having mixed characters and photographs.
■PHOTO
Select this for general photographs.
■BLUE PRINT
Select this for blue-printed original.
1
2
Text/Photo
3
A
Blue Print
1
A
4-R2.0
B
B
2
C
C
3
国名(日本語)
国名(英語)
首都
面積
人口
時差
ハワイ(アメリカ合衆国・ハワイ州)
ハワイ州 State of Hawaii
ホノルル(州都)
1万6634平方キロメ−トル
121万1537人
日本時間マイナス19時間。
たとえば、ハワイが日曜日の正午だとすると、
日本は月曜日の午前7時
A
4-R2.0
B
B
K
C
C
50.0
50.0
D
D
D
D
XXXXXXXXX
XXXXXXXXX
MODEL
SCALE
UNIT
1/1
1/1
MODEL
XXXXXXXXXXXXXXXXXXXX
SCALE
UNIT
1/1
1/1
XXXXXXXXXXXXXXXXXXXX
TITLE
APPROVED BY
Tanaka
CHECKED BY
Shimano
SIGNED BY
Ioka
TITLE
DRAWN BY
Oyama
Seiko I Infotech Inc. Design department
4
A
50.0
K
Photo
4
50.0
Text/Line
APPROVED BY
PART NO.
123456789
DRAWING NO.
123456789
A4
CHECKED BY
SIGNED BY
DRAWN BY
SHEET
Tanaka
PAGE
Seiko I Infotech Inc. Design department
Shimano
Ioka
Oyama
PART NO.
123456789
DRAWING NO.
123456789
SHEET
A4
PAGE
◆ For the original with dark background and thin lines, select
“BLUE PRINT” here and also set the contrast adjustment (⇒
page 2-54) to “Bright”, so that optimum copy can be performed.
2-13
Chapter 2 Copy function
Select the appropriate image type. Selecting the original type allows you
to take a better copy.
Operation steps
Keys used
WARNING LIGHT
MENU
COPY
PRINT
MEMORY
RESET
POWER
SAVING
DELIVERY
FILE
REPRINT
STOP
POWER
SCAN STOP
ORIGINAL
SIZE
TONER
PROCESS
WASTE
TONER
AUTO
ORIGINAL
TYPE
BACKGROUND
REMOVAL
DENSITY
PAPER
FEED
DARK
FIXED-SIZE
PORTRAIT
TEXT/PHOTO
FIXED-SIZE
LANDSCAPE
PHOTO
SYNCHRO
BLUE PRINT
NORMAL
LIGHT
DATA
SCALE x1
TEXT/LINE
MANUAL FEED
FIXED SCALE
ZOOM
NON-PROPORTIONAL
ORIGINAL
ERROR
FUNCTION
Select the original type.
Press the [ORIGINAL TYPE] key, and the LED
lighting position shifts. Press the [ORIGINAL
TYPE] key until the LED of the original size to
be selected turns on.
Co p y Re a d y
SCN : 0 0 CP Y : 0 0 / 0 0
SET : 01
AU TO A0 A1 Ma n u a l F e e d
1 0 0 . 0%
The screen display does not change.
2-14
START
IMAGE
QUALITY
SORT
SCALE
RIGINAL
IZE
AUTO
ORIGINAL
TYPE
TEXT/LINE
FIXED-SIZE
PORTRAIT
TEXT/PHOTO
FIXED-SIZE
LANDSCAPE
PHOTO
SYNCHRO
BLUE PRINT
BACKGRO
REMOVAL
Adjust background
■0 to 12
The background can be adjusted in 12 steps. As a numeric value
becomes larger, more background color is erased, and reversely as a
numeric value becomes smaller, more background color remains.
Original having
colored background
1
2
3
Slightly dirty original
1
4
A
A
2
3
A
4-R2.0
4-R2.0
B
B
B
C
C
B
C
50.0
50.0
D
D
D
D
XXXXXXXXX
XXXXXXXXX
MODEL
UNIT
1/1
1/1
MODEL
XXXXXXXXXXXXXXXXXXXX
SCALE
UNIT
1/1
1/1
XXXXXXXXXXXXXXXXXXXX
TITLE
APPROVED BY
CHECKED BY
Tanaka
SIGNED BY
Shimano
TITLE
DRAWN BY
Ioka
APPROVED BY
Oyama
Seiko I Infotech Inc. Design department
50.0
K
50.0
K
C
SCALE
4
A
PART NO.
123456789
DRAWING NO.
123456789
A4
CHECKED BY
SIGNED BY
DRAWN BY
SHEET
Tanaka
PAGE
Seiko I Infotech Inc. Design department
Shimano
Ioka
Oyama
PART NO.
123456789
DRAWING NO.
123456789
SHEET
12
1
2
3
12
1
4
A
A
1
2
PAGE
A4
3
1
4
2
3
4
A
A
1
2
3
1
4
4-R2.0
4-R2.0
A
A
A
1
1
4
K
4-R2.0
A
A
B
B
K
2
3
A
B
C
K
50.0
4-R2.0
B
B
B
C
C
C
D
C
D
K
50.0
D
K
50.0
C
C
C
C
D
D
D
D
XXXXXXXXX
XXXXXXXXX
MODEL
MODEL
50.0
50.0
SCALE
UNIT
1/1
1/1
XXXXXXXXXXXXXXXXXXXX
SCALE
UNIT
1/1
1/1
XXXXXXXXXXXXXXXXXXXX
TITLE
TITLE
APPROVED BY
Tanaka
CHECKED BY
Shimano
SIGNED BY
Ioka
APPROVED BY
DRAWN BY
123456789
PART NO.
Oyama
SHEET
Tanaka
D
Seiko I Infotech Inc. Design department
4
A
C
50.0
B
4-R2.0
50.0
C
50.0
D
3
50.0
4-R2.0
2
B
50.0
K
B
C
B
50.0
B
50.0
A
B
DRAWING NO.
CHECKED BY
Shimano
SIGNED BY
Ioka
DRAWN BY
123456789
PART NO.
Oyama
SHEET
D
D
123456789
PAGE
A4
Seiko I Infotech Inc. Design department
XXXXXXXXX
D
123456789
DRAWING NO.
XXXXXXXXX
PAGE
A4
MODEL
MODEL
SCALE
UNIT
1/1
1/1
CHECKED BY
SCALE
UNIT
1/1
1/1
SIGNED BY
APPROVED BY
Shimano
Ioka
CHECKED BY
SIGNED BY
DRAWN BY
DRAWN BY
Tanaka
Tanaka
XXXXXXXXXXXXXXXXXXXX
TITLE
XXXXXXXXXXXXXXXXXXXX
TITLE
APPROVED BY
Oyama
123456789
PART NO.
DRAWING NO.
123456789
SCALE
UNIT
1/1
1/1
Ioka
123456789
PART NO.
Oyama
Seiko I Infotech Inc. Design department
XXXXXXXXX
Seiko I Infotech Inc. Design department
Shimano
SHEET
SHEET
A4
MODEL
DRAWING NO.
123456789
A4
PAGE
Tanaka
CHECKED BY
Shimano
SIGNED BY
Ioka
SCALE
UNIT
1/1
1/1
Oyama
PAGE
XXXXXXXXXXXXXXXXXXXX
TITLE
APPROVED BY
DRAWN BY
Seiko I Infotech Inc. Design department
XXXXXXXXX
MODEL
XXXXXXXXXXXXXXXXXXXX
TITLE
APPROVED BY
PART NO.
123456789
DRAWING NO.
123456789
A4
CHECKED BY
SIGNED BY
DRAWN BY
SHEET
Tanaka
PAGE
Seiko I Infotech Inc. Design department
Shimano
Ioka
Oyama
PART NO.
123456789
DRAWING NO.
123456789
SHEET
A4
PAGE
Note
◆ After the background was adjusted if the original type is
changed (⇒ page 2-13), the background setting will also
be changed, thus requiring care.
2-15
Chapter 2 Copy function
Originals having dark colored background, slightly dirty originals, or
creased originals that affect the copy quality can be copied by removing
the background color.
Operation steps
Keys used
WARNING LIGHT
MENU
COPY
PRINT
MEMORY
RESET
POWER
SAVING
DELIVERY
FILE
REPRINT
STOP
POWER
SCAN STOP
ORIGINAL
SIZE
TONER
PROCESS
WASTE
TONER
AUTO
ORIGINAL
TYPE
BACKGROUND
REMOVAL
DENSITY
PAPER
FEED
DARK
MANUAL FEED
FIXED-SIZE
PORTRAIT
TEXT/PHOTO
FIXED-SIZE
LANDSCAPE
PHOTO
SYNCHRO
BLUE PRINT
NORMAL
LIGHT
DATA
SCALE x1
TEXT/LINE
FIXED SCALE
ZOOM
NON-PROPORTIONAL
ORIGINAL
START
IMAGE
QUALITY
SORT
SCALE
ERROR
FUNCTION
Press the [BACKGROUND REMOVAL
] or [BACKGROUND REMOVAL
key.
]
If the [BACKGROUND REMOVAL ] or
[BACKGROUND REMOVAL ] key is pressed,
the LED lighting position shifts.
Numeric value becomes large with
[BACKGROUND REMOVAL ] key, or small
with [BACKGROUND REMOVAL ] key. Press
the [BACKGROUND REMOVAL ] or
[BACKGROUND REMOVAL ] key until the
LED of the desired numeric value turns on.
Co p y Re a d y
SCN : 0 0 CP Y : 0 0 / 0 0
SET : 01
AU TO A0 A1 Ma n u a l F e e d
1 0 0 . 0%
The screen display does not change.
2-16
AL
BACKGROUND
REMOVAL
DENSITY
T/LINE
DAR
T/PHOTO
TO
NORM
E PRINT
LIGH
Adjust density
Adjust the density of the output.
Chapter 2 Copy function
■1 to 7
The density can be adjusted in 7 steps.
Original
1
2
3
4
A
A
4-R2.0
B
B
50.0
K
C
C
50.0
D
D
XXXXXXXXX
MODEL
SCALE
UNIT
1/1
1/1
XXXXXXXXXXXXXXXXXXXX
TITLE
APPROVED BY
Tanaka
CHECKED BY
Shimano
SIGNED BY
Ioka
DRAWN BY
Oyama
Seiko I Infotech Inc. Design department
PART NO.
123456789
DRAWING NO.
123456789
Dark
2
3
Normal
1
4
A
A
A
B
B
4-R2.0
2
3
C
C
D
D
50.0
XXXXXXXXX
1/1
Shimano
SIGNED BY
Ioka
Oyama
B
K
C
C
D
D
C
50.0
D
SCALE
UNIT
1/1
1/1
XXXXXXXXX
MODEL
XXXXXXXXXXXXXXXXXXXX
SCALE
UNIT
1/1
1/1
XXXXXXXXXXXXXXXXXXXX
TITLE
DRAWN BY
Seiko I Infotech Inc. Design department
APPROVED BY
PART NO.
123456789
DRAWING NO.
123456789
A4
CHECKED BY
SIGNED BY
Tanaka
PAGE
Seiko I Infotech Inc. Design department
Ioka
TITLE
DRAWN BY
SHEET
Shimano
4
A
MODEL
XXXXXXXXXXXXXXXXXXXX
TITLE
CHECKED BY
B
XXXXXXXXX
MODEL
UNIT
B
3
50.0
D
Tanaka
A
50.0
K
C
APPROVED BY
A
2
4-R2.0
50.0
K
1/1
Light
1
4
4-R2.0
B
SCALE
PAGE
Oyama
50.0
1
SHEET
A4
APPROVED BY
PART NO.
123456789
DRAWING NO.
123456789
A4
CHECKED BY
SIGNED BY
DRAWN BY
SHEET
Tanaka
PAGE
Seiko I Infotech Inc. Design department
Shimano
Ioka
Oyama
PART NO.
123456789
DRAWING NO.
123456789
SHEET
A4
PAGE
2-17
Operation steps
Keys used
WARNING LIGHT
MENU
COPY
PRINT
MEMORY
RESET
POWER
SAVING
DELIVERY
FILE
REPRINT
STOP
POWER
SCAN STOP
ORIGINAL
SIZE
TONER
PROCESS
WASTE
TONER
AUTO
ORIGINAL
TYPE
BACKGROUND
REMOVAL
DENSITY
PAPER
FEED
DARK
FIXED-SIZE
PORTRAIT
TEXT/PHOTO
FIXED-SIZE
LANDSCAPE
PHOTO
SYNCHRO
BLUE PRINT
NORMAL
LIGHT
DATA
SCALE x1
TEXT/LINE
MANUAL FEED
FIXED SCALE
ZOOM
NON-PROPORTIONAL
ORIGINAL
START
IMAGE
QUALITY
SORT
SCALE
ERROR
FUNCTION
UND
Press the [DENSITY ] or [DENSITY
] key.
If the [DENSITY ] or [DENSITY ] key is
pressed, the LED lighting position shifts. The
LED shifts in DARK direction with [DENSITY
] key, or in LIGHT direction with [DENSITY
] key. Select the desired density according to
the density of an original.
Co p y Re a d y
SCN : 0 0 CP Y : 0 0 / 0 0
SET : 01
AU TO A0 A1 Ma n u a l F e e d
1 0 0 . 0%
The screen display does not change.
2-18
DENSITY
DARK
NORMAL
LIGHT
SCALE x1
FIXED SCALE
ZOOM
NON-PROPORTION
SCALE
Set scale
■SCALE ×1
An original is copied in the same size as original without enlargement
or reduction.
■FIXED SCALE
The enlargement or reduction ratio to the same fixed-size series as
original can easily be selected.
Example: A1→A0 (141%), A0→A1 (70%)
■ZOOM
Select this if an original is enlarged or reduced at the same ratio in vertical and
horizontal directions.
■NON-PROPORTIONAL SCALE
Select this if an original is enlarged or reduced at different ratio in
vertical and horizontal directions.
Scale×1
1
2
3
Fixed Scale
1
4
2
3
A
A
Zoom
1
4
2
3
4
A
A
A
A
4-R2.0
4-R2.0
B
B
50.0
50.0
K
50.0
D
K
C
C
50.0
C
C
D
B
B
B
C
D
D
50.0
113.5%
4-R2.0
K
C
50.0
B
XXXXXXXXX
MODEL
SCALE
UNIT
1/1
1/1
XXXXXXXXXXXXXXXXXXXX
TITLE
APPROVED BY
CHECKED BY
SIGNED BY
D
D
DRAWN BY
XXXXXXXXX
Tanaka
Shimano
Ioka
Oyama
Seiko I Infotech Inc. Design department
PART NO.
123456789
DRAWING NO.
123456789
MODEL
SHEET
A4
PAGE
SCALE
UNIT
1/1
1/1
XXXXXXXXXXXXXXXXXXXX
TITLE
APPROVED BY
Tanaka
CHECKED BY
Shimano
SIGNED BY
Ioka
DRAWN BY
Oyama
Seiko I Infotech Inc. Design department
PART NO.
123456789
DRAWING NO.
123456789
SHEET
A4
PAGE
XXXXXXXXX
MODEL
SCALE
UNIT
1/1
1/1
APPROVED BY
Tanaka
CHECKED BY
Shimano
XXXXXXXXXXXXXXXXXXXX
TITLE
SIGNED BY
Ioka
DRAWN BY
Oyama
Seiko I Infotech Inc. Design department
2
3
123456789
DRAWING NO.
123456789
SHEET
A4
113.5%
PAGE
e.g. Enlarged from
A4 to A3
Non-proportional
Scale
1
PART NO.
e.g. Enlarged to
113.5%
4
A
A
4-R2.0
B
50.0
K
C
C
50.0
D
110%
B
D
XXXXXXXXX
MODEL
SCALE
UNIT
1/1
1/1
XXXXXXXXXXXXXXXXXXXX
TITLE
APPROVED BY
Tanaka
CHECKED BY
Shimano
SIGNED BY
Ioka
DRAWN BY
Oyama
Seiko I Infotech Inc. Design department
PART NO.
123456789
DRAWING NO.
123456789
SHEET
A4
PAGE
130%
e.g. Enlarged to 110%
in vertical, and 130%
in horizontal
2-19
Chapter 2 Copy function
An original is enlarged or reduced for copy.
Operation steps (SCALE ×1)
Keys used
WARNING LIGHT
MENU
COPY
PRINT
MEMORY
RESET
POWER
SAVING
DELIVERY
FILE
REPRINT
STOP
POWER
SCAN STOP
ORIGINAL
SIZE
TONER
PROCESS
WASTE
TONER
AUTO
ORIGINAL
TYPE
BACKGROUND
REMOVAL
DENSITY
PAPER
FEED
DARK
MANUAL FEED
FIXED-SIZE
PORTRAIT
TEXT/PHOTO
FIXED-SIZE
LANDSCAPE
PHOTO
SYNCHRO
BLUE PRINT
NORMAL
LIGHT
DATA
SCALE x1
TEXT/LINE
FIXED SCALE
ZOOM
NON-PROPORTIONAL
ORIGINAL
START
IMAGE
QUALITY
SORT
SCALE
ERROR
FUNCTION
Press the [SCALE ×1] key
Press the [SCALE ×1] key and make sure that
“100.0%” is displayed on the screen.
SITY
DARK
NORMAL
LIGHT
Co p y Re a d y
SCN : 0 0 CP Y : 0 0 / 0 0
SET : 01
AU TO A0 A1 Ma n u a l F e e d
1 0 0 . 0%
2-20
SCALE x1
FIXED SCALE
ZOOM
NON-PROPORTIONAL
SCALE
▼Set scale
Operation steps (FIXED SCALE)
Keys used
COPY
PRINT
DELIVERY
FILE
MENU
POWER
SAVING
MEMORY
RESET
REPRINT
STOP
POWER
SCAN STOP
ORIGINAL
SIZE
TONER
PROCESS
WASTE
TONER
AUTO
ORIGINAL
TYPE
BACKGROUND
REMOVAL
DENSITY
PAPER
FEED
DARK
MANUAL FEED
FIXED-SIZE
PORTRAIT
TEXT/PHOTO
FIXED-SIZE
LANDSCAPE
PHOTO
SYNCHRO
BLUE PRINT
NORMAL
LIGHT
DATA
1
SCALE x1
TEXT/LINE
FIXED SCALE
ZOOM
NON-PROPORTIONAL
ORIGINAL
START
IMAGE
QUALITY
SORT
SCALE
FUNCTION
ERROR
Press the [FIXED SCALE] key.
If the [FIXED SCALE] key is pressed, the screen
switches to the [FIXED SCALE] setting screen.
F i xed A Sca l e
O r i g i n a l : A0
P r i n t : A1
SITY
DARK
NORMAL
LIGHT
SCALE x1
FIXED SCALE
ZOOM
NON-PROPORTIONAL
SCALE
[ En t e r ] t o Se t
Note
◆ If the media series used for original is set to “30×42” or
“China series” (⇒ page 2-48), the [FIXED SCALE] key is
ineffective even if pressed.
◆ To display media series other than fixed sizes
displayed here, change the media series used for
the original in advance (⇒ page 2-48).
2
Press the [ ] or [ ] key.
Select the original size with the [ ] or [ ]
key.
F i x ed A Sc a l e
O r i g i n a l : A1
P r i n t : A1
[ En t e r ] t o Se t
Here, “A1” is selected.
2-21
Chapter 2 Copy function
WARNING LIGHT
3
Press the [ ] or [ ] key.
Press the [ ] or [ ] key to move to the paper
size for Print.
F i x ed A Sca l e
O r i g i n a l : A1
P r i n t : A1
[ En t e r ] t o Se t
4
Press the [ ] or [ ] key.
Select the paper size with the [ ] or [ ] key.
F i x ed A Sca l e
O r i g i n a l : A1
P r i n t : A0
[ En t e r ] t o Se t
Here, “A0” is selected.
5
Press the [Enter] key.
Press the [Enter] key to complete the setting.
Co p y Re a d y
SCN : 0 0 CP Y : 0 0 / 0 0
SET : 01
AU TO A0 A1 Ma n u a l F e e d
1 4 1 . 0%
The set enlargement/reduction ratio is displayed at the lower left of the
screen.
2-22
▼Set scale
Operation steps (ZOOM)
WARNING LIGHT
MENU
COPY
PRINT
MEMORY
RESET
POWER
SAVING
DELIVERY
FILE
REPRINT
STOP
POWER
SCAN STOP
ORIGINAL
SIZE
TONER
PROCESS
WASTE
TONER
ORIGINAL
TYPE
AUTO
BACKGROUND
REMOVAL
DENSITY
PAPER
FEED
DARK
MANUAL FEED
FIXED-SIZE
PORTRAIT
TEXT/PHOTO
FIXED-SIZE
LANDSCAPE
PHOTO
SYNCHRO
BLUE PRINT
NORMAL
LIGHT
DATA
1
SCALE x1
TEXT/LINE
FIXED SCALE
ZOOM
NON-PROPORTIONAL
ORIGINAL
START
IMAGE
QUALITY
SORT
SCALE
FUNCTION
ERROR
Press the [ZOOM] key.
If the [ZOOM] key is pressed, the screen
switches to the ZOOM setting screen.
SITY
DARK
NORMAL
SCALE x1
FIXED SCALE
ZOOM
Z o om ( %)
LIGHT
100 . 0
( 25 . 0 ) - ( 400 . 0 )
2
NON-PROPORTIONAL
SCALE
[ En t e r ] t o Se t
Enter numeric value with the ten keys.
Enter the enlargement/reduction ratio with the
ten keys. Numeric values can be entered in a
range of 25.0 to 400.0 %.
Z o om ( %)
77 . 7
( 25 . 0 ) - ( 400 . 0 )
[ En t e r ] t o Se t
Here, “77.7” is entered.
3
Press the [Enter] key.
Press the [Enter] key to complete the setting.
Cop y Read y
SCN : 0 0 C P Y : 0 0 / 0 0
SET : 01
AU TO A 0 A 1 Ma n u a l F e e d
7 7 . 7%
The set enlargement/reduction ratio is displayed at the lower left of the
screen.
2-23
Chapter 2 Copy function
Keys used
Operation steps (NON-PROPORTIONAL SCALE)
Keys used
WARNING LIGHT
COPY
PRINT
DELIVERY
FILE
MENU
POWER
SAVING
MEMORY
RESET
REPRINT
STOP
POWER
SCAN STOP
ORIGINAL
SIZE
TONER
PROCESS
WASTE
TONER
ORIGINAL
TYPE
AUTO
BACKGROUND
REMOVAL
DENSITY
PAPER
FEED
DARK
MANUAL FEED
FIXED-SIZE
PORTRAIT
TEXT/PHOTO
FIXED-SIZE
LANDSCAPE
PHOTO
SYNCHRO
BLUE PRINT
NORMAL
LIGHT
DATA
1
SCALE x1
TEXT/LINE
FIXED SCALE
ZOOM
NON-PROPORTIONAL
ORIGINAL
FUNCTION
ERROR
Press the [NON-PROPORTIONAL
SCALE] key.
If the [NON-PROPORTIONAL SCALE] key is
pressed, the screen switches to the NONPROPORTIONAL SCALE setting screen.
N o n - P r o p S c a l e ( %)
Ve r t i c a l : 100 . 0 Ho r i z o n t a l : 100 . 0
( 25 . 0 ) - ( 400 . 0 )
2
[ En t e r ] t o Se t
Enter numeric value with the ten keys.
Enter the enlargement/reduction ratio in vertical
direction with the ten keys. Numeric values can
be entered in a range of 25.0 to 400.0 %.
N o n - P r o p S c a l e ( %)
Ve r t i c a l : 200 . 4 Ho r i z o n t a l : 100 . 0
( 25 . 0 ) - ( 400 . 0 )
[ En t e r ] t o Se t
Here, “200.4” is entered.
3
Press the [ ] or [ ] key.
Press the or key to move to the magnification
value in Horizontal direction.
2-24
START
IMAGE
QUALITY
SORT
SCALE
SITY
DARK
NORMAL
LIGHT
SCALE x1
FIXED SCALE
ZOOM
NON-PROPORTIONAL
SCALE
▼Set scale
4
Enter numeric value with the ten keys.
Chapter 2 Copy function
Enter the enlargement/reduction ratio in horizontal
direction with the ten keys. Numeric values can be
entered in a range of 25.0 to 400.0 %.
N o n - P r o p S c a l e ( %)
V e r t i c a l : 200 . 4 Ho r i z o n t a l : 110 . 0
( 25 . 0 ) - ( 400 . 0 )
[ En t e r ] t o Se t
Here, “110.0” is entered.
5
Press the [Enter] key.
Press the [Enter] key to complete the setting.
Cop y R e a d y
SCN : 0 0 CP Y : 0 0 / 0 0
SET : 01
AUT O A 0 A 1 Ma n u a l F e e d
Ve r t i c a l : 2 0 0 . 4% H o r i z o n t a l : 1 1 0 . 0%
The set enlargement/reduction ratio is displayed at the lower left of the
screen.
2-25
Performing auto reduction
The original that cannot be accommodated in the print paper is
automatically reduced so that it is accommodated in the print paper.
Notes
◆ Setting of Fixed Scale/Zoom/Non-Proportional Scale is
disabled, if “Auto” is selected.
◆ Auto reduction is not performed, if original is copied on the
manually fed paper.
Operation steps
Keys used
WARNING LIGHT
COPY
PRINT
DELIVERY
FILE
MENU
POWER
SAVING
MEMORY
RESET
REPRINT
STOP
POWER
SCAN STOP
ORIGINAL
SIZE
TONER
PROCESS
WASTE
TONER
AUTO
ORIGINAL
TYPE
BACKGROUND
REMOVAL
DENSITY
PAPER
FEED
DARK
MANUAL FEED
FIXED-SIZE
PORTRAIT
TEXT/PHOTO
FIXED-SIZE
LANDSCAPE
PHOTO
SYNCHRO
BLUE PRINT
NORMAL
LIGHT
DATA
1
SCALE x1
TEXT/LINE
FIXED SCALE
ZOOM
NON-PROPORTIONAL
ORIGINAL
IMAGE
QUALITY
SORT
SCALE
ERROR
FUNCTION
Press the [PAPER FEED] key.
If the [PAPER FEED] key is pressed, the screen
switches to the paper feed setting screen.
Feed
Ma r g i n ( mm)
F r ame E r a s e / O f f s e t
F r ame E r a s e ( mm) O f f s e t ( mm)
Page : 01 / 02
[ En t e r ] t o Se l e c t
2-26
START
▼Performing auto reduction
2
Press the [ ] or [ ] key.
3
Feed
Pape r Ty pe
S c a l e mo d e
Page : 02 / 02
[ En t e r ] t o Se l e c t
Chapter 2 Copy function
Press the [ ] or [ ] key to move to “Scale
Mode”.
Press the [Enter] key.
If the [Enter] key is pressed, the screen switches
to the scale mode setting screen.
F e e d : S c a l eMo d e
Ma n u a l
Au t o
Page : 01 / 01
4
[ En t e r ] t o Se l e c t
Press the [ ] or [ ] key.
Press the [ ] or [ ] key to select “Auto”.
F e e d : S c a l eMo d e
Ma n u a l
Au t o
Page : 01 / 01
5
[ En t e r ] t o Se l e c t
Press the [Enter] key.
Press the [Enter] key to complete the setting.
Co p y Re a d y
SCN : 0 0 CP Y : 0 0 / 0 0
SET : 01
AU TO A0 A1 Ma n u a l F e e d
1 0 0 . 0%
2-27
Select paper fed location
Select which paper loaded into this device is to used for printing.
Operation steps
Keys used
WARNING LIGHT
MENU
COPY
PRINT
MEMORY
RESET
POWER
SAVING
DELIVERY
FILE
REPRINT
STOP
POWER
SCAN STOP
ORIGINAL
SIZE
TONER
PROCESS
WASTE
TONER
AUTO
ORIGINAL
TYPE
BACKGROUND
REMOVAL
DENSITY
PAPER
FEED
DARK
MANUAL FEED
FIXED-SIZE
PORTRAIT
TEXT/PHOTO
FIXED-SIZE
LANDSCAPE
PHOTO
SYNCHRO
BLUE PRINT
NORMAL
LIGHT
DATA
SCALE x1
TEXT/LINE
FIXED SCALE
ZOOM
NON-PROPORTIONAL
ORIGINAL
IMAGE
QUALITY
START
SORT
SCALE
ERROR
FUNCTION
Press the [ ] or [ ] key.
On the third line, the paper roll sizes loaded into
this device are displayed in the order of roll 1
and roll 2 from the left.
Press the [ ] or [ ] key until the paper to be
used is selected. At this time, if AUTO is
selected, the print paper is automatically selected
according to the original.
Co p y Re a d y
SCN : 0 0 CP Y : 0 0 / 0 0
SET : 01
AU TO A 0 A 1 Ma n u a l F e e d
1 0 0 . 0%
F i lm
Here, “A1” paper roll is selected. The paper type of the selected paper roll is
displayed at the lower right of the screen.
2-28
Selecting paper type
Select what type of paper is used for copy among those set in the device.
◆ This setting is valid only when the paper location is set to
“Auto”. (⇒ page 2-26).
Operation steps
Keys used
WARNING LIGHT
MENU
COPY
PRINT
MEMORY
RESET
POWER
SAVING
DELIVERY
FILE
REPRINT
STOP
POWER
SCAN STOP
ORIGINAL
SIZE
TONER
PROCESS
WASTE
TONER
AUTO
BACKGROUND
REMOVAL
ORIGINAL
TYPE
DENSITY
PAPER
FEED
DARK
FIXED-SIZE
PORTRAIT
TEXT/PHOTO
FIXED-SIZE
LANDSCAPE
PHOTO
SYNCHRO
BLUE PRINT
NORMAL
LIGHT
DATA
1
SCALE x1
TEXT/LINE
MANUAL FEED
FIXED SCALE
ZOOM
NON-PROPORTIONAL
ORIGINAL
IMAGE
QUALITY
START
SORT
SCALE
FUNCTION
ERROR
Press the [PAPER FEED] key.
If the [PAPER FEED] key is pressed, the screen
switches to the paper feed setting screen.
Feed
Ma r g i n ( mm)
F r ame E r a s e / O f f s e t
F r ame E r a s e ( mm) O f f s e t ( mm)
Page : 01 / 02
[ En t e r ] t o Se l e c t
2
Press the [ ] or [ ] key.
Press the [ ] or [ ] key to move to “Paper
Type”.
Feed
Pape r Ty pe
S c a l e mo d e
Page : 02 / 02
[ En t e r ] t o Se l e c t
2-29
Chapter 2 Copy function
Notes
3
Press the [Enter] key.
If the [Enter] key is pressed, the screen switches
to the paper type setting screen.
Feed : Pape r Ty pe
N o ne
N o rmal
Tr ace
F i lm
Page : 01 / 01
[ En t e r ] t o Se l e c t
4
Press the [ ] or [ ] key.
Press the [ ] or [ ] key to select the desired
paper type for copy.
Feed : Pape r Ty pe
Tr ace
N o ne
N o rmal
F i lm
Page : 01 / 01
[ En t e r ] t o Se l e c t
5
Press the [Enter] key.
Press the [Enter] key to complete the setting.
Co p y Re a d y
SCN : 0 0 CP Y : 0 0 / 0 0
SET : 01
AU TO A0 A1 Ma n u a l F e e d
1 0 0 . 0%
2-30
Enter number of copies
Enter the number of copies.
◆ If an original is copied on the manually fed paper, the
number of copies is ineffective even if entered.
Operation steps
Keys used
WARNING LIGHT
MENU
COPY
PRINT
MEMORY
RESET
POWER
SAVING
DELIVERY
FILE
REPRINT
STOP
POWER
SCAN STOP
ORIGINAL
SIZE
TONER
PROCESS
WASTE
TONER
AUTO
ORIGINAL
TYPE
BACKGROUND
REMOVAL
DENSITY
PAPER
FEED
DARK
MANUAL FEED
FIXED-SIZE
PORTRAIT
TEXT/PHOTO
FIXED-SIZE
LANDSCAPE
PHOTO
SYNCHRO
BLUE PRINT
NORMAL
LIGHT
DATA
SCALE x1
TEXT/LINE
FIXED SCALE
ZOOM
NON-PROPORTIONAL
ORIGINAL
IMAGE
QUALITY
START
SORT
SCALE
ERROR
FUNCTION
Enter numeric value with the ten keys.
Enter the number of copies with the ten keys.
The number of copies is displayed on the screen.
The number of copies that can be set per
operation is up to 99 copies, and numeric value
exceeding 99 is ineffective even if entered.
Cop y Read y
SCN : 0 0 CP Y : 0 0 / 0 0
SET : 12
AU TO A 0 A 1 Ma n u a l F e e d
1 0 0 . 0%
The entered number of copies is displayed on the side of “SET” at the right
of the screen. Here, “12” is entered.
2-31
Chapter 2 Copy function
Note
Add margin
You can add margin to the top and bottom of an original.
Non-fixed size original
1
2
3
Top
1
4
A
A
2
3
A
A
4-R2.0
4-R2.0
100.0
K
K
C
D
B
B
C
C
D
D
E
E
B
K
K
D
50.0
50.0
E
E
XXXXXXXXX
XXXXXXXXX
MODEL
SCALE
UNIT
1/1
1/1
MODEL
XXXXXXXXXXXXXXXXXXXX
SCALE
UNIT
1/1
1/1
XXXXXXXXXXXXXXXXXXXX
TITLE
APPROVED BY
CHECKED BY
Tanaka
Shimano
SIGNED BY
Ioka
TITLE
DRAWN BY
Oyama
Seiko I Infotech Inc. Design department
C
100.0
B
Paper feed
direction
4
APPROVED BY
PART NO.
123456789
DRAWING NO.
123456789
A4 long
CHECKED BY
SIGNED BY
DRAWN BY
SHEET
Tanaka
PAGE
Seiko I Infotech Inc. Design department
Shimano
Ioka
Oyama
PART NO.
123456789
DRAWING NO.
123456789
SHEET
A4 long
PAGE
Bottom
Note
◆ This setting is effective only if the original size is set to
“SYNCHRO” (⇒ page 2-7).
Operation steps
Keys used
WARNING LIGHT
COPY
PRINT
DELIVERY
FILE
MENU
POWER
SAVING
MEMORY
RESET
REPRINT
STOP
POWER
SCAN STOP
ORIGINAL
SIZE
TONER
PROCESS
WASTE
TONER
AUTO
ORIGINAL
TYPE
BACKGROUND
REMOVAL
DENSITY
PAPER
FEED
DARK
MANUAL FEED
FIXED-SIZE
PORTRAIT
TEXT/PHOTO
FIXED-SIZE
LANDSCAPE
PHOTO
SYNCHRO
BLUE PRINT
NORMAL
LIGHT
DATA
2-32
ERROR
SCALE x1
TEXT/LINE
FIXED SCALE
ZOOM
NON-PROPORTIONAL
ORIGINAL
IMAGE
QUALITY
SORT
SCALE
FUNCTION
START
▼Add margin
1
Press the [PAPER FEED] key.
If the [PAPER FEED] key is pressed, the screen
switches to the PAPER FEED setting screen.
2
Chapter 2 Copy function
Feed
Ma r g i n ( mm)
F r ame E r a s e / O f f s e t
F r ame E r a s e ( mm) O f f s e t ( mm)
Page : 01 / 02
[ En t e r ] t o Se l ec t
Press the [Enter] key.
After confirming that the Margin has been
selected, if the [Enter] key is pressed, the screen
switches to the Margin setting screen.
F e e d : Ma r g i n ( mm)
Top : 0
B o t t om :
( 0 - 100 )
3
0
[ En t e r ] t o Se t
Enter numeric value with the ten keys.
Enter the margin with the ten keys. Numeric
value can be entered in a range of 0 to 100 mm
(0 to 3.9 inches).
F e e d : Ma r g i n ( mm)
Top : 10
B o t t om :
( 0 - 100 )
0
[ En t e r ] t o Se t
Here, “10” is entered to the top.
*1 mm = 0.0394 inches
2-33
4
Press the [ ] or [ ] key.
Press the [ ] or [ ] key to move to the bottom.
F e e d : Ma r g i n ( mm)
Top : 10
B o t t om :
( 0 - 100 )
5
0
[ En t e r ] t o Se t
Enter numeric value with the ten keys.
Enter the margin with the ten keys. Numeric
value can be entered in a range of 0 to 100 mm
(0 to 3.94 inches).
F e e d : Ma r g i n ( mm)
Top : 10
B o t t om : 1 0 0
( 0 - 100 )
[ En t e r ] t o Se t
Here, “100” is entered to the bottom.
*1 mm = 0.0394 inches
6
Press the [Enter] key.
Press the [Enter] key to complete the setting.
Cop y Read y
SCN : 0 0 CP Y : 0 0 / 0 0
SET : 01
AU TO A 0 A 1 Ma n u a l F e e d
1 0 0 . 0%
2-34
Move original position
You can move the original position in vertical or horizontal
direction on the copy.
2
Vertical direction
3
Horizontal direction
2
4
3
4
Chapter 2 Copy function
Original
1
4-R2.0
A
B
B
K
4-R2.0
B
B
C
C
50.0
K
4-R2.0
K
50.0
C
C
50.0
B
50.0
A
A
C
D
D
50.0
50.0
D
D
D
XXXXXXXXX
MODEL
SCALE
UNIT
1/1
1/1
XXXXXXXXXXXXXXXXXXXX
TITLE
APPROVED BY
Tanaka
CHECKED BY
Shimano
SIGNED BY
Ioka
DRAWN BY
Oyama
Seiko I Infotech Inc. Design department
XXXXXXXXX
PART NO.
123456789
DRAWING NO.
123456789
SHEET
A4
PAGE
XXXXXXXXX
MODEL
MODEL
UNIT
1/1
1/1
XXXXXXXXXXXXXXXXXXXX
XXXXXXXXXXXXXXXXXXXX
TITLE
TITLE
Tanaka
CHECKED BY
Shimano
SIGNED BY
Ioka
KED BY
DRAWN BY
Oyama
Seiko I Infotech Inc. Design department
PART NO.
123456789
DRAWING NO.
123456789
imano
SHEET
A4
SIGNED BY
Ioka
DRAWN BY
Oyama
h Inc. Design department
PAGE
PART NO.
123456789
DRAWING NO.
123456789
SHEET
A4
1
PAGE
2
3
A
1
2
3
4
4-R2.0
A
A
B
K
4-R2.0
B
B
K
C
50.0
APPROVED BY
C
50.0
SCALE
50.0
C
D
50.0
D
D
XXXXXXXXX
MODEL
SCALE
UNIT
1/1
1/1
XXXXXXXXXXXXXXXXXXXX
TITLE
APPROVED BY
Tanaka
XXXXXXXXX
CHECKED BY
Shimano
SIGNED BY
Ioka
DRAWN BY
Oyama
Seiko I Infotech Inc. Design department
PART NO.
123456789
DRAWING NO.
123456789
A4
MODEL
SCALE
UNIT
Note
◆ If the original size is set to “AUTO”, (⇒ page 2-7), this
setting is ineffective.
2-35
Operation steps
Keys used
WARNING LIGHT
MENU
COPY
PRINT
MEMORY
RESET
POWER
SAVING
DELIVERY
FILE
REPRINT
STOP
POWER
SCAN STOP
ORIGINAL
SIZE
TONER
PROCESS
WASTE
TONER
BACKGROUND
REMOVAL
ORIGINAL
TYPE
AUTO
DENSITY
PAPER
FEED
DARK
FIXED-SIZE
PORTRAIT
TEXT/PHOTO
FIXED-SIZE
LANDSCAPE
PHOTO
SYNCHRO
BLUE PRINT
NORMAL
LIGHT
DATA
1
SCALE x1
TEXT/LINE
MANUAL FEED
FIXED SCALE
ZOOM
NON-PROPORTIONAL
ORIGINAL
IMAGE
QUALITY
SORT
SCALE
FUNCTION
ERROR
Press the [PAPER FEED] key.
If the [PAPER FEED] key is pressed, the screen
switches to the PAPER FEED setting screen.
Feed
Ma r g i n ( mm)
F r ame E r a s e / O f f s e t
F r ame E r a s e ( mm) O f f s e t ( mm)
Page : 01 / 02
[ En t e r ] t o Se l e c t
2
Press the [ ] or [ ] key.
Press the [ ] or [ ] key to move to the
FrameErase/Offset.
Feed
Ma r g i n ( mm)
F r ame E r a s e / O f f s e t
F r ame E r a s e ( mm) O f f s e t ( mm)
Page : 01 / 02
[ En t e r ] t o Se l e c t
3
Press the [Enter] key.
If the [Enter] key is pressed, the screen switches to the
FrameErase/Offset setting screen.
F e e d : F r ame E r a s e / O f f s e t
F r ame E r a s e
Of f se t
Page : 01 / 01
2-36
[ En t e r ] t o Se l e c t
START
▼Move original position
4
Press the [ ] or [ ] key.
Press the [ ] or [ ] key to select the Offset.
Page : 01 / 01
5
Chapter 2 Copy function
F e e d : F r ame E r a s e / O f f s e t
F r ame E r a s e
Of f se t
[ En t e r ] t o Se l ec t
Press the [Enter] key.
Press the [Enter] key to return to the top
screen.
Cop y Read y
SCN : 0 0 CP Y : 0 0 / 0 0
SET : 01
AU TO A 0 A 1 Ma n u a l F e e d
1 0 0 . 0%
6
Press the [PAPER FEED] key.
If the [PAPER FEED] key is pressed, the screen
switches to the PAPER FEED setting screen.
Feed
F r ame E r a s e / O f f s e t
Ma r g i n ( mm)
F r ame E r a s e ( mm) O f f s e t ( mm)
Page : 01 / 02
[ En t e r ] t o Se l ec t
7
Press the [ ] or [ ] key.
Press the [ ] or [ ] key to select the Offset.
F e e d : F r ame E r a s e / O f f s e t
F r ame E r a s e
Of f se t
Page : 01 / 01
[ En t e r ] t o Se l ec t
2-37
8
Press the [Enter] key.
If the [Enter] key is pressed, the screen switches
to the Offset setting screen.
F e e d : O f f s e t ( mm)
Ve r t i ca l : + 0
Ho r i z o n t a l : +
( - 1 0 0 –1 0 0 )
9
0
[ En t e r ] t o Se t
Enter numeric value with the ten keys.
Enter the Offset value with the ten keys.
Numeric value can be entered in a range of 100 to 100 mm.
F e e d : O f f s e t ( mm)
V e r t i c a l : +1 0 0
Ho r i z o n t a l : +
( - 1 0 0 –1 0 0 )
0
[ En t e r ] t o Se t
Here, “100” is entered to VERTICAL.
10 Press the [
] or [ ] key.
Press the [ ] or [ ] key to move to the Offset
value in horizontal direction.
F e e d : O f f s e t ( mm)
V e r t i c a l : +1 0 0
Ho r i z o n t a l : +
( - 1 0 0 –1 0 0 )
0
[ En t e r ] t o Se t
11 Enter numeric value with the ten keys.
Enter the Offset value with the ten keys.
Numeric value can be entered in a range of 100 to 100 mm (-3.9 to 3.9 inches).
F e e d : O f f s e t ( mm)
V e r t i c a l : +1 0 0
Ho r i z o n t a l : - 100
( - 1 0 0 –1 0 0 )
[ En t e r ] t o Se t
Here, “-100” is entered to Horizontal.
*1 mm = 0.0394 inches
2-38
▼Move original position
12 Press the [Enter] key.
Press the [Enter] key to complete the
setting.
SCN : 0 0 CP Y : 0 0 / 0 0
SET : 01
AU TO A 0 A 1 Ma n u a l F e e d
1 0 0 . 0%
Chapter 2 Copy function
Cop y Read y
2-39
Partial copy
The original can be partially copied.
1
2
3
Distanced
from top edge
(“Position”)
4
A
A
B
B
B
4-R2.0
B
4-R2.0
C
D
C
Length
100.0
K
K
E
D
D
E
E
C
K
K
100.0
C
D
E
50.0
50.0
Paper feed
direction
XXXXXXXXX
MODEL
SCALE
UNIT
1/1
1/1
XXXXXXXXXXXXXXXXXXXX
TITLE
APPROVED BY
Tanaka
CHECKED BY
SIGNED BY
Shimano
DRAWN BY
Ioka
Oyama
Seiko I Infotech Inc. Design department
PART NO.
123456789
DRAWING NO.
123456789
SHEET
A4 long
PAGE
◆ If you want to take a test copy several times according to the
darkness or image quality of original, use this function so that
you can check the results from partial copy. This function will
be more effective for large originals.
◆ If the test copy range is determined and registered to the
memory in advance, this function can be used only by reading
the memory when taking a test copy. (⇒ page 4-3)
Note
◆ If partial copy is set:
- Original size setting is invalidated and a copy is made as
the SYNCHRO original size.
- Offset/FrameErase settings are invalidated.
- Original is ejected from the front. However, if total of the
distance from the original top edge and the length of
partial copy exceeds 48 inches (1219 mm), the original is
ejected from the rear.
Operation steps
Keys used
WARNING LIGHT
MENU
COPY
PRINT
MEMORY
RESET
POWER
SAVING
DELIVERY
FILE
REPRINT
STOP
POWER
SCAN STOP
ORIGINAL
SIZE
TONER
PROCESS
WASTE
TONER
AUTO
ORIGINAL
TYPE
BACKGROUND
REMOVAL
DENSITY
PAPER
FEED
DARK
FIXED-SIZE
PORTRAIT
TEXT/PHOTO
FIXED-SIZE
LANDSCAPE
PHOTO
SYNCHRO
BLUE PRINT
NORMAL
LIGHT
DATA
2-40
ERROR
SCALE x1
TEXT/LINE
MANUAL FEED
FIXED SCALE
ZOOM
NON-PROPORTIONAL
ORIGINAL
IMAGE
QUALITY
SORT
SCALE
FUNCTION
START
▼Partrial copy
1
Press the [ORIGINAL] key.
If the [ORIGINAL] key is pressed, the screen
switches to the ORIGINAL setting screen.
2
E j ec tD i r ec t i on
P a r t i a l C o p y (mm)
[ En t e r ] t o Se l e c t
Chapter 2 Copy function
O r i g i na l
Se r i e s
S c a nMe d i a
Page : 01 / 01
Press the [ ] or [ ] key.
Press the [ ] or [ ] key to move to the “Partial
Copy (mm).”
O r i g i na l
Se r i e s
S c a nMe d i a
Page : 01 / 01
3
E j ec tD i r ec t i on
P a r t i a l C o p y (mm)
[ En t e r ] t o Se l e c t
Press the [Enter] key.
If the [Enter] key is pressed, the screen switches
to the Partial Copy setting.
O r i g i n a l : P a r t i a l C o p y (mm)
Leng t h : 0
Pos i t i on : 0
( 0 –1 0 0 0 0 )
4
[ En t e r ] t o Se t
Enter numeric value with the ten
keys.
For “Position”, enter the distance from the
original top edge to the copy start position
with ten keys. Numeric value can be entered
in a range of 0 mm to 10000 mm (0 to 393.70
inches).
O r i g i n a l : P a r t i a l C o p y (mm)
Po s i t i o n : 50
Leng t h : 0
( 0 –1 0 0 0 0 )
[ En t e r ] t o Se t
Here, “50” is entered to “Position”.
*1 mm = 0.0394 inches
2-41
5
Press the [ ] or [ ] key.
Press the [ ] or [ ] key to select the “Length”.
O r i g i n a l : P a r t i a l C o p y (mm)
Po s i t i o n : 50
Leng t h : 0
( 0 –1 0 0 0 0 )
6
[ En t e r ] t o Se t
Enter numeric value with the ten keys.
Enter the length of original range to be copied
partially with ten keys. Numeric value can be
entered in a range of 0 mm to 10000 mm (0 to
393.7 inches).
O r i g i n a l : P a r t i a l C o p y (mm)
Po s i t i o n : 50
Leng t h : 100
( 0 –1 0 0 0 0 )
[ En t e r ] t o Se t
Here, “100” is entered to the “Length”.
*1 mm = 0.0394 inches
Note
◆ If the length is set to “0”, the partial copy is invalidated and
normal copy print is executed.
◆ Either of the following cases causes a copy error,
requiring extreme care.
- Numeric value of “Position” is larger than original size
- Total of “Position” and “Length” exceeds the maximum
original size that can be scanned
2-42
▼Partrial copy
Press the [Enter] key.
Press the [Enter] key to complete the setting.
Note
◆ For the device not equipped with HDD or if ScanMedia is set
to “Memory” (⇒ page 2-60), to take a partial copy that
exceeds 1,250 mm (49.2 mm), the settings must be
changed as follows in advance. Copy error will occur unless
changed.
SCALE (⇒ page 2-19)
SCALE × 1
Scale mode (⇒ Page 2-26)
MANUAL
MARGIN (⇒ page 2-32)
All “0”
MOVE (⇒ page 2-35)
All “0”
FRAMEERASE (⇒ page 2-44) All “0”
MIRROR (⇒ page 2-56)
OFF
2-43
Chapter 2 Copy function
7
Erase frame
For fixed size originals only, a copy can be made with the edges
of the original removed. This function will be convenient when
the frame of an original is to be erased.
Original
1
2
3
4
A
A
4-R2.0
B
B
50.0
K
C
C
50.0
D
D
XXXXXXXXX
MODEL
SCALE
UNIT
1/1
1/1
XXXXXXXXXXXXXXXXXXXX
TITLE
APPROVED BY
Tanaka
CHECKED BY
Shimano
SIGNED BY
Ioka
DRAWN BY
Oyama
Seiko I Infotech Inc. Design department
1
PART NO.
123456789
DRAWING NO.
123456789
SHEET
A4
2
3
PAGE
4
A
A
4-R2.0
B
B
50.0
K
C
C
50.0
D
D
XXXXXXXXX
MODEL
SCALE
UNIT
1/1
1/1
XXXXXXXXXXXXXXXXXXXX
TITLE
APPROVED BY
Tanaka
CHECKED BY
Shimano
SIGNED BY
Ioka
DRAWN BY
Oyama
Seiko I Infotech Inc. Design department
PART NO.
123456789
DRAWING NO.
123456789
SHEET
A4
PAGE
Note
◆ This setting is effective only if the original size is set to
FIXED-SIZE PORTRAIT or FIXED-SIZE LANDSCAPE
(⇒ page 2-7).
2-44
▼Erase frame
Operation steps
WARNING LIGHT
MENU
COPY
PRINT
MEMORY
RESET
POWER
SAVING
DELIVERY
FILE
REPRINT
STOP
POWER
SCAN STOP
ORIGINAL
SIZE
TONER
PROCESS
WASTE
TONER
ORIGINAL
TYPE
AUTO
BACKGROUND
REMOVAL
DENSITY
PAPER
FEED
DARK
FIXED-SIZE
PORTRAIT
TEXT/PHOTO
FIXED-SIZE
LANDSCAPE
PHOTO
SYNCHRO
BLUE PRINT
NORMAL
LIGHT
DATA
1
SCALE x1
TEXT/LINE
MANUAL FEED
FIXED SCALE
ZOOM
NON-PROPORTIONAL
ORIGINAL
IMAGE
QUALITY
START
SORT
SCALE
FUNCTION
ERROR
Press the [PAPER FEED] key.
If the [PAPER FEED] key is pressed, the screen
switches to the PAPER FEED setting screen.
Feed
Ma r g i n ( mm)
F r ame E r a s e / O f f s e t
F r ame E r a s e ( mm) O f f s e t ( mm)
Page : 01 / 02
[ En t e r ] t o Se l e c t
2
Press the [ ] or [ ] key.
Press the [ ] or [ ] key to move to the
FrameErase/Offset.
Feed
Ma r g i n ( mm)
F r ame E r a s e / O f f s e t
F r ame E r a s e ( mm) O f f s e t ( mm)
Page : 01 / 02
[ En t e r ] t o Se l e c t
3
Press the [Enter] key.
If the [Enter] key is pressed, the screen switches
to the FrameErase/Offset choice screen.
F e e d : F r ame E r a s e / O f f s e t
F r ame E r a s e
Of f se t
Pa ge : 01 / 01
[ En t e r ] t o Se t
2-45
Chapter 2 Copy function
Keys used
4
Press the [ ] or [ ] key.
Press the [ ] or [ ] key to select FrameErase.
F e e d : F r ame E r a s e / O f f s e t
F r ame E r a s e
Of f se t
Pa ge : 01 / 01
5
[ En t e r ] t o Se t
Press the [Enter] key.
Press the [Enter] key to return to the top
screen.
Co p y Re a d y
SCN : 0 0 CP Y : 0 0 / 0 0
SET : 01
AU TO A0 A1 Ma n u a l F e e d
1 0 0 . 0%
6
Now you can choose the width of the
surrounding area to be removed.
Press the [PAPER FEED] key.
If the [PAPER FEED] key is pressed, the screen
switches to the PAPER FEED setting screen.
Feed
Ma r g i n ( mm)
F r ame E r a s e / O f f s e t
F r ame E r a s e ( mm) O f f s e t ( mm)
Page : 01 / 02
[ En t e r ] t o Se l e c t
7
Press the [ ] or [ ] key.
Press the [ ] or [ ] key to move to the
FrameErase.
Feed
Ma r g i n ( mm)
F r ame E r a s e / O f f s e t
F r ame E r a s e ( mm) O f f s e t ( mm)
Page : 01 / 02
[ En t e r ] t o Se l e c t
2-46
▼Erase frame
8
Press the [Enter] key.
If the [Enter] key is pressed, the screen switches
to the FrameErase setting screen.
9
Chapter 2 Copy function
F e e d : F r ame E r a s e ( mm)
Top : 0
B o t t om : 0
Le f t : 0
R i gh t : 0
( 0 - 50 )
[ En t e r ] t o Se t
Press the [ ] or [ ] key.
Press the [ ] or [ ] key to move to the edge to
be FrameErase.
F e e d : F r ame E r a s e ( mm)
Top : 0
B o t t om : 0
Le f t : 0
R i gh t : 0
( 0 - 50 )
[ En t e r ] t o Se t
10 Enter numeric value with the ten keys.
Enter the moving amount with the ten keys.
Numeric value can be entered in a range of 0
to 50 mm (0 to 1.9 inches).
F e e d : F r ame E r a s e ( mm)
Top : 0
B o t t om : 0
R i gh t : 0
L e f t : 50
( 0 - 50 )
[ En t e r ] t o Se t
Here, “50” is entered for the FrameErase at the left.
*1 mm = 0.0394 inches
11 Press the [Enter] key.
Press the [Enter] key to complete the
setting.
Cop y Read y
SCN : 0 0 CP Y : 0 0 / 0 0
SET : 01
AU TO A 0 A 1 Ma n u a l F e e d
1 0 0 . 0%
2-47
Select the size of the original
Select media series that indicates the correct width of the
original. If once the display will display the choices for that
series. (⇒ page 2-21).
Note
◆ For this setting, only the media series for which the
ENABLE SERIES is set to “ON” in the system menu is
displayed. (For details, see “User's Guide, Plotter Unit”
prepared separately.)
◆ Adjust this setting to the original series used actually.
◆ The use of China series of original further requires the
CHINA SIZE to be set in the system menu. (For details,
see “User's Guide, Plotter Unit” prepared separately.)
Operation steps
Keys used
WARNING LIGHT
MENU
COPY
PRINT
MEMORY
RESET
POWER
SAVING
DELIVERY
FILE
REPRINT
STOP
POWER
SCAN STOP
ORIGINAL
SIZE
TONER
PROCESS
WASTE
TONER
AUTO
ORIGINAL
TYPE
BACKGROUND
REMOVAL
DENSITY
PAPER
FEED
DARK
MANUAL FEED
FIXED-SIZE
PORTRAIT
TEXT/PHOTO
FIXED-SIZE
LANDSCAPE
PHOTO
SYNCHRO
BLUE PRINT
NORMAL
LIGHT
DATA
1
SCALE x1
TEXT/LINE
FIXED SCALE
ZOOM
NON-PROPORTIONAL
ORIGINAL
IMAGE
QUALITY
SORT
SCALE
FUNCTION
ERROR
Press the [ORIGINAL] key.
If the [ORIGINAL] key is pressed, the screen
switches to the ORIGINAL selection screen.
Or i g i na l
Se r i e s
S c a nMe d i a
Page : 01 / 01
2-48
E j ec t D i r ec t i on
P a r t i a l C o p y (mm)
[ En t e r ] t o Se l ec t
START
▼Select the size of the original
2
Press the [Enter] key.
When you have selected the series choice and
pressed the [Enter] key, the screen switches to
Chapter 2 Copy function
the Series setting screen.
O r i g i na l : Se r i e s
A
9"
8 . 5"
3 0×4 2
Ma p
DIN
Ch i na
Pa ge : 01 / 01
[ En t e r ] t o Se t
3
Press the [ ] or [ ] key.
Press the [ ] or [ ] key to move to the Media
Series to be selected.
O r i g i na l : Se r i e s
A
9"
8 . 5"
3 0×4 2
Ma p
DIN
Ch i na
Pa ge : 01 / 01
[ En t e r ] t o Se t
Here, “CHINA” is selected.
4
Press the [Enter] key.
Press the [Enter] key to complete the setting.
Co p y Re a d y
SCN : 0 0 CP Y : 0 0 / 0 0
SET : 01
AU TO A0 A1 Ma n u a l F e e d
1 0 0 . 0%
2-49
Select original reject direction
The device provides two options for where the original is rejected after
scanning, front and rear. The output choice is selected here.
Note
◆ For the front reject, the original length is limited to
maximum 48 inches (1219.2 mm).
Operation steps
Keys used
WARNING LIGHT
MENU
COPY
PRINT
MEMORY
RESET
POWER
SAVING
DELIVERY
FILE
REPRINT
STOP
POWER
SCAN STOP
ORIGINAL
SIZE
TONER
PROCESS
WASTE
TONER
AUTO
ORIGINAL
TYPE
BACKGROUND
REMOVAL
DENSITY
PAPER
FEED
DARK
MANUAL FEED
FIXED-SIZE
PORTRAIT
TEXT/PHOTO
FIXED-SIZE
LANDSCAPE
PHOTO
SYNCHRO
BLUE PRINT
NORMAL
LIGHT
DATA
1
SCALE x1
TEXT/LINE
FIXED SCALE
ZOOM
NON-PROPORTIONAL
ORIGINAL
IMAGE
QUALITY
SORT
SCALE
FUNCTION
ERROR
Press the [ORIGINAL] key.
If the [ORIGINAL] key is pressed, the screen
switches to the ORIGINAL setting screen.
O r i g i na l
Se r i e s
S c a nMe d i a
Page : 01 / 01
2
E j ec tD i r ec t i on
P a r t i a l C o p y (mm)
[ En t e r ] t o Se l e c t
Press the [ ] or [ ] key.
Press the [ ] or [ ] key to move to the Eject
Direction.
O r i g i na l
Se r i e s
S c a nMe d i a
Page : 01 / 01
2-50
E j ec tD i r ec t i on
P a r t i a l C o p y (mm)
[ En t e r ] t o Se l e c t
START
▼Select original reject direction
3
Press the [Enter] key.
If the [Enter] key is pressed, the screen switches
to the Eject Direction setting screen.
Page : 01 / 01
4
Chapter 2 Copy function
Or i g i na l : E j ec t D i r ec t i on
Rea r
F r on t
[ En t e r ] t o Se l ec t
Press the [ ] or [ ] key.
Press the [ ] or [ ] key to the original reject to
be selected.
Or i g i na l : E j ec t D i r ec t i on
Rea r
F r on t
Page : 01 / 01
[ En t e r ] t o Se t
Here, “Front” is selected.
5
Press the [Enter] key.
Press the [Enter] key to complete the setting.
Cop y Read y
SCN : 0 0 CP Y : 0 0 / 0 0
SET : 01
AU TO A 0 A 1 Ma n u a l F e e d
1 0 0 . 0%
2-51
Adjust sharpness of original
The outline of an original can be made sharp or blurred.
Note
◆ After the sharpness of an original was adjusted, if the
original type is changed (⇒ page 2-13), the original
sharpness setting changes, thus requiring care.
Operation steps
Keys used
WARNING LIGHT
MENU
COPY
PRINT
MEMORY
RESET
POWER
SAVING
DELIVERY
FILE
REPRINT
STOP
POWER
SCAN STOP
ORIGINAL
SIZE
TONER
PROCESS
WASTE
TONER
AUTO
ORIGINAL
TYPE
BACKGROUND
REMOVAL
DENSITY
PAPER
FEED
DARK
MANUAL FEED
FIXED-SIZE
PORTRAIT
TEXT/PHOTO
FIXED-SIZE
LANDSCAPE
PHOTO
SYNCHRO
BLUE PRINT
NORMAL
LIGHT
DATA
1
SCALE x1
TEXT/LINE
FIXED SCALE
ZOOM
NON-PROPORTIONAL
ORIGINAL
IMAGE
QUALITY
START
SORT
SCALE
FUNCTION
ERROR
Press the [IMAGE QUALITY] key.
If the [IMAGE QUALITY] key is pressed, the
screen switches to the IMAGE QUALITY
setting screen.
L i ne
Th r esho l d
Con t r a s t
Page : 01 / 02
Sh a r pn e s s
L i n e Gu a r a n t e e
[ En t e r ] t o Se l e c t
This screen varies depending on the selected original type (⇒ page 2-13).
Here, the screen in case of “Text/Line” selection is displayed.
2
Press the [ ] or [ ] key.
Press the [ ] or [ ] key to move to the
Sharpness.
L i ne
Th r esho l d
Co n t r a s t
Page : 01 / 02
2-52
Sha r pne s s
L i ne Gua r a n t e e
[ En t e r ] t o Se l e c t
▼Adjust sharpness of original
3
Press the [Enter] key.
If the [Enter] key is pressed, the screen switches
to the Sharpness setting screen.
4
N o rma l
Chapter 2 Copy function
L i n e : Sh a r pn e s s
Of f
We a k
S t r ong
Blur
Page : 01 / 01
[ En t e r ] t o Se t
Press the [ ] or [ ] key.
Press the [ ] or [ ] key to move to the desired
setting.
L i n e : Sh a r pn e s s
Of f
We a k
S t r ong
Blur
Page : 01 / 01
N o rma l
[ En t e r ] t o Se t
Here, “Strong” is selected.
5
Press the [Enter] key.
Press the [Enter] key to complete the setting.
Cop y Read y
SCN : 0 0 CP Y : 0 0 / 0 0
SET : 01
AU TO A 0 A 1 Ma n u a l F e e d
1 0 0 . 0%
2-53
Adjust contrast of original
The contrast of an original can be adjusted.
1
2
3
4
A
A
4-R2.0
B
B
50.0
K
C
C
50.0
D
D
XXXXXXXXX
MODEL
SCALE
UNIT
1/1
1/1
XXXXXXXXXXXXXXXXXXXX
TITLE
Tanaka
CHECKED BY
Shimano
SIGNED BY
Ioka
DRAWN BY
Oyama
Seiko I Infotech Inc. Design department
PART NO.
123456789
DRAWING NO.
123456789
Dark
1
2
3
A
2
3
A
B
B
C
C
D
1/1
Oyama
D
D
XXXXXXXXX
SCALE
UNIT
1/1
1/1
MODEL
XXXXXXXXXXXXXXXXXXXX
SCALE
UNIT
1/1
1/1
XXXXXXXXXXXXXXXXXXXX
TITLE
DRAWN BY
Ioka
C
MODEL
XXXXXXXXXXXXXXXXXXXX
SIGNED BY
Shimano
B
50.0
D
TITLE
CHECKED BY
C
XXXXXXXXX
MODEL
UNIT
Seiko I Infotech Inc. Design department
B
C
K
D
XXXXXXXXX
Tanaka
B
50.0
D
APPROVED BY
PART NO.
123456789
DRAWING NO.
123456789
A4
CHECKED BY
SIGNED BY
Tanaka
PAGE
Seiko I Infotech Inc. Design department
Ioka
TITLE
DRAWN BY
SHEET
Shimano
4
A
50.0
K
50.0
APPROVED BY
3
4-R2.0
50.0
K
C
2
A
4-R2.0
B
1/1
Bright
1
4
A
4-R2.0
SCALE
PAGE
Normal
1
4
A
SHEET
A4
Oyama
50.0
APPROVED BY
APPROVED BY
PART NO.
123456789
DRAWING NO.
123456789
A4
CHECKED BY
SIGNED BY
DRAWN BY
SHEET
Tanaka
PAGE
Seiko I Infotech Inc. Design department
Shimano
Ioka
Oyama
PART NO.
123456789
DRAWING NO.
123456789
SHEET
A4
PAGE
Operation steps
Keys used
WARNING LIGHT
COPY
PRINT
DELIVERY
FILE
MENU
POWER
SAVING
MEMORY
RESET
REPRINT
STOP
POWER
SCAN STOP
ORIGINAL
SIZE
TONER
PROCESS
WASTE
TONER
AUTO
ORIGINAL
TYPE
BACKGROUND
REMOVAL
DENSITY
PAPER
FEED
DARK
MANUAL FEED
FIXED-SIZE
PORTRAIT
TEXT/PHOTO
FIXED-SIZE
LANDSCAPE
PHOTO
SYNCHRO
BLUE PRINT
NORMAL
LIGHT
DATA
1
SCALE x1
TEXT/LINE
FIXED SCALE
ZOOM
NON-PROPORTIONAL
ORIGINAL
IMAGE
QUALITY
START
SORT
SCALE
FUNCTION
ERROR
Press the [IMAGE QUALITY] key.
If the [IMAGE QUALITY] key is pressed, the
screen switches to the IMAGE QUALITY
setting screen.
L i ne
Th r esho l d
Con t r a s t
Page : 01 / 02
Sh a r pn e s s
L i n e Gu a r a n t e e
[ En t e r ] t o Se l ec t
This screen varies depending on the selected original type (⇒ page 2-13).
Here, the screen in case of “Text/Line” selection is displayed.
2-54
▼Adjust contrast of original
2
Press the [ ] or [ ] key.
Press the [ ] or [ ] key to move to the Contrast.
3
Sh a r pn e s s
L i n e Gu a r a n t e e
[ En t e r ] t o Se l ec t
Chapter 2 Copy function
L i ne
Th r esho l d
Con t r a s t
Page : 01 / 02
Press the [Enter] key.
If the [Enter] key is pressed, the screen switches
to the Contrast setting screen.
L i ne : Con t r a s t
Da r k
B r i gh t
Page : 01 / 01
4
N o rma l
[ En t e r ] t o Se t
Press the [ ] or [ ] key.
Press the [ ] or [ ] key to move to the desired
setting.
L i ne : Co n t r a s t
Da r k
B r i gh t
Pa ge : 01 / 01
N o rma l
[ En t e r ] t o Se t
Here, “Bright” is selected.
5
Press the [Enter] key.
Press the [Enter] key to complete the setting.
Cop y Read y
SCN : 0 0 CP Y : 0 0 / 0 0
SET : 01
AU TO A 0 A 1 Ma n u a l F e e d
1 0 0 . 0%
2-55
Mirror
The mirrored original can be copied.
1
2
3
4
A
A
4-R2.0
B
B
50.0
K
C
C
50.0
D
D
XXXXXXXXX
MODEL
SCALE
UNIT
1/1
1/1
XXXXXXXXXXXXXXXXXXXX
TITLE
APPROVED BY
Tanaka
CHECKED BY
Shimano
SIGNED BY
Ioka
DRAWN BY
Oyama
Seiko I Infotech Inc. Design department
PART NO.
123456789
DRAWING NO.
123456789
SHEET
A4
PAGE
OFF
1
2
3
ON
4
4
A
A
3
1
2
A
A
4-R2.0
0.2R-4
B
B
C
C
D
D
B
50.0
B
K
0.05
K
C
C
50.0
0.05
D
D
XXXXXXXXX
XXXXXXXXX
MODEL
SCALE
UNIT
1/1
1/1
LEDOM
TINU
XXXXXXXXXXXXXXXXXXXX
1/1
XXXXXXXXXXXXXXXXXXXX
TITLE
APPROVED BY
Tanaka
CHECKED BY
SIGNED BY
Shimano
Ioka
Oyama
ELACS
1/1
ELTIT
DRAWN BY
Seiko I Infotech Inc. Design department
YB NWARD
PART NO.
123456789
DRAWING NO.
123456789
A4
SHEET
TEEHS
PAGE
EGAP
4A
987654321
.ON TRAP
987654321
.ON GNIWARD
amayO
YB DENGIS
akoI
YB DEKCEHC
onamihS
YB DEVORPPA
akanaT
tnemtraped ngiseD .cnI hcetofnI I okieS
Operation steps
Keys used
WARNING LIGHT
MENU
COPY
PRINT
MEMORY
RESET
POWER
SAVING
DELIVERY
FILE
REPRINT
STOP
POWER
SCAN STOP
ORIGINAL
SIZE
TONER
PROCESS
WASTE
TONER
AUTO
ORIGINAL
TYPE
BACKGROUND
REMOVAL
DENSITY
PAPER
FEED
DARK
FIXED-SIZE
PORTRAIT
TEXT/PHOTO
FIXED-SIZE
LANDSCAPE
PHOTO
SYNCHRO
BLUE PRINT
NORMAL
LIGHT
DATA
1
SCALE x1
TEXT/LINE
MANUAL FEED
FIXED SCALE
ZOOM
NON-PROPORTIONAL
ORIGINAL
IMAGE
QUALITY
START
SORT
SCALE
FUNCTION
ERROR
Press the [IMAGE QUALITY] key.
If the [IMAGE QUALITY] key is pressed, the
screen switches to the IMAGE QUALITY
setting screen.
L i ne
Th r esho l d
Con t r a s t
Page : 01 / 02
Sh a r pn e s s
[ En t e r ] t o Se l ec t
This screen varies depending on the selected original type (⇒ page 2-13).
Here, the screen in case of “Text/Line” selection is displayed.
2-56
▼Mirror
2
Press the [ ] or [ ] key.
Press the [ ] or [ ] key to move to the Mirror.
3
Chapter 2 Copy function
L i ne
L i n e Gu a r a n t e e
L i ne Th r esho l d
Mi r r o r
Re v e r s e
Page : 02 / 02
[ En t e r ] t o Se l ec t
Press the [Enter] key.
If the [Enter] key is pressed, the screen switches
to the Mirror setting screen.
L i ne :Mi r r o r
Of f
Pa ge : 01 / 01
4
On
[ En t e r ] t o Se t
Press the [ ] or [ ] key.
Press the [ ] or [ ] key to move to the ON.
L i ne :Mi r r o r
Of f
Pa ge : 01 / 01
5
On
[ En t e r ] t o Se t
Press the [Enter] key.
Press the [Enter] key to complete the setting.
Cop y Read y
SCN : 0 0 CP Y : 0 0 / 0 0
SET : 01
AU TO A 0 A 1 Ma n u a l F e e d
1 0 0 . 0%
2-57
Reverse
The reversed original can be copied.
1
2
3
4
A
A
4-R2.0
B
B
50.0
K
C
C
50.0
D
D
XXXXXXXXX
MODEL
SCALE
UNIT
1/1
1/1
XXXXXXXXXXXXXXXXXXXX
TITLE
APPROVED BY
CHECKED BY
Tanaka
SIGNED BY
Shimano
Ioka
DRAWN BY
Oyama
Seiko I Infotech Inc. Design Department
PART NO.
123456789
DRAWING NO.
123456789
SHEET
PAGE
A4
OFF
1
2
3
ON
1
4
A
A
2
3
4
A
A
4-R2.0
4-R2.0
B
B
B
C
C
50.0
K
50.0
K
B
C
C
50.0
50.0
D
D
D
D
XXXXXXXXX
XXXXXXXXX
MODEL
MODEL
SCALE
UNIT
1/1
1/1
XXXXXXXXXXXXXXXXXXXX
SCALE
UNIT
1/1
1/1
XXXXXXXXXXXXXXXXXXXX
TITLE
TITLE
APPROVED BY
APPROVED BY
CHECKED BY
Tanaka
SIGNED BY
Shimano
Ioka
CHECKED BY
SIGNED BY
DRAWN BY
DRAWN BY
Oyama
Seiko I Infotech Inc. Design Department
PART NO.
123456789
DRAWING NO.
123456789
A4
SHEET
Tanaka
PAGE
Seiko I Infotech Inc. Design Department
Shimano
Ioka
Oyama
PART NO.
123456789
DRAWING NO.
123456789
SHEET
A4
PAGE
Operation steps
Keys used
WARNING LIGHT
MENU
COPY
PRINT
MEMORY
RESET
POWER
SAVING
DELIVERY
FILE
REPRINT
STOP
POWER
SCAN STOP
ORIGINAL
SIZE
TONER
PROCESS
WASTE
TONER
AUTO
ORIGINAL
TYPE
BACKGROUND
REMOVAL
DENSITY
PAPER
FEED
DARK
FIXED-SIZE
PORTRAIT
TEXT/PHOTO
FIXED-SIZE
LANDSCAPE
PHOTO
SYNCHRO
BLUE PRINT
NORMAL
LIGHT
DATA
1
SCALE x1
TEXT/LINE
MANUAL FEED
FIXED SCALE
ZOOM
NON-PROPORTIONAL
ORIGINAL
IMAGE
QUALITY
START
SORT
SCALE
FUNCTION
ERROR
Press the [IMAGE QUALITY] key.
If the [IMAGE QUALITY] key is pressed, the
screen switches to the IMAGE QUALITY
setting screen.
L i ne
Th r esho l d
Co n t r a s t
Page : 01 / 02
Sha r pne s s
[ En t e r ] t o Se l e c t
This screen varies depending on the selected original type (⇒ page 2-13).
Here, the screen in case of “Text/Line” selection is displayed
2-58
▼Reverse
2
Press the [ ] or [ ] key.
Press the [ ] or [ ] key to move to the Reverse.
3
Chapter 2 Copy function
L i ne
L i n e Gu a r a n t e e
L i ne Th r esho l d
Mi r r o r
Re v e r s e
Page : 02 / 02
[ En t e r ] t o Se l ec t
Press the [Enter] key.
If the [Enter] key is pressed, the screen switches
to the Mirror setting screen.
L i ne : Re v e r s e
Of f
Pa ge : 01 / 01
4
On
[ En t e r ] t o Se t
Press the [ ] or [ ] key.
Press the [ ] or [ ] key to move to the ON.
L i ne : Re v e r s e
Of f
Pa ge : 01 / 01
5
On
[ En t e r ] t o Se t
Press the [Enter] key.
Press the [Enter] key to complete the setting.
Cop y Read y
SCN : 0 0 CP Y : 0 0 / 0 0
SET : 01
AU TO A 0 A 1 Ma n u a l F e e d
1 0 0 . 0%
2-59
Copying long original
When a long original is copied, either MEMORY or Hard Disk (HDD)
can be set as a storage area of the scanned image data.
■ Selecting “Memory”
- An attempt to copy a long original exceeding 1250 mm (49.2 inches)
may cause a warning error and then the print is disabled depending on
the setting up. The maximum copy and printing length is 2.5 m (98.4
inches).
- The next original may not be scanned during the printing.
■ Selecting “HDD”
- There is no limitation in setting up when a long original is copied.
The maximum copy and printing length is the maximum printing
length of the device.
- The next original can be scanned during the printing.
- The processing time may be rather longer than that of “MEMORY”
selection.
Note
◆ This setting is valid for the LP-1020L-MF (with HDD) or for
the device equipped with optional HDD. For the device not
equipped with HDD, “HDD” setting is invalid even if it is
selected.
◆ The maximum copy and printing length of the device is:
LP-1020-MF
2.5 m (98.4 inches)
LP-1020L-MF 10 m (393.7 inches)
◆ When copying a long original, the copy paper is also long, thus
requiring careful handling. It is recommended that a long
original be stored in the device once by using the sort function
and after the original was put away, the print be started.
(⇒ page 2-63)
2-60
▼Copying long original
Operation steps
WARNING LIGHT
MENU
COPY
PRINT
MEMORY
RESET
POWER
SAVING
DELIVERY
FILE
REPRINT
STOP
POWER
SCAN STOP
ORIGINAL
SIZE
TONER
PROCESS
WASTE
TONER
AUTO
ORIGINAL
TYPE
BACKGROUND
REMOVAL
DENSITY
PAPER
FEED
DARK
MANUAL FEED
FIXED-SIZE
PORTRAIT
TEXT/PHOTO
FIXED-SIZE
LANDSCAPE
PHOTO
SYNCHRO
BLUE PRINT
1
FIXED SCALE
NORMAL
LIGHT
DATA
SCALE x1
TEXT/LINE
ZOOM
NON-PROPORTIONAL
ORIGINAL
IMAGE
QUALITY
START
SORT
SCALE
FUNCTION
ERROR
Press the [ORIGINAL] key.
If the [ORIGINAL] key is pressed, the screen
switches to the original setting screen.
O r i g i na l
Se r i e s
S c a nMe d i a
Page : 01 / 01
2
E j ec tD i r ec t i on
P a r t i a l C o p y (mm)
[ En t e r ] t o Se l e c t
Press the [ ] or [ ] key.
Press the [ ] or [ ] key to move to
“ScanMedia”.
O r i g i na l
Se r i e s
S c a nMe d i a
Page : 01 / 01
3
E j ec tD i r ec t i on
P a r t i a l C o p y (mm)
[ En t e r ] t o Se l e c t
Press the [Enter] key.
If the [Enter] key is pressed, the screen switches
to the ScanMedia setting screen.
O r i g i n a l : S c a nMe d i a
Memo r y
HDD
Page : 01 / 01
[ En t e r ] t o Se l e c t
2-61
Chapter 2 Copy function
Keys used
4
Press the [ ] or [ ] key.
Press the [ ] or [ ] key to move to the area to be
selected.
O r i g i n a l : S c a nMe d i a
Memo r y
HDD
Page : 01 / 01
[ En t e r ] t o Se l e c t
Here, “HDD” is selected.
5
Press the [Enter] key.
Press the [Enter] key to complete the setting.
Co p y Re a d y
SCN : 0 0 CP Y : 0 0 / 0 0
SET : 01
AU TO A0 A1 Ma n u a l F e e d
1 0 0 . 0%
2-62
Sorting
Multiple originals can be sorted and then copied.
1
3
1
2
4
2
3
4
A
1
2
1
3
A
A
K
50.0
C
B
K
B
50.0
50.0
D
50.0
C
D
C
D
D
D
50.0
50.0
XXXXXXXXX
UNIT
1/1
XXXXXXXXX
MODEL
D
D
XXXXXXXXXXXXXXXXXXXX
SCALE
UNIT
1/1
1/1
D
Tanaka
CHECKED BY
SIGNED BY
Shimano
TITLE
DRAWN BY
Ioka
SCALE
UNIT
1/1
1/1
APPROVED BY
XXXXXXXXX
123456789
PART NO.
Oyama
SHEET
DRAWING NO.
123456789
A4
CHECKED BY
Tanaka
MODEL
Seiko I Infotech Inc. Design Department
PAGE
SIGNED BY
Shimano
DRAWN BY
Ioka
SCALE
UNIT
1/1
1/1
Tanaka
CHECKED BY
SIGNED BY
Shimano
Oyama
Seiko I Infotech Inc. Design Department
SCALE
UNIT
1/1
1/1
APPROVED BY
XXXXXXXXX
123456789
PART NO.
SHEET
Tanaka
123456789
A4
Tanaka
MODEL
123456789
DRAWING NO.
A4
PAGE
SIGNED BY
Shimano
DRAWN BY
Ioka
Oyama
Seiko I Infotech Inc. Design Department
XXXXXXXXXXXXXXXXXXXX
CHECKED BY
SIGNED BY
Shimano
Ioka
PAGE
XXXXXXXXXXXXXXXXXXXX
CHECKED BY
SCALE
UNIT
1/1
1/1
123456789
PART NO.
Oyama
SHEET
123456789
A4
PAGE
XXXXXXXXXXXXXXXXXXXX
TITLE
DRAWN BY
Seiko I Infotech Inc. Design Department
XXXXXXXXX
MODEL
DRAWING NO.
TITLE
APPROVED BY
SHEET
MODEL
DRAWING NO.
TITLE
DRAWN BY
Ioka
XXXXXXXXX
123456789
PART NO.
Oyama
Seiko I Infotech Inc. Design Department
XXXXXXXXXXXXXXXXXXXX
TITLE
APPROVED BY
D
XXXXXXXXXXXXXXXXXXXX
TITLE
APPROVED BY
C
D
C
MODEL
1/1
B
K
C
C
D
C
B
C
4-R2.0
50.0
50.0
50.0
B
C
K
C
D
SCALE
4
B
B
K
50.0
4
2
B
4-R2.0
4-R2.0
B
3
A
4-R2.0
4
A
K
B
3
A
2
4-R2.0
C
2
4
A
3
B
A
3
1
A
4-R2.0
B
2
A
50.0
1
1
3
A
Chapter 2 Copy function
2
50.0
1
A
APPROVED BY
PART NO.
123456789
DRAWING NO.
123456789
A4
CHECKED BY
SIGNED BY
DRAWN BY
SHEET
Tanaka
PAGE
Seiko I Infotech Inc. Design Department
Shimano
Ioka
Oyama
PART NO.
123456789
DRAWING NO.
123456789
SHEET
A4
PAGE
Note
◆ The sort function is valid for the LP-1020L-MF (with HDD)
or for the device equipped with optional HDD.
Operation steps
Keys used
WARNING LIGHT
COPY
PRINT
DELIVERY
FILE
MENU
POWER
SAVING
MEMORY
RESET
REPRINT
STOP
POWER
SCAN STOP
ORIGINAL
SIZE
TONER
PROCESS
WASTE
TONER
AUTO
ORIGINAL
TYPE
BACKGROUND
REMOVAL
DENSITY
PAPER
FEED
DARK
MANUAL FEED
FIXED-SIZE
PORTRAIT
TEXT/PHOTO
FIXED-SIZE
LANDSCAPE
PHOTO
SYNCHRO
BLUE PRINT
NORMAL
LIGHT
DATA
ERROR
SCALE x1
TEXT/LINE
FIXED SCALE
ZOOM
NON-PROPORTIONAL
ORIGINAL
IMAGE
QUALITY
START
SORT
SCALE
FUNCTION
2-63
1
Press the [ ] or [ ] key.
If the [ ] or [ ] key is pressed, display of the
first line on the screen changes to the store mode.
The storage capacity at a time is 99 originals or
10GB.
Co p y Re a d y
SCN : 0 0 CP Y : 0 0 / 0 0
SET : 01
AU TO A0 A1 Ma n u a l F e e d
1 0 0 . 0%
[ Up ] S t o r e
S t o r e Read y
SCN : 0 0
SET : 01
AU TO A 0 A 1 Ma n u a l F e e d
1 0 0 . 0%
[ D own ] C o p y
2
Store the originals.
Set the originals on the device, and press the
[START] key to store the originals.
◆ Only the original stored last can be printed, if the originals are
stored one by one and the [REPRINT] key is pressed every
time. This way of operation will be convenient for a check prior
to sorting and copy. To delete only the original that was stored
last and checked, press the [Cancel] key.
3
Press the [Enter] key.
If the [Enter] key is pressed, the print check
screen is displayed.
Pr int
[ En t e r ] t o S t a r t
[ Canc e l ] t o Con t i nue
2-64
▼Sorting
Press the [Enter] key.
Press the [Enter] key, and the print will start.
◆
To return to the copy mode from the store mode, press the [ ]
or [ ] key. The stored originals are all deleted if the copy mode
is restored.
2-65
Chapter 2 Copy function
4
Reset
The data set for copy is reset to initial settings.
Note
◆ The device saves the data of the original copied last. If
that original is to be printed additionally, it can be printed
by a single key operation without scanning the original
again. However, pressing the RESET key causes the
saved data to be deleted, besides initialization. For the
reprinting, see page 2-67.
Operation steps
Keys used
WARNING LIGHT
COPY
PRINT
DELIVERY
FILE
MENU
POWER
SAVING
MEMORY
RESET
REPRINT
STOP
POWER
SCAN STOP
ORIGINAL
SIZE
TONER
PROCESS
WASTE
TONER
AUTO
ORIGINAL
TYPE
BACKGROUND
REMOVAL
DENSITY
PAPER
FEED
DARK
MANUAL FEED
FIXED-SIZE
PORTRAIT
TEXT/PHOTO
FIXED-SIZE
LANDSCAPE
PHOTO
SYNCHRO
BLUE PRINT
NORMAL
LIGHT
DATA
SCALE x1
TEXT/LINE
ERROR
FIXED SCALE
ZOOM
NON-PROPORTIONAL
ORIGINAL
START
IMAGE
QUALITY
SORT
SCALE
FUNCTION
Press the [RESET] key.
If the [RESET] key is pressed, the data set for
copy is all reset.
RY
RESET
NT
STOP
PO
SCAN
2-66
Reprint
Chapter 2 Copy function
The device saves the data of the original copied last. If that original is to
be printed additionally, it can be printed without scanning the original
again.
Note
◆ The reprint is enabled only when the REPRINT LED is
lighting.
◆ For the reprint, only the number of copies can be set.
Operation steps
Keys used
WARNING LIGHT
COPY
PRINT
DELIVERY
FILE
MENU
POWER
SAVING
MEMORY
RESET
REPRINT
STOP
POWER
SCAN STOP
ORIGINAL
SIZE
TONER
PROCESS
WASTE
TONER
AUTO
ORIGINAL
TYPE
BACKGROUND
REMOVAL
DENSITY
PAPER
FEED
DARK
MANUAL FEED
FIXED-SIZE
PORTRAIT
TEXT/PHOTO
FIXED-SIZE
LANDSCAPE
PHOTO
SYNCHRO
BLUE PRINT
NORMAL
LIGHT
DATA
SCALE x1
TEXT/LINE
FIXED SCALE
ZOOM
NON-PROPORTIONAL
ORIGINAL
START
IMAGE
QUALITY
SORT
SCALE
ERROR
FUNCTION
Press the [REPRINT] key.
If the [REPRINT] key is pressed, the data saved
in the device is printed.
MEMORY
R
REPRINT
S
2-67
Force print
This device provides the Force Print function that selects a different
paper if the designated paper is not available when a copy operation is
performed.
Operation steps
Keys used
WARNING LIGHT
MENU
COPY
PRINT
MEMORY
RESET
POWER
SAVING
DELIVERY
FILE
REPRINT
STOP
POWER
SCAN STOP
ORIGINAL
SIZE
TONER
PROCESS
WASTE
TONER
AUTO
BACKGROUND
REMOVAL
ORIGINAL
TYPE
DENSITY
PAPER
FEED
DARK
FIXED-SIZE
PORTRAIT
TEXT/PHOTO
FIXED-SIZE
LANDSCAPE
PHOTO
SYNCHRO
BLUE PRINT
NORMAL
LIGHT
DATA
1
SCALE x1
TEXT/LINE
MANUAL FEED
FIXED SCALE
ZOOM
NON-PROPORTIONAL
ORIGINAL
IMAGE
QUALITY
START
SORT
SCALE
FUNCTION
ERROR
Press the [Enter] key.
If there is no designated paper, the following
screen is displayed. If the [Enter] key is pressed,
the Force Print confirmation screen is displayed.
Se t Pape r
Ro l l 1 A3 ( T r a c e )
[ En t e r ] t o P r i n t
Here, the device instructs that A3 tracing paper should be loaded in the roll
1 drawer.
2
Press the [Enter] key.
If the [Enter] key is pressed, the print on other
paper starts.
Fo r ce P r i n t ?
[ En t e r ] t o Ex ec .
2-68
◆ Force print is enabled only if the paper larger than the
required paper is present.
◆ Force print is disabled if print is made on manually fed
paper.
◆ When selecting paper feed location (⇒ page 2-28), if a
drawer is specified for paper feed, force print is disabled
(in this case, print is always made on the paper in the
specified drawer).
2-69
Chapter 2 Copy function
Note
Chapter 3
Chapter 3 Delivery function
Delivery function
Chapter 3 describes the delivery function of this device.
Contents of this chapter
Delivery function
Preparation before using delivery function
Flow of delivery operation
Delivery function overview
Select original size
Select original type
Adjust background
Adjust density
Select media series used for original
Select original eject direction
Adjust sharpness of original
Adjust contrast of original
Reverse
Designate resolution
Compress image data when transferred
Reset
3-1
Delivery function
In the DELIVERY mode of the device, the scanned data can be saved in
the delivery host computer connected via network, or the data can be
transferred to other computers on the same network. To use the delivery
function, plot share must be installed beforehand in the delivery host
computer used and various settings must be made with this application
software.
Exclusive applications:
●TeriostarDelivery (standard application attached)
This application provides the function that saves the image data
transferred from the device in the designated folder in the delivery host
computer.
Delivery Host computer
Plotter
3-2
Preparation before using delivery function
To use the delivery function, preparation is required in advance.
Make preparation following the procedure given below.
Check that the IP address, subnet mask, and gateway address of the
device are set correctly. For details, see Chapter 11 in “User's Guide,
Plotter Unit” prepared separately.
Preparing delivery host computer
Prepare the delivery host computer.
●Network connection of the computer used as a host for delivery
●Installation of exclusive application
●Setting of exclusive application
Note
◆ Install the delivery host computer within the same LAN as
this device because of:
- Prevention of reduced device utilization time due to the
delay of scan data transmission
- Prevention of scan data leak
◆ For the delivery to a remote site, use the functions of the
delivery host computer installed within the same LAN.
For the installation and setting procedure, see the user's guide of
exclusive application.
3-3
Chapter 3 Delivery function
Checking network connection of the device
Connecting delivery host computer
After the preparation of delivery host computer is completed, set the IP
address of delivery host computer to the device.
1
Press the [MENU] key.
If the [MENU] key is pressed, the screen
changes to the menu mode.
Me n u mo d e
MENU
# S E T UP
2
Press the [ ] or [ ] key.
Press the [ ] or [ ] key to select the system
menu.
Me n u mo d e
MENU
# S Y S T EM
3
Press the [ ] key.
If the [ ] key is pressed, the screen changes as
shown below.
Me n u Mo d e
S Y S T EM
# COMM. P ARAM .
3-4
▼Preparation before using delivery function
4
Press the [ ] key.
If the [ ] key is pressed, the screen changes as
shown below.
5
Chapter 3 Delivery function
Me n u Mo d e
# COMM. P ARAM .
# E TH E RN E T
Press the [ ] key.
Press the [ ] key to select the Scanner.
Me n u Mo d e
# COMM. P ARAM .
# SCANN E R
6
Press the [ ] key.
If the [ ] key is pressed, the screen changes as
shown below.
Me n u Mo d e
#D E L I V E R Y ADDR
>0 0 0 . 0 0 0 . 0 0 0 . 0 0 0
[ En t e r ] t o I npu t
7
Press the [ ] key.
If the [ ] key is pressed, the screen changes as
shown below.
Me n u Mo d e
#D E L I V E R Y ADDR
✽0 0 0 . 0 0 0 . 0 0 0 . 0 0 0
[ En t e r ] t o Se t
3-5
8
Press the [ ] key.
Press the [ ] key is pressed, the digit of
numeric value can be moved.
Me n u Mo d e
#D E L I V E R Y ADDR
✽0 0 0 . 0 0 0 . 0 0 0 . 0 0 0
[ En t e r ] t o Se t
9
Press the [ ] or [ ] key.
If the [ ] or [ ] key is pressed, numeric value
can be changed.
Me n u Mo d e
#D E L I V E R Y ADDR
✽2 0 0 . 0 0 0 . 0 0 0 . 0 0 0
[ En t e r ] t o Se t
Hence, repeat steps 8 and 9 to enter the IP address of the delivery host
computer.
10Press the [Enter] key.
Press the [Enter] key to complete the IP address
setting of the delivery host computer.
Me n u Mo d e
#D E L I V E R Y ADDR
✽1 9 2 . 1 6 8 . 1 . 1 0
[ En t e r ] t o Se t
Here, “192.168.1.10” is entered.
◆ When setting a port number of the delivery host computer, the
detailed description is given in Chapter 11 in the “User's Guide,
Plotter Unit” prepared separately.
3-6
Flow of delivery operation
Prior to start of the delivery operation, make sure that the preparation
before using the delivery function (⇒ page 3-3) has already been
completed.
1
Press the [DELIVERY] key.
Chapter 3 Delivery function
If the [DELIVERY] key is pressed, the device
requests the delivery host computer to send a
delivery list, and the screen switches to the
delivery list receiving screen.
Ge t t i n g De l i v e r y L i s t
2
Press the [Enter] key.
Upon successful acquisition of the delivery list,
the screen changes as follows. Press the [Enter]
key and go to step 3.
Se l e c t De s t i n a t i o n
P r e s s En t e r Ke y
In case of unsuccessful acquisition of the
delivery list, the screen changes as follows.
Check if the delivery host computer has been
connected to the network, or if the exclusive
application for delivery has started.
Ca n n o t Ge t De l i v e r y L i s t
[ En t e r ] t o Re t r y
◆ The time out time for delivery list acquisition can be set. For
details, see Chapter 11 in the “User's Guide, Plotter Unit”
prepared separately.
3-7
3
Press the [ ] or [ ] key.
The delivery list is displayed on the screen.
Also, the delivery destination selected at present
is attached with “✽” at the top. The delivery
destination can be moved with [ ] or [ ] key for
confirmation.
Se l e c t De s t i n a t i o n
✽De v e l o pme n t G_ P C
D e s i g n G_ P C
P l a n n i n g G_P C
✽S a l e s G_ P C
P a g e : 0 1 / 0 5 [ U p ] / [ D own ] t o S e l e c t
While checking the delivery destination, if the destination attached with
“✽” is to be changed, select the desired destination with [ ] or [ ] key
and press the [ ] or [ ] key, so that the “✽” can be attached or
removed.
Addition, deletion, and change of delivery destination are all performed
with the application in the delivery host computer. For details, see the
user's guide of application.
4
Press the [Enter] key.
Press the [Enter] key to complete the setting.
Sc an Read y
0 1 / 0 4 : D e v e l o pme n t G_P C
[ < ] / [ > ] t o Ch ang e D i s p .
◆ On the screen shown above, the selected delivery destination
can be confirmed. Multiple delivery destinations can be
switched and displayed with [ ] or [ ] key.
◆ If the [DELIVERY] key is pressed on the screen shown above,
the delivery destination selection screen (step 3) can be
displayed again.
3-8
▼Flow of delivery operation
5
Select the original size.
Select the original size.
(For details, see page 3-11.)
6
Select the original type.
Select what image type the original is.
7
Chapter 3 Delivery function
(For details, see page 3-16.)
Adjust the background.
Adjust the background color if the original has uneven density.
(For details, see page 3-18.)
8
Adjust the density.
Adjust the copy density.
(For details, see page 3-20.)
9
Set the original.
Set the original to the device.
(For details, see page 1-15.)
10 Press the [START] key.
Press the [START] key.
If the SCAN START or ORIGINAL SET has been set in the system
menu, the copy/delivery starts automatically without pressing the
[START] key.
(For details, see Chapter 11 in “User's Guide, Plotter Unit” prepared
separately.)
3-9
Delivery function overview
The delivery functions provided by this device are as follows. Detailed
setting steps are described on the following pages.
Function list
Description
Original Size
Sets the original size.
Original Type
Selects the image type according to the
original.
Background Removal
Removes the background color.
Density
Adjusts the scanning density.
Original Series
Selects the media series of an original.
Original Eject Direction Sets the location from which an original eject.
Sharpness
Adjusts the sharpness of outline of an original.
Contrast
Adjusts the contrast of an original.
Reverse
Copies the reverse original.
Resolution
Selects the resolution of scanning.
File transfer
Selects a transfer method of the scanned
image.
◆ Normally, the following settings need not be changed. Use
them as set at the factory.
Threshold, Line Guarantee, Line Threshold, Photo Type.
3-10
Select original size
Select the original size.
The following four kinds of original size are selectable.
■FIXED-SIZE PORTRAIT
Select this if an original is a fixed-size portrait.
■FIXED-SIZE LANDSCAPE
Select this if an original is a fixed-size landscape.
■SYNCHRO
Select this if the original size is non-fixed. Selecting the SYNCHRO
allows longer original than fixed-size original to be scanned.
Fixed-Size Landscape
Oyama
123456789
3
XXXXXXXXXXXXXXXXXXXX
XXXXXXXXX
123456789
50.0
2
K
MODEL
PART NO.
TITLE
DRAWING NO.
A4
50.0
A
B
B
K
K
C
4
SHEET
PAGE
D
4
4-R2.0
DRAWN BY
C
50.0
D
3
C
100.0
Ioka
SIGNED BY
C
2
A
4-R2.0
B
K
Synchro
1
1
Shimano
CHECKED BY
1/1
UNIT
Seiko I Infotech Inc. Design department
Tanaka
APPROVED BY
B
1/1
4-R2.0
SCALE
A
A
4
B
3
C
2
D
1
A
50.0
Fixed-Size Portrait
D
D
A
B
C
D
50.0
XXXXXXXXX
E
MODEL
SCALE
UNIT
1/1
1/1
E
XXXXXXXXXXXXXXXXXXXX
TITLE
APPROVED BY
Tanaka
CHECKED BY
Shimano
SIGNED BY
Ioka
DRAWN BY
Oyama
Seiko I Infotech Inc. Design department
PART NO.
123456789
DRAWING NO.
123456789
SHEET
A4
PAGE
XXXXXXXXX
MODEL
SCALE
UNIT
1/1
1/1
XXXXXXXXXXXXXXXXXXXX
TITLE
APPROVED BY
Tanaka
CHECKED BY
Shimano
SIGNED BY
Ioka
DRAWN BY
Oyama
Seiko I Infotech Inc. Design department
PART NO.
123456789
DRAWING NO.
123456789
SHEET
A4 long
PAGE
Note
◆ If the Original Series (⇒ page 3-23) is set to “China Series”,
the original size is treated as “SYNCHRO”, even if FIXEDSIZE PORTRAIT or FIXED-SIZE LANDSCAPE is set.
3-11
Chapter 3 Delivery function
■AUTO
This option is for the copy function and not selectable accordingly.
The original sizes applicable to this device are as listed below:
A series fixed form original
Name of
fixed form
Lengthwise length
A0
1189 mm (46.8 inches)
841 mm (33.1 inches)
Portrait
A1
841 mm (33.1 inches)
594.5 mm (23.4 inches)
Portrait/Landscape
A2
594.5 mm (23.4 inches) 420.5 mm (16.6 inches)
Portrait/Landscape
A3
420.5 mm (16.6 inches) 297.3 mm (11.7 inches)
Portrait/Landscape
A4
297.3 mm (11.7 inches)
Portrait/Landscape
Widthwise length
210.3 mm (8.3 inches)
Settable direction
A series width original
Name of
width
Paper width
A0 width
841 mm (33.1 inches)
A1 width
594.5 mm (23.4 inches)
A2 width
420.5 mm (16.6 inches)
A3 width
297.3 mm (11.7 inches)
A4 width
210.3 mm (8.3 inches)
Original min. length Original max. length
*LP-1010-MF
2,500 mm
(98.4 inches)
210 mm (8.3 inches)
*LP-1010L-MF
*LP-1010-MF+
Functional extension
kit LP-815)
10,000 mm
(393.7 inches)
9× 12 series fixed form original
Name of
fixed form
Lengthwise length
Widthwise length
Settable direction
E
1219.2 mm
(48 inch)
914.4 mm
(36 inch)
Portrait
D
914.4 mm
(36 inch)
609.6 mm
(24 inch)
Portrait/Landscape
C
609.6 mm
(24 inch)
457.2 mm
(18 inch)
Portrait/Landscape
B
457.2 mm
(18 inch)
304.8 mm
(12 inch)
Portrait/Landscape
A
304.8 mm
(12 inch)
228.6 mm
(9 inch)
Portrait/Landscape
9× 12 series width original
3-12
Name of
width
Paper width
E width
914.4 mm
(36 inch)
D width
609.6 mm
(24 inch)
C width
457.2 mm
(18 inch)
B width
304.8 mm
(12 inch)
A width
228.6 mm
(9 inch)
Original min. length Original max. length
*LP-1010-MF
2,500 mm
(98.4 inches)
210 mm (8.3 inches)
*LP-1010L-MF
*LP-1010-MF+
Functional extension
kit LP-815)
10,000 mm
(393.7 inches)
▼Select original size
Name of
fixed form
Lengthwise length
Widthwise length
Settable direction
E
1117.6 mm
(44 inch)
863.6 mm
(34 inch)
Portrait
D
863.6 mm
(34 inch)
558.8 mm
(22 inch)
Portrait/Landscape
C
558.8 mm
(22 inch)
431.8 mm
(17 inch)
Portrait/Landscape
B
431.8 mm
(17 inch)
279.4 mm
(11 inch)
Portrait/Landscape
A
279.4 mm
(11 inch)
215.9 mm
(8.5 inch)
Portrait/Landscape
8.5× 11 series width original
Name of
width
Paper width
E width
863.6 mm
(34 inch)
D width
558.8 mm
(22 inch)
C width
431.8 mm
(17 inch)
B width
279.4 mm
(11 inch)
A width
215.9 mm
(8.5 inch)
Original min. length Original max. length
*LP-1010-MF
2,500 mm
(98.4 inches)
210 mm (8.3 inches)
*LP-1010L-MF
*LP-1010-MF+
Functional extension
kit LP-815)
10,000 mm
(393.7 inches)
30× 42 series fixed form original
Name of
fixed form
Lengthwise length
Widthwise length
Settable direction
30× 42
1066.8 mm
(42 inch)
762.0 mm
(30 inch)
Portrait
30× 42 series width original
Name of
width
Paper width
Original min. length Original max. length
*LP-1010-MF
2,500 mm
(98.4 inches)
30"
762.0 mm
(30 inch)
210 mm
(8.3 inches)
*LP-1010L-MF
*LP-1010-MF+
Functional extension
kit LP-815)
10,000 mm
(393.7 inches)
3-13
Chapter 3 Delivery function
8.5× 11 series fixed form original
Map series fixed form original
Name of
fixed form
Lengthwise length
Widthwise length
Settable direction
B1
1000.0 mm
(39.4 inches)
700.0 mm
(27.6 inches)
Portrait
B2
700.0 mm
(27.6 inches)
500.0 mm
(19.7 inches)
Portrait/Landscape
Map series width original
Name of
width
Paper width
B1 width
700.0 mm
(27.6 inches)
Original min. length Original max. length
*LP-1010-MF
2,500 mm
(98.4 inches)
210 mm
(8.3 inches)
B2 width
500.0 mm
(19.7 inches)
*LP-1010L-MF
*LP-1010-MF+
Functional extension
kit LP-815)
10,000 mm
(393.7 inches)
DIN series fixed form original
Name of
fixed form
Lengthwise length
Widthwise length
Settable direction
B1
1000.0 mm
(39.4 inches)
707.0 mm
(27.8 inches)
Portrait
B2
707.0 mm
(27.8 inches)
500.0 mm
(19.7 inches)
Portrait/Landscape
B3
500.0 mm
(19.7 inches)
353.0 mm
(13.9 inches)
Portrait/Landscape
DIN series width original
3-14
Name of
width
Paper width
B1 width
707.0 mm
(27.8 inches)
B2 width
500.0 mm
(19.7 inches)
B3 width
353.0 mm
(13.9 inches)
Original min. length Original max. length
*LP-1010-MF
2,500 mm
(98.4 inches)
210 mm
(8.3 inches)
*LP-1010L-MF
*LP-1010-MF+
Functional extension
kit LP-815)
10,000 mm
(393.7 inches)
▼Select original size
China series width original
Paper width
914 mm width
914 mm (36 inches)
910 mm width
910 mm (35.8 inches)
900 mm width
900 mm (35.4 inches)
880 mm width
880 mm (34.6 inches)
620 mm width
620 mm (24.4 inches)
610 mm width
610 mm (24 inches)
450 mm width
450 mm (17.7 inches)
440 mm width
440 mm (17.3 inches)
310 mm width
310 mm (12.2 inches)
297 mm width
297 mm (11.7 inches)
Original min. length Original max. length
*LP-1010-MF
2,500 mm
(98.4 inches)
210 mm
(8.3 inches)
*LP-1010L-MF
*LP-1010-MF+
Functional extension
kit LP-815)
10,000 mm
(393.7 inches)
Note
◆ A larger sized image may be delivered depending on the
original size and the setting of scan resolution.
Accordingly, your image viewer may not display it or the
device may not plot it.
Operation steps
Select the original size.
Press the [ORIGINAL SIZE] key, and the LED
lighting position shifts. Press the [ORIGINAL
SIZE] key until the LED of the original size to be
selected turns on.
Sc an Read y
01 / 04 : De s t i n a t i o n1
[ < ] / [ > ] t o Ch ang e D i s p .
The screen display does not change.
3-15
Chapter 3 Delivery function
Name of
width
Select original type
Select the image type that meets the original. Selecting the original type
allows you to take a more suitable scanning.
■TEXT/LINE
Select this for an original having mixed characters and line drawings.
■TEXT/PHOTO
Select this for an original having mixed characters and photographs.
■PHOTO
Select this for general photographs.
■BLUE PRINT
Select this for blue-printed original.
Text/Line
1
2
Text/Photo
3
Photo
Blue Print
1
4
A
A
A
B
B
2
3
A
4-R2.0
4-R2.0
B
B
C
C
C
D
D
C
50.0
50.0
D
D
XXXXXXXXX
XXXXXXXXX
MODEL
UNIT
1/1
1/1
MODEL
XXXXXXXXXXXXXXXXXXXX
SCALE
UNIT
1/1
1/1
XXXXXXXXXXXXXXXXXXXX
TITLE
APPROVED BY
Tanaka
CHECKED BY
Shimano
SIGNED BY
Ioka
TITLE
DRAWN BY
Oyama
Seiko I Infotech Inc. Design department
50.0
K
50.0
K
SCALE
4
APPROVED BY
PART NO.
123456789
DRAWING NO.
123456789
A4
CHECKED BY
SIGNED BY
DRAWN BY
SHEET
Tanaka
PAGE
Seiko I Infotech Inc. Design department
Shimano
Ioka
Oyama
PART NO.
123456789
DRAWING NO.
123456789
SHEET
A4
PAGE
◆ For the original with dark background and thin lines, select
BLUE PRINT here and also set the contrast adjustment (⇒
page 3-28) to “Bright”, so that optimum copy can be performed.
3-16
▼Select original type
Chapter 3 Delivery function
Operation steps
Select the original type.
Press the [ORIGINAL TYPE] key, and the LED
lighting position shifts. Press the [ORIGINAL
TYPE] key until the LED of the original size to
be selected turns on.
Sc a n Re a d y
0 1 / 0 4 : De s t i n a t i o n 1
[ < ] / [ > ] t o Cha nge D i s p .
The screen display does not change.
3-17
Adjust background
Originals having dark colored background, slightly dirty originals, or
strongly folded originals that affect the copy quality can be scanned by
removing the background color.
■0 to 12
The background can be adjusted in 12 steps. As a numeric value
becomes larger, more background color is erased, and reversely as a
numeric value becomes smaller, more background color remains.
Original having
colored background
1
2
3
Slightly dirty original
1
4
A
A
2
3
A
4-R2.0
4-R2.0
B
B
B
B
C
C
C
D
D
C
50.0
50.0
D
D
XXXXXXXXX
XXXXXXXXX
MODEL
UNIT
1/1
1/1
MODEL
XXXXXXXXXXXXXXXXXXXX
SCALE
UNIT
1/1
1/1
XXXXXXXXXXXXXXXXXXXX
TITLE
APPROVED BY
CHECKED BY
Tanaka
SIGNED BY
Shimano
TITLE
DRAWN BY
Ioka
APPROVED BY
Oyama
Seiko I Infotech Inc. Design department
50.0
K
50.0
K
SCALE
4
A
PART NO.
123456789
DRAWING NO.
123456789
A4
CHECKED BY
SIGNED BY
DRAWN BY
SHEET
Tanaka
PAGE
Seiko I Infotech Inc. Design department
Shimano
Ioka
Oyama
PART NO.
123456789
DRAWING NO.
123456789
SHEET
12
1
2
3
12
1
4
A
A
1
2
PAGE
A4
3
1
4
2
3
4
A
A
1
2
3
1
4
4-R2.0
4-R2.0
A
A
1
B
1
4
K
4-R2.0
A
A
B
B
K
4-R2.0
3
A
B
C
K
4-R2.0
B
B
B
C
C
C
D
C
D
K
50.0
D
K
50.0
C
C
C
C
D
D
D
D
XXXXXXXXX
XXXXXXXXX
MODEL
MODEL
50.0
50.0
SCALE
UNIT
1/1
1/1
XXXXXXXXXXXXXXXXXXXX
SCALE
UNIT
1/1
1/1
XXXXXXXXXXXXXXXXXXXX
TITLE
TITLE
APPROVED BY
Tanaka
CHECKED BY
Shimano
SIGNED BY
Ioka
APPROVED BY
DRAWN BY
123456789
PART NO.
Oyama
SHEET
Tanaka
D
Seiko I Infotech Inc. Design department
4
A
50.0
50.0
B
2
C
50.0
C
50.0
D
3
50.0
4-R2.0
2
50.0
K
B
C
A
B
50.0
B
50.0
A
B
DRAWING NO.
CHECKED BY
Shimano
SIGNED BY
Ioka
DRAWN BY
123456789
PART NO.
Oyama
SHEET
D
D
123456789
PAGE
A4
Seiko I Infotech Inc. Design department
XXXXXXXXX
D
123456789
DRAWING NO.
XXXXXXXXX
PAGE
A4
MODEL
MODEL
SCALE
UNIT
1/1
1/1
CHECKED BY
SCALE
UNIT
1/1
1/1
SIGNED BY
APPROVED BY
Shimano
Ioka
CHECKED BY
SIGNED BY
DRAWN BY
DRAWN BY
Tanaka
Tanaka
XXXXXXXXXXXXXXXXXXXX
TITLE
XXXXXXXXXXXXXXXXXXXX
TITLE
APPROVED BY
Oyama
PART NO.
123456789
DRAWING NO.
123456789
SCALE
UNIT
1/1
1/1
Shimano
Ioka
Oyama
PART NO.
123456789
DRAWING NO.
123456789
SHEET
SHEET
Seiko I Infotech Inc. Design department
XXXXXXXXX
Seiko I Infotech Inc. Design department
A4
MODEL
A4
PAGE
XXXXXXXXXXXXXXXXXXXX
SCALE
UNIT
1/1
1/1
XXXXXXXXXXXXXXXXXXXX
TITLE
TITLE
APPROVED BY
Tanaka
CHECKED BY
Shimano
SIGNED BY
Ioka
APPROVED BY
DRAWN BY
Oyama
Seiko I Infotech Inc. Design department
PAGE
XXXXXXXXX
MODEL
PART NO.
123456789
DRAWING NO.
123456789
A4
CHECKED BY
SIGNED BY
DRAWN BY
SHEET
Tanaka
PAGE
Seiko I Infotech Inc. Design department
Shimano
Ioka
Oyama
PART NO.
123456789
DRAWING NO.
123456789
SHEET
A4
PAGE
Note
◆ After the background was adjusted if the original type is
re-selected (⇒ page 3-16), the background setting will
also be changed, thus requiring care.
3-18
▼Adjust background
Chapter 3 Delivery function
Operation steps
Press the [BACKGROUND
REMOVAL ] or [BACKGROUND
REMOVAL
] key.
If the [BACKGROUND REMOVAL ] or
[BACKGROUND REMOVAL ] key is
pressed, the LED lighting position shifts.
Numeric value becomes large with
[BACKGROUND REMOVAL ] key, or small
with [BACKGROUND REMOVAL ] key.
Press the [BACKGROUND REMOVAL ] or
[BACKGROUND REMOVAL ] key until the
LED of the desired numeric value turns on.
Sc a n Re a d y
01 / 04 : De s t i n a t i o n1
[ < ] / [ > ] t o Cha nge D i s p .
The screen display does not change.
3-19
Adjust density
Adjust the density when an original is scanned.
■1 to 7
The density can be adjusted in 7 steps.
Original
1
2
3
4
A
A
4-R2.0
B
B
50.0
K
C
C
50.0
D
D
XXXXXXXXX
MODEL
SCALE
UNIT
1/1
1/1
XXXXXXXXXXXXXXXXXXXX
TITLE
APPROVED BY
Tanaka
CHECKED BY
Shimano
SIGNED BY
Ioka
DRAWN BY
Oyama
Seiko I Infotech Inc. Design department
PART NO.
123456789
DRAWING NO.
123456789
Dark
2
3
Normal
1
4
A
A
A
B
B
4-R2.0
2
3
C
C
D
D
50.0
XXXXXXXXX
1/1
Shimano
SIGNED BY
Ioka
Oyama
3-20
B
K
C
C
D
D
C
50.0
D
SCALE
UNIT
1/1
1/1
XXXXXXXXX
MODEL
XXXXXXXXXXXXXXXXXXXX
SCALE
UNIT
1/1
1/1
XXXXXXXXXXXXXXXXXXXX
TITLE
DRAWN BY
Seiko I Infotech Inc. Design department
APPROVED BY
PART NO.
123456789
DRAWING NO.
123456789
A4
CHECKED BY
SIGNED BY
Tanaka
PAGE
Seiko I Infotech Inc. Design department
Ioka
TITLE
DRAWN BY
SHEET
Shimano
4
A
MODEL
XXXXXXXXXXXXXXXXXXXX
TITLE
CHECKED BY
B
XXXXXXXXX
MODEL
UNIT
B
3
50.0
D
Tanaka
A
50.0
K
C
APPROVED BY
A
2
4-R2.0
50.0
K
1/1
Light
1
4
4-R2.0
B
SCALE
PAGE
Oyama
50.0
1
SHEET
A4
APPROVED BY
PART NO.
123456789
DRAWING NO.
123456789
A4
CHECKED BY
SIGNED BY
DRAWN BY
SHEET
Tanaka
PAGE
Seiko I Infotech Inc. Design department
Shimano
Ioka
Oyama
PART NO.
123456789
DRAWING NO.
123456789
SHEET
A4
PAGE
▼Adjust density
Chapter 3 Delivery function
Operation steps
Press the [DENSITY ] or
[DENSITY ] key.
If the [DENSITY ] or [DENSITY ] key is
pressed, the LED lighting position shifts. The
LED shifts in DARK direction with [DENSITY
] key, or in LIGHT direction with [DENSITY
] key. Select the desired density according to
the density of an original.
Sc an Read y
01 / 04 : De s t i n a t i o n1
[ < ] / [ > ] t o Ch ang e D i s p .
The screen display does not change.
3-21
Select media series used for original
Select media series used for original.
Notes
◆ For this setting, only the media series for which the
ENABLE SERIES is set to “ON” in the system menu are
displayed. (For details, see “User's Guide, Plotter Unit”
prepared separately.)
◆ Use this setting together with the original series used
actually.
◆ The use of China series of original further requires the
CHINA SIZE to be set in the system menu. (For details,
see “User's Guide, Plotter Unit” prepared separately.)
Operation steps
1
Press the [ORIGINAL] key.
If the [ORIGINAL] key is pressed, the screen
switches to the original setting screen.
O r i g i na l
Se r i e s
Page : 01 / 01
3-22
E j ec tD i r ec t i on
[ En t e r ] t o Se l e c t
▼Select media series used for original
2
Press the [Enter] key.
After confirming that the ORIGINAL SERIES
has been selected, if the [Enter] key is pressed,
the screen switches to the original series setting
screen.
3
Chapter 3 Delivery function
O r i g i na l : Se r i e s
A
9"
8 . 5"
3 0×4 2
Ma p
DIN
Ch i n a
Page : 01 / 01
[ En t e r ] t o Se t
Press the [ ] or [ ] key.
Press the [ ] or [ ] key to move to the paper
series to be selected.
O r i g i na l : Se r i e s
A
9"
8 . 5"
3 0×4 2
Ch i n a
Ma p
DIN
Page : 01 / 01
[ En t e r ] t o Se t
Here, “CHINA” is selected.
4
Press the [Enter] key.
Press the [Enter] key to complete the setting.
Sc an Read y
01 / 04 : De s t i n a t i o n1
[ < ] / [ > ] t o Ch ang e D i s p .
3-23
Select original eject direction
The device provides two ejects, front and rear, for the original. Which
output the original is ejected to can be selected here.
Note
◆ For the front ejects, the original length is limited to
maximum 48 inches (1219.2 mm).
Operation steps
1
Press the [ORIGINAL] key.
If the [ORIGINAL] key is pressed, the screen
switches to the original setting screen.
O r i g i na l
Se r i e s
Page : 01 / 01
2
E j ec tD i r ec t i on
[ En t e r ] t o Se l e c t
Press the [ ] or [ ] key.
Press the [ ] or [ ] key to move to the original
eject direction.
O r i g i na l
Se r i e s
Page : 01 / 01
3-24
E j ec tD i r ec t i on
[ En t e r ] t o Se l e c t
▼Select original eject direction
3
Press the [Enter] key.
If the [Enter] key is pressed, the screen switches
to the original eject direction setting screen.
Or i g i na l : E j ec t D i r ec t i on
Rea r
F r on t
4
[ En t e r ] t o Se l ec t
Chapter 3 Delivery function
Page : 01 / 01
Press the [ ] or [ ] key.
Press the [ ] or [ ] key to move to the original
eject direction to be selected.
Or i g i na l : E j ec t D i r ec t i on
Rea r
F r on t
Page : 01 / 01
[ En t e r ] t o Se t
Here, “Front” is selected.
5
Press the [Enter] key.
Press the [Enter] key to complete the setting.
Sc a n Re a d y
01 / 04 : De s t i n a t i o n1
[ < ] / [ > ] t o Cha nge D i s p .
3-25
Adjust sharpness of original
The outline of an original can be made sharp or blurred.
Note
◆ After the sharpness of an original was adjusted, if the
original type is re-selected (⇒ page 3-16), the original
sharpness setting changes, thus requiring care.
Operation steps
1
Press the [IMAGE QUALITY] key.
If the [IMAGE QUALITY] key is pressed, the
screen switches to the image quality setting
screen.
L i ne
Th r esho l d
Con t r a s t
Page : 01 / 02
Sh a r pn e s s
L i n e Gu a r a n t e e
[ En t e r ] t o Se l e c t
This screen varies depending on the selected original type (⇒page 3-16).
Here, the screen in the case of “Text/Line” selection is displayed.
2
Press the [ ] or [ ] key.
Press the [ ] or [ ] key to move to the
Sharpness.
L i ne
Th r esho l d
Co n t r a s t
Page : 01 / 02
3-26
Sha r pne s s
L i ne Gua r a n t e e
[ En t e r ] t o Se l e c t
▼Adjust sharpness of original
3
Press the [Enter] key.
If the [Enter] key is pressed, the screen switches
to the sharpness setting screen.
4
N o rma l
[ En t e r ] t o Se t
Chapter 3 Delivery function
L i n e : Sh a r pn e s s
Of f
We a k
S t r ong
Blur
Page : 01 / 01
Press the [ ] or [ ] key.
Press the [ ] or [ ] key to move to the desired
setting.
L i n e : Sh a r pn e s s
Of f
We a k
S t r ong
Blur
Page : 01 / 01
N o rma l
[ En t e r ] t o Se t
Here, “Strong” is selected.
5
Press the [Enter] key.
Press the [Enter] key to complete the setting.
Sc an Read y
01 / 04 : De s t i n a t i o n1
[ < ] / [ > ] t o Ch ang e D i s p .
3-27
Adjust contrast of original
The contrast of an original can be adjusted.
1
2
3
4
A
A
4-R2.0
B
B
50.0
K
C
C
50.0
D
D
XXXXXXXXX
MODEL
SCALE
UNIT
1/1
1/1
XXXXXXXXXXXXXXXXXXXX
TITLE
Tanaka
CHECKED BY
Shimano
SIGNED BY
Ioka
DRAWN BY
Oyama
Seiko I Infotech Inc. Design department
PART NO.
123456789
DRAWING NO.
123456789
Dark
1
2
3
A
2
3
A
B
B
C
C
D
UNIT
1/1
Shimano
Ioka
C
50.0
D
D
D
XXXXXXXXX
SCALE
UNIT
1/1
1/1
MODEL
XXXXXXXXXXXXXXXXXXXX
SCALE
UNIT
1/1
1/1
XXXXXXXXXXXXXXXXXXXX
TITLE
DRAWN BY
Oyama
B
XXXXXXXXX
XXXXXXXXXXXXXXXXXXXX
SIGNED BY
C
MODEL
TITLE
CHECKED BY
Seiko I Infotech Inc. Design department
B
C
K
D
XXXXXXXXX
MODEL
Tanaka
B
50.0
D
APPROVED BY
PART NO.
123456789
DRAWING NO.
123456789
A4
CHECKED BY
SIGNED BY
Tanaka
PAGE
Seiko I Infotech Inc. Design department
Ioka
TITLE
DRAWN BY
SHEET
Shimano
4
A
50.0
K
50.0
APPROVED BY
3
4-R2.0
50.0
K
C
2
A
4-R2.0
B
1/1
Bright
1
4
A
4-R2.0
SCALE
PAGE
Normal
1
4
A
SHEET
A4
Oyama
50.0
APPROVED BY
APPROVED BY
PART NO.
123456789
DRAWING NO.
123456789
A4
CHECKED BY
SIGNED BY
DRAWN BY
SHEET
Tanaka
PAGE
Seiko I Infotech Inc. Design department
Shimano
Ioka
Oyama
PART NO.
123456789
DRAWING NO.
123456789
SHEET
A4
PAGE
Operation steps
1
Press the [IMAGE QUALITY] key.
If the [IMAGE QUALITY] key is pressed, the
screen switches to the image quality setting screen.
L i ne
Th r esho l d
Con t r a s t
Page : 01 / 02
Sh a r pn e s s
L i n e Gu a r a n t e e
[ En t e r ] t o Se l ec t
This screen varies depending on the selected original type (⇒ page 3-16).
Here, the screen in case of “Text/Line” selection is displayed.
3-28
▼Adjust contrast of original
2
Press the [ ] or [ ] key.
Press the [ ] or [ ] key to move to the Contrast.
3
Sh a r pn e s s
[ En t e r ] t o Se l ec t
Chapter 3 Delivery function
L i ne
Th r esho l d
Con t r a s t
Page : 01 / 02
Press the [Enter] key.
If the [Enter] key is pressed, the screen switches
to the contrast setting screen.
L i ne : Con t r a s t
Da r k
B r i gh t
Page : 01 / 01
4
N o rma l
[ En t e r ] t o Se t
Press the [ ] or [ ] key.
Press the [ ] or [ ] key to move to the desired
setting.
L i ne : Co n t r a s t
Da r k
B r i gh t
Pa ge : 01 / 01
N o rma l
[ En t e r ] t o Se t
Here, “Bright” is selected.
5
Press the [Enter] key.
Press the [Enter] key to complete the setting.
Sc an Read y
01 / 04 : De s t i n a t i o n1
[ < ] / [ > ] t o Ch ang e D i s p .
3-29
Reverse
The reversed original can be scanned.
1
2
3
4
A
A
4-R2.0
B
B
50.0
K
C
C
50.0
D
D
XXXXXXXXX
MODEL
SCALE
UNIT
1/1
1/1
XXXXXXXXXXXXXXXXXXXX
TITLE
APPROVED BY
Tanaka
CHECKED BY
SIGNED BY
Shimano
Ioka
DRAWN BY
Oyama
Seiko I Infotech Inc. Design department
PART NO.
123456789
DRAWING NO.
123456789
SHEET
PAGE
A4
OFF
1
2
3
ON
1
4
A
A
2
3
4
A
A
4-R2.0
4-R2.0
B
B
B
B
C
50.0
K
50.0
K
C
C
C
50.0
50.0
D
D
D
D
XXXXXXXXX
XXXXXXXXX
MODEL
MODEL
SCALE
UNIT
1/1
1/1
XXXXXXXXXXXXXXXXXXXX
SCALE
UNIT
1/1
1/1
XXXXXXXXXXXXXXXXXXXX
TITLE
TITLE
APPROVED BY
APPROVED BY
Tanaka
CHECKED BY
Shimano
SIGNED BY
Ioka
CHECKED BY
SIGNED BY
DRAWN BY
DRAWN BY
Oyama
Seiko I Infotech Inc. Design department
PART NO.
123456789
DRAWING NO.
123456789
A4
SHEET
Tanaka
PAGE
Seiko I Infotech Inc. Design department
Shimano
Ioka
Oyama
PART NO.
123456789
DRAWING NO.
123456789
SHEET
A4
PAGE
Operation steps
1
Press the [IMAGE QUALITY] key.
If the [IMAGE QUALITY] key is pressed, the
screen switches to the image quality setting screen.
L i ne
Th r esho l d
Co n t r a s t
Page : 01 / 02
Sha r pne s s
L i ne Gua r a n t e e
[ En t e r ] t o Se l e c t
This screen varies depending on the selected original type (⇒ page 3-16).
Here, the screen in case of “Text/Line” selection is displayed.
3-30
▼Reverse
2
Press the [ ] or [ ] key.
Press the [ ] or [ ] key to move to the reverse.
3
Chapter 3 Delivery function
L i ne
L i ne Th r esho l d
F i l e T r ans f e r
Re s o l u t i on ( dp i ) Re v e r s e
Page : 02 / 02
[ En t e r ] t o Se l ec t
Press the [Enter] key.
If the [Enter] key is pressed, the screen switches
to the mirror setting screen.
L i ne : Re v e r s e
Of f
Pa ge : 01 / 01
4
On
[ En t e r ] t o Se t
Press the [ ] or [ ] key.
Press the [ ] or [ ] key to move to the ON.
L i ne : Re v e r s e
Of f
Pa ge : 01 / 01
5
On
[ En t e r ] t o Se t
Press the [Enter] key.
Press the [Enter] key to complete the setting.
Sc a n Re a d y
01 / 04 : De s t i n a t i o n1
[ < ] / [ > ] t o Cha nge D i s p .
3-31
Designate resolution
Designate the resolution when an original is scanned.
Operation steps
1
Press the [IMAGE QUALITY] key.
If the [IMAGE QUALITY] key is pressed, the
screen switches to the image quality setting
screen.
L i ne
L i ne Th r esho l d
F i l e T r ans f e r
Re s o l u t i on ( dp i ) Re v e r s e
Page : 01 / 02
[ En t e r ] t o Se l ec t
This screen varies depending on the selected original type (⇒page 3-16).
Here, the screen in case of Text/Line selection is displayed.
2
Press the [ ] or [ ] key.
Press the [ ] or [ ] key to move to the
resolution.
L i ne
L i ne Th r esho l d
F i l e T r ans f e r
Re s o l u t i on ( dp i ) Re v e r s e
Page : 01 / 02
[ En t e r ] t o Se l ec t
3-32
▼Designate resolution
3
Press the [Enter] key.
If the [Enter] key is pressed, the screen switches
to the resolution setting screen.
4
300
[ En t e r ] t o Se t
Chapter 3 Delivery function
L i ne : Reso l u t i on ( dp i )
600
400
200
150
Pa ge : 01 / 01
Press the [ ] or [ ] key.
Press the [ ] or [ ] key to move to the desired
resolution.
L i ne : Reso l u t i on ( dp i )
600
400
200
150
Pa ge : 01 / 01
300
[ En t e r ] t o Se t
Here, “300 dpi” is selected.
5
Press the [Enter] key.
Press the [Enter] key to complete the setting.
Sc a n Re a d y
01 / 04 : De s t i n a t i o n1
[ < ] / [ > ] t o Cha nge D i s p .
3-33
Compress image data when transferred
The scanned image data can be compressed and transferred to the delivery
host computer. If the data transfer is slow, try to set “Compression.”
The format of image data delivered from the delivery host computer is set
with the exclusive application.
Operation steps
1
Press the [IMAGE QUALITY] key.
If the [IMAGE QUALITY] key is pressed, the
screen switches to the image quality setting
screen.
L i ne
L i ne Th r esho l d
F i l e T r ans f e r
Re s o l u t i on ( dp i ) Re v e r s e
Page : 01 / 02
[ En t e r ] t o Se l ec t
This screen varies depending on the selected original type (⇒page 3-16).
Here, the screen in case of Text/Line selection is displayed.
2
Press the [ ] or [ ] key.
Press the [ ] or [ ] key to move to the file
transfer.
L i ne
L i ne Th r esho l d
F i l e T r ans f e r
Re s o l u t i on ( dp i ) Re v e r s e
Page : 01 / 02
[ En t e r ] t o Se l ec t
3-34
▼Compress image data when transferred
3
Press the [Enter] key.
If the [Enter] key is pressed, the screen switches
to file transfer setting screen.
L i ne : F i l e T r ans f e r
S t anda r d
C omp r e s s
4
[ En t e r ] t o Se t
Chapter 3 Delivery function
Pa ge : 01 / 01
Press the [ ] or [ ] key.
Press the [ ] or [ ] key to move to the compress.
L i ne : F i l e T r ans f e r
S t anda r d
C omp r e s s
Pa ge : 01 / 01
5
[ En t e r ] t o Se t
Press the [Enter] key.
Press the [Enter] key to complete the setting.
Sc a n Re a d y
01 / 04 : De s t i n a t i o n1
[ < ] / [ > ] t o Cha nge D i s p .
3-35
Reset
The data set for copy is reset to initial settings.
Operation steps
Press the [RESET] key.
If the [RESET] key is pressed, the data set for
copy is all reset.
3-36
Chapter 4
Memory function
Chapter 4 Memory function
Chapter 4 describes the memory function of this device.
Contents of this chapter
Memory function overview
Save settings to memory
Call settings from save memory
Set as default
Rename saved memory
4-1
Memory function overview
Various settings of copy and delivery functions are saved in the memory,
and can be called for copy or delivery as necessary. This function is
called the memory function.
It will be very convenient if the settings frequently used or complicated
settings are saved in the memory in advance, not requiring the writing
down of settings and numeric values.
4-2
Save settings to memory
Save current various setting conditions to the memory.
Up to ten data each for copy and delivery can be saved.
Note
In case of delivery, no delivery destination is saved.
Operation steps
WARNING LIGHT
MENU
COPY
PRINT
MEMORY
RESET
POWER
SAVING
DELIVERY
FILE
REPRINT
STOP
Chapter 4 Memory function
Keys used
POWER
SCAN STOP
ORIGINAL
SIZE
TONER
PROCESS
WASTE
TONER
AUTO
ORIGINAL
TYPE
BACKGROUND
REMOVAL
PAPER
FEED
DARK
MANUAL FEED
FIXED-SIZE
PORTRAIT
TEXT/PHOTO
FIXED-SIZE
LANDSCAPE
PHOTO
SYNCHRO
BLUE PRINT
1
FIXED SCALE
NORMAL
LIGHT
DATA
SCALE x1
DENSITY
TEXT/LINE
ZOOM
NON-PROPORTIONAL
ORIGINAL
START
IMAGE
QUALITY
SORT
SCALE
ERROR
FUNCTION
Make settings to be saved.
Make settings to be saved in advance.
2
Press the [MEMORY] key.
If the [MEMORY] key is pressed, the screen
switches to the memory setting screen.
Memo r y
Re s t o r e
Sa v e
S e t A s D e f a u l t R e n ame
Page : 01 / 01
[ En t e r ] t o Se l e c t
3
MEMORY
R
REPRINT
S
Press the [ ] or [ ] key.
Press the [ ] or [ ] key to move to the save.
Memo r y
Re s t o r e
Sa v e
S e t A s D e f a u l t R e n ame
Page : 01 / 01
[ En t e r ] t o Se l ec t
4-3
4
Press the [Enter] key.
If the [Enter] key is pressed, the screen switches
to the memory save setting screen.
Memo r y : S a v e
Memo r y 1
Memo r y 3
Page : 01 / 03
5
Memo r y 2
Memo r y 4
[ En t e r ] t o Se l ec t
Press the [ ] or [ ] key.
Press the [ ] or [ ] key to move to the memory
number to which the settings are saved.
Memo r y : S a v e
Memo r y 1
Memo r y 3
Page : 01 / 03
Memo r y 2
Memo r y 4
[ En t e r ] t o Se l ec t
Here, “Memory1” is selected.
6
Press the [Enter] key.
If the [Enter] key is pressed, the save
confirmation screen appears.
Memo r y : S a v e
MEMOR Y 1 R e g i s t e r ?
[ En t e r ] t o Ex ec .
7
Press the [Enter] key.
If the [Enter] key is pressed, various setting
conditions are saved in the memory.
4-4
Call settings from save memory
The settings are called from the save memory.
Operation steps
Keys used
WARNING LIGHT
MENU
COPY
PRINT
MEMORY
RESET
POWER
SAVING
DELIVERY
FILE
REPRINT
STOP
POWER
WASTE
TONER
AUTO
ORIGINAL
TYPE
BACKGROUND
REMOVAL
DENSITY
PAPER
FEED
DARK
MANUAL FEED
FIXED-SIZE
PORTRAIT
TEXT/PHOTO
FIXED-SIZE
LANDSCAPE
PHOTO
SYNCHRO
BLUE PRINT
NORMAL
LIGHT
DATA
1
SCALE x1
TEXT/LINE
FIXED SCALE
ZOOM
NON-PROPORTIONAL
ORIGINAL
ERROR
FUNCTION
Press the [MEMORY] key.
If the [MEMORY] key is pressed, the screen
switches to the memory setting screen.
Memo r y
Re s t o r e
Sa v e
S e t A s D e f a u l t R e n ame
Page : 01 / 01
[ En t e r ] t o Se l e c t
2
START
IMAGE
QUALITY
SORT
SCALE
MEMORY
R
REPRINT
S
Press the [ ] or [ ] key.
Press the [ ] or [ ] key to move to the restore.
Memo r y
Re s t o r e
Sa v e
S e t A s D e f a u l t R e n ame
Page : 01 / 01
[ En t e r ] t o Se l e c t
4-5
Chapter 4 Memory function
SCAN STOP
ORIGINAL
SIZE
TONER
PROCESS
3
Press the [Enter] key.
If the [Enter] key is pressed, the screen switches
to the memory restore screen.
Memo r y : R e s t o r e
Memo r y 1
Memo r y 2
Memo r y 3
Memo r y 4
Page : 01 / 03
[ En t e r ] t o Se l ec t
4
Press the [ ] or [ ] key.
Press the [ ] or [ ] key to move to the save
memory number from which the settings are
restored.
Memo r y : R e s t o r e
Memo r y 1
Memo r y 2
Memo r y 3
Memo r y 4
Page : 01 / 03
[ En t e r ] t o Se l ec t
Here, “Memory1” is selected.
5
Press the [Enter] key.
If the [Enter] key is pressed, the restore
confirmation screen appears.
Memo r y : R e s t o r e
MEMOR Y 1 R e f e r ?
[ En t e r ] t o Ex ec .
6
Press the [Enter] key.
If the [Enter] key is pressed, the settings are
restored from the save memory. Then, perform a
copy or delivery operation.
4-6
Set as default
Frequently used settings or complicated settings can also be saved as
default, not as the memory. Once they have been saved as default, the
settings will return to the values set as default when the device is turned
on, a mode is changed, or resetting is executed afterwards.
It will be convenient to save the settings as default, if various settings of
the device are the same at all times.
Operation steps
WARNING LIGHT
COPY
PRINT
DELIVERY
FILE
MENU
POWER
SAVING
MEMORY
RESET
REPRINT
STOP
Chapter 4 Memory function
Keys used
POWER
SCAN STOP
ORIGINAL
SIZE
TONER
PROCESS
WASTE
TONER
AUTO
ORIGINAL
TYPE
BACKGROUND
REMOVAL
DENSITY
PAPER
FEED
DARK
MANUAL FEED
FIXED-SIZE
PORTRAIT
TEXT/PHOTO
FIXED-SIZE
LANDSCAPE
PHOTO
SYNCHRO
BLUE PRINT
NORMAL
LIGHT
DATA
1
SCALE x1
TEXT/LINE
FIXED SCALE
ZOOM
NON-PROPORTIONAL
ORIGINAL
START
IMAGE
QUALITY
SORT
SCALE
ERROR
FUNCTION
Make settings to be saved.
Make settings to be saved in advance.
2
Press the [MEMORY] key.
If the [MEMORY] key is pressed, the screen
switches to the memory setting screen.
Memo r y
Re s t o r e
Sa v e
S e t A s D e f a u l t R e n ame
Page : 01 / 01
[ En t e r ] t o Se l e c t
MEMORY
R
REPRINT
S
4-7
3
Press the [ ] or [ ] key.
Press the [ ] or [ ] key to move to the set as
default.
Memo r y
Re s t o r e
Sa v e
S e t A s D e f a u l t R e n ame
Page : 01 / 01
[ En t e r ] t o Se l e c t
4
Press the [Enter] key.
If the [Enter] key is pressed, the restore
confirming screen appears.
Memo r y : S e t A s D e f a u l t
Se t As De f a u l t ?
[ En t e r ] t o Ex ec .
5
Press the [Enter] key.
If the [Enter] key is pressed, various settings set
in step 1 are saved as default.
4-8
Rename saved memory
The saved memory can be renamed. Changing the name of each saved
memory to a discriminating one makes it easier to find when restoring the
memory.
Operation steps
Keys used
COPY
PRINT
DELIVERY
FILE
MENU
POWER
SAVING
MEMORY
RESET
REPRINT
STOP
POWER
SCAN STOP
ORIGINAL
SIZE
TONER
PROCESS
WASTE
TONER
AUTO
ORIGINAL
TYPE
BACKGROUND
REMOVAL
DENSITY
PAPER
FEED
DARK
MANUAL FEED
FIXED-SIZE
PORTRAIT
TEXT/PHOTO
FIXED-SIZE
LANDSCAPE
PHOTO
SYNCHRO
BLUE PRINT
NORMAL
LIGHT
DATA
1
SCALE x1
TEXT/LINE
FIXED SCALE
ZOOM
NON-PROPORTIONAL
ORIGINAL
ERROR
FUNCTION
Press the [MEMORY] key.
If the [MEMORY] key is pressed, the screen
switches to the memory setting screen.
Memo r y
Re s t o r e
Sa v e
S e t A s D e f a u l t R e n ame
Page : 01 / 01
[ En t e r ] t o Se l e c t
2
START
IMAGE
QUALITY
SORT
SCALE
MEMORY
R
REPRINT
S
Press the [ ] or [ ] key.
Press the [ ] or [ ] key to move to the rename.
Memo r y
Re s t o r e
Sa v e
S e t A s D e f a u l t R e n ame
Page : 01 / 01
[ En t e r ] t o Se l ec t
4-9
Chapter 4 Memory function
WARNING LIGHT
3
Press the [Enter] key.
If the [Enter] key is pressed, the screen switches
to the memory restore confirmation screen.
Memo r y : R e n ame
Memo r y 1
Z ume n a 2
Page : 01 / 03
4
Memo r y 2
Z ume n a 1
[ En t e r ] t o Se l e c t
Press the [ ] or [ ] key.
Press the [ ] or [ ] key to move to the memory
number to be renamed.
Memo r y : R e n ame
Memo r y 1
Z ume n a 2
Page : 01 / 03
Memo r y 2
Z ume n a 1
[ En t e r ] t o Se l e c t
Here, “Memory1” is selected.
5
Press the [Enter] key.
If the [Enter] key is pressed, the screen switches
to the memory rename screen.
Memo r y : R e n ame
Memo r y 1
[ En t e r ] t o Se t
6
Press the [ ] or [ ] key.
If the [ ] or [ ] key is pressed, a character can
be changed.
Memo r y : R e n ame
A emo r y 1
[ En t e r ] t o Se t
4-10
▼Rename saved memory
7
Press the [ ] key.
Press the [ ] key to move to the next character.
Memo r y : R e n ame
A emo r y 1
[ En t e r ] t o Se t
Hence, repeat steps 6 and 7 to enter the memory name.
8
Chapter 4 Memory function
Up to eight alphanumerals can be entered.
Press the [Enter] key.
If the [Enter] key is pressed, the changed
memory name is saved.
4-11
Chapter 5
File function
Chapter 5 describes the file function of this device.
Chapter 5 File function
Contents of this chapter
File function
Preparation before using file function
Screens of file function
5-1
File function
Change the mode of the device to “FILE,” and the original data is read
from a computer connected via network. To use this function, the
exclusive application PlotShareOneDX (standard application attached)
is installed in advance in the computer connected via network and one
of the functions of that application “ScanToFile” is used.
Plotter
◆ This device can scan the color original at the user's option.
5-2
Preparation before using file function
To use the file function, the preparation must be made beforehand.
Make preparation following the procedure given below.
Checking network connection of the device
Installing exclusive application
For the installation and setting procedure of the exclusive application, see
the user's guide of exclusive application.
5-3
Chapter 5 File function
Check that the IP address, subnet mask, and gateway address of the
device are set correctly. For details, see Chapter 11 in “User's Guide,
Plotter Unit” prepared separately.
Screens of file function
There are seven kinds of screens shown below in the file function.
Busy wait screen
If the [FILE] key is pressed, the following screen appears. This status
waits an instruction from the exclusive application in the computer
connected via network.
Wa i t i n g S c a n R e q .
Occupancy display screen
With an original not set in the device, when an instruction comes from the
exclusive application in the computer connected via network, the
following screen appears.
Se t O r i g i na l
H o s t : P C1
[ Ca n c e l ] t o Re l e a s e
Scan start wait screen
With an original set in the device, this screen is displayed until the scan
starts.
S t a r t Re a d y
H o s t : P C1
5-4
▼Screens of file function
Scanning screen
This screen is displayed from the start of scan to the end.
Scann i ng
H o s t : P C1
After the scan is completed, this screen is displayed while the image data
is being processed to send to the computer.
P r oces s i ng
H o s t : P C1
Sending screen
After the scan is completed, this screen is displayed while the image data
is being sent to the computer.
Se nd i ng
H o s t : P C1
Notes
◆ Opening a roll drawer or door during the transmission of
image data causes an error, resulting in an interruption of
the transmission. Also, the time-out may occur on the
computer side. Accordingly, do not open a roll drawer or
door during the data transmission.
5-5
Chapter 5 File function
Processing
Original ejecting screen
This screen is displayed if an original is not ejected when the image data
sending to the computer is completed.
E j ec t i ng
H o s t : P C1
5-6
Chapter 6
Troubleshooting
Chapter 6 describes a troubleshooting method for this device. If a
trouble is not removed despite the corrective measures, contact your
dealer or our service center.
Contents of this chapter
Chapter 6 Troubleshooting
Copy/scan cannot be performed clearly
Copy/scan cannot be performed satisfactorily
Delivery failed
6-1
Copy/scan cannot be performed clearly
Q.
A.
Streaks appear in the copy/scan result
■The shading guide or scanner glass is dirty.
➝Clean the shading guide or scanner glass (⇒ page 1-20).
Note
◆ Copying/scanning the original stained with the toner, ink,
or dust makes the inside of scanner dirty. Remove stains
on the original before starting the copy/scan.
◆ When copying/scanning a long original, be careful that the
original does not touch the floor.
◆ Use a document carrier for copy/scan, if the stains on
original cannot be removed completely.
Q.
A.
A fold of original appears on the copy/scan result.
■The shadow of a fold is read.
➝Open the scanner cover and change over the levers on both
sides toward the rear and then retry to scan (⇒ page 1-18).
➝Change the original setting direction (turn 90˚, and then retry to
scan.
➝Set the BACKGROUND REMOVAL to larger value (⇒ pages
2-15, 3-18).
Q.
Back side of an original is seen through original and copied/
scanned.
A.
6-2
■In case of a thin original, characters on the back are seen
through the original and may be read.
➝Set the BACKGROUND REMOVAL to larger value (⇒ pages
2-15, 3-18).
▼Copy/scan cannot be performed clearly
Q.
Dust attaches to background.
A.
■The BACKGROUND REMOVAL is set to smaller value.
➝Set the BACKGROUND REMOVAL to larger value (⇒ pages
2-15, 3-18).
A.
■The SHARPNESS setting is too strong.
➝Reduce the SHARPNESS setting (⇒ pages 2-52, 3-26).
Q.
A.
Moire occurs.
■When an image processing is executed, regularly-arranged
dots and lines overlap, causing the moire.
➝Change the original setting direction.
➝Reduce the SHARPNESS setting (⇒ pages 2-52, 3-26).
Q.
A.
Blue print cannot be copied clearly.
■For a blue print original with dark background and thin lines, it
may not be copied or scanned clearly only by setting the
original type to “Blue Print”.
➝Set the contrast adjustment to “Bright”. (⇒ page 2-54).
6-3
Chapter 6 Troubleshooting
➝Change the ORIGINAL TYPE to TEXT/PHOTO (⇒ pages 213, 3-16).
Copy/scan cannot be performed satisfactorily
Q.
A.
Original jammed and copy/scan failed.
■A folded original or strongly curled original causes a paper
jam.
➝Change the original setting direction.
➝Use a document carrier.
Copy function
Q.
A.
Margins are added in the original width direction, or both side
edges of original are not copied. Or, an original is printed on
different series paper roll from the original series during the
AUTO selection paper feed.
■The original series and print media series are not set
correctly.
➝During the copy operation, the original series and print media
series must be set.
For setting of the print media series, see “If new series of paper
is used” in Chapter 2 of User's Guide, Plotter Unit prepared
separately.
If China series of paper is used, see “If China series of paper is
used” in Chapter 2 of User's Guide, Plotter Unit prepared
separately.
For setting of an original, set the ORIGINAL SERIES of the
copy function to original series used (⇒ page 2-48).
6-4
▼Copy/scan cannot be performed satisfactorily
Both side edges of an original are not copied when the China
series of original is copied. Or, a copy is taken with the margins
added to both sides.
A.
■China size setting is not correct.
➝Set the China size that matches the original and paper roll used
by referring to “If China series of paper is used” in Chapter 2 of
User's Guide, Plotter Unit prepared separately.
A.
■Original width of China series does not match the paper roll
width of China series.
➝Use the paper roll width of China series, matching the original
width of China series. Correct copy cannot be taken in case where
the original width is 914 mm (36 inches) and the roll width is 880
mm (34.6 inches).
Q.
The original position cannot be moved for copy, or original does
not move to the desired position. If an original is moved, part of
original is not copied.
A.
■The ORIGINAL SIZE is set to AUTO.
➝The MOVE function is disabled if the ORIGINAL SIZE is set
to AUTO. Set the ORIGINAL SIZE to any setting other than
AUTO (⇒ page 2-7).
A.
■The FrameErase/Offset is set to FrameErase.
➝The offset function is disabled if the Frame Erase/Offset is set
to FrameErase/Offset. Set the FrameErase/Offset to Offset (⇒
page 2-44).
A.
■The moving amount is not affected by the scale setting.
➝When moving the original, the moving amount is not affected
by the scale setting even if set. Set the desired moving amount
regardless of the scale setting.
A.
■The Paper Feed Location is set to AUTO.
➝If the Paper Feed Location is set to AUTO, the device selects
automatically the print paper according to the original size.
However, the moving amount is not taken into account when the
paper is selected, and as a result of movement, the original area
exceeding the paper size is not printed. To print all the moved
original, set the Paper Feed Location to any settings other than
AUTO (⇒ page 2-28).
6-5
Chapter 6 Troubleshooting
Q.
Q.
An attempt to take a partial copy failed because warning error
“W COPY-0B31” “W COPY-0B32” occurred.
A.
■Set value of “Position” is larger than original size.
➝To take a partial copy, set value of “Position” must be smaller
than original size.
For example, if an original of A3 fixed-size portrait is partially
copied, setting such as “Position 1,000mm” or “Position
100mm, Length 10,000mm” may cause warning error.
A.
■Total of “Position” and “Length” exceeds the maximum
original size that can be scanned.
➝Set so that total of “Position” and “Length” does not exceed the
maximum original size that can be scanned.
The maximum original size that can be scanned is up to 10 m
(393.7 inches) if HDD is equipped and also “ScanMedia” is set
to “HDD” (⇒ page 2-60), or otherwise up to 2.5 m (98.4
inches).
Q.
6-6
The frame is not erased, or frame erasing is not satisfactory.
A.
■The FrameErase is set to Offset.
➝The FrameErase function is disabled if the FrameErase/Offset
is set to Offset. Set the Frame Erase/Offset to FrameErase/
Offset (⇒ page 2-45).
A.
■The frame erasing amount is affected by the scale setting.
➝When erasing the frame, the frame erasing amount is affected
by the scale setting if set. Set the FrameErase amount, taking the
scale setting into account.
▼Copy/scan cannot be performed satisfactorily
No margin is added, or desired margin is not added.
A.
■The ORIGINAL SIZE is set to either AUTO, FIXED-SIZE
PORTRAIT, or FIXED-SIZE LANDSCAPE.
➝The margin function is disabled if the ORIGINAL SIZE is set to
either AUTO, FIXED-SIZE PORTRAIT, or FIXED-SIZE
LANDSCAPE. Set the ORIGINAL SIZE to SYNCHRO.
A.
■The margin is not affected by the scale setting.
➝When adding the margin, the amount of margin is not affected
by the scale setting even if set. Set the amount of margin
regardless of the scale setting.
Q.
A.
An attempt to print the original exceeding 1,250 mm (49.2
inches) causes “W COPY-OB30” warning error to be displayed,
resulting in failure of copy operation.
■The scale, margin, move, frameerase, and mirror functions
are disabled.
➝If an original exceeding 1,250 mm (49.2 inches) is printed, the
scale, margin, move, framerase, and mirror functions are
disabled. Reset the warning error status by pressing any key,
and then set these functions as follows:
Scale (⇒ page 2-19)
SCALE × 1
Scale mode (⇒ page 2-26)
Manual
Margin (⇒ page 2-32)
All “0”
Move (⇒ page 2-35)
All “0”
FrameErase (⇒ page 2-44)
All “0”
Mirror (⇒ page 2-56)
OFF
➝For the device equipped with HDD, set the ScanMedia to
“HDD” (⇒ page 2-60).
Q.
Copying a long original causes the original to be jammed during
ejection of original.
A.
■This is not a device trouble.
➝Following a message displayed on the panel, remove the
original. After that, use the device as usual.
6-7
Chapter 6 Troubleshooting
Q.
Delivery function
Q.
An original is scanned with the margin added in the original
width direction, or both side edges of an original are not
scanned.
A.
■The original series used is not set correctly.
➝Set the ORIGINAL SERIES of the delivery function to the
original series used (⇒ page 3-22).
If new series of original is used, set the series to be used newly
to ON by the ENABLE SERIES in the system menu. (For
details, see Chapter 11 in User's Guide, Plotter Unit prepared
separately.)
Q.
Both side edges are not scanned when China series of original
is scanned, or both side edges are scanned with the margin
added.
A.
6-8
■The China size setting is not set correctly.
➝Set the China size by the CHINA SIZE in the system menu
according to the original used. (For details, see Chapter 11 in
User's Guide, Plotter Unit prepared separately.)
Color scanning function
A.
The color cannot be scanned.
■The color scanning is an optional feature, and requires a color
upgrade kit: LP840, LP-841, LP842 or LP843. Without this
kit, color scanning is not available.
➝When using the color scanning function, insert the CF card for
color scanning to the plotter, and then power on. Do not remove
the CF card when the plotter is operating, nor use the CF card
with other equipment like PCs. Without the CF card, color
scanning is not available.
When scanning as color, select "color" for the TWAIN driver's
color mode, and then start scanning.
Chapter 6 Troubleshooting
Q.
6-9
Delivery failed
If an error message is displayed, follow the Measure given in “Chapter 13
Troubleshooting” in the User's Guide, Plotter Unit prepared separately.
Q.
A delivery list cannot be got.
A.
■The device is not connected to the network.
➝Connect the device to the network using the UTP cable.
A.
■The network setting of the device is not set correctly.
➝Set the network (⇒ page 3-3).
A.
■IP address of the delivery host computer is not set correctly to
the device.
➝Set the IP address of the delivery host computer (⇒ page 3-3).
A.
■The exclusive application for delivery on the Windows PC is
not in the receiving status.
➝Set the exclusive application for delivery to the receiving
status. (For the installation and operating instruction of the
exclusive application, see the user's guide of the application
attached.)
Q.
A.
The scanned image is not delivered to the destination.
■An error occurs in the exclusive application for delivery.
➝Check the log of the exclusive application.
■Time-out occurred in the computer for data delivery.
➝Opening a roll drawer or door during the transmission of image
data causes an error, resulting in an interruption of the
transmission. Also, the time-out may occur on the computer
side. Accordingly, do not open a roll drawer or door during the
data transmission.
6-10
Q.
Communication from the device to the exclusive application for
delivery is slow.
■The File transfer setting does not match the original
type used.
➝A change in File transfer setting of the delivery function may
increase the transfer speed to the exclusive application for
delivery. It is recommended to set “compress” for line drawing
originals, or “standard” for photographic originals.
Chapter 6 Troubleshooting
A.
6-11