1
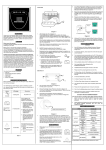
P73162-A-F5U104-man.qxd
8/15/01
2:40 PM
Page 1
USB Direct Connect
User Manual
P73162-A
F5U104
P73162-A-F5U104-man.qxd
8/15/01
2:40 PM
Page 2
Table of Contents
1. Introduction ........................................1
2. Technical Specifications ......................1
3. Package Contents ..............................2
4. Device Layout......................................2
5. Network Topology ..............................3
6. Windows® 98 Instructions....................6
7. Windows® Me Instructions ................11
8. Windows® 2000 Instructions..............16
9. Ready to Share..................................23
10. Troubleshooting ................................25
11. Information........................................28
P73162-A-F5U104-man.qxd
8/15/01
2:40 PM
Page 1
1. Introduction
Thank you for purchasing the Belkin USB Direct Connect. The
USB Direct Connect provides a convenient way to connect
stand-alone PCs and gain the benefits of networking without
having to install network cards. Two or more USB-equipped
computers can share programs, files, peripheral equipment,
and more. The USB Direct Connect is ideal for small offices,
home users, multiplayer gaming, and taking work on the road.
2. Technical Specifications
Description:
Operating System
Compatibility:
Standard:
Connectors:
Speed:
Data Modes:
LEDs:
Power:
Power Consumption:
Cable:
Approvals:
Operating Environment:
Dimensions:
Weight:
USB Direct Connect
Windows® 98, 98 SE, 2000, Me
USB 1.1
2 USB "B"-type Connectors
Up to 6Mbps
Isochronous/Asynchronous
RX, TX, Status
Powered from USB
Normal Operation: 300mA,
Suspend: 70uA
Includes (2) F3U133x06 USB A-B Device
Cables
FCC, CE
0 to 70 degrees ©, Humidity 10
to 90% non-condensing
22.1mm x 6.6mm x 10.8mm
2.0 oz
1
P73162-A-F5U104-man.qxd
8/15/01
2:40 PM
Page 2
3. Package Contents
• USB Direct Connect Device
• Two (2) 6’/2m USB A/B Device Cables
• User Manual
• Software Installation CD
4. Device Layout
There are three activity status lights: Rx=Receive, Tx=Transmit,
and St=Status
2
P73162-A-F5U104-man.qxd
8/15/01
2:40 PM
Page 3
5. Network Topology
The USB Direct Connect can be used to connect two or
more computers. There is a maximum distance limit between
computers (or hosts) of 10 meters (32 feet). This limit is due
to the USB cable length maximum of 5 meters (16 feet).
Therefore, each host can be up to 5 meters (16 feet) away
from the USB Direct Connect.
Two-Host Configuration
Basic connection of two PCs together. You must observe the
distance limitations outlined above.
3
P73162-A-F5U104-man.qxd
8/15/01
2:40 PM
Page 4
5. Network Topology (continued)
Daisy-Chain Configuration
You can configure your computer network by “daisy-chaining”
the computers together. The advantage to this configuration is
the distance in which you can place computers apart in your
small office or home. There will be a maximum of 16 feet from
computer 1 to computer 2 and a maximum of 32 feet from
computer 1 to computer 3, and so on.
4
P73162-A-F5U104-man.qxd
8/15/01
2:40 PM
Page 5
5. Network Topology (continued)
How NOT to connect a USB Direct Connect
PCs must never be connected together in such a way that
any two PCs in the network have more than one connection
to each other. Doing this will form a “ring,” which will crash
the network.
It is not recommended to install USB Direct Connect on a PC
that is already connected to a network, as the original
network connections will be changed.
5
P73162-A-F5U104-man.qxd
8/15/01
2:40 PM
Page 6
6. Windows 98 Instructions for the Belkin USB
Direct Connect
1. Insert the installation disk into the computer and, with the
supplied cable, attach the Direct Connect to the computer.
The “Add New Hardware Wizard” will start. Click “Next”.
2. Select “Search for the best driver for your device.
(Recommended)”. Click “Next”.
3. Check “Specify a location” and type “[drive letter]:\win98”,
where [drive letter] is the letter of your CD-ROM drive. See
the illustration below. Click “Next”.
4. Next, the window will tell you that it has found the drivers
for “Belkin USB Direct Connect”. Click “Next”.
6
P73162-A-F5U104-man.qxd
8/15/01
2:40 PM
Page 7
6. Windows 98 Instructions for the Belkin USB
Direct Connect (continued)
5. Click “Finish”.
6. On your desktop, you will now see a program called
“NETSETUP”. Double-click on the icon to start the
setup program.
7. Choose “Typical Installation (Recommended for most
users.)” and click “OK”.
8. Select a name for your computer that is different from
the other PCs to which you are trying to connect (for
example, computer 1). This name will identify your
computer on the network. Click “Next”.
9. Enter a workgroup name for your network (for example,
MY NETWORK). This name will be the same on all of
your computers. Keep in mind that the workgroup name
is case-sensitive and must be spelled identically on all
computers in your network. When you have entered a
name, click “Next”.
10. Enter a description. This is optional and is intended to
help further identify a computer (for example, Computer
1 Windows 98). This may be left blank if you prefer.
When you have entered a name, click “Next”.
11. The “Enter IP address?” window will now appear.
Click “Yes” under “Do you want to assign your own
IP Address?”.
7
P73162-A-F5U104-man.qxd
8/15/01
2:40 PM
Page 8
6. Windows 98 Instructions for the Belkin USB
Direct Connect (continued)
12. In the “IP Address” dialog box, the first two boxes must
contain 192 and 168. The third box can be anything you
would like, but it must be the same on every computer.
Zero is the most conventional number to use in this field for
home networking. The fourth box can also be anything you
like, but it must be different from every other computer. It is
recommended to use sequential numbers–1, 2, 3, etc.–to
easily identify PCs on your network.
13. After entering your IP address and clicking on “Continue”,
Windows may ask you to insert your CD-ROM. Insert the
CD-ROM into your CD-ROM drive and click “OK”.
Windows will ask you to enter the location of the files on
the CD-ROM. Normally the files are located in the Win98
folder on the CD. The path that you type under “Copy Files
From” always starts with the drive letter of your CD-ROM,
followed by a colon and a backslash (:\). In the example, the
CD-ROM drive letter is “F:\”. Yours may be different. Enter
the correct path to your CD-ROM and click “OK”.
8
P73162-A-F5U104-man.qxd
8/15/01
2:40 PM
Page 9
6. Windows 98 Instructions for the Belkin USB
Direct Connect (continued)
Note: If the files Windows needs are already located on
your hard drive, then Windows does not prompt you to
specify the location of the files it needs, and continues with
the installation.
14. Windows will ask if you want to reboot. Click “Yes”
to reboot.
15. When the computer restarts, the “Enter Network
Password” window will appear.
16. Type a password that you can remember and click “OK”.
If you do not wish to enter a password, leave it blank and
click “OK”. Either one will work.
9
P73162-A-F5U104-man.qxd
8/15/01
2:40 PM
Page 10
6. Windows 98 Instructions for the Belkin USB
Direct Connect (continued)
17. If the “Enter Network Password” window does not appear
when your PC restarts, right-click on “Network
Neighborhood” and select “Properties”. Under “Primary
Network Logon”, select “Client for Microsoft Networks”
and click “OK”.
18. Windows will then restart the computer. When the
computer restarts, repeat step 16.
19. Your USB Direct Connect is now installed. To enable your
PC to share data, please go to section 9a.
10
P73162-A-F5U104-man.qxd
8/15/01
2:40 PM
Page 11
7. Windows Me Instructions for the Belkin USB
Direct Connect
1. Insert the installation disk into the computer and, with the
supplied cable, attach the Direct Connect to the
computer. The “Add New Hardware Wizard” will start.
Select “Search for the best driver for your device.
(Recommended)”. Click “Next”.
2. The “Add New Hardware Wizard” will find the Belkin USB
Direct Connect and inform you that it has finished
installing the drivers. Click “Finish”.
3. The “Add New Hardware Wizard” has placed a program
on your desktop called NETSETUP. Double-click on the
icon to start the setup program.
4. Choose “Typical Installation (Recommended for most
users )” and click “OK”.
5. Select a name for your computer that is different from the
other PCs to which you are trying to connect, (for
example, computer 1). This will identify individual PCs
within the network. Click “Next”.
6. Enter a workgroup name for your network (for example,
My Network). This name will be the same on all of your
computers. Keep in mind that the workgroup name is
case-sensitive and must be spelled identically on all
computers in your network. When you have entered a
name, click “Next”.
7. Enter a description. This is optional and is intended to
help further identify a computer (for example,
Computer 1 Windows Me). This may be left blank if you
prefer. When you have entered a name, click “Next”.
8. The “Enter IP address?” window will now appear.
Click “Yes” under “Do you want to assign your own
IP Address?”.
11
P73162-A-F5U104-man.qxd
8/15/01
2:40 PM
Page 12
7. Windows Me Instructions for the Belkin USB
Direct Connect (continued)
9. In the “IP Address” dialog box, the first two boxes must
contain 192 and 168. The third box can be anything you
would like, but it must be the same on every computer. Zero
is the most conventional number to use in this field for home
networking. The fourth box can also be anything you like,
but it must be different from every other computer. The
convention is to number your computers sequentially, i.e.,
number your main PC “1” and your next PC “2”, etc. If you
are performing this installation on an additional PC, be sure
that the last field is different from any other computers
connected to your network. Once you have typed in the
values, click “Continue”.
12
P73162-A-F5U104-man.qxd
8/15/01
2:40 PM
Page 13
7. Windows Me Instructions for the Belkin USB
Direct Connect (continued)
10. The following screen will appear. Make sure your driver
CD is in the CD-ROM drive and click “OK”.
11. The “Select Device” dialog box will appear. Click
“Have Disk”.
12. The “Install From Disk” dialog box will appear. Enter the
drive letter that corresponds to your CD-ROM drive (for
example, D:, followed by “\Win9x”). Refer to the
illustration below:
13
P73162-A-F5U104-man.qxd
8/15/01
2:40 PM
Page 14
7. Windows Me Instructions for the Belkin USB
Direct Connect (continued)
13. The “Select Device” window will appear. Highlight the
“Belkin Direct Connect Network Adapter” and click “OK”.
14. The “Select Device” window will appear. Highlight
“Microsoft” and “TCP/IP”, and click “OK”.
15. The “Select Device” window will appear. Highlight “File
and Printer Sharing for Microsoft Networks” and click “OK”.
14
P73162-A-F5U104-man.qxd
8/15/01
2:40 PM
Page 15
7. Windows Me Instructions for the Belkin USB
Direct Connect (continued)
16. The computer will now need to reboot. Click “Yes”.
17. Upon restart, proceed to Section 9a to enable your
computer to share files.
15
P73162-A-F5U104-man.qxd
8/15/01
2:40 PM
Page 16
8. Windows 2000 Instructions
Installation and setup of the Belkin USB Direct Connect takes
three main steps:
• Hardware installation
• Adding the Direct Connect to the system
• Configuring the Direct Connect network settings
Follow the steps in this section to set up your Direct Connect.
Hardware Installation under Windows 2000
1. Insert the installation disk into the computer and, with the
supplied cable, attach the Direct Connect to the computer.
The “Found New Hardware Wizard” will start. Click Next”.
2. In the next window, select “Search for a suitable driver for
my device (recommended)” and click “Next”.
3. In the next window, select “Specify a location” and
click “Next”.
4. In the next window, under “Copy manufacturer’s files
from:”, type: [drive letter]:\win2000, where [drive letter] is
the letter of your CD-ROM drive. See the illustration below.
Click “Next”.
16
P73162-A-F5U104-man.qxd
8/15/01
2:40 PM
Page 17
8. Windows 2000 Instructions (continued)
5. The “Found New Hardware Wizard” will indicate that the
drivers for the USB Direct Connect have been located.
Click “Next”.
6. The “Found New Hardware Wizard” will now tell you that
Windows has finished installing the software for this
device. Click “Finish”.
The Direct Connect hardware is now installed. The next
section outlines how to set up the Direct Connect in the
network environment.
Adding Your Direct Connect to the System
1. Select “Start”, then “Control Panel”. Locate the
“Add/Remove Hardware” icon and double-click on
the icon.
17
P73162-A-F5U104-man.qxd
8/15/01
2:40 PM
Page 18
8. Windows 2000 Instructions (continued)
2. The “Add/Remove Hardware Wizard” will start.
Click “Next”.
3. In the next screen, select “Add/Troubleshoot a device”.
Click “Next”.
4. The “Add/Remove Hardware Wizard” will search for
new hardware.
5. In the next window, select “Add a new device” and
click “Next”.
6. In the next “Add/Remove Hardware Wizard” window, select
“No, I want to select the hardware from a list” option.
Click “Next”.
7. In the next window, “Hardware Type,” select “Network
adapters”. Click “Next”.
18
P73162-A-F5U104-man.qxd
8/15/01
2:40 PM
Page 19
8. Windows 2000 Instructions (continued)
8. The next “Add/Remove Hardware Wizard” window will ask
you to specify which network adapter to use. Click
“Have Disk…”.
9. In the next window, under “Copy manufacturer’s files
from:”, type: [drive letter]:\win2000, where [drive letter] is
the letter of your CD-ROM drive. See the illustration below.
Click “Next”.
10. In the next window, highlight “Belkin Direct Connect
Network Adapter”, and click “Next”.
11. Windows will now tell you that it is ready to install the
device. Click “Next”.
12. The “Digital Signature Not Found” window will pop up.
Click “Yes” to continue. If Windows gives you an error
message and/or will not allow you to install the driver
because it is not digitally signed, right-click on “My
Computer”, located on your desktop. Choose “Properties”
and select the “Hardware” tab. Select “Driver Signing” and
make sure “Block-Prevent installation of unsigned files” is
not selected.
19
P73162-A-F5U104-man.qxd
8/15/01
2:40 PM
Page 20
8. Windows 2000 Instructions (continued)
Configuring the Direct Connect Network Settings
1. Right-click on “My Network Places”, and select “Properties”
to open the “Network and Dial-up Connections” window. In
the window, you may see a number of connections. Click
once on the last “Connection” icon and wait until the
description “Belkin Direct Connect Network Adapter”
appears to confirm the icon is the Direct Connect-related
icon. Use this method to search for the Direct Connect if the
first one you tried is not the Direct Connect.
2. Right-click on the “Direct Connect” icon and select
“Properties”. In the “Properties” window, select “Internet
Protocol (TCP/IP)” and click “Properties”.
20
P73162-A-F5U104-man.qxd
8/15/01
2:40 PM
Page 21
8. Windows 2000 Instructions (continued)
3. In the “IP Address” dialog box, select “Use the Following
IP Address”. In the first line, the first two spaces must
contain 192 and 168. The third box can be anything you
would like, but it must be the same on every computer.
Zero is the most conventional number to use in this field
for home networking. The fourth box can also be anything
you like, but it must be different from every other
computer. The convention is to number your computers
sequentially, i.e., number your main PC “1” and your next
PC “2”, etc. If you are performing this installation on an
additional PC, be sure that the last field is different from
any other computers connected to your network. In the
“Subnet mask:” field, enter “255.255.255.0”. Once you
have entered the values, click “OK”. Leave “Default
Gateway” and “DNS” areas blank.
4. Return to the Windows 2000 desktop and right-click on
“My Computer”. Select “Properties” and select the
“Network Identification” tab. Click on the
“Properties” button.
21
P73162-A-F5U104-man.qxd
8/15/01
2:40 PM
Page 22
8. Windows 2000 Instructions (continued)
5. In the “Identification Changes” window, enter a computer
name (for example, Computer 1). This name must be unique
(different) for each computer on the network. Next, select
“Workgroup” and enter a workgroup name for your network
(for example, MY NETWORK). This name will be the same on
all of your computers. Keep in mind that the workgroup
name is case-sensitive and must be spelled identically on all
computers in your network. When you have entered a name,
click “OK”.
You are now finished. Restart the computer for the changes you
have made to take effect. When the computer restarts, you will
be prompted to enter a user name and password. Enter any
name you wish and a password to log on to Windows. Make
sure you use a password that you can remember.
To enable your PC to share data, please proceed to section 9a.
22
P73162-A-F5U104-man.qxd
8/15/01
2:40 PM
Page 23
9. Ready to Share
a. Share Files
To share files between Windows 98 and Windows Me PCs, you
first need to:
1. Double-click on the “My Computer” icon on your desktop.
2. Left-click on the hard drive available on your computer (e.g.,
C drive) to highlight it. From the menu bar, click on “File”.
On the pull-down menu that appears, select “Sharing”.
3. A window will appear. Select “Shared As”. Share name is
“C”. Set the Access Type to “Full”, then click “Apply”. Click
“OK”. Make sure you DO NOT set a password in this area.
4. When you go back to “My Computer”, you will see a “small
hand” underneath the C drive signifying that the drive is
now shared.
5. The installation is now complete on the first computer. You
can return to the beginning and commence installation on
the rest of the computers connected to the network.
6. Once the installation is done on all the computers on your
desktop (main screen), you can double-click on the
“Network Neighborhood” icon. Once it is open, you should
see all the computers connected to the network. If you get
an error saying “Not able to browse the network”, wait for a
minute or two, then press the F5 key on your keyboard to
refresh the network connections.
23
P73162-A-F5U104-man.qxd
8/15/01
2:40 PM
Page 24
9. Ready to Share (continued)
To share files on Windows 2000 PCs:
1. Double-click on the “My Computer” icon on your desktop.
2. Right-click on the hard drive available on your computer
(e.g., C drive) and select “Sharing”.
3. Select “Share this Folder”.
4. Click “OK”.
b. Make sure your machines are seeing each other
To make sure your installations were successful and check that
your PC is “seeing” other PCs on your network, do one or both
of the following:
1. Click on “Network Neighborhood/My Network Places” on
your desktop. You should see the “Entire Network” icon
and all the PCs connected to the network. If you don’t, press
F5 to refresh. If you don’t see these, consult the
“Troubleshooting” section.
2. On your desktop, right-click on “My Computer”, then
left-click on “Properties”. Click on the “Device Manager”
tab. The Belkin USB Direct Connect should be in the
“Network Adapters” section. If Belkin USB Direct Connect is
not there, or if there is a yellow question mark by it, the
device is not installed properly. Consult the
“Troubleshooting” section.
24
P73162-A-F5U104-man.qxd
8/15/01
2:40 PM
Page 25
10. Troubleshooting
PROBLEM: I cannot see other computers or a
workgroup on the network.
1. You need to make sure that the Identification and
File/Printer Sharing settings are properly configured. To
check these settings, do the following:
2. Go to Start > Settings > Control Panel.
3. Double-click on the “Network” icon.
4. Click on the “Identification” tab.
• Check to make sure that the computer name on each
computer is unique. They should not be the same. Make
the necessary changes when needed.
• Check to make sure that the workgroup name is the same.
The workgroup name must be identical on every PC on the
network. Make the necessary changes when needed.
5. Click on the “Access Control” tab.
• Make sure “Shared-level access control” is selected.
6. Click on the “Configuration” tab.
• Double-click on “File” and “Printer Sharing”. Make sure
those two boxes are checked.
• Make sure the “Primary Network Logon” is set to “Client
for Microsoft Networks”.
• Double-click on “Belkin TCP/IP for Belkin USB Direct
Connect”. Check the IP address. Make sure the third
number field is the same on all PCs and the last number
field is different on all PCs. Also make sure the subnet
mask is 255.255.255.0.
7. Check to make sure that “Browse Master” is set to
“Enabled” and “LM Announce” is set to “Yes”.
25
P73162-A-F5U104-man.qxd
8/15/01
2:40 PM
Page 26
10. Troubleshooting (continued)
8. Click “OK”. Note: You may need your Windows 95/98 CD.
9. Restart Windows when prompted.
10. When the computer boots up again and you are asked for a
user name and password, DO NOT click “Cancel”. Either
use your password or just click “OK”.
11. If you still cannot see other PCs on the network, please
contact Belkin Technical Support.
PROBLEM: In Windows 2000, I can see other computers
but I cannot access them.
If you can see computers, but cannot access them, go to the
“Control Panel” and select “Users and Passwords”. Select the
“Advanced” tab and click the “Advanced” button. Then click
on the “Users” folder. If the “Guest” file has a red X on it, it is
currently disabled. Click on that file and remove the X to enable
it. Click “Apply” and try accessing the computers on the
network again.
PROBLEM: Windows gives an error message and
won’t allow me to install the driver because it is not
digitally signed.
Right-click on “My Computer”, located on your desktop.
Choose “Properties” and select the “Hardware” tab. Select
“Driver Signing” and make sure “Block-Prevent installation of
unsigned files” is not selected.
26
P73162-A-F5U104-man.qxd
8/15/01
2:40 PM
Page 27
10. Troubleshooting (continued)
PROBLEM: How do I uninstall the USB Direct Connect
with Windows 98 and Windows Me?
Removing the USB Direct Connect from your computer is a
two-step process:
Step I:
a. Click on the “Start” button, then go to “Settings”, then
“Control Panel”.
b. Double-click on "Add/Remove Programs".
c. Select "USB Direct Connect Host-Host Connector" from
the list.
d. Click the “Add/Remove” button.
e. Click “OK” to close the “Add/Remove Programs” window.
f. You should return to the “Control Panel” window.
Step II:
a. Double-click on the “Network” icon.
b. Select the line that only says "USB Direct Connect
Network Adapter".
c. Click on the “Remove” button.
d. Click “OK”.
e Click on “Yes” when prompted to restart Windows.
PROBLEM: How do I uninstall USB Direct Connect from
Windows 2000?
1.
2.
3.
4.
Right-click on “My Computer” on your desktop.
Select “Properties”, then choose the “Hardware” tab.
In the “Hardware” tab, click on “Device Manager”.
In the “Network Adapters” section and the “USB
Controllers” section, highlight “USB Direct Connect”
and select “Remove”.
27
P73162-A-F5U104-man.qxd
8/15/01
2:40 PM
Page 28
11. Information
FCC Statement
DECLARATION OF CONFORMITY WITH FCC RULES FOR
ELECTROMAGNETIC COMPATIBILITY
We, Belkin Components, of 501 West Walnut Street, Compton, CA 90220,
declare under our sole responsibility that the product:
F5U104
to which this declaration relates:
Complies with Part 15 of the FCC Rules. Operation is subject to the following
two conditions: (1) this device may not cause harmful interference, and (2) this
device must accept any interference received, including interference that may
cause undesired operation.
CE Declaration of Conformity
We, Belkin Components, declare under our sole responsibility that the F5U104, to which
this declaration relates, is in conformity with Generic Emissions Standard EN50081-1 and
with Generic Immunity Standard EN50082-1 1992.
Belkin Components Limited Lifetime Product
Warranty
Belkin Components warrants this product against defects in materials and workmanship
for its lifetime. If a defect is discovered, Belkin will, at its option, repair or replace the
product at no charge provided it is returned during the warranty period, with
transportation charges prepaid, to the authorized Belkin dealer from whom you
purchased the product. Proof of purchase may be required.
This warranty does not apply if the product has been damaged by accident, abuse,
misuse, or misapplication; if the product has been modified without the written
permission of Belkin; or if any Belkin serial number has been removed or defaced.
THE WARRANTY AND REMEDIES SET FORTH ABOVE ARE EXCLUSIVE IN LIEU OF ALL
OTHERS, WHETHER ORAL OR WRITTEN, EXPRESSED OR IMPLIED. BELKIN SPECIFICALLY
DISCLAIMS ANY AND ALL IMPLIED WARRANTIES, INCLUDING, WITHOUT LIMITATION,
WARRANTIES OF MERCHANTABILITY AND FITNESS FOR A PARTICULAR PURPOSE.
No Belkin dealer, agent, or employee is authorized to make any modification, extension,
or addition to this warranty.
BELKIN IS NOT RESPONSIBLE FOR SPECIAL, INCIDENTAL, OR CONSEQUENTIAL
DAMAGES RESULTING FROM ANY BREACH OF WARRANTY, OR UNDER ANY OTHER
LEGAL THEORY, INCLUDING BUT NOT LIMITED TO, LOST PROFITS, DOWNTIME,
GOODWILL, DAMAGE TO OR REPROGRAMMING, OR REPRODUCING ANY PROGRAM
OR DATA STORED IN OR USED WITH BELKIN PRODUCTS.
28
P73162-A-F5U104-man.qxd
8/15/01
2:40 PM
Page 29
P73162-A-F5U104-man.qxd
8/15/01
2:40 PM
Belkin Components
501 West Walnut Street
Compton • CA • 90220 • USA
Tel: 310.898.1100
Fax: 310.898.1111
Belkin Components, Ltd.
Unit 13 • Gatelodge Close • Round Spinney
Northampton • Northants • NN3 8RX
United Kingdom
Tel: +44 (0) 1604678300
Fax: +44 (0) 1604678330
Belkin Components B.V.
Starparc Building • Boeing Avenue 333
1119 PH Schiphol-Rijk • The Netherlands
Tel. +31 (0) 20 654 7300
Fax: +31 (0) 20 654 7349
Belkin Components, Ltd.
7 Bowen Cresent • West Gosford
NSW 2250 • Australia
Tel: +61 2 4372 8600
Fax: +61 (2) 4325 4277
© 2001 Belkin Components. All rights reserved.
All trade names are registered trademarks of
respective manufacturers listed.
Page 30