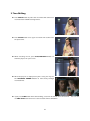
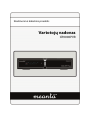
1
Digital Cable Receiver Personal Video Recording User's Manual CR9000PVR INDEX INDEX .................................................................................................................................................... 3 Precautions.......................................................................................................................................... 5 1. Important Safety Instructions...................................................................................................... 5 2. Notice ......................................................................................................................................... 5 Before You Begin ............................................................................................................................... 7 1. Main Features ............................................................................................................................ 7 2. Accessories ................................................................................................................................ 8 Hardware Description ....................................................................................................................... 9 1. Front Panel Configuration .......................................................................................................... 9 2. Rear Panel Configuration ......................................................................................................... 11 3. Remote Control Unit ................................................................................................................. 12 Connections Diagram ..................................................................................................................... 15 1. 2. 3. 4. Connecting to Antenna ............................................................................................................. 15 Receiver to TV with RF ............................................................................................................ 15 Receiver to TV and VCR .......................................................................................................... 16 Receiver to Digital Audio Equipment ........................................................................................ 17 Guide of Functions .......................................................................................................................... 18 1. Selecting a Service ................................................................................................................... 18 1.1 Using CH UP/DOWN buttons.............................................................................................. 18 1.2 Using NUMERIC buttons .................................................................................................... 18 1.3 Using Service List ............................................................................................................... 18 2. Information Window.................................................................................................................. 18 3. Multi-Picture Display. ................................................................................................................ 18 4. Electronic Program Guide (EPG) ............................................................................................. 19 5. Favorite Group ......................................................................................................................... 19 6. Volume Control ......................................................................................................................... 19 7. Pause ....................................................................................................................................... 19 8. Subtitle...................................................................................................................................... 19 9. Audio Track .............................................................................................................................. 19 PVR (Personal Video Recorder) Function ................................................................................. 20 1. Recording ................................................................................................................................. 20 1.1 Recording methods ............................................................................................................. 20 1.2 Instant Recording ................................................................................................................ 21 1.3 Recording Edit ..................................................................................................................... 21 1.4 Long Time Recording .......................................................................................................... 21 1.5 Pause during Recording...................................................................................................... 22 2. Time Shifting ............................................................................................................................. 23 3. Playback (Play List) .................................................................................................................. 24 4. Bookmark ................................................................................................................................. 24 5. Trick mode ................................................................................................................................ 25 3 Guide of Main Menu......................................................................................................................... 26 1. Configuration ............................................................................................................................ 26 1.1 Time Setting ........................................................................................................................ 26 1.2 Timer Manager .................................................................................................................... 26 1.3 UI (User Interface) Setting .................................................................................................. 27 1.4 Parental Control .................................................................................................................. 27 1.5 Language Setting ................................................................................................................ 28 1.6 A/V Output Setting .............................................................................................................. 28 2. Installation ................................................................................................................................ 28 2.1 Cable Search ...................................................................................................................... 28 2.2 System Recovery ................................................................................................................ 29 2.3 System Information ............................................................................................................. 29 3. Utilities ...................................................................................................................................... 29 3.1 USB ..................................................................................................................................... 29 3.2 Data Transfer....................................................................................................................... 30 3.3 Recording Option ................................................................................................................ 30 3.4 Calendar .............................................................................................................................. 30 3.5 Calculator ............................................................................................................................ 31 3.6 Game................................................................................................................................... 31 4. CA............................................................................................................................................. 31 4.1 Conax smart card menu ...................................................................................................... 31 4.2 Smart card information ........................................................................................................ 31 5. Service List ............................................................................................................................... 32 5.1 Service List manager .......................................................................................................... 32 5.2 Service List Option .............................................................................................................. 33 Troubleshooting ............................................................................................................................... 34 Specifications ................................................................................................................................... 35 4 Precautions 1. Important Safety Instructions Read these instructions. Keep these instructions. Heed all warnings. Follow all instructions. Do not use this apparatus near water. Clean only with dry cloth. Do not block any ventilation openings. Install in accordance with the manufacturer’s instructions. Do not install near any heat sources such as radiators, heat registers, stoves, or other apparatus (including amplifiers) that produce heat. Do not reverse the safety purpose of the polarized or grounding-type plug. A polarized plug has two blades with one wider than the other. A grounding type plug has two blades and a third grounding prong. The wide blade or third prong is provided for your safety. If the provided plug does not fit into your outlet, consult an electrician for replacement of the obsolete outlet. Protect the power cord from being walked on or pinched particularly at plugs, convenience receptacles, and the point where they exit from the apparatus. Only use attachments/accessories specified by the manufacturer. Use only with the cart, stand, tripod, bracket, or table specified by the manufacturer, or sold with the apparatus. When a cart is used, use caution when moving the cart/apparatus combination to avoid injury from tip-over. Unplug this apparatus during lightning storms or when unused for long periods of time. Refer all servicing to qualified service personnel. Servicing is required when the apparatus has been damaged in any way, such as power-supply cord or plug is damaged, liquid has been spilled or objects have fallen into the apparatus, the apparatus has been exposed to rain or moisture, does not operate normally, or has been dropped. WARNING : To Prevent fire or shock hazard do not expose the set to rain or moisture. 2. Notice Do not attempt to service this product by yourself. Do not remove the cover. Refer all serving to qualified service agents. These servicing instructions are for use by qualified service personnel only. To reduce the risk of electric shock, do not perform any servicing other than that contained in the operating instructions unless you are qualified to do so. 5 The apparatus shall not be exposed to dripping or splashing and that no objects filled with liquids, such as vases, shall be placed on the apparatus. The mains plug is used as the disconnect device. The disconnect device shall remain readily operable. To reduce the risk of electric shock, do not remove the cover (or back). No user serviceable parts are inside. Refer servicing to qualified service personnel. The Lightning Flash with arrowhead symbol within an equilateral triangle, is intended to alert the user to the presence of un-insulated "dangerous voltage" within the product enclosure that may be of sufficient magnitude to constitute a risk of shock to persons 6 The exclamation point within an equilateral triangle is intended to alert the user to the presence of important operating and maintenance (servicing) instructions in the literature accompanying the product Before You Begin 1. Main Features Digital Cable Receiver Time Shifting with External USB 2.0 Devices (Up to 2 Hours) Recording & Playback with External USB 2.0 Devices Event Recording by EPG Recording and Time Shifting Simultaneously Recording and Playback Simultaneously 8 Digits VFD on the Front Panel Dual USB 2.0 Host Support(MP3 Player & JPEG Viewer) Software & Service Data Transfer via USB MPEG-II Digital & Fully DVB Compliant Support EPG(Electronic Program Guide) On-Screen Display with 65535 Color Full Resolution Favorite Service Groups Powerful Service Control by Favorites, Lock, Skip, Move and Delete Service Sorting by Alphabet, Transponder and CAS Multi-language Supported (OSD & Menu) Teletext Support Maximum 10,000 Services Programmable Multi-picture Display Parental Lock / System Lock / Installation Lock CVBS Video & Audio Output via RCA CVBS, RGB Video & Audio Output via TV SCART Optical Output for Digital Audio 7 2. Accessories User's Manual Remote Control AAA size Batteries X2 NOTE : If any accessories listed above are missing, contact the sales representative where you purchased this unit. 8 Hardware Description 1. Front Panel Configuration 1. VFD(Vacuum Fluorescent Display): The VFD consist of 8-digit letter and various icons. These letters and icons display the status of receiver as follows. 1. (EURO) : Indicates that current channel is pay channel. 2. (PLAY) : Turned on during playback. 3. (REWIND) : Turned on during rewind in playback mode. 4. (PAUSE) : Indicates that current channel is paused. 5. (F.F) : Turned on during fast forward in playback mode. 6. (REC) : Turned on during recording. 7. (Small Arrow) : Turned on when you press a button in remote controller. 8. (Clock1) : Indicate that sleep timer is set up. 9. (Clock2) : The time that is set with timer manager is come, this icon is turned on. 9 10. (CARD) : Indicates that smart card is inserted. 11. (KEY) : Indicates that current channel is locked. 12. (USB) : Indicates that external USB device is connected. 13. (DVB) : Turned on during live mode. 14. (HDD) : Indicates that set-top box is accessing files in the external USB device. 15. (AUDIO) : Indicates that current channel is radio channel. 16. (VIDEO) : Indicates that current channel is TV channel. 17. (DOLBY) : Indicates that current channel supports Dolby digital audio. 18. (DIGIT) : Display channel name, time and other information with letter. 2. POWER Button: Press to switch between STANDBY and POWER ON modes. 3. CH Up/Down Button: Press to change services in normal mode, to move the highlighted-bar UP/DOWN in menu mode. 10 2. Rear Panel Configuration 1. CABLE IN: Use to connect a CATV antenna. 2. CABLE OUT: Use it when connecting to RF input on your TV or VCR. 3. VIDEO : Use to connect to video input of TV or VCR. 4. AUDIO L/R : Use to connect audio left, right of TV or VCR. 5. SPDIF : Use to connect SPDIF to digital audio equipment.( Optic) 6. VCR SCART: Use to connect to the VCR via a SCART cable. 7. TV SCART: Use to connect to the TV via a SCART cable. 8. RF OUT : Use to connect to RF(ANT) input jack of TV. 9. RF IN : Use to connect a general Aerial Antenna. 10. RS-232C : Use it when connecting to your PC. 11. USB: Use to connect to external USB device. 12. POWER: Power switch 11 3. Remote Control Unit 1. POWER : Turns the STB On/Off. 2. MUTE : Turns the sound On/Off. 3. MODE a. UHF : To adjust UHF service. b. SLEEP : To adjust sleep timer. c. TV/STB : Toggles the TV output source between the cable input(STB mode) and UHF/VHF antenna input(TV mode). d. TV/RADIO : Switches between TV and Radio. 4. NUMERIC Keys : Controls the numerical operation and service numbers directly. 5. EPG(Electronic Program Guide) : Show the TV/Radio program guide. 6. INFO : Shows the information of the current program. If you press one more, detail information box will be shown. 12 7. MENU : To enter the main menu or to move to the previous menu. 8. EXIT : Exit from the menu or pop-up window. 9. OK : Shows the service list in non-menu mode and select an item or confirm in menu mode. 10. ARROW : Moves the highlight bar for selecting options on the menus. And this key is used to change services(UP/DOWN) or change audio volume(LEFT/RIGHT). 11. PAGE UP/DOWN : Move to the next or previous page if more than one page are available. PAGE UP key is also used as hot-key to move to Timer Manager menu(Refer to Page 26, 1.2 Timer Manager). And PAGE DOWN key is also used as hot-key to move to Picture Adjust window(Refer to Page 28 ,1.6 A/V Output Setting). 12. RECALL : Moves to previous service. 13. SAT : Shows the service list 14. FAV : To change the favorite groups. 15. COLOR Keys : Used for special function in menu. RED key is used to add or delete the current position as a bookmark. GREEN key is used to go to the next bookmark position. BLUE key is used to display multiple pictures. 13 16. PLAY LIST : To display recorded service list. 17. SUBTITLE : To show multilingual subtitle. 18. TELETEXT : To show the digital teletext. 19. PAUSE : This key is used to pause the video. Press once more to resume the video. 20. PREV FILE : To play the previous MP3 file in MP3 play mode. 21. NEXT FILE : To play the next MP3 file in MP3 play mode. 22. REWIND : Rewind when the progress bar is displayed. Start reverse playback. Change the speed of reverse playback. 23. FAST FORWARD : Start fast forward or fast motion playback. Change the speed of forward playback. 24. RECORD : To start recording. 25. PLAY : Display the progress bar of playback when no progress bar is displayed. Start playback with normal speed. Return to normal speed from trick mode. 26. STOP : To stop time shifting, play back or recording. NOTE : When inserting batteries, make sure that the polarity (+/-) is correct. 14 Connections Diagram 1. Connecting to Antenna Connect the CATV antenna cable to CABLE IN. 2. Receiver to TV with RF Connect antenna cable to receiver, refer to above section, 1. Connecting to Antenna. Connect the RF OUT to RF IN of TV. Connect the VIDEO and AUDIO L, R to VIDEO IN and AUDIO L, R IN of TV. Connect the TV SCART to SCART of TV. 15 3. Receiver to TV and VCR Connect antenna cable to receiver, refer to above section, 1. Connecting to Antenna. Connect the RF OUT to RF IN of VCR. Connect RF OUT of VCR to RF IN of TV. Connect the TV SCART to SCART of TV. Connect the VCR SCART to SCART of VCR. Connect other jacks to the appropriate jacks of TV refer to above section, 2. Receiver to TV with RF. 16 4. Receiver to Digital Audio Equipment To get better quality audio, you can use digital audio via optical cable. If you have a digital audio equipment, connect SPDIF to Digital audio input of the equipment. Connect other jacks to the appropriate jacks of TV or VCR refers to above sections, 1. Connecting to Antenna, 2. Receiver to TV with RF and 3. Receiver to TV and VCR. 17 Guide of Functions 1. Selecting a Service To select the desired service, you can use below methods. 1.1 Using CH UP/DOWN buttons You can navigate between services using UP/DOWN buttons. Whenever you press the UP(DOWN) button, current service will be changed to next(previous) service. You have to press UP or DOWN button until find the service you want. 1.2 Using NUMERIC buttons If you know the service number, enter the number directly using NUMERIC buttons. 1.3 Using Service List To select the desired service in the service list, you should firstly display the service list using OK button. Use ARROW buttons to select a desired service and press OK button. In the Service List window, you can also use additional functions with COLOR buttons. Press RED button, you can sort the services by Alphabet, Transponder, Group and CAS. Press GREEN button, you can add the service to one of 10 favorites. 2. Information Window If you want to view the current service information window press INFO button. Then the Information window will appear. This Information window is automatically displayed when changing services. This window contains many items such as service number, service name, scrambled service, Teletext, subtitle, Dolby Digital symbol, duration time and so on. Press INFO button once more, you can get more detailed information. 3. Multi-Picture Display. Press the BLUE button to display multiple pictures and RED button display 9 or 12 multiple pictures option. 18 4. Electronic Program Guide (EPG) Electronic Program Guide (EPG) helps you navigate through all the possible viewing options. The EPG supplies information such as program listings, start/end times and detailed information about the program listings for all available services. The availability and amount of these program details will vary, depending on the particular broadcaster. If you press EPG button, EPG menu will be displayed. Press the ARROW buttons to move to other service or to see previous/next guide. Press EPG button once to view full EPG (Entertainment Program Guide) and press button twice to view only selected EPG. Press button consecutively to go back and forth. Press GREEN button to view next day EPG and RED button to view EPG for previous day. Select the program by using the ARROW buttons then set the timer by pressing OK. You can make a reservation for recording on EPG menu. - Press RECORD button to reserve the event. This reservation can be checked under the Timer Manager Menu. - To cancel the reservation for recording by OK button at the appointed event. - To edit the reservation for recording by RECORD button at the appointed event. 5. Favorite Group Select the FAV (favorite) button to view all favorite groups. Scroll through the various favorite group using the ARROW buttons, and select the appropriate satellite by pressing OK. 6. Volume Control To control audio volume while you are watching a service, press LEFT/RIGHT button to control volume. Volume control bar will be appeared in top of the screen. When necessary, press MUTE button to turn audio sound on/off. 7. Pause The PAUSE button is used to freeze the video. Press PAUSE button once more to resume the video. 8. Subtitle To display Sub-title press SUBTITLE button on your remote control. Sub-title is based on the transmitted data. 9. Audio Track You can select the audio language list by pressing the AUDIO button. Use the ARROW buttons to choose the audio track from the list than press OK to change. 19 PVR (Personal Video Recorder) Function 1. Recording 1.1 Recording methods There are two types of recording method. (Time Reserved Recording / Event Reserved Recording). Time Reserved Recording : - In Timer Manager you may set your time/program during this process. (Main Menu > Configuration > Timer Manager) - Press GREEN button to activate the new timer edit screen. - Timer Edit screen you may choose start date/time, duration, service, mode, type (Recording/Play) and simply press Yes button to reserve you recording schedule. Also, you must set you start time and end time to minimum of 3 minutes; start time must be present time. Event Reserved Recording : EPG screen choose the event you wish to reserve or record. - During LIVE TV press EPG button to access EPG screen. - Go to the event which you wish to view and then press OK. The event will be reserved with BLUE play icon. This BLUE play icon means that you want to just watch the event at the reserved time. BLUE play icon 20 - Press the OK one more time then the event will be reserved with RED record icon. This RED record icon means that you want to record the event at the reserved time. RED record icon - When you set an event for recording in EPG. It automatically set in the Timer Event in Main Menu > Configuration > Timer Manager. 1.2 Instant Recording At anytime, you may press RECORD button to start you recoding instantly. 1.3 Recording Edit During recording, you may press RECORD button to edit recording duration time. As it defaulted to 2 hours but you may increase or decrease as you desire. 1.4 Long Time Recording During long time recording process 4GB or more, additional files may be created every 4GB. (For example; aaa.ts, aaa.ts1, aaa.ts2… and so on) You must remember not to erase any of duplicated file. These files are only able to view with your PC not with receiver. 21 1.5 Pause during Recording When PAUSE button is pressed during recording, only the live video is paused, but recording is continued at the external USB2.0 stroage device. Press PAUSE button once again and event will resume from the pause time. During recording, press PLAY/TIMESHIFT button to show Play bar screen. While the Play bar is shown on your screen, you may use the LEFT/RIGHT ARROW button to move (forward & backward) freely within recorded time. If you press STOP button, it will go to LIVE and you may press PREV FILE button to view recorded file from the beginning. 22 2. Time Shifting Press PAUSE button to pause the live TV but will continue to record to external USB2.0 stroage device. Press PAUSE button once again and event will resume from the pause time. While watching live TV, press PLAY/TIMESHIFT button to show the play bar on your screen. When the play bar is displayed on your screen, you may use the LEFT/RIGHT ARROW buttons to move freely through recorded times. If you press STOP button while time-shifting, screen will be turned to live TV channel. You can also use PREV FILE button to move to a start location of Time-shifted file. 23 3. Playback (Play List) Press the PLAY LIST button to activate the Play List screen. In Play List you may choose any of pre-recorded event(s) and play it by pressing OK button. In Play List screen, you may press RED button to choose the event you wish to view in order listed in Play List. And, you may press GREEN button to choose all event in the Play List. In Play List screen, BLUE button to delete or rename already recorded event. In Play List screen, press RIGHT/LEFT ARROW button to change other list. (MP3 Player, Image Viewer) 4. Bookmark When Play bar is displayed, you may move to desired time and book mark it by pressing the RED button. Bookmark(s) are indicated with Green line on the play bar. Also, you may press RED button to activate play bar to mark your bookmark(s). 24 When the play bar is on, User can move / jump between the bookmarks by pressing the GREEN button. If you wish to delete any Bookmarks, go to that bookmark by pressing green button, then press RED button to delete the current bookmarks. 5. Trick mode During play, press the FAST FORWARD button once to 2X faster than regular playing speed and once more to 3X faster. During play, press the REWIND button once to 2X faster than regular paying speed. 25 Guide of Main Menu To display the menu, press MENU button at any time. You can select the sub menu using ARROW buttons. The selected sub menu becomes highlighted. When you have selected the sub menu you want, press the OK button. If you want to return to the previous menu, press the MENU button. And if you want to exit from the menu, press the EXIT button. 1. Configuration 1.1 Time Setting Time Setting : To set the current time, you can use two modes; Auto and Manual. Auto Time Setting - Local Offset : Enter the offset value using the standardized information of current service area. - Daylight Saving : If you want to apply daylight saving, select the country using ARROW buttons. Manual Time Setting - Date : Enter the calendar date by using ARROW buttons then press OK to finish. - Time : Enter the time by using the NUMERIC buttons. Clock Mode : Select the type of clock display(12 Hours or 24 Hours) using ARROW buttons. Wake Up Mode : Enter the time for the receiver to automatically power ON. And you can choose one of Wake Up Mode as 'off' or 'Once' or 'Daily' or 'Weekly'. - Wake Up Date : Select the date when STB is turn on. Press OK button to display calendar. - Wake Up Days : Select a day of the week when STB is turn on. - Wake Up Time : Enter the turn-on time of STB using NUMERIC buttons. - Wake Up Service : Select the service when STB is turn on. Press OK button to display service list. Sleep Mode : - Sleep Date : Select the date when STB is turn off. Press OK button to display calendar. - Sleep Days : Select a day of the week when STB is turn off. - Sleep Time : Enter the turn-off time of STB using NUMERIC buttons. 1.2 Timer Manager Insert a new timer entry or modify the existing timer entry. To add new timer entry : Press GREEN button. Timer Edit window will popup. You can set the specific start date, time, duration and service for its reservation. And you can choose one of Timer Modes as 'Once' or 'Daily' or 'Weekly'. You can choose timer operation type as ‘Recording’ or just to 'Play'. - If you choose 'Recording', it will start recording at that time. - If you choose 'Play', it will change and tune to the service that you wish to watch. 26 To modify existing timer entry : Choose the timer entry which you wish to modify and press OK button. To delete existing timer entry : Choose the timer entry that you want to delete and press RED button. NOTE : If you reserve one or more event through the EPG menu, the reserved event(s) will be added to Timer Manager automatically. 1.3 UI (User Interface) Setting OSD Transparency : Set a the OSD transparent type. Info Box Position: Set the information window position. Info Box Display Time: Set the display duration of volume bar displayed on the screen after changing volume. EPG OSD Type: - Set ‘ Transparent’ : If you press EPG button, selected service will be played in the background of EPG window. - Set ‘ Picture in Graphic’ : If you press EPG button, selected service will be played within the small box. EPG Time Range : You can set the time range which is displayed at the same time in the EPG window. Zapping Mode: You can set the zapping mode. Black screen means display the black screen when channel changed. Freeze means display the last picture when change. 1.4 Parental Control Access to services and programs is controlled by a 4-digit secret code that is defined by the user. Whenever you attempt to access parental control menu, the pop-up window will instruct you to input a PIN code.(If necessary, you can change it.) NOTE : The default PIN code is ‘0000’ Censorship : Set the parental guidance rating of highlighted censorship classification. The parental level is given as agebased numbers. Change Pin code : To change your PIN code, input the new PIN code using NUMERIC buttons. To verify the new PIN code, input the new PIN code again. System : Set the access rights to system menu. Installation : Set the access rights to Installation menu. Configuration : Set the access rights to Configuration menu. Edit Service : Set the access rights to Edit Service menu. 27 1.5 Language Setting Menu Language : Select the desired menu language by using the ARROW buttons. NOTE : The Kind of languages can be changed depending on the country sold. Available languages are subject to change without prior notice. Audio Language : Select the default language for audio when changing services. If no other language is provided, then the default language of current will be automatically selected. Subtitle Language : Select the default language for subtitle when changing service. 1.6 A/V Output Setting TV Type : Select the TV types.(PAL/NTSC/Auto) In Auto mode, the STB is automatically selected as NTSC or PAL according to the service played. TV Aspect Ratio : Select the aspect ratio of TV which is connected to STB.(4:3/16:9). Display Format : Select the format which the video is to be displayed on screen. (Letter Box/Pan Scan) In case of 16:9 mode, this option is not available. Sound Mode : Set the audio mode which is output from the RCA jack. (Stereo/Mono/Left/Right). RF Type : Select the RF type. (PAL G/I/K) RF Service : Select a RF service. (21~69) Picture Adjust : Adjust brightness, contrast and color of screen. 2. Installation 2.1 Cable Search Search Mode : Select the following search mode. Auto Search Mode - Search Type : Select the search type.(All Service/FTA Only/TV Only). - Start Search : Press OK button to start search. Manual Search Mode - Frequency : Select the frequency what you want to search. Or enter the frequency manually using NUMERIC buttons. - Symbol rate : Enter the symbol rate using NUMERIC buttons. - QAM Mode : Select the constellation using ARROW buttons. (AUTO/QAM16/QAM32/QAM64/QAM128/QAM256) - Search Type : Select the search type.(All Service/FTA Only/TV Only) - Start Search : Press OK button to start search. 28 2.2 System Recovery System restore to factory default : This menu allows you to restore the factory set values in case the user has encountered some problems after changing any new parameters of service data and others which may be in error. Press OK button to erase all services and restore default setting. System restore to stored position : This menu allows you to restore the stored values including service data and system parameters. Press OK button to restore all data. Store system data : If you want to use system parameters and service data in the future, this menu allows you to store current state. Press OK button to store current state. 2.3 System Information This menu displays general information about the hardware and software version of your receiver. 3. Utilities 3.1 USB Configuration : The STB has two USB port. One is the front panel and the other is in the rear panel. With this option, you can activate or inactivate these USB ports. - Rear : Activate rear USB port. In this case front USB port is not available. - Front : Activate front USB port. In this case rear USB port is not available. - Auto Detect : Activate the USB port which is connected to external USB device automatically MP3 Player : Stick the external USB memory into the provided USB port on front panel. Once inserted, press OK button to read external USB memory stick and choose the MP3 file from the window you want to play. Press INFO Button to show the ID3 tag information. Image Viewer : You can display the image file that is in the external USB memory stick on the screen. Select the image file(JPEG format) and press OK button to display the image. 29 Format : Before you use your USB external device, we recommend for you to format it by Format(USB) menu. NOTE : If you execute format, all data will be deleted. 3.2 Data Transfer Transfer all System data to USB storage : If you want to transfer and use BOTH of the current system parameters and service data in the future, this menu will allow you to store both data to your USB device. Press OK button to store current data to external USB storage. Transfer Service data to USB storage : If you want to transfer and use ONLY the service data in the future, this menu allows you to store current service data. Press OK button to store the current service data to your external USB storage. Data download from USB storage : This menu allows you to download the stored data from the external USB storage to your STB. Press OK button to download data. 3.3 Recording Option Recording Stop Message : - Set ‘On’ : When you press STOP button in recording, confirm window is displayed. - Set ‘Off’ : When you press STOP button in recording, STB will stop recording immediately with no message. Time Shift(USB) : You can adjust the time such as 30 Min / 60 Min / 120 Min. In this case, time shifting function works automatically up to time you set, if external USB device have enough space. If you set ‘off’ this option, time shifting function never works. 3.4 Calendar To display calendar, press OK button. Utilize ARROW buttons to choose the date. If you press PAGE UP/DOWN button, you can see past/next month of calendar. 30 3.5 Calculator To use a calculator, press OK button. 3.6 Game You can enjoy Games. (CAKEPIA, TETRS) If you want to play the Game, select the Game with UP/DOWN buttons and press OK button. 4. CA 4.1 Conax smart card menu To watch scrambled services, you need to have a appropriate Conax smart card from the service providers. - Insert a valid smart card into smart card slot. - The message of ‘Smart card Initializing…’ will appear on the screen. - After message disappear, you can watch the service you want. 4.2 Smart card information You can view the current status of smart card. - Select the slot what you want to view using ARROW buttons. And press OK button. 31 5. Service List 5.1 Service List manager Service List Manager menu will be appeared when press OK button. You can select Edit Mode by press YELLOW button. Lock Services : All service lists will be shown on left side of window, right side will show make service to be lock. By using ARROW and OK button you may move the chosen service to right side window to lock service. Move Services : All Service Lists will be shown on left window, Service Lists for moving will be shown on right Window. Move the Service to Right window by using ARROW and OK button, then right window services will be moved to related location when select desired location from the left window. Delete Services : All service lists will be shown on left side of window. By using ARROW and OK button you may select services to be delete. And press GREEN button to delete the selected services. Skip Services : All service lists will be shown on left side of window, right side will show make service to be skip. By using ARROW and OK button you may move the chosen service to right side window to skip service. 32 Set Favorite Services : Press FAV button to mark the favorite group list. Once, favorite group is chosen, left side window will show all service list marked and right side window will show only the marked service list. Using ARROW and OK buttons you may add any service to the favorite group or delete any service from the favorite group. Edit Services : All service lists will be shown on left side of window. Move the highlighted bar to the service what you want to edit its name and press OK button. Then you can see the virtual keyboard. Using ARROW and OK buttons, you can edit the service name. 5.2 Service List Option Service List Preview : - Setting ‘ON’ If you change service using ARROW buttons and press OK button in the Service List, service will be played which you want. But Service List still remains. To remove Service List on screen, press OK one more time. - Setting ‘OFF’ If you change service and press OK in the Service List, service will be played. And Service List disappears at the same time. Service List Slide Popup : - Setting ‘ON’ When you press RED or GREEN button in the Service List, pop-up window appears with slide-open effect. - Setting ‘OFF’ In the Service List, pop-up window is opened with no effect. Lock Favorite Popup : - Setting ‘ON’ If you press GREEN button to open Set Favorite menu, you must enter PIN code. - Setting ‘OFF’ PIN code is not required. View Only Filtered List : - Setting ‘ON’ If you sort services with any category (A~Z, Transponder, Group or CAS) in the Service List, only filtered services will be shown on the Service List. - Setting ‘OFF’ All services will be shown on the Service List. And filtered services are highlighted with yellow color. 33 Troubleshooting Problem Solution Does not display any message on the front panel. Check the main power cable and check that it is plugged into a suitable power outlet. Check you have switched the STB main power switch ON at the rear of the STB. No Picture See ‘Does not display any message on the front panel’ above. Check the video output port is firmly connected to the TV or VCR. If you are using the RF output, check that the RF lead is connected firmly to the STB and TV/VCR. Check that you have selected the correct channel or Video Output on your TV. If you are using the RF Output, check that you have correctly tuned the UHF channel of the STB or TV. Check the brightness level of the TV Poor picture quality See ‘No Picture’ above. Check the signal levels, if this are low then try adjusting the alignment of your dish. No Sound Remote Control does not operate No Signal / Bad Signal / Service Error See ‘No Picture’ above. Check the volume level of the TV and STB. Check the Mute status of the TV and STB. Point remote control directly towards the STB. Check and replace batteries. Check the connection of CATV line. Check the signal level and quality in the Cable Search menu. 34 Specifications Tuner & Channel Decoder Input Connector Loop through out Frequency Range Demodulation IF Bandwidth Modulation Format Symbol Rate F-type, IEC 169-2, Female F-type, IEC 169-2, Male 50.5 ~ 858.0 MHz QAM 8 MHz 16, 32, 64, 128, 256 QAM 1.0 Msps ~ 7.0 Msps MPEG Transport Stream A/V Decoding Transport Stream Profile Level Input Rate Video Formats Video Resolution Audio Decoding Audio Mode Sampling Rate MPEG-II ISO/IEC 13818 MPEG-II MP@ML Max. 15Mbit/s 4:3 LetterBox, 4:3 PanScan, 16:9 720 x 576, 720 x 480 MPEG/MusiCam Layer Ⅰ&Ⅱ Stereo/Joint stereo/Mono 32KHz, 44.1KHz and 48KHz Main System Main Processor Memory Conexant Virgo Flash-ROM : 2 MBytes SDRAM : 32 MBytes Audio / Video & Data IN/OUT TV SCART VCR SCART RCA S/PDIF RS-232C USB RGB, CVBS Video, Audio L, R Output CVBS Video, Audio L, R Output RGB, CVBS, Audio L, R Input CVBS Video Output, Audio L, R Output Digital Audio Output (Fiber-Optic) 9 pin D-SUB (Male) type, Transfer rate 115Kbps Dual USB 2.0 Host Support (Front & Rear) 35 RF Modulator RF Connector Frequency Output Channel TV Standard Preset Channel 75Ω, IEC 169-2, Male/Female 470 ~ 860MHz CH 21 ~ 69 for the Remodulator PAL G/I/K Selectable by Menu CH 36 (or TBD) Software changeable by Menu Front Panel Slot Buttons Display 1 Smart Card Slot 1 USB Host Slot 3 Buttons (CH UP/DOWN, STANDBY) VFD (Vacuum Fluorescent Display) Power Supply Input Voltage Type Power Consumption Standby Power Protection AC 100 ~ 250V, 50/60Hz SMPS Max. 25W Max. 8W Separate Internal Fuse & Lighting protection Physical Specification Size (W x H x D) Weight (Net) Operating Temp. Storage Temp. 260mm X 55mm X 210mm 1.2Kg 0°C ~ +45°C -10°C ~ +70°C 36 Skaitmeninis kabelinis priedėlis Vartotojų vadovas CR9000PVR Turinys Turinys .................................................................................................................................................. 3 Saugos priemonės ............................................................................................................................. 5 1. Svarbios saugos instrukcijos ...................................................................................................... 5 2. Pranešimas ................................................................................................................................ 5 Prieš pradedant .................................................................................................................................. 7 1. Pagrindinės savybės .................................................................................................................. 7 2. Priedai ........................................................................................................................................ 8 Korpuso Aprašymas .......................................................................................................................... 9 1. Priekinės panelės konfigūracijos ................................................................................................ 9 2. Galinės panelės konfigūracijos ................................................................................................ 11 3. Nuotolinio valdymo pultas ........................................................................................................ 12 Jungties schema .............................................................................................................................. 15 1. 2. 3. 4. Prijungimas prie antenos .......................................................................................................... 15 Prijungimas prie TV ir RF ......................................................................................................... 15 Prijungimas prie TV ir Vaizdo grotuvo ...................................................................................... 16 Prijungimas prie skaitmeninės garso įrangos........................................................................... 17 Funkcijų vadovas ............................................................................................................................. 18 1. Pasirinki kanalą ........................................................................................................................ 18 1.1 Naudojant Aukštyn/Žemyn mygtukus .................................................................................. 18 1.2 Naudojant SKAIČIUS .......................................................................................................... 18 1.3 Naudojant kanalų sąrašą .................................................................................................... 18 2. Informacinis langas .................................................................................................................. 18 3. Multi-kanalų vaizdas. ................................................................................................................ 18 4. Elektroninis Programų Gidas (EPG) ........................................................................................ 19 5. Favoritų grupė .......................................................................................................................... 19 6. Garso kontrolė .......................................................................................................................... 19 7. PAUZĖ ...................................................................................................................................... 19 8. Subtitrai .................................................................................................................................... 19 9. Garso takelis............................................................................................................................. 19 Laiko poslinkis, įrašymas ir atkūrimas ...................................................................................... 20 1. Įrašymas ................................................................................................................................... 20 1.1 Įrašymo metodai .................................................................................................................. 20 1.2 Momentinis įrašymas .......................................................................................................... 21 1.3 Įrašymo redagavimas .......................................................................................................... 21 1.4 Ilgo laiko įrašymas ............................................................................................................... 21 1.5 Pauzė įrašymo metu ........................................................................................................... 22 2. Laiko poslinkis .......................................................................................................................... 23 3. Atkūrimas.................................................................................................................................. 24 4. Žymė......................................................................................................................................... 24 5. Peržiūrėjimo būdai .................................................................................................................... 25 3 Pagrindinio meniu vadovas........................................................................................................... 26 1. Sistemos nustatymai ................................................................................................................ 26 1.1 Laiko Nustatymai ................................................................................................................. 26 1.2 Taimerio valdymas .............................................................................................................. 26 1.3 Meniu nustatymai ................................................................................................................ 27 1.4 Apsauga nuo vaikų .............................................................................................................. 27 1.5 Kalbos nustatymai ............................................................................................................... 28 1.6 A/V Išvesties nustatymai ..................................................................................................... 28 2. Instaliacija ................................................................................................................................. 28 2.1 Paieška per kabelį ............................................................................................................... 28 2.2 Sistemos perkrovimas ......................................................................................................... 29 2.3 Sistemos informacija ........................................................................................................... 29 3. Pagalbiniai ................................................................................................................................ 29 3.1 USB ..................................................................................................................................... 29 3.2 Duomenų perkėlimas .......................................................................................................... 30 3.3 Įrašymo parinktys ................................................................................................................ 30 3.4 Kalendorius ......................................................................................................................... 30 3.5 Kalkuliatorius ....................................................................................................................... 31 3.6 Žaidimai ............................................................................................................................... 31 4. CA............................................................................................................................................. 31 4.1 Conax kortelės meniu ......................................................................................................... 31 4.2 Kortelės informacija............................................................................................................. 31 5. Kanalų sąrašas ......................................................................................................................... 32 5.1 Redaguoti nustatymų vadovą.............................................................................................. 32 5.2 Kanalų sąrašo parinktys ...................................................................................................... 33 Trikčiai ................................................................................................................................................. 34 Specifikacijos .................................................................................................................................... 35 4 Saugos priemonės 1. Svarbios saugos instrukcijos Perskaitykite šiuos nurodymus. Laikykitės šiuo nurodimų. Įsidėmėkite visus įspėjimus. Sekite visus nurodymus. Nenaudokite šio aparato arti vandens. Valyti tik sausu audiniu. Neblokuoti vedinimo angas. Negalima statyti šalia šilumos šaltinių, tokiu kaip radiatoriai, šildymo registrų arba kitų prietaisų(įskaitant stiprintuvus), kurie įkaistą. Kištukas. Įžeminimo tipo kištukas turi du kontaktus ir trečia įžeminimo. Platus kontaktas numatytas jūsų saugumui. Jeigu numatytas kištukas netelpa į jūsų lizdą, konsultuokitės su elektriku dėl pasenusio lizdo. Saugokite maitinimo laidą nuo pažeidimu. Naudokite tik aksesuarus, kuriuos nurodė gamintojas. Naudokite tik lentynėlę, stovą, kurį yra nurodęs gamintojas arba kuris yra parduodamas su priedeliu. Išjunkite iš maitinimo aparatą, kai jis yra nenaudojamas ilgą laiką arba audros metu. Aptarnavimo kreipkitės i kvalifikuota personalą. Aptarnavimas yra būtinas, kai priedėlis buvo apgadintas, pvz. elektros energijos teikimo laidas arba kištukas yra sugadintas, kai aparatas buvo veikiamas lietaus, neveikia normaliai arba buvo nukritęs. ĮSPĖJIMAS : NORINT APSISAUGOTI NUO GAISRO ARBA ELEKTROS SMŪGIO NELAIKYKITE PRIEDĖLĮ LIETUJE ARBA SKYSTYJE. 2. Pranešimas ŠiuoS priežiūros instrukcijas pildo tik kvalifikuotas personalas. Elektros smūgio rizikai sumažinti nedarykite nieko kito, išskirus, kas parašyta instrukcijoje, jeigu jus nesate kvalifikuotas atlikti tokį darbą. Priedėlis neturi būti veikiamas lašu arba purslų ir kad jokie objektai pripildyti skysčio, tokie kaip vazos, nestovėtu ant priedėlio. Tinklo lizdas naudojas atjungti priedėlį. 5 Norint sumažinti elektros šoko riziką, nenuiminėkite priedėlio galo. Viduje nėra jokiu atsarginių dalių Priežiūros kreipkites į kvalifikuotą personalą. Žaibas lygiakraščiame trikampyje skirtas perspėti vartotoją, kad yra neizoliuotų vietų, kuriose gali kauptis pavojinga įtampa, kuri gali sukelti elektros smūgio pavojų 6 Šauktukas lygiakraščiame trikampyje skirtas perspėti vartotoją, kad prieš naudojimą būtina perskaityti vartotoju vadovą Prieš pradedant 1. Pagrindinės savybės Skaitmeninis kabelinis imtuvas Laiko Poslinkis su išoriniu USB 2.0 raktu (Iki 2 valandų) Įrašymas ir atkūrimas su išoriniu USB 2.0 raktu Programų įrašymas iš EPG Įrašymas ir Laiko Poslinkis vienu metu Įrašymas ir atkūrimas vienu metu 8 skaitmenų VFD USB 2.0 Host palaikymas (MP3 grotuvas & JPEG žiūrovas) Programinės įrangos ir duomenų perdavimas per USB Skaitmeninis MPEG-II ir visiškas DVB palaikymas EPG Palaikymas(Elektroninis Programų Gidas) Ekranas su 65535 atspalvių ir Pilna rezoliucija Favoritų Palaikymas Galingas kanalų redagavimas: Favoritai, Blokuoti, Praleisti, Judinti ir Pašalinti Kanalų išdėstymas pagal Abėcėlę, Transponderį ir CAS Įvairių kalbų palaikymas (OSD ir Meniu) Teleteksto Palaikymas Didžiausias 10,000 programų palaikymas Multi-kanalų vaizdas Apsauga nuo vaikų / Sistemos užraktas / Įdegimo užraktas CVBS Vaizdo ir Garso išeitis per RCA CVBS, RGB Vaizdo ir Garso išeitis per TV SCART Skaitmeninis Garsas per optinį išeitinį 7 2. Priedai Vartotojų vadovas Nuotolinio valdymo pultas AAA tipo elementai X 2 PASTABA : Jeigu bent vieno iš reikmenų nėra, kreipkitės į pardavimų atstovą, kur jus įsigijote ši priedėlį. 8 Korpuso Aprašymas 1. Priekinės panelės konfigūracijos 1. VFD(Vakuuminis Fluorescentinis Displėjus): VFD sudarytas iš 8-skaitmenų ir įvairių piktogramų. Šie skaitmenis ir piktogramos parodo imtuvo statusą. 1. (EURAS) : Rodo, kad kanalas yra koduotas. 2. (GROJIMAS) : Įsijungia atkūrimo metu. 3. (ATGAL) : Įsijungia, kai persukote atgal atkūrimo režime. 4. (PAUZĖ) : Parodo, kad dabartinis kanalas yra sustabdytas. 5. (PIRMYN) : Įsijungia atkūrimo režime, spartaus persukimo metu. 6. (ĮRAŠYMAS) : Įsijungią įrašymo metu. 7. (MAŽA STRĖLĖ) : Įsijungia kai paspaudžiate nuotoliniu valdimo pulto mygtuką. 8. (LAIKRODIS1) : Parodo, kad miego taimeris yra nustatytas. 9. (LAIKRODIS2) : Įsijungia, kai artėja taimeryje nustatytas laikas. 9 10. (KORTELĖ) : Parodo, kad atkodavimo kortelė įdėta. 11. (RAKTAS) : Parodo, kad programa yra užrakinta. 12. (USB) : Parodo, kad įdėtas USB raktas. 13. (DVB) : Įsijungia Gyvo režimo metu. 14. (HDD) : Parodo, kad priedėlis skaito duomenis iš išorinio USB rakto. 15. (AUDIO) : Parodo, kad esamas kanalas yra radijo kanalas. 16. (VIDEO) : Parodo, kad esamas kanalas yra televizijos kanalas. 17. (DOLBY) : Parodo, kad esamas kanalas palaiko skaitmeninį Dolby garsą. 18. (SKAIČIAI) : Parodo kanalo pavadinimą, laiką arba kita informacija su raidėmis. 2. POWER mygtukas: Paspauskite, jei norite persijungti tarp Budėjimo ir DARBO režimų. 3. CH Aukštyn/Žemyn mygtukas: Paspauskite, kad pakeisti kanalą. 10 2. Galinės panelės konfigūracijos 1. CABLE IN: Naudokite prijungti Kabelinės TV anteną. 2. CABLE OUT: Naudokite prijungti prie RF įvesties savo televizorių arba vaizdo grotuvą. 3. VIDEO : Naudokite prijungti prie vaizdo įvesties TV arba vaizdo grotuvą. 4. AUDIO L/R : Naudokite prijungti garsą prie TV arba vaizdo grotuvo. 5. SPDIF : Naudokite prisijungti S/PDIF prie skaitmeninės garso įrangos 6. VCR SCART: Naudokite prisijungti vaizdo grotuvą per SCART laidą. 7. TV SCART: Naudokite prisijungti TV per SCART laidą. 8. RF OUT : Naudokite prisijungti RF(ANT) įvesties lizdas TV. 9. RF IN : Naudokite prisijungti bendra oro anteną. 10. RS-232C : Naudokite prisijungti prie PC. 11. USB: Naudokite prisijungti išorinis USB raktą. 12. POWER: Maitinimo jungiklis 11 3. Nuotolinio valdymo pultas 1. ĮJUNGIMAS : Įjungti/Išjungtu priedėlį. 2. BE GARSO : Įjungti/Išjungtu garsą. 3. MODE a. UHF(UAD) : Norėdami nustatyti UHF(UAD) paslaugą. b. MIEGO REŽIMAS : Nustatyti miego taimerį. c. TV/SAT : Perjungia TV tarp kabelio įvedimo(Priedėlio režimas) ir UHF/VHF antenos įvedimo(TV režimas) d. TV/RADIJO : Perjungia tarp TV ir Radijo. 4. SKAIČIAI : Įvesti numerį arba perjungti kanalą. 5. EPG(Elektroninis Programų Gidas) : Parodo TV/Radijo programų gidą. 6. INFO : Parodo informaciją apie esamą programą. Jeigu paspausite dar karta, parodys papildomą informaciją. 12 7. MENIU : Įeiti i pagrindinį meniu arba perkelti į ankstesnį meniu. 8. IŠEITI : Išeiti iš meniu arba išplaukusio lango. 9. OK : Parodyti kanalų sąrašą ne meniu režime ir išrinkti paryškinta arba patvirtinti papildomą meniu. 10. RODYKLĖS : Pereiti prie pažymėto meniu. Ir perjungti kanalą(Aukš/Žem) arba garsą(Kair/Deš). 11. PUSLAPIS AUKŠTYN/ŽEMYN : Perkelti į sekanti arba ankstesnį puslapį, jeigu yra daugiau nei vienas puslapis. PAGE UP mygtukas tai pat naudojamas perkelti LAIKMAČIO MENIU(Žiūrėti 26 puslapį,1.2 Taimeris). Ir PAGE DOWN mygtukas taip pat naudojamas perkelti PAVEIKSLIUKO NUSTATYMO langą (Žiūrėti 28 puslapį, 1.6 G/V išvesties nustatymai). 12. GRĮŽTI : Perkelti į ankstesnį kanalą. 13. SAT : Parodo kanalą sąrašą. 14. FAV : Pakeisti favoritų grupes. 15. SPALVOTI MYGTUKAS : Naudoti specialioms funkcijoms. RAUDONAS mygtukas naudojamas pridėti arba pašalinti žymeklio esama padėtį. ŽALIAS mygtukas naudojamas pereiti prie kitos žymeklio pozicijos. MĖLYNAS mygtukas naudojamas įjungti multi-kanalų vaizdą. 13 16. GROJARAŠTIS : Parodo įrašytų kanalų sąrašą. 17. SUBTITRAI : Parodo įvairių kalbų subtitrus. 18. TELETEXT : To show the digital teletext. 19. PAUZĖ : Naudokite norėdami užšaldyti vaizdą. Paspauskite dar karta, kad pratęsti vaizdą. 20. ANKSTESNĖ BYLA : Norėdami atkurti ankstesnį MP3 bylą MP3 atkūrimo režime. 21. SEKANTI BYLA : Norėdami atkurti sekantį MP3 bylą MP3 atkūrimo režime. 22. ATGAL : Prasukti, kai padėties juosta yra rodomą. Pakeisti atvirkštinio atkūrimo greitį. 23. PIRMYN : Pradėti greitą persukimą arba greitą judėjimo atkūrimą. Keisti greičio atkūrimą. 24. ĮRAŠYMAS : Pradėti įrašą. 25. GROTI : Parodyti padėties juostą. Pradėti atkūrimą normaliu greičiu. Grįžti prie normalaus greičio. 26. STABDYTI : Sustabdyti laiko poslinkį, grojimą arba įrašymą. PASTABA : Kai įdėsite baterijas, įsitikinkite, kad poliariškumas (+/-) yra teisingas. 14 Jungties schema 1. Prijungimas prie antenos Prijunkite Kabelinės TV anteną prie CABLE IN jungties. 2. Prijungimas prie TV ir RF Prijunkite antenos kabelį prie priedėlio, žr. aukščiau, skyrius 1, 1. Prijungimas prie antenos. Prijunkite RF OUT išėjimą į RF IN įėjimą televizoriuje. Prijunkite VIDEO ir AUDIO L, R išėjimus į VIDEO IN ir AUDIO L, R IN įėjimus televizoriuje. Prijunkite TV SCART į SCART televizoriuje. 15 3. Prijungimas prie TV ir Vaizdo grotuvo Prijunkite antenos kabelį prie priedėlio, žr. aukščiau, skyrius 1, 1. Prijungimas prie antenos. Prijunkite RF OUT išėjimą į RF IN įėjimą vaizdo grotuve. Prijunkite RF OUT išėjimą Vaizdo grotuve į RF IN įėjimą televizoriuje. Prijunkite TV SCART į SCART televizoriuje. Prijunkite VCR SCART į SCART vaizdo grotuvas. Sujunkite kitus lizdus su atitinkamais lizdais televizoriuje, žr. aukščiau, skyrius 2. Prijungimas prie TV ir RF. 16 4. Prijungimas prie skaitmeninės garso įrangos Norint gauti geresnės kokybės garsą, Jūs galite prijungti skaitmeninį garsą per optinį kabelį. Jei turite skaitmeninio garso aparatūrą, prijunkite S/PDIF į skaitmeninio garso įėjimą jūsų aparatūroje. Sujunkite kitus lizdus su atitinkamais lizdais televizoriuje arba vaizdo grotuve, žr. aukščiau, skyrius: 1. Prijungimas prie antenos, 2. Prijungimas prie TV ir RF ir 3. Prijungimas prie TV ir Vaizdo grotuvo. 17 Funkcijų vadovas 1. Pasirinki kanalą Norėdami pasirinkti norimą kanalą, galite naudoti žemiau esančius metodus. 1.1 Naudojant Aukštyn/Žemyn mygtukus Jūs galite naršyti tarp kanalų, naudodami Aukštyn/Žemyn mygtukus. Kai paspaudžiate Aukštyn(Žemyn) mygtuką, esamas kanalas bus pakeistas į sekantį(ankstesnį) kanalą. Jūs turite spausti Aukštyn arba Žemyn mygtukus, kol rasite norimą kanalą. 1.2 Naudojant SKAIČIUS Jei žinote kanalo numerį, įveskite numerį naudojant SKAIČIUS. 1.3 Naudojant kanalų sąrašą Norėdami pasirinkti norimą kanalą, visų pirmą reikia išvesti kanalų sąrašą naudojant OK mygtuką. Naudokite Rodiklių mygtukus pasirinkite norimą kanalą ir paspauskite OK mygtuką. Kanalų sąrašo lange, Jūs galite naudoti papildomų funkcijų Spalvotus mygtukus. Paspausdami Raudoną mygtuką, Jūs galite rūšiuoti kanalus pagal Abėcėlę, Transponderį, Grupes ir CAS. Paspausdami Žalią mygtuką, Jūs galite pridėti kanalus į vieną iš 10 Favoritų. 2. Informacinis langas Jei norite peržiurti kanalo informacinį langą spauskite INFO mygtuką. Išvisite informacinį langą. Šis informacinis langas automatiškai rodomas, kai keičiamas kanalas. Šis langas susideda iš daugybės elementų, tokiu kaip kanalo numeris, kanalo pavadinimas, užkoduotas kanalas, teletekstas, subtitrai, Dolby Digital simbolio, trukmę ir t.t. Paspausdami INFO mygtuką dar karta, gausite išsamesnę informaciją. 3. Multi-kanalų vaizdas. Spauskite Mėlyną mygtuką norėdami pamatyti multi-kanalų vaizdą ir Raudoną mygtuką, kad pamatyti 9 arba 12 kanalų vaizdą. 18 4. Elektroninis Programų Gidas (EPG) Elektroninis Programų Gidas (EPG) padės jums susiorientuoti tarp visų galimų peržiūros funkcijų. EPG teikia informaciją apie programų pradžios ir pabaigos laiką, programų pavadinimus, išsamią informaciją apie programų sąrašą visuose prieinamuose kanaluose. Prieinamumas ir šių programų kiekis gali labai skirtis, priklausomai nuo konkretaus transliuotojo. Jei paspausite EPG mygtuką, bus rodomas EPG meniu. Spauskite RODYKLIŲ mygtukus, kad pereiti į kitą kanalą arba žiūrėti ankstesnį/sekanti gidą. Spauskite EPG mygtuką dar kartą, kad pamatyti pilną EPG(Elektroninį Programų Gidą) ir paspauskite mygtuką du kartus, kad pamatyti tik išrinktą EPF. Spauskite mygtuką nuosekliai, kad naršyti pirmyn ior atgal. Paspauskite ŽALIĄ mygtuką norėdami peržiūrėti kitos dienos EPG ir RAUDONĄ mygtuką norėdami peržiūrėti ankstesnes dienos EPG. Pasirinkite programą naudodamiesi RODYKLIŲ mygtukus, nustatykite taimerį, paspauskite OK. Jūs galite rezervuoti įrašymą iš EPG meniu. - Paspauskite ĮRAŠYMO mygtuką norėdami rezervuoti programą. Ši rezervacija gali būt patikrinta iš TAIMERIO VALDYMO meniu. - Norėdami atšaukti rezervaciją spauskite ĮRAŠYMO mygtuką ant pasirinktos programos. 5. Favoritų grupė Pasirinkite FAV (favoritų) mygtuką, norėdami pamatyti visus favorite grupes. Pereikite tarp įvairių favorite grupių naudodami Rodyklių mygtukus ir pasirinkite norima eilutę spausdami OK. 6. Garso kontrolė Kol žiūrite kanalą, galite valdyti garso stiprumą naudodami KAIRĘ/DEŠINĘ mygtuką. Garso valdymo juosta bus pavaizduota ant ekrano. Jei reikia, spauskite BE GARSO mygtuką norėdami įjungti/išjungti garsą. 7. PAUZĖ PAUSZĖS mygtukas naudojamas užšaldyti vaizdą. Spauskite PAUZĖS mygtuką dar kartą norėdami tęsti vaizdą. 8. Subtitrai Norėdami peržiūrėti Subtitrus spauskite SUBTITRAI mygtuką. Subtitrai remiasi perduodamomis duomenimis. 9. Garso takelis Jūs galite pasirinkti garso kalbą sąraše spausdami GARSO mygtuką. Naudokite Rodyklių mygtukus, kad pasirinkti iš sąrašo garso takelio kalbą ir paspauskite OK mygtuką. 19 Laiko poslinkis, įrašymas ir atkūrimas 1. Įrašymas 1.1 Įrašymo metodai Įrašymo metodai yra dvejų rūšių. (Laiko rezervavimo įrašymas / Programos rezervavimo įrašymas). Laiko rezervavimo įrašymas : - Taimeryje Jūs galite nustatyti savo laiką/programą. (Pagrindinis Meniu > Sistemos nustatymai > Taimerio valdymas) - Paspauskite ŽALIA mygtuką, kad aktyvuoti naujus laikmačio nustatymus. - Laikmačio redagavimo režime jūs galite pasirinkti pradžios laiką, pabaigos datą/laiką, būdą, rūšį(Įrašas/Paleisti). Galite paspausti Taip, kad rezervuoti Jūsų įrašymo grafiką. Be to, turite nustatyti pradžios ir pabaigos laiką(mažiausiai į minutės), pradžios laikas turi būti esamas laikas. Programos rezervavimo įrašymas : EPG meniu pasirinkite programą, kurį norite rezervuoti arba įrašyti. - Per Gyva TV paspauskite EPG mygtuką, kad patekti į EPG menių. - Pasirinkite programą, kurį norite peržiūrėti ir paspauskite OK. Programą bus rezervuota su MĖLYNA grojimo piktograma. Ši MĖLYNA grojimo piktograma reiškia, kad Jūs norite peržiūrėti šią programą esamu laiku. MĖLYNA grojimo piktograma 20 - Paspauskite OK mygtuką dar kartą, programą bus rezervuota su RAUDONU tašku piktograma. Ši RAUDONO taško piktograma reiškia, kad Jūs norite įrašyti programą esamų laikų. RAUDONAS taškas - Kai Jūs nustatote programą įrašymui iš EPG, ji automatiškai įrašoma į Taimerį į Pagrindini Meniu > Sistemos nustatymai > Taimerio valdymas. 1.2 Momentinis įrašymas Bet kurį laiką, Jūs galite paspausti ĮRAŠYMO mygtuką, kad pradėti įrašymą akimirksniu. 1.3 Įrašymo redagavimas Įrašymo metu, Jūs galite paspausti ĮRAŠYMO mygtuką, kad redaguoti įrašymo laiką. Pagal gamintoją yra nustatyta 2 valandų trukmė, kurį galima padidinti arba sumažinti pagal Jūsų nuožiūrą. 1.4 Ilgo laiko įrašymas Ilgo įrašymo metu 4GB arba daugiau, papildomos bylos gali būti sukurti kas 4GB. (PVZ; aaa.ts, aaa.ts1, aaa.ts2… ir t.t.) Jūs turite atsiminti, kad negalima trinti bet kurių nukopijuotų bylų. Šios bylos yra matomos tik Kompiuteryje, bet ne priedėlyje. 21 1.5 Pauzė įrašymo metu Paspauskite PAUZĖS mygtuką, kad užšaldyti transliacijos TV, bet įrašymas į Jūsų HDD vyks toliau. gyvos Paspauskite PAUZĖS mygtuką dar kartą ir programą bus atnaujinta. Įrašymo metu paspauskite GROJIMO mygtuką, kad rodytu Grojimo juosta. Grojimo juostos metu, Jūs galite spausti KAIRĖ/DEŠINĖ mygtuką, kad judėti Grojimo juostoje įrašymo metu. Jei paspausite STABDYTI mygtuką įrašymas bus sustabdytas ir Jūs galėsite paspausti ANKS. BYLOS mygtuką, kad peržiūrėti įrašyta byla iš pradžių. 22 2. Laiko poslinkis Paspauskite PAUZĖS mygtuką, kad užšaldyti Gyvą transliaciją, bet įrašymas į Jūsų laikmeną vyks toliau. Paspauskite PAUZĖS mygtuką dar kartą ir programą bus atnaujinta. Gyvos transliacijos metu paspauskite GROJIMO mygtuką, kad pamatyti grojimo juostą. Grojimo juostos metu, Jūs galite naudoti dešinės/kairės RODYKLĖS mygtukus, kad judėti įrašytame laike. Jei paspausite STABDYTI mygtuką Laiko poslinkio metu, vaizdas bus gražintas į Gyvą transliaciją. Jūs galite paspausti ANKS. BYLOS(|<) mygtuką, kad pereiti į įrašo pradžią. 23 3. Atkūrimas Paspauskite GROJARAŠČIO mygtuką, norėdami įjungti GROJARAŠTĮ. Grojaraštyje Jūs galite pasirinkti bet kurią iš anksto įrašytą programą ir atkurti ją spausdami OK mygtuką. Grojaraštyje Jūs, galite paspausti RAUDONĄ mygtuką, kad pasirinkti programą, kurią norite peržiūrėti. Grojaraštyje paspauskite MĖLYNAS mygtuką, kad ištrinti arba pervadinti jau įrašytą programą. Galite paspausti PAUZĖS mygtuką bet kurio metu, kad užšaldyti įrašytą programą. Paspauskite PAUZĖS mygtuką dar karta, kad atnaujinti grojimą. 4. Žymė Grojimo juostos metu galite perkelti į norimą laiką ir pažymėti žymę spausdami RAUDONĄ mygtuką. Žymė(ės) nurodyti žaliąja juosta grojimo juostoje. Be to, Jūs galėte paspausti RAUDONĄ mygtuką, kad įjungti grojimo juostą, kad pažymėti žymę(es). 24 Grojimo juostoje, spausdami ŽALIĄ mygtuką, galėte bet kuri pažymėta žymė perkelta iš žymes į žymę. Kiekvieną Žymę galėte ištrinti spausdami RAUDONĄ mygtuką. 5. Peržiūrėjimo būdai Peržiūros metu, vieną kartą paspauskite PIRMYN mygtuką, kad 2 kartus pagreitinti grojimą ir du kartus, kad 3 pagreitinti grojimą. Peržiūros metu paspauskite ATGAL mygtuką, kad 2 kartus pagreitinti grojimą. 25 Pagrindinio meniu vadovas Norėdami pamatyti meniu, paspauskite MENIU mygtuką bet kurio metu. Jūs galite pasirinki Sub meniu naudodami RODYKLIŲ mygtukus. Pasirinktas sub meniu tampa paryškintas. Jei pasirinkote norima sub menių paspauskite OK mygtuką. Jei norite grįžti į ankstesnį menių, spauskite MENIU mygtuką. O jei norite išeiti iš meniu spauskite IŠEITI mygtuką. 1. Sistemos nustatymai 1.1 Laiko Nustatymai Laiko Nustatymai : Norėdami nustatyti laiką, galite naudotis dviem būdais: Automatinių ir Rankinių. Automatinis laiko nustatymas - Vietinis poslinkis : Įveskite vietinį poslinkį pagal jūsų gyvenama regioną. - Žiemos/Vasaros laikas : Jeigu norite nustatyti automatinį Žiemos/Vasaros laiką, pasirinki savo šalį naudodami RODYKLIŲ mygtukus. Rankinis laiko nustatymas - Date : Įveskite šiandienos data naudodami RODYKLIŲ mygtukus, po to paspauskite OK. - Laikas : Įveskite laiką naudodami SKAIČIUS. Laiko režimas : Pasirinkite laikrodžio tipą (12 valandų arba 24 valandų) naudodami RODYKLIŲ mygtukus. Pažadinimo režimas : Įveskite laiką, kada priedėlis turi automatiškai įjungti. Jūs galite pasirinkti vieną iš Pažadinimo režimų: Išjungti/Vienąkart/Kasdien/Savaitinis - Pažadinimo data : Pasirinkite data, kada priedėlį reikia įjungti. Paspauskite OK mygtuką norėdami peržiūrėti kalendorių. - Pažadinimo dienos : Pasirinkite savaitės dieną, kada priedėlį reikia įjungti. - Pažadinimo laikas : Įveskite įjungimo laiką naudojant SKAIČIUS. - Pažadinimo kanalas : Pasirinkite priedėlio įjungimo kanalą. Paspauskite OK mygtuką, kad peržiūrėti kanalų sąrašą. Miegojimo režimas : Įveskite laiką, kada priedėlis turi automatiškai išsijungti. Jūs galite pasirinkti vieną iš Miegojimo režimų: Išjungti/Vienąkart/Kasdien/Savaitinis - Miegojimo data : Pasirinkite data, kada priedėlį reikia išjungti. Paspauskite OK mygtuką norėdami peržiūrėti kalendorių. - Miegojimo dienos: Pasirinkite savaitės dieną, kada priedėlį reikia išjungti. - Miegojimo laikas: Įveskite išjungimo laiką naudojant SKAIČIUS. 1.2 Taimerio valdymas Įvesti naują taimerį arba redaguoti esamus taimerius. Norėdami pridėti naują taimerį : Paspauskite ŽALIĄ mygtuką. Kad pamatyti taimerio redagavimo langą. Galite nustatyti pradžios datą, laiką, trukmę ir rezervavimo kanalą. Taip pat galite vieną iš Taimerio režimų Vienąkart/Kasdien/Savaitinis. Galite pasirinkti operacijos tipą: 'Įrašas' arba 'Paleisti' - Nustatyti ‘Įrašas' : Pradės įrašinėti nustatyta laiką. - Nustatyti ‘Paleisti' : Pakeis kanalą kurį Jūs žiūrite. 26 Norėdami redaguoti esamą taimerį : Pasirinkite vieną taimerį, kuri Jūs norite redaguoti ir paspauskite OK mygtuką. Norėdami pašalinti esamą taimerį : Pasirinkite vieną taimerį, kuri Jūs norite pašalinti ir paspauskite RAUDONĄ mygtuką. PASTABA : Jei rezervuosite vieną ir daugiau programų per EPG menių, rezervuotą(os) programą(os) automatiškai bus įtraukti į Taimerio valdymą menių. 1.3 Meniu nustatymai Info dėžutės padėtis : Nustatyti informacinio lango padėtį. Info dėžutės rodimo laikas : Nustatyti informacinio lango rodymo trukmė po kanalo pakeitimo. Garso juostos rodymo laikas : Nustatyti garso juostos rodymo trukmė po garso pakeitimo. EPG Laiko diapazonas : Galite nustatyti laikos intervalą, kuris bus rodomas EPG lange. Zapping režimas : Galite nustatyti Zapping režimą. Juodas ekranas reškia, kad bus kanalo perjungimo metu bus rodomas juodas ekranas. „Užšalti“ reiškia, kad bus rodomas paskutinis kadras kanalo perjungimo metu. 1.4 Apsauga nuo vaikų Kanalas arba programą yra kontroliuojama pagal 4 skaitmenų slaptą kodą, nustatyta vartotojo. Jei Jūs bandote prisijungti prie apsaugos nuo vaikų menių, iššoks langas, kuriame Jums reikės įvesti PIN kodą.(Jei reikia, galite pakeisti.) PASTABA : Gamyklinis PIN kodas yra ‘0000’ Cenzūra : Nustatyti tėvų rodoma amžių pagal cenzūros klasifikaciją. Tėvų lygis skiriamas amžiumi pagrėstais numeriais. Keisti PIN kodą : Kad pakeisti PIN kodą, įveskite naują PIN kodą naudojant SKAIČIUS. Kad patvirtinti naują PIN kodą, įveskite jį dar kartą. Sistema : Nustatyti sistemos prieinamumą. Instaliacija : Nustatyti Instaliacijos meniu prieinamumą. Sistemos nustatymai : Nustatyti Sistemos nustatymo meniu prieinamumą. Kanalų redagavimas : Nustatyti Kanalų redagavimo prieinamumą. 27 1.5 Kalbos nustatymai Meniu kalba : Pasirikite norimą kalbą naudojant RODYKLIŲ mygtukus. PASTABA : Kalbų sąrašas gali būti keičiamas priklausomai nuo šalies. Kalbos gali būti keičiamos be išankstinio įspėjimo. Audio kalba : Pasirinkite pagrindinį garso kalbą visiems kanalams. Jei kalba nepalaikoma, tada bus nustatyta pagrindinė kanalo kalba. Subtitrų kalba : Pasirinkite subtitrų pagrindinį kalbą. 1.6 A/V Išvesties nustatymai TV tipas : Pasirinkite TV tipą (PAL/NTSC/Automatinis). Automatinime režime priedėlis automatiškai nustato NTSC arba PAL priklausomai nuo transliuojamo kanalo. TV Aspect Ratio : Pasirinkite Jūsų televizoriaus formatą. (4:3/16:9) Monitoriaus formatas: Pasirinkite formatą, kurio vaizdas bus rodomas ekrane. (Letter Box/Pan Scan) Jei nustatytas 16:9 režimas, ši funkcija nepasiekiama. Video išvesties režimas: Jei naudojate SCART laidą, Jūs galite pasirinkti vaizdo išvesties režimą. (CVBS arba RGB) Garso režimas : Pasirinkite garso režimą, kuris išeina per RCA laidą.(Stereo/Mono/Kairė/Dešinė) RF tipas : Pasirinkite RF tipą. (PAL G/I/K) RF Kanalas : Pasirinkite RF kanalą. (21~69) Picture Adjust : Nustatykite ryškumą, kontrastą ir ekrano spalvą. 2. Instaliacija 2.1 Paieška per kabelį Paieškos režimas: Pasirinkite sekanti paieškos režimą. Automatini - Paieškos tipas : Pasirinkite paieškos tipą.(Visi kanalai/Tik nemokami kanalai/Tik televizija). - Pradėti paiešką : Paspauskite OK mygtuką, kad pradėti paiešką. Rankinis - Dažnis : Pasirinkite dažnį, kurį Jūs norite ieškoti. Arba įveskite dažnį spausdami SKAIČIUS. - Simbolių perdavimo sparta : Įveskite simbolių perdavimo spartą spausdami SKAIČIUS. - QAM Režimas : Pasirinkite konsteliaciją naudojant RODYKLIŲ mygtukus. (AUTO/ QAM 16 / 32 / 64 / 128 / 256) - Paieškos tipas : Pasirinkite paieškos tipą.( Visi kanalai/Tik nemokami kanalai/Tik televizija) - Pradėti paiešką : Paspauskite OK mygtuką, kad pradėti paiešką. 28 2.2 Sistemos perkrovimas Atstatyti į gamyklinę būklę : Šis meniu Jums padės atstatyti priedėlį į gamyklinius nustatymus. Paspauskite OK mygtuką, kad ištrinti visus kanalus ir atstatyti gamyklinius nustatymus. Atstatyti į išsaugotą būklę : Šis meniu Jums padės atstatyti priedėlį į išsaugota būklę. Paspauskite OK mygtuką, kad atstatyti visus duomenis. Saugoti esama būklę : Jei norite naudoti šios parametrus ateityje, šis meniu padės jums išsaugoti esama būklę. Paspauskite OK mygtuką, kad išsaugoti esama būklę. 2.3 Sistemos informacija Galite pamatyti bendrą informaciją apie įrangos ir programinės įrangos versiją, kuri naudoja Jūsų priedėlis. 3. Pagalbiniai 3.1 USB Konfigūracija: Priedėlis turi du USB portus. Vienas ant priekinio skydelio ir kitas ant galinio. Naudojant šį funkciją, galite įjungti arba išjungti juos. - Priekis : Aktyvuoti priekinį USB, galinis USB bus nepasiekiama. - Galas : Aktyvuoti galinį USB, priekinis USB bus nepasiekiamas. - Automatinis suradimas : Aktyvuoti USB portą, prie kurio yra prijungta USB atmintinė MP3 grotuvas : Įdekite USB atmintinė i priedėlį. Kai įdėta paspauskite OK mygtuką, kad skaityti USB atmintinė ir pasirinkite lange MP3 failą, kurį norite klausytis. Image Viewer : Galite rodyti vaizdus ant ekrano, kurie yra įrašyti USB. Pasirinkite vaizdo failą(JPEG formatas) paspauskite OK mygtuką, kad peržiūrėti vaizdą. 29 ir Formatas : Prieš naudojant USB atmintinė, mes rekomenduojame jį formatuoti naudojant USB meniu. PASTABA : Jei atliksite formatą, visi duomenis bus ištrinti. 3.2 Duomenų perkėlimas Visų sistemos duomenų perkėlimas į USB saugyklą : Jei norite naudoti sistemos parametrus ir kanalų duomenis ateityje, šis meniu išsaugos visus duomenis. Paspauskite OK mygtuką, kad išsaugoti esamus duomenis į USB atmintinę. Programos duomenų perkėlimas į USB saugyklą : Jei norite naudoti kanalų duomenis ateityje, šis meniu išsaugos esamus duomenis. Paspauskite OK mygtuką, kad išsaugoti esamus kanalų duomenis į USB atmintinę. Duomenų perkėlimas iš USB saugyklos : Šis meniu padės atstatyti priedėlio duomenis iš USB atmintinės. Paspauskite OK mygtuką, kad pradėti atstatymo procesą. 3.3 Įrašymo parinktys Įrašo sustabdymo pranešimas : - Įjungti : Kai spaudžiate STABDYTI mygtuką įrašo metu, rodomas patvirtinimo langas. - Išjungti : Kai spaudžiate STABDYTI mygtuką įrašo metu, Priedėlis sustabdys įrašymą iš karto be jokių pranešimų. Laikinas įrašas(USB) : Galite nustatyti laiką 30 Min / 60 Min / 90 Min / 120 Min. Šiuo atveju, laiko poslinkio funkcija veikia automatiškai iki Jūsų nustatyto laiko, jei USB atmintinėje užtenka vietos. Jei nustatyta Išjungta ši funkcija neveiks. 3.4 Kalendorius Norėdami peržiūrėti kalendorių, paspauskite mygtuką OK. Naudojant RODYKLIŲ mygtukus pasirinkite datą, AUKŠTYN/ŽEMYN mygtukai pakeis praėjusi/sekanti mėnesį. 30 3.5 Kalkuliatorius Norėdami naudoti kalkuliatorių paspauskite OK mygtuką. Galite naudoti Rodyklių mygtukus, Skaičių ir OK mygtuką. 3.6 Žaidimai Galite mėgautis žaidimais. (SUDOKU, CAKEPIA, TETRIS) Jei norite žaisti žaidimą, pasirinkite jį ir paspauskite OK mygtuką. 4. CA 4.1 Conax kortelės meniu Norėdami peržiūrėti koduotus kanalus, Jums reikia turėti tinkama Conax kortelę iš paslaugų teikėjo. - Įdėkite kortelę į kortelės lizdą. - Pranešimas ‘Kortelės inicializacija...’ bus rodomas ekrane. - Kai pranešimas dings, galėsite žiūrėti norimus kanalus. 4.2 Kortelės informacija Galite peržiūrėti esamą kortelės statusą. - Pasirinkite lizdą, kuri norite peržiūrėti ir paspauskite OK mygtuką. 31 5. Kanalų sąrašas 5.1 Redaguoti nustatymų vadovą Paspauskite OK mygtuką, kad įeiti į Redagavimo režimą. Galite pasirinkti Redagavimo režimą spausdami GELTONĄ mygtuką. Kanalų užrakinimas : Visas kanalų sąrašas bus rodomas kairiame lange, užrakinti kanalai bus rodomi dešiniame lange. Spausdami RODYKLIŲ ir OK mygtukus galite perkelti kanalus į dešinį langą, kad užrakinti kanalą. Perkelti kanalus : Visas kanalų sąrašas bus rodomas kairiame lange, perkelti kanalai bus rodomi dešiniame lange. Perkelkite Kanalus į dešinį langą spausdami RODYKLIŲ ir OK mygtukus, tada kanalai dešiniame lange bus perkelti į tą vietą, kurią pasirinksite kairiame lange spausdami ŽALIĄ mygtuką. Ištrinti kanalus : Visas kanalų sąrašas bus rodomas kairiame lange. Spausdami RODYKLIŲ ir OK mygtukus galite pasirinkti kanalą, kuri norite ištrinti. Paspauskite ŽALIĄ mygtuką, kad ištrinti kanalą. Praleisti kanalus : Visas kanalų sąrašas bus rodomas kairiame lange, kanalai, kuriuos reikia praleisti bus rodomi dešiniame lange. Spausdami RODYKLIŲ ir OK mygtukus galite perkelti kanalus į dešinį langą, kad praleisti kanalą. 32 Mėgstamiausių nustatymas : Spauskite FAV mygtuką, kad pasirinkti favoritų grupę. Grupė yra pasirinkama tik kartą. Visas kanalų sąrašas bus rodomas kairiame lange, pasirinkta favoritų grupė bus rodoma dešiniame lange. Spausdami RODYKLIŲ ir OK mygtukus į favoritų grupę galite pridėti arba ištrinti bet kurį kanalą. Paslaugų redagavimas : Visas kanalų sąrašas bus rodomas kairiame lange. Pasirinkite kanalą, kuri norite pervadinti ir paspauskite OK mygtuką. Tuomet pamatysite virtualią klaviatūrą. . Spausdami RODYKLIŲ ir OK mygtukus galite pervadinti kanalą. 5.2 Kanalų sąrašo parinktys Kanalų sąrašo peržiūra : - Įjungti Jei Jūs pasirinksite kanalą naudojant RODYKLIŲ mygtukus ir paspausite OK kanalų sąraše, bus pasirinktas kanalas, kurį norite. Tačiau Kanalų sąrašas išliks. Norėdami pašalinti Kanalų sąrašą, paspauskite OK mygtuką dar kartą. - Išjungti Jei Jūs pasirinksite kanalą ir paspausite OK Kanalų Sąraše, bus pasirinktas kanalas. Ir Kanalų sąrašas dings tuo pačiu metu. Užrakinti mėgstamą pranešimą : - Įjungti Kai spausite RAUDONĄ arba ŽALIĄ mygtuką Kanalų sąraše, iššokantis langas atidaromas su skaidrių atidarymo efektu. - Išjungti Kanalų sąraše, iššokantis langas atidaromas be efektų. Užrakinti mėgstamą pranešimą : - Įjungti Spausdami ŽALIĄ mygtuką, kad atidaryti Favoritų meniu, turite įvesti PIN kodą. - Išjungti PIN kodas nereikalingas. Žiūrėti tik filtruotą sąrašą : - Įjungti Jei Jūs rūšiuosite kanalus pagal bet kurią kategoriją(A~Z, Transponderis, Grupę arba CAS) Kanalų sąraše, bus rodomi tik filtruoti kanalai. - Išjungti Visi kanalai bus rodomi Kanalų sąraše. Ir filtruoti kanalai bus pasimeti geltoną spalvą. 33 Trikčiai Problema Sprendimas Nėra jokių simbolių ant priekinio skydelio. Patikrinkite pagrindinio maitinimo kabelį ar jis yra prijungtas prie tinkamo elektros lizdo. Patikrinkite, jūs įjungėte priedėlio maitinimo jungiklį, ties ON žodžio, ant galinės panelės. Nėra vaizdo Žr. „Nėra jokių simbolių ant priekinio skydelio.“ viršuje. Patikrinkite, ar vaizdo išvestis yra prie TV arba Vaizdo grotuvo. Jei naudojate RF išėjimą, patikrinkite, ar RF jungtis yra prijungta prie Priedėlio ir TV/Vaizdo grotuvo. Įsitikinkite, kad Jūs pasirinkote teisinga kanalą, arba vaizdo išvestį Jūs televizoriuje. Jei naudojate RF išvesti, patikrinkite, kad Jūs įjungėte teisingą kanalą Jūsų priedėlyje arba televizoriuje. Patikrinkite šviesos lygį televizoriuje Prasta vaizdo kokybė Žr. „Nėra vaizdo“ viršuje. Patikrinkite signalo lygį, jei jis žemas susisiekite su Jūsų operatoriumi. Nėra garso Nuotolinio valdymo pultas neveikia Nėra Signalo / Blogas Signalas Žr. „Nėra vaizdo“ viršuje. Patikrinkite garso lygį Jūsų priedėlyje, televizoriuje. Patikrinkite BE GARSO mygtuką Jūsų priedėlyje, televizoriuje. Patikrinkite ir pakeiskite elementus. Patikrinkite ryšį Kabelinės TV eilutėje. Patikrinkite signalo lygį ir kokybę Kabelinės paieškos meniu. 34 Specifikacijos Tuner & Channel Decoder Input Connector Loop through out Frequency Range Demodulation IF Bandwidth Modulation Format Symbol Rate F-type, IEC 169-2, Female F-type, IEC 169-2, Male 50.5 ~ 858.0 MHz QAM 8 MHz 16, 32, 64, 128, 256 QAM 1.0 Msps ~ 7.0 Msps MPEG Transport Stream A/V Decoding Transport Stream Profile Level Input Rate Video Formats Video Resolution Audio Decoding Audio Mode Sampling Rate MPEG-II ISO/IEC 13818 MPEG-II MP@ML Max. 15Mbit/s 4:3 LetterBox, 4:3 PanScan, 16:9 720 x 576, 720 x 480 MPEG/MusiCam Layer Ⅰ&Ⅱ Stereo/Joint stereo/Mono 32KHz, 44.1KHz and 48KHz Main System Main Processor Memory Conexant Virgo Flash-ROM : 2 MBytes SDRAM : 32 MBytes Audio / Video & Data IN/OUT TV SCART VCR SCART RCA S/PDIF RS-232C USB RGB, CVBS Video, Audio L, R Output CVBS Video, Audio L, R Output RGB, CVBS, Audio L, R Input CVBS Video Output, Audio L, R Output Digital Audio Output (Fiber-Optic) 9 pin D-SUB (Male) type, Transfer rate 115Kbps Dual USB 2.0 Host Support (Front & Rear) (5 Vdc 500 Ma max) 35 RF Modulator RF Connector Frequency Output Channel TV Standard Preset Channel 75Ω, IEC 169-2, Male/Female 470 ~ 860MHz CH 21 ~ 69 for the Remodulator PAL G/I/K Selectable by Menu CH 36 (or TBD) Software changeable by Menu Front Panel Slot Buttons Display 1 Smart Card Slot 1 USB Host Slot 3 Buttons (CH UP/DOWN, STANDBY) VFD (Vacuum Fluorescent Display) Power Supply Input Voltage Type Power Consumption Standby Power Protection AC 100 ~ 250V, 50/60Hz SMPS Max. 25W Max. 8W Separate Internal Fuse & Lighting protection Physical Specification Size (W x H x D) Weight (Net) Operating Temp. Storage Temp. 260mm X 55mm X 210mm 1.2Kg 0°C ~ +45°C -10°C ~ +70°C 36 Digital Cable Receiver CR9000PVR meanta™ e-Store Buy/Use/Be digital www.meanta.eu UAB „Ektra“ Taikos pr. 101, Klaipėda, LT-94198, Lietuva V.09091