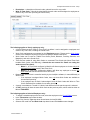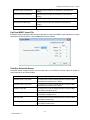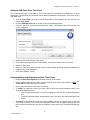
1
timeQplus User Guide Publication: Date of Publication: Revision: 06-0414-000 Sept. 12, 2013 C Contacting Acroprint When contacting customer support, please have your product CD and registration information available. Mailing Address: Acroprint Time Recorder Company, Inc timeQplus Support 5640 Departure Drive Raleigh, North Carolina 27616 Phone: Toll Free: (800) 334-7190 Web/Internet: Email: [email protected] Website: http://www.acroprint.com ii 06-0414-000 Rev. C Table of Contents Welcome .......................................................................................................................... 1 Getting Started ................................................................................................................ 2 Before Getting Started................................................................................................................ 3 timeQplus Setup Wizard............................................................................................................. 4 timeQplus Administrator Functions.............................................................................. 5 timeQplus Navigation Bar .......................................................................................................... 6 Employees ................................................................................................................................... 7 Managing Employees................................................................................................................. 7 Employee Options ...................................................................................................................... 9 Employee Finger/Face/Hand Enrollment ................................................................................... 9 Removing Employee Finger/Face/Hand Templates ................................................................ 10 Messages ................................................................................................................................... 11 Setup .......................................................................................................................................... 12 General..................................................................................................................................... 12 Holidays.................................................................................................................................... 14 Work Codes.............................................................................................................................. 14 Shifts .......................................................................................................................................... 16 Shift Settings ............................................................................................................................ 16 Lunch Rules ............................................................................................................................. 20 Overtime ................................................................................................................................... 22 7th Day Overtime ..................................................................................................................... 23 Holidays.................................................................................................................................... 23 Salaried Shift Settings .............................................................................................................. 24 Punch Editing ............................................................................................................................ 25 Managing Transactions ............................................................................................................ 26 Editing Total Time Accumulations............................................................................................ 27 Printing Time Cards.................................................................................................................. 28 Reports....................................................................................................................................... 29 Generating a Report................................................................................................................. 29 Future Transactions Report...................................................................................................... 30 Export ......................................................................................................................................... 31 Exporting Time and Attendance Data ...................................................................................... 31 Unapproved Timecards ............................................................................................................ 32 Advanced Payroll Integration ...................................................................................................32 File Payroll Export Formats ...................................................................................................... 32 Custom Export File Builder....................................................................................................... 33 QuickBooks® Payroll Integration ............................................................................................. 37 Peachtree Complete Accounting.............................................................................................. 39 WellsFargo, Premier, QwikPay and Intuit PC Access Import File............................................ 41 iii 06-0414-000 Rev. C ADP Version 7.0....................................................................................................................... 41 Generic V2.0 ............................................................................................................................ 42 Generic ASCII file Export ......................................................................................................... 43 Genesys & Oryel Payroll Export............................................................................................... 43 PayChex Paylink Export........................................................................................................... 45 PayChex Preview Export.......................................................................................................... 45 PayChex IM0007 Import File.................................................................................................... 46 PrimePay PrimeLink Export ..................................................................................................... 46 Heartland Plus One Fixed Length File ..................................................................................... 47 Supervisors................................................................................................................................ 48 Managing Administrators and Supervisors .............................................................................. 48 Supervisor Preferences............................................................................................................ 50 Time Clock ................................................................................................................................. 51 Adding an Ethernet Connected Time Clock ............................................................................. 52 Adding a Serial Connected Time Clock ................................................................................... 55 Adding a USB Flash Drive Time Clock .................................................................................... 57 Assigning/Removing Employees to/from Time Clocks ............................................................ 57 Loading Employee Data onto a USB Time Clock .................................................................... 58 Uploading Punch Data from the USB flash drive to the timeQplus server............................... 59 Poll and Update........................................................................................................................ 60 Changing Time Clock Connection Types................................................................................. 61 Copying Multiple Finger Templates from One Time Clock to Another..................................... 63 Hand Punch ............................................................................................................................... 64 System Utilities.......................................................................................................................... 65 Date Tools ................................................................................................................................ 65 timeQplus Settings ................................................................................................................... 67 timeQplus Supervisor Functions ................................................................................ 68 timeQplus Navigation Bar ........................................................................................................ 69 Employees ................................................................................................................................. 70 Work Codes.............................................................................................................................. 71 Messages ................................................................................................................................... 74 Punch Editing ............................................................................................................................ 75 Reports....................................................................................................................................... 75 Time Clock ................................................................................................................................. 76 Virtual Clock .................................................................................................................. 77 Login to Virtual Clock ............................................................................................................... 78 Submit Employee Time Slip ..................................................................................................... 79 IN/OUT Board............................................................................................................................. 80 Glossary......................................................................................................................... 81 iv 06-0414-000 Rev. C Welcome The timeQplus system allows a company's time & attendance to be managed from a single Windowsbased PC. Key Time and Attendance Features: • Easily review employees’ time totals past and present • Edit Time Sheets • Save and print reports • Export data to various file formats and payroll programs • Create Work Codes and assign to employees • Report on Archived Pay Periods • Submit Single Punch or Multiple Punches (TimeSlips) • Submit Future Transactions using TimeSlips Feature 1 06-0414-000 Rev. C Getting Started This chapter provides information on how to get started with timeQplus. It contains the following sections: ¾ Before Getting Started ¾ timeQplus Setup Wizard 2 06-0414-000 Rev. C Getting Started Before Getting Started Before using timeQplus for the first time, you may find it helpful to have your company’s pay period and time and attendance policies handy. Here is a list of configuration settings you will review and modify as needed: 1. Adjust the following items located in the Setup section as desired: • Current Pay Period Start Date • Pay Period Length • Pay Period Start Date • Holiday pay policies • Time card approval policies • Date Format • Time Totals Format 2. For each shift used, adjust the following items located in the Shifts and Lunches section as desired: • Set up shift rules • Maximum Time on the Clock • Pay Interval Rounding • Day Change Offset • Overtime Thresholds • 7th Day Overtime • Set up lunch rules 3. Add Employees to the timeQplus System. 4. Add Supervisors to the timeQplus System and then assign employees to those Supervisors. After completing the Setup Wizard, we recommend launching the timeQplus software and generating a Rules Setup Report (click Reports on the navigation bar, then select Rules Setup). Preview or print this report to verify the application has been configured correctly to reflect your company’s time and attendance policies. After checking this report for accuracy and (if necessary) making any desired changes, you may begin adding employees. Notes: • Most settings can be changed at any time and will affect only the total time accumulations in the Previous and Current Pay Period. • Changes to the next pay period start date will lengthen or shorten the duration of the current pay period, but not affect the Previous Pay Period. 3 06-0414-000 Rev. C Getting Started timeQplus Setup Wizard The first time you launch timeQplus, the system will open the timeQplus Setup Wizard. This wizard will walk you through a setup procedure to establish the initial settings for your timeQplus system. The application is configured with default settings, however, if you choose, you can simply click through the initial pay period setup, add employees and start clocking IN and OUT. However, we strongly suggest updating these default settings as needed to conform to your company’s policies. If you are upgrading from a previous version of either Attendance Rx Version 2 or timeQplus Version 3 you must still go through the Setup wizard, but simply press the Enter key for each input. Your existing settings will later be automatically imported from your existing database. For new installations, before you proceed through the Setup Wizard, you may find it helpful to review the Before Getting Started section. At any time during the Setup Wizard, you can use the Back button to review or change previous settings. When you have entered all your company’s information, click the Finish button to complete the process and start timeQplus. Note: Each of these settings can be changed at any time during normal operation using the Setup and Shifts screens on the timeQplus Navigation Bar. If you cancel the wizard before completing the setup, timeQplus will automatically run the Setup Wizard again the next time the software is started. 4 06-0414-000 Rev. C timeQplus Administrator Functions timeQplus has two level of system access: 1. Administrator – has total access to all system functions and data. 2. Supervisor – has limited access with the ability to view/edit employee information (including time cards) and run reports for assigned employees only. This chapter provides detailed information on timeQplus functions specific to the administrator role. It contains the following sections: ¾ timeQplus Navigation Bar ¾ Employees ¾ Messages ¾ Setup ¾ Shifts ¾ Punch Editing ¾ Reports ¾ Export ¾ Supervisors ¾ Time Clock ¾ System Utilities 5 06-0414-000 Rev. C timeQplus Administrator Functions - Navigation Bar timeQplus Navigation Bar The timeQplus Navigation Bar allows an administrator to manage the timeQplus software. An administrator can update any configuration settings, add and delete employees, approve time cards and TimeSlips, export timeQplus data to payroll, and view/print reports. To see the Navigation Bar, double click the timeQplus icon on your desktop. Ensure that you are connecting to the correct server and then enter your Administrator Login and Password. Click the buttons on the left Navigation bar to access these Administrator functions: • Employees Manage employee information and shift assignments • Messages View and edit your Company and Employee messages • Setup Setup company pay rules, Holidays, and Work Codes • Shifts • Punch Editing View and edit employee Time Cards & Time Slips • Reports • Export • Supervisors Manage administrators and supervisors • Time Clock Manage time clock devices • Hand Punch Manage hand punch devices Define shift hours, lunch rules, overtime, and holiday pay Print or preview reports Export time cards to payroll or a service provider 6 06-0414-000 Rev. C timeQplus Administrator Functions - Employees Employees The Employees screen allows an administrator to enter and view all employees and their information. An administrator can add a new employee, delete or modify an existing employee, assign employees to Time Clocks, or assign Work Codes to employees (please reference the Work Codes section in the timeQplus Supervisor Functions chapter for more information). An administrator can also enroll finger, face, and/or hand templates after capturing the templates on an appropriate Time Clock. To access the Employees screen, click the Employees button on the left Navigation Bar or click View on the top menu and choose Employees. Managing Employees To Add an Employee: • On the Employees screen, type the new employee information into the top blank row, entering the employee's Lastname, Firstname, MI (optional), Badge (optional), UserID, employee Number (optional), Shift, and Hire Date. o Note: If you wish, employee UserIDs and Numbers can be set to auto-increment by adjusting the Employee Options located on the top menu bar under ‘File’. • Press ENTER to save the new employee information and automatically create another blank line at the top for additional employee entries. • To erase input information before adding a new employee, press the ESC key on your keyboard, or click the Refresh button on this screen. If employees will be using proximity/barcode/magstripe badge Time Clocks to punch, ensure the Badge field corresponds with the number on the actual badge assigned to the employee on the Time Clock. Refer to the TQ600 User Manual for more information. If employees will be using biometric finger reader or facial recognition Time Clocks to punch, make a note of the UserID assigned to each employee. It may be a good idea to print the Employee Profiles report, which lists each employee’s UserID, which will be used to enroll the employee’s finger/face on the time clock. Refer to the TQ600 User Manual for more information on capturing finger/face templates. 7 06-0414-000 Rev. C timeQplus Administrator Functions - Employees To Edit an Employee: • From the Employees screen – On the Employees screen, simply type the updated information directly into the appropriate field and press ENTER. • From the Employee Profile screen – Click anywhere on the row containing the employee to be edited. Click the Detail button at bottom right to launch the Employee Profile window. This screen allows additional employee information to be recorded and saved. The Password field must be populated with the password the employee will be using to punch at the Virtual Clock and/or a connected Time Clock. There are also ten custom fields that can be used for creating Custom Payroll Exports. You can update the employee’s information and then click Save. Click Cancel to return to the Employees screen without saving. To Delete an Employee: • Click the Employees button on the left Navigation Bar or click View on the top menu bar and choose Employees. • Click anywhere on the row containing the employee to be deleted. • Click the Delete button at lower right. Note: You will not be able to delete an employee who has punches in the current or previous pay periods. The employee will be marked for deletion (shown with a red line through the row), and will be automatically deleted when the employee no longer has active punches in the current or previous pay periods.) • Click Yes to confirm the deletion, or click No to cancel. 8 06-0414-000 Rev. C timeQplus Administrator Functions - Employees Employee Options The Employee Options feature allows an administrator to determine the format of time totals viewed by employees using the Virtual Clock. Time can be displayed in either minutes or hundredths. Employee Options also allows employee UserIDs and Numbers to be auto incremented when adding new employees to timeQplus. To Change Employee Options: • Click File on the top menu bar and choose Employee Options. • Select your preference for Time Totals Format. You may choose to display time totals in minutes or hundredths. • To have the software automatically increment new employee UserIDs, check the Auto Increment New Employee UserIDs box. • To have the software automatically increment new employee Numbers, check the Auto Increment New Employee Numbers box. • Click Ok when done. To exit without saving changes, click Cancel. Employee Finger/Face/Hand Enrollment Collecting, enrolling, and assigning an employee’s Finger, Face, or Hand on a Time Clock is a three step process. 1. Collect the employee’s Finger/Face/Hand template on the Time Clock. • You will need to know the User ID assigned to the employee in timeQplus. You may find it helpful to print an Employee Profiles report to ensure you record the templates with the correct USER ID. • For detailed instructions, refer to the TQ600 User Manual for finger templates, the TQ600F User Manual for face templates, and the Hand Punch User Manual for hand templates. These documents can be found under Documentation on the top menu bar. • For USB Flash Drive time clocks, after all employees are enrolled, insert a USB flash drive into the clock to capture finger or face templates. On the TQ600B (finger), press Menu > PenDrive Mng > Download User. On the TQ600F (face), press Menu > Dn/Upload > Download User. 2. Associate the template with the employee record in the software. • On the Employees screen, select the row containing the employee’s name. • Click the appropriate Enroll or Remove button and follow the on-screen instructions. 3. Assign the employee to additional Time Clocks. • On the Time Clock screen, select the Time Clock the employee will be using to punch. If using a hand punch, click the Hand Punch tab and select the appropriate time clock. 9 06-0414-000 Rev. C timeQplus Administrator Functions - Employees • Select the employee’s name in the Unassigned Employees list and click the rightpointing arrow button to move that employee’s name to the Assigned Employees list. Click the Save button to save the assignment. Note: Employees can be assigned to and are able to punch at multiple Time Clocks. Removing Employee Finger/Face/Hand Templates 1. On the Employees screen, select the row containing the employee’s name. 2. Click the appropriate Enroll or Remove button for the template you wish to delete and follow the on screen instructions. Note: Once an employee’s template has been removed from timeQplus, it will remain on all time clocks to which the employee was assigned until after the next scheduled/manual poll or update occurs. Please see the Time Clocks section, Poll and Update for more information. 10 06-0414-000 Rev. C timeQplus Administrator Functions - Messages Messages The Messages screen allows an administrator to display a company-wide or employee-specific message to employees when they punch at a PC on the Virtual Clock. Note: Messages will only appear on the Virtual Clock screen when an employee punches. Messages will not display on connected Time Clocks. To create or edit a company-wide message: • To access the Messages screen, click the Messages button on the left Navigation Bar or click View on the top menu and choose Messages. • Enter a company-wide message in the Enter a Company Message field. This message will appear on the PC screen after each employee punches at the PC. • Click the Save button to save the message or click the X button to delete the Company Message. Note: You must delete the Company Message when you no longer wish it to display. It will continue to display on the PC screen after each employee punch as long as it exists on this screen. To create or edit employee-specific messages: Enter employee-specific messages in the Message field next to the employee’s name. This message will appear once on this employee’s PC screen after the next punch. 11 06-0414-000 Rev. C timeQplus Administrator Functions - Setup Setup The Setup screen allows an administrator to adjust variables related to the clock, time calculations, pay periods, holidays and Work Codes. Most items can be changed at any time and the change will be reflected in the total time accumulations for the current and previous pay periods only. To access the Setup screen, click the Setup button on the left Navigation Bar or click View on the top menu bar and choose Setup. Three tabs are available for editing: General, Holidays, and Work Codes. General The following items may be edited using the General tab: • • Pay Period – timeQplus supports WEEKLY, BI-WEEKLY, SEMI-MONTHLY, and MONTHLY Pay Periods. Time Card Approvals – timeQplus can be configured to require that timecards be approved by a supervisor (or an administrator) before they can be exported to payroll. 12 06-0414-000 Rev. C timeQplus Administrator Functions - Setup To Change the Pay Period Length: Be aware that pay periods are a critical part of time and attendance tracking. Changing pay periods can have legal and personnel implications. Exercise caution when changing the pay period after the timeQplus software has been configured and is in use. 1. Click the Modify button in the Pay Period section of the General tab. This will open the Modify Active Pay Periods screen. The available choices are: o Weekly - Employees are paid once per week o Bi-weekly - Employees are paid every two weeks o Semi-Monthly - Employees are paid twice per month o Monthly - Employees are paid once per month 2. Change the Next Pay Period Start Date if necessary to reflect the new pay period starting date. You may either click the downward-facing arrow at the right of the field to open a calendar from which you can select the desired date, or you may simply type the desired date directly in the Next Pay Period Start Date field. 3. Click the Modify button to save your changes. To exit without saving changes, click the Cancel button. 13 06-0414-000 Rev. C timeQplus Administrator Functions - Setup To configure Time Card Approvals preferences: • Check the “Do not export unapproved Time Cards for Hourly Employees” box to prevent the export of unapproved time cards for hourly employees. • Check the “Do not export unapproved Time Cards for Salaried Employees” box to prevent the export of unapproved time cards for salaried employees. • Click the Save button when done. To quit without saving changes, select another option from the left Navigation Bar or click the Refresh button at top right and then click No in the Save Changes dialog box. Holidays Optionally, timeQplus can track paid holidays and include this information when exporting to payroll. The timeQplus software does not automatically calculate holiday dates; they will need to be manually entered each year. If your company requires that an employee work a certain number of days before becoming eligible for paid holidays, this can also be configured on this screen. The following items may be edited using the Holidays tab: • Holiday Dates - Enter the date or select a date from the popup calendar. Enter the name of the holiday and press Enter to save. Repeat to add additional holidays. To delete a holiday, click to highlight the holiday you want to remove, and then click the Delete button. • Employee Eligibility for Holidays - In the ‘Eligible for Holiday Pay’ box, enter the number of days a new employee must work before becoming eligible for Holiday Pay and then click Save. To quit without saving changes, select another option from the left Navigation Bar or click the Refresh button at top right and then click No in the Save Changes dialog box. Work Codes Work Codes are used to allow a company to calculate how an employee’s work time is applied to a specific department, project, task, etc. Work codes can be entered, edited or deleted using the Work Codes tab on the Setup Screen. This list is referred to as the Master List of Work Codes. timeQplus can be configured to include work code information when exporting punch data to payroll. The following items may be edited using the Work Codes tab: • • Code – the work code number. After entering the first code number, timeQplus will auto increase the next work code number by 1. You may choose to keep the new number or just type over to input another of your choice. Name – the work code name. 14 06-0414-000 Rev. C timeQplus Administrator Functions - Setup • • Description – a description of the work code; optional but can be very useful. Write to Time Clock – Must be checked before the work code can be assigned to employees or used on any Time Clock (including the Virtual Clock). The following applies to Hourly employees only: • A Work Code must have "Write to Time Clock" set before it can be assigned to employees and used on any Time Clock, including the Virtual Clock. • Work Code assignments are managed on the Employees screen. Please see the Work Codes section in the timeQplus Supervisor Functions chapter for detailed instructions. • Work Codes can be used on TQ600 Time Clocks (Facial, Biometric, Proximity, Barcode, and Magstripe), and on the Virtual Clock. • There are two modes for using Work Codes on connected Time Clocks (the Virtual Time Clock handles Work Codes a bit differently). Consult the user manual for details on setting the mode on each Time Clock. o Mode 3 - A Time Clock configured to Mode3 will allow employees to choose only their assigned Work Codes stored in that Time Clock. o Mode 4 - A Time Clock configured to Mode 4 will allow any employee to choose any Work Code that has been stored in that Time Clock. • Because the Virtual Clock is controlled entirely by the timeQplus software, it reacts differently to Work Codes: o If an employee is assigned Work Codes, then only those Work Codes are available to choose when punching. o If an employee has no Work Codes assigned, then all Work Codes with ‘Write on Time Clock’ checked will be available for use when punching. • A punch is considered a ‘Transfer’ if a Work Code different from the previous punch is selected. • All OUT punches will have the same Work Code as the previous punch, which could be either an IN or a TRANSFER. The following applies to Salaried Employees only: • To assign a salaried employee a work code, select the employee on the Punch Editing screen. • In the Transaction area, select the date. • Select ‘Reg’ from the Type drop down list and enter the time [HH:MM]. • Select a work code from the Work Code drop down list and click Insert to save changes. 15 06-0414-000 Rev. C timeQplus Administrator Functions - Shifts Shifts A shift can be defined as a set of rules enforcing company policy for a group of employees, related to start and stop times, lunch times, overtime, and holidays. When an employee is assigned to a shift, the software then refers to the set of rules defined for that shift and applies those rules to that employee's transactions in order to derive the total time accumulations. Up to twelve different shifts can be defined in timeQplus. A shift can be a traditional shift, a department, a group within a department, etc. Each shift may be defined differently with its own set of rules. To access the Shifts screen, click the Shifts button on the left Navigation Bar or click View on the top menu bar and choose Shifts. The Shifts screen consists of four tabs: Shift Settings, Lunch Rules, Overtime, and Holidays. Shift Settings Under the Shift Settings tab, the following items may be edited: Pay Interval Round, Max Time on Clock, Day Change Offset, Shift Start, Shift Stop, Round, Grace, and Dock. Each setting is described in the sections that follow. Note: Definitions for all these settings can be found in the Glossary. To edit a shift’s settings: • Select a shift to edit from the Select a Shift drop-down list. • To change the name of a shift, simply type the new name in the Shift Name field. • Click the Shift Settings tab to modify Pay Interval Round, Max Time on Clock, and Day Change Offset. Check the Shift Rules Enabled box to modify Shift Start, Shift Stop, Round, Grace and Dock values. Click the Save button when finished. If you do not wish to make use of the Round, Grace or Dock features, leave the minutes set to zero. Pay Interval Rounding Pay Interval Rounding causes time worked totals for each employee to be rounded to the nearest one, five, six, ten or fifteen minute increment. It will not affect the actual punch time recorded in the software, only the worked time totals. If you do not wish for your worked time totals to be rounded, set the Pay Interval Rounding value to one minute (this is the default). 16 06-0414-000 Rev. C timeQplus Administrator Functions - Shifts Example 1: Pay Interval Round time set to 10 minutes. • Punch at 10:14 will be treated as though it occurred at 10:10. • Punch at 10:15 will be treated as though it occurred at 10:20. Example 2: Pay Interval Round time set to 15 minutes. • Punch at 10:07 will be treated as though it occurred at 10:00. • Punch at 10:08 will be treaded as though it occurred at 10:15. To edit Pay Interval Round: • Click the Shifts button on the left Navigation Bar or click View on the top menu bar and choose Shifts. Select the shift you want to modify, and then select the ‘Shift Settings’ tab. • Choose the desired Pay Interval Round value from its drop-down list. Choices include 1, 5, 6, 10 or 15 minute(s). The default value for Pay Interval Rounding is 1 minute. • Click the Save button when done. To quit without saving changes, select another option from the left Navigation Bar or click the Refresh button at top right and then click No in the Save Changes dialog box. Max Time on Clock The Max Time on Clock setting prevents the system from calculating erroneously large worked time totals (and possible overtime) due to missed punches. The system assumes that an employee has missed a punch after the maximum time on the clock has been exceeded. The system will change the employee's status to Out with zero accumulated time after the maximum time has passed since the last In/Transfer punch. A flag will also be set that there is a missing punch on the Punch Editing screen and on the Time Card and Hours Summary reports. You can then enter the missing punch via Punch Editing so the employee’s time can be correctly calculated. The default value for Max Time on Clock is twelve hours (12:00). Note: To disable this feature, set Max Time on Clock to zero hours (00:00). To edit the Max Time on Clock setting: • Click the Shifts button on the left Navigation Bar or click View on the top menu bar and choose Shifts. Select the shift you want to modify, and then select the ‘Shift Settings’ tab. • Enter the desired value in the Max Time on Clock field. • Click the Save button when done. To quit without saving changes, select another option from the left Navigation Bar or click the Refresh button at top right and then click No in the Save Changes dialog box. Changing Max Time on Clock will apply to the Previous, Current and all future Pay Periods. Day Change Offset A normal day by default begins at exactly 12:00 AM. Some companies, however, may have employees who work shifts that end at 12AM or even into the next day. Also, there may be shifts that begin at 12AM or earlier. Day Change Offset can be used to 'move' such employees’ workday change time backward or forward from 12AM so their hours are credited to the proper workday. The Day Change Offset field displays HH:MM. • If you do not have employees that begin or end work through 12AM, leave this setting at the default value [00:00]. 17 06-0414-000 Rev. C timeQplus Administrator Functions - Shifts • If you have employees that begin work on Day1 but end work on Day2, and the hours worked should be allocated to Day1, set Day Change Offset to the following calculated value: [Shift Stop Time + Shift Stop Round] Example: If your shift stops at 4:30 AM and you have a 30-minute shift stop round, the Day Change Offset is set to [5:00]. • If you have employees that begin work on Day1 and end work on Day2, and the hours worked should allocated to Day2, set the Day Change Offset to the NEGATIVE of the following calculated value: [12:00 – Shift Start Time + Shift Start Round] Example: If your Shift starts at 11:00 PM and you have a 15-minute shift start round, the Day Change Offset is set to [-01:15]. To edit Day Change Offset: • Click the Shifts button on the left Navigation Bar or click View on the top menu bar and choose Shifts. Select the shift you want to modify, and then click on the ‘Shift Settings’ tab. • Enter the appropriate value in the Day Change Offset field. • Click the Save button when done. To quit without saving changes, select another option from the left Navigation Bar or click the Refresh button at top right and then click No in the Save Changes dialog box. 18 06-0414-000 Rev. C timeQplus Administrator Functions - Shifts Shift Rules Check the Shift Rules Enabled box to modify Shift Start, Shift Stop, Round, Grace and Dock values. Click the Save button when finished. If you do not wish to make use of the Round, Grace or Dock features, leave the minutes set to zero. The following table describes each setting in more detail. Shift Name: The name of this shift as you would like it to appear on reports and screen displays. Shift Start Time: The time of day employees are scheduled to start work. Pay careful attention to the AM and PM settings to ensure your times are set correctly. Shift Stop Time: The time of day employees are scheduled to stop work. Pay careful attention to the AM and PM settings to ensure your times are set correctly. Shift Round: The number of minutes before the scheduled Start time that an employee’s "early" punch in will be treated as if it occurred exactly at the scheduled Start time, or the number of minutes after the scheduled Stop time that an employee’s "late" punch out will be treated as if it occurred exactly at the scheduled Stop time. This setting allows employees to clock in a few minutes early or clock out a few minutes late, say, for time spent getting a cup of coffee in the morning or gathering their personal belongings before leaving work, without accumulating overtime. It does not change the actual punch time recorded by the system, only how that punch is treated for the purpose of calculating the employee’s worked time. You can set different numbers of minutes for Start Round and Stop Round, if desired. If you do not wish to use this setting, set Start Round and Stop Round to zero. Note that U.S. law prohibits rounding of more than 15 minutes. Shift Grace: The number of minutes after the scheduled Start time that an employee’s "late" punch in is still considered on time, or the number of minutes before the scheduled Stop time that an employee’s "early" punch out is considered on time. This setting allows an employee to clock in a few minutes late or clock out a few minutes early without being docked. It does not change the actual punch time recorded by the system, only how that punch is treated for the purpose of calculating the employee’s worked time. You can set different numbers of minutes for Start Grace and Stop Grace, if desired. If you do not wish to use this setting, set Start Grace and Stop Grace to zero. 19 06-0414-000 Rev. C timeQplus Administrator Functions - Shifts Shift Dock: The number of minutes an employee will lose from their daily total for punching in late or punching out early outside of the parameters of the Shift Grace setting. Shift Dock works together with Shift Grace to determine employees’ calculated work time. If an employee clocks in or out during the time designated as Shift Grace, the employee’s time will not be docked. If Start Dock is set to zero, an employee who clocked in one minute after the end of the Start Grace period would only be docked the amount of time elapsed form the end of Start Grace. In other words, if your Shift Grace period is set to five minutes, an employee who punches in six minutes late would only be docked one minute. You can use the Shift Dock setting to override the effect of the Shift Grace period for employees who punch in a few minutes outside the Shift Grace period. For instance, if you set Start Grace to five minutes and Start Dock to 10 minutes, an employee who clocked in at three minutes after the scheduled shift start time (within the Shift Grace period) would not be docked. That employee’s punch would be treated as though it had occurred at the shift start time for the purpose of calculating employee worked time. However, if an employee clocked in at seven minutes after the scheduled shift start (outside the five minute Shift Grace period but within the 10 minute Shift Dock period), that employee’s punch would be treated as though it had occurred at 10 minutes after the shift start for the purpose of calculating the employee’s work time. If an employee clocked in at twelve minutes after the scheduled shift start (outside the periods covered by both Shift Grace and Shift Dock), that punch would simply be treated as though it occurred at its actual time for the purpose of calculating the employee’s worked time. You can set different numbers of minutes for Start Dock and Stop Dock if desired. If you do not wish to use this setting, set Start Dock and Stop Dock to zero. Lunch Rules If you wish to apply lunch rules, click the Lunch Rules tab and then check the Lunch Rules Enabled box. Enter the scheduled Lunch Start, Lunch End, Lunch Duration, and Auto After values. Click the Save button when done. To disable the Lunch Duration and/or Auto After feature, set their values to zero. 20 06-0414-000 Rev. C timeQplus Administrator Functions - Shifts The following table describes each lunch setting in more detail. Lunch Start: The earliest time of day at which an employee can punch out for lunch. If an employee clocks out before this time, the system assumes the punch does not relate to a lunch period, and lunch rules will not be applied. Lunch End: The latest time of day at which an employee should punch in from lunch. The system assumes employees will take their entire lunch break within the window between Lunch Start and Lunch End. It assumes a return after Lunch End indicates a longerthan-normal lunch period. If an employee clocks out to lunch after Lunch Start but before Lunch End (which puts Lunch Rules in effect), then clocks in from lunch after Lunch End, the difference between Lunch End and the time the employee actually clocks in will be added to the Lunch Duration to calculate the total time deducted from the employee’s hours worked total for lunch. You may need to adjust the hours worked totals for such employees using the Punch Editing screen if the time deducted exceeds their actual lunch time taken. If you find you consistently have to make this adjustment for many employees, you may wish to consider modifying your Lunch End setting to a later time. Lunch Duration: The minimum number of minutes subtracted from time worked totals for each lunch period. If an employee is clocked out for lunch longer than the designated Lunch Duration, the system will deduct the actual amount of time the employee is clocked out. However, if an employee takes a shortened lunch – that is, clocks out after the designated Lunch Start and clocks back in before the amount of time set in the Lunch Duration field has elapsed – the system will automatically deduct the full Lunch Duration. This setting can be useful in structured environments such as a production line, where employees must take standard-length lunch breaks. Enforcing a standard Lunch Duration will ensure you do not overpay employees in the event they clock back in from lunch early before they can actually start work. In other types of environments, use caution with this setting to ensure you do not underpay employees who take shortened lunch breaks. You may need to adjust the hours worked totals for such employees using the Punch Editing screen if the time deducted exceeds their actual lunch time taken. 21 06-0414-000 Rev. C timeQplus Administrator Functions - Shifts Auto Lunch After: The length of time an employee can be on the clock before the system assumes they have missed punching out for lunch and automatically deducts the Lunch Duration from their hours worked total. If the Lunch Duration field is set to zero, the Auto Lunch After setting will have no effect. Use caution with this setting. If an employee skips lunch, and you have Auto Lunch After configured, the Lunch Duration will automatically be deducted from their hours worked total. You must manually add that time back using the Punch Editing screen in order to avoid underpaying that employee. You can view the adjustments made to individual punches by the system as dictated by the shift and lunch rules you configured by selecting a punch affected by these rules in the Punch Editing screen and clicking the DETAILS button. Overtime Overtime specifies the amount of time an employee must work before overtime will begin to accumulate. The threshold amounts may be set on both a daily basis and/or weekly basis. Both the daily and weekly overtime thresholds may be set at two different levels to reflect company policy. Example 1: If you pay overtime based only on the number of hours worked in a week, not on the number of hours worked in a given day, set the Daily Level 1 and Daily Level 2 to 24:00 hours. If you do not pay a second level of overtime on a weekly basis, set Weekly Level 2 to 168:00 hours. 22 06-0414-000 Rev. C timeQplus Administrator Functions - Shifts Example 2: You pay employees at 1.5 times their pay rate (time and a half) if a given employee works over 40 hours in a week and 2 times the normal pay rate (double time) if the employee works over 48 hours in a week. To implement these rules, set Weekly Level 1 to 40 hours and Weekly Level 2 to 48 hours. If an employee then works 60 hours in a particular week, the totals generated will be: • Regular: 40:00 • Overtime 1: 08:00 • Overtime 2: 12:00 To edit the Overtime Threshold Values: • Click the Shifts button on the left Navigation Bar or click View on the top menu bar and choose Shifts. Select the shift you want to modify, and then click the ‘Overtime’ tab. • Check the Overtime Enabled box and type the desired overtime thresholds in the Daily Level 1, Daily Level 2, Weekly Level 1 and Weekly Level 2 fields. • Click the Save button when done. To quit without saving changes, select another option from the left Navigation Bar or click the Refresh button at top right and then click No in the Save Changes dialog box. 7th Day Overtime When enabled, 7th Day Overtime will promote all hours worked on the seventh consecutive worked day to the next higher pay level (Overtime 1 or Overtime 2), provided that the 7 consecutive days start at the beginning of the a given week of the pay period. This rule affects only the Daily Overtime calculations and will not overwrite any Weekly Overtime rule settings. To enable 7th Day Overtime, check the ‘Enable 7th Day Overtime’ box on the Overtime tab. Note: This feature was designed to accommodate a law commonly referred to as California Overtime. Holidays You can override the company-wide settings regarding holiday pay for individual shifts. If you wish holidays to be paid for employees assigned to this shift, check the ‘Holidays are paid’ box and then enter the number of hours to be paid for each holiday. Click the Save button when done. To quit without saving changes, select another option from the left Navigation Bar or click the Refresh button at top right and then click No in the Save Changes dialog box. 23 06-0414-000 Rev. C timeQplus Administrator Functions - Shifts Salaried Shift Settings The Salaried shift determines how salaried employees will be paid. To Change Salaried Employee Settings: • Click the Shifts button on the left Navigation Bar or click View on the top menu bar and choose Shifts. Select ‘Salaried’ from the ‘Select a Shift’ drop down list. • Under the General tab, you can specify the number of hours per Pay Period to pay salaried employees. The default value is 40 hours, which can be updated if necessary. This value is exported every pay period to payroll. • If salaried employees are to be paid for holidays, then under the Holidays tab, check the Holidays are paid box and enter the number of hours to pay for each holiday in the Hours to pay for each Holiday field; the default is 8:00 hours. • Click the Save button when done. To quit without saving changes, select another option from the left Navigation Bar or click the Refresh button at top right and then click No in the Save Changes dialog box. 24 06-0414-000 Rev. C timeQplus Administrator Functions – Punch Editing Punch Editing Punch Editing allows administrators and supervisors to do the following: • Review and edit employee transactions • Adjust the total time accumulations • View the details of transaction totals and how the software calculated the transactions • Add missed punches • Modify Work Codes • Add miscellaneous transactions (Vacation, Sick Time, Other, Holiday, FMLA) • Approve an employee’s time card • Print an employee's time card To access the Punch Editing screen, click the Punch Editing button on the left Navigation Bar or click View on the top menu bar and choose Punch Editing. timeQplus can store several different types of transactions: • PUNCH (CLK): a normal punch In or Out on a connected Time Clock • INSERTED (INS): an entry inserted using the Punch Editing screen. • PUNCH (PC): an entry created when an employee clocks In or Out using the Virtual Clock • TIMESLIP (SLP): an entry created when a salaried employee submits a transaction using the Submit Employee TimeSlip feature on the Virtual Clock (salaried employees only) The code (CLK, INS, PC, and SLP) at the left of each transaction line in the Punch Editing screen identifies the type of transaction. These various types of transactions allow for Salaried Exempt and Salaried Non-Exempt employees, as well as hourly employees, to use the software. 25 06-0414-000 Rev. C timeQplus Administrator Functions – Punch Editing Managing Transactions To insert a transaction: • On the Punch Editing screen, select employee from the ‘Select an Employee’ drop-down list. • Select the appropriate pay period from the ‘Choose a Pay Period’ drop-down list. Be certain to confirm transaction being inserted occurs within the date range of the pay period. Note: Transactions added to the Future pay period will appear in the Future Transactions Report until such time as the Pay Period in which the transaction occurs becomes the Current pay period. • Enter the Date of the transaction you are inserting in the field in the Insert section of the Transaction area at the bottom left of the screen. You may simply type the desired date in the field, or click the arrow at the right of the field to open a calendar to select the correct date. • Select the type of transaction to insert from the ‘Type’ drop-down menu: PUNCH, HOL (Holiday), VAC (Vacation), SIC (Sick leave), REG (Regular time), FMLA (Family Medical Leave Act) or OTH (Other). The transaction type is displayed in the IN/OUT column. Note: The REG transaction is useful to add hours when an employee forgot or otherwise unable to clock both in and out. The effect of adding hours via the REG transaction is essentially the same as adding two individual PUNCH transactions for a missed In punch and a missed Out punch. • Enter the correct Time for the transaction you are inserting. If you are inserting a PUNCH, enter the time when the punch should have taken place. For other inserted transactions (HOL, VAC, SIC, REG, OTH or FMLA), enter the number of Hours to apply to this transaction. You may simply type the correct value in the field; or, for Time, use the up or down arrows at the right of the field to adjust the time. • If applicable, select a Work Code from the drop down list. • Click the Insert button or press the <ALT> then the "I" key on your computer keyboard. • o When inserting a PUNCH transaction, you will be prompted to enter a comment, maybe why the transaction was added, for example. Enter text in the blank box and click the Save button. o Click the No Comment button to skip entering a comment and save the transaction. To permanently disable the Comments dialog box, check the Don’t display this dialog again. o To enable the Comments dialog box after permanently disabling it, click File > Supervisor Preferences… on the top menu bar, check the Show Punch Comment Dialog box, and then click Save. o You can view comments by selecting an inserted PUNCH transaction and clicking the Details button. The transaction will now appear on the Punch Editing Screen. 26 06-0414-000 Rev. C timeQplus Administrator Functions – Punch Editing To delete a transaction: • On the Punch Editing screen, select employee from the ‘Select an Employee’ drop-down list. • Select the appropriate pay period from the ‘Choose a Pay Period’ drop-down list. • Click the transaction to be deleted. • Click the Delete button, or simultaneously press the <ALT> and D keys on your keyboard. Note: When a PC or SLP transaction is deleted in Punch Editing, the timeQplus software does not actually remove the transaction from the database. The transaction will no longer appear in the Punch Editing screen, but will appear on the Time Card Report in a separate section entitled “Deleted Transactions”. These deleted transactions are ignored in calculating the employee's total time accumulation. To view deleted transactions: On the Punch Editing screen, select the desired employee and Pay Period from the drop down lists and then click the View Deleted button. If an employee does not have any deleted punches during the selected Pay Period, the View Deleted button will be grayed out. To view the details of a transaction, including adjustments arising from the use of Round, Grace, Dock or lunch rules: • On the Punch Editing screen, select employee from the ‘Select an Employee’ drop-down list. • Select the appropriate pay period from the ‘Choose a Pay Period’ drop-down list. • Select a transaction. Click the Details button or simultaneously press the <ALT> and T keys your keyboard. The Punch Details screen appears. It lists the rules applied to both the IN and OUT punch as well as adjustments made to the total time. • Click the Ok button to exit the Punch Details screen. Editing Total Time Accumulations To edit total time accumulations: • On the Punch Editing screen, select employee from the ‘Select an Employee’ drop-down list. • Select the appropriate pay period from the ‘Choose a Pay Period’ drop-down list. • Click the +/- Edit Totals button or simultaneously press the <ALT> and E keys on your keyboard. This will launch the Edit Totals screen, which will allow you to add or subtract time from an employee's totals. • Enter the number of hours and minutes to be added to or subtracted from the Regular, Overtime 1 or Overtime 2 categories. A value of 0:00 means that no time will be added to or subtracted from the employee's total time accumulations for that category. 27 06-0414-000 Rev. C timeQplus Administrator Functions – Punch Editing • When subtracting time, enter a minus sign (-) before the number of hours and minutes. When adding time, simply type the number of hours and minutes to be added. You do NOT need to insert a plus sign (+) in front of the number. • Click the Save button to accept changes or the Cancel button to exit the Edit Totals screen without saving changes. The changes you enter are reflected on the Punch Editing screen in the Totals area in the Edits and Totals columns. Note: The edited hours are added to or deleted from the overall pay period totals. They are not allocated to a particular day. Printing Time Cards An employee’s Time Card can be printed from either the Punch Editing screen by clicking the Print button at the upper right corner or from the Reports screen by following the steps below. To print a Time Card using Reports: • Click the Reports button on the left Navigation Bar or click View on the top menu bar and choose Reports. • Select the Time Card report. • Choose the appropriate Pay Period from the ‘Choose a Pay Period’ drop-down list. • On the Filters and Sorting area, select whether to print all employees, individual employees, salaried employees only or employees assigned a specific shift. • To include Work Codes, check the Include work codes box. • When printing individual employees, select the specific employees to include from the list in the box at the right of the screen. To print one employee, click that employee’s name. To print multiple employees, press and hold the CTRL key while clicking each employee name. • When printing an entire shift, select the desired shift from the drop-down list that appears below the filter selection. • Select the desired sort order from the ‘Sort By’ drop-down list. By default, employees are sorted in alphabetical order by last names. You can change the sort order to alphabetical by first name or numerical by badge number, employee number or shift. • To print the report, click the Print button. To preview the report before printing, click the Preview button. 28 06-0414-000 Rev. C timeQplus Administrator Functions – Reports Reports The Reports screen allows reports to be generated for preview, print, or export. It also allows administrators to search for past and present employees using the Employee Search button (located in the upper right corner of screen). The search results will contain data on when an employee was added to and, if applicable, removed from the timeQplus software. To access the Reports screen, click the Reports button on the left Navigation Bar or click View on the top menu bar and choose Reports. Certain reports offer filter options: All Employees, selected Individual Employee(s), only Salaried Employees or Individual Shift; and sorting options: Last Name, First Name, Badge Number, Employee Number or Shift. Generating a Report To generate a report: • On the Reports screen, select the type of report you wish to print. • If applicable, select the desired Pay Period, Pay Period Range, or Date Range. Please refer to Table 1 for a list of reports along with the available options and maximum date range values for each. • Select the filter criteria when applicable. For certain reports, you may choose to filter your report to include All Employees (the default), selected Individual Employee(s), only Salaried Employees or all employees assigned to an Individual Shift. If filtering is not applicable to the report you have selected, the options will be grayed out. • If filtering by Individual Employee(s), select the desired employee's name in the ‘Select Employees’ box at the right of the screen. To select more than one employee, press and hold down the CTRL key while clicking each employee name. • If Individual Shift is selected, select the shift in the drop down list that appears below the filter selection. • Select the sorting method, if applicable. You may choose from alphabetical by first name or last name (the default) or numerical by badge number, employee number, or shift. 29 06-0414-000 Rev. C timeQplus Administrator Functions – Reports • Select the output (where you want the report to go). Choices include: o Print – print a paper copy of the report o Preview – preview a copy of the report before printing o Export – create an electronic copy of the report. Format options include: Image (*.tiff) Adobe PDF (*.pdf) Web Archive(*.mhtml) Microsoft Excel (*.xls) CSV (*.csv) Table 1 Available Report Options Report Pay Period Pay Period Range Date Range Max # of Weeks in Pay Period Range or Date Range 9 52 Approaching Overtime Average Totals By Employee Daily Totals By Day 9 9 5 Daily Totals By Employee 9 9 5 9 53 9 53 Employees By Supervisor Employee Default Work Codes Employee Profiles Holidays 9 Hours Summary 9 Missing Punches 9 Punch Comments By Employee 9 Raw Transactions 9 Rules Setup 9 Shifts 9 Supervisors By Employee Time Card 9 Time Card Approvals 9 Who’s IN, Who’s OUT Work Codes Totals By Employee 9 9 5 Work Codes Totals By Work Code 9 9 5 Future Transactions Report The Future Transactions Report shows all transactions that have been entered into the system with dates that occur after the end of the current pay period. These transactions will automatically be properly inserted into the appropriate pay period as it becomes current. To print a Future Transactions report: • On the Reports screen, select the Time Card report. • Select the Pay Period option and then choose the Future pay period from the drop down list. • Click the Preview button to view the report on-screen, the Print button to produce a paper copy, or the Export button to produce an electronic copy of the report. 30 06-0414-000 Rev. C timeQplus Administrator Functions – Export Export The timeQplus system is designed to work with most common payroll programs. The Export screen allows employee time and attendance data to be exported to a file so it can later be imported into a database, spreadsheet, payroll software, or payroll service provider. To access the Export screen, click the Export button in the left Navigation Bar or click View in the top menu bar and choose Export. Exporting Time and Attendance Data To export time and attendance data: • Select the Pay Period you want to export. You can choose to export data for the current, previous or archived pay period. • Select the desired filter option. You can choose from All Employees, all employees assigned to an Individual Shift, or Individual Employee(s). If you choose Individual Shift, select the desired shift from the drop down list that appears below the filter selection. If you choose Individual Employee(s), select the desired employee name from the box at the right. To include multiple employees in the export, you may hold down the CTRL key while clicking each employee name. • Select the desired Output Format from the drop-down list. • Click the Export button. The first time you attempt to export to a particular Output Format you will be presented with a configuration screen in which you can set options specific to that format. Once you have configured the output format as necessary, click the Save button to continue with the export. On subsequent exports to that output format, the export will begin immediately. • A Save As dialog will appear. Enter the file name and location for the data to be exported. Click the Ok button to save the file, or click the Cancel button to return to the Export screen. • To edit a previously configured Output Format, select the desired format from the drop down list and click the Setup button to open the configuration screen for that format. Make the necessary changes and click the Save button or click the Cancel button to exit. 31 06-0414-000 Rev. C timeQplus Administrator Functions – Export Unapproved Timecards The Unapproved Time Cards window is displayed when attempting to export time card and/or time sheet data to payroll and not all employees’ Time Cards and TimeSlips have been approved. This feature can be disabled by de-selecting the option to require approval in the Setup screen. From this window you can print a list of unapproved time cards and time slips by clicking the Print button or click the Close button to exit. To approve an employee Time Card, go to the Punch Editing screen, select the employee from the ‘Select an Employee’ drop down list, choose the appropriate pay period, and click the Approve button. Advanced Payroll Integration QuickBooks Payroll Integration File Payroll Export Formats Custom Export File Builder V1.5 Peachtree Complete Import File V7.0 Generic V2.0 Premier Import File V2.0 Generic ASCII Export file builder Premier Plus Import File V2.0 ADP Version 7.0 PrimePay PrimeLink Import File V10001 Genesys Inbound Timecard QuickBooks Integration Intuit PC Access Import File V2.0 QuikPay Import File V2.0 Intuit PC Access Jr Import File V2.0 QuikPay Plus Import File V2.0 Oryel Payroll Export Wells Fargo Import File V2.0 PayChex Paylink Import File 5.0 Wells Fargo Plus Import File V2.0 PayChex Preview Import File V0002 Wells Fargo Timeclock Import File PayChex IM0007 Import File Heartland PlusOne Fixed Length File Peachtree Complete 2006 Import File 32 06-0414-000 Rev. C timeQplus Administrator Functions – Export Custom Export File Builder Click Here to Open an Existing Template Opens a saved Export setup. Insert Quotes Around Non-Numeric Select Y to put quotes around all Alpha or AlphaNumeric values. Note: Quotes will only appear in .txt Export File Formats. Include Column Heading … Select Y to include the Column Heading in the export. Example: the column heading for "Vacation" could be "Vacation", "Vac", "V", etc. The exact name that a payroll program needs can be entered into the "Properties" table by typing over the default name in the "Export Code" column. Custom Export File Header Lines Lines per Employee Custom Export File Trailer Lines You can specify the number of lines of data that will appear in the Header and Trailer records. You can also specify the number of lines that will be displayed for each employee in the Employee Data Section. 33 06-0414-000 Rev. C timeQplus Administrator Functions – Export Include in Total Lines Checksum Header Lines Employee Data Lines Trailer Lines Line Terminator: Determines which lines of data are used to compute the Total Lines in the Export. This is used as a checksum or a comparison value by some Payroll programs. Select Y to include the lines in the Total Lines checksum. CRLF - Carriage Return Line Feed CR - Carriage Return LF - Line Feed Custom Custom Line Terminator – appears when Custom is chosen. Enter a single character that your payroll program treats as a line terminator (the end of a line of data). Field Separator: Tab Comma Slash Semi-Colon Custom Custom Separator – appears when Custom is chosen. Enter a single character that your payroll program treats as the beginning and end of a data element. Fixed Length – sets the length of each attribute to a fixed length. When Fixed Length is chosen a "Fixed Length" column will be displayed in the Properties Table where each attribute can be set to the required fixed length. Time Format: HH:MM (hours : minutes) HH.XX (hours.decimal hours) HHMM (hours minutes) (Export without colon) HHXX (hours decimal hours) (Export without decimal) Date Format: MM / DD / YYYY DD / MM / YYYY MM.DD.YYYY DD.MM.YYYY MM-DD-YYYY DD-MM-YYYY YYYY/MM/DD YYYY-MM-DD YYYY.MM.DD MMDDYYYY DDMMYYYY YYYYMMDD 34 06-0414-000 Rev. C timeQplus Administrator Functions – Export User Defined Fields in Export Number of Custom Export Fields; valid values are 0 to 999. This value will set the number of Custom Export fields (lines) in the Properties Table. Totals Exported by: Pay Period Day Export File Format: csv Comma separated values txt Text Document Configure Export File Layout The Export Layout has three sections: 1. Header Record - contains info that identifies the payroll export such as Export ID, Company Name, Payperiod Start Date, Payperiod End Date, Export Creation Date, Export Creation Time, etc. 2. Employee Data - contains all data necessary for processing the payroll, i.e., the actual time and benefits that each employee accumulated or used. 3. Trailer Record - The trailer record usually reiterates information contained in the header record. The number of lines that appears in each section depends on the number of lines specified for each section in the Main Setup Screen. The "# of Field" is where the number of data elements for each line can be specified. If you type "4" in the block you will see (4) blank fields appear with each field having a drop down list of the elements you can select to specify the field. Note that you can increase the number of fields per line at any time in order to add additional fields. You can also decrease the number of fields at any time. The fields at the end of the line will drop off as you decrease the number. Click Save to save and exit the Export Layout. Click Cancel to exit without saving your changes. Export Properties Table Setup If “Fixed Length” is selected from the ‘Field Separator’ drop down list, the Custom Export Properties Table appears as follows: 35 06-0414-000 Rev. C timeQplus Administrator Functions – Export When any other selection except “Fixed Length” is selected from the ‘Field Separator’ drop down list, the Custom Export Properties Table appears as follows: • Export Field – The values in this column are all the data elements that are available for export to a payroll program. Note that the number of “Custom x” data elements is controlled by "User Defined Fields in Export" in the Main Setup Screen. • Export Code - For all fields you can type in the required name for any attribute that your Payroll program requires in the "Export Code" column. Example: the attribute "Overtime Level 1" may be imported by a Payroll program as "OT1". In the "Export Code" column beside "Overtime Level 1" you would type the name "OT1" over the default name "Overtime Level 1". • Custom Value – The "Custom x" attributes are static data elements that are exported with every export. An example might be "Company Name". You would type the Company Name in the "Custom value" column beside Custom 1 over the default value "Custom 1". Custom Value only applies to the Custom data attributes. Typing a value for any of the other data elements will not have an effect. 36 06-0414-000 Rev. C timeQplus Administrator Functions – Export • Format – The format of each data element can be set as either Alphanumeric, Numeric, Date or Time. To change the default value, click on the field and select the new value from the pull-down list. • Fixed Length – When Fixed Length is chosen for the field separator the "Fixed Length" column will be shown in the Properties Table. Each attribute has a default Fixed Length value. To change the value simply type the new value over the default value, i.e., if "First Name" must be limited to 8 characters by the payroll program type "8" over the default value of "10". Only the first "8" characters of the First Name will be exported (Right or Left Alignment has no effect on which characters are exported). • Alignment – When Fixed Length is chosen for the field separator the "Alignment" column will be shown in the Properties Table. Save Template Saves the current Export file setup as a .dat file in the "ExportTemplates" folder. Note: You must click "Save" in order to save the current template as the active template. If you do not click "Save" the current template form will not be available the next time you open the export. You will have to reconfigure it or retrieve a saved template. Template Location Win XP: C:\Program Files\Acroprint\timeQplusV3\exporttemplates Vista, Win7 & 2008 Server: C:\Program Data\Acroprint\timeQplus\Export Templates Clear Form: clears all data from the current Export and returns all settings to default values Help: activates timeQplus Help Layout Preview: gives a quick view of the layout of the Export. • This is not a preview of the actual export but simply shows the data elements (if column headings are chosen for display) and the Field Separators and Line Terminators. • If the Export Date and Export Time are part of the export they will show as actual values. Save: saves the current Export settings Cancel: closes the Main Setup screen without saving any changes QuickBooks® Payroll Integration timeQplus easily exports employee Time Card data to QuickBooks. Work Codes can be included in the export as well. The following topics will guide you throughout the export process: • Setting up QuickBooks® to communicate with timeQplus • Setting up timeQplus to Communicate with QuickBooks® • Exporting timeQplus data to QuickBooks® Setting up QuickBooks® to communicate with timeQplus Before You Begin Make sure QuickBooks® Pro/Premier is installed on your local computer and that you have access to the company file (*.QBW). Enable Time Tracking in QuickBooks® To turn on time tracking (in QuickBooks Pro/Premier 2013 or later): 1. From the Edit menu, choose Preferences. 2. In the Preferences window, select Time & Expenses from the scroll box on the left. 3. Click the Company Preferences tab and select Yes for "Do You Track Time?" 37 06-0414-000 Rev. C timeQplus Administrator Functions – Export Note: QuickBooks may close all windows after this setting has been changed. 4. In the Preferences window, select Payroll & Employees from the scroll box on the left. 5. On the Company Preferences tab, click the Employee Defaults button. 6. If not already, check "Use time data to create paychecks”. 7. Click OK to close the Employee Defaults window, and then click OK again to close the Preferences window. Note: In previous versions of QuickBooks Pro/Premier, some items listed on the left in the Preferences window may be labeled differently. Please refer to your QuickBooks ® documentation for more information on these settings. If employees were added to QuickBooks prior to enabling time tracking, each employee must be set up to use timesheets to track hours. This must be done one employee at a time. To turn on time tracking for a single employee: 1. On the top menu bar, choose Employees > Employee Center. 2. Double-click the employee in question. 3. Choose Change Tabs > Payroll and Compensation Info. In QuickBooks 2013, click the Payroll Info tab. 4. Under the Earnings box, check the Use time data to create paychecks box. 5. In Pay Frequency ensure the employee is set up for the correct frequency (i.e. If an employee has a Pay Frequency set for Annual all time sheets from the ending pay period date to the prior year will be pulled into the paycheck), be sure Pay Period and Payroll Schedule are correct. 6. Click OK. Create Hourly Wage Pay Items in QuickBooks® QuickBooks must be setup with a unique Hourly Wage Pay Item for each of the following timeQplus time types: Regular, Overtime 1, Overtime 2, Vacation, Holiday, Sick, and Other. Please refer to your QuickBooks® documentation for information on how to create and modify Hourly Wage Pay Items. In timeQplus, the default values for each Hourly Wage Pay Item are: • Regular Pay • Holiday Pay • Overtime Pay • Sick Pay • Premium Overtime Pay • Other Pay • Vacation Pay Please make note of the exact name for each Hourly Wage Pay Item from QuickBooks. This information will need to be entered in timeQplus prior to exporting employee time card data. Add Employees If you attempt to export an employee’s timecard to QuickBooks®, and the employee does not exist in the application, you will be prompted to add the employee(s) at the time of the export. Add Work Codes If Work Codes should be included when exporting to QuickBooks®, they will need to be defined as customers. The spelling of the customer name in QuickBooks® must exactly match the spelling of the work code name in timeQplus. Please refer to your QuickBooks® documentation for information on how to create and modify your customer list. Setting up timeQplus to Communicate with QuickBooks® For the QuickBooks® Integration, each employee name must be a unique combination of characters. Since timeQplus does NOT enforce uniqueness among employee names, it uses the Export ID assigned to each employee to export time card data to QuickBooks. When adding to timeQplus an employee who already exists in QuickBooks, enter the full employee name, exactly as it appears in QuickBooks, in the Export ID field on the employee’s Employee Profile screen in timeQplus. 38 06-0414-000 Rev. C timeQplus Administrator Functions – Export When adding to QuickBooks employees who already exist in timeQplus, make sure each employee name entered in QuickBooks exactly matches the Export ID of each employee in timeQplus. Exporting timeQplus data to QuickBooks® 1. On the Export screen, select the Output Format: QuickBooks Integration. 2. Click the Export button Note: If you have never chosen a QuickBooks® company file (*.QBW) or mapped your pay codes and work codes (if applicable), you will need to do so before you can run the integration. Data Export Setup Screen Step 1 – Select Company File Click Select to select the QuickBooks® company file (*.QBW) you created for your company. Step 2 – Setup Pay Codes Map the timeQplus Pay Code to the corresponding Wage Pay Item in QuickBooks®. If this is the first time you are running the integration, please have QuickBooks® running and your company file opened. You will not be required to have QuickBooks® running in the future. Step 3 – Include Work Codes If work codes are to be included in the export, check the ‘Include Work Codes’ box. Note: In order for work codes to be properly exported to QuickBooks®, they will need to be defined in QuickBooks® as customers (timeQplus does not currently support the export of work codes when defined as jobs in QuickBooks®). The work code name in timeQplus must exactly match the customer name as defined in QuickBooks®. Step 4 – Click OK to run the integration If this is the first time you are running the integration, QuickBooks® will prompt you that an application without a certificate is attempting to access your company file. Click Yes, Always to allow timeQplus to integrate with QuickBooks® Add Missing Employees to QuickBooks If you are attempting to export timecard data for an employee who is not found in QuickBooks® you will be prompted by timeQplus to add the missing employee to QuickBooks. Missing Payroll Items If you are attempting to export timeQplus Pay Codes that do not exactly match one of the QuickBooks® Payroll Items, you will be prompted by timeQplus and the integration will be canceled. Note: The spelling of the Pay Codes and corresponding Payroll Items must be identical. Missing Work Codes If you are attempting to export timeQplus Work Codes that do not exactly match one of the QuickBooks® Customer names, an error will occur and the integration will be canceled. If the ‘Include Work Codes’ box is checked, each work code in timeQplus must be defined as a customer in QuickBooks® before the export can continue. Note: The spelling of the Work Code names and the corresponding Customer names must be identical. Peachtree Complete Accounting Before exporting employee time card data to Peachtree Complete Accounting, you must first configure the following: • Inventory Items – You must set up inventory item(s) that are associated with REG, OT1, OT2, VAC,HOL, SIC and OTH hourly wages. Normally, this is one item but may be defined individually for each level. Please see Peachtree Accounting help for instructions on setting up Employee Time slip Items. 39 06-0414-000 Rev. C timeQplus Administrator Functions – Export • Employees – Before you can import Time Card data to Peachtree Complete Accounting, you must make sure that the employee IDs assigned to the employees in Peachtree match the Export IDs for each of the employees defined in the timeQplus software. Mismatched employee IDs will generate an error when attempting to import to Peachtree Complete Accounting and may cause unexpected results. Also, for each employee, you must enter Pay Rates for the 3 levels of the inventory item associated with hourly wages along with vacation, holiday, sick and other wages. By default, the first pay level will receive imported REGULAR hours, the second will receive imported OVERTIME1 hours and the third will receive imported OVERTIME2 hours. The vacation, holiday, sick and other wages levels must be set according to the desired outcome. After creating a Peachtree Compatible file from timeQplus data, go to the Import/Export form in your Peachtree Complete Accounting software and create a new export format including all fields and with Field Headers in first Record selected. Then selected the timeQplus export file you just created and execute the import to Peachtree. Peachtree Complete Accounting Export • On the Export screen, select Output Format Peachtree Complete Import File V7.0 or Peachtree Complete 2006 Import File. • Click the Export button. The first time you attempt to export you will be presented with a configuration screen in which you can set options specific to this format. Once you have configured the output format as necessary, click the Save button to continue with the export. You will not be required to configure the output format options on subsequent exports. • The software will then prompt you for the name of the Peachtree Complete export file (*.csv). Specify a file name and location on your hard drive and click the Save button to export the data. timeQplus exports employee time card data to a Peachtree Complete Accounting import file format based on values entered for the following fields: Regular Pay Level The Peachtree Pay Level (1-20) associated with Regular Pay Regular Pay Item Code The Peachtree Pay Item Code associated with Regular Pay Overtime 1 Pay Level The Peachtree Pay Level (1-20) associated with Overtime Level 1 Pay Overtime 1 Pay Item Code The Peachtree Pay Item Code associated with Overtime Level 1 Pay Overtime 2 Pay Level The Peachtree Pay Level (1-20) associated with Overtime Level 2 Pay Overtime 2 Pay Item Code The Peachtree Pay Item Code associated with Overtime Level 2 Pay Vacation Pay Level The Peachtree Pay Level (1-20) associated with Vacation Pay Vacation Pay Item Code The Peachtree Pay Item Code associated with Vacation Pay Holiday Pay Level The Peachtree Pay Level (1-20) associated with Holiday Pay Holiday Pay Item Code The Peachtree Pay Item Code associated with Holiday Pay Sick Pay Level The Peachtree Pay Level (1-20) associated with Sick Pay 40 06-0414-000 Rev. C timeQplus Administrator Functions – Export Sick Pay Item Code The Peachtree Pay Item Code associated with Sick Pay Other Pay Level The Peachtree Pay Level (1-20) associated with Other Pay Other Pay Item Code The Peachtree Pay Item Code associated with Other Pay Output Field Titles This value should match the Peachtree Import option chosen when executing the actual import to Peachtree. The default is NO. Batch Sequence Number The first ticket number that will be used in the resultant output file. This number should be modified only if a previous installation of timeQplus has already been used to export employee time cards to Peachtree. Any arbitrary changes to this field can cause imports to Peachtree to fail. WellsFargo, Premier, QwikPay and Intuit PC Access Import File timeQplus exports employee hours summary data to Wells Fargo ®, Premier ® and QwikPay ® payroll packages using the Intuit PC Access ® Time Clock Interface import file format. The following list describes the required export configuration fields when exporting using this format. Company Name Payroll application company name Determined by the payroll application being used. Regular Pay Code Payroll application pay code assigned to Regular Worked Hours 'PLUS' only...ignored in applications that use PC Access JR format Overtime Level 1 Pay Code Payroll application pay code assigned to Overtime Level 1 Worked Hours 'PLUS' only...ignored in applications that use PC Access JR format Overtime Level 2 Pay Code Payroll application pay code assigned to Overtime Level 2 Worked Hours Vacation Code Payroll application pay code assigned to Vacation Hours. Check 'Export as Deduction' to export as negative hours Holiday Code Payroll application pay code assigned to Holiday Hours. Check 'Export as Deduction' to export as negative hours Sick Code Payroll application pay code assigned to Sick Hours. Check 'Export as Deduction' to export as negative hours Other Code Payroll application pay code assigned to Other Hours. Check 'Export as Deduction' to export as negative hours ADP Version 7.0 timeQplus exports employee profile and time card data to two ADP import file formats based on values entered for the following fields: Company Code The 3-character alpha-numeric ADP Company Code Batch Sequence Number The numeric ADP Import Batch Number 41 06-0414-000 Rev. C timeQplus Administrator Functions – Export Pay Number The numeric ADP Pay Number Overtime Level 2 Pay Code The value to use in the ADP import Coded Hours field for Overtime Level 2 Hours Overtime Level 2 Pay Code Name The name of the value to use in the ADP import Coded Hours field for Overtime Level 2 Hours Vacation Pay Code The value to use in the ADP import Coded Hours field for Vacation Hours Vacation Pay Code Name The name of the value to use in the ADP import Coded Hours field for Vacation Hours Holiday Pay Code The value to use in the ADP import Coded Hours field for Holiday Hours Holiday Pay Code Name The name of the value to use in the ADP import Coded Hours field for Holiday Hours Sick Pay Code The value to use in the ADP import Coded Hours field for Sick Hours Sick Pay Code Name The name of the value to use in the ADP import Coded Hours field for Sick Hours Other Pay Code The value to use in the ADP import Coded Hours field for Other Hours Other Pay Code Name The name of the value to use in the ADP import Coded Hours field for Other Hours Output to ADP CSV format Chooses ADP Comma Delimited format for ADP Data Import (WINDOWS) Output to ADP EPIP format Chooses ADP EPIP format for ADP Data Import (DOS) Generic V2.0 timeQplus exports employee profile and time card data to a Generic ASCII delimited file based on values entered in the following screen. Click the Save button when done. 42 06-0414-000 Rev. C timeQplus Administrator Functions – Export Generic ASCII file Export The timeQplus software exports employee profile and time card data to a Generic ASCII delimited file based on values entered for the following fields. Click a row and then click the Edit button to edit a column header. Click a row and then click the up/down arrows to maneuver a row to its appropriate position. Click the Save button when done. Genesys & Oryel Payroll Export Inbound timecard file layout The purpose of these specifications is to provide you with the required format to produce time entry files. Each record is 80 bytes long and should be padded to that length. The file is fixed without field delimiters (such as commas, semicolons, tabs, etc. between each data field). There cannot be any null fields or blank positions. Fields or positions that do not have data should be filled with spaces (" ") or zeroes ("0") according to the specific field requirements. Format Legend Format Type Description A Alpha AN Alphanumeric N Numeric N2 Numeric 2 decimals implied 43 06-0414-000 Rev. C timeQplus Administrator Functions – Export N4 Numeric 4 decimals implied File Layout If an employee only has hours worked with no cost center or rate overrides, the following layout may be used. Field # Positions Length Format Field Name and Description 1 1-3 3 AN Company Identifier; Ex "PMC" 2 4-5 2 N Group Identifier Ex: 05 3 6-14 9 AN Social Security Number (no dashes) 4 15-20 6 A Space Fill 5 21-22 2 AN Literal ‘85’ 6 23-27 5 AN Sequence Field ‘YMMDD’ 7 28 1 AN Literal ‘1’ 8 29-30 2 N Earning number Ex ‘01’ for Regular 9 31-36 6 N2 Hours, Units or Dollars and Cents If no additional Earnings are needed, space fill the remaining fields 10 37-38 2 N Earning number Ex ‘02’ for Overtime 11 39-44 6 N2 Hours, Units or Dollars and Cents 12 45-46 2 N Earning Number Ex ‘03’ for Doubletime 13 47-52 6 N2 Hours, Units or Dollars and Cents 14 53-54 2 N Earning Number Ex ‘05’ for Shift 2 15 55-60 6 N2 Hours, Units or Dollars and Cents 16 61-62 2 N Earning Number Ex ‘17’ Holiday 17 63-68 6 N2 Hours, Units or Dollars and Cents 18 69-70 2 N Earning Number Ex ‘19’ Jury Duty 19 71-76 6 N2 Hours, Units or Dollars and Cents 20 77-80 4 A Space Fill If an employee has cost center or rate overrides, the following layout may be used. Field # Positions Length Format Field Name and Description 1 1-3 3 AN Company Identifier; Ex "PMC" 2 4-5 2 N Group Identifier Ex: 05 3 6-14 9 AN Social Security Number (no dashes) 4 15-20 6 A Space Fill 5 21-22 2 AN Literal ‘82’ 6 23-27 5 AN Sequence Field ‘YMMDD’ 44 06-0414-000 Rev. C timeQplus Administrator Functions – Export 7 28 1 AN Literal ‘1’ 8 29-30 2 N Earning number Ex ‘01’ for Regular 9 31-36 6 N2 Hours, Units or Dollars and Cents 10 37-42 6 N4 Rate Override (space fill if none) 11 43-44 2 N Earning number Ex ‘02’ for Overtime 12 45-50 6 N2 Hours, Units or Dollars and Cents 13 51-56 6 N4 Rate Override (space fill if none) 14 57-62 6 A Space Fill 15 63-80 17 AN Cost Center Override PayChex Paylink Export timeQplus exports employee profile and time card data to a PayChex PayLink import file based on values entered for the following fields: Office Number The PayChex Paylink office number Client ID Your PayChex Paylink Client ID Site Number The PayChex Paylink Site number for the employees entered in the Time and Attendance Software Sequence Number The PayChex Paylink Import Sequence Number Vacation Pay Code A valid PayChex Paylink pay code for Vacation Pay Holiday Pay Code A valid PayChex Paylink pay code for Holiday Pay Sick Pay Code A valid PayChex Paylink pay code for Sick Pay Other Pay Code A valid PayChex Paylink pay code for Other Pay PayChex Preview Export timeQplus exports employee profile and time card data to a PayChex Preview import file based on values entered for the following fields: Client Number Your PayChex Preview Client ID Regular Pay Code PayChex Preview Pay Code for Regular Hourly Wages Overtime Level 1 Pay Code PayChex Preview Pay Code for Overtime Level 1 Hourly Wages Overtime Level 2 Pay Code PayChex Preview Pay Code for Overtime Level 2 Hourly Wages Vacation Pay Code PayChex Preview Pay Code for Vacation Hourly Wages Holiday Pay Code PayChex Preview Pay Code for Holiday Hourly Wages Sick Pay Code PayChex Preview Pay Code for Sick Hourly Wages Other Pay Code PayChex Preview Pay Code for Other Hourly Wages 45 06-0414-000 Rev. C timeQplus Administrator Functions – Export Vacation Export as Deduction If checked, export Vacation as a deduction (otherwise as earning) Holiday Export as Deduction If checked, export Holiday as a deduction (otherwise as earning) Sick Export as Deduction If checked, export Sick as a deduction (otherwise as earning) Other Export as Deduction If checked, export Other as a deduction (otherwise as earning) Sequence The PayChex Preview Import Sequence Number PayChex IM0007 Import File timeQplus exports employee profile and time card data to a PayChex IM0007 import file based on values entered in the following screen. Click the Save button when finished. PrimePay PrimeLink Export timeQplus exports employee profile and time card data to a PrimePay PrimeLink import file based on values entered for the following fields. Batch Sequence Number The numeric PrimePay PrimeLink Import Batch Number Overtime Level 1 Pay Code The value to use in the PrimePay PrimeLink import Coded Hours field for Overtime Level 1 Hours Overtime Level 2 Pay Code The value to use in the PrimePay PrimeLink import Coded Hours field for Overtime Level 2 Hours Vacation Pay Code The value to use in the PrimePay PrimeLink import Coded Hours field for Vacation Hours Holiday Pay Code The value to use in the PrimePay PrimeLink import Coded Hours field for Holiday Hours Sick Pay Code The value to use in the PrimePay PrimeLink import Coded Hours field for Sick Hours Other Pay Code The value to use in the PrimePay PrimeLink import Coded Hours field for Other Hours 46 06-0414-000 Rev. C timeQplus Administrator Functions – Export Heartland Plus One Fixed Length File This page describes the file format Heartland PlusOne will accept. If a file does not match these specifications, it will not import correctly. Imported files should be verified by the payroll user prior to submitting to assure accuracy. • Company Identifier – Heartland Company Identifier. • Pay Codes – Earnings code defined in Heartland Payroll. • Department code zero len format – specifies the number of leading zeros to include when exporting department codes. 47 06-0414-000 Rev. C timeQplus Administrator Functions - Supervisors Supervisors As previously mentioned, timeQplus has two levels of system access: Administrator and Supervisor. Both types are managed on the Supervisors screen. All users defined as administrators have access to the Supervisors screen, which allows them to add/delete other administrators and supervisors, reset user passwords, and edit a supervisor’s list of assigned employees. To access the Supervisors screen, click the Supervisors button on the left Navigation Bar or click View on the top menu bar and choose Supervisors. Managing Administrators and Supervisors To add a new administrator: • On the Supervisors screen, click the blank top row under the Login column and enter the username of the new administrator. • Check the box under the Administrator column. • Press the Enter key to save the entry. To add a new supervisor: • On the Supervisors screen, click the blank top row under the Login column and enter the username of the new supervisor. • Press the Enter key to save the entry. Note: The default password for a new user will be the same as the Login ID. The system will prompt user to choose a new password when logging in for the first time. To delete an administrator/supervisor: • On the Supervisors screen, click the row displaying the Login ID of the user to be deleted. • Click the Delete button. Click Yes in the dialog box to confirm deletion. Click No to cancel. 48 06-0414-000 Rev. C timeQplus Administrator Functions – Supervisors An Administrator/Supervisor may change his/her password at any time by logging in and choosing Change Password from the File menu (on top bar). This will open the Change Password dialog box. Enter the desired new password in the New Password field as well as in the Confirmation field. Both entries must be identical. Click the Ok button to change the password. Click the Cancel button to exit. To reset the password of another administrator/supervisor: • On the Supervisors screen, click the row displaying the Login ID of the user whose password you want to reset. • Click the Reset Password button. Click Yes in the dialog box to reset the password to the user’s Login ID. Click No to exit without resetting the password. Note: After password reset, the system will prompt the user to choose a new password during next logon. To edit a supervisor’s list of assigned employees: • On the Supervisors screen, click the row displaying the Login ID of the supervisor whose employee list is to be edited. • Click the Assign/Unassign Employees button. The Employee Assignments screen is displayed for this supervisor. • To assign an employee to this supervisor, click the employee’s name under the Unassigned Employees column and then click the right arrow button to move the employee’s name to the Assigned Employees column. To assign all employees, click the double right arrows. • To remove an employee from this supervisor’s assigned list, click the employee’s name under the Assigned Employees column and then click the left arrow button to move the employee’s name to the Unassigned Employees column. To remove all employees, click the double left arrows. Note: To select multiple employee names, press and hold the CTRL key while clicking each name. • Click the Save button when done or click Cancel to exit without saving. 49 06-0414-000 Rev. C timeQplus Administrator Functions – Supervisors Supervisor Preferences The Supervisor Preferences feature allows you to modify your individual preferences for Time Totals Format and whether you want the Punch Comment dialog box to display by default when you insert punches through the Punch Editing screen. To view or change your Supervisor Preferences: • Log in to the timeQplus software. • Click File on the top menu bar and choose Supervisor Preferences. • Select your preference for Time Totals Format. You may choose to display time totals in minutes or hundredths. • If you generally like to enter comments when you insert transactions, check the Show Punch Comment Dialog box. This will cause the Comment dialog box to pop up by default every time you insert a punch. If you generally do not wish to enter comments when you insert transactions, uncheck the box. • Click the Save button when done. To exit without saving change, click the Cancel button. 50 06-0414-000 Rev. C timeQplus Administrator Functions – Time Clock Time Clock The Time Clock screen allows an administrator to configure and manage Time Clocks that are used with timeQplus. To access the Time Clock screen, click the Time Clock button on the left Navigation Bar or click View on the top menu bar and choose Time Clock. • The Time Clock screen consists of two horizontal tabs: Employees Rights and Device Events, and three side tabs: Ethernet, Comm Port (which includes RS232 and USB connections), and USB Flash Drive. • The Employees Rights tab allows you to assign or un-assign employees to Time Clocks. • The Device Events tab allows you to view the selected Time Clock event log which includes punches that were retrieved from the Time Clock. • Time Clocks that are currently connected via Ethernet to timeQplus are shown with a green dot and the IP address. A Time Clock that has a red dot is currently not connected or there is some other network issue at play. • Time Clocks that are currently connected via Serial [Comm Port] Port are shown with a Proxy IP address and a COM # and a green dot. If a red dot appears, this Time Clock is no longer connected. • Times Clocks that require a Flash drive to communicate with the timeQplus system appear on the list showing the Device #. • When the mouse pointer is hovered over a listed Time Clock, the user is presented with a small popup that shows what was input in the description field of that Time Clock. • Select the Ethernet Tab when adding a new network Time Clock or removing a network connected Time Clock. • Select the Comm Port side tab when adding a serially connected [Comm Port] Time Clock using an RS232 [Serial] or a USB using an RS232 adapter connection. • Select the USB Flash Drive side tab when using a USB flash drive to upload and download data to/from the computer. 51 06-0414-000 Rev. C timeQplus Administrator Functions – Time Clock Adding an Ethernet Connected Time Clock • • • • • • • Click the Time Clock button on the left Navigation Bar or click View on the top menu bar and choose Time Clock. If you’re adding a hand punch, click the Hand Punch button on the left Navigation Bar or click View on the top menu bar and choose Hand Punch. Click the Ethernet tab on the left of Time Clock Manager screen. Click the Add Time Clock button. The "Add Time Clock wizard" window will appear. Click the Next button. timeQplus will then automatically search your network for time clocks. Only time clocks that have not been previously added to the software will be listed. If adding a hand punch, you will need to manually enter the IP address information. Select the Time Clock you want to add, and then click the Next button. Note: You can also manually input the IP address for Time Clocks outside the LAN but can possibly still be accessed by timeQplus. To initiate this process, check the "I want to set the IP Address manually" box on lower left, and then click the Next button. On the Network Connection window: o If applicable, enter the Time Clock’s password (the COMM key value assigned on the Time Clock). A password safeguards the Time Clock against unauthorized network access. o Enter a description, which is optional, but recommended. A description such as "Front Lobby" or "Production Entrance C" can be useful if you have a number of Ethernet connected Time Clocks. o Select the Time Clock’s time zone. o If not adding a hand punch, select a type for the Time Clock: Biometric (Finger), Badge (Proximity/Barcode/Magstripe), or Facial Recognition. Click the Next button when finished. 52 06-0414-000 Rev. C timeQplus Administrator Functions – Time Clock • • • The "Test Connection" window will appear and indicate if the Time Clock was successfully connected to timeQplus. If so, click the Next button. If not, click the Back button to review the setup information on the previous window and try again or click Cancel to exit the wizard and diagnose the problem. When a successful connection is made, the next window will ask if you want to Clear Transactions (aka punches) on this Time Clock. To clear transactions, check the "Clear device transactions…" box and click the Next button. The "Clear Users" window will ask if you want to delete all existing users on this Time Clock. To delete all users, click the Clear users button; otherwise, click the Next button to continue. 53 06-0414-000 Rev. C timeQplus Administrator Functions – Time Clock • On the last screen, although not required, performing a manual poll is highly recommended. Click the Finish button to exit the wizard. The Time Clock should now appear in the list. 54 06-0414-000 Rev. C timeQplus Administrator Functions – Time Clock Adding a Serial Connected Time Clock Make sure the Time Clock is powered on and you have a USB cable connected correctly to the timeQplus Server or client PC. Note: Serial connectivity is only available with Biometric (Finger), Proximity, and Hand Punch Time Clocks. Step 1 - The Server/PC • Navigate to Control Panel>Device Manager>Ports • Locate the Time Clock just connected and note the COM#. This # will be input as the Serial Port # later. • Right click on this Time Clock, then select ‘Properties’, then select the ‘Port Settings’ tab • Select and note for future use the value in the ‘Bits per second’ drop down field. This value will be input as the Baud Rate later. Step 2 - The Time Clock For Biometric or Proximity: • Press ‘Menu’. • Select Options and press OK. • Select Comm Opt and press OK. • Navigate to and input the desired values for: o BaudRate o Dev Num (will be used on the timeQplus Serial Connection setup window) • The following must be set as noted: o Ethernet N o RS232 N o RS485 N o USB Y o COMM Key 0 • Once changes are complete, press ESC and then press OK to save. Note: For Hand Punch, please refer to the hand punch user manual for configuration instructions. Step 3 - timeQplus • Click the Time Clock button on the left Navigation Bar or click View on the top menu bar and choose Time Clock. • Click the Comm Port (RS232) tab on the left of Time Clock Manager screen. • Click the ‘Add Time Clock’ button. The "Serial Connection" window will appear. 55 06-0414-000 Rev. C timeQplus Administrator Functions – Time Clock • • • • • • • • The Proxy Server field defaults to the tQp Server machine. Click the search button and select the proxy server designation for the computer to which this time clock is physically connected. Select the correct values for Serial port, Baud Rate, Device ID, Time Zone, and Time Clock type. Enter a description, which is optional, but recommended. A description such as "Front Lobby" or "Production Entrance C" can be useful if you have a number of connected Time Clocks. Click the Next button to continue. The "Test Connection" window will appear and indicate if the Time Clock was successfully connected to timeQplus. If so, click the Next button. If not, click the Back button to review the setup information on the previous window and try again or click Cancel to exit the wizard and diagnose the problem. When a successful connection is made, the next window will ask if you want to Clear Transactions (aka punches) on this Time Clock. To clear transactions, check the "Clear device transactions…" box and click the Next button. The "Clear Users" window will ask if you want to delete all existing users on this Time Clock. To delete all users, click the Clear users button; otherwise, click the Next button to continue On the last screen, although not required, performing a manual poll is recommended as noted. Click the Finish button to exit the wizard. This Time Clock should now be listed on the “Comm Port (RS232)” tab. 56 06-0414-000 Rev. C timeQplus Administrator Functions – Time Clock Adding a USB Flash Drive Time Clock This communication type is used when a Time Clock cannot be connected via an Ethernet or a Serial Connection. It is essentially not connected at all so data is transferred to and from the Time Clock using a USB flash drive. • Click the Time Clock button on the left Navigation Bar or click View on the top menu bar and choose Time Clock. • Click the USB flash drive tab on the left of Time Clock Manager Screen. • Click the "Add Time Clock" button and then click "Next". The Remote Time Clock settings can now be configured. • Select the Device ID (from the Time Clock) • Enter a Description (optional but recommended), such as the location of the Time Clock. • Select the Time Zone. • Select the Time Clock type: Biometric (finger reader); Badge (proximity/magnetic stripe/barcode badge reader); Face Recognition. • Click ‘Next’ and then "Finish". Assigning/Removing Employees to/from Time Clocks • Ensure the Employee Rights tab is selected at the top of the screen. • Click the appropriate tab on the left to select the type of Time Clock communications. (Note: Use Comm Port for USB-connected Time Clocks.) • Click to select the desired Time Clock from the list. • To assign an employee to that Time Clock, click to select the desired employee name in the Unassigned Employees box. • o Click the right arrow button to move the employee’s name into the Assigned Employees box. o To quickly and easily assign all employees to the Time Clock, click the double right arrow button. To remove an employee from that Time Clock (meaning they will no longer be able to use that Time Clock to punch), click to select that employee’s name in the Assigned Employees box and then click the left arrow button to move the employee’s name back to the Unassigned Employees box. 57 06-0414-000 Rev. C timeQplus Administrator Functions – Time Clock • When you have assigned [or removed] all the desired employees on that Time Clock, click the Save button. Note: Occasionally, a Time Clock may display a red dot to the left of its name (indicating a loss of communications). This condition almost always indicates a problem with your company LAN. Normally, the communications connection would be re-established automatically at the next polling interval, when the software polls the Time Clocks. If you need to work with a Time Clock before then, such as to assign employees, press the POLL button. This usually works to re-establish the connection between the software and the Time Clock. If this fails to solve the problem, it is recommended you contact your company technical resources for assistance before contacting Acroprint. Contacting Acroprint for this type of problem may be a fee based communication. Loading Employee Data onto a USB Time Clock You can load Employee Data on a Time Clock using one of three methods: • Method 1: Uploading Employee Information from timeQplus via a flash drive. • Method 2: Connect the Time Clock via cable (Ethernet or serial) to the timeQplus Server or Client PC, assign employees, and then, in timeQplus, change the Time Clock to a USB Flash Drive. • Method 3: Manually adding employees to the Time Clock thru the Time Clock menu. Methods 1 and 2 are equally preferred ways to load employee information onto a Time Clock. Either method eliminates the possibility of keying in erroneous information for an employee and is much faster if you have more than a few employees. In both cases, the employee’s name is displayed when punching. Method 1 – Uploading Employee Info via Flash Drive 1. Download the employee data from the timeQplus software to a USB flash drive. a. Insert a flash drive into the PC where the timeQplus server is running. b. Navigate to the Time Clock screen on the timeQplus software and click the "USB flash drive" tab. c. Select the employees you want to assign to the Remote Time Clock and click "Save". d. If there are multiple USB storage devices connected to the PC, you will need to specify to which flash drive on which you want to save the employee information. (See image below) e. Click the "Save to USB" button. Two or four files will be downloaded to the Flash Drive. Two if you are not using Work Codes, four if you are. The files are: user.dat, template.dat, globalworkcodes.dat, and userworkcodes.dat. Note: For the Face Verify Time Clock, you will see ssrface.dat instead of template.dat. IMPORTANT! • Each time you click "Save to USB"; all assigned employees will be downloaded to the Flash Drive even if they have already been downloaded previously. • If you want to assign only certain employees to a given Time Clock, you will need to delete any existing files on the Flash drive before saving the next group of employees to the Flash drive for the next Time Clock. 2. After downloading all employee information, connect the flash drive to the Time Clock. 3. Press the "Menu’ button. 58 06-0414-000 Rev. C timeQplus Administrator Functions – Time Clock Note: For a facial recognition Time Clock, skip to step 6. 4. Select ‘PenDrive Mng’ and press ‘OK’. 5. Select ‘UpLoad User’ and press ‘OK’. You will see ‘Copy Data Suc‘ when upload is complete. 6. Press Menu > Dn/Upload > Upload User. You will see ‘Upload Successfully’ when upload is complete. 7. Remove flash drive. Now employees can punch as needed. Method 3 - Manually Adding Employees to the Time Clock: You can add employees directly to the time clock. You must make sure that the User ID of each employee matches that employee’s User ID in the timeQplus software. If you add employees via this method, a punch will show the employee User ID #. The employee name will not be displayed when punching. Downloading Punch Data from a Time Clock to a flash drive • Connect your flash drive to your Time Clock. For facial recognition time clocks, skip to step 3. • On the Time Clock, press Menu> PenDrive Mng> Download AttLog. Skip to step 4. • On the facial recognition Time Clock, press Menu > Dn/Upload > Download Transactions. • Once the Time Clock has copied all punch data to the Flash Drive, a message, "Copy Data Suc" or "Download Successfully" will appear on the Time Clock display indicating that the transfer of punch data was successful. • Remove the Flash Drive. A single flash drive can be used with multiple Time Clocks since each transaction data file is identified with the device number of the Time Clock. For example, 1_attlog.dat, 2_attlog.dat, etc. All transactions will be downloaded including any that existed before the last download, assuming they have not been manually deleted. To delete transactions from the Time Clock (only after downloading to a flash drive and uploading to your timeQplus Server): • On face recognition time clocks, press Menu > Data Mgt. > Delete Transactions. • On badge or biometric time clocks: o Press Menu. o Select ‘Options’ and press ‘OK’. o Select ‘System Opt’ and press ‘OK’ o Select ‘Adv Option’ and press ‘OK’ o Select ‘Del AttLogs’ and press ’OK’ Uploading Punch Data from the USB flash drive to the timeQplus server Note: Time Clock data can only be uploaded to the timeQplus Server and not to any client PCs. • Connect the flash drive to the PC. • Navigate to the Time Clock screen on the timeQplus software and click the "USB flash drive" tab. • Click "Import USB drive" or alternatively from the timeQplus Systems Utility Screen, you can click "timeQplus Import USB drive". Note: If there are multiple Flash Drives with punch data connected to the PC, please take care to select the one with the data you want for this import. • Select the appropriate flash drive and click ‘OK’. The Import Tool screen will appear: 59 06-0414-000 Rev. C timeQplus Administrator Functions – Time Clock • To view transaction data before importing, highlight a data file and click ‘View file transactions’. • To import transaction data, highlight the file(s) you wish to import and click ‘Import selected files…’ To select multiple files, press and hold the CTRL key while clicking the file name(s). • After the import is complete, you will be prompted to backup the file(s). Click ‘Yes" to create a backup file on the flash drive as an archive; otherwise, click ‘No’. • You will then be prompted to delete (from the flash drive) the file(s) that were just imported. Click ‘Yes’ to remove the files from the flash drive; otherwise, click ‘No’ to finish. Poll and Update The Polling process performs the following actions in timeQplus: • Polling retrieves punches that have been made on any connected Time Clock and updates the timeQplus server with punches since the last Polling event. • Polling will clear the Time Clock of all punches after retrieval. A visual record of punches will, however, remain on the ‘Device Events’ screen on the Time Clock tab. • Polling sends the timeQplus server time and date to any connected Time Clock. • Removes from connected Time Clocks employees that are ‘marked for deletion’, i.e., employees whose templates have been removed from the timeQplus software. The Update process performs the following actions in timeQplus: • A polling event is the first action launched when you start the Update process. Polling is done to obtain an accurate In/Out status for employees assigned to the Time Clock. • Updates a connected Time Clock with employee name changes. • Updates the hours worked for the current pay period for each employee assigned to a connected Time Clock. If an employee is assigned to multiple Time Clocks, each Time Clock is updated. • Refreshes the current Work Code list to update all additions and deletions. To schedule the automatic poll and update of all Time Clocks: • From the File menu, choose System Utilities. • Click the timeQplus Settings tab. • Enter a value for the polling interval. The default is 60 minutes, with a 10 minute minimum allowed. • Set the update time. The default is 12am. • Enter the frequency of the update. The default is 24 hours, with a 1 hour minimum allowed. • If applicable, set the polling interval, update time, and frequency for hand punch time clocks. 60 06-0414-000 Rev. C timeQplus Administrator Functions – Time Clock • Click Ok when done or Cancel to exit. To manually poll or update a single connected Time Clock: • Navigate to the Time Clock screen and click the appropriate tab on the left. • Click a Time Clock in the list to highlight and then click the Poll Clock button. • Click a Time Clock in the list to highlight and then click the Update Clock button. To manually poll or update multiple connected time clocks simultaneously: • Click the Multi Time Clock Poll & Update button located at upper right of Time Clock screen. • Check the box to the left of the Time Clocks you wish to include (identified by IP address). • Select either Poll or Update and then click Next to proceed. Changing Time Clock Connection Types Use caution when making changes to the Time Clock configuration. Incorrect settings can cause the software to be unable to communicate with the Time Clock. In certain instances, it may be necessary to change an Ethernet or Serial connected Time Clock to a USB Time Clock. Some reasons for this action: - A previously installed Ethernet or serial connected Time Clock is being moved to a location without a network or serial connection. - Communication to an existing Ethernet connected Time Clock has been lost and the user needs to get the transaction data from the clock. To change a Time Clock’s connection type from Ethernet or Serial to USB: • Select the Time Clock and click the Time Clock Details button. The Time Clock Details screen will appear. • Click USB flash drive and then click Save. 61 06-0414-000 Rev. C timeQplus Administrator Functions – Time Clock This Time Clock is now moved from the Ethernet or Comm Port connections tab to the USB Flash Drive connection tab. All employees assigned to the Time Clock will still remained assigned. Note: If you want to assign additional employees, you will have to add them to the Time Clock manually or via a Flash Drive. To change a Time Clock’s connection type from USB to Ethernet or Serial: • Select the desired USB Flash Drive Time Clock and click "Time Clock Details". • Check "Network Device" or "Serial Device". • o When selecting "Network Device", make sure you input the correct IP Address and Password (if applicable). o When selecting "Serial Device", make sure you enter the correct Serial Port number and Baud Rate Click the Save button when finished. The Time Clock is now moved from the USB Flash Drive tab to the Ethernet or Comm Port connection tab. 62 06-0414-000 Rev. C timeQplus Administrator Functions – Time Clock Copying Multiple Finger Templates from One Time Clock to Another timeQplus is capable of storing only one (1) primary finger template for each employee; however the TQ600B Time Clock is capable of storing up to ten (10) finger templates for each employee. If you wish to enroll multiple finger templates for employees on more than one Time Clock, you will need to download the finger templates from a Time Clock to a USB flash drive then upload the finger templates to one or more additional Time Clocks. The process is as follows: 1. Insert a flash drive into the Time Clock that has the multiple finger templates. 2. Select Menu, then PenDrive Mng and then press OK. 3. Select DwnLoad User and then press OK. You will see “Copy Data Suc” displayed once download is complete. 4. Press ESC until you see the Welcome screen. 5. Remove the flash drive. 6. Insert the Flash Drive into the next Time Clock. 7. Select Menu, then PenDrive Mng and then press OK 8. Select UpLoad User and then press OK. You will see “Copy Data Suc” displayed once upload is complete. 9. Press ESC until you see the Welcome screen. 10. Remove the Flash Drive. 11. Test an employee with multiple Fingers to see if all finger templates were uploaded successfully. 12. Repeat steps 6 -11 for all remaining Time Clocks. 63 06-0414-000 Rev. C timeQplus Administrator Functions – Hand Punch Hand Punch A new install key is required to be able to see the Hand Punch button and screen unless it was supplied as a new purchase. A Hand Punch time clock can be connected to the timeQplus software via an Ethernet or Serial connection only. Select the appropriate tab on this screen when adding a hand punch. An employee cannot use a UserID and Password combination to punch. For this reason, only employees with an enrolled hand template can be seen on the Hand Punch screen. Once an employee’s hand template is enrolled, the employee will be placed in the Assigned Employees area for that Hand Punch time clock. When assigned, an employee can be unassigned and will appear in the Unassigned Employees area. 64 06-0414-000 Rev. C timeQplus Administrator Functions – System Utilities System Utilities Date Tools The Data Tools tab of the System Utilities screen allows an administrator to manage important configuration options and troubleshoot the timeQplus database, as well as upgrade the number of employees allowed by the system. • Select System Language – Click the appropriate button to select the desired system language. The default is English. Note: Changing the language setting will require restarting the system. • Initialize Database – Clear all information from the database and invoke the setup wizard. WARNING! Use of this option will delete all existing information, including employee 65 06-0414-000 Rev. C timeQplus Administrator Functions – System Utilities profiles and punch data unless the Administrator performing this operation chooses to keep existing employees in the database. • Initialize Users – Deletes all users (both Administrators and Supervisors) defined on the Supervisors tab except the default admin login ID. The password for the admin login ID is reset to “admin”. • Import QuickBooks – Import employees from QuickBooks. • Import timeQplus or Attendance RX – When upgrading from Attendance RX or timeQplus Version 2 the Previous and Current pay period data from the old system will be imported into the new timeQplus Version 4.xx database. The archive databases will remain on, and be accessible to your computer where the current time and attendance applications are installed. • Backup – Backs up the current timeQplus database to a SQL Server database • Restore – Restores the most recent database stored in SQL Server to timeQplus. • Upgrade – Allows you to install an increased number of employees or additional features that you can configure in your timeQplus software. Requires a purchased upgrade from Acroprint. • View Event Log – Lists the date and time of critical events such as pay period rollover and setup rules changes. • Upload Data – Automatically uploads a copy of your database to Acroprint Customer Support group to assist you and the Acroprint technician in resolving issues. • Realign Transactions – If a punch is recorded at the Time Clock, but the Time Clock is not polled until the system has rolled to the next pay period, some punches could be associated with the incorrect pay period. Use this feature to move the misaligned punch(es) to the appropriate pay period. • timeQplus Debug Tool – Use this tool to troubleshoot communications issues with your timeQplus Time Clock devices and validate data that is stored on the Time Clocks. • timeQplus Import USB drive – When a Time Clock is installed as USB flash drive which has no wired data connection to the server, an Administrator takes a USB drive to the Time Clock and retrieves the Punch data. The punch data is then uploaded to the timeQplus database by connecting the USB drive to the computer which contains the timeQplus server/database. • timeQplus Import Tool – Use this tool to import Time Clock transactions from log files stored in the timeQplus database. Use extreme caution when changing settings on the Data Tools tab. Changes made on this screen can have a significant impact on the database and operations of timeQplus. 66 06-0414-000 Rev. C timeQplus Administrator Functions – System Utilities timeQplus Settings The timeQplus Settings tab of the System Utilities screen allows an administrator to enable and configure the automatic polling and update of all time clocks in addition to resetting the position of the virtual clock. Note: The settings on the timeQplus Settings screen apply to all online Time Clocks. • Enter the desired Polling Interval (in minutes). This determines how often the system will poll the Time Clock(s) and bring new punch data in to the central database. The default is every 60 minutes. When setting the Polling Interval, you should keep in mind employees cannot clock In/Out while the Time Clock is being polled. Also, polling too frequently may affect the availability of computer system resources. • Enter the desired Update Time for employee status on the Time Clocks. For TQ600 clocks, this is the time of day at which the system will determine and set the correct IN/OUT status of each employee, and also calculate and store in the Time Clocks the number of hours worked this pay period for each hourly employee. The system will also "push" to the Time Clocks any employee name changes that have occurred since the last status update. • Enter the Frequency (in hours) at which employee statuses should be updated. The default is once every 24 hours. • Click the Reset Virtual Clock Position button to center the Virtual Clock on the currently active display. This will take affect the next time the Virtual Clock is launched. 67 06-0414-000 Rev. C timeQplus Supervisor Functions This chapter provides detailed information on timeQplus functions specific to the supervisor role. It contains the following sections: ¾ timeQplus Navigation Bar ¾ Employees ¾ Messages ¾ Punch Editing ¾ Reports ¾ Time Clock 68 06-0414-000 Rev. C timeQplus Supervisor Functions timeQplus Navigation Bar The timeQplus Navigation Bar for supervisors allows them to view/edit employee information, approve time cards and TimeSlips, and view/print reports. To see the Navigation Bar, double click the timeQplus icon on your desktop. Ensure that you are connecting to the correct server and then enter your Supervisor Login and Password. Click the buttons on the left Navigation bar to access the Supervisor functions: • Employees Manage employee information and shift assignments • Messages View and Edit your Employee Messages • Punch Editing View and Edit Employee Time Cards & Time Slips • Reports • Time Clock Update Time Clocks Print or Preview Reports 69 06-0414-000 Rev. C timeQplus Supervisor Functions Employees On the Employees screen, supervisors can view/edit employee information or assign Work Codes to employees. This applies to assigned employees only. To access the Employees screen, click the Employees button on the left Navigation Bar or click View on the top menu and choose Employees. To edit an employee’s information: • From the Employees screen – On the Employees screen, simply type the updated information directly into the appropriate field and press ENTER. • From the Employee Profile screen – Click anywhere on the row containing the employee to be edited. Click the Detail button to launch the Employee Profile screen, which allows additional employee information to be recorded and saved. Click Save when done or click Cancel to exit without saving. Please reference the Managing Employees section in the timeQplus Administrator Functions chapter for more information. 70 06-0414-000 Rev. C timeQplus Supervisor Functions Work Codes To edit an employee’s list of work codes: • On the Employees screen, click the row containing the employee’s name. • Click the Work Codes button to display the Employee Work Codes screen. • From the “Choose a Pay Period” drop down list, select the pay period for which the work code assignments should apply. The selection defaults to the Current pay period. • To assign a work code(s) to this employee, click a single work code or, to select multiple work codes, press and hold the CTRL key while clicking each code under the Unassigned Work Codes column. Click the right arrow button to move the work code(s) to the Assigned Work Codes column. To assign all work codes, click the double right arrows. 71 06-0414-000 Rev. C timeQplus Supervisor Functions • To remove a work code(s) from this employee’s assigned list, click a single work code or, to select multiple work codes, press and hold the CTRL key while clicking each code under the Assigned Work Codes column. Click the left arrow button to move the work code(s) to the Unassigned Work Codes column. To remove all work codes, click the double left arrows. When a work code(s) is unassigned and the chosen pay period is Current, you will be asked if you want to unassign only from future pay periods: • o Click No if the work code(s) should be unassigned from both the current and future pay periods. o Click Yes if the work code(s) should be unassigned starting with the next pay period moving forward. An expiration date (the start date of the next pay period) will be displayed for each unassigned work code. When the next pay period begins, the work code will be automatically removed from this employee’s assigned work codes list. Click Next to proceed with selecting the employee’s default work code. 72 06-0414-000 Rev. C timeQplus Supervisor Functions • On the Default Work Code screen, select the work code that should be the employee’s default. Check the “Select a different default work code for the future pay period” box to choose a different default work code for the next pay period. Please note that this option is only visible when the chosen pay period is Current. Note: Only the employee’s assigned work codes are populated in the Default Work Code drop down list. If the employee has no assigned work codes, then the Default Work Code drop down list will contain all available work codes. • After selecting a default work code, click Next. For work codes that were unassigned, the software will then determine if there are existing transactions in the chosen pay period that use those work codes. If so, an error message will be displayed indicating which work codes are in use. In order to continue, you will need to click the Back button to reassign the work code(s) or click the Cancel button to exit. No work code can be unassigned if it is being used by at least one transaction. 73 06-0414-000 Rev. C timeQplus Supervisor Functions • If there are no errors, the “Save Changes on Time Clocks” screen is displayed. The work code changes will be sent to each time clock to which the employee is assigned. The Result column will indicate whether the time clock was updated successfully. Messages The Messages screen allows supervisors to display employee-specific messages to their assigned employees when they punch at a PC on the Virtual Clock. To create or edit employee-specific messages: Enter employee-specific messages in the Message field next to the employee’s name. This message will appear once on this employee’s PC screen after the next punch. 74 06-0414-000 Rev. C timeQplus Supervisor Functions Punch Editing On the Punch Editing screen, supervisors have access to all of the same functionality as administrators. The only difference is that supervisors have access to their assigned employees only. Please reference the Punch Editing section in the timeQplus Administrator Functions chapter for more details. Reports The Reports screen allows supervisors to generate reports to preview, print, or export. Supervisors have access to the reports listed below and, for reports involving employee data, can view data for their assigned employees only. The Reports screen also allows supervisors to search for past and present (assigned) employees using the Employee Search button (located in the upper right corner of screen). The search results will contain data on when an employee was added to and, if applicable, removed from the timeQplus software. • Employee Profiles • Approaching Overtime • Shifts • Daily Totals By Day • Time Card • Daily Totals by Employee • Holidays • Work Codes Total By Work Code • Hours Summary • Work Codes Totals By Employee • Raw Transactions • Missing Punches • Who’s IN, Who’s OUT • Employee Default Work Codes • Time Card Approvals • Punch Comments By Employee Please reference the Reports section in the timeQplus Administrator Functions chapter for detailed information on generating and exporting reports. 75 06-0414-000 Rev. C timeQplus Supervisor Functions Time Clock The Time Clock screen allows supervisors to send employee changes to all time clocks. During the update process, a poll of each time clock is also performed and an accurate IN/OUT status is obtained for each employee. Click the Update Time Clocks button to initiate an update of all time clocks. Once complete, the Result column will indicate whether each time clock was successfully updated. If a failure is observed, please contact your timeQplus Administrator for further assistance. 76 06-0414-000 Rev. C Virtual Clock This chapter describes the Virtual Clock functions. It contains the following sections: ¾ Login to Virtual Clock ¾ Submit Employee TimeSlip ¾ IN/OUT Board 77 06-0414-000 Rev. C timeQplus User Guide – Virtual Clock Login to Virtual Clock Click the Virtual Clock icon on your Desktop: Enter employee UserID and Password and then press the Enter key or click the Ok button. The following window will appear: • To punch, select a work code from the ‘Work code’ drop down list (if applicable) and then click the Punch button. If a work code is assigned, the ‘Work code’ field will be pre-populated with the employee’s default work code; otherwise, it will be blank. • To view the time card for the previous pay period, click View the Previous Time Card. • To view the time card for the current pay period, click View the Current Time Card. 78 06-0414-000 Rev. C timeQplus User Guide – Virtual Clock Submit Employee Time Slip This feature is for use by salaried employees for whom overtime pay is not applicable. Access to this feature requires a User ID and Password assigned by a timeQplus Adminstrator/Supervisor. Employees may enter a batch of transactions as a single TimeSlip. This can be useful for employees who wish to submit vacation or holiday hours in advance, or employees who track their own hours and submit their time at the end of each pay period. Each TimeSlip applies to a single pay period. Employees may submit multiple TimeSlips to record transactions in Current, Previous or Future pay periods. Note: A salaried employee who punches into timeQplus will show a red check mark under the column heading "@" on the day(s) at least one punch was made. This feature may be useful to validate a salaried employee was on site on a given date. To Access Your TimeSlip: • Double click the Virtual Clock icon on your desktop. • Enter your UserID and Password and then press the Enter key or click the Ok button. • Click Submit Employee TimeSlip (located on top menu bar). • Choose the Pay Period you would like to view from the ‘Pay Period’ drop-down list. To Edit Your TimeSlip: Once you have accessed the desired TimeSlip, you can edit the totals for any day which are listed on the left side of the screen. • Locate the row corresponding to the date you want to edit. • Click to select the field in that row under the category you want to edit. • Type over the existing value with your new total and press the Enter key on your computer keyboard, or click on another row. Enter the elapsed time in hours and minutes. • The Pay Period Totals will be updated to reflect your revised entry. To Submit Your TimeSlip: • You may select another pay period, add more transactions, or delete transactions until you are satisfied with the contents of each pay period's TimeSlip. 79 06-0414-000 Rev. C timeQplus User Guide – Virtual Clock • When you have finished entering hours and are ready to submit your TimeSlip(s), click the Submit button to submit to the Supervisor. Click the Cancel button to exit the process without submitting. IN/OUT Board The Employee IN/OUT Board displays the most recent known status of all employees. Employees who are clocked in appear in the left pane while employees who are clocked out appear in the right pane. Note: Since Time Clocks are polled at set intervals, the information on the IN/OUT board will not be displayed in real time. The board will display the employees’ status as of the most recent Time Clock polling cycle. You can force an IN/OUT board update by going to the Time Clock screen and pressing the Poll button. 80 06-0414-000 Rev. C Glossary The timeQplus system is a Windows-based PC application designed to offer simple yet effective employee time and attendance management. Active Transaction Any time card entry that exists in any active (previous, current, or future) pay period. Transaction types include: Punch, VAC, SIC, HOL, OTH, FMLA, REG Approaching OT The Approaching Overtime report lists employees whose total time worked places them at risk of incurring overtime for the pay period Auto Lunch After The number of hours of an employee being clocked in without clocking out for lunch, after which the system assumes the employee forgot to clock out and automatically subtracts the Lunch Duration from the employee’s total hours worked. Average Totals By Employee The Average Totals By Employee report shows the weekly and monthly time averages (worked and time off) for each employee for the specified date range. If an employee has any missing punches, an asterisk (*) is display next to that employee’s name. California Overtime California Overtime Rule settings as of the release of this product are as follows: Daily Weekly Overtime Level 1 Threshold: 8 hours 40 hours Overtime Level 2 Threshold: 12 hours 168 hours (disabled) 7th Day Overtime: ENABLED Daily Overtime Threshold The Daily Overtime Thresholds specify the amount of time worked in a day, after which, overtime will begin to accumulate. Any time worked after the overtime-level 2 threshold will be accumulated in overtime 2. Any time worked after the overtime level 1 threshold but not over the level 2 threshold will be accumulated in overtime 1. Note: Leave the threshold at 24 hours if you only pay overtime based on a 40-hour week only. The default value for Daily overtime threshold is 24 Hours. Daily Totals by Day The Daily Totals by Day report shows the time totals for each employees grouped by day for the selected pay period or pay period range. Daily Totals by Employee The Daily Totals by Employee report shows time totals for each day grouped by employee for the selected pay period or pay period range. Day Change Offset By setting a Day Change Time, the user can adjust the time of day that one day changes to the next to a time other than midnight. (For more information, please see Day Change Offset) 81 06-0414-000 Rev. C Glossary Edit Time Totals The Edit Time Totals feature allows an employee's total time accumulations to be adjusted without altering the punch information. Adjustments can be made, for both current and the previous pay periods, to regular, overtime 1, and overtime 2-hour accumulations. Employee Badge Number This number can be up to 10 digits, must be unique among employees and can range between 1 and 9999999999. This must be set to the same number as the employee’s badge used at the badge reader time clock. Employees By Supervisor Report The Employees By Supervisor report lists for each supervisor his/her assigned employees. Employee Default Work Codes The Employee Default Work Codes report lists each employee along with his or her assigned default work code. If the employee does not have an assigned work code, the first work code in the global work code list will be displayed. Employee Name The employee name is associated with a particular badge number. The employee name will show up in reports. Reports can be sorted alphabetically. Enter last names first if reports need to be sorted by last name. Employee Number This is the number to be associated with an employee. This is a payroll number. Alert: This number is not encrypted by the system. For security reasons, we strongly suggest you do not use employees’ Social Security numbers as their employee numbers in the timeQplus software. Employee Profile Report The Employee Profiles report lists all employees in the timeQplus system. It displays each employee’s last name, first name, middle initial, badge, employee number, export id, user id, and shift number. Employee Shift Assignment The shift number defines which set of shift and lunch rules are to be associated with a particular employee. Employee UserID This number must be unique among employees and between 1 and 9999. This number is used to clock in and out at the PC. Enter Current Pay Period Start Date The first item required is the start date of your company's current Pay Period. Export ID The Employee Alternate Export ID is a 48-character alphanumeric field that can be used to identify employees when exporting to OEM applications. Holiday Report The Holiday Report lists all holidays that have been entered into the timeQplus system as of the selected pay period. 82 06-0414-000 Rev. C Glossary Hours Summary Report The Hours Summary report lists hours worked by regular and overtime hours for a specified pay period or pay period range. This report can be generated for an individual employee, a specific shift, or all employees. If an employee has any missing punches, an asterisk (*) is display next to that employee’s name. Lunch Duration The standard number of minutes for lunch that will be subtracted from time worked totals. Lunch Duration is ignored if the employee's lunch rules are disabled. Lunch End This is the latest time of day at which an employee should punch back in from lunch. The system may adjust an employee's IN from lunch punch to make sure that a full Lunch Duration is taken. Lunch Start This is the earliest time of day at which an employee can punch out for lunch. The system may adjust an employee's out to lunch punch to make sure that a full Lunch Duration is taken. Max Time On Clock Max Time on Clock specifies how long an employee can be punched in before assuming that the employee forgot to punch out. (For more information, please see Max Time on Clock) Missing Punches Report The Missing Punches report lists all employees with missing punches for the selected pay period. Next Pay Period Start Date (Required For Semi-Monthly Pay Periods only) When using Semi-Monthly Pay Periods, each month contains two Pay Periods. After selecting a current pay period start date and semi-monthly pay period type, the user must also specify the start date of the NEXT pay period in order to establish the two days of each month that mark the beginning of each Semimonthly pay period. Overtime Thresholds Overtime thresholds specify how employee hours will be divided among Regular, Overtime1 and Overtime2 during the course of each day and of each week. For more information on overtime calculations in general, see Overtime Thresholds. Pay Interval Rounding The timeQplus Pay Period Setup Wizard allows the user to specify how time intervals will be rounded. timeQplus supports rounding to the nearest one(1), five(5), six(6), ten(10) or fifteen(15) minute interval. (For More information, Please see Pay Interval Rounding) Pay Period Type The timeQplus supports WEEKLY, BI-WEEKLY, SEMI-MONTHLY, and MONTHLY Pay Periods. Punch Comments By Employee Report The Punch Comments report lists by employee all comments and their associated punches for the selected pay period. 83 06-0414-000 Rev. C Glossary Raw Transactions Report The Raw Transactions report lists each transaction in the selected pay period. It allows you to see how and when transactions were entered into the system. Rules Setup Report The Rules Setup report lists all of the Setup rules plus all users, both Administrators and Supervisors for the selected pay period. Shift Dock The maximum number of minutes an employee will lose from time worked totals for punching IN late or punching OUT early. Shift Grace The number of minutes after the Shift Start Time or before the Shift Stop Time in which employee punches will be treated as if they had occurred exactly on the Shift Start and Stop Times. Shift Round The number of minutes before the Shift Start Time or after the Shift Stop Time in which employee punches will be treated as if they had occurred exactly on the Shift Start and Stop Times. Shift Start Time The time of day employees in this shift are scheduled to begin work. Shift Stop Time The time of day employees on the shift are scheduled to stop working. Shifts Report The Shifts Report displays the Shift rules and Lunch rules for each shift, including holiday settings. Supervisors By Employee Report The Supervisors By Employee report lists for each employee his/her assigned supervisor(s). Time Card Approval Report The Time Card Approvals report displays a two-column listing of employee names, with those whose time cards have been approved listed on the left and those whose time cards have not been approved listed on the right. The Time Card Approval feature can be turned on or off by an Administrator using the Setup screen. Time Card Report The Time Card Report lists an employee's transactions and accumulations of time worked. This may be for a selected pay period or pay period range. The report may be for one employee, employees on a specific shift, or for all employees. Weekly Overtime Threshold The Weekly Overtime Thresholds specify the amount of time worked in a week, after which, overtime will begin to accumulate. If an employee's Regular hours for the week reach the Weekly Overtime Level 1 Threshold, all subsequent hours worked for the week will begin to accrue to Overtime Level 1. Once an employee's combined Regular hours have exceeded Weekly Overtime 1 Threshold, AND the employee's combined Regular and Overtime 1 hours for the week have reached the Weekly Overtime Level 2 Threshold, all subsequent hours worked for the week will accrue to Overtime Level 2. To disable either Weekly Overtime 1 or Weekly Overtime 2, set the Overtime Level 1 or Overtime Level 2 threshold to zero (0), or set either Overtime Threshold to a large value that can never be reached. 84 06-0414-000 Rev. C Glossary The default value for Weekly Overtime Threshold Level 1 is 40 hours. The default value for Weekly Overtime Threshold Level 2 is 168 hours (disabled, logically unreachable). Who's In and Who's Out Report The Who's In, Who's Out report lists the IN/OUT status of all employees. This function is disabled on the original default installations. If Time Clocks are used, the In/Out status will be delayed until the Time Clocks are polled by the software. Work Codes Totals By Employee The Work Codes Totals By Employee report shows the time totals for each work code grouped by employee for the selected pay period or pay period range. Work Codes Totals By Work Code The Work Codes Totals By Work Code report shows the time totals for each employee grouped by work code for the selected pay period or pay period range. 85 06-0414-000 Rev. C