1
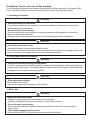
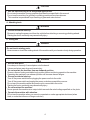
ELECTRIC TOOL
Alpha Electric Polisher
Instructional Guide
AEP-458 (110V - 50/60Hz)
Please read this instruction manual thoroughly to ensure safety and correct use of machine.
Keep this Manual in a place where operators can access it easily, anytime when necessary.
250 Braen Avenue, Wyckoff, NJ 07481 • 800-648-7229 • Fax: 201-447-1128
www.Alpha-Tools.com
ALPHA ELECTRIC POLISHER
INSTRUCTION MANUAL
Thank you for purchasing the Alpha Electric Polisher. This polisher is the workhorse of a complete polishing
system. A wide range of accessories help you perform many different tasks. This tool lets you grind, shape,
bevel, contour and polish all kinds of granite and marble. You can easily change from one type of disc to
another in just a matter of seconds. The tool is used with water to help you get the best possible finish, to
reduce the health risks of dust, and to give the most savings in time and money from modern accessories.
For your safety, please read this manual thoroughly before you start operating this polisher.
About the symbols
Handling this machine incorrectly may cause an accident or injury. In this manual, safety notices are classified into “DANGER”, “WARNING”, and “CAUTION” according to the hazard level:
DANGER
Death or serious personal injury are imminent when the operator neglects
to follow suggested instructions.
WARNING
There is a possibility of death or serious personal injury when the
operator neglects to follow suggested instructions.
CAUTION
There is a possibility of personal injury or property damage when the
operator neglects to follow suggested instructions.
Note: Failing to observe CAUTION notices could result in death or serious personal injury in
some situations. Be sure to read and observe the safety notices to ensure sefety and correct use
of the machine.
Examples of the symbols
This symbol is followed by a DANGER, WARNING, or CAUTION notice, which depicts the
suggested procedure or practice, and / or possible dangers or injuries.
The
symbol signifies prohibition. In or near this symbol, a prohibited action or motion
is depicted. (The symbol on the left prohibits disassembling the machine).
The
symbol signifies an order or instruction, Which is illustrated in the symbol. (The
symbol on the left shows to unplug the power cord from the outlet.)
1
CONTENTS
Precautions for the safe use of this machine..............................................3
1. Operating environment.............................................................................3
2. Clothing and protective equipment.........................................................3
3. Before use.................................................................................................3
4. Attaching a wheel......................................................................................4
5. During use.................................................................................................4
6. After use.....................................................................................................5
7. Precautions for using Alpha Electric Polisher.............................................6
Applications............................................................................................................................7
Specifications.........................................................................................................................7
Part names..............................................................................................................................7
Standard accessories...........................................................................................................8
Alpha Hand Polishing System...............................................................................................9
Preparations before starting a job......................................................................................15
Preparations before operation............................................................................................15
How to operate.....................................................................................................................16
Maintenance and inspection..............................................................................................19
If a problem occurs..............................................................................................................20
Schematic..............................................................................................................................21
Parts List..............................................................................................................................22
Declaration by the manufactures........................................................................................24
2
Precautions for the safe use of this machine
Correct operation and regular maintenance are essential for the safe operation of this machine. Be
sure to read safety notices in this manual carefully before using or servicing the machine.
1. Operating environment
WARNING
• Restrict access to the workshop.
Do not permit anybody but the operator to access the workshop. In particular, be sure to keep
children away from the workshop.
• Be careful of fire or explosions.
Never use this machine near ignitable or explosive materials including gasoline, combustible
gases, or inflammable adhesives.
Otherwise, sparks generated by commutation or switching may cause fire or explosion.
CAUTION
• Keeping the workarea in order.
Take particular care by keeping the workarea in order.
Leaving the work bench or work area untidy could cause cloth or material to be caught at the end of
tools or machine to be dropped, resulting in a very dangerous situation.
2. Clothing and Protective equipment
WARNING
• Wear personal safety clothing and equipment.
Be sure to wear all personal safety equipment including protective glasses, waterproof safety boots,
earplugs, and rubber gloves. If necessary, wear a dustproof mask in dusty areas. Inhaling dust can
damage the throat, lungs and circulatory system.
CAUTION
• Wear appropriate clothing
Do not wear loose clothing.
They can be caught in the rotating part of the machine.
3. Before use
WARNING
• Supply the specified voltage
Supply the voltage specified on the nameplate of the machine.
Otherwise, damage could result to the machine, or risk of personal injury.
• Do not let water into the motor.
Water inside the machine will weaken the electrical insulation of the motor and may result in
electric shock.
• Take measures against electric shock.
Be sure to install an GFCI to the power source to prevent electric shock.
3
CAUTION
• Use the machine only for its designated applications.
Do not use the machine for any purpose other than those specified in this manual.
Do not use the machine for grinding or polishing metal and wood workpieces.
This machine is specialized for processing of glass and natural stone.
4. Attaching tools
WARNING
• Prevent accidental start-up.
Be sure to unplug the power cord from the outlet before attaching or removing polishing wheels.
Starting the motor accidently may cause bodily injury.
5. During use
DANGER
•Do not touch rotating parts.
Never access or touch the rotating wheel of the machine with your hands or body during operation.
WARNING
• Secure work piece.
Use clamps to securely fix a workpiece onto the bench.
A loose workpiece may drop and cause injury.
• Do not operate the machine from an awkward position.
Ensure a secure footing and stable body position before and during operation the machine.
Operating the machine in an awkward position will increase human fatigue.
• Prevent accidental start-up.
Turn off the power switch before plugging the power cord into the outlet.
Turn off the power switch and unplug the power cord when power failure occurs.
Do not carry the machine while the power cord is connected to the outlet.
Starting the motor accidently may cause bodily injury
• Do not overload the machine.
Never operate the machine at an output which exceeds the rated voltage specified on the plate.
• Operate the machine with attention.
Do not use the machine when you cannot concentrate or make appropriate decisions (when
tired, or under the influence of drugs or alcohol)
4
CAUTION
• Use the machine after you have appropriate training and knowledge about it.
Never permit an untrained person or a child to use the machine.
• Handle the machine with care.
If you accidentally drop, do not use the machine until checking that it is not cracked, deformed, or in
any way damaged.
Do not block the ventilation window to avoid motor burnout.
6. After use
WARNING
• Use specified parts
Use specified genuine replacement parts when servicing the machine
CAUTION
• Conduct adequate maintenance and inspection.
Blow dust from inside the motor.
Always clean and maintain the power cord to prevent damage due to oils or grease.
• Unplug the power cord when not using the machine.
Be sure to unplug the power cord from the outlet before maintenance, change parts, inspection,
or cleaning.
• Keep the machine in a safe place.
After using the machine, remove any dust or dirt from it and store it in a dry, safe place.
Do not store the machine in areas:
• where children can reach the machine or it can be easily tampered with;
• where temperature and humidity fluctuate suddenly;
• where the machine is exposed in rain and high humidity;
• where the machine is exposed in direct sunlight.
• Handle the cord properly.
Do not move the machine without unplugging the power cord, or pull the power cord out of the
outlet.
By doing so may cause disconnection or short-circuit.
Avoid contact with heat, oil, or sharp objects.
ATTENTION
Observe the laws and regulations of noise levels in your area.
Please observe local laws and regulations regarding noise control in order to avoid disturbing surrounding
areas.
Install a soundproof wall if required to comply with the local laws and regulations.
5
Precautions for using the Alpha Electric Polisher.
In addition to the general safety notices described on the preceding pages, please read
and observe the following safety notices before using the machine.
WARNING
• Use protective cover.
Be sure to attach the protective cover and use it during operation.
The protective cover will protect the operator if the wheel breaks.
• Do not leave the machine unattended while running.
Do not leave the machine unattended on the workbench or workshop while it is running.
• If you accidentally drop the machine, do not use the machine until checking that it is not
cracked, deformed, or damaged.
Cracks, deformation, or damage of the machine and/or wheel may cause bodily injury.
CAUTION
• Follow the procedures specified in the instruction manual correctly to attach a wheel or
an accessory to the machine.
If accessories are not correctly attached, they will scatter or fall off and may cause bodily injury.
• When for the 1st time a new wheel is attached and machine is turned on, observe any
suspicious abnormal noises.
• Conduct a test run.
Wait until the machine reaches operating rotation speed, and check that there are no abnormal
sounds or vibrations during idling. Refer to page 12 (7. Making test run)
Operations without conducting a test run could cause bodily injury.
• Be careful of your surroundings when working in high places.
When working in high places, make sure there are no people below.
Be careful not to catch the power cord on anything.
Be careful not to drop the machine or any materials. They may cause an accident.
• Install the power cord and the water hose to avoid interference with working area.
Make sure the power cord and the water hose do not interfere with working area.
6
Application
Grinding, sanding and polishing the corners of glass and natural stone.
Grinding, sanding and polishing the straight edge of glass and natural stone.
Grinding, sanding and polishing the bevel edge of glass and natural stone.
Specifications
Working power supply:
Voltage:
Motor:
No load:
Continuous operation:
Weight:
Cord:
Single-phase AC, 50/60 Hz
115v (AEP-458) 220v (AEP-258)
Single-phase, series commutator motor
2,000 r.p.m.
30 minutes
5 lb/2.27 kg
23 ft / 7m vinyl insulated three-conductor power cord with a grounding clip
Part Names:
End Cap
Handle Grip
Switch
Motor
Water Control Valve
Power Cord
Power cord plug
Spindle
Splash Cover
Figure-1
7
Water Suppy Hose
Standard Accessories:
Side Handle.......................................................1pc.
17 mm Wrench..................................................1pc.
26mm Wrench...................................................1pc.
15 Amp Ground Fault Interrupter.....................1pc.
Complete Water Supply Hose.........................1pc.
Splash / Safety Guard......................................1pc.
Carbon Brush....................................................1pc.
8
ALPHA HAND POLISHING SYSTEM
The Alpha Wet Polishing System offers high quality, hand held, water-fed power tools to cover most
common hand polishing applications in the stone and tile industries. High gloss polishes are easily achieved
while reducing harmful dust and increasing safety.
AEP-458
Page #
GV Backer Pad
Rubber/Rigid
Backer Pad
Page #
Twistouch Backer Pads Page #
Ceramica
Wet
Granite Polishing System
Page #
Sandpaper & Felt Wheels
Wet or Dry
Marble Polishing System
Page #
Twistouch Adapter Page #
Twistouch Turbo
Wet
Granite Polishing System
Page #
Alpha Polishing Selection Chart
Application
Product Line
Ceramica
Twistouch Turbo
Sandpaper (Marble)
Felt W heel (Marble)
Flexible backer Pad
Rigid Backer Pad
Twistouch Backer Pad
Twistouch Double Magic
PVA*
Bullnose
Pa ge #
12
13
13
14
10
10
11
11
14
Key: HR = Highly Recommended
Fla t Edge
Fla t
Curve s
Gra nite
Polish
Surfa ce Sinkhole s (W e t)
Ma rble
(W e t or Dry)
Use with either AEP-458 or AIR-658
HR
NR
HR
HR
HR
NR
HR
HR
HR
R
HR
HR
HR
R
R
HR
NR
R
NR
HR
R
R
NR
HR
NR
NR
NR
R = Recommended
HR
NR
HR
HR
HR
NR
HR
HR
R
HR
HR
NR
NR
HR
HR
HR
HR
NR
R (Hard Marble)
R (Hard Marble)
HR
HR W et
HR
HR
HR
HR
HR Dry
NR = Not Recommended
*PVA Quick must be used dry. It can be used on the AEP-458 without water
Please refer to the above chart and cross-reference to the page number for additional information on a
specific product group. If your application is not mentioned or you have a question concerning a product,
please contact the Technical Information Line at 1-800-648-7229. You may also access Technical Notes
from our Fax-On-Demand by dialing 1-888-29-ALPHA.
9
ALPHA RIGID BACKER PADS
Alpha Professional Tools first introduced rubber
backer pads with the AEP-458 electric polisher
to promote the concept of wet polishing, which
became the accepted method of polishing.
Alpha recognized the need to add a rigid version
of this backer pad to its product line for the
straight edge or flat surface polishing
applications. We realized that Ceramica, with a
flexible backer pad, was too flexible for these
applications and produced wavy finishes. The
Rigid Backer Pads served to resolve the wavy
finish by keeping the Ceramica flat to the
polished surface. Although not the best
alternative compared to Twistouch Turbo for this
application, fabricators and tile contractors still use it with good results. Restoration workers find that the
rigidness of the pad enables them to work in small areas such as corners or staircases. Large machine
manufacturers began to recommend flexible diamond discs for use on their automatic edge polishing
machines specifically for the bullnose application using the Alpha Rigid Backer Pad. Velcro backed like
the flexible pads, they also accept Ceramica, Sandpaper, and Felt Wheels. The Rigid Backer Pad reduces
distortion on the surface and wavy results on straight edges. Available in 3, 4 and 5-inch sizes, the Rigid
Backer Pad is exclusive to Alpha Professional Tools. It comes in the standard 5/8-11 thread commonly
found on most polishing tools today. Some metric sizes are available on request. Super rigid and flat, there
is no other backer pad like this.
ALPHA RUBBER BACKER PADS
The Alpha Rubber Backer Pads were
developed as a part of the wet polishing
system that Alpha introduced to the North
American markets. This wet polishing
system quickly became the accepted
method of polishing. The Alpha Rubber
Backer Pad proved to be very durable and
soon became the backer pad of choice
among fabricators, tile contractors,
monumentalists and restoration workers.
The Alpha Rubber Backer Pads are
VelcroTM backed and will accept Ceramica,
Sandpaper and Felt Wheels. All users of
polishing equipment will love the quality and
life of these backer pads. Extremely flexible, these backer pads are ideally suited for tough contours
and inside curves. This allows the user to get in tight corners with ease. Available in 2, 3, 4, and 5-inch
versions, these pads come with the standard 5/8-11 thread, commonly seen on most of the polishing
tools in use today. Some metric sizes are available on request. Whether you are a fabricator, tile installer,
monumentalist or a restoration worker, Alpha Rubber Backer Pads are for you. Highly resistant to
the rigors of daily use, these flexible backer pads are the best on the market.
10
ALPHA TWISTOUCH SYSTEM
The New Alpha Twistouch System is a safe and long lasting
polishing system that is quick and easy to use. The Twistouch
System will increase performance and improve productivity,
saving you time and money. The Twistouch Adapter is
specially designed to accept Twistouch Turbo and Twistouch
Backer Pads, which accept velcroTM backed accessories. The
Alpha Twistouch System has everything necessary for all
of your hand held polishing needs.
TWISTOUCH ADAPTER
W
NE
Electric Polisher
W
NE
Twistouch Adapter (Fits 3” & 4”” backer pads)
(TW25/8AL)
Flat Edge Granite Polishing
W
NE
Bullnose & Curved Edge
Polishing for Granite & Hard Marble
Marble Polishing
W
NE
Twistouch Backer Pad
3” (TW3BRG)
4” (TW4BRG)
W
NE
Twistouch Turbo
Double Magic
3” (TW3BDM)
4” (TW4BDM)
W
NE
Ceramica (Flexible Diamond Disc)
11
Sandpaper
Felt Wheel
ALPHA CERAMICA THREE PART SYSTEM
Alpha Ceramica is a three part system for polishing granite, hard marble and porcelain ceramics. Utilizing
the best grade industrial diamonds and the best bond materials, Alpha Ceramica is sure to provide the best
possible finish on your polished stone.
Part 1: Ceramica Vitrified and Ceramica Metal
• Long lasting and aggressive design.
• Rigid or flexible depending upon application requirements.
• Use for light shaping work, smoothing and preparing for the
polishing process.
Part 2: Ceramica Resin
• Fine grade diamonds are heat sintered in a hard resin bond within a
flexible matrix.
• Each grit covers the previous grit and through the process closes the
pores for a natural polish.
• After the last grit, a solid natural polish is achieved.
Part 3: Ceramica Buff
• Super fine abrasive type disc that brings out a deep glossy reflection
with a mirror finish.
• Use in place of messy polishing powders and dangerous chemicals for
final polishing.
Key: NR = Not Recommended
Alpha Ceramica is designed for a variety of
applications and can be used in the polishing
shop and at the job site. A long time standard
in the fabrication area, there are no other
systems with the same capability for a deep
glossy finish.
R = Recommended
HR = Highly Recommended
APPLICATION
Ogee Edge
Undermount Sink Hole
Inside Corners
Bull Noses
VITRIFIED
NR
NR
NR
HR
RESIN
R
R
R
R
METAL
HR
HR
HR
R
PERFORMANCE
Durability
Flexibility
Cutting
VITRIFIED
HR
R
HR
RESIN
R
HR
R
METAL
HR
HR
HR
POLISHING AREAS
Concave
Convex
Flat
VITRIFIED
R
HR
R
RESIN
HR
R
NR
METAL
HR
R
HR
12
ALPHA TWISTOUCH TURBO
New Alpha Twistouch Turbo works as part
of the Alpha Twistouch System that
replaces Alpha Turbo. The Alpha “Original” Turbo
discs were a result of many years of research
for a series of diamond grits specifically
designed to polish flat granite areas. Before
Turbo discs existed, hand polishing of flat granite
was done with Ceramica – a flexible diamond
disc. Although performance was acceptable,
most often a wavy finish was obtained due to
the flexibility of the Ceramica discs. Alpha
“Original” Turbo discs resolved this problem;
however, the Velcro™ made disc removal difficult
and often wore out before the disc. Alpha Twistouch Turbo improves this popular polishing disc. It is
now safer and easier to use for flat granite polishing. Applications such as Straight Edge Polishing, Scratch
Removal, Floors (near walls, corners and staircases), Checks and Washes on Monuments, Chamfered
Edges, and Drain Boards can be done with ease using Alpha Twistouch Turbo. Fabricators,
monumentalists and restoration workers will love the results they obtain by using Alpha Twistouch Turbo.
The advanced “twist and lock” design gives the user better control during polishing, which allows for less
operator fatigue and better end results. Grits are easily changed thus increasing production capability. In
addition to the original selection of grits, we have added final buff discs to the Alpha Twistouch Turbo
series, which will improve your final polish results on any flat granite surface. Used as a wet polishing
system, Alpha Twistouch Turbo is a welcomed improvement for flat granite polishing applications.
ALPHA SANDPAPER
“For Marble Polishing”
Alpha Sandpaper discs consist of a
waterproof Velcro™ backed material combined
with a silicon carbide abrasive, which is the
perfect combination for use on marbles and
softer types of natural stone. Marble fabricators
find Alpha Sandpaper to be effective and
durable. Tile contractors find Alpha Sandpaper
to be very adaptable to onsite work and easy to
use. Restoration workers can polish wide areas
quickly without any hassle or difficulty. Alpha
Sandpaper is waterproof sandpaper that
resists clogging when used wet thus extending
the life of the disc. The discs can be used dry if necessary and are very durable. The Velcro™ makes disc
changes simple. Silicon Carbide is the abrasive of choice that is recommended for sanding and polishing
marble, travertine, terrazzo and onyx. Alpha Sandpaper can also be used to polish glass, metal and
wood.
For an extra high glossy finish, use the Alpha Felt Wheel with a buffing compound to finish the polishing
process.
13
ALPHA FELT WHEELS
The Alpha Felt Wheel is a very popular
material for the final buff process in stone
fabrication. Alpha Felt Wheels are Velcro™
backed buffing wheels designed for use with
polishing powders, polishing pastes, and
polishing bars to bring out a deep glossy finish
on marble and delicate granite edges such as
ogees & bullnoses. Marble fabricators love the
luster they obtain. Monumentalists like the
durability of the Alpha Felt Wheel. Tile
contractors love the glossy finish they can
present to their customers. We designed Alpha
Felt Wheels specifically to hold up to the acidic contents of most polishing compounds and the heat that
is typically generated during the final polishing process. Alpha Felt Wheels are ¼ inch thick and have the
perfect degree of hardness verses softness. These factors combined with the easy use of the Velcro™
backing, make Alpha Felt Wheels the best available final polishing disc for marble.
ALPHA PVA QUICK CHANGE STYLE
“Marble Edge Polishing System”
Alpha PVA Quick Change System is a low
speed version of the original “Makita” style PVA
and is designed for use on an aluminum snail-lock
backer plate specifically developed for low speed
polishing tools such as the AEP-458 and the AIR658. Alpha PVA Quick Change will work on all
of the same applications that the “Makita” style PVA
will, with the same excellence and quality. Marble
shops, tile installers or anyone else that already
has access to a low speed-polishing tool will find
that the Alpha PVA Quick Change system
will speed up their productivity. The aluminum
backer plate is attached to the polishing tool and
each of the pads has a snail lock adapter. The
adapter simply fits into place and locks on by a
twisting motion. To remove the pads simply untwist
and remove, then replace with the next grit. This “
Quick Change” process saves time, increases
productivity and Alpha PVA Quick Change is
an exclusive, revolutionary product that will enhance any marble crafter’s shop.
14
Preparation before starting a job
Before using the machine, be sure to complete the following preparations.
1.
Installing a ground fault circuit interrupter. (GFCI)
To prevent electrical shocks, be sure to install a ground fault circuit interrupt or between the main
power supply and the cord of the machine.
2.
Complete grounding
The machine should be thoroughly grounded by attaching the grounding clip on the power
cord to a known ground.
Note to the user:
A GFCI must be used when this machine is used anywhere in the damp
environment, or when it is used with a highly conductive liquid like water, or when it
is used on metal plates, steel frames or platens.
DANGER
Before using the machine, be sure to ground it. Never connect the
ground lead to a gas pipe. This is very dangerous.
3.
Be sure to connect the
ground lead.
Organize the work area
Before beginning operations, make sure that the work area conditions are well organized for
grinding safely.
Preparations before operation
WARNING
Before using the machine, check the following. Items 1 - 5
1.
2.
3.
Rubber gloves and waterproof safety boots should always be worn.
Be sure to wear rubber gloves and waterproof safety boots. If they are worn, cracked or have
any holes in them, replace them. Otherwise, you may receive an electrical shock.
Check the working voltage.
Be sure the voltage specified on the nameplate is the voltage available at the outlet. If the
machine is used with higher voltage than specified, the motor will burnout. This machine cannot be
used with a direct voltage source or with a portable generator. Any attempts to do so may damage
the machine or cause an accident.
Inspect your polishing wheels.
Never use cracked or chipped polishing wheels.
15
4.
Make sure that the switch is off.
If you plug in the power cord without realizing that the switch is on, the machine will start, and may
cause an accident.
When the switch lever (see “Part names”) is tilted toward the ON label, the machine is turned on.
When it is tilted toward the OFF label, the machine is turned off.
Make sure the switch lever is tilted toward the OFF label before plugging in the cord.
5.
Checking the outlet
When the plug of the power cord is inserted into the outletand is loose or is easily pulled out, the
outlet should be replaced. For such task, consult your electrician.
If the outlet is used continuously, it may overheat and cause accidents.
6.
Making test runs
CAUTION
•
•
Before turning the switch ON, make sure that the rotating parts are not touching anything. If the
switch is turned on while they are in contact with anything else, the wheel may break and it may
cause injuries.
When a new wheel is attached and the switch is first turned on, keep your body well away
from the exposed sides of the wheel for a moment until the machine reaches full speed.
It is very dangerous to perform grinding operations using cracked or chipped wheels.
Before starting grinding operations, keep the wheel away from anyone nearby. Be sure to make a few
test runs, to check whether there are any abnormalities.
Test run duration:
When replacing a wheel...........................At least 3 minutes
When starting operations each day..........At least 1 minute
How to operate
WARNING
•
•
•
•
Remove the plug
When grinding operations are interrupted to replace a wheel
from the outlet.
or when you are through with a particular operation, be sure
to turn off the switch.
During operation, be sure to wear safety glasses.
If water gets in the motor, it may shock the operator or
damage the machine. When halting an operation or replacing a wheel, put the machine in a
safe place where water will not be splashed on it.
When checking the grinding condition, the rotation of wheel or the position of the wheel
during operation, be sure to look through the observation port. (see fig. - 11)
16
1. When using the machine
1. WATER SUPPLY HOSE
This hose may be connected to any faucet or garden hose. It is composed of a special kinkproof material. Replacements are available should the hose become damaged however.
Water Supply Hose
Garden Hose
Screw on/off
2. WATER CONTROL VALVE
This valve lets you adjust the flow of water through the spindle. It may be used to shup off the water entirely when changing discs. When storing the tool overnight, open the valve and drain all water from the
supply hose and tool.
Open
Close
17
3. POWER SWITCH
On/Off Switch
2. How to grind
Make sure the water is flowing. Move the chamfer machine along the stone workpiece to grind it.
Adjust the water flow, traveling speed and pressure while grinding.
Switch operation
When the switch lever (see “Part names”) is tilted toward the ON label, the machine is
turned on. When it is tilted toward the OFF label, the machine is turned off.
How to handle wheels
After switching the machine ON, and the motor has reached its constant rpm’s, begin
grinding.
When the wheel first comes into contact with the workpiece, make contact slowly.
Do not apply more force onto the machine than is required. Such action may actually
damage the wheel, reduce its working efficiency and shorten the machine’s service life.
To change smoothly from rough chamfering to polishing, the following sequence of
wheel changes is recommended.
Precautions immediately after use
After the job is completed, turn off the switch. After the wheel stops rotating completely, put
the machine in a safe place.
If your hand is released off the machine before the wheel stops rotating, it may cause
an accident. Wait until the machine stops running.
18
Maintenance and inspection
WARNING
Be sure to unplug the cord from the outlet. Otherwise, the
machine may start abruptly and it may cause an accident.
Unplug the power
cord from the outlet.
Rubber gloves and waterproof safety boots
Always be sure to wear rubber gloves and waterproof safety boots. If they are worn, cracked or have any
holes in them, replace them.
Checking the attaching screws
Before starting any operation, if any screws are loose.
If the machine is used with loose screws, it is dangerous. Be sure to retighten them.
Checking the carbon brush
Carbon brushes are used inside the motor and will wear out over time.
If a carbon brush is worn too much, it may cause the motor to malfunction or fail. If the length of the carbon
brush reaches the wear limit (4 mm), replace it.
Keep the carbon brush clean, so that it can slide freely in the brush holder.
Replacement procedure
wear limit
When the brush cover (see “part
names”) is removed using a flat
screwdriver, the carbon brush can be
removed.
CAUTION
10 mm
When replacing the carbon brush with a new
one, be sure to use only an MG-1003 carbon
brush made by Sanko (or Mitachi).
4 mm
Handling the motor
The motor windings are the heart of this machine. Pay special attention not to damage the windings and
not to expose them to oil or water.
CAUTION
If dust or dirt settles in the motor, it may cause it to malfunction.
After 50 hours operation, run the motor with no load and blow dry air in the End Cap (see “part
names”).
This is effective for removing dust or dirt.
19
If a problem occurs
If the machine does not operate normally, do not try to repair it by yourself. Contact your dealer or Alpha
Professional Tools.
DANGER
If this machine is disassembled, there may be a possibility of
electrical shocks.
Do not disassemble this machine.
Never disassemble
the machine.
The machine you purchase may have a
somewhat different appearance form the one
used in the figures in this manual.
Limited Warranty of Alpha Electric Polisher
Alpha Professional Tools warrants this product against defects in material and
workmanship for a period of 90 days from the date of original retail purchase (proof
of purchase required). If Alpha Professional Tools receives notice of such defects
during the warranty period. Our obligation assumed under this warranty is limited to
the repair or replacement of parts, without charge. This warranty does not apply to
tool accessories.
For Warranty Claims: Send complete tool with all your information and details of
the problem to the below address, transportation prepaid. Do not send tool
accessories.
20
AEP-458 Schematic Update Ver 2.0
July 96
102
21
PARTS LIST
MODEL: ELECTRIC 458
SCHEMATIC #
ITEM #
1
2
3
4
5
6
7
8
9
11
13
14
15
16
17
18
19
20
22
23
26
27
28
30
31
32
33
34
35
37
38
39
40
41
42
43
45
46
47
48
49
51
52
416-01
416-02
416-03
416-04
416-05
416-06
416-07
416-08
416-09
416-11
416-13
416-14
416-15
416-16
416-17
416-18
416-19
416-20
416-22
416-23
416-26
416-27
416-28
416-30
416-31
416-32
416-33
416-34
416-35
416-37
416-38
416-39
416-40
416-41
416-42
416-43
416-45
416-46
416-47
416-48
416-49
416-51
416-52
DESCRIPTION
LIST PRICE
HEAD (with sleeve)
BODY
END CASE
HEAD CAP
GEAR CASE (with sleeve)
GEAR SHAFT 5/8"-11 Thread
PROTECTOR BAND FOR DISC COVER
RUBBER COVER FOR DISC COVER
BEVEL GEAR
WOODRUFF KEY 3x10
ARMATURE
FIELD COIL
CONNECTING SPRING
CARBON BRUSH SET (2pc/set)
HOLDER CAP
CARBON HOLDER
SWITCH FITTING PLATE
E-SIDE PLATE
SWITCH SET
DISC COVER
GRIP
BANDY FOR CORD
SPRING WASHER 10MM
PLUG WITH CORD
CORD GUARD
STOP RING R-26
BEARING FITTING PLATE
PINION GEAR SHAFT
STOP RING S-10
GEAR
STOP RING S-8
BUSHING
STOP RING S-9
SWITCH COVER
RUBBER HOLDER COVER
TUBE
CONNECTOR W
CONNECTOR M
COCK FITTING PLATE
WATER CONTROL COCK
WATER HOSE
STOP SPANNER 17MM
STOP SPANNER 26MM
22
$ 14.36
$ 23.61
$ 6.16
$ 30.79
$ 18.99
$ 32.07
$ 2.57
$ 2.82
$ 23.79
$ 0.38
$ 71.84
$ 26.94
$ 0.13
$ 5.20
$ 0.33
$ 2.05
$ 0.38
$ 1.03
$ 17.19
$ 8.73
$ 5.13
$ 0.25
$ 0.13
$ 8.21
$ 0.65
$ 0.65
$ 0.65
$ 24.12
$ 0.13
$ 13.08
$ 0.13
$ 2.50
$ 0.38
$ 0.52
$ 3.08
$ 10.50
$ 0.65
$ 0.13
$ 3.33
$ 15.39
$ 31.50
$ 3.47
$ 6.93
SCHEMATIC #
53
56
57
58
59
60
61
63
64
65
70
71
72
73
74
75
76
77
78
79
80
81
82
83
84
85
86
99
100
101
102
ITEM #
DESCRIPTION
LIST PRICE
416-53 SET SCREW M5x16
416-56 SET SCREW M4x45
416-57 SET SCREW M4x10
416-58 BOLT M4x10
416-59 SET SCREW M5x25
416-60 SET SCREW M4x60
416-61 SELF TAPPING SCREW M4x12
416-63 SET SCREW M4x12
416-64 NUT M4
416-65 SET SCREW M4x16
416-70 BALL BEARING 6200DDU
416-71 OIL SEAL TCNY 12-27-7
416-72 OIL SEAL TC 12-22-7
416-73 BALL BEARING 6000DDU
416-74 BALL BEARING 629DDW
416-75 BALL BEARING 608DDW
416-76 DUST PLATE 629
416-77 DUST PLATE 608
416-78 SILICON RUBBER PACKING
416-79 TUBE FITTING 6-01M
416-80 JOINT TG6-1PT1/8
416-81 JOINT TG8-1PT1/8
416-82 JOINT WITH ROTARY NUT
416-83 ENAMELING SCREW
416-84 PARALLEL KEY 3X3X8
416-85 SHOWER BOLT
416-86 WAVE WASHER W-10
416-99 C-SHAPE HANDLE
416-100GEAR SHAFT (M16 THREAD)
416-101GEAR SHAFT (M14 THREAD)
416-102SPLASH GUARD
Reference Guide when ordering parts
Part number Changes
Schematic #12 (Stop Ring S-10)
Schematic #36 (Stop Ring S-10)
Schematic #55 (M4x10 Screw)
Schematic #62 (M4x10 Screw)
Schematic #10 (Bushing)
Schematic #54 (M5x16 Set Screw)
use
use
use
use
use
use
416-35
416-35
416-57
416-57
416-39
416-53
23
$ 0.13
$ 0.25
$ 0.13
$ 0.52
$ 0.13
$ 0.13
$ 0.25
$ 0.38
$ 0.13
$ 0.13
$ 4.18
$ 10.26
$ 9.63
$ 7.56
$ 3.22
$ 2.95
$ 0.33
$ 0.33
$ 0.85
$ 4.50
$ 7.65
$ 3.80
$ 13.48
$ 0.07
$ 0.65
$ 2.25
$ 0.07
$ 34.00
$ 32.07
$ 32.07
$ 5.08
DECLARATION BY THE MANUFACTURER
(amended directive 89/392/EEC - Annex II A)
Name of manufacturer:
Alpha Professional Tools
Address of Manufacturer:
250 Braen Avenue
Wyckoff, NJ, 07481
Herewith declares that:
ELECTRIC TOOL:
“Electric Polisher”
Make: Alpha Professional Tools
Type: AEP-458 / AEP-258
Serial No: between xxxxx and yyyyy inclusive.
- does comply with the provisions of the “Machinery” Directive (Directive 89/392/EEC amended by
Council directive 91/368/EEC, 93/44/EEC and 93/68/EEC)
And furthermore declares that:
- The following (parts/clauses of) harmonized standards have been applied:
On request of Sanwa Kenma Kogyo Co., Ltd., the compliance of the model with the requirements
of the EC Machinery Directive was established by AIB-VINCOTTE INTER, Avenue A. Drouart
27-29, B-1160, Brussels, Belgium (notified body under the number 26 for machinery Listed in
annex IV of the EC Machinery Directive), acting here as competent body.
Wyckoff, NJ U.S.A.
October. / . 1996
DIRECTOR. Head office: Uji Factory
Alpha Professional Tools
24