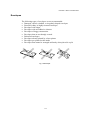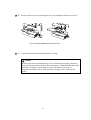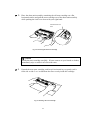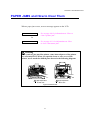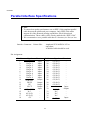
1
Brother Laser Printer / Scanner / Copier P2500 User’s Guide Please read this manual thoroughly before using the printer. You can print or view this manual from the CD-ROM at any time, please keep the CD-ROM in a convenient place for quick and easy reference at all times. TABLE OF CONTENTS TABLE OF CONTENTS DEFINITIONS OF WARNINGS, CAUTIONS, AND NOTES TO USE THE PRINTER SAFELY SHIPMENT OF THE PRINTER FOR TECHNICAL AND OPERATIONAL ASSISTANCE (FOR USA & CANADA ONLY) vi vi vii viii CHAPTER 1 ABOUT THIS PRINTER MAKE SURE ALL THE ITEMS ARE IN THE CARTON 1-1 CARTON CONTENTS 1-1 ABOUT YOUR PRINTER 1-2 FEATURES OF YOUR PRINTER 1-3 WHAT ARE THE AVAILABLE PRINTER OPTIONS CHOOSE A LOCATION 1-7 1-8 POWER SUPPLY 1-8 ENVIRONMENT 1-8 SYSTEM REQUIREMENTS FOR THE BROTHER PRINTING SOLUTION FOR WINDOWS® 1-9 WHAT TYPE OF PAPER CAN I USE i 1-10 WHAT TYPE OF DOCUMENTS CAN THE DOCUMENT FEEDER HANDLE 1-18 HOW TO LOAD PAPER INTO THE PAPER CASSETTE 1-19 HOW TO LOAD A SHEET OF PAPER MANUALLY 1-21 HOW TO PRINT ON BOTH SIDES OF THE PAPER (MANUAL DUPLEXING) 1-26 HOW TO COPY 1-29 VARIOUS SETTINGS FOR COPY HOW TO SCAN 1-32 1-37 HOW TO SCAN FROM THE PAPER PORT® FOR BROTHER SOFTWARE (FOR WINDOWS® 3.1/95/98/NT USERS IN USA/CANADA) 1-37 HOW TO SCAN FROM THE UNIMESSAGETM PRO VIEWER SOFTWARE (FOR WINDOWS® 95/98/NT USERS IN OTHER COUNTRIES) 1-42 FUNCTIONS OF THE BUTTONS ON THE CONTROL PANEL 1-46 SPECIAL FUNCTION 1-47 WHAT DO THE LED INDICATIONS MEAN 1-48 ALARM LED 1-48 DATA LED 1-48 LED 1-48 ii TABLE OF CONTENTS CHAPTER 2 OPTIONS OPTIONAL ACCESSORIES AND SUPPLIES 2-1 THE LOWER TRAY UNIT 2-2 INSTALLING PAPER IN THE LOWER TRAY UNIT HOW TO ADD EXTRA MEMORY HOW TO INSTALL AN ADDITIONAL MEMORY BOARD 2-3 2-4 2-5 WHAT IS THE BROTHER PRINT SERVER (NC-2010P) 2-8 FEATURES 2-8 CHAPTER 3 MAINTENANCE 3-1 HOW TO REPLACE THE TONER CARTRIDGE 3-2 HOW TO REPLACE THE DRUM UNIT 3-9 HOW TO CLEAN THE PRINTER CLEANING THE PRINTER EXTERIOR 3-14 3-14 HOW TO CLEAN THE PRINTER INTERIOR AND DRUM UNIT 3-16 HOW TO CLEAN THE DOCUMENT SCANNER iii 3-20 CHAPTER 4 TROUBLESHOOTING 4-1 IDENTIFYING YOUR PROBLEM 4-1 SERVICE CALL INDICATIONS 4-2 ERROR MESSAGES THAT APPEAR ON THE LCD PANEL4-3 ERROR MESSAGE PRINTOUTS 4-5 PAPER HANDLING 4-6 PAPER JAMS AND HOW TO CLEAR THEM 4-7 HOW TO CLEAR A PRINTER JAM HOW TO CLEAR A DOCUMENT JAM OTHERS 4-8 4-11 4-12 FOR DOS USERS 4-12 FOR APPLE MACINTOSH COMPUTER USERS 4-12 IMPROVING THE PRINT QUALITY 4-13 HOW TO PRINT CORRECTLY 4-19 COPY 4-20 SCAN 4-21 FOR DOS USERS 4-21 iv APPENDIX A-1 PRINTER TECHNICAL SPECIFICATIONS A-1 PRINTING A-1 COPYING A-2 SCANNING A-3 SPECIFICATION A-3 ELECTRICAL AND MECHANICAL A-4 PARALLEL INTERFACE SPECIFICATIONS A-5 UNIVERSAL SERIAL BUS (USB) INTERFACE A-7 RESIDENT FONTS A-8 REGULATIONS i INDEX v TABLE OF CONTENTS Definitions of Warnings, Cautions, and Notes The following conventions are used in this User’s Guide: Warning Indicates warnings that must be observed to prevent possible personal injury. ! Caution Indicates cautions that must be observed to use the machine properly or prevent damage to the machine. ✒ Note Indicates notes and useful tips to remember when using the machine. To Use the Machine Safely Warning After you have just used the machine, some internal parts of the machine are extremely hot. When you open the front cover or rear cover, never touch the shaded parts shown in the following illustration. High Temperature Front view High Temperature Rear view There are high voltage electrodes inside the machine. Before cleaning the machine, make sure you have turned off the power switch and unplugged the power cord from the power outlet. Turning off the Power Switch and Unplug the Machine vi Shipment of the Printer If for any reason you must ship your Machine, carefully package the Machine to avoid any damage during transit. It is recommended that you save and use the original packaging. The Machine should also be adequately insured with the carrier. ! Caution When shipping the Machine, the DRUM UNIT assembly including the TONER CARTRIDGE must be removed from the Machine and placed in the plastic bag. Failure to remove the unit and place it in the plastic bag during shipping will cause severe damage to the Machine and will VOID THE WARRANTY. 1 Remove the Drum unit assembly. 2 Place it in the plastic bag and seal the bag completely. 3 Remove the AC cord from the machine. Re-pack the machine. vii (For USA & CANADA Only) For technical and operational assistance, please call: In USA 1-800-276-7746 (outside California) 949-859-9700 Ext. 329 (within California) In CANADA 1-800-853-6660 514-685-6464 (within Montreal) If you have comments or suggestions, please write us at: In USA Printer Customer Support Brother International Corporation 15 Musick Irvine, CA 92618 In CANADA Brother International Corporation (Canada), Ltd. - Marketing Dept. 1, rue Hôtel de Ville Dollard-des-Ormeaux, PQ, Canada H9B 3H6 BBS For downloading drivers from our Bulletin Board Service, call: In USA 1-888-298-3616 In CANADA 1-514-685-2040 Please log on to our BBS with your first name, last name and a four digit number for your password. Our BBS supports modem speeds up to 14,400, 8 bits no parity, 1 stop bit. Fax-Back System Brother Customer Service has installed an easy to use Fax-Back System so you can get instant answers to common technical questions and product information for all Brother products. This is available 24 hours a day, 7 days a week. You can use the system to send the information to any fax machine, not just the one you are calling from. Please call 1-800-521-2846 (U.S.A) or 1-800-681-9838 (Canada) and follow the voice prompts to receive faxed instructions on how to use the system and your index of Fax-Back subjects. DEALERS/SERVICE CENTERS (USA only) For the name of an authorized dealer or service center, call 1-800-284-4357. SERVICE CENTERS (Canada only) For service center addresses in Canada, call 1-800-853-6660 INTERNET ADDRESS For technical questions and downloading drivers: http://www.brother.com viii CHAPTER 1 ABOUT THIS MACHINE CHAPTER 1 ABOUT THIS PRINTER Make Sure All the Items Are in the Carton Carton Contents When you unpack the printer, check to see that you have all of the following items: Document support Document support extension Drum unit assembly (with toner cartridge included) AC power cord Printer Documents Paper cassette CD-ROM Fig. 1-1 Printer Carton Contents Carton Contents may differ from one country to another. 1-1 About your printer Automatic document feeder Control panel Document support extension Tray extension flap Manual feed paper guides Front cover Paper cassette Manual feed slot Fig. 1-2 Front View Rear cover AC power inlet USB (Universal Serial Bus Interface) connector Power switch Parallel Interface connector Fig. 1-3 Rear View 1-2 CHAPTER 1 ABOUT THIS MACHINE Features of your printer ❏ Full Copier Function Multiple copies are easy to print using the Sort key on the control panel. For more information, see “How to Copy” in this Chapter. ❏ High Resolution and Fast Printing Speed True 600 x 600 dpi with microfine toner and up to 12 pages per minute (ppm) print speed (using A4 or Letter size paper). ❏ Quick Print Setup In a small selection window on your computer screen, you can easily make changes to settings that you use frequently. ❏ Versatile Paper Handling This printer loads paper automatically from the paper cassette. You can load A4, letter, B5, Executive, A5 and A6 size paper. The manual feed slot allows you to load pages manually, one sheet at a time, so you can use special types of paper. For additional information, see “What kind of paper can I use” in this Chapter. ❏ Document Management Application ‘PaperPort for Brother Software’ (For USA/Canada) PaperPort® for Brother Software is a document management application which contains a viewer, editor and filing system plus various links to other applications. PaperPort® for Brother Software is a sophisticated application and has widespread industry acceptance and endorsements. For more information, see “How to Scan” in this Chapter. 1-3 ❏ Sophisticated Viewer and Document management Software TM ‘Wordcraft Unimessage Pro’ (For other Countries) Wordcraft UnimessageTM Pro Viewer is a sophisticated viewer for displaying and editing graphic files. In addition to the usual image editing functions (object drawing, annotations, highlighting, etc.) you will also be able to use this software to view both colour and monochrome images, create cover sheets for use with the P2500, display thumbnails of graphics files in any of your directories and set up a referencing system for your files using DIR (Document Indexing Retrieval). For more information, see “How to Scan” in this Chapter. ❏ TWAIN Compliant Scanner Driver (For Windows and Macintosh users) The scanner driver is TWAIN compliant which is a defacto standard. You can use the scanner in other TWAIN compliant applications as well as in the PaperPort® application or UnimessageTM Pro viewer application. ❏ Enhanced Printing Performance and User-friendly Operation for ® Windows The dedicated printer drivers for Microsoft® Windows® 95/98, Windows 3.1x® and Windows NT® 4.0 are available on the CD-ROM supplied with your printer. You can easily install them into your Windows system using our installer program. The driver supports our unique compression mode to enhance the printing speed in Windows applications and allows you to choose various printer settings including toner save mode, custom paper size, sleep mode, gray scale adjustment, resolution and many layout functions and so forth. You can easily set these print options through the Printer Setup Menu. ❏ Popular Printer Emulation Support The printer supports HP LaserJet 5P (PCL5e). When you use DOS application software or Windows® version 3.0 or earlier, you can use this emulation to operate the printer. 1-4 CHAPTER 1 ABOUT THIS MACHINE ❏ Printer Status Monitor for USB interface cable or LPTx port users only (For Windows 95/98 users only) The printer driver can monitor the status of your printer using bi-directional parallel communications. The use of a high quality IEEE 1284 compliant bi-directional parallel printer cable is recommended. The printer status monitor program can show the current status of your printer. If an error occurs, the status monitor will let you know what to correct. For example: when your printer is out of paper, the status monitor will display “Cover Open” and instructions for loading paper. ❏ USB Interface (For Windows 98, iMac and Power Macintosh G3 with USB users Only) This printer can be connected by the USB (Universal Serial Bus) Interface to a PC that has a USB interface. Drivers to allow you to use the USB port are provided on the CD-ROM supplied with the printer. ❏ Remote Printer Console Program for DOS The Remote Printer Console (RPC) utility program is available on the CDROM supplied with your machine. When you operate your computer in a DOS (Disk Operating System) environment, this program allows you to easily change the default settings of fonts, page setup and emulations. This program also provides a status monitor program, which is a Terminateand-Stay Resident (TSR) program. It can monitor the printer status while running in the background and report the current status or errors on your computer screen. ❏ Enhanced Memory Management The printer provides its own data compression technology in the printer hardware and the supplied printer driver software, which compresses graphic and font data efficiently into the printer’s memory. You can avoid memory errors and print most full page 600 dpi graphic and text data, including larger fonts, with the printer’s standard memory. 1-5 ❏ Environment-Friendly Economy Printing Mode This feature will cut your printing cost by saving toner. It is useful to print draft copies for proof-reading. You can select economy modes through the Windows printer driver supplied with your printer. Sleep Mode (Power Save Mode) When the printer is not used for a certain period of time, it goes into sleep mode to reduce power consumption. The printer consumes less than 10 Watts when in sleep mode. Low Running Cost Since the toner cartridge is separate from the drum unit, you must replace only the toner cartridge after approximately 3,000 pages, this is both cost effective and ecologically friendly. (An optional high capacity toner unit that will print up to 6,000 pages is also available for this printer.) The actual number of pages printed with a toner cartridge may vary depending on your average type of print job, the figures quoted are based on 5% coverage per page. You can print up to 20,000 pages with the drum unit, however there are many factors that determine the actual drum life. ❏ Bar Code Print This printer can print the following 11 types of bar codes: • • • • • • Code 39 Interleaved 2 of 5 EAN-8 EAN-13 UPC-A EAN-128 • • • • • 1-6 UPC-E Codabar US-PostNet ISBN Code 128 CHAPTER 1 ABOUT THIS MACHINE What Are the Available Printer Options ❏ Lower Tray Unit (LT-400) A lower tray unit expands the paper source capacity. You can load extra paper and switch between the upper and lower paper sources automatically. See “The Lower Tray Unit” in Chapter 2. ❏ Memory Board The printer has 4.0 Mbytes of standard memory. You can add one board of additional memory. The memory can be expanded up to a total of 12 or 20 Mbytes by installing a recognized 8MB(ME-8000) or 16MB (ME-16000) optional memory board. We recommend that you add memory if you want to print graphics at higher resolutions. When you add an optional memory board, it increases the performance of printer operations. See “How to add extra Memory” in Chapter 2. ❏ External Print Server (Brother NC-2010p) An optional Network print server Brother NC-2010p is available, which allows your printer to be connected to your Network using a parallel interface. See “What is the Brother print server (NC-2010p)” in Chapter 2. 1-7 Choose a Location Please take note of the following before using the printer. Power Supply • • • • Use the printer within the specified power range. AC power: ±10% of the rated power voltage in your country Frequency: 50 Hz (220 V– 240 V) or 50/60 Hz (110–120 V) The power cord, including extensions, should not exceed 5 meters (16.5 feet). Do not share the same power circuit with other high-power appliances, particularly an air conditioner, copier or shredder. If you must use the printer with these appliances, we recommend that you use an isolation transformer or a high-frequency noise filter. Use a voltage regulator if the power source is not stable. Environment The printer should be installed near a power outlet, that is easily accessible. • Use the printer only within the following ranges of temperature and humidity. Ambient temperature: 10°C to 32.5°C (50_F to 90.5_F) Ambient humidity: 20% to 80% (without condensation) • The printer should be used in a well ventilated room. • Place the printer on a flat, horizontal surface. • Keep the printer clean. Do not place the printer in a dusty place. • Do not place the printer where the vent for the printer fan is blocked. Keep approximately 100 mm (3.4 inches) between the fan vent and the wall. • Do not place the printer where it will be exposed to direct sunlight. Use a blind or a heavy curtain to protect the printer from direct if you must place it near a window. 1-8 CHAPTER 1 ABOUT THIS MACHINE • Do not place the printer near devices that contain magnets or generate magnetic fields. • Do not subject the printer to strong physical shocks or vibrations. • Do not expose the printer to open flames or salty or corrosive gasses. • Do not place objects on top of the printer. • Do not place the printer near an air conditioner. • Keep the printer horizontal when you move it. • Do not cover the vents in the side cover. System Requirements for the Brother Printing Solution for Windows® Check the following system requirements to setup and operate the printer in Brother Printing Solution for Windows: CPU • Interface • RAM • Hard Disk • • • Operating System • IBM PC or compatible with 80486 SX or higher microprocessor Parallel interface (or printer port) and USB interface (Windows® 98 only) 8 MB or more of memory (for Windows® 3.1/3.11) 16 MB or more of memory (for Windows® 95/98/NT) 10 MB of space available on your hard disk for the printer and scanner driver and all fonts 20 MB of space available on your hard disk for PaperPort® for Brother software 40 MB of space available on your hard disk for Wordcraft Unimessage® Pro software Microsoft Windows® 3.1/3.11, Windows® 95/98 or Windows® NT® 4.0 1-9 What Type of paper can I use Media Type Paper type Cut sheet Paper cassette (standard) Transparency Cut sheet Manual feed slot Envelope Organizer Transparency Label Custom sizes Optional lower paper cassette cut sheet Paper size letter, A4, ISO B5, Executive, A5, A6, legal (USA and Canada Only) A4 and letter letter, A4, B5 (JIS/ISO), Executive, A5, A6, legal COM 10, Monarch, C5, DL and ISO B5 Day-Timer® J, K, L A4, Letter A4, Letter 70-216 x 116-356 mm, 2.75-8.5 x 4.57 -14 inches letter, A4, ISO B5, Executive, A5 and legal (US and Canada Only) Paper specification for the cassette Basis Weight Caliper Moisture Content Cut Sheet 64 to 105 g/m2 (17 to 28 lb.) 0.08 to 0.13 mm (0.003 to 0.005 inches.) 4% to 6% by weight 1-10 CHAPTER 1 ABOUT THIS MACHINE Manual feed slot Basis Weight Caliper Moisture Content Cut Sheet 64 to 157 g/m2 (17 to 42 lb.) 0.08 to 0.2 mm (±0.003 to ±0.008 in.) 4% to 6% by weight Envelope 75 to 90 g/m2 single thickness (20 to 24 lb.) 0.084 to 0.14 mm (0.0033 to 0.005 in.) single thickness 4% to 6% by weight ✒ Note We recommend you only use labels or transparencies that are designed for use in laser printers. To avoid damage to the printer, the printing speed may change automatically, depending on the paper size in use. 1-11 Paper Capacity Multi-purpose paper cassette A4/Letter paper: Transparency: Approx. 250 sheets of 80 g/m2 (21 lb.) Up to 27 mm (1.06 inch) in height (up to the mark) 10 sheets Printing to the front output tray (pages are face down) A4/Letter paper: Approx. 150 sheets of 80 g/m2 (21 lb.) Printing to the rear output tray (pages are face up) Thicker paper: Single sheets of thicker paper Recommended paper Cut sheet: Xerox 4200 (in USA) / Xerox 80 Premier Paper (in Europe) or equivalent Label: Avery laser label or equivalent Transparencies: 3M CG3300 or equivalent 1-12 CHAPTER 1 ABOUT THIS MACHINE Remarks about paper • • • • • • • • We recommend that you test paper, especially special sizes and types of paper, including heavy paper, on this printer before you purchase large quantities. Avoid using coated paper, such as vinyl coated paper. Avoid using preprinted or highly textured paper. For optimum print quality, use a recommended type of paper, especially for plain paper and transparencies. For more information on paper specifications, consult your nearest Brother authorized sales representative or the place where you purchased your printer . If the paper has problems feeding from the paper cassette, use the manual feed slot and try again. To avoid damage to the printer’s drum unit, use neutral paper. Do not use acid paper. For optimum print quality, make sure you select the appropriate media type in the printer driver. If you use the printer for special print jobs for more than short periods of time (for example, printing of name cards) the print quality may be degraded or the life of the drum unit may be shortened. Cut Sheet We recommend that you use long-grained paper for the best print quality. If you are using short-grained paper, it may cause paper jams. 1-13 Labels / Transparencies • • Avoid feeding labels with the carrier sheet exposed, or your printer will be damaged. We recommend that you use only labels and transparencies that are designed for use in laser printers. Special Paper • • • Before using paper with holes, such as organizer sheets, you must fan the stack well to avoid paper jams and misfeeds. Do not use organizer sheets that are stuck together. The glue that is used might cause damage to the printer . Before using any paper, make sure that it is not curled. If it is curled, you should straighten the paper as much as possible. Feeding curled paper can cause paper jams and misfeeds. Fig. 1-4 Fan the Paper and Straighten the Paper • Different types of paper should not be loaded at the same time in the feeder, this may cause paper jams or misfeeds. 1-14 CHAPTER 1 ABOUT THIS MACHINE Envelopes The following types of envelopes are not recommended. • Damaged, curled, wrinkled, or irregularly shaped envelopes • Extremely shiny or highly textured envelopes • Envelopes with clasps • Envelopes with self-adhesive closures • Envelopes of baggy construction • Envelopes that are not sharply creased • Embossed envelopes • Envelopes already printed by a laser printer • Envelopes pre-printed on the inside • Envelopes that cannot be arranged uniformly when placed in a pile Fig. 1-5 Envelopes 1-15 Print Mode The figure below shows the physically printable area. 6.35 mm 6.35 mm 4.2 mm 5.1 mm Unprintable area Fig. 1-6 Printable Area Copy Mode The figure below shows the physically uncopyable area. <A4 size> 2.0 mm <letter size> 2.0 mm 2.0 mm 4.23 mm 2.0 mm 4.23 mm 4.23 mm 4.23 mm Uncopyable area Uncopyable area Fig. 1-7 Copy Area 1-16 CHAPTER 1 ABOUT THIS MACHINE Scan Mode The figure below shows the physically unscannable area. <A4 size> 1.4 mm <letter size> 1.4 mm 4.3 mm 4.0 mm 4.3 mm 4.0 mm 4.23 mm 4.0 mm Unscannable area Unscannable area Fig. 1-8 Scannable Area 1-17 What Type of documents can the Document Feeder Handle The document feeder can handle documents that have the following specifications. Document size: 148-216 mm wide, (5.8 - 8.5 inches) 100-360 mm long, (3.9 - 14.1 inches) Document Basis Weight: 64 to 90 g/m2 (17.1 to 24 lb.) Document Thickness: 0.07mm to 0.12mm Paper Capacity A4/Letter paper: Approx. 30 sheets of 75 g/m2 (20 lb.) ! Caution • Do not load labels in the document feeder. • Do not load transparencies in the document feeder. ✒ Note • When loading multiple documents in the document feeder, load the same size and type of document. • When loading multiple documents in the document feeder, fan the documents before loading. • Documents printed in color might stick in the scanning unit. If this happens, clean the scanning unit. 1-18 CHAPTER 1 ABOUT THIS MACHINE How to Load Paper into the Paper Cassette ☛ 1. Pull the paper cassette completely out of the printer . Fig. 1-9 Pull out the paper cassette ☛ 2. Slide the width and length paper adjusters of the paper cassette to fit the size of paper you want to load. Ensure that the paper guide catches locate correctly in the slots Fig. 1-10 Adjust the paper guides 1-19 ☛ 3. Load paper into the paper cassette. Make sure that the paper is flat in the cassette at all four corners. Fig. 1-11 Load the paper ✒ Note Do not load more than 250 sheets of paper (80 g/m2) in the cassette, or paper jams may occur. Paper should be loaded up to the indicated maximum on the paper height guide. Fig. 1-12 Paper Lines ☛ 4. Slide the paper cassette into the printer. Make sure it is inserted completely into the printer. ☛ 5. Select the size of paper that you loaded in the cassette by pressing the Paper size button. ✒ Note Change the paper size setting when you change the paper size in the paper cassette or manual feed. 1-20 CHAPTER 1 ABOUT THIS MACHINE How to Load a Sheet of Paper Manually ✒ Note Use both hands to insert the paper into the manual feed slot. When you insert paper into the manual feed slot, the printer automatically turns on the manual feed mode. You may also view the technique of loading one sheet of paper manually in the instructional video on the supplied CD-ROM. ☛ 1. Select manual feed mode in the printer driver. <Windows® 95 / 98 and Windows® 3.1> Fig. 1-13 Select manual feed mode for Windows 95/998 and 3.1 1-21 ® <Windows NT 4.0> Fig. 1-14 Select manual feed mode for Windows NT 4.0 ☛ 2. Send the print data to the printer . 1-22 CHAPTER 1 ABOUT THIS MACHINE ☛ 3. Use both hands to slide the manual feed slot paper guides to the width of paper you will use. Fig. 1-15 Slide the width of the manual feed slot paper guides to fit the paper width ☛ 4. Insert the paper into the manual feed slot with both hands until the front edge of the paper touches the paper feed roller. Hold the paper in this position until the printer feeds the paper in automatically a short distance and then let go of the paper. Fig. 1-16 Insert the paper ☛ 5. After the printer ejects the printed page, repeat Step 4 to insert the next sheet of paper. Repeat this process for each page to be printed . 1-23 To print on thicker paper and card stock When the rear cover is lifted up, the printer has a straight paper path from the manual feed slot to the rear of the printer. Use this paper feed and output method when you want to print on thicker paper or card stock. ☛ 1. Select manual feed mode in the printer driver. ☛ 2. Send the print data as usual. ☛ 3. Lift up the rear cover at the back of the printer . Fig. 1-17 Lift up the rear cover ☛ 4. Use both hands to slide the manual feed slot paper guides to the width of the paper you will use.. 1-24 CHAPTER 1 ABOUT THIS MACHINE ☛ 5. Use both hands to insert the paper into the manual feed slot, until you feel the front edge of the paper touch the paper feed roller. Hold the paper in this position until the printer feeds in the paper a short distance, then let go of the paper. ☛ 6. After the printer ejects the printed page, insert the next sheet of paper as in step 5 above. The printer will wait until you insert the next sheet of paper. Repeat this as necessary for the number of pages you need to print. ☛ 7. Close the rear cover of the printer when you have finished the print job. ! Caution Remove each sheet immediately after it exits the printer, especially when using transparencies. Stacking the sheets may cause them to curl or may cause media feed jams. Fig. 1-18 Remove each sheet immediately 1-25 How to Print on Both Sides of the paper (Manual Duplexing) The supplied printer drivers for Windows® 95/98, Windows® 3.1x and Windows NT® 4.0 all enable manual duplex printing. For more detailed information, please see the Help text in the printer driver. Guidelines for printing on both sides of the paper 1 If the paper is too thin, it may wrinkle. 2 If the paper is curled, straighten it and then place it in the paper cassette. 3 Use regular paper. Do not use bond paper. 4 When loading paper in the paper cassette, empty the cassette first, then insert the printed paper only, printed side face up. (Do not add printed pages on top of the unprinted paper stack.) 5 If the paper is not feeding correctly, it is possible that the paper is curled. Remove the paper and straighten it. 1-26 CHAPTER 1 ABOUT THIS MACHINE To print on both sides of the paper from the paper cassette ☛ 1. From the driver, select the required manual duplex print mode. ☛ 2. The printer will print all the even numbered pages first. ☛ 3. Remove the printed even numbered pages from the output tray. Re-insert them in the paper cassette, with the side to be printed (blank side) face down, and the top edge toward you. Follow the instructions on the computer screen. Fig. 1-19 Paper orientation for the paper cassette ☛ 4. The printer will now automatically print all the odd pages on the reverse side of the paper. 1-27 To print on both sides of the paper from the manual feed slot • • • ! Caution Before re-inserting the sheets, straighten them, to prevent paper feed errors. We do not recommend using very thin or very thick paper. When you use the Manual Duplex function, it is possible that paper jams may occur or print quality might not be satisfactory. If a paper jam has occurred, please see ‘PAPER JAMS and how to clear them’ in Chapter 4. ☛ 1. From the driver, select the required manual duplex printing mode and manual feed mode. ☛ 2. Using both hands, insert the paper into the manual feed slot with the side to be printed first facing up. Follow the instructions on the computer screen. Repeat this process until you have printed all the even numbered pages. ☛ 3. Remove the printed even numbered pages from the output tray and re-insert them in order into the manual feed slot, loading the paper with the side to be printed (blank side) face up and the top of the printed side toward the printer. Follow the instructions on the computer screen. Fig. 1-20 Paper operation for the manual feed slot ☛ 4. Repeat step 3 until you have printed all the odd numbered pages on the reverse side of the paper. 1-28 CHAPTER 1 ABOUT THIS MACHINE How to Copy The printer allows you to make high-quality photocopies. Always make sure that paper is loaded in the paper cassette before making copies. ☛ 1. Set the width of the document feeder paper guides using both hands to the paper width to be used. ☛ 2. Insert the original document face down in the Document Feeder. Fig. 1-21 Insert the original document The following message appears on the control panel to indicate that the printer is ready to copy or scan. READY COPY/SCAN 1-29 When you make a copy on paper fed from the manual feed slot, insert the print sheet of paper into the manual feed slot after setting your original documents. ☛ 3. You can select the following settings using the buttons on the control panel. To clear a setting, press the Clear button. • Enlarge/Reduce - For further information, go to page 1-32 • Density - For further information, go to page 1-34 • Document type - For further information, go to page 1-33 • Paper size - For further information, go to page 1-35 • Options For further information, go to page 1-34 All these settings will be cleared after you press the Clear or Copy button except the Paper Size setting. ☛ 4. Use the 10 numeric keys to set the required number of copies on the display. NO.OF COPIES: 003 For more than 2 copies, you can choose the STACK or SORT options by pressing the Sort button. SORT: STACKED ☛ 5. Press the Copy button. 1-30 CHAPTER 1 ABOUT THIS MACHINE To stop copying, press the Stop button. STOP KEY PRESSED When the message below is displayed, press the Stop key again to eject the paper from the scanner feeder. PRESS STOP KEY You can reset all settings except the Paper size setting to their defaults for copying if you press the Clear button before copying. 1-31 Various settings for copy You can set various settings that are effective only for the next copy, after that the settings are cleared. The number of copies should be set last after the following settings have been made. Enlarge/Reduce You can make an enlarged or reduced copy by pressing the Enlarge/Reduce button, and then selecting an enlargement or reduction ratio. <For USA/Canada> You can reduce to 78%, 50% and manual. or You can enlarge to 120%, 150% and 200% and manual. <For other Countries> You can reduce to 87%, 71%, 50% and manual. or You can enlarge to 122%, 141%, 200% and manual. You can set a reduction or enlargement ratio from 50 to 200 % by using the 10 numeric keys while ‘MANUAL’ is displayed on the LCD. Setting a value out of this range will produce an error message on the LCD. 1-32 CHAPTER 1 ABOUT THIS MACHINE The Enlarge/Reduce function works as shown in the figure below. Enlarge Reduce Fig. 1-22 Enlarge and Reduce If the original document is larger than the print sheet size, you can change the reduction ratio automatically. For example, you might want to print an original A4 size document on B5 size paper. The AUTO setting allows you to change the reduction ratio automatically to make the original document print in the printable area of print sheet size A4, letter, B5, A5 and B5. Use the Paper size button to select the size of your original document. For more information, see ‘Paper Size’ in this Chapter. Document type Select the original document type as TEXT, PHOTO and both. DOC TYPE:TEXT: Select for original documents except that do not include photographic images. DOC TYPE:PHOTO: Select for original documents that contain only photographic images. DOC TYPE:TXT/PH: Select for original documents that contains both text and photos. 1-33 Density Adjust the density by pressing the Density button to alter the number of blocks on the display as shown below. <Default setting> -❚❚❚❚❚❚❚❚ + Light Dark Options Makes Copies and changes the layout on the print sheet. For example: 4 in 1 1 in 2x2 ABCD AB CD A Fig.2-23 Printing layout Before pressing the Copy button, select the paper size setting to match the size of paper in the paper cassette. 1-34 CHAPTER 1 ABOUT THIS MACHINE Paper Size ✒ Note • This setting is for changing the size of paper in the paper cassette or for print media loaded from the manual feed slot. • The Paper size selection is effective only when you copy using ‘Enlarge/Reduce’ copy or ‘Options’ . ☛ 1. Place the original document face down in the Document Feeder. ☛ 2. Use the Paper size button to select the paper size of your print media. You can select ☛ 3. Letter, Legal, A4, B5, A5, A6, B6 and Executive Press the Copy button to start making copies. If you have purchased the optional Lower tray unit (LT-400), the panel settings are different for the Lower tray unit. For further information, see “The lower tray unit” in Chapter 2. 1-35 Sort You can select STACK or SORT when making multiple copies. Sort 3 3 2 3 2 1 3 2 1 2 1 1 Stack 3 1 2 2 1 1 1 Fig. 1-24 Sort and Stack 1-36 3 2 3 2 3 CHAPTER 1 ABOUT THIS MACHINE How to scan ® How to scan from the Paper Port for Brother Software (for ® Windows 3.1x/95/98/NT users in USA/Canada) ☛ 1. Launch the PaperPort® for Brother application. ✒ Note • It is recommended that “MFL ProControl Center” and “Brother 3in1 Resource Manager” always run when you use the scan function. • Make sure that select source in the File menu of your application selects the ‘TWAIN_32 Brother P2500’ or ‘Brother P2500’ if you have had a scanner application except Brother installed. ☛ 2. Click the Twain icon. The scanner driver dialog is launched. ☛ 3. Make the necessary settings. 1-37 ☛ 4. Press the Start button. The scanned image will be shown on the desktop with the name ‘Untitled-x’. For further information about ‘PaperPort’, refer to the On-line Help in the application. 1-38 CHAPTER 1 ABOUT THIS MACHINE Scanning from TWAIN compliant applications The printer provides you with a TWAIN compliant scanner driver. This allows you to use the printer as scanner from any TWAIN compliant application such as PaperPort and Adobe Photoshop. ☛ 1. Launch the application you wish to use. ☛ 2. Select the ‘Select Source’ menu. ☛ 3. Select the ‘TWAIN_32 Brother P2500’ or ‘Brother P2500’ and click Select. ☛ 4. Select the “Acquire” menu. ☛ 5. Make the appropriate settings such as; • Scanning Resolution • Scanning Area etc.…….. ☛ 6. Click the Start button. ✒ Note • Selecting the exact scanning area reduces the scanning data so that you can save transfer time and memory. • Generally, the scanning resolution should be set according to the final output device. For example, when the output device is a monitor screen, 150 dpi scanning is enough. If a higher scan resolution is chosen the displayed output may not have any particular improvement. 1-39 Scanning from Control Panel (For Windows 95/98/NT4.0 only) This function makes it easy to scan from the printer control panel. ✒ Note When the “MFL ProControl Center” and “Brother 3in1 Resource Manager” are not running in the Task Tray, the buttons for ‘Scan to File’ and ‘Scan to Email’ do not work. Please use these functions after running these programs. Scan to File ☛ 1. Insert the original document face down in the Document Feeder. ☛ 2. “Brother MFL ProControl Center” window appears on your PC. ☛ 3. Press the Scan to File button. ✒ Note When you change the saving location for the scanned data, select the location by pressing the Scan to File button in ‘Brother MFL ProControl Center’. 1-40 CHAPTER 1 ABOUT THIS MACHINE Scan to Email ☛ 1. Insert the original document face down in the Document Feeder. ☛ 2. Press the Scan to Email button ☛ 3. The Mailer launches automatically with the file you scanned attached to the mail. 1-41 How to scan from the UnimessageTM Pro Viewer Software (for Windows® 95/98/NT users in other Countries) ☛ 1. Launch the Unimessage Pro Viewer software. ✒ Note • It is recommended that the “Brother 3in1 Resource Manager” is always running when you use the scan function. • Make sure that ‘Select Source’ in the File menu in your application is selected to the P2500 if you have had another scanner application installed other than the Brother HL-P2500. ☛ 2. Click the Scan to file button, the ‘Scan multiple pages’ window appears on your PC. ☛ 3. Press the Scan button on the Scan multiple pages window and the Scanner Setup window appears. ☛ 4. Adjust the following settings, if need, in the Scanner Setup window: ☛ 5. Resolution Gray Scale (Black & White, Gray [Error Diffusion], True Gray) Brightness Contrast Size Click the Start button on the Scanner Setup window . 1-42 CHAPTER 1 ABOUT THIS MACHINE ☛ 6. If required repeat step 2 to 5 to scan more pages. ☛ 7. Select the pages from the left column you want to use and click the Add button to include them in your document then click the OK button. The scanned image will be shown in the Unimessage Pro ‘Scanned images’ folder. For further information about ‘Unimessage Pro’, refer to the On-line Help in the application. 1-43 Scanning from TWAIN compliant applications The printer provides you with a TWAIN compliant scanner driver. This allows you to use the printer as scanner from any TWAIN compliant application such as Unimessage Pro and Adobe Photoshop. ☛ 1. Launch the application you wish to use. ☛ 2. Select the ‘Select Source’ menu. ☛ 3. Select the ‘TWAIN_32 Brother P2500’ or ‘Brother P2500’ and click Select. ☛ 4. Select the “Acquire” menu. ☛ 5. Make the appropriate settings such as; • Scanning Resolution • Scanning Area etc.…….. ☛ 6. Click the Start button. ✒ Note • Selecting the exact scanning area reduces the scanning data so that you can save transfer time and memory. • Generally, the scanning resolution should be set according to the final output device. For example, when the output device is a monitor screen, 150 dpi scanning is enough. If a higher scan resolution is chosen the displayed output may not have any particular improvement. 1-44 CHAPTER 1 ABOUT THIS MACHINE Scanning from the HL-P2500 Control Panel This function makes it easy to scan from the printer control panel. ✒ Note When the “Brother 3in1 Resource Manager” is not running in the Task Tray, the ‘Scan to File’ and ‘Scan to Email’ buttons do not work. Please use these functions after making sure the Resource Manager program is running. Scan to File ☛ 1. Insert the original document face down in the Document Feeder. ☛ 2. Press the Scan to File button. The scanned images at 300 dpi in Black and White will be shown in the Unimessage Pro ‘Scanned images’ folder. Scan to Email This function is used to quickly send images of your documents to people via email using your MAPI compatible email application. ☛ 1. Insert the original document face down in the Document Feeder. ☛ 2. Press the Scan to Email button. Unimessage Pro will start a new message in your MAPI compatible email application with the scanned image at 300 dpi in Black and White automatically attached. 1-45 Functions of the Buttons on the control panel This section refers to the following Buttons on the printer control panel. Alarm Scan Copy Scan to Email Enlarge/ Reduce Scan to File Density Print Data Paper Size 2 3 4 5 6 Stop 7 Job Cancel Document Type 1 Option 8 9 Sort Clear Copy 0 Fig. 1-25 Control panel For detailed information on the operation of the following buttons on the control panel, please see “How to copy” in this Chapter. BUTTONS Job Cancel Scan to File Scan to Email Copy Stop 10 keys Sort Clear Enlarge/Reduce Density Document type Paper size Options Explanation Pressing this button stops and cancels the printer operation in progress. The printed sheet will ejected. Pressing this button starts scanning of the original document into a file in the viewer software on your PC. Pressing this button starts scanning the original document into your e-mail software. Pressing this button starts copying. Pressing this button stops and cancels the copy operation in progress. The original document and printed sheet will be ejected. Set the number of copies by using these keys when you want to make multiple copies. The maximum number of copies is 250. Press this button to sort multiple copies. Press this button to reset all copy settings to their defaults. Set the enlarge/reduce ratio for the copy. The setting is effective only for the next copy operation. Set the print contrast by using this button. Set the copy mode. Press this button to select the size of the printed sheet. Pressing this button changes the layout on the print sheet for copying. 1-46 Special Function There are some special functions that can be accessed by using the buttons on the control panel as described below. * 1. Turn the power switch off. * 2. Turn the power switch on while holding down the Job cancel button. * 3. Select the number of the following available functions by using the 10 numeric keys. Key 1 2 3 4 5 6 LCD message TEST PRINT PRINT CONFIG PRINT FONTS HEX DUMP FACTORY RESET DRUM LIFE 1-47 Action Print Test page Print Configuration Print fonts Print the hexadecimal data Restore to default settings (Turn the Power switch on) Indicates the remaining drum life What do the LED indications mean This section refers to the following LEDs on the printer control panel. Alarm LED The Alarm LED indicates a printer error status. LED On Status The printer has detected an error. When the Alarm LED is on and the printer has detected and error condition, refer to the ‘Error Messages that Appear on the LCD Panel’ section in Chapter 4 and clear the problem and make the printer ready to print. Data LED LED On Blinking ✸ Status Print data remains in memory. The printer is receiving data from the computer. LED LED On Blinking ✸ Status The toner cartridge is empty. The toner cartridge is nearly empty. When the toner cartridge is empty, replace the toner cartridge with a new one referring to Chapter 3. 1-48 CHAPTER 2 OPTIONS CHAPTER 2 OPTIONS Optional Accessories and Supplies This printer has the following optional accessories and supplies, you can increase the capabilities of the printer with these items. Supplies Information Item 1 Toner cartridge See page 3-2 See page 3-9 2 Drum unit 1 2 Item Lower Tray Unit Memory Board 3 Print Server 1 1 2 Features Paper feeder and 250 sheet tray The memory can be expanded up to a total of 12 or 20 Mbytes It allows your printer to be connected to your network via the parallel interface. 2 3 2-1 Information See page 2-2 See page 2-4 See page 2-8 The Lower Tray unit The lower tray unit is an optional device that functions as a third paper source. It can contain a maximum of 250 sheets of paper (80 g/m2). To obtain the optional LT-400 lower tray unit, please consult the dealer or store where you purchased the printer. Fig. 2-1 Loading Paper in the Lower Tray Unit With the lower tray unit installed, load paper into the lower paper cassette in exactly the same way as you load paper in the upper paper cassette. The paper sizes that may be used in the lower paper cassette are not the same for the upper paper cassette as shown below. Paper type Available size Cut sheet letter, A4, ISO B5, Executive, A5 and legal (US and Canada Only) ! Weight and capacity 64 to 105 g/m2 plain paper (17 to 28 lb.) 250 sheets Caution If a paper jam occurs when using the lower tray unit, check for correct installation of the paper cassettes. 2-2 CHAPTER 2 OPTIONS Installing paper in the Lower tray unit ☛ 1. When you load paper in the Lower tray unit, press the Paper size button while holding down the Stop button. The ‘OPTION CASSETTE’ message appears on the LCD. ☛ 2. Press the Paper size button again, and then the ‘USE CASSETTE #2’ message appears on the LCD panel. ☛ 3. Press the 2 button of the 10 numeric keypad and then select the paper size for the Lower tray unit using the Paper size button. Change the paper tray to use to feed paper ☛ 1. Press the Paper size button. ☛ 2. Select the Paper tray by pressing the 1 or 2 button. 1 button 2 button Standard paper cassette Optional Lower tray cassette ☛ 3. Press the Copy button to start copying. 2-3 How to Add extra Memory The printer has 4 Mbytes of standard memory and a slot for optional additional memory. The memory can be expanded up to a total of 12 or 20 Mbytes by installing the optional memory board. The printer can recognize 8MB (ME-8000) or 16MB (ME-16000) of optional memory. Be careful to purchase the appropriate memory board for your needs. The memory board is located on the main control board inside the printer. When you add an optional memory board, it increases the performance for printer operations. ✒ Note This printer can also support a resolution of true 600 dpi under Windows® 95/98, Windows® 3.1x and Windows NT® 4.0 with the supplied printer driver. We recommend you expand the printer memory to avoid any memory full errors. The printer has only one slot for a memory board upgrade. If you want to increase your printer memory again after you have already installed a memory board module into the slot, you will need to remove the previously installed memory board first. Then you can install a different memory board. For example, if you previously increased the printer memory from the standard 4MB to 12MB by adding an 8MB memory board, you would have remove the installed 8MB memory board if you wanted to install a new 16 MB memory board into the printer. 2-4 CHAPTER 2 OPTIONS How to install an additional memory board To install the memory board, follow these steps: ☛ 1. Turn off the power switch and unplug the AC cord from the AC outlet. Disconnect the interface cable from the printer. Fig. 2-2 Unplug the AC Cord and Disconnect the Interface Cable ! Caution Be sure to turn off the power switch and unplug the AC cord to the printer before installing or removing the memory board to/from the main controller PCB. 2-5 ☛ 2. Remove the two screws securing the rear cover and pull out the access cover. Fig. 2-3 Removing the Main Controller access cover ☛ 3. Unpack the memory board and hold it by its edge. ! Caution Memory boards may be damaged by even a small amount of static electricity. Do not touch the memory chips or the board surface. When handling the board and before installing or removing it, wear an antistatic wrist strap, or frequently touch the surface of the antistatic package or bare metal on the printer. 2-6 CHAPTER 2 OPTIONS ☛ 4. To install the memory board onto the main control board, use the supplied spacer and plug the board into the upper left connector of the main control board. Fig. 2-4 Install the Memory Board ☛ 5. Secure the access cover with the two screws. ☛ 6. Refit the rear cover. ☛ 7. Reconnect the interface cable from your computer. Plug the power cord into the AC outlet and turn on the power switch. ☛ 8. To check that the memory board is installed correctly, you should perform a Test Print “Print Configuration”. This listing will show the current total memory size, so you can check that it was updated. 2-7 What is the Brother print server (NC-2010p) An optional Network print server Brother NC-2010p is available, which allows your printer to be connected to your network via the parallel interface. Brother print servers allow multiple host computers to share a Brother printer on a 10 Mbit Ethernet network. Any user can print their job as if the printer was directly connected to their computer. No special software is required on the host computers and users on DEC, UNIX, Novell, AppleTalk, LAN Server/Warp Server, Windows NT®, Windows® 95/98, NetBIOS and Banyan VINES computers can simultaneously access the same printer. Features The Brother print servers offers the widest range of features in the industry, including: LAT, TCP/IP, Netware, AppleTalk, NetBIOS, Banyan VINES and DLC/LLC protocols Network Operating System compatibility: - Digital Equipment Corporation networks, including PATHWORKS and DECprint Server - UNIX systems that support either the Berkeley lpr/lpd printing protocol, printing to a raw TCP port - Novell Netware V2.15 or above, V3.xx, or V4.xx, including support for NetWare Directory Services (NDS) - AppleTalk Phase 2 - Windows NT4.0 and NT3.5x - IBM LAN Server V4.0 or above, or any earlier version that has IBM TCP/IP V2.xx - Windows 95/98 (Peer-to-Peer or client mode) 2-8 CHAPTER 2 OPTIONS Very high performance Superior network and printer management: - BRAdmin and BRAdmin32 Windows-based Management utilities. SNMP MIB I and MIB II over IP or IPX Remote console management via DEC NCP, TELNET or NetWare. HTTP web browser management capability Ipd-Plus feature for providing multiple services with custom setup and reset strings plus text-to-PostScript conversion Flash memory for easy updating of firmware 2-9 CHAPTER 3 MAINTENANCE CHAPTER 3 MAINTENANCE The following are maintenance messages that appear on the LCD display. These messages prompt you to replace each of the consumables before they run out. LCD message TONER EMPTY CHANGE DRUM SOON Consumable to replace Toner cartridge Approximate life 3,000 pages * (standard toner cartridge) 6,000 pages * (high capacity toner cartridge) Up to 20,000 pages * Drum unit How to replace See 3-2 See 3-9 Periodic maintenance parts To maintain print quality, the units listed below should be replaced after printing the following number of pages. Item Fixing unit Separator pad holder assy Pick up roller assy Approximate life 50,000 pages * 50,000 pages * Way to replace Call to customer support Call to customer support 50,000 pages * Call to customer support * The actual number of printed pages may vary depending on your average type of print job and type of paper. The figures quoted are based upon 5% coverage per page. 3-1 How to Replace the Toner Cartridge The printer, when the Standard capacity toner cartridge is used, can print approximately 3,000 pages at 5% coverage on A4/Letter size paper with one toner cartridge. When the High capacity toner cartridge is used, approximately 6,000 pages can be printed under the same conditions. When the toner LED comes on and the ‘TONER EMPTY’ message appears on the LCD, replace the toner cartridge. ✒ Note • Actual page count will vary depending on your average document type. (i.e.: standard letter, detailed graphics, etc.) • We recommend that you always keep a new toner cartridge ready for use in case you get a toner low warning. • Discard the used toner cartridge according to your local regulations. If you are not sure of them, consult your local dealer. Be sure to seal the toner cartridge tightly so that toner powder does not spill out of the cartridge. Dispose of the used toner cartridge in accordance with local plastic waste regulations. • We recommend that you clean the printer when you replace the toner cartridge. See “How to clean the printer” in this chapter, you can also view how to do this on the CD video. 3-2 CHAPTER 3 MAINTENANCE The toner cartridge is replaced in the following way. You can also view the toner cartridge replacement method in the instructional video on the supplied CD-ROM: ☛ 1. Open the front cover. Pull out the drum unit assembly. Fig. 3-1 Removing the Drum Unit ! Caution We recommend to put the drum unit assembly on a piece of cloth or disposable paper in case you accidentally spill or scatter the toner. To prevent damage to the printer by static electricity, do not touch the electrodes shown below. Fig 3-2 Electrodes 3-3 ☛ 2. Place the drum unit assembly containing the old toner cartridge on a flat, horizontal surface and pull the toner cartridge out of the drum unit assembly while pushing the lock lever down with your right hand. Hold down this lock lever Fig. 3-3 Removing the Old Toner Cartridge ! Caution Handle the toner cartridge carefully. If toner scatters on your hands or clothes, immediately wipe or wash it off with cold water. ☛ 3. Unpack the new toner cartridge, and keep it horizontal as you gently rock it from side to side 5 or 6 to distribute the toner evenly inside the cartridge. Fig. 3-4 Rocking the Toner Cartridge 3-4 CHAPTER 3 MAINTENANCE ☛ 4. Remove the yellow protective cover. Fig.3-5 Remove the protective cover 3-5 ! • • • • • • Caution Wait to unpack the toner cartridge until immediately before you are ready to install it in the printer. If toner cartridges are left unpacked for a long period of time, the toner life is shortened. If an unpacked drum unit is subjected to excessive direct sunlight or room light, the drum unit may be damaged. You can only use a genuine Brother toner cartridge which is specially formulated to ensure top print quality. Printing with a 3rd party toner or toner cartridge may reduce not only the print quality but also the quality and life of the printer itself. It may also cause serious damage to the performance and life of a genuine Brother drum unit. Warranty coverage is not applied to problems caused by the use of 3rd party toner or toner cartridges. Printing with a 3rd party drum unit or OPC drum may reduce not only the print quality but also the quality and life of the printer itself. Warranty cover is not applied to problems or damage caused by the use of a 3rd party drum unit or OPC drum. Install the toner cartridge immediately after you remove the protective cover. Do not touch the shaded part shown below. Fig. 3-6 Developer roller 3-6 Fig. 3-7 OPC drum CHAPTER 3 MAINTENANCE ☛ 5. Install the new toner cartridge into the drum unit until it clicks into place. The lock lever should automatically jump to this position. X Fig. 3-8 Installing the Toner Cartridge into the Drum Unit ☛ 6. Clean the primary corona wire inside the drum unit by gently sliding the blue tab back and forth to the right end and left ends several times. Return the tab to the Home position before reinstalling the drum unit assembly. Home position Fig. 3-9 Cleaning the Primary Corona Wire ! Caution Make sure that you return the tab to the Home position (▲ mark position) before reinstalling the drum unit assembly into the printer, otherwise printed pages may have vertical stripes. 3-7 ☛ 7. Re-install the drum unit assembly into the printer and close the front cover. Fig 3-10 Re-install the Drum unit assembly 3-8 CHAPTER 3 MAINTENANCE How to Replace the Drum Unit The printer uses a drum unit to create the print images on paper. When the ‘CHANGE DRUM SOON’ message appears on the LCD display, it indicates that the drum unit is near the end of its life. Purchase a new drum unit to replace the current one. ! Caution • When removing the drum unit, handle it carefully because it contains toner. • You should clean the printer when you replace the drum unit. See “How to clean the printer” in this chapter and in the instructional video on the supplied CD-ROM. ✒ Note • The drum unit is a consumable, and it is necessary to replace it periodically. • There are many factors that determine the actual drum life, such as temperature, humidity, type of paper, your typical type of print job and the amount of toner it uses and the number of pages per print job, etc.. The average drum life is estimated at approximately 20,000 pages. The actual number of pages that your drum will print may be significantly less than this estimate. Because we have no control over the many factors that determine the actual drum life, we cannot guarantee a minimum number of pages that will be printed by your drum. • For best performance, use only genuine Brother toner. The product should only be used in a clean, dust-free environment with adequate ventilation. 3-9 Follow these steps to replace the drum unit. You can also view the drum unit replacement method in the instructional video on the supplied CD-ROM: ☛ 1. Open the front cover of the printer and pull out the drum unit assembly. Fig. 3-11 Removing the Drum Unit assembly ! Caution To prevent damage to the printer from static electricity, do not touch the electrodes shown below. Fig 3-12 Electrodes 3-10 CHAPTER 3 MAINTENANCE ☛ 2. Place the drum unit assembly on a flat, horizontal surface, and pull the toner cartridge out of the drum unit assembly while holding down the lock lever with your right hand . Hold down this lock lever Fig. 3-13 Removing the Toner Cartridge ✒ Note • Discard the used drum unit according to local regulations. If you are not sure of them, consult your local dealer/retailer. Be sure to seal up the drum unit tightly so that toner powder does not spill out of the unit. Do not discard used drum units together with domestic waste. • We recommend that you place the drum unit on a piece of cloth or disposable paper in case you accidentally spill or scatter toner. • Handle the toner cartridge carefully as it contains toner. If toner scatters and your hands or clothes get dirty, wipe or wash it off with cold water immediately. ☛ 3. Unpack the new drum unit. ! Caution • Wait to unpack a drum unit immediately before you are ready to install it into the printer. If an unpacked drum unit is subjected to excessive direct sunlight or room light, the unit may be damaged. • Handle the drum unit carefully. If toner scatters on your hands or clothes, wipe or wash it off with cold water immediately. 3-11 ☛ 4. Install the toner cartridge into the new drum unit until it clicks into place. For more information, see “How to replace the toner cartridge” earlier in this chapter. The lock lever should automatically jump to this position. X Fig.3-14 Install the Toner Cartridge into the Drum Unit ☛ 5. Install the new drum unit assembly into the printer. Fig. 3-15 Installing the Drum Unit Make sure the printer is turned on, the front cover is closed and the LCD message indicates ‘READY’. 3-12 CHAPTER 3 MAINTENANCE ☛ 6. To reset the page counter, open the front cover and press the Clear button. ! Caution Do not reset the page counter when you replace the toner cartridge. ☛ 7. When ‘REPLACE DRUM?’ appears on the LCD, press 1 with the front cover open. ☛ 8. Close the front cover when the displays shows ‘ACCEPTED’ . 3-13 How to Clean the Printer Clean the printer exterior and interior periodically. If printed pages get stained with toner, clean the printer interior and drum unit. Cleaning the Printer Exterior ✒ Note Clean the printer exterior as described in the following instructions. This is also shown in the instructional video on the supplied CD-ROM. ☛ 1. Turn off the power switch and unplug the power cord. Warning There are high voltage electrodes inside the printer. Before cleaning the printer, make sure you have turned off the power switch and unplugged the power cord from the power outlet. Fig. 3-16 Turning off the Switch and Unplugging 3-14 CHAPTER 3 MAINTENANCE ☛ 2. Use a damp cloth for cleaning. ! Caution Use water or neutral detergents for cleaning. Cleaning with volatile liquids such as thinners or benzene will damage the surface of the printer. ☛ 3. Wipe dirt and dust away from the printer exterior with the damp cloth and allow the printer to dry completely before you turn the power on again. ☛ 4. Plug in the power cord and turn on the power switch. 3-15 How to clean the Printer interior and drum unit ✒ Note Clean the printer interior and the drum unit as described in the following instructions. This is also shown in the instructional video on the supplied CDROM. ☛ 1. Turn off the power switch and unplug the power cord. Warning There are high voltage electrodes inside the printer. Before cleaning the printer, make sure you have turned off the power switch and unplugged the power cord from the outlet. Fig. 3-17 Turning off the Switch and Unplugging ☛ 2. Open the front cover of the printer. ☛ 3. Take the drum unit assembly out of the printer and place it aside. 3-16 CHAPTER 3 MAINTENANCE Warning After you have just used the printer, some internal parts of the printer are extremely HOT. When you open the front or rear cover of the printer, never touch the shaded parts shown in the following illustrations. High Temperature High Temperature Front view Rear view Fig. 3-18 Inside the Printer ☛ 4. Gently wipe the scanner window with a soft dry cloth. Scanner Window Fig. 3-19 Cleaning the Scanner Window 3-17 ! Caution • Do not touch the scanner window with your fingers. • Do not wipe the scanner window with cleaning alcohol (isophorol). • Handle the drum unit carefully because it contains toner. If toner scatters and your hands or cloths get dirty, wipe or wash it off with cold water immediately. ✒ Note We recommend that you place the drum unit on a piece of cloth or disposable paper in case you accidentally spill or scatter toner. ☛ 5. Clean the primary corona wire inside the drum unit by gently sliding the tab back and forth to the right and left ends several times. Home Position (▲) Fig. 3-20 Cleaning the Primary Corona Wire ☛ 6. Return the tab to the home position (▲ mark position) before reinstalling the drum unit assembly into the printer. ! Caution Be sure to position the tab at the Home position, otherwise, printed pages may have vertical stripes. 3-18 CHAPTER 3 MAINTENANCE ☛ 7. Install the drum unit assembly into the printer. See the section “How to replace the drum unit” earlier in this Chapter. ☛ 8. Close the front cover. ☛ 9. Plug in the power cord and turn on the power switch. 3-19 How to clean the Document scanner ☛ 1. Turn off the power switch and unplug the power cord. ☛ 2. Open the control panel cover. Fig. 3-21 Open the cover ☛ 3. Wipe dirt off the printer with a slightly damp clean cloth. 3-20 CHAPTER 3 MAINTENANCE ☛ 4. Clean the white bar and the glass scanner cover under the white bar. Moisten a small, clean, soft, lint-free cloth with isopropyl alcohol and carefully remove dirt from the glass cover and the white bar. Fig. 3-22 Clean the document scanner ☛ 5. Close the control panel cover. ☛ 6. Plug in the power cord and turn on the power switch. 3-21 CHAPTER 4 TROUBLESHOOTING CHAPTER 4 TROUBLESHOOTING Identifying your problem First, check the following: • • • • • • The power plug is connected correctly and the printer is turned on. All of the protective parts have been removed. The toner cartridge and drum unit are installed correctly. The interface cable is securely connected between the printer and computer. The correct driver for the printer is installed and selected. The PC is set up to connect to the correct printer port. Printer does not print, copy or scan If you did not solve your problem with the above checks, please find your problem in the following list and go to the section listed. • Error message appears on LCD or LED is on Go to “Error message appears on LCD panel” on page 4-3 or “What do the LED indications mean” in Chapter 1. Pages are printed, however there are problems with:• Print quality Go to ‘Improving the print quality’ on page 4-13. • Printout is incorrect Go to ‘How to Print correctly’ on page 4-19. 4-1 Service Call indications If an unrecoverable error occurs, the LCD displays an error message and an error number. The printer indicates the need for a service call. MACHINE ERROR XX If you see any of these service call indications, turn off the power switch, wait a few seconds and then turn it back on and try to print again. If you cannot clear the error and see the same service call indication after turning on the printer, consult your dealer or Brother authorized service representative. Please report the error status and situation referring to the information on the LCD display. ✒ Note Ensure that the front cover is fully closed before reporting a Service call. 4-2 CHAPTER 4 TROUBLESHOOTING Error Messages that Appear on the LCD Panel If an error occurs, the printer indicates the error messages on the LCD panel display and turns the Alarm LED on. Find the error and take the appropriate action to correct it. The printer automatically recovers from most errors, but you may have to reset the printer with a button as described below. Error Message COVER OPEN Action • Close the front cover of the printer. CHECK PAPER • The paper cassette may be out of paper or not properly installed. If it is empty, load a new stack of paper into the paper cassette. • If there is paper in the paper cassette, make sure it is straight. If the paper is curled, straighten it before printing. Sometimes it is helpful to remove the paper, turn the stack over and place it back into the paper cassette. • Reduce the amount of paper in the paper cassette, then try again. • Make sure you are using paper that meets Brother recommended paper specifications. See “What kind of paper can I use” in Chapter 1. NO DOCUMENT • Place the original document into the Document feeder. PLS CLEAN DRUM • Clean the primary corona wire of the drum unit. See "How to clean the printer interior and Drum unit" in Chapter 3. • Press the Stop button, or open and close the front cover. • Install the paper cassette into the printer. CHECK CASSETTE 4-3 Error Message PRINTER JAM Action • A Paper jam has occurred in the printer. See ‘PAPER JAMS and how clear to them’. DOCUMENT JAM • A Paper jam has occurred in the document feeder. Refer to ‘PAPER JAMS and how to clear them’. TONER LOW • Purchase a new toner cartridge in order to be ready for when the Toner Empty message is indicated. TONER EMPTY • Please replace the toner cartridge. See to ‘How to replace the toner cartridge’ in Chapter 3 or view the instructional video on the CD-ROM. • Make sure the toner cartridge is installed into the printer. • Re-install the toner cartridge into the printer correctly. CHANGE DRUM SOON • Please replace the drum unit by referring to ‘How to replace the drum unit’ in Chapter 3 or view the instructional video on the CD-ROM. MEMORY FULL • If you are printing, press the Job Cancel button to print the data remaining in the printer. If you are copying, press the Copy button to print the data remaining in the printer. • Reduce the print resolution or reduce the complexity of your document. • Expand the printer memory by adding a Memory Expansion board. See ‘How to add extra Memory’ in Chapter 2. MACHINE ERROR XX • Press the Stop key, and turn the power off. Wait for a few seconds and then try again. If the error occurs again, consult your dealer. PLS OPEN COVER • If this messages appears on the LCD, open and close the front cover. The message may disappear if opening/closing the front cover corrects the error. 4-4 CHAPTER 4 TROUBLESHOOTING Error Message Printouts The printer will report problems by printing an error message as defined in the following table. Take the corrective actions for the error message the Printout reports. Error Message RESOLUTION ADAPTED (The printer has printed the document at a reduced resolution.) Action • If you want to print without reducing the resolution, reduce the complexity of your document. • Expand the printer memory by adding a Memory Expansion board. See ‘How to add extra Memory’ in Chapter 2. 4-5 Paper Handling First, ensure that you are using paper that meets Brother recommended paper specifications. See “What kind of paper can I use” in Chapter 1. Problem The printer does not load paper. Recommendation • If there is paper in the paper cassette, make sure it is straight. If the paper is curled, straighten it before printing. Sometimes it is helpful to remove the paper, turn the stack of paper over and place it back in the paper cassette. • Reduce the amount of paper in the paper cassette, then try again. • Check that manual feed mode is not selected in the printer driver. The printer does not load paper from the manual feed slot. • Re-insert the paper firmly, one sheet at a time. • Make sure that manual feed mode is selected in the printer driver. The printer cannot load envelopes. • The printer can load envelopes from the manual feed slot. Your application software must be set up correctly to print on the size of envelope you are using. This is usually done in the page setup or document setup menu of your software. See your software application manual. The printer copies, but • Check that the Original documents are inserted face nothing is printed on the down in the document feeder. copy. A paper jam has occurred. • Clear the jammed paper. See “PAPER JAMS and how to clear them” or the paper jam instructional video on the CD-ROM. The printer does not print into the output tray. The printer does not print on the specified paper. (Optional Lower Tray Unit Only) • Close the rear cover. • Make sure that the cable is connected to the printer. • Make sure that the appropriate printer driver is selected. 4-6 CHAPTER 4 TROUBLESHOOTING PAPER JAMS and How to Clear Them When a paper jam occurs, an error message appears on the LCD. PRINTER JAM See to page 4-8 for information on “How to clear a printer jam”. Or DOCUMENT JAM See to page 4-11 for information on “How to clear a document jam”. Warning After you have just used the printer, some internal parts of the printer are extremely HOT. When you open the front or rear cover of the printer, never touch the shaded parts shown in the following diagram. High Temperature Front view Fig 4-1 Inside the Printer 4-7 High Temperature Rear view Clear the jammed paper. See the following description or you can view the paper jam instructional video on the CD-ROM. If the jammed paper has been removed completely using the following steps, you can close the paper cassette first, then close the front cover and the printer will resume printing automatically. If the printer still does not resume printing, please check that all the remaining jammed paper has been removed from the printer. Then try printing again. ✒ Note Always remove all paper from the paper cassette and straighten the stack when new paper is added. This helps prevent multiple sheets of paper from feeding through the printer at one time and reduces paper jams. How to clear a printer jam ☛ 1. Remove the paper cassette completely from the printer. Fig. 4-2 Remove the paper cassette 4-8 CHAPTER 4 TROUBLESHOOTING ☛ 2. Pull any jammed paper up and out of the printer. Fig. 4-3 Pull the jammed paper up and out ☛ 3. Open the front cover. ☛ 4. Remove the drum unit assembly. Pull any jammed paper up and out of the printer. If you cannot remove the drum unit assembly easily at this time, do not use additional force. Instead, pull the edge of the jammed paper from the paper cassette. Fig. 4-4 Remove the drum unit assembly 4-9 ! Caution To avoid damaging the printer by static electricity, do not touch the electrodes shown below. Fig. 4-5 Electrodes ☛ 5. Open the rear cover and pull the jammed paper out of the fuser unit. If you have to pull the paper towards the back of the printer, the fuser may get dirty with toner powder and may result in scattered toner on the next printed page or pages. Print a few copies of the test page until the toner stops scattering on the printed pages. Fig. 4-6 Pull the jammed paper ☛ 6. Close the rear cover. ☛ 7. Install the drum unit assembly and close the front cover. 4-10 CHAPTER 4 TROUBLESHOOTING How to clear a document jam ☛ 1. Open the control panel cover. Fig. 4-7 Open the cover ☛ 2. Pull any jammed paper up and out of the document feeder. Fig. 4-8 Open the cover ☛ 3. Close the control panel cover. 4-11 Others Problem The printer cannot print. “There was an error writing to BRPRT: (or BRLPT1:) for the printer.” error message appears on your PC. Recommendation • Check that the printer cable is not damaged or broken. • If you have an interface switching device, make sure the correct printer is selected. • Close the ‘Resource Manager’ and turn the printer power switch off and on again. For DOS users Problem Unable to print from application software. Recommendation • Check that the DOS application software interface settings match that of your printer : for example, if you are using a parallel printer cable, you would most likely set your DOS software printer port to LPT1. • Check if the printer has any printer alarms active. • Check that the appropriate printer is selected in your application software. For Apple Macintosh Computer users Problem Unable to print from application software. Recommendation • Make sure that the supplied Macintosh printer driver is installed in the System Folder and it is selected with Chooser. • Check the PORT selection within the Chooser : It should match the port to which you physically attached the printer cable. 4-12 CHAPTER 4 TROUBLESHOOTING Improving the Print Quality ! Caution If the “CHANGE DRUM SOON” message is on the LCD, you will clear a print quality problem by replacing the drum unit with a new one. The drum unit is at the end of it’s life. This section provides information on the following topics: problem with Copy problem with Scan Image default examples ABCDEFGH CDEF abcdefghijk defg ABCD abcde 01234 Faint ABCDEFGH abcdefghijk ABCD abcde 01234 Gray background Go to page 4-20 Go to page 4-21 Recommendation • Check the printer's environment. Conditions such as high humidity, high temperature, etc. may cause this situation to occur. • If the whole page is light, toner save mode may be on. Disable toner save mode in the Printer Properties tab of the Driver. • Try installing a new toner cartridge. See “How to replace the toner cartridge” in Chapter 3. • Try installing a new drum unit. See "How to replace the drum unit" in Chapter 3. • Make sure you are using paper that meets the Brother recommended specifications. See “What kind of paper can I use” in Chapter 1. • Check the printer's environment; high temperature and high humidity conditions can increase the amount of background shading. • Try installing a new toner cartridge. See "How to replace the toner cartridge" in Chapter 3. • Try installing a new drum unit. See "How to replace the drum unit" in Chapter 3. 4-13 Image default examples Ghost ABCDEFGH abcdefghijk ABCD abcde 01234 Toner specks Recommendation • Make sure you are using paper that meets the specifications. Rough surfaced paper, paper that has absorbed moisture or thick media can cause this problem. • Make sure that you selected the appropriate media type in the printer driver. See “What kind of paper can I use” in Chapter 1. • Try installing a new drum unit. See “How to replace the drum unit” in Chapter 3. • Make sure that you are using paper that meets the specifications. A rough surfaced paper may cause the problem. See “What kind of paper can I use” in Chapter 1. • The drum unit may be damaged. Install a new drum unit. See "How to replace the drum unit" in Chapter 3. • • • hollow print Make sure that you use paper that meets the specifications. See “What kind of paper can I use” in Chapter 1. Select the ‘Thick paper mode’ in the printer driver, or use thinner paper than you are currently using. The printer’s environment conditions such as high humidity may cause this situation to occur. • Clean the primary corona wire of the drum unit. See "How to clean the printer interior and Drum unit" in Chapter 3. • The drum unit may be damaged. Install a new drum unit. See "How to replace the Drum unit" in Chapter 3. All black 4-14 CHAPTER 4 TROUBLESHOOTING Image default examples Recommendation • If the problem is not solved after printing a few pages, the drum unit may have glue from label stock on the OPC drum surface. 94 mm Clean the drum unit as follows (3.7 in.) 94 mm (1) Place the printing samples in front of the drum (3.7 in.) unit, and find the exact position of the image defect. White Spots Printed pages have white spots in black text and graphics at intervals of 94 mm. Fig.4-9 Find the exact position of the image defect 94 mm (3.7 in.) 94 mm (3.7 in.) (2) Turn the drum unit gear by hand while looking at the surface of the OPC drum. Black Spots Printed pages have black spots at intervals of 94 mm. Fig. 4-10 Turn the drum gear (3) When you have located the mark on the drum that matches the print sample, wipe the surface of the OPC drum with a cotton swab until the dust or paper powder on the surface comes off. Fig. 4-11 Wipe the surface of the OPC drum ! • Caution Do not try to clean the surface of the photosensitive drum with anything sharp such as a ball-point pen etc. The drum unit may be damaged. Install a new drum unit. See “How to replace the Drum unit” in Chapter 3. 4-15 Image default examples ABCDEFGH abcdefghijk ABCD abcde 01234 Black Horizontal repetitive defects Toner scatters and stains the printed page. ABCDEFGH abcdefghijk ABCD abcde 01234 White horizontal stripes ABCDEFGH abcdefghijk ABCD abcde 01234 Recommendation • The drum unit may be damaged. Install a new drum unit. See "How to replace the drum unit" in Chapter 3. • Make sure you are using paper that meets specifications. See “What kind of paper can I use” in Chapter 1. ✒ Note • If you use label sheets for laser printers, the glue sometimes sticks to the OPC drum surface. • Do not use paper with clips or staples, these will scratch the surface of the drum. • If an unpacked drum unit is subject to excessive direct sunlight or room light, the unit may be damaged. • Make sure you are using paper that meets the specifications. Rough surfaced paper or thick media can cause this problem. • Make sure you selected the appropriate media type in the printer driver. • The problem may disappear by itself. Try printing a few pages to clear this problem especially if the printer has not been used for a long time. • The drum unit may be damaged. Install a new drum unit. See "How to replace the drum unit" in Chapter 3. • Clean the printer interior and the primary corona wire in the drum unit. See "How to clean the printer" in Chapter 3. • The drum unit may be damaged. Install a new drum unit. See "How to replace the drum unit" in Chapter 3. Horizontal Lines 4-16 CHAPTER 4 TROUBLESHOOTING Image default examples ABCDEFGH abcdefghijk ABCD abcde 01234 Black Vertical lines Printed pages are stained with toner or have vertical stripes. . ABCDEFGH abcdefghijk ABCD abcde 01234 Recommendation • Clean the primary corona wire of the Drum unit. See "How to clean the printer interior and Drum unit" in Chapter 3. • Make sure that the primary corona wire cleaner is at the home position. Make sure the Toner cartridge is not empty. • The Drum unit may be damaged. Install a new Drum unit. See "How to replace the Drum unit" in Chapter 3. • The Toner cartridge may be damaged. Install a new Toner cartridge. See "How to replace the Toner cartridge" in Chapter 3. Make sure that a torn piece of paper is not covering the scanner window inside the printer. • You may clear the problem by wiping the scanner window with a soft cloth. See “How to clean the printer” in Chapter 3. • The toner cartridge may be damaged. Install a new toner cartridge. See "How to replace the toner cartridge" in Chapter 3. White Vertical streaks 4-17 Image default examples FGH ABCDE hijk abcdefg ABCD abcde 01234 Page skew Curl or wave B DEFGH abc efghijk A CD bcde 1 34 Wrinkles or creases Recommendation • Make sure the paper or other media is loaded into the paper cassette correctly and that the guides are not too tight or too loose against the paper stack. • Set the paper guides correctly. Make sure that the tip of the paper guides fit into the slot correctly. See “How to load paper into the Paper cassette” in Chapter 1. • If you are using the manual feed slot see "How to load one sheet of paper manually" in Chapter 1. • The paper input bin may be too full. See "How to load paper into the paper cassette" in Chapter 2. • Check the paper type and quality. See "What kind of paper can I use" in Chapter 1. • Check the paper type and quality. Both high temperature and high humidity will cause paper to curl. See “What kind of paper can I use” in Chapter 1. • If you use the printer infrequently, the paper may have been in the paper cassette too long. Turn over the stack of paper in the paper input tray. Also, try rotating the paper 180° in the paper cassette. • Try printing using the straight-through output path. See "How to load one sheet of paper manually" in Chapter 1. • Make sure that paper is loaded properly. See "How to load paper into the paper cassette" in Chapter 1. • Check the paper type and quality. See “What kind of paper can I use” in Chapter 1. • Try printing using the straight-through output path. See "How to load one sheet of paper manually" in Chapter 1. • Turn over the stack of paper in the tray or try rotating the paper 180° in the input tray. 4-18 CHAPTER 4 TROUBLESHOOTING How to print correctly This section provides information on the following topics: problem with Copy problem with Scan Problem The printer prints unexpectedly or it prints garbage. Go to page 4-20 Go to page 4-21 Recommendation • Check that the printer cable is not too long. We recommend you use a parallel cable of less than 2 metres (6.6 feet) in length. • Check that the printer cable is not damaged or broken. • If you are using an interface switching device, remove it and connect your computer directly to your printer and try again. • Check that the appropriate printer driver is selected as ‘Set as Default’. • Check that the printer is not connected to the same port that is also connected to a mass storage device or scanner. Remove all other devices and connect the port to the printer only. Turn off printer status reporting in the device options tab in the printer driver. The printer cannot print • Press the Job Cancel button to print the data full pages of a document. remaining in the printer. A "MEMORY FULL" error • Reduce the print resolution or reduce the complexity message occurs. of your document. • Expand the printer memory by adding a Memory Expansion board. Refer to ‘How to add extra Memory’ in Chapter 2. 4-19 Problem My headers or footers appear when I view my document on screen but do not show up when I print them. Recommendation • Most laser printers have a restricted area that cannot be printed on. Usually this is the first two lines and last two lines of text cannot print (leaving 62 printable lines). Adjust the top and bottom margins in your document to allow for this. Copy Problem The printer copies, but nothing is printed on the copy. Recommendation Check the following: • Original documents are inserted face down in the document feeder. • The toner cartridge is not empty. Some portion of the image is missing on the copy. • The printer has unscannable and unprintable areas. Check these areas in Chapter 1. • If the image is larger than the paper size, some of the image may be lost. The printer cannot copy • Select stack mode instead of sort mode. full pages of a document. • Expand the printer memory by adding a Memory A "MEMORY FULL" error Expansion board. See ‘How to add extra Memory’ in message occurs. Chapter 2. 4-20 CHAPTER 4 TROUBLESHOOTING Scan Problem The printer cannot scan. The Scan to Email and Scan to File button do not work. Recommendation Check the following: • The printer is connected directly to the computer. • The computer can work in bi-directional mode. • The Scanner driver is correctly selected in your application. • A recommended interface cable is being used. (IEEE 1284 compliant) Check the following: (For USA/Canada) • Make sure to run the “MFL ProControl Center” and “Brother 3in1 Resource Manger” stay into the Task Tray. • If the Paperport 6.1 was installed 1. Click the ‘START’. Select ‘Program’ and then select ‘Programs’. 2. Click on “Paperport” program folder. 3. Click [Brother SmartUI PopUp]. (For Other countries) • “Unimonitor” and “Brother 3IN1 Resource Manager” must stay in the task tray. • If Unimessage was installed 1. Click on ’START’. Select ‘Programs’ and then select ‘Programs’. 2. Click on “Unimessage Pro” program folder. 3. Click [Unimonitor]. For DOS users Problem The printer prints, but it prints incorrect information. Sometimes it prints a couple of characters and then ejects the page, etc.. Recommendation • This is an indication that your application printer emulation setting and the printer’s emulation do not match. Check in your application software which printer you have selected to make sure the printer is set up correctly. Remember the printer emulates widely used printer selections: HP LaserJet 5P (PCL5e). Try setting the printer into HP emulation and then select the HP LaserJet 5 printer in your application software. 4-21 APPENDIX APPENDIX Printer Technical Specifications Printing Print Method Electrophotography by semiconductor laser beam scanning Laser Wavelengh: Output: Resolution 600 dpi Print Quality Normal print mode Economy print mode (25% and 50% toner saving) Print Speed Up to 12 pages/minute 780 nm 5mW max. (when loading A4 or letter-size paper from the paper tray) NOTE: Maximum print speed is obtained by printing multiple copies of the same page. Print speed may vary with the interface type, emulation, processing power of the computer, memory allocated to the print job, paper size and graphic quality. Warm-up Max. 45 seconds at 23°C (73.4°F) First Print 15 seconds (when loading A4 or letter-size paper from paper tray) A-1 Print Media Toner cartridge: Life Expectancy: 3,000 pages/standard capacity toner cartridge 6,000 pages/high capacity toner cartridge (When printing A4 or letter-size paper at 5% print coverage) NOTE: Toner life expectancy will vary depending on the type of average print job printed. Drum Unit: Life Expectancy: average up to 20,000 pages NOTE: There are many factors that determine the actual drum life, such as temperature, humidity, type of paper and toner that you use, the number of pages per print job, etc.. Copying Type Auto Document Feeder Resolution 600 dpi class interpolated (300 x 300 dpi optical) Enlarge/Reduce For USA and Canada: 50%, 78%, 120%, 150%, 200% and manual (50% ∼ 200%) For other countries: 50%, 71%, 87%, 122%, 141%, 200% and manual (50% ∼ 200%) Input 30 sheets Multi-copy Yes (up to 250 copies) Speed single copy: multi copy: up to 10 ppm up to 12 ppm A-2 APPENDIX Scanning Resolution 600 x 600 dpi interpolated with 256 levels of gray Software • • • TWAIN driver (for Windows and Macintosh users) For USA and Canada: PaperPort for Brother Software For other Countries:Wordcraft UnimessageTM Pro Viewer Emulation • • Brother Printing Solution for Windows HP LaserJet 5P (PCL5e) Printer Driver • Windows® 3.1/3.11, Windows® 95/98 and Windows NT® 4.0 driver, supporting Brother Native Compression mode and bidirectional capability Windows® 3.1/3.11, Windows® 95/98 driver, supporting bidirectional capability iMac/G3 driver available for iMac System 8.1 with iMac update or higher Specification • • TrueType Fonts on CD TrueType-compatible soft-fonts for Windows on the supplied CD-ROM. Interface Bi-directional parallel interface USB interface Memory 4 MB standard Optional memory board to 12MB or 20 MB total Diagnostics Self-diagnostic program A-3 Electrical and Mechanical Power Source U.S.A. and Canada: AC 110 to 120 V, 50/60 Hz Europe and Australia: AC 220 to 240 V, 50/60 Hz Power Consumption Printing (average): Stand-by: Sleep: 340 W or less 80 W or less 10W or less Noise Printing: Sleep: 50 dBA or less 27 dBA or less Temperature Operating: Storage: 10 to 32.5°C (50 to 90.5°F) 0 to 40°C (38 to 104°F) Humidity Operating: Storage: 20 to 80% (without condensation) 10 to 95% (without condensation) Dimensions (W x D x H) A4 paper cassette : 360 x 413 x 337 mm (14.2 x 16.3 x 13.3 inch) Legal paper cassette : 360 x 430 x 337 mm (14.2 x 16.9 x 13.3 inch) Weight Approx. 12 kg (26.5 lbs) including the drum unit A-4 APPENDIX Parallel Interface Specifications ✒ Note To ensure best quality performance use an IEEE 1284 compliant parallel cable between the printer and your computer. Only IEEE 1284 cables support all of the advanced printing capabilities, like bi-directional communication. These cables will be clearly marked with “IEEE-1284”. We recommend to use a parallel cable that is 2.0 meters (6.6 feet) or less. Interface Connector Printer Side: Amphenol FCN-685J036-L/X or equivalent A shielded cable should be used. Pin Assignment Pin No. Signal Direction Pin No. Signal Direction 1 Input 19 0V (S.G.) – DATA STROBE 2 DATA 1 Input 20 0V (S.G.) – 3 DATA 2 Input 21 0V (S.G.) – 4 DATA 3 Input 22 0V (S.G.) – 5 DATA 4 Input 23 0V (S.G.) – 6 DATA 5 Input 24 0V (S.G.) – 7 DATA 6 Input 25 0V (S.G.) – 8 DATA 7 Input 26 0V (S.G.) – 9 DATA 8 Input 27 0V (S.G.) – 10 Output 28 0V (S.G.) – ACKNLG 11 BUSY Output 29 0V (S.G.) – 12 PE Output 30 0V (S.G.) – 13 SLCT Output 31 Input INPUT PRIME 14 Input 32 Output AUTO FEED FAULT 15 N.C. – 33 N.C. – 16 0V (S.G.) – 34 N.C. – 17 0V (S.G.) – 35 N.C. – 18 +5V – 36 Input SLCT IN A-5 ✒ Note To use bi-directional communication, an interface cable which has the pin connections as above must be used. Pin 1 18 2 19 3 Pin 1 19 2 20 3 21 4 22 5 23 6 24 7 25 8 26 9 27 10 28 11 29 12 17 13 15 14 30 31 33 32 34 36 35 18 16 4 20 5 6 21 7 8 22 9 10 24 11 23 12 13 14 25 16 15 17 Shield Shield Fig. A-1 Parallel Interface Cable A-6 APPENDIX Universal Serial Bus (USB) Interface Interface Connector 2 1 4 3 Fig. A-2 USB interface connector Pin Assignment Pin No. 1 2 3 4 Signal Vcc (+5V) - Data + Data Ground Serial Data Serial Data + A-7 Resident Fonts The following bitmapped fonts are resident in this printer. Bitmapped Fonts This printer has the following bitmapped fonts. They can be used in the HP LaserJet 5P mode. They have the following characteristics. • • • Letter Gothic 16.66 Normal, Italic, Bold, BoldItalic (Portrait & Landscape) OCR-A(Portrait & Landscape) OCR-B(Portrait & Landscape) A-8 APPENDIX OCR Symbol Sets When the OCR-A or OCR-B font is selected, the corresponding symbol set is always used. • OCR-A • OCR-B HP LaserJet 5P Mode Roman 8 (8U) ISO Latin1 (0N) ISO Latin2 (2N) ISO Latin5 (5N) ISO Latin6 (6N) PC-8 (10U) PC-8 D/N (11U) PC-850 (12U) PC-852 (17U) PC-775 (26U) PC-1004 (9J) PC-8 Turkish (9T) Windows Latin1 (19U) Windows Latin2 (9E) Windows Latin5 (5T) Windows Baltic (19L) Legal (1U) Ventura Math (6M) Ventura Intl (13J) Ventura US (14J) PS Math (5M) PS Text (10J) Math-8 (8M) Pi Font (15U) MS Publishing (6J) Windows 3.0 (9U) Desktop (7J) MC Text (12J) Symbol (19M) Windings (579L) ISO2 IRV (2U) ISO4 UK (1E) A-9 ISO6 ASCII (0U) ISO10 Swedish (3S) ISO11 Swedish (0S) ISO14 JIS ASCII (0K) ISO15 Italian (0I) ISO16 Portuguese (4S) ISO17 Spanish (2S) ISO21 German (1G) ISO25 French (0F) ISO57 Chinese (2K) ISO60 Norwegian1 (0D) ISO61 Norwegian2 (1D) ISO69 French (1F) ISO84 Portuguese (5S) ISO85 Spanish (6S) HP German (0G) HP Spanish (1S) A-10 APPENDIX The following table shows characters available only in the corresponding character set. The numbers at the top of the table are code values with which characters are to be replaced in the Roman 8 character set. For other characters, see the Roman 8 character set. A-11 The following table shows characters available only in the corresponding character set. The numbers at the top of the table are code values with which characters are to be replaced in the US ASCII character set. For other characters, see the US ASCII character set. A-12 APPENDIX Trademarks The Brother logo is a registered trademark of Brother Industries, Ltd. Apple, the Apple Logo, and Macintosh are trademarks, registered in the United States and other countries, and TrueType is a trademark of Apple Computer, Inc. Hewlett Packard is a registered trademark and HP LaserJet 6P, 6L, 5P, 5L, 4, 4L 4P, III, IIIP, II, and IIP are trademarks of Hewlett-Packard Company. IBM, IBM PC, and Proprinter are registered trademarks of International Business Machines Corporation. Microsoft and MS-DOS are registered trademarks of Microsoft Corporation. Windows is a registered trademark of Microsoft Corporation in the U.S. and other countries. ENERGY STAR is a U.S. registered mark. All other brand and product names mentioned in this User’s Guide are registered trademarks of their respective companies. Compilation and Publication Notice Under the supervision of Brother Industries Ltd., this manual has been compiled and published, covering the latest product’s descriptions and specifications. The contents of this manual and the specifications of this product are subject to change without notice. Brother reserves the right to make changes without notice in the specifications and materials contained herein and shall not be responsible for any damages (including consequential) caused by reliance on the materials presented, including but not limited to typographical and other errors relating to the publication. ©1999 Brother Industries Ltd. A-13 APPENDIX REGULATIONS Federal Communications Commission(FCC) Declaration of Conformity (For USA Only) Responsible Party : Brother International Corporation 100 Somerset Corporate Boulevard Bridgewater, NJ 08807-0911, USA TEL : (908) 704-1700 declares, that the products Product Name : Brother Laser Printer HL-1240, HL-1250, MFC-P2500 Model Numbers : HL-12, P2500 Product Options : ALL complies with Part 15 of the FCC Rules. Operation is subject to the following two conditions: (1) This device may not cause harmful interference, and (2) this device must accept any interference received, including interference that may cause undesired operation. This equipment has been tested and found to comply with the limits for a Class B digital device, pursuant to Part 15 of the FCC Rules. These limits are designed to provide reasonable protection against harmful interference in a residential installation. This equipment generates, uses, and can radiate radio frequency energy and, if not installed and used in accordance with the instructions, may cause harmful interference to radio communications. However, there is no guarantee that interference will not occur in a particular installation. If this equipment does cause harmful interference to radio or television reception, which can be determined by turning the equipment off and on, the user is encouraged to try to correct the interference by one or more of the following measures: - Reorient or relocate the receiving antenna. - Increase the separation between the equipment and receiver. - Connect the equipment into an outlet on a circuit different from that to which the receiver is connected. - Consult the dealer or an experienced radio/TV technician for help. i Important A shielded interface cable should be used in order to ensure compliance with the limits for a Class B digital device. Changes or modifications not expressly approved by Brother Industries, Ltd. could void the user’s authority to operate the equipment. Industry Canada Compliance Statement (For Canada Only) This Class B digital apparatus complies with Canadian ICES-003. Cet appareil numérique de la classe B est conforme à la norme NMB-003 du Canada. International ENERGY STAR Compliance Statement The purpose of the International ENERGY STAR Program is to promote the development and popularization of energy-efficient office equipments, which includes computers, monitors, printers, facsimile receivers and copy machines world-wide. As an International ENERGY STAR partner, Brother Industries, Ltd. has decided that this product meets the guideline of the program. Radio Interference (220-240 V Model Only) This printer complies with EN55022(CISPR Publication 22)/Class B. Before this product is used, ensure that you use a double-shielded interface cable with twisted-pair conductors and that it is marked “IEEE 1284 compliant”. We recommend to use a parallel cable that is 2.0 metres (6.6 feet) or less. ii APPENDIX Laser Safety (For 110–120 V Model Only) This printer is certified as a Class I laser product under the U.S. Department of Health and Human Services (DHHS) Radiation Performance Standard according to the Radiation Control for Health and Safety Act of 1968. This means that the printer does not produce hazardous laser radiation. Since radiation emitted inside the printer is completely confined within protective housings and external covers, the laser beam cannot escape from the machine during any phase of user operation. FDA Regulations (For 110-120 V Model Only) U.S. Food and Drug Administration (FDA) has implemented regulations for laser products manufactured on and after August 2, 1976. Compliance is mandatory for products marketed in the United States. One of the following labels on the back of the printer indicates compliance with the FDA regulations and must be attached to laser products marketed in the United States. MANUFACTURED: Brother Corporation (Asia) Ltd. Brother Buji Nan Ling Factory Gold Garden Ind., Nan Ling Village, Buji, Rong Gang, Shenzhen, CHINA This product complies with FDA radiation performance standards, 21 CFR Subchapter J MANUFACTURED: BROTHER INDUSTRIES (USA) INC. 2950 Brother Blvd., Bartlett, TN 38133, U.S.A. This product complies with FDA radiation performance standards, 21 CFR Subchapter J MANUFACTURED: BROTHER INDUSTRIES LTD. 15-1 Naeshiro-cho Mizuho-ku Nagoya, 467-8561 Japan This product complies with FDA radiation performance standards, 21 CFR Subchapter J Caution Use of controls, adjustments or performance of procedures other than those specified in this manual may result in hazardous radiation exposure. iii Declaration of Conformity (For Europe) We, Brother Industries, Ltd., 15-1, Naeshiro-cho, Mizuho-ku, Nagoya 467-8561, Japan declare that this product is in conformity with the following normative documents. Safety: EMC: EN 60950 EN 60825 EN 55022 Class B EN 55024 EN 61000-3-2 EN 61000-3-3 following the provisions of the Low Voltage Directive 73/23/EEC and the Electromagnetic Compatibility Directive 89/336/EEC (as amended by 91/263/EEC and 92/31/EEC). Issued by: Brother Industries, Ltd. Printer Products Division IEC 825 Specification (For 220–240 V Model Only) This printer is a Class 1 laser product as defined in IEC 825 specifications. The label shown below is attached in countries where it is required. CLASS 1LASER PRODUCT APPAREIL Å LASER DE CLASSE 1 LASER KLASSE 1 PRODUKT This printer has a Class 3B Laser Diode which emits invisible laser radiation in the Scanner Unit. The Scanner Unit should not be opened under any circumstances. iv APPENDIX Caution Use of controls, adjustments or performance of procedures other than those specified in this manual may result in hazardous radiation exposure. The following caution label is attached on the scanner unit. CAUTION ADVARSEL VARNING VARO! INVISIBLE LASER RADIATION WHEN OPEN AND INTERLOCK DEFEATED. AVOID DIRECT EXPOSURE TO BEAM. CLASS 3B LASER PRODUCT. ADVARSEL ATTENTION VORSICHT USYNLIG LASERSTRÅLING.UNNGÅ DIREKTE KONTAKT MED LASERENHETEN NÅR TOPPDEKSELET ER ÅPENT. KLASSE 3B LASERPRODUKT. ATENCIÓN RADIACIÓN LASER INVISIBLE CUANDO SE ABRE LA TAPA Y EL INTERRUPTOR INTERNO ESTÁ ATASCADO. EVITE LA EXPOSICIÓN DIRECTA DE LOS OJOS. PRODUCTO LASER CLASE 3B. USYNLIG LASER STRÅLING NÅR KABINETLÅGET STÅR ÅBENT. UNGDÅ DIREKTE UDSÆTTELSE FOR STRÅLING. KLASSE 3B LASER. OSYNLIG LASERSTRÅLNING NÄR DENNA DEL ÄR ÖPPNAD OCH SPÄRRAR ÄR URKOPPLADE. STRÅLEN ÄR FARLIG. KLASS 3B LASER APPARAT. AVATTAESSA JA SUOJALUKITUS OHITETTAESSA OLET ALTTIINA NÄKYMÄTTÖMÄLLE LASERSÄTEILYLLE. ÄLÄ KATSO SÄTEESEEN. LUOKAN 3B LASERLAITE. RADIATIONS LASER INVISIBLES QUANDOUVERT ET VERROUILLAGE ENLEVE. EVITER EXPOSITIONS DIRECTES AU FAISCEAU. PRODUIT LASER CLASSE 3B. UNSICHTBARE LASERSTRAHLUNG WENN ABDECKUNG GEÖFFENT UND SICHERHEITSVERRIEGELUNG ÜBERBRÜCKT. NICHT DEM STRAHL AUSSETZEN. SICHERHEITSKLASSE 3B. ( For Finland and Sweden ) LUOKAN 1 LASERLAITE KLASS 1 LASER APPARAT Varoitus! Laitteen käyttäminen muulla kuin tässä käyttöohjeessa mainitulla tavalla saattaa altistaa käyttäjän turvallisuusluokan 1 ylittävälle näkymättömälle lasersäteilylle. Varning – Om apparaten används på annat sätt än i denna Bruksanvisning specificerats, kan användaren utsättas för osynlig laserstrålning, som överskrider gränsen för laserklass 1. v IMPORTANT - For Your Safety To ensure safe operation the three-pin electrical plug supplied must be inserted only into a standard three-pin power point which is properly grounded through normal household wiring. Extension cords used with the equipment must be three-pin plug type and correctly wired to provide proper grounding. Incorrectly wired extension cords may cause personal injury and equipment damage. The fact that the equipment operates satisfactorily does not imply that the power is grounded and that the installation is completely safe. For your safety, if in any doubt about the effective grounding of the power, consult a qualified electrician. Disconnect device This printer must be installed near a power outlet which is easily accessible. In case of emergencies, you must disconnect the power cord from the power outlet in order to shut off power completely. Geräuschemission / Acoustic Noise Emission (For Germany Only) Lpa < 70 dB (A) DIN 45635-19-01-KL2 vi APPENDIX IMPORTANT - Wiring Information (For U.K. only) If the power cord supplied with this printer is not suitable for your electrical outlet, remove the plug from the mains cord and fit an appropriate three pin plug. If the replacement plug is intended to take a fuse then fit a fuse with the same rating as the original. If a moulded plug is severed from the power cord then it should be destroyed because a plug with cut wires is dangerous if plugged into a live socket outlet. Do not leave it where a child might find it. In the event of replacing the plug fuse, fit a fuse approved by ASTA to BS1362 with the same rating as the original fuse. Always replace the fuse cover. Never use a plug with the cover omitted. WARNING - THIS PRINTER MUST BE PROPERLY EARTHED. The wires in the mains cord are coloured in accordance with the following code: Green and yellow: Blue: Brown: Ground Neutral Live The colours of the wiring in the power lead of this printer may not correspond with the markings which identify the terminals in your plug. If you need to fit a different plug, proceed as follows. Remove a length of the cord outer sheath, taking care not to damage the coloured insulation of the wires inside. Cut each of the three wires to the appropriate length. If the construction of the plug permits, leave the green and yellow wire longer than the others so that, in the event that the cord is pulled out of the plug, the green and yellow wire will be the last to disconnect. Remove a short section of the coloured insulation to expose the wires. The wire which is coloured green and yellow must be connected to the terminal in the plug which is marked with the letter “E” or by the earth symbol or coloured green or green and yellow. vii The wire which is coloured blue must be connected to the terminal which is marked with the letter “N” or coloured black or blue. The wire which is coloured brown must be connected to the terminal which is marked with the letter “L” or coloured red or brown. The outer sheath of the cord must be secured inside the plug. The coloured wires should not hang out of the plug. viii INDEX INDEX -A- -P- Alarm LED.................................................... 1-49 automatic document feeder .............................. 1-2 paper capacity .......................................1-12, 1-18 paper cassette .................................................1-19 paper guides ...................................................1-19 paper recommended .......................................1-12 paper size .......................................................1-10 paper type.......................................................1-10 Parallel Interface connector ..............................1-2 parallel interface pin assignment .....................A-6 parallel interface specification.........................A-5 ppm.................................................................1-3 primary corona wire ................................3-7, 3-18 printable area..................................................1-16 -Bbitmapped font.................................................A-8 -Ccard ............................................................... 1-24 control panel.................................................... 1-2 copy............................................................... 1-30 copy area ....................................................... 1-16 -D- -Q- data compression technology ........................... 1-5 Data LED ...................................................... 1-49 document feeder ............................................ 1-30 document feeder paper guide ......................... 1-30 document feeder paper guides.......................... 1-2 dpi ................................................................... 1-3 drum unit ......................................................... 3-9 duplex printing .............................................. 1-26 quick print setup...............................................1-3 Rear Cover .......................................................1-2 Remote Printer Console....................................1-5 resident font ....................................................A-8 resolution .........................................................1-3 RPC..................................................................1-5 -E- -S- economy mode ................................................ 1-6 error unrecoverable.......................................... 4-2 scannalbe are ..................................................1-17 scanner window..............................................3-17 service call .......................................................4-2 SIMM...............................................................2-4 sleep mode .......................................................1-6 symbol set .......................................................A-9 -Ffront cover ....................................................... 1-2 -R- -LLED............................................................... 1-49 lower paper cassette....................................... 1-10 lower tray unit ................................................. 2-2 -Mmachine status monitor .................................... 1-5 manual feed paper guide .................................. 1-2 manual feed slot.................... 1-2, 1-10, 1-11, 1-21 manual feed slot paper guide ......................... 1-23 memory SIMM ................................................ 2-4 -Tthicker paper...................................................1-24 toner cartridge ..................................................3-2 toner cartridge high capacity ............................1-6 Toner LED .....................................................1-49 -Uuniversal serial bus interface.....................1-5, A-7 upper paper cassette...............................1-10, 1-12 USB connector .................................................1-2 -Nnetwork print server......................................... 2-8 INDEX