1
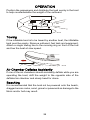
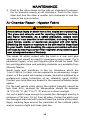
i
90-899337001 806
Dynamic 260, 280, 310
Warranty Message
The product you have purchased comes with a limited
warranty from Mercury Marine. The terms of the warranty are
set forth in the Warranty Information Section of this manual.
The warranty statement contains a description of what is
covered, what is not covered, the duration of coverage, how
to best obtain warranty coverage, important disclaimers and
limitations of damages, and other related information.
Please review this important information.
The description and specifications contained herein were in
effect at the time this manual was approved for printing.
Mercury Marine, whose policy is one of continued
improvement, reserves the right to discontinue models at any
time, to change specifications, designs, methods, or
procedures without notice and without incurring obligation.
© 2006 Mercury Marine
All of us at Mercury Marine want to thank you for choosing a
Mercury Marine Inflatable boat. You have made a sound
investment in boating pleasure. We firmly believe it will bring
you many years of boating fun and excitement.
This Owners Manual contains all the safety and operating
information you need to get the most out of your Inflatable
boat. It also contains information on how to provide care and
maintenance to help protect your investment. Store this
manual for future reference.
The operator, passengers and craft are governed by local,
national, and when applicable, international rules and
regulations of the waterways. If you are not familiar with these
rules and regulations, your local Department of Natural
Resources can assist you. Safety courses are available from
national and local organizations and are highly recommended
for anyone who is not familiar with the rules and regulations
on operating a boat.
Please read and understand this manual carefully before
operating your inflatable boat.
Record your Hull Identification Number (HIN) and engine model/
serial number. The HIN is located on the back of the boat on the
starboard side. The engine model/serial number is located on the
swivel bracket. You will need this information to obtain parts,
warranty service or provide information if your inflatable boat is
stolen.
Purchase Date
Dealer Name
Address
Phone
HIN
Engine Serial Number
Engine Model Number
Mercury Marine, Fond du Lac, Wisconsin U.S.A.
Litho in U.S.A.
© 2006, Mercury Marine
Mercury, Mercury Marine, MerCruiser, Mercury MerCruiser,
Mercury Racing, Mercury Precision Parts, Mercury Propellers,
Mariner, Quicksilver, #1 On The Water, Alpha, Bravo, Pro Max,
OptiMax, Sport‑Jet, K‑Planes, MerCathode, RideGuide,
SmartCraft, Zero Effort, M with Waves logo, Mercury with Waves
logo, and SmartCraft logo are all registered trademarks of
Brunswick Corporation. Mercury Product Protection logo is a
registered service mark of Brunswick Corporation.
ii
TABLE OF CONTENTS
WARRANTY INFORMATION
Transfer of Warranty....................................................................1
Warranty Registration United States and Canada.......................1
Mercury Inflatable Boat Limited Warranty United States and
Canada........................................................................................2
GENERAL INFORMATION
Boater's Responsibilities..............................................................6
Before Operating Your Boat .......................................................6
Lanyard Stop Switch....................................................................7
Protecting People In The Water................................................... 9
Wave And Wake Jumping.........................................................10
Impact With Underwater Hazards..............................................11
Exhaust Emissions....................................................................12
Safe Boating Suggestions.........................................................14
Specifications.............................................................................15
Manufacturer's Plate..................................................................17
BOAT COMPONENTS
Components Location................................................................19
TRANSPORTING
Trailering Boat...........................................................................21
OPERATION
Inflation......................................................................................22
Lifting the Boat...........................................................................23
Outboard Power......................................................................... 23
Pre-Operating Check List..........................................................24
Drain Valve Operation...............................................................25
Loading......................................................................................25
iii
TABLE OF CONTENTS
Towing.......................................................................................26
Air Chamber Deflates Accidently...............................................26
Beaching....................................................................................26
MAINTENANCE
Cleaning Procedure...................................................................27
Deflating.....................................................................................27
Air Chamber Repair - Hypalon Fabric........................................ 28
Air Chamber Repair - PVC Fabric.............................................30
STORAGE
Storage Preparation................................................................... 32
OWNERS SERVICE ASSISTANCE
Service Assistance....................................................................33
Parts And Accessories Inquiries................................................33
Service Away From Home.........................................................33
iv
WARRANTY INFORMATION
Transfer of Warranty
The limited warranty is transferable to a subsequent purchaser, but
only for the remainder of the unused portion of the limited warranty.
This will not apply to products used for commercial applications.
To transfer the warranty to the subsequent owner, send or fax a
copy of the bill of sale or purchase agreement, new owner’s name,
address and hull identification number (HIN) to Mercury Marine’s
warranty registration department. In the United States and
Canada, mail to:
Mercury Marine
Attn: Warranty Registration Department
W6250 W. Pioneer Road
P.O. Box 1939
Fond du Lac, WI 54936-1939
920-929-5054
Fax 920-929-5893
Upon processing the transfer of warranty, Mercury Marine will send
registration verification to the new owner of the product by mail.
There is no charge for this service.
For products purchased outside the United States and Canada,
contact the distributor in your country, or the Marine Power Service
Center closest to you.
Warranty Registration United States and Canada
Outside United States and Canada ‑ Check with your local
distributor.
1. You may change your address at any time, including at time
of warranty claim, by calling Mercury Marine or sending a letter
or fax with your name, old address, new address, and hull
identification number (HIN) to Mercury Marine’s warranty
registration department. Your dealer can also process this
change of information.
1
WARRANTY INFORMATION
Mercury Marine
Attn: Warranty Registration Department
W6250 W. Pioneer Road
P.O. Box 1939
Fond du Lac, WI 54936-1939
920-929-5054
Fax 920-929-5893
NOTE: Registration lists must be maintained by Mercury Marine
and any dealer on marine products sold in the United States,
should a safety recall notification under the Federal Safety Act be
required.
2. To be eligible for warranty coverage, the product must be
registered with Mercury Marine. At the time of sale, the dealer
should complete the warranty registration and immediately
submit it to Mercury Marine via MercNET, E‑mail, or mail.
Upon receipt of this warranty registration, Mercury Marine will
record the registration.
3. Upon processing the warranty registration, Mercury Marine
will send registration verification by mail to the purchaser of
the product. If this registration verification is not received
within 30 days, please contact your selling dealer immediately.
Warranty coverage is not effective until your product is
registered with Mercury Marine.
Mercury Inflatable Boat Limited Warranty United
States and Canada
Outside United States and Canada ‑ Check with your local
distributor.
WHAT IS COVERED
Mercury Marine Inflatable Boats are warranted to be free of defects
in material and workmanship during the period described following.
2
WARRANTY INFORMATION
DURATION OF COVERAGE
The fiberglass hull, air deck® floor, all hull attachments and
accessories, but not limited to, floorboards, seats, rope holders,
oar locks, oars, rope, air pump, lifting handles, d‑rings, oar holders,
valves, seat webbings, and transom integrity are covered by this
Limited Warranty for one (1) year from the date the product is first
sold, or the date on which the product is first put into service,
whichever occurs first. All the air holding fabrics are warranted
against defects in material or workmanship that cause blistering
and delaminating for five (5) years for PVC fabrics and ten (10)
years for Hypalon fabrics. The repair, replacement of parts, or the
performance of service under this warranty does not extend the life
of this warranty beyond its original expiration date. Unexpired
warranty coverage can be transferred to a subsequent purchaser
upon proper registration of the product.
CONDITIONS THAT MUST BE MET IN ORDER TO OBTAIN
WARRANTY COVERAGE
Warranty coverage is available only to retail customers that
purchase from a Dealer authorized by Mercury Marine to distribute
the product in the country in which the sale occurred. Warranty
coverage becomes available upon proper registration of the
product by the authorized dealer. Routine maintenance outlined in
the Operation and Maintenance Manual must be performed in a
timely manner in order to maintain warranty coverage. If the retail
customer performs this maintenance, Mercury Marine reserves the
right to make future warranty coverage contingent on proof of
proper maintenance.
WHAT MERCURY WILL DO
Mercury’s sole exclusive obligation under this warranty is limited
to, at our option, repairing a defective part, replacing such part or
parts with new or Mercury Marine certified remanufactured parts,
or refunding the purchase price of the Mercury product. Mercury’s
sole and exclusive obligation under the limited warranty against
fabric delamination is the replacement of the boat skin (only the
boat skin). Mercury reserves the right to improve or modify
products previously manufactured.
3
WARRANTY INFORMATION
HOW TO OBTAIN WARRANTY COVERAGE
The customer must provide Mercury with a reasonable opportunity
to repair, and reasonable access to the product for warranty
service. Warranty claims shall be made by delivering the product
for inspection to a Mercury dealer authorized to service the
product. If purchaser cannot deliver the product to such a dealer,
written notice must be given to Mercury. We will then arrange for
the inspection and any covered repair. Purchaser in that case shall
pay for all related transportation charges and/or travel time. If the
service provided is not covered by this warranty, purchaser shall
pay for all related labor and material, and any other expenses
associated with that service. Purchaser shall not, unless requested
by Mercury, ship the product or parts of the product directly to
Mercury. Proof of registered ownership must be presented to the
dealer at the time warranty service is requested in order to obtain
coverage.
WHAT IS NOT COVERED
This Limited Warranty does not cover routine maintenance items,
adjustments, normal wear and tear, puncture, discoloration,
oxidation, abrasion or damage caused by abuse, abnormal use,
neglect, accident, improper service, use of an accessory or part
not manufactured or sold by Mercury Marine, or alteration or
removal of parts. Use of the product for racing or other competitive
activity, at any point, even by a prior owner of the product, voids
the warranty. The engine, engine accessories, controls, props,
batteries or other accessories, carry their own individual
warranties.
Expenses related to haul‑out, launch, towing, storage, telephone,
rental, inconvenience, slip fees, insurance coverage, loan
payments, loss of time, loss of income, or any other type of
incidental or consequential damages are not covered by this
warranty.
No individual or entity, including Mercury Marine authorized
dealers, has been given the authority by Mercury Marine to make
any affirmation, representation or warranty regarding the product,
other than those contained in this limited warranty, and if made,
shall not be enforceable against Mercury Marine.
4
WARRANTY INFORMATION
DISCLAIMERS AND LIMITATIONS:
THE IMPLIED WARRANTIES OF MERCHANTABILITY AND FITNESS FOR A
PARTICULAR PURPOSE ARE EXPRESSLY DISCLAIMED. TO THE EXTENT
THAT THEY CANNOT BE DISCLAIMED, THE IMPLIED WARRANTIES ARE
LIMITED IN DURATION TO THE LIFE OF THE EXPRESS WARRANTY.
INCIDENTAL AND CONSEQUENTIAL DAMAGES ARE EXCLUDED FROM
COVERAGE UNDER THIS WARRANTY. SOME STATES/COUNTRIES DO
NOT ALLOW FOR THE DISCLAIMERS, LIMITATIONS AND EXCLUSIONS
IDENTIFIED ABOVE, AS A RESULT, THEY MAY NOT APPLY TO YOU. THIS
WARRANTY GIVES YOU SPECIFIC LEGAL RIGHTS, AND YOU MAY ALSO
HAVE OTHER LEGAL RIGHTS WHICH VARY FROM STATE TO STATE AND
COUNTRY TO COUNTRY.
5
GENERAL INFORMATION
Boater's Responsibilities
The operator (driver) is responsible for the correct and safe
operation of the boat and safety of its occupants and general
public. It is strongly recommended that each operator (driver) read
and understand this entire manual before operating the boat.
Be sure at least one additional person on board is instructed in the
basics of starting and operating the outboard and boat handling in
case the driver is unable to operate the boat.
Before Operating Your Boat
Read and understand this manual carefully. Learn how to operate
your boat properly. If you have any questions, contact your dealer.
Safety and operating information that is practiced, along with using
good common sense, can help prevent personal injury and product
damage.
This manual uses the following safety alerts to draw your attention
to special safety instructions that should be followed.
! WARNING
WARNING—indicates a potentially hazardous situation that, if
not avoided, could result in death or serious injury.
! DANGER
DANGER—indicates an imminently hazardous situation that, if
not avoided, will result in death or serious injury.
! CAUTION
CAUTION—indicates a potentially hazardous situation that, if not
avoided, may result in minor or moderate injury or property
damage. It may also be used to alert against unsafe practices.
6
GENERAL INFORMATION
Lanyard Stop Switch
The purpose of a lanyard stop switch is to turn off the engine when
the operator moves far enough away from the operator's position
(as in accidental ejection from the operator's position) to activate
the switch. Tiller handle outboards and some remote control units
are equipped with a lanyard stop switch. A lanyard stop switch can
be installed as an accessory ‑ generally on the dashboard or side
adjacent to the operator's position.
The
lanyard
is
a
cord
usually
between
122 and 152 cm (4 and 5 feet) in length when stretched out, with
an element on one end made to be inserted into the switch and a
snap on the other end for attaching to the operator. The lanyard is
coiled to make its at‑rest condition as short as possible to minimize
the likelihood of lanyard entanglement with nearby objects. Its
stretched‑out length is made to minimize the likelihood of
accidental activation should the operator choose to move around
in an area close to the normal operator's position. If it is desired to
have a shorter lanyard, wrap the lanyard around the operator's
wrist or leg, or tie a knot in the lanyard.
b
a
21629
a - Lanyard cord
b - Lanyard stop switch
Read the following Safety Information before proceeding.
7
GENERAL INFORMATION
Important Safety Information: The purpose of a lanyard stop switch
is to stop the engine when the operator moves far enough away
from the operator's position to activate the switch. This would occur
if the operator accidentally falls overboard or moves within the boat
a sufficient distance from the operator's position. Falling overboard
and accidental ejections are more likely to occur in certain types
of boats such as low sided inflatables, bass boats, high
performance boats, and light, sensitive handling fishing boats
operated by a hand tiller. Falling overboard and accidental
ejections are also likely to occur as a result of poor operating
practices such as sitting on the back of the seat or gunwale at
planing speeds, standing at planing speeds, sitting on elevated
fishing boat decks, operating at planing speeds in shallow or
obstacle infested waters, releasing your grip on a steering wheel
or tiller handle that is pulling in one direction, drinking alcohol or
consuming drugs, or daring high speed boat maneuvers.
While activation of the lanyard stop switch will stop the engine
immediately, a boat will continue to coast for some distance
depending upon the velocity and degree of any turn at shut down.
However, the boat will not complete a full circle. While the boat is
coasting, it can cause injury to anyone in the boat's path as
seriously as the boat would when under power.
We strongly recommend that other occupants be instructed on
proper starting and operating procedures should they be required
to operate the engine in an emergency (e.g. if the operator is
accidentally ejected).
! WARNING
Should the operator fall out of the boat, the possibility of serious
injury or death from being run over by the boat can be greatly
reduced by stopping the engine immediately. Always properly
connect both ends of the stop switch lanyard to the stop switch
and the operator.
8
GENERAL INFORMATION
! WARNING
Avoid serious injury or death from deceleration forces resulting
from accidental or unintended stop switch activation. The boat
operator should never leave the operator's station without first
disconnecting the stop switch lanyard from the operator.
Accidental or unintended activation of the switch during normal
operation is also a possibility. This could cause any, or all, of the
following potentially hazardous situations:
• Occupants could be thrown forward due to unexpected loss
of forward motion ‑ a particular concern for passengers in the
front of the boat who could be ejected over the bow and
possibly struck by the gearcase or propeller.
• Loss of power and directional control in heavy seas, strong
current or high winds.
• Loss of control when docking.
Protecting People In The Water
WHILE YOU ARE CRUISING
It is very difficult for a person standing or floating in the water to
take quick action to avoid a boat heading in his/her direction, even
at slow speed.
21604
Always slow down and exercise extreme caution any time you are
boating in an area where there might be people in the water.
Whenever a boat is moving (coasting) and the outboard gear shift
is in neutral position, there is sufficient force by the water on the
propeller to cause the propeller to rotate. This neutral propeller
rotation can cause serious injury.
9
GENERAL INFORMATION
WHILE BOAT IS STATIONARY
! WARNING
Stop your engine immediately whenever anyone in the water is
near your boat. Serious injury to the person in the water is likely
if contacted by a rotating propeller, a moving boat, a moving
gearcase, or any solid device rigidly attached to a moving boat
or gearcase.
Shift outboard into neutral and shut off the engine before allowing
people to swim or be in the water near your boat.
Wave And Wake Jumping
Operating recreational boats over waves and wake is a natural part
of boating. However, when this activity is done with sufficient speed
to force the boat hull partially or completely out of the water, certain
hazards arise, particularly when the boat re‑enters the water.
14463
The primary concern is the boat changing direction while in the
midst of the jump. In such case the landing may cause the boat to
veer violently in a new direction. Such a sharp change in direction
can cause occupants to be thrown out of their seats, or out of the
boat.
! WARNING
Avoid serious injury or death from being thrown within or out of
a boat when it lands after jumping a wave or wake. Avoid wave
or wake jumping whenever possible. Instruct all occupants that
if a wake or wave jump occurs, get low and hang on to any boat
hand hold.
10
GENERAL INFORMATION
There is another less common hazardous result from allowing your
boat to launch off a wave or wake. If the bow of your boat pitches
down far enough while airborne, upon water contact it may
penetrate under the water surface and submarine for an instant.
This will bring the boat to a nearly instantaneous stop and can send
the occupants flying forward. The boat may also steer sharply to
one side.
Impact With Underwater Hazards
Reduce speed and proceed with caution whenever you drive a
boat in shallow water areas, or in areas where you suspect
underwater obstacles may exist which could be struck by the
outboard or the boat bottom. The most important thing you can do
to help reduce injury or impact damage from striking a floating or
underwater object is to control the boat speed. Under these
conditions, boat speed should be kept to a minimum planing speed
of 24 to 40 km/h (15 to 25 MPH).
14462
! WARNING
To avoid serious injury or death from all or part of an outboard
coming into the boat after striking a floating or underwater
obstacle maintain a top speed no greater than minimum planing
speed.
Striking a floating or underwater object could result in an infinite
number of situations. Some of these situations could result in the
following:
• Part of the outboard or the entire outboard could break loose
and fly into the boat.
11
GENERAL INFORMATION
•
The boat could move suddenly in a new direction. Such a
sharp change in direction can cause occupants to be thrown
out of their seats or out of the boat.
• A rapid reduction in speed. This will cause occupants to be
thrown forward, or even out of the boat.
• Impact damage to the outboard and/or boat.
Keep in mind, the most important thing you can do to help reduce
injury or impact damage during an impact is control the boat speed.
Boat speed should be kept to a minimum planing speed when
driving in waters known to have underwater obstacles.
After striking a submerged object, stop the engine as soon as
possible and inspect it for any broken or loose parts. If damage is
present or suspected, the outboard should be taken to an
authorized dealer for a thorough inspection and necessary repair.
The boat should also be checked for any hull fractures, transom
fractures, or water leaks.
Operating a damaged outboard could cause additional damage to
other parts of the outboard, or could affect control of the boat. If
continued running is necessary, do so at greatly reduced speeds.
! WARNING
Avoid serious injury or death from loss of boat control. Continued
boating with major impact damage can result in sudden
component failure with or without subsequent impacts. Have the
power package thoroughly inspected and any necessary repairs
made.
Exhaust Emissions
BE ALERT TO CARBON MONOXIDE POISONING
Carbon monoxide is present in the exhaust fumes of all internal
combustion engines. This includes the outboards, sterndrives and
inboard engines that propel boats, as well as the generators that
power various boat accessories. Carbon monoxide is a deadly gas
that is odorless, colorless and tasteless.
Early symptoms of carbon monoxide poisoning which should not
be confused with seasickness or intoxication, include headache,
dizziness, drowsiness, and nausea.
12
GENERAL INFORMATION
! WARNING
Avoid the combination of a running engine and poor ventilation.
Prolonged exposure to carbon monoxide in sufficient
concentration can lead to unconsciousness, brain damage, or
death.
GOOD VENTILATION
Ventilate passenger area, open side curtains, or forward hatches
to remove fumes.
21622
Example of desired air flow through the boat
POOR VENTILATION
Under certain running and/or wind conditions, permanently
enclosed or canvas enclosed cabins or cockpits with insufficient
ventilation may draw in carbon monoxide. Install one or more
carbon monoxide detectors in your boat.
Although the occurrence is rare, on a very calm day, swimmers
and passengers in an enclosed area of a stationary boat that
contains or is near a running engine may be exposed to a
hazardous level of carbon monoxide.
WHILE BOAT IS STATIONARY
a
b
21626
a - Running the engine when the boat is moored in a confined
space
b - Mooring close to another boat that has its engine running
13
GENERAL INFORMATION
WHILE BOAT IS MOVING
a
b
21628
a - Running the boat with the trim angle of the bow too high
b - Running the boat with no forward hatches open
Safe Boating Suggestions
In order to safely enjoy the waterways, familiarize yourself with
local and other governmental boating regulations and restrictions,
and consider the following suggestions.
Use flotation devices. Have an approved personal flotation device
of suitable size for each person aboard (it is the law) and have it
readily accessible.
Do not overload your boat. Most boats are rated and certified for
maximum load (weight) capacities (refer to your boat capacity
plate). If in doubt, contact your dealer or the boats manufacturer.
Perform safety checks and required maintenance. Follow a regular
schedule and ensure that all repairs are properly made.
Know and obey all nautical rules and laws of the waterways. Boat
operators should complete a boating safety course. Courses are
offered in the U.S.A. by 1) The U.S. Coast Guard Auxiliary, 2) The
Power Squadron, 3) The Red Cross and 4) your state boating law
enforcement agency. Inquiries may be made to the Boating
Hotline, 1‑800‑368‑5647 or the Boat U.S. Foundation information
number 1‑800‑336‑BOAT.
Make sure everyone in the boat is properly seated. Do not allow
anyone to sit or ride on any part of the boat that was not intended
for such use. This includes the back of seats, gunwales, transom,
bow, decks, raised fishing seats, any rotating fishing seat; or
anywhere that an unexpected acceleration, sudden stopping,
unexpected loss of boat control, or sudden boat movement could
cause a person to be thrown overboard or into the boat.
14
GENERAL INFORMATION
Never be under the influence of alcohol or drugs while boating (it
is the law). Alcohol or drug use impairs your judgment and greatly
reduces your ability to react quickly.
Prepare other boat operators. Instruct at least one other person on
board in the basics of starting and operating the outboard, and boat
handling, in case the driver becomes disabled or falls overboard.
Passenger boarding. Stop the engine whenever passengers are
boarding, unloading, or are near the back (stern) of the boat. Just
shifting the outboard into neutral is not sufficient.
Be alert. The operator of the boat is responsible by law to maintain
a proper lookout by sight and hearing. The operator must have an
unobstructed view particularly to the front. No passengers, load,
or fishing seats should block the operators view when operating
the boat above idle speed.
Never drive your boat directly behind a water skier in case the skier
falls. As an example, your boat traveling at 40 km/h (25 MPH) will
overtake a fallen skier 61 m (200 ft.) in front of you in 5 seconds.
Watch fallen skiers. When using your boat for water skiing or
similar activities, always keep a fallen or down skier on the
operator's side of the boat while returning to assist the skier. The
operator should always have the down skier in sight and never
back up to the skier or anyone in the water.
Report accidents. Boat operators are required by law to file a
Boating Accident Report with their state boating law enforcement
agency when their boat is involved in certain boating accidents. A
boating accident must be reported if 1) there is loss of life or
probable loss of life, 2) there is personal injury requiring medical
treatment beyond first aid, 3) there is damage to boats or other
property where the damage value exceeds $500.00 or 4) there is
complete loss of the boat. Seek further assistance from local law
enforcement.
Specifications
Description
Dry weight
Maximum load
Model
260
280
310
35 kg (77 lbs.)
36 kg (80 lbs.)
44 kg (97 lbs.)
290 kg (640 lbs.)
404 kg (890 lbs.)
510 kg (1124 lbs.)
15
GENERAL INFORMATION
Description
Model
260
280
310
Maximum engine
power
3.7 kw (5 hp)
4.5 kw (6 hp)
7.3kw (9.9 hp)
Maximum engine
weight
25 kg (55 lbs.)
25 kg (55 lbs.)
40 kg (88 lbs.)
Maximum
personnel
3
4
4
Air chambers
3
3
3
Overall length
260 cm (8 ft. 6 in.) 280 cm (9 ft. 2 in.) 310 cm (10 ft. 2 in.)
Outer beam
144 cm (4 ft. 9 in.) 144 cm (4 ft. 9 in.) 164 cm (5 ft. 5 in.)
Tube diameter
Floor
Tube fabric
38 cm (15 in.)
38 cm (15 in.)
40 cm (16 in.)
Fiberglass
Fiberglass
Fiberglass
PVC or Hypalon
PVC or Hypalon
PVC or Hypalon
16
GENERAL INFORMATION
Manufacturer's Plate
The manufacturer's plate is located on the inside of the boat
transom.
c
d
b
e
a
14598
i
abcdefghi-
g
h
f
Boat design category ‑ see following table
Certified Europe Insignia
Model number
Maximum load capacity ‑ people + outboard + fuel tank
and equipment
Maximum outboard weight
Pressure of the air chambers
Maximum outboard power
Maximum number of people
ISO 6185 part ‑ see following table
Boat design category ‑ The following table shows the navigation
use that the boat was designed and constructed for.
Boat Design Categories
A
B
Navigation
Wind Force and Wave Height
Ocean
Designed for extended voyages
where conditions may exceed wind
force 8 (Beaufort scale) and wave
heights of 4 m (13 ft.) and above.
Offshore
17
Designed for offshore voyages
where conditions may experience
wind force 8 (Beaufort scale) and
wave heights up to 4 m (13 ft.).
GENERAL INFORMATION
Boat Design Categories
C
D
Navigation
Wind Force and Wave Height
Inshore
Designed for voyages in coastal
waters, large bays, estuaries, lakes
and rivers where conditions may
experience wind force 6 (Beaufort
scale) and wave heights up to
2 m (6.5 ft.).
Designed for voyages on sheltered
coastal waters, small bays, small
lakes, rivers, and canals where
Sheltered waters
conditions may experience wind
force 4 (Beaufort scale) and wave
heights up to 0.5 m (1.5 ft.).
ISO 6185 part ‑ The ISO 6185 part standard defines the power
rating for the boat. The following table shows these power ratings.
ISO 6185 Part Categories
Powered Boat Rating
Part 1: Type ll
Powered boats not exceeding 4.5 kw (6 hp)
Part 2: Type V
Powered boats of 4.5 to 15 kw (6 to 20 hp)
Part 3: Type VII
Powered boats of 15 kw and greater (20 hp +)
18
BOAT COMPONENTS
Components Location
BACK VIEW
a
25033
a - Hull identification number (HIN)
FRONT VIEW
20670
a
a - Front mooring ring
19
BOAT COMPONENTS
TRANSOM VIEW
a
b
a
c
d
25034
a - Lifting ring
b - Motor plate
c - Manufacturer's plate
d - Drain plug
SIDE VIEW
a
c
b
d
20672
a - Port air chamber valve
b - Front air chamber valve
c - Front lifting ring
d - Starboard air chamber
valve
20
TRANSPORTING
Trailering Boat
Use a trailer that will properly support the boat hull. Position the
boat on the trailer so it will rest in a stable position on the trailer
supports.
The boat must be properly secured to the trailer. Secure the boat
to the trailer using tie‑down straps. Tighten the straps down
securely so they will prohibit boat movement. Make sure to protect
the air chamber tubes so they will not get chafed or damaged from
the tie‑down straps.
Trailer your boat with the outboard tilted down in a vertical
operating position.
If additional ground clearance is required, the outboard should be
tilted up using an accessory outboard support device. Refer to your
local dealer for recommendations. Additional clearance may be
required for railroad crossings, driveways and trailer bouncing.
21
OPERATION
Inflation
! CAUTION
Do not use a compressed air source to fill air chambers. Over
inflation may result in damaged seams and or bulkheads. Seams
and or bulkheads ruptured from over inflation, are not covered
under the warranty.
IMPORTANT: Do not inflate or deflate one air chamber at a time.
When inflating or deflating, maintain a balanced air pressure
between air chambers to prevent stress or potential damage to the
inside diaphragms that separate the air chambers.
a
b
c
d
14778
a - Valve stem
b - Closed position
c - Open position
d - Valve cap
1. Unscrew the valve caps, turn a quarter of a turn
counterclockwise. Make sure the valve stems are in the closed
position. Push in on the valve stem and rotate to the closed
position.
2. Insert and lock the air pump fill adapter into the valve. Connect
the air pump hose to the fill adapter.
3. Starting at one of the air valves, inflate each air chamber in
turn inflating only a quarter of the way full. Repeat this
procedure to evenly fill the air chambers until the air chambers
are filled to the recommended air pressure of
0.24 bar (3.5 psi). Air pressure can be measured using air
gauge provided with the air pump or using an accessory air
pressure gauge.
22
OPERATION
NOTE: Always be aware of the air pressure in the air chambers.
The air volume inside the air chambers will expand as the internal
air temperature rises, this will cause the air pressure to fluctuate
depending on water temperature and weather conditions. A boat
that is correctly inflated, may experience a drop in air pressure and
require additional air when temperatures get cooler or it may
become over inflated when in direct sun light or as the
temperatures get hotter. This will require the air to be deflated until
the recommended air pressure is reached.
Lifting the Boat
When using a hoist to lift the boat, attach the hoist to the three lifting
rings attached to the hull.
Empty the boat of all equipment. Make sure nobody is on‑board
during lifting.
14774
Outboard Power
Choose an outboard for the boat that is in accordance with the
horsepower range and maximum weight limit. Refer to the
Specification table in this manual or the manufacturer's plate on
the boat for the maximum outboard horsepower and outboard
weight.
Install the outboard along the centerline of the boat transom.
Fasten the outboard to the transom following the recommended
installation instructions provided with the outboard or from the
outboard manufacturer.
Check outboard for tightness on transom before each use.
23
OPERATION
! WARNING
Using an outboard that exceeds the maximum horsepower limit
of a boat can: 1) cause loss of boat control 2) place too much
weight at the transom altering the designed flotation
characteristics of the boat or 3) cause the boat to break apart
particularly around the transom area. Overpowering a boat can
result in serious injury, death or boat damage.
Pre‑Operating Check List
•
•
•
•
•
•
•
•
•
•
•
•
•
Check the inflation pressure of the air chambers.
Remove any obstruction from the drain valve.
Check the outboard for tightness on the transom.
Know the fuel capacity and cruising range.
Check that the lanyard stop switch for the outboard works
correctly.
Be sure the boat is not overloaded. Do not exceed the
maximum number of passengers or load capacity. Look at the
boat capacity plate.
Be sure there is an approved personal flotation device of
suitable size for each person aboard and readily accessible (it
is the law).
Check that the paddles are in the boat in case of engine
trouble.
Be sure the operator knows safe navigation, boating, and
operating procedures.
Be sure there is a ring type life buoy or buoyant cushion
designed to be thrown to a person in the water.
Arrange the passengers and load in the boat so the weight is
distributed evenly and everyone is seated in a proper seat or
on the floor.
Instruct at least one passenger in the basics of boat handling
and the starting and operation of the outboard, in case the
driver becomes disabled or falls overboard.
Before departing, tell someone where you are going and when
you expect to return.
24
OPERATION
•
•
No alcohol or drugs. It is illegal to operate a boat while under
the influence of alcohol or drugs.
Know the waters and area you will be boating; tides, currents,
sand bars, rocks, and other hazards.
Drain Valve Operation
When underway, remove the drain plug from the drain and the
water will automatically run out. The inner diaphragm will prevent
water from returning. After the water has been drained, replace the
drain plug.
a
c
b
24453
a - Lock position
b - Un‑lock position
c - Drain plug
Loading
IMPORTANT: Do not exceed the maximum number of passengers
or load capacity of the boat. Refer to the Specification table in this
manual or the manufacturer's plate on the boat for the maximum
number of passengers and load capacity of the boat.
25
OPERATION
Position the passengers and distribute the load evenly in the boat
to help counterbalance the weight of the outboard.
14775
Towing
If the inflatable boat is to be towed by another boat, the inflatable
boat must be empty. Remove outboard, fuel tank and equipment.
Attach a single towing line to the mooring ring on front of the hull
and tow the boat at slow speed.
14776
Air Chamber Deflates Accidently
If one of the air chambers should accidently deflate while you are
operating the boat, shift the weight to the opposite side of the
deflated air chamber and slowly head for shore.
Beaching
It is recommended that the boat not be powered onto the beach,
dragged across rocks, sand, gravel or pavement as damage to the
fabric and/or hull may result.
26
MAINTENANCE
Cleaning Procedure
FABRIC SURFACES
Inflate the air chambers. Clean the fabric with a mild soap and fresh
water solution. Rinse with fresh water and dry thoroughly.
IMPORTANT: Do not use a vinyl preservative on the air chamber
fabric. Chemicals in the preservatives may dry out the fabric.
BOAT HULL
Remove the drain plug. Use a hose to wash out any debris from
the interior. Wash the interior with soap and water. Clean any
debris from the drain valve. Rinse with fresh water and dry
thoroughly. Replace the drain plug.
Deflating
IMPORTANT: When deflating the side air chambers, do not deflate
one side air chamber at a time. When deflating, maintain a
balanced air pressure between air chambers to prevent stress or
potential damage to the inside diaphragms that separate the air
chambers.
a
b
c
d
14778
a - Valve stem
b - Closed position
c - Open position
d - Valve cap
1. Unscrew the valve caps, turn a quarter turn counterclockwise.
2. Push in the valve stem and deflate the keel. Push in the valve
stem and turn the stem a quarter turn clockwise to lock the
valve in the open position.
3. Push in the valve stem and deflate the floor. Push in the valve
stem and turn the stem a quarter turn clockwise to lock the
valve in the open position.
27
MAINTENANCE
4. Push in the valve stems on the side air chambers to release
the air pressure evenly on all chambers. Push in the valve
stem and turn the stem a quarter turn clockwise to lock the
valve in the open position.
Air Chamber Repair ‑ Hypalon Fabric
! WARNING
Avoid serious injury or death from a fire, explosion or poisoning.
The glues and solvents used for repairing inflatables are toxic
and highly flammable. As a safety precaution, always work
outdoors or in an area that is well‑ventilated, and away from any
open flames, sparks, or appliances equipped with pilot lights.
Breathing the vapors or exposure to the skin may be hazardous
to your health. Avoid breathing the vapors and contact with skin
and eyes by wearing a carbon filter respirator and protective gear
over all exposed areas of the body.
The repair kit which comes with the boat is a one part glue
operation and should be used for emergency minor repair. For a
permanent repair, a two part Hypalon glue should be used. This
two part Hypalon glue and patching materials are available from
Mercury Marine.
Small tears and punctures in the air chambers which are
1 cm (0.393 in.) or less, can be repaired in an emergency. Larger
areas, or if the patch will overlap a seam, should be patched by a
professional repair technician at an inflatable repair station.
Contact your local Mercury dealer for the nearest inflatable repair
station.
For the best results when gluing, the relative humidity should be
less than 60%, ambient air temperature should be between
18 °C to 25 °C (65 °F to 77 °F) and not in direct sunlight.
Cut out a patch large enough to overlap the damaged area by a
minimum of 38 mm (1.5 in.) from all sides. Center the patch over
the damaged area and with a pencil trace the outline of the patch.
Apply masking tape around the perimeter of the outlined patch
area to ensure a tight and clean glue line.
28
MAINTENANCE
Using 100 grit sandpaper or a pumice stone, roughen the patch
area on the boat as well as the backside of the patch. When
sanding, you just need to rub off the protective outer surface of the
fabric until a dull finish appears.
Clean the sanded surfaces with either toluene or tolual cleaning
solvents. Keep solvent off skin.
ONE PART GLUE (EMERGENCY REPAIRS ONLY)
Follow the directions on the cement tube.
TWO PART ADHESIVE
Mix a batch of adhesive according to the mixing directions provided
with the adhesive. Keep adhesive off skin. When the adhesive is
fully mixed, it must sit for a short time to activate the catalyst.
Failure to do so will create poor fabric adhesion.
Apply two thin layers of adhesive using a short bristle brush, in a
circular pattern on both the backside of the patch and the patch
area on the boat. Allow the first layer to dry completely
(approximately 15 minutes) before applying the second layer. The
second layer should dry until tacky, then apply the patch to the
prepared area and press down firmly. Using a smooth object (the
back of a tablespoon works well), force out any air bubbles that
may have been trapped under the patch, working from the center
of the patch to the outside.
After removing the masking tape, use solvent to clean up any
excess glue, then place a 4 ‑ 5 pound weight onto the patch and
allow 24 hours drying time before pressurizing the repaired air
chamber.
29
MAINTENANCE
Air Chamber Repair ‑ PVC Fabric
! WARNING
Avoid serious injury or death from a fire, explosion or poisoning.
The glues and solvents used for repairing inflatables are toxic
and highly flammable. As a safety precaution, always work
outdoors or in an area that is well‑ventilated, and away from any
open flames, sparks, or appliances equipped with pilot lights.
Breathing the vapors or exposure to the skin may be hazardous
to your health. Avoid breathing the vapors and contact with skin
and eyes by wearing a carbon filter respirator and protective gear
over all exposed areas of the body.
The repair kit which comes with the boat is a one part glue
operation and should be used for emergency minor repair. For a
permanent repair, a two part adhesive for PVC fabric should be
used. This two part adhesive and patching materials for PVC fabric
are available from Mercury Marine.
Small tears and punctures in the air chambers which are
1 cm (0.393 in.) or less, can be repaired in an emergency. Larger
areas, or if the patch will overlap a seam, should be patched by a
professional repair technician at an inflatable repair station.
Contact your local Mercury dealer for the nearest inflatable repair
station.
For the best results when gluing, the relative humidity should be
less than 60%, ambient air temperature should be between
18 °C to 25 °C (65 °F to 77 °F) and not in direct sunlight.
Cut out a patch large enough to overlap the damaged area by
38 mm (1.5 in.) on all sides. Center the patch over the damaged
area, and with a pencil trace the outline of the patch. Apply masking
tape around the perimeter of the outlined patch area to ensure a
tight and clean glue line.
Clean the patch area on the boat as well as the backside of the
patch with M.E.K. (methyl ethel ketone) patching solvent and
cleaner. Keep solvent off skin. After applying the solvent, you will
notice that the area will become tacky. This tackiness ensures
good glue adhesion.
30
MAINTENANCE
ONE PART GLUE (EMERGENCY REPAIRS ONLY)
Follow the directions on the cement tube.
TWO PART ADHESIVE
Mix a batch of adhesive according to the mixing directions provided
with the two part adhesive. Keep adhesive off skin. When the
adhesive is fully mixed, it must sit for a short time to activate the
catalyst. Failure to do so will create poor fabric adhesion.
Apply three thin layers of adhesive with a short bristle brush, in a
circular pattern on both the backside of the patch and the patch
area on the boat. Allow each layer to dry for 5‑10 minutes before
applying the next layer. After applying the third layer, wait 5‑10
minutes and then apply the patch to the prepared area and press
down firmly. Using a smooth object (a back of a tablespoon works
well), force out any air bubbles that may have been trapped under
the patch, working from the center of the patch to the outside.
After removing the masking tape, place a 4‑5 pound weight onto
the patch and allow 24 hours drying time before pressurizing the
repaired air chamber.
31
STORAGE
Storage Preparation
NOTE: The boat should be cleaned and rinsed with fresh water
before being placed in long term storage. Refer to cleaning
procedure.
IMPORTANT: To prevent hull or fabric discoloration from marine
growth or polluted waters, do not store the boat in water for
extended periods of time.
Clean the boat fabric and wash the boat hull following the cleaning
procedure in Maintenance Section. Dry the boat thoroughly after
washing.
The boat can be stored inflated or deflated. Store the boat in a cool,
dry area that is protected from excess exposure from the sun.
Cover the boat to block direct sunlight exposure if the boat is to be
stored outside for an extended period of time.
32
OWNERS SERVICE ASSISTANCE
Service Assistance
Your satisfaction with your inflatable product is very important to
your dealer and to us. If you ever have a problem, question or
concern about your inflatable boat or outboard motor, contact any
authorized Mercury Marine dealership. If additional assistance is
required, take these steps.
1. Talk with the dealership's sales manager or service manager.
If this has already been done, then contact the owner of the
dealership.
2. Should you have a question, concern, or problem that cannot
be resolved by your dealership, please contact Mercury
Marine Service Office for assistance. Mercury Marine will work
with you and your dealership to resolve all problems.
The following information will be needed by the service office:
• Your name and address
• Daytime telephone number
• Model and serial number of your inflatable boat
• The name and address of your dealership
• Nature of problem
Parts And Accessories Inquiries
All inquiries concerning genuine replacement parts and
accessories should be directed to your local authorized dealer. The
dealer has the necessary information to order parts and
accessories for you. When inquiring on parts and accessories, the
dealer requires the model and serial number to order the correct
parts.
Service Away From Home
If you are away from your local dealer and the need arises for
service, contact the nearest authorized dealer. Refer to the Yellow
Pages of the telephone directory. If, for any reason, you cannot
obtain service, contact the nearest Mercury Marine Service Office.
33