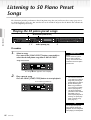
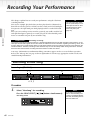
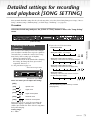
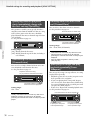
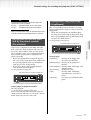
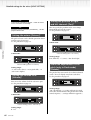
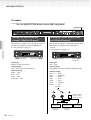
1
CLP-175
CLP-175
Owner's Manual
Clavinova Web site (English only)
http://www.yamahaclavinova.com/
Yamaha Manual Library
http://www2.yamaha.co.jp/manual/english/
M.D.G., Pro Audio & Digital Musical Instrument Division, Yamaha Corporation
© 2003 Yamaha Corporation
IMPORTANT
Check your power supply
Make sure that your local AC mains voltage matches the voltage specified on the name plate
on the bottom panel. In some areas a voltage selector may be provided on the bottom panel of
the main keyboard unit near the power cord. Make sure that the voltage selector is set for the
voltage in your area. The voltage selector is set at 240V when the unit is initially shipped. To
change the setting use a "minus" screwdriver to rotate the selector dial so that the correct voltage
appears next to the pointer on the panel.
WA67380 30?APZC?.?-01A0 Printed in Indonesia
DIC 435
Introduction
SPECIAL MESSAGE SECTION
PRODUCT SAFETY MARKINGS: Yamaha electronic
products may have either labels similar to the graphics
shown below or molded/stamped facsimiles of these
graphics on the enclosure. The explanation of these
graphics appears on this page. Please observe all cautions
indicated on this page and those indicated in the safety
instruction section.
CAUTION
RISK OF ELECTRIC SHOCK
DO NOT OPEN
CAUTION: TO REDUCE THE RISK OF ELECTRIC SHOCK.
DO NOT REMOVE COVER (OR BACK).
NO USER-SERVICEABLE PARTS INSIDE.
REFER SERVICING TO QUALIFIED SERVICE PERSONNEL.
See bottom of Keyboard enclosure for graphic symbol markings
The exclamation point within the
equilateral triangle is intended to alert
the user to the presence of important
operating and maintenance (servicing) instructions in the literature
accompanying the product.
The lightning flash with arrowhead
symbol, within the equilateral triangle, is intended to alert the user to the
presence of uninsulated “dangerous
voltage” within the product’s enclosure that may be of sufficient magnitude to constitute a risk of electrical
shock.
Battery Notice: This product MAY contain a small non-
rechargable battery which (if applicable) is soldered in
place. The average life span of this type of battery is
approximately five years. When replacement becomes
necessary, contact a qualified service representative to
perform the replacement.
Warning: Do not attempt to recharge, disassemble, or
incinerate this type of battery. Keep all batteries away
from children. Dispose of used batteries promptly and as
regulated by applicable laws. Note: In some areas, the
servicer is required by law to return the defective parts.
However, you do have the option of having the servicer
dispose of these parts for you.
Disposal Notice: Should this product become damaged
beyond repair, or for some reason its useful life is considered to be at an end, please observe all local, state, and
federal regulations that relate to the disposal of products
that contain lead, batteries, plastics, etc.
NOTICE: Service charges incurred due to lack of knowl-
edge relating to how a function or effect works (when the
unit is operating as designed) are not covered by the manufacturer’s warranty, and are therefore the owners responsibility. Please study this manual carefully and consult
your dealer before requesting service.
NAME PLATE LOCATION: The graphic below indicates the location of the name plate. The model number,
serial number, power requirements, etc., are located on
this plate. You should record the model number, serial
number, and the date of purchase in the spaces provided
below and retain this manual as a permanent record of
your purchase.
IMPORTANT NOTICE: All Yamaha electronic products
are tested and approved by an independent safety testing
laboratory in order that you may be sure that when it is
properly installed and used in its normal and customary
manner, all foreseeable risks have been eliminated. DO
NOT modify this unit or commission others to do so
unless specifically authorized by Yamaha. Product performance and/or safety standards may be diminished.
Claims filed under the expressed warranty may be denied
if the unit is/has been modified. Implied warranties may
also be affected.
SPECIFICATIONS SUBJECT TO CHANGE: The
information contained in this manual is believed to be
correct at the time of printing. However, Yamaha reserves
the right to change or modify any of the specifications
without notice or obligation to update existing units.
ENVIRONMENTAL ISSUES: Yamaha strives to produce products that are both user safe and environmentally
friendly. We sincerely believe that our products and the
production methods used to produce them, meet these
goals. In keeping with both the letter and the spirit of the
law, we want you to be aware of the following:
92-469 1 (bottom)
Model
Serial No.
Purchase Date
PRECAUTIONS
PLEASE READ CAREFULLY BEFORE PROCEEDING
* Please keep this manual in a safe place for future reference.
WARNING
Always follow the basic precautions listed below to avoid the possibility of serious injury or even death
from electrical shock, short-circuiting, damages, fire or other hazards. These precautions include, but
are not limited to, the following:
Power supply/Power cord
Water warning
• Only use the voltage specified as correct for the instrument.
The required voltage is printed on the name plate of the
instrument.
• Do not expose the instrument to rain, use it near water or in
damp or wet conditions, or place containers on it containing
liquids which might spill into any openings.
• Check the electric plug periodically and remove any dirt or
dust which may have accumulated on it.
• Never insert or remove an electric plug with wet hands.
• Use only the supplied power cord/plug.
Fire warning
• Do not place the power cord near heat sources such as
heaters or radiators, and do not excessively bend or otherwise
damage the cord, place heavy objects on it, or place it in a
position where anyone could walk on, trip over, or roll anything
over it.
• Do not put burning items, such as candles, on the unit.
A burning item may fall over and cause a fire.
If you notice any abnormality
• If the power cord or plug becomes frayed or damaged, or if
there is a sudden loss of sound during use of the instrument,
or if any unusual smells or smoke should appear to be caused
by it, immediately turn off the power switch, disconnect the
electric plug from the outlet, and have the instrument
inspected by qualified Yamaha service personnel.
Do not open
• Do not open the instrument or attempt to disassemble the
internal parts or modify them in any way. The instrument
contains no user-serviceable parts. If it should appear to be
malfunctioning, discontinue use immediately and have it
inspected by qualified Yamaha service personnel.
CAUTION
Always follow the basic precautions listed below to avoid the possibility of physical injury to you or
others, or damage to the instrument or other property. These precautions include, but are not limited
to, the following:
Power supply/Power cord
Location
• When removing the electric plug from the instrument or an
outlet, always hold the plug itself and not the cord. Pulling by
the cord can damage it.
• Remove the electric plug from the outlet when the instrument
is not to be used for extended periods of time, or during
electrical storms.
• Do not connect the instrument to an electrical outlet using a
multiple-connector. Doing so can result in lower sound quality,
or possibly cause overheating in the outlet.
• Do not expose the instrument to excessive dust or vibrations,
or extreme cold or heat (such as in direct sunlight, near a
heater, or in a car during the day) to prevent the possibility of
panel disfiguration or damage to the internal components.
• Do not use the instrument in the vicinity of a TV, radio, stereo
equipment, mobile phone, or other electric devices.
Otherwise, the instrument, TV, or radio may generate noise.
• Do not place the instrument in an unstable position where it
might accidentally fall over.
• Before moving the instrument, remove all connected cables.
Assembly
• Read carefully the attached documentation explaining the
assembly process. Failure to assemble the instrument in the
proper sequence might result in damage to the instrument or
even injury.
(1)B-7
1/2
CLP-175
3
Connections
Using the bench (If included)
• Before connecting the instrument to other electronic
components, turn off the power for all components. Before
turning the power on or off for all components, set all volume
levels to minimum. Also, be sure to set the volumes of all
components at their minimum levels and gradually raise the
volume controls while playing the instrument to set the desired
listening level.
Maintenance
• Gently remove dust and dirt with a soft cloth. Do not wipe too
hard since small particles of dirt can scratch the instrument's
finish.
• When cleaning the instrument, use a soft, dry or slightly damp
cloth. Do not use paint thinners, solvents, cleaning fluids, or
chemical-impregnated wiping cloths.
• Do not place the bench in an unstable position where it might
accidentally fall over.
• Do not play carelessly with or stand on the bench. Using it as
a tool or step-ladder or for any other purpose might result in
accident or injury.
• Only one person should sit on the bench at a time, in order to
prevent the possibility of accident or injury.
• Do not attempt to adjust the bench height while sitting on the
bench, since this can cause excessive force to be imposed on
the adjustment mechanism, possibly resulting in damage to
the mechanism or even injury.
• If the bench screws become loose due to extensive long-term
use, tighten them periodically using the included tool.
Saving data
Saving and backing up your data
Handling caution
• Take care that the key cover does not pinch your fingers, and
do not insert a finger or hand in any gaps on the key cover or
instrument.
• Never insert or drop paper, metallic, or other objects into the
gaps on the key cover, panel or keyboard. If this happens, turn
off the power immediately and unplug the power cord from the
AC outlet. Then have the instrument inspected by qualified
Yamaha service personnel.
• Do not place vinyl, plastic or rubber objects on the instrument,
since this might discolor the panel or keyboard.
• Current data (see page 48) is lost when you turn off the power
to the instrument. Save the data to a floppy disk/the storage
memory (see page 48).
Saved data may be lost due to malfunction or incorrect
operation. Save important data to a floppy disk.
Backing up the floppy disk
• To protect against data loss through media damage, we
recommend that you save your important data onto two floppy
disks.
• Bumping the surface of the instrument with metal, porcelain,
or other hard objects can cause the finish to crack or peel.
Use caution.
• Do not rest your weight on, or place heavy objects on the
instrument, and do not use excessive force on the buttons,
switches or connectors.
• Do not operate the instrument for a long period of time at a
high or uncomfortable volume level, since this can cause
permanent hearing loss. If you experience any hearing loss or
ringing in the ears, consult a physician.
Yamaha cannot be held responsible for damage caused by improper use or modifications to the instrument, or data that is lost or
destroyed.
Always turn the power off when the instrument is not in use.
4
(1)B-7
CLP-175
2/2
Thank you for choosing the Yamaha Clavinova CLP-175. In order to make the most of your
Clavinova’s performance potential and features, please read this Owner’s Manual thoroughly,
and keep it in a safe place for later reference.
About this Owner’s Manual and Reference Booklet
This manual consists of four main sections: “Introduction,” “Basic Operation,” “Detailed Settings,” and “Appendix.”
Also, a separate “Reference Booklet” is provided.
Introduction:
Please read this section first. In the “Application Index” section on page 10 and “Features” on
page 14, you can learn how to use the Clavinova and its functions in particular situations.
Basic Operation:
This main section explains how to use the basic functions. Refer to this section while you
play the Clavinova. If you have questions or come across the words you do not know, refer
to the section entitled “Questions about Operations and Functions” on page 104, or the
“Index” on page 117.
Detailed Settings:
This section explains how to make detailed settings for the Clavinova’s various functions.
Refer to this section as necessary.
Appendix:
This section introduces troubleshooting, a description of preset voices, and other reference
material.
Reference Booklet: XG Voice List, MIDI Data Format, etc.
• The model CLP-175 will be referred to as the CLP/Clavinova in this Owner’s Manual.
• The illustrations and LCD screens as shown in this Owner’s Manual are for instructional purposes only,
and may appear somewhat different from those on your instrument.
• Copying of the commercially available software is strictry prohibited except for your personal use.
COPYRIGHT NOTICE
This product incorporates and bundles computer programs and contents in which Yamaha owns copyrights or with respect to which it has license to use others’ copyrights. Such copyrighted materials include,
without limitation, all computer software, MIDI files, WAVE data and sound recordings. Any unauthorized
use of such programs and contents outside of personal use is not permitted under relevant laws. Any violation of copyright has legal consequences. DON’T MAKE, DISTRIBUTE OR USE ILLEGALCOPIES.
■ Trademarks
• Apple and Macintosh are trademarks of Apple Computer, Inc., registered in the U.S. and other countries.
• Windows is the registered trademark of Microsoft® Corporation.
All other trademarks are the property of their respective holders.
“The Clavinova-Computer Connection,” is a supplementary guidebook that describes, for beginners,
what you can do with your Clavinova and a personal computer and how to set up a Clavinova-Computer
system (the manual is not written for any specific models). The document is available as a PDF file (in
English) at the following Internet address:
Clavinova Web site (English only):
http://www.yamahaclavinova.com/
Yamaha Manual Library:
http://www2.yamaha.co.jp/manual/english/
CLP-175
5
Table of contents
Introduction.......................................................... 2
PRECAUTIONS ........................................................................................................................................ 3
About this Owner’s Manual and Reference Booklet..................................................................................................... 5
Table of contents ................................................................................................................................... 6
Application Index ................................................................................................................................. 10
Handling the Floppy Disk Drive (FDD) and Floppy Disk ..................................................................... 12
Maintenance ........................................................................................................................................ 13
Included Accessories ............................................................................................................................ 13
Features ................................................................................................................................................ 14
Before Using the Clavinova.................................................................................................................. 16
About the key cover ...................................................................................................................................................... 16
About the music rest ..................................................................................................................................................... 16
About the music braces................................................................................................................................................. 16
About the Lid ................................................................................................................................................................ 17
Turning the power on................................................................................................................................................... 18
Adjusting the display contrast ...................................................................................................................................... 19
Setting the volume ........................................................................................................................................................ 19
Using headphones......................................................................................................................................................... 19
Performing the iAFC automatic adjustment ............................................................................................................... 20
Basic Operation .................................................. 21
Panel Controls and Terminals.............................................................................................................. 22
Listening to the Demonstration Tunes................................................................................................ 24
Listening to 50 Piano Preset Songs ..................................................................................................... 26
Playing the 50 piano preset songs ................................................................................................................................ 26
Practicing a one-hand part using 50 preset songs ....................................................................................................... 28
Selecting and Playing Voices ............................................................................................................... 30
Selecting Voices............................................................................................................................................................. 30
Using the pedals ............................................................................................................................................................ 31
Adding variation to the sound [BRILLIANCE]/[REVERB]/[CHORUS].................................................................. 32
To enhance the acoustic realism of the sound ...[iAFC (Instrumental Active Field Control)] ................................ 34
Combining two voices (Dual mode)............................................................................................................................ 35
Splitting the keyboard range and playing two different voices (Split mode) ............................................................ 37
Using the metronome ................................................................................................................................................... 39
Recording Your Performance............................................................................................................... 40
Recording a New Song.................................................................................................................................................. 40
Recording to [TRACK 1]........................................................................................................................................ 40
Re-recording TRACK 1........................................................................................................................................... 42
Re-recording TRACK 1 partially............................................................................................................................ 43
Recording to [TRACK2]......................................................................................................................................... 44
Recording to the third or more tracks [EXTRA TRACKS] .................................................................................. 45
6
CLP-175
Table of contents
Introduction
Other recording techniques.......................................................................................................................................... 45
Adding data to or recording over an existing song ............................................................................................... 45
Changing a voice or tempo after recording ........................................................................................................... 46
Adjusting the volume balance between playback and your performance [SONG BALANCE] ......................... 47
Recording in Dual or Split mode ........................................................................................................................... 47
Basic Operation
Detailed Settings
Saving Recorded Songs and Handling the Files...[FILE] ...................................................................... 48
Clavinova memory.................................................................................................................................................. 48
Basic file operation.................................................................................................................................................. 49
Saving recorded or other songs to Clavinova Storage memory...[SaveToMemory]................................................. 50
Saving recorded or other songs to floppy disk...[SaveToDisk] .................................................................................. 51
Deleting songs in Clavinova Storage memory or a floppy disk...[DeleteSong]......................................................... 52
Renaming a song...[RenameSong] ............................................................................................................................... 53
Copying data from one floppy disk to another...[CopyDisk] .................................................................................... 54
Formatting a floppy disk...[FormatDisk] .................................................................................................................... 55
Automatically open a song when the disk is inserted [FDSongAutoOpen] .............................................................. 56
Changing the type of characters on screen...[CharacterCode]................................................................................... 56
Appendix
Playing Back Recorded Songs and Commercially-available Music Data............................................. 57
Playing back a song ....................................................................................................................................................... 57
Turning track playback on and off............................................................................................................................... 59
Supported song data type ............................................................................................................................................. 59
Connections ......................................................................................................................................... 61
Connectors .................................................................................................................................................................... 61
Connecting a personal computer ................................................................................................................................. 63
Detailed Settings ................................................ 69
Detailed Settings.................................................................................................................................. 70
Parameter List ............................................................................................................................................................... 70
Making detailed settings ............................................................................................................................................... 73
Detailed settings for recording and playback [SONG SETTING] ........................................................ 75
Correcting note timing [Quantize].............................................................................................................................. 75
Specifying whether playback starts immediately along with the first voicing [QuickPlay] ...................................... 76
Auditioning the channels [ChannelListen] ................................................................................................................. 76
Deleting data from each channel [ChannelClear]....................................................................................................... 76
Specifying the range and playing back repeatedly [FromToRepeat] ......................................................................... 76
Playing back the phrase specified by the phrase number [PhraseMark] ................................................................... 77
Playing back a song repeatedly [SongRepeat] ............................................................................................................. 77
Detailed settings for the metronome METRONOME [SETTING] ........................................................ 78
Setting the metronome time signature [TimeSignature]............................................................................................ 78
Setting the metronome volume level [MetronomeVolume]...................................................................................... 78
Selecting the metronome voice [MetronomeSound] ................................................................................................. 78
Detailed settings for the voices [VOICE SETTING] .............................................................................. 79
Setting the octave [Octave]........................................................................................................................................... 80
Setting the volume level [Volume] .............................................................................................................................. 80
Setting the position of right and left channels [Pan] .................................................................................................. 80
CLP-175
7
Table of contents
Make fine adjustments to the pitch (only in Dual mode) [Detune] .......................................................................... 80
Selecting the reverb type [ReverbType] ....................................................................................................................... 81
Setting the reverb depth [ReverbSend]........................................................................................................................ 81
Selecting the chorus type [Chorus Type]..................................................................................................................... 81
Setting the chorus depth [ChorusSend] ...................................................................................................................... 81
Setting the chorus on/off [ChorusOnOff]................................................................................................................... 82
Selecting the DSP type [DSP Type (DSP)] .................................................................................................................. 82
Setting the speed of the vibraphone vibrato effect [VibeRotorSpeed(RotorSpeed)] ................................................ 82
Turning the vibraphone vibrato effect on/off [VibeRotorOnOff (RotorOnOff)] .................................................... 83
Setting the rotation speed of the rotary speaker [RotarySpeed (Rot.Speed)]............................................................ 83
Adjusting the depth of the DSP effect [DSPDepth] .................................................................................................... 83
Adjusting the brightness of the sound [Brightness].................................................................................................... 83
Adjusting the resonance effect [HarmonicContent (Harmonic)] ............................................................................. 83
Adjusting the low-range frequency of the equalizer [EQ LowFreq. (EQ L.Freq)] .................................................... 84
Adjusting the low-range gain (amount of boost/cut) of the equalizer [EQ LowGain]............................................. 84
Adjusting the high-range frequency of the equalizer [EQ HighFreq. (EQ H.Freq)] ................................................ 84
Adjusting the high-range gain (amount of boost/cut) of the equalizer [EQ HighGain] .......................................... 84
Setting the touch sensitivity [TouchSense].................................................................................................................. 85
Setting the right pedal function [RPedal].................................................................................................................... 85
Setting the center pedal function [MPedal] ................................................................................................................ 85
Setting the left pedal function [LPedal] ....................................................................................................................... 86
Setting the auxiliary pedal function [AuxPedal] ......................................................................................................... 86
Detailed settings for iAFC [iAFC SETTING] .......................................................................................... 87
Selecting the iAFC type [iAFC Type] ........................................................................................................................... 87
Adjusting the iAFC depth [iAFC Depth]..................................................................................................................... 87
Calibration (automatic adjustment) [Calibration]..................................................................................................... 88
Restoring the default iAFC settings [iAFC Default].................................................................................................... 88
MIDI [MIDI SETTING]........................................................................................................................... 89
About MIDI................................................................................................................................................................... 89
Setting the MIDI transmit channel [MidiOutChannel] ............................................................................................. 90
Setting the MIDI receive channel [MidiInChannel]................................................................................................... 90
Setting Local control on/off [LocalControl]................................................................................................................ 91
Selecting performance from the keyboard or song data for MIDI transmission [MidiOutSelect].......................... 91
Selecting a type of data received via MIDI [ReceiveParameter]................................................................................. 91
Selecting a type of data transmitted via MIDI [TransmitParameter] ........................................................................ 91
Transmitting the initial settings on the panel [InitialSetup] ...................................................................................... 92
Executing voice data bulk dump [VoiceBulkDump].................................................................................................. 92
Other settings ...................................................................................................................................... 93
Selecting a touch response [TouchResponse] ............................................................................................................. 93
Fine tuning the pitch [Tune]........................................................................................................................................ 93
Selecting a tuning curve for a piano voice [PianoTuningCurve] ............................................................................... 93
Selecting a scale [Scale] ................................................................................................................................................. 94
Specifying the Split Point [SplitPoint]......................................................................................................................... 94
Changing the key [Transpose] ..................................................................................................................................... 94
Adjusting the depth of the Soft pedal [SoftPedalDepth] ............................................................................................ 95
Depth of string resonance [StringResonanceDepth] .................................................................................................. 95
Depth of sustain sampling for the damper pedal [SustainSamplingDepth].............................................................. 95
Specify the volume of the key-off sound [KeyOffSamplingDepth] ........................................................................... 95
Selecting a pedal function for vibraphone [VibraphonePedalMode] ........................................................................ 95
Assign the SONG [START/STOP] function to the pedal [PedalStart/Stop] ............................................................. 96
8
CLP-175
Table of contents
Introduction
Basic Operation
Selecting a type of auxiliary pedal [AuxPedalType].................................................................................................... 96
Setting the point at which the damper pedal starts to affect the sound [HalfPedalPoint] ....................................... 96
Pitch bend range [PitchBendRange]............................................................................................................................ 96
Switch the speaker on/off [Speaker] ............................................................................................................................ 97
Selecting items saved at shutdown [MemoryBackUp] ............................................................................................... 97
Restoring the normal (default) settings [FactorySet] ................................................................................................. 97
Other method for restoring the normal settings ......................................................................................................... 97
Message List ......................................................................................................................................... 98
Questions about Operations and Functions ...................................................................................... 104
Detailed Settings
Appendix .......................................................... 107
Troubleshooting................................................................................................................................. 108
Data Compatibility ............................................................................................................................. 109
Appendix
Preset Voice List ................................................................................................................................. 111
Voice Combination Examples (Dual and Split) ................................................................................. 113
Keyboard Stand Assembly ................................................................................................................. 114
Index................................................................................................................................................... 117
CLP-175
9
Application Index
Use this index to find reference pages that may be helpful for your application and situation.
Listening
Introduction
Listening to demo songs...............................................“Listening to the Demonstration Tunes” on page 24
“Playing the 50 piano preset songs” on page 26
Listening to demo songs with different voices ............“Listening to the Demonstration Tunes” on page 24
Listening to songs from “50 greats for the Piano” ..............“Playing the 50 piano preset songs” on page 26
Listening to my recorded performance ............................................ “Recording to [TRACK 1]” on page 40
“Playing back a song” on page 57
Listening to songs in a floppy disk............................................................. “Playing back a song” on page 57
Playing
Using three pedals.............................................................................................“Using the pedals” on page 31
Playing an accompaniment that matches pitch ....................... “Changing the key [Transpose]” on page 94
Changing tonal color
Viewing the list of voices ................................................................................ “Preset Voice List” on page 111
Simulating a concert hall........................................................................................... “[REVERB]” on page 33
Combining two voices ..................................................... “Combining two voices (Dual mode)” on page 35
Playing different sounds with left and right hands
........................... “Splitting the keyboard range and playing two different voices (Split mode)” on page 37
Making a voice brighter and sharper, or softer and smoother ........................“[BRILLIANCE]” on page 32
Adding spread to the sound .................................................................................... “[CHORUS]” on page 33
Making the sound three-dimensional
..............................................................................“[iAFC (Instrumental Active Field Control)]” on page 34
Practicing
Muting the right- or left-hand part ........... “Practicing a one-hand part using 50 preset songs” on page 28
Practicing with an accurate and steady tempo.......................................“Using the metronome” on page 39
Practicing using your recorded song .......................................... “Recording Your Performance” on page 40
“Turning track playback on and off ” on page 59
Recording
Recording your performance ...................................................... “Recording Your Performance” on page 40
Saving recorded songs to floppy disks or memory
...........................................................“Saving Recorded Songs and Handling the Files...[FILE]” on page 48
10
CLP-175
Application Index
Use this index to find reference pages that may be helpful for your application and situation.
Settings
Introduction
Making detailed settings for recording and playback
............................................“Detailed settings for recording and playback [SONG SETTING]” on page 75
Making detailed settings for the metronome
......................................... “Detailed settings for the metronome METRONOME [SETTING]” on page 78
Making detailed settings for the voices
................................................................. “Detailed settings for the voices [VOICE SETTING]” on page 79
Making detailed settings for MIDI .................................................... “MIDI [MIDI SETTING]” on page 89
Making detailed settings for the Clavinova .........................................................“Other settings” on page 93
Connecting the Clavinova to other devices
What is MIDI?......................................................................................................... “About MIDI” on page 89
Recording your performance
................................. “AUX OUT [R][L] Pin jacks (LEVEL FIXED), [R][L/L+R] Phone jacks” on page 62
Raising the volume .. “AUX OUT [R][L] Pin jacks (LEVEL FIXED), [R][L/L+R] Phone jacks” on page 62
Outputting other instruments’ sound from the Clavinova .......... “AUX IN [R], [L/L+R] jacks” on page 62
Connecting a computer........................................................ “Connecting a personal computer” on page 63
Assembling
Assemble/disassemble the Clavinova.............................................“Keyboard Stand Assembly” on page 114
Quick solution
What the Clavinova offers............................................................................. “Application Index” on page 10
“Features” on page 14
Returning to the main screen................................................................................. “EXIT button” on page 22
Resetting the Clavinova to the default setting
................................................................“Restoring the normal (default) settings [FactorySet]” on page 97
Meaning of the messages........................................................................................ “Message List” on page 98
If you have questions about operations and functions
............................................................................ “Questions about Operations and Functions” on page 104
Troubleshooting............................................................................................. “Troubleshooting” on page 108
CLP-175
11
Handling the Floppy Disk Drive (FDD)
and Floppy Disk
Precautions
Introduction
Be sure to handle floppy disks and treat the disk drive with
care. Follow the important precautions below.
Compatible Disk Type
3.5" 2DD and 2HD type floppy disks can be used.
Inserting/Ejecting Floppy Disks
To insert a floppy disk into the disk drive:
Hold the disk so that the label of the disk is facing upward and
the sliding shutter is facing forward, towards the disk slot.
Carefully insert the disk into the slot, slowly pushing it all the
way in until it clicks into place and the eject button pops out.
Drive lamp
When the power is turned on, the drive
lamp (at the bottom left of the drive) lights to
indicate the drive can be used.
To eject a floppy disk:
Before ejecting the disk, be sure to confirm that the floppy
disk drive is stopped. If the disk drive is operating (during
the [SaveToDisk] (P51), [DeleteSong] (P52), [RenameSong]
(P53), [CopyDisk] (P54), or [FormatDisk] (P55) operation), the Clavinova displays [Executing].
Never attempt to remove the disk or turn the power off
when the disk drive is operating. Doing so can damage the
disk and possibly the disk drive.
Press the eject button slowly as far as it will go; the disk will
automatically pop out. When the disk is fully ejected, carefully remove it by hand.
Eject button
If the eject button is pressed too quickly, or if it is not
pressed in as far as it will go, the disk may not eject properly.
The eject button may become stuck in a half-pressed position with the disk extending from the drive slot by only a few
millimeters. If this happens, do not attempt to pull out the
partially ejected disk, since using force in this situation can
damage the disk drive mechanism or the floppy disk. To
remove a partially ejected disk, try pressing the eject button
once again, or push the disk back into the slot and then
repeat the eject procedure.
12
CLP-175
Be sure to remove the floppy disk from the disk drive before
turning off the power. A floppy disk left in the drive for
extended periods can easily pick up dust and dirt that can
cause data read and write errors.
Cleaning the Disk Drive Read/Write Head
• Clean the read/write head regularly. This instrument
employs a precision magnetic read/write head which,
after an extended period of use, will pick up a layer of
magnetic particles from the disks used that will eventually
cause read and write errors.
• To maintain the disk drive in optimum working order
Yamaha recommends that you use a commercially-available dry-type head cleaning disk to clean the head about
once a month. Ask your Yamaha dealer about the availability of proper head-cleaning disks.
• Never insert anything but floppy disks into the disk drive.
Other objects may cause damage to the disk drive or
floppy disks.
About the Floppy Disks
• To handle floppy disks with care:
• Do not place heavy objects on a disk or bend or apply
pressure to the disk in any way. Always keep floppy disks
in their protective cases when they are not in use.
• Do not expose the disk to direct sunlight, extremely high
or low temperatures, or excessive humidity, dust or liquids.
• Do not open the sliding shutter and touch the exposed
surface of the floppy disk inside.
• Do not expose the disk to magnetic fields, such as those
produced by televisions, speakers, motors, etc., since
magnetic fields can partially or completely erase data on
the disk, rendering it unreadable.
• Never use a floppy disk with a deformed shutter or housing.
• Do not attach anything other than the provided labels to
a floppy disk. Also make sure that labels are attached in
the proper location.
Handling the Floppy Disk Drive(FDD) and Floppy Disk
• Data backup
• To prevent accidental erasure of important data, slide the
disk’s write-protect tab to the “protect” position (tab open).
• For maximum data security Yamaha recommends that
you keep two copies of important data on separate floppy
disks. This gives you a backup if one disk is lost or damaged. To make a backup disk use the Copy Disk function
on page 54.
Introduction
• To protect your data (Write-protect Tab):
write-protect tab open
(protect position)
Maintenance
Clean the instrument using a dry or slightly damp soft cloth (wring well).
CAUTION
Do not use benzene, thinner, detergent, or chemically-treated cloth for cleaning. Do not place vinyl, plastic or rubber
products on the instrument.
Otherwise, the panel or keys may become discolored or degraded.
CAUTION
Before using the Clavinova, be sure to read “Precautions” on pages 3-4.
Tuning
Unlike an acoustic piano, the Clavinova does not need to be tuned. It always stays perfectly in tune.
Transporting
If you move to another location, you can transport the Clavinova along with your other belongings. You can move
the unit as it is (assembled) or you can disassemble the unit.
Transport the keyboard horizontally. Do not lean it up against a wall or stand it up on its side. Do not subject the
instrument to excessive vibration or shock.
TIP
The CLP-175 features an iAFC (Instrumental Active Field Control) effect. This produces sound from the speaker located on the
bottom face of the Clavinova, enhancing the reverberation and spaciousness of the sound when you open the lid with the longer
stay (page 17).
In order to optimize the iAFC effect, please observe the following:
• Perform the automatic adjustment after each time you re-locate the Clavinova. (page 88)
• Do not block the speaker located on the bottom face of the Clavinova.
Included Accessories
“50 greats for the Piano” Score Collection
Owner’s Manual
Reference Booklet
Recording disk
Save your recorded performance to this disk. (page 51)
Bench
(included or optional depending on locale)
CLP-175
13
Features
Introduction
The Yamaha CLP-175 Clavinova features rich sounds produced by Yamaha’s proprietary “AWM dynamic stereo
sampling” tone generator system, and a special “Natural Keyboard” that uses wooden keys with an action mechanism for improved continuous key response. The CLP-175 GrandPiano1 voice features 3 velocity-switched samples
(Dynamic Sampling), “String Resonance” (page 95) that recreates resonance of piano strings, special “Sustain Sampling” (page 95)that samples the unique resonance of an acoustic grand piano’s soundboard and strings when the
damper pedal is pressed, and “Key-off Samples” that add the subtle sound produced when the keys are released. The
CLP-175 comes much closer to the sound of a true acoustic piano.
You can output the sound of the
Clavinova from an external audio system, or connect it to a
cassette tape recorder etc. and
record your playing. (page 62)
These jacks allow you to connect
an external tone generator to
reproduce the sound via the
Clavinova’s internal sound system
and speakers. (page 62)
This jack can be connected to your computer, allowing you to
transfer MIDI data between the Clavinova
and the computer.
(page 63, 67, 68)
LEVEL FIXED
R
L
R
L/L+R
R
L/L+R
AUX OUT
AUX IN
PC-2
MIDI
IN
OUT
AUX PEDAL
Connect an optional pedal
here and assign one of
the various functions to
the pedal. (page 61)
TRACK
1
SONG
SONG SELECT
KEYBOARD
TOP
TRACK
2
EXTRA
TRACKS
FILE
START/STOP
REC
SONG
SETTING
METRONOME
START/STOP SETTING
THRU
MIDI
HOST SELECT
TO HOST
A
CONTRAST
B
YES
UP
GRAND
PIANO 1
GRAND
PIANO 2
E.PIANO
1
E.PIANO
2
HARPSICHORD
CHURCH
ORGAN
JAZZ
ORGAN
STRINGS
CHOIR
SYNTH.
PAD
E.CLAVICHORD
VIBRAPHONE
GUITAR
WOOD
BASS
E.BASS
XG
VOICE
SETTING
ON/OFF
MIDI
SETTING
AFC
SETTING
OTHER
SETTING
AFC
SPLIT
VARIATION
REVERB
CHORUS
BRILLIANCE
MELLOW
BRIGHT
USB
This jack and selector
switch allow direct
connection to a personal computer for sequencing and other
music applications.
(page 63–65)
Connect a MIDI device
here to use various MIDI
functions. (page 61, 66)
(About MIDI—page 89)
NO
DOWN
Mac
USB
EXIT
MIN
NEW SONG
MAX
MASTER VOLUME
SONG BALANCE
DEMO
SYNCHRO START
TEMPO
C
D
VOICE
SONG
EFFECT
POWER
PHONES
A set of standard
stereo headphones can be
plugged in here
for private practice. (page 19)
Connect the pedal
cord here to use the
Clavinova’s pedals.
(page 115)
PEDAL
14
CLP-175
Features
[METRONOME]
Use the metronome
functions. (page 39)
[CONTRAST]
Adjust the brightness of the display
using this control.
(page 19)
[DEMO]
Demonstration
playback is
available for each
voice. (page 24)
SONG SELECT
[REVERB] / [CHORUS]
Add reverb (reverberation) and spread
(chorus) to the sound. (page 33)
Voice group buttons
You can choose from sixteen groups of
voices, including grand piano. (page 30)
You can also combine two voices and use
them together. (page 35)
[MASTER VOLUME]
Adjust the volume
level using this dial.
(page 19)
SONG
[MIDI SETTING]
Make detailed MIDI settings,
such as MIDI receive/transmit
channels. (page 89)
[FILE]
Save recorded songs and
manage song files. (page 48)
Introduction
The Clavinova includes
50 preset songs.
This section enables you to
listen to these songs, practice using a convenient
practice function, play back
Clavinova music data (sold
in music stores), and record and play back your
performance.
(page 26, 40, 57)
TRACK
1
TRACK
2
EXTRA
TRACKS
FILE
TOP
START/STOP
REC
SONG
SETTING
KEYBOARD
METRONOME
START/STOP SETTING
A
[SPLIT]
You can play different
voices on the left- and
right-hand sections of the
keyboard. (page 37)
CONTRAST
B
NO
DOWN
YES
UP
GRAND
PIANO 1
GRAND
PIANO 2
E.PIANO
1
E.PIANO
2
HARPSICHORD
E.CLAVICHORD
VIBRAPHONE
GUITAR
CHURCH
ORGAN
JAZZ
ORGAN
STRINGS
CHOIR
SYNTH.
PAD
WOOD
BASS
E.BASS
XG
VOICE
SETTING
ON/OFF
MIDI
SETTING
AFC
SETTING
OTHER
SETTING
AFC
SPLIT
VARIATION
REVERB
CHORUS
BRILLIANCE
MELLOW BRIGHT
EXIT
MIN
NEW SONG
MAX
MASTER VOLUME
SONG BALANCE
DEMO
SYNCHRO START
TEMPO
C
D
SONG
[SONG SETTING]
Make detailed settings for
song recording and playback.
(page 75)
[SONG BALANCE]
This lets you adjust the volume
balance between the song playback
and the sound you are playing on
the keyboard. (page 47)
TEMPO [DOWN] [UP]
You can change the song tempo (speed).
(page 27, 39, 41, 58)
TIP
In order to optimize the iAFC effect, please
observe the following:
• Perform the automatic adjustment after you
turn on the power of the Clavinova for the first
time, and after each time you re-locate the
Clavinova. (page 88)
• Do not block the speaker located on the bottom
face of the Clavinova.
VOICE
The display
allows accurate control
and operation.
(page 23)
EFFECT
[EXIT]
The screen returns to its
main display when you
press this button. (page 23)
[VOICE SETTING] / [VARIATION]
You can make detailed settings for
tone and effects. (page 79)
BRILLIANCE [MELLOW] [BRIGHT]
Adjust the brightness of the tone
using these buttons. (page 32)
You can use the iAFC only when you open the lid with the
longer stay. (page 17)
[iAFC ON/OFF]
This enhances the acoustic realism of the sound produced
from the Clavinova, similar to the sound of an acoustic instrument. (page 34)
[iAFC SETTING]
You can select the iAFC type and make other detailed
settings for iAFC. (page 87)
[OTHER SETTING]
This lets you make detailed settings, such as adjusting the keyboard touch or making fine adjustments to the pitch. (page 93)
CLP-175
15
Before Using the Clavinova
About the key cover
Introduction
To open the key cover:
Lift the cover slightly, then push and slide it open.
To close the key cover:
Slide the cover toward you and gently lower the
cover over the keys.
CAUTION
Be careful to avoid catching
your fingers when opening or
closing the cover.
CAUTION
Hold the cover with both hands when opening or closing it. Do not release it until it is fully opened or closed. Be
careful to avoid catching fingers (yours or others, especially children’s) between the cover and the unit.
Do not place objects such as a piece of metal or paper on top of the key cover. Small objects placed on the key
cover may fall inside the unit when the cover is opened and may be nearly impossible to remove. This could
cause electric shock, short circuit, fire or other serious damage to the instrument.
About the music rest
To raise the music rest:
1. Pull the music rest up and toward yourself as far as it will go.
2. Flip down the two metal supports at the left and right on the
rear of the music rest.
3. Lower the music rest so that it rests on the metal supports.
To lower the music rest:
1. Pull the music rest toward yourself as far as it will go.
2. Raise the two metal supports (at the rear of the music rest).
3. Gently lower the music rest backward until it is all the way
down.
CAUTION
Do not try to use the music rest in a half-raised position. When lowering the music rest, do not release your hands
from the music rest until it is all the way down.
About the music braces
These braces are for holding the pages of music books in place.
To open
16
CLP-175
To close
Before Using the Clavinova
About the Lid
Longer stay
Shorter stay
NOTE
For the longer stay, use the
inner recess, and for the
shorter stay, use the outer
recess to support the lid.
To open the lid:
1. Raise and hold the right side of the lid (viewed from the
keyboard end of the instrument).
2. Raise the lid stay and carefully lower the lid so that the end
of the stay fits into the recess in the lid.
Introduction
One long stay and one short stay are provided on the lid. Use one of them to
open the lid to the desired angle.
1
2
To turn on the iAFC (page 34), open the lid with the longer
stay using the inner recess.
When the lid is closed or open with the shorter stay, the
iAFC will not be turned on.
To close the lid:
1. Hold the lid stay and carefully raise the lid.
2. Hold the lid in its raised position and lower the lid stay.
3. Carefully lower the lid.
1
2
3
CAUTION
• Make sure that the end of the stay fits securely in the lid recess. If the stay is not properly seated in the recess, the
lid may fall, causing damage or injury.
• Be careful that you or others do not bump the stay while the lid is raised. The stay may be bumped out of the lid
recess causing the lid to fall.
• Be careful to avoid catching fingers (yours or others, especially children's) when raising or lowering the lid.
CLP-175
17
Before Using the Clavinova
Turning the power on
Introduction
1. Connect the power cable.
First insert the plug of the power cable into the AC connector on the Clavinova, then plug the other end of
the cable into the proper AC outlet on the wall.
In some areas a plug adaptor may be provided to match the pin configuration of the AC wall outlets in
your area.
1
2
(The shape of plug differs
depending on locale.)
WARNING!
Make sure your CLP-175 is rated for the AC voltage supplied in the area in which it is to be used (voltage rating appears on the
name plate on the bottom panel). In some areas, a voltage selector may be provided on the bottom panel of the main keyboard
unit near the power cord. Make sure that the voltage selector is set for the voltage in your area. Connecting the unit to the wrong
AC supply can cause serious damage to the internal circuitry and may even pose a shock hazard!
Use only the AC power cord supplied with the CLP-175. If the supplied cord is lost or damaged and needs to be replaced, contact your Yamaha dealer. The use of an inappropriate replacement can pose a fire and shock hazard!
The type of AC power cord provided with the CLP-175 may be different depending on the country in which it is purchased. (In
some areas a plug adaptor may be provided to match the pin configuration of the AC wall outlets in your area.) Do NOT modify
the plug provided with the CLP-175. If the plug will not fit the outlet, have a proper outlet installed by a qualified electrician.
2. Turn on the power to the Clavinova.
Press the [POWER] switch located on the right of the keyboard to turn the power on.
• The screen located in the center of the front panel lights up. The drive
lamp below the lower right end of the keyboard also lights.
TIP
If you close the key cover
without turning the power
off, the drive lamp remains
lit, indicating that the power
is still on.
[POWER]
The drive lamp lights.
A
B
NO
C
YES
D
When you turn on the power to the Clavinova, a voice name
appears on the screen.
Press the [POWER] switch again to turn off the power to the Clavinova.
• The screen and the drive lamp turn off.
18
CLP-175
Before Using the Clavinova
Adjusting the display contrast
You can adjust the contrast of the display by turning the [CONTRAST] knob located to the right of the LCD.
A
CONTRAST
B
Use this knob.
NO
YES
EXIT
C
D
TERMINOLOGY
CONTRAST:
difference between
brightness and darkness
Introduction
Setting the volume
To adjust the volume, use the [MASTER VOLUME] located at the left of the panel. Play the keyboard to actually produce sound while you adjust the volume.
The level
decreases.
MIN
The level
increases.
CAUTION
Do not use the Clavinova at a high volume
level for a long period of
time, or your hearing
may be damaged.
MAX
MASTER VOLUME
TERMINOLOGY
MASTER VOLUME:
The volume level of the entire keyboard sound
TIP
You can also adjust the [PHONES] output level, the
AUX IN input level and the AUX OUT [L/L+R][R]
output level using the [MASTER VOLUME] dial.
Using headphones
Connect a pair of headphones to one of the [PHONES] jacks.
When the headphones are plugged into either of the [PHONES]
jacks, the internal speaker system is automatically shut off.
Two [PHONES] jacks are provided. Two sets of standard stereo
headphones can be plugged in. (If you are using only one pair of
headphones, you can plug them into either of these jacks.)
CAUTION
Do not use headphones at a high volume for an extended period of time.
Doing so may cause hearing loss.
PHONES
TIP
Optional headphones
HPE-160 Yamaha headphones.
Using the Headphone Hanger
A headphone hanger is included in the CLP-175 package so that
you can hang the headphones on the Clavinova. Install the headphone hanger using included two screws (4 × 10mm) as shown in
the figure.
CAUTION
Do not hang anything other than the headphones on the hanger. Otherwise, the Clavinova or the hanger may be damaged.
CLP-175
19
Before Using the Clavinova
Performing the iAFC automatic adjustment
Introduction
The CLP-175 features an iAFC (Instrumental Active Field Control) effect. This produces sound from the speaker
located on the bottom face of the Clavinova, enhancing the reverberation and spaciousness of the sound when
you open the lid with the longer stay. (page 17)
In order to optimize the iAFC effect, perform the automatic adjustment. (page 88)
20
CLP-175
Basic Operation
CLP-175
21
Panel Controls and Terminals
D
C
CONTRAST
B
NO
G
E
YES
J K N
H I
GRAND
PIANO 1
GRAND
PIANO 2
E.PIANO
1
E.PIANO
2
HARPSICHORD
E.CLAVICHORD
VIBRAPHONE
GUITAR
CHURCH
ORGAN
JAZZ
ORGAN
STRINGS
CHOIR
SYNTH.
PAD
WOOD
BASS
E.BASS
XG
VOICE
SETTING
REVERB
CHORUS
BRILLIANCE
MELLOW BRIGHT
VARIATION
P
ON/OFF
MIDI
SETTING
iAFC
SETTING
OTHER
SETTING
O
Q
iAFC
SPLIT
EXIT
F
D
6
SONG SELECT
SONG
MIN
NEW SONG
SONG BALANCE
DEMO
3
4
Basic Operation
2
S
T
7
TRACK
1
TRACK
2
EXTRA
TRACKS
FILE
TOP
START/STOP
REC
SONG
SETTING
KEYBOARD
MAX
MASTER VOLUME
L
VOICE
5
SYNCHRO START
9
SONG
A
C
METRONOME
START/STOP SETTING
A
DOWN
EFFECT
D
UP
TEMPO
0
M
C
B
8
U
TRACK
1
SONG
SONG SELECT
KEYBOARD
TOP
TRACK
2
EXTRA
TRACKS
FILE
START/STOP
REC
SONG
SETTING
METRONOME
START/STOP SETTING
A
CONTRAST
B
NO
DOWN
YES
UP
GRAND
PIANO 1
GRAND
PIANO 2
E.PIANO
1
E.PIANO
2
HARPSICHORD
CHURCH
ORGAN
JAZZ
ORGAN
STRINGS
CHOIR
SYNTH.
PAD
E.CLAVICHORD
VIBRAPHONE
GUITAR
WOOD
BASS
E.BASS
XG
VOICE
SETTING
NEW SONG
MAX
MASTER VOLUME
SONG BALANCE
DEMO
SYNCHRO START
TEMPO
C
REVERB
CHORUS
BRILLIANCE
MELLOW
BRIGHT
D
VOICE
SONG
ON/OFF
MIDI
SETTING
AFC
SETTING
OTHER
SETTING
AFC
SPLIT
VARIATION
EXIT
MIN
EFFECT
a
POWER
1
PHONES
A-1 B-1 C0 D0 E0 F0 G0 A0 B0 C1 D1 E1 F1 G1 A1 B1 C2 D2 E2 F2 G2 A2 B2 C3 D3 E3 F3 G3 A3 B3 C4 D4 E4 F4 G4 A4 B4 C5 D5 E5 F5 G5 A5 B5 C6 D6 E6 F6 G6 A6 B6 C7
R
_
Center “C”
Top panel
1 [POWER]..............................................P18
2 [MASTER VOLUME].............................P19
3 SONG BALANCE..................................P47
4 [DEMO] ...............................................P24
5 SONG SELECT [ ] [
6 [TRACK1] [TRACK2] /
].........P26, 40, 57
[EXTRA TRACKS] ............... P28, 40–45, 59
7 [FILE] ...................................................P48
8 [TOP] / SONG [START/STOP]
................................................P26, 41, 58
9 [REC]....................................................P41
0 [SONG SETTING] ................................P75
A METRONOME [START/STOP] /
[SETTING]......................................P39, 78
B TEMPO [DOWN] [UP] .............P27, 39, 58
C LCD buttons A [–] [+] / B [– (NO)] [+ (YES)] /
C [–] [+] / D [–] [+]...............................P23
D LCD screen ..........................................P23
22
CLP-175
E [CONTRAST] knob...............................P19
F [EXIT]...................................................P23
G Voice group buttons ...........................P30
H [VOICE SETTING] ................................P79
I [SPLIT] .................................................P37
J [REVERB]..............................................P33
K [CHORUS] ............................................P33
L VARIATION [▼] [▲] .............................P30
M BRILLIANCE [MELLOW] [BRIGHT].......P32
N iAFC [ON/OFF] ....................................P34
O [iAFC SETTING] ...................................P87
P [MIDI SETTING]...................................P89
Q [OTHER SETTING] ...............................P93
R [PHONES] ............................................P19
S Soft pedal ............................................P31
T Sostenuto pedal ..................................P31
U Damper pedal .....................................P31
Panel Controls and Terminals
Connectors
V [AUX PEDAL] ..................................... P61
W MIDI [IN] [OUT] [THRU] .................... P61
X HOST SELECT..................................... P61
Y [TO HOST] ......................................... P61
Z [USB].................................................. P61
[ AUX IN ............................................... P62
\ AUX OUT............................................ P62
] [PEDAL] ............................................ P115
_ Floppy disk drive................................ P12
\
GM System Level 1
“GM System Level 1” is an addition to the MIDI
standard which guarantees that any data conforming to the standard will play accurately on any GMcompatible tone generator or synthesizer from any
manufacturer.
XG Format
XG is a new Yamaha MIDI specification which significantly expands and improves on the “GM System
Level 1” standard with greater voice handling capacity, expressive control, and effect capability while
retaining full compatibility with GM.
DOC (Disk Orchestra Collection)
This is a sound map format supported by Clavinovas and many other Yamaha MIDI instruments.
Tone generators and music data compatible with
this format carry the DOC logo.
Basic Operation
a Panel logos
[
LEVEL FIXED
R
L
R
L/L+R
AUX OUT
R
L/L+R
AUX IN
PC-2
MIDI
IN
AUX PEDAL
V
OUT
MIDI
W
Mac
USB
THRU
HOST SELECT
TO HOST
USB
X Y Z
a
`
]
PEDAL
iAFC (Instrumental Active Field Control)
This is functionality that uses a multi-channel
speaker system to generate three-dimensional
acoustical effects from musical instruments.
C LCD buttons
D LCD
Use the LCD button A, B, C, or D to select the contents displayed on the LCD.
Check the screen located in the center of the top
panel after every operation. A voice name appears
on the screen when you turn on the power to the
unit.
F [EXIT] button
When you press this button, the unit returns to the
default screen (the screen that indicates a voice
name(s) and is displayed when the power is turned
on).
A
B
NO
C
YES
D
CLP-175
23
Listening to the Demonstration
Tunes
For each voice group, the Clavinova contains one demo song that shows off the character of the voices.
This section explains how to listen to the demo songs for the voice groups listed below.
Demonstration tunes
Voice group
Tunes
GRAND PIANO1
HARPSICHORD
Composer
Consolation No.3
Gavotte
F.Liszt
J.S.Bach
Basic Operation
The demonstration pieces listed above are short rearranged excerpts the original
compositions.
All other songs are original (©2003 Yamaha Corporation).
2 3
1 4
SONG SELECT
SONG
TRACK
1
TRACK
2
EXTRA
TRACKS
FILE
TOP
START/STOP
REC
SONG
SETTING
KEYBOARD
METRONOME
START/STOP SETTING
DOWN
A
B
CONTRAST
UP
Voice
group buttons
GRAND
PIANO 1
GRAND
PIANO 2
E.PIANO
1
E.PIANO
2
HARPSICHORD
E.CLAVICHORD
VIBRAPHONE
GUITAR
CHURCH
ORGAN
JAZZ
ORGAN
STRINGS
CHOIR
SYNTH.
PAD
WOOD
BASS
E.BASS
XG
VOICE
SETTING
ON/OFF
MIDI
SETTING
AFC
SETTING
OTHER
SETTING
AFC
SPLIT
VARIATION
REVERB
CHORUS
BRILLIANCE
MELLOW BRIGHT
EXIT
MIN
NEW SONG
MAX
MASTER VOLUME
SONG BALANCE
DEMO
SYNCHRO START
TEMPO
C
D
SONG
3
VOICE
EFFECT
4
Procedure
1.
Engage the demo mode.
Press the [DEMO] button to engage the demo mode.
The indicators of the voice group buttons will blink in succession.
24
CLP-175
TERMINOLOGY
Mode:
A mode is a status under
which you can execute a
certain function. In demo
mode, you can play back
demonstration tunes.
Listening to the Demonstration Tunes
2.
Select a tune and start playback.
Press the voice group button for the demo song that you
want to hear.
The indicator of the voice group button you pressed will light, and the
demo song will begin playing. Subsequently, the demo songs will play
back consecutively from the upper left voice group button until you
stop the playback.
4.
Stop the playback.
Press the button of the voice group being played or the
SONG [START/STOP] button.
TIP
To adjust the volume balance between the song
playback and the sound you
are playing on the keyboard,
use the [SONG BALANCE]
slider (page 47) .
Basic Operation
3.
NOTE
To adjust the volume level of
the demo songs, use the
[MASTER VOLUME] dial.
Exit from demo mode.
Press the [DEMO] or [EXIT] button to exit from demo
mode.
By holding down the [DEMO] button and pressing the A[–]/[+]
buttons to get the [PianoDemo] display, you can hear the piano
demo / iAFC demo. The piano demo lets you compare the result of
enabling/disabling each sampling technology.
The iAFC demo lets you compare three iAFC types. The demo
songs are assigned to the sound buttons as follows.
GRAND PIANO1 ................. Stereo Piano (stereo sampling)
GRAND PIANO2 ................. Mono Piano (mono sampling)
E.PIANO1 ............................ mezzo piano (dynamic sampling,
mezzopiano)
E.PIANO2 ............................ mezzo forte (dynamic sampling, mezzoforte)
HARPSICHORD .................. forte (dynamic sampling, forte)
E.CLAVICHORD.................. with Sustain (with sustain sampling)
VIBRAPHONE ..................... no Sustain (without sustain sampling)
GUITAR ............................... with KeyOff (with key-off sampling)
CHURCH ORGAN............... no KeyOff (without key-off sampling)
JAZZ ORGAN...................... with StringRes (with string resonance)
STRINGS............................. no StringRes (without string resonance)
GHOIR................................. with iAFC SEE(iAFC spatial ensemble effect)
SYNTH.PAD ........................ with iAFC NSB (iAFC natural soundboard)
WOOD BASS ...................... with iAFC DDE (iAFC dynamic
damper effect)
CLP-175
25
Listening to 50 Piano Preset
Songs
The Clavinova provides performance data of 50 piano songs. You can just listen to these songs (page 26) or
use them for practice (page 28). You can also refer to the included “50 greats for the Piano” that contains the
scores for 50 piano preset songs.
Playing the 50 piano preset songs
Basic Operation
1
METRONOME [START/STOP]
SONG SELECT
SONG
METRONOME
START/STOP SETTING
TRACK
1
TRACK
2
EXTRA
TRACKS
FILE
TOP
START/STOP
REC
SONG
SETTING
KEYBOARD
DOWN
A
B
CONTRAST
UP
GRAND
PIANO 1
GRAND
PIANO 2
E.PIANO
1
E.PIANO
2
HARPSICHORD
E.CLAVICHORD
VIBRAPHONE
GUITAR
CHURCH
ORGAN
JAZZ
ORGAN
STRINGS
CHOIR
SYNTH.
PAD
WOOD
BASS
E.BASS
XG
VOICE
SETTING
ON/OFF
MIDI
SETTING
AFC
SETTING
OTHER
SETTING
AFC
SPLIT
VARIATION
REVERB
CHORUS
BRILLIANCE
MELLOW BRIGHT
EXIT
MIN
NEW SONG
MAX
MASTER VOLUME
SONG BALANCE
SYNCHRO START
TEMPO
C
D
SONG
DEMO
3 2
VOICE
EFFECT
4
TEMPO [DOWN] [UP]
Procedure
1.
Select a song.
Press one of the [SONG SELECT] buttons repeatedly to
select the desired piano song from P-001 to P-050.
Song select screen
A
B
NO
C
TERMINOLOGY
Song:
On the Clavinova, performance data is called a
“Song.” This includes demonstration tunes and piano
preset tunes.
YES
D
The song number appears on the display.
2.
Play a preset song.
Press the SONG [START/STOP] button to start playback.
the number of measures
A
B
NO
C
YES
D
TIP
• You can also use the C
[–]/[+] buttons to select a
song after pressing the
[SONG SELECT] button.
• [P-000: NewSong] is a
blank song provided for
you to record your performance. (See page 40.)
• Use the SongRepeat
parameter in the “SONG
SETTING” menu to
select repeat playback of
all songs or repeat playback of a single song.
(See page 77.)
TIP
You can play the keyboard
along with the preset song
playback. You can change the
voice playing on the keyboard.
26
CLP-175
Listening to 50 Piano Preset Songs
Adjusting the tempo
You can use the TEMPO [DOWN]/[UP] buttons to adjust the playback
tempo as required. The default tempo (the song’s original tempo) is set when
you press the [DOWN] and [UP] buttons simultaneously.
Press either of the SONG SELECT [ ]/[ ] buttons to return to the song
select screen.
A
B
NO
3.
NOTE
Resetting the tempo
Whenever you select a new
preset song, the tempo is
automatically reset to the
song’s original value.
Basic Operation
C
YES
TIP
You can also use the D[–]/[+]
buttons to change the tempo.
D
Stop the song playback.
When playback is complete, it automatically stops and the Clavinova
locates the top of the song. To stop playback in the middle of a song,
press the [TOP] button. You can also pause playback by pressing the
SONG [START/STOP] button. Playback stops when you press the
button.
Fast forward and rewind
You can perform the following operations in the song select screen:
• Use the B [–]/[+] buttons to move back and forth (rewind and fast forward) through the song while the song is played or stopped.
• Press the SONG SELECT [ ] or the C [–] button during playback to
restart playback from the top of the song.
• Press the SONG SELECT [ ] or the C [+] button during playback to
start playback from the next song.
• Press the SONG SELECT [ ] or the C [–] button while playback is
stopped in the middle of the song to locate the top of the song.
4.
Return to the default screen.
Press the [EXIT] button.
TIP
If you have selected a disc
song and there is a folder
before the song, the folder
will appear on the display
when you press the SONG
SELECT [
][
] buttons
or C [–]/[+] buttons during
song playback.
TERMINOLOGY
Default screen:
The default screen is a voice
select screen (page 30) that
appears when you turn on
the power to the Clavinova.
CLP-175
27
Listening to 50 Piano Preset Songs
Practicing a one-hand part using 50 preset songs
The 50 preset songs have separate left- and right-hand parts on individual tracks. You can turn the left- and
right-hand parts on or off as required so you can practice the corresponding part (the part that is turned off)
on the keyboard. The right-hand part is played by [TRACK 1] and the left-hand part is played by [TRACK 2].
1
SONG SELECT
SONG
TRACK
1
TRACK
2
EXTRA
TRACKS
FILE
TOP
START/STOP
REC
SONG
SETTING
KEYBOARD
METRONOME
START/STOP SETTING
DOWN
A
B
CONTRAST
UP
GRAND
PIANO 1
GRAND
PIANO 2
E.PIANO
1
E.PIANO
2
HARPSICHORD
E.CLAVICHORD
VIBRAPHONE
GUITAR
CHURCH
ORGAN
JAZZ
ORGAN
STRINGS
CHOIR
SYNTH.
PAD
WOOD
BASS
E.BASS
XG
VOICE
SETTING
ON/OFF
MIDI
SETTING
AFC
SETTING
OTHER
SETTING
AFC
SPLIT
VARIATION
REVERB
CHORUS
BRILLIANCE
MELLOW BRIGHT
EXIT
Basic Operation
MIN
NEW SONG
MAX
MASTER VOLUME
SONG BALANCE
DEMO
SYNCHRO START
TEMPO
C
D
SONG
VOICE
EFFECT
3 2
procedure
1.
Turn off the playback part you wish to practice.
After you select a song to practice, press the [TRACK1] or
[TRACK2] button to turn off the corresponding part.
TIP
You can turn parts on or off,
even during playback.
When you first select a song, both [TRACK1] and [TRACK2] indicators light up, indicating that you can play back both parts. When you
press one of the buttons to turn off playback, the corresponding button indicator turns off and the corresponding part playback is muted.
Pressing the buttons repeatedly toggles between playback on and off.
2.
Start playback and playing.
Press the SONG [START/STOP] button to start playback.
Play the part you just turned off.
Starting playback automatically as you start playing the
keyboard (Synchro Start)
You can cause playback to begin when you play the keyboard (Synchro Start).
Hold down the [TOP] button and press the SONG [START/STOP]
button. The SONG [START/STOP] indicator will blink, and the
Clavinova will wait for Syncro Start.
Now when you play the keyboard, playback will begin at the same
moment.
If you press the [TOP] button while waiting, Synchro Start will be
cancelled.
28
CLP-175
TERMINOLOGY
Synchro:
Synchronous;occurring at the
same time
Listening to 50 Piano Preset Songs
3.
Stop playback.
When playback is complete, it automatically stops and the Clavinova
locates the top of the song. If you wish to stop playback in the middle
of a song, press the [TOP] button. You can also pause playback by
pressing the SONG [START/STOP] button. Playback stops when you
press the button.
TIP
Resetting the part playback
Both parts are automatically
turned ON whenever you
select a new song.
Basic Operation
You can also assign a phrase in a song to repeatedly practice that part. Refer to
the [FromToRepeat] option in the “SONG SETTING” menu on page 76.
CLP-175
29
Selecting and Playing Voices
Selecting Voices
SONG SELECT
SONG
TRACK
1
TRACK
2
EXTRA
TRACKS
FILE
TOP
START/STOP
REC
SONG
SETTING
KEYBOARD
METRONOME
START/STOP SETTING
DOWN
A
Voice
group buttons
1
2
B
CONTRAST
UP
GRAND
PIANO 1
GRAND
PIANO 2
E.PIANO
1
E.PIANO
2
HARPSICHORD
E.CLAVICHORD
VIBRAPHONE
GUITAR
CHURCH
ORGAN
JAZZ
ORGAN
STRINGS
CHOIR
SYNTH.
PAD
WOOD
BASS
E.BASS
XG
2
VOICE
SETTING
ON/OFF
MIDI
SETTING
AFC
SETTING
OTHER
SETTING
AFC
SPLIT
VARIATION
REVERB
CHORUS
BRILLIANCE
MELLOW BRIGHT
EXIT
MIN
NEW SONG
MAX
MASTER VOLUME
SONG BALANCE
DEMO
SYNCHRO START
TEMPO
C
D
SONG
VOICE
EFFECT
Procedure
Basic Operation
1.
2.
Select a voice group.
Press a voice group button.
TERMINOLOGY
Voice
On the Clavinova, a voice
means “tone” or “tonal color.”
Select a voice.
Use the VARIATION [▼]/[▲] buttons or the A [–]/[+] buttons to select a voice.
TIP
You can also switch between
voices in the same group by
pressing a voice group button repeatedly.
If you select XG
If you select XG, you can select the XG voice group first, then select the desired voice.
2-1.
Simultaneously press the [–][+] screen buttons located
beside the XG voice name display, to access a screen
where you can select XG voices.
2-2.
Use the A [–]/[+] buttons to select the voice group.
2-3.
Use the C [–]/[+] buttons to select the desired voice.
Voice group
GRANDPIANO1
GRANDPIANO2
E.PIANO1
E.PIANO2
HARPSICHORD
E.CLAVICHORD
VIBRAPHONE
GUITAR
Voice name
GrandPiano1
MellowPiano
RockPiano
HonkyTonkPiano
GrandPiano2
BrightPiano
E.Piano1
SynthPiano
E.Piano2
Vintage E.Piano
Harpsichord8'
Harpsichord8'+4'
E.Clavichord
Wah Clavi.
Vibraphone
Marimba
Celesta
NylonGuitar
SteelGuitar
Voice group
CHURCHORGAN
JAZZORGAN
STRINGS
CHOIR
SYNTH.PAD
WOOD BASS
E.BASS
XG
Voice name
PipeOrganPrincipal
PipeOrganTutti
PipeOrganFlute1
PipeOrganFlute2
JazzOrgan
RotaryOrgan
MellowOrgan
Strings
SynthStrings
SlowStrings
Choir
SlowChoir
Scat
SynthPad1
SynthPad2
WoodBass
Bass&Cymbal
ElectricBass
FretlessBass
XGVoice
• For details on XG voices, refer to “XG voice list” (the separate reference booklet).
30
CLP-175
TIP
To learn characteristics of
the voices, listen to demo
songs for each voice group
(page 24). Refer to “Preset
Voice List” on page 111 for
more information on characteristics of each preset voice.
TIP
You can control the loudness of
a voice by how hard you play
the keyboard, although different playing styles (touch sensitivities) have little or no effect
with the sound of certain musical instruments. Refer to “Preset Voice List” on page 111.
TIP
XG is a major enhancement
of the GM System level 1
format, and was developed
by Yamaha specially to provide more voices and variations, as well as greater
expressive control over
voices and effects, and to
ensure compatibility of data
well into the future.
TIP
If you select XG and then
simultaneously press the
VARIATION [▼][▲] buttons,
the XG voice select screen
will appear.
Selecting and Playing Voices
Using the pedals
The Clavinova has three foot pedals: damper pedal (right), sostenuto
pedal (center), and soft pedal (left) that produce a range of expressive
effects similar to those produced by the pedals on an acoustic piano.
When you press the damper pedal, the notes
you play have a longer sustain.
When you select Grand Piano 1, pressing the
damper pedal activates the instrument’s special
“Sustain Samples” to accurately recreate the
unique resonance of an acoustic grand piano’s
soundboard and strings.
When you press the damper
pedal here, the notes you
play before you release the
pedal have a longer sustain.
Sostenuto (center) pedal
If you play a note or chord on the keyboard
and press the sostenuto pedal while holding
the note(s), the notes will sustain as long as
the pedal is held. All subsequent notes will
not sustain.
Basic Operation
Damper (right) pedal
TIP
If the damper pedal doesn’t
work, or notes are sustained
even when the pedal is not
pressed, make sure that the
pedal cord is properly
plugged into the PEDAL jack
on the unit (see step 3 on
page 115). Also, make sure
that the RPedal parameter in
the “VOICE SETTING”
menu is set to ON (see
page 85).
TIP
You can adjust the depth of
the resonance produced by
the “Sustain Samples” using
the Sustain Sampling Depth
parameter in the “OTHER
SETTING” menu. (See
page 95.)
When you press the sostenuto
pedal here while holding the
note(s), the notes will sustain
as long as you hold the pedal.
Soft pedal (left)
The soft pedal reduces the volume and slightly changes the timbre of notes
played while the pedal is pressed. (The soft pedal will not affect notes that are
already playing when it is pressed. Press the pedal immediately before you
play the target notes.)
With the Vibraphone and Jazz Organ voices, this pedal turns vibrato on and
off or toggles the speed of vibrato. (See page 95.)
TIP
You can assign a function to
each pedal via the “R
Pedal”, “M Pedal”, and “L
Pedal” parameters in the
“VOICE SETTING” menu.
(See pages 85, 86.)
TIP
The center and left pedals
can also be assigned to
song start/stop operation
(START/STOP function) via
the “PedalStart/Stop”
parameter in the “OTHER
SETTING” menu (on
page 96).
CLP-175
31
Selecting and Playing Voices
Adding variation to the sound
[BRILLIANCE]/[REVERB]/[CHORUS]
The Effect function enables you to add expression to the sound. The Clavinova effects include Brilliance,
Reverb, and Chorus.
[REVERB]
Basic Operation
[CHORUS]
SONG SELECT
SONG
TRACK
1
TRACK
2
EXTRA
TRACKS
FILE
TOP
START/STOP
REC
SONG
SETTING
KEYBOARD
METRONOME
START/STOP SETTING
DOWN
A
B
CONTRAST
UP
GRAND
PIANO 1
GRAND
PIANO 2
E.PIANO
1
E.PIANO
2
HARPSICHORD
E.CLAVICHORD
VIBRAPHONE
GUITAR
CHURCH
ORGAN
JAZZ
ORGAN
STRINGS
CHOIR
SYNTH.
PAD
WOOD
BASS
E.BASS
XG
VOICE
SETTING
ON/OFF
MIDI
SETTING
AFC
SETTING
OTHER
SETTING
AFC
SPLIT
VARIATION
REVERB
CHORUS
BRILLIANCE
MELLOW BRIGHT
EXIT
MIN
NEW SONG
MAX
MASTER VOLUME
SONG BALANCE
SYNCHRO START
TEMPO
C
D
SONG
DEMO
VOICE
EFFECT
BRILLIANCE [MELLOW] / [BRIGHT]
[BRILLIANCE]
You can use this control to adjust the brilliance of the tone and change the tonality to suit your preference.
Procedure
Press one of the BRILLIANCE [MELLOW]/ [BRIGHT] buttons
to select the desired tonality.
A
B
NO
C
Mellow3
Mellow2
Mellow1
YES
D
Soft and mellow tone.
The sound becomes more mellow and rounder as the
number increases.
Normal........... Standard tone
Bright1
Bright2
Bright tone.
The sound becomes brighter as the number increases.
Bright3
Press the [EXIT] button to return to the main screen.
32
CLP-175
TIP
You can press the BRILLIANCE [MELLOW]/
[BRIGHT] buttons, and then
use the D [–]/[+] buttons to
select the desired tonality.
TIP
Normal setting = Normal
TERMINOLOGY
Normal setting:
The “Normal setting” refers
to the default setting (factory
setting) obtained when you
first turn on the power to the
Clavinova.
NOTE
If you select [Bright1],
[Bright2] or [Bright3] as the
type of brilliance, the volume
level will increase slightly.
Under this condition, if you
raise the [MASTER VOLUME] dial setting, the sound
may become distorted. In
this case, lower the volume
accordingly.
Selecting and Playing Voices
[REVERB]
This control adds reverberation to the sound by simulating the natural reverberation of a concert hall.
Procedure
Pressing the [REVERB] button repeatedly toggles the reverb
on and off.
Basic Operation
Even if the reverb effect is turned off, a “soundboard reverb” effect
will be applied when the GrandPiano1 or GrandPiano2 voice is
selected.
TIP
You can select a reverb type
via the Reverb Type parameter in the “VOICE SETTING” menu, and adjust the
reverb depth for the selected
voice via the Reverb Send
parameter. (See page 81.)
TIP
Normal setting = ON
[CHORUS]
This control adds spread and spaciousness to the sound.
Procedure
Pressing the [CHORUS] button repeatedly toggles the chorus on and off.
You can turn the chorus effect on and off by pressing the [CHORUS]
ON/OFF buttons on the panel and by setting the Chorus On Off
parameter in the VOICE SETTING menu (see page 82). The [CHORUS] ON/OFF button setting on the panel is temporary. That is, if
you select another voice, the chorus setting for the previous voice is
cancelled. The Chorus On Off parameter setting is saved for each
voice. That is, if you select a given voice, the chorus setting is automatically turned on or off according to the saved chorus setting.
TIP
You can select a chorus type
via the Chorus Type parameter in the “VOICE SETTING” menu, and adjust the
chorus depth for the
selected voice via the
Reverb Send parameter. You
can also turn chorus on or
off via the Chorus On Off
parameter. (See page 81.)
TIP
Normal Setting
The normal chorus on/off
setting is different for each
voice.
CLP-175
33
Selecting and Playing Voices
To enhance the acoustic realism of the sound ...[iAFC
(Instrumental Active Field Control)]
When iAFC is engaged, the Clavinova will sound deeper and more resonant, similar to an acoustic musical
instruments.
• To turn on the iAFC, open the lid with the longer stay using the inner recess.
When the lid is closed or open with the shorter stay, the iAFC will not be turned on.
• Perform the automatic adjustment after you turn on the power of the Clavinova for the first time,
and after each time you move the Clavinova. (page 88)
Basic Operation
iAFC [ON/OFF]
Procedure
iAFC will toggle on or off each time you press iAFC [ON/
OFF] switch.
TIP
How iAFC works
Sounds picked up by mics
and sounds produced internally by the Clavinova are
processed and output from
the speaker on the bottom
face to enhance acoustic
realism of the sound.
iAFC uses Yamaha’s EMR
(Electronic Microphone
Rotator) technology to
ensure stability against
acoustic feedback.
TIP
iAFC cannot be used in
the following cases:
• When the lid is closed or
open with the shorter stay.
• When the Speaker setting
is Normal, and headphones are connected.
• When the Speaker setting
is Off.
TIP
When using iAFC, do not
block the speaker located on
the bottom face of the Clavinova. The optimal iAFC
effect cannot be obtained if
this speaker is blocked.
TIP
[iAFC SETTING] lets you
select the type of iAFC and
adjust the depth of the
effect. (page 87)
TIP
Normal setting = ON
34
CLP-175
Selecting and Playing Voices
Combining two voices (Dual mode)
You can play two voices simultaneously across the entire range of the keyboard. In this way, you can simulate
a melody duet or combine two similar voices to create a thicker sound. Refer to “Voice Combination Examples (Dual and Split)” on page 113 for examples of effective voice combinations.
The numbers on the upper row indicate the steps
in Dual mode using voices from different groups.
SONG SELECT
SONG
TRACK
1
TRACK
2
EXTRA
TRACKS
FILE
TOP
START/STOP
REC
SONG
SETTING
KEYBOARD
METRONOME
START/STOP SETTING
DOWN
2
A
B
Voice
group buttons
1 3
2
CONTRAST
UP
GRAND
PIANO 1
GRAND
PIANO 2
E.PIANO
1
E.PIANO
2
HARPSICHORD
E.CLAVICHORD
VIBRAPHONE
GUITAR
CHURCH
ORGAN
JAZZ
ORGAN
STRINGS
CHOIR
SYNTH.
PAD
WOOD
BASS
E.BASS
XG
VOICE
SETTING
ON/OFF
MIDI
SETTING
AFC
SETTING
OTHER
SETTING
AFC
SPLIT
VARIATION
REVERB
CHORUS
BRILLIANCE
MELLOW BRIGHT
Basic Operation
EXIT
MIN
NEW SONG
MAX
MASTER VOLUME
SONG BALANCE
SYNCHRO START
TEMPO
C
D
SONG
DEMO
The numbers on the bottom row indicate the steps
in Dual mode using voices from the same group.
VOICE
2
3
1 4
EFFECT
Voice
group buttons
Dual mode using voices in different voice groups
Procedure
1.
Enter Dual mode.
Press two voice group buttons simultaneously.
Voice 1
Voice 2
A
B
NO
C
2.
3.
YES
D
TIP
If you want to select Dual
mode for the left-hand area
when the entire keyboard is
divided into left and right
areas (page 37), hold down
[SPLIT] and simultaneously
press two voice group buttons.
Select a voice.
Use the A [–]/[+] buttons and B [–]/[+] buttons to select a
voice.
TIP
You can also use the VARIATION [▼]/[▲] buttons to
select the voice 1.
The voices listed in the upper row in “Preset Voice List” on page 111
are called voice 1, and those listed in the bottom row are called
voice 2.
TIP
Refer to page 30 for details
on how to select XG voices.
Exit Dual mode and return to normal play mode.
Press any voice group button.
CLP-175
35
Selecting and Playing Voices
Dual mode using voices in the same voice group
Procedure
Basic Operation
1.
2.
3.
Select a voice group.
In normal play mode, press the desired voice group button.
Select a voice.
Use the A [–]/[+] buttons to select a voice.
Select another voice.
Use the B [–]/[+] buttons to select another voice in the
same voice group.
To use the identical voices, press the B [–]/[+] buttons once. To use
different voices within the same voice group, press the B [–]/[+] buttons repeatedly.
A
B
NO
C
4.
36
CLP-175
YES
D
Exit Dual mode and return to normal play mode.
Press any voice group button.
TIP
If you want to select Dual
mode for the left-hand area
when the entire keyboard is
devided into left and right
areas (page 37), press the D
[–]/[+] buttons.
Selecting and Playing Voices
Splitting the keyboard range and playing two different voices (Split mode)
Split mode enables you to play two different voices on the keyboard — one with the left hand and another
with the right hand. For example, you can play a bass part using the [WOOD BASS] or [E. BASS] voice with
the left hand, and a melody with the right hand. Refer to “Voice Combination Examples (Dual and Split)” on
page 113 for examples of effective voice combinations.
3
4
1 3 4 5
Voice
group buttons
Basic Operation
2 3
2
Procedure
1.
2.
3.
Enter Split mode.
Press the [SPLIT] button.
Select a voice for the right hand.
Use the voice group buttons and the VARIATION [▼]/[▲]
buttons to select the voice for the right-hand area.
TIP
You can also use the A [–]/
[+] buttons to select a voice
for the right-hand area.
Select a voice for the left hand.
Hold down the [SPLIT] button, and press a voice group
button to select the voice group for the left-hand area.
TIP
Refer to page 30 for details
on how to select XG voice.
Use the C [–]/[+] buttons to select a voice.
CLP-175
37
Selecting and Playing Voices
4.
Specify the split point (the border between the rightand left-hand range).
The normal setting of the split point is “F 2.”
F2
TIP
The split point can also be
set by the [OTHER SETTING] parameter [SplitPoint]. (page 94)
Center “C”
To change the split point setting:
Basic Operation
Hold down the [SPLIT] button, then use the D [–]/[+] buttons to specify the split point.
(Optional) Press and hold down the [SPLIT] button and
play the key you wish to assign as the split point.
A
B
NO
C
YES
D
Release the [SPLIT] button to return to the main screen.
5.
Exit Split mode and return to normal play mode.
Press the [SPLIT] button.
You can use Dual (see page 35) in each area (right-hand and left-hand) of Split
mode.
A
B
NO
C
38
CLP-175
TIP
A specified “split point” key
is included in the left-hand
range.
YES
D
Selecting and Playing Voices
Using the metronome
The Clavinova is built-in metronome (a device that keeps an accurate tempo) is a convenient feature for
practice.
1 2
SONG SELECT
SONG
TRACK
1
TRACK
2
EXTRA
TRACKS
FILE
TOP
START/STOP
REC
SONG
SETTING
KEYBOARD
METRONOME
START/STOP SETTING
DOWN
A
B
CONTRAST
UP
GRAND
PIANO 1
GRAND
PIANO 2
E.PIANO
1
E.PIANO
2
HARPSICHORD
E.CLAVICHORD
VIBRAPHONE
GUITAR
CHURCH
ORGAN
JAZZ
ORGAN
STRINGS
CHOIR
SYNTH.
PAD
WOOD
BASS
E.BASS
XG
VOICE
SETTING
ON/OFF
MIDI
SETTING
AFC
SETTING
OTHER
SETTING
AFC
SPLIT
VARIATION
REVERB
CHORUS
BRILLIANCE
MELLOW BRIGHT
EXIT
MIN
NEW SONG
MAX
MASTER VOLUME
SONG BALANCE
SYNCHRO START
TEMPO
C
D
SONG
DEMO
VOICE
EFFECT
Basic Operation
TEMPO [DOWN] [UP]
Procedure
1.
Start the metronome.
Press the METRONOME [START/STOP] button.
When the metronome is sounding, the beat indicator flashes at the
current tempo.
Adjusting the tempo
Press the TEMPO [DOWN] or [UP] button.
A
B
NO
C
YES
D
To adjust the tempo (number of beats per minute: 10–500), use the TEMPO
[DOWN]/[UP] or the D [–]/[+] buttons. To reset the tempo to the normal
(default) setting, press the [DOWN] and [UP] buttons or the D [–] and [+]
buttons simultaneously.
Press the [EXIT] button to return to the normal screen.
2.
TIP
The default tempo is 120. (If
a song has been selected,
the song tempo is used.)
TIP
You can set the time signature, metronome volume,
and metronome tone using
the METRONOME [SETTING] button. (See page 78.)
Stop the metronome.
Press the METRONOME [START/STOP] button.
CLP-175
39
Recording Your Performance
TIP
You can record your performance (audio data) to a cassette tape recorder or other
recording devices via the
AUX OUT jacks. (see
page 62.)
Basic Operation
This chapter explains how to record your performance using the Clavinova
recording function.
You can, for example, play back what you have played on the Clavinova keyboard for an effective practice aid. You can also record just the left-hand part,
then practice the right-hand part while playing back the recorded left-hand
part.
Since you can record up to sixteen tracks separately, you could record the leftand right-hand parts separately, or record each part of a four-handed performance or ensemble song one by one to build a song.
TERMINOLOGY
Recording vs. Saving:
The format of performance data recorded on a cassette tape differs from that of data recorded on the Clavinova. A cassette tape records audio signals. On the other hand, the Clavinova “saves” information regarding note timing, voices, and
a tempo value, but not audio signals. When you play back recorded songs, the Clavinova produces sound based on the
saved information. Therefore, recording on the Clavinova may be more accurately called “saving information.” However,
this book often uses the word “recording” because it seems to make more sense.
A message (information or confirmation dialog) sometimes appears on the screen to facilitate operation.
Refer to the “Message List” on page 98 for an explanation of each message, appropriate actions to take, and
troubleshooting information.
Recording a New Song
Recording to [TRACK 1]
2
1 3
SONG SELECT
SONG
TRACK
1
TRACK
2
EXTRA
TRACKS
FILE
TOP
START/STOP
REC
SONG
SETTING
KEYBOARD
METRONOME
START/STOP SETTING
DOWN
A
B
CONTRAST
UP
GRAND
PIANO 1
GRAND
PIANO 2
E.PIANO
1
E.PIANO
2
HARPSICHORD
E.CLAVICHORD
VIBRAPHONE
GUITAR
CHURCH
ORGAN
JAZZ
ORGAN
STRINGS
CHOIR
SYNTH.
PAD
WOOD
BASS
E.BASS
XG
VOICE
SETTING
ON/OFF
MIDI
SETTING
AFC
SETTING
OTHER
SETTING
AFC
SPLIT
VARIATION
REVERB
CHORUS
BRILLIANCE
MELLOW BRIGHT
EXIT
MIN
NEW SONG
MAX
MASTER VOLUME
SONG BALANCE
SYNCHRO START
TEMPO
C
D
SONG
DEMO
VOICE
EFFECT
4 4 5
Procedure
1.
Select “NewSong” for recording.
Press the SONG SELECT [ ] [ ] buttons simultaneously.
New Song screen
A
B
NO
C
40
CLP-175
YES
D
NOTE
If you select a song other
than “P-000: NewSong” and
record on a track that already
has data, the existing data on
the track will be lost.
Recording Your Performance
2.
NOTE
Set the tempo in Step 3.
Set the other parameters, such as reverb and chorus.
Adjust the [MASTER VOLUME] dial to set the volume level to suit
your preference. You can also use the dial to adjust the level during
playback.
After you set the tempo or if the record standby screen does not
appear, press one of the SONG SELECT [ ] [ ] buttons once to
return to the New Song screen.
NOTE
See page 47 for more information on recording in Dual/
Split mode.
Basic Operation
3.
Select a voice.
Select a voice (or voices) for recording (see page 30).
Enter record mode and select a recording track.
Press and hold down the [REC] button and press the
[TRACK 1] button.
The [TRACK 1] indicator flashes in red. (To cancel recording, press
the [REC] or [TOP] button.)
Record standby screen
A
B
NO
C
YES
D
Set the tempo, if necessary.
If this record standby screen does not appear, press one of the SONG
SELECT [ ] [ ] buttons once.
4.
Start and stop recording.
Recording begins automatically as soon as you play a
note on the keyboard.
(Optional) Press the SONG [START/STOP] button to start recording.
The recording screen displays the current measure number.
Record screen
A
B
NO
C
YES
D
TIP
You can record data while
using the metronome. The
metronome is not recorded.
TIP
When you press the SONG
[START/STOP] button during recording, recording is
paused. To resume recording, press the SONG
[START/STOP] button again
or play a note on the keyboard.
Measure number in recording
To stop recording, press the [TOP] button. The Clavinova
locates the top of the song.
TIP
When you press the [REC]
button, recording pauses.
The [TRACK 1] indicator lights up in green. (Record mode is automatically cancelled.)
CLP-175
41
Recording Your Performance
5.
Play back the recorded performance.
Press the SONG [START/STOP] button to play back the
recorded performance.
When playback is complete, it automatically stops and the Clavinova
locates the top of the song. To stop playback in the middle of a song,
press the [TOP] button. You can also pause playback by pressing the
SONG [START/STOP] button. Playback stops when you press the
button.
NOTE
To erase recorded data from
a track, use the Channel
Clear parameter in the
“SONG SETTING” menu.
(See page 76.)
Basic Operation
When you turn off the power to the Clavinova, the recorded performance
data will be lost. If you wish to keep the recording, save the data using the
SaveToMemory parameter (page 50) or SaveToDisk parameter (page 51) in
the File menu.
Re-recording TRACK 1
This section explains how to record again in case your performance was not satisfactory.
Procedure
1.
Select a voice or voices for recording, if necessary.
Repeat Step 2 on page 41 if you wish to change the previous settings.
Follow the procedure from Step 3 on page 41 to re-record.
The original performance data will be overwritten by new performance data.
42
CLP-175
Recording Your Performance
Re-recording TRACK 1 partially
This section explains how to record part of a song again.
Procedure
1.
NOTE
If the playback screen is not
displayed, press one of the
SONG SELECT [
][
]
buttons once.
Basic Operation
Pause the song at the beginning of the part you wish
to re-record.
Use the B [–]/[+] buttons while the playback screen is displayed to move through the measures or play back the
recording and press the SONG [START/STOP] button to
locate a point slightly prior to the beginning of the part
you wish to re-record.
Playback screen
A
B
NO
C
2.
3.
3-1
YES
D
Select a voice or voices for recording, if necessary.
Repeat Step 2 on page 41 if you wish to change the previous settings.
Select the recording method and enter record mode.
Press and hold down the [REC] button, and press the
C [–]/[+] buttons repeatedly to specify how the
recording should start and press the D [–]/[+] buttons
repeatedly to specify how the recording should end.
While you are holding down the [REC] button, the following recording method select screen appears.
A
B
NO
C
YES
D
Starting methods:
Norm (Normal) — The existing data will be erased after re-recording
starts.
Key On — Data that exists prior to the point where you start playing a
note will not be erased.
CLP-175
43
Recording Your Performance
Ending methods:
Replace – The data after the point you stop recording will also be
erased.
Punch Out — The data after the point you stop recording will remain.
3-2
Keep holding down the [REC] button and press the
[TRACK 1] button.
TIP
If you cancel recording by
pressing the [REC] button,
recording stops when you
press the button. If you cancel recording by pressing
the [TOP] button, the Clavinova locates the top of the
song.
Basic Operation
The [TRACK 1] indicator flashes in red.
(To stop recording, press the [REC] button again or press the [TOP]
button.)
Follow the procedure beginning with Step 4 on page 41.
Recording to [TRACK2]
This section explains how to record another part on the second track.
1
2
SONG SELECT
SONG
TRACK
1
TRACK
2
EXTRA
TRACKS
FILE
TOP
START/STOP
REC
SONG
SETTING
KEYBOARD
METRONOME
START/STOP SETTING
DOWN
A
B
CONTRAST
UP
GRAND
PIANO 1
GRAND
PIANO 2
E.PIANO
1
E.PIANO
2
HARPSICHORD
E.CLAVICHORD
VIBRAPHONE
GUITAR
CHURCH
ORGAN
JAZZ
ORGAN
STRINGS
CHOIR
SYNTH.
PAD
WOOD
BASS
E.BASS
XG
VOICE
SETTING
ON/OFF
MIDI
SETTING
AFC
SETTING
OTHER
SETTING
AFC
SPLIT
VARIATION
REVERB
CHORUS
BRILLIANCE
MELLOW BRIGHT
EXIT
MIN
NEW SONG
MAX
MASTER VOLUME
SONG BALANCE
DEMO
SYNCHRO START
TEMPO
C
D
SONG
VOICE
EFFECT
Procedure
1.
2.
Select a voice.
Select a voice (or voices) for recording.
Repeat Step 2 on page 41.
Enter record mode and select a recording track.
Press and hold down the [REC] button and press the
[TRACK 2] button.
The [TRACK 2] indicator flashes in red. (To cancel recording, press
the [REC] or [TOP] button.)
TIP
Pressing the [TRACK 1] button repeatedly toggles
between playback on (the
indicator lights up in green)
and off (the indicator turns
off).
Make the recording by following the procedure beginning with Step 4 on page 41.
You can record a new part while listening to playback of the recorded [TRACK 1] data.
44
CLP-175
Recording Your Performance
Recording to the third or more tracks [EXTRA TRACKS]
You can continue recording other parts into tracks 3–16 [EXTRA TRACKS] one by one.
Procedure
1.
Basic Operation
Hold down the [REC] button in step 2 in the “Recording to [TRACK2]” on page 44 and use the B [–]/[+] buttons to select a recording track (3–16).
select a recording track (3-16)
A
B
NO
C
2.
YES
D
While holding down the [REC] button, press the
[EXTRA TRACKS] button.
Then, follow the procedure beginning with Step 4 on page 41.
Other recording techniques
Adding data to or recording over an existing song
The previous section explains how to record your performance from the beginning by selecting a blank “P000: NewSong.” You can also add your performance to or overwrite existing songs (such as 50 preset songs
[P-001—P-050], commercially-available music data [see page 60], or your old recorded performances [see
page 48]).
Procedure
1.
Select a song for recording (P-001 – P-050).
Select one of the preset songs (P-001–P-050) instead of “P-000:
NewSong” as described in Step 1 of “Recording to [TRACK1]” on
page 40. To select a song from commercial music data sold in stores or
from already-recorded data, see Steps 1 and 2 on page 57.
NOTE
If you record on a track that
already has data, the existing data on the track will be
lost.
To continue recording, follow the procedure described in “Recording a New Song” from page 40 to 45.
CLP-175
45
Recording Your Performance
Changing a voice or tempo after recording
You can change the voice and tempo after recording to change a song’s feel or to set a more suitable tempo.
You can also change these elements in the middle of a song.
Procedure
Basic Operation
1.
2.
3.
4.
Select a song you wish to change by using the SONG
SELECT [ ] [ ] buttons.
To change the voice or tempo in the middle of the
song, specify the measure to change using the B [–]/
[+] buttons.
Change the settings (voice, reverb, etc.).
For example, if you wish to change the recorded E.Piano1 voice to E.
Piano2, use the voice group buttons and the A [–]/[+] buttons to
select E.Piano2.
When the setting is complete, press one of the SONG SELECT [ ]
[ ] buttons once to return to the song select screen.
Press and hold down the [REC] button and select the
track to change.
The indicator for the selected track lights up in red.
Change the tempo setting now, if necessary.
At this point, do not play the keyboard or press the SONG [START/
STOP] button. Otherwise, recording will start, erasing the recorded
data.
5.
46
CLP-175
Press the [TOP] or [REC] button to exit record mode.
NOTE
Before changing a voice or
tempo, set the starting
method to “Normal.”
(page 43)
When the starting method is
set to “KeyOn,” you cannot
change a voice or tempo.
TIP
Refer to “Questions about
Operations and Functions”
on page 104 for information
on the settings that can be
changed here.
TIP
Change the tempo in Step 4.
CAUTION
The edited settings (except
for the tempo setting) will be
saved in memory and you
will not be able to restore the
previous settings. Proceed
with caution.
Recording Your Performance
Adjusting the volume balance between playback and your performance [SONG
BALANCE]
While recording multiple parts into tracks one by one, you can adjust the volume balance between the playback of the recorded parts and your current performance.
Procedure
1.
SONG
Your playing volume will
be lower.
KEYBOARD
SONG BALANCE
The song playback
volume will be lower.
TIP
Some commercially-available music data contains
extremely high volumes.
When using such data,
please adjust the song balance.
Basic Operation
Move [SONG BALANCE] to the left or right to make
adjustments.
TIP
The song balance setting is
also used during playback.
(See page 57.)
Recording in Dual or Split mode
When you record in Dual or Split mode, the Clavinova records each voice onto a separate track. The following table shows how tracks are assigned to each voice.
CAUTION
When you record multiple parts into tracks one by one, or when you record new data over an existing song (see
page 45), the existing data will be erased. Proceed with caution.
In the following example, Tracks 1, 2, and EXTRA TRACKn have been selected for recording.
Tracks assigned for
recording
Tracks
used for
recording
Dual
Split
Split+Dual
TRACK1
TRACK2
EXTRA
TRACKn
TRACK1
TRACK2
EXTRA
TRACKn
TRACK1
TRACK2
EXTRA
TRACKn
↓
↓
↓
↓
↓
↓
↓
↓
↓
MAIN
(voice 1)
TRACK1
TRACK2
TRACKn
LEFT
(voice 1)
–
MAIN
(voice 2)
TRACK3
LEFT
(voice 2)
–
TRACK4
TRACKn
+2
TRACK1
TRACKn
TRACK1
TRACKn
TRACK2
TRACKn+1
TRACK2
TRACKn +1
–
TRACK3
TRACKn +2
–
TRACK4
TRACKn +3
Note: TRACKn = TRACK 3 – TRACK 16
If “n+1,” “n+2,” and “n+3” exceed 16, TRACKs 1, 2, and 3 are used.
TIP
Switching between Dual and Split mode in a song is not recorded.
CLP-175
47
Saving Recorded Songs and
Handling the Files...[FILE]
File screens (accessed via the [FILE] button) enables you to handle song files
(e.g., save, delete, and rename recorded songs), copy and format disks, and
change the characters on the screen.
Basic Operation
The following parameters are provided for these operations:
Settings
Parameter
name
Reference
page
Saves recorded and other songs in Clavinova memory
SaveToMemory
50
Saves recorded and other songs on floppy disks
SaveToDisk
51
Deletes song data from Clavinova momery or floppy
disk
DeleteSong
52
Changes the title of songs
RenameSongs
53
Copies data from floppy disk to floppy disk
CopyDisk
54
Formats a floppy disk
FormatDisk
55
Automatically open a song when the disk is inserted
FD
SongAutoOpen
56
Change the type of characters on the screen
CharacterCode
56
Clavinova memory
The Clavinova has the following three types of memory:
• Current memory:
This is a temporary memory area where you can temporarily place and edit
the currently-selected song before playback or recording.
• Preset song memory:
This read-only memory area saves 50 piano preset songs.
• Storage memory:
This memory area enables you to save recorded songs or song data loaded
from floppy disk.
When you select a song in the song select screen, it is loaded from Preset song
memory, Storage memory, or floppy disk, into Current memory.
You will use Current memory to play back and record songs. When you turn
off the power to the Clavinova, songs saved in Preset song memory and Storage memory are not erased. On the other hand, songs in Current memory are
lost. If you wish to keep a song in Current memory, you must save it in Storage memory or on a floppy disk (see pages 50, 51).
In this manual, a song located in a song recorded in Current memory, is
referred to as a “Current song,” a song in Storage memory is a “Memory
song,” and a song on a floppy disk is a “Disk song”.
Preset song
memory
Storage memory
Current memory
TRACK
1
SONG SELECT
SONG
KEYBOARD
TOP
TRACK
2
EXTRA
TRACKS
FILE
START/STOP
REC
SONG
SETTING
METRONOME
START/STOP SETTING
A
CONTRAST
B
NO
DOWN
YES
UP
GRAND
PIANO 1
GRAND
PIANO 2
E.PIANO
1
E.PIANO
2
HARPSICHORD
CHURCH
ORGAN
JAZZ
ORGAN
STRINGS
CHOIR
SYNTH.
PAD
E.CLAVICHORD
VIBRAPHONE
GUITAR
WOOD
BASS
E.BASS
XG
VOICE
SETTING
ON/OFF
MIDI
SETTING
AFC
SETTING
OTHER
SETTING
AFC
SPLIT
VARIATION
REVERB
CHORUS
BRILLIANCE
MELLOW
BRIGHT
EXIT
MIN
NEW SONG
MAX
MASTER VOLUME
SONG BALANCE
DEMO
SYNCHRO START
SONG
TEMPO
C
D
VOICE
EFFECT
POWER
Floppy disk
48
Clavinova
CLP-175
TERMINOLOGY
File
A file contains a group of
data. On the Clavinova, a
song file includes song data
and a song number.
Memory
Memory is a location inside
the Clavinova in which you
can save and edit data.
Formatting (Initializing)
Floppy disks are a convenient media that allow you to
save various data for personal computers and other
devices. There are many
ways (formats) to save data
on floppy disks, depending
on the device. Therefore,
you need to prepare a floppy
disk by assigning a format
before you can use it on a
particular type of device.
This operation is called “formatting.”
Character code
Type of characters
TIP
Please note that the copy
features are intended for
your personal use only.
Saving Recorded Songs and Handling the Files...[FILE]
Basic file operation
A message (information or confirmation dialog) sometimes appears on the screen to facilitate operation.
Refer to the “Message List” on page 98 for an explanation of each message, appropriate actions to take.
2 3
SONG SELECT
SONG
TRACK
1
TRACK
2
EXTRA
TRACKS
FILE
TOP
START/STOP
REC
SONG
SETTING
KEYBOARD
3
METRONOME
START/STOP SETTING
DOWN
A
B
CONTRAST
UP
GRAND
PIANO 1
GRAND
PIANO 2
E.PIANO
1
E.PIANO
2
HARPSICHORD
E.CLAVICHORD
VIBRAPHONE
GUITAR
CHURCH
ORGAN
JAZZ
ORGAN
STRINGS
CHOIR
SYNTH.
PAD
WOOD
BASS
E.BASS
XG
VOICE
SETTING
ON/OFF
MIDI
SETTING
AFC
SETTING
OTHER
SETTING
AFC
SPLIT
VARIATION
REVERB
CHORUS
BRILLIANCE
MELLOW BRIGHT
EXIT
MIN
NEW SONG
MAX
MASTER VOLUME
SONG BALANCE
SYNCHRO START
TEMPO
C
D
SONG
DEMO
VOICE
5
Basic Operation
4
EFFECT
Procedure
1.
Select a song, or have a floppy disk ready.
2.
Access the File menu.
Select a song you wish to save or rename.
(Optional) Insert a floppy disk for copying or formatting into the disk
drive.
Press the [FILE] button.
A
B
NO
C
YES
D
To close the File menu, press the [EXIT] button once or twice.
3.
Select the desired parameter.
4.
Set the parameter or execute the command.
5.
Close the File menu.
Press the [FILE] or A [–]/[+] buttons repeatedly to display the desired
item from the following:
“SaveToMemory”, “SaveToDisk”, “DeleteSong”, “RenameSong”,
“CopyDisk”, “FormatDisk”, “FDSongAutoOpen”, “CharacterCode”.
Use the B [– (NO)]/[+ (YES)], C [–]/[+], D [–]/[+] buttons.
For more information regarding this procedure, refer to the corresponding section below.
Press the [EXIT] button.
CLP-175
49
Saving Recorded Songs and Handling the Files...[FILE]
Saving recorded or other songs to Clavinova Storage
memory...[SaveToMemory]
If you record a song, then turn off the power to the Clavinova, the song will be erased. To save the recorded
song, you must save it into the Clavinova Storage memory or to a floppy disk. (To save a song to a floppy
disk, refer to the next section [SaveToDisk].) You can also save the preset songs, disk songs, and additional or
overwriting recordings (page 45) to Storage memory.
Basic Operation
A
B
NO
C
YES
D
Procedure
See page 49 the basic operation information. The following is a detailed procedure of Step 4.
4-1
Name the song.
To move the cursor (a small underline), use the C [–]/[+] buttons.
To insert a space, press the C [–][+] buttons simultaneously.
To select a character on the cursor, use the D [–]/[+] buttons.
To delete a character, press the D [–][+] buttons simultaneously.
You can use up to 58 characters for a song name. If the name is longer
than the screen, use the C [–]/[+] buttons to move the cursor and
scroll the name.
4-2
Execute the operation.
Press the B [+ (YES)] button located next to “Execute?→”.
“Sure?→” appears on the screen. Press the B [+ (YES)] button again
to confirm the operation. (To cancel the operation, press the B [–
(NO)] button.)
The Clavinova displays “Executing” on the screen during the operation. When the operation is complete, “Completed” appears.
The song is automatically numbered as “M—,” where “M” means
“Memory” and “—” is a number.
TIP
If Storage memory contains one or more songs, and you save a new song, the Clavinova automatically sorts the songs alphabetically and renumbers them.
50
CLP-175
TIP
• You can change the type
of characters on the
screen using the CharacterCode parameter.
• When you select a saved
song later, the name with
an extension “.MID” will
appear.
TERMINOLOGY
“Execute?→”: Do you wish
to execute the operation?
“Sure?→”: Are you sure?
“Executing”: The Clavinova
is executing the operation.
“Completed”: The operation
is complete.
CAUTION
Do not turn off the power
while the screen displays
“Executing.”
Saving Recorded Songs and Handling the Files...[FILE]
Saving recorded or other songs to floppy
disk...[SaveToDisk]
Songs you record, memory songs, or recordings you added or recorded over (page 45) previously-recorded
memory songs can be saved on a floppy disk.
A
B
NO
Basic Operation
C
YES
D
Procedure
See page 49 for basic operation information. The following is a detailed procedure of Step 4.
4.
Make sure that a formatted floppy disk (page 55) is
inserted in the disk drive.
Follow the steps for the [SaveToMemory] operation (see page 50) to
name and save the song.
The song is automatically numbered as “D—,” where “D” means
“Disk” and “—” is a number.
TIP
The song data is saved in
the SMF format (format 0).
Therefore, you can play the
disk on instruments that
support the SMF format.
TIP
To specify a folder on the
disk as the save location ...
When the “Sure?->” display
appears, press either the C
[–]/[+] buttons to display the
folder. Use the C [–]/[+] buttons to select the folder.
You can use the D [+] button
to enter a folder. Press the D
[–] button to return to the
previous (higher) level.
You cannot create folders on
the CLP-175.
CAUTION
Do not turn off the power or
eject the floppy disk while
the screen displays “Executing.”
CLP-175
51
Saving Recorded Songs and Handling the Files...[FILE]
Deleting songs in Clavinova Storage memory or a
floppy disk...[DeleteSong]
You can delete Memory songs and Disk songs, but not Preset songs or Current songs.
A
B
Basic Operation
NO
C
YES
D
TIP
To delete a Current song,
select “ALL” for the ChannelClear parameter in the
“SONG SETTING” menu
(page 76). Alternatively,
press the SONG SELECT
[
][
] buttons simultaneously to display “Song
Changed Save?”. This
means “A song has been
edited. Do you wish to save
the change?” Press the B [–
(NO)] button. The Current
song is deleted and a blank
“NewSong” is selected.
Procedure
See page 49 for basic operation information. The following is a detailed procedure of Step 4.
4-1
Select a song to delete.
Use the C [–]/[+] buttons to select a song.
4-2
Execute the operation.
Press the B [+ (YES)] button located next to “Execute?→.”
Follow the instructions on screen.
TIP
If you select a Memory song
or Disk song, deleting the
song does not erase song
data from Current memory.
However, if you return to the
song select screen, song
information other than the
song name is replaced by “-------------”.
TIP
After you delete a song, the
Clavinova automatically
updates the song numbers.
TIP
When you delete a folder from
disk, all files within that folder
will be deleted.
→
→
TIP
If a folder is displayed for a
disk song, the [ / ] indicator
is displayed in the lower
right of the screen. In this
case, you can use the D [+]
button to open the folder.
Press the D [–] button to
return to the previous
(upper) level.
CAUTION
Never turn off the power or
remove the floppy disk while
[Executing] is displayed.
52
CLP-175
Saving Recorded Songs and Handling the Files...[FILE]
Renaming a song...[RenameSong]
You can change a song’s title except for the preset songs and [P-000: NewSong].
A
B
NO
C
YES
D
Basic Operation
Procedure
See page 49 for basic operation information. The following is a detailed procedure for Step 4.
4.
Name the song as described in the [SaveToMemory]
section (page 50).
CAUTION
Do not turn off the power or
eject the floppy disk while
the screen displays “Executing.”
TIP
After you rename a song,
the Clavinova sorts songs
alphabetically and renumbers them.
CLP-175
53
Saving Recorded Songs and Handling the Files...[FILE]
Copying data from one floppy disk to
another...[CopyDisk]
You can copy the entire contents of one floppy disk to another floppy disk.
A
B
Basic Operation
NO
C
YES
D
Procedure
See page 49 for basic operation information. The following is a detailed procedure for Step 4.
4-1
Make sure that a formatted floppy disk is inserted in
the disk drive.
4-2
Press the B [+ (YES)] button located next to “Execute?→.”
4-3
When the screen indicates “Insrt Target Disk”, eject
the source disk and insert the destination disk.
When the copy operation is complete, the Clavinova displays “Completed.”
TIP
Use the same type of disk
(2DD or 2HD) for the destination disk as the source
disk.
TERMINOLOGY
Insrt Target Disk:
Insert the destination (target) disk.
CAUTION
Do not turn off the power or
eject the floppy disk while
the screen displays “Executing.”
54
CLP-175
Saving Recorded Songs and Handling the Files...[FILE]
Formatting a floppy disk...[FormatDisk]
You can format a floppy disk so that it can be used with the Clavinova.
A
B
NO
C
YES
D
Basic Operation
Procedure
Refer to page 49 for the basic procedure.
Perform the following operations in step 4.
4-1
Make sure that the formatted floppy disk is inserted in
the disk drive.
4-2
Press the B [+ (YES)] button located next to “Execute?→.”
Follow the instructions on screen.
CAUTION
Do not turn off the power or
eject the floppy disk while
the screen displays “Executing.”
CLP-175
55
Saving Recorded Songs and Handling the Files...[FILE]
Automatically open a song when the disk is inserted
[FDSongAutoOpen]
Basic Operation
Specify whether a song will automatically be opened when you insert a disk.
Procedure
Refer to page 49 for the basic procedure.
Perform the following operation in step 4.
4
Use the D [–]/[+] buttons to select ON or OFF.
Changing the type of characters on screen...[CharacterCode]
You can change the type of characters that appear on screen.
The default setting is “International.” To input katakana, change this setting to “Japanese.”
A
B
NO
C
Options: International, Japanese
Character list
[International]
[Japanese]
56
CLP-175
YES
D
Playing Back Recorded Songs and
Commercially-available Music Data
TIP
See page 59 for information
on the types of song data
that can be played on the
Clavinova.
You can play back songs recorded using the Record function (page 40) as well
as commercially-available music data. You can also play the keyboard along
with the playback.
TIP
Songs containing a large amount of data may not be able to be read properly by the
instrument, and as such you may not be able to select them. The maximum capacity is
about 200–300KB, however this may differ depending on the data contents of each
song.
TIP
Change the Clavinova’s
character type ([CharacterCord]) as appropriate for the
selected song.
Basic Operation
Playing back a song
If you want to play back a disk song, insert the floppy disk into the disk drive.
TEMPO [DOWN][UP]
1 2-2
SONG SELECT
SONG
2-1
TRACK
1
TRACK
2
EXTRA
TRACKS
FILE
TOP
START/STOP
REC
SONG
SETTING
KEYBOARD
METRONOME
START/STOP SETTING
DOWN
A
B
CONTRAST
UP
GRAND
PIANO 1
GRAND
PIANO 2
E.PIANO
1
E.PIANO
2
HARPSICHORD
E.CLAVICHORD
VIBRAPHONE
GUITAR
CHURCH
ORGAN
JAZZ
ORGAN
STRINGS
CHOIR
SYNTH.
PAD
WOOD
BASS
E.BASS
XG
VOICE
SETTING
ON/OFF
MIDI
SETTING
AFC
SETTING
OTHER
SETTING
AFC
SPLIT
VARIATION
REVERB
CHORUS
BRILLIANCE
MELLOW BRIGHT
EXIT
MIN
NEW SONG
MAX
MASTER VOLUME
SONG BALANCE
SYNCHRO START
TEMPO
C
D
SONG
DEMO
43
[SONG BALANCE]
VOICE
2-2
EFFECT
5
Procedure
Display the song select screen.
Press either the SONG SELECT [ ]/[
] buttons.
Song select screen
A
B
NO
C
2.
D
Select the desired song.
Use the A [–]/[+] buttons to select the song type: “PresetSong,” “MemorySong,” or “DiskSong”.
If the internal Storage memory contains one or more songs, the Clavinova displays “MemorySong.” If a floppy disk that contains song data is
inserted in the drive, the Clavinova displays “DiskSong”.
2-2
Use the C [–]/[+] or SONG SELECT [
select a song.
]/[
] buttons to
TIP
If a folder is displayed for a
disk song, the [ / ] indicator
is displayed in the lower right
of the screen. In this case,
you can use the D [+] button
to open the folder. Press the
D [–] button to return to the
previous (upper) level.
→
2-1
TIP
Use the SongRepeat
parameter in the “SONG
SETTING” menu (page 77)
to select repeat playback of
all songs or repeat playback
of a single song.
YES
→
1.
TIP
You can enjoy ensemble
performance by yourself.
Record the parts for a fourhanded song or a piano
duet, then play the recorded
part while playing the other
part on the keyboard.
TIP
If the song name extends
beyond what can be displayed in the screen, you
can press the D [+] button to
move toward the right in
steps of one character.
Press the D [–] button to
move back to the left in
steps of one character.
CLP-175
57
Playing Back Recorded Songs and Commercially-available Music Data
3.
Start playback.
Press the SONG [START/STOP] button.
Starting playback automatically as you start playing the keyboard (Synchro Start)
Basic Operation
You can start playback as soon as you start playing the keyboard. This is called
the “Synchro Start” function.
To enter Synchro Start standby mode, press and hold down the [TOP] button
and press the SONG [START/STOP] button. The SONG [START/STOP]
indicator flashes.
Now play the keyboard. Playback starts simultaneously.
To cancel the Synchro Start function, press the [TOP] button while the Clavinova is in Synchro Start standby mode.
You can move back and forth (rewind and fast forward) through the bars by
using the B [–]/[+] buttons in the song select screen while the Clavinova is
playing or stopped.
The bar number in playback
A
B
NO
C
YES
]/[
] buttons to return to the song
Adjusting the tempo
You can use the TEMPO [DOWN]/[UP] buttons to adjust the playback
tempo as required before or during playback. The default tempo (the song’s
original tempo) is set when you press the [DOWN] and [UP] buttons simultaneously.
Press either of the SONG SELECT [
select screen.
4.
58
CLP-175
TIP
You can play the metronome
along with the song playback. When you stop playback, the metronome is also
stopped.
D
You can play the keyboard while the Clavinova is playing back a song. You can
also play the notes in a voice different from the playback voice by selecting the
voice from the panel, and adjusting the volume balance between the playback
parts and your current performance using the [SONG BALANCE] slider. (See
page 47.)
Press either of the SONG SELECT [
select screen.
TERMINOLOGY
Bar: measure
]/[
] buttons to return to the song
Stop playback.
When playback is complete, the Clavinova automatically stops and
locates the top of the song. To stop playback in the middle of a song,
press the [TOP] button. You can also pause playback by pressing the
SONG [START/STOP] button. Playback stops when you press the
button.
TIP
In the song select screen:
• Press the SONG
SELECT [
] or the C[–]
button while playback is
stopped in the middle of
the song to locate the top
of the song.
However, if you have
selected a disc song and
there is a folder before
the song, the folder will
appear on the display
when you press the
SONG SELECT [
]
[
] buttons or C [–]/[+]
buttons during song
playback.
• Press the SONG
SELECT [
] or the C[–
] button during playback
to restart playback from
the top of the song.
• Press the SONG
SELECT [
] or the
C[+] button during playback to start playback
from the next song.
Playing Back Recorded Songs and Commercially-available Music Data
5.
Return to the main screen.
Press the [EXIT] button.
Eject the floppy disk from the disk drive if you have been playing a
disk song.
Turning track playback on and off
TIP
You can practice a part or
phrase using the FromToRepeat (page 76) and PhraseMark parameters (page 77)
in the “SONG SETTING”
menu.
Basic Operation
When you select a song on the Clavinova, the indicators for tracks that contain data ([TRACK 1], [TRACK 2], [EXTRA TRACKS]) are lit in green. While
the Clavinova is playing or stopped, pressing these track buttons turn off the
indicators, and the data on those tracks will not be played. Pressing the track
buttons toggles track playback on and off. You can play the part that is turned
off.
Supported song data type
Data formats that can be played on the CLP-175
The Clavinova CLP-175 plays song data in the following formats:
Floppy disk format
3.5-inch 2DD disks in the MS-DOS 720KB format
3.5-inch 2HD disks in the MS-DOS 1.44MB format
TERMINOLOGY
Disk format:
A structured method for writing data to disk.
Sequence format
SMF (Standard MIDI File) formats 0 and 1
ESEQ
Performance data recorded on the CLP-175 is saved in the SMF format 0 in a floppy disk.
TERMINOLOGY
Sequence format:
A structured method for
recording performance data.
CLP-175
59
Playing Back Recorded Songs and Commercially-available Music Data
Voice arrangement format
XG voice arrangement
GM system level 1 voice arrangement
DOC voice arrangement
Basic Operation
Performance data recorded with preset XG voices on the CLP-175 can
be played on other XG-compatible instruments.
See page 6 of the separate “Reference Booklet” for the XG voice list.
Refer to “Data compatibility” on page 109 for more information on
formats.
60
CLP-175
TERMINOLOGY
Voice arrangement format:
A structured method for
numbering the voices for
assignment.
Connections
Connectors
CAUTION
Before connecting the Clavinova to other electronic components, turn off the power to all the components. Before
turning the power on or off to all components, set all volume levels to minimum (0). Otherwise, electrical shock or
damage to the components may occur.
7
6
LEVEL FIXED
L
R
L/L+R
AUX OUT
R
L/L+R
AUX IN
PC-2
MIDI
IN
AUX PEDAL
1
OUT
MIDI
2
Basic Operation
R
Mac
USB
THRU
HOST SELECT
TO HOST
USB
3
4
5
1 AUX PEDAL jack
A separately sold FC7 foot controller or FC4/FC5 foot switch can be connected to this jack. By using an FC7 you can control the volume while playing
to add expression to your performance, or control various other functions. By
using an FC4/FC5, you can switch various selected functions on/off. To select
the function that will be controlled, use the [VOICE SETTING] parameter
[AuxPedal] (See page 86). The SONG [START/STOP] function can also be
assigned to a foot switch (See page 96).
TIP
Connect or disconnect the
pedal when the power is off.
2 MIDI [IN], [OUT], [THRU] connectors
Use MIDI cables to connect external MIDI devices to these connectors.
Make sure you set the HOST SELECT switch (described on the privious page)
to MIDI when you use these connectors.
3 HOST SELECT switch
This switch should be set according to the type of connected MIDI device or
personal computer. (Refer to “Connecting a personal computer” on page 63
for more information.)
4 TO HOST jack
This jack allows direct connection to a personal computer. (Refer to “Connecting a personal computer” on page 63 for more information.)
5 USB jack
This jack allows direct connection to a personal computer. (Refer to “Connecting a personal computer” on page 63 for more information.)
CLP-175
61
Connections
6 AUX IN [R], [L/L+R] jacks
The stereo outputs from another instrument can be connected to these jacks,
allowing the sound of an external instrument to be reproduced via the Clavinova’s speakers. Refer to the diagram below and use audio cables for connection.
Basic Operation
CAUTION
When the Clavinova’s AUX IN jacks are connected to an external device, first
turn on the power to the external divice, then to the Clavinova. Reverse this order
when you turn the power off.
Clavinova
R
L/L+R
Plug shape depends
on the device.
AUX IN
AUX IN
AUX OUT
phone plug
(standard)
Tone Generator
audio cable
7 AUX OUT [R][L] Pin jacks (LEVEL FIXED), [R][L/L+R] Phone jacks
These jacks let you connect the Clavinova to your stereo system etc. to play at
higher volumes, or connect a cassette recorder etc. to record your playing.
Use audio cables to make connections as shown in the diagram.
CAUTION
When the Clavinova’s AUX OUT jacks are connected to an external audio system, first turn on the power to the Clavinova, then to the external audio system.
Reverse this order when you turn the power off.
Clavinova
R
L
R
L/L+R
AUX OUT
AUX IN
RCA
pin plug
audio cable
When these are connected (with RCA
pin plug; LEVEL FIXED), the sound is
output to the external device at a fixed
level, regardless of the [MASTER
VOLUME] dial setting.
62
CLP-175
TIP
If you connect the Clavinova
to a monaural device, use
only the AUX IN [L/L+R] jack
or AUX OUT [L/L+R] jack.
CAUTION
Do not route the output from
the AUX OUT jacks to the
AUX IN jacks. That is, when
you connect an external
audio device to the AUX
OUT jacks, do not connect
the audio device to the
Clavinova’s AUX IN jacks. If
you make this connection,
the signal input at the AUX
IN jacks will be output from
AUX OUT. This creates an
audio loop, causing audio
oscillation and abnormal
playback, and leading to
malfunction of both pieces of
equipment.
TIP
Use audio cables and adaptor plugs with no resistance.
LEVEL FIXED
Stereo
RCA
pin plug
TIP
The Clavinova’s [MASTER
VOLUME] dial setting affects
the input signal from the AUX
IN jacks, but the [REVERB],
[CHORUS], and [BRILLIANCE] (page 32) settings
do not.
phone plug
(standard)
To powered speakers
When these are connected (with
standard phone plugs), you can
use the [MASTER VOLUME] dial
to adjust the volume of the sound
output to the external device.
TIP
The Clavinova’s [MASTER
VOLUME] setting will not
affect the sound that is output from AUX OUT (LEVEL
FIXED).
Connections
Connecting a personal computer
You can connect the [TO HOST], MIDI [IN][OUT][THRU], or [USB] connector of the Clavinova to your
personal computer and enjoy using the Clavinova in conjunction with musical software on your computer.
Basic Operation
“The Clavinova-Computer Connection,” is a supplementary guidebook that describes, for beginners,
what you can do with your Clavinova and a personal computer and how to set up a Clavinova-Computer
system (the manual is not written for any specific models). The document is available as a PDF file (in
English) at the following Internet address:
Clavinova Web site (English only):
http://www.yamahaclavinova.com/
Yamaha Manual Library:
http://www2.yamaha.co.jp/manual/english/
There are the three methods by which to connect the Clavinova to a personal computer:
1. Connecting the serial port on the computer to the Clavinova’s TO HOST jack (page 64)
2. Using a MIDI interface and the Clavinova’s MIDI connectors (page 66)
3. Connecting the USB port on the computer to the Clavinova’s USB jack (page 67)
For more information, refer to the following pages.
TIP
When connecting the Clavinova to a personal computer, first turn off the power to both the Clavinova and the computer
before connecting any cables and setting the HOST SELECT switch. After making connections and switch settings, turn
on the power to the computer first, then to the Clavinova.
TIP
If you are not using the connection between the Clavinova and your computer, you must disconnect the cable from the
[TO HOST] jack or [USB] jack. The Clavinova may not operate correctly if a cable is left connected.
TIP
The connectors that can be used will depend on the setting of the HOST SELECT switch.
HOST SELECT switch setting
Usable connectors
[MIDI]
[MIDI] connectors (all: [IN][OUT][THRU])
[PC-2], [Mac]
[TO HOST] jack
[USB]
[USB] jack
CLP-175
63
Connections
1.
Connecting the serial port on the computer to the Clavinova’s TO HOST jack
Connect the computer’s serial port (RS-232C or RS-422) to the Clavinova’s TO HOST jack.
In this connection, the Clavinova functions as a MIDI interface. Therefore, you do not need a special
MIDI interface.
Connection
Use a special serial cable (page 65) to connect the computer’s serial port (RS-232C or RS-422) to the Clavinova’s TO HOST jack.
Basic Operation
Clavinova
PC-2
MIDI
Mac
USB
HOST SELECT
TO HOST
TO HOST
RS-232C (D-sub 9-pin)
modem port
Windows
Macintosh
Note for Windows users (regarding the MIDI driver)
To transfer data via the computer’s serial port and the Clavinova’s TO HOST jack, you need to install a
specific MIDI driver (the Yamaha CBX driver for Windows). You can download this driver from XG
Library on the Yamaha Web site (http://www.yamaha-xg.com) or install from the Accessory CD-ROM
included with the Clavinova.
64
CLP-175
Connections
Type of serial cables and connection pin assignments
According to the type of computer you connect, use one of the following serial cables.
• Windows (with a serial port of D-sub 9-pin)
8-pin mini DIN plug → D-sub 9-pin plug
(Yamaha CCJ-PC2 or equivalent)
mini DIN 1
2
8-pin
3
4
8
5
D-sub
9-pin
3 (TxD)
System peripheral plug → 8-pin plug
(Yamaha CCJ-TG or equivalent)
mini DIN 1
2
8-pin
3
4
5
6
7
8
2 (HSK i) mini DIN
1 (HSK O) 8-pin
5 (RxD-)
4 (GND)
3 (TxD-)
8 (RxD+)
7 (GP-)
6 (TxD+)
Basic Operation
8 (CTS)
7 (RTS)
2 (RxD)
5 (GND)
• Macintosh
• Pin assignment
The following diagram shows the pin assignments
for each cable.
Pin numbers (view from front)
mini DIN 8-pin
D-sub 9-pin
6 7 8
3 4
5
1 2
5 4 3 2 1
9 8 7 6
Clavinova HOST SELECT switch setting
Set the Clavinova HOST SELECT switch properly according to the type of connected computer.
• Macintosh: “Mac” (data transfer rate: 31,250bps, 1MHz clock)
• Windows: “PC-2” (data transfer rate: 38,400bps)
TIP
If your system does not work properly with the connections and settings listed above, your software may require different
settings. Check your software operation manual and set the HOST SELECT switch to the proper data transfer rate.
CLP-175
65
Connections
2.
Using a MIDI interface and the Clavinova’s MIDI connectors
Connection
Use a MIDI interface device to connect a computer to the Clavinova using special MIDI cables.
Clavinova
Basic Operation
PC-2
MIDI
IN
OUT
THRU
MIDI
MIDI
IN
HOST SELECT
MIDI OUT
MIDI
IN
MIDI
OUT
MIDI
OUT
Mac
USB
MIDI
IN
MIDI interface
MIDI interface
Windows
Macintosh
Clavinova HOST SELECT switch setting
Set the Clavinova HOST SELECT switch to “MIDI.”
66
CLP-175
Connections
3.
Connecting the USB port on the computer to the Clavinova’s USB jack
If you connect the Clavinova to your computer, you can transfer MIDI data between your computer
and the Clavinova. You can also use the included File Utility (software for your computer) to transfer
files between your computer and the internal memory of the Clavinova.
Connections
Use a USB cable to connect the USB port on your computer to the [USB] jack on the Clavinova.
computer
Clavinova
PC-2
MIDI
Mac
USB
Basic Operation
USB
HOST SELECT
TO HOST
USB
TRACK
1
SONG
SONG SELECT
KEYBOARD
TOP
TRACK
2
EXTRA
TRACKS
FILE
START/STOP
REC
SONG
SETTING
METRONOME
START/STOP SETTING
A
CONTRAST
B
NO
DOWN
YES
UP
GRAND
PIANO 1
GRAND
PIANO 2
E.PIANO
1
E.PIANO
2
HARPSICHORD
CHURCH
ORGAN
JAZZ
ORGAN
STRINGS
CHOIR
SYNTH.
PAD
E.CLAVICHORD
VIBRAPHONE
GUITAR
WOOD
BASS
E.BASS
XG
VOICE
SETTING
ON/OFF
MIDI
SETTING
AFC
SETTING
OTHER
SETTING
AFC
SPLIT
VARIATION
REVERB
CHORUS
BRILLIANCE
MELLOW
BRIGHT
EXIT
MIN
NEW SONG
MAX
MASTER VOLUME
SONG BALANCE
DEMO
SYNCHRO START
SONG
TEMPO
C
D
VOICE
EFFECT
POWER
USB cable
TIP
There are two types of USB connectors: A and B. The USB jack on the Clavinova accepts a B-type connector. Connect
the A-type connector of the USB cable to the USB port on your computer. Connect the B-type connector to the USB jack
on the Clavinova.
Clavinova HOST SELECT switch setting
Set the Clavinova HOST SELECT switch to “USB.”
About the USB driver
You must install the specified USB driver (YAMAHA USB MIDI Driver) in your computer before you can
transfer data between the computer and the Clavinova.
The YAMAHA USB MIDI Driver can be installed from the Accessory CD-ROM included with the Clavinova.
The YAMAHA USB MIDI Driver supports the following OS versions.
Windows 98/98SE/Me/2000/XP Home Edition/XP Professional
Mac OS 8.6–9.2.2 (Mac OS X and Mac Classic environments are not supported.)
CLP-175
67
Connections
About the USB connection
Basic Operation
• In order to use MIDI on your computer, you will need application software that is appropriate for your
computer and that meets your needs.
• If you want to use a USB cable to connect the Clavinova to your computer, you must connect the USB
cable before turning on the power of the Clavinova.
Also, do not turn the power of the Clavinova on or off while application software that uses USB MIDI is
running.
• The Clavinova will begin transmission a short time after the USB connection is made.
• When using a USB cable to connect the Clavinova to your computer, make the connection directly
without passing through a USB hub.
• Depending on the state of your computer, the operating state of the Clavinova may become unstable.
Do not use your computer in a way that causes it to enter an unstable state.
CAUTION
• If you turn the power of the Clavinova on/off or connect/disconnect the USB cable in the following
states, problems will occur in the computer system, possibly causing it to “freeze” (hang up), or causing
the Clavinova to stop functioning.
- While installing the driver
- While starting-up or shutting-down the operating system
- While your computer is suspended (sleeping)
- While a MIDI application is running
• Performing the following actions may cause your computer to hang up or the Clavinova to stop functioning.
- Rapidly turning the power on/off or connecting/disconnecting the cable
- Shifting to power-conservation (sleep) mode while MIDI data is being transferred, or returning from
sleep mode
- Connecting/disconnecting the cable while the power of the Clavinova is on
- Turning the power of the Clavinova on/off, starting up your computer, or installing the driver while a
large amount of data is being transferred
68
CLP-175
Detailed Settings
CLP-175
69
Detailed Settings
You can set various parameters to make the best use of Clavinova functions, such as fine tuning the pitch,
selecting a voice for the metronome, repeating playback, etc. For the basic procedure to make these settings,
refer to page 97.
Parameter List
The following parameters are available.
Recording and playback [SONG SETTING]
Settings
Detailed Settings
Correcting note timing
Specifying whether playback starts immediately
along with the first voicing
Auditioning the channels
Deleting data by each channel
Specifying the range and playing back repeatedly
Playing back the phrase specified by the phrase
number
Playing back a song repeatedly
Parameter name
Reference page
Quantize
75
QuickPlay
76
ChannelListen
ChannelClear
FromToRepeat
76
76
76
PhraseMark
77
SongRepeat
77
Metronome METRONOME [SETTING]
Settings
Metronome time signature
Metronome volume level
Metronome voice
70
CLP-175
Parameter name
TimeSignature
MetronomeVolume
MetronomeSound
Reference page
78
78
78
Detailed Settings
Voices [VOICE SETTING]
In Dual mode, parameters with the “ *” mark are set for Voice 1 and Voice 2 individually.
Parameter name
Reference page
Octave*
Volume level*
Position of right and left channels*
Fine pitch adjustment (only in Dual mode)
Reverb type
Reverb depth*
Chorus type
Chorus depth*
Chorus on/off
Select the DSP type*
Set the speed of the vibraphone vibrato effect*
Turn the vibraphone vibrato effect on/off*
Adjust the speed of the rotary speaker*
Adjust the DSP effect depth*
Adjust the brightness of the sound*
Adjust the resonance effect*
Adjust the low-range frequency of the equalizer*
Adjust the low-range gain (boost/cut) of the equalizer*
Adjust the high-range frequency of the equalizer*
Adjust the high-range gain (boost/cut) of the equalizer*
Touch sensitivity*
Right pedal function
Center pedal function
Left pedal function
Auxiliary pedal function
Octave
Volume
Pan
Detune
ReverbType
ReverbSend
ChorusType
ChorusSend
ChorusOnOff
DSP Type (DSP)
VibeRotorSpeed
VibeRotorOnOff (RotorOnOff)
RotarySpeed (Rot.Speed)
DSPDepth
Brightness
HarmonicContent (Harmonic)
EQ LowFreq. (EQ L.Freq)
80
80
80
80
81
81
81
81
82
82
82
83
83
83
83
83
84
EQ LowGain
84
EQ HighFreq. (EQ H.Freq)
84
EQ HighGain
84
TouchSense
RPedal
MPedal
LPedal
AuxPedal
85
85
85
86
86
Detailed Settings
Settings
iAFC [iAFC SETTING]
Settings
Select the iAFC type
Adjust the iAFC depth
Calibrate (automatically adjust) iAFC
Restore the basic iAFC settings
Parameter name
iAFC Type
iAFC Depth
Calibration
iAFC Default
Reference page
87
87
88
88
CLP-175
71
Detailed Settings
MIDI [MIDI SETTING]
Settings
MIDI transmit channel
Specify the MIDI receive channel
Local control on/off
Selecting performance from the keyboard or song
data for MIDI transmission
Type of data received via MIDI
Type of data transmitted via MIDI
Transmitting the initial settings
Voice data bulk dump
Parameter name
Reference page
MidiOutChannel
MidiInChannel
LocalControl
90
90
91
MidiOutSelect
91
ReceiveParameter
TransmitParameter
InitialSetup
VoiceBulkDump
91
91
92
92
[OTHER SETTING]
Detailed Settings
Settings
Selecting a touch response
Make fine pitch adjustments
Selecting a tuning curve for a piano voice
Selecting a scale
Specifying the Split Point
Change the key
Specify the depth of the Soft pedal
Depth of string resonance
Depth of sustain sampling for the damper pedal
Specify the volume of the key-off sound
Selecting a pedal function for vibraphone
Assign the SONG [START/STOP] function to the
pedal
Selecting a type of auxiliary pedal
Setting the point at which the damper pedal starts
to affect the sound
Pitch bend range
Switch the speaker on/off
Selecting the items saved at the time of shutdown
Restoring the normal (default) settings
72
CLP-175
Parameter name
Reference page
TouchResponse
Tune
PianoTuningCurve
Scale
SplitPoint
Transpose
SoftPedalDepth
StringResonanceDepth
SustainSamplingDepth
KeyOffSamplingDepth
VibraphonePedalMode
93
93
93
94
94
94
95
95
95
95
95
PedalStart/Stop
96
AuxPedalType
96
HalfPedalPoint
96
PitchBendRange
Speaker
MemoryBackUp
FactorySet
96
97
97
97
Detailed Settings
Making detailed settings
1
SONG SELECT
SONG
TRACK
1
TRACK
2
EXTRA
TRACKS
FILE
TOP
START/STOP
REC
SONG
SETTING
KEYBOARD
METRONOME
START/STOP SETTING
DOWN
2
A
3 4
B
1
CONTRAST
UP
GRAND
PIANO 1
GRAND
PIANO 2
E.PIANO
1
E.PIANO
2
HARPSICHORD
E.CLAVICHORD
VIBRAPHONE
GUITAR
CHURCH
ORGAN
JAZZ
ORGAN
STRINGS
CHOIR
SYNTH.
PAD
WOOD
BASS
E.BASS
XG
VOICE
SETTING
1
ON/OFF
MIDI
SETTING
AFC
SETTING
OTHER
SETTING
AFC
SPLIT
VARIATION
REVERB
CHORUS
BRILLIANCE
MELLOW BRIGHT
EXIT
MIN
NEW SONG
MAX
MASTER VOLUME
SONG BALANCE
DEMO
SYNCHRO START
TEMPO
C
D
SONG
VOICE
1
2 3
3 5
EFFECT
1 1
Procedure
1.
Detailed Settings
Access a setting menu.
Press the desired setting button ([SONG SETTING], METRONOME [SETTING], [VOICE SETTING], [iAFC SETTING],
[MIDI SETTING], or [OTHER SETTING]) to access the corresponding setting menu.
Press the [EXIT] button any time to close the setting menu.
2.
3.
Select the desired parameter or part.
Press the setting button, A [–]/[+], and/or C [–]/[+] buttons repeatedly as required.
Set the parameter or part.
Some parameters or parts lead you to more options. Use
the B [– (NO)]/[+ (YES)], C [–]/[+], and D [–]/[+] buttons
to select or set the option.
To restore the normal parameter value, press the [–] and [+] buttons
simultaneously.
CLP-175
73
Detailed Settings
4.
Write, execute, or save the data.
There are two ways to respond to the messages.
If “Execute?→” or “Start?→” appears:
Press the B [+(YES)] button to display confirmation ([Sure?→]). To
proceed, press the B [+(YES)] button again. The Clavinova displays
“Executing” and writes the data. When the operation is complete, it
displays “Completed” for three seconds, then returns to the previous
screen.
To cancel the operation, press the B [–(NO)] button instead of the B
[+(YES)] button.
A
B
NO
Detailed Settings
C
YES
D
If “Set?→” appears:
Press the B [+(YES)] button to execute the setting. The Clavinova displays “Executing” and saves the data. When the operation is complete,
it displays “Completed” for three seconds, then returns to the previous screen.
However, the “Completed” display that appears when [Calibration]
(page 88) and [VoiceBulkDump] (page 92) is finished will not change
back to the previous display after three seconds. Press any button on
the panel to return to the previous display.
A
B
NO
C
5.
74
CLP-175
Close the setting menu.
Press the [EXIT] button.
YES
D
Detailed settings for recording
and playback [SONG SETTING]
You can make detailed settings for the selected song. First, select the desired song from preset songs (“PresetSong”), memory songs (“MemorySong”), or disk songs (“DiskSong”) (see page 57).
Procedure
Select the desired song and press the [SONG SETTING] button to access the “Song Setting”
menu.
[SONG SETTING]
If you select “1/8” for correction:
Correcting note timing
[Quantize]
Performance data
Detailed Settings
You can correct the timing of notes. For example,
you can adjust recorded notes to precise eighth or
sixteenth notes, or make the entire feel of a song
more lively (with a swing type of rhythm).
• Changes are made by song.
• You can also listen to the sound while changing
the setting. To change the data, you need to
respond to “Execute?→.”
See the procedure on page 73.
Swing rate = 50% : not swinging
Swing rate = 75% (51% or higher) :
The timing of even beat notes is slightly delayed.
Swing rate = 25% (49% or lower) :
The timing of even beat notes is slightly early.
Stores the changed value.
A
B
NO
C
YES
Swing rate = 67% :
The timing of the even beat notes is moved to
the third beat of the triplets.
D
3
3
Specifies the type of note.
Notes for which you can adjust the timing:
[OFF]
[1/4]
quarter note
[1/8]
TIP
Save the edited song data to memory or a disk.
(See page 50.)
eighth note
3
[1/12]
eighth note triplets
[1/16]
sixteenth note
3
[1/24]
sixteenth note triplets
If you select “1/8” or “1/16” for correction, the
Clavinova displays “SwingRate=xx%”, which
enables you to make the entire feel of a song more
lively and swinging.
Setting range:
0% - 100%
CLP-175
75
Detailed settings for recording and playback [SONG SETTING]
Specifying whether playback
starts immediately along with
the first voicing [QuickPlay]
This parameter enables you to specify whether a
song that starts from the middle of a bar, or a song
with a silence prior to the first note, should be
played from the first note or from the top of the bar
(rest or blank).
See the procedure on page 73.
Deleting data from each channel [ChannelClear]
You can delete data from each of 16 channels.
See the procedure on page 73.
Press this button to delete data.
A
B
NO
C
A
B
NO
YES
D
Use these buttons to select the
desired channel for deletion.
YES
Setting range:
C
Ch1 - Ch16, ALL (all channels)
D
Detailed Settings
Setting range:
[On] Playing from the first note
[Off] Playing from the top of the bar (including a
rest or blank)
Auditioning the channels
[ChannelListen]
You can select a single channel to listen to its contents. Playback starts from the first note.
See the procedure on page 73.
Playback continues as long
as you press and hold down this button.
A
B
NO
C
YES
D
Use these buttons to select the
desired channel for playback.
Setting range:
Ch1 - Ch16
TIP
Usually, channels that do not contain any data are not
displayed. However, for some songs, all channels
(including the channels that contain no data) may be displayed.
TIP
• Channels that do not contain any data are not displayed. However, for some songs, all channels
(including the channels that contain no data) may be
displayed.
• Save the edited song data to memory or disk.
(See page 50.)
Specifying the range and playing back repeatedly [FromToRepeat]
You can specify a range (in steps of beats) in a song
to play back repeatedly.
• Playback repeats after it reaches just prior to the
beat specified as the end point.
• If you start playing back a song with “Repeat
On” selected, the count down starts, followed by
the repeated playback of the specified part until
you press the [TOP] button.
• If you select “Repeat Off,” normal playback starts.
See the procedure on page 73.
Use these buttons to select “Repeat On.”
A
NO
C
Use these buttons
to specify the start point
of the repeated range.
76
CLP-175
B
YES
D
Use these buttons
to specify the end point
of the repeated range.
Detailed settings for recording and playback [SONG SETTING]
TIP
Use the following buttons to specify the range to be
repeated during song playback.
C [–]/[+] .......specifies the start point of the repeat.
D [–]/[+] .......specifies the end point of the repeat.
NOTE
When you select another song, the specified range is automatically cancelled and the Repeat function is turned off.
Playing back the phrase specified by the phrase number
[PhraseMark]
Playing back a song repeatedly
[SongRepeat]
You can repeatedly play back all songs or a single
song selected from the 50 preset songs or from the
floppy disks.
• When you start playback, the Clavinova plays
the song you selected using the front panel, then
starts repeat playback of the specified songs until
you press the [TOP] button.
See the procedure on page 73.
Use these buttons to select “On.”
A
Use these buttons to select “Repeat On.”
A
B
NO
C
YES
NO
C
YES
Detailed Settings
If you select a song from an ensemble collection
disk, such as the “Disk Orchestra Collection” or
one of the “XG for Piano” disks, you can specify
phrase numbers in the score to play back from the
score from the mark point, or to play back the
phrase repeatedly.
• If you start playing back a song with “Repeat
On” selected, the count down starts, followed by
the repeated playback of the specified phrase
until you press the [TOP] button.
• If you select “Repeat Off,” normal playback
starts from the specified phrase.
See the procedure on page 73.
B
D
Use these buttons to specify the repeated songs.
Setting range:
[DiskSongs]
All songs in the floppy disk
inserted in the disk drive
[MemorySongs] All songs in the Clavinova’s
memory
[Disk+Memory] All songs from “DiskSongs” and
“MemorySongs”
[PresetSongs]
All 50 preset songs
[ALL]
All songs from “DiskSongs,”
“MemorySongs,” and “PresetSongs”
[OneSong]
One song selected from the front
panel
D
Use these buttons to specify the phrase number.
Setting range of the phrase number:
Off (not specified)
1 - the last phrase number of the song
If you select any song other than those from the
“Disk Orchestra Collection” or one of the “XG for
Piano” disks, you can select only “Off.”
CLP-175
77
Detailed settings for the metronome METRONOME [SETTING]
You can set the time signature, volume level, and voice of the Clavinova metronome.
Procedure
Press the METRONOME [SETTING] button to access the Metronome Setting menu.
METRONOME [SETTING]
Setting the metronome time
signature [TimeSignature]
See the procedure on page 73.
See the procedure on page 73.
Detailed Settings
A
A
B
NO
C
NO
C
Use these buttons
to set the denominator
of the time signature.
For example, to specify “3/4,” use the C [–]/[+]
buttons to select “3” and the D [–]/[+] buttons to
select “4.”
1 - 16
[BellOff]
[EnglishVoice]
[GermanVoice]
[JapaneseVoice]
[FrenchVoice]
[SpanishVoice]
[BellOn]
Setting options for the denominator:
2, 4, and 8
Setting the metronome volume level [MetronomeVolume]
See the procedure on page 73.
A
B
NO
Setting range:
0-127
78
CLP-175
YES
D
YES
D
Setting range:
Setting range for the numerator:
C
B
YES
D
Use these buttons
to set the numerator
of the time signature.
Selecting the metronome
voice [MetronomeSound]
Click (standard metronome
sound)
Click and “1, 2, 3, 4” in English
Click and “1, 2, 3, 4” in German
Click and “1, 2, 3, 4” in Japanese
Click and “1, 2, 3, 4” in French
Click and “1, 2, 3, 4” in Spanish
Click and bell
TIP
To mute the beat count, select “BellOff.”
Detailed settings for the voices
[VOICE SETTING]
This menu enables you to make various detailed settings for the voices in Dual or Split mode and the effects.
You can make these settings for each voice (or each combination of voices) individually. You can listen to the
notes you play on the keyboard while changing the settings.
Procedure
1.
Select a voice and press the [VOICE SETTING] button to access the “Voice Setting” menu.
[VOICE SETTING]
Press the A [–]/[+] buttons to select the part for which you wish to change the
voice.
Detailed Settings
2.
The range of the displayed part varies depending on the selected voice.
[Main]
[Main × Layer]
[Left]
[Left × Layer]
MAIN voices (displayed with a single voice or in Split mode)
MAIN Voice 1 and Voice 2 (displayed when the MAIN side is in Dual mode)
LEFT voice (displayed in Split mode)
LEFT Voice 1 and Voice 2 (displayed when the LEFT side is in Dual mode)
CLP-175
79
Detailed settings for the voices [VOICE SETTING]
TIP
In Dual mode, parameters with the “*” mark are set for
Voice 1 and Voice 2 individually.
TIP
Parameter names enclosed in parentheses ( ) are displayed in Dual mode.
Setting the octave [Octave]*
Setting the position of right
and left channels [Pan]*
You can specify the position in the stereo image
from which you hear the sound.
See the procedure on page 73.
A
B
NO
The pitch of a note can be shifted upward or downward in steps of an octave.
See the procedure on page 73.
A
C
YES
D
In Dual mode:
B
A
NO
B
YES
NO
Detailed Settings
C
D
C
D
Voice for editing (Voice 1 or Voice 2)
In Dual mode:
A
Setting range:
B
NO
C
YES
L64 (hard left) - C (center) - R63 (hard right)
D
Voice for editing (Voice 1 or Voice 2)
Setting range:
–2 (two octaves lower) - 0 (no pitch shift) - +2
(two octaves higher)
Make fine adjustments to the
pitch (only in Dual mode)
[Detune]
The pitch of the two sounds selected in Dual mode
can be “skewed” slightly away from each other.
See the procedure on page 73.
Setting the volume level
[Volume]*
A
You can set the volume level for each voice part.
See the procedure on page 73.
C
YES
D
A
B
NO
C
YES
D
Voice for editing (Voice 1 and Voice 2)
Setting range:
Setting range:
–20–+20 (Positive (+) settings will raise the pitch
of the first sound and lower the pitch of the second
sound. Negative (–) settings will do the opposite.)
D
In Dual mode:
CLP-175
YES
B
NO
80
B
NO
C
A
0 - 127
YES
Detailed settings for the voices [VOICE SETTING]
Selecting the reverb type
[ReverbType]
Selecting the chorus type
[Chorus Type]
TIP
You cannot set this parameter for the voice parts “Left”
and “Left × Layer.”
TIP
You cannot set this parameter for the voice parts “Left”
and “Left × Layer.”
See the procedure on page 73.
See the procedure on page 73.
A
B
NO
C
A
B
YES
NO
D
C
YES
D
Setting range:
Setting range:
Room Simulates reverberation in a room.
Hall1 Simulates reverberation in a concert hall.
Hall2 Reverberation is slightly longer than that of
“Hall1.”
Stage Reverberation suitable for a solo instrument sound.
Plate Reverberation from the vibration of a
metal plate.
Chorus
Celeste
Flanger
Detailed Settings
Adds a rich, spacious sound.
Adds swell and a spacious sound.
Adds swell effects of an ascending or
descending jet plane.
Setting the chorus depth
[ChorusSend]*
See the procedure on page 73.
Setting the reverb depth
[ReverbSend]*
A
B
NO
TIP
The reverb effect is not applied if the ReverbSend
parameter is set to “0.”
C
YES
D
In Dual mode:
A
See the procedure on page 73.
B
NO
A
YES
B
NO
YES
C
D
Voice for editing (Voice 1 or Voice 2)
C
D
Setting range:
In Dual mode:
0 - 127
A
B
NO
C
YES
D
Voice for editing (Voice 1 or Voice 2)
Setting range:
0 - 127
CLP-175
81
Detailed settings for the voices [VOICE SETTING]
AutoPan
Setting the chorus on/off
[ChorusOnOff]
You can set the [CHORUS] button on or off for
each voice. When you select a voice, the chorus on/
off setting for the voice automatically changes
according to this parameter.
TIP
Even if this parameter is turned on, the chorus effect is
disabled if the ChorusSend parameter is set to 0.
Setting the speed of the vibraphone vibrato effect* [VibeRotorSpeed(RotorSpeed)]
See the procedure on page 73.
A
B
Detailed Settings
NO
C
The sound pans left to right and
back and forth.
Phaser
The phase changes periodically,
swelling the sound.
AutoWah
The center frequency of the wah
filter changes periodically.
SoundBoardRev Simulates the reverberation of a
piano soundboard.
Off
No effect.
YES
TERMINOLOGY
Rotor= The rotating portion of an electrical device etc.
D
This will be displayed only if VibeRotor is selected
for the DSP Type parameter explained above.
This sets the speed of the vibrato effect that is
applied when you have selected Vibraphone and
are using the VibeRotor pedal.
See the procedure on page 73.
Setting range:
On/Off
Selecting the DSP type*
[DSP Type (DSP)]
You can select other effects (than reverb and chorus).
See the procedure on page 73.
A
B
Setting range:
NO
C
YES
D
Setting range:
DelayLCR
DelayLR
Echo
CrossDelay
Symphonic
RotarySpeaker
Tremolo
VibeRotor
82
CLP-175
Delay applied at left, center, and
right positions.
Delay applied at left and right
positions.
Echo-like delay
Left and right delays are crossed.
Adds a rich and deep acoustic
effect.
Adds the vibrato effect of a rotary
speaker.
The volume level changes in
rapid cycles.
The vibrato effect of a vibraphone.
1–10
Detailed settings for the voices [VOICE SETTING]
Turning the vibraphone
vibrato effect on/off* [VibeRotorOnOff (RotorOnOff)]
Adjusting the brightness of the
sound* [Brightness]
See the procedure on page 73.
This will be displayed only if VibeRotor is selected
for the DSP Type parameter explained above.
It turns on/off the vibrato effect that is applied
when you use the VibeRotor pedal.
See the procedure on page 73.
A
B
NO
C
Setting range:
YES
D
Setting range:
On/Off
This will be displayed only if RotarySpeaker is
selected for the DSP Type parameter explained above.
It sets the rotation speed of the rotary speaker effect.
See the procedure on page 73.
Adjusting the resonance
effect* [HarmonicContent
(Harmonic)]
Detailed Settings
Setting the rotation speed of
the rotary speaker* [RotarySpeed (Rot.Speed)]
–64–+63
See the procedure on page 73.
Setting range:
–64–+63
TIP
Resonance can produce a distinctive “peaky” tone, making the sound brighter and harder.
Setting range:
Slow/Fast
Adjusting the depth of the
DSP effect* [DSPDepth]
This sets the depth of the DSP effect (page 82).
Some DSP Type settings do not allow you to set the
DSPDepth.
See the procedure on page 73.
Setting range:
1 (output only the original sound with almost no
effect applied)–127 (output only the sound processed by the effect)
CLP-175
83
Detailed settings for the voices [VOICE SETTING]
Adjusting the low-range frequency of the equalizer*
[EQ LowFreq. (EQ L.Freq)]
Adjusting the high-range frequency of the equalizer*
[EQ HighFreq. (EQ H.Freq)]
TERMINOLOGY
Equalizer:
An audio equalizer divides the frequency spectrum into
multiple regions and enables the user to adjust the relative amplitude of each region.
See the procedure on page 73.
Setting range:
High Gain
Low Gain
500 Hz–16.0 kHz
Detailed Settings
Adjusting the high-range gain
(amount of boost/cut) of the
equalizer* [EQ HighGain]
See the procedure on page 73.
Low Freq.
High Freq.
A
See the procedure on page 73.
NO
C
Setting range:
–12–+12 dB
Setting range:
32 Hz–2.0 kHz
Adjusting the low-range gain
(amount of boost/cut) of the
equalizer* [EQ LowGain]
See the procedure on page 73.
A
B
NO
C
Setting range:
–12–+12 dB
84
CLP-175
B
YES
D
YES
D
Detailed settings for the voices [VOICE SETTING]
Setting the touch sensitivity
[TouchSense]*
Setting the right pedal function [RPedal]
This parameter enables determines the manner
and degree to which the volume level changes in
response to your touch on the keyboard (how hard
you play). Since the volume level of the harpsichords and pipe organs do not change regardless of
how you play the keyboard, the normal setting for
these voices is 127. (See the setting range below.)
See the procedure on page 73.
A
B
NO
C
YES
D
A
B
NO
C
YES
D
Voice for editing (Voice 1 or Voice 2)
Setting range:
0 (softest) - 64 (largest changes in the level) - 127
(loudest and fixed)
A
B
NO
C
YES
D
Setting range:
Sustain
SustainCont
ON/OFF switch type damper
Damper that sustains the sound
proportionately to how deeply
you press the pedal
Sostenuto
Sostenuto (page 31)
Soft
Soft (page 31)
Expression
A function that lets you create
changes in dynamics (volume) as
you play
PitchBend Up A function that smoothly raises
the pitch
PitchBend Down A function that smoothly lowers
the pitch
RotarySpeed
Change the rotational speed of
the JazzOrgan rotary speaker
(switch between fast/slow each
time you press the pedal)
Viberotor
Switch the vibraphone vibrato
on/off (switch on/off each time
you press the pedal)
Off
No function
Detailed Settings
In Dual mode:
See the procedure on page 73.
Normal setting:
SustainCont
Setting the center pedal function [MPedal]
See the procedure on page 73.
A
B
NO
C
YES
D
Setting range:
Same as “Specifying the function of the right
pedal,” above.
Normal Setting:
Sostenuto
CLP-175
85
Detailed settings for the voices [VOICE SETTING]
Setting the left pedal function
[LPedal]
See the procedure on page 73.
A
B
NO
C
YES
D
Setting range:
Same as “Right pedal function assignment”
(page 85).
Normal Setting:
Detailed Settings
Soft (for all voices other than JazzOrgan and
VibraPhone)
Rotary Speed (JazzOrgan), Vibraphone (VibeRotor)
Setting the auxiliary pedal
function [AuxPedal]
You can assign a function to the pedal connected to
the Clavinova’s AUX PEDAL jack.
See the procedure on page 73.
A
B
NO
C
YES
D
Setting range:
Same as “Right pedal function assignment”
(page 85).
Normal setting:
Expression
TIP
Optional pedals
YAMAHA FC7 foot controller
This foot controller is suitable for controlling Expression,
SustainCont, or PitchBend Up/Down.
YAMAHA FC4 foot switch
YAMAHA FC5 foot switch
These foot switches are suitable for controlling Sustain,
Sostenuto, Soft, RotarySpeed, or VibeRotor.
86
CLP-175
Detailed settings for
iAFC [iAFC SETTING]
This section describes how to adjust various iAFC settings, such as selecting the iAFC type and adjusting the
depth. You can also perform an automatic adjustment in order to obtain the optimal iAFC effect.
Procedure
Press [iAFC SETTING] to enter iAFC Setting mode.
[iAFC SETTING]
Selecting the iAFC type
[iAFC Type]
See the procedure on page 73.
A
B
NO
YES
NaturalSndBrd (Natural Soundboard)
This creates the resonance and enhances the
acoustic realism of the sound that is characteristic of acoustic instruments. When used on a
grand piano sound, it produces a more naturalsounding piano. The sound of the instrument
itself is picked up by mics, and processed to create a virtual soundboard.
Detailed Settings
• To turn on the iAFC, open the lid with the
longer stay using the inner recess.
When the lid is closed or open with the
shorter stay, the iAFC will not be turned on.
• Perform the automatic adjustment when
you turn on the power of the Clavinova for
the first time, and also after you have moved
the Clavinova. (page 88)
DynDmpEfx (Dynamic Damper Effect)
This simulates the sustain sound that occur when
you press the damper pedal of a grand piano.
The mic is not used, but the sound produced
within the Clavinova is processed to create a spacious sensation.
This parameter is effective only on the voice
group “GRANDPIANO1.”
Setting range:
C
Select the iAFC type
D
DynDmpEfx
Select the iAFC variation
TIP
To understand the character of each iAFC type ...
Listen to the demo song for each iAFC type. (page 34)
NaturalSndBrd/SpatialEnsEfx
Settings:
DynDmpEfx
NaturalSndBrd/SpatialEnsEfx
SpatialEnsEfx (Spatial Ensemble Effect)
This lets you experience the ambience and reverberation that are characteristic of performing on
stage. Ambience and reverberation are also
added to the performance of the musicians playing together with you, letting you enjoy the sensation of playing together on stage. The sound of
the instrument itself and the sound of singing
and other instruments played nearby is picked
up by mics, and processed to simulate the spatial
characteristic of performing together on stage.
GrandPiano,
SemiConcert,
FullConcert
Small, Medium,
Large
Normal setting:
SemiConcert
Medium
Adjusting the iAFC depth
[iAFC Depth]
See the procedure on page 73.
A
B
NO
C
YES
D
Setting range:
0–127
Normal setting:
106
CLP-175
87
Detailed settings for iAFC [iAFC SETTING]
Calibration (automatic adjustment) [Calibration]
Detailed Settings
To perform the automatic adjustment, open the
lid with the longer stay using the inner recess.
When the lid is closed or open with the shorter
stay, the automatic adjustment will not be performed.
This automatically adjusts the sensitivity and
response of iAFC so that the optimal iAFC effect
will be obtained.
When automatic adjustment begins, a fairly loud
harpsichord note will sound four times at a fixed
interval.
Automatic adjustment will end in approximately
two and a half minutes.
While automatic adjustment is being performed,
do not make audible noises in the vicinity of the
Clavinova.
See the procedure on page 73.
TIP
iAFC cannot be used in the following cases:
• When the lid is closed or open with the shorter stay.
• When the Speaker setting is Normal, and headphones are connected.
• When the Speaker setting is Off.
TIP
If you close the lid completely or to the shorter stay while
performing the automatic adjustment, the adjustment will
be aborted.
If this occurs, perform the automatic adjustment once
again.
TIP
The keyboard will not produce sound while automatic
adjustment is being performed. Nor is it possible to
adjust the volume of the Clavinova.
TIP
If a sound occurs in the vicinity of the Clavinova during
automatic adjustment, the automatic adjustment may be
aborted, and the settings reset to their default values.
If this occurs, we recommend that you perform the automatic adjustment once again.
88
CLP-175
TIP
If any low-range noise (such as an air conditioner or traffic) is audible around the Clavinova during the automatic
adjustment, the adjustment may abort and the settings
reset to their default values. If this occurs, we recommend that you perform the automatic adjustment once
again after you eliminate the noise.
TIP
If you re-locate the Clavinova after making the automatic
adjustment, first reset the iAFC settings to their default
values before re-locating the unit. (See the following.)
Restoring the default iAFC settings [iAFC Default]
This sets the iAFC function to the default setting.
See the procedure on page 73.
MIDI [MIDI SETTING]
You can make detailed MIDI settings, such as setting up MIDI transmit/receive channels.
About MIDI
MIDI (Musical Instrument Digital Interface) is a standard format for data transmission/reception. It
enables the transfer of performance data and commands between MIDI devices and personal computers.
Using MIDI, you can control a connected MIDI device from the Clavinova, or control the Clavinova from
a connected MIDI device or computer.
MIDI connectors
PC-2
MIDI
IN
OUT
Mac
USB
THRU
MIDI
HOST SELECT
TIP
Prepare dedicated MIDI cables.
[TO HOST] jack
Use this jack to connect the Clavinova to a computer.
PC-2
MIDI
When you are using the
MIDI connectors, set the
[HOST SELECT] switch to
“MIDI.” (See page 61.)
Mac
USB
HOST SELECT
TO HOST
TIP
The type connecting cable varies depending on the computer. Refer to “Connecting a Personal Computer” on page 63 for more information.
[USB] jack
Use this jack to connect the Clavinova and computer.
PC-2
MIDI
Since MIDI data that can be
transmitted or received varies depending on the type of
MIDI device, check the “MIDI
Implementation Chart” to find
out what MIDI data and commands your devices can
transmit or receive. The Clavinova’s MIDI Implementation
Chart is listed on page 32 in
the “Reference Booklet” for
the CLP-175.
Detailed Settings
MIDI [IN]: Receives MIDI data.
MIDI [OUT]: Transmits MIDI data.
MIDI [THRU]: Transmits data received at the MIDI [IN] connector as it is.
TIP
MIDI performance data and
commands are transferred in
the form of numeric values.
Mac
USB
HOST SELECT
TO HOST
USB
TIP
When you are using the [TO
HOST] jack, set the [HOST
SELECT] switch correctly,
according to the type of
computer you are using.
(See page 61.)
NOTE
When you are using the
[USB] jack, set the [HOST
SELECT] switch to “USB.”
TIP
You can also obtain detailed
information about MIDI from
various music magazines
and books.
CLP-175
89
MIDI [MIDI SETTING]
Procedure
Press the [MIDI SETTING] button to enter MIDI setting mode.
[MIDI SETTING]
Setting the MIDI transmit
channel [MidiOutChannel]
Setting the MIDI receive channel [MidiInChannel]
This parameter enables you to specify the channel
on which the Clavinova transmits MIDI data.
See the procedure on page 73.
Detailed Settings
A
You can specify whether each channel of data from
MIDI [IN], [TO HOST], and [USB] will be
received.
See the procedure on page 73.
B
A
NO
B
YES
NO
C
D
C
Select a voice part.
Specify the channel.
Setting for:
Main, Left, Layer, Left Layer
Setting range:
Ch1 - Ch16, Off (Not transmitted.)
Normal setting:
Main — Ch1
Left — Ch2
Layer — Ch3
Left Layer— Ch4
YES
D
Select a channel.
Select a MIDI
receive part.
Setting for:
Ch1 - Ch32
Setting range:
Song, Main, Left, Layer, LeftLayer, Keyboard, Off
Normal setting:
Ch1–16
Ch17
Ch18
Ch19
Ch20
Ch21
Others
—
—
—
—
—
—
—
Song
Keyboard
Main
Left
Layer
LeftLayer
Off
MIDI data
MIDI IN
TO HOST
USB
(When the channel
setting is other
than Song or Off)
Port A
90
CLP-175
Port B
Sound source A
Channels 1-16
Sound source B
Channels 17-32
Used for song
playback
Only for song
playback
Played from
the keyboard
MIDI [MIDI SETTING]
Setting Local control on/off
[LocalControl]
“Local Control On” is a state in which the Clavinova produces the sound from its tone generator
when you play the keyboard. In “Local Control
Off ” state, the keyboard and the tone generator are
cut off from each other. This means that even if
you play the keyboard, the Clavinova will not produce the sound. Instead, the keyboard data can be
transmitted via MIDI to a connected MIDI device,
which can produce the sound. The “Local Control
Off ” setting is useful when you wish to play an
external sound source while playing the keys on the
Clavinova.
See the procedure on page 73.
This parameter enables you to specify which MIDI
data the Clavinova can receive.
See the procedure on page 73.
A
B
NO
C
Select a type of data.
YES
D
Select On or Off.
Type of data:
Note, Control, Program, Pitch Bend, SysEx (System Exclusive)
Detailed Settings
A
Selecting a type of data
received via MIDI [ReceiveParameter]
B
Setting range:
NO
C
YES
On/Off
Normal setting:
D
On for all types of data
Setting range:
Selecting a type of data transmitted via MIDI [TransmitParameter]
On/Off
Normal setting:
On
Selecting performance from
the keyboard or song data for
MIDI transmission [MidiOutSelect]
This parameter enables you to specify which MIDI
data the Clavinova can transmit.
See the procedure on page 73.
A
B
NO
You can select whether your performance data or
song playback data (including demo songs) is sent
via MIDI.
See the procedure on page 73.
C
Select a type of data.
YES
D
Select On or Off.
Type of data:
A
B
NO
C
YES
D
Note, Control, Program, Pitch Bend, SystemRealTime, SysEx (System Exclusive)
Setting range:
On/Off
Setting range:
Normal setting:
Keyboard performance data played on the keyboard
Song
song playback data
On for all types of data
Normal setting:
Keyboard
CLP-175
91
MIDI [MIDI SETTING]
Transmitting the initial settings on the panel [InitialSetup]
You can transmit the panel data, such as voice
selection, to a connected sequencer. Before you
record performance data to a connected sequencer,
it is useful if you first send and record (at the
beginning of the performance data) the panel
setup data for your performance during playback.
See the procedure on page 73.
A
B
NO
Detailed Settings
C
YES
D
Executing voice data bulk
dump [VoiceBulkDump]
You can transmit the voice data specified in the
“Voice Setting” menu (page 79) as MIDI bulk data.
You can interrupt voice data bulk dump transmission by pressing the B [– (NO)] button.
See the procedure on page 73.
A
B
NO
C
92
CLP-175
YES
D
Other settings
You can make detailed settings for touch, tuning, scale, etc.
Procedure
Press the [OTHER SETTING] button to enter Other Setting mode.
[OTHER SETTING]
Selecting a touch response
[TouchResponse]
Fine tuning the pitch [Tune]
A
B
A
NO
B
YES
NO
C
Detailed Settings
You can specify a touch response (how the sound
responds to the way you play the keys).
See the procedure on page 73.
You can fine tune the pitch of the entire instrument. This function is useful when you play the
Clavinova along with other instruments or CD
music.
See the procedure on page 73.
YES
D
C
Setting range:
Light
With a soft touch, the Clavinova produces a loud sound. The volume level of
tones tends to be consistent.
Medium Standard touch response.
Heavy You must hit the key very hard to generate a loud volume. This allows for versatile expression, from pianissimo to
fortissimo tones.
Fixed
No touch response. The volume level will
be the same regardless of how hard you
play the keys. Use the B [–]/[+] buttons
to set the volume level.
D
Setting range:
A3=427.0Hz - 453.0Hz (0.1Hz steps)
Selecting a tuning curve for a
piano voice [PianoTuningCurve]
You can select a tuning curve from “GrandPiano1”
and “GrandPiano2.” Select “Flat” if you feel the
tuning curve of the piano voice does not quite
match that of other instruments voices.
See the procedure on page 73.
A
B
Setting range of the “Fixed” volume level:
NO
YES
1 - 127
C
D
Setting range:
Stretch
Flat
Tuning curve particularly for pianos
Tuning curve in which the frequency is
octave doubled over the entire keyboard
range
CLP-175
93
Other settings
Selecting a scale [Scale]
A
You can select various scales.
Equal Temperament is the most common contemporary piano tuning scale. However, history has
known numerous other scales, many of which
serve as the basis for certain genres of music. You
can experience the tunings of these genres.
See the procedure on page 73.
A
B
NO
C
D
Equal
One octave is divided into twelve equal
intervals. Currently most popular piano
tuning scale.
PureMajor/PureMinor
Based on natural overtones, three major
chords using these scales produce a beautiful, pure sound. They are sometimes used
for chorus parts.
Pythagorean
This scale, designed by Pythagoras, a Greek
philosopher, is based on the interval of a
perfect 5th. The 3rd produces swells, but
the 4th and 5th are beautiful and suitable
for some leads.
MeanTone
This scale is an improvement of the
Pythagorean in that the swell of the 3rd has
been eliminated. It spread during the late
16th century through the late 18th century.
Handel used this scale.
WerckMeister/KirnBerger
These scales combine Mean Tone and
Pythagorean in different ways. With these
scales, modulation changes the impression
and feel of the songs. They were often used
in the era of Bach and Beethoven. They are
also often used now to reproduce the music
of that era on harpsichords.
Detailed Settings
NO
C
Normal setting:
Equal
If you select a scale other than Equal, you need to
specify the root note using the B [–]/[+] buttons.
D
C, C , D, E , E, F, F , G, A , A, B , B
Setting range:
Specifying the Split Point
[SplitPoint]
You can specify the split point (the boundary between
the right-hand and left-hand keyboard areas).
See the procedure on page 73.
A
B
NO
C
YES
D
Setting range:
A-1–C7
NOTE
You can also use [SPLIT] to set the split point. (page 38)
Changing the key [Transpose]
TIP
TRANSPOSE= To change the key
(Changing the key: To raise or lower the overall pitch of
the entire song.)
The Clavinova’s Transpose function makes it possible to
shift the pitch of the entire keyboard up or down in semitone intervals to facilitate playing in difficult key signatures, and to let you easily match the pitch of the
keyboard to the range of a singer or other instruments.
For example, if you set the transposition amount to “5,”
playing key C produces pitch F. In this way, you can play
the song as if it were in C major, and the Clavinova will
transpose it to the key of F.
Setting for:
Master
Keyboard
Song
CLP-175
YES
YES
Setting range:
94
B
The sound of the entire instrument
(the manually-played sound and the
song playback)
The manually-played sound
The song playback
Other settings
Setting range:
–12 (–1 octave)–0 (normal pitch)–+12 (+1 octave)
Adjusting the depth of the
Soft pedal [SoftPedalDepth]
Specify the volume of the keyoff sound [KeyOffSamplingDepth]
You can adjust the volume of the key-off sound (the
subtle sound that occurs when you release a key)
This is effective on the voice groups “Grand
Piano1,” “Harpsichord,” and “E.Clavichord” and
on the voice “E.Piano2.”
See the procedure on page 73.
See the procedure on page 73.
Setting range:
1–10
Off, 1 - 10
This parameter is effective on the voices, such as
“Grand Piano 1.”
See the procedure on page 73.
A
Selecting a pedal function for
vibraphone [VibraphonePedalMode]
B
NO
C
YES
D
Setting range:
Off, 1 - 10
This parameter enables you to select whether the
sound is sustained while you press the keys on the
keyboard (“PianoLike”) or the sound is sustained
only while you press and hold down the sustain
pedal, like playing a real vibraphone (“Normal”).
See the procedure on page 73.
A
Depth of sustain sampling for
the damper pedal [SustainSamplingDepth]
This parameter is effective only on the voice group
“GRANDPIANO1.”
See the procedure on page 73.
A
B
NO
C
YES
D
Setting range:
PianoLike, Normal
Normal setting:
PianoLike
B
NO
C
Detailed Settings
Setting range:
Depth of string resonance
[StringResonanceDepth]
YES
D
Setting range:
Off, 1 - 10
CLP-175
95
Other settings
Assign the SONG [START/
STOP] function to the pedal
[PedalStart/Stop]
Setting the point at which the
damper pedal starts to affect
the sound [HalfPedalPoint]
TIP
If you assign the SONG START/STOP function to a
pedal and turn the function On, the pedal function
assigned to the pedal in the Voice Setting menu (pages
85 and 86) is disabled.
See the procedure on page 73.
A
B
NO
YES
C
Detailed Settings
Select a pedal to assign
the function.
Here you can specify the point to which you must
depress the pedal (right, center, left, AUX) before the
assigned effect begins to be applied. (This setting
applies to effects that can be assigned to each pedal,
such as damper or sostenuto (page 85). Expression is
not affected by this setting.)
If the effect is an on/off type effect, this setting
specifies the point at which the effect will be
switched on/off.
A
D
Set to On or Off.
B
NO
Setting for:
C
YES
D
Left, Middle, AUX
Setting range:
Setting range:
–2 (effective with the shallowest press) - 0 - +2
(effective with the deepest press)
On/Off
Normal setting:
Pitch bend range
[PitchBendRange]
Off for all pedals
Selecting a type of auxiliary
pedal [AuxPedalType]
A pedal connected to the [AUX PEDAL] connector
may switch on and off differently. For example,
some pedals turn on the effects and others turn
them off when you press them.
Use this parameter to reverse this mechanism.
See the procedure on page 73.
A
This specifies the amount of change that can be
produced by the pitch bend function which
smoothly varies the pitch.
• This setting applies only to the manually-played
sound.
• This setting can be made in semitone steps.
• You can set the pedal function (page 85) to specify whether the pitch will be raised or lowered.
See the procedure on page 73.
B
A
NO
B
YES
NO
C
YES
D
C
D
Setting range:
Make, Break
Setting range:
0–+12 (Pressing the pedal will raise/lower the pitch
by 12 semitones [1 octave])
Normal setting:
2
96
CLP-175
Other settings
Switch the speaker on/off
[Speaker]
Restoring the normal (default)
settings [FactorySet]
This setting lets you switch the speaker on/off.
See the procedure on page 73.
Normal (HeadphoneSW)
The speaker will sound only if headphones are not connected.
On
The speaker will always sound.
Off
The speaker will not sound.
You can reset the Clavinova to its normal (factory
default) settings.
• The CharacterCode parameter setting in the File
menu does not change.
• The MemoryBackUp parameter setting (On/
Off) (left column) is reset to the normal setting.
• You can specify whether the memory songs are
erased or kept.
See the procedure on page 73.
Reset the Clavinova.
A
B
NO
You can back up some settings, such as voice selection and metronome setting, so that they will not
be lost after you turn off the power to the Clavinova.
• Memory songs (saved in the Clavinova’s memory), the backup on/off setting (this parameter
setting), and the “CharacterCode” parameter
setting (page 56) are always backed up.
See the procedure on page 73.
A
B
NO
C
Select the desired item.
YES
D
Select on or off.
Setting for:
Transpose, Brilliance, ReverbOnOff, iAfcOnOff,
SplitPoint, Main/LeftVoice, MetronomeSetting,
SongSetting, iAfcSetting, MidiSetting, and OtherSetting (except for Transpose and SplitPoint setting).
C
Detailed Settings
Selecting items saved at shutdown [MemoryBackUp]
YES
D
Select a value for memory songs.
Selecting for “MemorySong”:
MemorySongExcluded
MemorySongIncluded
Memory songs are kept.
Memory songs are
erased.
Other method for restoring
the normal settings
Press and hold down the white key on the right end
(C7) and press the [POWER] switch to turn on the
power to the Clavinova. In this case, the Memory
songs saved in the storage memory are not erased.
If you wish to erase Memory songs at this time,
press and hold down the right-most white key (C7)
and black key (B6) and press the [POWER] switch
to turn on the power to the Clavinova.
B 6
D
2
E.PIANO
1
E.PIANO
2
HARPSICHORD
N
STRINGS
CHOIR
SYNTH.
PAD
E.CLAVICHORD
VIBRAPHONE
GUITAR
WOOD
BASS
E.BASS
XG
VOICE
VOICE
SETTING
ON/OFF
MIDI
SETTING
AFC
SETTING
OTHER
SETTING
AFC
SPLIT
VARIATION
REVERB
CHORUS
BRILLIANCE
MELLOW
BRIGHT
EFFECT
POWER
Setting range:
On/Off
Normal setting:
The Transpose, Main/LeftVoice, MetronomeSetting, and OtherSetting (except for Transpose and
SplitPoint setting) parameters are set to Off. Other
parameters are set to On.
C7
[POWER]
CLP-175
97
Message List
The messages are listed in alphabetical order.
Message
Meaning
This will be displayed following the “BulkDataReceiving Voice” message. This indicates that the Clavinova finished receiving the bulk data.
Once you have verified this message, you may proceed to the next step.
Receiving bulk data has failed. Check the parameter settings and try
again.
The Clavinova is receiving the voice setting bulk data while this message is displayed. Wait until the message disappears, then proceed to
the next step.
Detailed Settings
This message will appear if a sound is audible in the vicinity of the
Clavinova during automatic adjustment. The automatic adjustment
may abort, and the settings reset to their default values. In this case,
perform the automatic adjustment once again.
This message means that when the “Speaker” setting is set to Normal
and headphones are connected, no sound is output from the speaker
on the bottom face, and therefore automatic adjustment of iAFC is
not possible. In this case, unplug the headphones.
This message means that automatic adjustment of iAFC is not possible because the lid is closed or open with the shorter stay.
In this case, open the lid with the longer stay using the inner recess.
This message means that automatic adjustment of iAFC is not possible because no sound is output from the speaker on the bottom face.
In this case if the “Speaker” setting is Off, turn “Speaker” On. If
“Speaker” is set to Normal and headphones are connected, unplug
the headphones.
This message confirms that in the “VoiceBulkDump” operation
(page 92), you pressed the B [–(NO)] button to cancel while data
was being transmitted.
This message is displayed following the message “Executing.” The
Clavinova’s internal processing is complete. You may proceed to the
next step.
When you delete a folder, this message asks you whether you want to
delete all of the files in that folder. To delete all files in the folder,
press the D [+(YES)] button. To cancel, press the D [–(NO)] button.
Writing or reading data from the disk has failed. Try again. If you
still see this message, the disk may be damaged or the disk drive may
have malfunction. If you see this message while using a brand new
disk, it is more likely that the disk drive is malfunctioning. Ask your
Yamaha dealer for repair.
98
CLP-175
Message List
Message
Meaning
The floppy disk space is full and can no longer record data. Use a
new disk (page 50) or delete unnecessary files from the disk
(page 51) to make room for new data.
You attempted to eject a floppy disk from the disk drive while the
drive was writing or reading. The writing or reading operation is not
complete yet. Try it again.
When you attempted to rename a song and save it in “RenameSong”
(page 53), this message will appear if an identically-named song
already exists in the save memory / floppy disk that contains that
song. Three seconds after this message is displayed, you will return
to the previous screen. Please specify a different name.
Detailed Settings
This message prompts you to execute a file-related operation. Press
the B [+ (YES)] button to proceed, or press the [EXIT] button to
cancel.
The Clavinova is processing the data internally. Wait until the message disappears, then proceed to the next step.
The normal (factory default) settings (except for the memory song
setting) (“FactorySet” on page 97) have been restored. This message
also appears if you press and hold down the C7 key and turn on the
power to the Clavinova (page 97).
The normal (factory default) settings (including the memory song
setting) (“FactorySet” on page 97) have been restored. This message
also appears if you press and hold down the C7 and B6 keys and
turn on the power to the Clavinova (page 97).
The Clavinova’s flash memory (storage memory) has expired. Consult your Yamaha dealer. If this message appears, the Clavinova will
not back up the songs and settings in memory. Press the [EXIT] button to return to the previous screen.
There is a problem with the TO HOST/USB connector
When using the CLP-175 connected to your personal computer ...
The driver or MIDI application on your computer is not functioning correctly, perhaps because the computer is turned off, the cable is not connected correctly, or the HOST SELECT switch is not set correctly. In this
case, turn off the power of the CLP-175 and your computer, and check the
cable connections and HOST SELECT switch setting. Then turn on the
power in the order of your computer → CLP-175, and check that the driver
and MIDI application on your computer are functioning correctly.
When using the CLP-175 by itself ...
This message may appear if a cable is left connected to the [TO HOST] or
[USB] jack of the CLP-175. In this case, turn off the power of the CLP-175,
disconnect the cable, and then turn on the power again. If the cable is left
connected, the CLP-175 may not function correctly.
CLP-175
99
Message List
Message
Meaning
In the CopyDisk operation (page 54), the copy source disk has not
been inserted to the disk drive. Insert the disk.
In the CopyDisk operation (page 54), the copy destination disk has
not been inserted into the disk drive. Insert the disk.
You turned off the power to the Clavinova while it was writing a
song to storage memory. This message appears next time you turn
on the power. The Clavinova checks if the contents of storage memory can be recovered.
Detailed Settings
This message appears following the message “LastPowerOffIllegalMemorySongChecking,” indicating that the Clavinova recovered
data in the storage memory as much as possible.
This message appears following the message “LastPowerOffIllegalMemorySongChecking,” indicating that the Clavinova could not
recover data in the storage memory and that all memory songs were
deleted.
While a preset song was being read, the Clavinova detected defects in
memory. Reset the Clavinova to its normal (factory default) settings
with “MemorySongIncluded” (page 97) after you back up all song
data.
This message indicates that there may be a problem with the memory. If the message appears repeatedly when you continue using the
Clavinova, back up the song data, then restore the default setting by
using “FactorySet” with “MemorySongIncluded” selected (page 97).
There is not enough memory space left and you cannot save any
more songs. Save songs to a floppy disk (page 54) or delete some
songs in the storage memory, then save new data to memory.
A floppy disk has not been inserted into the disk drive for a diskrelated operation. Insert the disk and continue.
This message will appear if there is no song for the “SaveToMemory”
(page 50) or “SaveToDisk” (page 51) operation to save. In this case,
no song will be saved.
You tried to delete a song that does not exist in the storage memory
or on disk. You cannot delete the song.
100
CLP-175
Message List
Message
Meaning
This message prompts you to select whether you wish to overwrite
the existing data with new data when you add recordings to a
song. Press the B [+ (YES)] button to allow overwriting. Press the
B [– (NO)] button to cancel.
You tried to start playing a song or perform another operation right
after you select the song. Wait until the message disappears.
You tried to copy or delete data in internally-protected files (such as
commercially available music data). You cannot write to, copy, or
delete such files.
Detailed Settings
1. You tried to write, copy, or delete data on a disk that has its “write
protect” tab on, or a disk that is internally protected against writing. Set the protect tab to off (unprotected) (page 13) and try
again. If you still see this message, the disk is internally protected
(such as commercially available music data). You cannot write or
copy to such a disk.
2. This message also appears when you try to copy data on an internally-protected disk onto another disk using the CopyDisk function (page 54). You cannot duplicate such a disk.
After you load an internally-protected song into the Clavinova’s
Current memory or storage memory, you tried to save the song to a
floppy disk. You cannot save such a song to another disk. You cannot
write or copy to such a disk.
This message prompts you to select whether you wish to save the
edited settings. Press the B [+ (YES)] button to save the settings.
Press the [EXIT] button to cancel.
You tried to perform another operation before saving the recorded
song to storage memory or a floppy disk. If you continue the operation, the recorded song will be lost. To delete the new recording,
press the B [– (NO)] button. To keep the recording, press the B [+
(YES)] button. The Clavinova displays the “SaveToMemory”
(page 50) or “SaveToDisk” (page 51) parameter screen. If necessary,
select “SaveToMemory” or “SaveToDisk” accordingly and save the
recorded song, then proceed to another operation.
CLP-175
101
Message List
Message
Meaning
1. This message will appear if a problem is found with the song data
when you select a song or while the song is playing. In this case, reselect the song, and try once again to play it back. If the message
still appears, the song data may have been damaged.
2. This message will appear if a different “CharacterCode” (page 56)
is selected than when you assigned the song name. In this case,
switch the “CharacterCode”, re-select the song, and play back.
Detailed Settings
1. This message will be displayed if current memory fills up during
recording. Recording will stop automatically at this point. The
data that had been recorded up to that point will remain. This
message will also be displayed when you attempt to enter Record
mode for additional recording if that song already occupies all of
current memory. In this case, additional recording will not be possible. If there is an already-recorded track that you do not need to
keep, you can use “ChannelClear” (page 76) to delete the
unneeded track, so that you will then be able to record the equivalent amount of additional material.
2. This message will be displayed when you select a song if that song
is larger than the capacity of the current memory (page 104). This
song cannot be loaded into the CLP-175, and cannot be played
back. Please select a different song.
This message will be displayed when you edit a song if that song is
larger than the capacity of the current memory (page 104). This
song cannot be edited on the CLP-175.
This message prompts you to start the operation. To start, press the
B [+ (YES)] button. Press the [EXIT] button to cancel the operation.
This message prompts you to confirm the execution. Press the
B [+ (YES)] button to continue. Press the B [– (NO)] button to cancel.
You tried to perform a file- or disk-related operation using an unformatted disk. Eject the disk, format it using the “FormatDisk” parameter (page 55), and try again.
You tried to perform a file- or disk-related operation using an unformatted disk. To cancel the operation, press the B [– (NO)] button.
To format the disk and try again, press the B [+ (YES)] button to
display the “FormatDisk” parameter (page 55).
102
CLP-175
Message List
Message
Meaning
This message means that the Clavinova was unable to transmit voice
bulk data. If this message appears, make sure that the power of your
computer is not turned off, that the cable is connected correctly, that
the HOST SELECT switch is set correctly, and that the driver on
your computer is functioning correctly. Then try transmitting the
data once again.
You tried to copy data to a different type of disk (e.x.: 2DD →2HD,
2HD→2DD) during the CopyDisk operation (page 54). Eject the
disk and insert an appropriate disk.
CLP-175
Detailed Settings
You used a period or space at the beginning of a song name or you
tried to change a song name that includes a character (or characters)
not supported by the CLP-175, and the CLP-175 could not process
the name. The Clavinova displays the previous screen in three seconds. Rename the song correctly.
103
Questions about Operations
and Functions
■ The buttons do not respond.
While you are using a function, some buttons
not used for the function are disabled. If the
song is playing, stop the playback. Otherwise,
press the [EXIT] button to return to the main
screen. Then, perform the desired operation.
■ The sound sustains and does not decay
when I press the sostenuto pedal.
With the voices in the CHURCH ORGAN,
JAZZ ORGAN, STRINGS, CHOIR group, or
some voices in the XG group, the sound continues sustaining while you are holding down the
sostenuto pedal.
■ Higher or lower notes does not sound correctly when the transpose or octave setting
is made.
Detailed Settings
The setting range for the transposition and
octave setting is C-2 - G8. (With the normal setting, the Clavinova’s 88 keys covers the range of
A-1 - C7.) If the lowest key is set to a note lower
than C-2, it will produce a sound one octave
higher. If the highest key is set to a note higher
than G8, it will produce a sound one octave
lower.
■ How can I return to the recording or song
select screen during song recording or playback?
Press one of the SONG SELECT [
[ ] buttons once.
] and
■ The tempo does not change even though I
recorded with tempo changes.
Depending on the timing of tempo changes, the
changed tempo may not be recorded. In this
case, the recording will be played back at the
original tempo.
Make tempo changes when the recording track
is selected and a red track indicator is flashing.
The same trick applies to editing the tempo
after recording.
■ Performance in Dual or Split mode is not
recorded.
Track data is lost unexpectedly.
For Dual or Split mode recording, the recording
track for the second voice (that is, the voice for
the left-hand part) is automatically assigned
(page 35). Therefore, if the track already has
data, the data will be overwritten during
recording. Also, switching to Dual mode or
Split mode in the middle of the song is not
recorded. Therefore, the notes you played with
the second voice (or the notes lower than the
Split point) are not recorded.
■ What type of data is recorded?
Data recorded in the tracks:
• Note data (notes you play)
• Voice selection
• Clavinova pedals and external pedal on/off
• Reverb depth [ReverbSend]
• Chorus depth [ChorusSend]
• DSP effect depth [DSPDepth]
• Sound brightness [Brightness]
• Resonance effect setting [Harmonic Content]
• Equalizer’s low-range frequency setting
[EQLowFreq.]
• Equalizer’s low-range gain setting [EQLowGain]
• Equalizer’s high-range frequency setting
[EQHighFreq.]
• Equalizer’s high-range gain setting [EQHighGain]
• Octave setting of the voice [Octave]
• Volume setting of each voice [Volume]
• Left/right position of each sound [Pan]
• Fine pitch adjustment between two voices
(Dual only) [Detune]
• Volume change in response to playing
strength for each voice [TouchSense]
Data recorded globally in all tracks:
• Tempo
• Time signature
• Reverb type
• Chorus type
• DSP effect type
You can change all data except for note data after
recording.
You can change the time signature at the beginning of
the song, or at a position in the song to which you
move, by using the B [–]/[+] buttons while the song
is stopped.
104
CLP-175
Questions about Operations and Functions
■ I cannot change the key signature in the
song after recording.
Press the [TOP] button to locate the top of the
song, use the B [–]/[+] buttons to locate the
measure in which you wish to change the key
signature, then change it.
■ How much data can I record?
• Current memory (page 50): About 800KB
• Storage memory (page 50): About 750KB
• 2DD floppy disk (page 12): about 720KB
• 2HD floppy disk (page 12): about 1.4MB
■ The on/off setting of the pedal connected to
the AUX PEDAL jack is reversed.
■ What is the difference between “TouchSense” and “TouchResponse” MIDI data?
“TouchSense” determines the manner and
degree to which the volume level changes in
response to your touch on the keyboard. The
MIDI note-on velocity data is not changed. It
changes the volume level at the same velocity
data.
“TouchResponse” determines the touch sensitivity of an instrument. The MIDI note-on
velocity data is changed when you play the keyboard with a consistent touch.
CLP-175
Detailed Settings
Some types of pedals may turn on and off in
opposite fashion. Use the “AuxPedalType”
parameter (page 86) in the “OTHER SETTING” menu to change the external pedal setting.
■ The song title is not correct.
The “CharacterCode” setting may be different
than that used when you named the song. Also,
if the song was recorded on another instrument, the title might be displayed incorrectly.
Use the “CharacterCode” parameter (page 56)
in the FILE menu to change the setting. However, if the song was recorded on another
instrument, changing the “CharacterCode”
parameter setting may not resolve the problem.
105
Detailed Settings
MEMO
106
CLP-175
.
Appendix
CLP-175
107
Troubleshooting
Problem
Cause
The power of the Clavinova does
not turn on.
The power cable is not plugged in
(check at the Clavinova and at the
electrical outlet).
Insert the power cable plug firmly
into the Clavinova and into the electrical outlet of the correct voltage.
(page 18)
There is a clicking noise when you
press [POWER] to turn the power
on or off.
This is caused by the electrical
power within the instrument.
This is not a malfunction.
Noise is heard from the Clavinova.
A portable telephone is being used
near the Clavinova (or the ring tone
is sounding).
The overall volume is too low. Or,
there is no sound at all.
The [MASTER VOLUME] is lowered.
Headphones are connected (only if
the Speaker setting is “Normal
HeadphoneSW”). (page 97)
Speaker setting is off.
Appendix
Local Control is turned off.
“Expression” is assigned to one of
the right, center, and left pedals.
Turn off the power of the portable
telephone located near the Clavinova. Noise may be heard if a portable telephone is used near the
Clavinova or if the ring tone occurs.
Raise [MASTER VOLUME].
(page 19)
Disconnect the headphone plug.
Set [Speaker] to “Normal” or “ON”.
(page 97)
Set Local control ON. (page 91)
Assign any function other than
“Expression” to the pedal.
Move [SONG BALANCE] toward
the keyboard to increase the keyboard volume.
The keyboard volume is lower than
the song playback volume.
The volume level for the keyboard
performance is set too low.
Sound is still heard from the speakers even though headphones are
plugged in.
Speaker setting is On.
Set the speaker setting to “Normal
(HeadphoneSW)”. (page 97)
The lid is closed or open with the
shorter stay.
iAFC was not automatically
adjusted correctly.
Open the lid with the longer stay
using the inner recess.
Turn iAFC OFF, and perform the
automatic adjustment. (page 88)
The plug of the pedal cable is not
inserted into the [PEDAL] jack.
Plug the pedal cable firmly into the
[PEDAL] jack. (page 115)
iAFC cannot be turned ON.
Feedback occurs when you turn
iAFC on.
Damper pedal does not function, or
notes are sustained even though
the damper pedal is not pressed.
108
Solution
CLP-175
Data Compatibility
This section covers basic information on data compatibility: whether or not other MIDI devices can playback the
data recorded by CLP-175, and whether or not the CLP-175 can playback commercially available song data or song
data created for other instruments or on a computer.
Depending on the MIDI device or data characteristics, you may be able to play back the data without any problem,
or you may have to perform some special operations before the data can be played back. If you run into problems
playing back data, please refer to the information below.
Basic Check Points
Sequence Format
The data and the MIDI device must match in regards
to the items below.
• Disk Format
• Sequence format
• Voice allocation format
The system which records song data is called “sequence
format.”
• Playback is only possible when the sequence format
of the disk matches that of the MIDI device.
[Common Sequence Formats]
Disk format
■ SMF (Standard MIDI File)
This is the most common sequence format.
• Standard MIDI Files are generally available as one
of two types: Format 0 or Format 1.
• Many MIDI devices are compatible with Format
0, and most commercially available software is
recorded as Format 0.
• The CLP-175 is compatible with both Format 0
and Format 1.
• Performance data recorded on the CLP-175 is
saved in the SMF format 0 in a floppy disk.
Appendix
Floppy disks are the main storage medium for data
used with various devices, including computers. Different devices have different systems of saving data,
therefore it is necessary to first configure the floppy
disk to the system of the device being used. This operation is called “formatting.”
• There are two types of floppy disks: MF2DD (double sided, double density) and MF2HD (double
sided, high density), and each type has different formatting systems.
• CLP-175 can record and playback with both types of
floppy disks.
• When formatted by the CLP-175, a 2DD disk saves
up to 720 KB (kilobytes) and a 2HD disk saves up to
1.44 MB (megabytes). (The figures “720 KB” and
“1.44 MB” indicate the data memory capacity. They
are also used to indicate the format type of disk.)
• Playback is only possible when the MIDI device to
be used is compatible with the format of the disk.
■ ESEQ
This sequence format is compatible with many of
Yamaha’s MIDI devices, including the Clavinova
series instruments. This is a common format used
with various Yamaha software.
• The CLP-175 is compatible with ESEQ.
CLP-175
109
Data Compatibility
Voice Allocation Format
With MIDI, voices are assigned to specific numbers,
called “program numbers.” The numbering standard
(order of voice allocation) is referred to as the “voice
allocation format.”
• Voices may not play back as expected unless the
voice allocation format of the song data matches
that of the compatible MIDI device used for playback.
[Main Voice Allocation Formats]
Appendix
■ GM System Level 1
This is one of the most common voice allocation
formats.
• Many MIDI devices are compatible with GM System Level 1, as is most commercially available
software.
• The CLP-175 is compatible with GM System
Level 1.
■ XG
XG is a major enhancement of the GM System Level
1 format, and was developed by Yamaha specifically
to provide more voices and variations, as well as
greater expressive control over voices and effects,
and to ensure compatibility of data well into the
future.
• The CLP-175 is compatible with XG.
• Performance data recorded with preset voices on
the CLP-175 can be played on other XG-compatible instruments.
■ DOC (Disk Orchestra Collection)
This voice allocation format is compatible with
many of Yamaha’s MIDI devices, including the
Clavinova series instruments.
This is also common format used with various
Yamaha software.
The CLP-175 is compatible with DOC.
• Even if the devices and data used satisfy all the
conditions above, the data may still not be completely compatible, depending on the specifications of the devices and particular data recording
methods.
110
CLP-175
Preset Voice List
: YES, ×: No
Voice
group
Voice name
Stereo
sampling
Touch
Sense
Dynamic
sampling
Key-off
samples
String
resonance
GrandPiano1
This sound was sampled from a full concert grand
piano. Three stages of dynamics were sampled,
and no effort has been spared in making the sound
virtually identical to that of an acoustic piano. Even
the tonal changes produced by the damper pedal
and the subtle sounds of releasing a key are reproduced. The sympathetic vibration (string resonance) that occurs between the strings of an
acoustic piano has also been simulated. Suitable
not only for classical compositions but also for piano
pieces of any style.
MellowPiano
A warm and mellow piano sound. Ideal for classical
music.
RockPiano
A bright-sounding piano. Ideal for rock styles.
GRAND
PIANO1
HonkyTonk
Piano
GRAND
PIANO2
×
A honky-tonk style piano. Enjoy a tonal character
that is quite different than a grand piano.
×
×
×
A spacious and clear piano sound with a bright resonance. Ideal for popular music.
BrightPiano
×
×
×
A spacious and bright piano sound. Ideal for popular and rock music.
×
×
An electronic piano sound produced by an FM synthesizer. The tone will change as you vary your
playing touch. Ideal for popular music.
×
×
This voice simulates the electric piano sound produced by synthesizers in popular music. It also
goes well with the acoustic piano sound.
×
The sound of an electric piano using hammerstruck metallic “tines.” Soft tone when played lightly,
and an aggressive tone when played hard.
×
A different type of electric piano sound. Widely used
in rock and popular music.
E.Piano1
×
SynthPiano
×
E.Piano2
×
Vintage
E.Piano
×
×
E.PIANO2
E.CLAVI
CHORD
×
Harpsichord
8'
×
×
×
The sound of the instrument frequently used in
baroque music. Variations in playing touch will not
affect the volume, and a characteristic sound will be
heard when you release the key.
Harpsichord
8'+4'
×
×
×
A harpsichord with an added upper octave. Produces a more brilliant sound.
E.Clavichord
×
×
×
This is the voice of a keyboard that produces sound
by striking the strings with magnetic pickups. This
funky sound is popular in black contemporary music.
Because of its unique structure, the instrument produces a peculiar sound when you release the keys.
Wah Clavi.
×
×
×
A distinctive effect is preset.
×
×
Vibraphone played with relatively soft mallets. The
tone becomes more metallic the harder you play.
×
×
A marimba sound, sampled in stereo for spaciousness and realism.
×
The sound of a celesta (a percussion instrument in
which hammers strike metallic bars to produce
sound). This instrument is well-known for its
appearance in “Dance of the Sugar-plum Fairies”
from Tchaikovsky’s “Nutcracker Suite.”
Vibraphone
Marimba
VIBRAPHONE
Celesta
×
×
CLP-175
Appendix
GrandPiano2
E.PIANO1
HARPSI
CHORD
Voice description
111
Preset Voice List
Voice group
Voice name
Stereo
sampling
Touch
Sense
Dynamic
sampling
String
resonance
Voice description
×
×
A warm and natural nylon-string guitar sound.
Enjoy playing quiet tunes with this realistic
stereo-sampled sound. Playing the keyboard
strongly will sound a harmonic, producing an
even more guitar-like impression.
×
×
×
A bright steel guitar sound. Ideal for popular
music.
NylonGuitar
Key-off
samples
GUITAR
SteelGuitar
CHURCH
ORGAN
JAZZORGAN
×
PipeOrgan
Principal
×
×
×
×
This voice features the combination of pipes
(8'+4'+2') of a principal (brass instrument)
organ. It is suitable for Baroque church music.
PipeOrgan
Tutti
×
×
×
×
This voice features a full coupler of a pipe
organ, famous for the sound used in Toccatta
and Fugue by Bach.
PipeOrgan
Flute1
×
×
×
×
A pipe organ sound that combines flute-type
(woodwind type) stops of different pitches (8'
+ 4'). This is a gentle sound that is ideal for
accompanying hymns.
PipeOrgan
Flute2
×
×
×
×
A pipe organ sound that combines flute-type
(woodwind type) stops of different pitches (8'
+ 4' + 1-1/3'). This is brighter than
PipeOrganFlute1, and is suitable for solos.
JazzOrgan
×
×
×
×
×
The sound of a “tonewheel” type electric
organ. Often heard in jazz and rock idioms.
RotaryOrgan
×
×
×
×
×
A bright electric organ sound.
MellowOrgan
×
×
×
×
×
A mellow electric organ sound. Ideal for
calmer songs.
×
×
×
Stereo-sampled, large-scale strings ensemble
with realistic reverb. Try combining this voice
with piano in the Dual mode.
×
×
×
A bright and spacious strings sound. Suitable
for sustained parts in the background of an
ensemble.
×
×
×
The sound of a string ensemble, with a slow
attack. Suitable for use in Dual mode with
GRAND PIANO or E.PIANO.
Appendix
Strings
STRINGS
SynthStrings
×
SlowStrings
CHOIR
Choir
×
×
×
×
A big, spacious choir voice. Perfect for creating rich harmonies in slow pieces.
SlowChoir
×
×
×
×
The sound of a choir with a slow attack. Suitable for use in Dual mode with GRAND
PIANO or E.PIANO.
Scat
×
×
×
You can enjoy jazz “scatting” with this voice.
Depending on how hard and what note range
you play, different sounds will be produced.
SynthPad1
×
×
×
×
A warm, mellow, and spacious synth sound.
Ideal for sustained parts in the background of
an ensemble.
SynthPad2
×
×
×
×
A clear and spacious synth sound. Ideal for
sustained parts in the background of an
ensemble.
WoodBass
×
×
×
×
The sound of a finger-plucked upright bass.
Frequently used in jazz and Latin music.
Bass&Cymbal
×
×
×
×
The sound of a cymbal has been layered onto
the bass. Effective when used for jazz walking-bass lines.
ElectricBass
×
×
×
×
The sound of an electric bass. Frequently
used in jazz, rock, and popular music.
FretlessBass
×
×
×
×
The sound of a fretless bass. Suitable for
styles such as jazz and fusion.
SYNTH.PAD
WOOD BASS
E.BASS
112
CLP-175
Voice Combination Examples
(Dual and Split)
Dual
MAIN + MAIN
GrandPiano1 + E.Piano1
GrandPiano1 + E.Piano2
GrandPiano1 + SynthPiano
MAIN + MAIN
GrandPiano2 + GrandPiano2
MAIN + MAIN
E.Piano1 + SlowChoir
MAIN + MAIN
E.Piano2 + E.Clavichord
MAIN + MAIN
Harpsichord8' + Strings
MAIN + MAIN
Celesta + SynthStirngs
MAIN + MAIN
This combination is often used in popular music.
This produces a fantasy, spacious piano sound.
This combination sounds as if you are playing
two notes that are one octave apart. It is suitable
for the accompaniment of Salsa music.
This is suitable for romantic ballads.
This is suitable for funk, rhythm & blues, and soul
music.
This combination is very suitable for Baroque
music.
This combination adds strings and bell sound. A
delay effect is automatically applied.
Split
GrandPiano1 / WoodBass
or Bass&Cymbal
MAIN / LEFT
Celesta / Choir
MAIN / LEFT
Choir / GrandPiano1
MAIN / LEFT
Scat / WoodBass
MAIN / LEFT
E.Piano2 / Scat
This is recommended for light Jazz music. The
damper pedal is effective on the voice assigned
to the right-hand range.
This is suitable for a peaceful, somewhat cute
song.
Play these voices elegantly along with piano
arpeggio. Playing the Choir voice in chords
would be more effective.
This combination features a cool (stylish) jazz
chorus. The Scat voice is touch sensitive, adding
a variety of expressions.
Playing the Scat voice for a bass part may create
an interesting sound.
Appendix
MAIN / LEFT
Dual + Split
MAIN + MAIN / LEFT
GrandPiano1 + SynthString /
GrandPiano1
MAIN + MAIN / LEFT
GrandPiano2 + E.Piano1 /
ElectricBass
MAIN + MAIN / LEFT + LEFT
Harpsichord8' + 4' + Strings /
Harpsichord8' + Strings
This combination creates the thick sound of a
layered piano and strings.
This sound is suitable for fusion. Deeper reverb
and chorus (page 81) will improve the groove.
The damper pedal is effective on the voice
assigned to the right-hand range.
This combination makes a very brilliant sound.
CLP-175
113
Keyboard Stand Assembly
How to position the main unit
CAUTION
• Be careful not to confuse parts, and be sure to install
all parts in the correct orientation. Please assemble
in accordance with the sequence given below.
• Assembly should be carried out by at least two persons.
• Be sure to use the correct screw size, as indicated
below. Use of incorrect screws can damage the
stand.
• Be sure to tighten all screws upon completing the
assembly of each unit.
• To disassemble, reverse the assembly sequence given
below.
Appendix
Have a Phillips-head (+) screwdriver ready.
TIP
The CLP-175 features an iAFC (Instrumental Active Field
Control) effect. This produces sound from the speaker
located on the bottom face of the Clavinova, enhancing the
reverberation and spaciousness of the sound when you open
the lid with the longer stay (page 17).
In order to optimize the iAFC effect, please observe the following:
• Perform the automatic adjustment after you turn on the
power of the Clavinova for the first time, and after each
time you re-locate the Clavinova. (page 88)
• Do not block the speaker located on the bottom face of the
Clavinova.
1.
Remove all parts from the box. Confirm that all parts shown in the illustration are included.
Main unit
Lean the unit against the
wall as shown at right.
Legs
6 × 25 mm fixing screws × 16
AC power cord
114
CLP-175
Cord holder
Pedal box
CAUTION
Be careful not to pinch your fingers.
Be sure to position the keyboard side on the bottom.
Spread a large soft cloth, such as a blanket, on the floor.
Place the unit on the cloth with the key cover closed
and the keyboard side on the bottom and lean the unit
against the wall so that the unit will not fall or slip.
Place a soft cloth against the wall to protect the instrument and the wall from scratches.
CAUTION
Do not place the main unit with
the rear side facing down.
CAUTION
Do not lay the main unit upside
down on the floor.
CAUTION
Do not position the main unit so
that its bottom is in contact with
floor.
Keyboard Stand Assembly
2.
Attach two front legs and a rear leg.
Refer to the diagram below to verify the orientation of
the legs.
Rear leg
Front leg
Front leg
3 Insert the pedal cord plug into the pedal
connector. Insert the plug so the arrow side
faces front (toward the keyboard).
If the plug will not go in easily, do not
force it. Double-check the orientation of
the plug, then try again.
4 Attach the cord holder on the unit as shown
in the illustration below, then use the cord
holder to affix the pedal cord.
Install and tighten four screws on each leg, starting
with one of the front legs.
3
4
3.
Install the pedal box.
1 Remove the twist tie that affixes the pedal
cord to the upper portion of the pedal box.
4.
Raising the unit to the standing position.
CAUTION
Twist tie
Appendix
Use the front legs as support to raise the unit.
• Be careful not to pinch your fingers.
• When you raise the unit, do not hold the key
cover.
2 Align the cord with the groove on the unit,
and attach the pedal box using four screws.
CLP-175
115
Keyboard Stand Assembly
5.
Connect the power cord.
When moving the instrument after assembly,
always hold the bottom of the main unit.
CAUTION
Do not hold the key cover or top portion.
Improper handling can result in damage to the
instrument or personal injury.
Top portion
Left of the rear leg on the bottom of the main unit,
when viewed from front
6.
Set the adjuster.
Rotate the adjuster until it comes in firm contact with
Appendix
the floor surface.
After completing the assembly, please check the following.
116
• Are there any parts left over?
→ Review the assembly procedure and correct
any errors.
• Is the Clavinova clear of doors and other movable fixtures?
→ Move the Clavinova to an appropriate location.
• Does the Clavinova make a rattling noise when
you shake it?
→ Tighten all screws.
• Does the pedal box rattle or give way when you
step on the pedals?
→ Turn the adjuster so that it is set firmly
against the floor.
• Are the pedal and power cords inserted
securely into the sockets?
→ Check the connection.
• If the main unit creaks or is otherwise unsteady
when you play on the keyboard, refer to the
assembly diagrams and retighten all screws.
CLP-175
Key cover
Index
You can search the desired section using not only the terminology in this manual but also commonly-used words.
The * mark indicates that the corresponding page includes the terminology explanation in the right column.
Numerics
50 greats for the Piano 13
50 Piano Preset Songs 26
Practicing a one-hand part 28
A
Adding variation to the sound ➔ Effect
function 32
Assembly 114
Assigning the START/STOP function
to a pedal 96
AUX IN jacks 62
AUX OUT jacks 62
AUX PEDAL jacks 61
Auxiliary pedal function 86
B
C
Center pedal 31
Center pedal function 85
Character Code 56
Characters 56
CHORUS 33
combining two voices ➔ Dual mode
35
Connection
Audio 62
computer 63
MIDI 66
Other Components 61
Serial 64
Speaker 62
USB 67
Connectors
MIDI IN/OUT/THRU 61, 66
CONTRAST* 19
D
Damper (right) pedal 31
Data Compatibility 109
E
Effect function 32
equalizer 84
EXIT 23
EXTRA TRACKS ➔ the third or more
tracks 45
F
FactorySet 97
Fast forward 27, 58
FILE* 48
Floppy Disk 12
Formatting a floppy disk 55
H
Headphone Hanger 19
Headphones 19
HOST SELECT switch 61
I
iAFC 34
iAFC
iAFC Detailed settings 87
J
Jacks
AUX IN 62
AUX OUT 62
AUX PEDAL 61
PHONES 19
TO HOST 61, 64
USB 61
L
LCD ➔ Screen 23
Contrast 19
Left pedal 31
Left pedal function 86
Lid 17
List
Demonstration tunes 24
Detailed Settings 70
Message 98
Preset Voice 111
Appendix
BackUp 97
Bench 13
BRILLIANCE 32
Data type 59
Default (Normal) setting* 32
Demonstration tunes 24
Detailed Settings 70
iAFC 87
Metronome 78
MIDI 89
Other settings 93
recording and playback 75
voices 79
Disk
Copy 54
Format 55
SongAutoOpen 56
Disk song 48
Display contrast 19
DOWN (TEMPO)
50 Piano Preset Songs 27
metronome 39
Dual
Detailed settings 79
Recording 47
Dual mode ➔ combining two voices
35
M
Maintenance 13
MASTER VOLUME* 19
Memory 48
Memory song 48
MemoryBackUp 97
Message List 98
Metronome 39
Detailed settings 78
METRONOME SETTING 78
MIDI 89
Detailed settings 89
MIDI cables 66
MIDI connectors 63, 66
MIDI driver 64
MIDI SETTING 89
Music braces 16
Music Data 57
CLP-175
117
Music rest 16
N
New Song 40
Normal setting* 32
O
Other settings 93
Appendix
P
Pedal Function
Auxiliary 86
Center 85
Left 86
Right 85
Pedals 31
Personal computer 63
PHONES jacks 19
Playback
50 Piano Preset Songs 26
Demo Songs 25
Recorded Songs and Music Data 58
Playing back repeatedly (song) 77
Playing back repeatedly (specifying the
range) 76
playing two voices ➔ Split mode 37
POWER 18
Practicing a one-hand part (50 preset
songs) 28
Preset song memory 48
Preset Voice List 111
R
Recording
Tape Recorder 62
Recording in Dual 47
Recording in Split 47
Recording Your Performance 40
Re-recording 42
REVERB 33
Rewind 27, 58
Right pedal 31
Right pedal function 85
118
CLP-175
S
Scale 94
Screen 23
Select
50 piano preset songs 26
Demo Songs 25
Recorded Songs and Music Data 57
Selecting a touch response 93
SETTING
metronome 78
Volume 19
SMF (Standard MIDI File) 109
Soft (left) pedal 31
Song
Data Type 59
Delete 52
Detailed settings 75
Playing back repeatedly 77
Rename 53
Store 48
Store (Floppy disk) 51
Store (Storage memory) 50
SONG [START/STOP]
50 Piano Preset Songs 26
Recorded Songs and Music Data 58
Recording 41
SONG BALANCE 47
SONG SELECT
50 Piano Preset Songs 26
Recorded Songs and Music Data 57
Recording 40
SONG SETTING 75
Sostenuto (center) pedal 31
Sound
brilliance 32
expression 32
reverberation 33
spread and spaciousness 33
Soundboard reverb 33
Split
Detailed settings 79
Recording 47
Split mode ➔ playing two voices 37
Split point 38
Splitting the keyboard range and
playing two different voices 37
START/STOP
metronome 39
Storage memory 48
StringResonance 95
SustainSampling 95
Synchro Start
50 preset songs 28
Recorded Songs and Music Data 58
T
TEMPO
50 Piano Preset Songs 27
metronome 39
Recorded Songs and Music Data 58
the third or more tracks ➔ EXTRA
TRACKS 45
TO HOST jack 61, 64
TOP
50 Piano Preset Songs 27
Recorded Songs and Music Data 58
Recording 41
TouchResponse 93
Track playback on and off 59
TRACK1/TRACK2
50 Piano Preset Songs 28
Recording 40, 44
Troubleshooting 108
Tune 93
Type of characters 56
Type of data (recorded) 104
U
UP (TEMPO)
50 Piano Preset Songs 27
metronome 39
USB jack 61
V
Voice group buttons 30, 37
VOICE SETTING 79
Voices* 30
Detailed settings 79
Volume
Balance (SONG BLANCE) 47
Setting 19
X
XG 110
MEMO
CLP-175
119
MEMO
120
CLP-175
IMPORTANT SAFETY INSTRUCTIONS
INFORMATION RELATING TO PERSONAL INJURY, ELECTRICAL SHOCK,
AND FIRE HAZARD POSSIBILITIES HAS BEEN INCLUDED IN THIS LIST.
WARNING- When using any electrical or electronic product,
basic precautions should always be followed. These precautions
include, but are not limited to, the following:
1.
Read all Safety Instructions, Installation Instructions, Special Message Section items, and any Assembly Instructions
found in this manual BEFORE making any connections, including connection to the main supply.
2.
Main Power Supply Verification: Yamaha products are
manufactured specifically for the supply voltage in the area
where they are to be sold. If you should move, or if any doubt
exists about the supply voltage in your area, please contact your
dealer for supply voltage verification and (if applicable) instructions. The required supply voltage is printed on the name plate.
For name plate location, please refer to the graphic found in the
Special Message Section of this manual.
3.
This product may be equipped with a polarized plug (one
blade wider than the other). If you are unable to insert the plug
into the outlet, turn the plug over and try again. If the problem
persists, contact an electrician to have the obsolete outlet
replaced. Do NOT defeat the safety purpose of the plug.
4.
Some electronic products utilize external power supplies
or adapters. Do NOT connect this type of product to any power
supply or adapter other than one described in the owners manual,
on the name plate, or specifically recommended by Yamaha.
5.
WARNING: Do not place this product or any other
objects on the power cord or place it in a position where anyone
could walk on, trip over, or roll anything over power or connecting cords of any kind. The use of an extension cord is not recommended! If you must use an extension cord, the minimum wire
size for a 25’ cord (or less) is 18 AWG. NOTE: The smaller the
AWG number, the larger the current handling capacity. For
longer extension cords, consult a local electrician.
6.
Ventilation: Electronic products, unless specifically
designed for enclosed installations, should be placed in locations
that do not interfere with proper ventilation. If instructions for
enclosed installations are not provided, it must be assumed that
unobstructed ventilation is required.
7.
Temperature considerations: Electronic products should
be installed in locations that do not significantly contribute to
their operating temperature. Placement of this product close to
heat sources such as; radiators, heat registers and other devices
that produce heat should be avoided.
8.
This product was NOT designed for use in wet/damp locations and should not be used near water or exposed to rain.
Examples of wet/damp locations are; near a swimming pool, spa,
tub, sink, or wet basement.
9.
This product should be used only with the components
supplied or; a cart, rack, or stand that is recommended by the
manufacturer. If a cart, rack, or stand is used, please observe all
safety markings and instructions that accompany the accessory
product.
10.
The power supply cord (plug) should be disconnected
from the outlet when electronic products are to be left unused for
extended periods of time. Cords should also be disconnected
when there is a high probability of lightning and/or electrical
storm activity.
11. Care should be taken that objects do not fall and liquids are
not spilled into the enclosure through any openings that may exist.
12.
Electrical/electronic products should be serviced by a
qualified service person when:
a. The power supply cord has been damaged; or
b. Objects have fallen, been inserted, or liquids have been
spilled into the enclosure through openings; or
c. The product has been exposed to rain: or
d. The product dose not operate, exhibits a marked change
in performance; or
e. The product has been dropped, or the enclosure of the
product has been damaged.
13. Do not attempt to service this product beyond that
described in the user-maintenance instructions. All other servicing should be referred to qualified service personnel.
14.
This product, either alone or in combination with an
amplifier and headphones or speaker/s, may be capable of producing sound levels that could cause permanent hearing loss. DO
NOT operate for a long period of time at a high volume level or
at a level that is uncomfortable. If you experience any hearing
loss or ringing in the ears, you should consult an audiologist.
IMPORTANT: The louder the sound, the shorter the time period
before damage occurs.
15.
Some Yamaha products may have benches and/or accessory
mounting fixtures that are either supplied as a part of the product
or as optional accessories. Some of these items are designed to be
dealer assembled or installed. Please make sure that benches are
stable and any optional fixtures (where applicable) are well
secured BEFORE using. Benches supplied by Yamaha are
designed for seating only. No other uses are recommended.
PLEASE KEEP THIS MANUAL
92-469-2
FCC INFORMATION (U.S.A.)
1. IMPORTANT NOTICE: DO NOT MODIFY THIS UNIT!
This product, when installed as indicated in the instructions contained in this manual, meets FCC requirements. Modifications not expressly approved by
Yamaha may void your authority, granted by the FCC, to
use the product.
2. IMPORTANT: When connecting this product to accessories and/or another product use only high quality
shielded cables. Cable/s supplied with this product
MUST be used. Follow all installation instructions. Failure to follow instructions could void your FCC authorization to use this product in the USA.
3. NOTE: This product has been tested and found to comply with the requirements listed in FCC Regulations,
Part 15 for Class “B” digital devices. Compliance with
these requirements provides a reasonable level of
assurance that your use of this product in a residential
environment will not result in harmful interference with
other electronic devices. This equipment generates/
uses radio frequencies and, if not installed and used
according to the instructions found in the users manual,
may cause interference harmful to the operation of
other electronic devices. Compliance with FCC regulations does not guarantee that interference will not occur
in all installations. If this product is found to be the
source of interference, which can be determined by
turning the unit “OFF” and “ON”, please try to eliminate
the problem by using one of the following measures:
Relocate either this product or the device that is being
affected by the interference.
Utilize power outlets that are on different branch (circuit
breaker or fuse) circuits or install AC line filter/s.
In the case of radio or TV interference, relocate/reorient
the antenna. If the antenna lead-in is 300 ohm ribbon
lead, change the lead-in to co-axial type cable.
If these corrective measures do not produce satisfactory results, please contact the local retailer authorized
to distribute this type of product. If you can not locate
the appropriate retailer, please contact Yamaha Corporation of America, Electronic Service Division, 6600
Orangethorpe Ave, Buena Park, CA90620
The above statements apply ONLY to those products
distributed by Yamaha Corporation of America or its
subsidiaries.
* This applies only to products distributed by YAMAHA CORPORATION OF AMERICA.
IMPORTANT NOTICE FOR THE UNITED KINGDOM
Connecting the Plug and Cord
IMPORTANT. The wires in this mains lead are coloured in
accordance with the following code:
BLUE
: NEUTRAL
BROWN : LIVE
As the colours of the wires in the mains lead of this apparatus may not correspond with the coloured makings identifying the terminals in your plug proceed as follows:
The wire which is coloured BLUE must be connected to
the terminal which is marked with the letter N or coloured
BLACK.
The wire which is coloured BROWN must be connected to
the terminal which is marked with the letter L or coloured
RED.
Making sure that neither core is connected to the earth terminal of the three pin plug.
(2 wires)
• This applies only to products distributed by Yamaha-Kemble Music
(U.K.) Ltd.
CAUTION: TO PREVENT ELECTRIC SHOCK, MATCH
WIDE BLADE OF PLUG TO WIDE SLOT, FULLY INSERT.
ATTENTION: POUR ÉVITER LES CHOCS ÉLECTRIQUES, INTRODUIRE LA LAME LA PLUS LARGE DE
LA FICHE DANS LA BORNE CORRESPONDANTE DE LA
PRISE ET POUSSER JUSQU’AU FOND.
(polarity)
• This applies only to products distributed by Yamaha Canada Music
Ltd.
• Ceci ne s’applique qu’aux produits distribués par Yamaha Canada
Musique Ltée.
(class B)
For details of products, please contact your nearest Yamaha
representative or the authorized distributor listed below.
Pour plus de détails sur les produits, veuillez-vous adresser à Yamaha ou
au distributeur le plus proche de vous figurant dans la liste suivante.
NORTH AMERICA
CANADA
Yamaha Canada Music Ltd.
135 Milner Avenue, Scarborough, Ontario,
M1S 3R1, Canada
Tel: 416-298-1311
U.S.A.
Yamaha Corporation of America
6600 Orangethorpe Ave., Buena Park, Calif. 90620,
U.S.A.
Tel: 714-522-9011
CENTRAL & SOUTH AMERICA
MEXICO
Yamaha de Mexico S.A. De C.V.,
Departamento de ventas
Javier Rojo Gomez No.1149, Col. Gpe Del
Moral, Deleg. Iztapalapa, 09300 Mexico, D.F.
Tel: 686-00-33
BRAZIL
Yamaha Musical do Brasil LTDA.
Av. Rebouças 2636, São Paulo, Brasil
Tel: 011-853-1377
ARGENTINA
Yamaha de Panamá S.A. Sucursal de Argentina
Viamonte 1145 Piso2-B 1053,
Buenos Aires, Argentina
Tel: 1-4371-7021
PANAMA AND OTHER LATIN
AMERICAN COUNTRIES/
CARIBBEAN COUNTRIES
Yamaha de Panamá S.A.
Torre Banco General, Piso 7, Urbanización Marbella,
Calle 47 y Aquilino de la Guardia,
Ciudad de Panamá, Panamá
Tel: +507-269-5311
EUROPE
THE UNITED KINGDOM
Yamaha-Kemble Music (U.K.) Ltd.
Sherbourne Drive, Tilbrook, Milton Keynes,
MK7 8BL, England
Tel: 01908-366700
IRELAND
Danfay Ltd.
61D, Sallynoggin Road, Dun Laoghaire, Co. Dublin
Tel: 01-2859177
GERMANY
Yamaha Music Central Europe GmbH
Siemensstraße 22-34, 25462 Rellingen, Germany
Tel: 04101-3030
SWITZERLAND/LIECHTENSTEIN
Yamaha Music Central Europe GmbH,
Branch Switzerland
Seefeldstrasse 94, 8008 Zürich, Switzerland
Tel: 01-383 3990
AUSTRIA
Yamaha Music Central Europe GmbH,
Branch Austria
Schleiergasse 20, A-1100 Wien, Austria
Tel: 01-60203900
THE NETHERLANDS
Yamaha Music Central Europe,
Branch Nederland
Clarissenhof 5-b, 4133 AB Vianen, The Netherlands
Tel: 0347-358 040
Die Einzelheiten zu Produkten sind bei Ihrer unten aufgeführten
Niederlassung und bei Yamaha Vertragshändlern in den jeweiligen
Bestimmungsländern erhältlich.
Para detalles sobre productos, contacte su tienda Yamaha más cercana
o el distribuidor autorizado que se lista debajo.
ASIA
FRANCE
Yamaha Musique France, S.A.
Division Professionnelle
BP 70-77312 Marne-la-Vallée Cedex 2, France
Tel: 01-64-61-4000
ITALY
Yamaha Musica Italia S.P.A.
Combo Division
Viale Italia 88, 20020 Lainate (Milano), Italy
Tel: 02-935-771
SPAIN/PORTUGAL
Yamaha-Hazen Música, S.A.
Ctra. de la Coruna km. 17, 200, 28230
Las Rozas (Madrid), Spain
Tel: 91-639-8888
GREECE
Philippos Nakas S.A. The Music House
147 Skiathou Street, 112-55 Athens, Greece
Tel: 01-228 2160
SWEDEN
Yamaha Scandinavia AB
J. A. Wettergrens Gata 1
Box 30053
S-400 43 Göteborg, Sweden
Tel: 031 89 34 00
HONG KONG
Tom Lee Music Co., Ltd.
11/F., Silvercord Tower 1, 30 Canton Road,
Tsimshatsui, Kowloon, Hong Kong
Tel: 2737-7688
INDONESIA
PT. Yamaha Music Indonesia (Distributor)
PT. Nusantik
Gedung Yamaha Music Center, Jalan Jend. Gatot
Subroto Kav. 4, Jakarta 12930, Indonesia
Tel: 21-520-2577
KOREA
Yamaha Music Korea Ltd.
Tong-Yang Securities Bldg. 16F 23-8 Yoido-dong,
Youngdungpo-ku, Seoul, Korea
Tel: 02-3770-0661
MALAYSIA
Yamaha Music Malaysia, Sdn., Bhd.
Lot 8, Jalan Perbandaran, 47301 Kelana Jaya,
Petaling Jaya, Selangor, Malaysia
Tel: 3-703-0900
PHILIPPINES
DENMARK
YS Copenhagen Liaison Office
Generatorvej 8B
DK-2730 Herlev, Denmark
Tel: 44 92 49 00
FINLAND
F-Musiikki Oy
Kluuvikatu 6, P.O. Box 260,
SF-00101 Helsinki, Finland
Tel: 09 618511
Yupangco Music Corporation
339 Gil J. Puyat Avenue, P.O. Box 885 MCPO,
Makati, Metro Manila, Philippines
Tel: 819-7551
SINGAPORE
Yamaha Music Asia Pte., Ltd.
11 Ubi Road #06-00, Meiban Industrial Building,
Singapore
Tel: 65-747-4374
TAIWAN
NORWAY
Norsk filial av Yamaha Scandinavia AB
Grini Næringspark 1
N-1345 Østerås, Norway
Tel: 67 16 77 70
ICELAND
Skifan HF
Skeifan 17 P.O. Box 8120
IS-128 Reykjavik, Iceland
Tel: 525 5000
OTHER EUROPEAN COUNTRIES
Yamaha Music Central Europe GmbH
Siemensstraße 22-34, 25462 Rellingen, Germany
Tel: +49-4101-3030
Yamaha KHS Music Co., Ltd.
3F, #6, Sec.2, Nan Jing E. Rd. Taipei.
Taiwan 104, R.O.C.
Tel: 02-2511-8688
THAILAND
Siam Music Yamaha Co., Ltd.
121/60-61 RS Tower 17th Floor,
Ratchadaphisek RD., Dindaeng,
Bangkok 10320, Thailand
Tel: 02-641-2951
THE PEOPLE’S REPUBLIC OF CHINA
AND OTHER ASIAN COUNTRIES
Yamaha Corporation,
Asia-Pacific Music Marketing Group
Nakazawa-cho 10-1, Hamamatsu, Japan 430-8650
Tel: +81-53-460-2317
AFRICA
Yamaha Corporation,
Asia-Pacific Music Marketing Group
Nakazawa-cho 10-1, Hamamatsu, Japan 430-8650
Tel: +81-53-460-2312
MIDDLE EAST
TURKEY/CYPRUS
Yamaha Music Central Europe GmbH
Siemensstraße 22-34, 25462 Rellingen, Germany
Tel: 04101-3030
OTHER COUNTRIES
Yamaha Music Gulf FZE
LB21-128 Jebel Ali Freezone
P.O.Box 17328, Dubai, U.A.E.
Tel: +971-4-881-5868
OCEANIA
AUSTRALIA
Yamaha Music Australia Pty. Ltd.
Level 1, 99 Queensbridge Street, Southbank,
Victoria 3006, Australia
Tel: 3-9693-5111
NEW ZEALAND
Music Houses of N.Z. Ltd.
146/148 Captain Springs Road, Te Papapa,
Auckland, New Zealand
Tel: 9-634-0099
COUNTRIES AND TRUST
TERRITORIES IN PACIFIC OCEAN
Yamaha Corporation,
Asia-Pacific Music Marketing Group
Nakazawa-cho 10-1, Hamamatsu, Japan 430-8650
Tel: +81-53-460-2312
BELGIUM/LUXEMBOURG
Yamaha Music Central Europe GmbH,
Branch Belgium
Rue de Geneve (Genevastraat) 10, 1140 - Brussels,
Belgium
Tel: 02-726 6032
HEAD OFFICE Yamaha Corporation, Pro Audio & Digital Musical Instrument Division
Nakazawa-cho 10-1, Hamamatsu, Japan 430-8650
Tel: +81-53-460-3273
[CL] 28
CLP-175
CLP-175
Owner's Manual
Clavinova Web site (English only)
http://www.yamahaclavinova.com/
Yamaha Manual Library
http://www2.yamaha.co.jp/manual/english/
M.D.G., Pro Audio & Digital Musical Instrument Division, Yamaha Corporation
© 2003 Yamaha Corporation
IMPORTANT
Check your power supply
Make sure that your local AC mains voltage matches the voltage specified on the name plate
on the bottom panel. In some areas a voltage selector may be provided on the bottom panel of
the main keyboard unit near the power cord. Make sure that the voltage selector is set for the
voltage in your area. The voltage selector is set at 240V when the unit is initially shipped. To
change the setting use a "minus" screwdriver to rotate the selector dial so that the correct voltage
appears next to the pointer on the panel.
WA67380 30?APZC?.?-01A0 Printed in Indonesia
DIC 435