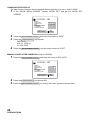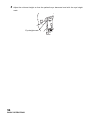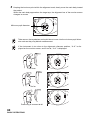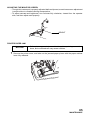
1
INSTRUCTION MANUAL AUTO REFRACTOMETER RM-8900 AUTO KERATO-REFRACTOMETER KR-8900 INTRODUCTION Thank you for purchasing the Auto Refractometer RM-8900, Auto Kerato-Refractometer KR-8900. This instrument is used to measure the spherical refractive-power,cylindrical refractive power, the direction of astigmatic axis, the radius of curvature, the direction of principal meridian and the corneal refractory power. This instrument features the following: • Measures the refractory power of eye and the corneal curvature with simple operations. • The minimum measurable pupil diameter is now smaller and thus the measuring range is extended. • The auto start function facilitates quick measurements under the optimal condition. This Instruction Manual covers an overview of the basic operation, toroubleshooting, checking, maintenance and cleaning of the Auto Refractometer RM-8900 and Auto Kerato-Refractometer KR-8900. To get the best use of the instrument, read Safety Displays and Safety Cautions. Keep this Manual at hand for future reference. PRECAUTIONS • Since this product is a precision instrument, always use and keep it in a normally controlled living environment, within a temperature range of 10-40°C, humidity levels between 30-90% and an atmospheric pressure range of 700hPa-1,060hPa. The instrument should also be placed away from direct sunlight. • To ensure smooth operation, install the instrument on a level floor free of vibrations. Also, do not put things on the instrument. • Connect all cables properly before using. • Use the power at a rated voltage. • When not in use, switch off the power source and apply the measuring lens cap and dust cover. • For accurate measurement results, take care to keep the examination window clean and free of fingerprints, spots and dust. This symbol is applicable for EU member countries only. To avoid potential damage to the environment and possibly human health, this instrument should be disposed of (i) for EU member countries - in accordance with WEEE (Directive on Waste Electrical and Electronic Equipment), or (ii) for all other countries, in accordance with local disposal and recycling laws. 1 PRECAUTIONS BASIC INSTRUCTIONS • To avoid electrical shock, do not open the instrument. Refer all servicing to only qualified personnel. • Electrical shock may cause burns or possible fire. Turn the main power switch OFF and UNPLUG the power cord before replacing fuses. Replace only with fuses of the correct rating. • To avoid potential injury during operation, do not touch the patient’s eyes or nose with the instrument. WORKING ENVIRONMENT Temperature: Humidity: Atmospheric Pressure: 10°C-40°C 30-90% (without dew) 700hPa-1,060hPa STORAGE, USAGE PERIOD AND OTHERS 1. ENVIRONMENTAL CONDITIONS FOR INSTALLATION (WITHOUT PACKAGE) Temperature: 10 °C-40 °C Humidity: 10%~95% (without dew) Air Pressure: 700hPa-1,060hPa THIS INSTRUMENT DOES NOT MEET THE TEMPERATURE REQUIREMENTS OF ISO 15004-1 FOR STORAGE. DO NOT STORE THIS INSTRUMENT IN CONDITIONS WHERE THE TEMPERATURE MAY RISE ABOVE 40°C OR FALL BELOW 10°C. 2.WHEN STRING THE INSTRUMENTS, ENSURE THAT THE FOLLOWING CONDITIONS ARE MET: (1) The instrument should not be splashed with water. (2) Store the instrument where air pressure, temperature, humidity, ventilation, sunlight,dust, salty/sulfurous air, etc. do not give any negative side water. (3) Do not store or transport the instrument on a slope or uneven surface or in an area where it is subject to vibrations or instability. (4) Do not store the instrument where chemicals are stored or gas is generated. 3.USAGE PERIOD 8 years from delivery providing regular maintenance is performed (according to the self-certification [Topcon data]) ENVIRONMENTAL CONDITIONS FOR PACKING IN TRANSPORTATION Temperature: Humidity: -40°C~70°C 10%-95% MAINTENANCE AND CHECKS 1.Regularly maintain and check all equipment and parts. 2.Before using equipment that has not been used in a while, be sure to confirm normal and safe operation beforehand attempting any patient measurements. 3.Keep the examination window free from finger prints and dust. 4.When the instrument is not in use, protect the instrument by covering it with the dust cover. 5.When the examination window becomes dirty or soiled, clean it according to the instructions listed in “CLEANING THE INSTRUMENT” on page 83 of the Instruction Manual. 2 SAFETY DISPLAYS In order to encourage the safe use of the instrument and to avoid danger to the operator and others as well as damage to properties, warnings are described in the Instruction Manual and marked on the instrument body. We suggest you thoroughly understand the meaning of the following displays/icons and Safety Cautions, as well as read the Manual, and strictly observe the instructions. DISPLAYS DISPLAY MEANING WARNING Improper handling or ignoring this display may lead to the danger of death or serious injury. CAUTION Improper handling or ignoring this display may cause personal injury or physical damage. • Injury means hurt, burn, electric shock, etc. • Physical damage means extensive damage that may involve building, peripheral equipment and furniture. ICON ICON MEANING This icon indicates an action to be avoided. Specific contents are shown with words or illustration close to the icon. This icon indicates Mandatory Action. Specific contents are shown with words or illustration close to the icon. This icon indicates Hazard Alerting (Warning). Specific content are shown with words or illustration close to the icon. 3 SAFETY CAUTIONS WARNINGS Icon Meaning Page To avoid electric shocks, do not attempt overhauling, rebuilding or repairs. Ask your dealer for repair. 74 To avoid electric shocks, do not remove covers from bottom and top surfaces, monitor, measuring unit, etc. 74 To prevent shock hazard, do not allow water or other foreign matter to enter the instrument. –– To avoid fire and electric shocks in case of tumbling, do not place a cup or vessel containing water/fluid on the instrument. –– To avoid electric shocks, do not insert objects metals through vent holes or gaps or contain them inside the machine body. –– To avoid electric shocks during fuse change, be sure to unplug the power cable before removing the fuse lid. Also, do not plug the power cable leaving the fuse box open. 86 Always use the attached fuse (3A 250V). Using any other type may cause troubles and fire. 86 Should any anomaly, such as smoke, occur, immediately switch OFF the power source and unplug the powr cable. Continued use ignoring the condition may cause fire. Ask your dealer for repair. –– . WARNING : Handling the cord on this product or cords associated with accessories sold with this product, will expose you to lead, a chemical known to the State of California to cause birth detects or other reproductive harm. Wash hands after handling This Product Contains Mercury in the backlighting of the LCD display. Prior to disposal remove of otherwise ensure that this is disposed of in accordance with Local, State and Federal Laws. This information is applicable in U.S.A only. This Product Contains a CR Lithium Battery which contains Perchlorate Material-special handling may apply. See http://www.dtsc.ca.gov/hazardouswaste/perchlorate/ Note; This is applicable to California. U.S.A only. 4 SAFETY CAUTIONS CAUTIONS Icon Meaning Before moving the instrument, fasten the clamping knob at the bottom surface to stop movements. Negligence of this may cause injury by falling parts. When moving the instrument, be sure to hold it at the bottom surface with two persons. Carrying by one person may cause a backache or injury by falling parts. Also, holding ares other than the bottom surface may cause pinching fingers between parts and injury by falling parts as well as damage to the instrument. Page 21 21 To prevent injury due to tumbling of the instrument body and falling parts, avoid a slope and unstable floor for installation. 21 To avoid electric shocks, do not handle the power plug with wet fingers. 22 To avoid injury, do not insert fingers under the chinrest. *Be sure to instruct the patient about this. 55 This instrument has been tested (with 100/120/230V) and found to comply with IEC60601-1-2:Ed.2.1:2004. This instrument radiates radio frequency energy within standard and may affect other devices in the vicinity. If you have discovered that turning on/off the instrument affects other devices, we recommend you change its position, keep a proper distance from other devices, or plug it into a different outlet. Please consult your authorized dealer if you have any additional questions. –– 5 USAGE AND MAINTENANCE Usage: • Since the Auto Refractometer is an electric equipment for medical purposes, the operation should be supervised by a well-experienced doctor. USER MAINTENANCE To maintain the safety and performance of the equipment, never attempt to do maintenance and except for the items specified here. For details, follow the instructions. FUSE CHANGE: For details, See “FUSE CHANGE” on page 86. CLEANING OF EXAMINATION WINDOW: For details, See “CLEANING THE INSTRUMENT” on page 83. ESCAPE CLAUSES • TOPCON shall not take any responsibility for damage due to fire, earthquakes, actions by third persons and other accidents, or the negligence and misuse of the user and use under unusual conditions. • TOPCON shall not take any responsibility for damage derived from the use or unavailability of this equipment, such as a loss of business profit and suspension of business. • TOPCON shall not take any responsibility for damage caused by usage other than that described in this Instruction Manual. • TOPCON shall not take any responsibility for the result of diagnosis using this equipment. 6 WARNING INDICATIONS AND POSITIONS To secure safety, this equipment provides warnings. Correctly use the equipment following these warning instructions. If any of the following marking labels are missing, please contact your dealer or TOPCON to the address stated on the back cover. CAUTION • To avoid potential injury during operation, do not touch the patient’s eyes or nose with the instrument. WARNING • To avoid electrical shock, do not open the instrument. Refer all servicing to only qualified personnel. WARNING • Electrical shock may cause burns or possible fire. Turn the main power switch OFF and UNPLUG the power cord before replacing fuses. Replace only with fuses of the correct rating. 7 CONTENTS INTRODUCTION ................................................................................................1 PRECAUTIONS ..................................................................................................2 WORKING ENVIRONMENT ...............................................................................2 STORAGE, USAGE PERIOD AND OTHERS ....................................................2 ENVIRONMENTAL CONDITIONS FOR PACKING IN TRANSPORTATION ..... 2 SAFETY DISPLAYS ........................................................................................... 3 SAFETY CAUTIONS ..........................................................................................4 USAGE AND MAINTENANCE ...........................................................................6 USER MAINTENANCE .......................................................................................6 ESCAPE CLAUSES ...........................................................................................6 WARNING INDICATIONS AND POSITIONS .....................................................7 COMPONENT NAMES MAIN BODY COMPONENTS ...........................................................................10 CONTROL PANEL COMPONENTS .................................................................11 MONITOR SCREEN .........................................................................................13 PRINTER OUTPUT ..........................................................................................15 STANDARD ACCESSORIES ...........................................................................20 PREPARATIONS INSTALLATION ................................................................................................21 CONNECTING POWER CABLE ......................................................................22 CONNECTING EXTERNAL I/O TERMINALS .................................................22 INITIAL SETTINGS ...........................................................................................23 INITIAL SET SCREEN ......................................................................................24 NO. SETTING ...................................................................................................29 PRINTOUT .......................................................................................................33 CUSTOM-PRINT SETTINGS ...........................................................................38 ON-LINE (DATA COMMUNICATION) ..............................................................44 MENU SETTING ...............................................................................................47 PRINTER PAPER SETTING ............................................................................53 RESETTING FROM POWER SAVE STATUS .................................................54 BASIC OPERATIONS PREPARATION BEFORE MEASUREMENT ...................................................55 MEASUREMENT UNDER AUTO START MODE (ONLY IN KR-8900) ...........57 MEASUREMENT UNDER MANUAL MODE ....................................................62 ERASING MEASUREMENT VALUES .............................................................64 INDIVIDUAL OPERATIONS PRINT-OUT OF MEASUREMENT VALUES ....................................................65 MEASUREMENT OF CORNEA DIAMETER (ONLY IN KR-8900) ...................67 MEASUREMENT OF HARD CONTACT LENS ................................................71 INPUT/OUTPUT USING RS232C ....................................................................72 OUTPUT USING USB ......................................................................................72 8 TROUBLESHOOTING TROUBLE-SHOOTING OPERATIONS ............................................................73 SPECIFICATIONS AND PERFORMANCE ELECTROMAGNETIC COMPATIBILITY .........................................................77 ELECTRIC RATING .........................................................................................81 SYSTEM CLASSIFICATION ............................................................................81 DIMENSIONS AND WEIGHT ...........................................................................81 PURPOSES OF USE ....................................................................................... 81 REFERENCE OPTIONAL ACCESSORIES .............................................................................82 SHAPE OF PLUG .............................................................................................82 MAINTENANCE DAILY CHECKUPS ..........................................................................................83 MAINTENANCE ................................................................................................87 9 COMPONENT NAMES MAIN BODY COMPONENTS Measuring Head Unit Measuring Head monitor Measurement switch Contorol lever Clamping knob Base Unit Control panel Power lamp Clamping knob (for movement) External I/O terminal Chinrest Unit Forehead rest Examination window Eye height mark Brightness volume Printer cover open switch Chinrest tissue pin Chinrest Power switch Cap (for examination window) 10 COMPONENT NAMES CONTROL PANEL COMPONENTS RM-8900 Print switch Menu switch IOL switch Graphic print switch Target image observation switch Fixation target brightness switch CYL (cylinder) display selection switch Print switch.................................... Prints out the measurement result. When there is no measurement value, press the switch to feed paper. Menu switch .................................. Displays the menu screen. IOL switch ..................................... Press the switch to try measurement when errors are likely, for example, eyes with IOL. Graphic print switch....................... Prints out graphically the state of refraction. Target image switch ...................... Allows the operator to observe the stored target image on the monitor screen. Fixation target brightness switch... Changes the brightness of fixation target. CYL CYL display selection switch......... Changes the CYL display. 11 COMPONENT NAMES KR-8900 Print switch Graphic print switch Menu switch Auto start switch Target image observation switch IOL switch Fixation target brightness switch CYL (cylinder) display selection switch Measurement mode switch Cornea diameter switch Print switch........................... Prints out the measurement result. When there is no measurement value, press the switch to feed paper. Menu switch ......................... Displays the menu screen. IOL switch ............................ Press the switch to try measurement when errors are likely, for example, eyes with IOL. Graphic print switch.............. Prints out graphically the state of refraction. Target image switch ............. Allows the operator to observe the stored target image on the monitor screen. Fixation target brightness switch .... Changes the brightness of fixation target. CYL CYL display selection switch .... Changes the CYL display. R K Measurement mode switch ...... Changes the measurement mode. Auto start switch................... Switch between auto start and manual mode. Cornea diameter switch ....... Measures the cornea diameter. 12 COMPONENT NAMES MONITOR SCREEN RM-8900 MEASURING SCREEN (LAYOUT 1) IOL Mode S + 0.00 C +0.50 A 100 Fixation target brightness R L 03 / 03 CYL power symbol Vertical distance Instrument No. Patient No. Target eye CYL VD (-) 12.00 01 0001 R L S + 0.00 C +0.50 A 100 Result of refractory power measurement Frequency of measurement Alignment mark Smallest measurable pupil diameter mark Typical value MEASURING SCREEN (LAYOUT 2) Result of refractory power measurement (Right eye) Instrument No. Patient No. CYL power symbol IOL Mode Vertical distance S + 0.00 C + 0.50 100 A CYL 0001 (-) + 0.00 S + 0.50 C 100 A VD 01 12.00 R L 01 / 01 R L Result of refractory power measurement (Left eye) Alignment mark Smallest measurable pupil diameter mark Frequency of measurement Target eye Fixation target brightness INITIAL SETTING SCREEN INITIAL MENU INITIAL SET NUMBER SET PRINT OUT ON-LINE EXIT MENU SETTING SCREEN SETTING MENU STEP AXIS STEP VD CONT. MEAS ON LINE ADD DATE/TIME D/MM EXIT MEASURE SWITCH PRINT SWITCH 0.12 0.25 ITEM SELECT 13 COMPONENT NAMES KR-8900 MEASURING SCREEN(LAYOUT 1) Mode IOL Mode D/MM mark R K Fixation target brightness S + 0.00 C + 0.50 A 100 H 44.00 V 44.00 A 100 R L R 03 / 03 K 03 / 03 mD CYL power symbol Vertical distance Instrument No. Patient No. Alignment bar Target eye CYL VD (-) 12.00 01 0001 R L S + 0.00 C + 0.50 A 100 Vertical distance Result of refractory power measuremen Cornea measurement result Frequency of measurement (REF) Frequency of measurement (KRT) Alignment mark Smallest measurable pupil diameter mark Typical value MEASURING SCREEN(LAYOUT 2) Result of refractory power measurement (Right eye) Cornea measurement result(Right eye) Instrument No. Patient No. CYL power symbol CYL Mode IOL Mode Vertical distance + 0.00 S + 0.50 C 100 A 43.00 H 44.00 V 180 A S + 0.00 C + 0.50 100 A H 43.00 V 44.00 180 A 0001 (-) R K 8& 01 12.00 R L R 01 / 01 K 01 / 01 O & R L Result of refractory power measurement (Left eye) Cornea measurement result(Left eye) Alignment mark Smallest measurable pupil diameter mark Frequency of measurement Target eye Fixation target brightness D/MM mark INITIAL SETTING SCREEN INITIAL MENU INITIAL SET NUMBER SET PRINT OUT ON-LINE EXIT MENU SETTING SCREEN SETTING MENU STEP AXIS STEP VD CONT. MEAS ON LINE ADD DATE/TIME D/MM EXIT MEASURE SWITCH PRINT SWITCH 0.12 0.25 ITEM SELECT CORNEA DIAMETER MEASUREMENT SCREEN CORNEA DIAMETER R L 14 COMPONENT NAMES R L PRINTER OUTPUT RM-8900 Bar code Work ID No. 4/ 0#/' AA#/ 0Q 8& %;. % # ޛ4 ޜ5 5' ޛ. ޜ5 % # Typical value of right eye Equivalent spherical power of right eye Results of 5 refractory power measurements of left eye (recordable up to 10 measurements) Patient No. Instrument No. VD (vertical distance) Cylindrical power mark Results of 5 refractory power measurements of right eye (recordable up to 10 measurements) 5' 2& #&& 02& 612%10 The ( ) mark is added when measurement values are not fully reliable. The Ι mark is displayed at IOL mode. If the reliablity is low and values of C and A cannot be determined, ∗∗ marks are given to pertaining columns. Typical value of left eye PD (pupil distance) Reliability mark (displayed when reliability is low) When measurement is done under the IOL mode, a reliability factor is printed out following the Ι mark. The reliability factor is formed with integers 1 to 9 in increasing order of reliability. Additionally, if the reliability is high enough, the reliability factor is not shown in the printout. 15 COMPONENT NAMES KR-8900 When "KRT PRINT TYPE" is set to "NORMAL" <R/K> mode Bar code Work ID No. -4 Patient No. 0#/' Instrument No. AA#/ 0Q 4'(# 8& %;. % # ޛ4 ޜ5 5' VD (vertical distance) Cylindrical power mark Right eye measurements Measurement Results of 3 right eye measurements (recordable up to 10 measurements) Typical value of riht eye Equivalent spherical power of right eye ޛ.ޜ % # 5 5' 2& #&& 02& -46# ޛ4ޜ & // * 8 #8' %;. %140'#&+# & & عع عع عع ޛ.ޜ * 8 #8' & // Near vision PD value ADD (ordinary additional power) PD value # # Measured value of horizontal corneal curvature Measured value of vertical corneal curvature Average value Corneal astigmatic power Cornea diameter # %;. %140'#&+# & & # عع عع عع عع The ( ) mark is added when measurement values are not fully reliable. 612%10 D1:Refractory power of second principal meridian D2:Refractory power of first principal meridian A1:angle of second principal meridian Low reliability mark ALL mode (example) When measurement is done under the IOL mode, a reliability factor is printed out following the Ι mark. The reliability factor is formed with integers 1 to 9 in increasing order of reliability. Additionally, if the reliability is high enough, the reliability factor is not shown in the printout. 16 COMPONENT NAMES <REF> mode <KRT> mode -4 -4 0#/' 0#/' AA#/ 0Q 4'(# 8& %;. % # ޛ4 ޜ5 5' ޛ. ޜ5 % # Typical value of right eye Patient No. Instrument No. VD (vertical distance) Cylindrical power mark Results of 5 refractory power measurements of right eye (recordable up to 10 measurements) 5' 2& #&& 02& Results of 5 refractory power measurements of left eye (recordable up to 10 measurements) Typical value of left eye PD (pupil distance) 612%10 Reliability mark (displayed when reliability is low) AA#/ 0Q -46# ޛ4ޜ & // # * 8 #8' %;. %140'#&+# // // # عع عع عع عع عع ޛ.ޜ & // # * 8 #8' %;. %140'#&+# // // # عع عع عع عع عع 612%10 Typical measured value of right eye corneal curvature Measured value of right eye cornea (mm) Results of 5 right eye corneal curvature measurements of right eye, average value and astigmatic power of cornea (recordable up to 10 measurements each for right / left eye) Measured value of left eye MM1:Radius of curvature of second principal meridian MM2:Radius of curvature of first principal meridian A 1:Angle of second principal meridian <R/K><KRT> mode The kerato data display in the case of setting the HV display as the R1R2 display. -46# & ޛ4ޜ 4 4 #8' // # STD 2 FORMAT, see “Setting communication format” on page 45. 17 COMPONENT NAMES When "KRT PRINT TYPE" is set to "CLASSIC" <R/K> mode Bar code Work ID No. Instrument No. Patient No. Instrument No. VD (vertical distance) Cylindrical power mark Right eye measurements Measurement Results of 5 right eye measurements (recordable up to 10 measurements) Typical value of riht eye (The * mark is displayed when 3 or more measurements are done.) Equivalent spherical power of right eye The ( ) mark is added when measurement values are not fully reliable. The I mark is displayed at IOL mpde. If the reliability is low and values of C and A cannot be detemined, ** marks are given to pertaining columns. PD value Measured value of horizontal corneal curvature Measured value of vertical corneal curvature Average value Cornea astigmatic power Cornea diameter ALL mode (example) When measurement is done under the IOL mode, a reliability factor is printed out following the Ι mark. The reliability factor is formed with integers 1 to 9 in increasing order of reliability. Additionally, if the reliability is high enough, the reliability factor is not shown in the printout. 18 COMPONENT NAMES <REF> mode <KRT> mode Patient No. Instrument No. VD (vertical distance) Cylindrical power mark Results of 5 refractory power measurements of right eye (recordable up to 10 measurements) Typical value of right eye Typical measured value of right eye corneal curvature Measured value of right eye cornea (mm) Results of 5 refractory power measurements of left eye (recordable up to 10 measurements) Typical value of left eye PD (pupil distance) Results of 5 right eye corneal curvature measurements of right eye, average value and astigmatic power of cornea (recordable up to 10 measurements each for right / left eye) Reliability mark (displayed when reliability is low) Measured value of left eye 19 COMPONENT NAMES STANDARD ACCESSORIES The following are standard accessories. Make sure that all these items are included (quantity). Power cable (1) Chinrest pin (2) Printer paper (2) Silicon cloth (1) Chinrest tissue (1) Dust cover (1) Fuse (2) Instruction manuals: unpacking and assembling (1 each) INSTRUCTIO AUTO REFRA N MANU AL RM-890 0 KR-890-4 0 CTOMETER AUTO KERA TO-REFRAC TOMETER Accessory box (1) 20 COMPONENT NAMES Model eye (1) PREPARATIONS INSTALLATION 1 2 CAUTION Before moving the instrument, fasten the clamping knob at the bottom surface to stop movements. Negligence of this may cause injury by falling parts. CAUTION When moving the instrument, be sure to hold it at the bottom surface with two persons. Carrying by one person may cause a backache or injury by falling parts. Also, holding ares other than the bottom surface may cause pinching fingers between parts and injury by falling parts as well as damage to the instrument. CAUTION To prevent injury due to tumbling of the instrument body and falling parts, avoid a slope and unstable floor for installation. Fasten the clamping knob. Firmly hold the instrument at the specified position and place it on the automatic instrument table. For the automatic instrument table, see “OPTIONAL ACCESSORIES” on page 82. Clamping knob Holding positions 3 Holding the instrument After installation, loosen the clamping knob. Now the main body can be moved. 21 PREPARATIONS CONNECTING POWER CABLE WARNING Be sure to connect the power plug to an AC 3-pin receptacle equipped with grounding. Connection with receptacle without grounding may cause fire and electric shock in case of shortcircuiting. CAUTION To avoid electric shocks, do not handle the power plug with wet fingers. 1 2 Make sure that the power switch of the main body is off. 3 Plug the power cable to a grounded 3-pin AC receptacle. Plug the power cable to the main body. CONNECTING EXTERNAL I/O TERMINALS Use the external device complying with IEC60950/IEC60950-1, UL60950/ UL609501, or UL60601-1. DATA OUT This machine may be connected with a PC (personal computer) using RS232C or USB . 1 2 Connect the connection cable to the OUT terminal of the main body. Connect the other end of the connection cable to the PC. IN terminal RS-232C OUT terminal 22 PREPARATIONS USB OUT terminal DATA IN Also, this machine may be connected with a bar code reader using RS232C. 1 2 Connect the connection cable to the IN terminal of the main body. Connect the other end of the connection cable to the external device. INITIAL SETTINGS In the initial setting, settings such as patient No., instrument No., refractory power shift, ON LINE, auto print, etc. can be done. PREPARATION FOR INITIAL SETTING 1 Make sure of the connection of power cable. For connection, see “CONNECTING POWER CABLE” on page 22. 2 While pressing MENU SWITCH of the control panel, press on the POWER SWITCH . Hold the MENU SWITCH till the buzzer sounds. The POWER lamp lights and the initial menu screen is displayed. RETURNING TO THE MEASUREMENT SCREEN 1 2 3 Press the MEASUREMENT SWITCH switch and move the cursor to “EXIT”. Press the PRINT SWITCH . (EXIT OK is displayed.) Press the PRINT SWITCH are printed out.) again. (The measurement screen is returned and the set items INITIAL MENU INITIAL SET NUMBER SET PRINT OUT ON-LINE EXIT Measurement switch 23 PREPARATIONS INITIAL SET SCREEN In the INITIAL SET screen, buzzer sound, refractory power shift, display of typical value in monitor screen and date can be changed. 1 In the “INITIAL MENU SCREEN”, make sure that the cursor is on “INITIAL SET”, and then press the PRINT SWITCH . The monitor screen is changed to the INITIAL SET SCREEN. INITIAL SET BUZZER DPTR SHIFT AVERAGE DISP. DATE INIT AUTO C.D MEMORY CREDIBILITY.NUM MEASURE SWITCH PRINT SWITCH YES NO ITEM SELECT • Close the “INITIAL SET SCREEN” and call the “INITIAL MENU SCREEN”. • Move the cursor to “EXIT”. • Press the PRINT SWITCH . To return to the previous item in the screen: While pressing the PRINT SWITCH , press the MEASUREMENT SWITCH . BUZZER SOUND SETTING The buzzer sound can be set. Before shipment, it is set to (YES) so that the buzzer sounds. 1 In the “INITIAL MENU SCREEN”, choose “INITIAL SET” and get the “INITIAL SET SCREEN”. INITIAL SET BUZZER DPTR SHIFT AVERAGE DISP. DATE INIT AUTO C.D MEMORY CREDIBILITY.NUM MEASURE SWITCH PRINT SWITCH YES NO ITEM SELECT 2 Press the PRINT SWITCH , and choose “YES” (buzzer sound) or “NO” (no buzzer sound) of “BUZZER”. 3 Setting is done by pressing the MEASUREMENT SWITCH , and the cursor goes to the next item. 24 PREPARATIONS SHIFTING REFRACTORY POWER The refractory power (S value) can be shifted. Before shipment, it is set to +0.37. 1 In the “INITIAL MENU SCREEN”, choose “INITIAL SET” and get the “INITIAL SET” screen. INITIAL SET BUZZER DPTR SHIFT AVERAGE DISP. DATE INIT AUTO C.D MEMORY CREDIBILITY.NUM MENU SWITCH IOL SWITCH MEASURE SWITCH 2 3 +0.37 UP DOWN ITEM Press the MEASUREMENT SWITCH and move the cursor to “DPTR SHIFT”. Pressing the MENU SWITCH increases the value. Pressing the IOL SWITCH decreases the value. Values can be set at 0.12D steps between -1.00D and +1.00D. 4 Press the MEASUREMENT SWITCH , and the cursor goes to the next item. MONITOR SCREEN DISPLAY OF TYPICAL VALUE The typical value can be displayed in the monitor screen. Before shipment, it is set to “NO” (no display). 1 In the “INITIAL MENU SCREEN”, choose “INITIAL SET” and get the “INITIAL SET SCREEN”. INITIAL SET BUZZER DPTR SHIFT AVERAGE DISP. DATE INIT AUTO C.D MEMORY CREDIBILITY.NUM MEASURE SWITCH PRINT SWITCH 2 3 4 YES NO ITEM SELECT Press the MEASUREMENT SWITCH and move the cursor to “AVERAGE DISP”. Press the PRINT SWITCH and choose “YES” (display in measuring screen) or “NO” (no display in measuring screen). Press the MEASUREMENT SWITCH , and the cursor goes to the next item. 25 PREPARATIONS CHANGING DATE DISPLAY The date format of printout can be changed. Before shipment, it is set to “JUN.01.2003”. 1 In the “INITIAL MENU SCREEN”, choose “INITIAL SET” and get the “INITIAL SET SCREEN”. INITIAL SET BUZZER DPTR SHIFT AVERAGE DISP. DATE INIT AUTO C.D MEMORY CREDIBILITY.NUM MEASURE SWITCH PRINT SWITCH 2003.12.01 DEC.01.2003 01.DEC.2003 ITEM SELECT 2 3 Press the MEASUREMENT SWITCH and move the cursor to “DATE”. 4 Press the MEASUREMENT SWITCH , and the cursor returns to “EXIT”. Press the PRINT SWITCH 2003.06.01; JUN. 01. 2003; or 01. JUN. 2003. and choose: MANUAL START AFTER POWER ON (Only in KR-8900) 1 Press the MEASUREMENT SWITCH and bring the cursor to INIT AUTO. INITIAL SET BUZZER DPTR SHIFT AVERAGE DISP. DATE INIT AUTO C.D MEMORY CREDIBILITY.NUM MEASURE SWITCH PRINT SWITCH 2 3 Press the PRINT SWITCH YES NO ITEM SELECT and choose NO. Press the MEASUREMENT SWITCH for setting; the cursor moves to the next item. 26 PREPARATIONS CHANGING THE CORNEA DIAMETER MEASUREMENT METHOD (Only in KR-8900) The method of cornea diameter measurement can be chosen between the measurement using the actual image or the static image. Before shipment, the setting is NO (measurement using actual image). 1 Press the MEASUREMENT SWITCH and bring the cursor to C.D MEMORY. INITIAL SET BUZZER DPTR SHIFT AVERAGE DISP. DATE INIT AUTO C.D MEMORY CREDIBILITY.NUM MEASURE SWITCH PRINT SWITCH YES NO ITEM SELECT 2 Press the PRINT SWITCH and choose “YES” (measurement using static image) or “NO” (measurement using actual image). 3 Press the MEASUREMENT SWITCH for setting; the cursor moves to the next item. RELIABILITY FACTOR The reliability factor can be printed out. Before shipment, it is set to [NO] (no printout). 1 In the “INITIAL MENU SCREEN”, choose “INITIAL SET” and get the “INITIAL SET SCREEN”. INITIAL SET BUZZER DPTR SHIFT AVERAGE DISP. DATE INIT AUTO C.D MEMORY CREDIBILITY.NUM MEASURE SWITCH PRINT SWITCH 2 3 4 YES NO ITEM SELECT Press the MEASUREMENT SWITCH and move the cursor to “CREDIBILITY NUM”. Press the PRINT SWITCH and choose “YES” (printout) or “NO” (no printout). Press the MEASUREMENT SWITCH , and the cursor goes to the next item. 27 PREPARATIONS ADD FACTOR The ordinary additional power (ADD) can be printed out. Before shipment, it is set to [NO] (no printout). 1 In the “INITIAL MENU SCREEN”, choose “INITIAL SET” and get the “INITIAL SET SCREEN”. INITIAL SET DPTR SHIFT AVERAGE DISP. DATE INIT AUTO C.D MEMORY CREDIBILITY.NUM ADD MODE MEASURE SWITCH PRINT SWITCH YES NO ITEM SELECT 2 3 4 Press the MEASUREMENT SWITCH and move the cursor to “ADD MODE”. 5 Press the MEASUREMENT SWITCH , and the cursor returns to the first item (BUZZER). Press the PRINT SWITCH and choose “YES” (printout) or “NO” (no printout). Press the MEASUREMENT SWITCH , and the cursor goes to the next item “DISPLAY STYLE”. CHANGING DISPLAY STYLE The display style can be changed. Before shipment, it is set to“LAYOUT 1”. 1 In the “INITIAL MENU SCREEN”, choose “INITIAL SET” and get the “INITIAL SET SCREEN”. INITIAL SET AVERAGE DISP. DATE INIT AUTO C.D MEMORY CREDIBILITY.NUM ADD MODE DISPLAY STYLE MEASURE SWITCH PRINT SWITCH 2 3 4 5 LAYOUT 1 LAYOUT 2 ITEM SELECT Press the MEASUREMENT SWITCH and move the cursor to “DISPLAY STYLE”. Press the PRINT SWITCH and choose “LAYOUT 1” or “LAYOUT2” . Press the MEASUREMENT SWITCH , and the cursor goes to the next item “EXIT”. Press the MEASUREMENT SWITCH , and the cursor returns to the first item (BUZZER). 28 PREPARATIONS NO. SETTING In the NUMBER SET screen, patient No. setting, monitor screen display of patient No., printing patient No., resetting of patient No., instrument No. setting, monitor screen display of instrument No. and printing instrument No. can be changed. 1 In the “INITIAL MENU SCREEN”, press the MEASUREMENT SWITCH and move the cursor to “NUMBER SET”. 2 Press the PRINT SWITCH , and the monitor screen is changed to the “NUMBER SET SCREEN”. NUMBER SET SERIAL NO. SERIAL TV SERIAL PRT SERIAL RESET INSTRUMENT NO. INSTRUMENT TV INSTRUMENT PRT EXIT MENU SWITCH IOL SWITCH MEASURE SWITCH 0001 UP DOWN ITEM • Close the “NUMBER SET SCREEN” and call the “INITIAL MENU SCREEN”. • Move the cursor to “EXIT”. • Press the PRINT SWITCH . To return to the previous item in the screen: • While pressing the PRINT SWITCH , press the MEASUREMENT SWITCH . SETTING PATIENT NO. The patient No. can be set between 0 and 9999. Before shipment, it is set to “0001”. 1 In the “INITIAL MENU SCREEN”, choose “NUMBER SET” and get the “NUMBER SET SCREEN”. NUMBER SET SERIAL NO. SERIAL TV SERIAL PRT SERIAL RESET INSTRUMENT NO. INSTRUMENT TV INSTRUMENT PRT EXIT MENU SWITCH IOL SWITCH MEASURE SWITCH 2 3 0001 UP DOWN ITEM Press the MEASUREMENT SWITCH and move the cursor to “SERIAL NO”. Pressing the MENU SWITCH increases the value. Pressing the IOL SWITCH decreases the value. 4 Press the MEASUREMENT SWITCH , and the cursor goes to the next item. 29 PREPARATIONS MONITOR SCREEN DISPLAY OF PATIENT NO. The patient No. can be displayed in the monitor screen. Before shipment, it is set to (YES). 1 In the “INITIAL MENU SCREEN”, choose “NUMBER SET” and get the “NUMBER SET SCREEN”. NUMBER SET SERIAL NO. SERIAL TV SERIAL PRT SERIAL RESET INSTRUMENT NO. INSTRUMENT TV INSTRUMENT PRT EXIT MEASURE SWITCH PRINT SWITCH YES NO ITEM SELECT 2 3 Press the MEASUREMENT SWITCH and move the cursor to “SERIAL TV”. 4 Press the MEASUREMENT SWITCH , and the cursor goes to the next item. Press the PRINT SWITCH and choose “YES” (display in measuring screen) or “NO” (no display in measuring screen). PRINTING PATIENT NO. The patient No. can be printed out. Before shipment, it is set to [YES] (printout). 1 In the “INITIAL MENU SCREEN”, choose “NUMBER SET” and get the “NUMBER SET SCREEN”. NUMBER SET SERIAL NO. SERIAL TV SERIAL PRT SERIAL RESET INSTRUMENT NO. INSTRUMENT TV INSTRUMENT PRT EXIT MEASURE SWITCH PRINT SWITCH 2 3 4 YES NO ITEM SELECT Press the MEASUREMENT SWITCH and move the cursor to “SERIAL PRT”. Press the PRINT SWITCH and choose “YES” (printout) or “NO” (no printout). Press the MEASUREMENT SWITCH , and the cursor goes to the next item. 30 PREPARATIONS RESETTING PATIENT NO. The patient No. can be reset by switching on the power source. Before shipment, it is set to “NO” (no reset). 1 In the “INITIAL MENU SCREEN”, choose “NUMBER SET” and get the “NUMBER SET SCREEN”. NUMBER SET SERIAL NO. SERIAL TV SERIAL PRT SERIAL RESET INSTRUMENT NO. INSTRUMENT TV INSTRUMENT PRT EXIT MEASURE SWITCH PRINT SWITCH 2 3 4 YES NO ITEM SELECT Press the MEASUREMENT SWITCH and move the cursor to “SERIAL RESET”. Press the PRINT SWITCH and choose “YES” (rest) or “NO” (no reset). Press the MEASUREMENT SWITCH , and the cursor goes to the next item. SETTING INSTRUMENT NO. The instrument No. can be set between 0 and 99. Before shipment, it is set to “01”. 1 In the “INITIAL MENU SCREEN”, choose “NUMBER SET” and get the “NUMBER SET SCREEN”. NUMBER SET SERIAL NO. SERIAL TV SERIAL PRT SERIAL RESET INSTRUMENT NO. INSTRUMENT TV INSTRUMENT PRT EXIT MENU SWITCH IOL SWITCH MEASURE SWITCH 2 3 01 UP DOWN ITEM Press the MEASUREMENT SWITCH and move the cursor to “INSTRUMENT NO.”. Pressing the MENU SWITCH increases the value. Pressing the IOL SWITCH decreases the value. 4 Press the MEASUREMENT SWITCH , and the cursor goes to the next item. 31 PREPARATIONS MONITOR SCREEN DISPLAY OF INSTRUMENT NO. The instrument No. can be displayed in the monitor screen. Before shipment, it is set to “NO” (no display). 1 In the “INITIAL MENU SCREEN”, choose “NUMBER SET” and get the “NUMBER SET SCREEN”. NUMBER SET SERIAL NO. SERIAL TV SERIAL PRT SERIAL RESET INSTRUMENT NO. INSTRUMENT TV INSTRUMENT PRT EXIT MEASURE SWITCH PRINT SWITCH YES NO ITEM SELECT 2 3 Press the MEASUREMENT SWITCH and move the cursor to “INSTRUMENT TV”. 4 Press the MEASUREMENT SWITCH , and the cursor goes to the next item. Press the PRINT SWITCH and choose “YES” (display in measuring screen) or “NO” (no display in measuring screen). PRINTING INSTRUMENT NO. The instrument No. can be printed out. Before shipment, it is set to (NO) [no printout]. 1 In the “INITIAL MENU SCREEN”, choose “NUMBER SET” and get the “NUMBER SET SCREEN”. NUMBER SET SERIAL NO. SERIAL TV SERIAL PRT SERIAL RESET INSTRUMENT NO. INSTRUMENT TV INSTRUMENT PRT EXIT MEASURE SWITCH PRINT SWITCH 2 3 4 YES NO ITEM SELECT Press the MEASUREMENT SWITCH and move the cursor to “INSTRUMENT PRT”. Press the PRINT SWITCH and choose “YES” (printout) or “NO” (no printout). Press the MEASUREMENT SWITCH , and the cursor goes to the next item. 32 PREPARATIONS PRINTOUT In the PRINT OUT screen, printout format, KRT printout format (only KR-8900), printing equivalent spherical power, printing computer lensmeter data, and printing bar code can be changed. 1 In the “INITIAL MENU SCREEN”, press the MEASUREMENT SWITCH and move the cursor to “PRINT OUT”. 2 Press the PRINT SWITCH , and the monitor screen is changed to the “PRINT OUT SCREEN”. PRINT OUT ALL AVE SIM CSTM KRT PRINT TYPE MEASURE SWITCH PRINT SWITCH ITEM SELECT • Close the “PRINT OUT SCREEN” and call the “INITIAL MENU SCREEN”. • Move the cursor to “EXIT”. • Press the PRINT SWITCH . To return to the previous item in the screen: While pressing the PRINT SWITCH , press the MEASUREMENT SWITCH . PRINTOUT FORMAT The printout format can be set. Before shipment, it is set to “ALL” (print out all data). 1 In the “INITIAL MENU SCREEN”, choose “PRINT OUT” and get the “PRINT OUT SCREEN”. PRINT OUT ALL AVE SIM CSTM KRT PRINT TYPE MEASURE SWITCH PRINT SWITCH 2 3 4 ITEM SELECT Press the MEASUREMENT SWITCH and move the cursor to “PRINT TYPE”. Press the PRINT SWITCH and choose: ALL (print out all data); AVE (print out date, settings and typical value of refractory power only); SIM (print out typical value only); or CSTM (select the settings by each item). Press the MEASUREMENT SWITCH page 33 page 38 , and the cursor goes to the next item. 33 PREPARATIONS R/K PRINTOUT FORMAT(ONLY KR-8900) You can set the printout type in the [R/K] mode. "NORMAL" (Print out only the central diopter value of kerato data) is set when shipped. 1 In the “INITIAL MENU SCREEN”, choose “PRINT OUT” and get the “PRINT OUT SCREEN”. KRT PRINT TYPE NORMAL CLASSIC 2 3 Press the MEASUREMENT SWITCH and move the cursor to “KRT PRINT TYPE”. 4 Press the MEASUREMENT SWITCH , and the cursor goes to the next item. Press the PRINT SWITCH to select "NORMAL" (Print out only the central diopter value of kerato data) or "CLASSIC" (Print out all diopter values of kerato data). PRINTING EQUIVALENT SPHERICAL POWER The equivalent spherical power can be printed. Before shipment, it is set to “YES” (printout). 1 In the “INITIAL MENU SCREEN”, choose “PRINT OUT” and get the “PRINT OUT SCREEN”. PRINT OUT KRT PRINT TYPE MEASURE SWITCH PRINT SWITCH 2 3 4 YES NO ITEM SELECT Press the MEASUREMENT SWITCH and move the cursor to “S.E.DATA”. Press the PRINT SWITCH and choose “YES” (printout) or “NO” (no printout). Press the MEASUREMENT SWITCH , and the cursor goes to the next item. 34 PREPARATIONS PRINTING COMPUTER LENSMETER DATA Computer lensmeter data can be printed. Before shipment, it is set to “NO” (no printout). 1 In the “INITIAL MENU SCREEN”, choose “PRINT OUT” and get the “PRINT OUT SCREEN”. PRINT OUT KRT PRINT TYPE MEASURE SWITCH PRINT SWITCH 2 3 4 YES NO ITEM SELECT Press the MEASUREMENT SWITCH and move the cursor to “CL PRINT”. Press the PRINT SWITCH and choose “YES” (printout) or “NO” (no printout). Press the MEASUREMENT SWITCH , and the cursor goes to the next item. PRINTING BAR CODE The bar code can be printed out. Before shipment, it is set to “NO” (no printout). 1 In the “INITIAL MENU SCREEN”, choose “PRINT OUT” and get the “PRINT OUT SCREEN”. PRINT OUT KRT PRINT TYPE MEASURE SWITCH PRINT SWITCH 2 3 4 YES NO ITEM SELECT Press the MEASUREMENT SWITCH and move the cursor to “BAR PRINT”. Press the PRINT SWITCH and choose “YES” (printout) or “NO” (no printout). Press the MEASUREMENT SWITCH , and the cursor goes to the next item. 35 PREPARATIONS AUTO PRINT AFTER FINISHING AUTO START MEASUREMENT (Only in KR-8900) 1 Press the MEASUREMENT SWITCH and bring the cursor to AUTO PRINT. PRINT OUT KRT PRINT TYPE MEASURE SWITCH PRINT SWITCH 2 3 Press the PRINT SWITCH YES NO ITEM SELECT and choose “YES” (auto printout) or “NO” (no auto printout). Press the MEASUREMENT SWITCH for setting; the cursor moves to the next item. CHANGING THE PRINTOUT DISPLAY ORDER (Only in KR-8900) 1 Press the MEASUREMENT SWITCH and bring the cursor to DATA ORDER. The printout display order of cornea refractory power and curvature can be changed. Before shipment, the setting is DATA ORDER D/MM. PRINT OUT KRT PRINT TYPE MEASURE SWITCH PRINT SWITCH 2 3 Press the PRINT SWITCH D / MM MM / D ITEM SELECT and choose D/MM or MM/D. Press the MEASUREMENT SWITCH for setting; the cursor moves to the next item. 36 PREPARATIONS CHANGING THE PRINTOUT DISPLAY ORDER (Only in KR-8900) 1 Press the MEASUREMENT SWITCH and bring the cursor to “PRINT R/L”. PRINT OUT KRT PRINT TYPE DATA R/L PRINT R / L MEASURE SWITCH PRINT SWITCH ITEM SELECT 2 Press the PRINT SWITCH and choose DATA (separate printout for REF/KRT), or R/L (printout of right eye and left eye in this order, irrespective of REF/KRT) 3 Press the MEASUREMENT SWITCH for setting; the cursor moves to the next item. 37 PREPARATIONS CUSTOM-PRINT SETTINGS This machine provides the ability to select the items to be printed, called the custom print function. On the custom-print screen, the details of the following items can be changed individually: refraction measurement values, cornea measurement values, corneal astigmatism and axial angles, PD values, the name, date, VD values, cylindricity mark and the TOPCON mark On/Off. 1 On the “PRINT OUT SCREEN”, press the “PRINT TYPE”. 2 Press the PRINT SWITCH , select “CSTM” and press the IOL SWITCH . MENU SWITCH and move the cursor to The monitor screen changes to the “CSTM SCREEN”. CUSTOM PRINT REF DATA KRT DATA KRT AVE KRT CYL PD DATA NAME MEASURE SWITCH PRINT SWITCH ALL AVE ITEM SELECT To exit this screen • Move the cursor to “EXIT”, then press the PRINT SWITCH . Close the “PRINT OUT (CSTM) SCREEN” and call the “PRINT OUT SCREEN”. • Move the cursor to “EXIT”. • Press the PRINT SWITCH . Return to the previous item in the screen • Hold the PRINT SWITCH down and press the MEASUREMENT SWITCH . 38 PREPARATIONS CHANGING THE PRINT TYPE OF REFRACTION MEASUREMENT VALUES The print type of refraction measurement values may be changed. Before shipment it is set to “ALL” (print all data). 1 On the “PRINT OUT SCREEN”, move the cursor to “PRINT TYPE”, and with “CSTM” selected, press the IOL SWITCH and get the “CSTM SCREEN”. CUSTOM PRINT REF DATA KRT DATA KRT AVE KRT CYL PD DATA NAME MEASURE SWITCH PRINT SWITCH ALL AVE ITEM SELECT 2 3 Press the MEASUREMENT SWITCH and move the cursor to “REF DATA”. 4 Press the MEASUREMENT SWITCH . The cursor moves to the next item. Press the PRINT SWITCH and select ALL (Print all data), or AVE (Print typical values only) CHANGING THE PRINT TYPE OF CORNEA MEASUREMENT VALUES (Only in KR-8900) The print type of cornea measurement values may be changed. Before shipment it is set to “AVE” (print typical values only). 1 On the “PRINT OUT SCREEN”, move the cursor to “PRINT TYPE”, and with “CSTM” selected, press the IOL SWITCH and get the “CSTM SCREEN”. CUSTOM PRINT REF DATA KRT DATA KRT AVE KRT CYL PD DATA NAME MEASURE SWITCH PRINT SWITCH ALL AVE ITEM SELECT 2 3 Press the MEASUREMENT SWITCH and move the cursor to “KRT DATA”. 4 Press the MEASUREMENT SWITCH . The cursor moves to the next item. Press the PRINT SWITCH and select ALL (Print all data), or AVE (Print typical values only) 39 PREPARATIONS PRINTING AVERAGE VALUES OF CORNEA MEASUREMENTS (Only in KR-8900) Average values of cornea measurements may be printed out. Before shipment it is set to “YES” (print average values). 1 On the “PRINT OUT SCREEN”, move the cursor to “PRINT TYPE”, and with “CSTM” selected, press the IOL SWITCH and get the “CSTM SCREEN”. CUSTOM PRINT REF DATA KRT DATA KRT AVE KRT CYL PD DATA NAME MEASURE SWITCH PRINT SWITCH YES NO ITEM SELECT 2 3 Press the MEASUREMENT SWITCH and move the cursor to “KRT AVE”. 4 Press the MEASUREMENT SWITCH . The cursor moves to the next item. Press the PRINT SWITCH and select “YES” (print average values), or “NO” (do not print average values). PRINTING CORNEAL ASTIGMATISM AND AXIAL ANGLES (Only in KR-8900) Corneal astigmatism and axial angles may be printed out. Before shipment it is set to “YES” (print corneal astigmatism and axial angles). 1 On the “PRINT OUT SCREEN”, move the cursor to “PRINT TYPE”, and with “CSTM” selected, press the IOL SWITCH and get the “CSTM SCREEN”. CUSTOM PRINT REF DATA KRT DATA KRT AVE KRT CYL PD DATA NAME MEASURE SWITCH PRINT SWITCH YES NO ITEM SELECT 2 3 Press the MEASUREMENT SWITCH and move the cursor to “KRT CYL”. 4 Press the MEASUREMENT SWITCH . The cursor moves to the next item. Press the PRINT SWITCH and select “YES” (print corneal astigmatism and axial angles), or “NO” (do not print corneal astigmatism and axial angles). 40 PREPARATIONS PRINTING PD VALUES PD values may be printed out. Before shipment it is set to “YES” (print PD values). 1 On the “PRINT OUT SCREEN”, move the cursor to “PRINT TYPE”, and with “CSTM” selected, press the IOL SWITCH and get the “CSTM SCREEN”. CUSTOM PRINT REF DATA KRT DATA KRT AVE KRT CYL PD DATA NAME MEASURE SWITCH PRINT SWITCH YES NO ITEM SELECT 2 3 Press the MEASUREMENT SWITCH and move the cursor to “PD DATA”. 4 Press the MEASUREMENT SWITCH . The cursor moves to the next item. Press the PRINT SWITCH and select “YES” (print PD values), or “NO” (do not print PD values). PRINTING NAMES The name may be printed out. Before shipment it is set to “YES” (print names). 1 On the “PRINT OUT SCREEN”, move the cursor to “PRINT TYPE”, and with “CSTM” selected, press the IOL SWITCH and get the “CSTM SCREEN”. CUSTOM PRINT REF DATA KRT DATA KRT AVE KRT CYL PD DATA NAME MEASURE SWITCH PRINT SWITCH 2 3 4 YES NO ITEM SELECT Press the MEASUREMENT SWITCH and move the cursor to “NAME”. Press the PRINT SWITCH and select “YES” (print names), or “NO” (do not print names). Press the MEASUREMENT SWITCH . The cursor moves to the next item. 41 PREPARATIONS PRINTING THE DATE The date may be printed out. Before shipment it is set to “YES” (print date). 1 On the “PRINT OUT SCREEN”, move the cursor to “PRINT TYPE”, and with “CSTM” selected, press the IOL SWITCH and get the “CSTM SCREEN”. CUSTOM PRINT KRT DATA KRT AVE KRT CYL PD DATA NAME DATE MEASURE SWITCH PRINT SWITCH 2 3 4 YES NO ITEM SELECT Press the MEASUREMENT SWITCH and move the cursor to “DATE”. Press the PRINT SWITCH and select “YES” (print date), or “NO” (do not print date). Press the MEASUREMENT SWITCH . The cursor moves to the next item. PRINTING VD VALUES VD values may be printed out. Before shipment it is set to “YES” (print VD values). 1 On the “PRINT OUT SCREEN”, move the cursor to “PRINT TYPE”, and with “CSTM” selected, press the IOL SWITCH and get the “CSTM SCREEN”. CUSTOM PRINT KRT AVE KRT CYL PD DATA NAME DATE VD MEASURE SWITCH PRINT SWITCH YES NO ITEM SELECT 2 3 Press the MEASUREMENT SWITCH and move the cursor to “VD”. 4 Press the MEASUREMENT SWITCH . The cursor moves to the next item. Press the PRINT SWITCH and select “YES” (print VD values), or “NO” (do not print VD values). 42 PREPARATIONS PRINTING THE CYLINDRICITY MARK The cylindricity mark may be printed out. Before shipment it is set to “YES” (print cylindricity mark). 1 On the “PRINT OUT SCREEN”, move the cursor to “PRINT TYPE”, and with “CSTM” selected, press the IOL SWITCH and get the “CSTM SCREEN”. CUSTOM PRINT YES NO KRT CYL PD DATA NAME VD CYL MEASURE SWITCH PRINT SWITCH ITEM SELECT 2 3 Press the MEASUREMENT SWITCH and move the cursor to “CYL”. 4 Press the MEASUREMENT SWITCH . The cursor moves to the next item. Press the PRINT SWITCH and select “YES” (print cylindricity mark), or “NO” (do not print cylindricity mark). PRINTING THE TOPCON MARK The TOPCON mark may be printed out. Before shipment it is set to “YES” (print TOPCON mark). 1 On the “PRINT OUT SCREEN”, move the cursor to “PRINT TYPE”, and with “CSTM” selected, press the IOL SWITCH and get the “CSTM SCREEN”. CUSTOM PRINT YES NO PD DATA NAME VD CYL TOPCON MEASURE SWITCH PRINT SWITCH ITEM SELECT 2 3 Press the MEASUREMENT SWITCH and move the cursor to “TOPCON”. 4 Press the MEASUREMENT SWITCH . The cursor moves to the next item. Press the PRINT SWITCH and select “YES” (print TOPCON mark), or “NO” (do not print TOPCON mark). 43 PREPARATIONS ON-LINE (DATA COMMUNICATION) In the ON-LINE screen, computer lensmeter data receiving format, communication format and communication speed can be changed. 1 In the “INITIAL MENU SCREEN”, press the MEASUREMENT SWITCH and move the cursor to “ON-LINE”. 2 Press the PRINT SWITCH , and the monitor screen is changed to the “ON-LINE SCREEN”. ON-LINE CL INPUT DATA FORMAT BAUD-RATE OUTPUT DATA TYPE EXIT MEASURE SWITCH PRINT SWITCH NO OLD NEW STD1 R-ID W-ID ITEM SELECT • Close the “ON-LINE SCREEN” and call the “INITIAL MENU SCREEN”. • Move the cursor to “EXIT”. • Press the PRINT SWITCH . To return to the previous item in the screen: • While pressing the PRINT SWITCH , press the MEASUREMENT SWITCH . COMPUTER LENSMETER DATA RECEIVING FORMAT The RS232C format for receiving computer lensmeter data can be set. Before shipment, it is set to “NO” (no receiving). 1 In the “INITIAL MENU SCREEN”, choose “ON-LINE” and get the “ON-LINE SCREEN”. ON-LINE CL INPUT DATA FORMAT BAUD-RATE OUTPUT DATA TYPE EXIT MEASURE SWITCH PRINT SWITCH 44 PREPARATIONS NO OLD NEW STD1 R-ID W-ID ITEM SELECT 2 3 Press the MEASUREMENT SWITCH and move the cursor to “CL INPUT”. 4 Press the MEASUREMENT SWITCH , and the cursor goes to the next item. Press the PRINT SWITCH and choose: NO (no receiving); OLD (OLD RS232C format); NEW (NEW RS232C format); STD1 (STD1 RS232C format); R-ID (receives patient No. via RS232C input port for processing as real ID); or W-ID (receives patient No. via RS232C input port for processing as work ID). SETTING COMMUNICATION FORMAT The communication format can be set. Before shipment, it is set to “OLD” (old TOPCON format). 1 In the “INITIAL MENU SCREEN”, choose “ON-LINE” and get the “ON-LINE SCREEN”. ON-LINE CL INPUT DATA FORMAT BAUD-RATE OUTPUT DATA TYPE EXIT MEASURE SWITCH PRINT SWITCH OLD NEW STD1 STD2 ALL CM1 CM2 CM3 CM4 CM5 USB1 USB2 ITEM SELECT 2 3 Press the MEASUREMENT SWITCH and move the cursor to “DATA FORMAT”. 4 Press the MEASUREMENT SWITCH , and the cursor goes to the next item. Press the PRINT SWITCH and choose: OLD (OLD Topcon format); NEW (NEW Topcon format); STD1 (TOPCON STD1 format,from RS232C OUT); STD2 (TOPCON STD2 format,from RS232C OUT); ALL (tool mode); CM1 (custom specification); CM2 (custom specification); CM3 (custom specification); CM4 (custom specification); CM5 (custom specification); USB1 (USB OUT TOPCON STD1 format); or USB2 (USB OUT TOPCON STD2 format); 45 PREPARATIONS SETTING RS232C COMMUNICATION SPEED The RS232C communication speed can be set. Before shipment, it is set to “2400” (baud rate 2400). 1 In the “INITIAL MENU SCREEN”, choose “ON-LINE” and get the “ON-LINE SCREEN”. ON-LINE CL INPUT DATA FORMAT BAUD-RATE OUTPUT DATA TYPE EXIT MEASURE SWITCH PRINT SWITCH 2400 9600 ITEM SELECT 2 3 Press the MEASUREMENT SWITCH and move the cursor to “BAUD-RATE”. 4 Press the MEASUREMENT SWITCH , and the cursor goes to the next item. Press the PRINT SWITCH and choose: 2400 (baud rate 2400); or 9600 (baud rate 9600. For inquiries about the RS232C communication format, please contact your dealer or Topcon at the address stated on the back cover. SELECTING RS232C OUTPUT DATA (Only in KR-8900) 1 Press the MEASUREMENT SWITCH and bring the cursor to “OUTPUT DATA TYPE”s. ON-LINE CL INPUT DATA FORMAT BAUD-RATE OUTPUT DATA TYPE EXIT MEASURE SWITCH PRINT SWITCH REF KRT ALL ITEM SELECT 2 Press the PRINT SWITCH and choose REF (data of refractometer only) KRT (data of keratometer only), or ALL (data of both refractometer and keratometer) 3 Press the MEASUREMENT SWITCH for setting; the cursor moves to the next item. 46 PREPARATIONS MENU SETTING In menu setting, data step, contact/glasses, continuous measurement, RS232C, date and time can be set. PREPARATION FOR MENU SETTING 1 Make sure of the connection of power cable. For connection, see “CONNECTING POWER CABLE” on page 22. 2 Press “ON” the power switch. DISPLAYING MENU SCREEN 1 2 Make sure of the measurement screen. Press the MENU SWITCH of the control panel. Make sure or the “SETTING MENU SCREEN”. SETTING MENU STEP AXIS STEP VD CONT.MEAS. OUTPUT DATA ADD EXIT MEASURE SWITCH PRINT SWITCH 0.12 0.25 ITEM SELECT RETURNING TO THE MEASUREMENT SCREEN 1 Press the MEASUREMENT SWITCH , invert “EXIT”, and press PRINT SWITCH . SETTING MENU CONT.MEAS. OUTPUT DATA ADD DATE / TIME D / MM HV / R1R2 EXIT MEASURE SWITCH PRINT SWITCH ITEM SELECT 47 PREPARATIONS SETTING STEP The measurement step can be selected from 0.12, 0.25. Before shipment, it is set to “0.25”. 1 Press the MENU SWITCH of the control panel and get the “SETTING MENU SCREEN”. “STEP” is inverted, and measurement steps are displayed on the right with the set step inverted. 2 Press the PRINT SWITCH and invert the desired measurement step. SETTING MENU STEP AXIS STEP VD CONT.MEAS. OUTPUT DATA ADD DATE TIME MEASURE SWITCH PRINT SWITCH 3 0.12 0.25 ITEM SELECT Press the MEASUREMENT SWITCH . Setting is done, and the next item (AXIS STEP) is inverted. SETTING AXIS STEP The axial angle step can be selected from 1 and 5. Before shipment, it is set to “1”. 1 2 Press the MENU SWITCH of the control panel and get the “SETTING MENU SCREEN”. 3 Press the PRINT SWITCH and invert the desired “AXIS” figure. Press the MEASUREMENT SWITCH and invert “AXIS STEP”. AXIS figures are displayed on the right. SETTING MENU STEP AXIS STEP VD CONT.MEAS. OUTPUT DATA ADD DATE TIME MEASURE SWITCH PRINT SWITCH 4 1 5 ITEM SELECT Press the MEASUREMENT SWITCH . Setting is done, and the next item (VD) flashes. 48 PREPARATIONS SETTING VD In VD setting, contact (0) or glasses (12mm or 13.75mm) can be selected. Before shipment, it is set to glasses (12mm). 1 2 Press the MENU SWITCH of the control panel and get the “SETTING MENU SCREEN”. 3 Press the PRINT SWITCH and invert the desired “VD” figure. Press the MEASUREMENT SWITCH and invert “VD”. VD figures are displayed on the right. SETTING MENU STEP AXIS STEP VD CONT.MEAS. OUTPUT DATA ADD DATE TIME MEASURE SWITCH PRINT SWITCH 4 0.00 12.00 13.75 ITEM SELECT Press the MEASUREMENT SWITCH . Setting is done, and the next item (CONT.MEAS.) flashes. SETTING CONT.MEAS. Continuous measurement can be set. Before shipment, it is set to “NO” (normal measurement). 1 2 Press the MENU SWITCH of the control panel and get the “SETTING MENU SCREEN”. 3 Press the PRINT SWITCH and invert “YES” for continuous measurement. Press the MEASUREMENT SWITCH and invert “CONT.MEAS.”. “YES” and “NO” are displayed on the right. SETTING MENU STEP AXIS STEP VD CONT.MEAS. OUTPUT DATA ADD DATE TIME MEASURE SWITCH PRINT SWITCH 4 YES NO ITEM SELECT Press the MEASUREMENT SWITCH . Setting is done, and the next item (OUTPUT DATA) flashes. 49 PREPARATIONS SETTING OUTPUT DATA The RS232C output can be set. Before shipment, it is set to “NO” (no output). 1 2 Press the MENU SWITCH of the control panel and get the “SETTING MENU SCREEN”. 3 Press the PRINT SWITCH and invert “YES” for RS232C output. Press the MEASUREMENT SWITCH and invert “OUTPUT DATA”. “YES” and “NO” are displayed on the right. SETTING MENU STEP AXIS STEP VD CONT.MEAS. OUTPUT DATA ADD DATE TIME YES NO MEASURE SWITCH PRINT SWITCH 4 ITEM SELECT Press the MEASUREMENT SWITCH . Setting is done, and the next item (ADD) flashes. SETTING ADD By choosing an age, an ordinary additional power (ADD) can be selected for the age. Before shipment, it is set to “NO” (no setting). 1 2 Press the MENU SWITCH of the control panel and get the “SETTING MENU SCREEN”. 3 Press the PRINT SWITCH and invert the desired age bracket. Press the MEASUREMENT SWITCH and invert “ADD”. The age bracket is displayed with the set bracket inverted on the right. SETTING MENU STEP AXIS STEP VD CONT.MEAS. OUTPUT DATA ADD DATE TIME MEASURE SWITCH PRINT SWITCH 4 NO 40-44 45-49 50-54 55-59 60-64 65-69 70-74 ITEM SELECT Press the MEASUREMENT SWITCH . Setting is done, and the next item (DATE/TIME) flashes. For “ADD”setting, set “ADD MODE” to “YES” in the initial set screen. To set “ADD MODE” to “YES”, see “ADD FACTOR” on page 28. 50 PREPARATIONS SETTING DATE/TIME 1 2 Press the MENU SWITCH of the control panel and get the “SETTING MENU SCREEN”. 3 Press the PRINT SWITCH and invert the desired item. Press the MEASUREMENT SWITCH and invert “DATE/TIME”. The date/time is displayed on the right. Change figures by pressing the MENU SWITCH (increase) or IOL SWITCH (decrease). SETTING MENU STEP AXIS STEP VD CONT.MEAS. OUTPUT DATA ADD DATE TIME MENU SWITCH IOL SWITCH MEASURE SWITCH 4 YEAR MONTH DAY HOUR MIN SEC 2003 01 01 PM01 20 00 UP DOWN ITEM Press the MEASUREMENT SWITCH . Setting is done, and the next item (D/MM) flashes. SETTING D/MM (Only in KR-8900) The unit of cornea measurement result displayed on the monitor screen can be selected from D (refractory power) or MM (curvature). Before shipment, the setting is MM (curvature). 1 Press the MENU SWITCH and get the menu screen. SETTING MENU AXIS STEP VD CONT.MEAS. OUTPUT DATA ADD DATE TIME D / MM MEASURE SWITCH PRINT SWITCH 2 3 4 MM D ITEM SELECT Press the MEASUREMENT SWITCH and invert “D/MM”. Press the MEASUREMENT SWITCH and invert the unit of measurement result to be set. Press the MEASUREMENT SWITCH for setting; the next item (HV/R1R2) is inverted. 51 PREPARATIONS SETTING HV/R1R2 (Only in KR-8900) You can select how the cornea measurement is displayed on the monitor screen from either HV (horizontal/vertical direction) or R1R2 (radius of curvature of first/second principal meridian). When shipped, the HV(horizontal/vertical direction) is selected as the default setting. 1 Press the MENU SWITCH to call up the menu screen. The HV/R1R2 cursor is inverted and the measurement step is displayd on the right. SETTING MENU VD CONT.MEAS. OUTPUT DATA ADD DATE / TIME D / MM HV / R1R2 MEASURE SWITCH PRINT SWITCH HV R1R2 ITEM SELECT 2 Press the MEASUREMENT SWITCH and invert "HV/R1R2." The display method of the cornea measurement result is displayed on the right. The set display method is inverted. 3 Press the PRINT SWITCH result you want to set. and invert the display method of the cornea measurement HV:Horizontal / vertical radius of curvature R1: Radius of curvature of seconde principal meridian R2: Radius of curvature of first principal meridian 4 Press the MEASUREMENT SWITCH to save the settings; the next item (EXIT) is inverted. 52 PREPARATIONS PRINTER PAPER SETTING NOTE: 1 Press the • Note that printing cannot be done if the paper back faces up by setting the roll in opposite direction. PRINTER COVER OPEN SWITCH to open the printer cover. Printer cover Printer cover open switch 2 Open the printer cover to the utmost limit. 3 As taking care for the winding direction, load the paper into the printer and pull out the paper end to your side by 7 to 8cm. Roll direction 53 PREPARATIONS 4 Arrange the position so that the paper can come out from the center of the printer outlet. Then, close the printer cover. . Unless the printer cover is correctly closed, it is not possible to execute printing. At this time, "CLOSE PRT COVER" is displayed on the monitor screen. A 58mm wide paper roll (example: TF50KS-E2C [Nippon Paper Co.]) is recommended. Other paper rolls may cause unnecessarily large printing noise or unclean printing. RESETTING FROM POWER SAVE STATUS This instrument adopts the power save system for saving electric power. Namely, when the main body is not in operation, power supply to the monitor and CCD camera is stopped. Under the power-save condition, only the POWER lamp of control panel lights and the monitor screen is off. 1 Press the MEASUREMENT SWITCH . In a few seconds, the monitor is displayed and measurement is enabled. 54 PREPARATIONS BASIC OPERATIONS PREPARATION BEFORE MEASUREMENT APPLYING POWER SOURCE 1 Make sure of the connection of power cable. For connection, see “CONNECTING POWER CABLE” on page 22. 2 3 Press on the POWER SWITCH . Confirm that the title screen is displayed and then the MEASUREMENT screen is displayed in a few seconds. POSITIONING THE PATIENT CAUTION To avoid injury, do not insert fingers under the chinrest. *Be sure to instruct the patient about this. 1 2 3 Make sure of the measurement screen. 4 Place the patient's chin on the chinrest and let his forehead touch the forehead rest. Let the patient sit in front of the instrument. Adjust the automatic instrument table or the chair height so that the patient can sit on the chair with comfort. 55 BASIC OPERATIONS 5 Adjust the chinrest height so that the patient's eye becomes level with the eye height mark. Eye height mark 56 BASIC OPERATIONS MEASUREMENT UNDER AUTO START MODE (ONLY IN KR-8900) NOTICE • Adjust the height of automatic instrument table so that the patient can sit on the chair with comfort to obtain correct measurement values. POSITIONING THE PATIENT In the initial status after power on, the mode is set to the auto start. 1 2 Make sure of the measurement screen. Press AUTO START SWITCH on the control panel and display the alignment bar in the monitor screen. R K S H mD D CYL VD (-) 12.00 01 0001 C V A A R L R 00 / 00 K 00 / 00 Alignment bar R L SETTING THE MEASUREMENT MODE This instrument can change the measurement mode R/K (REF-KRT continuous measurement, KRT, REF). In the initial status after power on, the measurement mode is R/K. 1 2 Make sure of the measurement screen. Press MEASUREMENT MODE SWITCH of the control panel and set the measurement mode. 57 BASIC OPERATIONS COLLIMATION AND MEASUREMENT (ADJUSTING THE PATIENT'S EYE TO AUTO REFRACTOMETER) Alignment operations are done with the control lever. Movement operations of the main body using the control lever. • The main body position can be fine-adjusted laterally by inclining the control level to each direction. Operating the control lever (for lateral adjustment) • The main body position can be fine-adjusted vertically by turning the control level right (up) and left (down). Operating the control lever (for up/down adjustment) 58 BASIC OPERATIONS 1 Hold the control lever and move the main body to the operator side. 2 Operate the control lever laterally and vertically to obtain the target eye in the center of monitor screen. R K S H C V mD D CYL VD A AR L R 00 / 00 K 00 / 00 (-) 12.00 01 0001 R L 3 While moving the main body toward the patient, focus the target eye. A vague, reflected luminous point for alignment appears on the cornea. R K mD D Luminous point CYL VD (-) 12.00 01 0001 S H C V A AR L R 00 / 00 K 00 / 00 Alignment mark R L 4 Fine-adjust the main body position in all directions so that the luminous point comes within the alignment mark. 59 BASIC OPERATIONS 5 Keeping the luminous point within the alignment mark, slowly move the main body toward the patient. When the main body approaches the target eye, the alignment bar of the monitor screen changes to arrows. R K S H C V A AR L R 00 / 00 K 00 / 00 mD D Minimum pupil diameter CYL VD (-) 12.00 01 0001 R L Take care so that eyelashes and eyelid do not come into the minimum pupil diameter mark as they may disturb measurement. If the instrument is too close to the alignment reference position, “ÅÆ” is displayed on the monitor screen, and if too far, “ÆÅ” is displayed. R K S H C V S H C V S H C V mD D A AR L R 00 / 00 K 00 / 00 (-) CYL 12.00 01 0001 VD R L Too close R K mD D A AR L R 00 / 00 K 00 / 00 (-) CYL 12.00 01 0001 VD R L Too far R K mD D CYL VD (-) 12.00 01 0001 R L Positioning is incorrect at all. 60 BASIC OPERATIONS A AR L R 00 / 00 K 00 / 00 6 After the alignment bar is displayed, move the main body slowly towards the patient. Measurement is done and the measurement value is displayed on the monitor screen. R K VD A A180 R L R 01 / 00 K 00 / 00 mD D CYL S-1.00 C H 7.71 V 7.70 (-) 12.00 01 0001 R L • To stop auto start Press the MEASUREMENT SWITCH , and release it after hearing the buzzer sounds twice. Auto measurement is stopped. To return to auto measurement, press the again. AUTO START After stopping the measurement, the measurement result is printed out by pressing the PRINT SWITCH . • To automatically print the measurement result (available at auto start mode only) If YES is selected for auto print in the initial setting, press the MEASUREMENT SWITCH after right and left measurements are finished. The buzzer sounds twice, and the measurement result is printed out automatically. NOTICE • If measurement is not possible under auto start mode (this may occur when the cornea condition is not good), measure under manual start mode. DISPLAYING MEASUREMENT VALUES Data of the latest measurement are displayed on the monitor screen. Figures only: Measurement was done correctly. Figures+*: The reliability of measurement is low. ERROR: Measurement was not done correctly. For messages on the monitor screen, see “Messages given during measurement” on page 73. 61 BASIC OPERATIONS MEASUREMENT UNDER MANUAL MODE NOTICE • Adjust the height of automatic instrument table so that the patient can sit on the chair comfortably to obtain accurate measurement values. SETTING THE PICTURING MODE In the initial status after power on, the mode is set to the auto start. 1 2 Check of the measurement screen. Press AUTO START monitor screen. on the control panel and erase the alignment bar from the R K mD D CYL VD (-) 12.00 01 0001 S H C V A AR L R 00 / 00 K 00 / 00 Alignment mark R L COLLIMATION AND MEASUREMENT Alignment operations are done with the control lever. For the adjustment of main body using the control lever, see MEMO on page 58. 62 BASIC OPERATIONS 1 Operate the control lever laterally and vertically so as to obtain the target eye in the center of monitor screen. R K S H C V mD D Luminous point CYL VD A AR L R 00 / 00 K 00 / 00 Alignment mark (-) 12.00 01 0001 R L 2 While moving the main body toward the patient, focus the target eye. A vague, reflected luminous point for alignment appears on the cornea. Focus the target eye to make the luminous point minimum. 3 Fine-adjust the main body position in all directions so that the luminous point comes within the alignment mark. R K mD D CYL VD S H C V A AR L R 00 / 00 K 00 / 00 (-) 12.00 01 0001 R L 4 When the luminous point becomes the minimum within the alignment mark, press the MEASUREMENT SWITCH . Even when collimation is improper, measurement is done by pressing the MEASUREMENT SWITCH , but to secure high-precision values, do collimation properly. 5 Measurement is done and measurement values are displayed. 63 BASIC OPERATIONS ERASING MEASUREMENT VALUES 1 While pressing the MENU SWITCH of the control panel, press the PRINT SWITCH . All measurement values, both right and left eyes are cleared, and the system returns to the initial status after power on. Menu switch Print switch 64 BASIC OPERATIONS INDIVIDUAL OPERATIONS PRINT-OUT OF MEASUREMENT VALUES NOTICE • To avoid paper jam in the printer, do not feed the paper if it is partly cut/torn or wrinkled. • To avoid discoloring the printing paper (particularly the recording area) during storage, use a polypropylene holder and not one containing plasticizer (PVC, etc.). • To avoid discoloring the printing paper (particularly the recording area) after pasting, use water soluble glue and not one containing solvent. • Since the printer paper is heat sensitive, it is not suitable for recording for a long period. If necessary to keep records for long, we recommend to take copies separately. This instrument is equipped with a built-in printer to print out measurement values. 1 2 Confirm the measurement screen. Press the PRINT SWITCH of the control panel. Measurement values of the monitor screen are printed out. After printing, the values are erased automatically from the monitor screen. The “ERR” mark is not printed. Also, printing is not done if there is no measurement value. When a red line appears in the printer paper, replace it with new one. For details about the replacement of printer paper, see “PRINTER PAPER SETTING” on page 53. Additionally, a 58mm wide paper roll (example: TF50KS-E2C [Nippon Paper Co.]) is recommended. When "CLOSE PRT COVER" is displayed, the printer cover is opened. Close it correctly. 65 INDIVIDUAL OPERATIONS 3 To cut the paper, hold the top left corner and pull it diagonally, as illustrated. 66 INDIVIDUAL OPERATIONS MEASUREMENT OF CORNEA DIAMETER (ONLY IN KR-8900) For the measurement of cornea diameter, “C.D.MEMORY YES” (measurement of static image) or “C.D.MEMORY NO” (measurement of dynamic image) can be selected in the initial setting. For changing settings, see “Changing the cornea diameter measurement method (Only in KR8900)” on page 27. MEASURING THE DYNAMIC IMAGE 1 Focus the target eye. R K S H C V mD D CYL VD A AR L R 00 / 00 K 00 / 00 (-) 12.00 01 0001 R L 2 Press the CORNEA DIAMETER SWITCH . CORNEA DIAMETER Guide mark Positioning bar R L L 3 R L Observe of the cornea diameter screen. 67 INDIVIDUAL OPERATIONS 4 Bring the left positioning bar to the left end of iris by pressing the AUTO START SWITCH (for moving left) and TARGET IMAGE (for moving right). CORNEA DIAMETER R L L 5 6 7 R L Press the MEASUREMENT SWITCH . The guide mark moves right. Bring the right positioning bar to the right end of iris by pressing the AUTO START SWITCH (for moving left) and TARGET IMAGE (for moving right). If it is necessary to move the left positioning bar again, press the MEASUREMENT MODE SWITCH . When the MEASUREMENT MODE SWITCH is pressed further, right and left positioning bars return to the initial positions. 8 9 Press the MEASUREMENT SWITCH . The cornea diameter is displayed. CORNEA DIAMETER L R L 10 Press the R 13.00 L . The measurement mode of left eye sets in. Measure also the right eye in like manner. 11 MEASUREMENT SWITCH After displaying data for both eyes, press the MEASUREMENT SWITCH to return to the measurement screen. 68 INDIVIDUAL OPERATIONS • To get out of the mode during measurement, press the PRINT SWITCH . • When the measurement result is necessary for one eye only, do the measurement and then press the PRINT SWITCH and get out of the mode. • Under the REF mode, the measurement of cornea diameter cannot be done. MEASURING THE STATIC IMAGE 1 Focus the target eye. R K S H C V mD D CYL VD A AR L R 00 / 00 K 00 / 00 (-) 12.00 01 0001 R L 2 Press the CORNEA DIAMETER SWITCH . CORNEA DIAMETER 1 DATA INPUT R L 3 4 Make sure of the cornea diameter screen. Press the MEASUREMENT SWITCH . The image of right eye is stored and the memory counter of screen changes to “1”. When the MEASUREMENT SWITCH is pressed repeatedly, the memory counter remains as is “1”, but the latest image is stored. 69 INDIVIDUAL OPERATIONS 5 Store the image of left eye in like manner. CORNEA DIAMETER L R L (Measuring the left eye only) 6 7 8 Press the CORNEA DIAMETER SWITCH . Make sure of the cornea diameter screen. Bring the left positioning bar to the left end of iris by pressing the AUTO START SWITCH (for moving left) and TARGET IMAGE (for moving right). If it is necessary to move the lft positioning bar again, press the MEASUREMENT MODE SWITCH . When the MEASUREMENT MODE SWITCH is pressed further, right and left positioning bars return to the initial positions. 9 Press the MEASUREMENT SWITCH . The cornea diameter is displayed. 10 Press the MEASUREMENT SWITCH . The measurement mode of left eye sets in. Measure also the left eye in like manner. • When the image of only one eye is necessary, press the CORNEA DIAMETER SWITCH after storing the image. • When images of both eyes are stored, the lft/right eye screen can be switched by pressing the CORNEA DIAMETER MEASUREMENT SWITCH . 70 INDIVIDUAL OPERATIONS MEASUREMENT OF HARD CONTACT LENS 1 Make sure the unit is in the corneal curvature measurement (R/K or KRT) mode. If not, choose the R/K or KRT mode by the MEASUREMENT MODE SWITCH . 2 Fill the concave part at the top of contact lens holder of model eye with water, and paste the contact lens. • The contact lens adheres by surface tension. • Take care not to allow bubbles in between. • Also take care and keep the measured lens surface free of water drops. contact lens contact lens holder 3 Insert the model eye into chinrest tissue pins. 4 Do measurement in like manner as the corneal curvature measurement. • When measuring the base (concave) curve of contact lens, the axial angle is reversed from the normal (convex) corneal curvature measurement. 71 INDIVIDUAL OPERATIONS INPUT/OUTPUT USING RS232C OUTPUT USING RS232C This instrument can output data to PC and the like via the RS232C interface. 1 Make sure of the connection to RS232C OUT. For connection, see “CONNECTING EXTERNAL I/O TERMINALS” on page 22. 2 Make sure of data communication settings. For data communication settings, see “ON-LINE (DATA COMMUNICATION)” on page 44. 3 4 Do measurements. Press the PRINT SWITCH of the control panel. When output is completed, “ DATA OUT” is displayed in the monitor screen. INPUT USING RS232C This instrument can input ID numbers from a bar code reader and the like via the RS232C interface. 1 Make sure of the connection of RS232C IN. For connection, see “CONNECTING EXTERNAL I/O TERMINALS” on page 22. 2 Make sure of data communication settings. For data communication settings, see “ON-LINE (DATA COMMUNICATION)” on page 44. 3 4 Confirm the measurement screen. Input ID numbers from the external device. The inputted ID numbers are displayed in the monitor screen. OUTPUT USING USB This instrument can output data to PC and the like via the USB1.1, interface. 1 Make sure of the connection to USB OUT. For connection, see “CONNECTING EXTERNAL I/O TERMINALS” on page 22. 2 Make sure of data communication settings. For data communication settings, see “ON-LINE (DATA COMMUNICATION)” on page 44. 3 4 Do measurements. Press the PRINT SWITCH of the control panel. When output is completed, “ DATA OUT” is displayed in the monitor screen. Please make sure to install the driver and create software prior to output data to a computer. For inquiries or information, please contact your dealer or TOPCON at the address stated on the back cover. If data out is necessary without print out, press the PRINTER COVER OPEN SWITCH and leave the cover open. If the data out is "ON", "CLOSE PRT COVER" is not displayed. 72 INDIVIDUAL OPERATIONS TROUBLESHOOTING TROUBLE-SHOOTING OPERATIONS MESSAGES GIVEN DURING MEASUREMENT “OVER-SPH” Spherical power exceeds +22D or -25D. “OVER-CYL” Cylindrical power exceeds ±10D. “OVER-R” Indicates that the corneal curvature exceeds 5.00-10.00mm. “NO TARGET” This indicates there is no target eye or the eye image is too dark. “AGAIN” There is a difference of more than 5D from the previous measurement value. “NO CENTER” There is no target eye center. “ALIGN ERR” The alignment is significantly faild during the measurement. “PAPER END” Paper is used up. “CLOSE PRT COVER” This is displayed when you press the [PRINT] switch while the printer cover is opened. “PRINT” Printing is under way. “ERROR” Is displayed when the patient's eye blinks or moves during measurement. If this appears when proper measurement is done with the model eye, something is wrong in the instrument: Ask our serviceman. 73 TROUBLESHOOTING TROUBLE-SHOOTING OPERATIONS WARNING To avoid electric shocks, do not attempt overhauling, rebuilding or repairs. Ask your dealer for repair. WARNING To avoid electric shocks, do not remove covers from bottom and top surfaces, monitor, measuring unit, etc. If a trouble is suspected, check conditions following the check list shown below. If the disposition according to the given instructions does not improve the condition, or if there is no relevant check item in the list, contact your dealer or TOPCON to the address stated on the back cover. CHECK LIST Trouble monitor does not work. monitor is hard to see. Condition Pilot lamp does not light either. 74 TROUBLESHOOTING Page Is power cable unplugged? 22 Is power cable connected to the instrument? 22 Fuse blows when POWER switch is pressed on. Call our serviceman. Picture is dark. Adjust “BRIGHT” volume. 85 Do not move it forcibly but call our serviceman. 58 Something is wrong with control lever (or another movable part). Printing is not done. Check 86 Paper comes out without printing. Is paper roll direction correct? 53 Paper does not come out. Is “PAPER END” displayed on monitor? If so, Replenish printer paper. 53 SPECIFICATIONS AND PERFORMANCE RM-8900 Sphere: Cylinder: Axis: Minimum pupil diameter measurable: PD measurement: External output terminal: -25D to +22D 0.25D step display (switchable to 0.12D step display) 0 to ±10D 0.25D step display (switchable to 0.12D step display) 0 to 180°1° step display (switchable to 5° step display) (Sphere+Cylinder +22D or Sphere+Cylinder -25D) 2.0φmm 20-85mm, 1mm display unit USB(for Export), RS232C(for Inport and Export) ESSENTIAL PERFORMANCE *Measurement must be performed correctly. Monitor screen display must not be distorted. 75 SPECIFICATIONS AND PERFORMANCE KR-8900 Sphere: Cylinder: Axis: Radius of corneal curvature: Corneal refractory power: Corneal astigmatic power: Corneal astigmatic axis angle: Minimum pupil diameter measurable PD measurement External output terminal: ESSENTIAL PERFORMANCE *Measurement must be performed correctly. Monitor screen display must not be distorted. 76 SPECIFICATIONS AND PERFORMANCE -25D to +22D 0.25D step display (switchable to 0.12D step display) 0 to ±10D 0.25D step display (switchable to 0.12D step display) 0~180° 1° step display (switchable to 5° step display) (Sphere+Cylinder +22D or Sphere+Cylinder -25D) 5.00~10.00mm, (0.01mm step display) 67.50~33.75D 0.25D step display (switchable to 0.12D step display) (corneal refractive index = 1.3375) 0 to ±10D 0~180° 1° step display (switchable to 5° step display) 2.0φmm 20-85mm, 1mm display unit USB(for Export), RS232C(for Inport and Export) ELECTROMAGNETIC COMPATIBILITY The product conforms to the EMC standard (IEC 60601-1-2 Ed2.1:2004) a)MEDICAL ELECTRICAL EQUIPMENT needs special precautions regarding EMC and needs to be installed and put into service according to the EMC information provided in the ACCOMPANYING DOCUMENTS. b)Portable and mobile RF communications equipment can affect MEDICAL ELECTRICAL EQUIPMENT. c)The use of ACCESSORIES, transducers and cables other than those specified, with the exception of transducers and cables sold by the manufacturer of the EQUIPMENT or SYSTEM as replacement parts for internal components, may result in increased EMISSIONS or decreased IMMUNITY of the EQUIPMENT or SYSTEM. d)The EQUIPMENT or SYSTEM should not be used adjacent to or stacked with other equipment. If adjacent or stacked use is necessary, the EQUIPMENT or SYSTEM should be observed to verify normal operation in the configuration in which it will be used. e)The use of the ACCESSORY, transducer or cable with EQUIPMENT and SYSTEMS other than those specified may result in increased EMISSION or decreased IMMUNITY of the EQUIPMENT or SYSTEM. Item AC power cord (for test device) RS232C cable RS232C cable USB cable Parts cord 44804 70020 41201 53100 41201 53100 Length(m) 1.5 1.4 1.4 3.0 Guidance and manufacturer's declaration - electromagnetic emissions The RM-8900,KR-8900 is intended for use in the electromagnetic environment specified below. The customer or the user of the RM-8900,KR-8900 should assure that it is used in such an environment. Emissions test Compliance Electromagnetic environment - guidance RF emissions CISPR 11 Group 1 RF emissions CISPR 11 Class B Harmonic emissions IEC61000-3-2 Class A Voltage fluctuations/ flicker emissions IEC61000-3-3 Complies The RM-8900,KR-8900 uses RF energy only for its internal function. Therefore, its RF emissions are very low and are not likely to cause any interference in nearby electronic equipment. The RM-8900,KR-8900 is suitable for use in all establishments other than domestic and those directly connected to the public low-voltage power supply network that supplies buildings used for domestic purposes. 77 SPECIFICATIONS AND PERFORMANCE Guidance and manufacturer's declaration - electromagnetic immunity The RM-8900,KR-8900 is intended for use in the electromagnetic environment specified below. The customer or the user of the RM-8900,KR-8900 should assure that it is used in such an environment. IEC 60601 Compliance Electromagnetic environment Immunity test test level level - guidance Floors should be wood, concrete or ceramic tile. If floors Electrostatic ± 6 kV contact ± 6 kV contact are covered with synthetic discharge(ESD) material, the relative humidity IEC 61000-4-2 ± 8 kV air ± 8 kV air should be at least 30%. ± 2 kV for power ± 2 kV for power Mains power quality should be supply lines supply lines Electrical fast that of a typical commercial or transient/burst hospital environment. ± 1 kV for ± 1 kV for IEC 61000-4-4 input/output lines input/output lines ± 1 kV ± 1 kV Mains power quality should be line(s) to line(s) line(s) to line(s) Surge that of a typical commercial or IEC 61000-4-5 hospital environment. ± 2 kV ± 2 kV line(s) to earth line(s) to earth <5% Ut <5% Ut (>95% dip in Ut) (>95% dip in Ut) Mains power quality should be for 0, 5 cycle for 0, 5 cycle that of a typical commercial or 40% Ut 40% Ut Voltage dips,short hospital environment. If the (60% dip in Ut) (60% dip in Ut) interruptions and user or the RM-8900,KR-8900 Voltage variations for 5 cycles for 5 cycles requires continued operation on power supply 70% Ut 70% Ut during power mains interrupinput lines tions, it is recommended that (30% dip in Ut) (30% dip in Ut) IEC 61000-4-11 the RM-8900,KR-8900 be powfor 25 cycles for 25 cycles ered from an uninterruptible <5% Ut <5% Ut power supply or battery. (>95% dip in Ut) (>95% dip in Ut) for 5 sec for 5 sec Power frequency magnetic Power frequency fields should be at levels char(50/60 Hz) 3 A/m 3 A/m acteristic of a typical location in magnetic field a typical commercial or hospital IEC 61000-4-8 environment. NOTE Ut is the a.c. mains voltage prior to application of the test level. 78 SPECIFICATIONS AND PERFORMANCE Guidance and manufacturer's declaration - electromagnetic immunity The RM-8900,KR-8900 is intended for use in the electromagnetic environment specified below. The customer or the user of the RM-8900,KR-8900 should assure that it is used in such an environment. IEC 60601 Compliance Electromagnetic environment Immunity test test level level guidance Portable and mobile RF communications equipment should be used no closer to any part of the RM-8900,KR-8900, including cables, than the recommended separation distance calculated from the equation applicable to the frequency of the transmitter. Recommended separation distance Conducted RF IEC 61000-4-6 Radiated RF IEC 61000-4-3 3 Vrms 150kHz to 80MHz 3V 3 V/m 80MHz to 2, 5GHz 3 V/m d = 1.2 P d = 1.2 P 80MHz to 800MHz d = 2.3 P 800MHz to 2, 5GHz where P is the maximum output power rating of the transmitter in watts (W) according to the transmitter manufacturer and d is the recommended separation distance in meters (m). Field strengths from fixed RF transmitters, as determined by an electromagnetic site survey, a should be less than the compliance level in each frequency range. b Interference may occur in the vicinity of equipment marked with the following symbol: NOTE 1 NOTE 2 a b At 80 MHz and 800 MHz, the higher frequency range applies. These guidelines may not apply in all situations. Electromagnetic propagation is affected by absorption and reflection from structures, objects and people. Field strengths from fixed transmitters, such as base stations for radio (cellular/cordless) telephones and land mobile radios, amateur radio, AM and FM radio broadcast and TV broadcast cannot be predicted theoretically with accuracy. To assess the electromagnetic environment due to fixed RF transmitters, an electromagnetic site survey should be considered. If the measured field strength in the location in which the RM-8900,KR-8900 is used exceeds the applicable RF compliance level above, the RM-8900,KR-8900 should be observed to verify normal operation. If abnormal performance is observed, additional measures may be necessary, such as reorienting or relocating the RM-8900,KR-8900. Over the frequency range 150 kHz to 80 MHz, field strengths should be less than 3 V/m. 79 SPECIFICATIONS AND PERFORMANCE Recommended separation distance between portable and mobile RF communications equipment and the RM-8900,KR-8900 The RM-8900,KR-8900 is intended for use in an electromagnetic environment in which radiated RF disturbances are controlled. The customer or the user of the RM-8900,KR-8900 can help prevent electromagnetic interference by maintaining a minimum distance between portable and mobile RF communications equipment (transmitters) and the RM-8900,KR-8900 as recommended below, according to the maximum output power of the communications equipment. Separation distance according to frequency of transmitter Rated maximum output power of transmitter W 150kHz to 80MHz d = 1.2 P 80MHz to 800MHz d = 1.2 P 800MHz to 2,5GHz d = 2.3 0, 01 0, 12 0, 12 0, 23 0, 1 0, 38 0, 38 0, 73 1 1.2 1.2 2.3 10 3.8 3.8 7.3 100 12 12 23 P For transmitters rated at a maximum output power not listed above, the recommended separation distance d in metres (m) can be estimated using the equation applicable to the frequency of the transmitter, where P is the maximum output power rating of the transmitter in watts (W) according to the transmitter manufacturer. NOTE 1 NOTE 2 At 80 MHz and 800 MHz, the separation distance for the higher frequency range applies. These guidelines may not apply in all situations. Electromagnetic propagation is affected by absorption and reflection from structures, objects and people. 80 SPECIFICATIONS AND PERFORMANCE ELECTRIC RATING Source voltage:100-240V AC, 50-60Hz Power input:RM-8900:60VA KR-8900:75VA SYSTEM CLASSIFICATION Types of protection against electric shocks : This instrument is classified as Class 1 equipment. Class 1 equipment dose not depend only on basic insulation for protection against electric shocks, but also provides a means of connection to a protective earth system of facilities so that metal parts that come into contact do not become conductive while the basic insulation is in failure. Degree of protection against electric shocks : Type B applied part Type B applied part is the applied part complying with the specified requirements of the Standard IEC 60601-1 to provide protection against electric shock, particularly regarding allowable LEAKAGE CURRENT. • Degree of protection against harmful ingress of water: IPX0 RM-8900 and KR-8900 has no protection against ingress of water. (The degree of protection against harmful ingress of water defined in IEC 60529 is IPX0) • Classification according to the method(s) of sterilization or disinfection recommended by the manufacturer: not applicable. RM-8900 andKR-8900 has no part to be sterilized or be disinfected. • Classification according to the degree of safety of application in the presence of a flammable anaesthetic mixture with air or with oxygen or nitrous oxide: Equipment not suitable for use in the presence of a flammable anaesthetic mixture with air or with oxygen or nitrous oxide. RM-8900 and KR-8900 should be used in environments where no flammable anesthetics and/or flammable gases are presents. • Classification according to the mode of operation: Continuos operation. Continuos operation is the operation under normal load for an unlimited period, without the specified limits of temperature being exceeded. DIMENSIONS AND WEIGHT Dimensions: 275mm(W) × 509mm(D) × 432~462mm(H) Weight : RM-8900 : 19.6kg KR-8900 : 19.6kg PURPOSES OF USE RM-8900 This instrument is used to measure the spherical refractive-power, cylindrical refractive power and the direction of astigmatic axis. KR-8900 This instrument is used to measure the spherical refractive-power, cylindrical refractive power, the direction of astigmatic axis, the radius of curvature, the direction of principal meridian and the corneal refractory power. 81 SPECIFICATIONS AND PERFORMANCE REFERENCE OPTIONAL ACCESSORIES • Automatic instrument table AIT-16 The table height can readily be adjusted to facilitate measurement. Specifications • Dimensions ...............490(W)x525(D)mm • Table height...............665~885mm • Table size ..................490x500mm • Weight .......................approx. 25kg • Power consumption ..150VA (100-120V,220-240V) • RS232C on-line cable SHAPE OF PLUG Country Mexico Argentina Peru Venezuela Voltage/frequency 110V/50Hz 220V/60Hz 220V/60Hz 110V/50Hz Bolivia & Paraguay 220V/60Hz Chile Colombia 220V/60Hz 110V/50Hz 220V/60Hz 127V/60Hz 110V/50Hz 120V/60Hz 120V/60Hz Brazil Ecuador USA Canada Shape of plug Type C&E Type A Type A Type C&E Type A (Most common) Type H (Infrequently) Type A Type C Type A Type C Type C&E Type A (Hospital Grade) Type A (Hospital Grade) SYMBOL Symbol 82 REFERENCE IEC Publication Description 60417-5032 Alternating Current Description (French) Courant alternatif 60348 Attention, consult accompanying documents Attention, consulter les documents d’accompagnement 60417-5008 Off (power: disconnection from the main power supply) Éteint (courant: coupure avec le secteur) 60417-5007 On (power: connection to the main power supply) Allumé (courant: raccordement sur le secteur) 60878-02-02 Type B applied part Partie appliquée du Type B MAINTENANCE DAILY CHECKUPS CHECKING THE MEASURING ACCURACY • Measure the attached model eye and check the accuracy at regular intervals. CLEANING THE INSTRUMENT • Dust on examination window ..... Blow off dust by a blower. • Fingerprints and oil spots on examination window................... Blow off dust by a blower and wipe the surface lightly with a camera lens cleaner using clean gauze. • Dirty instrument cover ................ Wipe the surface with the attached silicon cloth or a dry soft cloth. Never use solvents or a chemical duster. CLEANING APPLIED PARTS • Wipe the forehead rest and the chin rest with a cloth moistened with a tepid solution of neutral detergent for kitchenware. DAILY MAINTENANCE • For this instrument, dust may cause errors. When not in use, apply the measuring lens cap and dust cover. • When not in use, turn off the POWER switch. ORDERING CONSUMABLE ITEMS • When ordering consumable items, tell the product name, product code and quantity to your dealer or TOPCON to the address stated on the back cover. Product name Chinrest tissue Silicon cloth Dust cover Product code 40310 4082 31087 2007 42360 9002 Product name Printer paper Fuse 3A 250V Product code 44800 4001 41840 4014 83 MAINTENANCE USER MAINTENANCE ITEM Item Inspection time Inspection Before using Cleaning When the part is stained Replacement As required Contents • The instrument must oprate • The objective lens must be free of stain or flaw. • Objective lens • External cover, control panel, etc. • Fuse MANUFACTURER MAINTENANCE ITEMS Item Inspection time Cleaning each unit At least every 12 months Operation check At least every 12 months 84 MAINTENANCE • • • • • Contents Cleaning the external parts Cleaning the optical system Cleaning the base unit Operation of the instrument Operation of switches ADJUSTING THE MONITOR SCREEN • Though this instrument is properly adjusted before shipment, sometimes screen adjustment is required due to vibrations during transportation. • To adjust contrast and brightness, turn volumes fully clockwise, viewed from the operator side, and then adjust each properly. BRIGHT PRINTER PAPER JAM NOTICE 1 • If the printer paper is jammed in the printer, printing cannot be done, and continued use may cause troubles. Remove the printer cover, and take out the jammed paper pieces with the paper retainer lever fully released. 85 MAINTENANCE FUSE CHANGE WARNING To avoid electric shocks during fuse change, be sure to unplug the power cable before removing the fuse lid. Also, do not plug the power cable leaving the fuse box open. WARNING Always use the attached fuse (3A 250V). Using any other type may cause troubles and fire. 1 2 Make sure that the power switch of the main body is off and the power cable is off. 3 Replace the fuse with the attached one. Remove the fuse holder by rotating it counterclockwise by a screwdriver. Changing the fuse 4 After inserting, rotate the fuse holder clockwise by a screw driver while pushing it lightly. 86 MAINTENANCE MAINTENANCE CLEANING THE DUST COVER NOTICE 1 2 • Avoid cleaning plastic parts with solvents. Benzine, thinner, ether an gasoline may cause discoloring and decomposition. If the dust cover, control panel, etc. get soiled, wipe the surface with dry cloth. If the dust cover is noticeably stained, wipe the surface with a cloth which is moistened in a tepid water solution of neutral detergent for food and then squeezed out. USER MAINTENANCE To maintain the safety and performance of the instrument, unless performed by an authorized service engineer, never attempt to perform maintenance of items other than those specified herein. For details about maintenance, read the description of this manual. 87 MAINTENANCE When calling please have ready the following information about your unit: • Machine type: RM-8900,KR-8900 • Manufacturing No. (Shown on the rating plate on the right side of the base.) • Period of Usage (Please give us the date of purchase). • Description of Problem (as detailed as possible). AUTO REFRACTOMETER RM-8900 AUTO KERATO-REFRACTOMETER KR-8900 INSTRUCTION MANUAL Version of 2008 (2008.6-100TH1) Date of issue: 13th, June, 2008 Published by TOPCON CORPORATION 75-1 Hasunuma-cho, Itabashi-ku, Tokyo, 174-8580 Japan. ©2008 TOPCON CORPORATION ALL RIGHTS RESERVED AUTO REFRACTOMETER RM-8900 KR-8900 AUTO KERATO-REFRACTOMETER 41842 45990 Printed in Japan 0806-100TH 0