1
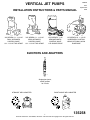
VERTICAL JET PUMPS
FW0636
0413
INSTALLATION INSTRUCTIONS & PARTS MANUAL
IL0319
“VA” SERIES 1/2 - 1-1/2 HP
FULLY AUTOMATIC
CONTROL VALVE
3/4 - 1-1/2 HP TWO STAGE
IL0316
Supersedes
0909
IL0435
“VS” SERIES 1/2 - 1-1/2 HP
SEMI AUTOMATIC
CONTROL VALVE
3/4 - 1-1/2 HP TWO STAGE
“VPH” SERIES - 1 HP
SEMI AUTOMATIC
CONTROL VALVE
1 HP SINGLE STAGE
“VS” SERIES 1/2 - 1-1/2 HP
HORIZONTAL POSITION
USING OPTIONAL 135276
PUMP BASE
EJECTORS AND ADAPTERS
L0195
Single pipe ejector,
leather packers
for 2” wells
STRAIGHT WELL ADAPTER
RIGHT ANGLE WELL ADAPTER
L0437
IL0438
1
135258
95 North Oak Street • Kendallville, IN 46755 • 260-347-1600 © Copyright 2013. All rights reserved.
MOTOR SPECIFICATION CHART
NAMEPLATE
PUMP
MOTOR
TAPPING SIZE INCHES
DIMENSIONS INCHES
MAX AMPS
MODEL
HP
STG.
CONNECTED
NO.
FOR
115V
230V
DISCHG. SUCTION PRESS.
H
W
L
WT.
VS207P
3/4
2
18
9
230V
1”
1-1/4”
1”
17”
9-1/4” 15-1/8” 67 lb.
VA207P
VPH10
1
1
18
9
230V
1”
1-1/4”
1”
15-1/2” 6-1/2” 14-1/2” 56 lb.
VS210P
1
2
21
10.5
230V
1”
1-1/4”
1”
17-5/8” 9-1/4” 15-1/8” 72 lb.
VA210P
VS215P 1-1/2
2
25
12.5
230V
1”
1-1/4”
1”
18-1/8” 9-1/4” 15-1/8” 76 lb.
All motors are single phase 60 Hz., 3450 RPM.
Motor can be changed to either 115V or 230V by following diagram on motor decal.
Pressure switch settings are 30 - 50 PSI for the above models.
EJECTOR SPECIFICATIONS AND WELL ADAPTER SELECTION CHART
WELL ADAPTER
EJECTOR
REQUIRED
WELL SIZE /
DROP PIPE
DROP PIPE PACKAGE
TAPPING
TYPE
NO.
129719
Straight
2” x 1”
127025
Rt. Angle
1” F
SP20BL
2” Brass, Leather
1-1/4” M
129720
Straight
2” x 1-1/4”*
129723
Rt. Angle
2” Cast Iron,
129719
Straight
SP20CL
1” F
2” x 1”
Leather
127025
Rt. Angle
2” Cast Iron,
129720
Straight
SP22CL
1-1/4” M
2” x 1-1/4”
Leather
129723
Rt. Angle
*129205 1-1/4” turned coupling required. Order separately.
EJECTOR
ORDER
NO.
EJECTOR
DESCRIPTION
READ THESE INSTRUCTIONS CAREFULLY
Read these installation instructions in detail before installing your pump. Be sure to check the following:
1. Be certain the motor is connected for the correct line voltage being used (check motor nameplate).
2. Be certain the pump is completely primed before starting. Otherwise damage may occur to the seal.
EVERY pump is tested before leaving the factory, and its performance depends largely on the installation.
GENERAL SAFETY INFORMATION
A. Follow all local electrical and safety codes, as well as
the National Electrical Code (NEC) and the Occupational
Safety and Health Act (OSHA).
B. Replace or repair damaged or worn cords immediately.
C. Do not kink power cable and never allow the cable
to come in contact with oil, grease, hot surfaces, or
chemicals.
D. Protect the power cable from coming in contact with
sharp objects.
E. Be careful when touching the exterior of an operating
motor--it may be hot enough to be painful or cause injury.
With modern motors, this condition is normal if operated
at rated load and voltage. Modern motors are built to
operate at higher temperatures.
F. Make certain that the power source conforms with the
requirements of your equipment.
2
G.Always disconnect power source before performing any
work on or near the motor or its connected load. If the
power disconnect point is out-of-sight, lock it in the open
position and tag it to prevent unexpected application of
power. Failure to do so could result in fatal electrical
shock.
H. Do not handle the pump with wet hands or when
standing in water, as fatal electrical shock could occur.
Disconnect main power before handling unit for ANY
REASON!
I. Unit must be securely and adequately electrically
grounded. This can be accomplished by wiring the unit
to a grounded metal-clad raceway system or by using a
separate ground wire connected to the bare metal of the
motor frame or other suitable means.
J.WARNING: Risk of electric shock. This pump has not
been investigated for use in swimming pool areas.
K.WARNING: This product contains chemicals known to
the State of California to cause cancer and birth defects
or other reproductive harm.
L. NOTE: Pumps with the “CSA” mark are tested to UL
standard UL778 and certified to CSA standard C22.2
No. 108.
95 North Oak Street • Kendallville, IN 46755 • 260-347-1600 © Copyright 2013. All rights reserved.
PRELIMINARY CONSIDERATIONS
V. Well To Pump Piping
A. All offset piping should slope upwards from well to pump.
B. Avoid dips or pockets in offset piping, or air will
accumulate at high points and make priming difficult.
C. Install unions at pump and at well to aid in servicing.
D. Allow enough room around pump and piping installation
for using pipe wrenches, and for service and installation.
E. Do not use piping of sizes smaller than those listed in
Chart 1, or pump will not operate properly.
I. Location
A. Pump can be located at the well or can be offset some
distance away from the well. For best performance, it
should be located as close to the well as possible.
B. Location can be in the basement, a pit below ground, or
in a pump house above ground.
C. Ventilation and drainage must be provided to prevent
damage from moisture to the motor and pressure switch.
D. The pump and all piping must be protected from freezing.
E. Pump and pipe line must be drained when not in use if
there is any danger of freezing.
II. Well Conditions
A. New wells should be pumped clean of all sand and
foreign matter before installing the pump, or damage may
result to the operating parts.
B. The foot valve should be installed a minimum of five feet
from the bottom of the well to prevent sand, mud or other
foreign matter from entering the system.
C. The well must be capable of furnishing a sufficient
quantity of water to satisfy the demands of the pump and
personal needs. The water level must not draw down
below the maximum rated depth of the pump, or loss of
capacity and prime will result.
D. For weak well installations, see Paragraph A under Deep
Well (Double Pipe System) installations.
E. For sanitary reasons, install a well seal or pitless adapter
as required and in accordance with local and state
codes.
III. Piping
A. Old or badly scaled pipe should not be used, because
dislodged flakes of scale can cause stoppage of the
ejector nozzle and malfunction the entire system.
B. Use only pipe in good condition, free of rust and
scale. Threads should be sharp, cleanly cut and with a
minimum of two threads remaining when connection is
completely drawn up.
C. On galvanized steel pipe installations, the ends should
be reamed to ensure maximum capacity.
D. All joints and connections should be doped (male threads
only) and drawn up tightly.
CHART I
PIPE SIZES REQUIRED FOR HORIZONTAL
PIPING BETWEEN PUMP AND WELL
Distance:
Well to
Pump
3/4 HP
1 HP
1-1/2 HP
Suc.
Press.
Suc.
Press.
Suc.
Press.
0’ - 25’
25’ - 50’
50’ - 75’
75’ - 100’
100’ - 125’
125’ - 150’
1-1/4”
1-1/4”
1-1/4”
1-1/2”
1-1/2”
1-1/2”
1”
1-1/4”
1-1/4”
1-1/4”
1-1/2”
1-1/2”
1-1/4”
1-1/4”
1-1/4”
1-1/2”
1-1/2”
1-1/2”
1”
1-1/4”
1-1/4”
1-1/4”
1-1/2”
1-1/2”
1-1/4”
1-1/4”
1-1/4”
1-1/2”
1-1/2”
1-1/2”
1”
1-1/4”
1-1/4”
1-1/4”
1-1/2”
1-1/2”
NOTE - USE PIPE JOINT COMPOUND ON
EXTERNAL THREADS OF ALL CONNECTIONS
INSTALLATION
I. Deep Well (Double Pipe System)
Application - Where the inside diameter of well is 3-1/2
inches or larger. (See illustration C & D).
A. Attach the foot valve to the ejector using a galvanized
steel or plastic nipple. Add sufficient pressure pipe (1”)
and suction pipe (1-1/4”) to submerge ejector 10 to 15’
below pumping water level, making certain foot valve is
at least 5 feet from bottom of well. If pressure pipe and
suction pipe of the same diameter are used, be sure to
identify them clearly so that they will be connected to the
proper tappings of the pump.
If a known weak well exists, replace nipple with 34 feet of
1” tail pipe between the ejector and the foot valve. This
will provide a continuous source of water for the pumping
system.
B. Check pipe and foot valve for leaks by filling pipes with
water. A continuous loss of water indicates a leak in the
piping, foot valve or unions, and must be corrected.
C. If no leaks are found, connect pressure and suction pipes
from well to pump using piping of the same diameter as
the suction pipe (1-1/4”) and pressure pipe (1” ) tappings
of the pump. For long offset distances, refer to Chart I.
for the proper pipe size.
D. Unions in suction and discharge piping near pump and
well will aid in servicing. Leave enough surrounding
room so that wrenches can be used without difficulty.
CAUTION: THE ENTIRE SYSTEM MUST BE AIR
AND WATER TIGHT FOR EFFICIENT OPERATION
IV. Type of Pipe
A. Plastic or galvanized steel pipe may be used in the
installation of jet pumps.
B. Plastic pipe must have a minimum pressure rating of 160
P.S.I.
C. DO NOT USE PLASTIC PIPE IN THE WELL ON
SINGLE PIPE EJECTOR INSTALLATIONS.
3
95 North Oak Street • Kendallville, IN 46755 • 260-347-1600 © Copyright 2013. All rights reserved.
II. Deep Well (Single Pipe System)
Application - Where the inside diameter of well is 2, 2-1/2 or
3 inches (See Illustration A & B).
A. Attach foot valve directly to bottom of ejector assembly
(tail pipe not used on single pipe installations). Ejector
is to be submerged 10 to 15 feet below pumping water
level, making certain foot valve is at least five feet from
bottom of well.
B. Attach foot valve and packer ejector to suction pipe
(presoak packer leathers for approximately two hours).
Start the assembly down the well. Some force may be
required to push the packer down the casing.
C. As each section is lowered, check for leaks by pouring
water into the suction pipe.
D. Attach well adapter to suction pipe, lower over casing top
and tighten adapter flange.
E. If pump is offset from the well, run suction and pressure
pipes from well to pump, using piping of the same
diameter as the suction tapping (1-1/4”) and pressure
tapping (1” of the pump. For long offset distances, refer
to Chart I for the proper pipe size.
F. Unions in suction and discharge piping near pump and
well will aid in servicing. Leave enough surrounding
room so that wrenches can be used without difficulty.
III. Pressure Tank Hook Up
A. Standard vertical pressure tanks require an air volume
control to ensure the proper air-to-water ratio in
the pressure tank. The air volume control tubing is
connected to the 1/4” tapping on the pump case (see
Illustration E).
B. Air-E-Tainer tanks are equipped with a diaphragm or
bladder that keeps the air and water from mixing. Since
these tanks are factory precharged with air, an air
volume control is not required.
C. On vertical tank installations, galvanized steel or plastic
pipe can be used to connect the pump to the tank. To
assist in servicing, place shut-off valve and union in line
between pump and tank (See Illustration E).
D. DO NOT install a check valve between pump and
pressure tank. This will cause the pressure switch to
malfunction.
IV. Wiring
A. All jet pump motors are suitable for use with 60 cycle
A.C. current only. Pumps with 3/4 thru 1-1/2 HP motors
are connected for 230 volt service.
B. All pumps (3/4 thru 1-1/2 HP) are dual voltage and may
be field connected for either 115 or 230 volt service.
C. Check the motor nameplate diagram if a voltage change
is required. Always use the higher voltage when
possible.
Your pump motor has built-in thermal overload that protects
the motor against burnout from overload of low voltage,
high voltage and other causes. The device is automatic
and resets itself once the temperature has dropped to a
safe point. Frequent tripping of the device indicates trouble
in the motor or power lines, and immediate attention is
needed. The device should never be tampered with, and
unless trouble is located and corrected, motor failure can
eventually be expected.
CHART II-A
RECOMMENDED WIRE AND FUSE SIZES
MAX. FUSE CAPACITY
15A
20A
30A
45A
60A
WIRE GAUGE
14
12
10
8
6
CHART II-B
RECOMMENDED WIRE SIZES
Distance From
Motor To Meter
0-50’
115V
230V
50-100’
115V
230V
100-150’
115V
230V
150-200’
115V
230V
200-300’
115V
230V
HP Rating of Single Phase Motors
3/4
1
1-1/2
12 GA
14 GA
12 GA
14 GA
12 GA
14 GA
12 GA
14 GA
12 GA
14 GA
12 GA
14 GA
12 GA
14 GA
10 GA
14 GA
10 GA
12 GA
10 GA
14 GA
10 GA
12 GA
8 GA
12 GA
8 GA
14 GA
8 GA
12 GA
6 GA
10 GA
CAUTION: Never examine, make wiring changes or
touch the motor before disconnecting the main electrical supply switch. The thermal device may have
opened the electrical circuit.
D. Undersize wiring can cause motor failure (low voltage),
frequent cutout of motor overload protector, television
interference and even fire. Make certain the wiring
is adequately sized (Chart II-B), well insulated and
connected to a separate circuit outside the house in case
of fire. For added safety, the pump and motor should be
securely grounded to the well casing or to a separate
ground rod driven eight feet into the ground. Consult
local codes before attempting a wiring installation.
NOTE: Charts II-A and II-B assume copper wire to be
installed.
E. When fusing the pump service entrance box, consult
Chart II-A for proper fuse size. Use only the fuse that is
stipulated for your particular installation. Never use one
larger. Service should never be reinstated to the pump
motor by attempting to circumvent a blown fuse by any
other means.
4
95 North Oak Street • Kendallville, IN 46755 • 260-347-1600 © Copyright 2013. All rights reserved.
F. The pressure switch is wired to the motor by connecting
the motor lead to the two inside terminals of the pressure
switch. Connect the power lines to pressure switch
terminals marked L-1 and L-2.
AVERAGE OPERATING PRESSURE
MODEL NO.
SETTING
VS, VA207P
Motor
Lo
ad
ad
Lo
Line 1
PRESSURE
3/4
46 PSI
VS, VA210P
1
57 PSI
VS, VA215P
1-1/2
72 PSI
VPH10
1
47 PSI
NOTE: PUMP WILL NOT PRIME IF THERE IS ANY
LEAKAGE IN THE SUCTION PIPING.
III. Pumps Installed In A Horizontal Position
A. “VA” and “VS” pumps can be installed horizontally by
using the optional 135276 pump base.
B. If installed horizontally, prime through the priming port of
the pump body.
C. By following this procedure, the entire pump cavity can
be filled with water and air will be expelled more readily.
Line 1
Power
Supply
HP
IL0199
PRIMING & ADJUSTMENT
CAUTION: Before starting motor, the pump body
must be completely filled with water. Running the
pump dry will cause seal damage.
MAINTENANCE
I. Pumps With Fully Automatic Control Valve
A.
Remove priming plug from pump. Fill pump body
completely with water until all air has been expelled.
Replace plug.
B. Start pump. If pump is properly primed, pressure will
build quickly and register on the pressure gauge. If
pressure does not build, repeat the priming operation.
ON DEEP WELL INSTALLATIONS, ALL AIR MUST BE
VENTED FROM THE DRIVE AND SUCTION PIPES AS
WELL AS THE PUMP BODY BEFORE THE PUMP WILL
PRIME. IT MAY BE NECESSARY TO FILL THE PUMP
BODY SEVERAL TIMES TO ACHIEVE PRIME.
C. Once prime is achieved, unit will adjust automatically to
the average operating pressure.
II. Pumps With Semi-Automatic Control Valve
A. Remove priming plug from pump. Fill pump body
completely with water until all air has been expelled.
Replace plug.
B. Screw adjusting stem on control valve all the way in, then
start the pump. If the pump is properly primed, pressure
will build quickly and register on the pressure gauge. If
pressure does not build, repeat the priming operation.
C. With the pump operating at high pressure and no
pressure in the tank (two or more faucets open) slowly
unscew the adjusting stem until maximum flow is
obtained. The case pressure at this point will be the
average operating pressure and should agree with the
chart shown below.
D. If the control valve is opened too far, a slight cavitation
noise will be noticeable and still further opening will
cause the pump to lose prime.
A.LUBRICATION
The pumps and motors require no lubrication. The ball
bearings of the motor have been pre-lubricated and
under normal operating conditions should require no
further greasing.
B.FREEZING
Drain the entire system if there is danger of freezing. A
drain plug is provided at the bottom of the pump case for
this purpose.
ROTARY SEAL ASSEMBLY
REPLACEMENT
CAUTION: Make certain that the power supply is
disconnected before attempting to service the unit!
The rotary seal assembly must be handled carefully
to avoid damaging the precision lapped faces of
the sealing components.
A. Disengage pump body from motor and mounting ring.
B. Remove diffuser and unthread impeller from the pump
shaft.
NOTE: To prevent the shaft from rotating when removing
the impeller, use an 11/16” open end wrench on the hex
of the pump shaft.
C. The carbon seal face, friction ring, and stainless steel
shell & spring of the rotary seal will come loose at this
time. Use a screwdriver (or similar instrument) to pry the
ceramic seal and rubber gasket from the recess of the
mounting bracket.
CAUTION: Be careful not to damage the motor
shaft or recess surface.
D. Clean the recess and pump shaft thoroughly.
5
95 North Oak Street • Kendallville, IN 46755 • 260-347-1600 © Copyright 2013. All rights reserved.
MOTOR REPLACEMENT
E. Install the new rotary seal assembly:
1. Insert the ceramic seal and the rubber gasket into the
recess.
N
OTE: To help facilitate installation, apply a light
coating of oil to the outside diameter of the rubber
gasket. Make certain that the ceramic seal is kept
clean and free of dirt and/or oil.
2. S
lip the remaining parts of the rotary seal assembly
onto the motor shaft.
NOTE: Apply a light coating of oil to the inside diameter of
the rubber drive ring.
F. Replace the impeller and diffuser removed in Step B.
G.Reassemble the pump body to the motor and mounting
bracket.
CAUTION: Before attempting to replace the motor,
make certain that the power supply is disconnected
and the systems pressure is relieved.
A. The motor can be removed without disturbing the seal
assembly or hydraulic components of the pump. Make
certain that the service factor of the replacement motor
corresponds with the motor being replaced.
B. Remove four bolts that hold the motor to the motor
mounting ring.
C. Break the motor shaft free from the pump shaft by using
an 11/16” wrench on the pump shaft and a 9/16” wrench
on the flats of the motor shaft. Unthread motor shaft
while holding the pump shaft.
D. Reassemble the new motor.
TROUBLESHOOTING CHART
SYMPTOM
PUMP WON’T
START OR RUN
PUMP STARTS
AND STOPS
TOO OFTEN
POSSIBLE CAUSE(S)
1. Blown fuse
2. Low line voltage
3. Loose, broken or incorrect wiring
4. Defective motor
5. Defective pressure switch
6. Impeller or seal
7. Bad capacitor
1. If blown, replace with fuse of proper size. Use time delay fuses.
2. If voltage under recommended minimum, check size of wiring from main switch
on property. If OK, contact power company.
3. Rewire any incorrect circuits. Tighten connections, replace defective wires.
4.Replace
5. Adjust switch settings. Clean contacts with emery cloth, if dirty.
6. If impeller won’t turn, remove housing and locate source of binding.
7.Replace.
1. Leak in pressure tank
2. Defective air volume control
3. Faulty pressure switch
4. Leak on discharge side of system
5. Leak on suction side of system
6. Leak in foot valve
PUMP WON’T
SHUT OFF
PUMP
OPERATES,
BUT DELIVERS
LITTLE OR NO
WATER
CORRECTIVE ACTION
1. Repair leaks or replace tank.
2. Clean or replace defective control.
3. Adjust switch settings. Clean contacts with emery cloth, if dirty.
4. Repair leaks as necessary.
5. Make sure above ground connections are tight. Then repeat test. If necessary,
pull piping and repair leak.
6. Repair or replace.
1.Wrong pressure switch setting, or
setting “drift”
2. Defective pressure switch
3. Loss of prime
4. Low well level
5. Fouled ejector
1. Adjust switch to proper setting.
1. Low line voltage
1. If voltage under recommended minimum, check size of wiring from main switch
on property. If OK, contact power company
2. Reprime if necessary.
3. Rearrange pipingi to eliminate air lock.
4. Replace undersized piping or install pump with higher capacity.
5. Tighten all fittings and replace control if necessary.
6 Make sure above ground connections are tight. Then repeat test. If necessary,
pull piping and repair leak.
7. Close down the valve on the discharge side of pump to limit the flow of water, in
keeping with well capacity.
8. Clean and reinstall if dirty.
9. Clean, repair, or replace as needed.
2. System incompletely primed
3. Air lock in suction line
4. Undersized piping
5. Leak in air volume control or tubing
6. Leak on suction side of system
7. Low well capacity
2. Replace switch if defective.
3. Reprime if necessary.
4. If undersized, replace pump or ejector.
5.Clean.
8. Plugged ejector
9.Defective or plugged foot valve and/
or strainer
10.Worn or defective pump parts or 10. Replace worn parts or entire pump. Clean parts if required.
plugged impeller
6
95 North Oak Street • Kendallville, IN 46755 • 260-347-1600 © Copyright 2013. All rights reserved.
DEEP WELL JET PUMP REPAIR PARTS
“VA”, “VS” & “VPH” SERIES
FORM NO. FW0035
0413
SUPERSEDES 1009
PAGE 3-1A REPAIR PARTS
(For Pricing Refer To Repair Parts Price List)
“VA”
“VS”
1
1
2
13
13
10
10
3
IL0319
14
IL0316
14
11
4
12
5
6
“VPH”
7
1
8
5
13
7
10
9
10
14
IL0426
12
ITEM
DESCRIPTION
1
Motor, Nema J (Thd)
Motor Cover w/screws
Screws Cover
Motor Lead Wire
Shaft
Mounting Ring
Hex Hd. Cap Screws 3/8 x 3/4”
Seal, Rotary w/Spring
Impeller †
Spacer, Shaft
Spacer, Suction
Diffuser †
Intermediate Stage
Bearing, Intermediate Stage
Ring, Square Cut
Rubber, Diffuser
Pump Body
Control Valve “VA”
Control Valve “VS” & “VPH”
Pressure Switch
Pressure Gauge
Plug, Priming 1/2” NPT
Plug, Drain 1/4” NPT
‡
2
3
4
5
6
‡
7
8
‡
9
‡
10
11
12
13
14
‡
‡
HORSEPOWER
STAGE
MODEL NO.
PART NO.
023212
021302
135235
*
131100
135245
135243
135246
135247
135240
132428
135237
020346
023294
*
*
(*) Standard hardware item
(†) For quantity required — See number of stages
(‡) Not shown
NOTE: For horizontal installations, use optional pump base 135276A
1/2
1
VA105P
VS105P
3/4
2
VA207P
VS207P
98H105
1
2
136135A
135238
1
9
1
135248
—
1
135242
—
—
1
—
1
C981D
132446
1
1
2
1
98H107
1
2
136135A
135239
1
9
1
127960
1
—
135241
1
1
1
—
1
C981G
133383
1
1
2
1
7
1
2
VA210P
VS210P
QTY.
98H110
1
2
136135A
135239
1
9
1
132613
1
—
135241
1
1
1
—
1
C981G
133383
1
1
2
1
1-1/2
2
VA215P
VS215P
98H115
1
2
136136A
135239
1
9
1
135248
1
—
135242
1
1
1
—
1
C981G
133383
1
1
2
1
95 North Oak Street • Kendallville, IN 46755 • 260-347-1600 © Copyright 2013. All rights reserved.
1
1
VPH10
98J110
1
2
136135A
N/R
136873
8
1
134138
—
—
132425
—
—
132429
1
134312
—
132446
1
1
2
1
Priming
Port
Priming
Port
Priming
Port
Pump
Pump
Pump
Gasket
Gasket
Right Angle
Well Adapter
Gasket
Straight
Adapter
Suction
Pipe
Suction
Pipe
Well
Casing
Pressure
Pipe
Well Seal
Suction
Pipe
Pressure
Pipe
Well
Casing
Single Pipe
Ejector
Foot Valve
Illustration (A)
Single Pipe Over the Well
Installation
Double Pipe
Ejector
Single Pipe
Ejector
Tail Pipe
Foot Valve
Foot Valve
Illustration (C)
Double Pipe Over the Well
Installation
Illustration (B)
Single Pipe Offset
Installation
IL1708
IL1707
IL1709
Priming
Port
Pump
Suction
Pipe
Fuse
Disconnect
Box
Gasket
Pressure
Pipe
Well Seal
House
Water
Supply
Line
Pressure Tank
Well Casing
Air
Volume
Control
Double Pipe
Ejector
Tail Pipe
Illustration (E)
Pressure Tank
Installation
Foot Valve
Illustration (D)
Double Pipe Offset
Installation
IL1710
8
95 North Oak Street • Kendallville, IN 46755 • 260-347-1600 © Copyright 2013. All rights reserved.
IL1711