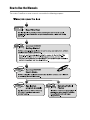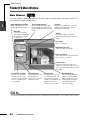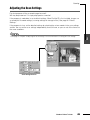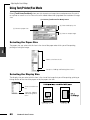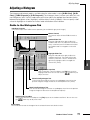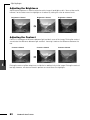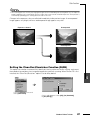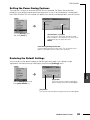
1
CanoScan FS4000US Driver Software
FilmGet FS
User’s Guide
Quick Start
To jump right into scanning
Chapter 1 to Chapter 4
To proceed at a more leisurely pace
You can start using your CanoScan scanner with either of these
procedures!!
Appendix: Troubleshooting
For problems during installation or use
How to Use the Manuals
The various CanoScan scanner manuals are used for the following purposes.
How to Use this Guide
This is the user’s guide for FilmGet FS for Windows and FilmGet FS for Macintosh, the driver software
for CanoScan FS4000US film scanners. Start the Windows version as a TWAIN driver from within
TWAIN-compliant applications and the Macintosh version as the plug-in compliant driver software
from within plug-in compatible applications.
This guide explains how to use FilmGet FS after starting the driver software from within the
application program. (The operations after starting the driver software are nearly the same for both
the Windows and Macintosh versions.) Please read this guide in conjunction with your Windows and
Macintosh guides and the guides for individual TWAIN-compliant or plug-in compliant application
programs.
1
Organization of the Guide
This user’s guide is organized as follows.
2
Quick Start <To jump right into scanning>
This is a digest of the scanning procedures using FilmGet FS.
Read this to start using the scanner immediately.
Chapter 1 Before Scanning
An explanation of starting and exiting FilmGet FS, and an introduction of FilmGet FS window names
and functions.
All users read this section.
3
Chapter 2 Scanning
A step-by-step explanation of scanning procedures using FilmGet FS.
All users read this section.
4
Chapter 3 Scanning Setup
An explanation of how to set the scan settings such as input resolution (how finely to read the
image) and output target. Read this section as required.
Chapter 4 Adjusting Images
An explanation of how to adjust the coloring and brightness of preview images. Read this section
as required.
5
Chapter 5 Other Functions
An explanation of the FilmGet FS menu items and settings. Read this section as required.
Appendices
Troubleshooting, glossary and index. Refer to these sections as required.
FilmGet FS User’s Guide
1
Symbols in this Guide
The following symbols are used to draw your attention to important topics throughout the guide.
This symbol introduces operating precautions and other critical information. Be sure
to read these topics.
This symbol introduces supplementary information. Read these topics at your
discretion.
1
2
3
4
5
Notation and Screen Samples
• Windows 98 Second Edition, Windows 2000 Professional and Windows Millennium Edition are
referred to as Windows 98 SE, Windows 2000 and Windows Me, respectively. Also, unless
otherwise specified, references to Windows in this guide include all of Windows 98, Windows 98
SE, Windows 2000 and Windows Me.
• Both FilmGet FS for Windows and FilmGet FS for Macintosh are referred to as FilmGet FS.
• Although the screen samples provided in this guide mostly show the Windows 98 version of
FilmGet FS, the Macintosh version features a virtually identical user interface. Separate
explanations are provided only for items requiring different procedures.
• Adobe Photoshop LE and Adobe Acrobat Reader are referred to as Photoshop LE and Acrobat
Reader, respectively.
Disclaimer
1. No part of this guide may be reproduced, transmitted, transcribed, stored in a retrieval system,
or translated into any language in any form, by any means, without the prior written permission
of Canon Inc.
2. Canon Inc. reserves the right to change the contents of this guide and the specifications of the
hardware and software described herein at any time without prior notice.
3. While every effort has been made to ensure that the information contained in this guide is
accurate and complete, no liability can be accepted for any errors or omissions. We respectfully
request that you notify the nearest Canon Customer Support Help Desk if you have any
questions or suggestions about this guide.
4. Please be aware that the use of text and images scanned from published material for other than
personal purposes may be prohibited.
5. Portions of this guide are copyrighted by Adobe Systems Incorporated, and are reproduced
herein under permission from Adobe Systems Incorporated.
• Adobe, Acrobat and Photoshop are trademarks of Adobe Systems Incorporated.
• Microsoft and Windows are registered trademarks of Microsoft Corporation in the U.S. and other countries.
• Macintosh, Power Macintosh, Mac OS and ColorSync are registered trademarks or trademarks of Apple
Computer Inc. in the U.S. and other countries.
• CanoScan, FilmGet and FARE are trademarks of Canon Inc.
• Other names and products not mentioned above may be trademarks or registered trademarks of their
respective companies.
2
FilmGet FS User’s Guide
FilmGet FS Features
● A Scanner Driver that Adjusts Images Too
FilmGet FS is the driver software for the CanoScan FS4000US scanner, and is equipped with a
variety of image processing functions and input and output controls. The Windows version can be
opened as a 32-bit TWAIN driver from within TWAIN-compliant application programs. The Macintosh
version can be opened as a plug-in from within plug-in compliant application programs.
● Color Matching System Support
(Windows: ColorGear, Macintosh: ColorSync)
1
This software supports color matching systems so that the colors read by the scanner are faithfully
reproduced on your monitor without forcing you to perform any troublesome adjustments.
● Batch Scanning of Multiple Frames
Save time and effort by setting the color adjustment and resolution settings for individual frames and
then scanning the selected frames in a single batch. You can scan up to six frames of 35 mm (135)
film, four frames of slide-mounted film, or 40 frames of APS (IX240) film in a single batch.
2
• APS film refers to APS standard film.
APS is the abbreviation for Advanced Photo System.
● Dirt and Scratch Correction Function FARE
This software is equipped with the FARE (Film Automatic Retouching and Enhancement) dirt and
scratch correction function. This function eliminates troublesome and time consuming cleaning and
scratch retouching work by automatically identifying dirt and scratches on the film surface and
correcting these defects to provide a clear image.
3
● Easy Scanning with Auto Settings
Settings for images that are to be used for specific purposes, such as for display on a monitor, for
output to a printer or for transmission in a fax, can be set automatically. You are now free to scan
without bothering with resolution and size settings.
4
● Tool Tips Provide Guidance
Guidance is always at hand when you position the mouse cursor over a button or tool. The tool tips
provide useful information if you are unsure how to use an item.
5
● Common Windows and Macintosh User Interface
The Windows and Macintosh versions of FilmGet FS both share the same user-friendly window
design and functions. You can switch between either platform without noticing the transition.
FilmGet FS User’s Guide
3
Table of Contents
How to Use this Guide.......................................................................1
FilmGet FS Features ..........................................................................3
QUICK START For Those Who Prefer to Jump Right into Scanning
1
Quick Start................................................................................................10
Chapter 1 Before Scanning
Windows Setup ........................................................................................18
2
System Requirements .....................................................................18
Installing FilmGet FS........................................................................18
Starting and Exiting FilmGet FS.......................................................19
Macintosh Setup ......................................................................................21
3
System Requirements .....................................................................21
Installing FilmGet FS........................................................................21
Starting and Exiting FilmGet FS.......................................................22
FilmGet FS Main Window ........................................................................24
4
Main Window
Main Windows
........................................................................24
.....................................................................25
Menu Bar in the Main Window.........................................................25
Toolbar in the Main Window.............................................................25
5
FilmGet FS Thumbnail Window ..............................................................26
Thumbnail Window ..........................................................................26
Toolbar in the Thumbnail Window....................................................26
How to Find Help .....................................................................................27
Tool Tips ..........................................................................................27
4
FilmGet FS User’s Guide
Chapter 2 Scanning
Scanning Procedures ..............................................................................29
Loading Film ............................................................................................30
Inserting the Film Holder .................................................................30
Ejecting the Film Holder ..................................................................31
1
Switching between Windows..................................................................32
Switching to the Main Window ........................................................32
Switching to the Thumbnail Window ...............................................32
Selecting the Film Type...........................................................................33
2
Film Type Setting .............................................................................33
Setting the Color Mode ...........................................................................34
Color Mode Setting..........................................................................34
Determining the Color Mode ...........................................................35
3
Thumbnail Scanning ...............................................................................36
Displaying the Thumbnail Window ..................................................36
Initiating a Thumbnail Scan .............................................................36
Selecting Frames .....................................................................................37
4
Selecting/Deselecting All ................................................................37
Selecting/Deselecting a Single Frame ............................................37
Rotating and Flipping Thumbnail Images .............................................38
Rotating and Flipping Images .........................................................38
5
Transferring Thumbnail Images to the Application Program ..............39
Transferring Thumbnail Images .......................................................39
Previewing to Inspect the Images ..........................................................40
Previewing .......................................................................................40
Switching between Preview Images................................................41
Adjusting Preview Images ......................................................................42
Zooming an Image for Verification ..................................................42
Moving an Image within the Preview Area ......................................43
Rotating and Flipping Images .........................................................43
Using Auto Correction on Images ...................................................44
FilmGet FS User’s Guide
5
Adjusting the Scan Settings ...................................................................45
Adjusting Brightness and Coloring .......................................................46
Selecting the Scan Area..........................................................................47
Selecting the Scan Area ..................................................................47
Adjusting the Scan Area Selection Frame.......................................48
1
Adjusting the Selected Scan Area ..................................................48
Final Scan.................................................................................................49
Scanning the Selected Frames .......................................................49
Exiting FilmGet FS ...........................................................................50
2
Chapter 3 Adjusting the Scan Settings
Scan Setting Modes.................................................................................52
Important Facts about Scan Settings ..............................................52
3
Guide to the Scan Settings Section.................................................53
Procedures Common to All Scan Modes ........................................54
Using File Mode .......................................................................................56
Selecting an Input Resolution..........................................................56
4
Select an Output Resolution............................................................57
Image Size Settings.........................................................................57
Using Text/Printer/Fax Mode...................................................................60
Selecting the Paper Size .................................................................60
Selecting the Display Size...............................................................60
5
Selecting an Output Target..............................................................61
Image and File Sizes .......................................................................61
Using Display Mode.................................................................................62
Selecting a Monitor Resolution........................................................62
Selecting the Display Size...............................................................62
Image and File Sizes .......................................................................62
Using Photo Size Mode ...........................................................................63
Selecting a Photo Size.....................................................................63
Selecting an Output Target..............................................................64
Image and File Sizes .......................................................................64
6
FilmGet FS User’s Guide
Using Custom Mode ................................................................................65
Preset Scan Settings .......................................................................65
Customizing the Pull-Down Menu ...................................................66
Adding Scan Settings and Menu Items..................................................68
Adding Scan Settings......................................................................68
Adding and Deleting Menu Items ...................................................69
1
Chapter 4 Adjusting Images
Image Adjustment Modes .......................................................................72
Guide to the Image Adjustment Section .........................................72
2
Adjustment Mode Types..................................................................73
Procedures Common to All Image Adjustment Modes ...................74
How to Use Each Image Adjustment Mode ....................................76
Adjusting a Histogram ............................................................................77
3
Guide to the Histogram Tab.............................................................77
Interpreting a Histogram .................................................................78
How to Adjust a Histogram..............................................................78
Adjusting the Tone Curve .......................................................................79
4
Guide to the Tone Curve Tab ...........................................................79
Interpreting Tone Curves .................................................................80
Adjusting a Tone Curve ...................................................................80
Adjusting the Brightness/Contrast ........................................................81
5
Guide to the Brightness/Contrast Tab .............................................81
Adjusting the Brightness .................................................................82
Adjusting the Contrast.....................................................................82
Adjusting the Color Balance...................................................................83
Guide to the Color Balance Tab ......................................................83
Adjusting the Threshold Value ...............................................................84
Guide to the Threshold Value Tab ...................................................84
FilmGet FS User’s Guide
7
Chapter 5 Other Functions
[Settings] Menu ........................................................................................86
Adjusting the Exposure ...................................................................86
Setting the Clean Dust/Scratches Function (FARE) ........................87
Adjusting the Focus.........................................................................88
1
Use Color Matching.........................................................................89
Setting the Monitor Gamma Value ...................................................90
Setting the Preferences ...................................................................91
Setting the Power Saving Features .................................................93
Restoring the Default Settings .........................................................93
2
[Device] and [Help] Menus ......................................................................96
Checking a Scanner ........................................................................96
Viewing the Device Version Information ..........................................96
Viewing the Software Version Information .......................................96
3
Appendices
Troubleshooting .......................................................................................98
FilmGet FS Error Messages ..................................................................105
4
Uninstalling FilmGet FS
.............................................................109
Uninstalling and Reinstalling FilmGet FS
................................112
Glossary .................................................................................................115
5
Index .......................................................................................................120
8
FilmGet FS User’s Guide
CanoScan FS4000US Film Scanner
QUICK START
For Those Who Prefer to Jump Right
into Scanning
1
2
3
4
5
FilmGet FS User’s Guide
9
QUICK START
Quick Start
This section provides the essentials of scanning with FilmGet FS. For those who prefer to jump right
into scanning, simply follow the procedures below.
If you wish more information in a particular procedure, refer to the pages quoted for that topic.
1
1
Install the FilmGet FS software.
• Proceed directly to step 2 if you have already installed the FilmGet FS
software according to the instructions in Getting Started.
See Getting Started p. 30.
• Connect the scanner to your computer and turn on the power. When the
“Add New Hardware Wizard” screen appears, place the supplied
“CanoScan Setup CD-ROM” into the CD-ROM drive and follow the
instructions in the messages to install the software.
2
See Getting Started p. 50.
(1) Place the supplied “CanoScan Setup CD-ROM” into the CD-ROM drive.
(2) When CanoScan Setup Utility starts, select [Install the Software] and
install Photoshop LE. Be sure to reboot your computer after installation is
finished.
(3) Start CanoScan Setup Utility again, select [Install the Software] and install
FilmGet FS together with the supplied application program.
3
4
5
10
FilmGet FS User’s Guide
QUICK START
2
Start FilmGet FS.
See p. 19.
• Start a TWAIN-compliant application program such as Photoshop LE, and
start FilmGet FS using the menu item or button.
1
Thumbnail Window
2
When using Photoshop LE, click the [File]
menu and select [Import] and
[TWAIN_32...].
Main Window
3
See p. 22.
• Start a plug-in-compliant application program such as Photoshop LE, and
select FilmGet FS using the menu item or button.
4
Thumbnail Window
5
When using Photoshop LE, click the
[File] menu and select [Import] and
[FilmGet FS 1.0...].
Main Window
FilmGet FS User’s Guide
11
QUICK START
3
Load the film. See p. 30.
(1) Hold the film holder horizontally
with the
mark facing
upwards.
1
(3) Insert the end with the
mark into the film
holder slot of the
scanner.
2
(2) Check that the [R] mark can be seen
properly from the right side.
3
4
Set the film type and color mode. See pp. 33 to 35.
5
Make a thumbnail scan of all the frames on the film. See p. 36.
(1) Click the main window to switch the window.
(2) Select a film type (color/
monochrome, negative/positive) that
matches the film you are scanning.
(3) Set the color mode (color, grayscale,
or black and white).
4
(1) Click the [Thumbnail…] button in the main window to display the
thumbnail window.
(2) Click the [Thumbnail Scan] button in the thumbnail window.
5
The thumbnail scan progress bar
will be displayed. Click the
[Cancel] button if you wish to
stop the thumbnail scan.
12
FilmGet FS User’s Guide
QUICK START
6
Select a frame you wish to scan. See pp. 37, 38.
7
Preview the image for the selected frame. See pp. 40, 41.
• Click a frame to select that
frame. The selected frame will
be displayed with a red border.
• If necessary, rotate or flip the
frame to change the orientation.
1
• Switch to the main window and click the [Preview] button.
• The image will be displayed in the preview area.
• For details on switching between the main window and the thumbnail
window, see page 32.
2
The preview progress bar will be
displayed. Click the [Cancel]
button if you wish to stop the
preview.
3
Preview Area
4
• You can only preview one frame at a time.
8
If necessary, adjust the preview image. See pp. 42 to 44.
• If the preview image
orientation and
brightness are not to your
satisfaction, adjust the
images frame by frame
using the toolbar in the
preview area. You can
zoom, rotate or flip the
image, or perform auto
retouching.
5
Toolbar
FilmGet FS User’s Guide
13
QUICK START
9
If necessary, set the scan settings. See p. 45.
• If the purpose is clear such as for printout or display on a monitor, set the
resolution, output target and other settings for each frame using the scan
setting section functions.
• If the purpose is undecided, scan at default settings. In this case the images
are scanned with file mode settings (scanning settings for storage in files).
Select a mode corresponding to the
purpose of the scanned image.
1
Set the values for each item.
Scan Settings Section
2
10
If necessary, adjust the image brightness and coloring. See p. 46.
• If the preview image brightness and coloring are not to your satisfaction,
adjust the images frame by frame using the image adjustment section
functions.
3
Select an image adjustment mode
(Contrast, Brightness, etc.).
4
Set the values for each item.
Image Adjustment Section
5
• When using the image adjustment section functions, remove the check from the “Use
Color Matching” option in the [Color Matching] item of the [Settings] menu.
See p. 89.
14
FilmGet FS User’s Guide
QUICK START
11
Select the scan area for each image. See pp. 47, 48.
• Drag the ‘+’ shaped
mouse cursor diagonally
to select a scan area.
1
12
2
Initiate the final scan. See p. 49.
• Click the [Scan] button.
• Scanning is executed. The scanned image will not appear in the preview
area, and will instead be transferred to the application program from which
FilmGet FS was started.
3
4
The scan progress bar will be
displayed. Click the [Cancel]
button if you wish to stop the
scan.
5
• To scan multiple frames in a batch, select the frames to be scanned beforehand at the
thumbnail window.
FilmGet FS User’s Guide
15
QUICK START
13
Click the
window.
(close box) at the top right of the window to close the
• For the Macintosh version, click the
(close box) at the top left of the
window to close the window.
• The scanned image will be displayed in the window of the application
program from which FilmGet FS was started.
1
2
The scanned images of all
the selected frames will be
displayed.
3
14
Retouch the image as required. See the manual for your application
program.
• Print or save the image to a disk with the application program from which
FilmGet FS was started.
4
5
16
FilmGet FS User’s Guide
CanoScan FS4000US Film Scanner
CHAPTER 1
1
Before Scanning
This section introduces procedures and main window and thumbnail window
2
names and functions that you should be familiar with before actually using
FilmGet FS.
All users read this section.
Windows Setup...............................................................18
3
Macintosh Setup.............................................................21
FilmGet FS Main Window ..............................................24
FilmGet FS Thumbnail Window ....................................26
How to Find Help ............................................................27
4
5
FilmGet FS User’s Guide
17
Before Scanning
Windows Setup
System Requirements
The computer you use to run FilmGet FS must meet the following minimum requirements. Check your
computer and install FilmGet FS onto the hard disk drive.
Computer
USB connection: IBM PC-AT compatible computer with standard
USB configuration
SCSI connection: IBM PC-AT compatible computer with SCSI card
installed
Operating System
Windows 98, Windows 98 SE, Windows 2000, Windows Me
CPU
Windows 98: Pentium 133 MHz or faster
Windows 98 SE: Pentium 133 MHz or faster
Windows 2000: Pentium 133 MHz or faster
Windows Me: Pentium 150 MHz or faster
RAM
64 MB or more (128 MB or more recommended)
Display
High Color (16 bit) or better, 800 x 600 pixels or better
Interface
USB 1.1/SCSI II
Hard Disk Capacity
500 MB or more (1 GB or more recommended) available after
installing the application program
CD-ROM Drive
Required
Required Application
Program
Photoshop LE or other TWAIN-compliant application program
1
2
3
4
5
•
•
•
•
FilmGet FS operation is not guaranteed on home-made or shop brand PCs.
FilmGet FS is not compatible with NEC PC-9800/9821 series computers.
Only one CanoScan scanner may be connected to a computer at a time.
Please note that the system may become unstable because the computer’s energy saving mode
(sleep mode) is not supported.
Installing FilmGet FS
Install FilmGet FS according to the instructions in “2. Installing the Driver Software” of
“Chapter 2 Using the Scanner with Windows” in Getting Started supplied with the scanner.
18
FilmGet FS User’s Guide
Before Scanning
Starting and Exiting FilmGet FS
■ Starting FilmGet FS
FilmGet FS must be started from within a TWAIN-compliant application program. It cannot be started
independently. Photoshop LE is used in the example below.
1
Start Photoshop LE.
• If you are using a different TWAIN-compliant application program, start that
program.
1
• When using Photoshop LE, you must increase the allotted memory in order to start
FilmGet FS. For more information please see page 41 “Increasing the Memory
Allocated to Photoshop LE” of Getting Started.
2
Click the [File] menu and select [Import]
and [Select TWAIN_32 Source...].
2
3
3
The Select Source dialog will be
displayed. Select [Canon FilmGet FS 1.0
for Windows] from the list and click the
[Select] button.
4
• The operations in steps 2 and 3 are not necessary if no driver software for other
scanners or digital cameras has been installed.
• Once FilmGet FS has been selected, you do not need to reselect it as long as you do
not disconnect the scanner or change the settings.
FilmGet FS User’s Guide
19
5
Before Scanning
4
Click the [File] menu and select
[Import] and [TWAIN_32...].
1
• FilmGet FS starts, and the main
window and thumbnail window will
be displayed.
• Scanning is performed using these
windows.
2
Thumbnail Window
3
Main Window
4
• Please refer to the manuals accompanying the individual software package for the
procedures for starting FilmGet FS from within a TWAIN-compliant application program
other than Photoshop LE.
■ Exiting FilmGet FS
5
1
Click the
(close box) at the top right of the main window.
• The FilmGet FS windows will close.
• FilmGet FS will automatically close after scanning has finished when the “Close
FilmGet FS after Acquire” option has been checked in the [Preferences...] item of the
[Settings] menu. See p. 92.
20
FilmGet FS User’s Guide
Before Scanning
Macintosh Setup
System Requirements
The computer you use to run FilmGet FS must meet the following minimum requirements. Check your
computer and install FilmGet FS onto the hard disk drive.
Computer
USB connection: Macintosh with standard USB configuration
SCSI connection: Macintosh with standard SCSI configuration or
SCSI card installed
Operating System
Mac OS 8.6 - 9.1
CPU
Power PC G3 or greater
RAM
64 MB or more (128 MB or more recommended)
Display
32,000 colors or better, 800 x 600 pixels or better
Interface
USB 1.1/SCSI II
Hard Disk Capacity
500 MB or more (1 GB or more recommended) available after
installing the application program
CD-ROM Drive
Required
Required Application
Program
Photoshop LE or other plug-in compliant application program
1
2
3
• Operation is not guaranteed on Macintosh-compatible computers.
• Only one CanoScan scanner may be connected to a computer at a time.
• Please note that the system may become unstable because the computer’s energy saving mode
(sleep mode) is not supported.
4
Installing FilmGet FS
Install FilmGet FS according to the instructions in “1. Installing the Software” of “Chapter 3
Using the Scanner with a Macintosh” in Getting Started supplied with the scanner.
FilmGet FS User’s Guide
21
5
Before Scanning
Starting and Exiting FilmGet FS
■ Starting FilmGet FS
FilmGet FS must be started from within a plug-in compliant application program. It cannot be started
independently. Photoshop LE is used in the example below.
• When using Photoshop LE, you must increase the allotted memory in order to start FilmGet FS. For more
information please see page 65 “Increasing the Memory Allocated to Photoshop LE” of Getting Started.
1
.
2
1
Start Photoshop LE.
2
Click the [File] menu and select
[Import] and [FilmGet FS 1.0...].
• If you are using a different plug-in compliant application program, start that
program.
3
4
• FilmGet FS starts, and
the main window and
thumbnail window will
be displayed.
• Scanning is performed
using these windows.
5
Thumbnail Window
Main Window
• Please refer to the manuals accompanying the individual software package for the
procedures for starting FilmGet FS from within a plug-in compliant application
program other than Photoshop LE.
22
FilmGet FS User’s Guide
Before Scanning
■ Exiting FilmGet FS
1
Click the
(close box) at the top left of the main window.
• The FilmGet FS windows will close.
• FilmGet FS will automatically close after scanning has finished when the “Close
FilmGet FS after Acquire” option has been checked in the [Preferences...] item.
See p. 92.
1
2
3
4
5
FilmGet FS User’s Guide
23
Before Scanning
FilmGet FS Main Window
Main Window
The main window is displayed together with the thumbnail window (See p. 26) when FilmGet FS is
started within the application program.
1
Image Adjustment Section
Adjusts the brightness and
coloring of preview images.
Menu Bar
Contains the various
commands and settings
to control how FilmGet
FS operates.
2
Scan Settings Section
Sets the resolution and output
target settings according to the
primary purpose of the scanned
image.
Title Bar
Displays the window title. Click here
and drag the window to change its
position on the desktop.
Toolbar
Contains the tools for rotating,
flipping and zooming the preview
image.
Close Box
Closes FilmGet FS.
Show/Hide Tool Tips
Shows or hides the tool tips.
3
Scan Area Frame
The image within the area enclosed
by this frame is scanned.
Preview Area
Displays the preview image for a
single frame. Use this area to set the
scan area and inspect adjustments to
the image.
4
5
[Thumbnail…] button
Displays the thumbnail
window (See p. 26) in
front of the main window
when it is hidden by the
main window.
[Preview] button
Initiates a preview scan
and displays the
images one at a time in
the preview area.
[Scan] button
Initiates the final scan of
all selected images and
transfers the scanned
images to the application
program from which
FilmGet FS was started.
Window Resizing
Click and drag anywhere
along the right or bottom
edges (Windows) or click
and drag the lower right
corner (Macintosh) to
resize the window.
• Some items and buttons are grayed out and not available when a film holder is not inserted into the scanner.
24
FilmGet FS User’s Guide
Before Scanning
Main Windows
The FilmGet FS main window is virtually indistinguishable between the Windows and Macintosh
versions. The primary difference is the location of the close box. On the Macintosh version it is
located at the top left corner of the window.
Close Box
Closes FilmGet FS.
1
Menu Bar in the Main Window
[Settings] menu
Sets the auto exposure, focus adjustment, and color matching
system settings among others. See p. 86.
[Device] menu
Runs a scanner test or displays scanner information. See p. 96.
2
3
[Help] menu
Displays FilmGet FS help topics or software version data.
See p. 96.
4
Toolbar in the Main Window
Selector Tool. See pp. 43, 47, 78.
Grab Tool. See p. 43.
Zoom In Tool. See p. 42.
5
Zoom Out Tool. See p. 42.
Zoom Reset Tool. See p. 42.
Rotate 90 Degrees Left Tool. See p. 43.
Rotate 90 Degrees Right Tool. See p. 43.
Rotate 180 Degrees Tool. See p. 43.
Flip Tool. See p. 43.
Auto Correct Tool. See p. 44.
Film Eject Tool. See p. 42.
FilmGet FS User’s Guide
25
Before Scanning
FilmGet FS Thumbnail Window
Thumbnail Window
The thumbnail window is the window that appears when you click the [Thumbnail...] button in the
main window (See p. 24). This window is displayed together with the main window when FilmGet FS
is started within the application program.
1
[Select All] button
Selects all of the frames.
When clicked, it changes to
the [Deselect All] button.
Toolbar
Contains the tools for rotating
or flipping the thumbnail
images.
Title Bar
Click here and drag the window to
change the window position on the
desktop.
[Thumbnail Scan] button
Initiates a thumbnail scan of all
frames and displays the thumbnail
images.
2
Scroll Bar
Lets you scroll to view thumbnail
images that are not currently
displayed.
3
Frame
Frame No.
[Transfer Thumbnails] button
Transfers the selected
thumbnail images to the
application program.
Window Resizing
Make the window larger in order to display
more frames at one time.
Click and drag anywhere along the right or
bottom edges (Windows) or click and drag
the lower right corner (Macintosh) to resize
the window.
4
• When a film holder is not inserted into the scanner, no frames will be displayed.
Toolbar in the Thumbnail Window
5
Flip Tool. See p. 38.
Rotate 180 Degrees Tool. See p. 38.
Rotate 90 Degrees Right Tool. See p. 38.
Rotate 90 Degrees Left Tool. See p. 38.
26
FilmGet FS User’s Guide
Before Scanning
How to Find Help
Tool Tips
FilmGet FS is equipped with tool tips that explain the functions of the buttons and tools in the
windows. When you click the
(Show/Hide Tool Tips) button, the button will change to the
button. In this state, positioning the mouse cursor over a button or tool will display the tool tip for that
item. To hide the tool tips, click the
button again.
1
Show/Hide Tool Tips Button
Tool Tip
2
3
4
5
FilmGet FS User’s Guide
27
CanoScan FS4000US Film Scanner
CHAPTER 2
Scanning
1
This section provides a step-by-step explanation of scanning operations
using FilmGet FS, from loading the film to thumbnail scanning and preview
2
scanning.
All users read this section.
Scanning Procedures ....................................................29
Loading Film ...................................................................30
3
Switching between Windows ........................................32
Selecting the Film Type .................................................33
Setting the Color Mode ..................................................34
Thumbnail Scanning ......................................................36
4
Selecting Frames ...........................................................37
Rotating and Flipping Thumbnail Images....................38
Transferring Thumbnail Images to the Application
Program .....................................................................39
5
Previewing to Inspect the Images.................................40
Adjusting Preview Images.............................................42
Adjusting the Scan Settings..........................................45
Adjusting Brightness and Coloring..............................46
Selecting the Scan Area ................................................47
Final Scan .......................................................................49
28
FilmGet FS User’s Guide
Scanning
Scanning Procedures
Although scanning procedures vary for each color mode (color, grayscale or black and white), the
basics are the same. Use the following procedures as a guideline. Each step is explained in greater
detail on the referenced pages.
(1)
Load the film. See p. 30.
Load the film into the film holder, then insert the film holder into the scanner.
(2)
1
Select the film type. See p. 33.
Select a film type (color/monochrome, negative/positive) matching the film you are scanning.
(3)
Set the color mode. See p. 34.
Select between [24-Bit Color] and [42-Bit Color] for the color mode, between [8-Bit Grayscale] and
[14-Bit Grayscale] for the grayscale mode, and [Black and White] for the black and white mode.
(4)
Check the images with a thumbnail scan. See p. 36.
2
Initiate a thumbnail scan of all the frames of the film loaded into the film holder, and check the
thumbnail images.
(5)
Select one or more frames. See p. 37.
(6)
Adjust the thumbnail images. See p. 38.
If necessary, change the orientations of the thumbnail images by rotating or flipping the images with
the tool buttons.
(7)
3
Preview the images. See p. 40.
Preview the selected frames to make sure they are to your satisfaction.
(8)
Determine the image size and resolution. See p. 45.
Set the resolution, output target and image size according to the purpose of the scanned image.
(9)
4
Adjust the brightness and coloring. See p. 46.
If the preview images are not to your satisfaction, adjust the color balance and brightness of images
scanned in color mode, the brightness of images scanned in grayscale mode and the threshold
value of images scanned in black and white mode.
(10) Select the scan area. See p. 47.
Drag the mouse cursor to select the scan area if you wish to crop the image.
5
(11) Initiate the final scan. See p. 49.
Scan all the selected frames and transfer the scanned images to the application program from which
FilmGet FS was started. Use the application program to print or save the images.
FilmGet FS User’s Guide
29
Scanning
Loading Film
Inserting the Film Holder
Load the film into the film holder and carefully insert the film holder straight into the film holder slot of
the scanner. Once the film holder has been inserted past a certain point, it is automatically drawn into
the scanner.
1
(1) Hold the film
holder
horizontally with
the
mark
facing upwards.
(3) Insert the end with the
mark into the film holder slot of
the scanner.
2
(2) Check that the [R] mark can be seen properly from
the right side.
3
• If the film holder is facing the wrong direction or tilted, you will not be able to insert it.
• For more information on loading film, see “Chapter 5 Setting the Film in Position” in Getting Started.
4
When the film holder is inserted into the scanner, frames and buttons will appear in the FilmGet FS
thumbnail window.
5
Thumbnail Window
Main Window
• When you insert the film holder, calibration is performed automatically and the message “Calibrating...” will be
displayed. This calibration is to teach the correct “white (reference color)” to the scanner in order to scan film
with more accurate colors.
• Although it takes about one minute to complete the calibration operation the first time that the operation is
performed after the scanner is turned on, subsequent calibration operations will be completed in about ten
seconds.
30
FilmGet FS User’s Guide
Scanning
Ejecting the Film Holder
To change the film or when scanning is finished, click the
film eject tool to eject the film holder.
When you click the tool a confirmation dialog box will be displayed. Click [Yes] to automatically eject
the film holder. The thumbnail and preview images will disappear from the screen at this time.
If you click the film eject tool when no thumbnail or preview images are displayed, the film holder will
be ejected without displaying the confirmation dialog box.
1
2
Film Eject Tool
• If you click the
film eject tool while an IX240 film cartridge holder is inserted in the scanner, you will hear a
winding sound and the power lamp will flash until the film has been wound back into the cartridge. Wait until the
power lamp changes from flashing to lighted before removing the film cartridge holder from the scanner.
3
4
5
FilmGet FS User’s Guide
31
Scanning
Switching between Windows
The thumbnail window remains open until you exit FilmGet FS, and can be switched with the main
window.
Switching to the Main Window
To switch to the main window, click the title bar of the main window.
1
Switching to the Thumbnail Window
To switch back to the thumbnail window, click the [Thumbnail…] button in the main window, or click
the title bar of the thumbnail window (when it is not hidden by the main window).
2
3
4
When the thumbnail window is hidden by the main window, you can also resize or change the
positions of the main window and the thumbnail window so that both windows are visible.
See pp. 24, 26.
5
Main window
Thumbnail Window
32
FilmGet FS User’s Guide
Scanning
Selecting the Film Type
Select the appropriate film type (color/monochrome, negative/positive) for the film being scanned.
Film Type Setting
Click the
arrow button on the right side of the
the desired film type from the pull-down menu.
(Film Type) box in the main window, and select
1
2
• The film type setting is grayed out and not available when a film holder is not inserted or when an IX240 film
cartridge holder that does not contain a cartridge is inserted.
• The following film types are selected when a film holder is first inserted.
35 mm film strip holder: Color Negatives
Slide mount holder: Color Positives
When using an IX240 film cartridge holder, the loaded film type is automatically identified and the appropriate
film type is selected.
However, if the same film holder is loaded again, the previously set film type will be selected.
• FilmGet FS can be used to scan sleeve, mount and cartridge film formats. For more information on film formats,
please refer to “2. Film Basics” of “Chapter 5 Setting the Film in Position” in Getting Started.
Sleeve
Mount
4
5
Cartridge
(IX240 film)
FilmGet FS User’s Guide
3
33
Scanning
Setting the Color Mode
You can select between color, grayscale and black and white modes when selecting the color mode.
Select a mode appropriate to the type of film and the purpose of the image.
Color Mode Setting
1
Click the
arrow button on the right side of the
(Color Mode) box in the main window, and
select the desired color mode from the pull-down menu.
2
3
The selected mode will appear in the
(Color Mode) box when the pull-down menu closes. You
may select from among the five modes of [42-Bit Color], [24-Bit Color], [14-Bit Grayscale], [8-Bit
Grayscale] and [Black and White].
4
• The [42-Bit Color] and [24-Bit Color] options are grayed out and not available when a monochrome film type
has been selected.
• The color mode setting is grayed out and not available when a film holder is not inserted or when an IX240 film
cartridge holder that does not contain a cartridge is inserted.
• The color mode can also be set independently for frames with preview images (See p. 40).
5
34
FilmGet FS User’s Guide
Scanning
Determining the Color Mode
You may select from among five color modes.
24-Bit Color
Select this setting to scan standard color films. The image is
expressed in 256 tones (8 bits) per RGB (red, green and blue)
channel.
42-Bit Color
Select this setting when a particularly high-quality color image is
required. The image is expressed in 16,384 tones (14 bits) per RGB
channel. The scanning time will be longer and the file will be larger
than the corresponding 24-bit color file. This requires an application
program such as Photoshop that supports 42-bit color.
8-Bit Grayscale
Select this setting for monochrome films or when a monochrome
image is desired. The image is expressed in 256 tones (black, white
and 254 gray shades).
14-Bit Grayscale
Select this setting when a particularly highquality grayscale image is required. The
image is expressed in 16,384 tones (black,
white and 16,382 gray shades). The file will
be larger than the corresponding 8-bit
grayscale file. This requires an application
program such as Photoshop that supports
14-bit color.
Black and White
1
2
Grayscale
3
Images are expressed in two colors only:
black and white. Light and dark areas of the
image are expressed as either black or white
according to the threshold value. The
threshold value can be freely set.
4
Black and White
5
FilmGet FS User’s Guide
35
Scanning
Thumbnail Scanning
Once you have selected the film type and color mode, you should make a thumbnail scan of all the
frames of the film loaded into the film holder.
Displaying the Thumbnail Window
1
When the thumbnail window is hidden, click the [Thumbnail…] button in the main window to display
the thumbnail window.
Initiating a Thumbnail Scan
Click the [Thumbnail Scan] button in the thumbnail window. All the film frames will be scanned and
the images displayed as thumbnail images (small images).
2
The thumbnail scan progress bar will be
displayed. Click the [Cancel] button if you
wish to stop the thumbnail scan.
3
4
• The scanner may take a few moments to respond to the [Cancel] button when it is clicked during thumbnail
scanning.
• If the “Insufficient hard disk space” message or a similar message appears during the thumbnail scan, it
means that your hard drive is too full to store the data for the thumbnail scan. Delete unnecessary files from the
hard drive to free sufficient space and reinitiate the thumbnail scan.
• When all of the thumbnail images are displayed, the [Thumbnail Scan] button is grayed out and thumbnail
scanning is not available.
5
36
FilmGet FS User’s Guide
Scanning
Selecting Frames
Select the desired frames at the thumbnail window, and then switch to the main window for preview
and final scanning.
Selecting/Deselecting All
All frames are deselected when the thumbnail window is first displayed. Use the button at the top left
of the thumbnail window to select and deselect all the frames at once.
• Click the [Select All] button to select all the frames. The borders around all the images will turn
red, and the [Select All] button will change to the [Deselect All] button.
• Click the [Deselect All] button to deselect all the frames.
1
2
Selecting/Deselecting a Single Frame
3
• Click on a frame to select it. The border around the image will turn red.
• Click again on the frame to deselect it. The red border will disappear.
4
5
FilmGet FS User’s Guide
37
Scanning
Rotating and Flipping Thumbnail Images
You can change the orientation of the scanned thumbnail images using the tool buttons.
Rotating and Flipping Images
1
2
Click the following tools to rotate or flip the images. When you click these tools, all the selected
images will be rotated or flipped.
•
(Rotate 90 Degrees Left Tool)
Rotates the images 90 degrees counterclockwise.
•
(Rotate 90 Degrees Right Tool)
Rotates the images 90 degrees clockwise.
•
(Rotate 180 Degrees Tool)
Rotates the images 180 degrees.
•
(Flip Tool)
Flips the images from left to right.
• When a preview image of the selected frame is displayed in the preview area, both the thumbnail image and
preview image are rotated or flipped.
3
4
5
38
FilmGet FS User’s Guide
Scanning
Transferring Thumbnail Images to the Application Program
You can transfer all the thumbnail images at once to the application program.
The transferred images can be printed out for use as an index print, or written to a CD-R together
with the scanned images for use as an index.
Transferring Thumbnail Images
Click the [Transfer Thumbnails] button in the thumbnail
window to transfer the thumbnail images for all the frames to
the application program.
1
The transferred thumbnail images will appear as follows
depending on the type of film holder that is inserted into the
scanner.
35 mm Film Strip Holder
2
Slide Mount Holder
IX240 Film Cartridge Holder
15-frame film
3
25-frame film
40-frame film
4
5
• If you have not yet initiated a thumbnail scan, a thumbnail scan will be automatically initiated and the images
will then be transferred to the application program.
FilmGet FS User’s Guide
39
Scanning
Previewing to Inspect the Images
Once you have selected and adjusted the frames in the thumbnail window, the next step is to switch
to the main window and preview to inspect the images. You can only preview one frame at a time.
Previewing
1
Click the [Preview] button to initiate a preview scan of the selected frame. The preview image will
appear in the preview area.
2
Preview Area
The preview progress bar will be displayed.
Click the [Cancel] button if you wish to cancel
the preview scan.
3
To preview other frames, switch to the thumbnail window, select another frame and repeat the
preview procedure.
4
• Select one frame at the thumbnail window before previewing. If multiple frames are selected or if no frames are
selected at the thumbnail window, the [Preview] button will be grayed out and previewing will not be available.
• If the “Insufficient hard disk space” message or a similar message appears during the preview scan, it means
that your hard disk is too full to store the data for the preview scan. Delete unnecessary files from the hard disk
to free sufficient space and reinitiate the preview scan.
5
• Adjustments, such as brightness (See p. 46), are reflected immediately in the preview image. Please note,
however, that the preview scan is only an approximation of how the final scan will appear. The end result may
differ slightly.
• If you resize the main window (See p. 24), the preview image size in the preview area is immediately changed
to match the new window size.
40
FilmGet FS User’s Guide
Scanning
Switching between Preview Images
Frames that have already been previewed will appear enclosed by a green border in the thumbnail
window. If you select one of these previewed frames, the preview image for the selected frame will
appear in the preview area. You can switch the preview image by selecting another frame. At this
time the number of the selected frame will be displayed in the main window.
Frame No.
1
Select a frame enclosed by a green border.
2
The preview image will change.
3
• When multiple frames are selected, a preview image will not be displayed in the preview area, and instead the
“No image can be displayed because more than one frame is selected.” message will appear.
4
5
FilmGet FS User’s Guide
41
Scanning
Adjusting Preview Images
If the preview image is not to your satisfaction, you can use the toolbar to adjust the orientation,
brightness and other settings. The procedures for zooming, rotating, flipping and auto correction are
explained below. For information on adjusting the image brightness or coloring, please see page 71
“Chapter 4 Adjusting Images”.
1
• Please note that the toolbar is grayed out (except for the
tools can be selected until an image is previewed.
film eject tool) when the preview area is empty. No
Zooming an Image for Verification
• Click the
zoom in tool to select it. The display will zoom in by a factor of 2 each time you click
the tool on the preview image.
2
3
Scroll Bars
4
5
• Click the
zoom out tool to select it. The display will zoom out by a factor of 2 each time you click
the tool on the preview image.
• Click the
zoom reset tool to restore the display to the default zoom setting.
• The
zoom in tool functions merely change the preview area display magnification, and do not affect the
resolution or scan size (See pp. 53, 54) of the scanned image. The preview area may be zoomed up to two
times to magnify the image by a factor of 400%.
• Scroll bars appear on the right and bottom edges of the preview area when it is zoomed. These scroll bars can
be used to change the portion of the image appearing in the window.
• The
zoom out tool and
zoom reset tool are only activated when the preview image has been zoomed.
42
FilmGet FS User’s Guide
Scanning
Moving an Image within the Preview Area
• When the image has been zoomed, click the
grab tool to change the mouse cursor into the
shape. Drag the grab tool over the image to shift the portion appearing within the preview area.
• To return the mouse cursor to the ‘+’ shape, click the
selector tool.
• The
grab tool is only activated when the preview area has been zoomed in with the zoom in tool.
Rotating and Flipping Images
1
Click one of the tools below to rotate the preview area or flip the image within it.
•
(Rotate 90 Degrees Left Tool)
Rotates the entire preview area 90 degrees counterclockwise.
•
(Rotate 90 Degrees Right Tool)
Rotates the entire preview area 90 degrees clockwise.
•
(Rotate 180 Degrees Tool)
Rotates the entire preview area 180 degrees.
•
(Flip Tool)
Flips the image from left to right in the preview area.
2
• When a preview image is rotated or flipped, the corresponding thumbnail image is also rotated or flipped in the
same manner.
3
4
5
FilmGet FS User’s Guide
43
Scanning
Using Auto Correction on Images
• If the preview image is not to your satisfaction, click the
auto correct tool to automatically
correct the highlights, shadows, brightness and coloring of the preview image to the optimal
states.
• Click the [Clear] button to return the image to the original state.
1
2
Auto Correction Clear Button
• You cannot use the
auto correct tool when the “Use Color Matching” option is on. See p. 89, “Use Color
Matching,” for an explanation of switching the Use Color Matching option.
3
4
5
44
FilmGet FS User’s Guide
Scanning
Adjusting the Scan Settings
For what purpose will the scanned images be used?
Will they be printed out? Or simply displayed on a monitor?
If the purpose is undecided, scan at default settings. When FilmGet FS is first installed, images are
scanned with file mode settings (scanning settings for storage in files). See page 94 “Default
Settings.”
If the purpose is clear, set the detailed settings by selecting the various modes in the scan settings
section. You can set the scan settings independently for each frame, or you can set all the frames to
the same conditions.
• See page 51 “Chapter 3 Adjusting the Scan Settings” for more information on setting the scan settings.
1
2
3
4
Scan Settings Section
5
FilmGet FS User’s Guide
45
Scanning
Adjusting Brightness and Coloring
You can adjust the brightness and coloring of the preview image to your satisfaction by selecting the
modes in the image adjustment section. These adjustments are performed on each frame
individually.
1
• See page 71 “Chapter 4 Adjusting Images” for more information on adjusting the brightness and coloring.
2
3
4
Image Adjustment Section
5
46
FilmGet FS User’s Guide
Scanning
Selecting the Scan Area
A scan area selection frame will appear in the preview area. When FilmGet FS is first installed, the
selected area is approximately 90% of the preview area. You can initiate the final scan without
changing this selection frame.
To scan only the area you want, simply change the scan area selection frame to reselect the scan
area. When you select a scan area, only that area is scanned and transferred to the application
program from which FilmGet FS was started.
Selecting the Scan Area
Click the
selector tool on the toolbar and drag the mouse cursor (which will change into a ‘+’
shape) across the preview image to enclose the scan area with the scan area selection frame. Here,
“drag” means to move the mouse cursor with the left button held down (or to move the mouse with
the button held down for the Macintosh version).
Scan Area Selection Frame
1
2
3
4
• You can drag the cursor in any direction.
• If you do not specify a scan area, the scan area selection frame displayed in the preview area will be used as
the scan area.
5
FilmGet FS User’s Guide
47
Scanning
Adjusting the Scan Area Selection Frame
• You can expand or shrink the scan area by positioning the mouse cursor over the selection frame
until it changes into one of the
,
,
or
shapes and dragging it.
• You can move the entire scan area selection frame by positioning the mouse cursor inside it. The
cursor will change into the
shape, allowing you to click and drag to shift the entire selection
frame around the image.
1
• See page 55, “Aspect Ratio of the Scan Area”, for instructions on how to change the width-to-height
proportions of the scan area selection frame.
Adjusting the Selected Scan Area
2
You may change the scan area selection any number of times. You can also change the scan
settings after you have selected the scan area. Moreover, you can freely change the selection
settings or the preview image on which the settings are based. Try reselecting them until you achieve
satisfactory results.
3
4
5
48
FilmGet FS User’s Guide
Scanning
Final Scan
Initiate the final scan after you have selected the frames, set the scan settings, adjusted the
brightness and coloring, and selected a scan area.
Scanning the Selected Frames
FilmGet FS makes it possible to perform batch scans. If you have already selected the frames that
you wish to scan at the thumbnail window, all you need to do is click the [Scan] button to batch scan
the selected frames in order of the frame numbers.
1
[Scan]
2
The scan progress bar will be displayed.
Click the [Cancel] button if you wish to
stop the scan.
3
The scanned images will not appear in the preview area, and will instead be transferred to the
application program from which FilmGet FS was started. The FilmGet FS windows will remain
displayed even after scanning has finished. To scan other film, repeat the procedures from the
beginning of this chapter.
4
• Photoshop LE allows you to open a maximum of 30 files at one time. If you plan to scan more than 30 frames
consecutively, scan 30 frames and save them to files in Photoshop LE. Then quit Photoshop LE, start
Photoshop LE and FilmGet FS again, and scan the remaining frames.
• If no frames are selected at the thumbnail window, the [Scan] button will be grayed out and scanning will not
be possible.
• If the “Insufficient hard disk space” message or a similar message appears during the final scan, it means that
your hard drive is too full to store the data for the final scan. Delete unnecessary files from the hard drive to free
sufficient space and reinitiate the final scan.
• If the “Size of combined image files exceeds the maximum setting.” message or a similar message appears,
follow the procedures instructed by the message and reinitiate the final scan. You can also solve this problem
by removing the check from the “Max. Combined Image File Size” option in the [Preferences...] item of the
[Settings] menu. See p. 92.
FilmGet FS User’s Guide
49
5
Scanning
1
• When using an application program that is not 42-bit color or 14-bit grayscale compatible, you cannot scan in
the [42-Bit Color] or [14-Bit Grayscale] modes. Also, the program may ‘hang’ or only the first image may be
scanned if you attempt to scan batches of images from an application program that does not support batch
scanning. Please check the specifications for your application program before attempting batch scanning.
• Photoshop LE, which is shipped with the CanoScan FS4000US scanner, supports batch scanning and also the
[42-Bit Color] and [14-Bit Grayscale] modes.
• When transferring data to a 42-bit color or 14-bit grayscale compatible application program, the data is treated
as 48-bit color data for [42-Bit Color] mode and 16-bit grayscale data for [14-Bit Grayscale] mode.
Exiting FilmGet FS
Click the
at the top right of the window ( at the top left of the Macintosh version) to close
FilmGet FS and display the scanned image(s) in the application program window.
2
3
Batch Scanned Images
4
• FilmGet FS will automatically close when the “Close FilmGet FS after Acquire” option has been checked in the
[Preferences...] item of the [Settings] menu. See p. 92.
Save the scanned images using the save function of the application program. You cannot save the
images with FilmGet FS.
5
50
FilmGet FS User’s Guide
CanoScan FS4000US Film Scanner
CHAPTER 3
Adjusting the Scan Settings
1
This section explains how to set the resolution, output target and other
settings for scanning.
2
Scan Setting Modes .......................................................52
Using File Mode..............................................................56
Using Text/Printer/Fax Mode .........................................60
Using Display Mode .......................................................62
3
Using Photo Size Mode .................................................63
Using Custom Mode.......................................................65
Adding Scan Settings and Menu Items ........................68
4
5
FilmGet FS User’s Guide
51
Adjusting the Scan Settings
Scan Setting Modes
Once you have previewed and inspected the images, you can set the scan settings for specific
purposes. These settings use the modes in the scan settings section, and set how finely to scan the
image, the purpose for which the scanned image will be used, the image size and so on.
1
• You can set the scan settings independently for each frame which has a preview image.
• If you have made a thumbnail scan, you can set the same scan settings for all images.
• If you do not adjust the scan settings, the image will be scanned at the previously set settings.
Important Facts about Scan Settings
The input resolution, output resolution and image width and height are important scan settings.
■ What is the Input Resolution?
2
When the scanner scans film it reads the image as a collection of dots. The relative density of these
dots is referred to as the “resolution.” Since this is the input stage of the scanning process, this
resolution is referred to as the “input resolution.” The illustration below shows the same image
scanned with different input resolutions.
Film Resolution
3
Scanned at a Fine Input
Resolution
4
5
One Dot
Scanned at a Coarse Input
Resolution
One Dot
• Resolution is measured in units called dots per inch (dpi). This measures the number of dots contained in one
linear inch.
• Each dot is assigned individual brightness and color values.
■ What is the Output Resolution?
The output resolution is the name used to describe the relative density of the dots that form an image
when it is reproduced after scanning. Printing an image on a printer, transmitting it as a fax or
displaying it on a monitor are examples of how a scanned image may be output.
52
FilmGet FS User’s Guide
Adjusting the Scan Settings
■ Image Width and Height
The image width and height settings determine the size at which an image will be reproduced when
it is output to a printer or displayed on a monitor.
The scan settings would require considerable time and effort to set correctly if you had to manually
set the input resolution, output resolution, and image width and height to achieve a particular result.
Fortunately, FilmGet FS simplifies this process by providing five preset modes that correspond to
various uses of the image. Detailed settings can be achieved almost automatically by selecting the
mode best suited to your purposes and then adjusting only the settings you wish.
Guide to the Scan Settings Section
1
The scan settings section is used to adjust the scan settings. Switch between modes by clicking one
of the five buttons. When FilmGet FS is first installed, the file mode is selected.
Custom Mode. See p. 65.
Select this mode when you wish to scan with customized scan settings that have been added to the
FilmGet FS list. Scan settings that have been added using the [Add…] button can also be selected from
this mode.
2
File Mode. See p. 56.
Select this mode when you scan an image for the
purpose of saving it to a file.
3
Text/Printer/Fax Mode. See p. 60.
Select this mode when you scan an image to paste
it into a document file, print it on a printer or send it
as a fax.
4
Display Mode. See p. 62.
Select this mode when you scan an image to
display it on a monitor.
Photo Size Mode. See p. 63.
Select this mode when you wish to output the image
at a typical photo print size.
[Add…] button
This is where the actual settings for each
mode are set and displayed. Refer to the
topics for each mode for an explanation of
the settings.
FilmGet FS User’s Guide
53
5
Adjusting the Scan Settings
Procedures Common to All Scan Modes
This topic introduces the procedures that are common to all five scan modes.
Settings
Click the
arrow beside any settings item to display a pull-down
menu with all the selectable options. Highlight an item with the mouse
cursor and click to select it.
1
Pull-Down Menu
Select the [Add/Delete…] option from any menu to add or delete
items to and from the list. See p. 69, “Adding and Deleting Menu
Items,” for more information.
2
Units
Click the
arrow beside any units box to display a pull-down menu
with all the selectable options. Highlight an item with the mouse cursor
and click to select it. Changing the units will also change the numbers
in the image size boxes to corresponding values.
3
Image Size
4
• The term “pixel” (picture element) is virtually equivalent in meaning to the “dots” used to describe resolution.
This unit of measure is often used to describe the size of an image, particularly when it is displayed on a
monitor.
5
Text Boxes and Grayed Out You can input optional values into the white text boxes. Input values
Values
are set by pressing the [Tab] key. Grayed out items indicate values
that are automatically calculated as a function of other settings. These
values cannot be changed.
Text Box
This indicates that the value is
automatically calculated as a
function of other settings.
54
FilmGet FS User’s Guide
Adjusting the Scan Settings
Aspect Ratio of the Scan
Area
(C/H/P/F) Button
Select this item when you wish to change the aspect ratio of the
selected scan area. Changes to this ratio are immediately reflected to
the scan area selection frame in the preview area. The image size
settings will also change accordingly.
Scan Area
Selection Frame
1
2
Standard Aspect Ratios
2
9
3
1
3
16
3
• The aspect ratios of custom sizes may be freely changed.
4
• This button is grayed out and not available when the scan mode is set to the photo size mode.
• If you rotate the image by 90 degrees, the width and height ratio will be reversed.
• When FilmGet FS is first installed, [Custom Size] is selected.
[Add...] Button
If you use a particular scan setting regularly, you can assign it a name
and add it to the list. The items you add will be displayed in the
custom mode pull-down menu. See p. 68, “Adding Scan Settings,” for
more information.
FilmGet FS User’s Guide
55
5
Adjusting the Scan Settings
Using File Mode
Select [File Mode] when you scan an image for the purpose of saving it to a file. When FilmGet FS is
first installed, this mode is selected.
(1) Click the [File Mode] button.
(2) Select an input resolution.
1
(3) Select an output resolution.
(4) Set the image width and
height.
File Size (automatically calculated)
2
Selecting an Input Resolution
3
The input resolution box sets the resolution at which an image will be scanned. The higher the value,
the finer the resolution, and conversely, the lower the value, the coarser the resolution. Select the
value best suited to your purposes. Note that the values you select for the input resolution determine
the image and file sizes.
Select a resolution from the list or input it directly
into the box. Input values are set by pressing the
[Tab] key.
4
■ How File Sizes Vary with the Input Resolution
5
The higher the input resolution, the larger the image file. If the file is too large, it can slow down
processing and may overload your computer’s memory resources. To illustrate the difference in
file size, the results of an image scanned from 35 mm film in 24-bit color mode at the respective
input resolutions are shown below.
35 mm Film
• These numbers are approximate and may differ from
actual results.
56
FilmGet FS User’s Guide
Adjusting the Scan Settings
Select an Output Resolution
The output resolution box sets the resolution at which an image is reproduced. Changing the output
resolution changes the image size (when the units are inch, cm or mm).
Select a resolution from the list or input it directly
into the box. Input values are set by pressing the
[Tab] key.
1
Image Size Settings
■ Image Size (Width and Height) Settings
The image size boxes set the width and height. Changing the image size changes the file size. The
size of the scan area selection frame will also change as a function of these settings.
2
Change the units as required.
File Size (automatically
calculated)
Input a width directly into the box.
Input a height directly into the
box.
3
4
• Changing the size of the scan area selection frame changes the image and file sizes in the scan settings
section by corresponding amounts.
5
FilmGet FS User’s Guide
57
Adjusting the Scan Settings
How the Input Resolution, Image Size and File Size Relate
To understand the relationship between the three settings, see the example below of image sizes
(pixels) for an image scanned in the file mode at different input resolutions.
1
• These numbers are approximate and
may differ from actual results.
2
Example with the Input Resolution Changed from 500 to 1000 dpi
3
An input resolution of 1000 dpi signifies that one linear inch of the scanned image contains
1000 dots (= pixels). Since the number of dots has been increased (doubled in this case), the
image size (pixels) has increased (doubled) by a corresponding amount.
4
5
Since the width and height were each doubled, the file size is quadrupled (704 KB x 2 (width) x 2
(height) = 2816 KB in the example above).
When you wish to save a scanned image to a file, it is helpful to keep this relationship in mind. In
this case, there is no need to pay attention to the output resolution.
58
FilmGet FS User’s Guide
Adjusting the Scan Settings
How the Output Resolution and Image Size Relate
To understand the relationship between the two settings, see the example below of image sizes
(cm) for an image scanned in the file mode at different output resolutions.
1
• These numbers are approximate and
may differ from actual results.
2
Example with the Output Resolution Changed from 500 to 1000 dpi
An output resolution of 1000 dpi signifies that one linear inch of an image output to a printer or to a
monitor will contain 1000 dots (= pixels). Since the image was scanned at a density of 500 dots
per inch and is being output at twice that density, the image size is cut in half. You are, in effect,
placing more of the image in less space.
3
4
5
Keep this relationship in mind when you need to pay attention to the size of the output image.
FilmGet FS User’s Guide
59
Adjusting the Scan Settings
Using Text/Printer/Fax Mode
Select [Text/Printer/Fax Mode] when you wish to paste an image into a word processor file, print it
on a printer or send it as a fax. You can use this mode without worrying about the resolution or image
size.
(1) Click the [Text/Printer/Fax Mode] button.
1
(3) Select the display size.
(2) Select the paper size.
(4) Select an output target.
2
Selecting the Paper Size
The paper size you select with this item is the size of the paper onto which you will be pasting,
printing or faxing the image.
3
Select a size from the list.
4
See p. 69, “Adding and Deleting Menu Items.”
Selecting the Display Size
5
The display size you select with this item is the size of the image that you will be pasting, printing or
faxing relative to the size of the paper set by the paper size item.
Select a size from the
list.
See p. 69, “Adding
and Deleting Menu
Items.”
60
FilmGet FS User’s Guide
Adjusting the Scan Settings
• Selecting the [Reduced] option sets the image size to fit within the margins below.
Top Margin: 20.5 mm
Bottom Margin: 20.5 mm
Left Margin: 3.7 mm
Right Margin: 3.7 mm
Selecting an Output Target
1
Select an output target with this item.
Select this when you are pasting the image into a document.
Select one of these when you are printing to a printer. Selecting
[Connected printer] automatically sets the resolution to that of
the printer you are currently using.
2
Select this when you are sending the image as a fax.
See p. 69, “Adding and Deleting Menu Items.”
3
• The output resolution of the [Text] option is set to the following values.
Windows: 96 dpi
Macintosh: 72 dpi
Image and File Sizes
The image and file sizes are automatically calculated when you set the paper size, the display size
and the output target. (The input boxes are grayed out and values cannot be entered directly into the
boxes.)
4
5
Image Size
File Size
The image size units can, however, be switched between pixels, inches, centimeters and millimeters.
The image size numbers will change to the appropriate values for the type of units selected. Monitor
how these settings change as you change the settings above them.
FilmGet FS User’s Guide
61
Adjusting the Scan Settings
Using Display Mode
Select [Display Mode] when you scan an image for the purpose of displaying it on a monitor.
(1) Click the [Display Mode] button.
(2) Select a monitor resolution.
1
(3) Select the display size.
Selecting a Monitor Resolution
2
Select the resolution setting for the monitor on which the scanned image will be displayed.
Selecting [My Monitor] automatically sets the resolution to that
of the monitor you are currently using.
3
Select a resolution from the list.
Selecting the Display Size
4
This setting allows you to choose the size at which the scanned image will be shown on the selected
display.
Select a size from the list.
See p. 69, “Adding and Deleting Menu Items.”
5
Image and File Sizes
The image and file sizes are automatically calculated when you set the monitor resolution and display
size. (The input boxes are grayed out and values cannot be entered directly into the boxes.)
Image Size
File Size
62
FilmGet FS User’s Guide
Adjusting the Scan Settings
Using Photo Size Mode
Select [Photo Size Mode] when you wish to output the scanned image at a typical photo print size.
(1) Click the [Photo Size Mode] button.
(2) Select a photo size.
1
(3) Select an output target.
2
Selecting a Photo Size
This item allows you to choose the photo size. The scan area selection frame in the preview area
changes to the aspect ratio of the size selected here.
3
Select a size from the list.
See p. 69, “Adding and Deleting Menu Items.”
4
• The scan area selection frame changes to the aspect ratio for the selected photo size, and cannot be changed.
5
FilmGet FS User’s Guide
63
Adjusting the Scan Settings
Selecting an Output Target
Select an output target for the scanned image.
Select this when you are pasting the image into a document.
Select one of these when you are printing to a printer. Selecting
[Connected printer] automatically sets the resolution to that of the
printer you are currently using.
1
Select this when you are sending the image as a fax.
See p. 69, “Adding and Deleting Menu Items.”
2
• The output resolution of the [Text] option is set to the following values.
Windows: 96 dpi
Macintosh: 72 dpi
3
Image and File Sizes
The image and file sizes are automatically calculated when you set the photo size and the output
target. (The input boxes are grayed out and values cannot be entered directly into the boxes.)
4
Image Size
File Size
5
64
FilmGet FS User’s Guide
Adjusting the Scan Settings
Using Custom Mode
The custom mode allows you to add six preset items. To use these settings, click the [Custom Mode]
button and select the setting you want from the pull-down menu. This feature lets you scan
immediately without having to set complex scan settings.
In addition, you can add new scan settings and access them from this mode. (See p. 68, “Adding
Scan Settings,” for more information.)
1
(1) Click the [Custom Mode] button.
(2) Select a scan setting.
Highlight and click to select a setting.
A check mark will appear beside the
selected item.
2
Preset Scan Settings
3
Hi-Res (File Mode)
Select this when a high quality image is required. Note, however,
that the file will be quadruple the size of a Medium-Res file. The
input and output resolutions are set to [4000 dpi].
4
Medium-Res (File Mode)
Select this when you require the image quality to be somewhere
between the Hi-Res and Low-Res quality. The file is quadruple
the size of a Low-Res file. The input and output resolutions are
set to [2000 dpi].
5
Low-Res (File Mode)
Select this when the image quality is not critical. The file size is
smaller than either the Hi- or Medium-Res files. The input and
output resolutions are set to [1000 dpi].
View on Monitor (Display Mode)
Select this when you intend to view the scanned image on a
monitor. The monitor setting is set to [My Monitor] and the
display size is set to [60%].
FilmGet FS User’s Guide
65
Adjusting the Scan Settings
Output to Printer (Text/Printer/Fax Mode)
Select this when you intend to print the image on a printer. The
paper size is set to [A4(P)], the display size is set to [100%] and
the output target is set to [My Printer Resolution]. If a printer is
not connected, the output target is set to [Printer (300 dpi)].
1
Image (Photo Size Mode)
Select this when you intend to output the image at a typical
photo print size. The photo size is set to [L] and the output target
is set to [My Printer Resolution]. If a printer is not connected,
the output target is set to [Printer (300 dpi)].
Customizing the Pull-Down Menu
2
You can customize the pull-down menu that is accessed when the [Custom Mode] button has been
clicked. You can make the pull-down menu easier to use by changing such things as the order in
which items are displayed or by deleting items that are seldom used.
3
Click the [Custom Mode]
button and select
[Customize…].
4
Custom Settings Dialog Box
Change the settings by clicking the buttons on the custom settings dialog box.
5
66
FilmGet FS User’s Guide
Adjusting the Scan Settings
Click this to accept the settings and close the dialog box.
Click this to cancel the settings
and close the dialog box.
A check mark will
appear beside each
item that is displayed
in the pull-down menu.
Removing the check
mark removes the item
from the pull-down
menu.
Click this to copy the selected
item.
1
Click this to rename an item.
Click this to insert a divider above the
selected item.
Click one of these to raise
or lower the selected item in
the list.
2
Click this to delete the selected item.
3
• The preset items cannot be deleted from the pull-down menu.
• The [New...] button is grayed out and not available.
• Clicking the [Copy...] button copies the selected item under the same name with “copy” added to the end.
■ Renaming Items
4
Clicking the [Rename...] button will display the following dialog box. Input the new name to the
“Name” box and click [OK] to rename the item.
[Rename...]
5
Input the new name.
• You cannot set the same name as an existing item.
FilmGet FS User’s Guide
67
Adjusting the Scan Settings
Adding Scan Settings and Menu Items
Adding Scan Settings
You can assign a name and add frequently used scan settings to any mode with the [Add...] button.
1
Placing a check mark in this box and
clicking the [OK] button causes the scan
area selection frame size and position data
to be saved with the setting.
2
3
Input a name for the
setting.
• You cannot set the same name as an existing scan setting.
• You can add up to 64 custom scan settings.
• The “Save Crop Frame Settings” option is grayed out and disabled in the file and photo size modes.
■ Selecting an Item that has been Added
4
The items you add will appear in the custom mode pull-down menu. Click the [Custom Mode] button
and select the item to make it active.
Custom Mode button
5
Custom Scan Settings
■ Deleting Scan Settings
Select the [Customize...] item from the custom mode pull-down menu to delete a custom scan
setting. See p. 66, “Customizing the Pull-Down Menu” for more instructions.
68
FilmGet FS User’s Guide
Adjusting the Scan Settings
Adding and Deleting Menu Items
You can customize the scan settings pull-down menu to make it easier to use. For example, you can
add items, change the item order and delete items.
This following example explains these procedures using the “Display Size” option of the display
mode.
1
Select [Add/Delete...].
2
Click this to accept the settings
and close the dialog box.
Click this to cancel the settings
and close the dialog box.
A check mark will
appear beside each
item that is displayed in
the pull-down menu.
Removing the check
mark removes the item
from the pull-down
menu.
3
Click this to add a new item.
Click this to copy the selected
item.
4
Click this to rename an item.
Click this to insert a divider above the
selected item.
Click one of these to raise or
lower the selected item in the
list.
5
Click this to delete the selected item.
• The preset items cannot be deleted from the pull-down menu.
• Clicking the [Copy...] button copies the selected item under the same name with “copy” added to the end.
• You cannot add or delete items to or from a pull-down menu that does not have an [Add/Delete...] item.
FilmGet FS User’s Guide
69
Adjusting the Scan Settings
■ Adding a New Item
Clicking the [New...] button will display the following dialog box. Input the new name, set the setting
and click [OK].
[New...]
1
Set the setting value to be added.
2
Input the new name.
• You cannot set the same name as an existing item.
• You can add up to 64 new items.
■ Renaming an Item
3
Clicking the [Rename...] button will display the following dialog box. Input the new name to the
“Name” box and click [OK] to rename the item.
[Rename...]
4
Input the new name.
5
• You cannot set the same name as an existing item.
70
FilmGet FS User’s Guide
CanoScan FS4000US Film Scanner
CHAPTER 4
Adjusting Images
1
This section explains how to adjust the brightness and coloring of preview
images.
2
Image Adjustment Modes..............................................72
Adjusting a Histogram ...................................................77
Adjusting the Tone Curve..............................................79
Adjusting the Brightness/Contrast...............................81
3
Adjusting the Color Balance .........................................83
Adjusting the Threshold Value......................................84
4
5
FilmGet FS User’s Guide
71
Adjusting Images
Image Adjustment Modes
You can use the image adjustments to correct a preview image if the image quality is not quite to your
satisfaction.
1
• You cannot use the image adjustment modes when the “Use Color Matching” option is on. See p. 89, “Use
Color Matching,” for an explanation of switching the Use Color Matching option.
• The image adjustment section is grayed out and adjustments cannot be made when there is no image
displayed in the preview area.
• You can make image adjustments individually for each frame which has a preview image.
Guide to the Image Adjustment Section
Channel Selection Panel
2
Adjustment Mode Tabs
Adjustment Settings Area
This is where the actual settings for each
image adjustment mode are set and
displayed. Refer to the topics for each mode
for an explanation of the settings.
3
RGB Values Display
4
[Save...] button
[Load...] button
[Clear] (Reset All Tabs) button
5
Reset Button inside Tab
• Preview images are scanned as a collection of dots into FilmGet FS. Each dot is assigned brightness and color
values. You can correct the image by applying various adjustments to this data.
72
FilmGet FS User’s Guide
Adjusting Images
Adjustment Mode Types
The available adjustment modes vary as shown below with the color mode that has been selected.
You can switch between adjustment modes by clicking on the respective tabs.
■ Color Mode (42-Bit and 24-Bit Color)
Tab
1
Color Balance. See p. 83.
Brightness/Contrast. See p. 81.
Tone Curve. See p. 79.
2
Histogram. See p. 77.
■ Grayscale Mode (14-Bit and 8-Bit Grayscale)
3
Brightness/Contrast. See p. 81.
Tone Curve. See p. 79.
Histogram. See p. 77.
4
■ Black and White Mode
5
Threshold Value. See p. 84.
FilmGet FS User’s Guide
73
Adjusting Images
Procedures Common to All Image Adjustment Modes
This topic introduces the procedures that are common to all image adjustment modes.
Channel Selection Panel
The color of each dot comprising the scanned image is expressed as a mixture of varying gradations
of red (R), green (G) and blue (B). The settings for each of these colors, which are referred to as
channels, can be adjusted individually or together via the master channel.
Master Channel
Adjusts or sets all three colors at once.
1
Red Channel
Adjusts or sets only the red elements of the image.
Green Channel
Adjusts or sets only the green elements of the image.
2
Blue Channel
Adjusts or sets only the blue elements of the image.
3
4
Channels are only displayed with the histogram and tone curve modes. Moreover, the red, green and
blue channels are all grayed out and cannot be selected when the color mode has been set to either
of the grayscale modes.
Sliders and Input Boxes
You can adjust or set a setting by dragging the slider tab left or right. The value in the input box will
change accordingly. You may also input a value directly into the box. In this case the slider will
change accordingly.
Slider Tab
5
74
FilmGet FS User’s Guide
Input Box
Adjusting Images
Reset and [Clear] Buttons
There are two reset buttons: one inside each tab and one at the bottom of the dialog.
Reset Button inside Tab
1
[Clear] (Reset All Tabs) button at Bottom
• Reset Button inside Tab
Click this button to reset all the settings in the particular tab to the default values. If the tab has
channel settings, this button only resets the default values for the selected channel.
• [Clear] (Reset All Tabs) button at Bottom
Click this button to reset all the settings for all the adjustment modes to the default values.
2
[Save...] button
You can save settings in a file for future reuse if you are going to rescan the same image. The files are
saved with the following extensions depending upon the color mode. If you are using a Macintosh,
the extension (“.adc”, etc.) is not used.
42-Bit and 24-Bit Color
[filename.adc]
14-Bit and 8-Bit Grayscale
[filename.adg]
Black and White
[filename.adb]
3
4
[Load...] button
Click this button to load a settings file that has been saved using the [Save...] button.
RGB Values Display
This display shows the color (RGB) values for the area of the preview image under
the mouse cursor. The values are displayed in the “XXX/YYY” format, where “XXX”
represents the original color values and “YYY” represents the adjusted color
values.
FilmGet FS User’s Guide
75
5
Adjusting Images
How to Use Each Image Adjustment Mode
Refer to the chart below for an idea of how to use each image adjustment mode. See the page
number referenced for each mode for more information on that particular mode.
1
2
3
4
5
76
FilmGet FS User’s Guide
Adjusting Images
Adjusting a Histogram
The histogram adjustment mode is available when the color mode is set to [42-Bit Color], [24-Bit
Color], [14-Bit Grayscale] or [8-Bit Grayscale]. The histogram shows just how much data falls into
each brightness level. Use this mode when you wish to specify the appropriate allocation of data
between the brightest values (highlights) and the darkest values (shadows). You can specify cutoff
values for highlights or shadows to create a better distribution of the halftones.
Guide to the Histogram Tab
1
Individual Channels
Click here to adjust each RGB channel separately (not available for grayscale images).
Master Channel
Click here to adjust all three RGB channels at
once.
Shadow Slider Tab
Drag the slider tab left or right to adjust the
shadow cutoff level. The cutoff level can be set
to any value from 0 to 254. All data to the left of
the shadow cutoff is changed to a value of 0
(black).
2
3
Highlight Slider Tab
Drag the slider tab left or right to adjust the
highlight cutoff level. The cutoff level can be
set to any value from 1 to 255. All data to the
right of the highlight cutoff is changed to a
value of 255 (white).
4
Highlight Value Input Box
Input a value from 1 to 255 and press the [Tab] key to set the
highlight cutoff level. You can also use the
arrow keys to
adjust the value.
5
White Point Eyedropper Tool
Click this tool to change the cursor to an eyedropper, then click on the
preview image to change the data at the clicked point to 255 (white).
Black Point Eyedropper Tool
Click this tool to change the cursor to an eyedropper, then click on the preview
image to change the data at the clicked point to 0 (black).
Shadow Value Input Box
Input a value from 0 to 254 and press the [Tab] key to set the shadow cutoff level. You can also use
the
arrow keys to adjust the value.
Reset Button
Click this button to reset the histogram for the selected channel to its default values.
FilmGet FS User’s Guide
77
Adjusting Images
Interpreting a Histogram
You can select the entire image or specify an area for which a histogram will be generated. The
relative heights of the peaks in the histogram indicate the concentration of data with the
corresponding brightness values.
Distribution of data with a bias
toward highlights
Bright Portion
1
Distribution of data with a bias
toward shadows
Dark Portion
2
Distribution of data well
distributed between shadows
and highlights
Entire Image
Shadow (0)
Highlight (255)
3
How to Adjust a Histogram
4
The distribution of data between highlights and shadows can be adjusted by dragging the shadows
and highlights slider tabs left or right. All data to the left of the shadows cutoff will change to 0 (black)
and all data to the right of the highlights cutoff will change to 255 (white). The examples below show
adjustments to improve the contrast.
Image 1
Image with a bias toward
highlight
Image 2
Image with a bias toward
shadows
Image 3
Image with well distributed
data
Move the shadows slider tab
toward the highlights end.
Move the highlights slider tab
toward the shadows end.
Move both the shadows and
highlights slider tabs inward.
5
• Click the
78
selector tool in the preview area to deselect the black or white point eyedropper tool.
FilmGet FS User’s Guide
Adjusting Images
Adjusting the Tone Curve
The tone curve adjustment mode is available when the color mode is set to [42-Bit Color], [24-Bit
Color], [14-Bit Grayscale] or [8-Bit Grayscale]. Use this mode to adjust the brightness of the image
by changing the relative input and output values on the tone curve, which is a graphical
representation of the highlights and shadows. This mode is especially useful for making fine
adjustments to the brightness of specific areas of an image.
Guide to the Tone Curve Tab
1
Individual Channels
Click here to adjust each RGB channel separately (not available for grayscale images).
Master Channel
Click here to adjust all three RGB channels at
once.
2
Tone Curve
Click anywhere along the tone curve to insert a
control point, which can then be dragged to
change the curve shape. You can insert more
than one control point.
3
4
Control Point
Reset Button
Click this button to reset the tone curve for the selected channel to its default shape.
5
FilmGet FS User’s Guide
79
Adjusting Images
Interpreting Tone Curves
In FilmGet FS, the input is the data scanned by the
scanner and the output is the data displayed on the
monitor. The tone curve shows the balance between the
highlights and shadows in the input and output.
.
1
2
Adjusting a Tone Curve
The images below demonstrate how to adjust the brightness of an image by changing the tone
curve.
Unadjusted Tone Curve
Convex Curve
The input halftone data values are shifted to the
highlight side in the output, making the image
appear brighter in the display.
3
4
5
The input halftone data values are shifted to the
shadow side in the output, making the image
appear darker in the display.
• Make the curve as smooth
as possible to provide a
natural appearance. You
can check the preview
image to see the effect of
any changes.
Concave Curve
The input highlights and shadows are accentuated,
sharpening the contrast of the image.
S Curve
80
FilmGet FS User’s Guide
Adjusting Images
Adjusting the Brightness/Contrast
The brightness/contrast adjustment mode is available when the color mode is set to [42-Bit Color],
[24-Bit Color], [14-Bit Grayscale] or [8-Bit Grayscale]. Use this mode to adjust the overall
brightness or contrast (difference between highlights and shadows) of an image. This mode is
particularly useful when the original image is too bright or too dark, or the contrast is too flat.
Guide to the Brightness/Contrast Tab
Contrast
1
Brightness Slider Tab
Drag the slider tab left (darker) or right
(brighter) to change the brightness setting.
Brightness
Brightness Value Input Box
Input a value from –100 to +100 and press the
[Tab] key to set the brightness level. You can
also use the
arrow keys to adjust the
value.
2
3
Contrast Value Input Box
Input a value from –100 to +100 and press the
[Tab] key to set the contrast level. You can also
use the
arrow keys to adjust the value.
4
Contrast Slider Tab
Drag the slider tab left (flatter contrast) or right (higher contrast) to change the
contrast setting.
5
Reset Button
Click this button to reset the brightness and contrast values to the default values.
FilmGet FS User’s Guide
81
Adjusting Images
Adjusting the Brightness
Adjusting the brightness is effective when the entire image is too bright or dark. You must be careful,
however, not to create excessive highlights or shadows by setting the value to extreme levels.
Brightness = Neutral
Brightness > Neutral
Brightness < Neutral
1
2
Adjusting the Contrast
Contrast is the degree of difference between light and dark areas of the image. Raising the contrast
accentuates the difference between light and dark. Lowering it reduces the difference between the
two.
Contrast = Neutral
Contrast > Neutral
Contrast < Neutral
3
4
Raising the contrast of blurred pictures is effective in adding clarity to the image. Raising the contrast
too high, however, will obscure the dark portions or create excessive highlights.
5
82
FilmGet FS User’s Guide
Adjusting Images
Adjusting the Color Balance
The color balance adjustment mode is available when the color mode is set to [42-Bit Color] or
[24-Bit Color]. Use this mode to adjust the balance between the three colors: red (R), green (G) and
blue (B). This mode is especially useful when a particular color is too strong or weak.
Guide to the Color Balance Tab
Red (R)
Green (G)
Blue (B)
RGB Slider Tabs
Drag the slider tabs left (weaker) or right (stronger) to
change the setting for each color.
1
RGB Value Input Boxes
Input values from –100 to
+100 and press the [Tab] key
to set the RGB color levels.
You can also use the
arrow keys to adjust the
values.
2
3
4
Reset Button
Click this button to reset the color balance to the default values.
• RGB is the acronym for the three primary colors: red, green and blue. These colors can be mixed in different
combinations (gradients) to form all the colors in the visible light spectrum. You can use the color balance
adjustment mode to adjust the level of each primary color in the image.
FilmGet FS User’s Guide
83
5
Adjusting Images
Adjusting the Threshold Value
The threshold value adjustment mode is available when the color mode is set to [Black and White].
In contrast to color and grayscale images, which are expressed with brightness settings ranging
from 0 to 255, all the halftones in black and white images are expressed as either black (0) or white
(255). The point at which a particular dot is assigned a black or white value is called the threshold
value. The default threshold value is 128.
1
Guide to the Threshold Value Tab
Threshold Value Input Box
Input a value from 0 to 255 and press the [Tab]
key to set the value. You can also use the
arrow keys to adjust the value.
2
3
Threshold Value Slider Tab
Drag the slider tab left (lower) or right (higher) to
change the threshold value.
Reset Button
Click this button to reset the threshold to the
default value.
4
5
You can obtain different effects with an image by changing the threshold value as shown below. The
threshold functions as a cutoff beyond which all data with lower values are changed to black and all
data with higher values are changed to white. Accordingly, the higher the threshold, the darker the
image, and conversely, the lower the threshold, the brighter the image.
Image scanned at the
default threshold value
84
FilmGet FS User’s Guide
Image scanned at a
higher value (slider
moved to the right)
Image scanned at a
lower value (slider
moved to the left)
CanoScan FS4000US Film Scanner
CHAPTER 5
Other Functions
1
This section explains the items on the pull-down menus accessed from the
FilmGet FS menu bar.
2
[Settings] Menu ..............................................................86
[Device] and [Help] Menus ............................................96
3
4
5
FilmGet FS User’s Guide
85
Other Functions
[Settings] Menu
Adjusting the Exposure
When FilmGet FS is first installed, the “Auto Gain” option is set to on (checked) by default. This is the
setting you are recommended to use in most cases. With this setting the exposure (amount of light
passing through the film) and coloring (negative film only) are set automatically by the scanner.
1
2
3
Click the [Settings] menu and select
[Exposure Settings...].
Click to add or remove the check mark. The option is
on when the check mark is present.
However, if a film is not producing well with this setting, you can turn off the Auto Gain option and
adjust the exposure manually. You may also wish to use the manual setting if you are scanning a film
that has been intentionally under- or overexposed, or that contains an image that is extremely bright
or dark. The default exposure value is 0.
Exposure Slider Tab
Drag the slider tab left or right to change the
exposure setting. For positive film, drag the slider
tab right to increase the exposure or left to
decrease it. The opposite applies to negative film.
4
[Cancel] button
Click here to cancel the changes and close the
dialog box.
5
Auto Gain Check Box
You can set the exposure manually when the
check mark is removed (off).
[OK] button
Click here to accept the changes and close the
dialog box.
• You cannot use the auto gain mode when the “Use Color Matching” option is on. To use the auto gain mode,
first set the “Use Color Matching” option to off. See p. 89, “Use Color Matching” for an explanation of switching
the Use Color Matching option.
• The setting is reflected to all frames of the film loaded into the holder. You cannot set each frame individually.
86
FilmGet FS User’s Guide
Other Functions
• The scanning process involves passing light through the film and reading the resulting data. You can adjust an
image’s brightness by controlling the amount of light, which may also be called the exposure. The exposure is
controlled by speeding up or slowing down the rate of the scan.
Changes to the exposure value are reflected immediately to the preview image. An overexposed
image appears very bright, while an underexposed image appears very dark.
Exposure = Neutral
1
Overexposed
2
Underexposed
3
4
Setting the Clean Dust/Scratches Function (FARE)
This option sets whether to automatically identify dirt and scratches on the film surface and correct
these defects to provide a clear image during preview and final scanning. When FilmGet FS is first
installed, the “Clean Dust/Scratches” option is set to off by default.
5
Click the [Settings] menu and
select [Clean Dust].
Click a radio button to select [Off], [On (Standard)]
or [On (Strong)].
FilmGet FS User’s Guide
87
Other Functions
•
•
•
•
1
Clean Dust/Scratches processing is not performed during the thumbnail scan.
Clean Dust/Scratches processing is performed when the color mode is set to [24-Bit Color] or [42-Bit Color].
When the film type is set to monochrome, all items are grayed out and unavailable.
When using the Clean Dust/Scratches function, the [On (Standard)] setting is recommended for normal cases.
If you desire a higher level of image correction, the [On (Strong)] setting is recommended.
• The Clean Dust/Scratches function may not be effective when using Kodachrome film.
• The setting is reflected to all frames of the film loaded into the holder. You cannot set each frame individually.
• When [On (Strong)] is selected, the corrected portion of the image may become scrambled.
Adjusting the Focus
2
This option sets whether to focus the lens automatically during scanning. When FilmGet FS is first
installed, the “Autofocus” option is set to on (checked) by default.
“Autofocus” can normally be used without problems, but when film warping, distortion or other
factors make the image appear blurry, set the “Autofocus” option to off and adjust the focus
manually.
Autofocus Check Box
Click to add or remove the check mark. The
“Autofocus” option is on when the check mark is
present.
3
Input a value from 1 to 100
and press the [Tab] key to
set the value. You can also
use the
arrow keys
to adjust the value.
4
Click the [Settings] menu and
select [Set Focus].
5
Focus Slider Tab
Drag the slider tab left or right to change the focus
value setting.
• The setting is reflected to all frames of the film loaded into the holder. You cannot set each frame individually.
88
FilmGet FS User’s Guide
Other Functions
Use Color Matching
(Windows: ColorGear, Macintosh: ColorSync)
This mode automatically corrects characteristic differences in color output between scanners and
monitors. With this option on, matching the original image colors to the colors on the monitor output is
much easier. (When FilmGet FS is first installed, this option is off by default.)
However, when this option is on, the color is automatically adjusted during preview and final
scanning, so histogram and other image adjustments are not available (See p. 71). To scan with
image adjustments, first set the “Use Color Matching” option to off. This option is only effective when
the color mode is set to [24-Bit Color] or [42-Bit Color].
1
2
Click the [Settings] menu and
select [Color Matching].
Color Matching Check Box
Click to add or remove the check mark. The
“Use Color Matching” option is on when the
check mark is present.
3
The color matching on/off setting will be displayed in the image adjustment section.
4
Color Matching ON/OFF
Setting
5
• The color matching system for this scanner is ColorGear for the Windows version and ColorSync for the
Macintosh version.
• When the “Use Color Matching” option is on, the monitor gamma value is set automatically.
• When the “Use Color Matching” option is off, the monitor gamma is set to the following values.
Windows: 1.8
Macintosh: 1.8
• When the color mode is set to grayscale or black and white, all items are grayed out and unavailable.
• The setting is reflected to all frames of the film loaded into the holder. You cannot set each frame individually.
FilmGet FS User’s Guide
89
Other Functions
Setting the Monitor Gamma Value
You can adjust the brightness to match the particular characteristics of the monitor you are using by
setting a monitor gamma value. This mode is especially useful for matching the colors that display on
your monitor to the colors of the original image.
Gamma Value Buttons
Click a radio button to select a gamma value from
among [1.0], [1.4], [1.8], [2.2] or [Custom].
Select [Custom] to set a customized gamma value.
1
Gamma Value Input Box
Input a value from 0.10 to 10.00
and press the [Tab] key to set
the gamma value. You can also
use the
arrow keys to
adjust the value.
2
Click the [Settings] menu
and select [Monitor
Gamma].
Gamma Value Slider Tab
Drag the slider left (lower) or right
(higher) to change the gamma value.
3
4
5
• The gamma value for the monitor is set automatically when the “Use Color Matching” option on page 89 is set
to on.
• Please read the documents shipped with your monitor or contact the manufacturer’s customer service
department to obtain the correct gamma value for your particular model.
• You cannot set the monitor gamma value when the “Use Color Matching” option is on. To set the monitor
gamma value, first set the “Use Color Matching” option to off. See p. 89, “Use Color Matching,” for an
explanation of switching the Use Color Matching option.
• The setting is reflected to all frames of the film loaded into the holder. You cannot set each frame individually.
90
FilmGet FS User’s Guide
Other Functions
■ Correcting the Gamma Value
The gamma value aims to match the brightness of the image displayed on the monitor to the
brightness of the original document (film). Individual monitors reproduce colors in characteristic
ways that are summarized by their “gamma values.” The gamma values of most monitors fall
within a range of 1.4 to 2.2, which reproduces colors slightly darker than the original. To faithfully
reproduce the original colors, it is necessary to compensate for your monitor’s gamma value with
the FilmGet FS setting. The program generally adjusts the monitor’s gamma value to 1.8 for both
the Windows and Macintosh version, but if your monitor does not operate at this default value, you
will need to adjust it.
1
Setting the Preferences
The preferences control how FilmGet FS behaves when it scans and how it starts up and closes.
2
3
Click the [Settings] menu
and select
[Preferences…].
A check mark beside an item
makes it active.
[Cancel] button
Click here to cancel the
settings and close the
dialog box.
[OK] button
Click here to accept the settings and close the dialog box.
FilmGet FS User’s Guide
4
5
91
Other Functions
■ Preview Size
Set this option to the value corresponding to the size of your monitor. The size of the FilmGet FS
preview area will change according to this value.
Preview Size
Click here, select a size from the list and
click the [OK] button.
1
2
• Sizes larger than your monitor are grayed out and unavailable.
■ Max. Combined Image File Size
3
This option sets the maximum combined size of the files created when more than one image is
scanned in a batch. A warning message will be displayed if you attempt to scan images that exceed
the specified maximum size.
Max. Combined Image File Size
Click here to insert a check mark, then input
a value in the box. You can also use the
arrow keys to adjust the value.
However, using the default settings is
recommended.
4
5
■ Close FilmGet FS after Acquire
With this option on, FilmGet FS closes after the final scan for all the selected frames has finished.
When FilmGet FS is first installed, this option is off by default. Some application programs, however,
will close FilmGet FS after the final scan even when this option is set to off.
■ Display previous preview image at FilmGet start-up
With this option on, the thumbnail scan and preview images are saved when FilmGet FS is closed,
and then automatically displayed the next time FilmGet FS starts up. When FilmGet FS is first
installed, this option is off by default.
92
FilmGet FS User’s Guide
Other Functions
Setting the Power Saving Features
The lamp unit is always on when the FS4000US unit is powered. The Power Saving function
temporarily turns off the lamp to conserve energy when a scan is not initiated over a set period of
time. When FilmGet FS is first installed, this option is on and the activation period is set to 30 minutes.
1
Click the [Settings] menu
and select [Power...].
“Activate After:” Input Box
Input a value from 10 to 59 to shut off the lamp
when the option is activated. You can also use the
arrow keys to adjust the value.
Power Saving Settings Check Box
Click to add or remove the check mark. The “Use Power Save”
option is activated when the check mark is present.
2
3
Restoring the Default Settings
You can restore all the default settings for the film type, color mode, scan settings, image
adjustments and menu items by selecting this item from the [Settings] menu.
Click the [Settings] menu and
select [Reset Defaults…].
4
[No] button
Click here to cancel without resetting the
default settings and close the dialog box.
[Yes] button
Click here to reset the default settings and close the dialog box.
FilmGet FS User’s Guide
93
5
Other Functions
■ Default Settings
Item
Default value
35 mm Film Strip Holder
Color Negatives
Slide Mount Holder
Color Positives
Film Type
IX240 Film Cartridge Holder
1
Color Negative
Color Negatives
Color Positive
Color Positives
Monochrome
Monochrome Negatives
Color Mode
24-Bit Color
Scan Settings Section
2
Selected Mode
3
File Mode
Custom Mode
Custom Settings
Medium-Res
File Mode
Input Resolution
2000 dpi
Output Resolution
2000 dpi
File Size Lock
Unlocked
Paper size
A4(P)
Display Size
100%
Output Target
Connected printer*
Display
My Monitor
Display Size
100%
Photo Size
L
Output Target
Connected printer*
Text/Printer/Fax Mode
Display Mode
4
Photo Size Mode
Image Adjustment Section
5
Highlight Value
Master & RGB: 255
Shadow Value
Master & RGB: 0
Tone Curve Value
Master & RGB: All Linear
Brightness Value
0
Contrast Value
0
Color Balance Value
RGB: 0
Threshold Value
128
* [Printer (300 dpi)] is selected when a printer is not connected.
94
FilmGet FS User’s Guide
Other Functions
Settings Menu
Auto Gain
On, Exposure Settings: 0
Clean Dust/Scratches
Off
Set Focus
Autofocus, Focus Value
(current position)
Color Matching
Off
Monitor Gamma
1
Use Color Matching: On
Automatic setting
Use Color Matching: Off
1.8 Windows, Macintosh
Preferences
• Preview Size
My Monitor
• Max. Combined Image File Size
On, Size: 1000
• Close FilmGet FS after Acquire
Off
• Display previous preview image at FilmGet start-up
Off
Power Save Settings
On, Activate After:
30 minutes
Main Window Size
My Monitor Size
Thumbnail Window Size
4-Frame Display Size
Scan Area Selection Frame Size and Position
According to the film
guides of the film
Hide/Show Tool Tips
Show
2
3
(button pressed)
4
5
FilmGet FS User’s Guide
95
Other Functions
[Device] and [Help] Menus
Checking a Scanner
This item runs a test to confirm whether the scanner is operating correctly. Run the test if you suspect
a malfunction when you are operating the scanner.
1
Click the [Device] menu
and select [Self Test…].
2
3
[Test] button
Click here to initiate
the test.
A message will be displayed in the dialog box if a
problem is detected.
[Close] button
Click here if you wish to close the dialog
box without running the test.
Viewing the Device Version Information
You can view information about the scanner ROM version.
4
Click the [Device] menu and
select [Scanner Info…].
5
Click here to close the dialog box.
Viewing the Software Version Information
You can view the version information for FilmGet FS.
Click the [Help] menu and
select [About FilmGet FS…].
Click here to close the dialog box.
96
FilmGet FS User’s Guide
CanoScan FS4000US Film Scanner
APPENDICES
1
The appendices contain troubleshooting tips for problems encountered when
using FilmGet FS. They also include the FilmGet FS uninstall procedure and a
2
glossary of terms.
Read this section as the need arises.
Troubleshooting .............................................................98
FilmGet FS Error Messages ........................................105
Uninstalling FilmGet FS
3
.................................109
Uninstalling and Reinstalling FilmGet FS
............ 112
Glossary........................................................................115
Index ..............................................................................120
4
5
FilmGet FS User’s Guide
97
Appendices
Troubleshooting
Check the suggestions here first if you encounter problems using FilmGet FS. If the suggestions do
not solve the problem or the problem is not listed here, contact the dealer or a Canon Customer Help
Support Desk listed at the back of this guide.
1
• Before you contact your dealer or a Canon Customer Help Support Desk, please ensure that you have first read
the “ReadMe” file included with the software as well as “Chapter 6 Troubleshooting” in Getting Started.
• The service representative to whom you speak may request information about the computer to which the
scanner is connected. You should note this information in advance in the System Information page included in
the Getting Started manual. Store this information where you can access it in case of a problem.
2
3
4
5
98
FilmGet FS User’s Guide
Appendices
List of Symptoms
Look on the referenced page for the relevant symptom.
Q1
FilmGet FS cannot be installed correctly............................................................100
Q2
Don’t know how to start FilmGet FS from within an application program. .....100
Q3
Cannot start FilmGet FS from within an application program..........................100
Q4
Several options are grayed out and unavailable................................................101
Q5
FilmGet FS preview area is displayed at a small size on the monitor..............101
Q6
“Insufficient hard disk space” message is displayed when a thumbnail scan or
preview scan is initiated.......................................................................................101
Q7
Image is upside down or reversed. .....................................................................101
Q8
Coloring of preview image is peculiar.................................................................102
Q9
Previewed image is not displayed in preview area. ...........................................102
1
2
Q10 Scanning takes a long time. ................................................................................102
Q11 Only one image is scanned in a batch scan.......................................................102
Q12 A portion of the scanned image is missing, or a black or white border appears
around it.................................................................................................................102
3
Q13 Unevenness or lines appear repeatedly in the same position. ........................102
Q14 Image is blurry.......................................................................................................103
Q15 Scanning quality is poor. .....................................................................................103
Q16 Image is white (black) overall when scanning with the color mode set to [Black
and White]..............................................................................................................103
4
Q17 Scan results are peculiar with the color mode set to [42-Bit Color] or [14-Bit
Grayscale]..............................................................................................................103
Q18 Scan area selection cannot be freely set in the preview area. .........................103
Q19 You forgot to eject the film holder from the scanner. ........................................103
Q20 Coloring is different between the preview image and printed image. .............103
Q21 Cannot clean up dust/scratches..........................................................................104
FilmGet FS User’s Guide
99
5
Appendices
Q1
FilmGet FS cannot be installed correctly.
A
Q2
Don’t know how to start FilmGet FS from within an application program.
A
1
Q3
A1
Make sure that the scanner is turned on.
If the power is off, follow the procedure below and turn on the power.
USB connection: Turn the scanner on.
SCSI connection: Turn the computer off, turn the scanner on, then turn the
computer back on.
A2
There is insufficient memory to start FilmGet FS. Shut down all other
currently active programs.
When using Photoshop LE, increase the allotted memory to 30 MB or more
(36 MB or more for the Macintosh).
See Getting Started for information on how to increase the allotted memory. See
“Chapter 2 Using the Scanner with Windows, 4. Testing the Scanner” for the
Windows version, or “Chapter 3 Using the Scanner with a Macintosh, 3. Testing
the Scanner” for the Macintosh version.
A3
Make sure that [Canon FilmGet FS 1.0 for Windows] is correctly selected as
the application program source (Windows).
See p. 19, “Starting and Exiting FilmGet FS” in this guide for information on how to
select the source.
A4
FilmGet FS is not installed correctly. See “Chapter 6 Troubleshooting” in
Getting Started and take the appropriate corrective measures, then reinstall
the FilmGet FS driver software.
See “Windows Issues – P2/P5” for the Windows version, or “Macintosh Issues –
P4/P5” for the Macintosh version.
3
5
100
See “Starting and Exiting FilmGet FS” in this guide.
See p. 19 for the Windows version or p. 22 for the Macintosh version. For
information on how to operate an application program, see the electronic manual.
Cannot start FilmGet FS from within an application program.
2
4
See “Chapter 6 Troubleshooting” in Getting Started.
See “Windows Issues – P1/P4” for the Windows version, or “Macintosh Issues –
P8” for the Macintosh version.
FilmGet FS User’s Guide
Appendices
Q4
Q5
Q6
Several options are grayed out and unavailable.
A1
Load the film holder into the film holder slot. See p. 30.
Many options are not available until the film holder is loaded into the film holder
slot.
A2
Preview an image. See p. 40.
Many options are not available until an image is previewed.
A3
The [Preview] button is available when one frame is selected at the thumbnail
window.
The button is grayed out when multiple frames are selected.
A4
The [Scan] button is available when one or more frames are selected at the
thumbnail window.
A5
The image adjustment section is available when the “Use Color Matching”
option is off. See p. 89.
2
FilmGet FS preview area is displayed at a small size on the monitor.
A1
Click the [Settings] menu, select [Preferences...] and set the “Preview Size”
option to [My Monitor] or to an appropriate display resolution. See p. 92.
A2
Increase the size of the FilmGet FS window. See p. 24.
3
“Insufficient hard disk space” message is displayed when a thumbnail scan or
preview scan is initiated.
A
Q7
1
There is insufficient free space on the hard disk, so a thumbnail scan or
preview scan cannot be initiated. Delete unnecessary files from the hard disk
to free up sufficient space (500 MB or more).
The thumbnail and preview images are temporarily saved to the hard disk (the
hard disk where FilmGet FS was installed for the Windows version, or the
[Preferences] folder of the startup disk for the Macintosh version). Click the
[Settings] menu, select [Reset Defaults...] to initialize the settings, and exit
FilmGet FS (See p. 93). Then, restart FilmGet FS and delete any unnecessary files.
Image is upside down or reversed.
A1
Orient the film correctly in the film holder.
See “Chapter 5 Setting the Film in Position” in Getting Started for information on
how to load the film.
A2
Change the orientation of the image with the FilmGet FS rotate or flip tools.
See pp. 38, 43.
FilmGet FS User’s Guide
101
4
5
Appendices
Q8
1
2
Q9
Coloring of preview image is peculiar.
A1
Select the correct film type. See p. 33.
A2
Adjust the image quality with the
A3
Adjust the coloring and brightness of the image using the modes in the
image adjustment section. See p. 71.
A4
For film not suited to automatic exposure correction with the Auto Gain
function, turn off the “Auto Gain” setting, set the exposure manually and
rescan. See p. 86.
A5
If the film quality is poor or the film has faded, it may be possible to fix these
problems to a certain degree with retouching software.
Previewed image is not displayed in preview area.
A
Q10
3
5
A1
Check whether the application program supports batch scanning. (See the
application program manual.)
A2
Scan each frame individually.
A portion of the scanned image is missing, or a black or white border appears
around it.
A
Q13
102
The input resolution (scan resolution) is set too high. Lower the resolution to
the lowest appropriate setting and rescan. See pp. 52, 56.
Only one image is scanned in a batch scan.
4
Q12
Select only the one frame you want to display at the thumbnail window.
If no frames are selected or if multiple frames are selected at the thumbnail
window, the preview image will not be displayed in preview area.
Scanning takes a long time.
A
Q11
auto correct tool. See p. 44.
Select the correct scan area. See p. 47.
Unevenness or lines appear repeatedly in the same position.
A1
Place a check in the “Clean Dust/Scratches” option and rescan. See p. 87.
A2
Clean the film and rescan.
See “Appendix, 4. Cleaning Film” in Getting Started for information on cleaning
methods.
A3
Clear away any dust or debris on the all windows (contain the small window)
of the film holder and rescan.
A4
For film with dirt or scratches that cannot be remedied with a blower brush or
the Clean Dust/Scratches function, it may be possible to fix these problems
to a certain degree with retouching software.
FilmGet FS User’s Guide
Appendices
Q14
Q15
Q16
Image is blurry.
A1
Turn off the “Autofocus” option, manually align the focus and scan.
See p. 88.
A2
The film was out of focus when originally shot.
Scanning quality is poor.
A1
Set a higher input resolution (scan resolution) and rescan. See pp. 52, 56.
A2
Place a check in the “Clean Dust/Scratches” option and rescan. See p. 87.
A3
Clean the film and rescan.
See “Appendix, 4. Cleaning Film” in Getting Started for information on cleaning
methods.
A4
The scanning quality may deteriorate if a power cord runs close by the
scanner. Separate any power cords from above and around the scanner.
Q18
Q20
Raise (Lower) the threshold value. See p. 84.
3
Scan results are peculiar with the color mode set to [42-Bit Color] or [14-Bit
Grayscale].
A1
Check whether the application program supports the 42-bit color or 14-bit
grayscale color modes. (See the application program manual.)
A2
Scan using the [24-Bit Color] or [8-Bit Grayscale] modes. See p. 34.
4
Scan area selection cannot be freely set in the preview area.
A
Q19
2
Image is white (black) overall when scanning with the color mode set to [Black and
White].
A
Q17
1
Click the aspect ratio (C/H/P/F) button in the scan settings section, select
[Custom Size] and resize the scan area selection. See p. 55.
5
You forgot to eject the film holder from the scanner.
A1
Restart FilmGet FS, click the
See p. 31.
film eject tool and remove the film holder.
A2
Turn the scanner off and then on again. The film holder will be automatically
ejected.
Coloring is different between the preview image and printed image.
A1
Check the toner (ink) level of the printer.
A2
Click the [Settings] menu, select [Color Matching] and place a check in the
“Use Color Matching” option. See p. 89.
A3
Change the color balance and gamma value settings of the printer driver
software. (See the printer manual.)
FilmGet FS User’s Guide
103
Appendices
Q21
1
Cannot clean up dust/scratches.
A1
Click the [Settings] menu, select [Clean Dust] and set the “Clean/Dust
Scratchs” option to [On (strong)]. See p. 87.
A2
If using a film sleeve, make sure that the space between frames is aligned
with the pillar in the film holder.
See “Chapter 5 Setting the Film in Position” in Getting Started for information on
how to load the film.
A3
Set the width of the scanning area to at least 10 mm. See p. 47.
2
3
4
5
104
FilmGet FS User’s Guide
Appendices
FilmGet FS Error Messages
If the following error messages appear while using FilmGet FS, look on the referenced page for the
relevant error message.
List of Error Messages (Windows/Macintosh)
Q1
Device not found. Check the following items.....................................................106
Q2
This scanner doesn’t support multi-hosting. Please connect it to only one PC
to use it. .................................................................................................................106
Q3
Processing failed because of insufficient memory............................................106
Q4
Disk access failure. Check disk...........................................................................106
Q5
An error occurred while scanning. Rescan?......................................................107
Q6
Film holder malfunction. Please reinsert film holder. .......................................107
Q7
Can’t eject film holder. Please remove film holder manually. ...........................107
Q8
Do not touch the film holder while a scan is in progress. ................................107
Q9
The cartridge chamber lid on the IX240 film cartridge holder is open. ...........107
Q10 Film data error. Check film. ..................................................................................107
1
2
3
Q11 Please check the film............................................................................................107
Q12 Please close the front door. .................................................................................107
Q13 Do not touch the front door while a scan is in progress...................................107
Q14 Dust/scratch removal failed. ................................................................................108
Dust/scratch removal failed because volume was too great to process. ........108
4
Q15 Transmission error. Close the application programs that are running and
restart the computer. ............................................................................................108
Q16 Scanner malfunction. Contact a service center. ................................................108
Q17
Size of combined image files exceeds the maximum setting. Reduce the input
resolution or the number of frames selected, or make the Crop Frame smaller. ...... 108
FilmGet FS User’s Guide
105
5
Appendices
Q1
1
Device not found. Check the following items.
A1
Is the scanner turned on?
If the power is off, follow the procedure below to turn on the power.
USB connection: Turn the scanner on.
SCSI connection: Turn the computer off, turn the scanner on, then turn the
computer back on.
A2
Are the cables connected correctly? Are any cables loose?
A3
Is the interface switch set properly?
See “Chapter 1, 3. Components and Functions Guide” in Getting Started for
information on the interface switch.
A4
Are the SCSI ID and terminator set properly?
See “Appendix, 2. Connecting Two or More SCSI Devices” in Getting Started for
information on setting methods.
2
Q2
This scanner doesn’t support multi-hosting. Please connect it to only one PC to use
it.
A
3
Q3
4
Processing failed because of insufficient memory.
A1
The data volume of the image to be scanned exceeds the free memory space.
Reduce the scan area selection to the minimum necessary (See p. 47) or
lower the input resolution (scan resolution) setting (See pp. 52, 56).
A2
Increase the memory allotted to the application program. When using
Photoshop LE, increase the allotted memory to 30 MB or more (36 MB or
more for the Macintosh). If performing batch scans while using a Macintosh
in [42-Bit Color] mode with the “Clean Dust/Scratches” option set to on,
increase the memory allotted to Photoshop LE even more. (For example, at
least 240 MB of memory is required when scanning six frames of 35 mm film
at 2000 dpi.)
See Getting Started for information on how to increase the allotted memory. See
“Chapter 2 Using the Scanner with Windows, 4. Testing the Scanner” for the
Windows version, or “Chapter 3 Using the Scanner with a Macintosh, 3. Testing
the Scanner” for the Macintosh version.
5
Q4
Disk access failure. Check disk.
A
106
You cannot use this scanner connected to multiple computers. Connect the
scanner to only one computer.
An error occurred during data exchange with the computer and hard disk.
Restart the computer. If there is insufficient free space on the hard disk,
delete unnecessary files to free up sufficient space.
FilmGet FS User’s Guide
Appendices
Q5
Q6
An error occurred while scanning. Rescan?
A1
The film is not loaded properly. Cancel the scan, load the film correctly into
the film holder and rescan.
A2
An error occurred during the scan. Rescan. If an error occurs repeatedly,
restart the computer.
A3
If an error occurs even after restarting the computer, see “Chapter 6
Troubleshooting” in Getting Started and take the appropriate corrective
measures, then reinstall the FilmGet FS driver software.
See “Windows Issues – P2/P5” for the Windows version, or “Macintosh Issues –
P4/P5” for the Macintosh version.
A4
If an error still occurs even after the procedures in A1 to A3 above, the
scanner or film holder may have malfunctioned. Contact a Canon Customer
Help Support Desk listed at the back of this guide.
Check whether the IX240 film cartridge is damaged. If there is no problem
with the IX240 film cartridge, the scanner or the IX240 film cartridge holder
may have malfunctioned. Contact a Canon Customer Help Support Desk
listed at the back of this guide.
Please close the front door.
A
Q13
The scanner could not read the type and number of frames information for
the film in an IX240 film cartridge. Check whether the cartridge is damaged. If
the cartridge is damaged, have it replaced at an authorized DPE shop.
Please check the film.
A
Q12
4
Remove the IX240 film cartridge holder from the scanner, close the cartridge
chamber lid and reinsert the holder into the scanner.
Film data error. Check film.
A
Q11
Do not attempt to pull out the film holder while a scan is in progress.
The cartridge chamber lid on the IX240 film cartridge holder is open.
A
Q10
3
Pull out the film holder from the scanner.
Do not touch the film holder while a scan is in progress.
A
Q9
Reinsert the film holder.
Can’t eject film holder. Please remove film holder manually.
A
Q8
2
Film holder malfunction. Please reinsert film holder.
A
Q7
1
Close the front door.
Do not touch the front door while a scan is in progress.
A
Do not open and close the front door while a scan is in progress.
FilmGet FS User’s Guide
107
5
Appendices
Q14
Dust/scratch removal failed.
Dust/scratch removal failed because volume was too great to process.
A
1
Q15
Transmission error. Close the application programs that are running and restart the
computer.
A
Q16
2
Some error occurred. Restart the computer. If the same error message is
displayed, the scanner may have malfunctioned. Contact a Canon Customer
Help Support Desk listed at the back of this guide.
Size of combined image files exceeds the maximum setting. Reduce the input
resolution or the number of frames selected, or make the Crop Frame smaller.
A1
Reduce the input resolution (scan resolution) to the minimum required
resolution, and then scan the images again. (p. 52, 56)
A2
Reduce the number of frames to be scanned, and then scan the images
again. (p. 37)
A3
Make the scan area smaller, and then scan the images again. (p. 47)
A4
In the “Settings” menu, clear the checkmark next to “Preferences - Max
Combined Image File Size,” and then scan the images again. (p. 92)
3
4
Some error occurred. Restart the computer.
Scanner malfunction. Contact a service center.
A
Q17
Dust/scratch removal was not possible for the scanned film. Remove any dirt
from the film with a blower brush and rescan. For scratches, it may be
possible to fix these problems to a certain degree with retouching software.
5
108
FilmGet FS User’s Guide
Appendices
Uninstalling FilmGet FS
Use the following procedures to uninstall (delete) FilmGet FS before you upgrade to a new version or
when installation fails for some reason and FilmGet FS cannot be reinstalled.
• Deleting FilmGet FS directly, with the Windows Explorer for instance, will leave unnecessary data in the system
files. Use the following procedures for the best results. Some information in files such as the WIN.INI file will
remain undeleted.
1
■ Windows 98/98 SE/2000
1
Make sure the scanner and computer are properly connected and the
computer is turned on.
2
Place the supplied “CanoScan Setup CD-ROM” into the CD-ROM
drive.
3
2
• CanoScan Setup Utility starts and the
menu screen appears.
• If the menu does not appear, double-click
the [My Computer] icon and then the
CD-ROM icon.
3
Click [Uninstall the Software].
4
• The Uninstall screen will be displayed.
5
4
Click [Uninstall FilmGet FS].
5
Click the [Yes] button in the Confirm File Deletion dialog box.
FilmGet FS User’s Guide
109
Appendices
6
Select [CanoScan FS4000US] at the Scanners and Cameras Properties
screen and click the [Remove] button.
• Delete “CanoScan FS4000US (USB)” for USB connection, or “CanoScan
FS4000US (SCSI)” for SCSI connection.
1
2
3
7
Click the [OK] button.
8
Follow the instructions in the messages and restart the computer.
This completes the uninstall procedure.
4
5
110
FilmGet FS User’s Guide
Appendices
■ Windows Me
1
Make sure the scanner and computer are properly connected and the
computer is turned on.
2
Click the [Start] menu and select [Settings] and [Control Panel].
3
Double-click the [Scanners and Cameras] icon.
4
Drag the icon for the scanner
driver to be deleted to the
Recycle Bin on the desktop.
5
• If the [Scanners and Cameras] icon is not displayed, click on the “view all
Control Panel Options” link on the left side of the window.
1
2
Click the [Yes] button in the Confirm
Device Removal dialog box.
3
• Even after the icon has been dragged to the
Recycle Bin, the scanner icon may remain
displayed until the Confirm Device Removal
dialog box appears.
4
This completes the uninstall procedure.
• If, after selecting [Uninstall the Software] - [Uninstall FilmGet FS] on the “CanoScan Setup CD-ROM”, setup
ends without displaying FilmGet FS Uninstallation screen, install the Adobe Acrobat Reader (provided on the
“CanoScan Setup CD-ROM”), restart the computer and then repeat the above procedure so that the screen is
displayed.
FilmGet FS User’s Guide
111
5
Appendices
Uninstalling and Reinstalling FilmGet FS
■ Uninstalling FilmGet FS
Use the following procedures to uninstall (delete) FilmGet FS before you upgrade to a new version or
when installation fails for some reason.
1
1
Drag the [FilmGet FS] folder to the Trash from the folder in which it
was installed.
• If you have installed FilmGet FS into the folder of more than one application
program, drag each copy to the Trash.
• For Photoshop LE, drag the [FilmGet FS] folder to the Trash from the
[Import/Export] folder in the [Plug-Ins] folder.
2
3
2
Double-click the [System] and [Preferences] folders and drag the
entire [FilmGet FS 1.0] folder to the Trash.
3
Drag the following folders and files from the [Preferences],
[Extensions], and [ColorSync Profiles] file folders in the [System]
folder to the Trash.
4
Empty the Trash.
4
5
This completes the uninstall procedure.
112
FilmGet FS User’s Guide
Appendices
■ Reinstalling FilmGet FS
When reinstalling FilmGet FS, first follow the procedures on page 112 to uninstall FilmGet FS, then
reinstall FilmGet FS according to the procedures below.
1
Place the supplied “CanoScan Setup CD-ROM” into the CD-ROM
drive.
• CanoScan Setup Utility starts and the
menu screen will be automatically
displayed.
• If the menu screen is not displayed,
double-click the CD-ROM icon and
then [Setup].
1
2
Menu Screen
2
Click the [Install the Software] button.
3
When the “Install Photoshop LE?” dialog box appears, click the [No]
button.
• The Install Software screen will be
displayed.
• If you click the wrong item, click the
[Return to the previons menu] button
and select [Install the Software].
3
4
4
Click to remove the check mark from all other programs so that there
is a check mark beside only FilmGet FS.
5
Click the [Start Installation] button at the bottom right of the screen.
• If a plug-in-compliant application program such as Photoshop LE is not installed, you
will be unable to install FilmGet FS. Install Photoshop LE before installing FilmGet FS.
6
Follow the instructions in the messages to install the software.
7
When installation is finished, follow the instructions in the messages
and restart the computer.
FilmGet FS User’s Guide
113
5
Appendices
8
After the computer restarts, press the CD-ROM drive eject button and
remove the “CanoScan Setup CD-ROM.”
• Store the CD-ROM carefully for future use.
This completes the reinstall procedure.
1
2
3
4
5
114
FilmGet FS User’s Guide
Appendices
Glossary
■ Auto Correct Tool
An automatic function that adjusts the highlights and shadows of a preview image to optimal values.
■ Bits/Number of Bits
• A 1-bit image can only be expressed in black and white. The threshold value determines which
value, black or white, is used to represent a dot that carries a given brightness value.
• An 8-bit grayscale image can be expressed in black, white and 254 shades of gray.
• A 14-bit grayscale image can be expressed in black, white and 16,382 shades of gray. The file is
approximately double the size of an 8-bit grayscale file.
• A 24-bit color image can be expressed in 16.7 million colors, which is achieved by combining 256
shades of red, green and blue (8 bits each) to each dot.
• A 42-bit color image can be expressed in 4.4 trillion colors, which is achieved by combining
16,384 shades of red, green and blue (14 bits each) to each dot. The file is approximately double
the size of a 24-bit color file.
1
2
■ Black Point Eyedropper Tool
A tool for sampling a portion of an image adjusted with the histogram adjustment mode. All areas of
the image that are darker than the point sampled are changed to black. See also “White Point
Eyedropper Tool.”
■ Brightness
The relative brightness of an image or part of an image detected by the scanner when scanning. The
higher the value, the brighter the image, and conversely, the lower the value, the darker the image.
3
■ Calibration
A scanner driver function that automatically sets the correct white color balance to scan film with
more accurate colors.
■ Channel
4
The red, green and blue elements of a color image. Color images have 14 bits of data per pixel for
each channel, so each pixel has 42 bits of data. The brightness and contrast can be varied
individually for the red, green and blue colors when scanning a color image. The master channel is
the composite of these three colors.
5
FilmGet FS User’s Guide
115
Appendices
■ Color Balance
The balance between the red, green and blue elements in an image. You can adjust the color
balance when a particular color is too strong or weak.
■ Color Matching
The gamut of colors scanned with a particular scanner occasionally varies from those reproduced on
a particular monitor. Use of a color matching system ensures that the devices reproduce the colors
the same way.
1
■ Coloring
The color balance of an image. The image coloring can be adjusted by fine tuning the balance of
red, green and blue or cyan, magenta and yellow.
■ Contrast
The difference between the highlights and shadows in a scanned film. Raising the contrast has the
effect of clarifying the image, while lowering it produces a somewhat blurry appearance.
2
■ Dot
The basic element on which images are built. The density of dots in a scanned image is referred to
as the image’s resolution, which is measured in dots per inch.
■ dpi
3
The acronym for dots per inch. The resolution of monitors and printers is expressed as the number of
dots displayed or printed in one horizontal inch. See also “Pixel” “Optical Resolution” and
“Resolution.”
■ Gamma Value
A setting to match the brightness of inputs (the original film) to outputs (the image shown on a
monitor or printed out).
■ Grayscale
4
An image type which reads only the brightness of the image and expresses it in 256 tones (8 bits) or
16,384 tones (14 bits) from black to white.
■ Halftones (Mid-tones)
Shades of gray between the brightest (highlights) and darkest (shadows) portions of an image.
5
116
FilmGet FS User’s Guide
Appendices
■ Histogram
A graphical representation of the distribution of data bearing varying brightness values in an image.
Brightness is expressed as a value ranging from 0 to 255. The histogram shows exactly how much of
the sampled area is distributed between bright areas (highlights) and dark areas (shadows).
■ Image File
An image that has been expressed as a collection of dots that are assigned varying color and
brightness values and that has been converted into a data format that can be read by a computer.
The fundamental structure of an image file is a bitmap, the horizontal and vertical arrangement of the
dot information, which is supplemented by other data in popular image formats, such as TIFF, JPEG
and BMP formats.
1
■ Color Mode
A mode that is selected to scan an image. The available options are 42-bit color, 24-bit color, 14-bit
grayscale, 8-bit grayscale and black and white.
■ Input Resolution
When the scanner scans film it reads the image as a collection of dots. The input resolution is the
setting for how finely to read the image. Raising the value increases the image file size.
2
■ Optical Resolution
The resolution at which a scanner reads information from the object it scans. See also “dpi” and
“Resolution.”
3
■ Output Resolution
The resolution for output to a printer (printing), fax, monitor (display) or file.
■ Pixel
The acronym for picture element. A pixel is the smallest unit forming an image.
■ Plug-in
Plug-in refers to software whose functions can be added by incorporation into application software.
For example, FilmGet FS for Macintosh is plug-in software (plug-in driver) that can be incorporated
into image processing software such as Photoshop LE. In this case, FilmGet FS for Macintosh can be
started up directly from the menu of that image processing software, and scanned images can be
displayed on that image processing software. See also “TWAIN.”
■ Preview
A low resolution scan of a film image that is displayed in the preview area. The preview image is used
to inspect the image, select the area of the image for the final scan (scan area), adjust the brightness
and coloring, and carry out other image processing.
FilmGet FS User’s Guide
117
4
5
Appendices
■ Preview Area
The right side of the FilmGet FS main window, which is used to display preview images. Click the
[Preview] button to initiate a preview scan of the film. Note that the image displayed in the preview
area has not yet been acquired by the application program from which FilmGet FS was started.
■ Resolution
The density of dots that comprise an image. The fineness or coarseness of an image is expressed as
the number of dots per inch (dpi). See also “dpi.”
1
■ RGB
The acronym for the primary colors of light: red, green and blue. The scanner passes light through
the film, which is then detected by red, green and blue sensors. Most color printers, on the other
hand, use the complementary colors to RGB, namely cyan, magenta, yellow and black (CMYK) to
express colors. Cyan, magenta and yellow are also called the primary colors of color.
■ Scanner Self Test
2
A function that tests the scanner for malfunctions. Click the [Device] menu and select [Self Test…]
to start the scanner self test and receive a report of any scanner problems detected.
■ Selector Tool
The tool used to select a portion of the image for scanning. In the FilmGet FS main window, the
selector tool can be used to select a particular area of a preview image for final scanning.
3
■ Slider
A device on many settings tabs for adjusting settings values. Drag the slider tab left or right to adjust
the value.
■ Threshold
4
The brightness value at which a dot or pixel is assigned a black or white color in an image scanned
in black and white mode. Raising the threshold value makes the image darker, and lowering it makes
the image brighter.
■ Thumbnail Scan
All the frames of the film loaded into the scanner are scanned at low resolution and displayed as
thumbnail (small) images in the thumbnail window. These images displayed in the thumbnail window
are then selected (frame selection) for previewing in the main window or final scanning.
5
■ Toolbar
The toolbars located on the left side of the preview area and at the top of the thumbnail window
contain the set of tools used to rotate and flip images.
118
FilmGet FS User’s Guide
Appendices
■ TWAIN
A worldwide standard for devices, such as scanners and digital cameras, that transmit data to
computers. TWAIN is the acronym for Technology Without An Interesting Name. It is a standardized
application programming interface (API) for input devices, such as film scanners. If both the input
device and software comply with this standard, the two are compatible regardless of the
manufacturer or model type. For example, the scanner TWAIN driver (e.g. FilmGet FS for Windows)
can be directly started from the menu of an image processing application program and the scanned
images can be displayed in the application program.
■ White Point Eyedropper Tool
A tool for sampling a portion of an image adjusted with the histogram adjustment mode. All areas of
the image that are lighter than the point sampled are changed to white. See also “Black Point
Eyedropper Tool.”
1
■ Zoom In
The process of magnifying the preview window to see an image in greater detail.
2
3
4
5
FilmGet FS User’s Guide
119
Appendix
Index
1
2
Numbers
E
14-/8-Bit Grayscale........................................ 35
24-/42-Bit Color.............................................. 35
Error Messages ............................................105
A
FARE (Film Automatic Retouching
Enhancement) ................................................87
File Mode..................................................53, 56
File Size ....................................................57, 58
Film Eject Tool ..........................................25, 31
Film Type..................................................12, 33
Final Scan.................................................15, 49
Flip Tool
Main Window .....................................25, 43
Thumbnail Window ............................26, 38
Focus..............................................................88
Frame/Frame No. ...........................................26
Add... Button............................................ 53, 55
Add/Delete... Option...................................... 54
Adding and Deleting Menu Items.................. 69
Adding Scan Settings.................................... 68
Adjusting Brightness and Coloring.......... 14, 46
Adjusting the Exposure (Auto Gain) .............. 86
Adjusting the Focus....................................... 88
Allotted Memory....................................... 19, 22
Auto Correct Tool............................. 25, 44, 115
Auto Gain....................................................... 86
B
3
4
5
F
Batch Scan .................................................... 49
Bits............................................................... 115
Black and White............................................. 35
Black Point Eyedropper Tool ........... 77, 78, 115
Brightness............................ 14, 46, 73, 81, 115
G
C
H
(C/H/P/F) Button............................................. 55
Calibration ............................................. 30, 115
Cartridge........................................................ 33
Channel ............................... 72, 74, 77, 79, 115
Clean Dust/Scratches Function ..................... 87
Clear Button............................................. 72, 75
Close Box .......................................... 24, 25, 50
Color Balance .................................. 73, 83, 116
Color Matching ...................................... 89, 116
Color Mode ...................................... 12, 34, 117
ColorGear/ColorSync..................................... 89
Coloring ........................................... 14, 46, 116
Contrast ........................................... 73, 81, 116
Control Point .................................................. 79
Custom Mode .......................................... 53, 65
Customizing the Pull-Down Menu.................. 66
Halftones (Mid-tones)...................................116
Hard Disk Capacity ..................................18, 21
Help Menu................................................25, 96
Highlight .........................................................77
Histogram.........................................73, 77, 117
D
Default Settings ............................................. 93
Device Menu............................................ 25, 96
Display Mode........................................... 53, 62
Dot ......................................................... 72, 116
Dpi ......................................................... 52, 116
120
FilmGet FS User’s Guide
Gamma Value.........................................90, 116
Grab Tool .................................................25, 43
Gradients........................................................83
Grayscale ...............................................35, 116
I
Image Adjustment Section ...........14, 24, 46, 72
Image File.....................................................117
Image Size .....................................................57
Image Width and Height ................................53
Input Resolution .........................52, 56, 58, 117
Inserting/Ejecting the Film Holder ............30, 31
Installation
Macintosh ..........................................10, 21
Windows ............................................10, 18
Installing FilmGet FS
Macintosh ..........................................10, 21
Windows ............................................10, 18
IX240 film........................................................33
L
Load... Button...........................................72, 75
Loading Film.............................................12, 30
Appendix
M
Main Window ........................................... 24, 32
Macintosh ................................... 11, 22, 25
Windows ........................................... 11, 20
Max. Combined Image File Size.................... 92
Menu Bar ................................................. 24, 25
Monitor Gamma ............................................. 90
Mount............................................................. 33
O
Optical Resolution ....................................... 117
Output Resolution ...................... 52, 57, 59, 117
P
Photo Size Mode...................................... 53, 63
Pixel ............................................................. 117
Plug-in............................................................ 22
Power Saving................................................. 93
Preferences ................................................... 91
Preview ............................................ 13, 40, 117
Preview Area.............................. 13, 24, 40, 118
Preview Button......................................... 24, 40
Preview Images
Adjusting........................................... 13, 42
Switching between.................................. 41
Preview Size .................................................. 92
Primary colors................................................ 83
R
Reset Button .............. 72, 75, 77, 79, 81, 83, 84
Resolution .................................................... 118
Restoring the Default Settings ....................... 93
RGB ....................................................... 83, 118
RGB Values Display ................................ 72, 75
Rotate 180 Degrees Tool
Main Window .................................... 25, 43
Thumbnail Window ........................... 26, 38
Rotate 90 Degrees Left Tool
Main Window .................................... 25, 43
Thumbnail Window ........................... 26, 38
Rotate 90 Degrees Right Tool
Main Window .................................... 25, 43
Thumbnail Window ........................... 26, 38
Rotating and Flipping Thumbnail Images ..... 38
Scan Settings ...........................................14, 45
Scanner Self Test ...................................96, 118
Scroll Bar..................................................26, 42
Select All Button .............................................26
Select Source dialog (Windows) ....................19
Selecting Frames .....................................13, 37
Selector Tool ..............................25, 43, 47, 118
Setting the Power Saving Features ................93
Setting the Preferences..................................91
Settings Menu ..........................................25, 86
Shadow ..........................................................77
Show/Hide Tool Tips Button .....................24, 27
Sleeve.............................................................33
Starting and Exiting FilmGet FS ...............11, 16
Macintosh ..........................................22, 23
Windows ............................................19, 20
System Requirements
Macintosh ................................................21
Windows ..................................................18
1
2
T
Text/Printer/Fax Mode ..............................53, 60
Threshold ...................................35, 73, 84, 118
Thumbnail Scan ...............................12, 36, 118
Thumbnail Scan Button ............................26, 36
Thumbnail Window.....11, 20, 22, 26, 30, 32, 36
Thumbnail... Button ........................................24
Title Bar ....................................................24, 26
Tone Curve...............................................73, 79
Toolbar .........................................................118
Main Window .....................................24, 25
Thumbnail Window ..................................26
Transfer Thumbnails Button ...........................26
Transferring Thumbnail Images .....................39
Troubleshooting .............................................98
TWAIN ....................................................19, 119
U
Uninstalling and Reinstalling FilmGet FS
Macintosh ..............................................112
Windows ................................................109
V
Version Information (Device/Software)...........96
S
W
Save... Button .......................................... 72, 75
Scan Area ................................................ 15, 47
Aspect Ratio ..................................... 48, 55
Selection Frame .................... 24, 47, 48, 55
Scan Button ................................................... 24
Scan Setting Section ................... 14, 24, 45, 53
White Point Eyedropper Tool............77, 78, 119
Window
Main...........................11, 20, 22, 24, 25, 32
Resizing.............................................24, 26
Switching between ..................................32
Thumbnail............11, 20, 22, 26, 30, 32, 36
FilmGet FS User’s Guide
121
3
4
5
Appendix
Z
Zoom In........................................................ 119
Zoom In/Out/Reset Tool........................... 25, 42
Zooming an Image ........................................ 42
1
2
3
4
5
122
FilmGet FS User’s Guide
Canon U.S.A., Inc.
CANON ESPAÑA S.A.
One Canon Plaza Lake Success, NY 11042-1113, U.S.A.
1-800-OK-CANON (652-2666)
http://www.usa,canon.com
CANON (UK) LTD.
Canon House, Manor Road, Wallington, Surrey SM6 0AJ,
United Kingdom
For technical support, please contact Canon Helpdesk.
Helpdesk:
P.O. Box 431, Wallington, Surrey SM6 0XU
TEL: (0990) 143 723
(Calls may be recorded)
FAX: (0990) 143-340
BBS: (0990) 143-350
For sales inquiries: (0121) 666-6262
CANON FRANCE S.A.
17, quai du Président Paul-Doumer
92414 Courbevoie Cedex, France
Tél.01 4199 7777
Fax.01 4199 7951
Hotline:
Tél.01 4199 7070
CANON DEUTSCHLAND GmbH
Postfach 528, 47705 Krefeld, Germany
CANON- Hotline-Service
Customer Support: (0 21 51)349-555
Info-Desk: (0 21 51)349-566
Mailbox: (0 21 51)349-577
Telefax: (0 21 51)349-588
CANON ITALIA S.p.A
Palazzo L, Strada 6,
20089 Milanofiori-Rozzano (MI), Italy
TEL: 02/8248. 1
FAX: 02/8248. 4604
Pronto Canon 02/8249. 2000
http://www.canon.it
CANON OY AB
Kornetintie, 3, 00380 Helsinki, Finland
Puhelin: 010 544 20
Help Desk: 0600-0-22606 (maksu 14,80 mk/min)
Fax: 010 544 4571
CANON SVENSKA AB
Stensätravägen 13, S-127 88, Skärholmen, Sweden
CANON DANMARK
Vasekær 12, DK-2730 Herlev, Denmark
Hotline: 44 88 26 66
http://www.canon.dk
CANON NORGE AS
Hallagerbakken 110, Boks 33, Holmlia 1210 Oslo 12,
Norway
Tlf: 2262 9321
FAX. 2262 0615
CANON BENELUX NEDERLAND N.V.
Neptunusstraat 1, 2132 JA Hoofddorp
The Netherlands
Tel: 023-5 670 123
Fax: 023-5 670 124
Helpdesk: 023-5 681 681
CANON BENELUX BELGIUM N.V./S.A.
Bessenveldstraat 7, 1831 Diegem, Belgium
Tel: 02 7220411
Fax: 02 7213274
Helpdesk: 02 7220404
C/Joaquin Costa No 41, 28002
Madrid, Spain
HelpDesk: 906-301255
Tel.: 91-5384500
Fax.: 91-4117780
CANON AUSTRALIA PTY. LTD.
1 Thomas Holt Drive, North Ryde, Sydney N.S.W. 2113,
Australia
Info-Line: (02)9805 2864
CANON NEW ZEALAND LTD.
Fred Thomas Drive, Takapuna
P.O. Box 33-336 Auckland, New Zealand
Info-Line: 0900-522666
CANON HONG KONG CO., LTD.
10/F, Lippo Sun Plaza, 28 Canton Road
Tsimshatsui, Kowloon, Hong Kong
Tel: (852)2739 0802
Fax: (852)2739 7701
CANON SINGAPORE PTE. LTD.
79 Anson Road #09-01/06
Singapore 079906
CANON MARKETING SERVICES PTE. LTD.
2, Alexandra Road, #04-01A
Delta House
Singapore 159919
Tel: 65 2735311
Fax: 65 2733317
CANON MARKETING (MALAYSIA) SDN. BHD.
13A, Jalan 219, 46100 Petaling Jaya
Selangor Darui Ehsan
Malaysia
Tel: 603-7577210/7570707/7579666
Fax: 603 7563802/7563012
CANON MARKETING (THAILAND) CO.LTD.
2nd Floor, Indosuez House
152 Wireless Road, Bangkok 10330
Thailand
Tel: 66-2-6514000
Fax: 66-2-6514096
CANON MARKETING (PHILIPPINES) INC.
Marvin Plaza Building,
2153 Don Chino Roces Ave,
Makati City
Tel: 632-812-6047
Fax: 632-812-0067/810-9797
CANON CANADA INC.
6390 Dixie Road
Mississauga, Ontario, L5T 1P7
1-800 OK CANON (652-2666)
http://www.canon.ca
CANON LATIN AMERICA, INC.
6505 Blue Lagoon Drive Suite 325
Miami, Florida 33126, U.S.A.
CANON EUROPA N.V.
P.O. Box 2262
1180 EG Amstelveen, The Netherlands
CANON INC.
30-2 Shimomaruko 3-chome, Ohta-ku
Tokyo 146-8501, Japan
CANON GmbH
Zetschegasse 11, 1232 Wien, Austria
CANON (SCHWEIZ) A.G.
Industriestrasse 12, CH-8305 Dietlikon
Switzerland
Tel: (01)835 61 61
Fax: (01)835 68 60
Hotline: 157 30 20
YT1-5716
022001IDE
©CANON INC.2001