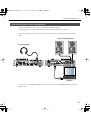
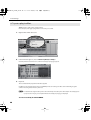
1
VS-100_install_e.book 1 ページ 2009年3月12日 木曜日 午後6時3分
VS-100_install_e.book 2 ページ 2009年3月12日 木曜日 午後6時3分
IMPORTANT NOTES
Handling DVD-ROM/CD-ROMs
Avoid touching or scratching the shiny underside (encoded surface) of the disc. Damaged or dirty DVD-ROM/CD-ROM discs may not be read properly.
Keep your discs clean using a commercially available cleaner.
DO NOT play a CD-ROM disc on a conventional audio CD player. The resulting sound may be of a level that could cause permanent hearing loss. Damage to
speakers or other system components may result.
Copyright
Recording, duplication, distribution, sale, lease, performance, or broadcast of copyrighted material (musical works, visual works, broadcasts, live performances,
etc.) belonging to a third party in part or in whole without the permission of the copyright owner is forbidden by law.
Do not use this unit for purposes that could infringe on a copyright held by a third party. We assume no responsibility whatsoever with regard to any
infringements of third-party copyrights arising through your use of this unit.
Additional Precautions
Unfortunately, it may be impossible to restore the contents of data that was stored on a hard disk etc. once it has been lost. Roland Corporation assumes no
liability concerning such loss of data.
To avoid disturbing your neighbors, try to keep the unit’s volume at reasonable levels. You may prefer to use headphones, so you do not need to be concerned
about those around you (especially when it is late at night).
Unauthorized duplication, reproduction, hiring, and lending prohibited.
Before you open the included DVD-ROM/CD-ROM, you must read the “license agreement.” Opening the DVD-ROM/CD-ROM will be taken to mean your
acceptance of the license agreement.
In the interest of product improvement, the specifications and/or contents of this package are subject to change without prior notice.
Use of the demosongs or data supplied with this product for any purpose other than private, personal enjoyment without the permission of the copyright
holder is prohibited by law. Additionally, this data must not be copied, nor used in a secondary copyrighted work without the permission of the copyright
holder.
The explanations in this manual include illustrations that depict what should typically be shown by the display. Note, however, that your unit may incorporate a
newer, enhanced version of the system (e.g., includes newer sounds), so what you actually see in the display may not always match what appears in the
manual.
While under most conditions, a computer similar to the “System Requirements” printed on package will permit normal operation of the SONAR V-STUDIO,
Roland cannot guarantee compatibility solely on these factors. This is due to numerous variables that may influence the processing environment, such as
differences in motherboard design and the particular combination of other devices involved.
Cakewalk is registered trademark of Cakewalk Inc.
SONAR and Cakewalk logo are trademarks of Cakewalk Inc.
Microsoft and Windows and Windows Vista are registered trademarks of Microsoft Corporation.
The screen shots in this document are used in compliance with the guidelines of the Microsoft Corporation.
Windows® is known officially as: “Microsoft® Windows® operating system.”
ASIO and VST is a trademark of Steinberg Media Technologies AG.
All product names mentioned in this document are trademarks or registered trademarks of their respective owners.
Before using this unit, carefully read the sections entitled: “USING THE UNIT SAFELY” (Hardware Manual p. 3) and “MPORTANT NOTES” (Hardware
Manual p. 6). These sections provide important information concerning the proper operation of the unit. Additionally, in order to feel assured that
you have gained a good grasp of every feature provided by your new unit, Hardware Manual should be read in its entirety. The manual should be
saved and kept on hand as a convenient reference.
Copyright © 2009 ROLAND CORPORATION
All rights reserved. No part of this publication may be reproduced in any form without the written permission of ROLAND CORPORATION.
VS-100_install_e.book 3 ページ 2009年3月12日 木曜日 午後6時3分
About This Manual
This manual (SONAR V-STUDIO 100 Getting Started) provides basic information about how to set up the SONAR
V-STUDIO 100, make initial settings, and set up your system. It also provides troubleshooting information.
● This manual uses the following icons to call your attention to explanations of terms or to important points you
should note. These contain important information, so please be sure to read them.
Explanation of terms, or tips
Points you should be aware of
Related information or detailed explanations
● In order to explain operations as simply as possible, this manual uses the following conventions.
• The steps for selecting a menu item are delineated by “|” (vertical bar) symbols. For example,
File|New means that you are to choose the “File menu command New.”
• Material that is distinct from the main text or operating procedure, such as operating tips or related information, is
enclosed by a heavy border.
• Unless otherwise specified, Windows Vista and Windows XP are referred to simply as Windows.
• Unless otherwise specified, the SONAR VS software included with this product is referred to simply as SONAR.
● SONAR is designed to be flexibly customized for a wide range of systems in order to be used in a broad range of
ways. Unless otherwise specified, this manual assumes that SONAR is in the state immediately after installation. If
you have customized SONAR, the explanations and operating procedures described in this manual may not
produce the intended result.
● If you have difficulty understanding the explanations of the operations (for example, when you’re using Windows
for the first time), please refer to the documentation for your computer or for Windows.
3
VS-100_install_e.book 4 ページ 2009年3月12日 木曜日 午後6時3分
Contents
About This Manual......................................................................................................................................... 3
Checking the Contents of the Package ......................................... 6
Installation and Registration ......................................................... 7
Installing the SONAR V-STUDIO 100 Driver .......................................................................................... 7
To Uninstall the SONAR V-STUDIO 100 Driver ....................................................................... 7
Windows Vista Users ....................................................................................................................... 8
Windows XP Users..........................................................................................................................10
Macintosh Users..............................................................................................................................14
Connecting your audio equipment.......................................................................................................17
Register SONAR.............................................................................................................................................18
Installing SONAR ..........................................................................................................................................19
To Install SONAR .............................................................................................................................19
To Uninstall SONAR .......................................................................................................................19
Running SONAR for the First Time.........................................................................................................20
Initial Settings ...............................................................................21
Audio Driver Settings .................................................................................................................................21
Select the Drivers............................................................................................................................21
Other Audio Driver and Audio-Related Settings ................................................................23
MIDI Devices Settings.................................................................................................................................25
MIDI Controllers/Surfaces Settings........................................................................................................27
Loading the VS-100 Plug-in ........................................................................................................27
VST/VSTi Registration and Settings .......................................................................................................28
Playing a Demo Song .................................................................................................................................29
Playing an Audio Demo Song....................................................................................................29
Recording audio ...........................................................................................................................................32
1. Connect your instrument or microphone.........................................................................32
2. Create a new file.........................................................................................................................34
3. Select the input for the track .................................................................................................35
4. Adjust the level...........................................................................................................................36
5. Arm the desired track for recording....................................................................................37
6. Turn on the metronome..........................................................................................................38
7. Record your performance.......................................................................................................39
8. Try out a plug-in effect.............................................................................................................40
4
VS-100_install_e.book 5 ページ 2009年3月12日 木曜日 午後6時3分
Troubleshooting ...........................................................................41
Problems When Installing Driver or Changing Settings ................................................................42
Problems When Installing SONAR or Changing Settings..............................................................43
Problems at Startup with SONAR...........................................................................................................44
Problems with Playback ............................................................................................................................45
Problems with Recording..........................................................................................................................47
Other Problems.............................................................................................................................................48
Eliminating Clicks and Dropouts ............................................................................................................49
Appendix .......................................................................................51
VS-100 Driver settings ................................................................................................................................51
Windows Users................................................................................................................................51
Macintosh Users..............................................................................................................................52
Uninstalling VS-100 Driver........................................................................................................................53
Windows Vista Users .....................................................................................................................53
Windows XP Users..........................................................................................................................53
Macintosh Users..............................................................................................................................54
Giving Priority to Background Service (Windows XP).....................................................................55
About Sampling Rates................................................................................................................................56
About Mixing Latency ................................................................................................................................57
Multi-user Use ...............................................................................................................................................58
Uninstalling SONAR and Other Components ....................................................................................58
Shortcut reference.......................................................................................................................................59
5
VS-100_install_e.book 6 ページ 2009年3月12日 木曜日 午後6時3分
Checking the Contents of the Package
As soon as you open the package, check that you have all of the included items.
If anything is missing, contact your dealer.
❏ SONAR V-STUDIO 100 Hardware
■ Getting Started
This is the manual you’re reading. It explains how to get SONAR V-STUDIO 100 up and running. It also explains what
you need to know when setting up this product, and what you should know when using it.
❏ SONAR V-STUDIO 100 Hardware Manual
This explains how to use the SONAR V-STUDIO 100 hardware, as well as points of caution that you should remember.
Keep this manual at hand for reference.
❏ SONAR VS Installation DVD-ROM
This DVD-ROM contains SONAR VS, VS Production Pack and Guitar Rig 3 LE.
❏ SONAR V-STUDIO 100 Driver CD-ROM
This CD-ROM contains the SONAR V-STUDIO 100 driver.
❏ USB cable
Use this cable to connect the SONAR V-STUDIO 100 hardware to the USB connector of your computer.
* Please use only the included USB cable. If you require a replacement due to loss or damage, please contact the nearest
Roland Service Center, or an authorized Roland distributor, as listed on the “Information” page.
❏ AC Adaptor
This AC adaptor is designed specifically for the SONAR V-STUDIO 100 hardware. Do not attempt to use any other
adaptor with the SONAR V-STUDIO 100 hardware.
❏ Ferrite Core
The ferrite core should be attached to the cord of your headphones.
6
VS-100_install_e.book 7 ページ 2009年3月12日 木曜日 午後6時3分
Installation and Registration
Here’s how to install the SONAR V-STUDIO 100 driver and SONAR on your computer.
Please note before installing
When installing, you must log on as a user with administrative privileges
In order to install SONAR, you must log on as a user who has administrative privileges. Once installed, the program
can also be used by users who do not have administrative privileges.
Close system monitoring software before installing
If system monitoring software such as anti-virus programs are installed on your computer, you must close them until
you’ve finished installing SONAR. You must also remember to close applications that are not shown in the Windows
taskbar.
Installing the SONAR V-STUDIO 100 Driver
What is a Driver?
A driver is software that transfers data between the SONAR V-STUDIO 100 hardware and application software on your
computer when your computer and the SONAR V-STUDIO 100 hardware are connected via a USB cable. You will need
to install the driver before connecting the SONAR V-STUDIO 100 hardware with your computer.
Log on to Windows as a user whose account type is administrator (such as the Administrator account).
• Windows Vista Users:
• Windows XP Users:
p. 8
p. 10
After installing the SONAR V-STUDIO 100 driver and SONAR VS, see “Running SONAR for the First Time” (p.
20) for information on how to configure the SONAR.
• Macintosh Users:
p. 14
To Uninstall the SONAR V-STUDIO 100 Driver
Refer to “Uninstalling SONAR and Other Components” (p. 58).
7
VS-100_install_e.book 8 ページ 2009年3月12日 木曜日 午後6時3分
Installation and Registration
Windows Vista Users
1. Disconnect all USB cables (except those for a USB keyboard and/or USB mouse, if used), then start
up Windows.
2. Close all currently running software (applications).
Also close all windows that are open. If you are using software such as antivirus programs, be sure to close these
programs as well.
3. Insert the included “SONAR V-STUDIO 100 Driver CD-ROM” into your computer’s CD/DVD-ROM
drive.
4. Select “Start-Run” and enter “d:\drivers\vista32\setup.exe” to start the driver installer.
(where d:\ is your disc drive).
* If a message informs you that “Driver installation must be performed by an administrator,” you must log on to
Windows as a user whose Account Type is Administrator, and then perform the installation.
5. A confirmation screen regarding User Account Control appears, click [Continue].
6. The message “VS-100 Driver will be installed on your computer.” appears. Click [Next].
* If any other message appears, follow the directions of the message.
7. Click [Next] to begin installation.
8. If a dialog box regarding Windows Security appears, click [Install].
9. The message “Ready to install the driver.” appears.
Leave the screen open; do not close it at this point.
* If any other message appears, follow the directions of the message.
8
VS-100_install_e.book 9 ページ 2009年3月12日 木曜日 午後6時3分
Installation and Registration
10. Perform the following procedure before you connect the SONAR V-STUIDO 100 hardware to your
computer.
1. Minimize the SONAR V-STUDIO 100 hardware’s [MAIN MIX] knob.
2. Connect the included AC adaptor to the SONAR V-STUDIO 100 hardware.
Power Cord
AC Adaptor
DC IN
to Power Outlet
3. Turn on the POWER switch of the SONAR V-STUDIO 100 hardware.
4. Use the included USB cable to connect the SONAR V-STUDIO 100 hardware to your computer.
USB cable
(Included)
USB connector
Computer
9
VS-100_install_e.book 10 ページ 2009年3月12日 木曜日 午後6時3分
Installation and Registration
11. The lower right corner of the screen will indicates “Installing device driver software,” and the
driver will be installed automatically.
* If any other message is displayed, note the contents and close the message.
12. When the “Installation has been completed.” message appears, installation has been completed.
Click [Close] to close the “Driver Setup” dialog box.
13. If the “System Settings Change” dialog box appears, click [Yes] to restart Windows.
If the installation was not completed successfully, disconnect the USB cable from the SONAR V-STUDIO 100
hardware, and uninstall the driver by executing “Uninstall”, found in the same folder as the driver setup. Then
install the driver once again, being careful to follow the instructions for the installation procedure.
Windows XP Users
1. Disconnect all USB cables (except those for a USB keyboard and/or USB mouse, if used), then start
up Windows.
2. Close all currently running software (applications).
Also close all windows that are open. If you are using software such as antivirus programs, be sure to close these
programs as well.
3. Insert the included “SONAR V-STUDIO 100 Driver CD-ROM” into your computer’s CD/DVD-ROM
drive.
4. Select “Start-Run” and enter “d:\drivers\XP\setup.exe” to start the driver installer.
(where d:\ is your disc drive).
* If a “Install Program As Other User” dialog box appears, click [Cancel] to quit the installation and then perform the
installation as an administrative account.
5. The message “VS-100 Driver will be installed on your computer.” appears. Click [Next].
* If any other message appears, follow the directions of the message.
10
VS-100_install_e.book 11 ページ 2009年3月12日 木曜日 午後6時3分
Installation and Registration
6. Click [Next] to begin installation.
* If the “Software Installation” dialog box appears, click [Continue Anyway] to proceed with the installation.
If the “Driver Signing Options” setting was not set to “Ignore,” a “Hardware Installation” dialog box
appears.
A dialog box with a “!” symbol appears.
1. Click [Continue Anyway] and continue the installation.
A dialog box with a “x” symbol appears.
1. Click [OK].
2. When the “Found New Hardware Wizard” appears, click [Finish].
3. Return to step 1 (p. 10) and re-install the driver from the beginning of the
procedure.
4. The message “Ready to install the driver.” appears.
Leave the screen open; do not close it at this point.
* If any other message appears, follow the directions of the message.
11
VS-100_install_e.book 12 ページ 2009年3月12日 木曜日 午後6時3分
Installation and Registration
5. Perform the following procedure before you connect the SONAR V-STUIDO 100 hardware to your
computer.
1. Minimize the SONAR V-STUDIO 100 hardware’s [MAIN MIX] knob.
2.Connect the included AC adaptor to the SONAR V-STUDIO 100 hardware.
Power Cord
AC Adaptor
DC IN
to Power Outlet
3.Turn on the POWER switch of the SONAR V-STUDIO 100 hardware.
4.Use the included USB cable to connect the SONAR V-STUDIO 100 hardware to your computer.
USB cable
(Included)
USB connector
12
Computer
VS-100_install_e.book 13 ページ 2009年3月12日 木曜日 午後6時3分
Installation and Registration
6. Wait until the lower right of the screen indicates “Found New Hardware” and the “Found New
Hardware Wizard” appears.
* It may take some time for the “Found New Hardware Wizard” to appear.
7. If you are asked whether you want to connect to Windows Update, choose “No” and then click
[Next].
8. Choose “Install the software automatically (Recommended)” and click [Next].
9. If the “Hardware Installation” dialog box appears, click [Continue Anyway] to proceed with the
installation.
* If you cannot proceed with the installation, click [OK] to cancel the installation, and then refer to “Driver Signing
Options setting.”
10. If the “Completing the Found New Hardware Wizard” appears, Click [Finish].
11. When the “Installation has been completed.” message appears, installation has been completed.
Click [Close] to close the “Driver Setup” dialog box.
12. If the “System Setting Change” dialog box appears, click [Yes] to restart Windows.
If the installation was not completed successfully, disconnect the USB cable from the SONAR V-STUDIO 100
hardware, and uninstall the driver by executing “Uninstall”, found in the same folder as the driver setup. Then
install the driver once again, being careful to follow the instructions for the installation procedure.
13
VS-100_install_e.book 14 ページ 2009年3月12日 木曜日 午後6時3分
Installation and Registration
Macintosh Users
* Do not connect the SONAR V-STUDIO 100 hardware to your computer until you are directed to do so.
* If the Authenticate dialog box or the dialog that indicates “Installer requires that you type your password” appears
during the installation, enter your password and click OK.
* What you actually see on the screen may differ depending on your system.
1. Start up computer without the SONAR V-STUDIO 100 hardware connected.
* Disconnect all USB cables other than those for a USB keyboard and/or USB mouse (if used).
2. Close all currently running software.
3. Insert the included “SONAR V-STUDIO 100 Driver CD-ROM” into your CD-ROM drive.
4. In the “Driver(MacOS X)” folder of the CD-ROM, double-click the “VS100USBDriver.pkg.”
5. In some cases, the display will indicate “This Installer package needs to run a program to
determine if it can be installed. Do you want to continue?” or “This package contains a program
that determines if the software can be installed. Are you sure you want to continue?”; click
[Continue].
6. The display will indicate “Welcome to the VS-100 Driver Installer”; click [Continue].
7. If the display indicates “Select a Destination,” click the drive on which the system is installed, then
click [Continue].
8. The display will indicate “Easy Install” or “Standard Install”; click [Install] or [Upgrade].
9. The display will indicate “Installing this software requires you to restart...”; click [Continue
Installation].
10. The display will indicate “Click Restart to finish installing the software”; click [Restart]. Your
computer will then restart.
* It may take some time for restarting the computer.
This completes installation of the SONAR V-STUDIO 100 Driver driver.
14
VS-100_install_e.book 15 ページ 2009年3月12日 木曜日 午後6時3分
Installation and Registration
Installing the software
This is a package containing AU and VST compatible plug-ins.
It contains a variety of plug-ins including plug-in effects, sample players, and plug-in synthesizers.
This is included on the SONAR VS INSTALLATION DVD-ROM, and installation will begin automatically when you insert
the DVD-ROM into your computer.
For details, refer to the online documentation of the installed plug-ins.
Control surface functionality
If you’ll be using the SONAR V-STUDIO 100 as a control surface for DAW software other than SONAR, set the SONAR
V-STUDIO 100’s system setting “DAW Select” to “Other.”
If the system setting “DAW Select” is set to “Other,” your DAW software will recognize the SONAR V-STUDIO 100 as a
Mackie Control.
For details on how to change system settings, refer to the SONAR V-STUDIO 100 hardware manual.
Example) Settings for Logic
* Refer also to the Logic owner’s manual.
1. Choose the “Logic Pro | Environment Settings | Control Surfaces | Setup” command to open Setup.
2. Click the Mackie Control icon, and in the lower left of the setup screen, change “Track indication”
to “Arrange.”
15
VS-100_install_e.book 16 ページ 2009年3月12日 木曜日 午後6時3分
Installation and Registration
Connecting
1. Minimize the SONAR V-STUDIO 100 hardware’s [MAIN MIX] knob.
2. Connect the included AC adaptor to the SONAR V-STUDIO 100 hardware.
Power Cord
AC Adaptor
DC IN
to Power Outlet
3. Turn on the POWER switch of the SONAR V-STUDIO 100 hardware.
4. Use the included USB cable to connect the SONAR V-STUDIO 100 hardware to your computer.
USB cable
(Included)
USB connector
16
Computer
VS-100_install_e.book 17 ページ 2009年3月12日 木曜日 午後6時3分
Installation and Registration
Connecting your audio equipment
Connect your headphones and/or speakers to the SONAR V-STUDIO 100 hardware.
* This package does not include sound reproduction equipment such as headphones or speakers.
If you connect headphones or monitor speakers as shown in the illustration, you’ll be able to monitor the playback
audio.
Monitor amplified speakers
Stereo Headphones
Computer
For details about on the SONAR V-STUDIO 100 hardware itself, refer to the included SONAR V-STUDIO 100 Hardware
Manual as well.
17
VS-100_install_e.book 18 ページ 2009年3月12日 木曜日 午後6時3分
Installation and Registration
Register SONAR
Before you install SONAR, take a minute to register the software so we can let you know when updates become
available and provide you with technical support. To register anytime, log onto
http://www.cakewalk.com/register,
or call 888-CAKEWALK (U.S.) or +1 (617)-423-9004 (outside the U.S.) between 9 AM and 8 PM Eastern Standard Time. If
you live outside of North America, please visit our distributor’s page at
http://www.cakewalk.com/ Dealers/International.asp
to get the telephone number of your local distributor.
You’ll need to supply your serial number, your name, and a valid email address.
18
VS-100_install_e.book 19 ページ 2009年3月12日 木曜日 午後6時3分
Installation and Registration
Installing SONAR
SONAR is easy to install. All you need to do is choose the folder where the program and sample project files should
be stored. Before you start, make sure you have your serial number handy. Your serial number is located on the back
of the SONAR VS Installation DVD-ROM case.
To Install SONAR
1. Start your computer.
2. Close any open programs that are running.
3. Place the SONAR V-STUDIO 100 INSTALLATION DVD-ROM in your disc drive.
If you have autorun enabled, the SONAR Setup Wizard opens automatically. If autorun is not enabled, you can open
the SONAR AutoRun menu by selecting “Start-Run” and enter “d:\VS_Production_Pack\Setup.exe” (where d:\ is
your disc drive).
4. Click the [Next] button.
5. Follow the installation instructions on the screen.
To Uninstall SONAR
Refer to “Uninstalling SONAR and Other Components” (p. 58).
19
VS-100_install_e.book 20 ページ 2009年3月12日 木曜日 午後6時3分
Installation and Registration
Running SONAR for the First Time
Before SONAR VS can communicate with the SONAR V-STUDIO 100 hardware, you must enable and assign the VS100 MIDI ports in SONAR, then insert the VS-100 control surface plug-in.
1. Power up the SONAR V-STUDIO 100 hardware.
2. The first time you run SONAR, the following message appears: “SONAR VS will now personalize
your setting by copying...,” Click [OK].
3. The following message appears: “Do you have a MIDI controller that you would to use to control
track/bus and plug-in parameters?” Click [Yes] to open the “Controllers/Surfaces” dialog.
4. Click [MIDI Devices] to open the “MIDI Devices” dialog.
5. In the “Inputs” and “Outputs” lists, select the following VS-100 MIDI devices that you will use with
SONAR.
Input
Output
MIDI (VS-100)
CONTROL (VS-100)
MIDI (VS-100)
CONTROL (VS-100)
6. Click [OK] to close the “MIDI Devices” dialog and return to the “Controllers/Surfaces” dialog.
7. Click the [Add New Controller/Surface] button
to open the “Controller/Surface Settings”
dialog.
8. In the “Controller/Surface” box, select “VS-100.”
9. Assign both “Input Port” and “Output Port” to “CONTROL (VS-100).”
10. Click [OK] to close the “Controller/Surface Settings” dialog.
11. In the “Controllers/Surfaces” dialog, select the “WAI” and “ACT” check boxes and click [Close].
If you have already run SONAR VS and skipped these instructions, see “MIDI Devices Settings” (p. 25), and
“MIDI Controllers/Surfaces Settings” (p. 27).
20
VS-100_install_e.book 21 ページ 2009年3月12日 木曜日 午後6時3分
Initial Settings
Audio Driver Settings
As described below, configure SONAR so that you can use the SONAR V-STUDIO 100 hardware as an audio driver.
You’ll need to make these settings in the following cases.
• Immediately after installing SONAR
• If you’ve updated the SONAR V-STUDIO 100 driver
• If you’ve newly installed the SONAR V-STUDIO 100 driver
Keep the SONAR V-STUDIO 100 Hardware Manual at hand.
Select the Drivers
Verify that the SONAR V-STUDIO 100 hardware is correctly recognized by SONAR.
1. Choose “Options | Audio” to display the “Audio Options” dialog box.
2. In the “Audio Options” dialog box, click the “Advanced” tab.
3. In the “Playback and Recording” section, select “ASIO” from the “Driver Mode” dropdown menu.
4. Click [Apply].
5. In the “Audio Options” dialog box, click the “Drivers” tab.
6. Verify that the SONAR V-STUDIO 100 driver is shown in the “Input Drivers” and “Output Drivers”
fields.
Select (check) the following drivers, and clear (uncheck) any other drivers.
Input Driver
Output Driver
VS-100 IN 1-2
VS-100 IN 3-4
VS-100 IN 5-6
VS-100 IN DIGITAL
VS-100 IN MAIN
VS-100 OUT 1-2
VS-100 OUT 3-4
VS-100 OUT 5-6
21
VS-100_install_e.book 22 ページ 2009年3月12日 木曜日 午後6時3分
Initial Settings
If the driver is not shown
Did you connect the SONAR V-STUDIO 100 hardware before launching SONAR?
Is the interface driver installed correctly?
Refer to “Installing the SONAR V-STUDIO 100 Driver” (p. 7), and verify that the SONAR
V-STUDIO 100 driver is installed correctly.
Is the SONAR V-STUDIO 100 hardware correctly connected to your computer?
Is the SONAR V-STUDIO 100 hardware powered on?
7. Click “OK” to close the dialog box.
If you’re asked to restart SONAR, do so.
* If the window does not close or the settings are not applied when you click [OK], refer to “Problems When Installing
SONAR or Changing Settings” (p. 43).
If the screen indicates “Audio Driver Error”, click [Use Anyway].
22
VS-100_install_e.book 23 ページ 2009年3月12日 木曜日 午後6時3分
Initial Settings
Other Audio Driver and Audio-Related Settings
You can also set the following options as necessary.
•
Execute the “Options | Audio” command to open the “Audio Options” dialog box.
By clicking the [Help] button in each dialog box, you can view detailed information about each option.
Audio Options dialog—General tab
Mixing Latency (MME and WDM drivers only)
If you’re using a MIDI keyboard to play software synthesizers, or if you’re using SONAR’s input monitor, you can
shorten the latency (delay until sound is heard) by reducing the I/O Buffer Size.
However, if you reduce the I/O buffer size too far, a greater processing load will be placed on your computer,
potentially causing pops, clicks, and dropouts (interrupted playback). If this occurs, increase the buffer size. ->
“About Mixing Latency” (p. 57)
Audio Options dialog—Advanced tab
Driver Mode
If an Audio Driver Error appears, adjust “Audio Buffer Size” in the “ASIO Panel.”-> “Troubleshooting” (p. 41)
If the driver mode is WDM/KS, try changing to ASIO.
Use Multiprocessing Engine
Select this check box if you have a multi-core or multi-processor computer.
Record Latency Adjustment
This specifies the offset when performing loopback recording. Measure the offset amount while actually performing
loopback recording, and then enter this value.
23
VS-100_install_e.book 24 ページ 2009年3月12日 木曜日 午後6時3分
Initial Settings
Audio Options dialog—Drivers tab
Friendly Names
For each driver, you can change the driver names that are displayed in SONAR. If you want to use this function, enter
the desired name in the Friendly Names field, and select the “Use Friendly Names to Represent Audio Drivers”
check box located at the bottom of the dialog box.
Global Options dialog—Audio Data tab
To open the “Global Options” dialog box, choose the menu command “Options | Global.”
Global Audio Folder
This specifies the folder where audio data will be stored temporarily, for example when a new project is created. If
you’re using a dedicated hard disk drive just for audio data, specify that drive in this field.
File Bit Depths
This specifies the bit depth of the audio files created by recording, audio processing (e.g. freezing or bouncing), and
importing audio.
24
Options
Default Value
Record Bit Depth
16
Render Bit Depth
32
Import Bit Depth
Original
VS-100_install_e.book 25 ページ 2009年3月12日 木曜日 午後6時3分
Initial Settings
MIDI Devices Settings
Here’s how to specify the MIDI devices that you want to use.
1. Execute the “Options | MIDI Devices” command to open the “MIDI Devices” dialog box.
In the input field and output field of the “MIDI Devices” dialog box, select the following MIDI devices that you will
use with SONAR.
Input
Output
MIDI (VS-100)
MIDI (VS-100)
CONTROL (VS-100)
CONTROL (VS-100)
If you’re using an external MIDI sound module, you can use “Instrument Definitions” so that SONAR will
show the bank names, patch names, and controller function names of typical MIDI sound modules. For
details on “Instrument Definitions”, refer to the online Help.
* If you’ve connected an external MIDI device, such as an external MIDI keyboard (Edirol PCR series), to your computer
via a USB cable, select such MIDI devices as well. (For details on these MIDI devices, refer to the manuals for the devices
you’re using.)
* In SONAR, don’t use the following MIDI devices shown in the “MIDI Devices” dialog box. (Clear the check box for these
devices.)
• MIDI Mapper/Microsoft MIDI Mapper
These are virtual MIDI ports used by Windows, and are not used by SONAR.
• Microsoft GS Wavetable SW Synth
This monopolizes the audio driver, making it impossible to use audio functionality in SONAR.
• Roland VSC (stand-alone version)/ the stand-alone versions of other software synthesizers
These are not suitable for use in SONAR, since their latency cannot be managed from SONAR.
2. Click [OK] to close the dialog box.
If you’re using MIDI controllers or control surfaces in your system, and you’ve changed the settings of the
“MIDI Devices” dialog box, you may need to re-configure the Controllers/Surfaces plug-in settings. When you
change the contents of the “MIDI Devices” dialog box, the entire state of the Controllers/Surfaces plug-ins will
be initialized.
If you want to use an external MIDI device that’s connected to the SONAR V-STUDIO 100 hardware’s MIDI
connectors, select the “MIDI (VS-100)” MIDI port in the “MIDI Devices” dialog box.
25
VS-100_install_e.book 26 ページ 2009年3月12日 木曜日 午後6時3分
Initial Settings
Caution regarding MIDI Devices
When using the SONAR V-STUDIO 100 with a ReWire client such as Project5
Set your MIDI keyboard or other MIDI input device so that it will be used by either SONAR or the ReWire client (not
both). If you attempt to use the MIDI input device simultaneously by both, the following problems will occur.
• Your plug-in synthesizer will be triggered twice; once by the MIDI messages sent to the ReWire client via SONAR, and
also by the MIDI messages that are input directly to the ReWire client.
• The ReWire client will be unable to receive MIDI messages from your MIDI keyboard.
When using a controller or surface that supports bi-directional communication
Place this device so that it is at the bottom of the selected MIDI Devices in the “MIDI Devices” dialog box “Outputs”
field.
In SONAR, when you open an SMF or create a new MIDI track, priority is given to the higher of the devices selected in
the “Outputs” field. In this case, if the MIDI Device used to control the controller/surface is higher in the list,
performance data will be sent to the controller/surface, possibly causing unintended results.
To re-order the devices, select the device that you want to move upward, and click the [Move Checked
Devices to Top] button.
26
VS-100_install_e.book 27 ページ 2009年3月12日 木曜日 午後6時3分
Initial Settings
MIDI Controllers/Surfaces Settings
Before you use the SONAR V-STUDIO 100 hardware to control SONAR, load the VS-100 plug-in and configure settings
to enable it.
Loading the VS-100 Plug-in
1. Make sure that the SONAR V-STUDIO 100 hardware is connected to your computer, and then start
up SONAR.
2. In SONAR, choose “Options | Controllers/Surfaces” to open the “Controllers/Surfaces” dialog box.
3. Click the “Add Controller/Surface”
button. The “Controller/Surface Settings” dialog box
appears.
4. In the “Controller/Surface Settings” field, choose “VS-100.”
5. Select the controllers’ Input Port and Output Port. Select “CONTROL (VS-100)” for both the Input
Port and the Output Port.
6. Click [OK] to close the dialog box.
7. In the “Controllers/Surfaces” dialog, make sure that the “WAI” check boxes and the “ACT” check
boxes are selected, and click [Close].
If you’re using an Edirol PCR series unit as an external MIDI keyboard, use the dedicated plug-in for the PCR
series. Details on settings and using the plug-in are provided in the section “Edirol PCR Controllers” of
the online Help.
What is ACT?
ACT (Active Controller Technology) is functionality that lets you operate SONAR from an external device
such as a MIDI controller or surface. The plug-in effect or software synthesizer that’s active in SONAR will
automatically be the target of control.
For details, refer to the “ACT” section in the Online Help.
27
VS-100_install_e.book 28 ページ 2009年3月12日 木曜日 午後6時3分
Initial Settings
VST/VSTi Registration and Settings
By default, the VST plug-ins included with SONAR are installed in the following folder, and can be used from SONAR
without changing any settings.
C:\Program Files\Cakewalk\VstPlugins
If you have VST plug-ins installed in any other folders, you’ll need to register them in SONAR as follows.
1. Execute the “Options | Global” command and click the “VST Plug-Ins” tab.
2. If the folder in which your VST plug-ins are installed does not appear in the “VST Scan Folder(s)
list”, click the [Add] button and specify the folder in which your VST plug-ins are installed.
If a folder in which no VST plug-ins are installed is shown, click the folder name to select it, and then click [Remove].
3. When you’ve finished specifying the folders that SONAR should scan, click [OK].
4. In the “VST Scan” section, click the [Scan VST Folders] button.
Your VST plug-ins have now been registered in SONAR.
About Cakewalk Plug-in Manager
Cakewalk Plug-in Manager allows you to edit the plug-in menu, manage presets, and configure settings for
each VST plug-in.
For details on using Cakewalk Plug-in Manager, refer to the online Help for Cakewalk Plug-in Manager.
28
VS-100_install_e.book 29 ページ 2009年3月12日 木曜日 午後6時3分
Initial Settings
Playing a Demo Song
Playing an Audio Demo Song
SONAR VS contains audio demo songs. Here’s how to enjoy these demo songs.
The demo songs included with SONAR are created at a sampling rate of 44.1 kHz. To play them, both the
SONAR V-STUDIO 100 hardware’s sampling frequency and the SONAR Audio Driver must be set to the 44.1
kHz setting. If the audio driver’s sampling rate has been set otherwise, change the rate to 44.1 kHz as
described in “About Sampling Rates” (p. 56).
1. Start up SONAR, execute the “File | Open” command to open the “Open” dialog box.
2. Select the project file “SONAR_VS_AudioDemo1” within the “Documents\Cakewalk\SONAR
VS\Tutorials\Tutorial 1” folder.
3. Click [Open] to open the project. Wait until the project has finished loading.
4. Press the SONAR V-STUDIO 100 hardware’s
(PLAY) button.
5. Adjust the volume of the SONAR V-STUDIO
100 hardware and your sound reinforcement
equipment (monitor speakers, etc.).
Controls the volume of
the MAIN OUTPUT 1/2.
6. When you’ve finished listening to the demo
song, choose “File | Close.” If you’re asked
whether you want to save the changes, click
[No].
Controls the volume
of headphones.
29
VS-100_install_e.book 30 ページ 2009年3月12日 木曜日 午後6時3分
Initial Settings
If you don’t hear sound
If you don’t hear sound, check the settings of the audio interface and your sound reinforcement equipment.
If you don’t hear sound and the audio track’s level meters are not moving either, there may be a problem with the
settings of the audio driver. Check the settings as described in “Audio Driver Settings” (p. 21).
If the CPU meter indicates a high value
fig.meterCPU.eps
If the CPU meter is staying in the green
area, there is probably no problem.
If you don’t hear noise or dropouts
(interruptions in the playback) even
though the meter reaches the yellow
area, this means that your computer’s
capabilities are being used nearly to
their limit.
The CPU meter is located on the Status
bar, which is at the bottom of the
screen.
CPU Meter
If you hear noise, or if the playback halts
• Dropouts may occur during playback or recording if you connect/disconnect another USB device (such as a memory
key), or switch a device’s power on/off at the same time that SONAR is being used.
• Data transfer using USB could get congested if you use the SONAR V-STUDIO 100 hardware and a USB-connected hard
disk at the same time. As a result, the data transfer speed for the hard disk could be significantly reduced. As a storage
location for the audio data that you record and play back, you should avoid using a hard disk that is connected via USB.
• Dropouts during playback/recording sometimes occur immediately after the system has started up, or after it has
woken from sleep. Wait for a while, then try the playback/recording again.
• Either the project is a very large one that your computer has insufficient power to play back, or there is a problem with
the settings of the audio driver.
• Check the settings as described in “Audio Driver Settings” (p. 21) and try playing it back again.
If this does not solve the problem, refer to “Eliminating Clicks and Dropouts” (p. 49).
30
VS-100_install_e.book 31 ページ 2009年3月12日 木曜日 午後6時3分
Initial Settings
If the DISK meter indicates a high value
fig.meterDISK.eps
The DISK meter is located on the Status
bar, which is at the bottom of the
screen.
If the DISK meter is staying in the green
area, there is probably no problem.
If the meter is reaching the yellow area
but you don’t hear noise or dropouts
(interruptions in the playback), this
means that your computer’s capabilities
are being used nearly to their limit.
DISK Meter
The DISK meter may also indicate a
relatively high value if you’re using a
notebook PC.
31
VS-100_install_e.book 32 ページ 2009年3月12日 木曜日 午後6時3分
Initial Settings
Recording audio
1. Connect your instrument or microphone
In order to record audio, you’ll connect your instrument or microphone to the SONAR V-STUDIO 100. Some typical
types of connections are shown below.
Connecting a microphone
If you’re using a condenser microphone that has a balanced (XLR) plug and requires phantom power to be
supplied, set the PHANTOM switch to “+48V.” Phantom power will be supplied to both MIC jacks, INPUT 1L
and 2R. This means that a mic requiring phantom power cannot be used simultaneously with a microphone
that does not require phantom power.
You must turn phantom power off unless you’re using a condenser mic that requires a phantom power
supply. Malfunctions will occur if phantom power is supplied to a dynamic microphone or audio
playback device. For details on the specifications of your microphone, refer to its owner’s manual.
The SONAR V-STUDIO 100’s balanced (XLR) type connectors
that are wired as shown in the illustration. Be sure to check
the wiring of your equipment before making connections.
Rear Panel
Microphone with a phone plug
Microphones with a phone
plug cannot be used.
Microphone with a balanced (XLR) plug
* The SONAR V-STUDIO 100 provides a compressor and equalizer on each of its audio inputs (INPUT 1–6). You can create
a fatter sound by applying a compressor to the input signal from a microphone or guitar. For details, refer to the
section “Compressor and equalizer” in the SONAR V-STUDIO 100 hardware manual.
Connecting a synthesizer
DJ Mixer, Audio Player, etc.
Synthesizer, etc.
If you want to connect a device such as a synthesizer or mixer, use an audio cable to connect its
outputs to the INPUT jacks (3-6). Equipment with phone plugs can be connected to INPUT
3L/4R, and equipment with RCA phono plugs can be connected to INPUT 5L/6R.
32
VS-100_install_e.book 33 ページ 2009年3月12日 木曜日 午後6時3分
Initial Settings
Connecting a guitar or bass
Connect your electric guitar or electric bass to the INPUT 1L LINE jack, and turn on the Hi-Z button.
Guitar, Bass
If you’ve connected a guitar/bass,
set [Hi-Z] button to ON.
Hi-Z
Connecting a digital device
If you want to make a digital audio connection from a digital mixer or similar device, connect its output (e.g. the
DIGITAL OUT connector) to the SONAR V-STUDIO 100’s COAXIAL IN (7/8) jack.
Digital Mixer, etc.
Set to match SONAR’s sampling rate.
33
VS-100_install_e.book 34 ページ 2009年3月12日 木曜日 午後6時3分
Initial Settings
2. Create a new file
1. Launch SONAR.
2. From the File menu, choose New to open the New Project File dialog box.
3. In the Name field of the New Project File dialog box, enter the name of the song that you want to
create.
fig.FileNew.eps
4. From the templates, choose 16 track audio and click “OK”.
5. A project containing 16 audio tracks will be created.
In this example we’re going to record on track 1.
34
VS-100_install_e.book 35 ページ 2009年3月12日 木曜日 午後6時3分
Initial Settings
3. Select the input for the track
Now we’ll configure input settings in SONAR as appropriate for the input you connected.
1. Press the SONAR V-STUDIO 100’s [SHIFT]+[VIEW] button, or click SONAR’s Console View icon, to open the
console view.
fig.ConsoleViewIcon01.eps
2. Click the input field for track 1.
fig.Input.eps
3. Select the appropriate device for the input you connected.
Source
Selected device
Record only INPUT 1L in monaural
Left VS-100 1-2
Record only INPUT 2R in monaural
Right VS-100 1-2
Record INPUT 1L and 2R in stereo
Stereo VS-100 1-2
Record INPUT 3/4 in stereo
Stereo VS-100 3-4
Record INPUT 5/6 in stereo
Stereo VS-100 5-6
Record INPUT 7/8 (COAXIAL IN) in stereo
Stereo DIGITAL
Mix all inputs and record the mix
Stereo MAIN
35
VS-100_install_e.book 36 ページ 2009年3月12日 木曜日 午後6時3分
Initial Settings
4. Adjust the level
If you’re recording from a device connected to INPUT 1L or INPUT 2R, adjust the levels as follows.
In order to record with the best possible audio quality, adjust the input level so that SONAR V-STUDIO 100’s level
meter does not light even during the loudest passages.
1. Press SONAR V-STUDIO 100’s [DISPLAY] button.
The level meter appears in the display. If a different screen is shown, press the [DISPLAY] button once again.
2. If your microphone or guitar is connected to the INPUT1L or 2R jacks, use SONAR V-STUDIO 100’s front
panel [SENS] knob to adjust the input level.
* The input level for a device connected to INPUT 3–6 must be adjusted using the controls of the device itself. This level
cannot be adjusted on the SONAR V-STUDIO 100.
36
VS-100_install_e.book 37 ページ 2009年3月12日 木曜日 午後6時3分
Initial Settings
5. Arm the desired track for recording.
We’ll arm track 1 for recording (i.e. put it in record-ready mode).
1. Press the SONAR V-STUDIO 100’s [DISPLAY] button to switch to the control surface screen.
If a different screen is shown, press the [DISPLAY] button once again.
2. Make sure that Track1 is shown in the control surface screen.
If Track1 is not shown, press the SONAR V-STUDIO 100’s track select button to make the screen indicate Track1.
Alternatively, you can click SONAR’s track 1 icon.
3. Press the SONAR V-STUDIO 100’s [ARM] button.
The SONAR V-STUDIO 100’s [ARM] button and SONAR’s track 1 ARM button will both light, indicating that this track is
armed for recording.
You can also arm the track by clicking the ARM button for SONAR’s track 1.
fig.Arm-btn.eps
37
VS-100_install_e.book 38 ページ 2009年3月12日 木曜日 午後6時3分
Initial Settings
6. Turn on the metronome.
1. Choose the SONAR menu item Option|Project, and click the Metronome tab.
2. Select the “Use Audio Metronome” check box.
3. In the Output field, select “VS-100 OUT 1-2” as the metronome’s output port.
4. Click “OK.”
fig.metro01.eps
5. In SONAR’s toolbar, double-click the tempo display and enter the desired tempo.
Enter a numerical value from your computer keyboard, and press the Enter key to confirm it.
fig.metro02.eps
This completes preparations for recording.
38
VS-100_install_e.book 39 ページ 2009年3月12日 木曜日 午後6時3分
Initial Settings
7. Record your performance.
Press the
record button to start recording.
Press the
stop button to stop recording.
Press the
play button to hear the recorded result.
If you’re not satisfied with your performance, you can easily re-record it. After you’ve stopped recording but before
you’ve performed any other operation, hold down the “Ctrl” key of your computer keyboard and press “Z.” The
waveform that had been displayed will disappear. Since you can re-record as easily as this, you can feel free to try as
many times as you like until you’ve captured a performance you’re happy with.
The sound of playback or recording may be interrupted if you connect or disconnect USB memory or another
USB device or turn the power on/off during these operations.
Using a USB-connected hard disk may decrease the hard disk data transfer rate due to congestion on the USB
data bus. Do not use a USB-connected hard disk to save the audio data that you are playing or recording.
Dropouts in playback or recording may occur immediately after the system has started up or resumed from the
sleep state. Please wait for a time before you perform playback or recording.
39
VS-100_install_e.book 40 ページ 2009年3月12日 木曜日 午後6時3分
Initial Settings
8. Try out a plug-in effect.
SONAR provides a wide variety of plug-in effects.
In this example, we’ll apply a plug-in effect to the track you recorded.
1. Right-click the FX bin for track 1.
fig.FXbin.eps
2. In the menu that appears, choose “Audio Fx |VX64_VocalStrip.”
VocalStrip will be inserted into track 1, and the VocalStrip property page appears.
fig.VX64.eps
3. Play back.
The recorded track will play back with the effect applied.
In addition to the VocalStrip plug-in for vocals, SONAR provides a broad range of effects such as Guitar Rig for guitar
as well as mastering effects. Please try them out.
For details about using VocalStrip, refer to the online Help for VocalStrip. The online Help for VocalStrip appears
if you press the F1 key of your computer while the VocalStrip property page is displayed.
You’ve successfully installed SONAR.
40
VS-100_install_e.book 41 ページ 2009年3月12日 木曜日 午後6時3分
Troubleshooting
1. This chapter lists problems that might occur when setting up this product, and explains how to
solve these problems. If you experience a problem during installation, read this chapter first.
2. If the system still does not operate as you expect even though you’ve checked the points listed in
this chapter, refer to the following documents as well.
SONAR V-STUDIO 100 Hardware Manual
The SONAR V-STUDIO 100 Hardware Manual contains cautions and detailed information about using the SONAR
V-STUDIO 100 hardware.
SONAR VS Getting Started (online document; PDF Format)
This explains how to operate SONAR; read this guide when you’re not sure how to use SONAR’s basic functionality.
This is located in the “\SONAR VS\Documentation” directory of the SONAR VS Installation DVD-ROM.
VS Production Pack Plug-ins (online document; PDF Format)
This explains how to operate plug-ins included in the VS Production Pack. This is located in the root directory of the
SONAR VS Installation DVD-ROM.
Online Help
SONAR’s online Help is an organized collection of information that covers everything from operation to full details of
all functions and commands. To view this, launch SONAR, and from the “Help” menu choose “Help Topics.” You can
open the Search tab and type a keyword to search for related topics.
README.RTF (online document; Rich Text Format)
This contains supplementary information about SONAR, information about changes from older versions of Cakewalk
products, and cautions regarding use in specific types of systems. To view this, access SONAR’s “Help” menu and
select “View README.RTF.”
Cakewalk Website
All VS products:
http://www.cakewalk.com/support/vstudio/
SONAR V-STUDIO 100 specific:
http://www.cakewalk.com/support/vstudio/vs1.aspx
Here you can obtain the latest information about Cakewalk products.
41
VS-100_install_e.book 42 ページ 2009年3月12日 木曜日 午後6時3分
Troubleshooting
Problems When Installing Driver or Changing Settings
Problem
Installer won’t start up
A warning or error is
displayed during
installation
Can’t install the driver
according to the
procedure
42
Points to check
Action
Is the CD-ROM correctly inserted in
the CD-ROM drive?
Make sure that the CD-ROM is correctly inserted in the drive.
Could the CD-ROM or the CD-ROM
drive’s lens be dirty?
The installer might not start correctly if the CD-ROM or the CD-ROM drive’s lens is dirty.
Use a commercially available CD cleaner or lens cleaner to clean the disc or lens.
Are you attempting to install the
driver from a network computer?
Install the driver from a local drive.
Could you have connected the
SONAR V-STUDIO 100 to your
computer before installing the
driver?
If you connect the SONAR V-STUDIO 100 to your computer before installing the driver,
an error message may appear when you begin the installation. Uninstall the SONAR
V-STUDIO 100 driver as described in “Uninstalling VS-100 Driver” (p. 53), and then
reinstall it as described in “Installing the SONAR V-STUDIO 100 Driver” (p. 7).
Could the device manager be
showing “Other devices,”
“Unknown devices,” or a device
with an “? / ! / X” symbol?
If driver installation was not completed successfully, the installed driver will remain in
an incomplete state, causing an error message to appear when you begin the
installation.
Uninstall the SONAR V-STUDIO 100 driver as described in “Uninstalling VS-100
Driver” (p. 53), and then reinstall it as described in “Installing the SONAR V-STUDIO
100 Driver” (p. 7).
What user privileges did you use to
log on to Windows?
You must log on to Windows as one of the following users.
- A user belonging to the Administrators group, such as Administrator
- A user whose account type is computer administrator
* For details, refer to the system administrator of your computer.
Driver installation may be
impossible depending on the
“Driver signing options” setting.
You may be unable to install the driver because of the “Driver Signing Option”
setting. Check the following points, and make the appropriate setting.
1. Open the System “Properties” dialog box.
1. From the Windows “Start” menu, open the “Control Panel.”
2. In “Pick a category,” click “Performance and maintenance.”
3. Under “Pick a Control Panel icon,” click the “System” icon.
* Depending on your setup, the System icon may be shown directly in the
Control Panel (the Classic view). If so, double-click the System icon.
2. Click the “Hardware” tab, and then click [Driver Signing].
3. The “Driver Signing Options” dialog box appears. In the “Driver Signing
Options” dialog box, choose “Warn” or “Ignore,” and then click [OK].
4. Click [OK] to close the “System Properties” dialog box.
5. Install the driver as described in the “Installation” procedure.
* After you’ve completed the installation, you can return the driver signing options
setting to its original state.
Could other software or
background programs (such as
anti-virus software) be running?
The installation may not be successful if other software is running. Be sure to close all
other software before you begin the installation.
VS-100_install_e.book 43 ページ 2009年3月12日 木曜日 午後6時3分
Troubleshooting
Problem
Points to check
Action
It may take between several tens of
seconds and several minutes after
you power-on the SONAR
V-STUDIO 100 until it is recognized
by your computer.
This is not a malfunction.
Please wait until the Found New Hardware Wizard appears.
Is the SONAR V-STUDIO 100
connected?
Once again, make sure that the SONAR V-STUDIO 100 is correctly connected to your
computer and that the power is on.
Could your computer be operating
on its battery?
Operation may not be stable if your computer is operating on its battery. Please
connect your computer to a power supply.
Could other USB devices be
connected?
Perform the installation with all USB devices (other than a mouse and keyboard)
disconnected from your computer.
Does your computer meet the USB
specifications?
Operation may be unstable if your computer does not meet the electrical requirements
of the USB specification.
In this case, you may be able to solve the problem by connecting a self-powered USB
hub (a USB hub that has an internal power supply or AC adaptor).
Is the SONAR V-STUDIO
100’s operating mode
correct?
You can’t install the driver if the
SONAR V-STUDIO 100’s system
setting “Storage” is turned on.
Refer to the SONAR V-STUDIO 100 hardware manual, and turn the system setting
“Storage” off.
“Found New Hardware
Wizard” appears even
though you installed the
driver (Windows XP)
Could you have connected the
SONAR V-STUDIO 100 to a different
USB connector of your computer
than when you installed the driver?
If your computer or USB hub has two or more USB connectors, connecting the SONAR
V-STUDIO 100 to a different USB connector may cause the “Found New Hardware
Wizard” to appear even though the driver has already been installed.
This is not a malfunction.
Install the driver as described in “Installing the SONAR V-STUDIO 100 Driver” (p. 7).
Could you have connected the
SONAR V-STUDIO 100 to a different
USB port?
If you connect the SONAR V-STUDIO 100 to a different USB port, the operating system
may automatically add a number at the beginning of the device name; this is not a
problem for using the SONAR V-STUDIO 100. If you want to return to the device name
without this number, you can either connect the SONAR V-STUDIO 100 to the same
USB port as when you installed the driver, or reinstall the driver. -> “Installing the
SONAR V-STUDIO 100 Driver” (p. 7)
Installation does not
finish successfully when
you connect the SONAR
V-STUDIO 100
A numeral such as “2-”
has appeared in front of
the device name
(Windows Vista)
Problems When Installing SONAR or Changing Settings
Problem
Can’t install SONAR
Points to check
Action
Could you have attempted to
install SONAR as a user without
administrative privileges?
In order to install SONAR, you must log on as a user who has administrative privileges.
Installation will not occur correctly if any other user attempts this.
Is the SONAR VS DVD-ROM
correctly inserted in the DVD drive?
If the DVD drive or the SONAR VS DVD-ROM is dirty, use a commercially available
cleaner to clean it.
Could system monitoring software
such as an anti-virus program be
running?
Close such software until installation is completed. For details on how to close the
software, refer to the documentation for your computer or for the software you’re
using.
Did you attempt to install from a
network drive?
You must install from a local drive.
Is there enough hard disk space?
Your hard drive must have at least 8 GB of free space.
43
VS-100_install_e.book 44 ページ 2009年3月12日 木曜日 午後6時3分
Troubleshooting
Problem
Points to check
Action
Plug-ins are not installed
The plug-ins are not installed
(registered) in the Start menu.
The software synthesizers included with SONAR are all plug-in versions. Unlike the
stand-alone versions, they will not be registered in the Windows Start menu. In order
to use the plug-in software synthesizers included with SONAR, you must call them up
from within SONAR. For details on how to do this, refer to SONAR’s online Help.
Plug-ins are installed but
not shown
It may be that a plug-in is disabled.
Check whether the plug-in might be disabled in the plug-in manager. For more about
the plug-in manager, refer to the SONAR’s Online Help.
“Audio Driver Error”
appears
Is the Audio Driver setting
appropriate?
Make sure that SONAR’s Sampling Rate (p. 56) is the same as the setting of the SONAR
V-STUDIO 100’s “Sample Freq” setting.
If an audio driver not being used by SONAR is installed, try either disabling that driver
or disconnecting the corresponding audio interface from your computer.
Try changing the “Driver Mode” (p. 23).
Could you be using a stand-alone
version of a software synthesizer
(such as the stand-alone version of
the Roland VSC)?
In this case, your settings might not be applied when you click [OK] in the Audio
Options dialog box. Try uninstalling the stand-alone version of the software
synthesizer.
Could an input-only or output-only
audio driver be installed, such as
for a USB speaker or USB
microphone?
In this case, your settings might not be applied when you click [OK] in the Audio
Options dialog box. Try disabling those audio drivers.
Could your computer’s internal
sound card be enabled?
Some internal sound cards may cause problems for other audio drivers. In this case, try
disabling the internal sound card in the device manager or in your computer’s BIOS
screen.
Clicking [OK] in the Audio
Options dialog does not
close the dialog box
Problems at Startup with SONAR
Problem
Points to check
Action
Could numerous applications be
running?
It may be that SONAR cannot start up because there is insufficient memory. Close other
applications before you start up SONAR. If an error still appears, try restarting Windows.
Could memory-resident programs
be running?
Memory-resident programs such as anti-virus software may prevent SONAR from
running correctly. Try closing such software before starting SONAR.
Could you be using other music
application software?
If Media Player or any other application that has audio playback capability is running,
SONAR won’t be able to use the audio driver, and an error appears when SONAR is
started. Close the audio playback application, and then start SONAR again.
Are the audio driver settings
appropriate?
Make sure that SONAR’s Sampling Rate (p. 56) is the same as the setting of the SONAR
V-STUDIO 100’s “Sample Freq” setting.
If an audio driver not being used by SONAR is installed, try either disabling that driver
or disconnecting the corresponding audio interface from your computer.
Try changing the “Driver Mode” (p. 23).
Do the audio data format settings
match?
Make sure that the Sampling Rate of the audio used in your project, the Sampling Rate
of SONAR, and the setting of the SONAR V-STUDIO 100’s “Sample Freq” all match.
“About Sampling Rates” (p. 56)
It may be that Windows has
become temporarily unstable.
Try restarting Windows.
Can’t start up
“Audio Driver Error” is
displayed
Notation displayed
incorrectly in Staff View
44
VS-100_install_e.book 45 ページ 2009年3月12日 木曜日 午後6時3分
Troubleshooting
Problem
An error such as
“Unknown Error in
Sequencer.DLL” appears
Points to check
Action
SONAR was not installed correctly.
Proceed as follows to re-install SONAR.
1. Log on as a user who has administrative privileges.
2. Click the Windows Start button, and then click Control Panel.
3. Click Programs and Features (in Windows XP, Add or Remove Programs)
4. In the list of programs, click SONAR VS.
5. Click Uninstall (in Windows XP, Remove) to uninstall SONAR.
* If a User Account Control dialog box appears, click Continue.
6. After uninstalling SONAR, restart Windows.
7. When Windows has restarted, re-install SONAR as described in “Installing SONAR”
(p. 19).
Problems with Playback
Problem
Points to check
Action
Is there sufficient free space on the
hard disk?
When opening a bundled file, make sure that there is sufficient space on the hard disk
(at least as much as the size of the song data)
A message indicates “Not a
Cakewalk Format File.”
It may be that the file has been damaged. You may be able to recover some of the data
by opening the file in Safe Mode. For details, refer to the SONAR’s online Help section
File Recovery Mode.
Is your sound reproduction
equipment (speakers,
headphones) connected correctly?
Connect your audio reproduction equipment.
“Connecting your audio equipment” (p. 17)
Is the power switch turned on?
Make sure that your sound reproduction system and the SONAR V-STUDIO 100
hardware is powered up.
Are the volume knobs raised?
Make sure that the volume knobs of your sound reproduction system, the SONAR
V-STUDIO 100’s [PLAYBACK] knob, and [MAIN MIX] knob are raised.
Is the VS-100’s driver correctly
installed?
Make sure that the VS-100’s driver is installed correctly.
Do the audio data format settings
match?
Make sure that the Sampling Rate of the audio used in your project, the Sampling Rate
of SONAR, and the setting of the SONAR V-STUDIO 100’s “Sample Freq” all match.
“About Sampling Rates” (p. 56)
Can’t open song data
No sound at all
Could you have switched off the
SONAR V-STUDIO 100 hardware’s
power or disconnected the USB
cable while SONAR was running?
Could your computer have entered
Suspend mode while SONAR was
running?
If you perform such actions while SONAR is running, communication between SONAR
and the SONAR V-STUDIO 100 hardware will be interrupted, and SONAR may stop
responding.
Check the connection to the SONAR V-STUDIO 100 hardware, restart your computer,
and restart SONAR.
45
VS-100_install_e.book 46 ページ 2009年3月12日 木曜日 午後6時3分
Troubleshooting
Problem
Points to check
Action
If Media Player or another application that has audio playback capability is running,
SONAR won’t be able to use the audio driver, and an error appears when SONAR is
started. Close the audio playback application, and then start SONAR again.
No sound at all
Could a message be indicating
“Unable to Open Audio Playback
Device”?
Make sure that SONAR’s “About Sampling Rates” (p. 56) is the same as the setting of
the SONAR V-STUDIO 100’s “Sample Freq” setting.
If an audio driver not being used by SONAR is installed, try either disabling that driver
or disconnecting the corresponding audio interface from your computer.
Try changing the Driver Mode (p. 23).
Make sure that the Sampling Rate of the audio used in your project, the Sampling Rate
of SONAR, and the setting of the SONAR V-STUDIO 100’s “Sample Freq” all match.
“About Sampling Rates” (p. 56)
Could more than one music
application be running?
If multiple music applications are running at the same time, close the other software. If
an indication remains in the taskbar even after you close the window, the software is
still running; you must also close the software that’s shown in the taskbar.
Are the MIDI Devices settings
correct?
Configure MIDI device settings as described in “MIDI Devices Settings” (p. 25).
Could you have connected/
disconnected another USB device,
such as a memory key?
Dropouts may occur during playback or recording if you connect/disconnect another
USB device (such as a memory key), or switch a device’s power on/off at the same time
that the SONAR V-STUDIO 100 is being used.
Are you using a hard disk that is
connected via USB?
Data transfer using USB could get congested if you use the SONAR V-STUDIO 100 and
a USB-connected hard disk at the same time. As a result, the data transfer speed for the
hard disk could be significantly reduced. As a storage location for the audio data that
you record and play back, you should avoid using a hard disk that is connected via USB.
Did the dropout occur immediately
after the system started up, or after
it woke from sleep?
Dropouts during playback/recording sometimes occur immediately after the system
has started up, or after it has woken from sleep. Wait for a while, then try the playback/
recording again.
Windows Update/ Microsoft
Update
Use Microsoft Corporation’s Windows Update or Microsoft Update to update your
system to the most recent state.
Windows XP:
System “Performance Options”
settings
Follow the procedure described in “Giving Priority to Background Service
(Windows XP)” (p. 55).
“Audio Buffer Size” in the setting
dialog box
1.Open the Settings dialog box as described in “VS-100 Driver settings” (p. 51).
2.Increase the “Audio Buffer Size.”
Clicks or pops may occur in the
sound if a LAN is operating
Try disabling the LAN in Device Manager. If this eliminates the clicks or pops, you may
be able to solve the problem by updating your LAN driver or BIOS.
Try adjusting the audio buffer size
in SONAR.
First, try adjusting the audio buffer size in SONAR.(“Other Audio Driver and AudioRelated Settings” (p. 23)) If you still experience clicks or pops during playback or
recording, try adjusting the “Audio Buffer Size” in the driver settings panel.(p. 51)
Could you have connected the VS100 to a USB hub?
Try connecting the VS-100 directly to a USB connector on your computer.
While you were using the SONAR
V-STUDIO 100, could your
computer have performed a task
with a heavy processing load, such
as accessing a CD-ROM drive or the
network?
If a heavy processing load occurs while the SONAR V-STUDIO 100 is being used, it may
not work correctly. In this case, stop playback, and then start playback once again.
If you are still unable to play, close all software that was using the SONAR V-STUDIO
100, disconnect the USB cable from the SONAR V-STUDIO 100 hardware, and then
reconnect it.
No MIDI sounds
There are Interruptions,
Dropouts, or Other
Problems in the Sound
During Playback
Playback Halts Midway,
and Subsequent
Playback is Not Possible
46
VS-100_install_e.book 47 ページ 2009年3月12日 木曜日 午後6時3分
Troubleshooting
Problems with Recording
Problem
Points to check
Action
If Media Player or another application that has audio playback capability is running,
SONAR won’t be able to use the audio driver, and an error appears when SONAR is
started. Close the audio playback application, and then start SONAR again.
Can’t record
Could a message be indicating
“Unable to open audio record
device”?
Make sure that SONAR’s Sampling Rate (p. 56) is the same as the setting of the SONAR
V-STUDIO 100’s “Sample Freq” setting.
If an audio driver not being used by SONAR is installed, try either disabling that driver
or disconnecting the corresponding audio interface from your computer.
Try changing the “Driver Mode” (p. 23)
Make sure that the Sampling Rate of the audio used in your project, the Sampling Rate
of SONAR, and the setting of the SONAR V-STUDIO 100’s “Sample Freq” all match.
“About Sampling Rates” (p. 56)
Dropouts occur in the
recording
Recording Halts Midway,
and Subsequent
Recording is Not Possible
Guitar Sound is Not Loud
Enough
Microphone is Not Loud
Enough
Could you have connected/
disconnected another USB device,
such as a memory key?
Dropouts may occur during playback or recording if you connect/disconnect another
USB device (such as a memory key), or switch a device’s power on/off at the same time
that the SONAR V-STUDIO 100 is being used.
Are you using a hard disk that is
connected via USB?
Data transfer using USB could get congested if you use the SONAR V-STUDIO 100 and
a USB-connected hard disk at the same time. As a result, the data transfer speed for the
hard disk could be significantly reduced. As a storage location for the audio data that
you record and play back, you should avoid using a hard disk that is connected via USB.
Did the dropout occur immediately
after the system started up, or after
it woke from sleep?
Dropouts during playback/recording sometimes occur immediately after the system
has started up, or after it has woken from sleep. Wait for a while, then try the playback/
recording again.
While you were using the SONAR
V-STUDIO 100, could your
computer have performed a task
with a heavy processing load, such
as accessing a CD-ROM drive or the
network?
If a heavy processing load occurs while the SONAR V-STUDIO 100 is being used, it may
not work correctly. In this case, stop playback, and then start playback once again.
If you are still unable to play, close all software that was using the SONAR V-STUDIO
100, disconnect the USB cable from the SONAR V-STUDIO 100 hardware, and then
reconnect it.
Are you using the correct
connector?
Connect your guitar to the INPUT 1 phone jack.
Is the input impedance switch set
correctly?
Turn the “Hi-Z” switch on.
Could you be using a connection
cable that contains a resistor?
Use a connection cable that does not contain a resistor.
Are you using the correct
connector?
Connect your microphone to the INPUT 1/2 MIC connector (XLR type jack).
Is the input level set appropriately?
Adjust the input level. (p. 36)
Could you be using a connection
cable that contains a resistor?
Use a connection cable that does not contain a resistor.
47
VS-100_install_e.book 48 ページ 2009年3月12日 木曜日 午後6時3分
Troubleshooting
Problem
Sound From the Device
Connected to the Input
Jacks is Not Loud Enough
Noise or distortion
occurs
Can’t Record via a Digital
Connection
Points to check
Action
Are the [MAIN MIX] knob, the level
knobs for each input, and the
headphone volume knob raised
appropriately?
Turn these knobs toward the right to adjust the volume.
Is the input level appropriate?
Adjust the input level while you watch the level meter in the display.
* For INPUT 1/2, use the [SENS] knob to adjust the input level. For INPUT 3–6, adjust the
input level by making adjustments on the connected device.
Could you be using a connection
cable that contains a resistor?
Use a connection cable that does not contain a resistor.
Could the compressor or equalizer
be on?
Try adjusting the compressor or equalizer gain settings.
Is a guitar connected?
If the noise diminishes when you lower the volume of your guitar, it could be that your
guitar’s pickups are being affected by electrical interference from your computer or
display. Try moving your guitar as far away as possible from your computer.
Could a microphone or guitar be
connected?
If a microphone or guitar is connected, unplug the microphone or guitar and turn
[SENS] knob all the way to the left so that the input level is lowered.
Could the level meter peak
indicator be lit?
Try lowering the input level. For INPUT 1/2, use the [SENS] knob to adjust the input
level. For INPUT 3–6, adjust the input level by making adjustments on the connected
device.
Check connections with your other
equipment.
If the audio output of another USB device is connected to the SONAR V-STUDIO 100,
noise from your computer may be heard via the SONAR V-STUDIO 100. Try connecting
via a self-powered USB hub (a USB hub that has an internal power supply or AC
adaptor) or changing the audio output connections.
Is your equipment grounded?
You may be able to solve the problem by connecting the chassis of your computer or
the ground pin of your computer’s power supply to an electrical ground. Also make
sure that there is no nearby device that might be producing a strong electromagnetic
field, such as a television or microwave oven.
Does the sample rate setting of
SONAR match the sample rate of
the digital device that’s connected
to the digital input connector?
Set them to the same sample rate.
Other Problems
Problem
Points to check
Action
Can’t select the SONAR
V-STUDIO 100 MIDI
device
Are you using the Media Player
included with Windows Vista?
In Windows Vista, you can’t use the SONAR V-STUDIO 100’s MIDI interface functionality
from Media Player.
No sound from your
computer’s speakers
If the SONAR V-STUDIO 100 is
connected to your computer,
sound will no longer be heard from
your computer’s speakers.
This is not a malfunction. Connect your headphones or audio playback system
(external monitors) to the SONAR V-STUDIO 100.
Does the software you’re using
support 24-bit audio data?
Check whether your software is able to play back and record 24-bit audio data.
Have you made the correct settings
in your software?
Make sure that your software is set to allow playback and recording of 24-bit audio
data.
Can’t record/play 24-bit
audio data
48
VS-100_install_e.book 49 ページ 2009年3月12日 木曜日 午後6時3分
Troubleshooting
Eliminating Clicks and Dropouts
If data cannot be recorded while recording audio, or if data cannot be fully processed during playback, SONAR will
automatically halt. This is called a dropout. Clicks or pops may also occur if problems occur in communication
between SONAR and the SONAR V-STUDIO 100 hardware.
There are a variety of possible reasons why clicks, pops, and dropouts might occur. To eliminate the cause of the
problem, follow the checkpoints listed below.
If problems occurs even with small projects
Increase the Mixing Latency
Extremely short Mixing Latency settings will place an excessive processing load on your computer.
“About Mixing Latency” (p. 57)
Try changing the Driver Mode
Since the SONAR V-STUDIO 100 hardware supports both WDM/KS and ASIO, you can try changing the “Driver
Mode” (p. 23).
“Audio Driver Settings” (p. 21)
Change the I/O Buffer Size
You may be able to solve the problem by changing the “I/O Buffer Size” in the “Advanced” tab of the “Audio Options”
dialog box. The I/O Buffer Size specifies the size of the buffer used when reading from, or writing to the disk. This
value will not affect the Mixing Latency. The default setting is 256, but you can try changing this to 512 if audiorelated problems occur.
Install the correct device driver
Even for your non-audio devices, make sure that the correct device drivers for your computer system are installed
and that your computer is running correctly. You should pay particular attention to this if you’ve modified your
computer or added peripheral devices, or if you’re using a computer that you assembled yourself.
Lower the screen resolution
Some computers have graphics functionality that places a heavy load on the CPU. You may be able to lighten this
load by lowering the screen resolution.
Uninstall the drivers of audio interfaces you’re not using
Some audio interfaces not intended for use in music production may cause problems with other audio interfaces (e.g.
the SONAR V-STUDIO 100 hardware). If SONAR does not perform as well as you expect, try using the Device Manager
to disable the standard audio functionality of your computer, or physically remove it and then uninstall the device.
Disable other hardware devices
Other hardware devices may interfere with the performance of your audio device. We recommend that you disable
any unnecessary hardware devices, such as network adapters and internal sound cards.
49
VS-100_install_e.book 50 ページ 2009年3月12日 木曜日 午後6時3分
Troubleshooting
If problems occur more frequently with large (heavy) projects
Increase the Mixing Latency
Extremely short Mixing Latency settings may place an excessive load on your computer.
“About Mixing Latency” (p. 57)
Use freezing or bouncing to reduce the load on your computer
If the size of the project exceeds the processing capability of your computer, you can reduce the processing load by
freezing synthesizers or bouncing audio tracks.
Update the driver of your audio device
In most cases, newer driver versions of the audio interface will have fewer problems and improved performance.
Close other programs
If other programs are running, they will reduce the CPU resources and memory that are available to SONAR. It is best
to close all programs that are not needed for your work.
Change the VS-100 driver’s buffer size
In some cases, reducing the VS-100 driver’s buffer size may allow stable operation even with a shorter Mixing
Latency.
1. Before you change the driver settings, you must close all programs that are using the SONAR
V-STUDIO 100 hardware. This is not necessary if you’re merely viewing the settings.
2. Open the “Control Panel” and click “VS-100.”
* If you don’t see the above icon, click “Switch to classic view.”
The “VS-100 Driver settings” dialog box appears.
3. Adjust the “Audio Buffer Size.”
To change the setting, make the desired setting and click [OK]. If you merely want to view the setting without
changing it, be sure to click [Cancel] after you’ve noted the setting.
* Execute SONAR’s “Wave Profiler...” if you’ve changed the buffer size (unless you’re using ASIO mode).
50
VS-100_install_e.book 51 ページ 2009年3月12日 木曜日 午後6時3分
Appendix
VS-100 Driver settings
Windows Users
Changing or Viewing the Settings
1. When changing driver settings, always make sure to first quit all applications using the SONAR
V-STUDIO 100 hardware. This is unnecessary when only checking the settings.
2. Open the “Control Panel,” and double-click “VS-100.”
* If the above icon cannot be found, click the “Switch to Classic View.”
3. The “VS-100 Driver Settings” dialog box appears.
4. To modify the settings, make the changes and click [OK]. To simply check the settings, be sure to
click [Cancel] after viewing the settings.
Controls in the Settings Dialog Box
Audio Buffer Size
Ordinarily, set the sixth position from the left for the buffer size.
After you’ve changed the “Audio Buffer Size,” make sure to restart all applications which are using the SONAR
V-STUDIO 100 hardware. Then, if you are using a program that offers a function for testing audio devices, we
recommend that you run such tests.
Also, you may want to check to see if your application is one of those that provides a setting for adjusting the
buffer size.
“Use Smaller ASIO Buffer Size” check box
If this check box is selected, the buffer size when using ASIO-compatible applications will be made smaller.
If you experience pops or clicks when this check box is selected, deselect this check box.
* You must deselect this check box when adjusting the “Audio Buffer Size.”
Information
This field shows the driver version.
51
VS-100_install_e.book 52 ページ 2009年3月12日 木曜日 午後6時3分
Appendix
Macintosh Users
Changing or Viewing the Settings
1. Use a USB cable to connect the SONAR V-STUDIO 100 hardware with your computer.
2. Turn the POWER switch of the SONAR V-STUDIO 100 hardware to the “ON” position.
3. Open “System Preferences” and click “VS-100.”
The Driver Settings Panel is displayed.
Controls in the Settings Dialog Box
Audio Buffer Size
This changes the Buffer Size for Audio Input/Output of the driver.
If sound dropouts or noise occur during playback or recording even after you’ve adjusted the Audio Buffer Size in
your software, you can increase this “Audio Buffer Size” setting.
* For some software, it may not be possible to adjust the buffer size.
Recording Margin
If the recorded audio data contains sound dropouts or noise even after you’ve adjusted the audio buffer size in your
software and also adjusted the above “Audio Buffer Size,” try increasing this “Recording Margin” setting.
* For some software, it may not be possible to adjust the buffer size.
Recording Timing
If the timing of the recorded audio data is not correct, adjust this value.
If you click the [Apply] while your audio software is running, the setting changes won’t be immediately
reflected. Only after all audio software have been quit, and the software is then started once again will the
settings become effective.
52
VS-100_install_e.book 53 ページ 2009年3月12日 木曜日 午後6時3分
Appendix
Uninstalling VS-100 Driver
Windows Vista Users
1. Start up Windows with all USB cables disconnected (except those for a USB keyboard and/or USB
mouse, if used).
2. Close all applications before performing the uninstallation.
3. Open “Control Panel” and click “Uninstall a program.”
* If you’re using the Classic View, double-click the “Programs and Features” icon.
4. In the list, choose VS-100 Driver, and click “Uninstall/Change.”
5. If a dialog box regarding User Account Control appears, click [Continue].
* If you are asked to enter the password for an administrative account, log on to Windows as a user whose account type
is Administrator, and then perform the uninstallation.
6. The display will indicate “The installed VS-100 Driver will be uninstalled.” Click the [OK].
7. When the message “Uninstallation was completed.” is displayed, click [OK] to restart Windows.
Windows XP Users
1. Start up Windows with all USB cables disconnected (except those for a USB keyboard and/or USB
mouse, if used).
2. Close all applications before performing the uninstallation.
3. Open “Control Panel” and click “Add or Remove Programs.”
4. In the list, choose VS-100 Driver, and click “Change/Remove.”
5. The display will indicate “The installed VS-100 Driver will be uninstalled.” Click the [OK].
* If any other message appears, follow the directions of the message.
6. When the message “Uninstallation was completed.” is displayed, click [OK] to restart Windows.
53
VS-100_install_e.book 54 ページ 2009年3月12日 木曜日 午後6時3分
Appendix
Macintosh Users
1. Start computer with all USB cables disconnected.
(except the keyboard and mouse)
2. Double-click “VS100_Uninstaller.”
3. The display will indicate “This uninstalls VS-100 driver from this Macintosh.”; click [Uninstall].
* If any other message appears, proceed as directed by that message.
4. The display will indicate “Are you sure to uninstall the driver?”; click [OK].
5. The “Authenticate” dialog box or the dialog that indicates “Installer requires that you type your
password” appears; enter the password and click [OK].
6. The display will indicate “Uninstllation is completed.”; click [Restart]. Your computer will then
restart.
* It may take some time for restarting the computer.
54
VS-100_install_e.book 55 ページ 2009年3月12日 木曜日 午後6時3分
Appendix
Giving Priority to Background Service (Windows XP)
On Windows XP, if you omit making this setting, you may experience sound dropout. By making this setting you may
be able to solve such problems. Be sure to make this setting before you begin using the SONAR V-STUDIO 100
hardware.
1. Open the “Control Panel,” and double-click “System.”
* If you don’t see the above icon, click “Performance and Maintenance,” and then click “System.”
2. Click the “Advanced” tab, click [Settings] located in the Performance area, and click the
“Advanced” tab.
3. Choose “Background services,” and click [OK].
4. Click [OK] to close “System Properties.”
55
VS-100_install_e.book 56 ページ 2009年3月12日 木曜日 午後6時3分
Appendix
About Sampling Rates
The SONAR V-STUDIO 100 hardware allows you to choose from the following sampling rates: 44,100 Hz, 48,000 Hz,
and 96,000 Hz.
* SONAR does not allow you to change the sampling rate of a project that contains audio data.
* Selecting a higher sampling rate will allow you to handle audio at a higher quality, but will require greater performance
from your CPU, memory, and hard disk. If you are unsure of your computer’s capabilities, we recommend that you use
44,100 Hz or 48,000 Hz.
1. Close SONAR.
2. Change the “Sample Freq” setting in the system settings of the SONAR V-STUDIO 100 hardware,
to change the sampling rate.
3. Launch SONAR. Even if an “Audio Driver Error” is displayed during startup, click [Use Anyway].
* An error message will not be displayed if you’re using ASIO.
4. Execute the “Options | Audio” command to open the “Audio Options” dialog box.
5. Click the “General” tab, and specify the same “Sampling Rate” as you selected on the SONAR
V-STUDIO 100 hardware.
6. Click [OK] to close the dialog box.
If you are asked to restart SONAR, proceed as directed by the screen. We recommend that if you’ve changed the
Sampling Rate, you also execute “Wave Profiler...” located in the same dialog box.
7. Restart SONAR.
The changed sampling rate will take effect.
* The sampling rate setting will also be reflected in new project files that you subsequently create.
56
VS-100_install_e.book 57 ページ 2009年3月12日 木曜日 午後6時3分
Appendix
About Mixing Latency
If the driver mode is set to ASIO, you won’t be able to adjust the Mixing Latency from SONAR. Adjust the
“Audio Buffer Size” from the [ASIO Panel].
The Mixing Latency setting is closely related to how SONAR can take full advantage of your computer’s performance.
Increasing the mixing latency will allow more audio processing to be performed within SONAR. However, increasing
the mixing latency will lengthen the time (latency) from when SONAR begins processing the audio until you actually
hear the sound. Increasing the latency will adversely affect your MIDI keyboard playing.
The most suitable Mixing Latency setting will depend on the performance of your computer and on various settings,
such as the sampling rate you’re using. If you experience the following problems with the default settings, try
adjusting the mixing latency.
Notes are delayed when you play a software synthesizer from a MIDI keyboard
Lower settings for Mixing Latency will shorten the delay (latency) from when you play a key until you hear the sound
from the software synthesizer.
However, shortening the latency may cause interruptions or dropouts in the sound; if this occurs, you won’t be able
to shorten the latency any further.
Interruptions or dropouts occur during playback in SONAR
You may be able to reduce interruptions or dropouts by increasing the Mixing Latency.
Procedure for setting the Mixing Latency
1. Execute the “Options | Audio” command to open the “Audio Options” dialog box. Click the
“General” tab.
2. Click the [Wave Profiler...] button. If you see an indication that the operation ended successfully,
the setting is OK. If the screen indicates “Audio Driver Error,” there may be a problem with the
setting; check once again from step 1. on p. 21.
3. In the “Mixing Latency” area, use the “Buffer Size” slider to change the latency.
The size of the specified Mixing Latency is shown in the latency field located below the slider. The size of the Mixing
Latency is determined by two factors: “Buffers in Playback Queue” and “Buffer Size.” Normally, you’ll adjust the
“Buffer Size.” If you’re trying to eliminate interruptions in the sound, you may be successful by increasing “Buffers
in Playback Queue” to a value of 3-5.
4. Click [OK] to close the dialog box.
If the screen indicates “Audio Driver Error”, there may be a problem with the setting; check once again from step 1.
on p. 21.
5. Play back the project in SONAR, and listen to the playback. If necessary, return to step 1. and
adjust the latency again.
* If the driver mode is ASIO, adjust the “Audio Buffer Size” in the [ASIO Panel].
57
VS-100_install_e.book 58 ページ 2009年3月12日 木曜日 午後6時3分
Appendix
Multi-user Use
In order to install SONAR, you must log on as a user who has administrative privileges.
Once installed, SONAR can be used by any user (in Windows Vista) or a limited user (in Windows XP), as well as by a
user who has administrative privileges.
Uninstalling SONAR and Other Components
If you want to uninstall a component of SONAR or VS Production Pack, use the following procedure to uninstall that
component.
1. Log on as a user who has administrative privileges.
2. Click the Windows “Start” button, and then click “Control Panel.”
3. Click “Programs and Features” (in Windows XP, “Add or Remove Programs”).
4. In the list of programs, click the component that you want to uninstall.
* Choose from “SONAR VS,” “VS Production Pack,” etc.
5. Click “Uninstall” (in Windows XP, “Remove”) to uninstall SONAR.
* If a user account control dialog box appears, click Continue.
6. After uninstalling SONAR, restart Windows.
58
VS-100_install_e.book 59 ページ 2009年3月12日 木曜日 午後6時3分
Appendix
Shortcut reference
Task
Shortcut
Switch tracks
Quickly navigate tracks
Hold down
Switch focus between tracks and buses
and turn
+
Change LCD display mode
Enable/disable ACT mode
Change parameter controlled by
Change value of current ASSIGN parameter
Turn
Adjust selected track’s level
Fader
Mute selected track
Enable/disable input monitoring
+
Solo selected track
Clear all solos
+
Arm selected track for recording
Enable/disable automation write
+
Enable/disable loop playback
Set loop region = selection
+
59
VS-100_install_e.book 60 ページ 2009年3月12日 木曜日 午後6時3分
Appendix
Task
Shortcut
Open Track view
Open Console view
+
Return to zero (RTZ)
Rewind
Fast forward
Go to end
Stop playback
Play
Record
Jump to next measure
+
Jump to previous measure
+
Jump to next marker
+
Jump to previous marker
+
Navigate the Now time with
+
Insert marker
60
VS-100_install_e.book 61 ページ 2009年3月12日 木曜日 午後6時3分
MEMO
MEMO
61
VS-100_install_e.book 62 ページ 2009年3月12日 木曜日 午後6時3分
MEMO
62
VS-100_install_e.book 63 ページ 2009年3月12日 木曜日 午後6時3分
VS-100_install_e.book 64 ページ 2009年3月12日 木曜日 午後6時3分
*
5
1
0
0
0
0
6
4
1
1
-
0
1
*