1
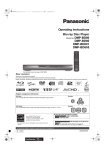
Panasonic
Operating Instructions
Blu-ray Disc Player
Model No. DMP-BD80
DMP-BD60
DMP-BD601
DMP-BD605
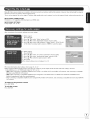
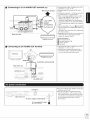
Theillustration
shows
theimage
ofDMP-BDa0.
Dear customer
Thank you for purchasing this product.
For optimum performance and safety, please read these instructions carefully.
Before connecting, operating or adjusting this product, please read the instructions
BD_lVE
_
completely.
DiGiTAL
Li k
TM
Region management
Please keep this manual for future reference.
AUDIO
AVC H E_ _
Java
POWER[D
information
BD-Video
Example:
This unit plays BD-Video marked with labels containing the region code A.
@
DVD-Video
Example:
This unit plays DVD-Video marked with labels containing the region number "1" or "ALL".
If you have any questions contact
As an ENERGY STAR®Partner[ _
Panasonic has determined that
this product meets the ENERGY STAR ®
_lrRl_f_rtlP4_:
1-800-211 -PANA(7262)
Ira_f!_J_l:1-800-561-5505
guidelines for energy efficiency.
For Canada only: The word "Participant"
"Partner",
is used in place of the word
Dm_ll';ratlk-!;_4,[,r._F41_m:t[_,l:Thewarranty can be found on
page 46.
I['a_f!_J_l:The
warranty can be found on page 47.
[iiii!
[_
_
RQT9378-4P
IMPORTANT
SAFETY
INSTRUCTIONS
Follow the safety instructions on the unit and the applicable
safety instructions listed below. Keep these operating instructions
handy for future reference.
1) Read these instructions.
2) Keep these instructions.
3) Heed all warnings.
4) Follow all instructions.
5) Do not use this apparatus near water.
6) Clean only with dry cloth.
7) Do not block any ventilation openings. Install in accordance
with the manufacturer's
instructions.
8) Do not install near any heat sources such as radiators, heat
registers, stoves, or other apparatus (including amplifiers)
that produce heat.
9) Do not defeat the safety purpose of the polarized or
grounding-type
plug. A polarized plug has two blades with
one wider than the other. A grounding-type
plug has two
blades and a third grounding prong. The wide blade or the
third prong are provided for your safety. If the provided plug
does not fit into your outlet, consult an electrician for
replacement of the obsolete outlet.
10) Protect the power cord from being walked on or pinched
particularly at plugs, convenience
receptacles, and the point
where they exit from the apparatus.
11) Only use attachments/accessories
specified by the
manufacturer.
12) Use only with the cart, stand, tripod, bracket, or
table specified by the manufacturer,
or sold
with the apparatus. When a cart is used, use
caution when moving the cart/apparatus
combination to avoid injury from tip-over.
13) Unplug this apparatus during lightning storms
or when unused for long periods of time.
14) Refer all servicing to qualified service personnel. Servicing is
required when the apparatus has been damaged in any way,
such as power-supply
cord or plug is damaged, liquid has
been spilled or objects have fallen into the apparatus, the
apparatus has been exposed to rain or moisture, does not
operate normally, or has been dropped.
rWARNING:
TO REDUCE THE RISK OF FIRE, ELECTRIC
SHOCK OR
PRODUCT
DAMAGE,
oDO NOT EXPOSE
THIS APPARATUS
TO RAIN,
MOISTURE,
DRIPPING
OR SPLASHING
AND THAT NO
OBJECTS
FILLED WITH LIQUIDS,
SUCH AS VASES,
SHALL BE PLACED ON THE APPARATUS.
oUSE ONLY THE RECOMMENDED
ACCESSORIES.
oDO NOT REMOVE
THE COVER (OR BACK); THERE
ARE NO USER SERVICEABLE
PARTS INSIDE. REFER
SERVICING
TO QUALIFIED
SERVICE
PERSONNEL.
rCAUTION!
DO NOT INSTALL OR PLACE THIS UNIT IN A
BOOKCASE,
BUILT-IN CABINET
OR IN ANOTHER
CONFINED
SPACE. ENSURE THE UNIT IS WELL
VENTILATED.
TO PREVENT
RISK OF ELECTRIC
SHOCK
OR FIRE HAZARD DUE TO OVERHEATING,
ENSURE
THAT CURTAINS
AND ANY OTHER MATERIALS
DO
NOT OBSTRUCT
THE VENTILATION
VENTS.
i
/Danger
of explosion if battery is incorrectly
replaced.
/Replace
only with the same or equivalent
type
I recommended
by the manufacturer.
Dispose of used
f_he
_ ......
/,2
RQT9378
socket
outlet
to the manufacturer's
shall be installed
instructions.
near the equipment
and_
asily accessible.
The mains plug of the power supply cord I
hall remain readily operable.
/
I:i:o completely
disconnect
this apparatus from the AC Mains, I
) L disconnect
the power
supply
The lightning
flash with arrowhead
symbol,
within
an equilateral triangle, is intended to alert the user
to the presence of uninsulated
"dangerous
voltage" within the product's enclosure that may be
of sufficient magnitude to constitute a risk of
electric shock to persons,
The exclamation
point within an equilateral
triangle
is intended to alert the user to the presence of
important operating and maintenance
(servicing)
instructions
in the literature accompanying
the
ppliance,
"THE FOLLOWING
APPLIES
ONLY IN THE U.S.A.
_"
FCC Note:
This equipment has been tested and found to comply with the limits
fora Class B digital device, pursuant to Part 15 of the FCC Rules.
These limits are designed to provide reasonable protection against
harmful interference in a residential installation. This equipment
generates, uses, and can radiate radio frequency energy and, if not
installed and used in accordance with the instructions, may cause
harmful interference to radio communications. However, there is no
guarantee that interference will not occur in a particular installation.
If this equipment does cause harmful interference to radio or
television reception, which can be determined by turning the
equipment off and on, the user is encouraged to try to correct the
interference by one or more of the following measures:
• Reorient or relocate the receiving antenna.
• Increase the separation between the equipment and receiver.
• Connect the equipment into an outlet on a circuit different from
that to which the receiver is connected.
• Consult the dealer or an experienced radio/TV technician for help
FCC Caution: To assure continued
compliance,
follow the
attached installation
instructions
and use only shielded
interface cables when connecting
to peripheral devices.
Any changes or modifications not expressly approved by the party
responsible for compliance could void the user's authority to
operate this equipment.
This device complies with Part 15 of the FCC Rules. Operation is
subject to the following two conditions: (1) This device may not
cause harmful interference, and (2) this device must accept any
interference received, including interference that may cause
undesired operation.
Support Contact:
Panasonic Consumer Electronics Company
Telephone No.: 1-800-211-PANA (7262)
%
{rCAUTION
according
SHOCK, DO NOT REMOVE SCREWS,
NO USER-SERVICEABLE
PARTS
INSIDE,
REFER SERVICING TO QUALIFIED
SERVICE PERSONNEL,
Responsible Party:
Panasonic Corporation of North America
One Panasonic Way
Secaucus, NJ 07094
THIS PRODUCT
UTILIZES
A LASER.
USE OF CONTROLS
OR ADJUSTMENTS
OR
PERFORMANCE
OF PROCEDURES
OTHER THAN
THOSE SPECIFIED
HEREIN
MAY RESULT IN
HAZARDOUS
RADIATION
EXPOSURE.
DO NOT OPEN COVERS AND DO NOT REPAIR
YOURSELF.
REFER SERVICING
TO QUALIFIED
PERSONNEL.
•
CAUTION: TO REDUCE THE RISK OF ELECTRIC
Declaration of Conformity
Trade Name: Panasonic
Model No.: DMP-BD80
DMP-BD60
DMP-BD601
DMP-BD605
"CAUTION!
L batteries
CAUTION
cord plug from AC receptacle.,)
CAUTION
VISIBLE
-
CAUTION-
Do
C_A_I
NOT
AND INVISIBLE
STARE
_ _IoBIREACN
INTO
_yl_V_
LASER
BEAM.
RADI#:/ION
FOA
BoL_T_C_A! #
_MI _Z_4
WHEN
OPEN,
21 CFR/Class_
_ _C06 _:
([a)
............
RAYONNEMENT LASER VISIBLE ET INVISIBLE CLASSE 1M,
ATTENTION- E.CAS
D_UVERTURE.
NE PASREGARDER DIRECTEMENT _,L'AIf)E O'INS_R ME_q'S D'OPTIQUE,
FORSIGTIG-
VARO
VAn NIN L_
SYNLIG OG USYNLIG LASERSTRALING KLASSE 1M, N,_R LAGET ER
ABNT. UNDGA AT S_ IGE PA MD OPTISKE INSTRUMENTER.
_ AVATTAESSA OLET ALTTIINA LUOKAN/M NAKYVAA JA NAKYMATONTA
ASERSATEI/Y#.
ALA KAT£O OPTISELLA LAI_EELLA SUORAAN SATEESEEN,
KLASS
1 M SYNLIG
OCH
OSYNLIG
LASERSTRALNING
N/_R
SICHTBARE UND UNSICHTBARE LASERSTRAHLUNG
WENN ABDECKUNG GEOFFNE31
_',_9'
;±,_
DENNA
DEL
AR
-- OPPNAD, 8E [RAK[A EJ STR_LEN DIREK1 GENOM OPTISK [ INS[RUMEN_:
VORSICHT=
KLASSE
1_
......
-- _._'_T_'_t,"_{,_
_
.......
......
unslae or proaucu
Unit and media care
Clean discs
DO
DO NOT
Wipe with a damp cloth and then wipe dry.
Disc and card handling precautions
• Handle discs by the edges to avoid inadvertent scratches or fingerprints on the disc.
• Do not attach labels or stickers to discs (This may cause disc warping, rendering it unusable).
• Do not write on the label side with a ball-point pen or other writing instrument.
• Do not use record cleaning sprays, benzine, thinner, static electricity prevention liquids or any other solvent.
• Do not use scratch-proof protectors or covers.
• Clean any dust, water, or foreign matter from the terminals on the rear side of the card.
• Do not use the following discs:
- Discs with exposed adhesive from removed stickers or labels (rented discs etc).
- Discs that are badly warped or cracked.
-Irregularly shaped discs, such as heart shapes.
Clean this unit with a soft, dry cloth
• Never use alcohol, paint thinner or benzine to clean this unit.
• Before using chemically treated cloth, carefully read the instructions that came with the cloth.
Observe the following
points to ensure continued listening and viewing pleasure.
Dust and dirt may adhere to the unit's lens over time, making it impossible to play discs.
Use the lens cleaner (not included) about once every year, depending
the lens cleaner's instructions before use.
on frequency
of use and the operating
environment.
Carefully
read
Lens cleaner: RP-CL720PP
• This lens cleaner is sold as specific for DIGA, but can be used
without problem on this unit as well.
This unit may record information
of your operating
procedures.
If you discard this unit either by disposal
or transfer, then follow the
procedures to return all the settings to the factory presets to delete the recorded information. (q> 42, "To return to the factory preset")
• When BD-Video is played back, the operation history may be recorded in the memory of this unit. The recorded contents differ depending on the
disc.
RQT9378
Table of contents
IMPORTANT SAFETY
INSTRUCTIONS
................................
2
Changing settings with
the on-screen menu .......................
Unit and media care ............................
3
Changing
Accessory
5
information
........................
Media (Disc, card and USB device)
information ........................................
Audio and video information
Connections
6
.............. 8
.......................................
10
Remote control and unit
reference guide .... ...........................
14
...........................
15
Setting .....................
Broadband
Firmware
Network
network connection
....... 16
About
the unit's settings ............ 32
MP3/JPEG/DivX
Messages
Troubleshooting
Specifications
17
Product
22
Chapter
playback ...............................
23
Playing music ....................................
23
Playing still pictures ..........................
24
Playing DivX ®videos .........................
26
Enjoying VIERA CAST TM................... 27
Linked operations
with the TV
Link TM"HDAVI
Control TM'')..........
28
45
47
settings ................................
Enjoying BD-Live or BONUSVIEW
in BD-Video .....................................
42
46
Limited Warranty
(Only for CANADA)
Playing HD Video or SD Video ......... 21
RQT9378
....................................
40
Limited Warranty (Only for U,S,A,
and Puerto Rico) ............................
........................
Service .................................
Licenses .............................................
Referencia
(Spanish
(VIERA
guide .....................
16
Basic play (Playing video contents) ...... 19
files .............. 38
...........................................
updates... ...........................
Inserting or removing a media ................. 19
30
48
48
rapida en espa_ol
Quick Reference) ........... 49
Glossary .............................................
Index ....................................
50
Back cover
Accessory
information
Please check and identify the supplied accessories. Use numbers indicated in parentheses when asking for
replacement parts.
(Product numbers correct as of December 2008. These may be subject to change.)
Only for U.S.A.
and Puerto
Rico: To order
accessories,
refer to "Accessory
Purchases
(United
States
and Puerto
Rico)"
on page 46.
Only for Canada:
To order
accessories,
[]
call the dealer
from whom
you
[]
1 Remote control
made your
purchase.
[]
1 Audio/Video cable
(N2QAYB000378)
have
(K2KAdBA00004)
[]
[]
1 AC power supply cord
(K2CB2CB00022)
oFor use with this unit only.
Do not use it with other equipment.
Also, do not use cords from other
equipment with this unit.
1 HDMI cable
(DMP-BDd05 only)
(K1HA19DA0005)
2 Batteries
for remote
control
(Only for U.S.A. and Puerto Rico)
Product Registration Card
Please complete and return the included product registration card, or register via the Internet at:
http://www.prodreg.com/panasonic/
(ONLY FOR CANADA)
he enclosed Canadian French label sheet corresponds to the English display on the front and back side of the unit.
Use
Batteries
Insert so the poles (÷ and ) match those in the remote control.
When closing the lid, insert it from the
(minus) side.
Remote control signal sensor
30 °
7m (23 feet) directly in front
of the unit
R6/LR6, AA
• Use alkaline or manganese batteries.
• Do not mix old and new batteries.
• Do not use different types at the same time.
• Do not heat or expose to flame.
• Do not leave the battery(ies) in an automobile exposed to direct
sunlight for a long period of time with doors and windows closed.
• Do not take apart or short circuit.
• Do not attempt to recharge alkaline or manganese batteries.
• Do not use batteries if the covering has been peeled off.
If you cannot operate the unit or other equipment using the remote
control after changing the batteries, please re-enter the codes
(=_ 15, 36).
CAUTION
Do not place objects in front of the unit. The disc tray may collide with
objects when it is opened, and this may cause injury.
Mishandling of batteries can cause electrolyte leakage which can
damage items the fluid contacts and may cause a fire.
Remove batteries if the remote control is not going to be used for a
long period of time. Store in a cool, dark place.
RQT9378
Media (Disc, card and USB device) information
This chart shows the different type of retail/commercial
discs and/or packaging.
discs you can use, and also includes the industry-standard
Iogos that should appear on the
This format supports High Definition video and audio content
including:
• BD-Live (BD-ROM Profile 2). This format provides interactive
features when this player is connected to the Internet via a
broadband connection.
iiii: ii_i
:
:i
: _ ii
|:]D]LvJ
BD?/vETM
ii
• BON USVl EW allows picture-in-picture
viewed.
BONUS
DVD,Video
VIEW
functions to be
TM
This format supports high quality video and audio playback.
|DIVJD]LVJ
V|DEO
Compact Discs (CD's) that contain audio and music
• Operation and sound quality of CDs that do not conform to
CD-DA specifications (copy control CDs, etc.) cannot be
guaranteed.
• The digital audio content side of a DualDisc does not meet the
technical specifications of the Compact Disc Digital Audio (CD-DA)
format so play may not be possible.
This chart shows the different type of discs recorded with other devices that you can use.
__,_i
This mark means you must finalize the disc with the DVD recorder, etc. before playback. For details about finalizing, refer to the
operating instructions for your equipment.
BD-RE
•Version 3 of the BD-RE Recording
=JPEG format
,m__._-"_=
Format
B/u-ray_'isc
• Version 2 of the BD-R Recording Format
DVD-RAM
•Version
1.1 of the DVD Video Recording
Format
IIDlvJDILVJ-']
Format
IIDlvJDILVJ-']
• JPEG format
eAVCHD format
R A M
RA/_4.7
DVD-R/RW
• DVD-Video Format
• Version 1.1 of the DVD Video Recording
•AVCHD format
_
R
R
R4.7
w
•[BD80
:
DivX format (DVD-RW is not supported)
• MP3 format (DVD-RW is not supported)
• JPEG format (DVD-RW is not supported)
• DVD-Video Format
• Version 1.2 of the DVD Video Recording
• AVCHD format
I!"JI,w_
Format
IIDlvJDILVJ-']
R
• [BD80
R DL
eMP3
• JPEG
+R/+RW/+R
DL
:
DivX format
format
format
I!"JI,W_
• +VR (+R/+RW Video Recording) Format
• AVCHD format
• CD-DA format
• MP3 format
• JPEG
format
• [BD80: DivX format
IID]I_:I
• It may not be possible to play the above discs in some cases due to the type of discs, the condition of the recording, the recording method and
how the files were created,
• When a disc recorded in the AVCHD format is being played, the video may be paused for a few seconds at portions spliced, due to deletion or editing.
RQT9378
Thischart
shows
thedifferent
typeofcards
recorded
withother
devices
thatyoucanuse.
oJPEG format
oAVCHD format
• MPEG2 format
_J',,]=[e
IIILN".1
=l:_,'.l
* Includes miniSD Card and microSD Card
The card types mentioned above will be referred to as "SD card" in these operating instructions.
• MiniSD Cards and microSD Cards can be used, but must be used with an adaptor card. These are usually supplied with such cards,
or otherwise customer provided.
• We recommend using a Panasonic SD card. Please confirm the latest information on the following website.
http:flpanasonic.co.jplpavclgloballcs
(This site is in English only.)
• This unit is compatible with SD Memory Cards that meet SD Card Specifications FAT12 and FAT16 formats, as well as SDHC
Memory Cards in FAT32 format.
• When using cards from 4 GB to 32 GB, only SD cards using the SDHC logo can be used.
• Useable memory is slightly less than the card capacity.
• If the SD card you are attempting to use was formatted on a PC, it is possible that the card may not work properly.
• Keep the Memory Card out of reach of children to prevent swallowing.
• When a card recorded in the AVCHD format is being played, the video may momentarily pause, especially where one recording ends and the next
one begins. This is normal and does not indicate a problem.
• To protect the card's contents, move the record prevention tab (on the SD card) to "LOCK".
This unit can playback pictures by connecting the USB memory recorded with a PC or similar in following formats, and Panasonic digital cameras
connected via USB cable.
• MP3 format
• JPEG format
• [BD80
:
DivX format
_J',,]=[e
I D]I_:t
Compatible
USB devices
• USB devices which are defined as USB mass storage class.
- USB devices that support USB 1.0/1.1 and USB 2.0 Full Speed/High Speed.
• USB devices of up to 128 GB can be used.
• USB devices that support bulk only transfer.
CBI (Control/Bulk/Interrupt)
is not supported.
• Digital Cameras which require additional program installation when connected to a PC are not supported.
• MTP (Media Transport Protocol) device is not supported.
• A multi-port USB card reader is not supported.
File system
• FAT12, FAT16 and FAT32 file systems are supported.
• UDF/NTFS/exFAT file system is not supported.
• Depending on the sector size, some files may not work.
• Only the first partition on USB devices with multi-partition is supported.
Despite meeting the conditions mentioned above, there may be USB device that cannot be used with this unit.
This unit does not support USB device charging,
• BD-RE discs (with cartridge)
• 2.6 GB and 5.2 GB DVD-RAM
•
•
•
•
•
•
•
•
•
•
•
DVD-RAM that cannot be removed from cartridge
3.95 GB and 4.7 GB DVD-R (Authoring)
Version 1.0 DVD-RW
DVD-ROM, CD-ROM, CDV, SACD, Photo CD, MV-Disc and PD
DVD-Audio
Video CD and SVCD
WMA discs
___:
DivX discs
PAL Discs
HD DVD
BD-Video discs recorded at a rate of 50 fields/sec
• Any other disc that is not specifically
supported
RQT9378
Audio and video information
Before connecting, read the table below, and confirm the desired audio type and necessary
D +/Dolby TrueHD" or "DTS/DTS-HD"). (_ 9)
• The number of channels listed is the maximum possible number of output channels.
HDMI
AV
OUT/DIGITAL
AUDIO
OUT
(Coaxial
settings ("BD-Video
Secondary Audio", "Dolby D/Dolby
_/Optical)
[:-]i.l_
-"II] LVll
ff-*lVlo]ll
Dolby Digital/
Dolby Digital
EX_6
Dolby Digital
I] [_ i/E*I !-*_lJ I] [oXo]II
Dolby Digital/
Dolby Digital/
Dolby Digital EX
Do!by Digita!
Plus
5.1ch PCM
5.1ch PCM _2
Dolby Digital
EX_6
7:1ch
PCM
Dolby Digital
Dolby TrueHD
DTS Digital
Surround/
DTS-ES .6
DTS Digital
Surround/
DTS-ES
I'€1_'_: 7.1ch PCM _'4
DTS Digital
Surround/
DTS_ES*6
DTS Digital
DTS:HD High
Reso uton
Audio
7:1ch PCM _'4
DTS Digital
Surround
Down-mixed
5.1ch PCM
AUDIO
li'l'_'_:
5.1ch PCM
DTS-HD Master
Audio
i
7.iCh
PCM
Down-mixed
2ch PCM
Surround
Down-mixed
5.1ch PCM _2
7:1ch PCM
Down-mixed
2ch PCM
OUT (Analog)
5.1ch
2ch
Down-mixed5.1ch
_2
17.1ch
• Also, depending
on the specifications or the settings of the amplifier/receiver,
the results of the output may vary.
_1 When the connected equipment is not supported with these audio formats, the audio is output as Dolby Digital bitstream, DTS Digital Surround
bitstream or down-mixed 2ch PCM (e.g., TV).
_2 I'_'A'_: When playing BD-Video without secondary audio or button click sound, the audio is output as the same format as if "BD-Video
Secondary Audio" was set to "Off".
_3 When the connected equipment is not supported with multi channel surround, the audio is output as down-mixed 2ch PCM.
_4 I'_'i_: When the connected equipment is supported with 7.1 channel surround, the audio output is amplified from 5.1ch or 6.1ch to 7.1ch
depending on the DTS, Inc. specifications.
_5 With PCM output, Dolby Digital EX becomes PCM audio decoded as Dolby Digital, DTS-ES recorded to DVD-Video becomes PCM audio
decoded as DTS Digital Surround, and DTS-ES recorded to BD-Video becomes PCM audio decoded as DTS-ES.
_6 I'_1_: When "BD-Video Secondary Audio" is set to "On", Dolby Digital EX is output as Dolby Digital and DTS-ES is output as DTS Digital
Surround, however if playing BD-Video without secondary audio or button click sound, the audio is output as the original format.
This unit supports high bit rate audio (Dolby Digital Plus, Dolby TrueHD, DTS-HD High Resolution Audio and DTS-HD Master Audio) adopted in BD-Video.
In order to enjoy these audio formats, the following conditions are necessary. (Part shown in the shaded area of table given above)
NECESSARY CONNECTIONS
eHDMI AV OUT terminal: (_ 12)
• 7.1ch AUDIO OUT terminal _:
(_ 12)/5.1ch AUDIO OUT terminal _:
(_ 13)
NECESSARY
SETTINGS
(_ 9)
• Set "BD-Video Secondary Audio" to "Off".
• HDMI AV OUT terminal: Set "Dolby D/Dolby D +/Dolby TrueHD" or "DTS/DTS-HD" to "Bitstream" or "PCM".
• 7.1 ch AUDIO OUT terminal _:
Set "Analog Audio Output" to "7.1 ch".
• 5.1ch AUDIO OUT terminal IBD80 : Set "Analog Audio Output" to "2ch (Downmix) + 5.1ch".
• The button click sound on the menu and audio with secondary video in picture-in-picture
RQT9378
mode (_ 22) is not output.
Many
BD-Video
movie
contents
arerecorded
in24frames/second
inaccordance
withthefilmmaterials.
However,
theywillnormally
beoutput
in
60frames/second
inaccordance
withthedisplay
format.
These
canbeoutput
in24pastheoriginal.
Therefore,
high-quality
video
canbeenjoyed,
such
astheimproved
clarity,
enhanced
perspective,
etc.
NECESSARY
CONNECTIONS
oConnect to a TV supporting 1080/24p input via an HDMI cable,
NECESSARY
SETTINGS
• "2@ Output": "On" (_, 34)
After connecting
to the terminals, perform necessary settings.
1) While stopped
Press [SETUP].
2) Press [A, T] to select "Audio" and press [OK].
3) Press [A
T] to select "Digital Audio Output" and press [OK].
4) Press [A
T] to select"Dolby
D/Dolby D +/Dolby TrueHD", "DTS/DTS-HD",
or "BD-Video Secondary Audio" and press [<,
I_] to select the option.
1) While stopped
Press [SETUP].
2) Press [A, T] to select "TV / Device Connection"
and press [OK].
3) Press [A
T] to select "Analog Audio Output" and press [OK].
4) Press [A
T] to select the option and press [OK].
5) Press [OK].
oThe channel setting screen is displayed. (_ 37)
• For more information
about settings, refer to page 33, 34, 37.
• When using the different terminal at the same time, the sound may not be output with the desired audio if the setting is incorrect.
In the following case, set "HDMI Audio Output" to "Off". (_ 34)
-[BD80
: When connecting a compatible amplifier/receiver
using 7.1ch AUDIO OUT/5.1ch AUDIO OUT terminals, and connecting
a compatible
television using HDMI AV OUT terminal
-[BD80
:
When connecting
a compatible
amplifier/receiver
using both 7.1ch AUDIO OUT/5.1ch
AUDIO OUT terminals and HDMI AV OUT
terminal if outputting the audio from analog terminals
-When connecting
OUT terminal
a compatible
amplifier/receiver
using DIGITAL AUDIO OUT terminals, and connecting a compatible television using HDMI AV
To return to the previous screen
Press [RETURN].
To exit the screen
Press [SETUP].
RQT9378
Connections
• This unit offers several different types of audio and video connections.
• Your TV/receiver/amplifier
may or may not support all the connections shown,
Standard
Quality
Highest
Quality
HDMI AV OUT
480p, 720p, 1080i,
1080p
COMPONENT
VIDEO OUT
BD-Video: 480i, 480p, 720p,
1080i
DVD-Video: 480i, 480p
VIDEO OUT
480i
Standard
Highest
Quality
Quality
HDMI AV OUT
DIGITAL AUDIO OUT
(COAXIAL BD_/OPTICAL)
Standard
Quality
Highest
Quality
7.1ch AUDIO OUT _
• Do not place the unit on amplifiers/receivers
5.1ch AUDIO OUT _
2ch AUDIO OUT
or equipment that may become hot. The heat can damage the unit.
• Before making any connections we strongly suggest that all units be temporarily disconnected from AC power.
• Do not connect video signals through a video recorder. Due to copy guard protection the picture may not be displayed properly
eNon-HDMI-compliant
cables cannot be utilized.
e_
_
_:
Please use High Speed HDMI Cables that have the HDMI logo (as shown on the cover). It is
recommended that you use Panasonic's HDMI cable. When outputting 1080p signal, please use HDMI cables 5.0
meters (16.4 ft) or less.
Recommended part number:
RP-CDHG10 (1.0 m/3.3 ft), RP-CDHG15 (1.5 m/4.9 ft.), RP-CDHG20 (2.0 m/6.6 ft), RP-CDHG30 (3.0 m/9.8 ft.), RP-CDHG50
(5.0 m/16.4 ft.), etc.
eThis unit incorporates HDMI (Deep Color, x.v.Color TM, High Bit rate Audio) technology. (_ 50, 51)
RQT9378
For audio output, refer to pages 12 and 13.
O
Connecting
to your
• "HDMI Video Mode" and "HDMI Audio
TV0 via HDMI AV OUT
HDMI cable
Output" should be set to "On". (_ 34)
• The HDMI connection supports VlERA
Link "HDAVl Control" (_ 28) when used
with a compatible Panasonic TV.
• This cable provides both Video and Audio
connections.
HDMI IN
(Only included
in
DMP-BD605)
Television
/
<
i
[]
!
!---
f____J__L_____
L__
Back of the unit
HDMI AV OUT
O
Connecting
to your TV, via COMPONENT
VIDEO
OUT
cable
• Connect terminals of the same color.
• Set the "Black Level Control" to "Darker".
(_ 32)
• Using the COMPONENT VIDEO OUT
terminal, while playing DVD-Video, the
video output resolution is limited to
"480p".
• Be sure your TV supports at least 480p.
Set "Component Video Resolution" to
"480p", "720p" or "1080i". (_ 34)
• If this unit is connected to an amplifier/
receiver, etc. via an HDMI cable with
"HDMI Video Mode" set to "On" (_ 34),
the video will be fixed to 480i.
• IBD80 : Set "High Clarity Sound" on the
on-screen menu to "Off" (_ 31).
(Otherwise, the video will not be output.)
iI
O
Connecting
II
• Connect terminals of the same color.
to your TV0 via VIDEO OUT
: Set "High Clarity Sound" on the
on-screen menu to "Off" (_ 31).
(Otherwise, the video will not be output.)
• IBD80
Television
VIDEO IN
Audio/Video
cable (included)
!iilii
Back of the unit
iiiiiiii_iiiiiiiii!i!!!'iii!iiiiiiiiiiiii'iiiiiiiiiii'iiii
i!iii !ii!!iii!iiiiiii/i/!il
_:::i!!iiiii!i
iii ,_
i:/_:i
ii_:i!_i_:i'"'_ii:_
,_
ii'_,ii_
_:ii_!i!_i:
:ii/:_
II,II
i I
I
VIDEO OUT
RQT9378
Connections
O
Connecting
• "HDMI Video Mode" and "HDMI Audio Output"
should be set to "On". (_ 34)
• "Digital Audio Output" : Depending on the
connected amplifier/receiver. (=_ 33)
• The HDMI connection supports VlERA Link
"HDAVl Control" (_ 28) when used with a
compatible Panasonic TV.
• Enjoying High Bit rate Audio of BD-Video
to HDMI AV OUT terminal
Multi channel speakers
(_ 8)
Back of the unit
_
Connecting
With COAXIAL
to Digital Audio
(_)
or OPTICAL
• Please set "Digital Audio Output" to the
connection you will use, coaxial or optical
digital. (_ 33)
• When connecting a TV (_ 11, O) with HDMI
AV OUT terminal, set "HDMI Audio Output" to
"Off". (_ 34)
(Otherwise, the sound may not be output with
the desired audio.)
Output terminal
Coaxial cable
Back of the unit
ii ii i¸¸¸¸¸¸¸!¸¸¸¸
¸¸¸ii ! ¸¸¸¸
OR
_
Amplifier/receiver
Optical digital audio cable
•
Connecting
to 7.1ch AUDIO OUT terminal
19080
Multi channel speakers
Connect Audio
cables to
terminals
corresponding to
the speakers you
have connected,
511ch
Back of the unit
(_ 8)
• When connecting amplifier/receiver or other
devices with HDMI AV OUT terminal, set "HDMI
Audio Output" to "Off". (_ 34)
(Otherwise, depending on the specifications of
connected devices, the audio from AUDIO OUT
terminal may be output as two channels only.)
• When connecting a TV (_ 11, O) with HDMI
AV OUT terminal, set "HDMI Audio Output" to
"Off". (_ 34)
(Otherwise, the sound may not be output with
the desired audio.)
• Depending on how the disc was recorded, the
audio may not be output properly on the
number of channels desired.
Cable connections
L
Amplifier/receiver
RQT9378
• "Analog Audio Output" should be set to
"7.1ch". (_ 34)
• Enjoying High Bit rate Audio of BD-Video
3
0
•
•
0
Surround back speaker (L/R)
Front speaker (L/R)
Surround speaker (L/R)
Center speaker
Subwoofer
Connecting
to 5.1ch AUDIO OUT terminal
EBD80
Multi channel speakers
• "Analog Audio Output" should be set to "2ch
(Downmix) + 5.1ch". (_ 34)
• Enjoying High Bit rate Audio of BD-Video
(_ 8)
• Using this connection, 7.1 channel surround
is mixed down to 5.1 channel audio.
• When connecting amplifier/receiver or other
devices with HDMI AV OUT terminal, set
"HDMI Audio Output" to "Off". (_ 34)
(Otherwise, depending on the specifications
of connected devices, the audio from AUDIO
5.1ch
OUT terminal may be output as two channels
only.)
• When connecting a TV (_ 11, O) with HDMI
AV OUT terminal, set "HDMI Audio Output" to
"Off". (_ 34)
(Otherwise, the sound may not be output with
the desired audio.)
• Depending on how the disc was recorded, the
audio may not be output properly on the
number of channels desired.
IIIIIb],["_
= I
Back of the unit
L
Cable connections
Amplifier/receiver
0
•
•
•
Connecting
• "Analog Audio Output" should be set to "2ch
(Downmix) + 5.1ch". (_ 34)
• Using the two analog audio channels this
connection provides, you will not be able to
use any surround sound audio modes.
to 2ch AUDIO OUT terminal
OR
-o
L
Television
!
I--
Front speaker (L/R)
Surround speaker (L/R)
Center speaker
Subwoofer
3
Amplifier/receiver
AUDIO IB
--
AudioNideo
cable (included)
Back of the unit
'1
2ch AUDIO OUT
• For best results this unit should be connected
Cooling
fan
directly to an AC outlet.
• This unit consumes a small amount of AC
power ("Quick Start": "Off", less than 0.5 W)
even when turned off. In the interest of power
conservation, if you will not be using this unit
for an extended period of time, it can be
disconnected.
To a household AC outlet
(AC 120 V, 60 Hz)
_V
lira
V
RQT9378
Remote control and unit reference guide
[] Turn the unit on and off (_ 15)
[] TV operation buttons (_ 15)
You can operate the TV through the unit's remote
control.
[_ TV POWER] : Turn the television on and off
[INPUT] : Input select
[+ - VOL] : Adjust the volume
[^ v CH] : Channel select
[] Open or close the disc tray (_ 19)
[] Select title numbers, etc.IEnter numbers or
characters (_ 18, 20)
(The character buttons may be used when
operating VIERA CAST contents. _ 27)
[CANCEL] :Cancel
[] Basic playback control buttons (_ 19, 20)
[] Show status messages (_ 20)
[] Show Pop-up menu (_ 19)
[] Show Top menulDirect Navigator (_ 19)
[] Show sub menu (_ 24)
[] These buttons are used when;
eOperating a BD-Video disc that includes Java TM
applications (BD-J). For more information about
operating this kind of disc, please read the
instructions that came with the disc.
• Displaying "Title View" and "Album View" screens.
(Only the [R] and [G] buttons, _ 24)
• Operating contents of VIERA CAST. (_ 27)
[] Show Setup menu (_ 32)
[] Switch onloff Secondary Video (Picture-in-picture)
(_ 22)
[] Transmit the remote control signal
[] Adjust the volume of an amplifierlreceiver through
the unit's remote control.
[] Select audio (_ 21)
[] Reproduce more natural audio (_ 21)
[] Show FUNCTIONS menu (_ 21)
[] SelectionlOK, Frame-by-flame (_ 20)
[] Show on-screen menu (_ 30)
[] Return to previous screen
[] Select drive (BDIDVDICD, SD card or USB device)
(_ 19)
[] Displays the Home screen of the VIERA CAST
(q> 27)
m
POWER f-illiTV
_
I11I
PEN/CLOSEINPUT
RECEIVER
o
=o
i
--N
J
i
o
'
_
i RE-MASTER
-m
STATUS
FUNCTIONS
-©
gDm
©-
SETUP
d)
PIP
N_?_==DR_E '=
I
I
@
® ®
®
®®®
I
\
®@@
POWER button
(POWER _/I)
(_ 15)
Press to switch the unit from on to standby mode or vice versa. In
standby mode, the unit is still consuming a small amount of power.
@ Display
Disc indicator
SD card indicator
USB device indicator
The indicator blinks when reading data from a disc, a card or a USB
device, or writing data to a card.
(_) Disc tray (_ 19)
@ [BD80 : SD Card LED
_-\
• It is possible to set the LED to turn on/off, (_ 34, SD Card LED
4)
RQT9378
Control)
(_) Remote control signal sensor (_ 5)
_) USB port (_ 19)
(_ SD card slot (_ 19)
_) Open or close the disc tray (_ 19)
@ Stop (=> 20)
@) Pause (_ 20)
@ Start play (_ 19)
Rear panel terminals (_ 10-16)
Setting
After
connecting
your
new player
Preparation
Turn on the television
and pressing
the power
button,
and select the appropriate
a screen
for the basic
settings
will appear.
video input on the television.
oYou can perform this setup anytime by
selecting "Easy Setting" in the Setup
menu. (=_ 35)
oYou can also change these settings
individually, (=_ 33-35)
elf this unit is connected toa Panasonic TV (VIERA)
supporting HDAVl Contro! 2 or later via an HDMI cable;
then the '!On-screen Language'! and !'TV Aspecti! setting
information on the TV are captured from the TV:
!_) Follow the on'screen instructions and
make
the settings with [ J,,T] and [0 K].
!!On-sc tee n La ng ua ge ,, _TV As pect'!; '!Analog Audi o O utp uti!
and !!Quick Sta[tlf are set. (_ 33--35)
You can operate the TV or amplifier/receiver using the unit's remote control,
Point the remote control at the television or amplifier/receiver.
Input the 4.digit code with the numbered
pl:essing
[RECEIVER _ VOL]:
buttons while
for them
television
e:g:i OOO1:[O] _, [O] @ [0] _ [1]
I_ Test by turning on the television or adjusting
volume of the amplifier/receiver,
Panas0nic
0051/0055/0250/0650
ADVENT
0761/0783/0815/0817/0842
AKAI
0030/0098/0672/0702/0812
AMERICA ACTION 0180
AOC
0003/0019/0030/0052/0137/0185
APEX DIGITAL
0748/0765/0767/0879/0890
0003/0092/0180/0451/0623/0802/0875/
AUDIOVOX
1937
AXION
1937
BANG & OLUFSEN0620/1620
BROKSONIC
0003/0236/0463
CASIO
0611/1205
0019/0039/0066/0067/009!/0092!045!!
DAEw00
0623/0661/0672/1661
0019/0038/0039/0154/0158/0171/0177/
EMERSON
0178/0179/0180/0181/0182/0183/0185/
0236/0270/0280/0282/0463/0623
ENVISION
0030/0813
EPSON
0833/0840
FISHER
0154/0159
FUJITSU
0179/0186/0683/0809/0853
0021/0027/0029/0047/0051/0055/0135/
GE
0138/0174/0178/0251/0279/0282/0451/
0747/1347/1447
0019/0030/0032/0106/0178/0317/0409/
GOLDSTAR
0442/0457/0700/0856/1178/1265
GO VIDEO
0886
HAlER
0768/1034
HANNSPREE
1348/1351/1352
HEWLETT
1088/1089/1101/1494/1502
PACKARD
HISENSE
0748
0016/0032/0038/0056/0095/0097/0145/
HITACHI
0151/0173/0227/0279/0409/0413/1145
INFOCUS
0736/0738/0741/0752/0781/1164/1516
0036/0053/0069/0160/0169/0182/0731/
JVC
1253
KLH
0765/0767
0019/0030/0032/0106/0178/0317/0409/
LG
0442/0457/0700/0856/1178/1265
LOEWE
0136
0020/0024/0028/0030/0036/0054/0096/
MAGNAVOX
0179/0186/0187/0230/0386/0706/0802/
1254/1454
MARANTZ
0030/0054/0444/0704/0854/0855/1154
MEMOREX
0016/0106/0150/0154/0178/0179/0463
MITSUBISHI
NORCENT
OPTOMA
ORION
PHILIPS
PH L PS
MAGNAVOX
PIONEER
PO_ROID
PROSCAN
PROVIEW
RCA
RUNCO
SAMPO
SAMSUNG
SANSUI
SL :_.
Al'dYU
SHARP
SONY
SVA
0020/0024/0028/0030/0036/0054/0096/
0179/0!86/0187/0230/0386/0690/0706/
0802/1154/1254/1454
0038/0166/0172/0679/0866
0765/0865/1262!1276/1314/1316/!326l
1327/1328/134111498/1523
0047/0747/1347/1447
0835/1401/1498
0018/0019/0029/0038/0047/0090/0135/
O174/0278/0679/0747/1047/1147/1247/
1347/1447/1547
0017/0030/0251/0497/0603
0030/0032/0039/0052/0100/0110/1755
0019/0030/0032/0056/0060/0178/0329/
0408/0427/0587/0702/0766/0812/0814/
1060
0463
0088/0107/0146/0154/0159/0232/0484/
0799/0893
0039/0093/0153/0157/0165/0220/0281/
0386/0398/0491/0688/0818/0851
°°°0/°°11/°°8°/0] ! !!0273!0353/08] 0/
0834/0867/1100
0587/0748/0768/0865/0870/0871/0872
O02010028!O030/O054tOO65tO096/01771
0381
SYMPHONIC
0171/0180
SYNTAX-BRILLIAN1007/1144/1240/1255/1257/1258/1331
TATUNG
0003/0049/0055/0396/1101/1756
THOMSON
0209/0210/0047
0036/0060/0149/0154/0156/0650/0832/
TOSHIBA
0845/1156/1164/1256/1265/1356/1656/
1704
ULTRA
0391
VIEWSONIC
0857/0864/0885/1755
WESTINGHOUSE 0885/0889/0890/1282/1577
YAMAHA
0019/0030/0769/0833/0839
ZENITH
0016/0017/0092/0178/0463/1265
SYLVANIA
not allow
control
or amplifier/receiver,
of
your
this
remote control isremote
not compatible
with
control.
the
0014/0019/0093/0098/0150/0155/0178/
0331/0358/0836/0868/1250
0748/0824/1089
0887
0179/0236/0463/1463
0054/0690/1154/1454
does
them.
Use their
Panasonic
0308
TECHNICS
BOSE
0308
0674
DENON
HARMAN
KARDON
KENWOOD
KLH
LINN
MAP_NTZ
MCINTOSH
NAD
ONKYO
0251
PHiEIPs
PIONEER
0823
QUASAR
RCA
0823
SAMSUNG
SANYO
SHARP
SHERWOOD
S*'NY
U
TEAC
TOSHIBA
YAMAHA
0815/
1126
0354
1308/0039/0367/1641/2001/
2002
1308/0039/0208
1229/0639/1253/1933
1360/0004/0121/0273/1142/
1306/1311
0110/0189/1289/1306
0110/0189/1289/1306
1313/0027/0042/0077/0186
1390/1412/1428
0189
1189/1269/0039/0189/1120/
1289
1289
0320
0135/0380/1298/1320
! 189/1269/0]89/0391!!120/
1266/1368
1023/0150/0244/0531/0630/
1343/1384
0039
1023/1609/1254/0054/0530/
0531/1074/1390/1511
1295
1251/1469/1801
0186/1361
0491/0502/1077/1423/1517/
1653
1622/0158/0168/0474/!367/
1529/1658/1758
0463/1074/1390
0135
1023/0176/0186/1331
ROT9378
Broadband network connection
Firmware updates
broadband.
Player. Firmware is embedded software that controls this unit's
microprocessor. These updates may add or improve a feature of this
unit. Firmware updates may also be released to correct operating
irregularities that are discovered with certain movies. These updates
are available at no charge.
• Firmware can be updated (=> right)
• You can enjoy the BD-Live (_ 22)
• You can enjoy the VlERA CAST (_ 27)
Internet
Back of the unit
This unit is capable of auto firmware check if it is connected to the
Internet via a broadband connection.
When latest firmware version is available, the following screen is
displayed.
Select "Yes" or "No".
Straight
LAN cable (not included)---_
Broadband
router,
etc.
Telecommunications
equipment
(modem,
etc.)
• Use shielded LAN cables when connecting
to peripheral devices.
• If "Yes" is selected, then follow the on-screen instructions.
• If "No" is selected, then manually update the firmware later.
(=> below)
After the latest firmware is downloaded, the system will be restarted
and the firmware will be updated.
• With installation where your broadband modem is connected
directly to your PC, a router must be installed.
When the system is restarted, the screen
display disappears and "START" is displayed
• Use a router that supports 10BASE-T/100BASE-TX.
• In case all available connection on your router is being used, a hub
on the unit's display.
After the firmware is updated and the system is restarted, the
following screen indicates that the firmware update has been
or switch can be installed to provide additional connections.
• When operating the Vl ERA CAST, use high-speed internet service
no less than 1.5 Mbps for SD (Standard Definition) and 6 Mbps for
HD (High Definition) picture quality by your local broadband
company.
- If using slow Internet connection, the video may not be displayed
correctly.
• After physically connecting this unit to your broadband connection,
some configuration is required. (_ 17)
• Inserting any cable other than a LAN cable in the LAN terminal can
damage the unit.
completed.
• During the update process, no other operations can be performed.
Serious damage may occur if you turn the power off and/or press
any buttons.
• Downloading will require several minutes. It may take longer or the
Internet may not be connected depending on the connection
environment. It is required that you use a broadband connection.
• When the unit is connected to the Internet, communication charges
may be generated.
• If you do not want to check for the latest firmware version when the
unit is turned on, set "Automatic Update Check" to "Off". (_, 36)
If the firmware update is not carried out when the unit is turned on, a
message is displayed when displaying the FUNCTIONS menu.
1)
2)
3)
4)
5)
Press
Press
Press
Press
Press
[SETUP].
[A, T] to
[A T] to
[A T] to
['4, I_] to
If downloading
select
select
select
select
"Others" and press [OK].
"Firmware Update" and press [OK].
"Update Now" and press [OK].
"Yes" and press [OK].
on this unit fails or this unit is not connected to
the Internet, then you can download the latest firmware from
the following website and burn it to a CD-R to update the
(This site is in English only.)
RQT9378
Network settings
These settings are used if you will connect this unit to the Internet.
oThe connection to the Internet may take time or the Internet may not be
connected depending on the connection environment, (_ 35)
It is required that you use a broadband connection.
Preparation
• Connect to a broadband
network. (=> 16)
In most cases, default settings can normally be used without
making any changes.
Set the IP address only when the router has no DHCP server
functions or when the router's DHCP server function is disabled.
After performing steps O-O
Always test the connection when a LAN cable is connected.
P r ess [A,
and
Y] to se Iect "N etwo r'"
k
press [OK]:
O Press [A_T]
to select ,,Connection
(_ left)
Press [A, V] to select "IP Address
Auto Configuration
(DHCP)" and
press [_1, I_] to select "Off".
Q Press [A, T] to select "IP Address",
SubnetMask
or Default
Gateway" and press [OK].
(_) Enter numbers with the numbered
buttons and press [OK].
O Press [_1, I_] to select "Yes" and
press [OK].
• After checking the specifications for your broadband router, enter
each number. If the number is unknown, then check the number of
IP Address
Auto
Configuration
(DHCP)
other devices such as personal computers connected via a LAN
cable. Assign a different number from those of other devices for the
"IP Address" and the same number for others.
• If a wrong number is entered then press [CANCEL].
• The numeric input range is between 0 and 255.
Auto
Detect
Connection
Speed
In most cases, default settings can normally be used without
making any changes.
When setting an assigned DNS server from your Internet service
provider, perform the following
settings.
After performing steps O-_)
"Testing":
"Pass":
"Fail":
The test is in progress.
The connection
is completed.
Press [RETURN] to exit.
Please check the connection and settings. (=>40)
• Perform the "Connection Test"also when any change was made to
the "IP Address/DNS Settings".
(_ left)
O Press [A, T] to select "DNS Auto
Configuration
(DHCP)" and press
[_1, I_] to select "Off".
Q Press [A, V] to select "Primary
DNS" or "Secondary
DNS"and
press [OK].
(_) Enter numbers with the numbered
buttons and press [OK].
• If the connection test fails, it may be necessary to set the MAC
address of this unit at the router side. The MAC address can be
displayed by pressing [SETUP] and selecting "Network".
IPAddress/DNSSettings
Proxy#;LServer
Settings
##L
&OL
LL
L LLLLL:::L
Network
Service
O Press [_1, I1_]to select "Yes"
press [OK].
and
• Follow the instructions given by your Internet service provider and
enter the numbers. If the number is unknown, then check the
number of other devices such as personal computers connected via
a LAN cable and assign the same number.
• If a wrong number is entered, then press [CANCEL].
• The numeric input range is between 0 and 255.
RQT9378
Network settings
O Press [A, V, _1, I_] to select
character and press [OK].
When the connection
Text field: shows the text you have entered
test results in "Fail" after the IP and DNS-IP
addresses are assigned,
a
perform the following settings.
After performing steps O-O
[][][]%[][]%[]%[]_
[]_[][]DD[][]DDE
(_ 17)
O Press [A; V] to select "Auto Detect
Connection
Speed i and press
[
] to select
Off
O Press [A, Y]t,o select Connection
Speed
Setting! and press [
to
select a connection speed:
• Select a connection speed in accordance with the environment
the network connected.
• When the settings are changed, the network connection
disabled depending on the device.
o@,%. _--s
_....
]
Using the numbered
buttons
e.g., entering the letter "F"
to enter
characters
of
may be
1]]]IS]LY.u_
Always test the connection
been made.
when new "Proxy Server Settings" have
1) Press
[3] to move to the 3rd row.
2) Press
3) Press
[3] twice
[OK].
Repeat
oPress
O Press
Server
[AIY]
to select
Settings,,
,Network,'
and press [OK]
O Press [A; V] to select !!Connection
Test'"and press[OK] i
"Testing":
"Pass":
"Fail":
In most
making
Please
service
to highlight
this step to enter
[I I] to delete.
"F".
other
characters.
O Press [11] when you complete the
entry.
O Press [A, V] to select "Proxy Port
Number" and press [OK].
O Enter numbers with the numbered
buttons and press [OK].
The test is in progress.
The connection is completed.
Press [RETURN] to exit.
Please check the connection and settings.
cases, default settings can normally be used without
any changes.
use this setting when instructed to by your Internet
provider.
After performing steps 0-0
(_ above)
0
Press [_1, I1_]to select "Yes"
press [OK].
and
• The specified ports may be blocked and not be able to be used
depending on the network environment.
In order to restore the default settings
Proxy Address
After performing
steps O-O
1) Press [A, V] to select "Reset to factory preset" and press [OK].
2) Press [_, I_] to select "Yes" and press [OK].
RQT9378
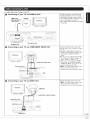
Inserting or removing a media
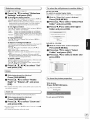
Basicplay(Playingvideocontents)
_lnserting
control in these operating instructions.
lil_J_l: _
only
or removing
a disc
Preparation
Turn on the television and select the appropriate video input on the television.
Press [_ OPEN/CLOSE] to open the disc tray.
Insert or remove the disc
............._ .............._'/_'_'_
......................................
• Press [_ OPEN/CLOSE] again to close the disc tray.
• DVD-RAM: Remove discs from their cartridges before use.
• Insert double-sided discs so the label for the side you want to play
is facing up.
Inserting
an SD card
DRIV[
Insert the card's label up, positioning the cut off corner to the right.
Pull to flip down the front panel.
Insert the SD card into the SD card slot.
• Press on the center of the card until it clicks into place.
Removing the SD card
Press on the center of the card and pull it straight out.
• When the card indicator ("SD") on the unit's display is flashing, the
card is being read from or written to. Do not turn off the unit or
remove the card. Such action may result in malfunction or loss of
the card's contents.
Play starts,
• If play does not start, press [1_] (PLAY).
• If a media with data in different file formats is
e.g.,
inserted, the file selection menu is displayed.
Press [A T] to select the desired file format and press [OK].
• If the menu is displayed, press [A T, <, I_] to select the item and
press [OK].
• If the screen prompting you to use the color buttons appears,
continue to operate with the color buttons on the remote control.
• DISCS CONTINUE TO ROTATE WHILE MENUS ARE
DISPLAYED. Press [I] when you finish to preserve the unit's motor
and your television screen.
• The producers of the disc can control how discs are played. So you
may not always be able to control play as described in these
operating instructions. Read the disc's instructions carefully.
• When playing a set of two or more BD-Video discs, the menu
screen may continue to display even if the disc has been ejected.
Inserting a USB device
• Before inserting any USB device into this unit, ensure that the data
stored therein has been backed up.
• Check the orientation of the USB connector and insert it straight in.
• Some USB devices inserted into this unit may cause this unit to
stop operating. Such USB devices cannot be used on this unit.
Press [DRIVE SELECT] to select "BD/DVD/CD",
device".
"SD card" or "USB
• If a media is inserted while the unit is stopped, the drive switches
automatically depending on the inserted media.
Pull to flip down the front panel.
Insert the USB device into the USB port.
Removing the USB device
Complete all USB device-related operations and pull the USB device
straight out.
• When the USB device indicator is flashing, the USB device is being
read from. Do not turn off the unit or remove the USB device. Such
action may result in malfunction
contents.
or loss of the USB device's
Since the physical size of USB devices can vary, please
consider its width when connecting
any USB device to this unit.
It is possible that some devices may accidentally activate the
playback button and cause this unit to not operate properly.
- In such cases we recommend using a USB extension cable (not
included).
Press [TOP MENU/DIRECT
NAVIGATOR].
The Pop-up menu is a special feature available with some BD-Video
discs. This menu may vary with discs. For the operating method,
refer to the instructions for the disc.
1) Press [POP-UP MENU].
2) Press [A T, <, I_] to select the item and press [OK].
• Pop-up menu also appears by pressing [SUB MENU] and selecting
"Pop-up Menu".
• Press [POP-UP MENU] to exit the screen.
RQT9378
Basic play (Playing video contents)
_ \o_ _)
Frame-by-frame
While paused, press [41] (4111) or [1_] (I I1_).
Each press shows the next frame.
• Press and hold to change in succession forward or backward.
• Press [1_] (PLAY) to revert to normal playback speed.
• i=l_,a _:
Forward direction [1_] (I I1_)only.
The stopped position is memorized.
Resume play function
Press [1_] (PLAY) to restart from this position.
• The position is cleared if the tray is opened or you press [11] several
times to display "STOP" on unit's display,
• I'_R!_: On BD-Video discs including BD-J (=) 50), the resume
play function does not work,
• !"4_1_
_
1"_1_--4"_1:
The position is cleared if the unit is turned
off,
• Press [I I] again or [1_] (PLAY) to restart play.
The speed increases up to 5 steps.
• Press [1_] (PLAY) to revert to normal playback speed.
• For some discs, the speed may not change.
When black bars are shown at the top, bottom, left, and right sides of
the screen, you can enlarge the image to fill the screen.
(_ Press [SUB MENU].
@ Press [A, T] to select "Screen Aspect" and press [OK].
(_) Press [<, I_] to select "Side cut" or "Zoom".
Normal:
Normal output
Side cut:
The black bars on the right and left sides of the 16:9
image disappear and the image is enlarged. Please note
that the right and left sides of the image are cut off when
the black bar is not displayed.
Zoom:
The black bars on the top and bottom sides of the 4:3
image disappear and the image is enlarged. Please note
that the top and bottom sides of the image are cut off
when the black bar is not displayed.
• _=_,a _:
"Side cut" does not have any effect,
eWhen "TV Aspect" (_ 34) is setto "4:3 Pan & Scan" or"4:3
Letterbox', the "Zoom" effect is disabled,
Search
While playing, press [<<]
or [IH_].
Audio is heard during first level of forward search.
• l;f_J_l ll'_l_l"_l: Audio is not heard during all levels of search.
• !'4_11"_1_1:The speed is fixed to a single step.
Slow-motion
While paused, press [<<]
The status messages give you information about what is currently
being played. Each time you press [STATUS], the information
displayed will change.
e.g. _
Type of disc
Play status
or [1_1_].
• i=lD_,a_:
Forward direction [1_1_] only.
• I;I_'_TI: If continued for approx. 5 minutes, slow-motion
pauses automatically.
play
T: Title
Items change
C: Chapter
depending
disc
played. on the
No display
Skip to the title, chapter or track you want to play.
• Each press increases the number of skips.
• l;f_J_l: Backward direction [1<_] only.
PL: Pay st
L
Elapsed time in the title
Current position
During playback, you can access specific recordings or scenes
through direct entry of the numbered buttons.
Play starts from the selected title or chapter.
r_Fa l_U
e.g.,
5:
_lDlV_
D_v_
[0] => [0] => [5]
15: [0] =>[1] =>[5]
e.g.,
5:
[0] => [5]
15: [1] =>[5]
• While stopped (the image on the right is
displayed on the screen), the title is designated.
While playing, the chapter is designated.
RQT9378
Total time
Depending on the kind of disc or the playback status, this
display may not appear.
Playing
HDVideoorSDVideo
...... ChanoinoauOioOurinop,a
the Panasonic High definition Video Camera on the DVD-RAM/R/
RW/R DLI+RI+RWI+R DL or SD card, and SD (Standard Definition)
Video recorded on the Panasonic SD Video Camera on the SD card.
0 Insert a disc or SD card. (_ 19)
• "Video (AVCHD)" or "Video
(MPEG-2)" screen is displayed.
• If a media containing data in
different file formats is inserted, the
e.g, m
I
English is selected.
file selection
dis played.
You can change the audio channel number each time you press the
button. This allows you to change the soundtrack language (_ 30,
Soundtrack), etc.
AudioLR-->AudioL-->Audio
¢
I
e g.,
menu may be
Press [A, y] to select "Play Video (AVCHD)" or "Play
Video (MPEG-2)" and press [OK].
e.g.,
R
"AudioLR" "
selected
is
_) Press [A, V, 4, I_] to select the title
and press [OK].
This feature gives you a more natural sound by adding higher
frequency signals not recorded on the track.
Press [RE-MASTER]
"Re-master 3".
to select "Re-master
1", "Re-master 2" or
Select the one that you like best.
When playing LPCM sound
Type of rnusic
Setting
:
Other types of
sound
Effect level
High tempo (e.g., pop and
1 rock)
Light
Re-master
Re-master
2 Various tempos (e.g.,jazz)
Medium
Re-master
Off
3 Low tempo (e.g., classical)
Off
Strong
Off
To return to the previous screen
Press [RETURN].
To exit the screen
Press [DIRECT
NAVIGATOR].
• This function is effective for audio from the HDMI terminal or the DIGITAL
To switch from other menus to AVCHD or MPEG2
menu
AUDIO OUT terminal only when "Dolby D/Dolby D +/Dolby TrueHD" or
"DTS/DTS-HD" is set to "PCM", (However, in this case, audio is output as
2ch from the DIGITAL AUDIO OUT terminal,)
(If the media contains data in different file formats)
1) Press [FUNCTIONS].
2) Press [A y] to select "Menu" and press [OK].
3) Press [A y] to select "Play Video (AVCHD)" or "Play Video
(MPEG-2)" and press [OK].
Some functions of this unit can be operated from the FUNCTIONS menu,
• It may pause for a few seconds on the break of images when
editing such as partial deletion is performed.
• High definition video (transfer rate of 18 Mbps or faster) cannot be
played back correctly if it was recorded on a DVD compatible to
double speed or slower.
• Items to be displayed may vary with the media.
i
11
i
• Playback
*Top Menu
• Menu
• Viewing Picture
• Other Functions
• Network
• BD/DVD/CD
oSD card
• USB device
"Playlists":
You can play playlists created on DVD-VR. Press
[&, Y, 4, I_] to select the playlist and press [OK],
"Setup" (=_ 32)
"Card Management" (_ 22)
Displaysthe Homescreen of the VIERA CAST (_ 27)
Switches to the disc drive.
Switches to the SD drive.
Switches to the USB drive.
RQT9378
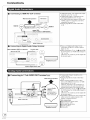
Enjoying
BD-Live
or BONUSVIEW
in BD-Video
BONUSVI EW allows you to enjoy functions such as picture-in-picture or secondary audio etc., with BD-Video supporting BD-ROM Profile 1 version
1.1/ Final Standard Profile.
What is BD-Live?
In addition to the BONUSVIEW function, BD-Video supporting BD-ROM Profile 2 that has a network extension function allows you to enjoy more
functions such as subtitles, exclusive images and online games by connecting this unit to the Internet. In order to use the Internet feature, you must
have this unit connected to a broadband network (_, 16).
• These discs may not be on Sale in Certain regionsl
• The usab!e functions and the operating method may vary with each disc, p!ease referto the instructions on the disc and/or visit their website: ................
• During search/slow-motion
or frame-by-frame,
only
the primary video is displayed.
• When "BD-Video Secondary Audio" in "Digital Audio
Output" is set to "Off", secondary audio will not be
played even if you set "Soundtrack" in "Secondary
Video" to "On". Please check that "BD-Video
Secondary Audio" is set to "On" (=_ 33).
Set "Soundtra,,ck"
!n ,,Secondary
Video to 'On or Off, (@ 30'
Press [DISPL,AY]
Signal
Type )
"Disc,,
The Secondary audi0 is played.
Many BD-Live compatible discs require content to be downloaded onto an SD card (_ 50, Local storage) in order to access the available
BD-Live features.
• An SD card with 1 GB or more of free space (SD Speed Class Rating 2 or higher) needs to be inserted prior to inserting the BD-Live compatible
disc.
Some BD-Live content available on the Blu-ray discs may require an Internet account to be created in order to access the BD-Live
content. Follow the screen display or instruction
manual of the disc for information
on acquiring an account.
Preparation
• If you experience any problems, first, try formatting
the SD card in this unit.
• Connect to the network. (_ 16)
•A message may be displayed when SD card doesn't
have enough storage capacity for BD-Live content.
• If the SD Card menu screen is displayed,
control, select :!BD/DVD/CD,:
Insert the disc
oF-or
press [DRIVE SELECT] on the remote
Please make space available on the current SD
card, or insert another SD card.
19):
• While using this feature, do not remove the SD card.
operation method, refer to the instructions on the disc,
To use the above functions,
it is recommended
Doing so will cause playback to stop.
• The unit must be connected to the Internet and set
that you format the card on this unit.
up (_ 17) to use the BD-Live functions. "BD-Live
Internet Access" may need to be changed for certain
discs (_ 32).
Format the card using the following procedures,
Formatting
SD cards/Deleting
data
•When
• If the SD card you use is formatted, all data on the card will be erased. It cannot be
recovered,
1) Insert an SD card (_ 19).
2) Press [FUNCTIONS].
3) Press [A, V] to select ?Other Functions" and
presS[OK].
7) Press [_1, I_] to se!ect !!Start:! and press [QK],
RQT9378
_'_i';2.........
_",_4,_;_
_,,B
discs supporting BD-Live are played back, the
player or disc IDs may be sent to the content
provider via the Internet. You can restrict Internet
access (_ 32).
•The unit is connected to the Internet when BD-Live
functions are used, generating communication
charges.
[
Chapter playback m
Playing music
onto a DVD-R/R DL. CD-R/RW and USB device.
....
• 'Title
e.g.i
View"
screen
is displayed,
e.g.,
(About structure of folders => 39. "Structure of folders that can be
played in this unit"_
O Insert a disc or USB device. (_ 19)
elf the me(]ia containing
data in different file formats is
inserted
the file selection menu may be displayed
Press [A, V] to select "Play Music (MP3)" and press
[OK].
O Press
[A,
V]
to select
the track
and
press [OK].
Play starts on the selected
• 1_ "TR" and the number
the unit as it plays.
track.
of that track are displayed
on
e.g.
j DIRECT_AVGATOR
Music
_CD
" ,_
list
_
o09 ........
_3(
TracM
" indicates the track currently playing.
To switch from other menus to MP3 menu
(If the media contains data in different file formats)
1) Press [FUNCTIONS].
2) Press [A V] to select "Menu" and press [OK].
3) Press [A V] to select "Play Music (MP3)" and press [OK].
oYou can use search and skip functions. (_ 20)
eWhen the "Screen Saver Function" is set to "On" (_ 33), the screen
switches to Screen Saver mode if there is no operation for 10
minutes after starting playback. (Playback continues.)
_) Press
0
[A, Y] to select a folder and
CD(MP3)
:ler No_
Total folders
If the folder has no
track, !!_ -'iis displayed
as folder number.
_
__OK
>
RETURN
eYou cannot select folders that contain no compatible
tracks.
To return to the previous screen
Press [RETURN].
RQT9378
Playing still pictures
pictures recorded. This unit can also play still pictures recorded on
the SD card or USB memory. In addition, you can also connect
Panasonic digital camera by USB connection.
(About structure of folders => 39, "Structure of folders that can be
played in this unit")
Connecting
a USB device
Panasonic digital camera, etc.
Press [RETURN],
To exit the screen
Press [DIRECT NAVIGATOR].
DVD-RAM/R/R DL, CD-R/RW, SD card, USB device
To switch from other menus to JPEG menu
(If the media contains data in different file formats)
1) Press [FUNCTIONS].
2) Press [A, T] to select "Menu" and press [OK].
3) Press [A, T] to select "Play Picture (JPEG)" and press [OK].
Connect to USB terminal
USB connection
cable
£ZL
accessorySpecified
cable such as
of the USB equipment
_j
• Setup screen may be displayed on equipment connected with the
USB, Set it to the mode for connecting to a PC,
• Also read the operating instructions of the connected equipment for
details of connection and setu p,
• Do not disconnect the USB connection cable while recognizing.
You can display still pictures one by one at a constant interval,
BD-RE, DVD-RAM
O Insert a disc, SD card or USB
device. (_ 19)
BD-RE, DVD-RAM
"Album View" screen is displayed
• When the "Title View" screen is displayed, press the [G]
button to switch to the "Album View" screen.
• If the DVD-RAM containing both JPEG and AVCHD format
is inserted, the file selection menu may be displayed.
DVD-R/R DL, CD-R/RW,
SD card, USB device
• If the media containing data in
different file formats is inserted, the
file selection menu may be displayed.
e.g.
Press [A, y] to select "Play
press [OK]
(JPEG)"
Picture
• You can also start slideshow by pressing [1_] (PLAY) after selecting
the album.
DVD-R/R
and
To stop slideshow
e.g.
Press [11].
"Picture View" screen is displayed.
=> Go to step _]t
Press [&, V, _1, I_] to select the
album and press [OK].
e,g,,
_RECT
NAY
G_OR _ Album_
Q Press
[A, V, _I, I_] to select
still picture and press [OKI.
e.g.,
DERFCT
_',_GATOR _ct_oVi_,
• Press [_, I_] to display the previous or next still picture.
• Press [14t4, I_1_1] to show other pages.
RQT9378
DL, CD-R/RW,
the
SD card,
USB device
In step I_ in Start Slideshow on page 24,
BD-RE,
DVD-RAM
To switch to another higher folder
Settings"
_To
and press[OK]:
change the display interval
select
(Only f there is a multiple number of higher folders recognizable)
O
[AI V] tO select "Display Interval" and press [_li I_] t°
th e interval ('!l_ong'!, "Norma!i' or !!Sh0rti'),
press [A; y] to selec t :'Transition Effect!t an d press [_1, I_] tO
select :Fade:f; :!Motionl! and i!Randomil,
: itFade": Pictures
are changed by fading out and fading in.
!'Motion,: :Pictures are changed by fading out and fading in,
while it is enlarged, reduced, or moved up or down,
!:Randonl": In addition to the !'Motion'T; pictures are changed by
the "Album
View"
screen
is displayed
Press [SUB MENU].
Press [&, V] to select "Select
folder,' and press [OK].
eWhen
a still Picture with large number of pixels is p!aye d, the
display interval may become !0nger_ Eve n if the setting is
changed, the display interval may not become shorter.
To set display method
While
Root
_) Press [_1, I_] to select the higher
folder and press [OK].
Select
Root folder
Changethe Album folder to be accessed.
UPEG_,DCIM001
To repeat
slJdeshow
Press [OK] to confirm
÷OK
RETURN
The MP3 that is recorded on the USB device or the music CD
Can be played back as Background Music during the
Slideshow.
Press [A,V]
to selec t i'Soundt[ack" and press [_1, I_] tO
Select '!On" or "Off':
eYou Cannot Search or Skip the music.
eWhen the Slideshow Stops, the playback 0fthe music also
stops.
eWhen both the music CD and the USB device with MP3
recorded
is inserted to this unit, the music CD has a priority
to be played back as Background Music.
To select a folder
......
A folder to playback can be selected when a USB device with
MR3 recorded is connected to this unit.
Press [A, T] to select "Soundtrack Folder:i and press [QK],
DVD-R/R
O
DL, CD-R/RW
While
the "Picture
View"
screen
is displayed
Press [SUB MENU].
Press [A, V] to select "Select
Folder" and press [OK].
_) Press [A, T] to select a folder
and
press [OK].
e.g.
Picture,
s
Fo[d_r s_iecti0_
}aP_G
and press [OK],
OK
RETUR_
Right,,
or ,,Rotate Left,, and press
While
playing
Press
• The rotation information
the media is removed.
[STATUS]
twice.
will be stored until the unit is turned off or
e.g. JPEG on DVD-RAM
Shooting date
This function is only available for small-sized
still pictures.
To exit, press [STATUS].
• To cancel "Zoom out", press [A, V] to select "Zoom in" in step I_
and press [OK].
• The zoom-out information will not be stored.
RQT9378
Playing
DivX ®videos
ABOUT DIVX VIDEO:
DivX _ is a digital video format created by DivX, Inc. This is an official
DivX Certified device that plays DivX video.
You can play DVD-RIR DL. CD-RIRW discs and a USB device which
contain DivX video contents that have been recorded on a persona
computer.
(About structure of folders => 39. "Structure of folders that can be
played in this unit")
• Because DivX format can use many different codecs, there is
no guarantee that all DivX files will play. (_ 38, "About
J PEG/DivX files")
MP3/
0 Insert a disc or USB device.
19)
elf the media
formats
displayed.
(DivX)"
containing
is inserted,
Press
and press
data in different
the file selection
[A,
y] to select
e.g.
file
menu
ler No. /
Total folders
!fthe
folder has no titlel
may be
"Play Video
[OK].
"_ _" is displayed as folder
number,
e.g.
• You cannot select folders that contain no compatible
To return
to the
Press [RETURN].
Press
[A,
V]
to select
the title
and press [OK].
Play starts on the selected
title
e.g.
. ABfd
Z
previous
ABOUT DIVX VIDEO-ON-DEMAND:
This DivX _Certified device must be registered in order to play DivX
Video-on-Demand (VOD) content.
First generate the DivX VOD registration code for your device and submit it
during the registration process.
[Important: DivX VOD content is protected by a DivX DRM
(Digital Rights Management) system that restricts playback to registered
DivX Certified devices. If you try to play DivX VOD content not authorized for
your device, the message "Authorization Error" will be displayed and your
content will not play.] Learn more at www.divx.com/vod.
Z
Display the unit's registration
Z
(_ 36, "DivX Registration"
Z
files.
screen
code.
in "Others")
• The picture sizes set for recording may prevent the unit from
showing pictures in the proper aspect. You may be able to adjust
the aspect through the TV.
• Successive play is not possible.
)hanumeric
• You can use search and skip functions. (=> 20)
• Press [ I,q141,I_ll_l] to show other pages.
DVD-R/R DL, CD-R/RW, USB device
To switch from other menus to DivX menu
(If the media contains data in different file formats)
1) Press [FUNCTIONS].
2) Press [A, T] to select "Menu" and press [OK].
3) Press [A, T] to select "Play Video (DivX)" and press [OK].
characters
• After playing DivX VOD content for the first time, another
registration code is then displayed in "DivX Registration". Do not
use this registration code to purchase DivX VOD content. If you use
this code to purchase DivX VOD content, and then play the content
on this unit, you will no longer be able to play any content that you
purchased using the previous code.
• If you purchase DivX VOD content using a registration code
different from this unit's code, you will not be able to play this
content. ("Authorization Error" is displayed.)
Regarding
set number
DivX VOD content
of times
that
can only be played
a
Some DivX VOD content can only be played a set number of times.
When you play this content, the remaining number of plays is
displayed. You cannot play this content when the number of
remaining plays is zero. ("Rental Expired." is displayed.)
When playing this content
=The number of remaining plays is reduced by one if
-you press [_ POWER].
-you press [11].
-you press [DIRECT NAVIGATOR].
-you press [ _
] or [-,9_, !,,-I_] etc. and arrive at another content
or the start of the content being played.
-you press [DRIVE SELECT] to change the drive.
• Resume functions do not work.
RQT9378
Enjoying VIERA CAST TM
You can display subtitles text onto the DivX video disc on this unit.
This function has no relation to the subtitles specified in DivX
standard specifications and has no clear standard. The operation
might be different or it may not operate properly depending on the
way the file was made or the state of this unit (playing, stopped, etc.).
Press [DISPLAY]
screen with VIERA CAST, for example YouTube, Picasa Web
Albums. (Current as of December 2008)
• VlERA CAST requires a broadband Intemet connection. Dial-up
Intemet connections cannot be used.
Preparation
• Network connection (_ 16)
• Network setting (_ 17)
O Press [VIERA CAST].
• Message is displayed. Please read these instructions carefu ly
and then press [OK] to start Vl ERA CAST function.
_,,
_
_
Images are for
illustration
y
may
change
purposes,
message
without notice.
__
Press [A, V, <1,
to select the
item and press [OK].
• DivX video files that do not display "Text" do not contain subtitles
text.
Subtitles text cannot be displayed.
• If the subtitles text are not displayed correctly, try changing the
language settings. (_ 32)
To exit the screen
Press [DISPLAY].
• You can operate Vl ERA CAST using the following buttons on
the unit's remote control.
[&, Y, _1, I_], [OK], [RETURN], [SUB MENU], colored
buttons and numbered buttons.
aT• access more features on YouTube or Picasa Web Albums
site, enter your user ID and password that you have previously
set up with these sites through the Internet on your PC.
However. not all features may be accessible through Vl ERA
CAST.
VIERA CAST Home screen;
After you access YouTube or
Picasa Web Albums from the
- Home screen and
add your favorite videos or
albums to VIERA CAST you
can choose them easily from
the Home screen,
Images are for illustration purpose.
contents may change without notice.
Regarding "Settings"
Set VIERA CAST Home screen.
• My Account:
• Lock:
You can remove your account from the unit.
Password can be used to lock YouTube and
Picasa Web Albums.
• Notices
• Depending on the usage conditions, it may take a while to load the page,
• The connection to the Internet may take time or the Internet may not
be connected depending on the connection environment.
• The unit is connected to the Internet when VIERA CAST is used,
generating communication charges where applicable.
To return to VIERA CAST Home screen
Press [VI ERA CAST].
To exit from VIERA CAST
Press [FUNCTIONS] or [TOP MENU/DIRECT
press [RETURN] to cancel the menu.
NAVIGATOR], then
• Set the "Network Lock" to "On" to restrict using VIERA CAST, (=> 35)
• If the audio is distorted while using the Vl ERA CAST feature set the
"Audio Auto Gain Control" to "Off" (=_ 35)
• When the entire picture cannot be displayed on the screen set the
"Reduce to Screen Size" to "On" (=_ 35)
• Set the "On-screen Language", to switch the language for Home
screen. (=_ 33)
• Set the "Time Zone" or "DST" when wrong time is displayed on the
screen. (=_ 35)
• VlERA CAST TM home screen is subject to change without notice.
• The services through VlERA CAST TM are operated by their
respective service providers, and service may be discontinued either
temporarily or permanently without notice. Therefore, Panasonic will
make no warranty for the content or the continuity of the services.
• All features of websites or content of the service may not be available.
• Some content may be inappropriate for some viewers.
• Some content may only be available for specific countries and may
be presented in specific languages.
RQT9378
Linked operations with the TV
_what
(VIERA
Link
TM
"HDAVI
Control
TM'')
is VIERA Link "HDAVI Control"?
VIERA Link TMis a new name for EZ Sync TM.
VIERA Link "HDAVI Control" is a convenient function
amplifier/receiver
under "HDAVI
that offers linked operations
of this unit, and a Panasonic TV (VIERA) or
Control".
You can use this function by connecting the equipment with an HDMI cable. See the operating instructions for connected equipment
for operational details.
• VIERA Link "HDAVI Control", based on the control functions provided by HDMI which is an industry standard known as HDMI CEC (Consumer
Electronics Control), is a unique function that we have developed and added. As such, its operation with other manufacturers'
equipment that
supports HDMI CEC cannot be guaranteed.
• This unit supports "HDAVI Control 4" function.
"HDAVI Control 4" is the newest standard (current as of December, 2008) for Panasonic's HDAVI Control compatible equipment.
is compatible
with Panasonic's conventional
This standard
HDAVI equipment.
• Please refer to individual manuals for other manufacturers'
equipment
supporting VIERA Link function.
J
(
Preparation
1)
2)
3)
4)
Connect this unit to your TV or am plifier/receiver with an HDMI cable (_ 11-12),
Set "VlERA Link"to "On" (=_ 34). (The default setting is "On".)
Set the "HDAVl Control" operations on the connected equipment (e.g., TV).
Turn on all "H DAVl Control" compatible equipment and select this unit's input channel on the connected
function works properly.
Also when the connection
or settings are changed, repeat this procedure.
TV so that the "HDAVl Control"
'_
When the following operations are performed,
display the corresponding action.
-When
the television will automatically
switch the input channel and
play starts on the unit
-When an action that uses the display screen is performed
(e.g., Direct Navigator screen)
When the television is off and the following operations are performed, the television will automatically
display the corresponding action.
-When play starts on the unit
-When an action that uses the display screen is performed
(e.g., Direct Navigator screen)
All connected equipment compatible with "HDAVI Control", including this unit, automatically
switch the television off.
• This unit automatically
turn on and
turns off when you
turns off even during playback or any other operation.
Stand-by power save and Auto power stand-by responsibly manage your systems power consumption
These functions are available with the TV that supports "HDAVI Control 4".
About the Stand-by power save function
It is possible to minimize the stand-by power of this unit by the Power off link, even if the "Quick Start" of this unit
is set to "On" (_ 35).
• "Stand-by power save" setting is required to be activated on the TV.
• When turning this unit on or off without using Power off link function, it is impossible to minimize the stand-by
power of this unit.
About the Auto power stand-by
function
If connected with a TV (VIERA) with the "Auto power stand-by" setting activated on the TV, when switching the TV input, the
unit will be automatically turned to standby. For details please read the operating instructions of the TV.
• When [1_] (PLAY) is pressed on this unit for "Automatic input switching" or "Power on link", the playback image is not immediately
the screen and it may not be possible to watch the contents from where playback started.
In this case, press [1_] or [<<] to go back to where playback started.
displayed on
Playing music continuously even after turning off power to the television
When the unit is connected to a Panasonic TV (VIERA) that supports HDAVI Control 2 or later and an amplifier/receiver
the unit is turned off if the power to the television is turned off, since "Power off link" (=>above) operates.
The following operations
(_)While playing music
Press [SUB MENU].
supports VIERA Link,
make it possible to keep the power of the unit on and to play music continuously.
@Press [A, T] to select "TV Power" and press [OK].
• Sound may be discontinued for several seconds when the power to the television is turned off.
• If the operation mentioned above is executed while audio is output from the television, the sound may not be output from the amplifier/receiver.
It is recommended
RQT9378
to set the amplifier/receiver
beforehand
so that audio will be output from the amplifier/receiver.
If you connect this unit to the TV that supports "HDAVI Control 2" or later with an HDMI cable, you can enjoy using more convenient functions.
You can operate this unit using buttons on the TV remote control.
The buttons that you can use for this unit vary depending on the TV. For details, refer to the operating instructions of the TV.
Use the remote control supplied with this unit if you cannot operate this unit using buttons on the TV remote control.
• The operation of this unit may be interrupted when you press incompatible
buttons on the TV remote control.
By using the TV remote control, you can play media using the FUNCTIONS
O Press the button for VIERA
_
Select
eThe
the
menu.
Link on the remote control.
e.g.,
player.
FUNCTIONS
menu
..........
_Bu-a D_ p_y_r
is displayed,
i,0,c_
....
i_ DVD-W_
i
oK
By using the TV remote control, you can play discs using the "Control Panel" and display the Top Menu (for BD-Video
and DVD-Video) or Pop-up Menu (for BD-Video).
O Press [SUB MENU].
e,g,,
oThis can also be displayed by using the VIERA menu screen.
eYou cannot use the sub menu while the Top Menu for BD-Video
DVD-Video
is displayed.
Select an item, then press
Control
Control Panel
or
Panel
Control Panel is displayed. Follow the indications on the screen.
Screen Aspect
Top Menu /If_!'/'ifll_
[OK].
(_ 20)
l'il!'i_'_l
Top menu is displayed.
Menu _
Menu is displayed.
Pop,up Menu/
Pop-up menu is displayed.
Rotate Right _
Rotate the still picture.
Rotate Left
Zoom in _
Enlarge or reducethe still picture.
Zoom out
When you want to leave the TV on and set only this unit to standby
Press [_ POWER] on this unit's remote control and set to standby mode.
mode
When not using "HDAVI Control"
Set "VIERA Link" in the Setup menu to "Off". (_ 34)
RQT9378
Changing settings with the on-screen menu
mllr
Disc
-ii1111f
.................
_1
:]l]Lvl
Signal Type
• Primary Video
Video:
The original video recording method appears, (=>below, Video attribute)
Soundtrack:
Select the type of audio or language. (=> below, Language, Audio attribute)
• Secondary Video
Video:
Select on/off of images,
The original video recording method appears, (,=>below, Video attribute)
Soundtrack:
Select on/off of audio and the language. (=> below, Language, Audio attribute)
Video
The original video recording method appears. (=> below, Video attribute)
Soundtrack
Select the type of audio or language.
(=> below, Language, Audio attribute)
The audio attributes appear. (=> below, Audio attribute)
Select the soundtrack number.
• Soundtrack numbers are displayed even when there is only one audio type.
Subtitle
Turn the subtitle on/off and select the language. (=> below, Language)
(Only discs that contain subtitle on/off information)
Turn the subtitle on/off.
i I]ili:l
Turn the subtitle on/off and select "Text" or the subtitle number.
• Subtitle number is displayed even if there are not multiple subtitles.
I :]llivl
Subtitle Style
Select the subtitle style.
Audio
channel
_
_
(=> 21, Changing audio during play)
Angle
_
Select the number of the angle.
Some items may be changed only on the disc s )ecific menu. (_ 19)
Language
ENG:
FRA:
DEU:
TA:
ESP:
NLD:
English
French
German
Italian
Spanish
Dutch
SVE:
NOR:
DAN:
POR:
RUS:
JPN:
Swedish
Norwegian
Danish
Portuguese
Russian
Japanese
Audio attribute
RQT9378
CHI:
KOR:
MAL:
VI E:
THA:
POL:
Chinese
Korean
Malay
Vietnamese
Thai
Polish
CES:
SLK:
HUN:
FIN:
•
Czech
Slovak
Hungarian
Finnish
Others
Video attribute
MPEG-2/MPEG-4
AVC/VC-1
Video recording
method
LPCM [::[]Digital/l'TlDigital+/rTITrueHD/DTS/DTS
96/DTS-HD H RES/DTS-HD MSTR/MPEG
Signal type
ch (channel)
Number of channels
480/576/720/1080
Video Format
k (kHz)
Sampling frequency
24p/50i/60i/50p!60p
Video Frame rate
b (bit)
Number of bits
YCbCr4:2:2/YCbCr4:4:4!RGB
Color Space
bps (bit per second)
Transfer rate of bit
bps (bit per second)
Transfer rate of bit
Play
-/lllllt .................
(Only when the elapsed time is being displayed on the unit's display.)
Select the item which you want to repeat. The items displayed differ depending on the type of media.
eAII tracks
All tracks
Repeat Play
• Chapter
• Playlists
• Title
• One track
•Off
Chapter
Playlist
Title
Track
Select "Off" to cancel.
Random
While playing, press [A, T] to select "On".
Random playback starts from the next track.
• On
Playback Information
Window EBD80
•Off
l'_pl
m,B'_
Displaysaudiolvideoattribute
information
ofdisc((i_)),
settings
statusof"Digital
Audio
Output"(_ 33) (_) and HDMI outputinformation
(I]_]) (_ 30 Audio attribute,
Video attribute)
- Depending on thedisc,displaymethod may be different.
-The audio attribute
information
will
be displayedfollowing
the "Digital
Audio Output"settings.
(_ 8)
Press [RETURN] to exit.
Video
Picture
Select the picture quality mode during play.
•
•
•
•
Normal:
Soft:
Fine:
Cinema:
Default setting
Soft picture with smoother video
Details are sharper
Mellows movies, enhances detail in dark scenes.
• User:
You can make further adjustments.
(_ below)
(_ Press [1_] to select "Picture Adjustment" and press [OK].
@ Select the item using [A, T] and adjust it with [-,4, I_].
Contrast:
Brightness:
Sharpness:
Color:
Gamma:
3D NR:
Integrated
Progressive
NR:
Increases the contrast between light and dark parts of the picture ( 7 to + 7),
Brightens the picture (0 to + 15).
Adjusts the sharpness of the edges of the horizontal lines ( 6 to +6).
Adjusts the shade of the picture's color ( 7 to +7).
Adjusts the brightness of dark portions of the screen (0 to +5).
Reduces the rough noise in the background to give a greater feeling of
depth (0 to +4).
When "24p Output" is set to "On", this function may not operate. (_ 34)
Smooths block noise and reduces the smudging that appears around
contrasting sections of the picture (0 to +3).
Select the method of conversion
(_ 50, Film and video).
• Auto:
• Video:
• On
24p
for progressive output to suit the type of material being played
Automatically detects the film and video content, and appropriately
Select when using "Auto", and the content is distorted.
•Off
converts it.
Only when you have selected "On" in "24p Output" (_ 34)
Audio
Sound
Effects .1.2
• Off
Re-master (=_ 21)
• Re-master 1
• Re-master 2
V. Surround
_
_
_
_
• Re-master 3
_
(2 channels or more only)
Enjoy a surround-like effect if you are using two front speakers only.
-Turn V. Surround off if it causes distortion.
- Do not use in combination with surround effects on other equipment.
-V. Surround does not work for bilingual recordings.
• V. Surround 1
•V. Surround 2
Night Surround
To enjoy a movie with powerful sound even when the volume is kept low at night, the audio is set
in such a way that it can be heard easily.
• Night Surround
Dialog
Enhancer
.1
_
_
_
_
_
(3 channels or more only, including a center channel)
The volume of the center channel is raised to make dialog easier to hear.
• On
High Clarity
EBD80
Sound
•Off
When the analog video terminal is not being used, the electrical current that flows through the
analog video circuit can be stopped. This prevents adverse effects on the audio signals and
produces clearer sound.
Use this when outputting image via HDMI terminal. Analog image will not be output via
COMPONENT VIDEO OUT terminal or VIDEO OUT terminal.
• On
•Off
Only when you have selected "Enable" in "High Clarity Sound" (_ 33)
"1 This function is effective for audio from the HDMI terminal or the DIGITAL AUDIO OUT terminal only when "Dolby D/Dolby D +/Dolby TrueHD"
or "DTS/DTS-HD" is set to "PCM". (However, in this case, audio is output as 2ch from the DIGITAL AUDIO OUT terminal.)
*2 Not every function can be set individually.
RQT9378
Changing the unit's settings
O
While
Press [SETUP].
Press [A, T] to select the menu
and press [OK].
_) Press [A, T] to select the item
and press [OK].
If there
are any other
items,
repeat
these
items are the factory
)isc
operation.
To return
to the
previous
screen
Press [RETURN].
To exit the screen
steps.
O Press [A, Y, 4, I_] to select
option and press [OK].
Underlined
• There may be differences in operation
methods. If this happens, follow the
on-screen instructions for the
stopped
the
Press[SETUP].
presets.
"Disc"
DVD-Video
Ratings
Set a ratings level to
limit DVD-Video play.
BD-Video
Ratings
Set an age limit of
BD-Video play.
• 8 No Limit:
• 1 to 7:
Follow the on-screen instructions.
All DVD-Video can be played.
Prohibits play of DVD-Video with corresponding
ratings recorded on them.
Prohibits play of all DVD-Video.
Enter a
4-digit password with the numbered buttons
when the password screen is shown. It will be
the common password for "DVD-Video
Ratings", "BD-Video Ratings" and "Network
Lock".
• Do not forget your password.
• 0 Lock All:
Changing settings (When level 0 to 7 is selected)
• Unlock Player
•Change Password
• Change Level
•Temporary Unlock
• No Limit:
• 0 to 254 year(s):
All BD-Video can be played.
Prohibits play of BD-Video with corresponding
ratings recorded on them.
Changing settings (When 0 to 254 year(s) is selected)
• Unlock Player
•Change Password
• Change Level
•Temporary Unlock
Audio
Language
Subtitle
Language
Menu
Language
Choose the language for audio, subtitle and
disc menus.
• Some discs start in a certain language despite
any changes you make here.
• When the selected language is not available
on the disc, the default language is played.
There are discs where you can only switch the
language from the menu screen. (=> 19)
• Enter a code (=> 36) with the numbered
buttons when you select "Other
".
BD-Live
Internet
Access
_
(_ 22)
You can restrict Internet access when BD-Live functions are used.
•_
.French
.Spanish
• Original: The original language of each disc will be selected.
• Other
•Automatic:
If the language selected for "Audio Language" is not available,
subtitles of that language will automatically appear if available on that
disc.
• English
• French
.Spanish
.Other
•_
.French
.Spanish
.Other
• Allow (ALL):
• Allow (Limited):
Internet access is permitted for all BD-Live contents.
Internet access is permitted only for BD-Live
contents which have content owner certificates.
Internet access is prohibited for all BD-Live
contents without a certificate.
• Prohibit:
BivX Subtitle
Text _
• Latin1
Select a suitable item accordingto the language used for DivX subtitles text (_ 27). • Latin2
• This item is displayed only when pressing [SETUP] after playing back a file.
• Cyrillic
Internet access is prohibited for all BD-Live contents.
English, German, Spanish, etc.
Polish, Czech, Hungarian, etc.
Russian, etc.
"Video"
Still Mode (paused video) _
_
17#RK_
Select the type of picture shown when you pause playback
(=> 50, Frames and fields).
• Auto
Seamless
Play
Select the play mode between playlist chapter segments and partially
deleted titles.
•O._0.n:
•Field:
Select ifjittering occurs when "Auto" is selected. (The picture
is coarser.)
• Frame: Select if small text or fine patterns cannot be seen clearly
when "Auto" is selected. (The picture is clearer and finer.)
• Off:
Black Level Control
Select lighter or darker for adjusting the black level control to the
desired setting for picture enhancement.
RQT9378
The chapters in playlists are played seamlessly. This does
not work while searching or when there are several audio
types included on the playlist. Additionally, the positioning of
chapter segments may change slightly.
The points where chapters in playlists change are played
accurately, but the picture may freeze for a moment.
•_:
When video is output from VIDEO OUT terminal.
• Darker: When video is output from COMPONENT VIDEO OUT
terminal.
To select these options, perform steps O-O
(_ 32)
"Audio"
Dynamic
Range Compression
_
_
_
(Dolby Digital, Dolby Digital Plus and Dolby TrueHD only)
• On
• Auto:
• Off
Effective only when Dolby TrueHD is played.
Change the dynamic range (_ 50) for late night viewing.
Digital Audio Output
(_ 8)
• Press [OK] to show the following settings.
Dolby
Dolby
D/Dolby
TrueHD
D +/
DTS/DTS-HD
Select whether Dolby Digital, Dolby
Digital Plus, Dolby TrueHD, DTS Digital
Surround, DTS-HD High Resolution
Audio or DTS-HD Master Audio is output
in "Bitstream" or "PCM" format,
• Not making the proper settings may
result in noise.
• If the unit is connected with the
HDMI AV OUT terminal, the
specifications of the connected
equipment take preference over this
unit and audio selected in these
items may not be output (e.g., when
a television is connected, the HDMI
audio output of this unit is limited to
down-mixed 2ch.)
• Bitstream:
Select "Bitstream" when the connected equipment can decode the
respective audio format.
-Connect equipment supporting HDMI (High Bit rate Audio) and use a
High Speed HDMI Cable in order to output high bit rate audio such as
Dolby Digital Plus, Dolby TrueHD, DTS-HD High Resolution Audio or
DTS-HD Master Audio.
•PCM:
Select "PCM" when the connected equipment cannot decode the
respective audio format.
Refer to the operating instructions for connected devices to verify whether or
not they can decode each of the audio formats.
BD-Video
Secondary
Audio
Turn on/off the button click sound on the menu and audio with
• O._En:
secondary video in picture-in-picture
• Off:
PCM Down
mode. (_ 22)
Conversion
Select how to output audio with a sampling frequency of 96 kHz.
• Signals are converted to 48 kHz despite the settings across in
the following cases:
-when the signals have a sampling frequency of 192 kHz
-when the disc has copy protection
-when "BD-Video Secondary Audio" is set to "On"
• On:
• Off:
The primary audio and secondary audio are mixed and output. The
sampling frequency is converted to 48 kHz.
The button click sound on the menu and secondary audio are not
output.
Signals are converted to 48 kHz. (Choose when the connected
equipment cannot process signals with sampling frequency of
96 kHz.)
Signals are output as 96 kHz. (Choose when the connected
equipment can process signals with sampling frequency of
96 kHz.)
Downmix
• Stereo:
Switch the downmix system for playing back multi-channel
surround sound.
When connected to equipment that does not support
the virtual surround function.
• Surround encoded:
When connected to equipment that supports the
virtual surround function.
• When "Dolby D/Dolby D +/Dolby TrueHD" or "DTS/DTS-HD" is
set to "Bitstream', there are no downmix effects for the outputted
audio.
• The audio will be outputted in "Stereo" in the following cases.
- AVCHD playback
- Playback of button click sound on the menu and audio with
secondary video in picture-in-picture mode
• Enable
• Disable
Status Messages
Choose whether to show status messages automatically.
• Automatic
• Off
On-screen
Language
Choose the language for these menus and on-screen messages.
•_
Screen
•On:
High Clarity
Sound
When the analog video terminal is not being used, the electrical
current that flows through the analog video circuit can be stopped.
This prevents adverse effects on the audio signals and produces
clearer sound.
• Set to "Enable" and then set "High Clarity Sound" on the
on-screen menu to "On". (_ 31)
• Use this when outputting image via HDMI terminal. Analog image
will not be output via COMPONENT VIDEO OUT terminal or
VIDEO OUT terminal.
"Display"
Saver
Function
This is to prevent burn-in on the screen.
• When this is set to "On", the masked-off area on the screen
becomes gray.
[Only when connecting with an HDMI cable or a component video
cable and "HDMI Resolution" (_ 34) is set to any other mode
than "480p", or "Component Video Resolution" (_ 34) is set to
"720p" or "1080i"]
•Franqais
• Esparlol
If there is no operation for 10 minutes or more, the displayed screen
switches to the other states automatically.
-When the Direct Navigator or FUNCTIONS menu is displayed, the
display returns to the screen saver mode.
-When CD or MP3 is played, the display returns to the screen saver
mode. (Playback continues.)
-When still pictures are shown (except for slideshow), the display returns
to the Direct Navigator screen.
•Off
(Continued
on the next page)
RQT9378
Changing the unit's settings
Underlined
items are the factory
"Display"
presets.
(continued)
FL Display
Changes the brightness of the unit's display.
._
• Dim:
•Auto:
SD Card LED Control [BD80
Set the lighting method for the lamp on the SD card slot.
•
License
Information about the software used by this unit is displayed.
On
•SD inserted:
The display is dimmed.
The display is dimmed during playback and bright
except playback.
•Off
When this unit is turned on and SD card is inserted, the
lamp is lighted.
"TV / Device Connection"
When connected to a 4:3 aspect television:
• 4:3 Pan & Scan: Video recorded for a widescreen is played as Pan & Scan
(unless prohibited by the producer of the disc). When playing
BD-Video, video is output as "4:3 Letterbox'.
• 4:3 Letterbox:
Video recorded for a widescreen is played in the letterbox style,
When connected to a 16:9 widescreen television:
TV Aspect
Set to match the type of television connected.
• 16:9:
• 16:9 Full:
Video recorded for 4:3 aspect screen is displayed as a 4:3 ratio
image in the center of the screen.
Video recorded for 4:3 aspect screen is displayed as a
horizontally stretched 16:9 image.
HDMI Connection
• Press [OK] to show the following settings.
HDMI
Video
Mode
Select "On" when video is output from HDMI AV OUT
terminal.
HDMI Resolution*
The items supported by the connected devices are
indicated on the screen as " ". When any item without
" " is selected, the images may be distorted.
• O._0.n: Images are output from the HDMI terminal in the resolution set in "HDMI
Resolution", Video from COMPONENT VIDEO OUT terminal is output as "480i".
• Off
Images are output in the resolution set in "Component Video Resolution".
• Auto:
Automatically selects the output resolution best suited to the
connected television (1080p, 1080i, 720p or 480p).
• 480p
•720p
• 1080i
• 1080p
-When outputting 1080p signal, we recommend using High Speed HDMI Cables
that have the HDMI logo (as shown on the cover) and are less than 5.0 meters to
prevent video distortion etc.
- When the unit is connected to an amplifier/receiver that does not support the
resolution set on the unit, the video cannot be output properly. In this case, use
the HDMI cable to connect the unit to the TV and then connect the unit to the
amplifier/receiver
using a cable other than HDMI.
-To enjoy high definition video up-converted to 1080p, you need to connect the unit directly
to 1080p compatible HDTV (High Definition Television), If this unit is connected to an
HDTV through other equipment, it must also be 1080p compatible,
24p Output
_
l_
When this unit is connected to a TV supporting I080124p output
via an HDMI cable, this unit displays each frame at 1124second
intervals - the same interval originally shot with the film camera.
• When playing DVD-Video, set to "On" and then set "24p"
in "Video" (_ 31) to "On"
• On:
Images in 24p are output in 24p as they are.
However,
-when video is being output at 24 frames, images from any other terminal
than the HDMI terminal may not be output properly.
_:
when images other than 24p are played, images are output at 60p.
HDMI RGB Output
Range
Effective when connected to a device that only supports
RGB output.
• Standard:
• Enhanced:
HDMI Audio Output
This setting selects whether or not to output audio from
HDMI.
•On:
• Off:
VIERA Link
Set to use "HDAVI Control" function when connected with
•On:
• Off:
•off
The video is output as it is.
When the black and white contrast of a video is low, the signal
is enhanced to reproduce clear video.
When the TV is connected to this unit using an HDMI cable, and this unit
is also connected to other devices, such as an amplifier/receiver using an
optical digital audio cable or a coaxial cable [BD80,
Select when you do not want to use "HDAVI Control".
an HDMI cable to a device that supports "HDAVI Control".
Component
Video Resolution*
This sets the video output resolution when using the
component
video terminal.
Analog
Audio Output
[BDS0
When connected with AUDIO OUT terminals, you can set
the unit to output the best possible sound for your speakers.
In this unit, a P4HD (_ 51) video processor
RQT9378
• 480i
•480p
•720p
•1080i
Even if you select "720p" or "1080i", the video output resolution is restricted to "480p" when
images of DVD-Video discs are output from the COMPONENT VIDEO OUT terminals.
• 2ch (Downmix) + 5.1ch: When connecting
OUT. (=_ 37)
• 7.1ch:
When connecting
to 2ch AUDIO OUT or 5.1ch AUDIO
to 7.1ch AUDIO OUT. (_ 37)
is used to provide video of optimal resolution to the connected TV.
To select these options, perform steps O-O
(_ 32)
"Network"
IP Address/DNS Settings (_ 17)
• Press [OK] to show the following settings.
Connection Test
IP Address
Auto Configuration
(DHCP)
• Or]
• Off
(DHCP)
• Or]
• Off
Speed
• O._0_n
• Off
IP Address
Subnet Mask
Default
Gateway
DNS Auto
Primary
Configuration
DNS
Secondary
Auto
DNS
Detect
Connection
Connection
Speed
Setting
This is enabled only when "Auto Detect Connection Speed" is
turned "Off".
• 10BASE Half Duplex
• 100BASE Half Duplex
• 10BASE Full Duplex
• 100BASE Full Duplex
Proxy Server Settings
(_ 18)
• Press [OK] to show the following settings.
Reset
to factory
• Yes
preset
• N._9o
Proxy
Address
(The initial setting is blank.)
Proxy
Port
(The initial setting is "0".)
Connection
Number
Test
Network
Service
(_ 27) (VlERA CAST)
• Press [OK] to show the following settings.
Network
Lock
• On
• Off
You can restrict using VIERA CAST.
• Follow the on-screen instructions. Enter a 4-digit password with
the numbered buttons when the password screen is shown. It
will be the common password for "DVD-Video Ratings",
"BD-Video Ratings" and "Network Lock".
• Do not forget your password.
Changing settings (When "On" is selected)
• Change Password
Audio Auto Gain Control
Volume that is different depending on the contents is adjusted
automatically to the standard volume while using the VIERA
CAST.
• Depending on contents, this function effect will not work.
• Select "Off" when the audio is warped.
• OmEn
• Off
Reduce
• On
• Off
to Screen
Size
The screen is displayed reduced so the displayed screen of the
content does not get truncated.
Time Zone
By selecting the time zone, it is possible to set the unit's time to
match your location.
• Some VIERA CAST contents require the time zone to be set.
Set the time zone if necessary.
• GMT-12to
+12
(The initial setting is "-5".)
DST
Select "On" when using Daylight Saving time.
• On
MAC
Address
(_
GMT -5
GMT-7
GMT-9
EST (Eastern Standard Time), GMT -6
MST (Mountain Standard Time), GMT-8
AKST (AlaskaStandard Time), GMT -10
CST (Central Standard Time)
PST (Pacific Standard Time)
HST (Hawaii StandardTime)
• Off
17)
Displays the "MAC Address" of this unit.
"Others"
Off Timer
Select how long the unit remains on when it is not being used.
•2 Hours
Remote
• Set Code
Control
Code
(_
36)
•6 Hours
1
•Set
Code
•Off
2
•Set
Code
3
Quick Start
Speed of startup from power off is increased.
• When the setting of "Stand-by power save" is enabled on
the TV that supports HDAVI Control 4, it will take longer to
startup this unit when the power supply of the TV is on
standby mode even if the "Quick Start" is set to "On".
•On:
• Of._[f:
Internal control unit will be powered when it is set to "On", so contents of the
following will be different from the time it is set to "Off".
• Idle power consumption will increase. (about the power consumption _ 45)
• The cooling fan may turn slowly to prevent overheating of internal parts.
Easy Setting
You can execute basic settings ("On-screen Language", "TV
• Yes
Aspect", "Analog Audio Output"
IBD80,
• N.__.o
"Quick Start").
(Continued
on the next
page)
RQT9378
Changing the unit's settings
Underlined
items are the factory
"Others"
presets.
(continued)
Restore Default
Settings
This returns all values in the Setup menu and the on-screen
menu, except for "Remote Control Code", "On-screen
Language", "1P Address/DNS Settings", "Proxy Server
Settings", "Network Service", "DVD-Video Ratings" and
"BD-Video Ratings" to the default settings.
DivX Registration
_
You need this registration
• Yes
• N__Q_o
(_ 26)
code to purchase and play DivX Video-on-Demand
(VOD) content.
Firmware
Update (_ 16)
• Press [OK] to show the following settings.
Automatic
Update Check
When this equipment remains connected to the Internet,
it will check for the latest firmware version when it is
• O._0.n
•Off
turned on and you can update it if necessary.
Update Now
You can update the firmware
•Yes
•No
manually.
When other Panasonic products respond
to this remote control
Change the remote control code on the main unit and the remote control (the two must match) if you place other Panasonic products close together.
O Press [SETUP].
Press [A, V] to select "Others"
_) Press
Code"
O Press
press
When the following
indicator
appears on the unit's display and
you are unable to operate the unit
and press [OK].
[A, V] to select "Remote Control
and press [OK].
[A, V] to select the code (1, 2, or 3) and
[OK].
The unit's remote control code
Press and hold [OK] and the
indicated number button at the
same time for more than 5 seconds.
To change the code on the remote control
While pressing [OK], press and hold the
numbered button ([1], [2] or [3]) for more than 5 seconds.
O Press [OK].
Language code list
Abkhazian:
Afar:
Afrikaans:
Albanian:
Amharic:
Arabic:
Armenian:
Assamese:
6566
6565
6570
8381
6577
6582
7289
6583
Aymara:
Azerbaijani:
Bashkir:
6589
6590
6665
Basque:
6985
Bengali; Bangla:
6678
Bhutani:
6890
Bihari:
6672
Breton:
6682
RQT9378
Bulgarian:
Burmese:
6671
7789
Byelorussian:
Cambodian:
6669
7577
Enter the code with the numbered buttons.
Catalan:
Chinese:
Corsican:
Croatian:
Czech:
Danish:
Dutch:
6765
9072
6779
7282
6783
6865
7876
Gujarati:
Hausa:
Hebrew:
Hindi:
7185
7265
7387
7273
Hungarian:
Icelandic:
Indonesian:
7285
7383
7378
English:
Esperanto:
Estonian:
Faroese:
6978
6979
6984
7079
Interlingua:
Irish:
Italian:
7365
7165
7384
Fiji:
Finnish:
French:
Frisian:
Galician:
7074
7073
7082
7089
7176
Georgian:
German:
Greek:
Greenlandic:
Guarani:
7565
6869
6976
7576
7178
Japanese:
Javanese:
Kannada:
Kashmiri:
Kazakh:
Kirghiz:
Korean:
Kurdish:
Laotian:
Latin:
Latvian, Lettish:
7465
7487
7578
7583
7575
7589
7579
7585
7679
7665
7686
Lingala:
Lithuanian:
Macedonian:
Malagasy:
Malay:
Malayalam:
Maltese:
Maori:
Marathi:
Moldavian:
7678
7684
7775
7771
7783
7776
7784
7773
7782
7779
Mongolian:
Nauru:
7778
7865
Nepali:
Norwegian:
Oriya:
Pashto, Pushto:
Persian:
Polish:
7869
7879
7982
8083
7065
8076
Portuguese:
Punjabi:
Quechua:
8084
8065
8185
Rhaeto-Romance:
Romanian:
Russian:
Samoan:
Sanskrit:
Scots Gaelic:
Serbian:
Serbo-Croatian:
Shona:
Sindhi:
8277
8279
8285
8377
8365
7168
8382
8372
8378
8368
Singhalese:
Slovak:
Slovenian:
Somali:
Spanish:
Sundanese:
Swahili:
Swedish:
Tagalog:
Tajik:
8373
8375
8376
8379
6983
8385
8387
8386
8476
8471
Tamih
Tatar:
8465
8484
Telugu:
Thai:
Tibetan:
Tigrinya:
Tonga:
Turkish:
Turkmen:
Twi:
Ukrainian:
Urdu:
Uzbek:
Vietnamese:
8469
8472
6679
8473
8479
8482
8475
8487
8575
8582
8590
8673
VolapQk:
Welsh:
Wolof:
Xhosa:
Yiddish:
Yoruba:
Zulu:
8679
6789
8779
8872
7473
8979
9085
When connecting to an amplifier/receiver to enjoy multi-channel surround sound, use the following settings on this unit if they cannot be set on the
amplifier/receiver.
The settings are effective when connecting to analog 7.1ch/5.1ch AUDIO OUT terminal.
Preparation
O Set "Analog Audio Output" to "2ch (Downmix) + 5.1ch" or "7.1ch".
(_ 34)
A message is displayed.
I_ Press [OK].
Center
Approximate
connection
7.1ch speaker
connection
room dimensions
(C)
Front
Com
5.1ch speaker
Front(R)
Subwoofer
Test
(SW)
Circle of constant primary listening distance
O:
Actual speaker position
: Ideal speaker position
@ (_ (_ : Primary listening distance
(LS) Surround
(RS)
(LB) Surround
@ Center speaker
back(RB)*
* Surround back channel is enabled only when setting "Analog Audio
Output" to "7.1 ch".
Speaker presence and size (_i_i_s_j!
_
)
Set all the connected speakers individually.
O Press [A, T, ,, I_] to select the speaker icon and press [OK].
I_ Press [A, T] to select the setting and press [OK].
Icon examples:
Surround speaker (LS)
Large
Small
(_
Approx. 34 cm (1 ft. 1 in.)
1.0 ms
Approx. 68 cm (2 ft. 2 in.)
2.0 ms
Approx. 102 cm (3 ft. 4 in.)
3.0 ms
Approx. 136 cm (4 ft. 5 in.)
4.0 ms
Approx. 170 cm (5 ft. 6 in.)
5.0 ms
Surround/Surround
No
back speakers
Approx. 170 cm (5 ft. 6 in.)
5.0 ms
Approx. 340 cm (11 ft. 1 in.)
10.0 ms
Approx. 510cm (16 ft. 8 in.)
15.0 ms
• Large:
Select when the speaker supports low-frequency
(under 100 Hz) reproduction.
Channel balance (_)
• Small:
Select when the speaker does not support
low-frequency reproduction.
O Select "Test" and press [OK].
A test signal is output.
In order to make an ideal listening environment,
sizes may be automatically adjusted.
settings of speaker
(C)_Front
(R)-_>Surround
(RS)
t
For example, if the subwoofer is set to "No", the front speakers will
automatically be set to "Large". (In this case, we recommend
connecting a speaker that can reproduce bass below 100 Hz.)
Delay time ( [] )
For optimum listening with 7.1/5.I-channel
Front (L)-_>Center
sound, all the speakers,
except for the subwoofer, should be the same distance from the
seating position.
If you have to place the center, surround and surround back speakers
Surround
(LS)<-_
Surround Back (LB) <-_ Surround
Back (RB)
I_ While listening to the test signal, press [A, T] to adjust the
volume of each speaker
Front speakers: 0.0 to -6.0 dB
Center and surround speakers: 0.0 to -12.0 dB
I_ Press [OK].
The test signal stops.
• No signal is output for the subwoofer. To adjust its volume, play
something, then return to this screen to adjust to suit your taste.
closer to the seating position, adjust the delay time to make up for the
difference.
If either distance @ or (1_)is less than (_) (_ right), find the difference
in the relevant table and change to the recommended
O Press [A, T, ,,
setting.
I_] to select the delay time box ( []
) and press
[OK].
I_ Press [A, T] to select the setting and press [OK].
To finish the speaker setting
Press [A, T, "_, I_] to select "Complete"
and press [OK].
RQT9378
About MP31JPEGIDivX files
File format
MP3
File format
Subtitles
Playable
media
CD-R% CD-RW%
USB device
Playable
media
CD-R% CD-RW%
USB device
Extension
Files must have the extension ".mp3" or ".MP3".
File format
MicroDVD,
Compression
rate
32 kbps to 320 kbps
Extension
Files must have the extension ".SRT", ".srt",
".SUB", ".sub", ".TXT", or ".txt"
Sampling
rate
44.1 kHz/48 kHz
Reference
•The
Reference
ID3 tags: version 1, 2.2, 2.3, 2.4
DVD-R .1,*5, DVD-R DL .1,*5,
text file of DivX
DVD-R .1, % DVD-R DL .1,*s
SubRip, or TMPlayer
DivX video file and subtitles text file are
inside the same folder, and the file names are
the same except for the file extensions.
• If there are more than one subtitles text files
ID3 is a tag embedded in MP3 track to provide
information about the track.
This unit supports the versions listed above but only
titles and the names of artists can be displayed.
• If there is a large amount of still picture data etc.
within a MP3 file, play may not be possible.
inside the same folder, they are displayed in the
following order of priority: ".srt", ".sub", ".txt".
• In the following situations, the subtitles cannot
be displayed as recorded. Furthermore,
depending on the methods used to create the
file or the state of the recording, only parts of the
subtitles may be displayed, or the subtitles may
not be displayed at all.
- When special text or characters are included
in the subtitles text.
File format
JPEG
Playable
media
CD-R .1, CD-RW%
Extension
Files must have the extension ".jpg" or ".JPG".
Picture
between 34x 34 and 8192x 8192 pixels
resolution
(sub sampling is 4:2:2 or 4:2:0)
Reference
JPEG conforming DCF .4 is supported.
Thawing Time: approx. 2 sec. (7 M pixels)
- When the file size is larger than 256 KB.
DVD-RAM .2, DVD-R .1,*5,
DVD-R DL .1,*5, BD-RE% SD card, USB device
- When characters with specified styling are
included in the subtitle data.
- Codes that specify the character style within
files are displayed as subtitle characters.
- When data with a different format exists within
the subtitle data.
• If the file name of the DivX video file is not
• MOTION JPEG and Progressive JPEG is not
supported
displayed correctly on the menu screen (the file
name is displayed as " "), the subtitles text may
not be displayed correctly.
• Depending on the disc, the subtitles text cannot
be displayed when search and other such
operations
are being performed.
• English alphabet and Arabic numerals are displayed correctly.
File format
DivX
Playable
media
CD-R% CD-RW%
USB device
Extension
Files must have the extension ".DIVX", ".divx',
".AVI" or ".avi".
and folders may not play in the order you numbered them.
• This unit is not compatible with packet-write format.
Picture
resolution
between 32 x 32 and 720 x 576 pixels
• Depending on the recording conditions, the media may not play.
• Operation may take time to complete when there are many files
Reference
•Certified
Video
DVD-R .1,*5, DVD-R DL.1, .5
displayed on a computer.
• Depending on how you create the media (writing software), files
to the DivX Home Theater Profile.
and/or folders and some files may not display or be playable.
"1 ISO9660 level 1 or 2 (except for extended formats), Joliet
- Number of stream: Up to 1
-Codec: DIV3, DIV4, DIVX, DV50, DIV6
- FPS (Frame Per Second): Up to 30 fps
Audio
This unit is compatible with multi-session.
This unit is not compatible with packet writing.
*2 Discs must conform to UDF 2.0.
*3 Discs must conform to UDF 2.5.
- Number of stream: Up to 8
-Format: MP3, MPEG, AC3
*4 Design rule for Camera File system: unified standard established
by Japan Electronics and Information Technology Industries
-Multi channel: AC3 is possible. MPEG multi is
2 ch conversion.
Association (J EITA).
*5 Discs must conform to UDF bridge (UDF 1.02/ISO9660).
• GMC (Global Motion Compensation)
supported.
is not
• Picture may stop if the DivX files are greater
than 2 GB.
RQT9378
Other characters may not be displayed correctly.
• The display order on this unit may differ from how the order is
This unit is not compatible with multi-session.
The default session only is played.
You can play files on this unit by structure
of folders
software),
play may not be in the order you numbered
as shown below.
the folders,
However
depending
on the method
of writing
data
(writing
in BD-RE/DVD-RAM
in SD card/USB
device
• Folder structure is not displayed.
Displays JPEG files in all folders.
• Folder structure is not displayed.
Folder which can be displayed with this unit
: Numbers
XXX: Letters
"1 ###: from 001 to 999
*2 ###: from 100 to 999
XXX: up to 5 figures
*3 >kS>kS: from 0001 to 9999
....................................
in DVD-R/DVD-R
DL/CD-R/CD-RW
Files inside a folder are displayed in the order
they were updated or taken.
Root
e.g.,
-i
Root
l|'il'llt
e.g.,
Root
--PO000001 @g
--POOOOOO2@g
P0000001 @g
P0000002@g
---
JPEG
--_
Folder A
P #XXXXX
--
P0000008dpg
_F
*3
_ ¢XXXXX *2
XXXX _ _ _ _ ,J PG .3
i_
--P0000007@g
i
2
XXXX# # # #.JPG
Folder B
P0000006@g
P0000001 jpg
P0000002@g
"1
-P000000S@g
--P0000004@g
-P0000005@_
--
e.g.,
DCIM
_ t tXXXXX
I
older
C
-P0000009@g
pXXXX?
--Z_old
*2
? ? ?.JPG
er A
POOOOOO3dpg
POOOOOO4@g
_3
b--POOO0O19,jPg
b'uuuuu / / ,jpg
PO000012,jpg
Li
-'_I | e[_ I e1114,] dl I]_'_:|1
in DVD-R/DVD-R DUCD-R/CD-RW/USB device
Prefix the file names with 3-digit numbers in
the order you want to play them.
Root
e.g.,
iO02XXXX
_
Root
---
--001XXXX,mp3
;| ,];_lli
I_J _ [:..]J.:
in DVD-R/DVD-R DL/CD-R/CD-RW/USB device
Files inside a folder are displayed in the order
they were updated or taken.
e.g.,
POOOOOOl,divx
PO000002
divx
mp3
Folder A
Folder A
POOOOOO3,divx
POOOOOO4,divx
--O03XXXX,mp3
--O04XXXX,mp3
--O05XXXX
rnp3
PO000005
_
Folder B
_
POOOOO06,divx
r....-- POOOOO07,divx
006XXXX,mp3
-- 007XXXX,mp3
i
008XXXX,mp3
--009XXXX
mp3
Folder C
--010XXXX,mp3
--011XXXX,mp3
--012XXXX
divx
FolderB
_----
i
P0000008,divx
PO000009
divx
older C
PO000010
k'---Li
divx
PO000011 ,divx
P0000012 divx
rap3
RQT9378
Messages
On the television
This unit is not authorized
to play this title.
Cannot display
on this unit.
No disc is inserted,
Page
• I11_i: You are trying to play the DivX VOD content that was purchased with a
different registration code. You cannot play the content on this unit.
26
eYou inserted an incompatible disc (Discs recorded in PAL video, etc.).
6, 7
eYou tried to play a non-compatible image.
eConfirm "SD" on the unit's display is not blinking and re-insert the card.
eThe disc may be upside down.
• I'ifl_i:
available.
prohibited
by this disc.
Cannot connect.
connection of the LAN
cable.
connection or router
settings.
Please check the IP address
setting.
7, 38
The DivX VOD content has zero remaining plays. You cannot play it.
26
• Some operations are unsupported by the unit. For example;
- ITti'_l: During playback, reverse slow-motion or reverse frame-by-frame is not possible.
20
• Depending on the disc, you may not be able to perform search or skip when film
previews and warning screens are being played back.
20
eWhen a hub is used but its Link lamp does not light up, check the cable
connection, LAN terminal connection, cable itself (a cross over cable may be
used by mistake), etc.
16
eThe "IP Address" in "IP Address/DNS Settings" is ....
. Set the "IP
Address", "Subnet Mask", and "Default Gateway". (Select the automatic address
acquisition if necessary.)
17
elf you use a hub, then check the connection between the hub and the router.
-Use the UPLINK port of the hub to connect to a router.
-Check whether or not the hub's Link lamp lights up. If it does not light up, then
check the cable connection, LAN terminal connection, cable itself (a cross over
cable may be used by mistake), etc.
elf the above conditions are OK, then the router may not operate in DHCP mode.
Check the router settings and operation. You may reset the router to restore it to
normal.
16
16
eThis unit's IP address is used by another device. Check the IP addresses of this
unit, personal computers, and routers, etc. If necessary, reconfigure them to
avoid IP addresses from being duplicated.
eTurn the unit off. Remove the power cord and reconnect it and try again. If the
same symptom persists, then consult your dealer.
Please try again.
IP address not set correctly.
unsuccessful. No reply
from host.
Please check the
connection or router
refused.
Please confirm Setup
"BD-Live Internet Access."
Unable to check for latest
firmware version.
Please try again later.
effective.
Analog video output is
turned off when
playback starts.
RQT9378
elf you use a hub, then check the connection between the hub and the router.
-Use the UPLINK port of the hub to connect to a router.
-If the hub's Link lamp does not light up, then check the cable connection, LAN
terminal connection, cable itself (a cross over cable may have been used by
mistake), etc.
eCheck the "IP Address", "Subnet Mask", and "Default Gateway" in the "IP
Address/DNS Settings".
elf the MAC address information is required, then press [SETUP] to display the
"Network" menu.
• When you set "BD-Live Internet Access" to "Allow (Limited)" and play BD-Live
contents which do not have a content owner certificate, the Internet access of the
content is not allowed, If you allow the content to connect to Internet, set "BD-Live
Internet Access" to "Allow (ALL)",
eThe firmware download server is currently unavailable.
16
17
17, 35
32
Please try again later.
• "High Clarity Sound" in setup menu is set to "Enable", and "High Clarity Sound" in
on-screen menu is set to "On".
31, 33
On the unit's
display
Page
F99
eThe unit fails to operate properly. Press [POWER Lb/I] on the main unit to switch
the unit to standby for 3 seconds. Now press [POWER (b/I] on the main unit
again to turn the unit on.
--
HDMI ONLY
eSome BD-Video discs can only be output with HDMI.
--
NET
eDisplays while VIERA CAST is starting up.
--
No PLAY
eThere is a viewing restriction on a BD-Video or DVD-Video.
32
No READ
eThe media is dirty or badly scratched. The unit cannot play.
--
PLEASE WAIT
eThe unit is carrying out internal process. This is not a malfunction. You cannot
--
operate the unit while "PLEASE WAIT" is displayed.
eWhen connected to TV(VIERA) with HDAVI Control 4, and power supply is turned
off by the "Auto power stand-by" function on the TV side.
REMOVE
eThe USB device is drawing too much power. Remove the USB device.
19
eThe remote control and main unit are using different codes. Change the code on
the remote control.
36
Press and hold [OK] and the indicated number button at the
same time for more than 5 seconds.
UNFORMAT
eYou inserted an unformatted DVD-RAM, DVD-RW, +RW, an unused +R, +R DL
or DVD-RW (DVD-Video format).
UNSUPPORT
eYou have inserted a media the unit cannot play.
eYou tried to operate with a non-compatible USB device.
6, 7
7
eThe unit is hot.
The unit switches to standby for safety reasons. Wait for about 30 minutes until
the message disappears,
Select a position with good ventilation when installing the unit, Do not block the
cooling fan on the rear of the unit,
U72
U73
eThe HDMI connection acts unusually.
-The connected equipment is not HDMI compatible.
-Please use HDMI cables that have the HDMI logo (as shown on the cover).
-The HDMI cable is damaged.
eThere is something unusual. (The service number displayed after H and F
depends on the unit's condition.)
eCheck the unit using the troubleshooting guide. If the service number does not
disappear, do the following.
1 Disconnect the plug from the AC outlet, wait a few seconds, then reconnect it.
2 Press [POWER Lb/I] to turn the power on. (The unit may be fixed.)
If the service number does not disappear despite doing the above, request
service from the dealer. Inform the dealer of the service number when requesting
service.
START
eThe system is being restarted during the firmware update. Please do not turn off
power.
16
UPDFI/E]
eThe firmware is being updated.
16
FINISH
eThe firmware update is complete.
16
RQT9378
Troubleshooting
guide
do not solve the problem, refer to "Customer Services Directory (United States and Puerto Rico)" on page 46 if you reside in the U.S.A.and Puerto
Rico, or refer to "Product information" on page 48 if you reside in Canada.
The following
do not indicate
a problem
with this unit:
• Regular disc rotating sounds.
• Image disturbance during search.
To reset this unit
Page
oSelect "Yes" in "Restore Default Settings" in the Setup menu.
This returns all values in the Setup menu and the on-screen menu, except for "Remote
Control Code", "On-screen Language", "IP Address/DNS Settings", "Proxy Server
Settings", "DVD-Video Ratings", "BD-Video Ratings" and "Network Service" to the
default settings.
36
The unit is on but cannot be
operated.
• Confirm the correct drive is selected.
eOne of the unit's safety devices may have been activated.
Reset the unit as follows:
1 Press [POWER (b/I] on the main unit to switch the unit to standby.
If the unit doesn't switch to standby, press and hold [POWER _/I] on the main unit for
about 3 seconds. The unit is forcibly switched to standby.
Alternatively, disconnect the AC power supply cord, wait one minute, then reconnect it.
2 Press [POWER dO/I]on the main unit to switch it on. If the unit still cannot be
operated, consult the dealer.
eCondensation has formed. Wait 1 to 2 hours for it to evaporate.
19
Cannot eject disc.
oThe unit may have a problem. While the unit is off, press and hold [I I] and
[A OPEN/CLOSE] on the main unit at the same time for about 5 seconds to force
the tray to eject. Remove the disc and consult the dealer.
Played back image is
distorted or does not
playback correctly. (1_]_1)
oHigh definition video (transfer rate of 18 Mbps or faster) cannot be played back
correctly if it was recorded on a DVD compatible to double speed or slower.
To return all settings to the
factory preset
Power
Operation
RQT9378
TV screen
and video
The screen changes
automatically.
• When the "Screen Saver Function" in the Setup menu is set to "On", the display may return
to the screen saver mode automatically if there is no operation for 10 minutes or more.
Video is not output in high
definition.
• High definition video cannot be output through the VIDEO OUT terminals.
eConfirm that the "HDMI Video Mode", "HDMI Resolution", and "Component Video
Resolution" in the Setup menu are set properly.
There is a lot of after-image
when playing video.
• Turn "3D NR" or "Integrated
Still pictures (JPEG) do not
play back normally.
eThe images that were edited on the PC, such as Progressive JPEG, etc., may not
play back.
NR" off if it is on.
33
31
38
Sound
Cannot switch audio.
eThere are discs for which audio cannot be changed because of how the disc was
created.
eWhen connecting an amplifier/receiver using a coaxial cable (_),
optical digital audio
cable or an HDMI cable, you cannot switch the audio if "Dolby D/Dolby D +/Dolby TrueHD"
or "DTS/DTS-HD" is set to "Bitstream". Set "Dolby D/Dolby D +/Dolby TrueHD" or "DTS/
DTS-HD" to "PCM" or connect using AUDIO OUT terminal.
RQT9378
Troubleshooting
Music on an SD card cannot
be played.
guide
eData that can be played from an SD card are AVCHD, MPEG2 and JPEG data.
USB
USB device cannot be
operated.
• Turn the power of this unit off once, and turn it back on,
Network
VIERA CAST does not
operate or connect,
Other
difficulties
els the network connection correct?
elmage of the video contents may be disturbed or may not display depending on
how busy the environment or the connected line is.
with playback
Picture-in-picture is not
played with BD-Video.
• Confirm whether the disc supports picture-in-picture.
Alternative soundtrack
subtitles cannot be
selected.
eThe languages are not recorded on the media.
eYou may not be able to use the on-screen menu to change the soundtrack and
subtitles on some discs. Use the disc's menus to make changes.
19
eTurn off the subtitles or turn off the closed caption setting on the TV.
30
and
The subtitles overlap closed
captions recorded on discs.
RQT9378
Specifications
Signal system:
NTSC
Operating temperature range:
+5 °C to +35 °C (+41 °F to +95 °F)
Operating
humidity
range:
10 % to 80 % RH (no condensation)
Playable disc:
BD-Video
BD-ROM:Version 2
BD-RE: Version 3 (Single Layer, Dual Layer), JPEG _6
BD-R:
Version 2 (Single Layer, Dual Layer)
DVD- RAM: DVD Video Recording format, AVCH D format _8,
JPEG _4
DVD-R/DVD-R DL:
DVD-Video format _1, DVD-Video Recording
format _1, AVCHD format _1,8 DivX,7 JPEG_4
MP3
DVD-RW:DVD-Video format _, DVD-Video Recording
format _, AVCHD format _1,8
+R/+RW/+R DL:
Video _, AVCHD format _1,8
DVD-VlDEO:
DVD-Video format
CD-Audio:CD-DA
CD-R/CD-RW:CD-DA, JPEG _, MP3, DivX .7
Digital audio output:
Optical digital output:
Coaxial digital output [BD80:
Optical terminal
Pin jack
HDMI AV output
Output format:
480p (525p)/1080i (1125i)/720p (750p)/1080p
(1125p)
Output Connector:
Type A (19 pin)
HDMI TM (Deep Color, x.v.Color TM, High Bit rate Audio)
eThis unit supports "HDAVI Control 4" function.
SD card slot:
Connector:
1 system
USB slot:
Connector:
1 system
Ethernet:
10BASE-T/100BASE-TX:
1 system
Optical pick-up:
Wave length:
System with 2 lenses
790 nm (CDs)/650 nm (DVDs)/405 nm (BDs)
LASER Specification
Class I LASER Product:
Wave length:
790 nm (CDs)/650 nm (DVDs)/405 nm (BDs)
Laser power:
No hazardous radiation is emitted with the safety
protection
Power supply:
Power consumption:
SD card:
SD Memory Card _2formatted FAT12, FAT16, FAT32*3:
JPEG _4,AVCHD format _8, MPEG-2
USB device:
USB Standard:USB 2.0 High Speed MP3, JPEG _4, DivX .7
Format:
FAT12, FAT16, FAT32
_:
___:
[BD80
1.0 Vp-p (75 _)
Pin jack (1 system)
Component video output:
(1080i1720p1480p1480i)
Y output level:
1.0 Vp-p (75 _)
PB output level:
0.7 Vp-p (75 _)
PR output level:
0.7 Vp-p (75 _)
Output connector:
Pin jack (Y: green, PB: blue, PR: red)
(1 system)
Audio output:
2 Vrms (1 kHz, 0 dB)
Output level:
Output connector:
Pin jack
Number of connectors :
_:
7.1 channel discrete output:
1 system
(2 channel + 5.1 channel discrete output)
2 channel:
Audio performance:
Frequency response:
eDVD (linear audio):
1 system
4 Hz to 22 kHz (48 kHz sampling)
4 Hz to 44 kHz (96 kHz sampling)
eCD-Audio:
4 Hz to 20 kHz
S/N ratio:
115 dB
100 dB
Dynamic range:
Total harmonic distortion:
0.003 %
Approx. 23 W
_
_:Approx.
22 W
Power consumption
in standby mode:
less than 0.5 W
Power consumption in quick start standby mode: _:
6W
Dimensions
Video output:
Output level:
Output connector:
AC 120 V, 60 Hz
sw
(WXDXH)
:
Excluding the projecting parts:
430 mmx242 mmx55 mm
(Approx. 16 15/16"x 9 9/16"x 2 3/16")
Including the projecting parts:
430 mmx249 mmx55 mm
(Approx. 16 15/16"x9 13/16"x2 3/16")
_
Excluding
Including
EBD605 ;;:
the projecting parts:
430 mm×242 mm×49 mm
(Approx. 16 15/16"x9 9/16"x1 15/16")
the projecting parts:
430 mm×249 mm×49 mm
(Approx. 16 15/16"x 9 13/16"x 1 15/16")
Mass (Weight):
Specifications
Approx. 2.6 kg (5.7 Ibs)
are subject to change without notice.
"1 Finalizing is necessary,
*2 Includes SDHC card
Includes miniSD Cards (need a miniSD Adaptor)
Includes microSD Cards (need a microSD Adaptor)
*3 Does not support long file name.
*4 The total combined maximum number of recognizable picture
contents and folders: 3000 picture contents and 300 folders.
*5 The total combined maximum number of recognizable picture
contents and folders: 999 picture contents and 99 folders.
*6 The total combined maximum number of recognizable picture
contents and folders: 9999 picture contents and 300 folders.
*7 [BD80 : The total combined maximum number of recognizable
picture contents and folders: 200 file contents and 300 folders.
*8 AVCHD format V1.0
• Useable capacity will be less. (SD Card)
RQT9378
Limited Warranty (Only for U.S.A. and Puerto Rico)
Division of Panasonic Corporation of North America
One Panasonic Way, Secaucus, New Jersey 07094
Panasonic
Blu-ray
Disc
Player
Limited Warranty Coverage (For U.S.A. and Puerto Rico Only)
If your product does not work properly because of a defect in
materials or workmanship, Panasonic Consumer Electronics
Company (referred to as "the warrantor") will, for the length of the
period indicated on the chart below, which starts with the date of
original purchase ("Limited Warranty period"), at its option either (a)
repair your product with new or refurbished parts, or (b) replace it with
a new or a refurbished product. The decision to repair or replace will
be made by the warrantor.
tor artOamo
t art ,.a ort
Disc Player
One (1) Year
/One
(1) Year
During the "Labor" Limited Warranty period there will be no charge for
labor. During the "Parts" warranty period, there will be no charge for
parts. You must mail-in your product during the warranty period. If
non-rechargeable
batteries are included, they are not warranted. This
Limited Warranty only applies to products purchased
and serviced in
the United States or Puerto Rico. This Limited Warranty is extended
only to the original purchaser
and only covers product purchased
as
new. A purchase receipt or other proof of original purchase date is
required for Limited Warranty service.
Carry-In or Mail-In Service
For Carry-In or Mail-In Service in the United States and Puerto Rico
call 1-800-211 -PANA (7262) or visit
Panasonic Web Site: http://www.panasonic.com
When shipping the unit carefully pack and send it prepaid, adequately
insured and preferably in the original carton. Include a letter detailing
the complaint and provide a day time phone and/or email address
where you can be reached.
IF REPAIR IS NEEDED DURING THE LIMITED WARRANTY
PERIOD THE PURCHASER WILL BE REQUIRED TO FURNISH A
SALES RECEIPT/PROOF OF PURCHASE INDICATING DATE OF
PURCHASE, AMOUNT PAID AND PLACE OF PURCHASE.
CUSTOMER WILL BE CHARGED FOR THE REPAIR OF ANY
UNIT RECEIVED WITHOUT SUCH PROOF OF PURCHASE.
Limited
Warranty
Limited Warranty Limits And Exclusions
This Limited Warranty ONLY COVERS failures due to defects in
materials or workmanship, and DOES NOT COVER normal wear and
tear or cosmetic damage. The Limited Warranty ALSO DOES NOT
COVER damages which occurred in shipment, or failures which are
caused by products not supplied by the warrantor, or failures which
result from accidents, misuse, abuse, neglect, mishandling,
misapplication, alteration, faulty installation, set-up adjustments,
misadjustment of consumer controls, improper maintenance, power
line surge, lightning damage, modification, or commercial use (such
as hotel, office, restaurant, or other business), rental use of the
product, or service by anyone other than a Factory Service Center or
other Authorized Servicer, or damage that is attributable to acts of
God.
THERE ARE NO EXPRESS WARRANTIES EXCEPT AS LISTED
UNDER "LIMITED WARRANTY COVERAGE". THE WARRANTOR
IS NOT LIABLE FOR INCIDENTAL OR CONSEQUENTIAL
DAMAGES RESULTING FROM THE USE OF THIS PRODUCT, OR
ARISING OUT OF ANY BREACH OF THIS WARRANTY. (As
examples, this excludes damages for lost time, cost of having
someone remove or re-install an installed unit if applicable, travel to
and from the servicer, loss of or damage to media or images, data or
other recorded content. The items listed are not exclusive, but are for
illustration only.)
ALL EXPRESS AND IMPLIED WARRANTIES, INCLUDING THE
WARRANTY OF MERCHANTABILITY,
ARE LIMITED TO THE
PERIOD OF THE LIMITED WARRANTY.
Some states do not allow the exclusion or limitation of incidental or
consequential damages, or limitations on how long an implied Limited
Warranty lasts, so the exclusions may not apply to you.
This Limited Warranty gives you specific legal rights and you may
also have other rights which vary from state to state. If a problem with
this product develops during or after the Limited Warranty period, you
may contact your dealer or Service Center. If the problem is not
handled to your satisfaction, then write to the warrantor's Consumer
Affairs Department at the addresses listed for the warrantor.
PARTS AND SERVICE, WHICH ARE NOT COVERED
LIMITED WARRANTY, ARE YOUR RESPONSIBILITY.
•
,
•
•
• _ •
,
BY THIS
[__121't!_r_j
Obtain Product Information and Operating
httm//www.#anasonic.c'om/hel#
or, _:ontact us v_a the web at:
httm//www.oanasonic.corn/contactinfo
Assistance; purchase Parts, Accessories, or obtain Literature by visiting our Web Site at:
Yotl may also contact us directly at:
1-800-211-PANA (7262),
Monday-Friday 9 am-9 pro; Saturday-Sunday 10 am-7 pro, EST.
For hearing
or speech
impaired
TTY users, TTY: 1-877-833-8855
Purchase Parts, Accessories and Instruction Books online for all Panasonic Products by visiting our Web Site at:
httm//www.ostc.oanasonic.corn
or, send your request'by E-mail to:
noc#[email protected]
You may also contact us directly at:
1-800-332-5368 (Phone) 1-800-237-9080 (Fax Only) (Monday - Friday 9 am to 9 pro, EST.)
Panasonic Service and Technology Company
20421 84th Avenue South, Kent, WA 98032
(We Accept Visa, MasterCard, Discover Card, American Express,and Personal Checks)
For hearing
or speech
impaired
TTY users, TTY : 1-866-605-1277
Centralized
MAIL
TO:
Please carefully
RQT9378
Factory Service Center
Panasonic Service and Technology Company
410B Airport Road
Elgin, IL 60123-9333
Attention: BD/DVD Repair
pack and ship, prepaid and insured, to the Elgin Centralized
Factory Service Center.
Limited
Warranty (Only for CANADA)
PANASONIC
PRODUCTmLIMITED
WARRANTY
Panasonic Canada Inc. warrants this product to be free from defects in material and workmanship
period as stated below from the date of original purchase.
Technics Audio Product
Panasonic Portable/Clock Radio (without Tape, CD, MD)
Panasonic Audio/SD Audio Product
Panasonic BD/DVD Product
Panasonic Combination
Panasonic Combination
Accessories
LIMITATIONS
DVD Player/VCR
DVD Recorder/VCR
including rechargeable
batteries
One (1) year, parts
One (1) year, parts
One (1) year, parts
One (1) year, parts
One (1) year, parts
One (1) year, parts
Ninety (90) days
and
and
and
and
and
and
and agrees to remedy any such defect for a
labour
labour
labour
labour
labour
labour
AND EXCLUSIONS
This warranty does not apply to products purchased outside Canada or to any product which has been improperly installed, subjected to usage for
which the product was not designed, misused or abused, damaged during shipping, or which has been altered or repaired in any way that affects
the reliability or detracts from the performance, nor does it cover any product which is used commercially. Dry cell batteries are also excluded from
coverage under this warranty.
This warranty is extended to the original end user purchaser only. A purchase receipt or other proof of date of original purchase is required before
warranty service is performed.
THIS EXPRESS, LIMITED WARRANTY IS IN LIEU OF ALL OTHER WARRANTIES, EXPRESS OR IMPLIED, INCLUDING ANY IMPLIED
WARRANTIES OF MERCHANTABILITY
AND FITNESS FOR A PARTICULAR PURPOSE.
IN NO EVENT WILL PANASONIC
CANADA
INC. BE LIABLE FOR ANY SPECIAL, INDIRECT OR CONSEQUENTIAL
In certain instances, some jurisdictions do not allow the exclusion or limitation of incidental or consequential
warranties, so the above limitations and exclusions may not be applicable.
WARRANTY
DAMAGES.
or the exclusion of implied
SERVICE
FOR PRODUCT
Our Customer
damages,
OPERATION
Care Centre:
FOR PRODUCT
ASSISTANCE,
please contact:
Telephone #:
1-800 #:
Fax #:
(905) 624-5505
1-800-561-5505
(905) 238-2360
Email link:
"Customer
REPAIRS, please locate your nearest Authorized
Link : "Servicentres
TM
Iocator" under "Customer
support" on www.panasonic.ca
Servicentre at www.panasonic.ca
:
support"
IF YOU SHIP THE PRODUCT
TO A SERVICENTRE
Carefully pack and send prepaid, adequately insured and preferably in the original carton.
Include details of the defect claimed, and proof of date of original purchase.
RQT9378
Product Service
Licenses
,j ........................................................................................................................................................................
qualified service personnel if:
(a) The AC power supply cord or AC adaptor has been damaged;
or
2,
Inc. in the United
Manufactured under license from Dolby Laboratories. Dolby and
the double-D symbol are trademarks of Dolby Laboratories.
(d) The unit does not operate normally or exhibits a marked
change in performance; or
Manufactured under license under U.S. Patent #'s: 5,451,942;
5,956,674; 5,974,380; 5,978,762; 6,226,616; 6,487,535;
7,392,195; 7,272,567; 7,333,929; 7,212,872 & other U.S. and
worldwide patents issued & pending.
DTS is a registered trademark and the DTS Iogos, Symbol,
DTS-HD and DTS-HD Master Audio I Essential are trademarks
DTS, Inc.
© 1996-2008 DTS, Inc. All Rights Reserved.
(e) The unit has been dropped or the cabinet damaged.
Servicing--Do
not attempt to service the unit beyond that
Replacement parts--When parts need replacing ensure the
servicer uses parts specified by the manufacturer or parts that
have the same characteristics as the original parts. Unauthorized
substitutes may result in fire, electric shock, or other hazards.
4,
and Iogos are trademarks or
registered trademarks of Sun Microsystems,
States and other countries.
(b) Objects or liquids have gotten into the unit; or
(c) The unit has been exposed to rain; or
described in these operating instructions. Refer all other
servicing to authorized servicing personnel.
3,
Java and all Java-based trademarks
Safety check--After repairs or service, ask the servicer to
perform safety checks to confirm that the unit is in proper working
condition.
of
This product incorporates copyright protection technology that is
3rotected by U.S. patents and other intellectual property rights.
Use of this copyright protection technology must be authorized by
Macrovision, and is intended for home and other limited viewing
uses only unless otherwise authorized by Macrovision. Reverse
engineering or disassembly is prohibited.
HDMI, the HDMI logo and High-Definition Multimedia Interface are
trademarks or registered trademarks of HDMI Licensing LLC.
For product information
or assistance with product operation:
In the U.S.A. and Puerto Rico, refer to "Customer Services Directory
(United States and Puerto Rico)" on page 46.
In Canada, contact the Panasonic Canada Inc. Customer Care
Centre at 1-800-561-5505,
or an authorized
Servicentre
or visit the website (www.panasonic.ca),
closest to you.
The model number and serial number of this product can be
found on either the back or the bottom of the unit.
Please note them in the space provided below and keep for
future reference.
This product is licensed under the AVC patent portfolio license and
VC-1 patent portfolio license for the personal and non-commercial
use of a consumer to (i) encode video in compliance with the AVC
Standard and VC-1 Standard ("AVC/VC-1 Video") and/or (ii)
decode AVC/VC-1 Video that was encoded by a consumer
engaged in a personal and non-commercial activity and/or was
obtained from a video provider licensed to provide AVC/VC-1
Video. No license is granted or shall be implied for any other use.
Additional information may be obtained from MPEG LA, LLC. See
htt p://www.m pegla.com.
HDAVl Control
TM
is a trademark
of Panasonic Corporation.
"x.v.Color TM"is a trademark.
MODEL NUMBER
VIERA Link TM is a trademark
SERIAL NUMBER
VlERA CAST
TM
of Panasonic Corporation.
is a trademark of Panasonic Corporation.
EZ Sync TM is a trademark of Panasonic Corporation.
User memo:
DATE OF PURCHASE
DEALER NAME
"AVCHD" and the "AVCHD" logo are trademarks
Corporation and Sony Corporation.
DEALER ADDRESS
SDHC Logo is a trademark.
TELEPHONE
Portions of this product are protected under copyright law and are
3rovided under license by ARIS/fiOLANA/4C.
NUMBER
Plays DivX " video
DivX is a registered trademark of DivX,
Inc., and is used under license.
of Panasonic
r-_=,=
"Blu-ray Disc" is trademark.
"BD-LIVE" logo is trademark of Blu-ray Disc Association.
"BONUSVlEW"
is trademark
of Blu-ray Disc Association.
YouTube and Picasa are trademarks of Google, lnc.
RQT9378
,r,,_d_
_
Referencia
rapida
en espatfol
(Spanish
Cable HDMI
(incluido : DMP-BD605)
Quick
Reference)
_
__
Cable de audio/
video (incluido)
Televisor
AUDIO/VIDEO
Parte
posterior
IN
de la unidad
Parte posterior de la unidad
• Esta conexion no permite la salida de video de alta definicion.
Utilice la conexion O o (_ para obtener video de alta definicion.
Cable HDMI
(incluido : DMP-BD605)
HDMI AV OUT
(_-"_
..:_.___
"_
_
HDMI IN
HDMI IN _
Amplificador/Receptor
Parte posterior de la unidad
A una toma de corriente
Altavoces
multicanal
--
domestica
HDMI OUT
_-_
HDMI IN
_.
(i_]_
_._[[_3_ _
_....
I
_ [] _
_
,
Televisor
L
.......
J
_
--"
Ahorro de energia
(CA 120 V, 60 Hz)
Esta unidad consume una pequer_a cantidad de energia aunque este
ajustada en el modo de espera (Accionamiento rcipido : Desactivado,
aprox. 0.5 W). Para ahorrar energia cuando no vaya a utilizar la
unidad durante mucho tiempo, desencht]fela de la toma de corriente.
Cable de alimentacion de CA (incluido)
Conectelo cuando haya realizado el resto de conexiones.
Preparacion
Encienda el televisor y seleccione la entrada de video adecuada en el televisor.
O Pulse [_ BD POWER] para encender la unidad.
Despues de conectar su nuevo reprodutor y pulsar el boton de
encendido, aparecera la pantalla de la Configuracion basica.
I_ Pulse [_ OPEN/CLOSE] para abirir
del
disco, cargue el disco.
la bandeja
• Pulse [1_] (PLAY) para recuperar la velocidad de reproduccion
normal.
• Para algunos discos, la velocidad podria no cambiar.
Busqueda
Durante la reproduccion, pulse ['_] o [1_1_].
• I'_l_'_ _
_
I_'_:
El audio se oye durante la
busqueda en avance de primer nivel.
• I_J_l I?_--Z'_I: El sonid no se oye durante todos los niveles de
busqueda.
• _t_l I'_1_1: La velocidad esta fija en un paso.
La posicion de detencion se memoriza.
Funcion de reanudacion de la reproduccion
Pulse [1_] (PLAY) para reiniciar la reproduccion desde esta posicion.
• La posicion se borra si se abre la bandeja o se pulsa [1] varias
veces para visualizar "STOP" en el visor de la unidad.
• r_l_'_: En los discos BD-Video incluidos los BD-J, la funcion de
reanudacion de la reproduccion
no funciona.
• r4r_l _
_
_
: La posicion se borra si apaga la unidad.
C,_mara lenta
Durante la pausa, pulse [,_]
o [1_11_].
• I'_l_'_ ItA'_'_'_:SOIo direccion en avance [1_11_].
• I_'_'¢i:Si
continua durante aprox. 5 minutos, la reproduccion
camara lenta se para autom_iticamente.
en
• Salta hasta el titulo, capitulo o pista que desee reproducir.
• Cada pulsacion aumenta el numero de saltos.
• I_J_l: Solo direccion hacia atr_is [l'qt_l].
• Pulse [I I] otra vez o [1_] (PLAY) para reiniciar la reproduccion.
RQT9378
Glossary
AVCHD
AVCHD is a new format (standard) for high definition video cameras
that can be used to record and play high-resolution HD images.
BD-J
Some BD-Video discs contain Java applications, and these
applications are called BD-J. You can enjoy various interactive
features in addition to playing normal video.
BD-Live
This is a BD-Video (BD-ROM Profile 2) that supports the new
functions such as Internet connection, etc. in addition to the
BONUSVIEW function.
Bitstream
This is the digital form of multi-channel audio data (e.g., 5.1 channel)
before it is decoded into its various channels.
BONUSVIEW (Final Standard Profile)
This is a BD-Video (BD-ROM Profile 1 version 1.1) that supports the
new functions such as Picture-in-picture, Secondary Audio, etc.
Deep Color
Deep Color is a name for device that can reproduce greater color
gradation (4096 steps) when connected to a TV that supports the
Deep Color with HDMI cable. You can enjoy exceptionally rich,
natural-looking colors, with smooth, detailed gradation and minimal
color banding. [A lower color gradation (256 steps), without Deep
Color, will be reproduced if connected to a TV which does not support
Deep Color. The unit will automatically set appropriate output to suit
the connected TV.]
DivX IBD80
DivX is a popular media technology created by DivX, Inc. DivX media
files contain highly compressed video with high visual quality that
maintains a relatively small file size.
DN S Server
A server which acts like a telephone directory and translates
domain names into IP addresses.
Internet
Dolby Digital
This is a method of coding digital signals developed by Dolby
Laboratories. Apart from stereo (2-channel) audio, these signals can
also be multi-channel audio.
Dolby Digital Plus
Multi-channel audio and higher audio quality is made possible using
Dolby Digital Plus. BD-Video supports up to 7.1 channel output.
Dolby TrueHD
Dolby TrueHD is a very high quality audio format that reproduces the
studio master audio. BD-Video supports up to 7.1 channel output.
Down-mixing
This is the process of remixing the multi-channel
some discs into fewer channels.
audio found on
DTS (Digital Theater Systems)
This surround system is used in many movie theaters. There is good
separation between the channels, so realistic sound effects are
possible.
DTS-HD
DTS-HD is a high-quality, sophisticated audio format used in movie
theaters. Previous DTS Digital Surround-compatible
equipment can
play DTS-HD as DTS Digital Surround audio. BD-Video supports up
to 7.1 channel output.
DTS-HD High Resolution Audio
This is a signal format achieved by improving the previous DTS,
DTS-ES and DTS96/24 formats. It is compatible with sampling
frequency 96 kHz/48 kHz. BD-Video supports up to 7.1 channel
output.
Dynamic range
Dynamic range is the difference between the lowest level of sound
that can be heard above the noise of the equipment and the highest
level of sound before distortion occurs.
Dynamic range compression means reducing the gap between the
loudest and softest sounds. This means you can listen at low
volumes but still hear dialog clearly.
Film and video
DVD-Video are recorded using either film or video. This unit can
determine which type has been used, then uses the most suitable
method of progressive output.
Film:
Recorded at 24 frames per second. (Recorded at 30
frames per second as well). Generally appropriate for
motion picture films.
Video:
Recorded at 30 frames/60 fields per second. Generally
appropriate for TV drama programs or animation.
Frames and fields
Frames refer to the single images that constitute the video you see
on your television. Each frame consists of two fields.
Frame
Field
Field
oA frame still shows two fields, so there may be some blurring, but
picture quality is generally better.
oA field still shows less picture information so it may be rougher, but
there is no blurring.
Gateway
IP address of the electronic device providing Internet access.
Usually called a router IP address. (e.g., 192.168.0.1 )
HDMI (High-Definition
Multimedia Interface)
HDMI is a digital interface for consumer electronic products. Unlike
conventional connections, it transmits uncompressed digital video
and audio signals on a single cable.
Hub
Used for connecting
more than one device to the network.
IP address
A set of numbers which distinguish each device on the network when,
for example, connected to the Internet. When using a PC in a LAN to
access a PC or device that is not included in the LAN, the IP address
is called the local IP address. (e.g., 192.168.0.10)
JPEG (Joint Photographic Experts Group)
This is a system used for compressing/decoding
color still pictures. If
you select JPEG as the storage system on digital cameras, etc., the
data will be compressed to 1/10-1/100 of its original size. The benefit
of JPEG is less deterioration in picture quality considering the degree
of compression.
LAN (Local Area Network)
A group of linked devices in a company, school or home.
Indicates the boundaries
of a particular network.
Local storage
This storage area is used as a destination for sub contents for playing
BD-Live on BD-Video.
LPCM (Linear PCM)
These are a kind of PCM format.
These are uncompressed
CDs.
digital signals, similar to those found on
MPEG2 (Moving Picture Experts Group)
A standard for efficiently compressing and expanding color video.
MPEG2 is a compression standard used for DVD and satellite based
digital broadcasting.
DTS-HD Master Audio
MP3 (MPEG Audio
This is a Iossless audio format and compatible with 96 kHz/7.1ch or
less. In addition, faithful reproduction of the master audio is enabled
using Iossless audio encoding technology. BD-Video supports up to
7.1 channel output.
An audio compression method that compresses audio to
approximately one tenth of its size without any significant loss of
audio quality.
RQT9378
Layer 3)
P4HD (Pixel Precision Progressive Processing for HD)
This is a processor which makes use of an exclusive Panasonic
algorithm. Various processing is supported, including a high-level
conversion of the TV scanning format from interlace to progressive
and a high-level conversion of standard resolution (480i or 576i)
video signal to a 1080 High Definition video signal.
Consequently, this unit is able to provide video of optimal resolution
to the connected TV.
24p
This is a progressive
second.
image recorded at a rate of 24 frames per
720p (750p)
In one high definition image, 720 (750) scan lines pass at the same
time to create a progressive image. Since progressive video does not
alternate scan lines like interlace, there is a minimal amount of
screen flicker.
Pan&Scan/Letterbox
In general, DVD-Video are produced with the intention that they be
viewed on a widescreen television (16:9 aspect ratio), so images
often don't fit regular (4:3 aspect ratio) televisions. Two styles of
picture, "Pan & Scan" and "Letterbox", deal with this problem.
Pan&Scan:The sides are cut off so the picture fills
the screen.
Letterbox:
Black bands appear at the top and bottom
of the picture so the picture itself appears
in an aspect ratio of 16:9.
PCM (Pulse Code Modulation)
This is one format for converting analog audio into digital audio,
enabling you to enjoy digital audio with no hassle.
Progressive/Interlace
The video signal standard of NTSC has 480 interlaced (i) scan lines,
whereas progressive (p) scanning uses twice the number of scan
lines, and this is referred to as 480p. Using progressive output, you
can enjoy watching high resolution video.
Router
Distinguishes the IP address assigned to each device, such as the
PC, and relays the flow of data within the network,
Sampling frequency
Sampling is the process of converting the heights of sound wave
(analog signal) samples taken at set periods into digits (digital
encoding). Sampling frequency is the number of samples taken per
second, so larger numbers mean more faithful reproduction of the
original sound.
Subnet mask
Enables efficient network use. A set of numbers which identify which
part of the IP address allocated to every device connected to the
router is the network portion.
USB (Universal
Serial Bus)
An interface specification to connect peripherals. Playback of MP3,
JPEG or DivX recorded to a USB device by PC or other equipment,
or JPEG in the Panasonic digital camera or similar connected via
USB connection cable is possible with this unit.
VIERA CAST
An information service unique to Panasonic where specific Web sites
can be viewed on this unit by connecting to the Internet without using
a PC.
x.v.Color
TM
x.v.Color TM is a name for devices that are compatible with the xvYCC
format, an international standard for expanded color in motion
pictures, and that follow the rules for signal transmission.
You can enjoy vivid colors of wider color ranges for a more realistic
picture when connected to a TV that supports the x.v.Color
HDMI cable.
TM
with
1080i (1125i)
In one high definition image, 1080 (1125) alternating scan lines pass
to create an interlaced image. Because 1080i (1125i) more than
doubles current television broadcasts of 480i, the detail is much
clearer and creates a more realistic and rich image.
1080p (1125p)
In one high definition image, 1080 (1125) scan lines pass at the same
time to create a progressive image. Since progressive video does not
alternate scan lines like interlace, there is a minimal amount of
screen flicker.
RQT9378
Index
Angle ..........................
Audio
Attribute ......................
Changing audio ................
Channel ......................
Language ..................
AVCHD .........................
30
30
21
30
30, 32
50
O BD-J ...........................
BD-Live
BD-Video
........................
Cleaning
Disc ...........................
Lens ..........................
Main unit .......................
Connections
Amplifier/Receiver
...........
HDMI .....................
Deep Color
Dialog
3
31
Direct Navigator
.................
19
be played
3
........
16, 50
_) Maintenance .....................
Menu
On-screen .....................
Pop-up ........................
Setup .........................
MPEG2 .........................
.................
Discs that cannot
24, 38, 50
LAN .........................
3
3
3
50
............
JPEG .....................
7
Dolby
Digital
...............
8, 33, 50
Dolby
Digital
Plus ...........
8, 33, 50
Dolby
TrueHD ..............
8, 33, 50
Picture-in-picture
8, 33, 50
Playback
DivX
....................
DNS Server
26, 38, 50
..................
17, 50
DTS ......................
DTS-HD
Finalize
Firmware
...................
8, 33, 50
Playlist
Information
Window
.........................
Pop-up Menu ....................
.........................
6
.......................
16
Product
22
Progressive
Format .........................
...............
Disposal
.....
33
30
20
33
22
..................
..................
32
...................
21, 31
36
15
5
Repeat play .....................
Restore Default
Settings
Resume play function
31
..........
Selected
playback
36
............
SD card ......................
Search .........................
20
7, 22
20
...............
20
Setup menu .....................
32
Skip ...........................
Slideshow ......................
20
24
Slow-motion
20
....................
Soundtrack
Status
.....................
Message
30
.................
20
Still pictures ....................
Subtitle ........................
24
30
Switch
19
drives ...................
USB device ......................
O V. Surround
VIERA CAST
21
VIERA Link TM "HDAVI
O
x.v.Color
TM
7
.....................
31
19
35
Remote control
Remote control code ............
Reprogramming the
remote control .................
Using the remote control ..........
35
On-screen
Language .....................
Menu .........................
Status messages ................
PCM Down Conversion ............
Start .....................
Re-master
31
31
.......................
18
51
O Ratings level ....................
23, 38, 50
O Noise reduction (NR)
Integrated NR ..................
3D NR ........................
Off Timer
_) Quick
30
19
32
50
MP3 ......................
23
24, 25
Proxy Server ....................
P4HD ..........................
17, 50
50
50
Enhancer
Disc and card handling
31, 33
Local storage ....................
LPCM ..........................
12, 13
11, 12
.....................
............
23
32
BONUSVIEW (Final Standard Profile)
............................
22, 50
(_ Chapter
•
Sound
...................
30, 32
36
32
33
30
30, 32
22, 50
Ratings ................
High Clarity
O IP address
Chapter ......................
Still picture .................
11, 12, 50
Language
Audio ......................
Code list ......................
Menu .........................
On-screen .....................
Soundtrack ....................
Subtitle ....................
50
.....................
O HDMI .....................
TM
31
..................
27
Control TM'' . ..
......................
28
51
3
31, 51
24p ...........................
31, 34
-If you see this symbolInformation on Disposal in other Countries outside the
European Union
This symbol is only valid in the European Union.
your
If
you local
wish authorities
to discard or
this
dealer
product,
and ask
please
for the
contact
correct
method of disposal.
Panasonic Consumer Electronics
Company, Division of Panasonic
Corporation
of North America
One Panasonic Way, Secaucus,
New Jersey 07094
http://www.panasonic.com
(_ Panasonic Corporation
Printed in China
2009
Panasonic Canada Inc.
5770 Ambler Drive
Mississauga, Ontario
L4W 2T3
www.panasonic.ca
RQT9378-4P
F1208SK4029