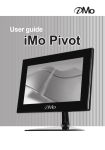
1
Safety Instructions
These safety instructions must be followed to ensure your safety and
prevent property damage.
Warning/Cautions
Otherwise, it may result in personal injury or property damage.
Make sure to read the instructions carefully and use the product in the correct manner.
Power Source:
– Make sure to use USB Cable (DC 5V) only.
• mimo doesn‘t require any additional power source
Do not place mimo in a location exposed to
moisture, dust, smoke, water, or in a car.
• Otherwise, this may result in electric shock or fire.
Clean the product using a soft cloth with a monitor
cleaner only.
– Make sure to disconnect USB Cable while cleaning
– Ensure that water does not enter the product and that it is not wet.
• Otherwise, this may result in electric shock, fire or a malfunction.
Do not forced on LCD(Touch Panel) Screen
– Do not tap or scratch LCD(Touch Panel) Screen with a sharp
object.
• Otherwise, LCD(Touch Panel) may get damage.
0 4 |
Product Input/Output Connectors
– Do not insert any metal, such as chopsticks, coins, pins and steel.
– If foreign material enters the product, disconnect the USB cable
and contact a Service Center.
Do not install mimo in an unstable location.
– Otherwise, it may fall and cause personal injury and/or damage
the product.
Ensure that users do not disassemble, repair or
modify the product themselves.
– If the product needs to be repaired, contact a Service Center.
If water enters the product, disconnect the USB and contact a Service Center.
This may result in a product malfunction, electric shock, or fire.
| 0 5
Product Features
• USB powered monitor with Touch Screen Panel(UM-720S only)
• Super Slim Foldable and Portable Design
• With only USB cable connection, a user may utilize mimo as Multiple
Input/Output device for Video Conference, Instant Messaging, News
and Stock casting.
Each model has different functions and features as listed Product Matrix below.
Product Matrix
Model Name
UM-710S
UM-720S
Extension Monitor
✔
✔
Pivot
✔
✔
✔
Touch Screen
Color
Black Color
White Color
Black Color
White Color
* Product Colors and Designs may vary upon each product and above listed specifications are subject to change without
prior notice.
Pivot Caution : mimo screen rotates one way only
Horizontal to Vertical: Clockwise
Vertical to Horizontal: Counter-Clockwise
Do not force to rotate the screen opposite way.
0 6 |
Package Contents
Please make sure the following items are included with your monitor.
Contact a local dealer to buy optional items.
UM-710S/UM-720S
USB CABLE
User‘s Manual
Install Disc
♦ Package Contents are subject to vary upon each model.
If any items are missing, contact your dealer.
| 0 7
Connections and Installation
※mimo requires USB connection only.
1
1 USB cap : USB mini B type connector inside
Buttons
Standby on/off
LCD Brightness +/-
System Requirements
• CPU : Intel Pentium/Celeron/AMD/K6/Athlon/Duron 1.2GHz or above
• RAM : 512MB RAM or above
• USB : at least one or more USB2.0 port
• HDD : 30MB HDD space above
• O/S : Windows 2000 SP4/XP SP2 32bit/Vista 32bit
Using the Software
With only USB cable connection, a user may operate mimo as a Extension monitor with
Touch Screen Panel(UM-720S only).
(For more detail functions and feature please refer to page 5 “Product Features”)
0 8 |
Installing Monitor Driver (AutoRun)
Insert the CD into the CD-ROM drive.
Please make sure that your mimo is connected to the PC
(If the CD is not running automatically please double-click the “Mimo Drive”)
Installation takes about 1 minute.
Do not power off or disconnect the USB cable until installation is completely finished. This
may damage systems or may cause system errors.
• The mimo screen resolution is fixed for the best picture quality with each model.
1
Click the correct model name of your mimo
(model name is printed on the product label
at the rear case of the product).
2
Select “I agree to the terms of the license
agreement” to accept the terms of use.
3
Select the Driver(s) you wish to install and
click “Next”.
| 0 9
4
If you see following message window, select
“I agree” to accept the terms of use.
Program will display the progress as below.
5
When the installation is complete, the mimo
setting icon appears on your system tray and
the connected USB monitor information will
pop-up.
6
After finish installation of the mimo driver,
please follow below steps for multi-monitor
setting.
(Microsoft® Windows® XP Operating System)
1 Right-click on desktop then click “Display
Properties”.
2 Choose ‘Setting’ then you may see
connected monitors.
3 Align the monitors displayed in [Display
Properties] as the same as actual monitor
usage.
4 Click “OK” to confirm.
1 0 |
mimo display setting
1
When the mimo driver installation is
complete, the mimo setting icon appears on
your system tray.
2
Click-on mimo icon then you may see the
mimo setup menu for Screen Resolution,
Colors, Rotation, Extention and etc.
| 1 1
Installing Touch Screen
Controller (UM-720S only)
1
Selecting Controller
If you see following message window, select
“E2i Technologies, NTR, USB” and click
”Install”.
2
Installing the Controller
Click “Next” and follow on screen direction.
Program will display the progress as below.
3
Finish Touch Screen Controller
installation
Click [Close] or <Enter> using keyboard.
1 2 |
Click [FINISH] or <Enter> using keyboard.
4
Settings and Calibrations
Check the monitor number of the installed
mimo at “Display Properties”.
Right-click and Run the UPDD Consol (Pointer
Device Setting) icon on system tray.
| 1 3
Chose Hardware and Click “Handling
Whole desktop” menu.
Select the monitor number of the
installed mimo.
Calibration
The product is with factory default calibration value. If required user may execute Touch
Screen Controller Calibration as follow.
Calibration is very important procedure to align coordinates of the exact touch point on
screen with Windows cursor. With the calibration user may utilize Touch Screen Control
without distortion.
The last calibration data will be saved in the Windows system so as not to be required after
reboot the system except the user rotate the screen.
1 4 |
1
Click [Start] ––> [Programs] ––> [UPDD] ––> [Setting].
2
Click UPDD Consol (Pointer Device Setting)
icon on system tray ––> [Calibration].
Touch + mark position in order then [Confirm].
If calibration point inputs are correct click [Confirm].
In case any mistake in calibration points inputs click [Cancel] or leave the screen untouched
for about 10 seconds then the Calibration Data will be scrapped.
The calibrated Touch Screen coordinates may vary upon the lapse of usage time.
Periodical calibration is recommended.
| 1 5
System Requirements &
Restrictions
Operating Systems
• Windows XP
– Service Pack 1 prior : Not supported
– Service Pack 2 or after : Supported
• Windows 2000 Professional
– Service Pack 3 prior : Not supported
– Service Pack 4 or after : Supported
• Windows 2000 Server/Advanced Server/Data Center Server: Not supported
• Windows Server 2003: Not supported
• Windows Vista SP1(32-bit and 64-bit editions): Supported
User may check the Operating System version by Right-click ‘My Computer’ ––> ‘Properties’
––> ‘System Properties’
mimo is a USB monitor to be recognized as a Generic USB device.
Therefore system boot-up screen or DOS screen cannot be displayed
properly.
Any software that requires Hardware 3D accelerator cannot be
displayed properly with USB monitor. Such as below,
• Real Player (Expansion Mode)
• 3D Graphic Games
• Programs based on Direct X graphic engine
If the PC doesn’t support USB2.0 mimo may not operate properly.
If the systems’ Graphic card doesn’t support WDDM(Windows Display
Driver Model), the USM monitor’s extension mode may not work
properly with Windows Vista System.
i.e.) Matrox Graphic Card specific version
1 6 |
Troubleshooting
Before calling for assistance, please read carefully below. If you do need
assistance, please call local service center or contact your dealer.
Q: No image on screen, I cannot turn on the mimo.
A: Is USB cable connected and did you install mimo driver yet?
Please run ‘mimo Installation Software’ in the CD.
For more detail about driver installation, please refer to Connections & Installation
chapter.
Q: I cannot turn my mimo screen on.
A: Please check if the USB cable is connected.
Touch the mimo’s power button ( ) once then check the screen status.
Please check if ‘mimo Installation Software’ has been installed properly.
1. Right-click ‘My Computer’ ––> click ‘Properties’.
2. Click ‘Device Manager’ at ‘Hardware’ tab.
3. Locate the cursor on PC at the top of the system tree.
4. Click ‘Action(A)’ ––> “Add Hardware(A)”.
5. Reboot the PC.
* Normal PC recognize mimo as a generic USB device. Frequent power on and off of the device
may cause USB device error. Please refer to Microsoft customer support for USB devices
trouble shooting.
Q: mimo screen doesn’t move – stands still.
A: Please check mimo screen’s ‘Hardware Acceleration’ setting in desktop properties.
Adjust ‘Hardware Acceleration’ value as ‘Max’.
1. Right-click on Desktop to and open ‘Display Properties’.
2. Click ‘Setting’ ––> Choose ‘nanovision Mini Monitor’.
3. Click ‘Advance(V)’.
4. Please check ‘Hardware Acceleration’ value as ‘Max’.
| 1 7
Q: I cannot boot my system after connecting mimo.
A: In case i815 chipset One-Board Type PC system, please disable ‘Legacy USB support’
option in system BIOS menu and reboot the system.
– BIOS setup method may differ from PC to PC, please refer to the User manual of the
PC. Please refer to Microsoft homepage for more detail.
Q: I cannot see DOS opening screen with mimo when my PC is booting up.
A: mimo is a generic USB device. Since DOS doesn’t recognize USB Device while booting-up,
mimo cannot get video signal from the system.
Q: I cannot run 3D graphic game with mimo screen.
A: mimo is using USB2.0 interface (480Mbps) for video data transfer. Therefore any program
that requires 3D high speed graphic acceleration may not be displayed properly.
– Restricted Programs,
(1) Real Player (Doesn’t support Extension Mode)
(2) 3D Graphic Games
(3) Programs that requires Direct X graphic acceleration
(4) Power DVD
(5) Win DVD (Version 5 or later)
– Supported Multimedia Players
(1) Windows Media Player (Version 10 or later)
(2) GOM Player
(3) KM Player
Q: How to uninstall “mimo installation software”?
A: ‘Control Panel’ ––> ‘Program Add/Remove’ ––> ‘nanovision Mini Monitor’ ––> Click ‘Remove’.
Q: How many mimo can be connected to one PC?
A: mimo is a generic USB device. Theoretically a PC can recognize up to 127 USB
devices.
However with the latest PC systems, we recommend number of USB monitors
and each respective PC system requirements as below.
1. 1~2 mimo connections - 1.2GHz CPU / 512 MB Memory
2. 3~5 mimo connections - 1.8GHz CPU / 1GB Memory
3. 6 mimo connections - 1.6GHz Dual core CPU / 1GB Memory
* Display response rates on each USB monitor may vary upon the PC°Øs resource management
status.
1 8 |
Specifications
• Model Name: MIMO UM-710S(7”WVGA), UM-720S(7”WVGA with TSP)
• Display Size : Diagonal 17.78 cm
152.4 mm(H) x 91.4 mm(V),
• Display Resolution : WVGA(800 x 480)
• Pixel Pitch : 0.1905mm(H) x 0.1905mm(V)
• Number of Color : 16.7M
• Contrast : 400:1
• Input Power : USB Power(DC 5V)
• Power Consumption : Max. 4W
• Dimension/Weight
Model Name
Dimension
UM-710S
180(W) x 140(L) x 25(H)mm
standing
180(W) x 140(L) x 115(H)mm
Weight
Specifications are subject to change without prior notice.
2 0 |
UM-720S
folding
less than 450g (main unit only)