1
Dear Loyal Customer:
First, thank you for purchasing the Zaurus K-PDA and
welcome to the Zaurus family. We are sure you will soon
find that your new assistant will change your life and the
way you do business. We would briefly like to share with
you our vision.
Your Zaurus exists today thanks to an incredible amount of
effort and determination from our entire Zaurus team (not to
mention numerous pots of black coffee). Our team at Sharp
has a dream to change the way we all do business. As a
business person, you already know that access to
information and people anytime, anywhere is the key to
gaining a competitive edge in this fast-paced information
age. We feel Zaurus is the tool that can deliver this to you. It
is simple to use, has months of battery life, and fits in your
pocket.
How did we come up with the idea for Zaurus? Many of us
found that we were lugging around notebook computers to
take notes, generate summaries, and report back to our
office and clients. We also found that we had a lot of "down
time" that could be put to better use; sitting on trains and
planes, waiting for clients, and even in meetings. Now that
we are using the Zaurus, we travel lighter, work smarter,
and stay more in touch with our contacts and each other.
Best of all, we have very little "down time" as our "Zauri" are
always with us. Now you know why we say that "Zaurus
means business anytime, anywhere".
We need your help to spread the word. Show a friend or
someone at work how you use your Zaurus and what it can
do for them. As more and more people start using the
Zaurus, we can spend even more resources on developing
new accessories, add-on software programs, and new
versions of the Zaurus. Better yet, if you have a mobile staff
or sales force that you would like to equip with Zauri, give us
a call at 800-BE-SHARP. We'll show you how you can
improve their efficiency and productivity as well as enable
them to better keep in touch with their clients and each
other.
Finally, let us know how you feel about your Zaurus. We
look forward to getting letters from our users about how you
use it and improvements you would like to see. We cannot
promise to answer every letter, but you can be sure we read
all of the suggestions you send us. We value feedback from
our customers and try to incorporate as many requests as
we can in our new products. Each of us takes an incredible
amount of personal pride in our work and the Zaurus. We
are all Zaurus users. We believe this makes a difference in
the products we create. After using the Zaurus, we think
you'll agree.
Thanks again for purchasing the Zaurus and sharing our
dream. We look forward to shaping the future of the
information age with you.
Sincerely,
The Z Team
1
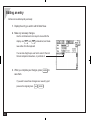
Notices
• For any electronic memory device, data may be
lost or altered under certain circumstances.
Sharp strongly recommends that you keep
separate written records of all important data.
• Sharp assumes no responsibility for data lost or
altered as a result of improper use, repairs,
defects, battery replacement/failures or any other
cause.
• Sharp assumes no responsibility, directly or
indirectly, for financial losses or claims from third
parties resulting from the use of this product and
any of its functions, such as stolen credit card
numbers, loss or alteration of stored data, etc.
• Information provided in this manual is subject to
change without notice.
• All company and/or product names are trademarks and/or registered trademarks of their
respective holders.
• There are only two differences between the ZR5700 and ZR-5800 models:
Memory capacity: ZR-5700 ... 1 MB
ZR-5800 ... 2 MB
Backlight:
ZR-5700 ... Not supported
ZR-5800 ... Supported
2
• The display examples and keyboard illustrations
used in this manual are taken from the ZR-5800,
although they apply equally to both models.
• Unless otherwise specified, the information in this
manual applies to both models.
The Zaurus will be referred to as the "unit"
throughout this manual.
Check the contents
Please check the contents carefully. Your unit
should come with the following:
• ZR-5700/ZR-5800 Main Unit
• Touch pen (installed)
• Operating batteries: LR6(AA) x 2
• Memory backup battery (installed): CR2032 x 1
• ZR-5700/ZR-5800 Operation Manual
• Spreadsheet and Communications Manual
• Registration Card
If there are problems with any of these contents,
contact your Sharp dealer.
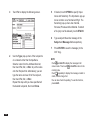
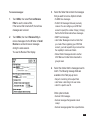
Contents
Quick Start .................................................. 9
Important things to do .................................... 9
Installing the batteries ................................. 10
Initializing ..................................................... 11
Adjust LCD contrast ..................................... 12
Adjusting the touch panel ............................ 13
Setting the time and date ............................. 14
Setting the start-up display .......................... 15
Making your first entry ................................. 16
Entering an appointment ............................. 17
Entering a To Do item .................................. 18
Using the Calendar Views ........................... 19
Taking notes ................................................ 20
Making a letter ............................................. 21
Searching for information ............................ 22
Finding an entry from the Index view ........... 23
Editing an entry ........................................... 24
Deleting entries ........................................... 25
Assigning an entry to Filer folders ............... 26
Using Filer ................................................... 27
Sending a fax ............................................... 28
Copying and pasting text ............................. 29
Tools ............................................................ 30
Drawing pictures .......................................... 32
Using the Calculator .................................... 33
Commonly asked Questions & Answers .. 35
What your unit can do ................................. 41
About this Manual ....................................... 42
Chapters ....................................................... 42
Conventions used ....................................... 44
Caring for your unit ..................................... 45
CHAPTER 1 Getting Started ................. 47
Before Use .................................................. 47
Part Names and Functions ......................... 48
Touch pen ..................................................... 50
Display angle adjustment .............................. 50
GUI operations ...........................................
Display layout .............................................
Touch panel display ....................................
Display symbols ..........................................
51
52
52
53
Keyboard layout ............................................ 53
3
Detail View and Index View ......................... 54
Filer............................................................. 69
Tool bar ......................................................... 54
Assigning entries to folders ........................... 69
Collect related entries to one folder .............. 70
Viewing entries via Filer ................................ 72
Editing folder entries ..................................... 73
New Assigned Entry...................................... 73
Delete an entry from Filer ............................. 74
Removing entries from folders ...................... 74
Empty a folder ............................................... 75
Merging (Moving) folders .............................. 75
Sending folders ............................................. 76
Generate a Report ........................................ 77
Help Function ............................................. 55
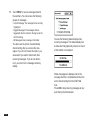
Key Sound .................................................. 55
Save Battery Life ........................................ 56
Sleep function ............................................... 56
External power supply ................................... 56
Backlight Function ...................................... 56
CHAPTER 2 Desk Accessories ............ 57
Calculator ................................................... 57
Movable window display ................................ 58
Paperless printer ........................................... 58
Date calculations ........................................... 60
Data from other entries ................................. 62
Error indicator E ............................................ 62
Scrapbook .................................................. 63
Drawing tools ................................................ 64
Finding entries .............................................. 64
Selecting an area .......................................... 65
Moving or copying graphics .......................... 65
Adding text strings to Scrapbook .................. 66
The Stamps tool ............................................ 67
Deleting Scrapbook entries ........................... 69
4
Search ........................................................ 78
Help ............................................................ 79
Tools ........................................................... 80
Utilities .......................................................... 80
Preferences ................................................... 80
Personal ........................................................ 80
Memory ......................................................... 81
Display .......................................................... 82
Sound ............................................................ 82
Start-up ......................................................... 83
Sleep ............................................................. 84
Secret ............................................................ 85
Word List ....................................................... 88
RAM Card ..................................................... 90
Backlight set-up ............................................ 90
MORE ......................................................... 95
Spreadsheets ............................................. 95
Entering text .................................................. 106
Moving around the display ............................ 107
Moving between fields .................................. 107
Inserting text ................................................. 107
Deleting text .................................................. 107
Blocks of text ................................................. 108
Deleting blocks of text ................................... 108
Cut, Copy and Paste ..................................... 108
Scroll bars ..................................................... 108
CHAPTER 3 General Operations ......... 97
Finding Specific Entries .............................. 109
Opening Applications and Accessories ...... 97
Tool Bar Functions ...................................... 98
Index View ..................................................... 109
Keyword Search ............................................ 110
Global Search ............................................... 111
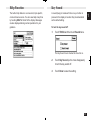
Using Filer ..................................................... 112
By Date ......................................................... 112
Clock ........................................................... 91
Daylight Saving Time .................................... 91
World City ..................................................... 91
User's City ..................................................... 92
Setting daily alarms ...................................... 93
Disabling alarm sound .................................. 94
Views/Index ................................................... 98
To change Index/Detail View ......................... 99
Filter .............................................................. 100
Show ............................................................. 102
Set Up ........................................................... 102
Edit ................................................................ 103
Link To ........................................................... 104
Links .............................................................. 104
File It ............................................................. 105
Send .............................................................. 105
General Editing Techniques ........................ 105
Fields ............................................................ 105
Resume ......................................................... 106
Cursor ........................................................... 106
Deleting Entries .......................................... 112
Deleting single entries from the keyboard ..... 112
Deleting single entries .................................. 113
Deleting group entries ................................... 113
Cut, Copy and Paste ................................... 114
Copying or moving blocks of text .................. 114
Copying or moving entries ............................ 115
Time Stamp and Date Stamp ..................... 116
Symbols and Special Characters ............... 116
5
CHAPTER 4 Time Management ............ 119
To Do .......................................................... 136
Calendar views ........................................... 119
Making a new To Do entry ............................. 137
Entering a Monthly Goal ............................... 138
Finding To Do entries .................................... 138
Checking off completed entries ..................... 139
Using Labels ................................................. 140
Making To Do entries with labels ................... 140
Reviewing the To Do list by Labels ................ 142
Editing labels ................................................. 142
Copying a To Do entry ................................... 142
Editing and deleting To Do entries ................ 144
Changing Activity type .................................. 144
Calendar view format .................................... 119
Changing Activities Setup ............................. 120
Calendar views ............................................. 120
Accessing entries using calendar views ....... 124
Selecting a date ............................................ 124
Appointments .............................................. 125
Making new Appointment entries .................. 125
Making an Appointment entry ....................... 125
Finding entries .............................................. 126
Editing Appointment entries .......................... 127
Deleting a single entry .................................. 128
Deleting group entries ................................... 128
Making entries for recurring or extended events ... 129
Using the Appointment Repeat function ....... 130
Appointment alarms ...................................... 131
Clearing a set alarm ...................................... 131
Birthday/Anniversary .................................. 132
Reminder function ......................................... 132
Making new entries in Birthday/Ann .............. 132
Finding Birthday/Ann entries ......................... 133
Editing an deleting entries ............................ 133
Holiday ........................................................ 134
Making new entries ....................................... 134
Finding Holiday entries ................................. 135
Editing and deleting entries .......................... 135
6
CHAPTER 5 Databases ......................... 145
Contacts and Data Files ............................. 145
Selecting a file ............................................... 146
Making a new Contacts entry........................ 146
Finding entries .............................................. 147
Using Index View .......................................... 147
Keyword search ............................................ 148
Direct search ................................................. 149
Filter function ................................................ 149
Link function ............................................... 150
Linked Entries ............................................... 150
New Linked Entry .......................................... 150
Link by Searching ......................................... 151
Viewing linked entries ................................... 152
Link To function ............................................. 153
Jump To function ........................................... 154
Breaking Links .............................................. 155
Editing Contacts and Data Files entries ..... 155
Deleting Groups of entries ............................ 156
Picture fields ............................................... 156
Adding a picture to an entry .......................... 157
Editing contents of picture fields ................... 158
Setup for Contacts and Data Files .............. 159
Configuring Contacts and Data Files ............ 159
Fax number field ........................................... 160
CHAPTER 6 Writing and Letters .......... 161
Notes .......................................................... 161
Taking Notes ................................................. 161
Notes window ................................................ 163
Changing Notes Setup .................................. 163
Review Notes ................................................ 164
Edit Notes ..................................................... 165
Documents ................................................. 165
Making a new entry based on an existing entry .... 166
Finding entries .............................................. 167
Editing a Documents entry ............................ 167
Deleting Documents entries .......................... 167
Changing display character size ................... 168
Find Text ........................................................ 168
Text styles ..................................................... 169
Tabs and indents ........................................... 170
Word wrap ..................................................... 173
Document size .............................................. 173
Display size ................................................... 173
Page Setup ................................................... 174
Inserting a page break .................................. 175
Print Preview ................................................. 176
Check Spelling .............................................. 176
Make a Letter function .................................. 177
Documents with pictures ............................... 180
Headers and Footers .................................... 180
Exchange Documents with PC Files ............. 181
Outlines ...................................................... 182
Example outline ............................................ 183
Creating an Outlines entry ............................ 183
Finding outlines ............................................. 184
Full Topics or 1 Line Topics ........................... 184
Revising outlines ........................................... 185
Outline deletion ............................................. 188
Using subtopics (children) ............................. 188
Expanding and Collapsing ............................ 189
CHAPTER 7 Optional Accessories ....... 191
Tools Utilities ................................................. 191
Preferences ................................................... 191
Printing ....................................................... 192
Paper source ................................................. 192
Printer connection ......................................... 192
7
Printing restrictions ....................................... 193
Printing the current display ........................... 194
Faxes .......................................................... 195
Fax Directory ................................................. 196
Setting fax options ........................................ 197
Cover sheets and headers ............................ 198
Speed buttons ............................................... 199
Sending a fax ................................................ 200
Manual fax dialing ......................................... 202
Fax Log ......................................................... 202
About fax numbers ........................................ 203
Conditions for sending faxes ......................... 203
Optional Cards ............................................ 203
Using PC cards ............................................. 205
SRAM and FLASH Memory Cards ............... 206
SRAM cards .................................................. 207
FLASH cards ................................................. 210
Fax/Modem cards ......................................... 212
More ........................................................... 213
Add-on software programs ............................ 213
PC Files ........................................................ 215
Data Exchange ........................................... 217
Data Transfer with Other Sharp Devices..... 219
Data transfer between ZR-5700/ZR-5800s or with ZR-5000 ... 219
Wireless infrared transfer (Beaming) ............ 219
Quick transfer ................................................ 220
Unit to Unit transfer ....................................... 220
8
Data Transfer with Other Computers .......... 223
PC Link ......................................................... 223
Organizer Link software for Other Sharp Products ... 224
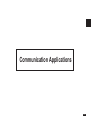
Special Communications Applications ........ 226
Remote Link .................................................. 226
Terminal Mode .............................................. 226
Message ....................................................... 226
CompuServe Access .................................... 227
AT&T Mail Access ......................................... 227
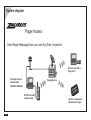
ZR-Pager ...................................................... 228
Appendices .............................................. 229
A. Key Notations ......................................... 229
B. Reset ...................................................... 234
All Reset operation ........................................ 234
C. Troubleshooting ...................................... 235
D. Battery Replacement ............................. 236
General guidelines ........................................ 236
Replacing operating batteries ....................... 236
Replacing the memory backup battery ......... 238
E. Specifications ......................................... 240
Index ......................................................... 245
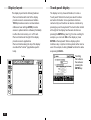
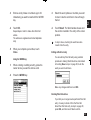
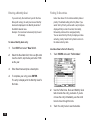
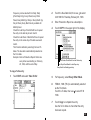
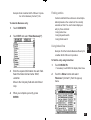
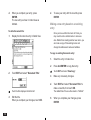
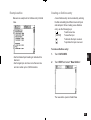
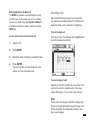
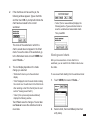
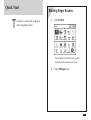
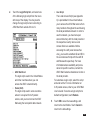
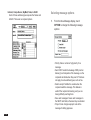
Quick Start
Important things to do
T
his section should be read and all necessary operations performed before you start
using your unit.
1.
Complete and send in the registration
card. This registers your purchase and
allows us to notify you of new
developments and products as they
become available.
2.
Read through this Quick Start section. It
will quickly get you up and running. Refer
to the rest of the manual for more details
about particular operations.
3.
If you have any particular questions about
your unit, read through the list of
commonly asked questions and answers.
There is a good chance that any questions
you have will be answered there.
4.
When you need help with any operation,
touch
at the left of the display. OnHELP
screen help is a topic-specific quick
reference guide that explains features and
their functions.
9
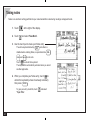
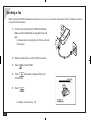
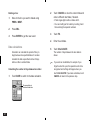
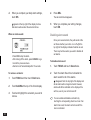
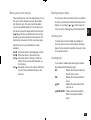
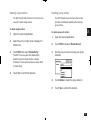
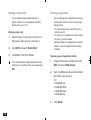
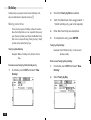
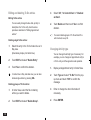
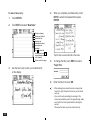
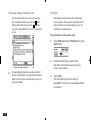
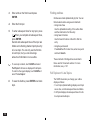
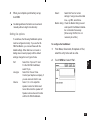
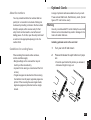
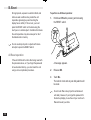
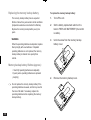
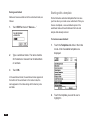
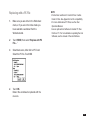
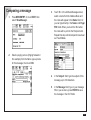
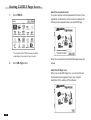
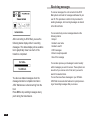
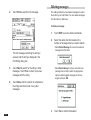
Installing the batteries
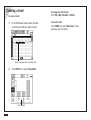
Before operation you will need to install the two operating batteries. The memory backup battery (CR2032) is installed at
the factory and should last five years if operating batteries are replaced as required.
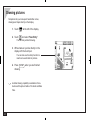
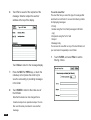
1. Set the battery replacement switch on the back to
"REPLACE BATTERIES" (expose the red dot).
2. Slide the operating battery cover off.
Battery
replacement
switch
1
2
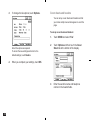
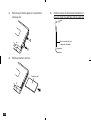
3. Insert the two LR6(AA) operating batteries.
Make sure the batteries are correctly aligned for
polarity (+ and -).
4. Replace the operating battery cover.
+
+
5. Set the battery replacement switch to "NORMAL
OPERATION".
On average, you can expect to get about two months
of battery life. Actual battery life will vary depending
on individual use.
If this is the first time you have installed batteries, you must also initialize your unit.
10
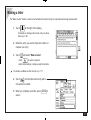
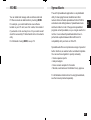
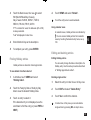
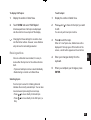
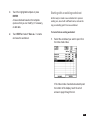
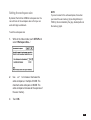
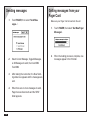
2
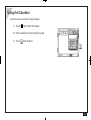
1
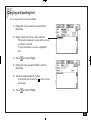
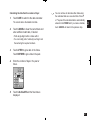
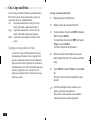
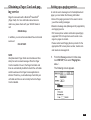
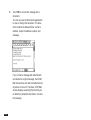
Initializing
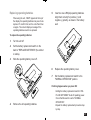
Your unit must be initialized the first time it is used.
Open
1. Press the lock button and open the display.
Press
2. Remove the touch pen.
3. While holding down the ON key, push the
RESET button on the back with the touch pen.
4. Touch
ON
to initialize.
After initialization, the Start-up display appears.
11
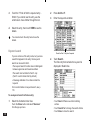
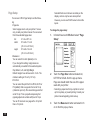
Adjust LCD contrast
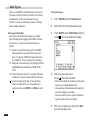
LCD contrast may sometimes need adjustment to suit certain lighting conditions.
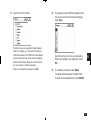
1. Touch
2. Touch
TOOLS
at the left of the display.
(under Preferences) twice.
3. To adjust LCD contrast, touch
or
.
4. When you are satisfied with the setting, touch
.
If LCD contrast is too light or dark to see the display, you can adjust the contrast directly. Turn the unit off, hold down the
MENU
12
key and then press ON . Press
and
to adjust the contrast.
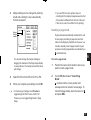
Adjusting the touch panel
Each person holds a pen differently. The touch panel can be adjusted to respond correctly to your individual style of writing,
drawing and selecting touch buttons.
1. Touch
TOOLS
2. Touch
.
(under Preferences) twice.
3. Touch
Press the
.
key.
4. Touch the exact center of all four cross-points with
the touch pen.
• As each cross-point is touched it will turn grey. When
all four are touched, "Adjusted!" is displayed.
• If for some reason the adjustment fails, a "Sorry,
please try again..." message is displayed. Touch the
centers of all four cross-points again until "Adjusted!"
is displayed.
13
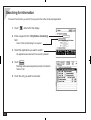
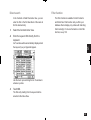
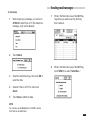
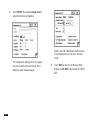
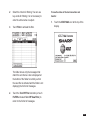
Setting the time and date
For time-based functions to be effective, the built-in clock must be set to the correct Home City time and date.
1. Touch
TOOLS
and then touch
Clock
twice.
2. To select a different Home city, touch the Home City
name.
New York, USA is the default Home City.
3. Select your city (if available) or a city in your time
.
zone and then touch
Use the scroll bars to see more cities.
By default, all cities are set to observe daylight saving
time (DST). If your city does not use DST, touch the
check box to disable it.
4. Touch
City.
to set the time and date for your Home
Touch each time/date field box and then use
to
change the value.
Alternately, you can enter the values from the keyboard.
5. When you are finished touch
14
.
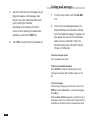
Setting the start-up display
Each time the unit is turned on, it can display your name, telephone number and address on one of two graphic backgrounds.
1. Touch
TOOLS
and then touch
twice.
2. Select the required setting in each field.
Select User's Picture when you want to use your own
original start-up picture.
For details, see p. 83.
3. Touch
to save your settings.
15
Making your first entry
Your first entry will be a Contacts entry. The procedures described below can be used with other applications.
To make a new Contact 1 entry:
1. Touch
2. Touch
CONTACTS
at the right of the display.
and select "New Business(1)".
“Business“ is the default file name of Contact 1.
3. Enter a name.
• Select the Company field and enter a company name.
• Select the Address field and enter an address.
Touch a field name to select the field for data entry.
Dark outlines around a field indicate that it is selected.
4. When you complete the entry, press
it.
16
ENTER
to save
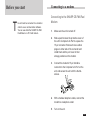
Entering an appointment
1. Touch
ACTIVITIES
Touch
at the right of the display.
ACTIVITIES
again if the Day view has not been
displayed.
2. Touch and drag the pen across the start and end
times of the appointment on the time bar.
When you lift the pen, a new appointment will appear.
3. Touch the text box and enter a description.
4. When you complete your entry, press
ENTER
.
17
Entering a To Do item
To Do lets you organize tasks and objectives.
1. Touch
2. Touch
ACTIVITIES
at the right of the display.
and select "New To Do".
3. Touch the date box and then use
to select the
due date (if the To Do item has one).
You can assign up to five labels to a task, then later use
these to filter the item in a To Do list.
4. Enter a priority level (number or letter) as required.
5. Move to the text box and enter a description.
6. When you complete your entry, press
save it.
18
ENTER
to
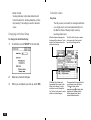
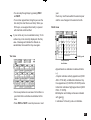
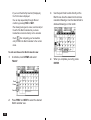
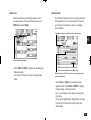
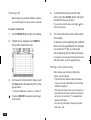
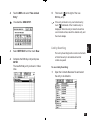
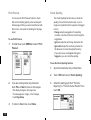
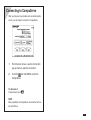
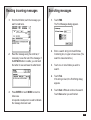
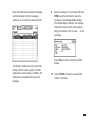
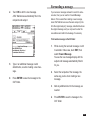
Using the Calendar Views
Activities has five different calendar views: Day (initial default view), Week, Weekly Graph, Month and Year. These calendar
views can be used to show Appointment, Birthday/Ann, Holiday and To Do entries.
To use the calendar views:
1. Touch
2. Touch
ACTIVITIES
at the right of the display.
and, if necessary, select "Day" view.
The time bar shows your appointments and free time.
Touch any date to select that day. The flashing date
indicates the currently selected date.
This box indicates today's date.
Touch here to view a week at a glance.
Touch here to see a month at a glance.
Touch here to see a year at a glance.
To Do list
3. Touch any entry twice to see details or make
changes.
Displays Birthday/Ann, Holiday and Appointment
entries for the Selected day.
19
Taking notes
Notes is an electronic writing pad that lets you make handwritten notes during meetings and appointments.
1. Touch
2. Touch
NOTES
at the right of the display.
and select "New Note".
3. Use the touch pen to make your Notes entry.
The entire keyboard including OFF and others is
disabled when entering Notes, so operations like DEL ,
CANCEL
and
MENU
do not work.
Touch
to unlock the keyboard.
The keyboard is automatically unlocked when you select
another application.
4. When you complete your Notes entry, touch
to
unlock the keyboard (unless it is already unlocked)
then press ENTER .
To give your entry a text title, touch
"Topic Title".
20
and select
Making a letter
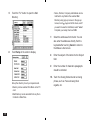
The "Make a Letter" feature converts an unformatted Documents entry into a professional looking business letter.
1. Touch
DOCUMENTS
at the right of the display.
For details on making a Documents entry, see Documents on p. 165.
2. Select the entry you want to make into a letter, or
create a new entry.
3. Touch
• Touch
and select "Make a Letter".
to select a recipient.
• Adjust other settings or simply accept the defaults.
For details, see Make a Letter function on p. 177.
4. Touch
and the Documents entry will be
converted into a letter.
5. When you complete your letter, press
save it.
ENTER
to
21
Searching for information
The search function lets you search for a keyword in the entries of selected applications.
1. Touch
SEARCH
at the left of the display.
2. Enter a keyword in the "Only Entries Containing"
field.
Select "Limit by Date Range" as required.
3. Select the applications you want to search.
All applications are selected for the search by default.
4. Touch
.
Matching entries are assigned temporarily to the Search
folder in Filer.
5. Touch the entry you want to view twice.
22
Finding an entry from the Index view
Keyword search lets you search for entries containing any word in Activities, Contacts, Data Files, Notes, Outline and
Documents.
1. Select the application and go to the Index View.
2. Press
2nd
then
F
.
3. Enter the first few letters of the keyword (the word
you are searching for).
4. Touch
to jump to the first entry that
contains the keyword.
5. Touch
or
you are looking for.
Touch
until you see the entry
to end the search.
23
Editing an entry
Entries can be edited quickly and easily.
1. Display the entry you wish to edit in Detail View.
2. Make any necessary changes.
Use the scroll bars and cursor keys to move within the
display, use
BS
and
to delete text, and make
DEL
new entries from the keyboard.
You can also drag the pen over text to select it, then cut
the text and paste it elsewhere, or just delete it.
3. When you complete your changes, press
save them.
ENTER
to
If you want to save these changes as a new entry (and
preserve the original) press
24
2nd
ENTER
.
Deleting entries
You can delete single entries or specific groups of entries.
To delete a single entry:
1. Select the entry that you wish to delete in Index View
or display it in Detail View.
2. Touch
and select "Delete Entry".
("Delete Note" in Notes; "Delete Document" in Documents; "Delete Outline" in Outline)
3. Touch
to confirm the deletion.
Single entries can also be deleted by selecting the entry
in Index View and pressing
DEL
.
To delete multiple entries:
1. Select the application that you want to delete entries
from.
2. Touch
and select "Delete Group".
Use the pop-up menus to select the group entries for
deletion.
3. Touch
.
4. Touch
to confirm the deletion.
25
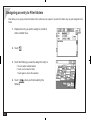
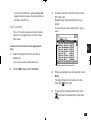
Assigning an entry to Filer folders
Filer allows you to group entries into folders. Filer entries are not copied or moved to the folder, they are just assigned to the
folder.
1. Display the entry you wish to assign to a folder in
Index or Detail View.
2. Touch
.
3. Touch the folder(s) you want to assign the entry to.
• You can select multiple folders.
• Touch once to select a folder.
Touch again to cancel the selection.
4. Touch
folder(s).
26
when you finish selecting the
Using Filer
Filer allows you to manage information by subject instead of by entry type.
Filer entries can be accessed and changed using the original application.
1. Touch
FILER
at the left of the display.
2. Touch a folder tab twice to view entries assigned to
that folder.
You can also select a folder tab and press
view entries.
ENTER
to
3. Touch an entry twice to examine it in Detail View.
You can also select the entry and press
it in Detail View.
ENTER
to see
27
Sending a fax
With the optional CE-FM4 Fax/Modem connected to your unit, you can fax Filer, Documents, Notes or Scrapbook entries to
a remote facsimile machine.
1. Connect your unit and the CE-FM4 Fax/Modem.
Make sure the Fax/Modem is plugged into a wall
jack.
For details about connecting the CE-FM4, see the CEFM4 manual.
2. Select a single entry or a Filer folder to be sent.
3. Touch
and select "Fax".
4. Touch
and select a recipient from your
Contacts file.
5. Touch
.
For details, see Faxes on p. 195.
28
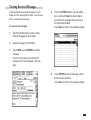
Copying and pasting text
You can copy text from one place to another.
1. Display the entry you want to copy text from in
Detail View.
2. Drag the touch pen over a word or sentence.
The text will be displayed in reverse (white on black)
to indicate it is selected.
To cancel the selection, touch any unhighlighted
area.
3. Touch
and select "Copy".
4. Display the entry you want to add the text to in
Detail View.
5. Touch the required place of insertion.
(In Scrapbook, use the area tool
to paste into.)
6. Touch
to select an area
and select "Paste".
29
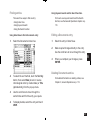
Tools
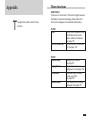
Tools provides a range of utilities that let you customize your unit to your personal taste. Tools is also used to set up communications and peripheral operations.
Transfer data with a remote computer via a modem
and phone line.
Send/receive messages (email) to a remote
computer.
Connect to CompuServe.
Exchange data with a personal computer or
use PC Link for the Sharp Electronic Organizer (OZ-7000/OZ-8000/YO-600/ZQ-5000
series).
Access and exchange data with a remote PC
via a modem and phone line.
Check the time at home and abroad.
Check the status of sent faxes.
Make a backup copy of main memory onto a
memory card.
30
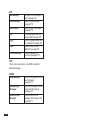
Send and receive AT&T Mail messages.
Send and (with Pager card) receive Pager messages.
Enter your name, etc. and set your password and
signature.
Check the amount of storage memory available.
Adjust the screen contrast and calibrate the touch
panel.
Turn key and alarm sounds on and off.
Set the start-up display.
Set the sleep interval.
Show/hide secret entries.
Stores commonly used words or phrases.
Select the data source for applications.
Control duration of the ZR-5800's Backlight.
31
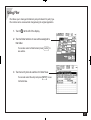
Drawing pictures
Scrapbook lets you make quick handwritten notes,
drawings and maps directly on the display.
1. Touch
2. Touch
SCRAP
BOOK
at the left of the display.
and select "New Entry".
You can also just start drawing.
3. Write whatever you like directly on the
display with the touch pen.
You can also use the stamp function to
insert some useful built-in pictures.
4. Press ENTER
drawing.
when you are finished
A similar drawing capability is available in Documents and the picture fields of Contacts and Data
Files.
32
Using the Calculator
Calculator works as a standard 10-digit calculator.
1. Touch
CALC
at the left of the display.
2. Enter calculations by touching the key pad.
3. Touch
when finished.
33
34
Commonly asked Questions & Answers
Q:
A:
I currently also own a Sharp Wizard and
would like to move my information from
my Sharp Wizard to the ZR-5700/ZR-5800.
How can I do it?
If you own an OZ-5000/OZ-6000/OZ-9000 series
you can use wireless infrared transfer to move the
information over:
• Line up the two units so the infrared ports are
facing each other.
• On the ZR-5700/ZR-5800, select an application
(e.g. Activities) and display the index of that
application. (Note: Select "Holiday Yearly by
Day Index" when transferring "Ann2" from the
Organizer.)
• Select "Unit to Unit" from the SEND menu.
Touch "Receive" and then "OK".
• On the Wizard, select the application (e.g.
Schedule) and select "VIA INFRARED PORT" in
SET UNIT TO UNIT PATH from the Global
setting, then select "SEND ALL IN THIS MODE
(FILE)" in UNIT TO UNIT TRANSFER.
• Repeat for each application you want to transfer.
(See p. 218 for details.)
Be sure that the sending unit does not have a
blank (no characters) Telephone/Contact or User
File/Data File field name or else the Zaurus will not
be able to receive information (an error message
will appear).
If you own an OZ-8000/OZ-7000 series or YO-600/
ZQ-5000 series Electronic Organizer you can get
information using PC/Macintosh link software kits
(OZ-791/792/793/890/892/893/895).
PC/Macintosh Link instructions:
• Transfer the data from the OZ-8000/7000, YO600/ZQ-5000 series to the PC or Macintosh
using the above software.
• Connect your cable to the PC and the ZR-5700/
ZR-5800.
• Put your ZR-5700/ZR-5800 into a special import
mode by touching TOOLS, and selecting
PC-Link and Cable (Import).
• Select the PC/Macintosh Link command to "Send
data" to your Wizard.
The ZR-5700/ZR-5800 will "pretend" to be a
Wizard for purposes of receiving the information.
• When finished, disconnect the ZR-5700/ZR-5800
and press ON to cancel PC-Link mode.
(See p. 223 for details.)
35
Q:
What does PC card mean?
Can I use any PC card I find on the market
on my ZR-5700/ZR-5800?
A:
PC card (formally "PCMCIA") is an industry
standard card format. Many popular PC cards
available on the market are compatible with your
ZR-5700/ZR-5800. Check with your Sharp dealer
for more information, or call our automated fax-ondemand service (612-397-8601) to obtain a
complete and up-to-date list of
ZR-5700/ZR-5800 compatible PC cards.
Memory cards are good for backups because you
can make multiple backups (space permitting) and
they are more reliable than SRAM cards (they
require no backup battery).
Communication cards, etc.:
Sharp has provided a number of drivers for many
of the input/output cards. Note that certain high
power cards require that you use the EA-23E AC
adaptor in conjunction with these cards in order to
prevent excessive battery consumption. Other
cards require an add-on software program to be
loaded onto the ZR-5700/ZR-5800.
Warning
Use only recommended PC cards. Attempt to use cards
that are not recommended may result in damage to the
main unit and/or data loss.
Q:
I am using the CE-FM4 attachable Fax/
modem for my ZR-5700/ZR-5800. Exactly
where can I fax from?
A:
You can use virtually any standard phone line. This
includes a jack on:
Memory cards:
In general, you will find that you can use most
SRAM memory cards and Flash Memory cards.
You can use SRAM cards for additional memory
storage (for the built-in application's data) or for
making a single complete backup of that data. In
addition, you can load add-on software programs
onto a memory card. Flash Memory cards can be
used to store multiple archives of the built-in
application data (for backup purposes) as well as
for loading add-on software programs. Flash
36
• The wall of your home or office
• New public pay phones found at hotels, airports,
convention centers, etc.
• Many hotel room phones (commonly labeled
"Data jack")
• GTE and AT&T air phones found on many
commercial jets.
Just plug the included RJ-11 phone cable into the
CE-FM4 modem and the phone jack.
Note that you cannot use this device with digital
phone lines. Digital phone lines are likely to be
found at your office, typically when you have a
PBX system installed.
The basic rule to follow is that if you can use a
standard fax machine on the phone line, then it is
analog and can be used with the ZR-5700/ZR5800/CE-FM4. Check with the proper facilities
personnel in your company to be sure.
Q:
My batteries only lasted about one month.
Is this normal? How long should I expect
them to last?
A:
There is probably nothing wrong with your unit.
Battery life will vary from user to user.
A number of factors will affect battery life, including
how much the unit is used. The battery life is rated
at 70 hours of continuous use. Assuming an
average of one hour per day of continuous use,
you would get about two months of battery life.
You can also use the optional EA-23E AC Adaptor
or the CE-BK1 battery pack.
Q:
How do I add software to my ZR-5700/ZR5800 to expand its capabilities?
A:
In general, ZR-5700/ZR-5800 Add-on software
come on computer floppy disks (PC format). You
will need a computer, of course, and either the
ZR-5700/ZR-5800 PC-Link cable (see registration
card special offer) or an infrared adaptor (such as
CE-IR4). Note that if you own either the cable or
an infrared adaptor for one of Sharp's various
Wizards, it will also work.
To download an Add-on software program simply
start the installation program included on the
computer floppy disk. Follow the on-screen
instructions to install the software. Once installed,
you can access any Add-on software program by
simply touching MORE and then touching the
program icon in the MORE screen. Note that these
Add-on software programs can be downloaded to
the unit's internal memory or onto an optional PC
memory card.
37
Q:
How do I backup my important
information?
A:
It is important to always have a back-up of your
important electronic information. Here are some
ways to do this:
• You can print out a hard copy using the Sharp
CE-IR1 infrared adaptor for printing. You will also
need a PC-compatible printer (see page 192 for
details).
• You can backup your entire unit using either a PC
SRAM Memory card or a PC Flash Memory card.
Flash Memory cards (space permitting) can hold
multiple back-ups and require no battery backup
system. In both cases, be sure the capacity of
the card can handle the roughly 650 KB of user
storage on ZR-5700 and 1700 KB on ZR-5800
(i.e. use 1 MB cards or higher).
• You can use an MS Windows or Macintosh data
transfer utility program to back-up your data onto
either a hard drive or a floppy disk. See the
enclosed registration card for details about the
free ($6.95 S&H) software offer from Sharp as
well as details about a transfer cable offer.
MS Windows is a registered trademark of
Microsoft Corporation.
Macintosh is a registered trademark of Apple
Computer, Inc.
38
Q:
How do I exchange information with my
personal computer? For example, can I
take telephone numbers I already have in
another software program and load them
into my ZR-5700/ZR-5800? Can I take
letters I have written on my ZR-5700/ZR5800 and send them to my favorite word
processing program?
A:
Sharp offers both MS Windows and Macintosh
transfer utility software that allows you to easily
exchange information with your personal
computer. This software can convert your ZR5700/ZR-5800 information into computer formats
that many popular software programs can read. In
addition, you can save information from your
favorite software programs using one of these
formats and then transfer the information to the
ZR-5700/ZR-5800 using this utility software.
Formats supported include:
.RTF (Rich Text Format), which many word
processors support (e.g. MS Word).
.TXT (text), which almost all text-oriented programs support.
.CSV (Comma Separated Values), which many
databases, PIMs, etc. support.
Note: CSV is for multi-field/multi-record informa-
tion. This utility software also allows you to "map"
the fields to fit almost any program that supports
CSV formats.
.BMP/PICT, which is used by many programs to
exchange graphics files.
dropped, for example, it may have to be reset.
This will not delete your data. If for any reason
data is missing after resetting the unit, it was lost
before you pressed the RESET switch, which
simply re-starts the unit.
You can, of course, also use this software to backup your information to your personal computer.
If none of the procedures above help, you should
send the unit to a service center. Call 800-BESHARP for the nearest service center. Give the
service center a call and ask for more information
about getting your ZR-5700/ZR-5800 repaired.
To get this software for just $6.95 S&H, see the
enclosed Registration Card for details.
Q:
I can't seem to turn my unit on. I changed
the batteries but still nothing happens.
What should I do?
A:
Check the following before sending the ZR-5700/
ZR-5800 in for service:
Check that the battery replacement switch on the
back of the unit is in the "NORMAL OPERATION"
position. If the switch is in the "REPLACE BATTERIES" position, the unit cannot be turned on.
Check or replace the operating batteries, even if
you have just replaced the batteries. It is possible
that the batteries were not fresh when you purchased them.
Press the RESET switch. If the unit has been
Q:
Why should I send in the registration
card?
A:
This is your way of registering your product with
Sharp, and allows us to keep you informed about
new products and software available for your unit.
It also gives us valuable information about our
users so that we can design products that continue
to meet your needs. Sharp never sells its customer
list, so registering your unit will not result in you
receiving loads of new junk mail from other
companies.
39
40
Q:
I would like to use the Filer feature but I
am afraid of using up memory. How does
the Filer work? Does it make a copy of
each entry?
A:
When you assign an entry to a folder in the Filer, it
uses only a negligible amount of extra memory.
The unit doesn't actually make a copy of the entry,
it simply assigns the entry to a folder. Entries are
still stored in each individual application (Contacts,
Documents, etc.). The Filer is a great way to
organize your information and there is no reason
not to use it.
Q:
What is the Outlines application? Why
would I want to use it sometimes instead
of Documents?
A:
The Outlines application allows you to group and
categorize information using a hierarchical
structure. Everyone has a lot of small but
important pieces of information that have to be
memorized or kept track of in a written record; for
example, important personal information such as
Social Security number, credit card numbers,
various ID numbers, account numbers, clothing
sizes, etc. Using the unit, you could make a
number of Documents entries for each piece of
information, but a better way to manage the
information would be to make a single Outlines file
called "Personal information".
This file could then contain a number of headings
(such as Car info., Travel info., Health info.,
Financial info., etc.), under which relevant pieces
of information could be stored. This makes it
easier to access information and prevents your
unit from becoming cluttered with hundreds of
individual entries.
Additional Outlines files could also be made,
including a favorite movies list, project management file, price lists, product line-up and specification files, business plans, product proposals, and
meeting notes.
Many types of information can be more easily and
efficiently managed in an Outline structure.
Another use of Outlines is document preparation.
Many times you might want to write a memo, letter,
proposal, marketing plan, etc., but find it difficult to
write an entire document from scratch. Outlines
allows you to capture your thoughts and ideas,
then rearrange and categorize them at any time.
You can also copy an Outlines file and paste it into
Documents to finish the document there, adding
text to the major topics.
What your unit can do
Your new ZR-5700/ZR-5800 is a full-featured, pocketsized information manager, designed to enhance any
information-based task, whether in the home, at the
office or on the road. Its large, easy-to-read screen and
graphical user interface makes it very easy to use for
novices and experienced users alike. Pen-based touchpanel operation offers tremendous user-friendliness in a
pocket-size device.
Time Management
The ACTIVITIES application helps you manage
your time better than ever:
• Appointment lets you record appointments,
meetings and other date-based events
• Birthday/Ann lets you record anniversaries,
birthdays and other important annual events
• Holiday lets you record your planned vacations
and public holidays
• To Do helps you track tasks and goals according
to priorities you assign
• Calendar displays all your Appointment, Birthday/
Ann, Holiday and To Do items in convenient daily,
weekly, monthly or yearly formats
Information Databases
• Contacts is used to store names, phone numbers
and other information
• Data Files lets you set up custom databases
• Spreadsheets provides a full-featured
spreadsheet utility
Letters & Documents
The unit offers powerful facilities for creating
documents, letters and even hand-written notes:
• Documents provides sophisticated word processing and document formatting features
• Outlines lets you organize your ideas and
information using topics and sub-topics
• Notes lets you make hand-written notes directly
onto the screen using the touch-pen.
Desk Accessories
A variety of other functions are provided to make
common tasks quick and convenient:
• Calculator performs standard mathematical and
date calculations
• Scrapbook lets you create and edit pictures,
drawings and maps
• Filer lets you group together entries from any
applications except Spreadsheets
Your unit allows you to store a wide range of
information according to your needs:
41
About this Manual
Fax & Information Exchange
Your unit allows you to send and receive information via a wide range of popular data methods and
information services, including:
• Fax
• AT&T Mail
• CompuServe
• Pager
• Other systems and networks
You will find two manuals with your unit. This manual is
designed to help you quickly learn and understand the
capabilities and operation of your unit. The other manual
contains detailed explanations of Spreadsheets, Terminal, CompuServe, AT&T Mail and ZR-Pager.
Chapters
The chapters are organized by task type so you
can focus your attention on the features that meet
your needs.
Utilities
The unit offers additional utilities to manage and
access your data easily:
• Clock displays both local and international time
• Filter selects only those entries you specify
• Search helps you find particular entries
• Cut & Paste lets you conveniently copy text and
graphics between different applications
Your new unit offers even more features too
numerous to mention here. But you can extend its
capabilities even further by adding new functions
via Add-on software. Features and enhancements
such as these, together with remarkable userfriendliness, make the ZR-5700/ZR-5800 among
the world's most powerful and sophisticated handheld information managers.
42
Quick Start
Commonly asked Questions & Answers
These sections show you how to quickly set up
and use the essential features of your unit.
Getting Started
Introduces part names and functions, and GUI
features.
Desk Accessories:
Explains the desk accessories: Calculator;
Scrapbook; Filer; Search; Help; Tools; and More.
These are located at the left of the display, and
can be selected whenever they are needed.
General Operations:
Introduces operations that are common to all of
the built-in applications. These operations are
accessed through the tool bar at the top of the
display and change to suit the application.
Time Management:
Explores Activities operations: Appointment;
Birthday/Ann; Holiday; To Do; and the Calendar
views. Activities helps you manage your time and
keep track of important events.
Optional Accessories:
Introduces peripheral operations including:
printing; data transfer with other units; sending
faxes; data exchange with personal computers;
optional Add-on software programs; and PC cards.
Appendices
A. Key Notations
B. Reset
C. Troubleshooting
D. Battery Replacement
E. Specifications
Databases:
An introduction to Contacts and Data Files,
personal databases which store information such
as addresses and phone numbers, but can also be
configured to manage other types of information.
Writing and Letters:
Shows you how to manage handwritten notes and
create professional looking documents using the
Notes and Documents features. Also explains how
to use the Outlines feature.
43
Conventions used
The following keyboard and symbol conventions are
used in this manual:
• ACTIVITIES, CALC, SEARCH, ON, MENU, ENTER
Done, Cancel and other bold notations indicate
buttons on the display that are touched with the touch
pen, or keys on the keyboard that are pressed with a
finger.
• Letters and numbers to be entered in examples are
shown in italics, for example "Lunch at 12:00" indicates
that "Lunch at 12:00" should be entered from the
keyboard.
• Activities, Notes, Filer, Search and similar notations
written with initial capitals are names of applications
and accessories. If the associated touch buttons on the
display are to be touched as part of a procedure, they
will be written in bold uppercase, for example: touch
ACTIVITIES, touch NOTES or touch SEARCH.
• Some keys have other functions that are accessed by
pressing the key in combination with the
(Shift) or
2nd key. For example: pressing
and also pressing
the Return ( ) key inputs a tab.
44
• For a full list of key notations, see Appendix A.
Indicates a tip or important point.
Indicates alternative methods. There is often
more than one way that you can perform an
operation.
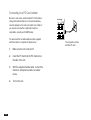
Caring for your unit
This unit contains delicate circuitry and a glass display
panel which can be damaged if not cared for properly.
The following precautions should ensure your unit gives
you many years of reliable use.
• Keep your unit away from extreme heat. Do not leave it
on the dashboard of a car or near a
Wrong
heater. Do not leave it in any place
that is extremely damp or dusty.
• Do not use solvents to clean your unit. Use only a soft,
dry cloth.
Wrong
• Do not carry your unit in your back pocket as it may
break when you sit down. The
Wrong
display is made of glass and is
particularly fragile.
• Do not drop your unit or subject it to severe impacts.
Bending the body can damage the
Wrong
circuitry. Do not use extreme force
when pressing the display or keys.
• Replace the batteries as soon as they become weak.
Failing to replace weak batteries may result in lost data
or damage from battery leaks.
• Do not use sharp, pointed objects or your fingernails to
touch the display screen. We
Wrong
recommend you use only the
supplied touch pen to touch or write
on the screen.
• Hard, sharp objects can scratch your unit, so ensure it
is closed and/or protected when
carried with other objects.
Wrong
45
46
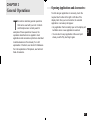
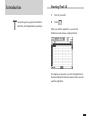
CHAPTER 1
Getting Started
A major feature of the unit is its graphical user
interface (GUI) which makes operation easy to
understand through a combination of graphic
images and text. The GUI is easy to use and
provides a great deal of versatility. Operations can
be entered using the touch pen on the display,
pressing keys on the keyboard, or a combination
of both.
Before Use
Before using your unit, the following operations are
required. If you have not performed these operations,
read the Quick Start section.
1
1.
Battery installation ... see "Installing the
batteries" on page 10.
2.
Initializing ... see "Initializing" on page 11.
3.
Adjusting the LCD contrast ... see "Adjust
LCD contrast" on page 12.
4.
Adjusting the touch panel ... see "Adjusting
the touch panel" on page 13.
5.
Setting the Clock ... see "Setting the time and
date" on page 14.
47
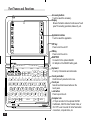
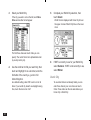
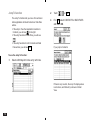
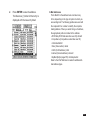
Part Names and Functions
CALC
Accessory buttons
Touch to select the accessory.
Display
Shows information and also functions as a "touch
panel" for selecting operations, data entry, etc.
ACTIVITIES
SCRAP
BOOK
CONTACTS
FILER
DATA FILES
SEARCH
NOTES
HELP
DOCUMENTS
TOOLS
OUTLINES
Application buttons
Touch to select the application.
OFF key
Press to turn the unit off.
ON key
Press to turn the unit on.
ADAPTOR
Connector for the optional EA-23E
AC Adaptor or the CE-BK1 battery pack.
MORE
SPREADSHEET
ADAPTOR
QUIT
COMPUTER LINK
ON
!
@
#
$
1
2
3
4
Q
E
W
CANCEL
SEND
GET
MENU
%
^
&
5
6
7
T
R
*
8
Y
NEXT
(
)
+
=
9
0
-
BS
I
U
O
P
TAB
A
S
Z
D
X
F
C
G
V
J
H
B
K
,
N
M
,
L
:
.
?
CAPS
BackLight
48
2nd
WORD
SMBL
SPACE
DEL
ENTER
EJECT PC CARD
OFF
PREV
NEW
ENTRY
Keyboard
For entry of characters and commands.
Touch pen holder
Holds the touch pen when not in use.
Touch pen
Selects touch buttons and writes on the
touch panel.
Lock button
Press to open the unit.
Computer Link
A 15-pin connector for the optional CE-FM4
Fax/Modem, CE-315L Data Transfer Cable, or
CE-137T Level Converter for other fax/modem
connections, computer links, etc.
Memory back-up battery compartment
Holds memory back-up battery: CR2032 x 1
Reset button
Press to reset and initialize the unit.
1
Serial number
Indicates you unit's serial number.
(on some units may be within the
battery compartment)
PC card slot
For inserting a PC card.
PC card eject button
Press to eject a PC card.
Battery replacement switch
Allows access to the battery compartment.
Operating battery compartment
Holds operating batteries: LR6(AA) x 2
Infrared port
For wireless infrared communications with other
units (including ZR-5700/ZR-5800, ZR-5000,
OZ-9000/OZ-6000/OZ-5000 series) and optional
Wireless Interfaces CE-IR1/IR4.
The unit will not operate if the battery replacement
switch is in the "REPLACE BATTERIES" position.
49
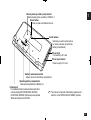
Touch pen
The touch pen is stored at the right front of the
keyboard.
Display angle adjustment
The display can be adjusted to any angle that suits
your reading style.
3/4
position
To remove the touch pen, pull it in the direction
shown by the arrow.
To replace the touch pen, push the pen back into
place (in the opposite direction to the arrow).
Check the ridge grip on the touch pen aligns
correctly with the mounting slot.
Caution:
Use only the supplied touch pen to operate the
display. Do not use pens, pencils or other sharp,
pointed objects. Keep the touch pen and display
clean to avoid scratches and damage to the
display.
50
When attempting a wireless infrared transfer, be
sure not to open the display more than 3/4 of the
way, or the IR port may become blocked.
GUI operations
A key feature of the graphical user interface (GUI) is its
system of displays and menus which can be used to
quickly execute commands and perform operations.
• Insertion mode is used for all text input except time and
dates. There is no overwrite mode.
• All Detail Views (except Notes and Scrapbook) have a
blinking cursor.
• Selecting an application (except Activities and
Spreadsheets) containing no entries brings up a New
Entry display with a blinking cursor.
• Cut, Copy and Paste from the tool bar EDIT menu can
be used to copy or move entries.
• In Detail View, the cursor can be moved to another field
by touching the field or pressing the cursor keys.
• Selected text is indicated by highlighted (reverse) text.
• Detail View supports rapid cursor movements as
follows:
2nd
Moves cursor to top of field
2nd
Moves cursor to bottom of field
2nd
Moves cursor to beginning of line
2nd
Moves cursor to end of line
• Pop-up menus, radio buttons and check boxes can
only be used by touch operations.
• Touch scroll bars to move through displayed information. In Notes, one grid block is scrolled as one line.
Index View
1
Scroll screen one line up.
Scroll screen one line down.
Scroll up one display "page".
Scroll display by dragging.
Scroll down one display "page".
Detail View
Scroll screen one line up.
Scroll screen one line down.
Scroll up one display "page".
Scroll display by dragging.
Scroll down one display "page".
Change display font size (zoom).
Display previous entry.
Display next entry.
51
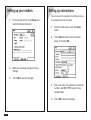
Display layout
Touch panel display
The display layout has the following features:
• The touch buttons at the left of the display
provide access to accessories and utilities.
TOOLS provides access to communications
utilities and user settings. MORE provides
access to optional Add-on software (if installed)
in either the main memory or in a PC card.
• The touch buttons at the right of the display
provide access to applications.
• The touch buttons along the top of the display
are called the "tool bar" (application-specific
tools).
The display not only shows information, it is also a
"touch panel" that lets the touch pen select functions
and enter information. Some operations which are
carried out by touch buttons can also be carried out by
pressing keys on the keyboard. The touch button in bold
at the right of the display has the same function as
pressing the ENTER key (see Fig.) To store a setting for
example, you can touch OK on the display or press
ENTER on the keyboard. When a display symbol
matches a key or symbol on the keyboard, either can be
used. For example, touching Cancel functions the same
as pressing CANCEL.
Touching
this button is
the same as
pressing the
ENTER key.
Tool bar
CALC
ACTIVITIES
SCRAP
BOOK
CONTACTS
FILER
DATA FILES
SEARCH
NOTES
HELP
DOCUMENTS
TOOLS
OUTLINES
MORE
SPREADSHEET
1-2-5
52
1-2-6
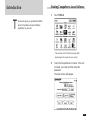
Display symbols
Keyboard layout
The following display symbols appear at the top right of
the display to indicate various conditions:
XX:XX Real time and date display. Touch to toggle
between time and date display.
BATT Operating batteries are weak and need
replacing.
CARD A PC card (RAM card) is currently selected
as the data source.
2nd
2nd key has been pressed.
CAPS CAPS has been pressed, the keyboard is in
caps lock mode, and all letters will be
entered in uppercase. Press CAPS again to
turn caps lock off.
Indicates the current entry is secret and can
only be accessed when the unit is unlocked.
The unit is locked. Entries marked as secret
cannot be recalled until your unit is unlocked
by entering a password.
Alarm sound is enabled.
The keyboard is laid out in a standard QWERTY
format, like a typewriter or computer.
• The
key has the same function as the Shift key
on a typewriter or computer.
• The CAPS key has the same function as a Caps
Lock key.
• The unit operates permanently in insertion mode
except for entering the time and date (there is no
overwrite mode).
• Symbols in white above a key, such as ' or :, can
be used by holding down
and pressing the
required key. Refer to Appendix A Key Notations.
• Special symbols and characters, such as ù and Ç,
can be entered using the SMBL key. (See p. 116
for details.)
*
ADAPTOR
QUIT
COMPUTER LINK
The display symbols may be hidden in some
dialogue.
ON
CANCEL
SEND
GET
MENU
!
@
#
$
%
^
&
1
2
3
4
5
6
7
Q
E
W
T
R
PREV
NEW
ENTRY
*
8
Y
NEXT
(
)
+
=
9
0
-
BS
I
U
O
P
EJECT PC CARD
OFF
TAB
A
S
Z
D
X
F
C
G
V
J
H
B
K
,
N
M
,
L
:
.
?
CAPS
2nd
WORD
SMBL
SPACE
DEL
ENTER
BackLight
53
1
Detail View and Index View
The application tool bar across the top of the display
normally offers a choice of either Detail View or Index
View for examining unit entries. For a particular application, Detail View lets you examine the detailed contents
of an entry, and Index View lets you examine a list of
entry titles.
1-2-9
Detail View
1-2-10
Index View
54
Tool bar
There is a special tool bar for each application.
The tool bar is located across the top of the
display and has the following features:
• A small pointer (" ") in the upper right of a tool
bar item indicates a menu will be displayed if it is
touched.
• For some tool bar menus;, current settings are
indicated by a check mark " ".
• Menus may be separated into categories by
dashed lines.
• Menu items that lead to dialogue are followed by
"...".
• If a particular tool bar item cannot be used for a
specific screen, it is "faded" out.
• Tool bar menus can be accessed from the
keyboard by pressing MENU then using the
PREV, NEXT, , , ENTER and CANCEL keys.
1-2-11
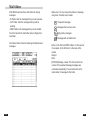
Help Function
Key Sound
The built-in Help feature is a convenient, topic-specific,
on-line reference source. You can view Help at any time
by touching HELP at the left of the display. Messages
are also displayed during normal operations for your
guidance.
A sound (beep) is made each time a key or button is
pressed or the display is touched. Key Sound enabled
as the default setting.
1
To turn the key sound off:
1.
Touch TOOLS and then touch Sound twice.
1-2-13
1-2-12
The Key Sound box is checked to show it is on.
2.
Touch Key Sound (so the cross disappears)
to turn the key sound off.
3.
Touch Done to save the setting.
55
Save Battery Life
Sleep function
To conserve battery power, the Sleep function
turns your unit off if it is not used for a set time
period (the default setting is 15 minutes).
• Sleep is disabled when communicating with other
devices to avoid interrupting data transfers.
• If you are storing an entry and the Sleep function
turns off power before the entry is finished, data
will not be lost. When you press ON, operation
resumes from the state before power was turned
off.
• When the unit is connected to the AC adaptor or
battery pack, the Sleep function is disabled.
External power supply
Power can be supplied to your unit from the
optional EA-23E AC adaptor or the CE-BK1
battery pack. The AC adaptor can be used whenever a normal AC electricity outlet is nearby. The
battery pack can be used as an alternative power
source when no AC power supply is available. This
greatly increases your unit's portability by allowing
you to operate your unit for long periods of time
without depleting the operating batteries, e.g.,
while traveling on long journeys or working
outdoors.
56
To use the EA-23E AC adaptor or CE-BK1 battery
pack, first turn off the unit, then connect the plug to
the ADAPTOR socket at the right of the keyboard,
then turn your unit back on.
• When using the CE-BK1 battery pack, make sure
the mode switch is set to OPERATION.
• If the operating batteries are not installed, or are
depleted, the AC adapter or battery pack will not
supply power to the unit.
• Be sure to turn your unit off before disconnecting
the AC adaptor or battery pack.
• Check that the AC adaptor or battery pack is
connected when the unit is on, especially during
data transfer. Disconnecting the unit will abort the
data transfer.
Backlight Function
The ZR-5800 provides a built-in Backlight, which allows
you to view the display and use the unit even in low-light
conditions, eg. in a theater, restaurant, or business
presentation. Press 2nd and CAPS to illuminate the
display. You can set up the Backlight duration. See page
90.
CHAPTER 2
Desk Accessories
he desk accessories along the left side of
the display are handy utilities that round off
the Application suite:
• Calculator can perform calculations on numbers
entered from the display, keyboard, or from other
entries.
• Scrapbook lets you make quick handwritten
notes and drawings directly on the display.
Scrapbook entries can be attached to Contacts
or Data Files entries, or integrated into a document.
• Filer lets you manage your data and information
by topic rather than by entry type.
• Search lets you locate a particular keyword from
among many different entries.
• Help provides quick access to topic-specific help
messages at any time.
• Tools provides many utilities such as Clock and
PC Link.
• More accesses the PC card and the Add-on
software setup functions. Full details are given in
chapter 7.
T
Calculator
Calculator is a standard 10-digit calculator which:
• Performs mathematical operations, including square
root, percentage and memory (R•CM, M- and M+).
• Can calculate dates and time durations, such as the
number of days to project completion.
• Has a paperless printer mode which shows all calculations in a vertical column on the display.
• Performs operations on data copied from other entries.
To perform calculations:
1.
Touch CALC at any time.
The calculator's key pad appears on the display.
2-1-1
2.
Enter the calculation by touching the display
keypad or using the keyboard number and
symbol keys.
• To clear an entered value, touch C•CE once.
To clear a calculator operation, touch C•CE twice.
• Calculations are performed in order of entry, not
by algebraic convention, i.e. 8+2x3 = (8+2)x3, not
8+(2x3).
57
2
• =, M-, M+ and % terminate a calculation sequence. Any value entered after these keys
begins a new calculation.
• Calculation steps are retained and can be
recalled with PREV or NEXT (even after the
display has been cleared with C•CE), until a new
sequence is entered or all steps are deleted
using DEL.
• Up to 50 steps can be stored in a calculation
sequence.
• Functions are the same as for the basic calculator, except power calculations must be performed
using repeated multiplication.
• M on the display indicates a number is stored in
memory. Touch R•CM twice to clear the memory.
• Press to erase the last digit entered.
• E on the display indicates an error.
Touch C•CE to clear errors.
• Touch +/- to change the sign of a displayed value.
3.
To quit Calculator, touch QUIT.
Movable window display
Calculator opens as a movable window over the
last display that was used. To move the Calculator
display, touch the top left corner and drag it to the
new location. After moving the Calculator display,
make sure to return it to its original location.
Otherwise, it may hide the paperless printer
display when that mode is selected.
Paperless printer
In the basic calculator mode, only calculation
results are displayed. In paperless printer mode,
the calculation steps are retained and you can edit
the sequence:
• This allows you to change numbers and operators (+, , x, , =) and return to intermediate
results so that you do not have to reenter entire
calculations.
-
58
Using the paperless printer calculator:
1.
Touch CALC and select PRINT.
2-1-2
2.
3.
Enter the calculation.
Inserting new values:
• marks the starting entry.
• The value on the key pad display is the value just
entered or the final calculation result (indicated
by ENTRY or ANSWER shown above the value).
1.
Touch "=" to get the result.
2.
Touch Insert.
3.
Enter the operator and value to be inserted,
then press ENTER.
4.
Press ENTER again to get the new result.
Using intermediate results:
1.
Touch PREV or NEXT until you reach the
calculation line you want to check. The result
up to and including the highlighted line is
displayed.
2-1-2A
2.
Touch C•CE once to return to the display of
the final result, and touch C•CE again to clear
the display.
Move to the line above the point where you
want to insert the new value.
2
Changing part of a calculation:
1.
Move to the entry you want to change by
touching PREV or NEXT (or pressing PREV
or NEXT keys).
2.
Make sure that the Entry radio button is
selected, then enter the new operator and
value, and press ENTER.
3.
Press ENTER again to get the new result.
59
2.
Deleting a line:
1.
Move to the line you want to delete using
PREV or NEXT.
2.
Press DEL.
3.
Press ENTER to get the new result.
Date calculations
Calculator can calculate the period of time (in
days) between two specified dates. It can also
calculate the date a specified number of days
before or after a set start date.
Calculating the number of days between two dates:
1.
Touch DATE to switch to the date calculator.
The current date is
the default start date.
2-1-3
60
Touch CANCEL to clear the current date and
enter a different start date, if desired.
• Prefix single-digit months or dates with 0.
• You can modify part of a date by touching it and
then entering the required numbers.
3.
Touch TO.
4.
Enter the end date.
5.
Touch CALCULATE.
The number of days between the two dates is
shown.
If you enter an invalid date, for example if you
forget to enter the year, the operation will not be
recognized and nothing will happen when you
touch CALCULATE. If you make a mistake, touch
CANCEL to return to the previous step.
Calculating the date from the number of days:
1.
Touch DATE to switch to the date calculator.
The current date is the default start date.
2.
Touch CANCEL to clear the current date and
enter a different start date, if desired.
You can continue to calculate other dates using
the calculated date as a new start date. Press +
or keys and the calculated date is automatically
entered in the FROM field. If you make a mistake,
touch CANCEL to return to the previous step.
-
• Prefix single-digit months or dates with 0.
• You can modify part of a date by touching it and
then entering the required numbers.
3.
Touch AFTER to get a date in the future.
Touch BEFORE to get a date in the past.
4.
Enter the number of days in the past or
future.
2-1-4
5.
Touch CALCULATE and the final date is
displayed.
61
2
Data from other entries
From Calculator to another entry:
You can perform calculations on numbers contained in other entries. You can also transfer
calculated values into another entry.
1.
After a calculation, touch the result to
highlight it, then press 2nd C to copy it.
2.
Open an entry in Detail View, and touch the
position where you want to enter the
calculated value.
3.
Touch EDIT and select "Paste".
From another entry to Calculator:
1.
2.
Select the entry with the data you want to
calculate.
Drag the touch pen to highlight the
calculation data.
The copied value is now included in the entry.
Error indicator E
2-1-4A
62
3.
Touch EDIT and select "Copy" to copy the
data.
4.
Touch CALC to open Calculator, then press
2nd V to paste the calculation data. The
copied calculation is performed and the result
is displayed.
The error indicator, E, appears when any of the
following situations occur:
• Integer part of the rough result has 11 to 20
digits. For example: 4567890123 x 456 =
208.2957896 is displayed with E to indicate that
208.2957896 x 1010 = 2,082,957,896,000 is the
rough result. Rough results are not available in
paperless printer mode.
• Integer part of the result exceeds 20 digits.
• Integer part of the value in memory exceeds 10
digits.
• A number has been divided by 0.
Touch C•CE to clear the error indicator.
Scrapbook
Scrapbook lets you make quick hand-written notes,
sketches and maps directly on the display. The stamp
function lets you add built-in images of buildings,
intersections and railways to make your maps more
accurate and clear.
Scrapbook entries can be added to Contacts and Data
Files entries as part of those databases, or can be
included in Documents entries. For more information on
adding Scrapbook entries to other entries, see p. 157
and p. 180.
Scrapbook entries take up much more space in memory
than text, so it is a good idea to delete unwanted
Scrapbook entries or copy them to a RAM card.
When
is displayed at the lower right of the display,
Scrapbook is in Detail View and you can scroll the
entries by touching .
Touching the upper left corner of
moves to the
previous entry, and touching the lower right corner
moves to the next entry.
Touching the display makes
disappear so you can
change an entry.
If Scrapbook is currently displayed and you select
another application (or you touch SMALL), the
Scrapbook display is reduced to a movable window. To
move this window, touch the top left corner and drag it to
the new location. To enlarge the Scrapbook window and
continue drawing, touch LARGE. Scrapbook will remain
on the display until you touch QUIT.
Making a new Scrapbook entry:
1.
Touch SCRAPBOOK.
A "blank" page is displayed.
2.
2
Use the touch pen to write or draw on the
display.
• Select drawing tools on the left.
• Default drawing tool width is medium.
3.
When you complete your entry, press
ENTER.
The entry is saved and the display changes to
Detail View. To make another entry, touch EDIT
and select "New Entry" (or press NEW ENTRY).
4.
To close Scrapbook, touch QUIT.
63
Drawing tools
Finding entries
The Scrapbook drawing tools add versatility to
creating graphics. The pencil tool is the default
selection when you first touch the display with the
touch pen.
Scrapbook entries are saved in the order entered.
to step
• To find a Scrapbook entry, touch
through all the entries (or press PREV or NEXT).
• You can also touch SHOW and select "First
Entry" or "Last Entry" to move to the top or
bottom of the entry list.
To edit an entry:
2-3-1
[Pencil]
[Ruler]
[Grid]
[Stamp]
[Area]
[Eraser]
[Pattern]
[Width]
64
Draws freehand lines.
Draws straight lines.
Draws the lines vertically or
holizontally.
Inserts built-in stamps.
Defines areas for editing operations.
Deletes graphics.
Selects drawing pattern from
white, hatch or black. White is
useful for deleting details that
cannot be easily removed by the
eraser.
Sets width of drawing tools.
1.
Display the entry you want to edit.
2.
Select the drawing tool you want to use.
3.
Make any required changes.
4.
To save the changes and quit Scrapbook,
touch QUIT.
To save the changes and remain in
Scrapbook, press ENTER.
Selecting an area
Moving or copying graphics
The area tool lets you select a Scrapbook area for
copying, deleting and other operations.
Display the entry you want to revise and
select the area tool ( ).
Area tool
2.
2
To move or copy graphics:
To select an area:
1.
Graphics sections can only be moved or copied
within Scrapbook.
1.
2-3-2A
2-3-2
Drag the touch pen from the upper left to the
lower right of the area you wish to select. A
rectangular outline will indicate the selected
area.
3.
Perform the required operation on the
selected area (as shown below). To deselect
the area, touch anywhere in the drawing area
or select another tool.
4.
Complete your changes, then press ENTER.
Touch the area tool and select the graphics
area you want to copy or move.
2.
Touch EDIT and select "Cut" (to move) or
"Copy".
3.
Select the area where you want to paste the
graphics.
65
4.
Adding text strings to Scrapbook
Touch EDIT and select "Paste".
You can import text into Scrapbook from other
application entries.
To add text strings to a Scrapbook entry:
N2-3-2B
1.
Display the entry with the text you want to
import.
2.
Highlight the required text by dragging the
touch pen.
3.
Touch EDIT and select "Copy".
4.
Touch SCRAPBOOK and display an entry.
Deleting sections of graphic entries:
66
1.
Use the area tool to select the area to be
deleted.
2.
Press DEL to delete the selection.
For a new entry, touch EDIT and select "New
Entry".
5.
Select the area where you want to place the
text.
The Stamps tool
You can use the Stamp tool to add one of the 64
built-in stamps to your Scrapbook entry.
2
To use the stamp tool:
1.
Display the entry you want to add a stamp to.
2.
Touch the Stamp tool at the left.
N2-3-3A
The stamp menu appears at the top of the
display.
6.
Touch EDIT and select "Paste".
N2-3-4
2-3-3
Text is pasted to fit the area you specify, and it is
split over several lines if necessary. If the area is
not large enough, only part of the text is pasted.
67
3.
Touch the stamp you desire to select.
To scroll the stamp menu, touch
PREV or NEXT).
or
( or press
5.
When you complete your entry, press
ENTER.
N2-3-6A
N2-3-5
4.
Touch the location where you want the stamp
inserted.
• The stamp can be dragged to any location until
the pen is lifted from the display. Once the pen is
lifted, the stamp is set and cannot be moved.
• A stamp can be inserted in multiple locations.
• To remove a stamp, select the stamp with the
area tool, then press DEL.
• The stamp menu is a movable window. To move
the stamp menu, touch the left corner and drag
to the new location.
68
Filer
Deleting Scrapbook entries
Deleting a single Scrapbook entry:
1.
Display the Scrapbook entry you want to
delete.
2.
Touch EDIT and select "Delete Entry".
Press DEL.
3.
Touch Yes to confirm the deletion.
Deleting all Scrapbook entries:
1.
Touch SCRAPBOOK.
2.
Touch EDIT and select "Delete Group".
3.
Touch Delete.
4.
Touch Yes to confirm the deletion.
Filer is a unique, easy-to-use accessory that helps you
manage your information by topics rather than by entry
type. Filer folders let you organize information in a
similar way to office folders.
For example, suppose you have a project called
"Andromeda". You might have the names and phone
numbers of three project personnel in a Contacts file,
two pages of meeting notes in Notes, a project outline in
Outlines, three To Do action items, and five meeting
dates in Appointments.
With Filer, you can assign all entries related to the
Andromeda project to a single folder. This folder can
then be selected when you want to work specifically on
Andromeda project information.
You cannot assign Spreadsheets entries to Filer.
Assigning entries to folders
Before using Filer, you must first assign entries to
the folders. There are three ways of assigning
entries to a folder: you can assign a group of
entries to one folder, you can assign individual
entries to one or more folders, or you can make a
new assigned entry. With all methods, the entries
themselves are not moved or stored in the folder,
they are just assigned to it. (Entries are retained in
the applications that created them).
69
2
Collect related entries to one folder
2.
The Collect function is used to assign entries
linked by a common keyword to a specified folder.
You can select the applications that are searched
for the keyword.
Touch a tab to specify the folder to hold the
collected entries, then touch COLLECT in the
tool bar.
To collect related entries to one folder:
1.
2-4-2
Touch FILER.
If the selected folder contains entries and you
touch COLLECT, a message indicates that if you
proceed all existing entries will be unassigned
from that folder. Touch Yes to proceed (or touch
No to cancel and choose another folder).
2-4-1
• Note the Search and Garbage folders at the front
of Filer Drawer. The Search folder provides
temporary storage for entries that match the
keyword Search criteria. The Garbage folder
provides temporary storage for deleted folder
entries.
70
3.
Complete the Collect Entries display as
required.
• Enter a keyword of up to 16 characters in the
"Only Entries Containing" field, using letters,
numbers and symbols.
• Check the Limit by Date Range box to set a date
range (only for Appointments and To Do entries).
The keyword is optional in this case.
• Touch the Only Secret Entries check box to
collect only secret entries (not displayed if the
unit is locked.) The keyword is optional in this
case.
4.
All applications are selected by default.
Deselect any applications you do not need.
5.
Touch Collect.
A "Collecting" message appears.
• A message indicates if no entries contain the
keyword. You can try again using a different
keyword, or touch Cancel to close the box.
• All entries containing the keyword are assigned
to the specified folder. The first ten characters of
the keyword are displayed as the folder name
(Untitled is displayed when entries are collected
without specifying a keyword).
• The folder name can be easily changed, see p.
72.
Assigning a single entry to multiple folders:
1.
2.
Display the entry that you want to assign to a
folder.
Touch FILE IT.
2-4-3
3.
Touch all the folders the entry is to be
assigned to. Touch any folder again to
deselect it.
4.
Touch File.
The "Filed!" message is displayed and the entry is
assigned to the selected folder(s).
If you assign the entry to an empty folder, the first
ten characters from the first text field of the entry
are shown on the name tab.
71
2
Naming or renaming folders:
To view an entry from Filer:
1.
In Filer Drawer, touch a tab to select the
folder (except IN folder) that you want to
name (or rename).
1.
2.
Touch EDIT and select "Folder Name".
Touch FILER and touch twice the tab of the
folder that contains the entries you want to
view.
2-4-5
2-4-4
3.
Enter any folder name of up to ten characters
using letters, numbers and symbols.
4.
Touch OK to save the folder name.
Viewing entries via Filer
Once an entry has been assigned to a Filer folder,
it can be easily viewed so you can access information by topic rather than by entry type.
72
• Only one folder can be opened at a time.
• Folder entries are sorted by entry type.
• If the folder has more than eleven entries, use
the scroll bar to move to other entries.
2.
Touch the desired entry twice. It will be shown
in the entry mode of the original application.
3.
Touch FILER to return to the Filer Index.
4.
Touch VIEWS and select "Drawer" to return
to Filer Drawer.
Editing folder entries
Once an entry is assigned to a Filer folder (or
folders), any changes made to the entry in its
source application will be reflected in all related
folders. The entry is edited in the entry mode of
the source application.
To edit a folder entry:
1.
Open the desired folder.
2.
Touch the entry to be edited twice. The
display changes to the entry mode of the
original application.
3.
Make the desired changes to the entry.
4.
When you complete your changes, press
ENTER then touch FILER to return to the
Filer Index.
New Assigned Entry
You can create a new assigned entry in another
application directly from within Filer.
2
To make a new assigned entry:
1.
Open the Filer Drawer then touch a tab.
2.
Touch EDIT and select "New Assigned
Entry".
2-4-6
The new entry will be assigned in the currently
selected folder.
3.
Select the new entry type and then touch
NEW.
4.
Create your new entry.
73
5.
When you complete the entry, press ENTER.
The new entry appears in the Index of the
selected application and the entry is
automatically assigned to the folder.
Removing entries from folders
If you assign an entry to the wrong folder, or no
longer require a particular entry to be assigned to
a folder, you can remove (unassign) single entries
from folders. Removed entries are not deleted
from the source application.
Touch FILER to see the new entry in the Filer
Index.
Delete an entry from Filer
Folder entries can be deleted directly from the
Filer Index.
The deleted entry will be deleted from the original
application and the Filer Index.
To delete a Filer Index entry:
1.
In Filer Index, select the entry to be deleted.
To remove a single entry from a folder:
1.
From Filer Drawer, select the folder that
contains the entry you want to remove.
2.
In Filer Index, select the entry to be removed.
3.
Touch UTILS and select "Remove This
Entry".
A message indicates the entry has been removed.
74
2.
Touch EDIT and select "Delete Entry".
3.
Touch Yes to confirm the deletion. The entry
is deleted and disappears from the Filer
Index.
Empty a folder
Merging (Moving) folders
You can empty a folder. This will remove
(unassign) all entries from the folder. Removed
entries are not deleted from the original application.
At times, you may have two folders whose contents, names or purpose are duplicated. You might
want to merge (combine) the two folders into a
single folder.
• To delete all entries in a folder, an alternate
method is to merge that folder with the Garbage
folder, then touch EDIT and select "Delete
Garbage Contents".
• To undo the deletion of a folder you can merge
the Garbage folder with an empty folder.
To empty a folder:
1.
In Filer Drawer, select the folder you want to
empty.
2.
Touch UTILS and select "Empty This
Folder".
3.
Touch Yes to confirm the folder is to be
emptied.
The folder contents are removed and the name
tab becomes blank, indicating an empty folder.
To merge folders:
1.
From Filer Drawer, select the first folder to be
merged.
2.
Touch MERGE.
N2-4-7
75
2
3.
Select the second (destination) folder that will
be merged, and touch Merge. The contents
of the first folder will be appended to the
destination folder.
Sending folders
You can send all entries assigned to a folder to
another unit via infrared transmission or via
optional cable. Sent folder entries will be assigned
to the IN folder of the receiving unit. For more
information about Unit to Unit transfers, see p. 220.
• The name of the destination folder has priority.
• If the folder contains duplicate entries, the
duplicates will be removed.
To send a folder to another unit via infrared transmission:
1.
Press GET on the receiving unit.
Touch SEND in the tool bar, select "Unit to Unit",
and then select Receive and touch OK.
2.
Touch FILER on the sending unit.
3.
Select the folder in Filer Drawer.
4.
Press SEND.
The folder entries will be sent to the receiving unit
and assigned to the IN folder.
Touch SEND in the tool bar and select "Unit to
Unit", then select Send and touch OK.
76
Generate a Report
Generate a Report makes a new Documents
based on the contents of a Filer folder. This makes
a new Document entry containing information on
entries assigned to a particular folder.
For example, you might want to fax a report on
your activities for a specified week. The Collect
tool can be used to gather your activities into a
single folder with a set date range. You can then
touch SEND and select "Generate a Report" to
make a Documents report entry. In Documents,
edit the report and then send it by fax.
2-4-8
Report format
Please note the following important points:
• The generated report page format is letter size,
with all margins set at 1 inch and uses Elite (12
cpi) font.
• For Appointment, alarm time and repeat information are not included.
• For Birthday/Ann, reminder information is not
included.
• For Contacts/Data Files, pictures and link
information are not included.
• For Notes, drawings and modified time information are not included in the report.
• For Documents, pictures and header, footer and
text style information are not included.
• For Outlines, topic text is not indented in accordance with the topic level.
77
2
Search
The Search function lets you locate entries containing a
specific keyword, even if you do not know the entry title
or the application it was created in. The search can be
limited to a specific date range for Appointments and To
Do entries, or limited to secret entries. The Search
function selects all applications as a default setting for
the search, but you can deselect applications as desired. When the search is completed, entries that match
the search criteria are assigned to the Search folder in
Filer.
You cannot use the search function in the
Spreadsheets application.
2.
Enter the search keyword in the "Only Entries
Containing" field. You can use up to 16
characters (letters, numbers and symbols).
3.
Check the Limit by Date Range box to enter a
search date range for Appointment and To Do
entries.
4.
Check the Only Secret Entries box to limit the
search to Secret Entries.
5.
Select the applications you want searched.
All applications is the default selection.
6.
Touch Search.
All entries that match the search criteria are
assigned to the Search folder in Filer. The
Search folder is displayed, and you can view
its contents with Filer.
To use the Search keyword function:
1.
From any application, touch SEARCH at the
left.
N2-5-1
78
In the application's Index View, it is also possible
to use the Keyword Search function without
touching SEARCH. See details in General
Operations.
Help
The built-in Help feature is a convenient, on-line help
and reference source. You can access Help at any time
by touching the HELP button on the left of the display.
To use Help:
1.
4.
When you complete your selection, touch
Details.
5.
Touch Index to return to the previous display.
Touch Cancel to exit the Help function.
Touch HELP.
Applications and
accessories list
Help item list
2.
Select an application or accessory from the
top list.
The current application is initially selected.
3.
Select the Help item from the bottom list.
Use the scroll bars to move through the list.
79
2
Tools
Touching the Tools accessory produces the following
display:
Preferences
Preferences let you configure your unit to suit your
own personal requirements.
Personal
Personal lets you enter your personal information
for use at start-up, when sending faxes, making
letters, etc.
2-6-1
To enter your personal information:
Utilities
The communications utilities ensure your unit is
much more than just a hand-held personal information manager. They make your unit a powerful
management and communications tool that links
you to your busy world through PC links, terminal
mode, data transfers, backups, faxes, messages,
etc.
The utilities shown in the top half of the TOOLS
display are: PC Link; Remote; Clock; Fax Log;
Backup; Terminal; Message; CompuServe; AT&T
Mail; and ZR-Pager. Clock is described on page 91
in this chapter and other Tools utilities are described in chapter 7, "Optional Accessories".
Terminal, CompuServe, AT&T Mail and ZR-Pager
are described in the manual provided separately.
80
1.
Touch TOOLS and touch Personal twice.
2-6-2
2.
Enter your own information for owner (your
name), company, position, phone number, fax
number and address.
3.
Touch Password to set the password. For
more information on the password function,
see p. 85.
4.
5.
Touch Sign to enter your signature for use
with the Make a Letter function in Documents.
For more information on the signature
function, see p. 179.
To check the memory:
1.
Touch TOOLS and touch Memory twice.
2
When you complete your Personal entry,
touch OK.
2-6-4A
Memory
The memory in your unit (ZR-5700: 1MB; ZR5800: 2MB) provides you with a certain amount
(ZR-5700: approx. 600 KB; ZR-5800: approx.
1,624 KB) to store your entries and Add-on
software. If you get close to using all the available
memory, certain features may not function.
To avoid such problems, you should regularly
check the available memory and free up space if
necessary by deleting unwanted entries.
The Memory function allows you to check the
amount of memory available in the main unit (and
the RAM card if installed).
If a RAM card is installed, you can select Card
Memory to check available memory on the card. If
there is no RAM card installed, this button will be
disable (unavailable).
2.
When you complete your memory check,
touch Done.
• The Memory display might show a small amount
of free memory available, but this may not be
enough for some features to function.
• If you set a value for Extra Workspace for
Spreadsheets using the Setup menu (in Index
View), this is indicated by the gray shaded
portion in the memory graph.
81
Display
Sound
The Tools Display accessory can be used to:
• Adjust the contrast of the LCD display
• Adjust the touch panel display for best touch pen
operation.
The Tools Sound accessory is used to set Key
Sound and Alarm Sound. Key Sound is set on as
the default setting, so a beep sound is made each
time a key or touch button is pressed or the display
is touched. Alarm Sound is off as a default setting,
but if you set a schedule or daily alarm, it is
automatically turned on.
LCD contrast
The LCD contrast may sometimes require adjustment. For example, a setting that is good indoors
may not be adequate when outside.
• You can also adjust the LCD contrast directly at
start-up. Turn the unit off, hold down the MENU
key then press ON.
• Press SPACE to go to Adjust Touch panel.
For more information, see Quick Start.
Touch panel
The touch panel should be adjusted to suit your
style of writing, drawing and touching the display.
For more information, see Quick Start.
82
To change sound settings:
1.
Touch TOOLS and touch Sound twice.
2-6-7
2.
Touch Key Sound to turn it on or off.
3.
Touch Alarm Sound to turn it on or off.
• You must also set Daily alarms, see p. 93 or
Appointment alarms, see p. 131.
4.
When you complete your settings, touch
Done.
Start-up
• Show Owner's Information: Start-up can be set to
Show Owner's Information (increasing the
chances of your unit being returned if it is lost).
Your personal information must first be registered
with TOOLS Personal, see p. 80.
Start-up lets you configure the start-up display to
suit your own requirements.
To display owner's information at start-up:
2-6-3
The Start-up display can be used to set the
following:
• Start-up: Can be set to On, Off.
• Picture: Globe is the default picture graphics. You
can also touch User's Picture to make a graphic
entry or load an entry through Scrapbook.
• Ask password at start-up: Start-up display can be
set to ask for a password at start-up, thus
protecting all entries. You must first register a
password by touching Password in TOOLS
Personal.
1.
Touch TOOLS and touch Start-up twice.
2.
Touch On to set Start-up to On.
3.
The start-up display picture will be the default
Picture. To use a User's Picture, check the
Use box and then touch User's Picture. You
can then draw pictures or paste a picture
from Scrapbook.
4.
You can check the Ask password at start-up
box. For more information on the Secret
Password function, see p. 85.
83
2
5.
Check the Show box, then touch the Owner's
Information button.
Sleep
Sleep turns the unit off if there is no activity within
a set time period. This extends the life of the
operating batteries.
• Default Sleep time period is 15 minutes.
• Sleep function is disabled if the unit is powered
by the optional AC Adaptor EA-23E or the
CE-BK1 battery pack.
N2-6-4
To change the Sleep time period setting:
6.
Select the owner's information to be shown at
start-up. When you complete your selection,
touch OK.
1.
• Selecting the owner's information is only useful if
you first use Tools Personal to enter your personal information.
7.
84
Complete your Start-up display settings and
touch OK. Your owner's information will now
be shown at start-up.
Touch TOOLS and touch Sleep twice.
2-6-8A
2.
Use the touch pen to touch and drag the
Sleep setting. Sleep time can be set to 1, 5,
15 or 30 minutes.
3.
When you complete your setting, touch OK.
Secret
3.
The Secret function keeps your information secure
(hidden) requiring a password that you specify.
Entries marked as secret are hidden until the
password is entered. Individual entries can be
marked as secret, or you can simply prevent
access to the entire machine by requiring a
password each time the unit is turned on. Marking
entries as secret has no effect until a password is
registered.
If you forget your password, you will not be able to
unlock your unit. To use the Secret function, you
must delete the old password, and this will also
delete all entries marked as secret. If you are
worried you might forget your password, write it
down and keep it in a safe place.
To register a password:
Enter a password of up to seven characters
using letters, numbers and symbols.
• Choose your password carefully. We recommend
you use an easy to remember word.
• Password recognizes uppercase and lowercase.
For example: SECRET is different from Secret or
secret.
4.
Touch Set to store the password.
5.
Touch OK.
Marking entries as secret
You can mark any entry (except those in Scrapbook) as secret.
To mark an entry as secret:
1.
Open the application and select the entry.
1.
Touch TOOLS and touch Personal twice.
2.
Open the entry you want to mark as secret.
2.
Touch Password.
3.
Touch EDIT and select "Secret Entry".
2-6-9
An asterisk (*) appears in the top right corner to
indicate this is a secret entry.
85
2
If your unit is locked to hide secret entries, an
entry which has just been marked as secret will
still be displayed until you select another entry.
Once you leave the entry marked as secret, it will
be hidden with all other secret entries.
To change a secret entry to a normal entry:
1.
Unlock your unit with the procedure above.
2.
Display the secret entry you want to make
normal.
3.
Touch EDIT and select "Normal Entry".
Accessing secret entries
Entries marked as secret are not shown in any
application Index, and they cannot be accessed by
any search method. To view secret entries, your
unit must first be unlocked.
The asterisk disappears from the top right corner
and the entry is no longer secret.
Locking your unit
When a password has been registered, even if you
unlock your unit using the procedure above, it will
automatically lock itself each time you turn it off.
This feature guards your secret entries in case you
forget to lock your unit, and remains in effect as
long as a password is registered.
To unlock the unit:
1.
Touch TOOLS and touch Secret twice.
2-6-10
To lock your unit:
2.
Select Unlock and touch OK.
3.
Enter your password and touch Unlock.
The "Unlocked!" message is displayed.
86
1.
Touch TOOLS and touch Secret twice.
2.
Touch Lock.
is displayed to indicate your unit is locked.
If you forget your password
Changing the password
If you forget your password, to use the Secret
function again you must delete all entries marked
secret. If you have installed an optional RAM card
which has the same password as the main unit,
secret data on the card will also be deleted by this
operation.
To register a new password, you must first enter
the current password, then enter the new password. To delete the current password, leave the
new password field blank.
To change your password:
1.
Touch TOOLS and touch Personal twice.
2.
Touch Password.
To delete all secret entries:
1.
Touch TOOLS and touch Secret twice.
2.
Touch Delete Secret Data.
3.
Touch Yes to confirm deletion of all secret
entries.
2-6-11
3.
Enter your current password and enter the
new password.
Leave New password blank if deleting the current
password.
4.
Touch Set.
5.
Touch OK.
You will now be able to enter a new password.
If you set the Start-up display to Ask password at
start-up, and then forget your password, you will
be required to do an All Reset operation, which
will cause the loss of all data on your unit. (See p.
234 for details).
If you delete the current password, a message
indicates that your unit is unlocked. Entries marked
as secret are unprotected until a new password is
registered.
87
2
RAM cards and the Secret function
If you use a RAM card in your unit, that card is
also protected by your password. If you remove a
RAM card and change your password, or register
a password for the first time, you will not be able to
use the card in your unit unless you re-register the
original password, or delete your current password. It is therefore crucial to keep track of
passwords used with specific RAM cards. Also,
before you use a new RAM card for the first time,
you must delete your current password or unit will
not recognize the card.
You cannot register a password for a Flash
Memory card. However, if you archive unit data
that includes a password into a Flash Memory
card, the password is also stored in the card.
Word List
You may find that you must enter the same word
many times, for example in lists, or you may need
to write several memos or letters on the same
topic. The WORD key lets you easily insert words,
numbers, or phrases (up to 32 characters long) in
any entry with the press of a key.
Word List entries
The Word list has no default words, so you must
first register your own words or phrases.
To make Word list entries:
1.
Touch TOOLS and touch Word List twice.
2-6-12
2.
Touch New.
2-6-13
88
3.
Enter a word, phrase or numbers (up to 32
characters) you want to recall with the WORD
key.
3.
Select the word, phrase or number you want
to insert. Use the scroll bar to move through
the list.
4.
Touch OK.
4.
Touch Recall. The Word window closes and
the word is inserted in the entry at the cursor
position.
Repeat steps 2 and 3 to make other Word list
entries.
The entries are registered and sorted alphabetically.
5.
When you complete your entries, touch
Close.
Using the WORD key:
1.
When entering or editing an entry, place the
cursor where you want to enter a word.
2.
Press the WORD key.
In step 3 above, touching the word twice also
inserts it into the entry.
Editing a Word list entry
You can edit any Word list entry using a similar
procedure to making Word list entries, but instead
of touching New in step 2 on page 88, touch the
word you want to edit twice.
2-6-15
Make any changes and then touch OK.
2-6-14
Deleting Word list entries
If you find you no longer need a particular Word list
entry, it is easy to delete it from the Word list.
Select the Word List entry in step 2 on page 88,
press DEL, and then touch Yes to confirm.
89
2
RAM Card
Backlight set-up
When a RAM card is installed in the unit, you can
select the RAM card or main unit to save and
retrieve data.
1.
You can specify how you want the Backlight of
your ZR-5800 to operate.
1.
Touch TOOLS and then touch Backlight
twice.
2.
Using the pen, drag the slider to the desired
number of seconds after which you want the
Backlight to turn off automatically.
Touch TOOLS and touch RAM Card twice.
N2-6-17:
2.
Select Main Unit or PC Card.
3.
Touch OK.
OPTION: Touch the check box if you want the
Backlight to come on automatically whenever you
type or touch the display. This would be useful
when using the unit for long periods in a dark
location. If you turn off the unit, the Options box
will be unchecked the next time you use the unit.
3.
90
Touch OK.
Clock
Clock is a built-in, dual-display clock that shows the
current time and date in your Home City and the time
and date in another World City. When Clock is selected
from Tools, the clock remains displayed until another
application is selected.
You can choose from a built-in list of 212 cities. If you
cannot find the city you require, you can make your own
customized list of three User's Cities. Clock Home City
time is used for all time-based operations.
• Home City selection is described in the Quick Start
section. A similar procedure is used for World City.
• Daylight saving time (DST) is set as the default for all
cities. You can change this setting for any city.
World City
World City display is very handy for international
phone calls and overseas travel. Once you make
your selection, World City time and date are
automatically calculated from the time difference to
your Home City.
To select your World City:
1.
Touch TOOLS and then touch Clock twice.
London, UK is the default World City.
2.
To select your own world city, touch the World
City name button of the lower clock.
Daylight Saving Time
Cities that use daylight saving time (DST) normally
set their time ahead one hour in the summer.
If Uses DST is selected in either Change Home
City or Change World City, and Summer is selected in World Clock display, the time will be
advanced one hour. To disable DST, select Winter.
2-2-1
If World City has been set before, a list of the last
six cities selected will be displayed.
91
2
3.
5.
Select your World City.
If the city you want is not on the list, touch More
Cities and another list will appear.
Complete your World City selection, then
touch Select.
World Clock is displayed with Home City time on
the upper clock and World City time on the lower
clock.
2-2-2
2-2-3
The first three cities are User's Cities you can
specify. The rest of the list is in alphabetical order
by country and by city.
4.
Use the scroll bar to find your world city, then
touch and highlight it. As a shortcut, enter the
first letter of the country, e.g. enter U for
United Kingdom.
As a default setting, Uses DST is set to on for all
cities. If your world city doesn't use daylight saving
time, touch the box to turn it off.
92
6.
If DST is currently in use for your World City,
select Summer. If DST is not currently in use,
select Winter.
User's City
To use cities that are not already listed, you can
enter three cities of your own choice as User's
Cities. These cities can then be selected as your
Home City or World City.
Setting daily alarms
To enter User's Cities:
1.
Touch TOOLS and then touch Clock twice.
2.
Touch USER'S at the top of the Clock display.
2-2-4
Daily alarms are set like a regular alarm clock and
sound even if your unit is turned off. You can set up
to seven daily alarms (and these are separate from
Activities alarms). This is handy when you need to
quickly set a wake-up alarm, but do not want to
make an Activities entry.
To set daily alarms:
1.
Touch TOOLS and then touch Clock twice.
2.
Touch ALARM at the top of the Clock display.
New York, USA is set as the default User's City 1.
3.
Enter User's City names, countries and GMT
values from the keyboard.
2-2-5
• GMT value is the time difference between the
User's City time and Greenwich Mean Time
(international time reference). Enter a value from
-11.5 to +12, with 0.5 hours precision.
• Uses DST is the default setting. If the city doesn't
use DST, touch the box to deselect it.
3.
4.
Complete your User's City settings, then
touch OK.
You can now select a User's City as Home or
World City.
Touch and highlight the alarm you want to
set.
• Touch the Set box (a cross appears).
• Touch to set the alarm time.
93
2
4.
When you complete your daily alarm settings,
touch OK.
4.
appears at the top right of the display to show
that alarms will sound at the set alarm times.
5.
When an alarm sounds:
The set alarm time disappears.
When you complete your setting changes,
touch OK.
Disabling alarm sound
Once you have set alarms, they will sound at the
set times whether your unit is on or off. at the
top right of the display indicates if alarms are set.
There may be times when you want to disable all
set alarms.
2-2-6
• Press ON to stop the alarm.
• After turning off the alarm, press CANCEL to go
back to the previous screen.
• Alarms turn off automatically after 15 seconds.
To remove a set alarm:
94
Press DEL.
1.
Touch TOOLS and then touch Clock twice.
2.
Touch ALARM at the top of the Clock display.
3.
Touch and highlight the set alarm you want to
remove.
To disable alarm sound:
1.
Touch TOOLS and touch Sound twice.
2.
Touch the Alarm Sound box to disable the
alarm sound for all of the alarms.
disappears from the top right of the display and
all set alarms will no longer be heard. However,
alarms will still be indicated on the display at the
set time, even if your unit is turned off.
You can enable and disable each alarm by
touching the corresponding check box. Even if an
alarm time is set, the alarm will not sound if the
box is unchecked.
MORE
Spreadsheets
You can install and manage add-on software and load
PC files received via data transfer by touching MORE.
For example, you could install some new software
located on your PC card, use it for a while, then delete it
if you decide not to use it anymore. Or you could convert
a text file received by PC data transfer into a Documents
entry.
For full details of using MORE, see p. 213.
The unit's Spreadsheets application is a sophisticated
utility for managing financial, statistical and other
numeric data in a flexible spreadsheet format. With its
worksheets and editing features, Spreadsheets looks
and feels similar to most of the popular spreadsheet
programs currently available, so you can get used to it in
no time. It even allows Spreadsheets data to be imported and exported between Microsoft Excel for
compatibility with your home or office PC.
Spreadsheets offers a comprehensive range of powerful
built-in functions, as well as built-in worksheet templates.
You can use these together to quickly and easily:
• Create expense reports
• Analyze budgets
• Run a scenario analysis for forecasts
• Tabulate, summarize and chart data for any purpose.
For full details and instructions for using Spreadsheets,
see the manual provided separately.
95
2
96
CHAPTER 3
General Operations
his section describes general operations
that can be used with your unit. Contacts
and Scrapbook are normally used for
examples of these operations. However, the
operations described can be applied to most
applications and accessories (which are described
in detail elsewhere in this manual). For a full
explanation of Contacts, see Section 5 Databases.
For a full explanation of Scrapbook, see Section 2
Desk Accessories.
T
Opening Applications and Accessories
To start using an application or accessory, touch the
required touch button at the right or left side of the
display. Each time you touch a button, the selected
application or accessory will appear.
• Any application that is currently open on the display will
be hidden when a new application is selected.
• You can return to any application at the exact point
where you left off by touching it again.
97
3
Tool Bar Functions
The tool bar across the top of the display has many
common functions as follows:
VIEWS/INDEX
FILTER
SHOW
LINKS
SET UP
EDIT
Views/Index
VIEWS/INDEX in the tool bar is used to select the
display mode. Once an application is open, you
can use VIEWS/INDEX to switch display modes.
Each display mode has its own unique variations,
functions and purposes.
Detail View
Detail View allows you to see the details for an
entry.
A basic Detail View is available for Contacts, Data
Files, Documents and Outlines. More advanced
Detail Views are available for Activities, Notes and
Filer.
Index View
LINK TO
Index View shows a one line view for each entry,
making it easier to find a particular entry.
FILE IT
SEND
A small pointer (" ") on the upper right of a tool
bar item indicates a menu will be displayed if
touched.
98
3-2-1
To change Index/Detail View
4.
To change the display mode for Activities:
1.
Touch ACTIVITIES.
2.
Touch VIEWS in the tool bar at the top of the
display.
3.
Use the touch pen to select the Detail View
from the list in the menu.
For example, select "Weekly Graph".
The display should now be similar to that shown
below.
Touch VIEWS and select an Index View from
the list.
For example: touch VIEWS and select "To Do
Index".
The display should now be similar to that shown
below.
3
N3-2-3
3-2-2
99
Filter
4.
The Filter function lets you focus on entries that
contain specific information. For example, you
could recall all entries related to a particular
company name. The Filter function does this by
hiding all entries that do not match the filter
criteria.
• Only Filtered entries can then be viewed or
edited.
• The Filter function is available only for Appointments, Contacts and Data Files.
Touch Filter.
Filtered entries that match your criteria can be
viewed in Index View.
A message indicates if no entries match your
request.
To turn on the filter for Contacts and Data Files:
1.
Open Contacts or Data Files in the Index or
Detail View.
2.
Touch FILTER and select "Filter".
To turn on the filter for Appointments:
1.
Touch ACTIVITIES and select Index or Detail
View of Appointments.
2.
Touch FILTER and select "Filter".
3-2-5
N3-2-4
3.
3.
100
• Check the "Secret Only" box to extract only
secret entries (not displayed if the unit is locked.)
Enter the filter keyword.
• For Appointments the keyword must be in the
description field.
• If a block of text is selected before touching
FILTER, the text will be automatically displayed
as the filter description.
• Check the "Secret Only" box to filter only secret
entries (not displayed if the unit is locked).
Select any field and enter the filter keyword.
4.
Touch Filter.
Filtered entries that match your criteria can be
viewed in Index View.
A message indicates if no entries match your
request.
If Filtering is on and a new entry is made or an
entry is transferred from another device, the entry
is displayed even if it does not match the filter
criteria. To filter the new entry, you must turn the
Filter off and then back on.
Turning the Filter off
To turn the Filter function off, touch the "Turn Off
Filter" button at the bottom of the display.
The "Turn Off Filter" button is movable. To move
the button, touch the left side and drag it to the
new location.
In Contacts or Data Files:
1.
Turn on Filter and use a keyword to filter the
entries you want to delete (an example may
be a company name).
2.
Touch EDIT and select "Delete Group".
3.
Make your deletion selections, then check the
"Filtered Entries Only" box.
4.
Touch Delete and then touch Yes to confirm
deletion.
Touch FILTER and select "Turn Off Filter".
Deleting filtered entries
The Filter function makes it possible to delete a
group of entries related to a specific topic. This can
be helpful if you finish a project with many related
entries. You can save time by deleting a filtered
group instead of deleting individual entries.
3
In Appointments:
1.
Turn on Filter and use a keyword to filter the
entries you want to delete (an example may
be a company name).
2.
Touch EDIT and select "Delete Group".
3.
Touch Delete and then touch Yes to confirm
deletion.
101
Show
The Show function is available with Activities,
Documents, Outlines, Spreadsheets and
Scrapbook. Show has the following special
functions:
• Activities:
Today, A Specific Date, Labels
• Documents:
Show/Hide Ruler, Show/Hide Special Symbols,
Print Preview, Header, Footer
• Outlines:
Show 1 Line Topics/Full Topics, Expand/Collapse
Subtopics (2nd E), Expand Family, Collapse All
• Spreadsheets:
Hide Gridlines, Show Formulas, Hide Column/
Row Labels, Show Full Screen, Show 10-Key
Pad
• Scrapbook:
First Entry, Last Entry
These Show functions provide access to application-specific views, tools and functions. For more
information, see the related section.
102
Set Up
The Set Up function is available for Activities,
Contacts, Data Files and Notes. Set Up allows you
to change the configuration of the applications as
follows:
Activities
3-2-6
Use Set Up to select the following:
Default View
Day, Week or Month
Date Format
Month/Day/Year or Day. Month. Year
Month Format
Sunday-Saturday or Monday-Sunday
Edit
Contacts/Data Files
Use Set Up to select the following:
File Name
Enter the file name and number of fields
Field Name
View and change field names and field types
(Text or Picture). Note that if you change a field
type, current field data will be permanently
deleted.
Index Form
Select three fields for the Index view and set the
column width of these fields.
Notes
3-2-7
Use Set Up to select:
The last drawing action, Pen thickness and
Drawing delay. Drawing delay is the time period
that separates different drawing actions.
The EDIT function in the tool bar is available for all
applications, Filer and Scrapbook. The EDIT
function includes:
• New Entry
• Revert To Saved
• Delete Entry/Group
• Cut/Copy/Paste
• Secret/Normal Entry
New Entry
The EDIT New Entry function creates new entries
in applications, Scrapbook and Filer, as follows:
Activities:
New Appointment, New Birthday/
Ann, New Holiday, New To Do
Contacts:
New Business, New Contact 2,
New Contact 3
Data Files:
New Data File 1, New Data File 2,
New Data File 3
Notes:
New Note, Topic Title
Documents: New Document, New Copy, Document Title
Outlines:
New Outline, New Topic
Spreadsheets: New Worksheet, New Chart,
Worksheet Title
Scrapbook:
New Entry
Filer:
New Assigned Entry, Folder Name
103
3
Revert to Saved
Revert to Saved cancels all changes and reverts to
the original saved copy of an entry.
Delete Entry/Group
Described later in this section, see p. 113.
Cut/Copy/Paste
Link To
The Link To function is a feature that allows entries
in different applications to be linked together. This
helps you to better manage your information and
projects.
• Link To lets you link any entries to Contacts or
Data Files entries.
• The Link To function is available for all applications.
Described later in this section, see p. 114.
Links
Secret/Normal Entry
The Secret/Normal function is used to designate
an entry as Secret or Normal. Secret entries are
protected by the password function and cannot be
listed or viewed unless the unit has been unlocked
with the password. Scrapbook data cannot be
made into secret data. For more information, see
Secret in Section 2 Desk Accessories.
104
Contacts and Data Files also have a separate
LINKS feature in the tool bar. Links provides
Contacts and Data Files with the following functions:
• Show/Hide Linked Entry
• New Linked Entry
• Link by Searching
• Break Link
• Break All Links
The Link functions are used within Contacts and
Data Files to establish and manage links to other
application entries. For more information on Links,
see p. 150.
General Editing Techniques
File It
The File It function is used to file an entry with
Filer. This allows the entry to be sorted by subject
instead of by entry type. For more information, see
Filer in Section 2 Desk Accessories.
Send
The Send function is used to send entries to other
units or devices such as printers. Entries can
either be sent directly by built-in infrared transmission or via optional cable. Some entries can also
be sent by fax using the optional Fax/Modem CEFM4. For more information see Section 7 Optional
Accessories.
Send functions include:
Unit to Unit
Available for all applications, Scrapbook and
Filer.
Print
Available for all applications (except for
Spreadsheets), Scrapbook and Filer.
Fax
Available for Notes, Documents, Scrapbook and
Filer.
The rest of this section explains general editing techniques used to make a new entry or to edit an existing
entry in any application. Notes has additional features
for working with text, see Section 6 Writing and Letters.
Fields
3
Many applications divide the display into field
boxes. The types and number of fields vary for
each application. The different field types include:
text, date, time, picture and special fields. Contacts
and Data Files let you define the number, type and
names of fields, see p. 159.
You can enter any character into a text field:
• Text field size is limited only by the size of the
entry. Text fields automatically adjust size to
accommodate the number of lines entered.
• Dates entered in date fields should use the
format in Activities Setup (MM/DD/YYYY or
DD.MM.YYYY). For example, with MM/DD/YYYY
you would enter 06231996 for June 23, 1996.
• Times are entered in time fields using the format
used in Clock (12 hour or 24 hour). For example,
with 12 hour format, for 9:00 AM, you would enter
0900A (Enter A for AM or P for PM).
• For Contacts and Data Files, you can setup fields
as picture fields. Pictures can be pasted from
Scrapbook, Notes, Spreadsheets, or created and
edited directly from the field.
105
Resume
While you are creating an entry, if you move to
another application or turn the unit off before the
entry is stored, your data will not be lost. When
you return to the application previously used, or
turn the unit back on, operation resumes at its
most recent state.
Cursor
• The unit uses permanent insertion mode for all
entries (except time and date fields).
• There is a blinking cursor in the Detail view of all
applications except Notes.
• In date and time fields, touch the box to make it
bold and then select the date or time with . You
can also enter the date or time directly from the
keyboard.
Entering text
Entering text from the keyboard is easy. The
keyboard's QWERTY layout is similar to typewriters and computer keyboards.
Letters
Any standard letter (A to Z) can be entered by
pressing the appropriate key. Letters are normally
entered in lowercase. To enter uppercase letters,
hold down either the
key while pressing the
106
letter key(s), or press the CAPS key to lock the
keyboard in the CAPS mode (the CAPS symbol is
displayed and any letters entered will be in
uppercase). To enter lowercase letters while in
CAPS mode, hold down
while pressing the
letter key. Press CAPS again to turn CAPS mode
off.
Numbers
Number keys are located on the keyboard above
the letter keys. These keys enter numbers regardless of the CAPS mode. However, holding down
and pressing a number key enters the symbol
printed above that key.
Symbols
The symbols that appear in white above some
keys can be entered directly from the keyboard by
holding down
and pressing the key. Other
symbols are also available by pressing SMBL, see
p. 112.
Moving text with Drag and Drop
(This function is available only in Activities,
Contacts, Data Files and Documents.)
Select the text by dragging with the touch pen so it
is highlighted. Touch the highlighted text and drag
the touch pen to the new location. Lift the touch
pen and the highlighted text will move to the new
location.
Moving around the display
When working in an entry, the easiest way to move
the cursor on the display is to touch the location
with the touch pen. The cursor will immediately
move to the selected position. You can also move
the cursor around the display with the cursor keys:
, , , . This may sometimes be more convenient when you are working from the keyboard. For
rapid cursor movement, hold the cursor key down.
Advanced cursor key combinations are also
available:
2nd
Move the cursor to the beginning of a line.
Move the cursor to the end of a line.
2nd
Move the cursor to the top of a field (or
2nd
bottom of the previous field if already on
the first line).
2nd
Moves the cursor to the bottom of the field
(or top of the next field if already on the
last line).
Moving between fields
You can move the cursor directly to the next field in
an entry by touching the desired field name on the
display, or by pressing or . In either case, the
cursor moves to the beginning of the desired field.
3
Inserting text
To insert new text in the middle of existing text,
move the cursor to the correct position and begin
typing. Text is entered in insertion mode only; there
is no overwrite mode.
Deleting text
If you make a mistake while entering text, delete
the mistake with the following keys:
BS
Deletes the character before (to
the left of) the cursor.
DEL
Deletes the character after the
cursor.
DEL
Deletes the entire line that the
cursor is on.
NEW ENTRY Clears current field (except in
Notes, Documents and Outlines).
107
Blocks of text
Scroll bars
Working with blocks of text is easy. The first step is
to select the text to work with:
• Position the touch pen at the beginning of the
required text and drag it to select and highlight
(reverse) the text. Lift the pen to complete your
selection.
If a field contains more information than can be
displayed, scroll bars can be used to move through
the information. Many displays have vertical scroll
bars. Some also have horizontal scroll bars that
work in a similar manner.
Index View
Scroll display one line up.
Scroll display one line down.
Scroll up display page.
3-3-1
• If text is selected, any new text that is entered will
replace the selected text.
Deleting blocks of text
To delete blocks of text, touch and drag to select
the text block, and then press BS or DEL.
Cut, Copy and Paste
The Cut, Copy and Paste functions can be used
for moving or copying blocks of text. For more
information, see p. 114.
108
Scroll display by dragging.
Scroll down display page.
Finding Specific Entries
Detail View
Scroll display one line up.
Scroll display one line down.
Scroll up display page.
Scroll display by dragging.
Scroll down display page.
There are many ways to locate entries and information:
• Index View
• Keyword search
• Global search
• Using Filer
• By Date
Index View
The tool bar across the top of the display normally
offers a choice of Detail View or Index View for
viewing entries. Index View lets you view a list of
entry titles for an application.
Change display font size (Zoom).
Display previous entry.
Display next entry.
To use Index View to find entries:
1.
Touch the desired application key.
2.
Touch INDEX or touch VIEW and select
INDEX.
• Touch the tab for the entry as required.
• If the Index is full and the desired entry is not
displayed, use the scroll bars to move through
the list.
3.
When the desired entry is displayed, touch
the entry to select it, and then press ENTER
to see the entry in detail.
You can also touch the entry twice to see details.
109
3
Keyword Search
4.
Keyword search lets you search for entries
containing a particular keyword. The keyword does
not distinguish between uppercase and lowercase,
and can contain up to 16 characters (letters,
numbers and symbols).
For Contacts and Data Files, select "Field 1
Only" to restrict the search to the Field 1 as
required.
3-4-2
For Documents and Outlines, select "Title
Only" to restrict the search to the Title as
required.
You cannot search for entries in the Spreadsheets
application using keyword search.
To use the keyword search:
3-4-3
1.
Select the Index View of an application.
2.
Press 2nd then F.
5.
Touch Search to begin the search.
A Search window will appear. This window varies
according to the application.
3.
Enter the keyword directly from the keyboard.
3-4-4
N3-4-1
110
Touch Prev or Next to go to other entries containing the keyword.
You can change the search criteria during a
search by touching "Search for" and changing the
keyword.
The search window is movable. To move the
window, touch the top left corner and drag it to the
new location.
6.
• Select "Only Secret Entries" to limit the search to
secret entries. When the unit is locked, "Only
Secret Entries" is not displayed.
3
Touch Done to close the keyword search.
N3-4-5
Global Search
The global Search function lets you search any or
all applications for a keyword. All entries found to
contain the keyword are assigned to the Search
folder in Filer. You can use Filer to examine these
entries. For more information on Search, see
Section 2 Desk Accessories.
You cannot search for entries in the Spreadsheets
using global search.
To use the global Search function:
1.
Touch SEARCH at the left of the display.
2.
Enter the keyword in the "Only Entries
Containing" field.
3.
All applications are selected for the search by
default. Deselect applications that are not
required.
4.
Touch Search to begin the search.
• After the search, the Search folder contents are
shown in Index View.
• To see the details of any entry in the Search
folder, touch the entry twice. To return to the
Search folder, touch FILER at the left of the
display.
• Select "Limit by Date Range" and enter From
and To dates to restrict the search to a date
range for Appointments and To Do.
111
Deleting Entries
Using Filer
Filer lets you group entries by subject. For example, all entries relating to a particular project could
be assigned to a single Filer folder, making it easy
to open one or more of the entries when necessary. Entries can be grouped regardless of the
application they were created in, and entries can
belong to more than one folder. For more information on Filer, see Section 2 Desk Accessories.
Single entries can be deleted by two methods: either
from the keyboard or using the tool bar EDIT function.
Group entries can be deleted using the EDIT Delete
Group function. This function lets you specify the group
of entries to be deleted from pop-up menus.
Deleting single entries from the keyboard
1.
Open the required application.
2.
Select the entry in Index View.
3.
Press DEL on the keyboard.
4.
Touch Yes to confirm the deletion.
By Date
Activities calendar views let you find information by
date.
To use the calender views:
112
1.
Touch ACTIVITIES.
2.
Touch VIEWS and select the desired view
(Year, Month, Week, Weekly Graph or Day).
3.
Locate the entry you require, then use
VIEWS Details to view the entry.
Press Y or N.
Deleting single entries
Deleting group entries
The EDIT Delete Entry function in the tool bar can
be used to delete single entries.
The EDIT Delete Group function in the tool bar
provides considerable flexibility when deleting
group entries.
To delete single entries:
1.
2.
3.
Open the required application.
3
To delete groups of entries:
1.
Open the desired application.
Select the entry in Index View or display it in
Detail View.
2.
Touch EDIT and select "Delete Group".
Touch EDIT and select "Delete Entry".
3.
Use the pop-up menus to make your group
selection.
The EDIT menu may also offer Delete Note,
Delete Document, Delete Outline or Delete
Worksheet. These options all have a similar affect
to Delete Entry.
3-5-1
4.
Touch Yes to confirm the deletion.
4.
Touch Delete to begin the group deletion.
5.
Touch Yes to confirm the deletion.
113
Cut, Copy and Paste
The Cut, Copy and Paste functions are available under
EDIT in the tool bar. These functions let you move or
copy blocks of text or completed entries:
Cut
Moves the selected text or entry to the clipboard. (Clipboard contents are replaced.)
Copy Copies the selected text or entry to the clipboard. (Clipboard contents are replaced).
Paste Inserts the current clipboard contents at the
cursor.
To copy or move blocks of text:
1.
Display an entry in Detail View.
2.
Drag the touch pen to select the text.
3.
To move blocks of text, touch EDIT and select
"Cut" (or press 2nd X).
To copy blocks of text, touch EDIT and select
"Copy" (or press 2nd C).
The text is copied to the clipboard.
4.
Move the cursor to the location where you
want to place the text, in the same or another
entry.
5.
Touch EDIT and select "Paste" (or press 2nd
V).
The text is now moved or copied to the new
location.
Copying or moving blocks of text
You can Cut, Copy and Paste blocks of text and
selected areas of graphics. Text or graphics that
are cut or copied are stored on the unit clipboard.
Only one block of text or graphics can be stored in
the clipboard at a time, and it will remain there until
new text or graphics is cut or copied. You can
paste text or graphics from the clipboard as many
times as you wish.
Text that is highlighted before a Paste is completely replaced by the pasted text.
Only numbers and operators can be pasted to
Calculator (text that is pasted is ignored).
114
Copying or moving entries
The Cut, Copy and Paste functions also provide a
convenient way to copy or move entire entries to
other applications, including those stored on a
RAM Card. The entries do not have to be in the
same file or the same application.
However, graphic entries can only be copied or
moved within Scrapbook or to picture fields in a
Contacts or Data Files entry, or to a Documents
entry or the start-up display. Pasting graphics
entries to any other location will only display
"«PICTURE»".
To copy or move an entry:
1.
Display the entry you want to copy or move in
Index View.
2.
To move the entry, touch EDIT and select
"Cut". Touch Yes to confirm the deletion.
5.
The entry is now moved or copied to the new
location. Make any necessary changes to the
moved/copied entry.
• In Outlines Detail View, to copy or move an entire
outline, you must select the title. If you select a
topic, only that topic and subtopics are copied.
• Only text data is pasted from a Documents entry
to another application. Formatting is not copied,
even if pasted within another Documents entry. If
the entry is pasted into Documents and the
original entry includes a tab, subsequent text will
be pasted, but for other applications subsequent
text will not be pasted.
• Once you have cut or copied something, do not
attempt to drag and drop another item until you
have pasted the first one. If you do so, the first
item will be lost.
To copy the entry, touch EDIT and select "Copy".
3.
Select the destination application.
(You can also append to an existing entry. In
Detail View, select the required position.)
4.
Touch EDIT and select "Paste".
115
3
Time Stamp and Date Stamp
Symbols and Special Characters
The Time Stamp and Date Stamp functions let you
insert the current time and/or date into your data so that
in the future you can verify when important events
occurred.
• Time Stamp can be used by pressing 2nd T.
• Date Stamp can be used by pressing 2nd D.
The symbols menu is a single-page menu display
containing 136 symbols and accent characters (such as
¥, Ç, Ú, and Í). The last symbol used is the initial
selection. These symbols and characters can be easily
selected and inserted at the cursor when entering data
or editing an entry.
To insert a symbol:
N3-9-A
1.
Move the cursor to the position where you
want to insert a symbol or special character.
2.
Press SMBL on the keyboard.
The Symbol menu appears.
116
3.
Select the symbol you require from the menu
and touch it twice. The symbol menu closes
and the selected character is entered at the
cursor position.
4.
If the symbol you selected is an accent mark
( `, ´, ¨, ˆ, , ° or _ ), type the letter you want
to enter with that accent mark. Only certain
letters can be combined with each accent
mark.
3
When printing, some symbols and characters may
not print correctly (depending on the capabilities of
your printer). Consult your printer manual.
117
118
CHAPTER 4
Time Management
he Activities application helps you to
structure and manage your busy
schedule. There are four activity types;
Appointment, Birthday/Ann, Holiday and To Do.
Activities has five different calendar views, each
with a convenient, easy-to-use form. This chapter
shows you how to make the time management
features work best for you.
T
Calendar views
The Calendar views provide an overview of all your
different Activities. (Appointment, To Do tasks, Birthdays/
Anniversaries, and Holidays.)
Calendar views have two major roles:
• They provide a handy, accurate calendar that can show
you any month from January 1901 to December 2099.
• They allow you to track and manage Appointments,
Birthdays, Anniversaries, Holidays and To Do tasks.
Calendar view format
You can use the Activities Setup display to change
the default calendar view to the one you find most
convenient. You can change three settings:
• Default View
Day is the initial default view. Select the default
view from: Day, Week or Month.
• Date Format
Month/Day/Year is the initial default date format.
Select from: Month/Day/Year or Day.Month.Year.
This date format is used for all time-based
operations.
119
4
• Month Format
Sunday-Saturday is the initial default month
format. Select from: Sunday-Saturday or Monday-Sunday. This setting is used for calendar
views.
Changing Activities Setup
To change the Activities Setup:
1.
In Activities, touch SETUP in the tool bar.
Calendar views
Day view
The Day view is convenient for viewing all activities
on a single day. It can be accessed directly from
the Month, Week or Weekly Graph views by
touching a date twice.
A Month calendar is displayed in
the upper left for reference. Touch
a day in this Calendar to see the
activities for that day.
The To Do list for the day is shown
in the upper right. Use the scroll
bars to move through the list.
4-1-1
120
2.
Make any desired changes.
3.
When you complete your set up, touch OK.
A Birthday/Ann, Holiday and
Appointment list is shown at the
bottom of the display. Use the
scroll bars to move through the
list. Touch an entry twice to see its
details or to make changes.
The appointments line graph for the
day is shown across the center.
Touch to display earlier
appointment and to display later
appointment. Shaded portions
indicate appointments, black
portions indicate conflicts.
• You can step through days by pressing PREV
and NEXT.
• To record an appointment, drag the pen over the
time bar (from start time to end time). When you
lift the pen, a new appointment entry is opened
with start and end times filled.
year.
• Touch any month twice within the selected year
and the view changes to the selected month.
Month view
If your unit is very low on available memory, To Do
entries may not be correctly displayed in the Day
view. A message will indicate this. Delete unwanted data, then select the Day view again.
4
Year view
Monthly goals
Today's date has
a bold border.
4-1-2
• Year view provides an overview of all months in a
year. Note that no activities are indicated in this
view.
• Press PREV or NEXT to see the previous or next
• Appointments are indicated on dates with dots
( ).
A top dot indicates an Early appointment (00:00
AM to 11:59 AM), a middle dot indicates a Day
time appointment (12:00 PM to 05:59 PM) and a
bottom dot indicates a Night appointment (06:00
PM to 11:59 PM).
• Birthday/Ann and Holiday entries are indicated
with and .
• ! indicates a To Do entry is due on that date.
121
• If you touch the Monthly Goal list (if displayed),
the To Do Index is displayed.
• You can step sequentially through different
months by pressing PREV or NEXT.
• The drawing tools (pencil, eraser, and clear all) at
the left of the Month calendar let you make
handwritten comments directly on the calendar.
3.
Use the pencil tool to write directly on the
Month view. Use the eraser tool to remove
unwanted drawings. Use the clear all tool to
delete all drawings on this month.
• Touch
after completing your hand-written
entry to return the Month calendar to the normal
mode.
4-1-6
To write and draw on the Month calendar view:
1.
In Activities, touch VIEWS and select
"Month".
Pencil
Eraser
Clear All
2.
122
Press PREV and NEXT to select the desired
Month calendar view.
4.
When you complete your entry, press
ENTER.
Weekly Graph
Week view
Week view shows your Activities events over a
one-week period. To open the Week view, touch
VIEWS and select "Week".
The Weekly Graph view shows your appointments
as line graphs over a one-week period. This lets
you check for free time at a glance, and helps
avoid conflicts.
Appointment times are indicated using 5-minute blocks.
4
4-1-7
Selected date is highlighted.
• Press PREV or NEXT to display the preceding or
following weeks.
• You can go to the Day view by touching a date
twice.
Black portions indicate you have a conflict
(more than one appointment in that period).
Shaded portions indicate times when you have appointments
or other commitments.
4-1-8
• Touch Early or Night to see earlier or later
appointments. Press PREV or NEXT to display
the preceding or following weeks.
• You can change to a Day view by touching the
day twice.
• To record an appointment, drag the pen over the
time bar (from start time to end time) for the
desired day.
123
Accessing entries using calendar views
Appointment, Birthday/Ann, Holiday and To Do
entries can be accessed from the Day view.
• Overdue (due date has passed) To Do entries are
always shown on Today's date.
• Monthly goals can only be accessed from the
Month view.
In the Day view:
1.
Select the desired entry.
2.
Touch VIEWS and select "Details" to
examine the entry.
Show A Specific Date
Another convenient way of selecting a date is to
touch SHOW and select "A Specific Date".
To show a Specific Date:
1.
In Activities, select any calendar view.
2.
Touch SHOW and select "A Specific Date".
4-1-10
You can also touch the entry twice to view the
details.
Selecting a date
In any calendar view you can scroll to the previous
or next time period (day, week, month or year) by
pressing PREV or NEXT.
124
3.
Enter the date you require. Touch each date
field box, then use to select a date, or enter
directly from the keyboard.
4.
To move to the selected date, touch Go.
Appointments
Appointments lets you enter meetings, conferences,
parties and other important events. You can also set
alarms to warn you of an impending appointment. This
makes it easy to organize your day and always get to
appointments on time. Appointment entries are indicated
in the Month view by a dot to the right of the date.
Making new Appointment entries
Appointment entries have four components: date,
time, alarm and description. When you touch EDIT
and select "New Appointment", there are four
basic steps to making new entries:
• Select the date.
The date selected in the calendar view is initially
displayed in the Date field. To select another
date, touch a date box so the border changes to
bold, then use to change the date.
• Enter the start and end time (optional).
• Select Alarm if desired. The start time is the
default alarm time. To select a different alarm
time, touch the alarm time boxes, and then use
to select the time.
• You must enter a description for each entry.
Making an Appointment entry
Example: Enter "Staff meeting" to be held from
8:30 a.m. to 11:30 a.m. on February 7,
1996.
To make the Appointment entry:
1.
In a calendar view (day, week, weekly graph
or month), select the required date (February
7, 1996).
2.
Touch EDIT and select "New Appointment".
4-2-1
Previously selected date is entered.
3.
Set the start and end times for the entry.
Touch a time box, then use to select the
time. Set the start time to 830 AM and set the
end time to 1130 AM. (Enter A for AM or P for
PM.)
125
4
Set the Alarm as required. Check the Alarm
box and the start time is selected as the
default alarm time.
Set the alarm time to 815 AM.
Finding entries
5.
Enter Staff meeting as a description.
Using calendar views
6.
To complete your entry, press ENTER.
4.
Note that you can also create a new entry from
the Day or Weekly Graph view by dragging the
pen across the time bar.
This simplifies the time entry as the start and end
times are automatically entered for you.
You can find an Appointment entry using the
Calendar views, the Index View or a keyword
search.
You can access an Appointment entry directly from
the Day view by touching the required entry twice.
To find an entry using Index View:
1.
In Activities, touch VIEWS and select
"Appointment Index".
4-2-2
Appointment entries are listed in
chronological order. If you do not see the
entry you are looking for, use the scroll bars
to move through the list (or press PREV or
NEXT) until you find it.
126
2.
Touch the entry twice to view the details.
Editing Appointment entries
You can easily change the time, date, or description of an appointment. Cut, Copy and Paste can
also be used to move appointments, see p. 115.
Pressing NEXT or PREV steps through entries in
Detail View.
Using keyword search
If you cannot remember the date of an Appointment entry, but you know a word that appears in
the Description, you can locate the entry with a
keyword search. For more information on keyword
search, see p. 110.
Using a keyword to find an Appointment entry:
1.
In the Appointment Index View, press 2nd
then F.
To edit an Appointment entry:
1.
View the details of a particular entry.
2.
Touch any field and make the required
changes.
3.
When you complete your changes, press
ENTER.
4
The Search box will automatically appear.
2.
Enter the search keyword then touch Search.
The search function displays the first entry
that contains the keyword. Touch Prev or
Next to move to additional entries (if any) that
contain the keyword.
3.
When you find the desired entry, or to exit the
search function, touch Done.
127
Deleting a single entry
Deleting group entries
You can delete a single Appointment entry or
groups of entries. For an explanation of deleting
filtered entries, see p. 101.
You can delete groups of Appointment entries by
choosing from Delete All entries or specifying a
deletion period.
• You cannot delete group entries if the unit is
locked, see p. 86.
• You must be in a calendar view which includes
the period you want to delete.
• Monday-Sunday is recognized as one week for
deletion, even if the default format is SundaySaturday.
Deleting a single entry:
1.
Select the entry in Index View or in Day view.
(Alternatively, display the entry in Detail View.)
128
2.
Touch EDIT and select "Delete Entry".
3.
Touch Yes to confirm the deletion.
To delete groups of Appointment entries:
You can also delete a single Appointment entry by
selecting it in Index View or Day view and pressing
DEL.
1.
In Appointment Index or Detail View, touch
EDIT and select "Delete Group".
2.
Touch the All button and select the deletion
type from the pop-up menu:
• All
• in Selected Year
• in Selected Month
• in Selected Week
• in Selected Day
3.
Touch Delete.
4.
Touch Yes to confirm the deletion.
You cannot delete groups of entries if your unit is
locked, see p. 86.
You can delete Appointment entries by selecting
them in any calendar view and pressing DEL.
Making entries for recurring or extended
events
The Appointment REPEAT function lets you copy
entries to other dates without having to make new
individual entries. This is convenient for appointments and meetings that are held regularly.
Repeat can also make entries that span a few
days or a few weeks, such as a business trip or
vacation.
Appointments created with the Repeat function
can be individually edited later, like any other entry.
The REPEAT function has six different types of
events:
• Daily:
Repeats an appointment on consecutive days.
• Daily (Work Days Only):
Repeats an appointment on consecutive work
days (from Monday to Friday) only.
• Every Week:
Repeats an appointment on the same day each
week
• Every Other Week:
Repeats an appointment on the same day every
two weeks.
• Every Month (by Date):
Repeats an appointment on the same date each
month. Events like "a meeting on the 10th of
each month".
• Every Month (by Day of Week):
Repeats an appointment on the same day of
each month, e.g. first Tuesday.
The REPEAT function cannot be used on entries
that were originally created with the Repeat
function.
129
4
Using the Appointment Repeat function
Example: Enter a five-day vacation from March 5,
1996.
5.
Select Daily from the list of options.
6.
The entry date (MAR 5, 1996) is
automatically entered as the From date.
Select the final repeat date for the To field.
Touch the day box, then touch four times
(or enter 03 09 1996 from the keyboard).
7.
Touch Repeat.
Your five-day vacation is now stored. Select a
calendar view to confirm your vacation has
been entered.
To use the Repeat function to enter a vacation:
1.
From any calendar view, select the initial date
for the entry (March 5, 1996).
2.
Touch EDIT and select "New Appointment".
3.
Enter Vacation as a description.
4.
Touch REPEAT in the top right of the display.
• To repeat an entry that has already been stored,
display its details and then proceed from step 4.
• Repeated data has RPT shown at the right in
Index or Day view.
Editing and Deleting Repeat Appointments
When editing or deleting a Repeat Appointments
entry, you can choose between repeating a single
entry or all entries.
Check the box to repeat the entry on the
same day of the last week each month.
Check the box to repeat the entry on the last
day of each month.
4-2-5
130
Appointment alarms
Clearing a set alarm
Alarms can be set to remind you of appointments.
• You can set an alarm for any Appointment entry
that has a start time set.
• If the unit is off when an alarm is due, the alarm
will still sound.
• After setting an event alarm,
appears in Index
View.
To clear an alarm that has been set for an Appointment entry, display the entry in Detail View, touch
the Alarm box to deselect the Alarm, then press
ENTER to save the change. You can also disable
all set alarm sounds, see p. 82.
4
Touch the Alarm
time box then
use to select
the time.
4-2-6
• To set an alarm for an entry that has already
been stored, display the entry in Detail View,
touch the Alarm check box and set the alarm
time.
• You can also set daily alarms in Clock, see p. 91.
131
Birthday/Anniversary
Birthday/Ann helps you keep track of annual events,
such as anniversaries and birthdays. Birthday/Ann
entries are indicated in the Month calendar view by .
To make a Birthday/Ann entry:
1.
In Activities, touch EDIT and select "New
Birthday/Ann".
Reminder function
The Reminder function can be set to remind you of
a birthday or anniversary. To set the Reminder
function, check the Remind box and select On
That Day or 7 Days before. Whenever you turn on
your unit within the Reminder period, the start-up
display will include a Birthday/Ann Reminder
message.
• When you no longer need a reminder, turn it off.
• If the Birthday/Ann entry is secret, the reminder
message shows only ***. Unlock the unit to see
the reminder details.
Making new entries in Birthday/Ann
4-3-1
2.
Touch the date boxes, then use
May 17. Year is not required.
3.
Enter Joe's Birthday as a description.
4.
Touch the Remind check box and select "7
Days before" from the pop-up menu.
5.
To complete the entry, press ENTER.
Example: Enter Joe's Birthday on May 17 and set
the remind function for 7 Days before.
132
to enter
Finding Birthday/Ann entries
Birthday/Ann entries are stored in chronological
order.
You can find a Birthday/Ann entry using the
calendar views, the Index View, or a keyword
search. Use the same procedure described in
"Finding Appointment entries".
Editing and deleting entries
Editing Birthday/Ann entries
You can easily change the date or description of a
Birthday/Ann entry. Use the same procedure
described in "Editing Appointment entries".
Deleting single entries:
1.
Select the entry in Index View or in Day view.
(Alternatively, display the entry in Detail View.)
2.
Touch EDIT and select "Delete Entry".
3.
Touch Yes to confirm the deletion.
In Index View or Day view, you can also delete
single entries by pressing DEL in step 2 above.
4
Deleting all Birthday/Ann entries:
1.
Touch EDIT and select "Delete Group".
2.
Check that the selection is "Birthday/Ann"
and "All".
3.
Touch Delete.
4.
Touch Yes to confirm the deletion.
You cannot delete groups of entries if the unit is
locked, see p. 86.
133
Holiday
Holiday helps you keep track of annual holidays. Holidays are indicated in calendar views by .
2.
Check that Yearly by Date is selected.
3.
Touch the Date boxes, then use to select 1
1 (month and day only, year is not required).
4.
Enter New Year's Day as a description.
5.
To complete the entry, press ENTER.
Making new entries
There are two types of Holiday entries, those like
New Year's Day that occur on a specific date every
year (Yearly by Date), and those like Mother's Day
that occur on a specific day (Yearly by Day). Yearly
by Date is the default entry type.
Yearly by Day Holiday
Yearly by Date Holiday
Example: Enter "Mother's Day" on the second
Sunday in May.
Example: Make a Holiday entry for New Year's
Day.
Enter a new Yearly by Day Holiday:
To make a new Yearly by Date Holiday entry:
1.
1.
In Activities, touch EDIT and select "New
Holiday".
2.
Select Yearly by Day.
In Activities, touch EDIT and select "New
Holiday".
4-4-1
4-4-2
134
3.
Touch the Date boxes, then use to select
520 (Month/Week/Day of week).
Day of week: SUN=0, MON=1, TUE=2,
WED=3, THU=4, FRI=5, SAT=6
4.
If "5" is entered for week, the last week (4th or 5th)
is always selected.
"Last" is displayed in Index View.
Using calendar views
4.
Enter Mother's Day as the description.
5.
To complete your entry, press ENTER.
Touch VIEWS and select "Details".
Touch the entry twice to examine details.
In calendar views, Holiday entries are indicated by
. You can access Holiday entries from calendar
views by touching the desired entry twice, see p.
120.
Editing and deleting entries
Finding Holiday entries
Editing Holiday entries
You can easily change the date or description of a
Holiday entry. Use the same procedure described
in "Editing Appointment entries".
Holiday entries are stored in chronological order.
To view details from the Index list:
1.
In Activities, touch VIEWS and select
"Holiday Index".
2.
Touch the Yearly by Date or Yearly by Day
tabs to view the desired Holiday Index.
3.
Touch an entry to select it.
If the desired entry is not displayed, use the
scroll bars to find the entry (or press PREV or
NEXT).
Deleting single entries:
1.
Select the entry in Index View or in Day view.
2.
Touch EDIT and select "Delete Entry".
3.
Touch Yes to confirm the deletion.
In Index View or Day view you can also delete
single entries by pressing DEL in step 2 above.
135
4
To Do
Deleting all Holiday entries:
1.
In Index or Detail View, touch EDIT and select
"Delete Group".
2.
Select Delete "Holiday", and "All", "in
Holiday by Date" or "in Holiday by Day"
from the pop-up menus.
3.
Touch Delete.
4.
Touch Yes to confirm the deletion.
You cannot delete groups of entries if the unit is
locked, see p. 86.
136
To Do helps you meet deadlines and add structure and
efficiency to your work. To Do lets you organize and
track tasks and objectives, assign priority levels, and
attach up to five labels to each entry so they can be
grouped together. To Do entries are automatically
categorized as To Be Done, Done or Monthly Goal.
New To Do entries can have a due date, a description,
and a priority level. The LABELS icon lets you define
and assign labels that are used to manage tasks by
project, personnel, etc.
Display of To Do entries in calendar views differs
according to the Due Date field contents, as follows:
• Entries with no due date are shown on Today's date
and are automatically carried forward each day until
completed.
• Entries with a due date (month, day and year) are
shown only on that date. Once a To Do with a due date
is "past due" it will also carry forward until completed.
• Entries with a due date that has no day, but with a
month and year, become Monthly Goals and appear in
a box on the Month calendar view.
Priority levels
You can enter a number (0-9) or a letter (A-Z) in
the priority field to indicate the task importance.
• Numbers have higher priority than letters.
• Do not use symbols or accented characters.
• Even though a lowercase letter has been entered, it will be saved as uppercase.
Note that from the Calendar views, the currently
selected date will automatically be entered into the
new To Do. From the To Do detail view or Index
view, no due date will be entered.
2.
Use the cursor keys to move to the Priority
field and enter 1.
3.
Use the cursor keys to move to the
description field and enter Prepare Alpha
project proposal for John as a description.
4.
To complete your entry, press ENTER.
Making a new To Do entry
Example: Enter "Prepare Alpha project proposal
for John" as a priority 1 To Do task.
To make a To Do entry:
1.
4
The date and priority fields are optional.
From the Day view, touch EDIT and select
"New To Do".
Press 2nd then NEW ENTRY.
4-5-1
137
Entering a Monthly Goal
Finding To Do entries
If you enter only the month and year for the Due
Date (with no day), the entry becomes a Monthly
Goal and is displayed in the Monthly Goal list of
the Month calendar view.
Example: You must read a manuscript by the end
of February.
Index View shows To Do entries sorted by date or
priority. The default setting is Sort by Date. If you
select Sort by Priority, entries with a set priority are
displayed first (in order of number, then letter),
followed by entries with no assigned priority.
You can select Sort by Priority to display an index
sorted by priority. Select Sort by Date to return to
the index sorted by date.
To make a Monthly Goal entry:
138
1.
Touch EDIT and select "New To Do".
2.
Select the Due Date field, then use to enter
2 as the month, skip the day and enter 1996
as the year.
3.
Enter Read manuscript as a description.
4.
To complete your entry, press ENTER.
The entry is displayed in the Monthly Goal To
Do Index.
Use Index View to find a To Do entry:
1.
Touch VIEWS and select "To Do Index".
2.
Use the To Be Done, Done and Monthly Goal
tabs to locate the entry you desire. If you do
not see the entry immediately, use the scroll
bars to move through the lists.
3.
Touch the entry twice to see the details.
Using keywords
You can use a keyword search for any field,
including Date and Priority, to directly access an
entry.
For more information, see General Operation.
4-5-4
Checking off completed entries
Once you achieve a target or goal, it is important
to check off that entry as done so that you can
focus on tasks that are still outstanding.
Entries marked "Done" are sorted into the Done
file and the completion date is indicated in the
calendar views. You can check off completed
entries using calendar views (check off completed
entries while reviewing your daily schedule) or the
To Do Index.
To check off To Do entries from Day view:
1.
Select the Day view.
2.
Select the date you want to check.
The To Do list is in the upper right of the
display. If the entry you want to check off is
not shown, use the scroll bars to move
through the list.
4
3.
Touch the check box to the left of the To Do
entry.
If the box shows
, the entry is marked as
completed on today's date and sorted to the Done
file.
To check off To Do entries from Index or Detail View:
1.
In Detail View, check the "Done" box.
In To Do Index, touch the check box to the
left. The box has a
to indicate it is done.
2.
The entry is marked as completed with
today's date and is sorted into the Done file.
If you mistakenly check off an entry as completed,
you can deselect the entry by touching the check
box again. However, if you do this, the entry is
saved without a due date.
139
Using Labels
Labels are fields you can specify that contain up to
12 characters. Labels are assigned to To Do
entries and used to manage information by
grouping tasks by project, personnel or other
criteria.
• Up to 32 labels can be defined, and each To Do
entry can have up to five labels assigned to it.
• Once a word is entered as a label, that word is
automatically registered and sorted alphabetically in the label list (from which you assign entry
labels).
• You can also add, edit and delete labels directly
in the label list.
Take care when adding labels directly to the list,
as uppercase and lowercase letters are recognized as separate labels.
Making To Do entries with labels
Example: Enter "Call Frank about Alpha Project"
on Mar 15, 1996.
To make a To Do entry with labels:
1.
In Activities, touch EDIT and select "New To
Do".
2.
Enter the date you require.
Touch a date box, then use
to select 3 15 1996.
3.
Enter Call Frank about Alpha Project as a
description.
4.
Touch the LABELS icon.
4-5-5
140
Touch an empty label twice.
To assign labels using the Labels list:
1.
4-5-6
Select the To Do entry in Detail View, then
touch SHOW and select "Labels".
Enter Alpha Pro and touch OK to register this
label.
5.
Touch another empty label twice.
Enter Phone Calls and touch OK to register
the label.
6.
To select these two labels, check the box to
the left of Alpha Pro and Phone Calls so a
cross appears.
7.
4-5-7
2.
• Each entry can have a maximum of five labels.
• The Labels list is sorted alphabetically and can
contain a maximum of 32 labels.
Touch Done to complete the label entry and
selection.
3.
8.
To complete the To Do entry, press ENTER.
To assign a label to the To Do entry, touch the
check box to the left.
When you complete your label selections,
touch Done.
The new entry is shown in the To Be Done Index.
Touch
and
to view the label tabs.
141
4
Reviewing the To Do list by Labels
You can check the entries assigned to a specific
label.
To review To Do entries by label:
1.
Touch VIEWS and select "To Do Index".
2.
Touch the (or ) tab at the bottom of the
To Do Index to display the Label tabs.
Each time you touch the or tab, the
display moves across three Labels.
3.
Touch a Label's tab to see the list of To Do
entries that have that label assigned.
4.
When you have completed your review, touch
to return to the previous display.
Editing labels
In the Labels list, you can directly edit labels, add
new labels or delete unused labels. If you edit a
label, the change is reflected for all entries with
that label assigned.
142
To edit the labels list:
1.
From the To Do Detail View, touch SHOW and
select "Labels".
2.
To add a new label, touch a blank label twice.
Enter the new label text, then touch OK.
3.
To edit an existing label, touch the label twice.
If the selected label is already assigned to an
entry, touch Yes to confirm the selection.
Make your changes directly to the label, then
touch OK.
4.
To delete a label, select the label in the list,
then press DEL. Touch Yes to confirm
deletion.
If the label is currently in use, it cannot be
deleted.
5.
When you complete your Labels list changes,
touch Done.
Copying a To Do entry
The COPY icon in the To Do Detail View lets you
copy the entry. This feature is very convenient for
making To Do entries that are repeated on a
regular basis. You can define the frequency and
set the copy period.
Frequency can be selected from: Daily, Daily
(Work Days Only), Every Week, Every Other
Week, Every Month (by Date) or Every Month (by
Day of Week). Every Month is only available for
Monthly Goal.
Check the Last Day of Each Month box to repeat
the entry on the last day of each month.
Check the Last Week of Each Month box to repeat
the entry on the same day of the last week each
month.
The Period is defined by selecting From and To
dates. The due date is automatically selected as
the From date.
Example: Enter a Production Report that is due
every other week starting on February
29, 1996, until the end of May.
2.
Touch the Due Date field, then use to select
2 29 1996 for Thursday February 29, 1996.
3.
Enter Production Report as a description.
4.
Touch COPY in the upper right of the display.
4
Last Week of Each Month for Last Week entry
Last Day of Each Month for Last Day entry
Every Month for Monthly goal entry
4-5-9
To copy a To Do entry:
1.
Touch EDIT and select "New To Do".
5.
For frequency, select Every Other Week.
6.
FEB 29, 1996 (THU) is automatically selected
as the From date.
Touch the To date, then use to select 5 30
1996.
7.
Touch Copy to complete the entry.
Use the To Do Index to check that the entry
has been copied.
4-5-8
143
Editing and deleting To Do entries
3.
Select "All", "in Current View" or "Checked
as Done".
4.
Touch Delete and then touch Yes to confirm
deletion.
Editing To Do entries
You can easily change the due date, priority or
description of a To Do entry. Use the same
procedure described in "Editing Appointment
entries".
You cannot delete groups of To Do entries if the
unit is locked, see p. 86.
Deleting single To Do entries:
1.
Select the entry in the To Do Index View or in
Day view.
Changing Activity type
(Alternatively, display it in Detail View.)
You can change the Activity type if necessary. For
example, you can change an Appointment entry to
a To Do entry, and the opposite is also possible.
2.
Touch EDIT and select "Delete Entry".
3.
Touch Yes to confirm the deletion.
1.
Display an Appointment entry in Detail View.
In Index View or Day calendar view, you can also
delete single entries by pressing DEL.
2.
Touch Type and select "To Do" from the popup menu and touch "OK" to confirm the
message.
Deleting groups of To Do entries:
144
1.
In Index View, select the file containing
entries you want to delete.
3.
Enter or change the other information if
necessary.
2.
Touch EDIT and select "Delete Group".
4.
Press ENTER.
CHAPTER 5
Databases
his section describes the use of Contacts
and Data Files. These are personal
database applications and they both have
similar functions. The only difference between
them is that they have different default file and field
names for different types of information. These two
applications are very flexible so you can manage a
wide variety of personal information, from simple
address books to a restaurant guide or a listing of
your favorite movies. You can also, for example,
make a simple "picture book" database for storing
Scrapbook images.
T
Contacts and Data Files
Both applications have three files in which you can store
information:
• The three files for Contacts (Business, Contact 2 and
Contact 3) are set by default to work as simple,
efficient address books.
• The three files for Data Files (Data File 1, Data File 2
and Data File 3) can be configured for many uses
including a business card file, a restaurant guide (with
maps) and other miscellaneous applications.
5
Examples
Procedures used for Contacts and Data Files
operations are similar. Contacts will be used for
the examples provided, but the procedures are the
same for Data Files.
145
Selecting a file
4.
Before beginning a particular database operation,
you must first select the file you want to work with.
If you want to scroll the menu touch
bottom of the menu.
To select a Contacts file:
1.
Touch CONTACTS at the right of the display.
2.
If Detail View is displayed, touch INDEX at
the top left to select Index View.
To select the field used to sort the Index
entries, touch the Sort By: button and select
the field from the pop-up menu.
5.
or
in the
The current index tab is shown at the bottom
of the display.
To display to entries beginning with a different
letter, touch the appropriate tab. For example,
if you touch the "H" tab, you will see the
entries beginning with H at the top of the list.
If you want to move between Contacts entries and
Data Files entries, touch the application key.
5-1-1
3.
To choose the Contacts file for display, touch
the Show button and select the file from the
pop-up menu.
Choose from Business, Contact 2 or Contact 3.
Touching CONTACTS repeatedly steps through
the three files.
146
Making a new Contacts entry
When making new Contacts (or Data Files)
entries, note the following:
• The first field must always contain information.
If you do not enter a description in the first field,
"untitled" is displayed
• If the file is sorted by name, we recommend you
enter the last name first so entries are sorted by
last name. Use a comma (",") to separate last
name and first name.
• You can only enter graphic images in a picture
field, see p. 156.
Example: Enter Jonathan Smith of Brown Corporation in the Business (Contact 1) file.
Finding entries
Contacts and Data Files entries are stored alphabetically based on the contents of the currently
selected sort field. You can find and display an
entry by three methods:
• Using Index View
• Using Keyword search
• Using Direct search
To make the Business entry:
1.
Touch CONTACTS.
2.
Touch EDIT and select "New Business(1)".
Using Index View
Example: Find the Contacts Business file entry for
Jonathan Smith of Brown Corporation.
5-1-2
To find the entry using Index View:
1.
3.
4.
Enter the required information into each field.
Select the Name field and enter Smith,
Jonathan.
Move to the Company field and enter Brown
Corp.
Touch CONTACTS.
If necessary, touch INDEX to display Index View.
2.
Touch the Show: button and select
"Business" (Contact 1) from the pop-up
menu.
When you complete your entry, press
ENTER.
5-1-3
147
5
3.
4.
Touch the "S" tab to find the required entry Smith. If you cannot see the entry, use the
scroll bars to move further through the list.
2.
Press 2nd then F.
3.
Enter the keyword Jonathan.
Select the entry, then touch VIEW to see the
details.
You can also touch the entry twice to see the
details.
5-1-4
Keyword search
Check the Field 1 Only box if required.
If you are not sure of the entry name, but you know
a word that appears in the entry, then keyword
search can be used to find it.
• The keyword search function does not distinguish
between uppercase and lowercase letters.
• The search can be limited to Field 1 only.
(Field 1 is set to Name Field by default)
• A message indicates if no entries contain the
keyword.
For more information on keyword search, see p.
110.
4.
Touch Search.
The first entry that contains the keyword is
displayed in Detail View.
N5-1-5
To use keyword search to find an entry:
1.
Select the Contacts Index View.
Touch the Show: button and select "Business"
from the pop-up menu.
148
• Touch Next or Prev to see other matching
entries.
• Touch Search for to change the search criteria.
• Touch Done to close the search.
Direct search
In the Contacts or Data Files Index View, you can
enter the first or the first few letters of the name to
find the desired entry.
1.
Select the Contacts Index View.
2.
Enter the keyword Smi directly from the
keyboard.
Filter function
The Filter function is available for both Contacts
and Data Files. Filter function lets you filter your
database files to display only entries with matching
field content(s). For more information on the Filter
function, see p. 100.
Go To window will be automatically displayed and
the keyword you just typed will appear.
5
Use the touch pen and drag the Go To window to
wherever you like.
3.
Touch OK.
The first entry starting from the keyword will be
selected in the Index View.
149
Link function
The Link function is a powerful feature that lets you link
related information.
Any entry or document can be linked to any Contacts or
Data Files entry. This allows you to do the following:
• You can jump directly to a Contacts or Data Files entry
from a linked entry.
• While viewing a Contacts or Data Files entry, you can
view a list of linked entries. You can also jump directly
to any of these linked entries.
Linked entries can be viewed from a Contacts entry.
Linked Entries
Before you can start using the Link function to find
related entries, you must first establish the links.
From Contacts and Data Files, you can make links
using:
• New Linked Entry
• Link by Searching
From all applications, you can make links to
existing entries using:
• Link To
150
New Linked Entry
While viewing a Contacts (or Data Files) entry, you
can create new entries that will automatically be
linked to the Contacts (or Data Files).
To make a New Linked Entry:
1.
Open the Contacts Business file and select
the desired entry.
2.
Touch LINKS and select "New Linked
Entry".
5.
Press 2nd then NEW ENTRY.
Then touch
at the right of the new
Birthday entry.
If the entry is linked to only one Contacts entry,
touch
and details of the Contacts entry is
displayed. When the entry is linked to more than
one Contacts entries, select the desired entry and
then touch Jump.
5-2-1
5
Link by Searching
3.
Select BIRTHDAY and then touch New.
4.
Complete the Birthday entry and press
The Link by Searching function can link a Contacts
or Data Files entry to all related entries that
contain a keyword.
ENTER.
The new Birthday entry is shown in Index
View.
To use Link by Searching:
1.
Open the Contacts Business file and select
the entry to be linked to.
5-2-2
N5-2-3
151
2.
Touch LINKS and select "Link by
Searching".
5.
Touch Search.
5-2-5
5-2-4
3.
Enter the search keyword.
• Search function does not distinguish between
uppercase and lowercase letters.
• You can limit the search to secret entries by
checking the Only Secret Entries box.
4.
152
As a default, all applications are selected for
the search. Touch any application icon to
deselect it.
The search is completed and you can view the
linked entries.
Viewing linked entries
To see Linked entries in the Contacts Detail View,
touch LINKS and select "Show Linked Entries".
This will be done automatically when you touch the
Link icon to see the contacts entry in another
application.
• Touch any application tab at the bottom of the
display to see linked entries in that application.
• The ALL tab is always selected as the default.
• To conceal Linked entries, touch LINKS and
select "Hide Linked Entries".
• In the Contacts Detail View, pressing 2nd and W
toggles the screen between Show Linked Entries
and Hide Linked Entries.
3.
Link To function
To make each link, check the link box to the
left of the entry.
Repeat for as many linked entries as you
desire.
You can also select a file using the "File:" pop-up
menu.
The Link To function provides a method of linking
entries from any application to Contacts or Data
Files entries.
To use the Link To function from an Appointment
entry:
1.
5
Select the Appointment entry in Index or
Detail View.
5-2-6
(You can also use the calendar Day view.)
Check the link boxes at left to make links.
2.
Touch LINK TO and select "Contacts".
4.
When you complete your link selection, touch
Done.
The Appointment entry is shown in Index
View with
to the right.
5.
To jump to the linked Contacts entry, touch
and select the desired entry, then touch
Jump.
153
Jump To function
The Jump To function lets you move from entries in
other applications to linked Contacts or Data Files
entries.
• If the entry in the other application has links to
Contacts, you will see
to the right.
• If the entry has links to Data Files, you will see
.
• If the entry has links to both Contacts and Data
2.
Touch
3.
For LINK , select CONTACTS or DATA FILES
and touch OK.
,
or LINK .
5-2-8
If you jump to Contacts:
Files entries, you will see LINK .
To use the Jump To function:
1.
Select a Birthday/Ann Index entry with links.
5-2-9
5-2-7
If there is only one link, the Jump To display above
is not shown, and that entry is shown in Detail
View.
154
Editing Contacts and Data Files entries
4.
If there is more than one link, select the
required entry and then touch Jump.
Otherwise, you will jump directly to the linked
entry.
The linked Contacts (or Data Files) entry is
shown in Detail View.
Breaking Links
You may want to break links you have made. For
example, you may have made an incorrect link and
want to break that link before making the correct
link.
To break links you have made, select the linked
entry and then touch LINKS and select "Break
Link" or "Break All Links".
• Break Link lets you select and break an individual link.
• Break All Links lets you break all links to any
entry.
You can edit and delete Contacts and Data Files entries
in a similar manner to other applications. For more
information on editing and deleting, see General
Operations, p. 105, 112.
To edit a Contacts entry:
1.
Display the Contacts entry in Detail View.
2.
Touch the desired field and make the
changes directly to the field.
3.
5
When you complete your changes, press
ENTER.
If you change the contents of the first field, the
entry will be sorted again.
To delete a single Contacts entry:
1.
Select the Contacts entry in Index View or
display it in Detail View.
2.
Touch EDIT and select "Delete Entry".
3.
Touch Yes to confirm the deletion.
155
Picture fields
Deleting Groups of entries
You can use EDIT Delete Group to delete groups
of Contacts or Data Files entries. Select group
deletion from: All entries; all in Contact 1; all in
Contact 2; or all in Contact 3. For more information, see p. 113.
You cannot use "Delete Group" if the unit is locked,
so unlock it first with the Password function.
For files in both Contacts and Data Files, you can
change text fields to picture fields, and new pictures can
be created from these picture fields. These pictures can
be hand-drawn maps, handwritten notes or signatures.
Drawings created in Scrapbook can also be copied and
pasted to picture fields.
To create a picture field:
1.
In Contacts Index or Detail View, touch
SETUP and select the file in which you want
to create the picture field.
5-4-1
156
2.
Select the Field Name tab at the bottom.
Adding a picture to an entry
To add a picture to any entry, that file must have at
least one field set up as a picture field.
• Touch "Empty picture field" twice to open the
picture drawing screen. You can then draw
directly. After drawing, touch OK.
5-4-2
To add a picture to a Contacts entry:
3.
Move to the field that you want to change,
and then select Picture.
4.
Touch and edit the field name as desired.
5.
When you complete your changes, touch OK.
Touch Yes to confirm the changes.
5
1.
Touch SCRAPBOOK and display the
required drawing (if necessary, create the
drawing).
2.
Copy the drawing to clipboard.
Touch EDIT and select "Copy" (or press 2nd
C).
3.
Touch Contacts and move to the required
picture field.
Check your changes in Contacts Detail View.
157
4.
Touch EDIT and select "Paste" (or press 2nd
V) to paste the picture into the field.
Editing contents of picture fields
The contents of picture fields can be edited directly
within Contacts or Data Files.
For example, you may want to edit the map in a
map field.
To delete picture field contents:
5-4-3
The message in the field changes from "Empty
picture field" to "Touch to view picture."
5.
Display the Contacts or Data Files entry and
select the picture field with the contents you
want to delete.
2.
Press DEL and touch Yes to confirm deletion.
Deleting a picture from a Contacts or Data
Files picture field does not affect the original
picture.
3.
The picture is deleted and the field message
now reads "Empty picture field".
Touch the field to view or edit the picture.
In step 2, to save memory you can cut the
drawing. This will cut the drawing from Scrapbook
and copy it to the clipboard. Touch EDIT and
select "Cut" (or press 2nd X), then touch Yes to
confirm.
You can also copy or paste the Notes or
Spreadsheets entries to Contacts by specifying a
range.
158
1.
Setup for Contacts and Data Files
You can customize Contacts or Data Files in the following three ways:
• File names:
Each file can have a new name of up to 10 characters.
• Fields:
You can change field names (up to 12 characters), field
type (text or picture), and the number of fields that
each entry can have (up to 16).
• Index View display:
For Index View, you can determine which three fields
are displayed and adjust display widths for each field.
The File Name tab should be initially
selected. If not, touch that tab to select it.
3.
Touch the "File Name:" field to enter a new
file name.
Touch "Number of Fields:" to enter a new
number.
• You can use up to 10 characters for File Name.
• You can have up to 16 fields.
4.
5
Touch the Field Name tab to select it.
Configuring Contacts and Data Files
Contacts and Data Files can be configured using
SETUP from the tool bar.
Changing Contacts set up:
1.
Touch CONTACTS.
2.
Touch SETUP and select Contact 1, 2 or 3.
5-5-2
5-5-3
5.
Select any field and enter the new name.
• You can enter up to 12 characters for Field
Name.
• Select Text or Picture to change the field type. If
you change the field type, all previous entries in
that field are deleted.
• The first field is always fixed as a text field. This
cannot be changed.
159
The field type for Field 1 is fixed as text. You can
specify the field type as picture or text for any of
the remaining 15 fields. Note that pictures use
more space than text and memory is limited.
6.
Touch the Index Form tab to select it.
5-5-4
7.
Touch the First Field: button and select the
First Field name from the pop-up menu.
• Index View can have up to three fields.
• Repeat this process for the Second and Third
Field.
8.
Touch the field separator icons
and
adjust them to suit your requirements.
9.
To complete your changes, touch OK.
Check your changes in the new Index View display.
160
Fax number field
The Fax number field is used by the fax function
for automatic dialing. The Contacts Business file
(Contact 1) has a Fax # field as a default setting,
but Fax # field must be set up for Contact 2, 3 and
Data Files. Use the above procedure to do this, but
in step 5, enter Fax # as one of your fields.
When entering fax numbers in the Fax # field, be
sure to include hyphens in appropriate places. A
hyphen is required following the area code for the
fax function to pause and dial correctly.
CHAPTER 6
Writing and Letters
his section explains the features of the
powerful writing tools. These tools include:
Notes, which lets you take handwritten
notes and comments at meetings; Documents, a
built-in word processor; and Outlines, a simple but
powerful outline package for structuring your
thoughts and ideas. Used together, these three
applications provide powerful documentation
capabilities in a convenient, hand-held device.
T
Notes
Notes provides a simple yet powerful means of recording information. Notes lets you easily record handwritten
notes and drawings. This can be very convenient during
meetings when you are too busy to enter text through
the keyboard.
After your meeting is over, you can review your notes
and comments, add titles from the keyboard and then
use these notes as a reference while working with other
applications such as Documents.
Taking Notes
Making a Notes entry at a meeting or appointment
is very quick and easy. Notes has the following
features:
• The drawing tools are at the right.
• A drawing can be selected by touching it for a few
seconds. It can then be moved, reduced or
deleted.
• The first line becomes the default topic title.
• Use the scroll bars to move up and down the
entry.
• Use
and
to move to other pages.
• Touch VIEWS and select Show/Hide Grid Lines.
• To link your Notes entry to Contacts or Data Files
entries, touch LINK TO.
161
6
4.
To make a Notes entry:
1.
Touch NOTES.
2.
Touch EDIT and select "New Note".
When you complete your Notes entry, touch
KEYS to unlock the keyboard then press
ENTER.
Selects a drawing.
Writing tool (default)
Erases the last
drawing, and
subsequent touches
erase previous
drawings.
Use to select the
drawing then touch AAA to
reduce/enlarge the size
of the drawing.
Moves to the next page.
3.
6-1-2
The first line is used as the title in the Index.
5.
Use the touch pen to write your notes directly
on the display.
6-1-3
6.
6-1-1A
162
To change the title, touch EDIT and select
"Topic Title".
Enter the title, then touch OK.
• When drawing lines across the screen, always draw
from left to right; otherwise the line may not be stored
correctly.
• If you want to write something at one edge of the
screen and something else at the opposite edge, make
sure the first item has registered before starting the
second.
Otherwise the items may not be stored correctly.
Notes window
If you touch VIEWS and select "Window", Notes
changes to a moveable window. You can still see
the Notes window while you open and use other
applications. This is very convenient because it
allows you to transcribe Notes contents to other
applications.
• To move the Notes window, touch the top left
corner and drag the window to the new location.
• To close the window, touch QUIT.
• To return Notes to Review Notes display, touch
VIEW.
• To move to the previous or next entry, touch .
• To turn pages within an entry, use the scroll bars
or
.
• To turn the Backlight on while the keyboard is
locked in Notes, check the Option box beforehand in Tools Backlight. When the Backlight goes
off, you can reactivate it simply by touching the
display.
• Keyboard lock only works with Notes.
Changing Notes Setup
You can change Notes Setup to suit your own
style.
To change Notes Setup:
1.
6
Touch SETUP.
Locking the keyboard
You may want to lock the keyboard to prevent
accidental key input when you are using Notes.
• The keyboard is locked as the default setting.
• Touch KEYS at the top of the display to lock or
unlock the keyboard. When the KEYS icon has a
white background, the keyboard is locked, and
when it is black, the keyboard is unlocked.
• When the keyboards is locked, all the keys
including OFF do not operate.
6-1-4
2.
After drawing action can be selected from:
• Will not be selected (you can continue to draw).
(default)
• Will be selected (you can manipulate drawing).
• Will be reduced by 75% and then selected.
163
• Will be reduced by 50% and then selected.
• Will be reduced to fit between grid lines but will
not be selected.
Review Notes
After your meeting, you can review your Notes
entry, modify it as required and save it for future
reference. The Review Notes function is also
convenient for checking the layout of your Notes
entry.
• Notes entries can contain up to eight "screens"
(4 pages).
• The Review Notes mode provides a two-page
view (half of a full Notes entry).
• You cannot edit in Review Notes so change to
the Take Notes view.
• If "will be selected" is selected, your last drawing
will be automatically selected with the area tool
so you can move it or delete it.
• If "will be reduced to fit between grid lines but will
not be selected" is selected, the entry window will
be displayed. You can move the window by
touching the box in its upper right corner. However the entry cannot be selected in this setting.
3.
Pen Thickness (before reduction) can be
selected from:
• Thick
• Thin
4.
Drawing delay can be set to 1/8, 1/4, 1/2, 1 or
2 seconds. Use the touch pen to touch and
drag the bar.
Drawing delay determines when your handwriting
becomes a single object for moving or deleting.
164
5.
If there are any problems, touch Default to
return to the default settings.
6.
When you complete your setup, touch OK.
To review your Notes entry:
1.
Open the Notes entry.
2.
Touch VIEWS and select "Review Notes".
From the Index View, select the entry and press
ENTER or touch the entry twice.
Documents
Documents is a built-in word processor that lets you set
margins, tabs and indents. You can also select page size
and change fonts. If you connect a printer to your unit,
you can print out professional looking full-page letters,
reports and other documents. The Make a Letter feature
helps you produce high-quality letters with your own
signature. You can use advanced editing techniques and
the Check Spelling function helps you eliminate spelling
mistakes.
Touch
Touch
3.
4.
and
to change to other pages.
to change to other entries.
In Review Notes, touch the area to be edited
and the display changes to Take Notes view.
When you complete your changes, press
ENTER.
Edit Notes
• Use Delete Note to delete single entries.
• Use Delete Group to delete all Notes entries.
For detailed information, see General Operations
on p. 112.
To make a new Documents entry:
1.
Touch DOCUMENTS.
2.
Touch EDIT and select "New Document".
6
Press NEW ENTRY.
3.
Enter the text for the new entry. Example:
To: Frank Smith, CEO Beta Corp.
Date: March 14 1996
Dear Frank,
Did you receive my fax of March 8th on the Alpha
Project? Call if you received it or I will send it again
Friday.
Best regards, Pat Jones
165
4.
When you complete your entry, press
ENTER.
The new entry is shown in Index View as
Untitled.
4.
Making a new entry based on an existing
entry
To edit a Document title:
1.
To save your entry with the new title, press
ENTER.
Once you have written the memo to Frank, you
may need to write a similar memo to someone
else. Rather than creating another new memo, you
can make a copy of this existing memo and
change the addressee's name and address.
Display the Documents entry in Detail View.
To copy an existing Documents entry:
6-2-2
2.
1.
Select the entry in Index View.
2.
Press 2nd ENTER to copy that entry.
Touch EDIT and select "New Copy".
Touch EDIT and select "Document Title".
6-2-3
3.
Make any necessary changes.
4.
Touch EDIT and select "Document Title" to
make a new title, then touch OK.
The default title of the new Document is "Untitled".
Touch the title displayed at bottom left.
3.
166
Edit the title.
When you complete your changes, touch OK.
5.
When you complete your changes, press
ENTER.
Finding entries
Using Keyword search and the Search function.
For how to use keyword search and the Search
function, see the General Operations chapter on p.
110.
There are three ways to find an entry:
• Using Index View
• Using Keyword search
• Using the Search function
Using Index View to find a Documents entry:
Editing a Documents entry
1.
1.
Select the entry in Detail View.
2.
Make required changes directly to the entry.
Use the scroll bars to move through the entry.
3.
When you complete your changes, press
ENTER.
Select the Documents Index View.
6-2-5
6
Deleting Documents entries
2.
To select the sort method, touch the Sort by:
button, then select Date (shown in reverse
chronological order by creation date) or Title
(alphabetically) from the pop-up menu.
3.
Use the scroll bars to move through the
sorted Index and find the entry you require.
4.
To display details, select the entry and touch
VIEW.
For detailed information on deleting entries, see
Chapter 3, General Operations on p. 112.
167
Changing display character size
Find Text
In Documents Detail View, you can change the
size of display characters by touching AA at the
bottom right. Each time you touch AA , the size
cycles from 9 pt (default) to 12 pt to 7 pt and back
to 9 pt.
When editing a Documents entry in Detail View,
you may want to find a specific text string to edit or
delete. Find Text can find text strings of up to 20
characters (including spaces).
To use Find Text in a Documents entry:
1.
Touch UTILS and select "Find Text" (or press
2nd then F).
6-2-9
6-2-8
2.
Note that Find Text starts searching from the
current cursor position.
Large characters may go off the display.
Use the scroll bars to see them.
Changing display character size does not affect
the size of printed text. The large character size is
easier to read, but the small size lets you fit more
text on the display.
168
Enter the text string you want to find.
3.
Touch Find.
The first matching text in the entry is
highlighted. You can cut, copy, paste and edit
as required.
4.
To continue searching, repeat steps 1 and 3
above.
• Find Text will continue from the last match.
• The same text string can be used for many
searches.
• A message indicates if no matching text is found.
Text styles
Text style keyboard shortcuts
You can use keyboard shortcuts to change text
styles on the fly. Keyboard shortcuts (shown in the
Style menu) are:
• Plain
(2nd Y)
• Bold
(2nd O)
• Italic
(2nd I)
• Underline
(2nd U).
Text styles add variety and emphasis to Documents entries.
• Text style is selected from the STYLE menu. A
indicates current settings.
• Style is selected from Plain (default), Bold or
Italic.
• Underline can be combined with Plain, Bold or
Italic.
• Style settings remain in effect until another style
is selected.
• Documents printed from your printer should also
contain the text styles (consult your printer
manual).
6
169
To change the text style for a Documents entry:
1.
Open a Documents entry in Detail View.
2.
Move the cursor to the desired location.
3.
Touch STYLE and select the text style.
For example, touch Bold.
4.
Make your text entry.
The text is displayed in the selected style.
Changing the style for existing text
To change the style of existing text, select the text
by dragging the pen across it, then choose the text
style from the menu (or use keyboard shortcuts).
• The style cannot be changed for the Title field.
• Underline remains in effect until plain is selected.
• Inserted text assumes the style of the text block.
Align
The ALIGN menu lets you change the alignment of
the paragraph containing the cursor. Text alignment can be selected from Left, Center or Right.
170
Tabs and indents
Tabs and indents let you format the appearance of
text blocks. A tab changes an individual line, while
an indent changes a paragraph and all following
text until it is turned off or changed.
• Indents can be set from the left or the right.
• The first line of each paragraph can have a
different indent setting to achieve special layout
effects.
To change tab settings:
Setting tabs and indents
Tabs and indents are set using the ruler across the
top of the display. The ruler is a standard feature
with many word processors. The ruler is enabled
with Show Ruler from the SHOW menu.
1.
To see the ruler, touch SHOW and select
"Show Ruler".
Tab markers
at default
settings
Tab markers
First line
indent marker
6
6-2-11
Left indent marker
Right indent marker
6-2-10
2.
Touch the tab marker you wish to change and
drag it to the new position.
Tab settings
When entering text, you can enter a tab by
pressing
TAB ([ ]). This moves the cursor to
the next tab position to the right and shifts following text. There are eight tab markers at default
settings four characters apart. You can change the
default tab settings by dragging the tab markers to
new locations on the ruler.
When you enter text with tabs, following text will
now be affected by the new tab settings.
Please avoid setting a tab marker at 0, as this can
lead to problems during printing.
171
Indent settings
No Indent is the default setting. You can set
different indents for individual paragraphs (which
are preceded by a [ ]).
To change indent settings:
1.
To see the ruler, touch SHOW and select
"Show Ruler".
Left indent
marker
First line
indent marker
6-2-12
172
2.
Place the cursor in the paragraph you want
indented.
3.
To set the first line indent, touch the first line
indent marker and drag it to the new position.
4.
To set the left indent, touch the left indent
marker and drag it to the new position.
5.
To set the right indent, use the horizontal
scroll bar to move to the right side, then touch
the right indent marker and drag it to the new
position.
If Show Special Symbols is enabled, the indent
indicator, " I ", is shown at the left of any paragraph
that has an indent setting (first line, left or right).
Changing or canceling indents
You can change (or cancel) indent settings from
those that were set earlier in a Documents entry. If
you drag all indent markers back to their default
positions, the indent indicator, " I ", is no longer
displayed for that paragraph or following text.
To change indent settings:
1.
Position the cursor in the paragraph (which is
preceded by a [ ]) where you want the
change to take effect.
2.
Touch the desired indent markers and drag
them to the new positions. That paragraph
and following text will assume the new layout.
New indent settings only start from a new paragraph (which is preceded by a [ ]).
Show/Hide Special Symbols
In the SHOW menu, Show/Hide Special Symbols
has the following functions:
• Show Special Symbols - tab ( ), return ( ),
page ( P ), indent ( I ), center align and right align
symbols are displayed.
• Hide Special Symbols - special symbols are
hidden.
Word wrap
The built-in word wrap function automatically
moves words that will not fit at the end of a line to
a new line. This prevents words from being split,
and there is no need to press [ ]. Word wrap is
permanently selected.
Document size
So far you have worked only in the limited space of
the display. However, you can make Documents
entries that fit standard letter-size paper so you
can print out full-size documents. For more
information on printing, see p. 192.
Display size
The unit's display is smaller than standard lettersize paper. For paper sizes larger than the display,
the display functions as a floating window that
moves around the page. As you enter text, the
display automatically shifts across the page. The
scroll bars can be used to view text that is currently off the display. You can also press PREV or
NEXT to view the previous or next Documents
entry.
173
6
Page Setup
You can use UTILS Page Setup to set the following:
• Page size
Select a page size to suit your printer. If necessary, consult your printer manual. You can select
from three standard page sizes:
A4:
21 cm x 29.7 cm
Letter:
8.5 inch x 11 inch
(21.6 cm x 27.9 cm)
Legal:
8.5 inch x 14 inch
(21.6 cm x 35.6 cm)
• Measure in
You can select from Inch (default) or cm.
If you change this setting, margin sizes are
automatically converted for the selected system.
• Top, Bottom, Left, and Right Margin
Default margins have all been set to 1 inch. The
minimum setting is 0.5 inch (1.27 cm).
• Print Font
You can select the print font from PICA, ELITE or
PS (default). Elite is a popular font set at 12 cpi
(characters per inch). Pica is another popular font
set at 10 cpi. PS is a proportional spacing font
(spacing adjusts to suit text width) set at 12 cpi.
You can fit more text on a page with a 12 cpi font
than a 10 cpi font.
174
Selected fonts are not shown accurately on the
display, and can only be seen when printed.
However, you can use Print Preview to check the
layout.
To change the page setup:
1.
In Detail View touch UTILS and select "Page
Setup".
6-2-13
2.
Touch the Page Size: button and select A4,
LETTER or LEGAL from the pop-up menu.
Page size should match the size of the paper
used with your printer.
• Selecting a paper size that your printer is not set
up for may delay or prevent printing. Consult your
printer manual regarding printer set-up.
3.
Touch the Measure in: button and select Inch
or cm from the pop-up menu.
4.
Margin settings can be changed by touching
a field and entering the new value directly
from the keyboard.
• If you use PS font, some printers may not
correctly print the display image because the font
of the printer is different from the font of the unit.
If this occurs, use Pica or Elite font for printing.
Inserting a page break
Margin
Margin
marker
Page breaks are automatically inserted at the end
of each page (according to page size) and indicated on the display by dotted lines. However, you
can also manually insert a page break for layout
purposes. Inserted page breaks are indicated by a
P and dotted lines.
6-2-14
You can also change the margin settings by
dragging the markers on the Page Setup display
to new positions. The margin line and field value
will change.
5.
Select Print Font from PICA, ELITE or PS.
6.
When you complete your settings, touch OK.
• To check layout changes, touch Preview to
toggle straight to Print Preview. From Print
Preview you can toggle straight back to Page
Setup.
To insert a page break:
1.
Position the cursor at the location where you
want to insert a page break.
2.
Touch UTILS and select "Insert Page
Break".
P is entered at the cursor position and
subsequent text is moved to a new page. To
cancel the page break, place the cursor on P
and press DEL.
175
6
Print Preview
Check Spelling
You can use the Print Preview function to check
that text is formatting properly when working with
full-size pages. While you cannot read the text with
this function, it is useful for indicating the full page
layout.
The Check Spellings function lets you check the
spelling of an entire Documents entry, or just a
single word (entered from the keyboard or dragged
in text.)
• Change accepts a suggestion for a spelling
correction. Use the scroll bar to move through the
suggestions.
• Ignore accepts the word being checked as OK.
• Ignore All accepts the word being checked as
OK whenever it occurs throughout that entry.
• If you enter a new word, Ignore changes to
Suggest so you can check the spelling.
To use Print Preview:
1.
In Detail View, touch SHOW and select "Print
Preview".
To use the Check Spelling function:
6-2-15
2.
If you are working with a long document,
touch Prev or Next to move to other pages.
• The display changes in two page units.
• To make page size, margin, or font changes,
touch Page Setup.
3.
176
To return to Detail View, touch Done.
1.
Open the Documents entry in Detail View.
2.
Touch UTILS and select "Check Spelling".
3.
Select the starting point from "From the
Beginning" or "From the Cursor Position" then
touch OK.
6-2-16
4.
5.
Touch Change, Ignore, Ignore All or
Suggest as needed.
1.
When you complete your spelling check,
touch Close.
Enter the text of your letter as a Documents
entry.
2.
Touch UTILS and select "Make a Letter".
To use the Make a Letter function:
Make a Letter function
The Make a Letter function helps you format a
Documents entry as a letter that is automatically
dated, addressed and closed with your signature.
The addressee can be selected from any file in
Contacts and Data Files, or entered from the
keyboard. Your layout changes are reflected in the
layout preview at the top of the display. Once your
Make a Letter format is established, it can easily
be used to create other letters.
6-2-17
6
3.
Select the date layout from Left (US), Center
or Right (British). Changes should be
reflected in the layout preview at the top.
4.
Select the addressee title from the pop-up
menu. The default title is Mr.
Select either a colon (US) or comma (British)
to follow the title.
177
5.
Touch the "To:" button to open the Mail
Directory.
6-2-18
6.
7.
Select the addressee from the list. You can
also enter the addressee directly from the
keyboard after touching Cancel to return to
the Make a Letter screen.
8.
Enter the subject of the letter into the Subject
field.
9.
Enter the number of characters paragraphs
should be indented.
Touch Setup in the Letter to display.
6-2-19
Set up the directory to suit your requirements.
• Memory can be selected from Main unit or PC
card.
• Mail Directory can be selected from any file in
Contacts or Data Files.
178
• Name, Position, Company and Address can be
matched to any fields in the selected Mail
Directory using pop-up menus. In the pop-up
menus, touch or to scroll the menu, and if
you want to leave the field blank, select "none".
Complete your setup, then touch OK.
10. Touch the Closing field and enter a closing
phrase, such as: Yours sincerely, Best
regards, etc.
11. Touch the "From:" button.
12. If you want to use a different signature from
the one saved under the Personal display,
touch Sign.
6-2-20
6-2-21
Check the boxes as required for Owner's Name,
Position, Company, etc. This enters the owner's
information saved in the TOOLS Personal display.
You can also select use of the owner's signature
saved in the Personal display. For more information, see section 2, Desk Accessories.
When you complete your setup, touch OK.
6
Use the touch pen to write your signature.
When you complete your signature, touch
OK.
13. To complete your letter, touch Make.
The letter will be displayed in Detail View.
To save the completed letter, press ENTER.
179
Documents with pictures
3.
Documents entries can also contain pictures
created with the Pictures function (similar to
Scrapbook).
• The picture can be moved by touching it and
dragging it to the new location.
• To make changes to the picture, touch it, and
then touch [PICT]. The display changes to the
Picture display so you can use the drawing tools
to edit the picture.
To add a picture to your Documents entry:
1.
In Documents Detail View, touch [PICT]
above the vertical scroll bar.
6-2-22
2.
Use the drawing tools to create your picture.
When you complete your drawing, touch OK.
For more information, see Scrapbook on p. 63.
180
Your document entry now contains the
picture.
To save this entry, press ENTER.
• Unused area of the picture are not inserted into
the document entry to save space.
• To delete a picture, touch it and press DEL.
• You can also copy or paste single entries in the
Scrapbook application or Notes or Spreadsheets
entries to Documents entries by specifying a
range.
• It is possible to copy or paste a Spreadsheets
entry larger than the display width. However, if
the pasted entry is modified, the unshown data
will be deleted.
• If you copy a Worksheet created in Spreadsheets
to a Documents entry by using "Copy Image",
you may not be able to send the Documents
entry to a PC or a Macintosh.
Headers and Footers
You can add headers and footers to your Documents entries. This adds important information,
such as page number, time and/or date, to the top
or bottom of each page. This is very handy when
sending documents by fax. A similar process is
used to add a header or a footer.
To add a header:
Exchange Documents with PC Files
1.
Create the body text of your document.
To copy a Documents entry to PC Files:
2.
Touch SHOW and select "Header".
1.
Select the Documents entry you want to copy
to PC Files in Index View.
2.
Touch SEND and select "Copy to PC Files".
3.
Type the file name and the description for the
created PC File.
4.
Select "RTF" or "TXT".
5.
Touch OK.
6-2-23
3.
Touch the icons to select the header
information.
[PAGE] Inserts the page number
[DATE] Inserts the current date
[TIME] Inserts the current time
Other characters and symbols, such as "-" can be
inserted in headers and footers.
4.
6
To get a Documents entry from PC Files:
1.
Touch SEND and select "Get from PC Files".
Touch [LEFT], [CENTER] or [RIGHT] to
select the position of the header information.
Note that the header can contain two lines.
2.
Select "Main Unit" or "PC Card", to indicate
the memory location of the PC File.
When you complete the header, touch OK.
3.
Select the PC File you want to copy to
Documents.
• You can use a similar procedure to set a Footer.
• You can check headers and footers in the Print
Preview screen.
4.
Touch OK.
5.
Type in a title for the newly created
Documents entry.
181
Outlines
6.
Touch OK.
To replace a Documents entry with PC Files:
1.
Select the Documents entry you want to
replace with a PC File in Index View.
2.
Touch SEND and select "Replace with PC
Files".
3.
Select "Main Unit" or "PC Card", to indicate
the memory location of the PC File.
4.
Select the PC File you want to copy to
Documents.
5.
Touch OK.
6.
Touch OK, if the replacement information is
correct.
• You can see the data created on a PC in MS
Word in Documents or see a Documents entry
on a PC in MS Word by using this DocumentsPC Files conversion function.
For the details about PC Files, see p. 215.
• If you convert a Documents entry in RTF format
to a PC File by selecting "Copy to PC File" and
then get the converted PC File by selecting "Get
from PC File", any graphics, center or right
alighnment information or header and footer
information will be lost.
182
Outlines is a simple, convenient tool to help you arrange
your thoughts into a clear, easy-to-understand, hierarchical structure. This is ideal for organizing plans and
ideas, and the order can be restructured whenever
necessary.
The outline structure consists of topics that are promoted or demoted to different levels. The topic in the
first line automatically becomes the title. Topics can have
one or more subtopics, and these can be rearranged,
grouped together, or even hidden from view, allowing
you to manage large amounts of information easily and
efficiently. Each topic in an outline is like an entry in
other applications, and the outline can be thought of as
a file holding those topics (or entries). You can enter, edit
and delete topics while maintaining an overview of the
entire outline.
Example outline
Creating an Outlines entry
Below is an example of an Outlines entry in Detail
View.
A new Outlines entry can be created by entering
the title and adding the different levels of topics
and subtopics. When creating a new Outlines
entry, use the following keys:
[ ]
To add a new line.
[ENTER]
To save the topic.
[ ]
To demote the topic one level.
To promote the topic one level.
[ ]
6-3-1
To make an Outlines entry:
• Each individual topic heading is marked with a
diamond.
• Each single topic can have more than one line
and can contain up to 2,048 characters.
1.
Touch OUTLINES.
2.
Touch EDIT and select "New Outline".
6
6-3-2
The new outline opens in Detail View.
183
3.
Enter a title on the first line and press
ENTER.
4.
Enter the first topic.
5.
To enter subsequent lines for any topic, press
[ ]. When you complete all subsequent lines,
press ENTER.
Second and subsequent lines of the topic are
hidden and a flashing diamond prompts entry
of a new topic. You can only see the first line
of each topic, but you can store large
amounts of information in one outline.
To view topic contents, touch SHOW and select
"Full Topics". All lines are displayed for all topics.
To return to the regular display, touch SHOW and
select "1 Line Topics".
6.
184
To save the Outline, press ENTER on a blank
topic.
Finding outlines
Outlines are stored alphabetically by title. You can
find a desired outline using several methods:
• Using Index View
Use the alphabetical sorting of the outline titles
and the letter tabs to find the entry.
• Using Search function
Use the Search function at the left to find the
entry.
• Using Keyword search
Press 2nd then F in Index View, enter a keyword
and touch Search.
These methods of finding entries are similar to
those used for Documents entries. For more
information, see p. 167.
Full Topics or 1 Line Topics
The SHOW menu lets you change your outline
display as follows:
• 1 Line Topics (default setting) displays each topic
as one line, and all subsequent lines are hidden.
• Full Topics displays all subsequent lines of multiline topics and subtopics.
To edit a topic:
To display Full Topics:
1.
Display the outline in Detail View.
1.
Display the outline in Detail View.
2.
Touch SHOW and select "Full Topics".
2.
Press and
to edit.
All subsequent lines of all topics are displayed.
Use the scroll bar to see topics off the display.
Changing the Show settings for an outline does
not affect other outlines. However, a new Outlines
entry will use the last settings selected.
to move to the topic you want
You can only edit one topic at a time.
3.
Press
to edit the topic.
When in 1 Line Topics view, hidden lines will be
displayed. If the topic goes off the bottom of the
screen, a scroll button appears on the scroll bar.
Revising outlines
Once an outline has been created, it is easy to
revise either the topic text or the outline structure
itself.
• Topics and subtopics can be revised individually.
• Restructuring is carried out in Detail View.
4.
Enter your changes directly from the
keyboard.
5.
When you complete your changes, press
ENTER.
6
Selecting topics
Touch a topic to select it. A flashing diamond
indicates the currently selected topic. You can also
move between topics using the cursor keys.
• Press
to move directly to the last topic.
• Press
to move directly to the first topic (i.e.
title).
185
Adding topics
You can also add a topic between existing topics
by touching the location and entering the new topic
from the keyboard. If the existing topics are parent
topics, the added topic becomes a subtopic.
However, if between subtopics, this topic will have
the same level as the topic above it.
As your plans and ideas grow, you may want to
add topics to an existing outline.
To insert a new topic in an outline:
1.
Display the outline entry in Detail View.
2.
Touch the topic below which you will add the
new topic (or use the cursor keys).
3.
Touch EDIT and select "New Topic" (or press
2nd Q).
I appears and begins flashing.
Press or to change the level of the new
topic.
Moving topics
4.
Enter the text for the new topic.
Only one new topic can be inserted at a time.
5.
When you complete your changes, press
ENTER.
You can change a topic's position (even after it is
saved).
To move a topic:
1.
In Detail View, select the topic you want to
move.
2.
Touch UTILS and select "Move Family" (or
press 2nd W).
The entire topic family is briefly highlighted,
then replaced by F (for family).
3.
Touch the new location and the F moves.
4.
To complete the move, press ENTER.
F changes back to the full topic family
contents.
Topics cannot move to a position above the title.
186
Joining two topics
You can join a selected topic to the topic above it.
If the entry is in 1 Line Topics mode, change to Full
Topics first.
Splitting one topic into two
1.
In Detail View, select the topic you want to
split.
2.
Touch UTILS and select "Split 1 Topic into
2".
To join two topics:
1.
In Detail View, select the topic you want to
join to the one above it.
2.
Touch UTILS and select "Join 2 Topics".
The selected topic is joined to the one above
it.
No space is inserted between the two joined
topics, so you may want to edit the new
joined topic and make changes, for example
add a space, "and", etc.
If you attempt to join two topics that will exceed
2,048 characters when joined, a warning message
will be displayed and the operation will be automatically canceled.
6-3-3
6
The selected topic is displayed with the cursor
positioned on the first character.
3.
Move the cursor to the point where you want
the topic split and touch Split. The old topic is
split into two topics at the cursor position.
If a topic with subtopics is split, the subtopics are
assigned to the new split topic.
187
Outline deletion
Deleting all outlines:
Deleting topics:
1.
1.
In Detail View, select the topic you want to
delete.
2.
Press DEL.
3.
Touch Yes to confirm the deletion.
If you select a topic for deletion, all subtopics
below it will also be deleted. You may want to
rearrange an outline beforehand to prevent this.
Deleting an outline:
1.
Select the outline.
2.
Touch EDIT and select "Delete Outline".
3.
Touch Yes to confirm the deletion.
You can also delete an outline by pressing DEL in
step 2 above. To do this in Detail View, the title
must be selected.
188
Touch EDIT and select "Delete Group".
All Outlines is the only option.
2.
Touch Delete.
3.
Touch Yes to confirm the deletion.
You cannot delete all outlines simultaneously if
your unit is locked, see p. 86.
Using subtopics (children)
Outlines examples used so far have only contained
one level of topics. This simple outline form may be
all you need to organize your information.
However, you can create other levels of topics
(subtopics) for greater flexibility.
6-3-4
• Each subtopic belongs to the topic above it.
• Subtopics are created by pressing before
entering the topic text. (Press to promote a
subtopic).
• A subtopic can also have its own subtopics, and
these can continue for 15 levels below the title.
• Topics are often referred to as "parents",
subtopics as "children", and topics and
subtopics as a "family".
• A white diamond indicates that the topic is a
parent.
Expanding and Collapsing
You can expand and collapse an outline to concentrate on the topics and families that interest you.
• Expand/Collapse Subtopics toggles between
Expand (show all subtopics) and Collapse (hide
all subtopics).
• Expand Family shows all subtopics for a specific
topic.
• Collapse All displays only 1st and 2nd level
topics, hiding all other levels.
To collapse families:
1.
Display the complete outline in Detail View.
2.
Touch SHOW and select "Collapse All".
6
All subtopics are collapsed and hidden.
To expand families:
1.
Display the collapsed outline in Detail View.
2.
Select the topic you want to expand.
3.
Touch SHOW and select "Expand Family".
All subtopics are displayed to all levels.
189
Restructuring families
You can move, delete, join and divide families just
as you can topics. However, these operations
affect the entire family (even if the topic is collapsed and subtopics are not visible), so proceed
with caution.
Restrictions when working with families:
You may not be able to change the level of a
collapsed family in some situations. Other topics
cannot be moved unless the family is expanded.
Generally, if you have problems, expand all
families and try again.
You cannot insert a topic between a parent and
its child at the same level as the parent.
When moving topics (or families):
• You cannot demote a topic more than one level
below the topic directly above it.
• Topics cannot be added below a collapsed
family; you must expand the family first.
• You cannot promote a topic one level if this
would split up a parent and child. Move the
selected topic to another location and then
promote it.
190
If you divide a topic that has subtopics (children),
the second half of the divided topic will become
the parent of these subtopics. The two parts of
the original topic will remain on the same level.
Do not try to join a topic with a collapsed topic
above it. If you attempt this, you will be asked to
confirm the action, and the topic will then be
combined with the last topic in the preceding
family. Expand the collapsed topic first to see
what you are joining.
CHAPTER 7
Optional Accessories
his is a powerful pocket-size computer with
many features that let you accomplish a
broad range of tasks. Tools Utilities allow
you to connect and transfer data to personal
computers, and public information and message
systems. You can log in to CompuServe, a popular
on-line information service, and even send and
receive messages via AT&T Mail and radio pager.
You can even send faxes directly from Notes,
Documents, Scrapbook and Filer. This chapter
provides explanations and examples of the
peripheral functions to get you up and running with
these features.
T
Tools Utilities
These functions make the unit a powerful communications tool that keeps you connected to your
busy world through backups, information services,
electronic mail and messages, PC links, etc.
N7-1
Tools Utilities include: PC Link, Remote, Clock,
Fax Log, Backup, Terminal, Message,
CompuServe, AT&T Mail and ZR-Pager. Clock is
described in Chapter 2 "Desk Accessories" and
Terminal, CompuServe, AT&T Mail and ZR-Pager
are described in the manual provided separately.
Preferences
Preferences in the lower half of the Tools display
let you configure operations to suit your personal
needs. Preferences are described in Chapter 2
Desk Accessories.
191
7
Printing
This offers great flexibility in what you can print, from
current display contents, to single entries and all entries
in an application or a file. Printing options depend on the
particular application you are using. The unit has built-in
printer drivers (software that tells printers how to format
and print data) for the following printers:
• Canon BJ-10e series
• IBM Proprinter series
• Epson FX-80, FX-850 and LQ series
• Hewlett Packard LaserJet II and III series
• Other (US Characters/International)
You can also print from printers with emulation modes
for any of the above printers (consult your printer’s
manual for emulation modes). For information about
other printers supported by the unit, consult your local
Sharp dealer.
A printer is connected to your unit via the optional
Sharp CE-IR1 wireless interface:
• Printer Path is set to Wireless as a default
setting.
• It is possible to change Printer Path to Cable (via
a direct cable).
• Hardware compatibility between the CE-IR1 and
your printer may affect the printing capability.
• For more details, see the CE-IR1 operation
manual.
ZR-5700/ZR-5800
CE-IR1
PC Printer
Cable
Paper source
The printer paper source can be selected from:
• Use Cut Paper
• Use Continuous Paper.
Printer connection
Because the ZR-5700/ZR-5800 supports industry
standard IrDA, you can print directly to infrared
printers that also support this, such as many new
Hewlett Packerd Printers.
192
ZR-5700/ZR-5800
IrDA compatible Printers
No extra hardware needed to print to industry
standard IrDA printers
Parallel Printer
Printing restrictions
Text should always print, but printing of graphic
images is determined by your particular printer's
capabilities. Data may not print exactly as shown
in your entry if the printer does not support the text
styles used (italics, bold, etc.). Also, because of
the way in which data sent by the unit is converted
to characters on the printer, the final printed copy
may not appear exactly the same as on your unit.
The following printing restrictions apply:
• LaserJets may not correctly print Documents
containing Elite or PS fonts (Elite is available on
the LaserJet III). If this occurs, select Pica.
Optional printer-resident fonts (like those on a
cartridge) cannot be used.
• Proprinter Series supports X24E. Printers that
emulate other Proprinter models may not function
properly.
• FX Series supports FX-80 and FX-850.
• LQ Series supports the LQ-510.
• If you use PS font, some printers may not
correctly print the display image because the font
of the printer is different from the font of the unit.
If this occurs, use Pica or Elite font for printing.
To print an entry:
1.
Select an application.
2.
Select the entry to be printed.
3.
Touch SEND and select "Print".
N7-1-1
7
If the entry to be printed is a Contacts/Data
Files entry, its linked entries are also
printed.
4.
Select the printer emulation from the pop-up
menu.
BJ-10e Series is the default setting.
5.
Select Use Cut Paper (default) or Use
Continuous Paper from the pop-up menu.
193
6.
Select Printer Path from Wireless or Cable.
7.
When using A4-size paper instead of the
default Letter-size, press the A key. To return
to Letter-size, press the L key. A small A
appears at the top of the Print display when
A4-size is selected.
• When using Documents, the page size may be set
as A4, LETTER or LEGAL using Page Setup.
• The setting will be retained even after the unit is
turned off or the reset button is pressed.
8.
To print a specified group of entries:
1.
Select an application.
2.
Touch SEND and select “Print”.
3.
Select group from the “Print:” pop-up menu.
Select Printer Emulation and Printer Path, if
required.
4.
Printing the current display
You can print a copy of almost any display. Exceptions are confirmation displays (Yes/No), messages, etc. Printing of graphic images depends on
your printer’s capabilities.
When you complete your settings, touch OK.
Touch Set to save the print settings for future use.
You can press 2nd SEND to print a single entry.
However, the print display does not appear so you
cannot change the settings. It will be printed with
the current settings.
Touch OK.
To print the current display:
1.
Go to the display you want to print.
2.
Press 2nd P.
• Press ON at any time to cancel printing.
• Message displayed during transfers or momentarily displayed cannot be printed.
• With this operation, the print settings cannot be
changed. If you need to change the settings,
touch SEND and select “Print”.
194
Faxes
Print Conditions
• To cancel printing at any time, press ON. All
other key functions are inoperative.
• If you try to print a group of entries with your unit
locked, only non-secret entries are printed. To
print secret entries, you must first unlock your
unit, see p. 86.
• Entries are printed in Detail View format. For
example, collapsed Outlines topics would be
printed without hidden subtopics, etc.
• When printing graphics, if there is a transfer
problem or the print job is canceled while in
progress, the printer might not function properly
until it is turned off and on again.
• If you are in an application other than Documents, you must remove the paper manually
after printing. If you are using a Hewlett Packard
LaserJet Series printer, the paper will exit
automatically after printing.
• All four pages of the Notes will be printed even if
you have only drawn on one of them.
With the optional Sharp CE-FM4 Fax/Modem connected
to your unit, you can fax single Notes, Documents or
Scrapbook entries, or an entire Filer folder. See the next
section for more information about using PC card Fax/
Modems.
Fax communication over a cellular phone connection is
typically less reliable than using a standard telephone
connection. Please refer to your modem manual for
information on your modem's support for cellular, as well
as cellular communications guidelines.
Connecting the Fax/Modem:
1.
Turn your unit off.
2.
Connect the Fax/Modem to the Computer
Link port.
For more information, see the CE-FM4 operation
manual.
3.
Use a modular telephone cable to connect
the Fax/Modem to the wall jack.
Fax/Modem
(CE-FM4)
Wall jack
Modular cable
195
7
4.
3.
Turn your unit on.
Touch the “To:” button.
Fax Directory
Any of the three files in Contacts or Data Files can
be designated as the fax directory. Each time you
send a fax, the unit will allow you to select the fax
recipient from the fax directory. Once selected, the
unit will automatically use that person’s fax number
and extract other information for the cover sheet,
etc. By default Contact 1 (Business) is selected as
the fax directory.
7-2-3
4.
Touch Setup.
To set up the fax directory:
1.
From Notes, Documents, Scrapbook or Filer,
select the entry to be sent as a fax.
2.
Touch SEND and select “Fax”.
7- 2-3A
5.
Set all fields to properly match your Contact
data.
7-2-2
196
7- 2-3B
6.
When you complete your directory set up,
touch OK.
Detect:
Select Dial Tone for normal
settings. If using a line without dial
tone, e.g. PBX, select None.
Modem string: Check the Modem String box and
enter specific Fax/Modem initialization commands if necessary.
(When using CE-FM4, it is not
necessary to set this.)
Fax dialing address information can be entered
manually without using the fax directory.
Setting fax options
To send faxes, the following Fax/Modem options
must be configured correctly. If you use the CEFM4 Fax/Modem, you can send faxes with the
default settings. When dial tone is not used or
dialing does not work properly with the default
settings, change the Line Type to Pulse.
Port:
Line type:
Volume:
Select from 15-pin or PC card.
For the CE-FM4 Fax/Modem,
select 15-pin.
Select from Tone or Pulse.
Contact your telephone company if
you are unsure of which to use.
Select 1, 2 or 3 to adjust the
speaker volume for dial/connect
tones. Mute turns the speaker off.
Speaker volume does not function
with the CE-FM4 Fax/Modem.
To configure the Fax/Modem:
1.
From Notes, Documents, Scrapbook or Filer,
select the entry to be sent as a fax.
2.
Touch SEND and select “Fax”.
7
7-2-3B
197
3.
To change the fax options, touch Options.
Cover sheets and headers
You can set up cover sheets and headers so that
your name and phone number appear on each fax
page.
7-2-4
To set up cover sheets and headers:
1.
Touch SEND and select “Fax”.
2.
Touch Options and then touch the Cover
Sheet tab at the bottom of the display.
Set all fax options as required.
To cancel the new settings and return to the
default settings, touch Restore.
4.
When you complete your settings, touch OK.
7-2-5
3.
198
Enter the sender’s name and telephone
number in the header fields.
4.
8.
Touch the “From:” button.
Before sending a fax, check that the home time
and date set in your unit are correct. By law, your
name, fax number, time and date must appear on
the top of each fax page sent (see the inside front
cover of this manual). This information is inserted
automatically if entered correctly.
7-2-6
5.
Select the owner’s information to be used
with the fax cover sheet. As an alternative to
step 4, enter “From” information in the text
box. For more information, see p. 80.
Speed buttons
Frequently-dialed fax numbers can be assigned to
one of the six Speed Buttons in the Dialing display.
Touching a Speed Button dials that number
automatically.
When you complete your selection, touch OK.
6.
Check the Use Cover Sheet Graphic box as
required. To make or edit cover sheet
graphics, touch the Cover Sheet Graphic
button. For more information, see Scrapbook
on p. 63.
When you complete your Cover Sheet set up,
touch OK.
To set the Speed Buttons:
1.
Touch SEND and select “Fax”.
2.
Touch Options and then touch the Speed
Buttons tab at the bottom of the display.
When you complete your cover sheet graphic,
touch OK.
7.
Check the Shorter Cover Sheet box to use a
shorter cover sheet with less blank space.
199
7
Sending a fax
You can fax a single Notes, Documents or
Scrapbook entry, or you can fax an entire Filer
folder. The fax can be dialed automatically or you
can use manual dialing.
7-2-8
To send a fax:
1.
3.
4.
Select any of the six speed button fields in
the list. You can now edit the name (6
characters) and enter a fax number in the
Number fields below.
From Notes, Documents or Scrapbook, select
an entry, touch SEND and select “Fax”.
From Filer, select a folder, touch SEND and select
“Fax”.
Speed Button numbers can be made secret.
They are then displayed as asterisks so the
digits cannot be read.
N7-2-9
To make any Speed Button secret, touch the
Secret box.
5.
When you complete your Speed Button
settings, touch OK.
2.
Touch the “To:” button, select the recipient
from the directory, and touch Select.
To set up the fax directory, see p. 196.
You can enter the recipient's information directly
into the To field, then touch Fax# and enter the fax
number.
200
3.
Check that the fax number is correct and has
hyphens in the appropriate places.
4.
Check that the Use Cover Sheet box as
required. If you check this box, Preview
appears at the top of the display.
5.
Touch Preview.
7.
• The unit does not have an automatic redial
function. A message will indicate if the line is
busy and the fax transmission will be terminated.
• All four pages of the Notes will be faxed even if
you have only drawn on one of them.
When a fax transmission is completed without
any errors, the fax mode closes automatically
and the display returns to the last application
used.
The recipient's information from the Send Fax
display is automatically entered into the cover
sheet.
6.
Touch Fax.
Complete your settings and touch Start to
send the fax.
Some public phones need a special procedure.
1.
Go through the normal steps for sending a
Fax until "Dialing" dialog appears.
2.
Pick up the pay phone handset, insert a
credit card into the card slot, and then
immediately pull it out.
3.
Plug the phone cable into the data port and
touch Start on the unit.
4.
Do not hang up the handset until you confirm
that the receiving fax machine has picked-up
and you can hear its fax tone.
7-2-10
The directory fax number is displayed after “Touch
to use this:”.
• Select Local or Use 1+Number.
• You can touch any of the Speed Buttons.
7
201
Manual fax dialing
You may sometimes want to dial a fax number
manually so that you can hear dial tone and other
sounds. Manually dialing a fax number with your
unit is similar to using the speaker on a conventional fax machine when dialing. To hear dial tone,
you must set Volume in Fax Options to 1, 2 or 3.
For settings, see Setting Fax Options on p. 197.
• If you touch the Manual button, you should hear
a dial tone within a few seconds.
• Dial normally by touching the display number
pad. The manual number is entered in the top
field.
• Wait until you hear pick-up and fax tone from the
receiving fax machine, then touch Start.
• After touching Manual, and initializing the Fax/
Modem, the Manual button changes to the Hangup button. Touch Hang-up to stop the fax
transmission.
your transmissions and provides information on
faxes sent as follows:
• Status: NG (no good) or OK
• Number of pages sent
• To (addressee)
• Date/Time
• Source application
• Title
To use Fax Log:
1.
Touch TOOLS and select "Fax Log".
7-2-11
Press ON to stop fax transmission at any time.
Manual fax dialing is not supported when using a
cellular phone to send a fax.
2.
Use the scroll bars to move through the list.
To remove unwanted entries from the list,
select the entry and touch Delete.
3.
To leave Fax Log, touch Done.
Fax Log
Fax Log is a useful feature that keeps a record of
the faxes you have sent. Fax Log lets you review
202
Optional Cards
About fax numbers
You may sometimes find a fax number dials too
quickly for a connection to be made. Dialing can
be slowed by inserting commas in the fax number
field (for example, after an area code) for that
entry. Each comma inserts a one-half second
dialing pause. To do this, open the entry and insert
a comma in the appropriate place(s) in the fax
number field.
Conditions for sending faxes
When sending Documents entries as faxes,
certain conditions apply:
• Margin settings on the received fax may not
match your Documents entry.
• A preset font is used (you cannot select the font
or size).
• If legal size paper is selected and the receiving
fax machine has roll paper, legal-size pages are
printed. If the receiving fax uses single sheets,
legal-size pages are printed across two single
sheets.
A range of optional cards are available to suit your unit.
These include RAM cards, Flash Memory cards. (Not all
types of PC card can be used.)
Warning
Use only recommended PC cards. Attempt to use cards
that are not recommended may result in damage to the
main unit and/or data loss.
Installing optional cards in the card slot:
1.
Turn your unit off and close it.
2.
Press and release the eject button so it pops
out.
• Press the eject button fully before you release it,
otherwise it might not pop out.
1
2
203
7
3.
Push the eject button again so the protection
card pops out.
2
Pull the protection card out.
Protection card
204
Hold the card so its back faces the bottom of
the unit. Insert the card fully into the card slot.
Be sure to insert the card
to this point, if possible.
1
4.
5.
Using PC cards
The ZR-5700/ZR-5800 are extremely powerful and
flexible products due in part to their industry
standard PC card (formally "PCMCIA") Type II slot.
This allows you to use cards such as;
• SRAM memory cards
• FLASH memory cards
• Fax/modem cards (including cards that can be
used with your cellular phone).
• Pager Cards
Because the PC card standard was originally
designed for use with personal computers, some
limitations exists including the following:
• Not all PC card brands will work in the ZR-5700/
ZR-5800. Be sure to use only recommended
cards. You can get a list of these electronically
(such as via CompuServe or the Internet) or from
our Fax-on-demand service (612-397-8601).
Attempts to use non-recommended cards may
cause problems such as damage to the main unit
or the card.
• Some cards, especially Fax/modem cards,
require a lot of power. These cards will typically
drain the batteries very quickly. We recommend
using the AC adaptor or the external battery pack
when possible. When the batteries are low, many
cards will not work. Some cards may not work at
all without the AC adaptor or external battery.
If you will frequently be using a Fax/Modem card,
you may want to consider using Lithium batteries
which perform well under high-power drain
conditions.
Even though the BATT symbol does not appear,
some communication cards may not be used.
In that case, replace the operating batteries with
new ones.
We recommend that you use Lithium batteries or
an external power supply while using high-power
cards such as Fax/Modem cards.
Constant usage of many high-power Fax/Modem
cards will deplete a fresh set of alkaline batteries
in about 20 minutes, for example. Lithium batteries will perform significantly better under these
conditions. Under normal operating conditions,
however, Lithium batteries do not perform significantly better than alkaline batteries and may not
be cost effective. Be sure to best match your
battery selection to your particular usage.
205
7
• Be sure to turn the unit off before removing or
inserting any cards or you may lose memory in
either the unit or the card.
Store the protection card in a safe place and
replace it in your unit when there is no other card
installed.
• Additional types of cards may require the installation of an add-on software program before use.
SRAM and FLASH Memory Cards
The ZR-5700/ZR-5800 support up to 2MB SRAM
cards and up to 16MB FLASH cards which provide
you with different benefits as outlined below.
SRAM cards allow you to:
Store additional data created by the built-in
application.
Install Add-on software programs and store the
data created by these programs.
Other notes
When a PC card is inserted, the unit may take a
few extra seconds to turn on than normal.
When using SRAM cards, you may get a message
warning you that the card battery is low. Be sure to
change the card battery as soon as possible.
While changing the battery be sure to do so
without removing it from the main unit and while
the unit is still on with this message showing or
you will lose the data stored on the card. The ZR5700/ZR-5800 will only provide enough power to
protect the card during a battery change when this
message is displayed on the screen. For more
details, refer to the manual for the card.
206
FLASH cards allow you to:
Create and store multiple backups (archives) of
your main unit data and Add-on software programs
(a complete backup).
Install Add-on software programs (but NOT the
data created by these programs which will automatically be stored in the main memory).
A maximum of 2MB on a FLASH card can be
used for Add-on software applications.
Notes about Memory cards
FLASH cards are ideal for backing up your ZR5700/ZR-5800. They require no back-up battery
and will back up everything in the main unit.
FLASH cards require more power than SRAM
cards when being written to. When creating a
backup or especially when installing Add-on
software programs onto a FLASH card, try to use
an external power supply such as the AC Adaptor
in order to extend the life of the main unit batteries.
When memory cards reside in the main unit, they
do slightly affect the battery life. The effect on the
battery life depends upon the type of card and
your usage.
• If a message appears that indicates there is a
problem with the card, initialize the card. Note
this will delete all data on the card.
• Never move the protection switch while the card
is inserted in the unit.
SRAM cards
An SRAM card can be used to expand your unit's
memory capacity. Additional Add-on software
programs and additional data for the built-in
applications can be stored on an SRAM card. It is
important to note that SRAM cards DO NOT
expand the amount of main memory but instead
add a second memory bank, which can be
accessed via the TOOLS menu.
Installing an SRAM card
Important: Before installing an SRAM card for the
first time be sure to delete your password. After
the card is installed you can re-enter your password. As a security precaution, you cannot install a
card into your unit unless its password matches
the unit's password. When you enter a new
password while the card is installed, the password
will be installed on both. See p. 85 for more details
about passwords and the Secret Function.
207
7
To initialize a new SRAM card:
1.
Install the card.
2.
Press ON.
To copy data to the SRAM card:
Note that although the data of the communications
applications (those applications found under
"TOOLS") will be copied to the SRAM card, it
cannot be accessed from there. This data will,
however, be copied back to the main memory if
you ever decide to copy all data back from the
SRAM card to the main memory.
A message telling you this card needs to be
initialized will appear.
3.
Touch Initialize.
4.
Touch Yes to confirm.
1.
Install the card and then turn the unit on.
2.
First be sure your unit is unlocked and touch
TOOLS then select "Backup".
3.
Touch Backup to make a copy of the major
built-in application data onto the card. Note
that will delete ALL existing data on the card,
including any installed Add-on software
applications.
4.
Touch OK to confirm. Note the unit will take a
few seconds to re-start after this operation.
To initialize a previously used SRAM card:
1.
Install the card.
2.
Hold down ON while pressing and releasing
the RESET switch.
3.
Touch No when prompted to clear the main
memory.
4.
Touch Yes when prompted to clear the card
memory.
Note that this will delete all data on the card.
208
You can also copy the SRAM card data back into
the main memory by selecting Restore in step 3.
Note that using the Restore operation will delete
ALL existing data in the main memory including
any installed Add-on software applications.
To view and store data on an SRAM card:
1.
Install the card and then turn the unit on.
2.
Touch TOOLS and select RAM Card.
3.
Select PC Card in the Set Data Source
screen and touch OK.
CARD will appear at the top of the display to
indicate you are now accessing the SRAM
memory. Note that now all of the major built-in
applications will be accessing the SRAM card
memory. You can't set this individually for each
application. To set it back again, you must use the
steps above and select Main Unit.
Add-on software programs are not backed up
when backing up to a SRAM card. However, the
data associated with Add-on software programs is
backed up. If you delete Add-on software programs from the unit, but wish to use the programs
and their associated backed up data again, simply
re-install the software programs either before or
after you perform a Restore from the SRAM card.
Notes about SRAM cards
Note that when you set the data source to be the
SRAM card, the communication applications on
the ZR-5700/ZR-5800 (found in TOOLS) DO NOT
use this memory for data storage. Thus when you
switch the data source to the SRAM card but then
touch TOOLS and then CompuServe, for example,
the data you view and create for CompuServe will
still reside in the main unit. This can be useful for
the user who wants to "simulate" using the main
memory and card memory as one. This user can
use the main memory for these communications
programs and use the card memory for the other
applications without having to bother constantly
changing the data source.
The Search and Filer features cannot cross data
sources (Main unit and SRAM card). You cannot
search across both memory locations, for example. You have to first switch the data source to the
desired memory location. In the case of Filer, you
will actually have two Filers; one in the main
memory and one on the SRAM card memory.
SRAM cards have a battery which holds the
memory (just as the main unit does). Be sure to
keep a separate backup of the card data on a
Personal Computer, for example. See the precaution earlier in this section.
209
7
FLASH cards
2.
Additional Add-on software programs and multiple
backup (archive) files of your main unit can be
stored on a FLASH card. FLASH cards cannot be
used to provide additional memory for the built-in
application as SRAM cards can. You cannot view
backup (archive) files, just restore them to the
main unit if necessary.
to adjust the memory
Data Backup Area is used for archives of the main
unit. This size can be set for as much memory as
the card has. Be sure that you leave enough space
for Backup file. A full ZR-5800 uses about 1.7MB
of space. A full ZR-5700 uses about 650KB of
space.
Program Area is used for storing Add-on software
programs and can be set to a maximum of approx.
2MB.
To initialize a new FLASH Card:
1.
Touch and
partition size.
Install the card and then turn the unit on.
The following initializing screen will appear.
3.
Touch OK to initialize the card.
To initialize a previously used FLASH Card:
210
1.
Install the card and then turn the unit on.
2.
Touch MORE.
3.
Touch DELETE and select "Initialize Flash
Memory Card".
To backup your main unit data to a FLASH Memory
card:
1.
Make sure your unit is unlocked.
2.
Touch TOOLS and then touch Backup twice.
5.
Touch OK.
Note that the unit will take a few seconds to restart after this operation.
Note that this operation backs up ALL main unit
data, including Add-on software programs and
their data. A backup operation does not delete
your main unit data.
To delete an archive from a FLASH card:
First be sure your unit is unlocked.
3.
4.
1.
Touch TOOLS and then touch Backup twice.
2.
Select the Backup file you want to delete and
then touch Delete.
3.
Touch Yes to confirm the deletion.
Touch Archive.
Name this backup file.
211
7
To restore your main unit data from an archive file:
Note that this will delete ALL information stored in
the main memory including Add-on software
programs and their data.
First be sure your unit is unlocked.
1.
Touch TOOLS and then touch Backup twice.
2.
Select the Backup file you want to use to
restore your main unit data and touch
"Restore".
Notes about FLASH cards
FLASH cards do not require a backup battery.
Add-on software programs installed onto a FLASH
card automatically store their data onto the main
memory.
Backup time depends on the amount of data
stored in your unit.
Approximate backup and restore times when the
unit memory is full:
ZR-5700
Backup: 1.5 minutes / Restore: 1 minute
ZR-5800
Backup: 3 minutes / Restore: 1.5 minutes
Fax/Modem cards
3.
Touch Yes to confirm.
If you back up ZR-5000 or ZR-5700 main unit data
containing Add-on software program(s) onto the
Flash memory card and restore it on a ZR-5800,
the Add-on software program(s) will not work and
vice versa.
212
The PC card standard means you can use cellular
ready and high speed Fax/Modem cards. Be sure
to check out the accessory brochure included in
your ZR-5700/ZR-5800 box for a list of compatible
cards that you can use.
More
Notes about Fax/Modem cards
When using these Fax/Modem cards with the builtin communications software, be sure to set the
modem settings to reflect this in each of these
applications.
For increased cellular communications reliability
with most cellular-ready modems, we recommend
you consult your modem manual for the proper
cellular modem initialization string.
For more information, see the Q&A on p. 36, the
included accessory brochure, the CompuServe
forum (GO ZAURUS), or our Fax-on -demand
service at 612-397-8601.
The MORE area provides access to optionally purchased, Add-on software programs you install as well as
a generic file storage area called “PC FILES”.
Add-on software programs
Add-on software programs add functionality to
your ZR-5700/ZR-5800. These programs are
especially written for your ZR-5700/ZR-5800 by
Sharp and independent software developers. You
cannot run PC software on your ZR-5700/ZR5800. Once installed, you can access and run
these software programs from the MORE area by
simply touching them twice.
7
For a list of currently available Add-on software
programs for your ZR-5700/ZR-5800 and where
you can purchase them:
213
• Call Sharp’s 24 hour automated Fax-on-demand
service at 612-397-8601
• Go to the ZAURUS forum on CompuServe and
download the appropriate files from the Zaurus
library.
• Call 800-BE-SHARP and request a free brochure.
from another ZR-5700/ZR-5800. This software
could be installed via the PC Files area (see PC
Files).
See the directions included in the Add-on software
program instruction manual for more details about
installation.
Software on SRAM cards.
The MORE tool bar:
[PC FILES]
[RUN]
[DELETE]
Changes to the PC Files Index
(see PC Files)
Executes the currently selected
program (you can also simply
double touch the program).
Deletes all programs or the last
installed program.
Up to 20 Add-on software programs can be
installed into the ZR-5700/ZR-5800. You can also
install up to 20 Add-on software programs onto an
SRAM or FLASH memory card. Generally Add-on
software programs installed on an SRAM card will
give you a choice as to where you want to store
the data created by the Add-on software program.
You can set the data storage location to be the
card or the main memory.
Installing Add-on software programs
In general, Add-on software programs are distributed on a PC and floppy disks. You then need to
install the software using a PC Link cable or
infrared adaptor. PC Installer software is usually
included on the disk. You can select the main
memory or card memory as the installation
destination. It is also possible that you might
download Add-on software (e.g. from
CompuServe) or have software beamed to you
214
Software on FLASH cards.
Add-on software programs installed on FLASH
cards, automatically store their data in the main
memory. Program data cannot be stored on the
FLASH card. Although the ZR-5700/ZR-5800
supports up to 16MB FLASH cards, only 2MB can
be used for Add-on software programs.
Deleting add-on software programs
Using the delete tool, you can delete either all
installed programs or the last installed program
(farthest down and to the right in the MORE
display). You cannot simply delete any individual
program so be sure to install your program in order
of importance when possible.
PC Files
From the MORE area of your ZR-5700/ZR-5800,
you can access the PC Files area by touching the
PC Files icon. PC Files enables you to easily
communicate with people not using a ZR-5700/
ZR-5800 (such as PC users in your office). PC
Files area is a kind of “File Manager” that provides
you with the following capabilities:
To delete Add-on software programs:
1.
From the MORE display (on the Main unit or
PC card), touch DELETE.
2.
Select “All Installed Programs” or “Last
Installed Program”.
3.
Touch Yes to confirm the deletion.
Using Add-on software programs written for the ZR5000
In general, all Add-on software programs designed
for the ZR-5000 will also work with the ZR-5700/
ZR-5800 except those built-into this unit including
AT&T Mail, ZR-Pager, and CompuServe for
Zaurus. If you insert a memory card that contains
these programs, you won’t be able to run them
(nor will you need to as they are available in
“Tools”).
• You can temporarily store incompatible files that
can’t be used on your ZR-5700/ZR-5800 (such
as an E-Mail attachment sent to you by a coworker). Later you can use the Data Exchange
Utility to move this file to your PC.
• You can convert ASCII text and RTF files to the
Documents Application and you can convert
Excel 3.0 and Excel 4.0 files to the Spreadsheets
Application. These commands are available from
the SEND menu in these applications. If you are
receiving files from a PC user, ask them to send
files in these formats if possible.
• You can attach these files to an E-mail attachment. Because you can store generic file
formats here, these attachments very likely can
be viewed by the recipient.
215
7
• You can install Add-on software programs from
here (such as a program downloaded from a
CompuServe Forum) to the main memory or to a
memory card (SRAM or FLASH).
• You can beam files stored here to another ZR5000 series.
• You can copy files to and from an SRAM memory
card.
• You can upload files to a remote system using
the Terminal mode.
As an example you may create a memo in Documents (with graphics) and then convert the file to
an RTF file (compatible with MS Word). You could
then attach this file to a CompuServe E-mail and
send it to a co-worker who could then open the file
using virtually any Word Processor. The same
could be done with a Spreadsheets file.
PC Files tool bar:
The PC Files tool bar includes the following
functions:
[S’WARE] Returns you to the MORE display
[INSTALL] Installs an Add-on software program to
the main memory or the PC memory
card.
[DELETE] Deletes the currently selected file.
[TO DOC] Converts an ASCII text file to Documents.
[COPY]
Copies a file from the main memory to
the SRAM card memory and vice
versa.
[SEND]
Send the selected file to/from another
ZR-5000 series via infrared transmission or via optional cable.
Getting Files into the PC Files area
There are a number of ways a file might be loaded
into the PC FILES area including:
• Attachments detached from an E-Mail message
(such as CompuServe, LAN E-Mail, etc.).
• Library files downloaded from CompuServe
Forums.
• Files downloaded using the Terminal Software.
The files you have got into the PC Files area are
listed in chronological order.
216
Data Exchange
• Files from your PC you downloaded directly
using the Windows or Macintosh Data Exchange
Utility or remotely using Sharp’s remote access
software.
• Files beamed (unit to unit) from another ZR-5000
series.
PC Files on Memory Cards
When an SRAM card is installed, there will be two
PC Files areas; one in the main memory and one
on the SRAM card. Note that FLASH memory
cards do not have a PC Files area. You can only
store Add-on software programs and data backup
archives on FLASH cards.
Add-on software programs in PC Files
There are many different ways to exchange data,
entries, folders, or all entries between your unit and
other devices, including Sharp organizers and personal
computers. The table below provides a summary of
transfer devices, data types, and tasks suited to each
device.
• Features and capabilities may vary depending
upon the Sharp or third party software used.
• Sleep function is disabled in all transfer modes.
• Information about Printer, Fax, RAM card and
Flash Memory card, are described in previous
sections.
• Use only PC cards (RAM card/Flash Memory
card) initialized by a ZR-5000 series. You cannot
use PC cards initialized by any other devices,
including PCs.
Add-on software programs cannot be executed
from the PC Files area. You must first install this
software to the MORE area and then run it from
there. Simply select the program file and touch
INSTALL.
When you convert a TXT or RTF PC File imported
from a PC or Macintosh to a Documents entry by
selecting "Get from PC File" (see p. 181), be sure
the last three characters of the File Name are
"TXT" or "RTF".
217
7
Data and transfer direction
( : from ZR-5700/ZR-5800,
: to ZR-5700/ZR-5800)
Transfer
Add-on
Main
device
application software PC Files
programs
data
Single entry
Printer Entire file/
NA
application
NA
(See p. 192) Filer folder
Single
Notes,
Remote
Documents,
fax
Scrapbook
machine entries
(See p. 195) Filer folder
RAM Card All entries
NA
NA
NA
Single file
All files
Data and transfer direction
RecomPeripherals
mended
required
tasks
Transfer
device
CE-IR1 +
PC Printer Wireless
transfer of
Cable
None for printer data
IrDA
compatible
printers
OZ-5000
OZ-6000
OZ-9000
series
(See p. 226)
CE-FM4 or
Send faxes
PC card
modem
NA
Application
memory
and extra
application
features
NA
Memory
for multiple
archive
files
(See p. 207)
Flash
All
All entries
Memory
programs
Card
(See p. 210)
Single entry
Another Entire file/
ZR-5000 application
Filer folder
series
(See p. 219)
218
NA
All files
None for
Single file infrared
transfer;
All files
CE-315L
for cable
transfer.
Exchange
data
with other
ZR-5000
series
( : from ZR-5700/ZR-5800,
: to ZR-5700/ZR-5800)
Add-on
Main
application software PC Files
programs
data
Single entry
Entire file/
application
Filer folder
Single entry
Personal Entire file/
application
computer Filer folder
(See p. 223)
NA
NA
NA
RecomPeripherals mended
required
tasks
None for
infrared
transfer;
CE-315L
for cable
transfer.
Exchange
data
with Sharp
Organizers
Software
plus:*
CE-IR4 or
Single file CE-137T+
null model
cable or
File
Link cable transfer
with other
personal
computers
Remote
computers,
public
Differs depending on application
E-mail
services
(See p. 226)
* Optional software may be required.
NA: Not applicable
CE-FM4
or
PC card
modem *
Data Transfer with Other Sharp Devices
Your unit can transfer data with other Sharp Devices as
follows:
• ZR-5700/ZR-5800 to ZR-5700/ZR-5800 via infrared
transfer or cable.
• To/From ZR-5000 via infrared transfer or cable.
• To/From OZ-5000/OZ-6000/OZ-9000 series units via
infrared transfer or cable.
Data transfer between ZR-5700/ZR-5800s
or with ZR-5000
Data can be transferred easily from one unit to
another using the GET and SEND keys. You can
also use SEND Unit to Unit via infrared port or
Data Transfer Cable.
• Transfer procedures vary according to whether
single entries, folders, files or all entries are
transferred.
• Single entries or all entries can be transferred for
Activities, Notes, Documents, Outlines,
Spreadsheets (between ZR-5700/ZR-5800s only)
and Scrapbook.
• Single entries or all file entries can be transferred
for Contacts and Data Files.
• Single folders can be transferred from Filer.
• Single file can be transferred for PC Files.
• To transfer whole applications, files, or entries
marked as secret, both units must be unlocked,
see p. 86.
Wireless infrared transfer (Beaming)
• Wireless transfer is possible with another
ZR-5700/ZR-5800, with a ZR-5000 unit or with a
OZ-5000/OZ-6000/OZ-9000 series unit.
• No special hardware is required for wireless
infrared Unit to Unit transfer.
• The units must be correctly aligned so their
infrared ports face each other and are less than
50 cm (20 inches) apart, see p. 241.
45
7
• The units should not be more than three-quarters
open during transfer or the infrared beam might
be blocked.
• No special software setup is required to transfer
single entries or folders using the GET and
SEND keys.
219
• Keep the infrared port clean with a soft, dry cloth.
Dust on the port restricts data transfer.
• Avoid direct sunlight.
• Infrared transfer is simple, but it is easily affected
by ambient conditions such as external light,
distance, transfer angle, etc. Received data
should be confirmed after the transfer.
Quick transfer
Single entries can be quickly exchanged between
two units at any time using the wireless infrared
transfer.
To quickly transfer single entries:
1.
Turn both units on.
2.
On the sending unit, select the entry you
want to send in Index View or Detail View.
3.
Press GET on the receiving unit.
4.
Press SEND on the sending unit.
The entry is transferred and added to the proper
application data in the receiving unit. It will also be
assigned to the IN folder in Filer.
220
Unit to Unit transfer
Unit to Unit transfer lets you send:
• Single entries or all entries for Activities, Documents, Notes, Outlines, Spreadsheets and
Scrapbook.
• Single entries or all file entries for Contacts and
Data Files.
• Single files for PC Files.
• Filer folders.
For Unit to Unit transfer to take place correctly:
• Both units must use the same path; Cable or
Wireless.
• If Cable is selected, connect the optional Data
Transfer Cable CE-315L between the two units.
• Check the orientation of the cable when it is
connected.
• Disconnect the cable as soon as the transfer is
completed to conserve battery power.
• If Wireless is selected, correctly align the two
units so that their infrared ports face each other
and are less than 50 cm (20 inches) apart.
To perform a Unit to Unit data transfer:
1.
Open the application.
2.
Touch SEND and then select “Unit to Unit”.
5.
Select the Unit to Unit Path from Wireless or
Cable.
6.
When you complete your settings and the
other unit is ready to receive data, touch OK
to transfer the data.
To receive a Unit to Unit data transfer:
1.
Open the application you want to receive. If
you are in the Contacts, Data Files or Holiday,
also select the file.
2.
Touch SEND and then select “Unit to Unit”.
3.
Select Receive.
4.
Select Unit to Unit Path from Wireless or
Cable.
5.
When you complete your settings, touch OK
and wait for the data to be transferred.
7
7-7-1
3.
Touch Send and select the entry/entries from
the pop-up menu.
4.
When sending Contacts or Data Files entries,
check the With Link Information box as
required.
For detailed steps for the OZ-5000/OZ-6000/OZ9000 series, see the respective manual.
221
Corresponding applications
When transferring data from your unit to OZ-5000/
OZ-6000/OZ-9000 series, the following applications correspond:
Schedule - Appointment
To Do - To Do
ANN 1 - Holiday (Yearly by date)
ANN 2 - Holiday (Yearly by day)
Tel 1 - Contact 1
Tel 2 - Contact 2
Tel 3 - Contact 3
User File 1 - Data File 1
User File 2 - Data File 2
User File 3 - Data File 3
Notebook, Memo - Documents
Outline - Outlines
Scrapbook - Scrapbook
• For Appointments, Contacts and Data Files
entries, if the Filter function is turned on, only
filtered entries are sent. For Filer, transferred
entries are stored in the proper source applications and are also automatically assigned to the
IN folder on the receiving unit. After the transfer,
move IN folder data to another folder, see p. 77.
• When transferring data from the OZ-5000/OZ6000/OZ-9000 series to the ZR-5700/ZR-5800
from an application in different format, a warning
message may be displayed.
You should check whether all the data was
transferred successfully after selecting OK.
222
Transfer conditions
• Press ON at any time to cancel a transfer.
• Received data is stored and appended to existing
data in the selected application.
• After a transfer using GET and SEND on the
keyboard, the data is also automatically assigned
to Filer’s IN folder so that you can check it.
Always try to keep the IN folder empty.
• If a RAM card is installed and selected as the
data source, data in the card can also be selected for data transfer, see p.90.
• For Contacts or Data Files, the receiving file
must be set up with the same fields. If a field type
(text or picture) is different, the field cannot be
transferred.
Be sure that the sending unit does not have a
blank (no characters) Telephone/Contact or User
File/Data File field name or else the ZR-5700/ZR5800 will not be able to receive information (an
error message will appear).
• GET and SEND on the keyboard do not work for
cable transfers. These keys initiate an infrared
transfer regardless of the selection for Unit to
Unit path or if a cable is connected.
• Transfer of data via the infrared port requires no
other devices. However, infrared transfer is easily
affected by interference from ambient conditions.
Use the optional data transfer cable CE-315L to
ensure a more reliable connection, see p. 220.
Data Transfer with Other Computers
Your unit can exchange data with personal computers
(PCs) and other computers.
4.
Touch TOOLS and select PC Link.
7-8-1
PC Link
Using Sharp’s optional PC Link software and
hardware package (or third party software packages), you can exchange data with a personal
computer.
Some PC Link software allows data transfer via
the infrared port using the optional CE-IR4
wireless interface. You can also use your unit in a
remote location, then transfer the data to your
desktop computer when you return to your office.
To check the availability of PC-Link products that
perform these functions, call 800-BE-SHARP.
To set up your unit for use with PC Link software for
ZR-5700/ZR-5800:
1.
2.
For infrared transfer, connect the CE-IR4
wireless interface to your PC. For details, see
the CE-IR4 manual.
Press ON.
Select the PC Link Path from Wireless or
Cable, then touch OK.
Your unit is now ready for transfer. For further
transfer procedures, check your PC Link software
manual.
Press ON at any time to exit the PC Link mode.
To set up your unit to use PC Link software for
OZ-7000/OZ-8000/YO-600/ZQ-5000 series:
1.
Make sure the unit is turned off.
2.
Connect the PC Link cable to the 15-pin
cable jack on your unit, and to an available
communications port on your PC.
3.
Press ON.
4.
Touch TOOLS and select PC Link.
5.
Touch Cable (Import).
Make sure your unit is turned off.
For cable transfer, connect the PC Link cable to
the 15-pin cable jack on your unit, and to an
available communications port on your PC.
3.
5.
7
Your unit is now ready for data transfer.
For detailed steps for the PC Link software for OZ7000/OZ-8000/YO-600/ZQ-5000 series, see the
respective manual.
223
Corresponding applications
When transferring data between OZ-7000/OZ8000/YO-600/ZQ-5000 series and ZR-5700/ZR5800, the following applications correspond:
• Schedule - Appointment
• To Do - To Do
• ANN 1 - Holiday (Yearly by date)
• ANN 2 - Holiday (Yearly by day)
• Tel 1 - Contact 1
• Tel 2 - Contact 2
• Tel 3 - Contact 3
• User File 1/Business Card - Data File 1
• User File 2 - Data File 2
• User File 3 - Data File 3
• Memo - Documents
• Outline - Outlines
To exchange data with a OZ-5000/OZ-6000/OZ9000 series unit, use the wireless transfer method
(see p. 219) or Unit to Unit transfer method (see p.
220).
224
Organizer Link software for Other Sharp
Products
To use Organizer Link software (designed for OZ7000/OZ-8000/YO-600/ZQ-5000 series), the
following conditions apply.
When sending data:
• Application data not supported by Organizer Link
cannot be sent. (Data File 1 corresponds to
Business Card in the OZ-8000/YO-600 series.)
• If you try to exceed link character transfer limits,
excess data is not sent.
• Documents entry tab codes are converted to
carriage return [ ] characters on a computer. If
you restore the Documents entry to your unit,
converted carriage returns do not change back to
tab codes, so the original layout (and text styles)
are lost.
• The first 20 characters (or first line of text) of a
Memo entry received as a Documents entry are
entered as a title and also appear in the text. If
you restore this data to the computer, the title (or
first 20 characters) are redundant.
• For Contacts, free field names and contents
cannot be sent over a OZ-7000 series Organizer
Link.
When using OZ-8000 series Organizer Link:
• You cannot transfer the following data: DAILY
ALARM, TEL FILE NAME, TEL/BUSINESS
CARD (corresponds to Data File 1) FREE FIELD
NAME and USER’S DICTIONARY (corresponds
to Word key). If you attempt these transfers, no
error messages are displayed, but the data is not
transferred.
• You cannot transfer a Data File 1 (Business)
entry if it has no data in its Name field, and you
cannot transfer any complete file containing such
an entry.
When receiving data:
• If an Outlines entry exceeds 32 Kb, only the first
32 Kb of data are received by your unit. Any
subsequent text and entries are not transferred.
• For Memo entries received in Documents, the
first 20 characters, or the first line of text, are
entered as a title and also appear in the text field.
• For Memo entries received in Documents, the
number of pages displayed in Index View are
shown as **. Once data has been transferred,
open the entry in Detail View and store it again
after pressing BS or making some changes.
• Only suitable application data can be transferred.
(Period mode data from the OZ-8000/YO-600
series cannot be received by your unit.)
• If you used free fields in TEL (corresponds to
Contacts) or Business Card or User File (corresponds to Data Files) on the other unit, you must
set the number of fields in Contacts or Data Files
on your unit to be the same (e.g. 8 for the 8000
series) before transferring information, or the
data in the free fields is not transferred to your
unit. Also, if a field type (text or picture) is
different in the two units, it cannot be transferred.
• When transferring Business Card entries from a
YO-600 or OZ-8000 series unit to Data File 1 or
vice versa, data is entered into the corresponding
fields. Even if Data File 1 fields are renamed,
data is transferred to or from the fields with
corresponding default names.
• When receiving a Business Card entry, if field
contents would exceed 2048 characters (the limit
for a Data File 1 entry), neither that field nor any
subsequent fields of the Business Card entry are
transferred.
225
7
Special Communications Applications
Certain built-in or optional applications allow your unit to
serve as a powerful hand-held data communications
tool. Connecting to a variety of information services or
networks via telephone or cellular phone lets you stay in
touch with the world, wherever you are.
Remote Link
Remote Link allows you to exchange information
between your unit and a PC, more flexibly than
ever. This gives you greater control and security for
your data, and is especially valuable for people
who spend a lot of time on the road and away from
their office PC.
Optional Remote Link software for your personal
computer is required to use the Remote Link
function.
• Remote File Access lets your unit directly access
your PC's data via a remote connection, eg. a
cellular phone.
• Enhanced Import/Export utilities now allow you to
exchange data with a PC via the Infrared link in a
wide variety of standard file formats.
• Direct Import/Export utilities let you read or write
data for popular PC applications, including
Microsoft WORD and EXCEL, for full compatibility with your PC.
• For details, see the Remote Link software
manual.
226
Terminal Mode
Terminal mode is a special utility which allows your
unit to work as a powerful data communications
tool. Together with an optional fax modem or PC
card modem, you can use Terminal mode to
exchange data with a remote computer or system,
or link to a BBS (bulletin board service) for on-line
information access.
Terminal mode provides a wide range of data
communication settings and methods, allowing you
to connect to almost any computer or system. For
full details of Terminal mode, see the separate
manual provided with your unit.
Message
Optional Zaurus Mail software for your personal
computer is required to use the Message function.
Message lets you send and receive messages and
data to/from other unit’s users.
• You can use your personal computer as a host
for sending and receiving messages.
• You can also attach messages when sending and
receiving Filer folders and PC Files.
• For details, see the Zaurus Mail software manual.
• Call 800-BE-SHARP regarding availability of
Zaurus Mail software for your PC.
CompuServe Access
CompuServe Access allows you on-line access to
CompuServe using your unit. Simply select
CompuServe from Tools, connect to a telephone or
cellular phone using a modem or PC card, and
you're ready to get on-line! Now you no longer
need to carry around a bulky PC just to stay in
touch on the road. The CompuServe Access lets
you use your unit to:
• Send and receive mail via CompuServe, Internet
and other electronic mail networks and services.
• Obtain up-to-the-minute news, stock market
prices, financial information and weather reports.
• Join one of CompuServe's many exciting specialinterest forums.
• Access CompuServe's extensive information
databases.
• Use the touch-pen for all convenience of a true
graphical user interface (GUI).
AT&T Mail Access
AT&T Mail Access allows you to use your unit to
send and receive mail messages from almost
anywhere, via AT&T Mail. After selecting AT&T
Mail Access from TOOLS, you can use a fax
modem or PC card to let your unit connect to the
AT&T Mail service via telephone or mobile phone.
Now you never need to be out of touch whenever
you're travelling on the road.
• AT&T Mail Access lets you use your unit to
create messages to be sent via AT&T Mail.
• Managing your messages is easy, with facilities
to file, delete and search for messages.
• Convert your messages into documents for
editing using your unit.
• Built-in address book makes it easy for you to
manage your mailing lists.
• For details, see the separate manual provided
with your unit.
• For details, see the separate manual provided
with your unit.
227
7
ZR-Pager
ZR-Pager allows you to send pager messages from
your unit, wherever you are. Using ZR-Pager you
can create pager messages and send them via
telephone or cellular phone using the optional fax
modem or PC card modem. And with the optional
Pager Card, you can even receive, view and store
incoming pager messages using your unit. ZRPager and a Pager Card transform your unit into a
sophisticated personal communications tool.
• Use ZR-Pager to create pager messages for any
pager service you register, then send via telephone or cellular phone.
• Use a Pager Card to receive messages from
pager services, as well as CompuServe, America
Online and other on-line services.
• Register the details of any pager services you
want to send messages to.
• Receive news updates, stock quotes, financial
information and even sports results sent by pager
services.
• File incoming pager messages for viewing and
editing using the Document application.
228
• Send pager messages to another unit user with
ZR-Pager and a Pager Card.
• For details, see the separate manual provided
with your unit.
Appendices
A. Key Notations
Key
A. Key Notations
B. Reset
C. Troubleshooting
D. Battery Replacement
E. Specifications
Representation in text
Function
ACTIVITIES
Opens the Activities application.
CONTACTS
Opens the Contacts application.
Press again to switch between
Contact 1, 2 and 3.
DATA FILES
Opens the Data Files application.
Press again to switch between
Data File 1, 2 and 3.
NOTES
Opens the Notes application.
DOCUMENTS
Opens the Documents application.
OUTLINES
Opens the Outlines application.
ACTIVITIES
CONTACTS
DATA FILES
NOTES
DOCUMENTS
OUTLINES
SPREADSHEET
SPREADSHEET Opens the Spreadsheets
application.
CALC
Opens the Calculator.
SCRAPBOOK
Opens the Scrapbook.
CALC
SCRAP
BOOK
229
Key
Representation in text
Function
FILER
Opens the Filer.
SEARCH
Initiates the Search function.
HELP
Calls the on-line help feature.
TOOLS
Opens utilities and user preferences.
MORE
Accesses installed PC cards or
Add-on software.
ON
Turns the unit on.
QUIT
Interrupts printing and data
transfer.
OFF
OFF
Turns the unit off.
GET
GET
Receives data from another unit
via the infrared port.
SEND
SEND
Sends data to another unit via the
infrared port.
2nd SEND
Prints selected entry or folder
when a printer is connected.
Key
CANCEL
Representation in text
Function
CANCEL
Clears entries that have not been
stored. Cancels a menu, selection
or operation; returns to a previous
display.
MENU
Opens the tool bar menu.
NEW ENTRY
Opens a new entry in an application.
FILER
SEARCH
MENU
HELP
TOOLS
MORE
QUIT
NEW
ENTRY
NEW ENTRY Clears field contents when entering or editing data.
Moves the cursor one character to
the left. In Outlines, promotes a
topic one level (to the left).
ON
230
2nd
Moves the cursor to the beginning
of a line.
Moves the cursor up one line.
Scrolls the display up.
2nd
Moves the cursor to the beginning
of a field, or moves the cursor to
first line of a field.
Key
Representation in text
2nd
Function
-
Moves the cursor to the end of a
field, or moves the cursor to last
line of a field.
BS
!
1
2nd
Moves the cursor to the end of a line.
PREV
Moves the cursor between fields.
Steps up through entries or
screens. Continues a keyword
search backward.
NEXT
NEXT
)
0
Moves the cursor between fields.
Steps down through entries or
screens. Continues a keyword
search forward.
1-0
1-
+
Moves the cursor down one line.
Scrolls the display down.
Moves the cursor one character to
the right. In Outlines, demotes a
topic one level (to the right).
PREV
Key
=
Representation in text
-
Enters a hyphen.
BS
Enters the symbol +.
Backspace key; deletes the
character to the left of the cursor.
BS
A
Function
Z A-Z
Enters the symbol =.
Enters the letters A to Z.
2nd Q
Inserts a new topic in Outlines.
2nd W
Moves family in Outlines.
Shows/Hides Linked Entries in
Contacts/Data Files.
2nd E
Expand/Collapse topics in outlines.
2nd T
Stamps the current local time at
the cursor position in an entry.
2nd Y
Sets the text style to plain in
Documents and Spreadsheets.
2nd U
Underlines any text style in
Documents and Spreadsheets.
Enters numerals 1 to 0.
0
Enters symbols.
231
Key
Representation in text
Function
Key
Representation in text
Function
2nd I
Sets the text style to italics in
Documents and Spreadsheet.
2nd K
Enters an accent mark ´ (then
enter a letter).
2nd O
Sets the text style to bold in
Documents and Spreadsheet.
2nd L
Enters an accent mark
enter a letter).
P
Enters PM in a time field.
2nd Z
Undo [DEL] in Notes and last
operation in Spreadsheets.
2nd P
Prints the current display (with
printer connected).
2nd X
Cuts the specified text, picture or
entry to the clipboard (for pasting).
2nd C
Copies the selected text, picture or
entry to the clipboard (for pasting).
2nd V
Pastes text, a picture or an entry
from the clipboard to the cursor
location.
(then
A
Enters AM in a time field.
2nd A
Redo an undone operation in
Spreadsheets.
2nd D
Stamps the current local date at
the cursor position in an entry.
2nd F
Searches for specific text in any
application(s).
2nd B
Enters an accent mark ˆ (then
enter a letter).
2nd H
Enters an accent mark ¨ (then
enter a letter).
2nd N
Enters the French character Ç.
Enters an accent mark ` (then
enter a letter).
2nd M
2nd J
Enters the German character β.
TAB
Enters a carriage return.
Enters a tab in Documents.
232
Key
Representation in text
Function
Switches letters between uppercase
and lowercase when held. Enters
symbol above a key when held while
the key is pressed.
,
,
,
Enters a comma.
2nd ,
Enters a double quotation mark.
,
:
.
Enters a quotation mark.
.
Enters a period. For Calculator, a
keyboard period acts as a decimal
point.
2nd .
Enters a semicolon.
Key
Representation in text
WORD
WORD
?
SMBL
SMBL
SMBL
SPACE
DEL
Caps lock key; switches letter keys
between uppercase and
lowercase.
2nd CAPS
Turns the Backlight on and off
(applies only to the ZR-5800).
2nd
2nd
Press with another key to access
keyboard shortcuts.
ENTER
Enters a slash.
Accesses the symbol selection
display.
Enters a question mark.
SPACE
Space key.
DEL
Deletes the character to the right
of the cursor when entering or
editing data. Deletes entries in
Index mode.
Enters a colon.
CAPS
CAPS
Accesses the user word list.
WORD
DEL
.
Function
Deletes the line at the cursor
location.
ENTER
Executes operations, stores entries
in memory.
2nd ENTER
Stores a copied entry as a new
entry, leaves the original entry
unchanged.
233
B. Reset
Strong impacts, exposure to electrical fields, and
other unusual conditions may render the unit
inoperative (pressing keys and touching the
display has no effect). If this occurs, you must
press the RESET switch on the back using the
touch pen or a similar object. Conditions that make
the unit inoperative may also erase part or all of
the data stored in memory.
To perform an All Reset operation:
1.
Hold down ON while pressing and releasing
the RESET switch.
ON
Do not use sharp objects or objects with breakable tips to press the RESET switch.
All Reset operation
If the unit still fails to function after being reset with
the procedure above, or if you forget the password
to be entered at start up, you must reset the unit
using a more complicated procedure.
A message appears.
2.
Release ON.
3.
Touch No.
The built-in clock and any set daily alarms will
be reset.
Do not touch Yes in step 3 (as this will delete all
unit data). However, if you forget the password for
the start-up display, to use the unit you must touch
Yes and lose all your data.
234
C. Troubleshooting
When the unit is not functioning properly, refer to
the list below for solutions before contacting your
Sharp dealer.
Problem
The display remains
blank after pressing
ON.
Solution
• Make sure the battery
replacement switch is in
the NORMAL
OPERATION position.
• Adjust the LCD contrast,
see p. 12.
• Install new batteries,
see p. 236.
Poor display contrast. Adjust the LCD contrast,
see p. 12.
The unit is turned on, Reset the unit, see
but pressing keys and p. 234.
touch buttons has no
effect.
The entire keyboard
including OFF does
not function.
In Note, unlock the
keyboard by touching
KEYS at the top of the
display.
"Not enough memory" The memory is full or
nearly full. Delete
displayed.
unnecessary data or
install a RAM card.
Check the amount of free
memory using TOOLS/
Memory, see p. 81.
Problem
Solution
Alarms don't sound at Enable alarms using
TOOLS/Sound, see p. 82.
set times.
Calibrate the touch panel
Pressing a touch
button or touching the using TOOLS/Display,
display has no effect see p. 13.
(or an operation which
is not selected occurs).
A PC card is inserted Remove the card, and
but it doesn't function. then insert it again.
(Check from the back
of the unit that the card
is fully inserted.)
Press ON to access
the card functions. For
removing and inserting
cards, see p. 203.
Be sure that the
Transferring a
Telephone or User File sending unit does not
have a blank (no
entry (from an
Electronic Organizer) characters) Telephone/
results in the following Contact or User File/
Data File field name.
error message: "The
sending unit is
attempting to send
information in an
incompatible format.
This unit can't receive
this data."
235
D. Battery Replacement
General guidelines
Your unit uses the following battery types:
Use
Operations
Memory
backup
Type
Alkaline
batteries
Lithium
battery
Size/Model
Qty.
LR6(AA)
2
CR2032
1
Important points to remember when installing new
batteries:
• Be certain to use alkaline batteries with your unit
under normal conditions. We also recommend
that you use High Energy Lithium batteries L91
(size AA) or an external power supply (such as
the EA-23E AC adaptor or the CE-BK1 rechargeable battery pack) while using high-power cards
such as Fax/Modem cards. Constant usage of
many high-power Fax/Modem cards will deplete
a fresh set of alkaline batteries in about 20
minutes, for example. Lithium batteries will
perform significantly better under these conditions. Under normal operating conditions,
however, Lithium batteries do not perform
significantly better than alkaline batteries and
may not be cost effective. Be sure to best match
your battery selection to your particular usage.
• Be sure not to use manganese batteries or nickel
cadmium rechargeable batteries. These are
easily mistaken for alkaline or lithium batteries.
236
• Do not remove operating batteries and the
memory backup battery at the same time (this
will result in the loss of all stored data).
• Backup important data before replacing batteries.
• Remove an installed PC card before replacing
batteries. If the PC card has its own batteries,
check that they are not depleted before removing
the card from the unit.
• Replace both operating batteries at the same
time with new batteries of the same type.
• The memory backup battery is installed at the
factory. It drains slightly during shipment and
distribution, so it may not achieve the lifetime
indicated in the specifications.
Caution:
• Keep batteries out of the reach of children.
• If the unit will not be used for a long period of
time, turn the unit on once a month and confirm
that BATT doesn't appear at the top of the display
(or replace the batteries beforehand). Leaving
spent batteries in the unit may cause battery
leakage and damage from corrosion.
• Do not dispose of batteries in a fire, this may
cause explosions.
Replacing operating batteries
5.
When using the unit, if BATT appears at the top of
the display, the operating batteries may need to be
replaced. To confirm this, turn the unit off and then
on again. The unit will display a message if the
operating batteries need to be replaced.
Insert two new LR6(AA) operating batteries.
Align them correctly for positive (+) and
negative (-) polarity, as shown in the battery
well.
To replace the operating batteries:
1.
Turn the unit off.
2.
Set the battery replacement switch on the
back to "REPLACE BATTERIES" (the red dot
is visible).
3.
+
+
Slide the operating battery cover off.
1
6.
Replace the operating battery cover.
7.
Set the battery replacement switch to the
"NORMAL OPERATION" position.
If nothing happens when you press ON:
2
4.
Remove the old operating batteries.
• Setting the battery replacement switch to "REPLACE BATTERIES" shuts off operating power.
Check that this switch is set to "NORMAL
OPERATION".
• Repeat the battery replacement procedure step
by step.
237
Replacing the memory backup battery
To replace the memory backup battery:
The memory backup battery has an expected
lifetime of about five years under normal conditions
(temperature extremes can shorten this lifetime).
Replace the memory backup battery every five
years.
1.
Turn off the unit.
2.
Set the battery replacement switch on the
back to "REPLACE BATTERIES" (the red dot
is visible).
WARNING:
3.
Undo the screw from the memory backup
battery cover.
When the operating batteries are depleted, replace
them promptly with new batteries. If depleted
operating batteries are not replaced, the memory
backup battery is drained more quickly than
normal.
2
1
Memory backup battery lifetime (approx.):
T
238
Remove the memory backup cover.
SE
Do not replace the memory backup battery if the
operating batteries are weak, as this may result in
the loss of all data. If necessary, replace the
operating batteries before replacing the memory
backup battery.
4.
RE
• 1 month (if operating batteries are depleted)
• 5 years (when operating batteries are replaced
promptly)
5.
Use a ballpoint pen or a similar object to
remove the old memory backup battery.
6.
Insert a new CR2032 battery, positive (+) side
up.
7.
Replace the backup battery cover and secure
it with the screw.
8.
Set the battery replacement switch to the
"NORMAL OPERATION" position.
If nothing happens when you press ON:
• Setting the battery replacement switch to "REPLACE BATTERIES" shuts off operating power.
Check that this switch is set to "NORMAL
OPERATION".
• Repeat the battery replacement procedure step
by step.
239
E. Specifications
Model:
Display:
ZR-5700
320 x 240 dot matrix liquid
crystal display
Model:
Display:
ZR-5800
320 x 240 dot matrix liquid
crystal display with Backlight
function
Electronic unit
Applications:
Desk accessories:
Activities, Contacts, Data
Files, Notes, Documents,
Outlines, Spreadsheets
Calculator, Scrapbook, Filer,
Search, Help, Tools and More
Memory capacity:
ZR-5700
1 MB (User area: Approx.
600 KB)
Appointments capacity:
Approx. 8,850 entries
Contacts capacity:
Approx. 8,600 entries
240
ZR-5800
2 MB (User area: Approx.
1,624 KB)
Appointments capacity:
Approx. 25,450 entries
Contacts capacity:
Approx. 24,700 entries
These capacities assume the
following average entry sizes
and only apply when all the
available memory is committed to a single function.
Appointments: 32 characters/
entry
Contacts: 16 characters/entry
in the name field 12
characters/entry in
the number field
Maximum data per entry:
Documents: 16 Kbytes
Outlines:
32 Kbytes for an entire outline,
2 Kbytes for each topic
Contacts/Data Files:
2 Kbytes for text data, 61.7
Kbytes for graphics data
Others:
2 Kbytes
User interfaces:
Touch panel, keyboard
Other features:
Secret function, data transfer,
keyword search, messages,
etc.
Calculator
Digits:
Functions:
10
Addition, subtraction, multiplication, division; constant,
square root, percent, memory
calculation, date calculation,
paperless printer.
Clock
Crystal frequency:
Accuracy:
Display :
Time system:
Other functions:
32,768 Hz
Average variance per day, 1.5
seconds (at 25°C/77°F).
Year, month, day, day of week,
hours, minutes, AM/PM, city
names.
12 hour or 24 hour
Date and time for world cities.
Daylight saving time (DST)
function.
Peripherals and transfer interface
IR send distance
• 50 cm (20 inches) maximum
at speeds of 9600 bps to
115 Kbps using IrDAcompatible protocol.
• 50 cm (20 inches) maximum
at speeds of 9600 bps to
19.2 Kbps using Sharp IR
(ASK) protocol.
• IR distance may change
depending on the system
used.
Cable jack:
15 pin
PC card slot:
1 (Type II)
241
General
Power:
Battery ( The EA-23E AC
Adaptor and CE-BK1 battery
pack are optional.)
Operating:
3 V DC alkaline batteries
(LR6 x 2)
* Be certain not to use manganese or nickel cadmium
batteries. These may be
easily mistaken for alkaline or
lithium batteries.
Memory backup: 3 V DC, lithium battery
(CR2032 x 1)
Power consumption:
ZR-5700 0.5W
ZR-5800 0.9W (when the
Backlight is on)
Battery lifetime:
Varies depending on usage.
Operating
ZR-5700
• 70 hours approx.
2 months of 1 hour per day
continuous display at
ambient temperature of
23°C (73°F).
• 45 hours approx.
1.5 months of 1 hour per day
use, searching data for 5
minutes and display for 55
minutes, at ambient
temperature of 23°C (73°F).
242
ZR-5800
• 70 hours approx.
2 months of 1 hour per day
continuous display at
ambient temperature of
23°C (73°F).
• 45 hours approx.
1.5 months of 1 hour per day
use, searching data for 5
minutes and display for 55
minutes, at ambient
temperature of 23°C (73°F).
• 35 hours approx.
1 month of 1 hour per day
use, searching data for 5
minutes and display for 55
minutes, with using the
Backlight for 2 minutes per
hourly use at ambient
temperature of 23°C (73°F).
Memory backup:
• 1 month approx. (with
depleted operating
batteries)
• 5 years approx. (with
replacement of depleted
operating batteries).
Operating temperature:
32° to 104°F (0° to 40°C)
Dimensions:
Open:
170(W) x 191(D) x 18(H) mm
(6-11/16(W) x 7-17/32(D) x
23/32(H) inch)
Closed:
170(W) x 100(D) x 25.4(H)
mm
(6-11/16(W) x 3-15/16(D) x
1(H) inch)
Weight:
ZR-5700
Approx. 380 g (0.84 lb)
including batteries
ZR-5800
Approx. 390 g (0.86 lb)
including batteries
Accessories:
Alkaline batteries LR6(AA) x
2, lithium battery CR2032 x 1
(installed), operation manuals,
protection card (installed),
touch pen
243
244
Index
A
AC Adaptor 56
Accessing
Entries using calendar views 124
Secret entries 86
Accessories 57, 97, 191
Activities 119
Appointment 125
Birthday/Ann 132
Calendar 119
Changing type 144
Holiday 134
To Do 136
Adding
Labels 140
Picture to an entry 157, 180
Text to graphic entries 66
Topics 186
User's Cities 93
Add-on Software 37, 213
Deleting
215
Installing
214
Alarms
Daily 94
Disabling all alarms 94
Appointments 131
Align 170
All Reset 234
Anniversaries 132
Appendices 229
Appointments 125
Alarms 131
Editing 127
Making an entry 17, 125
REPEAT function 129
Application buttons 48
Archive files 206, 210
Assigning
Due date 136
Entries to Filer folders 26, 69
Labels 140
Priority 137
AT&T Mail Access 227
Automatic dialing 200
245
B
Backing up data 38, 206, 207, 210
Backlight 56
Setting 90
Battery
Installing 10
Lifetime 37, 56, 242
Memory backup 236
Operating 236
Pack 56
Replacing memory backup 238
Replacing operating 236
Before use 47
Birthdays 132
Blocks of text
Copying/moving 114
Working with 108
C
Calculator 33, 57
Changing part 59
Inserting new values 59
Performing 57
With dates 60
With other entries 62
246
Calendar views 19, 119
Changing default 119
Day 120
Month 121
Week 123
Weekly Graph 123
Year 121
Canceling indents 172
Cards 203
Caring for unit 45
CE-137T level converter 218
Changing
Calendar view format 119
Contacts/Data Files 145
Display character size 168
Fax options 197
Home City 14, 91
Indents 173
Password 87
Text styles 170
Chapters 42
Checking
Intermediate results 59
Memory 81
Real time and date 53
Spelling 176
World city time 91
Checking off To Do entries 139
Clock 14, 91
Collapsing 189
Communications applications 226
CompuServe Access 227
Connecting Fax/Modem 195
Contacts
Finding 147
Making an entry 16, 146
Selecting a file 146
Setup 159
Conventions 44
Copying
Blocks of text 29, 108, 114
Entries 115
Documents to PC files 181
Graphics to picture fields 157
Graphic sections 65
To Do entries 142
Cover sheet 198
Creating new entry 103
Cursor 106
Cut 108, 114
D
Daily alarms
Setting 93
Removing 94
Disabling 94
Databases 145
Data exchange 217
Data Files 145
(See also Contacts)
Date
Calculations 60
Changing default format 119
Show specific 124
Stamp 116
Daylight saving time (DST) 91
Day view 120
Deleting
Add-on software 215
All secret entries 87
Appointment entries 128
Blocks of text 108
Calculation lines 60
Entries from keyboard 112
Filtered entries 101
Group entries 25, 113
Labels 142
Multiple entries 25
Picture field contents 158
247
Scrapbook entries 69
Single entries 25, 113, 155
Text 107
To Do entries 144
Topics 188
Using tool bar 113
Desk accessories
57
Detail View 54, 98
Display
Adjust LCD contrast 12
Adjust touch panel 13
Detail View 98
Index View 98
Layout 52
Symbols 53
Time/date 53
Documents 165
Adding a picture to 180
Exchanging with PC files 181
Find Text 168
Headers/footers 180
Make a Letter 21, 177
Page Setup 174
Spelling check 176
Tabs/indents 170
Text styles 169
Drag and drop 106
248
Drawing
On Month calendar 122
Pictures 32, 64
Tools 64
E
Edit 103
Appointments 127
Contacts/Data Files 155
General techniques 105
Labels 142
Outlines 185
Picture field 158
Scrapbook 64
Entering
Monthly goals 138
Subtopics 188
Text 106
Error indicator, E 62
Exchanging documents with PC files 181
Expanding 189
External power supply 56
F
Families 188
Collapsing 189
Expanding 189
Restructuring 190
Fax 195
Cover sheets/headers 198
Directory 196
Log 202
Number field 160
Send 28, 200
Speed buttons 199
Fax/modem 36, 195
Fields 105
Moving between 107
Picture 156
File It 105
Filer 27, 40, 69
Drawer 70
Report 77
Filter 100
Deleting filtered entries 101
Turning off 101
Finding entries 109
(see also Search)
Appointment entries 126
Scrapbook entries 64
Using calendar views 126
Using direct search 149
Using Index View 23, 109
Using keyword search 110, 127,
148
Using global search 111
Find Text 168
Flash Memory cards 36, 206
Initializing 210
Folders
Assigning entries 26, 69, 71
Collecting entries 70
IN 220, 222
Merging (Moving) 75
Multiple 71
Naming/renaming 72
Sending 76
Viewing entries 72
Font
Styles 169
Print font 174
Footers 180
249
G
Generate a Report 77
General operations 97
Getting started 47
GUI operation 51
H
Headers
Documents 180
Fax 198
Help function 55, 79
Holidays 134
Home City 14, 91
Inserting
Page break 175
Text 107
Topic 186
Installing
Add-on software 214
Batteries 10, 236, 238
PC cards 203
J
Joining two topics 187
Jump To function 154
K
I
Import 223
Important points 9
IN folder 220, 222
Indents 170
Changing/Canceling 172
Setting 172
Index View 54, 98
Infrared transfer 219
Initializing
Flash Memory cards 210
RAM cards 208
Units 11
250
Key sound 55, 82
Keyboard
Layout 53
Locking 163
Key notations 229
L
Labels 140
Assigning to entries 141
Editing/deleting 142
Reviewing entries 142
Level converter CE-137T 218
Link function 104, 150
Breaking links 155
Link by searching 151
Link To 104, 153
Making linked entries 150
Locking your unit 86
M
Make a Letter 177
Manual dialing 202
Margins 174
Making secret entries 85
Memory cards 36, 207
Memory check 81
Memory expansion 207
Messages 226
Monthly goals 138
Month view 121
More 213
Movable window display 58
Moving
Appointments 127
Between fields 107
Blocks of text 114
Cursor 106
Entries 115
Graphics sections 65
Topics 186
N
New entries
Based on existing 166
Creating 103
Notes 20, 161
Keyboard lock 163
Making 161
Reviewing 164
Setting up 163
O
Opening applications 97
Organizer Link 224
Outlines 40, 182
Creating 183
Deleting 188
Displaying full topics 185
Expanding/collapsing 189
Revising 185
Subtopics 188
Overwrite mode 107
Owner's information 83
251
P
Page break 175
Paper
Size 174
Source 192
Paperless printer calculator 58
Part names and functions 48
Password
Deleting/changing 87
Forgotten 87
Registering 80, 85
Paste 29, 114, 115
PC Files 215
PC Link 223
PC cards 36, 203, 205
Personal 80
Picture
Adding to an entry 157, 180
Fields 156
In documents 180
Power
AC Adaptor 56
Battery pack 56
ON key 48
Sleep function 56
Preferences 80, 191
Printing
252
Connections 192
Current display 194
Group entries 194
Page size/font type 174
Single entry 193
Printer emulations 193
Priority levels 137
Q
Questions and answers 35
R
RAM cards 90, 206, 207
(see also PC cards)
Initializing 208
Memory expansion 207
Secret function 88
Using 207
Redial 201
REPEAT function 129
Report 77
Reset 234
Resume function 106
Registration card 9, 39
Reminder function 132
Removing set alarms 94
Remote Link 226
Replacing
Memory backup battery 238
Operating batteries 237
Restoring data 209, 212
Review Notes 164
Ruler 171
S
Scrapbook 32, 63
Scroll bars 51, 108
Search 22, 78, 109
(see also Finding entries)
By Date 112
For information 22
Global Search 111
Keyword Search 110, 127, 139,
148, 167
Using Filer 112
Secret function 85
When using RAM cards 88
Selecting
Calendar views 120
Data source 90
Date 124
Display View 98
Paper size/print font 173, 174
Topics 185
Send function 105
Sending a fax
Automatic Dialing 200
Manual Dialing 202
Setting
Appointment alarms 131
Backlight 90
Clock 14, 91
Daily alarms 93
Date format 119
Fax options 197
Indents 172
LCD contrast 12
Margins 175
Start-up display 15, 83
Tabs 171
Time and date 14
Setting up
Activities default view 119
Data transfer 219, 220
Fax cover sheets 198
Fax directory 196
Fax/Modem 195
Printing 192
Set Up function 102
Show function 102
Sleep function 56, 84
253
Software
Add-on 37, 213
Sound setting 82
Speaker 197
Special characters 116
Specifications 240
Speed buttons 199
Spelling check 176
Splitting one topic into two 187
Spreadsheets 95
Stamps tool 67
Start-up display 15, 83
Subtopics (Children) 188
Symbols
Display 53
On keyboard 53
Inserting 106, 116
T
Tabs 170
Changing 171
Setting 171
Time management 119
Time stamp 116
To Do 18, 136
Checking off 139
Copying 142
254
Tools 30, 80, 191
Tool bar 52, 98
PC files 216
Topics
1 line/Full 184
Adding/Moving 186
Editing 185
Joining two 187
Selecting 185
Splitting one into two 187
Subtopics 188
Touch buttons 44
Touch panel display 52
Adjusting 13
Transferring data 219
Between two ZR-5700/5800s 219
Filer folders 76
Quick transfer 220
Wireless infrared 219
With other Sharp devices 222
With personal computer 38, 223
Troubleshooting 235
Turning on/off
Daily alarms 93, 94
Key sound 55
ON/OFF keys 48
Sleep function 84
Start-up display 15
U
Unit to Unit transfer 220
Unlocking 86
User's City 92
Utilities 80, 191
W
Weekly Graph view 123
Week view 123
Window display 58, 163
Wireless infrared transfer 192, 219, 220
Wizard (Sharp OZ-9000 series) 35
Word List 88
Editing/deleting words 89
Registering words 88
Using 89
Word wrap 173
World City 91
Z
ZR-Pager 228
255
Contents
Formatting cells .............................................. 13
Creating a chart .............................................. 14
General .......................................................... 1
Disclaimer and warnings ..................................... 1
Trademarks and copyrights ................................. 1
About this manual ............................................... 1
Important things to do ......................................... 2
Manual conventions ............................................ 2
Spreadsheet
Commonly Asked Questions & Answers ... 15
Introduction ................................................ 17
Starting PenCell .............................................. 17
Selecting display modes ................................. 18
Index mode ....................................................... 18
Sorting the index list.......................................... 18
Worksheet mode ............................................... 19
Chart mode ....................................................... 19
Quick Start .................................................... 5
Getting to know PenCell ................................. 20
Starting PenCell ................................................ 5
Creating a worksheet........................................ 6
Saving a worksheet .......................................... 6
Entering data in worksheet cells ....................... 7
Entering formulas ............................................. 8
Using built-in functions ..................................... 9
Creating a worksheet from a template............ 10
Editing data in a cell ....................................... 10
Selecting cells and ranges .............................. 11
Moving and copying data ................................ 12
Navigating the worksheet ............................... 13
Using PenCell with other applications ............... 20
Tool bar ............................................................. 20
Creating a Worksheet ................................. 23
Three ways to start a worksheet ..................... 23
Starting with a new worksheet .......................... 23
Starting with a template .................................... 24
Starting with an existing worksheet .................. 25
Entering data .................................................. 26
Entering numbers.............................................. 27
Entering labels .................................................. 28
Selecting cells ................................................... 29
Entering formulas ........................................... 30
Guidelines for entering formulas ....................... 32
i
How formulas work with the data in your
worksheet .......................................................... 35
Types of formulas .............................................. 37
About built-in functions ...................................... 37
Guidelines for editing data or formulas ............. 40
Displaying the legend ........................................ 64
Exchanging the X and Y axes ........................... 64
Exiting and saving a chart ................................. 64
Saving a chart ................................................... 64
Viewing saved charts ........................................ 65
Deleting a chart ................................................. 66
Moving around a worksheet ........................... 41
Printing and adding mark-ups to a chart ........ 66
Going to a specific cell ...................................... 41
Finding cell contents ......................................... 42
Copying and moving data ................................. 42
Copying formulas .............................................. 45
Clearing data .................................................... 46
Sorting .............................................................. 46
Inserting and deleting cells ............................... 47
Managing Worksheets................................ 67
Editing a worksheet ........................................ 40
Formatting a worksheet .................................. 48
Worksheet characteristics ................................. 48
Cell characteristics ............................................ 53
Working With Charts .................................. 61
Creating a chart .............................................. 61
Formatting a chart .......................................... 62
Pie charts .......................................................... 63
Line charts ........................................................ 63
Column charts ................................................... 63
Stacked column charts ...................................... 63
Chart titles ......................................................... 64
Displaying gridlines ........................................... 64
Index mode operations ................................... 67
Entering the Index mode ................................... 67
Managing worksheets ..................................... 68
Duplicating a worksheet .................................... 68
Changing a worksheet name ............................ 68
Deleting worksheets .......................................... 69
Making a secret worksheet ............................... 70
Transferring worksheets ................................. 70
Unit to unit transfer ............................................ 70
Copying a worksheet to a PC File ..................... 71
Getting a worksheet from a PC File .................. 72
Replacing with a PC File ................................... 73
Linking a worksheet ........................................ 74
Linking with Contacts or Data Files entries ....... 74
Viewing linked entries ....................................... 74
Setting the workspace size ............................... 75
Troubleshooting ......................................... 77
Troubleshooting checklist ................................ 77
ii
Appendixes ................................................. 79
Appendix A: Menu Functions .......................... 79
In Index mode ................................................... 79
In Worksheet mode ........................................... 81
In Charts mode ................................................. 83
Appendix B: Function Reference .................... 84
Arithmetic functions .......................................... 84
Date/time functions ........................................... 86
Financial functions ............................................ 89
Logical functions ............................................... 92
Miscellaneous functions .................................... 93
Relational functions ........................................... 95
Statistical functions ........................................... 95
Trigonometric functions ..................................... 96
Appendix C: Spreadsheet Limits .................... 98
Appendix D: Keyboard Reference .................. 99
Appendix E: File Compatibility ...................... 102
Communication Applications
Before you start ........................................ 105
Connecting to a modem ............................... 105
Connecting to the SHARP CE-FM4
Fax/Modem ..................................................... 105
Connecting to a PC Card modem ................... 106
– CompuServe –
Quick Start ................................................ 109
Starting CompuServe
Access Software ........................................... 109
Setting up your modem ................................ 110
Setting up connections ................................. 110
Connecting to CompuServe ......................... 111
Creating Mail ................................................ 112
Sending Mail ................................................. 113
Getting Mail .................................................. 113
Reading Mail off-line ..................................... 114
Commonly Asked Questions & Answers.... 115
Introduction .............................................. 117
iii
Starting CompuServe Access Software ....... 117
Setting up your modem ................................ 118
Setting up connections ................................. 119
Connecting to CompuServe ......................... 120
Mail ............................................................ 121
Creating mail ................................................ 121
Sending mail messages ............................... 123
Getting mail messages ................................. 124
Reading mail messages off-line ................... 125
Forums ...................................................... 126
Going to a forum ........................................... 126
Reading a forum message on-line ................ 127
Downloading forum messages ..................... 128
Downloading library files............................... 129
Reading forum messages off-line ................. 129
Creating a new forum message off-line ........ 130
Posting messages to a forum on-line ........... 131
Getting responses to your forum messages ... 131
Executive News Service .......................... 133
Setting up a personal folder .......................... 133
Getting news ................................................. 134
iv
Reading news stories off-line ....................... 134
Other Functions ....................................... 135
Setting preferences ...................................... 135
Setting up an address book .......................... 136
Checking what has been sent out ................ 137
Deleting data ................................................ 138
Troubleshooting ....................................... 139
Troubleshooting checklist .............................. 139
Appendix ................................................... 141
Menu functions ............................................. 141
– Pager Access –
Quick Start ................................................ 147
Starting Pager Access .................................. 147
System diagram ............................................ 148
Setting up a paging service .......................... 150
Composing a message ................................. 151
Sending messages ....................................... 152
Getting messages from your Pager Card ..... 152
Reading incoming messages ....................... 153
Searching messages .................................... 153
Commonly Asked Questions & Answers.... 154
Introduction .............................................. 157
What is Pager Access? ................................ 157
Starting ZAURUS Pager Access .................. 158
Obtaining a Pager Card and paging service ... 159
Setting up a paging service .......................... 159
Sending messages ....................................... 171
Getting messages from your Pager Card ..... 173
Reading incoming messages ....................... 173
Messages containing errors ......................... 174
Viewing and saving attachments .................. 175
Converting messages to documents ............ 175
Deleting messages in the unit ...................... 176
Deleting a single message .............................. 176
Deleting a group of messages ........................ 176
Modifying an existing paging service .............. 160
Deleting an existing paging service ................ 161
Deleting messages in your Pager Card ........ 177
Applying a filter to view selected messages .... 178
Configuring your modem .............................. 161
Deactivating the filter ...................................... 178
Using Pager Access ................................. 164
Searching messages .................................... 179
Copying and moving text .............................. 180
Customizing Pager Access ........................... 180
Looking at the Message screen .................... 164
Message folders ........................................... 165
IN folder .......................................................... 165
OUT folder ...................................................... 165
SENT folder .................................................... 166
Troubleshooting ....................................... 183
Composing a message ................................. 166
Appendix ................................................... 185
Selecting recipients of a message .................. 167
Menu functions ............................................. 185
Attaching data to a message ........................ 168
Modifying a message .................................... 169
Setting up an address book .......................... 170
Troubleshooting checklist .............................. 183
v
– AT&T Mail –
Quick Start ................................................ 189
Starting AT&T Mail Access ........................... 189
Setting up AT&T Mail Access ....................... 190
Creating a new message .............................. 191
Sending messages ....................................... 192
Receiving messages .................................... 193
Commonly Asked Questions & Answers.... 194
Introduction .............................................. 195
Obtaining an AT&T Mail account .................. 195
Setting up AT&T Mail Access ....................... 196
Setting up the address book ......................... 200
Contacts and Data Files .................................. 200
Receiving messages .................................... 214
Using AT&T Mail as a terminal ..................... 219
Viewing Received Messages ........................ 221
Answering a message .................................. 224
Forwarding a message ................................. 225
Managing Your Messages ........................ 227
Finding messages ........................................ 227
Deleting messages ....................................... 228
Converting messages to Documents ............ 229
Troubleshooting ....................................... 231
Troubleshooting checklist .............................. 231
Appendixes ............................................... 233
Mail Basic .................................................. 203
Appendix A: AT&T EasyLink Services Global
Alliance program member directory .............. 233
Setting the date and time .............................. 203
Mail folders ................................................... 204
Creating a new message .............................. 205
EUROPE, AFRICA, MIDDLE EAST REGION .. 234
ASIA, PACIFIC REGION ................................. 235
AMERICAS REGION ...................................... 236
Addressing messages ..................................... 206
Address types ................................................. 207
Selecting message options ............................. 210
Attachments .................................................... 211
Editing a message .......................................... 212
Connecting to the host .................................... 212
vi
Appendix B: AT&T Mail traveler’s access
numbers ........................................................ 238
Australia .......................................................... 238
Canada ........................................................... 238
Hong Kong ...................................................... 238
Singapore ........................................................ 238
Appendix C:AT&T Mail login scripts .............. 239
AT&T Mail Direct ............................................. 239
REDI-ACCESS Packet (X.25) ......................... 239
LAS – Local Access Service ........................... 240
DATAPAC – DataPac in Canada ..................... 240
Login Script Commands ................................. 241
– Terminal –
Terminal emulation ....................................... 257
Terminal display setup .................................. 257
Troubleshooting ....................................... 258
Troubleshooting checklist .............................. 258
ASCII Control Codes .................................... 260
Index .......................................................... 263
Introduction .............................................. 245
About Terminal .............................................. 245
Setting up your modem ................................ 246
Modem settings ............................................... 246
Making Terminal dial setting entry ................ 247
About directory settings .................................. 249
Changing dial settings ..................................... 250
Using Terminal .......................................... 251
Making a call ................................................. 251
Hanging up ................................................... 252
Receiving a call ............................................ 253
On-line operations ........................................ 254
Data transfer ................................................. 255
Auto log-on ................................................... 256
vii
viii
General
About this manual
Disclaimer and warnings
NOTICE
SHARP strongly recommends that you keep separate
permanent written records of all important data. Data
may be lost or altered in virtually any electronic memory
product under certain circumstances. Therefore,
SHARP assumes no responsibility for data lost or
otherwise rendered unusable as a result of improper
use, repairs, defects, software error, or any other
causes.
SHARP assumes no responsibility, directly or indirectly,
for financial losses or claims from third persons resulting
from the use of this product and all of its functions, such
as stolen credit card numbers, the loss of or alteration of
stored data, etc.
The information provided in this manual is subject to
change without notice.
Trademarks and copyrights
All company and/or product names are trademarks and/or
registered trademarks of their respective folders.
This manual introduces you to the spreadsheet and
communication functions of the unit. It consists of the
following five chapters:
Spreadsheet
Describes how to create a worksheet, build formulas,
enter data, and create charts.
Communication – CompuServe® Access Software
Explains how to connect to CompuServe, get or send
mail/forum messages, and read news.
Communication – Pager Access
Discusses how to connect to paging services to get or
send messages so that you can communicate with other
pager users.
Communication – AT&T Mail® Access
Covers the steps required to use the AT&T Mail service
to get or send messages to other users.
Communication – Terminal
Walks you through setting up the terminal mode so that
you can use it as a general tool to connect to bulletin
board services, on-line information services, or another
computer, via a telephone line.
For the “Spreadsheet” chapter, Copyright© 1996
PenWare, Inc.
1
The indexes for these chapters are listed, separately, at
the back of this manual.
Manual conventions
In this manual, screen menus, menu items and keys on
the keyboard are in bold lettering.
Important things to do
2
1.
Read through the Quick Start section of each
chapter. It will quickly get you up and running. Refer to the rest of the chapter for more
details about particular operations.
2.
If you have any particular questions about
the software, read through the list of commonly asked questions and answers. There
is a good chance that any questions you
have will be answered there.
3.
When you need help with any operation,
touch HELP at the left of the display. Onscreen help is a topic-specific quick
reference guide that explains features and
their functions.
Throughout this manual, ZAURUS is referred as “the
unit” or “your unit.”
Spreadsheet
Caution
• Spreadsheet data in the ZR-5700/ZR-5800
cannot be backed up using Zaurus Data
Exchange Utility for ZR-5000 (Data Exchange
Utility version 1.02 or prior).
• If you attempt to backup a ZR-5700/ZR-5800
with Data Exchange Utility version 1.02 or prior
and then restore your data, all spreadsheet
data will be lost.
• Please be sure to use only version 1.1 or
higher of the Data Exchange Utility with your
ZR-5700/ZR-5800. If you already own an older
version of the Data Exchange Utility, check on
CompuServe (GO ZAURUS) or America Online
(Keyword: PDA) for a free patch to version 1.1.
Quick Start ................................................................... 5
Commonly Asked Questions & Answers ................ 15
Introduction ............................................................... 17
Creating a Worksheet ................................................ 23
Working With Charts ................................................. 61
Managing Worksheets .............................................. 67
Troubleshooting ........................................................ 77
Appendixes ................................................................ 79
3
4
Quick Start
T
his section is a quick start to setting up
and running PenCell®, a spreadsheet
application. On your unit, PenCell is
referred to as SPREADSHEETS and indicated by
the
icon.
Starting PenCell
1.
Turn on the unit.
2.
Touch
.
5
Creating a worksheet
Press NEW ENTRY.
Saving a worksheet
1.
Touch EDIT, then select “Save as....”
2.
Type a file name that is 20 characters or less.
3.
Touch OK.
A new, blank worksheet appears in the display.
The worksheet has the name [Untitled] until you save it
and give it a name of your choice (20 characters or
less).
The worksheet name
6
Entering data in worksheet cells
Touch cell C4 or press ENTER.
Now you see 5 in cell B4. Selecting another
cell signals that you are finished entering
data into the current cell.
To enter data in a worksheet cell:
4.
Press 1 0.
1.
5.
Press .
The arrow keys move the selection to the
adjacent cell in the direction of the arrow.
6.
Press 1 5. Then touch E4.
A cell is referred to by its column letter and row number
(for example, cell B4). When you select a cell by
touching it, its reference appears in the cell indicator.
Touch cell B4 to select it.
The cell
indicator
£
3.
The edit bar
The selected cell is highlighted.
2.
Press 5.
The data you enter appears in the edit bar as
you type.
NOTE
If you need to correct mistakes while you enter data,
press BS (backspace). If you want to quit entering
data without changing the cell, press CANCEL.
7
Entering formulas
4.
Touch cell C4.
5.
Press 5, replacing the previous cell content.
6.
Touch another cell (or press ENTER).
To enter a formula in a worksheet cell:
1.
Touch cell E4.
2.
Enter B 4 + C 4 + D 4.
3.
Touch another cell (or press ENTER).
By default, formulas are automatically calculated and the results are displayed in the cell.
When you select a cell that contains a
formula, the formula appears in the edit bar.
The formula appears in the edit bar.
Changing data in C4 also changes
the formula result in E4.
Formula results are updated automatically when you
edit data.
The result of the formula appears in the cell.
8
Using built-in functions
Built-in functions make it easier to enter complex
formulas. The following example use the MAX function
to determine the maximum value from data in a
specified range of cells.
1.
Touch cell F4.
2.
Touch
to use a built-in function.
Scroll arrows
The edit bar displays the function and its argument
place holder. Now you can replace (values) by
typing (for example, B4:D4) or by selecting a
range of worksheet cells.
6.
Drag the pen across the range B4:D4.
7.
Press ENTER or select another cell to see
the result of the formula in F4.
The function appears
in the edit bar.
“values...” is highlighted
Scroll bar
3.
Touch the up and down scroll arrows or the
scroll bar beneath the arrows until the
function you want to use is visible.
4.
Touch MAX (values...) to select it.
5.
Touch Insert to enter the selected function.
9
Creating a worksheet from a
template
To create a new worksheet using a template:
1.
While in the Index mode, touch the Templates
tab to see the list of available templates.
Editing data in a cell
You can quickly replace a cell's contents by touching the
cell to select it, then typing new data and pressing
ENTER. Anything that was in the cell is replaced. But if
you want to edit parts of the data or formula in a cell,
first select the cell, then touch in the edit bar. This
activates the blinking edit cursor that lets you delete and
replace individual characters in the edit bar. The full
editing functions are available when you see the blinking
edit cursor.
The blinking cursor
indicates that you can
edit individual characters
in the edit bar.
To edit the contents,
touch cell F4, then
touch the edit bar.
3.
Touch the template you want to use to highlight it.
Touch the highlighted template.
10
When the blinking edit cursor is present in the edit bar,
you can:
• Move to the beginning or end of the edit bar by
pressing and .
• Select characters in the edit bar by touching or
dragging with the pen.
• Erase selected characters by pressing DEL or BS.
• Cut or copy and paste selected characters in the edit
bar.
• Replace selected characters by typing.
£
A new worksheet opens in Edit mode. The worksheet
comes with formulas and tables already created. All you
need to do is provide your own data. The worksheet has
the same name as the template until you save it and give
it a name of your choice.
This indicates you can
edit the cell content now.
£
2.
£
£
£
£
• Touch a cell to select it.
• Touch a column heading to select all cells in the
column.
• Touch a row heading to select all cells in the row.
• Touch All to select all cells in the worksheet.
• Drag the pen across several cells to select the range
of cells.
• Press 2nd and touch a cell to extend or reduce a
selection.
£
To select cells:
• Drag the pen to the edge of the worksheet to select a
range that extends past the edge of the display.
• Press , , , or £to move the selection one cell at
a time.
• Press
,
,
to add or remove the
£, or
adjacent cell to the selection.
£
Selecting cells and ranges
NOTE
Drag the pen within the edit bar to select characters that
you want to edit. This works even if the edit cursor is not
displayed or blinking.
Touch here to select all cells
in column D.
Touch here to
select all cells in
the worksheet.
Touch here to
select all cells
in row 10.
Drag the pen across cells to select
a range (rectangular block) of cells.
11
Moving and copying data
To move the contents of a cell or range:
1.
Select a cell or range.
2.
Touch and hold the pen within the selection
and drag the selected cell or range to a new
location.
This is the new location where the
highlighted data will be moved to.
To copy the contents of a cell or range:
1.
Select a cell or range.
2.
Press 2nd.
3.
Touch and hold the pen within the selection
and drag the selected cell or range to a new
location.
Whether it is moving or copying cells, the selected cell
contents replace anything in the new location.
You can touch EDIT and select “Undo” if you want to
reverse an operation you just performed.
Select a cell or
range to move.
A white outline around the selection indicates that it is
ready to be moved.
12
NOTE
• If you touch a cell in a selected range, the cell you
touched becomes selected. If you press 2nd and then
touch a cell, the selection is extended (or reduced) to
the cell you touched.
• You can use the keyboard for many operations. For
details see Appendix D.
Navigating the worksheet
Below are some guidelines for moving around the
worksheet:
• Touch the up or down arrow in the scroll bar to display
cells in rows above or below those in the display.
• Touch the left or right arrows in the scroll bar to
display cells in columns left or right of those in the
display.
• Touch within the scroll bar to page to the next position
in the worksheet.
• Drag the scroll button in the scroll bars to jump to the
corresponding position in the worksheet.
• Press PREV and NEXT to page up and down in the
worksheet.
• Press 2nd PREV and 2nd NEXT to page left and
right in the worksheet.
Up and down
scroll arrows
Scroll button
Scroll bars
Left and
right scroll arrows
Formatting cells
You can control the displayed content of cells by
assigning specific formats. For example, you can format
a cell to display U.S. dollar values, or labels, or numbers
with 4 decimal places.
To change cell formats:
1.
Select the cell or range you want to format.
2.
Touch FORMAT, then select “Format....”
3.
Select one of the format choices.
4.
Touch OK.
If you change your mind, you can revert the cell back to
its original format by immediately pressing 2nd Z
or touch EDIT and select “Undo.”
In a similar way, you can change font sytle and alignment of the cells, or add borders to the cells.
NOTE
Only the dollar ($) currency symbol can be displayed.
All other currency values (e.g. pound sterling, marks,
francs, etc.) should be treated like $.
13
Creating a chart
To create a chart:
1.
In the Worksheet mode, select the cells
containing the data you want to chart.
Select a range of cells to create a chart.
2.
Touch EDIT, then select “New Chart.”
Chart legend
14
To change the chart format
Touch PIE, LINE, COLUMN, or STACK.
To save the chart
Touch VIEWS, then select “Worksheet.” When
prompted, enter a chart title.
Commonly Asked Questions &
Answers
Q:
A:
I want to print or Fax a worksheet. Is there any way to
accomplish this?
Yes. You have three options although PenCell does not
support Print or Fax directly as other applications do.
1) You may use the 2nd P (PRINT SCREEN) key. This
sends the screen image to a printer that is connected to
your unit using the optional cable or infrared adapter.
2) Select the range of cells or display a Chart (in Chart
mode) you wish to print. There are some size restrictions, if
some technical image limits are exceeded, a message
wants you of possible truncation of your selection. You then
use the Copy Image command in the EDIT menu. Paste
your selection into either Documents or Scrapbook Application and use Print or FAX commands in the SEND menu of
the receiving application. There are advantages and
disadvantages to using either Scrapbook or Documents.
Documents will receive larger images than Scrapbook. You
can place the worksheet selection or chart in your Document as a single graphic image with text characters
wrapped around. Scrapbook receives a single image into a
single New Entry, but you can use the graphic tools to
annotate the image before you send by Print or Fax.
3) Transfer a worksheet to a Macintosh® or PC and print
the worksheet. For more ditails on operating the Link
Software, see the manual (readme) of the Link Software.
Q:
A:
I want a printout of a chart of a worksheet. How can I
print my chart?
In Chart mode, you can use the Copy Image option in the
EDIT menu. Then paste the image into the unit's Scrapbook or Documents applications where it can be printed
using the PRINT command in the SEND menu. You can
also paste the image into a Documents. In Documents,
you can add titles, text, or combine with other images.
Q:
A:
How do I save a worksheet?
There are two ways to save the current worksheet. The
first is to exit from the Worksheet mode worksheet by
returning to the Index mode. When you do so, you are
prompted to save the worksheet. The second way is to
select Save as from the EDIT menu.
Q:
A:
How can I correct mistakes?
Use the Undo function. You can reverse up to four of your
previous operations by using the undo keystroke 2nd Z, or
by choosing Undo in the EDIT menu. If you undo too
many levels, you can redo operations by selecting Redo
from the EDIT menu or by pressing 2nd A.
Q:
A:
Can I change the width of several columns at once?
Yes, it's easy. First select the column headings you want
to adjust by dragging through them. Then choose “Set
Column/Row Size” from CELLS menu. Now adjust the
size of any one of the selected column by touching and
holding the pen in the center of any one the heading and
slowly dragging it to the desired width. Adjust rows using
the same steps. Touch Done when complete.
15
Q:
A:
Q:
A:
Is there a shortcut for moving and copying cells?
Yes. You can “drag and drop” selected cells to move them
anywhere in the worksheet. To copy the selected cells,
press 2nd before you drag and drop. PenCell automatically maintains the cell references and dependencies that
the moved or copied cells contain.
Can I import very large spreadsheets from a desktop
computer to PenCell?
It depends on the size and complexity of the spreadsheet.
The spreadsheet is limited by the maximum column and
row limits of PenCell. (See Appendix C, “Spreadsheet
Limits.”) The spreadsheet complexity is constrained by the
available file space and workspace memories of your unit.
Q:
A:
How do I enter " (double quotes)?
Press 2nd and then press ,.
Q:
A:
How do I enter < and > symbols in formulas?
Press SMBL and select <, > etc.
Q:
Do I have to be concerned about file format conventions when I import MS Excel files into Spreadsheet?
No, Spreadsheet will read and write MS Excel 4.0
worksheet, and can read MS Excel 3.0.
A:
Q:
A:
16
I have been using Excel 5.0 on my PC. Can I import
my spreadsheet files to PenCell?
Save your spreadsheets in Excel 4.0 format, if you want to
import to PenCell.
Q:
A:
Q:
A:
I have comported a large spreadsheet in my unit. But
when I try to open it, it runs out of memory
workspace.
Try to increase the spreadsheet workspace. In the Index
view, touch SETUP and select “Workspace Size....”
Increase the Extra Workspace for Spreadsheet, close and
try to open your spreadsheet again.
I would like to freeze the titles of my data and scroll
around the rest of the spreadsheet.
See the Set Titles feature of Spreadsheet.
Introduction
T
his section gives you general information
about the unit's Spreadsheets operations.
Starting PenCell
1.
Turn on your unit.
2.
Touch
.
When you start the application, you enter the
Worksheet mode and see a display like this:
The display you see when you enter the application is
the same display that had been present when you last
used the application.
17
Selecting display modes
Once in PenCell, you can move between three display
modes: Index, Worksheet, and Charts. Each mode has
its own appearance and purpose. To change to another
mode, touch VIEWS and select the appropriate mode.
Index mode
The Index mode shows you a list of templates and a list
of the worksheets you have named and saved.
The primary functions of Index mode are to:
• Open an existing worksheet.
• Create a new, blank worksheet.
• Create a new worksheet using a template.
• Transter worksheets between PenCell and PC Files.
• Transfer worksheets to another unit.
To view the list of available
templates, touch the Templates
tab. Then scroll through the index.
18
Sorting the index list
You can sort the worksheets either by title (ascending
order) or by date (descending order) by using the Sort
by pop-up menu. Each entry shows the spreadsheet
title, last date modified, storage size in bytes, and link
status. Secret spreadsheets, however, are not displayed
if your unit is locked. Also, to see the templates, touch
the Templates tab. Templates are built-in read-only
worksheets that can be used to build custom
worksheets. They must be “saved as” a custom
worksheet before they can be linked or filed.
Worksheet mode
Chart mode
The Worksheet mode lets you create and edit one
worksheet at a time. By default:
• Calculated results of formulas are automatically
displayed in the worksheet cells.
• New results are automatically calculated and displayed if you change data or formulas in the
worksheet.
The Chart mode gives you the power to graphically
display meaningful interpretations of your worksheet
data.
19
Getting to know PenCell
PenCell operates like other applications on your unit,
except that it does not directly support printing or faxing.
You must use the Copy Image command to paste into
Scrapbook or Documents. You may then print or fax
from Scrapbook or Documents.
Tool bar
There is a special tool bar for each application. The tool
bar is located across the top of the display and has the
following features:
• A small pointer (“ ”) in the upper right of a tool bar
item indicates a menu will be displayed if it is touched.
• For some tool bar menus;, current settings are
indicated by a check mark “✓”.
• Menus may be separated into categories by dashed
lines.
• Menus items that lead to dialogue are followed by “...”.
• If a particular tool bar item cannot be used for a
specific screen, it is “faded” out.
• Tool bar menus can be accessed from the keyboard
by pressing MENU then using the PREV, NEXT, ,
£, ENTER and CANCEL keys.
£
You can move between PenCell and other applications.
By touching an application on the display, you change
the display. PenCell disappears, but your work is
preserved in its current status and you can return to it
again.
Only one worksheet can be active at a time. If you try to
open a different worksheet before you save changes to
one that is already open, PenCell displays a message
that gives you the opportunity to save the changes or
quit the worksheet without saving it. If you quit without
saving, the worksheet reverts to the content that was
last saved.
20
£
Using PenCell with other applications
The pop-up menu
In the worksheet mode, the popup menu is available for
quick access to frequently used operations. Press 2nd
MENU to display the pop-up menu.
Keyboard shortcuts
Many operations in PenCell have keyboard equivalents.
Refer to Appendix D, “Keyboard Reference” for a
summary of keyboard operations.
If a menu option has a keyboard equivalent, it appears
beside the command in the menu. For example, to copy a
selected item, touch EDIT and then select “Copy,” or
press 2nd C.
21
22
Creating a Worksheet
T
his section describes ways to create and
work with worksheets
Three ways to start a worksheet
You can start a worksheet in any of the following three
ways:
• Create a new, blank worksheet.
• Create a new worksheet using a template.
• Open an existing worksheet.
Starting with a new worksheet
You can create a new worksheet in either the
Worksheet or Index mode.
To create a new, blank worksheet:
Touch EDIT, then select “New Worksheet,” or press
NEW ENTRY.
By default, the new worksheet has the name [Untitled]
until you name and save it.
In the worksheet mode, only one worksheet is open at
a time. When you create a new worksheet from the
worksheet mode, a message appears in the display
asking if you want to save any changes you made to
the currently open worksheet. Respond to the message then the currently open worksheet is closed.
23
Saving a worksheet
Starting with a template
Name and save a worksheet in the worksheet mode, as
follows:
PenCell includes worksheet templates that can save
you time when you create a new worksheet. When you
choose a template, a new worksheet opens in the
worksheet mode with useful data and formula and
sample data already entered.
1.
Touch EDIT and select “Save as....”
To create a new worksheet:
2.
Type a worksheet name. The name must be
20 characters or less and can include letters
or numbers.
3.
Touch OK.
1.
Touch the Templates tab while in the Index
mode. A list of available templates are
displayed.
2.
Touch the template you want to use to
highlight it.
In the worksheet mode, the worksheet name appears at
the bottom of the worksheet. In the Index mode, the
name appears in the index along with its memory size
and date.
24
3.
4.
Touch the highlighted template or press
ENTER.
A new worksheet based on the template
opens so that you can modify it, if necessary,
or add data.
Touch EDIT and select “Save as...” to name
and save the worksheet.
Starting with an existing worksheet
Another way to create a new worksheet is to open an
existing one, save it with a different name, and use the
copy as a starting point for a new worksheet.
To create from an existing worksheet:
1.
Select the worksheet you want to open from
the Index mode index.
If the Index mode of worksheets extends past
the bottom of the display, touch the scroll
arrows to page through the list.
25
Entering data
2.
Press ENTER, or touch the selected
worksheet, or touch VIEWS and select
“Worksheet.”
The selected worksheet opens in the
worksheet mode.
3.
Touch EDIT and select “Save as....”
4.
Type a new worksheet name.
5.
Touch OK.
To enter data in a worksheet:
1.
Touch a cell to select it.
The cell becomes highlighted and the cell
reference appears in the cell indicator. See
“Entering formulas,” later in this section for
more information about cell references. For
more information about selecting, see
“Selecting cells,” later in this section.
26
3.
When you are finished entering, select a
different cell (or press ENTER). The data now
appears in the worksheet cell.
£
Type the data you want the cell to contain.
The maximum number of characters in a cell
is 255, excluding the “quotes” that PenCell
adds around text labels.
Press , , , or £ to complete data entry and
move cell highlighting in the direction of the arrow.
£
By default, all the cells in the worksheet have
the General cell type so they can contain
numbers, labels, or formulas.
As you type, the edit bar above the
worksheet displays cell contents.
£
2.
Entering numbers
PenCell recognizes a variety of number formats, such
as percentages, scientific notation, and logical values.
For example, if you enter 7%, PenCell interprets this as
0.07.
If you enter a number that has too many digits to fit in a
General cell, PenCell rounds up decimal places or
changes to scientific notation (n.nnEnn) so the value
can be displayed. The true cell contents appear in the
edit bar when you select the cell, and the true cell
contents (to at least 15 decimals of precision) are used
when formulas are calculated.
Press BS (backspace) to move back and to make
corrections while you type or press CANCEL to
clear the edit bar.
You can adjust the width of cells. See “Adjusting column
and row size,” later in this chapter for more information.
27
Entering data with the 10-Key Pad
Entering labels
PenCell includes a 10-key Pad that allows you to enter
numeric data with the pen in a cell.
If you add text to a cell, PenCell assumes that the text is
a label and automatically adds quotes around it. The
quotes only appear in the edit bar after you enter the
label. They are not displayed in the worksheet cell.
To use the 10-Key Pad:
1.
Touch SHOW and select “Show 10-Key Pad.”
The 10-key pad appears in the display. You can
move it around the display by dragging the top left
corner of it.
2.
28
Touch the numbers (or arithmetic operators)
you want to enter in the selected cell. You can
also insert a function by touching ƒ().
3.
When you are finished entering in the
selected cell, select another cell by touching
it or by touching the arrow keys in the pad.
4.
To close the 10 Key Pad, touch CLOSE on
the pad.
You can also enter text by enclosing it in quotes. For
example, if you want to enter a numeric label (or a label
that begins with a number, such as 2001 Projections),
you have two choices: add quotes when you enter the
label (such as “2001 Projections”) or change the cell
type to Label and then enter your text.
If you enter too many characters to fit in the selected
cell, and if the adjacent cells are empty, the text extends
across column boundaries. Worksheet cells can contain
up to 255 characters including spaces and carriage
returns.
Touch EDIT then select “Undo” if you enter something
by mistake. Undo returns the worksheet to its content
prior to the last operation.
Entering labels from the Word list
The WORD key provides a quick alternative to typing
words that you use frequently, such as your company
name or logo. Refer to the other Operation Manual for
information about storing words or phrases using the
WORD key.
Selecting cells
Many worksheet functions operate on selected cells
only. Selecting a cell distinguishes it from others in the
worksheet. When a cell is selected, it is highlighted.
To select a single cell:
To enter text from the word list into a cell:
1.
Select a cell.
2.
Press WORD.
3.
Select the word or phrase you want to insert.
4.
Press ENTER.
Touch the cell once. The selected cell is highlighted and
the edit bar displays its contents.
The word or phrase from the list appears in the
edit bar, and it can be edited as text.
To select a range of cells:
Drag the pen from the cell that will be one corner of the
range to the cell in the opposite corner of the range
without lifting the pen. You can drag in any direction.
NOTE
If some cells in the range are outside the display, drag
the pen in the appropriate direction past the edge of the
PenCell worksheet. The display will scroll in the direction you are dragging.
29
Entering formulas
To select a column or row:
Touch the column or row heading.
To select multiple adjacent columns or rows:
Drag through column or row headings.
Formulas make your worksheet an interactive calculating machine that not only lists raw data, but also
calculates useful results based on that data.
To enter formulas in the worksheet:
1.
Touch a cell to select it. The cell becomes
highlighted.
NOTE
• All refers to all cells that are above and to the left of
the last cell actually used in the worksheet.
•
+ £, , ,
arrow key extends a selection on
row/col when active.
• 2nd + touching a cell extends a selection.
2.
Enter the formula. See “Guidelines for
entering formulas,” later in this section for
information about the many easy ways to
create formulas.
Press BS to make corrections while you type.
Press CANCEL if you change your mind and
want to leave the cell unchanged.
3.
When you are finished entering, select a
different cell (or press ENTER).
£
To select an entire worksheet:
Touch the top left corner cell labeled All.
£
£
By default, the result of calculating the formula, not the
formula itself, is displayed in the cell. See “Formatting a
worksheet,” later in the section for information about
displaying formulas in cells.
30
Wnen the cursor blinks in the edit bar, you can edit your
formula using copy, cut and paste operations, and you
can move the cursor using the arrow keys.
Touch EDIT and select “Undo” if you enter something
by mistake. Undo returns the worksheet to its status
prior to the last operation.
Automatic or manual recalculation
When you edit worksheet data or formulas, results of
formulas need to be recalculated. Recalculating is
automatic by default, but you can also choose manual
recalculation.
To choose between automatic and manual recalculation:
1.
Touch UTILS and select “Recalc Options....”
2.
In the dialog box, touch the box beside Auto
Recalculation to toggle Auto Recalculation
(on and off). An X in the box indicates Auto is
“on.”
3.
Touch OK.
To manually recalculate the worksheet:
1.
While in the manual calculation mode, you
can force recalculation. Turn off Auto Recalculation in the Recalc Options dialog.
2.
Touch UTILS and select “Calculate Now!.”
Manual recalculation is useful while you enter data and
formulas to prevent recalculation after each entry.
Computation iterations
When PenCell computes the value of the formula in a
cell, it sorts out the circular dependencies among
formulas in different cells and starts an iterative process
to converge on a result for the calculation. This iterative
process allows PenCell to achieve greater accuracy in
its calculations, but with a tradeoff in terms of performance. The greater the number of iterations, the slower
the computational performance when circular dependencies are present.
For example, a circular dependency exists in a
worksheet when:
A1 contains 1000
A2 contains A3 x 0.5
A3 contains A1 - A2
31
To control performance, you can specify the number of
iterations:
1.
Choose Recalc Options... in the UTILS
menu.
The greater the number you enter for iterations, the more accurate the result of circular
computations will be, but the longer it will
take to arrive at that result.
2.
Touch OK to close the dialog box and to
cause the new iteration count to take effect.
The iteration count for a worksheet is saved with its
name and other characteristics. The number of iterations has no effect on the accuracy of non-circular
formulas.
32
Guidelines for entering formulas
Observe the following guidelines when entering a
formula:
• A formula can begin with a number, an opening
parenthesis, a cell reference, a function name, or the
+, =, -, $, •, *, /, ", × or ÷ symbols.
• A formula can contain up to 255 characters.
• A formula can have either upper- or lower-case
letters. All of the following are valid and have the
same meaning: SUM(A4:A8), sum(a4:a8),
SuM(A4:a8).
• A formula can have spaces between a function name
and its arguments. All of the following are valid and
have the same meaning: SUM(A4:A8), SUM (A4:A8),
sum (a4: a8 ).
Formulas can contain the following:
• Numbers (for example, 250, -90, 21%, 8.1E+10), date
numbers, and time numbers. You can enter numbers
using either the unit's keypad or the 10-key pad. Date
and time numbers cannot be mixed with other data in
the formulas.
• Cell and range references (for example, $B$4 and
C22:C29).
• Functions (for example, SUM(B4:B10)).
Formulas cannot include Date and Time numbers mixed
with other data.
Two ways to enter cell and range references in
formulas
As you enter a formula, you have two ways to insert a
cell or range reference:
To use a built-in function:
1.
Select a cell.
2.
Touch
(or touch UTILS and select “Insert
Function....”)
3.
Scroll through the list by touching the up and
down arrow. Touch the white area above or
below the scrolling button to move one page
up or down.
4.
Touch a function to select it or touch SUM(),
AVERAGE(), or COUNT() for the
respective function.
• Type the reference, such as B2:E5, using the keyboard.
• If the blinking edit cursor is at a position to the right of
an arithmetic operator (like “+” or “-”) or a parenthesis,
then touching a cell or range causes that cell or range
reference to be inserted in the formula.
PenCell automatically assumes you want to insert a cell
or range reference if you touch or drag through
worksheet cells when inserting a cell reference would
be appropriate.
Using the built-in functions
PenCell supports certain mathematic business, statistical and miscellaneous functions. You can include built-in
functions in your worksheet by typing them or, more
simply, by inserting them using
. See Appendix B,
“Function Reference,” for the syntax and examples of
built-in functions.
33
34
5.
Touch Insert to add the selected function and
its argument place holder to the formula in
the edit bar.
Functions that require a specific type of
argument include a place holder to remind
you what argument to add. (See “Syntax of
funcitons,” for details about arguments.) The
place holder is highlighted so all you need to
do is type the argument or touch a cell to
enter the cell reference.
6.
Enter the function argument, if necessary.
For example, if you want to compute the
statistical average of a set of data in your
worksheet, use the AVERAGE function.
AVERAGE requires a set of numbers as its
argument. When you select AVERAGE,
AVERAGE (values...) appears in the edit bar
and values... is highlighted. Highlighted
characters in edit bar are replaced when you
type or when you touch a cell or range in the
worksheet.
Press PREV or NEXT to move the highlighting to the next argument place holder in the
formula. In effect, NEXT serves as a tab key,
permitting you to move through a formula
entering argumets.
7.
To signal that you are finished entering the
formula, select a new cell (or press ENTER).
How formulas work with the data in
your worksheet
A worksheet formula can be a simple arithmetic
operation, such as 5 + 2, or a complicated operation,
such as determining the net present value of a series of
future cash flows based on data present in worksheet
cells.
Use cell and range references to identify the data used
in formulas. A cell reference identifies one cell by its
column letter and its row number, such as C3.
PenCell supports both absolute cell references and
relative cell references, as well as combinations of the
two.
Relative cell references
Relative cell references point to a cell by referring to its
location relative to the cell which contains the reference.
Relative cell references do not use the dollar sign
syntax.
For instance, if a formula in cell B3 includes the relative
cell reference C5, PenCell interprets this pointer as “one
cell to the right and two cells down.” If you copy the
formula containing this reference to another location on
the worksheet, it still means “one cell to the right and
two cells down,” but now it refers to a different cell. Thus
if you copy the formula C5 - 2 in cell B3 to cell D6, the
formula in D6 contains the appropriate new relative cell
reference (E8 - 2).
Mixed cell references
Absolute cell references
Absolute cell references always point to precisely the
same cell, no matter where the reference is made.
Absolute cell references have dollar signs ($) before the
column letter and row number.
For example, the absolute cell reference $C$5 always
points to the cell at the intersection of column C and row
5. When you copy or move an absolute cell reference
from one location to another, the cell that the reference
points to does not change. If you copy the formula
$C$5 - 2 in cell A1 to cell K9, the formula in K9 remains
the same as $C$5 - 2.
Mixed cell references express an absolute reference to
the column and a relative reference to the row (for
example, $C5) or an absolute reference to the row and
a relative reference to the column (for example, C$5).
Put a dollar sign in front of the part of the reference that
is absolute.
Once again, if you copy such a reference, the absolute
part of the reference always remains the same, while
the relative part changes depending on the new
location.
35
Ranges
Order of precedence in calculations
A range is a rectangular block of adjacent cells in the
worksheet. A range can be one or more rows, one or
more columns, or a group of cells in adjacent rows and
columns. Use ranges in commands and formulas to
perform operations on more than one cell at the same
time.
The following table shows the arithmetic, relational, and
logical operators you can use in formulas and their
order of precedence. The lower the precedence number,
the earlier the worksheet performs the operation.
Operations with the same precedence number are
performed sequentially from left to right.
Precedence
Operator
1
-+
2
3
4
5
Refer to a range by its upper left cell, followed by a
colon, followed by its lower right cell, such as C4:C6.
You can use the absolute, relative, and mixed range
references described above.
6
7
Operation
Identifying value as
positive or negative
(binary operators)
^
Exponentiation
*/
Multiplication and division
+Addition and subtraction
(binary operators)
=,<>,<,>,<=,>= Tests: Equal-to, Notequal-to, Less-than,
Greater-than, Less-thanor-equal-to, Greaterthan-or-equal-to
NOT
Logical-NOT test
AND, OR
Logical-AND and logicalOR tests
You can override the order of precedence by enclosing
an operation in parentheses. The worksheet performs
operations inside parentheses first. Within each set of
parentheses, the normal order of precedence applies.
36
Types of formulas
About built-in functions
There are three types of formulas: numeric, logical, and
date.
A formula can include one or more built-in functions. You
can include built-in functions in your worksheet by
typing them or, more simply, by inserting them using the
icon. See Appendix B, “Function Reference” for
details. This section gives you some general information
about using the functions.
Numeric formulas
Numeric formulas perform calculations with numbers,
using one or more of the arithmetic operators +, -, *, /, ^,
or related built-in functions.
Types of functions and operators
Two examples of numeric formulas are 3*B20 and
SUM(B20:B25)/4. The formula 3*B20 returns a numeric
value by multiplying 3 by the value in cell B20. The
formula SUM(B20:B25)/4 returns a numeric value by
dividing the sum of the values in the range B20:B25 by 4.
Logical formulas
Logical formulas are statements that return true (value
1) or false (value 0). For example, the logical formula
B5>=40 returns true (1) if cell B5 contains a value
greater than or equal to 40. Otherwise, the formula
returns false (0). Logical formulas use the logical and
relational functions described in the following pages.
Date formulas
Date formulas return results expressed as dates or time.
PenCell supports six major types of functions and
operators:
Arithmetic
Perform arithmetic operations. These include:
*, +, -, /, ^, ABS, INT, ROUND, SQRT, EXP, LN,
LOG, LOG10, MOD, RAND, PI, SUM.
Date/Time
Compute values based on dates and times. These
functions use the unit's clock, so the clock must be
set properly for date and time values to be
accurate. These include: DATE, DATEVALUE,
DAY, HOUR, MINUTE, MONTH, NOW, SECOND,
TIME, TIMEVALUE, TODAY, YEAR.
37
Financial
Calculate annuities, loan payments, cash flows,
and so on. These include: DDB, FV, IRR, NPER,
NPV, PMT, PV, RATE, SLN, SYD.
For the remainder of the functions, the syntax is:
FUNCTION (argument1, argument2,...,argumentN)
Where:
Logical
Compute the results of conditional formulas.
These include: AND, FALSE, IF, NOT, OR, TRUE.
Relational Operators
Perform mathematical comparisons. These
include: <, <=, <>, =, >, >=.
Statistical
Perform calculations on lists of values. These
include: AVARAGE, COUNT, COUNTA, MAX,
MIN, STDEVP, VARP.
Syntax of functions
Each function has a specific structure, or syntax, that
you must follow when you type it. When you enter a
built-in
or touch UTILS and select “Insert Function...”, the appropriate syntax is included. For the
arithmetic and relational operators, the syntax is:
argument1
38
OPERATOR
argument2
FUNCTION
Represents the name of the function.
Parenthesis
You must enclose a function's arguments in
parentheses. For example, in INT(SUM(A4:A8)),
the argument for INT is (SUM(A4:A8)), while the
argument for SUM is (A4:A8).
Argument separator
You must separate arguments from one another
with commas, for example, SUM(A1,A5,A6,B8).
The ellipses, or three dots (...), used between
argument2 and argumentN are not part of the
syntax; they represent hypothetical arguments
only.
Functions and their arguments
Supply the information PenCell needs to carry out a
function. For example, when PenCell comes across the
function SUM(A4:A20), the argument A4:A20 tells
PenCell to add the values in the range extending from
A4 to A20. The number and type of arguments required
varies by function. The functions in the function list of
the PenCell formula editor display a template of the
arguments that each function requires.
Arguments can be values, cell references, and conditions:
• For values, use a number (such as 2), a numeric
formula (such as 2+3 or A1+B1), or a cell or range
reference that contains a number or numeric formula
(such as A4 or A4:A20).
• For cell or range references, type the reference or
touch the cell or range when the cursor is to the right
of a parenthesis or an arithmetic operator (+, -, >,
etc.).
• For conditions, use a logical formula or the reference
of a cell that contains a logical formula. You can also
use any numeric formula, literal string, or cell reference.
• PenCell assigns the value 0 to blank cells used as
arguments in financial, logical, and mathematical
functions.
• A blank cell is ignored in the computation of statistical
functions: MIN, MAX, AVERAGE, STDEVP and VARP.
NOTE
Your unit provides a way of entering symbols like > and
< or { and }. Press SMBL to see the list of symbols.
Touch one to enter it to the selected cell.
Errors when formulas are calculated
Two kinds of error messages are available to help you
evaluate errors when they occur.
• #REF appears in a cell when a cell reference in a
formula is invalid.
• #ERR appears in a cell when a numeric error occurs.
There are some conditions that cause an error when
formulas are calculated.
• A zero as denominator in the formula.
• An incorrect parameter range in a function.
• Error in a function used in a formula. For instance,
ASIN(2) evaluates to #ERR.
• A #REF error occurs when a cell reference in a
formula becomes invalid after the formula is copied, or
a cell referenced in a formula is deleted.
NOTE
If you enter an invalid formula that begins with an
alphabetical character, PenCell interprets the formula as
a label.
39
Editing a worksheet
Select the cell that you want to change. The
cell contents appears in the edit bar.
2.
Touch within the edit bar (or press ENTER) to
obtain the blinking edit cursor that indicates
you are ready to edit.
Now you can use any of the editing techniques described below in “Guidelines for
editing.”
If you start to type immediately, before you
obtain the blinking cursor, the original cell
contents disappear from the edit bar and are
replaced by what you type.
3.
When you are finished, touch another cell.
Guidelines for editing data or formulas
Observe the following guidelines when editing the
contents of a cell:
40
£
1.
• Touch the edit bar to obtain a blinking edit cursor
before editing the contents of the selected cell.
If the blinking cursor is absent when you use the
keyboard, 10-Key Pad, or function list, the original cell
contents are replaced.
• Move the blinking cursor to the right of an operator
(like“+” or “÷”) or within parentheses, then touch a cell
or select a range to add its reference to the edit bar.
• Drag the pen across a formula, label, or number in the
edit bar to select characters you want to change or
delete. The selected characters are replaced when
you type or deleted when you press DEL.
• Press DEL to delete the character to the right of the
blinking cursor.
• Press BS to delete the character to the left of the
blinking cursor.
• Touch and to move the blinking cursor to the
beginning or end of the edit bar.
• Press CANCEL if you change your mind and want the
cell contents to remain the same.
• Use Revert to Saved to abort all the changes made
to the worksheet.
• Use Undo (or press 2nd Z) to revert back to the cell
contents prior to the last operation.
• Press WORD to add words from the custom word list
you create using the unit's Word function.
• Press SMBL to insert one of the unit's list of special
characters like < and {.
• You can also cut, copy and paste.
£
To edit the contents of a cell:
Moving around a worksheet
Your unit displays a portion of the cells in a worksheet at
one time. There are several methods to display other
parts of the worksheet. You can move around the
worksheet in the following ways:
Going to a specific cell
1.
• Touch the scroll arrows to move the worksheet one
row or column at a time in the direction the arrow
points.
• Touch in the scroll bar or drag the scroll button to
move a proportional distance in the worksheet. The
display changes after you lift the pen.
• Select a cell or range and drag the pen to the edge of
the display where you want to view more columns (or
rows).
• Use the “Go To” Command.
• Use the “Find” Command.
Touch UTILS, then select “Go to....”
Type the cell reference or choose TOP or
BOTTOM to go to the first or last cell in the
worksheet.
PenCell assumes that the bottom cell is the
last cell actually used in the worksheet, not
the maximum row or column in PenCell.
2.
Touch Go to....
The display moves to that portion of the
worksheet and the specified cell is highlighted.
When you touch Go to..., PenCell remembers the anchor
cell of the current selection. Next time you select Go to...
that cell will appear in the Go to dialog. This makes it easy
to switch between two areas of the worksheet.
NOTE
PenCell remembers the Current selection and the next
time you use “Go to” it appears as the destination in the
“Go to ” dialog. This is an easy way to alternate between
two areas of a worksheet.
41
Finding cell contents
Another way to move the worksheet display is to find
specific cell contents. You can find a value, label, or
formula. Note, however, that the search is not casesensitive.
NOTE
By default, formulas do not appear in cells, the value
calculated by the formula is displayed instead. Before
you can search for a formula, you need to show
formulas by touching SHOW and selecting “Show
Formulas.” See “Formatting a worksheet” for more
information.
To find cell contents:
1.
Touch UTILS, then select “Find...,” or press 2nd F.
Copying and moving data
You can use the pen, menu commands, or the keyboard
to copy or move data.
Copying and moving with the pen
2.
Type all or part of the value, label, or formula
and choose either forward or backward
search.
Include blank spaces as they appear in the
formulas and labels you are searching for.
42
3.
Touch Find.
The cell is selected and displayed.
4.
Repeat steps 1, and 3 to find the same
information in other locations in the
worksheet.
1.
Select the cell or range you want to move.
2.
To move:
Touch and hold the pen on the selected
(highlighted) cell or range.
To copy:
Press 2nd, then touch and hold the pen on
the selected (highlighted) cell or range.
A white outline appears around the selected
cell or range.
Copying and cutting using menu commands
1.
Select the cell or range whose contents you
want to copy or cut.
2.
To copy, touch EDIT and then select “Copy.”
To cut, touch EDIT and then select “Cut.” The
contents of the cell or range disappear.
3.
4.
Drag the outline to the new location. If you
want to move the cell contents to a location
that is not in the current display, just drag it in
the direction you want to go, hold the pen
past the edge of the worksheet, and the
worksheet will scroll in the direction you drag.
Lift the pen when the outlined cell or range is
at the desired location.
3.
Select a new location for the data: either one
cell, or a range of the same dimensions as
the original, or a range that is a multiple of
the range originally selected.
4.
Touch EDIT, then select “Paste.” The cell or
range's contents now appear in the new
location, replacing anything that had been
there.
NOTE
Use 2nd C to copy and 2nd X to cut. Use 2nd V to
paste.
NOTE
• The copied or moved data overwrites anything that
previously occupied that location.
• To copy or move a column (or row), select the column
(or row) and 2nd drag & drop it to the destination
column (or row).
43
NOTE
If you copied or cut a single cell, but selected a range of
cells prior to pasting, the cell's contents are repeated
throughout the range. If you cut or copy a range and
select a range of a different size prior to pasting, an
error message is displayed unless the new range size is
a multiple of the range you cut or copied. If you select
one cell to paste a range of cells, the full range is
pasted in, with the selected cell as the top left cell of the
pasted range.
The effect of moving cells on formulas
When a cell or range of data is moved to a new location,
any formulas that refer to the moved data are modified
to refer to the new positions, except as noted below. For
example, if you enter SUM(A1:B2) in cell A5, then move
A1:B2 to C3:D4, PenCell automatically updates the
formula in A5 to become SUM(C3:D4). However, if you
move only part of the data, such as A1:B1, to a new
location, the formula in A5 remains unchanged because
only a part of the range A1:B2 was moved.
If you move a formula to a new location, PenCell
automatically updates the formula to continue refering to
the same data, even if the data is moved along with the
formula. For example, enter SUM(A1:B2,D1) in C1.
Then move the range A1:C2, which includes the formula
in C1 and the data in A1:B2, to A4:C5. The formula,
which is now in C4, automatically changes to
SUM(A4:B5,D1) to refer to the data moved to range
A4:B5, and the data in D1 which was not moved.
44
Copying and annotating a worksheet
Copying formulas
To copy the current worksheet as an image that you can
paste in the Scrapbook or Documents application:
1.
Select the cells you want to copy.
To speed up building formulas in a worksheet, you can
copy a formula to a number of continuous cells, and the
contents of the formulas automatically adjust themselves to the new locations.
2.
Touch EDIT, then select “Copy Image.”
To replicate a formula:
3.
Touch your unit's SCRAPBOOK or DOCUMENTS application.
1.
Select a cell or range containing formula(s).
2.
Press 2nd.
4.
Open a new entry.
For Documents you may open an existing
entry and place the cursor at desired location.
For Scrapbook you may annotate the
worksheet image with the graphic tools.
3.
Touch and hold the pen within the selection
and drag the selected cell or range to a new
location.
5.
Press 2nd V.
Whether it is moving or copying cells, the selected cell
contents replace anything in the new location.
You can touch EDIT and select “Undo” if you want to
reverse an operation you just performed.
NOTE
• If you touch a cell in a selected range, the cell you
touched becomes selected. If you press 2nd and then
touch a cell, the selection is extended (or reduced) to
the cell you touched.
• You can use the keyboard for many operations. For
details see Appendix D.
45
Clearing data
Sorting
You can clear the contents of a cell or range without by:
• Using the Clear command or DEL.
• Using the Cut command or 2nd X.
You can sort a range in ascending or descending order
based on the key cell you enter. If you sort by rows, the
order of the rows is changed. If you sort by columns the
order of the columns is changed.
To remove data from your worksheet:
To sort a range of cells:
1.
2.
Select the cell or range that contains data
you want to remove.
Select the range. (For example, C4:E7.)
2.
Touch CELLS, then select “Sort....”
Select “Cut” from EDIT or “Clear” from
CELLS.
The cut and clear commands are slightly different.
The Cut command places the selected cell contents in a
short term memory allocation, enabling you to use the
Paste command as if you were moving the data. The
Cut command also deletes the cell format, returning the
cell to the General format. The Clear command immediately erases the data but has no effect on the cell
format.
46
1.
3.
4.
Select your sorting criteria by touching your
choices in the Sort window. For example, if
you choose rows, ascending, and D5, the
data in the selected range, C4:E7, are
rearranged with the data in cells D4 through
D7 in increasing order.
To add new, empty cells to your worksheet:
1.
For example, to add a new, blank column or row to
the worksheet, select the column or row that
currently occupies that location.
Touch Sort.
NOTE
If you sort a column or row that contains both numeric
values and labels, the numeric values come before the
labels in the ascending sort.
Select the cell or range that is currently at the
location where you want to place the new
cells.
2.
Touch CELLS, then select “Insert....” If the
range is not a row or column, then the
following dialog box appears.
3.
Decide whether to shift the selected cells
down or to the right before insention. Then
touch OK.
If you want to restore the range to its original order,
touch EDIT and select “Undo.”
Inserting and deleting cells
Occasionally you need to reorganize a worksheet so
you can incorporate new cells or remove obsolete ones.
Updating your worksheet might involve adding new
blank cells or deleting cells. PenCell lets you add and
delete cells while automatically maintaining cell references in the remainder of the worksheet.
When you want to delete cells (and cell contents), the
remaining cell references automatically adjust so they
continue to refer to the same cells.
When you insert new blank cells, all the cell and range
references automatically continue to refer to the same
cells, even if those cells have changed location.
47
Formatting a worksheet
To delete cells from your worksheet:
1.
2.
3.
Select the cell or range that you want to
delete.
Touch CELLS, then select “Delete....”
If the range is not a row or column, then the
following dialog box appears.
Decide whether to shift the selected cells up
or to the left after deletion. Then touch OK.
NOTE
#REF appears in a cell containing a formula if you
delete a cell that is referred to in the formula or if you
delete an entire range that is referred to in the formula.
If you delete part of a range that appears in a formula,
the formula is updated appropriately.
48
Formatting not only enhances the appearance of your
worksheet, it also can aid in analysis.
You can format worksheets on two levels:
• Worksheet characteristics affect the entire worksheet.
• Cell characteristics affect individual cells.
Worksheet characteristics
Worksheet characteristics affect the entire worksheet.
These “globally” formatted characteristics control the
appearance of the worksheet, overall functions like
recalculating, or the worksheet status in relationship to
other functions on the unit. The table on the following
page identifies worksheet characteristics and shows the
default settings.
Worksheet
Characteristic
Default Setting
Hiding or displaying gridlines
Hide or display gridlines
Gridlines displayed
Display values or formulas
Values displayed
Touch SHOW, then select “Hide Gridlines.” To redisplay
them, touch SHOW and select “Show Gridlines.” Any
changes in this setting will affect only this worksheet.
Display or hide
Column/Row Labels
Displayed
Show full screen
Off
Set Worksheet Protection
On or Off
Off
Set Title On or Off
Off
Number of calculation
iterations
5
Automatic or manual
recalculation
Automatic
Zoom
100%
Gridlines are always displayed between row and column
headings.
Showing formulas or values
Touch SHOW and select “Show Formulas.” To display
their calculated values again, touch SHOW and select
“Hide Formulas.”
When you choose these items, you toggle the functions
on and off.
The following sections explain in detail each worksheet
characteristic and the alternatives to the default
settings.
49
If the formula is too long to fit in a cell, you only see the
part that fits in the cell (unless the adjacent cell is
empty).
Any change in this setting will affect only this worksheet.
Showing full screen
To view more cells, you can set the display to full
screen. Touch SHOW, then select “Show Full Screen.”
If you want to see the formula in one cell without
reformatting the entire worksheet, touch the cell to
select it. The formula appears in the edit bar.
Zooming
Touch
in the lower right corner to select a different
zooming mode.
You can revert back to the normal viewing by touching
.
NOTE
• You can show the full screen while in any zoom mode.
• You can also touch
to display another type of full
screen mode where only the toolbar is hidden but the
scrollbars and column/row labels remain visible.
NOTE
When in 70% viewing (zoom out mode), all texts are
shown in plain text and accent characters are not
available.
50
Displaying or hiding column/row labels
Setting title
Touch SHOW, then select “Hide Column/Row Labels.”
To redisplay them, touch SHOW and select “Show
Column/Row Labels.”
Use Set Title to create stationary table headings. This
enables you to scroll through multiple pages of data
while the appropriate row or column labels remain
stationary and visible.
For example, if your table has long columns of data that
extend beyond the bottom of the screen, you can scroll
while column labels remain visible using Set Titles.
To turn on Set Titles:
1.
Create appropriate row and column labels
above and to the left of the scrolling data.
2.
Select the cell that occupies the top left
position of the data that will scroll normally.
3.
Touch UTILS, then select “Set Titles.”
51
Rows above and columns to the left of the selected cell
are indicated by dark lines that divide the display into
panes. When you scroll up and down, column labels
appear on each page and when you scroll left and right,
row labels appear on each page.
modified:
1.
Touch UTILS.
2.
Select “Turn Protection On.”
If you select a cell in column A or row 1 before you
choose Set Titles, the display is divided into only two
panes and scrolling is impacted in only one dimension.
1.
Select the cell or range you do not want to
protect.
To unset titles:
Touch UTILS, then select “Unset Titles.”
2.
Touch CELLS, then select “Protect....”
NOTE
If you set title near the bottom right corner at a zoom out
mode, and then zoom in, you may not be able to scroll
or select cells. In this case, unset titles by choosing
UTILS and selecting Unset Titles.
3.
Clear the Protect Cells checkbox, then touch
OK.
4.
Touch UTILS, then select “Turn Protection
On.”
To protect only part of the worksheet:
Protecting worksheet
You can lock up part or all of a worksheet so that
protected area cannot be modified. Protection takes two
steps: cell protection, then worksheet protection. By
default, all cells are protected.
To protect the whole worksheet so that it cannot be
If you try to modify a protected area, a message
appears to inform you that the protected cells cannot be
changed.
NOTE
52
When you activate the protection status of the
worksheet, the undo and redo operations are cleared
from the memory. That means you will not be able to
undo or redo operations you performed prior to activating worksheet protection. In addition, when the
worksheet protection status is active, you cannot move
cells.
You can control cell characteristics for a selected cell or
range. The following table shows cell characteristics and
the default settings.
Cell Characteristic
Cell Type
Column width
Row height
Alignment
Cell characteristics
Font style
Cell protection
Default Setting
General
7 characters
1 character
Left for text,
right for numbers, dates &
time
Plain
On
Cell formatting operations can be reversed using the
undo operation.
Cell type
By default, all cells in a worksheet are defined as
General cells, meaning they can contain data, labels, or
formulas. Other cell types are available that enable you
to specify the way to display cell contents.
If you change the type of a cell after you have entered
data in it, the content of the celll does not change. Only
the way it is displayed may change.
To change the cell type:
53
1.
2.
3.
Select the cell or range you want to format.
(To change the default setting of worksheet,
select All instead.)
Touch FORMAT, then select “Format....”
Choose a cell type, then touch OK.
If you select the Number or Date/Time cell
type, you also need to choose a format
option from the pop-up menu.
54
The following table describes the available cell types.
Cell Type
Number
Description
If the cell contains a value, it is displayed in
one of the following formats:
Format
Name
Example
nnnn.nn
general (default) 1976.10
nnnEnn
scientific notation 1.98e3
$n,nnn.nn Currency (U.S.) $1,976.10
nn.nn%
percentage
197610.00%
n,nnn.nn punctuated
1,976.10
The number of displayed decimal points is
controlled by entering a value in the Decimals
box in the Format Cells dialog.
If the numeric value is too large to fit in the
cell, asterisks (*) appear across the entire
cell. To see the value, either select the cell
and view the value in the edit bar, or adjust
the column width.
Cell Type Description
Date/Time Displays cell content in one of the selected
date/time format. Date/time formats are:
Format
Example
DD-MMM-YY
28-Dec-96
DD-MMM
28-Dec
MMM-YY
Dec-96
HH:MM:SS (AM/PM) 02:34:51 AM
HH:MM (AM/PM)
02:34 AM
MM/DD/YY
12/28/96
MM/DD
12/28
HH:MM:SS
02:34:51 (24 hour)
HH:MM
02:34 (24 hour)
General
By default, all cells have the General format
until you change them.
• General cells can contain a value,
formula, or label.
• If you enter a number in a General cell, it
is right justified.
• If you enter text in a General cell, it is
interpreted as a label and is left justified.
• If you enter a formula (including a cell
reference) in a General cell, the computed result of the formula is displayed. If
the result is a number, it is right justified
and if it is text, it is left justified.
Label
Logical
• If you enter data that looks like a date into
a General cell, PenCell interprets the data
as a formula first. If it fails, it tries to
interpret the data as a date. For instance,
12/28/96 in a General cell is interpreted
as 12 divided by 28 divided by '96.
However, 28-Dec-96 is interpreted as a
date. Once you enter a date in a General
cell, its type changes to a Date/Time
format.
• If you enter True or False in a General
cell, PenCell interprets these as logical
values 1 and 0 and can use them in
logical and relational functions.
Limits cell contents to labels. If you enter
any data in a Label cell, PenCell uses the
data as a label.
Displays cell contents as logical true (nonzero) or false (0). Logical results are
computed from logical and relational
operations in formulas or can be entered
directly. See Appendix B, “Function Reference.”
55
To reverse a format change, touch EDIT, then select
“Undo.”
Decimals
When a cell has the number cell type, you control the
decimal points displayed in the cell from the Format
dialog.
To specify decimal points for the NUMBER cell type:
56
1.
Select a cell or range.
2.
Touch FORMAT, then select “Format....”
3.
Touch Number.
4.
Enter a value between 0 and 15 in the box
beside Decimals.
5.
Touch OK.
If you see asterisks (****) displayed across a cell, this
means that the cell is not wide enough to display its
value. To solve this problem, adjust the column width.
(See “Adjusting column and row size” later in this
section.)
NOTE
PenCell uses true values when formulas are calculated
(to at least 15 decimals of precision). The rounded value
appears in the worksheet display, but the true value for
a cell appears in the edit bar when you select the cell.
Alignment
Alignment determines where cell contents appear
relative to the edges of the cell. General alignment is
the default. With General alignment, numbers, dates
and times are right justified, and labels are left justified.
Changing font style
Cells can include bold, italic, or plain characters that you
can combine with underlining. The default font style is
plain.
To change the font style for a cell or range:
To change the alignment for a cell or range:
1.
Select the cell or range you want to change.
You can also select All to chane the
worksheet's default setting.
2.
Touch FORMAT, then select “Alignment....”
3.
Touch the general, left, center, or right
alignment button to highlight your choice.
4.
Touch OK.
1.
Select a cell or range.
NOTE
To change the default font style touch All in the upper
left corner of the worksheet. This will have no effect on
cells previously changed from the default.
2.
Touch FORMAT, then select “Font Style...”
3.
Touch the font style of your choice to highlight it. You can also use 2nd + Y, 2nd + O,
2nd + I, 2nd + U to choose plain, bold, italic,
or underline font style.
4.
Touch the Underline for underlined characters.
5.
Touch OK.
NOTE
In the zoom out mode, all fonts are displayed as plain.
57
Drawing borders
You can add borders to one or more cells in a
worksheet.
58
1.
Select the cell or range you want to change.
2.
Touch FORMAT, then select “Borders....”
3.
Touch one or more of the checkboxes, as
required.
4.
Touch OK.
NOTE
• When the dialog is opened Outline is unchecked.
• For multi-cell selection the other buttons are initially
grayed.
• When Outline is not checked, the other buttons
control all the borders of the selected cells.
• When Outline is checked, the outermost edge of the
selection is given a border and the interior edges are
set according to the other buttons.
• When the dialog is closed with OK, the grayed buttons
leave the relevant edges unchanged.
Adjusting column and row size
You can easily change the column width or row height in
a worksheet.
1.
Select a column or row heading.
2.
Touch CELLS then select “Set Column/Row
Size.” If necesary, you can drag the dialog
box to a different location.
3.
Touch and hold the pen tip in the center of
any selected column or row heading.
4.
Holding the pen tip in the display, drag left or
right to change the size of columns or up or
down to change the size of rows.
5.
When you lift the pen, the cells are displayed
with the new column or row size.
6.
You may change the size of other columns or
rows not in the selection.
7.
Touch Done to finish.
NOTE
• To change the widths of a group of columns (or rows),
select the columns (or rows). Then perform the above
operation by changing the width of any of the selected
columns (or rows). All of the selected columns (or
rows) will be changed to the same width.
• Initially, all columns and rows are set to the default
width and height. You can change the default values
of this worksheet by making the All selection, then
change a column width or row height.
• Individual groups of columns or rows that were
previously changed are not affected by changes in the
default column width/row height.
59
60
Working With Charts
Creating a chart
You can create and save one or more charts for your
worksheet.
C
harts are a visually compelling way of
presenting many kinds of worksheet
information.
To create a new chart, you need to start in the
Worksheet mode:
1.
Select the range of cells containing data you
want to chart. The cells you select in the
Worksheet mode form the basis of the chart.
The row above the selected
range determines the
horizontal axis labels.
The selected
range determines
the chart content.
The column to the left of the
selected range determines the
chart legend.
61
Formatting a chart
2.
Touch EDIT, then select “New Chart.”
The number of bars comes from the
number of rows in the selected range.
The default chart display is a column chart. You can
display the same data in a pie chart, line chart, or stack
chart. In addition you can add a chart title, add gridlines,
remove the chart legend and reverse the chart axes.
Chart title
Grid lines
The horizontal (X)
axis labels come
from the row
above the
selected range.
The chart legend comes from the
column to the left of the selected range.
Legend
When you create a chart, the cells
immendiately above or left of the selection
(if any) contain labels for one of the axes in
your chart. (See “Exchanging the X and Y
axes” later in this chapter.)
62
To change the chart format, touch PIE, LINE, COLUMN,
or STACK.
Pie charts
Column charts
A pie chart shows the data from one column in the
selected range as percentages of a whole.
A column chart displays all the data for each row or
column in the worksheet as a single column, with each
category of data distinguished by its pattern.
Line charts
A line chart shows the individual values of selected data
connected by a line.
Stacked column charts
A stacked column chart displays all the data for each
row or column in the selected range as a single column,
with each category of data distinguished by its pattern.
63
Chart titles
Exchanging the X and Y axes
You can add a chart title to enhance your chart, as
follows:
When you originally create your chart, the horizontal or
x axis is determined by the data in the selected rows.
The vertical or y axis comes from the data in the
selected columns. You can switch the axes so the x axis
comes from column data and y axis comes from row
data.
1.
Touch EDIT, then select “Chart Title....”
2.
Type a chart title, up to 25 characters.
3.
Touch OK.
To swap, touch the X
in the Chart mode.
Y SWAP in the lower left corner
Exiting and saving a chart
To show the title, touch SHOW, then select “Show Title.”
Displaying gridlines
Gridlines can aid in the visual comparison of data. You
can add gridlines to column, stacked column, and line
charts.
Saving a chart
To show the gridlines, touch SHOW and select “Show
Gridlines.” To hide, repeat the same and select “Hide
Gridlines.”
You can save up to 20 charts with any worksheet. To
save, change the display mode from Chart to
Worksheet, Index or Chart (may be faded out if there is
no previously saved chart for the current worksheet).
Displaying the legend
1.
The chart legend is based on the data in the worksheet
columns to the left of the selected range. The legend
provides a key to differentiate the patterns in the chart.
To show the legend, touch SHOW and select “Show
Legend.” To hide, repeat the same and select “Hide
Legend.”
64
To exit without saving the current chart, touch CANCEL.
The worksheet display will appear.
Touch VIEWS, then select “Worksheet”,
“Index” or “Charts....”
2.
If the chart does not have a title yet, the
following window appears. Type a chart title
and then touch OK. A prompt will indicate the
chart has been saved to the current
worksheet.
The name of the worksheet in which the
chart is saved does not appear in the Chart
mode. To see the name of the worksheet, go
to the Worksheet mode or touch VIEWS then
select “Charts....”
3.
The next display depends on the mode
change you selected.
• “Worksheet” returns you to the worksheet
display.
• “Chart” displays the list of saved charts including
the current one. You will return to the Chart mode
after selecting a chart from the list (See the next
section “Viewing saved charts”) .
• “Index” (from a previously saved worksheet)
displays the following window.
Touch Yes to save the changes. You can also
use Save as to save the worksheet under a
new name.
• “Index” (from a new worksheet) displays the
following window. Type a worksheet name to
save the worksheet and asssociated charts.
Then press OK.
Viewing saved charts
After you have saved one or more charts for a
worksheet, you can switch to the Charts mode to view
the charts.
To view saved charts starting from the worksheet mode:
1.
Touch VIEWS, then select “Charts....”
2.
Select a chart, then touch View (or touch an
entry twice).
65
Duplicating a chart
You can make a new chart by duplicating an existing
one, then change its content, for example.
1.
While viewing a chart, touch EDIT, then
select “Duplicate Chart....”
2.
Charge the suggested chart title, if necessary. Then touch OK.
Deleting a chart
Printing and adding mark-ups to a
chart
The unit's Documents or Scrapbook applications include
operations that enable you to print graphics like your
PenCell. Scrapbook has graphic options to edit the
image directly. The charts cannot return to PenCell,
however (Refer to the other Operation Manual for details
on using the Documents or Scrapbook applications and
printing from the Documents or Scrapbook applications).
To put a chart into the Documents or Scrapbook
applications:
1.
Touch EDIT, then select “Copy Image.”
2.
Touch the Documents or Scrapbook applications.
3.
Open a blank page.
4.
Press 2nd V to paste the chart into the
Documents or Scrapbook applications. In
Scrapbook the chart appears in the screen
and you can use the graphic options to edit it.
To delete a chart:
1.
Touch EDIT, then select “Delete Chart.”
2.
Touch Yes.
To delete group of charts:
66
1.
Touch EDIT, then select “Delete Group....”
2.
Select the Delete option, then touch OK.
NOTE
• In Scrapbook or Documents, you can save or print the
chart.
• Documents will receive larger worksheet image than
Scrapbook, however the image cannot be marked.
Managing Worksheets
I
ndex mode includes file management
operations, as well as operations for importing
and exporting worksheet files, creating a new
file from a template, and opening saved
worksheets.
Index mode operations
Index mode provides you with tools for managing
worksheet files. You can:
• delete, rename, and copy a worksheet
• create a new worksheet
• create a new worksheet from a template
• assign secret status to a worksheet
In addition, use the Index mode when you transfer
worksheet files between other unit's as well as personal computers.
Entering the Index mode
The index mode is active when you enter PenCell for
the first time, so you can create your first new
worksheet.
Thereafter, you can switch to the Index mode by
touching VIEWS and then selecting “Index.” The index
mode contains two tabs: Worksheets and Templates.
Touch the Worksheets tab to select it.
67
Managing worksheets
The Index tab mode provides you with worksheet
management operations. Some operations require that
a worksheet be selected. Touch a worksheet to select it.
Duplicating a worksheet
1.
Select the worksheet you want to duplicate.
2.
Touch EDIT and select “Duplicate
Worksheet....”
3.
Type a name for the duplicate Worksheet.
4.
Touch OK.
NOTE
Links are not duplicated.
68
Changing a worksheet name
1.
Select the worksheet you want to rename.
2.
Touch EDIT, then select “Worksheet Title....”
3.
Type a name for the Worksheet up to 20
characters.
4.
Touch OK.
NOTE
You can also change the worksheet name in the
worksheet mode by touching the worksheet title at the
bottom left of the display.
Deleting worksheets
To delete all worksheets:
To delete a worksheet:
1.
Touch EDIT, then select “Delete Group....”
1.
Select the worksheet you want to delete.
2.
2.
Touch EDIT, then select “Delete Worksheet.”
If your unit is locked, a message appears to
prompt you to unlock it before performing the
delete operation. Touch OK.
If your unit is not locked, the following window
appears:
3.
Touch Yes to confirm that you want to permanently delete the worksheet.
3.
Touch Delete to delete.
4.
Touch Yes to confirm.
All worksheets as well as charts are deleted.
NOTE
Secret worksheets are hidden from the Worksheets tab
index if your unit is locked. Therefore, you must unlock it
before deleting the worksheets.
69
Transferring worksheets
Making a secret worksheet
You can turn a normal worksheet into a secret
worksheet, or vice versa. When your unit is locked,
secret worksheets are not shown in the Index mode and
cannot be opened, viewed, deleted, copied, renamed,
or set to Normal.
You can transfer worksheets to another unit using the
built-in infrared ports or direct cable connection. You can
also exchange files between PenCell and PC Files.
Unit to unit transfer
1.
While in the Index or Worksheet mode, touch
SEND and select “Unit to Unit....”
If the worksheet has not been saved, you will
be prompted to do so; otherwise the following
dialog box appears.
2.
On the sending unit, use the Send pop-up
menu to select whether to send only the
selected worksheet or all worksheets.
On the receiving unit, select Receive.
To turn a worksheet secret:
1.
While viewing the Worksheets tab in the
Index mode, select the desired worksheet.
2.
Touch EDIT, then select “Secret Entry.”
You can also perform this operation from the Worksheet
mode.
To turn a secret worksheet normal:
70
1.
Unlock your unit.
2.
Touch EDIT, then select “Normal Entry.”
3.
Set the Unit to Unit Path on both units to the
correct option.
4.
Touch OK on both units. To quit during the
transfer, press [ON].
The data is transferred as PenCell data (but
not assigned to Filer’s IN folder).
To transfer a worksheet via the infrared port, you can
also use the following simpler method:
1.
Make sure you are either in the Worksheet
mode, or if you are in the Index mode you
have selected a worksheet from the
Worksheets tab.
2.
Place the two units at a close distance, then
press GET on the receiving unit and SEND
on the sending unit.
Copying a worksheet to a PC File
1.
Make sure you are either in the Worksheet
mode, or if you are in the Index mode and
you have selected a worksheet from the
Worksheets tab.
2.
Touch SEND, then select “Copy to PC
Files....”
If the worksheet has not been saved, you will
be prompted to do so; otherwise the following
dialog box appears.
3.
If necessary, change the file name and
description.
4.
Touch OK.
The worksheet is copied to a new PC File in
MORE.
71
Getting a worksheet from a PC File
72
1.
While in the Worksheet mode or the Index
mode, touch SEND, then select “Get from
PC Files....”
If the worksheet has not been saved, you will
be prompted to do so; otherwise the following
dialog box appears.
2.
From the Select a File pop-up menu, select
the data source, then select a file from the
list.
3.
If necessary, change the suggested
worksheet title.
4.
Touch OK.
Replacing with a PC File
1.
Make sure you are either in the Worksheet
mode, or if you are in the Index mode you
have selected a worksheet from the
Worksheets tab.
2.
Touch SEND, then select “Replace with PC
File....”
3.
Select data sorce, Main Unit or PC Card.
Select the PC file. Touch OK.
4.
Touch OK.
Data in the worksheet is replaced with the
new one.
NOTE
• PenCell can read Excel 3.0 and 4.0 files. It writes
Excel 4.0 files. See Appendix E on file compatibility.
• For more details about PC Files, see the other
Operation Manual.
• Use an optional Link Software to transfer PC files
from/to a PC. For more details on operating the Link
Software, see the manual of the Link Software.
73
Linking a worksheet
Linking with Contacts or Data Files
entries
You can link a worksheet. When linked, the entry in the
Worksheets tab of the Index mode contains the following icons:
Contacts only
1.
Data files only
Contacts and
Data files
Make sure you are either in the Worksheet
mode, or if you are in the Index mode you
have selected a worksheet from the
Worksheets tab.
4.
Select an entry to link by checking the box
(Contacts in this example).
Viewing linked entries
2.
Touch LINK TO, then select “Contacts...” or
“Data Files...” as required.
1.
3.
If the worksheet has not been saved, you will
be prompted to do so; otherwise the following
dialog box appears.
When viewing a Contacts or Data Files entry,
touch LINKS and select “Show Linked
Entries.”
2.
Touch the spreadsheet icon, then select a
spreadsheet entry to view.
You can also search for or make a linked entry. Refer to
the other Operation Manual for explanation on using
Contacts and Data Files entries.
74
Setting the workspace size
By default, PenCell has 128KB of workspace size. You
can add more to the workspace size so that you can
work with larger worksheets.
NOTE
If you set a value for the extra workspace, then when
you look at the user memory (by touching Memory in
TOOLS), this is indicated by the gray, shaded portion in
the memory graph.
To set the workspace size:
1.
While in the Index mode, touch SETUP and
select “Workspace Size....”
2.
Use £ or
to increase or decrease the
extra workspace, in multiple of 32KB. The
maximum extra workspace is 384KB. The
extra workspace increases at the expense of
the user memory.
3.
Touch OK.
£
75
76
Troubleshooting
T
his section answers questions you may
have when using PenCell.
Troubleshooting checklist
❐ A formula entered into a cell remains as text and no
calculation is performed.
• Make sure the cell has not been formatted to label.
• Touch SHOW, then select “Hide Formulas” if it
appears on the list.
❐ Cannot find a menu command to remove the 10-Key
Pad from the screen.
• When the 10-Key Pad is no longer needed, touch
CLOSE on the key pad to close it.
❐ When the formula in a cell is copied into another
cell, the formula contents are changed. Can the
contents be fixed?
• To fix the contents of a formula so that it will not be
changed during copying, use the absolute cell
reference when specifying the contents.
❐ A built-in function does not calculate as expected.
• Make sure the function is spelled correctly.
• Make sure the function contains the desired arguments.
77
❐ A formula does not calculate as expected.
• Make sure the order of precedence is correct. If
necessary, use parentheses to overwrite the normal
order of precedence.
• Touch UTILS, then select “Recalc Options....” Then
see if Auto Recalculation is checked. If Auto Recalculation is not checked, you can perform calculation
manually by touching UTILS and then selecting
“Calculate Now!.”
❐ #REF appears in a cell.
• Reference is made to a cell that no longer exists.
❐ #ERR appears in a cell
• Zero is used as denominator in the formula.
• Parameter range in a function is incorrect.
• There is errors in the formula.
• If the formula depends on other cells, check to see if
any one of the cells displays #ERR.
❐ The gridlines no longer appear.
• Touch SHOW, then select “Show Gridlines” to bring it
back.
❐ A message always pops up saying that the cells are
protected and cannot be changed.
• To be able to change the cell contents again, turn off
the protection.
78
❐ Cannot select a cell or scroll the worksheet.
• Touch UTILS and select “Unset Titles”. Or, touch
to zoom out in case Set Titles is selected.
Appendix A: Menu Functions
Appendixes
Appendix A:
Appendix B:
Appendix C:
Appendix D:
Appendix E:
Menu Functions
Function Reference
Spreadsheet Limits
Keyboard Reference
File Compatibility
Menus and functions are available depending on which
mode you are in: Index, Worksheet, or Charts.
In Index mode
VIEWS menu
Index
Use the Index mode to manage
worksheets and templates. See page
18.
Worksheet
Use the Worksheet mode to work on
the contents of a worksheet. See
page 19.
Charts...
Use the Charts mode to create and
manage charts. See page 19.
A checkmark (✔) appears in front of the current mode.
SETUP menu
Workspace Size...
Changes the workspace size to allow
for larger worksheets. See page 75.
79
EDIT menu
SEND menu
New Worksheet Creates new worksheet. See page 23.
Unit to Unit...
Worksheet Title...
Changes the worksheet title. See
page 68.
Duplicate Worksheet...
Makes a copy of the current
worksheet. See page 68.
Delete Worksheet
Deletes the current worksheet. See
page 69.
Delete Group... Deletes group of worksheets. See
page 69.
Secret Entry
Normal Entry
Turn the worksheet secret. See page
70.
Turn the worksheet normal. See page
70.
LINK TO menu
80
Contacts...
Links the current worksheet to a
Contacts entry. See page 74.
Data Files...
Links the current worksheet to a Data
Files entry. See page 74.
Transfers worksheets among units
using the Unit to Unit method. See
page 70.
Copy to PC Files...
Copies a worksheet to a PC Files
entry. See page 71.
Get from PC Files...
Copies a PC Files entry into PenCell
as a new worksheet. See page 72.
Replace with PC File...
Copies a PC Files entry into PenCell
to replace the current worksheet. See
page 73.
Note that when in the Templates tab, only the following
functions are available:
• In the VIEWS menu: Index
• In the SETUP menu: Workspace Size
• In the EDIT menu: New Worksheet
In Worksheet mode
Show/Hide 10-Key Pad
Shows or hides the 10-key numeric
pad. See page 28.
VIEWS menu
Index
Use the Index mode to manage
worksheets and templates. See page
18.
Worksheet
Use the Worksheet mode to work on
the contents of a worksheet. See
page 19.
Charts...
Use the Charts mode to create and
manage charts. See page 19.
FORMAT menu
Format...
Changes the way contents of the
selected cells should be displayed.
See page 56.
Font Style...
Changes the font style of the selected
cells. See page 57.
Alignment...
Aligns the contents of the selected
cells. See page 57.
Borders...
Changes the borders of the selected
cells. See page 58.
SHOW menu
Show/Hide Gridlines
Shows or hides the gridlines in a
worksheet. See page 49.
Show/Hide Formulas
CELLS menu
Insert...
Inserts blank cells to the selected cells,
but leaves format, font, alignment and
border unchanged. See page 47.
Delete...
Deletes the selected cells.
See page 48.
Clear
Clears contents of the selected cells,
but leaves format, font, alignment and
border unchanged. See page 46.
Protect...
Protects or unprotects the selected
cells. See page 52.
Shows or hides formulas stored in
cells of the worksheet. See page 49.
Hide/Show Column/Row Labels
Shows or hides the column or row
labels of the worksheet. See page 51.
Show Full Screen
Displays the worksheet in full screen
mode. See page 50.
81
Set Column/Row Size
Sort...
EDIT menu
Changes column or row size.
See page 59.
New Worksheet Opens a new worksheet. See page
23.
Sorts the selected cells. See page 46.
New Chart
UTILS menu
Worksheet Title...
Find...
Finds desired data in the worksheet.
See page 42.
Go to...
Jumps to the desired location in a
worksheet. See page 41.
Turn Protection On/Off
Protects or unprotects the worksheet.
See page 52.
Set/Unset Titles Sets or unsets the worksheet title.
See page 51, 52.
Changes the worksheet title. See
page 68.
Revert to Saved Aborts all the changes made to the
worksheet. See page 40.
Save as...
Saves the worksheet under a new
title. See page 24.
Cut
Cuts contents of the selected cells
into the clipboard. See page 43.
Copy
Copies contents of the selected cells
into the clipboard. See page 43.
Paste
Pastes contents from the clipboard.
See page 43.
Copy Image
Copies display image of selected cells
to clipboard. See page 45.
Undo
Reverses the most recent action. See
page 45.
Redo
Opposite of Undo. Use it if you decide
to keep the change after all. See page
15.
Recalc Options...
Sets the recalculation options.
See page 31.
Calculate Now! Performs calculation on the worksheet
immediately. See page 31.
Insert Function...
82
Creates a new chart based on the
selected cells in the worksheet. See
page 62.
Inserts a built-in function at the
selected location in the worksheet.
See page 33.
Secret Entry
Turns the worksheet secret. See page
70.
Normal Entry
Turns the worksheet normal. See
page 70.
LINK TO menu
Contacts...
Links the current worksheet to a
Contacts entry. See page 74.
Data Files...
Links the current worksheet to a Data
Files entry. See page 74.
SEND menu
Unit to Unit...
In Charts mode
VIEWS menu
Index
Uses the Index mode to manage
worksheets and templates.
See page 18.
Worksheet
Uses the Worksheet mode to work on
the contents of a worksheet.
See page 19.
Charts...
Uses the Charts mode to create and
manage charts. See page 19.
SHOW menu
Transfers worksheets among the units
using the Unit to Unit method. See
page 70.
Copy to PC Files...
Copies a worksheet to a PC Files
entry. See page 71.
Get from PC Files...
Copies a PC Files entry into PenCell
as a new worksheet. See page 72.
Show/Hide Title Shows or hides the chart title. See
page 64.
Show/Hide Gridlines
Shows or hides gridlines of the chart.
See page 64.
Show/Hide Legend
Shows or hides the chart legend. See
page 64.
Replace with PC File...
Copies a PC Files entry into PenCell
to replace the current worksheet. See
page 73.
83
Appendix B: Function Reference
EDIT menu
New Worksheet
Opens a new worksheet. See page
23.
Chart Title...
Changes the chart title. See page
64.
Duplicate Chart... Makes a copy of the current chart.
See page 66.
Delete Chart
Deletes the current chart. See page
66.
Delete Group...
Deletes group of charts. See page
66.
Copy Image
The following built-in functions are available for inclusion
in spreadsheet formulas. Each function is described in
detail below.
Arithmetic functions
Arithmetic functions (or operators) operate on numeric
values or references to numeric values.
value1 * value2
Returns the result of multiplying
value1 by value2.
Example: 6*5 returns 30.
value1 + value2 Returns the result of adding value1 to
value2.
Copies display image of the current
chart to clipboard. See page 66.
Example: 6+5 returns 11.
value1 - value2
Returns the result of subtracting
value2 from value1.
Example: 6-5 returns 1.
value1 / value2
Returns the result of dividing value1
by value2.
Example: 6/5 returns 1.2.
value1 ^ value2 Returns the result of multiplying
value1 by itself value2 times.
Example: 2^4 returns 16.
2^-3 returns 0.125
84
ABS(value)
Returns the absolute value of value.
LOG10(value)
Example: ABS(54) returns 54.
ABS(-54) returns 54.
EXP(value)
Returns e raised to the power of
value. e is a constant equal to
approximately 2.718281828459045.
Example: LOG10(86) returns
1.934498451.
MOD(value, base)
Returns the remainder (modulus) after
value is divided by base.
Example: EXP(4) returns the
approximate value of 54.5982.
INT(value)
Returns the largest integer less than
value.
Example: INT(128.35) returns 128
while INT(-128.35) returns -129.
LN(value)
Example: MOD (24, 9) returns 6.
PI()
RAND()
Returns a pseudo random value
between 0 and 1.
Example: RAND() * 10 returns a
randomly generated value between
0 and 10.
ROUND(value, digits)
Rounds value to a specified number
of digits.
LOG(value, base) Returns the common logarithm of a
value to the base you specify or base
10 if base is omitted.
Example: LOG(100) returns 2.
Log(A10, 3) returns the log base 3 of
the value in cell A10.
Returns the value of π.
Example: PI() returns 3.14159265...
Returns the natural logarithm of value.
Natural logs use base e. e is a
constant value equal to approximately
2.718281828459045.
Example: LN(A4) returns the natural
log of the value in cell A4.
Returns the base 10 logarithm of a
value.
Example: ROUND(23.25,1) returns
23.3. ROUND(23.247,2) returns 23.25.
ROUND(234.24,-2) returns 200.
SQRT(value)
Returns the square root of value.
Example: SQRT(30) returns 5.47723.
85
SUM (values...)
Returns the sum of all the values in
list of arguments.
Example: SUM (23,293,-97,63)
returns 282. SUM (A1:A4) returns the
sum of values in cells A1 to A4.
Date/time functions
All time functions use a 24-hour clock.
TODAY()
Returns the current date (from the
system clock) as a serial number. If the
cell is formatted with the date/time
format DD-MMM-YY, this serial number
is displayed as the current date.
Example: TODAY() appears as
03-Sep-96 when the date is September 3, 1996 and the cell is formatted
to display the date.
DATE(year, month, day)
The spreadsheets represent date and time information
in cells as “serial numbers.”
Creating date and time representations
There are six functions for creating date and time
representations:
NOW()
Returns current date or time. If the cell
is formatted with the date/time format
HH:MM:SS, this serial number is
displayed as the current time (from the
system clock).
Example: NOW() appears as
09:27:45 when the time is 09:27:45
a.m. and the cell is formatted to
display the time.
86
Returns a serial number corresponding to the date, where year is a 2- or
4-digit integer (e.g. 1996 or 96),
month is an integer from 1 to 12, and
day is an integer from 1 to 31.
Example: DATE(1996, 3, 22) displays
22-Mar-96.
DATE(1996, 3, 22)+1 displays 23-Mar96.
NOTE
When you enter a year after 2000, be
sure to enter it in four digits.
TIME (hour, minute, second)
Returns the fractional value of a
particular time, where hour is a value
from 0 to 24, minute is a value from 0
to 60, second is a value from 0 to 60.
Example: TIME (15,32,39) returns
0.647674 which is the fractional
number representing 15 hours, 32
minutues and 39 seconds. In this
encoding, 0 hours is represented by
the value 0 and 24 hour is represented by 1.
DATEVALUE(date_text)
Converts its argument to a numeric
serial value counting the days since
the first day of 1900.
Example: DATEVALUE(“10/7/96”)
returns 35345. This number is
displayed as 07-Oct-96 if the cell is
formated as DD-MMM-YY.
TIMEVALUE(time_text)
Converts its time_text argument to a
fractional number since the beginning
of the day (i.e. midnight).
Example: TIMEVALUE(“10:30 PM”) is
equal to 0.9375. This number is
displayed as 22:30:00 if the cell is
formatted as HH:MM:SS.
NOTE
Valid date-text and time-text are:
Representations
DD-MMM-YY
DD-MMM
MMM-YY
HH:MM:SS (AM/PM)
HH:MM (AM/PM)
MM/DD/YY
MM/DD
HH:MM:SS
HH:MM
Example
28-Dec-96
28-Dec
Dec-96
02:34:51 AM
02:34 AM
12/28/96
12/28
02:34:51 (24 hour)
02:34 (24 hour)
<date_text>
<date_text>
<date_text>
<time_text>
<time_text>
<date_text>
<date_text>
<time_text>
<time_text>
87
Extracting information from date and time representations
There are six functions for extracting information from
date and time representations:
DAY(date)
MONTH(date)
Returns the value of the day in date,
which is an integer in the range 1 to
31.
Example: HOUR(TIME(15,08,0))
returns 15. HOUR(“15:08:0”) returns
15.
MINUTE(time)
Returns the value of the minute in
time, which is an integer in the range
0 to 59.
Returns the value of the month in
date, which is an integer in the range
1 to 12.
Example: MINUTE(TIME(15,08,0))
returns 8. MINUTE(“15:08:0”) returns
8.
Returns the value of the year in date,
which is a 4-digit integer representing
the year.
Example: YEAR(DATE(96,9,11))
returns 1996. YEAER(“9/11/96”)
returns 1996.
88
Returns the value of the hour in time,
which is an integer in the range 0 to
23.
Example: DAY(DATE(96,9,11))
returns 11. DAY(“9/11/96”) returns 11.
Example: MONTH(DATE(96,9,11))
returns 9. MONTH(“9/11/96”) returns
9.
YEAR(date)
HOUR(time)
SECOND(time)
Returns the value of the second in
time, which is an integer in the range
0 to 59.
Example: SECOND(TIME(15,08,0))
returns 0. SECOND(“15:08:0”) returns
0.
Computing with date and time representations
You can use date and time representations in arithmetic
expressions. For example:
Financial functions
In the following table, the optional parameters are
shown in italic.
date_representation + days
Returns a new date plus a given
number of days (days).
date_representation - days
Returns a new date minus a given
number of days (days).
date_representation_date - representation
Returns the number of days difference
between the two dates.
DDB(cost, salvage, life, period, factor)
Calculates double-declining (or specified) balance
depreciation for an asset, acquired at cost, with
the specified life and estimated final salvage, for
the specified period. It assumes the rate at which
the balance declines to be 2 (double-declining) if
factor is omitted. Accelerates the depreciation
rate, to give larger depreciation in earlier periods.
Example: DDB(5500,900,4,1) returns 2750.
DDB(2400,300,10,2,1.5) returns 306.
FV(rate, nper, pmt, pv, type)
Calculates the future value for fixed payments pmt
made for the number of periods nper, at a
constant interest rate. pv is the lump-sum amount
that a series of future payments is worth right now.
It is assumed to be 0 if pv is omitted. The function
assumes that payments are made at the end of
each period if type is 0 or omitted, at the beginning of the month, if type is equal to 1.
Example: FV(0.083,25,-1500) returns 114583.
FV(0.5%,10,-200,-500,1) returns 2581.40.
89
IRR(range, guess)
Calculates the internal rate of return for a range of
values that occur at equal and regular intervals.
guess is a starting approximation to the expected
result, or assumed to be 0.1 (10%) if omitted.
Example: IRR(C9:G9) returns -2.12% where
C9:G9 contains (-70000, 12000, 15000, 18000,
21000).
IRR(C9:E9, -10%) returns -44.35% (same interval
as above.)
NPER(rate, pmt, pv, fv, type)
Calculates the number of periods for an investment pv based on periodic, constant payments
pmt and a constant interest rate. fv is the cash
balance after the last payment is made. If fv is
omitted, it assumes to be 0. If type is 0 or omitted,
it is assumed that payments are made at the end
of each period, if type is 1, at the beginning of
month.
Example: NPER(1%,-100,1000) returns approximately 11.
NPER(12%/12,-100,-1000,10000,1) returns
approximately 60.
90
NPV(rate, values...)
Computes the net present value for a range or a
series of values that occur at equal and regular
intervals, when discounted at a fixed, periodic
interest rate. It assumes that cash flow occurs at
the end of each period.
Example: NPV(8%,C15:G15) returns 41922.1
where C15:G15 contains (8000, 9200, 10000,
12000, 14500).
NPV(10%,-10000,3000,4200,6800) returns
1188.44.
PMT(rate, nper, pv, fv, type)
Computes the periodic payment needed to pay off
the starting principal pv over the number of
periods nper, at a fixed interest rate. It assumes
the future value, or a cash balance after the last
payment is made, to be 0 if fv is omitted; it also
assumes the payments are made at the end of
each period if type is 0 or omitted, and at the
beginning of the month if type is 1.
Example: PMT(1%,5,-5000) returns 1030.20.
PMT(8%/12,10,10000,0,1) returns -1030.16.
PV(rate, nper, pmt, fv, type)
Computes the present value for a fixed payment
pmt made for the number of periods nper, at a
fixed interest rate. It assumes the future value to
be 0 if fv is omitted, assumes the payments are
made at the end of the periods if type is 0 or
omitted, and at the beginning of the month if type
is 1.
Example: PV(7.5%,20,-10000) returns
101944.91.
PV(0.08/12,12*20, -500, 10000,1) returns
58145.95.
RATE(nper, pmt, pv, fv, type, guess)
Computes the periodic interest rate required for a
fixed payment pmt made for the number of periods
nper to have the present value pv. It assumes that
the future value to be 0 if fv is omitted. It assumes
payments to be made at the end of the periods if
type is 0 or omitted, and at the beginning of the
periods if type is 1. guess is as a starting approximation to the expected result; it is assumed to be
10% if omitted.
SLN(cost, salvage, life)
Computes the straight-line depreciation of an
asset, acquired at cost, with the specified life and
estimated final salvage value. It spreads the rate
of depreciation evenly among all periods.
Example: SLN(30000, 7500, 10) returns 2250.
SYD(cost, salvage, life, per)
Calculates the sum-of-the-years depreciation for
an asset, acquired at cost, with specified life and
estimated final salvage, for the specified period
per.
Example: SYD(30000, 7500, 10, 1) returns
4090.91.
Example: RATE(48, -200, 8000) returns 0.77%.
The annual rate would be 0.77%*12 which is
9.2%. RATE (60, -700, 100000, -140000, 1, 1%)
returns 0.0117 (or 1.17%).
91
Logical functions
Logical functions let you use conditions in building
formulas. Use them when you want the outcome of a
computation or a returned value to determine some
other value assignment or to control the sequence of
operations. You can also use logical functions to
determine values and control operations when error
conditions occur and when special input types are used.
Using logical functions to test for such conditions helps
you avoid errors which might otherwise ripple throughout the spreadsheet.
AND(values...)
Evaluates each of the arguments. Returns TRUE if
all the arguments are TRUE; returns FALSE if one
or more is FALSE.
Example: AND( TRUE(), TRUE(), FALSE() )
returns FALSE.
FALSE()
Returns the logical value FALSE.
IF(cond, true, false)
Evaluates the cond expression. If cond is true, it
evaluates and returns the value of true part.
Otherwise, it evaluates and returns the value of
false part or FALSE if false part is omitted.
Example: IF( B5>5, “Bigger”, “Smaller” ) returns
“Bigger” if B5 is greater than 5, and “Smaller”,
otherwise.
IF( A1, “OK” ) returns “OK” if A1 is TRUE and
FALSE, otherwise.
IF( B1>A1, 24*(B1-A1), 24-24*(A1-B1)) is an
example of a more complicated IF function.
NOT(value)
Reverses the logical value of its argument.
Example: NOT( FALSE() ) returns TRUE.
OR(values...)
Returns TRUE if one or more of the arguments is
TRUE; returns FALSE if all arguments are FALSE.
Example: OR( FALSE(), TRUE() ) returns TRUE.
TRUE()
Returns the logical value TRUE.
92
Miscellaneous functions
CHOOSE(index, values ...)
Chooses a value from a list. If index evaluates to
1, the first value is returned; if it evaluates to 2, the
second value is returned and so on.
Example: CHOOSE(4, “mon”, “tue”, “wed”, “thur”,
“fri”) returns “thur”.
COLUMNS(range)
Returns the number of columns in the range.
Example: COLUMNS($A$8:$K$9) returns 11.
HLOOKUP(key, range, row)
Looks in the first row of the range for the largest
value that is less than or equal to key. Then it
moves down the column and returns the value in
the specified row. The row index starts from one.
The values in the first row (key row) should be
sorted in ascending column order. For alphabetic
comparison, the search is case-sensitive. That is,
the key “Orange” will match “Orange” and not
“orange”.
Example: HLOOKUP( 5, A1:D3, 2) returns “c”
where the content of range A1:D3 in row order is
{2, 3, 5, 8}
{8, b, c, d}
{10, f, g, h}
INDEX(range, row, col)
Uses a row and col index to choose a value from a
range.
Example: Assume C10:E11 in row order contains
the values:
{5, 2, 7},
{8, 4, 9}.
Then INDEX (C10:E11, 1, 3) returns 7 which is
the content of the cell in row 1 column 3 of the
range.
ISBLANK(value)
Returns TRUE if value is blank, and FALSE,
otherwise.
Example: ISBLANK(C13) returns TRUE when
C13 is empty.
ISERR(value)
Returns TRUE if value is any error value except
NA (Not Available), and FALSE, otherwise.
Example: ISERR( NA() ) returns FALSE.
ISERROR(value)
Returns TRUE if value is any error value, and
FALSE, otherwise.
Example: ISERROR( NA() ) and ISERROR(1/0)
both return TRUE.
93
ISNA(value)
Returns TRUE if value is the error value NA (Not
Available), and FALSE, otherwise.
Example: ISNA( NA() ) returns TRUE.
ISNUMBER(value)
Returns TRUE if the value is a number, and
FALSE, otherwise.
Example: ISNUMBER(D21) returns TRUE where
D21 has the value 298.
NA()
Returns the error value NA (Not Available). If a
formula refers to a cell having value NA, the
formula also returns NA. The NA() function is
useful when you want to guard against using an
empty cell with unavailable information in your
computation.
ROWS(range)
Returns the number of rows in a reference.
Example: ROWS( A3:G6) returns 4.
94
VLOOKUP(key, range, col)
Looks in the first column of the range for the
largest value that is less than or equal to key. Then
it moves in the right direction in the row and
returns the value in the specified col. The column
index starts from one. The values in the first
column (key column) must be sorted in ascending
row order. For alphabetic comparisons, the search
is case-sensitive. That is, the key “Orange” will
match “Orange” and not “orange”. You can use
sort tool to sort the range the right order.
Example: VLOOKUP( 8, A1:D3, 3) returns “c”
where the content of range A1:D3 in row order is
{2, 3, 5, 8}
{8, b, c, d}
{10, f, g, h}
Relational functions
Statistical functions
Relational functions operate on numeric values,
references to numeric values, and labels.
For statistical functions that accept a list of values as
arguments, the values can be any combination of
numbers, numeric formulas, cell references, and cell
ranges.
value1 < value2 Returns TRUE if value1 is less than
value2, FALSE otherwise.
Example: 5<7 returns TRUE.
value1 <= value2 Returns TRUE if value1 is less than or
equal to value2, FALSE otherwise.
Example: 8<=10 returns TRUE.
value1 <> value2 Returns TRUE if value1 is not equal to
value2, FALSE if value1 equals
value2.
Example: 3<>6 returns TRUE.
value1 = value2 Returns TRUE if value1 equals
value2, FALSE otherwise.
Example: 5=2 returns FALSE.
value1 > value2 Returns TRUE if value1 is greater
than value2, FALSE otherwise.
Example: 8>8 returns FALSE.
value1 >= value2 Returns TRUE if value1 is greater
than or equal to value2, FALSE
otherwise.
AVERAGE(values...)
Returns the average of the values.
Example: AVERAGE(79, 83, 92, 82,
90) returns 85.2.
COUNT(values...)
Counts how many numbers (including
date and time values) are in the
argument list.
Example: COUNT( C2:E2) returns 1
where C2 contains “a label”, D2 is
empty and E2 contains 15.6.
COUNTA(values...)
Counts how many non-empty cells are
in the argument list.
Example: COUNT( C2:E2) returns 2
where C2 contains “a label”, D2 is
empty and E2 contains 15.6.
Example: 9>=3 returns TRUE.
95
MAX(values...)
MIN (values...)
Returns the largest value in the
argument list.
Trigonometric functions
Example: MAX(12, 29, 8, -39) returns
29.
Trigonometric functions operate on numeric values or
references to numeric values. The angle values are
generally expressed in radians.
Returns the smallest value in the
argument list.
ACOS(value)
Example: MIN(-5, 29, 32, 7) returns
-5.
Returns the arccosine of a value. The
value cannot be less than -1 or
greater than 1.
Example: ACOS(-0.5) returns 2.094.
STDEVP(values...)
Calculates standard deviation of the
population as given.
ASIN(value)
Returns the arcsine of a value. The
value cannot be less than -1 or
greater than 1.
Example: STDEVP(45, 68, 22, 70,
50, 39) returns 16.5731.
Example: ASIN(-0.5) returns -0.524.
ATAN(value)
VARP(values...) Calculates the variance of the
population as given.
Example: VARP(45, 68, 22, 70, 50,
39) returns 274.67.
Returns the arctangent of a value. The
returned value is in the range -π/2 to
π/2.
Example: ATAN(1) returns 0.785.
ATAN2(xvalue, yvalue)
NOTE
Blank cells in the argument range of these functions are
ignored: MIN, MAX, STDEVP, VARP and AVERAGE.
Returns the arctangent of yvalue
divided by xvalue. The returned value
is in the range -π to π.
Example: ATAN2(3,1) returns 0.322.
96
COS (value)
Returns the cosine of a value which is
an angle.
Example: COS(1.047) returns
0.500171.
SIN (value)
Returns the sine of a value which is
an angle.
Example: SIN(PI()/2) returns 1.
TAN (value)
Returns the tangent of a value which
is an angle.
Example: TAN(2.328) returns
-1.058041.
97
Appendix C: Spreadsheet Limits
The following table summarizes the spreadsheet limits:
Description
98
Minimum
Maximum
Number of columns
64
Number of rows
128
Charts saved in
worksheet
0
Rows in a chart
1
40
Columns in a chart
1
40
Nesting level of
parentheses in a
formula
0
12
20
Description
Minimum
Maximum
Iteration epsilon
1e-6
99
Number of
characters in a cell
N/A
255
Number of decimal
places in numerics
0
15
File size
Number of
arguments in a
function var-arg
function like SUM(),
OR(), etc.
30
Number of terms in
a formula
60
Depth of chained
circular formulas
N/A
40
Numeric value
2.225073e-308
1.797693e308
Number of
iterations
1
99
Depends on
available
memory
resources.
Appendix D: Keyboard Reference
The following table summarizes the keys for use in the three modes:
• Index mode (Worksheets tab, Templates tab)
• Worksheet mode
• Charts mode
Key
Index Mode
(Worksheets tab)
Index Mode
(Template tab)
Worksheet Mode
(When Editbar inactive)
ENTER
View worksheet
Open template
Enter editbar mode
DEL
Delete worksheet
Chart Mode
Clear
Delete chart
CANCEL/ON/QUIT
Cancel edit bar mode
View worksheet
RETURN ↵
Go to first column of next
row
NEW ENTRY
New worksheet
New worksheet
New worksheet
PREV
Page up
Page up
Page up
Previous chart
NEXT
Page down
Page down
Page down
Next chart
2nd + PREV
Page left
2nd + NEXT
Page right
UP
Move to worksheet
entry above
Move to template
entry above
Move to cell above
Move to worksheet
entry down
Move to template
entry down
Move to cell below
RIGHT
£
Move to cell on the right
LEFT
£
£
DOWN
£
Move to cell on the left
99
Key
Index Mode
(Worksheets tab)
SHIFT+UP
Worksheet Mode
(When Editbar inactive)
Chart Mode
Extend selection upward
£
SHIFT+RIGHT
£
Extend selection to the right
SHIFT+LEFT
£
£
Extend selection downward
Extend selection to the left
SHIFT+DOWN
100
Index Mode
(Template tab)
GET
Unit to Unit Get
operation
Unit to Unit Get
operation
Unit to Unit Get operation
SEND
Unit to Unit Send
operation
MENU
Open VIEWS menu
Open VIEWS menu
Worksheet: open VIEWS
menu Full screen: collapse
and open VIEWS menu
Open VIEWS menu
2nd MENU
Open VIEWS menu
Open VIEWS menu
Open pop-up menu
Open VIEWS menu
Touch
Select entry
Select entry
Select a single cell
Select
Unit to Unit Send operation
Drag
In selection: drag move
Outside selection: select
range
2nd + Touch
In selection: reduce
selection Outside selection:
extend selection
2nd + Drag
In selection: drag copy
Outside selection: extend
selection
Key
Index Mode
(Worksheets tab)
Index Mode
(Template tab)
Worksheet Mode
(When Editbar inactive)
2nd + X
Cut
2nd + C
Copy
2nd + V
Paste
2nd + Z
Undo
2nd + A
2nd + P
Chart Mode
Copy image
Redo
Print screen
Print screen
Print screen
2nd + Y
Use plain font style
2nd + U
Use underline font style
2nd + I
Use italic font style
2nd + O
Use bold font style
2nd + F
Open find dialog
Print screen
101
Appendix E: File Compatibility
PenCell can read Excel 3.0 and Excel 4.0 files. It writes
to Excel 4.0 files.
Only a subset of Excel’s features and functions are
supported in PenCell. Unsupported functions, after
being imported into PenCell, evaluate to error value and
are displayed in edit bar with the prefix XL_ (such as
XL_DMAX(...)).
102
Communication Applications
103
104
Before you start
T
he unit must be connected to a modem in
order to use a communication software.
You can use either the SHARP CE-FM4
Fax/Modem or a PC Card modem.
Connecting to a modem
Connecting to the SHARP CE-FM4 Fax/
Modem
1.
Make sure the unit is turned off.
2.
Slide up and remove the protective cover of
the unit's Computer Link Port to expose the
15-pin connector. Remove the two rubber
plugs on either side of the connector and
install them and the port cover in their
storage positions on the modem.
3.
Connect the modem’s 15-pin interface
connector to the Computer Link Port on the
unit, and secure the unit with the thumbscrews.
4.
With a modular telephone cable, connect the
modem to a telephone outlet.
5.
Turn on the unit.
105
Connecting to a PC Card modem
Be sure to use only a recommended PC Card modem.
Using card modems that are not recommended may
result in damage to the main unit and/or loss of data. If
you are not sure whether a particular modem is
compatible, consult your SHARP dealer.
You also need the modular telephone cable supplied
with the modem to complete the steps below.
The
variesvaries
Theconnection
connection
with the PCMCIA card.
with the PC card.
106
1.
Make sure the unit is turned off.
2.
Insert the PC Card into the PC Card slot on
the side of the unit.
3.
With the supplied modular cable, connect the
modem to a telephone outlet or a cellular
phone.
4.
Turn on the unit.
CompuServe
Quick Start ............................................................... 109
Commonly Asked Questions & Answers .............. 115
Introduction ............................................................. 117
Mail ........................................................................... 121
Forums ..................................................................... 126
Executive News Service ......................................... 133
Other Functions ...................................................... 135
Troubleshooting ...................................................... 139
Appendix .................................................................. 141
107
108
Quick Start
T
his section is a quick start to setting up
and running CompuServe Access
Software.
Starting CompuServe
Access Software
1.
Touch TOOLS.
This section assumes you have already joined
CompuServe.
* The contents of the TOOLS screen may differ
depending on the version for your country.
2.
Touch the CompuServe icon twice. If the unit
is locked, you need to enter the password.
The main screen will appear.
109
Setting up your modem
1.
110
From the main screen, touch Setup, then
touch the Modem Setup tab.
2.
Make any necessary changes to these
settings.
3.
Touch OK to save the changes.
Setting up connections
You can connect to CompuServe from different places
or via different networks, as follows:
1.
From the main screen, touch the Setup
button.
2.
Touch Add and enter a new connection
name. Then touch OK.
3.
Enter your name, ID, password, and access
number. Use NEXT/PREV keys to move
between fields.
4.
Touch OK to save the changes.
Connecting to CompuServe
After you have set your modem and connection preferences, you are ready to connect to CompuServe.
1.
From the main screen, use the Connection
pop-up menu to select a connection.
2.
Touch the
icon then OK to connect to
CompuServe.
To disconnect
To disconnect, touch
.
NOTE
Many operations in CompuServe can be done both online and off-line.
111
Creating Mail
1.
If necessary, touch MAIN to go back to the
main screen, then touch the OUT tray.
2.
From the Mail index view, touch EDIT, then
select “Create Mail”
3.
112
Touch To: to display the following screen.
4.
Use the Type: pop-up menu if the recipient is
on a network other than CompuServe.
Select a name from the Address Book list,
then touch To:, Cc: or Bcc: to put the name
into the Recipients list. Alternatively, you can
type the name and user ID of the recipient,
then touch To:, Cc:, or Bcc:.
Repeat this step until you have specified all
the desired recipients, then touch Done.
5.
If desired, touch OPTION to specify Importance and Sensitivity. To attach a file (one file
maximum), touch ATTACH.
6.
Type a subject title and a message in the
Subject and Message fileds respectively.
7.
Press ENTER to save the message (to the
OUT tray).
Sending Mail
1.
While in the Mail index view of the OUT tray,
tag entries you want to send by touching their
checkbox.
Getting Mail
1.
From the main screen, touch the New Mail
icon.
2.
A list of new mail messages will appear. The
Receipt Notification and Sensitivity information of the selected message, if available, will
also appear above the list.
To read a message on-line
Touch a message entry twice.
2.
Touch SEND, then select “Send Mail....”
3.
Select the current message only, all tagged
messages, or all messages.
4.
Touch OK to send (connect to CompuServe).
To save messages to the unit
Tag any messages you want to save. Then touch SEND
and select “Save to IN...” to save mail messages to the
IN tray.
When the Save to IN dialog appears, specify the type of
messages to save. You can also select to disconnect
after the messages are saved.
113
Reading Mail off-line
1.
If necessary, touch MAIN to go back to the
main, then touch the IN tray.
2.
From the index view, touch a mail message
entry twice to read it.
To reply
114
1.
While reading a message (or from the Mail
index view of the IN tray), touch EDIT, then
select “Reply.”
2.
Select Reply to Author Only or Reply to All
Recipients.
Check the Include Original Message box to
include a copy of the original message in the
reply message.
3.
Touch OK.
4.
Type in a message and press ENTER to save
the reply.
Commonly Asked Questions &
Answers
Q:
A:
What do I need to use CompuServe Access Software?
First, you must join CompuServe and get an account
number and password. If you don't already have one, call
CompuServe and they will send you PC or Macintosh
disks that will allow you to sign up using your personal
computer (and your personal computer's modem). See
the CompuServe brochure included in this box for more
details. Second, you also need a modem (either the
CE-FM4 or a PC card modem) for the ZR-5700/ZR-5800.
Q:
A:
Can I reply to mail or forum messages while on-line?
No. You cannot create messages on-line. You must first
download messages (“Save to IN”) and then reply off-line.
You can then send these messages next time you connect
to CompuServe. You cannot create new messages on-line
either. This software was designed as a mobile
CompuServe companion. It minimizes your time on-line
and lets you work extensively off-line (such as on a train,
plane, etc.).
Q:
A:
What do “on-line” and “off-line” mean?
When the unit is connected to CompuServe, it is said to
be on-line. When it is disconnected, it is said to be off-line.
Q:
Can I send the same mail or forum message to several
recipients at the same time?
Yes. When creating a message, use the Recipients list to
name one or more recipients.
Q:
A:
Q:
A:
Do I need to join a forum before I can use it?
No. If you add a forum to your forum list, the unit will
automatically join the forum for you the first time you
access it.
Where on CompuServe is Zaaurus discussed?
Put “Zaurus” into your forum list and go to that forum.
There you will find a lot of ideas to help you use your
Zaurus more effectively.
A:
Q:
A:
I have some data that I would like to send to others.
Can I do that?
Of course you can! Filer and PC File data can be sent as
an attachment. When you compose a new mail message,
use the ATTACH button to attach a file to the message.
You can attach only one file to each message.
115
116
Introduction
Starting CompuServe Access Software
1.
T
Touch TOOLS.
his section gives you general information
about CompuServe Access Software
application in your unit.
* The contents of the TOOLS screen may differ
depending on the version for your country.
2.
Touch the CompuServe icon twice. If the unit
is locked, you need to further enter the
password.
The main screen will appear.
117
Setting up your modem
You need to set up your modem, as follows:
1.
2.
3.
118
Make sure the unit is not connected to
CompuServe. From the main screen, touch
Setup, then touch the Modem Setup tab.
Make any necessary changes to these
settings. See the “Modem settings” section
for details.
You can restore the modem settings to the
default values by touching Restore. When
prompted, touch Yes.
Touch OK to save the changes.
Modem settings
Speed
Specify a modem speed to use.
Port
Specify if communication with the modem is via
the 15-pin connector or the PC card.
Volume
If your modem has a built-in speaker, you can
adjust the sound you hear when the modem is
dialing or connecting. A value of 3 gives you the
highest volume. Selecting Mute turns off the
speaker. (This function is not valid for the
CE-FM4 Fax/Modem.)
MNP
Check to use MNP (Microcom Network Protocol)
if this is supported by your modem. MNP corrects
data errors caused by line noise, etc.
(The CE-FM4 Fax/Modem, however, does not
support this function.)
Hardware
Flow Control
Provide data flow control for high speed communication.
Modem string Some modems requires you to initialize it with a
modem initialization string. Refer to the modem’s
manual to see if any string is required.
Setting up connections
You can connect to CompuServe from different places
or via different networks, as follows:
1.
2.
Make sure the unit is not connected to
CompuServe. From the Setup screen, touch
the Connection tab.
Touch Add and enter a new connection
name. Then touch OK.
Connection settings
Your name
The name to identify yourself on CompuServe
User ID
The ID required to access CompuServe
Password
The password required to access CompuServe
Phone
Number
The number of the access point to
CompuServe
Timeout
The time to wait before hanging up the phone
Redial
Attempts
The number of times the unit should redial if it
cannot connect successfully. The acceptable
redial range is from 0 to 2. A value of 0 means
there will be no redial.
Network
Use this pop-up menu to select a network to
access CompuServe.
Line Type
Choose between tone or pulse dialing.
About the “On the road” connection
This is the default with the CIS 800#.
3.
Make any necessary changes to these
settings. See the “Connection settings”
section for details.
4.
Touch OK to save the changes.
To remove a connection
While in the Connection tab, select a connection from
the Connection pop-up menu and touch Remove. When
prompted, touch Yes.
119
Connecting to CompuServe
After you have set your modem, connection, and
preferences you are ready to connect to CompuServe.
To disconnect
To disconnect, touch
.
NOTE
Many operations in CompuServe can be done both online and off-line.
120
1.
From the main screen, use the Connection
pop-up menu to select a connection point.
2.
Touch the
icon to connect to
CompuServe.
Creating mail
Mail
Create a mail message as follow:
Y
1.
If necessary, touch MAIN to go back to the
main screen, then touch the OUT tray.
2.
From the Mail index view, touch EDIT, then
select “Create Mail.”
ou can create, send, get, and read mail.
121
3.
4.
122
Touch To: to display the following screen.
Use the Type: pop-up menu if the recipient is
on a network other than CompuServe.
Select a name from the Address Book list,
then touch To:, Cc:, or Bcc: to put the name
onto the Recipient list. Alternatively you can
type the name and user ID of the recipient,
then touch To:, Cc:, or Bcc:.
Repeat this step until you have specified all
the desired recipients, then touch Done.
5.
If desired, touch OPTION to specify Importance and Sensitivity. The Importance pop-up
menu contains: Low, Normal and High. The
Sensitivity pop-up menu has: Normal,
Personal, Private and Confidential. To attach
a file (only one file allowed), touch ATTACH.
6.
Type a subject title and a message in the
Subject and Message fields respectively.
7.
Press ENTER to save the message (to the
OUT tray).
NOTE
• Touch
or 2nd W to display the message in full
screen mode. Then touch
or 2nd W to return to the
normal mode.
• Touch
repeatedly to display the message content in
small, normal or large font.
• You can also check the spelling. To use this function,
press 2nd S.
Sending mail messages
To attach data
1.
While composing a message, you can touch
ATTACH to attach Filer or PC File data to the
message. (only one file allowed)
2.
Touch Attach.
3.
Select the attachment type, then touch OK to
select the data.
4.
Select a Folder or a PC File, then touch
Attach.
5.
Touch Done to attach the data.
1.
While in the Mail index view of the OUT tray.
Tag entries you want to send by touching
their checkbox.
2.
While in the Mail index view of the OUT tray,
touch SEND, then select “Send Mail....”
NOTE
You can also use the Send menu in FILER to send a
Filer folder as an attachment.
123
Getting mail messages
3.
4.
Specify to send the current message only, all
tagged messages, or all messages. Also
decide if you want to disconnect after sending by touching the checkbox.
Depending on the settings in the Preferences, the sent mails may be deleted automatically or moved to the SENT tray.
Touch OK to send (connect to CompuServe).
1.
From the main screen, touch the New Mail
icon.
2.
A list of new mail messages appears. The
Receipt Notification and Sensitivity information of the selected message, if available, will
also appear above the list. The Importance
status can be Low, Normal or High. The
Sensitivity status can be Normal, Personal,
Private, or Confidential.
To read a message on-line
Touch a message entry twice.
To filter out unwanted messages
Touch FILTER and check the desired options. Only
messages meeting the filter conditions appear on the
list.
To save messages
If desired, tag messages you want to save. Then touch
SEND and select “Save to IN...” to save mail messages
to the IN tray.
When the Save to IN dialog appears, specify the type of
messages to save. You can also select to disconnect the
CompuServe connection after the messages are saved.
124
Reading mail messages off-line
To forward a message
1.
2.
If necessary, touch MAIN to go back to the
main, then touch the IN tray.
1.
While reading a message (or from the Mail
index view of the IN tray), touch EDIT, then
select “Forward.”
A copy of the original message is included in
the message body.
2.
Complete the rest of the message in the
same way you create a new message in the
OUT tray. Be sure to press ENTER to save
the message when finished.
While in the Mail index view, touch a mail
message twice to read it.
To reply
1.
While reading a message (or from the Mail
index view of the IN tray), touch EDIT, then
select “Reply.”
2.
Select Reply to Author Only or Reply to All
Recipients.
Check the Include Original Message box to
include a copy of the original message in the
reply message.
• Status Icon: The icon shows the status of a
message at a glance. Possible icons include:
Unopened messages.
Messages that you have read.
High-priority messages.
Complete the rest of the message in the
same way you create a new message in the
OUT tray. Be sure to press ENTER to save
the message when finished.
➞
3.
Low-priority messages.
Messages with an attachment.
125
Going to a forum
Forums
O
1.
If necessary, touch MAIN to go back to the
main screen, then touch Forums.
2.
Select a forum, then touch GO.
If necessary, touch Add and type the forum
description and service name (or the forum's
“Go” word) to add a new one. Then touch
OK.
3.
You will now enter the selected forum.
It will automatically join the forum if this is the
first time you visit it.
n CompuServe, each forum consists of
two major areas; messages and libraries:
the software provides two tabs to correspond to the two groups.
The message group is divided into sections. The
number of sections vary from forum to forum, and
are pre-set by the forum system operator (Sysop).
Within each section, you can post messages.
When someone posts a forum message and
others respond, these messages are linked
together as one topic for easy tracking and
retrieval; the number of messages in a topic may
grow as more and more people respond. If no one
replies to a message, the topic will consist of only
1 message.
The result is three “levels” consisting of a section
index, a topic index, and the individual message
details. Note there is no “index” of messages.
To go to another forum
Touch MAIN and repeat the above steps again.
126
Reading a forum message on-line
3.
1.
While in the section view of a forum, touch a
section of interest twice (or touch INDEX, or
press ENTER).
Read the message using the scroll bar, if
necessary, to see the rest of the message.
Touch FULL to get a full screen view, or
touch SMALL to return to the normal view.
£
➡
➡
£
Use MORE to see the next message. To go
to another topic, touch or . MORE will
continue to display the next message even
across topics.
Use PREV key to see the top message of the
topic.
2.
Touch a topic of interest twice (or touch
VIEW, or press ENTER).
If you want to go to a different section, use
the Section pop-up menu.
Filtering messages
While in the section view, touch FILTER and select
“Forum Message....” Then set the filter condition and
touch Filter.
To turn off the filter, touch FILTER, then select “Turn Off
View Filter.” Also, when you leave the forum, the filter
will be reset to the default one.
127
Downloading forum messages
1.
2.
3.
Touch SEND, then select “Save to IN....”
While in the section view of a forum, touch a
section of interest twice.
4.
Select the download option, then touch OK to
start the download.
To download all messages related to a topic,
tag the topic.
NOTE
• You can only download topics and/or messages from
one section at a time. Downloading messages from
different sections in a forum at once is not possible.
• In the Save to IN dialog, if you have selected the
Disconnect after receiving checkbox, then unit will
disconnect automatically after downloading the
messages.
• Once downloaded, you can respond to messages (or
create new messages) by going off-line and then going
to the IN tray. After responding you can then send
these messages.
If you only want to download selected
messages, touch the topic twice to go into
each message and check each one individually. When you return to the section view, the
checkbox of each entry may either be , ,
or
to indicate that all, some or no messages of this topic are tagged.
128
Downloading library files
Reading forum messages off-line
You can download files from CompuServe (but not
upload files), as follows:
1.
Touch the IN tray and touch Forum M.
2.
Use the Forum pop-up menu to select a
forum. Each entry consists of the topic
(“thread”) title, the section it belongs, and the
number of messages in the thread.
3.
Touch (or press ENTER, or touch VIEW) a
message entry twice to see its contents.
1.
2.
3.
Select the Library tab, then touch a section
name twice.
If required, touch FILTER and select “Forum
Library...” to set a filter.
Touch a file twice to see its description. To
download, tag the files of interest, then touch
SEND and select “Save to IN....”
Files will actually be downloaded to the PC
Files area.
Select the download options, then touch OK.
Responding to a message
While in the index view, touch EDIT and select “Reply.”
Filtering messages
While in the section view, touch FILTER and select
“Filter (Off-Line)....”
129
Creating a new forum message off-line
1.
2.
130
3.
Use the Forum pop-up menu to specify a
forum, and the Section pop-up menu to
specify a section. Then type a title in the
Topic box.
Check the Private checkbox if you want the
message to be visible to only the recipients;
use the Via Mail checkbox to send the
message to the mail box of the recipients
instead.
4.
Touch To: and enter the names of recipients
in the same the way you create a mail
message.
From the main screen, touch the OUT tray
icon and touch the Forum M tab.
Touch EDIT, then select “Create Forum
Message.”
Posting messages to a forum on-line
1.
When you are in the desired section of a
forum, go to the OUT tray.
2.
If necessary, tag the messages you want to
send. Then touch SEND and select “Send
Forum Messages....”
3.
In the Send Messages dialog, set the Send
option, then touch OK.
NOTE
• You must post the messages while you are in the OUT
tray.
• To post messages to a forum, you must be in the same
forum.
Getting responses to your forum
messages
1.
When you are connected, the following
prompt appears if there are waiting messages.
2.
Touch Yes to see these messages.
If you touch No, you can still see the waiting
messages later when you are on-line; while
in the section view of a forum, touch FILTER,
then select “Waiting Messages....”
131
132
Troubleshooting
I
f you are having difficulty using CompuServe
Access Software, check the following list for
possible solutions before contacting your
SHARP dealer.
Troubleshooting checklist
❏ The modem cannot dial.
• Make sure the modem is correctly and securely
connected to the unit.
• Make sure the modem settings on the unit are
correct. See “Setting up your modem” on
page110.
• If you know the proper initialization string for the
modem you are using, make sure it is entered
correctly. Refer to your modem user manual for
information on modem commands. See “Setting
up your modem” on page 110.
If you are not sure of the proper string, leave the
entry blank.
❏ The unit always dials the wrong number.
• Make sure the access phone number of the
CompuServe service is correct.
• Make sure the line type setting on the unit is
same as that of the telephone line.
❏ The unit fails to connect to CompuServe.
• Make sure the Connection information is correct.
See “Setting up connections” on page 110 for
details.
139
❏ Attachment cannot be sent out.
• Make sure the attachment is Filer or PC File
data. All other type of data cannot be attached to
a message.
❏ Some of the messages no longer appear on the unit.
• Make sure there is no filter active.
140
Appendix
T
he appendix lists all menu functions you
can use in the application.
Menu functions
VIEW/ INDEX
(There are no menu items.) This button toggles between
the details of a selected message (View) and a list of
the current messages in the selected tab (Index).
MAIN
Go to the main screen.
141
SETUP
EDIT
Connection / Modem... Set up connections and your
modem. See page 118.
Create Mail
Preferences...
Customize the unit to the way you
prefer. See page 135.
Create Forum Message Create a new forum message.
See page 130.
Address Book...
Enter recipients of your messages. See page 136.
Reply
Replay to a message.
See page 125.
ENS Personal
Folders...
Set up personal folders for news
clipping. See page 133.
Forward
Forward a message to someone
else. See page 125.
Delete Entry
Delete the current message.
See page 138.
Delete Group...
Delete a group of messages.
See page 138.
,
icon
Tap to Connect or Disconnect from CompuServe.
Create a new mail message.
See page 121.
Convert to Document... Convert a message to a document. See page 134.
142
FILTER
SEND
Filter (Off-Line)...
Turn on the filter. See page 129.
Send Mail...
Mail...
Specify filter keyword so that only
filtered mail messages can be
viewed and deleted.
See page 124.
Send mail messages.
See page 123.
Send Forum
Messages...
Send forum messages.
See page 131.
Save to IN...
Save data to the IN tray.
See page 124.
Waiting Messages... If there are any messages waiting for
you in the forum, they will be
selected and displayed.
See page 131.
Forum Message...
Specify filter keyword so that only
filtered forum messages can be
viewed.
See page 127.
Forum Library...
Specify filter keyword so that only
filtered files can be listed and
downloaded. See page 129.
Turn Off View Filter
Turn off the filter if it has been set.
See page 127.
143
144
Pager Access
Quick Start ............................................................... 147
Commonly Asked Questions & Answers .............. 154
Introduction ............................................................. 157
Using Pager Access ................................................ 164
Troubleshooting ...................................................... 183
Appendix .................................................................. 185
145
146
Quick Start
T
his section is a quick start to setting up
and running Pager Access.
Starting Pager Access
1.
Touch TOOLS.
* The contents of the TOOLS screen may differ
depending on the version for your country.
2.
Touch ZR-Pager twice.
147
System diagram
Pager Access
Send Pager Messages from your unit AnyTime, Anywhere.
Send to user with a
Pager Card
Use Pager Access
software with
CE-FM4 Fax/Modem
Paging Service
Or PC Card and
cellular phone
148
Send to a text-based
alphanumeric Pager
Receive information to your unit and Pager Card
Internet
CompuServe
America Online
E-mail users can send messages
to your unit and Pager Card
Pager Access and
Pager Card
Forward Mail messages to
your unit and Pager Card
Paging Service provides
information to your unit *
– Messages from others
through operator dispatch
– News Updates
– Stock quotes
– Financial information
– Sports Scores
Receive pager messages
into your Pager Access IN folder
* Contact your Paging Service Carrier for more information
149
Setting up a paging service
2.
Select the paging service from the Name list.
If it is not on the list, you must touch Delete
to delete one or more paging services you're
not going to use from the Name list, then
touch New to enter a new paging service.
3.
Type the name of the paging service and its
TAP access phone number. Specify the
communication speed as well as the maximum message length the service accepts.
4.
Touch OK and the Save changes? dialog box
appears. Touch Yes to save the new entry
and return to the Paging Service screen.
Finally, touch OK to return to the Message
screen.
In order to send a message to a full text/alphanumeric
pager, you must obtain the following information:
• Name of the paging services for the users to whom you
will be sending messages.
• Maximum message size (Message Limit) supported by
each paging service.
• TAP access phone number and modem speed (bps)
supported. TAP is the protocol used to send a message
to a pager user via modem.
As a default setting, some common TAP access
numbers for nationwide Paging Services are listed in
the Paging Service screen and can be modified or
deleted by the user.
Please contact each Paging Service provider for the
appropriate TAP access phone number, modem baud
rate and maximum message limit for your service area.
1.
150
From the Message screen in Index view, touch
SETUP, then select “Paging Service...”.
Composing a message
1.
Press NEW ENTRY. Or, touch EDIT, then
select “New Message”.
2.
Select a paging service (Paging Network in
this example) from the Name: pop-up menu
for this message, then touch OK.
3.
Touch To:. In the Address Message screen,
select a name from the Address Book and
the name will appear in the Name: field. Or,
you can type directly in the Name: and Pager
PIN: fields. When you touch the To: button,
the name will be put into the Recipients list.
Repeat this step until all recipients have been
set. Touch Done.
4.
In the Subject: field, type the subject of this
message, up to 30 characters.
5.
In the Message: field, type in your message.
When you are done, press ENTER to save
the message in the OUT folder.
151
Sending messages
1.
152
Touch PAGER, then select “Send Messages...”.
2.
Select Current Message, Tagged Messages,
or All Messages to send, then touch OK.
Touch OK.
3.
After making the connection, the Now Sending status box appears and the messages are
sent.
4.
When there are no more messages to send,
Pager Access disconnects and the SENT
folder appears.
Getting messages from your
Pager Card
Make sure your Pager Card is inserted in the unit.
1.
Touch PAGER, then select “Get New Pager
Messages”.
2.
When the loading process is complete, new
messages appear in the IN folder.
Reading incoming messages
1.
From the IN folder, touch the message you
want to read twice.
2.
Read the message using the scroll bar, if
necessary, to see the rest of the message. If
the ATTACH button is visible, you can touch
the button to view and save the attachment.
3.
Press ENTER or touch INDEX to return to
index view.
An opened envelope icon is used to indicate
the message has been read.
Searching messages
1.
Touch FIND.
The Find Messages dialog appears.
2.
Enter a search string into the All Entries
Containing box, in upper or lower case. (The
search is case-insensitive.)
3.
Touch one or more folders you wish to
search.
4.
Touch Find.
If the string is found, the Find String dialog
appears.
5.
Touch Next or Prev to continue the search.
Touch Done when you are finished.
153
Commonly Asked Questions &
Answers
Q:
A:
How does Pager Access work?
It uses the CE-FM4 Fax/Modem or PC Card modem to
send out messages through paging services, and reads
messages from your Pager Card.
Q:
Do I need to subscribe to the paging service which I
want to send messages to?
No. But you do need to know its TAP access phone number,
etc. in order to set it up in Pager Access and send a message to a pager user. See “Setting up a paging service” on
page 159 for details.
A:
Q:
A:
Can I send the same message to several recipients at
the same time?
Yes, but they must use the same paging service. See
“Selecting recipients of a message” on page 167 for
detailed steps.
If you need to send messages to groups on different
paging services, create a new message (use copy & paste
in the subject or message field) for each group of recipients on the same paging service.
Q:
A:
Q:
A:
Q:
A:
Q:
A:
154
I have some data on my unit that I would like to send
to others. Can I do that?
Of course you can! Appointment or To Do data is accepted. When you compose a new message, use the
ATTACH button to attach data to the message. You can
attach only one entry to each message and the size of the
entry plus the message text must not exceed the message
limit set by the paging service.
What is the maximum length of the message I can
send?
This varies from one paging service provider to another.
Check with the service provider for such details.
Can I get my new pager messages whenever I start
Pager Access?
Yes. Touch SETUP and select “Preferences.” Then make
sure the Get new messages at start up box is checked.
What happens if during a message transmission
some messages could not be sent due to some
problems?
Those that were sent appear in the SENT folder while
those not sent remain in the OUT folder. Simply try
sending the failed messages again.
Q:
A:
Q:
A:
Q:
A:
Is there an automatic way to put my name into every
new message I compose?
Touch SETUP and select “Preferences.” Then type your
name into the box below the Contents of From: Field, or
touch the Use Owner's Name: button to copy the Owner's
Name registered in Personal within the TOOLS area.
What are some good habits I can develop when using
Pager Access?
Here are some:
• Always back up important messages.
• When you no longer need to keep the old messages,
delete them to make room for new messages.
At times I receive messages which contain garbled
data and/or strange characters. What is the cause?
You may have been inside a building or in a location
where your Paging Service provider does not have
complete coverage. Check with your Paging Service
provider if this happens frequently.
155
156
Introduction
T
his section gives you general information
about Pager Access.
What is Pager Access?
You can compose a message, name one or more
recipients, then dial the paging service of the recipients.
Your message is sent via a modem to the pagers of the
recipients. What’s more, you can use either a conventional telephone line or a cellular phone for modem
connection.
To read incoming messages from your Pager Card,
insert the Pager Card into the unit and use Pager
Access to load the messages.
Although you can send messages to any paging service
with this software, you must subscribe to a paging
service to receive messages via that paging service,
and that paging service must support alphanumeric or
text message transmission. You must also set up the
hardware and the software as described in the following
sections.
157
Starting ZAURUS Pager Access
1.
Touch TOOLS.
About the password screen
If you have entered a secret password into the unit, then
regardless of whether the unit is locked or unlocked, the
following screen appears when you select ZR-Pager.
* The contents of the TOOLS screen may differ
depending on the version for your country.
2.
Touch ZR-Pager twice.
Enter the correct password and the Message screen will
appear.
About the ZR-Pager icon
When you see the ZR-Pager icon, you can touch it and
the following screen appears to give you a graphic
description of the working of this software.
158
Obtaining a Pager Card and paging service
Pager Access works with a Motorola® NewsCard®
(Pager Card). For more information about where to
obtain one, please check with your SHARP dealer or
call:
800-BE-Sharp
In addition, you can call our automated Fax-on-Demand
service at:
612-397-8601
NOTE
All alphanumeric Pager Cards record a date and time
stamp for each received message. When the Pager
Card is inserted in the unit, the Pager Card date and
time are automatically modified to match the unit's date
and time whenever the Pager Access application is
initiated. Therefore, you should always check that your
unit's date and time are set correctly before the Pager
Card is installed.
Setting up a paging service
In order to send a message to a full text/alphanumeric
pager, you must obtain the following information:
• Name of the paging services for the users to whom
you will be sending messages
• Maximum message size (Message Limit) supported by
each paging service
• TAP access phone number and modem speed (bps)
supported. TAP is the protocol used to send a message to a pager via modem.
Please contact each Paging Service provider for the
appropriate TAP access phone number, modem rate
and maximum message limit.
1.
From the Message screen in Index view,
touch SETUP, then select “Paging Service...”.
The following screen appears.
159
2.
Select the paging service from the Name list.
If it is not on the list, you must touch Delete
to delete one or more paging services you're
not going to use from the Name list. Touch
New to enter a new paging service.
The following screen appears.
About the Message Limit field
Message Limit refers to the total of number of characters in the From, Subject, Message and Attachment
fields. In actual use, however, the message limit is
slightly less than this total. If Other is selected, the
maximum number of characters allowed is 2048.
Also, if this field is set to a number less than that
allowed by the paging service and there is already a
message to be sent out, an alert box appears informing
you that other messages in the OUT folder exceed the
message limit. If you touch YES, then these messages
will be truncated. The open envelope icon in the index
view in the OUT folder indicates that the message was
truncated.
3.
4.
160
Type the name of the paging service and its
TAP access phone number. Specify the
communication speed as well as the maximum message length the service accepts.
This information can be obtained from the
paging service provider.
Then touch OK and the Save changes?
dialog box appears. Touch Yes to save the
new entry and return to the Paging Service
screen. Finally touch OK to return to the
Message screen.
Modifying an existing paging service
1.
From the Paging Service screen, select a
paging service.
2.
Make changes to this entry, such as speed
(bps), Phone Number, and Message Limit.
You cannot change the name of the service.
3.
Touch OK to save the changes.
Configuring your modem
Deleting an existing paging service
After you have connected to a modem, you need to
configure Pager Access for your modem, as follows:
1.
From the Paging Service screen, select the
paging service you want to delete.
1.
Touch SETUP, then select “Modem Setup”.
2.
Touch Delete. When prompted, touch Yes to
confirm. If this paging service is referenced in
any messages in the OUT or SENT folders,
an alert box appears. If you do not delete the
messages you will not be allowed to delete
the paging service from the list.
2.
Touch and select any required setting, or
type in the desired value. See the “Modem
settings” section (below) for a detailed
description of each setting.
You can restore the settings to the factory
preset values by touching Restore.
3.
Touch OK to save the changes.
161
Modem settings
Port
Line type
Redial
Volume
MNP
Hardware
162
Specify if communication with the modem is via
the 15-pin connector or the PC Card slot.
Specify whether your telephone system uses
tone or pulse dialing. If you are not sure, check
with your local telephone company.
Specify the number of times the unit should
redial if it cannot connect successfully (due to a
busy line, etc.). The acceptable redial range is
from 0 to 9. A value of 0 means there will be no
redial.
If your modem has a built-in speaker, you can
adjust the sound you hear when the modem is
dialing and connecting. A value of 3 gives you
the highest volume. Selecting Mute turns off the
speaker. (This function is not valid for the
CE-FM4 Fax/Modem)
Check to use MNP (Microcom Network Protocol) if this is supported by your modem. MNP
corrects data errors caused by line noise, etc.
(The CE-FM4 Fax/Modem, however, does not
support this function.) MNP should be disabled
when connecting to most Paging Service TAP
access phone numbers.
Provide data flow control for high Flow Control
speed communication.
Use Dialing This is required if you call out from a private
Prefix
branch exchange (PBX). This allows you to get
an outside line before you can make any call.
Modem
Some modems require you to initialize them
String
with a modem initialization string. Refer to the
modem’s manual to see if any string is required.
(The CE-FM4 Fax/Modem does not require a
modem string.) Refer to the table below for the
recommended modem strings.
Fax/Modem initialization strings for paging service
Manufacturer
Model No.
Sharp
CE-FM4
AT&T Paradyne Keep ln Touch
3762
Megahertz
XJ1144
XJ2144
CC4144
Motorola
Lifestyle
Power
CELLect 14.4
Epson
EFM144FP
EFM144C
Landline (RJ11) Connection
Cellular Phone Connection
None
Not supported
&F0B1C1\C2\N1%C0S7=100S10=100%B1200 &F0B1C1\C2\N1%C0S7=100S10=100%B1200
(1200 baud)
(1200baud and Nokia 121/128 phone only)
&F0B1C1\C2\N1%C0S7=100S10=100%B2400 &F0B1C1\C2\N1%C0S7=100S10=100%B2400
(2400 baud)
(2400baud and Nokia 121/128 phone only)
None
Not Applicable
None
Not Applicable
None
F4N0%C0S7=100S10=100S37=5
(NEC P100 and MIT 3500/4000 phones)
None
Not Applicable
None
&J2%B1200S7=100S10=100
(Motorola Microtac phone)
None
&J2%B1200S7=100S10=100
(Motorola Microtac phone)
None
Not Applicable
None
&J2%B1200S7=100S10=100
(Motorola Microtac phone)
163
Using Pager Access
Looking at the Message screen
The Message screen is where you handle all of your
messages. It consists of a Tool bar on the top and the
IN, OUT, and SENT folders.
T
his sections explains in details how to use
Pager Access to communicate with a
paging service in order to send or get
messages.
Status Column
Indicats the status of the message using icons:
Unread
Unread with attachment
Read
Read with attachment
VIEW/INDEX Toggles between the details of a selected message (VIEW) and a list of the current messages in
the selected folder (INDEX).
FILTER
Accesses the View Filter. The View Filter controls
the display of messages in each of the IN, OUT,
and SENT folders according to criteria you set.
SETUP
Sets up the modem, a paging service, your
preferences, as well as address book.
EDIT
Accesses various message commands: message
creation, deleting, cutting, copying and pasting, and
converting message to document.
FIND
Searches for a string in any combination of the IN,
OUT and SENT folders.
PAGER
Sends or gets new messages or displays an index
list of all messages in the Pager Card.
164
Message folders
OUT folder
IN folder
The OUT folder stores all messages waiting to be sent,
including messages which have not been successfully
transmitted.
New messages are composed in the OUT folder.
The IN folder stores messages read from your Pager
Card.
From:
Subject:
Message:
ATTACH
Sender of this message
Subject for this message
Details of the message
If ATTACH is visible, additional data is attached
to this message. Touch ATTACH to see and
save the attachment.
To:
Subject:
Message:
ATTACH
Touch to specify one or more recipients of this
message. (All of the recipients of this message
must reside on the same paging service.)
Type a subject for this message, up to 30
characters.
Type in your message.
Touch to attach Appointment or To Do data to
this message.
165
Composing a message
SENT folder
1.
Press NEW ENTRY. Or, touch EDIT, and
then select “New Message”.
2.
Select a paging service (Paging Network in
this example) from the Name: pop-up menu
for this message, then touch OK.
3.
Touch the To: button to select one or more
recipients of this message. For details, see
“Selecting recipients of a message” on page
167.
The SENT folder stores all messages which have been
successfully sent out.
166
4.
5.
6.
In the Subject: field, type the subject of this
message, up to 30 characters.
In the Message: field, type in your message.
Note that you cannot create a new line. The
Message field will stop accepting text if you
reach the limit allowed by the paging service
you are going to send the message to. This
information is stored in SETUP. See “Setting
up a paging service” on page 159 for details.
If desired, touch the ATTACH button to attach
Appointment or To Do data. (See “Attaching
data to a message” on page 168 for detailed
steps.)
Selecting recipients of a message
Each outgoing message can be sent to only one paging
service, but you can send the same message to multiple
recipients on the same paging service.
If you need to send to groups on different paging
services, create a new message (use copy & paste in
the subject or message field) for each group of recipients on the same paging service.
When composing a new message, touch the To: button
to bring up the Address Message screen as shown
below:
1.
Select a name from the Address Book and
the name will appear in the Name: field. Or,
you can type directly in the Name: and Pager
PIN: fields. When you touch the To: button,
the name will be put into the Recipients list.
Repeat this step until all recipients have been
set.
167
Attaching data to a message
2.
If you want to remove a name from the
Recipient list, select the name and touch
REMOVE.
3.
Touch Done.
Touching a selected name on the Recipients list
displays the Send Status information as well as a date
(current date if the send status is Queued or the
transmission or failed transmission date otherwise) in
the area above the Address Book.
You can attach Appointment or To Do data to an
outgoing message. The data, however, must have been
filed into a FILER folder. Each message can accept only
one attachment. Follow the steps below to attach data
to a message.
1.
When you are composing a message, touch
ATTACH.
The following screen appears.
2.
Select the memory location, Main Unit or PC
Card, that contains the desired data.
Messages stored in the SENT folder usually have the
“Sent” status.
Messages stored in the OUT folder have the “Queued”
status. The following is a list of errors for Send Status
information for messages stored in the OUT folder:
168
No Dial Tone
The telephone line is not correctly
connected.
Line Busy
TAP Access number is busy.
Line Error
The line was cut off due to communication error.
No Pager PIN
Number
There is a problem in the PIN
number.
TAP Error
There was a problem in the
communications protocol.
User aborted
operation
You pressed the ON key.
Modifying a message
3.
4.
Touch the desired folder, then touch Attach.
From the Select Attachment screen, select
the desired data to attach, then touch
Attach.
You can only attach Appointment or To Do
data filed in a Filer folder.
Sometimes you may want to modify a message or its
attachment before it is sent. You cannot modify messages in the IN and SENT folders, though you can copy
them to another location.
1.
Select the OUT folder.
2.
Touch the desired entry twice.
The details of the message appears.
If an attachment already exists
A prompt appears and you can replace it with the new
attachment.
169
Setting up an address book
3.
4.
170
Edit the message contents as required. You
can touch ATTACH to view or change the
attachment. You cannot edit the attachment,
but you can change to another one. See
“Attaching data to a message” on page 168
for more information.
Press ENTER to save the modifications and
return to the Message screen.
An address book makes addressing outgoing messages
simpler and quicker. Use an address book to select
names you want to send a message to.
1.
Touch SETUP, then select “Address Book”.
The following screen appears.
Sending messages
2.
Touch each list and select the appropriate
information:
Memory:
Selects the memory location that contains the
source information, either the main unit memory or
PC Card memory.
Before sending messages, make sure is connected to a
telephone line via a modem. Also make sure the
modem as well as the paging service is correctly
configured.
1.
Touch PAGER, then select “Send Messages...”.
2.
Select the current message, tagged messages, or all of the messages to send. Then
touch OK.
The following screen appears.
Extract From:
Selects which Contact or Data File is to be used
as the information source.
Name Field:
Select which field in the source information is
assigned as the recipient name in the address
book.
Pager PIN Field:
Select which field in the source information is
assigned as the recipient’s pager PIN in the
address book.
Pager Service Field:
Select which field in the source information is
assigned as the recipient’s pager service in the
address book. This information is provided for
reference when the user is addressing a message
and is not included in the actual message that is
sent.
3.
Touch OK.
Touch OK to save the changes.
171
3.
4.
When Pager Access configures the modem,
the following screen appears.
5
After making the connection, the Now
Sending status box appears and the messages are sent out.
6.
When there are no more messages to send,
Pager Access disconnects and the SENT
folder appears.
Then Pager Access dials the access number
of the paging service (Paging Network in this
example).
About message transmission
When a message is successfully sent, that means it has
reached the paging service only. Pager Access cannot
determine if the recipients have actually received the
message.
If message transmission succeeds, the message is
copied to the SENT folder.
If message transmission fails, the message remains in
the OUT folder. If a failure occurs on any recipient, for
messages containing multiple recipients, for those
recipients where transmission has succeeded, their
names appear in the SENT folder.
172
Getting messages from your Pager
Card
Make sure your Pager Card is inserted in the unit.
Reading incoming messages
1.
From the IN folder, touch the message you
want to read twice.
If you have checked the Get new messages at start up
box in the Preferences screen, Pager Access automatically gets messages from your Pager Card when it
starts up. Otherwise, use the following steps to get the
messages.
1.
Touch PAGER, then select “Get New Pager
Messages”.
The following status box appears.
If the message originator was not included in
the message, the From: field will show “[Not
Specified]”.
2.
3.
When the loading process is complete, new
messages appear in the IN folder.
An alternative is to use the “Show All Pager
Messages” selection to get old messages
from the Pager Card.
2.
Read the message using the scroll bar, if
necessary, to see the rest of the message. If
the ATTACH button is visible, you can touch
the button to view and save the attachment.
(See "Viewing and saving attachments" on
page 175 for detailed steps)
173
Messages containing errors
3.
174
Press ENTER or touch INDEX to return to
index view.
An opened envelope icon appears to indicate
the message has been read.
If messages received in the Pager Card contain any
errors, Access Pager indicates this in the message
detail view.
Viewing and saving attachments
Converting messages to documents
Some received messages may contain a Appointment
or To Do attachment. You may view and save the
attachment as follows:
You can convert one or more messages to Documents,
as follows.
1.
2.
3.
1.
Touch EDIT, then select “Convert Message...”.
2.
Enter a title for the Document.
You can convert the current message, tagged
messages, or all messages.
3.
If you have chosen Delete messages after
conversion, the selected messages will be
deleted after the conversion process is
complete.
4.
Touch OK to start the conversion.
5.
When the following prompt appears, touch
OK.
While you are reading the message, if the
ATTACH button is bisible, touch the ATTACH
button.
To save the attachment, touch Save.
The attachment is detached and saved as an
Appointment or a To Do, accordingly.
If you do not want to detach the attachment,
touch Done.
175
Deleting messages in the unit
Deleting a group of messages
Deleting a single message
176
1.
Select the message you want to delete.
2.
Press the DEL key (possible only in index
view), or touch EDIT and select “Delete
Message”.
3.
When the following message appears, touch
Yes.
You can delete a group of messages from the IN, OUT
or SENT folder, as follows:
1.
Touch EDIT, then select “Delete Group”.
2.
Select the folder where messages will be
deleted (IN, OUT, SENT or ALL).
3.
Further specify to delete Tagged Messages
or All Messages in the selected folder.
4.
Touch Delete and the following prompt
appears.
5.
Touch Yes to delete.
Deleting messages in your Pager
Card
2.
Touch Delete.
The following screen appears. You can delete
the current message only, messages tagged
with a check mark on the Index screen, or all
messages.
3.
Select the type of messages to delete, then
touch OK.
From time to time, you may want to delete old messages from your Pager Card memory.
If you have checked the Delete messages from pager
after reading box in the Preferences screen, messages
automatically deleted after copied into the IN folder.
1.
Touch PAGER, then select “Show All Pager
Messages”.
A list of all the messages stored in Pager
Card memory appears.
If some of the messages have not been read
The following prompt will also appear before the
deletion:
177
Applying a filter to view selected
messages
2.
This function lets you focus on messages that contain
specific information. For example, you can view only
entries related to a particular company name. The
function does this by hiding all entries that do not match
the filter criteria. Then, only filtered messages can be
viewed, edited, or deleted.
1.
Type a keyword into the To/From, Subject, or
Message fields.
Examples:
- To show messages sent to or received from
“Steve Bell”, enter “Steve Bell” in the To/From:
field.
- To show messages with the subject containing
the keyword “sales”, enter “sales” in the subject:
field.
- To show messages containing the word “Wall
Street”, enter “Wall Street” in the Message: field.
Touch FILTER and select “Filter”.
3.
Touch FILTER to start filtering all messages.
Deactivating the filter
Touch the FILTER button and select “Turn Off View
Filter” or touch the Turn Off Filter box to display all
messages again.
178
Searching messages
You can search for messages containing a text string in
any or all of the IN, OUT, and SENT folders. Only the
Subject and Message fields of each message are
searched for the entered text string.
1.
Touch FIND.
The Find Messages dialog appears.
2.
Enter the search string into the All Entries
Containing box, in upper or lower case. (The
search is case-insensitive.)
3.
Touch one or more folders you wish to
search.
4.
Touch Find.
If the string is found, the Find String dialog
appears. The folder containing the message
appears, with a Detail view of the message
that contains the string, and the string is
highlighted.
5.
Touch Next to search forward through the
current folder and the other folders. The
folders are searched in the following sequence:
IN—>OUT—>SENT
Touch Prev to search in reverse order.
The search stops at each occurrence of the
search string. To enter a new string, touch the
Find String button in the Search dialog.
When you have completed the search, touch
Done.
179
Copying and moving text
Customizing Pager Access
You can copy or move text using the clipboard.
1.
Display the message you want to copy or
move, in View mode.
2.
Drag over a word or sentence to highlight it.
3.
For copying, press 2nd and C. Or, touch
EDIT and select “Copy”.
For moving, press 2nd and X. Or, touch EDIT
and select “Cut”.
4.
Move to the entry where you want to paste
the text, then touch the required place of
insertion.
5.
Press 2nd and V. Or, touch EDIT and select
“Paste”.
1.
From the Message screen in Index view
touch SETUP, then select “Preferences”.
2.
Check the box if you want to use the option.
Delete messages from Pager Card after
reading:
Messages are automatically deleted from Pager
Card memory after copied into the IN folder.
Save sent messages in SENT folder:
By default sent messages are automatically saved
in the SENT folder.
Get new messages at start up:
When starting up, ZR Pager Access will automatically read in new messages from your Pager Card.
180
Contents of From: Field
If you enter a name here, this name will appear in
the message area when you create a new
message, thus saving time in typing your name.
You may also touch Use Owner's Name: to copy
the Owner's Name registered in Personal under
the TOOLS area.
3.
Touch OK to save the changes.
181
182
Troubleshooting
I
f you have difficulty using Pager Access,
check the following list for possible solutions
before contacting your SHARP dealer.
Troubleshooting checklist
❏ The modem cannot dial.
• Make sure the modem is correctly and securely
connected to your unit.
• Make sure the modem settings in Pager Access are
correct. See “Configuring your modem” on page 161.
• If you know the proper initialization string for the
modem you are using, make sure it is entered
correctly. Refer to your modem user manual for
information on modem commands.
• If you are not sure of the proper string, leave the entry
blank.
❏ Pager Access always dials the wrong number.
• Make sure the access phone number of the paging
service is correct.
• Make sure the line type setting in Pager Access is the
same as that of the telephone line.
❏ Pager Access fails to connect to a paging service.
• Make sure the paging service is registered in Pager
Access. See “Setting up a paging service” on page
159 for details.
183
❏ Cannot send messages over a cellular phone.
• Make sure the cellular phone works with Pager
Access.
• Check to ensure you are using the appropriate modem
initialization string.
• There may be strong interference. Move the cellular
phone to another location and try again.
❏ Cannot receive any incoming messages.
• Make sure the Pager Card is correctly inserted in your
unit.
• Messages do not come in to Pager Access automatically. See “Getting messages from your Pager Card”
on page 173 and try to load any incoming message
from your Pager Card.
• There are no messages in your Pager Card.
❏ Cannot attach data to a message.
• Check the Maximum Message Limit setting for the
selected paging service. Attaching data may cause the
message size to exceed the limit.
• Make sure the attachment is either an Appointment or
To Do entry. All other types of data cannot be attached
to a message.
❏ Cannot detach data from a message
The attachment is not in your unit's format or there was
a transmission error which corrupted the message. You
can call the paging service provider and they may be
able to re-transmit the message.
184
❏ Cannot send the same message to recipients on
different paging services.
Pager Access does not allow you to send the same
message to recipients on different paging services. If
you need to send to groups on different paging services,
create a new message (use copy & paste in the subject
or message field) for each group of recipients on the
same paging service.
❏ Some messages no longer appear on in Pager Access.
Make sure no filter is active. See “Applying a filter to
view selected messages” on page 178 for details.
Appendix
T
he appendix contains a list of menu
function.
Menu functions
VIEW/ INDEX
(There are no menu items.) This button toggles between
the details of a selected message (View) and a list of
the current messages in the selected folder (Index).
FILTER
Filter
Turn Off View Filter
SETUP
Modem Setup
Paging Service
Preferences
Address Book
Specify a filter keyword so that
only filtered entries can be
viewed, edited, and deleted.
See page 178.
Turn off the filter if it has been
set. See page 178.
Configure your modem.
See page 161.
Add, modify or remove a
paging service. See page 159.
Customize Pager Access to
the way you prefer.
See page 180.
Enter recipients of your pager
messages. See page 170.
185
EDIT
New Message
Delete Message
Delete Group
Cut
Copy
Paste
Convert Message
Compose a new message to
send. See page 166.
Delete a single message.
See page 176.
Delete a group of messages.
See page 176.
Cut the highlighted text into
the clipboard.See page 180.
Copy the highlighted text into
the clipboard. See page 180.
Paste contents from the
clipboard. See page 180.
Convert messages to a
document. See page 175.
FIND
(There are no menu items.) Use FIND to search for
desired messages.
PAGER
Send Messages
Get New Pager
Messages
Show All Pager
Messages
186
Connect to a paging service to
send messages.
See page 171.
Copy new messages from the
Pager Card into memory.
See page 173.
Build an index list of all
messages in the Pager Card.
See page 177.
AT&T Mail
Quick Start ............................................................... 189
Commonly Asked Questions & Answers .............. 194
Introduction ............................................................. 195
Mail Basic ................................................................. 203
Managing Your Messages ....................................... 227
Troubleshooting ...................................................... 231
Appendixes .............................................................. 233
187
188
Quick Start
T
his section is a quick start to setting up
and running AT&T Mail Access.
Starting AT&T Mail Access
1.
Touch TOOLS.
* The contents of the TOOLS screen may differ
depending on the version for your country.
2.
Touch AT&T Mail twice.
189
Setting up AT&T Mail Access
3.
Touch the Modem Setup tab to configure
your modem settings. If using a Sharp CEFM4 Fax/Modem, touch RESTORE to use
the default settings. You may need to change
this information when using a PC card
modem. Refer to the Zaurus, PC card
compatibility chart for a list of supported
modems and the required modem string.
4.
Touch OK to save the new settings, and
return to the mail folders. Touch Cancel to
return to the old settings.
AT&T Mail Access requires you to enter your AT&T Mail
account and modem information to connect to the AT&T
Mail service. Use E-Mail Setup to specify setup information for AT&T Mail, the modem, and the login script. You
may need to change these settings if there is a change to
your account, modem, or when you connect to AT&T Mail
from different locations.
To change E-Mail Setup:
190
1.
Touch SETUP at the top of the mail-folder
display, and select E-Mail to access the E-Mail
Setup screen.
2.
Enter your AT&T account information the AT&T
Mail Setup display. Refer to your AT&T Mail
Welcome Kit for this information.
Creating a new message
3.
Touch To: to address the message.
The first step in sending a message is to create the
message.
To create a message:
1.
Touch EDIT, then select New Message to get
a blank message display.
Select a name from Address Books. Touch
To: (or Cc:, or Bcc:). The name will be put
into the Recipients list. Repeat this step until
all recipients have been set. Touch Done.
2.
Type a brief subject that describes the nature
of the message.
4.
Touch the message box and type a message.
5.
Touch OPTION to include any message
options.
6.
Touch ATTACH to include any attachments
with the message.
7.
Press ENTER to save the message to the
OUT folder.
191
Sending messages
To send messages:
192
1.
If you have more than one message in your
OUT folder you can tag selected messages
that you want to send.
2.
Touch MAIL, then select Send Only or
Send/Receive. Note that these selections are
available only if the currently displayed folder
is the OUT folder.
3.
Select the messages that you want to send
and touch OK.
4.
After verifying your modem and phone line
connection, touch OK to send the messages.
Receiving messages
3.
After verifying your modem and phone line
connection, touch OK to connect to AT&T
Mail.
4.
Status messages are displayed when the
message transfer is completed and when the
unit is disconnecting from the AT&T Mail
host.
To receive messages:
1.
Touch MAIL, then select Turn on Receive
Filter to use the receive filter.
If the receive filter is turned off, then all new
messages are received.
2.
Touch MAIL, then touch Receive Only or
Send/Receive.
You see the Receive Filter display if the
receive filter is turned on.
193
Commonly Asked Questions &
Answers
Q:
A:
Q:
A:
What do I need to use AT&T Mail Access?
You need an AT&T Mail account which you must first
obtain from AT&T.
Is there any limit to the size of a message that I can
create?
Yes, the maximum length of the message body is approximately 14.5K bytes. However, the size of additional
attachments is limited only by the amount of memory
available in your unit.
Q:
A:
Can I send multiple messages all at the same time?
Yes. Before sending, be sure to tag the messages for
sending by touching the checkbox in front of each
message entry. Then in the Send Mail dialog, specify to
send the tagged messages. Alternatively, you may choose
to Send all messages.
Q:
I would like to put my company logo on all paper and
fax messages sent via AT&T Mail. How can I do that?
You need to register the logo with AT&T for an additional
cost. Refer to your AT&T Mail Welcome Kit for details.
A:
194
Q:
A:
Can I attach some data in my unit to a mail message?
Yes. From the New Message screen, touch ATTACH to
attach FILER folders or PC Files.
Q:
A:
How can I convert a message to Document?
When viewing a message, touch EDIT. Select “Convert to
Document” and give the new document a name.
Q:
Can I send the same mail message to several recipients at the same time?
Yes. When creating a message, use the recipient list to
add one or more recipients of the message.
A:
Q:
A:
Can I customize the login procedure?
Yes. See Appendix C and learn how to write a custom
login script.
Introduction
T
his section gives you general information
about AT&T Mail Access.
Obtaining an AT&T Mail account
Before using AT&T Mail, you need to get a user name
and password. To register with AT&T EasyLink®
Services, call 1-800-242-6005 (within the U.S.) and say
Department Zaurus. They will then mail you an AT&T
Mail Welcome Kit with your account information and
documentation. To register with AT&T from outside of
the U.S., see the international support list in Appendix A.
195
Setting up AT&T Mail Access
AT&T Mail Access needs your AT&T Mail account and
modem information to connect to the AT&T Mail service.
Use E-Mail Setup to specify setup information for AT&T
Mail, the modem, and the login script. You may need to
change these settings if there is a change to your
account, modem, or when connecting to AT&T Mail from
different locations.
•
Your AT&T Mail user name. Do not
precede the user name with an exclamation point (!) or any other characters that
may be necessary when specifying user
addresses.
•
Touch SETUP at the top of the mail-folder
display, and select E-Mail to access the
E-Mail Setup displays.
2.
Enter the following information on the AT&T
Mail Setup display. Refer to your AT&T Mail
Welcome Kit for this information.
•
196
Password
The AT&T Mail passwords. Everyone
receives one password, but you may
configure a second password for added
security. If you have one password, leave
Password 2: blank.
Lock your unit using the secret password
to prevent any unauthorized use of your
AT&T Mail account by others. When the
unit is locked, the Mail function can not be
used unless the password is entered.
To change E-Mail Setup:
1.
Mail ID
Phone Number
The phone number needed to access the
AT&T Mail service. The following access
numbers are available in the U.S. based
on the speed of the connection:
2400 bps access: 1-800-624-5123
14.4K bps access: 1-800-624-5016
If you are traveling outside of your home
country, you may have to change this
information. Refer to Appendix B for a list
of international access numbers.
•
Use Dialing Prefix
An optional prefix that may be needed to
dial the above phone number. For instance, you may need to enter a 9 to get
an outside line or a string of numbers for a
long-distance access code. You may need
to change this prefix when using the unit
at different locations (such as your office,
home, or hotel).
•
3.
Touch the Modem Setup tab, and enter the
following information. If using a Sharp CEFM4 Fax/Modem, touch Restore to use the
default settings. You may need to change this
information when using a PC card modem,
particularly the modem string. For other
modems, refer to the manual that came with
your modem for this information.
User Phone Number
Your phone number, if you want it to
appear with the messages you send.
•
Private Logo
A personalized logo, if you want it to
appear with the paper and fax messages
you send. To use a private logo, you must
register it with AT&T® for an additional
cost. (Refer to your AT&T Mail Welcome
Kit for more information about logos.)
•
File Transfer
The type of file transfer protocol that you
need to use with your modem. The default
is FMODEM. If you are having trouble
sending and receiving messages (such as
when connecting via a cellular phone), try
using XMODEM or YMODEM.
197
•
If using a PC card modem, change the
Port setting to PC Card, and enter a
Modem String, if recommended by your
modem manual. If you select a speed
(bps) greater than 2400, we recommend
that you select the Hardware Flow Control
box.
Refer to your modem user manual for
more information on these settings.
Speed(bps), Port, Parity, Line Type, Data
Bits, Stop Bits, MNP, Hardware Flow
Control, Modem String
Modem settings are based on the type of
modem and connection. The default
settings are as follows:
Speed(bps)
: 2400
Port
: 15-pin
Parity
: None
Line Type
: Tone
Data Bits
:8
Stop Bits
:1
MNP
: not selected
Hardware Flow Control : not selected
Modem String
: blank
198
•
Redial
The number of times that AT&T Mail
Access tries to connect to the service, if it
gets an error or busy signal.
•
Volume
The volume of the modem when connecting to AT&T Mail.
4.
Touch the Login Script tab, and select one
of the following login scripts from the menu
at the top of the display. You may need to
change the login script when connecting to
AT&T Mail from outside of the U.S.
•
•
The Local Access Script (see Appendix
C) is preinstalled in the unit and allows
you to access the AT&T Mail service from
many locations throughout the world using
the local packet data network. In order to
use this network, you must set up an
account directory with the local provider in
the respective country where Local
Access Service is available. Before
accessing the LAS (Local Access Service), you need to substitute $A and $C in
the Local Access Script with the LAS ID
and Password respectively. For more
information about availability and procedures for specific countries, contact the
AT&T Mail Customer Assistance Center or
the local provider.
To customize a login script, select the script
and enter a title. For more information on
X.25 packet access, refer to your AT&T Mail
User’s Guide. To restore a login script to its
default configuration, touch Restore.
AT&T Mail Direct
The login script used in the United States
and other countries where you can
access the AT&T network directly.
•
Packet (X.25)
The login script used in some countries
where it is required for X.25 packet
service, and you must connect to AT&T
Mail using the local public data network.
User Script
5.
Touch OK to save the new settings, and
return to the mail folders. Touch Cancel to
return to the old settings.
199
Setting up the address book
AT&T Mail Access uses the address information you
have entered into other applications in your unit. This
way you only have to maintain one address book for all
applications. You can also enter a new address when
you are creating a message, but it saves time to store
frequently used addresses in the address book.
Contacts and Data Files
You can use the Contacts or Data Files features for your
address book. There are 3 Contacts files that are
already setup for address information. There are also 3
Data Files that are generic database files where you
must define the fields.
To enter addresses into a Contacts file:
Example: Enter the following into Contacts 1.
Allison Wicks of ABC Consulting Co.
P.O. Box 85, Lee, New Jersey 07000
phone: 908-555-4321
fax: 908-555-4567
AT&T Mail User ID: !auser
200
1.
Touch CONTACTS.
2.
Touch EDIT and select New Business (1).
3.
Select the following fields and enter the
desired information into them. You do not
need to enter information into all of the fields.
Name field: Wicks, Allison.
Company field : ABC Consulting Co.
Office # field: 908-555-4321.
Fax # field: 908-555-4567.
Address field: P.O. Box 85 Lee, NJ 07000.
E-Mail ID 1 field: !auser
NOTE
• The Name field must always contain information.
• For Name fields, enter the last name first so entries
can be sorted by last name.
• There are 2 E-Mail ID fields and 4 User fields that can
be used for addressing information.
4.
Press ENTER to save the address.
The Business (1) Index for that entry is
displayed with the new entry listed.
E-Mail Addresses
The E-Mail ID in the address book can take many
forms, depending on the type of system to which you
are sending mail. The following prefixes are used with
the recipients ID or number to identify the complete
mailing address. When you select the type of address,
the appropriate prefix is included in the address.
• AT&T Mail (AT&T Mail subscriber user ID): attmail!
• CompuServe (CompuServe subscriber user ID):
mhs!csmail/dd.id=
• Telex (Telex number): telex!
• X.400 (X.400 address): mhs!
• Internet (Internet address): internet!
• SkyMail (SkyTel pager PIN): mhs!skymail/s=
Refer to the AT&T Mail User’s Guide for additional Email address types.
201
202
Mail Basic
Setting the date and time
Messages that you create include the date and time.
Therefore, you should adjust this information if it is not
set correctly in your unit.
T
his section explains he basic operations
about AT&T Mail Access that you can
perform.
203
Mail folders
AT&T Mail Access has three mail folders for storing
messages:
• IN Folder: Lists the messages that you have received.
• OUT Folder: Lists the messages that you will be
sending.
• SENT Folder: Lists messages that you have mailed.
Touch the tab with the mail folder name to display that
mail folder.
All of these folders show the following information about
messages.
204
• Status Icon: The icon shows the status of a message
at a glance. Possible icons include:
Unopened messages.
Messages that you have read.
High-priority messages.
Messages with an attachment.
• Name: In the OUT and SENT folders, it is the name of
the recipient. In the IN folder, it is the name of the
sender.
• Subject
• Date
• [001/002] Message counter: The first number is the
number of the selected message (messages are
numbered sequentially). The second number is the
total number of messages in the folder.
204
Creating a new message
The first step in sending a message is to create the
message. The size of a message is limited only by the
amount of memory available in the unit.
4.
Touch the message box and type a message.
Touch the font button in the scroll bar to
change the font size displayed in the message.
5.
Touch OPTION to include any message
options. (See the “selecting message options” section that follows.)
6.
Touch ATTACH to include any attachments
with the message. (See the “Attachments”
section that follows.)
7.
Press ENTER to save the message to the
OUT folder.
To create a message:
1.
Touch EDIT, then select New Message to get
a blank message display.
2.
Type a brief subject that describes the nature
of the message.
3.
Touch To: to address the message. (See the
“Addressing Messages” section that follows.)
NOTE
• The message is saved in the unit's main memory, even
if you have switched the data source to PC Card (in
PC Card of TOOLS).
• You can also check the spelling. To use this function,
touch UTILS and select “Check spelling”.
The operation is same as that in Documents. For more
detail, refer to unit's operation manual.
205
Addressing messages
206
1.
Touch To: on the message display to add
recipients to the message. An E-Mail Address display is shown.
2.
Select the type of address from the pop-up
menu at the top of the display. This choice
affects the address information and options
that are available for the message. See the
“Address types” section that follows for the
types of available messages.
3.
Select the name of a recipient from the
Address Book listing to display their full
Name and Mail ID at the top of the page.
If the incorrect address book is listed or the
address book is using the incorrect field, you
can change the address book setup by
touching Setup at the top of the display.
4.
Touch one of the following buttons to add that
person to the Recipients list:
• To: Sends the message to a primary
recipient.
• Cc: Sends a courtesy copy to a recipient.
• Bcc: Sends a blind courtesy copy to a
recipient. Other recipients do not see the
list of Bcc: recipients.
You can also manually address a message
by entering new information in the address
fields, then selecting To:, Cc:, or Bcc:.
NOTE
There must be at least one recipient for a message.
To view a recipient’s detailed address information, touch the recipient’s name. You can
then modify that recipient’s address information.
5.
Address types
The address type affects the address information and
available options. The following address types are
available:
• AT&T Mail
• Internet
• Paper
• Fax
• CompuServe
• SkyMail
• Telex
• X.400
Touch the TYPE: pop-up menu to select the type of
message. This selection adjusts the prefix used in the
Mail ID. Alternatively, you can directly type in the Mail ID
prefix for any type of message. (See ”Setting up the
address Book” on page 200 for a complete list of
message types and address prefixes.)
Touch Done to return to the New Message
display.
207
AT&T Mail
An AT&T Mail address needs the Name and Mail ID.
• /overnight: Sends the message by overnight courier
service on business days (if the recipient is in the
courier’s overnight delivery zone). This only applies if
you also select /usmail.
• /receipt: Sends a receipt of delivery to the sender
when the message is opened by the recipient. There is
also a /noreceipt option.
• /usmail: Sends the message via U.S. mail (with U.S.
delivery only).
Refer to the AT&T Mail User’s Guide for a complete list
of recipient options.
Fax
A fax address requires the Name and Fax number.
AT&T Mail recipient options
Touch AT&T OPTNS to select any of the following
recipient options:
• /cod: Sends the message cod (recipients pay the
charge if the message is read). There is also a /nocod
option.
• /nologo: Sends the message without a user logo. This
only applies if you also select /usmail.
• /nocoversheet: Sends the message without a cover
sheet. (The cover sheet lists the date, time, sender’s
name and address, recipient’s name and address,
message subject, total number of pages, and logo.)
This only applies if you also select /usmail.
208
Fax recipient options
The following recipient options are available with a fax:
• Logo: Specifies the public or private logo for the fax.
• Nocoversheet: Sends the message without a cover
sheet.
• Landscape: Sends the message using an 8.5 x 11inch horizontal format (132-character width). This
option is available to AT&T MailFAX only. Logos and
signatures are not available with this format.
Paper
Paper messages are sent to an AT&T Mail printing
facility, then mailed to the recipient based on the priority.
Recipients must be within the United States to receive a
paper message. A paper message requires the Address
and Phone number.
Paper recipient options
The following paper recipient options are available by
touching PAPER OPTION:
• Format: Business format is the standard letter format
with the date and recipient information at the top of the
page and the sender information and copy list at the
bottom of the page. Memo format has the recipient
and sender information, date, and subject at the top of
the page.
• Delivery: Standard delivery sends the message via 1st
class U.S. mail. Priority delivery sends the message
using an overnight courier service on business days.
Urgent delivery sends the message the same day
using a courier service.
• Logo: Specifies if the message is printed with a user or
public logo.
Refer to the AT&T Mail User’s Guide for a complete list
of recipient options.
209
Internet, CompuServe, SkyMail, Telex, & X.400
Each of these address types requires the Name and
Mail ID. There are no recipient options.
Selecting message options
1.
From the New Message display, touch
OPTION to change the following message
options:
• Priority: Sets a normal or high priority for a
message.
• Send COD: Sends the message COD (cash on
delivery) to all recipients of the message, so the
recipients are billed when they read it. This does
not apply to some address types, such as fax.
• Return receipt: Notifies the sender when the
recipient reads the message. This feature is
useful if the recipient is traveling, and you are
having difficulty reaching them.
• Save sent messages: Saves sent messages in
the SENT mail folder, otherwise they are deleted.
• Project Code: Assigns a project code to the
message for billing purposes.
210
2.
Touch Done to return to the New Message
display.
2.
Touch Attach and select the type of attachment (the unit FILER Folders or PC FILES
Directory), then touch OK.
3.
For FILER folders, select a folder and touch
Attach. Only folders can be attached, not
individual entries. For PC Files, select a file
and touch Attach.
4.
Touch Done to include the attachments with
the message and return to the New Message
display.
Attachments
You have the option of including the unit FILER folders
or PC files directories with messages. These attachments are not included in the body of the message, but
they are merely attached. The attachments retain their
original format.
To add attachments to a message:
1.
From the New Message display, touch
ATTACH to include attachments with the
message.
211
Editing a message
Connecting to the host
If you need to correct or add to a message in the OUT
folder, you can edit it. Simply select the message and
touch VIEW to display the message. You can then make
any changes to the message in the same way as when
creating new messages.
AT&T Mail Access has the added benefit of editing a
message, and saving the original and newly edited
versions of the message in the OUT folder.
After creating messages, you can send them using
AT&T Mail Access.
You have the option of selecting the messages that you
want to send. The currently selected folder must be the
OUT folder to send messages. You can send one of the
following groups:
• The currently selected message.
• A group of tagged messages.
• All messages in the OUT folder.
To select a group of messages, you must tag them. To
tag a message, touch the tag box on the left side of the
index in the OUT folder. A checkmark appears in the tag
box to show that the message is selected.
To edit a message (and save the original version):
212
1.
While in Index view, select a message from
the OUT folder that you want to edit.
2.
Touch EDIT, and select Copy to copy the
message while keeping the original message
untouched.
3.
Touch EDIT, and select Paste to place a copy
of the message in the OUT folder.
4.
Touch VIEW to display the message, then
change or add new information to it.
5.
Press ENTER to save the message.
To connect to the host:
1.
2.
Touch MAIL, then select Send Only to send
messages in the OUT folder or Send/
Receive to send and receive messages
during the same session. Note that these
selections are available only if the currently
displayed folder is the OUT folder.
3.
If you need to change the AT&T Mail or
Modem setup before connecting, touch
Setup.
4.
After verifying your modem and phone line
connection, touch OK to connect to AT&T
Mail.
Select the messages that you want to send
and touch OK. You can send one of the
following groups:
• Current Message: The one message that is
selected.
• Tagged Messages: The messages that are
tagged with the checkmark in the tag box.
• All Messages: Every message in the OUT folder.
The following display shows you the status of
the connection during this process. For a
successful connection, you see the following
messages:
• Configuring Modem
• Dialing the AT&T Mail Access phone number
• Logging into Host
• Completing communication link
213
Receiving messages
To receive messages, the unit connects to the AT&T
Mail system and looks for messages addressed to your
user ID. This procedure is similar to the procedure for
sending messages, but incoming messages are stored
in the IN mail folder.
After connecting to AT&T Mail, you see the
following status display while it is sending
messages. This status display shows a status
bar to graphically show how much of the
transfer is completed.
You also see status messages when the
message transfer is completed and when
AT&T Mail Access is disconnecting from the
host.
Press ON to stop sending messages at any
point during the transmission.
214
You can selectively receive messages based on the
following criteria:
• Subject
• Sender’s user name
• Sender’s user ID
• COD messages
• Return receipt requested
• Size of the message
You can also preview your messages to select exactly
which messages you want to receive. These options can
save time if you receive a lot of mail, and you need to
search for selected items.
You can then view these messages in your IN folder.
AT&T Mail Access also has features for quickly answering or forwarding messages that you receive.
To receive messages:
1.
Touch MAIL, then select Turn on Receive
Filter to use the receive filter.
If the receive filter is turned off, then all new
messages are received.
2.
Touch MAIL, then touch Receive Only to
receive messages into the IN folder or Send/
Receive to send and receive messages
during the same session.
You see the Receive Filter display.
3.
Select the folder that contains the messages
that you want to receive. Options include:
• IN.NEW: New messages.
• IN.OLD: Old messages that were previously
received. You can configure your AT&T Mail
account to specify the number of days (1-6 days)
that the IN.OLD folder retains these messages.
• SENT: Sent messages.
• User Folder: Messages stored in a folder that
you create. When registering your AT&T Mail
account, you must request that your account has
the capability to create user folders.
• Shared Folder: Messages stored in another
AT&T Mail user’s folder that is shared with a
group of users.
4.
Select the criteria that the messages need to
match. The following message fields are
available in the Field pop-up menu:
• Subject: a text string in the subject field.
• User Name: a text string in the user name.
• User ID: a specific user ID.
Other options include:
• Exclude COD messages.
• Exclude messages that generate a return
receipt.
• Exclude messages greater than a specified size.
215
216
5.
Select the Preview summaries option, if you
want to see a list of messages that matches
the filter criteria before they are downloaded.
The following display shows you the status of
the connection during this process. For a
successful connection, you see the following
messages:
6.
Touch OK to get the Connect to Host display.
7.
If you need to change the AT&T Mail or
Modem setup before connecting, touch
Setup.
• Configuring Modem
• Dialing the AT&T Mail Access phone number
• Logging into Host
• Completing communication link
8.
After verifying your modem and phone line
connection, touch OK to connect to AT&T
Mail.
Next, AT&T Mail Access builds the message
summary display, listing the messages
waiting to be received in the selected folder.
This listing is similar to the other mail folder
listings, with the sender, subject, and date
displayed for each message. In addition, the
listing shows the approximate size of the
message.
9.
Select a message in the summary and touch
VIEW to get more information about the
message on the Message Details display.
The Details display is useful if the message
information could not all fit in the summary
listing (for example, when you see . . . on the
summary).
Touch Done to return to the Preview Mail
display.
10. Touch FILTER to change the receive-filter
criteria, if necessary.
217
11. Touch RECV to receive messages listed in
the summary. You can receive the following
groups of messages:
• Current Message: The message that is currently
highlighted.
• Tagged Messages: The messages that are
tagged with the check mark in the tag box at the
left of the listing.
• All Messages: Every message in the folder.
You also have the option of automatically
disconnecting after you receive the messages. If you do not choose this option, you
are asked if you want to disconnect after
receiving messages. If you do not disconnect, you return to the message summary
display.
You see the following status display when
receiving messages. This status display has
a status bar that graphically shows how much
of the transfer is completed.
Status messages are displayed when the
message transfer is completed and when the
unit is disconnecting from the AT&T Mail
host.
Press ON to stop receiving messages at any
point during the transmission.
218
Using AT&T Mail as a terminal
You can use AT&T Mail as a simple TTY (teletypewriter)
computer terminal and connect directly to the AT&T Mail
network.
There are two ways to use AT&T Mail in terminal mode.
The first method directly connects to AT&T Mail in
terminal mode, while the second method connects via
AT&T Mail Access and lets you preview mail summaries
before entering terminal mode.
To switch between preview mail and terminal mode:
1.
Connect to the AT&T Mail network, using the
receive filter and preview summaries option.
2.
From the Preview Mail display, touch TERM.
To connect to AT&T Mail using terminal mode:
1.
Touch MAIL, then select Terminal to select
terminal mode.
2.
Touch OK from the Connect to Host display
to connect to the AT&T Mail network.
Once connected, you can then use the
terminal mode displays to create, send, and
receive messages directly on the AT&T Mail
network. These messages are not downloaded
to AT&T Mail Access on the unit, so they do
not appear in your IN and OUT folders.
Refer to the AT&T Mail User’s Guide for a list
of commands that you can use in terminal
mode and the “Terminal” chapter for a
detailed explanation of terminal mode
operation.
219
3.
Touch SETUP, then select Configuration to
setup the terminal configuration.
Refer to the AT&T Mail User’s Guide for a list
of commands that you can use in terminal
mode.
The configuration settings are on two pages.
Touch the bottom right-hand corner of the
display to switch between pages.
220
4.
Touch QUIT to return to the Receive Filter
display or LOG OFF to disconnect from AT&T
Mail.
Viewing Received Messages
The IN mail folder lists received messages. You can
display all of the messages in the folder, or use the view
filter to show selected messages.
4.
Touch the ATTACH button, select an attachment, and touch Detach to detach attachments from the message and store them in
the appropriate location.
Touch Done to return to the message display.
5.
Touch OPTION to see the message options
that the sender selected.
Touch Done to return to the message display.
To view received messages:
1.
Touch the IN folder tab to view the index
listing of messages in the IN folder.
2.
Select a message in the IN folder.
3.
Touch VIEW or press ENTER to read the
message.
Touch the font button in the scroll bar to
change the font size displayed in the message.
221
6.
Touch To: to see all of the recipients of the
message. Select a recipient to see their
address at the top of the display.
To use the view filter:
The view filter lets you select the type of messages that
are listed in a mail folder. It can use the following criteria
for displaying messages:
• Priority
• Sender using the From: field (messages in IN folder
only)
• Recipients using the To/Cc: field
• Subject
• Message body
You can use the view filter on any of the mail folders, but
you must select it separately in each folder.
1.
Touch Done to return to the message display.
7.
Press the NEXT or PREV keys, or touch the
curled-up corner (below the scroll bar) to
view the succeeding or preceding messages
in the folder.
8.
Touch INDEX to return to the index view of
the IN folder.
Note that the status icon has changed from a
closed envelope to an opened envelope. You can
then use this same procedure to view another
message.
222
Touch FILTER, and select Filter to set the
filtering criteria.
2.
Select the criteria for filtering. You can use
key words for filtering; it is not necessary to
enter the entire name or subject.
To view the status of the last connection and
transfer:
1.
3.
Touch Filter to activate the filter.
Touch the AT&T MAIL icon at the top of the
display.
The folder shows only the messages that
match the set criteria. A box is displayed at
the bottom of the folder to remind you that
the view filter is activated and the folder is not
displaying the full list of messages.
4.
Touch the Turn Off Filter reminder (or touch
FILTER and select Turn Off View Filter) to
return to the full list of messages.
223
Answering a message
This display shows the following information:
• Last Connected: Date and time of the last
connection.
• Last Transfer Status: Transfer status (such as
Successful or Error) of the last connection.
Refer to Troubleshooting for a list of possible
problems and solutions.
• Messages Sent: Number of messages sent
successfully and the total number of messages
that AT&T Mail Access tried to send.
• Messages Received: Number of messages
received successfully and the total number of
messages that AT&T Mail Access tried to
receive.
2.
224
If you need to respond to a message that you received,
you can use the Answer Message feature. This is easier
than creating a new message, since AT&T Mail Access
automatically addresses the message and enters a
subject (such as Re: original subject). You simply type in
the reply.
To answer a message in the IN folder:
1.
While viewing the received message, or with
it selected in Index view, touch EDIT, then
select Answer Message.
2.
Select the recipients of the answer (either the
author or all of the recipients of the original
message).
3.
Check the box if you want to include the
original message as part of the new message.
The original message is displayed in the
message box after the title Begin Original
Message. It includes the date, sender,
recipients, and message.
Touch Done to return to the mail folders.
Forwarding a message
4.
Touch OK to edit the new message.
AT&T Mail Access automatically fills in the
recipients and subject.
If you receive a message and want to send it to someone else, then you can use the Forward Message
feature. This is easier than creating a new message,
since AT&T Mail Access uses the same subject (in the
form Re:original subject), message, and attachments as
the original message, and you only need to enter the
new address and add to the message, if necessary.
To forward a message in the IN folder:
5.
6.
Type in an additional message or add
attachments, as when creating a new message.
1.
While viewing the received message, or with
it selected in Index view, touch EDIT, then
select Forward Message.
You see the new message display with the
subject and message automatically filled in
for you.
2.
Select the recipients of the message, the
same way you do when creating a new
message.
3.
Add any additional text to the message, as
needed.
4.
Press ENTER to save the message to the
OUT folder.
Press ENTER to save the message to the
OUT folder.
225
226
Managing Your Messages
Finding messages
If the mail folders contain many messages, you can use
this feature to automatically search for a specific
message.
A
T&T Mail Access has a variety of functions
that help you organize your messages.
To find a message:
1.
Touch FIND to search for messages.
2.
Enter the search criteria.
3.
Select the mail folders that you want to
search.
227
Deleting messages
4.
Touch Find to search for the message.
The editing functions let you delete messages to reduce
the clutter in your mail folders. You can delete messages
from the index or detail view.
To delete a message:
1.
Touch EDIT to use the delete commands.
2.
Select the delete function based on the
number of messages that you need to delete:
• Select Delete Message to remove the selected
message from the folder.
The first message containing the string is
opened, and the string is displayed in the
Find String dialog box.
5.
Touch Next to search for the string in other
messages. Touch Prev to return to previous
messages with the string.
6.
Touch Done when the search is completed or
the string cannot be found in any other
messages.
• Select Delete Group to remove more than one
message from a folder. Select the appropriate
option to delete tagged messages or all messages, and touch OK.
3.
228
Touch Yes to confirm the deletion.
Converting messages to Documents
AT&T Mail Access lets you convert a message to a
Document, so you can format and edit it or file a copy of
it in Filer.
4.
• Current Message: The message that is currently
selected.
• Tagged Messages: The messages that are
tagged with the checkmark in the tag box at the
left of the listing.
• All Messages: Every message in the folder.
To convert a message:
1.
In Index view, select a message or tag
several messages that you want to convert to
documents.
2.
Touch EDIT, and select Convert to Document.
3.
Enter the name of the new document.
The message subject will be used as the
default name.
Select the messages that you want to
convert. You have the following options:
5.
Check the Delete messages after conversion box if you want to delete the messages
from the mail folder after converting them to
documents.
229
6.
Touch OK to convert the message into a
document.
You can now use the Documents application
to view or change the document. The document contains the date and time, sender’s
address, recipient’s address, subject, and
message.
If you convert a message with attachments
and delete the original message, then AT&T
Mail Access does not retain the attachments
anywhere on the unit. Therefore, AT&T Mail
Access displays a warning that reminds you
to detach any attachments before it converts
the message.
230
Troubleshooting
Troubleshooting checklist
❐ Cannot find AT&T Mail Access on the unit.
• Touch TOOLS.
T
his section answers questions you may
have when using AT&T Mail Access.
❐ Incorrect date and time on the unit.
• Touch TOOLS and then touch Clock twice. Touch
ADJUST, and enter the correct date and time.
❐ Cannot connect to the AT&T Mail service network.
Check the following:
• Modem settings.
• Modem connection to the unit.
• Modem connection to a phone line.
• AT&T Mail settings.
• AT&T Mail phone number.
• Phone number prefix (if you are dialing from a location
that needs additional numbers to access an outside
line).
• Login script.
❐ Memory is full.
• Delete data from the main memory (such as Documents, Notes, Contacts, Data Files, or old messages)
to free up memory.
❐ Unable to send messages.
• The AT&T Mail message was rejected. Check the
recipient list to ensure that the addresses are valid.
231
232
Appendixes
T
his section contains AT&T EasyLink
Services Global Alliance program member
directory, AT&T Mail traveller's access
number, and AT&T Mail login scripts.
Appendix A: AT&T EasyLink Services Global Alliance program
member directory
Use the following international customerservice numbers
to get information about registration, access numbers, or
other questions about using AT&T Mail.
233
EUROPE, AFRICA, MIDDLE EAST REGION
European Regional Support Center (ERSC) Tel: 32-2-676-3737
15B Herman de Broux
Fax: 32-2-676-3810
1160 Brussels Belgium
!europehelp
Iran
Pars Supala
31, 7th Street
Motaheri Avenue
Daryaeihnoor St.
Tehran 15876
Tel: 982-1-623-208/304/
806
Fax: 982-1-629-258
!parshelp
Israel
Egypt
Comm Net Group
Tel: 20-2-344-2085/39/64
6 Elbatal Medhat Abdel Hamid St. Fax: 20-2-344-2027
Cairo
!commnet
France
AT&T EasyLink France
52 Quai de Dion-Bouton
92086 Puteaux Cedex
Tel: 33-47-67-4776
Fax: 33-47-67-4775
!francehelp
Germany
AT&T EasyLink Germany
Eschersheimer Landstrasse 14
6000 Frankfurt/Main 1
Tel: 49-69-153-06242
Fax: 49-69-153-06119
!atthilfe
Hungary
Ediport Telecommunications Ltd.
Konkoly Theze M.
ut 29 - 33
Budapest XIII
Tel: 361-160-2497
Fax: 361-175-8056
!zsolt
Goldnet
40 Namal Street
63506 Tel Aviv
Italy
SEVA S.p.A.
Via Pantano 20
20122 Milano
Tel: 39-2-850-7300
Fax: 39-2-850-7290
!sevahelp
Lebanon
Libatel s.a.r.l.
12, Camille Edde Street
Beirut
Tel: 961-1-496-430
Fax: 961-1-500-706
!libatel
Russia
Institute for Automated
Services
2A Nezhdamova Street
Moscow 103009
Tel: 70-95-229-7846
Fax: 70-95-229-3237
!iasnet
UK
AT&T EasyLink Services
4 Selsdon Way
City Harbour
London E14 9GL
234
Tel: 972-3-543-3777
Fax: 972-3-544-4199
!goldhelp
Tel: 44-71-537-4115
Fax: 44-71-537-3765
!attukhelp
ASIA, PACIFIC REGION
Philippines
Customer Service Center (CSC) Tel: 852-511-5828
4/F China Underwriters Center
Fax: 852-598-0810
88 Gloucester Road
!elsaphelp
Wanchai, Hong Kong
TIN Asia, Inc.
22 Filmore St., Greenhills
San Juan, Metro Manila
Australia, New Zealand
AT&T ELS Australia Ltd.
Level 8
15 Orion Rd
Lane Cove, NSW Sydney
Tel: 61-2-911-1530
Fax: 61-2-911-1555
!elauhelp
Tel: 63-2-722-2059
Fax: 63-2-722-6650
!tinasia
Taiwan, R.O.C.
New Southern Engineering
Enterprises Co., Ltd..
8F, No.279, Sec.4
Hsin-I Road
TaipeiTel: 886-2-708-7679
Fax: 886-2-703-1025
!nsehelp
Hong Kong, People’s Rep. of
China, Macao, Thailand
AT&T ELS Asia-Pacific
4/F, China Underwriters Ctr
88 Gloucester Road
Wanchai, Hong Kong
Tel: 8522-511-5828
Fax: 8522-598-0810
!elsaphelp
Japan
AT&T Jens
No. 25 Mori Building
1-4-30 Roppongi
Minato-ku, Tokyo 106
Rep. of Korea
S.T. Lee International Co.
Room 1805, Jung-Dong Bldg
15-5 Jung-Dong, Choong-ku
Seoul
Tel: 813-5561-3411
Fax: 813-3584-1125
!jenshelp
Tel: 82-2-752-4597
Fax: 82-2-773-2948
!stlee
235
AMERICAS REGION
Canada
Americas Regional Support Center (ARSC)
Tel: (201) 331-4400
400 Interpace Parkway
Fax: (201) 331-4513
Parsippany, NJ 07054
!arschelp
Unitel Communications, Inc.
2005 Sheppard Ave East
Suite 215
Willowdale, Ontario M2J 5B4
Argentina
EasyMail, S.A.
Viamonte 611
9th Floor
1053 Buenos Aires
Bermuda
Cable and Wireless
20 Church Street
P.O. Box HM 151
Hamilton HMAX
Brazil
MSS do Brazil
SCLN 309, Bloco A, No.70
Sala 101/105
CEP : 70755 Brasilia DF
In Brasilia:
236
Tel: 541-322-1024
Fax: 541-322-0160
!agraizer
Tel: 1-809-295-4777
Fax: 1-809-295-7909
!rtbassett
Tel: 5561-349-2100
Fax: 5561-349-1744
In Sao Paulo:
Tel: 5511-210-3211
Fax: 5511-210-3838
!msshelp
Chile
EasyMail Chile S.A.
Marchant Pereira 605
Providencia, Santiago
Colombia
ComWare
Calle 99 Numero 11, A-32
Santa Fe de Bogota D.C.
Tel: 1-416-502-1740
Fax: 1-416-490-3633
!cndahelp
Tel: 562-274-0072
Fax: 562-235-7529
!helpchile
Tel: 571-616-6066
Fax: 571-616-0695
!xofthelp
Dominican Rep.
Codetel
Redes de Datos
1101 Abraham Lincoln Blvd.
Santo Domingo
Tel: 1-809-220-5115
Fax: 1-809-220-5206
!codemail
Mexico
EKONOM, S.A. de C.V.
Leibnitz 270
C.P. 11590
Mexico D.F.
Tel: 52-5-227-7444
Fax: 52-5-227-7432
!vatrev
Panama
Fidanque hermanos e hijos,s.a.
Calle 50 y Calle 59
Urbanizacion Obarrio
Apartado Postal 721
Panama 1
Paraguay
Netsystems
Avenida Espana 1615
Asuncion
Tel: 507-64-2444
Tel: 595-21-20-8290
Fax: same as phone
!paraguayhelp
Peru
Limatel
Conquistadores 396
OF. 305
Lima 27
Tel: 5114-411319
Fax: 5114-410830
!limatel
Uruguay
EasyMail, S.A.
Yaguaron 1225
11100 Montevideo
Tel: 598-2-92 01 27
Fax: 598-2-92 01 14
!elsuruguay or !mvdsales
Venezuela
ComWare
La Urbina
Edificio Mulimar Piso 3
Calle 5 con Calle 8
Caracas
Tel: 582-242-5144/5122
Fax: 582-242-4216
!comwarehelp
237
Appendix B: AT&T Mail
traveler’s access numbers
Hong Kong
You will access AT&T Mail in the US and internationally
from over 160 countries. To receive the detail international access numbers, call AT&T international customer
service mentioned in Appendix A.
Hong Kong
Access Number:
Speed/Standard:
Script:
Australia
Singapore
Country Wide
Access Number:
Charges:
Speed/Standard:
Script:
+61-13-1136
Local call
2400/V.22
9600/V.32 MNP5
AT&T Mail Direct (installed in Zaurus)
Canada
200+ cities via DATAPAC service
Access Number: 416-868-4100 or 416-979-1619
Charges:
No DATAPAC charges, only local
call
Speed/Standard: 1200 or 2400
(depending on location)
Script:
DATAPAC (see Appendix C)
Toronto
Access Number:
Speed/Standard:
Script:
238
416-502-3000
9.6 V.32
AT&T Mail Direct (installed in Zaurus)
Singapore
Access Number:
Speed/Standard:
Access Number:
Speed/Standard:
Script:
+852-3003-4900
V.32/22/MNP
AT&T Mail Direct (installed in Zaurus)
+65-535-1444
2400/V.22/MNP5
+65-535-1940
9600/V.32/MNP5
LAS (see Appendix C)
NOTE
The use of LAS requires an additional subscription.
Contact your local AT&T EasyLink Service support
center (see Appendix A) for additional information.
Appendix C:AT&T Mail login
scripts
AT&T Mail Direct
DELAY 10
SEND 0 "^M"
DELAY 20
SEND 0 "^M"
WAIT 450 "Name:"
SEND 0 "$USERID^M"
WAIT 300 "Password:"
SEND 0 "$ATTPASS^M"
WAIT 900 "word:" OR "**" OR "ion:"
IFGOT 2 SKIP 7
IFGOT 1 SKIP 4
IFTERMINAL SKIP 5 OR 0
SEND 0 "1^M"
WAIT 900 "word:" OR "**"
IFGOT 2 SKIP 2
SEND 0 "$SECPASS^M"
WAIT 900 "**"
REDI-ACCESS Packet (X.25)
For a listing of REDI-ACCESS telephone numbers for
each state in the U.S., check your AT&T Mail User’s
Guide.
DELAY 50
SEND 1"....^M"
WAIT 300 ">>" OR "__"
SEND 1 "set 21:0^M"
DELAY 10
SEND 1 "attmail^M"
WAIT 300 "Welcome" OR "COM"
DELAY 10
SEND 0 "^M"
DELAY 20
SEND 0 "^M"
WAIT 450 "Name:"
SEND 0 "$USERID^M"
WAIT 300 "Password:"
SEND 0 "$ATTPASS^M"
WAIT 900 "word:" OR "**" OR "ion:"
IFGOT 2 SKIP 7
IFGOT 1 SKIP 4
IFTERMINAL SKIP 5 OR 0
SEND 0 "1^M"
WAIT 900 "word:" OR "**"
IFGOT 2 SKIP 2
SEND 0 "$SECPASS^M"
WAIT 900 "**"
239
LAS – Local Access Service
DATAPAC – DataPac in Canada
In the following script, substitute $A with the LAS ID and
$C with the LAS password.
DELAY 30
SEND 0 "..^M"
WAIT 300 "DATAPAC:"
DELAY 20
SEND 0 "SET 123:0^M"
DELAY 20
SEND 0 "R 95800942^M"
DELAY 50
DELAY 10
SEND 0 "^M"
DELAY 20
SEND 0 "^M"
WAIT 450 "Name:"
SEND 0 "$USERID^M"
WAIT 300 "Password:"
SEND 0 "$ATTPASS^M"
WAIT 900 "word:" OR "**" OR "ion:"
IFGOT 2 SKIP 7
IFGOT 1 SKIP 4
IFTERMINAL SKIP 5 OR 0
SEND 0 "1^M"
WAIT 900 "word:" OR "**"
IFGOT 2 SKIP 2
SEND 0 "$SECPASS^M"
WAIT 900 "**"
DELAY 50
SEND 5 "^M^M^M"
DELAY 50
SEND 0 "c^M"
DELAY 50
SEND 0 "$A, $C ^M"
WAIT 400 "Welcome"
DELAY 10
SEND 0 "^M"
DELAY 20
SEND 0 "^M"
WAIT 450 "Name:"
SEND 0 "$USERID^M"
WAIT 300 "Password:"
SEND 0 "$ATTPASS^M"
WAIT 900 "word:" OR "**" OR "ion:"
IFGOT 2 SKIP 7
IFGOT 1 SKIP 4
IFTERMINAL SKIP 5 OR 0
SEND 0 "1^M"
WAIT 900 "word:" OR "**"
IFGOT 2 SKIP 2
SEND 0 "$SECPASS^M"
WAIT 900 "**"
240
Login Script Commands
This section documents the scripting language supported by AT&T Mail Access.
Each line in a script file represents a command to be
executed by AT&T Mail Access. The syntax and
meaning of each command is as follows:
BREAK [<h-seconds>]
Sends a BREAK signal for <h-seconds> hundreths of a
second duration. The default without the optional
argument is 12/100 or 0.12 of a second (or BREAK 12)
DELAY <t-seconds>
Delays script execution for <t-seconds> tenths of a
second duration.
IFGOT { 1 | 2 | 3 } SKIP <#-lines>
Transfer control <#-lines> down if WAIT parameter
<string-1>, <string-2>, or <string-3> was received. Used
after a WAIT command.
IFTERMINAL SKIP <#-lines1> OR
<#-lines2>
Used for conditional control for a user who goes on-line
in terminal mode and uses the Information Services
menu. Pressing 1 <CR> (for AT&T Mail) skips <#lines2> lines down. Pressing anything else skips <#lines1> lines down.
SEND <t-seconds> "<string>"
Sends <string> with <t-seconds> tenths of a second delay
before every character is sent. Use 0 for <t-seconds> for
no delay. Quotes are required, but not sent.
SKIP <#-lines>
Transfer control <#-lines> down unconditionally.
WAIT <t-seconds> "<string-1>"
Wait for <string-1>, <string2>, or [ OR "<string-2>"
<string-3> no longer than <t-seconds> tenths of a second
[ OR "<string-3>" ] ]. Use IFGOT to test which string was
received. Quotes are required, but not part of the strings.
Several character sequences have special meanings in
a SEND or WAIT command string parameter, and they
are replaced with the following values:
$USERID
Login name from configuration.
$SECPASS
Mail service password from configuration.
$ATTPASS
Password from configuration.
^X
ASCII Control X character (where X can be from A to Z).
For example, ^M = ASCII 13 = Carriage Return.
241
242
Terminal
Introduction ............................................................. 245
Using Terminal ......................................................... 251
Troubleshooting ...................................................... 258
243
244
Introduction
T
his section describes how to use the unit's
Terminal to communicate with other
computers.
About Terminal
Terminal is an application which lets you use communications functions to link your unit to a remote computer
or system (including a bulletin board service (BBS) or
an on-line information service), and to transfer data via
phone lines between your unit and a personal computer.
For example, Terminal makes it possible to link your unit
with a computer at home or the office using ordinary
telephone lines, or to download (receive) information
from public or private subscription databases.
245
Setting up your modem
1.
Turn your unit on.
2.
Touch TOOLS and touch Terminal twice.
Modem settings
The modem settings are as follows:
3.
Touch SETUP and select “Modem Setting”.
Port:
Select 15-pin (CE-FM4) or PC Card.
Line type:
Telephones use either tone or pulse dialing.
Normally, push-button phones use tone dialing
and rotary phones use pulse dialling (but not
always). Select Tone or Pulse. Contact your
telephone company if unsure.
246
4.
Touch and select any required settings.
5.
Use the numeric keys to enter the Redial
value.
6.
When you complete your settings, touch OK.
Redial:
Sets the number of redial tries if a connection is not
made on the first attempt (number is busy or did not
answer). Redial can be set in the range 0-2.
Making Terminal dial setting entry
Volume:
If your modem has a built-in speaker, selecting 1,
2 or 3 adjusts the speaker volume so you can hear
dial and connection tones. The Speaker turns off
automatically after connection. Mute turns the
speaker off. (Speaker volume does not function
with the CE-FM4 Fax/Modem.)
1.
Touch TOOLS and select Terminal.
2.
Touch SETUP and select “Dial Setting”.
MNP:
Check to use MNP (Microcom Network Protocol) if
supported by your modem. MNP corrects data
errors caused by line noise, etc. CE-FM4 does not
support MNP, and will ignore this setting.
Wake Up:
Turns your unit on in Terminal mode when called
by a remote system (unless start-up display has
Ask Password set to On). There are other hardware and software requirements. For more
information, contact your local Sharp dealer.
Hardware Flow Control:
Provides enhanced data flow control for highspeed (greater than 2400 bps) communications.
Modem String:
Used to input commands for initializing the
modem. To use it, touch the Modem String
checkbox first. When using the CE-FM4, you do
not have to set this field.
NOTE
You can restore the settings to the factory preset
values by touching Restore.
• Enter the name and phone number for each
entry.
• Default settings (except transmission speed),
should work well for most modem communications.
• When changing settings, try to match the
settings of the remote (called) system.
247
3.
Touch Name field and enter the entry’s
name.
4.
Touch the Number field and enter the phone
number for the remote system.
• Include the area code if required.
• If calling from a private PBX telephone system,
you may need to dial 9 or some other number to
get an outside line before dialing a required
number.
• PBX outside line connection usually has a delay.
If the modem dials continuously, part of the
number may be lost. Insert a comma in the
number to instruct the modem to pause when
dialing. For example, 9,555-1212.
248
5.
Touch the Speed (bps) button and select a
speed setting.
Data transmission can only be as fast as the
slowest of the two modems used. If your
modem is capable of 2400 bps and the
remote modem of 1200 bps, select 1200 bps.
6.
Check the Secret box if you require password
access for this entry.
7.
Make any other required setting changes.
Use the page icon ( ) to turn to other pages.
8.
When you complete your settings, touch OK.
NOTE
It is beyond the scope of this manual to explain all
aspects of communications, such as protocols, terminal
emulation, etc. For further information, consult your
modem manual or a reference book.
About directory settings
Terminal connection parameters are set from the Dialing
Directory Setting display. Each entry has its own
settings, so that you can dial a number just by selecting
the desired entry.
• When off line, Dial Setting can be selected and
Configuration is faded.
• When on line, Configuration can be selected and Dial
Setting is faded. Configuration is a subset of Dial
Setting, for use while on-line.
Dial Setting has three setting displays and Configuration has two.
Parameters that can be set:
Name:
Name of the dialing entry.
Number:
Phone number to dial.
Speed (bps): Transmission speed in bits per
second.
Parity:
Simple form of transmission error
checking.
Data Bits:
Size of each data character
transmitted (8 or 7 bits).
Stop Bits:
Signals sent to indicate the end of
each transmitted character.
Emulation:
Type of computer terminal emulated
as the basic remote system input/
output device. Select from TTY or
VT100.
Xon/Xoff:
Form of handshaking (or flow
control) between modems.
Local Echo: Selects whether or not to display
entered characters when connected
to a remote terminal.
249
7F Code Conversion:
Switch to interpret transmission
code as a delete or backspace in
7-bit data.
Auto Repeat: Repeat key function for press and
hold.
Send LF after CR:
Adds a line feed to a sent carriage
return.
Receive LF after CR:
Adds a line feed to a received
carriage return.
Wrap Around: Moves characters to a new display
line when the end of a line is
reached.
To shift to the Setting 2/3 display, touch the bottom
right of the
icon:
Cursor Shape:
Select cursor shape from
Block/Underline.
Cursor Translate:
Number of vertical lines
(range 1 - 24, default 8) or horizon
tal characters (range 1 - 80, default
40) that key operations move the
cursor.
Tab:
Sets the tab size in characters.
Delay Time: Time the sending unit waits for the
receiving unit to read a line of text.
Set any value from 0-99, in tenths of
a second.
Shift In/Out: Switch to distinguish between
accented and unaccented alphanu
meric characters.
250
Changing dial settings
1.
Select the entry from the Dialing Directory
display.
2.
Touch SETUP and select “Dial Setting”.
3.
Make any changes you require.
4.
Touch OK. The new settings are stored.
Using Terminal
Y
ou can make and receive a call, or perform
other communications operation in
Terminal.
Making a call
After setting up your unit with the modem, and making a
dialing directory entry for the BBS, computer information
service, or other remote computer, you are ready to
communicate.
To make a call:
1.
Touch TOOLS and select Terminal.
2.
Select the entry you want to call.
3.
Touch LOG ON to dial the number.
A message indicates when a connection is
made with the other modem.
• If the other modem answers, but no connection
is made due to a setting mismatch or other
problem, or if a connection is made but garbled
characters are displayed, press ON to disconnect, and try again.
• If you (after checking) still have trouble connecting, refer to the “Troubleshooting” section.
251
Hanging up
Calling conditions
• If you connect with a remote unit but the displayed characters are garbled, try connecting
again at a slower speed.
• If your telephone line has a call waiting feature,
you may receive data errors or garbled characters when someone tries to call while you are
connected to a remote computer. You may be
able to temporarily disable this feature before
connecting to the remote computer. Contact your
telephone company for details.
• If you make a connection, but do not see any
characters on the display when you enter text, or
you see double characters, change the local
echo setting for the entry (turn it on or off).
• You must unlock your unit before selecting a
secret entry.
252
When you want to disconnect, you must log off from the
remote computer. BBS and information services have
specific log off procedures that you should follow. Do not
just unplug the modem or break the telephone line
connection.
After logging off, press ON to hang up. If for any reason
the auto log off procedure fails, or you are connected to
another user, press ON at any time to end the call and
return to the Dialing Directory display.
Receiving a call
In addition to making outgoing calls, your unit can also
receive calls from other modems when set to “auto
answer”.
6.
In the terminal display, enter ATS0=1 and
press ENTER.
To receive a call:
1.
Touch TOOLS and touch Terminal twice.
2.
Select a blank entry field, touch SETUP and
then select “Dial Setting”.
3.
Enter a name for the expected caller, or a
general name such as “Answer”. Leave the
Number field blank. Make settings changes
as required for the incoming call (speed may
be the only setting you need to change).
4.
When you complete your settings, touch OK.
5.
From the Dialing Directory display, select the
entry you just made, and then touch LOG
ON.
This sets your unit’s modem to automatically
answer a call after one ring. For an explanation of AT commands (such as ATS0=1),
consult your modem manual.
• Any call is automatically answered.
• Press ON to turn off auto answer or to disconnect when the call is completed.
NOTE
The Sleep function is disabled in Terminal mode. Auto
answer draws battery power continuously so you should
set it up just prior to the call.
253
On-line operations
When connected to another computer via modem,
anything you enter on your keyboard is sent to the
remote computer, and anything received appears on
your display. Terminal mode commands add power and
flexibility to the process.
• To use ASCII control codes while your unit is on-line,
touch UTILS, select "Use Control Code" (or press
NEW ENTRY) then press the appropriate key.
• To interrupt a process, touch UTILS and select “Send
Break Code”.
This is also required for some log-off procedures.
• To open a movable numeric keypad on the display,
Touch UTILS and select “Pop-up Numeric Keypad”.
This keypad function is only for VT-100 terminal
emulation.
• Use SMBL to enter accented characters (Ä, Ü, etc.) in
on-line mode.
254
To make Terminal mode commands:
1.
Once connected to the desired remote
system, touch UP/DN.
2.
Select the required command or function
from the menu.
3.
If necessary, press ON to cancel an upload
or download which is currently in progress.
NOTE
With SHIFT IN/OUT set to ON and DATA BIT to 7, trying
to cancel a file transfer might break the connection. If
this occurs, press ON to disconnect and change SHIFT
IN/OUT to OFF or DATA BIT to 8 for that entry, then try
again.
Data transfer
Your unit can upload (send) Documents entries in either
ASCII (text) format or using XMODEM file transfer
protocol. It can also upload Filer folders and PC Files
using XMODEM, and upload and download text and
files using either ASCII or XMODEM.
• For a Documents entry, the number of downloaded
pages is displayed as ** in Index View. Once downloaded, open the entry in Detail View and store it again
to display the number correctly.
• ASCII (American Standard Code for Information
Interchange) is a character set for transferring text
between different kinds of computers, so that text
entered on one computer appears in the same form on
a remote computer. ASCII has no error correction.
• XMODEM is a file transfer protocol with error correction.
When MNP is on, XMODEM cannot be used. (To
check, touch SETUP and select “Modem Setting”.)
3.
Select the desired data transfer function from
the menu.
• For Upload Text (XMODEM or ASCII), a display
similar to Index View appears, showing all your
Documents entries. Select the entry to be
uploaded, and then touch Upload.
• For Upload Folder, a display similar to Filer
Drawer opens, select the folder to be uploaded,
and then touch Upload.
• Select between Main Unit or PC Card to set
download destination, then for Download, edit a
name (of up to 20 characters), enter a description (only in PC Files) and touch OK.
• Select Stop Download when download text
(ASCII) is completed.
4.
The selected entry or folder is transferred.
Press ON at any time to cancel the upload or
download.
To upload or download data in Terminal mode:
1.
Touch TOOLS, select Terminal and LOG ON
to the desired system.
2.
Once connected, select UP/DN.
NOTE
Some computer information services require specific
log-on procedures before data upload or download.
Consult the service provider for details.
255
Auto log-on
When you call a BBS or information service, the log-on
procedure (in which you enter your name, user number,
and password), is often the same each time you
connect. Your unit can automate your log-on, making it
faster, cheaper and easier.
Auto Log on Commands
Auto log-on uses the character strings you normally
enter manually (when logging onto the BBS or information service), in conjunction with the following commands:
“S”: Search for a character string sent from the BBS
before going to the next step of the log-on procedure. For example, SUSER ID: means wait for the
text “USER ID:” to be received before continuing.
“R”: Reply with a character string. For example, RJOHN
JOHNSON means send the text “JOHN JOHNSON”.
“W”: Wait in tenths of a second. For example, W2 would
introduce a 0.2 second pause before the next step.
“ ”: Insert a carriage return after a character string.
Must be included at the end of lines where you
would normally press ENTER. Use SMBL to enter
“ ”.
To use auto log on:
1.
Touch TOOLS and touch Terminal twice.
2.
Select the entry that requires auto log-on.
3.
Touch SETUP, select “Dial Setting” and then
touch to turn to the Setting 3/3 display.
4.
Enter your Auto Log on text.
Press [ ] after each command.
• Enter search strings (S command) exactly as the
system you are calling displays them.
• Use uppercase and lowercase letters exactly as
used when logging on manually.
• You may need to log onto a system manually to
copy the system’s log-on text strings.
5.
256
When you complete your entry, touch OK to
store the auto log-on text.
Terminal emulation
Terminal display setup
There are two terminal emulation modes, TTY (teletypewriter) and the more advanced VT100 (VT stands for
video terminal). In the dialing entry, select the terminal
emulation mode the remote computer system supports.
You can configure terminal parameters (Cursor Shape,
Cursor Translate (Horizontal and Vertical), Tab, Auto
Repeat and Wrap Around) to suit your requirements.
Default settings work well for most communications, but
you may sometimes need to change emulation settings,
see page 151. Use the VT100 numeric keypad on the
display like function keys on a standard computer.
Your unit's display is smaller than most standard
personal computers. Terminal SETUP lets you select a
Fixed or Virtual screen display, and choose between
Small and Large fonts.
To use the VT100 keypad in on-line mode:
1.
Once connected, touch UTILS and select
“Pop up Numeric Keypad”.
2.
Touch the keys on the keypad as required.
• The keypad is a movable window, so you can
move it to any place on the display. Touch the top
left corner and drag the keypad to the new
location.
• The keyboard is inactive when the keypad is
displayed.
3.
Fixed Screen (Wrap Text):
Text that does not fit on a line wraps to a new
line.
Virtual Screen (80 Chr):
The display forms a window and text is displayed
in the same format as a conventional remote
terminal. Use the cursor keys to view text off the
display. Default cursor key settings move the
display window 40 characters horizontally or 8
lines vertically.
Use Small Font:
Selects display using a small font.
Use Large Font:
Selects display using a large font.
Touch Cancel when you have finished with
the keypad.
257
Troubleshooting
Troubleshooting checklist
Common communications problems and their solutions
are listed below.
T
his section answers questions you may
have when using Terminal.
Problem:
User message:
Cause:
Solution:
Problem:
User message:
Cause:
Solution:
258
Remote system answers, but no
connection is made.
None, or NO CARRIER.
Setting mismatch with remote
system.
Excessive line noise.
Touch SETUP, select “Dial setting”,
and check the configuration (data
speed, parity, data bits, stop bits).
Wait a short period of time and try
again.
Remote system answers but
received characters are garbled.
None.
Incorrect setting for parity, data bits
or stop bits.
Excessive line noise.
Change the settings for parity, data
bits or stop bits.
Wait a short period of time and try
again.
Problem:
User message:
Cause:
Solution:
Problem:
User message:
Cause:
Solution:
Connection with remote system
terminates unexpectedly.
None.
Surge of line noise, user error, etc.
Try again.
Problem:
User message:
Dialing terminated unexpectedly.
Problem during dialing, auto dialing
was terminated.
Incorrect phone number entered.
Incorrect line type selected (tone or
pulse).
Modem not connected to a phone
line.
Check phone number in Dialing
Directory.
Check Line Type setting in Modem
Setup.
Check modem is correctly con
nected to your unit and a telephone
line.
Solution:
Cause:
Auto log-on fails.
There was a problem during auto
log on. Check the auto log on
commands.
Incorrect auto log-on settings.
Excessive line noise.
Check auto log-on settings. Make
sure “S” and “R” character strings
are correct and that “ ” is included
at the end of each line that requires
it.
Wait a short period of time and try
again.
259
ASCII Control Codes
To generate ASCII control code in Terminal mode, touch
UTILS, select “Use Control Code” (or press NEW
ENTRY), then press the key as shown in the table
below.
Hex Value
00
01
02
03
04
05
06
07
08
09
0A
0B
0C
0D
0E
0F
10
12
14
15
16
17
18
260
Key
@
A
B
C
D
E
F
G
H or BS
I or +
J
K
L
M or
N
O
P
R
T
U
V
W
X
ASCII Code
NUL
SOH
STX
ETX
EOT
ENQ
ACK
BEL
BS
HT
LF
VT
FF
CR
SO
SI
DLE
DC2
DC4
NAK
SYN
ETB
CAN
Hex Value
Key
19
Y
1A
Z
1B
[ or CANCEL
1C
\
1D
]
1E
^
1F
-
ASCII Code
EM
SUB
ESC
FS
GS
RS
US
Index
Spreadsheet ............................................................. 263
CompuServe ............................................................ 266
Pager Access ........................................................... 268
AT&T Mail ................................................................. 270
Terminal ................................................................... 271
261
262
Index
Spreadsheet
B
Border ........................................................................ 58
Drawing ........................................................... 58
C
Cells ..................................................................... 11, 29
Alignment ........................................................ 53
Characteristics ................................................ 53
Deleting ........................................................... 47
Finding cell contents ....................................... 42
Going to .......................................................... 41
Inserting .......................................................... 47
Protecting ........................................................ 52
Range ............................................................. 36
Selecting ................................................... 11, 29
Types ............................................................... 53
Cell reference ............................................................. 35
Absolute .......................................................... 35
Mixed .............................................................. 35
Relative ........................................................... 35
Charts .................................................................. 14, 61
Adding mark-ups ............................................. 66
Column charts ................................................. 63
Creating .................................................... 14, 61
Deleting ........................................................... 66
Exchanging X and Y axes ............................... 64
Formatting ....................................................... 62
Legend ............................................................ 64
Line charts ...................................................... 63
Marking up ...................................................... 66
Pie charts ........................................................ 63
Saving ............................................................. 64
Stacked column charts.................................... 63
Column/row ................................................................ 51
Adjusting sizes ................................................ 59
Displaying labels ............................................. 51
Column and size ........................................................ 59
Adjusting ......................................................... 59
Common Questions & Answers ................................. 15
Copy data ............................................................. 12, 42
Create chart ......................................................... 14, 61
Create worksheet from
Existing worksheet .......................................... 25
Template ................................................... 10, 24
D
Data ........................................................................ 7, 26
Clearing .......................................................... 46
Copying ..................................................... 12, 42
Dragging ......................................................... 29
Moving ...................................................... 12, 42
Sorting ............................................................ 46
263
Display mode ............................................................. 18
Chart mode ..................................................... 19
Index mode ..................................................... 18
Selecting ......................................................... 18
Worksheet mode ............................................. 19
K
E
Legend ....................................................................... 64
Displaying ....................................................... 64
Entering ................................................ 7, 26, 27, 28, 30
Data ............................................................ 7, 26
Formulas ................................... 8, 30, 35, 37, 40
Labels ............................................................. 28
Numbers ......................................................... 27
Keyboard .................................................................... 21
Shortcuts ......................................................... 21
L
M
Menu functions ........................................................... 79
Moving data .......................................................... 12, 42
F
P
Formulas .............................................. 8, 30, 35, 37, 40
Types of ........................................................... 37
Font style .................................................................... 53
Changing ......................................................... 57
Full screen .................................................................. 50
Functions .................................................................... 33
Built-in ............................................................. 33
Pop-up menu .............................................................. 21
G
Recalculation .............................................................. 31
Q
Questions and answers .............................................. 15
Quick start .................................................................... 5
R
Gridlines
Displaying ....................................................... 64
264
S
Secret entry ................................................................ 70
Speadsheet limits ....................................................... 98
Starting PenCell ..................................................... 5, 17
T
Title
Setting ............................................................. 51
Tool bar ...................................................................... 20
Transferring worksheet ............................................... 70
Copying to PC File .......................................... 71
Getting from PC File ....................................... 72
Replacing with PC File .................................... 73
Unit to unit ....................................................... 70
Editing guidelines ............................................ 40
Formatting ....................................................... 48
Inserting and deleting data ............................. 47
Linking............................................................. 74
Navigating ....................................................... 13
Protecting ........................................................ 52
Sorting ............................................................ 18
Starting ............................................... 23, 24, 25
Transferring ..................................................... 70
Workspace
Setting size ..................................................... 75
Z
Zooming ..................................................................... 50
U
Undo ............................................................... 12, 13, 28
W
Word list ..................................................................... 29
Worksheet .................................................................. 23
Changing worksheet name ............................. 68
Characteristics ................................................ 48
Clearing data .................................................. 46
Creating ................................................ 6, 10, 23
Deleting ........................................................... 69
Duplicating ...................................................... 68
265
CompuServe
A
Address book ........................................... 112, 122, 136
Setting up ...................................................... 136
Using ............................................................. 112
Attachment ............................................... 112, 115, 122
C
CompuServe ............................................ 109, 111, 117
Connections ..................................................... 110, 119
On the road ................................................... 119
Remove ......................................................... 119
Converting to Documents ......................................... 134
F
Filter ................................................. 124, 127, 129, 143
Turning off ..................................................... 143
Forum ....................................................................... 126
Creating messages ....................................... 130
Downloading files .......................................... 128
Filtering messages ........................................ 129
Getting responses ......................................... 125
Going to ........................................................ 131
Posting messages ......................................... 131
Reading messages ............................... 127, 129
Responding to messages ............................. 129
I
D
Deleting .................................................................... 138
Documents ............................................................... 134
IN tray ............................................... 124, 125, 134, 136
Index ........................................................ 113, 114, 141
M
E
Executive News Service ........................................... 133
Getting news ................................................. 134
Reading news ............................................... 134
Setting up folders .......................................... 133
Mail ........................................................................... 121
Creating ................................................ 121, 130
Filtering ......................................................... 124
Forwarding ............................................ 125, 142
Getting .......................................................... 124
Reading......................................................... 125
Replying ................................................ 125, 142
Saving ........................................................... 124
Sending ......................................................... 123
266
Menu functions ......................................................... 141
Modem ............................................................. 110, 118
Setting up .............................................. 110, 118
Settings ......................................................... 118
O
OUT tray ........................... 112, 121, 122, 123, 130, 136
P
Preferences .............................................................. 135
Executive News Service ............................... 136
Forum ............................................................ 136
Mails .............................................................. 135
S
Setting up ................................................. 110, 119, 136
Address book ................................................ 130
Connections .................................................. 119
Modem .................................................. 110, 118
Settings .................................................................... 118
Connections .................................................. 119
Modem .......................................................... 118
Starting ............................................................. 109, 117
SENT tray ................................................. 124, 135, 136
T
Tray
Questions & Answers ............................................... 115
Quick Start ............................................................... 109
IN .......................................... 124, 125, 134, 136
OUT ...................... 112, 121, 122, 123, 130, 136
SENT ............................................ 124, 135, 136
Troubleshooting ........................................................ 139
R
V
Q
Recipient .......................................................... 114, 125
Selecting ............................................... 114, 125
View ......................................................................... 141
267
Pager Access
A
Address book ........................................................... 170
Setting up ...................................................... 170
Addressing message .................................... 167
Attaching data to a message .................................... 168
Viewing and saving ....................................... 175
C
Commonly Asked Questions & Answers .................. 154
Converting messages to Documents ....................... 175
Copying and moving text .......................................... 180
Customizing Pager Access ...................................... 180
D
Detail view ................................................................ 173
Reading incoming messages ................ 153, 173
F
Filter ................................................................. 164, 178
Applying ........................................................ 178
Deactivating .................................................. 178
Folder ....................................................................... 165
IN .................................................................. 165
OUT .............................................................. 165
SENT ............................................................ 166
I
IN folder .................................................................... 165
Index ........................................................................ 164
M
Menu functions ......................................................... 185
Message
Addressing ............................................ 151, 167
Attachment ............................................ 165, 168
Composing ............................................ 151, 166
Converting to Documents ............................. 175
Copying and moving ..................................... 180
Deleting ................................................. 176, 177
Getting .................................................. 152, 173
Modifying ....................................................... 169
Transmission ................................................. 172
Reading................................................. 153, 173
Screen........................................................... 164
Searching .............................................. 153, 179
Sending ................................................. 152, 171
O
OUT folder ................................................................ 165
268
P
S
Pager Access ........................................................... 147
Customizing .................................................. 180
Starting ................................................. 147, 158
What is it ....................................................... 157
Pager Card ............................................................... 159
Paging service .................................. 159, 160, 161, 163
Fax/Modem initialization strings .................... 163
Modifying ....................................................... 160
Setting up .............................................. 159, 171
Password screen ...................................................... 158
PIN ........................................................................... 168
Preferences .............................................................. 180
Seaching messages ......................................... 153, 179
Secret password ...................................................... 158
SENT folder .............................................................. 166
Setting up ......................................................... 159, 170
Address book ................................................ 170
Modem .......................................................... 161
Paging service ...................................... 159, 171
Preference .................................................... 180
Show All Pager messages ....................................... 177
System diagram ....................................................... 148
Q
T
Troubleshooting ........................................................ 183
Tool bar .................................................................... 164
Quick Start ............................................................... 147
R
Recipient .................................................................. 167
Selecting ....................................................... 167
Redial ....................................................................... 162
269
AT&T Mail
A
AT&T Mail ......................................................... 189, 208
Connecting to ................................................ 212
Obtaining account ......................................... 195
Recipient options .......................................... 208
AT&T Mail Access .................................................... 189
Setting up ...................................................... 190
Starting ......................................................... 189
Attachment ............................................................... 211
Finding .......................................................... 227
Forwarding .................................................... 225
Receiving .............................................. 193, 214
Sending ......................................................... 192
Viewing ......................................................... 221
Modem setup ........................................................... 190
S
Setting up ................................................................. 196
Address book ................................................ 200
Starting AT&T Mail Access ....................................... 189
I
Internet ..................................................................... 210
T
Terminal ................................................................... 219
L
Login script ............................................................... 199
M
Mail basic ................................................................. 203
Message
Addressing .................................................... 206
Answering ..................................................... 224
Converting to Document ............................... 229
Creating ................................................ 191, 205
Deleting ......................................................... 228
Editing ........................................................... 212
Filtering ................................................. 217, 222
270
Terminal
A
R
Receiving a call ........................................................ 253
Auto log-on ............................................................... 256
C
Calls ......................................................................... 251
Hanging up ................................................... 252
Making .......................................................... 251
Receiving ...................................................... 253
T
Terminal ........................................................... 251, 257
Display setup ................................................ 257
Emulation ...................................................... 257
D
Data transfer ............................................................ 255
Dial setting ............................................................... 247
H
Hanging up ............................................................... 252
M
Making a call ............................................................ 251
Modem ..................................................................... 246
Setting up ...................................................... 246
Settings ......................................................... 246
O
On-line operations .................................................... 254
271
272