1
This chapter provides instructions for connecting Dell PowerVault 650F and 651F storage systems to a Dell PowerEdge or Compaq server system running the Novell
NetWare operating system. All procedures in this document require administrator
access permissions.
This chapter describes a NetWare configuration that requires that Managed Node for
NetWare be installed on at least one of the NetWare servers (see Figure 2-2).
This chapter describes the following procedures:
Cabling the NetWare system to the storage area network (SAN)
Updating the QLogic host bus adapter (HBA) basic input/output system (BIOS)
and nonvolatile random-access memory (NVRAM)
Installing the QLogic drivers on the NetWare system
Installing, Configuring, and Uninstalling Data Managed Node for NetWare
Dell OpenManage ATF for NetWare
Creating partitions and volumes on the NetWare hard-disk drives
NOTE: To install the Windows NT or Windows 2000-based Data Management software, see Chapter 11, “Installing, Configuring, and Removing Microsoft Windows
SAN Software Components.”
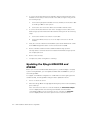
Perform the following steps to cable NetWare systems to the PowerVault storage
system:
1.
Turn off the PowerEdge server(s) and the PowerVault 65xF storage systems.
65xF
!" !
#
support.dell.com
Novell NetWare Support for Dell PowerVault 65xF Storage Systems
12-1
2.
3.
To connect an interface between the 5xF Fibre Channel switch and each of the
NetWare servers that you want to install on the SAN (see Figure 12-1), perform
the following steps:
a.
Connect the high-speed serial data connector (HSSDC) of the interface cable
to the QLogic HBAs on each system.
b.
Connect the other end of the cable to the 5xF Fibre Channel switch.
To connect an interface between each of the storage processors (SPs) on the
65xF storage systems and the 5xF Fibre Channel switch, perform the following
steps:
a.
Connect the HSSDC to the switch on each cable.
b.
Connect the DB-9 connector to one of the 9-pin connectors on the SP
modules.
4.
Verify the connection between the NetWare system and a Windows NT or Windows 2000 management station on the local area network (LAN).
5.
Power on all Fibre Channel switches and PowerVault storage systems.
This step takes 3–5 minutes and ensures that the PowerVault storage systems
are completely booted.
6.
Power on the server(s).
7.
Complete any switch zoning before continuing.
!"
# $
Before you connect a Dell PowerVault 65xF system to your PowerEdge or Compaq
system running NetWare, you must update the BIOS and the NVRAM on your system’s QLogic HBAs.
For support of a NetWare Configuration on a SAN with more than eight logical unit
numbers (LUNs), the QLogic BIOS settings must be updated as follows:
1.
Turn on or reboot the server.
2.
When the QLogic BIOS message appears during the power-on self-test (POST),
press <Alt><q>.
If the server has more than one controller installed, the Select Host Adapter
screen is displayed with a list showing each installed controller and the
corresponding address. If the server has only one controller, the Controller
screen is displayed with a list of the options for the selected controller.
12-2
SAN Installation and Troubleshooting Guide
3.
If the Select Host Adapter screen is displayed, press the up- or down-arrow key
to highlight the controller you want and press <Enter>.
The Controller screen is displayed with a list of options for the selected
controller.
4.
Press the up- or down-arrow key to highlight Configuration settings and press
<Enter>.
The Configuration Settings screen is displayed.
5.
Press the up- or down-arrow key to highlight Advanced Adapter Settings and
press <Enter>.
The Advanced Adapter Settings screen is displayed.
6.
Press the up- or down-arrow key to highlight Luns per Target and press <Enter>.
The Luns per Target screen is displayed.
NOTE: You must set the range of the LUNs to the minimum range that applies to
the number of LUNs on the SP. Setting the LUNs per Target value to a higher
value affects the time required for the server to boot. The maximum supported
setting is 32. For larger numbers of LUNs, Dell recommends having at least
256 MB of random-access memory (RAM) in the server.
7.
Type the desired value and press <Enter>.
The Advanced Adapter Settings screen is displayed, and the Luns per Target
value is set correctly.
8.
Press <Esc> twice, select File—> Save Changes, and press <Enter>.
9.
Repeat steps 1 through 8 for each installed adapter and for each server.
For instructions on updating the QLogic HBA BIOS and NVRAM, see Chapter 4,
”Installing the Host Bus Adapter in the Server.”
!%&
&
For instructions on installing the drivers for the QLogic HBA in your NetWare server,
see Chapter 4, ”Installing the Host Bus Adapter in the Server.”
!'('
%$
(
Data Managed Node for NetWare must be installed on one of the NetWare servers.
support.dell.com
Novell NetWare Support for Dell PowerVault 65xF Storage Systems
12-3
NOTE: The NetWare configuration specified in Figure 2-2 requires that a LUN is bound
on an SP in order for the Data Managed Node for Netware to communicate with the
SP. If there are no LUNs bound, then a Windows NT or Windows 2000 system
attached directly to the SP is required to configure and initialize a LUN. Following this,
the Windows NT or Windows 2000 server can be removed and management can
occur through the NetWare server.
To install and configure the Data Managed Node for NetWare, perform the following
steps.
NOTE: Because long filename support may not have been enabled on the NetWare
server, the agent installation uses the 8.3 file format.
1.
If a previous version of Managed Node is running, it must be stopped and uninstalled using the uninstall commands in the next section.
2.
On a client system running Microsoft Windows or DOS, insert the Managed
Node installation CD in the CD-ROM drive.
3.
On the client system, map drive letter H to the sys volume on your NetWare
server.
4.
At the DOS prompt of the client system, change the directory to the drive containing the installation CD and run the install script by typing GULYH,
where drive is the remote drive corresponding to the sys volume on the NetWare
server.
For example,
would create h:\dell\om with the appropriate agent
and command line interface (CLI) directories under it.
5.
Edit the sys:\etc\hosts file by adding the Internet Protocol (IP) address of the
server, followed by localhost.
For example, type
.
6.
If you do not wish to maintain individual host files, edit the sys:\resolve.cfg file
by adding the IP addresses and names of your domain name system (DNS)
servers.
!!$ $% &
'
$!
! !"" #
12-4
SAN Installation and Troubleshooting Guide
7.
Edit the sys:\dell\om\agent\agent.cfg file.
8.
In the User Specification section, add where admin_user_name is the administrator account and
Netwareservername is the name of your NetWare server. For example, type
.
If you intend to use any Windows NT or Windows 2000 Data Managed Node
applications on the client, also specify !".
You must specify the device name. The NetWare device names are in the
same format as the device displayed on the NetWare server when load
monitor is run and Disk information is selected. The device name is in the
format 9#$', where V is the vendor, A is the adaptor, D is the bus
ID, and 0 is the disk LUN. These values are assigned by NetWare.
To start the agent on the NetWare server, type the following command on the
NetWare console and press <Enter>:
$%%%"%"&$%%%"%"&"
9.
To unload the agent, type the following command on the NetWare console and
press <Enter>.
"
10. To have the agent automatically start up at NetWare server start-up, perform the
following steps on the NetWare console:
a.
Type '()*!+(,(--. and press <Enter>.
%(
"!!")&
#*
!
" +
!
,
&
! -!#!$$ #.$
) &+
!
! -!#!$$ "$# !
'
! $+
!
- ! %.
" "
#
$
%
% !%%
%.&
!/
-!#!$$ # $ &$ !
'
! # !
%%$
%%
!
%.#
support.dell.com
b.
Append the load command from step 8 to the end of the file.
c.
Press <Esc> and save the file.
d.
Exit the program.
Novell NetWare Support for Dell PowerVault 65xF Storage Systems
12-5
To uninstall the Data Managed Node for NetWare, perform the following steps:
1.
From the NetWare server console, stop the agent by using the unload omagent
command.
2.
From a DOS prompt on the client system, type the following commands and
press <Enter>.
GULYH%% (where drive is the remote drive corresponding to the
sys volume on the NetWare server)
This step removes the om directory and all its contents. It does not remove the
Dell directory.
3.
Remove the entries from the Autoexec.ncf file that are loading the agent program. To remove the entries, perform the following steps:
a.
At the system console, type /&.
b.
Locate and remove the following line:
$%%%"&$%%"%"&"
c.
Press <Esc> to save the changes and exit.
%
"
$
)*(
Dell OpenManage Application Transparent Failover (ATF) is a software product that
works with Dell PowerVault 650F and 651F disk processor enclosure (DPE) storage
systems to let applications continue running after the failure of an SP, HBA, or cable.
Without human intervention, ATF can route input/output (I/O) through a secondary
path to the disk units the applications need.
To install Dell OpenManage ATF for NetWare, perform the following steps:
1.
Create a SCSISAN High Availability Driver for NetWare diskette.
2.
Install the SCSISAN High Availability Driver.
3.
Install the High Availability Device Manager (HADM) Utility.
NOTE: The drivers for the Novell NetWare operating system are located on the Dell
PowerVault Fibre Channel Utilities CD. Before installation you must create a diskette
with the files needed to install ATF for Netware.
12-6
SAN Installation and Troubleshooting Guide
To create the diskette, perform the following steps:
1.
Insert the Dell PowerVault Fibre Channel Utilities CD into your computer’s CDROM drive.
2.
Insert a blank formatted diskette into the diskette drive.
3.
Navigate through the HTML pages to ATF for Netware.
4.
Click Create SCSISAN High Availability Driver for Netware Diskette.
Follow this link to create a diskette with the needed Dell OpenManage ATF for
Netware files.
5.
Follow the instructions on the screen to complete creating the diskette image.
To install the SCSISAN High Availability Driver, perform the following steps:
1.
If a previous version of Dell OpenManage ATF for Netware is installed, stop it and
uninstall it.
2.
Turn on or reboot the server.
Allow the server to boot completely.
3.
Insert the SCSISAN High Availability Driver for Netware diskette that you created
in the previous steps into your Netware Server.
4.
Start the appropriate NetWare installation program:
For NetWare 4.2, type at the server console prompt.
For NetWare 5.x, type &" at the server console prompt.
5.
Select Driver Options.
6.
Select Configure disk and storage device drivers.
7.
Select Select an additional driver.
8.
Press <Insert> to select Install an unlisted driver.
9.
If the SCSISAN High Availability Driver for NetWare diskette is in drive A, press
<Enter>. If the diskette is not in drive A, press <F3> to enter the correct path to
the diskette.
10. Select Novell SCSISAN NPA Custom Device Module Driver, and press
<Enter>.
11. Select Yes at the prompt Do you want to copy driver scsisan.cdm.
support.dell.com
Novell NetWare Support for Dell PowerVault 65xF Storage Systems
12-7
12. If you are asked to save the existing file scsisan.cdm select No and press
<Enter>.
This message only occurs if you have previously installed this file.
13. If you are asked to save the existing file scsisan.ddi select No and press
<Enter>.
This message only occurs if you had installed this file previously.
14. At the Specify server boot path prompt, type the path to server.exe, or press
<Enter> to accept the default path of c:\nwserver.
15. Select No at the prompt Do you want to select an additional Disk driver?.
16. Select Return to previous menu twice.
17. Select Exit to exit the installation program.
The installation program makes all necessary additions and changes to the
startup.ncf file and sets the values appropriately, so you should not need to adjust
any driver settings.
1.
The hadm.nlm file is located in the \ATF\Install\NW\hadm directory on the Dell
PowerVault Fibre Channel Utilities CD.
2.
Copy the hadm.nlm file to a system that is running a NetWare client.
3.
Connect and log on to your NetWare server using the system that you just copied
the file to.
4.
Map a drive letter to the SYS: volume on your NetWare server.
5.
Create a directory on the SYS: volume to store your Dell OpenManage ATF for
NetWare files. For this example, we use \system\Dell\ATF\ as the directory
name.
NOTE: Dell OpenManage ATF for NetWare must be installed to a local drive on the
NetWare server. If the SYS: volume is located on the SAN storage array, Dell
OpenManage ATF for NetWare must be installed on a different, locally attached
volume.
6.
Copy the Dell OpenManage ATF for NetWare file, hadm.nlm to the \system\Dell\ATF\ directory.
For additional information about how to perform an ATF restore, see the Dell OpenManage ATF for NetWare Operation Guide. For information about installing ATF in a
Windows NT or Windows 2000 system, see Chapter 11, “Installing, Configuring, and
Removing Microsoft Windows SAN Software Components.”
12-8
SAN Installation and Troubleshooting Guide
+%,%&
For information about creating partitions and volumes on NetWare hard-disk drives,
see your NetWare documentation.
support.dell.com
Novell NetWare Support for Dell PowerVault 65xF Storage Systems
12-9
12-10 SAN Installation and Troubleshooting Guide