1
Introduction
Thank you for purchasing the SoftBank 812SH/813SH.
^ For proper handset use, read this manual beforehand.
^ This manual was created exclusively for SoftBank 812SH and 813SH handsets sold in Japan.
^ Keep this manual in a convenient place for reference.
^ Accessible SoftBank services may vary by service area, subscription, etc.
SoftBank 812SH and 813SH are compatible with both 3G and GSM network technologies.
Note
^ Copying this manual in whole or part without authorisation is prohibited.
^ Manual content is subject to change without prior notice.
^ Efforts have been made to ensure the accuracy and clarity of this manual. Please contact
Customer Service, General Information (see P.20-29) about unclear or missing information.
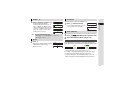
Symbols & Illustrations
In this manual, most operations are described with SoftBank 812SH open (see P.1-11) in Standby. Sample screen shots, etc.
are provided for reference only. Actual handset windows, menus, etc. may differ in appearance.
SoftBank 813SH users, please note that SoftBank 813SH is not equipped with mobile camera. See SoftBank 813SH
Supplementary Guide for operational and functional differences with SoftBank 812SH.
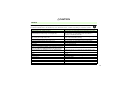
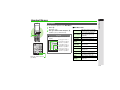
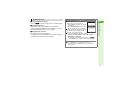
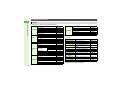
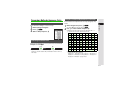
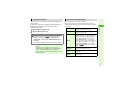
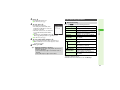
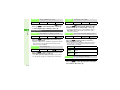
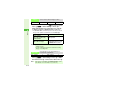
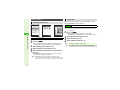
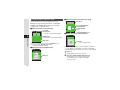
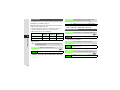
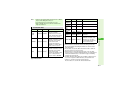
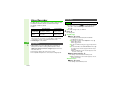
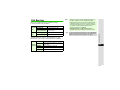
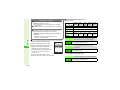
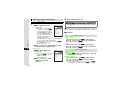
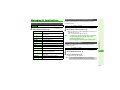
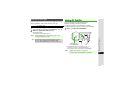
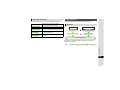
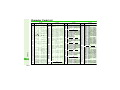
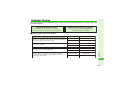
812SH-813SH Comparison
CFunctions
These functions are not available on SoftBank 813SH:
B Video Call B Camera B Face Recognition B Scan Barcode B Create QR Code B Text Scanner
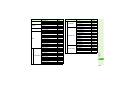
CMain Menu
SoftBank 812SH
SoftBank 813SH
Communication
Communication
Yahoo! Keitai
Yahoo! Keitai
Media Player
Media Player
Messaging
Messaging
Camera
Data Folder
Data Folder
PIM
Tools
Tools
Entertainment
Entertainment
S! Appli
S! Appli
Lifestyle-appli
Lifestyle-appli
Phone
Phone
Settings
Settings
i
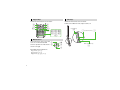
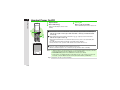
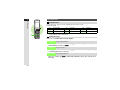
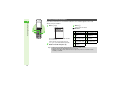
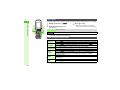
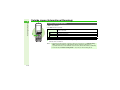
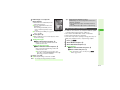
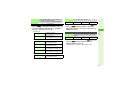
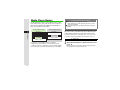
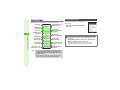
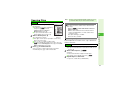
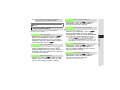
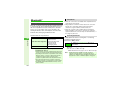
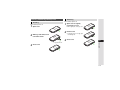
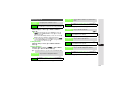
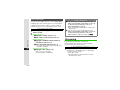
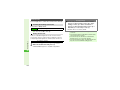
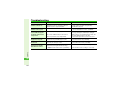
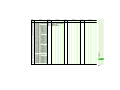
Keypad Keys
Side Keys
Indicated in this manual as shown below.
Activate/cancel Manner mode, adjust volume, etc.
Indicated in this manual as shown below.
N
f
k
M
g
i
j
Circle Talk Key
1 2 3
4 5 6
7 8 9
0
u
L Volume/Zoom Key M
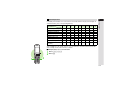
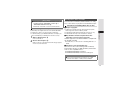
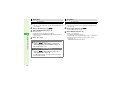
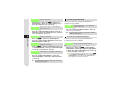
Multi Selector
Select menu items, move cursor and
scroll, etc. In this manual, Multi
Selector operations are indicated as
shown to the right.
Basic Multi Selector Operations
B E: Press C or D
B F: Press B or A
B G: Press C, D, B or A
ii
C
b
B
A
D
Multi Job/Manner Key
h
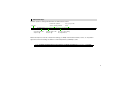
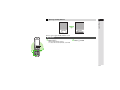
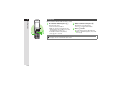
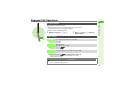
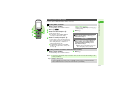
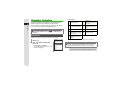
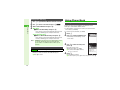
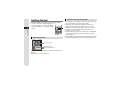
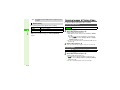
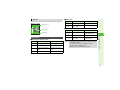
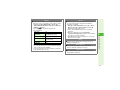
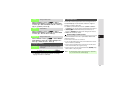
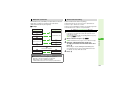
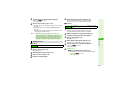
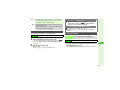
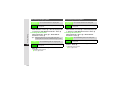
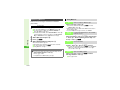
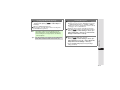
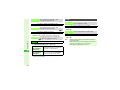
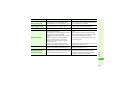
Abbreviated Steps
Handset operations starting from Main Menu are abbreviated as follows:
Perform the operation
such as opening a window
Press b
Use F to open the
menu
Main Menu H Menu Item A Selection A Operation A Options (N) A Menu (F)
Select the menu item
and press b
Select the folder or file
and press b
Press the corresponding
key in parentheses
Manual descriptions are based on default Font Settings (see P.9-4). Actual handset windows, menus, etc. may differ in
appearance when Font Settings are different or when Simple Menu (see P.2-21) is active.
In this SoftBank 812SH/813SH Instruction Manual, SoftBank 812SH/813SH is referred to as handset.
iii
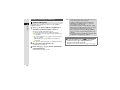
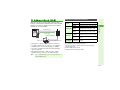
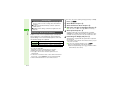
Accessories
CLithium-ion Battery (Type 1)
(SHBAY1)
CAC Charger (SHCAA1)
CUtility Software (CD-ROM)*★
*Utility Software updates/upgrades may become available on SoftBank Mobile Website (http://www.softbank.jp) without prior notification.
Please check for the newest versions of Utility Software and download as required.
★
Complimentary sample not available for purchase
Note H Supplied Utility Software is designed exclusively for 812SH and 813SH.
Tip H ^ For accessory-related information, please contact SoftBank Customer Centre, General Information (see P.20-29).
^ 812SH and 813Sh are compatible with microSD! Memory Card; microSD! Memory Card is not included in this package.
Purchase microSD! Memory Card to use Memory Card-related handset functions.
^ In this manual, microSD! Memory Card is referred to as "Memory Card".
iv
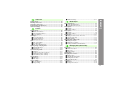
Symbols & Illustrations ...................................................................i
Accessories....................................................................................iv
Contents ..........................................................................................v
Safety Precautions........................................................................xii
General Notes..............................................................................xxii
Specific Absorption Rate (SAR) ................................................xxx
1
Getting Started
Function & Feature Preview....................................................... 1-2
USIM Card .................................................................................... 1-4
C General Information & Precautions ...................................... 1-4
C Inserting & Removing USIM Card ........................................ 1-5
C USIM PINs............................................................................ 1-6
Handset Parts & Functions ........................................................ 1-7
C Handset ................................................................................ 1-7
C Display Indicators ................................................................. 1-9
C Display Positions ................................................................ 1-11
Battery & Charger ..................................................................... 1-12
C Getting Started ................................................................... 1-12
C Installing & Removing Battery ............................................ 1-16
C AC Charger ........................................................................ 1-17
C Desktop Holder................................................................... 1-18
C In-Car Charger ................................................................... 1-19
Handset Power On/Off .............................................................. 1-20
C My Details........................................................................... 1-21
C Keypad Lock....................................................................... 1-22
Handset Menus.......................................................................... 1-23
C Main Menu.......................................................................... 1-23
C User Shortcuts ................................................................... 1-24
C Multi Job ............................................................................. 1-26
Security Codes .......................................................................... 1-27
C Handset Code .................................................................... 1-27
C Centre Access Code .......................................................... 1-27
C Network Password.............................................................. 1-27
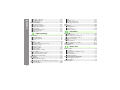
2
Basic Handset Operations
Contents
Contents
Initiating a Call ............................................................................ 2-2
C Emergency Calls .................................................................. 2-3
C Redial ................................................................................... 2-4
C Placing an International Call from Japan.............................. 2-5
Incoming Call .............................................................................. 2-6
C Calling from Received Calls ................................................. 2-8
Answer Phone ............................................................................. 2-9
C Activating & Cancelling......................................................... 2-9
C Playing Messages .............................................................. 2-10
Engaged Call Operations ......................................................... 2-11
C Earpiece Volume ................................................................ 2-11
C Voice Output....................................................................... 2-11
C Voice Memo........................................................................ 2-12
C Other Engaged Call Operations ......................................... 2-12
Call Log ...................................................................................... 2-13
C Using Call Log .................................................................... 2-13
Call Timers & Data Counter...................................................... 2-14
C Call Timers ......................................................................... 2-14
C Data Counter ...................................................................... 2-14
Call Costs .................................................................................. 2-15
C Limit Call Costs .................................................................. 2-15
Outside Japan (International Roaming) .................................. 2-16
C Switching Network Services ............................................... 2-16
C Calling from Outside Japan ................................................ 2-17
v
Contents
Manner Mode ............................................................................. 2-18
C Minding Mobile Manners .................................................... 2-18
C Activating & Cancelling....................................................... 2-19
C Activating/Cancelling Offline Mode..................................... 2-20
Simple Menu .............................................................................. 2-21
C Activating/Cancelling Simple Menu .................................... 2-21
C Simple Menu Operations.................................................... 2-22
3
Text Entry
Character Selection .................................................................... 3-2
C Entry Modes ......................................................................... 3-2
C Key Assignments.................................................................. 3-3
Entering Characters.................................................................... 3-5
C Kanji, Hiragana & Katakana ................................................. 3-5
C Entering Alphanumerics ....................................................... 3-7
C Symbols, Pictograms & Emoticons ...................................... 3-8
C Mail & Web Extensions ........................................................ 3-9
C Character Code .................................................................... 3-9
C Pager Code .......................................................................... 3-9
Conversion Methods (Japanese Only) .................................... 3-11
C Phonetic Conversion .......................................................... 3-11
C One-Hiragana Conversion.................................................. 3-11
C Hiragana to Katakana/Alphanumerics Conversion............. 3-11
C Quick Conversion (for Hiragana) ........................................ 3-12
C Conversion Settings ........................................................... 3-13
Editing Characters .................................................................... 3-13
C Deleting & Replacing.......................................................... 3-13
C Copy/Cut & Paste ............................................................... 3-13
C Deleting Text On and After Cursor ..................................... 3-14
Additional Functions ................................................................ 3-14
C Copying from Phone Book ................................................. 3-14
C Using Text Templates ......................................................... 3-15
C Changing Font Size ............................................................ 3-15
vi
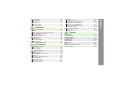
4
Phone Book
Overview ...................................................................................... 4-2
Saving to Phone Book ................................................................ 4-3
C Phone Book Entry Items ...................................................... 4-3
C Creating Phone Book Entries ............................................... 4-4
C Saving from Call Log ............................................................ 4-8
C Phone Book Memory Status ................................................ 4-8
Using Phone Book ...................................................................... 4-8
C Dialling from Phone Book..................................................... 4-8
Editing Phone Book Entries..................................................... 4-10
C Correction/Change ............................................................. 4-10
C Copying Phone Book Entries ............................................. 4-10
C Deleting Phone Book Entries ............................................. 4-11
Category Settings ..................................................................... 4-11
C Changing Category Name.................................................. 4-11
C Customising Handset Responses ...................................... 4-12
Contact Groups ......................................................................... 4-12
C Creating Contact Groups.................................................... 4-12
C Saving Group Members ..................................................... 4-12
C Editing Contact Groups ...................................................... 4-12
C Editing Group Members ..................................................... 4-13
Speed Dial List .......................................................................... 4-13
C Saving Phone Numbers ..................................................... 4-13
C Speed Dial.......................................................................... 4-14
S! Address Book (SAB) ............................................................ 4-15
C SAB Sync Commands & Features ..................................... 4-15
C Service Usage Outline ....................................................... 4-16
C Saving User ID & Password ............................................... 4-17
C Backup & Restore .............................................................. 4-17
C Synchronising Phone Book ................................................ 4-18
C Opening Log....................................................................... 4-19
My Details .................................................................................. 4-19
C Opening My Details ............................................................ 4-19
Video Call
Getting Started ............................................................................ 5-2
Initiating a Video Call.................................................................. 5-3
Answering a Video Call .............................................................. 5-3
Engaged Video Call Operations................................................. 5-4
Video Call Settings ..................................................................... 5-6
6
Camera
Getting Started ............................................................................ 6-2
C Mobile Camera Basics ......................................................... 6-2
C Camera Display Indicators ................................................... 6-3
C Key Assignments.................................................................. 6-4
Still Images .................................................................................. 6-5
C Photo Camera Mode ............................................................ 6-5
C Capturing Still Images .......................................................... 6-6
C Still Image Functions ............................................................ 6-7
Video ............................................................................................ 6-8
C Video Camera Mode ............................................................ 6-8
C Recording Video................................................................... 6-8
C Video Recording Operations ................................................ 6-9
Opening Images & Playing Video ............................................ 6-10
C Opening Still Images .......................................................... 6-10
C Playing Video ..................................................................... 6-10
Special Shooting Modes .......................................................... 6-11
C Self-timer ............................................................................ 6-11
C Continuous Shoot (Photo Camera) .................................... 6-12
C Adding Frames (Photo Camera)......................................... 6-13
C Camera Effects (Photo Camera) ........................................ 6-14
Sending Images ........................................................................ 6-14
C Still Images......................................................................... 6-14
C Video Clips ......................................................................... 6-15
Camera Settings........................................................................ 6-15
C Shooting Options................................................................ 6-15
C Image Settings ................................................................... 6-16
C Additional Settings.............................................................. 6-17
7
Media Player
8
Managing Files (Data Folder)
Media Player Basics.................................................................... 7-2
C Downloading Music/Video .................................................... 7-2
C Saving Music Files from PCs ............................................... 7-3
Playing Music .............................................................................. 7-4
C Playback ............................................................................... 7-6
C Playback Settings ................................................................. 7-7
Playing Video............................................................................... 7-8
C Playback ............................................................................... 7-8
C Playback Settings ............................................................... 7-10
Editing Video ............................................................................. 7-11
C Clipping Portions between Two Points ............................... 7-11
C Cropping Video Clips.......................................................... 7-12
C Adding Subtitles ................................................................. 7-12
Managing Video & Music Files................................................. 7-15
C Adding New Playlist............................................................ 7-16
C Adding Files to Playlists ..................................................... 7-16
C Deleting SD VIDEO & SD AUDIO Files.............................. 7-17
Contents
5
Data Folder .................................................................................. 8-2
C Window Description.............................................................. 8-2
C Major Icons........................................................................... 8-3
C Display Settings.................................................................... 8-4
Opening Files .............................................................................. 8-5
Managing Files & Folders........................................................... 8-8
C Adding Folders ..................................................................... 8-8
C Changing File/Folder Name ................................................. 8-8
C Deleting Files & Folders ....................................................... 8-8
C Copying/Moving Files ........................................................... 8-9
Using Files ................................................................................. 8-10
C Wallpaper ........................................................................... 8-10
C Saving to Phone Book........................................................ 8-10
vii
Contents
C Ringvideo & Ringtone......................................................... 8-10
C S! Mail Attachments ........................................................... 8-11
C Printing Images .................................................................. 8-11
Editing Still Images ................................................................... 8-12
C Changing Image Size ......................................................... 8-12
C Visual Effects (Retouch)..................................................... 8-13
C Adding Text & Stamps ........................................................ 8-14
C Face Arrange...................................................................... 8-14
C Additional Picture Effects ................................................... 8-16
C Panorama Images .............................................................. 8-17
C Split Screen ........................................................................ 8-18
9
Additional Settings
Mode Settings ............................................................................. 9-2
C Activating a Mode................................................................. 9-2
C Customising Modes.............................................................. 9-2
C Reset .................................................................................... 9-2
Display ......................................................................................... 9-3
C Display Settings.................................................................... 9-3
C Standby Window (Japanese Only) ....................................... 9-6
C Language Setting ................................................................. 9-9
C Custom Screens................................................................... 9-9
C Familiar Usability ................................................................ 9-12
C Light Settings...................................................................... 9-13
C External Display Settings ................................................... 9-13
Sounds & Alerts ........................................................................ 9-14
C Customising Handset Responses ...................................... 9-14
C Customising System Sounds ............................................. 9-16
C Additional Sound Settings .................................................. 9-17
Date & Time ............................................................................... 9-18
User Dictionary ......................................................................... 9-19
C Entries (Japanese Only)..................................................... 9-19
C 812SH/813SH Download Dictionary (Japanese Only) ....... 9-19
Handset Security....................................................................... 9-20
C Face Recognition................................................................ 9-20
viii
C PIN ..................................................................................... 9-24
C Handset Locks.................................................................... 9-25
C Opening Secret Entries ...................................................... 9-27
C Changing Handset Code .................................................... 9-28
Reset .......................................................................................... 9-28
Call Settings .............................................................................. 9-29
C International Call ................................................................ 9-29
C Auto Answer ....................................................................... 9-30
C Additional Settings.............................................................. 9-30
10
Connectivity
11
Memory Card
Bluetooth#.................................................................................. 10-2
C Getting Started ................................................................... 10-2
C Transferring Files via Bluetooth#......................................... 10-4
C Connecting Handsfree Devices .......................................... 10-8
C Bluetooth# Settings............................................................. 10-9
Infrared..................................................................................... 10-10
C Getting Started ................................................................. 10-10
C Transferring Files via Infrared ........................................... 10-10
Network Settings..................................................................... 10-14
Location Info............................................................................ 10-15
Memory Card ............................................................................. 11-2
C Precautions ........................................................................ 11-2
C Inserting & Removing Memory Card .................................. 11-3
C Format Card ....................................................................... 11-4
C Backup & Restore .............................................................. 11-4
C Additional Functions ........................................................... 11-7
Digital Print Order Format (DPOF)........................................... 11-7
C Selecting Images & Prints .................................................. 11-7
C Print Settings ...................................................................... 11-8
Mass Storage............................................................................. 11-9
Tools
Calendar..................................................................................... 12-2
C Opening Calendar .............................................................. 12-2
C Saving Entries .................................................................... 12-4
C Opening Entries ................................................................. 12-6
C Searching Entries by Subject ............................................. 12-6
C Editing Entries .................................................................... 12-7
C Deleting Entries .................................................................. 12-7
Tasks .......................................................................................... 12-8
C Saving Entries .................................................................... 12-8
C Opening Entries ............................................................... 12-10
C Searching Entries by Subject ........................................... 12-10
C Editing Entries .................................................................. 12-11
C Deleting Entries ................................................................ 12-11
Alarm ........................................................................................ 12-11
C Setting Alarm.................................................................... 12-11
C Cancelling & Reactivating Alarm ...................................... 12-14
C Deleting Alarm.................................................................. 12-14
World Clock ............................................................................. 12-14
C Setting Time Zone & Daylight Saving............................... 12-14
C Opening World Clock ....................................................... 12-15
Calculator ................................................................................ 12-15
Voice Recorder ........................................................................ 12-16
C Preparation....................................................................... 12-16
C Recording ......................................................................... 12-16
C Playback ........................................................................... 12-17
C Recording Setting............................................................. 12-17
Document Viewer .................................................................... 12-18
Barcode.................................................................................... 12-19
Create QR Codes .................................................................... 12-22
Text Scanner............................................................................ 12-23
Stopwatch ................................................................................ 12-24
Countdown Timer.................................................................... 12-25
Expenses Memo ...................................................................... 12-25
Text Templates ........................................................................ 12-26
C New Entry......................................................................... 12-26
C Opening Templates .......................................................... 12-26
C Editing Templates ............................................................. 12-27
C Deleting Templates........................................................... 12-27
Phone Help .............................................................................. 12-27
13
Optional Services
14
Messaging
Contents
12
Optional Services Overview..................................................... 13-2
Call Forwarding ......................................................................... 13-2
Voicemail.................................................................................... 13-4
C Missed Call Notification ...................................................... 13-5
Call Waiting................................................................................ 13-5
Conference Call......................................................................... 13-6
Call Barring................................................................................ 13-7
C Restricting Outgoing Calls.................................................. 13-8
C Restricting Incoming Calls.................................................. 13-8
C Rejecting a Call .................................................................. 13-9
C Changing Network Password ........................................... 13-10
Caller ID ................................................................................... 13-10
Basics ........................................................................................ 14-2
C Messaging Folders ............................................................. 14-2
C Window Description............................................................ 14-3
C Changing Views ................................................................. 14-4
C Customising Handset Address ........................................... 14-5
Sending Text Messages............................................................ 14-5
C Basics................................................................................. 14-5
C Creating & Sending SMS Mail............................................ 14-6
C Creating & Sending S! Mail ................................................ 14-7
C Delivery Options ............................................................... 14-15
C Send Reservation............................................................. 14-17
C Using Drafts...................................................................... 14-18
Incoming Text Messages........................................................ 14-18
ix
Contents
C Opening New Messages .................................................. 14-18
C Retrieving Complete S! Mail Messages ........................... 14-21
C Retrieving Mail List ........................................................... 14-22
Using Messages ...................................................................... 14-23
C Checking Messages ......................................................... 14-23
C Replying to Messages ...................................................... 14-25
C Forwarding Messages ...................................................... 14-26
C Cancelling Sent Messages............................................... 14-27
C Linked Info ........................................................................ 14-27
C Protecting Messages........................................................ 14-28
C Deleting Messages........................................................... 14-29
C Saving Attachments to Data Folder.................................. 14-30
C Using Attachments ........................................................... 14-30
C My Folders........................................................................ 14-31
Additional Functions .............................................................. 14-33
C Speed Mail List................................................................. 14-33
C Speed Mail ....................................................................... 14-34
C Auto Resend..................................................................... 14-34
C General Settings............................................................... 14-34
C SMS Settings.................................................................... 14-36
C S! Mail Settings ................................................................ 14-37
15
Yahoo! Keitai
Getting Started .......................................................................... 15-2
Using Yahoo! Keitai .................................................................. 15-3
C Opening Yahoo! Keitai Menu .............................................. 15-3
C Entering URLs Directly ....................................................... 15-4
Basic Operations ...................................................................... 15-5
Advanced Features ................................................................... 15-9
C Bookmarks & Saved Pages................................................ 15-9
C Saving Files to Data Folder .............................................. 15-11
C Using Linked Info.............................................................. 15-12
Streaming ................................................................................ 15-12
Live Monitor (Japanese Only) ................................................ 15-14
C Live Monitor Basics .......................................................... 15-14
x
C Opening Information......................................................... 15-15
C Registering with Live Monitor Items ................................. 15-15
C Updating Live Monitor Items............................................. 15-16
C Automatic Update............................................................. 15-16
C Deleting Live Monitor Items.............................................. 15-17
Using PC Site Browser ........................................................... 15-18
C Opening Yahoo! JAPAN.................................................... 15-18
C Entering URLs Directly ..................................................... 15-19
Additional Functions .............................................................. 15-19
C Sub Menu Settings ........................................................... 15-19
C Common Settings............................................................. 15-20
C PC Site Browser Settings ................................................. 15-21
C Security Settings .............................................................. 15-21
16
S! Applications
17
S! FeliCa (Japanese Only)
Getting Started .......................................................................... 16-2
C S! Appli Library ................................................................... 16-2
C S! Applications on Memory Card........................................ 16-3
C Downloading S! Applications.............................................. 16-3
Using S! Applications ............................................................... 16-4
C Starting S! Applications ...................................................... 16-4
C Exit, Pause & Resume ....................................................... 16-4
Managing S! Applications ........................................................ 16-5
C Opening S! Application Properties ..................................... 16-5
C Moving S! Applications to Memory Card ............................ 16-5
C Deleting S! Applications ..................................................... 16-5
C Screensaver ....................................................................... 16-6
C Setting Permissions............................................................ 16-7
C S! Application Operational Settings.................................... 16-7
C Reset .................................................................................. 16-8
Basics ........................................................................................ 17-2
C Starting Lifestyle-Appli........................................................ 17-3
Using S! FeliCa.......................................................................... 17-3
18
Entertainment
S! Cast (Japanese Only) ........................................................... 18-2
C Basics................................................................................. 18-2
C Service Registration & Content Subscription ..................... 18-2
C Opening Received Information........................................... 18-2
C Using Information ............................................................... 18-3
C Using Weather Indicator..................................................... 18-4
Electronic Books....................................................................... 18-5
C Reading Content ................................................................ 18-6
C Using E-Book Images......................................................... 18-8
C Using a Dictionary .............................................................. 18-8
BookSurfing# (Japanese Only) ............................................... 18-9
19
Communication
S! Town (Japanese Only).......................................................... 19-2
C Using S! Town .................................................................... 19-2
C S! Town Library................................................................... 19-3
S! Loop (Japanese Only) .......................................................... 19-3
Hot Status .................................................................................. 19-4
C Adding Members ................................................................ 19-5
C Opening Member Status Details ........................................ 19-7
C My Status ........................................................................... 19-8
C Editing Hot Status Member List........................................ 19-10
C Deleting Members ............................................................ 19-10
C Using Hot Status Info ....................................................... 19-11
C Hot Status Settings........................................................... 19-11
C Additional Functions ......................................................... 19-12
Circle Talk ................................................................................ 19-13
C Initiating Circle Talk .......................................................... 19-14
C Accepting a Circle Talk Request....................................... 19-16
C Adding/Cancelling Participants......................................... 19-16
C Creating Circle Talk Member List ..................................... 19-17
C Editing Circle Talk Member List ........................................ 19-18
C Circle Talk Settings........................................................... 19-18
Near Chat (Japanese Only) .................................................... 19-19
C Basics............................................................................... 19-19
C Using Near Chat............................................................... 19-19
20
Contents
S! FeliCa Settings ..................................................................... 17-4
C IC Card Status.................................................................... 17-4
C IC Card Lock ...................................................................... 17-4
C Remote Lock ...................................................................... 17-5
C Interface Settings ............................................................... 17-7
C Resetting Defaults .............................................................. 17-8
Appendix
Function List ............................................................................. 20-2
Troubleshooting ........................................................................ 20-4
Software Update........................................................................ 20-8
Character Code List ................................................................ 20-10
Pictogram List ......................................................................... 20-16
Specifications.......................................................................... 20-17
Memory List............................................................................. 20-19
Index......................................................................................... 20-20
Warranty & After-Sales Services ........................................... 20-28
Customer Service ................................................................... 20-29
xi
Safety Precautions
^ Read safety precautions before using handset.
^ Observe precautions to avoid injury to self or others, or damage to property.
^ SoftBank is not liable for any damages resulting from use of this product.
Before Using Handset
CSymbols
Make sure you thoroughly understand these symbols before reading on. Symbols and their meanings are described below:
!
!
!
DANGER
Great risk of death or serious injury from improper use
WARNING
Risk of death or serious injury from improper use
CAUTION
Risk of injury or damage to property from improper use
CSymbols
$(%+*
Prohibited Actions
xii
#)
Compulsory Actions
!
Attention Required
!DANGER
Handset, Battery & Charger
Use specified battery, Charger and Desktop Holder
only (see P.iv).
Battery
#
Using non-specified equipment may cause malfunctions,
electric shock or fire due to battery leakage, overheating or
bursting.
Do not short-circuit Charger terminals.
Keep metal objects away from Charger terminals. Keep
handset away from necklaces, hairpins, etc. Battery may
leak, overheat, burst or ignite causing injury. Use a case to
carry battery.
$
Prevent injury from battery leakage, breakage or
fire. Do not:
^
^
^
^
^
^
^
$
Heat or dispose of battery in fire
Open/modify/disassemble battery
Damage or solder battery
Use a damaged or deformed battery
Use non-specified charger (see P.iv)
Force battery into handset
Charge battery near fire or sources of heat; or expose it
to extreme heat
^ Use battery for other equipment
If battery fluid contacts eyes, do not rub them.
Rinse with clean water and consult a doctor
immediately.
#
Eyes may be severely damaged.
xiii
!WARNING
Handset, Battery & Charger
Do not insert foreign objects into the handset,
Charger or Desktop Holder.
$
Do not disassemble or modify handset or related
hardware.
%
$
If water or foreign matter is inside handset:
Do not insert metal or flammable objects into handset,
Charger or Desktop Holder; may cause fire or electric
shock. Keep out of children's reach.
Keep handset out of rain or extreme humidity.
Fire or electric shock may result.
Keep handset away from liquid-filled containers.
Keep the handset, Charger and Desktop Holder away from
chemicals or liquids; fire or electric shock may result.
Keep battery, handset, Charger or Desktop Holder
away from microwave ovens.
Battery, handset, Charger or Desktop Holder may leak,
burst, overheat or ignite, leading to accidents or injury.
xiv
$
^ Do not open handset, Charger or Desktop Holder; may
cause electric shock or injury. Contact SoftBank
Customer Centre, Customer Assistance for repairs.
^ Do not modify handset, Charger or Desktop Holder; fire
or electric shock may result.
Discontinue handset use to prevent fire/electric shock. Turn
off handset, remove battery and unplug Charger, then
contact SoftBank Customer Centre, Customer Assistance.
(
)
!WARNING
Handset, Battery & Charger
Keep handset off and Charger disconnected near
filling stations or places with fire/explosion risk.
Handset
#
Handset use near petrochemicals or other flammables may
cause fire/explosion; turn handset off before using S! FeliCa
at filling stations (cancel IC Card Lock beforehand).
Do not subject handset to strong shocks or
impacts.
$
Strong shocks or impacts to handset, Charger or Desktop
Holder may cause malfunction or injury. Should handset be
damaged, remove battery then contact SoftBank Customer
Centre, Customer Assistance. Discontinue handset use;
fire or electric shock may occur.
If an abnormality occurs:
If a handset emits an unusual sound, smoke or odour,
discontinue use; may cause fire or electric shock. Turn off
handset, remove battery and unplug Charger; contact
SoftBank Customer Centre, Customer Assistance.
Take measures to prevent accidents.
^ For safety, never use handset while driving. Pull over
beforehand. Mobile phone use while driving is prohibited by
the revised Road Traffic Law (effective 1 November 2004).
^ Do not use Headphones while driving or riding a bicycle.
Accidents may result.
^ Moderate volume outside, especially near rail crossings/
intersections, etc. to avoid accidents.
Do not swing handset by strap.
May result in injury or breakage.
Turn handset power off before boarding aircraft.
)
Using wireless devices aboard aircraft may cause
electronic malfunctions or endanger aircraft operation.
Adjust vibration and ringtone settings:
Users with a heart condition/pacemaker/defibrillator should
adjust handset settings accordingly.
During thunderstorms, turn power off; find cover.
There is a risk of lightning strike or electric shock.
$
$
#
#
#
xv
!WARNING
Charger
Use only the specified voltage.
Non-specified voltages may cause fire or electric shock.
^ AC Charger: AC 100V-240V Input
B SoftBank is not liable for problems caused by charging
battery abroad.
^ In-Car Charger: DC 12V-24V Input
Do not use power adapters.
Using AC Charger with step-up/step-down transformer may
cause fire, electric shock or damage.
Do not use In-Car Charger in positive earth
vehicles.
$
Do not short-circuit Charger terminals.
May cause overheating, fire or electric shock. Keep metal
away from terminals.
Do not use Desktop Holder inside vehicles.
Extreme temperature or vibration may cause fire or
damage handset, etc.
$
Take measures to prevent accidents.
Secure In-Car Charger to avoid injury or accidents.
$
Fire may result. Use In-Car Charger in negative earth
vehicles only.
Damaged AC Charger/In-Car Charger cord:
May cause fire or electric shock; discontinue use and
purchase a new Charger.
During thunderstorms:
Charger care
^ Do not touch with wet hands. Electric shock may occur.
^ Do not use multiple cords in one outlet; may cause
excess heat/fire.
^ Do not bend, twist, pull or set objects on cord. Exposed
wire may cause fire or electric shock.
xvi
+
$
Unplug Charger to avoid damage, fire or electric shock.
Charger/Desktop Holder use and children:
May cause electric shock/injury; keep out of reach.
$
$
#
#
)
#
!WARNING
Battery
^ If battery does not charge properly, stop charging. Battery
may overheat, burst or ignite.
^ If there is leakage or abnormal odour, avoid fire sources.
Battery may catch fire or burst.
#
If there is abnormal odour, excessive heat, discolouration or
distortion, remove battery from handset. It may leak,
overheat or explode.
#
Handset Use & Electronic Medical Equipment
This section is based on "Guidelines on the Use of Radio Communications Equipment such as Cellular Telephones and
Safeguards for Electronic Medical Equipment" (Electromagnetic Compatibility Conference, April 1997) and "Report of
Investigation of the Effects of Radio Waves on Medical Equipment, etc." (Association of Radio Industries and Businesses,
March 2001).
Persons with implanted pacemaker/defibrillator
should keep handset more than 22 cm away.
#
Radio waves can interfere with implanted pacemakers or
defibrillators causing such devices to malfunction.
Turn handset off in crowds or trains where persons
with implanted pacemaker/defibrillator may be near.
Radio waves can interfere with implanted pacemakers or
defibrillators causing such devices to malfunction.
#
Observe these rules inside medical facilities:
^ Do not enter an operating room or an Intensive or
Coronary Care Unit while carrying a handset.
^ Keep handset off in hospitals, including lobbies.
^ Obey medical facility rules on mobile phone use.
Consult electronic medical equipment vendor on
radio wave effects.
#
#
xvii
!CAUTION
Handset, Battery & Charger
Handset care
^ Place handset on stable surfaces to avoid malfunction or injury.
^ Keep handset away from oily smoke or steam. Fire or
accidents may result.
^ Cold air from air conditioners may condense, resulting in
leakage or burnout.
^ Keep handset away from direct sunlight (inside vehicles,
etc.) or heat sources. Distortion, discolouration or fire
may occur. Battery shape may be affected.
^ Keep handset out of extremely cold places to avoid
malfunction or accidents.
^ Keep handset away from fire sources to avoid malfunction
or accidents.
Usage environment
^ Excessive dust may prevent heat release and cause
burnout or fire.
^ Avoid using handset on the beach. Sand may cause
malfunction or accidents.
^ Keep handset away from credit cards, telephone cards,
etc. to avoid data loss.
xviii
Handset
!
Handset temperature
Handset may become hot while in use. Avoid prolonged
contact with skin especially at high temperature. May cause
burn injuries.
Avoid leaving handset in extreme heat (inside
vehicles, etc.).
!
$
Handset may become hot to the touch, leading to burn injuries.
Volume settings
Moderate handset volume; excessive volume may damage
ears or hearing.
!
Inside vehicles
Handset use may cause electronic equipment to malfunction.
!
!
!CAUTION
Handset
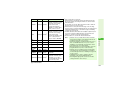
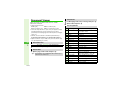
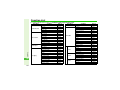
If you experience any skin irritation associated with handset use, discontinue handset use and consult a doctor.
See handset materials below. Some materials may cause skin irritation, rashes, or itchiness depending on your physical condition.
Parts
#
Materials & Finishing
Housing (Display side), Display ornament
ABS resin/Acrylic UV curing painting (sealer: discontinuous deposition)
Housing (Display back side), hinge cover (Keypad side)
ABS resin/Acrylic UV curing painting (sealer: acrylic painting)
ABS resin/Acrylic UV curing painting (sealer: discontinuous
deposition) for metallic blue and silver
Hinge housing (left & right, Display side)
Nylon-based resin (with glass fibres)/Acrylic UV curing painting
(sealer: acrylic and urethane painting)
External Display ornament panel
Acrylic resin/Acrylic UV curing painting (sealer: printed foil)
Housing (Keypad/Keypad back side), battery cover
ABS resin/Acrylic UV curing painting (sealer: acrylic painting)
Display window
Acrylic resin
Infrared Port
ABS resin (infrared grade)
Multi Selector (centre, Cursor Keys)
ABS resin (chrome plating on nickel plating)
Start Key, Power On/Off Key, Mail Key, Yahoo! Keitai Key, Shortcuts &
A/a Key, Clear/Back Key, Multimedia/Text Key, Side Keys, Keypad
PC resin/Paint
Memory Card Slot cover, Headphone Port cover, External Device
Port cover
Urethane-based resin, PC resin/Acrylic UV curing painting (sealer:
acrylic painting)
Display stop rubber
Silicon rubber
Battery
PC resin
Charger Terminal
SUS/Gold plating (sealer: nickel plating)
Screw (all pieces)
SWCH12A/Ni plating
Screw cover
PC resin
USIM pin
Copper alloy/Gold plating (sealer: nickel)
External Camera window
Acrylic resin
Portrait/Macro Selector
ABS resin
xix
!CAUTION
Charger
Charger & In-Car Charger
^ Grasp plug (not cord) to disconnect Charger. May cause
fire/electric shock.
^ Keep cord away from heaters. Exposed wire may cause
fire or electric shock.
^ Stop use if plug is hot or improperly connected. May
cause fire/electric shock.
^ Keep In-Car Charger socket clean. May overheat and
cause injury.
$
Always charge battery in a well-ventilated area.
Avoid covering/wrapping Charger and Desktop Holder; may
cause damage/fire.
Do not use In-Car Charger when engine is off.
#
To avoid weakening the car battery, always start engine
before charging the handset using In-Car Charger.
During periods of disuse
Always unplug AC Charger or In-Car Charger after use.
Do not touch Desktop Holder while in use.
May cause burn injuries.
Use only the specified fuse.
1 A fuse for In-Car Charger.
Or may cause damage/fire.
$
$
Handset maintenance
Always disconnect AC Charger or In-Car Charger when
cleaning handset.
In-Car Charger installation
Properly position the cable for safe driving to avoid injury or
accidents.
xx
$
$
)
)
!
!CAUTION
Battery
Do not throw or abuse battery. Battery may overheat, burst
or ignite.
Do not leave battery in direct sunlight or inside a closed
vehicle; may reduce battery performance or overheat. An
overheated battery may cause fire.
Do not expose battery to liquids. Performance may
deteriorate.
If battery fluid contacts skin or clothes, rinse with clean
water immediately.
Do not dispose of an exhausted battery with ordinary
refuse; always tape over battery terminals before disposal.
Take exhausted battery to a SoftBank shop, or follow the
local disposal regulations.
Keep battery out of children's reach.
$
$
*
#
$
^ Charge battery in ambient temperatures between 5]C
and 35]C; outside this range, battery may leak/overheat
and performance may deteriorate.
^ If your child is using handset, explain all instructions and
supervise usage.
^ If there is abnormal odour or excessive heat, stop using
battery and call SoftBank Customer Centre, Customer
Assistance.
^ Charge battery at least once every six months; an
uncharged battery may become unusable.
!
#
xxi
General Notes
General Use
^ SoftBank is not liable for any damages resulting from
accidental loss/alteration of handset or Memory Card data.
Keep a copy of Phone Book entries, etc. in a separate place.
^ Handset transmissions may be disrupted inside buildings,
tunnels or underground, or when moving into/out of such
places.
^ Use handset without disturbing others.
^ Handsets are radios as stipulated by the Radio Law. Under the
Radio Law, handsets must be submitted for inspection upon
request.
^ Handset use near landlines, TVs or radios may cause
interference.
^ Beware of eavesdropping.
Because this service is completely digital, the possibility of
signal interception is greatly reduced. However, some
transmissions may be overheard.
Eavesdropping
Deliberate/accidental interception of communications
constitutes eavesdropping.
Inside Vehicles
^ Never use handset while driving.
^ Do not park illegally to use handset.
^ Handset use may affect a vehicle's electronic equipment.
Aboard Aircraft
^ Never use handset aboard aircraft (keep power off).
Handset use may impair aircraft operation.
Electromagnetic Waves
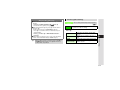
For body-worn operation, this phone has been tested and meets RF exposure guidelines when used with accessories
containing no metal, that position handset a minimum of 15 mm from the body. Use of other accessories may not ensure
compliance with RF exposure guidelines.
xxii
FCC Notice
^ This device complies with part 15 of the FCC Rules. Operation
is subject to the following two conditions:
(1) This device may not cause harmful interference, and (2)
this device must accept any interference received, including
interference that may cause undesired operation.
^ Changes or modifications not expressly approved by the
manufacturer responsible for compliance could void the user's
authority to operate the equipment.
FCC RF Exposure Information
Your handset is a radio transmitter and receiver. It is designed
and manufactured not to exceed the emission limits for
exposure to radio frequency (RF) energy set by the Federal
Communications Commission of the U.S. Government.
The guidelines are based on standards that were developed
by independent scientific organisations through periodic and
thorough evaluation of scientific studies. The standards
include a substantial safety margin designed to assure the
safety of all persons, regardless of age and health.
The exposure standard for wireless handsets employs a unit
of measurement known as the Specific Absorption Rate, or
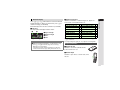
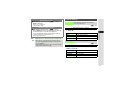
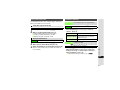
SAR. The SAR limit set by the FCC is 1.6 W/kg.
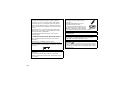
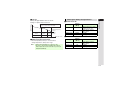
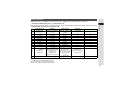
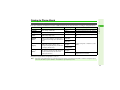
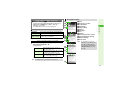
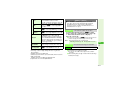
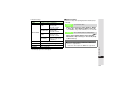
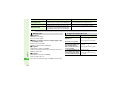
Highest SAR value:
Model
FCC ID
At the Ear
On the Body
812SH
APYHRO00054
1.27 W/kg
0.77 W/kg
813SH
APYHRO00055
1.45 W/kg
1.10 W/kg
This device was tested for typical body-worn operations with
the back of the handset kept 1.5 cm from the body. To
maintain compliance with FCC RF exposure requirements,
use accessories that maintain a 1.5 cm separation distance
between the user's body and the back of the handset. The
use of beltclips, holsters and similar accessories should not
contain metallic components in its assembly.
The use of accessories that do not satisfy these
requirements may not comply with FCC RF exposure
requirements, and should be avoided.
The FCC has granted an Equipment Authorisation for this
model handset with all reported SAR levels evaluated as in
compliance with the FCC RF emission guidelines. SAR
information on this model handset is on file with the FCC
and can be found under the Display Grant section of http://
www.fcc.gov/oet/fccid after searching on the corresponding
FCC ID (see table on the left).
Additional information on Specific Absorption Rates (SAR)
can be found on the Cellular Telecommunications & Internet
Association (CTIA) Website at
http://www.phonefacts.net.
xxiii
European RF Exposure Information
Your mobile device is a radio transmitter and receiver. It is
designed not to exceed the limits for exposure to radio waves
recommended by international guidelines. These guidelines
were developed by the independent scientific organization
ICNIRP and include safety margins designed to assure the
protection of all persons, regardless of age and health.
The guidelines use a unit of measurement known as the
Specific Absorption Rate, or SAR. The SAR limit for mobile
devices is 2 W/kg. As mobile devices offer a range of
functions, they can be used in other positions, such as on
the body as described in this user guide*.
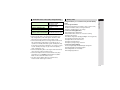
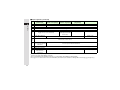
Highest SAR value:
Model
At the Ear**
On the Body
812SH
1.647 W/kg
1.258 W/kg
813SH
1.619 W/kg
0.903 W/kg
As SAR is measured utilizing the device's highest transmitting
power the actual SAR of this device while operating is
typically below that indicated above. This is due to automatic
changes to the power level of the device to ensure it only uses
the minimum level required to reach the Network.
xxiv
The World Health Organization has stated that present
scientific information does not indicate the need for any
special precautions for the use of mobile devices. They note
that if you want to reduce your exposure then you can do so
by limiting the length of calls or using a hands-free device to
keep the mobile phone away from the head and body.
*
Please see General Notes (Electromagnetic Waves) on P.xxii for
important notes regarding body-worn operation.
**
Values are measured in accordance with international guidelines
for testing.
Declaration of Conformity
Hereby, Sharp Telecommunications of Europe Ltd, declares
that 812SH and 813SH are in compliance with the essential
requirements and other relevant provisions of Directive
1999/5/EC.
A copy of the original declaration of conformity for each
model can be found at the following Internet address:
http://www.sharp.co.jp/k-tai/
Handset Care
^ If handset is left with no battery or an exhausted one, data
may be altered/lost. SoftBank is not liable for any resulting
damages.
^ Use handset within 5]C to 35]C and 35% to 85% humidity.
Avoid extreme temperatures/direct sunlight.
^ Exposing lens to direct sunlight may damage colour filter and
affect image colour.
^ Do not drop or subject handset to shocks.
^ Clean handset with dry, soft cloth. Using alcohol, thinner, etc.
may damage it.
^ Do not expose handset to rain, snow or high humidity.
^ Never disassemble or modify handset.
^ Avoid scratching handset Display.
^ When closing handset, keep straps, etc. outside to avoid
damaging the Display.
^ When using Headphones, moderate volume to avoid sound
bleed.
^ Function Usage Limits
These functions are disabled after handset upgrade/
replacement or service cancellation:
B Camera
B Media Player
B S! Applications
^ Handset is not water-proof. Avoid exposure to liquids and
high humidity.
B Keep handset away from precipitation.
B Cold air from air conditioning, etc. may condense causing
corrosion.
B Avoid dropping handset in damp places (toilet, bathroom,
etc.).
B On the beach, keep handset away from water and direct
sunlight.
B Perspiration may seep inside handset causing malfunction.
^ Avoid heavy objects or excessive pressure. May cause
malfunction or injury.
B Do not sit down with handset in a back pocket.
B Do not place heavy objects on handset in a bag.
^ Connect only the specified products to Headphone Port.
Non-specified devices may malfunction or cause damage.
^ Always turn off handset before removing battery. If battery is
removed while saving data or sending mail, data may be lost,
changed or destroyed.
After a period of disuse, these functions may be unusable;
retrieve Network Information (see P.10-15) to restore usability.
xxv
Copyrights
Copyright laws protect sounds, images, computer programs, databases, other materials and copyright holders. Duplicated
material is limited to private use only. Use of materials beyond this limit or without permission of copyright holders may
constitute copyright infringement, and be subject to criminal punishment. Comply with copyright laws when using images
captured with 812SH camera.
Video recording and playback are based on MPEG-4.
This product is licensed under the MPEG-4 Visual Patent Portfolio
License for the personal and non-commercial use of a consumer to
(i) encode video in compliance with the MPEG-4 Video Standard
("MPEG-4 Video") and/or (ii) decode MPEG-4 Video that was
encoded by a consumer engaged in a personal and
non-commercial activity and/or was obtained from a licensed video
provider. No licence is granted or implied for any other use.
Additional information may be obtained from MPEG LA.
See http://www.mpegla.com.
This product is licensed under the MPEG-4 Systems Patent
Portfolio License for encoding in compliance with the MPEG-4
Systems Standard, except that an additional licence and payment
of royalties are necessary for encoding in connection with (i) data
stored or replicated in physical media which is paid for on a title by
title basis and/or (ii) data which is paid for on a title by title basis
and is transmitted to an end user for permanent storage and/or
use. Such additional licence may be obtained from MPEG LA,
LLC.
See http://www.mpegla.com for additional details.
xxvi
Handset employs RSA# BSAFE! software
developed by RSA Security Inc.
RSA is a registered trademark of RSA Security Inc.
BSAFE is a registered trademark of RSA Security
Inc. in the United States and/or other countries.
This product is equipped with JBlend!
designed to accelerate the performance
of Java! Application.
Powered by JBlend! Copyright
1997-2006 Aplix Corporation.
All rights reserved.
JBlend and JBlend-related brands are trademarks or registered
trademarks of Aplix Corporation in Japan and other countries.
Java and Java-related brands are trademarks or registered
trademarks of Sun Microsystems, Inc. in the United States and
other countries.
Bluetooth is a registered trademark of the Bluetooth SIG, Inc.
microSD! and miniSD! are trademarks of the SD Card
Association.
Licensed by QUALCOMM Incorporated under one or more of the
following United States Patents and/or their counterparts in other
nations:
4,901,307 5,490,165 5,056,109 5,504,773 5,101,501
5,506,865 5,109,390 5,511,073 5,228,054 5,535,239
5,267,261 5,544,196 5,267,262 5,568,483 5,337,338
5,600,754 5,414,796 5,657,420 5,416,797 5,659,569
5,710,784 5,778,338
The Bluetooth word mark and logos are owned by the Bluetooth
SIG, Inc. and any use of such marks by SHARP is under license.
Other trademarks and trade names are those of their respective
owners.
FeliCa is a contactless IC card technology developed by Sony
Corporation.
FeliCa is a trademark of Sony Corporation.
m is a trademark of FeliCa Network, Inc.
This product employs NetFront Browser (Internet browser) and
NetFront SMIL Player (SMIL player) developed by ACCESS Co.,
Ltd.
Copyright$ 2004-2006 ACCESS Co., Ltd.
ACCESS and NetFront are trademarks or registered trademarks of
ACCESS Co., Ltd in Japan or other countries.
This product includes a module developed by Independent JPEG
Group.
xxvii
The frequency band used for the Bluetooth# function of handset is
shared with other industrial, scientific or medical equipment
(microwave ovens, etc.), and used at premises radio stations,
amateur radio stations, etc. (hereinafter "other radio stations").
1 Before using the Bluetooth# function, visually check that there
are no other radio stations sharing the same frequency band
nearby.
2 Should interference occur between handset and other radio
stations, move to other place or stop the Bluetooth# function
(stop the transmission) immediately.
3 For additional information and support, contact us at the
following number.
SoftBank Customer Centre, General Information
From a SoftBank handset, call toll free at 157 for General
Information.
From landlines, see P.20-29 "Customer Service".
^ This radio equipment operates in the 2.4 GHz band using the
FH-SS modulation, and its maximum communication distance is
ten metres.
Microsoft# Word is a product name of Microsoft Corporation in the
United States.
Microsoft, PowerPoint and Microsoft Excel# are registered
trademarks of Microsoft Corporation in the United States and/or
other countries.
xxviii
This product employs Macromedia# Flash# Lite!
technology developed by Adobe Systems
Incorporated.
Copyright$ 1995-2006 Adobe Systems
Incorporated. All rights reserved.
Macromedia, Flash, Macromedia Flash and
Macromedia Flash Lite are either registered
trademarks or trademarks of Adobe Systems
Incorporated in the United States and/or other countries.
QR Code is a registered trademark of DENSO WAVE
INCORPORATED.
Powered by Mascot Capsule#/Micro3D Edition!
Mascot Capsule is a registered trademark of HI Corporation
$2002-2006 HI Corporation. All rights reserved.
Document Viewer is enabled by Picsel
Technologies.
Picsel, Picsel Powered, Picsel Viewer, Picsel
File Viewer, Picsel Document Viewer, Picsel PDF Viewer and the
Picsel cube logo are trademarks or registered trademarks of Picsel
Technologies Ltd.
Chaku-Uta and Chaku-Uta Full are registered trademarks of Sony
Music Entertainment (Japan) Inc.
BookSurfing is a trademark of CELSYS Inc., Voyager Japan, Inc.
and INFOCITY Inc.
^ SOFTBANK, SoftBank and the SoftBank logo are trademarks or
registered trademarks of SOFTBANK CORP. in Japan and other
countries.
^ Yahoo! and the Yahoo! and Y! logos are trademarks or registered
trademarks of Yahoo! Inc.
Video Call, S! Application, Custom Screen, Sky Mail, Movie
Sha-mail, Sha-mail, 3D Pictogram, Input Memory, Near Chat, Multi
Job, S! Mail, Arrange Mail, Feeling Mail, S! Cast, S! Town, S! Loop,
Standby Window, PC Site Browser, Weather Indicator, Live
Monitor, S! Address Book, Circle Talk, Hot Status, Lifestyle-Appli
and Familiar Usability are trademarks or registered trademarks of
SOFTBANK MOBILE Corp.
CP8 PATENT
Other company and product names mentioned herein are
trademarks or registered trademarks of their respective owners.
The software contained in handset is copyrighted material;
copyright, moral right and other related rights are protected by
copyright laws. Do not copy, modify, alter, disassemble, decompile
or reverse-engineer the software, and do not separate it from
hardware in whole or part.
xxix
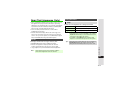
Specific Absorption Rate (SAR)
812SH and 813SH meet the government's requirements
for exposure to radio waves.
These requirements are based on scientific basis to assure
that radio waves emitted from mobile phones and other
handheld wireless devices do not affect human health. They
require that the Specific Absorption Rate (SAR), which is
the unit of measurement for the amount of radiofrequency
absorbed by the body, shall not exceed 2 W/kg*.
This limit includes a substantial safety margin designed to
assure the safety of all persons, regardless of age or health,
and meets the international standard set by International
Commission on Non-Ionizing Radiation Protection (ICNIRP)
in cooperation with World Health Organization (WHO).
The highest SAR value is 1.43 W/kg for 812SH, and 1.50 W/kg
for 813SH. Tests for SAR are conducted with handset
transmitting at its highest certified power level, and follow the
testing methods set by the government. While there may be
differences between the SAR levels for various handsets, they
all meet the governmental requirements for safe exposure.
The actual SAR level of the handset while operating can be
well below the highest value. This is because the handset is
designed to operate at multiple power levels so as to use only
the power required to reach the Network.
Additional information on SAR can be obtained on the
Websites on the right.
xxx
------------------------------------------------------------------------------Ministry of Internal Affairs and Communications (Protection
from Radio Wave Environment)
http://www.tele.soumu.go.jp/e/ele/index.htm
Association of Radio Industries and Businesses (ARIB)
http://www.arib-emf.org/index02.html (Japanese only)
------------------------------------------------------------------------------*
Requirements are stipulated in Radio Law (Ordinance Regulating
Radio Equipment, Article 14-2)
Getting Started
1-1
1
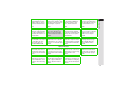
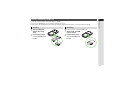
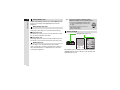
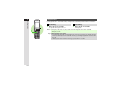
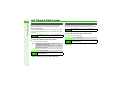
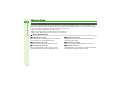
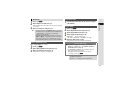
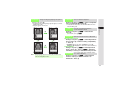
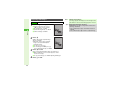
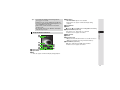
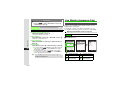
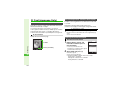
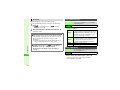
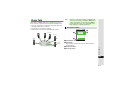
Function & Feature Preview
Getting Started
^ Memory Card is required for items with grey background.
^ ★These items are not available on 813SH.
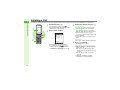
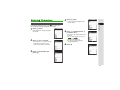
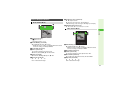
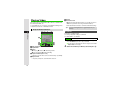
Circle Talk
Press one key to speak to up to
ten parties simultaneously via
this Walkie-Talkie type service.
P.19-13
E-Book/Document Viewer
Read E-Book, E-Book
dictionaries or documents
(PDF files, etc.) on handset.
P.18-5, P.12-18
1-2
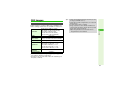
PC Site Browser
View websites designed for
PCs on handset.
P.15-18
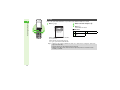
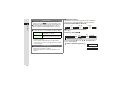
USIM Card
For use only with USIM Cardcompatible SoftBank handsets;
contains vital user information.
P.1-4
Simple Menu
Phone Book
Select a simplified menu, ideal
for users who use only basic
handset functions.
P.2-21
Save up to 750 entries; add up
to three phone numbers/three
mail addresses to each.
P.4-2
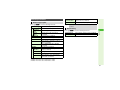
S! Town
Select an avatar to enter 3D
virtual town via this online
communication application.
P.19-2
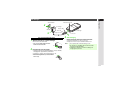
International Roaming
Make/receive calls, exchange
mail or access services even
outside Japan.
P.2-16
S! Address Book (SAB)
Backup Phone Book via
Server; synchronise Phone
Book/SAB to reflect changes.
P.4-15
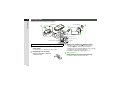
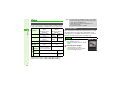
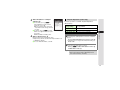
Camera★
Media Player
Data Folder
Capture still/video images shot
with the 2 megapixel handset
camera; send images via S! Mail.
P.6-2
Play downloaded music and
video images as well as those
recorded/captured on handset.
P.7-2
Access handset image and
sound files from here; files are
organised by file type.
P.8-2
S! Loop
S! Loop is a communication
service.
P.19-3
Manner Mode
Press a single key to mute
ringer and activate Answer
Phone automatically.
P.2-18
Video Call★
Place or receive video calls:
send live video or previously
saved still image during calls.
P.5-2
microSD! Memory Card
Save files to Memory Card to
expand handset memory or
backup your handset files.
P.11-2
Display Language
Custom Screen
Face Recognition★
1
Getting Started
Display
Change Wallpaper, System
Graphics, Fonts, et cetera to
customise handset interface.
Change Phone Settings to make
handset user interface appear in
either English or Japanese.
Load uni-themed Wallpaper,
Indicators, ringtones, and
more, all at the same time.
Save up to five facial images to
use along with passwords, etc.
to restrict handset access.
P.9-3
P.9-9
P.9-9
P.9-20
Bluetooth# & High-Speed Infrared
Wirelessly exchange handset
files with compatible devices.
Use Bluetooth# headsets, etc.
P.10-2, P.10-10
Mass Storage
Use a PC to directly access
Memory Card content while
card is inserted into handset.
P.11-9
Calendar & Tasks
Voice Recorder
Add events by date with time
parameters; set Reminder, add
stamps and set other options.
P.12-2, P.12-8
Save voice memos on handset
or Memory Card; send via
S! Mail or use as ringtone.
P.12-16
Barcodes & Text Scanner★
S! FeliCa
S! Cast
Scan UPC/QR Codes and text
or create QR Codes from
Phone Book entries, etc.
P.12-19, P.12-22, P.12-23
Hold handset over compatible
reader/writers to use e-money
services, etc. all around Japan.
P.17-2
Subscribe to Japanese mobile
periodicals delivered overnight
to your handset automatically.
P.18-2
Near Chat
Exchange instant messages
with compatible Bluetooth#
devices within ten metres.
P.19-19
Optional Services
Call Forwarding
Voicemail
Missed Call Notification
Automatically divert all or all
unanswered incoming calls to
another preset phone number.
P.13-2
Redirect all or unanswered calls
to Voicemail; access messages
from handset/touchtone landline.
P.13-4
Receive records of calls missed
while handset is off/out-of-range
and Voicemail is active.
P.13-5
Conference Call
Switch between open lines or
connect multiple lines at once
for wireless teleconferencing.
P.13-6
Call Barring
Restrict all incoming/outgoing
calls or apply restrictions by
type of call/current location.
P.13-7
Call Waiting
Reduce missed calls! Answer
incoming calls even while the
handset is already engaged.
P.13-5
Caller ID
Set handset to show/hide your
phone number for all outgoing
calls or enter show/hide prefix.
P.13-10
1-3
1
USIM Card
Getting Started
General Information & Precautions
Universal Subscriber Identity Module (USIM) Card is an IC
card containing customer and authentication information,
including the handset number, and limited storage for
Phone Book entries and SMS messages. USIM Card must
be inserted to use this handset.
^ Save contacts on USIM Card Phone Book (see P.4-3).
^ Insert into compatible SoftBank handsets to access files.
^ Do not apply excessive force to insert/remove USIM Card.
^ Do not insert USIM Card into any other IC card device.
SoftBank is not liable for resulting damages.
^ Keep the USIM Card IC chip
clean.
^ Use a dry, soft cloth to clean the
USIM Card.
^ Do not attach labels to USIM
Card. Malfunction may result.
IC Chip
USIM Card
Note H Some downloaded files may be inaccessible after repairs,
USIM Card replacement or handset upgrade/
replacement.
In addition, S! Applications, BookSurfing#, S! Town and
Near Chat may be disabled after USIM Card
replacement.
1-4
CIf Handset is Dropped or Subjected to Shocks
Handset may not recognise USIM Card; REFRESH appears
and handset returns to Standby. This is not a malfunction. If
Insert USIM Card appears or handset does not restart,
clean and properly reinsert USIM Card then restart handset.
Important
^ USIM Card is the property of SoftBank.
^ USIM Card will be reissued for a fee if lost or damaged.
^ Return USIM Card to SoftBank upon subscription termination.
^ Returned USIM Cards are recycled.
^ USIM Card specifications may change without prior notice.
^ Backup USIM Card files. SoftBank is not liable for lost files.
^ If your USIM Card or handset (with USIM Card inserted) is
lost or stolen, suspend your service immediately. For details,
contact SoftBank Customer Centre, General Information
(see P.20-29).
1
Inserting & Removing USIM Card
Inserting
Removing
1
Slide in USIM Card
with IC chip facing
down
Take care not to lose removed USIM Card.
1
Gently slide out USIM
Card as shown
2
Insert battery (Steps
3 - 4 in "Inserting" on
P.1-16)
2
Insert battery (Steps
3 - 4 in "Inserting" on
P.1-16)
Getting Started
^ Follow the steps below after removing battery (see P.1-16).
^ Do not force USIM Card into or out of handset; damage may result.
^ Avoid contact with USIM Card IC chip and Battery terminals; may hinder performance or result in lost data (see P.1-4).
e
Notch
f
1-5
1
USIM PINs
Getting Started
There are two Security Codes for USIM Card: PIN1 and PIN2.
PIN1
A 4-digit to 8-digit Security Code to prevent unauthorised
use of handset.
^ PIN 1 is 9999 by default; change as needed (see P.9-25
"Change PIN").
^ Activate PIN Entry (see P.9-24) to require PIN1 entry each
time handset (USIM Card inserted) is turned on.
PIN2
Required to clear Call Costs or set Max Cost (see P.2-15).
PIN 2 is 9999 by default; change as needed (see P.9-25
"Change PIN").
1-6
PIN Lock & PUK Code
PIN1 Lock or PIN2 Lock is activated if PIN1 or PIN2 is
incorrectly entered three times consecutively. Cancel PIN
Lock (see P.9-24) by entering the Personal Unblocking Key
(PUK Code). For information on PUK Code, contact SoftBank
Customer Centre, General Information (see P.20-29).
Note H ^ If PUK Code is incorrectly entered ten times
consecutively, USIM Card is locked and handset is
disabled. Write down PUK Code.
^ For USIM Card unlocking procedures, call SoftBank
Customer Centre, General Information (see P.20-29).
^ Emergency calls (110, etc.) are not possible when PIN
Entry (see P.9-24) is active. See P.2-3 "Emergency Calls".
Handset Parts & Functions
1
Getting Started
★
813SH is not equipped with these parts (9, T and U).
Handset
8
G
P
1
Q
R
9★
A
2
3
5
6
7
4
B
C
D
H
I
L
S
J
M
N
T★
U★
K
V
E
F
1 Display
2 Mail Key
Open Messaging menu or execute Soft Key functions (see
P.1-23).
3 Start Key
Initiate/answer calls. Open records of All Calls.
O
W
4 Shortcuts & A/a Key
Open Shortcuts menu. In text entry windows, toggle upper/
lower case roman letters or standard/small hiragana/katakana.
5 Clear/Back Key
Delete entries, escape/return to previous window.
6 Keypad
1-7
1
Getting Started
1-8
7 4 Key
In text entry windows, open Symbol/Pictogram Lists.
8 Earpiece
9 Internal Camera★
Use during Video Call.
A Multi Selector & Keypad Lock Key
Select menu items, move cursor, scroll, etc. In Standby,
press b for 1+ seconds to activate/cancel Keypad Lock.
B Yahoo! Keitai Key
Open Yahoo! Keitai Main Menu or execute Soft Key functions
(see P.1-23).
C Power On/Off Key
Press and hold to turn handset power on/off.
D Multimedia/Text Key
Start Media Player or change character entry mode. In
Standby, press for 1+ seconds to activate/cancel Simple Menu.
E # Key
F Microphone
G Strap Eyelet
Attach straps as shown; avoid metallic straps.
H Memory Card Slot
Insert Memory Card here.
I Headphone Port
Connect optional Headphones, etc.
J Infrared Port
Use for infrared data transmissions.
K Charger Terminal
L Circle Talk Key
Press to speak during Circle Talk.
M Volume/Zoom Key
Adjust Earpiece Volume or zoom mobile camera.
N Multi Job/Manner Key
Toggle multiple active function windows. Press for 1+ seconds
to activate/cancel Manner mode.
O External Device Port
Connect Charger here.
P Small Light
Flashes for calls/new mail; illuminates red while charging.
Q External Display
R Speaker
S Internal Antenna Location
T External Camera (lens cover)★
U Portrait (p)/Macro (o) Selector★
Note H Internal Antenna
^ Handset has no external antenna. Handset transmits
and receives signals via Internal Antenna.
^ Do not cover or place stickers, etc. over the area
containing Internal Antenna.
^ Voice quality varies with handset usage/location.
^ For better reception in Standby, close handset (see P.1-11).
Display Indicators
Display
1 2 3 4 5 678 9 A
B
NDbyGBcoqz J
jClWekgFEAMBJK
CD E F G H I J K
1 Signal Strength
N: Within 3G range, V: Within GSM range
N: Strong, O: Moderate, P: Low, Q: Weak
P: Out-of-Range
L
1
1
Undisplayable on 813SH.
Appears constantly if IP Service Setting (see P.9-26) is On and
Hot Status Connection Setting (see P.19-9) is Online.
2
3 Mail (see P.14-3)
Y: Unread Mail, L: Unread Delivery Report
Y (red): Memory Low
V: Receiving Mail, U: Sending Mail
4 Hot Status*
y: Hot Status Online, x: Unread Hot Status Notification
z: Hot Status Registration Request Received
Tip H Descriptions (P.1-7 - 1-9) are illustrative of general
handset usage.
N DbyGBcoqz J
jClWekgF EAMBJK
2 Calls/Circle Talk, Offline Mode (see P.2-20)
SSL, Packet Transmission (see P.15-3)
m: Incoming Voice Call, p: Voice Call in Progress
Q1: Incoming Video Call, A1: Video Call in Progress
K: Incoming Circle Talk Request, U: Offline Mode, E: SSL
C: Packet Transmission Protocol Ready
D: Waiting2/Packet Transmission in Progress
j: Packet Transmission Available
Getting Started
V m Logo
S! FeliCa contactless IC Card embedded. Place m logo over
reader/writer to use IC Card.
W Battery Cover
*Appears constantly if IP Service Setting (see P.9-26) is On and
Hot Status Connection Setting (see P.19-9) is Online.
5 Auto Delivery Info, Cast Info (see P.18-2)
Software Update (see P.20-8)
G: Auto Delivery Info, U: Cast Info
Q: Software Update, R: Software Update Result
G: Live Monitor Info
6 S! Application (see P.16-4), Music Player (see P.7-5)
B: Activate S! Application, A: Paused S! Application
9: Music Player Active
1-9
1
Getting Started
1-10
7 Memory Card Status, Loudspeaker
Microphone Mute (see P.2-11)
c: Inserted, b: In Use, a: Formatting
s: Unusable/Poor Connection
x: Loudspeaker Active, h: Microphone Muted
L: Loudspeaker Active & Microphone Muted
8 Multi Job (see P.1-26), IC Card Lock
S: Multiple Functions (Multi Job) Active
o: IC Card Lock Active
9 External Transmission, PC Site Browser (see P.15-18)
q: USB Transmission Ready
r: USB Transmission in Progress
y: Infrared Connection in Progress
p: Infrared Transmission in Progress
r: Bluetooth# Transmission Ready
Appears in grey when Visibility is set to Hide My Phone.
d: Bluetooth# Transmission in Progress
e: Bluetooth# Talk in Progress
M: PC Site Browser in Use
A Mode (see P.9-2)
z: Manner, e: Drive, i: Original
B Battery Strength (see P.1-15)
Indicator may appear vertically (e.g. W).
C Answer Phone (see P.2-9)
j: Answer Phone Active
r: Answer Phone Active & Message Recorded
s: Answer Phone Cancelled & Message Recorded
D Call Forwarding or Voicemail Active (see P.13-2)
Appears when Always (forwarding condition) is set for Voice Calls.
E New Voicemail (see P.13-4)
F Message Delivery Failure (see P.14-9)
G Alarm (see P.12-11), Schedule (see P.12-4)
e: Alarm Set
h: Reminder Set, i: Reminder Unset
H Show Secret Data (see P.9-27)
Password Lock (see P.9-25), Keypad Lock (see P.1-22)
k: Show Secret Data Active
l: Password Lock Active, b: Keypad Lock Active
I Ringtone (see P.9-14), Vibration (see P.9-15)
g: Silent, h: Increasing Volume, u: Vibration Active
v: Silent & Vibration Active
J Copyright Information, Infrared Transmission
F: Content Key Received
When Content Key memory is low, O (below 10 %) or G
(below 5 %) appears.
y (grey): Infrared Transmission Ready
K Auto Answer (see P.9-30) or Remote Monitor (see P.5-8) Active
L Weather Indicator (see P.18-4)
External Display
CIndicators
See major External Display indicators below.
1
3
2
4
1 Signal Strength
2 Battery Strength
3 Date
4 Time
Clock View
C While External Display Backlight is on (with handset closed),
press h to toggle Clock view (Large Clock, Clock (S),
World Clock or Clock & Date).
^ Display Date & Time setting (see P.9-13) is not affected.
^ View is fixed while music plays, during infrared transfers, etc.
1
Missed Calls
F New Delivery Report
U
Answer Phone Message
D Message Delivery Failure
f
Missed Call Notification
H Content Key
V
New Voicemail
I Bluetooth# Notification
h
Alarm
G New Cast Info
i
Schedule Reminder
b Cast Reception Failure
W
Task Reminder
a Hot Status Notification
B
New Messages
Y Weather Indicator Update
C
Getting Started
Press h, L or M with handset closed to turn External
Display Backlight on. When new mail arrives, press h to
read the message (see P.14-19).
External Display shuts off after set Duration (see P.9-13).
CAdditional Indicators
Indicator and number of calls/messages, etc. appear for
missed calls, new mail/information, etc.
^ Up to two indicators appear at the same time. Press L or
M to view more.
^ Corresponding Pictogram (A, etc.) appears for Feeling Mail.
Display Positions
CHandset Closed
Handset is closed. Keep handset in this
position when not in use.
CHandset Open
Handset is open. Place or answer calls, enter
text, etc.
1-11
1
Battery & Charger
Getting Started
Getting Started
Charge battery before first use/after period of disuse.
Battery Life
^ Do not use/store battery at extreme temperatures; this may
shorten battery life.
Ideally, use/store between 5]C - 35]C.
^ Use specified Charger only; others may damage handset/
battery or overheat or ignite battery.
^ Replace battery if operating time shortens noticeably.
Charging
^ Do not use Charger for other purposes.
^ Contact with metal may short, overheat or burst battery.
^ Small Light illuminates red while charging. (It may take longer
for the light to illuminate when handset is off.)
1-12
^ Charging takes approximately 150 minutes (with handset off).
B Charging time may vary by ambient temperature.
^ Handset and Charger may warm during charging.
^ Separate Charger from TV/radio if interference occurs.
Precautions
^ Clean device charging terminals with a dry cotton swab.
^ Avoid:
B Extreme temperatures
B Humidity, dust and vibration
B Direct sunlight
^ Charge battery at least once every six months; an uncharged
battery may become unusable.
^ Use a case when carrying battery separately.
Tip H ^ Battery must be inside handset to charge it.
^ While charging battery with handset on, J flashes
until battery is fully charged.
^ Battery will charge regardless of handset position.
Estimated Hours of Use (fully charged battery)
150 minutes in 3G
240 minutes in GSM
Continuous Standby Time
330 minutes in 3G
320 minutes in GSM
Continuous Operating Time
7 hours
Continuous Playback Time
16.5 hours
Continuous Video Call Talk Time
80 minutes
(with Internal Camera in use)
Values calculated with Backlight Brightness set to Level:2.
^ Continuous Talk Time is an average measured with a new,
fully charged battery, with stable signals. Continuous Talk
Time may be less than half this value if signal is weak.
^ Continuous Standby Time is an average measured with a new,
fully charged battery, with handset closed without calls or
operations, in Standby with stable signals. Standby Time may
be less than half this value if handset is out-of-range or signal
is weak. Standby Time may vary by environment (battery
status, temperature, etc.).
^ Continuous Operating Time is the length of time handset keys
can be pressed continuously without calls.
^ Continuous Playback Time is measured while music plays
(Sound Effects set to Normal) using Headphones, Offline
Mode cancelled, and with handset closed.
^ The above values (Battery Time) are nominal values,
measured under stable signal conditions.
^ Poor Usage Conditions
B Extreme temperatures (use within a range of 5]C to 35]C)
B Impaired handset, battery or Charger terminals
B Signal is weak/handset is out-of-range
^ Power Consuming Operations
B Activating/using S! Applications
B Repeated mobile camera use or barcode scanning
B Playing video images
B Continuous Keypad use (keeping backlights on for long periods)
B Using Music Player/Voice Recorder
B Frequent Bluetooth# transmissions
B Frequent infrared transfers
B Frequent opening/closing of handset
^ Power Consuming Settings
B Increasing Backlight Time Out/Display Saving time
B Setting Backlight to illuminate brighter
B Activating Bluetooth# in Standby
B Activating Keypad Tones
1
Getting Started
Continuous Talk Time
Battery Time
Using handset in poor conditions may shorten Battery
Time:
1-13
1
Extend Battery Time
Getting Started
Adjust Light Settings (see P.9-13) to extend Battery Time.
Select shorter Display Saving/Backlight time and lower
Brightness.
When Battery Runs Out
A message appears and short beeps sound. Press g to stop
short beeps. (Short beeps do not sound in Manner mode.)
CDuring Voice Call
A double beep sounds every five seconds. After 20 seconds,
the call ends and handset shuts down.
Tip H This product requires a lithium-ion battery.
Lithium-ion batteries are a recyclable resource.
^ To recycle a used lithium-ion battery, take it
to any shop displaying the symbol shown to
the right.
^ To avoid fire or electric shock, do not:
B Short-circuit battery
B Disassemble battery
Battery Strength
Strength Levels (see P.1-15)
CDuring Video Call
A message appears and call ends with a double beep, then
short beeps sound. Handset shuts down after 20 seconds.
Battery Disposal
Do not dispose of an exhausted battery with ordinary
refuse; always tape over battery terminals before disposal.
Take exhausted battery to a SoftBank shop, or follow the
local disposal regulations.
1-14
External Display
When battery runs out, Battery low. Please connect to
charger! appears and short beeps sound. Handset shuts
down after 20 seconds.
Small Light & Battery Strength Indicator
CHandset Power On
Battery Voltage
Battery low. Please connect to charger! appears.
Charge or replace battery immediately.
Minimum Operating
Voltage
J/W
Level 3
Approx. 70%
K/X
Level 2
L/Y
Level 1
M/Z
Level 0
Approx. 20% Approx. 10%
Hours of Use
Remaining Strength (at 25˚C)
CBattery Strength & Environment
At low temperatures, battery is consumed faster.
At high temperatures, battery lasts longer.
Note H ^ Battery Strength indicator is for reference only.
^ At Level 1, some functions including Video Camera,
Music Player and Voice Recorder do not operate (see
P.6-8, P.7-4, P.12-16).
Small Light
Indicator
(J / W)
Conditions
Off
Flashes
Ambient temperature is outside
the range of 5]C to 35]C
Flashes red
Flashes
Battery life has ended, or
battery defect
Illuminates red
Flashes
Off
On
1
Getting Started
CIndicator
Battery Strength indicator varies as shown.
Charge or replace when level is low.
Charging
Charging completed/Standby
CHandset Power Off
Small Light
Indicator
(J / W)
Flashes red
Off
Conditions
Battery life has ended, or
battery defect
Illuminates red
Off
Charging
Off
Off
Charging completed
1-15
1
Installing & Removing Battery
Getting Started
Inserting
1
Battery Cover
e
f
2
1-16
Press down and slide cover
as shown
Removing
^ Turn handset power off before removing battery.
^ Do not remove battery immediately after saving files, sending
messages, etc.
1
Press down and slide cover
as shown
Lift and remove cover as
shown
3
Insert battery
4
Close cover
e
f
2
Lift and remove cover as
shown
3
Remove battery
^ With printed side up, fit tabs into
battery cavity slots.
^ Position and slide the cover gently as
shown until it stops.
Battery Cover
^ Take hold of Battery Tab here and lift
as shown.
1
AC Charger
2
Getting Started
External Device Port
AC 100V Outlet
AC Charger
Release Tabs
Blades
Small Light
Arrows Up
Charger Connector
3
Port Cover
1
Use specified Charger only.
1
Open Port Cover to connect Charger
^ Insert connector until it clicks.
^ Use slot to gently pull Port Cover
down and out as shown.
Slot
2
Plug Charger into AC outlet
3
After Charging
Unplug Charger, then disconnect handset
^ Squeeze release tabs to remove connector.
^ Replace Port Cover to protect External Device Port.
Note H ^ Do not pull, bend or twist AC Charger cord.
^ AC Charger is compatible with household currents
between AC 100V and 240V.
^ SoftBank is not liable for problems resulting from
charging battery abroad.
^ Charging starts and Small Light illuminates red (see P.1-15).
Charging takes approximately 150 minutes.
^ Charging is complete when Small Light goes out.
^ Extend Charger blades. (Fold back when
not in use.)
1-17
1
Desktop Holder
Getting Started
Desktop Holder may be purchased separately.
Small Light
3
2
AC 100V Outlet
2
1 Release Tabs
1
Blades
AC Charger
Charger Connector
4
Insert cord
into the groove.
Connection Port
Use specified Charger only.
1
Arrows
3
Gently insert handset into Desktop Holder
4
After Charging
Unplug Charger, then disconnect handset
Insert Charger connector into Desktop Holder
until it clicks
^ Connection Port is on the back of Desktop Holder.
2
1-18
Plug Charger into AC outlet
^ Extend Charger blades. (Fold back
when not in use.)
^ Fit tabs into slots as shown in 1 and push handset as
indicated in 2 until it clicks into place (resting flat).
^ Charging starts and Small Light illuminates red (see P.1-15).
Charging takes approximately 150 minutes.
^ Charging is complete when Small Light goes out.
^ To remove connector, squeeze release tabs.
1
In-Car Charger
Getting Started
In-Car Charger may be purchased separately.
Cigarette Lighter Socket
2
External Device Port
Release Tabs
Charger Connector
3
In-Car Charger
4
1
2
3
Small Light
1
Plug
Open Port Cover to connect In-Car Charger
^ Insert connector until it clicks.
Plug Charger into cigarette lighter socket
Start car engine
^ Charging starts and Small Light illuminates red (see P.1-15).
Charging takes approximately 150 minutes.
^ Charging is complete when Small Light goes out.
Tip H ^ For more information, see In-Car Charger manual.
^ Use optional In-Car Holder to secure handset.
4
Port Cover
Arrows Up
After Charging
Unplug Charger, then disconnect handset
^ Squeeze release tabs to remove connector.
^ Replace Port Cover to protect External Device Port.
Note H ^ Use In-Car Charger in negative earth vehicles only.
^ Disconnect Charger before leaving vehicle to prevent
charging with engine off.
^ Do not use In-Car Charger with Desktop Holder.
^ Avoid charging battery inside extremely hot vehicles.
^ Never use handset while driving.
1-19
1
Handset Power On/Off
Getting Started
1
2
3
Open handset
Press and hold g
After Power On Graphic, handset enters
Standby.
Turning Off
Press g for 2+ seconds
After Power Off Graphic, handset shuts down.
My Details Setup & Network Information
1
C When handset is turned on for the first time, setup confirmation appears after Power On Graphic.
2
3
Choose Yes or はい A Press b A Enter last name A Press b A Enter first name
A Press b
C Handset initiates Network Information retrieval when N, M or b is pressed for the first time.
Choose Yes or はい A Press b
^ Retrieve Network Information to use Network-related services. (Clock is set automatically after
retrieval.)
^ To update Network Information manually, see P.10-15 "Retrieve NW Info".
^ Unless otherwise noted, operations in this manual are described with Clock set.
Return to Standby
C Press g to return to Standby from function windows, menus, etc.
^ When a confirmation appears, choose Yes and press b. Handset returns to Standby.
Standby
Note H ^ USIM Card data is read after turning power on. Signal strength indicator may take some time
to appear. It may take longer when turning power on for the first time.
^ Insert USIM Card appears when USIM Card is not inserted (see P.1-4).
^ Some functions are disabled if handset is left with power off or out-of-range for long periods.
For details, contact SoftBank Customer Centre, General Information (see P.20-29).
Tip H Display turns off after a period of inactivity.
1-20
Opening Standby Window
1
Getting Started
g
Standby
Standby Window
B Press g to toggle Standby Window on/off.
My Details
1
1
Press b0
Handset phone number appears.
^ To add, edit or delete My Details, see P.4-19.
2
Press g to exit
2
1-21
1
Keypad Lock
Getting Started
Use Keypad Lock to lock handset keys and prevent accidental operation/function activation.
1
1
Activating
Cancelling
Press b for 1+ seconds
Press b for 1+ seconds
b appears and Keypad Lock is set.
1
b disappears.
Note H Emergency calls (110, etc.) are possible even when Keypad Lock is active. See P.2-3
"Emergency Calls".
Tip H When Keypad Lock is Active
^ Incoming calls temporarily cancel Keypad Lock. To answer a call, press f. [Activate Any Key
Answer (see P.9-17) to answer calls with other keys (see P.2-6).] Keypad lock reactivates after
the call.
^ Handset power does not turn off even if g is pressed for 2+ seconds.
1-22
Handset Menus
1
Access functions/operations from Main Menu.
1
2
1
2
Press b
CMain Menu Items
Main Menu opens.
Use G to select an item and press b
Soft Keys
Press N to select or
execute the assigned
function or operation.
Press b to select or
execute the assigned
function or operation.
Press M to select or
execute the assigned
function or operation.
Shortcut to Custom Screens
(see P.9-9)
Launch Hot Status, Circle Talk,
S! Town, S! Loop or Near Chat
Yahoo! Keitai
Access Yahoo! Keitai Mobile
Internet and PC sites or use
Live Monitor
Media Player
Play/download music/video
Messaging
Open/create messages, etc.
Camera
Capture still images or record
video
Data Folder
Open files saved on handset/
Memory Card
Sub Menu opens (see P.20-2 - 20-3).
C Soft Key functions appear at the bottom of
Display.
Main Menu
Communication
Tools
Use Calendar, Alarms, etc.
Entertainment
Launch BookSurfing#/S! Cast or
read E-Books
S! Appli
Use/download S! Applications
Getting Started
Main Menu
Customise IC Card settings to
Lifestyle-appli
use e-money services, etc.
Phone
Search contacts, add entries, etc.
Settings
Customise handset interface,
sounds, etc.
1-23
1
User Shortcuts
Getting Started
Using Shortcuts
Press a key (1 - 9) to access assigned function, folder or menu.
Default Shortcuts:
1
1
1
Received Msg.
4
Calendar
7
Calculator
2
Create Message
5
Phone Book List
8
Alarms
3
Bookmarks
6
Data Folder
9
Bluetooth#
In Standby, press a key (1 - 9) for 1+ seconds
Assigned function, folder or menu opens.
Editing Shortcuts
Edit items except Main Menu and Enter Number.
Assign
Change default shortcuts
Press k A Select an item A Press N x A Select Assign A Press b A
Select new item A Press N U
Move
Change item order
Press k A Select an item A Press N x A Select Move A Press b A Use E
to select target location A Press b
Set to Default
Restore default shortcuts
Press k A Press N x A Select Set to Default A Press b A Choose Yes A
Press b
1-24
Quick Operations
1
Digits
1
2
3
4
5-6
Speed Dial (see P.4-14)
!
#
#
#
#
#
#
#
#
Speed Video Call (see P.4-14)
!
#
#
#
#
#
#
#
#
Calculator (see P.12-15)
!
!
!
!
!
!
!
#
#
Expenses Memo (see P.12-25)
!
!
!
!
!
#
#
#
#
Speed Mail (see P.14-33)
!1
#
#
#
#
#
#
#
#
Calendar (see P.12-2)
#
#
#
!2
#
#
#
#
#
Set Alarm (see P.12-11)
#
#
#
!3
#
#
#
#
#
Call Circle Talk (see P.19-14)
#
#
#
#
#
#
!
!
#
Place International Calls
(see P.2-5)
#
#
#
#
!
!
!
!
!
Function
1
2
3
7 - 10 11 - 12 13 - 24 25 - 32
Getting Started
In Standby, enter numbers to access functions. Accessible functions vary by entered digits. To
activate functions, press corresponding Soft Key.
Press N A after entering a number. Save entries to Speed Mail List (see P.14-33) beforehand.
Enter four digits for month and day and press C to view entries up to 12 months forward of current date.
Enter four digits for time (24-hour format) to set Alarm.
CExample: Enter 1111 to use Calculator
1
2
1
Press 1111
Press j
2
1-25
1
Multi Job
Getting Started
Open a function window while another is active.
1
1
2
3
In a function window, press k
Shortcuts menu opens.
^ Some shortcuts are disabled.
^ Multi Job cannot be activated from some
windows/under some conditions (e.g. when
an S! Application is active, etc.).
^ In text/phone number entry windows,
press k for 1+ seconds.
2
Select a function and press b
3
Press g to exit
Menu/window opens (S appears).
^ Press h to toggle active windows.
The other window appears (S disappears).
C When a confirmation appears, choose Yes
A Press b
Handling Incoming Calls
C Press b to answer a call. End the call to return.
1-26
Security Codes
1
Handset Code
4-digit number (9999 by default) required to use or change
some handset functions.
^ 4 appears as digits are entered.
^ If Handset code is incorrect! appears, enter again.
^ Change Handset Code as needed (see P.9-28).
Centre Access Code
4-digit number selected at initial subscription; required to
access Voicemail via landlines or subscribe to fee-based
information.
Network Password
4-digit number selected at initial subscription; required to
restrict handset services. (see P.13-7).
Getting Started
Handset Code, Centre Access Code and Network Password are needed for handset use.
For details, contact SoftBank Customer Centre, General Information (see P.20-29).
^ If Network Password is incorrectly entered three times
consecutively, Call Barring settings are locked. To resolve,
Network Password and Centre Access Code must be
changed. For details, contact SoftBank Customer Centre,
General Information (see P.20-29).
^ Change Network Password as needed (see P.13-10).
Note H ^ Write down Handset Code, Centre Access Code and Network Password.
^ Do not reveal Handset Code, Centre Access Code and Network Password. SoftBank is not liable for misuse or damages.
Tip H There are two other Security Codes. For details, see P.1-6 "PIN1" and "PIN2".
1-27
Basic Handset Operations
2-1
Initiating a Call
2
See P.2-5 to initiate international calls from Japan, P.2-17 for Voice Calls from outside Japan and P.5-3 for Video Calls.
Basic Handset Operations
1
Confirm handset is on
2
Enter a phone number
1
^ Check signal strength (see P.1-9 1).
^ Handset will not transmit when P, U, b or
l appears (see P.20-4 - 20-6).
3
Confirm the number and press f
4
Press g to end call
3
4
2
^ Include dialling code for all numbers.
C To send/block Caller ID, enter a phone
number and press N x A Select
Show My ID or Hide My ID A Press b
2-2
Correcting Numbers
^ Use F to move cursor and press i to
delete the digit above the cursor. Move
cursor and press i for 1+ seconds to
delete the digits above and after the cursor.
^ Before moving cursor, press i for
1+ seconds to delete the entire number and
return to Standby.
^ If you misdial, press g to hang up and try
again.
Busy Numbers
^ Press g to end the call and try again later.
^ Alternatively, close handset.
Calling Numbers Not Saved in Phone Book
^ Save this number to your Phone Book?
appears after calls.
B To save, choose Yes A Press b A
Perform Step 4 in "Saving from Call Log"
on P.4-8
B To end without saving, choose No A
Press b
^ To hide this confirmation, see P.4-5
"Confirmation for Unsaved Numbers".
Tip H ^ Check Call Timers (see P.2-14) and Call Costs (see
P.2-15).
^ For operations during a call (Loudspeaker, Mute, Hold,
etc.), see P.2-11- 2-12.
Emergency Calls
Emergency calls (110, 119, 118, etc.) are possible even
while some handset restrictions are active.
Active Restriction
Keypad Lock (see P.1-22)
Max Cost (see P.2-15)
Emergency Calls
Possible
Possible
Offline Mode (see P.2-20)
Not Possible
PIN Entry (see P.9-24)
Not Possible
Password Lock (see P.9-25)
Possible
Outgoing Calls (see P.13-8)
Possible
2
Basic Handset Operations
Note H ^ Do not cover Microphone while talking.
^ Avoid covering area over Internal Antenna.
^ Voice quality is affected depending on how and where
handset is used.
Note H Emergency calls may not be possible when outside Japan
as handset operations are affected by wireless network/
radio signals available in the country or handset settings.
2-3
Redial
2
Place calls from Dialled Numbers. Up to 30 recently dialled numbers are saved.
Basic Handset Operations
1
1
3
Press B (F)
2
3
Select a record and press b
Press f
Handset dials the number.
CIndicators
2
q
Dialled Voice Call
J
Requested Circle
Talk
O
Dialled Video Call
Dialled numbers appear with date and time,
most recent first.
^ Name appears if saved in Phone Book.
^ Use F to open Received Calls/All Calls.
Tip H ^ When the same number is dialled more than once, only the last record appears. (All records
appear for Circle Talk.)
^ Records remain even after handset power is turned off.
^ When there are 30 records, oldest records are replaced by new ones. To delete records
manually, see P.2-13.
2-4
Placing an International Call from Japan
1
2
3
4
Enter a phone number
5
Press f
^ Include dialling code for landline numbers.
Press N x
Select Int'l Call and press b
Country names appear.
Select a country and press b
+ (international prefix symbol) and corresponding country code
appear.
C To call unlisted countries, select Enter Code A Press b A
Enter country code A Press b
Quick Operations
C Enter a phone number A Press k A Select a country
A Press b A Skip ahead to Step 5
Direct Entry
C Press 0 for 1+ seconds (+ appears) A Enter country
code A Enter a phone number including the dialling
code A Skip ahead to Step 5
^ Omit the first 0 of the dialling code except when calling Italy
(country code: 39).
2
Basic Handset Operations
^ See P.2-17 to initiate Voice Calls from outside Japan.
^ Service requires an additional contract. For details, contact SoftBank Customer Centre, General Information (see P.20-29).
Tip H ^ To change the default international prefix, see P.9-29
"Int'l Prefix".
^ To save frequently used country codes, see P.9-29
"Country Codes".
^ To restrict outgoing international calls, see P.13-7 "Call
Barring".
2-5
Incoming Call
2
Basic Handset Operations
1
When a call arrives, open handset
1
2
3
^ Number appears when Caller ID is sent.
^ Name appears if saved in Phone Book.
C To reject an incoming call, press N x
while handset is ringing/vibrating A Select
Reject A Press b
B Standby returns; record appears in
Received Calls.
C To place a caller on hold, press g while
handset is ringing/vibrating.
B Press f to answer the call on hold.
C Answering a Video Call: see P.5-3
2
Press f
3
Press g to end call
When Any Key Answer (see P.9-17) is Active
^ Press any of these keys to answer calls:
0 - 9, q, p, G, k, j
^ Alternatively, close handset.
Calls from Numbers Not Saved in Phone Book
^ Save this number to your Phone Book?
appears after calls.
B To save, choose Yes A Press b A
Perform Step 4 in "Saving from Call Log"
on P.4-8
B To end without saving, choose No A
Press b
^ To hide this confirmation, see P.4-5
"Confirmation for Unsaved Numbers".
Tip H ^ When Caller ID is not sent, Withheld appears instead of the phone number.
^ Up to 30 received call records are saved (see P.2-13).
^ Use Quick Recorder (see P.2-10) to record caller messages on handset when Answer Phone
is inactive.
^ Change ringtone volumes/patterns and vibration patterns (see P.9-14 - 9-16).
^ To instantly mute ringer, press i/h (handset open) or h (handset closed) for 1+ seconds.
2-6
Redirecting a Call
CVoicemail: see P.13-4
Unanswered calls are forwarded to Voicemail Centre.
Activate Missed Call Notification (see P.13-5) for records of
calls missed while handset is off/out-of-range.
CAnswer Phone: see P.2-9
Record caller messages on handset.
Use Quick Recorder (see P.2-10) to record caller messages
on handset when Answer Phone is inactive.
Information
C Information window opens for Missed
Calls or Answer Phone messages.
^ Select Call and press b to see details
(see P.2-13).
^ Select Voice Message and press b to
play recorded messages (see P.2-10).
C Information window opens for other items
as well. Select an item and press b to
open the corresponding window.
C To open Information list, follow these steps.
Press b A Select Phone A Press b A Select
Information A Press b
2
Basic Handset Operations
CCall Forwarding: see P.13-2
Press M h to direct incoming call to a specified number.
B To clear list, open Information list and press N x A
Select Reset A Press b A Choose Yes A Press b
Answering Calls with Headphones
C Press Call Button for 1+ seconds to answer a call.
^ To end the call, press Call Button for 1+ seconds until a
beep sounds.
2-7
Calling from Received Calls
2
Basic Handset Operations
Up to 30 received calls are saved. When Caller ID is sent, number appears. Place calls
directly to those numbers.
1
1
3
Press A (l)
3
Press f
Handset dials the number.
CIndicators
r
Answered Voice Call N
Rejected Voice Call
Q
Answered Video Call S
Rejected Video Call
I
Requested Circle
Talk
L
Missed Call
Notification
Received numbers appear with date and time,
most recent first.
^ Name appears if saved in Phone Book.
^ Use F to open Dialled Numbers/All Calls.
s
Missed Voice Call
G
Answer Phone
Answered
R
Missed Video Call
W
Forwarded to
Voicemail Centre
Select a record and press b
H
Missed Circle Talk
Request
2
2
Tip H ^ Names in Secret entries appear only when Show Secret Data is active.
^ Records remain even after handset power is turned off.
^ When there are 30 records, oldest records are replaced by new ones. To delete records
manually, see P.2-13.
2-8
Answer Phone
2
Record caller messages on handset.
Activating & Cancelling
Main Menu H Settings A Call/Video Call (F) A Answer Phone
1
Select Switch On/Off and press b
2
Activating
1 Choose On and press b
C To sample outgoing message, select Outgoing Message A
Press b
B Press i to stop.
^ Press g to return to Standby (j appears). (r appears
when messages are recorded.)
Cancelling
1 Choose Off and press b
Note H ^ When less than 12 seconds remain or 20 messages are
recorded, Answer Phone is disabled. Delete messages
to activate Answer Phone.
^ Answer Phone is not available for incoming Video Calls.
^ In Manner, Drive or Original mode, respective Answer
Phone setting (see P.9-2) takes priority.
Basic Handset Operations
^ Answer Phone cannot be used when handset is off, out-of-range or in Offline Mode. Use Voicemail (see P.13-4) to record caller
messages when Answer Phone is not available.
^ Record up to 90 seconds or 20 messages between Answer Phone and Voice Memo (see P.2-12).
^ Answer Phone is inactive by default.
When Answer Phone is Active
C For incoming calls, outgoing message plays and recording starts.
^ Recording continues even if handset is closed.
^ To answer calls, press f during recording (no message
will be recorded).
^ When recording ends, r appears.
C If recording capacity becomes full after the recording,
Answer Phone is cancelled and s appears.
Tip H Alternatively, press i for 1+ seconds in Standby to
activate/cancel Answer Phone.
2-9
Playing Messages
2
Main Menu H Phone
Basic Handset Operations
1
Select Play Messages and press b
Number of recordings appears and playback starts from the
most recent message. After all messages have played, playback
ends automatically.
C Press B to replay.
C Press i to stop playback.
C To skip a message, press b J or A.
C To play the previous message, press B twice during playback.
C To delete a message, press N . during playback A
Choose Yes A Press b
Note H Message playback stops for incoming calls. Press f to
answer a call.
Tip H Alternatively, press i in Standby to play messages.
Earpiece Volume
C Follow these steps to activate or mute Earpiece for outgoing
message/caller message recordings.
Press b A Select Settings A Press b A Use F
to select Call/Video Call A Select Answer Phone A
Press b A Select Volume A Press b A Select
Link to Profile or Silent A Press b
^ For Link to Profile, current Earpiece Volume applies.
Answer Time
C Adjust ring time between 0 and 30 seconds (Answer Phone
waits to answer calls).
Press b A Select Settings A Press b A Use F
to select Call/Video Call A Select Answer Phone A
Press b A Select Answer Time A Press b A
Enter time (00 - 30) A Press b
B To start recording immediately after a call arrives, enter
00 for time A Press b
^ Activation Time is 09 seconds by default.
C When Answer Phone and Voicemail or Call Forwarding are
both active, the function with the shortest ring time takes
priority.
Example:
Ring time for Answer Phone: 9 seconds
Ring time for Voicemail or Call Forwarding: 10 seconds
In this example, Answer Phone responds first. (Priority may
change depending on signal conditions.)
^ If Answer Phone is full or handset is in Offline Mode,
incoming calls are handled by Voicemail or Call
Forwarding.
Quick Recorder
C Use Quick Recorder to record caller messages on handset
when Answer Phone is inactive. When a call arrives, follow
these steps. Outgoing message plays and caller's message
is recorded.
Press N x A Select Record Message A
Press b
2-10
Engaged Call Operations
2
Adjust Earpiece Volume (5 levels).
^ Volume level remains as set even after handset power is turned off.
^ To adjust Earpiece Volume in Standby, see P.9-17.
^ Earpiece Volume is Level 3 by default.
1
1
2
During a call, press L or M
2
Press L (up) or M (down) to
adjust volume
Basic Handset Operations
Earpiece Volume
Voice Output
Loudspeaker
Use Loudspeaker for handsfree conversations
During a call, press b.
C To cancel, press b.
Mute
Mute Microphone
Other party's voice is audible
During a call, press M N.
C To cancel, press M M.
Hold
Hold tone sounds and each other's voice is not audible
CSubscription to Call Waiting (see P.13-5) or Conference Call (see P.13-6) is required.
During a call, press N x A Select Hold A Press b
C To cancel, press N x A Select Retrieve A Press b
B Alternatively, press f.
Touch Tones
C Use Touch Tones to send alphanumeric messages to pagers or operate a home answerphone remotely.
^ Use 0 - 9, 4 and # to send Touch Tones.
2-11
Voice Memo
2
Record up to 90 seconds or 20 messages between Voice Memo and Answer Phone (see P.2-9).
Basic Handset Operations
1
2
1
2
3
During a call, press N x
Select Record and press b
3
Recording starts.
Play
Press b to stop
^ Alternatively, end call to stop. (Recordings
remain even after handset power is turned off.)
Play Voice Memos
Main Menu H Phone
Select Play Messages A Press b
C For details, see P.2-10 "Playing Messages".
Other Engaged Call Operations
Open Phone
Book Entry
Save Phone
Book Entry
Open Message
Create
Message
Dial New
Number
Enable/Disable
DTMF
Open Phone Book entries
Press N x A Select Phone Book List A Press b A Select an entry A Press b
Save the other party's number to Phone Book
Press N x A Select Phone Book List A Press b A Press N x A
Select Add New Entry A Press b A Perform from Step 2 on P.4-4
Check received/sent/draft messages
Press N x A Select Messaging A Press b A Select an item A Press b
Create a new message
Press N x A Select Messaging A Press b A Select Create Message or
Create New SMS A Press b A Perform form Step 3 on P.14-7 or on P.14-6
Call another number
Press N x A Select Dial New Number A Press b A Enter a phone number
A Press f
Select whether to send Touch Tones during a call
Press N x A Select Disable DTMF or Enable DTMF A Press b
Tip H To switch sound output between handset and handsfree devices during a call, see P.10-8 "Sound Output".
2-12
Call Log
2
All Calls
Dialled Numbers
Received Calls
1
1
2
All dialled/received calls
All dialled calls
All received calls
Press f
All Calls opens.
C Press F to open others.
2
Select a record and press b
Record details appear.
Tip H Press f to open All Calls during a call.
Delete
Basic Handset Operations
Open the following records:
Delete records one at a time
Press f A Select a record A Press N x A Select Delete A Press b A
Choose Yes A Press b
Delete All
Delete all records
Press f A Open All Calls, Dialled Numbers or Received Calls A Press N x A Select
Delete All A Press b A Enter Handset Code A Press b A Choose Yes A Press b
Tip H To save phone numbers to Phone Book, see P.4-8 "Saving from Call Log".
Using Call Log
Call
Place calls
Press f A Select a record A Press N x A Select Call or Video Call A Press b
C To edit numbers before dialling, select a record and press N x A Select Edit Before Call A
Press b A Edit number A Press f (Long Press for Video Calls)
Create
Message
Create messages
Press f A Select a record A Press N x A Select Create Message A Press b
A Select S! Mail or SMS A Press b A Perform from Step 5 on P.14-8 or on P.14-6
2-13
Call Timers & Data Counter
2
Basic Handset Operations
Call Timers
Data Counter
Check estimated time of the most recent call (Last Call
Time) and all calls made since Clear Timers was last
applied (All Calls Time).
^ Times for Dialled Calls and Received Calls appear separately.
^ To show elapsed Call Time during a call, see P.9-30 "Call Time
Counter".
Main Menu
1
2
H Settings A Call/Video Call (F) A Call Time &
Cost A Call Timers
Select Dialled Calls or Received Calls and press b
Press b to return to Call Timers menu
^ Press g to return to Standby.
Tip H ^ Last Call Time and All Calls Time remain even after
handset power is turned off.
^ Ring time for incoming or outgoing calls is not counted.
On hold time is counted.
Clear Timers
Main Menu
Reset Call Timers
H Settings A Call/Video Call (F) A Call Time &
Cost A Call Timers
Select Clear Timers A Press b A Enter Handset
Code A Press b A Choose Yes A Press b
2-14
Check estimated volume of the most recent or all packet
transmissions (sent, received and total). Charges do not appear.
Main Menu
1
2
H Settings A Call/Video Call (F) A Call Time &
Cost A Data Counter
Select Last Data or All Data and press b
Press b to return to Data Counter menu
^ Press g to return to Standby.
Clear Counter
Main Menu
Reset Data Counter
H Settings A Call/Video Call (F) A Call Time &
Cost A Data Counter
Select Clear Counter A Press b A Choose Yes A
Press b
Call Costs
Main Menu
1
2
H Settings A Call/Video Call (F) A Call Time &
Cost A Call Costs
Select Last Call or All Calls and press b
Press b to return to Call Costs menu
^ Press g to return to Standby.
Tip H ^ Call Costs remain even after handset power is turned off.
^ Sum of charges appears for Conference Call (Optional
Service).
Clear Costs
Main Menu
Reset Call Costs
H Settings A Call/Video Call (F) A Call Time &
Cost A Call Costs
Select Clear Costs A Press b A Enter PIN2 A
Press b A Choose Yes A Press b
Cost Units
Set currency and conversion rate (per yen) to
show converted amount in Call Costs
KYEN 1
H Settings A Call/Video Call (F) A Call Time &
Main Menu
Cost A Call Costs A Cost Units
Press N Z A Enter PIN2 A Press b A Enter
currency A Press b A Enter conversion rate A
Press b A Press b
Limit Call Costs
Max Cost
Main Menu
2
Basic Handset Operations
Check estimated call charge of the most recent call or all calls.
To show Call Cost automatically after each call, see P.9-30
"Display Call Cost".
Set a limit of total call charges
When the limit is reached, outgoing calls are blocked
H Settings A Call/Video Call (F) A Call Time &
Cost A Call Costs
Select Max Cost A Press b A Press M j A
Select Set A Press b A Enter PIN2 A Press b A
Enter the amount A Press b
C To cancel Max Cost, select Max Cost A Press b A Press M
j A Select Unset A Press b A Enter PIN2 A Press b
C To change Max Cost, select Max Cost A Press b A Press N
Z A Enter PIN2 A Press b A Enter the amount A
Press b
C To check the remaining amount, select Residual Credit A
Press b
Note H Emergency calls (110, etc.) are possible even when the
limit is reached. See P.2-3 "Emergency Calls".
2-15
Outside Japan (International Roaming)
2
Basic Handset Operations
Switching Network Services
^ Auto is set by default.
^ Use Auto whenever possible.
Sets Network by location (Network status) when selected and each time handset is
turned on thereafter.
Auto
3G/GSM
1
Use in 3G or GSM service areas
3G
Use in 3G service areas
GSM
Use in GSM service areas
Main Menu H Settings A Network Settings (F) A Select Service
1
Select Auto, 3G/GSM, 3G or GSM and press b
Selected service is activated.
Note H ^ International roaming requires a separate contract. For service basics, see Global Roaming
Guide, available in English via SoftBank Mobile Website (http//www.softbank.jp). For
up-to-date information, contact SoftBank Customer Centre, General Information (see P.20-29).
^ Download and print Global Roaming Guide to carry with you while travelling abroad.
2-16
Calling from Outside Japan
2
Use the same SoftBank handset number overseas.
2
5
1
3
4
1
2
3
4
Enter a phone number
Calling SoftBank Handsets
^ Always select 日本 (JPN) (or press 81
for direct entry).
^ Include dialling code for landline numbers.
Press N x
Select Int'l Call and press b
Country names appear.
C To call Japan, select Call to Japan A
Press b A Skip ahead to Step 5
Select a country and press b
^ + and country code are inserted before the
phone number. The first 0 is omitted except
when calling Italy (39). (+ indicates an
outgoing international call.)
C To call unlisted countries, select Enter
Code A Press b A Enter country code
A Press b
5
Press f
Calling Japan via Quick Operation
C Enter a phone number A Press k A
Perform from Step 4
Basic Handset Operations
Calling Other Countries
Direct Entry
C Press 0 for 1+ seconds (+ appears) A
Enter country code A Enter a phone
number including the dialling code A
Skip ahead to Step 5
B Omit the first 0 of the dialling code except
when calling Italy (country code: 39).
Calling Landlines & Mobiles within the Same Country
1
Enter a phone number
^ Include dialling code for landline numbers.
2
Press f
Note H In some areas, other parties may not be able to hear you and vice versa after returning to calls
on hold (see P.2-11).
Tip H Adding Country Codes
To save frequently used country codes, see P.9-29 "Country Codes". For more information,
contact SoftBank Customer Centre, General Information (see P.20-29).
2-17
Manner Mode
2
Basic Handset Operations
2-18
Minding Mobile Manners
Please use your handset responsibly. Use these basic tips as a guide. Inappropriate handset use can be both dangerous and
bothersome. Please take care not to disturb others when using your handset. Adjust handset use according to your surroundings.
^ Turn it off in theatres, museums and other places where silence is the norm.
^ Refrain from using it in restaurants, hotel lobbies, lifts, etc.
^ Observe signs and instructions regarding handset use aboard trains, etc.
^ Refrain from use that interrupts the flow of pedestrian or vehicle traffic.
Manner-Related Features
CManner Mode: see P.2-19
Press Manner Key to automatically mute all sounds and
activate vibration for incoming transmissions.
COffline Mode: see P.2-20
Temporarily suspend all handset transmissions without
turning off handset power.
CVibration Mode: see P.9-15
Activate vibration for incoming transmission alerts.
CAnswer Phone: see P.2-9
Handle incoming calls inappropriate/unsafe to answer.
CVolume Settings: see P.9-14
When carrying handset in public, decrease or mute
incoming transmission alerts or S! Application tones.
CDrive Mode: see P.9-2
Small Light flashes for incoming calls; if unanswered driving
message plays and Answer Phone activates.
Activating & Cancelling
Activate/cancel Manner mode in Standby, while browsing the Internet or during calls, etc.
1
Cancelling
Press h for 1+ seconds
E appears and Manner mode is set.
^ j (Answer Phone), g (Silent) and v (Silent
& Vibration) appear as set in Manner
settings (see P.9-2 "Mode Settings").
1
E disappears and Manner mode is cancelled.
When Manner Mode is Active
Basic Handset Operations
1
Activating
Press h for 1+ seconds
2
C Keypad Tones, Power On/Off and error tones are muted. Swap Call (see P.13-6) beeps are audible.
^ Even in Manner mode, ringtone is audible from Headphones. Volume is fixed to Level 1.
C Shutter click and Self-timer tone sound even in Manner mode.
C Manner settings (see P.9-2 "Mode Settings") apply to Answer Phone, ringtones, Vibration, etc.
Tip H ^ While Answer Phone is recording, caller's voice is audible from Earpiece.
^ To change Manner settings, see P.9-2 "Mode Settings".
2-19
Activating/Cancelling Offline Mode
2
Use Offline Mode to temporarily suspend all handset transmissions.
Basic Handset Operations
^ Offline Mode blocks all calls/Internet transmissions. Bluetooth#/infrared transmissions are available.
^ Offline Mode is Off by default.
Activating
Main Menu H Settings A Network Settings (F) A Offline Mode
1
Choose On and press b
U appears and Offline Mode is set.
Cancelling
Main Menu H Settings A Network Settings (F) A Offline Mode
1
2-20
Choose Off and press b
U disappears and Offline Mode is cancelled.
Tip H ^ When Offline Mode is set while an S! Application (see
P.16-2) is paused, confirmation appears. Choose Yes
and press b to enter Offline Mode. (Network
connection is disabled until Offline Mode is cancelled.)
^ Emergency calls (110, etc.) are not possible in Offline
Mode. See P.2-3 "Emergency Calls".
Simple Menu
^ Handset is limited to basic operations (see P.2-22).
^ Fonts are enlarged while Simple Menu is active.
Press N to toggle
description on/off.
1
Standard Main Menu
2
Basic Handset Operations
Activate Simple Menu to reduce available handset functions and simplify menus.
Simple Main Menu
Activating/Cancelling Simple Menu
Activating
1
Press j for 1+ seconds
^ Simple Menu remains active even after
handset power is turned off.
Cancelling
1
Press j for 1+ seconds
Note H Some menu items, function names, etc. differ from Standard Menu.
Tip H ^ Activate Simple Menu in Normal mode (see P.9-2). While Simple Menu is active, Drive and
Original modes are not available.
^ A message to end the corresponding function appears when Simple Menu is activated in the
following cases:
B Infrared transmission is in progress
B S! Application is paused
B Media Player is active (playing background music) B Bluetooth# is active
2-21
Simple Menu Operations
2
Menus
Basic Handset Operations
In Standby, press b to open Simple Main Menu.
Messaging
Phone
Received Msg.
Create Msg.
Drafts
Templates
Sent Messages
Unsent Msg.
Create SMS
Ph. Book List
Add New Entry
Play Messages
Call VM
My Details
Speed Dial
Camera
Calendar
Alarms
Calculator
Convenient
Tool
Assignment
Hot Status
Circle Talk
Answer Phone
Simple Menu
Pictures
DCIM
My Pictograms
Data Folder Ring Tones
S! Appli
Music
Videos
2-22
Wallpaper
Assign Tone
Volume
See P.14-23
See P.14-7
See P.14-18
See P.14-14
See P.14-23
See P.14-23
See P.14-6
See P.4-2
See P.4-4
See P.2-10
See P.13-4
See P.4-19
See P.4-13
See P.6-2
See P.12-2
See P.12-11
See P.12-15
See P.9-3
See P.9-14
See P.9-14
See P.19-4
See P.19-13
See P.2-9
See P.2-21
See P.8-2
See P.8-2
See P.8-2
See P.8-2
See P.16-2
See P.8-2
See P.8-2
Lifestyle-appli
Books
CustomScreens
Data Folder Flash#
Flash#Ringtones
Other Docs.
Memory Status
See P.17-3
See P.8-2
See P.9-9
See P.8-2
See P.8-2
See P.8-2
See P.8-2
CKey Assignments
In Standby:
j (Long Press)
g (Long Press)
M
N
N (Long Press)
f
B
A
D
D (Long Press)
p/h (Long
Press)
b (Long Press)
i
i (Long Press)
Switch to Standard Menu
Turn handset on/off
Open Yahoo! Keitai Main Menu
Open Messaging menu
Open S! Mail Composition
window
Open Call Log (All Calls)
Open Call Log (Dialled No.)
Open Call Log (Received Calls)
Open Phone Book
Create new Phone Book entry
See P.2-21
See P.1-20
See P.15-2
See P.14-2
Activate/cancel Manner mode
See P.2-18
See P.14-7
See P.2-13
See P.2-4
See P.2-8
See P.4-8
See P.4-4
Activate/cancel Keypad Lock
See P.1-22
Play Answer Phone messages See P.2-10
Activate/cancel Answer Phone See P.2-9
^ While Simple Menu is active, shortcuts and some Quick
Operations (see P.1-25) are disabled.
Text Entry
3-1
^ Available Modes:
Character Selection
3
Text Entry
Use Kana and Pager (see P.3-9) to enter alphanumerics,
Symbols, hiragana, kanji, katakana and Pictograms.
Unless otherwise noted, text entry operations are described
for use in text entry windows using Kana Mode.
A
Kanji (hiragana)
H
Single-byte
alphanumerics (upper/
lower case)
D
Double-byte katakana
I
Single-byte
alphanumerics (lower
case)
Help
E
Single-byte katakana
J
Single-byte number
F
Double-byte
alphanumerics (upper/
lower case)
B
Character Codes
G
Double-byte
alphanumerics (lower
case)
C In a text entry window, press N x A Select Help A
Press b
Entry Modes
Follow these steps to change character entry mode.
1
2
Press j
F and H appear in upper/lower case mode (see below).
Use E to select a mode and
press b
Upper & Lower Case
C In double or single-byte alphanumerics mode, press k to
toggle between upper/lower case and lower case modes.
^ For Pictogram or Symbols,
corresponding list appears. (Entry mode
remains unchanged.)
Tip H ^ Handset Character Codes correspond to 6,355 kanji.
^ Some characters are not available for mail addresses, etc.
Current Entry Mode
3-2
Key Assignments
Key
Kanji (Hiragana)
[Double-byte]
Katakana
[Double & Single-byte]
Alphanumerics
[Double & Single-byte]
Numbers
[Single-byte]
Character Codes
1
あいうえお
ぁぃぅぇぉ
アイウエオ
ァィゥェォ
@./_-1
7 (Space)
1
1
2
かきくけこ
カキクケコ
ABCabc2
2
2
3
さしすせそ
サシスセソ
DEFdef3
3
3
4
たちつてとっ
タチツテトッ
GHIghi4
4
4
5
なにぬねの
ナニヌネノ
JKLjkl5
5
5
6
はひふへほ
ハヒフヘホ
MNOmno6
6
6
7
まみむめも
マミムメモ
PQRSpqrs7
7
7
8
やゆよゃゅょ
ヤユヨャュョ
TUVtuv8
8
8
9
らりるれろ
ラリルレロ
WXYZwxyz9
9
9
0
わをんー
ワヲンー
0
0 +1
0
゛゜ Log/History,
Pictogram List,
Symbol List
゛゜-2 Log/History,
Pictogram List, Symbol
List3 (Symbol List %
Log/History %
Pictogram List in
single-byte entry mode)
Log/History, Pictogram
List, Symbol List3
(Symbol List % Log/
History % Pictogram List
in single-byte entry
mode)
4M (Pause) ? -4
Symbol List, Log/History,
Pictogram List
,.X (Line Break)?!
7 (Space)
#
q
p
、。X (Line Break)?! ) (Space)
3
Text Entry
Multiple characters are assigned to each key. Press a key to toggle between character options for that key.
Example: In katakana entry, press 1 three times for ウ.
When entering characters, press f to toggle options in reverse. (Not available for single-byte numbers or Character Codes.)
Example: Enter い, then press f to return to あ.
─────
─────
Press 0 for 1+ seconds to enter + (available for phone number entry).
- is available only in single-byte katakana entry.
3
Double or single-byte according to the entry mode.
4
4, M (Pause), ? and - are for phone number entry.
1
2
3-3
CKey Assignments (Continued)
Key
Kanji (Hiragana)
[Double-byte]
3
C
Conversion (Up)5
Text Entry
D
Conversion (Down)6
Katakana
[Double & Single-byte]
B
Cursor Down X (Line Break)
Cursor Right
Change Entry Mode
Toggle Case (for some characters)
Delete One Character,
Cancel Conversion
i
Long
Press
f
Character Codes
Cursor Left
A
i
Press
Numbers
[Single-byte]
Cursor Up
j
k
Toggle Case + Toggle
Mode (upper/lower and
lower case)
─────
Delete One Character
─────
Delete Code/
One Character
Delete before or after cursor
Re-convert7
Recover up to 64 deleted
characters8
b
5
Alphanumerics
[Double & Single-byte]
Recover up to 64 deleted characters8
OK
N
Phonetic Conversion
─────
─────
M
Hiragana to Katakana/
Alphanumerics
Conversion
─────
─────
Cursor moves up except during conversion.
Cursor moves down except during conversion.
7
Press f immediately after inserting characters to re-convert them. (Not available for Arrange Mail.)
8
Press f once for each character to recover immediately after deletion. (Not available for Arrange Mail or after using i (Long Press).)
6
3-4
Entering Characters
4
Kanji, Hiragana & Katakana
Press 2 twice
^ To enter unconverted hiragana, skip
ahead to Step 6.
3
1
2
3
Text Entry
Following the example below, enter 鈴木 to learn how to
enter characters in kanji (hiragana) entry mode.
Press 3 twice
Word suggestions change as hiragana
are entered.
5
^ The most recent selection appears first
in the list.
C To see other suggestions, press N
z or M J.
C To exit the list, press i.
C To change segment, see P.3-6
"Segmenting Phrases".
Press 3 for 1+ seconds
^ Press a key for 1+ seconds to enter the
next hiragana assigned to it and
advance cursor (before conversion).
Press D (convert) and use E
to select a word
6
Press b
Press 3 three times and
press q
3-5
Katakana Entry
3
Text Entry
C Switch to double or single-byte katakana mode to enter
katakana. (Press b ) after entry.) Alternatively, enter
hiragana then select katakana from the word suggestion list.
C To convert hiragana to katakana/alphanumerics only, see
P.3-11 "Hiragana to Katakana/Alphanumerics Conversion".
Predictive & Previous Usage
C Use these functions to convert hiragana to kanji more quickly.
Predictive
Word suggestions change as up to
five hiragana are entered
Previous Usage
Suggests words/characters likely to
follow entry based on previous entries
^ Both functions are active by default (see P.3-13 "Optional
Predictive Functions").
^ To lower priority of particular types of words (names of
people, places, etc.) in the word suggestion list, see P.3-13
"Set Low Priority".
User Dictionary
C Save frequently used words/phrases to select from the word
suggestion list. For details, see P.9-19.
^ In text entry windows, save entered words/phrases from
Options.
3-6
CSegmenting Phrases
If the word is not listed, press i after Step 5 on P.3-5 to
exit. Use F to segment hiragana to convert separately.
Example: Segment みち into み and ち.
B
みち
DEb
みち
DEb
三ち
三智
CSelecting Multiple Converted Words
Press k
Example: To enter 西山大輔
D
にしやまだいすけ
k
西山大輔
西山大輔
Small Kana (っ , ッ , etc.)
Enter small hiragana あ, い, う, え, お, つ, や, ゆ and よ as
well as small katakana.
1
Enter a character and press k
つ
k
っ
Adding ゛or ゜
1
Enter a character and press q
は
q
q
q
Space
Alternatively, in kanji (hiragana), katakana
or alphanumeric entry, press p
six times for space.
^ To insert line breaks in text, press p
until X appears, then press b.
Contact me at
D
Contact me atX
3
Undo & Recover
Cancel the previous conversion or recover deleted characters.
Tip H In Single-byte Katakana Entry
^ Press q once to add single-byte ゛or twice for ゜.
^ Press i to remove ゛or ゜.
Press A
Press D at the end of text
ぱ
は
1
1
ば
Text Entry
^ In kanji (hiragana)/double-byte
katakana entry, press the key once to
add ゛to か (Ka) row, さ (Sa) row and
た (Ta) row characters, and press twice
to remove. For は (Ha) row characters,
press once to add ゛, twice to add ゜
and three times to remove.
Line Break
Insert line breaks in text, Text Templates, etc.
1
2
Press N x immediately after character entry
Select Undo/Reverse Order and press b
Entering Alphanumerics
Ueda
A
Ueda
Enter alphanumerics in double or single-byte alphanumerics
mode. Alternatively, enter numbers in single-byte number mode.
3
b)
a
ad
ad
^ When the next character is on the same key (example:
entering a then b), press A first to move cursor.
^ In double or single-byte alphanumerics mode, press k to
toggle between upper/lower and lower case modes.
^ To convert hiragana to katakana/alphanumerics only, see
P.3-11 "Hiragana to Katakana/Alphanumerics Conversion".
3-7
Symbols, Pictograms & Emoticons
Symbols & Pictograms
3
Text Entry
Pictograms do not appear in e-mail or on incompatible
SoftBank handsets.
1
Press q to open Log/History (Log/History is
available in some entry modes; see P.3-3)
Recently used Symbols/Pictograms appear.
^ ― appears by default or when Log/History is deleted.
C To see Symbols, press M; toggle as follows: Symbol List(s)
% Log/History.
C To see Pictograms, press N; toggles as follows: Pictogram
Lists % Log/History.
B Alternatively, press D repeatedly to scroll Symbols or
Pictograms.
C To enter cross-carrier Pictograms, see P.14-8 (below Step 7).
2
3
Use G to select one and press b
^ Repeat Step 2 to enter more.
Press a key (0 - 9) to exit list and enter the
assigned character
^ Alternatively, press i to exit list.
3-8
Tip H ^ Double-byte Symbols appear only in double-byte entry
mode. (All Pictograms are double-byte.)
^ Single-byte Symbols do not appear in Log/History.
^ Alternatively, enter きごう and press D (convert).
Some Symbols can be selected.
^ For available Pictograms, see P.20-16. While creating
Arrange Mail (see P.14-11), My Pictograms (see P.8-2)
downloaded via the Internet can also be used.
^ Enter a descriptive word such as はーと or はな and
press D (convert). Corresponding Pictograms can be
selected.
^ My Pictogram History is available while creating S! Mail
(see P.14-7) or Arrange Mail (see P.14-11).
Clear Log/History
C In a text entry window, press N x A Select Input/
Conversion A Press b A Select Clear History A
Press b A Choose Yes A Press b
B To return to the text entry window, press i A Press i
Emoticons
1
2
Select Emoticons and press b
^ Enter two digits (01 - 50) to jump to the emoticon assigned to
the number.
Select an emoticon and press b
Tip H ^ For other emoticons, enter かお and press D (convert).
Alternatively, enter a descriptive word such as わーい or
うーん and press D (convert). Corresponding
emoticons can be selected.
^ Immediately after inserting a descriptive word such as
嬉しい or 悲しい, corresponding emoticons may appear
in the word suggestion list. To disable this function, see
P.3-13 "Optional Predictive Functions" (EmotionWordlink).
Character Code
1
In Character Code entry mode, enter four digits
(see P.20-10)
Pager Code
1
2
3
4
Press N x
5
Enter two digits (see P.3-10)
Select Input/Conversion and press b
3
Text Entry
3
Press N x
Select Input Method and press b
Select Pager Code and press b
Pager Code _ _ appears at the bottom.
C To switch to Kana Mode, select Kana A Press b
^ Pager Mode is active until switched to Kana Mode.
Mail & Web Extensions
Character Entry Modes
Enter .co.jp, http://, etc., easily.
1
2
3
Press N x
Select Quick Address List and press b
Select an extension and press b
^ Mail addresses and URLs are single-byte.
C In Pager Mode, toggle between entry modes as follows:
Press j A Select K, M, Pictogram, Symbols or
Character Code A Press b
^ For Pictogram or Symbols, corresponding list appears.
(Entry mode remains unchanged.)
B To toggle between upper and lower case modes,
press j A Press N .
Tip H ^ Hiragana to Katakana/Alphanumerics Conversion is
disabled in Pager Mode.
^ To enter ゙or ゚, see Pager Code List on P.3-10.
3-9
CPager Code List
^ Blanks indicate no entry.
^ Grey background indicates upper and lower case available. Press k to switch immediately after character entry.
First digit (Press first)
Text Entry
1
2
3
4
5
6
7
8
9
0
1
あ
か
さ
た
な
は
ま
や
ら
わ
2
い
き
し
ち
に
ひ
み
(
り
を
Single-byte upper case
Second digit (Press next)
3
4
5
6
7
8
う え お A B C
く け こ F G H
す せ そ K L M
つ て と P Q R
ぬ ね の U V W
ふ へ ほ Z ? !
む め も 5 &
ゆ
) よ 4 # Space
る れ ろ 1 2 3
ん ゛ ゜ 6 7 8
9
D
I
N
S
X
―
Z
Y
4
9
0
E
J
O
T
Y
/
*1
*2
5
0
First digit (Press first)
Double-byte lower case
1
2
3
4
5
6
7
8
9
0
1
ぁ
2
ぃ
Second digit (Press next)
3
4
5
6
7
8
ぅ ぇ ぉ a b c
f g h
k l m
っ
p q r
u v w
z
ゅ
9
d
i
n
s
x
0
e
j
o
t
y
ょ
、
*2
。
Press 70 to insert line breaks (in mail message text, Text Templates, etc.).
*2
Press 80 to toggle between upper and lower case modes.
*1
^ Y and Z are double-byte.
3-10
1
2
3
4
5
6
7
8
9
0
1
ア
カ
サ
タ
ナ
ハ
マ
ヤ
ラ
ワ
2
イ
キ
シ
チ
ニ
ヒ
ミ
(
リ
ヲ
Second digit (Press next)
3
4
5
6
7
8
ウ
エ
オ
A
B
C
ク
ケ
コ
F
G
H
ス
セ
ソ
K
L
M
ツ
テ
ト
P
Q
R
ヌ
ネ
ノ
U
V
W
フ
ヘ
ホ
Z
?
!
&
ム
メ
モ
5
ユ
)
ヨ
# Space
4
ル
レ
ロ
1
2
3
ン
゛ ゜
6
7
8
9
D
I
N
S
X
Z
Y
4
9
0
E
J
O
T
Y
/
9
d
i
n
s
x
0
e
j
o
t
y
*1
*2
5
0
Single-byte lower case
*1
ゃ
First digit (Press first)
Double-byte upper case
First digit (Press first)
3
1
2
3
4
5
6
7
8
9
0
1
ァ
2
ィ
Second digit (Press next)
3
4
5
6
7
8
ゥ
ェ
ォ
a
b
c
f
g
h
k
l
m
ッ
p
q
r
u
v
w
z
*1
ャ
ュ
ョ
,
.
*2
Conversion Methods (Japanese Only)
Enter katakana and alphanumerics in kanji (hiragana) entry
mode.
Phonetic Conversion
Enter reading in hiragana
Press N _
Select a kanji and press b
One-Hiragana Conversion
Enter the first hiragana to access previously selected words.
Example: To enter 鈴木
DE
b
す
鈴木
鈴木
^ Up to 20 word selections are saved per hiragana. When
memory is full, the oldest entry is deleted to make room for a
new entry.
1
2
Enter hiragana and press M S
^ To enter AM, press 26 then M S.
Use E to select a word and press b
^ Hiragana to Roman Letter Conversion (hiragana with ゛or ゜
is converted to the same characters/Symbols):
あ
@
い
.
う
/
え
_
お
Space
か
A
き
B
く
C
け
Space
こ
Space
さ
D
し
E
す
F
せ
Space
そ
Space
た
G
ち
H
つ
I
て
Space
と
Space
な
J
に
K
ぬ
L
ね
Space
の
Space
は
M
ひ
N
ふ
O
へ
Space
ほ
Space
ま
P
み
Q
む
R
め
S
も
Space
や
T
ゆ
U
よ
V
―
―
―
―
ら
W
り
X
る
Y
れ
Z
ろ
Space
わ
,
を
.
ん
3
Text Entry
Enter alternate readings to search for kanji.
1
2
3
Hiragana to Katakana/Alphanumerics Conversion
Space ー (Long Sound) Space
^ Hiragana to Number Conversion (hiragana with ゛or ゜is
converted to the same numbers):
B あ (A) row...1 B か (Ka) row...2 B さ (Sa) row...3 B た (Ta) row...4
B な (Na) row...5 B は (Ha) row...6 B ま (Ma) row...7 B や (Ya) row...8
B ら (Ra) row...9 B わをんー (Long Sound)...0
3-11
66q (び)77 (み)
888888 (ょ )
111 (う) D (convert)
Quick Conversion
6q (ば)7 (ま)8 (や)1 (あ)
C (convert)
1
2
Enter hiragana and press C
Cursor turns green.
^ While cursor is green, use F to segment entered hiragana
and then convert one segment at a time.
C To cancel Quick Conversion, press i A Press D for
normal conversion
Use E to select a word and press b
Note H Use Quick Conversion in kanji (hiragana) mode only.
5:00 - 10:59
11:00 - 16:59
朝一番
朝帰り
行ってきます
いってらっしゃい
あちぃ∼
後でね
いただきま∼す♪
移動中
遊ぼう
明日
急いで行くよ
今どこ?
23:00 - 4:59
アウチ!!
ありがとう
いえーい!!!
行こうね
^ Words in the list are preset by time blocks.
^ If Clock is unset, only words for 11:00 - 16:59 are available.
One Hiragana Word Call
Enter the first hiragana of entries you used Quick
Conversion for. The most recent selection appears first.
Example: You entered あたあさわ and selected お父さん
last time.
Tip H The most recent selection (mostly nouns) appears first.
C
あ
3-12
17:00 - 22:59
…
Normal Conversion
…
Text Entry
Quick Conversion helps reduce keystrokes needed to enter
frequently used words.
A list of word suggestions appears based on the key pressed.
Example: To enter 微妙
…
3
One Hiragana Predictive Entry
Enter hiragana and initiate Quick Conversion. Words
starting with a hiragana in the same row (あ い う え お for
あ) appear. Word suggestions vary by time of day.
Example: When あ is entered
…
Quick Conversion (for Hiragana)
お父さん
Editing Characters
Conversion Settings
Optional Predictive
Functions
Activate or cancel Predictive, Previous Usage
or EmoticonWordLink
Press N x A Select Input/Conversion A
Press b A Select Predictive, Previous Usage or
EmoticonWordLink A Press b A Choose On or Off
A Press b
Set
Low Priority
^ The highlighted character is deleted.
^ Place cursor at the end of text and
press i for 1+ seconds to delete all
text. When cursor is located amidst a
block of text, characters on and after
cursor are deleted.
Select types of words to lower their priorities in
the word suggestion list
Press N x A Select Input/Conversion A
Press b A Select Set Low Priority A Press b A
Select an item A Press b A Press M K
^ To select multiple items, select and press b for each item
before pressing M K.
Reset Learning
1
Clear log of words selected in kanji conversion,
Predictive, etc.
Press N x A Select Input/Conversion A Press b
A Select Reset Learning A Choose Yes A Press b
^ Words saved in User Dictionary remain.
Use G to select a character and
press i
2
3
Mikako
i
Mikko
Text Entry
KOn (all)
Deleting & Replacing
Mikiko
Enter another character
Copy/Cut & Paste
When Options appears, copy or cut and paste text into the
same window or another. (My Pictograms, etc. copied from
Arrange Mail Composition window may not be pasted.)
1
2
Press N x
Select Copy or Cut and press b
3-13
3
Use G to select the first
character of text and press b
Start point is set.
C To change the start point, press M s.
3
Text Entry
4
5
6
7
Select the end point and press b
Open text paste target window
Press N x
Select Paste and press b
1
2
3
4
Additional Functions
Cut
Copying from Phone Book
Insert Phone Book entry items into text entry windows.
Select from name, phone numbers, mail addresses,
Category, postal address, homepage, Note, and Birthday.
Deleting Text On and After Cursor
3-14
Jump to Top or End
C In a text entry window, press N x A Select Cursor
Position A Press b A Select Jump to End or Jump to
Top A Press b
Select the first character of text
Press N x
Select Cursor Position and press b
Select Delete Posterior and press b
1
2
3
4
5
Press N x
^ Move cursor to target location beforehand.
Select Advanced and press b
Select Phone Book and press b
Open a Phone Book entry or My Details
Use G to select an item and press b
Using Text Templates
Insert text saved in Text Templates (see P.12-26) into text
entry windows.
Select Text Templates and press b
Select Call Templates and press b
Select text and press b
1
2
3
4
Press N x
Select Advanced and press b
Select Font Size and press b
Select a size and press b
Tip H Setting applies to Editor Font Size in Display Font
Settings (see P.9-4).
3
Text Entry
1
2
3
4
Press N x
Changing Font Size
Text is inserted.
Saving to Text Templates
C Follow these steps to save text in text entry windows to Text
Templates.
Press N x A Select Text Templates A Press b
A Select Save Templates A Press b A Select the
first character of text A Press b A Select the end
point A Press b
^ Enter up to 1,536 characters.
^ Not available while creating Arrange Mail.
3-15
Phone Book
4-1
Overview
Save frequently used phone numbers and mail addresses to Phone Book.
4
^ Entry names appear for calls from numbers saved in Phone Book.
^ Set ringtone/ringvideo by caller/sender, sort entries into Categories, etc. See P.4-3 for more about Phone Book entry items.
Phone Book
CDialling from Phone Book
f
CSending SMS/S! Mail messages from Phone Book
CWhen a Call Arrives
A call arrives
Service Dial
C Dial service dial numbers saved on compatible USIM Cards
to use services.
b
Press b A Select Phone A Press b A Select
Service Dial No. A Press b A Select service A
Press b
^ For details, contact the service providers.
Note H Back-up Important Information
When battery is exhausted/removed for long periods,
Phone Book entries may be lost; handset damage may
also affect handset information recovery. SoftBank is not
liable for damages from lost/altered data.
4-2
Tip H Use Phone Book Lock (see P.9-26) to protect entries from
accidental alteration and to restrict access to Phone Book
information.
Saving to Phone Book
Phone Book Entry Items
Save up to 750 entries in handset Phone Book; USIM Card Phone Book entry limit varies according to card specifications.
2
Item
Description
Enter up to 32 characters. (Select Name:
when saving to USIM Card.)
Homepage:1
Save URLs. Enter up to 1,024 bytes.
First Name:
Note:1
Add personal details. Enter up to 256 characters.
Reading:
Enter up to 64 characters.
Birthday:1
Enter birth date
Add Phone
Number:
Enter up to three numbers on handset/two on
USIM Card (32 digits each)
Picture:1, 2
Set an image to appear for incoming calls/
mail
Add Email
Address:
Enter up to three addresses on handset/one
on USIM Card (128 single-byte alphanumerics
each)
Category:
Sort entries into 16 Categories (11 on some
USIM Cards). Category names can be
changed. Set ringtone/ringvideo and Vibration
by Category (handset only).
Address:1
Enter postal code (20 characters), country name
(32 characters), state/province (64 characters),
city name (64 characters) and street name/
number (64 characters)
Last Name:
1
Description
4
Phone Book
Item
Tone/Video for
Voice Call:1
Tone/Video for
Video Call:1
Tone/Video for New
Message:1
Set ringtone/ringvideo or Vibration by caller/
sender
Vibration for
Incoming Call:1
Vibration for New
Message:1
Secret:1
Restrict access to Phone Book entries by
saving them as Secret entries
Not supported on USIM Card.
Image may not appear while an S! Application is active, etc.
Note H Depending on the USIM Card in use, some items may not be supported, and character entry limits or number of Categories may be
lower. Also, the number of phone numbers or mail addresses per entry may be lower.
4-3
Creating Phone Book Entries
4
Phone Book
4-4
Enter a name, reading, phone number and mail address.
For other items, see P.4-5 - 4-7.
Storage media is set to handset (Phone) by default.
Main Menu H Phone
1
Select Add New Entry and press b
2
3
4
5
Select Last Name: and press b
6
7
8
Select Add Phone Number: and press b
Note H To save an entry, enter at least one of the following: a) last
name; b) first name; c) phone number; or d) mail address.
Phone Book Details appears.
C If storage media confirmation appears,
select To Phone or To USIM A Press b
Incoming Calls while Creating Entry
C Contents are temporarily saved. End the call to return.
Enter last name and press b
Select First Name: and press b
Enter first name and press b
9 Select Add Email Address: and press b
10 Enter a mail address and press b
11 Press b
an icon and press b
12 Select
^ To save additional mail addresses, repeat Steps 9 - 12.
13 Press M q
Storage Media
Phone Book
Details
Characters entered for names (reading for kanji) appear.
^ To correct reading, see P.4-7.
Enter a phone number and press b
^ Include dialling code for landline numbers.
Select an icon and press b
^ To save additional phone numbers, repeat Steps 6 - 8.
C Follow these steps to set default storage media for new entries.
Press b A Select Phone A Press b A Select
Ph.Book Settings A Press b A Select Save New
Entry A Press b A Select Phone, USIM Memory
or Ask Each Time A Press b
^ Phone is set by default.
^ For Ask Each Time, select storage media for each new entry.
Confirmation for Unsaved Numbers
Ringtone
1 Select Preset Sounds, Ring Songs·Tones,
Music or Flash#Ringtones and press b
Ringvideo
1 Select Videos and press b
4
Select a file and press b
C Follow these steps to show/hide confirmation for saving to
Phone Book after calls with unsaved numbers.
Press b A Select Phone A Press b A Select
Ph.Book Settings A Press b A Select New
Number Prompt A Press b A Select Incoming
Call or Outgoing Call A Press b A Choose On or
Off A Press b
^ Both are On by default.
Personal Ringtone/Ringvideo
Select ringtones or ringvideos for calls/mail from numbers/
addresses saved in Phone Book.
^ Select from preset patterns or use the following melody or
video files in Data Folder.
B Files in Ring Songs·Tones, Music or Flash#Ringtones folder
(file name: 55 characters or less including extension)
B Files in Videos folder (file name: 55 characters or less
including extension)
^ Save files to Data Folder (Videos) before assigning video.
^ Follow these steps after opening Phone Book Details (see
P.4-4). When finished, Phone Book Details returns. Complete
other fields.
1
Select form Tone/Video for Voice Call: to Tone/
Video for New Message: and press b
2
Select Assign Tone and press b
C For Preset Sounds, select a tone A Press b
Setting Ring Time for Incoming Mail
4
Phone Book
3
C After Step 4, select Tone/Video for New Message: A
Press b A Select Duration A Press b A Enter time A
Press b
Note H ^ If source file in Data Folder is deleted, renamed or
moved to another handset/Memory Card folder (or is
copy protected and licence expires), Sounds & Alerts
(see P.9-14 "Ringtone/videos") setting applies.
^ To apply settings to Secret entries, first activate Show
Secret Data.
C To cancel assigned tone/video, select Remove Tone/Video
A Press b A Choose Yes A Press b
4-5
Personal Vibration
4
Phone Book
Set handset vibration for calls/mail from numbers/addresses
saved in Phone Book.
Follow these steps after opening Phone Book Details (see
P.4-4). When finished, Phone Book Details returns.
Complete other fields.
1
Select Vibration for Incoming Call: or Vibration
for New Message: and press b
2
3
Select Switch On/Off and press b
4
5
6
Select Vibration Pattern and press b
Select On, Link to Sound or Off and press b
^ Link to Sound: Handset vibrates only when ringtone is a
compatible SMAF file.
Select a pattern and press b
Press i
Personal Picture
Save an image to each Phone Book entry; saved image
appears for calls/mail from phone numbers/mail addresses
saved in that entry.
Follow these steps after opening Phone Book Details (see
P.4-4). When finished, Phone Book Details returns.
Complete other fields.
1
Select Picture: and press b
2
Selecting from Data Folder
1 Select Assign Picture and press b
2 Select an image and press b
Capturing New Image
1 Select Take Picture and press b
2 Frame image on Display and press b
C To cancel saved image, select Remove Picture A Press b
A Choose Yes A Press b
Captured image appears.
3 Press b
Note H ^ Setting is cancelled when source file in Data Folder is
deleted, renamed or moved. (Similarly, if source file is
copy protected and licence expires.)
^ To apply settings to Secret entries, first activate Show
Secret Data.
^ Images may not appear for incoming calls while
messaging with an S! Application paused.
4-6
Saving Secret Entries
1
2
Select Secret: and press b
Choose On and press b
Other Phone Book Entry Items
^ For descriptions of each item, see P.4-3.
^ Follow these steps after opening Phone Book Details (see
P.4-4). When finished, Phone Book Details returns. Complete
other fields.
Reading
Select Reading: A Press b A Enter
reading A Press b A Press b
Category
Select Category: A Press b A Select a
Category A Press b
Address
Select Address: A Press b A Select
Postal Code: A Press b A Enter postal
code A Press b A Select Country: A
Press b A Enter name A Press b A
Select State/Province: A Press b A
Enter name A Press b A Select City: A
Press b A Enter name A Press b A
Select Street & Number: A Press b A
Enter street name/number A Press b A
Press M K
Homepage
Select Homepage: A Press b A Enter
URL A Press b A Press b
Note
Select Note: A Press b A Enter text A
Press b
Birthday
Select Birthday: A Press b A Enter date
A Press b
Unlock Temporarily
C For temporary access to Secret entries, follow these steps.
Press D A Press N x A Select Unlock
Temporarily A Press b A Enter Handset Code A
Press b
^ Secret entries are hidden next time Phone Book is opened.
Note H ^ Activate Show Secret Data (see P.9-27) to open Secret
entries.
^ To cancel Secret, activate Show Secret Data (see
P.9-27) and choose Off in Step 2. To edit Phone Book
entries, see P.4-10 "Editing Phone Book Entries".
^ Secret entries do not appear in Standby Window or Hot
Status member list.
4
Phone Book
Restrict access to Phone Book entries by saving them as
Secret entries.
Follow these steps after opening Phone Book Details (see
P.4-4). When finished, Phone Book Details returns.
Complete other fields.
4-7
Saving from Call Log
4
Phone Book
1
2
3
4
Use F to open Dialled Numbers/Received Calls
Use E to select a record and press N x
Select Save Number and press b
New Entry
1 Select As New Entry and press b
Phone number is entered automatically and Phone Book
Details (see P.4-4) appears. Complete other fields.
Add to Existing Entry
1 Select a Phone Book entry and press b
Using Phone Book
Dialling from Phone Book
Search Phone Book by katakana row (default search
method) to call numbers within entries.
^ To dial numbers saved in Secret entries, first activate Show
Secret Data (see P.9-27).
^ To search by other methods, see P.4-9.
1
2
Press D
3
Use E to select an entry and
press b
Phone number is entered automatically and Phone Book
Details (see P.4-4) appears. Complete other fields.
Note H Withheld records cannot be saved. New numbers cannot
be saved to handset Phone Book entries with three
phone numbers or USIM Card entries with two phone
numbers.
Phone Book Memory Status
4-8
Select Memory Status and press b
Numbers of entries on handset and USIM Card appear.
C Press b to return.
^ Alternatively, enter Reading to search
Phone Book.
Phone Book entry opens.
(Window Description: see P.4-9)
C For entries with multiple numbers,
use E to select one.
Main Menu H Phone A Manage Entries
1
Use F to specify katakana row
4
Press f
Handset dials the number.
C For other options, press b A Select an option A Press b
Window Description
Switching Between Handset & USIM Card
1
2
3
4
Phone Book Search Methods
By Reading
Shows entries that start with specified Reading
By Category
Opens entries in the specified Category
By a-ka-sa-ta-na
Shows entries with Readings that start with
katakana in the specified row
By a-ka-sa-ta-na is set by default.
Main Menu H Phone A Ph.Book Settings A Sort Entries
1
B
A
B
D
C
5
6
7
8
9
Select By Reading, By Category or By
a-ka-sa-ta-na and press b
^ Dialling Methods:
A
A
By Reading
Enter Reading A Select an entry A
Press b A Press f
By Category
Select a Category A Press b A Select
an entry A Press b A Press f
By a-ka-sa-ta-na
Use F to specify a row A Select an
entry A Press b A Press f
B
1 Name
2 Image Set for Picture
3 Phone Number
4 Mail Address
5 Category Name
6 Address
7 Homepage
8 Note
9 Birthday
A Name of Image Set for Picture
B Ringtone/Ringvideo Settings
C Vibration Settings
D Secret Status
4
Phone Book
C Press D A Press N x A Select Ph.Book Settings
A Press b A Select Select Phone Book A Press b A
Select Phone, USIM Memory or Both A Press b
^ Phone is set by default.
^ For Both, entries in both storage media appear.
Tip H To see details or use saved
information, select an item and
press b. To add information,
select an item in angle brackets
(<Add New Entry>, etc.) and
press b.
C
For entries with multiple numbers, select one and press f.
Tip H In Standby, press D and follow the steps above.
D
4-9
Editing Phone Book Entries
To edit Secret entries, first activate Show Secret Data (see
P.9-27).
4
Correction/Change
Phone Book
1
2
3
4
Copying Phone Book Entries
Exchange entries between handset and USIM Card.
USIM Card does not support some Phone Book entry items
(see P.4-3). Those items are deleted when Phone Book
entries are copied from handset.
Press D, then select an entry
Press N x
Select Edit and press b
Select an item and press b
Edit contents.
^ See procedure for saving items to Phone Book (see P.4-4 - 4-7).
^ Edit Reading after editing names.
5
Press b when finished
6
Press M q
One Entry
1
2
3
4
^ To edit other items, repeat Steps 4 - 5.
C To cancel, press g A Choose Yes A Press b
Press D, then select an entry
Press N x
Select Manage Entries and press b
Handset to USIM Card
1 Select Copy Entry to USIM and press b
2 Choose Yes and press b
USIM Card to Handset
1 Select Copy Entry to Phone and press b
All Entries
The entry is overwritten.
If handset or USIM Card memory is low, entries cannot be
copied all at once.
Main Menu H Phone A Manage Entries A Copy All
4-10
1
Select USIM to Phone or Phone to USIM and
press b
2
Choose Yes and press b
Deleting Phone Book Entries
One Entry
Press D, then select an entry
Press N x
Select Delete and press b
Choose Yes and press b
Tip H The source files remain in Data Folder, even when
deleting entries containing melodies, video or images set
for incoming calls/mail or Picture.
Customise Category options; create new Category names.
Changing Category Name
Main Menu H Phone A Category Control
1
2
3
Use F to select handset or USIM
4
Enter name
5
Press b
All Entries
Main Menu H Phone A Manage Entries A Delete All
1
Select Phone Entries, USIM Entries or Both
Entries and press b
2
3
Choose Yes and press b
Select a Category and press b
^ No Category (on handset) cannot be renamed.
4
Phone Book
1
2
3
4
Category Settings
Select Edit Name and press b
C To change icons, select Change Icon A Press b A Select
an icon A Press b (Omit the next steps.)
^ Enter up to 16 characters on handset; USIM Card character
entry limit varies according to card specifications.
^ Repeat Steps 1 - 5 for other Categories.
Enter Handset Code and press b
4-11
Customising Handset Responses
4
Phone Book
Set ringtone/ringvideo or Vibration for incoming calls/mail by
Category.
Category settings for incoming calls/mail are not available
for Categories on USIM Card.
Main Menu H Phone A Category Control
1
2
3
4
Use F to select handset
Select a Category and press N x
Select Assign Ringtone or Assign Vibration and
press b
Select an item and press b
^ See the corresponding procedure for each setting.
B Ringtone/ringvideo: perform from Step 2 in "Personal
Ringtone/Ringvideo" on P.4-5
B Vibration: perform from Step 2 in "Personal Vibration" on P.4-6
Note H Personal ringtone/ringvideo and Vibration settings (see
P.4-5 - 4-6) take priority.
Contact Groups
Create Contact Groups to send messages to multiple recipients
at one time (see "Contact Groups" in Step 4 on P.14-7).
Creating Contact Groups
Create up to 20 Contact Groups.
Main Menu H Phone A Contact Groups A <Add New Group>
1
Enter a Group name and press b
Saving Group Members
Save up to 20 members per Group.
Main Menu H Phone A Contact Groups
1
2
3
Select a Group and press b
Select Assign New Entry and press b
Select an entry and press b
C For entries with multiple numbers/addresses, use E to select
a SoftBank handset number or mail address A Press b
^ To add other numbers/mail addresses, repeat Steps 2 - 3.
Editing Contact Groups
Renaming Groups
Main Menu H Phone A Contact Groups
1
4-12
Select a Group and press N x
2
3
4
Select Edit Name and press b
Enter name and press b
^ Enter up to 16 characters.
Choose Yes and press b
Main Menu H Phone A Contact Groups
1
2
3
4
Select a Group and press N x
Main Menu H Phone A Contact Groups A Open a Group
1
2
3
Select a member and press N x
Select Remove Entry and press b
Choose Yes and press b
Tip H Source Phone Book entries remain even after deleting
members.
Select Delete and press b
Choose Yes and press b
Enter Handset Code and press b
Editing Group Members
4
Phone Book
Deleting Groups
Deleting Members
Speed Dial List
Saving Phone Numbers
Save phone numbers to Speed Dial List for easy dialling.
Changing Members
Main Menu H Phone A Contact Groups A Open a Group
1
2
3
Select a member and press N x
4
Choose Yes and press b
Select Re-assign Entry and press b
Select an entry and press b
C For entries with multiple numbers/addresses, use E to select
a SoftBank handset number or mail address A Press b
Main Menu H Phone A Speed Dial List
1
2
Select from 0 to 9 and press b
Select an entry and press b
C For entries with multiple numbers, use E to select one A
Press b
C To overwrite existing number, choose Yes A Press b
4-13
Saving from Phone Book
4
C Open a Phone Book entry and select a phone number A
Press N x A Select Add Speed Dial A Press b A
Select from 0 to 9 A Press b
B To overwrite existing number, choose Yes A Press b
Phone Book
Note H Saved numbers are deleted from Speed Dial List when
edited in Phone Book or when source entry is deleted.
Tip H Use Headphones with Call Button to call the number
saved in Speed Dial 0.
Delete
Delete entries one at a time
Main Menu H Phone A Speed Dial List
Select an entry A Press N x A Select Delete
A Press b A Choose Yes A Press b
Tip H Source Phone Book entries remain even after deleting
Speed Dial entries.
Clear All
Return Speed Dial List to default setting
Main Menu H Phone A Speed Dial List
Speed Dial
1
2
4-14
Press a key (0 - 9)
Press f
Handset dials the number. (Name appears if saved.)
^ Alternatively, select a name from Speed Dial List and press f.
^ To place Video Calls, press f for 1+ seconds. (Speed Video
Call)
Press N x A Select Clear All A Press b A
Choose Yes A Press b
Using Headphones with Call Button
C In Standby, press Call Button for 1+ seconds until a double beep
sounds; handset dials the number saved in Speed Dial 0.
^ To end the call, press Call Button for 1+ seconds until a
beep sounds.
S! Address Book (SAB)
SAB Sync Commands & Features
Backup/
Restore
Synchronise
Backup/Restore
Synchronise
Birthday Notification
Phone
Book
Edit on PC
Server
Edit on PC
Send Notice
Import from/Export to PC
Backup
Export Phone Book content to SAB1
Restore
Import SAB content to Phone Book2
Normal
Synchronise Phone Book and SAB3
Sync from
Client
Add Phone Book changes to SAB
Sync from
Server
Add SAB changes to Phone Book5
Import
from PC
Upload PC address book info to SAB
Export to
PC
Export SAB content to PC address
book
4
4
Phone Book
Back up Phone Book content in SAB; add Phone Book
changes to SAB anytime. Edit SAB online via PC; add SAB
changes to Phone Book anytime. Restore lost or altered
Phone Book content from SAB.
Birthday
SAB sends reminders via SMS to
Notification handset
1
^ SAB requires a separate contract and basic monthly fee.
^ Use SAB to add Phone Book content to a new compatible
SoftBank handset; some conditions apply (see P.4-16).
^ Use a PC to edit SAB online (http://mb.softbank.jp/mb/en/
support/useful/sab/).
^ Save birthday information to SAB; use a PC to activate
Birthday Notification online to receive SMS reminders.
Any existing SAB content is deleted.
Any existing Phone Book content is deleted.
3
If the same entry item is edited in Phone Book and SAB, SAB
content is referenced.
4
Unrelated SAB changes remain.
5
Unrelated Phone Book changes remain.
2
Note H Sync commands (Backup, Restore and Synchronise) all
incur transmission fees.
4-15
Service Usage Outline
Complete Contract
4
Phone Book
Visit a SoftBank shop, dial 157 from a SoftBank
handset for SoftBank Customer Centre, General
Information or access My SoftBank via Yahoo! Keitai.
Receive User ID & Password
After subscription, User ID and Password arrive via SMS.
^ Handset phone number serves as User ID.
Save User ID & Password
See P.4-17 for procedures.
Use SAB
Export Phone Book content to SAB.
^ Using sync commands incurs transmission fees.
Tip H If User ID and Password SMS does not arrive, dial 157 for
Customer Service or follow these steps:
Press M A Select 設定・申込 (My SoftBank)
A Press b A Select English A Press b A
Select Password confirmation for S! Address
Book A Press b
B Follow onscreen instructions.
4-16
Precautions
CUnsynchronisable Items
SAB restoration cancels these Phone Book settings:
B Picture, Tone/Video, Vibration
CUnintentional Phone Book or SAB Content Deletion
^ When no Phone Book content exists, selecting, Normal, Sync
from Client or Backup deletes all SAB content.
^ When no SAB content exists, selecting Normal, Sync from
Server or Restore deletes all Phone Book content.
CPhone Book ( SAB Content Capacity Disparities
When the number of savable items varies between Phone
Book and SAB entries, Synchronisation reflects lower limit.
CSAB Transfers to New Handsets
^ SAB-Compatible 3G Handsets
SAB content remains as last saved.
^ Other 3G Handsets
Service contract and SAB content remain (accessible via PC).
^ V3/V4/V5/V6/V8 Series
Service contract is terminated and SAB content is deleted.
CContract Termination
SAB content is deleted upon contract termination.
CAvailability
SAB is only accessible within Japan.
After completion of contract, User ID and Password arrive
via SMS. Save them on handset to activate SAB.
Main Menu H Phone A S! Address Book A Sync Settings
1
2
3
Backup (Phone Book % SAB)
Main Menu H Phone A S! Address Book
1
2
3
Select Backup and press b
4
Press b to return
Select User Settings and press b
User ID
1 Select User ID and press b
2 Enter handset number and press b
Password
1 Select Password and press b
2 Enter Password and press b
Press M q
Choose Yes and press b
Enter Handset Code and press b
Handset connects to the Server and Backup starts.
^ After Backup, details appear.
C To cancel, press M 3 A Choose Yes A Press b
4
Phone Book
Saving User ID & Password
Backup & Restore
Restore (SAB % Phone Book)
Main Menu H Phone A S! Address Book
1
2
3
Select Restore and press b
4
Press b to return
Choose Yes and press b
Enter Handset Code and press b
Handset connects to the Server and Restore starts.
^ After Restore, details appear.
C To cancel, press M 3 A Choose Yes A Press b
4-17
Auto Synchronisation
Synchronising Phone Book
Manual Synchronisation
4
Phone Book
^ For details, see the table on P.4-15.
^ If this is your first use of SAB (new handset), Synchronisation
is performed via Normal regardless of selection.
Main Menu H Phone A S! Address Book
1
Select Normal, Sync from Client or Sync from
Server and press b
2
3
Choose Yes and press b
4
Enter Handset Code and press b
Handset connects to the Server and Synchronisation starts.
^ After Synchronisation, details appear.
C To cancel, press M 3 A Choose Yes A Press b
Press b to return
^ Save User ID and Password beforehand.
^ Auto Sync Settings is Off by default.
Main Menu H Phone A S! Address Book A Sync Settings
1
2
3
4
Select Auto Sync Settings and press b
Select Set On/Off and press b
Choose On and press b
Enter Handset Code and press b
Set Frequency
Select Auto Sync frequency
KEvery Sun. 00:00
H Phone A S! Address Book A Sync Settings A
Main Menu
Auto Sync Settings A Set Frequency
Every Month
Select Every Month A Press b A Enter date A
Press b A Enter time A Press b
Every Week
Select Every Week A Press b A Select a day of the
week A Press b A Enter time A Press b
Every Day
Select Every Day A Press b A Enter time A Press b
Set Sync Mode
Select Auto Sync command
KNormal
H Phone A S! Address Book A Sync Settings A
Main Menu
Auto Sync Settings A Set Sync Mode
Select a command A Press b
4-18
Opening Log
View result of Backup, Restore or Synchronisation.
Main Menu H Phone A S! Address Book
C Press b to return.
Edit/add My Details
Main Menu H Phone A My Details
Press N x A Select Edit/Add Details A Press b
A Select an item A Press b
^ For more, see P.4-4.
Note H Phone number in Tel 1: cannot be changed.
My Details
Opening My Details
Confirm handset number (phone number on USIM Card).
Save name, reading, phone number, mail address, personal
data, etc.
Delete
Clear My Details
4
Phone Book
1
Select View Log and press b
Edit/Add
Details
Main Menu H Phone A My Details
Press N x A Select Reset My Details A Press b
A Choose Yes A Press b
Note H Phone number in Tel 1: remains.
Main Menu H Phone
1
2
Select My Details and press b
^ My Details are similar to Phone Book entries (see P.4-9).
Press g to exit
Tip H Exchange My Details via Bluetooth# (see P.10-2) or
infrared (see P.10-10) with compatible devices.
4-19
Video Call
Not Available for 813SH Users
5-1
Getting Started
Important Video Call Usage Notes
Communicate with another party using live video images.
5
^ Use Video Call with compatible handsets only.
^ Use Internal Camera to send your own image.
^ Use External Camera to send higher quality
images.
Video Call
Internal Camera
Window Description
Incoming Image1
Outgoing Image1
Other Party's Number2
1
Change incoming/outgoing image size/position (see P.5-5 "Switch
Images").
2
Name appears if saved in Phone Book.
5-2
^ If both parties are not using the same Video Call system, call
may be interrupted. (Video Call charges apply.)
^ Depending on the other party's handset specifications or
settings, incoming image may appear small or not at all.
^ Rapid motion can make images appear choppy or distorted.
^ Conversations may be hampered by ambient noise. Use
Headphones to reduce noise.
^ Increasing Earpiece Volume for Loudspeaker (see P.5-5, 5-7)
use may cause feedback/interference. Moderate volume or
use Headphones.
^ Handset temperature may rise during Video Calls; this is normal.
^ Use AC Charger during Video Call to avoid battery exhaustion.
Initiating a Video Call
Answering a Video Call
1
2
3
1
Press N x
Incoming Video Call appears.
Select Video Call and press b
When the call is answered, incoming image
appears.
^ Incoming image may not appear
depending on handset settings.
(Video Call charges apply.)
C For operations during a Video Call, see
P.5-4.
When a Video Call arrives, open
handset
5
2
Press g to end call
Answer with Video Image
1 Press b L
2 Choose Yes and press b
Video Call
4
Enter a phone number
Internal Camera image is sent.
C For operations during a Video
Call, see P.5-4.
^ Alternatively, close handset to end calls. (Note, however, that if
Headphones or a Bluetooth# headset is in use, line will remain
open even when handset is closed.)
Answer with Voice Only
1 Press b L
2 Choose No and press b
Tip H ^ Enter a phone number (or select a record from Call Log)
and press f for 1+ seconds to initiate a Video Call.
^ To initiate a Video Call from Phone Book, see P.4-8. To
select a record from Call Log, see P.2-13.
^ Outgoing image is suppressed.
(Video Call charges apply.)
C For operations during a Video Call, see P.5-4.
3
Press g to end call
^ Alternatively, close handset to end calls. (Note, however, that if
Headphones or a Bluetooth# headset is in use, line will remain
open even when handset is closed.)
Tip H If image is not selected within five seconds of answering
Video Call, outgoing image is not sent.
5-3
Rejecting Video Calls
C When a Video Call arrives, press N x A Select
Reject A Press b
Engaged Video Call Operations
Camera Picture
Change outgoing image
Redirecting Video Calls
C When a Video Call arrives, press M h.
5
Placing Callers on Hold
Video Call
C When a Video Call arrives, press g or follow these steps.
Press N x A Select Hold A Press b
B To answer the call on hold, press b A Choose Yes or
No A Press b
^ Callers placed on hold receive Hold Guidance Picture;
Microphone is muted.
Note H Loudspeaker (see P.5-5, 5-7) is temporarily cancelled
when receiving Video Calls in Manner mode. To
reactivate, set to Loudspeaker On during a call.
During a call, press A.
^ Image toggles as follows: External Camera image %
Alternative Image % Internal Camera image.
^ Press B to toggle image in reverse order.
^ To change Alternative Image during a call, press N x A
Select Settings A Press b A Perform from "Select
Alternative Image" in "Camera Picture" on P.5-6
Earpiece
Volume
Adjust Earpiece Volume (5 levels)
KLevel 3
During a call, press L or M A Press L (up) or
M (down) to adjust level
^ Each press changes volume by one level.
^ Volume level remains as set even after handset power is turned off.
Mute
Mute Microphone
During a call, press M N.
C To cancel, press M M.
5-4
KInternal Camera
Switch Images
Change incoming/outgoing image size/position
During a call, press b.
^ Incoming Priority (incoming image appears larger) is set when
initiating Video Calls.
^ Images toggle as shown below.
Loudspeaker
Cancel or activate Loudspeaker
During a call, press N x A Select Loudspeaker
Off or Loudspeaker On A Press b
^ Loudspeaker is temporarily cancelled when Manner mode is
activated during calls.
Pause live voice/image transmissions
Send Hold Guidance Picture
During a call, press N x A Select Hold A
Press b
b
C To resume, press M e.
Open
Phone Book
Incoming Priority
Outgoing Priority
b
b
5
Video Call
Hold
Open/save Phone Book entries or My Details
Opening Phone Book
During a call, press N x A Select Open Phone
Book A Press b A Select an entry (or My Details)
A Press b
^ My Details appears only when Sort Entries is set to By
Reading or By Category (see "Phone Book Search Methods").
b
Saving Entries
During a call, press N x A Select Open Phone
Book A Press b A Press N x A Select Add
New Entry A Press b A Perform from Step 2 on P.4-4
Incoming Only
Outgoing Only
Note H Outgoing image appears on other party's handset even
when Incoming Only is active.
Transfer Audio
Select sound output when a handsfree device,
etc. is used for telephony
During a call, press N x A Select Transfer
Audio A Press b A Select To Phone or To
Bluetooth A Press b
5-5
Activate or cancel reversed Internal Camera
image
Mirror Image
During a call, press N x A Select Settings A
Press b A Select Mirror Image A Press b A
Choose On or Off A Press b
5
^ External Camera image, Alternative Image and incoming
images cannot be reversed.
^ Mirror Image is On when initiating Video Calls.
Video Call
Adjust outgoing image brightness
(5 levels: -2 to +2)
Exposure
During a call, press N x A Select Settings A
Press b A Select Exposure A Press b A Use E
to adjust level A Press b
^ Alternative Image appearance is fixed.
^ Exposure is Level 0 when initiating Video Calls.
Help
View a summary of key assignments
During a call, press N x A Select Help A
Press b
C Press b to return.
Other Engaged Call Operations
C Digital Zoom
Press C (zoom in) or D (zoom out).
^ Not available for Alternative Image.
C Manner Mode
Press h for 1+ seconds to activate or cancel.
C To change Incoming Picture, Outgoing Picture, Hold
Guidance Pict or Backlight (see P.5-6, P.5-7) during a call,
press N x, select Settings and press b.
5-6
Video Call Settings
To change these settings (except Remote Monitor) during
calls, see P.5-4 - 5-6.
Camera
Picture
Outgoing image is either live video via Internal Camera
or Alternative Image when initiating Video Calls
KInternal Camera
H Settings A Call/Video Call (F) A Video Call A
Main Menu
Camera Picture
Select Default Image A Press b A Select Internal
Camera or AlternativeImage A Press b
C To change Alternative Image, select Alternative Image A
Press b A Select Preset Picture or Pictures A Press b
A Select an image A Press b A Press b
C To use Custom Screen image, select Alternative Image A
Press b A Select Custom Screen A Press b A Press b
^ Custom Screen does not appear when Custom Screen (see
P.9-9) is set to Pattern 1.
^ External Camera image is selectable during a call.
Incoming
Picture
Select quality of incoming images
KNormal
H Settings A Call/Video Call (F) A Video Call A
Main Menu
Incoming Picture
Select Normal, Quality Prior or Frame Rate Prior A
Press b
^ Select Quality Prior for higher quality and Frame Rate Prior
for faster frame rate.
Outgoing
Picture
Select quality of outgoing images
Loudspeaker
Activate or cancel Loudspeaker for Video Calls
KNormal
H Settings A Call/Video Call (F) A Video Call A
Main Menu
Outgoing Picture
KOn
H Settings A Call/Video Call (F) A Video Call A
Main Menu
Loudspeaker
Choose On or Off A Press b
^ Select Quality Prior for higher quality and Frame Rate Prior
for faster frame rate.
^ Outgoing Picture setting may automatically change during calls
depending on the other party's Incoming Picture setting.
^ Loudspeaker is temporarily cancelled when initiating Video
Calls in Manner mode.
Hold Guidance
Pict
Select image that can be sent while calls are
on hold
KPicture 1
H Settings A Call/Video Call (F) A Video Call A
Main Menu
Hold Guidance Pict
Mute
Microphone
Mute Microphone for Video Calls
KOff
5
Video Call
Select Normal, Quality Prior or Frame Rate Prior A Press b
H Settings A Call/Video Call (F) A Video Call A
Main Menu
Mute Microphone
Choose On (mute) or Off A Press b
Preset Picture
Select Preset Picture A Press b A Select an image
A Press b A Press b
Data Folder Images
Select Pictures A Press b A Select an image A
Press b A Press b
Custom Screens
Select Custom Screen A Press b A Press b
^ Custom Screen does not appear when Custom Screen (see
P.9-9) is set to Pattern 1.
Backlight
Select a Backlight status for Video Calls
KAlways On
H Settings A Call/Video Call (F) A Video Call A
Main Menu
Backlight
Select Always On, Always Off or Normal Setting A Press b
^ Selecting Normal Setting applies Display Backlight setting (see P.9-13).
5-7
Remote
Monitor
Automatically answer Video Calls from
numbers saved in Auto Answer List
KSwitch On/Off: Off, Answer Time: 00 seconds
H Settings A Call/Video Call (F) A Video Call A
Main Menu
Remote Monitor A Enter Handset Code
5
Activating/Cancelling
Video Call
Select Switch On/Off A Press b A Choose On
(answer automatically) or Off A Press b
Adding to Auto Answer List
Select Auto Answer List A Press b A Select
<empty> A Press b A Enter a number A Press b
C To select from Phone Book or Call Log, select Auto Answer
List A Press b A Select <empty> A Press N x A
Select Change A Press b A Select From Contacts List or
From Call Log A Press b A Select a number A Press b
C To change entries, select Auto Answer List A Press b A
Select an entry A Press b A Enter a number A Press b
B To select from Phone Book or Call Log, select Auto
Answer List A Press b A Select an entry A Press N
x A Select Change A Press b A Select From
Contacts List or From Call Log A Press b A Select a
number A Press b
C To delete entries, select Auto Answer List A Press b A
Select an entry A Press N x A Select Delete A
Press b A Choose Yes A Press b
^ Save up to ten numbers.
Changing Ring Time
Select Answer Time A Press b A Enter time A
Press b
5-8
Note H ^ Even if Remote Monitor is active, calls from non-Auto
Answer List numbers are not answered.
^ Remote Monitor is effective only when handset is open.
^ For calls answered via Remote Monitor, a tone sounds
from Speaker even if Manner mode is active/handsfree
device is connected. (Tone and volume are fixed.)
Camera
Not Available for 813SH Users
6-1
Getting Started
812SH features a 2 megapixel CCD camera. Capture still
images (see P.6-5) or record video (see P.6-8).
Tip H Use Internal Camera or External Camera; unless
otherwise noted, mobile camera operations are described
for External Camera.
6
Camera
Mobile Camera Basics
^ Clean dust/smudges from lens cover with a soft cloth before use.
^ Handset movement may blur images; hold handset firmly or
place it on a stable surface and use Self-timer. (see P.6-11).
^ Mobile camera is a precision instrument, however, some pixels
may appear brighter or darker.
^ Shooting/saving images while handset is hot may affect the
image quality.
^ Subjecting the lens to direct sunlight will damage the camera's
colour filter.
Shutter Click
C Shutter click volume is fixed, and sounds even in Manner mode.
C To change shutter click sound for still images, see P.6-15.
Incoming Calls/Alarm while Using Camera
C Before capturing image or recording video, mobile camera
temporarily shuts down for incoming calls and Alarm. End
the call or close Alarm Time notice to reactivate camera.
^ Press h during a call to toggle mobile camera and Call
windows.
C When recording video, Alarm Times are announced after
exiting mobile camera.
C Captured image or clip is temporarily saved. End the call,
close Alarm Time notice or exit mobile camera to return.
Precautions for Video Recording
C When battery is low, Video Camera is not available. If
battery runs low while recording video, recording stops.
(Recorded video is saved.)
Auto Shut-off
C Before image capture, mobile camera shuts down after
three minutes of inactivity and handset returns to Standby.
6-2
Camera Display Indicators
Photo Camera Mode
1
2
3
4
5
6
7
8
7 Continuous Shoot (see P.6-12)
Q - c: Captured/Total
Q: 4 Pictures, R: 9 Pictures, S: Overlapped
^ S: Index Image (composite image for Overlapped) is on Display.
8 Self-timer Active (see P.6-11)
M: 10 seconds, N: 5 seconds, O: 2 seconds
Video Camera Mode
1 Capacity (see P.6-5)
^ F: 101 or more
^ Red background: 3 or less
2 Picture Quality* (see P.6-16)
M: High Quality, L: Fine, K: Normal
*Hidden if IP Service Setting (see P.9-26) is On and Hot Status
Connection Setting (see P.19-9) is Online.
3 Picture Size (see P.6-16)
4 Save to (see P.6-18)
n: Handset, o: Memory Card (Pictures)
p: Memory Card (DCIM), D: Ask Each Time
5 Scene (see P.6-16)
K: Automatic, s: Night, J: Sports, J: Text
6 Exposure (see P.6-16)
E
D
A
B
C
Dark B Standard A Bright
4
5
6
Camera
1
2
3
6
1 Video Quality (see P.6-16)
M: High Quality, L: Fine, K: Normal
*Hidden if IP Service Setting (see P.9-26) is On and Hot Status
Connection Setting (see P.19-9) is Online.
2 Record Size (see P.6-17)
3 Save to (see P.6-18)
n: Handset, o: Memory Card, D: Ask Each Time
4 Record Time (see P.6-17)
J: For Message, I: Extended Video, K: SD VIDEO
5 Exposure (see P.6-16)
E
D
A
B
C
Dark B Standard A Bright
6-3
6 Shutter
7 Exposure
B (darker), A (brighter)
8 End
9 Function Shortcuts
Activate mobile camera and press the following keys to use
the corresponding functions.
6 Self-timer Active (see P.6-11)
M: 10 seconds, N: 5 seconds, O: 2 seconds
Key Assignments
1
6
Camera
Show Exposure slider
2
Hide indicators to frame image on full Display (see
P.6-15 "Display Indicators")
Toggle Viewfinder size (see P.6-16 "Display Size")
2
3
4
2
5
6
7
8
9
1 Portrait (p)/Macro (o) Selector
^ Slide to Macro to capture images as close as 10 cm. Allow
at least 40 cm for Portrait.
2 Digital Zoom
Press C (zoom in) or D (zoom out).
^ Alternatively, use L (zoom in) and M (zoom out).
3 Options
4 Cancel
5 Toggle Mode
6-4
1
4
Switch save location (see P.6-18 "Save to")
5
Change image size (see P.6-16 "Picture Size" or P.6-17
"Record Time/Size")
6
Switch Scene options for still image capture (see P.6-16)
Turn Microphone on/off for video recording (see P.6-16)
7
Change image quality (see P.6-16)
8
Toggle Self-timer mode (see P.6-11)
9
Maximise or cancel Digital Zoom
0
Open Help (see below)
q
Toggle between Internal Camera and External Camera
(see P.6-17 "Internal Camera/External Camera")
^ Available options vary by selected image capture mode. For
details, see P.6-7 "Still Image Functions" and P.6-9 "Video
Recording Operations".
Help
C Activate mobile camera and press 0 to view a summary of
key assignments.
B Press D to scroll down.
B Press b to return.
Alternatively, press N x A Select Help A Press b
Still Images
Photo Camera Mode
Capture images to send via S! Mail, save as Wallpaper, etc.
Various settings and functions are available for camera use.
Format
Save Location
Picture Quality
Digital Zoom
S! Mail
Attachment
Memory Capacity
6
Camera
Picture Size
2M (W 1200 x H 1600 dots: UXGA)
1.2M (W 960 x H 1280 dots: Quad-VGA)
VGA (W 480 x H 640 dots: VGA)
Mail L (W 240 x H 320 dots: QVGA)
Mail S (W 120 x H 160 dots: QQVGA)
Tip H ^ Select storage media beforehand or each time you save
an image (see P.6-18 "Save to").
^ Saved video, melodies, S! Applications, etc. reduce still
image memory.
^ To check memory status, see P.8-2.
^ Images captured at or above W 480 x H 640 dots are
saved as landscape images. (Images appear as portrait
images when viewed on handset.)
B Open image Details and see Resolution for true
image dimensions and orientation.
JPEG (.jpg)1
Handset Data Folder (Pictures) or
Memory Card Data Folder (Pictures/DCIM2)
High Quality/Fine/Normal
2M (W 1200 x H 1600 dots): None
1.2M (W 960 x H 1280 dots): 1 - 1.3x
VGA (W 480 x H 640 dots): 1 - 2.5x
Mail L (W 240 x H 320 dots ): 1- 10x
Mail S (W 120 x H 160 dots ): 1 - 20x
OK
4,050 files3
1
Default file names appear as Image001.jpg, Image002.jpg, etc.
Save W 480 x H 640 dots or larger images.
3
Approximate value for handset Data Folder, with default image size
and quality (see P.6-16).
2
6-5
Note H Internal Camera Images
Your image appears on Display as a mirror image before/
after shutter is released; saved image appears reversed.
Capturing Still Images
Main Menu H Camera
1
6
Camera
Tip H When Captured Image is Unsaved
Finished? appears when closing mobile camera before
returning to Viewfinder.
^ Choose Yes and press b to end. Handset returns to
Standby.
^ Choose No and press b to return to captured image.
Frame image on Display
C In Video Camera mode, press M
(k) to switch to Photo Camera.
C Key Assignments: see P.6-4
C Special Shooting Modes: see P.6-11
C Camera Settings: see P.6-15
Photo Camera
2
6-6
Press b
Shutter clicks and the captured image
appears on Display.
^ When Auto Save is active, captured
image is saved automatically and
Viewfinder returns.
C To start over, press i.
C To send image via S! Mail, press M
(U) A Perform from Step 3 on P.14-7
3
Press b to save
4
Press g to exit
Image is saved and Viewfinder returns for another shot.
C When confirmation for save location appears, select a
location A Press b
C To open saved images, see P.6-10 "Opening Still Images".
Still Image Functions
Before Image Capture
Press N x to use the following functions:
Adjust amount of light (see P.6-16)
Add Frame2
Add frames (see P.6-13)
Continuous
Shoot3
Capture images sequentially (see P.6-12)
Camera
Effects2
Capture images with special effects
(see P.6-14)
Scan Barcode
Scan barcodes (see P.12-19)
Data Folder
Access Data Folder files (see P.6-10)
Picture Size
Select image size (see P.6-16)
Scene
Select a mode to suit lighting conditions or
subject (see P.6-16)
Picture Quality
Select High Quality, Fine or Normal
(see P.6-16)
Self-timer1
Set Self-timer (see P.6-11)
1
Settings
Display
Indicators
Toggle between Internal Camera and
External Camera (see P.6-17)
Help
View a summary of key assignments (see P.6-4)
Tip H Open Options and use Multi Selector or Keypad to open/
set items.
Before Saving
Press N x to use the following functions:
Save Pictures to
Select handset or Memory Card (see P.6-18)
Data Folder
Access Data Folder; delete saved files
6
Camera
Modes1
Exposure
Internal Camera/
External Camera
Hide indicators to frame image on full
Display (see P.6-15)
Shutter Sound Change shutter click sound (see P.6-15)
Save Pictures to Select handset or Memory Card (see P.6-18)
Auto Save
Select whether to save captured image
automatically (see P.6-18)
1
Available for External Camera.
Available when Picture Size is 240 x 320 or smaller.
3
Available when Picture Size is 480 x 640 or smaller.
2
6-7
Video
Video Camera Mode
Record short video clips to send via S! Mail. Use Memory Cards
to save long recordings (recording time varies by card capacity).
6
Image Size
Camera
Format
W 176 x H 144 dots
(QCIF)
W 128 x H 96 dots
(SubQCIF)
MPEG-4 or H.263
(.3gp)2
W 320 x H 240 dots
(QVGA)
W 240 x H 176 dots
(HQVGA)1
MPEG-4
(.3gp)2
MPEG-4
(.ASF)3
Save Location
Handset or Memory
Card Data Folder
(Videos)
Memory Card
Memory Card
Data Folder
(SD VIDEO)
(Videos)
Video Quality
High Quality/Fine/
Normal
High Quality
OK
N/A
For
Message
Approx. 60 seconds (Normal)
Approx. 50 seconds (Fine)
Approx. 30 seconds (High Quality)
―
Extended
Video
30 minutes
―
SD VIDEO
―
Capacitybased
Recording Time
(per shot)
S! Mail
Attachment
1
MPEG-4 (.3gp) only.
Default file names appear as video001.3gp, video002.3gp, etc.
3
Default file names appear as MOL001.ASF, MOL002.ASF, etc.
2
6-8
Tip H ^ For best results, record within 1.5 metres, in good light.
^ Select storage media beforehand or each time you save
a video file (see P.6-18 "Save to").
^ Saved still images, melodies, S! Applications, etc.
reduce video memory.
^ To check memory status, see P.8-2.
Recording Video
Make sure battery is adequately charged and there is enough
free memory before recording video. When battery is low,
Video Camera is not available. If battery runs low or memory
becomes full while recording video, recording stops.
Main Menu H Camera
1
Press M (i)
2
Frame image on Display
Video Viewfinder appears.
^ Omit this step if Video Camera is already
active.
C Key Assignments: see P.6-4
C Special Shooting Modes: see P.6-11
C Camera Settings: see P.6-15
Video Camera
4
6
Video Recording Operations
Recording begins after a tone.
C To start over, press i.
To stop, press b
Before Recording
Press N x to use the following functions:
Recording stops with a tone.
^ Recording stops automatically when
maximum recording time is reached or
memory becomes full.
^ When Auto Save is active, recorded video
is saved automatically and Viewfinder
returns.
C To play back, select Preview A Press b
B Press 2 during playback to toggle Display Size.
C To start over, press i.
Exposure
To save, select Save and press b
Image is saved and Viewfinder returns for another shot.
C When confirmation for save location appears, select a
location A Press b
Press g to exit
Tip H When Recorded Video is Unsaved
Finished? appears when closing mobile camera before
returning to Viewfinder.
^ Choose Yes and press b to end. Handset returns to
Standby.
^ Choose No and press b to return to Menu.
Adjust amount of light (see P.6-16)
Display Size1
Change Viewfinder size (see P.6-16)
Data Folder
Access Data Folder files (see P.6-10)
6
Record Time/Size
Select a format based on recording time
and image size (see P.6-17)
Microphone
Activate to record sound (see P.6-16)
Camera
5
Press b
Video Quality1
Select High Quality, Fine or Normal
(see P.6-16)
Self-timer2
Set Self-timer (see P.6-11)
Settings
3
Save Videos to3
Select handset or Memory Card (see
P.6-18)
Auto Save
Select whether to save recorded video
automatically (see P.6-18)
Video Encode1
Select a video encoding format (see P.6-17)
Internal Camera1/
External Camera1
Toggle between Internal Camera and
External Camera (see P.6-17)
Help
View a summary of key assignments
(see P.6-4)
1
Available for SubQCIF or QCIF.
Available for External Camera.
3
Available when Record Time/Size is set to For Message.
2
6-9
Tip H Open Options and use Multi Selector or Keypad to open/
set items.
Before Saving
The following menu items appear after recording:
6
Camera
*
Save
Save video to handset or Memory Card (see P.6-9)
Preview
Play video (see P.6-9)
Save and Send*
Attach video to S! Mail (see P.6-15)
Available when Record Time/Size is set to For Message. If Attach
Only is set for Send File Settings (see P.14-38), Multimedia
appears.
Opening Images & Playing Video
To open files directly from Data Folder, see P.8-5.
Opening Still Images
Main Menu H Camera A Activate Photo Camera
1
2
3
Press N x
Select Data Folder and press b
^ Memory Status appears at the top.
C When Memory Card is inserted, select Pictures or DCIM A
Press b
B To switch between handset and Memory Card (Pictures)
press N x A Select Change to Phone or Change
to Memory Card A Press b
C To open a created sub folder or a sub folder in DCIM, select it
A Press b
Select a file and press b
C To open other files, press i A Select one A Press b
Playing Video
Main Menu H Camera A Activate Photo Camera
1
2
6-10
Press N x
Select Data Folder and press b
^ Memory Status appears at the top.
C To switch between handset and Memory Card, press N
x A Select Change to Phone or Change to Memory
Card A Press b
C To open a created sub folder, select it A Press b
3
Select a file and press b
Video plays. Press b to pause/resume playback.
C To open other files, press i A Select one A Press b
SD Video
4
Frame image on Display and press b
5
Saving Still Images
1 Press b
Play QVGA size (.ASF) video
Main Menu H Media Player A Videos A SD VIDEO
Select a file A Press b
C To open other files, press i A Select one A Press b
Saving Video
1 To stop, press b
2 To save, select Save and press b
Self-timer
Delay shutter release after Shutter Key is pressed to
capture still images or record video.
1
2
3
Press N x
Select Self-timer and press b
Select time and press b
Viewfinder returns (M, N or O appears).
C To cancel, choose Off A Press b
6
Camera
Self-timer is cancelled and Viewfinder returns.
C When confirmation for save location appears, select a
location A Press b
Special Shooting Modes
^ Switch to External Camera to use Self-timer.
^ Follow these steps before capturing an image (after Step 1 on
P.6-6) or recording video (after Step 2 on P.6-8).
^ Self-timer is Off by default.
Tone sounds and countdown starts.
^ After selected time elapses, shutter is released and captured
image appears or video recording starts.
C To cancel Self-timer during countdown, press M 3.
B Viewfinder returns. (Self-timer remains active.)
Self-timer is cancelled and Viewfinder returns.
C When confirmation for save location appears, select a
location A Press b
6
Press g to exit
C When Captured Image/Recorded Video is Unsaved: see
P.6-6 or P.6-9
Note H Self-timer is not available when shooting speed for
Continuous Shoot (see P.6-12) is Manual.
Tip H Activate mobile camera and press 8 to toggle
Self-timer as follows:
10 seconds % 5 seconds % 2 seconds % Off
6-11
^ Follow these steps before capturing an image (after Step 1 on P.6-6).
Self-timer Details
C To release shutter manually during countdown, press b.
Image is captured or video recording starts and Self-timer is
cancelled.
C Incoming calls and Alarm interrupt countdown. (Self-timer
remains active.)
C Available functions during countdown are Digital Zoom and
Exposure.
6
Camera
Continuous Shoot (Photo Camera)
Capture a series of 4 or 9 separate images automatically
with a single press of the Shutter Key. Select from three
speed settings or choose the manual option to control the
rate at which images are captured.
4 Pictures1
Capture four separate images with Index Image2
3
Capture nine separate images with Index Image2
9 Pictures
3
Overlapped
Capture five images to create a composite image
1
Available when Picture Size is 480 x 640 or smaller. (Index image is
not created for 480 x 640).
2
Index Image consists of reduced images of each shot.
3
Available when Picture Size is 240 x 320 or smaller.
^ Press b for the first shot. Handset captures the rest
automatically.
^ In 4 Pictures or 9 Pictures mode, select shutter interval from
three levels, or select Manual to release shutter manually.
^ Switch to External Camera to use Continuous Shoot.
6-12
1
2
3
4
5
Press N x
6
Frame image on Display and press b
Select Modes and press b
Select Continuous Shoot and press b
Select from 4 Pictures to Overlapped and press b
C To cancel, choose Off A Press b (Omit the next steps.)
Select speed and press b
Viewfinder returns with corresponding indicator (see P.6-3).
^ Manual is not available when Self-timer (see P.6-11) is active.
^ Available shooting speed options vary by selected Picture Size.
The first frame is captured with subsequent frames captured at
selected speed.
^ For manual control (4 Pictures and 9 Pictures modes), repeat
Step 6 for each frame.
C To stop before capturing all frames, press M 3.
B To save captured images, skip ahead to Step 8.
B To discard captured images, press i. (Viewfinder returns
with Continuous Shoot active.)
7
Index Image or a composite
image appears
8
To save, press b
9
Saving All Images
1 Select All Pictures and press b
C When confirmation for save location appears, select a
location A Press b
Images are saved and Viewfinder returns with
Continuous Shoot active.
Saving the Selected Image
1 Select Selected Picture and press b
Image is saved and captured image returns with
Continuous Shoot active.
C To save other images, use F to select one A
Press b A Select Selected Picture A Press b
B Press i to return to Viewfinder.
Adding Frames (Photo Camera)
^ In addition to Preset Frames, use transparent PNG files (40 KB
or smaller) obtained via the Internet, S! Mail, etc.
^ Select Picture Size 240 x 320 or smaller to add frames.
^ Switch to External Camera to add frames.
^ Follow these steps before capturing an image (after Step 1 on
P.6-6); after Viewfinder returns, complete image capture.
1
2
3
4
6
Camera
^ When Picture Size is 480 x 640, the first
captured image appears.
C Use F to toggle between frames and
Index Image.
B To save images individually, select a
frame or Index Image and proceed to
4 Pictures
Step 8.
C To send image via S! Mail, press M (U) A Perform from
Step 3 on P.14-7
Tip H When Only Selected Image is Saved
Finished? appears when closing mobile camera before
returning to Viewfinder.
^ Choose Yes and press b to end. Handset returns to
Standby.
^ Choose No and press b to return to captured image.
Press N x
Select Modes and press b
Select Add Frame and press b
Preset Frames
1 Select Preset Frames and press b
2 Select a frame and press b
C To check frames, select one and press N ).
B Press i to return.
g to exit
10 Press
C When Captured Image is Unsaved: see P.6-6
Note H In low light, shooting speed may slow down.
6-13
Original Frames
1 Select Data Folder and press b
^ Some images may not be used as frames.
2 Select a frame and press b
C To check frames, select one A Press M )
B Press i to return.
3 Press b
Cancelling
1 Choose Off and press b
6
Camera
Tip H In Continuous Shoot, frame is added to each image.
Camera Effects (Photo Camera)
Sending Images
Still Images
Capture and send images as S! Mail attachments.
To attach images in Data Folder, see P.8-11.
1
Capture an image
2
Press M (U)
Capture images with special effects.
^ Select Picture Size 240 x 320 or smaller to use Camera Effects.
^ Switch to External Camera to use Camera Effects.
^ Follow these steps before capturing an image (after Step 1 on
P.6-6); after Viewfinder returns, complete image capture.
1
2
3
4
6-14
Press N x
Select Modes and press b
Select Camera Effects and press b
Select an effect and press b
C To check effects, press N ).
B Press i to return.
C To cancel, choose Off A Press b
3
C Perform Steps 1 - 2 on P.6-6.
C To attach Continuous Shoot images, after Step 7 on P.6-13,
use F to select a frame or Index Image.
Image is saved to Data Folder and Mail Composition window
opens with image attached.
^ To attach images without saving to Data Folder, see P.14-38
"Send File Settings".
C When confirmation for save location appears, select a
location A Press b
Complete other fields and send S! Mail
(perform from Step 3 on P.14-7)
Tip H Make sure recipient's handset is attachment-compatible.
For information about Mail service and compatibility with
other handset models, contact SoftBank Customer
Centre, General Information (see P.20-29).
Video Clips
Send recorded video clips via S! Mail.
^ For details of attachable files, see the table on P.6-8.
^ To attach video files saved in Data Folder, see P.8-11.
1
2
Select Save and Send and press b
Video is saved to Data Folder and Mail Composition window
opens with the video file attached.
^ To attach video without saving to Data Folder, see P.14-38
"Send File Settings".
B If Attach Only is set for Send File Settings (see P.14-38),
Multimedia appears instead of Save and Send.
C When confirmation for save location appears, select a
location A Press b
Complete other fields and send S! Mail
(perform from Step 3 on P.14-7)
Note H ^ Send video clips to S! Mail- or VGS-compatible
SoftBank handsets.
^ Only MPEG-4 compatible SoftBank handsets support
video files recorded on 812SH.
Tip H For information about Mail service and compatibility with
other handset models, contact SoftBank Customer
Centre, General Information (see P.20-29).
^ Available options vary by selected image capture mode.
^ Shortcut keys are assigned to some functions (see P.6-4
"Function Shortcuts").
^ Follow these steps before capturing an image (after Step 1 on
P.6-6) or recording video (after Step 2 on P.6-8); after
Viewfinder returns, complete image capture/recording.
Shooting Options
Display
Indicators
Photo Camera
Hide indicators to frame image on full Display
!
Video Camera
6
Camera
3
Record video (perform Steps 1 - 4 on P.6-8 - 6-9)
Camera Settings
#
KNormal Finder
Press N x A Select Settings A Press b A
Select Display Indicators A Press b A Select
Normal Finder or Hide Indicators A Press b
Shutter Sound
Photo Camera
Change shutter click sound
!
Video Camera
#
KPattern 1
Press N x A Select Settings A Press b A
Select Shutter Sound A Press b A Select a pattern
A Press b
C To check sound, select a pattern A Press N L
^ Volume is fixed.
^ Shutter click sound for Continuous Shoot is unique and fixed.
6-15
Display Size
#
Photo Camera
*
Picture/Video
Quality
Change Viewfinder size for video
Video Camera
!*
*
Available when Record Time/Size is SubQCIF or QCIF.
KOriginal Size
Press N x A Select Display Size A Press b
A Select Original Size or Enlarge A Press b
6
Photo Camera
Image Settings
Camera
Exposure
Photo Camera
Adjust brightness for still images and video
!
Video Camera
!
Select image or video quality
!
^ Exposure setting returns to default upon exiting Photo Camera/
Video Camera or switching between Internal Camera and
External Camera (see P.6-17).
Picture Size
Photo Camera
Select still image size
!
Video Camera
#
KMail L (240 x 320)
Press N x A Select Picture Size A Press b A
Select a size (see P.6-5) A Press b
^ Select Mail L (240 x 320) or Mail S (120 x 160) for Internal Camera.
^ To change video image size, see P.6-17 "Record Time/Size".
!*
Available when Record Time/Size is SubQCIF or QCIF.
KNormal (Photo Camera), Fine (Video Camera)
Press N x A Select Picture Quality or Video
Quality A Press b A Select quality A Press b
^ The image quality increases as follows: Normal % Fine %
High Quality. Saving higher quality images/video requires
more space in memory.
Scene
Photo Camera
Select a mode according to lighting or subject
!*
Video Camera
*
K0 (standard)
Press N x A Select Exposure A Press b A
Use F to adjust level
Video Camera
#
Available for External Camera.
KAutomatic
Press N x A Select Scene A Press b A
Select a mode A Press b
^ Scene setting returns to default upon exiting Photo Camera/
Video Camera or switching between Internal Camera and
External Camera (see P.6-17).
Automatic
Automatic adjustment
Night
Use in low light conditions
Sports
Best suited for action sports or fast-moving
subjects
Text
Most suitable for high contrast black and white
subjects
Microphone
Photo Camera
Record sound together with video
#
Video Camera
!
KOn
Press N x A Select Microphone A Press b A
Choose On or Off A Press b
6-16
Record Time/
Size
Select For Message to record short video (up
to 295 KB) to send via S! Mail
For longer recording, select Extended Video
Photo Camera
#
Video Camera
!
KFor Message, QCIF (176 x 144)
Press N x A Select Record Time/Size A Press b
A Select For Message, Extended Video or SD VIDEO A
Press b A Select a size A Press b
Photo Camera
*
Select a video encoding format
#
!*
Video Camera
Available when Record Time/Size is SubQCIF or QCIF.
KMPEG4
Press N x A Select Settings A Press b A
Select Video Encode A Press b A Select H.263 or
MPEG4 A Press b
Additional Settings
QCIF (176 x 144)
W 176 x H 144 dots
Format: MPEG-4 or H.263 (.3gp)
SubQCIF (128 x 96)
W 128 x H 96 dots
Format: MPEG-4 or H.263 (.3gp)
B Extended Video
Internal Camera/
External Camera
Photo Camera
*
QVGA (320 x 240)
W 320 x H 240 dots
Format: MPEG-4 (.3gp)
HQVGA (240 x 176)
W 240 x H 176 dots
Format: MPEG-4 (.3gp)
QCIF (176 x 144)
W 176 x H 144 dots
Format: MPEG-4 or H.263 (.3gp)
SubQCIF (128 x 96)
W 128 x H 96 dots
Format: MPEG-4 or H.263 (.3gp)
Switch between Internal Camera and External
Camera
!
Video Camera
6
Camera
B For Message
Video Encode
!*
Available when Record Time/Size is SubQCIF or QCIF.
KExternal Camera
Press N x A Select Internal Camera or
External Camera A Press b
^ Setting returns to default after exiting mobile camera.
B SD VIDEO
QVGA (320 x 240)
W 320 x H 240 dots
Format: MPEG-4 (.ASF)
6-17
Save to
Photo Camera
*
Select a save location for images or video
!
Video Camera
!*
Available when Record Time/Size is set to For Message.
KPhone Memory (handset)
6
Press N x A Select Settings A Press b A
Select Save Pictures to or Save Videos to A Press b
A Select a location or Ask Each Time A Press b
Camera
^ For Ask Each Time, confirmation appears each time you save an
image or video (with Record Time/Size set to For Message).
Camera Mode/Size
Save Location
Photo Camera
(120 x 160 or 240 x 320)
Video Camera
Phone Memory (handset)
Memory Card
Photo Camera
(480 x 640 or larger)
Phone Memory (handset)
SD (Pictures) (Memory Card)
SD (DCIM) (Memory Card)
Note H ^ Ask Each Time is not available when Auto Save (see
below) is active.
^ To save to Memory Card, insert a card before saving
image or recording video.
Auto Save
Photo Camera
Select whether to save captured images or
recorded video automatically
!
Video Camera
!
KOff
Press N x A Select Settings A Press b A Select
Auto Save A Press b A Choose On or Off A Press b
Note H Auto Save is not available when Ask Each Time is set for
Save Pictures to or Save Videos to (see above).
6-18
Media Player
7-1
Media Player Basics
Use Media Player to listen to music (Music Player) or play
video (Video Player). Save video/music files to handset or
Memory Card (including SD VIDEO and SD AUDIO). To
open files, specify the location first.
Video (Video Player)
7
Music (Music Player)
Downloading Music/Video
Media Player
My Videos
My Music
Handset
Handset/Memory Card
Open music/video-related links directly from Media Player to
download music (Chaku-Uta#) and video via the Internet.
Memory Card
SD AUDIO
SD VIDEO
Memory Card
^ Read information (price, expiry date, etc.) on the source site.
^ Use Music Search (see P.7-3) to search by title, artist, etc.
Memory Card
^ For My Videos and My Music details, see P.7-15.
^ Playback stops when battery is low. Charge battery and
resume from where it stopped (see Step 1 on P.7-6 or P.7-8).
^ Consume media as it downloads (Streaming: see P.15-12).
7-2
Incoming Calls/Mail during Playback
C Playback stops for incoming calls or Alarm.
^ When playback stops while streaming, the URL is saved to
History (see P.15-13).
C A notification appears for incoming mail without interrupting
playback.
Main Menu H Media Player
1
2
Select Music or Videos and press b
Select Download Music or Download Videos and
press b
Handset connects to the Internet and download page appears.
^ Follow the links to download music/video.
Music Search
C Follow these steps to access Yahoo! Keitai Music Search site.
In Step 1 on P.7-2, select Music A Press b A
Select Music Search A Press b
^ Fill in fields or follow links to search for/download music.
Downloading Content Keys
Content Keys are required to use some downloaded files.
1
2
Select a file and press b
^ Select a file with b.
Choose Yes and press b
Handset connects to the Internet and download page appears.
^ Follow onscreen instructions.
Save music files onto Memory Cards from CDs, etc. using
PCs or other devices to play them on handset Music Player.
Precautions for Handling Music Files on PCs
CRespect copyrights.
^ Comply with copyright and other intellectual property laws
when using music saved on Memory Cards.
^ Copyright laws limit duplicated material to private use only.
^ Converted CD files may not be attachable to S! Mail.
CPlay SD-Audio standard compliant music files.
(These files cannot be used as ringtones.)
Handset supports Secure AAC and AAC files compliant with
the SD-Audio standard.
7
Media Player
^ Acquire Key to play a copy protected file (b appears).
^ To download Keys, open All Music/All Videos or Playlist (see
Step 2 on P.7-6/Step 3 on P.7-9) then follow these steps.
Saving Music Files from PCs
B For AAC files, see "Precautions for Handling AAC Files" on
P.7-4.
CSave music to the specified directory.
Save music to either of the following folders on Memory
Card via Mass Storage (see P.11-9), Memory Card reader/
writer or other compatible devices.
B PRIVATE/MYFOLDER/My Items/Music
B PRIVATE/MYFOLDER/My Items/Sounds & Ringtones
Details
C For more about saving music files from PCs, see "Utility
Software Starter Guide" on Utility Software CD-ROM.
7-3
Precautions for Handling AAC Files
CUse software supporting AAC conversion.
^ Use software such as iTunes to convert music to AAC format.
^ iTunes is an example only. SoftBank does not guarantee
compatibility with any software.
^ For software usage and specifications, see the provider's
website, etc.
iTunes is a registered trademark of Apple Computer, Inc.
registered in the United States and other countries.
7
Media Player
CSupported bit rate and sampling frequency are as
follows.
Bit Rate (kbps)
16*1, 24*1, 32, 48, 64, 96*2, 128*2
Sampling
Frequency (Hz)
16000, 22050, 24000, 32000, 44100, 48000
*1
*2
Monaural only.
Stereo only.
Note H Titles and artist names for AAC files created using
iTunes, etc. do not appear on handset.
7-4
Playing Music
Play music on handset/Memory Card.
Use Headphones, etc. to listen to sound without bothering others.
Precautions before Playing Music/Video
^ Music Player is not compatible with some recording/playback
formats. Music may not play depending on the Memory Card status.
^ Grasp the plug when connecting or disconnecting
Headphones. Do not bend the plug to avoid damaging the
cord or Headphone Port.
^ Use only the specified accessories (Headphones, etc.). Other
devices may not function properly and cause damage to
Headphone Port.
^ When battery is low, Music Player will not play. If battery runs
low during playback, Music Player shuts off.
Tip H ^ To activate/cancel Manner mode during playback,
press h for 1+ seconds.
^ In Manner mode, sound is audible from Headphones.
^ To answer calls during playback with Headphones, etc.,
press Call Button for 1+ seconds.
^ Turn down the volume if distortion is noticeable in
Speaker sound.
^ As saved files increase, files, My Music and Playlists
may take longer to open.
Playback Window Indicators
3
8
4
9
5
A
6
7
B
1 Playback in Progress
2 Playlist Name
3 Title
^ Titles also appear on External Display during playback.
7
Media Player
1
2
4 Artist Name
^ No Artist Name appears if not available.
^ Artist names also appear on External Display during
playback.
5 Track Number
6 Status
1: Playing, 0: Paused, 3: Fast Forwarding, 4: Fast Rewinding
7 Playback Pattern (see P.7-7)
5: Repeat, 6: Repeat All, 7: Random
^ Indicator does not appear for Normal.
8 Elapsed Time
9 Volume
A Information Link
^ N appears when linked information is accessible via Access
WEB Link (see P.7-7 "Accessing Linked Information").
B Sound Effects (see P.7-7)
i: Bass, l: Surround, k: Surround Bass
^ Indicator does not appear for Normal.
7-5
Playback Operations (Music/Video)
Playback
Main Menu H Media Player A Music
1
Select My Music or SD AUDIO
and press b
C For My Music, use F to select Music
Folder or Ring Songs·Tones.
C To play the last played file from where it
stopped, select Last Played Music A
Press b
7
Media Player
2
Select All Music or a Playlist and
press b
My Music
Three Playlists (プレイリスト1 to プレイリスト3) are saved by default.
C To search files, press N x A Select Search A
Press b A Enter search text A Press b
B When no matching text is found, text entry window returns.
Change text and try again.
C To sort files, press N x A Select Sort A Press b A
Select a sort option A Press b
B Sort is available for All Music files.
3
Select a file and press b
Playback window opens and playback starts.
^ Playback stops after the last file when Playback Pattern is set
to Normal (see P.7-7).
Tip H Use LCD Remote/Mic with Headphones (optional
accessory) to remote control Music Player activated via
Music menu.
7-6
1
2
3
Replay
Press B
Press repeatedly to play previous files.1
Skip Forward
Press A2
Fast Forward
Press and hold A
Release for playback.
Fast Rewind
Press and hold B
Release for playback.
Pause
Press b
Press again to resume playback.
Volume Control3
Press C/L (up) or D/M (down)
Mute
Press D (Long Press)
Press C to play sound.
Open Help
Press 0, or press N x A Select Help
A Press b
In Random Play, B only replays the current file.
Not available for the last file when Playback Pattern is set to Normal.
Volume level remains as set until changed.
Opening File Properties
C While playing or paused, press N x A Select
Details A Press b
^ Press D to scroll down.
B Press b to return.
Accessing Linked Information
Note H Playback pauses for Alarm, then resumes automatically.
Tip H ^ Press k to create mail messages and use Phone
Book, etc. during playback; however, some functions
are not available.
^ Stop music? appears when g is pressed in Standby.
Choose Yes or No and press b.
Sound Effects
Play back files in surround sound; increase
bass or dynamic range
CUse Headphones to enjoy sound effects.
KNormal
Main Menu H Media Player A Music A Settings
Select Sound Effects A Press b A Select an effect
A Press b
Normal
No sound effects
Bass
Boosts bass frequencies
Surround
Adds surround effect
Surround Bass
Adds surround effect with enhanced bass
Playback
Pattern
7
Media Player
C While playing or paused, press N x A Select
Access WEB Link A Press b A Choose Yes A Press b
^ Linked information is accessible while N appears.
^ Accessing linked information activates Yahoo! Keitai (D
appears) and may incur transmission fees.
^ Press i to disconnect.
Playback Settings
Play all or Playlist files repeatedly or randomly
KNormal
Main Menu H Media Player A Music A Settings
Select Playback Pattern A Press b A Select a
pattern A Press b
Normal
Play in order until the last file ends
Repeat
Repeat one file
Repeat All
Repeat all files
Random
Play all files randomly
7-7
Playing Video
Play video files recorded with mobile camera or obtained via
the Internet, S! Mail, etc.
^ Use Headphones, etc. to listen to sound without bothering others.
^ Read the precautions on P.7-4 beforehand.
Playback Window Indicators
Tip H Press 2 during playback to toggle Display Size (see
P.7-10).
Playback
7
Media Player
Play video on Video Player.
^ To change playback settings, see P.7-10.
^ To add subtitles, see P.7-12.
1
2
5
3
6
4
7
1 Video Image/Subtitles
2 Clip Number
3 Status
1: Playing, 0: Paused, 2: Advancing Frame
3: Fast Forwarding, 4: Fast Rewinding
4 Playback Pattern (see P.7-10)
^ Indicators are the same as those for Music Player (see P.7-5).
5 Elapsed Time
^ To specify start point, see P.7-9 "Time Search".
7-8
6 Volume
7 Information Link
^ N appears when linked information is accessible via Access
WEB Link (see P.7-7 "Accessing Linked Information").
^ To disable linked information, see P.7-10 "Web Link Setting".
Main Menu H Media Player A Videos
1
Select My Videos or SD VIDEO and press b
2
Select Phone Memory or Memory Card and press b
^ For SD VIDEO, skip ahead to Step 4 on P.7-9.
C To play the last played file from where it stopped, select Last
Played Video A Press b
3
For basic operations, see P.7-6 "Playback Operations
(Music/Video)".
All Videos
Select a file and press b
Playback window opens and playback starts.
^ Playback stops after the last file when Playback Pattern is set
to Normal (see P.7-10).
C To access linked information, see P.7-7.
Change Settings
Press N x A Select Settings A
Press b A P.7-10
Edit
See P.7-11
Frame Advance
While paused, press A (Long Press)
Toggle Display Size
Press 2 or h (see P.7-10)
Video with Linked Information
C After playing video (with N) Internet connection confirmation
appears.
To access linked information, choose Yes A Press b
7
Media Player
C To search files, press N x A
Select Search A Press b A Enter
search text A Press b
B When no matching text is found, text
entry window returns. Change text and
try again.
C To sort files, press N x A Select
Sort A Press b A Select a sort option
A Press b
B Sort is available for All Videos files.
4
Playback Operations (Video Only)
Select All Videos or a Playlist
and press b
^ Confirmation does not appear when Web Link Setting (see
P.7-10) is Off.
Time Search
C Specify start point while playing or paused.
Press N x A Select Time Search A Press b
A Enter time A Press b
Tip H ^ Video recorded on other devices may appear rotated.
^ Out of Video Playback window, Media Player shuts
down after five minutes of inactivity.
7-9
Playback Settings
Display Size
Change playback size
Available for My Videos files only.
Playback
Pattern
KEnlarge
Play all or Playlist files repeatedly or randomly
KNormal
Main Menu H Media Player A Videos A Settings
7
Select Playback Pattern A Press b A Select a
pattern A Press b
Media Player
Normal
Play in order until the last file ends
Repeat
Repeat one file
Repeat All
Repeat all files
Random
Play all files randomly
Main Menu H Media Player A Videos A Settings
Select Display Size A Press b A Select Normal,
Enlarge or Full Screen A Press b
^ Some Display sizes are not selectable.
^ Alternatively, press 2 or h during playback to toggle
Display Size as follows: Full Screen (no indicators) % Full
Screen (with indicators) % Normal % Enlarge
B Press 2 or h in paused Full Screen view to show or hide
indicators.
Web Link
Setting
Select whether to show linked information
KOn
Main Menu H Media Player A Videos A Settings
Backlight
Select a Backlight status for playback
KAlways On
Main Menu H Media Player A Videos A Settings
Select Backlight A Press b A Select a pattern A
Press b
7-10
Always On
Backlight remains on during playback
Always Off
Backlight remains off during playback
Normal Settings
Applies Display Backlight setting (see
P.9-13)
Select Web Link Setting A Press b A Choose On
(show) or Off A Press b
Editing Video
HQVGA (W 240 x H 176 dots) or larger video cannot be edited.
Select Two Points
Crop Delete Before
Delete After
Save portion after selected point as a
new file
Save portion before selected point as
a new file
Add subtitle text to video
Note H ^ Some files may not be edited.
^ Edited video may not play properly if Memory Card is
not formatted for 812SH or 813SH.
^ To save to Memory Card, a maximum of 1.2 MB of free
memory is required in addition to the file size.
Follow these steps after Step 4 on P.7-9.
1
2
3
4
5
While playing or paused, press N x
6
7
Press N U at the start point
Select Edit and press b
Choose Yes and press b
^ Incoming transmissions are blocked during editing.
Select Crop and press b
Select Select Two Points and press b
Video plays.
^ Press b to pause/start video.
The start point is specified and playback resumes.
7
Media Player
Subtitle
Save portion between two points as a
new file
Clipping Portions between Two Points
Press N E at the end point
The portion is saved and playback starts.
Note H Portions over 30 minutes may not be saved.
7-11
Cropping Video Clips
Delete the portion before or after the selected point to save
the rest as a new file.
Follow these steps after Step 4 on P.7-9.
7
Media Player
1
2
3
4
5
6
While playing or paused, press N x
Select Edit and press b
Choose Yes and press b
^ Incoming transmissions are blocked during editing.
Select Crop and press b
Select Delete Before or Delete After and press b
Video plays.
^ To adjust start point, press b to start/pause video.
^ The portion before or after the selected point will be deleted.
C To cancel, press i.
Press N { at approximate start point
The remaining portion is saved and playback starts.
Note H Portions over 30 minutes may not be saved.
7-12
Adding Subtitles
Set subtitles to appear while playing video. Select timing,
add effects, etc.
Entering Text
After entry, set timing and time period for subtitles.
^ Save up to ten subtitles (48 single-byte alphanumerics each).
^ Follow these steps after Step 4 on P.7-9.
1
2
3
4
5
6
7
While playing or paused, press N x
Select Edit and press b
Choose Yes and press b
^ Incoming transmissions are blocked during editing.
Select Edit Subtitle and press b
Select <empty> and press b
Enter text and press b
^ Press b to pause/play video.
Press N U at the start point
8
9
Press N E at the end point
Display Settings
Edit Subtitle menu opens.
^ If video has ended before pressing N
E, start over from Step 7.
C To edit text, select Edit Text A Press b
A Edit text A Press b
Change display settings (see
right) and add effects (see P.7-14)
Follow these steps in Step 9 on the left.
Duration
Set timing and time period for subtitles
Select Duration A Press b A Press N U at the
start point A Press N E at the end point
C When finished, perform from Step 10 on the left.
Edit Subtitle Menu
^ To complete without changing display
settings or adding effects, proceed to Step 10.
C To edit saved subtitles, select one A Press b A Select Edit
Text A Press b A Edit A Press b A Perform from Step 9
C To delete saved subtitles, select one A Press N x A
Select Delete A Press b A Choose Yes A Press b
11 Press M q
Overwrite or Create New and press b
12 Select
^ Playback starts. (Subtitles appear only in Normal size.)
Set position for subtitles to appear
Select Advanced A Press b A Select Display
Position A Press b A Use G to select a position
A Press b
C When finished, press i A Perform from Step 10 on the left.
Font Size
7
Media Player
completing all the settings, press M K
10 After
^ To add more, repeat Steps 5 - 10.
Display
Position
Change font size of subtitles
KLarge (20 x 20)
Select Advanced A Press b A Select Font Size A
Press b A Select Large(20x20) or Small(12x12) A
Press b
C When finished, press i A Perform from Step 10 on the left.
7-13
Scrolling
Select a direction and visual effect for subtitle
scroll
KDirection: Stop, Effect: Frame In
Scroll Direction
Select Advanced A Press b A Select Scrolling A
Press b A Select Direction A Press b A Select
Stop, Left to Right or Right to Left A Press b
C When finished, press i A Press i A Perform from
Step 10 on P.7-13
7
Scroll Effects
Media Player
Select Advanced A Press b A Select Scrolling A
Press b A Select Effect A Press b A Select an
effect A Press b
Frame In
Subtitle comes in from an end, then disappears
in the centre
Frame Out
Subtitle appears in the centre and scrolls out
Rolling
Subtitle scrolls from end to end
C When finished, press i A Press i A Perform from
Step 10 on P.7-13
On-Screen Time
Select Advanced A Press b A Select Scrolling A
Press b A Select On-Screen Time A Press b A
Enter time A Press b
C When finished, press i A Press i A Perform from
Step 10 on P.7-13
Background
Colour
Select from seven background colours
KBlack
Select Advanced A Press b A Select Background
Colour A Press b A Select a colour A Press b
C When finished, press i A Perform from Step 10 on
P.7-13
7-14
Adding Text Effects
^ Up to two effects can be applied per entry.
^ Follow these steps in Step 9 on P.7-13.
Font Colour
Change font colours
KWhite
Changing Colour of Entire Text
Select Advanced A Press b A Select Font Colour
A Press b A Select All A Press b A Select a
colour A Press b
C When finished, press i A Perform from Step 10 on P.7-13
Changing Colour of Portion
Select Advanced A Press b A Select Font Colour
A Press b A Select Select Text A Press b A
Use G to select the first character of text A
Press b A Use G to select the end point A
Press b A Select a colour A Press b
C When finished, press i A Perform from Step 10 on P.7-13
Managing Video & Music Files
C When finished, press i A Perform from Step 10 on P.7-13
Blink
Set subtitles to flash
C When finished, press i A Perform from Step 10 on P.7-13
Reset
Reset Advanced subtitle settings
Select Advanced A Press b A Press N l A
Choose Yes A Press b
^ Reset does not affect Duration setting.
All Videos/All Music
Classic_music_01
Classic_music_02
Classic_music_03
Pops_music_01
Pops_music_02
Pops_music_03
Playlist
Classic_music_01
Pops_music_01
Rock_music_02
Rock_music_03
Selected Files
7
Media Player
Select Advanced A Press b A Select Blink A
Press b A Use G to select the first character of
text A Press b A Use G to select the end point A
Press b
Organise video/music files on handset in My Videos and My
Music. All files are saved in All Videos or All Music. Use
Playlists to organise them.
…
KWhite
Select Advanced A Press b A Select Highlight A
Press b A Use G to select the first character of
text A Press b A Use G to select the end point A
Press b A Select a colour A Press b
…
Highlight subtitles
Rock_music_01
Rock_music_02
Rock_music_03
…
Highlight
All Files
^ Playlists store only file locations. Source files remain in All
Videos or All Music.
^ Three Playlists are saved by default. To create new Playlists, see
P.7-16.
^ Use Music Manager on the supplied Utility Software CD-ROM
to create Playlists and organise music files via PCs.
Note H To save video to Memory Card, a maximum of 1.2 MB of
free memory is required in addition to the file size.
7-15
Adding New Playlist
Adding Files to Playlists
Create up to 99 Playlists in My Videos, My Music and SD
AUDIO each.
^ Playlists cannot be added into SD VIDEO.
^ Playlist 1 to Playlist 3 (or プレイリスト1 to プレイリスト3) are saved in
My Videos and My Music by default.
Main Menu H Media Player
7
Media Player
1
Video Playlists
1 Select Videos and press b
2 Select My Videos and press b
3 Select Phone Memory or Memory Card
Music Playlists
1 Select Music and press b
2 Select My Music or SD AUDIO
2
Press b
3
4
5
7-16
C To delete Playlists, select one A
Press N x A Select Delete
Playlist A Press b A Choose Yes A
Press b
C To rename Playlists, select one A
Press N x A Select Edit List Title A
Press b A Enter new name A Press b
Press N x
Select Add New Playlist and press b
Enter name and press b
My Videos
Add files to Playlists from All Videos or All Music.
^ Playlists store only file locations. Source files remain in All
Videos or All Music.
^ SD VIDEO files cannot be added to Playlists.
Main Menu H Media Player
1
Adding Video Files
1 Select Videos and press b
2 Select My Videos and press b
3 Select Phone Memory or Memory Card
Adding Music Files
1 Select Music and press b
2 Select My Music or SD AUDIO
2
3
4
5
Press b
Select All Videos or All Music and press b
Select a file and press N x
Select Add to Playlist and press b
6
Select a Playlist and press b
File is added to the end of the Playlist.
C To delete saved files, press i A Select a Playlist A
Press b A Select a file A Press N x A Select
Delete A Press b A Choose Yes A Press b
C To move files within a list, press i A Select a Playlist A
Press b A Select a file A Press N x A Select Change
Order A Press b A Use E to move file A Press b
Opening Playlist Properties
Select All Music, All Videos or a Playlist A
Press N x A Select Details A Press b
Deleting SD VIDEO or SD AUDIO All Music files deletes
source files.
Deleting Video Files
Main Menu H Media Player A Videos A SD VIDEO
1
2
3
Select a file and press N x
Select Delete and press b
Choose Yes and press b
Deleting Music Files
Main Menu H Media Player A Music A SD AUDIO A All Music
1
2
3
7
Media Player
C Follow these steps when Playlists are listed (see Step 2 on
P.7-6, Step 3 on P.7-9 or Step 2 on P.7-16).
Deleting SD VIDEO & SD AUDIO Files
Select a file and press N x
Select Delete Track and press b
Choose Yes and press b
Deleting My Videos/My Music Files
C Delete All Videos and All Music files from Videos and Ring
Songs·Tones/Music in Data Folder respectively (see P.8-8).
7-17
Managing Files (Data Folder)
8-1
Data Folder
Window Description
Handset files are organised in folders by file format.
Still Images
Data Folder
Pictures
Downloaded
Pictograms
DCIM
My Pictograms
8
Shortcut to
S! Applications
(see P.16-2)
Ring Songs • Tones
Managing Files (Data Folder)
Downloaded
E-Books, etc.
Videos
Lifestyle-appli
Book
Custom Screens
Downloaded
Flash# Files
Downloaded
Melodies and other
Sound Files
S! Appli
Music
Video Images
Large Still Images on
Memory Card
Flash#
Downloaded
Chaku-Uta Full# Files
Downloaded
Lifestyle-Appli
Shortcut to Custom
Screens (see P.9-9)
Flash#Ringtones
Other Files (vFiles,
Dictionary Files, etc.)
Other Documents
Downloaded Flash#
Ringtones
Tip H ^ Access the corresponding Yahoo! Keitai Menu directly
from Pictures, My Pictograms, Ring Songs·Tones,
S! Appli, Music, Videos, Lifestyle-appli, Books and
Custom Screens.
^ Exchange files via Bluetooth# (see P.10-2) or infrared
(see P.10-10) with compatible SoftBank handsets.
8-2
To open Data Folder from Standby, follow
these steps.
Press b A Select Data Folder A
Press b
Memory Status
C To check memory usage status, open Data Folder and follow
these steps.
Select Memory Status A Press b A Select Phone
Memory or Memory Card A Press b
^ Delete messages/files when memory is low. Handset
performance may be affected when memory is full.
CVideo Files
File List
In Data Folder, select a folder and press b. File list appears.
Download Icon
Icon
S
MPEG-4 (.3gp)
3GPP video image
U
MPEG-4 or H.263
(.3gp or .mp4)
3GPP video image
Icon
Thumbnails
Pictures
CStill Image & Animation Files
Format & Extension
Description
JPEG (.jpg)
JPEG image
PNG (.png)
PNG image
R
E-Animation (NEVA files)
(.nva)
Animation (may include
sound)
W
SVG (.svgz)
SVG-T file
Format & Extension
Description
H
SMAF (.mmf)
Melody via the Internet
(may include images)
V
Audio (.mp4)
Downloaded Chaku-Uta#
I
Voice (.amr)
Voice/sound recorded on
Voice Recorder
Tip H ^ a appears for copy protected files. b appears for files
in the public domain.
^ U appears for files used for Wallpaper, System
Graphics, ringtone, ringvideo, etc.
^ n appears for copy/forward protected files.
8
Managing Files (Data Folder)
Major Icons
F
G
Description
CSound Files
Selected File
Icon
Format & Extension
8-3
Sorting Files
Display Settings
Sort files by name, date, size, type or Content Key status.
Select Unsorted to list files randomly.
Switching File List View
Main Menu H Data Folder
8
Managing Files (Data Folder)
Inline
Grid
Preview
Main Menu H Data Folder
1
2
Select a folder and press b
3
4
5
Select Manage Items and press b
Press N x
^ Select a folder other than My Pictograms, Ring Songs·Tones,
S! Appli, Music, Lifestyle-appli, Flash# or Flash# Ringtones.
Select Change List View and press b
Select Inline View, Grid View or Preview View and
press b
^ Preview View appears for folders other than Books, Videos,
Custom Screens or Other Documents.
Tip H Alternatively, press h in file list to toggle the view.
8-4
1
Select a folder and press b
2
Press N x
3
4
5
Select Manage Items and press b
C To open a created sub folder or a sub folder in DCIM, select it
A Press b
^ Select a folder other than S! Appli or Lifestyle-appli.
^ If Download icon is highlighted in file list, skip ahead to Step 4.
Select Sort and press b
Select a method and press b
Note H It may take a while to sort many files.
Tip H To reverse the order, sort by the same method again.
Opening Files
Note H Remote control on LCD Remote/Mic (optional accessory)
is disabled for Music Player activated via Data Folder.
Main Menu H Data Folder
1
3
C Open file list in Pictures, DCIM or Videos folder and follow
these steps.
File list appears.
C To switch between handset and Memory
Card, press N x A Select
Change to Phone or Change to
Memory Card A Press b
C To open a created sub folder or a sub
folder in DCIM, select it A Press b
Select a file and press b
Press N x A Select Take Picture or Record
Video A Press b
B Mobile camera activates in Photo Camera mode from
Pictures and DCIM folders, or in Video Camera mode
from Videos folder.
B To capture still images, see P.6-6.
B To record video, see P.6-8.
File List
(Pictures)
The content plays or appears.
C Press b to zoom in. (Press repeatedly to zoom in more.)
B To zoom out, press i.
C Press C (up) or D (down) to adjust volume.
C To switch sound file name display, select a file A Press N
x A Select Item Displayed A Press b A Select File
Name or Title (default) A Press b
Press i to return to file list
^ Press i twice to return to file list from zoomed view.
^ From file list, press i to return to Data Folder.
Selecting Multiple Files
Select multiple files in a folder to move, copy or delete them
all at the same time.
Main Menu H Data Folder
1
Select a folder and press b
2
Select a file and press M @
3
Repeat Step 2 to select more
C To open a created sub folder or a sub folder in DCIM, select it
A Press b
8
Managing Files (Data Folder)
2
Activating Mobile Camera
Select a folder and press b
P appears.
^ Select a folder other than S! Appli or Lifestyle-appli.
C To uncheck, select a file with P A Press M r
^ Copy, move, or delete files (see P.8-8, P.8-9).
8-5
Slide Show
Properties
Main Menu H Data Folder
1
Select Pictures or DCIM and press b
2
3
Select a file and press N x
8
Managing Files (Data Folder)
4
C To open a created sub folder or a sub folder in DCIM, select it
A Press b
Select Slide Show and press b
Slide Show starts.
^ All images in the folder appear sequentially.
^ When Speed is set to Manual, press b or q to advance or
reverse frames.
Press b to stop
Setting Interval
C Follow these steps after Step 3.
Press N j A Select Speed A Press b A
Select Fast, Normal, Slow or Manual A Press b
^ Speed is Normal by default.
Repeat Slide Show
C Follow these steps after Step 3.
Press N j A Select Repeat A Press b A
Choose On or Off A Press b
^ For Off, all images in the folder appear then file list returns.
^ Repeat is On by default.
8-6
Main Menu H Data Folder
1
Select a folder and press b
2
3
Select a file and press N x
C To open a created sub folder or a sub folder in DCIM, select it
A Press b
^ Select multiple files as needed.
Select Details and press b
^ Press D to scroll down.
^ The following information appears:
File name, type, size, last modified date, vendor, copy/forward
protection and other restrictions (number of times to open,
expiry term), etc.
B Available information varies by file.
SVG Files
C Handset supports Scalable Vector Graphics-Tiny (SVG-T).
Follow these steps to view graphics such as tables or maps.
Press b A Select Data Folder A Press b A
Select Other Documents A Press b A Select an
SVG file A Press b
^ Press N x to use the following functions.
^ Key Assignments:
G
Page Scroll
2 (Up), 4 (Left)
6 (Right), 8 (Down)
Zoom
1 (Zoom Out), 3 (Zoom In)
Rotate
7 (Counterclockwise)
9 (Clockwise)
Key Action Mode
0
Set Default
5
^ Some features may not be available depending on the file.
^ To create SVG files via PC, use PC Document Conversion
Utility on Utility Software CD-ROM.
^ For more information on SVG-T, visit http://j.sst.ne.jp/svgt/
index_pdc.html (Japanese only).
Press b A Select Data Folder A Press b A Select
Books A Press b A Select a CCF file A Press b
B BookSurfing S! Application starts.
^ Refer to the BookSurfing# help menu for operational
instructions.
^ When an S! Application is paused, Application
suspended. End application? appears. Choose Yes and
press b twice to start BookSurfing.
^ When BookSurfing is paused, properties of opened CCF
file may not be accessible.
Flash#
C Download Flash# animation files via the Internet; use as
Wallpaper (see P.9-3), etc.
Flash# Ringtones
C Download Flash# Ringtones via the Internet; use as
ringtones with Flash# animation (see above).
My Pictograms
8
Managing Files (Data Folder)
Line Scroll
CCF Files
C Follow these steps to read CCF files (comics, photo books,
etc. saved in Books folder) designed for BookSurfing#
application (see P.18-9).
C Download GIF image Pictograms via the Internet; create
Arrange Mail (see P.14-11).
8-7
Managing Files & Folders
Adding Folders
^ Assign different names to folders within a layer.
^ Folders cannot be added to DCIM, S! Appli or Lifestyle-appli folder.
Main Menu H Data Folder
8
Managing Files (Data Folder)
1
2
3
4
5
Select a folder and press b
Press N x
Select Manage Items and press b
Select Create Folder and press b
Enter name and press b
Changing File/Folder Name
^ File extensions do not change.
^ Assign different names to files/folders within a layer.
B Single-byte Symbols 5, /, :, ;, ., <, >, |, ?, 4 and ”are not supported.
^ Make sure there is enough free memory.
^ Folders/files in DCIM, S! Appli or Lifestyle-appli folder cannot
be renamed.
Main Menu H Data Folder
1
2
8-8
Select a folder and press b
Select a file or folder and press N x
3
4
5
Select Manage Items and press b
Select Rename and press b
Edit name and press b
Deleting Files & Folders
Delete files and created folders in Data Folder.
To delete S! Applications, see P.16-5 "Deleting S! Applications".
Main Menu H Data Folder
1
2
Select a folder and press b
Deleting Folders
1 Select a folder and press N x
^ Select a folder other than S! Appli or Lifestyle-appli.
Deleting Single Files
1 Select a file and press N x
Deleting Multiple Files
1 Perform from Step 2 on P.8-5 to select
multiple files and press N x
Deleting All Created Folders & Files
1 Select a file and press N x
2 Select Manage Items and press b
3
4
Select Delete or Delete All and press b
C For deleting folders or Delete All, enter Handset Code A Press b
Choose Yes and press b
3
4
Select Copy or Move and press b
5
Select Copy here.. or Move here.. and press b
Copying/Moving Files
Copy or move files to the corresponding folder on Memory
Card or to created sub folders within the folder (handset or
Memory Card).
Main Menu H Data Folder
1
Select a folder and press b
2
Copying/Moving Single Files
1 Select a file and press N x
Copying/Moving Multiple Files
1 Perform from Step 2 on P.8-5 to select
multiple files and press N x
^ Select a folder other than S! Appli or Lifestyle-appli.
C To open a created sub folder or a sub folder in DCIM, select it
A Press b
C To move files set as Wallpaper or used for other functions,
choose Yes A Press b
C To copy/move to created sub folders, select a folder A Press b
Note H ^ If a copy protected file is included in the selected files,
only the remaining files are copied.
^ Files copied or moved to Memory Card may not be
usable on other SoftBank handsets or PCs, etc.
^ Name of copied or moved file may change when the
same name already exists in the folder.
8
Managing Files (Data Folder)
^ Copy or move files in DCIM folder to Pictures folder (handset
or Memory Card).
^ Copy/forward protected files cannot be copied.
^ Some files may not be copied or moved.
^ Files in S! Appli and Lifestyle-appli folders cannot be copied or
moved.
Select Phone or Memory Card and press b
8-9
Using Files
Use Data Folder files as Wallpaper, Phone Book Picture,
ringtone and ringvideo.
^ Set as Wallpaper, Add to Ph.Book, Set as Ring Video and
Set as Ringtone appear only for compatible files.
^ Some files may not be used depending on the size.
8
Managing Files (Data Folder)
8-10
Note H Some copy protected files (a or b) cannot be used even
if Set as Wallpaper, Add to Ph.Book, Set as Ring
Video or Set as Ringtone appears.
Wallpaper
Saving to Phone Book
Main Menu H Data Folder
1
Select Pictures, Ring Songs·Tones, Music,
Videos or Flash#Ringtones and press b
2
3
Select a file and press N x
Select Pictures, DCIM, Flash# or Other
Documents and press b
C To open a created sub folder or a sub folder in DCIM, select it
A Press b
2
3
Select a file and press N x
4
Press b
Select Set as Wallpaper and press b
C For images smaller or larger than Display, select Centred,
Full Screen or Fit Image A Press b
B For Display size images or Centred, use E to zoom in/out
or press N to rotate.
Wallpaper is set.
C For more, perform Step 4 in "Saving from Call Log" on P.4-8.
Ringvideo & Ringtone
Assign video or sound file as ringvideo or ringtone for Voice Calls.
Main Menu H Data Folder
1
Select Add to Ph.Book and press b
Ringvideo
Main Menu H Data Folder A Videos
1
2
Select a file and press N x
Select Set as Ring Video and press b
Ringtone
Main Menu H Data Folder
1
Select Ring Songs·Tones, Music or
Flash#Ringtones and press b
2
3
Select a file and press N x
Select Set as Ringtone and press b
S! Mail Attachments
Printing Images
Connect handset to a printer via Bluetooth# and print JPEG/
PNG images.
^ Use a Bluetooth#-compatible printer.
^ Activate Bluetooth# on the printer.
Main Menu H Data Folder
1
1
2
3
4
5
Select a folder and press b
Select a file and press N x
Select Send and press b
Select As Message and press b
C For large JPEG images, select attachment size A Press b
Complete other fields and send S! Mail (perform
from Step 3 on P.14-7)
2
3
4
5
Select a still image and press N x
6
Choose Yes and press b
Select Print and press b
Select Via Bluetooth and press b
Device search starts.
Select a device and press b
C When requested, enter passcode A Press b
C When transmission is in progress, choose Yes A Press b
8
Managing Files (Data Folder)
C To open a created sub folder or a sub folder in DCIM, select it
A Press b
Attach files to S! Mail from Data Folder.
Main Menu H Data Folder
Select Pictures, DCIM or Other Documents and
press b
Offline Mode is set and printing starts.
^ When printing completes, printer stops automatically.
C To cancel, press M 3.
Note H Some images sent to Basic Imaging Profile-compatible
printers may not be printed due to printer limitations.
8-11
Editing Still Images
Changing Image Size
Resize Pictures folder images for Wallpaper, Alarm, etc.
^ Alternatively, crop image for size or zoom in/out on portions.
(File size changes when images are resized.)
^ Picture Editor appears only for compatible files.
3
4
5
6
7
Resize to Preset Size
8
Managing Files (Data Folder)
Select from To Wallpaper to
Alarm and press b
A rectangle appears on the image (except
for To Wallpaper and Power On/Off).
To Wallpaper
W 240 x H 320 dots
Power On/Off
W 240 x H 320 dots
2
8-12
W 240 x H 104 dots
Select Save as New and press b
C To overwrite, select Overwrite A Press b
Enter name and press b
Select a location and press b
Image is saved to Data Folder as a new entry.
Main Menu
H Data Folder A Pictures A Select a file A Options
(N) A Edit A Picture Editor A Resize
1
2
Select Cut and press b
3
Use G to move + to the lower right corner of the
portion to crop and press b
Use G to move + to the upper left corner of the
portion to crop and press b
C To cancel, press i A Start over from Step 1
For Incoming Call W 176 x H 144 dots
Alarm
Press M q
Cropping Images
H Data Folder A Pictures A Select a file A Options
Main Menu
(N) A Edit A Picture Editor A Resize
1
Press b
For Incoming Call
4
Use G to specify display area
^ Display area may be unspecifiable depending on image size.
C To zoom in/out, press N 0 A Press C (zoom in) or D
(zoom out)
C To start over from size selection, press i.
5
6
Use G to specify display area
^ Display area may be unspecifiable depending on image size.
C To zoom in/out, press N 0 A Press C (zoom in) or D
(zoom out)
C To cancel, press i A Start over from Step 1
Press b
Press M q
7
8
9
Select Save as New and press b
C To overwrite, select Overwrite A Press b
Enter name and press b
Select a location and press b
Image is saved to Data Folder as a new entry.
Visual Effects (Retouch)
Dress up images with pre-loaded visual effects.
Main Menu
1
H Data Folder A Pictures A Select a file A Options
(N) A Edit A Picture Editor A Retouch
Select an effect and press b
^ Retouch Effects:
Sepia
Renders image in sepia tone
Sparkling
Adds sparkling effect to bright portions of image
Ripples
Superimposes widening rings over image
Tile
Adds a brick frame around image
Emboss
Renders image in black and white relief
Oil Painting
Renders image as a blurred image
Clear Frame
Adds a transparent 3D frame around image
Press b
Press M q
Select Save as New and press b
C To overwrite, select Overwrite A Press b
Enter name and press b
Select a location and press b
Image is saved to Data Folder as a new entry.
Note H Edited images may be too large to save or send via S! Mail.
8
Managing Files (Data Folder)
^ Apply to W 52 x H 52 dots or larger JPEG/PNG images
including Continuous Shoot images.
^ Picture Editor appears only for compatible files.
2
3
4
5
6
Round Frame Adds a round, opaque frosting around image
Soft Frame
Adds a soft, opaque edged frame around
image
Zigzag Frame Adds a jagged edged frame around image
C To start over, press i.
8-13
Adding Text & Stamps
Picture Editor appears only for compatible files.
H Data Folder A Pictures A Select a file A Options
Main Menu
(N) A Edit A Picture Editor
1
C To enter the date, select Date A Press b A Skip
ahead to Step 2
8
3 Enter text and press b
Managing Files (Data Folder)
^ Enter up to 16 characters.
^ Apply to JPEG and PNG images.
^ Face Arrange may not fit all images. Adjust position and size
as required (see P.8-15).
^ Picture Editor appears only for compatible files.
Main Menu
1
H Data Folder A Pictures A Select a file A Options
(N) A Edit A Picture Editor A Face Arrange
Select a type and press b
^ Face Arrange Types:
Copies right side of face onto left side
Collage: Left-half
Copies left side of face onto right side
Grin
Pulls eyes down & mouth up
Mad
Pulls eyes up & mouth down
Sad
Pulls eyes & mouth down
Big Eyes
Adds graphic eyes
C To specify colours, press N n A Select text colour A
Press b A Select outline colour or no outline A Press b
A Press M $
Burning Eyes
Adds flames in the eyes
Crying
Adds tears
Aristocrat
Adds a monocle and moustache
Press M q
Angry Mark
Adds a stress mark to face
C To change the stamp, press i.
2
Make smiley, angry or sad faces.
Collage: Right-half
Adding Stamps
1 Select Stamp and press b
2 Select a stamp and press b
3
4
5
6
8-14
Adding Text
1 Select Paste and press b
2 Select Free Text and press b
Face Arrange
Use G to move text or stamp to target location
and press b
Select Save as New and press b
C To overwrite, select Overwrite A Press b
Enter name and press b
Select a location and press b
Image is saved to Data Folder as a new entry.
C To check current positions of targets, press N ;.
B Press i to return.
C To start over, press i.
2
3
4
5
6
Press b
Press M q
3
Set the face line
Select Save as New and press b
C To overwrite, select Overwrite A Press b
b
b
Enter name and press b
Select a location and press b
Image is saved to Data Folder as a new entry.
Use G to move
+ to the lower
right corner
Adjusting Face Arrange Position
Change the default positions and sizes of targets to fit the image.
Changes apply to the current image only.
1
In Step 1 under "Face Arrange" on P.8-14,
press N ;
2
Press N u
A rectangle appears with + in the upper left corner.
Use G to move
+ to the upper
left corner
Face line is set
C To start over, press i.
4
Set the eyes and then mouth in the same way
5
6
7
Press b
^ When finished, all the targets appear.
^ To readjust targets, start over from Step 2.
C To restore the original positions, press i. (Not available
after setting mouth position.)
Choose Yes and press b
Select a location and press b
8
Managing Files (Data Folder)
Note H When using Face Arrange, take care not to create images
that may embarrass or offend others. Always obtain
permission before photographing others.
Image is saved to Data Folder as a new entry with Face Arrange
positions adjusted, and Face Arrange menu returns.
^ Complete Face Arrange. Face Arrange is applied to the
adjusted positions.
8-15
Additional Picture Effects
Rotate
Picture Editor appears only for compatible files.
Main Menu
Frame
Add Frame to JPEG and PNG images
H Data Folder A Pictures A Select a file A
Main Menu
Options (N) A Edit A Picture Editor A Frame
8
Select a frame A Press b A Press b A Press M
q A Select Save as New A Press b A Enter
name A Press b A Select a location A Press b
Managing Files (Data Folder)
C To change the frame, press i before assigning it.
C To overwrite, select Overwrite instead of Save as New A
Press b
Correction
Main Menu
Correct images
H Data Folder A Pictures A Select a file A
Options (N) A Edit A Picture Editor A Correction
Select from Sharpness to Dark A Press b A
Press b A Press M q A Select Save as New
A Press b A Enter name A Press b A Select a
location A Press b
C To change Correction type, press i before assigning it.
C To overwrite, select Overwrite instead of Save as New A
Press b
^ Apply to W 52 x H 52 dots or larger JPEG and PNG images.
Rotate images
H Data Folder A Pictures A Select a file A
Options (N) A Edit A Picture Editor A Rotate
Select a type A Press b A Press b A Press M
q A Select Save as New A Press b A Enter
name A Press b A Select a location A Press b
C To start over from type selection, press i before second
press of b.
C To overwrite, select Overwrite instead of Save as New A
Press b
File Format/
File Size
Main Menu
Convert file format and change file size
H Data Folder A Pictures A Select a file A
Options (N) A Edit A Picture Editor A File Format
Converting File Format
Select File Format A Press b A Select a format A
Press b A Press i A Press M q A Enter
name A Press b A Select a location A Press b
^ Changing file format may affect file size and image quality.
Changing File Size
Select File Size A Press b A Select a size A
Press b A Press i A Press M q A Select
Save as New A Press b A Enter name A Press b
A Select a location A Press b
C To overwrite, select Overwrite instead of Save as New A
Press b
^ Changing file size may affect image quality.
8-16
Main Menu
Cancelling Effects
C Before saving/adding an effect, select Undo A Press b
B To restore effect immediately after cancelling, select
Redo A Press b
Panorama Images
Combine two still images into one.
Select two images
1
Select Merge Panorama and press b
2
3
Select 2 and press b
4
5
Select EFFECT and press b
Applicable to all kinds of shots
Near View
Best suited for close-up shots with parallax correction
Document
Use for images with text
^ Use JPEG images between W 48 x H 64 and W 120 x H 160 dots/
W 160 x H 120 dots.
^ Some portions may be cropped to adjust two images to the
same size.
^ The result may not be satisfactory if colour tones are different
between two images.
Select another image and press b
Two images are set.
^ If image is incompatible, a message appears; select another.
8
Select from Standard to
Document and press b
C To check images, select either A Press b
B Press i to return.
C To change images, select one A
Press b A Press N X A Select
an image A Press b
C To switch the positions, press N *.
Merge Panorama
Panorama Image Effects:
Standard
Left image is set.
^ Merge Panorama is selectable only for compatible files.
6
7
8
9
Press M q
Merge Panorama
Window
Press b
Managing Files (Data Folder)
+
H Data Folder A Pictures A Select a file A Options
(N) A Edit A Composite
Enter name and press b
Select a location and press b
Image is saved to Data Folder as a new entry.
8-17
4
Split Screen
Combine up to four reduced images into one.
^ Apply to JPEG and PNG images.
^ Make sure there is enough free memory.
^ Images are placed in the upper left, upper
right, lower left and lower right in numerical
order.
Split Image
8
Managing Files (Data Folder)
8-18
Main Menu
1
H Data Folder A Pictures A Select a file A Options
(N) A Edit A Composite
Select SplitPicture 240x320 or SplitPicture
120x160 and press b
Upper left image is set.
2
3
Select 2 and press b
Select an image and press b
^ If image is incompatible, a message appears; select another.
5
6
7
Repeat Steps 2 - 3 to add images
^ In Step 2, select 3 or 4.
C To preview Split Picture, press N x
A Select View Composite A Press b
B Press b to return.
C To change images, select one A
Press b A Press N X A Select
an image A Press b
C To delete images, select one A Press N
x A Select Remove A Press b
A Choose Yes A Press b
Press M q
Enter name and press b
Select a location and press b
Image is saved to Data Folder as a new entry.
Split Picture Preview
Additional Settings
9-1
Mode Settings
Any Key
Answer
Activate Normal, Manner, Drive or Original mode to change
multiple handset settings at one time; each mode offers a
basket of defaults tailored to a particular usage pattern.
Activating a Mode
KDrive: On, Manner/Original: Off
Main Menu H Settings A Phone Settings (F) A Mode Settings
Select a mode A Press N Z A Select Any Key
Answer A Press b A Choose On or Off A Press b
Answer Phone
Mode Settings
Select from four modes
Main Menu H Settings A Phone Settings (F) A Mode Settings
Select a mode A Press b
Additional Settings
Customising Modes
Customise Manner, Drive or Original in Mode Settings. To
customise Normal, see P.9-14 "Sounds & Alerts", P.9-17
"Any Key Answer" or P.2-9 "Answer Phone".
Tip H Volume settings are fixed in Manner mode. Volume,
Vibration and Answer Phone settings are fixed in Drive
mode.
Edit
Customise Volume, Vibration, Event Light and
Status Light settings
Main Menu H Settings A Phone Settings (F) A Mode Settings
Select a mode A Press N Z A Select an item
A Press b A Customise settings (see P.9-14
"Volume", P.9-15 "Vibration", P.9-16 "Event Light"
and P.9-16 "Status Light")
9-2
Activate or cancel Answer Phone for incoming
calls in Manner or Original mode
CAnswer Phone setting is fixed for Drive mode.
KManner/Drive: On, Original: Off
KNormal
9
Activate or cancel Any Key Answer (see P.2-6)
Main Menu H Settings A Phone Settings (F) A Mode Settings
Select Manner or Original A Press N Z A
Select Answer Phone A Press b A Choose On or
Off A Press b
Reset
Reset
Reset settings for each mode
Main Menu H Settings A Phone Settings (F) A Mode Settings
Select a mode A Press M l A Enter Handset
Code A Press b A Choose Yes A Press b
Display
Restoring Custom Screen Wallpaper
Display Settings
Wallpaper
Use Wallpaper to show an image in Standby
KFlash PANTONE
H Settings A Phone Settings (F) A Display A
Main Menu
Wallpaper
Preset Pictures
Select Preset Pictures A Press b A Select an
image A Press b
Select Pictures, DCIM, Flash# or Other Documents A
Press b A Select an image A Press b
C To use files in DCIM folder, select DCIM A Press b A
Select a folder A Press b A Select an image A Press b
A Select Centred, Full Screen or Fit Image A Press b
A Press b
C For images smaller or larger than Display, select an image
A Press b A Select Centred, Full Screen or Fit Image
A Press b A Press b
B For Display size images or Centred, use E to zoom in/out
or press N to rotate.
Cancelling
Select Blank A Press b
Select Custom Screen A Press b A Press b
Note H ^ Some images may be incompatible/not appear correctly.
^ When an S! Application is set as Screensaver,
Wallpaper may not appear.
^ Files in My Pictograms are not selectable.
Tip H Using Wallpaper shortens Battery Time.
System
Graphics
Use images for Power On/Off, incoming calls
and Alarm windows
KPower On/Power Off: Preset Animation
Voice Call/Video Call/Circle Talk/Alarm: Pattern 1
Main Menu
H Settings A Phone Settings (F) A Display A
System Graphics
9
Additional Settings
Data Folder Images
C When Wallpaper is set while Custom Screen is active,
Wallpaper takes priority over Custom Screen Wallpaper.
(Custom Screen remains active.)
To restore Custom Screen Wallpaper, follow these steps after
opening Wallpaper menu.
Power On/Power Off
Select Power On or Power Off A Press b A Select
Preset Animation, Pictures, DCIM, Flash# or Other
Documents A Press b
C For Pictures, Flash# or Other Documents, select an image
A Press b A Press b
C For DCIM, select a folder A Press b A Select an image A
Press b A Press b
9-3
Incoming Calls/Alarm
Select from Voice Call to Alarm A Press b A Select
from Pattern 1 to Pattern 3, Pictures, DCIM, Flash#,
Other Documents or Custom Screen A Press b
C For Pictures, Flash# or Other Documents, select an image
A Press b A Press b
C For DCIM, select a folder A Press b A Select an image A
Press b A Press b
^ If a rectangle appears for images in Pictures, DCIM or Other
Documents, use G to specify display area and press b.
^ Custom Screen is selectable when compatible Custom
Screen is active.
9
Note H Images may not appear for incoming calls/Alarm while
messaging with an S! Application paused.
Additional Settings
Restoring Custom Screen System Graphics
C When System Graphics are set while Custom Screen is
active, System Graphics take priority over Custom Screen
System Graphics. (Custom Screen remains active.)
To restore Custom Screen System Graphics for Voice Call,
Video Call, Circle Talk or Alarm, follow these steps after
opening the corresponding menu.
Select Custom Screen A Press b A Press b
9-4
Note H ^ Ringtone and ringvideo images for Sounds & Alerts may
take priority over System Graphics for incoming calls.
^ Ringtone, ringvideo and Picture images for Phone Book
entries take priority over System Graphics for incoming
calls with caller ID.
Font Settings
Change font size/weight for menus, text entry,
mail messages and the Internet
KFont Size: Standard, Font Weight: Normal
H Settings A Phone Settings (F) A Display A
Main Menu
Font Settings
Font Size
Select Font Size A Press b A Select an item A
Press b A Select a size A Press b
Font Weight
Select Font Weight A Press b A Select a weight A
Press b
^ Selected font weight applies to all windows.
Note H Some menu items, function names, etc. differ by font size.
Tip H Some windows may not support Font Settings.
Clock/
Calendar
Show
Operator Name
Select Clock/Calendar type/view
Show or hide the name of your service
provider (SoftBank, etc.) in Standby
KClock (M)
H Settings A Phone Settings (F) A Display A
Main Menu
Standby Display A Clock/Calendar
Select a type A Press b
CCalendar Contents
Holiday
KOff
H Settings A Phone Settings (F) A Display A
Main Menu
Standby Display A Show Operator Name
Choose On (show) or Off A Press b
Greeting
Message
Create a short text message to appear on
Display each time handset power is activated
KOff
^ Appears in red
Current Date
^ Highlighted
H Settings A Phone Settings (F) A Display A
Main Menu
Greeting Message
9
Edit Message
Clock + 1 Month
^ Underlined (see P.12-2 "Calendar" for
schedules)
Note H ^ Calendar appears on Wallpaper.
^ Preset holidays are based on Japanese calendar as of
January 2007. (Spring Equinox Day and Autumnal Equinox
Day are gazetted on 1 February of the previous year, and
thus may differ from dates scheduled on handset.)
Tip H When an S! Application is set as Screensaver, Calendar
may not appear.
Show
Indicators
^ Enter up to 10 characters.
Switch On/Off
Select Switch On/Off A Press b A Choose On or
Off A Press b
Dial Number
Additional Settings
Scheduled Date
Select Edit Message A Press b A Enter a message
A Press b
Change font of numbers entered in Standby
KPattern 1
H Settings A Phone Settings (F) A Display A Dial
Main Menu
Number
Select Pattern 1, Pattern 2 or Pattern 3 A Press b
Show or hide indicators/Soft Keys in Standby
KStatus Area: On, Softkey Area: Off
H Settings A Phone Settings (F) A Display A
Main Menu
Standby Display A Show Indicators
Select Status Area or Softkey Area A Press b A
Choose On (show) or Off A Press b
9-5
Standby Window (Japanese Only)
CWindow Description (Communication Mode)
My Status
Access shortcut icons, view Live Monitor news (see
P.15-14) or monitor Hot Status members (see P.19-4) in
Standby; open Standby Window in Shortcut, Headline,
Communication or Calendar mode.
Circle Talk Availability
Mail Availability
Call Availability
Icon
CWindow Description (Shortcut Mode)
Icon Panel
Shortcut Area
^ Save up to six shortcuts/Bookmarks.
9
Member Area
Additional Settings
^ Monitor up to five Hot Status members.
News Area
Calendar
Use F to toggle months.
^ Above is an example of Icon Panel in Template 1 view.
^ Icon Panel view is Template 7 by default.
C Change Templates: see P.9-8
CWindow Description (Headline Mode)
News List
9-6
Hot Status Member List
CWindow Description (Calendar Mode)
^ Subscription and member or content registration required to
use Live Monitor (see P.15-14) or Hot Status (see P.19-4).
^ Standby Window opens in Shortcut mode (see left) by default.
1
2
Press C
Standby Window opens in last used mode.
Use G to select an item and press b
Shortcut target, news or member status appears.
^ In Calendar mode, press b to use Calendar.
C Press g to exit.
Tip H For more about icons and information in Headline/
Communication mode, see P.15-14 or P.19-4.
Toggle Modes
C Press M.
Customising Shortcut Mode
Follow these steps after opening Standby Window in
Shortcut mode (see P.9-6).
Assign
Shortcut
Save up to six shortcuts
Assign
Bookmark
Select an icon or a blank entry A Press N x A
Select Icon Panel Display A Press b A Select
Assign Bookmark A Press b A Use G to select a
Bookmark A Press b A Select an icon A Press b
A Choose Yes A Press b
Move
Select an icon A Press N x A Select Icon
Panel Display A Press b A Select Delete A
Press b A Choose Yes A Press b
Assign
Member
Change the order of icons
Select an icon A Press N x A Select Icon Panel
Display A Press b A Select Move A Press b A Select
an icon A Press N (Up) or M (Down) A Press b
Monitor up to five Hot Status members
CSave members to Hot Status member list (see P.19-5) or save Phone
Book entries (see P.4-3) beforehand.
Select an icon or a blank entry A Press N x A
Select Icon Panel Display A Press b A Select
Assign Member A Press b A Select Status Member
List A Press b A Select a member A Press b
C To select from Phone Book, select an icon or a blank entry
A Press N x A Select Icon Panel Display A
Press b A Select Assign Member A Press b A Select
Phone Book A Press b A Select an entry A Press b
Move
Save up to six Bookmarks
Delete shortcut/Bookmark icons
Change member order
Select an icon A Press N x A Select Icon
Panel Display A Press b A Select Move A
Press b A Select a member to move A Press N
(Up) or M (Down) A Press b
Delete
Member Icons
9
Additional Settings
Select an icon or a blank entry A Press N x A
Select Icon Panel Display A Press b A Select
Assign Shortcut A Press b A Use E to select a
menu item A Press b A Select a function, folder or
menu A Press b A Press N U
Delete
Delete Hot Status member icons
Select an icon A Press N x A Select Icon
Panel Display A Press b A Select Delete A
Press b A Choose Yes A Press b
^ My Status icon cannot be deleted.
9-7
Change Icon
Change member icons
Select an icon A Press N x A Select Icon
Panel Display A Press b A Select Change Icon A
Press b A Select an icon A Press b
Add News
Content
Add Live Monitor items; corresponding titles
appear in News area
Press N x A Select Icon Panel Display A
Press b A Select Add News Content A Press b A
Perform from Step 1 in "Live Monitor List" on P.15-15
or in "S! Loop List" on P.15-16
9
Additional Settings
Change
Templates
Change Icon Panel view
Press N x A Select Icon Panel Display A
Press b A Select Change Templates A Press b A
Select a template A Press b
Add News
Content
Add Live Monitor items; corresponding news
appears in News List
Press N x A Select News Panel Settings A
Press b A Select Add News Content A Press b
^ Follow onscreen instructions.
Tip H To update Live Monitor items automatically, see P.15-16 15-17 "Automatic Update".
Customising Communication Mode
Follow these steps after opening Standby Window in
Communication mode (see P.9-6).
Assign Member
News Speed
Monitor up to five Hot Status members
Change title scroll speed
Press N x A Select Icon Panel Display A Press b
A Select News Display A Press b A Select News Speed
A Press b A Select speed A Press b
Target News
Select whether to scroll all titles or unread only
Press N x A Select Icon Panel Display A
Press b A Select News Display A Press b A
Select Target News A Press b A Select an option
A Press b
Tip H To update Live Monitor items automatically, see P.15-16 15-17 "Automatic Update".
9-8
Customising Headline Mode
Follow these steps after opening Standby Window in
Headline mode (see P.9-6).
CSave members to Hot Status member list (see P.19-5) or save Phone
Book entries (see P.4-3) beforehand.
Select a row A Press N x A Select Member
Panel Settings A Press b A Select Assign Member
A Press b A Select Status Member List A Press b
A Select a member A Press b
C To select from Phone Book, select a row A Press N x
A Select Member Panel Settings A Press b A Select
Assign Member A Press b A Select Phone Book A
Press b A Select an entry A Press b
Move
Custom Screens
Change member order
Select a member A Press N x A Select
Member Panel Settings A Press b A Select Move
A Press b A Select a member to move A Press N
(Up) or M (Down) A Press b
Delete
Hide members
Select a member A Press N x A Select
Member Panel Settings A Press b A Select Delete
A Press b A Choose Yes A Press b
Change Icon
Change member icons
Language Setting
Language
Switch handset interface between Japanese
and English
KAutomatic
Main Menu H Settings A Phone Settings (F) A 言語選択
Select Automatic, English or 日本語 A Press b
^ In addition to preloaded Custom Screens (Pattern 1, Pattern 2
and Pattern 3), use Custom Screens downloaded via the Internet.
^ カスタモご紹介 in handset Data Folder (Custom Screens) is a
doorway to カスタモ Mobile Internet site offering Custom Screens.
^ Pattern 1 is installed by default.
Downloading Custom Screens
To download Custom Screens, open handset Data Folder
(Custom Screens).
^ Some Custom Screens are fee-based.
^ To use fee-based Custom Screens, download Custom Screen
Keys to handset (see P.9-10).
^ Custom Screens and Custom Screen Keys are downloaded
via the Internet. Make sure signal is strong.
^ Custom Screens can also be downloaded via カスタモ (http://
www.custamo.com/) using a PC.
9
Additional Settings
Select a member A Press N x A Select Member
Panel Settings A Press b A Select Change Icon A
Press b A Select an icon A Press b
Download and install applications that load single-themed
handset Wallpaper, menu windows, indicators, ringtones
and more, all at the same time.
Note H Read information (Custom Screen Key price, expiry date,
etc.) on Custom Screen download page.
^ For Automatic, interface language switches according to
language information on USIM Card.
9-9
Main Menu H Data Folder A Custom Screens
1
2
Select Download Custom Screens and press b
Handset connects to the Internet and カスタモ appears.
C To read introduction to カスタモ first, select カスタモご紹介
A Press b A Press b A Choose Yes A Press b
2
^ Select one with b.
3
Select Activate and press b
4
Press N i
Download a Custom Screen
^ Read through information on the site.
^ On PCs, download Custom Screens to the following Memory
Card directory. Do not change file name, extension, etc.
B PRIVATE/MYFOLDER/My Items/Custom Screens
CPurchasing Custom Screen Keys
9
Additional Settings
9-10
Main Menu H Data Folder
1
Select Custom Screens and press b
Available Custom Screens appear.
^ Fee-based Custom Screen Indicators:
Key Found
a
Key Not Found
^ When 100 Content Keys are already downloaded, delete Keys
before downloading new ones.
Handset connects to the Internet and download page appears.
^ Custom Screen Key download page contains the following
information:
B Custom Screen Key price
B Payment method
B Terms of service
B Link to customer enquiry service
C To cancel, press M 3.
5
Read through terms of service and download
Custom Screen Key following online instructions
6
After download, press N K
b
^ U appears for the current Custom Screen.
C To switch between handset and Memory Card, press N
x A Select Change to Phone or Change to Memory
Card A Press b
Select a Custom Screen for which to download
the Key and press N x
Data Folder (Custom Screens) returns.
Delete
Delete Custom Screen and Custom Screen Key
Main Menu H Data Folder A Custom Screens
Select a Custom Screen A Press N x A Select
Delete A Press b A Choose Yes A Press b
C To delete the corresponding Custom Screen Key at the
same time, choose Yes A Press b
B To cancel, choose No A Press b
^ Custom Screen Keys cannot be deleted independently.
^ Delete カスタモご紹介 as needed.
Web Access
CCustom Screens in Data Folder
Main Menu H Data Folder
1
Select Custom Screens and press b
2
Select a Custom Screen and press b
Access Custom Screen source sites
Main Menu H Data Folder A Custom Screens
Custom Screen Setup
Custom Screen setup may take some time. (Pressing g
does not cancel setup.)
CPreset Custom Screens
Main Menu
1
2
H Settings A Phone Settings (F) A Custom
Screens A Preset Screens
Select Pattern 1, Pattern 2 or Pattern 3 and press b
3
^ Custom Screens with b cannot be set.
^ Select a Custom Screen and press N x to open
properties, change file names or copy/move to other folders
(see P.8-6, P.8-8, P.8-9).
Press b
Custom Screen is set and Data Folder (Custom Screens) returns.
Note H ^ Some Custom Screens may not contain files for
Wallpaper, System Graphics, ringtones or ringvideos;
default settings apply for these functions.
^ Custom Screen setup may fail when battery is low or
depending on content.
9
Additional Settings
Select a Custom Screen A Press N x A Select
Web Access A Press b
Available Custom Screens appear.
(Fee-based Custom Screen Indicators: see P.9-10)
C To switch between handset and Memory Card, press N
x A Select Change to Phone or Change to Memory
Card A Press b
Tip H Once installed, Custom Screen remains active even after
Memory Card is removed or replaced with another.
Select Icon Menu, Horizontal or Vertical and press b
9-11
Familiar Usability
Download and install applications that load user interface
themes based on previous SoftBank or other handsets.
Note H Familiar Usability does not completely remake handset.
Downloading Familiar Usability
Download Familiar Usability applications via the Internet.
Main Menu H Data Folder A Custom Screens
9
Additional Settings
9-12
1
Select Download Familiar Usability and press b
Handset connects to the Internet and Familiar Usability
download site appears.
^ Follow onscreen instructions.
Familiar Usability Setup
Download Familiar Usability application beforehand.
Main Menu H Data Folder A Custom Screens
1
Select a Familiar Usability application and press b
Cancelling Familiar Usability
C Press b A Press M (メニュー) A Select おなじみ操作解除
A Press b
Cancelling Familiar Usability Temporarily
C Press b A Press M (メニュー) A Select 通常メニュー A Press b
Note H ^ Activating Familiar Usability restores default Wallpaper,
System Graphics, tones, etc. and cancels Simple
Menu; cancelling Familiar Usability also returns these
settings to their defaults.
^ Familiar Usability does not support Font Settings (see
P.9-4) or Language Setting (see P.9-9).
Light Settings
Backlight
External Display Settings
Select Display and Keypad Backlight
illumination time or Display Brightness
Duration
Select active time for External Display
KTime Out: 15 seconds, Brightness: Level 2
H Settings A Phone Settings (F) A Display A
Main Menu
Backlight
K5 seconds
H Settings A Phone Settings (F) A Display A
Main Menu
External Display A Duration
Select time A Press b
Backlight Illumination Time
Select Time Out A Press b A Select time A Press b
C To disable External Display, choose Off A Press b
C To disable Backlight, choose Off in Time Out list A Press b
Messages
Display Brightness
Select Brightness A Press b A Use E to adjust
level A Press b
CSet Caller Display (see P.9-14) to On beforehand.
KDisplay
Select a period of inactivity after which Display
turns off
K2 minutes
H Settings A Phone Settings (F) A Display A
Main Menu
Display Saving
Select a period A Press b
Tip H Even when Display Saving is set to Always On, Display
turns off automatically after five minutes of Call Time. To
turn it back on, press a key other than g.
Select Display or Not Display A Press b
Display
Date & Time
Change External Display Clock view
KClock & Date
9
Additional Settings
H Settings A Phone Settings (F) A Display A
Main Menu
External Display A Messages
Tip H Keypad light Brightness is fixed.
Display Saving
Select whether to open new received
messages on External Display
H Settings A Phone Settings (F) A Display A
Main Menu
External Display A Display Date&Time
Select a type A Press b
^ With handset closed, press h to toggle Clock view. (Display
Date & Time setting is not affected.)
Clock Type
Change External Display font
KPattern 1
H Settings A Phone Settings (F) A Display A
Main Menu
External Display A Clock Type
Select Pattern 1, Pattern 2 or Pattern 3 A Press b
9-13
Caller Display
Show or hide caller's number or name on
External Display
Ringtone/
videos
KOn
H Settings A Phone Settings (F) A Display A
Main Menu
External Display A Caller Display
Choose On (show) or Off A Press b
Sounds & Alerts
Customising Handset Responses
9
Additional Settings
Volume
Main Menu
Set volume level for handset functions
H Settings A Phone Settings (F) A Sounds &
Alerts A Volume
Select an item A Press b A Use G to adjust level
A Press b
^ Select from five levels. When Increasing Volume is set,
volume increases every four seconds from Level 1 to Level 5.
Increasing Volume is not available for General Volume.
Main Menu
Set ringtones or ringvideos for incoming
communications
H Settings A Phone Settings (F) A Sounds &
Alerts A Ringtone/videos
Assign Tone in Preset Sounds
Select For Voice Call, For Video Call or Circle Talk A
Press b A Select Preset Sounds A Press b A
Select a tone A Press b
C For items other than For Voice Call, For Video Call or
Circle Talk, select Assign Tone A Press b A Select
Preset Sounds A Press b A Select a tone A Press b
C To play tones, select one and press N L.
B Press N C to stop.
Assign Tone in Data Folder
Select For Voice Call, For Video Call or Circle Talk A
Press b A Select Ring Songs·Tones or Music A
Press b A Select a file A Press b
C For items other than For Voice Call, For Video Call or
Circle Talk, select Assign Tone A Press b A Select
Ring Songs·Tones or Music A Press b A Select a file A
Press b
C To play files, select one and press M L.
B Press i to stop.
Assign Video or Flash# Ringtone
Select For Voice Call or For Video Call A Press b A
Select Videos or Flash#Ringtones A Press b A
Select a file A Press b
C For For New Message or Delivery Report, select Assign
Tone A Press b A Select Videos or Flash#Ringtones A
Press b A Select a file A Press b
C To play files, select one and press M L.
B Press i to stop.
9-14
Duration (Not Available for Calls or Circle Talk)
Select an item other than For Voice Call, For Video
Call or Circle Talk A Press b A Select Duration A
Press b A Enter time (01 - 99 seconds) A Press b
Restoring Custom Screen Ringtone/Ringvideo
C When ringtone/ringvideo is set while Custom Screen is
active, ringtone/ringvideo takes priority over Custom Screen
ringtone/ringvideo. (Custom Screen remains active.)
To restore Custom Screen ringtone/ringvideo, select Custom
Screen instead of Preset Sounds, etc. and press b.
Handset vibrates for incoming communications
KOff
H Settings A Phone Settings (F) A Sounds &
Main Menu
Alerts A Vibration
Activating/Deactivating
Select an item A Press b A Select Switch On/Off
A Press b A Select On, Link to Sound or Off A
Press b
^ Link to Sound: Handset vibrates only when ringtone is a
compatible SMAF file.
Vibration Pattern
Select an item A Press b A Select Vibration
Pattern A Press b A Select from Pattern 1 to
Pattern 5 A Press b
C To check vibration patterns, select one and press N @.
B Press N C to stop.
Note H Disable vibration when charging.
9
Additional Settings
Note H ^ Some files may not be usable.
^ When a Memory Card file is set as ringtone/ringvideo or
System Sounds, removing the card restores default
tone/sound (except for Power On Sound).
Inserting the same card restores Memory Card
file-based tone/sound unless the corresponding setting/
file is changed/edited.
^ Default ringtone/ringvideo may sound/play for Voice
Calls when downloading files, streaming, editing still
images, etc.
^ S! Application set as Screensaver that also responds to
incoming communications may take priority.
^ Video files over 3 MB and 3GPP video cannot be set as
ringvideo.
Vibration
9-15
Event Light
Set Small Light illumination for incoming
communications
KOn (Live Monitor: Off)
H Settings A Phone Settings (F) A Sounds &
Main Menu
Alerts A Event Light
Activating/Deactivating
Select an item A Press b A Select On, Link to
Sound or Off A Press b
^ Select Link to Sound to allow compatible SMAF files to control
Small Light. For other SMAF files, Small Light flashes to the
main melody.
9
Status Light
Additional Settings
Main Menu
Set Small Light illumination for missed
incoming communications
H Settings A Phone Settings (F) A Sounds &
Alerts A Status Light
Activating/Deactivating
Select an item A Press b A Choose On or Off A
Press b
^ Default Settings:
Switch On/Off
9-16
For Missed Call
On
For New Message
On
Hot Status
Off
For Answer Phone
Off
P Missed Calls
On
Bluetooth Notif.
Off
Delivery Report
Off
Customising System Sounds
Keypad Tones
A tone sounds when a key is pressed
KTouch Tone
H Settings A Phone Settings (F) A Sounds &
Main Menu
Alerts A System Sounds A Keypad Tones
Assign Touch Tone
Select Touch Tone A Press b
Assign a Pattern
Select Pattern 1, Pattern 2 or Pattern 3 A Press b
C To check patterns, select one and press N L.
B Press N C to stop.
Disable Keypad Tone
Choose Off A Press b
Circle Talk
Select a tone for Circle Talk
KXylophone
H Settings A Phone Settings (F) A Sounds &
Main Menu
Alerts A System Sounds A Circle Talk
Select a tone A Press b
C To play tones, select one and press N L.
B Press N C to stop.
^ Earpiece Volume applies to tones during Circle Talk. (Volume
setting on P.9-14 applies to Circle Talk ringtones.)
Other System
Sounds
Select tones for errors, power on/off, handset
open/close, or charging completion; set duration
KWarning Tone: Sound Effect 11 (0.5 seconds)
Power On/Off Sound: Off (5 seconds)
Handset Open: Sound Effect 14 (2 seconds)
Handset Close: Sound Effect 15 (2 seconds)
Charge Full: Off (2 seconds)
Main Menu
H Settings A Phone Settings (F) A Sounds &
Alerts A System Sounds
Sound Patterns in Preset Sounds
Select an item A Press b A Select Tone or Sound
A Press b A Select Preset Sounds A Press b A
Select a tone A Press b
Sound Patterns in Data Folder
Select an item A Press b A Select Tone or Sound
A Press b A Select Ring Songs·Tones A Press b
A Select a file A Press b
C To play files, select one and press M L.
B Press i to stop.
Duration
Select an item A Press b A Select Duration A
Press b A Select/enter time A Press b
Ringer Output
Set ringer source when using Headphones, etc.
KEarphone/Speaker
Main Menu H Settings A Phone Settings (F) A Ringer Output
Select Earphone or Earphone/Speaker A Press b
^ Even if Earphone is selected, ringtone sounds from Speaker
when Headphones are not connected.
Earpiece
Volume
Setting applies when placing/answering calls
KLevel 3
Main Menu H Settings A Phone Settings (F) A Earpiece Volume
Use G to adjust level A Press b
Any Key
Answer
Activate or cancel Any Key Answer (see P.2-6)
KOff
Main Menu
H Settings A Phone Settings (F) A Sounds &
Alerts A Any Key Answer
9
Additional Settings
C To play tones, select one and press N L.
B Press N C to stop.
Additional Sound Settings
Choose On or Off A Press b
^ Tone/sound does not play longer than the source regardless of
Duration setting.
Disable Tone
Select an item A Press b A Select Tone or Sound
A Press b A Choose Off A Press b
9-17
Date & Time
Set Time Zone/
Daylight Saving
Change Time Zone or activate Daylight Saving
KTime Zone: Tokyo, Daylight Saving: Off
See indicated pages for these items.
World Clock
See P.12-14
Alarm
See P.12-11
Main Menu H Settings A Phone Settings (F) A Date & Time
Time Zone
Set Date/Time
Main Menu
Set the date and time
H Settings A Phone Settings (F) A Date & Time
A Set Date/Time
When Time Format is 24 Hour
9
Enter the year A Enter the month A Enter the day A
Enter the time A Press b
Additional Settings
When Time Format is 12 Hour
Enter the year A Enter the month A Enter the day A
Enter the time A Use E to select am or pm A Press b
Note H ^ Entry order varies by Date Format (see right). Use the
letters below the entry fields as a guide.
^ When removing the battery for replacement, etc., Clock
settings remain. However, should the handset go
without power for an extended period of time
(approximately three days), Clock will need to be reset.
Tip H ^ The day of the week is set automatically.
^ When Clock has not been set, --/--/-- --:-- appears for
date and time in Call Log, etc.
^ To correct numbers, use F to move cursor and
re-enter digits.
^ Choose a Clock type or use Calendar for Standby (see P.9-5).
9-18
Select Set Time Zone A Press b A Use F to select
a Time Zone A Press b
C If your zone is not preset, press N m A Enter city
name (up to 16 characters) A Press b A Use E to select
+ or - A Press A A Enter time difference A Press b
Daylight Saving
Select Daylight Saving A Press b A Choose On A
Press b
C To cancel, select Daylight Saving A Press b A Choose
Off A Press b
^ Activate Daylight Saving to advance handset local time by one hour.
Date/Time
Format
Change date/time format
KTime Format: 24 Hour, Date Format: Y/M/D
Main Menu H Settings A Phone Settings (F) A Date & Time
Time Format
Select Time Format A Press b A Select 24 Hour or
12 Hour A Press b
Date Format
Select Date Format A Press b A Select D.M.Y,
M-D-Y or Y/M/D A Press b
Calendar
Format
Select whether to start the week on Sunday or
Monday
Edit/Delete
KSunday-Saturday
H Settings A Phone Settings (F) A Date & Time
Main Menu
A Calendar Format
Select Sunday-Saturday or Monday-Sunday A Press b
User Dictionary
Entries (Japanese Only)
^ Save up to 100 entries.
^ Save up to five words/phrases per reading.
New Entry
Main Menu
Save words/phrases to User Dictionary
H Settings A Phone Settings (F) A User
Dictionary A New Entry
Enter a word/phrase A Press b A Enter a reading
(keyword) A Press b
^ Enter up to 15 characters per word/phrase and eight characters
in hiragana per reading.
C Alternatively, in other text entry windows, press N x A
Select Add to Dictionary A Press b A Select the first
character of text A Press b A Select the end point A
Press b A Press b A Enter a reading (keyword) A
Press b A Press b
H Settings A Phone Settings (F) A User
Dictionary A Saved Word List
Edit
Select a word/phrase A Press b A Edit the word/
phrase A Press b A Edit reading A Press b A
Choose Yes A Press b
Delete
Select a work/phrase A Press N . A Choose
Yes A Press b
812SH/813SH Download Dictionary (Japanese Only)
Download specialised 812SH/813SH Download
Dictionaries from Sharp Space Town Mobile Internet site
(see P.15-9). Activate up to five dictionaries at one time to
improve handset character conversion. Dictionary words
appear among word suggestions.
Acquire
Dictionary
Main Menu
9
Additional Settings
Save frequently used words/phrases. Assign a reading
(keyword) in hiragana to each entry. In text entry windows,
enter a reading and convert. Saved words/phrases appear
among word suggestions.
Main Menu
Edit or delete entries
Activate downloaded dictionary
H Settings A Phone Settings (F) A User
Dictionary A Acquire Dictionary
Select from Dictionary 1 to Dictionary 5 A Press b
A Select a dictionary A Press b
C To replace dictionaries, select one and press b A Select a
dictionary A Press b
Note H Some dictionary files may not be usable.
9-19
Cancel
Main Menu
Cancel dictionary
H Settings A Phone Settings (F) A User
Dictionary A Acquire Dictionary
Select a dictionary A Press N x A Select
Cancel A Press b
Info
Main Menu
9
Additional Settings
9-20
View dictionary information
H Settings A Phone Settings (F) A User
Dictionary A Acquire Dictionary
Select a dictionary A Press N x A Select Info
A Press b
C Press b to return.
Handset Security
Face Recognition
Activate to automatically lock handset when it is turned on,
opened in Standby, or whenever Display is refreshed after
Display Saving time, etc. Match live face image with saved
one to unlock. When another function is active, etc., Face
Recognition window may not open right away. Cancel the
function to open Face Recognition window.
Precautions for capturing portrait/scanning face:
B Make sure your face is clearly visible; facial features
may be obscured by hair, coloured glasses, masks, etc.
B Face should be lit evenly and brightly (avoid backlight
and strong light).
Note H ^ Identification accuracy is not guaranteed. SoftBank
cannot be held liable for misuse or any damages
associated with the use of Face Recognition.
^ Handset Code is required to activate/cancel Face
Recognition. Changing the code (see P.9-28) helps
enhance security.
^ S! FeliCa is available even when Face Recognition is
active.
Saving User Information
Save a name and portrait as well as a question and an
answer to the question. In case recognition fails, enter the
answer to unlock handset.
Main Menu
1
2
3
H Settings A Phone Settings (F) A Locks A Face
Recognition A User Registration
Enter Handset Code and press b
Select from User 1 to User 5 and press b
C To edit user information, select a user A Press b
C To delete users, select one A Press N . A Choose
Yes A Press b
Enter name and press b
Select Register Riddle: and press b
Enter a question and press b
Select Register Answer: and press b
Enter the answer and press b
^ Capture and save portrait if not already saved (see below).
Press M q to save
CSaving Portraits
Save up to five portraits per user. Change location, face
angle, accessory, brightness, etc. for each shot.
^ Saving multiple portraits increases recognition accuracy.
However, security will be compromised.
^ A person's portraits can be saved to multiple users; this may
increase recognition accuracy.
^ Look straight into lens and frame whole face with no
expression; adjust face size (may not be saved if too small).
Stay still until shooting is completed.
^ Follow these steps after Step 8 above.
1
9
Additional Settings
^ Save up to five users (with up to five portraits each).
^ If no question or answer is saved, enter Handset Code to
unlock handset.
4
5
6
7
8
9
Select Face Image: and press b
Select User Name: and press b
9-21
2
3
9
4
5
Select from Image 1 to Image 5 and press N l
C To overwrite saved portrait, choose Yes A Press b
C To delete portraits, select one A Press M . A Choose
Yes A Press b
B Deleting all portraits cancels Face Recognition.
Frame your face on Display and press b
^ Stay still until shooting is completed.
^ If Cannot Register. Please change the shooting condition.
appears, start over from Step 2.
Press N i
Portrait is saved.
Choose Yes and press b
Additional Settings
Face Recognition is activated.
^ To save more, repeat Steps 2 - 4.
^ To save user information, press i then M q.
Note H Do not wear a mask when capturing portraits, even for
use with Low(Mask) (see P.9-24 "Security Level").
Activating & Cancelling
^ Save a user beforehand.
^ Face Recognition is Off by default.
Main Menu
1
2
Choose On or Off and press b
Enter Handset Code and press b
Tip H Activate to automatically lock handset when it is turned
on, opened in Standby, or whenever Display is refreshed
after Display Saving time, etc.
Scanning Face
Face Recognition window opens when handset is turned
on, opened in Standby, or whenever Display is refreshed
after Display Saving time, etc.
^ Clean dust/smudges from lens cover of Internal Camera with a
soft cloth before use.
^ When another function is active, etc., Face Recognition
window may not open right away. Cancel the function to open
Face Recognition window.
1
9-22
H Settings A Phone Settings (F) A Locks A Face
Recognition A Switch On/Off
Face the Display
^ To show operational tips, select Panda in Conductor Setting
(see P.9-23).
^ Handset is unlocked when your face matches saved portrait.
When Face Recognition Fails
C Under Pwd Key Lock. appears. Follow these steps to unlock
handset.
Face Recognition Settings
Conductor
Setting
Show or hide operational tips during recognition
Press b A Enter Handset Code A Press b
^ To retry Face Recognition, press N k.
C When saved question appears, press b, enter the answer
and press b.
^ If the answer is incorrect, Collate failure. appears.
Press b to re-enter the answer, or follow these steps to
unlock handset.
Press g A Press b A Enter Handset Code A
Press b
Tip H When wearing a mask, set Security Level (see P.9-24) to
Low(Mask) to make your face recognisable. However,
security will be compromised.
Select Off, Preview, Panda or Custom Screen A
Press b
Off
Under Face Recognition. Please wait...
appears.
Preview
Internal Camera Viewfinder appears as a
guide
Panda
Panda graphic appears with operational tips
Custom Screen
Custom Screen (see P.9-9) graphic-based
guidance appears
9
Additional Settings
C While handset is locked, press M to open contact information.
^ Save contact information first (see P.9-24 "Report").
KOff
H Settings A Phone Settings (F) A Locks A Face
Main Menu
Recognition A Conductor Setting
9-23
Security Level
PIN
Select accuracy level
KNormal
H Settings A Phone Settings (F) A Locks A Face
Main Menu
Recognition A Security Level
For more information on PIN, see P.1-6.
PIN Entry
Select whether to require PIN every time
handset is turned on
Select High, Normal, Low or Low(Mask) A Press b
High
Normal
Low
9
Additional Settings
Low
(Mask)
Report
Main Menu
Unsaved faces are least likely recognised by
mistake; your face may be hard to recognise
Standard recognition accuracy
Your face is most recognisable; unsaved
faces are most likely recognised by mistake
Handset recognises faces with masks.
(Accuracy is equal to that of Low.)
Save contact information to open when Face
Recognition fails (see P.9-23)
H Settings A Phone Settings (F) A Locks A Face
Recognition A Report
Enter Handset Code A Press b A Enter contact
information A Press b
^ Enter up to 128 characters.
9-24
KOff
H Settings A Phone Settings (F) A Locks A PIN
Main Menu
Entry A Switch On/Off
Choose On or Off A Press b A Enter PIN1 A Press b
PIN Lock
C PIN1 Lock or PIN2 Lock is activated if PIN1 or PIN2 is
incorrectly entered three times consecutively. To cancel PIN1
Lock or PIN2 Lock, follow these steps.
Open a function requiring PIN1 or PIN2 A Enter
Personal Unblocking Key (PUK Code) A Press b
A Enter new PIN1 or PIN2 A Press b A Re-enter
PIN1 or PIN2 A Press b
^ For information on Personal Unblocking Key (PUK Code),
contact SoftBank Customer Centre, General Information
(see P.20-29).
^ If PUK Code is incorrectly entered ten times consecutively,
USIM Card is locked. (Count continues even if handset
power is turned off.)
^ For procedures required to unlock USIM Card, contact
SoftBank Customer Centre, General Information (see P.20-29).
Change PIN
Activating Lock when Handset is Turned On
Change PIN1 or PIN2
CActivate PIN Entry first.
Main Menu H Settings A Phone Settings (F) A Locks
PIN1
Select PIN Entry A Press b A Select Change PIN
A Press b A Enter current PIN1 A Press b A
Enter new PIN1 A Press b A Re-enter new PIN1 A
Press b
Cancelling
Choose Off A Press b A Enter Handset Code A
Press b
Tip H Password Lock remains active even if handset power is
deactivated, then reactivated.
When Password Lock is Active
PIN2
Handset Locks
Password Lock
Restrict access to handset functions
CTo unlock, enter Handset Code.
KOff
H Settings A Phone Settings (F) A Locks A
Password Lock
Activating Lock when Handset is Closed
Select Auto A Press b A Enter Handset Code A
Press b
C In Standby, press g for 2+ seconds to deactivate handset
power, b for 1+ seconds to activate/cancel Keypad Lock,
0 - 9 to enter Handset Code or i to edit Handset
Code entry.
C During a call, press g to end the call, press N to show
Options, b to toggle Loudspeaker on/off or switch Video
Call images, M to mute/unmute Microphone, f to switch
between callers in Call Waiting, 0 - 9 to enter Handset
Code or i to edit Handset Code entry.
C When a call arrives, press N to show Options. Answer calls
by pressing f, b or keys for Any Key Answer (see P.2-6),
or place callers on hold by pressing g. Press M to forward
incoming calls (when No Answer is set for Diverts).
9
Additional Settings
Select Change PIN2 A Press b A Enter current
PIN2 A Press b A Enter new PIN2 A Press b A
Re-enter new PIN2 A Press b
Main Menu
Select At Power On A Press b A Enter Handset
Code A Press b
Note H Emergency calls (110, etc.) are possible even when
Password Lock is active. See P.2-3 "Emergency Calls".
One Time Lock
Select Once A Press b A Enter Handset Code A
Press b
^ Password Lock is cancelled once handset is unlocked.
9-25
IP Service
Setting
Enable or disable Hot Status and Circle Talk
Fixed
Dialling No.
KOn
H Settings A Phone Settings (F) A Locks A IP
Main Menu
Service Setting
Choose On (enable) or Off A Enter Handset Code A
Press b
Phone Book
Lock
Protect Phone Book entries from accidental alteration
and restrict access to Phone Book information
KOff
9
Main Menu
H Settings A Phone Settings (F) A Locks A
Phone Book Lock
Additional Settings
Choose On A Press b A Enter Handset Code A
Press b
C To cancel, choose Off A Press b A Enter Handset Code
A Press b
^ Enter Handset Code to temporarily cancel Phone Book Lock to
access Phone Book entries.
Note H When Phone Book Lock is active, the following Phone
Book operations are disabled:
B Searching, saving, editing and dialling, including
Speed Dial (see P.4-14).
Main Menu
Allow calls only to designated numbers
H Settings A Phone Settings (F) A Locks A
Restrict Modes A Fixed Dialling No.
Activating/Cancelling Fixed Dialling No.
Select Switch On/Off A Press b A Choose On A
Press b A Choose Yes A Press b A Enter PIN2 A
Press b
C To cancel, choose Off A Press b A Enter PIN2 A Press b
Designating Numbers
Select Edit Dial List A Press b A Select a list A
Press b A Enter PIN2 A Press b A Select an
entry A Press b A Edit entry A Press b A
Press M q
Editing Lists
Select Edit Dial List A Press b A Select a list A
Press N x A Select Edit A Press b A Enter
PIN2 A Press b A Select an entry A Press b A
Edit entry A Press b A Press M q
Deleting Lists
Select Edit Dial List A Press b A Select a list A
Press N x A Select Delete A Press b A
Enter PIN2 A Press b A Choose Yes A Press b
Note H ^ This function is available only for compatible USIM Cards.
^ To send SMS to designated numbers, save SMS Centre
Number (+819066519300) to Fixed Dialling No. list. (Do
not change Centre Number unless instructed to do so.)
9-26
Packet Lock
Opening Secret Entries
Disable packet transmissions
KOff
H Settings A Phone Settings (F) A Locks A
Main Menu
Restrict Modes A Packet Lock
Choose On A Press b A Choose Yes A Press b
A Enter PIN2 A Press b
C To cancel, choose Off A Press b A Enter PIN2 A Press b
Note H This function is available only for compatible USIM Cards.
Activate Show Secret Data to open Secret entries.
Show
Secret Data
Activate or cancel Show Secret Data
KOff
H Settings A Phone Settings (F) A Locks A
Main Menu
Show Secret Data
Choose On A Press b A Enter Handset Code A
Press b
C To cancel, choose Off A Press b
When Show Secret Data is Off
C Phone Book Names/Picture images do not appear for calls/mail
from numbers/addresses in Secret entries. Personal ringtones/
ringvideos are disabled. Names for numbers in Secret entries
do not appear in Call Log or list of received messages.
9
Additional Settings
Note H Do not save confidential information in Phone Book/
schedule entries. Handset Code and thus Secret entries
may be compromised.
9-27
Changing Handset Code
Chng
Handset Code
Reset All
Whenever necessary, change Handset Code
K9999
H Settings A Phone Settings (F) A Locks A Chng
Main Menu
Handset Code
Enter current Handset Code A Press b A Enter
new Handset Code A Press b A Re-enter new
Handset Code A Press b
9
Additional Settings
Reset
Reset Settings
Main Menu
Cancel custom settings and return handset
functions to their default settings
H Settings A Phone Settings (F) A Master Reset
A Reset Settings
Enter Handset Code A Press b A Choose Yes A
Press b A Choose Yes A Press b
^ Phone Book entries, etc. are unaffected.
^ A confirmation appears (before entering Handset Code) in the
following cases. Choose Yes and press b to proceed.
B S! Application is paused
B Music Player is active
B Bluetooth# is active
B Infrared is active
Note H Some default settings may not be restored.
9-28
Main Menu
Clear all Phone Book entries, Data Folder files,
etc.
H Settings A Phone Settings (F) A Master Reset
A Reset All
Enter Handset Code A Press b A Choose Yes A
Press b A Choose Yes A Press b
^ A confirmation appears (before entering Handset Code) in the
following cases. Choose Yes and press b to proceed.
B S! Application is paused
B Music Player is active
B Bluetooth# is active
B Infrared is active
Note H ^ Files and records deleted by Reset All cannot be restored.
Handset Code returns to the default setting. Reset All
deletes downloaded S! Applications and Lifestyle-Appli.
^ カスタモご紹介 in Data Folder (Custom Screens) and
S! Applications are restored.
^ Reset All is disabled if IC Card (see P.17-2) data
remains. Delete IC Card data beforehand.
Call Settings
Auto Add Code
Add a preset country code automatically when
placing calls
KOff/Country Code: 81 (Japan)
See indicated pages for these items.
Voicemail/Divert
See P.13-4,
P.13-2
Show My Number See P.13-10
Call Waiting
See P.13-5
Call Barring
See P.13-7
International Call
Int'l Prefix
K0046010
Select Switch On/Off A Press b A Choose On or
Off A Press b
Change, add or delete Country Codes
H Settings A Call/Video Call (F) A Int'l Calling A
Country Codes
Select Country Code A Press b A Select a country
A Press b
C To enter a country code, select Enter Code in Country Code
list A Press b A Enter country code A Press b
Note H When Auto Add Code is active, preset country code is
added to all phone numbers (except emergency call
numbers) unless + is included.
9
Additional Settings
Enter Handset Code A Press b A Enter a prefix A
Press b
Main Menu
Activating/Deactivating
Set Country Code
Save frequently used international prefix
H Settings A Call/Video Call (F) A Int'l Calling A
Main Menu
Int'l Prefix
Country Codes
H Settings A Call/Video Call (F) A Int'l Calling A
Main Menu
Auto Add Code
Change
Select a country A Press b A Select Change A
Press b A Enter country name A Press b A Enter
country code A Press b
Add
Select <empty> A Press b A Enter country name
A Press b A Enter country code A Press b
Delete
Select a country A Press b A Select Delete A
Press b A Choose Yes A Press b
9-29
Auto Answer
Answer Time
Set handset to answer Voice Calls automatically when using
Headphones or handsfree devices.
When Auto Answer is active, Auto Answer tone sounds after
ringtone (even in Manner mode).
^ To avoid unintentional activation, cancel Auto Answer after use.
^ Handsfree device Auto Answer tone varies by device.
^ Ringtone/Auto Answer Tone Availability:
K5 seconds
Main Menu H Settings A Call/Video Call (F) A Auto Answer
Enter Handset Code A Press b A Select Answer
Time A Press b A Enter time A Press b
Additional Settings
Minute Minder
9
Additional Settings
Handset
Headphones
Handsfree
Devices
Ringtone
Available1
Available
Available
Auto Answer Tone
Available
Available
-2
Handset beeps once each minute during calls
KOff
Main Menu H Settings A Call/Video Call (F) A Minute Minder
Choose On (handset beeps) or Off A Press b
^ Handset beeps every minute.
1
Not available in Manner mode.
2
Varies by device.
Tip H To set handset to answer Video Calls automatically, see
P.5-8 "Remote Monitor".
Switch On/Off
Adjust ring time between 1 and 30 seconds
(Auto Answer waits to answer calls)
Activate or cancel Auto Answer
KOff
Main Menu H Settings A Call/Video Call (F) A Auto Answer
Enter Handset Code A Press b A Select Switch
On/Off A Press b A Choose On or Off A Press b
Display
Call Cost
Show or hide Call Cost after each call
KOff
H Settings A Call/Video Call (F) A Disp. Time/Call
Main Menu
A Display Call Cost
Choose On (show) or Off A Press b
Call Time
Counter
Show or hide elapsed Call Time during a call
KOn
H Settings A Call/Video Call (F) A Disp. Time/Call
Main Menu
A Call Time Counter
Choose On (show) or Off A Press b
9-30
Connectivity
10-1
Bluetooth#
Precautions
Getting Started
Bluetooth# is a wireless technology that allows 812SH and 813SH
to communicate with other 812SH and 813SH within ten metres or
with other compatible devices (PCs, mobile phones, handsfree
devices, etc.). In this chapter, "files" refers collectively to the
following: Bookmarks, Tasks, Text Templates, Phone Book and
Calendar entries; Messaging and Data Folder files.
^ Bluetooth# connections are available with compatible devices
supporting the same profile.
^ Bring handsets to within ten metres. Bluetooth# connection/
transfer rate is affected by distance between handsets,
obstructions, signal conditions, handset status, etc.
^ Bluetooth# operates in the 2.4 GHz unlicensed frequency
band. Depending on the status of other devices used in the
spectrum, Bluetooth# connection may slow down/terminate, or
the range may decrease.
Handset Bluetooth# Specifications:
10
Communication System
Bluetooth# specification Ver 2.0
Connectivity
Headset Profile
Hands-Free Profile
Dial-up Networking Profile
Bluetooth# Profiles Supported
Object Push Profile
File Transfer Profile
Basic Imaging Profile
Output
Bluetooth# Power Class 2
Note H Bluetooth# connection may not be possible with
some Bluetooth# devices.
^ Handset shall be connected to certified Bluetooth# devices that
meet the specification standards developed by Bluetooth SIG.
^ Depending on characteristics or specifications of the certified
Bluetooth# devices, connection or data transfers may fail, or
operational procedures, display content and actual
operations may differ from those described in this manual.
^ Noise may interfere with wireless or handsfree conversations
depending on the status of connected devices or signal conditions.
^ For details about headset/handsfree devices, see the
device manuals.
10-2
Activating Bluetooth#
Activate Bluetooth# before receiving files or connecting
handset to handsfree devices.
Bluetooth# is Off by default.
Main Menu
1
H Settings A Connectivity (F) A Bluetooth A
Switch On/Off
Choose On and press b
r appears.
C To cancel, choose Off A Press b
B When transmission is in progress, choose Yes A Press b
Note H Handset must be in Standby to accept connection
requests from other devices or to receive files; these
functions are disabled even in Standby if Password Lock/
Keypad Lock is active or firmware update is in progress.
Bluetooth# Connection
Device Search & Pairing
Activate Bluetooth# (see P.10-2) on recipient device. Connection
starts when a request is received from the other device.
(Authorisation Code may be required.)
CExample
Sender
Recipient
Search for devices
Search for Bluetooth# devices for pairing.
^ Authorisation Codes are not necessary for paired devices.
^ Search for up to 16 devices at a time.
^ Device search is disabled if 32 devices are already registered.
^ Activate Bluetooth# on devices to be paired with.
Main Menu H Settings A Connectivity (F) A Bluetooth
Select Search for Devices and press b
2
3
Select a device and press b +
Activate Bluetooth®
Select device
Request connection
Accept
Enter the same Authorisation Code
Receive
C When transmission is in progress, choose Yes A Press b
Enter the same Authorisation Code (4 to
16 digits) for handset and the other device and
press b
10
When pairing is complete, Pairing is successful. appears.
^ For handsfree devices, enter specified Authorisation Code.
^ Complete code entry within 30 seconds.
Connection completes
Send
Found devices are listed after search. (The previous search
result appears, if any.)
^ Device names appear with corresponding indicators (c, etc.).
C Press M 3 to cancel.
Connectivity
1
4
Press b
Authorisation Code
C Authorisation Codes (4 to 16 digits) are specific for
Bluetooth# connection. Pairing is possible when
Authorisation Codes of both devices match.
^ Authorisation Codes are not necessary for paired devices.
10-3
Pairing with Handsfree Devices
C Start device search with handsfree devices for pairing.
Handset receives a connection request A Choose Yes
A Press b A Enter Authorisation Code A Press b
^ Activate Bluetooth# (see P.10-2) on handset and set
Visibility (see below) to Show My Phone.
Opening Paired Device List
Transferring Files via Bluetooth#
Transfer Options
One File Transfer
Transfer files one at a time. Received files
are saved to corresponding functions.
All File Transfer
Transfer all files by function
Receive Folder
Receive a folder and its contents. Folders
are saved to Data Folder. (Handset does
not support sending folders.)
Main Menu H Settings A Connectivity (F) A Bluetooth
1
10
Select Paired Devices and press b
Connectivity
List of all paired devices appears.
C To open list of handsfree devices only, press A.
C To rename paired devices, select one A Press N x A
Select Change Name A Press b A Enter name (up to
16 characters) A Press b
C To delete paired devices, select one A Press N x A
Select Delete A Press b A Choose Yes A Press b
Visibility
Note H ^ Bluetooth# transfers activate Offline Mode. Thus,
transfers are disabled during calls, while receiving calls,
using the Internet or Media Player, sending/receiving
messages or accessing Server Mail. Offline Mode is
cancelled after transfers.
^ Some files may not be saved correctly.
Transferable Files
Function
Make handset visible to other Bluetooth# devices.
^ Set Visibility to Hide My Phone to cloak handset.
^ Visibility is set to Show My Phone by default.
Main Menu
1
10-4
H Settings A Connectivity (F) A Bluetooth A
My Device Settings A Visibility
Select Show My Phone or Hide My Phone and
press b
Phone
Book
One File All Files
Notes
One File Transfer omits
Category, Tone/Video,
Available Available Vibration and Secret. Picture
may be omitted; transfer image
alone then reset as Picture.
Function
Calendar
Tasks
Notes
Available Available1
One File Transfer resets
Reminder Tone/Video to Alert
1 and omits Secret setting.
Received entries with
unsetable start date/time
(0:00 AM on 1 January 2016
or later) cannot be saved.
Available Available1
One File Transfer resets
Reminder Tone/Video to Alert
1 and omits Secret setting.
Received entries with
unsetable due date/time (0:00
AM on 1 January 2016 or
later) are saved as No limit.
2
Available
Available
Bookmarks Available Available3
Received
Msg.
N/A4
Available5
Sent
Messages
N/A4
Available
4
Available6
Drafts
Templates
N/A
Available Available7
Data Folder Available Available7
1
Copy protected files are not
transferable.
Copy protected files are not
transferable. Send files from
DCIM folder one at a time;
received DCIM folder files are
saved to Pictures folder.
2
Only receiving files is supported.
All File Transfers send all Yahoo! Keitai, Streaming and PC Site
Browser Bookmarks; Streaming Bookmarks are saved in Yahoo!
Keitai Bookmarks.
4
Received files are saved to Other Documents folder as unknown
files and cannot be used as messages.
5
All File Transfers save Spam Folder messages to the incoming
message folder on recipient SoftBank handsets (except 812SH and
813SH) and S! Mail Notices as standard messages, invalidating
complete message retrieval.
6
In All File Transfers, SMS addressed to multiple recipients may not
be saved on recipient SoftBank handsets (except 812SH and
813SH), or only the first entered recipient remains.
7
Receive folders one at a time into handset Data Folder.
3
Note H ^ Handset stores up to 300 entries between Calendar
and Tasks. If the limit is reached during a transfer, the
remaining entries will not be received.
^ Transfer most Memory Card Data Folder files one at a
time. Send DCIM folder files one by one; received
DCIM files are automatically saved in Pictures folder.
^ Unsent Messages are not transferable.
^ Messages may not be received depending on the size.
^ Large Bookmarks may not be received correctly.
^ Handset stores up to 500 messages between Drafts,
Unsent Messages and Sent Messages. If the limit is
reached during a transfer, the remaining messages will
not be received.
^ Sky Mail may be received as S! Mail on handset
depending on the sender SoftBank handset.
^ Receiving Messaging folders cancels Secret folder
settings and deletes auto sort keys.
10
Connectivity
Text
Templates
One File All Files
In All File Transfers, Calendar and Tasks are sent together from
Appointments/Tasks.
10-5
One File Transfer
CSending
Send one file from Phone Book, Calendar, Tasks, Bookmarks,
Templates or Data Folder (see P.10-4 "Transferable Files").
10
Connectivity
10-6
1
2
Select a file and press N x
3
Select Via Bluetooth and press b
4
5
6
Select Send, Send Entry or Send My Card and
press b
^ When there is no entry in Paired Devices, device search starts.
C To send files to unpaired devices, select More Devices A
Press b A Press N , A Device search starts
Select a device and press b
CReceiving
Main Menu
1
2
Choose Yes and press b
Offline Mode is set and transfer starts.
C When requested, enter Authorisation Code A Press b
Choose On and press b
Bluetooth# is activated.
When connection is requested, Calling not
available during operation, OK? appears
C To accept connection request from unpaired devices, choose
Yes A Press b A Enter Authorisation Code A Press b
3
4
Choose Yes and press b
5
Choose Yes and press b to save
C When transmission is in progress, choose Yes A Press b
Prepare recipient device
H Settings A Connectivity (F) A Bluetooth A
Switch On/Off
Offline Mode is set.
Transfer starts and confirmation appears
C Press M 3 to cancel.
C Press g to end.
C To cancel transfer, choose No A Press b A Choose Yes A
Press b
C For Data Folder files, select Phone or Memory Card A
Press b
All File Transfer
2
CSending
C To accept connection request from unpaired devices, choose
Yes A Press b A Enter Authorisation Code A Press b
Main Menu H Settings A Connectivity (F) A Bluetooth
1
^ When there is no entry in Paired Devices, device search
starts.
C To send files to unpaired devices, select More Devices A
Press b A Press N , A Device search starts
Select a device and press b
C When transmission is in progress, choose Yes A Press b
Choose Yes and press b
Offline Mode is set.
Enter Handset Code and press b
Prepare recipient device
Select an item and press b
Transfer starts.
C When requested, enter Authorisation Code A Press b
C For Phone Book, choose Yes or No A Press b
CReceiving
Main Menu
1
H Settings A Connectivity (F) A Bluetooth A
Switch On/Off
3
4
Choose Yes and press b
5
Adding Files
1 Select As New Items and press b
Offline Mode is set.
Transfer starts and confirmation appears
C Press M 3 to cancel.
C Press g to end.
When transfer completes, handset returns to Standby.
C Press M 3 to cancel.
C Press g to end.
Overwriting Existing Files
1 Select Delete All & Save and press b
2 Choose Yes and press b
3 Enter Handset Code and press b
10
Connectivity
2
3
4
5
6
Select Send All and press b
When connection is requested, Calling not
available during operation, OK? appears
When transfer completes, handset returns to Standby.
^ When Phone Book is overwritten, My Details except
handset phone number is overwritten as well.
C Press M 3 to cancel.
C Press g to end.
Choose On and press b
Bluetooth# is activated.
10-7
Receiving Folders
Receive folders from compatible devices and save to
handset Data Folder.
^ Handset does not support sending folders.
^ Handset receives folders when it can newly create a folder, or the
same folder name exists in the same layer as that of sender's.
^ For sender's procedures, see the device manual.
Main Menu
10
Connectivity
10-8
1
2
H Settings A Connectivity (F) A Bluetooth A
Switch On/Off
Choose On and press b
Bluetooth# is activated.
When connection is requested, Calling not
available during operation, OK? appears
C To accept connection request from unpaired devices, choose
Yes A Press b A Enter Authorisation Code A Press b
3
Choose Yes and press b
Offline Mode is set and transfer starts. When finished, handset
returns to Standby.
C Press M 3 to cancel.
C Press g to end.
Connecting Handsfree Devices
Pair with handsfree devices beforehand (see P.10-3).
Main Menu
1
2
H Settings A Connectivity (F) A Bluetooth A
Paired Devices
Press A
List of paired handsfree devices appears.
Select a device and press b
The device is connected and P (checked) appears.
C When transmission is in progress, choose Yes A Press b
C To disconnect, select a device A Press b
C To rename paired devices, select one A Press N x A
Select Change Name A Press b A Enter name A Press b
Sound Output
C Switch sound output between handset and handsfree devices.
While talking on the phone, press N x A
Select Transfer Audio A Press b A Select To
Phone or To Bluetooth A Press b
^ Select To Phone to talk on handset.
^ If To Bluetooth is selected, list of paired handsfree devices
appears.
Note H ^ While talking on handsfree devices, adjust volume on
the device.
^ Place calls from handsfree devices while handset is in
Standby.
Tip H ^ Devices marked with P reconnect to handset when
placing or receiving calls.
^ O indicates that the device is not selected. When O is
set to the connected device, a confirmation appears.
Handsfree
Setting
KHandsfree Mode
H Settings A Connectivity (F) A Bluetooth A
Main Menu
My Device Settings A Handsfree Setting
Choose Handsfree Mode or Private Mode A Press b
^ When placing calls from handsfree devices, only handsfree
conversation is available regardless of setting.
My Device
Details
Bluetooth# Settings
Select whether to talk handsfree when placing
calls from handset
Open Bluetooth#-related handset properties
Main Menu H Settings A Connectivity (F) A Bluetooth
Device Name
Specify a Bluetooth# name for handset
K812SH or 813SH
H Settings A Connectivity (F) A Bluetooth A
My Device Settings A Device Name
Enter name A Press b
^ Enter up to 16 characters. (Pictograms are not available.)
Bluetooth
Timeout
Set idle time after which Bluetooth# is cancelled
10
Connectivity
Main Menu
Select My Device Details A Press b
KNo Timeout
H Settings A Connectivity (F) A Bluetooth A
Main Menu
My Device Settings A Bluetooth Timeout
Select time A Press b
C To cancel, select No Timeout A Press b
10-9
Infrared
Getting Started
Infrared is a wireless technology that allows 812SH and
813SH to communicate with other 812SH and 813SH or
with other compatible devices (PCs, mobile phones, etc.). In
this chapter, "files" refers collectively to the following:
Bookmarks, Tasks, Text Templates, Phone Book and
Calendar entries; Messaging and Data Folder files.
10
Connectivity
^ 812SH and 813SH comply with IrMC 1.1, but some files may
not be exchanged.
^ Infrared transfers are disabled while sending/receiving mail or
using the Internet.
^ Transfers in direct sunlight, under fluorescent lighting or near
infrared equipment may fail.
Tip H When transfer fails, Device not found. Reconnect?
appears. Take the precautions below then choose Yes
and press b to try again.
Within 20 cm
^ Keep Infrared Ports aligned during transfer.
^ Dust/oil may impair file transfers; clean Infrared Ports with a
soft cloth beforehand.
Transferring Files via Infrared
Transfer Options
One File Transfer
Transfer files one at a time. Received files
are saved to corresponding functions.
All File Transfer
Transfer all files by function
Receive Folder
Receive a folder and its contents. Folders
are saved to Data Folder. (Handset does
not support sending folders.)
High-Speed Infrared
(see P.10-12)
Transfer JPEG files one at a time from
Data Folder (Pictures or DCIM). Received
files are saved to Pictures folder.
Authorisation Code
C Authorisation Codes (four digits) are specific for infrared
transfers. All File Transfers are possible when Authorisation
Codes of both devices match.
Precautions
^ Align Infrared Ports within 20 centimetres with no obstructions
between handsets.
10-10
Note H ^ Transfers are disabled while using the Internet or Media
Player, while editing mail or files, etc.
^ Some files may not be saved in whole or part.
^ Only compatible devices receive files transferred via
high-speed infrared.
Function
Text
Templates
Phone
Book
Tasks
1
Notes
One File Transfer omits
Category, Tone/Video,
Available Available Vibration and Secret. Picture
may be omitted; transfer image
alone then reset as Picture.
Available Available1
Available Available1
One File Transfer resets
Reminder Tone/Video to Alert
1 and omits Secret setting.
Received entries with
unsetable start date/time
(0:00 AM on 1 January 2016
or later) cannot be saved.
One File Transfer resets
Reminder Tone/Video to Alert
1 and omits Secret setting.
Received entries with
unsetable due date/time (0:00
AM on 1 January 2016 or
later) are saved as No limit.
In All File Transfers, Calendar and Tasks are sent together from
Appointments/Tasks.
Available
Notes
Available
Received
Msg.
N/A4
Available5
Sent
Messages
N/A4
Available
Drafts
N/A4
Available6
Templates
Available Available7
Data Folder Available Available
2
7
Copy protected files are not
transferable.
Copy protected files are not
transferable. Send files from
DCIM folder one at a time;
received DCIM folder files are
saved to Pictures folder.
Only receiving files is supported.
All File Transfers send all Yahoo! Keitai, Streaming and PC Site
Browser Bookmarks; Streaming Bookmarks are saved in Yahoo!
Keitai Bookmarks.
4
Received files are saved to Other Documents folder as unknown
files and cannot be used as messages.
5
All File Transfers save Spam Folder messages to the incoming
message folder on recipient SoftBank handsets (except 812SH and
813SH) and S! Mail Notices as standard messages, invalidating
complete message retrieval.
6
In All File Transfers, SMS addressed to multiple recipients may not
be saved on recipient SoftBank handsets (except 812SH and
813SH), or only the first entered recipient remains.
7
Receive folders one at a time into handset Data Folder.
3
10
Connectivity
Calendar
One File All Files
2
Bookmarks Available Available3
Transferable Files
Function
One File All Files
10-11
10
Connectivity
10-12
Note H ^ Handset stores up to 300 entries between Calendar
and Tasks. If the limit is reached during a transfer, the
remaining entries will not be received.
^ Transfer most Memory Card Data Folder files one at a
time. Send DCIM folder files one by one; received
DCIM files are automatically saved in Pictures folder.
^ Unsent Messages are not transferable.
^ Messages may not be received depending on the size.
^ Large Bookmarks may not be received correctly.
^ Handset stores up to 500 messages between Drafts,
Unsent Messages and Sent Messages. If the limit is
reached during a transfer, the remaining messages will
not be received.
^ Sky Mail may be received as S! Mail on handset
depending on the sender SoftBank handset.
^ Receiving Messaging folders cancels Secret folder
settings and deletes auto sort keys.
One File Transfer
CSending
Send one file from Phone Book, Calendar, Tasks, Bookmarks,
Templates or Data Folder (see P.10-11 "Transferable Files").
1
2
Select a file and press N x
3
Select Via Infrared and press b
Select Send, Send Entry or Send My Card and
press b
4
5
Prepare recipient device
Choose Yes and press b
Offline Mode is set and transfer starts. When finished, file list
returns.
Transferring Images via High-Speed Infrared
C Follow these steps to send images to compatible devices.
Press b A Select Data Folder A Press b A
Select Pictures or DCIM A Press b A Select a file
A Press M (Long Press)
^ Only JPEG images are supported.
^ Transfers are one-way; start regardless of recipient device
status and end even if files are not received.
^ For recipient's procedures, see "Receiving" below.
CReceiving
Main Menu
H Settings A Connectivity (F) A Infrared A Switch
On/Off
1
Choose On (3 min.) and press b
2
When connection is requested, Calling not
available during operation, OK? appears
Infrared is activated and handset returns to Standby.
^ Acquire infrared transmission within three minutes.
^ High-speed infrared transfers activate Offline Mode.
3
Choose Yes and press b
Offline Mode is set.
4
Transfer starts and confirmation appears
5
Choose Yes and press b to save
C Press M 3 to cancel.
C Press g to end.
C To cancel transfer, choose No A Press b A Choose Yes A
Press b
C For Data Folder files, select Phone or Memory Card A
Press b
B Files are automatically saved to handset or Memory Card
depending on available memory.
All File Transfer
CSending
Main Menu H Settings A Connectivity (F) A Infrared
1
2
3
4
5
Select Send All and press b
Choose Yes and press b
Offline Mode is set.
Enter Handset Code and press b
Select an item and press b
Enter Authorisation Code and press b
Transfer starts. When finished, Send All menu returns.
C For Phone Book, choose Yes or No A Press b
CReceiving
Main Menu
H Settings A Connectivity (F) A Infrared A Switch
On/Off
1
Choose On (3 min.) and press b
2
When connection is requested, Calling not
available during operation, OK? appears
3
4
5
Choose Yes and press b
6
Adding Files
1 Select As New Items and press b
Infrared is activated and handset returns to Standby.
^ Acquire infrared transmission within three minutes.
Offline Mode is set.
Enter Authorisation Code and press b
^ Enter the same Authorisation Code as sender's.
Transfer starts and confirmation appears
C Press M 3 to cancel.
C Press g to end.
10
Connectivity
Note H ^ Handset must be in Standby to receive files; this
function is disabled even in Standby if Password Lock/
Keypad Lock is active or firmware update is in progress.
^ High-speed infrared transfer supports JPEG files only.
Send up to 1.8 MB per transfer to 812SH or 813SH.
6
When transfer completes, handset returns to Standby.
C Press M 3 to cancel.
C Press g to end.
Prepare recipient device
10-13
Overwriting Existing Files
1 Select Delete All & Save and press b
2 Choose Yes and press b
3 Enter Handset Code and press b
When transfer completes, handset returns to Standby.
^ When Phone Book is overwritten, My Details except
handset phone number is overwritten as well.
C Press M 3 to cancel.
C Press g to end.
Receiving Folders
Receive folders from compatible devices and save to
handset Data Folder.
10
Connectivity
^ Handset does not support sending folders.
^ Handset receives folders when it can newly create a folder, or
the same folder name exists in the same layer as that of
sender's.
^ For sender's procedures, see the device manual.
H Settings A Connectivity (F) A Infrared A Switch
Main Menu
On/Off
1
Choose On (3 min.) and press b
2
When connection is requested, Calling not
available during operation, OK? appears
Infrared is activated and handset returns to Standby.
^ Acquire infrared transmission within three minutes.
3
Choose Yes and press b
Offline Mode is set and transfer starts. When finished, handset
returns to Standby.
^ If the same folder name exists, received files are saved there.
C Press M 3 to cancel.
C Press g to end.
Network Settings
See P.2-16 for information on Select Service.
Select Network
Select a Network to connect
KAutomatic
H Settings A Network Settings (F) A Select
Main Menu
Network
Select Manual A Press b A Select a Network A
Press b
C To change Network automatically, select Automatic A
Press b
^ Use default setting unless connecting to a specific Network.
Set Preferred
Main Menu
Set priority of Networks to be selected when
Automatic is set for Select Network
H Settings A Network Settings (F) A Select
Network A Set Preferred
Inserting Network
Select a place to insert A Press b A Select Insert
A Press b A Select a Network A Press b
^ Network is inserted above the selected entry.
10-14
Adding Network to the End
Press b A Select Add to End A Press b A Select
a Network A Press b
Deleting Network
Select a Network A Press b A Select Delete A
Press b
Add, Edit &
Delete
Add, edit or delete Networks
H Settings A Network Settings (F) A Select
Main Menu
Network A Add New Network
Network Info
Check Network Information
Main Menu H Settings A Network Settings (F)
Select Network Info A Press b
Retrieve
NW Info
Retrieve Network Information manually
Main Menu H Settings A Network Settings (F)
Select Retrieve NW Info A Press b A Choose Yes
A Press b
Adding Network
Location Info
^ Add up to five Networks.
^ After selecting Add New Network and pressing b, Network
list appears if Network has already been added. In this case,
press b again and perform above operations.
^ Use up to three digits for country code and Network code, and
up to 25 single-byte alphanumerics for name.
Main Menu
Editing Network
Select a Network A Press b A Select Change A
Press b A Edit settings
^ Edit in the same manner as in "Adding Network" above.
Deleting Network
Select a Network A Press b A Select Delete A
Press b
URL Setting
Set URL of map information provider
H Settings A Network Settings (F) A Location Info
A URL Setting
Select URL A Press b
10
Connectivity
Select Add A Press b A Enter country code A
Press b A Enter a Network code A Press b A
Enter name A Press b A Press b A Select Select
NW Type A Press b A Select a Network type A
Press b
C To view complete URLs, select one A Press N x A
Select Display A Press b
C To edit URLs, select one A Press N x A Select Edit
A Press b A Edit URL A Press b
B Default URL cannot be edited.
C To delete URLs, select one A Press N x A Select
Delete A Press b A Choose Yes A Press b
B Default URL cannot be deleted.
C To add URLs, select <empty> A Press b A Enter URL A
Press b
10-15
Datum On/Off
Select whether to send Location Information
automatically upon request
KOn
H Settings A Network Settings (F) A Location Info
Main Menu
A Datum On/Off
Choose On (send) or Off A Enter Handset Code A
Press b
Location
Property
Set Location Information confirmation parameters
KAlways Confirm
H Settings A Network Settings (F) A Location Info
Main Menu
A Location Property
10
Connectivity
10-16
Select Always Confirm, Send or Do not Send A
Press b A Enter Handset Code A Press b
Memory Card
11-1
Memory Card
812SH and 813SH are compatible with microSD! Memory Card.
^ Format a new microSD! Memory Card for use with handset
(see P.11-4).
^ To learn how to save a particular file to Memory Card, refer to
that section of the manual.
Keep Memory Card out of children's reach; may cause
suffocation if swallowed.
11
Memory Card
11-2
Note H ^ SoftBank is not liable for any damages resulting from
accidental loss/alteration of information. Keep a copy of
Phone Book entries, etc. in a separate place.
^ microSD! Memory Cards do not have Write Protection
Switch. There is a risk of accidental erasure or
overwriting of files.
Tip H To reduce risk of malfunction, use only recommended
microSD! Memory Cards.
For information on compatibility with microSD! Memory
Cards, access the following Website:
B From Handset
Sharp Space Town Mobile Internet site (Japanese only)
B From PC
http://k-tai.sharp.co.jp/peripherals/sd_support.html
(SHARP ケータイ daSH is available in Japanese only.)
Precautions
^ To reduce risk of malfunction, use only recommended
microSD! Memory Cards.
^ Turn handset power off before inserting or removing a Memory Card.
^ Do not place labels or stickers on Memory Card. These items
may affect card performance or result in lost information.
^ Use an oil-based felt pen to write on Memory Card. Using a
pencil or ballpoint pen may damage the card or result in lost
information.
^ Never disassemble or modify a Memory Card.
^ Do not expose Memory Card to strong impacts, pressure or liquids.
^ Do not touch Memory Card terminals or expose them to metal
objects.
^ Do not expose Memory Card to direct sunlight or excessive
heat (e.g. inside vehicles, etc.).
^ Do not expose Memory Card to static electricity or electrical noise.
^ Keep a Memory Card away from dust or high humidity.
^ Do not use in the presence of corrosive gases.
^ Avoid heat sources and do not dispose of in fire.
^ A Memory Card is a consumable item. Card performance
deteriorates with usage.
Removing
Inserting & Removing Memory Card
Turn handset power off.
Inserting
1
Turn handset power off.
1
2
Open cover
^ With a light push, card pops out.
2
Remove card
3
Close cover
With logo side down, insert
card until it clicks.
Close cover
^ Using the notch on its edge, pull
card straight out.
11
Memory Card
Logo Side Down
3
Open cover and gently
push down on card
11-3
Note H ^ Do not force Memory Card into or out of handset;
damage may result.
^ When s appears, Memory Card may not be connected
properly; reinsert the card.
^ Do not insert other objects into Memory Card slot; may
damage handset/card.
^ Never remove Memory Card or battery while files are
being accessed. Damage to handset/card may result
and files/data may be damaged/lost.
Tip H Insert a Memory Card and turn handset power on.
Standby appears. Memory Card load times vary by card
size and the amount of information saved.
Format Card
11
Memory Card
11-4
When using a new microSD! Memory Card, format it on
handset for use with handset before trying to save files, etc.
Main Menu
1
2
3
H Settings A Connectivity (F) A Memory Card A
Format Card
Choose Yes and press b
Offline Mode is set.
Enter Handset Code and press b
Choose Yes and press b
Note H ^ Before formatting a Memory Card, make sure there is
no important information saved on the card. Format
Card deletes all files from Memory Card.
^ Never remove Memory Card or battery while formatting.
^ An improperly formatted Memory Card may not function
as it should with 812SH or 813SH.
Backup & Restore
Back up information to Memory Card, and restore to
handset in case of accidental loss/alteration of data.
^ All contents are copied to Memory Card as a single file. (File
name is the date of transfer.)
^ The following folders/entries can be transferred at once:
B Received Msg. B Drafts
B Sent Messages
B Templates
B Phone Book
B Contact Groups
B Calendar
B Tasks
B Text Templates
B Bookmarks
B User Dictionary B My Pictograms
B Content Keys
^ Templates and My Pictograms are not copied as a single file.
^ Unsent Messages are not transferable.
^ Select an item to back up or transfer all at once.
Tip H Copy handset entries as backups, share information
between microSD! Memory Card-compatible handsets,
or transfer entries to a newly purchased handset.
Precautions
11
Memory Card
^ Backup/Restore is not available when battery is low or while
handset is in use.
^ Transmissions are blocked during Backup or Restore.
^ When restoring data from Memory Card, select an item; when
prompted, delete corresponding data on handset to proceed.
^ Some items may not be transferable. Some backup files may
not be usable on other SoftBank handsets or PCs, etc.
^ When handset or Memory Card memory is low, entries may
not transfer correctly.
^ Handset stores up to 300 entries between Calendar and
Tasks. If the limit is reached during a transfer, the remaining
entries will not be received.
^ Yahoo! Keitai, Streaming and PC Site Browser Bookmarks are
backed up. When restored, Streaming Bookmarks are saved
in Yahoo! Keitai Bookmarks.
^ Large Bookmarks may not restore correctly.
^ Phone Book entry Picture settings may be lost depending on
image; copy images separately and re-assign to entries after
Phone Book is restored.
^ S! Mail Notices are restored as standard messages,
invalidating complete message retrieval.
^ To access backed up content (excluding Templates and My
Pictograms) restore it to handset.
^ Use Backup and Restore for Content Keys.
B Moving Keys to Memory Card creates a special file.
Performing Backup again on the same Memory Card
overwrites that file. Perform Restore beforehand.
B While Keys are on Memory Card, files are inaccessible.
B Restoring Keys to handset does not overwrite existing ones.
^ Restoring Messaging folders cancels Secret folder settings
and deletes auto sort keys.
11-5
^ Observe the following when transferring data backed up on
other SoftBank handsets to handset.
B Messages may not transfer depending on the size.
B Handset stores up to 500 messages between Drafts, Unsent
Messages and Sent Messages. If the limit is reached during
a transfer, the remaining messages will not be received.
B Sky Mail may transfer as S! Mail depending on the SoftBank
handset used for backup.
^ Observe the following when transferring data backed up on
handset to other SoftBank handsets.
B Messages in Spam Folder are saved as standard received
messages.
B SMS addressed to multiple recipients may not be saved or only
the first entered recipient remains if transferred from Drafts.
11
Memory Card
11-6
Memory Card to Handset
Restoring backed up content to handset overwrites current
handset content (with the exception of Content Keys).
Main Menu
1
2
3
4
Enter Handset Code and press b
5
Choose Yes and press b
Handset to Memory Card
Main Menu
1
2
3
H Settings A Connectivity (F) A Memory Card A
Backup/Restore A Backup
Enter Handset Code and press b
Choose Yes and press b
Offline Mode is set.
Select an item and press b
C For Select All, Phone Book or Content Keys confirmation
appears. Choose Yes or No A Press b
C To cancel, press M 3.
H Settings A Connectivity (F) A Memory Card A
Backup/Restore A Restore
Choose Yes and press b
Offline Mode is set.
Select an item and press b
^ Some items may not be selected.
Select a file and press b
^ If there is more than one file, check the date of transfer to select.
Example: 070214XX indicates the file was transferred on 14
February 2007. (XX: 00 - 99 or aa - zz)
^ For Select All, repeat Step 4 for each item.
C To delete files on Memory Card, select one A Press N
. A Choose Yes A Press b
C To cancel, press M 3.
C For Select All, confirmation appears. Choose Yes or No A
Press b
Tip H For Tasks, due dates that cannot be set on handset are
overwritten as No limit.
Additional Functions
Memory Status
Check Memory Card memory status
Main Menu H Data Folder A Memory Status
Select Memory Card A Press b
^ A portion of Memory Card is reserved for storing copyright
information, etc.
SD Local
Open HTML files on Memory Card to access
Contents
Internet sites
B Available only when HTML files are saved on Memory Card.
Main Menu
H Settings A Connectivity (F) A Memory Card A
SD Local Contents
Digital Print Order Format (DPOF)
Digital Print Order Format (DPOF) is a standard
specification for requesting prints from digital cameras.
Select images from Memory Card and specify the number
of copies to print on DPOF-compatible printers, or at digital
printing services.
^ DPOF does not support images obtained via the Internet, S! Mail, etc.
^ If Memory Card capacity becomes insufficient while in use, a
warning message appears. Delete files and try again.
^ For printing procedures, see the printer manual.
Selecting Images & Prints
Select a title A Press b
Main Menu
H Settings A Connectivity (F) A Memory Card A
DPOF A Number of Copies A For Each Picture
1
2
Select a folder and press b
3
Enter a number of copies to print (00 - 99) and
press b
Thumbnails appear.
Use G to select an image and press N W
C To open images, select one A Press b
B Press i to return.
11
Memory Card
^ HTML files for SD Local Contents are saved in PRIVATE/
MYFOLDER/Local Contents folder when viewed on PCs.
C To return, press i A Press i
C To cancel, enter 00 A Press b
11-7
4
5
11
Repeat Steps 2 - 3 for other images
Index Print
KOff
H Settings A Connectivity (F) A Memory Card A
Main Menu
DPOF A Settings A Index Print
Note H ^ DPOF settings made on other devices are unusable;
delete existing settings to create new ones on handset.
^ Some settings may not be supported depending on the
printer or printing services.
^ Process may take a while if print settings are made for
many images.
^ If image files are deleted or renamed on PCs or other
devices, print settings change. Perform Reset Settings
(see right) and start over with settings.
Check Settings
Print Settings
Reset Settings
For All
Pictures
Apply a number to all DCF images to print the
same number of copies
Memory Card
K0 Copy each
H Settings A Connectivity (F) A Memory Card A
Main Menu
DPOF A Number of Copies A For All Pictures
Enter a number (01 - 99) A Press b
Add Date
Add dates to prints
KOff
H Settings A Connectivity (F) A Memory Card A
Main Menu
DPOF A Settings A Add Date
Choose On or Off A Press b
11-8
Create Index Print (a print with thumbnails)
Press M $
Choose On (require) or Off A Press b
Main Menu
View current print settings
H Settings A Connectivity (F) A Memory Card A
DPOF
Select Check Settings A Press b
Main Menu
Reset DPOF settings
H Settings A Connectivity (F) A Memory Card A
DPOF
Select Reset Settings A Press b A Choose Yes A
Press b
Mass Storage
Activate Mass Storage and connect handset to a PC via
USB Cable to access Memory Card from the PC without
removing the card from handset.
^ Activating Mass Storage activates Offline Mode.
^ Mass Storage is not available when battery is low, when an
S! Application is paused or while Music Player is active.
Main Menu H Settings A Connectivity (F)
Select Mass Storage and press b
Calling not available during operation, OK? appears.
Choose Yes and press b
Connect handset to a PC via USB Cable
^ If it is already connected, remove it then reconnect it.
To exit, press M 3
Choose Yes and press b
^ Safely remove handset (recognised as removable hardware
device) on the PC, then disconnect USB Cable.
11
Memory Card
1
2
3
4
5
11-9
Tools
12-1
Calendar
Key
6
8
E
F
Opening Calendar
^ Open Calendar in Month View, 2Month View or Week View.
^ Calendar appears in Month View by default.
Main Menu H Tools A Tools 1 (F)
1
12
Set to open Calendar in Month View, 2Month
View or Week View
KMonth View
Calendar of the current month opens.
C If Clock is unset, use F to select a Time
Zone A Press b A Enter date/time A
Press b
C To open Help (Key Assignments),
press N x A Select Help A Press b
B Press b to return.
Main Menu H Tools A Tools 1 (F) A Calendar
Press N x A Select Calendar Settings A
Press b A Select Default View A Press b A
Select a type A Press b
Set Colour
Tools
Calendar Window
(Month View)
Key
Month/2Month View
Week View
q
Open the previous month1
Open the previous week
p
Open the next month1
Open the next week
2
12-2
In 2Month View, view changes by two months.
Select Calendar and press b
0
2
Week View
Find
Go to (Enter Date)
Select the previous/next week1 Select the previous/next time block
Select date
Default View
CKey Assignments
1
1
Month/2Month View
Help
Stamp2
-
4
Set Colour (By Date)
5
Go to (Today)
In 2Month View, view changes by two months.
Available in Month View.
Set Calendar date colour
KSunday (and holiday): Red, Saturday: Blue, Others: Black
Main Menu H Tools A Tools 1 (F) A Calendar
By Days of the Week
Press N x A Select Calendar Settings A
Press b A Select Set Colour A Press b A Select
By Week A Press b A Select a day A Press b A
Select a colour A Press b
By Date
Select a day A Press N x A Select Calendar
Settings A Press b A Select Set Colour A Press b A
Select By Date A Press b A Select a colour A Press b
C To use the colour set for the day of the week, select No
Setting A Press b
C To reset, press N x A Select Calendar Settings A
Press b A Select Set Colour A Press b A Select Reset
Colour A Press b A Select an option A Press b A
Choose Yes A Press b
Set Holiday
Remove/restore preset holidays or save
additional holidays
Stamp
Create new entry quickly by entering a stamp
CAvailable in Month View.
Main Menu H Tools A Tools 1 (F) A Calendar
Removing/Restoring Holidays
Press N x A Select Calendar Settings A Press b
A Select Set Holiday A Press b A Use F to select Set
My Holidays or Set Public Holidays A Select a holiday A
Press b to check or uncheck
C To check or uncheck all, press N x A Select Check
All or Uncheck All A Press b
Saving Additional Holidays
Press N x A Select Calendar Settings A Press b
A Select Set Holiday A Press b A Use F to select Set
My Holidays A Select <empty> A Press b A Enter
name A Press b A Enter date A Press b A Select
frequency A Press b A Press M q
Editing Additional Holidays
Tip H ^ Preset holidays cannot be deleted or edited.
^ Save up to ten additional holidays.
Select a date A Press 2 A Select a stamp A Press b
Tip H To edit the entry, see P.12-7.
Alarm Settings
Select Alarm Volume, Vibration and Manner
Setting
KAlarm Volume: Level 3, Vibration: Off, Manner Setting: Do not Ring
Main Menu H Tools A Tools 1 (F) A Calendar
Alarm Volume
Press N x A Select Alarm Settings A Press b
A Select Alarm Volume: A Press b A Use G to
adjust level A Press b
Vibration
Press N x A Select Alarm Settings A Press b
A Select Vibration: A Press b A Select On, Link to
Sound or Off A Press b
12
Tools
Press N x A Select Calendar Settings A Press b
A Select Set Holiday A Press b A Use F to select Set
My Holidays A Select a holiday A Press N x A
Select Edit A Press b A Select Name: A Press b A
Enter name A Press b A Select Date: A Press b A
Enter date A Press b A Select frequency A Press b
A Press M q
Main Menu H Tools A Tools 1 (F) A Calendar
Manner Setting
Press N x A Select Alarm Settings A Press b
A Select Manner Setting: A Press b A Select Ring
or Do not Ring A Press b
C For Ring, choose Yes A Press b
12-3
Saving Entries
Organise daily, weekly, monthly and yearly schedule.
Save up to 300 entries between Calendar and Tasks (see P.12-8).
Main Menu H Tools A Tools 1 (F) A Calendar
12
Tools
1
2
3
4
Select a day and press b
5
6
7
8
Select End: and press b
Select <Add New Entry> and press b
Enter subject and press b
^ Enter up to 32 characters. Subject is mandatory.
Enter start date/time and press b
^ For all-day entries, enter date and press N (press again to
cancel), then press b and skip ahead to Step 7.
Enter end date/time and press b
Select Category: and press b
Select a category and press b
^ To proceed without setting Reminder, skip ahead to Step 13. For
all-day entries, set Repeat (see P.12-6) and skip ahead to Step 13.
9 Select Reminder: and press b
10 Select Reminder Time: and press b
12-4
from At Start Time to 1 hour before and press b
11 Select
C For custom Reminder Time, select Other A Press b A
Enter date/time A Press b
C To set tone/video and duration, see P.12-5.
MK
12 Press
^ If K does not appear, press i.
C Repeat: see P.12-6
13 Select Location: and press b
location and press b
14 Enter
^ Enter up to 16 characters.
15 Select Description: and press b
schedule details and press b
16 Enter
^ Enter up to 128 characters.
New Entry Window
C Secret: see P.12-6
Mq
17 Press
The entry is saved.
Note H When entries are transferred to other devices, date/time
or other information may appear different depending on
the recipient device.
Tip H h (Reminder set) or i (Reminder unset) appears on
scheduled day. (Indicator disappears after scheduled time.)
At Reminder Time
Reminder is activated, sounding/vibrating, etc. according to
related settings.
Image appears if System Graphics is set (see P.9-3). However,
video and SMAF file images take priority over System Graphics.
Calendar Options
Follow these steps after Step 12 on P.12-4. After each
setting, New Entry window returns. Complete other settings.
Assign
Tone/Video
Set a tone/video to sound/play at Reminder Time
KAlert 1
Stopping Reminder
C Press M C, g, i or h.
Opening Entries
C While Reminder is activated, press b.
Tip H ^ If Reminder Time arrives during a call or while
recording video, Reminder will not be announced. End
the call or exit mobile camera to reactivate Reminder.
^ Active Reminder stops for incoming calls. Information
window opens after the call ends.
Preset Sounds
Select Reminder: A Press b A Select Assign Tone/
Video: A Press b A Select Preset Sounds A Press b
A Select a tone A Press b A Press M K
C To play tones, select one and press N L.
B Press N C to stop.
Data Folder Files
C To play files, select one and press M L.
B Press i to stop.
Duration
12
Tools
Select Reminder: A Press b A Select Assign Tone/
Video: A Press b A Select Ring Songs·Tones,
Music, Videos or Flash#Ringtones A Press b A
Select a file A Press b A Press M K
Set how long Reminder operates
K10 seconds
Select Reminder: A Press b A Select Duration: A
Press b A Select time A Press b A Press M K
C For custom Duration, select Other A Press b A Enter
time A Press b A Press M K
12-5
Repeat
Assign schedule type (once only, daily, weekly,
monthly or yearly) for each event
2
Select an entry and press b
3
Press i to return
KOnce Only
Once Only Schedule
Select Repeat: A Press b A Select Once Only A
Press b
C To send the entry via S! Mail, press N x A Select Send
A Press b A Select As Message A Press b A Complete
and send message (Perform from Step 3 on P.14-7.)
Repetitive Schedule
C After Step 1 on the left, press N x A Select
Memory Status A Press b
^ Start date and time are reflected in the items. For Month, if the
day is 29, 30 or 31, entries are saved for the valid months only.
^ Repeat time is not available for Every Year; the schedule is
repeated until deleted.
^ Set Repeat time to 00 to repeat until deleted.
C For temporary access to Secret entries, open Calendar and
follow these steps.
Secret
12
Press N x A Select Unlock Temporarily A
Press b A Enter Handset Code A Press b
^ Secret entries are hidden next time Calendar is opened.
KOff
Tools
^ Activate Show Secret Data (see P.9-27) to open/edit Secret
entries.
Opening Entries
Main Menu H Tools A Tools 1 (F) A Calendar
12-6
Unlock Temporarily
Restrict access to entries
Select Secret: A Press b A Choose On or Off A
Press b
1
Memory Status
Select Repeat: A Press b A Select from Day to
Every Year A Press b A Enter repeat time (00 99 times) A Press b
Select a date and press b
C Alternatively, to specify date, press N x A Select Go
to A Press b A Select Enter Date A Press b A Enter
date A Press b
C Alternatively, to open current date, press N x A Select
Go to A Press b A Select Today A Press b
Searching Entries by Subject
Main Menu H Tools A Tools 1 (F) A Calendar
1
2
3
4
Press N x
Select Find and press b
Enter search text and press b
^ Enter up to 32 characters.
Select an entry and press b
Editing Entries
Main Menu H Tools A Tools 1 (F) A Calendar
1
2
3
4
5
Select a date and press b
Select an entry and press N x
Select Edit and press b
Select an item and press b
^ For details, see procedure for saving entries.
When finished editing, press M q
Deleting Entries
This Appointment/
All This Day
All This Week/
Up to Last Week
In Week View, delete all entries in the week or
up to the end of the previous week
Main Menu H Tools A Tools 1 (F) A Calendar
Week
Select a week A Press N x A Select Delete A Press b
A Select All This Week A Press b A Choose Yes A Press b
Up to the End of Previous Week
Select a week A Press N x A Select Delete A Press b
A Select Up to Last Week A Press b A Choose Yes A Press b
All This Month/
Up to Last Month
In Month View, delete all entries in the month
or up to the end of the previous month
Main Menu H Tools A Tools 1 (F) A Calendar
Month
Delete one entry or all entries of the day
Main Menu H Tools A Tools 1 (F) A Calendar
Select a date A Press b A Select an entry A Press N
x A Select Delete A Press b A Select This
Appointment A Press b A Choose Yes A Press b
All Entries of the Day
Select a date A Press N x A Select Delete A
Press b A Select All This Day A Press b A
Choose Yes A Press b
Up to the End of Previous Month
Select a month A Press N x A Select Delete A Press b
A Select Up to Last Month A Press b A Choose Yes A Press b
All This
2Months
12
Tools
One Entry
Select a month A Press N x A Select Delete A Press b
A Select All This Month A Press b A Choose Yes A Press b
Delete all entries in two months on Display
Main Menu H Tools A Tools 1 (F) A Calendar
Select two months A Press N x A Select
Delete A Press b A Select All This 2Months A
Press b A Choose Yes A Press b
All
Appointments
Delete all entries
Main Menu H Tools A Tools 1 (F) A Calendar
Press N x A Select Delete A Press b A Select
All Appointments A Press b A Enter Handset Code A
Press b A Choose Yes A Press b
12-7
Deleting Repetitive Entries
C A confirmation appears except for All Appointments. To
delete, follow these steps.
5
6
Choose Yes A Press b
Save event with deadlines.
^ Check completed tasks (see P.12-10).
^ Save up to 300 entries between Tasks and Calendar (see P.12-4).
Saving Entries
12
Tools
12-8
Select from At Due Time to 1 hour before and
press b
C For custom Reminder Time, select Other A Press b A
Enter date/time A Press b
C To set tone/video and duration, see P.12-9.
^ To retain repetitive entries, choose No A Press b
Tasks
Select Reminder Time: and press b
7
8
9
Press M K
Select Description: and press b
Enter task details and press b
^ Enter up to 128 characters.
C Secret: see P.12-9
Mq
10 Press
The entry is saved.
Main Menu H Tools A Tools 1 (F) A Tasks
1
2
3
Select <Add New Entry> and press b
4
Select Reminder: and press b
Enter subject and press b
^ Enter up to 32 characters. Subject is mandatory.
Enter due date/time and press b
^ To set no limit, press N (press again to cancel), then press b
and skip ahead to Step 8.
^ To proceed without setting Reminder, skip ahead to Step 8.
New Entry Window
At Reminder Time
Reminder is activated, sounding/vibrating, etc. according to
related settings.
Image appears if System Graphics is set (see P.9-3).
However, video and SMAF file images take priority over
System Graphics.
Data Folder Files
Stopping Reminder
Select Reminder: A Press b A Select Assign Tone/
Video: A Press b A Select Ring Songs·Tones,
Music, Videos or Flash#Ringtones A Press b A
Select a file A Press b A Press M K
C Press M C, g, i or h.
Opening Entries
C While Reminder is activated, press b.
Tip H ^ If Reminder Time arrives during a call or while
recording video, Reminder will not be announced. End
the call or exit mobile camera to reactivate Reminder.
^ Active Reminder stops for incoming calls. Information
window opens after the call ends.
Task Options
Follow these steps after Step 7 on P.12-8. After each
setting, New Entry window returns. Complete other settings.
Assign
Tone/Video
Set a tone/video to sound/play at Reminder Time
Preset Sounds
Select Reminder: A Press b A Select Assign Tone/
Video: A Press b A Select Preset Sounds A Press b
A Select a tone A Press b A Press M K
Duration
Set how long Reminder operates
K10 seconds
Select Reminder: A Press b A Select Duration: A
Press b A Select time A Press b A Press M K
C For custom Duration, select Other A Press b A Enter
time A Press b A Press M K
Secret
Restrict access to entries
KOff
Select Secret: A Press b A Choose On or Off A
Press b
^ Activate Show Secret Data (see P.9-27) to open/edit Secret entries.
12
Tools
KAlert 1
C To play files, select one and press M L.
B Press i to stop.
C To play tones, select one and press N L.
B Press N C to stop.
12-9
Alarm Settings
3
C Select Alarm Volume setting.
In Task list, select an entry A Press N x A Select
Alarm Settings A Press b A Select Alarm Volume: A
Press b A Use G to adjust level A Press b
Completed Tasks
C To mark completed, follow these steps after Step 1 on the left.
Select an unchecked entry (O) A Press b A Press b
B To cancel checks, select a checked entry (P) A
Press b A Press b
C Select Vibration setting.
In Task list, select an entry A Press N x A
Select Alarm Settings A Press b A Select
Vibration: A Press b A Select On, Link to Sound
or Off A Press b
Unlock Temporarily
C For temporary access to Secret entries, follow these steps.
After Step 1 on the left, press N x A Select
Unlock Temporarily A Press b A Enter Handset
Code A Press b
C Select Manner mode ringer setting.
In Task list, select an entry A Press N x A Select
Alarm Settings A Press b A Select Manner Setting: A
Press b A Select Ring or Do not Ring A Press b
B For Ring, choose Yes A Press b
12
^ Secret entries are hidden next time Task list is opened.
Memory Status
C After Step 1 on the left, press N x A Select
Memory Status A Press b
Tools
Opening Entries
Main Menu H Tools A Tools 1 (F)
1
2
12-10
Press i to return
Select Tasks and press b
C To open completed (checked) entries,
use F to select a (Completed Tasks).
C To open uncompleted (unchecked) entries,
use F to select b (Incomplete Tasks).
Select an entry and press b
C To send the entry via S! Mail, press N
x A Select Send A Press b A
Select As Message A Press b A Complete and send
message (Perform from Step 3 on P.14-7.)
Searching Entries by Subject
Main Menu H Tools A Tools 1 (F) A Tasks
1
2
3
4
Press N x
Select Find and press b
Enter search text and press b
^ Enter up to 32 characters.
Select an entry and press b
Editing Entries
Main Menu H Tools A Tools 1 (F) A Tasks
1
2
3
4
Select an entry and press N x
Select Edit and press b
Select an item and press b
^ For details, see procedure for saving entries.
When finished editing, press M q
Deleting Entries
Delete
Delete one entry
Main Menu H Tools A Tools 1 (F) A Tasks
All Tasks/
All Comp. Tasks
Delete all tasks or all completed tasks
Main Menu H Tools A Tools 1 (F) A Tasks
All Tasks
Press N x A Select Delete A Press b A
Select All Tasks A Press b A Enter Handset Code
A Press b A Choose Yes A Press b
All Completed Tasks
Press N x A Select Delete A Press b A
Select All Comp. Tasks A Press b A Choose Yes
A Press b
Setting Alarm
Set Alarm to sound at a specific time each day or on specific
days of the week. Save up to 5 Alarm settings.
Main Menu H Tools A Tools 1 (F) A Alarms
1
2
3
4
Select -- : -- and press b
Enter time and press b
C Alarm Options: see P.12-13
Select Repeat: and press b
Daily
1 Select Every Day and press b
Specified Day of the Week
1 Select Selected Days and
press b
12
Alarm Settings
C To select all, press N x A Select Check All A
Press b A Skip ahead to Step 4
Tools
Select an entry A Press N x A Select Delete
A Press b A Select This Task A Press b A
Choose Yes A Press b
Alarm
2 Select a day of the week and press b
The day is set and P appears.
^ To cancel, highlight the selected day and press b.
3 Repeat Step 2 to select more
4 Press M K when finished
One Time Alarm
1 Select Once Only and press b
12-11
5
6
Press M q
Alarm is set.
^ For more settings, start over from Step 1 in "Setting Alarm" on
P.12-11.
Press g to exit
Handset returns to Standby and e appears.
For Manner Mode
C Select Manner mode ringer setting.
After Step 1 in "Setting Alarm" on P.12-11, select
Settings A Press b A Select For Manner Mode A
Press b A Select Ring or Do not Ring A Press b
B For Ring, choose Yes A Press b
For World Clock
C Set Alarm for World Clock (see P.12-14) as follows:
12
Tools
After Step 1 in "Setting Alarm" on P.12-11, select
Settings A Press b A Select Link To World Clk A
Press b A Choose On or Off A Press b
At Alarm Time
Alarm is activated, sounding/vibrating, etc. according to
related settings.
Image appears if System Graphics is set (see P.9-3). However,
video and SMAF file images take priority over System Graphics.
12-12
Stopping Alarm
C Press M C, g, i or h.
^ Alarm activates only when handset is on at Alarm Time.
Snooze
C When Snooze (see P.12-13) is set, Alarm repeats at the set
interval.
^ Accept incoming calls. End the call to reactivate Snooze.
^ If other Alarm Time arrives while Snoozing, the other Alarm
is activated only after Snooze is cancelled.
C To cancel Snooze, follow these steps while Alarm is activated
or Snoozing.
Press M C, g or i A Choose Yes A Press b
^ Snooze is cancelled automatically 60 minutes after initial
Alarm Time.
Tip H ^ If Alarm Time arrives during a call or while recording
video, no tone will sound. End the call or exit mobile
camera to reactivate Alarm.
^ In Manner mode, volume depends on For Manner
Mode setting (Do not Ring by default).
^ Active Alarm stops for incoming calls. When Snooze is
unset, Information window opens after the call ends.
Alarm Options
Snooze
Follow these steps after Step 2 in "Setting Alarm" on
P.12-11. After each setting, Alarm settings window returns.
Complete other settings.
Assign
Tone/Video
Set a tone/video to sound/play at Alarm Time
KAlert 1
Set Alarm to activate at set intervals after initial
Alarm Time
KOff
Select Snooze: A Press b A Select an interval A
Press b
C For custom intervals, select Other A Press b A Enter
interval A Press b
Alarm Volume
Set volume from seven levels
Preset Sounds
Select Assign Tone/Video: A Press b A Select Preset
Sounds A Press b A Select a tone A Press b
C To play tones, select one and press N L.
B Press N C to stop.
Data Folder Files
Select Assign Tone/Video: A Press b A Select Ring
Songs·Tones, Music, Videos or Flash#Ringtones A
Press b A Select a file A Press b
Custom
Screen
Set Custom Screen tone/video to sound/play
at Alarm Time
Select Assign Tone/Video: A Press b A Select
Custom Screen A Press b
C To play files, select Custom Screen and press N L.
B Press N C to stop.
^ Custom Screen is selectable when compatible Custom
Screen is active.
Vibration
Set handset to vibrate at Alarm Time
KOff
Select Vibration: A Press b A Select On, Link to
Sound or Off A Press b
^ For details on Link to Sound, see P.9-15 "Vibration".
Duration
12
Tools
C To play files, select one and press M L.
B Press i to stop.
KLevel 5
Select Alarm Volume: A Press b A Use G to
adjust level A Press b
Set how long Alarm operates
K10 seconds
Select Duration: A Press b A Select duration A Press b
C For custom Duration, select Other A Press b A Enter
time A Press b
12-13
Cancelling & Reactivating Alarm
Switch Off
Cancel Alarm and retain the settings
Main Menu H Tools A Tools 1 (F) A Alarms
Select an entry A Press N x A Select Switch
Off A Press b
^ e disappears.
^ Reactivate Alarm to use the same settings.
Switch On
Reactivate Alarm with the same settings, or
change current settings
Main Menu H Tools A Tools 1 (F) A Alarms
Select an entry A Press N x A Select Switch
On A Press b
12
C To change settings, select an entry A Press b A Edit settings
B For details, see procedure for saving entries.
Tools
Deleting Alarm
Reset Alarm
Delete Alarm settings one by one
Main Menu H Tools A Tools 1 (F) A Alarms
Select an entry A Press N x A Select Reset
Alarm A Press b A Choose Yes A Press b
Clear All
Delete all Alarm settings
Main Menu H Tools A Tools 1 (F) A Alarms
Select an entry A Press N x A Select Clear All
A Press b A Enter Handset Code A Press b A
Choose Yes A Press b
12-14
World Clock
Display local date/time (see P.9-18) and the date/time of
another area in the world.
^ Select from preset Time Zones or specify a new one; enter
area name and time difference between new and local areas.
^ To set World Clock to appear in Standby, see P.9-5 "Clock/
Calendar".
^ Time Zone is set to Tokyo by default.
Setting Time Zone & Daylight Saving
Activate Daylight Saving to advance the selected area's
time by one hour.
Main Menu H Tools A Tools 1 (F) A World Clock
1
2
Press b
Time Zone
1 Select Set Time Zone and press b
2 Use F to specify an area and press b
C To add Time Zone, press N m A Enter city name
(up to 16 characters) A Press b A Use E to select +
or - A Press A A Enter time difference A Press b
Daylight Saving
1 Select Daylight Saving and press b
2 Choose On and press b
C To cancel, choose Off A Press b
Opening World Clock
Main Menu H Tools A Tools 1 (F)
1
Select World Clock and press b
Local date/time and the date/time of another area in the world appear.
Tip H ^ To change local Time Zone, see P.9-18.
^ To set World Clock to appear in Standby, select World
Clock (L), World Clock (S), World Clk+1mo. or World
Clk+2mos. for Clock/Calendar (see P.9-5).
1
2
2
Calculator
Use Calculator for basic arithmetic (up to 12 digits) and percentage
calculation, or currency conversion (Money Converter).
Main Menu H Tools A Tools 1 (F)
Select Calculator and press b
Calculator opens.
^ Alternatively, enter digits in Standby and press j to open
Calculator.
^ Use Keypad to enter digits, and the keys in the table (see
right) for calculation.
C To copy the result, press N x A Select Copy A Press b
B
CM (Clear Memory)
- (Subtract)
A
RM (Recall Memory)
j
f
x (Multiply)
C
M+ (Add Memory)
M1
÷ (Divide)
D
. (Decimal)
q
= (Equal)
b
+/- (Switch)
p
C·CE (Clear)
i
% (Percent)
N2
While 0 appears, press to return to Tools 1 menu.
Press N x and select %.
Press g to exit
Money Converter
C To change exchange rate, open Calculator and follow these steps.
Press N x A Select Money Converter A
Press b A Select Exchange Rate A Press b A
Select Domestic or Foreign A Press b A Enter
rate A Press b
^ Exchange rate is 1 for both conversions by default.
C To convert foreign currencies, follow these steps.
12
Tools
1
+ (Add)
Enter amount of money and press N x A
Select Money Converter A Press b A Select To
Domestic or To Foreign A Press b
^ Conversion is based on the preset exchange rate.
Tip H ^ Entered numbers, results and numbers saved in Memory
are not affected by incoming calls. End the call to return.
^ Clear Memory before starting Memory calculations.
^ Numbers saved in Memory remain even if Calculator is
closed, but are cleared when handset power is turned off.
12-15
Voice Recorder
Recording
Use Microphone to record short voice memos and save files
on handset or Memory Card; record and save longer
recordings on Memory Card.
Main Menu H Tools A Tools 2 (F)
1
Select Voice Recorder and press b
2
3
Press b
^ Modes:
Recording Time
Storage Media
Up to three minutes
For Message
(attachable to S! Mail)
Handset or
Memory Card1
Extended
Voice
Memory Card2
Up to 99 hours 59 minutes
59 seconds
1
Specify storage media before recording, or set handset to ask each
time; when set to ask, always record with Memory Card inserted.
2
Insert Memory Card to record in Extended Voice mode.
^ For Message is set by default.
12
Tools
Preparation
^ When battery is low, Voice Recorder does not activate. If
battery runs low while recording in Extended Voice mode,
Battery low. Please connect to charger! appears and Voice
Recorder shuts off.
^ Conversations during calls cannot be recorded.
^ If incompatible microphone is connected, recording may fail.
C To switch mode, press N x A Select Record Time A
Press b A Select For Message or Extended Voice A
Press b
C To switch storage media, see P.12-17.
Recording starts.
For Message
1 Press b to stop
^ Recording stops automatically when maximum
recording time is reached.
C To play the recording, select Playback A Press b
B Press b to pause.
B Press i to return.
C To start over without saving, press i A Repeat from
Step 2
C To send via S! Mail, select Save and Send A Press b
A Complete and send message (Perform from Step 3
on P.14-7.)
B When confirmation for save location appears, select
a location A Press b
2 Select Save and press b
Recording is saved to handset or Memory Card.
C When confirmation for save location appears, select a
location A Press b
Extended Voice
1 Press b to stop
Recording is saved to Memory Card.
12-16
Note H ^ Avoid shocks to handset; may cause noise or skipping.
^ Recording window may take longer to open as more
Voice files are saved on Memory Card.
Tip H ^ Alarm is disabled while recording, and starts after Voice
Recorder stops/closes.
^ Attach saved Voice file or record voice directly from Mail
Composition windows (see P.14-10).
Playback
Play sounds from Speaker, or use Headphones.
Main Menu H Tools A Tools 2 (F) A Voice Recorder
1
2
Select Ring Songs·Tones and press b
C To switch between handset and Memory Card, press N x
A Select Change to Phone or Change to Memory Card A
Press b
Select a file and press b
Playback starts.
C Press C (up) or D (down) to adjust volume.
Select a file A Press N x A Select Delete A
Press b A Choose Yes A Press b
Incoming Calls/Mail during Playback
C Playback stops for incoming calls or Alarm.
C A notification appears for incoming mail without interrupting
playback.
Recording Setting
Save
Recording To
Select storage media for For Message
KPhone Memory
Main Menu H Tools A Tools 2 (F) A Voice Recorder
Press N x A Select Save Recording To A
Press b A Select Phone Memory, Memory Card or
Ask Each Time A Press b
^ Set to Ask Each Time to select media after every recording.
12
Tools
3
Press N x
Deleting Files
C Follow these steps after Step 2 on the left.
12-17
Document Viewer
Open documents via Data Folder, Internet, S! Mail,
Bluetooth# or infrared.
^ Supported File Formats:
B PDF (.pdf)
B Microsoft Excel (.xls)
B Microsoft Word (.doc) B Microsoft PowerPoint (.ppt)
^ Some files may take time to open or may not appear correctly.
(Complicated designs, special characters in file names,
password-protected, language other than Japanese or English
used, etc.)
^ On PCs, save documents to this Memory Card directory:
B PRIVATE/MYFOLDER/MY Items/OTHER DOCUMENTS
^ Open documents of up to 1 MB each. (Some documents may
not open depending on content.)
12
Data Folder Files
Tools
Main Menu H Tools A Tools 2 (F) A Document Viewer
1
Select a file and press b
Internet Files
1
Open a page, select a file and press b
Tip H Download files of up to 300 KB via Yahoo! Keitai or up to
500 KB via PC Site Browser.
Attachments
1
2
In a Messaging folder, select a message and press b
Select a file and press b
Key Assignments
b
Whole Page
Zoom to view the whole page
M
Vertical/Horizontal
Rotate page 90 degrees counterclockwise
(press again to return)
C
Up
Scroll up
D
Down
Scroll down
B
Left
Scroll left
Scroll right
A
Right
1
Upper Left
View upper left portion of page
2
Full Screen
View document in full screen
3
Upper Right
View upper right portion of page
4
Zoom Out
Zoom out
5
Centre
View page centre
6
Zoom In
Zoom in
7
Lower Left
View lower left portion of page
8
Select Page
Jump to specified page
B Enter page number A Press b
9
Lower Right
View lower right portion of page
0
Help
View a summary of key assignments
p
Next Page
Open the next page
q
Previous Page
Open the previous page
Fit Page
Zoom to fit width
f
12-18
Barcode
Scan printed barcodes with mobile camera or download/
exchange QR Codes via the Internet, S! Mail, etc.
Main Menu H Tools A Tools 3 (F) A Barcode A Scan Barcode
1
^ Slide Portrait/Macro Selector to Macro (o).
^ Hold handset approximately 10 cm away
from barcode.
C Use F to adjust brightness.
C To activate or cancel Continuous mode,
press N x A Select Continuous
Scan A Press b A Choose On or Off
A Press b
C To open Help (Key Assignments), press 0.
B Press b to return.
^ Scan UPC (JAN) or QR Codes. Handset automatically detects
code type and reads data.
^ In Continuous mode, scan up to 50 UPC (JAN) or 16 QR
Codes at one time. In some cases, continuous scans may be
disrupted depending on barcode data or data size.
^ Zoom is not available.
Note H ^ Scan may fail if the barcode is dirty or unclear.
^ Scan barcodes under adequate light.
^ Capture one barcode at a time; otherwise scan may fail.
2
3
Press b
Mobile camera scans the barcode.
^ If recognition takes time, move handset slowly and adjust the
distance from barcode.
C Press M 3 to stop scan A Start over from Step 1
Barcode recognition tone sounds
and scan results appear
12
Tools
Tip H ^ A UPC (Universal Product Code) or JAN (Japanese
Article Number) is a series of varying width vertical
lines (bars) and spaces. Bars and spaces together are
elements, combinations of which represent different
numbers. Handset cannot read other one-dimensional
barcodes (ITF Code, Code39, Codabar/NW-7, etc.).
^ A QR (Quick Response) Code is a matrix symbology
consisting of an array of nominally square cells, which allows
omni-directional reading of up to 4,296 alphanumerics and
byte data, as well as kanji and kana.
Frame barcode in the centre of
Display
C Using Scan Results: see P.12-20 - 12-22
C To start over, press i A Choose Yes
A Press b A Repeat from Step 1
12-19
Continuous Mode
C After scanning, Scan completed. Scan new? appears.
^ To scan next code, choose Yes A Press b A Frame
the code on Display A Press b
^ To cancel, choose No A Press b A Scan results
appear
Split Data
C After scanning, Split data. Scan next symbol? appears.
^ To scan next code, choose Yes A Press b A Frame
the code on Display A Press b
^ To cancel, choose No A Press b A Choose Yes A
Press b
C Scan results do not appear until all split data is scanned.
C The scanning status appears on the first line of Display. For
example, d indicates that 1 of 4 codes has been scanned.
12
CUsing Scan Results
Place Calls1
Select a number starting with TEL:2 A
Press b A The number appears A Press f
Send Mail3
Select a mail address including @ A
Press b A Complete and send message
(Perform from Step 5 on P.14-8.)
Press N x A Select Send Message
A Press b A Press b A Select S! Mail
or SMS4 A Press b A Complete and send
message (Perform from Step 3 on P.14-6 or
Quote & Send Mail on P.14-7.)
To use a part of text, press N { in
Send Message window A Select the first
character of text A Press b A Select the
end point A Press b
Tools
Save to
Phone Book1, 3
Select a number starting with TEL:2 or mail
address including @ A Press N x A
Select Save to Ph.Book A Press b A
Select As New Entry A Press b A
Perform from Step 2 on P.4-4
Access Internet
Sites5
Select a URL starting with http:// or rtsp:// A
Press b A Handset connects to the Internet
Save to Data Folder Select an image or melody file A Press N
(Images & Melodies) x A Select To Data Folder A Press b
12-20
Saving
Press N x A Select Save A Press b
Save up to 10 items. To open saved items,
see P.12-22 "Scanned Results".
Use for System
Graphics
Select an image A Press N x A
Select As System A Press b A Select an
item A Press b A Press b
Copy Text
Text
Press N x A Select Copy A Press b
A Select the first character of text A
Press b A Select the end point A Press b
URL5
Select a URL starting with http:// or rtsp://
A Press N x A Select Copy URL A
Press b
Mail Address3
Select a mail address including @ A Press N
x A Select Copy Address A Press b
Phone
Number1
Select a number starting with TEL:2 A Press N
x A Select Copy Telephone A Press b
Wallpaper
Select an image A Press N x A Select
As Wallpaper A Press b A Press b
B For images smaller or larger than Display,
select Centred, Full Screen or Fit Image
A Press b A Press b (For Display size
images or Centred, use E to zoom in/out
or press N to rotate.)
Select an image or melody file A Press b
Open Properties
Select an image or melody file A Press N
x A Select Details A Press b
1
Available when text is in TEL: 4 format.
Text strings of 10 to 32 digits starting with 0 are recognised as
phone numbers.
3
Available when text is in 4@4 format.
4
S! Mail Composition window opens automatically if text exceeds the
SMS character limit.
5
Available when text is in http:// 4 or rtsp:// 4 format.
2
Scanning during
Text Entry
Scan barcodes during text entry and insert
scan results into current cursor position
In a text entry window, press N x A Select
Scan A Press b A Select Scan Code A Press b
A Frame barcode in the centre of Display A
Press b A Press b
C To use a part of text, press N { A Select the first character
of text A Press b A Select the end point A Press b
Note H Barcodes/text cannot be scanned when:
B Entering text during a call B S! Application is active
Open Barcode
Read saved barcode images in Data Folder
12
Tools
Open Images or
Play Melodies
MEMORY: or MAILTO:
C When MEMORY: or MAILTO: appears in scan results,
press b to enter the items underlined with a dotted line
automatically in Phone Book Details or SMS/S! Mail
messages. However, text after an invalid character is not
underlined and is not copied.
Main Menu H Tools A Tools 3 (F) A Barcode A Open Barcode
Select a barcode image A Press b
C For split data, choose Yes A Press b
B To cancel, choose No A Press b A Choose Yes A
Press b
C When scanning fails, press b A Select next barcode image
manually A Press b
4 represents one or more alphanumerics.
12-21
Note H ^ Resized QR Codes may be invalid.
^ When invalid, This data may be incorrect. appears.
Scanned
Results
Main Menu
Open files saved in Scanned Results
H Tools A Tools 3 (F) A Barcode A Scanned
Results
Select a file A Press b
C To open properties, select a file A Press N x A
Select Details A Press b
B Press b to return.
C To delete files, select one A Press N x A Select
Delete A Press b A Choose Yes A Press b
^ Opened results cannot be re-saved.
^ Some files such as large images may not open.
12
Create QR Codes
Tools
Create QR Codes from entered text, Phone Book, Pictures,
Ring Songs·Tones, Text Templates or Other Documents.
^ Save up to the equivalent of 513 digits, 311 alphanumerics or
131 kanji per QR Code.
^ Large items are divided into maximum of 16 QR Codes.
^ Created QR Codes are saved to Data Folder (Pictures). To
open them, see P.8-5.
Phone Book
Main Menu
Encode name, reading, phone numbers, mail
addresses, address and note
H Tools A Tools 3 (F) A Barcode A Create QR
Code A Phone Book
Select an entry A Press b A QR Code appears A
Press b
^ Only name, reading, phone numbers, mail addresses, address
and note are encoded.
Text Input
Main Menu
Enter and encode text
H Tools A Tools 3 (F) A Barcode A Create QR
Code A Text Input
Enter text A Press b A QR Code appears A Press b
Data Folder
Main Menu
Encode melody/image files or Text Templates
in Data Folder
H Tools A Tools 3 (F) A Barcode A Create QR
Code A Data Folder
Select a folder A Press b A Select an item A
Press b A QR Code appears A Press b
Switching Storage Media
C While created QR Code appears, press N x A
Select Save To A Press b A Select Phone or Memory
Card A Press b
Attaching to S! Mail
C While created QR Code appears, press N x A Select
Send As A Press b A Perform from Step 3 on P.14-7
12-22
Incoming Calls while Creating QR Code
C Contents are temporarily saved. End the call to return.
Main Menu H Tools A Tools 3 (F) A Barcode A Scan Text
1
Text Scanner
Scan text (URLs, mail addresses, phone numbers or roman
letters) with mobile camera.
^ Scan up to 256 characters continuously.
^ Scan up to 60 single-byte characters within 3 lines. Scanning
over 35 characters at one time may yield poor results.
^ Some symbols may not be read.
^ Text mode is set to Auto each time Text Scanner is activated.
Change the mode if text is distorted in Auto (such as white
text in black background).
^ Zoom is not available.
^ Adjust to frame text in [ ]. Letters at the
ends may be distorted.
^ Slide Portrait/Macro Selector according
to text size.
^ Hold handset approximately 10 cm away
from barcode.
C Use F to adjust brightness.
C To switch text mode, press N x A Focus Adjustment
Select Reversed Text A Press b A
Bar (Better focus in
Select Auto, Normal or Reversed A
darker blue)
Press b
C To open Help (Key Assignments), press 0.
B Press b to return.
2
Press b
3
Use E to select a line and press b
Text Scanner reads the text.
C Press i to stop scan A Start over
from Step 1
12
Tools
Note H ^ Text Scanner will not activate if music is playing; when
Stop music? appears, choose Yes and press b to
proceed.
^ Text Scanner will not activate if an S! Application is active.
Frame text on Display
^ Text Scanner reads one line per scan.
12-23
4
5
Scan results appear
Handset automatically registers scan results as a URL, Email
Address, Phone Number or Text; if incorrect, change mode.
^ If text exceeds limit, results appear with overage truncated.
C To change mode, press N x A Select Change Mode
A Press b A Select a type A Press b (Scan results and
alternatives list change accordingly.)
C To edit, press N x A Select Select/Edit A Press b
A Select the character to edit A Select an alternative from
the list or enter the correction directly from Keypad
C To start over, press i A Choose Yes A Press b A
Repeat from Step 1
Press b
^ To use scan results, see P.12-20.
Scanning More Text
12
Tools
12-24
C After Step 5, press N x A Select Continue Part or
Scan More A Press b
^ Continue Part
Select Continue Part to enter additional text. (Mode
remains the same.)
^ Scan More
Select Scan More to enter text after a line break.
C Continue Part and Scan More are disabled once 256 characters
have been scanned.
Scanning during
Text Entry
Scan text during text entry and insert scan
results into current cursor position
In a text entry window, press N x A Select
Scan A Press b A Select Text Scanner A Press b
A Frame text in the centre of Display A Press b A
Select a line A Press b A Press b
^ To change mode or edit scan results, see Step 4 on the left.
Stopwatch
Record elapsed time for up to 24 hours (23 hours 59 minutes
59.9 seconds) in 0.1-second increments. Use lap time
feature to segment elapsed time.
^ Save times (including the last four lap times) to handset Text
Templates.
^ Stopwatch is disabled when battery is low. Stopwatch ends
when battery runs low.
Main Menu H Tools A Tools 2 (F) A Stopwatch
1
Press b
2
Press b to stop countdown
Stopwatch starts.
C To record Lap times, press N ,.
B The last four Lap times are recorded. The records are
deleted when Stopwatch is cancelled.
C To save the records to Text Template, press N x A
Select Save to Templates A Press b
B To check saved records, open Text Templates (see P.12-26).
C Press b to resume.
C To clear the records, press N x A Select Reset A
Press b
3
To exit, press i then choose Yes and press b
Tip H ^ Records are deleted when Stopwatch is cancelled.
Save records to Text Templates.
^ Stopwatch setting is not affected by incoming calls. End
the call to return.
^ Alarm is disabled while Stopwatch window is open, but is
reactivated automatically when handset returns to Standby.
Countdown Timer
Set Countdown Timer up to 60 minutes in 1-second increments.
Alarm Tone sounds and Small Light flashes when set time elapses.
Main Menu H Tools A Tools 2 (F) A Countdown Timer
Enter time (00:01 - 60:00) and press b
2
Press b
^ To edit entered time, use F to move cursor and enter correct
time. If b is already pressed, follow the steps below.
^ When times over 60 minutes (60:00) are entered, the last set
time returns.
C To change time, press N Z A Enter time A Press b
Countdown starts.
Press b to stop countdown
4
To exit, press i then choose Yes and press b
C Press b to resume.
C To reset, stop countdown and press N l.
Countdown Timer End
C Tone sounds according to General Volume setting.
^ Alarm stops automatically after 60 seconds. Press M
3 to stop manually.
^ In Manner mode, Manner settings take priority.
^ When the set timer time has elapsed during a call, Timer
Expired appears after g is pressed to end the call.
Tip H ^ Countdown is not affected by incoming calls. End the
call to return.
^ Alarm is disabled while Countdown Timer window is
open, but is reactivated automatically when handset
returns to Standby.
12
Tools
1
3
Expenses Memo
Use Expenses Memo to add expenses, such as travel expenses.
Enter up to 30 entries (up to 29,999,999.70 yen in total,
999,999.99 yen per entry).
12-25
Add New
Expense
Main Menu
Enter monetary figure and categorise it
H Tools A Tools 3 (F) A Expenses Memo A Add
New Expense
Enter amount A Press b A Select a category A Press b
C Shortcut: In Standby, enter amount A Press D A Press b
A Select a category A Press b
^ The entry date, category and figure are saved.
^ If Clock is unset, entry date and time will be saved as --/--/-- --:--.
Totals
Check entries
Main Menu H Tools A Tools 3 (F) A Expenses Memo
Select Totals A Press b
12
Tools
C Use E to scroll entries.
C To change category, select an entry A Press b A Select a
category A Press b
B To enter custom category name, select Other in category
list A Press b A Enter name (up to 14 characters) A
Press b (Preset category names are not affected.)
C To change entry amount, select an entry A Press N x
A Select Change Amount A Press b A Edit A Press b
C To delete an entry, select one A Press N x A Select
Delete Item A Press b A Choose Yes A Press b
C To delete all entries, press N x A Select Delete All
A Press b A Enter Handset Code A Press b A Choose
Yes A Press b
Edit Category
Rename categories
Main Menu H Tools A Tools 3 (F) A Expenses Memo
Select Edit Category A Press b A Select a
category A Press b A Edit A Press b
^ Enter up to 14 characters.
12-26
Text Templates
Save frequently used phrases for use in mail message, etc.
Save up to 60 entries (1,536 characters each).
New Entry
Main Menu
1
H Tools A Tools 3 (F) A Text Templates A <Add
New Entry>
Enter text and press b
Tip H To paste saved text into text entry windows, see P.3-15
"Using Text Templates".
Opening Templates
Main Menu H Tools A Tools 3 (F) A Text Templates
1
Select a file and press b
C Press i to return.
Editing Templates
Main Menu H Tools A Tools 3 (F) A Text Templates
1
2
3
Select a file and press N x
Select Edit and press b
Edit text and press b
Phone Help
Learn when/how to use Keypad functions/shortcuts.
Most Phone Help functions are inaccessible from menu items.
Main Menu H Tools A Tools 3 (F)
1
File is overwritten.
Select Phone Help and press b
Phone Help window opens.
Deleting Templates
Handset Status and
Key Press Method
Delete single Text Templates.
Main Menu
1
Target Key
H Tools A Tools 3 (F) A Text Templates A Select
a file A Options (N) A Delete
Function
Choose Yes and press b
Press E to toggle guides
^ Alternatively, press p or q.
Press b to return
12
Tools
2
3
12-27
Optional Services
13-1
Optional Services Overview
^ When P appears, access services from a touch-tone landline.
^ For details, contact SoftBank Customer Centre, General
Information (see P.20-29).
Optional Services
13
*
13-2
Call
Forwarding
When you know you won't be able to receive calls
made to handset, automatically divert incoming
calls to another phone number (see right)
Voicemail
Set handset to forward all or all unanswered
calls to Voicemail Centre. Access caller
messages from handset in service area or from
a touch-tone phone anywhere (see P.13-4).
■ Missed Call Notification
Records of calls missed while handset is off/
out-of-range and Voicemail is active.
Call Waiting*
Call Waiting alerts you to incoming calls when
the line is already engaged. After the tone, place
the current call on hold and answer the second,
or alternate between calls (see P.13-5).
Conference
Call*
Open a second line while the first is engaged.
Switch back and forth between two lines or talk
on both simultaneously. Add other parties to an
existing conversation and talk on up to five lines
simultaneously (see P.13-6).
Call Barring
Restrict incoming/outgoing calls depending on
conditions (see P.13-7)
Caller ID
Show or hide your own number when placing
calls (see P.13-10)
An additional contract is required.
Call Forwarding
^ Voicemail and Call Forwarding can only be set simultaneously
when Call Forwarding is set to Video Calls.
^ Call Forwarding and Voicemail are not available when All
Outgoing Calls or All Incoming Calls in Call Barring is active.
Call Forwarding
Main Menu
Initiate Call Forwarding
H Settings A Call/Video Call (F) A Voicemail/
Divert A Diverts
Direct Entry
Select a call type A Press b A Select Always or No
Answer A Press b A Select Enter Number A
Press b A Enter a phone number A Press b
C For No Answer, select ring time A Press b
^ Include dialling code for landline numbers.
Phone Book
Select a call type A Press b A Select Always or No
Answer A Press b A Select an entry A Press b
A Press b
C For entries with multiple numbers, select an entry A
Press b A Select a number A Press b A Press b
C For No Answer, select ring time A Press b
Call Forwarding Records
Select a call type A Press b A Select Always or No
Answer A Press b A Select a phone number A
Press b A Press b
C For No Answer, select ring time A Press b
Incoming Calls while Call Forwarding is Active
C To answer calls, press f while handset is ringing/vibrating.
^ When Always is set, handset does not ring/vibrate for calls.
Cancel All
Cancel Call Forwarding
Main Menu H Settings A Call/Video Call (F) A Voicemail/Divert
Select Cancel All A Press b A Choose Yes A
Press b
^ Cancel All also cancels Voicemail.
Status
Check Call Forwarding status
Main Menu H Settings A Call/Video Call (F) A Voicemail/Divert
Select Status A Press b
^ Call Forwarding status appears.
C Press b to return.
Optional Services
Note H Phone Numbers Beginning with the Following
Numbers Cannot be Saved:
^ 1 (Public Service Numbers: 110, 119, 118, etc.)
^ 00 (International call numbers: 001, 0041, etc.)
^ 0120 (Toll-free numbers)
^ 0990 (Fee-based services: Dial Q2, etc.)
Forwarding Video Calls
Video Calls are forwarded only to Video Call-compatible
devices that comply with 3G-324M.
Tip H Adjust ring time to set the response priority when using
Call Forwarding together with Answer Phone (see P.2-9).
Example: Ring time for Call Forwarding: 10 seconds
Ring time for Answer Phone: 9 seconds
In this example, Answer Phone responds first. (Priority
may change depending on signal conditions.)
13
13-3
Voicemail
Optional Services
13
^ Calls are diverted to Voicemail Centre via Call Forwarding
function; Voicemail and Call Forwarding can only be set
simultaneously when Call Forwarding is set to Video Calls.
^ Call Forwarding and Voicemail are not available when All
Outgoing Calls or All Incoming Calls in Call Barring is active.
^ For details, contact SoftBank Customer Centre, General
Information (see P.20-29).
^ Activate Missed Call Notification (see P.13-5) for records of
calls missed while handset is off/out-of-range.
Voicemail
Main Menu
Initiate Voicemail
H Settings A Call/Video Call (F) A Voicemail/
Divert A Voicemail A Activate
Select Always or No Answer A Press b
C For No Answer, select ring time A Press b
Incoming Calls while Voicemail is Active
C To answer calls, press f while handset is ringing/vibrating.
^ When Always is set, handset does not ring/vibrate for calls.
Tip H Adjust ring time to set the response priority when using
Voicemail together with Answer Phone (see P.2-9).
Example:Ring time for Voicemail: 10 seconds
Ring time for Answer Phone: 9 seconds
In this example, Answer Phone responds first. (Priority
may change depending on signal conditions.)
Cancel All
Main Menu
Cancel Voicemail
H Settings A Call/Video Call (F) A Voicemail/
Divert
Select Cancel All A Press b A Choose Yes A
Press b
^ Cancel All also cancels Call Forwarding.
Call Voicemail
Check Voicemail messages
Main Menu H Phone
Select Call Voicemail A Press b
^ Follow the voice guidance for further operations after handset
connects to Voicemail Centre.
^ Alternatively, follow these steps in Standby.
B Press b A Select Settings A Press b A Use F to select
Call/Video Call A Select Voicemail/Divert A Press b A
Select Voicemail A Press b A Select Call Voicemail A
Press b
Tip H l appears when new messages are recorded, and
disappears after they are checked from handset.
13-4
Status
Main Menu
Check Voicemail status
H Settings A Call/Video Call (F) A Voicemail/
Divert
Select Status A Press b
^ Voicemail status appears.
C Press b to return.
Missed Call Notification
Activate/Cancel
Activate or cancel Missed Call Notification
Main Menu H Settings A Call/Video Call (F)
Select P Missed Calls A Press b A Press b
^ Follow the voice guidance for further operations after handset
connects to the Network.
Retrieving Missed Call Notification Records
C Missed Call Notification records are
stored at the Centre. When handset is
turned on or comes into range,
Information window (see P.2-7) appears
with Missed Call records.
^ Information window may take some
time to open.
An additional contract is required.
Call Waiting
On/Off
Activate or cancel Call Waiting
Main Menu H Settings A Call/Video Call (F) A Call Waiting
Choose On or Off A Press b
Incoming Calls
Place Line 1 on hold to answer Line 2
When a tone sounds during a call, press f.
^ Press f to switch between two lines.
Closing Handset while Someone is on Hold
C All lines are disconnected.
Pressing g while Someone is on Hold
C Active line ends and handset re-engages the party on hold.
Optional Services
Activate this function for records of calls missed while
handset is off/out-of-range and Voicemail is active.
Call Waiting
13
Line 1 Ends while Line 2 is on Hold
C Short beeps sound. To re-engage the party on hold:
Press N x A Select Retrieve A Press b
13-5
Tip H ^ Handset does not ring or vibrate for incoming calls
while a line is engaged. A tone sounds from Earpiece.
^ When Voicemail or Call Forwarding is active,
unanswered calls are transferred to Voicemail Centre or
the forwarding number. When active service is set to
Always Call Waiting is disabled.
Closing Handset while Someone is on Hold
C All lines are disconnected.
Pressing g while Someone is on Hold
C Active line ends and handset re-engages the party on hold.
Line 1 Ends while Line 2 is on Hold
Status
Check Call Waiting status
Main Menu H Settings A Call/Video Call (F) A Call Waiting
Select Status A Press b
Optional Services
13
^ Call Waiting status appears.
C Press b to return.
Conference Call
An additional contract is required.
Dial New
Number
Open another line during a call
Enter a phone number during a call A Press f
^ Line 2 is open. Line 1 is placed on hold.
^ Press D to select a number from Phone Book or press f for
1+ seconds to select from Call Log.
Swap Calls
Switch between two open lines
During a call, press f.
^ The line switches. The other line is placed on hold.
13-6
C Short beeps sound. To re-engage the party on hold:
Press N x A Select Retrieve A Press b
Conference
Call
Use up to five lines simultaneously
Press N x while switching between two lines
A Select Multi Party A Press b A Select
Conference All A Press b
C To switch to private conference during Conference Call,
select a number/name A Press b A Select Private A
Press b
B The other lines are placed on hold.
C To switch back to Conference Call during private conference
or after opening a new line, press N x A Select Multi
Party A Press b A Select Conference All A Press b
Ending Calls during Conference Call
C All lines are disconnected.
Some Lines End during Conference Call
C Other lines remain connected.
Call Barring
Restrict incoming/outgoing calls or SMS messages.
Following restrictions are available:
All Outgoing Calls
Restrict all non-emergency calls
Outgoing Bar Int'l Call1
Allow only domestic calls
Calls
Restrict all international calls
Only Local & Home2
except to Japan
1
2
Reject all calls
Reject calls when outside Japan
Example: While in the UK, place domestic calls only.
Example: While in the UK, place calls domestically or to Japan.
Alternatively, restrict calls by number/Caller ID availability.
Rejected
Numbers
Black List
Reject calls from designated numbers
Unknown
Reject calls from numbers not saved in
Phone Book
Withheld
Reject calls without Caller ID
Payphone
Reject calls from public phones
Unavailable
Reject calls with undisplayable Caller ID
Tip H If call is attempted when Call Barring is active, Call barred.
appears. It may take longer to appear in some areas. Check
Call Barring settings if the message does not appear.
Optional Services
Incoming All Incoming Calls
Calls
Bar if Abroad
Note H ^ Network Password selected at initial subscription (see
P.1-27) is required to change Call Barring settings.
^ If Network Password is incorrectly entered three times,
Call Barring settings are locked. To resolve, Network
Password and Centre Access Code must be changed.
For details, contact SoftBank Customer Centre,
General Information (see P.20-29).
^ All Outgoing Calls and All Incoming Calls are
disabled when Call Forwarding or Voicemail is active.
13
13-7
Restricting Outgoing Calls
Set/Cancel
Restriction
Main Menu
Set or cancel restriction of outgoing calls
H Settings A Call/Video Call (F) A Call Barring A
Outgoing Calls
Each Restriction
Select restriction A Press b A Choose On (set) or Off
A Press b A Enter Network Password A Press b
Cancelling All Restrictions
Optional Services
13
Select Cancel All A Press b A Enter Network
Password A Press b
Tip H Emergency calls (110, etc.) are possible even when
outgoing calls are restricted. See P.2-3 "Emergency Calls".
Status
Main Menu
Check Call Barring status for outgoing calls
H Settings A Call/Video Call (F) A Call Barring A
Outgoing Calls
Select restriction A Press b A Select Status A
Press b
^ Call Barring status appears.
C Press b to return.
13-8
Restricting Incoming Calls
Set/Cancel
Restriction
Main Menu
Set or cancel restriction of incoming calls
H Settings A Call/Video Call (F) A Call Barring A
Incoming Calls
Each Restriction
Select restriction A Press b A Choose On (set) or Off
A Press b A Enter Network Password A Press b
Cancelling All Restrictions
Select Cancel All A Press b A Enter Network
Password A Press b
Status
Main Menu
Check Call Barring status for incoming calls
H Settings A Call/Video Call (F) A Call Barring A
Incoming Calls
Select All Incoming Calls A Press b A Select
Status A Press b
^ Call Barring status appears.
C Press b to return.
Rejecting a Call
Set Reject
Number
Main Menu
Unknown
Reject calls from numbers not saved in Phone
Book
KOff
Designate phone numbers to reject
H Settings A Call/Video Call (F) A Call Barring A
Rejected Numbers A Black List A Set Reject Number
H Settings A Call/Video Call (F) A Call Barring A
Main Menu
Rejected Numbers A Unknown
Choose On (reject) or Off A Press b
Adding Numbers
Select <empty> A Press b A Enter a number A
Press b
Editing Numbers
Select an entry A Press b A Edit the number A
Press b
Deleting Numbers
Select an entry A Press N x A Select Delete
A Press b A Choose Yes A Press b
Tip H Designate numbers to reject then set Switch On/Off to On.
Switch On/Off
Reject calls from designated numbers
Reject calls without Caller ID
KOff
H Settings A Call/Video Call (F) A Call Barring A
Main Menu
Rejected Numbers A Withheld
Choose On (reject) or Off A Press b
Payphone
Reject calls from public phones
KOff
H Settings A Call/Video Call (F) A Call Barring A
Main Menu
Rejected Numbers A Payphone
Choose On (reject) or Off A Press b
Unavailable
Optional Services
C To select from Phone Book, select <empty> A Press N
x A Select Ph.Book List A Press b A Select an
entry A Press b
B For entries with multiple numbers, select one A Press b
B Name appears for numbers saved in Phone Book.
C To select from Call Log, select <empty> A Press N x
A Select From Call Log A Press b A Use F to select a
type A Select a record A Press b
Withheld
13
Reject calls with undisplayable Caller ID
KOff
H Settings A Call/Video Call (F) A Call Barring A
Main Menu
Rejected Numbers A Unavailable
Choose On (reject) or Off A Press b
KOff
Main Menu
H Settings A Call/Video Call (F) A Call Barring A
Rejected Numbers A Black List A Switch On/Off
Choose On (reject) or Off A Press b
13-9
Changing Network Password
Change NW
Password
Main Menu
Change Network Password
H Settings A Call/Video Call (F) A Call Barring A
Change NW Password
Enter current Network Password A Press b A
Enter new Network Password A Press b A Enter
new Network Password again A Press b
Optional Services
13
Caller ID
Show or hide your own phone number when placing calls.
Regardless of this setting, sending or blocking Caller ID can
be selected for each call. Enter the following numbers/
symbols before a phone number when placing a call.
Send
186 or q31p
Block
184 or p31p
Show My
Number
Send or block Caller ID
KOn
H Settings A Call/Video Call (F) A Show My
Main Menu
Number
Choose On (send) or Off A Press b
Status
Main Menu
Check Caller ID status
H Settings A Call/Video Call (F) A Show My
Number
Select Status A Press b
^ Caller ID status appears.
C Press b to return.
13-10
Messaging
14-1
Basics
Use SMS and S! Mail for messaging.
Create Arrange Mail or Feeling Mail from S! Mail.
Messaging Folders
Messages are organised in folders by type.
Received Msg.1
Received messages
SMS
Exchange short text messages of up to 160 alphanumerics
with SoftBank handsets.
^ Send SMS to up to 20 recipients at one time.
Drafts
Templates
Sent Messages2
S! Mail
Messaging
14
Exchange text messages of up to 30,000 characters with
e-mail compatible SoftBank handsets, other mobiles and
PCs, etc. Attach image/sound files.
^ Send S! Mail to up to 20 recipients at one time.
Arrange Mail
Select font colour, font size, background colour; insert
images, background sound, and more (see P.14-11).
Feeling Mail
Ringtone, Vibration and Small Light response varies by the
emotion set by sender (see P.14-15).
Tip H ^ An additional contract is required to use S! Mail and
receive e-mail from PCs, etc.
^ Address questions about messaging to SoftBank
Customer Centre, General Information (see P.20-29).
14-2
Unsent Messages
1
Incomplete/unsent messages
Arrange Mail created/downloaded as
templates
Sent messages
Undelivered, cancelled, failed or Send
Reservation messages
Received Folder and Folder 1 - Folder 7 (My Folders) appear
within when Received Msg. View (see P.14-4) is set to Folder View.
Spam Folder appears as well if Anti Spam Measures (see P.14-35)
is active.
2
Sent Folder and Folder 1 - Folder 7 (My Folders) appear within
when Sent Msg. View (see P.14-4) is set to Folder View.
Memory Status
C Press b A Select Messaging A Press b A Select
Memory Status A Press b A Select Received Msg.,
Sent Total, Sent Msg., Drafts or Unsent Msg. A Press b
B Press b to return.
^ Save up to 5 MB or 1,000 messages in Received Msg.
folder. Handset stores up to 3 MB or 500 messages
between Sent Messages, Drafts and Unsent Messages.
^ A notice appears when Messaging Folder memory is low.
^ Templates memory usage is reflected in memory status of
Other Documents in Data Folder (see P.8-2).
^ USIM Card SMS message count and volume do not appear.
Window Description
Messaging Folder Contents
Select a Messaging folder and press b to open it.
Message Type/Status
^ Message Status:
Y Unread
Z Read
Y Sent
P Failed
O Replied
N Forwarded
Q S! Mail Notice
L
X
Send
Reservation set*
e appears below SMS messages (d).
*
Send Reservation messages are saved to
Unsent Messages folder.
^ Message Settings:
k Attachments
f Protected
a Priority (High)
b Priority (Low)
Messaging
Sender+Preview
Unread Delivery
Report
14
SMS Mail on
e
USIM Card
Sender or Recipient
^ Number, address or name appears.
Message Text
14-3
Tip H ^ Follow these steps to sort messages.
Press N x A Select View Settings A
Press b A Select Sort A Press b A Select
an option A Press b
^ To change message list view, see right.
2
^ Message List View is Sender+Preview by default.
Tip H ^ Alternatively, open a Messaging folder and follow these
steps.
Press N x A Select View Settings A
Press b A Perform from Step 1 on the left
Message Contents
Select a message and press b to open it.
^ Shortcut: Open a Messaging folder and press h to
toggle view.
Message Number
Folder View
Sender or Recipient
• Number, address or name appears.
Subject (S! Mail only)
Messaging
14
Received or Sent Date & Time
Message Text
Tip H ^ To activate Display Backlight, press 0 - 9.
^ Press p to open previous message (older one), or
press q to open next one (newer one).
Set folders to appear in Received Msg. and Sent Messages
folders. Organise messages into folders manually or
automatically (see P.14-31).
Received Msg. View and Sent Msg. View are List View
(folders are hidden) by default.
Main Menu H Messaging A Settings A General Settings
1
Changing Views
Message List View
Main Menu H Messaging A Settings A General Settings
1
14-4
Select Message List View and press b
Select Two-line, Sender+Preview, Sunjects+Preview,
Sender or Subjects and press b
Select Received Msg. View or Sent Msg.View and
press b
C When the folder contains a Secret folder, enter Handset
Code A Press b
2
Select Folder View and press b
C To hide folders, select List View A Press b
Note H When folders are hidden, messages in Secret folders
appear in message list.
Sending Text Messages
Customising Handset Address
Change alphanumerics before @ of the default handset
mail address.
Default
[email protected]
Custom
Account Name
^ Create Contact Groups beforehand to send the same
message to multiple recipients at one time (see P.4-12).
^ Save frequently used numbers/addresses to Speed Mail List
(see P.14-33).
^ Use Multi Job (see P.1-26) to view other messages while
creating a message.
Basics
Domain Name
Entered Account Name @softbank.ne.jp
Available entry limits vary by Message Type.
If you have further questions, please contact SoftBank
Customer Centre, General Information (see P.20-29).
Main Menu H Messaging A Settings
1
2
Select Address Setting and press b
*
Subject
Message
Available*
N/A
Available
Attachments
N/A
S! Mail
Available
Available
Available
Available
SoftBank handset numbers only.
Mail Composition Overview
SMS
S! Mail
Messaging
^ Handset must connect to the Internet to customise handset
address.
^ Retrieve Network Information (see P.1-20) before customising
handset address.
^ Customising handset mail address helps reduce spam.
^ Default Account Name is random alphanumerics.
Recipient
SMS
14
Enter Recipient
Enter Subject
Handset connects to the Internet.
Select English and press b
^ Follow onscreen instructions.
Tip H Alternatively, customise handset address via Yahoo!
Keitai Main Menu. (Click 設定・申込, then English, then
Messaging Settings.)
Compose Message
Attach Files
Add Arrange Mail Effects
Apply Feeling Mail Settings
Send Message
14-5
Character Entry Limits
Character entry limit varies by Message Type.
SMS
160 single-byte alphanumerics
S! Mail
Approximately 30,000 single-byte alphanumerics
^ For SMS, only single-byte alphanumeric entry is available
when Char-code (see P.14-37) is GSM 7bit.
^ Send up to 300 KB including message text via S! Mail.
Message text character limit differs by attachment size or
number of recipients.
^ Approximate mail size appears in Mail Composition window
(see right, P.14-7).
Messaging
14
Creating & Sending SMS Mail
1
2
^ Alternatively, press N in Standby.
Select Create New SMS and
press b
Mail Composition window opens.
3
4
5
Select recipient field and press b
C Entering Recipients: see P.14-9
Enter recipients
C To enter a recipient, perform Step 4 on
P.14-7.
B Enter Address is not available for SMS.
SMS Mail Composition
Window
Select message text field and press b then
enter a message
Alternatively, enter the first character; message text entry
window opens automatically.
C Entering Characters: see P.3-5
6
7
14-6
Press b, select Messaging and press b
Press b
C To edit the message, see Step 8 on P.14-8.
C To delete the message, see Step 8 on P.14-8.
C To preview 3D Pictogram, see Step 8 on P.14-8.
C Delivery Options: see P.14-15
C Send Reservation: see P.14-17
C Saving to Drafts: see P.14-18
Press M N
Converting SMS Mail to S! Mail
C In SMS Mail Composition window, press N x A
Select Change to S! Mail A Press b A Choose Yes A
Press b
^ When entered message text exceeds SMS character limit,
a confirmation appears. Choose Yes and press b to
convert SMS to S! Mail and continue entering text.
Creating & Sending S! Mail
1
2
Press b, select Messaging and press b
^ Alternatively, press N in Standby.
Select Create Message and
press b
3
Select recipient field and press b
4
Phone Book
1 Select Phone Book and
press b
2 Select a recipient and
press b
Select Recipient window opens.
C Entering Recipients: see P.14-9
Select Recipient
Window
C To search Phone Book, perform
Steps 2 - 3 in "Dialling from
Phone Book" on P.4-8.
C When multiple items are saved, select one A Press b
Mail Composition window opens.
^ Shortcut: In Standby, press N for
1+ seconds
C To add recipients, select recipient field A Press b A
Select Add Recipient A Press b A Repeat Step 4
S! Mail Composition
Window
Sent Mail Records
1 Select a recipient and press b
Messaging
Contact Groups (see P.4-12)
1 Select Select Group and press b
2 Select a Group and press b
14
^ Sent mail records are names, phone numbers or mail
addresses with corresponding indicators.
Speed Mail List (see P.14-33)
1 Select Speed Mail List and press b
2 Select a recipient and press b
14-7
Direct Entry
1 Select Enter Number or Enter Address and
press b
2 Enter recipient's SoftBank handset number
or mail address and press b
Messaging
14
14-8
5
Select subject field and press b
6
7
Enter subject and press b
Subject entry window opens. Alternatively, enter the first
character to open subject entry window.
^ Enter up to 512 single-byte alphanumerics.
Select lText and press b then enter a message
C Entering Characters: see P.3-5
B After entering My Pictogram from My Pict History, Arrange
Mail Composition window (see P.14-11) opens automatically.
C To enter cross-carrier Pictograms, press N x A Select
Pict Setting A Press b A Select For DoCoMo, For au,
For SoftBank or Common A Press b A Select a
Pictogram A Press b
B Available Pictograms vary by Pict Setting mode.
B Mode selection applies to the current message only.
B Changing Pict Setting does not affect entered Pictograms.
C Creating Arrange Mail: see P.14-11
C To enter Signature, press N x A Select Advanced A
Press b A Select Signature A Press b
B Activate Auto Insert (see P.14-35) to enter Signature
automatically.
8
Press b
C To edit the message, select message text
field A Press b A Edit A Press b
C To delete the message, select message
text field A Press N x A Select
Remove Text A Press b
C To preview 3D Pictogram, select
message text field A Press N x
A Select 3D Pictogram A Press b
B Preview how the message appears
on 3D Pictogram-compatible recipient handsets.
C Delivery Options: see P.14-15
C Creating Feeling Mail: see P.14-15
C Send Reservation: see P.14-17
C Saving to Drafts: see P.14-18
files
9 Attach
C Attaching Files: see P.14-10
MN
10 Press
^ Message is sent even if handset is closed.
C To cancel, press M 3.
B Message is not sent if cancelled quick enough.
Incoming Calls while Creating Message
C Content is saved temporarily. End the call to return.
Sending from Phone Book Entries
C Open a Phone Book entry and follow these steps.
^ Phone Numbers
Select a number A Press b A Select Create
Message A Press b A Select S! Mail or SMS A
Press b A Perform from Step 5 on P.14-8 or on P.14-6
^ Mail Addresses
Select a mail address A Press b A Perform from
Step 5 on P.14-8
When Recipient Handset is Off or Out-of-Range
Delivery Failure
C Information window opens (W appears) for delivery failure.
To send unsent messages, select Sending failure
A Press b A Select a message A Press b
C Activate Auto Resend (see P.14-34) to reattempt to send
unsent messages automatically up to two times.
^ If messages are not sent after two Automatic Resend
attempts, follow the above steps to send manually.
^ Automatic Resend may send the same message twice.
Select recipient field A Press b A Select Add
Recipient A Press b A Perform from Step 4 on P.14-7
B Press i to return.
^ Enter up to 20 recipients in total.
C To switch recipient status between To, Cc (carbon copy) and
Bcc (blind carbon copy), open S! Mail Composition window
and follow these steps.
Select recipient field A Press b A Select a
recipient A Press N x A Select Change to
To, Change to Cc or Change to Bcc A Press b
^ Other recipients cannot see numbers/addresses set to Bcc.
C To change/edit, open Mail Composition window (see P.14-6,
P.14-7) and follow these steps.
Select recipient field A Press b A Select a
recipient A Press b A Edit A Press b
B Press i to return.
C To delete, open Mail Composition window (see P.14-6,
P.14-7) and follow these steps.
Messaging
C Messages are stored in Server Mail Box, and delivered when
recipient handset detects signal.
^ Messages are deleted if not received by the specified
Expiry Time.
Entering Recipients
C To add recipients, open Mail Composition window (see
P.14-6, P.14-7) and follow these steps.
14
Select recipient field A Press b A Select a recipient
A Press N x A Select Delete A Press b
B To delete all, select Delete All instead of Delete A Press b
A Choose Yes A Press b
B Press i to return.
Note H When a mail address is entered, do not use single-byte
katakana or Pictograms in message text and subject.
They may not appear properly on recipient devices.
14-9
Attaching Files
Attach images, sound files, vFiles (Phone Book/schedule
entries), etc. to S! Mail messages.
^ Attach up to 20 files or 300 KB including message text.
^ Confirm compatibility with recipient handsets (file format,
services, etc.) before sending files.
^ Follow these steps after Step 8 on P.14-8; after S! Mail
Composition window returns, complete and send message.
Messaging
14
1
2
3
Select h Attach
Select Attach File and press b
C Alternatively, press N x A Select Attach File A Press b
Image Files
1 Select Picture and press b
2 Select a folder and press b
C To capture an image, select Take Picture A Press b
A Press b to shoot A Press b
B When confirmation for save location appears, select
a location A Press b
3 Select a file and press b
C For large JPEG images, select attachment size A
Press b
C To change image size, select attached image A
Press N x A Select Resize Picture A Press b
A Select a size A Press b
B Resize Picture is not available when Multi Job is
active or when a non-JPEG (.jpg) image is selected.
14-10
Sound Files
1 Select Sound and press b
2 Select a folder and press b
C To record sound, select Record Voice A Press b A
Press b to start recording A Press b to stop A
Select Accept A Press b A Select To Phone
Memory or To Memory Card A Press b (Omit the
next step.)
3 Select a file and press b
Video Files
1 Select Video and press b
2 Select Saved Videos and press b
C To record video, select Record Video A Press b A
Press b to start recording A Press b to stop A
Select Accept A Press b A Select To Phone
Memory or To Memory Card A Press b (Omit the
next step.)
3 Select a file and press b
Flash#/Flash# Ringtone Files (see P.8-7)
1 Select Flash# or Flash#Ringtone and press b
2 Select a file and press b
Phone Book Entries
1 Select Attach Contact and press b
2 Select an entry and press b
Schedule Entries
1 Select Attach Appointment and press b
2 Select a date with schedule and press b
3 Select an entry and press b
Templates
1 Select Templates and press b
2 Select a file and press b
Books
1 Select Books and press b
2 Select a file and press b
Custom Screens
1 Select Custom Screens and press b
2 Select a file and press b
Other Files
1 Select Other Documents and press b
2 Select a file and press b
Creating Arrange Mail
Select font colour, font size, background colour; insert
images, background sound, and more.
^ Insert one sound or Flash# file per Arrange Mail.
^ Enter up to 40 types of My Pictograms per Arrange Mail.
^ Follow these steps in Step 7 on P.14-8; after S! Mail
Composition window returns, complete and send message.
1
2
Press N x
Select Arrange and press b
Arrange Mail Composition window opens.
^ Shortcut: Press f for 1+ seconds
C In S! Mail Composition window, select a file A Press N
x A Select Remove Item A Press b
Arrange Menu
Adding Attachments
• Use G to select an item.
C In S! Mail Composition window, select gAttach A Select
Attach File A Press b A Perform from Step 3 on P.14-10
Messaging
Applied Effects
Deleting Attachments
14
Arrange Mail
Composition Window
14-11
3
Changing Font Colour
1 Select Font Colour: and press b
2 Select a colour and press b
3 Enter text
^ To open Arrange menu, press M.
C To change colour of entered text, press N % A
Select the start point A Press b A Select the end
point A Press b A Select Font Colour: A Press b
A Select a colour A Press b
C To change colour of all entered text, press N %
A Press N # A Select Font Colour: A
Press b A Select a colour A Press b
Messaging
14
14-12
Changing Font Size
1 Select Font Size: and press b
2 Select a size and press b
3 Enter text
^ To open Arrange menu, press M.
C To change font size of entered text, press N % A
Select the start point A Press b A Select the end
point A Press b A Select Font Size: A Press b A
Select a size A Press b
C To change font size of all entered text, press N %
A Press N # A Select Font Size: A Press b
A Select a size A Press b
Inserting Images
1 Select Insert Picture and press b
2 Select Pictures or DCIM and press b
3 Select a file and press b
C To capture an image, select Insert Picture A
Press b A Select Take Picture A Press b A
Press b to shoot A Press b
4 Use G to select target location and press b
^ Omit this step if there is no text.
Inserting My Pictograms (see P.8-7)
1 Select Insert My Pictogram and press b
Data Folder (My Pictograms) opens.
2 Select a file and press b
3 Press b
C Alternatively, while entering message text, press q
until History appears A Press p to open My Pict
History A Select a file A Press b
B After entering My Pictogram, Arrange Mail
Composition window opens automatically.
B To select My Pictograms from file list, press p in
My Pict History.
Inserting Background Sound
1 Select Insert and press b
2 Select Insert BGM Sound and press b
3 Select Ring Songs·Tones or Music and
press b
4 Select a file and press b
Inserting Flash# (see P.8-7) File
1 Select Insert and press b
2 Select Insert Flash and press b
Data Folder (Flash#) opens.
3 Select a file and press b
C To preview inserted Flash#, press M ( A
Press N x A Select Preview A Press b
C To delete inserted file, press M ( A Move cursor
before the Flash# file icon A Press i
Inserting Horizontal Lines
1 Select Insert and press b
2 Select Insert Line and press b
C To flash entered text, press N % A Select the
start point A Press b A Select the end point A
Press b A Select Effect A Press b A Select Blink
A Press b A Select Blink On A Press b
C To cancel, press N % A Select the start point A
Press b A Select the end point A Press b A
Select Effect A Press b A Select Blink A Press b
A Select Blink Off A Press b
Scrolling Text
1 Select Effect and press b
2 Select Scrolling and press b
3 Select Right to Left or Swing and press b
4 Enter text
C To scroll entered text, press N % A Select the
start point A Press b A Select the end point A
Press b A Select Effect A Press b A Select
Scrolling A Press b A Select Right to Left or
Swing A Press b
C To cancel, press N % A Select the start point A
Press b A Select the end point A Press b A
Select Effect A Press b A Select Scrolling A
Press b A Select Scroll Off A Press b
Messaging
C To record sound, select Insert A Press b A Select
Insert BGM Sound A Press b A Select Record
Voice A Press b A Press b to start recording A
Press b to stop A Select Accept A Press b A
Select To Phone Memory or To Memory Card A
Press b (Omit the next step.)
C To delete inserted sound, select Insert A Press b A
Select Delete BGM Sound A Press b A Choose
Yes A Press b
Flashing Text
1 Select Effect and press b
2 Select Blink and press b
3 Select Blink On and press b
4 Enter text
14
C Press i to return.
14-13
Aligning Text
1 Select Effect and press b
2 Select Alignment and press b
3 Select Alignment Left, Alignment Centre or
Alignment Right and press b
4 Enter text
C To align entered text, press N % A Select the
start point A Press b A Select the end point A
Press b A Select Effect A Press b A Select
Alignment A Press b A Select Alignment Left,
Alignment Centre or Alignment Right A Press b
Messaging
14
Changing Background Colour
1 Select Background Colour: and press b
2 Select a colour and press b
Cancelling All
1 Select Normal and press b
2 Choose Yes and press b
^ All Arrange Mail settings are cancelled and message
text entry window returns.
Cancelling Last Action
C In Arrange Mail Composition window, select Undo A
Press b
^ Does not apply to Background sound insertion/deletion.
14-14
Creating Templates
C In S! Mail Composition window, press N x A
Select Save as Template A Press b A Enter name A
Press b A Select Save here.. A Press b
^ Entered recipients, subject and attachments are deleted.
^ Templates can also be downloaded via the Internet, etc.
Creating Arrange Mail from Templates
C In Standby
Press b A Select Messaging A Press b A Select
Templates A Press b A Select one A Press b
B To check Templates, select one in Templates list and
press N x A Select Preview A Press b
B To switch Template name display, select one in Templates
list and press N x A Select Item Displayed A
Press b A Select File Name or Title A Press b
^ To organise Templates, see P.8-8 "Managing Files & Folders".
C In S! Mail Composition Window
Press N x A Select Launch Template A
Press b A Select one A Press b
Creating Feeling Mail
Apply Feeling Mail setting to S! Mail; corresponding Pictogram
appears to the left of subject, and recipient handset responds
according to Link to Feeling settings (see P.14-20).
^ Send Feeling Mail to compatible SoftBank handsets only.
^ Feeling Mail Pictograms appear as standard Pictograms in
subjects on incompatible recipient handsets.
^ Follow these steps in Step 8 on P.14-8; after Mail Composition
window returns, complete and send message.
4
Press N x
Select Feeling Settings and press b
Select Happy/Glad, OK/Good, Sad/Sorry, NG/Bad
or Imp./Notice and press b
Select a Pictogram and press b
^ Options are effective only when sent to compatible handsets.
^ Settings are valid for one message.
^ Follow these steps after Step 6 on P.14-6 (for SMS) or Step 8
on P.14-8 (for S! Mail); press i to return to Mail
Composition window then complete and send message.
SMS/S! Mail Delivery Option
Delivery Report
Set to receive Delivery Report (see P.14-19)
CAvailable when messaging to SoftBank handset numbers.
KOff
Press N x A Select Messaging Settings A
Press b A Select Delivery Report A Press b A
Choose On or Off A Press b
SMS Delivery Option
S! Mail Composition window returns.
Expiry Time
Set Message Centre sent message storage limit
KMaximum
Messaging
1
2
3
Delivery Options
14
Press N x A Select Messaging Settings A
Press b A Select Expiry Time A Press b A Select
a limit A Press b
14-15
S! Mail Delivery Options
Reply To
Settings
Reply Request
Designate a different mail address for
receiving replies
CAvailable when reply-to address is saved.
KOff
Press N x A Select Messaging Settings A
Press b A Select Reply To Settings A Press b A
Choose On or Off A Press b
CAvailable when messaging to SoftBank handset numbers.
KOff
Press N x A Select Messaging Settings A
Press b A Select Reply Request A Press b A
Choose On or Off A Press b
Forward NG
C To set reply-to address, see P.14-37 "Reply To Settings".
Note H This function may not work depending on the recipient's
mail software.
Priority
Messaging
14
Set message priority
KNormal
Press N x A Select Messaging Settings A
Press b A Select Priority A Press b A Select
priority A Press b
^ Priority setting does not affect delivery speed.
Remote Fwd.
Action
Select whether to delete Server Mail after
forwarding it
CAvailable when forwarding Server Mail (Remote Forward).
KNot Delete
Press N x A Select Messaging Settings A
Press b A Select Remote Fwd. Action A Press b
A Select Not Delete or Del. After Forward A Press b
Set Auto Delete
Set the message to be deleted from recipient
handsets once read
CAvailable when messaging to SoftBank handset numbers.
KOff
Press N x A Select Messaging Settings A
Press b A Select Set Auto Delete A Press b A
Choose On or Off A Press b
14-16
Set to show a reply request
Set to show a do not forward request
CAvailable when messaging to SoftBank handset numbers.
KOff
Press N x A Select Messaging Settings A
Press b A Select Forward NG A Press b A
Choose On or Off A Press b
Delete NG
Set to show a do not delete request
CAvailable when messaging to SoftBank handset numbers.
KOff
Press N x A Select Messaging Settings A
Press b A Select Delete NG A Press b A Choose
On or Off A Press b
Quiz
Set up a question; recipients need to answer it
correctly to open the message
CAvailable when messaging to SoftBank handset numbers.
KOff
Setting Up Quiz
Press N x A Select Messaging Settings A
Press b A Select Quiz A Press b A Select Switch
On/Off A Press b A Choose On A Press b A
Select Question A Press b A Enter a question A
Press b A Select Answer A Press b A Enter the
answer A Press b A Press N $
^ Entered question and answer are deleted when Quiz is set to Off.
B Default question (When is my birthday?) returns.
Editing Question/Answer
Press N x A Select Messaging Settings A Press b
A Select Quiz A Press b A Select Edit Question A
Press b A Select Question A Press b A Enter a
question A Press b A Select Answer A Press b A
Enter the answer A Press b A Press N $
Set Auto
Play File
Show a comment and open/play an attached
file automatically before message text is
opened on recipient handsets
CAvailable when messaging to SoftBank handset numbers.
CFollow these steps after Step 9 on P.14-8.
KOff
Activating/Cancelling
^ Comment is deleted when Set Auto Play File is cancelled.
Entering a Comment
Select a file A Press N x A Select Set Auto
Play File A Press b A Select Enter Message A
Press b A Enter text A Press b
Send messages at the designated date/time in the future.
^ Messages are saved to Unsent Messages folder.
^ Save up to ten Send Reservation messages.
^ Information window opens for successful delivery.
^ Follow these steps after Step 6 on P.14-6 (for SMS) or Step 8
on P.14-8 (for S! Mail).
1
2
3
Press N x
4
5
Enter date/time
Select Send Reservation and press b
Select Date & Time and press b
C To send messages ten seconds after signal returns, select
Within the Network A Press b A Choose Yes A Press b
Choose Yes and press b
Messaging
Select a file A Press N x A Select Set Auto
Play File A Press b A Select Switch On/Off A
Press b A Choose On or Off A Press b
Send Reservation
^ When Auto Resend (see P.14-34) is Off, failed Send Reservation
messages (due to out-of-range or power-off) will not be resent.
14
^ Select date/time within a week.
^ Apply to one file per message.
^ Not available for Arrange Mail.
^ Set Auto Play File appears only for compatible files.
Note H Set Auto Delete, Reply Request, Forward NG, Delete
NG, Quiz and Set Auto Play File cannot be applied at
the same time; select one per message.
14-17
Using Drafts
3
Saving to Drafts
^ When memory is full, delete messages (see P.14-29) before
creating new ones.
^ Follow these steps after Step 6 on P.14-6 (for SMS) or Step 8
on P.14-8 (for S! Mail).
1
2
Press N x
Select Save to Drafts and press b
Message is saved to Drafts folder.
Note H Recipient status (To/Cc/Bcc) or the order in which attachments
appear may change when saving S! Mail messages.
Messaging
14
2
14-18
Opening New Messages
1
Select Drafts and press b
Select a message and press b
Mail Composition window (see P.14-6, P.14-7) opens with some
fields filled in.
Delivery Notice appears and
Information window opens (b
appears) for new mail
^ If closed, open handset for new
information to see Delivery Notice
appear and Information window open.
Main Menu H Messaging
Saved messages appear.
C To open properties, select a message A Press N x A
Select Message Details A Press b
B Press b to return.
C To delete draft messages, select one A Press N x A
Select Delete A Press b A Choose Yes A Press b
^ For details, see procedures for creating SMS (see P.14-6) or
S! Mail (see P.14-7 - 14-8).
^ Sent messages are deleted from Drafts.
C To save edited message to Drafts again, press N x A
Select Save to Drafts A Press b A Select Save as New or
Save (overwrite) A Press b
Incoming Text Messages
Sending from Drafts
1
Edit/send the message
2
Select Message and press b
Received Msg. folder opens.
^ Alternatively, press b while Delivery
Notice appears.
C When folders appear (see P.14-4
"Folder View"), select one A Press b
3
Select a message and press b
Message window opens.
^ To set 3D animation (see P.14-24 "3D Pictogram") to play for
compatible messages, see P.14-24 "Display Effect".
C To retrieve complete S! Mail messages, see P.14-21.
C Using Messages: see P.14-23
Tip H ^ When no Delivery Notice or Information window
appears, open from Received Msg. folder (see P.14-23
"Checking Messages").
^ Handset does not respond to messages with Low Priority.
Viewing New Message Text on External Display
Retrieving Server Mail Box Messages Manually
C Press N A Select Retrieve New Msg. A Press b
Messages with Quiz
C A question appears when opening a message locked with
Quiz. To open, press b, enter the answer and press b.
^ Message cannot be opened until the correct answer is entered.
^ Subject and message text do not appear in message list.
Auto Play
C If Set Auto Play File is set to an attached file, a comment
appears and the file opens/plays automatically upon opening
the message.
^ Some files may not open/play.
Delivery Report
C When messages are sent with Delivery Report (see P.14-35)
On, handset receives a Delivery Report from Server Mail
Box. To open Delivery Report, follow these steps in
Information window (see P.14-18).
Messaging
C When a new message is received with handset closed,
activate External Display Backlight and press h.
B To scroll message text, press M or L.
B To exit, press h. (Next new message opens, if any.)
^ Pictograms and My Pictograms do not appear.
^ Up to 150 characters appear per message. (Line break
counts as two characters.)
^ New messages appear on External Display only when
Message is set to Display and Caller Display is On in
External Display settings (see P.9-13).
Messages with Reply Request
C When closing a message containing Reply Request, a
confirmation appears.
^ To reply, choose Yes and press b.
^ Confirmation does not appear for replied messages.
14
Select Delivery Report A Press b A Select a
message with unconfirmed Delivery Report A
Press b A Press M M
B When Report list appears, press b to open first report
A Press i A Select next report A Press b
^ Alternatively, open sent message; H appears for delivered
messages, J for unknown and I for failed messages.
14-19
New Mail Out of Standby
C A double beep sounds and a notice such as New Message
from XX (name/number). appears.
^ To change/hide notice or mute double beep, see P.14-36
"Message Notice".
C Information window opens when handset returns to Standby.
When Handset Address is Changed
C New handset address confirmation from SoftBank arrives. To
update My Details automatically, follow these steps.
Select the message A Press b A Choose Yes A
Press b
B My Details cannot be updated when three mail
addresses are already saved.
Messaging
14
Receiving Feeling Mail
Ringtone, Vibration and Small Light
respond according to emotion set by
sender and Information window opens.
^ Ringtone, Small Light and Vibration
settings in Phone Book take priority.
^ Feeling Mail settings are disabled when:
B Sender is saved in Phone Book as
Secret entry
B The message was filtered as spam
B The message was sorted to a Secret folder
CCustomising Handset Response
Default Settings:
Happy/
Glad
OK/
Good
Sad/
Sorry
Idle Screen Info.
On
Light On/Off
On
Vibration Pattern
On
Sound
Effect 6
Sound
Effect 7
Duration
Sound
Effect 8
Sound
Sound
Effect 9 Effect 10
5 seconds
Idle Screen
Info.
Main Menu
Show or hide subject, sender and graphics above
Information window for received Feeling Mail
H Messaging A Settings A General Settings A
Link to Feeling A Idle Screen Info.
Choose On (show) or Off A Press b
Set Small Light illumination for incoming
Feeling Mail
Light
Main Menu
H Messaging A Settings A General Settings A
Link to Feeling A Light
Activating/Deactivating
Choose On or Off A Press b
Vibration
Pattern
Main Menu
Set handset vibration for incoming Feeling Mail
H Messaging A Settings A General Settings A
Link to Feeling A Vibration Pattern
Select On, Link to Sound or Off A Press b
14-20
Important/
Notice
Link to Sound
Ringtone On/Off
Ringtone
NG/
Bad
Ringtone
Main Menu
Select sound/video for incoming Feeling Mail;
set duration
H Messaging A Settings A General Settings A
Link to Feeling A Ringtone
Activating/Deactivating
Select Switch On/Off A Press b A Choose On or
Off A Press b
Assign Tone/Video
Select Assign Tone A Press b A Select Happy/
Glad, OK/Good, Sad/Sorry, NG/Bad or Important/
Notice A Press b A Select Preset Sounds, Ring
Songs·Tones, Music, Videos or Flash#Ringtones A
Press b A Select a tone or file A Press b
Duration
Retrieving Complete S! Mail Messages
If Message DL (Japan)/Message DL (Abroad) is set to DL
only Tel. No. or Always Defer (see P.14-37), Server Mail
Box sends initial portion of S! Mail message in each of the
following cases:
Main Menu H Messaging
1
2
3
Select Received Msg. and press b
C When folders appear, select one A Press b
Select a message with Q and press b
Press M b
Download starts.
^ After download, complete message appears.
C To cancel download, press M 3.
Note H Messages larger than 300 KB may be partially deleted
depending on Server status.
Messaging
Select Duration A Press b A Enter time A Press b
Tip H ^ Q (S! Mail Notice) appears for S! Mail messages in
Received Msg. folder when the remaining portion is in
Server Mail Box.
^ To retrieve complete S! Mail via Mail List, see P.14-22.
14
B The message was sent to multiple recipients
B Files are attached to the message
By default, Message DL (Japan) is set to Always
Download and Message DL (Abroad) is set to Always
Defer. To change settings, see P.14-37.
14-21
Retrieving Mail List
Retrieve a list of messages stored in Server Mail Box
(Server Mail).
Main Menu H Messaging
1
Messaging
14
2
3
4
Select Server Mail Box and press b
C To open retrieved Mail List, select Mail List A Press b
C To retrieve all Server Mail, select Retrieve All Mails A
Press b (Omit the next steps.)
C To delete all Server Mail, select Delete All Mails A Press b
A Enter Handset Code A Press b A Select Except New
Msg. or Delete All A Press b (Omit the next steps.)
Select Mail List and press b
Press N x
Select Retrieve Mail List and press b
After retrieval, Mail List appears.
^ When Mail List has already been retrieved, it is refreshed.
C To cancel retrieval, press M 3.
C Using Mail List: see right
Server Status
C To check Server status, follow these steps after Step 1 above.
Select Mailbox Volume A Press b
B Press i to return.
B To update Server Mail Volume, press b.
14-22
Using Mail List
Get
Retrieve complete S! Mail messages
Select a message A Press b
C To retrieve all Server Mail, press N x A Select
Retrieve All A Press b
^ Retrieved messages are deleted from Mail List and saved to
Received Msg. folder.
^ To select multiple messages to retrieve, see P.14-24.
Remote
Forward
Forward Server Mail directly to other SoftBank
handsets, PCs, etc.
Select a message A Press N x A Select
Remote Forward A Press b A Select recipient field
A Press b A Enter recipients (perform Step 4 on
P.14-7) A Press M N
Delete
Delete Server Mail
Select a message A Press N x A Select
Delete A Press b A Choose Yes A Press b
C To delete all Server Mail, press N x A Select Delete
All A Press b A Enter Handset Code A Press b A
Choose Yes A Press b
Message
Details
Open Server Mail properties
Select a message A Press N x A Select
Message Details A Press b
C Press b to return.
Using Messages
Checking Messages
To open Received Msg. folder while using another function,
press N for 1+ seconds.
Main Menu H Messaging
1
Select Received Msg., Drafts, Sent Messages or
Unsent Messages and press b
Select a message and press b
^ When an image is attached, press b to open it. Images may
not appear if file size is too large.
^ When a question appears, press b and enter the correct
answer to open the message.
B Message cannot be opened until the correct answer is entered.
^ Mail Composition window (see P.14-7) opens after opening
messages in Drafts.
C Use E to scroll.
C To jump to the top or bottom of the message, press N x
A Select Scroll Jump A Press b A Select Jump to Top
or Jump to Bottom A Press b
Note H Attached text file contents may not appear correctly.
Changing Encoding
C In Step 1 on the left, select Received Msg. and press b,
then perform Step 2 above and follow these steps.
Press N x A Select Char-code A Press b A
Select an option A Press b
Slide Playback
Messaging
Messages appear.
C While Information window appears, select Message A Press b
C When folders appear, select one A Press b
C To open properties (not available for unsent messages),
select a message A Press N x A Select Message
Details A Press b
B Press D to scroll down.
B Press b to return.
C To open sender/recipient details, select a received or sent
message A Press N x A Select View Mail Address
A Press b A Select sender or recipient A Press b
B To return, press i A Press i A Press i
B Open sender/recipient details and press N x to copy
number/address, save to Phone Book or set as an auto sort
key (see P.14-32).
2
14
C A slide consists of message text with image/sound or video.
After Step 2 above, press N x A Select Slide
Play A Press b
B Press i to stop.
Editing Sent/Unsent Messages
C In Step 1 on the left, select Sent Messages or Unsent
Messages and press b then follow these steps.
Select a message A Press N x A Select Edit
& Send or Edit A Press b A Press D A Perform
from Step 5 on P.14-6 or on P.14-8
14-23
Copying Message Contents
C After Step 2 on P.14-23, press N x A Select Copy
A Press b A Select Address, Subject or Message Text
A Press b
B For Message Text or Subject, use G to select the first
character of text A Press b A Use G to select the end
point A Press b
B Paste text in other windows (see P.3-13 "Copy/Cut &
Paste"). Copied Arrange Mail messages pastes as text;
My Pictograms, images, etc. paste as single-byte spaces.
B Select a folder other than Drafts, Unsent Messages or
Templates.
Saving SMS to USIM Card
Messaging
C In Step 1 on P.14-23, select Received Msg. or Sent
Messages and press b then follow these steps.
Select an SMS message A Press N x A
Select Manage Msg. A Press b A Select SIM
Sync A Press b
B The number of savable messages varies by USIM Card.
B SIM Sync appears only for compatible USIM Cards.
14
3D Pictogram
To animate Pictograms, Emoticons and compatible words
such as おはよう, 食事 and 新幹線 included in the first
150 characters of message text, in 3D, follow these steps
after Step 1 on P.14-23.
1
Select a message and press b
2
3
Select 3D Pictogram and press b
C Press M C to stop animation.
^ Press b to pause/resume.
C3D Pictogram Settings
Display Effect
Enable or disable 3D Pictogram upon opening
received messages
KDisable
H Messaging A Settings A General Settings A 3D
Main Menu
Pictogram A Display Effect
Select Always, Only Unread or Disable A Press b
Background Colour/
Display Speed
Change background colour and animation
speed
KBackground Colour: Random, Display Speed: Standard
Main Menu
H Messaging A Settings A General Settings A 3D
Pictogram
Background Colour
Select Background Colour A Press b A Select a
colour or Random A Press b
Display Speed
Select Display Speed A Press b A Select speed A
Press b
Selecting Multiple Messages
Select multiple messages to protect, delete, change the
status of or move all selected items simultaneously.
Main Menu H Messaging
1
14-24
Press N x
Select a folder and press b
C When folders appear within, select one A Press b
2
Select a message and press M @
3
Repeat Step 2 as required
P appears.
C To uncheck, select a message with P A Press M r
C To uncheck all, press N x A Select Unselect All A
Press b
Switch to Read/Unread
Replying to Messages
Main Menu H Messaging
1
2
Select Received Msg. and press b
3
4
Press N x
Change received message status to read or unread.
Main Menu H Messaging
Select Received Msg. and press b
C When folders appear, select one A Press b
Switching Status of a Message
1 Select a message and press N x
Switching Status of Selected Messages
1 Select messages (perform from Step 2
above) and press N x
C To reply to sender only without quoting text, press M o
A Skip ahead to Step 5
B Mail Composition window opens.
Replying to SoftBank Handset
1 Select Reply or Reply All and press b
2 Select S! Mail, S! Mail (History), SMS or
SMS (History) and press b
^ For S! Mail or S! Mail (History), S! Mail Composition
window opens.
^ For SMS or SMS (History), SMS Mail Composition
window opens.
^ Skip ahead to Step 4.
3
4
Select a message and press b
Replying to E-mail
1 Select Reply or Reply All and press b
2 Select S! Mail or S! Mail (History) and press b
Select Manage Msg. and press b
Select Switch to Unread or Switch to Read and
press b
Messaging
1
2
C When folders appear, select one A Press b
14
S! Mail Composition window opens.
5
Complete and send message (perform from Step
5 on P.14-6 or on P.14-8)
14-25
Tip H ^ Select Reply All to send the same message to the
sender and up to 19 recipients (To/Cc) of the original
message at one time. Reply All may not appear for
some messages.
^ For Reply All, your handset may be included in recipients.
^ Select SMS (History) or S! Mail (History) to quote the
original message text when replying.
Forwarding Messages
Main Menu H Messaging
Messaging
14
14-26
1
2
3
4
Select Received Msg. and press b
5
6
Select recipient field and press b
C When folders appear, select one A Press b
Select a message and press b
Press N x
Select Forward and press b
^ For S! Mail messages, S! Mail Composition window opens.
^ To forward SMS messages, select S! Mail or SMS and
press b. Mail Composition window opens.
Select Recipient window opens.
Enter recipients and press b
C To enter a recipient, perform Step 4 on P.14-7.
7
Press M N
^ Files attached to the original message are automatically
attached to forwarded messages.
Forwarding Forward NG Messages
C Sender prohibits forwarding. Forward this message?
appears.
To forward, choose Yes A Press b
Forwarding Server Mail
C Follow these steps after Step 1 on the left.
Select an S! Mail Notice (Q) A Press N x A
Select Forward A Press b A Select Notifi.
Forward or Remote Forward A Press b A Perform
from Step 5 in "Forwarding Messages" on the left
^ Some messages may not be forwardable.
^ Notifi. Forward forwards S! Mail Notice subject and
message text only.
Cancelling Sent Messages
Send cancellation request to delete sent messages saved in
recipient's received message folder. Subjects of
cancellation requests are prefaced with Del:.
^ Available for S! Mail messages sent to compatible SoftBank
handsets.
^ Sent messages may not be deleted if message text is short.
^ Protected sent messages cannot be deleted.
Main Menu H Messaging
Select Sent Messages and press b
3
4
Select Set Sent Cancel and press b
Saving to Phone Book
Save a linked phone number/mail address from within message
text or sender's/recipient's number/address to Phone Book.
In message text, available numbers/addresses are selectable
with E.
Main Menu H Messaging
1
C When folders appear, select one A Press b
C When folders appear, select one A Press b
Select a message and press N x
^ When selected sent message is addressed to multiple
recipients, cancellation request is sent to all the recipients.
Select Received Msg. or Sent Messages and
press b
2
3
Choose Yes and press b
^ Handset receives a Delivery Report.
4
Select a message and press b
Saving Sender's/Recipient's Address
1 Press N x
2 Select Save Address and press b
3 Select a phone number or mail address and
press b
Saving Linked Info
1 Select a phone number or mail address and
press b
2 Select Save to Phone Book or Save Address
and press b
Messaging
1
2
Linked Info
14
Select As New Entry and press b
Number or address is entered in corresponding Phone Book
field. Complete other fields and save (see P.4-4).
C To save to an existing Phone Book entry, open one A
Press b A Press M q
14-27
Accessing Internet Sites
1 Select a URL and press b
2 Choose Yes and press b
Using Linked Info
Use linked numbers, addresses or URLs (http://, https:// or
rtsp://) within message text to place calls, send messages
or access Internet sites. Available numbers/addresses/
URLs are selectable with E.
Main Menu H Messaging
1
Select Received Msg., Sent Messages or Unsent
Messages and press b
C When folders appear, select one A Press b
2
3
Messaging
14
Select a message and press b
Dialling Numbers
1 Select a number and press b
2 Select Call or Video Call and press b
Sending Messages
1 Select a SoftBank handset number or mail
address and press b
2 Select Create Message and press b
C For phone numbers, select S! Mail or SMS A Press b
A Complete and send message (Perform from Step 5
on P.14-6 or on P.14-8.)
C For mail addresses, complete and send S! Mail
(perform from Step 5 on P.14-8).
14-28
Handset connects to the Internet.
^ Video/sound plays for rtsp:// URLs (see P.15-12
"Streaming").
Protecting Messages
Protect important messages in Received Msg. or Sent
Messages folder from unintentional deletion.
Protected messages cannot be deleted.
Main Menu H Messaging
1
Select Received Msg. or Sent Messages and
press b
C When folders appear, select one A Press b
2
Protecting a Message
1 Select a message and press N x
^ To cancel protection, select a message with f .
Protecting Selected Messages
1 Select messages (perform from Step 2 in
"Selecting Multiple Messages" on P.14-25)
and press N x
3
Select Lock and press b
f appears for protected messages.
C To cancel protection, select Unlock A Press b
Deleting Messages
Protected messages cannot be deleted.
Selecting Messages to Delete
Deleting Server Mail
C Select Received Msg. in Step 1 on the left and follow these
steps.
Select an S! Mail Notice (Q) A Press N x A
Select Delete A Press b A Select Notification,
Remote Delete or Notifi. and Remote A Press b A
Choose Yes A Press b
Main Menu H Messaging
1
Select Received Msg., Drafts, Sent Messages or
Unsent Messages and press b
^ Some messages cannot be deleted.
C When folders appear, select one A Press b
2
Select Delete and press b
Delete All
Main Menu H Messaging
1
C When folders appear, select one A Press b
2
Press N x
3
4
Select Manage Msg. and press b
5
Enter Handset Code and press b
Choose Yes and press b
Tip H It may take some time to delete messages.
Deleting Delete NG Messages
C Sender prohibits deletion. Delete this message? appears.
To delete, choose Yes A Press b
^ Confirmation does not appear for Delete All.
Select Received Msg., Drafts, Sent Messages or
Unsent Messages and press b
^ To delete messages in Drafts or Unsent Messages, skip
ahead to Step 4.
Messaging
3
4
Deleting a Message
1 Select a message and press N x
Deleting Selected Messages
1 Select messages (perform from Step 2 in
"Selecting Multiple Messages" on P.14-25)
and press N x
14
Select Delete All and press b
C When folder contains protected messages, select Delete All
or Except Locked Msg. A Press b
14-29
Saving Attachments to Data Folder
Save attached images, sounds, vFiles (Phone Book/
schedule entries, etc.) and other files to Data Folder.
Main Menu H Messaging
1
Select Received Msg. or Sent Messages and
press b
Using Attachments
Assign attached files as Wallpaper, ringtone or ringvideo
directly from messages and save to Data Folder.
Main Menu H Messaging
1
C When folders appear, select one A Press b
2
3
Select a file and press N x
Messaging
C To open properties, select File Details A Press b
B Press b to return.
C To switch display size, select Picture Appearance A
Press b A Select Normal or Fit for Screen A Press b
4
5
Select Save to Data Folder and press b
6
Select Save here.. and press b
14
14-30
Select a message and press b
C When folders appear, select one A Press b
2
3
4
Select a message and press b
5
6
Enter name and press b
7
Press b
Enter name and press b
^ To save without changing file name, press b and proceed to
Step 6.
Message window returns.
^ When memory is full, a confirmation appears. Delete files (see
P.8-8) and try again.
C To save to Memory Card, press N x A Select Change
to Memory Card A Press b A Select Save here.. A
Press b
Select Received Msg. or Sent Messages and
press b
Select a file and press N x
Wallpaper
1 Select Save as Wallpaper and press b
Ringtone
1 Select Set as Ringtone and press b
Ringvideo
1 Select Set as Ring Video and press b
Select Save here.. and press b
Wallpaper, ringtone or ringvideo is set.
C For images smaller or larger than Display, select Centred,
Full Screen or Fit Image A Press b
My Folders
Organise received/sent messages into My Folders.
Activate Folder View beforehand (see P.14-4).
3
Select Rename and press b
4
Enter name and press b
Adding My Folders
Select Received Msg. or Sent Messages and
press b
2
3
4
Press N x
Select Create New Folder and press b
Enter name and press b
^ Enter up to 20 characters.
^ Protected or incoming linked messages cannot be moved.
^ To move files to a Secret folder, unlock temporarily or cancel
Secret beforehand.
Main Menu H Messaging
1
Select Received Msg. or Sent Messages and
press b
2
Select a folder and press b
3
Moving a Message
1 Select a message and press N x
Moving Multiple Messages
1 Select messages (perform from Step 2 in
"Selecting Multiple Messages" on P.14-25)
and press N x
4
5
6
Select Manage Msg. and press b
Renaming My Folders
Main Menu H Messaging
1
Select Received Msg. or Sent Messages and
press b
2
Select a folder (My Folder) and press N x
C To select a Secret folder, see P.14-33 "Unlock Temporarily" or
"Cancel Secret".
Messaging
1
^ Enter up to 20 characters.
Moving Messages
Create up to 13 folders in addition to default Folder 1 - 7.
Main Menu H Messaging
C To select a Secret folder, see P.14-33 "Unlock Temporarily" or
"Cancel Secret".
14
^ Skip ahead to Step 5.
Select Move to Folder and press b
Select a folder and press b
14-31
Setting Auto Sort Keys
5
Set keys (sender/recipient, S! Mail subject or SMS message
text string) by folder to sort received/sent messages
automatically.
C To change entries, select one A Press N x A
Select Replace A Press b A Perform Step 4 on P.14-7
^ Specify up to 20 keys for each folder including Spam Folder
(see P.14-35 "Anti Spam Measures").
^ Keys in folders with smaller numbers have higher priority.
^ Settings apply to newly received or sent messages.
Sort by Subject (S! Mail) or Text String (SMS)
1 Select Subject and press b
2 Enter text and press b
Main Menu H Messaging
1
Messaging
14
14-32
2
Select Received Msg. or Sent Messages and
press b
Select a folder (My Folder or Spam Folder) and
press N x
C To select a Secret folder, see P.14-33 "Unlock Temporarily" or
"Cancel Secret".
3
4
Select My Folders and press b
Select a blank entry and press b
C To delete entries, select one A Press N x A Select
Delete or Clear All A Press b A Choose Yes A Press b
Sort by Sender/Recipient
1 Select Address and press b
2 Enter sender/recipient (perform Step 4 on
P.14-7)
^ Enter up to 40 single-byte alphanumerics.
Secret Folder
Hide folders to require Handset Code entry for access.
Handset does not respond to messages sorted to Secret
folders when Secret Folder (see P.14-36) in Message Notice
is set to No Response.
Main Menu H Messaging
1
Select Received Msg. or Sent Messages and
press b
2
3
4
Select a folder (My Folder) and press N x
Select Set Secret and press b
Enter Handset Code and press b
Unlock Temporarily
C For temporary access to Secret folders, set folders to appear
and follow these steps.
After Step 1 in "Secret Folders" on P.14-32,
press N x A Select Unlock Temporarily A
Press b A Enter Handset Code A Press b
^ Secret folders are hidden next time Received Msg. or Sent
Messages folder is opened.
Cancel Secret
C Unlock Secret folders temporarily and follow these steps.
Additional Functions
Speed Mail List
Save up to ten frequently used numbers/addresses here to use
Speed Mail (see P.14-34). When creating messages, reference
recipient addresses from Speed Mail List (see P.14-7).
Main Menu H Messaging A Settings A Speed Mail List
1
Select <empty> and press b
2
Phone Book
1 Select Phone Book and press b
2 Select an entry and press b
Select a Secret folder A Press N x A Select
Unset Secret A Press b A Enter Handset Code A
Press b
Empty folder (move or delete messages) beforehand.
Main Menu H Messaging
1
Select Received Msg. or Sent Messages and
press b
2
Select a folder (My Folder or Spam Folder) and
press N x
3
Select Delete and press b
4
Enter Handset Code and press b
C To search Phone Book, perform Steps 2 - 3 in "Dialling
from Phone Book" on P.4-8.
Direct Entry
1 Select Enter Number or Enter Address and
press b
2 Enter recipient's SoftBank handset number
or mail address and press b
Messaging
Deleting Folders
C To change entries, select one A Press b A Edit number/
address A Press b A Choose Yes A Press b
C To delete entries, select one A Press N x A Select
Delete or Clear All A Press b A Choose Yes A Press b
14
C Confirmation appears when auto sort keys are set to the
folder. Choose Yes A Press b
14-33
Adding to Speed Mail List while Creating Message
C Follow these steps after Step 3 on P.14-6 or on P.14-7.
Select Speed Mail List A Press b A Select empty
A Press b A Choose Yes A Press b A Perform
Step 2 on P.14-33
Speed Mail
Create mail from Standby using numbers/addresses saved
to Speed Mail List (see P.14-33).
Messaging
14
1
In Standby, press Speed Mail List entry number
with Keypad (0 - 9)
2
Press N A
3
Complete and send message (perform from Step
5 on P.14-6 or on P.14-8)
C When messaging to SoftBank handsets, select S! Mail or
SMS A Press b
Auto Resend
Activate Auto Resend to send unsent messages (failed due
to out-of-range, etc.) automatically when signal returns.
^ Resend is attempted up to two times for each message.
^ Messages are sent in the same order they were created.
^ Information window opens for successful delivery.
^ Auto Resend is On by default.
Main Menu
1
H Messaging A Settings A General Settings A
Auto Resend
Choose On and press b
C To cancel, choose Off A Press b
B Remaining failed messages will not be sent automatically.
Note H Auto Resend is available while roaming, however,
message delivery may incur higher charges.
General Settings
Sending
Progress
Show or hide animation when sending mail
KShow
H Messaging A Settings A General Settings A
Main Menu
Sending Progress
Select Show or Do not Show A Press b
14-34
Delivery Report
Confirm SMS/S! Mail delivery (see P.14-19)
CAvailable when messaging to SoftBank handset numbers.
KOff
Main Menu
H Messaging A Settings A General Settings A
Delivery Report
Choose On (request) or Off A Press b
^ If On, reports arrive for all messages to SoftBank handsets.
Anti Spam
Measures
Filter incoming messages from numbers or
addresses not saved in Phone Book
KOff
H Messaging A Settings A General Settings A
Main Menu
Anti Spam Measures
^ When Anti Spam Measures is active, unsolicited messages
(spam) are filtered into Spam Folder.
^ Auto sort keys (see P.14-32) are available for Spam Folder.
^ Keys in folders other than Spam Folder have higher priority.
^ Handset does not respond to filtered messages. (No ringtones,
Information window, etc.)
Save a name, etc. to insert into message text
KAuto Insert: Off
H Messaging A Settings A General Settings A
Main Menu
Signature Settings
Edit
Select Edit A Press b A Enter/edit signature A
Press b
^ Enter up to 256 single-byte alphanumerics.
Auto Insert
Select Auto Insert A Press b A Choose On or Off
A Press b
C When signature is not saved, enter signature A Press b
^ Activate Auto Insert to enter signature into message text
automatically.
^ Available only for S! Mail.
Messaging
Enter Handset Code A Press b A Choose On or
Off A Press b
Signature
Settings
14
14-35
Auto Delete
Activate or cancel automatic deletion of oldest
received/sent messages to save new ones
Secret Folder
Select whether to notify (with ringtones, etc.) of
incoming messages sorted to Secret folders
KReceived Msg.: Off, Sent Messages: On
H Messaging A Settings A General Settings A
Main Menu
Auto Delete
KNotify
H Messaging A Settings A General Settings A
Main Menu
Message Notice A Secret Folder
Select Notify or No Response A Press b
Received Messages
Select Received Msg. A Press b A Choose On or
Off A Press b
Scroll Unit
Select from three scroll units
Sent Messages
KSingle Line
Select Sent Messages A Press b A Choose On or
Off A Press b
Message
Notice
Messaging
14
Change/hide notice or activate/mute alert
sound (double beep) for messages received
during handset use
Select Single Line, Half Page or Whole Page A Press b
SMS Settings
KView Setting: Name, Alert Sound: On
Main Menu
H Messaging A Settings A General Settings A
Message Notice
Expiry Time
Select View Setting A Press b A Select Name,
Address, Name & Subject or Off A Press b
Select Alert Sound A Press b A Choose On or Off
A Press b
Set Message Centre sent message storage limit
KMaximum
Edit Message
Alert Sound
14-36
H Messaging A Settings A General Settings A
Main Menu
Scroll Unit
Main Menu
H Messaging A Settings A SMS Settings A Expiry
Time
Select Maximum, 30 minutes, 1 hour, 6 hours, 1 day
or 1 week A Press b
^ Expiry Time applies to SMS Centre Number set to
Setting1(Default) in Message Centre (see P.14-37).
Message
Centre
S! Mail Settings
Set SMS Centre Number
KSetting1 (+819066519300)
H Messaging A Settings A SMS Settings A
Main Menu
Message Centre
Message DL
(Japan)
CAdjust this setting when using handset in Japan.
KAlways Download
Adding Centre Number
Select Setting2 or Setting3 A Press b A Enter SMS
Centre Number A Press b
Editing Centre Number
Select Setting1(Default), Setting2 or Setting3 A
Press b A Edit SMS Centre Number A Press b
Deleting Centre Number
Select Setting2 or Setting3 A Press N x A
Select Delete A Press b A Choose Yes A Press b
Select Setting2 or Setting3 A Press N x A
Select Set Default A Press b
^ Selected number moves to Setting1(Default) and shifts the
others down.
Note H Do not change Centre Number unless instructed to do so.
Char-code
Select character encoding for composing SMS
messages
Main Menu
H Messaging A Settings A S! Mail Settings A
Message DL (Japan)
Select Always Download, DL only Tel. No. or Always
Defer A Press b
Note H Depending on the price plan, transmission fees may apply
even when receiving messages addressed to SoftBank
handset numbers. Change Message DL setting as needed.
Message DL
(Abroad)
Set complete S! Mail retrieval to auto or manual
CAdjust this setting when using handset outside Japan.
KAlways Defer
Main Menu
H Messaging A Settings A S! Mail Settings A
Message DL (Abroad)
Select Always Download or Always Defer A Press b
Reply To
Settings
Select Shift JIS (70 characters) or GSM 7bit
(160 single-byte alphanumerics) A Press b
14
Designate a different mail address for
receiving replies
KShift JIS
H Messaging A Settings A SMS Settings A
Main Menu
Char-code
Messaging
Setting Centre Number
Set complete S! Mail retrieval to auto or manual
KOff
H Messaging A Settings A S! Mail Settings A
Main Menu
Reply To Settings
Activating/Deactivating
Select Switch On/Off A Choose On or Off A Press b
Set Address
Select Edit Address A Press b A Select or enter
address A Press b
14-37
Picture
Appearance
Set display size for images in received
messages
KNormal
H Messaging A Settings A S! Mail Settings A
Main Menu
Picture Appearance
Select Normal or Fir for Screen A Press b
^ Slides (see P.14-23) always play at Normal size.
Auto Play File
Select whether to open/play attached images/
sounds automatically
KPictures: On, Sounds: Off
H Messaging A Settings A S! Mail Settings A Auto
Main Menu
Play File
Images
Messaging
14
Select Pictures A Press b A Choose On (open) or
Off A Press b
Sounds
Select Sounds A Press b A Choose On (play) or
Off A Press b
^ Images/sounds always open/play when playing slides (see P.14-23).
^ Auto Play File settings do not apply to Arrange Mail.
Send File
Settings
Select whether to save newly captured images
and newly recorded Voice files to Data Folder
before attaching them to messages
KSave & Attach
Main Menu
H Messaging A Settings A S! Mail Settings A
Send File Settings
Select Save & Attach or Attach Only A Press b
14-38
Yahoo! Keitai
15-1
Getting Started
Access Yahoo! Keitai Mobile Internet and PC sites.
In this manual, "Yahoo! Keitai" refers to the SoftBank Mobile
Internet portal, "PC sites" to websites viewed via PC Site
Browser, and "Internet" to both Yahoo! Keitai and PC sites.
Retrieve Network Information (see P.1-20) before using the
Internet.
Tip H ^ An additional contract is required to use the Internet.
^ Address questions about Yahoo! Keitai to SoftBank
Customer Centre, General Information (see P.20-29).
Internet Content
Sample Internet page:
Internet
Yahoo! Keitai
PC Sites
SoftBank Mobile Internet portal
Websites designed for PCs
Cursor (see P.15-6)
Pointer (see P.15-5)
Scroll Bar (see P.15-6)
CYahoo! Keitai Features
Yahoo! Keitai
15
^ Using Yahoo! Keitai: see P.15-3
^ Saving Files to Data Folder: see P.15-11
^ Streaming: see P.15-12
^ Live Monitor: see P.15-14
CPC Site Feature
Using PC Site Browser: see P.15-18
Note H Some page content may automatically activate Internet
connection and thus transmission fees apply. To
disconnect, press i.
15-2
Note H Requested pages may not appear due to transmission
conditions/Server status.
Tip H To activate PC Site Browser while browsing Yahoo! Keitai,
see Step 1 in "Opening Yahoo! Keitai Menu" on P.15-3.
Cache Memory
C Cache Memory temporarily holds copies of retrieved pages;
when full, oldest are deleted to make room for new ones.
^ Previously viewed pages may load from Cache Memory.
^ Cached items with expiry dates are deleted upon expiry.
CSSL
Secure Sockets Layer (SSL) is an encryption protocol for
secure Internet transmissions of important/sensitive
information such as credit card numbers. Electronic certificates
are saved on handset (see P.15-22 "Root Certificates").
Disclaimer
C When a security notice appears, subscribers must decide for
themselves whether or not to open the page. Opening secure
pages constitutes agreement to the terms of usage.
SoftBank, VeriSign Japan, Baltimore Technologies Japan,
Entrust Japan, GeoTrust Japan, RSA Security and SECOM
Trust Systems cannot be held liable for any damages
associated with the use of SSL.
Using Yahoo! Keitai
Opening Yahoo! Keitai Menu
Select topics from Yahoo! Keitai Menu to access sites.
Yahoo! Keitai Menu is subject to change.
Main Menu H Yahoo! Keitai
1
Select Yahoo! Keitai and press b
2
3
Highlight a menu item
4
Repeat Steps 2 - 3 to open additional links
Press b
Handset connects to the Internet.
^ Handset remains connected to the Internet even if it is closed.
C To disconnect, press i.
Yahoo! Keitai
Yahoo! Keitai Main Menu appears.
^ Shortcut: In Standby, press M
C To activate PC Site Browser, press N x A Select
Change to PC Browser A Press b
B A message appears. To proceed, press b twice. The
current page opens via PC Site Browser.
B Some sites may not appear correctly.
15
C Basic Operations: see P.15-5
C To return to Yahoo! Keitai Main Menu, press N x A
Select Yahoo! Keitai A Press b
15-3
5
To exit, press g then choose Yes and press b
Using History
Deleting History
C Open History and follow these steps.
Select an item A Press N x A Select Delete
A Press b A Choose Yes A Press b
Open previously viewed Yahoo! Keitai pages. History stores
up to 300 pages; when full, oldest are deleted to make room
for new ones.
B To delete all, press N x A Select Delete All A
Press b A Enter Handset Code A Press b A Choose
Yes A Press b
Main Menu H Yahoo! Keitai A History
1
2
Select an item and press b
To exit, press g then choose Yes and press b
Opening Properties
C Open History and follow these steps.
Yahoo! Keitai
15
Select an item A Press N x A Select Details
A Press b
B Press b to return.
Sending URLs via S! Mail/SMS
C Open History and follow these steps.
Select an item A Press N x A Select Send
URL A Press b A Select S! Mail or SMS A
Press b A Complete and send message (Perform
from Step 3 on P.14-7 or on P.14-6.)
Sorting Items
C Open History and follow these steps.
Press N x A Select Sort A Press b A
Select By Domain or By Date A Press b
15-4
Entering URLs Directly
Enter URLs directly to access Yahoo! Keitai sites.
^ To use History, see left.
^ http:// may be omitted.
Main Menu H Yahoo! Keitai A Enter URL
1
2
Enter URL and press b
^ PC Site Browser may activate depending on the URL.
To exit, press g then choose Yes and press b
Selecting from Previously Entered URLs
C Open URL entry window and follow these steps.
Press N x A Select URL Entry Log A
Press b A Select a URL A Press b
B Up to 10 entries are saved. When full, oldest entries are
deleted to make room for new ones.
Basic Operations
Back
Return to the previous page
Press M W.
C To return to the initial page, press N x A Select
Forward A Press b
Jump to
Top/Bottom
Access pages requiring user authentication
If requested, enter user ID or password A Press b
A Press M N
View a summary of key assignments
Press N x A Select Help A Press b
C Press b to return.
Activating/Cancelling Pointer Navigation
C Open a page and follow these steps.
Press N x A Select Settings A Press b A
Select Cursor Settings A Press b A Select
Cursor/Yahoo! Keitai or Cursor/PC Site Browser A
Press b A Choose On or Off A Press b
Yahoo! Keitai
^ E appears for secure connections.
^ To disable confirmations, see P.15-22 "Secure Prompt".
Help
G
Open secure page
When Entering highly secure area. appears, press b.
Authentication
CSelecting Items
Jump to page top or bottom
Press N x A Select Convenient Functions A
Press b A Select Jump to Top or Jump to Bottom
A Press b
Secure Area
Pointer Navigation
Move pointer (K) with Multi Selector to scroll or select items.
When page content continues beyond view, move pointer to
Display edges to scroll in those directions.
15
^ Alternatively, press f for 1+ seconds to activate/cancel
pointer navigation.
Changing Pointer Speed
C Open a page and follow these steps.
Press N x A Select Settings A Press b A
Select Cursor Settings A Press b A Select Speed
Settings A Press b A Select Slow, Normal or Fast
A Press b
15-5
Using Cursor
Scrolling Pages
When pointer navigation is off, use cursor.
Use E to scroll items.
D
D
C
C
Cursor
Yahoo! Keitai
15
15-6
Use F to move left and right when multiple items are listed
in one row. Cursor does not appear for unselectable items.
Tip H Press and hold these keys to scroll by page.
2 (Up), 4 (Left), 6 (Right), 8 (Down)
CNon-Framed Pages
Scroll bar appears on the right or bottom
when page content continues beyond view.
Slider indicates current page position.
Use G to scroll; slider moves accordingly.
CFramed Pages
Press j for 1+ seconds to select
other frames. Use E to scroll.
Scroll Bar
Selected Frame
Viewing Single Frame
C Open a framed page and follow these steps.
Press j for 1+ seconds to select a frame A
Press N x A Select Frame In A Press b
B To return, press N x A Select Frame Out A
Press b
B Alternatively, press i to return.
Tabbed Browsing
Open up to three pages at one time using tabs. Yahoo!
Keitai and PC site pages cannot be open simultaneously.
2
Select Open in New Tab and press b
Highlighted link opens in a new tab.
^ From Bookmarks, Saved Pages, Enter URL and History, the
selected/specified page opens in a new tab.
C To open a third page, press N x A Select Tab Menu
A Press b A Select Open in New Tab A Press b
C To switch between tabs, press N x A Select Tab
Menu A Press b A Select Switch Tab A Press b A
Select a tab A Press b
B Alternatively, press q for 1+ seconds then use F to
select a tab.
C To close the active tab, press N x A Select Tab Menu
A Press b A Select Close Tab A Press b
C To close all but the active tab, press N x A Select Tab
Menu A Press b A Select Close All Other Tabs A Press b
Tip H Some pages automatically open in a new tab.
1
Press N x
Yahoo! Keitai
Note H Portions of page content may not appear in tabbed
browsing; close old tabs.
15
15-7
Text Entry & Item Selection
Enter text or select items to send information.
Text Entry Field
^ Highlight , and press b. Text entry
window opens. Enter text and press b.
Check-box
^ Highlight ) (check-box) and press b.
The box changes to P, indicating that
the item is selected.
^ In addition to ), ! may also appear as
selection indicators.
Menu List
Yahoo! Keitai
15
15-8
^ Highlight the field and press b to
select an item. Some menu lists
support multiple selection; select items
and press i to exit list.
Command Button
^ Use to send, reset, etc.
^ Highlight , and press b to execute
the indicated command.
Input Memory
C Entered text (except Security Code) is saved to Input
Memory. Use saved text in other applications.
C Up to 20 entries are saved. When full, oldest entries are
deleted to make room for new ones.
Using Input Memory
C In a text entry window, press N x A Select
Advanced A Press b A Select Input Memory A
Press b A Select text A Press b
Advanced Features
Bookmarks & Saved Pages
Bookmark sites or save page content to Saved Pages.
Item
Bookmarks
Save links to sites. Handset connects to the
Internet to access the site.
^ Create folders to organise Bookmarks.
^ Save up to 100 Bookmarks between Yahoo!
Keitai and Streaming Bookmarks, and up to
100 for PC sites.
Save page content; handset opens saved pages
without connecting to the Internet.
^ Save frequently used items to Saved Pages.
^ Save up to 100 Bookmarks for Yahoo! Keitai
and PC sites each.
Default Bookmarks
C Sharp Space Town and カスタモ are links to Japanese Mobile
Internet sites for SoftBank handsets by SHARP.
^ Visit Space Town to download Wallpaper, games,
Dictionary files, etc.
^ Visit カスタモ to download Custom Screens (see P.9-9).
1
2
Press N x
^ Bookmark or Saved Pages appears only for savable pages.
Bookmarks
1 Select Bookmark and press b
2 Select Save and press b
3 Enter title and press b
^ Bookmarks saved while streaming are saved to
Streaming Bookmarks.
Saved Pages
1 Select Saved Pages and press b
2 Select Save and press b
3 Enter title and press b
Saving URLs to Bookmarks
C Enter URLs directly to save site references to Bookmarks.
Press b A Select Yahoo! Keitai A Press b A Select
Bookmarks A Press b A Select a (Yahoo! Keitai), M
(PC Site Browser) or M (Streaming) A Press N x
A Select Add New Bookmark A Press b A Enter URL
A Press b A Enter title A Press b
Yahoo! Keitai
Saved Pages
Description
Saving Bookmarks & Pages
Follow these steps after opening a page (after Step 4 on
P.15-3 or on P.15-18).
15
15-9
Opening Bookmarks & Saved Pages
2
Select a title and press b
Main Menu H Yahoo! Keitai
1
Yahoo! Keitai
15
Opening Bookmarks Online
C Press N x A Select Bookmark A Press b A
Select Open List A Press b A Select a title A Press b
Bookmarks
1 Select Bookmarks and
press b
C To send URLs via S! Mail/SMS,
select a title A Press N x
A Select Send A Press b A
Select As Message A Press b
A Select S! Mail or SMS A
Press b A Complete and send
message (Perform from Step 3
Bookmarks
on P.14-6 or on P.14-7.)
B S! Mail Composition window opens automatically if a
URL exceeds the SMS character limit.
C To open properties, select a title A Press N x A
Select Details A Press b
B Press b to return.
2 Use F to select a (Yahoo! Keitai), M (PC
Site Browser) or M (Streaming)
Saved Pages
1 Select Saved Pages and
press b
15-10
CBookmarks
Edit
Edit titles or URLs
Titles
Select a title A Press N x A Select Edit A
Press b A Select Title: A Press b A Enter title A
Press b A Press M q
URLs
Select a title A Press N x A Select Edit A
Press b A Select URL: A Press b A Enter URL A
Press b A Press M q
Bookmarks
Folder
Sort Bookmarks into folders
Creating a Folder
Press N x A Select Create Folder A Press b
A Enter name A Press b
C To open properties, select a title
A Press N x A Select
Details A Press b
B Press b to return.
2 Use F to select a (Yahoo!
Keitai) or M (PC Site
Browser)
Editing Bookmarks & Saved Pages
Open Bookmarks or Saved Pages first (perform Step 1 on the left).
Moving to Folder
Select a title A Press N x A Select Move A
Press b A Press N p A Select a folder A
Press b A Press b
Saved Pages
C To move back from folders, select a title A Press N x A
Select Move A Press b A Press N q A Press b
Changing Folder Names
Select a folder A Press N x A Select Rename
A Press b A Enter name A Press b
2
Select Save Items and press b
3
Select a file and press b
CSaved Pages
Rename
Change titles
Select a title A Press N x A Select Rename A
Press b A Enter title A Press b
CBookmarks & Saved Pages
Move
5
Press b
Select a title or folder A Press N x A Select
Delete A Press b A Choose Yes A Press b
C To delete all titles/folders, press N x A Select Delete
All A Press b A Enter Handset Code A Press b A
Choose Yes A Press b
Data Folder opens.
C To switch between handset and Memory Card, press N
x A Select Change to Phone or Change to Memory
Card A Press b
C To save to a sub folder, select folder A Press b
File is saved to Data Folder.
^ Handle File(s) menu may open with available file functions.
^ When memory is full, notification appears. Delete files and try
again (see P.8-8).
C If the same file name exists, select Rename, Overwrite or
Cancel A Press b
Yahoo! Keitai
Select Save and press b
Change entry order
Delete entries
C To open files, select View or Play A Press b
B Press i to return.
C To open properties, select Details A Press b
B Press b to return.
4
Select a title A Press N x A Select Move A
Press b A Use E to select target location A Press b
Delete
^ If there is only one file, skip ahead to Step 4.
C To save background image, select Save Background Image
A Press b A Skip ahead to Step 4
B Save Background Image appears for pages with
background images.
15
Saving Files to Data Folder
Clicking on File Links
Save images, sounds, etc. on Yahoo! Keitai to Data Folder.
Main Menu H Yahoo! Keitai A Yahoo! Keitai A Open a page
1
C Some files are saved automatically. Save location is
indicated after download.
Press N x
15-11
Using Linked Info
Use linked numbers (TEL:), addresses or URLs (http://, https://
or rtsp://) to place calls, send messages or access the Internet.
^ Available only when number, address or URL is underlined.
^ Underlined words may serve as a linked number, address or URL.
Main Menu H Yahoo! Keitai A Yahoo! Keitai
Yahoo! Keitai
15
1
Open a page containing a phone number, mail
address or URL
2
Dialling Numbers
1 Highlight a number and press b
2 Select Call or Video Call and press b
Sending Messages
1 Highlight a SoftBank handset number or
mail address and press b
2 Select Create Message and press b
C To complete and send message, perform from Step 5
on P.14-6 or on P.14-8.
Accessing Internet Sites
1 Highlight a URL and press b
Handset connects to the Internet.
^ Video/sound plays for rtsp:// URLs.
15-12
Saving to Phone Book
C To save as new entry, open page and follow these steps.
Select a phone number or mail address A Press b
A Select Save to Phone Book A Press b A
Select As New Entry A Press b
B Phone Book Details (see P.4-4) appears. Complete other
fields and save.
C To save as new item, open page and follow these steps.
Select a phone number or mail address A Press b
A Select Save to Phone Book A Press b A
Select an entry A Press b A Press M q
Streaming
Enjoy audiovisual media while it downloads.
^ Only compatible Yahoo! Keitai files support streaming.
^ Downloaded content cannot be saved.
Main Menu H Yahoo! Keitai A Yahoo! Keitai A Open a page
1
Select a file and press b
Streaming begins. (Playing Music/Video: see P.7-4, P.7-8)
C To pause a stream, press b.
B Press b to resume.
B Streaming requires a continuous Internet connection.
(Transmission fees apply.)
Incoming Calls/Mail while Streaming
Changing Display Size
C Streaming stops for incoming calls. Press b to answer calls.
C Press 2 to toggle Display Size for current stream.
B Display Size toggles as follows: Full Screen (no indicators)
% Full Screen (with indicators) % Normal % Enlarge
B Display Size cannot be changed while stream is paused;
press 2 to show or hide indicators.
^ Display Size may not change depending on file/stream.
C Change Display Size setting for streaming while streaming.
To reject calls, press N x A Select Reject A
Press b
^ After the call, Reconnect? appears.
C Notice appears or a double beep sounds for incoming mail
(see P.14-36 "Message Notice").
Note H ^ Streaming continues even after handset is closed.
^ After three minutes on pause, Reconnect? appears.
^ Live streaming does not support pause, fast forward,
rewind or Options.
Tip H Up to 10 previously accessed URLs are saved. When full,
oldest URLs are deleted to make room for new ones.
Press N x A Select Settings A Press b A
Select Display Size A Press b A Select Normal,
Enlarge or Full Screen A Press b
Backlight
C Adjust streaming Backlight while streaming.
^ Selecting Normal Settings applies Display Backlight
setting (see P.9-13).
Yahoo! Keitai
Press N x A Select Settings A Press b A
Select Backlight A Press b A Select Always On,
Always Off or Normal Settings A Press b
15
15-13
Time Search
C Specify start point while streaming.
Press N x A Select Time Search A Press b
A Enter time A Press b
Streaming from
Media Player
Access the Internet from Media Player
Main Menu H Media Player A Streaming
Live Monitor (Japanese Only)
Live Monitor Basics
Register with compatible Yahoo! Keitai content to receive
update notices on handset.
^ Live Monitor consists of Live Monitor List and S! Loop List.
^ In Standby, view breaking news in Live Monitor List (see P.9-6).
Opening Live Monitor List & S! Loop List
Resuming the File Played Last
Select Last Played A Press b
^ File plays from where it stopped.
Entering URLs
Select Enter URL A Press b A Enter URL A Press b
^ Enter up to 1,024 characters.
Yahoo! Keitai
15
1
Select Live Monitor List or S! Loop List and press b
CLive Monitor List
Using Bookmarks
Select Bookmarks A Press b A Select an entry A
Press b
Using History
b
Select History A Press b A Select an entry A Press b
C To open properties, select History A Press b A Select an
entry A Press N x A Select Details A Press b
B Press b to return.
C To edit and access URLs, select History A Press b A
Select an entry A Press N x A Select Edit URL A
Press b A Edit URL A Press b
Tip H Select Settings in Streaming menu and press b to set
Backlight and Display Size.
15-14
Main Menu H Yahoo! Keitai A Live Monitor
Items
b
Title List
Information
Indicators
C
Unread News Flash
F
Unread General news
A
Read News Flash
D
Read General news
B
News Flash auto
update disabled
E
General news auto
update disabled
CS! Loop List
S! Loop List
Main Menu H Yahoo! Keitai A Live Monitor
b
Indicators
Items
1
2
3
b
Title List
F
Unread S! Loop
D
Read S! Loop
H
S! Loop auto update disabled
Information
1
2
3
Select Live Monitor List and press b
Select an item and press b
Title list appears (see P.15-14).
Select a title and press b
Information appears (see P.15-14).
C To access the Internet, select the title in information A
Press b A Choose Yes A Press b
B Handset connects to the Internet.
Title list appears (see left).
Select a title and press b
Information appears (see left).
C To access the Internet, select the title in information A
Press b A Choose Yes A Press b
B Handset connects to the Internet.
Live Monitor List
Register with up to one News Flash item and four General
news items.
Main Menu H Yahoo! Keitai A Live Monitor
1
2
3
4
Select Live Monitor List and press b
Select Content List and press b
Yahoo! Keitai
Main Menu H Yahoo! Keitai A Live Monitor
Select an item and press b
Registering with Live Monitor Items
Opening Information
Live Monitor List
Select S! Loop List and press b
15
Choose Yes and press b
Handset connects to the Internet.
Select an item and press b
^ Follow onscreen instructions.
15-15
S! Loop List
Register with up to five S! Loop items.
Main Menu H Yahoo! Keitai A Live Monitor
1
2
3
Select S! Loop List and press b
Select S! Loop and press b
Choose Yes and press b
Handset connects to the Internet.
^ Refer to the S! Loop help menu for operational instructions.
Updating Live Monitor Items
Main Menu H Yahoo! Keitai A Live Monitor
Yahoo! Keitai
15
15-16
1
2
Select Live Monitor List or S! Loop List and press b
Updating Single Items
1 Select an item and press N x
2 Select Reload and press b
3 Select Reload This Monitor and press b
Updating All Items
1 Press N x
2 Select Reload and press b
3 Select Reload All and press b
Opening Properties
C Open Live Monitor List or S! Loop List (see P.15-14) and
follow these steps.
Select an item A Press N x A Select Details
A Press b
Automatic Update
^ Update Live Monitor items automatically after a set interval
(from Automatic Update activation). Open properties (see
above) to see next Automatic Update time.
^ Automatic Update does not affect Live Monitor List News
Flash or S! Loop List update items overnight.
^ Automatic Update is only available in Japan.
^ Update may fail if signal is weak/handset is out-of-range.
^ To update manually, see left.
^ USIM Card replacement cancels Automatic Update.
^ Automatic Update is Off by default.
Live Monitor List
Main Menu
1
H Yahoo! Keitai A Live Monitor A Settings A
Automatic Update A Live Monitor
News Flash
1 Select News Flash and press b
2 Press b
3 Select an interval and press b
C To cancel, choose Off A Press b
General News
1 Select General and press b
2 Press b
3 Choose On and press b
S! Loop List
Main Menu
1
2
H Yahoo! Keitai A Live Monitor A Settings A
Automatic Update A S! Loop
Press b
Main Menu H Yahoo! Keitai A Live Monitor
1
2
Select Live Monitor List or S! Loop List and press b
Deleting Single Items
1 Select an item and press N x
2 Select Delete and press b
3 Select Delete This Monitor and press b
4 Choose Yes and press b
Deleting All Items
1 Press N x
2 Select Delete and press b
3 Select Delete All and press b
4 Enter Handset Code and press b
5 Choose Yes and press b
Note H Items are not deleted during auto updates.
Yahoo! Keitai
^ General news items are updated once a day.
C To cancel, choose Off A Press b
Deleting Live Monitor Items
15
Choose On and press b
^ S! Loop List items are updated approximately four times a day.
C To cancel, choose Off A Press b
15-17
Using PC Site Browser
4
Activate PC Site Browser to view websites designed for
PCs; only document files are downloadable and browsing
PC sites may incur higher charges.
Opening Yahoo! JAPAN
Main Menu H Yahoo! Keitai A PC Site Browser
1
Yahoo! Keitai
15
15-18
2
3
Select Homepage and press b
A message appears. To proceed, press b
twice. Yahoo! JAPAN Home opens (J
appears).
C To open Yahoo! Keitai, press N x
A Select Switch Browser A Press b
B A message appears. To proceed,
press b twice. The current page
opens via Yahoo Keitai.
B Some sites may not appear correctly.
Highlight a menu item
Press b
Handset connects to the Internet.
^ Handset remains connected to the Internet even if it is closed.
C To disconnect, press i.
5
Repeat Steps 2 - 3 to open additional links
C Basic Operations: see P.15-5
C Saving Bookmarks & Pages: see P.15-9
C Using Linked Info: see P.15-12
C To return to Yahoo! JAPAN Home, press N x A Select
Homepage A Press b
To exit, press g then choose Yes and press b
Switching View
C Open a page and follow these steps.
Press N x A Select PC Screen A Press b
B To switch from PC Screen view to Small Screen view,
press N x A Select Small Screen A Press b
^ In Small Screen view, PC sites are redesigned to fit Display.
^ In PC Screen view, PC sites appear in W 800 x H 600 dots.
Zoom
C Open a page and follow these steps.
Press N x A Select Convenient Functions A
Press b A Select Zoom A Press b A Select a
scale A Press b
Using History
Open previously viewed pages. History stores up to 300 pages;
when full, oldest are deleted to make room for new ones.
Main Menu H Yahoo! Keitai A PC Site Browser A History
1
2
Select an item and press b
C To open properties, send URL, sort items or delete, see P.15-4.
To exit, press g then choose Yes and press b
Entering URLs Directly
Enter URLs directly to access sites.
^ To use History, see above.
^ http:// may be omitted.
1
Enter URL and press b
2
To exit, press g then choose Yes and press b
^ Yahoo! Keitai page may open depending on the URL.
C Selecting from Previously Entered URLs: see P.15-4
Sub Menu Settings
Access Options menu settings from an open page.
Copy Text
Copy text
Press N x A Select Copy Text A Press b A
Perform from Step 3 in "Copy/Cut & Paste" on P.3-14
Reload
Update page content
Press N x A Select Reload A Press b
^ Reload simultaneously updates the corresponding content
saved in Saved Pages.
Enter URL
Enter URL directly to access Internet sites
Press N x A Select Enter URL A Press b A
Perform from Step 1 in "Entering URLs Directly" on
P.15-4 or on the left.
Search
Search current page
Yahoo! Keitai
Main Menu H Yahoo! Keitai A PC Site Browser A Enter URL
Additional Functions
15
Press N x A Select Convenient Functions A
Press b A Select Search A Press b A Enter text
to search A Press b
^ First search result is highlighted; press b to jump to next.
C To cancel, press M 3.
15-19
Send URL
Uploading
Files
Send URLs via S! Mail/SMS
Press N x A Select Convenient Functions A
Press b A Select Send URL A Press b A Select
S! Mail or SMS A Press b A Complete and send
message (Perform from Step 3 on P.14-7 or on P.14-6.)
^ S! Mail Composition window opens automatically if a URL
exceeds the SMS character limit.
Details
C Press b to return.
Yahoo! Keitai
15
COpen compatible site first.
Select Browse... A Press b A Select a file A
Press b A Select Send A Press b
^ Example above is for reference only. Follow site instructions for
specific procedure.
^ Files are uploadable only via pages supporting uploads.
Common Settings
Open page properties
Press N x A Select Convenient Functions A
Press b A Select Details A Press b A Select
Page Information or Server Certificate A Press b
History
Upload images or other Data Folder files to the
Centre via Internet sites
Font Size
Change character size
KStandard
Main Menu H Yahoo! Keitai A Common Settings A Font Size
Select a size A Press b
Previously visited Internet site links
Press N x A Select History A Press b A Perform
from Step 1 in "Using History" on P.15-4 or on P.15-19
Scroll Unit
Select from three scroll units
KSingle Line
Main Menu H Yahoo! Keitai A Common Settings A Scroll Unit
Char-code
Change encoding when text appears distorted
Select a unit A Press b
KAutomatic
Press N x A Select Settings A Press b A Select
Char-code A Press b A Select an option A Press b
Downloads
^ Use Automatic whenever possible.
Select whether to download images and
sounds on Internet sites automatically or to
open text information only
KShow Images/Play Sounds
Main Menu H Yahoo! Keitai A Common Settings A Downloads
Images
Select Images A Press b A Select Show Images or
Do not Show A Press b
Sounds
Select Sounds A Press b A Select Play Sounds or
Do not Play A Press b
15-20
Memory
Operation
Main Menu
Clear cache, cookies or authentication
information
H Yahoo! Keitai A Common Settings A Memory
Operation
Select Delete Cache, Delete Cookies or Delete Auth
Info A Press b A Choose Yes A Press b
^ Deleted Items:
Cache
Temporarily saved information in Cache Memory
Cookies
Information sent by a server for user identification
Auth Info
User ID or password previously entered for
authentication
Download to
Select whether to save downloaded files on
handset or Memory Card
Select Phone Preferred or Prefer Card A Press b
^ If selected memory is low, downloaded files are not saved.
^ Saving to Memory Card is prohibited depending on the file;
such files are saved to handset.
Initialized
Browser
Main Menu
Restore default settings and reset Bookmarks
and Saved Pages
H Yahoo! Keitai A Common Settings A Initialized
Browser
Enter Handset Code A Press b A Choose Yes A Press b
Reset Settings
Warning
Message
Show or hide warning message when activating
PC Site Browser or when switching to Yahoo! Keitai
KOn
H Yahoo! Keitai A PC Site Browser A PC Site
Main Menu
Browser Settings A Warning Message
Select PC Site Browser or Yahoo! Keitai A Press b
A Choose On (show) or Off A Press b
Zoom Setting
Select page scale
K100%
H Yahoo! Keitai A PC Site Browser A PC Site
Main Menu
Browser Settings A Zoom Setting
Select a scale A Press b
Security Settings
Security Settings affect both Yahoo! Keitai and PC Site Browser.
Manufacture
Number
Select whether or not to send handset manufacture
number automatically for authentication
Yahoo! Keitai
KPhone Preferred
Main Menu H Yahoo! Keitai A Common Settings A Download to
PC Site Browser Settings
15
KOff
Main Menu
H Yahoo! Keitai A Common Settings A Security
Settings A Manufacture Number
Choose On (send) or Off A Press b
Restore default settings
Main Menu H Yahoo! Keitai A Common Settings A Reset Settings
Enter Handset Code A Press b A Choose Yes A Press b
15-21
Send Referer
Select whether or not to send referer
information to the Server
Root
Certificates
KSend
H Yahoo! Keitai A Common Settings A Security
Main Menu
Settings A Send Referer
Select Send or Not Send A Press b
Cookies
Main Menu
H Yahoo! Keitai A Common Settings A Security
Settings
Select Root Certificates (preloaded certificates) A
Press b
C To open certificates, select one A Press b
C Press b to return.
Enable or disable cookies (see P.15-21)
KEnabled
Keep Auth Info
H Yahoo! Keitai A Common Settings A Security
Main Menu
Settings A Cookies
Select Enabled, Disabled or Confirm A Press b
Script Settings
Yahoo! Keitai
15
Select whether or not to run scripts
KOn
H Yahoo! Keitai A Common Settings A Security
Main Menu
Settings A Script Settings
Select On, Ask NW Access, Confirm or Off A Press b
Secure Prompt
Show or hide confirmations before entering
and exiting secure pages (see P.15-3)
KShow
H Yahoo! Keitai A Common Settings A Security
Main Menu
Settings A Secure Prompt
Select Show or Do not Show A Press b
Open electronic certificates issued by
Certificate Authorities saved on handset
Previously entered user ID or password is
entered automatically for authentication
KPer Browsing
H Yahoo! Keitai A Common Settings A Security
Main Menu
Settings A Keep Auth Info
Select Per Browsing, On (authenticate automatically)
or Off A Press b
^ For Per Browsing, entered user ID or password remains for
automatic authentication and is deleted upon exiting the Internet.
^ For On, entered user ID or password remains even after exiting
the Internet or turning handset power off.
Tip H Saved user ID or password is applicable to Basic/Digest
authentication. Some sites may employ other HTTP
authentication schemes.
Flash#
Restriction
Select whether or not to restrict Flash# downloads
KOn
H Yahoo! Keitai A Common Settings A Security
Main Menu
Settings A Flash# Restriction
Choose On (restrict) or Off A Press b
15-22
S! Applications
16-1
Getting Started
Download S! Applications, including games.
Download and use 812SH/813SH compatible S! Applications.
Tip H ^ Separate subscriptions are required for S! Applications
downloaded via Yahoo! Keitai.
^ Address questions about S! Applications to SoftBank
Customer Centre, General Information (see P.20-29).
^ Some preloaded S! Applications can be deleted (see P.16-5).
To restore them, perform Memory All Clear (see P.16-8).
Lifestyle-Appli
C Lifestyle-Appli, an S! Application required to use S! FeliCa, is
preloaded on handset (see P.17-2). Lifestyle-Appli settings
and usage patterns resemble those of other S! Applications.
S! Applications
16
16-2
S! Appli Library
Open S! Appli Library to access S! Applications saved on
handset or Memory Card.
Main Menu H S! Appli
1
Select S! Appli and press b
C To switch between handset and Memory Card, press N
x A Select Change to Phone or Change to Memory
Card A Press b
C To open Java! Licence Information, select Information A
Press b
Tip H When b is pressed in Standby with an S! Application
paused, Application is suspended. appears. Select
End and press b to open S! Appli Library.
Network S! Applications
Memory Status
C Network S! Applications require Internet connection.
^ Before using a Network S! Application, a message appears
indicating that Internet connection is required. To skip this
confirmation, see P.16-7.
C Press b A Select Data Folder A Press b A Select
Memory Status A Press b A Select Phone Memory or
Memory Card A Press b
S! Applications on Memory Card
Synchronise Memory Cards used on other SoftBank
handsets, PCs and other devices to update S! Appli Library.
Retrieve Network Information beforehand (see P.1-20).
3
Press N i
4
Downloaded S! Application is automatically
saved and a confirmation appears
Main Menu H S! Appli A Settings A Synchronisation
1
Downloading S! Applications
^ Retrieve Network Information beforehand (see P.1-20).
^ Some S! Applications can be downloaded to Memory Cards.
^ Make sure signal is strong.
Open an Internet site offering S! Applications
Select an S! Application and press b
Properties appear.
C When an S! Application is paused, choose Yes A Press b
5
Choose Yes and press b
Internet connection ends and S! Appli Library opens.
C To return to the site, choose No and press b.
C Starting S! Applications: see P.16-4
Tip H Some S! Applications require permission settings. Follow
onscreen prompts to use the S! Application (may only be
available in Japanese).
Properties
Check S! Application properties before completing download.
S! Applications
Main Menu H S! Appli A S! Appli A Download
1
2
^ When you download a new version of S! Application set as
Screensaver (see P.16-6), Screensaver may be cancelled.
Choose Yes and press b
Tip H It may take some time to update S! Appli Library
depending on the number of files saved, etc.
Download starts.
^ Download may take time.
C Press i to cancel.
16
16-3
Using S! Applications
Exit, Pause & Resume
Exiting or Pausing S! Applications
Starting S! Applications
Main Menu H S! Appli
1
2
Select S! Appli and press b
S! Appli Library opens (see P.16-2).
S! Applications
16-4
Starting Network S! Applications
Choose Yes or No A Press b A S! Application starts
^ To skip confirmation, select Never Ask for Network Access
(see P.16-7 "Setting Permissions").
C Some S! Applications require permission settings (see P.16-7).
Exiting S! Application
1 Select End and press b
Pausing S! Application
1 Select Suspend and press b
S! Application starts.
^ For operations, refer to the source Internet site, etc.
^ If the S! Application cannot be used, S! Appli Library returns.
C If Internet connection confirmation appears after Step 2 above:
Press g while using an S! Application
S! Appli Library returns.
Select an S! Application and press b
Tip H S! Applications automatically pause for incoming
transmissions. To set handset to ignore them, see P.16-8
"Calls & Alarms".
16
1
2
Handset returns to Standby.
^ S! Application resumes from pause point.
Resuming S! Applications
1
While an S! Application is paused, press b in
Standby
2
Select Resume and press b
C To end the S! Application, select End A Press b
C To open Main Menu and keep the S! Application paused,
select Cancel A Press b
Managing S! Applications
Opening S! Application Properties
Main Menu H S! Appli A S! Appli
1
2
Select an S! Application and press N x
Select Details and press b
Title of the S! Application
Vendor
Name of the distributor (or supplier/
manufacturer)
Version
Version of the S! Application
Description
Description of the S! Application
Save Size
Downloaded file size
Recorded
Record game scores, etc. up to this size
Screensaver
Compatibility with Screensaver
Profile
Versions: VSCL (Overseas)/JSCL (Domestic)
Link
Link to source Internet site
Certification
Trusted/Untrusted
Cert. Subject
Authority of Certification (Common Name,
Country and Organization)
Push
Compatibility with automatic Internet
connection
IC Support
Compatibility with Lifestyle-Appli
Book Support
Compatibility with book viewing
C Press D to scroll down.
To move an S! Application set as Screensaver, cancel
Screensaver first.
Main Menu H S! Appli A S! Appli
1
2
Select an S! Application and press N x
Select Move to Card and press b
C When an older version of the S! Application is saved, choose
Yes or No A Press b
B Choose Yes and press b to overwrite.
Note H ^ S! Applications cannot be moved to Memory Card when
the same S! Application is already saved or when
Memory Card memory is low.
^ Some S! Applications cannot be moved to Memory Card.
Deleting S! Applications
To delete an S! Application set as Screensaver, cancel
Screensaver first.
Main Menu H S! Appli A S! Appli
1
2
3
Select an S! Application and press N x
S! Applications
Title
Moving S! Applications to Memory Card
16
Select Delete and press b
Choose Yes and press b
^ Handset Code may be required.
Tip H Some preloaded S! Applications can be deleted. To
restore them, perform Memory All Clear (see P.16-8).
16-5
Screensaver
Set an S! Application to activate when handset enters Standby.
Activating/Cancelling Screensaver
Screensaver is Off by default.
Main Menu H S! Appli A Settings A Screensaver A Switch On/Off
1
Choose On and press b
C To cancel, choose Off A Press b
Setting Screensaver
^ Only one compatible S! Application can be set for Screensaver.
^ Screensaver cannot be set when another S! Application is paused.
^ Lifestyle-Appli and S! Applications on Memory Card cannot be set.
S! Applications
16
16-6
Main Menu H S! Appli A S! Appli
1
2
Select an S! Application and press N x
Select As Screensaver and press b
^ As Screensaver appears for compatible S! Applications.
Activation Time
C Enter time delay before Screensaver activates in Standby.
Press b A Select S! Appli A Press b A Select
Settings A Press b A Select Screensaver A
Press b A Select Activation Time A Press b A
Enter time (01 - 10 seconds) A Press b
^ Activation Time is 3 seconds by default.
Note H ^ Screensaver does not start when Headphones are
connected.
^ Connecting Headphones (with Memory Card inserted)
cancels an active Screensaver.
^ Screensaver may not start when an external device
(handsfree kit, etc.) is connected to handset.
^ Screensaver which responds to incoming transmissions
may cancel out selected Mode Settings profile.
Setting Permissions
Customise the method of confirmation, etc. for each
S! Application operation below.
^ Settings:
Phone Call
Place Voice Calls
Network Access
Connect to the Internet
Messaging
Send/receive messages
Autorun
Execute Autorun files
Bluetooth Conn.
Connect via Bluetooth#
Resetting Permission Settings
C Follow these steps after Step 2 on the left.
Select Reset Settings A Press b A Choose Yes
A Press b
S! Application Operational Settings
Application
Volume
Adjust the volume of S! Application sounds
KLevel 3
Main Menu H S! Appli A Settings A Application Volume
Local Connection
Connect to other devices
Read User Data
Access Phone Book, Calendar, etc.
Use G to adjust level A Press b
Write User Data
Edit Phone Book, Calendar, etc.
^ In Manner mode, volume set in Manner settings applies.
Use Multimedia
Use Media Player
Location Access
Send Location Information
Main Menu H S! Appli A S! Appli
1
2
3
4
Select an S! Application and press N x
Select Permission and press b
Select an item and press b
Select a Backlight status for S! Applications
KNormal Settings
Main Menu H S! Appli A Settings A Backlight A Switch On/Off
Select Always On, Always Off or Normal Settings A
Press b
Always On
Backlight remains on while S! Application runs
Always Off
Backlight remains off while S! Application runs
S! Applications
^ These settings are also available for S! Applications on Memory Card.
^ Permission settings may not be available for some S! Applications.
Backlight
16
Normal Settings Applies Display Backlight setting (see P.9-13)
Select an option and press b
^ Some options may not appear.
Ask Once
Confirmation appears every time the
S! Application starts
Always Ask
Confirmation appears before the specific operation
Never Ask
No confirmation
No
Reject the operation
16-7
When activated, Backlight flashes while
compatible S! Applications play
Blink
Reset
KOn
Set to Default
Main Menu H S! Appli A Settings A Backlight A Blink
Choose On (activate) or Off A Press b
Main Menu H S! Appli A Settings A Set to Default
Enter Handset Code A Press b A Choose Yes A
Press b
When activated, handset vibrates while
compatible S! Applications play
Vibration
KOn
Main Menu H S! Appli A Settings A Vibration
Choose On (activate) or Off A Press b
^ In Manner mode, vibration set in Manner settings applies.
Calls & Alarms
Select handset response to incoming calls,
etc. while an S! Application is active
KAccept Calls, Alarm/Start Priority, Message Notice
S! Applications
16
Main Menu H S! Appli A Settings A Calls & Alarms
Select from Voice Calls to Start Demand A Press b
A Select handset response A Press b
Accept Calls,
Message/Alarm/
Start Priority
S! Application pauses for incoming call/
mail, Alarm or S! Appli Request
Show Call Notice,
Message/Alarm/
Start Notice
A message appears for incoming calls,
mail, etc. For example, 090392XXXX1
appears. Press f to answer a call.
^ Regardless of setting, a message appears for S! Applications
started from Screensaver.
16-8
Reset S! Application settings
Memory All
Clear
Restore S! Appli Library to default setting
Main Menu H S! Appli A Settings A Memory All Clear
Enter Handset Code A Press b A Choose Yes A
Press b
Note H ^ Memory All Clear deletes downloaded S! Applications
and Lifestyle-Appli.
^ Memory All Clear resets Near Chat application password
and thus cancels Near Chat access restriction.
^ Preloaded S! Applications are restored.
S! FeliCa (Japanese Only)
Not Available for 813SH for Biz Users
17-1
Basics
Service Usage Outline
S! FeliCa encompasses a range of IC Card-based services
available via FeliCa-compatible SoftBank handsets. 812SH
and 813SH support S! FeliCa. To use services such as
e-money, e-ticketing and reward point systems, simply hold
handset over a compatible reader/writer at a shop or
restaurant, etc.
FeliCa
C A contactless IC card technology enabling wireless data
transmissions with compatible reader/writer terminals
S! FeliCa (Japanese Only)
17
17-2
IC Card
C The FeliCa chip embedded in FeliCa-compatible handsets
C Holds information required to use S! FeliCa
Lifestyle-Appli
C S ! Applications required to use S! FeliCa
^ Edy e-money Lifestyle-Appli is preloaded on handset.
B Edy is a prepaid e-money service run by bitWallet Inc.
Note H IC Card data content varies by service and usage history.
Procedures to delete IC Card data vary by Lifestyle-Appli;
contact service providers for details.
Download Lifestyle-Appli
Download Lifestyle-Appli via Internet site.
^ Lifestyle-Appli is saved to Lifestyle-appli folder.
Complete Registration/Set Up
Activate Lifestyle-Appli, complete registration/
customise settings.
^ Charge accounts, check balance or payment records, etc.
Use Service
To use S! FeliCa at shops, restaurants, and locations,
place m logo over reader/writer.
^ Use e-money/e-tickets to shop/travel; earn reward points.
Note H ^ Lifestyle-Appli registration and usage vary; contact the
service provider for details.
^ SoftBank is not liable for damages resulting from
accidental loss/alteration of IC Card data/settings.
^ Keep service passwords/customer service contact
information, etc. in a separate place.
Starting Lifestyle-Appli
To use S! FeliCa, activate a service Lifestyle-Appli and complete
service registration, setup, charge, balance check, etc.
Main Menu H Lifestyle-appli
1
2
Select Lifestyle-appli and press b
C To download a Lifestyle-Appli, select Download A Press b
Select an application and press b
Using S! FeliCa
Follow these steps to conduct a transaction.
Example: making an electronic payment:
^ Complete registration, setup and charge in advance.
^ Complete transactions without activating a Lifestyle-Appli.
1
Place m logo over reader/writer
Lifestyle-Appli starts.
C To end the Lifestyle-Appli, press g.
Note H Lifestyle-Appli cannot be started during calls or when
another S! Application is active.
Place this part
over reader/writer
^ The illustration above is for reference only.
^ Confirm scan results on reader/writer display.
^ If recognition is slow, move handset around slightly.
Note H ^ Align handset parallel to reader/writer.
^ Foreign articles can block/hamper recognition.
S! FeliCa (Japanese Only)
Tip H Lifestyle-Appli settings and usage patterns resemble
those of other S! Applications (see P.16-5 - 16-8).
However, Lifestyle-Appli cannot be set as Screensaver.
17
17-3
Tip H ^ When placed over sensor, handset may display a
message, vibrate or activate mail, Internet or an
S! Application for some services. To disable response,
see P.17-7 "Interface Settings".
^ Reader/writer will scan FeliCa IC Card even during calls
or Internet transmissions. (It may take some time.)
When Handset Power is Off
C Transactions possible; Lifestyle-Appli does not start
automatically.
^ After installing/reinstalling battery, always turn on handset
power to use S! FeliCa.
When Battery is Low
S! FeliCa (Japanese Only)
17
17-4
C S! FeliCa is not available. Charge it beforehand.
S! FeliCa Settings
IC Card Status
Main Menu H Lifestyle-appli A IC Card Settings
1
Select IC Card Status and press b
C If IC Card Lock is set, choose Yes A Press b A Enter
Handset Code A Press b
C Press b to return.
IC Card Lock
Use this function to restrict access to/prevent unauthorised
use of S! FeliCa on handset.
IC Card Lock is Off by default.
Main Menu H Lifestyle-appli A IC Card Settings A IC Card Lock
1
2
3
Choose On and press b
C To cancel, choose Off A Press b
Enter Handset Code and press b
Choose Yes and press b
Remote Lock
7
Send mail with specified subject (Mail Remote Lock) or call
from a specified phone (Call Remote Lock).
C Press i to return.
Sending Notice to Specified Address
1 Select AddressTo Notice and press b
2 Select Address to Notice and press b
3 Select Phone Book, Enter Number or Enter
Address and press b
4 Select/enter mail address or SoftBank
handset number and press b
Disabling Notice
1 Choose Off and press b
Preparation on Handset
CMail Remote Lock Password/Address
Save a password for Mail Remote Lock, and set mail
address to send IC Card Lock notice to.
Main Menu H Lifestyle-appli A IC Card Settings A Remote Lock
Enter Handset Code and press b
Select Mail Remote Lock and press b
Select Remote Lock PW and press b
Enter a password and press b
^ Enter between 5 and 16 alphanumerics.
Select LockNoticeSettings and press b
Select Email Lock Notice and press b
C Press i to return.
8
To save settings without enabling Mail Remote
Lock, press M q
^ To enable Mail Remote Lock, perform from Step 3 in "Remote
Lock Setup" on P.17-6 and choose On in Step 4.
S! FeliCa (Japanese Only)
1
2
3
4
5
6
Sending Notice to Remote Lock Activator
1 Select As Reply and press b
17
17-5
CCall Remote Lock Number/Count for Lock
Save up to two phone numbers from which to call handset,
and set Missed Call count required to activate IC Card Lock
(default count is 3 times).
Enable Remote Lock activation via public phones.
7
^ To enable Call Remote Lock, perform from Step 3 in "Remote
Lock Setup" below and choose On in Step 4.
8
Main Menu H Lifestyle-appli A IC Card Settings A Remote Lock
1
2
3
S! FeliCa (Japanese Only)
17
17-6
Enter Handset Code and press b
Select Call Remote Lock and press b
Select Phone No. to Lck 1 and press b
C To enable activation via public phone, select Set Public
Phone A Press b A Choose On A Press b
C To disable activation via public phone, choose Off.
4
5
Select Phone Book or Enter Number and press b
6
Select Count for Lock and press b
Select/enter a phone number and press b
C To save second phone number, select Phone No. to Lck 2
A Press b A Repeat Steps 4 - 5
Enter Missed Call count (3 - 10 consecutive times)
required to activate IC Card Lock and press b
To save settings without enabling Mail Remote
Lock, press M q
Remote Lock Setup
Activate or cancel Mail Remote Lock/Call Remote Lock.
Both Remote Locks are Off by default.
Main Menu H Lifestyle-appli A IC Card Settings A Remote Lock
1
2
Enter Handset Code and press b
Select Mail Remote Lock or Call Remote Lock
and press b
3
4
Select Switch On/Off and press b
5
Press M q
^ 3 times is set by default.
Choose On and press b
C To cancel, choose Off A Press b
B Saved mail address and phone numbers remain.
Reactivate Remote Lock to use the same setting.
Activating Remote Lock
CVia Mail
1
After Specified Number of Missed Calls
C IC Card Lock is set; a message announces Remote Lock activation.
Use S! Mail/e-mail to send password to handset
^ Enter password as subject; leave other fields blank.
^ To confirm IC Card Lock status, send a message via phone or
PC with specified mail address (see P.17-5 "Mail Remote Lock
Password/Address").
Note H ^ Missed Call count is reset by calls from numbers not
saved for this function. If series is interrupted, start over
from the beginning.
^ When Call Forwarding is active, Missed Calls may not
be recorded.
After Handset Receives Message
C IC Card Lock is set and notice is sent from handset to
specified mail address.
Note H If handset cannot receive mail IC Card Lock is not set.
1
2
Using one of the specified phones, call handset
End the call
The call is recorded as a Missed Call on your handset.
^ Within three minutes, repeat Steps 1 - 2 until the specified
number of Missed Calls are recorded.
^ Public phones can be used for this function if Set Public
Phone is activated beforehand.
^ Send Caller ID when placing calls from specified phone.
(Caller ID is not required for public phones.)
Main Menu H Lifestyle-appli A IC Card Settings A Interface Settings
1
2
3
Enter Handset Code and press b
Select from S! Appli to Pop-up Message and press b
Choose On or Off and press b
S! FeliCa (Japanese Only)
CVia Phone
Interface Settings
Set handset response to reader/writer commands: Choose
On for S! Appli to activate S! Application, Browser to access
Internet, Messaging to activate mail, Vibration to vibrate
handset, and Pop-up Message to open pop-up message.
Interface Settings is On for all items by default.
17
17-7
Resetting Defaults
Cancel custom settings and return S! FeliCa settings to their
defaults.
Main Menu H Lifestyle-appli A IC Card Settings A Set to Default
1
2
Enter Handset Code and press b
Choose Yes and press b
Note H ^ Set to Default does not delete downloaded Lifestyle-Appli.
^ Reset All (see P.9-28)/Memory All Clear (see P.16-8)
returns Lifestyle-Appli settings to defaults; all downloaded
Lifestyle-Applications are deleted. If IC Card data
remains, Reset All and Memory All Clear are disabled.
S! FeliCa (Japanese Only)
17
17-8
Entertainment
18-1
S! Cast (Japanese Only)
Basics
Subscribe to Japanese mobile periodicals that download to
handset automatically overnight.
^ A separate subscription and registration are required.
^ After registration, Weather Indicator (see P.18-4) appears in Standby.
^ Only available within Japan on compatible 3G handsets.
^ Retrieve Network Information (see P.1-20) before using S! Cast.
Service Registration & Content Subscription
Complete service registration to use S! Cast, then subscribe
to content.
Registration and subscription require Internet use
(connection fees apply). Confirm signal strength beforehand.
Main Menu H Entertainment A CAST
1
S! Cast Content
Sample S! Cast information page:
Select Registration/Cancel and press b
Handset connects to the Internet and service registration page
opens.
^ Follow onscreen instructions.
Opening Received Information
New Received Information
Content
Entertainment
18
18-2
1
Delivery Notice appears and
Information window opens for
new information
^ If closed, open handset for new
information to see Delivery Notice appear
and Information window open.
Cursor (see P.15-6)
2
Select CAST and press b
Information appears.
Information
^ Follow onscreen instructions.
^ Information handling is similar to that of Yahoo! Keitai.
B Using Cursor: see P.15-6
B Saving Files to Data Folder: see P.15-11
B Using Linked Info: see P.15-12
3
Press g to exit
Using Information
Requesting Re-Delivery
C If information delivery fails, follow these steps to request re-delivery
of latest information. (Make sure signal is strong and stable.)
Press b A Select Entertainment A Press b A
Select CAST A Press b A Select Get Latest
Contents A Press b A Choose Yes A Press b
CAST Notif.
Setting
Toggle Notification (Information window) on/off
Save Sound/
Chaku-Uta#
Select Save A Press b
Change Font Size
Press N x A Select Font Size A
Press b A Select a size A Press b
Change Scroll Unit
Press N x A Select Scroll Unit A
Press b A Select a unit A Press b
Copy Text
Press N x A Select Copy Text A
Press b A Perform from Step 3 in "Copy/
Cut & Paste" on P.3-13
Open Properties
Press N x A Select Page Information
A Press b
B Press b to return.
KNotify
Main Menu H Entertainment A CAST A CAST Notif. Setting
Select Notify or No Response A Press b
Stored Information
Main Menu H Entertainment A CAST
Latest Information
1 Select What's New and press b
Back Issues
1 Select History and press b
2 Select date and press b
2
3
Select an item and press b
Information appears.
Entertainment
1
18
Press g to exit
18-3
Activating/Cancelling Weather Indicator
Using Weather Indicator
After S! Cast (see P.18-2) registration, local area weather
forecast (based on Location Information) appears.
Main Menu H Entertainment A CAST A Weather Icon A Settings
CIndicators & Updates
A : Clear Skies (Day)
F : Clear Skies (Night)
B : Cloudy
C : Rain
D : Snow
E : Thunder Showers
N : Partly/Chance of
M : Then
Example: BNC
A Partly cloudy with a
chance of rain
^ J (chance of rain), K (fall foliage season), etc. appear at the
same time.
^ Weather Indicator is updated when:
B Weather Indicator update time arrives
B Manually updated
Entertainment
18
18-4
Show or hide Weather Indicator in Standby. On (show) is set
by default.
Note H When handset location changes, a new forecast appears
at Weather Indicator update time. Alternatively, update
Weather Indicator manually.
1
2
Select Standby Settings and press b
Choose On or Off and press b
Activating Updates
Activate automatic updates. On (activate) is set by default.
Main Menu H Entertainment A CAST A Weather Icon A Settings
1
2
3
Select Icon Update and press b
Choose On and press b
C To cancel, choose Off A Press b (Omit the next step.)
Choose Yes and press b
Weather Indicator is updated when update time arrives.
Display Info
Toggle Notification (Information window) on/off
KOn
H Entertainment A CAST A Weather Icon A
Main Menu
Settings A Display Info
Choose On (show) or Off A Press b
Manual Update
Update Weather Indicator manually
Main Menu H Entertainment A CAST A Weather Icon
Select Manual Update A Press b
^ Handset connects to the Internet and Weather Indicator is
updated.
Note H Activate Icon Update (see P.18-4) beforehand.
Weather Forecast (Japanese Only)
Main Menu H Entertainment A CAST A Weather Icon
Select Weather and press b
Information appears.
Read XMDF or Text format E-Books saved on handset/
Memory Card.
^ E-Book dictionaries turn handset into an electronic dictionary.
^ Adjust Text Code (see P.18-7) for E-Books in other languages.
^ Handset may not support some embedded sounds/images.
^ E-Book folder cannot be accessed during Synchronisation.
Downloading E-Books
C Press b A Select Yahoo! Keitai A Press b A Select
Yahoo! Keitai A Press b A Select メニューリスト A Press b
A Select 書籍・コミック・写真集 A Press b
^ Visit Sharp Space Town (see P.15-9) for more information
on E-Books (how to purchase, etc.).
Support Book (Japanese Only)
C Download Support Book (E-Book on 812SH/813SH
operational tips) via Sharp Space Town (see P.15-9).
Entertainment
1
Electronic Books
18
18-5
Reading Content
Main Menu H Entertainment
1
2
Entertainment
18
3
Select E-Book and press b
Book contents list appears. (When you press g to close
Reading window, the same page will open next time.)
C To read E-Books saved in other folders, press N x A
Select Switch Folders A Press b A Select a folder A
Press b
B Selected item appears next time E-Book is selected.
B Access E-Books saved in Book and Book (SD) from
Entertainment or Data Folder (Books).
Select an E-Book and press b
^ !% indicates location of the current page.
C If the E-Book is password protected, enter password A
Press b A Reading window opens
C To see the title, author, etc., press N x A Select
Details A Press b
B Press b to return.
Press g to close
^ The last page opened will appear next time.
Note H ^ E-Books automatically close for low battery, five minutes
of inactivity, or Memory Card removal.
^ Only zbf, zbs, zbk, txt or text files appear in content list.
^ Revised E-Books are not supported.
Key Assignments
C Operations vary by text orientation as follows.
Horizontal
C Scroll up (by line)
Vertical
Backward (by page)
D Scroll down (by line)
Forward (by page)
B Backward (by page)
Scroll left (by line)
A Forward (by page)
Scroll right (by line)
For some E-Books, use p/q to scroll by page.
Text Operations
C Jump to the first or last page.
Press N x A Select Jump to Top or Jump to
Bottom A Press b
C Move to a specific location.
Press N x A Select Move to Specified % A Press b
A Enter location by percentage (00 - 99%) A Press b
C Select a chapter when a table of contents is contained.
Press N x A Select Contents A Press b A
Select a chapter A Press b
C Move back to link source or open link again.
Press N x A Select Back or Next A Press b
C Return to E-Book list.
Press N x A Select Back to List A Press b
C See P.18-8 to use Bookmarks.
Using Linked Info/Copying Text
C Use linked numbers, addresses or URLs to place calls, send
messages or access Internet sites.
Select an Item A Press b A Choose Yes A Press b
^ Some linked information may not be usable.
18-6
C Copy text (up to 20 characters).
In Reading window, press N x A Select Copy
A Press b A Perform from Step 3 in "Copy/Cut &
Paste" on P.3-14
B Dictionary index text and search results cannot be copied.
B Images and ruby annotations cannot be copied.
Reading Window Settings
C Press N x A Select Settings A Press b A Select
an Item A Press b A Change the setting A Press b
Item
Default
Font Size
Text Orientation
Read text vertically or horizontally Vertical Text*
Ruby
Show/hide ruby annotations
Text Code
Set encoding to Shift-JIS,
Latin-1 or Latin-9
View Settings
Select Detail View or Page View Detail View
Vibration
Activate/cancel vibration
On
Resolution
Set to Low, Normal or High
Low
May vary by E-Book.
^ Above settings are not available for some content.
Standard
Off
Shift-JIS
Folders and Files in E-Book Folders
C Open E-Book list first.
^ Adding Folders
Press N x A Select New Folder A Press b
A Enter name A Press b
^ Editing Folder/File Names
Select a folder/file A Press N x A Select
Change Name A Press b A Edit A Press b
^ Deleting Folders/Files
Select a folder/file A Press N x A Select
Delete A Press b A Choose Yes A Press b
^ Moving Files
Select a file A Press N x A Select Move A
Press b A Select a location A Press b A Press b
Tip H The above operations are not available for E-Books in
Data Folder (handset/Memory Card). For managing
folders/files on handset, see P.8-8.
Entertainment
*
Description
Select Tiny, Small, Standard,
Large or Huge
Mask & Jump
C Some E-Books may contain hidden text or images (masked
info) or links (jump links).
^ Select masked info and press b to see the text or image.
Press b again to hide.
^ Select a jump link and press b to jump to the specified
page. Press i to return.
18
18-7
Bookmark
Using E-Book Images
Add bookmarks to return to the pages easily.
Use two bookmarks per E-Book (for up to five E-Books).
1
Press b
2
Select Bookmark1 or Bookmark2 and press b
Embedded
Information
Main Menu H Entertainment A E-Book A Open E-Book
C If ! is not on Display, press N x A Select
Bookmark A Press b
Select an image A Press b
^ Soft Key Assignments:
Assign
Save images as Wallpaper
For images smaller or larger than Display, select
Centred, Full Screen or Fit Image A Press b
(For Display size images or Centred, use E to
zoom in/out or press N to rotate.)
Jump to
Select jump information to move to other pages.
Use linked information to send S! Mail messages
or access Internet sites (E-Book will close).
See P.18-6 "Using Linked Info/Copying Text".
Switch
Hidden text or images appear
Play
Animation plays
Bookmark is added.
Auto Bookmark
C When Reading window is closed, Auto Bookmark 1 is added
to the last page opened. When the same E-Book is opened
and closed again, Auto Bookmark 1 changes to Auto
Bookmark 2.
^ Each E-Book holds up to two Auto Bookmarks, the oldest
of which is deleted first when a new one is added.
Opening Bookmarked Page
Entertainment
18
Save images as Wallpaper or use information
contained in images
C In Reading window, press N x A Select Move to
Bookmark A Press b A Select Bookmark1,
Bookmark2, Auto Bookmark1 or Auto Bookmark2 A
Press b
Using a Dictionary
Look Up Word
Use downloaded E-Book dictionaries to look
up word definitions, etc.
Main Menu H Entertainment A E-Book
Select a dictionary A Press b A Select an entry
field A Press b A Enter a word A Press b
^ Select an entry and press b to view its definitions.
^ Key Assignments: see P.18-6
18-8
BookSurfing# (Japanese Only)
Activate BookSurfing# S! Application to read comics, photo
books and other CCF files saved in Data Folder (Books).
To read fee-based CCF files, download Content Keys.
Main Menu H Entertainment
1
Select BookSurfing and press b
BookSurfing# S! Application starts.
^ Refer to the BookSurfing# help menu for operational instructions.
^ When an S! Application is paused, Application suspended.
End application? appears. Choose Yes and press b to start
BookSurfing#.
Note H When purchasing a new handset, move CCF files via
Memory Card and retrieve Content Key to open the files.
Some files may need to be re-downloaded.
Tip H Save CCF files to handset/Memory Card Data Folder (Books).
Entertainment
18
18-9
Communication
19-1
S! Town (Japanese Only)
Communication
19
19-2
Using S! Town
S! Town is an online communication application. Select an
avatar to enter this 3D virtual town, where you can
participate in events and meet other users.
When using S! Town for the first time, agree to the terms of
service then complete free user registration.
^ Usage requires the pre-installed S! Town S! Application.
^ S! Town S! Application cannot be deleted.
^ Internet connection is required; may incur high charges.
^ S! Town is not available if Internet access is restricted by
subscription.
1
Main Menu H Communication
Select S! Town and press b
S! Town starts.
^ Refer to the S! Town S! Application's help menu for operational
instructions.
Tip H ^ Check registration status or cancel registration via
Yahoo! Keitai. For details, refer to the S! Town
S! Application's help menu.
^ An upgrade notice may appear when starting S! Town.
Follow onscreen instructions to upgrade.
S! Town Library
Save S! Town-compatible S! Applications to S! Town Library.
^ Start S! Applications from S! Town Library. (S! Town may start
for some applications.)
^ S! Town-compatible S! Applications are not saved in S! Town
Library by default.
Main Menu H Communication
1
S! Loop (Japanese Only)
S! Loop is a communication service.
Main Menu H Communication
1
Select S! Loop and press b
Handset connects to the Internet and S! Loop Main Menu opens.
^ Refer to the S! Loop help menu for operational instructions.
Select S! Town and press N $
S! Town Library opens.
Tip H Downloaded S! Town-compatible applications are
automatically saved to S! Town Library.
Communication
19
19-3
Hot Status
Window Description
3
Exchange current usage status, mood, etc. with compatible
handsets.
Member Status
My Status
ごきげん
ひまー
Answer
OK
Member Status
Hot Status Info
Trip
Communication
19
19-4
5
6
2
7
8
Hot Status Info
Answer
OK
4
1
^ A separate subscription is required.
Answer
NG
^ Save compatible handset numbers to member list. Hot Status
information is updated automatically.
Note H ^ Before use, set IP Service Setting (see P.9-26) to On.
^ Only available on compatible 3G handsets.
Member List
Member Status Details
1 My Status (see P.19-8)
2 Members
3 Image
^ Image set for Picture: in My Details or Phone Book appears.
4 Group Name
5 Connection Status
^ Online, Offline or Unknown appears.
6 Status
^ Current status indicated by Status Icon (Pictogram) and
Status Label (description) appears.
7 Availability
^ Availability for Calls, Mail and Circle Talk appear.
8 Comment
Hot Status Notification
Information window opens for the following notifications.
Adding Members
Save up to 30 members to Hot Status member list.
Request Memo
A request for permission to add your
number to Hot Status member list
Acceptance Memo
An acceptance reply to your Request Memo
On Handset
Prospective Member
Abstention Memo
A rejection reply to your Request Memo; also
arrives when no reply is sent within two hours
Save Number
Receive Request Memo
Removal Memo
Your number is deleted from a member's
Hot Status member list
Receive Acceptance Memo
Accept Request
NW Interruption
Network failure notice; Hot Status is not
available
Overview
Member Registered
My Status is sent and member's Hot Status information
appears on handset.
Note H Set Connection Setting (see P.19-9) to Online to add members.
Communication
19
19-5
Adding from Phone Book or Direct Entry
Main Menu H Communication A Hot Status
1
Use F to select a Group and press N x
2
3
Select Add Member and press b
C When Register a member? appears, choose Yes A
Press b A Skip ahead to Step 3
Phone Book
1 Select Phone Book and press b
2 Select an entry and press b
C For entries with multiple numbers, select one A Press b
Direct Entry
1 Select Add New Entry and press b
2 Enter a phone number and press b
4
Communication
19
19-6
Choose Yes and press b
Request Memo is sent to the number.
^ Member is saved when Request Memo is accepted
(Acceptance Memo arrives).
^ Waiting and Unknown appear for pending members'
availability and Status respectively.
Note H ^ When 30 members are already saved, delete members
(see P.19-10 "Deleting Members") to add new ones.
^ Abstention Memo arrives when Request Memo is sent
to incompatible handsets.
^ After sending Request Memo, Bluetooth# and infrared
transfers are disabled until Acceptance or Abstention
Memo arrives.
Tip H Update My Status (see P.19-8) as needed before adding
members.
Adding from Request Memo
Save members via Request Memo.
When a request arrives, Accept the registration request
from XX (name/number) ? appears. Accept or reject it.
1
Accepting
1 Choose Yes and press b
Opening Member Status Details
Main Menu H Communication A Hot Status
1
2
Use F to select a Group, then E to select a member
Press b
Member status details appear.
C Window Description: see P.19-4
Acceptance Memo is sent and the number is saved to Hot
Status member list.
Rejecting
1 Choose No and press b
Abstention Memo is sent; number is not saved to Hot
Status member list.
Auto Reject
C Abstention Memo is sent automatically when:
^ Handset fails to respond within two hours
^ Thirty members are already saved in total
Communication
Note H ^ Once rejected, the same number cannot be added to
member list for 24 hours.
^ Request Memo arrives again when the requesting party
fails to receive Abstention Memo within 24 hours.
19
19-7
CDefault Settings
My Status
Item
Opening My Status Details
1
In Standby, press q for 1+ seconds
1
2
3
4
5
6
D
7
Communication
19
19-8
C
1 Image/Name
^ Image and name appear if saved
in My Details.
2 Connection Status (see P.19-9)
3 Status
^ To edit Status Icon/Label, see
P.19-12 "Status Setting".
4 Answer Status
^ Change availability for Calls, Mail
and Circle Talk at once.
5 Availability
^ Set availability for Calls, Mail and
Circle Talk separately.
6 Comment
^ Enter up to 15 characters.
7 Standby Window On/Off (see P.19-9)
Status
Answer Status
Default
w ごきげん
All OK
Availability (Calls)
Answer OK
Availability (Mail)
Reply OK
Availability (Circle Talk)
Join OK
Comment
─
Changing My Status
Follow these steps after opening My Status details (Step 1
on the left) to change Status, availability and Comment. For
other items, see P.19-9.
1
Select an item (except Connection status and
Standby Window On/Off) and press b
2
Select status and press b
3
Press M h
^ To change more items, repeat Steps 1 - 2.
C For Comment, enter text A Press b
New status is sent to the members.
C To exit without updating, press i A Choose No A Press b
^ Available Settings:
Item
Status
Setting
16 Status Icon/Label combinations
All OK
Calls: Answer OK
Mail: Reply OK
Circle Talk: Join OK
Only Mail is OK
Calls: Answer NG
Mail: Reply OK
Circle Talk: Join NG
All NG
Calls: Answer NG
Mail: Check Later
Circle Talk: Join NG
Answer Status
User Setting
2
Calls
Answer OK, Urgency Only or Answer NG
Mail
Reply OK or Check Later
Circle Talk
Join OK, Auto Join1 or Join NG2
Comment
Up to 15 characters
Automatically accepts Circle Talk requests.
Automatically rejects Circle Talk requests.
Connection
Setting
Set Connection status
Select current Connection status (Online or Offline)
A Press b A Select Online or Offline A Press b
^ Set to Online to change Status/availability or to use Circle Talk.
Standby
Window
Show or hide My Status in Standby Window
KOn
Select current Standby Window status (Standby
Window On or Off) A Press b A Choose On (show)
or Off A Press b
Connection Status Auto Update
C Connection status is updated to Unknown or Offline after a
period of no signal detection.
^ Connection status is updated to Online when signal returns.
Communication
1
- (See P.19-11 "Answer
Status" to assign custom
combination)
CAdditional Settings
Follow these steps after opening My Status details (Step 1
on P.19-8).
19
19-9
Editing Hot Status Member List
Edit Group name or move members to other Groups.
Renaming Groups
Main Menu H Communication A Hot Status
1
2
3
Use F to select a Group and press N x
Select Edit Group Name and press b
Enter name and press b
Moving Members
Main Menu H Communication A Hot Status
1
2
3
Communication
19
19-10
Select a member and press N x
Select Change Group and press b
Select target Group and press b
Deleting Members
Deleting a member simultaneously deletes your number
from the deleted member's Hot Status member list.
Main Menu H Communication A Hot Status
1
2
3
4
5
Select a member and press b
Press N x
Select Registration Release and press b
Choose Yes and press b
Choose Yes and press b
Removal Memo is sent and the member is deleted from Hot
Status member list.
Note H ^ Deleted members cannot be re-saved for 24 hours.
^ Request Memo arrives when the member fails to
receive Removal Memo within 24 hours.
Member is moved.
Tip H Open Standby Window in Communication mode (see
P.9-8) to view member Status/availability in Standby.
When Abstention/Removal Memo Arrives
C Member is deleted from Hot Status member list.
^ When handset fails to receive Abstention/Removal Memo
within 24 hours, Request Memo is sent to the member.
Using Hot Status Info
Use Hot Status to place calls, send messages, start Circle
Talk or save numbers to Phone Book.
Calls, Messages & Circle Talk
Main Menu H Communication A Hot Status
1
2
Select a member and press N x
Select a contact method and press b
For Call and Video Call, handset dials the number.
C Creating & Sending SMS/S! Mail: see P.14-6
C Initiating Circle Talk: see P.19-14 - 19-15
Saving to Phone Book
Main Menu H Communication A Hot Status
Select a member and press N x
Select Save to Phone Book and press b
Select As New Entry or an existing entry and press b
Number is entered in Phone Book. Complete other fields and
save (see P.4-4).
Request Reply
Select handset response to Request Memos
KAlways Confirmed
Main Menu H Communication A Hot Status
Press N x A Select Settings A Press b A
Select Request Reply A Press b A Select an
option A Press b
Always Confirmed
Show confirmation for all Request Memos
Reject Request Memos from numbers
Unregistered Entry not saved in Phone Book; otherwise,
confirmation appears
Always Ignored
Answer Status
Reject all Request Memos
Assign custom availability combination to User
Setting (see P.19-9)
KCalls: Answer OK, Mail: Reply OK, Circle Talk: Join OK
Main Menu H Communication A Hot Status
Press N x A Select Settings A Press b A
Select Answer Status A Press b A Select User
Setting A Press b A Select a type A Press b A
Select availability A Press b
C When finished setting for all types, press M q.
Communication
1
2
3
Hot Status Settings
19
19-11
Status Setting
Change Status Icon Pictogram or edit Status
Label description for My Status
Additional Functions
Main Menu H Communication A Hot Status
Press N x A Select Settings A Press b A
Select Status Setting A Press b A Select a Status
A Press b A Select Status Icon A Press b A
Select a Pictogram A Press b A Select Status
Label A Press b A Enter text A Press b
Opening Hot Status Notification List
Main Menu H Communication A Hot Status
1
2
C Press M q to save.
^ Pictogram List: see P.20-16
^ Enter up to four characters for Status Label.
Press N x
Select Hot Status Notification List and press b
Hot Status Notification List appears.
C To open details, select a notification A Press b
B For Request Memos, see P.19-7 "Adding from Request Memo".
Manual Info Update
Normally Hot Status information is updated automatically.
Follow these steps for manual update.
Main Menu H Communication A Hot Status
Communication
19
19-12
1
2
3
Press N x
Select Settings and press b
Select Status Update and press b
Hot Status information is updated.
Circle Talk
Circle Talk is a Walkie-Talkie type communication service.
Press one key to speak to up to ten parties simultaneously.
^ Press u to take the floor and speak; other participants may
only listen until the floor is released.
^ A subscription to Hot Status is required.
^ Transmission/connection fees apply during Circle Talk.
Receiver
Note H ^ Before use, set IP Service Setting (see P.9-26) to On
and Connection Setting (see P.19-9) to Online. (Circle
Talk is disabled when Connection Setting is Offline.)
^ A new Circle Talk session cannot begin during a call.
^ Only available on compatible 3G handsets.
Window Description
1
2
Receiver
Receiver
3
Receiver
4
Initiator
Receiver
(Speaker)
Send Request
Press u to speak
Communication
1 Total Number of Participants
2 Participants
Names appear if saved in Phone Book. Otherwise phone
numbers appear.
3 Connection Status
4 Circle Talk Status
19
19-13
Initiating Circle Talk
6
Follow the steps below to start Circle Talk from Standby.
When Register the circle talk member right now?
appears, see P.19-17 to create Circle Talk member list.
Communication
19
19-14
1
2
3
4
Enter a phone number
5
Press u when finished
Press u (Circle Talk Key)
To speak again, press u while Press M to
speak appears
Press M when finish appears when you have the floor.
^ Busy appears if the floor is taken by another participant; try
again later.
7
Press g to exit
^ Circle Talk ends automatically when there is only one
participant left, including yourself.
C Adding/Cancelling Participants: see P.19-16
Press b ‐
^ Circle Talk starts when request is accepted by a receiver.
Speak
Initiator is the first speaker when Circle Talk starts.
^ Speaker's voice is heard by all other participants.
^ Speak for up to 30 seconds at one time.
^ Warning tone sounds five seconds before limit.
^ The floor is released automatically when the time is up.
Rejoining Circle Talk
C In Standby, press B/A to open Dialled Numbers/
Received Calls A Select the most recent Circle Talk
record A Press N x A Select Rejoin Circle Talk A
Press b
^ An error message appears when all other participants have
exited or 11 participants are already engaged.
Loudspeaker On/Off
C Press b to toggle Loudspeaker on/off during Circle Talk.
^ To activate/cancel Loudspeaker when starting Circle Talk,
see P.19-18 "Loudspeaker".
Note H Incoming Calls/Alarm during Circle Talk
^ Handset responds to incoming calls according to
Incoming Calls settings (see P.19-18).
^ Alarm Times are announced after exiting Circle Talk.
From Circle Talk Member List
Save members or Groups beforehand (see P.19-17).
1
2
From Hot Status Member List
Main Menu H Communication A Hot Status
1
2
Use G to select a member and press u
1
Phone Book
1 Press D
2 Select an entry and press b
Call Log
1 Use F to open Dialled Numbers/Received Calls
2
3
Select a number and press u
C Adding/Cancelling Participants: see P.19-16
3
Press b ‐
From Phone Book or Call Log
Press u
Select a member or Group and
press b
C Adding/Cancelling Participants: see P.19-16
Press b ‐
C Adding/Cancelling Participants: see P.19-16
Press b ‐
Communication
19
19-15
Accepting a Circle Talk Request
1
3
While handset is ringing/
vibrating, press u, f or N
Circle Talk starts.
C To take the floor, see P.19-14.
2
Press g to exit
Note H To always accept Circle Talk requests automatically, set
Circle Talk availability (see P.19-8) to Auto Join. If Join
NG is set, Circle Talk requests are always rejected.
C For entries with multiple numbers, press b A Select
one
Direct Entry
1 Select Enter Phone Number and press b
2 Enter a phone number
Adding/Cancelling Participants
Adding Participants
Follow these steps before starting Circle Talk or during Circle Talk.
Communication
19
19-16
1
2
Press N x
Select Add Member and press b
From Hot Status Member List
1 Select Members List and press b
2 Use F to select a Group, then select a
member
From Circle Talk Member List
1 Select C/T Members List and press b
2 Select a member or Group
From Phone Book
1 Select Phone Book and press b
2 Select an entry
4
Press b
Selected member, Group or number is added.
^ To add more participants, repeat Steps 1 - 4.
Cancelling Participants
Follow these steps before starting Circle Talk.
Participants cannot be cancelled during Circle Talk.
1
2
3
Select a member and press N x
Select Delete Member and press b
Choose Yes and press b
Creating Circle Talk Member List
Save members from Hot Status member list or Phone Book
to create Circle Talk member list.
^ Save members as individuals or Groups.
^ Save up to 30 entries in total (up to ten members per Group).
1
2
Press u
Select Add New Entry and press b
C When opening Circle Talk member list for the first time,
choose Yes A Press b
3
Saving as Individuals
1 Select Individual and press b
2 Select Members List or Phone Book and
press b
3 Select an entry and press b
The entry is saved as a member.
C For entries with multiple numbers, select one A Press b
Saving as Groups
1 Select Group and press b
2 Press b
3 Enter name and press b
4 Select from No.1: to No.10: and press b
5 Select Members List or Phone Book and
press b
6 Select an entry and press b
C For entries with multiple numbers, select one A Press b
7 Repeat Steps 4 - 6 to add members
8 Press M q
Communication
Tip H To change Group names or saved members, see P.19-18
"Editing Circle Talk Member List".
19
19-17
Editing Circle Talk Member List
Edit or delete members and Groups.
Circle Talk Settings
Loudspeaker
Editing Members or Groups
1
2
Communication
19
19-18
Press u
Individual Members
1 Select a member and press N x
2 Select Edit and press b
3 Press b
4 Perform Steps 2 - 3 in "Saving as
Individuals" on P.19-17
Groups
1 Select a Group and press N x
2 Select Edit and press b
3 Perform Steps 2 - 8 in "Saving as Groups"
on P.19-17
Deleting Members or Groups
1
2
3
4
Press u
Select a member or Group and press N x
Select Delete and press b
Choose Yes and press b
Activate or cancel Loudspeaker for Circle Talk
KOn
Press u A Press N x A Select Loudspeaker
A Press b A Choose On or Off A Press b
Incoming Calls
Set response to calls received during Circle Talk
KVoice Calls/Video Calls: Reject Calls
Press u A Press N x A Select Incoming
Calls A Press b A Select Voice Calls or Video Calls
A Press b A Select handset response A Press b
Accept Calls
Incoming calls interrupt Circle Talk sessions
Reject Calls
Incoming calls are ignored. (Caller hears
a busy tone.)
Near Chat (Japanese Only)
^ In the event that this handset may be used by a minor, access to
this application may be password restricted by a supervising
adult. In this case, Handset Code access must also be managed
to prevent the execution of Memory All Clear (see P.16-8) that
may be used to reset the application password.
^ For more about password restriction, see Near Chat
S! Application instructions.
^ Because Near Chat employs Bluetooth# technology, users
may receive unsolicited connection requests from unknown
sources. To reject such requests, choose No and press b in
Step 2 on P.19-20 "Receiving Near Chat Request".
Basics
Exchange real-time text messages wirelessly with
compatible Bluetooth# devices within ten metres.
Note H ^ Near Chat range may vary by ambient conditions.
^ Near Chat S! Application cannot be deleted.
Setup
Activate the following Bluetooth# settings beforehand.
Bluetooth#
See P.10-2 (choose On)
Visibility
See P.10-4 (select Show My Phone)
S! Appli Request
See P.19-20 (choose On)
Note H ^ Always activate Bluetooth# to use Neat Chat.
^ When Bluetooth# is active and Visibility is set to Show
My Phone, handset may receive unsolicited connection
requests from other Bluetooth# devices.
^ Set Visibility to Show My Phone and activate S! Appli
Request to receive Near Chat request from other parties.
Tip H Starting Near Chat activates Bluetooth# and sets Visibility to
Show My Phone. Bluetooth# remains active even after
ending Near Chat but Visibility returns to its previous state.
Communication
^ Because this application employs Bluetooth# wireless
technology transmission/connection fees do not apply.
^ Usage requires the pre-installed Near Chat S! Application.
Using Near Chat
19
19-19
CS! Appli Request
S! Appli Request is On by default.
Main Menu
1
H Settings A Connectivity (F) A Bluetooth A My
Device Settings A S! Appli Request A Switch On/Off
Receiving Near Chat Request
1
Choose On or Off and press b
^ After 30 seconds of inactivity, the tone
sounds again, notification appears and
Information window opens.
^ Check request log in Latest Information
(see below).
C For On, if Activate Bluetooth? appears, choose Yes A Press b
Sending Near Chat Request
Main Menu H Communication
1
2
3
Select Near chat and press b
C If Activate Bluetooth? appears, choose Yes A Press b
2
Choose Yes and press b
3
To end Near Chat, exit the application (see P.16-4)
Send Near Chat request via the application
^ Near Chat starts when the other party accepts your request.
To end Near Chat, exit the application (see P.16-4)
When a Near Chat request
arrives, a tone sounds and
Bluetooth# Notification appears
Near Chat S! Application starts.
^ For details, read the instructions on the application.
C To reject request, choose No A Press b
Latest
Information
Main Menu
Communication
19
19-20
Open details of the most recently received
Near Chat request
H Settings A Connectivity (F) A Bluetooth A My
Device Settings A S! Appli Request
Select Latest Information A Press b
C Press b to return.
Appendix
20-1
Function List
For SoftBank 813SH Function List, see SoftBank 813SH Supplementary Guide.
Communication
Yahoo! Keitai
Media Player
Appendix
20
20-2
Messaging
Sub Menu
S! Town
S! Loop
Hot Status
Circle Talk
Near chat
Yahoo! Keitai
Bookmarks
Saved Pages
Enter URL
History
Live Monitor
PC Site Browser
Common Settings
Music
Videos
Streaming
Received Msg.
Create Message
Retrieve New Msg.
Drafts
Templates
Sent Messages
Unsent Messages
Server Mail Box
Create New SMS
Settings
Memory Status
Refer to
P.19-2
P.19-3
P.19-4
P.19-13
P.19-19
P.15-3
P.15-9
P.15-9
P.15-4
P.15-4
P.15-14
P.15-18
P.15-20
P.7-6
P.7-8
P.15-12
P.14-23
P.14-7
P.14-19
P.14-18
P.14-14
P.14-23
P.14-23
P.14-22
P.14-6
P.14-33
P.14-3
Main Menu
Camera
Data Folder
Tools 1
Tools
Main Menu
Tools 2
Tools 3
Sub Menu
Pictures
DCIM
My Pictograms
Ring Song·Tones
S! Appli
Music
Videos
Lifestyle-appli
Books
Custom Screens
Flash#
Flash#Ringtones
Other Documents
Memory Status
Calendar
Alarms
Calculator
Tasks
World Clock
Voice Recorder
Document Viewer
Stopwatch
Countdown Timer
Expenses Memo
Text Templates
Barcode
Phone Help
Refer to
P.6-2
P.8-2
P.8-2
P.8-2
P.8-2
P.16-2
P.8-2
P.8-2
P.17-2
P.8-2
P.9-9
P.8-2
P.8-2
P.8-2
P.8-2
P.12-2
P.12-11
P.12-15
P.12-8
P.12-14
P.12-16
P.12-18
P.12-24
P.12-25
P.12-25
P.12-26
P.12-19
P.12-27
Main Menu
Connectivity
Settings
Refer to
P.18-9
P.18-5
P.18-2
P.16-2
P.16-7
P.16-2
P.17-2
P.17-4
P.4-2
P.4-4
P.2-7
P.2-13
P.2-10
P.13-4
P.4-11
P.4-19
P.4-13
P.4-12
P.4-15
P.4-9
P.4-8
P.9-2
P.9-3
P.9-9
P.9-14
P.9-18
P.9-9
P.9-19
P.9-17
P.9-17
P.2-21
P.9-20
P.20-8
P.9-28
Call/Video Call
Sub Menu
Bluetooth
Infrared
Mass Storage
Memory Card
Call Time & Cost
Answer Phone
Voicemail/Divert
Video Call
Show My Number
P Missed Calls
Int'l Calling
Disp. Time/Call
Call Barring
Minute Minder
Auto Answer
Call Waiting
Select Network
Select Service
Offline Mode
Network Settings
Retrieve NW Info
Location Info
Network Info
Refer to
P.10-2
P.10-10
P.11-9
P.11-2
P.2-14
P.2-9
P.13-2
P.5-6
P.13-10
P.13-5
P.9-29
P.9-30
P.13-7
P.9-30
P.9-30
P.13-5
P.10-14
P.2-16
P.2-20
P.10-15
P.10-15
P.10-15
Appendix
Sub Menu
BookSurfing
Entertainment
E-Book
CAST
S! Appli
S! Appli
Settings
Information
Lifestyle-appli
Lifestyle-appli
IC Card Settings
Phone Book List
Add New Entry
Information
Call Log
Play Messages
Call Voicemail
Category Control
Phone
My Details
Speed Dial List
Contact Groups
S! Address Book
Ph.Book Settings
Manage Entries
Mode Settings
Display
Custom Screens
Sounds & Alerts
Date & Time
言語選択 (Language)
Phone Settings User Dictionary
Ringer Output
Earpiece Volume
Simple Menu
Locks
Software Update
Master Reset
Settings
Main Menu
20
20-3
Troubleshooting
Problem
^ Is Switch On/Off in PIN Entry On?
^ If On, PIN1 is required. Enter PIN1 according to
onscreen instructions. For more, see P.9-24.
^ USIM Card may not be properly inserted.
^ There may be debris on IC chip/terminals.
^ Make sure USIM Card is properly inserted. If the
message still appears, USIM may be damaged.
^ Make sure the correct USIM Card is inserted. The
inserted USIM Card may not be valid.
^ Clean relevant parts with a dry cloth and re-insert.
Keypad won't respond
^ Keypad Lock (see P.1-22) may be active.
^ Password Lock (see P.9-25) may be active.
^ Cancel Keypad Lock (see P.1-22).
^ Cancel Password Lock (see P.9-25).
Cannot place call from
Phone Book
^ The number may be saved as Secret entry.
^ Phone Book Lock may be active.
^ Activate Show Secret Data (see P.9-27).
^ Cancel Phone Book Lock (see P.9-26).
P appears in Standby
and call won't connect
^ Handset may be outside the service area or
otherwise beyond signal transmission range.
^ Is GSM selected in Select Service (see P.2-16)?
^ Move to a place where signal is strong and retry.
Handset won't respond
Insert USIM Card appears
in Standby and handset is
unresponsive
Appendix
20-4
Solution
^ Press and hold g longer.
^ Charge battery or install a charged battery.
^ Install battery properly.
Handset won't turn on
20
Possible Cause
^ Was g pressed and held long enough?
^ Battery may need to be charged or replaced.
^ Battery may not be properly installed.
^ The correct USIM Card may not be inserted.
^ Select another mode according to service area.
Problem
Possible Cause
Solution
Call won't connect and
there's a beeping tone
^ Did you include the dialling code or the first 0?
^ Handset may be out-of-range. (P appears)
^ Handset Offline Mode (see P.2-20) may be active.
^ Dial the number including the dialling code or 0.
^ Move to a place where signal is strong and retry.
^ Cancel Offline Mode (see P.2-20).
Call is choppy or cut off
^ Network signal may be weak.
^ Battery may need to be charged or replaced.
^ Move to a place where signal is strong and retry.
^ Charge battery or install a charged battery.
Line is noisy during calls
^ Network signal may be weak or unstable.
Battery won't charge
^ AC Charger may not be properly connected to
handset or Desktop Holder.
^ AC Charger may not be firmly plugged in to outlet.
^ Battery may not be properly installed.
^ Handset may not be properly inserted into Desktop
Holder.
^ There may be debris on: terminals (handset,
battery or Desktop Holder); connector (AC
Charger); Connection Port (Desktop Holder);
External Device Port.
^ Battery may not charge outside 5]C to 35]C.
^ Battery may be terminally exhausted or defective.
Battery charges quickly
^ Clean terminals, connector and Port with a cotton
swab and try again.
^ Charge within an ambient temperature of 5]C - 35]C.
^ Replace battery with a new one.
―
^ Battery may be terminally exhausted or defective.
^ Replace battery with a new one.
^ During charging, AC Charger or Desktop Holder
normally becomes warm; handset may feel warm
to the touch during extended periods of use.
^ Unless handset/accessories become very hot to
the touch, this should be considered normal;
regardless, avoid prolonged skin contact which
could cause burn injuries (see P.xviii).
Appendix
Handset/Charger/Desktop Holder feels warm
^ Remaining charge shortens charging time.
―
^ Make sure connector is securely inserted and try
again.
^ Remove plug from outlet, re-insert and try again.
^ Open handset, install battery properly and try again.
^ Remove handset and re-insert correctly.
20
20-5
Problem
Possible Cause
Solution
Battery Time seems
shorter than usual
^ Environmental factors (temperature, charging/signal
conditions), usage or settings can affect Battery Time.
Display flickers
^ Display may flicker under fluorescent lights.
Display went dark
^ Leaving handset open with no key presses for a
preset period cancels Backlight (Time Out) then
panel (Display Saving); this is not a malfunction.
^ For more on Battery Time, usage factors and ways
to extend Battery Time, see P.1-13 - 1-14.
―
^ Press any key to reactivate Display Backlight.
Tip H For repairs and after-sales services, contact SoftBank Customer Centre, Customer Assistance (see P.20-29).
Warning Signs
CP appears
Handset is out-of-range.
Move for a better signal.
CBattery low. Please connect to charger! appears and
short beeps sound
Battery is low (see P.1-15).
Charge or replace battery immediately.
Appendix
20
20-6
Cb appears
Keypad Lock is active (see P.1-22).
Cancel to use Keypad. Press keys for Any Key Answer (see
P.2-6) to answer calls.
Cl appears
Password Lock is active (see P.9-25).
Cancel to place calls, etc.
Press keys for Any Key Answer (see P.2-6) to answer calls.
S! Application Display Messages
Message
Cause & Solution
Application suspended. End
application?
^ An S! Application is paused.
D
^ Close application and try again.
Application is suspended.
!! Download to Phone
Download Size: XXKB Save
Size: XXKB Download?
Battery low. Download may
not be completed.
^ Download may fail due to low
battery.
D
^ Charge battery then try again.
!! Not Enough Memory in
Phone. Download to Memory
Card Download Size: XXKB
Save Size: XXKB Download?
^ Memory is full.
D
^ Press b to download or i
to cancel.
Message
Exceeds limit. Cannot save.
Cause & Solution
^ 100 S! Applications are already
saved. (The message
disappears automatically.)
D
^ Delete applications (see
P.16-5) and try again.
Same version found
Continue download?
^ The same version of selected
S! Application is already saved.
D
^ Choose Yes (download) or No
(cancel) and press b.
New version found Continue
download?
^ An older version of the same
S! Application is saved.
D
^ Choose Yes (download) or No
(cancel) and press b.
Tip H If one of these messages appears, S! Application
cannot be downloaded:
^ Improper data. Cannot download application.
^ Size too large. Cannot receive.
Messaging Mishaps
CWhen S! Mail is not delivered as sent
Causes include the following. For details, contact SoftBank
Customer Centre, General Information (see P.20-29).
^ Recipient is not subscribed to S! Mail, Super Mail or Long Mail.
^ Recipient handset is not S! Mail-compatible.
B The maximum size of messages/attachments recipient
handsets can receive varies by make and model.
^ Recipient handset is not JPEG-compatible.
B Some Long Mail-compatible handsets may only be able to
process PNG images; convert JPEG files to PNG (see
P.8-16), then attach and send.
CWhen handset memory is insufficient
New messages cannot be delivered (b appears in red).
Undeliverable mail is saved at the Centre.
Appendix
^ Delete messages to free memory for new ones (see P.14-29).
When memory is available, new messages are delivered
automatically.
^ Delete unprotected messages automatically to receive new
ones (see P.14-36).
^ Even if memory is not full, handset cannot receive new
messages larger than remaining memory.
20
20-7
Software Update
Check for firmware updates and download as required.
Precautions
Before updating software, turn power off to end all
active functions/applications, then restart handset.
^ Choose to begin update or schedule update.
^ Handset is disabled until update is complete. Update may take
up to approximately 30 minutes.
^ Connection fees do not apply to updates (including checking
for updates, downloading and rewriting).
^ Keep handset in a place where signal is strong and stable.
^ Charge battery (W appears) beforehand; a low battery may
cause update to fail.
^ Do not remove battery during update; update may fail.
^ To reduce risk of failure, disconnect USB Cable from handset
beforehand.
Updating Software
Read Software Update Precautions (left) beforehand.
Main Menu H Settings A Phone Settings (F) A Software Update
1
Select Software Update and press b
Confirmation appears.
^ Follow onscreen instructions. (Q appears
during update.)
^ Update may take up to approximately
30 minutes.
Confirmation
^ Confirmation appears for successful
update then handset restarts. Completion
message appears and Information window
opens (R appears).
B While completion message appears,
press b to acknowledge update
completion and cancel Information
window.
Update Complete
Appendix
20
20-8
Note H Update failure may disable handset.
Contact SoftBank Customer Centre,
Customer Assistance (see P.20-29).
Scheduled Update
Update Failure
Update Result
C While Information window appears,
select Update Result A Press b
B Press b again to exit.
C In Standby, press b A Select
Settings A Press b A Use F to
select Phone Settings A Select
Software Update A Press b A Select
Update Result A Press b
B Press b again to return.
C Confirmation appears at scheduled
update time. Press b or wait
approximately ten seconds for update to
start.
^ Update will not start while handset is in
use. When the current operation ends,
confirmation appears. After ten minutes,
scheduled update is automatically
cancelled.
^ Update automatically cancels Keypad Lock.
Confirmation
Note H ^ Handset Phone Book entries, media files, and other
content are not affected by firmware updates, but users
should always back up important information (note that
some files cannot be copied). SoftBank is not liable for
damages from lost information, etc.
^ If handset does not return to Standby after update, turn
power off, reinsert battery, then restart handset.
Update Result
Appendix
20
20-9
Character Code List
First Three
Digits
Last Digit
0
1
2
3
4
5
6
7
8
9
*
010
(Space) 、 。 , .・ : ; ?
011 ! ゛ ゜ ´ ` ¨ ^  ̄ _ ヽ
012 ヾ ゝ ゞ 〃 仝 々 〆 〇 ー ―
013 ‐ / \ ∼ ‖ | … ‥‘ ’
014 “ ”( )〔 〕[ ]{ }
015 〈 〉《 》「 」『 』【 】
016 + − ± × ÷ = ≠ < > ≦
017 ≧ ∞ ∴ ♂ ♀ ° ′ ″ ℃ ¥
018 $ ¢ £ % # & @ § ☆
019 ★ ○ ● ◎ ◇
020
◆□■△▲▽▼※〒
021 → ← ↑ ↓ 〓
022
∈∋⊆⊇
023 ⊂ ⊃ ∪ ∩
024
∧∨¬⇒⇔∀∃
026
027
028
029
Appendix
20
20-10
031
032
033
034
035
036
037
038
039
040
041
042
043
044
045
046
∠⊥͡∂∇≡≒≪≫√
∽∝∵∫∬
ʼn♯♭♪†‡¶
⃝
0 1 2 3
4 5 6 7 8 9
ABCDEFG
HIJKLMNOPQ
RSTUVWXYZ
abcde
fghijklmno
pqrstuvwxy
z
ぁあぃいぅうぇえぉ
おかがきぎくぐけげこ
ごさざしじすずせぜそ
ぞただちぢっつづてで
とどなにぬねのはばぱ
ひびぴふぶぷへべぺほ
ぼぽまみむめもゃやゅ
First Three
Digits
Last Digit
0
1
2
3
4
5
6
7
8
9
047
048
ゆょよらりるれろゎわ
ゐゑをん
050
051
052
053
054
055
056
057
058
ァアィイゥウェエォ
オカガキギクグケゲコ
ゴサザシジスズセゼソ
ゾタダチヂッツヅテデ
トドナニヌネノハバパ
ヒビピフブプヘベペホ
ボポマミムメモャヤュ
ユョヨラリルレロヮワ
ヰヱヲンヴヵヶ
060
061
062
063
064
065
ΑΒΓΔΕΖΗΘΙ
ΚΛΜΝΞΟΠΡΣΤ
ΥΦΧΨΩ
αβγδεζη
θικλμνξοπρ
στυφχψω
070
071
072
073
074
075
076
077
078
АБВГДЕЁЖЗ
ИЙКЛМНОПРС
ТУФХЦЧШЩЪЫ
ЬЭЮЯ
а
бвгдеёжзий
клмнопрсту
фхцчшщъыьэ
юя
080
081
082
083
─│┌┐┘└├┬┤
┴┼━┃┏┓┛┗┣┳
┫┻╋┠┯┨┷┿┝┰
┥┸╂
160
あ
亜唖娃阿哀愛挨姶逢
First Three
Digits
161
162
163
164
164
165
166
167
168
169
170
170
171
172
173
173
174
175
176
177
178
178
179
180
181
182
182
183
184
185
186
187
Last Digit
0
1
2
3
4
5
6
7
8
9
葵茜穐悪握渥旭葦芦鯵
梓圧斡扱宛姐虻飴絢綾
鮎或粟袷安庵按暗案闇
鞍杏
い
以伊位依偉囲夷委
威尉惟意慰易椅為畏異
移維緯胃萎衣謂違遺医
井亥域育郁磯一壱溢逸
稲茨芋鰯允印咽員因姻
引飲淫胤蔭
院陰隠韻吋
う
右宇烏羽
迂雨卯鵜窺丑碓臼渦嘘
唄欝蔚鰻姥厩浦瓜閏噂
云運雲
え
荏餌叡営嬰影映
曳栄永泳洩瑛盈穎頴英
衛詠鋭液疫益駅悦謁越
閲榎厭円園堰奄宴延怨
掩援沿演炎焔煙燕猿縁
艶苑薗遠鉛鴛塩
お
於汚甥
凹央奥往応
押旺横欧殴王翁襖鴬
鴎黄岡沖荻億屋憶臆桶
牡乙俺卸恩温穏音
か
下化
仮何伽価佳加可嘉夏嫁
家寡科暇果架歌河火珂
禍禾稼箇花苛茄荷華菓
蝦課嘩貨迦過霞蚊俄峨
我牙画臥芽蛾賀雅餓駕
First Three
Digits
188
189
190
191
192
193
194
195
196
197
198
199
200
201
202
203
204
205
206
207
207
208
209
210
211
212
213
214
215
216
217
218
219
220
221
222
Last Digit
0
1
2
3
4
5
6
7
8
9
介会解回塊壊廻快怪悔
恢懐戒拐改
魁晦械海灰界皆絵芥
蟹開階貝凱劾外咳害崖
慨概涯碍蓋街該鎧骸浬
馨蛙垣柿蛎鈎劃嚇各廓
拡撹格核殻獲確穫覚角
赫較郭閣隔革学岳楽額
顎掛笠樫橿梶鰍潟割喝
恰括活渇滑葛褐轄且鰹
叶椛樺鞄株兜竃蒲釜鎌
噛鴨栢茅萱
粥刈苅瓦乾侃冠寒刊
勘勧巻喚堪姦完官寛干
幹患感慣憾換敢柑桓棺
款歓汗漢澗潅環甘監看
竿管簡緩缶翰肝艦莞観
諌貫還鑑間閑関陥韓館
舘丸含岸巌玩癌眼岩翫
贋雁頑顔願
き
企伎危喜器
基奇嬉寄岐希幾忌揮机
旗既期棋棄
機帰毅気汽畿祈季稀
紀徽規記貴起軌輝飢騎
鬼亀偽儀妓宜戯技擬欺
犠疑祇義蟻誼議掬菊鞠
吉吃喫桔橘詰砧杵黍却
客脚虐逆丘久仇休及吸
宮弓急救朽求汲泣灸球
究窮笈級糾給旧牛去居
巨拒拠挙渠虚許距鋸漁
禦魚亨享京
供侠僑兇競共凶協匡
卿叫喬境峡強彊怯恐恭
挟教橋況狂狭矯胸脅興
First Three
Digits
223
224
225
226
226
227
228
229
230
231
232
232
233
234
235
236
237
238
239
240
241
242
243
1
2
3
4
5
6
7
8
9
蕎郷鏡響饗驚仰凝尭暁
業局曲極玉桐粁僅勤均
巾錦斤欣欽琴禁禽筋緊
芹菌衿襟謹近金吟銀
く
九
倶句区狗玖矩苦躯駆駈
駒具愚虞喰空偶寓遇隅
串櫛釧屑屈
掘窟沓靴轡窪熊隈粂
栗繰桑鍬勲君薫訓群軍
郡
け
卦袈祁係傾刑兄啓圭
珪型契形径恵慶慧憩掲
携敬景桂渓畦稽系経継
繋罫茎荊蛍計詣警軽頚
鶏芸迎鯨劇戟撃激隙桁
傑欠決潔穴結血訣月件
倹倦健兼券剣喧圏堅嫌
建憲懸拳捲
検権牽犬献研硯絹県
肩見謙賢軒遣鍵険顕験
鹸元原厳幻弦減源玄現
絃舷言諺限
こ
乎個古呼固
姑孤己庫弧戸故枯湖狐
糊袴股胡菰虎誇跨鈷雇
顧鼓五互伍午呉吾娯後
御悟梧檎瑚碁語誤護醐
乞鯉交佼侯候倖光公功
効勾厚口向
后喉坑垢好孔孝宏工
巧巷幸広庚康弘恒慌抗
拘控攻昂晃更杭校梗構
江洪浩港溝甲皇硬稿糠
紅紘絞綱耕考肯肱腔膏
航荒行衡講貢購郊酵鉱
砿鋼閤降項香高鴻剛劫
First Three
Digits
257
258
259
260
261
261
262
263
264
265
266
267
268
269
270
271
272
273
273
274
275
276
277
278
279
280
281
282
283
284
285
286
287
288
289
290
291
292
Last Digit
0
1
2
3
4
5
6
7
8
9
号合壕拷濠豪轟麹克刻
告国穀酷鵠黒獄漉腰甑
忽惚骨狛込
此頃今困坤墾婚恨懇
昏昆根梱混痕紺艮魂
さ
些
佐叉唆嵯左差査沙瑳砂
詐鎖裟坐座挫債催再最
哉塞妻宰彩才採栽歳済
災采犀砕砦祭斎細菜裁
載際剤在材罪財冴坂阪
堺榊肴咲崎埼碕鷺作削
咋搾昨朔柵窄策索錯桜
鮭笹匙冊刷
察拶撮擦札殺薩雑皐
鯖捌錆鮫皿晒三傘参山
惨撒散桟燦珊産算纂蚕
讃賛酸餐斬暫残
し
仕仔伺
使刺司史嗣四士始姉姿
子屍市師志思指支孜斯
施旨枝止死氏獅祉私糸
紙紫肢脂至視詞詩試誌
諮資賜雌飼歯事似侍児
字寺慈持時
次滋治爾璽痔磁示而
耳自蒔辞汐鹿式識鴫竺
軸宍雫七叱執失嫉室悉
湿漆疾質実蔀篠偲柴芝
屡蕊縞舎写射捨赦斜煮
社紗者謝車遮蛇邪借勺
尺杓灼爵酌釈錫若寂弱
惹主取守手朱殊狩珠種
腫趣酒首儒受呪寿授樹
綬需囚収周
宗就州修愁拾洲秀秋
終繍習臭舟蒐衆襲讐蹴
輯週酋酬集醜什住充十
First Three
Digits
293
294
295
296
297
298
299
300
301
302
303
304
305
306
307
308
309
310
311
312
313
314
315
315
316
317
318
319
320
320
321
322
323
324
325
326
327
328
Last Digit
0
1
2
3
4
5
6
7
8
9
従戎柔汁渋獣縦重銃叔
夙宿淑祝縮粛塾熟出術
述俊峻春瞬竣舜駿准循
旬楯殉淳準潤盾純巡遵
醇順処初所暑曙渚庶緒
署書薯藷諸助叙女序徐
恕鋤除傷償
勝匠升召哨商唱嘗奨
妾娼宵将小少尚庄床廠
彰承抄招掌捷昇昌昭晶
松梢樟樵沼消渉湘焼焦
照症省硝礁祥称章笑粧
紹肖菖蒋蕉衝裳訟証詔
詳象賞醤鉦鍾鐘障鞘上
丈丞乗冗剰城場壌嬢常
情擾条杖浄状畳穣蒸譲
醸錠嘱埴飾
拭植殖燭織職色触食
蝕辱尻伸信侵唇娠寝審
心慎振新晋森榛浸深申
疹真神秦紳臣芯薪親診
身辛進針震人仁刃塵壬
尋甚尽腎訊迅陣靭
す
笥諏
須酢図厨逗吹垂帥推水
炊睡粋翠衰遂酔錐錘随
瑞髄崇嵩数枢趨雛据杉
椙菅頗雀裾
澄摺寸
せ
世瀬畝是凄制
勢姓征性成政整星晴棲
栖正清牲生盛精聖声製
西誠誓請逝醒青静斉税
脆隻席惜戚斥昔析石積
籍績脊責赤跡蹟碩切拙
接摂折設窃節説雪絶舌
蝉仙先千占宣専尖川戦
扇撰栓栴泉浅洗染潜煎
First Three
Digits
329
330
331
332
332
333
334
335
336
337
338
339
340
341
342
343
344
345
346
347
348
349
350
351
352
353
354
354
355
356
357
358
359
360
361
362
363
Last Digit
0
1
2
3
4
5
6
7
8
9
煽旋穿箭線
繊羨腺舛船薦詮賎践
選遷銭銑閃鮮前善漸然
全禅繕膳糎
そ
噌塑岨措曾
曽楚狙疏疎礎祖租粗素
組蘇訴阻遡鼠僧創双叢
倉喪壮奏爽宋層匝惣想
捜掃挿掻操早曹巣槍槽
漕燥争痩相窓糟総綜聡
草荘葬蒼藻装走送遭鎗
霜騒像増憎
臓蔵贈造促側則即息
捉束測足速俗属賊族続
卒袖其揃存孫尊損村遜
た
他多太汰詑唾堕妥惰打
柁舵楕陀駄騨体堆対耐
岱帯待怠態戴替泰滞胎
腿苔袋貸退逮隊黛鯛代
台大第醍題鷹滝瀧卓啄
宅托択拓沢濯琢託鐸濁
諾茸凧蛸只
叩但達辰奪脱巽竪辿
棚谷狸鱈樽誰丹単嘆坦
担探旦歎淡湛炭短端箪
綻耽胆蛋誕鍛団壇弾断
暖檀段男談
ち
値知地弛恥
智池痴稚置致蜘遅馳築
畜竹筑蓄逐秩窒茶嫡着
中仲宙忠抽昼柱注虫衷
註酎鋳駐樗瀦猪苧著貯
丁兆凋喋寵
帖帳庁弔張彫徴懲挑
暢朝潮牒町眺聴脹腸蝶
調諜超跳銚長頂鳥勅捗
直朕沈珍賃鎮陳
Appendix
243
244
245
246
247
248
249
250
251
252
253
254
255
256
Last Digit
0
20
20-11
First Three
Digits
Last Digit
0
1
2
3
4
5
6
7
8
9
つ
363
364
365
366
366
367
368
369
370
371
372
373
373
374
375
376
377
378
379
380
381
382
383
384
385
386
Appendix
386
387
388
20
388
389
390
390
391
20-12
津墜椎
槌追鎚痛通塚栂掴槻佃
漬柘辻蔦綴鍔椿潰坪壷
嬬紬爪吊釣鶴
て
亭低停偵
剃貞呈堤定帝底庭廷弟
悌抵挺提梯汀碇禎程締
艇訂諦蹄逓
邸鄭釘鼎泥摘擢敵滴
的笛適鏑溺哲徹撤轍迭
鉄典填天展店添纏甜貼
転顛点伝殿澱田電
と
兎吐
堵塗妬屠徒斗杜渡登菟
賭途都鍍砥砺努度土奴
怒倒党冬凍刀唐塔塘套
宕島嶋悼投搭東桃梼棟
盗淘湯涛灯燈当痘祷等
答筒糖統到
董蕩藤討謄豆踏逃透
鐙陶頭騰闘働動同堂導
憧撞洞瞳童胴萄道銅峠
鴇匿得徳涜特督禿篤毒
独読栃橡凸突椴届鳶苫
寅酉瀞噸屯惇敦沌豚遁
頓呑曇鈍
な
奈那内乍凪薙
謎灘捺鍋楢馴縄畷南楠
軟難汝
に
二尼弐迩匂賑肉
虹廿日乳入
如尿韮任妊忍認
ぬ∼の
濡禰
祢寧葱猫熱年念捻撚燃
First Three
Digits
392
393
393
394
395
396
397
398
399
400
401
402
403
404
405
405
406
407
408
409
410
411
412
413
414
415
415
416
417
418
419
420
421
422
422
423
Last Digit
0
1
2
3
4
5
6
7
8
9
粘乃廼之埜嚢悩濃納能
脳膿農覗蚤
は
巴把播覇杷
波派琶破婆罵芭馬俳廃
拝排敗杯盃牌背肺輩配
倍培媒梅楳煤狽買売賠
陪這蝿秤矧萩伯剥博拍
柏泊白箔粕舶薄迫曝漠
爆縛莫駁麦
函箱硲箸肇筈櫨幡肌
畑畠八鉢溌発醗髪伐罰
抜筏閥鳩噺塙蛤隼伴判
半反叛帆搬斑板氾汎版
犯班畔繁般藩販範釆煩
頒飯挽晩番盤磐蕃蛮
ひ
匪
卑否妃庇彼悲扉批披斐
比泌疲皮碑秘緋罷肥被
誹費避非飛樋簸備尾微
枇毘琵眉美
鼻柊稗匹疋髭彦膝菱
肘弼必畢筆逼桧姫媛紐
百謬俵彪標氷漂瓢票表
評豹廟描病秒苗錨鋲蒜
蛭鰭品彬斌浜瀕貧賓頻
敏瓶
ふ
不付埠夫婦富冨布
府怖扶敷斧普浮父符腐
膚芙譜負賦赴阜附侮撫
武舞葡蕪部封楓風葺蕗
伏副復幅服
福腹複覆淵弗払沸仏
物鮒分吻噴墳憤扮焚奮
粉糞紛雰文聞
へ
丙併兵塀
幣平弊柄並蔽閉陛米頁
First Three
Digits
424
425
426
426
427
428
429
430
431
432
433
434
435
436
436
437
438
439
440
440
441
441
442
442
443
444
444
445
446
447
447
448
449
Last Digit
0
1
2
3
4
5
6
7
8
9
僻壁癖碧別瞥蔑箆偏変
片篇編辺返遍便勉娩弁
鞭
ほ
保舗鋪圃捕歩甫補輔
穂募墓慕戊暮母簿菩倣
俸包呆報奉宝峰峯崩庖
抱捧放方朋
法泡烹砲縫胞芳萌蓬
蜂褒訪豊邦鋒飽鳳鵬乏
亡傍剖坊妨帽忘忙房暴
望某棒冒紡肪膨謀貌貿
鉾防吠頬北僕卜墨撲朴
牧睦穆釦勃没殆堀幌奔
本翻凡盆
ま
摩磨魔麻埋妹
昧枚毎哩槙幕膜枕鮪柾
鱒桝亦俣又抹末沫迄侭
繭麿万慢満
漫蔓
み
味未魅巳箕岬密
蜜湊蓑稔脈妙粍民眠
む
務
夢無牟矛霧鵡椋婿娘
め
冥
名命明盟迷銘鳴姪牝滅
免棉綿緬面麺
も
摸模茂妄
孟毛猛盲網耗蒙儲木黙
目杢勿餅尤戻籾貰問悶
紋門匁
や
也冶夜爺耶野弥
矢厄役約薬訳躍靖柳薮
鑓
First Three
Digits
449
450
451
452
452
453
454
455
456
456
457
458
458
459
460
461
462
463
464
465
466
467
468
469
470
470
471
472
473
473
474
475
476
Last Digit
0
1
2
3
4
5
6
7
8
9
ゆ
愉愈油癒
諭輸唯佑優勇友宥幽
悠憂揖有柚湧涌猶猷由
祐裕誘遊邑郵雄融夕
よ
予
余与誉輿預傭幼妖容庸
揚揺擁曜楊様洋溶熔用
窯羊耀葉蓉要謡踊遥陽
養慾抑欲沃浴翌翼淀
ら
羅
螺裸来莱頼雷洛絡落酪
乱卵嵐欄濫藍蘭覧
り
利吏
履李梨理璃
痢裏裡里離陸律率立
葎掠略劉流溜琉留硫粒
隆竜龍侶慮旅虜了亮僚
両凌寮料梁涼猟療瞭稜
糧良諒遼量陵領力緑倫
厘林淋燐琳臨輪隣鱗麟
る∼れ
瑠塁涙累類令伶例冷励
嶺怜玲礼苓鈴隷零霊麗
齢暦歴列劣烈裂廉恋憐
漣煉簾練聯
蓮連錬
ろ
呂魯櫓炉賂路
露労婁廊弄朗楼榔浪漏
牢狼篭老聾蝋郎六麓禄
肋録論
わ
倭和話歪賄脇惑
枠鷲亙亘鰐詫藁蕨椀湾
碗腕
First Three
Digits
1
2
3
4
5
6
7
8
9
弌丐丕个丱丶丼丿乂
乖乘亂亅豫亊舒弍于亞
亟亠亢亰亳亶从仍仄仆
仂仗仞仭仟价伉佚估佛
佝佗佇佶侈侏侘佻佩佰
侑佯來侖儘俔俟俎俘俛
俑俚俐俤俥倚倨倔倪倥
倅伜俶倡倩倬俾俯們倆
偃假會偕偐偈做偖偬偸
傀傚傅傴傲
僉僊傳僂僖僞僥僭僣
僮價僵儉儁儂儖儕儔儚
儡儺儷儼儻儿兀兒兌兔
兢竸兩兪兮冀冂囘册冉
冏冑冓冕冖冤冦冢冩冪
冫决冱冲冰况冽凅凉凛
几處凩凭凰凵凾刄刋刔
刎刧刪刮刳刹剏剄剋剌
剞剔剪剴剩剳剿剽劍劔
劒剱劈劑辨
辧劬劭劼劵勁勍勗勞
勣勦飭勠勳勵勸勹匆匈
甸匍匐匏匕匚匣匯匱匳
匸區卆卅丗卉卍凖卞卩
卮夘卻卷厂厖厠厦厥厮
厰厶參簒雙叟曼燮叮叨
叭叺吁吽呀听吭吼吮吶
吩吝呎咏呵咎呟呱呷呰
咒呻咀呶咄咐咆哇咢咸
咥咬哄哈咨
咫哂咤咾咼哘哥哦唏
唔哽哮哭哺哢唹啀啣啌
售啜啅啖啗唸唳啝喙喀
咯喊喟啻啾喘喞單啼喃
喩喇喨嗚嗅嗟嗄嗜嗤嗔
嘔嗷嘖嗾嗽嘛嗹噎噐營
嘴嘶嘲嘸噫噤嘯噬噪嚆
First Three
Digits
517
518
519
520
521
522
523
524
525
526
527
528
529
530
531
532
533
534
535
536
537
538
539
540
541
542
543
544
545
546
547
548
549
550
551
552
553
554
555
556
Last Digit
0
1
2
3
4
5
6
7
8
9
嚀嚊嚠嚔嚏嚥嚮嚶嚴囂
嚼囁囃囀囈囎囑囓囗囮
囹圀囿圄圉
圈國圍圓團圖嗇圜圦
圷圸坎圻址坏坩埀垈坡
坿垉垓垠垳垤垪垰埃埆
埔埒埓堊埖埣堋堙堝塲
堡塢塋塰毀塒堽塹墅墹
墟墫墺壞墻墸墮壅壓壑
壗壙壘壥壜壤壟壯壺壹
壻壼壽夂夊夐夛梦夥夬
夭夲夸夾竒奕奐奎奚奘
奢奠奧奬奩
奸妁妝佞侫妣妲姆姨
姜妍姙姚娥娟娑娜娉娚
婀婬婉娵娶婢婪媚媼媾
嫋嫂媽嫣嫗嫦嫩嫖嫺嫻
嬌嬋嬖嬲嫐嬪嬶嬾孃孅
孀孑孕孚孛孥孩孰孳孵
學斈孺宀它宦宸寃寇寉
寔寐寤實寢寞寥寫寰寶
寳尅將專對尓尠尢尨尸
尹屁屆屎屓
屐屏孱屬屮乢屶屹岌
岑岔妛岫岻岶岼岷峅岾
峇峙峩峽峺峭嶌峪崋崕
崗嵜崟崛崑崔崢崚崙崘
嵌嵒嵎嵋嵬嵳嵶嶇嶄嶂
嶢嶝嶬嶮嶽嶐嶷嶼巉巍
巓巒巖巛巫已巵帋帚帙
帑帛帶帷幄幃幀幎幗幔
幟幢幤幇幵并幺麼广庠
廁廂廈廐廏
廖廣廝廚廛廢廡廨廩
廬廱廳廰廴廸廾弃弉彝
彜弋弑弖弩弭弸彁彈彌
彎弯彑彖彗彙彡彭彳彷
徃徂彿徊很徑徇從徙徘
徠徨徭徼忖忻忤忸忱忝
悳忿怡恠怙怐怩怎怱怛
First Three
Digits
557
558
559
560
561
562
563
564
565
566
567
568
569
570
571
572
573
574
575
576
577
578
579
580
581
582
583
584
585
586
587
588
589
590
591
592
593
594
595
596
Last Digit
0
1
2
3
4
5
6
7
8
9
怕怫怦怏怺恚恁恪恷恟
恊恆恍恣恃恤恂恬恫恙
悁悍惧悃悚
悄悛悖悗悒悧悋惡悸
惠惓悴忰悽惆悵惘慍愕
愆惶惷愀惴惺愃愡惻惱
愍愎慇愾愨愧慊愿愼愬
愴愽慂慄慳慷慘慙慚慫
慴慯慥慱慟慝慓慵憙憖
憇憬憔憚憊憑憫憮懌懊
應懷懈懃懆憺懋罹懍懦
懣懶懺懴懿懽懼懾戀戈
戉戍戌戔戛
戞戡截戮戰戲戳扁扎
扞扣扛扠扨扼抂抉找抒
抓抖拔抃抔拗拑抻拏拿
拆擔拈拜拌拊拂拇抛拉
挌拮拱挧挂挈拯拵捐挾
捍搜捏掖掎掀掫捶掣掏
掉掟掵捫捩掾揩揀揆揣
揉插揶揄搖搴搆搓搦搶
攝搗搨搏摧摯摶摎攪撕
撓撥撩撈撼
據擒擅擇撻擘擂擱擧
舉擠擡抬擣擯攬擶擴擲
擺攀擽攘攜攅攤攣攫攴
攵攷收攸畋效敖敕敍敘
敞敝敲數斂斃變斛斟斫
斷旃旆旁旄旌旒旛旙无
旡旱杲昊昃旻杳昵昶昴
昜晏晄晉晁晞晝晤晧晨
晟晢晰暃暈暎暉暄暘暝
曁暹曉暾暼
曄暸曖曚曠昿曦曩曰
曵曷朏朖朞朦朧霸朮朿
朶杁朸朷杆杞杠杙杣杤
枉杰枩杼杪枌枋枦枡枅
枷柯枴柬枳柩枸柤柞柝
柢柮枹柎柆柧檜栞框栩
桀桍栲桎梳栫桙档桷桿
First Three
Digits
597
598
599
600
601
602
603
604
605
606
607
608
609
610
611
612
613
614
615
616
617
618
619
620
621
622
623
624
625
626
627
628
629
630
631
632
633
634
635
636
Last Digit
0
1
2
3
4
5
6
7
8
9
梟梏梭梔條梛梃檮梹桴
梵梠梺椏梍桾椁棊椈棘
椢椦棡椌棍
棔棧棕椶椒椄棗棣椥
棹棠棯椨椪椚椣椡棆楹
楷楜楸楫楔楾楮椹楴椽
楙椰楡楞楝榁楪榲榮槐
榿槁槓榾槎寨槊槝榻槃
榧樮榑榠榜榕榴槞槨樂
樛槿權槹槲槧樅榱樞槭
樔槫樊樒櫁樣樓橄樌橲
樶橸橇橢橙橦橈樸樢檐
檍檠檄檢檣
檗蘗檻櫃櫂檸檳檬櫞
櫑櫟檪櫚櫪櫻欅蘖櫺欒
欖鬱欟欸欷盜欹飮歇歃
歉歐歙歔歛歟歡歸歹歿
殀殄殃殍殘殕殞殤殪殫
殯殲殱殳殷殼毆毋毓毟
毬毫毳毯麾氈氓气氛氤
氣汞汕汢汪沂沍沚沁沛
汾汨汳沒沐泄泱泓沽泗
泅泝沮沱沾
沺泛泯泙泪洟衍洶洫
洽洸洙洵洳洒洌浣涓浤
浚浹浙涎涕濤涅淹渕渊
涵淇淦涸淆淬淞淌淨淒
淅淺淙淤淕淪淮渭湮渮
渙湲湟渾渣湫渫湶湍渟
湃渺湎渤滿渝游溂溪溘
滉溷滓溽溯滄溲滔滕溏
溥滂溟潁漑灌滬滸滾漿
滲漱滯漲滌
漾漓滷澆潺潸澁澀潯
潛濳潭澂潼潘澎澑濂潦
澳澣澡澤澹濆澪濟濕濬
濔濘濱濮濛瀉瀋濺瀑瀁
瀏濾瀛瀚潴瀝瀘瀟瀰瀾
瀲灑灣炙炒炯烱炬炸炳
炮烟烋烝烙焉烽焜焙煥
Appendix
477
478
479
480
481
482
483
484
485
486
487
488
489
490
491
492
493
494
495
496
497
498
499
500
501
502
503
504
505
506
507
508
509
510
511
512
513
514
515
516
Last Digit
0
20
20-13
First Three
Digits
Appendix
20
20-14
637
638
639
640
641
642
643
644
645
646
647
648
649
650
651
652
653
654
655
656
657
658
659
660
661
662
663
664
665
666
667
668
669
670
671
672
673
674
675
676
Last Digit
0
1
2
3
4
5
6
7
8
9
煕熈煦煢煌煖煬熏燻熄
熕熨熬燗熹熾燒燉燔燎
燠燬燧燵燼
燹燿爍爐爛爨爭爬爰
爲爻爼爿牀牆牋牘牴牾
犂犁犇犒犖犢犧犹犲狃
狆狄狎狒狢狠狡狹狷倏
猗猊猜猖猝猴猯猩猥猾
獎獏默獗獪獨獰獸獵獻
獺珈玳珎玻珀珥珮珞璢
琅瑯琥珸琲琺瑕琿瑟瑙
瑁瑜瑩瑰瑣瑪瑶瑾璋璞
璧瓊瓏瓔珱
瓠瓣瓧瓩瓮瓲瓰瓱瓸
瓷甄甃甅甌甎甍甕甓甞
甦甬甼畄畍畊畉畛畆畚
畩畤畧畫畭畸當疆疇畴
疊疉疂疔疚疝疥疣痂疳
痃疵疽疸疼疱痍痊痒痙
痣痞痾痿痼瘁痰痺痲痳
瘋瘍瘉瘟瘧瘠瘡瘢瘤瘴
瘰瘻癇癈癆癜癘癡癢癨
癩癪癧癬癰
癲癶癸發皀皃皈皋皎
皖皓皙皚皰皴皸皹皺盂
盍盖盒盞盡盥盧盪蘯盻
眈眇眄眩眤眞眥眦眛眷
眸睇睚睨睫睛睥睿睾睹
瞎瞋瞑瞠瞞瞰瞶瞹瞿瞼
瞽瞻矇矍矗矚矜矣矮矼
砌砒礦砠礪硅碎硴碆硼
碚碌碣碵碪碯磑磆磋磔
碾碼磅磊磬
磧磚磽磴礇礒礑礙礬
礫祀祠祗祟祚祕祓祺祿
禊禝禧齋禪禮禳禹禺秉
秕秧秬秡秣稈稍稘稙稠
稟禀稱稻稾稷穃穗穉穡
穢穩龝穰穹穽窈窗窕窘
窖窩竈窰窶竅竄窿邃竇
First Three
Digits
677
678
679
680
681
682
683
684
685
686
687
688
689
690
691
692
693
694
695
696
697
698
699
700
701
702
703
704
705
706
707
708
709
710
711
712
713
714
715
716
Last Digit
0
1
2
3
4
5
6
7
8
9
竊竍竏竕竓站竚竝竡竢
竦竭竰笂笏笊笆笳笘笙
笞笵笨笶筐
筺笄筍笋筌筅筵筥筴
筧筰筱筬筮箝箘箟箍箜
箚箋箒箏筝箙篋篁篌篏
箴篆篝篩簑簔篦篥籠簀
簇簓篳篷簗簍篶簣簧簪
簟簷簫簽籌籃籔籏籀籐
籘籟籤籖籥籬籵粃粐粤
粭粢粫粡粨粳粲粱粮粹
粽糀糅糂糘糒糜糢鬻糯
糲糴糶糺紆
紂紜紕紊絅絋紮紲紿
紵絆絳絖絎絲絨絮絏絣
經綉絛綏絽綛綺綮綣綵
緇綽綫總綢綯緜綸綟綰
緘緝緤緞緻緲緡縅縊縣
縡縒縱縟縉縋縢繆繦縻
縵縹繃縷縲縺繧繝繖繞
繙繚繹繪繩繼繻纃緕繽
辮繿纈纉續纒纐纓纔纖
纎纛纜缸缺
罅罌罍罎罐网罕罔罘
罟罠罨罩罧罸羂羆羃羈
羇羌羔羞羝羚羣羯羲羹
羮羶羸譱翅翆翊翕翔翡
翦翩翳翹飜耆耄耋耒耘
耙耜耡耨耿耻聊聆聒聘
聚聟聢聨聳聲聰聶聹聽
聿肄肆肅肛肓肚肭冐肬
胛胥胙胝胄胚胖脉胯胱
脛脩脣脯腋
隋腆脾腓腑胼腱腮腥
腦腴膃膈膊膀膂膠膕膤
膣腟膓膩膰膵膾膸膽臀
臂膺臉臍臑臙臘臈臚臟
臠臧臺臻臾舁舂舅與舊
舍舐舖舩舫舸舳艀艙艘
艝艚艟艤艢艨艪艫舮艱
First Three
Digits
717
718
719
720
721
722
723
724
725
726
727
728
729
730
731
732
733
734
735
736
737
738
739
740
741
742
743
744
745
746
747
748
749
750
751
752
753
754
755
756
Last Digit
0
1
2
3
4
5
6
7
8
9
艷艸艾芍芒芫芟芻芬苡
苣苟苒苴苳苺莓范苻苹
苞茆苜茉苙
茵茴茖茲茱荀茹荐荅
茯茫茗茘莅莚莪莟莢莖
茣莎莇莊荼莵荳荵莠莉
莨菴萓菫菎菽萃菘萋菁
菷萇菠菲萍萢萠莽萸蔆
菻葭萪萼蕚蒄葷葫蒭葮
蒂葩葆萬葯葹萵蓊葢蒹
蒿蒟蓙蓍蒻蓚蓐蓁蓆蓖
蒡蔡蓿蓴蔗蔘蔬蔟蔕蔔
蓼蕀蕣蕘蕈
蕁蘂蕋蕕薀薤薈薑薊
薨蕭薔薛藪薇薜蕷蕾薐
藉薺藏薹藐藕藝藥藜藹
蘊蘓蘋藾藺蘆蘢蘚蘰蘿
虍乕虔號虧虱蚓蚣蚩蚪
蚋蚌蚶蚯蛄蛆蚰蛉蠣蚫
蛔蛞蛩蛬蛟蛛蛯蜒蜆蜈
蜀蜃蛻蜑蜉蜍蛹蜊蜴蜿
蜷蜻蜥蜩蜚蝠蝟蝸蝌蝎
蝴蝗蝨蝮蝙
蝓蝣蝪蠅螢螟螂螯蟋
螽蟀蟐雖螫蟄螳蟇蟆螻
蟯蟲蟠蠏蠍蟾蟶蟷蠎蟒
蠑蠖蠕蠢蠡蠱蠶蠹蠧蠻
衄衂衒衙衞衢衫袁衾袞
衵衽袵衲袂袗袒袮袙袢
袍袤袰袿袱裃裄裔裘裙
裝裹褂裼裴裨裲褄褌褊
褓襃褞褥褪褫襁襄褻褶
褸襌褝襠襞
襦襤襭襪襯襴襷襾覃
覈覊覓覘覡覩覦覬覯覲
覺覽覿觀觚觜觝觧觴觸
訃訖訐訌訛訝訥訶詁詛
詒詆詈詼詭詬詢誅誂誄
誨誡誑誥誦誚誣諄諍諂
諚諫諳諧諤諱謔諠諢諷
First Three
Digits
757
758
759
760
761
762
763
764
765
766
767
768
769
770
771
772
773
774
775
776
777
778
779
780
781
782
783
784
785
786
787
788
789
790
791
792
793
794
795
796
Last Digit
0
1
2
3
4
5
6
7
8
9
諞諛謌謇謚諡謖謐謗謠
謳鞫謦謫謾謨譁譌譏譎
證譖譛譚譫
譟譬譯譴譽讀讌讎讒
讓讖讙讚谺豁谿豈豌豎
豐豕豢豬豸豺貂貉貅貊
貍貎貔豼貘戝貭貪貽貲
貳貮貶賈賁賤賣賚賽賺
賻贄贅贊贇贏贍贐齎贓
賍贔贖赧赭赱赳趁趙跂
趾趺跏跚跖跌跛跋跪跫
跟跣跼踈踉跿踝踞踐踟
蹂踵踰踴蹊
蹇蹉蹌蹐蹈蹙蹤蹠踪
蹣蹕蹶蹲蹼躁躇躅躄躋
躊躓躑躔躙躪躡躬躰軆
躱躾軅軈軋軛軣軼軻軫
軾輊輅輕輒輙輓輜輟輛
輌輦輳輻輹轅轂輾轌轉
轆轎轗轜轢轣轤辜辟辣
辭辯辷迚迥迢迪迯邇迴
逅迹迺逑逕逡逍逞逖逋
逧逶逵逹迸
遏遐遑遒逎遉逾遖遘
遞遨遯遶隨遲邂遽邁邀
邊邉邏邨邯邱邵郢郤扈
郛鄂鄒鄙鄲鄰酊酖酘酣
酥酩酳酲醋醉醂醢醫醯
醪醵醴醺釀釁釉釋釐釖
釟釡釛釼釵釶鈞釿鈔鈬
鈕鈑鉞鉗鉅鉉鉤鉈銕鈿
鉋鉐銜銖銓銛鉚鋏銹銷
鋩錏鋺鍄錮
錙錢錚錣錺錵錻鍜鍠
鍼鍮鍖鎰鎬鎭鎔鎹鏖鏗
鏨鏥鏘鏃鏝鏐鏈鏤鐚鐔
鐓鐃鐇鐐鐶鐫鐵鐡鐺鑁
鑒鑄鑛鑠鑢鑞鑪鈩鑰鑵
鑷鑽鑚鑼鑾钁鑿閂閇閊
閔閖閘閙閠閨閧閭閼閻
First Three
Digits
1
2
3
4
5
6
7
8
9
閹閾闊濶闃闍闌闕闔闖
關闡闥闢阡阨阮阯陂陌
陏陋陷陜陞
陝陟陦陲陬隍隘隕隗
險隧隱隲隰隴隶隸隹雎
雋雉雍襍雜霍雕雹霄霆
霈霓霎霑霏霖霙霤霪霰
霹霽霾靄靆靈靂靉靜靠
靤靦靨勒靫靱靹鞅靼鞁
靺鞆鞋鞏鞐鞜鞨鞦鞣鞳
鞴韃韆韈韋韜韭齏韲竟
韶韵頏頌頸頤頡頷頽顆
顏顋顫顯顰
顱顴顳颪颯颱颶飄飃
飆飩飫餃餉餒餔餘餡餝
餞餤餠餬餮餽餾饂饉饅
饐饋饑饒饌饕馗馘馥馭
馮馼駟駛駝駘駑駭駮駱
駲駻駸騁騏騅駢騙騫騷
驅驂驀驃騾驕驍驛驗驟
驢驥驤驩驫驪骭骰骼髀
髏髑髓體髞髟髢髣髦髯
髫髮髴髱髷
髻鬆鬘鬚鬟鬢鬣鬥鬧
鬨鬩鬪鬮鬯鬲魄魃魏魍
魎魑魘魴鮓鮃鮑鮖鮗鮟
鮠鮨鮴鯀鯊鮹鯆鯏鯑鯒
鯣鯢鯤鯔鯡鰺鯲鯱鯰鰕
鰔鰉鰓鰌鰆鰈鰒鰊鰄鰮
鰛鰥鰤鰡鰰鱇鰲鱆鰾鱚
鱠鱧鱶鱸鳧鳬鳰鴉鴈鳫
鴃鴆鴪鴦鶯鴣鴟鵄鴕鴒
鵁鴿鴾鵆鵈
鵝鵞鵤鵑鵐鵙鵲鶉鶇
鶫鵯鵺鶚鶤鶩鶲鷄鷁鶻
鶸鶺鷆鷏鷂鷙鷓鷸鷦鷭
鷯鷽鸚鸛鸞鹵鹹鹽麁麈
麋麌麒麕麑麝麥麩麸麪
麭靡黌黎黏黐黔黜點黝
黠黥黨黯黴黶黷黹黻黼
First Three
Digits
837
838
839
840
Last Digit
0
1
2
3
4
5
6
7
8
9
First Three
Digits
Last Digit
0
1
2
3
4
5
6
7
8
9
First Three
Digits
Last Digit
0
1
2
3
4
5
6
7
8
9
黽鼇鼈皷鼕鼡鼬鼾齊齒
齔齣齟齠齡齦齧齬齪齷
齲齶龕龜龠
堯槇遙瑤凜熙
Appendix
797
798
799
800
801
802
803
804
805
806
807
808
809
810
811
812
813
814
815
816
817
818
819
820
821
822
823
824
825
826
827
828
829
830
831
832
833
834
835
836
Last Digit
0
20
20-15
Pictogram List
Appendix
20
Note H Pictograms do not appear in e-mail or on incompatible SoftBank handsets.
Tip H Pictograms in 2 are animated.
20-16
Specifications
CSoftBank 812SH
CSoftBank 813SH
Weight
Approximately 105 g
Weight
Approximately 104 g
Continuous Talk Time
Approximately 150 minutes (3G)
Approximately 240 minutes (GSM)
Continuous Talk Time
Approximately 150 minutes (3G)
Approximately 240 minutes (GSM)
Continuous Standby
Time (handset closed)
Approximately 330 hours (3G)
Approximately 320 hours (GSM)
Continuous Standby
Time (handset closed)
Approximately 330 hours (3G)
Approximately 320 hours (GSM)
Continuous Video Call
Talk Time
Approximately 80 minutes
(with Internal Camera in use)
Continuous Video Call
Talk Time
-
Charging Time
(power off)
AC Charger: Approximately 150 minutes
In-Car Charger: Approximately 150 minutes
Charging Time
(power off)
AC Charger: Approximately 150 minutes
In-Car Charger: Approximately 150 minutes
Dimensions (W x H x D)
Approximately 49 x 97 x 17.6 mm
(handset closed, without protruding parts)
Dimensions (W x H x D)
Approximately 49 x 97 x 17.6 mm
(handset closed, without protruding parts)
Maximum Output
0.25 W (3G)
2.0 W (GSM)
Maximum Output
0.25 W (3G)
2.0 W (GSM)
^ Values above were calculated with battery installed.
^ Continuous Talk Time is an average measured with a new,
fully charged battery, with stable signals. Continuous Talk
Time may be less than half this value if signal is weak.
^ Continuous Standby Time is an average measured with a new,
fully charged battery, with handset closed without calls or
operations, in Standby with stable signals. Standby Time may
be less than half this value if handset is out-of-range or signal
is weak. Standby Time may vary by environment (battery
status, ambient temperature, etc.).
Appendix
^ Values above were calculated with battery installed.
20
20-17
^ Talk Time/Standby Time decrease with frequent use of
Display/Keypad backlights.
^ Talk Time/Standby Time may decrease when an
S! Application is active.
^ Talk Time/Standby Time decrease with handset use in poor
signal conditions (see P.1-13 "Battery Time").
^ Display employs precision technology, however, some pixels
may appear brighter/darker.
CAC Charger
Power Source
AC 100V-240V, 50/60 Hz
Power Consumption
12VA
Output Voltage/Current
DC 5.2V/650 mA
Charging Temperature
5]C to 35]C
Approximately 55 x 45 x 22 mm
Dimensions (W x H x D)
(without protruding parts, cord)
Cord Length
Appendix
20
20-18
Approximately 1.5m
CBattery
Voltage
3.7V
Battery Type
Lithium-ion
Capacity
820 mAh
Dimensions (W x H x D)
Approximately 44.5 x 4.5 x 33.7 mm
(without protruding parts)
Memory List
Messaging
1
2
Received Msg.
Approximately 5 MB or 1,000 messages
Drafts
Approximately 3 MB1
Sent Messages
Approximately 3 MB or 500 messages1
Unsent Messages
Approximately 3 MB1
Templates
Approximately 64 MB2
Drafts, Sent Messages and Unsent Messages share memory.
Shared with S! Appli Library and Data Folder.
S! Applications
S! Appli
*
Approximately 64 MB* (100 items) on handset
Shared with Templates folder and other folders in Data Folder.
Data Folder
Data Folder
*
Approximately 64 MB*
Shared with Templates folder and S! Appli Library.
Appendix
20
20-19
Index
Number
3D Pictogram ................................14-24
3D Pictogram Settings .................14-24
3G.....................................................2-16
A
Appendix
20
20-20
AC Charger......................................1-17
Accept Calls (S! Applications) ......16-8
Access WEB Link .............................7-7
Acquire Dictionary .........................9-19
Activation Time (S! Applications) ....16-6
Add Date..........................................11-8
Add Email Address...........................4-3
Add Frame (Photo Camera) ...........6-13
Add Member....................................19-6
Alarm Settings ................................12-3
Alarm Volume................................12-13
Alarms ...........................................12-11
Alarms (cancelling/reactivating)...12-14
All Calls ...........................................2-13
Alternative Image (Video Call).........5-6
Answer Phone...................................2-9
Answer Phone (Manner mode)........9-2
Answer Status...............................19-11
Anti Spam Measures ....................14-35
Any Key Answer ....................... 2-6, 9-2
Application Volume (S! Applications) ....16-7
Arrange Mail..................................14-11
Assign Ringtone (by Phone Book Category)....4-12
Assign Tone/Video .... 12-5, 12-9, 12-13
Assign Tone/Videos (by Phone Book entry)....4-5
Attach File .....................................14-10
Auth Info........................................15-21
Authentication ................................15-5
Authorisation Code .............10-3, 10-10
Auto (Network Settings).................2-16
Auto Add Code ...............................9-29
Auto Answer ...................................9-30
Auto Bookmark (E-Book)...............18-8
Auto Delete ...................................14-36
Auto Play File................................14-38
Auto Resend (Messaging) ...........14-34
Auto Save (mobile camera) ...........6-18
B
Background Colour........................7-14
Backlight (Display/Keypad) ...........9-13
Backlight (S! Applications)............16-7
Backlight (Video Call) ......................5-7
Backlight (Video Player) ................7-10
Backup ............................................11-6
Barcode (opening)........................12-21
Battery ....................................1-12, 1-16
Battery Strength ....................1-14, 1-15
Blink (S! Applications) ...................16-8
Blink (subtitles) ..............................7-15
Bluetooth Timeout..........................10-9
Bluetooth# ....................................... 10-2
Bookmarks...........................15-9, 15-10
Bookmarks (editing) .................... 15-10
BookSurfing# ...........................8-7, 18-9
Brightness (Backlight)................... 9-13
By a-ka-sa-ta-na (Phone Book) ....... 4-9
By Category (Phone Book).............. 4-9
By Reading (Phone Book) ............... 4-9
C
Cache ............................................ 15-21
Cache Memory................................ 15-2
Calculator...................................... 12-15
Calendar (schedule)....................... 12-2
Calendar (Standby) .......................... 9-5
Calendar Format............................. 9-19
Call Barring..................................... 13-7
Call Costs........................................ 2-15
Call Forwarding .............................. 13-2
Call Settings ................................... 9-29
Call Time Counter .......................... 9-30
Call Timers...................................... 2-14
Call Voicemail ................................. 13-4
Call Waiting..................................... 13-5
Caller Display (External Display) ..... 9-14
Caller ID (sending/blocking) ...2-2, 13-10
Calls & Alarms (S! Applications) ..... 16-8
Calls (ending) ................................... 2-2
Calls (placing)............................2-2, 5-3
Cookies ..............................15-21, 15-22
Copy (text).......................................3-13
Copy Text (Internet)......................15-19
Cost Units .......................................2-15
Countdown Timer.........................12-25
Country Codes ...............................9-29
Create QR Code............................12-22
Crop .................................................7-11
Cursor..............................................15-6
Custom Screens ...............................9-9
Cut (images)....................................8-12
Cut (text)..........................................3-13
D
Data Folder........................................8-2
Date Format ....................................9-18
Datum On/Off ................................10-16
Daylight Saving ...................9-18, 12-14
Default Image (Video Call) ...............5-6
Default View (Calendar) .................12-2
Delete (Server Mail)......................14-22
Delete NG (Messaging) ................14-16
Delete Posterior..............................3-14
Delivery Report...... 14-15, 14-19, 14-35
Desktop Holder...............................1-18
Details (Data Folder) ........................8-6
Details (Internet) ...........................15-20
Details (Media Player) ......................7-7
Details (Messaging) .. 14-18, 14-22, 14-30
Details (S! Applications) ................16-5
Device Name ...................................10-9
Dial New Number (Conference Call) ... 13-6
Dial Number (Display)...................... 9-5
Dialled Numbers......................2-4, 2-13
Digital Zoom ..................................... 6-4
Disable DTMF ................................. 2-12
Display Call Cost............................ 9-30
Display Date & Time
(External Display)........................... 9-13
Display Indicators (Photo Camera)..... 6-15
Display indicators ............................ 1-9
Display Position ............................. 7-13
Display Saving................................ 9-13
Display Settings ............................... 9-3
Display Size (streaming).............. 15-13
Display Size (Video Camera)......... 6-16
Display Size (Video Player) ........... 7-10
Document Viewer ......................... 12-18
Download to.................................. 15-21
Downloads .................................... 15-20
DPOF ............................................... 11-7
Drafts (Messaging)....................... 14-18
Duration (Calendar)........................ 12-5
Duration (External Display) ........... 9-13
Duration (subtitles) ........................ 7-13
Duration (Tasks) ............................. 12-9
E
Earpiece Volume.............2-11, 5-4, 9-17
E-Book............................................. 18-5
Edit Category................................ 12-26
Emoticons......................................... 3-9
Appendix
Camera Picture (Video Call) .... 5-4, 5-6
Category Control (Phone Book) ... 4-11, 4-12
Centre Access Code ......................1-27
Change List View (Data Folder) ......8-4
Change NW Password..................13-10
Change PIN .....................................9-25
Change to Bcc ................................14-9
Change to Cc ..................................14-9
Change to To...................................14-9
Character Code List .....................20-10
Character Codes (entering) .............3-9
Character entry modes ....................3-2
Char-code (Internet) .....................15-20
Char-code (Messaging)................14-37
Charging time ..... 1-12, 1-17, 1-18, 1-19
Check Settings................................11-8
Chng Handset Code .......................9-28
Circle Talk......................................19-13
Circle Talk (System Sounds) .........9-16
Circle Talk member list.... 19-15, 19-17, 19-18
Clear All (Speed Dial) .....................4-14
Clear Costs .....................................2-15
Clear Counter..................................2-14
Clock Type (External Display) .......9-13
Clock/Calendar .................................9-5
Conductor Setting
(Face Recognition) .........................9-23
Conference Call ..............................13-6
Connection Setting ........................19-9
Contact Groups ..............................4-12
Continuous Shoot ..........................6-12
20
20-21
Enable DTMF...................................2-12
English ..............................................9-9
Enter URL ................. 15-4, 15-14, 15-19
Entertainment .................................18-1
Event Light......................................9-16
Expenses Memo ...........................12-25
Expiry Time (Messaging) ..... 14-15, 14-36
Exposure (mobile camera) ............6-16
Exposure (Video Call) ......................5-6
External Display..............................1-11
External Display Settings ..............9-13
Appendix
20
20-22
Font Weight.......................................9-4
For All Pictures (DPOF) .................11-8
Format Card (Memory Card)..........11-4
Forward NG (Messaging).............14-16
Frame (Picture Editor)....................8-16
Free Text (Picture Editor)...............8-14
Function List...................................20-2
G
F
Get Latest Contents (S! Cast) .......18-3
Go to ................................................12-6
Greeting Message ............................9-5
GSM .................................................2-16
Face Arrange (Picture Editor)........8-14
Face Recognition............................9-20
Familiar Usability............................9-12
Fast forward (Media Player).............7-6
Fast rewind (Media Player) ..............7-6
Feeling Mail....................... 14-15, 14-20
FeliCa...............................................17-2
File Format ......................................8-16
File Size (Picture Editor) ................8-16
Fixed Dialling No. (Locks)..............9-26
Flash#.................................................8-2
Flash# Restriction.........................15-22
Flash# Ringtones ..............................8-2
Font Colour (subtitles) ...................7-14
Font Size ................................. 3-15, 9-4
Font Size (E-Book) .........................18-7
Font Size (Internet).......................15-20
Font Size (subtitles) .......................7-13
Handset Closed ..............................1-11
Handset Code .................................1-27
Handset Open .................................1-11
Handset Security ............................9-20
Handsfree devices (connecting) ...10-8
Handsfree Setting...........................10-9
Help (Internet) .................................15-5
Help (mobile camera) .......................6-4
Help (Video Call)...............................5-6
Highlight..........................................7-15
High-speed infrared .....................10-12
Hiragana to Katakana/
Alphanumerics Conversion...........3-11
History (Internet) ..... 15-4, 15-19, 15-20
Hold (Video Call)...............................5-5
Hold (Voice Call) .............................2-11
H
Hold Guidance Pict .......................... 5-7
Hot Status ....................................... 19-4
Hot Status Notification .................. 19-5
Hot Status Notification List ......... 19-12
I
IC Card ............................................ 17-2
IC Card Lock ................................... 17-4
IC Card Status ................................ 17-4
Idle Screen Info. ........................... 14-20
In-Car Charger ................................ 1-19
Incoming calls (answering) ......2-6, 5-3
Incoming Calls (Call Barring)........ 13-8
Incoming Calls (Circle Talk) ........ 19-18
Incoming calls (Video Call) ............. 5-3
Incoming calls (Voice Call) .............. 2-6
Incoming Picture (Video Call) ......... 5-6
Index Print....................................... 11-8
Information ....................................... 2-7
Initialized Browser ....................... 15-21
Input Memory.................................. 15-8
Interface Settings ........................... 17-7
Internal Antenna............................... 1-8
Internal Camera/External Camera ... 6-17
International calls............................. 2-5
Internet Content ............................. 15-2
Int'l Calling ...................................... 9-29
Int'l Prefix ........................................ 9-29
IP Service Setting........................... 9-26
J
Jump to Top/Bottom ...................... 15-5
K
Keep Auth Info ..............................15-22
Key Assignments (text entry)..........3-3
Keypad Lock ...................................1-22
Keypad Tones .................................9-16
L
Language ..........................................9-9
Last Played..................... 7-6, 7-8, 15-14
Latest Information (Near Chat)....19-20
Lifestyle-Appli.................................17-2
Light...............................................14-20
Live Monitor ..................................15-14
Location Info .................................10-15
Location Property.........................10-16
Look Up Word (E-Book) .................18-8
Loudspeaker (Circle Talk) ............19-18
Loudspeaker (Video Call) ........ 5-5, 5-7
Loudspeaker (Voice Call)...............2-11
M
Mobile camera .................................. 6-2
Mode Settings................................... 9-2
Money Converter (Calculator) ..... 12-15
Move to Card (S! Applications) ..... 16-5
Multi Job ......................................... 1-26
Multi Selector....................................... ii
Music Player ..................................... 7-4
Music Search .................................... 7-3
Mute..........................................2-11, 5-4
Mute Microphone ............................. 5-7
My Details ..............................1-21, 4-19
My Device Details (Bluetooth#) ..... 10-9
My Folders .................................... 14-32
My Pictograms.................................. 8-2
My Status ........................................ 19-8
N
Near Chat ...................................... 19-19
Network
(adding, editing & deleting)......... 10-15
Network Info.................................. 10-15
Network Password ..............1-27, 13-10
Network S! Applications................ 16-2
Network Settings .......................... 10-14
O
Offline Mode ................................... 2-20
One Hiragana Predictive Entry ..... 3-12
One Hiragana Word Call ................ 3-12
One-Hiragana Conversion ............. 3-11
Appendix
Mail address
(customising handset address) ....14-5
Mailbox Volume ............................14-22
Main Menu .......................................1-23
Manner Mode ..................................2-18
Manual Update (Weather Indicator) ....18-5
Manufacture Number....................15-21
Mass Storage ..................................11-9
Master Reset (handset settings) ...9-28
Max Cost .........................................2-15
Memory All Clear ............................16-8
Memory Card ..................................11-2
Memory Status (Data Folder) ..........8-2
Memory Status (Memory Card) .....11-7
Memory Status (Messaging)..........14-3
Memory Status (Phone Book) .........4-8
Memory Status (S! Appli Library) ....16-2
Memory Status (schedule).............12-6
Memory Status (Tasks) ................12-10
Merge Panorama (Picture Editor) ....8-17
Message Centre............................14-37
Message DL ..................................14-37
Message List View..........................14-4
Message Notice ............................14-36
Message Notice (S! Applications) ....16-8
Message Priority (S! Applications) ....16-8
Messages (External Display).........9-13
Messaging.......................................14-2
Messaging
(checking messages) .......14-18, 14-23
Messaging
(creating & sending messages) ....14-7
Messaging (deleting messages) ....14-29
Messaging (using attachments) ....14-30
Messaging Settings......................14-15
Microphone .......................................1-8
Microphone (Video Camera)..........6-16
Minute Minder .................................9-30
Mirror Image......................................5-6
Missed Call Notification.................13-5
20
20-23
Optional Predictive Functions
(text entry).......................................3-13
Outgoing Calls (Call Barring) ........13-8
Outgoing Picture (Video Call) .........5-7
Out-of-range............................ 1-9, 20-6
P
Appendix
20
20-24
Packet Lock (Locks) .......................9-27
Packet transmission volume .........2-14
Pager Code........................................3-9
Pager Code List ..............................3-10
Paired Devices ................................10-4
Password Lock ...............................9-25
Paste (Picture Editor) .....................8-14
Paste (text entry) ............................3-14
Payphone (Call Barring).................13-9
PC Site Browser............................15-18
Permission ......................................16-7
Phone Book ......................................4-2
Phone Book (deleting entries) ......4-11
Phone Book (editing) .....................4-10
Phone Book (quoting information)...3-14
Phone Book (saving)........................4-3
Phone Book (searching) ..................4-9
Phone Book Lock ...........................9-26
Phone Help....................................12-27
Phonetic Conversion......................3-11
Photo Camera Mode.........................6-5
Pictogram List ..............................20-16
Pictograms........................................3-8
Picture (Phone Book).......................4-6
Picture Appearance (Messaging) ..14-38
Picture Editor..................................8-12
Picture Quality (Photo Camera) ....6-16
Picture Size (Photo Camera) .........6-16
PIN ............................................1-6, 9-24
PIN Entry .........................................9-24
Play (Voice Memo) ..........................2-12
Playback Pattern (Music Player) .....7-7
Playback Pattern (Video Player)....7-10
Playlist (Media Player)....................7-15
Pointer .............................................15-5
Portrait/Macro Selector....................1-8
Power Off Sound ............................9-17
Power On Sound.............................9-17
Power on/off....................................1-20
Predictive (conversion)....................3-6
Previous Usage (conversion) ..........3-6
Priority (Messaging).....................14-16
Properties (S! Applications) ..........16-3
Q
Quick Conversion...........................3-12
Quick Operations ...........................1-25
Quiz (Messaging)..........................14-16
R
Received Calls .........................2-8, 2-13
Received MsView ...........................14-4
Record Time (Voice Recorder) ....12-16
Record Time/Size (Video Camera)...6-17
Rejected Numbers..........................13-9
Reload ........................................... 15-19
Remote Forward........................... 14-22
Remote FwAction......................... 14-16
Remote Monitor................................ 5-8
Repeat (Calendar) .......................... 12-6
Reply ............................................. 14-25
Reply All........................................ 14-25
Reply Request .............................. 14-16
Reply To Settings ..............14-16, 14-37
Report (Face Recognition) ............ 9-24
Request Reply .............................. 19-11
Reset (Mode Settings) ..................... 9-2
Reset (subtitles) ............................. 7-15
Reset All.......................................... 9-28
Reset Learning ............................... 3-13
Reset Settings (DPOF)................... 11-8
Reset Settings (handset settings) ... 9-28
Reset Settings (S! Applications)... 16-7
Resize (Picture Editor)................... 8-12
Restore............................................ 11-6
Retouch (Picture Editor)................ 8-13
Retrieve Mail List.......................... 14-22
Retrieve New Msg......................... 14-19
Retrieve NW Info..................1-20, 10-15
Ringer Output ................................. 9-17
Ringtone (Feeling Mail)................ 14-21
Ringtone/videos (Phone Settings) ... 9-14
Roaming.......................................... 2-16
Root Certificates .......................... 15-22
Rotate .............................................. 8-16
S
Send URL .............................15-4, 15-20
Sending Progress ........................ 14-34
Sent Messages ............................... 14-2
Sent MsView ................................... 14-4
Server Mail Box ............................ 14-22
Set as Ring Video........................... 8-10
Set as Ringtone .............................. 8-11
Set as Wallpaper............................. 8-10
Set Auto Delete............................. 14-16
Set Auto Play File ......................... 14-17
Set Colour ....................................... 12-2
Set Date/Time ................................. 9-18
Set Frequency (S! Address Book) ... 4-18
Set Holiday...................................... 12-3
Set Low Priority.............................. 3-13
Set Sent Cancel ............................ 14-27
Set Sync Mode (S! Address Book) ... 4-18
Set Time Zone......................9-18, 12-14
Set to Default (S! Applications) .... 16-8
Set to Default (S! FeliCa) ............... 17-8
Set to Default (shortcuts) .............. 1-24
Settings (E-Book) ........................... 18-7
Settings (S! Applications) ............. 16-7
Sharp Space Town ......................... 15-9
Shortcuts ........................................ 1-24
Show Call Notice (S! Applications)... 16-8
Show Indicators................................ 9-5
Show My Number ......................... 13-10
Show Operator Name....................... 9-5
Show Secret Data........................... 9-27
Shutter Sound ................................ 6-15
Appendix
S! Address Book.............................4-15
S! Appli Library...............................16-2
S! Appli Request...........................19-20
S! Applications ...............................16-2
S! Applications (deleting) ..............16-5
S! Applications (downloading)......16-3
S! Applications (exiting or pausing) ...16-4
S! Applications (resetting).............16-8
S! Applications (resuming)............16-4
S! Applications (starting)...............16-4
S! Cast .............................................18-2
S! FeliCa ..........................................17-2
S! Loop ............................................19-3
S! Mail..............................................14-2
S! Mail
(retrieving remaining portion) .....14-21
S! Mail Settings.............................14-37
S! Town............................................19-2
Save Address (Messaging)..........14-27
Save and Send ................................6-10
Save Items.....................................15-11
Save Pictures to..............................6-18
Save Recording To .......................12-17
Save to Data Folder ......................14-30
Save to Phone Book (Internet) ....15-12
Save to Phone Book (Messaging) ...14-27
Save Videos to ................................6-18
Saved Pages ...................................15-9
Saved Pages (editing) ..................15-11
Scan Barcode ...............................12-19
Scan Code (during text entry) .....12-20
Scan Text.......................................12-24
Scanned Results (Barcode).........12-22
Scene...............................................6-16
Screensaver ....................................16-6
Script Settings ..............................15-22
Scroll bar.........................................15-6
Scroll Unit ..........................14-36, 15-20
Scrolling ..........................................7-14
SD Local Contents .........................11-7
SD VIDEO ........................................6-11
Search ...........................................15-19
Search for Devices .........................10-3
Secret (Phone Book) ........................4-7
Secret (schedule) ...........................12-6
Secret (Tasks) .................................12-9
Secret Folder (Messaging) ..........14-36
Secure Area
(opening secure page) ...................15-5
Secure Prompt..............................15-22
Security Codes ...............................1-27
Security Level (Face Recognition)....9-24
Security Settings (Internet) .........15-21
Select Network..............................10-14
Self-timer.........................................6-11
Send All (Bluetooth#) .....................10-7
Send All (Infrared) ........................10-13
Send File Settings ........................14-38
Send Referer .................................15-22
Send Reservation .........................14-17
20
20-25
Appendix
20
20-26
Side Keys .............................................ii
Signature Settings (Messaging) ...14-35
Simple Menu ...................................2-21
Slide Show ........................................8-6
Slides.............................................14-23
Small Light ......................................1-15
SMS..................................................14-2
SMS Settings ................................14-36
Snooze (Alarm) .............................12-13
Soft Keys .........................................1-23
Software Update .............................20-8
Sort (Data Folder) .............................8-4
Sort (Media Player) ................... 7-6, 7-9
Sort (Messaging) ............................14-4
Sound Effects ...................................7-7
Sounds & Alerts .............................9-14
Speed Dial List................................4-13
Speed Mail.....................................14-33
Split Picture ....................................8-18
SSL ..................................................15-3
Stamp (Picture Editor) ...................8-14
Stamp (schedule)............................12-3
Standby ...........................................1-20
Standby Window...................... 9-6,19-9
Status Light.....................................9-16
Status Setting ...............................19-12
Stopwatch .....................................12-24
Streaming......................................15-12
Subtitle (Video Player) ...................7-12
SVG files............................................8-7
Swap Calls ......................................13-6
Switch Images ..................................5-5
Switch to Read (Messaging)........14-25
Switch to Unread (Messaging) ....14-25
Symbols ............................................3-8
Sync Settings (Phone Book) .........4-17
Synchronisation (Phone Book)...4-15, 4-18
Synchronisation (S! Applications)...16-3
System Graphics ..............................9-3
System Sounds ..............................9-16
T
Tasks ...............................................12-8
Templates......................................14-14
Text Entry (Editing Characters).....3-13
Text Entry (Entering Characters) ....3-5
Text Orientation (E-Book) ..............18-7
Text Templates.....................3-15, 12-26
Time Format....................................9-18
Time Search ......................................7-9
Totals .............................................12-26
Touch Tones....................................2-11
Transfer Audio (Video Call) .............5-5
V
Via Infrared ................................... 10-12
Vibration (Alarm) .......................... 12-13
Vibration (Phone Settings) ............ 9-15
Vibration (S! Applications) ............ 16-8
Vibration Pattern .......................... 14-20
Video Call.......................................... 5-2
Video Call
(answering with voice only) ............ 5-3
Video Call Settings........................... 5-6
Video Camera Mode......................... 6-8
Video Encode ................................. 6-17
Video Quality (Video Camera)....... 6-16
View Log (Phone Book) ................. 4-19
Visibility .......................................... 10-4
Voice Memo..................................... 2-12
Voice Recorder ............................. 12-16
Voicemail......................................... 13-4
Volume (Answer Phone) ................ 2-10
Volume (Earpiece Volume) ...2-11, 5-4, 9-17
Volume (handset functions) .......... 9-14
Volume (Media Player) ..................... 7-6
U
Unavailable (Call Barring)..............13-9
Unknown (Call Barring) .................13-9
Unsent Messages ...........................14-2
Uploading Files.............................15-20
User Dictionary...............................9-19
USIM Card .........................................1-4
USIM PINs .........................................1-6
W
Wallpaper .......................................... 9-3
Warning Message......................... 15-21
Warning Tone.................................. 9-17
Weather Indicator ........................... 18-4
Web Access (Custom Screen) ...... 9-11
Web Link Setting ............................ 7-10
Withheld (Call Barring) ..................13-9
World Clock...................................12-14
Y
Yahoo! Keitai...................................15-2
Yahoo! Keitai (accessing) ..............15-3
Appendix
20
20-27
Warranty & After-Sales Services
CWarranty
Warranty is provided when you purchase handset.
^ Check the name of distributor and date of purchase.
^ Read through contents and keep in a safe place.
^ The warranty term is described in the warranty.
CAfter-Sales Services
See P.20-4 "Troubleshooting" before contacting SoftBank for
service or repairs. If you cannot find solutions or solve
problems, contact SoftBank Customer Centre, Customer
Assistance (see P.20-29) in your subscription area and
provide a detailed description of the problem.
^ Repairs within warranty are performed under terms and
conditions described.
^ Out of warranty, possible repairs are performed upon
request at subscriber expense.
For other services, contact the distributor, the nearest
SoftBank shop or SoftBank Customer Centre, General
Information (see P.20-29). Replacement parts are available
for 6 years after termination of production.
Appendix
20
20-28
Note H ^ SoftBank is not liable for any damages resulting from
use of this product.
^ SoftBank is not liable for any damages resulting from
accidental loss/alteration of handset data. Keep a copy
of Phone Book entries, etc. in a separate place.
^ Disassembling or modifying handset may violate the
Radio Law. Modified handset will not be repaired.
Customer Service
If you have questions about SoftBank handsets or services, please call General Information. For repairs, please call
Customer Assistance.
SoftBank Customer Centres
SoftBank International Call Centre
From a SoftBank handset, dial toll free at 157 for
General Information or 113 for Customer Assistance
From outside Japan, dial +81-3-5351-3491
(International charges will apply.)
CCall these numbers toll free from landlines.
Subscription Area
Service Centre
Phone Number
Hokkaido, Aomori, Akita, Iwate, Yamagata, Miyagi, Fukushima,
Niigata, Tokyo, Kanagawa, Chiba, Saitama, Ibaraki, Tochigi, Gunma,
Yamanashi, Nagano, Toyama, Ishikawa, Fukui
General Information
G0088-240-157
Customer Assistance
G0088-240-113
Aichi, Gifu, Mie, Shizuoka
Osaka, Hyogo, Kyoto, Nara, Shiga, Wakayama
G0088-241-157
G0088-241-113
General Information
G0088-242-157
Customer Assistance
G0088-242-113
General Information
G0088-250-157
Customer Assistance
G0088-250-113
Appendix
Hiroshima, Okayama, Yamaguchi, Tottori, Shimane, Tokushima,
Kagawa, Ehime, Kochi, Fukuoka, Saga, Nagasaki, Oita, Kumamoto,
Miyazaki, Kagoshima, Okinawa
General Information
Customer Assistance
20
20-29
SoftBank 812SH/813SH Instruction Manual
March 2007, First Edition
SOFTBANK MOBILE Corp.
For additional information, please visit a SoftBank shop.
Model: SoftBank 812SH
813SH
Manufacturer: SHARP CORPORATION
Please help the mobile industry maintain high environmental standards. Recycle your old
handsets, batteries and charger units (all manufacturers and brands). Before you recycle, please
remember these important points:
^ Handsets, batteries and chargers submitted for recycling cannot be returned.
^ Always erase all data recorded on old handsets (Phone Book entries, call records, mail, etc.) before recycling.
Mind your mobile manners when carrying a handset.