1
SubliJet IQ™/ChromaBlastTM
Hybrid - Dual Decoration System
Getting Started Guide
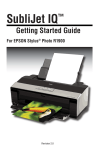
For EPSON Stylus® Photo R1800
Revision 2.0
SubliJet IQ™/ChromaBlast
TM
Getting Started Guide
for the
EPSON Stylus® Photo R1800
© Copyright 2007, Sawgrass Technologies, Inc., Revision 2.0 February 2008. All
rights reserved. Printed in the United States of America.
SubliJet® is a registered trademark of Sawgrass Technologies, Inc. SubliJet IQ™
is a registered trademark of Sawgrass Technologies, Inc. PowerDriver Pro is a
registered trademark of Sawgrass Technologies inc. Epson® and Stylus® are
registered trademarks of Seiko Epson Corporation.
ChromaBlastTM, ChromaBlast™ inks, ChromaBlast Driver™, and ColorSure™
are trademarks of Sawgrass Technologies, Inc.
Other trademarks and registered trademarks are the property of their respective
owners.
No part of this manual may be reproduced or transmitted in any form by any
means without the prior written consent of Sawgrass Technologies, Inc.
Information in this manual is subject to change without notice and does not
represent a commitment on the part of Sawgrass Technologies, Inc.
IMPORTANT – READ CAREFULLY:
This Process License Agreement (“PLA”) is a legal agreement between you and Sawgrass Technologies,
Inc. (“Sawgrass”). By installing the SubliJet IQ™ ink in your printer, or otherwise using the Sawgrass
SubliJet IQ™ ink, you agree to be bound by the terms of this PLA. If you do not agree to the terms of this
PLA, Sawgrass is unwilling to license the process of using the SubliJet IQ™ ink to you. In such event, you
may not use the SubliJet IQ™ink, and you should promptly contact your supplier for instructions on return
of the unopened package.
The process of using the SubliJet IQ™ ink is protected by U.S. and foreign patents. Sawgrass will provide a
complete list of the relevant patents upon request. The use of the SubliJet IQ™ ink to practice the patented
process is permitted by this license.
GRANT OF LICENSE This PLA grants you the following rights: You may install and use the SubliJet IQ™ ink
packaged herewith in your EPSON printer to practice the printing process described in U.S. Patent No. 5,488,907.
The use of any ink, dye, or pigment to practice the Sawgrass Process, other than a SubliJet IQ™ ink purchased
from Sawgrass or its authorized distributor accompanied by a PLA, is not a licensed use of the Sawgrass
Process. No rights to use the Sawgrass Process, except those specified herein, are granted, and no rights to use
any other process, product, software, or hardware developed or sold by Sawgrass are granted or implied hereby.
LIMITATIONS ON REVERSE ENGINEERING You agree that you will not attempt to reverse engineer, reproduce,
or deformulate the SubliJet IQ™ ink. You agree that you will not attempt to reverse engineer, reproduce or
deformulate the ChromaBlast™ ink.
PATENTS AND COPYRIGHTS Sawgrass owns multiple U.S. and foreign patents which apply to the Sawgrass
Process and/or the SubliJet IQ™ ink or its use. All patents in and to the SubliJet® ink and the method of using the
SubliJet IQ™ ink are owned by Sawgrass Technologies, Inc. You may not copy the printed materials
accompanying the SubliJet IQ™ ink. All rights not specifically granted under this PLA are reserved by Sawgrass
Technologies, Inc. Sawgrass owns multiple U.S. and foreign patents which may apply to the Sawgrass Process
and/or the use of ChromaBlast™ ink. All patents in and to the method of using ChromaBlast™ ink are owned by
Sawgrass Technologies, Inc. You may not copy the printed materials accompanying the ChromaBlast™ ink. All
rights not specifically granted under this PLA are reserved by Sawgrass Technologies, Inc.
Made In U.S.A.
CAUTION:
• For best printing results, use the ink within six months of purchase. Please refer to the individual ink
bag/cartridge for the specific ink expiration date.
•
Keep out of reach of children.
•
Do not expose ink to temperatures above 100º F or below 40º F.
•
Keep ink out of direct sunshine.
Sawgrass Technologies, Inc. agrees to replace any defective ink within a reasonable time, which shall be
Sawgrass’ sole responsibility for errors or defects in these goods.
THERE ARE NO OTHER WARRANTIES, EXPRESSED OR IMPLIED, INCLUDING, BUT NOT LIMITED TO,
ANY IMPLIED WARRANTY OF MERCHANTABILITY OR ANY IMPLIED WARRANTY OF FITNESS FOR A
PARTICULAR PURPOSE. SAWGRASS SHALL NOT BE LIABLE FOR LOSS OF PROFIT OR OTHER
ECONOMIC LOSS, OR FOR INDIRECT, SPECIAL, CONSEQUENTIAL OR OTHER SIMILAR DAMAGES.
END-USER LICENSE AGREEMENT FOR SAWGRASS SOFTWARE-
PowerDriver IQ®, PowerDriver XG®, PowerDriver Lite®, PowerDriver
R1800 IQ ® PowerDriverSupraXG8 and ChromaBlast Driver™
IMPORTANT-READ CAREFULLY: This Sawgrass Technologies Inc. End-User License Agreement ("EULA") is a legal agreement
between you (either an individual or a single entity) and Sawgrass Technologies, Inc for the Sawgrass software product identified
above, which includes computer software and may include associated media, printed materials, and "online" or electronic
documentation ("SOFTWARE PRODUCT"). By installing, copying, or otherwise using the SOFTWARE PRODUCT, you agree to
be bound by the terms of this EULA. If you do not agree to the terms of this EULA, do not install or use the SOFTWARE
PRODUCT.
Software PRODUCT LICENSE
Copyright laws and international copyright treaties, as well as other intellectual property laws and treaties protect the SOFTWARE
PRODUCT. The SOFTWARE PRODUCT is licensed, not sold. The title to, and ownership of, this SOFTWARE PRODUCT
remains with Sawgrass Technologies, Inc. (Sawgrass).
GRANT OF LICENSE. This EULA grants you the following rights:
•
•
•
•
•
•
•
•
This license is provided to you for your use according to the terms hereof. You may install and use the SOFTWARE
PRODUCT packaged herewith to practice the printing process described in U.S. Patent No. 5,488,907 (the "Sawgrass
Process"). The use of any ink, dye or pigment to practice the Sawgrass Process, other than a SubliJet ink which is purchased
from Sawgrass or its authorized distributor, is not a licensed use of the SOFTWARE PRODUCT. You agree not to use the
SOFTWARE PRODUCT for any other purpose or in any process except as expressly permitted hereby.
This license is provided to you for your use according to the terms hereof. You may install and use the SOFTWARE
PRODUCT packaged herewith to practice the printing process described in U.S. Patent No. 6,341,856 (the "Sawgrass
Process"). The use of any ink, dye or pigment to practice the Sawgrass Process, other than a ChromaBlast™ ink which is
purchased from Sawgrass or its authorized distributor, is not a licensed use of the SOFTWARE PRODUCT. You agree not to
use the SOFTWARE PRODUCT for any other purpose or in any process except as expressly permitted hereby.
Not for Resale. You may not sell, or otherwise transfer for value, the SOFTWARE PRODUCT.
No Reverse Engineering, Decompilation, Copying or Disassembly. You may not reverse engineer, decompile, copy or
disassemble the SOFTWARE PRODUCT.
No Rental. You may not rent, lease, or lend the SOFTWARE PRODUCT.
Support Services. Sawgrass Technologies, Inc. may provide you with support services related to the SOFTWARE
PRODUCT ("Support Services"). Use of Support Services is governed by the Sawgrass policies and programs described
in the user manual, in "online" documentation, and/or in other Sawgrass-provided materials. Any supplemental software
code provided to you as part of the Support Services shall be considered part of the SOFTWARE PRODUCT and subject
to the terms and conditions of this EULA. With respect to technical information you provide to Sawgrass as part of the
Support Services, Sawgrass may use such information for its business purposes, including for product support and
development. Sawgrass will not utilize such technical information in a form that personally identifies you.
No Assignment or Sublicense. You may not assign or sublicense the rights granted hereby.
Termination. Without prejudice to any other rights, Sawgrass may terminate this EULA if you fail to comply with the terms
and conditions of this EULA. In the event of termination, you must destroy all copies of the SOFTWARE PRODUCT and
all of its component parts.
SubliJet IQ®,PowerDriver IQ®, PowerDriver Pro®, PowerDriver XG®, PowerDriver R1800 IQ ® and
PowerDriverSupraXG8, are registered trademarks of Sawgrass Technologies, Inc. ColorSure™ is a
trademark of Sawgrass Technologies, Inc. ChromaBlast™ ink, ChromaBlast™ media, ChromaBlast
Driver™, and Color Sure™ are trademarks of Sawgrass Technologies, Inc.
General Notice: Other product names used herein are for identification purposes only and may be
trademarks of their respective owners. Sawgrass Technologies, Inc. disclaims any and all rights in
those marks.
COPYRIGHT. All title and copyrights in and to the SOFTWARE PRODUCT (including but not limited to any images, photographs,
animations, video, audio, music, text, and "applets" incorporated into the SOFTWARE PRODUCT), the accompanying printed
materials, and any copies of the SOFTWARE PRODUCT are owned by Sawgrass Technologies Inc. or its suppliers. Copyright
laws and international treaty provisions protect the SOFTWARE PRODUCT. Therefore, you must treat the SOFTWARE
PRODUCT like any other copyrighted material, except that you may install the SOFTWARE PRODUCT on a computer for the uses
permitted hereby. You may not copy the printed materials accompanying the SOFTWARE PRODUCT. You may not loan, rent,
lease, or otherwise transfer the other medium to another user, except as part of the permanent transfer (as provided above) of the
SOFTWARE PRODUCT.
U.S. GOVERNMENT RESTRICTED RIGHTS. The SOFTWARE PRODUCT and documentation are provided with RESTRICTED
RIGHTS. Use, duplication, or disclosure by the Government is subject to restrictions as set forth in subparagraph (c)(1)(ii) of the
Rights in Technical Data and Computer Software clause at DFARS 252.227-7013 or subparagraphs (c)(1) and (2) of the
Commercial Computer Software-Restricted Rights at 48 CFR 52.227-19, as applicable.
MISCELLANEOUS
a. If you acquired this product in the United States, this EULA is governed by the laws of the State of South Carolina. In the event
of any dispute arising under this license or from the use of the SOFTWARE PRODUCT, each party irrevocably agrees to the
jurisdiction of the United States District Court for the District of South Carolina, Charleston Division.
b. If you acquired this product in Canada, this EULA is governed by the laws of the Province of Ontario, Canada. In the event of
any dispute arising under this license or from the use of the SOFTWARE PRODUCT, each party irrevocably agrees to the
jurisdiction of the courts of the Province of Ontario and further agrees to commence any litigation which may arise hereunder in the
courts located in the Judicial District of York, Province of Ontario.
c. If this product was acquired outside the United States, then local law may apply.
LIMITED WARRANTY. Sawgrass warrants that (a) the SOFTWARE PRODUCT will perform substantially in accordance with the
accompanying written materials for a period of thirty (30) days from the date of receipt, and (b) any Support Services provided by
Sawgrass shall be substantially as described in applicable written materials provided to you by Sawgrass, and Sawgrass support
engineers will make commercially reasonable efforts to solve any problem issues. Some states and jurisdictions do not allow
limitations on duration of an implied warranty, so the above limitation may not apply to you. To the extent allowed by applicable
law, implied warranties on the SOFTWARE PRODUCT, if any, are limited to thirty (30) days.
CUSTOMER REMEDIES. Sawgrass' and its suppliers' entire liability and your exclusive remedy shall be, at Sawgrass' option,
either (a) return of the price paid, if any, or (b) repair or replacement of the SOFTWARE PRODUCT that does not meet Sawgrass'
Limited Warranty and which is returned to Sawgrass with a copy of your receipt. This Limited Warranty is void if failure of the
SOFTWARE PRODUCT has resulted from accident, abuse, or misapplication. Any replacement SOFTWARE PRODUCT will be
warranted for the remainder of the original warranty period or thirty (30) days, whichever is longer. Outside the United States,
neither these remedies nor any product support services offered by Sawgrass are available without proof of purchase from an
authorized international source.
NO OTHER WARRANTIES. To the maximum extent permitted by applicable law, Sawgrass and its suppliers disclaim all other
warranties and conditions, either express or implied, including, but not limited to, implied warranties of merchantability, fitness for a
particular purpose, title, and non-infringement, with regard to the SOFTWARE PRODUCT, and the provision of or failure to provide
Support Services. This limited warranty gives you specific legal rights. You may have others, which vary from state/jurisdiction to
state/jurisdiction.
LIMITATION OF LIABILITY. To the maximum extent permitted by applicable law, in no event shall Sawgrass or its suppliers be
liable for any special, incidental, indirect, or consequential damages whatsoever (including, without limitation, damages for loss of
business profits, business interruption, loss of business information, or any other pecuniary loss) arising out of the use of or
inability to use the SOFTWARE PRODUCT or the provision of or failure to provide Support Services, even if Sawgrass has been
advised of the possibility of such damages. In any case, Sawgrass' entire liability under any provision of this EULA shall be limited
to U.S. $5.00. Because some states and jurisdictions do not allow the exclusion or limitation of liability, the above limitation may
not apply to you.
Sawgrass Technologies, Inc. Limited Warranty
– QuickConnect IITM System
What Is Covered:
Defects in materials or workmanship.
Length of Warranty Coverage:
The warranty coverage for the QuickConnect is one year from date of purchase. Any
QuickConnect not purchased from Authorized Sawgrass Resellers is not covered.
How to get service:
Please contact Sawgrass Technologies Technical Support at 888-253-1679 or an Authorized
Sawgrass Reseller. A technical support representative will troubleshoot the issue and provide
instructions on how to get a replacement if necessary.
What we will do:
Provide you with a new, or at our option, a refurbished QuickConnect unit. Alternatively, at our
option, we may refund the purchase price. The exchange is under warranty for the remainder of
the original products’ warranty period or 90 days, whichever is longer. The replacement will be
shipped to you via Ground shipment. Any rush shipments will be freight prepaid.
What your warranty does not cover:
Damage from misuse or neglect.
Damage caused by use outside of Sawgrass Technologies recommendations.
Limitations of Warranty
THERE ARE NO OTHER WARRANTIES, EXPRESSED OR IMPLIED, INCLUDING, BUT NOT
LIMITED TO, ANY IMPLIED WARRANTY OF MERCHANTABILITY OR ANY IMPLIED
WARRANTY OF FITNESS FOR A PARTICULAR PURPOSE. SAWGRASS SHALL NOT BE
LIABLE FOR LOSS OF PROFIT OR OTHER ECONOMIC LOSS, OR FOR INDIRECT, SPECIAL,
CONSEQUENTIAL, OR OTHER SIMILAR DAMAGES.
Table of Contents
Introduction ...................................................................................................................................... 2
About this Document ........................................................................................................................ 3
Quick Connect II™ Set-up for the R1800 ........................................................................................... 4
Printer Set-up for the R1800 .............................................................................................................. 5
Tips for Using the QuickConnect II™ System .................................................................................. 10
Selecting Paper & Heat Transfer Instructions – SubliJet Inks .......................................................... 11
Selecting Paper & Heat Transfer Instructions – ChromaBlast Inks .................................................. 11
R1800 Hybrid Dual Decoration User Guide ..................................................................................... 13
ChromaBlast R1800 Driver Step by Step Installation.................................................................... 14
PowerDriver R1800 IQ Driver Step by Step Installation .................... Error! Bookmark not defined.
Using the PowerDriver R1800 IQ in Windows 2000/XP................................................................ 23
PowerDriver R1800 IQ Properties - Overview............................................................................... 24
Using the ChromaBlast R1800 Driver in Windows 2000/XP ......................................................... 29
ChromaBlast R1800 Properties - Overview................................................................................... 30
Appendices ..................................................................................................................................... 34
Appendix A: Network Printing in Windows 2000, XP........................................................................ 34
Appendix B: Over-riding Graphic Software Color Management ....................................................... 35
Appendix C: Using ColorSure™ and Custom Palette ....................................................................... 40
Tips for Successful Sublimation ..................................................................................................... 46
Supplies & Equipment .................................................................................................................... 47
Storage ........................................................................................................................................... 47
Troubleshooting ............................................................................................................................. 49
Technical Support ........................................................................................................................... 51
Project Sublimation ........................................................................................................................ 51
Project Cotton ................................................................................................................................ 52
Introduction
Congratulations on your purchase of the R1800 Hybrid Dual Decoration System with SubliJet IQ™
and ChromaBlast digital transfer inks. This system for the EPSON Stylus Photo R1800 is the
latest advancement from Sawgrass Technologies, Inc., a leader in the development of digitally
driven color transfer technologies and related products.
Your R1800 Hybrid Dual Decoration System includes: SubliJet IQ™ inks, ChromaBlast digital
transfer inks, the QuickConnect II™ ink delivery system, and PowerDriver IQ color matching
software. This revolutionary, comprehensive system takes sublimation and cotton decoration to
the professional level, allowing users to create perfect transfers with minimal effort. The
comprehensive CMYK in configuration provides a wide color gamut, creates noticeably smoother
gradient transitions, captures finer detail and adds color depth.
With this system, your printed images can be transferred onto any product designed to accept
sublimation dyes including: ceramic, metal, tiles, mylar, polyester fabric, performance wear,
UniSub®, and Hanes Soft L’Ink® T-shirts, resulting in an attractive, durable product. This system
Your imagination is the limit for producing brilliant, near photo-quality images on caps, clipboards,
clocks, mugs, mousepads, plaques, puzzles, synthetic T-shirts, and more. SubliJet IQ™ is ideal
for markets that personalize, customize or create short-run output.
The ChromaBlast Driver™ is user-friendly software that enables you to maximize output quality
and quantity for decorating to cotton surfaces. Bundled with the SubliJet IQ driver, this hybrid
solution gives the user a powerful combination of customized decorations options.
This document contains information for using SubliJet IQ™ and ChromaBlast digital transfer inks
and helpful tips are also provided for getting the best results from your transfers. The information
provided pertains only to the use of SubliJet IQ™ and ChromaBlastTM in your EPSON Stylus
R1800 printer. If you have questions about the operation of your EPSON printer, refer to the
EPSON Stylus Photo R800 &/or R1800 Printer User’s Guide.
Technical support is available from your Authorized SubliJet reseller or directly from Sawgrass
Technologies, Inc. See the section entitled Technical Support for additional information.
We at Sawgrass strive to provide you with the tools to make the sublimation process easy to learn
and simple to master. We hope you will find that the tools we have developed will make your
years in the sublimation and cotton decoration business fun and profitable. Please feel free to
contact us with your feedback about our products. For additional information on our other
products, visit our web site at www.sawgrassink.com.
Thank you and enjoy your R1800 Hybrid Dual Decoration system
-2-
About this Document
This document contains descriptions and procedures for using SubliJet IQ and ChromaBlast inks
and the R1800 IQ System, along with additional information for getting the best results from your
transfers.
The documentation provided pertains only to the use of SubliJet IQ™ and ChromaBlastTM inks in
your EPSON Stylus Photo R1800 ink jet printer. To assist you in the overall setup process,
references are made back to the EPSON Stylus Photo R800 &/or R1800 Printer Basics Guide for
instructions.
To help point out important information, specific instructions, and helpful tips look for the
following symbols:
Indicates Must-Do items, including warnings
and important guidelines. These must be
followed to prevent damage to your printer.
Indicates useful tips for
printing and sublimation.
-3-
Before you Begin
It is crucial that the OEM ink supplied with your
printer is installed before you attempt to install
your SubliJet IQ™ and ChromaBlastTM inks. This
allows for two things: First, it primes the ink
delivery system, ensuring that the SubliJet IQ™
and ChromaBlastTM inks will load more easily.
Second, it familiarizes you with the basic operation
of your printer. Please see the EPSON Stylus
Photo R800 or R1800 Printer User’s Guide for
instructions on installation.
Quick Connect II™ Set-up for the Epson R1800
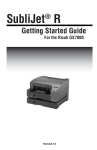
1.Check to ensure that you have all of the components necessary to setup your
Quick Connect II™ system.
Components
1. Ink Cartridge + tubes
2. 1 x Long Tube Grip
3. 1 x Short Tube Grip
4. Chips
5. 8x SubliJet & ChromaBlast Ink Bags
(Not included with QC II)
6. Small primer bottle
7. Cartridge Cover (R1800 Only)
8. Ink configuration sticker
9. Rubber Gloves
10. Ink Box
11. ChromaBlast R1800 Driver CD
12. SubliJet R1800 IQ Driver CD
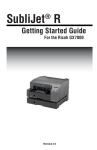
2. Place the Quick Connect II box on a level surface next to where
your printer is going to be placed. The R1800 should be on the
right hand side with the clamps facing towards the front.
Your ink bags should never be elevated above the print
head. Keeping the bags beside the printer at the same
level assures the ink delivery system will operate
properly.
3. Remove the lid from the box and place it to the side. Place the
Ink Configuration Sticker on the Front of the bottom box just above
the white connector clips.
-4-
4. Insert the ink bags into the ink box by clipping them into the
corresponding connectors attached inside the box. Each
section is marked with which color ink should be placed there.
Remember to match the
right color ink to its
corresponding cartridge
chamber. Once the tube is
filled, there is no way to
undo it!
5. Once all ink bags are connected inside your Quick Connect
II™ ink box, you will need to obtain the small primer bottle to
prime each line.
6. Take the cartridge in one hand and the priming bottle in the
other as shown in the picture to the right. Squeeze the priming
bottle to release all of the air and insert it into the bottom of the
cartridge to pull ink through the line and just bring ink into the
reservoir.
7. Once ink is in the reservoir, pinch together the clamp that’s
connected to the tube on the outside of the box. This will ensure
that no more ink will pull into the reservoir until you are ready for
it.
8. Do this for each cartridge.
9. Place the lid back onto the Quick Connect II™ ink box and
gently place the cartridges on top of the box while you are
completing the printer setup.
Printer Set-up for the R1800
1. Turn the printer on, lift the lid, and press the cartridge
replacement button.
2. The cartridge bay will shift into the remove position. Lift the
bay lid and remove any installed cartridges.
-5-
3. Remove the cartridge cover by gently pushing on the right side and twisting to the right as
shown below.
4. Install the cartridge chips as shown in the pictures below. Start by lining up the first chip with
the yellow dot with the yellow ink slot in the cartridge bay. Then line up the second chip with the
black dot with the black slot in the cartridge bay.
-6-
5. Insert the plastic cross bars into place by sliding the notched end into the back of the chip
holders.
6. Slide the cartridge bay to the center of the printer to install the
sublimation cartridges. It must be to the left of the gray bar before
any cartridges can be installed.
7. Gently place the cartridges into the cartridge bay. Start with the
yellow cartridge on the left and attach the cartridges in this order:
1
SJ ink
Y
2
SJ ink
M
3
SJ ink
C
Channel
4
5
SJ ink
CB ink
K
K
6
CB ink
C
7
CB ink
M
8
CB ink
Y
8. Once all cartridges are attached and in place, slide the cartridge
bay back to its original position. The Quick Connect II™ tubes
should be underneath the gray bar on the printer.
-7-
9. Attach the custom cover to the cartridge bay. Be careful
not to pinch the tubes when closing the cover.
10. Obtain the long tube holder and remove the tabs from the
back exposing the adhesive. Place the tube holder in the
middle of the gray bar and attach it to the printer.
11. Slide tubing into the holder for placement. Leave enough
slack so that the cartridge bay can easily slide from one side
of the printer to the other without creating tension on the
tubes.
12. Obtain the short tube holder and remove the tabs from the
back exposing the adhesive. Attach it to the right hand side of
the printer where the tubes hang down to meet the Quick
Connect II™ ink box. Slide tubes into the holder for placement.
-8-
13. Press the ink button to move the print head back to the ink
cartridge parked position.
Congratulations! You’ve successfully installed an R1800 Quick Connect II ink system and printer.
-9-
You may want to remove the printer lid or leave it
open at all times.
You may have a little air showing in your lines, but
this will clear after a few prints.
If you are going to leave your system without using
it for several days, you should clamp your lines with
the tube clamps.
Do not raise the ink box higher than the printer.
Tips for Using the QuickConnect II™ System
Make sure you install the SubliJet IQ Driver and theChromaBlast
Driver™ from the CD that came with your Quick Connect II system.
Perform a nozzle check from the SubliJet and ChromaBlast Driver™.
A few cleanings may be necessary to get a good nozzle check.
Check the support tube connections periodically.
Ensure the support arm is securely attached and not drooping, and that the lid
props are firmly attached. If the support arm droops too low, the tubing could scrape the bottom of
the printer.
Check the ink level in your ink bags periodically.
As the bags empty, they flatten in appearance. Before beginning a large print job, check the ink
bags to ensure enough ink is available to finish the job.
Ink indicator shows as low, even though ink bags are full.
The ink levels shown are based on using cartridges, not bulk systems, therefore the ink level
indication is not accurate and should not be used to judge the level of ink in reaming in the Quick
Connect bags. To reset your ink indicator levels to continue printing, turn off the printer via the
front power button and leave it off for 15 or more seconds or press the cartridge replacement
button twice
How to remove the QuickConnect II™ system from the printer:
Clamp off the tubes before removing. The cartridges may drip slightly when removed from the
printer because they are filled with more ink than the sponge can retain. Keep the cartridges
above the level of the ink bags until you are able to plug the exit holes with electrical tape. Please
note the exit port area must be perfectly dry or the tape won’t stick.
- 10 -
Selecting Paper - Sublimation
For information on selecting the appropriate paper to use with your SubliJet IQ™ inks, please check our
website at http://www.sublimation.com/support/ or call your authorized SubliJet reseller. While the use of
copy paper or other inkjet paper will not harm your printer, the transferred results may be light, splotchy, or
uneven. Some papers may even stick to the surface or leave a visible residue.
Heat Transfer Instructions - Sublimation
Because you can print on a variety of surfaces, you need to take all variables of the surface into account
when selecting time, temperature, and pressure. Some of the variables are:
thickness of surface,
how fast the surface absorbs heat,
coatings used on the material to create a receptive surface for sublimation inks (ceramics, metals,
etc.),
accuracy of heat press (time, temperature, and pressure).
The information listed below are only guidelines. Due to the differences in heat presses and the various
materials you will be printing on, it is not possible to give absolute figures. You should check with your
supplier for specific heat transfer instructions or experiment to find your own preferred settings.
SURFACE
CERAMIC
FR PLASTIC
METAL (Other) White,
Silver, Gold
TRANSFER
TIME
SUBLIJET
TRANSFER
TIME
SUBLIJET IQ
150-210
seconds
33 seconds
40 seconds
150-210
seconds
75-80 seconds
60 seconds
350400oF
400oF
375oF
- 400oF
40 seconds
60 seconds
400oF
40 psi
TEMP
PRESSURE
40 psi
40 psi
40 psi
METAL (Universal
Woods)
MOUSEPADS
POLYESTER FABRIC &
PERFORMANCE APPAREL
SOFT L’INK™
25 seconds
25 seconds
45 seconds
45 seconds
400oF
400oF
40 psi
40 psi
25 seconds
35 seconds
400oF
40 psi
TEC FILM
UNISUB™ PRODUCTS
210 seconds
75 seconds
210 seconds
75-85 seconds
350oF
400oF
40 psi
40 psi
- 11 -
REMARKS
Time varies with press, use green
tile mat for ceramic tile
Remove Plastic
Time varies with metal manufacturer
(Contact your reseller for correct
time and temperature)
Place absorbent sheet on bottom
plate of heat press. Then place
transfer paper face up on top of the
absorbent. Next place the substrate
face down on top of the transfer
paper. Remove paper from
substrate immediately after
transferring for best results.
Use absorbent, remove plastic
Press for 5 secs to eliminate
moisture, use Teflon sheet between
sides of shirt to prevent “blow
through”
Remove Plastic
Printing and Heat Transfer Instructions – ChromaBlast
cotton decoration inks
Recommended Applications
White or light colored fabrics in 100% cotton.
PRINTING
Print using the supplied ChromaBlast Driver program only.
The print side of ChromaBlast media is opposite the ChromaBlast logo.
• For the R1800, place print side face up in the printer tray.
Mirror Image: Check this box in the ChromaBlast Driver to ensure the image prints in reverse and that text
appears correctly when image is transferred. If your image is already reversed in your graphic program,
leave this box unchecked.
TRANSFERRING THE IMAGE USING A COMMERCIAL HEAT PRESS
1. If desired, you may trim the non-printed area before transferring, leaving .25 in. margin around the
printed area.
2. Place garment on the heat press. Cover with ChromaBlast paper with image face down.
3. Press image according to proper pressure, heat, and time settings.
4. Peel the paper off the shirt while the shirt is still hot using an even motion.
5. Stretch the image area while the shirt is hot from both left to right and top to bottom to reduce the
hand.
HEAT PRESS SETTINGS
•
Pressure: Heavy. If using a pneumatic press, set the pressure to 60 psi.
•
Temperature and Time: 350°F (176°C) for 45-60 seconds
Due to variations in cotton garments and in heat presses, time and temperature can be adjusted for
preferred performance up to 400°F for 25 seconds. Some scorching may occur, but will wash out.
STORAGE INSTRUCTIONS
Store ChromaBlast media in a cool, dry area within the provided plastic storage bag. Do not remove from
carton until ready to use.
- 12 -
User Guide
For the Epson R1800
For distribution with SubliJet IQ® and ChromaBlastTM only
NOT FOR RESALE
Rev 2.0
- 13 -
Setup Instructions – Windows XP/Windows 2000
TheR1800 Hybrid system comes supplied with a single CD that includes both the ChromaBlast and PowerDriver IQ
drivers and documentation. The installation will autostart once the CD is placed in the computer. The process begins
with the ChromaBlast driver and continues to the PowerDriver. On-Screen instructions will prompt the user to register
the software before full installation can begin.
System Requirements
Minimum Hardware:
Pentium 4 – 2.0GHz or Athlon XP 2000+ Processor
512 MB System Memory
Recommended Hardware:
Pentium 4 – 3.0GHz or Athlon XP 2500+ Processor
1 GB System Memory
Product Overview - ChromaBlast
The ChromaBlast R1800 Driver™ v1.0 is color management software that has been written as a Windows printer
driver. It is designed to work with Epson ink-jet printers and Sawgrass ChromaBlast™ ink. The installation program
will install Sawgrass color management software, the Sawgrass ChromaBlast™ printer driver software, and ColorSure
tools and utilities.
Quick Start
1. Unpack and setup printer as described in the Epson manual.
2. Install the Epson printer driver and verify printer operation.
3. Insert the R1800 Hybrid Driver v1.0 CD into the CD-ROM drive on the computer to begin the installation
process.
Step By Step Installation – ChromaBlast Driver
To get started printing as soon as possible, these are the steps Sawgrass recommends you perform while setting
up your hybrid printer driver software.
1.
2.
3.
4.
Setup the printer according to the Epson instructions.
Install the SubliJet and ChromaBlast inks.
Install the Epson printer driver. According to the Epson user’s manual.
After the Epson driver is installed, check to see which port the printer is set to:
a.
b.
c.
In XP you can do this by clicking on Start, Printers and Faxes. For XP with the Classic menu enabled, click
Start, Settings, Printers.
Right click on the Epson printer you just installed and click on the Properties option.
Select the Ports tab and write down the port the printer is assigned to. You will use this later in the PowerDriver
IQ and ChromaBlast R1800 Driver™ v1.0 software installation.
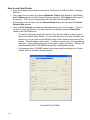
5. Insert the R1800 Hybrid CD v1.0 into your CD-ROM drive. The installation process should begin automatically
6. The Welcome screen is displayed. Click Next to proceed.
- 14 -
- 15 -
7.
The License Agreement is displayed next. Select the appropriate choice for acceptance of the Licensing
Agreement.
8. If you have not previously registered the ChromaBlast R1800 Driver™ v1.0, you will be prompted to do so.
Registering is the only way to take full advantage of the features in this Driver. If you choose to register later,
select Register Later and click Next to proceed with the installation.
9.
If you choose to register now, the registration screen will be
displayed. To obtain your registration code you may do so in
one of the following ways: Register on-line and receive your
registration code via e-mail. Call Sawgrass Technologies, Inc.
directly (888) 253-1679 and obtain your code over the phone.
Send a fax and receive your registration code by fax.
To register, you will use your Product ID (displayed on the
registration screen) to obtain a Registration code. You will need
separate registration code for every machine on which The
ChromaBlast R1800 Driver™ v1.0 is installed. Enter your
registration code and click the Apply Code button.
- 16 -
A notification box indicating you have successful registered the ChromaBlast Driver will appear. Click “OK” to
continue with the installation.
10. Sawgrass Technologies, Inc. provides ColorSure color palettes for use with Corel and Adobe. (Check the
ColorSure section of the manual for information on how to use ColorSure to get perfect spot colors). If Setup
detects either of these applications on your system, the palette files will be placed in the appropriate folder
indicated in the Destination Folder box. Click Next to proceed with the installation.
11.
- 17 -
The ChromaBlast R1800 Driver™ v1.0 installation program will attempt to use plug-n-play to determine the
port that the printer is connected to, click Next to continue. Note: Cancel any ‘Found New Hardware’
wizards that may start during this process, do NOT cancel any file copy process however.
12. If the installation cannot find the printer port then you will be given the opportunity to choose the port you want
to use for the product you are installing. Use the value that was recorded in step 4 above.
13.
- 18 -
Once the installation has completed, the Installation Complete screen will display. Click OK to continue to
the installation of the PowerDriver R1800 IQ software.
Product Overview – PowerDriver R1800 IQ
PowerDriver R1800 IQ is a color management software solution that has been written as a Windows printer driver. It
is designed to work with Epson ink-jet printers and Sawgrass sublimation ink. The installation program will
automatically install the Sawgrass color management software, the Sawgrass PowerDriver R1800 IQ printer driver
software, and ColorSure tools and utilities directly after the installation of the ChromaBlast R1800 driver.
Step By Step Installation – PowerDriver R1800 IQ
1.
Once the ChromaBlast Driver has been successfully registered and installed, the process continues with the
PowerDriver R1800 IQ installation.
2.
The Welcome screen is displayed. Click Next to proceed.
3.
The License Agreement is displayed next. Select the appropriate choice for acceptance of the License
Agreement to continue.
- 19 -
4.
If you have not previously registered PowerDriver, you will be prompted to do so. Registering is the only
way to take full advantage of the features in PowerDriver. If you choose to register later, select Register
Later and click Next to proceed with the installation.
5.
If you choose to register now, the registration screen will be displayed.
To obtain your registration code you may do so in one of the following
ways: Register on-line and receive your registration code via e-mail. Call
Sawgrass Technologies, Inc. directly (888) 253-1679 and obtain your
code over the phone. Or send a fax and receive your registration code
by fax.
To register, you will use your Product ID (displayed on the registration
screen) to obtain a Registration code. You will need a separate
registration code for every machine on which PowerDriver is installed.
Enter your registration code and click the Apply Code button.
- 20 -
Product
Registration
Screen
A notification box indicating you have successful registered the PowerDriver R1800 IQ will appear. Click “OK”
to continue with the installation.
6.
Sawgrass Technologies, Inc. provides ColorSure color palettes for use with Corel and Adobe. (Check the
ColorSure section of the manual for information on how to use ColorSure to get perfect spot colors). If
Setup detects either of these applications on your system, the palette files will be placed in the appropriate
folder indicated in the Destination Folder box. Click Next to proceed with the installation.
7.
The PowerDriver installation program will attempt to use plug-n-play to determine the port that the printer is
connected to, click Next to continue. Note: Cancel any ‘Found New Hardware’ wizards that may start during
this process, but do NOT cancel any file copy process.
- 21 -
8.
If you see the screen below, click Continue Anyway to proceed with the installation.
9.
If the installation cannot find the printer port, then you will be given the opportunity to choose the port you
want to use for the product you are installing. Use the information that was recorded before during the
ChromaBlast driver installation.
10. Once the installation has completed, the Hybrid Installation Complete screen will display. Click OK to end
the installation.
- 22 -
Using PowerDriver R1800 IQ in Windows 2000 / XP
PowerDriver R1800 IQ is simple to use. Whenever you have SubliJet inks in your printer, you
should print using PowerDriver R1800 IQ . Do not print to your Epson printer with the Epson
printer driver; printing with the Epson driver will not give you the benefit of color management.
Quick Start Example (Corel Draw)
1) Open/Create an image in Corel Draw.
2) Select print from the File menu.
3) Select the PowerDriver R1800 IQ printer.
4) Use the properties button to access and set the Substrate, Resolution, and Advanced
options.
5) Click Print.
Setting PowerDriver R1800 IQ printer properties
To configure PowerDriver R1800 IQ for the correct substrate, you must display its printer
properties. There are two ways to display the printer properties:
From the Windows Desktop:
1. Click on Start> Printers and Faxes.
2. Right-click on your PowerDriver printer.
3. Select Properties from the pop-up menu.
4.
Select the Printing Preferences button.
From an Application:
1. Select File, Print Setup.
2. Choose the PowerDriver R1800 IQ
printer from the list of printers.
3. Click the Properties button.
- 23 -
PowerDriver R1800 IQ Properties Overview
The following figure shows the printer properties for a registered version of PowerDriver R1800 IQ
.
There are three main property groups;
1. Configuration – Set Paper, Transfer Substrate, and Copy Count
2. Color Settings – Color management control options. (The Color Options group comes in two
modes; Easy and Advanced) Both are described below.
3. Options – Utilities for printer maintenance, online help, product registration, and setting input
profiles.
PowerDriver R1800 IQ Easy Color Property Page
PowerDriver R1800 IQ Advanced Property Page
Group 1 – Configuration
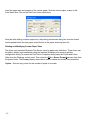
Paper Size – Paper Size – From the drop down list, select the paper size you wish to use.
To add custom paper sizes click the + button to the right of the paper size drop down list.
The following dialog box will appear
- 24 -
Insert the paper size and margins of the custom paper. Give the custom paper a name in the
Form Name box. Click on the Add Form button when done.
Note that after adding a custom paper size, the printing preferences dialog box must be closed
and reopened before the new paper size will show in the paper size drop down list.
Deleting and Modifying Custom Paper Sizes
The driver uses standard Windows Print Server forms for paper size definitions. These forms can
be added, deleted, and maintained using the standard Windows print server properties
configuration dialog.To access the Print Server Properties dialog open the Printer and Faxes
folder from the Windows control panel. Then select the File -> Server Properties menu item from
the printer folder. The Forms property sheet can be used to delete and modify form properties
Copies – Sets the copy count for the number of prints to be made.
- 25 -
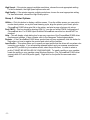
Group 2 - Color Settings (Easy Color Mode)
The Easy Color Option tab provides you with access to a collection of carefully selected color
management presets. The right color management choice is essential to making high quality transfers.
Easy Color is a fast, simple way of choosing a color management scheme. You choose an Easy Color
setting based on the composition of the original image. The chart below lists some guidelines for when
to choose different Easy Color settings. Choosing a setting and clicking the apply button automatically
sets the bitmap, vector, and output settings found on the advanced tab*.
Color Correction Preset – Sets the color correction, the mirror, and the print quality options.
Easy Color Icon
Easy Color Description
Photo – Realistic
When to select: If your source image is a photograph or a photographic scene.
Color Management Goal: Realistic color reproduction. The goal is to reproduce
the transferred image with color that is as close as possible to the input image.
Clip Art and Text
When to select: If your source image is clip art, text, or a mixture of the two.
Color Management Goal: The goal is to generate colors that are vivid and
contrast well with each other. The overall emphasis is to keep the transferred
colors close to the input colors but still add a little extra “pop” to the colors.
Art Logo
When to select: If your source image is clip art, text, or a mixture of the two and
you want to increase the intensity of the colors.
Color Management Goal: The goal is to generate colors that are vivid and
contrast well with each other. Unlike the “Clip Art and Text” setting, Art Logo
emphasizes vivid output at the expense of color accuracy.
ColorSure™ Spot Colors
When to select: For all image types (bitmaps, scans, clipart, text, etc...) that were
designed using the ColorSure palette. (See appendix C for details on using
ColorSure to design your artwork).
Color Management Goal: Generate consistent output that reproduces colors
based on the ColorSure palette.
ColorSure™ Photos
When to select: When you have a mix of bitmap and vector (text, clipart, or
shapes) and only the vector elements were designed using the ColorSure palette.
Color Management Goal: Generate output that reproduces photographic data
using the Photo - Realistic setting and uses ColorSure™ Spot Colors for the vector
components of the artwork.
*If you want to know what an Easy Color setting is really doing, choose a setting, click apply, and click on the advanced
tab. Your Easy Color choices are always reflected in the advanced section.
- 26 -
Print Palette Button – Prints the ColorSure palette for the selected substrate. ColorSure is a method
for reproducing exact spot colors. The two main components are: 1) the transferred palette and 2) the
CorelDraw, Corel PhotoPaint, and Adobe swatches. For a complete description on how to use
ColorSure to get perfect spot colors, see appendix C.
Group 2 - Color Settings (Advanced Mode)
Overview
This tab gives you access to all of the color management controls available in PowerDriver R1800
IQ . Color correction allows you to create transfers from all kinds of images, from photorealistic
images to spot color logos. For maximum flexibility, PowerDriver R1800 IQ lets you color correct
bitmap and vector elements differently, even if they are in the same graphics file. For example, if
you scan a photograph and import it into CorelDraw, PowerDriver will use the color management
settings that have been selected for Bitmap. If you then add text on top of the bitmap image,
PowerDriver will use the color management settings that have been selected for Vector. The
photograph and the text will be color corrected differently! Why? You can now sublimate images
with realistic photographic backgrounds that have vivid spot color text.
Vector and Bitmap Explanation
Bitmaps are a grid of pixels. Bitmaps come from digital cameras, scanners, and photo CDs.
Bitmaps can also be created in applications like Corel PhotoPaint or Adobe PhotoShop. Bitmaps
have file extensions like GIF, JPG, BMP, and TIF. Vector components consist of shapes, curves,
lines, and text. They are created in programs such as CorelDraw and Adobe Illustrator. Higher
end programs like CorelDraw can combine Vector and Bitmaps into a single image. As a rule of
thumb, if the object in your image is made of curves, text, shapes, or fills, it will be color corrected
using the PowerDriver Vector settings. All other image types will be color corrected based on the
PowerDriver R1800 IQ Bitmap setting.
Bitmap & Vector Options
Intense – This kicks the color intensity and saturation to the extreme. This setting does not try
to keep color accurate; its main goal is to produce deep dark colors. Artwork, graphics, logos,
and text are good candidates for this setting. Some photographs will look good but typically,
this setting is too intense to be used with photographs. This can be set for either Bitmap or
Vector images.
Vivid – This setting is most suitable for images where it is important that the colors are vivid
and contrast well with each other. Artwork, graphics, logos, and text, as well as photographs
of landscapes or still life are good candidates for the Vivid setting. This can be set for either
Bitmap or Vector images.
Saturated - The Saturated setting will make the colors in your image more intense. Saturated
output tries to remain color accurate with a slight bump in intensity.
Realistic (Bitmap ONLY) - This setting is most suitable for reproducing skin tones in scanned
photographs.
Original (Vector ONLY) - This setting is most suitable for reproducing life-like clipart.
ColorSure Checkbox - ColorSure is used to replace specific colors in your image with a spot
color chosen from the ColorSure palette. This resulting spot color enhancement is not affected
by color setting. A ColorSure spot color will ALWAYS print the same. See Appendix C for an
overview of ColorSure.
- 27 -
ColorSure Options
Print Palette Button – Prints the ColorSure palette for the selected substrate. ColorSure is a
method for reproducing exact spot colors. The two main components are: 1) the transferred
palette and 2) the CorelDraw, Corel PhotoPaint, and Adobe swatches. For a complete
description on how to use ColorSure to get perfect spot colors, see appendix C.
Custom Palette Button – This button launches the Custom Palette utility, which enables you
to add, edit, import, and export custom colors to the ColorSure palette. If you need to precisely
match a specific color, the Color Finder tool makes this a breeze. For a complete description
on how to use the Custom Palette, see appendix C.
Output Options
Mirror – When you transfer an image, the result will be “flipped” when compared to the printed
image. In order for your transfers to come out correctly, you must flip the image before
transferring.
Fast Copies – Turn fast copies on if you are printing five or more pages of the same image.
When Fast Copies is enabled, PowerDriver will first load the printer data into a buffer and then
spool the data to the printer. This feature frees the computer to perform other tasks while the
printer prints in the background.
High Speed – If the printer supports multiple resolutions, choose the most appropriate setting.
For soft substrates, the High Speed option works well.
High Quality – If the printer supports multiple resolutions, choose the most appropriate
setting. For hard substrates, choose the High Quality option.
Group 3 – Printer Options
Utilities – Click this button to display a utilities screen. From the utilities screen you can print
a nozzle check pattern, run a print head cleaning cycle, align the printer’s print head, spool a
PowerDriver R1800 IQ print file to the printer, and print a page of primary ink colors.
Help – This will display a help dialog box for an easy overview of the PowerDriver R1800 IQ
driver functions and settings. Also contains a link to the Sawgrass Technologies website.
Register – If the PowerDriver R1800 IQ product has not been registered, click this button for
instructions on how to register the product and unlock all the features.
Input Profile – This option allows you to specify an input profile that the driver will use when
color correcting your image. If you are printing scanned artwork and your scanner
manufacturer provided ICC profiles for your scanner model, select the profile here In order to
select a profile IT MUST BE INSTALLED ON YOUR MACHINE. To install a profile on your
machine, locate the profile on your machine using Windows Explorer. (PowerDriver supports
both ICC and ICM profile types). Right click on the profile file name and select “Install”.
Visit Project Sublimation – This button will take you to the Project Sublimation website. Are
you looking for answers to your sublimation questions? Would you like some hands-on
experience making products? Do you want to learn more about color management? Project
Sublimation tours cities throughout North America. Check the calendar and sign up for an
interactive Project Sublimation workshop in your area!
- 28 -
Using ChromaBlast R1800 Driver™ in Windows 2000 / XP
The ChromaBlast R1800 Driver is simple to use. Whenever you have ChromaBlast™ inks in your
printer, you should print using the a ChromaBlast R1800 Driver™. Do not print to your Epson
printer with the Epson printer driver; printing with the Epson driver will not give you the benefit of
color management.
Quick Start Example (Corel Draw)
1) Open/Create an image in Corel Draw.
2) Select print from the File menu.
3) Select the ChromaBlast R1800 Driver printer.
4) Use the properties button to access and set the Color, Output, Ink and Substrate,
Resolution, and Advanced options.
5) Click Print.
Setting the ChromaBlast R1800 Driver printer properties
To configure the ChromaBlast R1800 Driver for the correct substrate, you must display its printer
properties. There are two ways to display the printer properties:
From the Windows Desktop:
5. Click on Start> Settings> Printers.
6. Right-click on your ChromaBlast R1800 Driver printer.
7. Select Properties from the pop-up menu.
8. Select the Printing Preferences button.
From an Application:
4. Select File, Print Setup.
5. Choose the ChromaBlast R1800 Driver printer from the list of
printers.
6. Click the Properties button.
- 29 -
ChromaBlast R1800 Driver™ Properties Overview
The following figure shows the printer properties for a registered version of the ChromaBlast
R1800 Driver. The Advanced Color Options tab and the Print Palette functions will not be
available if the product has not been registered.
There are three main property groups;
Configuration – Set Paper, Transfer Substrate, and Copy Count
Color Settings – Color management control options. (The Color Options group comes in two
modes; Easy and Advanced) Both are described below.
Options – Utilities for printer maintenance, online help, product registration, and setting input
profiles
Group 1 – Configuration
Paper Size – From the drop down list, select the paper size you wish to use. To add
custom paper sizes click the + button to the right of the paper size drop down list. The
following dialog box will appear
- 30 -
Insert the paper size and margins of the custom paper. Give the custom paper a name in the
Form Name box. Click on the Add Form button when done.
Note that after adding a custom paper size, the printing preferences dialog box must be closed
and reopened before the new paper size will show in the paper size drop down list.
Deleting and Modifying Custom Paper Sizes
The driver uses standard Windows Print Server forms for paper size definitions. These forms can
be added, deleted, and maintained using the standard Windows print server properties
configuration dialog.To access the Print Server Properties dialog open the Printer and Faxes
folder from the Windows control panel. Then select the File -> Server Properties menu item from
the printer folder. The Forms property sheet can be used to delete and modify form properties
Copies – Sets the copy count for the number of prints to be made.
- 31 -
Group 2 - Color Settings
Overview
This tab gives you access to all of the color management controls available in the ChromaBlast
R1800 driver. Color correction allows you to create transfers from all kinds of images, from
photorealistic images to spot color logos. For maximum flexibility, the ChromaBlast R1800 driver
lets you color correct bitmap and vector elements differently, even if they are in the same graphics
file. For example, if you scan a photograph and import it into CorelDraw, the ChromaBlast R1800
driver will use the color management settings that have been selected for Bitmap. If you then add
text on top of the bitmap image, the ChromaBlast R1800 driver will use the color management
settings that have been selected for Vector. The photograph and the text will be color corrected
differently! Why? You can now sublimate images with realistic photographic backgrounds that
have vivid spot color text.
Vector and Bitmap Explanation
Bitmaps are a grid of pixels. Bitmaps come from digital cameras, scanners, and photo cds.
Bitmaps can also be created in applications like Corel PhotoPaint or Adobe PhotoShop. Bitmaps
have file extensions like GIF, JPG, BMP, and TIF. Vector components consist of shapes, curves,
lines, and text. They are created in programs such as CorelDraw and Adobe Illustrator. Higher
end programs like CorelDraw can combine Vector and Bitmaps into a single image. As a rule of
thumb, if the object in your image is made of curves, text, shapes, or fills, it will be color corrected
using the ChromaBlast R1800 driver Vector settings. All other image types will be color corrected
based on the ChromaBlast R1800 driver Bitmap setting.
Color Correction Settings
Realistic (Bitmap ONLY) - This setting is most suitable for reproducing skin tones in scanned
photographs.
Original (Vector ONLY) - This setting is most suitable for reproducing life-like clipart.
Saturated - The Saturated setting will make the colors in your image more intense. Saturated
output tries to remain color accurate with a slight bump in intensity.
Vivid – This setting is most suitable for images where it is important that the colors are vivid and
contrast well with each other. Artwork, graphics, logos, and text, as well as photographs of
landscapes or still life are good candidates for the Vivid setting. This can be set for either
Bitmap or Vector images.
ColorSure Enhancement - The ColorSure enhancement is used to replace specific colors in your
image with a spot color chosen from the ColorSure palette. This resulting spot color
enhancement is not affected by color setting. A ColorSure spot color will ALWAYS print the
same. See Appendix C for an overview of ColorSure.
Print Palette Button – Prints the ColorSure palette for the selected substrate. ColorSure is a
method for reproducing exact spot colors. The two main components are; 1) the transferred
palette and 2) the CorelDraw, Corel PhotoPaint, and Adobe swatches. For a complete
description on how to use ColorSure to get perfect spot colors, see appendix C.
Custom Palette Button – The Custom Palette utility enables you to add, edit, import and export
custom colors to the ColorSure palette. If you need to precisely match a specific color, the
Color Finder tool makes this a breeze. For a complete description on how to use the Custom
Palette, refer to Appendix C.
Mirror – When you transfer an image, the result will be “flipped” when compared to the printed
image. In order for your transfers to come out correctly, you must flip the image before
transferring. Select this option to do the flipping for you. If you are doing this yourself in your
editing application, make sure this option is turned off.
- 32 -
High Speed – If the printer supports multiple resolutions, choose the most appropriate setting.
For soft substrates, the High Speed option works well.
High Quality – If the printer supports multiple resolutions, choose the most appropriate setting.
For hard substrates, choose the High Quality option.
Group 3 – Printer Options
Utilities – Click this button to display a utilities screen. From the utilities screen you can print a
nozzle check pattern, run a print head cleaning cycle, align the printer’s print head, spool a
ChromaBlast R1800 driver print file to the printer, and print a page of primary ink colors.
Dual CMYK – This box should be checked ONLY if you are use a dual CMYK configuration of
ChromaBlast inks. For R1800 Hybrid SubliJet/ChromaBlast users this box should NOT be
checked.
Help – This will display a help dialog box for an easy overview of the ChromaBlast R1800 driver
functions and settings. It also contains a link to the Sawgrass Technologies website.
Register – If the ChromaBlast R1800 driver product has not been registered, click this button for
instructions on how to register the product and unlock all the features.
Input Profile – This option allows you to specify an input profile that the driver will use when color
correcting your image. If you are printing scanned artwork and your scanner manufacturer
provided ICC profiles for your scanner model, select the profile here In order to select a
profile IT MUST BE INSTALLED ON YOUR MACHINE. To install a profile on your machine,
locate the profile on your machine using Windows Explorer. (The ChromaBlast R1800 driver
supports both ICC and ICM profile types). Right click on the profile file name and select
“Install”.
- 33 -
Appendices
Appendix A: Network Printing in Windows 2000, XP
Network printing with PowerDriver in Windows 2000 and Windows XP is simple. Before a network
printer can be used, it must be installed on the network and shared.
Host Machine (Server)
The server machine must have installed the printer and have the printer shared. To install the
networked printer, run Start | Setting | Printer | Add Printer. The Wizard will guide you through
setting up the printer. When prompted, choose “Network Printer” and browse to the server
machine to locate either the PowerDriver R1800 IQ or ChromaBlast R1800 drivers.
- 34 -
Appendix B: Over-riding Graphic Software Color Management
PowerDriver R1800 IQ and ChromaBlast R1800 drivers provides a complete color management
solution for your Hybrid SubliJet/ChromaBlast printing. It is extremely important that you turn
off any color matching features associated with your design software. An explanation of how
to disable print-time color management in several popular design packages follows:
CorelDraw™ version 9
Create a new graphic.
From the main menu choose Tools, Color Management. The Color Management dialog box
is displayed.
In the Color Management window (see figure below), UNCHECK the Calibrate colors for
display box.
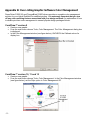
CorelDraw™ version 10, 11 and 12
- 35 -
Create a new graphic.
From the main menu choose Tools, Color Management. In the Color Management window
(see figure below), set the Style option to Color Management Off.
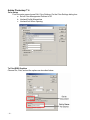
Adobe Photoshop™ 6
Color Setup
From the main menu choose Edit, Color Settings. On the Color Settings dialog box:
a. Set all Color Management Policies to Off
b. Uncheck Profile Mismatches
c. Uncheck Ask When Opening.
To Print RGB Graphics
Choose File, Print, and set the options as described below:
- 36 -
To Print CMYK Graphics
Choose File, Print, and set the options as described below:
Adobe Photoshop™ 7 , CS and CS2
Color Setup
From the main menu choose Edit, Color Settings. On the Color Settings dialog box, turn all
Color Management Policies off. Turn off Profile Mismatches.
- 37 -
To Print:
Always select File, Print with Preview. On the print dialog page, set the options as described
below:
a. Check Show More Options
b. Choose Color Management
c. Choose Document as Source Space
d. Choose Same as Source for Print Space
From the Color Management drop option list, make sure that Source is set to “Document” and
Print Space is set to “Same As Source”.
- 38 -
Adobe Photoshop Elements 3.0/4.0/5.0
Select Edit and then Color Settings from the top drop down menu bar.
Select No Color Management. Click Ok.
- 39 -
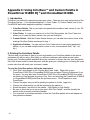
Appendix C: Using ColorSure™ and Custom Palette in
PowerDriver R1800 IQ ® and ChromaBlast R1800.
I. Introduction
ColorSure is a method for reproducing exact spot colors. There are four main components of the
ColorSure System: 1.) the transferred palette; 2.) Color Finder; 3.) Custom Palette; and 4.) the
CorelDRAW and Adobe application palettes / swatches.
1. ColorSure Palette: This is your main color palette that includes a wide variety of over 150
commonly used colors.
2. Color Finder: If a color you need is not on the ColorSure palette, the Color Finder tool
allows you to locate the exact custom color you are looking for.
3. Custom Palette: With the Custom Palette feature, you can add new custom colors to the
existing ColorSure Palette mentioned in step 1.
4. Application Palettes: You can add your Color Finder colors to an existing application
palette, or you can add multiple custom colors to new, custom palette files (*.cpl, *.acl,
etc.).
II. Printing the ColorSure Palette
The first step you will want to take is to print and transfer your ColorSure palette to the various
substrates you will be using. Most likely you will have customers who desire precise colors.
Having your ColorSure palette available allows the customer to choose the color from the palette
that is the closest match to what they want, and this gives you a starting point for finding the exact
custom color that will match your customer’s needs.
To print the ColorSure palette, follow the steps below:
Click ‘Start’ and navigate to the ‘Printers and Faxes’ folder. Right-click on your
PowerDriver R1800 IQ or ChromaBlast R1800 icon and select ‘Printing Preferences’ from
the menu. You may also open PowerDriver R1800 IQ or ChromaBlast R1800 from within
an Adobe or Corel program by going to File, Print, and choosing the PowerDriver R1800 IQ
or ChromaBlast R1800 printer from the pull-down menu. Click Properties to open
PowerDriver.
Choose the paper size you will be printing the palette to (Letter, Legal, etc)
Choose the substrate that you will be transferring the palette to.
Select the speed / resolution of the palette – High Speed or High Quality.
Be sure to check the box to mirror your print, click ‘Print Palette,’ and then transfer the
palette to the previously selected substrate.
You now have a visual representation of how the ColorSure palette colors will appear on
that particular substrate.
- 40 -
III. Designing Your Artwork
By picking colors from the ColorSure palette, you will be able to consistently reproduce colors in a
reliable manner. To assist you in designing your artwork, PowerDriver R1800 IQ and
ChromaBlast R1800 installs three palettes: two for Adobe products and one for Corel products.
These colors match the palette that is printed from within PowerDriver and ChromaBlast drivers.
To open the ColorSure Palette in Corel 9,10, 11 or 12 choose Window | Color Palette |
Open Palette. Select the file “ColorSure IQ/CB CMYK”
To open the ColorSure Palette in Illustrator, choose Window | Swatch Libraries | Other
Library. Navigate to where it was installed to when you installed PowerDriver: C:\Program
Files\Sawgrass\PowerDriver\Adobe Illustrator and hit Open. For easier access to the
Palette file copy it from this [above] path to Illustrator10\Presets\Swatches and
it will show up in your pull-down list directly under the Swatch Libraries menu. Other
versions of Illustrator will have similar steps.
To open the ColorSure Palette in Adobe PhotoShop, choose the Swatches Palette, click
the option arrow on the palette, choose Replace Swatches and pick the “ColorSure IQ/CB
CMYK” file.
HINT
After you have the ColorSure palette loaded into CorelDraw, move the cursor over
each color. As the cursor hovers over each different color, the ColorSure name is
displayed in the status area at the bottom of the screen.
IV. Using Color Finder
After printing and transferring the ColorSure Palette, you see that you have an array of colors to
work with. There will be times, however, when the color you need is not included in the ColorSure
Palette. This is where the Color Finder tool comes in handy.
The Color Finder tool allows you to start with a specific color (e.g. navy blue) and find similar
colors in the same family by adding and subtracting up to three colors (CMYKRB) called ‘Step
Colors.’ For example, starting with navy blue with a CMYKRB value of 60,60,0,40,0,0 and
choosing two step colors (e.g. cyan and magenta) would expand the original navy blue in four
directions (more cyan, less cyan, more magenta, and less magenta). This expanded color chart –
specific to a particular substrate and printing speed – is outputted directly to your printer.
- 41 -
How to use Color Finder:
Open the PowerDriver window as instructed in “Printing the ColorSure Palette” outlined in
Section II.
First, make sure you select your desired Substrate, Output (High Speed or High Quality),
and the Mirror option from the Printing Preferences window. Click Apply at the bottom of
the window. This is a very important step as it will affect the final printed output.
At the bottom of the window, click the Custom Palette button; this will open the Custom
Palette Utility window.
Click on Color Chooser and select your desired starting color from the matrix. If you do
not wish to use Color Chooser, you have the option to manually enter the Start Color
values in the CMYKRB boxes.
▬ To use Color Chooser, simply click on the ‘Color Chooser’ button in the top right of
the Custom Palette Utility window. You can then choose a color from the basic color
selection, or you can click on the ‘Define Custom Colors’ button at the bottom of the
window. This will display a color matrix. To define a custom color, click anywhere in
the matrix. Use the slider at the right of the matrix to adjust luminosity. Clicking ‘OK’
will automatically fill the CMYKRB boxes with the corresponding values.
▬ For advanced users, CMYKRB values can be determined by printing out a Custom
Palette, which is outlined in the next section.
Custom Palette Utility
- 42 -
You may alter the chosen color’s CMYKRB value by selecting two or three Step Colors.
Using multiple step colors will present you with a greater range and variety of colors to choose
from.
▬ For instance, if you choose to modify your Start Color with two steps, then Step
Color 1 will change its values on the X (horizontal) axis and Step Color 2 will change
its values on the Y (vertical) axis.
Color Finder Palette with two Step Colors
▬ If you modify your Start Color with three steps, Step Color 1 will remain the same.
However Step Color 2 and Step Color 3 will form an imaginary ‘X’ and their values
will change on opposing diagonal Y axes.
Color Finder Palette with three Step Colors
- 43 -
Next, determine what Step Size you want to apply to the Color Finder palette. This is
simply a question of how much you want your Start Color to fluctuate. If your Start Color is
close to the color you are looking for, use a low Step Size (i.e. 5-10). However, if your start
color is not close to what you are looking for, use a higher Step Size. You can enter any
Step Size value between 1 and 40.
As an example, let’s say your Start Color is C:20, M:100, Y:150, K:0, R:0, B:0 and you
select Cyan and Magenta to be your Step Colors. You also enter a Step Size of 10. When
the ‘Print Colors’ button is clicked, your Start Color will be in the middle of the Color Finder
palette and from there each color will vary the Cyan and Magenta values by 10.
When you are finished selecting the Start Color, Step Colors, and the Step Size, click on
the Print Colors button. This will print your custom Color Finder palette directly to your
printer.
After printing the Color Finder palette, transfer it to your selected substrate and then try to
match your desired color to one that is on the palette. If you find a suitable match, you are
finished using the Color Finder tool. Move on to Section V. The Custom Palette.
If you couldn’t find an accurate match on the first printed Color Finder palette, don’t worry.
Follow the easy steps below, and you can find a more suitable custom color.
1. First, try to locate a new Start Color from the palette that is closer than the original
color.
2. Next, after finding a more suitable Start Color, write down that color’s CMYKRB
value. Here is how to obtain this value. There are numbers under each color that
are dependant upon which Step Colors you chose. For example, it might say C:70
M:120. Take note of these values. Then, at the bottom left of the Color Finder
palette you will see a full set of CMYKRB values. The new Start Color’s CMYKRB
value would be C:70, M:120 and whatever the YKRB values are from the full set.
3. Lastly, plug the CMYKRB values for the new Start Color into the boxes in Color
Finder, choose your Step Size, and click on Print Colors once again. Continue with
steps 1-3 until you find your desired color.
V. The Custom Palette
Let us assume that you have found the exact color you need using the Color Finder tool. What
you will want to do next is apply these custom color values to either an existing palette, or to
create a new custom palette altogether. This allows you access to this color again should the
same job arise.
How to use Custom Palette:
First, you need to assign the CMYKRB values of the matched color from the Color Finder
palette to the Output Color CMYKRB fields in the Custom Palette section.
Give your new custom color a descriptive Name in its designated field (e.g. IBM Blue).
Next, assign an RGB Input Color value. There are two methods to establish this value.
- 44 -
1. If you have the original file, sample the color that was matched in your graphic design
application with the eye dropper tool. This will give you the RGB value of that color.
Input this value into the RGB Input Color fields of the Custom Palette section.
2. If you do not have the original file or the artwork has not yet been designed, simply click
on the ‘Input Color Chooser’ button, and then click on “Define Custom Colors”. From
the color matrix, find a color that closely resembles the color that you are adding to the
custom palette. At the bottom-right of the color matrix window are the RGB values.
Simply click ‘OK’ and the RGB Input Color values will be automatically entered. Please
take note of these RGB values for later use in your design applications.
Click the Add Color button. A window will pop up asking you whether you want to add the
color to the palette for all substrates or just the current substrate. Click ‘YES’ here unless
you have the same custom color saved on palettes for other substrates. Another window
will then ask you if you want to save the custom color for all resolutions or just the current
one. Click ‘YES’ here unless you have the same custom color saved on palettes for other
resolutions.
Lastly, click the Save Palette button. When finished, simply Exit out of the window.
* The ‘Import Palette’ and ‘Export Palette’ buttons are convenient to have in the event you need to
transfer palettes to and from different computers.
VI. Adding Swatches to your Application Palette:
It is possible to add your custom color(s) swatch to an application palette as well. You will need to
take note of the Input Color RGB value that you assigned in the previous step in order to create
the new swatch. Refer to your specific design application software’s manual for instructions on
this.
- 45 -
Tips for Successful Sublimation
POLYESTER FABRIC
Maintain appropriate heat press times.
Shortened pressing times will result in good surface color but the sublimation dyes will not completely
penetrate the polyester fibers. This leaves the dyes more susceptible to wash out.
Longer pressing times will cause the dye molecules to penetrate deeper into the fiber, creating a
washed out look. For guidelines on transfer times, see the section entitled Heat Transfer Instructions.
Maintain appropriate heat press temperatures & pressure
The correct temperature setting is vital for achieving desired results. Higher temperatures can damage
the polyester fibers to the point that they cannot properly “hold” the dyes. For guidelines on transfer
temperatures, see the section entitled Heat Transfer Instructions.
Too much pressure on the heat press may cause the dyes to penetrate too deeply into the fabric
causing a washed out look. For guidelines on transfer pressure see the section entitled Heat Transfer
Instructions.
METAL
To obtain the best results when printing onto metal, place the transfer between the metal and an absorbent
cloth or fresh, non-textured paper towel. This will absorb any dyes that pass back through the paper and
any moisture released during the transfer process. If you have problems with inconsistently filled areas, this
may alleviate the problem.
CERAMIC TILES & MUGS
When transferring onto ceramic tiles and mugs, immediately peel the paper off of the ceramic after
removing it from the heat press. Once the paper has been removed, cool the ceramic by submerging it in
cool water, or run water over it from a faucet. If paper residue remains on the surface of the ceramic, clean
with citrus cleaner. If you experience a significant paper-sticking problem, call your SubliJet reseller for
assistance.
Hanes Soft L’Ink® Shirts
The presence of moisture in your fabric can lead to bleeding of the image. Remove moisture by prepressing your shirt for 10 seconds. Use Teflon sheets between the front and back of the shirt to
prevent the inks from penetrating to the other side of the shirt. If dye residue from your heat press is
being deposited on your shirts at any time, heat press a paper towel or similar absorbent material to
remove it.
Using a lint brush before pressing can greatly reduce lint or debris on the shirt.
- 46 -
MOISTURE & HUMIDITY PROBLEMS
The addition of moisture to the sublimation process can cause unwanted results. Under normal
circumstances, the small amount of moisture that can accumulate in your paper is absorbed directly into
the transfer substrate; however hard substrates like metal and ceramic are unable to absorb excess
moisture. Some of problems that are attributed to moisture include: color shifting (colors lose accuracy),
bleeding of the image, and uneven transfer of solid filled areas
To avoid these problems
Keep your paper in a dry place.
If you suspect moisture, set the paper on your press for a few seconds. Do not press it. Just
expose it to the warmth. The heat radiating from the press should help evaporate most of the
moisture.
To eliminate moisture in fabric, press the fabric for 10 seconds before doing the heat transfer.
Use an absorbent cloth or fresh, non-textured paper towel behind the transfer sheet to absorb the
moisture.
- 47 -
Supplies & Equipment
Contact your reseller to purchase sublimation supplies and equipment. For more information, see
the Sublimation Supplies Directory on our website at www.sublimation.com.
Operating Conditions
Certain environmental conditions should be taken into account for the operation of SubliJet IQ™
inks, including temperature and relative humidity.
Supported Operating Conditions are 65° – 80° F with 40 – 60% relative humidity
Optimum Operating Conditions are 68° – 75° F with 40 – 60% relative humidity
Storage
Care should be taken to prevent storing SubliJet below freezing temperatures (32°F, 0°C). Do
not expose SubliJet to extreme heat (temperatures in excess of 104°F, 40°C). If SubliJet has
been in storage, you should allow it to reach room temperature before using it.
Do not expose SubliJet cartridges directly to light, especially sunlight, for extended periods.
For best results, install your SubliJet cartridges by the date on the cartridge. Please refer to
the individual ink bag/cartridge for the specific ink expiration date.
- 48 -
Troubleshooting
The troubleshooting tips found in this section relate mainly to problems that can be seen in
transferred SubliJet images. If you are having problems related to the performance of your printer,
please refer to the Problem Solving section found in the EPSON Stylus Photo R800 &/or R1800
Printer User’s Guide.
The colors in my transferred image are incorrect
The image may need color adjustment. Use PowerDriver color matching software. For more
information on how to use this software, please see the section entitled PowerDriver R1800
IQ User’s Guide.
Ensure you used the right printer driver and driver settings. Please see the section entitled
PowerDriver R1800 IQ User’s Guide.
Ensure you pressed the item with the proper time, temperature, and pressure. For
guidelines see the section entitled Heat Transfer Instructions.
Verify all colors print correctly. Run the Nozzle Check utility and clean the print heads as
required.
My printout is really light on paper
SubliJet IQ ink naturally looks muted before the heat transferring of the image. After
transferring is complete, SubliJet’s unique inks will produce a brilliant and durable final product.
My printout gets cut off on the bottom or side
Verify the printer driver is setup for the correct paper size. Your printer driver setting needs
to match the paper size that is loaded in your printer.
Ensure the right paper guide is in the proper position. When setting up the printer, slide the
right paper guide to the left until it clicks into position.
My image looks good but it washes out
Ensure you pressed the garment with the proper time, temperature, and pressure. If so, try
pressing longer to ensure that the dyes are penetrating the fibers sufficiently. For guidelines,
see the section entitled Heat Transfer Instructions.
Ensure you used a recommended paper. See the section entitled Selecting Paper.
Ensure your substrate is designed to accept sublimation transfers. Garments made from
natural fibers, such as cotton, are not compatible with the sublimation process.
- 49 -
Colors are light and splotchy
Ensure you printed on the correct side of the paper. The print side is the bright white side of
the paper.
Ensure you used a recommended paper. For more information, see the section entitled
Selecting Paper.
Ensure you pressed the item with the proper time, temperature, and pressure. For
guidelines, see the section entitled Heat Transfer Instructions.
Verify your printer driver settings are correct. Please see the section entitled PowerDriver
R1800 IQ User’s Guide for additional information.
Ensure you do not have a moisture problem. For more information, see the section entitled
Moisture and Humidity on the Tips for Successful Sublimation page.
Ensure your substrate is designed to accept a sublimation transfer. Garments made from
natural fibers such as Cotton are not compatible with the sublimation process.
My image looks blurred
Ensure you pressed the item with the proper time, temperature, and pressure. For
guidelines, see the section entitled Heat Transfer Instructions.
Ensure you used a recommended paper. For more information, see the section entitled
Selecting Paper.
Ensure you printed on the correct side of the paper. The print side is the bright white side of
the paper.
Ensure you do not have a moisture problem. Try drying the paper on the press or putting a
paper towel behind the transfer when you heat press it. Read the section entitled Moisture
and Humidity on the Tips for Successful Sublimation page.
Verify that the printer’s print heads are properly aligned. For further instructions, see the
EPSON Stylus Photo R800 &/or R1800 Printer User’s Guide.
My image has gaps or bands present
Ensure that all of the printer’s nozzles are firing properly. Perform a Nozzle Check from the
Utility tab of your printer driver. For further instructions, see the EPSON Stylus Photo R800
& R1800 Printer User’s Guide
If one or more of the nozzles fail to print, perform a Print Head Cleaning. For further
instructions, see the EPSON Stylus Photo R800 &/or R1800 Printer User’s Guide.
- 50 -
Technical Support
If you are having difficulties achieving good results from your SubliJet IQ™ inks, you have several
support options:
1. Telephone: You may contact your authorized SubliJet reseller during their normal hours of
operation for assistance. A full listing of authorized SubliJet Resellers is available on our Web
site at www.sawgrassink.com. In addition, you may also contact Sawgrass Technical Support
at (888) 253-1679 between the hours of 8:00 AM and 5:30 PM Eastern Standard Time.
2. Internet: Visit the Technical Support area of the Sawgrass Technologies, Inc. website at
www.sawgrassink.com. The troubleshooting utility found here will provide you with solutions to
some of the most common problems. You may submit a detailed description of your problem if
you need further assistance.
3. E-mail: You may e-mail Sawgrass Technical Support with a detailed description of your
problem at [email protected].
4. Fax: You may fax a detailed description of your problem to Sawgrass Technical Support at
(843) 849-3847.
Project Sublimation
Whether you are a current business owner adding sublimation to your line-up, a
novice/intermediate sublimation user who would like to learn more, or an entrepreneur exploring
the dye-sub industry, Project Sublimation is the industry’s choice for practical, handson instruction. From equipment and product overview to marketing and pricing your products;
from the science of sublimation to color management, our two-day, interactive workshop series
will give you the background and know-how needed to run a full-service sublimation business.
At Project Sublimation workshop events, you will also have the opportunity to network with fellow
sublimation users across the US and Canada. The new, enhanced Project Sublimation web site
gives attendees access to the full business assets and forums, an invaluable resource for growing
your sublimation business.
Isn’t it time you took your business to the next level?
Project Sublimation travels to cities throughout the United States and Canada. Join us in a city
near you for this dynamic, full-service workshop. Spend two days with one of our experts and get
a leg up on your competition.
Please visit us on the web at www.ProjectSublimation.com or phone us toll free at
1.888.780.7349.
- 51 -
Project Cotton is a series of workshops and courses designed to provide the knowledge, skills and
strategies for growing a profitable digital cotton decorating business.
Sawgrass Technologies, Inc. is pleased to announce the availability of a new and exciting
educational series – Project Cotton! Modeled along the same line as our popular and productive
Project Sublimation program, Project Cotton will provide current and prospective garment
decorators with knowledge, skills, strategies and ideas to build and grow their cotton printing
business.
For those of you considering investment in a cotton decorating business or adding cotton
decorating as a complement to your existing business, Project Cotton will provide valuable
information and insight into this exciting and dynamic technology. Project Cotton will help you
evaluate which systems are best suited to your needs and provide guidance to assist you in
selecting the solution and accessories which are right for you and your business.
Whether you are a new system purchasers, or a current user wanting to learn more, Project
Cotton can help you grow and expand your business. Project Cotton will provide insight into
profitable new markets and new products. Project Cotton will share innovative sales strategies to
assist you in increasing sales and growing your business. On the operations side, Project Cotton
provides tools to increase the productivity and profitability of your business.
Project Cotton events are offered throughout the country through Authorized Sawgrass Channel
Partners. Please contact Sawgrass Technologies (888) 253-1679 or visit
www.sawgrassink.com/learn/project-cotton.php for more information on Project Cotton workshops
in your area.
- 52 -