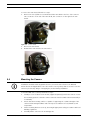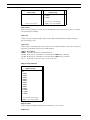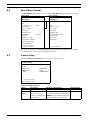
1
MIC Series 550 Classic Camera MIC Series 550 Classic en Installation and User Manual MIC Series 550 Classic Camera Table of Contents | en 3 Table of Contents 1 Preface 5 1.1 About this Manual 5 1.2 Conventions (Safety Precautions) in this Manual 5 1.3 Legal Information 5 2 Safety 6 2.1 Important Safety Instructions 6 2.2 Important Notices 7 2.3 FCC and ICES Compliance 9 2.4 Bosch Notices 10 2.5 Customer Support and Service 11 3 Unpacking 12 3.1 Parts List 12 3.2 Additional Tools Required 12 4 Installation Overview 13 4.1 Typical Mounting Arrangements 14 4.2 Mounting Positions 15 5 Installation 16 5.1 Overview of Installation Steps 16 5.2 Canting the Camera 16 5.3 Adjusting the Rain Shield for Inverted Operation 17 5.4 Mounting the Camera 18 5.5 Lightning Protection 19 5.6 Electrical Connections 20 5.6.1 Composite Cable Color-coding 20 5.6.2 Alarm Inputs 21 5.6.3 Video 21 6 Getting Started 22 6.1 Establishing Control of the Camera 22 6.1.1 Establishing Control of the Camera via Biphase Protocol 22 6.1.2 Establishing Control of the Camera via RS-485 Protocol 22 6.2 Powering On 23 6.3 Controlling the Camera 23 6.3.1 Navigating the On-Screen Display (OSD) Menus 23 6.3.2 Basic Keyboard Operation 24 6.3.3 Keyboard Commands, Bosch Protocol 24 6.3.4 Keyboard Commands, Pelco Protocol 25 6.3.5 Special Preset Commands, Pelco Protocol 25 6.4 Setting the Camera Address via FastAddress 26 6.4.1 FastAddress, Bosch Protocol 26 6.4.2 FastAddress, Pelco Protocols 26 Bosch Security Systems, Inc. Installation and User Manual F.01U.276.622 | 1.0 | 2012.09 4 en | Table of Contents MIC Series 550 Classic Camera 6.5 Setting Passwords 27 6.5.1 Special Passwords 27 6.5.2 Setting Passwords, Bosch Protocol 27 6.6 Configuring the Camera for Inverted Operation 28 7 On-Screen Display (OSD) Menus (Bosch Protocol) 29 7.1 Camera Setup Menu 30 7.2 Lens Setup Menu 31 7.3 PTZ Setup Menu 32 7.4 Display Setup Menu 34 7.5 Communication Setup Menu 34 7.6 Alarm Setup 35 7.7 Diagnostics Menu 38 8 On-Screen Display (OSD) Menus (Pelco Protocol) 41 8.1 Command Lock (locked) 41 8.2 Bosch Menu (locked) 42 8.3 Camera Setup 42 8.4 PTZ Setup (unlocked) 43 8.5 Other Menus 44 9 Common User Commands (unlocked) 45 9.1 Setting AutoPan Mode 45 9.2 Setting Preset Shots 45 9.3 Specifying a Shot Title 45 9.4 Configuring Preposition Tours 46 9.5 Programming the Inactivity Operation 46 9.6 Recording Tours 47 9.7 Using the Wiper/Washer 47 10 Advanced Features 48 10.1 Alarm Rules 48 10.1.1 Controlling Alarm Rules 48 10.1.2 Alarm Rule Examples 48 10.2 Pre-position Tour 49 A Keyboard Commands by Number 50 F.01U.276.622 | 1.0 | 2012.09 Installation and User Manual Bosch Security Systems, Inc. MIC Series 550 Classic Camera Preface | en 1 Preface 1.1 About this Manual 5 This user manual has been compiled with great care and the information it contains has been verified thoroughly. The text was complete and correct at the time of printing. The ongoing development of products means that the content can change without notice. Bosch Security Systems accepts no liability for damage resulting directly or indirectly from faults, incompleteness or discrepancies between the user guide and the product described. 1.2 Conventions (Safety Precautions) in this Manual In this manual, the following symbols and notations are used to draw attention to special situations: DANGER! This symbol indicates an imminently hazardous situation such as “Dangerous Voltage” inside the product. If not avoided, this will result in an electrical shock, serious bodily injury, or death. WARNING! Indicates a potentially hazardous situation. If not avoided, this could result in serious bodily injury or death. CAUTION! Medium Risk Indicates a potentially hazardous situation. If not avoided, this may result in minor or moderate injury. Alerts the user to important instructions accompanying the unit. CAUTION! Indicates a potentially hazardous situation. If not avoided, this may result in property damage or risk of damage to the unit. NOTICE! This symbol indicates information or a company policy that relates directly or indirectly to the safety of personnel or protection of property. 1.3 Legal Information Copyright This user manual is the intellectual property of Bosch Security Systems, Inc. and is protected by copyright. All rights reserved. Trademarks All hardware and software product names used in this document are likely to be registered trademarks and must be treated accordingly. Bosch Security Systems, Inc. Installation and User Manual F.01U.276.622 | 1.0 | 2012.09 6 2 en | Safety MIC Series 550 Classic Camera Safety Before installing and operating the camera, please read this manual carefully. 2.1 Important Safety Instructions Read, follow, and retain for future reference all of the following safety instructions. Heed all warnings on the unit and in the operating instructions before operating the unit. 1. Install in accordance with the manufacturer's instructions and in accordance with applicable local codes. 2. Do not install the unit near any heat sources such as radiators, heaters, stoves, or other equipment (including amplifiers) that produce heat. 3. Do not install the camera power supply near water for example near a bathtub, washbowl, or swimming pool. The power supplies have an IP65 rating and are suitable for outside installation; however, for security reasons, Bosch recommends that they are installed in a suitable equipment cabinet. The camera unit is sealed to IP68 and can be used safely in damp environments or outdoors, as long as the base cable connector is suitably sealed. 4. Operate the unit only from the type of power source indicated on the label. Before proceeding, be sure to disconnect the power from the cable to be installed into the unit. – For external power supplied units, use only the recommended or approved power – For limited power source units, this power source must comply with EN60950. – For 24 VAC units, voltage applied to the unit's power input should not exceed ±10%, supplies. Substitutions may damage the unit or cause fire or shock. or 28 VAC. User-supplied wiring must comply with local electrical codes (Class 2 power levels). Do not ground the supply at the terminals or at the unit's power supply terminals. – If unsure of the type of power supply to use, contact your dealer or local power company. 5. Overloading - Do not overload outlets and extension cords. This can cause fire or electrical shock. 6. Power disconnect - Units have power supplied whenever the power cord is inserted into 7. Ventilation - The MIC Series 550 Classic camera is a completely sealed unit and requires the power source. The power cord is the main power disconnect for all units. no special consideration as regards to ventilation. 8. Power cord and plug protection - Protect the plug and power cord from foot traffic, being pinched by items placed upon or against them at electrical outlets, and its exit from the unit. For units intended to operate with 230 VAC, 50 Hz, the input and output power cord must comply with the latest versions of IEC Publication 227 or IEC Publication 245. 9. Lightning - For added protection during a lightning storm, or when leaving this unit unattended and unused for long periods, unplug the unit from the wall outlet and disconnect the cable system. This will prevent damage to the unit from lightning and power line surges. 10. Object and liquid entry - With the exception of the base connector, the MIC Series 550 Classic camera can be exposed to non corrosive liquids without damage. Never push objects into the base connector as this may damage the connection pins and prevent the camera operating correctly. 11. Controls adjustment - Adjust only those controls specified in the operating instructions. Improper adjustment of other controls may cause damage to the unit. F.01U.276.622 | 1.0 | 2012.09 Installation and User Manual Bosch Security Systems, Inc. MIC Series 550 Classic Camera Safety | en 7 12. Safety check - Safety checks should be performed upon completion of service or repairs to the unit to ensure proper operating condition. 13. Attachments, changes or modifications - Only use attachments/accessories specified by the manufacturer. Any change or modification of the equipment, not expressly approved by Bosch, could void the warranty or, in the case of an authorization agreement, authority to operate the equipment. 14. Cleaning - Unplug the unit from the outlet before cleaning. Follow any instructions provided with the unit. Generally, using a dry cloth for cleaning is sufficient, but a moist fluff-free cloth or leather shammy may also be used. Do not use liquid cleaners or aerosol cleaners. 15. Servicing - Do not attempt to service this unit yourself. Opening or removing covers may expose you to dangerous voltage or other hazards. Refer all servicing to qualified service personnel. 16. Damage requiring service - Unplug the unit from the main AC power source and refer servicing to qualified service personnel when any damage to the equipment has occurred, such as: – the power supply cord or plug is damaged; – liquid has been spilled in the equipment; – an object has fallen into the unit; – the unit has been dropped or the unit cabinet is damaged; – the unit exhibits a distinct change in performance; – the unit does not operate normally when the user correctly follows the operating instructions. 17. Replacement parts - Make sure that the service technician uses replacement parts specified by the manufacturer, or that have the same characteristics as the original parts. Unauthorized substitutions may cause fire, electrical shock, or other hazards. 2.2 Important Notices Accessories - Do not place this unit on an unstable stand, tripod, bracket, or mount. The unit may fall, causing serious injury and/or serious damage to the unit. Use only with the cart, stand, tripod, bracket, or table specified by the manufacturer. When a cart is used, use caution and care when moving the cart/apparatus combination to avoid injury from tip-over. Quick stops, excessive force, or uneven surfaces may cause the cart/unit combination to overturn. Mount the unit per the manufacturer's instructions. All-pole power switch - Incorporate an all-pole power switch, with a contact separation of at least 3 mm in each pole, into the electrical installation of the building.If it is needed to open the housing for servicing and/or other activities, use this all-pole switch as the main disconnect device for switching off the voltage to the unit. Camera grounding - For mounting the camera in potentially damp environments, ensure to ground the system using the ground connection of the power supply connector (see section: Connecting external power supply). Camera lens - An assembled camera lens in the outdoor housing must comply and be tested in accordance with UL/IEC60950. Any output or signal lines from the camera must be SELV or Limited Power Source. For safety reasons, the environmental specification of the camera lens assembly must be within the environmental specification of -10 °C (14 °F) to 50 °C (122 °F). Camera signal - Protect the cable with a primary protector if the camera signal is beyond 140 feet, in accordance with NEC800 (CEC Section 60). Coax grounding: – Bosch Security Systems, Inc. Ground the cable system if connecting an outside cable system to the unit. Installation and User Manual F.01U.276.622 | 1.0 | 2012.09 8 en | Safety MIC Series 550 Classic Camera – Connect outdoor equipment to the unit's inputs only after this unit has had its grounding plug connected to a grounded outlet or its ground terminal is properly connected to a ground source. – Disconnect the unit's input connectors from outdoor equipment before disconnecting the grounding plug or grounding terminal. – Follow proper safety precautions such as grounding for any outdoor device connected to this unit. U.S.A. models only - Section 810 of the National Electrical Code, ANSI/NFPA No.70, provides information regarding proper grounding of the mount and supporting structure, grounding of the coax to a discharge unit, size of grounding conductors, location of discharge unit, connection to grounding electrodes, and requirements for the grounding electrode. NOTICE! This device is intended for use in public areas only. U.S. federal law strictly prohibits surreptitious recording of oral communications. Cold Start-ups - If camera is powered up in extremely cold temperature (for example, -40°C), please allow 30 minutes warm-up after powering camera prior to operation. In some cases, camera may require soft reset (Aux ON 911) or a power cycle before usable video is available. Disposal - Your Bosch product was developed and manufactured with high-quality material and components that can be recycled and reused. This symbol means that electronic and electrical appliances, which have reached the end of their working life, must be collected and disposed of separately from household waste material. Separate collecting systems are usually in place for disused electronic and electrical products. Please dispose of these units at an environmentally compatible recycling facility, per European Directive 2002/96/EC. Environmental statement - Bosch has a strong commitment towards the environment. This unit has been designed to respect the environment as much as possible. Electrostatic-sensitive device - Use proper CMOS/MOS-FET handling precautions to avoid electrostatic discharge. NOTE: Wear required grounded wrist straps and observe proper ESD safety precautions when handling the electrostatic-sensitive printed circuit boards. Fuse rating - For security protection of the device, the branch circuit protection must be secured with a maximum fuse rating of 16A. This must be in accordance with NEC800 (CEC Section 60). Grounding and polarization - This unit may be equipped with a polarized alternating current line plug (a plug with one blade wider than the other blade). This safety feature allows the plug to fit into the power outlet in only one way. If unable to insert the plug fully into the outlet, contact a locally certified electrician to replace the obsolete outlet. Do not defeat the safety purpose of the polarized plug. Alternately, this unit may be equipped with a 3-pole grounding plug (a plug with a third pin for earth grounding). This safety feature allows the plug to fit into a grounded power outlet only. If unable to insert the plug into the outlet, contact a locally certified electrician to replace the obsolete outlet. Do not defeat the safety purpose of the grounding plug. Moving - Disconnect the power before moving the unit. Move the unit with care. Excessive force or shock may damage the unit. Outdoor signals - The installation for outdoor signals, especially regarding clearance from power and lightning conductors and transient protection, must be in accordance with NEC725 and NEC800 (CEC Rule 16-224 and CEC Section 60). Permanently connected equipment - Incorporate a readily-accessible disconnect device in the building installation wiring. F.01U.276.622 | 1.0 | 2012.09 Installation and User Manual Bosch Security Systems, Inc. MIC Series 550 Classic Camera Safety | en 9 Power lines - Do not locate the camera near overhead power lines, power circuits, or electrical lights, nor where it may contact such power lines, circuits, or lights. Video loss - Video loss is inherent to digital video recording; therefore, Bosch Security Systems cannot be held liable for any damage that results from missing video information. To minimize the risk of lost digital information, Bosch Security Systems recommends multiple, redundant recording systems, and a procedure to back up all analog and digital information. NOTICE! This is a Class A product. In a domestic environment, this product may cause radio interference, in which case the user may be required to take adequate measures. 2.3 FCC and ICES Compliance FCC & ICES Information (U.S.A. and Canadian Models Only) This device complies with part 15 of the FCC Rules. Operation is subject to the following conditions: – this device may not cause harmful interference, and – this device must accept any interference received, including interference that may cause undesired operation. NOTE: This equipment has been tested and found to comply with the limits for a Class A digital device, pursuant to Part 15 of the FCC Rules and ICES-003 of Industry Canada. These limits are designed to provide reasonable protection against harmful interference when the equipment is operated in a commercial environment. This equipment generates, uses, and radiates radio frequency energy and, if not installed and used in accordance with the instruction manual, may cause harmful interference to radio communications. Operation of this equipment in a residential area is likely to cause harmful interference, in which case the user will be required to correct the interference at his expense. Intentional or unintentional modifications, not expressly approved by the party responsible for compliance, shall not be made. Any such modifications could void the user's authority to operate the equipment. If necessary, the user should consult the dealer or an experienced radio/television technician for corrective action. The user may find the following booklet, prepared by the Federal Communications Commission, helpful: How to Identify and Resolve Radio-TV Interference Problems. This booklet is available from the U.S. Government Printing Office, Washington, DC 20402, Stock No. 004000-00345-4. Informations FCC et ICES (modèles utilisés aux États-Unis et au Canada uniquement) Ce produit est conforme aux normes FCC partie 15. la mise en service est soumises aux deux conditions suivantes : – – cet appareil ne peut pas provoquer d'interférence nuisible et cet appareil doit pouvoir tolérer toutes les interférences auxquelles il est soumit, y compris les interférences qui pourraient influer sur son bon fonctionnement. AVERTISSEMENT: Suite à différents tests, cet appareil s’est révélé conforme aux exigences imposées aux appareils numériques de Classe A en vertu de la section 15 du règlement de la Commission fédérale des communications des États-Unis (FCC). Ces contraintes sont destinées à fournir une protection raisonnable contre les interférences nuisibles quand l'appareil est utilisé dans une installation commerciale. Cette appareil génère, utilise et émet de l'energie de fréquence radio, et peut, en cas d'installation ou d'utilisation non conforme aux instructions, générer des interférences nuisibles aux communications radio. L’utilisation de ce Bosch Security Systems, Inc. Installation and User Manual F.01U.276.622 | 1.0 | 2012.09 10 en | Safety MIC Series 550 Classic Camera produit dans une zone résidentielle peut provoquer des interférences nuisibles. Le cas échéant, l’utilisateur devra remédier à ces interférences à ses propres frais. Au besoin, l’utilisateur consultera son revendeur ou un technicien qualifié en radio/télévision, qui procédera à une opération corrective. La brochure suivante, publiée par la Commission fédérale des communications (FCC), peut s’avérer utile : How to Identify and Resolve Radio-TV Interference Problems (Comment identifier et résoudre les problèmes d’interférences de radio et de télévision). Cette brochure est disponible auprès du U.S. Government Printing Office, Washington, DC 20402, États-Unis, sous la référence n° 004-000-00345-4. 2.4 Bosch Notices Disclaimer Underwriter Laboratories Inc. (“UL”) has not tested the performance or reliability of the security or signaling aspects of this product. UL has only tested fire, shock and/or casualty hazards as outlined in UL's Standard(s) for Safety for Closed Circuit Television Equipment, UL 2044. UL Certification does not cover the performance or reliability of the security or signaling aspects of this product. UL MAKES NO REPRESENTATIONS, WARRANTIES, OR CERTIFICATIONS WHATSOEVER REGARDING THE PERFORMANCE OR RELIABILITY OF ANY SECURITY OR SIGNALING RELATED FUNCTIONS OF THIS PRODUCT. Disclaimer Underwriter Laboratories Inc. (“UL”) has not tested the performance or reliability of the security or signaling aspects of this product. UL has only tested fire, shock and/or casualty hazards as outlined in UL's Standard(s) for Safety for Information Technology Equipment, UL 60950-1. UL Certification does not cover the performance or reliability of the security or signaling aspects of this product. UL MAKES NO REPRESENTATIONS, WARRANTIES, OR CERTIFICATIONS WHATSOEVER REGARDING THE PERFORMANCE OR RELIABILITY OF ANY SECURITY OR SIGNALINGRELATED FUNCTIONS OF THIS PRODUCT. F.01U.276.622 | 1.0 | 2012.09 Installation and User Manual Bosch Security Systems, Inc. MIC Series 550 Classic Camera 2.5 Safety | en 11 Customer Support and Service If this unit needs service, contact the nearest Bosch Security Systems Service Center for authorization to return and shipping instructions. Service Centers USA Telephone: 800-366-2283 or 585-340-4162 Fax: 800-366-1329 Email: [email protected] Customer Service Telephone: 888-289-0096 Fax: 585-223-9180 Email: [email protected] Technical Support Telephone: 800-326-1450 Fax: 585-223-3508 or 717-735-6560 Email: [email protected] Repair Center Telephone: 585-421-4220 Fax: 585-223-9180 or 717-735-6561 Email: [email protected] Canada Telephone: 514-738-2434 Fax: 514-738-8480 Europe, Middle East & Africa Region Please contact your local distributor or Bosch sales office. Use this link: http://www.boschsecurity.com/startpage/html/europe.htm Asia Pacific Region Please contact your local distributor or Bosch sales office. Use this link: http://www.boschsecurity.com/startpage/html/asia_pacific.htm More Information For more information please contact the nearest Bosch Security Systems location or visit www.boschsecurity.com Bosch Security Systems, Inc. Installation and User Manual F.01U.276.622 | 1.0 | 2012.09 12 3 en | Unpacking MIC Series 550 Classic Camera Unpacking This equipment should be unpacked and handled with care. If an item appears to have been damaged in shipment, notify the shipper immediately. Verify that all the parts listed in the Parts List below are included. If any items are missing, notify your Bosch Security Systems Sales or Customer Service Representative. The original packing carton is the safest container in which to transport the unit and must be used if returning the unit for service. Save it for possible future use. NOTICE! Do not stand the canted (45°) MIC Series 550 Classic camera upright as it is unstable unless properly mounted. 3.1 Parts List The package containing the MIC Series 550 Classic camera should include the following items: Quantity Part 1 MIC Series 550 Classic Camera 1 Nebar gasket 3.2 Additional Tools Required The following table lists additional tools required (not supplied by Bosch): Quantity 1 1 1 1 1 F.01U.276.622 | 1.0 | 2012.09 Part 13 mm wrench for the PCD foot, fixing bolts 3 mm screwdriver for the terminal blocks in power supply 8 mm screwdriver for fixing screws for MIC Series PSU enclosure No. 2 Phillips screwdriver for adjusting the rain shield, if required Silicone sealant for ensuring a water tight seal [if not using the Nebar gasket] Installation and User Manual Bosch Security Systems, Inc. MIC Series 550 Classic Camera 4 Installation Overview | en 13 Installation Overview CAUTION! Installation should be made by qualified service personnel and conform to the National Electrical Code and applicable local codes. The MIC Series cameras are designed for easy installation on a variety of common fittings. The most common type of mount used is a dedicated CCTV camera pole where the camera is bolted directly to the top using industry-standard 4 in. (101.6 mm) fitting. This type of camera pole provides a robust mounting platform that minimizes camera motion and typically has a large base cabinet for mounting ancillary equipment such as power supplies. The camera can also be mounted on lamp post columns using the Pole Mount Bracket (MICPMB); however, users should be aware that lamp posts can often be subject to movement and are not suitable platforms in all conditions or for all applications. For mounting directly onto buildings, Bosch Security Systems manufactures a range of brackets suitable for all typical building installations for upright (90°), Inverted, or canted (45°) positions. Figure 4.1 MIC camera mounting positions: Inverted, Upright, and Canted The camera’s adaptability enables easy integration in a wide variety of mobile and redeployable installations. These have included lifeboats and other surface/subsurface vessels, emergency service vehicles, highway agency vehicles, council/contractor parking enforcement vehicles, and crowd-control vehicles. Bosch Security Systems, Inc. Installation and User Manual F.01U.276.622 | 1.0 | 2012.09 14 4.1 en | Installation Overview MIC Series 550 Classic Camera Typical Mounting Arrangements Below are examples of typical mounting arrangements for MIC Series cameras. Figure 4.2 Typical pole mount (from left to right: Pole Mount Bracket (MIC-PMB), Shallow Conduit Adapter (MIC-SCA), and Wall Mount Bracket (MIC-WMB)) Number 1 2 3 4 5 6 7 8 9 Figure 4.3 Description Securing bolts for Shallow Conduit Adapter 90 mm stainless steel pole banding Blocks for Pole Mount Bracket Plate for Pole Mount Bracket Securing bolts for plate for Pole Mount Bracket Shallow Conduit Adapter “O” ring Wall Mount Bracket Securing bolts for Wall Mount Bracket Typical wall mount (from left to right: Wall Mount Bracket (MIC-WMB), Shallow Conduit Adapter (MIC-SCA), and Spreader Plate (MIC-SPR)) F.01U.276.622 | 1.0 | 2012.09 Installation and User Manual Bosch Security Systems, Inc. MIC Series 550 Classic Camera Installation Overview | en Figure 4.4 15 Typical corner mount (from left to right: Wall Mount Bracket (MIC-WMB), Shallow Conduit Adapter (MIC-SCA), and Corner Mount Bracket (MIC-CMB)) 4.2 Mounting Positions CAUTION! The upright unit can be mounted either with the camera ball up or down. To get the picture the correct way for installation with the camera ball down, rotate the camera tilt axis 180°. For more information, see Section 6.6 Configuring the Camera for Inverted Operation, page 28. If the camera is mounted ball down, it is essential that the connector and base area of the camera are completely sealed from water ingress. Any water getting into the connector is liable to cause corrosion to the connector pins, leading to unreliable operation of the camera unit. To prevent water penetrating the composite cable connector threads, seal the 25 mm thread at final installation using PTFE tape. Alternately, a suitable sealant may be liberally applied to the thread prior to final tightening. The MIC Series 550 Classic cameras, if canted, are designed to be mounted upright (straight up, 90°), inverted (straight down, 90°), or canted upright (ball up, 45°). The tilt limits for the canted unit prevent it from working properly if mounted ball down. See the figure below for the correct ways to mount the camera. Figure 4.5 Mounting diagram: Correct and Incorrect ways (1 = Upright; 2 = Inverted; 3 = Canted; 4 = inverted canted; 5 = inverted on top of pole) Number 1 2 3 4 5 Bosch Security Systems, Inc. Description Correct way, Upright Correct way, Inverted Correct way, Canted Incorrect way, inverted and canted Incorrect way, inverted on top of pole Installation and User Manual F.01U.276.622 | 1.0 | 2012.09 16 en | Installation MIC Series 550 Classic Camera 5 Installation 5.1 Overview of Installation Steps Follow these steps in sequence to install the MIC550 Classic camera. Note: Depending on your desired mounting position and location, as well as your chosen accessories, you may not need to complete every step. 1. Cant the camera. See Section 5.2 Canting the Camera, page 16. 2. Reverse the rain shield (for cameras mounted in inverted position). See Section 5.3 Adjusting the Rain Shield for Inverted Operation, page 17. 3. Mount the camera. See Section 5.4 Mounting the Camera, page 18. 4. Mount the power supply unit (PSU). See the MIC Series Power Supplies Installation Manual that came with the PSU (sold separately from the camera). 5. Make the necessary connections for power, telemetry, and video. See Section 5.6 Electrical Connections, page 20. 6. Connect the camera to the computer. See Section 6 Getting Started. 7. Configure the camera for inverted operation (for cameras mounted in inverted position). See Section 6.6 Configuring the Camera for Inverted Operation, page 28. 5.2 Canting the Camera The MIC550 Classic camera features twist-lock on-site canting functionality. This allows the camera to be installed upright (90°), inverted, or canted (45º) to achieve the perfect field of view. Installers can adjust the camera from an upright position to a canted position if desired. The following graphic shows the camera in both upright and canted positions. Figure 5.1 MIC550 Classic cameras (from left: Front view, canted (1); Front view, upright (2); Side view, upright (3); Side view, canted (4)) To cant the camera, follow these steps: 1. Firmly secure the camera base by the 4-inch PCD foot bolts. 2. Locate and remove the two (2) pan body fixing screws (identified by arrows in Figure 5.2 below). Once the screws have been loosened, lift them up and continue turning to lock the screws open. Ensure not to damage the paint work on the camera. F.01U.276.622 | 1.0 | 2012.09 Installation and User Manual Bosch Security Systems, Inc. MIC Series 550 Classic Camera Installation | en Figure 5.2 17 Pan body fixing screws NOTICE! The small security screws (identified in Figure 5.4 below) are not designed to be removed. Any attempt to remove these screws will void the warranty and potentially cause serious damage to the camera. 3. Grasp the lower camera body beneath the pan body joint and then carefully twist the upper camera body clockwise, as shown in Figure 5.3 below, until the camera body has rotated 180° around. The top part of the camera will now be at a 45° angle (canted). Figure 5.3 4. Canting in progress Align the two (2) pan body fixing screws, then carefully replace and tighten them. The camera is now ready to be installed and configured. Figure 5.4 5.3 Camera in canted position; arrows point to pan body fixing screws (1) and security screws (2) Adjusting the Rain Shield for Inverted Operation The upright unit can be mounted with the camera ball up or down. When the camera will be in inverted position, you should reverse the rain shield to provide weather protection for the window glass. Figure 5.5 Bosch Security Systems, Inc. Rain shield Installation and User Manual F.01U.276.622 | 1.0 | 2012.09 18 en | Installation MIC Series 550 Classic Camera To reverse the rain shield, follow these steps: 1. Remove the four (4) M3 x 6 screws that hold the rain shield to the face of the camera. Two screws are on the left of the rain shield; two screws are on the right of the rain shield. Figure 5.6 Reverse the rain shield. 3. Reattach the rain shield to the camera face. Figure 5.7 5.4 Screw removal 2. Inverted rain shield installed on camera Mounting the Camera NOTICE! Installation should be made by qualified service personnel and conform to the National Electrical Code and applicable local codes. Ensure a strong safety chain is used to secure the camera to prevent any danger of dropping the product during installation. To mount a MIC Series camera, follow these steps: 1. Identify a secure location for the mount (supplied separately) and for the camera. Locate the mounting position so that the camera cannot be interfered with either intentionally or accidentally. 2. Ensure that the mounting surface is capable of supporting the combined weight of the camera and mounting hardware under all expected conditions of load, vibration, and temperature. 3. Fit the mounting brackets securely, observing all appropriate safety precautions and local building regulations. 4. F.01U.276.622 | 1.0 | 2012.09 Carefully lift the camera to the mounting point. Installation and User Manual Bosch Security Systems, Inc. MIC Series 550 Classic Camera Installation | en 5. Attach the security attachment point to a safety chain (not supplied). 6. Attach the safety chain to a secure part of your mounting structure. 7. 19 Connect the female cable 12-pin connector to the male plug in the base of the camera. Screw the cable connector sleeve onto the plug until it is firmly secured (approximately four (4) turns from the start of thread engagement). 8. Earth the camera using one of the securing supplied bolts. Only earth the camera at a single point to prevent earth loops and video distortion (hum bars), caused by electrical interference, from appearing on the camera picture in the control room. Please note the following: – The camera module and housing are electrically isolated so the housing should be safety earthed regardless. The safety earth should be a bonding connection (for example, one of the securing bolts) to the camera’s outside case, and should be attached to the Earth terminal post on the PCD base of the camera. – If dual earthing is unavoidable, then a video isolation transformer should be fitted between the two earths. – If the system is copper throughout and the camera pictures are fed back to the control room coaxial copper cable, then the camera should be earthed only at the video termination point in the control room. In this case, the "Earth Link" on the PCB should be broken. – If the video is transmitted back to the control room via some non-electrical connecting medium (for example, fiber optic, radio, or microwave link), then the camera should be earthed at the transmitter point in the power supply unit. The PSU "Earth Link" may be used for this purpose. 9. Use M8 x 20 mm stainless steel nuts, bolts, and washers to secure the PCD base of the camera to the mounting bracket. An additional Nebar gasket or suitable silicone sealant can be used to ensure a water tight seal between the base and mounting surface. Tighten all bolts securely. 10. Secure all cabling and conduit. WARNING! If the camera is mounted ball down, it is essential that the connector and base area of the camera are completely sealed from water ingress. Any water getting into the connector is liable to cause corrosion to the connector pins, leading to unreliable operation of the camera unit. WARNING! To prevent water from penetrating the composite cable connector threads, the 25 mm thread should be sealed at final installation using PTFE tape (not supplied). Alternatively, a suitable sealant may be liberally applied to the thread prior to final tightening. 5.5 Lightning Protection If the camera is positioned in a highly exposed area where lightning strikes may occur, it is recommended to install a lightning conductor within 0.5 m of the camera and at least 1.5 m higher than the camera. The construction of the housing itself is capable of coping with secondary strikes. If the correct lightning protection is applied, no damage to the internal electronics or camera should result. Additionally, an earth bonding connection to the case provides protection against damage from secondary strikes. Bosch Security Systems, Inc. Installation and User Manual F.01U.276.622 | 1.0 | 2012.09 20 en | Installation 5.6 MIC Series 550 Classic Camera Electrical Connections All connections (power, telemetry, video) to the camera are provided through the screw terminal connections in the MIC power supply. Purpose-built composite cables, available in various lengths, are 2-conductor cables that are pre-made with a female terminated 12-way connector fitted to them for attachment to the male connector installed into the base of the camera. The table below identifies the available lengths of these cables, which are required but sold separately from the camera. (The gauge ranges from 14 - 18.) Model Number MIC-2M-S MIC-10M-S MIC-20M-S MIC-25M-S Length 2m 10 m 20 m 25 m Figure 5.8 Composite cable before connection Figure 5.9 View of the Composite Cable connected to a MIC Series 550 Classic camera Refer to the MIC Series Power Supply Installation Manual included on the Installation CD for full details on installing a MIC Series Power Supply Unit and connecting to a MIC550 Classic camera. WARNING! Ensure that all power is disconnected before opening or working on the MIC power supply. Installation should be made by qualified service personnel and conform to the National Electrical Code and applicable local codes. Ensure a strong safety chain is used to secure the MIC-550 Camera to prevent any danger of dropping the product during installation. 5.6.1 Composite Cable Color-coding The composite cable has no termination (free wires) at the other end for wiring into the power supply. The standard color coding used in these cables is as follows: F.01U.276.622 | 1.0 | 2012.09 Installation and User Manual Bosch Security Systems, Inc. MIC Series 550 Classic Camera Installation | en Figure 5.10 21 Exploded View of Composite Cable Connections Camera Cable Signal Name Connector Pin 1 2 3 4 5 6 7 8 9 10 Description Cable Wire Washer Drive Rtn Tamper Sw Rtn Washer Drive Tamper Sw Video Return Video Output Full Duplex Tx B Full Duplex Tx A 0v Full Duplex Rx A 11 Half Duplex Tx/Rx A Full Duplex Rx B Telemetry I/O to RS-422/485 White 12 13 Half Duplex Tx/Rx B Power Input 2 Power Input 1 Low Voltage Power Input Low Voltage Power Input Green Red Color Auxiliary Connection Grey Auxiliary Connection Brown Wash Signal Orange Alarm Communications Black Video Signal Ground Coax Screen Video Output to Control Room Coax Core Telemetry I/O to RS-422/485 Violet Telemetry I/O to RS-422/485 Blue Ground Shield Telemetry I/O to RS-422/485 Yellow NOTICE! Bosch Security Systems does not recommend using the shielded composite cable for distances in excess of 25 m between the camera and the MIC power supply. 5.6.2 Alarm Inputs The table below identifies the number of alarm inputs and outputs available depending on the type of MIC power supply unit installed and whether or not an 8-input alarm card is installed. Type of MIC Power Supply Number of Number of Unit Alarm Inputs Alarm Outputs Non-IR with 8-input alarm card 8 2 Non-IR without alarm card 1 0 Table 5.1 5.6.3 Number of alarm inputs and outputs by power supply unit (PSU) Video The video coax cable should use a shield coverage copper braid 95% and standard copper center conductor. Recommended cables are RG-59, RG-6/U, or RG-11U. Cable Type RG-59/U RG-6/U RG-11/U Size Shield Central Conductor Terminal Connector Bosch Security Systems, Inc. Maximum Distance 300 m (1000 ft) 450 m (1500 ft) 600 m (2000 ft) O.D. between 4.6 mm (0.181 in.) and 7.9 mm (0.312 in.) Copper braid: 95% Standard copper center BNC Installation and User Manual F.01U.276.622 | 1.0 | 2012.09 22 en | Getting Started 6 MIC Series 550 Classic Camera Getting Started Install and wire the camera according to the instructions in this manual and in the manuals that accompany the power supply and mounting devices. A typical system includes a keyboard, matrix switcher, monitor, and appropriate wiring connections. Refer to the individual product manuals for complete installation and setup instructions for each of the system components. 6.1 Establishing Control of the Camera The MIC550 Classic camera supports two communication protocols (Biphase and RS-485), Bosch, Pelco D and P, and Forward Vision (keyboard) controller protocols that allow you to send commands to the camera and to receive information from the camera. 6.1.1 Establishing Control of the Camera via Biphase Protocol NOTICE! Biphase protocol works only with Bosch controller protocol. It does not work with Pelco controller protocol. Shielded 2-wire, half-duplex, multi-drop, 5000 ft. cable limit Biphase is the standard Bosch protocol used to send Pan/Tilt/Zoom control over 2-wire shielded twisted pair (STP) terminated with a 100 Ω terminal resistor. Biphase connections require a MIC-BP3 or a MIC-BP4 Biphase converter (sold separately). CAUTION! The Biphase shield must be connected to the head end only. Cable Type Distance Transmission Rate Gage Termination Terminal Connector Voltage 6.1.2 STP - Shielded Twisted Pair 1524 m (5000 ft) Belden 8760 recommended 31.25 KHz 1.02 mm (18 AWG) 100 Ω Screw terminals 4 Vp-p Establishing Control of the Camera via RS-485 Protocol NOTICE! In Pelco controller protocol, RS-485 is the only communication protocol that the MIC-550 supports. It does not transmit responses back to the controller. 2-wire (shielded), half-duplex, differential, multi-drop (32 nodes), 4000 ft cable limit RS-485 is capable of controlling a true multi-drop network and is specified for up to 32 drivers and 32 receivers on a single 2-wire bus. The camera uses the 2-wire mode, although RS-485 can be connected in a 2- or 4-wire mode. NOTICE! The wire shield must be tied to signal at both ends, if 2-wire twisted pair is used. After connecting the wires for RS-485 operation, ensure that the slide switch on the main board to the camera head is positioned toward the LEDs (default). F.01U.276.622 | 1.0 | 2012.09 Installation and User Manual Bosch Security Systems, Inc. MIC Series 550 Classic Camera Getting Started | en 23 CAUTION! Bosch recommends that multiple RS-485 connections be arranged as a connected series of point-to-point (multi-dropped) nodes, as a line or as a bus. It is not recommended to arrange RS-485 connections as a star, ring, or as a multiple-connected network. Star and ring topologies may cause signal reflections or excessively low or high termination impedance. Wire Type Distance Maximum Baud Rate Gage Wire Impedance 2-wire shielded twisted pair 1219 m (4000 ft) 57.6 kb 0.511 mm (24 AWG) 120 W In Pelco Protocol Mode, the camera is configured from the factory for RS-485 operation. 1. Connect the controller's Tx terminals to the Tx terminals in the power supply box. See the MIC Series Power Supplies Installation Manual for complete wiring instructions. 2. Pan or tilt the keyboard joystick to confirm that control has been established to the camera (approximately five (5) seconds). 6.2 Powering On When you turn on power to the camera, there is a ten (10) second pause before the camera starts its homing phase. During the homing phase, the camera pans left and right and tilts up and down. It also adjusts the lens focus. The entire homing phase lasts approximately 40 seconds and ends with the appearance of a splash screen or text that displays the type of device (MIC550), the camera model, the video type (PAL), and the firmware version. 6.3 Controlling the Camera After the camera is on and homing is complete, you must set the camera address. You may also want to assign a password and to customize some of the default settings of the camera. To do this, you must control the camera. The most common ways to interface with the MIC550 are: – Using a keyboard and on-screen display (OSD) menus. This method is the most common. – Using the Configuration Tool for Imaging Devices (CTFID) software running on a PC with See the next section and Section 6.3.2 Basic Keyboard Operation, page 24. Bilinx or the RS-232/RS-485 communication protocol. Go to www.boschsecurity.com to download the latest version of the software and the CTFID User Manual. – Using a PC-based graphical user interface (GUI) such as the Bosch DiBos 8 software. Refer to the DiBos 8 User Guide for instructions. 6.3.1 Navigating the On-Screen Display (OSD) Menus The OSD menus provide access to the programmable settings of the camera. The OSD displays only the submenus that are applicable to a particular MIC configuration. Some menu items (indicated as (L)) are locked and require a system password to use. Menu items marked with an asterisk (*) are default factory settings, unless otherwise noted. NOTICE! After 4.5 minutes of inactivity, the OSD menu times out and exits without warning. Some unsaved settings in the current menu can be lost. To navigate the OSD menus: Bosch Security Systems, Inc. Installation and User Manual F.01U.276.622 | 1.0 | 2012.09 24 en | Getting Started MIC Series 550 Classic Camera 1. Use the joystick to highlight a menu item. 2. Press either the Focus or the Iris key to open a menu item. 3. Follow the on-screen instructions. Note: To select the Exit Menu item from anywhere in the current menu, use the Zoom command. 6.3.2 Basic Keyboard Operation The following tables summarize the basic operations for a standard keyboard and the functions available to control a MIC550 Classic camera. Typical Keyboard Usage Features Function Keys Number Keys Camera Key Enter Key Focus Key Iris Key Key LEDs LCD Joystick Table 6.1 Selects a specific control setting. Inputs a number from 0 to 9. Selects a camera number. Inputs a selection. Sets the lens focus or makes a menu selection in OSD mode. Sets the lens iris setting or makes a menu selection in OSD mode. Indicates an active key. Displays the current status. Controls the pan/tilt/zoom (PTZ) functions of the camera. Typical Keyboard Functions Camera Operation To Pan Side to Side To Tilt Up and Down To Zoom In To Zoom Out Table 6.2 6.3.3 How to control Move the joystick left or right. Move the joystick forward and back. Twist the joystick clockwise. Twist the joystick counterclockwise. Typical Keyboard Controls for a MIC-550 Camera Keyboard Commands, Bosch Protocol Keyboard control commands are composed of a sequence of three (3) inputs with the following convention: 1) a Function key + 2) a Command number key(s) + 3) the Enter key. – Depending on the type of keyboard, the control function keys are labeled: ON or AUX ON OFF or AUX OFF SET or SET SHOT SHOT or SHOW SHOT NOTICE! The convention used for control key commands in this manual is ON, OFF, SET, and SHOT. Refer to your keyboard manual for the key naming conventions. – Command numbers range from 1 to 999. See Section A Keyboard Commands by Number, page 50 for a complete list of keyboard commands. – The Enter key can also be labeled with the ∞ symbol. For example, the keyboard command to make the camera pan 360° continuously is: ON-1-ENTER (Press the ON key, then press the number 1 key, and then press ENTER.) F.01U.276.622 | 1.0 | 2012.09 Installation and User Manual Bosch Security Systems, Inc. MIC Series 550 Classic Camera 6.3.4 Getting Started | en 25 Keyboard Commands, Pelco Protocol Pelco control commands are composed of a sequence of two (2) keyboard inputs with the following convention: 1) a Command Number and 2) a Function key input. The camera uses the PRESET command key to save and recall presets (pre-positions) 1 through 64. NOTICE! To save a preset, enter the desired number and hold the PRESET key for approximately two (2) seconds. To recall a preset, enter the desired preset number (or command) and momentarily press and release the PRESET key. Keyboard Command User Action 0-Pattern Press Press and hold Description Initiates recording continuous playback based upon current Recording setting (A or B) in the Setup Menu. Initiates recording based upon current Recording setting (A or B) in the Setup Menu. Press ACK to end 6.3.5 1-Pattern Press Press and hold recording. Initiate Recording A continuous playback. Initiate Recording A. Press ACK to end recording. 2-Pattern Press Press and hold Initiate Recording B continuous playback. Initiate Recording B. Press ACK to end recording. 3-Pattern 4-Pattern 1 – Aux On / Aux Off 2 – Aux On / Aux Off 3 – Aux On / Aux Off 4 – Aux On / Aux Off 91 – Aux On 92 – Aux On Press Press Press Press Press Press Press Press Initiate the standard preset tour (Tour 1). Initiate the custom preset tour (Tour 2). Activates / deactivates alarm output 1. Activates / deactivates alarm output 2. Activates / deactivates alarm output 3. Activates / deactivates alarm relay. Activate Zone Scan (display zone titles). Deactivate Zone Scan (re-move zone titles) Special Preset Commands, Pelco Protocol Some Pelco mode preset commands have a special meaning and override the normal Pelco preset function as follows: Preset Command 33-PRESET 34-PRESET 80-PRESET Description Pans the camera 180° (Flip). Goes to Zero Pan (original home position). Toggles the Synchronization Mode between Line Lock and Internal (Pelco Frame Scan). This command is available if commands are 81-PRESET 82-PRESET 92-PRESET 93-PRESET 94-PRESET 95-PRESET unlocked using the Main menu. Initiates Preset Tour 1. Initiates Preset Tour 2. Sets the Left pan limit for an AutoScan with Limit Stops enabled. Sets the Right pan limit for an AutoScan with Limit Stops enabled. Initiates a Preset Tour. Enables or disables Limit Stops in the Setup Menu for AutoScan. 96-PRESET 97-PRESET 98-PRESET Invokes the Pelco main Setup Menu when pressed for 2 seconds. Stops a scan. Initiates FastAddress (Pelco Random Scan). Toggles the Synch. Mode between Line Lock and Internal (Pelco Frame Scan). This command is available only for two (2) minutes after the 99-PRESET Bosch Security Systems, Inc. power is applied and then reverts to normal preset functionality. Starts an AutoScan. Installation and User Manual F.01U.276.622 | 1.0 | 2012.09 26 en | Getting Started MIC Series 550 Classic Camera NOTICE! Some Pelco controllers do not support all of the preset command numbers. Consult the documentation of the specific Pelco controller for supported preset commands. 6.4 Setting the Camera Address via FastAddress The MIC550 Classic offers remote addressing via the feature "FastAddress," which allows you to set or to change a camera address using the keyboard and on-screen menus. The feature FastAddress allows you to install all cameras first, then to set the addresses via the control system. Since it is not necessary to go to the physical location of the camera, this feature makes it easier to re-address cameras at a later time. NOTICE! You do not need to set a camera address if using Bilinx communication. FastAddress is stored in nonvolatile memory and does not change if the power is turned off or if the default settings are restored. 6.4.1 FastAddress, Bosch Protocol In Bosch protocol, there are three (3) FastAddress commands: – ON-999-ENTER: Displays and programs all cameras without an address in the system. NOTICE! If a keyboard is set to a camera number that already has an address, that camera also responds to this command. – ON-998-ENTER: Displays and programs all cameras with or without an address in the system. – ON-997-ENTER: Displays the current address status of all cameras in the system simultaneously. To set an address for a camera without an address: 1. Select the number of the camera that you want to FastAddress. The system displays the camera number on the keyboard and the image on the corresponding monitor. 2. Press #-ENTER (where # is the camera number without an address). 3. Press ON-999-ENTER to invoke an on-screen display of cameras on the system without an address. 4. Follow the on-screen instructions. You receive an on-screen confirmation when the FastAddress is complete. To change or clear an address for a camera with an address: 1. Select the camera number you want to FastAddress. The system displays the camera number on the keyboard and the image on the corresponding monitor. 2. Press #-ENTER (where # is the camera number with an address). 3. Press ON-998-ENTER to invoke an on-screen display of all cameras on the system, with or without an address. 4. Follow the on screen instructions. You receive an on-screen confirmation when the FastAddress is complete. 6.4.2 FastAddress, Pelco Protocols This section provides instructions to set a FastAddress with a Pelco keyboard or controller. – A MIC550 camera with an address set to 0 responds to commands set to any address. – Pelco-P protocol must use addresses 1 to 32. F.01U.276.622 | 1.0 | 2012.09 Installation and User Manual Bosch Security Systems, Inc. MIC Series 550 Classic Camera – Getting Started | en 27 Pelco-D protocol must use addresses 1 to 254. NOTICE! A previously-configured MIC550 camera with an address above 32 (Pelco-P upper limit) or 254 (Pelco-D upper limit) can be used without readdressing the unit. However, no two (2) addresses can be the same. For example: Pelco-P addresses above 32 are repeated in multiples of 32 (1, 33, 65, 97 are the same). Pelco-D addresses above 254 are repeated in multiples of 254 (1, 255, 509, 763 are the same). To set FastAddress with a Pelco Keyboard: 1. Press and hold 95-PRESET for two seconds to open the Pelco Setup menu. 2. Move the joystick to select the Command Lock menu. 3. Press the FOCUS or the IRIS button to turn Command Lock to OFF. 4. Move to the FastAddress menu and press the FOCUS or the IRIS button to open the menu. 5. Use the joystick to enter the unique identifier for the camera. – Move the joystick up or down to select the number. – Move the joystick right to move to the next number position. 6. Move the joystick right to select Continue. Then, press the FOCUS or the IRIS button. 7. Use the keyboard to enter the FastAddress number. Then, press the Camera button. Note: You must first clear an assigned FastAddress number to use the number for a different MIC550 camera. 8. Move the joystick down then back up to set the FastAddress number. 9. Press the FOCUS or the IRIS button to store the FastAddress number. The on-screen display menu confirms that the camera stored the FastAddress number. 6.5 Setting Passwords Passwords are used to control access to locked command menus. Unlocked commands are available to all users. Passwords are four (4) digits in length. 6.5.1 Special Passwords The table below identifies special passwords and their function and security level. 6.5.2 Password 0000 (default) Function / Security Level Enables security and requires a user to enter the unlock command 9999 OFF-90-ENTER before invoking a locked command. Disables all security and allows all users to access locked commands. Setting Passwords, Bosch Protocol To set or change a password (locked command): 1. Press OFF-90-ENTER to turn off the command lock. 2. Press SET-802-ENTER to access the password menu. 3. Tilt the joystick up or down to choose a number. Tilt the joystick right to move to the next number position. 4. Follow the on-screen instructions and save the password. You receive an on-screen confirmation. Bosch Security Systems, Inc. Installation and User Manual F.01U.276.622 | 1.0 | 2012.09 28 6.6 en | Getting Started MIC Series 550 Classic Camera Configuring the Camera for Inverted Operation The video display from a camera installed in inverted position will appear upside down until you set the video orientation to “Inverted position.” Follow these steps: 1. Access the main Setup Menu of the on-screen display (OSD). The screen Setup Menu appears. 2. Select the submenu “PTZ Setup.” The screen PTZ Setup appears. 3. Select the option “Orientation.” 4. Select the value “Inverted,” which rotates the video 180°. The video should now appear upright. F.01U.276.622 | 1.0 | 2012.09 Installation and User Manual Bosch Security Systems, Inc. MIC Series 550 Classic Camera 7 On-Screen Display (OSD) Menus (Bosch Protocol) | en 29 On-Screen Display (OSD) Menus (Bosch Protocol) This chapter identifies and describes each OSD menu option, as well as the default setting for each option, for Bosch protocol. For step-by-step instructions, see Section 9 Common User Commands (unlocked), page 45 and Section 10 Advanced Features, page 48. To open the main Setup Menu in Bosch protocol: (locked commands) 1. Press OFF-90-ENTER to turn off the command lock. 2. Press ON-46-ENTER to access the Setup Menu. The screen Setup Menu appears. Setup Menu Exit... Camera Setup Lens Setup PTZ Setup Display Setup Communication Setup Alarm Setup Diagnostics Focus / Iris: Select Setup Menu Choices: Menu Exit Camera Setup Description Exits the menu. Accesses adjustable camera settings such as: white balance, gain, Lens Setup sharpness, sync, line lock, backlight, shutter, and night mode. Accesses adjustable lens settings such as: focus, iris, zoom speed, and PTZ Setup digital zoom. Accesses adjustable pan/tilt/zoom (PTZ) settings such as: Autopan, tours, PTZ speed, inactivity period, AutoPivot, and tilt limits. Display Setup Accesses adjustable display settings such as OSD. Communication Accesses communication settings such as: AutoBaud and Bilinx. Setup Alarm Setup Diagnostics Bosch Security Systems, Inc. Accesses the alarm settings such as: inputs, outputs, and rules. Displays the status of diagnostic events. Installation and User Manual F.01U.276.622 | 1.0 | 2012.09 30 7.1 en | On-Screen Display (OSD) Menus (Bosch Protocol) MIC Series 550 Classic Camera Camera Setup Menu The Camera Setup Menu contains camera settings that can be changed/customized. Camera Setup Exit... * White Bal: * Gain Control: * Max Gain Level: * Sharpness: * Backlight Comp: WDR: * Shutter Mode: * Shutter: * Auto SensUP Max: * Night Mode: * Night Mode Color: * Night Mode Threshold: * IR Focus Correction: * Pre-Comp: Restore Defaults... EXT ATW AUTO 6 (4**) 12 OFF OFF Auto SensUP 1/50 15x AUTO OFF 55 AUTO 1 * = Factory Setting Focus / Iris: Select White Bal Maintains proper color reproduction (white balance) as the color temperature of a scene changes (for example, from daylight to fluorescent lighting). Option Extended ATW ATW Indoor W.B. Outdoor W.B. AWB Hold Manual Outdoor Auto Sodium Lamp Auto Sodium Lamp Description (Default setting) Adjusts camera color using extended range. Adjusts camera color constantly. Optimizes camera color for typical indoor conditions. Optimizes camera color for typical outdoor conditions. Sets the camera's color settings for the current scene. Allows users to adjust the Red and Blue gain. Sliding scale: –(1 to 100)+ Automatically adjusts camera color in outdoor scenes. Automatically adjusts camera color in scenes with sodium vapor lighting. Allows users to adjust color in scenes with sodium vapor lighting. Gain Control Electronically brightens darker scenes which may cause graininess in low light scenes. Options: Auto (default setting), OFF. Max Gain Level Adjusts the maximum gain level to which the gain control adjusts when set to AUTO. Sliding scale: –(1 to 6)+ (1=8db, 2=12db, 3=16db, 4=20db, 5=24db, 6=28db) Default setting: 6 (for 28x camera); 4 (for 36X camera). Sharpness Adjusts the sharpness level of the picture. Sliding scale: –(1 to 16)+. Default setting: 8 F.01U.276.622 | 1.0 | 2012.09 Installation and User Manual Bosch Security Systems, Inc. MIC Series 550 Classic Camera On-Screen Display (OSD) Menus (Bosch Protocol) | en 31 Backlight Comp Improves image quality when the background illumination level is high. Options: ON, OFF (default setting). WDR Wide Dynamic Range. Options: ON, OFF (default setting), AUTO. Shutter Mode Turns Auto SensUP on or off. Options: Auto SensUP (default setting), OFF. Shutter Adjusts the electronic shutter speed (AES). Sliding scale: –(50 to 1/10000) +. 1/50 sec. (PAL) Auto SensUP Max. Sets the limit for sensitivity when the shutter speed is set to Auto SensUP. Options: 2x, 4x, 7.5x, 15x (default setting). Night Mode Selects night mode (B/W) to enhance lighting in low light scenes. Options: ON, OFF, AUTO (default setting). Night Mode Color Determines if color processing remains in effect while in night mode. Options: ON, OFF (default setting). Night Mode Threshold Adjusts the level of light at which the camera automatically switches out of night mode (B/W) operation. Sliding scale: –(10 to 55)+, (in increments of 5) 10 is earlier, 55 is later. Default setting: 55 IR Focus Correction Optimizes the focus for IR lighting. Options: ON, OFF, AUTO (default setting). Pre-Comp Amplifies the video gain to compensate for long distance cable runs. Sliding scale: –(1 to 10)+. Default setting: 1 7.2 Lens Setup Menu The Lens Setup Menu contains lens settings that can be changed/customized. Lens Setup * * * * * * * Bosch Security Systems, Inc. Exit... Auto Focus: Auto Iris: Auto Iris Level: Focus Speed: Iris Speed: Max Zoom Speed: Digital Zoom: SPOT CONSTANT 8 2 5 FAST ON Installation and User Manual F.01U.276.622 | 1.0 | 2012.09 32 en | On-Screen Display (OSD) Menus (Bosch Protocol) MIC Series 550 Classic Camera Lens Setup Restore Defaults * = Factory Setting Focus / Iris: Select Auto Focus Automatically focuses on the subject in the center of the screen. Options: Option CONSTANT MANUAL SPOT Description Auto Focus is always active, even while the camera is moving. Auto Focus is inactive; manual focus must be used. (Default setting) The camera activates Auto Focus after the camera stops movement. Once focused, Auto Focus is inactive until the camera moves again. Auto Iris Automatically adjusts to varying light conditions. Options: Option Description MANUAL Iris must be adjusted manually. CONSTANT (Default setting) Auto Iris is constantly active. Auto Iris Level Reduces the camera's iris level for proper exposure. Sliding scale: – (1 to 15) +. Default setting: 8. Focus Speed Adjusts the manual focus speed. Sliding scale: – (1 to 8) +. Default setting: 2. Iris Speed Adjusts the manual iris speed. Sliding scale: – (1 to 10) +. Default setting: 5. Max Zoom Speed Adjusts the manual zoom speed. Options: SLOW, MEDIUM, FAST (default setting). Digital Zoom Enables or disables digital zoom. Options: ON (default setting), OFF. 7.3 PTZ Setup Menu The PTZ Setup Menu contains pan/tilt/zoom settings that can be changed/customized. PTZ Setup * * * * * * * Exit... Autopan: Tour 1 Period: Tour 2 Period: PTZ Fixed Speed: Inactivity: Inact. Period: Autopivot: F.01U.276.622 | 1.0 | 2012.09 30 deg/sec 5 sec 5 sec 4 OFF 2 min ON Installation and User Manual Bosch Security Systems, Inc. MIC Series 550 Classic Camera On-Screen Display (OSD) Menus (Bosch Protocol) | en PTZ Setup * Orientation * Freeze Frame on Preposition Tilt Up Limit... Restore Defaults... 33 NORMAL ON * = Factory Setting Focus/Iris: Select AutoPan Adjusts speed of camera during AutoPan and AutoScan. Sliding scale: –(1º/sec. to 60º/sec.)+. Default setting: 30°/sec. Tour 1 Period; Tour 2 Period Changes dwell time between presets during the tour. Sliding scale: –(3 sec. to 10 min.)+. Default setting: 5 sec. PTZ Fixed Speed Sets pan and tilt speed when controlled by a fixed speed controller. Sliding scale: –(1 to 15)+. Default setting: 4. Inactivity Selects the mode to which the camera reverts after the set period of inactivity. Options: Option Scene 1 Prev Aux OFF Description Returns to Preset 1. Returns to previous activity, such as Aux commands 1, 2, 7, 8, 50, or 52. (Default setting) Remains on the current scene indefinitely. Inact. Period Sets the time period of inactivity before the above action occurs. Sliding scale: – (3 sec. to 10 min.) +. Default setting: 2 min. Autopivot Automatically rotates the camera 180° when following a subject traveling directly beneath the camera. Options: ON (default setting), OFF. Orientation Selects mounting options. Options: Option Description NORMAL (Default setting) The camera is straight, upright; the software does not rotate the view. INVERTED The sofware rotates the video 180° automatically. CANTED The software compensates for a 45° angle of orientation to provide full view from the camera. Freeze Frame On Preposition Holds a preposition video frame while moving to another preposition. Options: ON (default setting), OFF. Bosch Security Systems, Inc. Installation and User Manual F.01U.276.622 | 1.0 | 2012.09 34 en | On-Screen Display (OSD) Menus (Bosch Protocol) MIC Series 550 Classic Camera Tilt Up Limit... Sets the upper tilt limit of the camera. Use the joystick to move to a scene. 7.4 Display Setup Menu The Display Setup Menu contains display settings that can be changed/customized. Display Setup Exit... * Title OSD: * Camera OSD: Display Adjust Edit Scene Title... Restore Defaults... MOMENTARY ON * = Factory Setting Focus / Iris: Select Title OSD Controls how the OSD displays shot titles. Options: Option OFF ON MOMENTARY Description Titles are hidden. Titles are displayed continuously. (Default setting) Titles are displayed for a few seconds, then disappear from the screen. Camera OSD Controls how the OSD displays camera response information, such as Digital Zoom, Iris open/ close, and Focus near/far. Options: ON (default setting), OFF. Display Adjust Adjusts the text brightness and vertical position of the on-screen title. Options: Option Up Down Brighter Darker Description Moves screen title up. Moves screen title down. Brightens the intensity of the on-screen text. Darkens the intensity of the on-screen text. Edit Scene Title Allows editing existing Scene (Shot) Titles. Select a scene title, and then select a menu option: – Edit Scene Title to access the character palette. For instructions, refer to – Clear Scene to delete the selected scene title. Section 9.3 Specifying a Shot Title, page 45. 7.5 Communication Setup Menu The Communication Setup Menu contains baud rate and Bilinx control settings. F.01U.276.622 | 1.0 | 2012.09 Installation and User Manual Bosch Security Systems, Inc. MIC Series 550 Classic Camera On-Screen Display (OSD) Menus (Bosch Protocol) | en 35 Communication Setup Exit... * AutoBaud: * Baud Rate: Restore Defaults ON 9600 * = Factory Setting Focus / Iris: Select AutoBaud Turns on AutoBaud detection, which detects and adjusts the camera protocol and baud rate to match that of the controller. Options: ON (default setting), OFF. ON automatically accepts baud rates from 2400 to 57600. Note: If stepping from 2400 to 57600 baud, you must first set the Baud Rate to 19200 for AutoBaud to detect the higher baud rate. Baud Rate Manually sets the baud rate when AutoBaud is set to OFF. Options are 2400, 4800, 9600 (default setting), 19200, 38400, and 57600. Bilinx Activates Bilinx control communication. (Only available when not connected to a Bilinx data interface unit.) Options: ON (default setting), OFF. 7.6 Alarm Setup The Alarm Setup Menu contains alarm inputs, outputs and rules. NOTICE! The maximum number of Alarm Inputs is eight (8), available only on the Alarm and Washer Pump Drive Card (MIC-ALM) (sold separately). This card is available for non-IR power supply units (PSUs) only. See Section 5.6.2 Alarm Inputs, page 21 for the specific number of alarm Inputs and Outputs per PSU. Alarm Setup Exit... Inputs Setup... Outputs Setup... Rule Setup... Restore Defaults... Bosch Security Systems, Inc. Inputs Setup Exit... 1. Alarm Input 1 2. Alarm Input 2 3. Alarm Input 3 4. Alarm Input 4 5. Alarm Input 5 6. Alarm Input 6 7. Alarm Input 7 8. Alarm Input 8 9. NONE Installation and User Manual N.O. N.O. N.O. N.O. N.O. N.O. N.O. N.O. F.01U.276.622 | 1.0 | 2012.09 36 en | On-Screen Display (OSD) Menus (Bosch Protocol) Alarm Setup MIC Series 550 Classic Camera Inputs Setup 10. NONE 11. NONE 12. NONE Focus / Iris: Select Focus / Iris: Select Type Right / Left: Select Mode Inputs Setup Defines physical inputs or events and commands that can be used in a rule. There are twelve (12) alarm inputs available. Inputs 1-8 Defines the type of physical input (dry contact): N.O. (Normally Open) (default setting) or N.C. (Normally closed). Inputs 9-12 Defines input commands that can be used in a rule. Command inputs can also be customized by using non-assigned keyboard command numbers. Option NONE Aux On Aux Off Shot Description (Default setting) No command defined. Responds to a standard or custom keyboard ON (1-64) command. Responds to a standard or custom keyboard OFF (1-64) command. Responds to a Preset shot or scene from 1-64. Outputs Setup Submenu Outputs Setup... Exit... 1. NONE 2. NONE 3. NONE 4. NONE 5. NONE 6. NONE 7. NONE 8. NONE 9. NONE 10. NONE 11. NONE 12. NONE Focus / Iris: Select Type Right / Left: Select Mode Outputs Setup Defines physical outputs and keyboard commands for use in a rule. Outputs 1-4 F.01U.276.622 | 1.0 | 2012.09 Installation and User Manual Bosch Security Systems, Inc. MIC Series 550 Classic Camera On-Screen Display (OSD) Menus (Bosch Protocol) | en 37 Defines a physical output: N.O. (Normally Open circuit) (default setting) or N.C. (Normally closed circuit). Outputs 5-12 Defines a command output for use in a rule. Option None Aux On Aux Off Shot OSD Transmit Description (Default setting) No command defined. Responds to a keyboard ON command. Responds to a keyboard OFF command. Responds to a Preset shot. An on-screen display. Transmits a message back to the head end (available with RS-232 serial and Bilinx NONE connections). (Default setting) No command defined. Note: Outputs 5 and 6 are set to OSD and Shot 1. NOTICE! You can program a total of twelve rules. You must define the inputs and outputs before you program a rule. See Section 7.6 Alarm Setup, page 35, to configure alarm inputs and outputs. Rule Setup... Exit... 1. Rule 1 2. Rule 2 3. Rule 3 4. Rule 4 5. Rule 5 6. Rule 6 7. Rule 7 8. Rule 8 9. Rule 9 10. Rule 10 11. Rule 11 12. Rule 12 Rule 1 Enabled Disabled Invalid Empty Empty Empty Empty Empty Empty Empty Empty Empty Focus / Iris: Select Exit... Enabled Input: NONE NONE NONE Output: OSD Shot 2 Alarm Relay NONE YES 2 sec Right / Left: Select Period Time Focus / Iris: Select Type Rule Setup Displays the status of rules and lets you add new rules or modify an existing rule. Rule 1-12 Displays the status of a rule on the right side of the menu. Rule status options: Option Description Enabled The rule inputs and outputs are properly defined and the rule is turned on. Disabled The rule inputs and outputs are defined but the rule is turned off. Invalid The rule has a missing or invalid input or output. Empty (Default setting) The rule has no inputs or outputs defined. Bosch Security Systems, Inc. Installation and User Manual F.01U.276.622 | 1.0 | 2012.09 38 en | On-Screen Display (OSD) Menus (Bosch Protocol) MIC Series 550 Classic Camera Selecting a Rule number provides access to its configuration menu. The Rule # Menu allows you to configure a rule from previously-defined alarm inputs and outputs. Once an alarm is configured with valid inputs and outputs, it can be turned on or off (enabled or disabled) through its configuration menu. Rule # Choices: Enabled Turns the rule on or off after its inputs and outputs have been defined. YES to enable or NO to disable (default setting) Input Toggles through a list of valid inputs set in the Alarm I/O Setup > Inputs Setup Menu that define the rule's inputs. A rule can have up to four (4) inputs. Ilnputs which were set in the Inputs Setup Menu include Aux On/Off (1-64), Shot, and NONE (default setting). Output Toggles through a list of valid outputs set in the Alarm I/O Setup > Outputs Setup Menu that defines a rule's outputs. Outputs set in the Outputs Setup Menu include Alarm Relay, Aux On/Off (1-64), Shot, OSD, Transmit, and NONE (default setting). Some outputs, such as Alarm Outputs 1-3, Alarm Relay, and Aux On/Off can be set to be active for a specific duration of time as follows: Seconds: 1-5, 10, 15, or 30 Minutes: 1-5 or 10 Latched: The alarm stays active until acknowledged. Follows: The alarm follows the alarm rule. Default setting: NONE NOTICE! You can include up to four (4) Input and Output events in a single rule. Each input and output, however, must be true for the alarm's rule to be valid and enabled. 7.7 Diagnostics Menu The Diagnostics menu contains a list of diagnostic tools and events. Most of these menu items are display items only; you cannot select different values to change. Diagnostics Exit... Alarm Status... BIST... Internal Temp: High Temp Events: Highest Temp Low Temp Events: Lowest Temp: Internal Humidity Humidity Events Security Access: F.01U.276.622 | 1.0 | 2012.09 Deg F / Deg C Deg F / Deg C Deg F / Deg C Deg F / Deg C Deg F / Deg C % 0 0 Installation and User Manual Bosch Security Systems, Inc. MIC Series 550 Classic Camera On-Screen Display (OSD) Menus (Bosch Protocol) | en 39 Diagnostics CTFID Access: 0 Restart Events: Low-Volt Events: 0 Power Up Events: 0 Video Loss Events: 0 Total Time On 0hr 0min Focus / Iris: Save and Exit Alarm Status Enters the Alarm Status menu and displays the real time status of alarm inputs and outputs. Alarm Inputs 1 to 8, Alarm Outputs 1 to 2 (Closed or Open) BIST Enters the Perform Built-in Self Tests menu. YES to start test. If confirmed, the BIST tests start and the results are displayed. Typical results are: Data Flash: PASS FPGA: PASS Bilinx: PASS Internal Temp. Displays the current temperature of the camera, in degress Fahrenheit and in degrees Celsius. High Temp Events Displays the number of times that the threshold of high temperature was exceeded. Highest Temp Displays the highest temperature reached, in degrees Fahrenheit and in degress Celsius. Low Temp Events Displays the number of times that the threshold of low temperature was exceeded. Lowest Temp Displays the lowest temperature reached, in degrees Fahrenheit and in degress Celsius. Internal Humidity Displays the percentage of humidity inside the camera housing. Humidity Events Displays the number of times that the threshold of the humidity inside the camera housing was exceeded. Security Access Displays the number of times that the locked-command menu is unlocked. CTFID Access Displays the number of times that the Configuration Tool is accessed. Restart Events Displays the number of restart events. Bosch Security Systems, Inc. Installation and User Manual F.01U.276.622 | 1.0 | 2012.09 40 en | On-Screen Display (OSD) Menus (Bosch Protocol) MIC Series 550 Classic Camera Power Up Events Displays the number of power up events. Low Volt Events Displays the number of times that the camera dropped below the acceptable voltage limit. Video Loss Events Displays the number of time that video was lost. Total Time On Displays the total time that the video has been on. Alarm Status Submenu This menu displays the status of the alarm inputs and outputs. Alarm Status Exit... Alarm Input 1 Alarm Input 2 Alarm Input 3 Alarm Input 4 Alarm Input 5 Alarm Input 6 Alarm Input 7 Alarm Input 8 Alarm Output 1 Open Open Open Open Open Open Open Open Open Focus / Iris: Save and Exit Alarm Input 1...8 Displays the status of alarm inputs 1 through 7. Options are: High, Low, Open (Normally Open), Closed (Normally Closed). Alarm Output Displays the status of the alarm output. F.01U.276.622 | 1.0 | 2012.09 Installation and User Manual Bosch Security Systems, Inc. MIC Series 550 Classic Camera 8 On-Screen Display (OSD) Menus (Pelco Protocol) | en 41 On-Screen Display (OSD) Menus (Pelco Protocol) This chapter identifies and describes each OSD menu option, as well as the default setting for each option, for Pelco protocol. For step-by-step instructions, see Section 9 Common User Commands (unlocked), page 45 and Section 10 Advanced Features, page 48. To open the main Setup Menu in Pelco protocol (locked commands): Press 95-PRESET for approximately 2 seconds. The screen Setup Menu appears. Setup Menu Exit... Command Lock: Bosch Menu Camera Setup PTZ Setup Edit Password *FastAddress: Advanced Software Version Ack and Reset Alarms Restore All Settings Reset All Memory * = Factory Setting Focus / Iris: Select OFF Not Set Setup Menu Choices: Menu Exit Command Lock (L) Description Exits the menu. Allows or prohibits accessing locked commands. (If password is set, Bosch Menu (L) Camera Setup you are prompted to enter the password. Accesses the full configuration menu and all camera settings. Accesses adjustable camera settings such as White Balance and PTZ Setup Night Mode. Accesses adjustable pan/tilt/zoom (PTZ) settings such as tours, scan Edit Password (L) FastAddress (L) Advanced Software Version Ack and Reset Alarms Restore All Settings (L) Reset All Memory (L) speed, edit presets, limit stops, recording, and AutoPivot settings. Changes the password. Sets or changes a camera address. Displays the current software versions. Acknowledges and resets active alarms. Restores all settings to their original default setting. Clears all settings, including scene shots, tours, and recordings stored in the camera’s memory. 8.1 Command Lock (locked) The Pelco Command Lock Menu allows or prohibits the use of locked commands. The default setting is ON. NOTICE! If the Command Lock is set to ON and you press Focus or Iris on a locked command, the camera displays the on-screen message: “Command is Locked.” Bosch Security Systems, Inc. Installation and User Manual F.01U.276.622 | 1.0 | 2012.09 42 8.2 en | On-Screen Display (OSD) Menus (Pelco Protocol) MIC Series 550 Classic Camera Bosch Menu (locked) The Bosch Menu allows full access to the main Setup Menu and all configuration settings. Pelco menu Bosch menu Setup Menu Setup Menu Exit... Command Lock: OFF Bosch Menu Camera Setup PTZ Setup Edit Password *FastAddress: Not Set Advanced Software Version Ack and Reset Alarms Restore All Settings Reset All Memory * = Factory Setting Focus / Iris: Select Exit... Camera Setup Lens Setup PTZ Setup Display Setup Communication Setup Alarm Setup Advanced Diagnostics Focus / Iris: Select Refer to Section 7 On-Screen Display (OSD) Menus (Bosch Protocol), page 29 for a complete description of Bosch menus and configuration settings. 8.3 Camera Setup The Pelco Camera Setup Menu provides access to camera settings. Camera Setup Exit... * White Bal: * Night Mode: * Wiper OUTDOOR AUTO CONTINUOUS * = Factory Setting Focus / Iris: Select Camera Setup Menu Choices: Menu Exit White Description Exits the menu. Sets a default value in Sub-menu / Description Default Setting OUTDOOR: Sets a default setting if OUTDOOR Balance case the Pelco the controller disables white balance. controller disables the INDOOR: Sets a default setting if the white balance. controller disables white balance. F.01U.276.622 | 1.0 | 2012.09 Installation and User Manual Bosch Security Systems, Inc. MIC Series 550 Classic Camera On-Screen Display (OSD) Menus (Pelco Protocol) | en Menu Description Night Mode Switches from color to monochrome. 43 Sub-menu / Description ON: Sets Night Mode on. Default Setting ON (Day/Night OFF: Sets Night Mode off. models only) AUTO: Sets Night Mode to Auto set. CONTINUOUS: Wiper wipes Wiper continuously until deactivated manually or by the five-minute timeout built in to the system. INTERMITTENT: Wipes twice, then turns off after 15 seconds. ONE SHOT: Wipes five times, then turns off. WASH WIPE: Wiper washes and wipes. 8.4 PTZ Setup (unlocked) The Pelco PTZ Setup Menu provides access to the PTZ settings such as tours, scan speed, presets, limit stops, recording, and AutoPivot. PTZ Setup Exit... Edit Tour 1... Edit Tour 2... Tour 1 Period: Tour 2 Period: Scan Speed Edit Presets... * Limit Stops: * Recording: * Autopivot: * * * * * 5 sec 5 sec 30 deg/sec OFF “A” ON * = Factory Setting Focus / Iris: Select PTZ Setup Menu Choices: Menu Description Sub-menu / Description Exit Edit Tour 1 Exits the menu.? Accesses the Add / Remove Exit: Exits the menu. Default Setting Scenes On Standard Tour 1 Scene (1 - 5): Adds or removes Edit Tour 2 Tour 1 Period Menu. Accesses the Edit Custom scenes from the Standard Tour. Exit: Exits the menu. Tour Menu. Scene (1 - 5): Adds or removes Changes the length of scenes from the Custom Tour. Sliding scale: – (3 sec. to 10 min.) + 5 sec. waiting time between Tour 2 Period presets. Changes the length of Sliding scale: – (3 sec. to 10 min.) + 5 sec. waiting time between presets. Bosch Security Systems, Inc. Installation and User Manual F.01U.276.622 | 1.0 | 2012.09 44 en | On-Screen Display (OSD) Menus (Pelco Protocol) MIC Series 550 Classic Camera Menu Description Sub-menu / Description Default Scan Speed Changes the Autopan and Setting Sliding scale: – (1°/sec to 60°/sec) + 30°/sec. Edit Presets Limit Stops AutoScan speeds. Modifies preset scenes. Toggles the Limit Stops for 1-64 scenes ON or OFF Recordings AutoScan. Selects record Pattern 1 or “A” or “B” OFF “A” 2, if normal pattern command does not AutoPivot respond. Follows a subject while ON or OFF ON beneath the camera, without inverting the picture. 8.5 Other Menus Menu Description Default Setting Edit Password Sets or displays the password. See Section 6.5 Setting Passwords, page 27. FastAddress (locked) Sets or changes the address. Software Version Displays the camera software version. Not Set (unlocked) Ack and Reset Alarms Acknowledges and resets alarms. If there is no active alarm input, the OSD displays the following message: “No Active Alarms.” Restore All Settings Restores all settings to their original factory default (locked) settings. Reset All Memory Restores all settings to their original factory default (locked) settings and clears all user programmed settings such as preset scenes and recordings. F.01U.276.622 | 1.0 | 2012.09 Installation and User Manual Bosch Security Systems, Inc. MIC Series 550 Classic Camera 9 Common User Commands (unlocked) | en 45 Common User Commands (unlocked) This chapter details common user commands. See Section A Keyboard Commands by Number, page 50, for a complete list of commands. 9.1 Setting AutoPan Mode AutoPan mode pans the camera 360° or pans between user-defined limits (when programmed). The camera continues to pan until stopped by moving the joystick. To pan 360º: 1. Press ON-1-ENTER. 2. Move the joystick to stop the pan. To set left and right pan limits: 1. Move the camera to the starting position and press SET-101-ENTER to set the left limit. 2. Move the camera to the end position and press SET-102-ENTER to set the right limit. To start AutoPan between limits: 9.2 1. Press ON-2-ENTER. 2. Move the joystick to stop the pan. Setting Preset Shots Preset shots are saved camera positions. Shots are saved as scenes, therefore, the terms SHOT and SCENE are used interchangeably. To set a Shot: 1. 2. Move the camera to the position you want to save. Press SET-#-ENTER, where # can be a number from 1 to 64 that identifies the camera position of the scene. 3. To specify a title for the shot, see the procedure below. To view a Shot: Press SHOT-#-ENTER, where # is the number of the scene position that you want to view. To store or clear a Shot: 1. Press SET-100-ENTER to access the Store/Clear Scene Menu. 2. Follow the on-screen instructions. To disable overwrite confirmations: If you overwrite a preset shot, the camera issues a confirmation message prompting you to approve the overwrite. To disable this confirmation message, press OFF-89-ENTER. 9.3 Specifying a Shot Title The camera provides an alphanumeric character palette used to specify a title for a shot (scene). To specify a title: 1. Navigate to the shot or scene: – for a shot: set a new shot or view a stored shot, then press ON-62-ENTER. – for a scene: move the camera to the scene (zone), then press ON-63-ENTER. 2. Use the joystick to move the cursor to highlight a character. 3. Press Focus/Iris to select the character. 4. Continue to select characters (up to 20) until you have created the title. Bosch Security Systems, Inc. Installation and User Manual F.01U.276.622 | 1.0 | 2012.09 46 en | Common User Commands (unlocked) MIC Series 550 Classic Camera To clear a character from a title: 1. 2. Use the joystick to highlight the Clear OR Position Character prompt. Move the joystick left or right until the cursor is below the title character that you need to clear. 3. Press Focus/Iris to clear the character. 4. Move the joystick up to bring the cursor back into the character palette. To save a title: 9.4 1. Use the joystick to highlight the Exit prompt. 2. Press Focus/Iris to save the title. Configuring Preposition Tours A Preposition Tour automatically moves the camera through a series of preset or saved shots. The camera has one (1) standard preset tour and one (1) customized preset tour. Tour 1 is a standard tour that moves the camera through a series of shots in the sequence that they were set. Tour 2 is a custom tour that allows you to change the sequence of shots in the tour by inserting and deleting scenes. To start Preposition Tour 1: 1. Set a series of preset shots in the order that you want the camera to cycle through. 2. Press ON-8-ENTER to start the tour. The tour then cycles through the series of shots until it is stopped. To stop a Preposition Tour: Press OFF-8-ENTER or move the joystick to stop either type of tour. To add or remove scenes to Preposition Tour 1: 1. Press SHOT-900-ENTER to access the Add/Remove Scenes Menu. 2. Use the Focus/Iris buttons to add or remove the selected scene from the tour. To start custom Preposition Tour 2: Press ON-7-ENTER to start a tour. The tour cycles through the series of shots (in the order that they were defined) until it is stopped. To edit a custom Preposition Tour 2: 1. Press SET-900-ENTER to access the Add/Remove Menu. 2. Press the Focus/Iris buttons to add or remove the selected scene. To change the dwell period of a tour: 9.5 1. Press ON-15-ENTER to access the Tour Period Menu. 2. Select the tour (Tour 1 or Tour 2) and follow the on-screen instructions. Programming the Inactivity Operation You can program the camera to change its operating mode automatically after a period of inactivity. To access the Inactivity mode (locked command): 1. Press OFF-90-ENTER to turn off the command lock. 2. Press ON-9-ENTER to access the Inactivity Mode Menu. 3. Select one of the following choices: – Return to Scene 1: Returns the camera position to the first scene saved in memory. – Recall Previous Aux: Returns the camera to the previous operating mode, such as a Preposition Tour. F.01U.276.622 | 1.0 | 2012.09 Installation and User Manual Bosch Security Systems, Inc. MIC Series 550 Classic Camera 9.6 Common User Commands (unlocked) | en 47 Recording Tours The camera can make up to two (2) recorded tours. A Recorded Tour saves all manual camera movements made during the recording, including its rate of pan, tilt and zoom speeds and other lens setting changes. To Record Tour A: 1. Press ON-100-ENTER to start recording a tour. 2. Press OFF-100-ENTER to stop recording. To playback Recorded Tour A: 1. Press ON-50-ENTER to begin continuous playback. 2. Press OFF-50-ENTER or move the joystick to stop playback. To Record Tour B: 1. Press ON-101-ENTER to start recording the tour. 2. Press OFF-101-ENTER to stop the tour. To playback Recorded Tour B: 9.7 1. Press ON-52-ENTER to begin continuous playback. 2. Press OFF-52-ENTER or move the joystick to stop playback. Using the Wiper/Washer To activate the washer/wiper function, press ON-105-ENTER and confirm this sequence: 1. 2. The wiper moves to a predefined position. The washer turns on for five seconds. SImultaneously, the wiper turns on and wipes five times. 3. The washer turns off. The wiper turns off. 4. The camera returns to its previous PTZ position (and to inactive mode if applicable). To activate the wiper manually (or if the corresponding alarm was activated or deactivated): Press ON-102-ENTER. Note: The wiper will turn off automatically after 5 minutes of use. To activate intermittent wipe: Press ON-103-ENTER. The wiper wipes twice, then turns off 15 seconds later, after it returns to parked position. To activate the wiper to wipe five (5) times: Press ON-104-ENTER. The wiper wipes five times, then turns off after it returns to parked position. NOTICE! If the power fails while the wiper is activated, the wiper will return to ’parked’ position, after power is restored, before turning off. The wiper will not stop in front of the camera window. Bosch Security Systems, Inc. Installation and User Manual F.01U.276.622 | 1.0 | 2012.09 48 en | Advanced Features 10 MIC Series 550 Classic Camera Advanced Features This chapter details advanced user commands, which are more complicated than those in Section 9 Common User Commands (unlocked), page 45. 10.1 Alarm Rules The camera features a powerful alarm rule engine. In its simplest form, an alarm rule defines those inputs that activate specific outputs. In its more complex form, a rule can be programmed to take any combination of inputs and keyboard commands to perform a camera function. There are numerous combinations of alarm inputs and outputs that can be programmed into twelve (12) alarm rules. 10.1.1 Controlling Alarm Rules The AUX 69 command allows a user to enable or disable all alarm rules. By default, alarm rules are enabled until the OFF-69-ENTER command is issued from a keyboard (there is no corresponding menu item for this command). Disabling alarms rules does not erase the rule, the camera preserves the user-defined settings and the rule data is restored when the ON-69ENTER command is issued. The OFF-69-ENTER command performs the following actions: – Disables all alarm rules – Displays the message “Ack and Reset Alarms” if an alarm-rule triggered alarm is active when the camera receives the disable command. You must acknowledge the alarm before the rule is disabled. – 10.1.2 Prevents the modification of an alarm rule while disabled. Alarm Rule Examples Following are two examples for setting up alarm rules. Example 1: Basic Alarm Rule Scenario: We want a door alarm contact to: 1. Flash an OSD message (***ALARM 1***) on the display when the alarm is triggered. 2. Move the camera to a saved position. (For this example, Shot 7.) 3. Transmit a Bilinx signal over the coax cable to the headend system, such as an Allegiant, to trigger an alarm response. The sequence to program the above alarm rule example is as follows: 1. 2. Wire the door contact to Input 1 in the camera. This circuit is normally open. Define the Alarm Input(s): From the Inputs Setup menu, ensure that Alarm Input 1 is set to N.O. (the default setting for Input 1). 3. Define the Alarm Outputs: a. From the Outputs Setup menu, ensure that Output 5 is set to OSD (the default setting for Output 5). 4. 5. F.01U.276.622 | 1.0 | 2012.09 b. Set Output 6 to Shot 7. c. Set Output 7 to Transmit (a Bilinx signal to the head end). Set up the Alarm Rule by selecting the Inputs and Outputs from the Rule Setup menu: a. Select Rule 1. b. Set the first input to Alarm Input 1. c. Set the first output to OSD. d. Set the second output to Shot 7. e. Set the third output to Transmit. Enable the Alarm Rule: Highlight Enabled and select YES. Installation and User Manual Bosch Security Systems, Inc. MIC Series 550 Classic Camera Advanced Features | en 49 Example 2: Advanced Alarm Rule Scenario: A MIC550 camera located at an airport is set to AutoPan Between Limits from the parking garage to the airport terminal. The gate entering the airport has an alarm contact connected to the camera, and the perimeter fence in the area of the gate has an infrared (IR) sensor for motion detection (motion detector) that is connected to the camera. When the alarms for the gate contact and the motion detector are activated at the same time, we want the alarm rule to: 1. Flash an OSD message (***ALARM 2***) on the monitor. 2. Stop the AutoPan and move the camera to a saved position (Shot 5) viewing the fence. 3. Transmit a Bilinx signal to the head end system to trigger an alarm response. The sequence to program this alarm rule example is as follows: 1. 2. Wire and set the alarm Input(s). a. Wire the motion detector to Input 1. (This circuit is normally open.) b. Wire the gate alarm contact to Input 5. (This circuit is normally closed.) From the Inputs Setup menu: a. Ensure that Input 1 (the motion detector) is set to N.O. (This setting is the default for Input 1.) b. 3. a. 4. 5. 10.2 Ensure that Input 5 (the gate contact) is set to N.C. Set the alarm Outputs from the Outputs Setup menu: Set Output 5 to OSD. b. Set Output 6 to Transmit. c. Set Output 7 to Shot 5. Set up the Alarm Rule by selecting the Inputs and Outputs from the Rule Setup menu: a. Select Rule 2. b. Set the first input to Alarm Input 1 (the motion detector). c. Set the second input to Alarm Input 5 (the gate alarm contact). d. Set the first output to OSD. e. Set the second output to Shot5 viewing the fence. f. Set the third output to Transmit (a Bilinx signal to the headend). Enable the Alarm Rule: Highlight Enabled and select YES. Pre-position Tour The camera features (2) preset tours. Each preset scene is saved for playback later. Tour 1 is a standard tour that only recalls the scenes in the exact sequence they were shot. Scenes can be added or deleted on the tour, but the sequence cannot be changed. To add or remove scenes on Tour 1 enter the keyboard command SHOT-900-ENTER and follow the onscreen instructions. Tour 2 is a customizable tour that allows you to rearrange the sequence of scenes on the tour by inserting and deleting scenes. To enter the Edit Tour 2 menu, enter the keyboard command SET-900-ENTER and follow the on-screen instructions. Bosch Security Systems, Inc. Installation and User Manual F.01U.276.622 | 1.0 | 2012.09 50 en | MIC Series 550 Classic Camera A Locked * * * * * * * * * * * * Keyboard Commands by Number Function Command Key No. Command Description On/Off On/Off On/Off On/Off On/Off On/Off On/Off 1 2 3 4 7 8 9 Scan 360° Autopan Iris Control Focus Control Play Custom Pre-position Tour Play Pre-position Tour Inactivity Mode Autopan without limits Autopan between limits Enters menu (auto, manual) Enters menu (spot, auto, manual) Activate/Deactivate Activate/Deactivate Enters menu (Off, Return to Scene 1, Recall On/Off On/Off On/Off On/Off On/Off On/Off On/Off On/Off On On/Off On/Off On On On/Off On/Off On/Off On/Off On/Off/ 11 14 15 18 20 23 26 35 40 43 44 46 47 50 51 52 53 56 Auto Iris Level Adjust Set Autopan and Scan Speed Set Pre-position Tour Period (dwell) AutoPivot Enable Backlight Comp Electronic Shutter Wide Dynamic Range White Balance Mode Restore Camera Settings Auto Gain Control Sharpness Advanced Menu View Factory Settings Playback A, continuous Playback A, single Playback B, continuous Playback B, single Night Mode Menu Previous PTZ Command) Enters Iris Level Adjustment menu Enters speed adjustment slide bar Enters dwell adjustment slide bar Enables/disables AutoPivot Backlight Compensation Enters Shutter Speed slide bar Activate/Deactivate Enters White Balance menu Restores all settings to their original defaults AGC–On, Auto, Off Enters Sharpness menu Enters Main Setup menu View all menu default settings Activate/Deactivate Activate/Deactivate Activate/Deactivate Activate/Deactivate On, Off, Auto (Day/Night only) Auto On/Off 57 Night Mode Control Enables/disables Night Mode Day/Night Threshold Night Mode Priority (Day = Off /Night = On) On–menu (Day/Night only) Motion–Activates Night Mode before slow On/Off On/Off 58 59 shutter, preserving full-frame integration as light is reduced. Color–Activates slow shutter before Night Mode, * On/Off 60 On Screen Display preserving color longer as light is reduced. On–Enable * On On 61 62 Display Adjust Pre-position Title menu Off–Disable Adjust On-screen Display Enters Pre-position Title menu. Refer to * On 63 Zone Title Menu Section 9.3 Specifying a Shot Title, page 45. Enters Zone Title menu. Refer to On Off 64 65 Alarm Status Alarm Acknowledge Section 9.3 Specifying a Shot Title, page 45. Enters Alarm Status menu Acknowledge alarm or deactivate physical On 66 Display Software Version outputs Displays software version number F.01U.276.622 | 1.0 | 2012.09 Installation and User Manual Bosch Security Systems, Inc. MIC Series 550 Classic Camera Locked Function Command Key On/Off/ | en Command 51 Description No. 67 IR Focus Correction Auto On (two times)–Activates focus compensation when using external IR illuminators. Off–Deactivates focus compensation when using normal lighting. Auto–Automatically activates/deactivates IR Focus Correction when external IR illuminators * On/Off 69 Alarm Rule Activation/Deactivation turn on/off. On–Enables all alarm rules * * On On On/Off On/Off 72 79 80 81 Re-initialize Camera Camera Height Digital Zoom Lock Alarm Output 1 Off–Disables all alarm rules Performs camera/lens re-initialization functions Enters the Camera Height menu Turns digital zoom on and off On–Activates output On/Off 82 Open Collector Alarm Output 2 Off–Deactivates output On–Activates output On/Off 83 Open Collector Alarm Output 3 Off–Deactivates output On–Activates output On/Off 84 Open Collector Alarm Output 4 Off–Deactivates output On–Activates output On/Off 89 Relay Preposition Confirmation Off–Deactivates output On–Isues a message that prompts for approval to overwrite a preposition On/Off 90 Command Lock/Unlock Off–No confirmation message issued On–Lock on * On/Off 91 Lens Polarity Menu Off–Lock off On–Reverse * On/Off 92 Lens Polarity Menu Off–Normal On–Reverse * On/Off 93 Lens Polarity Menu Off–Normal On–Reverse On 99 Factory P/T Home Position Off–Normal Recalibrates home position; can be used as an On/Off On/Off 100 101 102 103 Record A Record B Wiper alarm Wiper wipe Alarm Output Activate/Deactivate Activate/Deactivate Manual on/off Intermittent; wipes twice, then turns off after 15 104 105 On 997 On 998 On 999 Set “1-64” Shot “1-64” Set 100 Set/Shot 101 Wiper wipe Washer/Wiper FastAddress, display FastAddress, all units FastAddress, unaddressed cameras Pre-position Programming Pre-position Recall Pre-position Menu Autopan Left Limit seconds. On shot; wipes five times, then turns off. Activate Display current address Display and program current address Display and program unaddressed units Set ##–Programs a preset view Shot ##–Recall programmed preset Enters the Pre-position menu Set–Programs left limit Set/Shot 102 Autopan Right Limit Shot–Shows limit Set–Programs right limit Set Factory P/T Home Position Shot–Shows limit Set–Recalibrate home position 110 Bosch Security Systems, Inc. Installation and User Manual F.01U.276.622 | 1.0 | 2012.09 52 en | Locked MIC Series 550 Classic Camera Function Key * * Set Set Command Command Description No. 802 899 Edit Password Reset ALL Enters the Edit Password menu Restores all settings to original defaults and Set 900 Edit Tour 1 (Standard) Shot 900 Edit Tour 2 (Custom) Set/Shot 901-999 Adds/Removes a Preposition Shot from Tour 1 F.01U.276.622 | 1.0 | 2012.09 clears all user-programmed settings Enters the Standard Tour Scene menu Enters the Custom Tour Scene menu Set ###–Adds preset Shot ###–Removes preset Installation and User Manual Bosch Security Systems, Inc. Bosch Security Systems, Inc. 850 Greenfield Road Lancaster, PA 17601 U.S.A. www.boschsecurity.com © Bosch Security Systems, Inc., 2012