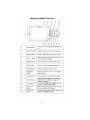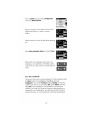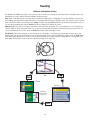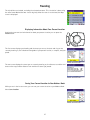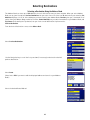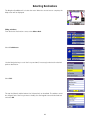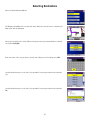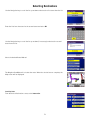
1
~AGELLAts
•
Magellan® RoadMate™ 760
The first time you use your Magellan RoadMate, or if you travel over 500 miles with the unit off, there may be a delay in receiving the initial satellite
fix; depending on your position and the position of the satellites, this could take 15 minutes or more. Normal usage will receive the satellite fix much
faster, but still may take several minutes. It is important to have your antenna rotated upward and an unobstructed view of the sky to receive the
best possible satellite signal. An external antenna (not included) provides faster satellite fix times and greater signal strength. Because it is
mounted outside of the vehicle, it is not affected by reflective coatings on windows and has an unobstructed line of sight to the satellites. Please
refer to the Documentation CD-ROM for more information on signal reception.
re everything is included in the box...
E@5rnm===O==~
USB (Data) Cable
Magellan RoadMate 760
Cradle with
Mounting Plate
Windshield Mount
iD
Magellan RoadMate
~
POI Ma nager Softwa re o:::::Jffi=====D=~
0)
CD-ROM
Power Cable (home)
o:::::Jm==O=~
Power Ca ble (car)
Basic User's Gu ide
Docu mentation
CD-ROM
in your car...
--'-
A>
Take care when mounting the unit in your vehicle that it does not obstruct the driver's view of the road,
interfere with the operation of the vehicle's safety devices such as air bags, or present a hazard to
occupants of the vehicle should the unit be dislodged while driving. You assume the risks associated
with damage to your vehicle or vehicle occupants as the result ofyour choices in mounting the unit. It is
your responsibility to ensure that your choice in mounting the unit complies with applicable motor
~vehicle regulations.
c>
B>
Slide the cradle and plate
assembly onto the
windshield mount.
D>
Attach the Magellan
RoadMate to the cradle.
Clean the area of the
windshield with the
supplied alcohol swab.
F>
G>
E>
Plug the power cable
into the cradle...
...and into your car.
Press the windshield mount
to the glass and turn the
locking dial until it clicks
into place.
Rotate the antenna
upward and ...
Please visit our Web site at www.magellangps.com to register your Magellan RoadMate. While you are there, you can get information on updates and accessories.
©2005 Thales S.A. All rights reserved. The Magellan logo, Magellan, Magellan RoadMate, and Turn it on and go! are trademarks of Thales.
HF2AT001407
631237-98 A
eM~GELLA~
Magellan® RoadMate™
Basic Operation Instructions for the
Magellan RoadMate 760
This document covers the basic operation of the Magellan RoadMate 760
Vehicle-Navigation System. The information provided here is enough to give you all the
normal operating features for using this product. If you need additional information or if
you require details on other functions, refer to the Reference Manual found on the
compact disc (CD-ROM) supplied with your Magellan RoadMate.
IMPORTANT SAFETY WARNINGS
The Magellan RoadMate is a vehicle navigation aid designed to guide you to your selected
destinations. When using the Magellan RoadMate, these safety rules must be followed to
prevent accidents that can result in injury or death to yourself or others:
•
•
•
•
•
•
When driving, the need to view the display is minimal. Voice prompts will guide you to
your destination. The driver should enter data or program the unit only when the
vehicle is stopped. Only a vehicle passenger should enter data or program the unit
while the vehicle is moving.
It is your responsibility to comply with all traffic laws.
While every attempt is made to ensure that the database is accurate, roadways, points
of interest (POls), and business and service locations may change over time. The
database does not include, analyze, process, consider or reflect any of the following:
legal restrictions (such as vehicular type, weight, height, width, load and speed
restrictions); road slope or grade; bridge height, width, weight or other limits;
population density; neighborhood quality or safety; availability or proximity of
law-enforcement, emergency-rescue, medical or other assistance; construction work
zones or hazards; road or lane closures; road, traffic or traffic facilities safety or
condition; weather conditions; pavement characteristics or conditions; special events;
traffic congestion. It is your responsibility to disregard any unsafe, hazardous or illegal
route suggestions.
Keep the Magellan RoadMate safe from extreme temperature conditions. For
example, do not leave it exposed to direct sunlight for an extended period of time.
Take care when mounting the unit in your vehicle, whether using the windshield
mount or other mount or accessories, that it does not obstruct the driver's view of the
road, interfere with the operation of the vehicle's safety devices such as air bags, or
present a hazard to occupants of the vehicle should the unit be dislodged while
driving. You assume the risks associated with damage to your vehicle or vehicle
occupants as the result of your choices in mounting the unit.
For installation instructions, please refer to the Read Me First document supplied with
your Magellan RoadMate.
© 2005 Thales S.A. All rights reserved. The Magellan Logo, Magellan, Magellan
RoadMate, Turn it on and go, TrueView, QuickSpell, SmartDetour, TrueFix, and SayWhere
are trademarks of Thales. No part of this user manual may be reproduced or transmitted in
any form or by any means, electronic or mechanical, including photocopying and
recording, for any purpose other than the purchaser's personal use, without the prior
written permission of Thales.
Table of Contents
Registration
Magellan RoadMate
Traveling to Europe with your Magellan RoadMate
Magellan RoadMate (Front View)
Magellan RoadMate (Rear View)
Traveling with the Magellan RoadMate
Tips on Signal Reception
Where Is the Volume Control?
Can the Voice Command be Repeated?
How Do I Adjust the Contrast and Brightness?
What About Driving at Night?
Viewing the Guidance Screens
~
How Do I Read the Map screen?
Changing the Map Zoom Levels
How Can I See the Entire Route?
How Can I See What the Next Maneuver Will Be?
What if I Am Not Looking at the Map?
Entering Information
How Do I Enter Text?
What is QuickSpell?
Can I Transfer Addresses from a PDA or Smartphone?
Selecting a Destination
How Do I Find a Street Address?
How Do I select a Point of Interest as a Destination?
How Do I Go To a Previous Destination?
How Do I Go To an Address in My Address Book?
Can I Route to Several Destinations in a Row?
What About Finding Restaurants and Gas Stations along the Way?
What if I Get Stuck In Traffic?
Can I Have a Password?
Magellan RoadMate POI Manager Software
Installation
Creating Custom POls
Uploading POls to Your Magellan RoadMate
Viewing Custom POls on your Magellan RoadMate
~
CONTACT INFORMATION
Tech nica I Su pport
Warranty Service
Customer Service
i·
iii
1
1
2
3
4
4
4
4
5
5
5
6
6
6
6
7
7
7
7
7
8
8
9
11
12
12
14
~
14
15
16
16
16
17
17
18
18
18
18
Registration
Registering your product will ensure prompt, effective technical assistance and
customer service and allow you to receive notIfication of product updates, new
products, and other valuable information to help you make the most of your
Magellan RoadMate Vehicle-Navigation System.
To register your Magellan RoadMate, go to www.magellangps.com using your Web
browser. Select the RegisterlLogin option from the list of menu items. If you have
already registered an account with Thales Navigation, enter your e-mail address
and password. If you are not registered, you will need to create a personal profile
by clicking on the Create Your Profile option.
Once you have logged in, select the Your Products menu option and use the
Register A Product button to open the registration page. Fill out your information
and click on the Submit button to finish the registration.
Thank you for registering your Magellan RoadMate.
Magellan RoadMate
Thank you for purchasing the Magellan RoadMate 760. We hope
you will enjoy using your new vehicle-navigation system and
encourage you to provide us with feedback.
The Magellan RoadMate is amazingly simple to use. The easiest way
to learn is to go to your car and let it work for you. But to get you
started, here is a simple step-by-step overview of using your
Magellan RoadMate.
Raise Antenna
Turn it on...
Select User
Select Destination
...and go.
Traveling to Europe with your Magellan RoadMate
Your Magellan RoadMate also comes with European Map Data
pre-installed which can be unlocked for a fee. Call Customer Service
or go to our website at www.magellangps.com for information and
pricing.
1
Magellan RoadMate (Front View)
1
Power Button
Press to turn the Magellan RoadMate on or
off.
2
Volume Control
Adjust to set the volume of the speaker.
3
Repeat Button
Press to repeat the last spoken prompt.
4
Zoom In Button
While viewing the map, press to zoom in on
the center of the display.
5
Option Button
Press to access the User Options menu.
6
Enter Button
Press to confirm highlighted selections.
7
Cancel Button
Press to stop the current function.
8
Navigation
Button
Press to move the cursor or to highlight
other options.
9
Locate Button
Press to display current location details.
10
Light Sensor
11
View Button
12
Zoom Out
Button
While viewing the map, press to zoom out
from the center of the display.
13
Infrared (IR)
Port
Enables wireless infrared data transfer from
a POA or smartphone device.
AutOmatICallY cnanges tne contrast ana
brightness of the display to adjust for
changes in lighting.
Press to view Map screen, Maneuver List
.screen, or TrueView 3D display.
2
Magellan RoadMate (Rear View)
1
Speaker
For audible maneuvering instructions.
2
Repeat Button
Press to repeat the last spoken prompt.
3
Volume Control
Adjust to set the volume of the speaker.
4
Antenna
Rotate up when in use to receive signals
from the GPS satellite network.
5
Compact Flash
This compartment stores the compact flash
memory card (for future applications)
6
Power/Data
Connection
Connection for power and data for the
Magellan RoadMate.
3
Traveling with the Magellan RoadMate
Tips on Signal Reception
Your Magellan RoadMate receives signals from satellites to compute
your location. The advanced technology used with the Magellan
RoadMate allows it to receive these signals even in harsh conditions.
However, there are a few things to keep in mind in order to get the
strongest signal possible.
•
•
•
•
Always raise the antenna unless using an external antenna (not
included 1).
The Magellan RoadMate will not work indoors or in a garage.
Also, navigating around tall buildings and canyons may interfere
with the satellite signal.
Tinted windows can interfere with satellite signal reception. To
test this, hold the receiver outside your window and see whether
it computes your location faster. If it does, you may need to
relocate the receiver in your vehicle or use an external antenna.
Depending on the configuration of your vehicle's interior, the
Magellan RoadMate may not be able to receive the satellite
signals while resting on the center console. It is recommended
that you use the included windshield mount or an external
antenna.
Where Is the Volume Control?
The volume control is located at the top of the Magellan RoadMate
(see page 2). Use the wheel to set the volume of the speaker to the
desired level. A volume-level bar will be displayed on the Map screen
as you adjust the volume. In addition, the volume level can be
increased automatically to a predetermined level by enabling
Automatic Volume (Option Button> Configuration> Automatic
Volume). With Automatic Volume enabled, when your vehicle
exceeds 45 mph, the volume level will automatically increase to the
level set in the menu.
Can the Voice Command be Repeated?
Yes. If you missed a voice prompt, press the Repeat button on the
top of the Magellan RoadMate (see page 2) to repeat the last voice
prompt.
1. Accessories can be purchased on the Internet at www.magellangps.com
4
How Do I Adjust the Contrast and Brightness?
The Magellan RoadMate has alight sensor on the front of the unit
that detects changes in light levels and adjusts the brightness and
contrast automatically. You also can adjust the brightness and
contrast levels manually.
To access the Contrast and Brightness menus,
press the Option button (see page 2) and select
Configuration. Select either Contrast or
Brightness. The adjustment procedure for both
is identical.
Press the left arrow to decrease or the right arrow to increase the
level. When you have set the desired level, press Save.
What About Driving at Night?
The Magellan RoadMate 760'can be configured to automatically
switch to a Night screen. The Night screen is designed to be less
bright for nighttime driving conditions. Press the Option button and
select Select Map Color. Enable Auto Night Mode and select Save.
For more information, please refer to the Reference Manual found
on the Documentation CD included with your Magellan RoadMate.
Viewing the Guidance Screens
You can view the different guidance screens by pressing the View
button. Press the View button (see page 2) from the Select
Destination menu to view the Map screen. Press the View button
again to go to the Maneuver List screen, and again to go to the
TrueView 3D screen.
5
How Do I Read the Map screen?
The Map screen is used most often when traveling and provid'es you
with information about where you are and where you are going.
POI Icon
t --Position Cursor
(points in the
""".:::::iiiiiiiMII........~--directionyou are
traveling)
Next Maneuver
ID-§-~-Next
Direction of Travel
and GPS Signal
Strength tt
Road
Distance to Destination
Direction of Destination
Distance to Next
Maneuver
t By touching the POI icon on the screen, you can get information and route to it.
tt Blue =WASS Signal, Green = Strong Signal, Yellow = Average Signal, Red =Weak Signal,
Black = No Signal
As you travel, the Guidance screen constantly updates your location
and provides you with not only a map, but also a visual indication of
where you are on the map.
Changing the Map Zoom Levels
You can increase or decrease the detail of the Map screen by
pressing the Zoom In (+) or Zoom Out (-) button (see page 2).
How Can I See the Entire Route?
The Maneuver List screen can be viewed only
after a route has been calculated. From the Map
screen, press the View button to bring up a list of
all of the maneuvers along the route. When you
are done viewing the Maneuver List screen,
press the View button twice to retu rn to the Ma p
screen, or wait a few moments and it will return automatically.
How Can I See What the Next Maneuver Will Be?
The Magellan RoadMate uses TrueView 3D
technology to display a three-dimensional
picture of the next maneuver. The TrueView 3D
screen can be viewed only after a route has been
calculated. From the Map screen, press the View
6
button twice to view the TrueView 3D screen. In split mode, the left
half of the screen shows TrueView 3D, while the right half of the
screen shows the map. You can also view TrueView 3D in full screen.
For more information, please refer to the Reference Manual fou~d
on the Documentation ·CD included with your Magellan RoadMate,
When you are done viewing the TrueView 3D screen, press the View
button to return to the Map screen, or wait a few moments and it will
return automatically.
What if I Am Not Looking at the MapJ
The Magellan RoadMate 760 will give you audible voice prompts to
let you know what your next instruction will be. In addition, the
Magellan RoadMate 760 can be configured to spe'ak the street name
of the next maneuver. This feature can be enabled by selecting
Voice Options> Announce Street Name in the Configuration menu.
Entering Information
How Do I Enter Text?
The Magellan RoadMate 760 has a touch
screen, making it easy to input information and
select menus. In addition, the Navigation button
can also be used to move to the desired key on
the screen, after wh ich pressi ng the Enter button
will input the information. For the examples in
this book, we will use the touch-screen method.
What is QuickSpell?
The Magellan RoadMate uses QuickSpel1 technology to provide you
with the fastest method possi ble to select informationfrom the
database. QuickSpel1 eliminates the possibility of a misspelling a
word or entering a city or street that is not in the database. As you
begin entering text, QuickSpell highlights only the characters that
are available next in sequence, thereby accelerating the entry
process.
Can I Transfer Addresses from a PDA or Smartphone?
You can transfer addresses from your PDA or smartphone by
activating the address transfer function on your PDA or smartphone
and aiming its IR port toward the IR window on the Magellan
RoadMate (see page 2). A message will be displayed on your
Magellan RoadMate to confirm that the address has been
transferred successfully.
7
It is required that your PDA use the same IrDA protocol as the
Magellan RoadMate. If an error occurs in transmission or protocol,
an error message will be displayed. The Magellan RoadMate's IrDA
protocol will work with PDAs using PocketPC® 2003, 2004, and
Palm® OS Version 5 and above.
Selecting a Destination
The Magellan RoadMate has four different ways to select
desti nations: Select Address fi nds an add ress in the data base;
Address Book enables you to select addresses you have saved;
Dining, ATM, Gas... searches the database for Points of Interest
(POls), and Intersection finds a locabon from two intersecting
streets.
How Do I Find a Street Address?
Select Select Address from the Select
Destination menu.
Select Search By City, Search By State or
Previous City. Search By City'is the most
commonly used because you probably know the
city that the street is in. If you do not know the
city, Search By State will show you every city in
the selected state that has a street that matches
the one you will enter. Previous City shows you a list of the last 10
cities you have routed to. For this example we, will assume that you
know the city, so select Search By City.
1 0 0 o o - . . . . 0 -..................................... . . . 0 -.........
Enter the first few characters in the city name. In
this example, we are looking for San Jose, CA.
Using the keyboard, enter S-A-N-<space>-J and
select OK (if you have entered enough
characters, the Magellan RoadMate will display
the list automatically). A list of possible cities
from the database is displayed. Select the desired city by touching it
on the screen.
8
Next, enter the first few characters of the street
name. In this example, we are looking for Denise
Way. Using the keyboard, enter D-E-N and select
OK (Do not enter prefixes such as "North" or
"N", or suffixes such as "Ave" or "Road" in the
street name). A list of possible streets from the
database is displayed. Select the desired street name by touching it
on the screen.
Note: Some streets have a prefix or suffix like North or South and will
also appear in the list of possible street names.
Next, enter the street number. At the top of the
screen, the range of addresses that are within
the selected street is displayed. If the desired
address is not in this range, it may be new
address that is not yet in the database. Entering
a number higher or lower than the range will
route you to the closest address. Press Done without entering a
number and you will be routed to the lowest number in the range.
The last step is to enter which method by which
you wish to calculate the route: Shortest Time,
Shortest Distance, Least Use Of Freeways, or
Most Use Of Freeways. If you would like to see
your destination on the map, press the Map
button. Select the desired method and the
Magellan Road Mate will begin routing you to your destination.
How Do I select a Point of Interest as a Destination?
What is a poi nt of interest?
Points of Interest (or POls), are commercial or recreational locations,
landmarks, or services that are preloaded into the Magellan.
RoadMate database. There are over six million POls in the database
that range from restaurants, parks, gas stations, and banks, to
schools and police stations, and more. The purpose of the POI
database (accessed through the Dining, ATM, Gas ... menu option) is
to provide you with a list of popular destinations without having to'
add them to your address book manually. In t~is example, we need
to go to San Francisco International Airport in San Francisco,
California.
9
Select Dining, ATM, Gas... from the Select
Destination menu.
Next, you will need to indicate how you plan to
access the name of the POI you are looking for.
Spell Name: Use the keyboard to enter the first
few characters of the name. After pressing OK,
you will be given a list of all of the places stored
in the data base that begi n with those
characters. Select Category: This option enables
you to select from a list of available POI categories. Custom POls:
These are POls downloaded from other sources on the Internet, or
created manually using the POI Manager Software and loaded into
the Magellan RoadMate. For more information on Custom POls,
please refer to the Reference Manual found on the Documentation
CD included with your Magellan RoadMate.
In this example, we will be looking for an airport
in San Francisco. Select Category is selected;
the Select Category Type screen is displayed.
Scroll down the list and select Airport.
We now have three options to choose from:
Nearest enables you to display a list of all of the·
POls in the category closest to your present
location, from closest to farthest; with List By
City, you can use the keyboard to select the city
that the POI is in, using Spell Name, you would
use the keyboard to enter the name of the POI you are searching for.
In this example, the fastest way to find this
airport is by using the List by City option. The
keyboard is displayed; input S-A-N-<space>-F
and select OK. A list of airport locations is
displayed, select the desired location.
Select the Route Method for your trip. Once the
Route Method is selected, the Magellan
RoadMate begins computing the route. When
the route is defined, the Map screen appears
and you are ready to go.
10
How Do I Go To a Previous Destination?
Once the Magellan RoadMate has calculated a destination, it stores
that desti nation in you r Previous Desti nations list. Th is Iist is stored in
the Address Book menu and contains the last 50 destinations you
have routed to.
Previous Destinations are not added to your Address Book
automatically. For information on how to save Previous Destinations
to your Address Book, please refer to the Reference Manual found
on the Documentation CD included with your Magellan RoadMate.
From the Select Destination menu, select
Address Book.
Select Previous Destinations.
The list of your Previous Destinations is
displayed. Select the destination that you wish to
route to.
The information for the selected desti nation is
displayed. Select Route to go to the selected
desti nation. (Select Edit to custom ize the
information and save it to your Address Book,
select Delete to remove it from the list.)
The final option is to select the Route Method
you desire. The Magellan RoadMate will begin to
ca Icu late the route to the Previous Desti nation
you selected and you are ready to go.
11
""""",,,,,,,,,,,,-,,,
""
"''''
Previous Destinations
Lax-Departures
100 World Way
Los Angeles, CA
310-646-5252
"",,,,,,,,,
How Do I Go To an Address in My Address Book?
The Magellan RoadMate 760 stores up to 200 street addresses for
each user for quick and easy access. In addition, you can designate
an address as a Favorite for even quicker access to places traveled
to most often. For more information on Favorites, please refer to the
Reference Manual found on the Documentation CD included with
your Magellan RoadMate.
From the Select Destination menu, select
Address Book.
From the Address Book menu, select List
Addresses. (Use Create New Entry to input an
address into the Address Book and then use the
new add ress as you r desti nation.)
Select the add ress you wish to route to and
select Route.
Finally, select the Route Method that you want
the Magellan RoadMate to use in calculating the
route.
Can I Route to Several Destinations in a Row?
Yes. The Magellan RoadMate includes a Trip Planner with Route
Optimization. You can select two or more destinations and route to
them in the order you enter them, or optimize the route to go to the
next closest destination.
12
From the Select Destination menu, select
Address Book.
Select Trip (press the Trip button).
Select New and give your trip a name. Select
OK.
Select Add.
At this point you can add destinations using
Select Address, Address Book, POls (Dining,
ATM, Gas ... ), or Intersection. For this example,
we will use the Address Book. Select Address
Book.
Next, select List Addresses. Select an address
and then select Save. The address is added to
your trip. To add additional destinations, select
any destination in the trip and select Add from
the pop-up menu. Follow the previous steps and
continue to add as many destinations as you
wish. When you are finished, select Save: [Trip
Name].
To optimize the route, select Edit; then, select
the trip and select Optimize. This will sort your
destinations from nearest to farthest from your
current position.
13
Select Save: [Trip name). Then, press the Cancel
button to be taken back to the Trip menu. Select
Guide Me and then select the trip.
Select the first destination in the list you wish to
route to.
i:...................;.......................-..............................J
Note: Selecting the second destination in the list
will exclude the first destination, selecting the
third destination in the list will exclude the first
and second destinations, and so on.
Finally, select the Route Method that you want
the Magellan RoadMate to use in calculating the
route. When you have arrived at your first
destination, the Magellan RoadMate will prompt
you to continue on your trip. If you turn the unit
off, and turn it back on when you are ready to
continue, the Magellan RoadMate will prompt
you to continue your trip, as well.
Note: Destination added to the Trip Planner will not appear in the
Previous Destinations List.
What About Finding Restaurants and Gas Stations along the Way?
As you are traveling along your route, press the Enter button. Select
Dining, ATM, Gas...; then, select the category. A list of POls within
approximately 3.5 miles of your current position will appear. Choose
a destination from the list and select Route. When you have arrived,
the Magellan RoadMate will prompt you t6 continue with your
original destination.
What if I Get Stuck In Traffic?
The Magellan RoadMate comes equipped with SmartDetour. With
SmartDetour enabled, you can have the Magellan RoadMate reroute you around traffic if it detects your speed is under 15 miles per
hour for a predetermined amount of time.
14
Press the Option key and select Configuration.
Then select Detour Options.
Select the distance of the detour form the preprogrammed options, or enter a custom
distance.
Select the amount of time to wait before alerting
you.
Select Enable automatic detour and select Save.
When traffic on the freeway slows down, the
SmartDetour icon will flash on the Map screen.
Touch the icon on the screen to re-ca Icu late the
route.
Can I Have a Password?
Yes you can. Each user can set a password. To set a password, press
the Option button on the Magellan RoadMate and select
Configuration, then, select Password. Select Change and enter the
password you wish to use and select OK. Select Activate and then,
select Save. Your password is now activated. If you forget your
password, you must call Technical Support to get instructions on
resetting the unit. Resetting the unit will erase all the information
stored for all users, so it is important to remember your password.
15
Magellan RoadMate POI Manager Software
The following covers the basics of installing and using the Magellan
RoadMate POI Manager software. For more information, please refer
to the Reference Manual found on the Documentation CD included
with your Magellan RoadMate.
Installation
Insert the Magellan RoadMate POI Manager CD into your computer's
CD drive. The installation will begin automatically. Follow the onscreen instructions to install the POI Manager software.
Creating Custom POls
To create a POI you must know the latitude and longitude of the
item. This information can be found by pressing the Locate button
on the Magellan RoadMate at the location you wish to save as a POI.
<tM<iF,l!AK-:.>
Click on the Add New POI
+ button.
A dialog box will appear, asking you to
enter the latitude, longitude, and
altitude (optional) of the POI.
Next, enter a category name and
then, choose an icon from the pu 11down menu.
You can continue adding POls to the
same category or create as many others as you wish.
16
Uploading POls to Your Magellan RoadMate
When you have finished creating your
~Ols, click on the right arrow to move
the PO I category into the tra nsfer
window.
Click on the Save POI
button. A
dialog box will appear, prompting you
to save the POls to your hard drive or
to your Magellan RoadMate. Select
Magellan RoadMate and give the POI
file a name. Click Save. The POls
have been transferred to your
Magellan RoadMate.
Viewing Custom POls on your Magellan RoadMate
Press the Option button on your Magellan RoadMate and select
Configu ration.
Select Custom POls.
Select Select a POI File and select the POI file
you uploaded.
Select Display Categories and mark the
categories you want to display on the Map
screen.
Return to the Map screen and your POls will
now be displayed on the Map screen. They will
also function as regular POls in that you can
route to them, use them in Trips, touch them on the screen, etc.
17
CONTACT INFORMATION
If you need support for your Magellan RoadMate and you wish to
contact Thales, the following information is provided so that you can
direct your questions/comments to the proper person.
Technical Support
If you need technical assistance or "how-to" help, or if you have a
technical question about the functionality of your Magellan product,
please contact us on the Internet at www.magellangps.com or reach
us by fax or by phone.
Our Technical Support phone representatives are available Monday
through Friday, 6:00 a.m. to 5:00 p.m. PST/PDT. After hours you
may leave a detailed voice mail message that will be returned within
the next business day.
Telephone: (866) 868-2259 or (909) 394-5000 (Outside North
America)
You may also reach Technical Support by Fax: (909) 394-7050
[Attn: Tech. Support]; or E-Mail:
[email protected]
Warranty Service
To obtain warranty service on your unit, you must contact us for a
return authorization prior to shipping the product. Packages arriving
at our dock withoutan RMA may be refused.
To obtain an RMA, simply contact our technical support group at:
Telephone: (866) 868-2259 or (909) 394-5000; Fax: (909) 3947050 [Attn: Tech. Support]; or E-Mail:
[email protected]
Customer Service
If you need to order accessories or obtain unlock codes, you can call
our Customer Service Department Monday through Friday, 6:00
a.m. to 5:00 p.m. PST/PDT.
Telephone: (866) 339-0488 or (909) 394-5000 (Outside North
America); Fax: (909) 394-7078.
18
~~GELLAb
631239-01 A
Thales Consumer Products
960 Overland Court
San Dimas, CA 91773 USA
Tel: 909 394 5000
Fax: 909 394 7050
www.magellangps.com
HDCPS25CET1
Magellan® RoadMate™
Reference Manual
Instructions for Operating the
Magellan RoadMate 760
IMPORTANT SAFETY WARNINGS
The Magellan RoadMate 760 is a vehicle-navigation aid designed to assist you in arriving at your
selected destinations. When using the Magellan RoadMate, these safety rules must be followed to
prevent accidents that can result in injury or death to yourself or others:
•
When driving, the need to view the display is minimal. Voice prompts will guide you to your
destination. The driver should enter data or program the unit only when the vehicle is stopped.
Only a vehicle passenger should enter data or program the unit while the vehicle is moving.
•
It is your responsibility to comply with all traffic laws.
•
Every attempt is made to ensure that the database is accurate. However, roadways, points of
interest (POIs), and business and service locations may change over time. The database does not
include, analyze, process, consider, or reflect any of the following: legal restrictions (such as
vehicular type, weight, height, width, load and speed restrictions); road slope or grade; bridge
height, width, weight, or other limits; population density; neighborhood quality or safety;
availability or proximity of law enforcement, emergency rescue, medical, or other assistance;
construction work zones or hazards; road or lane closures; road, traffic, or traffic facilities’ safety
or condition; weather conditions; pavement characteristics or conditions; special events; traffic
congestion. It is your responsibility to disregard any unsafe, hazardous, or illegal route
suggestions.
•
Keep the Magellan RoadMate safe from extreme temperature conditions. For example, do not
leave it exposed to direct sunlight for an extended period of time.
•
Take care when mounting the unit in your vehicle, whether using the windshield mount or other
mount or accessories, that it does not obstruct the driver's view of the road, interfere with the
operation of the vehicle's safety devices such as air bags, or present a hazard to occupants of the
vehicle should the unit be dislodged while driving. You assume the risks associated with damage
to your vehicle or vehicle occupants as the result of your choices in mounting the unit.
•
Please refer to the Read Me First document supplied with your Magellan RoadMate for
installation instructions.
© 2005 Thales S.A. All rights reserved. The Magellan Logo, Magellan, Magellan RoadMate, Turn it on
and go, TrueView, QuickSpell, SmartDetour, TrueFix, and SayWhere are trademarks of Thales. No part of
this user manual may be reproduced or transmitted in any form or by any means, electronic or
mechanical, including photocopying and recording, for any purpose other than the purchaser’s personal
use, without the prior written permission of Thales.
631241-01 A
Table of Contents
Information ............................................................................................................................................. 1
About Satellite Navigation ..................................................................................................... 1
How Satellite Navigation Works .............................................................................................. 1
Line of Sight ................................................................................................................... 1
Precision ......................................................................................................................... 1
A Word on the Safe Usage of GPS Maps .................................................................................. 2
From Source to Destination ............................................................................................... 2
GPS Maps and Your Safety ............................................................................................... 3
Magellan RoadMate ................................................................................................................................ 4
Front View ............................................................................................................................ 4
Rear View ............................................................................................................................. 5
Cradle Front View .................................................................................................................. 6
........................................................................................................................................... 6
Cradle Side View ................................................................................................................... 6
Installation ............................................................................................................................................. 7
Installation with the Windshield Mount ................................................................................... 7
POI Manager ........................................................................................................................................... 9
Overview .............................................................................................................................. 9
Latitude .......................................................................................................................... 9
Longitude ...................................................................................................................... 10
Altitude ......................................................................................................................... 11
Installation ......................................................................................................................... 12
Connecting Your Magellan RoadMate .................................................................................... 14
Application ......................................................................................................................... 14
Adding A Single POI ....................................................................................................... 14
Adding Multiple POIs ..................................................................................................... 16
Basic Operation .................................................................................................................................... 19
Turning the Magellan RoadMate On ...................................................................................... 19
Adjusting the Volume .......................................................................................................... 20
Repeating the Last Command .............................................................................................. 20
Inputting Text Characters .................................................................................................... 20
Additional Characters (“More” Button) .................................................................................. 20
Numerical Characters (“123” Button) ................................................................................... 21
What Is QuickSpell? ............................................................................................................ 21
Traveling .............................................................................................................................................. 23
Guidance Information Screens ............................................................................................. 23
Map Screen ........................................................................................................................ 24
Changing the Map Zoom Levels ............................................................................................ 24
Maneuver List Screen .......................................................................................................... 25
TrueView 3D Screen ............................................................................................................ 25
Detouring from the Planned Route ........................................................................................ 26
Excluding a Maneuver in the Planned Route .......................................................................... 26
Displaying Information About Your Present Location ............................................................... 27
Saving Your Current Location to Your Address Book ................................................................ 27
Finding POIs Along Your Route ............................................................................................ 28
Finding a Detour Along Your Route ....................................................................................... 29
i
Table of Contents
Selecting Destinations ........................................................................................................................... 31
Choosing the Route Method ................................................................................................. 32
Changing the Route Method ................................................................................................. 33
Cancelling a Planned Route ................................................................................................. 34
Selecting a Destination Using Select Address ........................................................................ 35
Search By City ............................................................................................................... 35
Search By State ............................................................................................................. 36
Previous City ................................................................................................................. 38
Selecting a Destination Using the Address Book .................................................................... 40
Previous Destinations ..................................................................................................... 40
Saving a Previous Destination to the Address Book ............................................................ 41
Deleting A Previous Destination ....................................................................................... 42
Favorites ....................................................................................................................... 43
Editing a Favorite ........................................................................................................... 44
Deleting A Favorite ......................................................................................................... 46
List Addresses ............................................................................................................... 47
Editing an Address ......................................................................................................... 48
Deleting an Address ....................................................................................................... 49
Create New Entry – Search by City ................................................................................... 50
Create New Entry – Search by State ................................................................................. 52
Create New Entry – Previous City ..................................................................................... 54
Trip Planner – New ........................................................................................................ 56
Trip Planner – Optimizing a Trip ...................................................................................... 57
Trip Planner – Guide Me ................................................................................................. 58
Trip Planner – Edit ......................................................................................................... 59
Trip Planner – Delete and Rename ................................................................................... 60
Selecting a Point of Interest as a Destination ......................................................................... 63
Spell Name ................................................................................................................... 63
Select Category .............................................................................................................. 66
Custom POIs ................................................................................................................. 69
Selecting an Intersection as a Destination ............................................................................. 71
Search by City ............................................................................................................... 71
Search by State ............................................................................................................. 72
Previous City ................................................................................................................. 74
Options ................................................................................................................................................. 76
Trip Computer .................................................................................................................... 77
Current Trip ................................................................................................................... 77
Stopping or Starting the Trip Computer ............................................................................ 77
Saving the Current Trip Report ........................................................................................ 78
Resetting the Trip Computer ........................................................................................... 78
Viewing a Saved Trip Report ............................................................................................ 78
Deleting a Trip Report .................................................................................................... 79
Configuration ...................................................................................................................... 80
POI Selection ................................................................................................................ 80
Custom POIs ................................................................................................................. 81
Map Options .................................................................................................................. 86
Select Map Color ........................................................................................................... 87
ii
Table of Contents
Route Preferences .......................................................................................................... 88
Detour Options .............................................................................................................. 89
Voice Options ................................................................................................................ 91
Menu Colors .................................................................................................................. 92
Contrast ........................................................................................................................ 92
Brightness ..................................................................................................................... 93
Display Options .............................................................................................................. 93
Tone Options ................................................................................................................. 94
Language ...................................................................................................................... 95
Diagnostics ................................................................................................................... 95
Product Information ....................................................................................................... 95
Video Test ..................................................................................................................... 95
Touch Screen Test ......................................................................................................... 96
Keypad Test .................................................................................................................. 96
Set GPS Position ........................................................................................................... 97
Simulator Mode ............................................................................................................. 98
Edit User Name ............................................................................................................. 98
Map Regions ................................................................................................................. 99
Safety Lockout ............................................................................................................. 101
Password ..................................................................................................................... 101
Automatic Volume ........................................................................................................ 102
Backup and Restore ..................................................................................................... 103
Restoring Information and Preferences ........................................................................... 103
Tutorial ............................................................................................................................ 105
Moving Around the Tutorial ........................................................................................... 105
Help ................................................................................................................................ 106
Contact Information ............................................................................................................................. 107
Technical Support ............................................................................................................ 107
Warranty Service .............................................................................................................. 107
Customer Service .............................................................................................................. 107
Appendix A ......................................................................................................................................... 108
Adding Addresses from an IrDA-Equipped Device ................................................................. 108
Appendix B ......................................................................................................................................... 109
GPS Status Screen ............................................................................................................ 109
GPS STATUS Screen Structure-first page ....................................................................... 109
Bad fix code ................................................................................................................ 109
GPS STATUS Screen Structure - second page ................................................................. 110
Typical GPS STATUS Screen Display ............................................................................. 111
Appendix C ......................................................................................................................................... 112
POI Categories .................................................................................................................. 112
Appendix D ......................................................................................................................................... 113
Specifications ................................................................................................................... 114
THALES CONSUMER PRODUCTS GPS RECEIVER END USER SOFTWARE LICENSE ...................................... 115
THALES CONSUMER PRODUCTS PRODUCTS LIMITED WARRANTY ........................................................... 118
iii
Information
Information
About Satellite Navigation
Global satellite navigation is an exciting technology, providing enhanced productivity and accuracy in a vast number of
industries. It adds a new level of enjoyment and safety to a wide range of navigation, sports, and recreational activities.
A Global Navigation Satellite System (GNSS) is a network of satellites that transmit high-frequency radio signals containing
time and distance data that can be picked up by a receiver, allowing users to pinpoint their precise locations anywhere
around the globe.
There are two Global Navigation Satellite Systems in operation: the U.S. Global Positioning System (GPS) and the Russian
GLObal NAvigation Satellite System (GLONASS). These systems are constantly being upgraded to meet higher standards of
reliability. A third GNSS named GALILEO, after the Italian astronomer of the early 1600s, is being developed in Europe
specifically to provide a higher standard of integrity and reliability, required to ensure the safety of lives during transport by
air, land and sea, without the use of additional augmentation systems.
While the GPS and GLONASS satellite networks are being developed to achieve maximum performance, Satellite-Based
Augmentation Systems (SBAS) have been established to provide improved accuracy. SBAS provides differential signal
corrections for GPS and GLONASS transmissions with the use of ground stations and geostationary satellites in specific
regions. This is GNSS-1, the first phase in establishing the required integrity for high-precision satellite navigation.
GNSS-2 requires the launching of new satellites into orbit and a complete upgrade of the existing satellite systems. This
second phase is already well underway. GALILEO, scheduled to begin service in 2008, is being developed to meet the
standards of GNSS-2 for rapid and reliable, certified precision positioning.
How Satellite Navigation Works
Global navigation satellites continuously transmit time and distance information as they orbit Earth in a precise formation.
Navigation satellite receivers use this information to calculate an exact location through triangulation. Every point on Earth is
identified by two sets of numbers called coordinates. These coordinates represent the exact point where a horizontal line,
known as latitude, crosses a vertical line, known as longitude. The receiver locks on to at least three satellites and uses the
information received to determine the coordinates of the receiving device.
By comparing the time the signals were transmitted from the satellites and the time they were recorded, the receiver
calculates how far away each satellite is. The distance of the receiver from three or more satellites reveals its position on the
surface of the planet. With these distance measurements, the receiver might also calculate speed, bearing, trip time,
distance to destination, altitude, and more.
The satellite-navigation device may display its position as longitude/latitude, Universal Transverse Mercator (UTM), Military
Grid (MG), or simply as a point on an electronic map. Many Thales Navigation receivers provide comprehensive mapping
data, making satellite navigation an easy tool to enhance your recreational and industrial activities.
Line of Sight
Satellite-navigation receivers operate by line of sight with global-positioning satellites. This means that at least three
satellites must be in “view” of a receiver in order to calculate longitude and latitude. A fourth satellite must also be within
line of sight to calculate altitude. On average, eight satellites are continuously within line of sight of every position on Earth;
the more satellites in view, the more accurate the positioning.
Though the radio signals of navigation satellites will pass through clouds, glass, plastic, and other lightweight materials,
satellite-navigation receivers will not work underground or in other enclosed spaces.
Precision
On average, a satellite-navigation receiver is accurate to within 15 meters. Thales Navigation employs several technologies to
increase the accuracy of their professional and Magellan®-branded receivers. An accuracy of 3 meters or better is achieved
using correction signals from satellite navigation-augmentation systems. In the U.S., an accuracy of 3 meters is achieved
1
Information
using signal corrections from a network of ground stations and fixed-position satellites known as WAAS (Wide-Area
Augmentation System). Throughout Europe a similar system, EGNOS (European Geostationary Navigation Overlay System),
provides the same accuracy. In Asia, satellite navigation-signal correction is provided by MSAS (Multi-functional Transport
Satellite-Based Augmentation System). Other ways to increase the accuracy of satellite navigation include the use of DGPS
(Differential Global-Positioning System); ground relay stations, set at known positions, transmit corrected satellite-navigation
signals. Various methods and applications of DGPS can increase satellite-navigation accuracy from a few meters to within a
few millimeters. Using DGPS requires a differential-beacon receiver and antennae in addition to a satellite-navigation
device. Accuracy can also be increased using an RTK (Real-Time Kinematic) satellite-navigation system. This is a receiver
capable of transmitting a phase-corrected signal from a known position to one or more rover receivers.
A number of positioning errors can occur, limiting accuracy to within 15 to 25 meters. These errors are monitored and
compensated for in a number of ways:
Orbiting errors -- Occasionally, a satellite's reported position does not match its actual trajectory. In the U.S., the
Department of Defense continuously monitors each satellite, making orbital corrections with on-board booster rockets.
Poor geometry -- If all of the satellites within line of sight of a receiver are clustered closely together, or lined up relative to
the position of the receiver, the geometric calculations necessary for triangulating a position become difficult and less
reliable. The use of differential-correction signals from satellite-based augmentation systems or DGPS can compensate for
both orbital errors and poor geometry.
Multipath signals -- Signals may be reflected off tall buildings or other obstructions before reaching the receiver, increasing
the distance a signal travels and reducing accuracy.
Thales Navigation receivers make a number of complex mathematical calculations to effectively compensate for other
potential errors in positioning:
Atmospheric delay -- Satellite-navigation signals slow as they pass through Earth's atmosphere. Thales Navigation receivers
calculate the average delay in nanoseconds to compensate.
Clock errors -- The clock built into a receiver is not as accurate as the atomic clock on a navigation satellite, which is
accurate to one second every million years. Each Thales Navigation receiver compensates for time differentials by comparing
the time signals of several satellites and adjusting its calculations and its clock to match.
A Word on the Safe Usage of GPS Maps
Just like paper maps, maps on GPS devices vary greatly in terms of information included and visual presentation. Whether
topographical maps, roadmaps or marine charts, each map and the data it presents is designed for a specific purpose. For
example, marine charts will often present only a minimal representation of roadways and are not a substitute for street maps.
Topographic maps usually provide minimal detail about bodies of water and do not contain marine navigational markers.
Maps also vary widely in scale: the smaller the scale, the more detailed the map. Therefore, when using GPS maps (just as
with paper maps) it is important to consider what type of map you are using in your explorations and to use common sense.
From Source to Destination
Thales Navigation, maker of Magellan GPS products, is not a cartography company. We do not create the maps that are used
on our GPS devices. We seek to acquire map data from the best public and private sources available at the time of
publication. Thales Navigation licenses* topographical maps, roadmaps, marine charts and points of interest (POI) data
from commercial and governmental cartographic sources that provide raw map data. Thales Navigation processes and
compresses the raw data into a format that makes it presentable and manageable to work on our GPS devices. And to ensure
that our map data is as robust as possible, data from multiple sources are often combined to provide a better user experience
for our customers. This processing does not alter the landforms, coordinates or other spatial data that comes in the raw data.
The accuracy of the maps is fundamentally dependent on the source data used to create them. Map data changes frequently
due to both natural and man-made causes. As a result, governmental and commercial cartography companies must
2
Information
continuously review, correct, and improve upon their map data. We release new versions of our maps on a regular basis to
reflect these changes.
After processing the data, we test the compatibility of the map with our GPS devices to ensure that the products we release
work properly on our GPS devices. We also beta-test our products to get customer feedback prior to release.
GPS Maps and Your Safety
Remember, your GPS device is an aid to navigation. It must be used with common sense, and it is important that users
interpret GPS map data with a critical eye. Landscapes and roads change or may be impassable, trees and tall buildings can
obscure GPS signals, and your GPS device may not always reflect the complete picture. When using GPS, you must combine
the information provided by your GPS map with your relevant local knowledge, road signage, buoys, depth soundings and
changing local conditions to generate a complete understanding of your situation.
It is your responsibility to ensure compliance to all traffic laws, including pedestrian observance of crosswalks, and to use
good judgment while operating the Magellan GPS receiver. Safety must be your primary concern. The Magellan GPS receiver
must not be used while engaged in any activity requiring the user's full attention to the environment. For instance, the
Magellan GPS receiver should be operated only by vehicle passengers or by the driver when the vehicle has come to a
complete stop. The driver must not attempt to view the display while driving. A climber must not attempt to view the display
while negotiating treacherous terrain. Disregard any unsafe, hazardous or illegal route suggestions.
Magellan maps do not include, analyze, process, consider or reflect any of the following: legal restrictions (such as weight,
height, width, load and speed restrictions); road slope or grade; bridge height, width, weight or other limits; population
density; neighborhood quality or safety; availability or proximity of law enforcement, emergency rescue, medical or other
assistance; construction work zones or hazards; road, sidewalk, or waterway closures or conditions; weather conditions;
pavement characteristics or conditions; special events; traffic congestion; time of day.
*Thales Navigation licenses map data from governmental sources such as, but not limited to, U.S. Geological Survey
(USGS), the National Oceanic and Atmospheric Administration (NOAA-NOS) and the Canadian Hydrographic Service (CHS).
Thales Navigation also licenses map data from commercial cartography companies such as Navigation Technologies,
Navionics, DMTI and C-Map.
3
Magellan RoadMate
Magellan RoadMate
Front View
3
2
5
4
6
1
13
12
11
10
9
8
7
1
Power Button
Press to turn the Magellan RoadMate on or off.
2
Volume Control
Adjust to set the volume of the speaker.
3
Repeat Button
Press to repeat the last spoken prompt.
4
Zoom In Button
While viewing the map, press to zoom in on the center of the display.
5
Option Button
Press to access the User Options menu.
6
Enter Button
Press to confirm highlighted selections.
7
Cancel Button
Press to stop the current function.
8
Navigation Button
Press to move the cursor or to highlight other options.
9
Locate Button
Press to display current location details.
10
Light Sensor
Automatically changes the contrast and brightness of the display to
adjust for changes in lighting.
11
View Button
Press to view map display, maneuver list or TrueView 3D display.
12
Zoom Out Button
While viewing the map, press to zoom out from the center of the display.
13
Infrared (IR) Port
Enables wireless IR data transfer from a PDA or SmartPhone device.
4
Magellan RoadMate
Rear View
2
3
4
1
5
6
1
Speaker
Used for audible maneuvering instructions.
2
Repeat Button
Press to repeat the last spoken prompt.
3
Volume Control
Adjust to set the volume of the speaker.
4
Detachable Antenna
Rotate up when in use to receive signals from the GPS satellite network.
5
Compact Flash
Compartment to store the compact flash memory card.
6
Power/Data Connector
Connection for power and data for the Magellan RoadMate.
5
Magellan RoadMate
Cradle Front View
1
2
1
Power/Data Connector
Connection for power and data for the Magellan RoadMate.
2
Release
Press to remove the Magellan RoadMate from the cradle.
Cradle Side View
1
2
1
USB Connection
Connect to your PC to upload Custom POIs or software updates.
2
Power Connection
Plug into your vehicle or at home.
6
Installation
Installation
Take care when mounting the Magellan RoadMate in your vehicle, whether using the windshield mount or other mount, that
it does not obstruct the driver’s view of the road. Make sure that the placement of the Magellan RoadMate and cable does
not interfere with the operation of vehicle safety devices, such as air bags. You assume the risks associated with damage to
your vehicle or vehicle’s occupants as a result of how you choose to mount the Magellan RoadMate.
Installation with the Windshield Mount
Slide the cradle and plate assembly onto the windshield mount.
Attach the Magellan RoadMate to the cradle.
Clean the area of the windshield with the supplied alcohol swab.
Press the windshield mount to the glass and rotate the locking dial until it clicks into place.
7
Installation
Plug the power cable into the cradle.
Plug the cigarette lighter connector into an appropriate 12V receptacle in your car.
Rotate the antenna upward.
Installation is complete, and you are ready to turn the Magellan RoadMate on and go.
8
POI Manager
POI Manager
Overview
The Magellan RoadMate 760 comes with Magellan RoadMate POI Manager Software. This allows you to add custom POIs to
your Magellan RoadMate. You can add things such as friends’ houses and other favorite places that are not in the installed
database. POIs are easier to search for than street addresses and show up on the Map screen. The POI Manager adds POIs
based on Latitude, Longitude, and a name. Other information such as altitude and a description are optional.
Latitude
Latitude can be expressed by dividing Earth into horizontal segments totalling 180 degrees. Starting at the Equator, or zero
degrees Latitude, lines (or Parallels) are drawn in 10-degree increments 90 degrees to the north and 90 degrees to the
south. If your location is below the Equator, you are at a South Latitude.
90° (North Pole)
80°
North Latitude
Equator
South Latitude
0°
10°
20°
30°
40°
50°
60°
70°
80°
90° (South Pole)
9
70°
60°
50°
40°
30°
20°
10°
0°
POI Manager
Longitude
Conversely, longitude lines can be expressed by dividing Earth into vertical segments totalling 360 degrees. Starting at the
Prime Meridian (which is The Royal Observatory in Greenwich, England), or zero degrees Longitude, lines are drawn in 10degree increments 180 degrees to the West and 180 degrees to the East. If your location is on the western hemisphere, you
are at a West Longitude.
West Longitude
90° 70° 50° 30° 10° 10° 30° 50° 70° 90°
80° 60° 40° 20° 0° 20° 40° 60° 80°
East Longitude
Additionally, to narrow down your location further, each 10-degree segment is divided into 60 smaller segments called
minutes and, still further, each minute is divided into 60 segments called seconds.
To express this in coordinates, the city of Los Angeles is located at 34° (degrees) 03’ (minutes) and 08 (seconds) North of
the Equator, and 118° (degrees) 14’ (minutes) and 42 (seconds) West of the Prime Meridian.
10
POI Manager
Altitude
Each location also must have an Altitude. Altitude is expressed by how far the point is above or below the level of the ocean,
or Sea Level. For example, Los Angeles, California is about 300 feet above sea level. Death Valley, California is about 270
feet below sea level.
100’ Above
80’ Above
60’ Above
40’ Above
20’ Above
Sea Level 0’
20’ Below
40’ Below
60’ Below
80’ Below
100’ Below
11
POI Manager
Installation
Insert the POI Manager CD into your PC’s CD drive.
The setup application will begin automatically. If it does not, browse your computer’s CD drive and double-click on the
setup.exe file.
Select a default language for the Application.
The Welcome screen will appear to begin the installation process.
Choose a destination for the application. Select Next to use the
default location, or select Browse to choose a custom
destination.
12
POI Manager
Next, choose a Program Folder to place the application icons.
THe Magellan RoadMate POI Manager software will be installed.
When it has finished, to can have the installer launch the
application automatically, or deselect to exit without launching
the application.
13
POI Manager
Connecting Your Magellan RoadMate
The standard cradle is equipped with ports for connecting the Magellan RoadMate to a personal computer and external
power.
When connecting to a personal computer, leave the Magellan RoadMate attached to the cradle, disconnect the vehicle power
cable and remove the assembly (Magellan RoadMate and cradle) from the vehicle.
Connect the small end of the USB cable to the USB port on the cradle and the large end to an available USB port on your
personal computer. See “Cradle Side View” on page 6.
Connect the small end of the External Power cable to the power port on the cradle and plug the other end of the cable into a
standard, 110 VAC wall outlet. See “Cradle Side View” on page 6.
Depending on the location and surrounding obstructions, the Magellan RoadMate may or may not be able to receive GPS
satellite information.
Application
The POI Manager has a single interface for loading, adding, and deleting custom POIs from your Magellan RoadMate.
Adding A Single POI
Click on the Add New POI
button. A dialog box will appear. Enter the Name, the Latitude, the Longitude, the Altitude
(optional), and Description (optional). To find the latitude, longitude, and altitude of a POI, press the Locate button on the
Magellan RoadMate while you are at the location. See “Displaying Information About Your Present Location” on page 27.
Next, select an icon for the POI by clicking on the drop-down menu.
Finally, create a category for your POI. For example, “Friends’ Houses”, or “Coffee Shops”. Click on OK.
The POI you created is now in the Import, Create, and Modify window. You can continue adding POIs to the new category by
repeating the previous instructions. Each POI file can contain up to 10 categories with 1,000 POIs for a total of 10,000
total POIs.
14
POI Manager
Once you have finished creating POI’s, select the category or categories you wish to upload and click on the right arrow to
add them to the Save and Transfer window.
Click on the Save
button. You are given the option of saving the POIs either to your computer (for later transfer) or directly
to your Magellan RoadMate. Select the Save to My Magellan RoadMate button.
Give your POI file a name and click on Save.
15
POI Manager
The POIs are uploaded to your Magellan RoadMate. To access the new POIs on your Magellan RoadMate, refer to page 81.
Adding Multiple POIs
The POI Manager software supports ASCII file format (.ASC,.CSV,.TXT); GPS Exchange file format (.GPS,.XML); Magellan
Waypoint file format (.WPT,.RTE); and Garmin PCX5 Waypoint file format (.WPT,.RTE).
Click on the Import POI File button.
Select a POI file. Assign the POIs an icon and create a category. Click Open.
16
POI Manager
Define the data separator. Click Next.
Assign a title to each field. You must have a latitude, a longitude, and a name. Click Finish.
If there are any errors in the data you can view them. Otherwise, click No. The POI file has been imported and is ready to
upload to your Magellan RoadMate.
17
POI Manager
Select the POI file and click the right arrow.
Click the Save button. You are given the option of saving the POIs either to your computer (for later transfer) or directly to
your Magellan RoadMate. Select the Save to My Magellan RoadMate button.
Give your POI file a name and click on Save.
The POIs are uploaded to your Magellan RoadMate. To access the new POIs on your Magellan RoadMate, refer to page 81.
18
Basic Operation
Basic Operation
Turning the Magellan RoadMate On
Press the Power Button.
If power is properly connected, a logo screen is displayed, followed by the Warning screen.
Select the desired User. The Magellan RoadMate can be personalized for three different
users. It will use the saved profile settings for the user that you select here.
Either the Select Destination screen or the Resume Route screen will be displayed automatically.
Select Destination
Resume Guidance
Resume Route is displayed if you were navigating toward a destination when the Magellan RoadMate was turned off.
Press the Power button and the Magellan RoadMate will turn off.
19
Basic Operation
Adjusting the Volume
The volume control is located at the top of the Magellan RoadMate. Use the thumbwheel to set the volume of the speaker to
a desired level. See “Rear View” on page 5.
Repeating the Last Command
If you missed the last verbal command, you can repeat it by pressing the Repeat button. The Repeat button is located on the
top of the Magellan RoadMate. See “Rear View” on page 5.
Inputting Text Characters
Whenever you need to input names, street addresses, etc., the Magellan RoadMate will display a keyboard. Touch the letter
you want and, if you make a mistake, use the Backspace key to go back one character at a time. The Spacebar is used to
insert spaces between characters or words.
Cancel
Backspace
Spacebar
Numerical
Characters
Accept Entry
Additional
Characters
Additional Characters (“More” Button)
When you are entering characters, you may need to add punctuation or other special characters.
When available, pressing the More button brings up a keypad with the characters shown here.
20
Basic Operation
Numerical Characters (“123” Button)
When available, pressing the 123 button brings up a keypad with the numeric characters shown
here.
What Is QuickSpell?
The Magellan RoadMate uses QuickSpell technology to provide you with the fastest method possible to enter characters.
QuickSpell eliminates the possibility of a misspelled word or looking for a city or street that is not in the loaded database. As
you begin entering characters, the QuickSpell feature of the Magellan RoadMate dims out those characters which that are
not available, thereby speeding up the process of entering data.
Example:
Suppose that you need to input the name of a city--in this case, San Francisco.
Select “S”.
Select “A”.
Select “N”.
21
Basic Operation
Select the spacebar.
When enough characters have been entered, the Magellan RoadMate will automatically
display the list of cities; or, if you feel that enough characters have been entered, select OK.
Use the Navigation key to scroll the list up or down and select “San Francisco, CA” from
the list.
If the list is still too long, press Cancel to return to the keyboard and continue entering
characters. The list of items found in the database is limited to 100 items. When over 100
items have been found, “Matches: > 100” will be displayed shown in the bottom right
corner of the display; you may need to press Cancel and enter additional characters.
22
Traveling
Traveling
Guidance Information Screens
The Magellan RoadMate has three screens you can use to assist you in travelling to your destination: the Map screen, the
Maneuver List screen, and the TrueView 3D/Split TrueView screen.
Map: When a new destination is selected and calculated, the Map screen is displayed. This screen displays a map of your
surrounding area along with the planned route (if calculated) and information about the route. This screen can be accessed
when no route has been calculated by selecting Map or by pressing the View button while at the Select Destination screen. It
can also be selected by pressing the View button while viewing the TrueView 3D screen.
Maneuver List: This screen is available only when a route has been calculated. This screen displays a list of maneuvers to
follow in order to arrive at the destination. It can also be used exclude a maneuver and reroute you to your destination. To
access the Maneuver List screen, press the View button while viewing the Map screen.
TrueView 3D: This screen displays the next maneuver as a 3D graphic. It will help you to know which lane to be in and
provides you with an easy-to-follow picture of the next maneuver. To access the TrueView 3D screen, press the View button
while viewing the Maneuver List. You can also show the TrueView 3D in split mode (see “Map Options” on page 86). This
view shows the TrueView screen on the left side and the Map on the right side.
Map
TrueView 3D
Maneuver List
Split TrueView
(enabled from Map
Options menu)
View
23
Traveling
Map Screen
The Map screen is the most commonly used screen in the Magellan RoadMate and provides you with detailed information
about where you are and where you are going.
Current Road
POI Icon †
Planned Route (pink)
Position Cursor
(points in the
direction you are
traveling)
Next Maneuver
Next Road
Direction of Travel
and GPS Signal
Strength ††
Distance to Next
Maneuver
Distance to Destination
Estimated Time to
Destination
Direction of Destination
† By touching the POI icon on the screen, you can get information and route to it.
†† Blue = WASS Signal, Green = Strong Signal, Yellow = Average Signal, Red = Weak Signal,
Black = No Signal
As you travel, the Map screen constantly updates your location and provides you with not only a map but a visual indication
of where you are on the map.
Changing the Map Zoom Levels
You can zoom in by pressing the + (plus) button or zoom out by pressing
the - (minus) button.
Zoom In Button
Zoom Out Button
24
Traveling
Maneuver List Screen
The Maneuver List screen can be viewed only after a route has been calculated. From the Map screen, press the View button
to bring up a list of all of the maneuvers along the route. When you are done viewing the Maneuver List screen, press the
View button twice to return to the Map screen, or wait a few moments and it will return automatically.
Next Maneuver
Direction of Travel
and GPS Signal
Strength
Distance to Next
Maneuver
Distance to Destination
Estimated Time to
Destination
Direction of Destination
TrueView 3D Screen
The Magellan RoadMate uses TrueView 3D technology to display a three-dimensional picture of the next maneuver. The
TrueView 3D screen can be viewed only after a route has been calculated. From the Map screen, press the View button twice
to view the TrueView 3D screen.
Next Maneuver
Direction of Travel
and GPS Signal
Strength
Distance to Next
Maneuver
Distance to Destination
Estimated Time to
Destination
25
Direction of Destination
Traveling
In split mode, the left half of the screen shows TrueView 3D, while the right half of the screen shows the Map.
Map with
Planned Route
Next Maneuver
Direction of Travel
and GPS Signal
Strength
Distance to Destination
Distance to Next
Maneuver
Estimated Time to
Destination
Direction of Destination
Detouring from the Planned Route
If you exit the planned route, the Magellan RoadMate will get you back on course in one of two ways.
1. If you exit the planned route before its completion and turn off your vehicle, the Magellan RoadMate will also turn off.
When you turn your vehicle back on, the Magellan RoadMate will turn on automatically and present you with a screen
asking whether you want to resume your route.
Select Resume to continue the route to the selected destination.
Select Cancel to clear the route and display the Select Destination screen.
2. If, while driving, you exit the planned route, the Magellan RoadMate will automatically recalculate the route based on
your new location.
Excluding a Maneuver in the Planned Route
While travelling or setting up your destination you may find it necessary to exclude one of the maneuvers in the Maneuver
List. This could be due to an accident or street maintenance you want to avoid. The Magellan RoadMate provides you with
tools to select a specific maneuver, exclude it from the planned route and reroute the trip.
Press the View button to get to the Maneuver List. Select the maneuver you wish to exclude.
The details for the maneuver are displayed. Select Exclude.
26
Traveling
The trip will be recalculated, excluding the selected maneuver. This calculation is done using
the same Route Method that was chosen originally. After the route is recalculated, the Map
screen is displayed.
Displaying Information About Your Present Location
Anytime that you want to view information about your present location you can press the
Locate button.
The first screen displays your heading and the street you are on, the state and city you are
currently traveling in, the latitude and longitude of your present location, a compass, and your
speed.
The next screen displays the street you are currently traveling on, the distance to and the next
street on the map, and the distance from and the last street you passed.
Saving Your Current Location to Your Address Book
While you are in the Locate screen, you can save your current location to your Address Book.
Select Save Location.
27
Traveling
The information about your location is displayed. Select Edit Name and/or Edit Information and
use the keypad to assign a name to the location and other information about it. If the point you
are saving is off-road, the nearest road information will be used.
When you have finished, select Save. The location is saved to your Address Book and you are
returned to the Locate screen.
Finding POIs Along Your Route
While driving along a route, if you need to find a gas station, ATM, or other POI, the Magellan RoadMate can find the nearest
POI and route to it. Then, when you have completed the side route, resume guidance to your original destination.
While driving along a route, press the Enter button.
Select Dining, ATM, Gas....
Select the desired POI category.
A list of the nearest POI’s is displayed. Use the Navigation key to scroll the list up or down (if
necessary) and select the desired POI.
28
Traveling
The Magellan RoadMate will calculate a new route to the selected POI from your current
position. When you have arrived at the new destination, you will be prompted to resume
guidance to your original destination. Select Resume. The Magellan RoadMate will calculate
the route to your original destination using the Route Method previously selected.
Finding a Detour Along Your Route
While driving along a route, if you encounter traffic, road construction, or other situation you might need to navigate around,
the Magellan RoadMate can calculate an alternate route to your destination.
While driving along a route, press the Enter button.
Select Detour.
Select the distance of the detour. Select 3 miles, 5 miles, or 10 miles.
Or, you can enter a custom distance. Select Custom and select the custom distance.
Enter the number of miles for your detour and then select OK.
29
Traveling
Select Route. The Magellan RoadMate will recalculate the alternate route to your destination.
30
Selecting Destinations
Selecting Destinations
Search by City
Search by State
Previous
Destinations
Previous City
Favorites
Select Address
List Addresses
Address Book
Spell Name
Select Category
Create New Entry
Trip Planner
Custom POIs
Search by City
Dining, ATM, Gas...
Search by State
Previous City
Intersection
31
Selecting Destinations
Choosing the Route Method
Every route is calculated based on the Route Method criteria selected. Every time a new destination is selected, the
Magellan RoadMate prompts you for the method that will be used to calculate the route.
Shortest Time: This selection calculates a route that should take the least amount of time
using speed limits and other information in the database. Other factors, such as traffic
conditions, cannot be used in the calculation of shortest time.
Shortest Distance: This option calculates the route using the most direct route to the
destination. This route may not be the fastest due to lower speed limits, left turns or other
factors.
Least Use of Freeways: This selection calculates the route avoiding freeways whenever
possible.
Most Use of Freeways: This selection calculates the route using freeways as much as
possible.
View Destination on Map: Before you select your Route Method, you can see where you are
going.
32
Selecting Destinations
Changing the Route Method
While viewing the Map screen, the Maneuver List screen, or the TrueView
3D screen, press the Cancel button.
Select Route.
Select the new Route Method.
The route will be re-calculated using the new Route Method chosen and the Map screen will be
displayed. Press the View button to see the Maneuver List with the new route.
33
Selecting Destinations
Cancelling a Planned Route
While viewing the Map screen, the Maneuver List screen, or the TrueView
3D screen, press the Cancel button.
Select Yes to cancel the route and display the Select Destination screen.
Select No returns the display to the last viewed screen.
34
Selecting Destinations
Selecting a Destination Using Select Address
A destination can be created by entering the street address that you want to go to. This address is not automatically added
your Address Book but is saved to your Previous Destinations list. You have three options, Search By City, Search By State, or
Previous City. Use Search By City when you know the city that the address can be found in. Use Search By State when you
don’t know, or are unsure of the city name. You will be given a listing of all of the cities for the state you select that have the
street name you are looking for. Use Previous City to speed up your search by not having to re-enter a city you have used
before. Additionally, The Previous Cities list places your current city at the top of the list.
Search By City
From the Select Destination screen, select Select Address.
Select Search By City.
Enter the first few characters in the city name. Do not enter prefixes such as “North” or
“N”, or suffixes such as “Ave.” or “Street”. Select OK.
Remember, if the list is too long, press Cancel while viewing the list to return to this screen
and continue to input characters.
Use the Navigation key to scroll the list up or down (if necessary) and select the desired
city.
Enter the first few characters for the street name and select OK. which addendum
35
Selecting Destinations
Use the Navigation key to scroll the list up or down (if necessary) and select the desired
street.
Enter the street address. The acceptable range of numbers is displayed at the top of the
screen. Select Done.
Select the desired Route Method.
The Magellan RoadMate will calculate the route. When the calculations are complete, the
Map screen will be displayed.
Search By State
From the Select Destination screen, select Street Address.
Select Search By State.
36
Selecting Destinations
Enter the first few characters for the state and select OK.
Select the state.
Enter the first few characters for the name of the street and select OK.
Use the Navigation key to scroll the list up or down (if necessary) and select the desired
street.
Select the city from the list of cities displayed. (These are all of the cities in your loaded
database that have the street name you selected.)
Enter the street address. The acceptable range of numbers is displayed at the top of the
screen. Select Done.
37
Selecting Destinations
Select the desired Route Method.
The Magellan RoadMate will calculate the route. When the calculations are complete, the
Map screen will be displayed.
Previous City
From the Select Destination screen, select Street Address.
Select Previous City.
Select the city from the list.
Enter the first few characters for the name of the street and select OK.
38
Selecting Destinations
Use the Navigation key to scroll the list up or down (if necessary) and select the desired
street.
Enter the street address. The acceptable range of numbers is displayed at the top of the
screen. Select Done.
Select the desired Route Method.
The Magellan RoadMate will calculate the route. When the calculations are complete, the
Map screen will be displayed.
39
Selecting Destinations
Selecting a Destination Using the Address Book
The Address Book can store up to 200 addresses for each of the three users you have available. When you select Address
Book you are given five options: Previous Destinations lets you select from a list of the last 50 destinations you routed to; List
Addresses displays a list of all of the addresses you have stored in your Address Book; Favorites gives you a shortened list of
entries from your Address Book marked as Favorites; Create New Entry lets you add a new address to your Address Book; and
Trip Planner (indicated by the Trip button) lets you create a multi-destination trip from entries.
Previous Destinations
From the Select Destination screen, select Address Book.
Select Previous Destinations.
Use the Navigation key to scroll the list up or down (if necessary) and select the desired
previous destination.
Select Route.
(Note: Select Edit if you want to edit the displayed address and save it to your Address
Book.)
Select the desired Route Method.
40
Selecting Destinations
The Magellan RoadMate will calculate the route. When the calculations are complete, the
Map screen will be displayed.
Saving a Previous Destination to the Address Book
From the Select Destination screen, select Address Book.
Select Previous Destinations.
Use the Navigation key to scroll the list up or down (if necessary) and select the desired
previous destination.
Select Edit.
The top line (Name) and the bottom line (Information) can be edited. The address cannot
be changed. Select the line you want to modify. Use the keypad to enter the desired text
and select OK.
41
Selecting Destinations
When you have finished making changes, select Save.
The address is saved to the Address Book. The Previous Destination screen is displayed to
continue the routing to the previous destination. Select Route.
Select the desired Route Method.
The Magellan RoadMate will calculate the route. When the calculations are complete, the
Map screen will be displayed.
Deleting A Previous Destination
From the Select Destination screen, select Address Book.
Select Previous Destinations.
42
Selecting Destinations
Use the Navigation key to scroll the list up or down (if necessary) and select the desired
previous destination.
Select Delete.
A dialog box will appear to confirm your selection. Select Yes.
The Previous Destination is deleted from the list.
Favorites
From the Select Destination screen, select Address Book.
Select Favorites.
43
Selecting Destinations
Use the Navigation key to scroll the list up or down (if necessary) and select the destination
from the list of addresses.
Select Route.
Select the desired Route Method.
The Magellan RoadMate will calculate the route. When the calculations are complete, the
Map screen will be displayed.
Editing a Favorite
From the Select Destination screen, select Address Book.
Select Favorites.
44
Selecting Destinations
Use the Navigation key to scroll the list up or down (if necessary) and select the desired
previous destination.
Select Edit.
The top line (Name) and the bottom line (Information) can be edited. The address cannot
be changed. Select the line you want to modify. Use the keypad to enter the desired text
and select OK.
When you have finished making changes, select Save.
The address is saved to the Address Book. The Previous Destination screen is displayed to
continue the routing to the previous destination. Select Route.
Select the desired Route Method.
45
Selecting Destinations
The Magellan RoadMate will calculate the route. When the calculations are complete, the
Map screen will be displayed.
Deleting A Favorite
From the Select Destination screen, select Address Book.
Select Favorites.
Use the Navigation key to scroll the list up or down (if necessary) and select the desired
previous destination.
Select Delete.
A dialog box will appear to confirm your selection. Select Yes.
46
Selecting Destinations
The Previous Destination is deleted from the list.
List Addresses
From the Select Destination screen, select Address Book.
Select List Addresses.
Use the Navigation key to scroll the list up or down (if necessary) and select the destination
from the list of addresses.
Select Route.
Select the desired Route Method.
47
Selecting Destinations
The Magellan RoadMate will calculate the route. When the calculations are complete, the
Map screen will be displayed.
Editing an Address
From the Select Destination screen, select Address Book.
Select List Addresses.
Use the Navigation key to scroll the list up or down (if necessary) and select the desired
previous destination.
Select Edit.
The top line (Name) and the bottom line (Information) can be edited. The address cannot
be changed. Select the line you want to modify. Use the keypad to enter the desired text
and select OK.
48
Selecting Destinations
When you have finished making changes, select Save.
The address is saved to the Address Book. The Address screen is displayed to continue
editing or you can route to the selected address. Select Route.
Select the desired Route Method.
The Magellan RoadMate will calculate the route. When the calculations are complete, the
Map screen will be displayed.
Deleting an Address
From the Select Destination screen, select Address Book.
Select List Addresses.
49
Selecting Destinations
Use the Navigation key to scroll the list up or down (if necessary) and select the desired
previous destination.
Select Delete.
A dialog box will appear to confirm your selection. Select Yes.
The Previous Destination is deleted from the list and you are returned to the Address Book
screen.
Create New Entry – Search by City
From the Select Destination screen, select Address Book.
Select Create New Entry.
50
Selecting Destinations
Select Search by City.
Enter the first few characters in the city name and select OK.
Use the Navigation key to scroll the list up or down (if necessary) and select the desired
city.
Enter the first few characters for the street name and select OK.
Use the Navigation key to scroll the list up or down (if necessary) and select the desired
street.
Enter the street address. The acceptable range of numbers is displayed at the top of the
screen. Select Done.
51
Selecting Destinations
The top line (Name) and the bottom line (Information) can be edited. The address cannot
be changed. Select the line you want to modify.
Use the keypad to enter the desired text and select OK.
When you have finished making changes, select Save.
You are taken back to the Address Book screen.
Create New Entry – Search by State
From the Select Destination screen, select Address Book.
Select Create New Entry.
52
Selecting Destinations
Select Search by State.
Use the keypad to enter the first few characters for the state and select OK.
Select the state.
Enter the first few characters for the street name and select OK.
Use the Navigation key to scroll the list up or down (if necessary) and select the desired
street.
Use the Navigation key to scroll the list up or down and select the desired city. (These are
all of the cities in your loaded database that have the street name you selected.)
53
Selecting Destinations
Enter the street address. The acceptable range of numbers is displayed at the top of the
screen. Select Done.
The top line (Name) and the bottom line (Information) can be edited. The address cannot
be changed. Select the line you want to modify.
Use the keypad to enter the desired text and select OK.
When you have finished making changes, select Save.
You are taken back to the Address Book screen.
Create New Entry – Previous City
From the Select Destination screen, select Address Book.
54
Selecting Destinations
Select Create New Entry.
Select Previous City.
Use the Navigation key to scroll the list up or down (if necessary) and select the desired
city.
Enter the first few characters for the street name and select OK.
Use the Navigation key to scroll the list up or down (if necessary) and select the desired
street.
Enter the street address. The acceptable range of numbers is displayed at the top of the
screen. Select Done.
55
Selecting Destinations
The top line (Name) and the bottom line (Information) can be edited. The address cannot
be changed. Select the line you want to modify.
Enter the desired text and select OK.
When you have finished making changes, select Save.
You are taken back to the Address Book screen.
Trip Planner – New
From the Select Destination screen, select Address Book.
Select Trip (Trip button).
56
Selecting Destinations
Select New.
Use the keypad to enter a name for the new trip and select OK.
From the pop-up menu, select Add.
From the Select Trip Planner Address screen, select the method for adding a destination to
your trip: Map (Map button) will add a destination by selecting a point on the map; Select
Address will add a destination from a new address; Address Book will add a destination from
a previous destination, Address Book, or favorites; Dining, ATM, Gas... will add a destination
from the POI database; and Intersection will add a destination of two intersecting streets.
Continue adding destinations. When you are finished, select Save.
Trip Planner – Optimizing a Trip
With Route Optimization, you can sort the destinations in your trip from closest to farthest.
From the Trip Planner screen, select Edit.
57
Selecting Destinations
Select the trip to optimize.
Select Optimize.
The destinations are sorted from closest to farthest from you current location.
Select Save.
Trip Planner – Guide Me
From the Select Destination screen, select Address Book.
Select Trip (Trip button).
58
Selecting Destinations
Select GuideMe.
Select the Trip.
Select the first destination in the list you wish to route to.
Note: Selecting the second destination in the list will exclude the first destination,
selecting the third destination in the list will exclude the first and second destinations, and
so on.
Select the desired Route Method.
The Magellan RoadMate will calculate the route. When the calculations are complete, the
Map screen will be displayed.
Trip Planner – Edit
Destinations within a trip can be moved up or down, deleted, or added to.
From the Trip Planner screen, select Edit.
59
Selecting Destinations
Select the trip to edit.
Select the destination you wish to delete, and select Delete from the pop-up menu.
Select the destination you wish to change, and select Move Up from the pop-up menu.
When you have finished, select Save and you are returned to the Trip Planner screen.
Trip Planner – Delete and Rename
From the Trip Planner screen, select Delete, Rename.
Select Delete.
60
Selecting Destinations
Select the trip you wish to delete.
A dialog box will appear to confirm your selection. Select Yes.
The trip has been deleted.
Select Rename.
Select the trip to renamed.
Use the backspace key to delete the old name; then, enter the new name for the trip. When
you have finished, select OK.
61
Selecting Destinations
The trip has been renamed.
62
Selecting Destinations
Selecting a Point of Interest as a Destination
Points of Interest (or POIs) are commercial or recreational locations, landmarks, or services that are preloaded into the
Magellan RoadMate database. There are over 6,500,000 POI’s in the database, which range from restaurants, parks, gas
stations, and banks, to schools and police stations, and more. The purpose of the POI database (accessed through the
Dining, ATM, Gas... menu option) is to provide you with a list of popular destinations without having to add them to your
Address Book manually.
Spell Name
From the Select Destination screen, select Dining, ATM, Gas...
Select Spell Name.
Enter the name of the POI.
Selecting Nearest will list the POIs matching the name you entered from closest to farthest.
Select Nearest.
Use the Navigation key to scroll the list up or down (if necessary) and select the desired
POI. This list can be very long because the first 100 POIs beginning with the text entered
are displayed.
63
Selecting Destinations
Select the desired Route Method.
The Magellan RoadMate will calculate the route. When the calculations are complete, the
Map screen will be displayed.
Selecting List by City will list the POIs matching the name you entered within a selected
city. Select List by City.
Enter the name of the city you wish to search.
Use the Navigation key to scroll the list up or down (if necessary) and select the desired
city.
Use the Navigation key to scroll the list up or down (if necessary) and select the desired
POI. This list can be very long because the first 100 POIs beginning with the text entered
are displayed.
64
Selecting Destinations
Select the desired Route Method.
The Magellan RoadMate will calculate the route. When the calculations are complete, the
Map screen will be displayed.
Selecting Select Category enables you to list all of the POIs in the selected category. Select
Select Category.
Use the Navigation key to scroll the list up or down and select the desired POI category.
Use the Navigation key to scroll the list up or down (if necessary) and select the desired
POI. This list can be very long because the first 100 POIs beginning with the text entered
are displayed.
Select the desired Route Method.
65
Selecting Destinations
The Magellan RoadMate will calculate the route. When the calculations are complete, the
Map screen will be displayed.
Select Category
From the Select Destination screen, select Dining, ATM, Gas...
Select Select Category.
Select the POI category.
Selecting Nearest will list the POIs matching the name you entered from closest to farthest.
Select Nearest.
A list of all the POI’s in the selected categories nearest to your current position is displayed.
Select the POI from the list.
66
Selecting Destinations
Select the desired Route Method.
The Magellan RoadMate will calculate the route. When the calculations are complete, the
Map screen will be displayed.
Selecting List by City will list the POIs matching the name you entered within a selected
city. Select List by City.
Enter the name of the city you wish to search from. When you are finished, select OK.
Use the Navigation key to scroll the list up or down (if necessary) and select the desired
city.
Use the Navigation key to scroll the list up or down (if necessary) and select the desired
POI.
67
Selecting Destinations
Select the desired Route Method.
The Magellan RoadMate will calculate the route. When the calculations are complete, the
Map screen will be displayed.
Selecting Spell Name will list the POIs matching the name you entered. Select Spell Name.
Enter the name of the POI. When you are finished, select OK.
Use the Navigation key to scroll the list up or down (if necessary) and select the desired
POI.
Select the desired Route Method.
68
Selecting Destinations
The Magellan RoadMate will calculate the route. When the calculations are complete, the
Map screen will be displayed.
Custom POIs
Please refer to page 14 for information on creating and loading Custom POIs.
From the Select Destination screen, select Dining, ATM, Gas...
Select Custom POIs.
Select the category.
If the POI list has more than 15 returns, you can further narrow the search by selecting
either Nearest or Spell Name. Select the desired POI from the list.
Select Route to go to the selected Address, or select Cancel to return to the Select Custom
POI menu.
69
Selecting Destinations
Select the desired Route Method.
The Magellan RoadMate will calculate the route. When the calculations are complete, the
Map screen will be displayed.
70
Selecting Destinations
Selecting an Intersection as a Destination
An intersection of two streets can be used as a destination for your trip. The search for the intersection can be done whether
or not you know the city. If you know the city, you can start there; if you are unsure of the city, you can start with the state.
Search by City
From the Select Destination screen, select Intersection.
Select Search by City.
Enter the first few characters for the city and select OK.
Use the Navigation key to scroll the list up or down (if necessary) and select the desired
city.
Enter the first few characters for the first street and select OK.
71
Selecting Destinations
Use the Navigation key to scroll the list up or down and select the first street from the list.
Enter the first few characters for the second street and select OK.
Use the Navigation key to scroll the list up or down (if necessary) and select the second
street from the list.
Select the desired Route Method.
The Magellan RoadMate will calculate the route. When the calculations are complete, the
Map screen will be displayed.
Search by State
From the Select Destination screen, select Intersection.
72
Selecting Destinations
Select Search by State.
Enter the first few characters for the state and select OK.
Use the Navigation key to scroll the list up or down (if necessary) and select the state from
the list.
Enter the first few characters for the first street and select OK.
Use the Navigation key to scroll the list up or down (if necessary) and select the first street
from the list.
Enter the first few characters for the second street and select OK.
73
Selecting Destinations
Use the Navigation key to scroll the list up or down (if necessary) and select the second
street from the list.
Select the desired Route Method.
The Magellan RoadMate will calculate the route. When the calculations are complete, the
Map screen will be displayed.
Previous City
From the Select Destination screen, select Intersection.
Select Previous City.
Use the Navigation key to scroll the list up or down (if necessary) and select the desired
city.
74
Selecting Destinations
Enter the first few characters for the first street and select OK.
Use the Navigation key to scroll the list up or down (if necessary) and select the first street
from the list.
Enter the first few characters for the second street and select OK.
Use the Navigation key to scroll the list up or down (if necessary) and select the second
street from the list.
Select the desired Route Method.
The Magellan RoadMate will calculate the route. When the calculations are complete, the
Map screen will be displayed.
75
Options
Options
The Options menu of the Magellan RoadMate enables you with enhanced features to customize your Magellan RoadMate.
Additionally, it provides features to assist you in learning how to operate the most common functions and in contacting a
Support Representative should you need more detailed assistance.
The Trip Computer displays useful information about your trip that can be saved for future reference. This is ideal for the
business traveller who needs to record mileage and time spent on the road. See “Trip Computer” on page 77.
Configuration provides access to customize the look and operation of the Magellan RoadMate. It also contains diagnostic
features to keep your Magellan RoadMate performing at its best. See “Configuration” on page 80.
Tutorial provides instructions and verbal narration on how to use the most common features of the Magellan RoadMate.
See “Tutorial” on page 105.
Help provided you with Customer Support phone numbers. See “Help” on page 106.
These functions are accessed by pressing the Option button on the Magellan RoadMate.
76
Options
Trip Computer
The Trip Computer is a valuable tool for recording the mileage and time spent driving while on business or vacation. The
information for the trip can be saved and viewed at any time, providing you easy access to information on your current trip,
as well as previous trips.
Current Trip
When you begin a new trip and you need to record the information, access the Trip Computer. There you can save the
information displayed for the current trip (if needed) and reset the Trip Computer to zero in preparation for your new trip.
From any screen press the Option button. Select Trip Computer
Select Current from the list of saved Trip Reports.
The Trip Computer is always in a “Running” state. The information for the current trip is
displayed.
Stopping or Starting the Trip Computer
At any time the Trip Computer can be stopped and started. If the Trip Computer is currently
running, select Stop. The Trip Computer will stop recording until restarted or reset.
77
Options
While the Trip Computer is in a “Stopped” state, select Start to continue recording the current
trip or select reset to begin a new trip.
Saving the Current Trip Report
When you have finished with your trip, you can save the information for later viewing. Select
Save at any time.
Use the keypad to enter a name for the Trip Report and select OK when you are finished.
Resetting the Trip Computer
Before starting a new trip that you want to record, you need to reset the Trip Computer first.
Select Reset and the information will be set to zero. The Trip Computer will remain in a
“Running” state.
Viewing a Saved Trip Report
From the Trip Computer screen, select the Trip Report you wish to view.
78
Options
The saved Trip Report is displayed. Press the Cancel button when you are finished to view the
trip and return to the Trip Computer screen.
Deleting a Trip Report
Select the Trip Report to be deleted.
Select Delete.
The trip is deleted and you are returned to the Trip Computer screen.
79
Options
Configuration
The configuration options can be set differently for each user.
From any screen, press the Option button and select Configuration.
POI Selection
From the POI Selection menu, you can choose which icons to display on the Map screen. For a list of POI Categories, see
“POI Categories” on page 112.
Select POI Selection.
Select Mark All to display all POI icons on the Map screen.
Select Clear All if you wish not to have any POI icons displayed on the Map screen.
You can also select individual icons to display or hide on the Map screen. When you have
finished, press the Cancel button to return to the Configuration menu.
80
Options
Custom POIs
The Custom POI menu enables you to select POIs previously loaded into your Magellan RoadMate using the Magellan
RoadMate POI Manager software. See “Application” on page 14. The instructions following instructions are assuming that
you have loaded one or more POIs into your Magellan RoadMate.
Select Custom POIs.
Select Select a POI File.
Use the Navigation key to scroll the list up or down (if necessary) and select a POI file. With the
file selected, you are returned to the Custom POIs menu.
Select Display Categories.
The categories you created are displayed in the same way as the built-in POIs.
Select Mark All to display all POI icons on the Map screen. Select Clear All if you wish not to
have any POI icons displayed on the Map screen. You can also select individual icons to display
or hide on the Map screen.
81
Options
When you have finished, press the Cancel button to return to the Custom POIs menu.
You can also be alerted when you approach a custom POI. The Set Alarm function works for
Custom POIs only and only if the POI has been selected to show on the Map screen. Select Set
Alarms.
Again, you can select all, none, or individual POIs to have an alert set. Select Mark All to set an
alert for all custom POI icons on the Map screen. Select Clear All if you wish not to have any
alerts set for custom POI icons displayed on the Map screen. You can also select individual
categories to have an alert set.
When you have finished, press the Cancel button to return to the Custom POIs menu.
With the POI alerts set, you can now choose at what point you will be alerted. Select Alert
Parameters.
Select the POI category to customize.
82
Options
The Detection Angle is set to alert you when you are within so many degrees of the POI.
Select Detection Angle.
Use the numeric keypad to enter the number of degrees in which to set the alert. When you
have finished, select OK.
83
Options
The First Warning is set to alert you when you are within a certain number of feet from the POI.
Select First Warning.
Use the numeric keypad to enter the number of feet in which to alert you. When you have
finished, select OK.
84
Options
The Last Warning is set as a final alert when you are within a certain number of feet from the POI.
Select Last Warning.
Use the numeric keypad to enter the number of feet in which to alert you. When you have
finished, select OK.
When you have set the parameters as you like, select Save.
85
Options
Map Options
Map Options enable you to determine the behavior of the Map while you are driving.
Select Map Options.
With Map Smart selected, the Map screen will automatically switch to the Maneuver List and/or
the TrueView 3D screen when applicable. That is, when the satellite signal is lost for more than
30 seconds, the Maneuver List will be displayed so that you can still be guided to your
destination. Also, when you are one-half mile from the next maneuver, the TrueView 3D screen
is displayed. Then, at two-tenths of a mile before the maneuver, the Map screen is displayed.
With Map Always selected, only the Map screen is displayed with the highlighted route.
With Map Manual selected, the Maneuver List and TrueView 3D screen can be shown only by
pressing the View button.
With Scrolling enabled, the vehicle position icon will always remain in the same position with
the map scrolling, or moving as while the vehicle is in motion. With Scrolling disabled, the
vehicle position icon will move forward slightly; then, the map will scroll down. Having Scrolling
disabled allows for a faster display.
With Split TrueView enabled, when the TrueView 3D screen is displayed, it will show the next
maneuver in TrueView 3D on the left side of the screen, and the map with the highlighted route
on the right side of the screen.
86
Options
Heading Up sets the map display so that the direction of travel is always at the top of the
screen. North Up sets the map display so that North is always at the top of the screen.
Select Miles or Kilometers as the unit of measure for distance.
Select Map Color
Select Select Map Color.
With Automatic Night Mode enabled, the Magellan RoadMate will switch between a Day screen
and a Night screen based on sunrise and sunset times for your current location.
Select Day Screen to choose a color scheme for the map while you are driving during the
day.
Select Night Screen to select a color scheme for driving at night.
87
Options
Select from nine available color schemes:
When you have finished, select Save and you will be returned to the Configuration menu.
Route Preferences
Route Preferences enable you to set parameters for the Magellan RoadMate to follow when
calculating a route. Select Route Preferences.
Avoid Toll Roads instructs Magellan RoadMate to avoid known toll roads when calculating a
route.
88
Options
Automatic Re-Route will cause the Magellan RoadMate to try up to three times to automatically
re-route to the destination when it has detected that the vehicle has deterred from the
calculated route.
Detour Options
The Magellan RoadMate comes equipped with SmartDetour. If you are driving on the freeway with SmartDetour enabled and
your speed drops below 15 MPH, you may press the detour icon on the Map screen in order for the Magellan RoadMate to
calculate an alternate route around traffic.
Select Detour Options.
Select the distance of the detour. You can select from a preset distance of three miles, five
miles, or 10 miles.
You can also select a custom distance. Select Custom, and then select the button to the right to
enter a custom distance.
Enter the number of miles and select OK.
89
Options
Next, select the amount of time the Magellan RoadMate will wait before alerting you to
recalculate the route. Select the Time button.
Enter the number of minutes and select OK.
Select Enable automatic detour.
When you have finished, select Save.
When you encounter traffic, and the set time has elapsed, the Detour icon will flash on the Map
screen. Touch the icon on the screen to have the Magellan RoadMate calculate the detour. You
can choose to ignore the Detour alert; and after one minute it will stop flashing until the set
time has elapsed again when it will alert you once more.
90
Options
Voice Options
From the voice options menu, you can select to have your voice prompts announced in either a male or a female voice in the
language currently enabled (refer to “Language” on page 95). Additionally, you can also have the Magellan RoadMate speak
the street name of the next maneuver.
Select Voice Options.
Choose Male Voice or Female Voice.
If you wish to have the street names spoken, enable Announce street name.
When you are finished, select Save.
91
Options
Menu Colors
You can change the color of the menu screens by selecting one of four color schemes.
Select Menu Colors.
Select the desired color scheme.
When you have finished, select Save.
Contrast
Contrast determines the level of difference between light and dark colors.
Select Contrast.
Select the left arrow to decrease the amount of contrast, or select the right arrow to increase the
amount of contrast. When you are finished, select Save.
92
Options
Brightness
Brightness determines how bright or dim the level of the display will be.
Select Brightness.
Select the left arrow to decrease the amount of brightness (make the display darker), or select
the right arrow to increase the amount of brightness (make the display lighter). When you are
finished, select Save.
Display Options
The Magellan RoadMate can be configured to automatically adjust the display. When the light sensor detects changes in
light levels, it can automatically adjust the contrast and brightness of the display for optimum performance. With the
automatic settings enabled, your manual settings will remain the same; however, the display will change, depending on the
ambient light levels. If you wish to maintain your manual settings, do not enable Automatic Contrast or Automatic
Brightness. Additionally, you can set the Magellan RoadMate to shut off automatically if no movement is detected for 20
minutes.
Select Display Options.
Select Automatic Brightness.
Select Automatic Contrast.
93
Options
Select Auto Power Off.
When you are finished, select Save.
Tone Options
As you approach a maneuver, an audible alert sounds to let you know to make the maneuver.
Select Tone Options.
Select either Bell, Chime, or Beep.
When you have finished, select Save.
94
Options
Language
You can select to have the menus displayed in one of 12 languages. Also, audible voice prompts will be spoken in the
selected language. Select from US English, UK English, French (Français), German (Deutsch), Dutch (Nederlands), Italian
(Italiano), Spanish (Español), Danish (Dansk), Norwegian (Norsk), Finnish (Suomi), Swedish (Svenska), and Portuguese
(Português).
Select Language.
Use the Navigation key to scroll the list up or down and select the desired language.
Diagnostics
The Magellan RoadMate comes with built-in system tests and other features to aid in the performance of the unit. If you feel
that your unit is not functioning properly, contact our Technical Support Representative before engaging any of the options in
the Diagnostics menu.
Select Diagnostics.
Product Information
Product Information displays information about the hardware and software installed in your
Magellan RoadMate. This information aids our Technical Support Representative in finding
a solution to whatever problem you may have.
Video Test
Video Test displays random colors to ensure that your display is working properly.
95
Options
Touch Screen Test
Touch Screen Test checks that the touch screen is calibrated and accurate.
Keypad Test
Keypad Test verifies proper operation of the keypad.
Audio Test checks that the speaker is working correctly.
GPS Status monitors the satellite signal. For more information on the GPS Status screens
refer to “GPS Status Screen” on page 109.
Initialize GPS resets the unit and reacquires the satellite signal. Note: Previously saved
satellite data will be reset, and reacquiring the satellite signal may take 15 minutes or
more.
96
Options
Set GPS Position
Set GPS Position enables you to manually set the location of the Current Position icon. If
you have travelled a long distance with the unit off, it may take some time for the unit to
reacquire a satellite signal. By manually setting the position of the unit, you are telling the
unit where you are and will speed up the satellite signal acquisition. Select Set GPS
Position.
Use the keypad to enter the city name.
Use the Navigation key to scroll the list up or down (if necessary) and select the desired
city.
Enter the street name (do not enter prefixes such as “North” or “N”, or suffixes such as
“Ave” or “Road” in the street name).
Use the Navigation key to scroll the list up or down (if necessary) and select the desired
city.
Enter the street address. The acceptable range of numbers is displayed at the top of the
screen. If you do not know the exact address, just select Done and the Magellan RoadMate
will use the lowest number in the range. Select Done to continue. You will be returned to
the Diagnostics menu.
97
Options
Go to the Map screen. Your current position is now set to the address you entered.
Simulator Mode
In Simulator Mode, you can demonstrate the capabilities of the Magellan RoadMate
without actually driving. In order for the simulation to work, you must set a route first.
Select Simulator Mode.
Set the speed variance of the simulation: x1 will “drive” at normal speed using known
speed limits; x1.5 will “drive” at one and a half times normal speed; x2 will “drive” at two
times normal speed.
Select Start to begin the simulation.
Return to the Map screen to view the simulation.
To disable Simulator Mode, select Stop, or when the power is turned off the Simulator will
stop.
Edit User Name
You can customize the name for each of the three users. The name will appear at the Warning/
User Selection screen and in the Configuration selection menus.
98
Options
Select Edit User Name.
Use the keypad to delete the existing user name and enter the desired name for the selected
user. When you have finished, select OK and you will be returned to the Configuration menu.
Next time you start your Magellan RoadMate, the name you entered will be displayed.
In addition, configurable items that are user specific will display the user name in the menu.
Map Regions
The Magellan RoadMate 760 comes preloaded with North American and European map data. If you are travelling to Europe,
you can take your Magellan RoadMate with you and use it while you are driving abroad. To unlock the European map, contact
our Customer Service department for pricing and unlock-code information.
Select Map Regions.
99
Options
Select Europe and then select Unlock.
Select Code.
Use the keypad to enter the unlock code. When you have finished, select OK.
Select Unlock.
The database is unlocked. Select OK.
Select Europe and then select Switch. Note: If you have a Compact Flash (CF) card inserted,
you must remove it before switching maps.
100
Options
Select Yes. After the unit has powered down, turn the unit back on and the new map will begin
loading. When it has finished, you will have access to the European maps. Also note that the
user interface will be slightly different.
Safety Lockout
The Safety Lockout feature disables any user input while the vehicle is in motion. While this feature can be disabled, the
driver should not operate the unit while the vehicle is in motion.
Select Safety Lockout.
Select Enable Safety Lockout and select Save.
Password
The Magellan RoadMate has the capability of enabling a password for each of the three users. This will keep other users from
accessing and changing your preferences or altering your address book.
Select Password.
Select Change.
101
Options
Use the keypad to enter a password of up to six characters. You can use letters or numbers, or a
combination of both. When you have finished, select OK.
Select Activate to enable the password.
When you have finished, select Save.
Automatic Volume
The Magellan RoadMate can be set to automatically increase the volume when the vehicle exceeds 45 MPH in order to
compensate for road noise.
Select Automatic Volume.
Select the number increment by which to increase the volume.
102
Options
Select Enable.
When you have finished, select Save.
Backup and Restore
The Magellan RoadMate 760 has the capability to back up your information (Address Book, Previous Destinations, etc.) to a
Compact Flash (CF) card (not included). When a CF card is inserted in the CF card slot (see “Rear View” on page 5), the
information will automatically back up when you power down the unit. In the event that you need to reset your unit, you can
also restore the information back to the unit. A minimum-size CF card of 16 MB is required.
Restoring Information and Preferences
Select Backup and Restore.
If you do not have a CF card inserted in the CF card slot (see “Rear View” on page 5), you will
be prompted to turn the unit off and insert the CF card.
Then, turn the unit back on and reselect Backup and Restore.
103
Options
A dialog box will appear, stating that your information is being restored, and the unit will shut
off automatically. Turn the unit back on, and your information and preferences are restored.
104
Options
Tutorial
The Magellan RoadMate has a built-in Tutorial that you can view or refer to anytime the Magellan RoadMate is turned on. Do
not use the tutorial while you are driving. If you are operating the vehicle, please come to a complete stop before reviewing
the tutorial topics.
From any screen, press the Option button and select Tutorial.
Select the desired topic.
The tutorial includes verbal narration to further aid you in understanding the selected topic.
When the tutorial for the selected topic is complete, it will automatically return to the
Tutorial menu. You can then select another topic to view or press the Cancel button to
return to the Option menu.
Moving Around the Tutorial
At any time during the tutorial, press the right side of the Navigation key to skip ahead to the next topic.
To go back to the previous topic, press the left side of the Navigation key.
When you are finished viewing the tutorial, press the Cancel button to return to the Option menu.
105
Options
Help
Select Help.
Customer Support phone numbers for United States, Canada, and Europe are displayed.
See page 107 for more information.
106
Contact Information
Contact Information
If you need support for your Magellan RoadMate and you wish to contact Thales, please use the following information to
direct your questions/comments to the proper person.
Technical Support
If you need technical assistance or “how-to” help, or if you have a technical question about the functionality of your
Magellan product, please contact us on the Internet at www.magellangps.com or reach us by fax or by phone.
Our Technical Support phone representatives are available Monday through Friday, 6:00 a.m. to 5:00 p.m. PST/PDT. After
hours, you may leave a detailed voice mail message that will be returned within the next business day.
Telephone: (866) 868-2259 or (909) 394-5000 (Outside North America)
You may also reach Technical Support by Fax: (909) 394-7050 [Attn: Tech. Support]; or E-Mail:
[email protected]
Warranty Service
To obtain warranty service on your unit, you must contact us for a return authorization before you ship the product. Packages
arriving at our dock without an RMA will be refused.
To obtain an RMA, simply contact our Technical Support group at: Telephone: (866) 868-2259 or (909) 394-5000; Fax: (909)
394-7050 [Attn: Tech. Support]; or E-Mail: [email protected]
Customer Service
If you need to order accessories or obtain unlock codes, you can call our Customer Service Department Monday through
Friday, 6:00 a.m. to 5:00 p.m. PST/PDT, or visit our Web site at www.magellangps.com.
Telephone: (866) 339-0488 or (909) 394-5000 (Outside North America); Fax: (909) 394-7078.
107
Appendix A
Appendix A
Adding Addresses from an IrDA-Equipped Device
The Magellan RoadMate comes equipped with an IRDA receiver (see “Front View” on page 4). With this, you can “beam”
addresses from your Palm or other equipped device.
Do not attempt to transfer addresses while you are driving, at a stop, or in traffic. Address transfer should be done only while
the vehicle is parked.
Make sure the Magellan RoadMate is turned on and at the Select Destination screen.
From your Palm or other IrDA-equipped device, select the address you wish to transfer to the Magellan RoadMate and select
the IrDA transfer function.
Aim the device directly at the IRDA receiver on the Magellan RoadMate.
If the transfer was successful, the Magellan RoadMate will begin “searching” for the address in its database.
The Address Book screen will appear with the information from your device.
You can then choose to edit the information. Or, if you are satisfied with the entry, select Save.
The entry is stored in your address book.
108
Appendix B
Appendix B
GPS Status Screen
GPS STATUS Screen Structure-first page
CH
01
02
03
04
05
06
07
08
09
10
11
12
13
14
PRN
d1
d1
d1
d1
d1
d1
d1
d1
d1
d1
d1
d1
d1
d1
AZ
d2
d2
d2
d2
d2
d2
d2
d2
d2
d2
d2
d2
d2
d2
EL
d3
d3
d3
d3
d3
d3
d3
d3
d3
d3
d3
d3
d3
d3
SNR
d4
d4
d4
d4
d4
d4
d4
d4
d4
d4
d4
d4
d4
d4
FRQ
d5
d5
d5
d5
d5
d5
d5
d5
d5
d5
d5
d5
d5
d5
U/N
c1
c1
c1
c1
c1
c1
c1
c1
c1
c1
c1
c1
c1
c1
c2
c2
c2
c2
c2
c2
c2
c2
c2
c2
c2
c2
c2
c2
d6
d7
It is ordered by the channel number from 1 to 12.
Where:
d1:
Satellite PRN number, with “e” or “E” to the right means got ephemeris data, “v” or “V” to the right means got verified
ephemeris data (double check). “E” or “V” also means got satellite time for this channel.
d2:
Azimuth, in degrees
d3:
Elevation angle, in degrees
d4:
SNR (signal to noise ratio), it is ratio-Hz, not dB unit
d5:
Searching Frequency Offset (Hz)
c1:
U – Used for position fix, U – Not used for position fix
c2:
Mode of the channel: I- Idle, S-searching, B – Bit sync, R- Reacquisition, T- Tracking, D-tracking and collecting data
d6:
Last Bad fix code. 0 means getting fixes. A non-zero value is either waiting for a fix or has a bad fix
d7:
Clock Offset (Hz).
Bad fix code
0 PVT_OK
:good fix
2 ILLEGAL_ALT: illegal altitude
< -10km or > 17.5km
4 POSITION_JUMP: too big position jump between two epoch (300 miles)
5 ILLEGAL_VELOCITY_OR_ALT: max velocity 951mile
7 TOO_BIG_ACCELERATION
8 TOO_SMALL_ALTITUDE
9 TOO_BIG_ALTITUDE
10 TOO_BIG_PDOP
max 15m around 1.5g
-10000 m
17,500 m
max PDOP 50
11 SATS_BELOW_MASK_ANGLE satellite elevation angle is below mask angle
16 ILL_DEFINED_3D_MATRIX 3X3 matrix can not be inverted in 3D fix
109
Appendix B
17 ILL_DEFINED_2D_MATRIX 2X2 matrix can not be inverted in 2D fix
20 NO_SAT_TIME
no satellite time
23 NOT_ENOUGH_SATS
no enough satellite for 2D or 3D fix
24 CANNOT_SELECT_FIX_TYPE
30 VELOCITY_2D_ONLY
2 satellite fix only for velocity, no position fix
31 BAD_VELOCITY_PDOP
50 too big pdop for velocity
32 TOO_MANY_SATS_FOR_2D_VEL there are 4 or more satellites, but 2D fix provided
51 WRONG_NUMSAT
number of satellite for fix > 12 or less 2
56 LOOP_3D_NOT_CONVERGING 3D initial fix is not convergent
57 MILLISECOND_ERROR
millisecond jump happened
58 LOOP_2D_NOT_CONVERGING 2Dinitial fix is not convergent
59 BAD_RANGE_CHITEST; range post-fix residuals chi-test failed
60 BAD_DOPPLER_CHITEST
doppler post-fix residuals chi-test failed
61 OSC_DRIFT_ERR
too much clock drift 60HZ for XO, 7.5HZ for TCXO
62 BAD_DOPPLER_ERR
too big Doppler errors 4m/s
63 BIG_RANGE_RESID
110m/40m depend on virtual ttagl/ DGPS factors
64 BIG_DOPPLER_RESID 0.7m/s
65 HUGE_RANGE_RESID
10km normal for postfit residuals for range
66 HUGE_DOPPLER_RESID
100m/s normal for postfit residuals for doppler
Usually, Bad code is 20 and 23. If fix is good, it would be 0.
GPS STATUS Screen Structure - second page
Heading XXX
(degree)
Current Lat: DDD.DDDDD W/E
Current Long: DDD.DDDDD N/S
Speeding
XX.X (meter per second)
(current latitude, degree)
(current longitude, degree)
Current altitude XXXX (altitude in mean sea level meter)
TTFF XXXXs (Time-To-First-Fix in second)
#Satellite (U/T) XX/XX (the number of satellite used and tracked)
PDOP
XX.X
(Position Dilution Of Precision)
VDOP
XX.X
(Vertical Dilution of Precision)
TDOP
XX.X
(Time Dilution of Precision)
HDOP
XX.X
(Horizontal Dilution of Precision)
FOMS
P/V/H
(Figures Of Merits for position, velocity and heading in map matching)
UTC TIME MM/DD/YY HH:MM:SS(UTC time without local zone)
110
Appendix B
Typical GPS STATUS Screen Display
First Page
CH
01
02
03
04
05
06
07
08
09
10
11
12
13
14
PRN
27V
03E
13e
20e
31v
01V
28V
08V
02V
84
10
72
134
122
AZ
311
078
079
175
119
120
220
282
046
255
325
105
255
105
EL
54
29
81
06
34
53
13
29
27
12
06
13
12
13
SNR
334
135
204
90
179
316
152
182
173
0
47
34
50
63
Second Page
Heading 0Speeding
0.0 m/s
Current Lat: 34.10939 N
Current Long:117.82599 W
Current altitude 255
TTFF 116s
#Satellite (U/T) 11/12
PDOP
2.3
VDOP
1.7
TDOP
0.0
HDOP 1.3
FOMS
P/V/H
2
UTC TIME 08/16/2004 22:56:53
111
FRQ
1712
-702
-704
-1952
1525
-1954
3677
2848
2120
934
2257
934
171
169
U/N
U
U
U
N
U
U
U
U
N
N
N
N
N
N
D
D
D
S
D
D
D
D
D
S
S
S
S
S
0
941
Appendix C
Appendix C
POI Categories
The Magellan RoadMate POI database has 37 different categories. The icons will appear on the Map screen (if enabled):
Restaurant
Fast food, diners, and food marts
Bank/ATM
Most financial services
Gas Station
Most fuel services
Roadside Assistance
Towing companies
Hospital/Polyclinic
Most medical services
Vehicle Services
Repair shops, tire stores, and oil changes
Airport
International and Municipal airports
Camping & RV
Campgrounds, camping areas, and RV parks
Car Rental
Car rental companies
Casino
Gambling venues
City Center
The geographical center of a selected city
Clothing
Clothing retail stores
Convention Center
Major Convention Centers
Education
Schools, Colleges, and other learning
institutions
Emergency Services
Police, FIre, and Emergency Rooms
Entertainment
Movie theaters, live performance venues
Golf Course
Private and public courses
Grocery Store
Major chains and local markets
Hair & Beauty
Salons and beauty parlors
Health Care
Doctors’ offices and pharmacies
Home & Garden
Nurseries and do-it-yourself centers
Hotel or Motel
Most overnight stay locations
Marina
Docks and harbors
Misc. Services
Other services not categorized
Nightlife
Dance halls, pubs, nightclubs
Open Parking Area
Parking lots and garages
Parks
County, regional, and local parks
Professional Services
Business office locations
112
Appendix C
Appendix D
Public Buildings
Libraries, museums, and government buildings
Rest Area
Rest stops along major highways
Shopping
Malls and other retail stores
Ski Resorts
Most major ski resorts
Sports & Recreation
Stadiums, parks, lakes
Tourist Attraction
Places most visited by tourists
Transportation
Bus and train stations
Winery
Vinyards and tasting locations
Worship
Churches, temples, mosques
When selecting restaurants, you can further narrow the search by cuisine type such as French, Italian, Greek, Mexican, etc.
113
Appendix D
Specifications
DImensions:
3.3” x 6.6” x 1.5”
8.4cm x 16.8cm x 3.8cm
Weight:
13 oz.
368g
Display:
3.8” anti-glare TTF color touch screen, 2.25” x 3.0”
Screen Resolution:
320 x 240 QVGA; 32,000 colors
Storage:
20 GB Hard Drive
Audio:
Integrated Speaker
GPS Antenna:
Integrated, detachable for optional external antenna connection
114
THALES CONSUMER PRODUCTS GPS RECEIVER
END USER SOFTWARE LICENSE
All Thales global positioning system (GPS) receivers are navigation aids, and are not intended to replace
other methods of navigation. Purchaser is advised to perform careful position charting and use good
judgment. READ THE USER GUIDE CAREFULLY BEFORE USING THE PRODUCT.
1. THALES WARRANTY
Thales warrants their GPS receivers and hardware accessories to be free of defects in material and
workmanship and will conform to our published specifications for the product for a period of one year
from the date of original purchase. THIS WARRANTY APPLIES ONLY TO THE ORIGINAL PURCHASER
OF THIS PRODUCT.
In the event of a defect, Thales will, at its option, repair or replace the hardware product with no charge
to the purchaser for parts or labor. The repaired or replaced product will be warranted for 90 days from
the date of return shipment, or for the balance of the original warranty, whichever is longer. Thales
warrants that software products or software included in hardware products will be free from defects in
the media for a period of 30 days from the date of shipment and will substantially conform to the thencurrent user documentation provided with the software (including updates thereto). Thales's sole
obligation shall be the correction or replacement of the media or the software so that it will substantially
conform to the then- current user documentation. Thales does not warrant the software will meet
purchaser’s requirements or that its operation will be uninterrupted, error-free or virus-free. Purchaser
assumes the entire risk of using the software.
2. PURCHASER’S REMEDY
PURCHASER’S EXCLUSIVE REMEDY UNDER THIS WRITTEN WARRANTY OR ANY IMPLIED
WARRANTY SHALL BE LIMITED TO THE REPAIR OR REPLACEMENT, AT Thales’ OPTION, OF ANY
DEFECTIVE PART OF THE RECEIVER OR ACCESSORIES WHICH ARE COVERED BY THIS WARRANTY.
REPAIRS UNDER THIS WARRANTY SHALL ONLY BE MADE AT AN AUTHORIZED THALES SERVICE
CENTER. ANY REPAIRS BY A SERVICE CENTER NOT AUTHORIZED BY THALES WILL VOID THIS
WARRANTY.
3. PURCHASER’S DUTIES
To obtain service the purchaser must obtain a Return Materials Authorization (RMA) number from
Thales prior to shipping by calling +1 800-707-7845, or by sending an e-mail to
[email protected]. The purchaser must return the product postpaid with a copy of the
original sales receipt, purchaser’s return address and the RMA number clearly printed on the outside of
the package to the Authorized Thales Service Center address provided by Thales with the RMA number.
Thales reserves the right to refuse to provide service free-of-charge if the sales receipt is not provided or
if the information contained in it is incomplete or illegible or if the serial number is altered or removed.
Thales will not be responsible for any losses or damage to the product incurred while the product is in
transit or is being shipped for repair. Insurance is recommended. Thales suggests using a trackable
shipping method such as UPS or FedEx when returning a product for service.
4. LIMITATION OF IMPLIED WARRANTIES
Except as set forth in item 1 above, all other expressed or implied warranties, including those of fitness
for any particular purpose or merchantability, are hereby disclaimed AND IF APPLICABLE, IMPLIED
WARRANTIES UNDER ARTICLE 35 OF THE UNITED NATIONS CONVENTION ON CONTRACTS FOR
THE INTERNATIONAL SALE OF GOODS.
Some national, state, or local laws do not allow limitations on implied warranty or how long an implied
warranty lasts, so the above limitation may not apply to you.
5. EXCLUSIONS
The following are excluded from the warranty coverage:
(1) periodic maintenance and repair or replacement of parts due to normal wear and tear;
(2) batteries;
(3) finishes;
(4) installations or defects resulting from installation;
(5) any damage caused by (i) shipping, misuse, abuse, negligence, tampering, or improper use; (ii)
disasters such as fire, flood, wind, and lightning; (iii) unauthorized attachments or modification;
(6) service performed or attempted by anyone other than an authorized Thales
Service Center;
(7) any product, components or parts not manufactured by Thales,
(8) that the receiver will be free from any claim for infringement of any patent, trademark, copyright or
other proprietary right, including trade secrets
(9) any damage due to accident, resulting from inaccurate satellite transmissions. Inaccurate
transmissions can occur due to changes in the position, health or geometry of a satellite or
modifications to the receiver that may be required due to any change in the GPS. (Note: Thales GPS
receivers use GPS or GPS+GLONASS to obtain position, velocity and time information. GPS is operated
by the U.S. Government and GLONASS is the Global Navigation Satellite System of the Russian
Federation, which are solely responsible for the accuracy and maintenance of their systems. Certain
conditions can cause inaccuracies which could require modifications to the receiver. Examples of such
conditions include but are not limited to changes in the GPS or GLONASS transmission.).
Opening, dismantling or repairing of this product by anyone other than an authorized Thales Service
Center will void this warranty.
6. EXCLUSION OF INCIDENTAL OR CONSEQUENTIAL DAMAGES
THALES SHALL NOT BE LIABLE TO PURCHASER OR ANY OTHER PERSON FOR ANY INDIRECT,
INCIDENTAL OR CONSEQUENTIAL DAMAGES WHATSOEVER, INCLUDING BUT NOT LIMITED TO
LOST PROFITS, DAMAGES RESULTING FROM DELAY OR LOSS OF USE, LOSS OF OR DAMAGES
ARISING OUT OF BREACH OF THIS WARRANTY OR ANY IMPLIED WARRANTY EVEN THOUGH
CAUSED BY NEGLIGENCE OR OTHER FAULT OFTHALES OR NEGLIGENT USAGE OF THE PRODUCT.
IN NO EVENT WILL THALES BE RESPONSIBLE FOR SUCH DAMAGES, EVEN IF THALES HAS BEEN
ADVISED OF THE POSSIBILITY OF SUCH DAMAGES.
Some national, state, or local laws do not allow the exclusion or limitation of incidental or consequential
damages, so the above limitation or exclusion may not apply to you.
7. COMPLETE AGREEMENT
This written warranty is the complete, final and exclusive agreement between Thales and the purchaser
with respect to the quality of performance of the goods and any and all warranties and representations.
THIS WARRANTY SETS FORTH ALL OF Thales’ RESPONSIBILITIES REGARDING THIS PRODUCT.
THIS WARRANTY GIVES YOU SPECIFIC RIGHTS. YOU MAY HAVE OTHER RIGHTS WHICH VARY
FROM LOCALITY TO LOCALITY AND CERTAIN LIMITATIONS CONTAINED IN THIS WARRANTY MAY
NOT APPLY TO YOU.
8. CHOICE OF LAW.
This limited warranty is governed by the laws of the State of California, without reference to its conflict
of law provisions or the U.N. Convention on Contracts for the International Sale of Goods, and shall
benefit Thales, its successors and assigns.
This warranty does not affect the consumer's statutory rights under applicable laws in force in their
locality, nor the customer's rights against the dealer arising from their sales/purchase contract.
For further information concerning this limited warranty, please call or write:
Thales, Inc. - 960 Overland Court - San Dimas, California, U.S.A. 91773
Phone: +1 909-394-5000, Fax: +1 909-394-7050
THALES CONSUMER PRODUCTS PRODUCTS LIMITED WARRANTY
All Thales global positioning system (GPS) receivers are navigation aids, and are not intended to replace
other methods of navigation. Purchaser is advised to perform careful position charting and use good
judgment. READ THE USER GUIDE CAREFULLY BEFORE USING THE PRODUCT.
1. THALES WARRANTY
Thales warrants their GPS receivers and hardware accessories to be free of defects in material and
workmanship and will conform to our published specifications for the product for a period of one year
from the date of original purchase. THIS WARRANTY APPLIES ONLY TO THE ORIGINAL PURCHASER
OF THIS PRODUCT.
In the event of a defect, Thales will, at its option, repair or replace the hardware product with no charge
to the purchaser for parts or labor. The repaired or replaced product will be warranted for 90 days from
the date of return shipment, or for the balance of the original warranty, whichever is longer. Thales
warrants that software products or software included in hardware products will be free from defects in
the media for a period of 30 days from the date of shipment and will substantially conform to the thencurrent user documentation provided with the software (including updates thereto). Thales's sole
obligation shall be the correction or replacement of the media or the software so that it will substantially
conform to the then- current user documentation. Thales does not warrant the software will meet
purchaser’s requirements or that its operation will be uninterrupted, error-free or virus-free. Purchaser
assumes the entire risk of using the software.
2. PURCHASER’S REMEDY
PURCHASER’S EXCLUSIVE REMEDY UNDER THIS WRITTEN WARRANTY OR ANY IMPLIED
WARRANTY SHALL BE LIMITED TO THE REPAIR OR REPLACEMENT, AT Thales’ OPTION, OF ANY
DEFECTIVE PART OF THE RECEIVER OR ACCESSORIES WHICH ARE COVERED BY THIS WARRANTY.
REPAIRS UNDER THIS WARRANTY SHALL ONLY BE MADE AT AN AUTHORIZED THALES SERVICE
CENTER. ANY REPAIRS BY A SERVICE CENTER NOT AUTHORIZED BY THALES WILL VOID THIS
WARRANTY.
3. PURCHASER’S DUTIES
To obtain service the purchaser must obtain a Return Materials Authorization (RMA) number from
Thales prior to shipping by calling +1 800-707-7845, or by sending an e-mail to
[email protected]. The purchaser must return the product postpaid with a copy of the
original sales receipt, purchaser’s return address and the RMA number clearly printed on the outside of
the package to the Authorized Thales Service Center address provided by Thales with the RMA number.
Thales reserves the right to refuse to provide service free-of-charge if the sales receipt is not provided or
if the information contained in it is incomplete or illegible or if the serial number is altered or removed.
Thales will not be responsible for any losses or damage to the product incurred while the product is in
transit or is being shipped for repair. Insurance is recommended. Thales suggests using a trackable
shipping method such as UPS or FedEx when returning a product for service.
4. LIMITATION OF IMPLIED WARRANTIES
Except as set forth in item 1 above, all other expressed or implied warranties, including those of fitness
for any particular purpose or merchantability, are hereby disclaimed AND IF APPLICABLE, IMPLIED
WARRANTIES UNDER ARTICLE 35 OF THE UNITED NATIONS CONVENTION ON CONTRACTS FOR
THE INTERNATIONAL SALE OF GOODS.
Some national, state, or local laws do not allow limitations on implied warranty or how long an implied
warranty lasts, so the above limitation may not apply to you.
5. EXCLUSIONS
The following are excluded from the warranty coverage:
(1) periodic maintenance and repair or replacement of parts due to normal wear and tear;
(2) batteries;
(3) finishes;
(4) installations or defects resulting from installation;
(5) any damage caused by (i) shipping, misuse, abuse, negligence, tampering, or improper use; (ii)
disasters such as fire, flood, wind, and lightning; (iii) unauthorized attachments or modification;
(6) service performed or attempted by anyone other than an authorized Thales
Service Center;
(7) any product, components or parts not manufactured by Thales,
(8) that the receiver will be free from any claim for infringement of any patent, trademark, copyright or
other proprietary right, including trade secrets
(9) any damage due to accident, resulting from inaccurate satellite transmissions. Inaccurate
transmissions can occur due to changes in the position, health or geometry of a satellite or
modifications to the receiver that may be required due to any change in the GPS. (Note: Thales GPS
receivers use GPS or GPS+GLONASS to obtain position, velocity and time information. GPS is operated
by the U.S. Government and GLONASS is the Global Navigation Satellite System of the Russian
Federation, which are solely responsible for the accuracy and maintenance of their systems. Certain
conditions can cause inaccuracies which could require modifications to the receiver. Examples of such
conditions include but are not limited to changes in the GPS or GLONASS transmission.).
Opening, dismantling or repairing of this product by anyone other than an authorized Thales Service
Center will void this warranty.
6. EXCLUSION OF INCIDENTAL OR CONSEQUENTIAL DAMAGES
THALES SHALL NOT BE LIABLE TO PURCHASER OR ANY OTHER PERSON FOR ANY INDIRECT,
INCIDENTAL OR CONSEQUENTIAL DAMAGES WHATSOEVER, INCLUDING BUT NOT LIMITED TO
LOST PROFITS, DAMAGES RESULTING FROM DELAY OR LOSS OF USE, LOSS OF OR DAMAGES
ARISING OUT OF BREACH OF THIS WARRANTY OR ANY IMPLIED WARRANTY EVEN THOUGH
CAUSED BY NEGLIGENCE OR OTHER FAULT OFTHALES OR NEGLIGENT USAGE OF THE PRODUCT.
IN NO EVENT WILL THALES BE RESPONSIBLE FOR SUCH DAMAGES, EVEN IF THALES HAS BEEN
ADVISED OF THE POSSIBILITY OF SUCH DAMAGES.
Some national, state, or local laws do not allow the exclusion or limitation of incidental or consequential
damages, so the above limitation or exclusion may not apply to you.
7. COMPLETE AGREEMENT
This written warranty is the complete, final and exclusive agreement between Thales and the purchaser
with respect to the quality of performance of the goods and any and all warranties and representations.
THIS WARRANTY SETS FORTH ALL OF Thales’ RESPONSIBILITIES REGARDING THIS PRODUCT.
THIS WARRANTY GIVES YOU SPECIFIC RIGHTS. YOU MAY HAVE OTHER RIGHTS WHICH VARY
FROM LOCALITY TO LOCALITY AND CERTAIN LIMITATIONS CONTAINED IN THIS WARRANTY MAY
NOT APPLY TO YOU.
8. CHOICE OF LAW.
This limited warranty is governed by the laws of the State of California, without reference to its conflict
of law provisions or the U.N. Convention on Contracts for the International Sale of Goods, and shall
benefit Thales, its successors and assigns.
This warranty does not affect the consumer's statutory rights under applicable laws in force in their
locality, nor the customer's rights against the dealer arising from their sales/purchase contract.
For further information concerning this limited warranty, please call or write:
Thales S.A. - 960 Overland Court - San Dimas, California, U.S.A. 91773
Phone: +1 909-394-5000, Fax: +1 909-394-7050
Before installing the windshield mount, use the alcohol pad (supplied) to clean the suction
cup and the area of the windshield where you will place the windshield mount.
Avant dJinstaller Ie support de fixation pour pare-brise, nettoyez la zone de son emplacement
ainsi que la ventouse avec Ie tampon alcoolise (fourni).
Reinigen Sie vor der Installation der Windschutzscheibenhalterung den Saugnapf und den
Bereich der Windschutzscheibe, an dem Sie die Halterung anbringen mochten, mit einem
alkoholgetrankten Tuch (mitgeliefert).
Antes de instalar el soporte de parabrisas, utilice el pano con alcohol (incluido) para Iimpiar
la ventosa y la zona del parabrisas donde va a colocar el soporte de parabrisas.
Voordat u de voorruitmontage installeert, moet u het meegeleverde alcoholdoekje gebruiken
am de zuignap en de plaats op de vQorruit waar u het systeem zal aanbrengen, te reinigen.
Prima di installare la staffa di montaggio per parabrezza, pulire la ventosa e la zona del
parabrezza in cui si installera la staffa utilizzando la salvietta imbevuta di alcol fornita in
dotazione.
Reeister your MaJ1ellan product
on the World Wide WebD
Go to www.maQellanQPs.com for details
[Fran~ais]
Enreqistrez votre produit Maqellan sur Internet. Rendez-vous sur \J\/\NW.maQellan~ps.com pour en savoir plus.
[Espanol] Re~istre su producto Ma~ellan a traves de Internet.
Vaya a vvvvw.ma~ellanQPs.com para mas detalles.
[Deutsch] ReQistrieren Sie Ihr Ma~ellan-Produkt im Internet.
Gehen Sie zu \N\tVW.ma~ellanQPs.com.
[Italiano] ReQistrazione del prodotto MaQellan nel World Wide
Web. Indirizzo: www.ma~ellanQPs.com per maQQiori detta~li.
[PortuQues] ReQiste 0 seu produto l\I\a~ellan na World Wide
Web. Va para www.maQellanQps.com para abter mais
informa~6es.
[Dansk] ReQistrer din MaQellan-produkt pa World Wide Web.
Se flere oplysninQer pa. adressen www.maQellan~ps.com.
[Nederlands] ReQistreer uw MaQellan-product op het internet.
Ga naar www.magellanQps.com voor meer informatie.
[Suomi] Rekisteroi MaQellan-tuotteesi internetissa. Lisatietoja
loydat osoitteesta www.magellanQps.com.
[Norsk] Re!listrer diU Ma~ellan-produkt pa. Internett.
www.maQellanQPs.com for detaljer.
Ga til
[Svenska] ReQistrera din MaQellan-produkt pa World Wide
Web. Ga till www.maQellanQPs.com for mer information.
631042 D
HF2AT000117
c:::M~GELLA~
Any Questions?
Dear Customer,
Congratulations! Thank you for purchasing your Magellan® RoadMate™ portable vehicle navigation system.
Your Magellan RoadMate has been manufactured with the greatest care and highest standard of quality for your satisfaction. We would like
to ensure that you have the best possible experience using your new GPS system. However, in the unlikely event that you experience technical difficulties in using this product, our support staff will be happy to help answer any questions you may have. Please contact us
before deciding to return your product to the store where you purchased it.
Operating hours: 6:00 A.M. to 5:00 P.M. Monday through Friday (Pacific Standard Time)
E-mail address:[email protected]
Phone number (toll free): (866) 868-2259
Additional support can be conveniently accessed on our website at www.magellangps.com. There you can get the latest product information, firmware and register your new Magellan RoadMate. Registering your product will keep you informed of the latest available updates
and make phone and email support quicker and easier.
Thank you for allowing us to assist you.
©2004 Thales Navigation, Inc. All rights reserved. The Magellan logo, Magellan, and Magellan RoadMate are trademarks of Thales Navigation.
Part #204581-98 A
THALES NAVIGATION MAGELLAN ROADMATE 700 PRODUCT SOFTWARE LICENSE
IMPORTANT - READ CAREFULLY BEFORE USING THE SOFTWARE
By clicking the acceptance button or using the pre-loaded software, you are
agreeing to be bound by all of the terms and conditions of this software
license agreement ("Agreement") which is provided with the pre-loaded software program and data (together the "Software") including, without limitation, the use restrictions, warranty disclaimer and limitation of liability set
forth therein. If you do not agree to be bound by all of the terms and conditions of the Agreement, you shou Id immediately STOP USE of the Software
and refer any questions in writing to: Thales Navigation Customer Support,
960 Overland Court, San Dimas, CA 91773.
The license is not a sale of the Software. This Software and the accompanying documentation are copyrighted works of authorship and contain valuable secret and confidential information proprietary to Thales Navigation
("Licensor") and its third-party suppliers, including data supplied by
Navigation Technologies C'NAVTEQ"), each of whom retain the ownership of
the information and aII copyrights and other proprietary rights therei n. You
agree to exercise all reasonable efforts to protect these rights. Copyright law
prohibits making copies of the Software for any reason, nor may you copy
the written material accompanying the Software.
Under the Agreement, you have a limited, non-exclusive, non-transferable
Iicense to use the Software contained in with the prod uct only for your personal use subject to the User Restrictions below. You may not sublicense,
rent or lease the Software, but you may permanently transfer your Iicense to
use the Software and accompanying materials by delivering to another party
the original copy of the Software package, including this Agreement, together with the hardware. The transferee must then confirm, in writing to
Licensor, its agreement to all terms and cond itions outl i ned in th is Software
License. Such transfer terminates your license to use the Software.
Licensor and its third-party suppliers retain all rights to the Software.
User Restrictions: The Software must remain upon a single Magellan
RoadMate 700 product owned by you. You may not operate the Software in
a time-shari ng or service bureau operation, dispatch or fleet management,
on a temporary or permanent basis, without the prior written consent of
Licensor. You agree not to translate, modify, adapt, disassemble, decompi Ie, or reverse engi neer the Software or create derivative works of the
Software or documentation or any portion thereof. Unauthorized reproduction or distribution of this Software, or any portion of it, may result in civil
and criminal penalties and will be prosecuted to the maximum extent possible under the law. End User shall indemnify and save harmless, the
t
Licensor and its th ird-party su ppl iers (and thei r th ird-party su ppl iers) and
their officers, employees and agents from and against any claim, demand
or action, irrespective of the nature or the cause of the claim, demand or
action, alleging loss, costs, expenses, damages or injuries (including
injuries resulting in death) arising out of the use or possession of the
Software.
The Iicense is effective unti I term inated. The Iicense wi II term inate without any notice from Licensor if you fai I to com ply with any provisions of
the Agreement. Upon termination, you must cease all use of the
Software and docu mentation and return the prod uct incorporati ng the
Software to Licensor. The Agreement is governed by and construed in
accordance with the laws of the State of Cal iforn ia without regard to conflict of laws provisions thereof and without regard to the United Nations
Convention on Contracts for the International Sale of Goods.
DISCLAIMER OF WARRANTIES AND LIMITATION OF LIABILITY:
EXCEPT AS SET FORTH IN THE LIMITED WARRANTY THAT ACCOMPANIES TH E PRODUCT, LICENSOR AND ITS TH IRD-PARTY SUPPLI ERS
(AND THEIR THIRD-PARTY SUPPLI ERS) MAKE NO WARRANTI ES OR
REPRESENTATIONS, EXPRESS OR IMPLI ED, REGARDI NG TH E SOFTWARE, MEDIA, DOCUMENTATION, RESULTS OR ACCURACY OF THE
SOFTWARE AND HEREBY EXPRESSLY DISCLAIM ANY WARRANTIES
OF MERCHANTABILITY AND FITNESS FOR A PARTICULAR PURPOSE
AND NONINFRINGEMENT. THE SOFTWARE IS PROVIDED "AS IS" AND
LICENSOR AND ITS TH IRD PARTY SUPPLI ERS (AND THEIR TH IRD
PARTY SUPPLIERS) DO NOT WARRANT THE SOFTWARE WILL MEET
YOUR REQUIREMENTS OR THAT ITS OPERATION WILL BE UNINTERRUPTED OR ERROR-FREE. This product does not replace the need for
good judgment while navigating and should never be relied upon as the
sale means of navigation.
Licensor and its third-party suppliers (and their third-party suppliers)
shall have no liability to you or any third party for special, incidental,
indirect or consequential damages (including, but not limited to, loss of
profits or savings, downtime, damage to or replacement of equipment
and property, or recovery or replacement of computers or data) arisi ng
from claims based in warranty, contract, tort (including negligence),
strict liability, or otherwise even if Licensor or its third-party suppliers
(and their third-party suppliers) have been advised of the possibility of.
such claim or damages. The liability of Licensor and its third-party suppliers (and their third-party suppliers) for damages shall not exceed the
actual amount paid for the Software.
Some states do not allow the exclusion of limitation of implied warranties
or liability for incidental or consequential damages, so the above limitations or exclusions may not apply to you.
U.S. Government Restricted Rights: The software is provided with
Restricted Rights or Limited Rights. Use, duplication or disclosure by
the U.S. Government is subject to the restrictions as set forth in subparagraphs (b)(3) and (c)(I)(ii) of the Rights in Technical Data
Noncommercial Items clause at DFARS 252.227-7013 or subparagraphs
(cHI) and (2) of the Commercial Computer Software-Restricted Rights
clause at 48 CFR 52.227-19, as applicable. Manufacturer is Thales
Navigation, Inc., 471 EI Camino Real, Santa Clara, CA 95050.
WARNING
The Software data reflect conditions as they existed at various points in
time before you purchased the product incorporating the Software.
Accordingly, the Software may contain inaccurate or incomplete data or
information due to the passage of time, road construction, and changing
conditions or otherwise. The Software does not include, analyze,
process, consider or reflect any of the followi ng: legal restrictions (such
as veh icu lar type, weight, height, width, load and speed restrictions);
road slope or grade; bridge height, width, weight or other limits; population density; neighborhood qual ity or safety; avai labi Iity or proxim ity of
law enforcement, emergency rescue, medical or other assistance; construction work zones or hazards; road or lane closures; road, traffic or
traffic facilities safety or condition; weather conditions; pavement characteristics or cond itions; special events; traffic congestion; travel ti me.
© 2004 Thales Navigation, Inc. All rights reserved.
Included data © 2004 Navigation Technologies Corporation. All rights
reserved.
The Software may include information taken with the permission from
Canadian authorities, and include © Her Majesty the Queen in Right of
Canada, © Queen's printer for Ontario.
For information on language translations or distribution outside the
United States of America, contact Thales Navigation at the address
shown below.
Thales Navigation, Inc., 960 Overland Court, San Dimas, California
91773
Hot Line: 866-868-2259
Voice:
909-394-5000
FAX:
909-394-7050
H F2ATOO 1300
631177 A
~~GELLA~
Please check the Magellan web site, www.magellangps.com. for accessories
available for your Magellan RoadMate. Accessories can be purchased at the
Magellan Online Store, by phone or from your local dealer.
Magellan Online Store
www.magellangps.com/en/store/
Direct your web browser to www.magellangps.com/en/store/ to enter the
Magellan Online Store. There you will find information about accessories
that work with your new Magellan RoadMate.
Online orders from the Magellan store are currently only available in the
United States, can only be shipped to US addresses and be paid for in US
dollars.
Order By Phone (North America only)
1-866-339-0488
You can also purchase accessories for your Magellan RoadMate by using the
Magellan Products Order Desk toll-free number. All major credit cards are
accepted.
From Your Dealer
Contact your Magellan dealer to purchase accessories for your Magellan
RoadMate. To help you locate other Magellan dealers in your area, you can
access the Dealer Locator in the Magellan GPS web site. The web page for
the Dealer Locator is www.magellangps.com/en/store/dealerlocator/.
631105 A
H F2AT000303
Magellan Extended Warranty Program
Take advantage of this great opportunity to extend the life of your Magellan ® product warranty for
two additional years l . The Magellan Extended Warranty Program provides you with a single point of
contact for reliable end-to-end service and avoids expensive time and material repairs.
Choose the product you want to cover:
Product
SporTrak Basic
SporTrak Map
SporTrak Pro
SporTrak Pro Marine
SporTrak Topo
SporTrak Color
Merdian Gold
Meridian Marine
Meridian Platinum
Meridian Color
FX324 Mono Display
FX324 Color Display
Magellan RoadMate 300
Magellan RoadMate 500
Magellan RoadMate 700
Extended
Warranty Price
$ 29.95
$ 29.95
$ 29.95
$ 29.95
$ 39.95
$ 49.95
$ 29.95
$ 39.95
$ 39.95
$ 49.95
$ 49.95
$ 79.95
$ 69.95
$ 99.95
$129.95
To sign up, simply follow these steps within 90 days of the
purchase date of your unit:
Step 1: Complete the attached application form - be sure
to include your product serial number .
Step 2: Attach a copy of your dated sales receipt and a
copy of the UPC code from the product box
Step 3: Mail or fax the application form, sales receipt and
UPC code, complete with credit card payment2
information to:
Thales Navigation, Inc.
Attn: Extended Warranty Customer Service
P.O. Box 869, San Dimas, CA 91773
Fax (909) 394-7070
Your serial number is located on a label affixed to your GPS
product. Some labels are located inside the battery bay. All
serial numbers begin with the letters SIN.
For more information call 888-550-7628 or check our website
www.magellangps.com/extendedwarranty
1
2
In accordance with the Terms and Conditions on the reverse. Program is subject to change or cancellation without notice.
Only Visa, MasterCard, American Express and Discover accepted, no checks or cash.
Offer Valid in United States Only ---
-- X
Complete this section and return to Thales Navigation.
Magellan Products Extended Warranty Program Application.
Name
_
Telephone
Address
City
Fax - - - - - - - - - - - State
Zip _ _ _ _ E-mail
Product
Extended Warranty Price
Serial #
Purchase Date
Credit Card Number
_
_
'----
_
_ Expiration Date
Name as it appears on Credit Card
Signature
830329 A
MAGELLAN PRODUCTS EXTENDED WARRANTY TERMS AND CONDITIONS
This Extended Warranty is an agreement between Thales Navigation, Inc., 471 El Camino Real,
Santa Clara, CA 95050, which is the obligor and administrator, and you, the purchaser. This document, together with the Thales Navigation Magellan Products Limited Warranty ( Limited Warranty ) that accompanied the products when purchased, sets forth the entire Extended Warranty and
may not be modified except by written agreement by Thales Navigation.
HOW LONG IS COVERAGE? Coverage begins on the original product purchase date and expires
3 years later. KEEP YOUR ORIGINAL RECEIPT AS PROOF OF DATE OF PURCHASE. This
Extended Warranty (2 years) is inclusive of the original Limited Warranty period (1 year). THIS
WARRANTY APPLIES ONLY TO THE ORIGINAL PURCHASER.
WHAT IS COVERED? This Extended Warranty covers products listed in the Extended Warranty
Application, purchased as new, and manufactured for use in the United States ( Covered Products). We warrant Covered Products to be free of defects in material and workmanship and that
Covered Products will conform to our published specifications for the product for the duration of
the Extended Warranty.
Under this Extended Warranty we will maintain your Covered Product in good operating condition,
providing parts and labor at no charge. At our option, we will repair or replace the defective Covered Product with a product of like kind or quality, which may be new or reconditioned. The
repaired or replaced Covered Product will be warranted for 90 days from the date of return shipment, or for the balance of the Extended Warranty, whichever is longer. If while under extended
warranty, the Covered Product is not repairable and a replacement product is not available, we will
refund to you the Extended Warranty purchase price and this contract will be terminated.
EXCLUSIONS The following are excluded from the Extended Warranty coverage: (1) periodic
maintenance and repair or replacement of parts due to normal wear and tear; (2) batteries, peripherals, cables, cords, finishes, optional software, or accessories; (3) damage caused by shipping, installation, unauthorized attachments or modification, misuse, abuse, negligence, tampering, dropped
product, collision with another object; loss of power or improper use, including improper use of
electrical/power supply; (4) damage caused by disasters such as fire, flood, wind, and lightning; (5)
Covered Products with removed or altered serial numbers; (6) any damage due to accident, resulting from inaccurate satellite transmissions. Inaccurate transmissions can occur due to changes in
the position, health or geometry of a satellite or modifications to the receiver that may be required
due to any change in the GPS used to obtain position, velocity and time information. (Note: GPS is
operated by the U.S. Government and GLONASS is the Global Navigation Satellite System of the
Russian Federation, which are solely responsible for the accuracy and maintenance of their systems. Certain conditions can cause inaccuracies that could require modifications to the receiver not
covered by this Extended Warranty.). Opening, dismantling or repairing of this product by anyone
other than an authorized Thales Navigation Service Center will void this warranty.
This Extended Warranty does not cover any fees related to third party contacts or no problem
found diagnosis. If your Covered Product experiences a defect or damage that is excluded from
coverage or if no covered defect or damage is found, you are responsible for all repair costs.
IF YOUR PRODUCT NEEDS REPAIR To obtain service, call 888-550-7628. You will be given a
return authorization (RA) number. For faster service, please have your Extended Warranty Card
available when you place the call. Do not return the product to your retailer. Your service representative will direct you to send your product to a designated service center. Ship the Covered Product
(postage pre-paid and insured) to the designated service center. The name, address and phone number for returning the product to you must be included. The RA number should be written legibly on
the front of the box. We suggest using a trackable shipping method such as UPS or FedEx when
returning a Covered Product for service.
We will return repaired or replaced Covered Product by ground shipping. While we try to complete
service as quickly as possible, we are not responsible for delays caused by factors beyond our control, including but not limited to shipping delays or acts of God.
We are not responsible for software or data stored in the Covered Product returned for service.
Back up all software and your data before returning the Covered Product for repair.
DISCLAIMER OF CERTAIN LIABILITIES UNDER NO CIRCUMSTANCES WILL WE BE
LIABLE FOR ANY INDIRECT, INCIDENTAL OR CONSEQUENTIAL DAMAGES, INCLUDING BUT NOT LIMITED TO LOST PROFITS, DAMAGES RESULTING FROM DELAY OR
LOSS OF USE, LOSS OF OR DAMAGES ARISING OUT OF BREACH OF THIS WARRANTY
OR ANY IMPLIED WARRANTY EVEN THOUGH CAUSED BY NEGLIGENCE OR OTHER
FAULT OF THALES NAVIGATION, EVEN IF WE HAVE BEEN ADVISED OF THE POSSIBILITY OF SUCH DAMAGES. THIS EXTENDED WARRANTY IS NOT INTENDED TO CREATE ANY IMPLIED WARRANTIES, WHICH MAY OR MAY NOT EXIST UNDER
APPLICABLE LAW. ALL OTHER EXPRESSED OR IMPLIED WARRANTIES, INCLUDING
FITNESS FOR ANY PARTICULAR PURPOSE OR MERCHANTABILITY, ARE HEREBY DISCLAIMED. Some national, state, or local laws do not allow the exclusion or limitation of incidental .
or consequential damages, so the above limitation or exclusion may not apply to you.
CANCELLATION We may cancel this Extended Warranty for fraud, material misrepresentation,
or unauthorized repair of Covered Products. Written notice of cancellation will be mailed to you at
your last known address not less than 60 days before cancellation is effective.
You can cancel this Extended Warranty at any time for any reason by mailing written notice of cancellation. If this Extended Warranty is cancelled: (a) within 30 days of the effective date of this
Extended Warranty, you will receive a full refund of the price paid for the Extended Warranty provided no service has been performed, or (b) more than 30 days after the effective date of the
Extended Warranty or after service has been performed, you will receive a pro rata refund less the
cost of any service received. Deliver cancellation request along with your Extended Warranty Card
to: Thales Navigation, Attn: Extended Warranty Customer Support, P.O. Box 869, San Dimas, CA
91773.
IMPORTANT CONSUMER INFORMATION This Extended Warranty is deemed a service contract under federal law. Should repair parts become unavailable during the coverage period of this
Extended Warranty, we will be excused from performance and you will receive a refund of the purchase price paid by you for the Extended Warranty less claims paid, if any. In no event will we be
liable for any damages as a result of the unavailability of repair parts.
Although we maintain a record of your Extended Warranty purchase on a computer retrieval system, you must retain in your possession your validated Extended Warranty Card and all original
receipts to receive product replacements or exchanges.
THIS WARRANTY GIVES YOU SPECIFIC RIGHTS. YOU MAY HAVE OTHER RIGHTS AND
CERTAIN LIMITATIONS CONTAINED IN THIS WARRANTY MAY NOT APPLY TO YOU.
The laws of the State of California govern this Extended Warranty, without reference to its conflict
of law provisions or the U.N. Convention on Contracts for the International Sale of Goods.
SPECIAL STATE REQUIREMENTS The following terms apply only in the state indicated if
inconsistent with the terms above:
ARIZONA: You may cancel this service contract at anytime prior to the expiration date by sending
written notice to the Thales Navigation, P.O. Box 869, San Dimas, CA 91773. You will receive a
pro-rata refund. No claims incurred or paid will be subtracted from this refund.
CALIFORNIA: If you purchase your contract in California you may cancel this Extended Warranty
by providing written notice to Thales Navigation. If your request for cancellation is made more
than 30 days after the date of receiving the Extended Warranty card, you will receive a pro-rata
refund of the Extended Warranty purchase price, less the cost of repairs made (if any), and less an
administrative fee of 10% of the Extended Warranty, price up to $25.00.
CONNECTICUT: The expiration date of this Extended Warranty shall automatically be extended
by the duration that the product is in our custody while being repaired. In the event of a dispute
with Thales Navigation, you may contact The State of Connecticut, Insurance Department, P.O.
Box 816, Hartford, CT 06142-0816, Attn: Consumer Affairs. The written complaint must contain a
description of the dispute, the purchase price of the product, the cost of repair of the product and a
copy of the Extended Warranty contract.
GEORGIA: Cancellation will comply with Section 33-24-44 of the Georgia Code.
KANSAS: This Extended Warranty is not an insurance policy.
MARYLAND: The expiration date of this Extended Warranty shall automatically be extended by
the duration that the product is in our custody while being repaired.
NEVADA: If you cancel this Extended Warranty, no deduction will be made from the refund for
the cost of any service received.
NORTH CAROLINA: The purchase of an Extended Warranty is not required in order to purchase
or obtain financing for the product. You may cancel this Extended Warranty at any time after purchase. You will receive a pro-rata refund of the Extended Warranty purchase price less the cost of
repairs made.
SOUTH CAROLINA: To prevent any further damage, please refer to the owner's manual. If you
have any questions regarding this Extended Warranty, or a complaint against Thales Navigation,
you may contact the South Carolina Department of Insurance, P.O. Box 100105, Columbia, SC
29202-3105, (803) 737-6180, (800) 768-3467.
TENNESSEE: The expiration date of this Extended Warranty shall automatically be extended by
the duration that the product is in our custody while being repaired.
TEXAS: Ifyou have a complaint against Thales Navigation, you may contact the Texas Department
of Licensing & Regulation, 920 Colorado, P.O. Box 12157, Austin, Texas 78711, (800) 803-9202.
UTAH: The Utah Property and Casualty Guarantee Association does not guarantee coverage
afforded under this Extended Warranty.
WISCONSIN: THIS EXTENDED WARRANTY IS ONLY SUBJECT TO LIMITED REGULATION BY THE WISCONSIN OFFICE OF THE COMMISSIONER OF INSURANCE. This
Extended Warranty shall not be canceled due to unauthorized repair of the covered equipment. If
you cancel this Extended Warranty, no deduction shall be made from the refund for the cost of any
service received.