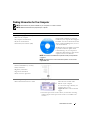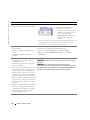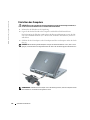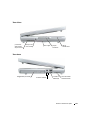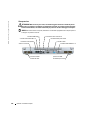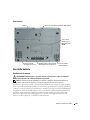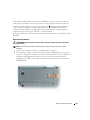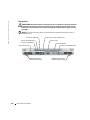
1
Dell Precision™ M70 Mobile
Workstation
Quick Reference Guide
Model PP15L
w w w. d e l l . c o m | s u p p o r t . d e l l . c o m
Notes, Notices, and Cautions
NOTE: A NOTE indicates important information that helps you make better use of your computer.
NOTICE: A NOTICE indicates either potential damage to hardware or loss of data and tells you how to avoid the
problem.
CAUTION: A CAUTION indicates a potential for property damage, personal injury, or death.
Abbreviations and Acronyms
For a complete list of abbreviations and acronyms, see the User’s Guide (depending on your operating system,
double-click the User’s Guide icon on your desktop, or click the Start button, click Help and Support Center,
and then click User and system guides).
If you purchased a Dell™ n Series computer, any references in this document to Microsoft® Windows®
operating systems are not applicable.
The Drivers and Utilities CD and the Operating System CD are optional and may not ship with all computers.
_________________
Information in this document is subject to change without notice.
© 2004 Dell Inc. All rights reserved.
Reproduction in any manner whatsoever without the written permission of Dell Inc. is strictly forbidden.
Trademarks used in this text: Dell, the DELL logo, and Dell Precision are trademarks of Dell Inc.; Microsoft and Windows are registered
trademarks of Microsoft Corporation; Intel and Pentium are registered trademarks of Intel Corporation.
Other trademarks and trade names may be used in this document to refer to either the entities claiming the marks and names or their products.
Dell Inc. disclaims any proprietary interest in trademarks and trade names other than its own.
Model PP15L
October 2004
P/N Y4303
Rev. A00
Contents
. . . . . . . . . . . . . . . . . . .
5
. . . . . . . . . . . . . . . . . . . . . . . . .
7
Finding Information for Your Computer
Setting Up Your Computer
. . . . . . . . . . . . . . . . . . . . . . . . . . .
9
. . . . . . . . . . . . . . . . . . . . . . . . . . . . .
. . . . . . . . . . . . . . . . . . . . . . . . . . . . .
10
11
11
12
13
. . . . . . . . . . . . . . . . . . . . . . . . . . . . . .
13
About Your Computer
Front View .
Left View . .
Right View .
Back View .
Bottom View
Using a Battery
. . . . . . . . . . . . . . . . . . . . . . . . . . . . .
. . . . . . . . . . . . . . . . . . . . . . . . . . . . .
. . . . . . . . . . . . . . . . . . . . . . . . . . . . .
Battery Performance . . . .
Checking the Battery Charge
Charging the Battery . . . .
Removing a Battery . . . . .
Installing a Battery . . . . .
Storing a Battery . . . . . .
Solving Problems
. . . . . . . . . . . . . . . . . . . . .
. . . . . . . . . . . . . . . . . . . . .
13
14
16
16
17
17
. . . . . . . . . . . . . . . . . . . . . . . . . . . . .
17
. . . . . . . . . . . . . . . . . . .
17
18
20
. . . . . . . . . . . . . . . . . . . . .
. . . . . . . . . . . . . . . . . . . . .
. . . . . . . . . . . . . . . . . . . . .
. . . . . . . . . . . . . . . . . . . . .
Notebook System Software (NSS)
Lockups and Software Problems .
Running the Dell Diagnostics . .
. . . . . . . . . . . . . . . . . . .
. . . . . . . . . . . . . . . . . . .
Contents
3
4
Contents
Finding Information for Your Computer
NOTE: Some features may not be available for your computer or in certain countries.
NOTE: Additional information may ship with your computer.
What Are You Looking For?
Find It Here
•
•
•
•
•
Drivers and Utilities CD (also known as the ResourceCD)
A diagnostic program for my computer
Drivers for my computer
My computer documentation
My device documentation
Notebook System Software (NSS)
Documentation and drivers are already
installed on your computer when shipped
from Dell. You can use the CD to reinstall
drivers, run the Dell Diagnostics, or access
your documentation.
Readme files may be included on your CD
to provide last-minute updates about
technical changes to your computer or
advanced technical-reference material for
experienced users or technicians.
NOTE: The Drivers and Utilities CD is optional and may not ship with all
computers.
NOTE: The latest drivers and documentation updates can be found at
support.dell.com.
•
•
•
•
•
•
Warranty information
Terms and Conditions (U.S. Only)
Safety instructions
Regulatory information
Ergonomics information
End User License Agreement
• Service Tag and Express Service Code
• Microsoft® Windows® License Label
Dell™ Product Information Guide
Service Tag and Microsoft Windows License
These labels are located on the
bottom of your computer.
•Use the Service Tag to identify your
computer when you use
support.dell.com or contact technical
support
• Enter the Express Service Code to direct your call when contacting
technical support. The Express Service Code is not available in all
countries.
Quick Reference Guide
5
www.dell.com | support.dell.com
What Are You Looking For?
Find It Here
•
•
•
•
Dell Precision™ M70 User’s Guide
How to remove and replace parts
Specifications
How to configure system settings
How to troubleshoot and solve problems
Microsoft® Windows® XP Help and Support Center
1 Click the Start button and click Help and Support.
2 Click User and System Guides and click User Guides.
• Solutions — Troubleshooting hints and tips,
articles from technicians, online courses,
frequently asked questions
• Community — Online discussion with other
Dell customers
• Upgrades — Upgrade information for
components, such as memory, the hard drive,
and the operating system
• Customer Care — Contact information,
service call and order status, warranty, and
repair information
• Service and support — Service call status and
support history, service contract, online
discussions with technical support
• Reference — Computer documentation,
details on my computer configuration,
product specifications, and white papers
• Downloads — Certified drivers, patches, and
software updates
Dell Support Website — support.dell.com
NOTE: Select your region to view the appropriate support site.
NOTE: Corporate, government, and education customers can also use the
customized Dell Premier Support website at premier.support.dell.com.
The website may not be available in all regions.
• Notebook System Software (NSS)
Drivers and Utilities CD or Dell Support Website
If you reinstall the operating system for your computer, you should also
reinstall the NSS utility (available on the optional Drivers and Utilities
CD or on the Dell Support Site). NSS provides critical updates for your
operating system and support for Dell™ 3.5-inch USB floppy drives,
Intel® Pentium® M processors, optical drives, and USB devices. NSS is
necessary for correct operation of your Dell computer. The software
automatically detects your computer and operating system and installs
the updates appropriate for your configuration.
• How to use Windows XP
• Documentation for my computer
• Documentation for devices (such as a
modem)
6
Quick Reference Guide
Windows Help and Support Center
1 Click the Start button and click Help and Support.
2 Type a word or phrase that describes your problem and click the arrow
icon.
3 Click the topic that describes your problem.
4 Follow the instructions on the screen.
What Are You Looking For?
Find It Here
• How to reinstall my operating system
Operating System CD
The operating system is already installed on your computer. To reinstall
your operating system, use the Operating System CD. See your Dell
Precision User’s Guide for instructions.
After you reinstall your operating system,
use the Drivers and Utilities CD to
reinstall drivers for the devices that came
with your computer.
The operating system product key is
located on your computer.
NOTE: The color of your CD varies based
on the operating system you ordered.
NOTE: The Operating System CD is
optional and may not ship with all
computers.
Setting Up Your Computer
CAUTION: Before you begin any of the procedures in this section, follow the safety instructions
located in the Product Information Guide.
1
Unpack the accessories box.
2
Set aside the contents of the accessories box, which you will need to complete your computer
setup.
The accessories box also contains user documentation and any software or additional
hardware (such as PC Cards, drives, or batteries) that you have ordered.
3
Connect the AC adapter to the AC adapter connector on the computer and to the electrical
outlet.
NOTICE: When using the AC adapter, secure the cable so that the cable is not pulled, tangled, stepped
on, or crushed by objects such as chair legs or desk supports.
Quick Reference Guide
7
www.dell.com | support.dell.com
NOTE: Do not connect the computer to the docking device until the computer has been turned on and
shut down at least once.
8
Quick Reference Guide
4
Open the computer display and press the power button to turn on the computer.
power button
About Your Computer
See your online User’s Guide for detailed information about your computer. Depending on your
operating system, double-click the User’s Guide icon on your desktop, or click the Start button,
click Help and Support Center, and then click User and system guides. The following items
address some of the more commonly asked questions about the computer.
•
Modem and network adapter: The computer may include both a v.92 56K modem and a
10/100/1000 Ethernet LOM network adapter. For connector locations, see "Back View" on
page 12. For more information on ports and connectors, see "About Your Computer" in your
online User’s Guide.
•
Battery life and usage: Various batteries are available for use with your computer. Using the
battery that comes standard with the computer, you can expect from 3 to 4 hours of operating
time from a single fully charged battery with average usage. Performing certain types of
operations, such as extended wireless operation, can significantly reduce battery life.
–
For more information on battery performance, usage, and conserving power, see your
online User’s Guide.
–
For information on an optional second battery, see your online User’s Guide.
Quick Reference Guide
9
www.dell.com | support.dell.com
•
Module bay devices: For information on the module bay and the devices it supports, see "Using
the Module Bay" in your online User’s Guide.
•
Docking devices: Your computer supports the Dell D/Dock Expansion Station and the Dell
D/Port Advanced Port Replicator.
NOTE: Docking devices may not be available in all countries.
For information on your optional docking device, see the documentation that accompanied
the device.
For information on obtaining optimal performance when using a docking device with this
computer, see "Solving Problems" in your online User’s Guide.
Front View
keyboard status lights
display latch
display
mute button
power button
volume control
buttons
device status
lights
track stick
keyboard
track stick/
touch pad
buttons
touch pad
display latch
button
speakers (2)
10
Quick Reference Guide
Left View
processorfan air vent
security
cable slot
hard drive
PC Card slot
smart card slot
Right View
module bay
audio connectors (2)
USB 2.0
connectors (2)
video-fan
air vent
Quick Reference Guide
11
www.dell.com | support.dell.com
Back View
CAUTION: Do not block, push objects into, or allow dust to accumulate in the air vents. Do not store
your computer in a low-airflow environment, such as a closed briefcase, while it is running. Restricting
the airflow can damage the computer or cause a fire.
NOTICE: To avoid damaging the computer, wait 5 seconds after you turn off the computer before you
disconnect an external device.
USB 2.0 connectors (2)
modem connector (RJ-11)
network connector (RJ-45)
infrared sensor
video-fan
air vent
12
Quick Reference Guide
S-video TV-out connector
serial connector
video connector
AC adapter connector
processorfan air vent
Bottom View
battery
battery-bay latch release
Mini PCI
card/modem/DIMM
module cover
processor-fan air vent
docking device slot
video-fan air vent
Using a Battery
Battery Performance
CAUTION: Before you begin any of the procedures in this section, follow the safety instructions
located in the Product Information Guide.
NOTE: For information about the Dell warranty for your computer, see the Product Information Guide or
separate paper warranty document that shipped with your computer.
For optimal computer performance and to help preserve BIOS settings, operate your Dell™
portable computer with the main battery installed at all times. Use a battery to run the computer
when it is not connected to an electrical outlet. One battery is supplied as standard equipment in
the battery bay. Battery operating time varies depending on operating conditions. You can install an
optional second battery in the module bay to significantly increase operating time. For more
information about the optional second battery, see your User’s Guide.
NOTE: Battery operating time (the time it can hold a charge) decreases over time. Depending on how
often the battery is used and the conditions under which it is used, you may need to purchase a new
battery during the life of your computer.
Quick Reference Guide
13
www.dell.com | support.dell.com
Operating time is significantly reduced when you perform operations including, but not limited to,
the following:
•
Using CD, DVD, or other optical drives
•
Using wireless communications devices, PC Cards, or USB devices
•
Using high-brightness display settings, 3D screen savers, or other power-intensive programs
such as 3D games
•
Running the computer in maximum performance mode
NOTE: It is recommended that you connect your computer to an electrical outlet when writing to a CD
or DVD.
You can check the battery charge before you insert the battery into the computer. You can also set
power management options to alert you when the battery charge is low.
CAUTION: Using an incompatible battery may increase the risk of fire or explosion. Replace the
battery only with a compatible battery purchased from Dell. The lithium-ion battery is designed to work
with your Dell computer. Do not use a battery from other computers with your computer.
CAUTION: Do not dispose of batteries with household waste. When your battery no longer holds a
charge, call your local waste disposal or environmental agency for advice on disposing of a lithium-ion
battery. See "Battery Disposal" in the Product Information Guide.
CAUTION: Misuse of the battery may increase the risk of fire or chemical burn. Do not puncture,
incinerate, disassemble, or expose the battery to temperatures above 65°C (149°F). Keep the battery
away from children. Handle damaged or leaking batteries with extreme care. Damaged batteries may
leak and cause personal injury or equipment damage.
Checking the Battery Charge
The Dell QuickSet Battery Meter, the Microsoft® Windows® Power Meter window and
icon,
the battery charge gauge and health gauge, and the low-battery warning provide information on the
battery charge. For information about checking the charge on the optional second battery, see your
User’s Guide.
Dell QuickSet Battery Meter
If Dell QuickSet is installed, press <Fn><F8> to display the QuickSet Battery Meter.
The Battery Meter window displays status, charge level, and charge completion time for the battery
in your computer.
NOTE: You can use your docking device to charge a computer battery. However, a battery in a docking
device does not power the docking device or computer.
In addition, when your computer is connected to a docking device (docked), the Battery Meter
window includes a Dock Battery tab, which displays the charge level and current status of the
docking device battery.
14
Quick Reference Guide
The following icons appear in the Battery Meter window:
• The computer or docking device is running on battery power.
• The battery is discharging or idle.
• The computer or docking device is connected to an electrical outlet and
running on AC power.
• The battery is charging.
• The computer or docking device is connected to an electrical outlet and
running on AC power.
• The battery is discharging, idle, or charging.
For more information about QuickSet, right-click the
icon in the taskbar, and click Help.
Microsoft Windows Power Meter
The Windows Power Meter indicates the remaining battery charge. To check the Power Meter,
double-click the
icon on the taskbar. For more information about the Power Meter tab, see
your User’s Guide.
If the computer is connected to an electrical outlet, a
icon appears.
Charge Gauge
Before you install a battery, press the status button on the battery charge gauge to illuminate the
charge-level lights. Each light represents approximately 20 percent of the total battery charge. For
example, if the battery has 80 percent of its charge remaining, four of the lights are on. If no lights
appear, the battery has no charge.
Health Gauge
The battery operating time is largely determined by the number of times it is charged. After
hundreds of charge and discharge cycles, batteries lose some charge capacity, or battery health. To
check the battery health, press and hold the status button on the battery charge gauge for at least
3 seconds. If no lights appear, the battery is in good condition, and more than 80 percent of its
original charge capacity remains. Each light represents incremental degradation. If five lights
appear, less than 60 percent of the charge capacity remains, and you should consider replacing the
battery. See your User’s Guide for more information about the battery operating time.
NOTE: When you press and hold the status button on the battery charge gauge for at least 3 seconds,
the charge-level lights will first light to display the current charge status. Then they switch to Health
status where they represent incremental degradation when lit.
Quick Reference Guide
15
www.dell.com | support.dell.com
Low-Battery Warning
NOTICE: To avoid losing or corrupting data, save your work immediately after a low-battery warning.
Then connect the computer to an electrical outlet. You can also turn the computer off and install a
second battery in the module bay. If the battery runs completely out of power, hibernate mode begins
automatically.
A low-battery warning occurs when the battery charge is approximately 90 percent depleted. The
computer beeps once, indicating that minimal battery operating time remains. During that time,
the speaker beeps periodically. If two batteries are installed, the low-battery warning means that the
combined charge of both batteries is approximately 90 percent depleted. The computer enters
hibernate mode when the battery charge is at a critically low level. For more information about lowbattery alarms, see "Power Management" in your User’s Guide.
Charging the Battery
NOTE: The AC adapter charges a completely discharged battery in approximately 1 hour with the
computer turned off. Charge time is longer with the computer turned on. You can leave the battery in the
computer as long as you like. The battery’s internal circuitry prevents the battery from overcharging.
When you connect the computer to an electrical outlet or install a battery while the computer is
connected to an electrical outlet, the computer checks the battery charge and temperature. If
necessary, the AC adapter then charges the battery and maintains the battery charge.
If the battery is hot from being used in your computer or being in a hot environment, the battery
may not charge when you connect the computer to an electrical outlet.
The battery is too hot to start charging if the
light flashes alternately green and orange.
Disconnect the computer from the electrical outlet and allow the computer and the battery to cool
to room temperature. Then connect the computer to an electrical outlet to continue charging the
battery.
For more information about resolving problems with a battery, see your User’s Guide.
Removing a Battery
CAUTION: Before performing these procedures, disconnect the modem from the telephone wall jack
NOTE: For information about removing the optional second battery, see your User’s Guide.
16
1
Ensure that the computer is turned off and disconnected from the electrical outlet.
2
If the computer is connected to a docking device (docked), undock it. See the documentation
that came with your docking device for instructions. Slide and hold the battery-bay latch
release on the bottom of the computer, and then remove the battery from the bay.
Quick Reference Guide
Installing a Battery
Ensure that the computer is turned off. Slide the battery into the bay until the latch release clicks.
For information about installing the optional second battery, see your User’s Guide.
Storing a Battery
Remove the battery when you store your computer for an extended period of time. A battery
discharges during prolonged storage. After a long storage period, recharge the battery fully before
you use it.
Solving Problems
Notebook System Software (NSS)
If you reinstall the operating system for your computer, you should also reinstall the NSS utility.
This utility is available on the optional Drivers and Utilities CD and on the Dell Support Website.
To download the utility from the Dell Support Website, go to the Downloads section of the
website and select your computer model from the pull-down menu. Select the Download Category
"System and Configuration Utilities," select your operating system and language, and then follow
the posted instructions.
NSS provides critical updates for your operating system and support for Dell™ 3.5-inch USB floppy
drives, Intel® Pentium® M processors, optical drives, and USB devices. NSS is necessary for correct
operation of your Dell computer. The software automatically detects your computer and operating
system and installs the updates appropriate for your configuration.
Quick Reference Guide
17
www.dell.com | support.dell.com
NOTE: NSS is critical for the correct operation of USB devices, including the Dell D/Bay, D/Dock, D/Port,
and D/View devices.
Lockups and Software Problems
CAUTION: Before you begin any of the procedures in this section, follow the safety instructions in the
Product Information Guide.
The computer does not start up
E N S U R E T H A T T H E AC A D A P T E R I S F I R M L Y C O N N E C T E D T O T H E C O M P U T E R A N D T O T H E
ELECTRICAL OUTLET
The computer stops responding
NOTICE: You might lose data if you are unable to perform an operating system shutdown.
TU R N T H E C O M P U T E R O F F — If you are unable to get a response by pressing a key on your keyboard or
moving your mouse, press and hold the power button for at least 8 to 10 seconds until the computer
turns off. Then restart your computer.
A program stops responding
END THE PROGRAM —
1 Press <Ctrl><Shift><Esc> simultaneously.
2 Click Applications.
3 Click the program that is no longer responding.
4 Click End Task.
A program crashes repeatedly
NOTE: Software usually includes installation instructions in its documentation or on a floppy disk or CD.
C H E C K T H E S O F T W A R E D O C U M E N T A T I O N — If necessary, uninstall and then reinstall the program.
18
Quick Reference Guide
A program is designed for an earlier Windows operating system
I F Y O U A R E U S I N G W I N D O W S X P, R U N T H E P R O G R A M C O M P A T I B I L I T Y W I Z A R D —
The Program Compatibility Wizard configures a program so it runs in an environment similar to nonWindows XP operating system environments.
1 Click the Start button, point to All Programs→ Accessories, and then click Program Compatibility
Wizard.
2 In the welcome screen, click Next.
3 Follow the instructions on the screen.
A solid blue screen appears
TU R N T H E C O M P U T E R O F F — If you are unable to get a response by pressing a key on your keyboard or
moving your mouse, press and hold the power button for at least 8 to 10 seconds until the computer
turns off. Then restart your computer.
Other software problems
CHECK THE SOFTWARE DOCUMENTATION OR CONTACT THE SOFTWARE MANUFACTURER FOR
TROUBLESHOOTING INFORMATION —
• Ensure that the program is compatible with the operating system installed on your computer.
• Ensure that your computer meets the minimum hardware requirements needed to run the software. See
the software documentation for information.
• Ensure that the program is installed and configured properly.
• Verify that the device drivers do not conflict with the program.
• If necessary, uninstall and then reinstall the program.
BACK UP YOUR FILES IMMEDIATELY
USE A VIRUS-SCANNING PROGRAM TO CHECK THE HARD DRIVE, FLOPPY DISKS, OR CDS
SAVE AND CLOSE ANY OPEN FILES OR PROGRAMS AND SHUT DOWN YOUR COMPUTER THROUGH THE
Start M E N U
Quick Reference Guide
19
www.dell.com | support.dell.com
S C A N T H E C O M P U T E R F O R S P Y W A R E — If you are experiencing slow computer performance, you
frequently receive pop-up advertisements, or you are having problems connecting to the Internet, your
computer might be infected with spyware. Use an anti-virus program that includes anti-spyware
protection (your program may require an upgrade) to scan the computer and remove spyware. For more
information, go to support.dell.com and search for the keyword spyware.
R U N T H E D E L L D I A G N O S T I C S — If all tests run successfully, the error condition is related to a
software problem.
Running the Dell Diagnostics
CAUTION: Before you begin any of the procedures in this section, follow the safety instructions
located in the Product Information Guide.
When to Use the Dell Diagnostics
If you experience a problem with your computer, perform the checks in "Solving Problems" (see
your online User’s Guide) and run the Dell Diagnostics before you contact Dell for technical
assistance.
NOTICE: The Dell Diagnostics works only on Dell™ computers.
Start the Dell Diagnostics from either your hard drive or from the optional Drivers and Utilities CD
(also known as the ResourceCD).
Starting the Dell Diagnostics From Your Hard Drive
The Dell Diagnostics is located on a hidden diagnostic utility partition on your hard drive.
NOTE: If your computer cannot display a screen image, contact Dell.
1
Shut down the computer.
2
If the computer is connected to a docking device (docked), undock it. See the documentation
that came with your docking device for instructions.
3
Connect the computer to an electrical outlet.
4
Turn on the computer. When the DELL™ logo appears, press <F12> immediately.
NOTE: If you cannot see anything on your display, hold down the mute button and press the computer’s
power button to begin the Dell Diagnostics. The computer automatically runs the Pre-boot System
Assessment.
NOTE: If you see a message stating that no diagnostics utility partition has been found, run the Dell
Diagnostics from your Drivers and Utilities CD.
If you wait too long and the operating system logo appears, continue to wait until you see the
Microsoft® Windows® desktop. Then shut down your computer and try again.
20
Quick Reference Guide
5
When the boot device list appears, highlight Diagnostics and press <Enter>.
The computer runs the Pre-boot System Assessment, a series of initial tests of your system
board, keyboard, hard drive, and display.
•
During the assessment, answer any questions that appear.
•
If a failure is detected, the computer stops and beeps. To stop the assessment and restart
the computer, press <n>; to continue to the next test, press <y>; to retest the
component that failed, press <r>.
•
If failures are detected during the Pre-boot System Assessment, write down the error
code(s) and contact Dell before continuing on to the Dell Diagnostics.
If the Pre-boot System Assessment completes successfully, you receive the message Booting
Dell Diagnostic Utility Partition. Press any key to continue.
6
Press any key to start the Dell Diagnostics from the diagnostics utility partition on your hard
drive.
Starting the Dell Diagnostics From the Optional Drivers and Utilities CD
1
Insert the Drivers and Utilities CD.
2
Shut down and restart the computer.
When the DELL logo appears, press <F12> immediately.
If you wait too long and the Windows logo appears, continue to wait until you see the
Windows desktop. Then shut down your computer and try again.
NOTE: The next steps change the boot sequence for one time only. On the next start-up, the computer
boots according to the devices specified in system setup.
3
When the boot device list appears, highlight CD/DVD/CD-RW Drive and press <Enter>.
4
Select the CD/DVD/CD-RW Drive option from the CD boot menu.
5
Select the Boot from CD-ROM option from the menu that appears.
6
Type 1 to start the ResourceCD menu.
7
Type 2 to start the Dell Diagnostics.
8
Select Run the 32 Bit Dell Diagnostics from the numbered list. If multiple versions are listed,
select the version appropriate for your computer.
9
When the Dell Diagnostics Main Menu appears, select the test you want to run.
Quick Reference Guide
21
www.dell.com | support.dell.com
Dell Diagnostics Main Menu
1
After the Dell Diagnostics loads and the Main Menu screen appears, click the button for the
option you want.
Option
Function
Express Test
Performs a quick test of devices. This test typically takes 10 to 20 minutes
and requires no interaction on your part. Run Express Test first to increase
the possibility of tracing the problem quickly.
Extended Test
Performs a thorough check of devices. This test typically takes 1hour or
more and requires you to answer questions periodically.
Custom Test
Tests a specific device. You can customize the tests you want to run.
Symptom Tree
Lists the most common symptoms encountered and allows you to select a
test based on the symptom of the problem you are having.
2
If a problem is encountered during a test, a message appears with an error code and a
description of the problem. Write down the error code and problem description and follow
the instructions on the screen.
If you cannot resolve the error condition, contact Dell.
NOTE: The Service Tag for your computer is located at the top of each test screen. If you contact Dell,
technical support will ask for your Service Tag.
3
If you run a test from the Custom Test or Symptom Tree option, click the applicable tab
described in the following table for more information.
Tab
Function
Results
Displays the results of the test and any error conditions encountered.
Errors
Displays error conditions encountered, error codes, and the problem
description.
Help
Describes the test and may indicate requirements for running the test.
Configuration
Displays your hardware configuration for the selected device.
The Dell Diagnostics obtains configuration information for all devices from
system setup, memory, and various internal tests, and it displays the
information in the device list in the left pane of the screen. The device list
may not display the names of all the components installed on your
computer or all devices attached to your computer.
Parameters
22
Quick Reference Guide
Allows you to customize the test by changing the test settings.
4
When the tests are completed, if you are running the Dell Diagnostics from the Drivers and
Utilities CD, remove the CD.
5
When the tests are complete, close the test screen to return to the Main Menu screen. To exit
the Dell Diagnostics and restart the computer, close the Main Menu screen.
Quick Reference Guide
23
24
Quick Reference Guide
www.dell.com | support.dell.com
Index
A
C
O
about your computer, 9
back view, 12
bottom view, 13
front view, 10
left side view, 11
right side view, 11
computer
crashes, 18-19
slow performance, 20
stops responding, 18
Operating System
CD, 7
air vents
location, 11
audio connectors
location, 11
B
battery
battery life and usage, 9
charge gauge, 15
charging, 16
checking the charge, 14
health gauge, 15
installing, 17
low-battery warning, 16
performance, 13
power meter, 15
removing, 16
storing, 17
P
D
Dell
support site, 6
Dell Premier Support
website, 6
Diagnostics, 5
Dell, 20
Documentation, 5
device, 5
ResourceCD, 5
documentation
online, 6
Drivers, 5
H
Help and Support Center, 6
problems
blue screen, 19
computer crashes, 18-19
computer does not start up, 18
computer stops responding, 18
lockups, 18
program crashes, 18
program stops responding, 18
programs and Windows
compatibility, 19
slow computer
performance, 20
software, 18-19
solving, 17
spyware, 20
S
software
problems, 19
spyware, 20
Index
25
26
Index
T
troubleshooting
Help and Support Center, 6
W
Windows XP
Help and Support Center, 6
Program Compatibility
Wizard, 19
wizards
Program Compatibility
Wizard, 19
26
Index
Mobilní pracovní stanice Dell
Precision™ M70
Stručná referenční příručka
Model PP15L
w w w. d e l l . c o m | s u p p o r t . d e l l . c o m
Poznámky, upozornění a varování
POZNÁMKA: POZNÁMKA označuje důležité informace, které pomáhají lepšímu využití počítače.
UPOZORNĚNÍ: UPOZORNĚNÍ označuje nebezpečí poškození hardwaru nebo ztráty dat a popisuje, jak se lze problému vyhnout.
VAROVÁNÍ: VAROVÁNÍ upozorňuje na potenciální poškození majetku a riziko úrazu nebo smrti.
Zkratky a značky
Kompletní seznam zkratek naleznete v Uživatelské příručce (podle druhu vašeho operačním systému, poklepejte
na ikonu Uživatelská příručka na ploše nebo klepněte na tlačítko Start, Nápověda a odborná pomoc a poté na
tlačítko Uživatelské příručky a průvodci systémem).
Pokud jste si zakoupili počítač řady Dell™ n, v tomto dokumentu neplatí odkazy na operační systémy Microsoft®
Windows®.
Disk CD s ovladači a nástroji a disk CD s operačním systémem jsou volitelné a s některými počítači
pravděpodobně nebudou dodány.
_________________
Informace v tomto dokumentu se mohou bez předchozího upozornění změnit.
© 2004 Dell Inc. Všechna práva vyhrazena.
Jakákoli reprodukce bez písemného povolení společnosti Dell Inc. je přísně zakázána.
Obchodní značky použité v tomto textu: Dell, logo DELL a Dell Precision jsou ochranné známky společnosti Dell Inc.; Microsoft a Windows
jsou registrované ochrannné známky společnosti Microsoft Corporation; Intel a Pentium jsou registrované ochranné známky společnosti Intel
Corporation.
Ostatní obchodní značky a názvy mohou být v tomto dokumentu použity buď v souvislosti s organizacemi, které si na tyto značky a názvy
činí nárok, nebo s jejich produkty. Společnost Dell Inc. si nečiní nárok na jiné obchodní značky a názvy, než své vlastní.
Model PP15L
Říjen 2004
P/N Y4303
Rev. A00
Obsah
Vyhledávání informací o počítači .
. . . . . . . . . . . . . . . . . . . . .
31
. . . . . . . . . . . . . . . . . . . . . . . . . . . .
33
. . . . . . . . . . . . . . . . . . . . . . . . . . . . . . . . .
35
Instalace počítače .
O počítači
Pohled zepředu.
Pohled zleva . .
Pohled zprava .
Pohled zezadu .
Pohled zdola . .
Používání baterie
. . . . . . . . . . . . . . . . . . . . . . . . . . . .
. . . . . . . . . . . . . . . . . . . . . . . . . . . .
36
37
37
38
39
. . . . . . . . . . . . . . . . . . . . . . . . . . . . .
39
. . . . . . . . . . . . . . . . . . . . . . . . . . . .
. . . . . . . . . . . . . . . . . . . . . . . . . . . .
. . . . . . . . . . . . . . . . . . . . . . . . . . . .
Výkon baterie . . . .
Kontrola nabití baterie
Nabíjení baterie . . .
Vyjmutí baterie . . . .
Instalace baterie . . .
Skladování baterie . .
Odstraňování problémů.
. . . . . . . . . . . . . . . . . . . . . . . . .
. . . . . . . . . . . . . . . . . . . . . . . . .
39
40
42
42
43
43
. . . . . . . . . . . . . . . . . . . . . . . . . .
43
. . . . . . . . . . . . . . . . . . . . . . . . .
. . . . . . . . . . . . . . . . . . . . . . . . .
. . . . . . . . . . . . . . . . . . . . . . . . .
. . . . . . . . . . . . . . . . . . . . . . . . .
Notebook System Software (NSS) . .
Zablokování a problémy se softwarem
Spuštění diagnostického nástroje Dell
. . . . . . . . . . . . . . . . . .
. . . . . . . . . . . . . . . . . .
. . . . . . . . . . . . . . . . . .
43
44
46
Obsah
29
30
Obsah
Vyhledávání informací o počítači
POZNÁMKA: Některé funkce pravděpodobně nebudou k dispozici pro váš počítač nebo v některých zemích.
POZNÁMKA: Dodatečné informace byly pravděpodobně dodány s počítačem.
Co hledáte?
Kde je naleznete
•
•
•
•
•
Disk CD s ovladači a nástroji (říká se mu také Zdrojový disk CD)
Diagnostický program pro počítač
Ovladače pro počítač
Dokumentace k počítači
Dokumentace k zařízení
Notebook System Software (NSS)
Dokumentace a ovladače jsou v počítači
nainstalovány již při odeslání ze
společnosti Dell. Tento disk CD můžete
použít pro přeinstalování ovladačů,
spuštění diagnostických nástrojů Dell
Diagnostics a pro přístup ke své
dokumentaci.
Soubory readme, které můžete nalézt na
disku CD, obsahují nejnovější informace o
technických změnách počítače nebo
odborné technické referenční materiály
pro zkušené uživatele či techniky.
POZNÁMKA: Disk CD s ovladači a nástroji je doplňkový a s některými počítači
pravděpodobně nebude dodán.
POZNÁMKA: Nejnovější ovladače a aktualizace dokumentace jsou k dispozici
na webu support.dell.com.
•
•
•
•
•
•
Informace o záruce
Podmínky (pouze USA)
Bezpečnostní pokyny
Informace o předpisech
Informace o ergonomii
Licenční smlouva s koncovým uživatelem
• Servisní štítek a kód expresní služby
• Licenční štítek Microsoft® Windows®
Příručka s informacemi o produktu Dell™
Servisní štítek a licenční smlouva Microsoft Windows
Tyto štítky se nachází na dolní straně
počítače.
• Při používání webu
support.dell.com nebo
kontaktování odborné pomoci
použijte servisní štítek k
identifikaci počítače
• Při kontaktu s technickou podporu zadejte pro přesměrování hovoru
kód expresní služby. Kód expresní služby není k dispozici ve všech
zemích.
Stručná referenční příručka
31
www.dell.com | support.dell.com
Co hledáte?
Kde je naleznete
•
•
•
•
Dell Precision™ M70 Uživatelská příručka
Odstraňování a výměna součástí
Specifikace
Konfigurace systému
Odstraňování a řešení problémů
Nápověda a centrum podpory systému Microsoft® Windows® XP
1 Klepněte na tlačítko Start a Nápověda a odborná pomoc.
2 Klepněte na položku Uživatelské a systémové příručky a dále na
položku Uživatelské příručky.
• Řešení – tipy a rady pro odstraňování
problémů, články odborníků, školení online,
časté dotazy
• Community (Veřejnost) – Diskuse online s
ostatními zákazníky společnosti Dell
• Upgrade (Aktualizace) – aktualizace
informací pro součásti jako je paměž, pevný
disk a operační systém
• Péče o zákazníky – kontaktní informace,
servisní volání a stav objednávky, záruka a
informace o opravách
• Servis a odborná pomoc – stav servisního
požadavku a historie odborné pomoci,
servisní kontrakt, diskuze online s odbornou
podporou
• Reference – dokumentace k počítači,
podrobnosti o individuální konfiguraci
počítače, specifikace produktů a oficiální
dokumenty
• Soubory ke stažení – certifikované ovladače,
opravy a aktualizace softwaru
Web odborné pomoci společnosti Dell – support.dell.com
POZNÁMKA: Po vybrání oblasti se zobrazí příslušná stránka odborné pomoci.
POZNÁMKA: Zákazníci z podnikové, vládní a vzdělávací oblasti mohou rovněž
využít specializovaný webový server s odbornou pomocí Dell Premier Support
na adrese premier.support.dell.com.Tento webový server pravděpodobně
nebude v některých oblastech k dispozici.
• Notebook System Software (NSS)
Disk CD s ovladači a nástroji nebo webový server odborné pomoci
společnosti Dell
Pokud znovu nainstalujete operační systém v počítači, musíte také
znovu nainstalovat nástroj NSS (k dispozici na volitelném disku CD s
ovladači a nástroji nebo na webu odborné pomoci společnosti Dell).
NSS zajišt’uje důležité aktualizace operačního systému, podporu
disketových jednotek 3,5" USB Dell™, procesorů Intel® Pentium® M,
optických jednotek a zařízení USB. NSS je nezbytný pro správnou
funkci vašeho počítače Dell.Tento software automaticky rozpozná
počítač a operační systém a nainstaluje aktualizace, které odpovídají
individuální konfiguraci.
32
Stručná referenční příručka
Co hledáte?
Kde je naleznete
• Práce se systémem Windows XP
Nápověda a centrum podpory systému Windows
• Dokumentace k počítači
1 Klepněte na tlačítko Start a Nápověda a odborná pomoc.
• Doumentace pro zařízení (např. pro modem) 2 Napište slovo nebo frázi popisující vzniklé potíže a klepněte na ikonu
se šipkou.
3 Klepněte na téma popisující vaše potíže.
4 Postupujte podle pokynů na obrazovce.
• Nová instalace operačního systému
Disk CD s operačním systémem
Operační systém je již v počítači nainstalován. Chcete-li stávající
operační systém přeinstalovat, použijte disk CD s operačním systémem.
Viz Dell Precision - uživatelská příručka s dalšími pokyny.
Po přeinstalování operačního systému
použijte disku CD s ovladači a nástroji k
reinstalaci ovladačů pro zařízení, které se
dodávají s počítačem.
Kód Product Key operačního systému je
umístěn na počítači.
POZNÁMKA: Barva CD závisí na operačním
systému, který jste si objednali.
POZNÁMKA: Disk CD s operačním
systémem je volitelný a s některými počítači
pravděpodobně nebude dodán.
Instalace počítače
VAROVÁNÍ: Dříve než budete postupovat podle pokynů v této části, přečtěte si bezpečnostní pokyny v
Informační příručce k produktu.
1
Rozbalte krabici s příslušenstvím.
2
Vymezte obsah okna s příslušenstvím, které budete potřebovat k dokončení instalace počítače.
V krabici s příslušenstvím je i dokumentace a objednaný software či doplňkový hardware
(například karty PC Card, jednotky a baterie).
3
Ke konektoru napájení počítače a do zásuvky napájení připojte napájecí adaptér.
UPOZORNĚNÍ: Při používání napájecího adaptéru zajistěte kabel před napínáním, kroucením, šlapáním nebo
drcením jinými předměty, jako jsou nohy židlí nebo nosníky stolů.
Stručná referenční příručka
33
www.dell.com | support.dell.com
POZNÁMKA: Počítač nepřipojujte do základnové stanice, dokud ho nejméně jednou nezapnete a nevypnete.
34
Stručná referenční příručka
4
Otevřením displeje a stisknutím tlačítka napájení zapněte počítač.
tlačítko napájení
O počítači
Podrobné informace o tomto počítači najdete v uživatelské příručce online. V závislosti na vašem
operačním systému poklepejte na ikonu Uživatelská příručka na ploše nebo klepněte na tlačítko
Start, na položku Centrum pro nápovědu a odbornou pomoc a poté na položku Uživatelské
příručky a průvodci systémem. Následující položky se vztahují k některým častěji kladeným
otázkám ohledně vašeho počítače.
•
Modem a sít’ový adaptér: Počítač může obsahovat modem v.92 56K i sít’ový adaptér
10/100/1000 Ethernet LOM. Informace o umístěních konektorů naleznete v části „Pohled
zepředu“ na straně 36. Další informace o portech a konektorech naleznete v části O počítači
uživatelské příručce online.
•
Životnost a používání baterie: K tomuto počítači jsou k dispozici různé baterie. Použijete-li
baterii, která je součástí standardního balení počítače, můžete u jedné plně nabité baterie při
běžném používání počítat s provozní dobou 3 až 4 hodin. Provedení určitých typů činností,
jako jsou např. rozšířené bezdrátové operace, může výrazně snížit životnost baterie.
–
Další informace o výkonu, použití a úspoře energie najdete v uživatelské příručce online.
–
Informace o volitelné druhé baterii najdete v uživatelské příručce online.
Stručná referenční příručka
35
www.dell.com | support.dell.com
•
Zařízení části modulu: Informace o části modulu a zařízeních, která podporuje, naleznete v
části Použití části modulu v uživatelské příručce online.
•
Dokovací zařízení: Tento počítač podporuje dokovací stanici Dell D/Dock Expansion Station a
replikátor portu Dell D/Port Advanced Port Replicator.
POZNÁMKA: Dokovací zařízení nemusí být k dispozici ve všech zemích.
Informace o volitelném dokovacím zařízení naleznete v dokumentaci dodávané se zařízením.
Informace o tom, jak zajistit co nejlepší provoz počítače při použití s dokovacím zařízením,
naleznete v části Odstraňování problémů v uživatelské příručce online.
Pohled zepředu
kontrolky klávesnice
západka displeje
obrazovka
tlačítko vypnutí zvuku
tlačítko
napájení
tlačítka ovládání
hlasitosti
kontrolky
zařízení
tyčinka
klávesnice
tlačítka tyčinky/
dotykové podložky
dotyková
podložka
tlačítko
západky displeje
reproduktory (2)
36
Stručná referenční příručka
Pohled zleva
větrací otvor
ventilátoru procesoru
bezpečnostní oko
pevný disk
pozice pro
kartu PC Card
pozice pro
kartu Smart
Pohled zprava
přihrádka pro modul
konektory zvuku (2)
konektory
USB 2.0 (2)
větrací otvor
ventilátoru videa
Stručná referenční příručka
37
www.dell.com | support.dell.com
Pohled zezadu
VAROVÁNÍ: Nezakrývejte větrací otvory, dejte pozor, aby se do nich nedostaly žádné předměty, a
zabraňte shromažování prachu v nich. Zapnutý počítač neponechávejte v prostředí s nedostatečným
prouděním vzduchu, například v zavřené aktovce. Při nedostatečném proudění vzduchu hrozí poškození
počítače nebo požár.
UPOZORNĚNÍ: Abyste předešli poškození počítače, počkejte po vypnutí počítače 5 sekund a teprve poté
odpojte externí zařízení.
konektory USB 2.0 (2)
konektor modemu (RJ-11)
sít’ový konektor (RJ-45)
infračervený snímač
konektor sériového rozhraní
konektor zobrazovacího zařízení
konektor napájení
větrací otvor
ventilátoru videa
38
konektor S-video s výstupem na TV
Stručná referenční příručka
větrací otvor
ventilátoru procesoru
Pohled zdola
baterie
západka pro uvolňování baterie
kryt karty Mini
PCI/modemu/
modulu DIMM
větrací otvor
ventilátoru procesoru
zásuvka pro
základnovou stanici
větrací otvor
ventilátoru videa
Používání baterie
Výkon baterie
VAROVÁNÍ: Dříve než budete postupovat podle pokynů v této části, přečtěte si bezpečnostní pokyny v
Informační příručce k produktu.
POZNÁMKA: Informace o záruce společnosti Dell na tento počítač najdete v informační příručce k produktu
nebo v samostatném dokumentu se zněním záruky, který byl dodán s počítačem.
Pro dosažení optimálního výkonu počítače a zachování nastavení systému BIOS používejte tento
přenosný počítač Dell™ vždy s nainstalovanou hlavní baterií. Používejte baterii k napájení počítače,
když není připojen k elektrické zásuvce.Jedna baterie je dodávána jako standardní vybavení v
přihrádce.Délka provozu baterie se liší v závislosti na provozních podmínkách.Chcete-li podstatně
prodloužit délku provozu, můžete do přihrádky nainstalovat volitelnou druhou baterii. Informace o
volitelné druhé baterii najdete v uživatelské příručce online.
POZNÁMKA: Délka provozu baterie (doba udržení napětí) se časem snižuje. V závislosti na frekvenci a
podmínkách používání baterie bude během životnosti počítače pravděpodobně nutné zakoupit novou baterii.
Stručná referenční příručka
39
www.dell.com | support.dell.com
Délka provozu se značně snižuje při provádění následujících operací (včetně, ale bez omezení):
•
Používání disků CD, DVD nebo jiných optických jednotek
•
Používání zařízení pro bezdrátovou komunikaci, karet PC nebo zařízení USB
•
Používání velmi jasných nastavení zobrazení, spořičů obrazovky 3D nebo jiných programů
náročných na spotřebu, například her 3D
•
Používání počítače v režimu maximálního výkonu
POZNÁMKA: Před zápisem na disk CD nebo DVD doporučujeme připojit počítač k elektrické zásuvce.
Před vložením do počítače můžete zkontrolovat napětí baterie. Můžete rovněž nastavit možnosti
řízení spotřeby, které vás upozorní na vybití baterie.
VAROVÁNÍ: V případě používání nevhodné baterie hrozí zvýšené nebezpečí požáru nebo výbuchu.
Baterii nahrate pouze kompatibilní baterií zakoupenou u prodejce Dell. Pro napájení tohoto počítače
Dell je určena baterie Li-Ion. V tomto počítači nepoužívejte baterie vyjmuté z jiných pořítačů.
VAROVÁNÍ: Baterie nevhazujte do domácího odpadu. Pokud baterii již nelze nabít, informujte se o
možnosti likvidace baterií Li-Ion u místní organizace pro likvidaci odpadu nebo ochranu životního
prostředí. Viz část Likvidace baterie v informační příručce k produktu.
VAROVÁNÍ: V případě nevhodné manipulace s baterii hrozí zvýšené nebezpečí požáru nebo popálení
chemickými látkami.Baterii neperforujte, nespalujte, nedemontujte ani nevystavujte teplotě nad 65°C
(149°F). Udržujte baterii mimo dosah dětí. Při manipulaci s poškozenými bateriemi nebo s bateriemi, ze
kterých vytéká elektrolyt, postupujte s maximální opatrností. Z poškozených baterií mohou vytékat
chemické látky, které mohou způsobit zranění osob nebo poškození zařízení.
Kontrola nabití baterie
Měřič baterie Dell QuickSet Battery Meter, okno Měřič napájení operačního systému
Microsoft® Windows® a ikona, měřič nabití baterie a měřič stavu, a signalizace vybití baterie
poskytují informace o nabití baterie. Informace o kontrole nabití volitelné druhé baterie najdete v
uživatelské příručce.
Měřič baterie Dell QuickSet Battery Meter
Je-li nainstalována sada Dell QuickSet, stisknutím to zobrazíte měřič baterie QuickSet Battery
Meter.
V okně měřiče baterie je zobrazen stav, úroveň nabití doba do dokončení nabíjení baterie v
počítači.
POZNÁMKA: Pro nabíjení baterie počítače můžete použít dokovací zařízení. Baterie v dokovacím zařízení
ovšem nenapájí zařízení ani počítač.
Navíc když je počítač připojen k dokovacímu zařízení (nachází se doku), okno Battery Meter
(Měřidlo baterie) obsahuje kartu Dock Battery (Baterie v doku), na které je zobrazena úroveň
nabíjení a aktuální stav baterie v doku.
40
Stručná referenční příručka
V okně Battery Meter (Měřidlo baterie) jsou zobrazeny následující ikony:
• Počítač nebo dokovací zařízení odebírá energii z baterie.
• Baterie se vybíjí nebo se nepoužívá.
• Počítač nebo dokovací stanice je připojena k elektrické zásuvce a odebírá
střídavý proud.
• Baterie se nabíjí.
• Počítač nebo dokovací stanice je připojena k elektrické zásuvce a odebírá
střídavý proud.
• Baterie se vybíjí, nepoužívá nebo nabíjí.
Chcete-li získat další informace o sadě QuickSet, klepněte pravým tlačítkem myši na hlavní
panel a potom klepněte na položku Help (Nápověda).
Měřič napájení systému Microsoft Windows
Měřič napájení systému Windows ukazuje zbývající dobu nabíjení baterie.
Stav měřiče
napájení zobrazíte poklepáním na ikonu na hlavním panelu. Další informace o kartě Měřič
napájení najdete v uživatelské příručce.
Pokud je počítač připojen k elektrické zásuvce, zobrazí se ikona.
Měřidlo nabití
Před nainstalováním baterie stiskněte stavové tlačítko na měřidle nabití baterie; zobrazí se
indikátory úrovně nabití. Každý indikátor představuje přibližně 20 procent celkové kapacity baterie.
Například pokud baterii zbývá 80 procent energie, svítí čtyři indikátory. Pokud nesvítí žádný
indikátor, baterie je vybitá.
Měřidlo stavu
Na délku provozu baterie má z velké části vliv frekvence nabíjení. Po stovkách cyklů nabití a vybití
se snižuje kapacita nabíjení neboli stav baterie. Chcete-li zkontrolovat stav baterie, stiskněte a
podržte stavové tlačítko na měřidle nabití baterie alespoň 3 sekundy. Pokud se nezobrazí žádné
indikátory, baterie je v dobrém stavu a má k dispozici více než 80 procent své původní kapacity
nabíjení. Osm indikátorů představuje postupnou degradaci. Pokud se zobrazí pět indikátorů, zbývá
méně než 60 procent kapacity nabíjení a je třeba zvážit pořízení nové baterie. Další informace o
délce provozu baterie najdete v uživatelské příručce.
POZNÁMKA: Jestliže stiskněte a podržíte stavové tlačítko na měřidle nabití baterie alespoň 3 sekundy,
indikátory úrovně nabití nejprve zobrazí stav aktuálního nabití. Potom zobrazí stav kapacity baterie (postupná
degradace).
Stručná referenční příručka
41
www.dell.com | support.dell.com
Upozornění na vybití baterie
UPOZORNĚNÍ: Aby nedošlo ke ztrátě nebo poškození dat, ihned po upozornění na vybití baterie uložte práci.
Potom připojte počítač k elektrické zásuvce. Rovněž můžete vypnout počítač a do přihrádky nainstalujte druhou
baterii. Pokud se baterie zcela vybije, počítač přejde automaticky do režimu spánku.
K upozornění na vybití baterie dojde, když je kapacita baterie vyčerpána přibližně z 90 procent.
Počítač jedním pípnutím signalizuje, že zbývá minimální provozní doba baterie. Po tuto zbývající
dobu se z reproduktorů ozývá pravidelné pípání. Pokud jsou nainstalovány dvě baterie, signál
upozornění na vybití baterie znamená, že společná kapacita obou baterií je vyčerpána přibližně z 90
procent. Jakmile napětí baterie klesne na kritickou úroveň, počítač přejde do režimu spánku. Další
informace o alarmech vybité baterie najdete v části Řízení spotřeby v uživatelské příručce.
Nabíjení baterie
POZNÁMKA: Napájecí adaptér nabije zcela vybitou baterii přibližně za 1 hodinu (je-li počítač vypnutý). Je-li
počítač zapnutý, je doba nabíjení delší. Baterii můžete ponechat v počítači libovolně dlouho. Vnitřní okruh baterie
zabraňuje přebití baterie.
Když připojíte počítač k elektrické zásuvce nebo když nainstalujete baterii do počítače, který je
připojený k elektrické zásuvce, počítač zkontroluje nabití baterie a teplotu. Napájecí adaptér potom
podle potřeby nabije baterii a bude ji udržovat nabitou.
Pokud byla baterie používána v počítači nebo byla v horkém prostředí a je horká, po připojení
počítače do elektrické zásuvky se baterie pravděpodobně nenabije.
Pokud indikátor bliká střídavě zeleně a oranžově, baterie je příliš horká, aby se mohla začít
nabíjet. Odpojte počítač z elektrické zásuvky a nechte počítač a baterii vychladnout na pokojovou
teplotu. Potom připojte počítač k elektrické zásuvce a pokračujte v nabíjení baterie.
Další informace o odstraňování problémů s baterií najdete v uživatelské příručce.
Vyjmutí baterie
VAROVÁNÍ: Před prováděním těchto operací odpojte modem z telefonní zásuvky.
POZNÁMKA: Pokyny pro vyjmutí volitelné druhé baterie najdete v uživatelské příručce.
42
1
Zkontrolujte, zda je počítač vypnutý a zda je odpojený z elektrické zásuvky.
2
Je-li počítač připojen k základnové stanici, odpojte ho. Pokyny naleznete v dokumentaci
dodané se základnovou stanicí. Vysuňte a podržte západku zásobníku baterie v dolní části
počítače a poté baterii vyjměte ze zásobníku.
Stručná referenční příručka
Instalace baterie
Zkontrolujte, zda je počítač vypnutý. Novou baterii zatlačte do zásuvky, až uslyšíte zacvaknutí.
Pokyny pro instalaci volitelné druhé baterie najdete v uživatelské příručce.
Skladování baterie
Před dlouhodobým uložením počítače vyjměte baterii. Během dlouhodobého skladování se baterie
vybije. Po dlouhodobém skladování baterii před používáním znovu zcela nabijte.
Odstraňování problémů
Notebook System Software (NSS)
Pokud znovu nainstalujete operační systém do počítače, musíte také znovu nainstalovat nástroj
NSS. Tento nástroj je k dispozici na volitelném disku CD s ovladači a nástroji nebo na webu
odborné pomoci společnosti Dell.
Chcete-li stáhnout tento nástroj s webového serveru odborné pomoci společnosti Dell, přejděte do
části Downloads (Soubory ke stažení) a v rozevírací nabídce vyberte příslušný model počítače.
Vyberte kategorii souborů ke stažení System and Configuration Utilities (Systémové a
konfigurační nástroje), vyberte operační systém a jazyk a potom postupujte podle zobrazených
pokynů.
NSS zajišt’uje důležité aktualizace operačního systému, podporu disketových jednotek 3,5" USB
Dell™, procesorů Intel® Pentium® M, optických jednotek a zařízení USB. NSS je nezbytný pro
správnou funkci vašeho počítače Dell. Tento software automaticky rozpozná počítač a operační
systém a nainstaluje aktualizace, které odpovídají individuální konfiguraci.
Stručná referenční příručka
43
www.dell.com | support.dell.com
POZNÁMKA: Nástroj NSS je nezbytný pro správnou funkci zařízení USB, včetně Dell D/Bay, D/Dock, D/Port a
D/View.
Zablokování a problémy se softwarem
VAROVÁNÍ: Před prováděním některého z postupů uvedených v této části si přečtěte bezpečnostní
pokyny v Informační příručce k produktu.
Počítač nelze spustit
ZKONTROLUJTE, ZDA JE NAPÁJECÍ ADAPTÉR ŘÁDNĚ PŘIPOJEN K POČÍTAČI A K ELEKTRICKÉ ZÁSUVCE
Počítač přestal reagovat
UPOZORNĚNÍ: Pokud řádně neukončíte operační systém, může dojít je ztrátě dat.
V Y P N Ě T E P O Č Í T A Č — Pokud počítač nereaguje na stisknutí libovolné klávesy na klávesnici nebo na
pohyb myši, stiskněte a podržte vypínač alespoň 8 až 10 sekund, dokud se počítač nevypne. Potom
počítač restartujte.
Program přestal reagovat
UKONČETE PROGRAM —
1 Opakovaně stiskněte kombinaci kláves <Ctrl><Shift><Esc>.
2 Klepněte na kartu Aplikace.
3 Klepněte na program, který přestal reagovat.
4 Klepněte na tlačítko Ukončit úlohu.
Některý program se opakovaně zhroutil
POZNÁMKA: V dokumentaci k softwaru nebo na disketě nebo na disku CD jsou obvykle uvedeny pokyny pro
instalaci.
Z K O N T R O L U J T E D O K U M E N T A C I K S O F T W A R U — V případě potřeby software odinstalujte a znovu
nainstalujte.
44
Stručná referenční příručka
Program je určen pro starší verzi operačního systému Windows
J E S T L I Ž E P O U Ž Í V Á T E O P E R A Č N Í S Y S T É M W I N D O W S X P, S P U S . T E P R Ů V O D C E N A S T A V E N Í M
KOMPATIBILITY PROGRAMU —
Průvodce nastavením kompatibility programu nakonfiguruje program tak, aby jej bylo možné spustit v
prostředí, které je podobné prostředí operačních systémů jiných, než Windows XP.
1 Klepněte na tlačítko Start, přejděte na příkaz Programy, dále na položku Příslušenství a potom Průvodce
nastavením kompatibility programu.
2 Na uvítací obrazovce klepněte na tlačítko Další.
3 Postupujte podle pokynů na obrazovce.
Zobrazila se modrá obrazovka
V Y P N Ě T E P O Č Í T A Č — Pokud počítač nereaguje na stisknutí libovolné klávesy na klávesnici nebo na
pohyb myši, stiskněte a podržte vypínač alespoň 8 až 10 sekund, dokud se počítač nevypne. Potom
počítač restartujte.
Jiné softwarové problémy
POKYNY PR O ODSTRANĚNÍ PROBLÉMŮ VYHLEDEJTE V DOKUMENTACI K SOFTWARU NEBO SE
OBRAŮTE NA VÝROBCE SOFTWARU —
• Přesvědčte se, zda je program kompatibilní s operačním systémem nainstalovaným v počítači.
• Přesvědčte se, zda počítač splňuje minimální požadavky na hardware, který je nezbytný pro spuštění
softwaru. Další informace najdete v dokumentaci k softwaru.
• Přesvědčte se, zda je program řádně nainstalován a nakonfigurován.
• Ověřte, zda nedochází ke konfliktu ovladačů zařízení s programem.
• V případě potřeby software odinstalujte a znovu nainstalujte.
IHNED ZAZÁLOHUJTE SOUBORY
P R O V Ě Ř T E P E V N Ý D I S K , D I S K E T Y N E B O D I S K Y CD A N T I V I R O V Ý M S O F T W A R E M
U L O Ž T E A Z A V Ř E T E V Š E C H N Y O T E V Ř E N É S O U B O R Y, U K O N Č E T E V Š E C H N Y S P U Š T Ě N É P R O G R A M Y A
VYPNĚTE POČÍTAČ PROSTŘEDNICTVÍM NABÍDKY START
Stručná referenční příručka
45
www.dell.com | support.dell.com
P R O V Ě Ř T E , Z D A S E V P O Č Í T A Č I N E V Y S K Y T U J E S P Y W A R E — Pokud je výkon počítače nízký, často se
zobrazují místní okna s reklamním obsahem nebo máte problémy s připojením k Internetu, počítač je
pravděpodobně zasažen spywarem. Prověřte počítač antivirovým programem, který obsahuje ochranu
před spywarem (pravděpodobně bude třeba program zaktualizovat), a odstraňte spyware. Chcete-li
získat další informace, přejděte na web support.dell.com a vyhledejte klíčové slovo spyware.
S P U S Ů T E D I A G N O S T I C K Ý N Á S T R O J D E L L — Pokud všechny testy proběhnou úspěšně, chyba souvisí
se softwarovým problémem.
Spuštìní diagnostického nástroje Dell
VAROVÁNÍ: Dříve než budete postupovat podle pokynů v této části, přečtěte si bezpečnostní pokyny v
Informační příručce k produktu.
Kdy použít diagnostický program Dell Diagnostics
Dojde-li k problémům s počítačem, před kontaktováním odborné pomoci společnosti Dell provete
kontrolní kroky uvedené v části Odstraňování problémů (viz uživatelská příručka online) a spusůte
diagnostický nástroj Dell.
UPOZORNĚNÍ: Diagnostický program Dell Diagnostics lze použít pouze u počítačů společnosti Dell™.
Spusůte diagnostický nástroj Dell z pevného disku nebo z doplňkovéhodisku CD s ovladači a
nástroji (dříve zdrojový disk CD).
Spuštění diagnostického porgramu Dell Diagnostics z pevného disku
Diagnostický program Dell Diagnostics je umístěn ve skrytém oddílu diagnostického nástroje na
pevném disku.
POZNÁMKA: Pokud se obrazovce počítače nezobrazuje žádný obraz, obraůte se na společnost Dell.
1
Vypněte počítač.
2
Je-li počítač připojen k základnové stanici, odpojte ho. Pokyny naleznete v dokumentaci
dodané se základnovou stanicí.
3
Připojte počítač do zásuvky.
4
Zapněte počítač. Ihned po zobrazení loga DELL™ stiskněte klávesu <F12>.
POZNÁMKA: Pokud se na obrazovce nezobrazuje žádný obraz, stiskněte a podržte tlačítko ztlumení a potom
stisknutím vypínače napájení počítače spusůte diagnostický nástroj Dell. Počítač automaticky spustí zkoušku
Pre-boot System Assessment.
POZNÁMKA: Zobrazí-li se hlášení oznamující, že žádný oddíl s diagnostickým nástrojem nebyl nalezen,
spusůte diagnostický program Dell Diagnostics z disku CD s ovladači a nástroji.
Pokud čekáte příliš dlouho a objeví se logo operačního systému, počkejte, dokud se nezobrazí
plocha Microsoft® Windows®. Potom vypněte počítač a akci zopakujte.
46
Stručná referenční příručka
5
Když se zobrazí seznam spouštěcích zařízení, klepněte na položku Diagnostika a stiskněte
klávesu <Enter>.
Počítač spustí zkoušku Pre-boot System Assessment, sérii počátečních testů systémové desky,
klávesnice, pevného disku a obrazovky.
•
Během zkoušek odpovězte na všechny kladené otázky.
•
Pokud bude zjištěna nějaká chyba, počítač přestane a vydá zvukový signál. Chcete-li
zkoušku zastavit a počítač restartovat, stiskněte <n>; chcete-li pokračovat v dalším testu,
stiskněte <y>; chcete-li znovu otestovat součást, která selhala, stiskněte <r>.
•
Pokud při zkouškách Pre-boot System Assessment dojde k chybě, zapište si chybový kód
nebo kódy a než budete pokračovat diagnostickým programem Dell Diagnostics, obrat’te
se na společnost Dell.
Pokud diagnostický program Pre-boot System Assessment proběhne úspěšně, zobrazí se
zpráva Booting Dell Diagnostic Utility Partition (Restartování nástroje
diagnostického programu Dell Diagnostics). Press any key to continue (Pokračujte
stisknutím libovolné klávesy).
6
Stisknutím libovolné klávesy spustíte diagnostický program Dell Diagnostics z oddílu s
diagnostickým nástrojem na pevném disku.
Spuštění diagnostického nástroje Dell z volitelnéhodisku CD s ovladači a nástroji
1
Vložte disku CD s ovladači a nástroji.
2
Vypněte a restartujte počítač.
Když se zobrazí logo DELL, stiskněte ihned <F12>.
Pokud čekáte příliš dlouho a zobrazí se logo systému Windows, čekejte dále, dokud se
nezobrazí pracovní plocha systému Windows. Poté vypněte počítač a opakujte akci.
POZNÁMKA: Další kroky změní spouštěcí sekvenci pouze jednou. Při příštím spuštění se počítač spustí podle
zařízení uvedených v systémovém nastavení.
3
Když se zobrazí seznam spouštěcích zařízení, klepněte na položku Jednotka CD/DVD/CDRW a stiskněte <Enter>.
4
Vyberte položku Jednotka CD/DVD/CD-RW volba ze zaváděcí nabídky CD.
5
V zobrazené nabídce vyberte možnost Spustit z disku CD-ROM.
6
Zadáním 1 otevřete nabídku zdrojového disku CD.
7
Zadáním 2 spustíte diagnostický program Dell Diagnostics.
8
Z očíslovaného seznamu zvolte položku Spustit 32 bitový diagnostický program Dell
Diagnostics. Je-li v seznamu uvedeno několik verzí, zvolte verzi odpovídající vašemu počítači.
9
Když se zobrazí Hlavní nabídka diagnostického programu Dell Diagnostics, zvolte test, který
chcete spustit.
Stručná referenční příručka
47
www.dell.com | support.dell.com
Hlavní nabídka diagnostického programu Dell Diagnostics
1
Po spuštění programu Dell Diagnostics a zobrazení Hlavní nabídky klepněte na tlačítko
požadované činnosti.
Možnost
Funkce
Express Test (Expresní
zkouška)
Provede rychlou zkoušku zařízení. Tento test obvykle trvá 10 až 20 minut a
není nutné, abyste do něj zasahovali. Expresní zkoušku je vhodné spustit
nejdříve, zvýší totiž možnost rychlého nalezení problému.
Extended Test
(Podrobná zkouška)
Provede důkladnou zkoušku zařízení. Tento test obvykle trvá 1 hodinu
nebo déle a vyžaduje pravidelné odpovědi uživatele.
Custom Test (Vlastní
zkouška)
Zkouší konkrétní zařízení. Testy, které chcete spustit, si můžete
přizpůsobit.
Symptom Tree (Strom
příznaků)
Uvádí seznam nejběžnějších příznaků a umožňuje výběr testu na základě
příznaku problému, který máte.
2
Pokud na problém narazíte během testu, zobrazí se hlášení s chybovým kódem a popisem
daného problému. Kód chyby a popis problému si opište a poté postupujte podle pokynů na
obrazovce.
Pokud chybu nedokážete napravit, obrat’te se na společnost Dell.
POZNÁMKA: Servisní štítek vašeho počítače se nachází v horní části obrazovky při každém testu. Když se
obrátíte na společnost Dell, pracovníci technické podpory budou servisní štítek požadovat.
3
48
Pokud spouštíte zkoušku Custom Test (Vlastní zkouška) nebo Symptom Tree (Strom
příznaků), klepnutím na příslušnou kartu popsanou v následující tabulce získáte další
informace.
Karta
Funkce
Results (Výsledky)
Zobrazuje výsledky zkoušky a případně zjištěné chyby.
Errors (Chyby)
Zobrazí chybové podmínky, chybové kódy a popis daného problému.
Help (Nápověda)
Popisuje zkoušky a může obsahovat požadavky pro spuštění zkoušky.
Configuration
(Konfigurace)
Zobrazí konfiguraci hardwaru pro vybrané zařízení.
Parameters (Parametry)
Umožňuje přizpůsobovat zkoušky změnou nastavení.
Stručná referenční příručka
Diagnostický program Dell Diagnostics zjistí konfigurační údaje pro všechna
zařízení ze systémového nastavení, z paměti a z různých interních testů a
zobrazí dané údaje v seznamu zařízení v levé části obrazovky. V seznamu
nemusí být uvedeny všechny názvy součástí nainstalovaných v počítači nebo
k němu připojených.
4
Po dokončení testů a v případě, že jste diagnostický program Dell Diagnostics spustili z Disk
CD s ovladači a nástroji, vyjměte disk CD.
5
Po dokončení testů zavřete obrazovku pro test a vraůte se na obrazovku Hlavní nabídky.
Diagnostický program Dell Diagnostics ukončíte a počítač restartujete zavřením okna Hlavní
nabídky.
Stručná referenční příručka
49
50
Stručná referenční příručka
www.dell.com | support.dell.com
Rejstřík
B
K
baterie
instalace, 43
kontrola nabití, 40
meřidlo nabití, 41
měřidlo stavu, 41
měřič napájení, 41
nabíjení, 42
skladování, 43
životnost a používání
baterie, 35
upozornění na vybití, 42
výkon, 39
vyjmutí, 42
konektory zvuku
umístění, 37
D
Dell
web odborné pomoci, 32
Dell Premier Support
website, 32
diagnostický nástroj
Dell, 46
diagnostika, 31
Dokumentace, 31
zařízení, 31
zdrojový disk CD, 31
dokumentace
online, 32
N
nápověda a centrum
podpory, 33
O
o počítači, 35
pohled zdola, 39
pohled zepředu, 36
pohled zezadu, 38
pohled zleva, 37
pohled zprava, 37
odstraňování problémů
nápověda a centrum
podpory, 33
Disk CD s operačním
systémem, 33
ovladače, 31
P
počítač
dochází ke zhroucení, 44-45
nízký výkon, 46
přestal reagovat, 44
problémy
modrá obrazovka, 45
nízký výkon počítače, 46
odstraňování, 43
počítač nelze spustit, 44
počítač přestal reagovat, 44
počítač se zhroutil, 44-45
program přestal reagovat, 44
program se zhroutil, 44
programy a kompatibilita se
systémem Windows, 45
software, 44-45
spyware, 46
zablokování, 44
průvodci
Průvodce nastavením
kompatibility
programu, 45
S
software
problémy, 45
spyware, 46
V
vetrací otvory
umístění, 37
větrací otvory
umístění, 37
Rejstřík
51
52
Rejstřík
W
Windows XP
nápověda a centrum
podpory, 33
Průvodce nastavením
kompatibility
programu, 45
52
Rejstřík
Dell Precision™ M70 Mobil
arbejdsstation
Hurtig referenceguide
Model PP15L
w w w. d e l l . c o m | s u p p o r t . d e l l . c o m
Bemærkninger, meddelelser og advarsler
BEMÆRK: En BEMÆRKNING angiver vigtige oplysninger, som du kan bruge for at udnytte computeren optimalt.
MEDDELELSE: En MEDDELELSE angiver enten en mulig beskadigelse af hardware eller tab af data og oplyser dig om,
hvordan du kan undgå dette problem.
ADVARSEL: En ADVARSEL angiver mulig tingskade, legemsbeskadigelse eller død.
Forkortelser og akronymer
En fuldstændig liste over forkortelser og akronymer finder du i User’s Guide (Brugerhåndbog) (afhængigt af
operativsystemet skal du dobbeltklikke på ikonen User’s Guide (Brugerhåndbog) på skrivebordet eller klikke på
knappen Start, klikke på Help and Support Center (Hjælp og support) og derefter klikke på User and system
guides (Bruger- og systemhåndbøger)).
Hvis du købte en Dell™ n Series-computer, er eventuelle referencer i dette dokument til Microsoft® Windows®
-operativsystemerne ikke gældende.
Cd'en Drivers and Utilities (Drivere og hjælpeværktøjer) og cd'en Operating System (operativsystem) er ekstra og
er måske ikke afsendt med alle computere.
_________________
Oplysningerne i dette dokument kan ændres uden varsel.
© 2004 Dell Inc. Alle rettigheder forbeholdes.
Enhver form for gengivelse uden skriftlig tilladelse fra Dell Inc. er strengt forbudt.
Anvendte varemærker i denne tekst: Dell, DELL logoet og Dell Precision er varemærker, som tilhører Dell Inc.; Microsoft og Windows er
registrerede varemærker, som tilhører Microsoft Corporation; Intel og Pentium er registrerede varemærker, som tilhører Intel Corporation.
Andre varemærker og firmanavne kan være brugt i dette dokument til at henvise til enten de fysiske eller juridiske personer, som gør krav på
mærkerne og navnene, eller til deres produkter. Dell Inc. fraskriver sig enhver tingslig rettighed, for så vidt angår varemærker og firmanavne,
som ikke er deres egne.
Model PP15L
Oktober 2004
P/N Y4303
Rev. A00
Indholdsfortegnelse
Sådan finder du information til computeren .
. . . . . . . . . . . . . . . .
57
. . . . . . . . . . . . . . . . . . . . . . . . .
59
. . . . . . . . . . . . . . . . . . .
61
. . . . . . . . . . . . . . . . . . . . . . . . . .
. . . . . . . . . . . . . . . . . . . . . . . . . .
62
63
63
64
65
. . . . . . . . . . . . . . . . . . . . . . . . . .
65
Opstilling af computeren .
For anden information om computeren
Visning forfra . . .
Venstre visning . .
Højre visning . . .
Visning bagfra . .
Visning fra bunden
Anvendelse af et batteri
. . . . . . . . . . . . . . . . . . . . . . . . . .
. . . . . . . . . . . . . . . . . . . . . . . . . .
. . . . . . . . . . . . . . . . . . . . . . . . . .
Batteriydelse . . . . . . .
Kontrol af batteriopladning
Opladning af batteriet . . .
Fjernelse af et batteri . . .
Isætning af et batteri . . .
Opbevaring af batteri . . .
Løsning af problemer
. . . . . . . . . . . . . . . . . . . . . .
. . . . . . . . . . . . . . . . . . . . . .
65
66
68
68
69
69
. . . . . . . . . . . . . . . . . . . . . . . . . . .
69
. . . . . . . . . . . . . . . . . . . . . .
. . . . . . . . . . . . . . . . . . . . . .
. . . . . . . . . . . . . . . . . . . . . .
. . . . . . . . . . . . . . . . . . . . . .
Notebook System Software (NSS) .
Hængnings- og softwareproblemer
Kørsel af Dell Diagnostics . . . . .
. . . . . . . . . . . . . . . . . .
. . . . . . . . . . . . . . . . . .
. . . . . . . . . . . . . . . . . .
69
70
72
Indholdsfortegnelse
55
56
Indholdsfortegnelse
Sådan finder du information til computeren
BEMÆRK: Nogle elementer vil måske ikke være tilgængelige på din computer eller i visse lande.
BEMÆRK: Yderligere information kan blive sendt med computeren.
Hvad leder du efter?
Find det her
•
•
•
•
•
Cd'en Drivers and Utilities (Drivere og hjælpeværktøjer) (også kendt som
ResourceCD)
Et diagnosticeringsprogram til computeren
Drivere til computeren
Min dokumentation til computeren
Dokumentationen til enheden
Notebook System Software (NSS)
Dokumentationen og driverne er allerede
installeret på computeren, når den leveres
fra Dell. Du kan bruge cd'en til at
geninstallere drivere, køre Dell
Diagnostics (Dell-diagnoser) eller få
adgang til dokumentationen.
På cd'en kan der være readme-filer
(Vigtigt-filer), som indeholder sidste
øjebliks-opdateringer om tekniske
ændringer eller avanceret teknisk
referencemateriale til erfarne brugere eller
teknikere.
BEMÆRK: Cd'en Drivere and Utilities (Drivere og hjælpeværktøjer) er
ekstra og vil måske ikke være afsendt sammen med alle computere.
BEMÆRK: De seneste opdateringer af drivere og dokumentation kan
findes på support.dell.com.
•
•
•
•
•
•
Garantioplysninger
Handelsbetingelser (Kun USA)
Sikkerhedsinstruktioner
Kontrolinformation
Ergonomi-information
Licensaftale for slutbrugere
• Servicemærke og ekspresservicekode
• Microsoft® Windows®-licensmærke
Dell™ produktinformationsguide
Servicemærke og Microsoft Windows licens
Disse etiketter er placeret i bunden af
computeren.
• Anvend servicemærket til at
identificere computeren, når du
bruger support.dell.com eller
kontakter teknisk support
• Indtast ekspressservicekoden for at anvise opkaldet, når du kontakter
teknisk support. Ekpresservicekoden er ikke tilgængelig i alle lande.
Quick Reference Guide
57
www.dell.com | support.dell.com
Hvad leder du efter?
Find det her
•
•
•
•
Dell Precision™ M70 Brugerhåndbog
Afmontering og udskiftning af dele
Specifikationer
Konfiguration af systemindstillinger
Fejlfinding og løsning af problemer
Microsoft® Windows® XP Help and Support Center (Hjælpe- og
supportcenter)
1 Klik på knappen Start og klik på Help and Support (Hjælp og
support).
2 Klik på User and System Guides (Brugerhåndbog og
systeminformation) og klik på User Guides (Brugerhåndbøger).
• Løsninger — fejlfindingsoplysninger og tip,
tekniske artikler og onlinekurser, ofte spurgte
spørgsmål
• Kundeforum — onlinediskussion med andre
Dell-kunder
• Opgraderinger — Opgraderingoplysninger
om komponenter, f.eks. hukommelse,
harddisken og operativsystemet
• Kundepleje — Kontaktoplysninger,
serviceopkald og ordrestatus, garanti- og
reparationsoplysninger
• Service og support — Status på serviceopkald
og supporthistorie, servicekontrakt, onlinediskussioner med teknisk support
• Reference — Computer-dokumentation,
detaljer om min computerkonfiguration,
produktspecifikationer og hvidbøger
• Downloads — Godkendte drivere,
programrettelser og softwareopdateringer
Dell support webside — support.dell.com
BEMÆRK: Vælg dit område for at se den relevante supportside.
BEMÆRK: Corporate (virksomheder), offentlige kontorer og
undervisningsområder kan goså bruge den specielkonstruerede Dell
Premier Support-hjemmeside på premier.support.dell.com. Det kan
forekomme, at hjemmesiden ikke er tilgængelig i alle områder.
• Notebook System Software (NSS)
Cd'en Drivers and Utilities (Drivere og hjælpeværktøjer) eller Dell
support webside
Hvis du installerer operativsystemet på computeren igen, bør du også
geninstallere NSS redskab (kan findes på den valgfrie cd Drivers and
Utilities (Drivere og hjælpeværktøjer) eller på Dell supportsiden). NSS
giver kritiske opdateringer til operativsystemet og support til Dell™ 3,5
tomme USB diskettedrev, Intel® Pentium® M processorer, optiske drev
og USB-enheder. NSS er nødvendigt for korrekt drift af Dell
computeren. Softwaren opdager automatisk din computer og dit
styresystem og installerer de opdateringer, der passer til din
konfiguration.
58
Quick Reference Guide
Hvad leder du efter?
Find det her
• Brug af Windows XP
• Dokumentation for min computer
• Dokumentation for enheder (f.eks. et
modem)
Windows Help and Support Center (Hjælp og supportcenter)
1 Klik på knappen Start og klik på Help and Support (Hjælp og
support).
2 Skriv et ord eller en sætning, der beskriver problemet, og klik på
pileikonet.
3 Klik på det emne, der beskriver problemet.
4 Følg vejledningen på skærmen.
• Geninstallation af operativsystemet
Cd'en Operating System (Operativsystem)
Operativsystemet er allerede installeret på computeren. For at
geninstallere dit styresystem, skal du bruge cd'en Operating System
(Operativsystem). Der henvises tilDell Precision Brugerhåndbog med
instruktioner
Når operativsystemet er installeret igen,
anvend Cd'en Drivers and Utilities
(Drivere og hjælpeværktøjer) for at
geninstallere drivere til enhederne, som
blev leveret med computeren.
Produktnøglen til operativsystemet
findes på computeren.
BEMÆRK: Farven på din cd kan variere, afhængig af det operativsystem,
som du bestilte.
BEMÆRK: Cd'en Operating System (operativsystem) er ekstra og vil
måske ikke være afsendt med alle computere.
Opstilling af computeren
ADVARSEL: Før du foretager nogen af procedurerne i dette afsnit, skal sikkerhedsinstruktionerne, der
findes i Produktinformationsguiden følges.
1
Åbn æsken med tilbehør, og tag delene ud.
2
Tag de dele fra, som du skal bruge til opsætning af din computer.
Æsken med tilbehør indeholder også brugerdokumentation, programmer og ekstra hardware
(f.eks. PC Cards, drev eller batterier), som du har bestilt.
3
Tilslut vekselstrømsadapteren til vekselstrømsadapterstikket på computeren og til
stikkontakten.
MEDDELELSE: Når AC-adapteren bruges, skal kablet placeres, så kablet ikke kan blive hevet i, indviklet
i noget, trådt på eller klemt af genstande, som f.eks. stoleben eller bordben.
Quick Reference Guide
59
www.dell.com | support.dell.com
BEMÆRK: Tilslut ikke computeren til dockingenheden, før computeren er blevet slukket og lukket ned
mindst en gang.
60
Quick Reference Guide
4
Åbn computerskærmen, og tryk på tænd/sluk-knappen for at tænde computeren.
tænd/sluk-knap
For anden information om computeren
Der henvises til User’s Guide (Brugerhåndbogen) online for detaljeret information om computeren.
Alt efter operativsystemet, dobbeltklik på ikonen User’s Guide (Brugerhåndbog) på skrivebordet,
eller klik på knappen Start, klik på Help and Support Center (Supportcenter), og klik derefter på
User and system guides (Brugerhåndbog og systemvejledninger). Følgende emner omhandler nogle
af mest almindelige spørgsmål om computeren.
•
Adapter til modem og netværk: Computeren kan inkludere både et v.92 56K modem og en
10/100/1000 Ethernet LOM netværksadapter. Du kan se placeringen af stikkene under
"Visning bagfra" på side 64. For more information on porte og stik, henvises til "About Your
Computer" (Om denne computer) i User’s Guide (Brugerhåndbogen) online.
•
Batterilevetid og anvendelse: Der er forskellige batterier til rådighed til computeren. Hvis du
bruger det batteri, der som standard følger med computeren, kan du forvente fra 3 til 4 timers
driftstid fra et enkelt fuldt opladet batteri med gennemsnitsbrug. Udførsel af visse ting, som
f.eks. forlænget trådløs anvendes, kan reducere batteriets levetid betragteligt.
–
For mere information om batteriydelse, anvendelse og energibesparelse, henvises til din
User’s Guide (Brugerhåndbog) online.
–
Oplysninger om et ekstra batteri findes i din User’s Guide (Brugerhåndbog) online.
Quick Reference Guide
61
www.dell.com | support.dell.com
•
Enheder til modulbås: Oplysninger om modulbåsen og de enheder, som den understøtter,
findes i "Using the Module Bay" (Brug af modulbåsen) i din online User’s Guide
(Brugerhåndbog).
•
Tildockningsenheder: Computeren understøtter Dell D/Docking udvidelsesstationen og Dell
D/Port avanceret portreplikator.
BEMÆRK: Tildockningsenheder er muligvis ikke tilgængelige i alle lande.
For information om en valgfri tildockningsenhed, henvises til dokumentationen, som fulgte
med enheden.
Oplysninger om at opnå optimal ydelse, når der bruges en tildockningsenhed med denne
computer, findes i "Solving Problems" (Problemløsning) i din online User’s Guide
(Brugerhåndbog).
Visning forfra
skærmlås
tastaturstatuslamper
skærm
lydløs-knappen
tænd/sluk-knap
lydstyrkeknapper
enhedstatuslamper
track stick
tastatur
knapper til
trackstick/touchpad
touchpad
skærmlåseknap
højttalere (2)
62
Quick Reference Guide
Venstre visning
processorblæser luftventilator
stik til
sikkerhedskabel
harddisk
stik til PC Card
chipkortstik
Højre visning
modulbås
lydstik (2)
USB 2.0stikforbindelser (2)
video-blæser
luftventilator
Quick Reference Guide
63
www.dell.com | support.dell.com
Visning bagfra
ADVARSEL: Undgå at blokere, skubbe genstande ind i eller lade støv samle sig i ventilationshullerne.
Opbevar ikke computeren et sted med lav luftgennemstrømning, f.eks. en lukket mappe eller taske, når
den er tændt. Dette kan beskadige computeren eller forårsage brand.
MEDDELELSE: Vent 5 sekunder, efter du har slukket for computeren, før du frakobler en ekstern enhed,
for at undgå at beskadige computeren.
USB 2.0-stikforbindelser (2)
modemstik (RJ-11)
netværksstik (RJ-45)
infrarød sensor
Quick Reference Guide
seriel port
skærmstik
vekselstrømsadapterstik
video-blæser
luftventilator
64
S-video TV-out-stik
processorblæser luftventilator
Visning fra bunden
batteri
frigørelseshåndtag til batterirum
Mini PCIkort/modem/
DIMMmoduldæksel
processor-blæser luftventilator
stik til dockingenhed
video-blæser luftventilator
Anvendelse af et batteri
Batteriydelse
ADVARSEL: Før du foretager nogen af procedurerne i dette afsnit, skal sikkerhedsinstruktionerne, der
findes i Produktinformationsguiden følges.
BEMÆRK: For information om Dell-garantien til computeren, henvises til Produktinformationsguiden
eller det separate garantidokument, der blev sendt med computeren.
For optimal computerydelse og hjælp til bevaring af BIOS-opsætning og betjening af din Dell™
bærbare computer, skal du altid bruge den sammen med det installerede batteri. Tilslut et batteri
til at køre computeren, når den ikke er sat i en stikkontakt. Der medfølger et batteri som
standardudstyr i batterirummet. Batterilevetid varierer alt afhængig af vilkårene for anvendelsen.
Du kan installere et ekstra batteri i modulrummet for at forøge brugstiden væsentligt. For mere
information om det ekstra andet batteri, se din User’s Guide (Brugerhåndbog).
BEMÆRK: Batteriets levetid (den tid som et batteri kan fungere på en opladning) falder med tiden.
Afhængig af, hvor ofte batteriet bruges og de betingelser, hvorunder det bruges, kan du få brug for at
købe et nyt batteri i løbet af computerens levetid.
Quick Reference Guide
65
www.dell.com | support.dell.com
Brugstiden reduceres væsentligt, hvis du bruger den til noget, der indebærer og ikke blot begrænses
til følgende:
•
Brug afcd, dvd eller andre optiske drev
•
Bruger trådløse kommunikationsenheder, PC-kort eller USB-enheder
•
Bruger en skærmopsætning med høj lysstyrke, 3D-pauseskærme og andre strømkrævende
programmer, som f.eks. 3D-spil.
•
Bruger computeren i maximal ydelsesfunktion
BEMÆRK: Det anbefales, at du tilslutter din computer til en stikkontakt, når du skriver til en cd eller en
dvd.
Du kan kontrollere batteriets opladning, før du sætter batteriet i computeren. Du kan også indstille
strømstyringsoptionerne for at gøre dig opmærksom, når batteriopladningen er lav.
ADVARSEL: Brug af et inkompatibelt batteri kan øge risikoen for eksplosion. Udskift kun batteriet med
et kompatibelt batteri købt af Dell. Lithium-ion-batteriet er beregnet til at fungere sammen med din
Dell-computer. Brug ikke et batteri fra andre computere sammen med din computer.
ADVARSEL: Batterier bør ikke bortskaffes sammen med køkkenaffald. Når dit batteri ikke længere
holder opladningen, skal du kontakte din lokale renovatør eller genbrugsstation for råd vedrørende
bortskaffelse af et Lithium-ion-batteri. Se "Bortskaffelse af batterieri" i Produktionformationsguiden.
ADVARSEL: Misbrug af batteriet kan øge risikoen for brand eller kemisk forbrænding. Punktér, brænd
eller adskil ikke batteriet eller udsæt det for temperaturer over 65°C (149°F). Batteriet opbevares
utilgængeligt for børn. Håndtér beskadigede eller lækkende batterier med ekstrem omhu. Beskadigede
batterier kan lække og medføre personskade eller skade på udstyr.
Kontrol af batteriopladning
Dell QuickSet batterimåler, Microsoft® Windows® Power Meter-vindue og
-ikon,
batteriopladningsmåler, tilstandsmåler, og advarsel om lavt batteri giver oplysning om
batteriopladning. For flere oplysninger om kontrol af opladning på det ekstraandet batteri, se din
User’s Guide (Brugerhåndbog).
Dell QuickSet batterimåler
Hvis Dell QuickSet er installeret, trykkes på <Fn><F8> for at få vist QuickSet batterimåleren.
Vinduet Battery Meter (Batterimåler) viser status, opladningsniveau og tid for
opladningsafslutning på computeren.
BEMÆRK: Du kan bruge dockingenheden til at oplade et computerbatteri. Et batteri på en
dockingenhed, giver imidlertid ikke strøm til dockingenheden eller computeren.
Når computeren er tilsluttet en dockingenhed (docked), vil vinduet Battery Meter (Batterimåler)
imidlertid have et faneblad Dock Battery, der viser opladningsniveau og aktuel status på
dockingenhedens batteri.
66
Quick Reference Guide
Følgende ikoner vises i vinduet Battery Meter (Batterimåler):
• Computeren eller dockingenhedens kører på batteristrøm.
• Batteriet aflader eller oplades ikke.
• Computeren eller dockingenheden er tilsluttet en stikkontakt med
vekselstrøm.
• Batteriet er under opladning.
• Computeren eller dockingenheden er tilsluttet en stikkontakt med
vekselstrøm.
• Batteriet aflader, oplader ikke eller er ved at oplade.
For nærmere oplysninger om QuickSet (Kvik-opsætning), højreklik på
og klik på Help (Hjælp).
- ikonet på proceslinjen
Microsoft Windows Power Meter
Windows Power Meter viser resterende batteriopladning. For at kontrollere Power Meter,
dobbeltklikkes på
ikonet på proceslinjen. For mere information om fanebladet Power Meter, se
din User’s Guide (Brugerhåndbog).
Hvis computeren er tilsluttet en stikkontakt, vises en
ikon.
Opladningsmåler
Før du indsætter et batteri, trykkes på statusknappen på batteriopladningsmåleren for at tænde
lysene til niveau for opladning. Hvert lys repræsenterer ca. 20% af total batteriopladning. Hvis
batteriet f.eks. har 80% af opladningen tilbage, vil fire lys være tændt. Hvis ingen lys vises, er
batteriet ikke opladet.
Tilstandsmåler
Batteriets funktionstid er stort set bestemt af det antal gange, det oplades. Efter hundredvis af
opladnings- og afladnings-cyklusser, mister batteriet noget af opladningskapaciteten eller
batterilevetiden. For at kontrollere batteriets tilstand, trykkes og holdes på statusknappen på
måleren til batteriopladning i mindst 3 sekunder. Hvis der ikke vises nogen lys, fungerer batteriet
fint, og mere end 80% af dens oprindelige opladningskapacitet er tilbage. Hvert lys viser en trinvis
forringelse. Hvis fem lys vises, er mindre en 60% af opladningskapaciteten tilbage, og du bør
overveje at udskifte batteriet. Se din User’s Guide (Brugerhåndbog) for flere oplysninger om
batterilevetid.
BEMÆRK: Når du trykker og holder på statusknappen på måleren til batteriopladning i mindst 3
sekunder, vil opladningskapacitetlysene først lyse for at vise den aktuelle opladningsstatus. Derefter
skifter de til sundhedsstatus, hvor de repræsenterer trinvis forringelse, når de lyser.
Quick Reference Guide
67
www.dell.com | support.dell.com
Advarsel om lavt batteri
MEDDELELSE: For at undgå at miste eller ødelægge data, så gem dit arbejde straks efter en advarsel
om lavt batteri. Tilslut derefter computeren til en stikkontakt. Du kan også slukke for computeren og sætte
et andet batteri i modulbåsen. Hvis batteriet løber helt tør for strøm, så begynder nedluknings- funktion
automatisk.
En advarsel om lavt batteri vises, når batteriladningen er ca. 90% brugt. Computeren bipper en
gang for at vise, at der kun er lidt batterifunktionstid tilbage. I den periode, vil højttaleren bippe
jævnligt. Hvis der er installeret to batterier, betyder en advarsel om lavt batteri, at den samlede
ladning på begge batterier er 90% brugt. Computeren går i nedlukningsfunktion, når
batteriladningen er nået til et kritisk lavt niveau. For mere information om alarmer for lavt batteri,
se "Power Management" (Strømstyring) i User’s Guide (Brugerhåndbog).
Opladning af batteriet
BEMÆRK: En vekselstrømsadapter oplader et helt afladet batteri på ca. 1 time, når computeren er
slukket. Opladningstiden er længere, når computeren er tændt. Du kan lade batteriet sidde i computeren,
så længe du vil. Batteriets interne kredsløb forhindrer, at batteriet bliver overbelastet.
Når du tilslutter din computer til en stikkontakt eller isætter et batteri, mens computeren er
tilsluttet til en stikkontakt, vil computeren kontrollere batteriopladning og temperatur. Om
nødvendigt vil vekselstrømsadapteren oplade batteriet og opretholde batteriopladningen.
Hvis batteriet er varmt efter at være brugt i din computer eller anvendes i varme omgivelser, kan
det ske, at batteriet ikke oplades, når du tilslutter computeren til en stikkontakt.
Batteriet er for varmt til at starte opladning, hvis
lyset blinker skiftevis grønt og orange. Fjern
computeren fra stikkontakten og lad computer og batteri afkøle til stuetemperatur. Tilslut derefter
computeren til en stikkontakt for at fortsætte opladning.
For mere information om løsning af batteriproblemer, se din User’s Guide (Brugerhåndbogen).
Fjernelse af et batteri
ADVARSEL: Inden du udfører disse procedurer, skal du tage modemkablet ud af telefonstikket i
væggen
BEMÆRK: For information om fjernelse af det ekstra andet batteri, se din User’s Guide
(Brugerhåndbog).
68
1
Sørg for at computeren er slukket og afbrudt fra stikkontakten.
2
Hvis computeren er tilsluttet til en dockingenhed, skal du tage den ud af enheden. Se den
dokumentation, der fulgte med dockingenheden, hvis du ønsker yderligere oplysninger. Drej
frigørelseshåndtaget på undersiden af computeren, hold fast i det, og tag derefter batteriet ud
af båsen.
Quick Reference Guide
Isætning af et batteri
Sørg for at computeren er slukket. Skub batteriet ind i båsen, til låsehåndtaget klikker.
For information om installation af det ekstra anadet batteri, se din User’s Guide (Brugerhåndbog).
Opbevaring af batteri
Fjern batteriet, når du skal opbevare din computer i en længere periode. Et batteri aflades under
længerevarende opbevaring. Efter en længere opbevaringsperiode, skal batteriet oplades helt, før
det bruges.
Løsning af problemer
Notebook System Software (NSS)
Hvis du installerer operativsystemet på computeren igen, bør du også geninstallere NSS
hjælpeprogram. Dette program kan findes på den valgfrie cd Drivers and Utilities (Drivere og
hjælpeværktøjer) og på Dell supportwebsiden.
For at downloade programmet fra Dell supportwebsiden, gå til afsnittet Downloads på websiden og
vælg computermodellen fra rullemenuen. Vælg downloadkategorien "System and Configuration
Utilities" (System- og konfigurationsprogrammer), vælg operativsystemet og sprog og følg derefter
de angivne instruktioner.
NSS giver kritiske opdateringer til operativsystemet og support til Dell™ 3,5 tomme USB
diskettedrev, Intel® Pentium® M processorer, optiske drev og USB-enheder. NSS er nødvendigt for
korrekt drift af Dell computeren. Softwaren finder automatisk din computer og dit operativsystem
og installerer de opdateringer, der passer til din konfiguration.
Quick Reference Guide
69
www.dell.com | support.dell.com
BEMÆRK: NSS er vigtig til korrekt betjening af USB-enheder, herunder Dell D/Bay-, D/Dock-, D/Port- og
D/View-enheder.
Hængnings- og softwareproblemer
ADVARSEL: Før du foretager af nogle procedurerne i dette afsnit, skal sikkerhedsinstruktionerne i
Produktinformationsguiden følges.
Computeren starter ikke op
KONTROLLÉR AT VEKSELSTRØMSADAPTEREN ER KORREKT TILSLUTTET TIL COMPUTEREN OG
STIKKONTAKTEN
Computeren reagerer ikke
MEDDELELSE: Du kan miste data, hvis du ikke kan udføre en nedlukning af operativsystemet.
S L U K F O R C O M P U T E R E N — Hvis du ikke er i stand til at få svar ved at trykke på en tast på tastaturet
eller ved at bevæge musen, skal trykke og holde på strømforsyningsknappen i 8-10 sekunder, indtil
computeren slukkes. Genstart derefter din computer.
Et program reagerer ikke
AFSLUT PROGRAMMET —
1 Tryk <Ctrl><Shift><Esc> samtidigt.
2 Klik på Programmer.
3 Klik på det program, der ikke længere svarer.
4 Klik på Afslut.
Et program går ned gentagne gange
BEMÆRK: Software indeholder almindeligvis installationsoplysninger i dokumentationen eller på en
diskette eller CD.
K O N T R O L L É R S O F T W A R E - D O K U M E N T A T I O N — Om nødvendigt afinstallér og geninstallér derefter
programmet.
70
Quick Reference Guide
Et program er beregnet til en tidligere version af Windows operativsystemet
H V I S D U B R U G E R W I N D O W S X P, K Ø R P R O G R A M C O M P A T I B I L I T Y W I Z A R D ( G U I D E T I L
PROGRAMKOMPATIBILITET ) —
Programkompatibilitetsguiden konfigurerer et program, så det kører i et miljø, der er lig med ikkeWindows XP operativsystemmiljøer.
1 Klik på knappen Start, peg på All Programs (Alle programmer)→ Accessories (Tilbehør) og klik derefter
på Program Compatibility Wizard (Programkompatibilitetsguiden).
2 På velkomstskærmen, klikkes på Næste.
3 Følg vejledningen på skærmen.
En hel blå skærm kommer frem
S L U K F O R C O M P U T E R E N — Hvis du ikke er i stand til at få svar ved at trykke på en tast på tastaturet
eller ved at bevæge musen, skal trykke og holde på strømforsyningsknappen i 8-10 sekunder, indtil
computeren slukkes. Genstart derefter din computer.
Andre softwareproblemer
S E I S O F T W A R E D O K U M E N T A T I O N E L L E R K O N T A K T S O F T W A R E F A B R I K A N T E N F O R O P L YS N I N G E R O M
FEJLFINDING —
• Kontrollér at programmet er kompatibelt med det styresystem, der er installeret på din computer.
• Kontrollér at computeren opfylder de nødvendigie minimumskrav, der behøves til at køre softwaren Se i
softwaredokumentationen for oplysninger.
• Kontrollér at programmet er installeret og konfigureret rigtigt.
• Undersøg at enhedsdriverne ikke er i konflikt med programmet.
• Om nødvendigt, afinstalleres og geninstalleres programmet.
LAV STRAKS BACK-UP AF DINE FILER
BRUG ET VIRUS-SCANNINGSPROGRAM FOR AT KONTROLLERE HARDDISK, DISKETTER OG CD'ER
G E M O G L U K A L L E Å B N E F I L E R E L L E R P R O G R A M M E R O G L U K N E D F O R D I N C O M P U T E R V I A StartMENUEN
Quick Reference Guide
71
www.dell.com | support.dell.com
S C A N C O M P U T E R E N F O R S P Y W A R E — Hvis du oplever langsom computerydelse, ofte modtager popup-reklamer, eller hvis du har problemer med at koble dig på internettet, kan din computer være
inficeret med spyware. Brug et anti-virus-program, der indeholder beskyttelse mod anti-spyware (det er
muligt, at dit program skal opgraderes) for at scanne computeren og fjerne spyware. For flere
oplysninger, gå til support.dell.com og søg efter nøgleordet spyware.
K Ø R D E L L D I A G N O S T I C S — Hvis alle testerne kører korrekt, skyldes fejltilstanden et
softwareproblem.
Kørsel af Dell Diagnostics
ADVARSEL: Før du foretager nogen af procedurerne i dette afsnit, skal sikkerhedsinstruktionerne, der
findes i Produktinformationsguiden følges.
Hvornår Dell Diagnostics (Dell-diagnoser) skal anvendes
Hvis du kommer ud for problemer med computeren, skal du udføre procedurerne i "Solving
Problems" (Problemløsning) (se online User’s Guide (Brugerhåndbog)) og køre Dell Diagnostics
(Dell diagnosticering), før du kontakter Dell for teknisk assistance.
MEDDELELSE: Dell Diagnostics (Dell diagnosticering) fungerer kun på Dell™-computere.
Start Dell Diagnostics (Dell diagnosticering), enten fra din harddisk eller fra den ekstra Drivers and
Utilities (Drivere og hjælpeværktøjer) cd (også kendt som ResourceCD).
Start af Dell Diagnostics (Dell diagnosticering) fra harddisken
Dell Diagnostics (Dell-Diagnoser) findes på en skjult partition med diagnosticeringsværktøjer på
harddisken.
BEMÆRK: Hvis computeren ikke kan vise et skærmbillede, kontakt Dell.
1
Luk computeren.
2
Hvis computeren er tilsluttet til en dockingenhed, skal du tage den ud af enheden. Se den
dokumentation, der fulgte med dockingenheden, hvis du ønsker yderligere oplysninger.
3
Tilslut computeren til en stikkontakt.
4
Tænd computeren. Når DELL™-logoet vises, skal du trykke <F12>med det samme.
BEMÆRK: Hvis du ikke kan se noget på skærmen, kan du holde lyddæmpningsknappen nede og trykke
på strømknappen for at starte Dell Diagnostics. Computeren kører automatisk en test af systemet før
start.
BEMÆRK: Hvis du ser en meddelelse som angiver, at der ikke er fundet nogen diagnosticeringshjælppartition, køres Dell Diagnostics (Dell diagnosticering) fra Cd'en Drivers and Utilities (Drivere og
hjælpeværktøjer).
72
Quick Reference Guide
Hvis du venter for længe, og operativsystemets logo vises, skal du fortsætte med at vente,
indtil du ser Microsoft® Windows® skrivebord. Luk derefter computeren og prøv igen.
5
Når listen med boot-enheder vises, fremhæves Diagnostics (Diagnoser) og tryk på <Enter>.
Computeren kører en vurdering af systemet før start, dvs. en række tests af systemkortet,
tastaturet, harddisken og skærmen.
•
Besvar eventuelle spørgsmål, der stilles under testen.
•
Hvis der bliver fundet en fejl, stopper computeren og kommer med en biplyd. For at
stoppe vurderingen og genstarte computeren, tryk på <n>. For at fortsætte til den næste
test tryk på <y>. For at teste komponenten, som fejlede, igen, tryk på <r>.
•
Hvis der bliver fundet fejl ved vurderingen af systemet før start, skal du notere fejlkoden
eller fejlkoderne og kontakte Dell, inden du forsætter med at køre Dell Diagnostics (Dell
Diagnosticering).
Hvis før start-testen afvikles korrekt, modtager du meddelelsen "Booting Dell
Diagnostic Utility Partition" (Booter Dells værktøjspartition til diagnosticering)
Tryk på en vilkårlig tast for at fortsætte.
6
Tryk på en vilkårlig tast for at starte Dell Diagnostics (Dell Diagnosticering) fra partitionen
med diagnosticeringsværktøjet på harddisken.
Start af Dell Diagnostics (Dell diagnosticering) fra den valgfrie cd'en Drivers and Utilities (Drivere og
hjælpeværktøjer)
1
Isæt cd'en Drivers and Utilities (Drivere og hjælpeværktøjer).
2
Luk computeren og genstart den.
Når DELL-logoet vises, skal du trykke på <F12> med det samme.
Hvis du venter for længe, og Windows-logoet vises, skal du fortsætte med at vente, indtil du
ser skrivebordet i Windows. Luk derefter computeren og prøv igen.
BEMÆRK: De næste trin ændrer kun boot-sekvensen denne ene gang. Ved den næste opstart, starter
computeren op i overensstemmelse med enhederne, som er specificeret i systemets opsætning.
3
Når listen med boot-enheder vises, fremhæves CD/DVD/CD-RW-drev og tryk på <Enter>.
4
Vælg CD/DVD/CD-RW-drev valgt fra CD-boot-menuen.
5
Vælg optionen Boot from CD-ROM (Boot fra cd-rom) fra menuen, som vises.
6
Skriv 1 for at starte menuen for ResourceCD (Resurse-cd).
7
Skriv 2 for at starte Dell Diagnostics (Dell-diagnoser).
8
Vælg Run the 32 Bit Dell Diagnostics (Kør 32 bit Dell-diagnoser) fra den nummererede liste.
Hvis der er anført flere versioner, vælges versionen, som er passende for computeren.
9
Når Dell Diagnostics Main Menu (Hovedmenu for Dell-diagnoser) vises, vælges den test,
som du vil køre.
Quick Reference Guide
73
www.dell.com | support.dell.com
Dell Diagnostics Main Menu (Hovedmenu for Dell-diagnoser)
1
Når Dell Diagnostics (Dell-diagnoser) er indlæst, og skærmbilledet Main Menu
(Hovedmenu) vises, skal du klikke på knappen for den ønskede indstilling.
Valgmulighed
Funktion
Eksprestest
Udfører en hurtig test af enhederne. Testen tager typisk 10 til 20 minutter,
og du behøver ikke at gøre noget. Run Express Test (Kør eksprestest) først
for at øge muligheden for hurtigt at identificere problemet.
Udvidet test
Udfører en grundig test af enhederne. Denne test tager typisk 1 time eller
mere og kræver, at du af og til besvarer nogle spørgsmål.
Brugerdefineret test
Tester en bestemt enhed. Du kan tilpasse den test, der skal køres.
Liste over symptomer
Viser de mest almindelige symptomer, som oftest forekommer og lader dig
vælge en test baseret på symptomet for det problem, du er udsat for.
2
Hvis der opdages et problem under en test, vises der en meddelelse med en fejlkode og en
beskrivelse af problemet. Skriv fejlkoden og beskrivelsen af problemet ned, og følg
vejledningen på skærmen.
Hvis du ikke kan løse problemet, skal du kontakte Dell.
BEMÆRK: Servicemærket til computeren findes øverst på hver testskærm. Hvis du kontakter Dell, vil
teknisk support bede om servicemærket.
3
Hvis du kører en test via indstillingen Custom Test (Brugerdefineret test) eller via Symptom
Tree (Liste over symptomer), skal du klikke på den relevante fane, som er beskrevet i
nedenstående tabel, for at få yderligere oplysninger.
Fane
Funktion
Resultater
Her vises testresultaterne og eventuelle fejl som opstod.
Fejl
Her vises, hvilke fejl der opstod, fejlkoder og beskrivelser af problemet.
Hjælp
Her får du en beskrivelse af testen og evt. hvilke krav, der stilles til udførelse
af testen.
Konfiguration
Her vises hardwarekonfigurationen for den valgte enhed.
Dell Diagnostics (Dell-diagnoser) henter konfigurationsoplysningerne for
alle enheder fra systemets installation, hukommelse og forskellige interne
tests samt viser oplysningerne i enhedslisten i den venstre rude på skærmen.
Det er ikke sikkert, at alle komponenter, som er installeret på computeren
eller alle enheder, som er tilsluttet til computeren, vises på listen over
enheder.
Parametre
74
Quick Reference Guide
Giver dig mulighed for at tilpasse testen ved at ændre testindstillingerne.
4
Når testerne er færdige, hvis du kører Dell Diagnostics (Dell-diagnoser) fra cd'en Drivers and
Utilities (Drivere og hjælpeværktøjer), fjernes cd'en.
5
Når testerne er færdige, luk testskærmen for at vende tilbage til skærmen Main Menu
(Hovedmenu). For at forlade Dell Diagnostics (Dell-diagnoser) og genstarte computeren
lukkes skærmen Main Menu (Hovedmenu).
Quick Reference Guide
75
76
Quick Reference Guide
www.dell.com | support.dell.com
Indeks
B
Diagnostik, 57
Batteri
kontrol af batteriopladning, 66
Dokumentation, 57
enhed, 57
ResourceCD, 57
batteri
advarsel om lavt batteri, 68
batterilevetid og
anvendelse, 61
fjernelse, 68
isætning, 69
opbevaring, 69
opladning, 68
power meter, 67
ydelse, 65
batteriopladningsmåler, 67
-dokumentationonline, 58
Drivere, 57
F
FejlfindingHelp og Support
Center, 59
lydstik
placering, 63
O
om denne computer
visning bagfra, 64
visning forfra, 62
visning fra bunden, 65
visning fra højre side, 63
visning fra venstre side, 63
for anden information om
computeren, 61
Operating System
(Operativsystem)
cd'en, 59
G
P
guider
Programkompatibilitetsguide,
71
problemer
blå skærm, 71
computer går ned, 70-71
computeren reagerer ikke, 70
computeren starter ikke op, 70
hængninger, 70
løsning, 69
program går ned, 70
program reagerer ikke, 70
programmer og Windows
kompatibilitet, 71
software, 70-71
batteritilstandsmåler, 67
C
computer
går ned, 70-71
reagerer ikke, 70
computerlangsom
ydeevne, 72
D
Dell
supportside, 58
Dell Premier Support
website, 58
Diagnosticering
Dell, 72
H
Help and Support Center
(Hjælp og
supportcenter), 59
L
luftventilator
placering, 63
problemerlangsom
ydeevne, 72
problemerspyware, 72
Indeks
77
78
Indeks
S
software
problemer, 71
spyware, 72
W
Windows XP
Programkompatibilitetsguide,
71
Windows XP (Hjælp og
supportcenter til
Windows XP)Help og
Support Center (Hjælp og
supportcenter), 59
78
Indeks
Station de travail mobile Dell
Precision™ M70
Guide de référence rapide
Modèle PP15L
w w w. d e l l . c o m | s u p p o r t . d e l l . c o m
Remarques, avis et précautions
REMARQUE : Une REMARQUE fournit des informations importantes qui vous aident à mieux utiliser votre ordinateur.
AVIS : Un AVIS vous avertit d’un risque de dommage matériel ou de perte de données et vous indique comment éviter le
problème.
PRÉCAUTION : Une PRÉCAUTION indique un risque potentiel d'endommagement du matériel, de blessure corporelle
ou de mort.
Abréviations et sigles
Pour obtenir la liste complète des abréviations et sigles, reportez-vous au Guide d'utilisation (selon votre système
d'exploitation, double-cliquez sur l'icône Guide d'utilisation du bureau, ou sur le bouton Démarrer, puis sur
Centre d'aide et de support, et enfin Guides d'utilisation du système).
Si vous avez acheté un ordinateur Dell™ Série n, les références du présent document concernant les systèmes
d'application Microsoft® Windows® ne sont pas applicables.
Les CD Drivers and Utilities et Operating System sont en option et ne sont pas obligatoirement livrées avec tous
les ordinateurs.
_________________
Les informations contenues dans ce document sont sujettes à modification sans préavis.
© 2004 Dell Inc. Tous droits réservés.
La reproduction de ce document, de quelque manière que ce soit, sans l'autorisation écrite de Dell Inc. est strictement interdite.
Marques utilisées dans ce document : Dell, le logo DELL et Dell Precision sont des marques de Dell Inc. ; Microsoft et Windows sont des
marques déposées de Microsoft Corporation ; Intel et Pentium sont des marques déposées d'Intel Corporation.
D'autres marques et noms commerciaux peuvent être utilisés dans ce document pour faire référence aux entités se réclamant de ces marques
et de ces noms ou à leurs produits. Dell Inc. rejette tout intérêt propriétaire dans les marques et les noms commerciaux autres que les siens.
Modèle PP15L
Octobre 2004
Réf. Y4303
Rév. A00
Table des matières
. . . . . . . . . . .
83
. . . . . . . . . . . . . . . . . . . . .
86
. . . . . . . . . . . . . . . . . . . . . . .
87
. . . . . . . . . . . . . . . . . . . . . . . . . . .
88
89
89
90
91
Recherche d'informations concernant votre ordinateur
Configuration de votre ordinateur.
À propos de votre ordinateur .
Vue frontale. . .
Vue de gauche .
Vue de droite . .
Vue arrière . . .
Vue de dessous .
. . . . . . . . . . . . . . . . . . . . . . . . . . .
. . . . . . . . . . . . . . . . . . . . . . . . . . .
. . . . . . . . . . . . . . . . . . . . . . . . . . .
. . . . . . . . . . . . . . . . . . . . . . . . . . .
Utilisation d'une batterie .
. . . . . . . . . . . . . . . . . . . . . . . . .
Performances de la batterie . . . . . .
Vérification de la charge de la batterie .
Chargement de la batterie . . . . . . .
Retrait de la batterie. . . . . . . . . .
Installation d'une batterie . . . . . . .
Stockage de la batterie . . . . . . . .
Résolution des problèmes
. . . . . . . . . . . . . . . .
91
. . . . . . . . . . . . . . . .
91
92
94
95
96
96
. . . . . . . . . . . . . . . . . . . . . . . . .
96
. . . . . . . . . . . . . . . .
. . . . . . . . . . . . . . . .
. . . . . . . . . . . . . . . .
. . . . . . . . . . . . . . . .
Notebook System Software (NSS) . . . . . .
Problèmes de blocage et problèmes logiciels .
Exécuter Dell Diagnostics . . . . . . . . . .
. . . . . . . . . . . . .
. . . . . . . . . . . . .
. . . . . . . . . . . . .
96
96
99
Table des matières
81
82
Table des matières
Recherche d'informations concernant votre ordinateur
REMARQUE : Certaines fonctions ne sont pas nécessairement disponibles sur votre ordinateur ou dans
tous les pays.
REMARQUE : Il est possible que des informations supplémentaires soient livrées avec votre ordinateur.
Que recherchez vous ?
Cherchez ici.
• Un programme de diagnostic pour mon
CD Drivers and Utilities (Pilotes et utilitaires) (également appelé CD
ordinateur
ResourceCD)
• Pilotes pour mon ordinateur
La documentation et les pilotes sont déjà
• Doccumentation concernant mon ordinateur
installés sur votre ordinateur lorsqu'il est
livré par Dell. Vous pouvez utiliser ce CD
• Documentation concernant mon
pour réinstaller les pilotes, exécuter Dell
périphérique
Diagnostics, ou accéder à la
• Notebook System Software (NSS)
documentation.
Des fichiers readme (lisez-moi) peuvent
être inclus sur votre CD-ROM afin de
fournir des mises à jour de dernière
minute concernant des modifications
techniques apportées à votre système ou
des informations de référence destinées
aux utilisateurs expérimentés ou aux
techniciens.
REMARQUE : Le CD Drivers and Utilities est en option et n'est pas
obligatoirement expédié avec tous les ordinateurs.
REMARQUE : Les pilotes et mises à jour de documentation les plus
récents se trouvent à l'adresse support.dell.com.
• Informations sur les garanties
• Termes et Conditions (États-Unis
uniquement)
• Consignes de sécurité
• Informations sur les réglementations
• Informations relatives à l'ergonomie
• Contrat de licence pour utilisateur final
Guide d'information sur le produit Dell™
Guide de référence rapide
83
www.dell.com | support.dell.com
Que recherchez vous ?
Cherchez ici.
• Numéro de service et code de service express Numéro de service et license Microsoft Windows
• Étiquette de licence Microsoft® Windows®
Ces étiquettes sont situées sur le
dessous de votre ordinateur.
• Utilisez le numéro de service pour
identifier votre ordinateur lorsque
vous accédez au site Web
support.dell.com ou lorsque vous
appelez le service de support
technique.
• Entrez le code de service express pour orienter votre appel lorsque vous
communiquez avec le service d'assistance technique. Le code de
service express n'est pas disponible dans certains pays.
• Comment retirer et remplacer des pièces
• Caractéristiques
• Comment configurer les paramètres du
système
• Comment déterminer et résoudre des
problèmes
Guide d'utilisation du Dell Precision™ M70
• Solutions — Astuces de dépannage, articles
de techniciens, cours en ligne, questions
fréquemment posées
• Communauté — Discussion en ligne avec
d'autres clients Dell
• Mises à niveau — Informations sur les mises à
niveau des composants, comme la mémoire,
le disque dur et le système d'exploitation
• Service clientèle — Personnes-ressources,
appels de service et état des commandes,
garanties et informations sur les réparations
• Service et support — Historique de l'état des
appels de service et du support, contrat de
service, discussions en ligne avec le support
technique
• Référence — Documentation de l'ordinateur,
détails sur la configuration de l'ordinateur,
caractéristiques de produit et livres blancs
• Téléchargements — Pilotes, correctifs et
mises à jour logicielles agréés
Site Web de support de Dell — support.dell.com
REMARQUE : Sélectionnez votre région pour afficher le site de support
approprié.
REMARQUE : Les représentants des grandes entreprises, du
gouvernement et du domaine de l'éducation peuvent également utiliser le
site Web Premier Support de Dell à l'adresse premier.support.dell.com. Ce
site Web n'est peut-être pas disponible dans toutes les régions.
84
Guide de référence rapide
Centre d'aide et de support Microsoft® Windows® XP
1 Cliquez sur le bouton Démarrer, puis sur Aide et support.
2 Cliquez sur Guides d'utilisation du système, puis sur Guides
d'utilisation.
Que recherchez vous ?
Cherchez ici.
• Notebook System Software (NSS)
CD Drivers and Utilities ou site Web de support de Dell
Si vous réinstallez le système d'exploitation de votre ordinateur, vous
devez également réinstaller l'utilitaire NSS (disponible sur le CD
Drivers and Utilities en option, ou sur le site Web de support de Dell).
NSS fournit des mises à jour essentielles pour le système d'exploitation
et la prise en charge des lecteurs de disquette USB Dell™ de 3,5 pouces,
des processeurs Intel® Pentium® M, des lecteurs optiques et des
périphériques USB. NSS est requis pour le bon fonctionnement de
votre ordinateur Dell. Ce logiciel détecte automatiquement votre
ordinateur et son système d'exploitation, et installe les mises à jour
appropriées à votre configuration.
• Comment utiliser Windows XP
Centre d'aide et de support de Windows
• Documentation sur mon ordinateur
1 Cliquez sur le bouton Démarrer, puis sur Aide et support.
• Documentation pour les périphériques (pour 2 Tapez un mot ou une expression qui décrit votre problème, puis
cliquez sur l'icône en forme de flèche.
un modem, par exemple)
3 Cliquez sur la rubrique qui décrit votre problème.
4 Suivez les instructions qui s'affichent à l'écran.
• Comment réinstaller mon système
d'exploitation
CD Operating System (Système d'exploitation)
Le système d'exploitation est déjà installé sur votre ordinateur. Pour
réinstaller le système d'exploitation, utilisez le CD Operating System.
Reportez-vous à votre Guide d'utilisation Dell Precision pour obtenir
des instructions.
Une fois le système d'exploitation
réinstallé, utilisez le CD Drivers and
Utilities pour réinstaller les pilotes des
périphériques accompagnant votre
ordinateur.
La clé de produit (product key) de votre
système d'exploitation se trouve sur
l'ordinateur.
REMARQUE : La couleur du CD varie selon le système d'exploitation que
vous avez commandé.
REMARQUE : Le CD Operating System est en option et n'est pas
obligatoirement expédié avec tous les ordinateurs.
Guide de référence rapide
85
www.dell.com | support.dell.com
Configuration de votre ordinateur
PRÉCAUTION : Avant de commencer toute procédure de cette section, lisez les consignes de sécurité
qui figurent dans le Guide d'information sur le produit.
1
Déballez la boîte d'accessoires.
2
Mettez de côté le contenu de la boîte d'accessoires ; vous en aurez besoin ultérieurement pour
configurer votre ordinateur.
Cette boîte contient également la documentation utilisateur et tout autre logiciel ou matériel
supplémentaire (cartes PC, lecteurs, batteries, etc.) que vous avez commandé.
3
Reliez l'adaptateur secteur au connecteur de l'adaptateur secteur de l'ordinateur et à la prise
secteur.
AVIS : Lorsque vous utilisez l'adaptateur secteur, vérifiez que le câble n'est pas étiré, coincé ou écrasé
par des objets tels que des pieds de chaise ou de bureau, et qu'on ne marche pas dessus.
REMARQUE : Ne raccordez pas l'ordinateur à la station d'accueil tant qu'il n'a pas été mis sous tension
et arrêté au moins une fois.
86
Guide de référence rapide
4
Pour mettre l'ordinateur sous tension, ouvrez le moniteur et appuyez sur le bouton
d'alimentation.
bouton
d'alimentation
À propos de votre ordinateur
Pour plus d'informations sur l'ordinateur, reportez-vous au Guide d'utilisation en ligne. Selon votre
système d'exploitation, double-cliquez sur l'icône Guide d'utilisation sur votre bureau ou cliquez
sur le bouton Démarrer, puis sur Centre d'Aide et de support, et enfin sur Guides d'utilisation du
système. Vous trouverez ci-dessous des réponses aux questions les plus fréquemment posées
concernant l'ordinateur.
•
Carte réseau et modem : L'ordinateur peut être équipé à la fois d'une carte réseau 10/100/1000
Ethernet LOM et d'un modem v.92 56K. Pour des informations sur les emplacements des
connecteurs, reportez-vous à la section «Vue arrière» à la page 90. Pour plus d'informations sur
les ports et les connecteurs, reportez-vous à la section «À propos de votre ordinateur» du
Guide d'utilisation en ligne.
•
Durée de vie et utilisation de la batterie : Diverses batteries sont disponibles pour votre
ordinateur. La batterie standard fournie avec l'ordinateur vous offre, lorsqu'elle est
complètement rechargée, une durée de fonctionnement de 3 à 4 heures pour une utilisation
moyenne. Certains types de fonctionnement, tels que le fonctionnement sans fil étendu
peuvent sensiblement réduire la durée de vie de la batterie.
Guide de référence rapide
87
www.dell.com | support.dell.com
–
Pour plus d'informations sur les performances de la batterie, son utilisation et l'économie
d'énergie, consultez votre Guide d'utilisation en ligne.
–
Pour des informations sur l'installation de la seconde batterie optionnelle, reportez-vous à
votre Guide d'utilisation en ligne.
•
Périphériques de baie modulaire : Pour en savoir plus sur la baie modulaire et les périphériques
qu'elle prend en charge, reportez-vous à la section «Utilisation de la baie modulaire» du Guide
d'utilisation en ligne.
•
Stations d'accueil : Votre ordinateur prend en charge la Dell D/Dock Expansion Station et le
Dell D/Port Advanced Port Replicator.
REMARQUE : Il se peut que les stations d'accueil ne soient pas disponibles dans tous les pays.
Pour des informations sur votre station d'accueil optionnelle, reportez-vous à la
documentation qui accompagne le périphérique.
Pour savoir comment obtenir des performances optimales lors de l'utilisation d'une station
d'accueil avec cet ordinateur, reportez-vous à la section «Résolutions des problèmes» du Guide
d'utilisation en ligne.
Vue frontale
voyants d'état
du clavier
loquet de l'écran
écran
bouton de mise
en sourdine
bouton
d'alimentation
boutons de
contrôle du volume
voyants d'état
de l'appareil
manette
clavier
touches de la
manette/
tablette tactile
tablette tactile
bouton du
loquet de
l'écran
Haut-parleurs (2)
88
Guide de référence rapide
Vue de gauche
entrées d'air
du ventilateur
du processeur
emplacement
pour câble
de sécurité
unité de
disque dur
logement de
carte PC
logement de
carte à puce
Vue de droite
baie modulaire
connecteurs audio (2)
connecteurs
USB 2.0 (2)
entrées d'air
du ventilateur
vidéo
Guide de référence rapide
89
www.dell.com | support.dell.com
Vue arrière
PRÉCAUTION : Ne bloquez pas les entrées d'air de l'ordinateur et n'insérez pas d'objets dedans ;
évitez également toute accumulation de poussière. Ne placez pas l'ordinateur dans un environnement
peu aéré, tel qu'une mallette fermée, lorsque celui-ci fonctionne. Le manque de ventilation risquerait
de causer un incendie ou d'endommager l'ordinateur.
AVIS : Pour éviter d'endommager l'ordinateur, après l'avoir éteint, attendez 5 secondes avant de
déconnecter tout périphérique externe.
connecteurs USB 2.0 (2)
connecteur modem (RJ-11)
connecteur réseau (RJ-45)
capteur infrarouge
connecteur série
connecteur vidéo
connecteur d'adaptateur secteur
entrée d'air du
ventilateur vidéo
90
connecteur de sortie TV S-vidéo
Guide de référence rapide
entrée d'air du
ventilateur vidéo
Vue de dessous
batterie
loquet de la baie de batterie
Cache de carte
Mini PCI/modem/
modules de
mémoire
entrée d'air du ventilateur
du processeur
connecteur de
station d'accueil
entrée d'air du
ventilateur vidéo
Utilisation d'une batterie
Performances de la batterie
PRÉCAUTION : Avant de commencer toute procédure de cette section, lisez les consignes de sécurité
qui figurent dans le Guide d'information sur le produit.
REMARQUE : Pour plus d'informations sur la garantie Dell relative à l'ordinateur, reportez-vous au
Guide d'information sur le produit ou au document de la garantie livré avec votre ordinateur.
Pour un fonctionnement optimal et afin de préserver les paramètres du BIOS, laissez la batterie
principale installée en permanence dans votre ordinateur portable Dell™. Utilisez une batterie
pour alimenter l'ordinateur lorsqu'il n'est pas branché sur une prise électrique. Votre ordinateur est
livré avec une batterie, installée dans la baie. La durée de fonctionnement de la batterie varie en
fonction des conditions de fonctionnement. Vous pouvez installer une deuxième batterie en option
dans la baie modulaire, et ce pour augmenter la durée de fonctionnement de façon significative.
Pour plus d'informations sur la seconde batterie optionnelle, reportez-vous à votre Guide
d'utilisation.
Guide de référence rapide
91
www.dell.com | support.dell.com
REMARQUE : L'autonomie de la batterie (la période durant laquelle la batterie reste chargée) diminue
avec le temps. Selon la fréquence d'utilisation et les conditions de fonctionnement de la batterie, il est
possible que vous deviez en acheter une autre au cours de la durée de vie de votre ordinateur.
Cette durée est considérablement réduite par l'exécution de certaines opérations, notamment, sans
que cela soit limitatif :
•
Utilisation de lecteurs de CD, DVD, ou autres lecteurs optiques
•
Utilisation de périphériques de communication sans fil, cartes PC ou périphériques USB
•
Utilisation de paramètres élevés d'affichage et de luminosité, d'économiseurs d'écran en 3D
ou d'autres programmes gourmands en ressources, tels que des jeux en 3D
•
Utilisation de l'ordinateur en mode Performances maximales
REMARQUE : Il est recommandé de connecter l'ordinateur à une prise secteur lorsque vous gravez un
CD ou DVD.
Vous pouvez vérifier le niveau de charge de la batterie avant de l'insérer dans l'ordinateur. Vous
pouvez également définir des options de gestion de l'alimentation afin que l'ordinateur vous alerte
lorsque le niveau de charge de la batterie est bas.
PRÉCAUTION : L'utilisation d'une batterie non compatible peut accroître le risque d'incendie ou
d'explosion. Ne remplacez la batterie que par une batterie compatible achetée auprès de Dell. La
batterie au lithium-ion est conçue pour fonctionner avec votre ordinateur Dell. N'utilisez pas de
batterie provenant d'un autre ordinateur.
PRÉCAUTION : Ne jetez pas les batteries avec les ordures ménagères. Lorsque votre batterie ne tient
plus sa charge, contactez votre service municipal de traitement des déchets pour savoir comment vous
en débarrasser. Consultez la section «Mise au rebut de la batterie» du Guide d'information sur le
produit.
PRÉCAUTION : Une utilisation inadéquate de la batterie peut augmenter le risque d'incendie ou de
brûlure chimique. Prenez soin de ne pas la percer, l'incinérer, la démonter ou l'exposer à une
température supérieure à 65° C (149° F). Rangez la batterie hors de portée des enfants. Manipulez les
batteries endommagées ou percées avec extrême précaution. Les batteries endommagées peuvent fuir
et causer des dommages personnels ou matériels.
Vérification de la charge de la batterie
La jauge de batterie Dell QuickSet, la fenêtre et l'icône
de la jauge d'alimentation/d'énergie
Microsoft® Windows®, l'indicateur de charge de la batterie, la jauge d'état et l'alerte en cas de
niveau de batterie faible fournissent des informations sur le niveau de charge de la batterie. Pour
obtenir des informations sur la vérification de la charge de la seconde batterie optionnelle,
reportez-vous à votre Guide d'utilisation.
92
Guide de référence rapide
Jauge de batterie Dell QuickSet
Si Dell QuickSet est installé, appuyez sur <Fn><F8> pour afficher la jauge de batterie QuickSet.
La fenêtre Jauge de batterie affiche l'état, le niveau de charge et le temps de chargement de la
batterie de votre ordinateur.
REMARQUE : Vous pouvez utiliser votre station d'accueil pour charger la batterie d'un ordinateur.
Cependant, une batterie située dans une station d'accueil n'alimente pas la station d'accueil ou
l'ordinateur.
De plus, lorsque votre ordinateur est connecté à une station d'accueil (amarré), la fenêtre Jauge de
batterie affiche l'onglet Dock Battery (Batterie de station d'accueil), qui indique le niveau de
charge et l'état actuel de la batterie de la station d'accueil.
Les icônes suivantes s'affichent dans la fenêtre Jauge de batterie :
• L'ordinateur ou la station d'accueil fonctionne sur batterie.
• La batterie se décharge ou est inactive.
• L'ordinateur ou la station d'accueil est connecté à une prise électrique et
alimenté en CA.
• La batterie est en cours de charge.
• L'ordinateur ou la station d'accueil est connecté à une prise électrique et
alimenté en CA.
• La batterie se décharge, est inactive ou en cours de chargement.
Pour plus d'informations sur QuickSet, cliquez avec le bouton droit de la souris sur l'icône
la barre des tâches, puis cliquez sur Aide.
dans
Jauge d'alimentation Microsoft Windows
La jauge d'alimentation Windows indique la charge de batterie restante. Pour consulter la jauge,
double-cliquez sur l'icône
de la barre des tâches. Pour des informations supplémentaires
concernant l'onglet Jauge d'alimentation, reportez-vous à votre Guide d'utilisation.
Si l'ordinateur est branché sur le secteur, l'icône
apparaît.
Jauge de charge
Avant d'installer une seconde batterie, appuyez sur le bouton d'état situé sur la jauge de charge de
la batterie afin d'allumer les voyants de niveau de charge. Chaque voyant représente environ 20
pour cent de la charge totale de la batterie. S'il reste, par exemple, 80 pour cent de la charge de la
batterie, quatre des voyants sont allumés. Si aucun voyant n'est allumé, la batterie est
complètement déchargée.
Guide de référence rapide
93
www.dell.com | support.dell.com
Jauge d'état
La durée de service de la batterie est déterminée en grande partie par le nombre de charges qu'elle
reçoit. Après des centaines de cycles de charge et de décharge, la capacité de charge des batteries
diminue et l'état des batteries se dégrade. Pour vérifier l'état de la batterie, appuyez sur le bouton
d'état, situé sur l'indicateur de charge de la batterie, et maintenez-le enfoncé pendant au moins
3 secondes. Si aucun voyant ne s'allume, la batterie est en bon état et elle dispose encore de plus de
80 pour cent de sa capacité de charge d'origine. Chaque voyant représente une dégradation
incrémentielle. Si cinq voyants s'allument, la batterie dispose de moins de 60 pour cent de sa
capacité de charge et vous devez envisager son remplacement. Reportez-vous à votre Guide
d'utilisation pour plus d'informations sur l'autonomie de la batterie.
REMARQUE : Lorsque vous maintenez appuyé le bouton d'état de l'indicateur de charge de la batterie
pendant au moins trois secondes, les voyants de niveau de charge s'allument pour indiquer l'état actuel
de charge. Ils indiquent ensuite l'État de santé quand ils sont allumés, pour signaler l'état de dégradation
de la batterie.
Alerte de batterie faible
AVIS : Pour éviter la perte ou la corruption de vos données, enregistrez votre travail immédiatement
après avoir reçu une alerte de niveau de batterie faible. Connectez ensuite l'ordinateur à une prise
secteur. Il est également possible d'éteindre l'ordinateur puis d'installer une seconde batterie dans la
baie modulaire. Si la batterie est complètement déchargée, l'ordinateur passe automatiquement en
mode Mise en veille prolongée.
Une alerte de batterie déchargée a lieu lorsque la batterie est déchargée à environ 90 pour cent.
L'ordinateur émet un signal sonore pour indiquer que la limite de durée minimale de
fonctionnement est atteinte. Pendant ce délai, le haut-parleur émet régulièrement des bips. Si
deux batteries sont installées, l'alerte de batterie faible indique que les deux batteries sont
déchargées à environ 90 pour cent. L'ordinateur passe en mode Mise en veille prolongée lorsque la
charge de la batterie est extrêmement faible. Pour obtenir plus d'informations sur les alertes de
niveau de batterie faible, reportez-vous à la section «Gestion de l'alimentation» de votre Guide
d'utilisation.
Chargement de la batterie
REMARQUE : L'adaptateur secteur charge complètement la batterie déchargée en 1 heure environ
lorsque l'ordinateur est éteint. La durée de chargement est plus longue lorsque l'ordinateur est sous
tension. Vous pouvez laisser la batterie dans l'ordinateur aussi longtemps que vous le souhaitez. Les
circuits internes de la batterie préviennent toute surcharge.
Lorsque vous branchez l'ordinateur sur une prise électrique ou installez une batterie pendant que
l'ordinateur est branché sur une prise électrique, l'ordinateur vérifie le niveau de charge et la
température de la batterie. Au besoin, l'adaptateur secteur charge alors la batterie et maintient le
niveau de charge.
94
Guide de référence rapide
Si la batterie est chaude parce qu'elle se trouvait dans l'ordinateur ou en raison de la température
extérieure, il est probable qu'elle ne se charge pas lorsque vous branchez l'ordinateur sur une prise
électrique.
La batterie est trop chaude pour démarrer le processus de recharge si le voyant
clignote
affichant alternativement les couleurs vert et orange. Débranchez l'ordinateur de la prise électrique
et laissez refroidir l'ordinateur et la batterie jusqu'à ce qu'ils atteignent la température ambiante.
Branchez alors l'ordinateur sur une prise électrique et continuez à charger la batterie.
Pour des informations supplémentaires sur la résolution des problèmes de batterie, reportez-vous à
votre Guide d'utilisation.
Retrait de la batterie
PRÉCAUTION : Avant d'effectuer ces procédures, déconnectez le modem de la prise téléphonique
murale
REMARQUE : Pour obtenir des informations sur la seconde batterie optionnelle, reportez-vous à votre
Guide d'utilisation.
1
Assurez-vous que l'ordinateur est éteint et qu'il n'est pas branché à une prise électrique.
2
Si l'ordinateur est connecté à une station d'accueil (amarré), déconnectez-le. Pour obtenir des
instructions, reportez-vous à la documentation qui accompagne la station d'accueil. Faites
glisser et maintenez le loquet de la baie de batterie, situé sur le dessous de l'ordinateur, puis
retirez la batterie de la baie.
Guide de référence rapide
95
www.dell.com | support.dell.com
Installation d'une batterie
Assurez-vous que l'ordinateur est éteint. Faites glisser la batterie dans la baie jusqu'à ce que le
loquet s'enclenche.
Pour obtenir plus d'informations sur la seconde batterie optionnelle, reportez-vous à votre Guide
d'utilisation.
Stockage de la batterie
Retirez la batterie de l'ordinateur lorsque vous rangez ce dernier pendant une période prolongée.
Sinon, la batterie finira par se décharger. Après une longue période de stockage, rechargez
complètement la batterie avant de l'utiliser.
Résolution des problèmes
Notebook System Software (NSS)
Si vous réinstallez le système d'exploitation de votre ordinateur, vous devez également réinstaller
l'utilitaire NSS. Cet utilitaire est disponible sur le CD Drivers and Utilities en option et sur le site
Web de support de Dell.
Pour télécharger l'utilitaire à partir du site Web de support de Dell, allez à la section
Téléchargements du site Web et sélectionnez le modèle de votre ordinateur dans le menu
déroulant. Sélectionnez la Catégorie de téléchargement «Utilitaires Système et configuration», le
système d'exploitation et la langue, puis suivez les instructions qui s'affichent.
NSS fournit des mises à jour essentielles pour le système d'exploitation et la prise en charge des
lecteurs de disquette USB Dell™ de 3,5 pouces, des processeurs Intel® Pentium® M, des lecteurs
optiques et des périphériques USB. NSS est requis pour le bon fonctionnement de votre ordinateur
Dell. Ce logiciel détecte automatiquement votre ordinateur et son système d'exploitation, et
installe les mises à jour appropriées à votre configuration.
REMARQUE : NSS est indispensable pour le bon fonctionnement des périphériques USB, qui
comprennent les périphériques D/Bay, D/Dock, D/Port et D/View de Dell.
Problèmes de blocage et problèmes logiciels
PRÉCAUTION : Avant de commencer toute procédure de cette section, suivez les consignes de
sécurité du Guide d'information sur le produit.
L'ordinateur ne démarre pas
ASSUREZ-VOUS QUE L'ADAPTATEUR SECTEUR EST SOLIDEMENT BRANCHÉ SUR L'ORDINATEUR ET
SUR LA PRISE SECTEUR
96
Guide de référence rapide
L'ordinateur ne répond plus
AVIS : Vous pouvez perdre des données si vous n'arrivez pas à arrêter correctement le système
d'exploitation.
É T E I G N E Z L ' O R D I N A T E U R — Si vous n'obtenez aucune réponse lorsque vous appuyez sur une touche
du clavier ou lorsque vous déplacez la souris, appuyez sur le bouton d'alimentation et maintenez-le
enfoncé pendant au moins 8 à 10 secondes jusqu'à ce que l'ordinateur s'éteigne. Redémarrez
l'ordinateur.
Un programme ne répond plus
QUITTEZ LE PROGRAMME —
1 Appuyez simultanément sur <Ctrl><Maj><Échap>.
2 Cliquez sur Applications.
3 Cliquez sur le programme qui ne répond plus.
4 Cliquez sur Terminer la tâche.
Un programme se bloque fréquemment
REMARQUE : La documentation de tout logiciel, la disquette ou le CD qui l'accompagne incluent
généralement des instructions d'installation.
V É R I F I E Z L A D O C U M E N T A T I O N D U L O G I C I E L — Si nécessaire, supprimez, puis réinstallez le
programme.
Un programme est conçu pour une version antérieure du système d'exploitation Windows
S I V O U S U T I L I S E Z W I N D O W S X P, E X É C U T E Z L ' A S S I S T A N T C O M P A T I B I L I T É D E S P R O G R A M M E S —
L'Assistant Compatibilité des programmes configure un programme pour qu'il fonctionne dans un
environnement proche des environnements des systèmes d'exploitation non Windows XP.
1 Cliquez sur le bouton Démarrer, pointez sur Tous les programmes→ Accessoires, puis cliquez sur
Assistant Compatibilité des programmes.
2 Dans l'écran d'accueil, cliquez sur Suivant.
3 Suivez les instructions qui s'affichent à l'écran.
Guide de référence rapide
97
www.dell.com | support.dell.com
Un écran bleu uni apparaît
É T E I G N E Z L ' O R D I N A T E U R — Si vous n'obtenez aucune réponse lorsque vous appuyez sur une touche
du clavier ou lorsque vous déplacez la souris, appuyez sur le bouton d'alimentation et maintenez-le
enfoncé pendant au moins 8 à 10 secondes jusqu'à ce que l'ordinateur s'éteigne. Redémarrez
l'ordinateur.
Autres problèmes logiciels
VÉRIFIEZ LA DOCUMENTATION DU LOGICIEL OU CONTACTEZ LE FABRICANT POUR OBTENIR DES
INFORMATIONS DE DÉPANNAGE —
• Assurez-vous que le programme est compatible avec le système d'exploitation installé sur votre
ordinateur.
• Assurez-vous que l'ordinateur est conforme aux exigences matérielles requises pour que le logiciel
fonctionne. Reportez-vous à la documentation du logiciel pour de plus amples informations.
• Assurez-vous que le programme est correctement installé et configuré.
• Assurez-vous que les pilotes de périphérique n'entrent pas en conflit avec le programme.
• Le cas échéant, supprimez, puis réinstallez le programme.
SAUVEGARDEZ IMMÉDIATEMENT VOS FICHIERS
U T I L I S E Z U N P R O G R A M M E D E R E C H E R C H E D E S V I R U S P O U R V É R I F I E R L E D I S Q U E D U R, L E S
DISQUETTES OU LES CD
ENREGISTREZ LES FICHIERS OUVERTS ET QUITTEZ TOUS LES PROGRAMMES, PUIS ÉTEIGNEZ
L ' O R D I N A T E U R V I A L E M E N U Démarrer
A N A L YS E Z V O T R E O R D I N A T E U R P O U R V O I R S ' I L C O N T I E N T D E S L O G I C I E L S E S P I O N S — Si vous
observez un ralentissement des performances de votre ordinateur, si des fenêtres publicitaires s'affichent
fréquemment sur votre écran ou si vous avez des problèmes pour vous connecter sur Internet, votre
ordinateur est peut-être infecté par un logiciel espion. Utilisez un programme anti-virus qui inclut une
protection contre les logiciels espions (une mise à niveau de votre programme sera peut-être nécessaire)
afin d'analyser votre ordinateur et de supprimer les logiciels espions. Pour plus d'informations, allez sur
le site support.dell.com et lancez une recherche avec le mot-clé espion.
E X É C U T E Z D E L L D I A G N O S T I C S — Si tous les tests s'exécutent correctement, la condition d'erreur est
liée à un problème logiciel.
98
Guide de référence rapide
Exécuter Dell Diagnostics
PRÉCAUTION : Avant de commencer toute procédure de cette section, lisez les consignes de sécurité
qui figurent dans le Guide d'information sur le produit.
Quand utiliser Dell Diagnostics
Si vous rencontrez un problème avec l'ordinateur, effectuez les vérifications indiquées dans la
section «Résolution des problèmes» (reportez-vous au Guide d'utilisation en ligne) et exécutez Dell
Diagnostics avant de contacter Dell pour obtenir une assistance technique.
AVIS : Dell Diagnostics ne fonctionne qu'avec les ordinateurs Dell™.
Démarrez Dell Diagnostics à partir du disque dur ou du CD Drivers and Utilities (également
appelé CD ResourceCD) en option.
Démarrage de Dell Diagnostics à partir de votre disque dur
Dell Diagnostics se trouve dans une partition cachée (utilitaire de diagnostics) de votre disque dur.
REMARQUE : Si aucune image ne s'affiche, contactez Dell.
1
Éteignez l'ordinateur.
2
Si l'ordinateur est connecté à une station d'accueil (amarré), déconnectez-le. Pour obtenir des
instructions, reportez-vous à la documentation qui accompagne la station d'accueil.
3
Connectez l'ordinateur à une prise électrique.
4
Allumez l'ordinateur. Lorsque le logo DELL™ apparaît, appuyez immédiatement sur <F12>.
REMARQUE : Si rien ne s'affiche, maintenez le bouton de mise en sourdine enfoncé et appuyez sur le
bouton d'alimentation de l'ordinateur pour démarrer Dell Diagnostics. L'ordinateur lance
automatiquement l'évaluation du système de préamorçage.
REMARQUE : Si un message indique qu'aucune partition d'utilitaire de diagnostics n'a été détectée,
exécutez Dell Diagnostics à partir du CD Drivers and Utilities.
Si vous attendez trop longtemps et que le logo du système d'exploitation apparaît, patientez
jusqu'à ce que vous voyiez le bureau de Microsoft® Windows®. Ensuite, arrêtez votre
ordinateur et faites une nouvelle tentative.
5
Lorsque la liste des périphériques d'amorçage apparaît, sélectionnez Diagnostics et appuyez
sur <Entrée>.
L'ordinateur lance l'évaluation de préamorçage du système avec une série de diagnostics
intégrés qui effectue un test préalable de la carte système, du clavier, du disque dur et de
l'écran.
•
Répondez à toutes les questions qui s'affichent pendant l'évaluation.
•
Si une défaillance de composant est détectée, l'ordinateur s'arrête et émet un signal
sonore. Pour arrêter l'évaluation et redémarrer l'ordinateur, appuyez sur <n> ; pour
passer au test suivant, appuyez sur <y> ; pour retester le composant défectueux,
appuyez sur <r>.
Guide de référence rapide
99
www.dell.com | support.dell.com
•
Si des défaillances sont détectées lors de l'évaluation de préamorçage du système, notez
les codes d'erreur et contactez Dell avant de continuer.
Si l'évaluation de préamorçage du système se déroule sans problème, vous recevez le message
Booting Dell Diagnostic Utility Partition (Amorçage de la partition d'utilitaires
de diagnostics). Press any key to continue (Appuyez sur une touche pour
continuer).
6
Appuyez sur une touche pour démarrer Dell Diagnostics à partir de la partition de diagnostics
du disque dur.
Démarrage de Dell Diagnostics à partir du CD Drivers and Utilities en option
1
Insérez le CD Drivers and Utilities.
2
Éteignez et redémarrez l'ordinateur.
Lorsque le logo DELL apparaît, appuyez immédiatement sur <F12>.
Si vous attendez trop longtemps et que le logo Windows apparaît, attendez encore jusqu'à ce
que le bureau Windows s'affiche. Éteignez alors votre ordinateur et faites une nouvelle
tentative.
REMARQUE : Les étapes suivantes ne modifient la séquence d'amorçage qu'une seule fois. Au
démarrage suivant, l'ordinateur démarre en fonction des périphériques définis dans le programme de
configuration du système.
100
3
Lorsque la liste des périphériques d'amorçage apparaît, sélectionnez Lecteur de
CD/DVD/CD-RW et appuyez sur <Entrée>.
4
Sélectionnez l'option Lecteur de CD/DVD/CD-RW dans le menu d'amorçage du CD.
5
Sélectionnez l'option Amorcer à partir du CD-ROM dans le menu qui s'affiche.
6
Saisissez 1 pour ouvrir le menu du CD ResourceCD.
7
Saisissez 2 pour démarrer Dell Diagnostics.
8
Sélectionnez Exécuter Dell Diagnostics 32 bits dans la liste numérotée. Si plusieurs versions
sont répertoriées, sélectionnez la version appropriée à votre ordinateur.
9
Lorsque le menu principal de Dell Diagnostics s'affiche, sélectionnez le test à effectuer.
Guide de référence rapide
Menu principal de Dell Diagnostics
1
Une fois Dell Diagnostics chargé et l'écran du menu principal affiché, cliquez sur le bouton
correspondant à l'option souhaitée.
Option
Fonction
Express Test (Test
rapide)
Exécute un test rapide des périphériques. Ce test dure généralement de 10
à 20 minutes et n'exige pas d'action de votre part. Exécutez un test rapide
pour améliorer la capacité de suivi du problème.
Extended Test (Test
approfondi)
Exécute un test approfondi des périphériques. En règle générale, ce test
prend une heure ou plus et nécessite que vous répondiez régulièrement à
des questions.
Custom Test (Test
personnalisé)
Teste un périphérique spécifique. Vous pouvez personnaliser les tests à
exécuter.
Symptom Tree
(Arborescence des
symptômes)
Répertorie les symptômes couramment rencontrés et permet de
sélectionner un test en fonction du symptôme du problème.
2
Si un problème survient pendant un test, un message indiquant le code d'erreur et une
description du problème s'affiche. Notez le code d'erreur et la description du problème et
suivez les instructions.
Si vous ne pouvez pas résoudre le problème, contactez Dell.
REMARQUE : Le numéro de service de votre ordinateur s'affiche dans la partie supérieure de chaque
écran de test. Lorsque vous communiquerez avec le support technique de Dell, ce numéro de service
vous sera demandé.
3
Si vous exécutez un test à partir de l'option Test personnalisé ou Arborescence des
symptômes, cliquez sur l'onglet approprié décrit dans le tableau suivant pour en savoir plus.
Onglet
Fonction
Résultats
Affiche les résultats du test et les conditions d'erreur rencontrées.
Erreurs
Affiche les conditions d'erreur rencontrées, les codes d'erreur et la
description du problème.
Aide
Décrit le test et peut indiquer les conditions requises pour exécuter le test.
Guide de référence rapide
101
www.dell.com | support.dell.com
Onglet
Fonction (Suite)
Configuration
Affiche la configuration matérielle du périphérique sélectionné.
Dell Diagnostics obtient vos informations de configuration de tous les
périphériques à partir du programme de configuration du système, de la
mémoire et de divers tests internes, et les affiche dans la liste des
périphériques située dans le volet gauche de l'écran. La liste des
périphériques risque de ne pas afficher les noms de tous les composants
installés sur votre ordinateur ou de tous les périphériques reliés à celui-ci.
Paramètres
102
Vous permet de personnaliser le test en modifiant ses paramètres.
4
Une fois les tests terminés, si vous exécutez Dell Diagnostics à partir du CD Drivers and
Utilities, retirez le CD.
5
Une fois les tests terminés, fermez l'écran de test pour revenir à l'écran du menu principal.
Pour quitter Dell Diagnostics et redémarrer l'ordinateur, fermez l'écran du menu principal.
Guide de référence rapide
Index
A
D
à propos de votre
ordinateur, 87
vue arrière, 90
vue de dessous, 91
vue de droite, 89
vue de gauche, 89
vue frontale, 88
Dell
site de support, 84
assistants
Assistant Compatibilité des
programmes, 97
Documentation, 83
CD ResourceCD, 83
périphérique, 83
B
batterie
alerte de batterie faible, 94
chargement, 94
durée de vie et utilisation de la
batterie, 87
installation, 96
jauge d'alimentation, 93
jauge d'état, 94
jauge de charge, 93
performances, 91
retrait, 95
stockage, 96
vérification de la charge, 92
dépannage
Centre d'aide et de support, 85
Diagnostics, 83
Dell, 99
documentation
en ligne, 84
E
entrées d'air
emplacement, 89
L
logiciel
problèmes, 97-98
logiciel espion, 98
O
C
Centre d'aide et de
support, 85
connecteurs audio
emplacement, 89
ne répond plus, 97
performances lentes, 98
P
Pilotes, 83
problèmes
blocage d'ordinateur, 97-98
blocages, 96
blocages programme, 97
compatibilité programmes et
Windows, 97
écran bleu, 98
l'ordinateur ne démarre pas, 96
l'ordinateur ne répond plus, 97
le programme ne répond
plus, 97
logiciel, 96
logiciel espion, 98
logiciels, 97-98
performances lentes de
l'ordinateur, 98
résolution, 96
S
Site Web Premier Support de
Dell, 84
Operating System
CD, 85
ordinateur
blocages, 97-98
Index
103
104
Index
W
Windows XP
Assistant Compatibilité des
programmes, 97
Centre d'aide et de support, 85
104
Index
Dell Precision™ M70 Mobile
Workstation
Schnellreferenzhandbuch
Modell PP15L
w w w. d e l l . c o m | s u p p o r t . d e l l . c o m
Anmerkungen, Hinweise und Vorsichtshinweise
ANMERKUNG: Eine ANMERKUNG macht auf wichtige Informationen aufmerksam, mit denen Sie den Computer besser
einsetzen können.
HINWEIS: Ein HINWEIS warnt vor möglichen Beschädigungen der Hardware oder Datenverlust und zeigt, wie diese
vermieden werden können.
VORSICHT: Durch VORSICHT werden Sie auf Gefahrenquellen hingewiesen, die materielle Schäden, Verletzungen
oder sogar den Tod von Personen zur Folge haben können.
Abkürzungen und Akronyme
Eine vollständige Liste der Abkürzungen und Akronyme finden Sie im Benutzerhandbuch (doppelklicken Sie je
nach Betriebssystem auf das Symbol Benutzerhandbuch auf dem Desktop oder klicken Sie auf die Schaltfläche
Start, dann auf Hilfe- und Supportcenter und anschließend auf Benutzer- und Systemhandbücher).
Wenn Sie einen Dell™-Computer der Serie n besitzen, treffen alle Referenzen in diesem Dokument auf die
Microsoft ® Windows®-Betriebssysteme nicht zu.
Die Drivers and Utilities CD und die Betriebssystem-CD sind optional und möglicherweise nicht bei allen
Computern im Lieferumfang enthalten.
_________________
Die in diesem Dokument enthaltenen Informationen können sich ohne vorherige Ankündigung ändern.
© 2004 Dell Inc. Alle Rechte vorbehalten.
Die Vervielfältigung oder Wiedergabe in jeglicher Weise ist ohne schriftliche Genehmigung von Dell Inc. strengstens untersagt.
In diesem Text verwendete Markenzeichen: Dell, das DELL Logo und Dell Precision sind Markenzeichen von Dell Inc.; Microsoft und Windows
sind eingetragene Markenzeichen von Microsoft Corporation; Intel und Pentium sind eingetragene Markenzeichen von Intel Corporation.
Alle anderen in dieser Dokumentation genannten Markenzeichen und Handelsbezeichnungen sind Eigentum der entsprechenden Hersteller
und Firmen. Dell Inc. verzichtet auf alle Besitzrechte an Markenzeichen und Handelsbezeichnungen, die nicht Eigentum von Dell sind.
Modell PP15L
Oktober 2004
Teilnr. Y4303
Rev. A00
Inhalt
. . . . . . . . . . . . . . . . .
109
. . . . . . . . . . . . . . . . . . . . . . . .
112
Informationsquellen für Ihren Computer
Einrichten des Computers
Wissenswertes über Ihren Computer .
. . . . . . . . . . . . . . . . . .
113
. . . . . . . . . . . . . . . . . . . . . . . .
. . . . . . . . . . . . . . . . . . . . . . . .
114
115
115
116
117
. . . . . . . . . . . . . . . . . . . . . . . . .
117
Vorderansicht . . . .
Linke Seitenansicht .
Rechte Seitenansicht
Rückansicht . . . .
Unterseite . . . . .
Verwenden eines Akkus
. . . . . . . . . . . . . . . . . . . . . . . .
. . . . . . . . . . . . . . . . . . . . . . . .
. . . . . . . . . . . . . . . . . . . . . . . .
Akkuleistung . . . . . . . .
Prüfen des Akkuladezustands
Aufladen des Akkus . . . . .
Entfernen des Akkus . . . .
Einsetzen eines Akkus . . . .
Lagern des Akkus . . . . . .
Störungen beheben
. . . . . . . . . . . . . . . . . . . .
. . . . . . . . . . . . . . . . . . . .
117
118
120
121
121
122
. . . . . . . . . . . . . . . . . . . . . . . . . . .
122
. . . . . . . . . . . . . . . . . . . .
. . . . . . . . . . . . . . . . . . . .
. . . . . . . . . . . . . . . . . . . .
. . . . . . . . . . . . . . . . . . . .
Notebook-Systemsoftware (NSS) .
Probleme mit Absturz und Software
Dell Diagnose durchführen . . . .
. . . . . . . . . . . . . . . . .
. . . . . . . . . . . . . . . . .
. . . . . . . . . . . . . . . . .
122
122
124
Inhalt
107
108
Inhalt
Informationsquellen für Ihren Computer
ANMERKUNG: Einige Leistungsmerkmale sind möglicherweise für Ihren Computer oder in bestimmten
Ländern nicht verfügbar.
ANMERKUNG: Zusätzliche Informationen werden eventuell mit dem Computer geliefert.
Was suchen Sie?
Hier finden Sie die gewünschten Informationen
• Ein Diagnoseprogramm für Ihren Arbeitsplatz
• Treiber für Ihren Arbeitsplatz
• Meine Computer-Dokumentation
• Dokumentation zu dem Gerät
• Notebook-Systemsoftware (NSS)
Drivers and Utilities CD (auch bekannt unter der Bezeichnung
ResourceCD)
Die Dokumentation und die Treiber sind
bei Lieferung bereits von Dell vorinstalliert. Mithilfe der CD können Sie Treiber
neu installieren, das Programm Dell Diagnostics ausführen oder auf die Dokumentation zugreifen.
Infodateien können sich auf der CD befinden, die allerneueste Informationen zu
technischen Änderungen am Computer
oder fortgeschrittene technische Informationen für erfahrene Benutzer oder Techniker enthalten.
ANMERKUNG: Die Drivers and Utilities CD ist optional und ist möglicherweise nicht bei allen Computern im Lieferumfang enthalten.
ANMERKUNG: Die neusten Aktualisierungen für Treiber und Dokumentation finden Sie unter support.dell.com.
•
•
•
•
•
•
Garantie-Informationen
Dell™-Produktinformationshandbuch
Verkaufs- und Lieferbedingungen (nur USA)
Sicherheitshinweise
Zulassungsinformationen
Informationen zur Ergonomie
Enduser-Lizenzvereinbarung
Schnellreferenzhandbuch
109
www.dell.com | support.dell.com
Was suchen Sie?
Hier finden Sie die gewünschten Informationen
• Service-Tag-Nummer und Express-Servicecode
• Microsoft® Windows® Lizenzetikett
Service-Tag-Nummer und Microsoft Windows-Etikett
Diese Etikette befinden sich an der
Unterseite Ihres Computers.
• Geben Sie die Service-Tag-Nummer auf der Website
support.dell.com oder beim Anruf
beim Technischen Support an, um
den Computer zu identifizieren.
• Geben Sie beim Anruf beim Technischen Support den Express-Servicecode an, um zum geeigneten Ansprechpartner weitergeleitet zu
werden. Der Express-Servicecode ist möglicherweise nicht in allen
Ländern verfügbar.
Dell Precision™ M70 Benutzerhandbuch
• Anweisungen zum Entfernen und Austauschen von Teilen
Hilfe- und Supportcenter von Microsoft® Windows® XP
• Technische Daten
1 Klicken Sie auf die Schaltfläche Start und anschließend auf Hilfe und
• Anweisungen zum Konfigurieren von SystemSupport.
einstellungen
2 Klicken Sie auf Benutzer- und Systemhandbücher und anschließend
• Anweisungen zum Beheben von Störungen
auf Benutzerhandbücher.
und Lösen von Problemen
• Lösungen – Tipps und Hinweise zum Beheben von Störungen, Artikel von Technikern,
Online-Kurse, häufig gestellte Fragen
• Kundenforum – Online-Diskussion mit anderen Dell-Kunden
• Aufrüstungen – Aufrüstungsinformationen
für Komponenten wie Speicher, die Festplatte
und das Betriebssystem
• Kundenbetreuung – Kontaktinformationen,
Status von Serviceanfragen und Bestellung,
Informationen zu Garantie und Reparatur
• Service und Support – Status der Serviceanfrage und Support-Verfolgung, Service-Vertrag, Online-Diskussionen mit dem Technischen Support
• Referenzmaterial –
Computerdokumentationen, Einzelheiten
zur Arbeitsplatzkonfiguration, Produktangaben und Whitepapers
• Downloads – Zertifizierte Treiber, Patches
und Softwareaktualisierungen
110
Schnellreferenzhandbuch
Dell Support-Website – support.dell.com
ANMERKUNG: Wählen Sie Ihre Region, um die passende Support-Website anzuzeigen.
ANMERKUNG: Kunden aus Unternehmen, Regierungseinrichtungen und
dem Bildungswesen können auch die individuelle Dell Premier SupportWebsite www.premier.support.dell.com verwenden. Die Website ist
möglicherweise nicht in allen Ländern verfügbar.
Was suchen Sie?
Hier finden Sie die gewünschten Informationen
• Notebook-Systemsoftware (NSS)
Drivers and Utilities CD oder Dell Support-Website
Wenn Sie das Betriebssystem auf Ihrem Computer neu installieren,
sollten Sie auch das NSS-Dienstprogramm (erhältlich auf der optionalen Drivers and Utilities CD sowie auf der Dell Support-Website) neu
installieren. NSS- sorgt dafür, dass wichtige Aktualisierungen für Ihr
Betriebssystem durchgeführt werden und bietet Support für Dell™ 3,5Zoll-USB-Diskettenlaufwerke, Intel® Pentium® -M-Prozessoren, optische Laufwerke und USB-Geräte. NSS ist für den ordnungsmäßigen Betrieb des Dell Computers erforderlich. Die Software erkennt automatisch Ihren Computertyp und das Betriebssystem und installiert die für
Ihre Konfiguration geeigneten Aktualisierungen.
• Anleitungen zum Arbeiten unter Windows
Hilfe- und Supportcenter von Windows
XP
1 Klicken Sie auf die Schaltfläche Start und auf Hilfe und Support.
• Dokumentation zu Ihrem Arbeitsplatz
2 Geben Sie ein Wort oder einen Ausdruck ein, das bzw. der Ihr Problem
beschreibt, und klicken Sie anschließend auf das Pfeilsymbol.
• Dokumentation für Komponenten (z. B. Modem)
3 Klicken Sie auf das Thema, das Ihr Problem beschreibt.
4 Befolgen Sie die Anweisungen im Bildschirm.
• Anleitungen zur Neuinstallation des Betriebs- Betriebssystem-CD
systems
Das Betriebssystem ist bereits auf dem Computer installiert. Um das
Betriebssystem neu zu installieren, verwenden Sie die BetriebssystemCD. Anweisungen zur Neuinstallation des Betriebssystems finden Sie
im Dell Precision Benutzerhandbuch.
Nachdem Sie Ihr Betriebssystem neu installiert haben, verwenden Sie die Drivers and Utilities CD um Treiber für die
Komponenten, die mit Ihrem Computer
geliefert wurden, neu zu installieren.
Der Product Key für Ihr Betriebssystem
befindet sich auf Ihrem Computer.
ANMERKUNG: Die Farbe der CD hängt von dem von Ihnen bestellten
Betriebs-system ab.
ANMERKUNG: Die Betriebssystem-CD ist optional und möglicherweise
nicht bei allen Computern im Lieferum-fang enthalten.
Schnellreferenzhandbuch
111
www.dell.com | support.dell.com
Einrichten des Computers
VORSICHT: Bevor Sie irgendwelche in diesem Abschnitt beschriebenen Anweisungen ausführen, lesen Sie erst die Sicherheitshinweise im Produktinformationshandbuch.
1
Nehmen Sie das Zubehör aus der Verpackung.
2
Legen Sie die für das Einrichten des Computers erforderlichen Zubehörteile bereit.
Der Lieferumfang des Zubehörs umfasst ferner die Benutzerdokumentation sowie die Software oder zusätzliche Hardware (wie z. B. PC Cards, Laufwerke oder Batterien), die Sie bestellt haben.
3
Schließen Sie den Netzadapter an den Netzadapteranschluss am Computer und an die Steckdose an.
HINWEIS: Bei Verwendung des Netzadapters verlegen Sie das Kabel trittsicher und so, dass es nicht
gezogen, verwickelt oder durch Gegenstände wie z. B. Stuhl- oder Tischbeine gequetscht werden kann.
ANMERKUNG: Schließen Sie den Computer erst an das Docking-Gerät an, wenn der Computer mindestens einmal hoch- und wieder heruntergefahren wurde.
112
Schnellreferenzhandbuch
4
Öffnen Sie zum Einschalten des Computers den integrierten Bildschirm und betätigen Sie
den Netzschalter.
Netzschalter
Wissenswertes über Ihren Computer
Weitere Informationen über Ihren Computer finden Sie im Online-Benutzerhandbuch.
Doppelklicken Sie je nach Betriebssystem auf das Symbol Benutzerhandbuch auf dem Desktop
oder klicken Sie auf die Schaltfläche Start und anschließend auf Hilfe- und Supportcenter. Klicken
Sie danach auf Benutzer- und Systemhandbücher. Im Folgenden werden einige der häufiger gestellten Fragen über den Computer beantwortet.
•
Modem und Netzwerkadapter: In den Computer kann sowohl ein v.92 56K-Modem als auch
ein 10/100/1000 Ethernet LOM-Netzwerkadapter integriert sein. Informationen wo sich die
Steckplätze befinden erhalten Sie unter „Rückansicht” auf Seite 116. Weitere Informationen
zu Schnittstellen und Anschlüssen finden Sie unter „Wissenswertes über Ihren Computer” im
Online-Benutzerhandbuch.
•
Akkubetriebsdauer und Verwendung: Für Ihren Computer stehen verschiedene Akkus zur Verfügung. Wird der Akku verwendet, der im Lieferumfang des Computers enthalten ist, so beträgt die Betriebsdauer mit einem vollständig geladenen Akku bei durchschnittlicher Nutzung 3 bis 4 Stunden. Bei bestimmten Vorgängen, wie einem längeren drahtlosen Betrieb,
kann sich die Akkubetriebsdauer bedeutend verringern.
Schnellreferenzhandbuch
113
www.dell.com | support.dell.com
–
Weitere Informationen zu der Akkuleistung, Verwendung und Energieeinsparung finden
Sie in unserem Online-Benutzerhandbuch.
–
Informationen über einen optionalen zweiten Akku finden Sie in unserem Online-Benutzerhandbuch.
•
Modulschacht-Komponente: Informationen zum Modulschacht und den davon unterstützten
Geräten finden Sie unter „Verwenden des Modulschachts” im Online-Benutzerhandbuch.
•
Docking-Geräte: Ihr Computer unterstützt die Dell D/Dock Erweiterungsstation und den
Dell D/Port Advanced Port Replicator.
ANMERKUNG: Docking-Geräte sind in bestimmten Ländern möglicherweise nicht verfügbar.
Informationen zum optionalen Docking-Gerät finden Sie in der mitgelieferten Dokumentation zum Gerät.
Informationen zum Erzielen der optimalen Leistung bei Verwendung eines Docking-Geräts
mit Ihrem Computer finden Sie unter „Lösen von Problemen” im Online-Benutzerhandbuch.
Vorderansicht
Tastaturstatusanzeigen
Bildschirmhebel
Bildschirm
Stummtaste
Netzschalter
Tasten zur
Lautstärkeregelung
Gerätestatusanzeige
Trackstick
Tastatur
Trackstick-/
Touchpadtasten
Touchpad
Taste für die
Bildschirmentriegelung
Lautsprecher (2)
114
Schnellreferenzhandbuch
Linke Seitenansicht
Lüftungsschlitze
für Prozessorlüfter
Sicherheitskabeleinschub
Festplatte
PC CardSteckplatz
Steckplatz für
Smart Card
Rechte Seitenansicht
Modulschacht
Audioanschlüsse (2)
Lüftungsschlitze für
USB 2.0Anschlüsse (2) Videokartenlüfter
Schnellreferenzhandbuch
115
www.dell.com | support.dell.com
Rückansicht
VORSICHT: Die Lüftungsschlitze dürfen nicht verdeckt werden, auch nicht durch Staubansammlungen.
Führen Sie keine Gegenstände in die Lüftungsschlitze ein. Bewahren Sie den Computer während des
Betriebs nicht in schlecht durchlüfteten Behältnissen wie einer geschlossenen Tragetasche auf. Ohne
Luftzirkulation kann der Computer Schaden nehmen oder sogar ein Brand entstehen.
HINWEIS: Um Schäden am Computer zu vermeiden, sollten Sie nach dem Ausschalten des Computers
fünf Sekunden warten, bevor Sie ein externes Gerät davon trennen.
USB 2.0-Anschlüsse (2)
Modemanschluss (RJ-11)
Netzwerkanschluss (RJ-45)
Infrarotsensor
Serieller Anschluss
Monitoranschluss
Netzadapteranschluss
Lüftungsschlitze für
Videokartenlüfter
116
Fernseh- und S-Video-Anschluss
Schnellreferenzhandbuch
Lüftungsschlitze
für Prozessorlüfter
Unterseite
Akku
Akkufach-Freigabevorrichtung
Mini-PCIKarte/Modem/
DIMMModulabdeckung
Lüftungsschlitze für
Prozessorlüfter
Anschluss für
Docking-Gerät
Lüftungsschlitze für
Videokartenlüfter
Verwenden eines Akkus
Akkuleistung
VORSICHT: Bevor Sie irgendwelche in diesem Abschnitt beschriebenen Anweisungen ausführen, lesen Sie erst die Sicherheitshinweise im Produktinformationshandbuch.
ANMERKUNG: Weitere Informationen zur Dell-Garantie für den Computer finden Sie im Produktinformationshandbuch bzw. im Garantieschein, der im Lieferumfang des Computers enthalten ist.
Für eine optimale Leistung des Computers und zur Beibehaltung der BIOS-Einstellungen müssen
Sie für Ihren portablen Computer von Dell™ immer den Hauptakku verwenden. Verwenden Sie
den Akku, um den Computer mit Strom zu versorgen, wenn kein Netzstrom zur Verfügung steht.
Bei Auslieferung ist standardmäßig bereits ein Akku im Akkufach installiert. Die Akkubetriebsdauer hängt von den Betriebsbedingungen ab. Sie können einen optionalen zweiten Akku im Modulschacht installieren und die Betriebsdauer so erheblich verlängern. Weitere Informationen zum
optionalen zweiten Akku finden Sie in Ihrem Benutzerhandbuch.
Schnellreferenzhandbuch
117
www.dell.com | support.dell.com
ANMERKUNG: Die Betriebsdauer eines Akkus (Zeit, wie lange eine Akkuladung vorhält) nimmt mit der
Zeit ab. Je nachdem, wie oft und unter welchen Bedingungen der Akku verwendet wird, müssen Sie
möglicherweise noch vor Ende der Laufzeit Ihres Computers den Akku ersetzen.
Die Betriebsdauer wird stark beeinträchtigt, wenn Sie bestimmte Vorgänge durchführen. Dazu gehören u. a.:
•
Verwenden von CD, DVD oder anderen optischen Laufwerken
•
Einsatz von wireless Kommunikationsgeräten, PC Cards oder USB-Geräten.
•
Verwenden von sehr hellen Anzeigeeinstellungen, von 3D-Bildschirmschonern oder anderen
Programmen, die viel Energie benötigen, z. B. 3D-Spielen
•
Betrieb des Computers mit maximaler Leistung
ANMERKUNG: Es wird empfohlen, den Computer beim Beschreiben von CDs oder DVDs an das Stromnetz anzuschließen.
Sie können den Akkuladezustand überprüfen, bevor Sie den Akku in den Computer einsetzen.
Außerdem können Sie die Energieverwaltungsoptionen so konfigurieren, dass eine Warnmeldung
ausgegeben wird, wenn der Ladezustand des Akkus niedrig ist.
VORSICHT: Bei Verwendung inkompatibler Akkus besteht Brand- oder Explosionsgefahr. Ersetzen Sie
die Akkus nur mit einem kompatiblen Akku von Dell. Der Lithium-Ionen-Akku ist für den Einsatz in Ihrem Dell-Computer vorgesehen. Setzen Sie keine Akkus aus anderen Computern in Ihren Computer ein.
VORSICHT: Entsorgen Sie Akkus nicht im Hausmüll. Falls ein Akku nicht mehr aufgeladen werden
kann, wenden Sie sich bitte an einen Recyclinghof vor Ort oder an eine Umweltorganisation, um Informationen zur Entsorgung von Lithium-Ionen-Akkus zu erhalten. Informationen zur Batterieentsorgung
finden Sie im entsprechenden Abschnitt im Produktinformationshandbuch.
VORSICHT: Unsachgemäße Verwendung von Akkus kann zu Feuer oder chemischen Bränden führen.
Sie dürfen den Akku nicht aufstechen, verbrennen, auseinander nehmen oder Temperaturen über 65 °C
aussetzen. Bewahren Sie den Akku außerhalb der Reichweite von Kindern auf. Handhaben Sie beschädigte oder auslaufende Akkus mit äußerster Vorsicht. Beschädigte Akkus können auslaufen und Personen- oder Sachschäden verursachen.
Prüfen des Akkuladezustands
Die Akkuanzeige von Dell QuickSet, die Energieanzeige von Microsoft® Windows® als Fenster
und als
Symbol, die Akku-Ladestandanzeige und Zustandsanzeige und die Warnung „Akku
niedrig” liefern Informationen über den Akkuladezustand. Weitere Informationen zum Überprüfen des Ladezustands des optionalen zweiten Akkus finden Sie in Ihrem Benutzerhandbuch.
118
Schnellreferenzhandbuch
Akkuanzeige von Dell QuickSet
Ist Dell QuickSet installiert, drücken Sie <Fn><F8>, um die Akkuanzeige von QuickSet anzuzeigen.
Im Fenster Battery Meter (Akkuanzeige) werden Status, Ladezustand und Ladedauer des Akkus im
Computer angezeigt.
ANMERKUNG: Sie können Computerakkus mithilfe des Docking-Geräts laden. Ein Akku in einem Docking-Gerät versorgt das Docking-Gerät oder den Computer jedoch nicht mit Strom.
Wenn der Computer an ein Docking-Gerät angeschlossen ist, wird auf dem Bildschirm Battery
Meter (Akkuanzeige) auch die Registerkarte Dock Battery (Docking-Akku) angezeigt. Diese gibt
den Ladezustand und den aktuellen Status des Akkus im Docking-Gerät wieder.
Folgende Symbole sind im Fenster Akkuanzeige zu sehen:
• Der Computer oder das Docking-Gerät wird mit Akkustrom betrieben.
• Der Akku wird entladen oder ist inaktiv.
• Der Computer oder das Docking-Gerät ist an eine Steckdose angeschlossen und wird mit Netzstrom betrieben.
• Der Akku wird aufgeladen.
• Der Computer oder das Docking-Gerät ist an eine Steckdose angeschlossen und wird mit Netzstrom betrieben.
• Der Akku wird entladen, ist inaktiv oder wird geladen.
Um weitere Informationen über die QuickSet-Anzeige zu erhalten, klicken Sie in der Taskleiste mit
der rechten Maustaste auf das Symbol
und anschließend auf Hilfe.
Energieanzeige von Microsoft Windows
Die Energieanzeige von Windows zeigt die verbleibende Akkuladung an. Um die Energieanzeige
zu überprüfen, doppelklicken Sie auf das entsprechende Symbol
in der Taskleiste. Weitere
Informationen über das Register „Energieanzeige” finden Sie in Ihrem Benutzerhandbuch.
Wenn der Computer an eine Steckdose angeschlossen ist, wird das Symbol
angezeigt.
Ladestandanzeige
Drücken Sie vor dem Installieren des Akkus die Statustaste an der Akku-Ladestandanzeige, um
diese zu aktivieren. Jede Anzeige repräsentiert etwa 20 Prozent der Gesamtladekapazität des Akkus.
Wenn der Akku also beispielsweise noch zu 80 Prozent geladen ist, leuchten vier der fünf Anzeigen
auf. Wenn keine der Anzeigen aufleuchtet, ist der Akku vollständig entladen.
Schnellreferenzhandbuch
119
www.dell.com | support.dell.com
Health Gauge (Zustandsanzeige)
Die Betriebsdauer des Akkus hängt weitgehend von der Anzahl der Aufladungen ab. Durch hunderte Auf- und Entladungen verlieren Akkus an Ladekapazität, d. h. der Akkuzustand verschlechtert
sich. Um den Akkuzustand zu überprüfen, halten Sie die Statustaste der Akku-Ladestandanzeige
mindestens drei Sekunden lang gedrückt. Wenn keine der Anzeigen aufleuchtet, ist der Akku in
gutem Zustand, und mehr als 80 Prozent der ursprünglichen Ladekapazität verbleiben. Jede Anzeige stellt eine prozentuelle Verschlechterung dar. Wenn fünf Anzeigen leuchten, verbleiben weniger
als 60 Prozent der Ladekapazität. In diesem Fall sollten Sie den Akku austauschen. Siehe Benutzerhandbuch.
ANMERKUNG: Die Ladestandanzeige zeigt zuerst den aktuellen Ladestatus an, wenn Sie die Statustaste auf der Akku-Ladestandanzeige drücken und mindestens 3 Sekunden gedrückt halten. Danach schaltet die Anzeige auf den Leistungsstatus, wobei die Anzeigen durch Aufleuchten den inkrementellen Leistungsabfall anzeigen.
Warnung „Akku niedrig”
HINWEIS: Um den Verlust oder die Beschädigung von Daten zu vermeiden, sollten Sie Ihre Arbeit bei
einer Warnung „Akku niedrig” unverzüglich speichern. Schließen Sie den Computer anschließend an eine Steckdose an. Sie können auch den Computer ausschalten und einen zweiten Akku im Modulschacht
installieren. Ist der Akku vollständig entladen, wird automatisch der Ruhezustand aktiviert.
Die Warnung „Akku niedrig” wird angezeigt, wenn der Akku zu ungefähr 90 Prozent entladen ist.
Es wird ein Signalton ausgegeben, der darauf hinweist, dass nur noch die Mindestbetriebsdauer
verbleibt. Während dieser Zeit gibt der Lautsprecher in regelmäßigen Abständen Signaltöne aus.
Falls zwei Akkus installiert sind, bedeutet die Warnung „Akku niedrig”, dass die Gesamtkapazität
der beiden Akkus zu etwa 90 Prozent erschöpft ist. Der Computer geht in den Ruhezustand über,
wenn die Akkuladung ein kritisch niedriges Niveau erreicht hat. Weitere Informationen zur Warnung „Akku niedrig” finden Sie im Benutzerhandbuch unter „Energieverwaltung”.
Aufladen des Akkus
ANMERKUNG: Das Aufladen eines vollständig entladenen Akkus mit dem Netzadapter dauert bei ausgeschaltetem Computer etwa 1 Stunde. Bei eingeschaltetem Computer verlängert sich die Ladezeit entsprechend. Der Akku kann beliebig lange im Computer verbleiben. Der interne Schaltkreis des Akkus verhindert ein Überladen.
Wenn der Computer an das Stromnetz angeschlossen oder ein Akku in einen daran angeschlossenen Computer eingesetzt wird, prüft der Computer den Ladezustand und die Temperatur des Akkus. Der Netzadapter lädt gegebenenfalls den Akku auf und erhält die Akkuladung.
Falls der Akku durch Betrieb in Ihrem Computer oder aufgrund hoher Umgebungstemperaturen
heiß ist, wird der Akku bei Anschluss des Computers an eine Steckdose unter Umständen nicht
geladen.
120
Schnellreferenzhandbuch
Bei abwechselnd grün und gelb blinkender Anzeige
ist die Akkutemperatur zu hoch, und der
Ladevorgang kann nicht erfolgen. Ziehen Sie den Netzstecker aus der Steckdose, und lassen Sie
Computer und Akku auf Zimmertemperatur abkühlen. Schließen Sie den Computer anschließend
wieder an eine Steckdose an, und setzen Sie den Ladevorgang fort.
Weitere Informationen zum Beheben von Problemen mit dem Akku finden Sie in Ihrem Benutzerhandbuch.
Entfernen des Akkus
VORSICHT: Bevor Sie diese Schritte durchführen, trennen Sie das Modem von der Telefonwanddose.
ANMERKUNG: Weitere Informationen zum Entfernen des zweiten optionalen Akkus finden Sie in Ihrem
Benutzerhandbuch.
1
Stellen Sie sicher, dass der Computer ausgeschaltet und nicht an eine Steckdose angeschlossen ist.
2
Falls der Computer mit einem Docking-Gerät verbunden ist, trennen Sie die Verbindung.
Weitere Anweisungen hierzu finden Sie in der Dokumentation zum Docking-Gerät. Betätigen Sie den Freigabeschieber für das Akkufach an der Unterseite des Computers und halten
Sie ihn zum Herausnehmen des Akkus in dieser Position.
Einsetzen eines Akkus
Stellen Sie sicher, dass der Computer ausgeschaltet ist. Schieben Sie den Akku in den Schacht ein,
bis die Freigabevorrichtung hörbar einrastet.
Weitere Informationen zur Installation des optionalen zweiten Akkus finden Sie in Ihrem Benutzerhandbuch.
Schnellreferenzhandbuch
121
www.dell.com | support.dell.com
Lagern des Akkus
Entfernen Sie den Akku, wenn Sie den Computer für längere Zeit lagern möchten. Akkus entladen
sich während einer längeren Lagerzeit. Laden Sie den Akku nach längerer Lagerzeit vollständig auf,
bevor Sie ihn verwenden.
Störungen beheben
Notebook-Systemsoftware (NSS)
Wenn Sie das Betriebssystem auf Ihrem Computer neu installieren, sollten Sie auch das NSSDienstprogramm neu installieren. Dieses Dienstprogramm finden Sie auf der optionalen Drivers
and Utilities CD und auf der Dell Support-Website.
Gehen Sie auf der Dell Support-Website zum Bereich Downloads und wählen Sie Ihr ComputerModell aus dem Pull-Down-Menü aus, um das Dienstprogramm herunterzuladen. Wählen Sie die
Download-Kategorie „System- und Konfigurations-Dienstprogramm” aus, wählen Sie Ihr Betriebssystem und die Sprache aus, und folgen Sie den entsprechenden Anweisungen.
NSS sorgt dafür, dass wichtige Aktualisierungen für Ihr Betriebssystem durchgeführt werden und
bietet Support für Dell™ 3,5-Zoll-USB-Diskettenlaufwerke, Intel® Pentium®-M-Prozessoren, optische Laufwerke und USB-Geräte. NSS ist für den ordnungsmäßigen Betrieb des Dell Computers
erforderlich. Die Software erkennt automatisch Ihren Computertyp und das Betriebssystem und
installiert die für Ihre Konfiguration geeigneten Aktualisierungen.
ANMERKUNG: NSS ist für den ordnungsgemäßen Betrieb von USB-Geräten, wie Dell D/Bay-, D/Dock-,
D/Port- und D/View-Geräte, erforderlich.
Probleme mit Absturz und Software
VORSICHT: Bevor Sie Anweisungen an den in diesem Abschnitt beschriebenen Komponenten ausführen, lesen Sie erst die Sicherheitshinweise im Produktinformationshandbuch.
Der Computer startet nicht
S T E L L E N S I E S I C H E R, D A S S D E R N E T Z A D A P T E R R I C H T I G A M C O M P U T E R U N D A N D E R S T E C K D O S E
ANGESCHLOSSEN IST
Der Computer reagiert nicht mehr
HINWEIS: Wenn Sie das Betriebssystem nicht ordnungsgemäß herunterfahren, können Daten verloren
gehen.
A U S S C H A L T E N D E S C O M P U T E R S — Wenn der Computer nicht mehr reagiert und auch nicht durch
Drücken einer Taste auf der Tastatur bzw. Bewegen der Maus aktiviert werden kann, halten Sie den
Netzschalter mindestens acht bis zehn Sekunden lang gedrückt, bis der Computer ausgeschaltet wird.
Starten Sie anschließend den Computer neu.
122
Schnellreferenzhandbuch
Ein Programm reagiert nicht mehr
BEENDEN EINES PROGRAMMS —
1 Drücken Sie <Strg><Umschlt><Esc> gleichzeitig.
2 Klicken Sie auf Anwendungen.
3 Klicken Sie auf das Programm, das nicht mehr reagiert.
4 Klicken Sie auf End Task (Task beenden).
Ein Programm stürzt wiederholt ab
ANMERKUNG: Anweisungen für die Installation von Software finden Sie im Allgemeinen in der jeweiligen Dokumentation oder auf einer mitgelieferten Diskette oder CD.
S O F T W A R E D O K U M E N T A T I O N L E S E N — Deinstallieren Sie gegebenenfalls das Programm und installieren Sie es anschließend erneut.
Ein Programm wurde für ein früheres Windows-Betriebssystem entwickelt
B E I V E R W E N D U N G V O N W I N D O W S X P, P R O G R A M M K O M P A T I B I L I T Ä T S -A S S I S T E N T E N A U S F Ü H REN —
Der „Programmkompatibilitäts-Assistent” konfiguriert ein Programm für Windows XP entsprechend, so
dass es auch in ähnlichen Betriebssystemumgebungen eingesetzt werden kann.
1 Klicken Sie auf Start, zeigen Sie auf Alle Programme→ Zubehör, und klicken Sie anschließend auf
Programmkompatibilitäts-Assistent.
2 Klicken Sie auf der Begrüßungsseite auf Weiter.
3 Befolgen Sie die Anweisungen im Bildschirm.
Ein blauer Bildschirm wird angezeigt
A U S S C H A L T E N D E S C O M P U T E R S — Wenn der Computer nicht mehr reagiert und auch nicht durch
Drücken einer Taste auf der Tastatur bzw. Bewegen der Maus aktiviert werden kann, halten Sie den
Netzschalter mindestens acht bis zehn Sekunden lang gedrückt, bis der Computer ausgeschaltet wird.
Starten Sie anschließend den Computer neu.
Schnellreferenzhandbuch
123
www.dell.com | support.dell.com
Sonstige Probleme mit der Software
LESEN SIE DIE SOFTWARE-DOKUMENTATION ZU DEM JEWEILIGEN PROGRAMM ODER SETZEN SIE
S I C H M I T D E M S O F T W A R E H E R S T E L L E R I N VE R B I N D U N G U M I N F O R M A T I O N Z U R B E H E B U N G V O N S T Ö RUNGEN ZU BEKOMMEN —
• Stellen Sie sicher, dass das Programm mit dem auf Ihrem Computer installierten Betriebssystem kompatibel ist.
• Stellen Sie sicher, dass Ihr Computer die Mindesthardwareanforderungen erfüllt, die für die Software
erforderlich sind. Informationen dazu finden Sie in der Softwaredokumentation.
• Stellen Sie sicher, dass das Programm ordnungsgemäß installiert und konfiguriert wurde.
• Stellen Sie sicher, dass die Gerätetreiber nicht mit dem Programm in Konflikt stehen.
• Deinstallieren Sie gegebenenfalls das Programm und installieren Sie es anschließend erneut.
LEGEN SIE SOFORT EINE SICHERUNGSKOPIE IHRER DATEIEN AN
VE R W E N D E N S I E F Ü R D I E Ü B E R P R Ü F U N G V O N F E S T P L A T T E N L A U F W E R K , D I S K E T T E N B Z W. C D S E I N
VIRUSABTASTUNGSPROGRAMM
SPEICHERN UND SCHLIEßEN SIE ALLE GEÖFFNETEN DATEIEN ODER PROGRAMME UND FAHREN SIE
I H R E N C O M P U T E R Ü B E R D A S Start M E N Ü H E R U N T E R
S C A N N E N S I E D E N C O M P U T E R N A C H S P Y W A R E — Wenn Sie eine langsame Computerleistung
wahrnehmen, häufige Pop-Up-Werbungen erhalten oder wenn Sie Probleme haben, eine Verbindung
mit dem Internet herzustellen, könnte es sein, dass Ihr Computer mit Spyware infiziert ist. Benutzen
Sie ein Anti-Virus Program, das einen Anti-Spyware Schutz hat (Ihr Programm braucht möglicherweise
eine Aufrüstung), um den Computer zu scannen und die Spyware zu entfernen. Weitere Informationen
erhalten Sie auf der Webseite support.dell.com. Suchen Sie dort nach dem Schlagwort Spyware.
F Ü H R E N S I E D A S P R O G R A M M „ D E L L D I A G N O S T I C S ” A U S — Wenn alle Tests erfolgreich ausgeführt
wurden, liegt der Fehler in der Software begründet.
Dell Diagnose durchführen
VORSICHT: Bevor Sie irgendwelche in diesem Abschnitt beschriebenen Anweisungen ausführen, lesen Sie erst die Sicherheitshinweise im Produktinformationshandbuch.
Wann wird Dell Diagnostics eingesetzt?
Wenn eine Störung am Computer auftritt, führen Sie zuerst die Tests unter „Beheben von Störungen” in Ihrem Online-Benutzerhandbuch durch und führen Sie das Programm „Dell Diagnostics” aus, bevor Sie Dell kontaktieren, um technische Unterstützung zu erhalten.
124
Schnellreferenzhandbuch
HINWEIS: Dell Diagnostics funktioniert nur für Dell™-Computer.
Starten Sie die „Dell Diagnostics” entweder von Ihrem Festplattenlaufwerk oder von der optionalen Die CD Drivers and Utilities (diese wird auch als ResourceCD bezeichnet).
Starten von Dell Diagnostics vom Festplattenlaufwerk
Das Programm „Dell Diagnostics” befindet sich auf der Festplatte auf einer verborgenen Partition.
ANMERKUNG: Wenn auf dem Bildschirm nichts angezeigt werden kann, wenden Sie sich an Dell.
1
Fahren Sie den Computer herunter.
2
Falls der Computer mit einem Docking-Gerät verbunden ist, trennen Sie die Verbindung.
Weitere Anweisungen hierzu finden Sie in der Dokumentation zum Docking-Gerät.
3
Schließen Sie den Computer an eine Steckdose an.
4
Schalten Sie den Computer ein. Wenn das DELL™-Logo angezeigt wird, drücken Sie sofort
<F12>.
ANMERKUNG: Wenn nichts angezeigt wird, halten Sie die Stummtaste gedrückt und drücken gleichzeitig den Netzschalter, um das Programm „Dell Diagnostics” zu starten. Der Computer führt automatisch
die Überprüfung vor dem Systemstart aus.
ANMERKUNG: Wenn eine Meldung erscheint, dass keine Diagnoseprogrammpartition gefunden wurde, führen Sie das Programm „Dell Diagnostics” über die Drivers and Utilities CD aus.
Falls Sie zu lange gewartet haben, und das Betriebssystem-Logo angezeigt wird, warten Sie
noch, bis der Microsoft® Windows®-Desktop angezeigt wird. Fahren Sie danach den Computer herunter und versuchen Sie es erneut.
5
Wenn die Liste der Startgeräte erscheint, markieren Sie Diagnose und drücken Sie die EINGABETASTE.
Der Computer führt die Überprüfung vor dem Systemstart durch, d. h. eine Reihe von Tests
der Systemplatine, Tastatur, Festplatte und dem Bildschirm.
•
Beantworten Sie alle Fragen, die während der Überprüfung angezeigt werden.
•
Wird bei einer Komponente eine Fehlfunktion festgestellt, unterbricht der Computer die
Überprüfung und gibt einen Signalton aus. Um die Überprüfung zu unterbrechen und
den Computer neu zu starten, drücken Sie <n>. Um mit dem nächsten Test fortzufahren, drücken Sie <y>. Um die Komponente, bei der eine Fehlfunktion aufgetreten ist,
erneut zu testen, drücken Sie <r>.
•
Werden bei der Überprüfung vor dem Systemstart Fehlfunktionen festgestellt, notieren
Sie sich die Fehlercodes, und wenden Sie sich an Dell, bevor Sie mit dem Dell-Diagnostics-Programm fortfahren.
Wenn der Systemtest vor Hochfahren des Computers erfolgreich abgeschlossen wird, erhalten
Sie die Meldung Booting Dell Diagnostic Utility Partition (Dell DiagnosticDienstprogrammpartition wird gestartet). Drücken Sie eine beliebige Taste, um
fortzufahren.
Schnellreferenzhandbuch
125
www.dell.com | support.dell.com
6
Drücken Sie eine beliebige Taste, um das Programm „Dell Diagnostics” von der entsprechenden Diagnostic-Dienstprogrammpartition auf der Festplatte zu starten.
Starten der Dell Diagnostics von der optionalen Drivers and Utilities CD
1
Legen Sie die Drivers and Utilities CD ein.
2
Fahren Sie den Computer herunter und führen Sie einen Neustart aus.
Wenn das Dell Logo angezeigt wird, drücken Sie sofort <F12>.
Falls so lange gewartet wurde, bis das Windows-Logo erscheint, warten Sie noch, bis der Windows-Desktop angezeigt wird. Fahren Sie danach den Computer herunter und starten Sie ihn
erneut.
ANMERKUNG: Die nächsten Schritte ändern die Startsequenz nur einmal. Bei dem nächsten Systemstart startet der Computer entsprechend den im System-Setup angegebenen Geräten.
3
Wenn die Liste der Startgeräte erscheint, markieren Sie CD/DVD/CD-RW-Laufwerk und
drücken Sie die EINGABETASTE.
4
Wählen Sie die CD/DVD/CD-RW-Laufwerk aus dem CD-Startmenü.
5
Wählen Sie die Option Boot from CD-ROM (Start von CD-ROM) im angezeigten Menü.
6
Geben Sie 1 ein, um das Menü der ResourceCD zu starten.
7
Geben Sie 2 ein, um „Dell Diagnostics” zu starten.
8
Wählen Sie Run the 32 Bit Dell Diagnostics (32-Bit-Dell Diagnostics ausführen) aus der
Nummernliste. Wählen Sie die für Ihren Computer zutreffende Version aus, wenn mehrere
Versionen aufgelistet werden.
9
Wenn das Hauptmenü des Programms „Dell Diagnostics” erscheint, wählen Sie den gewünschten Test aus.
Hauptmenü des Programms „Dell Diagnostics”
1
126
Klicken Sie nach dem Laden von Dell Diagnostics und nachdem das Hauptmenü angezeigt
wird auf die Schaltfläche für die von Ihnen gewünschte Option.
Option
Funktion
Express Test
(Schnelltest)
Es wird ein Schnelltest der Geräte durchgeführt. Für diesen Test werden
normalerweise 10 bis 20 Minuten benötigt und er erfordert Ihrerseits kein
Eingreifen. Führen Sie den Schnelltest zuerst aus, um die Möglichkeit
zum schnellen Auffinden des Problems zu erhöhen.
Extended Test
(Erweiterter Test)
Es wird ein ausführlicher Test der Geräte durchgeführt. Dieser Test nimmt
normalerweise mindestens eine Stunde in Anspruch. Dabei muss der Benutzer in regelmäßigen Abständen Informationen eingeben.
Schnellreferenzhandbuch
Option (fortgesetzt)
Funktion (fortgesetzt)
Custom Test
(Benutzerdefinierter
Test)
Es wird ein bestimmtes Gerät geprüft. Sie können die Tests, die Sie ausführen möchten, an die eigenen Bedürfnisse anpassen.
Symptom Tree
(Problemübersicht)
Listet die am häufigsten vorkommenden Symptome auf und lässt zu, dass
Sie einen Test wählen, der auf dem Symptom der vorliegenden Störung
basiert.
2
Wenn beim Test eine Störung gefunden wird, wird eine Meldung mit dem Fehlercode und
eine Beschreibung der Störung angezeigt. Notieren Sie den Fehlercode und die Problembeschreibung und folgen Sie den Anweisungen auf dem Bildschirm.
Kann das Problem nicht gelöst werden, wenden Sie sich an Dell.
ANMERKUNG: Die Service-Tag-Nummer des Computers befindet sich oben auf jedem Testbildschirm.
Wenn Sie bei Dell anrufen, fragt Sie der Technische Support nach der Service-Tag-Nummer.
3
Klicken Sie beim Ausführen eines Custom Tests (Benutzerdefinierter Test) oder mit der Option Symptom Tree (Problemübersicht) auf das in der folgenden Tabelle beschriebene
zutreffende Register, um weitere Informationen zu erhalten.
Registerkarte
Funktion
Results (Ergebnisse)
Es werden die Testergebnisse und möglicherweise gefundene Probleme angezeigt.
Errors (Fehler)
Es werden die gefundenen Fehler, die Fehlercodes und eine Beschreibung
des Problems angezeigt.
Help (Hilfe)
Beschreibt den Test und verweist auf mögliche Voraussetzungen für die
Durchführung des Tests.
Configuration
(Konfiguration)
Die Hardwarekonfiguration der ausgewählten Geräte wird angezeigt.
Parameters (Parameter)
Das Programm „Dell Diagnostics” sammelt über das System-Setup-Programm, den Speicher und verschiedene interne Tests Konfigurationsinformationen für alle Geräte. Diese Informationen werden in der Geräteliste auf
der linken Seite des Bildschirms angezeigt. In der Geräteliste werden möglicherweise nicht alle Namen von Geräten angezeigt, die im Computer installiert oder daran angeschlossen sind.
Der Test kann durch Änderungen an den Einstellungen an Ihre Bedürfnisse
angepasst werden.
4
Nachdem die Tests abgeschlossen sind, wenn Sie die Dell Diagnose von der Drivers and Utilities CD ausführen, entfernen Sie die CD.
5
Schließen Sie nach der Beendigung der Tests den Testbildschirm und kehren Sie zum Hauptmenü zurück. Schließen Sie zum Beenden von Dell Diagnostics und zum Neustart des Computers das Hauptmenü.
Schnellreferenzhandbuch
127
128
Schnellreferenzhandbuch
www.dell.com | support.dell.com
Index
A
Akku
Akkubetriebsdauer und
Verwendung, 113
Aufladen, 120
Einsetzen, 121
Energieanzeige, 119
Entfernen, 121
health gauge
(Zustandsanzeige), 120
Ladestandanzeige, 119
Lagern, 122
Leistung, 117
Prüfen des Ladezustands, 118
Warnung „Akku niedrig“, 120
Assistenten
ProgrammkompatibilitätsAssistent, 123
Audioanschlüsse
Anordnung, 115
reagiert nicht mehr, 122
stürzt ab, 122-123
Computer reagiert nicht
mehr, 122
Computer startet nicht, 122
Computer stürzt ab, 122-123
langsame
Computerleistung, 124
Programm reagiert nicht
mehr, 123
Programm stürzt ab, 123
Programme und WindowsKompatibilität, 123
Software, 122-124
Spyware, 124
D
Dell
Support-Website, 110
Dell Premier SupportWebsite, 110
Diagnose, 109
Dell, 124
Dokumentation, 109
Gerät, 109
Online, 110
ResourceCD, 109
S
Software
Probleme, 123-124
H
Spyware, 124
Hilfe- und Supportcenter, 111
T
B
L
Beheben von Störungen
Hilfe- und Supportcenter, 111
Lüftungsschlitze
Anordnung, 115
Betriebssystem
CD, 111
C
Computer
langsame Leistung, 124
P
Probleme
Beheben, 122
Blauer Bildschirm, 123
Treiber, 109
W
Windows XP
Hilfe und Supportcenter, 111
ProgrammkompatibilitätsAssistent, 123
Wissenswertes über Ihren
Computer, 113
Linke Seitenansicht, 115
Index
129
130
Index
Rechte Seitenansicht, 115
Rückansicht, 116
Unterseite, 117
Vorderansicht, 114
130
Index
Stazione di lavoro mobile Dell
Precision™ M70
Guida di consultazione rapida
Modello PP15L
w w w. d e l l . c o m | s u p p o r t . d e l l . c o m
N.B., avvisi e attenzione
N.B. Un N.B. indica informazioni importanti che contribuiscono a migliorare l'utilizzo del computer.
AVVISO: Un AVVISO indica un danno potenziale all'hardware o perdita di dati e spiega come evitare il problema.
ATTENZIONE: Un messaggio di ATTENZIONE indica un rischio di danni materiali, lesioni personali o morte.
Abbreviazioni ed acronimi
Per un elenco completo delle abbreviazioni e degli acronimi, consultare la Guida dell'utente (a seconda del
sistema operativo, fare doppio clic sull'icona Guida dell'utente sul desktop, oppure fare clic sul pulsante Start,
fare clic su Guida in linea e supporto tecnico, quindi fare clic su Guide dell'utente e di sistema).
Se si è acquistato un computer Dell™ Serie n, qualsiasi riferimento in questo documento ai sistemi operativi
Microsoft® Windows® non è applicabile.
I CD Drivers and Utilities e Operating System sono opzionali e potrebbero non essere spediti con tutti i
computer.
_________________
Le informazioni contenute in questo documento sono soggette a modifica senza preavviso.
© 2004 Dell Inc. Tutti i diritti riservati.
È severamente vietata la riproduzione, con qualsiasi strumento, senza l'autorizzazione scritta di Dell Inc.
Marchi commerciali usati nel presente documento: Dell, il logo DELL logo e Dell Precision sono marchi commerciali di Dell Inc.; Microsoft
e Windows sono marchi depositati di Microsoft Corporation; Intel e Pentium sono marchi depositati di Intel Corporation.
Altri marchi e nomi commerciali possono essere utilizzati in questo documento sia in riferimento alle aziende che rivendicano il marchio e i
nomi che ai prodotti stessi. Dell Inc. nega qualsiasi partecipazione di proprietà relativa a marchi e nomi commerciali diversi da quelli di sua
proprietà.
Modello PP15L
Ottobre 2004
N/P Y4303 Rev. A00
Sommario
. . . . . . . . . . . . . . . .
135
. . . . . . . . . . . . . . . . . . . . . . .
137
. . . . . . . . . . . . . . . . . . . . . . . .
139
. . . . . . . . . . . . . . . . . . . . . . . . . .
. . . . . . . . . . . . . . . . . . . . . . . . . .
140
141
141
142
143
. . . . . . . . . . . . . . . . . . . . . . . . . . .
143
Ricerca delle informazioni per il computer
Installazione del computer .
Informazioni sul computer
Vista frontale . .
Vista sinistra . .
Vistra destra . .
Vista posteriore .
Vista inferiore . .
Uso di una batteria .
. . . . . . . . . . . . . . . . . . . . . . . . . .
. . . . . . . . . . . . . . . . . . . . . . . . . .
. . . . . . . . . . . . . . . . . . . . . . . . . .
Rendimento della batteria . . . . .
Controllo della carica della batteria
Ricarica della batteria . . . . . . .
Rimozione della batteria . . . . . .
Installazione di una batteria . . . .
Conservazione della batteria . . . .
Soluzione dei problemi.
. . . . . . . . . . . . . . . . .
. . . . . . . . . . . . . . . . .
143
144
146
147
148
148
. . . . . . . . . . . . . . . . . . . . . . . . .
148
. . . . . . . . . . . . . . . . . .
148
148
150
Notebook System Software (NSS)
Blocchi e problemi del software .
Esecuzione di Dell Diagnostics . .
. . . . . . . . . . . . . . . . .
. . . . . . . . . . . . . . . . .
. . . . . . . . . . . . . . . . .
. . . . . . . . . . . . . . . . .
. . . . . . . . . . . . . . . . . .
. . . . . . . . . . . . . . . . . .
Sommario
133
134
Sommario
Ricerca delle informazioni per il computer
N.B. Alcune funzioni potrebbero non essere disponibili per alcuni computer o in alcuni Paesi.
N.B. Informazioni supplementari potrebbero essere fornite assieme al computer.
Cosa si ricerca?
Si trova qui
•
•
•
•
•
CD Drivers and Utilities (noto anche come il ResourceCD)
Un programma diagnostico per il computer
Driver per il computer
Documentazione del computer
Documentazione delle periferiche
Notebook System Software (NSS)
La documentazione dell'utente e i driver
sono preinstallati sul computer spedito
dalla Dell. È possibile utilizzare il CD per
reinstallare driver, eseguire Dell
Diagnostics o accedere alla
documentazione.
I file Leggimi possono essere compresi nel
CD per fornire gli ultimi aggiornamenti a
proposito di modifiche tecniche operate
sul computer o materiale di riferimento
tecnico avanzato per utenti esperti o
tecnici.
N.B. I CD Drivers and Utilities è opzionale e potrebbe non essere spedito
con tutti i computer.
N.B. Gli aggiornamenti più recenti dei driver e della documentazione si
trovano nel sito support.dell.com.
•
•
•
•
•
•
Informazioni sulla garanzia
Guida alle informazioni sul prodotto Dell™
Clausole e condizioni (solo per gli Stati Uniti)
Istruzioni di sicurezza
Avvisi normativi
Informazioni sull'ergonomia
Contratto di licenza con l'utente finale
• Numero di servizio e codice del servizio
Numero di servizio e licenza di Microsoft Windows
espresso
Tali etichette sono situate sulla parte
• Etichetta di licenza di Microsoft® Windows®
inferiore del computer.
• Usare il numero di servizio per
identificare il computer quando si
utilizza support.dell.com o ci si
rivolge al supporto tecnico.
• Immettere il codice del servizio espresso per smistare la telefonata
quando ci si rivolge al supporto tecnico. Il codice del servizio espresso
non è disponibile in tutti i Paesi.
Guida di consultazione rapida
135
www.dell.com | support.dell.com
Cosa si ricerca?
•
•
•
•
Si trova qui
Come rimuovere e sostituire i componenti
Guida dell'utente di Dell Precision™ M70
Specifiche
Guida in linea e supporto tecnico di Microsoft® Windows® XP
Come configurare le impostazioni del sistema 1 Fare clic sul pulsante Start, quindi scegliere Guida in linea e supporto
tecnico.
Come individuare e risolvere i problemi
2 Fare clic su Guide dell'utente e di sistema, quindi scegliere Guide
dell'utente.
• Soluzioni — suggerimenti per la risoluzione
dei problemi, articoli di tecnici, corsi in linea,
domande frequenti
• Forum clienti — discussione in linea con altri
clienti Dell
• Aggiornamenti — informazioni di
aggiornamento per componenti, quali ad
esempio la memoria, il disco rigido e il
sistema operativo
• Servizio clienti — informazioni di contatto,
sullo stato delle richieste di servizio e degli
ordini, sulla garanzia e sulle riparazioni
• Servizio e supporto — stato della richiesta di
servizio, contratto di servizio, discussioni in
linea con supporto tecnico
• Riferimenti — documentazione del
computer, dettagli sulla configurazione del
computer, specifiche del prodotto e libri
bianchi
• Download — aggiornamenti dei driver
certificati, patch e software
Sito Web del supporto tecnico della Dell — support.dell.com
N.B. Selezionare il Paese per visualizzare il sito appropriato di supporto.
N.B. I clienti aziendali, governativi e degli istituti scolastici possono
utilizzare anche il sito Web personalizzato del supporto tecnico Dell
Premier all'indirizzo premier.support.dell.com. Il sito Web potrebbe non
essere disponibile in tutti i Paesi.
• Notebook System Software (NSS)
CD Drivers and Utilities o sito Web del supporto tecnico della Dell
Se si reinstalla il sistema operativo per il computer, è opportuno
reinstallare anche l'utilità NSS (disponibile nel CD opzionale Drivers
and Utilities o nel sito di supporto Dell). NSS fornisce aggiornamenti
importanti per il sistema operativo e supporto per unità disco floppy
USB Dell™ da 3,5 pollici, processori Intel® Pentium® M, unità ottiche
e periferiche USB. NSS è necessario per il corretto funzionamento del
computer Dell. Il software rileva automaticamente il computer e il
sistema operativo e installa gli aggiornamenti adeguati alla propria
configurazione.
136
Guida di consultazione rapida
Cosa si ricerca?
Si trova qui
• Come usare Windows XP
• Documentazione per il computer
• Documentazione per periferiche (per
esempio un modem)
Guida in linea e supporto tecnico di Windows
1 Fare clic sul pulsante Start, quindi scegliere Guida in linea e supporto
tecnico.
2 Digitare una parola o una frase che descriva il problema e fare clic
sull'icona della freccia.
3 Fare clic sull'argomento che descrive il problema.
4 Seguire le istruzioni visualizzate.
• Come reinstallare il sistema operativo
CD Operating System
Il sistema operativo è già installato nel computer. Utilizzare il CD
Operating System per reinstallare il sistema operativo. Consultare la
Guida dell'utente di Dell Precision per istruzioni.
Dopo aver reinstallato il sistema
operativo, utilizzare il CD Drivers and
Utilities per reinstallare i driver per le
periferiche fornite assieme al computer.
La product key per il sistema operativo è
situata sul computer.
N.B. Il colore del CD varia in base al
sistema operativo ordinato.
N.B. Il CD Operating System è opzionale e
potrebbe non essere spedito con tutti i
computer.
Installazione del computer
ATTENZIONE: Prima di eseguire le procedure descritte in questa sezione, seguire le istruzioni di
sicurezza riportate nella Guida alle informazioni sul prodotto.
1
Disimballare la scatola degli accessori.
2
Mettere da parte il contenuto della scatola degli accessori, che sarà necessario per completare
l'installazione del computer.
La scatola degli accessori contiene anche la documentazione per l'utente ed eventuali
software o hardware aggiuntivi (quali ad esempio schede PC, unità o batterie) ordinati.
3
Collegare l'adattatore c.a. al relativo connettore sul computer e alla presa elettrica.
AVVISO: Quando si utilizza l'adattatore c.a., fissare il cavo in modo che non possa essere tirato,
aggrovigliato, calpestato o schiacciato da oggetti come le gambe di una sedia o i supporti per scrivania.
Guida di consultazione rapida
137
www.dell.com | support.dell.com
N.B. Non collegare il computer alla periferica di inserimento nell'alloggiamento di espansione fino a
quando il computer non sia stato acceso e arrestato almeno una volta.
138
Guida di consultazione rapida
4
Aprire lo schermo del computer e premere il pulsante di alimentazione per accendere il
computer.
pulsante di
alimentazione
Informazioni sul computer
Consultare la Guida dell'utente in linea per informazioni dettagliate sul computer. A seconda del
sistema operativo, fare doppio clic sull'icona Guida dell'utente sul desktop, oppure fare clic sul
pulsante Start, fare clic su Guida in linea e supporto tecnico, quindi fare clic su Guide dell'utente
e di sistema. I seguenti elementi rispondono ad alcune delle domande più frequenti sul computer.
•
Adattatore modem e di rete: Il computer potrebbe includere sia un modem v.92 da 56 K, sia un
adattatore di rete LOM Ethernet 10/100/1000. Per le ubicazioni dei connettori, consultare
"Vista posteriore" a pagina 142. Per maggiori informazioni sulle porte e sui connettori,
consultare "Informazioni sul computer" nella Guida dell'utente in linea.
•
Durata e utilizzo della batteria: Sono disponibili varie batterie che possono essere utilizzate
col computer. Utilizzando la batteria da mAh fornita come standard assieme al computer,
sono prevedibili da 3 a 4 ore di tempo di funzionamento da una singola batteria
completamente carica con un utilizzo medio. L'esecuzione di alcuni tipi di operazioni, quali
ad esempio il funzionamento senza fili prolungato, può ridurre significativamente la durata
della batteria.
–
Per maggiori informazioni sul rendimento della batteria, utilizzo e risparmio di energia,
consultare la Guida dell'utente in linea.
Guida di consultazione rapida
139
Per informazioni su una batteria secondaria opzionale, consultare la Guida dell'utente in
linea.
Periferiche per alloggiamento per moduli: Per informazioni sull'alloggiamento per moduli e le
periferiche supportate, consultare "Uso dell'alloggiamento per moduli" nella Guida dell'utente
in linea.
Periferiche di inserimento nell'alloggiamento di espansione: Il computer supporta la stazione
d'espansione Dell D/Dock e l'APR [Advanced port replicator - Replicatore di porta avanzata]
Dell D/Port.
www.dell.com | support.dell.com
–
•
•
N.B. Le periferiche di inserimento nell'alloggiamento di espansione potrebbero non essere disponibili in
tutti i Paesi.
Per informazioni sulla periferica opzionale di inserimento nell'alloggiamento di espansione,
consultare la documentazione di accompagnamento della periferica.
Per informazioni su come ottenere prestazioni ottimali quando si utilizza una periferica di
inserimento nell'alloggiamento di espansione con questo computer, consultare "Soluzione dei
problemi" nella Guida dell'utente in linea.
Vista frontale
indicatori di stato
della tastiera
dispositivo di chiusura dello schermo
schermo
pulsante di
disattivazione
del volume
pulsante di
alimentazione
indicatori di
stato del
computer
pulsanti dei
comandi volume
track stick
tastiera
pulsanti del
track stick e
del touchpad
touchpad
pulsante del
dispositivo di
chiusura dello
schermo
altoparlanti (2)
140
Guida di consultazione rapida
Vista sinistra
presa d'aria
della ventola
del processore
slot per cavo
di sicurezza
disco rigido
slot per
schede PC
slot per
schede smart
Vistra destra
alloggiamento per moduli
connettori audio (2)
connettori
USB 2.0 (2)
presa d'aria della
ventola del video
Guida di consultazione rapida
141
www.dell.com | support.dell.com
Vista posteriore
ATTENZIONE: Non ostruire le prese d'aria, non introdurvi oggetti ed evitare l'accumulo di polvere.
Non riporre il computer in un ambiente con insufficiente aerazione, ad esempio una valigetta chiusa,
durante il funzionamento, Una ridotta ventilazione può provocare incendi o danneggiare il computer.
AVVISO: Per evitare danni al computer, attendere 5 secondi dallo spegnimento del computer prima di
scollegare una periferica esterna.
connettori USB 2.0 (2)
connettore del modem (RJ-11)
connettore di rete (RJ-45)
sensore a infrarossi
connettore della porta seriale
connettore video
connettore dell'adattatore c.a.
presa d'aria della
ventola del video
142
connettore S-video di uscita TV
Guida di consultazione rapida
presa d'aria della
ventola del processore
Vista inferiore
batteria
chiusura a scatto dell'alloggiamento della batteria
coperchio dei
moduli scheda
Mini PCI/modem/
DIMM
presa d'aria della
ventola del processore
slot della periferica di inserimento
nell'alloggiamento di espansione
presa d'aria della
ventola del video
Uso della batteria
Rendimento della batteria
ATTENZIONE: Prima di eseguire le procedure descritte in questa sezione, seguire le istruzioni di
sicurezza riportate nella Guida alle informazioni sul prodotto.
N.B. Per informazioni sulla garanzia Dell per il computer, consultare la Guida alle informazioni sul
prodotto o il documento di garanzia, su un foglio di carta separato, forniti con il computer.
Per mantenere prestazioni ottimali e le impostazioni del BIOS, usare sempre il computer portatile
Dell™ con la batteria principale installata. Usare la batteria per alimentare il computer quando non
è collegato a una presa elettrica. Come dotazione standard viene fornita una batteria nell'apposito
alloggiamento. L'autonomia della batteria varia a seconda delle condizioni di funzionamento. Per
prolungare significativamente l'autonomia di funzionamento a batteria si può installare una
batteria secondaria opzionale nell'alloggiamento per moduli. Per maggiori informazioni sulla
batteria secondaria opzionale, consultare la Guida dell'utente.
Guida di consultazione rapida
143
www.dell.com | support.dell.com
N.B. L'autonomia della batteria (il tempo per cui può conservare una carica) diminuisce col tempo. A
seconda della frequenza di utilizzo della batteria e delle condizioni in cui è utilizzata, potrebbe essere
necessario acquistare una nuova batteria nel corso della durata utile del computer.
L'autonomia della batteria risulta notevolmente ridotta se si eseguono operazioni che comportano
un alto consumo di energia. A titolo esemplificativo, di seguito sono elencate alcune di queste
operazioni:
•
Uso di CD, DVD o altre unità ottiche
•
Uso di dispositivi di comunicazione senza fili, schede PC o periferiche USB
•
Uso di impostazioni di valori elevati di luminosità dello schermo, screen saver con grafica 3D
o altri programmi che usano intensivamente le risorse del computer quali i giochi 3D
•
Uso del computer in modalità massime prestazioni
N.B. Si consiglia di collegare il computer a una presa elettrica quando si eseguono operazioni di
scrittura su CD o DVD.
È possibile controllare il livello di carica della batteria prima di inserirla nel computer. È inoltre
possibile impostare le opzioni di risparmio energia in modo da ricevere un avviso quando il livello di
carica della batteria è basso.
ATTENZIONE: L'uso di un tipo di batteria incompatibile potrebbe provocare incendi o esplosioni.
Sostituire la batteria solo con un modello compatibile acquistato presso un rivenditore Dell. La batteria
agli ioni di litio è progettata per l'uso con computer Dell. Non utilizzare una batteria proveniente da altri
computer.
ATTENZIONE: Non smaltire le batterie insieme ai rifiuti domestici. Quando non è più possibile
ricaricare la batteria, contattare l'ente locale che si occupa di smaltimento dei rifiuti per consigli su
come smaltire la batteria a ioni di litio. Consultare "Smaltimento della batteria" nella Guida alle
informazioni sul prodotto.
ATTENZIONE: L'uso improprio della batteria potrebbe provocare incendi o ustioni da sostanze
chimiche. Non perforare, incenerire o disassemblare la batteria, né esporla a temperature superiori a
65 °C. Tenere la batteria lontano dalla portata dei bambini. Maneggiare con molta attenzione una
batteria danneggiata o dalla quale si è verificata una perdita. Nelle batterie danneggiate possono
verificarsi delle perdite che possono provocare lesioni alle persone o danneggiare le apparecchiature.
Controllo della carica della batteria
Il Misuratore di alimentazione Dell QuickSet, la finestra e l'icona
del Misuratore di
alimentazione Microsoft® Windows®, l'indicatore di carica della batteria e di capacità di carica
della batteria, e l'avviso di batteria scarica, forniscono informazioni sulla carica della batteria. Per
maggiori informazioni sul controllo della carica della batteria secondaria opzionale, consultare la
Guida dell'utente.
144
Guida di consultazione rapida
Misuratore di alimentazione Dell QuickSet
Se Dell QuickSet è installato, premere <Fn><F8> per visualizzare il misuratore di alimentazione
di QuickSet.
Nella schermata Misuratore di alimentazione sono visualizzati lo stato, il livello di carica e il
tempo di completamento della carica per la batteria installata nel computer.
N.B. È possibile usare la periferica di inserimento nell'alloggiamento di espansione per caricare la
batteria di un computer. Si tenga presente, però, che una batteria inserita nella periferica di inserimento
nell'alloggiamento di espansione non è in grado di alimentare la periferica di inserimento
nell'alloggiamento di espansione o il computer.
Inoltre, quando il computer è collegato ad una periferica di inserimento nell'alloggiamento di
espansione (inserito), la finestra Battery Meter (Misuratore di alimentazione) include una scheda
Dock Battery (Batteria di alloggiamento), che visualizza il livello di carica e lo stato attuale della
batteria della periferica di inserimento nell'alloggiamento di espansione.
Nella schermata Misuratore di alimentazione sono visualizzate le seguenti icone.
• Il computer o la periferica di inserimento nell'alloggiamento di espansione
è alimentata a batteria.
• La batteria si sta scaricando o non è in uso.
• Il computer o la periferica di inserimento nell'alloggiamento di espansione
è collegata a una presa elettrica ed è alimentata a corrente.
• La batteria si sta ricaricando.
• Il computer o la periferica di inserimento nell'alloggiamento di espansione
è collegata a una presa elettrica ed è alimentata a corrente.
• La batteria si sta scaricando o caricando oppure non è in uso.
Per ulteriori informazioni su QuickSet, fare clic con il pulsante destro del mouse sull'icona
sulla barra delle applicazioni e fare clic su Guida in linea.
Misuratore di alimentazione di Microsoft Windows
Il misuratore di alimentazione di Windows indica il livello di carica residua della batteria. Per
accedere al misuratore di alimentazione, fare doppio clic sull'icona
sulla barra delle
applicazioni. Per maggiori informazioni sulla scheda Power Meter (Misuratore alimentazione),
consultare la Guida dell'utente.
Se il computer è collegato a una presa elettrica, apparirà l'icona
.
Guida di consultazione rapida
145
www.dell.com | support.dell.com
Indicatore di carica
Prima di installare una batteria nel computer, premere il pulsante di stato sull'indicatore del livello
di carica della batteria per illuminare i relativi indicatori. Ciascun indicatore rappresenta circa il
20% della carica totale della batteria. Se, ad esempio, il livello di carica della batteria è pari all'80%,
vi sono quattro indicatori accesi. Se non si accende alcun indicatore, significa che la batteria è
scarica.
Indicatore della capacità di carica
L'autonomia della batteria dipende principalmente dal numero di volte che viene caricata. Dopo
centinaia di cicli di carica e scarica, le batterie perdono parte della capacità di carica. Per verificare
la capacità di carica della batteria, tenere premuto il pulsante di stato sull'indicatore del livello di
carica della batteria per almeno 3 secondi. Se non si accende alcun indicatore, la batteria è in buone
condizioni e possiede ancora oltre l'80% della capacità di carica originale. Ogni indicatore
rappresenta una degradazione incrementale. Se si accendono cinque indicatori, significa che
rimane meno del 60% della capacità di carica ed è consigliabile sostituire la batteria. Consultare la
Guida dell'utente per maggiori informazioni sull'autonomia della batteria.
N.B. Quando si preme e si tiene premuto il pulsante di stato sull'indicatore del livello di carica della
batteria per almeno 3 secondi, gli indicatori del livello di carica si illuminano per primi per visualizzare lo
stato di carica corrente. Quindi passano allo stato Condizioni in cui rappresentano, quando accesi, la
degradazione incrementale.
Avviso di batteria scarica
AVVISO: Per evitare che i dati vengano persi o danneggiati, salvare il lavoro immediatamente non
appena si riceve un messaggio che avvisa che la batteria è scarica. Collegare quindi il computer a una
presa elettrica. È inoltre possibile spegnere il computer e installare una batteria secondaria
nell'alloggiamento per moduli. Se la batteria si scarica completamente, la modalità di sospensione viene
avviata automaticamente.
L'avviso del livello di carica batteria basso viene emesso quando la batteria è scarica al 90% circa.
Viene emesso un segnale acustico per indicare che l'autonomia residua della batteria è minima.
Durante tale intervallo di tempo l'altoparlante emetterà periodicamente ulteriori segnali acustici.
Se sono installate due batterie, l'avviso di batteria scarica indica che il livello di carica delle due
batterie combinate è inferiore al 10%. Quando la batteria è quasi scarica, il computer entrerà in
modalità sospensione. Per maggiori informazioni sugli avvisi di batteria scarica, consultare
"Gestione del risparmio di energia" nella Guida dell'utente.
Ricarica della batteria
N.B. Con il computer spento, l'adattatore c.a. ricarica una batteria completamente scarica in circa 1 ora.
Il tempo di carica risulta più lungo se il computer è acceso. La batteria può essere lasciata nel computer
per tutto il tempo desiderato. I circuiti interni della batteria ne impediscono il sovraccarico.
Quando si collega il computer a una presa elettrica oppure si installa una batteria in un computer
collegato a una presa elettrica, viene automaticamente eseguito il controllo del livello di carica e
della temperatura della batteria. Se necessario, l'adattatore c.a. carica la batteria e la mantiene
carica.
146
Guida di consultazione rapida
Se la temperatura della batteria è elevata a causa dell'utilizzo o perché si trova in un ambiente
caldo, la ricarica potrebbe non avere luogo quando si collega il computer ad una presa elettrica.
La batteria è troppo calda per essere caricata se l'indicatore
lampeggia alternativamente in
verde e arancione. Scollegare il computer dalla presa elettrica, quindi lasciare raffreddare il
computer e la batteria finché non raggiungono la temperatura ambiente. Collegare quindi il
computer a una presa elettrica per continuare a caricare la batteria.
Per maggiori informazioni sulla risoluzione dei problemi relativi alla batteria, consultare la Guida
dell'utente.
Rimozione della batteria
ATTENZIONE: Prima di eseguire queste procedure, scollegare il modem dalla presa a muro della
linea telefonica
N.B. Per informazioni sulla rimozione della batteria secondaria opzionale, consultare la Guida
dell'utente.
1
Verificare che il computer sia spento o scollegato dalla presa elettrica.
2
Se il computer è collegato a una periferica di inserimento nell'alloggiamento di espansione
(inserito), scollegarlo. Per istruzioni, consultare la documentazione fornita con la periferica di
inserimento nell'alloggiamento di espansione. Fare scorrere il dispositivo di chiusura
dell'alloggiamento della batteria situato sul fondo del computer, quindi estrarre la batteria
dall'alloggiamento.
Guida di consultazione rapida
147
www.dell.com | support.dell.com
Installazione di una batteria
Accertarsi che il sistema sia spento. Fare scorrere la batteria nell'alloggiamento fino a quando la
chiusura a scatto scatta in posizione.
Per informazioni sull'installazione della batteria secondaria opzionale, consultare la Guida
dell'utente.
Conservazione della batteria
Se non si intende usare il computer per un certo periodo di tempo, rimuovere la batteria. Una
batteria si scarica se non la si usa per un periodo prolungato, sarà pertanto necessario ricaricare
completamente la batteria prima di utilizzarla.
Soluzione dei problemi
Notebook System Software (NSS)
Se si reinstalla il sistema operativo per il computer, è opportuno reinstallare anche l'utilità NSS.
Questa utilità è disponibile nel CD opzionale Drivers and Utilities e sul sito Web del supporto
tecnico della Dell.
Per scaricare l'utilità dal sito Web del supporto tecnico della Dell, passare alla sezione Downloads
del Sito Web e scegliere il modello del computer dal menu a discesa. Scegliere in Download
Category (Categoria di download) "System and Configuration Utilities" (Utilità di sistema e di
configurazione), scegliere il sistema operativo e la lingua, quindi seguire le istruzioni visualizzate.
NSS fornisce aggiornamenti importanti per il sistema operativo e supporto per unità disco floppy
USB Dell™ da 3,5 pollici, processori Intel® Pentium® M, unità ottiche e periferiche USB. NSS è
necessario per il corretto funzionamento del computer Dell. Il software rileva automaticamente il
computer e il sistema operativo e installa gli aggiornamenti adeguati alla propria configurazione.
N.B. NSS è importante per il corretto funzionamento delle periferiche USB, tra cui le periferiche Dell
D/Bay, D/Dock, D/Port e D/View.
Blocchi e problemi del software
ATTENZIONE: Prima di eseguire le procedure descritte in questa sezione, seguire le istruzioni di
sicurezza riportate nella Guida alle informazioni sul prodotto.
Il computer non si avvia
ACCERTARSI CHE L'ADATTATORE C.A. SIA SALDAMENTE COLLEGATO AL COMPUTER E ALLA PRESA
ELETTRICA
148
Guida di consultazione rapida
Il computer smette di rispondere
AVVISO: Così facendo è possibile perdere dati non salvati in precedenza.
S P E G N E R E I L C O M P U T E R — Se il computer non risponde alla pressione di un tasto o al movimento
del mouse, premere il pulsante di alimentazione e tenerlo premuto per almeno 8-10 secondi fino a
quando il computer si spegne. Riavviare il computer.
Un programma smette di rispondere
CHIUDERE IL PROGRAMMA —
1 Premere simultaneamente <Ctrl><MAIUSC><Esc>.
2 Fare clic su Applicazioni.
3 Fare clic sul programma che non risponde più.
4 Fare clic su Termina operazione.
Un programma si interrompe ripetutamente
N.B. In genere insieme a un programma vengono fornite le istruzioni di installazione nella relativa
documentazione o su un disco floppy o CD.
C O N T R O L L A R E L A D O C U M E N T A Z I O N E F O R N I T A C O N I L S O F T W A R E — Se necessario, disinstallare e
quindi reinstallare il programma.
Un programma è stato progettato per una versione precedente del sistema operativo Windows
S E S I U T I L I Z Z A W I N D O W S X P, E S E G U I R E V E R I F I C A G U I D A T A C O M P A T I B I L I T À P R O G R A M M I —
Verifica guidata compatibilità programmi consente di configurare un programma in modo che venga
eseguito in un ambiente simile a versioni del sistema operativo Windows diverse da XP.
1 Fare clic sul pulsante Start, scegliere Tutti i programmi→ Accessori, quindi fare clic su Verifica guidata
compatibilità programmi.
2 Nella schermata di benvenuto fare clic su Avanti.
3 Seguire le istruzioni visualizzate.
Appare una schermata completamente blu
S P E G N E R E I L C O M P U T E R — Se il computer non risponde alla pressione di un tasto o al movimento
del mouse, premere il pulsante di alimentazione e tenerlo premuto per almeno 8-10 secondi fino a
quando il computer si spegne. Riavviare il computer.
Guida di consultazione rapida
149
www.dell.com | support.dell.com
Altri problemi relativi al software
CONTROLLARE LA DOCUMENTAZIONE DEL SOFTWARE O RIVOLGERSI AL COSTRUTTORE DEL SOFTWARE
PER INFORMAZIONI SULLA RISOLUZIONE DEI PROBLEMI —
• Accertarsi che il programma sia compatibile col sistema operativo installato sul computer.
• Accertarsi che il computer soddisfi i requisiti hardware minimi necessari per eseguire il software. Per
informazioni, consultare la documentazione fornita con il software.
• Accertarsi di avere installato e configurato correttamente il programma.
• Verificare che i driver della periferica non siano in conflitto col programma.
• Se necessario, disinstallare e quindi reinstallare il programma.
ESEGUIRE IMMEDIATAMENTE UNA COPIA DI RISERVA DEI FILE
UTILIZZARE UN PROGRAMMA DI RICERCA VIRUS PER CONTROLLARE IL DISCO RIGIDO, I DISCHI
FLOPPY O I CD
SALVARE E CHIUDERE EVENTUALI FILE O PROGRAMMI APERTI E ARRESTARE IL SISTEMA TRAMITE IL
M E N U Avvi o
E S E G U I R E U N A S C A N S I O N E D E L C O M P U T E R P E R C E R C A R E S O F T W A R E S P I A — Se si sta
sperimentando un'esecuzione lenta del computer, o se si ricevono continuamente annunci pubblicitari,
o se si hanno problemi di connessione a Internet, il computer potrebbe contenere software spia.
Utilizzare un programma anti-virus che include protezione anti-software spia (il programma può
richiedere un aggiornamento) per eseguire una scansione del computer e rimuovere i software spia. Per
maggiori informazioni, visitare l'indirizzo support.dell.com e ricercare la parola spyware.
E S E G U I R E D E L L D I A G N O S T I C S — Se tutte le prove vengono completate correttamente,
probabilmente l'errore è di origine software.
Esecuzione di Dell Diagnostics
ATTENZIONE: Prima di eseguire le procedure descritte in questa sezione, seguire le istruzioni di
sicurezza riportate nella Guida alle informazioni sul prodotto.
Quando usare il programma Dell Diagnostics
Se si sperimenta un problema relativo al computer, eseguire i controlli in "Soluzione di problemi"
(consultare la Guida dell'utente in linea) ed eseguire Dell Diagnostics prima di rivolgersi alla Dell
per assistenza tecnica.
AVVISO: Dell Diagnostics funziona solo su computer Dell™.
150
Guida di consultazione rapida
Avviare Dell Diagnostics dal disco rigido o dal CD opzionale CD Drivers and Utilities (noto anche
come ResourceCD).
Avvio del programma Dell Diagnostics dal disco rigido
Il programma Dell Diagnostics è ubicato in una partizione dell'utilità diagnostica nascosta del
disco rigido.
N.B. Se sullo schermo del computer non viene visualizzata alcuna immagine, contattare Dell.
1
Arrestare il sistema.
2
Se il computer è collegato a una periferica di inserimento nell'alloggiamento di espansione
(inserito), scollegarlo. Per istruzioni, consultare la documentazione fornita con la periferica di
inserimento nell'alloggiamento di espansione.
3
Collegare il computer a una presa elettrica.
4
Accendere il computer. Quando viene visualizzato il logo della DELL™, premere
immediatamente <F12>.
N.B. Se sullo schermo non è visualizzato nulla, premere e tenere premuto il pulsante di disattivazione del
volume, quindi premere il pulsante di alimentazione del computer per avviare Dell Diagnostics. Il
computer esegue automaticamente il Ciclo di verifica del sistema pre-avvio.
N.B. Se viene visualizzato un messaggio che indica che la partizione dello strumento di diagnostica non
è stata trovata, eseguire il programma Dell Diagnostics dal CD Drivers and Utilities.
Se si attende troppo a lungo e viene visualizzato il logo del sistema operativo, attendere la
visualizzazione del desktop di Microsoft® Windows®. Arrestare quindi il sistema e riprovare.
5
Quando appare l'elenco delle unità d'avvio, evidenziare Diagnostica e premere <Invio>.
Verrà eseguito il ciclo di verifica del sistema pre-avvio, ovvero una serie di verifiche iniziali
della scheda di sistema, della tastiera, del disco rigido e dello schermo.
•
Durante il ciclo di verifica, rispondere alle domande visualizzate.
•
Se viene rilevato un errore, il computer si arresta e viene emesso un segnale acustico. Per
interrompere il ciclo di verifica e riavviare il computer, premere <n>; per passare alla
prova successiva, premere <y>; per ripetere il controllo del componente che non ha
superato la prova, premere <r>.
•
Se durante il ciclo di verifica del sistema pre-avvio vengono rilevati errori, annotare i
codici di errore e contattare la Dell prima di procedere all'esecuzione del programma Dell
Diagnostics.
Se il ciclo di verifica del sistema pre-avvio è completato con successo, si riceve il messaggio
Booting Dell Diagnostic Utility Partition. Press any key to continue
(Avvio della partizione dell'utilità Dell Diagnostics. Premere un tasto per continuare).
6
Premere un tasto per avviare il programma Dell Diagnostics dalla partizione dell'utilità di
diagnostica sul disco rigido.
Guida di consultazione rapida
151
www.dell.com | support.dell.com
Avvio di Dell Diagnostics dal CD opzionale Drivers and Utilities
1
Inserire il CD Drivers and Utilities.
2
Arrestare e riavviare il computer.
Quando viene visualizzato il logo della DELL™, premere immediatamente <F12>.
Se si attende troppo a lungo e viene visualizzato il logo di Windows, attendere la
visualizzazione del desktop di Windows. Arrestare quindi il sistema e riprovare.
N.B. I passi successivi cambiano la sequenza d'avvio una sola volta. All'avvio successivo, il computer si
avvia in base alle periferiche specificate nell'installazione del sistema.
3
Quando appare l'elenco delle unità d'avvio, evidenziare Unità CD/DVD/CD-RW e premere
<Invio>.
4
Selezionare l'opzione Unità CD/DVD/CD-RW dal menu di avvio del CD.
5
Selezionare l'opzione Boot from CD-ROM (Avvia da CD-ROM) dal menu che appare.
6
Digitare 1 per avviare il menu ResourceCD.
7
Digitare 2 per avviare Dell Diagnostics.
8
Selezionare Run the 32 Bit Dell Diagnostics (Esegui la Diagnostica della Dell a 32 bit)
dall'elenco numerato. Se sono elencate più versioni, selezionare la versione appropriata per il
computer utilizzato.
9
Quando viene visualizzato il Main Menu (Menu principale) di Dell Diagnostics, scegliere il
tipo di prova da eseguire.
Menu principale del programma Dell Diagnostics
1
152
Dopo il caricamento di Dell Diagnostics e la comparsa della schermata Main Menu (Menu
principale), fare clic sul pulsante relativo all'opzione desiderata.
Opzione
Funzione
Express Test
Esegue una prova veloce delle periferiche. L'esecuzione di questa prova
richiede in genere da 10 a 20 minuti e non richiede interazione da parte
dell'utente. Eseguire Express Test (Prova veloce) prima per aumentare la
possibilità di scoprire il problema rapidamente.
Extended Test
Esegue una verifica approfondita delle periferiche. L'esecuzione di questa
prova richiede in genere almeno 1 ora e l'utente dovrà rispondere
periodicamente a delle domande.
Custom Test
Esegue la verifica di una periferica specifica. È possibile personalizzare le
prove che si desidera eseguire.
Symptom Tree
Elenca i sintomi più comuni riscontrati e consente di selezionare una prova
in base al sintomo del problema che si sperimenta.
Guida di consultazione rapida
2
Se si riscontra un problema durante una prova, appare un messaggio che visualizza il codice di
errore e la descrizione del problema. Annotare il codice di errore e la descrizione del problema
e seguire le istruzioni visualizzate.
Se non è possibile risolvere la condizione di errore, rivolgersi alla Dell.
N.B. Il Numero di servizio per il computer si trova nella parte superiore di ciascuna schermata di prova.
Se si contatta Dell, il personale del supporto tecnico richiederà all'utente il numero di servizio.
3
Se si esegue una prova dalle opzioni Custom Test (Prova personalizzata) o Symptom Tree
(Albero dei sintomi), fare clic sulla scheda pertinente descritta nella tabella seguente per
maggiori informazioni.
Scheda
Funzione
Results
Visualizza i risultati della prova e le eventuali condizioni di errore
riscontrate.
Errors
Visualizza le condizioni di errore riscontrate, i codici di errore e la
descrizione del problema.
Help
Descrive la prova e può contenere informazioni sui requisiti per l'esecuzione
della prova.
Configuration
Visualizza la configurazione hardware della periferica selezionata.
Le informazioni di configurazione di tutte le periferiche visualizzate in Dell
Diagnostics sono derivate dalla configurazione del sistema, dalla memoria e
da varie prove interne e vengono visualizzate nell'elenco delle periferiche
disponibile nel riquadro sinistro dello schermo. Nell'elenco delle periferiche
potrebbero non essere elencati i nomi di tutti i componenti installati sul
computer o di tutte le periferiche collegate al computer.
Parameters
Consente di personalizzare la prova modificandone le impostazioni.
4
Quando le prove sono completate, se si sta eseguendo Dell Diagnostics dal CD Drivers and
Utilities, rimuovere il CD.
5
Al completamento delle prove, chiudere la schermata di prova per ritornare alla schermata
Main Menu (Menu principale). Per uscire da Dell Diagnostics e riavviare il computer,
chiudere la schermata Main Menu (Menu principale).
Guida di consultazione rapida
153
www.dell.com | support.dell.com
154
Guida di consultazione rapida
Indice analitico
B
batteria
avviso di batteria scarica, 146
conservazione, 148
controllo della carica, 144
durata e utilizzo della
batteria, 139
indicatore della capacità di
carica, 146
indicatore di carica, 146
installazione, 148
misuratore di
alimentazione, 145
rendimento, 143
ricarica, 146
rimozione, 147
C
computer
esecuzione lenta del
computer, 150
interruzioni, 149
smette di rispondere, 149
connettori audio
ubicazione, 141
D
Dell
sito di supporto, 136
Diagnostica, 135
Dell, 150
Documentazione, 135
periferica, 135
ResourceCD, 135
documentazione
in linea, 136
Driver, 135
G
Guida in linea e supporto
tecnico, 137
I
informazioni sul
computer, 139
vista frontale, 140
vista inferiore, 143
vista laterale destra, 141
vista laterale sinistra, 141
vista posteriore, 142
problemi
blocchi, 148
esecuzione lenta del
computer, 150
il computer non si avvia, 148
il computer smette di
rispondere, 149
il programma smette di
rispondere, 149
interruzioni del computer, 149
interruzioni del
programma, 149
programmi e compatibilità con
Windows, 149
schermata blu, 149
software, 148-150
software spia, 150
soluzione, 148
procedure guidate
Verifica guidata compatibilità
programmi, 149
R
O
Operating System
CD, 137
P
prese d'aria
ubicazione, 141
Risoluzione dei problemi
Guida in linea e supporto
tecnico, 137
S
Sito Web del supporto tecnico
Dell Premier, 136
Indice analitico
155
156
Indice analitico
software
problemi, 149-150
software spia, 150
W
Windows XP
Guida in linea e supporto
tecnico, 137
Verifica guidata compatibilità
programmi, 149
156
Indice analitico
Estación de trabajo portátil M70 Dell
Precision™
Guía de referencia rápida
Modelo PP15L
w w w. d e l l . c o m | s u p p o r t . d e l l . c o m
Notas, Avisos y Precauciones
NOTA: Una NOTA indica información importante que le ayudar a hacer un mejor uso de la computadora.
AVISO: Un AVISO indica la posibilidad de daños al hardware o pérdida de datos y le explica cómo evitar el problema.
PRECAUCIÓN: Una PRECAUCIÓN indica un posible daño material, lesión corporal o muerte.
Abreviaturas y acrónimos
Para obtener una lista completa de abreviaturas y acrónimos, consulte la Guía del usuario (según su sistema
operativo, haga doble clic en el icono Guía del usuario del escritorio o bien haga clic en el botón Inicio, en
Centro de ayuda y soporte técnico y, a continuación, haga clic en Guías del usuario y del sistema).
Si ha adquirido un equipo Dell™ Serie n, todas las referencias que aparecen en este documento relativas a los
sistemas operativos de Microsoft® Windows® no son aplicables.
El CD Drivers and Utilities (Controladores y utilidades) y el CD del sistema operativo son opcionales y es posible
que no se entreguen con todos los equipos.
_________________
La información contenida en este documento puede modificarse sin aviso previo.
© 2004 Dell Inc. Todos los derechos reservados.
Queda estrictamente prohibido realizar cualquier tipo de reproducción sin el consentimiento por escrito de Dell Inc.
Marcas comerciales utilizadas en este texto: Dell, el logotipo de DELL y Dell Precision son marcas comerciales de Dell Inc.; Microsoft y
Windows son marcas comerciales registradas de Microsoft Corporation; Intel y Pentium son marcas comerciales registradas de Intel Corporation.
Este documento puede incluir otras comerciales y nombres comerciales para referirse a las entidades que son propietarias de los mismos o a
sus productos. Dell Inc. renuncia a cualquier interés sobre la propiedad de marcas y nombres comerciales que no sean los suyos.
Modelo PP15L
Octubre de 2004 N/P Y4303
Rev. A00
Contenido
. . . . . . . . . . . . . . . .
161
. . . . . . . . . . . . . . . . . . . . . . . .
163
. . . . . . . . . . . . . . . . . . . . . . . . . .
165
. . . . . . . . . . . . . . . . . . . . . . . . . . .
. . . . . . . . . . . . . . . . . . . . . . . . . . .
166
167
167
168
169
. . . . . . . . . . . . . . . . . . . . . . . . . . . .
169
Localización de información de su equipo
Configuración del equipo
Acerca de su equipo .
Vista anterior .
Vista izquierda
Vista derecha .
Vista posterior
Vista inferior .
Uso de la batería
. . . . . . . . . . . . . . . . . . . . . . . . . . .
. . . . . . . . . . . . . . . . . . . . . . . . . . .
. . . . . . . . . . . . . . . . . . . . . . . . . . .
Rendimiento de la batería . . . . . . .
Comprobación de la carga de la batería
Carga de la batería . . . . . . . . . .
Extracción de una batería . . . . . . .
Instalación de una batería . . . . . . .
Almacenamiento de una batería . . . .
Solución de problemas.
. . . . . . . . . . . . . . .
. . . . . . . . . . . . . . .
169
170
172
173
173
173
. . . . . . . . . . . . . . . . . . . . . . . . .
174
Notebook System Software (NSS) . . .
Bloqueos y problemas con el software .
Ejecución de los Dell Diagnostics . . .
. . . . . . . . . . . . . . .
. . . . . . . . . . . . . . .
. . . . . . . . . . . . . . .
. . . . . . . . . . . . . . .
. . . . . . . . . . . . . . .
. . . . . . . . . . . . . . .
. . . . . . . . . . . . . . .
174
174
176
Contenido
159
160
Contenido
Localización de información de su equipo
NOTA: Es posible que algunas funciones no estén disponibles para su equipo o en determinados países.
NOTA: Su equipo puede incluir información adicional.
¿Qué busca?
Aquí lo encontrará
•
•
•
•
•
CD Drivers and Utilities (también conocido como ResourceCD)
Un programa de diagnóstico para mi equipo
Controladores para mi equipo
La documentación de mi equipo
La documentación de mi dispositivo
Notebook System Software (NSS)
Dell ya ha instalado la documentación y
los controladores en el equipo. Puede
utilizar el CD para volver a instalar los
controladores, ejecutar los Dell
Diagnostics o acceder a la
documentación.
Los archivos \ldblquote readme\rdblquote
(léame) pueden estar incluidos en su CD
para disponer de actualizaciones de última
hora sobre los cambios técnicos del equipo
o material de consulta destinado a los
técnicos o usuarios avanzados.
NOTA: El CD denominado Drivers and Utilities (Controladores y utilidades)
es opcional y es posible que no se entregue con todos los equipos.
NOTA: Los últimos controladores y actualizaciones de la documentación
se pueden encontrar en support.dell.com.
•
•
•
•
•
•
Información sobre la garantía
Términos y condiciones (sólo en EE.UU.)
Instrucciones de seguridad
Información reglamentaria
Información ergonómica
End User License Agreement (Contrato de
licencia de usuario final)
• Etiqueta de servicio y código de servicio
rápido
• Etiqueta de licencia de Microsoft®
Windows®
Guía de información del producto Dell™
Etiqueta de servicio y licencia de Microsoft Windows
Estas etiquetas están situadas en el
panel inferior de su equipo.
• Utilice la etiqueta de servicio para
identificar el equipo cuando utilice
support.dell.com o se ponga en
contacto con el servicio de
asistencia técnica.
• Escriba el código de servicio urgente para dirigir su llamada cuando se
ponga en contacto con el servicio de asistencia técnica. El código de
servicio urgente no está disponible en todos los países.
Guía de referencia rápida
161
www.dell.com | support.dell.com
¿Qué busca?
Aquí lo encontrará
•
•
•
•
Guía del usuario para Dell Precision™ M70
Cómo extraer y cambiar piezas
Especificaciones
Cómo configurar los parámetros del sistema
Cómo detectar y solucionar problemas
Centro de ayuda y soporte técnico de Microsoft® Windows® XP
1 Haga clic en el botón Inicio y, a continuación, haga clic en Ayuda y
soporte técnico.
2 Haga clic en Guías del usuario y del sistema y en Guías de usuario.
• Soluciones — Consejos y sugerencias para la
solución de problemas, artículos de técnicos,
cursos en línea y preguntas más frecuentes
• Comunidad — Debates en línea con otros
clientes de Dell
• Actualizaciones — Información de
actualización para componentes como, por
ejemplo, la memoria, la unidad de disco duro
y el sistema operativo
• Atención al cliente — Información de
contacto, llamada de servicio y estado de los
pedidos, garantía e información de reparación
• Servicio y asistencia — Historial de asistencia
y estado de las llamadas de servicio, contrato
de servicio, debates en línea con el personal
de asistencia técnica
• Referencia — Documentación del equipo,
detalles en la configuración de mi equipo,
especificaciones del producto y
documentación técnica
• Descargas — Controladores certificados,
revisiones y actualizaciones de software
Sitio web Dell Support — support.dell.com
NOTA: Seleccione su región para ver el sitio web de asistencia
adecuado.
NOTA: Los clientes de empresas, instituciones gubernamentales y
educativas también pueden utilizar el sitio web personalizado Dell Premier
Support de premier.support.dell.com. Es posible que este sitio web no esté
disponible en todas las regiones.
• Notebook System Software (NSS)
CD Drivers and Utilities (Controladores y utilidades) o sitio web Dell
Support
Si vuelve a instalar el sistema operativo del equipo, también debe
volver a instalar la utilidad NSS (disponible en el CD Drivers and
Utilities (Controladores y utilidades) o en el sitio web Dell Support). La
utilidad NSS proporciona actualizaciones importantes del sistema
operativo y asistencia para las unidades de disquete de 3,5 pulgadas de
Dell™, procesadores Intel® Pentium® M, unidades ópticas y
dispositivos USB. La utilidad NSS es necesaria para el correcto
funcionamiento de su equipo Dell. El software detecta
automáticamente su equipo y sistema operativo e instala las
actualizaciones apropiadas a su configuración.
162
Guía de referencia rápida
¿Qué busca?
Aquí lo encontrará
• Cómo utilizar Windows XP
• Documentación de mi equipo
• Documentación para los dispositivos (como,
por ejemplo, un módem)
Centro de ayuda y soporte técnico de Windows
1 Haga clic en el botón Inicio y en Ayuda y soporte técnico.
2 Escriba una palabra o frase que describa el problema y, a continuación,
haga clic en el icono de flecha.
3 Haga clic en el tema que describa el problema.
4 Siga las instrucciones que aparecen en pantalla.
• Cómo volver a instalar mi sistema operativo
CD del sistema operativo
El sistema operativo ya está instalado en el equipo. Para volver a instalar
el sistema operativo, utilice el CD del sistema operativo. Consulte la
Guía del usuario de Dell Precision para obtener instrucciones.
Después de volver a instalar el sistema
operativo, utilice el CD Drivers and
Utilities para volver a instalar los
controladores de los dispositivos
suministrados con el equipo.
La clave del producto del sistema
operativo se encuentra en el equipo.
NOTA: El color de su CD varía según el
sistema operativo que haya solicitado.
NOTA: El CD del sistema operativo es
opcional, por lo que es posible que no se
envíe con todos los equipos.
Configuración del equipo
PRECAUCIÓN: Antes de comenzar cualquiera de los procedimientos de esta sección, siga las
instrucciones de seguridad que se encuentran en la Guía de información del producto.
1
Desempaquete la caja de accesorios.
2
Saque el contenido de la caja de accesorios, que necesitará para completar la configuración
del equipo.
La caja de accesorios también contiene la documentación del usuario y todo el software o
hardware adicional (como tarjetas PC, unidades o baterías) que ha solicitado.
3
Conecte el adaptador de CA al conector del adaptador de CA del equipo y a la toma de
corriente eléctrica.
AVISO: Cuando utilice el adaptador de CA, fije el cable de modo que objetos como las patas de la silla o
los soportes del escritorio no tiren del cable, ni se enreden con él, lo pisen o aplasten.
Guía de referencia rápida
163
www.dell.com | support.dell.com
NOTA: No conecte el equipo al dispositivo de acoplamiento hasta que el equipo se haya encendido y
apagado como mínimo una vez.
164
Guía de referencia rápida
4
Para encender el equipo, abra la pantalla y pulse el botón de alimentación.
Botón de alimentación
Acerca de su equipo
Consulte la Guía del usuario en línea para obtener información detallada acerca del equipo. Según
el sistema operativo que tenga, haga doble clic en el icono Guía del usuario del escritorio o bien
haga clic en el botón Inicio, en Centro de ayuda y soporte técnico y, a continuación, en Guías del
usuario y del sistema. Los siguientes puntos tratan algunas de las preguntas más frecuentes acerca
del equipo.
•
Módem y adaptador de red: El equipo puede incluir un módem v.92 de 56K y un adaptador de
red Ethernet LOM 10/100/1000. Para ubicaciones del conector, consulte “Vista posterior” en
la página 168. Para obtener más información acerca de los puertos y conectores, consulte la
sección “Acerca de su equipo” en la Guía del usuario en línea.
•
Duración de la batería y utilización: Se pueden utilizar diferentes baterías con el equipo. Con
la batería de mAh que se incluye de manera estándar con el equipo, la expectativa de duración
de una sola batería es de 3 a 4 horas con una utilización media. Si se realizan determinados
tipos de operaciones como, por ejemplo, la utilización prolongada sin cable, se puede reducir
de manera significativa la duración de la batería.
–
Para obtener más información sobre la conservación de energía, la utilización y el
rendimiento de la batería, consulte la Guía del usuario en línea.
Guía de referencia rápida
165
www.dell.com | support.dell.com
–
Para obtener información acerca de una segunda batería opcional, consulte la Guía del
usuario en línea.
•
Dispositivos del compartimento para módulos: Para obtener información acerca del
compartimento para módulos y los dispositivos compatibles, consulte la sección “Uso del
compartimento para módulos” de la Guía del usuario en línea.
•
Dispositivos de acoplamiento: El equipo admite la estación de expansión D/Dock de Dell y el
replicador de puerto avanzado D/Port de Dell.
NOTA: Es posible que los dispositivos de acoplamiento no estén disponibles en algunos países.
Para obtener información sobre el dispositivo de acoplamiento opcional, consulte la
documentación incluida con el dispositivo.
Para obtener información acerca de cómo obtener un rendimiento óptimo al utilizar un
dispositivo de acoplamiento con este equipo, consulte la sección “Solución de problemas” de
la Guía del usuario en línea.
Vista anterior
Indicadores de
estado del teclado
Seguro de la pantalla
Pantalla
Botón de
silencio de audio
Botón de
alimentación
Botones de
control de volumen
Indicadores
de estado del
dispositivo
Palanca de
seguimiento
Teclado
Botones de la
palanca de
seguimiento y de
la superficie táctil
Superficie
táctil
Botón del seguro
de la pantalla
Altavoces (2)
166
Guía de referencia rápida
Vista izquierda
Rejilla de
ventilación
del ventilador
del procesador
Ranura
para cable
de seguridad
Unidad de
disco duro
Ranura para
tarjetas PC
Ranura para
tarjetas Smart
Vista derecha
Compartimento para módulos
Conectores de audio (2)
Conectores
USB 2.0 (2)
Rejilla de
ventilación
del ventilador
del vídeo
Guía de referencia rápida
167
www.dell.com | support.dell.com
Vista posterior
PRECAUCIÓN: No introduzca objetos ni permita que el polvo se acumule en las rejillas de ventilación
ni las bloquee. No almacene el equipo en un entorno con poca ventilación, como un maletín cerrado,
mientras esté en funcionamiento. La circulación restringida de aire podría dañar el equipo o provocar
un incendio.
AVISO: Para no dañar el equipo, espere 5 segundos después de apagarlo antes de desconectar un
dispositivo externo.
Conectores USB 2.0 (2)
Conector de módem (RJ-11)
Conector de red (RJ-45)
Sensor de infrarrojos
Conector serie
Conector de vídeo
Conector del adaptador de CA
Rejilla de ventilación
del ventilador del vídeo
168
Conector para S-vídeo y salida de TV
Guía de referencia rápida
Rejilla de ventilación del
ventilador del procesador
Vista inferior
Batería
Pasador de liberación del compartimento de la batería
Cubierta de la
minitarjeta
PCI/módem/
módulo DIMM
Rejilla de ventilación
del ventilador del
procesador
Ranura para el dispositivo
de acoplamiento
Rejilla de ventilación
del ventilador del vídeo
Uso de la batería
Rendimiento de la batería
PRECAUCIÓN: Antes de comenzar cualquiera de los procedimientos de esta sección, siga las
instrucciones de seguridad que se encuentran en la Guía de información del producto.
NOTA: Para obtener información sobre la garantía de Dell para el equipo, consulte la publicación Guía
de información del producto o el documento en papel de la garantía que viene con el equipo.
Para el rendimiento óptimo del equipo y para facilitar la conservación de la configuración del BIOS,
utilice su equipo portátil Dell™ con la batería principal instalada en todo momento. Utilice una
batería para ejecutar el equipo cuando no esté conectado a una toma de corriente eléctrica. Se
proporciona una batería en su compartimento correspondiente como equipamiento estándar. El
tiempo de funcionamiento de la batería depende de las condiciones de funcionamiento. Para
aumentar significativamente el tiempo de funcionamiento, puede instalar una segunda batería
opcional en el compartimento para módulos. Para obtener más información acerca de la segunda
batería opcional, consulte la Guía del usuario.
Guía de referencia rápida
169
www.dell.com | support.dell.com
NOTA: El tiempo de funcionamiento de la batería (el tiempo que puede mantener una carga) disminuye
con el tiempo. En función de la frecuencia y las condiciones de uso de la batería, es posible que deba
comprar una nueva batería durante la vida útil del equipo.
La duración de la batería se reduce en gran medida si realiza, entre otras, las operaciones que se
indican a continuación:
•
Uso de CD, DVD, u otras unidades ópticas
•
Usar dispositivos de comunicaciones inalámbricas, tarjeta PC o dispositivos USB
•
Usar una configuración de pantalla con mucho brillo, protectores de pantalla 3D u otros
programas que consuman mucha energía como juegos 3D
•
Ejecutar el ordenador en el modo de máximo rendimiento
NOTA: Se recomienda conectar el equipo a una toma de alimentación eléctrica mientras se escribe en
un CD o DVD.
Puede comprobar la carga de la batería antes de insertarla en el equipo. También se pueden
establecer las opciones de administración de energía de modo que avisen cuando la carga de la
batería esté baja.
PRECAUCIÓN: El uso de baterías incompatibles puede aumentar el riesgo de incendio o explosión.
Sustituya la batería únicamente por baterías de Dell. La batería de iones de litio está diseñada para
funcionar con equipos Dell. No utilice una batería de otro equipo.
PRECAUCIÓN: No deseche las baterías en la basura doméstica. Cuando la batería ya no pueda
cargarse, solicite información a una empresa local de gestión de residuos o al departamento
responsable en materia de medio ambiente sobre el modo de desechar las baterías de iones de litio.
Consulte el apartado “Cómo desechar las baterías” de la Guía de información del producto.
PRECAUCIÓN: El uso incorrecto de la batería puede aumentar el riesgo de incendio o quemadura
química. No perfore, incinere, desmonte o exponga la batería a temperaturas superiores a 65°C (149 °F).
Mantenga la batería fuera del alcance de los niños. Tenga mucho cuidado con las baterías dañadas o
que goteen. Las baterías dañadas pueden gotear y causar lesiones personales o daños en el equipo.
Comprobación de la carga de la batería
El medidor de batería Dell QuickSet, la ventana de Microsoft® Windows® Medidor de energía y el
icono
, el medidor de carga de la batería y el medidor de estado, así como la advertencia de
batería baja proporcionan información sobre la carga de la batería. Para obtener más información
acerca de la comprobación de la carga de la segunda batería opcional, consulte la Guía del usuario.
Medidor de batería QuickSet de Dell
Si Dell QuickSet está instalado, presione <Fn><F8> para ver el Medidor de batería Dell
QuickSet.
La ventana Medidor de la batería muestra el estado, el nivel y el tiempo total de carga de la batería
del equipo.
170
Guía de referencia rápida
NOTA: Puede usar el dispositivo de acoplamiento para cargar una batería del equipo. Sin embargo, la
batería de un dispositivo de acoplamiento no alimenta a éste o al equipo.
Además, cuando el equipo está conectado a un dispositivo de acoplamiento (acoplado), la ventana
Battery Meter (Medidor de batería) incluye una ficha Dock Battery (Acoplar batería), que muestra
el nivel de carga y el estado actual de la batería del dispositivo de acoplamiento.
Los iconos siguientes aparecen en la ventana Medidor de la batería:
• El equipo o el dispositivo de acoplamiento se alimenta de la batería.
• La batería se está descargando o está inactiva.
• El equipo o el dispositivo de acoplamiento está conectado a un enchufe
eléctrico y se alimenta de la corriente alterna.
• La batería se está cargando.
• El equipo o el dispositivo de acoplamiento está conectado a un enchufe
eléctrico y se alimenta de la corriente alterna.
• La batería se está descargando, está inactiva o se está cargando.
Para obtener más información sobre QuickSet, pulse el botón derecho del ratón en el icono
la barra de tareas y seleccione Ayuda.
de
Medidor de energía de Microsoft Windows
El medidor de energía de Windows indica la carga que le queda a la batería. Para consultar el
medidor de energía, pulse dos veces en el icono
de la barra de tareas. Para obtener más
información sobre la ficha Medidor de energía, consulte la Guía del usuario.
Si el equipo está conectado a una toma de corriente, aparece un icono
.
Medidor de carga
Antes de instalar una batería, pulse el botón de estado del medidor de carga de la batería para
encender los indicadores luminosos de nivel de carga. Cada luz representa aproximadamente un
20% de la carga total de la batería. Por ejemplo, si la batería tiene aún un 80% de carga restante,
habrá cuatro luces encendidas. Si no hay ninguna luz encendida, la batería está descargada.
Medidor de estado
El tiempo de funcionamiento de la batería se ve determinado en gran medida por el número de
veces que se carga. Tras cientos de ciclos de carga y descarga, las baterías pierden parte de su
capacidad de carga, o estado. Para comprobar el estado de la batería, mantenga pulsado el botón de
estado del medidor de carga de esa batería durante al menos 3 segundos. Si no se ilumina ningún
indicador, significa que la batería está en buenas condiciones y que mantiene más del 80 por ciento
de su capacidad de carga original. Cada luz representa una degradación gradual. Si se iluminan
Guía de referencia rápida
171
www.dell.com | support.dell.com
cinco indicadores, significa que la batería conserva menos del 60 por ciento de su capacidad de
carga, por lo que se debería considerar su sustitución. Consulte la Guía del usuario para obtener
más información sobre el tiempo de funcionamiento.
NOTA: Si mantiene pulsado el botón de estado del medidor de carga de la batería durante tres
segundos como mínimo, los indicadores luminosos de nivel de carga se iluminarán primero para mostrar
el estado de carga actual. A continuación pasarán a mostrar su estado donde representan la
degradación en incrementos cuando está iluminado.
Advertencia de bajo nivel de carga de la batería
AVISO: Para evitar la pérdida de datos o que éstos resulten dañados, tras una advertencia de batería
baja guarde inmediatamente el trabajo. A continuación, conecte el equipo a una toma de corriente
eléctrica. También puede desactivar el equipo e instalar una segunda batería en el compartimento para
módulos. Si la batería se agota por completo, el modo de hibernación se activa automáticamente.
La advertencia de batería baja se produce cuando se ha agotado aproximadamente un 90 % de la
carga. El equipo emitirá un pitido, lo que indica que queda el tiempo mínimo de funcionamiento
de la batería. Durante ese tiempo, por el altavoz se emitirán pitidos a intervalos periódicos. Si tiene
instaladas dos baterías, la advertencia de batería baja indica que se ha agotado aproximadamente
un 90% de la carga combinada de ambas. El equipo entrará en el modo de hibernación cuando la
carga de la batería se encuentre en un nivel peligrosamente bajo. Para obtener más información
sobre advertencias de batería baja, consulte “Administración de energía” en la Guía del usuario.
Carga de la batería
NOTA: El adaptador de CA tarda una hora aproximadamente en cargar una batería totalmente
descargada con el equipo apagado. El tiempo de carga aumenta con el equipo encendido. Puede dejar la
batería en el equipo todo el tiempo que desee. Los circuitos internos de la batería impiden que se
sobrecargue.
Cuando conecte el equipo a un enchufe eléctrico o instale una batería mientras está conectado a
un enchufe eléctrico, comprobará la carga y la temperatura de la batería. Si es necesario, el
adaptador de CA cargará la batería y mantendrá la carga.
Si la batería está caliente porque se ha estado usando en el equipo o porque ha permanecido en un
ambiente donde la temperatura es elevada, puede ser que no se cargue cuando se conecte el equipo
a una toma de alimentación eléctrica.
La batería está demasiado caliente para iniciar la recarga si la luz
parpadea alternando entre el
verde y el naranja. Desconecte el equipo de la toma de corriente y espere a que tanto éste como la
batería se enfríen hasta alcanzar la temperatura ambiente. A continuación, conecte el equipo a una
toma de corriente y continúe cargando la batería.
Para obtener más información sobre la solución de problemas de la batería, consulte la Guía del
usuario.
172
Guía de referencia rápida
Extracción de una batería
PRECAUCIÓN: Antes de realizar estos procedimientos, desconecte el módem del enchufe telefónico
de pared.
NOTA: Para obtener información acerca de cómo extraer la segunda batería opcional, consulte la Guía
del usuario.
1
Asegúrese de que el equipo está apagado y desconectado de la toma de alimentación eléctrica.
2
Si el equipo está conectado (acoplado) a un dispositivo de acoplamiento, desacóplelo. Si
desea instrucciones, consulte la documentación incluida con el dispositivo de acoplamiento.
Deslice y sostenga el pasador de liberación del compartimento de la batería y, a continuación,
extraiga la batería del compartimento.
Instalación de una batería
Asegúrese de que el equipo está apagado. Deslice la batería en el compartimento hasta que el
pasador de liberación haga clic.
Para obtener información acerca de la instalación de la segunda batería opcional, consulte la Guía
del usuario.
Almacenamiento de una batería
Extraiga la batería cuando vaya a guardar el equipo durante un período largo. Las baterías se
descargan durante los almacenamientos prolongados. Tras un periodo prolongado de
almacenamiento, deberá cargar la batería completamente antes de utilizarla.
Guía de referencia rápida
173
www.dell.com | support.dell.com
Solución de problemas
Notebook System Software (NSS)
Si vuelve a instalar el sistema operativo del equipo, también debe volver a instalar la utilidad NSS.
Esta utilidad está disponible en el CD Drivers and Utilities (Controladores y utilidades) opcional y
en el sitio web Dell Support.
Para descargar la utilidad del sitio web Dell Support, vaya a la sección Downloads (Descargas) del
sitio web y seleccione su modelo de equipo del menú descendente. Seleccione la opción Download
Category (Descargar categoría) denominada “System and Configuration Utilities” (Utilidades del
sistema y configuración), seleccione su sistema operativo e idioma y, a continuación, siga las
instrucciones que aparecen allí.
La utilidad NSS proporciona actualizaciones importantes del sistema operativo y asistencia para las
unidades de disquete de 3,5 pulgadas de Dell™, procesadores Intel® Pentium® M, unidades
ópticas y dispositivos USB. La utilidad NSS es necesaria para el correcto funcionamiento de su
equipo Dell. El software detecta automáticamente su equipo y sistema operativo e instala las
actualizaciones apropiadas a su configuración.
NOTA: NSS es fundamental para el correcto funcionamiento de dispositivos USB, incluidos los
dispositivos D/Bay, D/Dock, D/Port y D/View de Dell.
Bloqueos y problemas con el software
PRECAUCIÓN: Antes de comenzar cualquiera de los procedimientos de esta sección, siga las
instrucciones de seguridad que se encuentran en la Guía de información del producto.
El equipo no se inicia
ASEGÚRESE DE QUE EL ADAPTADOR DE CA ESTÉ BIEN CONECTADO AL EQUIPO Y A LA TOMA DE
ALIMENTACIÓN ELÉCTRICA
El equipo no responde
AVISO: Es posible que se pierdan datos si no puede apagar el sistema operativo.
A P A G U E E L E Q U I P O — Si no puede conseguir que responda pulsando una tecla o moviendo el mouse,
pulse el botón de alimentación durante unos 8 ó 10 segundos como mínimo hasta que se apague el
equipo. A continuación, reinícielo.
174
Guía de referencia rápida
Un programa no responde
CANCELE EL PROGRAMA —
1 Pulse <Ctrl><Shift><Esc> simultáneamente.
2 Haga clic en Aplicaciones.
3 Haga clic en el programa que ha dejado de responder.
4 Haga clic sobre Finalizar tarea.
Un programa no responde repetidamente
NOTA: Normalmente el software incluye instrucciones de instalación en su documentación o en un
disquete o CD.
C O M P R U E B E L A D O C U M E N T A C I Ó N D E L S O F T W A R E — Si es necesario, desinstale y vuelva a instalar el
programa.
Un programa está diseñado para una versión anterior del sistema operativo Windows
S I U T I L I Z A W I N D O W S X P, E J E C U T E E L A S I S T E N T E P A R A C O M P A T I B I L I D A D D E P R O G R A M A S —
Dicho asistente configura un programa para que se ejecute en un entorno similar a un sistema operativo
que no sea Windows XP.
1 Haga clic en el botón Inicio, seleccione Todos los programas→ Accesorios y, a continuación, haga clic en
Asistente para compatibilidad de programas.
2 En la pantalla de bienvenida, haga clic en Siguiente.
3 Siga las instrucciones que aparecen en pantalla.
Aparece una pantalla azul fija
A P A G U E E L E Q U I P O — Si no puede conseguir que responda pulsando una tecla o moviendo el mouse,
pulse el botón de alimentación durante unos 8 ó 10 segundos como mínimo hasta que se apague el
equipo. A continuación, reinícielo.
Guía de referencia rápida
175
www.dell.com | support.dell.com
Otros problemas con el software
COMPRUEBE LA DOCUMENTACIÓN DEL SOFTWARE O PÓNGASE EN CONTACTO CON EL FABRICANTE DE
SOFTWARE PARA OBTENER INFORMACIÓN SOBRE LA SOLUCIÓN DE PROBLEMAS —
• Asegúrese de que el programa sea compatible con el sistema operativo instalado en el equipo.
• Asegúrese de que el equipo cumple los requisitos mínimos de hardware necesarios para ejecutar el
software. Consulte la documentación del software para obtener más información.
• Asegúrese de el programa esté instalado y configurado correctamente.
• Compruebe que los controladores de dispositivo no sean incompatibles con el programa.
• Si es necesario, desinstale el programa y, a continuación, vuelva a instalarlo.
HAGA COPIAS DE SEGURIDAD DE SUS ARCHIVOS INMEDIATAMENTE
UTILICE UN PROGRAMA DE DETECCIÓN DE VIRUS PARA COMPROBAR LA UNIDAD DE DISCO DURO, LOS
DISQUETES O LOS CD
GUARDE Y CIERRE CUALQUIER ARCHIVO O PROGRAMA QUE ESTÉ ABIERTO Y APAGUE EL EQUIPO A
T R A V É S D E L M E N Ú Inicio
C O M P R U E B E S I E L E Q U I P O T I E N E S O F T W A R E E S P Í A — Si el equipo tiene un bajo rendimiento, recibe
frecuentemente anuncios emergentes, o tiene problemas para conectarse a Internet, es posible que el
equipo esté infectado con software espía. Utilice un programa antivirus que incluya protección contra
software espía (es posible que el programa necesite una actualización) para explorar el equipo y eliminar
el software espía. Para obtener más información, vaya a support.dell.com y busque la palabra clave
software espía.
E J E C U T E L O S D E L L D I A G N O S T I C S — Si todas las pruebas se ejecutan satisfactoriamente, el error
puede estar relacionado con un problema de software.
Ejecución de los Dell Diagnostics
PRECAUCIÓN: Antes de comenzar cualquiera de los procedimientos de esta sección, siga las
instrucciones de seguridad que se encuentran en la Guía de información del producto.
Cuándo utilizar los Dell Diagnostics
Si tiene algún problema con el equipo, realice las comprobaciones que se indican en la sección
“Solución de problemas” (consulte la Guía del usuario en línea) y ejecute Dell Diagnostics antes de
ponerse en contacto con Dell para obtener asistencia técnica.
AVISO: Los Dell Diagnostics sólo funcionan en los equipos Dell™.
176
Guía de referencia rápida
Inicie Dell Diagnostics desde la unidad de disco duro o desde el CD opcional El CD Drivers and
Utilities (Controladores y utilidades), también conocido como Resource CD (CD de recursos).
Inicio de los Dell Diagnostics desde la unidad de disco duro
Los Dell Diagnostics están situados en una partición oculta para la utilidad de diagnóstico de la
unidad de disco duro.
NOTA: Si el equipo no muestra ninguna imagen en la pantalla, póngase en contacto con Dell.
1
Apague el equipo.
2
Si el equipo está conectado (acoplado) a un dispositivo de acoplamiento, desacóplelo. Si
desea instrucciones, consulte la documentación incluida con el dispositivo de acoplamiento.
3
Conecte el equipo a un enchufe eléctrico.
4
Encienda el equipo. Cuando aparezca el logotipo de DELL™, oprima <F12>
inmediatamente.
NOTA: Si no aparece nada en la pantalla, mantenga pulsado el botón de silencio y pulse el botón de
encendido del equipo para comenzar los Dell Diagnostics. El equipo ejecutará automáticamente la
evaluación del sistema previa al inicio.
NOTA: Si recibe un mensaje que indica que no se ha encontrado ninguna partición para la utilidad de
diagnóstico, ejecute los Dell Diagnostics desde el CD Drivers and Utilities.
Si espera demasiado y aparece el logotipo del sistema operativo, siga esperando hasta que
aparezca el escritorio de Microsoft® Windows®. Después apague el equipo y vuelva a
intentarlo.
5
Cuando aparezca la lista de dispositivos de inicio, resalte Diagnostics (Diagnósticos) y pulse
<Intro>.
El equipo ejecutará la evaluación del sistema previa al inicio, una serie de pruebas iniciales de
la tarjeta del sistema, el teclado, la unidad de disco duro y la pantalla.
•
Durante la evaluación, responda a las preguntas que puedan formularse.
•
Si se detecta un fallo, el equipo se detiene y emite pitidos. Para detener la evaluación y
reiniciar el equipo, oprima <n>; para continuar con la siguiente prueba, oprima <y>;
para volver a probar el componente que falló, oprima <r>.
•
Si se detectaron fallos durante la evaluación del sistema previa al inicio, anote el código o
códigos de error y póngase en contacto con Dell antes de continuar con los Dell
Diagnostics.
Si la evaluación del sistema previa al inicio se realiza correctamente, recibirá el mensaje
Booting Dell Diagnostic Utility Partition. Press any key to continue
(Iniciando la partición de la utilidad Dell Diagnostics. Pulse cualquier tecla para continuar).
6
Pulse cualquier tecla para iniciar los Dell Diagnostics desde la partición para la utilidad de
diagnóstico del disco duro.
Guía de referencia rápida
177
www.dell.com | support.dell.com
Inicio de los Dell Diagnostics desde el CD Drivers and Utilities opcional
1
Inserte el CD Drivers and Utilities.
2
Apague y reinicie el equipo
Cuando aparezca el logotipo DELL, oprima <F12> inmediatamente.
Si tarda demasiado y aparece el logotipo de Windows, espere hasta que se muestre el
escritorio de Windows. A continuación, apague el equipo y vuelva a intentarlo.
NOTA: Los siguientes pasos cambian la secuencia de inicio una sola vez. La próxima vez que inicie el
equipo, éste lo hará según los dispositivos especificados en la configuración del sistema.
3
Cuando aparezca la lista de dispositivos de inicio, resalte CD/DVD/CD-RW Drive (Unidad
de CD/DVD/CD-RW) y pulse <Intro>.
4
Seleccione la opción CD/DVD/CD-RW Drive (Unidad de CD/DVD/CD-RW) en el menú de
inicio del CD.
5
En el menú que aparece, seleccione la opción Boot from CD-ROM (Iniciar desde CDROM).
6
Escriba 1 para iniciar el menú de ResourceCD.
7
Escriba 2 para iniciar los Dell Diagnostics.
8
Seleccione Run the 32 Bit Dell Diagnostics (Ejecutar los Diagnósticos Dell de 32 bits) de la
lista numerada. Si se muestran varias versiones, seleccione la apropiada para su equipo.
9
Cuando aparezca el Main Menu (Menú principal) de Dell Diagnostics (Diagnósticos Dell),
seleccione la prueba que desea ejecutar.
Menú principal de los Dell Diagnostics
1
Una vez se hayan cargado los Dell Diagnostics y aparezca la pantalla Main Menu (Menú
principal), haga clic en el botón de la opción que desea.
Opción
Función
Express Test (Prueba
rápida)
Realiza una prueba rápida de los dispositivos. Esta prueba suele durar entre
10 y 20 minutos, y no requiere la intervención del usuario. Ejecute primero
Express Test (Prueba rápida) para incrementar la posibilidad de rastrear el
problema rápidamente.
Extended Test (Prueba
extendida)
Realiza una prueba completa de los dispositivos. Esta prueba suele durar 1
hora o más y requiere que responda a unas preguntas periódicamente.
Custom Test (Prueba
personalizada)
Prueba un dispositivo específico. Es posible personalizar las pruebas que se
van a ejecutar.
Symptom Tree (Árbol de Hace una lista de los síntomas más habituales que se pueden encontrar y le
síntomas)
permite seleccionar una prueba basándose en el síntoma del problema que
usted tiene.
178
Guía de referencia rápida
2
Si se produce un problema durante una prueba, aparecerá un mensaje con un código de error
y una descripción del problema. Anote el código de error y la descripción del problema, y siga
las instrucciones de la pantalla.
Si no puede resolver la condición del error, póngase en contacto con Dell.
NOTA: La etiqueta de servicio para su equipo está situada en la parte superior de cada pantalla de
prueba. Si se pone en contacto con Dell, el servicio de asistencia técnica le pedirá su etiqueta de
servicio.
3
Si ejecuta una prueba desde la opción Custom Test (Prueba personalizada) o Symptom Tree
(Árbol de síntomas), haga clic en la pestaña correspondiente que se describe en la tabla
siguiente para obtener más información.
Ficha
Función
Results (Resultado)
Muestra el resultado de la prueba y las condiciones de error encontradas.
Errors (Errores)
Muestra las condiciones de error encontradas, los códigos de error y la
descripción del problema.
Help (Ayuda)
Describe la prueba y puede indicar los requisitos para ejecutarla.
Configuration
(Configuración)
Muestra la configuración de hardware del dispositivo seleccionado.
Dell Diagnostics (Diagnósticos Dell) obtiene la información de
configuración de todos los dispositivos a partir de la configuración del
sistema, la memoria y varias pruebas internas, y la muestra en la lista de
dispositivos del panel izquierdo de la pantalla. La lista de dispositivos puede
que no muestre los nombres de todos los componentes instalados en el
equipo o de todos los dispositivos conectados al equipo.
Parameters (Parámetros) Permite personalizar la prueba cambiando su configuración.
4
Cuando las pruebas hayan finalizado, si está ejecutando Dell Diagnostics desde el CD Drivers
and Utilities, extraiga el CD.
5
Cuando las pruebas hayan finalizado, cierre la pantalla de prueba para volver a la pantalla
Main Menu (Menú principal). Para salir de Dell Diagnostics y reiniciar el equipo, cierre la
pantalla Main Menu (Menú principal).
Guía de referencia rápida
179
180
Guía de referencia rápida
www.dell.com | support.dell.com
Índice
A
acerca de su equipo, 165
vista anterior, 166
vista inferior, 169
vista lateral derecha, 167
vista lateral izquierda, 167
vista posterior, 168
asistentes
Asistente para compatibilidad
de programas, 175
B
batería
advertencia de bajo nivel de
carga de la batería, 172
almacenar, 173
cargar, 172
comprobar la carga, 170
duración de la batería y
utilización, 165
extraer, 173
instalar, 173
medidor de carga, 171
medidor de energía, 171
medidor de estado, 171
rendimiento, 169
C
Centro de ayuda y soporte
técnico, 163
conectores de audio
ubicación, 167
el programa no responde, 175
el programa se bloquea, 175
pantalla azul, 175
programa y compatibilidad de
Windows, 175
rendimiento bajo del
equipo, 176
software, 174-176
software espía, 176
solucionar, 174
Controladores, 161
D
Dell
sitio de asistencia, 162
Diagnósticos, 161
Diagnostics
Dell, 176
Documentación, 161
dispositivo, 161
ResourceCD, 161
documentación
en línea, 162
E
equipo
no responde, 174
rendimiento bajo, 176
se bloquea, 174-175
R
rejillas de ventilación
ubicación, 167
S
sistema operativo
CD, 163
sitio web Dell Premier
Support, 162
software
problemas, 175-176
software espía, 176
P
problemas
bloqueos, 174
el equipo no responde, 174
el equipo no se inicia, 174
el equipo se bloquea, 174-175
solución de problemas
Centro de ayuda y soporte
técnico, 163
Índice
181
182
Índice
W
Windows XP
Asistente para compatibilidad
de programas, 175
Centro de ayuda y soporte
técnico, 163
182
Índice