1
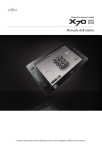
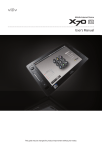
Detail Guide
Intel Atom Silverthorne 1.33Ghz
Superfine 4.8” Touch LCD with Virtual Haptic Keyboard
200 hours Standby Time
6 hours continuous movie Playback
Bluray HD Video Playback
HDD 30G/60G, Windows XP
This guide is subject to change for product improvement without prior notice.
Thank you for purchasing viliv.
Please read the Precautions before using the product.
Copyright
Yukyung Technologies Corp. has the copyright for this guide.
The contents of this guide may not be copied for use in any way without prior authorization
from Yukyung Technologies Corp.
©2009 Yukyung Technologies Corp. All rights reserved.
Registered Trademark
viliv is Yukyung Technologies’ registered trademark.
Windows 2000, Windows XP and Windows CE are Microsoft Corporation’s registered trademarks.
※There are differences in functions for each model.
Please use the product after reading the contents corresponding to the relevant function.
The contents of this manual may be changed or modified without the user’s prior consent
or prior notice to the user.
Contents...
CubeUI . . . . . . . . . . . . . . . . . . . . 4
Setting Up BIOS . . . . . . . . . . . . 23
Screen of Cube . . . . . . . . . . . . . . . . . . .4
Setting Cube . . . . . . . . . . . . . . . . . . . . . 5
Screen for Setting Up BIOS . . . . . . . . 23
Entering BIOS Set-up . . . . . . . . . . . . . 24
Setting up Booting Priority for
Booting Device . . . . . . . . . . . . . . . . . . 25
Setting up Booting Password . . . . . . . 26
Virtual Keyboard . . . . . . . . . . . . . 6
Using Virtual Keyboard . . . . . . . . . . . . . 6
Virtual Keyboard Function . . . . . . . . . . 7
User Registration Button . . . . . . 8
Set up for New Shortcut Button . . . . . . 8
Playing Video . . . . . . . . . . . . . . . . 9
Video Screen . . . . . . . . . . . . . . . . . . . . 9
Detailed Function . . . . . . . . . . . . . . . . 10
Procedure for Playing Video . . . . . . . . 11
Playing Video . . . . . . . . . . . . . . . . . . . 12
Setting Video Configuration . . . . . . . . 13
Playing Music . . . . . . . . . . . . . . 15
Music Main Screen . . . . . . . . . . . . . . . 15
Detailed Function . . . . . . . . . . . . . . . . 16
Advanced Functions . . . . . . . . . . . . . . 17
Procedure for Playing Music . . . . . . . .18
Playing Music . . . . . . . . . . . . . . . . . . . 19
Setting Music Configuration . . . . . . . . 20
Changing to Screen Mode . . . . . . . . . 21
vilivManager . . . . . . . . . . . . . . . 22
Setting vilivManager . . . . . . . . . . . . . . 22
Recovery Solution (AMI Rescue)
Guide . . . . . . . . . . . . . . . . . . . . . 27
Way to Use Recovery Solution
(AMI Rescue) . . . . . . . . . . . . . . . . . . . 27
Connection of S5 . . . . . . . . . . . . 28
Way to Connect S5 . . . . . . . . . . . . . . . 28
FAQ . . . . . . . . . . . . . . . . . . . . . . . . . . 30
Connection of GPS . . . . . . . . . . 31
Way to Connect GPS . . . . . . . . . . . . . 31
Software License Agreement . . . 32
CubeUI
Double-click the [
CubeUI ] icon on the screen for operation.
Screen of Cube
ON/OFF for Wireless LAN
Set Vibration
ON/OFF for Bluetooth
Current Time
Enter into Standby Mode
Terminate CubeUI
Volume
External Power and Battery
Execution Icon
Weather Information
Cube Menu
Calendar
Move to WINDOWS XP
Wallpaper
Set Wallpaper Skin
Set Cube
Vibration effect can be set by the following 3 modes.
Setting Vibration
Do not set vibration.
Vibration is always on.
Vibration is on only when using the keyboard.
Just on
Enter into Standby Mode.
(The cancellation of Standby Mode is same as turning on the power.)
Setting Wallpaper Skin
Change the wallpaper skin by using ◄► icon.
Setting Cube
Move to the screen for setting cube.
(The execution icon can be set on each cube menu.)
ON/OFF for Wireless
LAN
Turn on/off wireless LAN function. (Same as setting in vilivManager.)
ON/OFF for Bluetooth
Turn on/off Bluetooth function. (Same as setting in vilivManager.)
Execution Icon
Press the applicable icon and it will be executed immediately.
Wallpaper
Pressing WINDOWS icon to move to Windows XP Wallpaper.
ULTRA PC PMP
4 www.myviliv.com
CubeUI
Setting Cube
1. Screen for Setting Cube
When pressing [
cube is selected.
] icon on Cube screen, the screen for setting
2. Setting Cube
Press the menu to be set from cube menu.
Drag the corresponding icon, and insert into the vacant
place in 3 .
Set other cube menus using the above setting method.
3
1
2
※ If the original icon on the wallpaper is deleted after inserting the icon in
CubeUI, the corresponding icon in CubeUI will not be executed.
3 To delete the corresponding icon in Cube, drag towards
the wallpaper.
3. Movement of Cube Screen
When pressing [
selected.
] icon on Cube screen, the cube screen is
ULTRA PC PMP
5 www.myviliv.com
2
1
Virtual Keyboard
Using Virtual Keyboard
1. Execution of Virtual Keyboard
Press the [
] icon on the screen to run the virtual keyboard.
You can also press the [
] button.
2. Hiding/Showing Virtual Keyboard
Press the [
] icon on the virtual keyboard to minimize the
virtual keyboard into the [ ] icon.
Press the [
] icon to bring it back to its original form.
3. Configuration Set-up and Termination
Right-click the [
] icon on the task bar and select [Setting].
[Setting] window will appear.
Terminate by selecting [Close].
Alpha : Move the alpha value to the left or right to adjust the transparency of the
virtual keyboard.
User Key : Select whether or not the user-defined button will be used as a virtual keyboard.
·Ctrl+Alt : While the virtual keyboard is used, set the user-defined button to operate
when Ctrl and Alt button are pressed simultaneously.
·Show/Hide : While the virtual keyboard is used, set the user-defined button to
operate as Show/Hide Virtual Keyboard.
ULTRA PC PMP
6 www.myviliv.com
Virtual Keyboard
Virtual Keyboard Function
4
1
2
3
5
1
Caps
Supports capital letters. (Caps Lock)
2
Shift
Inputs capital letter.
3
Win
Executes start menu.
4
5
Backspace key.
Mode
Changes to number or special letter mode.
Notice
When pressing
button while virtual keyboard is executed, it is executed the same as pressing Ctrl + Alt
button together. (In case of setting for configuration set-up for virtual keyboard)
ULTRA PC PMP
7 www.myviliv.com
User Registration Button
Shortcut button for user registration software
of S5 terminal is registered in the virtual keyboard when
it is shipped from the factory. To change to the desired software, set up as follows.
Set up for New Shortcut Button
1. Cancellation of Initial Factory Set-up
In configuration set-up, cancel the check mark of [User Key] to cancel the
virtual keyboard set up when it is shipped from the factory.
※ Caution: If the check mark of [User Key] is not cancelled beforehand,
other applications cannot be registered as a user-defined button.
2. Set up for viliv Player (Example)
Select the icon of the application that you want to add.
Same as for cancellation, open the Properties window by clicking
[ ] or right-clicking on the terminal.
3. Set up for Set Value
Select [Shortcut > Shortcut Key] in Properties window.
By pressing
on the terminal, the set value is entered
automatically by [Ctrl + Alt + H].
Save the changed value by pressing OK button.
ULTRA PC PMP
8 www.myviliv.com
Playing Video
Video Screen
Current Time
Volume
Hide Window
Terminate
Select Play List
Play Screen
Move to File List Page
Time Bar
Play List
Function Icon
Volume Control
Set Environment
Processing Time/Time
for Entire File
Show/Hide Play List
■ Function Icon
Play/Pause
Previous File
Stop
Next File
ULTRA PC PMP
9 www.myviliv.com
Playing Video
Detailed Function
1. Search Browser
: Change Folder/File Selection Mode
: Move to Upper Folder
: Select All
: Cancel All
: Register on the Play List
: Sort
: Terminate
Notice
By touching check box in front of file name, individual selection can be made.
On video search browser, only the formats which may be played are displayed.
However, if the file format and codec for playing file do not match or the file has an error, it may be played,
or the playing status may not be smooth.
If folder/file selection mode is on, the selection is possible by only clicking folder/file name.
2. Play List
: File Information
: Delete by Selecting
: Delete All
: Sort in Descending Order of File Name
: Sort in Ascending Order of File Name
: Search Browser
Notice
Double-touching the movie title on play list plays the movie immediately.
ULTRA PC PMP
10 www.myviliv.com
Playing Video
Procedure for Playing Video
1 Selection of Video Icon
2 Execution of Video Player
3 Getting File
Double-touch Video icon.
Execute video player.
Touch icon.
Execute the search browser.
Double-touch the folder that has
the video file.
4 Selection of File
5 Registration of Play List
6 Enjoying Video
Touch check box,
, or
icon to select a file.
Touch
After selecting a file from the play
list, touch
icon or double-touch
the file on the play list to play.
7 Execution of Function
8 Termination
Enjoy the file on the play list by
using execution and function
icon.
Touching icon moves to the
main screen.
icon.
Notice
When double-touching the file you want on the file browser screen, all the files in the folder are registered on the play list, and a double-touched file is played first automatically.
ULTRA PC PMP
11 www.myviliv.com
Playing Video
Playing Video
1. Opening File (FILE BROWSER)
When the search browser is executed by
touching icon, tick the check box in front of the
file and then touch
icon to register the file on
the play list.
Notice
When double-touching the file you want on the file browser screen, all the files in the folder are registered on
the play list, and a double-touched file is played first automatically.
2. Showing/Hiding Play List
Touching
icon shows or hides the play list.
●Double-touching a file on the play list plays a movie.
● After selecting a file, the movie is played even by
touching,
icon.
3. Time Bar
Dragging a time bar or touching a specific location moves the
playing location.
4. Playing Previous/Next File
: Play the upper file on the play list.
: Play the lower file on the play list.
5. Stopping Play
It stops playing.
ULTRA PC PMP
12 www.myviliv.com
Playing Video
When touching
icon on the video main screen, setting screen for video configuration appears.
Change the value by using ◄► icon.
Setting Video Configuration
1
2
3
■ PLAYER
1. PLAY MODE
Set the play mode wanted by the user.
It can be set by PLAY ALL, REPEAT ALL, REPEAT ONE, or RANDOM
2. SKIP
While playing, move the direction button to the left or right in units of 1 second.
3. CONTINUE
ON : Play from the last location played for the corresponding file.
OFF : Play from the beginning of the corresponding file.
ULTRA PC PMP
13 www.myviliv.com
Playing Video
1
2
3
4
■ CAPTION
1. LANGUAGE
In multiple language caption file, language selection and caption indication can be turned off.
2. SYNC
It is used if the video and caption do not match.
It can be adjusted in units of 0.5 second.
3. FONTSIZE
Set the font size.
It can be set by 1X, 2X, 3X, 4X, 5X, or 6X
4. FONTCOLOR
Set the font color.
It supports 15 colors.
ULTRA PC PMP
14 www.myviliv.com
Playing Music
Music Main Screen
Select Play List
Current Time
Volume
Hide Window
Terminate
Currently Playing File
Time Bar
Change of Screen Mode
Move to File List Page
Play List
Play List Function Icon
File Information
Function Icon
Show/Hide Advanced Functions
Volume Control
Set Configuration
1
2
4
5
3
6
1. Play Time
3. Multiple Speed Play
5. Sampling
2. Play Mode
4. Equalizer Mode
6. Bit Rate
■ Function Icon
Play/Pause
Previous File
Stop
Next File
■ Advanced Function Icon
Repeat the Interval
1 Multiple Speed Play
Retrieve from Bookmark
High Speed Real Multiple
Speed Play
Store to Bookmark
Forward Multiple Speed Play
Backward Multiple Speed Play
Hide Advanced Functions
Low Speed Real Multiple Speed Play
Show Advanced Functions
ULTRA PC PMP
15 www.myviliv.com
Playing Music
Detailed Function
1. Search Browser
: Change Folder/File Selection Mode
: Move to Upper Folder
: Select All
: Cancel All
: Register on the Play List
: Sort
: Terminate
Notice
By touching check box in front of file name, individual selection can be made.
On music search browser, only the formats which may be played are displayed.
However, if the file format and codec for playing file do not match or the file has an error, it may be played, or
the playing status may not be smooth.
2. Play List
: Delete by Selecting
: Delete All
: Sort in Descending Order of File Name
: Sort in Ascending Order of File Name
: Search Browser
Notice
Double-touching the music file on play list plays the music immediately.
ULTRA PC PMP
16 www.myviliv.com
Playing Music
Advanced Functions
3
4
1
2
5
6
1. Repeating Interval
: Set the starting location.
: Set the ending location. ►Start repeating the interval.
: Start repeating the interval. (By touching it again, it stops repeating the interval.)
2. Bookmark
: Retrieve from the stored bookmark.
: Save the bookmark.
※ Retrieving from bookmark function is executed only in case of playing a file stored in the bookmark.
3. Multiple Speed Play
:Backward multiple speed play.
(Backward multiple speed play in the order of -2X, -5X, -10X, -20X, -30X)
:Forward multiple speed play.
(Forward multiple speed play in the order of 2X, 5X, 10X, 20X, 30X)
4. Real Multiple Speed Play
:Low speed real multiple speed play.
(Low speed real multiple speed play in the order of 90X, 80X, 70X, 60X, 50X)
:High speed real multiple speed play.
(High speed real multiple speed play in the order of 110X, 120X, 130X, 140X, 150X,
160X, 170X, 180X, 190X, 200X)
5. 1 Multiple Speed Play
: Indication of 1 Multiple Speed Play
6. Hide Advanced Functions
ULTRA PC PMP
17 www.myviliv.com
Playing Music
Procedure for Playing Music
1 Selection of Music Icon
2 Execution of Music Player
3 Getting File
Double-touch Music icon.
Execute music player.
Touch icon.
Execute the search browser.
Double-touch the folder that has
the music file.
4 Selection of File
5 Registration of Play List
6 Enjoying Music
Touch check box,
, or
icon to select a file.
Touch
Register on the play list.
Press
icon to play the music
file.
7 Execution of Function
8 Termination
Enjoy the file on the play list by
using execution and function
icon.
Touching icon moves to the
main screen.
icon.
ULTRA PC PMP
18 www.myviliv.com
Playing Music
Playing Music
1. Opening File (FILE BROWSER)
When search browser is executed by touching
icon, tick the check box in front of the file and
then touch
icon to register the file on the
play list.
When double-touching the file you want on the file browser screen, all the files in the folder are registered
on the play list, and a double-touched file is played first automatically.
2. Changing Play File (Play List)
Double-touching a file on the play list plays the music.
After selecting a file, the music is played even by touching
icon.
3. Time Bar
Dragging a time bar or touching a specific location moves the
playing location.
While playing, if the jog key of the terminal is moved to left or right,
it moves in the units of 5 seconds.
4. Playing Previous/Next File
: Play the upper file on the play list.
: Play the lower file on the play list.
While playing, if the jog key of the terminal is moved up or down,
the file on the upper or lower side will be played.
5. Stopping Play
ULTRA PC PMP
19 www.myviliv.com
Playing Music
When touching
icon on the music main screen, setting screen for music configuration appears.
Setting Music Configuration
1
2
3
1. PLAY MODE
Set up the play mode
It provides
Play All /
Repeat Playing All /
Repeat One Song /
2. Spectrum Mode
Set up the spectrum mode wanted by the user.
It provides
NORMAL /
DOWN /
UP functions.
3. Spectrum Color
Set up the spectrum color wanted by the user.
ULTRA PC PMP
20 www.myviliv.com
Random Play functions.
Playing Music
Changing to Screen Mode
1. Advanced Spectrum Mode
Touching
Touching
icon moves the screen to advanced spectrum mode.
icon on advanced mode screen returns the screen to general mode.
[ General Mode ]
[ Advanced Mode ]
2. Advanced Play List Mode
Touching
Touching
icon moves the screen to advanced play list mode.
icon on advanced mode screen returns the screen to general mode.
[ General Mode ]
ULTRA PC PMP
[ Advanced Mode ]
21 www.myviliv.com
vilivManager
It is executed by double-clicking [
vilivManager ] icon on the screen.
Setting vilivManager
1
7
2
3
4
8
5
6
1
WiFi & Modem
Turns on/off built-in wireless function.
2
Bluetooth
Turns on/off built-in Bluetooth function.
3
LCD Brightness
Adjusted by status bar or -,+ button.
4
Vibration
1. Not Use: Don’t vibrate.
2. Only SoftKeyboard: Use only when using soft keyboard.
3. Always: Use whenever using touch.
5
Windows Start Program
1. Sets whether to execute CubeUI automatically or not.
2. Sets whether to execute viliv Manager or not.
6
System
Confirms system information.
7
Start Option
1. OFF: Always starts by turning it off.
2. Last Status: Starts by the last status used.
3. ON: Always starts by turning it on.
8
Calibration
If setting the touch coordinates of S5 is needed, execute touch
calibration by pressing Set.
ULTRA PC PMP
22 www.myviliv.com
Setting Up BIOS
Set-up is a configuration utility that sets up the system configuration for the user.
Bios is delivered by optimizing this configuration. Therefore, do not change this configuration unless it is
an unavoidable case.
Screen for Setting Up BIOS
Set-up Menu
Help
Set-up Items
■ Set-up Menu
Main
Displays basic specifications for the system, and you can change the date.
Advanced
Sets up the configuration related to disk and chipset.
Boot
Sets up the content related to booting such as booting priority.
Security
Can set up or change the password.
Exit
Menu related to terminating set-up.
■ Keys Used in Set-up
Jog Key (Up/Down)
Moves to upper or lower items.
Jog Key (Left/Right)
Moves to other menu.
Jog Key (Select)
Use Keyboard (F10)
Saves the changed content and terminates set-up.
OK Button
Use Keyboard (Enter)
Selects the item and displays sub-menu.
Button
Use Keyboard (ESC)
In sub-menu, it moves to the upper menu or exit menu.
Func Button
Use Keyboard (F1)
Displays the help for set-up.
Notice
When entering numbers or letters, you must use an external keyboard.
ULTRA PC PMP
23 www.myviliv.com
Setting Up BIOS
Before you begin:
Set-up is used for changing booting priority in case of booting BIOS, setting up or changing
password, and so on.
The content of set-up can be changed due to reasons such as improvement of product.
Entering BIOS Set-up
1
Turn on the power of product.
2
When the booting screen (viliv logo) appears, press [MENU] button or [Del] key for external keyboard.
3
After a few seconds, the initial set-up screen appears.
ULTRA PC PMP
24 www.myviliv.com
Setting Up BIOS
Setting up Booting Priority for Booting Device
3
2
1
Enter into Boot menu on the set-up.
2
Press OK or Enter key on [Boot Device Priority] item.
Press OK or Enter key on [1st Boot Device] item to select the booting device with the highest priority.
3
Press OK or Enter key on [2nd Boot Device] item to select the booting device with the 2nd highest priority.
Press OK or Enter key on [3rd Boot Device] item to select the booting device with the 3rd highest priority.
4
After saving the contents set up by pressing F10 key, boot again.
Notice
If there are no booting devices other than hard disk, above [2nd Boot Device] and [3rd Boot Device] do
not appear.
If booting cannot be made by the first booting device, it attempts booting by the send booting device.
ULTRA PC PMP
25 www.myviliv.com
Setting Up BIOS
When setting up the password, the password must be entered when you turn on the computer or
execute the set-up. Therefore, the password must be set up very carefully.
Make sure to remember the password when you set up.
Setting up Booting Password
When setting or changing booting password, a keyboard is needed.
1.Setting up Supervisor Password
When setting up supervisor password, no users except the
supervisor can use the computer.
2
1)Move to Security menu on the set-up.
2)Press Enter or OK key on Change Supervisor Password item.
3)For ‘Enter New Password’ prompt, enter the password and
press Enter or OK. Enter the password one more time, and
press Enter or OK.
※ For a password, 6 or less alphanumeric digits can be used,
but special letters cannot be used.
3
4)When ‘Password Installed’ appears, press Enter or OK.
Set-up is completed.
2. Setting up User Password
The use of user password is limited compared to supervisor password.
Depending on the user access level set up by supervisor, the change of items on the set up may be
impossible.
After entering Enter or OK on Change User Password item, proceed in the same way as described
in 3) of Setting up Supervisor Password.
3. Cancelling Password
1)Press Enter key on the password item to be deleted.
2)For ‘Enter New Password’, press Enter or OK key only without inputting any keys.
3)The password is cancelled with Password Uninstalled message.
ULTRA PC PMP
26 www.myviliv.com
Recovery Solution (AMI Rescue) Guide
As an image-based OS recovery solution, it recovers to the initial status of shipment from factory when
HDD of user cannot be booted from OS or it has problems.
Way to Use Recovery Solution (AMI Rescue)
1. Execution of Recovery Solution (AMI Rescue)
If viliv logo appears when booting the system (BIOS POST),
press the select button of product’s jog key 1-2 times or F10 key
if external keyboard is connected.
As the logo disappears, Pre-Boot Menu window appears.
2. Pre-Boot Menu
When selecting Normal Boot, booting proceeds to Windows.
For recovering OS, select AMI Rescue and click Launch Service.
AMI Rescue Lite-Wizard appears.
3. AMI Rescue Lite-Wizard
When clicking [ Restore OS ] button, a message that confirms the
recovery of OS is displayed. If you press [ Yes (Y) ], it starts the
recovery of OS.
If the process of OS recovery is completed, a message that
confirms the successful recovery is displayed.
(Partition 0 on disk 0 was successfully restored.)
If you press [ OK ] button, the system is booted again automatically.
Now, if you boot to Windows, OS will be in the initial status of shipment from factory.
Notice
When recovering OS, recover by connecting battery adaptor.
Since data is deleted in case of recovery, make sure to back up the data beforehand.
ULTRA PC PMP
27 www.myviliv.com
Connection of S5
Way to Connect S5
1. Confirmation of S5 Set-up (S5)
Execute [ USBC Client Utility] on the screen to confirm the mode
of Advance tab.
It must be set to RNDIS only.
※ Do not connect S5 to PC.
Description of Mode
- MSD(Mass Storage Device) and RNDIS
It operates by large-capacity storage device and network drive.
- RNDIS only
It operates as a network drive mode. (This mode is set when shipping from factory.)
PC
2. Installation of Driver on Host PC
Install the driver by executing [ vilivConnect.exe ] on the host PC
to be connected.
※This software can be downloaded from myviliv homepage
(www.myviliv.com).
※Before installing the driver to host PC, do not connect to S5 terminal.
3. Execution of Connection Wizard
1)After installation, select [Yes] to execute Host Wizard.
2)Press [Next].
※ Before pressing [Next], make sure to connect
S5 terminal and PC.
3)After connecting S5 terminal, confirm that device driver is
installed on PC automatically.
ULTRA PC PMP
28 www.myviliv.com
Connection of S5
PC
4. Execution of Connection Wizard
By pressing [Next] of Host Wizard, configuration is processed
automatically.
After automatic configuration is completed, press [Next] to
connect the network driver.
5. Connection of Network Driver
Select network driver name and folder to be connected.
1 Select network drive.
2 Select folder to be connected.
3 When checked, it is connected automatically if connected again.
6. Confirmation of Network Driver Connection
After connecting network driver, confirm that icon and driver of
tray are created.
ULTRA PC PMP
29 www.myviliv.com
1
3
2
Connection of S5
FAQ
1. Way to reinstall driver to S5 when connection fails
1)Right-click the mouse on My Computer. Select
[ Properties > Hardware > Device Manager ].
2)Remove [ Inter(R) USB Client Ethernet Device ] driver on
network adaptor item.
3)Reinstall Usbc32client.
※Download the driver from homepage (www.myviliv.com).
4)Reinstall Intel(R) USB Client Utility.
※Download the driver from homepage (www.myviliv.com).
5)Start the set-up for S5 connection from the beginning again.
ULTRA PC PMP
30 www.myviliv.com
Connection of GPS
Way to Connect GPS
1. Manual Set-up for GPS
How to set up GSP for applications that need GPS set-up such
as navigation software.
Baud rate : 9,600 Bps
For set-up method, select manual.
Serial Port : COM1
ULTRA PC PMP
31 www.myviliv.com
Software License Agreement
This is a legal agreement between the user and Yukyung Technologies Corp. (hereinafter called “viliv”).
This agreement is applicable to all the software sold with viliv products. There are no other separate
license agreements between user and software manufacturer or owner. This agreement is not used for
selling software or other intellectual property. All ownerships and intellectual properties for this software
belong to the manufacturer and owner of this software. All the rights not mentioned in this agreement
belong to the manufacturer and owner of this software. If this software is installed, downloaded, loaded
at least once or the software inside this product is used, then it is assumed that all articles in this agreement are agreed to. If the user does not agree to the conditions in this agreement, all items including
disk, manual, and packing material must be returned immediately and all software built-in or installed
must be removed.
One copy of software can be used for each S5. If the user owns several software licenses, then he or she
can use the copies for the number of licenses. “Use” means to load to the temporary memory or permanent storage device in the computer. If the user owns the license for each computer where the software
will be distributed, installing the network server used for distributing software to other computers does not
correspond to “Use”. If using the software by exceeding the number of licenses, the number of simultaneous users should not exceed the number of licenses. If the number of users for software installed in
the network server exceeds the number of licenses, the licenses must be purchased additionally before
adding the number of users to match the number of users and the number of licenses. For commercial
customers acknowledged by viliv, affiliated concerns, or agents selected by viliv that have the right to audit the use of software during business hour, they should agree to cooperate with viliv as a right for audit
and provide all the records related to the use of software to viliv. The audit is restricted only to confirming
that the conditions of this agreement are met.
This software is protected by the copyright law of Korea and international treaties. The original copy of
software can be stored in a single hard disk only for the purpose of back-up or storage. This software
must not be lent or borrowed and the books included along with this software must not be copied. This
software must not be used for reverse engineering, decompiling, or breaking down. The disk with this
software must not be used by other computers or networks, and this software must not be lent or delivered to a user not acknowledged in this agreement.
ULTRA PC PMP
32 www.myviliv.com
Software License Agreement
Limited Warranty
viliv does not warrant that the software function satisfies the user’s request, the software is not interfered,
or it operates without any error. The responsibility for selecting the software needed for user and the
result caused by using this software belongs to the user.
viliv denies all other warranties implied or stated by representing itself and supplier. This includes implied
warranties for product and compatibility for specified purpose of this software and all books included. This
limited warranty assigns the specified rights to you, and different rights can be given for each jurisdiction.
Even though viliv or related supplier reports the possibility of software damage beforehand, viliv or related supplier is not responsible for the result caused by misuse of software (disturbance of work, loss
of work information, or all losses including other financial losses). Since exceptional or limited conditions
for indirect or accidental losses can be different for each jurisdiction, the above restrictions may not be
applied to the user.
Open Source Software
All open source software provided by viliv can be used by following the specified license trade condition
where the open source software is distributed.
This open source software should be distributed usefully, but it is provided “as it is” without explicit or
implied warranty. This includes but is not limited to the implied warranty for product and compatibility for
specified purpose. If viliv, owner of copyright, or contributor is warned of the possibility of loss by not following the agreement, absolute responsibility, or non-fulfillment of obligation, he or she is not responsible
for any direct, indirect, accompanying, special, foreshadowing, or derivative loss (It includes but is not
limited to using product or service agent, loss of data or product, and stoppage of work) caused by use
of this product.
ULTRA PC PMP
33 www.myviliv.com
200-11 Anyang-dong, Manan-gu, Anyang-si,
Gyeonggi-do, South Korea
E-mail : [email protected]