1
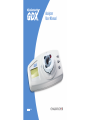
Analyzer User Manual REF 12-656 Analyzer User Manual Refer to the CD in the analyzer package for instructions in English. The instructions are available from your local distributor. Der henvises til den vedlagte CD i analysatorpakken for instruktioner på dansk. Instruktionerne fås hos den lokale forhandler. Consulte el CD incluido en el envase del analizador para obtener instrucciones en español. También puede pedir las instrucciones a su distribuidor local. Se CD:n i analysatorförpackningen beträffande instruktioner på svenska. Anvisningarna kan erhållas från en lokal distributör. Anweisungen auf Deutsch befinden sich auf der CD in der Verpackung des Analysegeräts. Die Anleitung ist von Ihrem Händler erhältlich. Lue suomenkieliset ohjeet analysaattorin pakkauksessa olevalta CD:ltä. Ohjeet ovat saatavissa paikalliselta jälleenmyyjältä. Fare riferimento al CD nella confezione dell'analizzatore per istruzioni in italiano. Le istruzioni sono disponibili presso il distributore di zona. Le CD contenu dans l'emballage de l'analyseur inclut les directives d'utilisation en français. Le mode d'emploi est disponible auprès du distributeur local. Consulte o CD no pacote do analisador para instruções em Português. As instruções estão disponíveis junto do seu distribuidor local. Türkçe talimat için analizör paketindeki CD’ye bak›n›z. Talimat yerel da¤›t›c›n›zdan elde edilebilir. ∞Ó·ÙÚ¤ÍÙ ÛÙÔ CD ÛÙË Û˘Û΢·Û›· ÙÔ˘ ·Ó·Ï˘Ù‹ ÁÈ· Ô‰ËÁ›Â˜ ÛÙ· ∂ÏÏËÓÈο. √È Ô‰ËÁ›Â˜ Â›Ó·È ‰È·ı¤ÛÈ̘ ·fi ÙÔÓ ÙÔÈÎfi ‰È·ÓÔ̤· Û·˜. TABLE OF CONTENTS Cholestech GDX Analyzer User Manual Table of Contents General Information . . . . . . . . . . . . . . . . . . . . . . . . . . . . . . . . . . .1 Unpacking the Cholestech GDX Analyzer . . . . . . . . . . . . . . . . . . . .1 Storage Instructions . . . . . . . . . . . . . . . . . . . . . . . . . . . . . . . . . . .2 Features . . . . . . . . . . . . . . . . . . . . . . . . . . . . . . . . . . . . . . . . . . .2 Display . . . . . . . . . . . . . . . . . . . . . . . . . . . . . . . . . . . . . . . . . . . .3 Principles of the Cholestech GDX A1C Testing System . . . . . . . . . .4 Cholestech GDX Analyzer Basic Operation . . . . . . . . . . . . . . . . . . .5 To Run an Optics Check Cartridge . . . . . . . . . . . . . . . . . . . . . . . . .6 To Run a Cholestech GDX A1C Test . . . . . . . . . . . . . . . . . . . . . . . .8 Displaying Results in Memory . . . . . . . . . . . . . . . . . . . . . . . . . . . .8 Calibration . . . . . . . . . . . . . . . . . . . . . . . . . . . . . . . . . . . . . . . . . .8 To Use the 10 µL MiniPet™ Pipette . . . . . . . . . . . . . . . . . . . . . . . .9 Performance Characteristics . . . . . . . . . . . . . . . . . . . . . . . . . . . .10 Troubleshooting . . . . . . . . . . . . . . . . . . . . . . . . . . . . . . . . . . . . .12 Contacting Technical Service . . . . . . . . . . . . . . . . . . . . . . . . . . .13 Safety . . . . . . . . . . . . . . . . . . . . . . . . . . . . . . . . . . . . . . . . . . . .14 Limitations of Use . . . . . . . . . . . . . . . . . . . . . . . . . . . . . . . . . . .14 Shutdown Information . . . . . . . . . . . . . . . . . . . . . . . . . . . . . . . . .15 Disposal . . . . . . . . . . . . . . . . . . . . . . . . . . . . . . . . . . . . . . . . . .15 GENERAL INFORMATION TABLE OF CONTENTS / UNPACKING THE CHOLESTECH GDX ANALYZER Table of Contents Specification . . . . . . . . . . . . . . . . . . . . . . . . . . . . . . . . . . . . . . .16 References . . . . . . . . . . . . . . . . . . . . . . . . . . . . . . . . . . . . . . . .17 1 Cholestech GDX Analyzer User Manual Cholestech GDX Analyzer User Manual General Information The Cholestech GDX Analyzer is a small, portable analyzer for use with Cholestech GDX A1C Test Cartridges. The analyzer performs a self-check before each test is run. You may also check that the analyzer is working correctly by using the Cholestech GDX Optics Check Cartridge and Cholestech GDX A1C Controls. The Cholestech GDX Analyzer is powered by a 12-volt regulated DC supply which is supplied with the analyzer. Never use any other power supply transformer as this may give incorrect results or permanently damage the analyzer. This user manual will give general information about the performance of the analyzer and test cartridge. You must also use the package insert in each pack of Cholestech GDX A1C Test Cartridges. Please keep this guide for future use. Unpacking the Cholestech GDX Analyzer Carefully look at the outer box for any damage. If you see any damage to the analyzer, please contact Cholestech Technical Service or your local distributor. Contents: 1 Cholestech GDX Analyzer 1 Power Supply Transformer and Plug for European Power Supply 1 Analyzer User Manual 1 Quick Reference Guide 1 Instructional CD-ROM 1 Insert CD-ROM 1 Warranty Card 1 10 µL MiniPet Pipette 50 Pipette Tips 1 Cholestech GDX Optics Check Cartridge (packaged separately) 2 STORAGE INSTRUCTIONS / FEATURES DISPLAY Cholestech GDX Analyzer User Manual 3 Cholestech GDX Analyzer User Manual Storage Instructions Display The Cholestech GDX Analyzer must be stored at a temperature between 10 and 35ºC (50–95ºF). It is important to prevent dust and dirt from getting into the analyzer. So keep the analyzer covered. Make sure the Cholestech GDX Optics Check Cartridge is protected from sunlight during storage. Store the Optics Check Cartridge at a humidity of less than 60% and at a temperature between 15 – 25°C (59° – 77°F). Features Cartridge This icon will be used with “up” and “down” arrow icons to prompt the user to insert or remove a cartridge from the analyzer. Hourglass This indicates that the operator must wait for an action to be performed before proceeding. If a number is displayed, it is a countdown timer. Rotate Cartridge A single icon prompts the user to rotate the cartridge. This will be used in conjunction with flashing lights placed around the edge of the cartridge to indicate the position to rotate to. Error Message The number displayed is an error message. Pour Solution A single icon to prompt the user to pour the solution into the A1C Test Cartridge funnel. Insert/Remove/Mix These two icons will be used in combination with either the Cartridge icon or the Solution Tube icon to prompt the user to perform an operation. Keypad The keypad icons comprise “left” and “right” arrows and “enter” button. They perform a function when they are solid (as shown). When they are present in outline only, they are not active, and pressing them will not produce a response from the analyzer. Positional Lights Power Connection Left and Right Arrows Analyzer Enter Button Test Platen Icon and Results Display Cartridge Result The number displayed is the percentage of hemoglobin HbA1c (A1C) in the test sample. Blood Drop This icon will be used to prompt the user to take a blood sample. Identification Number The number displayed is the unique test identification code. Solution Tube This icon will be used along with the “up” and “down” arrows to prompt the user either to remove a tube or mix a blood sample in the tube. Computer Connection A single icon to indicate a link-up with an external device such as a printer or computer, shown during download. 4 PRINCIPLES OF THE CHOLESTECH GDX A1C TESTING SYSTEM CHOLESTECH GDX ANALYZER BASIC OPERATION Cholestech GDX Analyzer User Manual Principles of the Cholestech GDX A1C Testing System Cholestech GDX Analyzer Basic Operation The Cholestech GDX A1C Testing System uses boronate affinity chromatography to separate the glycated hemoglobin fraction. The Cholestech GDX Analyzer, which is a single wavelength spectrophotometer (440 nms), measures both fractions and an algorithm converts the result into the percentage A1C in the sample. After a Cholestech GDX Test Cartridge has been placed in the analyzer, a small sample of blood is added to the first sample tube. The blood is instantly lysed to release the hemoglobin and the boronate affinity resin binds the glycated hemoglobin. After a short incubation step, the liquid is poured into the central funnel of the test cartridge and the nonglycated fraction is collected in an optical chamber, where the hemoglobin concentration is photometrically measured. A combination of microswitches is used by the logic of the analyzer to detect the exact position of a test or control cartridge during operation, and Dynamic Meniscus Sensing (DMS) is used to detect when liquids enter the cartridge reading wells. The glycated hemoglobin remains bound to the boronate affinity resin, which sits at the bottom of the test cartridge funnel. The boronate affinity resin is then washed with the contents of the second buffer tube and the final step is the elution of the glycated hemoglobin off the boronate affinity resin using the third buffer tube. The glycated hemoglobin concentration is measured and the A1C concentration in the sample is calculated and reported by the analyzer. The algorithm for the calculation is: % A1C= M 5 Cholestech GDX Analyzer User Manual A Glycated X 100 +C A Glycated + A Nonglycated Where “M” and “C” are slope and intercept factors to correct the value for DCCT calibration (see Calibration, page 8). WARNING: When using the Cholestech GDX Analyzer, do not operate within an electromagnetic field. Do not operate any VHF emitting equipment within 1 meter (39.4 inches). The analyzer will run through a check stage. All the red positional indicator lights on the analyzer will flash, the beep will sound, and the display will show all icons and characters momentarily. The Cholestech GDX Analyzer is designed to be simple and easy to operate. This user manual describes some basic functions, but must be used with the package insert in each pack of Cholestech GDX A1C Test Cartridges. A number will appear on the display. This is the version of software in the analyzer, for example 2.06. The Hourglass icon will flash to tell you to wait. Please read this user manual carefully before use. 1. Ensure the Analyzer is placed on a flat surface. Operate the Analyzer between 17 and 30ºC (63–86ºF). 2. Remove the power pack. Check that the input power matches the local voltage supplied. If the input voltage does not match the local power supply, contact Cholestech Technical Service or your local distributor. 3. Plug the power pack into the main supply. Connect the jack plug into the back of the Analyzer indicated by the following marking. Note: The Hourglass icon may flash for some time if the analyzer has been stored at extreme temperature/humidity. Normally the time required for warm-up is 10 minutes. If the analyzer has been moved from a high or low temperature or humid area just prior to warm-up, the warm-up period may be extended to up to 40 minutes. If the analyzer fails to warm-up an error message will appear on the display. (SeeTroubleshooting, pages 12–13.) When the analyzer is ready for use, the Insert and Cartridge icons will flash. The “left” and “right” arrows will be solid. You can now use the analyzer to run an Optics Check Cartridge or an A1C Test Cartridge. 6 TO RUN AN OPTICS CHECK CARTRIDGE TO RUN AN OPTICS CHECK CARTRIDGE Cholestech GDX Analyzer User Manual 7 Cholestech GDX Analyzer User Manual To Run an Optics Check Cartridge Intended Use Running an Optics Check Cartridge The Optics Check Cartridge is supplied with the Cholestech GDX Analyzer to check that it is working correctly. Replacement Optics Check Cartridges are available from Cholestech. 1. Plug in the analyzer and allow to warm up. 2. Place the cartridge in the analyzer when the insert cartridge icon flashes. • “ ”appears on the display and the Hourglass icon is displayed. • The Rotate Cartridge icon is displayed. The Analyzer will beep and the light at Position 1 will flash. Principles of the Procedure The Optics Check Cartridge is reusable. It is designed to check that the analyzer is working correctly. The cartridge contains a resin with a dye that acts like your blood sample. The analyzer will automatically recognize when an Optics Check Cartridge is being used. The Optics Check Cartridge should be run every day the Cholestech GDX Analyzer is used. If you are concerned that your test result is incorrect, also run an Optics Check Cartridge. Remove the cartridge. • The analyzer will display the result: e.g. . Note: “ ” stands for Optics Check Cartridge. Summary and Explanation The measurement of A1C is recommended for monitoring the long-term care of people with diabetes.1,2 The concentration of A1C within red blood cells reflects the average level of blood sugar (glucose) over the previous 2–3 months. The higher the blood sugar level, the higher A1C. 7. 3. 4. 5. 6. Turn the cartridge to Position 1. • “ ” and the Hourglass icon will show on the display. • The Rotate Cartridge icon will be displayed. The analyzer will beep and the light at Position 2 will flash. Turn the cartridge to Position 2. • “ ” and the Hourglass icon will show on the display. • The Rotate Cartridge icon will be displayed. The analyzer will beep and the light at Position 3 will flash. 8. Press the “enter” button to clear the Optics Check Cartridge result. Shelf Life Stability Optics Check Cartridges have a shelf life date. This is printed on the top of the Optics Check Cartridge. Storage Always store the Optics Check Cartridge at room temperature in its box. This will help to protect it from damage such as scratches which may affect the result. The cartridge must not be left in direct sunlight for long periods while not in use. Turn the cartridge to Position 3. • “ ” and the Hourglass icon will show on the display. • The Rotate Cartridge icon will be displayed. The Optics Check Cartridge must be stored at relative humidity of less than 60%. Turn the cartridge to Position 0. • The Remove and Cartridge icons will be displayed. The result displayed on the analyzer at the end of Optics Check Cartridge test must be in the range on the cartridge label. Results If the result does not fall within the range displayed, do the following: • Clean the clear plastic surfaces of the cartridge with a soft, lint-free cloth. Do this on the inside and outside of the cartridge. Follow the test from point 2. • If the result is still not in the correct range, turn the analyzer off. Restart the analyzer and run the Optics Check Cartridge. • If the result is still not correct, contact Cholestech Technical Service. • If the cartridge is physically scratched, dirty or damaged, replace the cartridge with a new Optics Check Cartridge. Warning: For In Vitro Diagnostic Use Do not use the Optics Check Cartridge after the end of the shelf life date. When the test is finished, the Optics Check Cartridge should be returned to its protective packaging for storage. Do not use the Optics Check Cartridge if it has been stored incorrectly and is scratched or damaged in any way. For technical help and troubleshooting, please refer to the Cholestech GDX A1C Test Cartridge package insert and this user manual. If technical help is required, please contact your local distributor. 8 TO RUN A CHOLESTECH GDX AIC TEST / DISPLAYING RESULTS IN MEMORY / CALIBRATION CALIBRATION Cholestech GDX Analyzer User Manual / TO USE THE 10 µL MINIPET PIPETTE 9 Cholestech GDX Analyzer User Manual To Run a Cholestech GDX A1C Test Refer to the Cholestech GDX A1C Test Cartridge package insert which is in each pack of test cartridges or use the Cholestech GDX Quick Reference Guide supplied with the analyzer. Displaying Results in Memory Press the “left” arrow to select the unique identification (ID) number for the result required. Press the “enter” button. The stored result will be displayed.When this value has been written down, press the “enter” button once more. You may find another result from the memory in the same way. Return to the Insert and Cartridge icons by moving up the stored results until the last ID number has been shown on the display. Note: To exit rapidly from the memory, press the “left” and “right” arrow buttons simultaneously. Calibration The Cholestech GDX Analyzer and A1C Test Cartridges have been manufactured to deliver an A1C result. This is calibrated to the recommendations of the Diabetes Control and Complications Trial (DCCT). This result is traceable to the NGSP (National Glycohemoglobin Standardization Program), an internationally accepted method of standardization. The DCCT was a landmark multicenter clinical study which conclusively linked elevated A1C levels to the complications associated with diabetes. The result of the test can be used by your doctor to monitor your disease. Traceability of Values The Cholestech GDX Analyzer and A1C Test Cartridges have been manufactured to deliver an A1C result. Values have also been assigned using materials supplied by the IFCC network.3 Users may convert their DCCT values to IFCC values using the following equation: GDX IFCC values = 1.1218 x GDX DCCT value - 2.684. This equation was derived by Provalis Diagnostics Ltd. specifically for the GDX test using IFCC calibrated reference materials and was shown to to have a correlation coefficient of r = 0.99. To Use the 10 µL MiniPet Pipette ™ Use this procedure to apply a venous whole blood sample or control sample to the red-capped sample tube of the Cholestech GDX A1C Test Cartridge. • Firmly attach a pipette tip to the end of the 10 µL MiniPet Pipette. • To fill the pipette, push the plunger down as far as you can. Place the pipette tip into the blood or quality control sample and slowly release the plunger. Do not allow air to be drawn into the tip. • Place the pipette tip into the liquid of the red-capped sample tube. Dispense the sample into the sample tube by pressing the plunger again. Move the pipette tip out of the liquid before releasing the plunger. • Remove the pipette tip and discard it in a biohazard waste container. Note: If the plunger is released before the pipette tip is out of the liquid, it will remove some of the sample just dispensed. 10 PERFORMANCE CHARACTERISTICS PERFORMANCE CHARACTERISTICS Cholestech GDX Analyzer User Manual Cholestech GDX Analyzer User Manual 11 Performance Characteristics Clinical Trial Results Abnormal Hemoglobins Clinical studies were carried out to assess the performance of the Cholestech GDX System for the measurement of A1C in diabetic patients. The results were compared with those for a number of laboratory-based systems. The Cholestech GDX assay uses boronate affinity chromatography to determine the level of A1C in a blood sample. The presence of hemoglobin variants in a sample, such as HbS, HbC and HbD, which are known to affect other, non-boronate-based methods of A1C measurement, do not interfere with the Cholestech GDX test. In addition, the presence of fetal hemoglobin (HbF) in a sample does not interfere with the Cholestech GDX test result.5 Uremic patients with high levels of carbamylated hemoglobin can also be tested with the Cholestech GDX System. System Manufacturer Patient Number (n) Correlation Variant II HPLC Bio-Rad 62 r=0.98 Mono S HPLC Pharmacia 62 r=0.98 Biomen 8121 HPLC Menarini 24 r=0.97 Total GHb Test Sigma 94 r=0.96 Glycomat 765 HPLC Corning 95 r=0.94 Glycotest II Pierce 95 r=0.97 DCA 2000 Bayer 56 r=0.96 Hemoglobin and Hematocrit The Cholestech GDX System performs acceptably over a hemoglobin a range of 8–20 g/dL and a hematocrit range of 30–60%. The equations for the GDX test compared to the Menarini Biomen HA8140 and the Bayer DCA 2000 are as follows: Interfering Substance GDX = 0.9167 X DCA 2000 - 0.1323 GDX = 0.8968 X Menarini HA8140 + 0.7074 Precision In comparative studies using three different batches of Cholestech GDX Test Cartridges, the overall standard deviation was 0.23 (4.1% CV) for a sample having a level of 5.7% A1C and 0.36 (3.8% CV) for a sample having a level of 9.4% A1C. The following substances were shown to have no effect on the Cholestech GDX test result at the levels indicated: bilirubin 145 µmol/L, acetylsalicylic acid 300 µg/mL, caffeine 300 µg/mL, acetoaminophenol 300 µg/mL and hydroxyzine dihydrochloride 300 µg/mL. Triglycerides at 8.6 mmol/L showed no effect on the Cholestech GDX test result; however, elevated lipid concentrations may interfere and cause low results in this type of assay. Linearity and Temperature Effects Venous Sample Use/Storage The Cholestech GDX System has been shown to give a linear response from 4-15% A1C using patient samples. Values above 15% A1C are outside the validated range. Caution should be exercised if results outside the validated range of 4-15% are obtained. Cholestech GDX test results were shown not to be affected by operating temperatures of 17-30°C (63-86°F). Venous samples may be stored at 2–8°C (36–46°F) for up to 4 days. Store samples as whole blood, not as hemolysates or packed red blood cells. Venous samples may use anticoagulants potassium-EDTA, sodium citrate, sodium heparin, lithium heparin and fluoride. 12 TROUBLESHOOTING CONTACTING TECHNICAL SERVICE Cholestech GDX Analyzer User Manual Cholestech GDX Analyzer User Manual Troubleshooting 13 Contacting Technical Service The Cholestech GDX Analyzer has been programmed to detect any analyzer or test problems. An error code will appear on the display if any mistakes arise during the test. For technical assistance, please contact your local distributor. Look at the following table to see the cause of the error code and the possible correction. Error Cause Code Explanation Error Cause Code Explanation 1 Test abandoned by the user. N/A 15 Internal analyzer check is incorrect. Do the test again. If the problem persists, contact your local distributor. 2 Test cartridge is not in the analyzer. Analyzer has failed to detect a test cartridge. This may be due to an analyzer problem, or the cartridge is damaged. 16 Internal analyzer check is incorrect. Do the test again. 3 Cartridge has not been turned in time. It is essential to follow the instructions without long delays between steps. The analyzer measures time intervals between steps and will error if the time taken is too long. 17 Internal analyzer check is incorrect. Remove the cartridge and do the test again. 4 The cartridge is in the wrong position. The cartridge has been moved when not told to do so. It is essential to follow the instructions for use. 18 Internal analyzer check is incorrect. The cartridge may be damaged or dirty. To check that the analyzer is running correctly, run the Optics Check Cartridge. 5 Too long has been taken to do the step. The analyzer measures time intervals between steps and will error if the time taken is too long. 19 Internal analyzer check is incorrect. The cartridge may be damaged or dirty. To check that the analyzer is running correctly, run the Optics Check Cartridge. 6 The sample has not been added. The analyzer measures time intervals between steps and will error if the time taken is too long. It is essential to follow the instructions for use. 20 Internal analyzer check is incorrect. The cartridge may be damaged or dirty. To check that the analyzer is running correctly, run the Optics Check Cartridge. 7 Enter button has been pressed too early. The analyzer measures time intervals between steps and will error if the time taken is too long or too short. It is essential to follow the instructions for use. 21 Internal analyzer check is incorrect. The cartridge may be damaged or dirty. To check that the analyzer is running correctly, run the Optics Check Cartridge. 22 8 Internal analyzer check is incorrect. The cartridge may be damaged or dirty. To check that the analyzer is running correctly, run the Optics Check Cartridge. Internal analyzer check is incorrect. The cartridge may be damaged or dirty. To check that the analyzer is running correctly, run the Optics Check Cartridge. 23 9 Internal analyzer check is incorrect. The cartridge may be damaged or dirty. To check that the analyzer is running correctly, run the Optics Check Cartridge. Internal analyzer check is incorrect. The cartridge may be damaged or dirty. To check that the analyzer is running correctly, run the Optics Check Cartridge. 24 10 Internal analyzer check is incorrect. This may be due to an insufficient blood sample, or failure of the liquid to flow through the funnel. Do the test again and make sure that the pipette is filled correctly. The supply voltage is not at the correct level. The analyzer must be run with 11.4 –12.6 volts DC. Check the type of transformer being used. 11 Internal analyzer check is incorrect. This may be due to too much blood. Do the test again and make sure that the pipette is filled correctly. 25 Internal analyzer check is incorrect. If this problem continues, contact your local distributor. 12 Internal analyzer check is incorrect. This may be due to an insufficient blood sample, or failure of the liquid to flow through the funnel. Do the test again and make sure that the pipette is filled correctly. 26 Turn the analyzer off. Wait a few seconds and turn the analyzer on again. If the problem continues, contact your local distributor. 13 Internal analyzer check is incorrect. Do the test again and make sure that the pipette is filled correctly. Warm-up cycle has not been completed in time. 27 The analyzer has reached the limit of 9,999 tests. Contact your local distributor. Internal analyzer check is incorrect. Do the test again. Programmed analyzer shutdown. 14 14 SAFETY / LIMITATIONS OF USE SHUTDOWN INFORMATION Cholestech GDX Analyzer User Manual Safety / DISPOSAL 15 Cholestech GDX Analyzer User Manual Shutdown Information Following testing, the instrument may be left on ready for the next test or switched off at the main socket. If unused for a period it should be placed in its carton to protect the optical window. The Cholestech GDX Analyzer requires a 12-volt (±5%) DC supply regulated at greater than 250 milliamps. This is provided. There are no user-serviceable parts. If the Cholestech GDX Analyzer is dirty, clean it carefully with a lint-free cloth dampened with aqueous solutions containing 5% hypochlorite or alcohol. Take care not to get liquid in the space for the cartridge. Do not use more aggressive chemicals such as acetone. The Cholestech GDX Analyzer has been fully tested according to Electrical Safety Regulations (BS EN 61326:1998). Limitations of Use • For professional use only. • For in vitro diagnostic use only. • Do not use any part of the test components beyond the marked expiry date. • Store the test components according to the instructions on the box. • Always wear gloves when handling blood samples. • In patients where the lifespan of the red blood cell is significantly shortened, e.g. hemolytic anemia, new A1C reference ranges should be established. • The test solutions (first and second tube) contain 0.1% sodium azide as preservative, which is very toxic by inhalation, in contact with skin and if swallowed. After contact with skin, wash immediately with plenty of water. • Cholestech is not responsible for any injury or damage caused by the use of the Cholestech GDX Analyzer for purposes other than for which it is intended or by modifications of the Cholestech GDX Analyzer. Disposal The analyzer has been designed for a long and fault-free life and has been validated for 9,999 tests. As long as the Optics Check Cartridge is giving acceptable results, the Analyzer may be used with confidence. Excessive wear on the mechanisms will result in error conditions, and may indicate that the Analyzer has reached the end of its useful life. The Analyzer must then be disposed of according to local regulations concerning the disposal of electronic items in general. The Cholestech GDX Analyzer has been preprogrammed to shut down after 9,999 tests have been performed. From test ID 9900 onwards the ID number will flash momentarily to remind the user that the analyzer is approaching the end of its programmed life. 16 SPECIFICATION REFERENCES Cholestech GDX Analyzer User Manual Specification References Precision: <1%CV 1. American Diabetes Association. Diabetes Care 2002; 25(Suppl.1):S33–S49. Wavelength: 440 nm (nominal) 2. Goldstein DE et al. Diabetes Care 1995; 18:896–909. Molded materials: Keypad – Silicone elastomer Casework – ABS Window – Acrylic Central well features – Delrin Feet – Evoprene-G Signal to noise: >1,000:1 Power: 12-volt (±5%) DC at >250 mA Data download: RS232 serial port 17 Cholestech GDX Analyzer User Manual 3. Jeppsson JO, Kobold U, Barr J, Finke A, Hoelzel W, Hishino T, Miedema K, Mauri P, Mosca A, Paroni R, Thienpont L, Umemoto M, Weykamp C. Approved IFCC reference method for the measurement of A1C in human blood. Clin Chem Lab Med 2002;40:78-89. 4. The Diabetes Control and Complications Trial Research Group. N Engl J Med 1993; 329:977–986. 5. John WG. Glycated hemoglobin analysis. Ann Clin Biochem 1997; 34:7–31. 18 NOTES NOTES Cholestech GDX Analyzer User Manual Notes Cholestech GDX Analyzer User Manual Notes 19 Analyzer User Manual Cholestech GDX is a trademark of Cholestech Corporation. MiniPet is a trademark of TriContinent Scientific, Inc. This product is sold under license from Provalis Diagnostics Ltd. Distributed by Cholestech Corporation. U.S. Patent 6,300,142. Provalis Diagnostics Ltd, Newtech Square, Deeside Industrial Park, Deeside, Flintshire, UK. CH5 2NT. T: + 44 1244 288888 F: + 44 1244 833441. 201412E Rev. 01/06 003 12710 Rev. B © 2006 Cholestech Corporation. Distributed by 3347 Investment Blvd. Hayward, CA 94545 U.S.A. U.S. Tel 1.510.732.7200 Fax 1.510.732.7227 www.cholestech.com