1
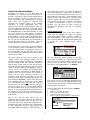
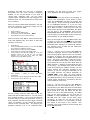
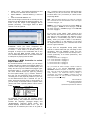
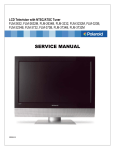
POWER USER
MUSIC PRODUCTION
With the MOTIF-RACK ES
Working with the Motif-Rack ES Arpeggios
Tips 101
If you are using the Motif-Rack ES as your MIDI
interface, you will need to learn to use the Input
Transformer (as a MIDI Channel filter) device to isolate
the controller keyboard’s trigger notes from the output
of the arpeggio when recording data to your computer
sequencer.
Recording the output of the Motif-Rack ES arpeggio can
be a bit tricky but this article will give you a few tips and
tricks to ease the task. If you are working with DAW
software that records audio, you may find that the
easiest thing to do is to record the audio output of the
Motif-Rack ES to an audio track. This is very simple and
if you are not a MIDI-Jedi, is the recommended route.
Typically you would send the notes (trigger notes) from
your controller to the software, and route (echo) the
MIDI signal to trigger the Motif-Rack ES. Then it is a
simple matter to route the audio out of the Rack ES to a
track of the DAW. However, those of you who want to
record the MIDI data to a track so you can edit it – you
will need to follow this tutorial carefully to accomplish
this task. We use Cubase SX3 in this tutorial but you can
use whatever sequencer you prefer. The process will be
similar in most DAW software, however the actual setup
may be different…your mileage may vary. Enjoy.
If you are using the Motif Rack ES as your USB-MIDI
interface (shown above):
[UTILITY] Æ MIDI screen Æ MIDI IN/OUT = USB
If you are using the Motif Rack ES in an mLAN setup, or
any other external MIDI interface:
Phil Clendeninn
Senior Product Specialist
Technology Products
©Yamaha Corporation of America
[UTILITY] Æ MIDI screen Æ MIDI IN/OUT = MIDI
1
ISSUES IN MIDI RECORDING
fact, dangerous and are the result of starting a
clock into a MIDI loop – sometimes it is difficult to
reset your gear and rebooting is the only way. Try
and avoid this clock loop, if at all possible. There
should only be one device that is sending clock
into the system. But let’s not scare ourselves –
once you set it up and get it working you will have
a better understanding of how it all works
together. You will want to keep a setup for
recording the arpeggios and one for recording
normally.
Recording the output of the Motif-Rack ES
arpeggiator is a bit tricky but when you think it
through, it is logical. I will be using Cubase SX3 in
the first example to show you how you can go
about connecting and accomplishing the goal.
Many users are surprised to discover that
recording the arpeggio output to an external
sequencer is more complicated than first
imagined. This is due to several factors. First, you
need to understand that what is normally output
from the MIDI OUT (be it the 5-pin MIDI jack or
the USB-MIDI OUT) of the Motif-Rack ES, or most
any rack module for that matter, is nothing.
Typically, unless you are bulk-dumping data from
a rack module, you are usually unconcerned about
the data that is output from the MIDI OUT Port.
So it is the rare occasion that you would want to
record the MIDI output of a module – after all
most modules do not generate their own data.
MOTIF-RACK SETUP
Here is what we will need to do. Let’s select a
Voice with an arpeggio to record. In playing
through the USER 1 bank, I called up “USER 1:
002 Gt:FolkGuitar” (Pick what ever Voice you
like). It has 5 different arpeggios associated with
it. These are very realistic finger picking
arpeggios.
The second point is, the output of the arpeggiator
is not normally routed to the MIDI Out – this is
true in a keyboard with an arpeggiator and is true
of the Motif-Rack ES. We will learn how to turn
the “Arp Out Switch” ON and how to select a MIDI
channel for this data.
You can change the active arpeggio in real time
by pressing the PAGE [<]/[>] buttons on the front
panel. Or you can assign a MIDI controller to do
the job (more on this later in the article). Place
this Voice in an initialized Multi – as PART01.
The keys played (we will refer to these as the
“trigger notes”) and “arpeggio output” are two
separate things. When recording to a sequencer
you will be dealing with your controller keyboard’s
trigger-notes, which must be sent to the MotifRack ES and you must also deal with the output
result of the Motif-Rack ES’s arpeggiator. Then, of
course, there is the matter of clock/sync. Most
external software sequencers do not default to
sending clock. You must consult the manual or
online help for your particular sequencer to
determine what steps are necessary to turn the
clock out to ON. Do not assume that because you
have selected “INTERNAL” as the clock source for
your software that it sends this to the MIDI
out…most software does not send clock until you
activate clock out and select a port on which you
send it. Of course, you will want the Motif-Rack ES
to slave to MIDI clock, so you need to set all of
this up. If you are beginning to see that this is a
bit complex, then do not feel frustrated if your
first attempts to get this going have turned into a
mild disaster.
If I wish to use the 5 associated Arpeggios from
Voice mode, I can copy the ARP data from Voice
mode into the current Multi using the Utility mode
Copy function. Here’s how:
After you place the Folk Guitar Voice in PART01:
•
•
•
•
•
Add to the mix the fact that if you are
experimenting with clock and wind up creating a
MIDI loop with multiple clocks on the wire, you
may have bad errors. Typical bad symptoms are:
arpeggios that start and then stop unexpectedly
or are consistently off time (even though you
have MIDI SYNC set properly). Clock loops are, in
2
Press [UTILITY]
PAGE [>] to the JOB SEL screen
Cursor down and select [COPY]
The COPY MULTI function appears
Setup so you are copying PART 01’s ARP (shown):
remember you will want to keep your trigger
notes separate from the arpeggio notes.
Executing this JOB will copy the 5 arpeggios
associated with the Voice currently occupying
PART01 to our current MULTI. If you wish to
record other arpeggios later, you can easily
reassign these 5 positions with the arpeggios of a
different Voice. You can repeat this as many times
as is necessary.
DAW SETUP
In Cubase SX3 you will need to set computer to
output clock information. Clock setup is found
under the TRANSPORT pull-down in Cubase, find
“Sync Setup…” If you are using the Motif-Rack ES
as you USB-MIDI interface, or if you are using
mLAN to route MIDI to the Motif-Rack ES or some
other MIDI interface, select the port that will
communicate directly to the Motif-Rack ES. While
you are here in the TRANSPORT area find the
METRONOME SETUP and create a click and countin that makes you comfortable. Please consult the
documentation of your DAW for details.
Now let’s set the MIDI SYNC parameter. This will
allow the arpeggios to follow the tempo you set
for your song in your DAW.
•
•
•
•
Press [UTILITY]
PAGE [<] to the MIDI screen
Cursor down and set MIDI SYNC = MIDI
Press [MULTI] to lock in these settings
Now let’s set the ARP ON for PART01 and set the
main ARP SWITCH ON, and select a ARP OUT
Channel. Here’s how:
•
•
•
•
•
•
•
•
Next you will need to create two MIDI tracks. One
is simply to ‘echo’ the trigger notes to the MotifRack ES, the second is to record the output of the
Motif-Rack ES’s arpeggio. In sequencing software
you typically have a MIDI IN and MIDI OUT
routing for each track.
Press [EDIT]
Press the [MUTE/SEL] button to turn the LED OFF.
This selects the “SELECT” function.
Press button [1/5/9/13] to select PART01
Press PAGE [<] to select the VOICE screen
Cursor down to set ARP SW = ON. As a rule, the
arpeggio switch can be ON for only one MIDI
channel (you can have more than one PART
assigned to a single MIDI channel).
Track 1 – will be set to receive (IN) from our
controller keyboard. Set the Track Inspector so
that incoming signal registers from your controller
keyboard, as normal. Set the Input Monitor icon
to ON. You do not have to engage Record on this
track – this track, remember, is only the triggernotes. The MIDI transmit (OUT) function from this
track should be set to arrive at the Motif-Rack ES
(MIDI channel 1). Nothing unusual about this part
of the setup – you probably have done this many
times when playing the module normally. You are
simply echoing the controller message to the
module. (If you are using the Motif-Rack ES as
your MIDI Interface see special paragraph on
“USING USB” -next page, for more specific
details). When you are using the Motif-Rack ES as
your MIDI Interface it will be necessary to use the
Cubase “Input Transformer” to isolate or filter the
channel data for each track).
Hold [SHIFT] + [ARP] to select ARP EDIT
parameters.
Cursor down; set the arpeggio OUTPUT SW = ON
Cursor down; set the OUT CH = 2
Track 2 – will be set to receive (IN) from the
Motif-Rack ES. Set the MIDI IN Port so that it
corresponds to the MIDI Port that the Motif-Rack
ES is set to transmit Out. The MIDI channel of this
track should be 2 (this will match the Arp Out
channel we set in the Motif-Rack ES). The MIDI
OUT of this track should be set (and this is
critical): to “NOT CONNECTED”. That’s right! You
do not want the output of this track going
anywhere… at least not yet. We are going to
record into this track, it is unnecessary to route
the output of this track to any module… until
playback. This track should be Record armed. But
set to not echo back.
We will initially send the ARP data out of the
Motif–Rack ES on MIDI channel 2. You can choose
any available channel – but it must be different
than the channel of the Folk Guitar Part. This is so
that it remains discreet from the trigger note data
(later, for playback, we can change the transmit
channel of the recorded data – by changing the
playback channel). This is an important step;
3
version of the USB Driver and the computer
operating system the driver will operate in.
Okay, we are almost set to record. Playing the
controller now you will not hear anything – there
is no clock running yet. The last thing to do is to
turn the ARP ON/OFF switch ON – it is found in
the lower right corner of the Motif-Rack ES front
panel.
Make sure in your software that you have set your
tempo and metronome with an appropriate countin. It is important that you play in time (as
always) – I do not recommend quantizing the
arpeggio data as this will change some of the
naturally nuance (but this is your call).
•
Press Record and record your track.
PLAYBACK Setup
Once you have completed the recording:
•
Press STOP and turn the ARP ON/OFF switch to OFF
(Once you have recorded the output of the
arpeggio – you do not want anything to trigger
the arp during playback… arpeggiating the
arpeggio data).
•
Setting up the Cubase Input Transformer:
When setting up your Tracks in Cubase SX3 you
will have the tracks set as follows:
TRACK 1 (trigger notes)
In: Yamaha USB IN 0-1
Out: Yamaha USB OUT 0-1
•
Click on the Input Transformer
icon in the upper right corner of the Track
Inspector.
The Input Transformer will allow us to setup MIDI
Filters so that the data that we want will be
passed and the data we don’t want passed on will
be ignored.
•
Select “Local” – this opens the dialog box.
•
Select PRESET > Channel Filtering > Pass CH
01
Turn the ARP OUT SW = OFF. It is found in the
Motif-Rack ES on the [SHIFT] + [ARPEGGIO] screen
(Arp Edit).
In the DAW: you now need to set a playback
OUTPUT Port for the track we just recorded
sending it to the Motif-Rack ES. And you can set
the MIDI channel to match the Part (Folk Guitar),
which is on MIDI channel 1. If you did record the
trigger notes, MUTE that track, it will only get in
the way (they are for most part unnecessary now
that you have recorded the output of the arpeggio
data to a track).
•
Set the MIDI channel of the target track to Channel
1. This will allow the data to play the proper sound.
Your data should be on the track, in time with
your metronome. Alternatively, you can simply
drag the track 2 data to track 1 (since track 1 is
already set to trigger the correct sound in the
Motif-Rack ES.
**USING USB**
•
Click the ACTIVE MODULE #1
This will set things so that track 1 will only see the
data from the controller keyboard (the trigger
notes). For Track 1 only MIDI channel 1 will pass.
If you are using the Motif-Rack ES as your MIDI
interface: let’s get specific about the Ins and
Outs, so to speak. In this scenario on a Windows
computer you will have the MIDI-USB icon in the
Control Panels of your system.
When you have an active USB
device connected you will be able
to double click this icon to open the
Driver Device setup page.
TRACK 2 (arpeggio output notes)
In: Yamaha USB IN 0-1
Out: Not Connected
•
Click on the Input Transformer icon in the
upper right corner of the track 2 Track
Inspector.
The page will show you the current
4
any – because it does not have a defined function
in MIDI…so you can use it for this. You will be able
to select either “inc” (increment) or “direct” as the
Arp Assign Mode.
•
Select “Local” – This opens the dialog box and
this time we will filter all but channel 2
•
Select PRESET > Channel Filtering > Pass CH
02
•
Click the ACTIVE MODULE #1
This will set things so that track 2 will only see the
data from the Motif-Rack ES arpeggio output). For
Track 2 only the output of the arpeggio will be
passed (recorded) – the trigger notes on MIDI
channel 1 will be ignored.
INC – With this setting anytime, any value for controller
87 is received the unit will increment to the next higher
numbered arpeggio, 1-5.
DIRECT – any value for controller 87 between 0-25 will
select Arpeggio 1, 26-50 will select Arpeggio 2, 51-76
will select Arpeggio 3, 77-101 Arpeggio 4 and 102-127
will select Arpeggio 5.
If you have a foot switch, “INC” might be the
best. Set the foot switch to send cc087 and when
you step on it the arpeggio will advance. If the
foot switch is a momentary type (like a sustain
pedal), when you press it down it will advance,
when you release it, it will advance. If you have
an assignable button on your controller this would
also be a good selection.
PLAYBACK: Once you have completed the
recording you can simply drag the track data up
to track 1 – since Track 1 is already setup and
assigned to output to the Motif-Rack ES on the
correct port and MIDI channel. Make sure you
turn the ARP ON/OFF switch on the Motif-Rack ES
to OFF prior to playing back the data.
If you have an assignable sweep pedal, knob
control or control slider that you can assign to this
parameter, then the “DIRECT” might suit your
needs better. A typical knob will sweep from 7
o’clock (minimum) to 5 o’clock (maximum). This
translates to:
7-9 on the clock dial = Arpeggio 1
9-11 on the clock dial = Arpeggio 2
11-1 on the clock dial = Arpeggio 3
1-3 on the clock dial = Arpeggio 4
3-5 on the clock dial = Arpeggio 5
Assigning a MIDI Controller to select
Arps in Real-time
As mentioned earlier in the article, you can assign
a MIDI controller to select the arpeggio pattern in
real-time. Each program (Voice, Performance, and
Multi) can have up to five different arpeggio types
associated with it. I mentioned earlier that you
can move between these five types by pressing
the front panel PAGE [<]/[>] buttons. However,
this may not be convenient when performing or
recording due to the physical position of your unit
so the Motif-Rack ES has a method for you to
either increment through them 1Æ2Æ3Æ4Æ5, or
you can assign a controller where a specific value
(direct) will recall a specific pattern. Here’s how it
works.
Tip: you would not want to assign a knob or slider to
control this if you selected increment. Because
increment advances anytime a value (any value) is
sent. This will send the Arpeggio selection parameter
crazy. Likewise, you would not want to assign a
momentary foot switch to direct – because a typical
foot switch sends 0 or 127 (no values in between). So
choose your controllers wisely.
Phil Clendeninn
Senior Product Specialist
Technology Products
©Yamaha Corporation of America
In [UTILITY] you will find the “CtrlAsn” screen
(shown above). The parameters that control this
function are “ArpAsgn” (arpeggio assign) and
“ArpAsgnMode” (arpeggio assign mode). The
default ArpAsgn control number is 87 – you can
change this as necessary but cc87 is as good as
5