1
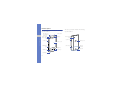
Vodafone 360 Samsung M1
user manual
Read me first!
using this
manual
When you need information, instructions, and
tips to learn more about your device, you can
use the online user manual.
This user manual has been specially designed
to guide you through the functions and features
of your device. It contains extensive information
about Samsung software and features and tips
for using and maintaining the device.
On the Samsung website, you will find the user
manual in Adobe Acrobat (.pdf) format. You can
either view the guide online or download and
print the file for your convenience. To view the
file, you must have Adobe Reader or Adobe
Acrobat installed-you can download Adobe
Reader free from Adobe's website
(www.adobe.com).
ii
Instructional icons
Before you start, familiarise yourself with the
icons you will see in this manual:
Followed by—the order of options or
menus you must select to perform a
step; for example: In Apps view, select
Settings → Phone profile (represents
Settings, followed by Phone profile)
[ ]
Square brackets—device keys; for
example: [ ] (represents the Power
key).
Warning—situations that could cause
injury to yourself or others
Caution—situations that could cause
damage to your device or other
equipment
Note—notes, usage tips, or additional
information
X
Refer to—pages with related
information; for example: X p. 12
(represents "see page 12")
iii
using this manual
→
Copyrights and trademarks
Rights to all technologies and products that
comprise this device are the property of their
respective owners:
using this manual
• Bluetooth® is a registered trademark of the
Bluetooth SIG, Inc. worldwide.
Bluetooth QD ID: B015726
• Java™ is a trademark of Sun Microsystems,
Inc.
• DivX® is a registered
trademark of DivX, Inc., and is
used under licence.
Pat. 7,295,673
ABOUT DIVX VIDEO: DivX® is a digital video
format created by DivX, Inc. This is an official
DivX Certified device that plays DivX video. Visit
www.divx.com for more information and
software tools to convert your files into DivX
video.
ABOUT DIVX VIDEO-ON-DEMAND: This
DivX Certified® device must be registered in
order to play DivX Video-on-Demand (VOD)
content. To generate the registration code,
locate the DivX VOD section in the device setup
menu. Go to vod.divx.com with this code to
complete the registration process and learn
more about DivX VOD.
DivX Certified to play DivX® video up to
320x240
LiMo and the star design are trademarks of Limo
Foundation Inc. and are used with permission.
iv
introducing your device ........................... 1
contents
Unpack ....................................................... 1
Device layout .............................................. 2
Keys ........................................................... 3
Icons .......................................................... 3
getting started with your device ............. 5
Assemble and prepare your device ............. 5
Turn your device on and off ........................ 9
Use the touch screen ............................... 10
Switch your device’s modes ..................... 12
Access applications .................................. 13
Open the status bar .................................. 14
Download applications from Shop ............ 14
Enter text .................................................. 14
Customise your device ............................. 16
Search for data ......................................... 17
communication ...................................... 18
Calling ...................................................... 18
Text and multimedia messages ................ 21
Voicemails ................................................ 22
Email messages ....................................... 23
Chat ......................................................... 23
v
contents
media ...................................................... 24
additional programs ............................... 49
Music ....................................................... 24
Camera .................................................... 26
Gallery ...................................................... 29
My Files .................................................... 31
Radio ........................................................ 32
Voice Recorder ......................................... 33
PC Studio ................................................. 34
Alarm ........................................................ 49
World Clock .............................................. 50
Calculator ................................................. 50
Units ......................................................... 51
Stopwatch ................................................ 51
Maps ........................................................ 51
personal productivity ............................. 35
Contacts ................................................... 35
Calendar ................................................... 37
File Viewer ................................................ 38
Notes ....................................................... 39
web applications .................................... 40
Internet ..................................................... 40
Web Player ............................................... 41
RSS .......................................................... 42
connectivity ............................................ 44
Bluetooth .................................................. 44
USB .......................................................... 46
vi
settings ................................................... 53
Phone profile ............................................ 53
Display and light ....................................... 53
Time and date .......................................... 54
Phone settings ......................................... 54
Application settings .................................. 54
Network settings ...................................... 55
Security .................................................... 55
Memory settings ....................................... 56
Reset settings ........................................... 56
Open source licence ................................. 56
troubleshooting ........................................ a
index ......................................................... e
Unpack
introducing your
device
In this section, learn about your mobile device’s
layout, keys, and icons.
Check your product box for the following items:
• Mobile device
• Battery
• Travel adapter (charger)
• Headset
• PC data cable
• safety and usage information
• The items supplied with your device may
vary depending on the software and
accessories available in your region or
offered by your service provider. You can
obtain additional accessories from your
local Samsung dealer.
• The supplied accessories perform best for
your device.
1
Device layout
The front of your device includes the following
keys and features:
Microphone for
speakerphone
introducing your device
Power key
Front camera
lens for video
calls
The rear of your device includes the following
keys and features:
Headset jack
Earpiece
Rear camera
lens
Search key
Volume key
Battery cover
Touch screen
Camera key
Multifunction
jack
Internal
antenna
Apps key
Timeline key
Mouthpiece
2
People key
Speaker
Keys
Key
Key
Function
Turn the device on and off (press and
hold); Activate Sleep mode
Access People view; Switch between
list view and tile view
Access Apps view; Switch between
list view and grid view
Icons
Learn about the icons that appear on your
display.
Icon
introducing your device
Access Timeline view; Switch
between list view and tile view; Open
the dialling screen (press and hold)
Function
Turn on the camera (press and hold);
In Camera mode, take a photo or
record a video
Definition
Signal strength
GPRS network connected
Adjust the device’s volume; Activate
or deactivate the Silent profile (press
and hold the Volume key down);
During an incoming call, mute the call
ringer
EDGE network connected
Launch the search application (press
and hold)
Browsing the web
UMTS network connected
HSDPA network connected
GPS connected
Connected to secured web page
3
Icon
Definition
Alarm activated
New text message (SMS)
New multimedia message (MMS)
New voicemail message
New email message
introducing your device
Call diverting activated
Roaming (outside of normal service
area)
Radio on
Bluetooth activated
Connected to PC
Memory card inserted
Battery power level
4
getting started
with your device
Assemble and prepare your
device
Get started by assembling and setting up your
mobile device for its first use.
Install the SIM or USIM card and
battery
When you subscribe to a cellular service, you
will receive a Subscriber Identity Module (SIM)
card with subscription details, such as your
personal identification number (PIN) and optional
services.
To use UMTS or HSDPA services, you can
purchase a Universal Subscriber Identity
Module (USIM) card.
5
To install the SIM or USIM card and battery,
2. Insert the SIM or USIM card.
1. Remove the battery cover.
getting started with your device
If the device is on, press and hold [ ] to turn
it off.
6
• Place the SIM or USIM card in the device
with the gold-coloured contacts facing
down.
• Without inserting a SIM or USIM card, you
can use your device’s non-network
services and some menus.
3. Insert the battery.
Charge the battery
Before using the device for the first time, you
must charge the battery.
1. Open the cover to the multifunction jack on
the side of the device.
4. Replace the battery cover.
With the triangle
facing up
Improperly connecting the travel adapter can
cause serious damage to the device. Any
damages by misuse are not covered by the
warranty.
7
getting started with your device
2. Plug the small end of the travel adapter into
the multifunction jack.
3. Plug the large end of the travel adapter into
a power outlet.
4. When the battery is fully charged (the
icon is no longer moving), unplug the travel
adapter from the power outlet.
5. Unplug the travel adapter from the device.
getting started with your device
6. Close the cover to the multifunction jack.
About the low battery indicator
When your battery is low, the device will emit
a warning tone and a low battery message.
The battery icon will also be empty and
blinking. If the battery level becomes too low,
the device will automatically power off.
Recharge your battery to continue using your
device.
8
Insert a memory card (optional)
To store additional multimedia files, you must
insert a memory card. Your device accepts
microSD™ or microSDHC™ memory cards up
to 16 GB (depending on memory card
manufacturer and type).
Formatting the memory card on a PC may
cause incompatibility with your device.
Format the memory card only on the device.
1. Remove the battery cover and battery.
2. Insert a memory card with the label side
facing down.
3. Push the memory card in the memory card
slot until it locks in place.
4. Replace the battery cover and battery.
To remove the memory card, remove the
battery cover and battery, push it gently until it
disengages from the device, and then pull the
memory card out of the memory card slot.
Turn your device on and off
To turn your device on, press and hold [ ].
Your device will automatically connect to the
cellular network.
Vodafone 360 provides extended internet
services to connect you to the people and
things around you. First, you must log in to
Vodafone 360. If you do not have a Vodafone
360 account, sign up for an account.
Lock or unlock the touch screen
and keys
You can lock the touch screen and the keys to
prevent any unwanted device operations.
When you press [ ], your device activates
Sleep mode and locks the touch screen and
keys.
To unlock, drag your finger on the bottom left of
the screen to the right side.
Activate the Silent profile
To activate the Silent profile, press and hold the
Volume key down.
You can also touch the top of the screen to
open the status bar and then select Phone
profiles → Silent.
9
getting started with your device
If you are transferring data, do not remove
the memory card. Otherwise, your memory
card may be damaged and the data may be
corrupted or erased.
To turn your device off, press and hold [ ]
again.
Disable wireless functions
getting started with your device
By disabling wireless functions, you can use
your device’s non-network services in areas
where wireless devices are prohibited, such as
aeroplanes and hospitals.
To disable wireless functions, touch the top of
the screen to open the status bar and then
select Phone profiles → Flight.
Follow all posted warnings and directions
from official personnel when in areas where
wireless devices are prohibited.
Use the touch screen
Your device’s touch screen lets you easily
select items or perform functions. Learn basic
actions to use the touch screen.
For the optimal use of the touch screen,
remove the screen protection film before
using your device.
10
• Touch an icon to open a menu or launch an
application.
• Drag your finger up or down to scroll through
vertical lists.
• Drag your finger left or right to scroll through
horizontal lists.
getting started with your device
11
Switch your device’s modes
Timeline view
Your device has three modes; Timeline view,
People view, and Apps view.
From any screen, press [
Timeline view.
People view
Your device records call log, message log, and
other communication history in Timeline view.
getting started with your device
From any screen, press [ ] to switch to
People view. Your contacts appear in 3D view.
When you press [ ] again, the view mode
changes to 2D view.
People view displays all of the saved contact
cards with their profile photos, status updates.
You can manage contact cards by groups and
search for contacts. X p. 35
When you are logged in to Vodafone 360, you
can invite Vodafone 360 contacts to your
personal network and connect to them easily.
You can share the presence status or location
information, share photos, and chat with them.
12
] to switch to
Apps view
From any screen, press [ ] to switch to Apps
view.
Apps view provides you access to applications
and features available on your device. You can
switch between the list view and the grid view.
Access applications
Learn to access your device’s applications from
Apps view.
4. Touch and hold an icon and drag to the
location you want.
5. When you are finished, select
.
Open applications
Remove downloaded applications
1. Press [
1. Press [
] to switch to Apps view.
3. Select
to return to the previous screen;
Press [ ] or select
to close the current
application and return to Apps view.
Change the location of an
application icon
1. Press [
3. Select
.
4. Select
or
next to the application you
want to uninstall.
You cannot uninstall default applications on
your device.
] to switch to Apps view.
2. Press [ ] again to access the grid view (if
necessary).
3. Select
.
13
getting started with your device
2. Select an application.
] to switch to Apps view.
2. Press [ ] again to access the list view (if
necessary).
getting started with your device
Open the status bar
To download applications,
The status bar also displays the status of the
currently running applications, such as playing
music, and notifications for missed calls, new
messages, or missed calendar events and
other event alerts. You can also open the
dialling screen or change the phone profile on
the status bar.
1. Press [
To open the status bar, touch the top of the
screen.
Download applications from
Shop
Shop provides an easy and quick way to shop
for mobile applications. You can extend your
device’s functionality by downloading and
installing additional applications.
14
] to switch to Apps view.
2. Select Shop. You are connected to the
Shop.
3. Search for an application you want to
download.
4. Select Download.
Enter text
With your device’s touch screen, you can enter
text and create messages or notes.
When you touch a text input field, your device
will show an input panel at the bottom of the
screen. To hide an input panel, select
.
• To change the input panel, select
→
Qwerty or Keypad.
• To change the input language, select
→
Language → a language.
• To activate Predictive mode, select
→
XT9 On. When Predictive mode is activated,
your device attempts to predict the word you
are entering to save your time and
keystrokes.
Enter text using the virtual keypad
Touch a button until the character you want
appears.
You can also use the following icons:
Icon
Touch buttons you want on the input panel.
You can also use the following icons:
Icon
Function
Change the case
Function
Insert a space
getting started with your device
Enter text using the qwerty
keyboard
Switch between Number/Symbol
mode and ABC mode
Delete characters; Clear the input
field (touch and hold)
Insert a space
Switch between Number/Symbol
mode and ABC mode
Start a new line
Delete characters; Clear the input
field (touch and hold)
15
Customise your device
3. Select
Get more from your device by customising it to
match your preferences.
4. Change the settings as desired.
next to the profile you want.
Available settings may vary depending on
the selected profile.
Change the phone profile
getting started with your device
Your device includes preset profiles that control
the behaviour of incoming calls and messages
and phone sounds. You can activate profiles for
different situations and personalise profiles.
Select a wallpaper for the idle
screen
1. Press [
] to switch to Apps view.
Activate a profile
2. Select Settings → Display and light →
Wlallpaper.
1. Press [
3. Select an image.
] to switch to Apps view.
2. Select Settings → Phone profile.
3. Select a profile.
Personalise a profile
1. Press [
] to switch to Apps view.
2. Select Settings → Phone profile.
16
Change the display theme colour
1. Press [
] to switch to Apps view.
2. Select Settings → Display and light →
Theme colour settings.
3. Select a colour.
Lock your device
1. Press [
] to switch to Apps view.
2. Select Settings → Security → Power-on
lock.
3. Enter the default password and select
.
Search for data
Use the search application to search for any
specific data stored in your device or on a
memory card (including contacts, media files,
schedules, or messages), or on the web.
17
getting started with your device
• The default password is 00000000. You
can change the default password by
selecting Change password.
• Samsung is not responsible for any loss of
passwords or private information or other
damages caused by illegal software.
1. Press and hold the Search key.
2. Select a search category.
• Google: Search the web with Google
• Shop: Search the Shop
• Vodafone 360 members: Search for
your Vodafone 360 contacts
• My phone: Search inside the device
• Memory card: Search a memory card (if
a memory card is inserted)
3. Select the text input field and enter a letter
or a word of the data to search.
Any data including the letter or word you
have entered will be listed.
4. Select the data you want to access.
Calling
communication
Your device allows you to send and receive
many types of messages over cellular networks
and the internet.
Learn to make or answer calls and use call
functions.
During a call, your device automatically locks
the touch screen to prevent accidental
inputs. To unlock, drag your finger on the
bottom left of the screen to the right side.
Make a call
1. Press and hold [
screen.
] to open the dialling
2. Enter an area code and a phone number.
3. Select
to dial the number.
For a video call, select
.
4. To end the call, press and hold [
18
].
Answer a call
1. When a call comes in, press [
View and dial missed calls
].
2. For a video call, press [ ] and select
to allow the caller to see you.
Your device will display calls you have missed
on the display. To dial the number of a missed
call,
1. Touch the top of the screen to open the
status bar.
Adjust the volume
2. Select the missed call field. The missed call
list appears.
To adjust the volume during a call, press the
Volume key up or down.
Use the speakerphone feature
1. During a call, select Speaker on to activate
the speaker.
2. To switch back to the earpiece, select
Speaker off.
3. Select the missed call you want to dial and
select
.
Call a recently dialled number
1. Press [
] to switch to Timeline view.
2. Select the name or number you want to dial
and select
.
In noisy environments, you may have
difficulty hearing the calls while using the
speakerphone feature. For better audio
performance, use the normal mode.
19
communication
3. To end the call, select End.
Call an international number
Dial a second call
1. Press and hold [
screen.
If your network supports this function, you can
dial another number during a call:
] to open the dialling
2. Touch and hold 0 to insert the + character.
communication
3. Enter the complete number you want to dial
(country code, area code, and phone
number), and then select
.
Call a number from Contacts
You can call numbers directly from Contacts
using stored contacts. X p. 36
1. Press [
] to switch to People view.
2. Select the contact you want to dial and
select
.
Hold a call or retrieve a held call
Select Hold to place a call on hold, or select
Retrieve to retrieve a held call.
20
1. During a call, select Dialler, enter the
second number to dial, and then select
.
The first call is automatically placed on hold.
2. Select Swap to switch between the two
calls.
3. To end a call, select the call you want to
end and select End.
Answer a second call
If your network supports this function, you can
answer a second incoming call:
1. During a call, press [
second call.
] to answer the
2. Select Hold active call to place the first call
on hold, or select End active call to end
the first call.
3. Select Swap to switch between the two
calls.
Make a multiparty call (conference
call)
2. While connected to the first party, call the
second party.
The first party is automatically placed on
hold.
3. When connected to the second party,
select More → Merge.
4. Repeat steps 2 and 3 to add more parties
(if necessary).
Use messaging functions. For instructions on
entering text, X p. 14.
Send a text message
1. Press [
] → Messaging.
2. Select
.
3. Select the recipient field and enter a
recipient number.
You can select a contact from Contacts by
selecting
.
4. Select the text input field and enter your
message.
5. Select
to send the message.
5. To have a private conversation with one
party, select Split.
21
communication
1. Call the first party you want to add to the
multiparty call.
Text and multimedia messages
Send a multimedia message
View text or multimedia messages
1. Press [
] → Messaging.
1. Press [
2. Select
.
2. Select
communication
3. Select the recipient field and enter a
recipient number or address.
You can select a contact from Contacts by
selecting
.
4. Select the text input field and enter your
message.
5. Select
→ Add subject and enter a
subject (if necessary).
] → Messaging.
→ Inbox.
3. Select a text or multimedia message.
Voicemails
If your voicemail number is preset by your
service provider, you can touch and hold 1 to
access your voicemail from the dialling screen.
If the voicemail number is not preset or if you
need to change the voicemail number,
6. Add media files by using the following
icons:
•
: Add files to the message.
•
: Add files as attachment.
1. Press [
7. Select
3. Select the input field.
to send the message.
] → Messaging.
2. Select
→ Settings → Voicemail
number.
4. Enter the voicemail number provided by
your service provider.
22
Email messages
communication
You can retrieve new email messages from
other web accounts to your device by using the
Vodafone 360 service. When you launch the
email application, the email accounts you have
registered appear. Select an email account you
want to retrieve messages from.
To launch the email application, press [ ] →
Email.
Chat
You can send and receive instant messages
(IM) by using the chat application. Before
sending or receiving instant messages, you
must log in to Vodafone 360.
To launch the chat application, press [
Chat.
]→
23
Music
media
Learn to listen to music, capture photos and videos,
and take advantage of your device's multimedia
features.
Learn how to listen to music via the music
player. Music files are categorised in folders by
artist, album, track, genre, and playlist.
Add music files to your device
Start by adding files to your device or memory
card:
• Download from Music Shop.
• Download from a PC with the optional
Samsung PC Studio. X p. 46
• Synchronise with Windows Media Player 11.
X p. 47
• Copy music files to your memory card.
X p. 47
• Receive via Bluetooth. X p. 45
Download music files from Music Shop
1. Press [
] → Music → Music Shop.
2. Search for music files and download them
to your device.
24
Play music files
1. Press [
Icon
] → Music → My Library.
2. Select a music category → a music file.
You can select Shuffle tracks to play
music files in the random order.
Add the currently playing track to
the On-the-go playlist
Recommend the current track to
your friends
3. During playback, use the following icons:
Function
Activate Shuffle mode
Change the repeat mode (repeat
once/repeat all/repeat off)
Skip to the previous file; Scan
backward in a file (touch and hold)
Create a playlist
1. Press [ ] → Music → My Library →
Tracks.
2. Select
4. Select
Resume playback
5. Select
screen.
Rate the current track
.
3. Select the files you want to add to a playlist.
Pause playback
Skip to the next file; Scan forward
in a file (touch and hold)
media
Icon
Function
Open the tack list
.
→
to return to the library
6. Select Playlists → On-the-go playlist.
7. Select
.
25
8. Enter a name for the playlist and select OK.
9. Select Clear to remove the tracks from the
On-the-go playlist (if necessary).
4. Press the Camera key to take a photo.
The photo is saved automatically.
5. Select
to take another photo (step 3).
Camera
View photos
Learn to capture and view photos and videos.
1. From the viewfinder, select
media
If you are logged in to Vodafone 360, your
device will automatically upload captured
photos to the Vodafone 360 server.
To upload photos to the server manually,
select
.
Capture photos
1. Press and hold the Camera key to turn on
the camera.
2. Rotate the device anti-clockwise to
landscape view.
3. Aim the lens at the subject and make any
adjustments.
26
.
2. Scroll to the photo you want.
Use camera options
Before capturing a photo, use the following
icons:
Icon
Function
Change the shooting mode
Change the scene mode
Change the camera settings
Switch to camcorder
Change the resolution option
Icon
Function
View videos
Adjust the brightness
1. From the viewfinder, select
View captured photos
Capture videos
2. Rotate the device anti-clockwise to
landscape view.
3. Select
to switch to Recording mode.
4. Aim the lens at the subject and make any
adjustments.
5. Press the Camera key to start recording.
6. Select
or press the Camera key to stop
recording.
The video is saved automatically.
7. Select
3. Select
to play the video.
Use camcorder options
media
1. Press and hold the Camera key to turn on
the camera.
.
2. Scroll to the video you want.
Before capturing a video, use the following
icons:
Icon
Function
Change the recording mode
Change the camera settings
Switch to camera
Change the resolution option
Adjust the brightness
View captured video clips
to record another video (step 4).
27
Capture photos by using options
preset for various scenes
5. Press and hold the Camera key to take a
series of photos.
1. Press and hold the Camera key to turn on
the camera.
Capture mosaic photos
2. Rotate the device anti-clockwise to
landscape view.
media
3. Select
→ a scene.
4. Make any necessary adjustments.
5. Press the Camera key to take a photo.
1. Press and hold the Camera key to turn on
the camera.
2. Rotate the device anti-clockwise to
landscape view.
3. Select
→ Mosaic.
4. Select an image layout
Capture a series of photos
5. Make any necessary adjustments.
1. Press and hold the Camera key to turn on
the camera.
6. Press the Camera key to take photos for
each segment.
2. Rotate the device anti-clockwise to
landscape view.
Capture photos with decorative
frames
3. Select
→ Continuous.
4. Make any necessary adjustments.
28
1. Press and hold the Camera key to turn on
the camera.
2. Rotate the device anti-clockwise to
landscape view.
3. Select
→ Frames.
4. Select a frame.
5. Aim the camera lens at your subject.
Your device recognises people in an image
and detects their smiles. When the subject
smiles, the device automatically takes a
photo.
5. Make any necessary adjustments.
Capture photos in Smile shot mode
1. Press and hold the Camera key to turn on
the camera.
2. Rotate the device anti-clockwise to
landscape view.
3. Select
→ Smile.
4. Press the Camera key.
Gallery
Learn to view your photos and videos and edit
photos.
View a photo or video
1. Press [
] → Gallery.
2. Select a tab.
• All: Display all photos and videos saved
in your device.
• Camera roll: Display photos and videos
you captured with your device.
• Albums: Display photo albums you
created on your device.
29
media
6. Press the Camera key to take a photo with
the frame.
Edit a photo
3. Select a photo or video.
• You can touch the photo display twice to
enter the zoom screen. Drag up or down
on the right of the screen.
• You can view photos as a slideshow by
selecting
.
media
] → Gallery → Albums.
2. Select
.
] → Gallery → a photo.
.
3. Use the following editing options to edit the
photo:
Option
Create an album
1. Press [
1. Press [
2. Select
Tools
•
3. Select the text input field.
4. Enter a name for the new album.
5. Select and drag files to the Selected list.
6. When you are finished, select
the album.
Function
•
: Draw a sketch or add
shapes
•
: Add a text
to save
Adjust
: Rotate, flip, or crop an
image, or change the image
size
•
: Adjust the brightness,
contrast, or saturation
•
: Apply various special
effects
•
: Apply various image styles
4. When you are finished, select
30
→ Save.
Share photos
My Files
You can share photos with Vodafone 360 all
connected. You can view the shared photo of
Vodafone 360 all connected in the contact
view. In the Me view, you can view and unshare
photos you shared.
Learn to view and access all the files and
folders on your device or a memory card.
If you access this menu before loading data
from a memory card, your device will not
display all files.
1. Press [
] → Gallery.
2. Select and open a photo.
3. Select
.
4. Select Vodafone 360 all connected.
Share with a social network
1. Press [
] → Gallery.
Open a file
1. Press [
] → My Files.
2. Select a folder (if necessary).
3. Select a file you want.
Copy or move files
1. Press [
] → My Files.
2. Select and open a photo.
2. Select a folder.
3. Select
3. Select
.
4. Select one from the registered social
network domains.
media
Share with Vodafone 360 all connected
.
4. Select the check boxes next to the files you
want to copy or move.
31
5. Select
or
.
Listen to the radio
6. Locate where the files are copied or
moved.
1. Plug the supplied headset into the device’s
headset jack.
7. Select
2. Press [
.
Edit file names
media
1. Press [
] → My Files.
2. Select a folder.
3. Select
.
4. Touch the name of the file you want to
rename.
] → Radio.
3. Select < or > to scan through available
radio stations.
• To adjust the volume, press the Volume
key.
• To change the sound output, select
.
When you unplug the headset from the
device, the radio turns off.
5. Edit the file name.
Save radio stations by automatic
tuning
Radio
1. Press [
Learn to listen to your favourite radio stations.
2. Select
You must connect the headset to your
device to listen to the radio. The headset
serves as a radio antenna.
32
3. Select
] → Radio.
to open the station list.
.
4. Select Continue.
The radio scans and saves available
stations automatically.
Voice Recorder
5. Select a station you want to listen to.
Record a voice memo
Set up your favourite radio station
list
1. Press [
] → Radio.
] → Voice Recorder.
2. Select
to begin recording.
• To pause, select
.
• To resume, select
.
2. Select < or > to select the radio station you
want to save.
3. When you are finished recording, select
.
3. Select
4. Select
at the bottom of the screen.
Record the radio
1. Press [
2. Select
] → Radio.
to begin recording.
media
1. Press [
Learn to operate your device’s voice recorder.
to save the voice clip.
Play a voice memo
1. Press [
2. Select
] → Voice Recorder.
→ a voice clip.
3. When you are finished recording, select
.
33
3. During playback, use the following icons:
Icon
Function
Skip to the previous file; Scan
backward in a file (touch and hold)
Pause playback
Resume playback
media
Skip to the next file; Scan forward
in a file (touch and hold)
PC Studio
Samsung PC Studio is a Windows-based
program that allows you to manage your
personal information and sync files to your
device.
Install Samsung PC Studio
1. Press [ ] → Settings → Phone settings
→ USB setting → Install PC studio.
34
2. Connect your device to a PC via the USB
port.
3. If Samsung PC Studio is not installed on the
PC and the PC is connected to the internet,
you will be prompted to install the program.
4. When the installation is complete, Samsung
PC Studio automatically launches.
If Samsung PC Studio does not
automatically run, open My Computer and
double-click NPS Auto Installer and then
the NPSAI.exe file.
• If Samsung PC Studio is installed on a PC,
the corresponding Samsung USB drivers
will be automatically installed.
• You can also download the Samsung PC
Studio program from the Samsung
website (www.samsungmobile.com).
Use Samsung PC Studio
To connect your phone to a computer with PC
Studio, you must change the phone’s USB
mode. X p. 46
Contacts
personal
productivity
Learn to manage contacts, schedule calendar
events, create notes, and use the file viewer.
Learn to use contact cards and groups to store
personal information, such as names, phone
numbers, and addresses.
Add a new contact
1. Press [
].
2. Select
.
3. Complete the fields.
• To add a caller ID image, touch the tile
image next to the name field and capture a
new photo or select one from My Files.
• To add contact information, select
→a
detail item.
4. When you are finished, select
.
If you want to cancel adding a new contact,
press any key on the front of the device.
35
Import contacts from the SIM or
USIM card
Create a contact group
1. Press [
2. Select
].
→ Contacts setting.
2. Select
3. Select Import SIM contacts.
personal productivity
4. Select OK.
Find a contact
1. Press [
3. Select
].
→ Manage groups.
.
4. Enter a group name.
To change the colour assigned to the
group, select
.
1. Press [
].
5. Select and drag a contact to the Selected
list to add members to the new group.
2. Select
.
6. When you are finished, select
3. Enter the first few letters of the name you
want to find.
Invite a contact to connect
4. Select the contact’s name from the search
list.
1. Press [
5. Select
3. Select
36
to edit the contact information.
.
].
2. Select a contact.
, or select
→ Invite.
4. Enter an invitation message and select
to send the message.
When the contact accepts the connection
invitation, your device will notify you.
Calendar
] → Calendar.
2. Select
→ an event type (appointment,
anniversary, birthday).
If you touch an empty field in the week or day
view, your device will prompt you to create
an event.
3. Complete the fields and adjust the settings
for your event.
Change the calendar view
1. Press [ ] → Calendar.
The calendar opens in month view.
4. When you are finished, select
2. Select a tab to change the calendar view.
• Events: a list of scheduled events
• Day: hourly blocks for one full day
• Week: hourly blocks for the days in one
full week
• Month: a full month in one view
To go to a specific date, select
touch the month or year field.
1. Press [
and
.
View an event
To view events of a specific date,
1. Press [
] → Calendar.
2. Select a date on the calendar.
A list of the events saved on the date
appears at the bottom of the calendar.
3. Select an event to view its details.
37
personal productivity
Use the calendar to keep track of your monthly,
weekly, daily schedule.
Create an event
To view events by event types,
1. Press [
] → Calendar → Events tab.
→ an event type.
2. Select
3. Select an event to view its details.
personal productivity
File Viewer
Use the file viewer to view Word, PowerPoint,
Excel, PDF, and text files.
Open a file
1. Press [
] → File Viewer.
2. Select a file.
3. While viewing the document, use the
following features:
• Select
or
to move between
pages.
• Select
to go to specific page.
38
• Touch the display to view in full screen
mode; To exit full screen mode, touch
the display again.
• Touch the display twice and then drag
up (zoom in) or down (zoom out).
Find a word from a document
1. Press [
] → File Viewer.
2. Select a file.
3. Select
→ Search for word.
4. Enter the word to find and select
.
The word found will be highlighted in the
document.
5. To find another word, select
.
Notes
Use Notes to create notes.
1. Press [
2. Select
] → Notes.
to create a new note.
3. Enter your note with the input panel.
.
personal productivity
4. When you are finished, select
39
Internet
web
applications
Learn to access and bookmark your favourite
web pages.
Browse a web page
1. Press [ ] → Internet.
Your service provider’s homepage opens.
2. Access a web page:
• Select the address bar and enter a web
address.
• Select
→ a bookmark.
• Select
→ History → a web address.
3. While browsing web pages, use the
following features:
• To move backward or forward on a web
page, select
or
.
• To reload a web page, select
.
40
Open multiple pages
You can open multiple pages and switch back
and forth between them.
1. Press [
2. Select
] → Internet.
→ Multi window.
4. Access another web page on the new
window.
5. To switch back and forth between currently
open windows, select
→ Multi window
and select a web page to retrieve.
Bookmark your favourite pages
1. Press [
2. Select
] → Internet.
→
5. When you are finished, select
.
Web Player
Use Web Player to add streaming internet links
and play videos or audio files linked to the
internet.
Add a streaming internet link
1. Press [
] → Web Player.
2. Select
.
3. Enter a name and web address and select
.
.
3. Enter a name and web address.
41
web applications
3. Touch the empty page.
A new blank window opens.
4. Select a folder to save the bookmark.
You can add a new folder by selecting Add
to → New folder.
Play streaming media files
1. Press [
] → Web Player.
2. Select a link you want.
The web player opens and starts playing
the file.
web applications
RSS
Use the RSS application to get the latest news
and information from your favourite websites.
Subscribe to RSS feeds
Update and read RSS feeds
1. Press [
] → RSS.
2. Select
next to the RSS feed you want to
update.
Your device will attempt to connect to the
internet. If necessary, activate your internet
connection.
3. Select a feed and a link.
Export RSS feeds
1. Press [
] → RSS.
→ Export feed list.
1. Press [
] → RSS.
2. Select
2. Select
.
3. Select and drag a feed to the Selected list.
3. Enter the title and address of an RSS feed
and select
.
42
4. Select
.
5. Enter a file name and select
.
Import RSS feeds
1. Press [
2. Select
] → RSS.
→ Import feed list.
3. Select a feed from the list.
4. Select the check box next to the feed you
.
want to import and select
web applications
5. Select a folder where the feed is saved and
select
.
43
Bluetooth
connectivity
Learn to transfer data to and from your device via
the Bluetooth wireless feature or USB, and use your
device as a wireless modem.
You can connect with other Bluetooth-enabled
wireless devices within a range. Walls or other
obstacles between devices may block or impair
the wireless connection.
Turn on the Bluetooth wireless
feature
1. Press [
] → Bluetooth.
2. Touch the slide bar next to My Bluetooth to
turn on the Bluetooth wireless feature.
3. To allow other devices to locate your device,
select
→ My phone’s visibility → an
option for a duration that your device is
visible.
44
Search for and register a Bluetoothenabled device
Send data via the Bluetooth
wireless feature
1. Press [
] → Bluetooth.
1. Locate an item or a file to send.
2. Select
.
2. Select a sending option.
Your device searches for and displays the
list of Bluetooth-enabled devices.
4. Enter the Bluetooth PIN for the device you
are trying to connect to and select
.
When the owner of the other device enters
the same PIN or accepts the connection,
registering is complete.
To register another Bluetooth-enabled
device, both devices must use the same
passcode. Headsets or hands-free car kits
may use a fixed PIN, such as 0000.
Receive data via the Bluetooth
wireless feature
1. When another device attempts to access
yours, select Yes to permit the connection
(if necessary).
2. Select Yes again to confirm that you are
willing to receive data from the device (if
necessary).
Activate Remote SIM mode
In Remote SIM mode, you can make or answer
calls only with a connected Bluetooth handsfree car kit via the SIM or USIM card on your
device.
45
connectivity
3. Select a device name.
3. Select a registered device.
To activate Remote SIM mode,
1. Press [
] → Bluetooth.
2. Select
.
3. Select Remote SIM mode.
To use Remote SIM mode, start the Bluetooth
connection from a Bluetooth hands-free car kit.
connectivity
The Bluetooth hands-free car kit must be
authorised. To authorise the car kit, touch and
hold it from the device list and select
.
USB
You can connect your device to a PC and use
various USB modes.
• You must close running applications
before connecting your device to a PC.
• While connected to a PC, you will not
access network-based menus and use
the network features, such as calls and
messages.
46
Set a default action for your USB
connection
When the Ask on connection setting (by
default) is selected for USB connection, your
device will prompt you to choose the USB
mode every time you connect to a PC.
To set your device to perform a default action
when you connect the device to a PC with the
PC data cable,
1. Press [ ] → Settings → Phone settings
→ USB setting.
2. Set the default USB mode (Samsung PC
studio, Media player, Mass storage, PC
Internet, or Install PC studio).
Use Samsung PC Studio
1. Press [ ] → Settings → Phone settings
→ USB setting → Samsung PC studio.
2. Press [ ] to close running applications
and return to Apps view.
3. Connect your device to a PC via the USB
port.
6. Select and drag the files you want to the
sync list.
4. Run Samsung PC Studio and copy files
from the PC to the device.
7. Start synchronisation.
Copy files to a memory card
Synchronise with the Windows
Media Player
2. Press [ ] to close running applications
and return to Apps view.
3. Connect your device to a PC with Windows
Media Player installed via the USB port.
4. Open Windows Media Player to
synchronise files.
5. Edit or enter your device’s name in the popup window (if necessary).
2. Press [ ] → Settings → Phone settings
→ USB setting → Mass storage.
3. Press [ ] to close running applications
and return to Apps view.
4. Connect your device to a PC via the USB
port.
5. Select Phone or Memory card.
6. Open the folder to view files.
7. Copy files from the PC to the memory card.
47
connectivity
1. Press [ ] → Settings → Phone settings
→ USB setting → Media player.
1. Insert a memory card.
connectivity
When you disconnect your device from a
PC, the device updates the internal
database. While updating, you will not
access some menus, such as My Files or
Gallery.
3. Connect your device to a PC via the USB
port.
If you remove or edit MMS and email data in
./message or ./email through a PC when
connected to the mass storage of your
device, the data may be corrupted and you
cannot open multimedia or email messages.
If the mass storage is full, messages may not
be received.
5. Once the installation is complete, the
Vodafone Mobile Connect via the phone
window will appear.
If Vodafone Mobile Connect via the phone
does not automatically run, open My
Computer and double-click Samsung
Mobile and then the VTP_Manager.exe file.
Use internet sharing
Learn to use your device as a wireless modem
and connect your PC to the internet over the
Vodafone high-speed mobile phone network.
1. Press [ ] → Settings → Phone settings
→ USB setting → PC Internet.
2. Press [ ] to close running applications
and return to Apps view.
48
4. When the installation manager appears,
follow the on-screen instructions to
complete the installation of the software.
6. Activate the internet connect via the
Vodafone network.
Alarm
additional
programs
Learn to use Alarm, World clock, Calculator,
Units, Stopwatch, and Maps.
Learn to set and control alarms for important
events.
Set a new alarm
1.
2.
3.
4.
Press [ ] → Alarm.
Select
.
Set alarm details in each field.
When you are finished, select
.
Delete an alarm
1. Press [ ] → Alarm.
2. Select
.
3. Select the check boxes next to the alarm
names you want to delete.
4. Select
→ OK.
To deactivate an alarm, touch the slide bar
next to an alarm name on the list.
49
World Clock
Learn to add world clocks and monitor the time
in other regions.
3. Select the check boxes next to the city or
country names you want to delete.
4. Select
→ OK.
Add a world clock
Calculator
additional programs
1. Press [ ] → World Clock.
2. Select
.
3. Enter the name of the city or country you
want to add.
4. Select the city from the result list.
• To set daylight saving time, touch DST on
the right of a world clock on the list.
• To change the city, touch a world clock on
the list and enter the city name you want.
Delete a world clock
1. Press [
2. Select
50
] → World Clock.
.
Use the calculator to perform mathematical
calculations.
To perform a calculation,
1. Press [ ] → Calculator.
2. Enter the first number using the calculator
buttons on the screen.
3. Select the appropriate math function.
4. Enter the second number.
5. To view the result, select
.
• To clear the last digit entered in a multi-digit
entry, select
.
• To clear the displayed numbers, select
.
You can use the following icons while using
calculator:
•
: Use advanced mathematical functions
•
: Clear, save, or recall values
•
: Switch to the converter
Use the converter application to convert one
unit of measure to another.
To perform a conversion,
1. Press [ ] → Units.
2. Select a type of measurement.
3. Select the first line and select the unit of
measure to convert.
4. Select the input field and enter the base
amount.
The device displays the conversion result.
Use the stopwatch to measure the length of
time.
1.
2.
3.
4.
5.
Press [ ] → Stopwatch.
Select
.
Select
to record lap times.
When you are finished, select
.
Select
to clear the recorded times.
Maps
With Maps, you can find your location, search
the online map for streets, cities, or countries,
and get directions. You can also search the
map for your Vodafone 360 connected
contacts.
Search the map
1. Press [ ] → Maps.
2. Drag your finger in the direction you want
on the map.
51
additional programs
Units
Stopwatch
additional programs
From the map, you can use the following
features:
• To zoom in on the location you want,
select
. To zoom out, select
.
• To find your current location, select
.
• To create a placemark, touch and hold the
location you want on the map. Create and
enter the information for the location.
Search for a specific location
1. Press [ ] → Maps.
2. Select
.
3. Use one of the following methods:
• Search for: Enter a keyword of interest
or business.
• Previous searches: Select a keyword
from the previous search list.
• Address: Enter the address of the
location.
52
• My places, My contacts, Exchanged
places: Browse My places,
My contacts, and Exchanged places.
Get directions to a specific
destination
1. Press [ ] → Maps.
2. Select the location you want and open the
location details screen.
3. Select
.
The selected location is set as the ending
location for the navigation.
4. Select a navigation mode (
for drive or
for walk).
5. Select Start navigation.
settings
Learn about your device settings.
To access your device settings, press [
Settings.
]→
Vodafone 360
Change the settings for using Vodafone 360.
You can change the login status to the
Vodafone 360 server or set up web accounts
for Google, facebook, and other web services.
You can also synchronise phone data with a
web server, or remove phone data, such as
messages, email, contacts, timeline information,
and status information stored in your device.
Phone profile
Select a phone profile that controls ringtones for
calls and new events, and set devices sounds,
such as touch tones.
53
Display and light
settings
Time and date
• Language: Select a display language for all
menus and applications.
• Text input: Select an input language for all
text editors and set XT9 options.
• Vibration feedback: Set to activate or
deactivate the vibration feedback on your
display touch.
• USB setting: Select a USB connection
mode used when you connect your device
to a PC using the PC data cable.
• Licence settings: Set to manage the
licences for your media files.
• DivX® VOD: Check the DivX registration
code for your device.
Control the appearance and behaviour of the
date, time, and time zone.
Application settings
Customise the display and light settings.
• Brightness: Adjust the brightness of the
screen.
• Backlight timing: Set the length of time the
screen stays on when the device is not in
use.
• Theme colour settings: Select a theme
colour for the screen.
• Wallpaper: Select a background image for
the idle screen.
Customise the application settings.
Phone settings
Customise the general phone settings.
54
• Call: Change the settings for call functions.
• Messaging: Change the settings for
message functions.
Network settings
Customise the network settings.
• Select network: Set the device to
automatically select the first available
network or select a network manually.
• Network mode: Select the network mode.
• Vodafone connections: View available
connection profiles or add new connection
profiles.
• Preferred networks: Set up the preferred
network list.
• Data roaming: Set the device to
automatically connect to another network
when you are roaming or your home network
is not available.
Security
Customise the security settings.
• Power-on lock: Lock your device. You will
be prompted to enter the password when
turning on the device.
• Prompt if device unused for: Set a length
of time the phone waits for before locking
itself when it is not in used. The device will
be automatically locked after the specified
length of time when the display turns off. You
will be prompted to enter the password
when starting to use the device.
• Change password: Change your
password. The default password is
00000000.
55
settings
• Email: Change the settings for sending or
receiving email.
• Contacts: Change the display order and
sort order of contact cards in Contacts.
• Gallery: Change the option for uploading
photos and videos.
• Radio: Change the settings for using the
radio.
settings
• PIN lock: Lock your SIM or USIM card by
activating the PIN requirement. You need to
enter the PIN supplied with your SIM or
USIM card.
• Change PIN1 code: Change the PIN1
code.
• Change PIN2 code: Change the PIN2
code.
• SIM lock: When this option is enabled, your
device only works with the current SIM or
USIM card. If you insert an unknown SIM or
USIM card, your device will ask for the lock
code.
Memory settings
Customise the memory settings.
• Memory card details: View the total
amount of memory and available memory in
a memory card.
56
• Default memory: Set a default memory
location for storing media files.
• Memory status: View the amount of
memory available for storing messages or
files.
Reset settings
Set to restore default settings.
Open source licence
View the open source licence information on
your device.
troubleshooting
When you turn on your device or while
you are using the device, it prompts you
to enter one of the following codes:
Code
Try this to solve the problem:
Code
Try this to solve the problem:
PUK
Your SIM or USIM card is blocked,
usually as a result of entering your
PIN incorrectly several times. You
must enter the PUK supplied by
your service provider.
PIN2
When you access a menu
requiring the PIN2, you must enter
the PIN2 supplied with the SIM or
USIM card. For details, contact
your service provider.
When the phone lock feature is
Password enabled, you must enter the
password you set for the device.
PIN
When using the device for the first
time or when the PIN requirement
is enabled, you must enter the PIN
supplied with the SIM or USIM
card. You can disable this feature
by using the PIN lock menu.
a
The device prompts you to insert the
SIM card.
Ensure that the SIM or USIM card is installed
correctly.
Your device does not show a signal (no
bars next to the network icon)
Your display shows white lines
The display may show white lines if you have
turned the device on after a long period of
disuse or if you removed the battery without first
turning off the device. The display should
correct itself in a short time.
troubleshooting
• If you just turned on the device, wait about 2
minutes for your device to find the network
and receive a signal.
• You may not be able to receive a signal in
tunnels or elevators. Move to an open area.
• You may be between service areas. You
should receive a signal when you enter a
service area.
You enter a number, but the call is not
dialled
You forgot a PIN or PUK
You select a contact to call, but the call
is not dialled
If you forget or lose this or another code,
contact the seller or your service provider.
b
• Ensure that you have selected
or you
have pressed and held [ ].
• Ensure that you have accessed the right
cellular network.
• Ensure that you have not set call barring for
the phone number.
• Ensure that the correct number is stored in
the contact information.
• Re-enter and save the number, if necessary.
Another caller cannot hear you
speaking
• Ensure that you are not blocking the built-in
microphone.
• Move the built-in microphone closer to your
mouth.
• If using a headset, ensure that it is properly
connected.
• Ensure that you are not blocking the internal
antenna on bottom of the device.
• When you are in areas with weak signals,
you may lose reception. Move to another
area and try again.
• Disconnect the device from the charger,
remove and reinstall the battery, and try
charging again.
• The battery terminals may be dirty. Wipe
both gold-coloured contacts with a clean,
soft cloth and try charging the battery again.
• If the battery no longer charges completely,
dispose of the old battery properly and
replace it with a new battery.
Your device is hot to the touch
When you use applications that require more
power, your device may heat up.
This is normal and should not affect your
device’s lifespan or performance.
c
troubleshooting
The sound quality of a call is poor
The battery does not charge properly or
sometimes your device turns itself off
while charging
Your device prompts you to delete
some data
You cannot listen to music on a remote
Bluetooth headset
The available memory is low. Move your data to
a memory card or delete old items from
applications.
• Ensure that your device is connected to the
headset.
• Ensure that the music format you are trying
to listen to is supported by your device.
• Ensure that the distance between the
headset and device is within a range and
that they are not separated by walls or other
obstacles.
You cannot find a Bluetooth-enabled
device
troubleshooting
• Ensure that both devices have activated the
Bluetooth wireless feature.
• Ensure that the distance between the
devices is not more than 10 metres and that
they are not separated by walls or other
obstacles.
• Ensure that each device's visibility is
activated.
• Ensure that both devices are compatible
with Bluetooth wireless technology.
d
index
alarms
creating, 49
deleting, 49
applications
accessing, 13
downloading, 14
uninstalling, 13
apps view 12
battery
charging, 7
installing, 5
low battery indicator, 8
Bluetooth
activating, 44
receiving data, 45
remote SIM mode, 45
sending data, 45
calculator 50
viewing missed, 19
chat 23
conference call
see calls, multiparty
calls
adjusting volume, 19
answering, 19
dialling additional calls, 20
from Contacts, 20
international numbers, 20
making, 18
multiparty call, 21
placing on hold, 20
recently dialled, 19
retrieving held calls, 20
using speakerphone feature,
19
contacts
adding, 35
creating groups, 36
finding, 36
importing from SIM, 36
inviting to connect, 36
converter 51
email messages 23
file viewer 38
e
FM radio
see radio
gallery
creating photo albums, 31
editing photos, 30
viewing photos and videos,
29
index
GPS 3
internet
adding bookmarks, 41
launching homepage, 40
opening multiple pages, 41
internet sharing 48
memory card 8
messages
instant, 23
f
retrieving email from the web
23
sending multimedia, 22
sending text, 21
viewing text and multimedia,
22
music player
creating playlists, 25
playing music, 25
people view 12
phone lock 16
photos
basic capturing, 26
capturing in continuous
mode 28
capturing in mosaic mode 28
capturing in scene mode 28
capturing in smile shot mode
29
capturing with frames 28
creating photo albums, 31
editing, 30
viewing, 26
radio
automatic tuning, 32
listening to, 32
recording, 33
setting up favourites list, 33
RSS
exporting feeds, 42
importing feeds, 43
subscribing to feeds, 42
updating and reading feeds,
42
search 17
silent profile 9
SIM card 5
stopwatch 51
voicemail 22
text
web browser
creating notes, 39
entering, 14
messages, 21
timeline view 12
see internet
web player
adding streaming links, 41
playing stream, 42
wireless modem 48
units
world clock
adding, 50
deleting, 50
see converter
USIM card 5
index
touch screen 10
videos
capturing, 27
viewing, 27
voice recorder
playing, 33
recording, 33
g
Declaration of Conformity (R&TTE)
We,
Samsung Electronics
declare under our sole responsibility that the product
GSM Mobile Phone : GT-I6410
to which this declaration relates, is in conformity with the following
standards and/or other normative documents.
SAFETY
EN 60950- 1 : 2001 +A11:2004
SAR
EN 50360 : 2001
EN 62209-1 : 2006
EMC
EN 301 489- 01 V1.6.1 (09-2005)
EN 301 489- 07 V1.3.1 (11-2005)
EN 301 489- 17 V1.2.1 (08-2002)
EN 301 489- 24 V1.4.1 (09-2007)
RADIO
EN 301 511 V9.0.2 (03-2003)
EN 300 328 V1.7.1 (10-2006)
EN 301 908- 1 V3.2.1 (05-2007)
EN 301 908- 2 V3.2.1 (05-2007)
We hereby declare that [all essential radio test suites have been
carried out and that] the above named product is in conformity to all
the essential requirements of Directive 1999/5/EC.
The conformity assessment procedure referred to in Article 10 and
detailed in Annex[IV] of Directive 1999/5/EC has been followed with
the involvement of the following Notified Body(ies):
BABT, Forsyth House,
Churchfield Road,
Walton-on-Thames,
Surrey, KT12 2TD, UK*
Identification mark: 0168
The technical documentation kept at :
Samsung Electronics QA Lab.
which will be made available upon request.
(Representative in the EU)
Samsung Electronics Euro QA Lab.
Blackbushe Business Park, Saxony Way,
Yateley, Hampshire, GU46 6GG, UK*
2009. 10. 08
(place and date of issue)
Yong-Sang Park / S. Manager
(name and signature of authorised person)
* It is not the address of Samsung Service Centre. For the address or the
phone number of Samsung Service Centre, see the warranty card or
contact the retailer where you purchased your product.
Some of the contents in this manual may differ from your device depending on the software of the
device or your service provider.
World Wide Web
http://www.samsungmobile.com
Printed in Korea
Code No.:GH68-28207A
English. 03/2010. Rev. 3.0