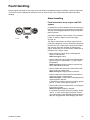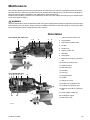
1
OPERATOR’S MANUAL
Volvo Penta IPS
An English version of this Operator’s Manual may
be ordered free of charge up to 12 months after delivery, via
internet, mail or fax. Refer to the order form in the back of
the book.
En dansk version af denne instruktionsbog kan
bestilles gratis, op til 12 måneder efter levering, via internet,
post eller telefax. Se bestillingsformular i slutningen af bogen.
All information is stored internally at AB Volvo Penta and will
not be passed on to third parties.
Alle oplysninger gemmes internt hos AB Volvo Penta og
overgives ikke til tredje part.
Diese deutsche Version dieses Handbuches kann
innerhalb von 12 Montane ab Lieferung kostenlos online,
per Brief oder per Fax bestellt werden. Bitte Bestellformular
hinten im Buch verwenden.
Tämän ohjekirjan suomenkielisen version voi tilata
veloituksetta 12 kuukauden sisällä toimituksesta internetistä,
postin kautta tai faksilla. Katso tilauslomake kirjan lopusta.
Alle Angaben werden bei AB Volvo Penta gespeichert und
nicht Dritten übermittelt.
AB Volvo Penta tallentaa kaikki tiedot sisäisesti eikä niitä
luovuteta kolmannelle osapuolelle.
Une version française de ce manuel d’instructions
peut être commandée gratuitement, jusqu’à 12 mois après
la date de livraison, via Internet, la poste ou par fax. Voir à
la fin de ce document.
Pode-se encomendar uma versão gratuita deste
manual de instruções em português, até 12 meses após a
entrega, através de Internet, correio ou fax. Consultar o formulário de encomenda no fim do manual.
Toutes les informations sont stockées en interne chez AB
Volvo Penta et ne sont divulguées à aucun tiers.
Todas as informações são armazenadas internamente pela
Volvo Penta e não são partilhadas com terceiros.
Hay disponible una versión en español gratuita de
este manual de instrucciones, la cual puede pedirse, a través de Internet, correo postal o fax, en el plazo de 12 meses
después de la entrega del producto. Véase el formulario de
pedido en las últimas páginas del manual.
Εντός 12 μηνών από την παράδοση μπορείτε να
παραγγείλετε μέσω Internet, ταχυδρομικής επιστολής ή φαξ
μια ελληνική έκδοση του Βιβλίου χρήσης χωρίς χρέωση.
Χρησιμοποιήστε το δελτίο παραγγελίας στο τέλος του
βιβλίου.
Todos los datos recibidos son almacenados de forma in-
Όλες οι πληροφορίες αποθηκεύονται από την AB Volvo Pen-
Una versione in lingua italiana di questo manuale di
istruzioni può essere ordinata gratuitamente, fino a 12 mesi
dopo la consegna, via internet, per posta o via fax. Vedere il
modulo per l’ordinazione alla fine del manuale.
Вариант настоящего руководства по
эксплуатации на русском языке можно заказать
бесплатно в течение 12 месяцев после доставки по
Интернету, электронной почте или по факсу. См. бланк
заказа на обложке руководства.
Tutti i dati forniti saranno memorizzati internamente presso
AB Volvo Penta e non saranno divulgati a terzi.
En svensk version av denna instruktionsbok kan
beställas kostnadsfritt, upp till 12 månader efter leverans,
via internet, post eller fax. Se beställningsformulär i slutet av
boken.
Alla uppgifter lagras internt hos AB Volvo Penta och lämnas
inte ut till tredje part.
Вся информация используется компанией AB Volvo Penta конфиденциально и не передается третьим сторонам.
Bu Kullanım Kılavuzunun Türkçe versiyonu teslimden 12 ay sonrasına kadar internet, posta veya faks yoluya
sipariş edilebilir. Kitabın arka kısmında bulunan sipariş formuna bakınız.
Tüm bilgiler AB Volvo Penta’da saklıdır ve üçüncü kişilere
verilmez.
Een Nederlandse versie van dit instructieboek kan
kosteloos worden besteld tot 12 maanden na aflevering, internet, post of fax. Zie het bestelformulier achterin het boek.
Alle gegevens worden intern opgeslagen bij AB Volvo Penta
en niet verstrekt aan derden.
CALIFORNIA
Proposition 65 Warning
Diesel engine exhaust and some of its constituents are known
to the State of California to cause cancer, birth defects, and
other reproductive harm.
Content
Foreword ...................................................................................................... 2
Safety Information ...................................................................................... 3
Introduction ................................................................................................. 8
Presentation .............................................................................................. 10
Instruments and Controls ........................................................................ 12
Optional ..................................................................................................... 26
Starting ...................................................................................................... 31
Operation ................................................................................................... 34
Engine Shutdown ...................................................................................... 38
Fault Handling ........................................................................................... 41
Fault Code Register .................................................................................. 45
In Case of Emergency .............................................................................. 57
Maintenance Schedule ............................................................................. 65
Maintenance .............................................................................................. 67
Storage ....................................................................................................... 98
Calibration and Settings ......................................................................... 102
Technical Data ......................................................................................... 114
Alphabetical index .................................................................................. 120
1
Foreword
Volvo Penta marine engines are used all over the world. They are used in all possible operating conditions for
professional as well as leisure purposes. This is not a coincidence. After 100 years as an engine manufacturer
the Volvo Penta name has become a symbol of reliability, technical innovation, top of the range performance and
long service life. We also believe that this is what you demand and expect of your Volvo Penta engine.
We would like you to read this operator’s manual thoroughly and consider the advice we give on running and
maintenance before your maiden voyage so that you will be ensured of fulfilling your expectations. Please pay
attention to the safety instructions contained in the manual.
As owner of a Volvo Penta marine engine, we would also like to welcome you to a worldwide network of dealers
and service workshops to assist you with technical advice, service requirements and replacement parts. Please
contact your nearest authorized Volvo Penta dealer for assistance.
You will find your closest dealer at our home page on the Internet www.volvopenta.com - amongst other
useful information about your Volvo Penta engine - we invite you to visit!
2
7748921 04-2008
Safety Information
Read this chapter very carefully. It has to do with your safety. This describes how safety information is presented
in the instruction book and on the product. It also gives you an introduction to the basic safety rules for using and
looking after the engine.
Check that you heave received the correct instruction book before you read on. If not, please contact your
Volvo Penta dealer.
!
This symbol is used in the instruction book and on the product, to call your attention to
the fact that this is safety information. Always read such information very carefully.
Safety texts in the instruction book have the following order of priority:
DANGER!
Indicates a hazardous situation which, if not avoided, will result in death or serious
injury.
WARNING!
Indicates a hazardous situation which, if not avoided, could result in death or serious
personal injury.
CAUTION!
Indicates a hazardous situation which, if not avoided, could result in minor or moderate
personal injury.
IMPORTANT!
Indicates a situation which, if not avoided, could result in property damage.
NOTICE! Used to draw attention to important information that will facilitate work or
operations.
This symbol is used on our products in some cases and refers to important information
in the instruction book. Make sure that warning and information symbols on the engine
are clearly visible and legible. Replace symbols which have been damaged or painted
over.
7748921 04-2008
3
Safety Information
Your new boat
Fuel filling
Read the instruction books and other information
carefully, which came with your new boat. Learn to
handle the engine, controls and other equipment in a
safe and correct manner.
If this is your first boat, or a type of boat you are not
experienced in using, we recommend that you practice operating the boat in peace and quiet. Get to know
the way the boat reacts to sea and to the controls
under different speed, sea and loading conditions
before you cast off for your first “real” maiden voyage.
Remember that the captain of every boat is required
by law to know and to observe applicable rules for
traffic and safety at sea. Get to know the rules which
apply to you and your waters, by contacting the relevant authority or sea safety organization.
It is a good idea to go on some kind of boat operation
course. We recommend that you contact a regional
boat or sea safety organization to find a suitable
course.
There is always a risk of fire and explosion during fuel
filling. Smoking is not permissible, and the engine
should be stopped.
Never over-fill the tank. Shut the tank cap securely.
Only use the fuel recommended in the instruction
book. The wrong grade of fuel can cause serious malfunctions, power loss or stop the engine.
Daily checks
Do not start the engine
Make it a habit to give the engine and engine bay a
visual check before driving (before starting the
engine) and after operation (when you have stopped
the engine). This helps you to quickly discover
whether any leakage of fuel, coolant, oil or any other
abnormal event has happened, or is about to happen.
Do not start the engine if you suspect a fuel or LPG
leak in the boat, close to explosive media, or if there
is a spillage of explosive media. An explosive environment entails a risk of fire and/or explosion.
Manoeuvring
Avoid sudden or surprising rudder movements and
gear shifting. There is a risk that passengers could fall
over, or overboard.
A rotating propeller can cause severe injury. Check
that there is nobody in the water before you engage
forward / astern (reverse) drive. Never drive close to
bathers or in areas where you could reasonably
expect that people could be in the water.
Accidents and near misses
4
Life saving statistics show that inadequate care of
boats and engines, and deficiencies in safety equipment are frequent causes of accidents and near
misses at sea.
Make sure that your boat and engine are maintained
in accordance with the advice in each instruction
book, and that the necessary safety equipment is on
board, and is in working condition.
7748921 04-2008
Safety Information
Carbon monoxide poisoning
When a boat moves forwards, an area of low pressure
air forms behind the boat. In adverse conditions, this
low pressure can be so strong that the boat’s own
exhaust fumes are sucked into the cockpit or cabin,
which entails a risk of carbon monoxide poisoning for
all aboard.
The problem of low-pressure suction is worst in high,
wide boats with a square transom. But even in other
types of boats, low-pressure suction can be a problem
in some conditions, such as if you drive with the hood
up. Other factors which increase the low-pressure
effect are wind conditions, load distribution, pitching,
trimming, open windows and ventilators etc.
Most modern boats are designed so that the problem
of low-pressure suction is very rare, however. If lowpressure suction does occur anyway, do not open
hatches or ventilators in the forward part of the boat.
Strangely enough, this makes the problem worse. Try
changing speed, trimming or load distribution instead.
Also try taking down/opening the hood or modifying it
in some other manner. Ask your boat dealer for advice
about the best solution for your particular boat.
P0003073
Remember
•
Safety equipment: Life jackets for everybody aboard, communication equipment, emergency
rockets, approved fire extinguisher, first aid kit, life buoy, anchor, paddle, torches etc.
•
Spare parts and tools: Impeller, fuel filters, fuses, tape, hose clamps, engine oil, propeller and
tools for the jobs you could be expected to have to do.
•
Take your chart out and study your planned route. Calculate distance and fuel consumption.
Listen to weather reports.
•
Tell your friends/relatives about route plans if you undertake a long journey. Remember to
notify changed plans or delays.
•
Inform everybody aboard about where the safety equipment is located, and how it works. Make
sure that there is more than one person aboard who can start and operate the boat safely.
This list can be extended, since the need for safety equipment varies with the type of boat, and
where or how it is used etc. We recommend that you ask a regional boat or sea safety organization
for more detailed maritime safety information.
7748921 04-2008
5
Safety Information
Preparations
Before starting the engine
Knowledge
The operator’s manual contains instructions on how
to carry out general maintenance and service operations safely and correctly. Read the instructions carefully before starting work.
Reinstall all protective parts removed during service
operations before starting the engine. Check that no
tools or other items have been left on the engine.
Service literature covering more complicated operations is available from your Volvo Penta dealer.
Never carry out any work on the engine if you are
unsure of how it should be done, contact your Volvo
Penta dealer who will be glad to offer assistance.
Stop the engine
Stop the engine before opening or removing engine
hatches. Unless otherwise specified all maintenance
and service must be carried out with the engine stopped.
To prevent accidental start of the boat engine, remove
the ignition key, turn off the power supply to the engine
at the main switches and lock them in the OFF position before starting work. Put up a warning sign in the
control position that work on the engine is being carried out.
Approaching or working on an engine which is running
is a safety risk. Loose clothing, hair, fingers or a dropped tool can be caught in the rotating parts of the
engine and cause serious personal injury. Volvo
Penta recommend that all servicing with the engine
running should be undertaken by an authorized Volvo
Penta workshop.
Lifting the engine
When lifting the engine, use the lifting eyes installed
on the engine. Always check that lifting equipment is
in good condition and has sufficient load capacity to
lift the engine (engine weight including any extra
equipment installed). For safety’s sake lift the engine
using an adjustable lifting beam. All chains and cables
should run parallel to each other and as perpendicular
as possible in relation to the top of the engine. Bear
in mind that extra equipment installed on the engine
may alter its center of gravity. Special lifting equipment may then be required in order to maintain the
correct balance and make the engine safe to handle.
Never carry out work on an engine suspended on a
hoist.
6
Never start a turbocharged engine without installing
the air cleaner (ACL). The rotating compressor in the
Turbocharger unit can cause serious personal injury.
Foreign objects can also be sucked in and cause
mechanical damage to the unit.
Fire and explosion
Fuel and lubrication oil
All fuel, most lubricants and many chemicals are
inflammable. Read and follow the instructions on the
packaging.
When carrying out work on the fuel system, make sure
the engine is cold. A fuel spill onto a hot surface or
electrical components can cause a fire.
Store fuel soaked rags and other flammable material
so that there is no danger of them catching fire. Fuelsoaked rags can self-ignite under certain conditions.
Do not smoke when filling fuel, oil or in proximity of a
filling station or in the engine room.
Non-original components
Components used in the fuel and electrical systems
on Volvo Penta products are designed and constructed to minimize the risk of fire and explosion.
Using non-original Volvo Penta parts can result in fire
or explosion on board.
Batteries
The batteries contain and emit oxyhydrogen gas,
especially during charging. This gas is easily ignited
and highly volatile.
Do not under any circumstances smoke or use naked
flame or allow sparks in the vicinity of the batteries or
battery compartment.
An incorrect connection of a battery terminal cable or
jump-start cable can cause a spark which in its turn
can be sufficient to cause an explosion.
Start spray
Never use start spray or similar agents to start an
engine equipped with air pre-heating (glow plugs/
starter element). This may cause an explosion in the
inlet manifold. Danger of personal injury.
7748921 04-2008
Safety Information
Hot surfaces and fluids
Fuel system
There is always a risk of burns when working with a
hot engine. Beware of hot surfaces. For example: the
exhaust pipe, turbo unit, oil pan, charge air pipe,
starter element, hot coolant and hot oil in oil lines and
hoses.
Always use protective gloves when tracing leaks. Liquids ejected under pressure can penetrate body tissue and cause serious injury. There is a danger of
blood poisoning.
Carbon monoxide poisoning
Only start the engine in a well-ventilated area. If operating the engine in an enclosed space, ensure that
there is proper ventilation in order to remove exhaust
gases and crankcase ventilation emissions from the
working area.
Chemicals
Most chemicals such as anti-freeze, rustproofing
agent, inhibiting oil, degreasing agent etc. are hazardous to health. Read and follow the instructions on
the packaging.
Some chemicals such as inhibiting oil are inflammable
and dangerous if breathed in as well. Ensure good
ventilation and use a protective mask when spraying.
Read and follow the instructions on the packaging.
Store chemicals and other hazardous materials out of
the reach of children. To protect the environment,
please dispose of used or leftover chemicals at a
properly designated disposal site for destruction.
Cooling system
There is a risk of flooding when working on the seawater system. Turn off the engine and close the sea
cock before starting work on the system.
Avoid opening the coolant filler cap when the engine
is hot. Steam or hot coolant can spray out and cause
burns.
Always cover the generator if it is located under the
fuel filter. The generator can be damaged by spilled
fuel.
Steering system
The boat has a advanced steering system. DO NOT
change connectors, wiring or splice of the components.
Service must be done by approved workshops which
have certifed personnel with qualified professional
training.
Electrical system
Cutting off power
Always stop the engine and break the current using
the main switches before working on the electrical
system. Isolate shore current to the engine block
heater, battery charger, or accessories mounted on
the engine.
Batteries
The batteries contain an extremely corrosive electrolyte. Protect your skin and clothes when charging or
handling batteries. Always use protective goggles and
gloves.
If battery electrolyte comes into contact with unprotected skin, wash off immediately using plenty of
water and soap. If battery acid comes into contact with
the eyes, flush immediately with plenty of water and
obtain medical assistance without delay.
If work must be carried out with the engine at operating temperature and the coolant filler cap or a cock
open or a coolant hose disconnected, open the coolant filler cap carefully and slowly to release pressure
before removing the cap completely. Note that the
coolant may still be hot and can cause burns.
Lubrication system
Hot oil can cause burns. Avoid skin contact with hot
oil. Ensure that the lubrication system is not under
pressure before commencing work on it. Never start
or operate the engine with the oil filler cap removed,
oil can spray out.
7748921 04-2008
7
Introduction
This Operator's Manual has been prepared to give you the greatest possible benefit from your Volvo Penta marine
engine. It contains the information you need to be able to operate and maintain the engine safely and correctly.
Please read the Operator's Manual carefully and learn to handle the engine, controls and other equipment in a
safe manner before you cast off on your maiden voyage.
Always have the Operator's Manual available. Store it safely and do not forget to hand it over to the next owner
if you sell your boat.
The Operator’s Manual describes the engine and equipment sold by Volvo Penta. The illustrations in this book
covers several varieties and might differ, the essential information is always correct though. Installations with e.g.
different controls and instrumentation might occur, in these cases we refer to this products manual.
Warranty
Your new Volvo Penta marine engine is covered by a
limited warranty, under the conditions and instructions
compiled in the Warranty and Service book.
Please note that AB Volvo Penta’s liability is limited to
the specification in the Warranty and Service book.
Read it carefully, as soon as possible after delivery. It
includes important information about warranty cards,
service, maintenance, which it is the responsibility of
the owner to know, check and carry out. If this is not
done, AB Volvo Penta may fully or partly refuse to
honour its warranty undertakings.
Please contact your Volvo Penta dealer if you
have not received a Warranty and Service book,
or a customer copy of the warranty card.
Environmental care
All of us want to live in a clean, healthy environment.
Where we can breathe clean air, see healthy trees,
have clean water in lakes and seas, and be able to
enjoy the sunlight without fearing for our health.
Unfortunately, this is not self-evident these days, it is
something all of us must work hard for.
As a manufacturer of marine engines, Volvo Penta
has particular responsibility and for this reason, environmental care is a core value in our product development. Volvo Penta has a wide engine programme
these days, where considerable progress has been
made in reducing exhaust fumes, fuel consumption,
engine noise etc.
We hope that you will be want to preserve these values. Always observe the advice in the Operator's
Manual about fuel grades, operation and maintenance, to avoid unnecessary environmental impact.
Please contact your Volvo Penta dealer if you notice
any changes such as increased fuel consumption or
increased exhaust smoke.
8
Moderate your speed and distance so that wake and
noise do not disturb or damage animal life, moored
boats, jetties etc. Leave the archipelago and harbours
in the same state you would like to find them. Remember to always hand in drained oil, coolant, paint and
wash residue, used batteries etc. for destruction at a
recycling station.
If we all pull together, we can make a valuable contribution to the environment together.
Running in
The engine must be “run in” during its first 10 hours,
as follows:
Use the engine in normal operation. Full load should
only be applied for short periods. Never run the engine
for a long period of time at constant speed during this
period.
Higher oil consumption is normal during the running
in period. For this reason, check the oil level more
frequently than normally recommended.
After the first period of operation, the specified warranty inspection “First service inspection” can be
done. For more information: Please refer to the Maintenance Schedule.
Fuel and oils
Only use the fuels and oils recommended in the Operator's Manual. Other grades can cause malfunctions,
increased fuel consumption and eventually even
shorten the life of the engine.
Always change the oil, oil filters and fuel filter at the
specified intervals.
7748921 04-2008
Introduction
Service and spare parts
Certified engines
Volvo Penta marine engines are designed for high
reliability and long life. They are built to withstand a
marine environment, but also to have the smallest
possible environmental impact. Through regular service and use of by Volvo Penta approved spare parts,
these qualities are retained.
Volvo Penta’s world-wide network of authorised dealers is at your service. They are Volvo Penta product
specialists, and have the accessories, original spares,
test equipment and special tools needed for high quality service and repair work.
Always observe the maintenance intervals in the
Operator's manual, and remember to note the engine/
transmission identification number when you order
service and spare parts.
If you own or operate an emission certified engine it
is important to be aware of the following:
Certification means that an engine type has been
checked and approved by the relevant authority. The
engine manufacturer guarantees that all engines
made of the same type are equivalent to the certified
engine.
This makes special demands on the care and
maintenance you give your engine, as follows:
•
Maintenance and service intervals recommended by Volvo Penta must be complied with.
•
Only Volvo Penta original spares may be used.
•
Service on injection pumps, pump settings and
injectors must always be done by an authorised
Volvo Penta workshop.
•
The engine must not be converted or modified,
except for the accessories and service kits
which Volvo Penta has approved for the engine.
•
Installation changes to the exhaust pipe and
engine air inlet ducts must not be done.
•
No seals may be broken by unauthorised personnel.
The general advice in the Operator's manual about
operation, care and maintenance apply.
Late or inadequate maintenance/service or the use of
spare parts not approved by Volvo Penta will invalidate AB Volvo Penta’s responsibility for the engine
specification being in accordance with the certificated
variant.
Volvo Penta accepts no responsibility or liability for
any damage or costs arising due to the above.
7748921 04-2008
9
Presentation
Volvo Penta IPS - Inboard
Performance System
p0006599
Volvo Penta IPS overview
Volvo Penta IPS is setting a new standard:
-
Much improved efficiency, higher top speed,
reduced fuel consumption/extended range and
great acceleration.
-
Low-speed maneuvering is easier than ever
before, and high speed handling is a dream.
-
Onboard comfort is greatly enhanced thanks to
much lower levels of sound and vibrations.
-
Installation is greatly simplified.
-
More space available for accommodation.
-
Improved safety and quality.
-
Ease of service and a complete system supported by one supplier.
Maneuvering and handling
The reasons for the amazing maneuverability are:
-
The Volvo Penta IPS drive-units are steerable,
turning and pointing the entire thrust in the
desired direction. This results in much higher
efficiency and far greater response to driver
commands.
-
Two counter-rotating propellers on each propulsion unit means that there are no lateral forces
to consider and that tracking is completely
straight.
-
Electronic controls give a distinct and precise
feeling, and shifting is immediate. Thanks to the
progressive electronic steering, the wheel spins
easier at low speed, further reducing driver
effort.
- Improved overall environmental care.
All this is combined with the usual benefits of a traditional inboard such as a robust, high strength construction, excellent corrosion resistance and the
propellers under the hull.
10
7748921 04-2008
Presentation
Comfort
Volvo Penta IPS new technology leads to major
improvements for all comfort enhancing factors.
-
The propulsion forces and vibrations are absorbed by the combined rubber suspension and
sealing.
-
A U-joint in the drive shaft makes it possible to
have the engine soft suspended, which efficiently reduces engine vibrations.
-
The propellers are working in undisturbed water
with no cavitation, and have good clearance
from the hull.
-
There is an increased number of propeller
blades to distribute the forces. This means that
the pulses created by the propellers have very
little effect on the hull.
-
Exhaust fumes are truly minimized. First of all,
the new engine has very low exhaust emissions,
and secondly, the exhausts are emitted through
the propulsion unit into the prop wash and carried well behind the boat.
Environmental care
The Volvo Penta IPS has been developed as a complete system with excellent environmental performance as one of the main design targets. The very high
efficiency of the Volvo Penta IPS system gives greatly
reduced overall emissions.
Volvo Penta’s new D4/D6 in-line engines have been
developed from the latest design in modern diesel
technology. The engines have common rail fuel injection system, double overhead camshafts, 4 valves per
cylinder, turbocharger, compressor (Volvo Penta IPS
500), and aftercooler. The interaction of these, the
large swept volume, and the EVC system results in
exceptional diesel performance combined with low
emissions.
Installation
The Volvo Penta IPS system can be installed in various ways, either as a compact system or with an
extended jackshaft, giving opportunities for different
boat designs.
The system is always used in twin engine installation
configuration.
Safety and quality
Heavy duty material throughout means excellent corrosion resistance. Everything in contact with seawater
is either made from a specially formulated nickel-aluminum- bronze alloy or stainless steel. Propulsion
unit, bearings, couplings, etc. are all robustly dimensioned to cope with the unexpected and ensure a
really long and trouble-free service life.
EVC handles all communication and monitoring
including shift, throttle and steering. Several safety
functions in the system minimize the risk of damage
to engine or propulsion unit.
The Volvo Penta IPS system is designed with full
redundancy, i.e. even if you have a total breakdown
in one driveline, the remaining one will bring you home
safely.
7748921 04-2008
11
Instruments and Controls
This chapter describes the instruments, panels and controls Volvo Penta sells for your engine.
If you would like to complement your instrumentation, or if your boat is equipped with instruments not described
here, we ask that you contact your Volvo Penta dealer.
Ignition Lock
The start keys are supplied with a plate bearing the key
code to be used when ordering spare keys. Keep the
code beyond the reach of unauthorized people.
S
0
I
II
III
=
=
=
=
=
Stop position.
The key can be inserted or removed.
Operating position. System voltage is connected.
Not used.
Start position. Start motor is engaged.
Read the starting instructions in chapter Starting page 31 to ensure you use the correct start
procedure.
Start/Stop Panel
The start/stop panel is used for starting and stopping
the engine.
To start the engine it is necessary for the start key at
the main station to be in the ”I” operating position. The
engine can only be stopped from an activated control
panel.
Read the starting instructions in chapter Starting page 31 to ensure you use the correct start
procedure.
12
7748921 04-2008
Instruments and Controls
Gauges
Tachometer
The tachometer displays engine speed; multiply the
value shown on the dial by 1,000 to get the number of
engine revolutions per minute.
Boat and engine information is displayed in the tachometer window. Information displayed depends on
engine type, the number of sensors and which accessories are installed.
Optional instruments
These instruments are sold as engine options by Volvo
Penta.
1
1 Fuel level gauge
The fuel level gauge shows the quantity of remaining fuel.
2 Voltmeter, battery charging
The meter shows the alternator charge current.
During operations the charge voltage should be
around 14 V. When the engine is stopped and electrical power switched on the battery voltage should
be around 12 V.
If a 24 V system is installed, the charge voltage
should be around 28 V during operations.
3 Coolant temperature gauge
The instrument shows engine coolant temperature.
During operations coolant temperature should normally be between 75-90°C (167-194°F).
4 Oil pressure gauge
The oil pressure gauge displays engine oil pressure. During operations the oil pressure gauge
should normally show 4-5.5 bar. At idle, lower values are normal.
5 Rudder position indicator
The instrument shows rudder position.
6 Fresh water level sensor
Freshwater tank level gauge.
7 Alarm monitor
The alarm monitor gives a visual warning to call
attention to any alarms that occur.
P0005255
7748921 04-2008
13
Instruments and Controls
Control Panel
The control panel is used for station handling, disengaging the drive and to navigate the EVC system
menu.
Always push the buttons firmly and for at least one
second.
Activation button
The control panel and station are activated by pushing
the activation button once. Push twice to lock the station. On boats with only one station, this is always
active.
The lamp above the activation button shows the status
of the station.
Red lamp: Active station.
Lamp off: Station not activated.
Lamp flashing: A fault that limits the function of the
station has been detected.
Padlock
The padlock symbol lights when the station is locked
with the activation button or if change of stations is
under way, please refer to section Helm Stations page 36.
Lit: The station is locked and the boat can only be controlled from this station.
Flashing: Another station is locked.
Neutral button
The neutral button is used to disengage the drive enabling the engine rpm to increase without affecting the
drive, to warm up the engine. The lamp above the neutral button shows the status of the station.
Green lamp: Gear in neutral. The drive is in neutral
position and the engine runs at idle speed.
Lamp off: The drive is engaged for movement forward/
astern.
Flashing lamp: The drive is disengaged and the
engine speed can be adjusted.
Knob
Navigate the display menu by turning the knob.
Push the knob to confirm a selection or acknowledge
an alarm.
Tachometer Display Selection
Boats with one tachometer for port engine and one for
starboard can choose which engine menu to handle
from the station. The lamp above the button shows
which engine is chosen, green lamp for starboard
engine and red lamp for port engine.
Lamp off: Menu inactivated.
Lamp lit: Menu activated.
14
7748921 04-2008
Instruments and Controls
Multifunction Button
With the multifunction button the instruments and panels backlighting is adjusted.
Push the button for over a second to turn the backlighting on or off. The backlighting can be adjusted in
five stages by repeatedly pushing the multifunction
button quickly (less than 1 second).
If the button is pressed on an inactive station, operating
information is shown on the display(s) and the menu
structure is activated.
Back Button
Used to return a step up in the menu structure.
Docking Station Panel
1
The docking station panel allow stopping and restarting of the engines and handling of faults when operating the boat from a docking station.
The docking function (maneuvering with the joystick)
is enabled when the docking station is activated.
Please refer to the section Joystick page 23 for further information on docking.
2
Docking station can only be activated when the
engines are running.
Always push the buttons firmly and for at least one
second.
Activation button
1
2
Push this button on the docking station panel to activate and lock/unlock the docking station. Please refer
to section Instruments and Controls page 14 for further
information.
Stop and start buttons
Push these buttons to stop or restart the engines.
Both engines must be running when using the docking
function.
Lamp above the button: White
Lit: Port engine (1)/Starboard (2) engine are/is running.
Off: Port engine (1)/Starboard (2) engine are/is shut
off. Flashing and accompanied with a buzzer: The
engine(s) has stopped without a stop request. Silence
the buzzer with the Alarm acknowledge button and
restart the engine(s).
7748921 04-2008
15
Instruments and Controls
Alarm acknowledge button
Push this button to acknowledge an alarm of a fault. A
fault is always indicated with a flashing lamp above the
button and a more serious faults is also indicated with
a buzzer. When the fault is acknowledged the lamp will
light continuously and the buzzer will silence. The fault
pop-up must be read and acknowledged on a station
that is equipped with displays. Please refer to the
“Operation” chapter, section “Acknowleging alarms
and messages”.
Lamp above the button: Red
Flashing: Port (1)/Starboard (2) engine has a fault. Lit:
The fault is acknowledged.
Acknowledging faults on Docking Station
Since a docking station is not equipped with displays
and a control panel, an alarm of a fault is handled in a
different way.
On a docking station a fault is always indicated with a
Alarm acknowledge
flashing red lamp above the
button the docking station panel. The flashing lamp
indicates which engine (1/2/3) is faulty. A more serious
fault is also indicated with a buzzer.
1 Acknowledge the fault with the
Alarm acknowledge button. The lamp above the button stops
flashing and lights continuosly. The buzzer is
silenced.
2 Activate a station that is equipped with displays in
order to read and acknowledge the fault pop-up.
3 Take the recommended actions. Please refer to
Fault Code Register page 45.
EVC System Display
In the EVC system display it is possible to show multiple windows with different information. There are four
display modes that can be chosen with the buttons on
the instrument.
Button 1–4 shows the different display modes. Button
5 i used to adjust the contrast and to access the configuration menu. Please refer to section Konfigurationsmeny.
P0002383
The EVC menu can be shown in the display by entering
Systeminformation (se section Multi, button 2) or the
Configuration menu. In this mode the display works the
same way as the display in the tachometer and is handled via the separate control panel, see chapter Instruments and Controls page 20. If there is no tachometer installed the EVC meny can be reached by
pressing the knob on the control panel. To get back to
the display modes, press
.
At start up, the display performs a self-test. If an constant signal is heard, the system has discovered a
16
7748921 04-2008
Instruments and Controls
malfunction. The display will work but may act in an
unexpected way.
NOTICE! Only installed functions will be shown in the
display.
Display modes
Press button 1–4 to view the function menu for the
buttons, apperaring in the lower part of the display.
Press button 1–4 to choose the desired display mode.
1 Engine
2 Multi
3 Trip
G
1
3
2
H
4 Graph
4
To leave the menu, wait a few seconds or press button
5 (EXIT).
5
P0002382
Contrast
In the display modes Engine, Trip and Graph, it is possible to adjust the contrast.
Press button 5 outside the menu and then + (button 4)
and – (button 3).
P0002403
Engine, button 1
ENGINE
SPEED
1
4
2
2
8
10
0
0
x1000
6
Rpm and speed is shown in the upper part of the display. In the lower part it will show trip computer and a
fuel level indicator, if these function are installed.
RPM
KTS
FUEL RATE
L/H
If speed information is missing, coolant temperature
will be shown instead.
Navigate in the trip computer by repeatedly press button 1.
29
• Fuel Rate, fuel consumption per hours
P0002401
• Fuel Economy, fuel consumption per distance
• Trip Fue, fuel used since last reset
• Fuel Remaining, remaining fuel in tank
• Dist. to Empty, remaining distance until tank
isempty, based on fuel consumption per distance
• Trip Distance, trip distance since last reset
7748921 04-2008
17
Instruments and Controls
Multi, button 2
In the multi mode the information can be shown in several windows, analogue or digital. The display can
show windows with different information or be dividedto show windows and system information. To handle
the system information, see chapter Instruments and
Controls page 20. To go between the different display modes press button 2 repeatedly.
By pressing button 5, the right arrow, you choose what
information to be shown in the different windows. Press
repeatedly on the button that correspond to the window, until desired information is shown.
Trip, button 3
The display works as trip computer and shows:
Trip Fuel, since last reset
Fuel Rate, fuel consumption
Trip hours, since last reset
Engine hours, total amount of operating hours
Reset by pressing button 3 for three seconds until a
beep is heard.
P0002418
The values from the engines are summarized, except
for engine hours that are shown for each engine.
Graph, button 4
The information is shown as graphs. Press button 4
repeatedly to choose what information will be shown.
The time interval is set in the Configuration menu.
If the connection is broken there will be a straight linein
the display.
The port engine is shown as a black line and the starboard engine as a grey line.
P0002421
18
7748921 04-2008
Instruments and Controls
Configuration menu
Press button 5 for five seconds to enter the Configuration menu. Navigate with the up and down arrows,
select with the right arrow.
NOTICE! The port engine, or both engines must have
the ignition on when display settings are made.
System information
System information shows the EVC-menyn and is handled by the knob on the control panel. For more information, see chapter Instruments and Controls page 20.
Settings
SETTINGS
LANGUAGE
BLEEP
ENGINE
DISPLAY
ENGLISH
OFF
PORT
BACK
- Language: Setting of what language the information is to be presented in are made in the EVCmenu, see Instruments and Controls page 20.
- Bleep: On/Off, setting if pressing the instrument
buttons will be followed by a beep or not.
- Engine: Setting of what kind of installation the display is a part of and which engine is to be shown
inthe display.
P0002408
UNITS
SPEED
DISTANCE
OIL PRESSURE
TURBO PRESSURE
FUEL RATE
KM/H
KM
kPa
kPa
L/H
- Display: Setting of intervals (unit settings are made
in the EVC-menu, see Instruments and Controls page 20):
Rpm interval, 2500–9000 rpm, in steps of 500 rpm
Speed, on/off
Speed interval, 10–100 knots, in steps of 10 knots
Graph interval, 2 min, 10 min, 30 min, 60 min, 2 h,4
h or 8 h
BACK
P0002409
7748921 04-2008
19
Instruments and Controls
EVC Menu
The EVC menu can be shown in both the EVC system
display and the tachometer display. The main menu
shows operating information, the settings menu and
the fault menu (only shown when a fault in the system
is detected).
Only installed functions are shown in the menu.
Turn the knob to navigate through the menus.
Press the knob to access sub menus and to confirm
selections in the settings menu.
It is always possible to return to the previous menu by
. Press repeatedly to return to the main
pressing
menu; alternatively, hold down the button for a couple
of seconds.
A
B
A This field displays engine operating data.
B This field displays warning symbols and active function symbols.
P0001006
20
7748921 04-2008
Instruments and Controls
Settings
P0001015
Turn the control panel wheel until the start screen for
the settings menu is displayed. Press the wheel to
reach the sub menus.
Turn to move between the available setting functions.
For further information, refer to section Settnings
menu page 102.
Fault
The fault window is only shown in the main menu if a
fault has been detected.
For further information, refer to section Fault Handling page 41.
P0001315
7748921 04-2008
21
Instruments and Controls
Controls
Single Lever Control
Maneuvering
A single-lever control operates both gearshift and
throttle functions with the same lever.
The engine can only be started with the control lever
in the neutral position.
N = Neutral position. Reverse gear/drive disengaged
and engine at idle.
F = Reverse gear/drive engaged for forward motion.
R = Reverse gear/drive engaged for rearward
motion.
T = Engine rpm control (throttle).
Disconnecting the gearshift function
The gearshift function can be disconnected so that the
control lever only operates the throttle.
1 Put the control lever in neutral (N).
2 Depress the neutral button (N) and keep it
depressed at the same time as the lever is moved
forwards to the gearshift position (F).
P0006664
3 Release the neutral button. The green indicator will
flash as confirmation that the gearshift function is
disconnected and the that lever will only affect
engine revolutions.
The gear shift function is reconnected automatically
when the lever is returned to the neutral position. This
is confirmed by the green indicator shining continuously.
CAUTION!
Take care not to engage the gear by mistake.
22
7748921 04-2008
Instruments and Controls
Adjusting the friction brake
The lever is fitted with a friction brake to allow adjustment for easier or stiffer movement as required. The
friction brake only affects movement of the throttle control lever.
1 Stop the engine.
2 Move the control lever forward so that the groove
in the lever hub is accessible.
3 Remove the plug with the aid of a screwdriver.
4 Adjust the friction brake (wrench, 8 mm) by turning
the bolt clockwise (+) for stiffer lever movement,
and counterclockwise (–) for easier movement.
5 Reinstall the plug.
Joystick
Volvo Penta IPS Joystick is a control used for docking
and maneuvering in low speed. The joystick makes it
possible to rotate the boat and maneuver the boat in
different directions – sideways, diagonally, forward
and backward.
Learn to handle the joystick in a safely and correct
manner before you start using the function in a marina.
B
A
When the docking function is active the engine speed
is reduced and the boat can only be maneuvered with
the joystick.
Activating the docking function
Before activating the docking function the following has
to be fulfilled:
• the engines must to be running
p0005186
A. Docking (ON/OFF)
B. Boost (ON/OFF)
7748921 04-2008
• the controls must to be in neutral
• the helm station must be active
• the joystick in its middle position
23
Instruments and Controls
1 Activate the docking function by pressing the docking button (A) on the joystick.
2 A sound signal confirms that the docking function is
active and the lamp by the docking button is lit.
3 To inactivate the function press the docking button.
To confirm that the function is inactivated the signal
sounds twice and the lamp goes out.
P0006292
4 The docking function is also deactivated if the controls is moved out of neutral.
Activating the boost function
If the driver needs extra power, e.g. in windy weather
or if there is a strong currant, the boost function can be
activated.
1 Activate the boost function by pressing the boost
button (B) on the joystick.
2 A sound signal confirms that the function is active
and the lamp by the button is lit.
3 Inactivate the function press the boost button. To
confirm that the function is in active the signal
sounds twice and the lamp goes out.
4 The system is now back in docking mode.
24
7748921 04-2008
Instruments and Controls
Maneuvering with joystick
To maneuver the boat move the joystick forwards, backwards, sideways or by turning the top of the joystick, see
figure.
IMPORTANT!
The boat keeps moving even after the joystick is
released, compensate this by moving the joystick in
opposite direction.
P0001191
7748921 04-2008
25
Optional
Sport Fishing Mode
Volvo Penta's sport fish function has been developed
by deep-sea fishermen. When the function is activated,
the IPS units are angled outwards and the helmsman
can quickly rotate and maneuver forward/backwards
to follow the movement of the fish. When activated, the
wheel is disconnected and the boat is maneuvered
solely via the control lever.
When the function is disengaged, both the IPS units
are set to straight forward.
P0001219
The single-lever function used together with the sport
fish function makes it possible to control both engines
with just one of the control levers.
Activating the sport fish function
1 Move both control levers to neutral.
2 Press the sport fish button on the panel. The activation of the function is acknowledged by an acoustic signal and the lamp next to the button lighting.
An image stating that the sport fish function is active
is shown on the display for 5 seconds.
3 If the lamp flashes, all is not in order, e.g. the control
levers are not in neutral.
4 When the function is activated, the wheel is disconnected and the boat is steered with the control
lever.
SPORT FISH
SINGLE LEVER
5 Exit the function by pressing the sport fish button
on the panel. Inactivation of the function is acknowledged by an acoustic signal and the lamp next to
the button going out. An image stating that the function is inactive is shown on the display.
It is also possible to exit the function by turning the
wheel more than 30 degrees.
WARNING!
There is a risk that the boat may take in water if the
movements are too violent.
P0001215
26
7748921 04-2008
Optional
Activating single-lever function
1 In order to activate the single-lever function, the
control levers must be roughly the same position,
max 10% difference.
2 Press the single lever button. The activation of the
function is acknowledged by an acoustic signal and
the lamp next to the button lighting. An image stating that the function is active is shown on the display
for 5 seconds.
SPORT FISH
P0001214
7748921 04-2008
SINGLE LEVER
3 When the function is activated, the control lever that
is moved first steers the boat and steers both
engines. The other control lever now has no function as long as the single lever function is activated.
4 To inactivate the function, the control levers must
again be in roughly the same position. Press the
single lever button; that the function is inactive is
confirmed by an acoustic signal and the lamp going
out. An image stating that the function is inactive is
shown on the display.
27
Optional
ACP
Volvo Penta ACP (Active Corrosion Protection) protects against galvanic corrosion by controlling an electric current that can be monitored by the engine
electrical system.
It is preferable to connect the boat to shore supply, if
such is available. If shore power is unavailable, ACP
utilizes the batteries, as it is connected to the boat's 12
V/24 V system. If the batteries begin to discharge, the
ACP switches from primary to secondary protection.
The IPS is then protected by the consumption of a
sacrificial zinc anode installed in the ACP unit on the
transom.
When the primary protection is in use, a small quantity
of chlorine gas is produced by the ACP; if desired it can
be switched off temporarily. The ACP then switches
over to secondary protection.
The ACP reverts automatically to normal mode after 4
hours; earlier reversion can be arranged in the settings
menu (see below) or when ignition is switched on.
Protection levels
The ACP has three protection levels; the active level
is displayed in the EVC menu.
• Good Protection; the IPS unit is optimally protected
by the ACP function.
P0001217
• Limited Protection; secondary protection - the IPS
P0003747
28
has complete corrosion protection via the sacrificial
anode.
Check that the batteries are being charged by shore
power; alternatively, start the engine so that the
alternator charges the batteries.
There is no risk of corrosion as the sacrificial anode
protects the IPS. However, seek service for system
checks at the first suitable opportunity if the system
remains in the limited protection mode for more than
approx. 2 hours.
If the system remains in this mode for a longer break
in operations, more than 8 weeks, service should be
sought for system checks.
7748921 04-2008
Optional
• No Protection; risk of corrosion, system gives warning alarm. The display switches between the two
screens.
Seek service for system checks.
P0001218
• If the ACP is set to inactive, the system cannot iden-
P0001203
P0001203
tify ACP status and three lines will be shown on the
display.
If this should occur when the system is not set to
inactive, seek service for checks.
ACP will also show the three lines during one minute
after ignition is turned on, thereafter it will show current protection level.
Settings
ACP has three function modes; these are set in the
EVC menu under Settings/ACP. Refer to Settnings
menu page 102, section ACP.
P0001015
P0001015
P0001022
P0001022
• Normal means that the system is active and working
in the optimal manner.
• Chlorine Free means that the system has switched
over to protection by the zinc anode for 4 h, resulting
in no chlorine gas being given off.
P0001021
P0001021
7748921 04-2008
29
Optional
• Inactive; this mode should only be used when the
P0003049
P0003049
30
boat is taken out of the water on to dry land.
To avoid fault codes, select inactive mode before
lifting the boat out of the water. In this mode the ACP
no longer monitors the corrosion condition, but the
IPS is protected by the zinc anode.
The system is re-started when the ignition is
switched on; inactive mode switches to normal
mode.
7748921 04-2008
Starting
Make a habit of visually checking the engine, engine bay and transmission before start. This will help you to
discover quickly if anything abnormal has happened, or is about to happen. Also check that instruments and
warning displays show normal values when you have started the engine.
To minimize cold start smoke we recommend the installation of an engine heater or engine bay heater if temperatures below +5°C (41°F) are encountered.
WARNING!
Never use start spray or similar products as starting aid. Explosion risk!
Before Starting
• Check the engine and drive units oil level.
• Check the coolant level.
• Open the sea cocks.
Position A open. Position B closed.
• Open the fuel cock.
1
• Turn the main switches on.
0
IMPORTANT!
Never disconnect the current with the main switches
when the engine is running. The alternator and electronics could be damaged.
P0002431
• Start the engine bay fan, where fitted, and allow it to
run for at least four minutes.
• Check there is sufficient fuel for the planned trip.
A
B
A
B
P0002851
7748921 04-2008
31
Starting
Starting the Engine
Shifting, adjusting speed and performing EVC settings
and calibrations is only possible at an active station.
On a boat with one station the station is always active.
On a boat with two or more stations the main station
automatically becomes active when the EVC system
is started up with the ignition key(s). If the engine(s) is/
are started from another station this station automatically becomes active instead.
Put the drive in neutral
Put the drive in neutral by moving the control levers to
neutral at all stations.
Turn the ignition on
Turn the starter key of each engine to position I to
switch the ignition on.
Check the tachometer display
If a fault is registered it will shown in the tachometer
display, please refer to Fault Handling page 41 for
further information and recomended actions.
32
7748921 04-2008
Starting
Check lamps
-
!
Each time the ignition is turned on, all lamps in the
alarm instrument are illuminated. Check that all lamps
light up and go out. If a lamp flashes a fault has been
registred, please refer to section Fault Handling page 41 for further information and recomended actions.
If the boat has more than one station, it has to be activated before the lamps can be checked.
+
!
P0002435
Start the engines
If a station is locked the engines can only be started
and stopped from this station
Start using the ignition switch
Turn the key of each engine to position III. Release the
key and let it spring back to position I as soon as the
engine has started.
If repeated start attempts are needed, the key must be
turned back to position 0 first.
Starting with the starter button
Press the starter button for each engine. Release the
button as soon as the engine has started.
If you start from a secondary station, the starter keys
at the main station must be in position I.
Overheating protection
If the starter motor is engaged for its maximum activation time (30 seconds), the starter motor circuit is cut
automatically to protect the starter motor from overheating. If possible, leave the starter motor to cool for
at least five minutes before making a new start attempt.
Read the instruments and warm the engine
up
START
P0005860
STOP
Allow the engines to idle for the first ten seconds. Check
that instruments and warning displays show normal values. Check that no alarms are displayed and no warning
lamps are flashing. If an alarm is registred, please refer
to section Fault Handling page 41 for further information and recomended actions.
Warm the engine up at low speed and low load, so normal operating temperature is reached before full power
is used.
IMPORTANT!
Never race the engine when it is cold.
7748921 04-2008
33
Operation
Learn to handle the engine, controls and other equipment in a safe and proper manner before casting off on your
maiden voyage. Remember to avoid sudden and extreme rudder maneuvers and gear shifts. There is a risk for
passengers and crew falling over or falling overboard.
WARNING!
A rotating propeller can cause serious injury. Check that nobody is in the water before engaging ahead or astern.
Never drive near bathers or in areas where people could be in the water.
Reading the Instruments
Read all instruments and alarm displays directly after
starting, and then regularly during the voyage. Values
from the analog instruments are also shown in the
tachometer display.
Alarms
Alarms and messages are shown in the display, some
alarms do also have a sound alarm. Is there an alarm
instrument installed the lamp in question will flash.
If a malfunction is discovered the sound alarm starts
and the lamp in question in the alarm instrument
flashes. The display will show a fault message.
1 Read the alarm/fault message.
2 Acknowledge the alarm by pressing the knob on the
control panel.
3 Take the indicated actions, see chapter Fault Code
Register page 45.
The fault will be stored as long as the fault remains. It
is possible to read out the fault code at an upcoming
service.
34
7748921 04-2008
Operation
Maneuvering
1
Shifting between forward and reverse should be done
at idling. Shifting at higher engine speeds can be
uncomfortable for passengers and cause unnecessary
stress on the transmission or cause the engine to stop.
If you attempt to shift gear at an excessive engine
speed, a safety function cuts in automatically, and
delays shifting until engine speed has fallen to 1500
rpm.
Always do a forwards/reverse operation as
follows:
2
1 Reduce engine speed to idle and let the boat more
or less lose way.
WARNING!
Never shift to reverse when the boat is planing.
2 Move the control lever to neutral with a rapid, distinct movement. Make a brief pause.
3 Then move the control lever to reverse with a rapid,
distinct movement and increase engine speed.
3
IMPORTANT!
It is important all engines are running during reversing
maneuvers, to avoid the risk of water entry via the
exhaust pipe into the stationary engine.
P0005856
7748921 04-2008
35
Operation
Helm Stations
Changing stations
3
1 Put the gear in neutral.
The lamp above the neutral button (1) is lit when the
gear is in neutral.
2
2 Unlock, if locked, the station you leave by pushing
the activation button (2).
1
3 Activate the station you change to by pressing the
activation button (2).
The lamp above the activation button lights when
the station is active.
P0006366
An active station is indicated by the lit lamp above the
activation button.
Is the light above the activation button off, the station
is inactive.
If the padlock sign (3) flashes the station can not be
activated. Another station is either active and locked,
or active with the gear engaged (not in neutral)
A flashing light above the activation button (2) indicates
a fault that limits the functionality of the station. The
fault is also indicated by a pop-up appearing in the display, please refer to section “Fault handling”.
Locking/Unlocking station
Is a station locked it is only possible to start or stop the
engine and change stations from this station.
Lock an active station by pressing the activation button
(2). Unlock an active, locked station by pressing the
activation button (2). The padlock sign (3) on the control panel indicates whether the station is locked (lit) or
not (off).
36
7748921 04-2008
Operation
Cruising Speed
For best fuel economy operations at full must be
avoided. We recommend a cruising speed that is at
least 10% below the maximum engine revolutions at
top speed (full throttle).
Depending on hull type, the choice of propeller, the
load and sea state etc., the maximum revolutions at
top speed may vary, but they should be within the full
throttle range; refer to the “Technical data” chapter.
If the engine does not reach its maximum throttle range
it can depend on a number of factors mentioned in the
“Fault tracing” chapter.
Select a propeller with greater pitch if actual engine
revolutions exceed the full throttle range. Contact your
Volvo Penta dealer for advice.
Synchronizing Engine Speed
When driving with twin engines, both the operating
economy and comfort will be increased when the
engines are operating at the same engine speed (rpm).
When the synchronization function is activated, the
engine speed (rpm) of the starboard engine is automatically adjusted to that of the port engine. The synchronization function is activated automatically if the
following conditions are met.
1 The engine speed levers for both engines are in
(approximately) the same position.
2 The engine speed on both engines exceeds 800
rpm.
NOTICE! The synchronizer is disengaged as soon as
the conditions are no longer met.
7748921 04-2008
37
Engine Shutdown
Allow the engine to run at low idle, in neutral, for a few minutes after operations are completed. In this way afterboiling is avoided at the same time as temperature equalization takes place. This is especially important when
the engine has been run at high rpm or under heavy load.
Stop the Engine
If a station is active and locked the engines can only
be started and stopped from that station.
IMPORTANT!
Never disconnect the current with the main switches
when the engine is running. The alternator and electronics could be damaged.
IMPORTANT!
Make sure the starter key is in 0-position or removed
before main switches are switched off. Otherwise the
alternator and electronics could be damaged.
Stop with key
1 Disengage the drive by putting the control lever in
neutral.
2 Turn the keys to stop position “S”. Keep the key
turned until the engines stops. The key will automatically return to the “0” position when it is
released and can then be removed.
The starter keys must be in the “0” position or
removed before main switches are switched off.
Stopping with the stop button
1 Disengage the drive by putting the control lever in
neutral.
2 Push the stop buttons. Release the buttons when
the engines have stopped.
38
7748921 04-2008
Engine Shutdown
If the engine cannot be stopped in a normal procedure,
it is possible to stop the engine via auxiliary stop
mounted on the side of the engine.
X S
TO
P
AU
Auxiliary stop
P0003709
After Engine Shutdown
• Check the engine and engine bay for leakages.
• Close the fuel taps.
• Close the two sea cocks at each propulsion unit.
Position A open. Position B closed.
• Take an hour meter reading and carry out preventive maintenance according to the maintenance
schedule.
B
A
• Turn off the main switches before any long stoppage.
A
B
P0002849
7748921 04-2008
39
Engine Shutdown
Operation break with the boat in water
If the boat is not used, but left in the water, the engine
must be warmed up at least once every fortnight. This
prevents corrosion damage in the engine.
If you expect the boat to be unused for two months or
more, it must be laid up, please refer to Storage page 98
Operation break with the boat out of water
Where boats are kept laid up on land when not in use,
there is a lower level of galvanic corrosion protection
due to oxidation on the sacrificial anodes. Before
launching the boat the sacrificial anodes on the drive
must be cleaned with emery paper to remove any oxidation.
If you expect the boat to be unused for two months or
more, it must be laid up, please refer to Storage page 98.
IMPORTANT!
Use emery paper. Do not use a wire brush or other
steel tools when cleaning, as these may damage the
galvanic protection.
Cold Weather Precautions
F C
70
20
60
50
10
20
32
0
20
10
10
If the engine bay cannot be kept frost free, the raw
water system must be drained and the freshwater system coolant must have sufficient frost protection to
prevent frost bursting; refer to the sections Seawater
System, Draining page 80 and Maintenance page 77 respectively for more detailed information.
Check the charge status of the battery. A poorlycharged battery can freeze and burst.
P0005905
40
7748921 04-2008
Fault Handling
Despite regular maintenance according to the maintenance schedule and perfect operation conditions faults may
occur which must be attended to before the boat can travel further. This chapter describes alarms and fault
handling.
Alarm handling
Fault information from engine and EVC
system
-
!
P0006368
!
+
If a malfunction is discovered the driver is warned by a
buzzer sounding and a pop-up showing in the display.
The pop-ups will toggles between cause of fault and
tasks to perform.
Information regarding ”cause of fault” and ”measures
to take” is found in chapter Fault Code Register page 45.
The engine, transmission and EVC system is monitored by the diagnostic function. Should the diagnostic
function discover a malfunction it protects the engine
and ensures continued operation by affecting the
engine. Depending on how serious the malfunction is
the effect on the engine varies.
• Minor malfunction which does not damage the
engine or transmission.
Affect on engine: None.
• Serious malfunction which will not immediately damage the engine or transmission e.g. high coolant
temperature.
Affect on engine: Engine power is reduced until
faulty value becomes normal.
• Serious malfunction which will cause serious damage to engine or transmission.
Affect on engine: Engine power is reduced.
• Serious malfunction which makes it impossible to
control the engine or transmission.
Affect on engine: Transmission is disengaged and
engine speed is reduced.
It is possible to perform emergency shifting, please
refer to In Case of Emergency page 59.
• Serious malfunction on transmission or in the engine
fuel injection system.
Affect on engine: Engine is stopped.
It is possible to perform emergency shifting, please
refer to In Case of Emergency page 59. In emergency situations it is also possible to start the engine
with gear engaged after acknowledging the alarm.
7748921 04-2008
41
Fault Handling
Acknowledging alarm
1 Push the knob on the control panel to ackowledge
the alarm. The buzzer becomes silent.
2 Read the alarm or message in the pop-up.
3 Push the knob on the control panel again and the
pop-up disappears.
NOTICE! The alarm has to be acknowledged before
the engine can be started.
Popup windows
There are three levels of fault messages showing in
the pop-up: danger, warnign and caution.
Danger
If the Danger pop-up is shown during operation, a serious fault has occured.
P0004987
Acknowledge the alarm and stop the engine immediately.
DANGER! Stop the engine immediately.
Warning
If the Waring pop-up is shown during operation, a fault
has occured.
P0004986
Acknowledge the alarm and stop the engine at once.
WARNING! Stop the engine.
Caution
If the Caution pop-up is shown during operation, a fault
has occured.
Acknowledge the alarm.
P0004985
CAUTION! See operator's manual.
42
7748921 04-2008
Fault Handling
Faults list
Is a fault registered the display shows Faults in the
EVC menu along with the number of faults.
Push the knob on the control panel to open the menue.
Turn the knob to see all faults registred.
The popup toggles between cause of fault and tasks
to perform.
P0004375
Erasing faults in faults list
Acknowledged faults that has been stored automatically erased every time the starter key is turned to the
stop position (S).
Stop the engine and check that the ignition key(s) is
(are) in position 0 in all control positions.
When system voltage is switched on again, the diagnostic function checks whether there are faults in the
EVC system. If this is the case, new fault pop-ups are
shown.
Faults which have been attended to or have disappeared are automatically erased.
Faults which have not been attended to must be
acknowledged every time the system voltage is
switched on.
7748921 04-2008
43
Fault Handling
Fault Tracing
A number of symptoms and possible causes of engine malfunctions are described in the table below. Always
contact your Volvo Penta dealer if problems occur which you can not solve by yourself.
NOTICE! Read through the safety advice for care and maintenance work in chapter Safety Information page 6
before starting work.
Symptoms and possible causes
Pop-ups are shown in the tachometer display
See chapter Fault Code Register page 45
Starter motor not turning (or slow)
1, 2, 3, 24
Engine does not start
4, 5, 6, 7, 24
Engine starts but stops again
6, 7, 24
Engine difficult to start
4, 5, 6, 7
Engine does not reach correct speed at wide open
throttle (WOT)
5, 6, 7, 8, 9, 10, 11, 15, 18, 19, 20, 21, 24
Engine knocks
4, 5, 6, 7
Engine runs unevenly
4, 5, 6, 7, 10, 11
Engine vibrates
15, 16
High fuel consumption
8, 9, 10, 12, 15
Black exhaust smoke
10
Blue or white exhaust smoke
12, 22
Low oil pressure
13, 14
Engine coolant temperature too high
17, 18, 19, 20, 21
No charge or poor charge
2, 23
1.
2.
3.
4.
5.
6.
7.
8.
9.
Flat batteries
Poor contact/open circuit in cables
Fuse tripped
Lack of fuel
Fouled fuel filter
Air filter in the fuel injection system
Water/contaminants in the fuel
Boat abnormally loaded
Fouling on underwater hull/propulsion unit/propeller
10. Insufficient air supply
11. Engine coolant temperature too high
12. Engine coolant temperature too low
44
13.
14.
15.
16.
17.
18.
19.
20.
21.
22.
23.
24.
Lubricating oil level too low
Blocked oil filter
Defective/incorrect propeller
Defective engine mounting
Too little coolant
Blocked seawater intake/pipe/filter
Circulation pump drive belt slipping
Defective impeller
Defective/incorrect thermostat
Lubricating oil level too high
Alternator drive belt slipping
Stored diagnostic fault codes
NOTICE! The codes can only be read and erased
by a service technician.
7748921 04-2008
Fault Code Register
CAUTION!
Read the safety precautions for maintenance and service in the Safety Information chapter before starting work.
When a malfunction i discovered the driver is warned by a sound alarm and at the same time a pop-up window
is shown in the display. The fault message gives information about what has caused the fault and what actions
to take.
This chapter gives a more detailed description of cause and actions.
Explanation of fault message
A Description of current fault, affect on the system and
measures to take.
B Current warning lamp which flashes during an
alarm. O/R means that an orange or red lamp
flashes.
C Audible warning.
D Fault pop-up which is shown on the EVC tachometer
display.
A.
Explanation:
Battery voltage too low.
Symptom:
None.
Action:
B.
D.
C.
•
Check the batteries fluid level
•
Check belt tension.
•
Please contact a Volvo Penta workshop if the fault remains.
P0005024
1
1 Is the orange “water in fuel” lamp lit there is to much
water in the water separator on the fuel pre-filter.
2
7
2 Is the charging lamp lit the alternator has stopped
charging.
6
3
5
P0004761
4
3 Is the coolant temperature lamp lit the coolant temperature is to high.
4 Is the orange coolant level lamp lit during operation
the coolant level is to low.
5 Is the orange oil level lamp lit during operation the
engine oil level is to low.
6 Is the red (R) warning lamp lit during operation a
serious malfunction has been discovered.
Is the orange (O) warning lamp lit during operation
a malfunction has been discovered.
7 Is the red oil pressure lamp lit during operation the
engine oil pressure is to low.
7748921 04-2008
45
Fault Code Register
Engine Speed
Explanation:
Fault in engine speed sensor.
Symptom:
Engine power is reduced.
Action:
Please contact a Volvo Penta workshop.
P0005008
DANGER! Engine Speed See Operator's Manual
Stop engine
Water in Fuel
Explanation:
Water in water trap in fuel filters.
Symptom:
None.
Action:
•
Empty the water trap underneath the fuel filters. Please refer
to Maintenance page 74.
•
Please contact a Volvo Penta workshop if the fault remains.
P0001200
CAUTION! Water in Fuel
See Operator's Manual
Air Temperature
Explanation:
Charge air temperature too high.
Symptom:
Engine power is reduced.
Action:
Please contact a Volvo Penta workshop.
P0005011
WARNING!
Air Temperature See Operator's Manual
Reduce rpm
46
7748921 04-2008
Fault Code Register
Coolant Level
Explanation:
Coolant level too low.
Symptom:
None.
Action:
•
Check coolant level. Please refer to Coolant Level, Checking
and Topping Up page 79.
•
Check that no coolant leakage occurs in auxiliary equipment
connected to the engine cooling system.
•
Please contact a Volvo Penta workshop if the fault remains.
R
P0005012
WARNING! Coolant Level See Operator's Manual
Coolant Temperature
Explanation:
Coolant temperature too high.
Symptom:
Engine power is reduced.
Action:
•
Check coolant level. Please refer to Coolant Level, Checking
and Topping Up page 79.
•
Check that the seawater filter is not blocked. Please refer to
Seawater Filter, Check and Cleaning page 83.
•
Check the impeller in the seawater pump. Please refer to
Impeller, Check and Change page 81.
•
Check that no leakage occurs.
•
If the cooling water flow ceases, the exhaust hose should be
inspected internally and replaced if the hose shows signs of
damage.
•
Please contact a Volvo Penta workshop if the fault remains.
P0005014
WARNING! Coolant Temperature See
Operator's Manual
Reduce rpm
Fuel Pressure
Explanation:
Fuel pressure too low.
Symptom:
None.
Action:
•
Check fuel level.
•
Open the fuel taps and check that no leakage occurs.
•
Check that the fuel filters are not blocked. Replace filters if
necessary. Please refer to Maintenance page 74.
•
Please contact a Volvo Penta workshop if the fault remains.
P0005015
WARNING! Fuel Pressure See Operator's Manual
Reduce rpm
7748921 04-2008
47
Fault Code Register
Engine Oil Level
Explanation:
Oil level too low.
NOTICE! In rough following seas or head seas, the system can
incorrectly sense that the engine oil level is too low. If this happens,
acknowledge the fault, and check the points below for safety reasons.
Symptom:
None.
Action:
•
Check the oil level in the engine. Please refer to Oil level,
checking and topping up page 72.
•
Check that no leakage occurs.
•
Please contact a Volvo Penta workshop if the fault remains.
P0005017
WARNING! Engine Oil Level See Operator's Manual
Engine Oil Pressure
Explanation:
Oil pressure too low.
Symptom:
Engine power is reduced.
Action:
•
Check the oil level in the engine. Please refer to Oil level,
checking and topping up page 72.
•
Check that the oil filters are not blocked. Replace filters if necessary.
•
Check that no leakage occurs.
•
Please contact a Volvo Penta workshop if the fault remains.
P0005018
WARNING! Engine Oil Pressure See
Operator's Manual
Stop Engine
Check drive oil
Explanation:
Oil level too low.
Symptom:
Engine power is reduced.
Action:
•
Check the oil level. Please refer to Maintenance page 90.
•
Fill up with oil to the right level.
•
Check that no leakage occurs.
•
Please contact a Volvo Penta workshop if the fault remains.
P0001194
CAUTION!Check drive oilSee Operator's Manual
48
7748921 04-2008
Fault Code Register
Transmission Oil Pressure
Explanation:
Reverse gear oil pressure too low.
Symptom:
None.
Action:
•
Check the oil level. Please refer to Oil level, checking and topping up.
•
Check that the oil strainer is not blocked.
•
Check that no leakage occurs.
•
Please contact a Volvo Penta workshop if the fault remains.
P0005023
WARNING! Transmission Oil Pressure
See Operator's Manual
Battery Voltage
Explanation:
Battery voltage too low.
Symptom:
None.
P0002364
Action:
•
Check the batteries fluid level
•
Check belt tension.
•
Please contact a Volvo Penta workshop if the fault remains.
P0005024
WARNING! Battery Voltage See Operator's Manual
Auxiliary Stop
Explanation:
External stop signal.
Symptom:
Engine stops or can not be started.
Action:
•
Check emergency stop button if any. Reset if necessary.
Please refer to Engine Shutdown page 38.
•
Please contact a Volvo Penta workshop if the fault remains.
P0005025
WARNING! Auxiliary Stop See Operator's Manual
7748921 04-2008
49
Fault Code Register
Primary Battery
Explanation:
Poor batteries or charging.
Symptom:
None.
Action:
•
Check the batteries fluid level Please refer to Battery, Maintenance page 86.
•
Check belt tension. Please refer to Drive Belt, Check and
Change page 70.
•
Please contact a Volvo Penta workshop if the fault remains.
P0005026
WARNING! Primary Battery See Operator's Manual
SUS, Battery Voltage Low
Explanation:
Low supply voltage to SUS unit.
Symptom:
Engine power is reduced.Limited steering
Action:
•
Check the batteries fluid level
•
Check belt tension.
•
Please contact a Volvo Penta workshop if the fault remains.
P0007711
WARNING! SUS, Battery Voltage LowSee Operator's Manual
50
7748921 04-2008
Fault Code Register
Check Control Lever
Explanation:
Fault in control lever.
Symptom:
Engine in emergency mode. Gear to neutral.
Action:
•
Restart engine(s).
•
If the engine can not be operated from the chosen station, use
an alternative station.
•
Please contact a Volvo Penta workshop if the fault remains.
P0005031
WARNING!Check Control Lever
See Operator's Manual
P0005032
CAUTION!Check Control LeverSee
Operator's Manual
Lever Calibration
Explanation:
Incorrect lever calibration.
Symptom:
Impossible to select active station.
Action:
•
Restart engine(s).
•
Please contact a Volvo Penta workshop if the fault remains.
P0005033
CAUTION! Lever Calibration IncorrectSee Operator's Manual
7748921 04-2008
51
Fault Code Register
Check EVC System
Explanation:
Internal fault in EVC system.
Symptom:
Engine power is reduced.
Action:
•
Restart engine(s).
•
If the engine can not be operated from the chosen station, use
an alternative station.
•
Please contact a Volvo Penta workshop if the fault remains.
P0005034
WARNING!Check EVC SystemSee
Operator's Manual
P0005035
CAUTION!Check EVC SystemSee
Operator's Manual
Check Engine
Explanation:
Miscellaneous system faults.
Symptom:
None.
Action:
•
Restart engine(s).
•
Please contact a Volvo Penta workshop if the fault remains.
P0005036
CAUTION! Check Engine See Operator's Manual
52
7748921 04-2008
Fault Code Register
Check Joystick
Explanation:
Faulty joystick.
Symptom:
Engine power is reduced.
Action:
•
Restart engine(s).
•
If the engine can not be operated from the chosen station, use
an alternative station.
•
Please contact a Volvo Penta workshop if the fault remains.
P0005037
WARNING!Check JoystickSee Operator's Manual
P0005038
CAUTION!Check JoystickSee Operator's Manual
Check Steering Wheel
Explanation:
Faulty steering wheel unit.
Symptom:
Engine power is reduced.
Action:
•
Restart engine(s).
•
Please contact a Volvo Penta workshop if the fault remains.
P0005039
CAUTION! Check Steering Wheel See
Operator's Manual
7748921 04-2008
53
Fault Code Register
Limited Engine RPM
Explanation:
Fault in steering system.
Symptom:
Engine power is reduced.
Action:
•
Restart engine(s).
•
Please contact a Volvo Penta workshop if the fault remains.
P0005040
CAUTION! Limited Engine RPM See
Operator's Manual
Limited steering
Explanation:
Fault in steering system.
Symptom:
Engine power is reduced. Limited steering.
Action:
•
Restart engine(s).
•
Please contact a Volvo Penta workshop if the fault remains.
P0005041
WARNING! Limited steering Limited
Engine RPM
See Operator's Manual
No Steering
Explanation:
Faulty steering wheel unit.
Symptom:
Engine power is reduced. No steering.
Action:
•
Restart engine(s).
•
Please contact a Volvo Penta workshop if the fault remains.
P0005042
DANGER! No Steering Limited Engine
RPM
See Operator's Manual
54
7748921 04-2008
Fault Code Register
No Gear/Throttle, No Steering
Explanation:
Fault in steering system.
Symptom:
No steering. No drifting.
Action:
•
Restart engine(s).
•
Please contact a Volvo Penta workshop if the fault remains.
P0005043
DANGER! No Gear/Throttle, No Steering
Restart Engines See Operator's Manual
Helm Restarted
Explanation:
Lost active helm during crank.
Symptom:
None.
Action:
Restart engine(s).
P0001206
CAUTION! Helm Restarted See Operator's Manual
Check Corrosion Status
Explanation:
Corrosion protection not guaranteed.
Symptom:
None.
Action:
•
Check that the batteries are charged by land current or by the
alternator.
•
Please contact a Volvo Penta workshop if the fault remains.
P0001209
CAUTION!Check Corrosion StatusSee
Operator's Manual
7748921 04-2008
55
Fault Code Register
Key Failure
Explanation:
Key or start panel out of order.
Symptom:
None.
Action:
Please contact a Volvo Penta workshop.
P0001199
CAUTION! Key FailureSee Operator's
Manual
Check Multilink
Explanation:
Fault in multilink communication.
Symptom:
Possible loss of engine synchronization or loss of display(s).
Action:
Please contact a Volvo Penta workshop.
P0001204
CAUTION! Check Multilink See Operator's Manual
56
7748921 04-2008
In Case of Emergency
In Case of Emergency
Despite regular maintenance according to the maintenance schedule and perfect operation, faults may
occur which must be attended to before the boat can
travel further. This chapter contains tips for rectifying
some of the possible faults. There are safety functions
which are activated when certain faults occur, to protect the engine.
The following can occur:
• Engine can not be started.
• Gear in neutral and engine speed is limited to 1500
rpm, no steering.
• The engine stops.
If fault occurs, acknowlege any alarm and take the recommended measures. Please refer to chapter Fault
Code Register page 45.
Running Aground
If the boat has been run aground or into an object in a
way that may have damaged any of the propulsion
units or propellers, the boat must be run (if possible) at
reduced speed or towed to the nearest harbor. Take
the boat out of the water and let an authorized Volvo
Penta workshop inspect the propulsion units and propellers. Undetected damage could lead to serious propulsion unit damage.
7748921 04-2008
57
In Case of Emergency
Starting Using Auxiliary
Batteries
WARNING!
Explosion hazard. Batteries contain and give off an
explosive gas which is highly flammable and explosive.
A short circuit, open flame or spark could cause a violent explosion. Ventilate well.
WARNING!
Never confuse the positive and negative poles on the
batteries. Risk of arcing and explosion.
P0002107
1 Check that the auxiliary battery has the same voltage as the engine system voltage.
2 Connect the red positive cable to the plus (+) terminal on the discharged battery and then to the plus
terminal on the auxiliary battery.
3 Connect the black start cable to the minus (–) terminal on the auxiliary battery and to a place a little
distance away from the discharged battery, e.g. the
start motor's negative terminal.
WARNING!
Under no circumstances may the black jumper cabel
(–) come in contact with the positive connection on the
starter motor.
4 Start the engine and let it run at fast idle for approximately 10 minutes to charge the batteries. Make
sure there is no extra equipment connected to the
electrical system.
WARNING!
Working with or going close to a running engine is a
safety risk. Watch out for rotating components and hot
surfaces.
WARNING!
Do not touch the connections during the start attempt:
Risk of arcing.
Do not bend over any of the batteries either.
5 Turn off the engine. Remove the start cables in the
exact opposite order to their connection.
58
7748921 04-2008
In Case of Emergency
Emergency Shifting
If a fault occurs which prevents gear shifting with the
control levers, it is possible to shift manually using the
description below.
NOTICE! The following procedure can be performed
with the engine(s) shut down or running.
WARNING!
In emergency shifting, the unit is locked in forwards
operation and the revers gear can not be disengaged
with the control lever. Forward motion can only be cut
off by stopping the engine with the ignition key or stop
button.
NOTICE! The marking “P” (Primary) is for forward gear
and the marking “S” (Secondary) is for reverse gear.
7748921 04-2008
59
In Case of Emergency
Manual engagement – forward gear:
1
1 Undo the two connectors, marked “Secondary” and
“Primary”, from the solenoid valves.
2 Remove the cap nut from the lower solenoid valve
marked “P” (forward gear).
3 Release the spring loaded button by pushing and
at the same time turning it 1/2 turn counter-clockwise. The gear is now engaged for forward motion
and cannot be disengaged by the control lever.
Manual disengagement:
4 Lock the spring loaded button in position by pushing
and at the same time turning it clockwise 1/2 turn.
The gear is now disengaged.
2
Manual engagement/disengagement – reverse
gear:
Use the same procedures as above but engage/disengage with the valve marked “S” (reverse gear)
instead.
3
4
60
7748921 04-2008
In Case of Emergency
Emergency Alignment, Propulsion
Unit
If a fault occurs which prevents one or several propulsion units from being operated with the steering wheel
it is possible to align the propulsion unit(s) for straight
forward operation manually using the description
below.
If one or several propulsion units can be operated by
the steering wheel, this emergency operation is not
necessary. However, it could be that the steering ability
is badly unbalanced if the non working propulsion unit
(s) is locked in a disadvantageous angle, then alignment of the non working propulsion unit(s) will improve
the steering ability. The operator determines whether
the alignment is necessary or not, in order to maneuver
the boat in a safe way to the nearest harbor.
If steering is out of order on all propulsion units, align
all propulsion units and use control levers to steer the
boat.
The tools needed during this operation are delivered in
a special tool box together with the boat.
WARNING!
Working with or going close to a running engine is a
safety risk. Watch out for rotating components and hot
surfaces.
The following procedure can be carried out with the
engines running, even though it is not recommended.
Wear hearing protection when in the engine room as
there is a risk of harmful sound levels.
1 Unscrew and remove the plug (1). Disconnect the
cable by pressing down the lock (2) and at the same
time wiggle the connector in “forward” position.
7748921 04-2008
61
In Case of Emergency
2 Connect the switch and fit the red crank tool.
3 Press the switch button down and keep it pressed
while turning the crank tool carefully to an end position. When the end position is reached, stop turning. The end position feels like a compression
spring.
IMPORTANT!
Do not force the crank tool beyond the end position,
it could damage the propulsion unit.
4 Turn the crank tool back 75 turns. The propulsion
unit is now aligned for straight forward motion.
62
7748921 04-2008
In Case of Emergency
5 Remove the crank tool. Disconnect the switch by
pressing down the lock and at the same time
unplugg the switch by slowly wiggling it (please
refer to procedure in step 1).
Screw back the plug.
6 Reconnect the cable you disconnected in step 1.
Emergency steering with control
levers
If a fault occurs which prevents all propulsion units from
being operated with the steering wheel, align all the
propulsion units and use the steering method described below to reach nearest habor.
If one or several propulsion units can be operated by
the steering wheel, the steering method described
below is not needed.
Rotate the boat
Put one control lever in the position for forward and put
the other control lever in the position for reverse. Use
a suitable engine speed for maneuvring.
The direction of rotation is determined by the lever
which is put in the position for reverse. If the boat is to
move to starboard, the starboard control lever should
be put in the position for reverse.
7748921 04-2008
63
In Case of Emergency
Steering the boat
Put the control levers in forward. Use a suitable engine
speed for maneuvring.
The direction of the steering is determined by the use
of the control levers. If the boat is to turn to starboard,
reduce speed on starboard engine. The greater the
difference in speed between the control levers the
more the boat turns. To make a sharp turn, move one
of the control lever to reverse for a moment.
64
7748921 04-2008
Maintenance Schedule
C
R
A
L
I
=
=
=
=
=
Clean
Replace
Adjust
Lubricate
Inspect (Clean, Adjust, Lubricate or Replace if necessary)
FSI, S2 = First time Service Inspection
A, B, C, D, E = Type of service (regular service)
FSI
First service inspection, after 20–50 running hours1)
Coolant level and antifreeze mixture
I
Drive belt (tension)
I
Seawater filter
IC
Drive-unit, oil level
I
Corrosion protection (space between IPS-housing and clamping ring)
I
Instrument panel function
I
Start and warm up engine
Inspection with VODIA (Diagnostic Tool)
I
Engine and transmission, oil / fuel / water leakage
I
Engine and transmission, abnormal noises
I
Stop Engine
Engine Oil and Oil Filters / By-pass filter
R
Restart engine
Oil pressure / oil leakage
1)
I
Or within 180 days of the date of delivery, or the end of the first season, whichever comes first.
Daily, Before First Start
Engine and engine room. General inspection
I
Checking Engine Oil Level
I
Check coolant level.
I
Drive-unit, oil level
I
Leakage and function check
I
Every 14 days
Drive belts, wear
Seawater Filter, Check and Cleaning
Batteries, electrolyte level
I
IC
I
A
Every 100–200 hours / at least every 12 months, included in extended protection
Engine Oil and Oil Filters / By-pass filter1)
R
Primary Fuel Filter, Draining Water / Contamination
I
1) Oil change intervals vary, depending on engine type, oil grade and sulfur content of the fuel. Se kapitel Technical
Data page 115. Change the filters during each oil change.
7748921 04-2008
65
Maintenance Schedule
B
Every 200 hours / at least once a year, included in extended protection
Crankcase ventilation filter
R
Air filter insert
R
Fuel pre-filter and fuel fine filter
R
Drive belt (tension)
I
Compressor, oil level
I
Seawater pump impeller
I
Sacrificial anodes (charge air cooler and heat exchanger)
I
Corrosion protection (space between IPS-housing and clamping ring)
I
Engine and propulsion unit. Clean and touch up paintwork as required
IC
All hoses and pipes – Check the condition and re-tighten the hose clamps
I
Exhaust hose and cooling water hoses
I
-
Check hoses / pipes, unions and hose clamps
Inspection with VODIA (Diagnostic Tool)
I
C
Every 400 hours / at least once every 12 Months, included in extended protection
Drive-unit. Oil and oil filter
R
Drive-unit. Function check of seawater cock
I
Drive-unit and transom. Corrosion protection (sacrificial anodes)
I
Drive-unit antifouling coating. Repair as required
I
D
Every second year
Coolant
R
E
Every 600 hours / at least every 5 years
Turbocharger, inspect / clean as required
Drive-unit. Function and wear
-
Propellershaft (check straightness)
-
Steering
IC
I
F
Every 1200 hours / at least every 5 years
Drive Belt
R
Drive belt, compressor
R
Compressor, oil
R
Heat exchanger
IC
Charge air cooler
IC
Propellershaft seal
R
66
7748921 04-2008
Maintenance
This chapter contains general technical information and instructions on how the prescribed maintenance items
must be carried out. Read through the instructions carefully before starting work. The times when maintenance
items must be carried are indicated in the Maintenance Schedule page 65.
Read through the safety precautions for maintenance and service in the Safety Information page 4 chapter before
work on the engine is begun.
WARNING!
Care and maintenance work should be done with the engine stopped unless otherwise specified. Stop the engine
before opening or removing the engine hatch/hood. Make it impossible to start the engine by removing the start
key and cutting the system voltage with the main switches.
Orientation
Volvo Penta IPS, starboard
1
1 Volvo Penta IPS, Servo Unit
2 3
4
6
5
2 Turbocharger
3 Crankcase ventilation filter
4 Air filter
5 Oil filler cap
6 Engine control unit
7 Alternator
9
8 Compressor
10
8
9 Water shut off valve, propulsion
unit
7
10 Oil filter, propulsion unit
11 Expansion tank
12 Sea water filter
p0006597
13 Fuel filter
Volvo Penta IPS, port
11 12 13 14 15 16
14 Aux stop
17
18
15 Oil bypass filter
16 Oil filter
17 Charge air cooler
18 Oil filler cap, propulsion unit
19
20
23
22
21
19 Oil dipstick, propulsion unit
20 Water shut off valve, propulsion
unit
21 Cooling water intake unit
22 Oil dipstick, engine
23 Sea water pump
p0006598
7748921 04-2008
67
Maintenance
Engine, General
General inspection
Make a habit of visually checking the engine and
engine bay before starting, and after operations when
you have stopped the engine. This will help you to discover abnormalities quickly, or if something is about to
happen.
Look especially carefully for oil, fuel and coolant leakages, loose bolts, worn or poorly-tensioned drive
belts, loose cable connections, damaged electrical
cables and hoses. This inspection only takes a few
minutes and can prevent serious malfunctions and
expensive repairs.
WARNING!
Accumulations of fuel, oil and grease on the engine or
in the engine room is a fire hazard and must be
removed immediately they are detected.
WARNING!
If an oil, fuel or coolant leak is detected, the cause must
be investigated and the fault rectified before the engine
is started.
Never direct the jet from a high-pressure washer at
seals, rubber hoses or electrical components.
Never use the high pressure setting for engine cleaning.
68
7748921 04-2008
Maintenance
Crankcase Ventilation, Filter
Change
1 Unscrew the cover and remove the old filter.
2 Clean the filter cover/housing as necessary. Be
careful to prevent contamination from entering the
engine.
3 Install the new filter.
4 Screw the cover back in place.
IMPORTANT!
Scrap the old filter. They may not be cleaned.
p0003704
Air Filter, Change
1 Unscrew the air filter cover and remove the old filter.
2 Clean the air filter cover/housing as necessary. Be
careful to prevent contamination from entering the
engine.
3 Install the new filter and air filter cover.
IMPORTANT!
Scrap the old filter. They may not be cleaned.
7748921 04-2008
69
Maintenance
Drive Belt, Check and Change
WARNING!
Stop the engine before doing any maintenance work.
General
Check belt tensions and condition regularly. A belt that
is tensioned too tightly may damage bearings, while a
belt too-loosely tensioned may slip.
Check and adjust the belt after operation, while the belt
is still warm.
IMPORTANT!
Always replace a belt that appears worn or has cracks
(belts that work in pairs shall always be changed
together).
Adjusting/replacement of drive belts
The standard alternator and water pump are driven by
a poly-V belt for the best function and lifespan.
Replace/tension the belt as follows:
1 Loosen the screws (1) on the tension roller bracket.
Remove and replace the belt as required.
2 Tension the belt by applying a torque to the tensioning roller square fitting (2) of 70 Nm (52 lbf.ft).
Lock the tensioning roller using screws (1). The
screws must be tightened to 50 Nm (37 lbf.ft).
3 Repeat the procedure when the engine is warm:
Loosen screws (1) and tension the belt.
70
7748921 04-2008
Maintenance
Compressor, checking oil
Checking and filling
1 Unscrew and lift up the oil dipstick. Dry the oil off.
Screw the oil dipstick down as far as it will go and
then unscrew and lift up.
2 Check that the oil level is between the MAX and
MIN marks. Check that the dip stick is screwed fully
home so that the reading is correct. If the dipstick
is not screwed fully home, the oil level will be above
the MIN mark even if the oil level is correct.
3 Fill with oil as required, use the dipstick hole. Oil
quantity and grade, see section Technical
Data page 115.
P0002655
IMPORTANT!
The oil level shall be between the MAX and MIN marks
on the dipstick.
Compressor, oil change
1 Run the engine until it reaches normal operating
temperature.
2 Pull up the oil dipstick
3 Remove the plug and let the oil run out.
4 Replace the plug and fill with oil to the correct level.
7748921 04-2008
71
Maintenance
Lubrication System
Oil change intervals can vary depending on oil grade
and sulphur content of the fuel, please refer to Technical Data page 115.
Oil change intervals must never exceed a period of 12
months.
If you want longer oil change intervals than given in the
table Technical Data page 115, the condition of the
oil must be checked by the oil manufacturers through
regular oil testing.
P0002089
Oil level, checking and topping up
The oil level must be within the marked area on the oil
dipstick and must be checked daily before the first
start.
Check the oil level a while after the engine has been
switched off. The oil in the engine needs some time to
return to the sump before a correct oil level check can
be performed.
Wait 15 minutes if the engine has been run at normal
operating temperature. Wait an hour if the engine has
been idling.
The oil level shall be between the MAX and MIN marks
on the dipstick. Levels that are higher or lower than
these marks can damage the engine.
IMPORTANT!
Do not fill over the limit for max. oil level. Use only oil
of the recommended grade, refer to Technical
Data page 115.
P0003706
1 Fill the oil slowly via the filling hole on the top of the
engine.
2 Wait 5 minutes to allow the oil time to reach the
sump before checking the level again.
3 Then check the level again.
NOTICE! The volume between MAX and MIN is about
3.5 litre (0.9 US gal).
Engine Oil, Change
Always follow the recommended oil change interval.
Use only oils of the recommended grades; refer to
Technical Data page 115.
72
7748921 04-2008
Maintenance
WARNING!
Hot oil and hot surfaces can cause burns.
1 Run the engine until warm so that the oil is easier
to pump. Then stop the engine and wait 10 minutes.
2 Connect the oil suction pump to the draining pipe.
Pump out the oil.
3 Replace the oil filter and by-pass filter at every oil
change, see sectionOil Filter/By-pass Filter,
Change page 73.
4 Fill with oil to the correct level through the filling hole
on the top of the engine. Oil quantity, see section
Technical Data page 115.
5 Start the engine. Run the engine until it reaches
normal operating temperature. The oil level shall be
checked with the engine warm.
Check that the low oil pressure lamp goes out and
that there are no leaks around the oil filter.
6 Turn off the engine. Wait ten minutes before checking the oil level. Top up as needed.
Hand in the old oil and oil filter to a re-cycling station.
Oil Filter/By-pass Filter, Change
The oil filter and by-pass filter must be replaced at
every oil change.
Deposit the old filter at a waste management facility.
WARNING!
Hot oil and hot surfaces can cause burns.
1 Put a suitable container under the filter to collect
any spilled oil.
2 Clean the filter bracket.
3 Unscrew the by-pass filter (1) and the oil filter (2)
with a suitable filter puller.
4 Check that the mating surfaces on the filter bracket
are clean and that no remnants of the old gaskets
are left.
5 Moisten the gaskets on the new filters with engine
oil.
6 Screw on the filter by hand until the rubber gasket
touches the filter bracket mating surface. Then
tighten an additional 3/4 turn.
7 Start the engine, run at low idle, and check that no
leakage occurs. Check the oil level after the engine
has stopped.
7748921 04-2008
73
Maintenance
Fuel System
Only use the grades of fuel recommended in the fuel
specification, see Technical Data page 116. Always
observe the greatest cleanliness during re-fuelling and
work on the fuel system.
All work on the unit injectors of the engine must be
carried out by an authorized workshop.
WARNING!
Fire hazard. When carrying out work on the fuel system
make sure the engine is cold. A fuel spill onto a hot
surface or an electrical component can cause a fire.
Store fuel soaked rags so that they can not cause fire.
Engine Fuel Filter Replacement
1 Close the fuel tap(s).
2 Clean the filter bracket and install a suitable vessel
under the filter.
3 Remove the connector piece (1) from the water
separator (2). Unscrew the filter. Use a filter wrench
if necessary.
4 Clean the sealing surfaces on the filter holder.
Make sure that the filter is clean and that the sealing
rings are undamaged. Moisten the seal rings with
engine oil.
IMPORTANT!
Do not fill the new filter with fuel before installation.
Dirt may get into the system and cause damage and
malfunctions.
5 Screw on the new filter by hand until the gasket just
bottoms on the sealing surface. Then tighten a further 1/2 turn. Install the water separator and connect the union.
6 Open the fuel cock.
7 Bleed the fuel system, see section “Fuel system,
bleeding”.
8 Start the engine and check that there are no leaks.
74
7748921 04-2008
Maintenance
Fuel system, bleeding
The fuel system must be bled after a filter change, if
the fuel tank has been run dry and after a long-term
stoppage.
IMPORTANT!
Never disconnect the pressure pipe.
1 Connect a transparent hose to the bleed nipple
(1). Feed the hose to a container to avoid spillage.
2 Open the bleeding nipple and pump fuel with the
hand pump (2) until the fuel is free from bubbles.
Close and tighten the bleed nipple.
3 Pump a further 10 times on the hand pump. Resistance in the hand pump can feel heavy, but this is
completely normal and necessary to bleed the system.
4 Remove the hose and fit the protective cap to the
bleed nipple.
Fuel Pre-filter, Change
WARNING!
Working with or going close to a running engine is a
safety risk. Watch out for rotating components and hot
surfaces.
1 Close the fuel stop cock on the fuel tank. Place a
container beneath the fuel filter.
2 Remove the cover by loosening screw (1).
3 Replace the insert and refit the cover.
4 Open the fuel stop cock and bleed the fuel system,
see section “Fuel system, bleeding”.
5 Start the engine and check for leaks.
6 Hand in the scrapped filter at a recycling depot.
7748921 04-2008
75
Maintenance
Water in Fuel
If the EVC system warns for too much water in the fuel
pre-filter, the water separator needs emptying.
IMPORTANT!
Do not continue operating if there is water in the water
separator, it can damage the engine.
Draining the fuel filter
1 Stop the engine and remove the ignition key from
the ignition lock.
2 Remove the connector piece from the water separator (1).
3 Place a container under the fuel filter and carefully
unscrew the water separator (2) sufficiently for the
water to run out. Then screw in the water separator
until it bottoms against the filter. Then tighten an
additional 1/4 to 1/2 turn.
4 Refit the connecting piece (1).
Draining the fuel pre-filter (extra equipment)
1 Place a container beneath the fuel filter.
2 Open the bleed screw (1) on the fuel filter about 4
turns.
3 Drain the water and contaminants via the plug in the
bottom of the filter.
4 Bleed the fuel system.
NOTICE! Wait a few hours after switching the engine
off before draining the filter.
76
7748921 04-2008
Maintenance
Freshwater System
The freshwater system is the engine's internal cooling
system that ensures that the engine operates at the
correct temperature. It is a closed system that must
always be filled with a mixture of concentrated coolant
and water in order to protect the engine against internal
corrosion, cavitation and frost bursting.
We recommend “Volvo Penta Coolant, Ready Mixed”,
or “Volvo Penta Coolant” (concentrated) mixed with
pure water according to specifications. Refer to the
table Water Quality page 116. Only coolant of this
grade is suitable for, and approved by, Volvo Penta.
The use of anti-corrosion agents alone is not permitted
in Volvo Penta engines. Never use water alone as the
coolant.
IMPORTANT!
Coolant of a suitable chemical composition must be
used all year round. This applies even when there is
no risk for frost damage, so that the engine always has
complete corrosion protection. Future warranty claims
related to engine and accessories may be refused if an
unsuitable coolant has been used, or if the instructions
for coolant mixture have not been followed.
The corrosion protection additives become less effective over time, which means that the coolant must be
changed at regular intervals; refer to the Maintenance
Schedule page 65. The cooling system must be
flushed whenever the coolant is changed, refer to the
Freshwater system, Flushing section.
“Volvo Penta Coolant” is a concentrated coolant that
must be mixed with water. It has been prepared to work
best with Volvo Penta engines and offers excellent
protection against corrosion, cavitation damage and
frost bursting.
“Volvo Penta Coolant, Ready Mixed” is a readymixed coolant, 40% “Volvo Penta Coolant” and 60%
water. This mixture protects the engine from corrosion
damage, cavitation damage and frost bursting down to
–28°C (–18°F).
7748921 04-2008
77
Maintenance
Coolant, Mixing
WARNING!
All coolant is hazardous and harmful to the environment. Do not consume. Coolant is flammable.
IMPORTANT!
Volvo VCS coolant (yellow in color) must not be used
in Volvo Penta engines.
Different kinds of coolant must not be mixed with each
other!
Mix: 40% “Volvo Penta Coolant” (conc. coolant)
and 60% water
This mixture protects against internal corrosion, cavitation and frost bursting down to –28°C (–18°F). At
60% glycol concentration, the freezing point is lowered
to –54°C (–65°F).
Never mix more than 60% concentrate (Volvo Penta
Coolant) in the coolant. A greater concentration provides reduced cooling effect with the risk for overheating and reduced frost protection.
The coolant must be mixed with distilled, deionized
water. The water must fulfill the requirements specified
by Volvo Penta; refer to Water Quality page 116.
It is extremely important that the system is filled with
the correct coolant concentration. Mix in a separate
clean vessel before filling the cooling system. Make
sure that the liquids mix.
78
7748921 04-2008
Maintenance
Coolant Level, Checking and
Topping Up
WARNING!
Do not open the coolant filler cap when the engine is
warm, except in emergencies, this could cause serious
personal injury. Steam or hot fluid could spray out.
1 Turn the filler cover slowly counter-clockwise and
release any pressure from the system before
removing the cover completely.
2 Top the coolant up as necessary. The coolant level
shall be between the MAX and MIN marks on the
expansion tank.
3 Screw the filler cover on.
Freshwater System, Draining
WARNING!
Stop the engine and let it cool before starting work on
the cooling system. Hot fluids and hot surfaces can
cause burns.
WARNING!
All coolant is hazardous and harmful to the environment. Do not consume. Coolant is flammable.
1 Remove the filler cover on the expansion tank to
speed up the coolant drainage.
2 Loosen the hose (1) mounted on the intercooler and
connect to the drain cock (2) on the heat exchanger.
Open the cock (2). Let all the coolant run out into a
container.
3 Screw in the stop cock.
4 Move the hose to the drain cock (3) on the engine
block and continue draining the coolant.
5 Close the cock and put the hose back on the intercooler.
6 Collect the old coolant and hand it to a re-cycling
station for disposal.
7748921 04-2008
79
Maintenance
Seawater System
The raw water system is the engine's external cooling
system. On IPS engines, the raw water pump sucks in
water via the IPS cooling water inlet, through the IPS
unit oil cooler to the raw water pump. The water then
passes through the raw water filter before being
pumped through the fuel cooler, intercooler, engine oil
cooler and heat exchanger. Finally the water is fed out
through the exhaust elbow, where it is mixed with the
exhaust gases.
B
A
WARNING!
If the boat is in the water while working on the seawater
system the two seawater cocks on the propulsion units
must be closed. Otherwise there is a risk of flooding of
the engine compartement and sinking of the boat. The
boat must be brought up on land if this is not possible.
A Open
B Closed
A
B
P0002849
Seawater System, Draining
WARNING!
Risk of water entry. Close the seawater cocks before
doing any work on the seawater system.
To prevent frost damage, the raw water system must
be drained during cold weather if there is a risk for frost.
An alternative to draining is to keep the engine room
warm using an approved heater fan.
Draining:
1 Close the sea cocks.
2 Open the drain stop cock (1) by unscrewing it carefully.
3 Drain the coolant into a container. Screw in the stop
cock by hand.
4 Move the hose on the stop cock (1) and connect to
stop cock (2).
Open stop cock (2) and drain all coolant. Close the
stop cock.
2
5 Refit the drain hose to stop cock (1).
1
P0006575
3
6 Remove hose clamp (3) and release the end of the
hose. Drain the coolant from the hose and oil
cooler.
Refit the end of the hose.
7 Open the sea cocks and check for leaks.
80
7748921 04-2008
Maintenance
Zinc Anodes, Check and Change
WARNING!
Risk of water entry. Close the seawater cocks before
doing any work on the seawater system.
1 Close the sea cock(s).
2 Drain the raw water as described in Seawater System, Draining page 80.
3 Remove the zinc anodes from the heat exchanger
(1) and intercooler (2).
2
1
4 Check the zinc anodes and replace if consumed to
more than 1/3rd of original size. If not, clean the zinc
anodes with Emery cloth to remove the oxide layer
before re-installing them.
IMPORTANT!
Use emery paper. Do not use a wire brush or other
steel tools when cleaning, as these may damage
the galvanic protection.
5 Install the zinc anodes. Make sure there is good
metallic contact between the anode and the metal
contact point.
6 Close the drain cocks.
P0003705
7 Open the sea cock(s), before starting the engine.
8 Check that there are no leaks.
Impeller, Check and Change
WARNING!
Risk of water entry. Close the seawater cocks before
doing any work on the seawater system.
1 Remove the cover from the raw water pump and
remove the impeller.
If the impeller is cracked or damaged it must be
replaced.
2 If the pump shaft can be turned by hand, the flange
must be replaced.
3 Lubricate the pump housing and inside of the cover
with a little glycerin.
IMPORTANT!
The impeller will be damaged if other types of lubricant than glycerin are used.
4 Press the impeller in with an anti-clockwise rotating
movement.
5 Fit the sealing washer on the center bearing of the
shaft. Install the cover with a new O-ring.
7748921 04-2008
81
Maintenance
Seawater System, Cleaning and
Inhibiting
To prevent the build up of deposits and salt crystals in
the seawater system it must be flushed with freshwater. The system must also be preserved when the boat
is going to be layed up on land for longer periods than
two month.
This procedure can be performed with the boat either
in or out of the water.
WARNING!
Working with or going close to a running engine is a
safety risk. Watch out for rotating components and hot
surfaces.
1 If the procedure is performed up on land, open the
outlet seawater cock on the propulsion unit..
If the procedure is performed in the water, detach
the exhaust outlet hose from the (closed) outlet
sewater cock.
2 Detach the hose from the seawater pump and connect a draining hose with one end dipped into to a
bucket filled with fresh water. Keep the bucket filled.
IMPORTANT!
The impeller could be damaged if the pump runs
dry.
3 If the procedure is performed up on land, check that
nothing will get splashed by the water from the
exhaust outlet on the propulsion unit.
If the procedure is performed in the water, secure
a container at the end of the exhaust outlet hose.
4 Set the gear control lever in the neutral position.
Check that nobody is near the propellers. Start the
engine. Let it run at fast idle for a few minutes. Stop
the engine.
5 For preservation fill a bucket with antifreeze mixture
40% anti freeze and 60% freshwater to inhibit the
system. Secure a container at the exhaust outlet.
6 Connect the inlet seawater hose to the seawater
pump.
If the procedure is performed in the water also connect the exhaust outlet hose on the outlet seawater
cock.
82
7748921 04-2008
Maintenance
7 The antifreeze mixture should be left in the system
while the boat is not used. Before starting to use the
boat again drain the mixture and clean the system
using the same procedure as above.
8 Deposit antifreeze mixture at a properly designated
waste site.
9 Check that the system is intact and that there are
no leaks.
Seawater Filter, Check and Cleaning
WARNING!
Risk of water entry. Close the seawater cocks before
doing any work on the seawater system.
If the water where the boat is used contains contaminants, seaweed, etc. the filter should be checked more
frequently than stated in the maintenance schedule.
Otherwise there is a risk that the filter may be blocked
resulting engine overheating.
1 Close the sea cock.
2 Unscrew the cover (1) and remove the sealing plate
(2).
3 Lift out the insert (3) and clean it.
4 Replace parts as illustrated.
5 Open the sea cock and check for leaks.
7748921 04-2008
83
Maintenance
Electrical System
The engine is equipped with a 2-pole electrical system
and an alternator. System voltage is 12V or 24V.
WARNING!
Always stop the engine and break the current using the
main switches before working on the electrical system.
Isolate shore current to the engine block heater, battery charger or accessories mounted on the engine.
Main Switch
IMPORTANT!
Never disconnect the current with the main switches
when the engine is running, the alternator and electronics could be damaged.
The main switches must never be switched off before
the engine has stopped. If the circuit between the alternator and the battery is disconnected when the engine
is running, the alternator and electronics can be damaged. For the same reason the charging circuits must
never be re-connected with the engine running.
Fuses
12–volt system (engine)
The engine is fitted with automatic circuit breakers. The
circuit breakers cut the power if the system is overloaded.
If it is not possible to start the engine or if the instrument
stops working while running, the circuit breaker may
have been activated.
Resetting will take place automatically.
84
7748921 04-2008
Maintenance
24–volt system (engine)
The engine is fitted with two automatic circuit breakers
(1). The circuit breakers cut the power if the system is
overloaded.
If it is not possible to start the engine or if the instrument
stops working while running, the circuit breaker may
have been activated. Reset by pressing in the circuit
breakers (1) (red button).
IMPORTANT!
Always investigate the cause of the overload. If the
fuse trips frequently, contact an authorized Volvo
Penta workshop.
IPS
The drive unit has an automatic circuit breaker (2). The
circuit breaker cut the power if the drive unit system is
overloaded. Reset by pressing in the circuit breaker
(2).
IMPORTANT!
Always investigate the cause of the overload. If the
fuse trips frequently, contact an authorized Volvo
Penta workshop.
Electrical Connections
Check that electrical connections are dry, free from
oxide, and that they are securely tightened. Spray the
connections as necessary with water-repellent spray
(Volvo Penta universal oil).
7748921 04-2008
85
Maintenance
Battery, Maintenance
WARNING!
Risk of fire and explosion. Never allow an open flame
or electric sparks near the battery or batteries.
P0002107
WARNING!
Never confuse the positive and negative poles on the
batteries. Risk of arcing and explosion.
WARNING!
The battery electrolyte contains extremely corrosive
sulfuric acid. Protect your skin and clothes when charging or handling batteries.
Always use protective goggles and gloves. If battery
electrolyte comes into contact with unprotected skin
whas off immediately using plenty of water and soap.
If battery acid comes in contact with the eyes, flush
immediately with plenty of water and obtain medical
assistance without delay.
Connecting and disconnecting the battery
Connecting
1 Connect the + cable (red) to the + pole on the battery.
2 Connect the – cable (black) to the – pole on the
battery.
Disconnecting
1 Remove the – cable (black).
2 Remove the + cable (red).
Cleaning
Keep the batteries clean and dry. Contamination and
oxide on the batteries and battery poles can cause
stray currents, voltage drop and discharge, especially
in wet weather. Remove oxidation from the battery
poles and terminals, using a brass brush. Tighten the
terminals securely and grease them with terminal
grease or petroleum jelly.
86
7748921 04-2008
Maintenance
Filling
The electrolyte level should be 5–10 mm (0.2– 0.4”)
above the cell plates in the battery. Top up with distilled
water as required.
After filling, the battery should be charged for at least
30 minutes by running the engine at idle.
Some maintenance-free batteries have special
instructions, which must be followed.
P0002110
Battery, Charging
WARNING!
Risk of fire and explosion. Never allow an open flame
or electric sparks near the battery or batteries.
P0002107
WARNING!
The battery electrolyte contains extremely corrosive
sulfuric acid. Protect your skin and clothes when charging or handling batteries.
Always use protective goggles and gloves. If battery
electrolyte comes into contact with unprotected skin
whas off immediately using plenty of water and soap.
If battery acid comes in contact with the eyes, flush
immediately with plenty of water and obtain medical
assistance without delay.
WARNING!
Never confuse the positive and negative poles on the
batteries. Risk of arcing and explosion.
IMPORTANT!
Observe the instruction manual for the battery charger
carefully. To avoid the risk of electrochemical corrosion
when an external charger is connected, the battery
cables should be removed from the batteries before
the charger is connected.
Always switch off the charging current before the
charging clips are removed.
7748921 04-2008
87
Maintenance
• Charge batteries if they have become discharged.
During charging, unscrew the cell plugs but leave
them in the plug holes. Ventilate well, especially if
the batteries are charged in an enclosed space.
• If the engine is not used for a longer period of time,
the batteries should be fully charged, then possibly
trickle charged (please refer to the battery manufacturer’s recommendations). Batteries are damaged by being left discharged, and can also freeze
and burst easier in cold weather.
• Special instructions apply to boost charging. Boost
charging can shorten battery life, and should therefore be avoided.
P0002111
Electrical Installations
An incorrectly-carried-out electrical installation may
generate leakage current from the electrical system.
Leakage current can in turn render galvanic protection
insufficient in respect of propellers, propeller shafts,
rudder posts, keel etc and may cause damage through
electrochemical corrosion.
WARNING!
Work on the low voltage circuits in the boats should be
done by a person with electrical training or knowledge.
Installation or work on land current equipment must
only be done by a competent electrician, in accordance
with local regulations for mains electricity.
88
7748921 04-2008
Maintenance
Always consider the following:
1 If shore power is connected it must always be
ground protected ashore, never in the boat. Furthermore, the shore power installation should be
equipped with a ground fault interrupter.
The shore power installation (transformer, inverter,
battery charger etc.) must be designed for marine
use where the high-tension side is galvanically
separated from the low-tension side.
2 Electrical cables must be run and clamped such
that there is no risk of exposure to chafing, damp or
bilge water.
P0002900
3 Ground protection for radios, navigation instruments, rudder, boarding ladders or other equipment
where separate cables for ground protection are
present, must be clustered to a common ground
connection that is not connected to the engine or
reverser gear.
IMPORTANT!
The engine and reverse gear must never be used
as earth planes.
4 The start battery must have a main switch (1) connected to the battery's plus (+) side. The main
switch must break the circuit to all equipment and
be switched off when the boat is not in use.
5 If an auxiliary battery is used a main switch must be
placed between the auxiliary battery's plus (+) terminal and the circuit breaker panel for the boat's
electrical equipment. The main switch must break
the circuit to all equipment connected to the auxiliary battery and must be switched off when power is
no longer required. All equipment connected to the
auxiliary battery must have separate main
switches.
For simultaneous charging of two independent battery
circuits a separate charging distributor (accessory)
should be installed on the standard alternator.
7748921 04-2008
89
Maintenance
Drive
The propulsion unit has an electronically controlled
hydraulic clutch. Two soleniod valves, primary (forward gear) and secondary (reverse gear), is controlled
by electrical signals from the operator’s control levers.
The propulsion unit's lubrication system is equipped
with an oil filter and an oil cooler.
The propulsion unit is protected against galvanic corrosion. This protection consists of sacrificial anodes.
An active corrosion protection, ACP, is optional. Faulty
electrical installation can also cause the breakdown of
the galvanic protection. Damage due to electrolytic
corrosion occurs rapidly and is often extensive. For
further information please refer to Maintenance page 84.
Oil level, checking and topping up
IMPORTANT!
The propulsion unit must be shut down for at least 12
hours before a correct oil level check can be done.
Check the oil level every day before starting the
engine.
1
2
P0003981
Open the oil filler cap (1) slowly so that any overpressure is released. Remove the dipstick (2) by turning it
anti clockwise. Dry off the dipstick and reinstall it in the
propulsion unit, screw it into place. Remove the oil dipstick again and check the oil level. The correct oil level
is inside the marked area.
If necessary, top up the oil through the filling hole (1).
For oil grades and volume, please refer to Technical
Data page 115.
While checking the oil level, ensure there are no signs
of water dilution. The oil should have a golden brown
hue. If the oil is thin and greyish it is probable water
diluted. If so, always let the propulsion unit be checked
by a Volvo Penta workshop.
90
7748921 04-2008
Maintenance
Changing oil and filter
1 Open the oil filling (1) cap slowly so that any overpressure is released. Unscrew the draining plug
(3) and allow the oil to run out.
2 Change the filter.
3 Refit the drain plug with a new gasket.
NOTICE! Always replace the gasket when the drain
plug has been removed.
4 Measure up the correct quantity of oil and fill the
propulsion unit with the oil via the oil filling hole. For
oil grades and volume, please refer to Technical
Data page 115.
3
P0003997
IMPORTANT!
Never over-fill the propulsion unit. The oil level must
always be within the recommended levels, otherwise
the gear change function will be impaired.
Corrosion protection, checking and
changing
Check the corrosion protection between
the housing and the lock plate
Check that the space between the drive housing and
the lock plate is completely covered by corrosion protection, Volvo Penta part # 9510227. Follow the
instructions below if the protection needs renewing:
1 Clean and dry the surface between the housing and
the lock plate.
2 Spray a liberal coating of corrosion protection in the
space between the housing and the lock plate.
7748921 04-2008
91
Maintenance
Inspection/replacing corrosion protection
– Sacrificial anodes
Check the sacrificial anodes regularly. There are two
anodes per stern drive; one is fixed to the drive and the
other to the transom. Refer to the illustrations. Replace
an anode when approximately 1/3 of it has corroded
away.
When the boat is stored ashore, corrosion protection
deteriorates due to sacrificial anode oxidization. Even
new anodes oxidize on the surface. The anodes must
be cleaned before the boat is launched.
The anode in the exhaust outlet is made of iron and
does not need cleaning.
IMPORTANT!
Use emery paper. Do not use a wire brush or other
steel tools when cleaning, as these may damage the
galvanic protection.
Replacing corrosion protection
All anodes are secured by bolts or nuts. Remove the
anode retaining bolts or nuts. Clean the contact surface and secure the new anode. Tighten the new
anode so that it makes good electrical contact.
p0006680
ACP, Active Corrosion Protection
Boats equipped with ACP (option) have a zinc anode
integrated in the ACP unit; see illustration. Replace the
anode when about 1/3 has corroded away.
92
7748921 04-2008
Maintenance
Inspect the drive unit paint
Volvo Penta recommends ”Prop speed ®” coating.
Instructions regarding the application of ”Prop speed
®” coating are included with the product.
Inspect the coating every year and scrape away any
loose coating and apply new.
Do not apply coating in the groove (A) between the
drive unit and the hull or to the exhaust cushion (B).
Allow the coating to dry before launching the boat.
Painting the hull bottom
All paints containing anti-fouling agents are poisonous
and damage the marine environment. Avoid these
preparations. Most countries have introduced legislation that regulates the use of anti-fouling agents. Find
out about legislation applicable in the area where the
boat is used.
Always follow these regulations. In many cases it is
strictly forbidden to use anti-fouling agents on leisure
craft, e.g. in freshwater.
Tin-based agents (TBT paints) may not be used.
On boats that are relatively easy to take out of water
we recommend treatment using Teflon alone, in conjunction with mechanical cleaning several times per
season. However, for larger boats this is not practicable. If the boat is in an area where the water causes
fast fouling, paint with anti-fouling agents will most
likely be necessary.
Do not paint in the groove (A) between the drive unit
and the hull or the exhaust cushion (B).
Allow the paint to dry before launching the boat.
7748921 04-2008
93
Maintenance
Propeller
WARNING!
Make sure the engine can not start during work on
propeller(s); remove ignition key(s) and shift drive
into forward or reverse.
NOTICE! Damaged propellers should be replaced
immediately otherwise there is high risk of serious
damage to the propulsion unit. Operating the boat with
a damaged propeller should be undertaken with
extreme care and only at reduced engine speeds.
Propulsion unit propellers
NOTICE! A special tool (A) for removing and fitting the
propellers is supplied together with the propulsion unit.
Please refer to the figure.
Dismantling
1 Take the igniton keys out of the ignition locks.
2 Remove the spinner (1) using the special tool.
94
7748921 04-2008
Maintenance
3 Undo the locking ring with the accompanying special tool by unscrew the four socket cap screws
(2). Remove nut (B) and locking ring (3). Remove
the forward propeller from the propeller shaft.
4 Undo the locking ring for the aft propeller with the
accompanying special tool by unscrew the four
socket cap screws (4). Remove nut (C) and locking
ring (5). Remove the aft propeller from the propeller
shaft.
5 Wipe the propeller shafts clean.
7748921 04-2008
95
Maintenance
Assemble propellers
1 Apply water-resistant grease, P/N 828250 to the
splines and threads on both propeller shafts.
2 Install the aft propeller. Then install the aft nut (C)
and tighten it by hand until it bottoms. Install locking
ring (5). Tighten the locking ring with the accompanying special tool and four socket cap screws (4).
Torque 24-28 Nm (17.7-20.7 ft. lb.).
96
7748921 04-2008
Maintenance
3 Install the forward propeller on the propeller shaft.
Tighten nut (A) by hand and install locking ring (3).
Tighten the locking ring with the accompanying
special tool and four socket cap screws (2).
Torque 24-28 Nm (17.7-20.7 ft. lb.).
4 IMPORTANT!
Tighten the screw (D) until it bottoms. Otherwise it
will not be possible to change the propeller without
damaging the spinner.
5 Push the spinner into place by hand.
7748921 04-2008
97
Storage
Short Term Storage
If the boat is not going to be used for a shorter period,
the engines must be run up to normal operating temperature at least once every 14 days. This prevents
corrosion in the engines.
WARNING!
If the engines must be run up to normal operating temperature with the boat kept up on land, make sure to
provide the seawater system with water during the
operation. If the seawater pump is run dry the impeller
could be damaged. Always check the impeller after dry
runs.
Please refer to chapter Impeller, Check and
Change page 81.
If the boat is kept up on land the sacrificial anodes on
the propulsion unit and on the transom must be
cleaned to remove any oxidation before launching the
boat. Please refer to Corrosion protection, checking
and changing page 91.
To avoid fault codes in the ACP function, select inactive mode (see Instruments and Controls page 20)
before lifting the boat out of the water. In this mode the
ACP no longer monitors the corrosion condition.
98
7748921 04-2008
Storage
Long Term Storage
If the boat is not going to be used for a longer period
than two months, either left in the water or layed up on
land, a long-term preservation of the engine and propulsion unit should be carried out. This ensures that
the engine and propulsion unit are kept in good condition and that no damage arises. It is important that this
is done properly and that nothing is forgotten.
We have provided a checklist covering the most important points.
Long-term storage checklist
CAUTION!
Read the chapter on Maintenance before starting
work. It contains instructions on how to carry out maintenance and service operations in a safe and correct
manner.
The following should be carried out on each engine
when the boat is in the water:
• Change the engine oil and replace the oil filter.
• Replace the fuel filter. Replace the fuel pre-filter if
installed.
• Run the engine to normal operating temperature.
The following are carried out on each engine when
the boat is either in or out of the water:
• Clean the seawater filter.
• Clean and preserve the seawater system with antifreeze mixture (50/50 freshwater and antifreeze).
• Remove the impeller from the seawater pump. Store
the impeller in a sealed plastic bag in a cool place.
• Check the condition of the engine coolant antifreeze. Change it or top it up if required.
• Drain any water and contaminants from the fuel
tank. Fill the tank completely with fuel to avoid condensation.
7748921 04-2008
99
Storage
• Clean the outside of the engine. Touch up any damaged areas of paintwork with Volvo Penta original
paint.
IMPORTANT!
Never use a high-pressure washer when washing
the engine and never point highpressure water jets
directly at seals, rubber hoses or electrical components, as this could cause serious damage.
• Disconnect the battery leads. Clean and charge the
batteries.
A poorly charged battery may burst as a result of
freezing.
• Spray the electrical system components with moisture repellent spray.
• Check the anodes on the engine and transom.
Replace an anode when approximately 1/3 of the
anode has been eroded. Tighten the new anode so
that there is a good electrical contact.
The following are carried out on each propulsion
unit when the boat is out of the water:
If the boat is left in the water during the longterm preservation the boat must still be taken out of the water to
perform these points shortly before starting to use the
boat again:
• Clean the hull directly after taking up the boat
(before it dries).
• Clean the outside of the propulsion unit directly after
!
taking up the boat (before it dries).
IMPORTANT!
Be careful when cleaning with a high pressure water
spray. The spray must not be pointed towards the
propeller shaft seal or the steering seals.
• Repair any damaged areas of the propulsion unit
paintwork.
• Remove propeller (for storage). Grease the propeller shaft using water repellent grease Volvo Penta
P/N 828250.
• Check the anode on the propulsion unit. Replace
!
with a new anode when approximately 1/3 of the
anode has been eroded. Tighten the new anode so
that there is a good electrical contact.
IMPORTANT!
Use emery paper. Do not use a wire brush or other
steel tools when cleaning, as these may damage the
galvanic protection.
• Change the oil and replace the oil filter the in propulsion unit.
P0001901
100
7748921 04-2008
Storage
Bringing Out of Storage
The following should be carried out on each
propulsion unit with the boat out of the water:
• Paint the hull.
• Check the sacrificial anode on the propulsion unit If
there is less than 2/3 of the anode left, it must be
replaced. Clean just before the boat is launched.
IMPORTANT!
Use emery paper. Do not use a wire brush or other
steel tools when cleaning, as these may damage the
galvanic protection.
• Check the oil level in the propulsion unit. Top up if
necessary.
• Install the propellers.
The following should be carried out on each engine
with the boat either in or out of the water:
• Check the oil level in the engine. Top up if neces-
sary. If there is preservation oil in the system drain
and fill with new oil and change the oil filter.
• Drain the antifreeze from the seawater system.
• Install the impeller in the seawater pump. Replace if
the old one looks worn.
• Close/tighten the drain cocks/plugs.
• Check the tension and condition of the drive belts.
• Check the condition of rubber hoses and tighten the
hose clamps.
• Check the engine coolant level. Top up if necessary.
• Connect the fully charged batteries.
• Check the sacrificial anodes on engine and
transom. If there is less than 2/3 of an anode left, it
must be replaced. Clean just before the boat is
launched.
IMPORTANT!
Use emery paper. Do not use a wire brush or other
steel tools when cleaning, as these may damage the
galvanic protection.
The following should be carried out with the boat
in the water:
• Check for leaks.
• Start all the engines. Check that there are no fuel,
engine coolant or exhaust gas leaks and that all
control functions are operating.
7748921 04-2008
101
Calibration and Settings
Settnings menu
Settings are entered and certain calibrations are carried out in the Settings menu.
Navigate through the menus by turning and depressing
the control panel wheel.
It is always possible to return to the menu above by
. Repeated presses or holding the button
pressing
down for >3 seconds will return to the main menu.
NOTICE! Only installed functions are shown in the settings menu.
p0005184
1 Turn clockwise until Settings is shown on the display.
2 Press the wheel to access the settings menu.
3 Navigate by turning the wheel.
P0001015
Depth Alarm
Setting the depth alarm for the Volvo Penta echo sounder.
The setting need only be entered at one display, at one
station.
1 Activate the station.
2 Turn until Depth Alarm is shown in the settings
menu. Press the wheel to reach the submenu.
P0001028
3 Depth Alarm, press the wheel to switch the function on or off.
P0001027
102
7748921 04-2008
Calibration and Settings
4 Turn to Set Level. Press the wheel to access
adjustment of depth level alarm.
Turn the wheel to set the alarm depth, i.e. the depth
when the alarm should begin sounding.
Press the wheel to confirm the set depth.
The depth alarm is dependent on depth compensation (offset depth).
P0001033
P0001024
5 Turn to Set offset. Press the wheel to access offset
depth adjustment.
Adjust it to correspond to the boat's deepest point
or the boat's waterline, depending on the depth to
be displayed. The echo-sounder can be placed
anywhere between these two points.
A
C
P0010424
B
A
Waterline
B
Echo-sounder
C
Lowest point
P0001023
7748921 04-2008
6 Turn the wheel to set depth compensation. If the
number is positive (+) the distance between the
echo-sounder and the water line is set, if the number is negative (–) it is the distance between the
echo-sounder and the lowest point.
Press the wheel to confirm the setting.
103
Calibration and Settings
Depth alarm popup window
When the depth is less than the alarm level, the popup
window will display intermittently, followed by the alarm
signal.
The pop-up window will be displayed every 30 seconds
until the depth is greater than the alarm level.
Confirm the selection by depressing the navigation
wheel.
P0005853
P0005854
Lost depth alarm signal
If the signal from the depth alarm disappears, e.g. if the
depth alarm sensor is defective, the popup window is
displayed to the left.
P0005855
Trip Reset
Zeroing trip information
1 Activate the station.
2 Turn to Trip reset in the settings menu.
P0001032
104
3 Press the wheel twice to zero the trip information.
7748921 04-2008
Calibration and Settings
My View
In My view it is possible to select the operating information to be displayed in the main menu.
The type of information that may be selected depends
on the functions installed.
P0001016
1 Turn to My View in the settings menu. Press to
reach the submenu.
2 Turn to navigate through the menu with available
operating information.
3 Press the wheel to check and uncheck the information to be displayed in the main menu.
P0001014
Neutral Beep
Sound indication, controls in neutral position. The
sound may be set on or off. The sound level is set
under Information beep.
The setting must be entered at each station. If the station has several displays, the setting need only be
made at one display.
1 Turn until Neutral Beep is shown in the settings
menu.
2 Press the wheel to select On or Off.
P0001031
Display Contrast
Adjusting the tachometer display contrast
1 Turn to Display Contrast in the settings menu.
Press to reach the submenu.
2 Turn to adjust the contrast. Press the wheel to confirm the selection.
P0001030
7748921 04-2008
105
Calibration and Settings
ACP
Setting the ACP protection position.
1 Turn until ACP is shown in the settings menu. Press
to reach the submenu.
P0001022
2 Turn to the desired position Normal, Chlorine Gas
Free or Inactive.
Press the wheel to confirm the selection.
P0001021
EVC Info
Information regarding accessories, components and
software installed in the boat is displayed here.
P0001020
1 Turn to EVC About in the settings menu and press
the wheel to reach the submenu.
2 Features shows what accessories are installed.
Press the wheel to access the submenu.
3 Components shows what hardware components
are installed. Press the wheel to access the submenu.
4 Software shows what software is installed. Press
the wheel to access the submenu.
Units
Setting operating information and trip data units.
P0001035
106
7748921 04-2008
Calibration and Settings
1 Activate the station.
2 Turn until Units is shown in the settings menu.
Press to reach the units menu.
P0001036
3 Turn to US or Metric; press the wheel and select
US or Metric.
Press the wheel to confirm the selection.
4 Turn to Distance; press the wheel and select km,
Nm (nautical miles) or Miles.
Press the wheel to confirm the selection.
Language
It is possible to select between 10 languages.
On boats with more than one station and with several
displays language only need to be selected on one
display for it to be shown at all stations and on all displays.
1 Activate the station.
2 Turn until Language is shown in the settings menu.
Press to reach the language menu.
P0001037
3 Turn to the desired language and press to confirm
the selection. The display will return to the settings
menu.
Information Beep
Adjusting the volume of the integral tachometer alarm.
1 Turn until Info Beep is shown in the settings menu.
Press to access adjustment.
2 Turn to the desired volume. Press to confirm the
selection; the setting will be confirmed by a beep at
the set volume. The display will return to the settings menu.
P0001039
7748921 04-2008
107
Calibration and Settings
Fuel Tank
There are two alternative methods for calibrating the
level sensor in the fuel tank. Full Fuel Tank Calibration is an approximate method, while Fuel Multipoint
Calibration provides more precise results. Multi-point
calibration is a prerequisite if the trip computer is to
show fully accurate information.
Fuel Multipoint Calibration
In order for multi-point calibration to be carried out, the
fuel tank may not be filled to more than 20% of its total
capacity.
Calibration is carried out in 5 steps.
POS 1, 20% full tank
POS 2, 40% full tank
POS 3, 60% full tank
POS 4, 80% full tank
POS 5, 100% full tank
1 Activate the station.
2 Turn to Fuel Tank in the settings menu and press
to access the calibration menu.
P0001012
3 Turn to Multipoint Calibr. and press the wheel.
P0001011
4 Fill the tank with the quantity shown in the display,
POS 1.
P0001010
5 Fill the tank up to the level shown in the display,
POS 2.
Press the wheel to confirm that the tank has been
filled to the indicated level.
6 Repeat the procedure for POS 3 , POS 4 and POS
5. Confirm by pressing the wheel at each position.
108
7748921 04-2008
Calibration and Settings
Full Fuel Tank Calibration
For this method the tank must be full and calibration of
the fuel level sensor takes place in one step. This
means that the fuel level value will be approximate,
and therefore all trip data based on remaining fuel must
be seen as approximate values.
1 Turn to Fuel Tank and press the wheel to reach the
submenu.
P0001012
2 Turn to Full Tank Calibr. and press the wheel.
P0001009
3 Fill the fuel tank. Confirm that the fuel tank is full by
depressing the wheel.
P0001034
Speed Factor
The speed factor must be set while the boat is under
way. Compare the displayed boat speed value with
GPS data (or another boat) and adjust the speed factor
until the values agree.
On boats with more than one station and with several
displays it is enough to enter the setting on one display
for it to be shown at all stations and on all displays.
1 Activate the station.
2 Turn to Log cal. factor in the settings menu and
press to reach adjustment,
3 Turn the wheel to set the level. Press to confirm the
selection.
P0001230
7748921 04-2008
109
Calibration and Settings
Joystick
Joystick calibration need only be carried out if boat
movements do not correspond to joystick movements.
When calibrating the joystick the boat must be driven
on open waters in safe conditions. Avoid calibrating in
high winds or currents that can influence the result of
the calibration.
Allow the boat to run for a fairly long distance during
the calibration. Hold the joystick firmly in position.
Calibration can only be carried out at a helm station
that is equipped with both a joystick and a control
panel.
Calibration need only be done in one direction, port or
starboard.
1 Move the control lever(s) to neutral.
2 Activate docking mode by depressing the docking
button.
3 An audible signal will confirm that docking mode is
activated and the docking button lamp will light up.
P0006292
110
7748921 04-2008
4 Simultaneously press both buttons on the joystick
for 5 sec. to reach calibration mode.
5 Calibration mode is confirmed by an audible signal
and by both lamps on the joystick and the neutral
button lamps on the control panel flashing.
6 Move the joystick sideways as far as it will go in one
direction.
Correct boat movements by moving the joystick up
and down, and by turning it.
7 When the boat is moving straight abeam, depress
the docking button.
7748921 04-2008
111
Calibration and Settings
8 An audible signal and both lamps on the joystick
and the neutral button lamps on the control panel
will light up to confirm that calibration is complete
and stored. The system is now in docking mode.
9 When the joystick is returned to the central position
the lamps stop flashing; the lamps by the docking
button and the neutral button shine continuously
instead.
Resetting the calibration
1 Activate docking mode by depressing the docking
button.
2 An audible signal will confirm that docking mode is
activated and the docking button lamp will light up.
P0006292
3 Simultaneously press both buttons on the joystick
for 5 seconds.
112
7748921 04-2008
Calibration and Settings
4 Calibration mode is confirmed by an audible signal
and by both lamps on the joystick and the neutral
button lamps on the control panel flashing.
5 Press the docking button. Calibration is now reset,
which is confirmed by an audible signal. The system is now in docking mode.
7748921 04-2008
113
Technical Data
Engines
Engine, General
Volvo Penta IPS system designation
D4 — See table below
D6 — See table below
Engine model/after market designation
See table below
See table below
Crankshaft power kW (hp)*
See table below
See table below
Propellershaft power kW (hp)*
See table below
See table below
Idling speed
700 rpm
600 rpm
Displacement
3.7 dm3 (225.8 in3)
5.5 dm3 (335.6 in3)
Injection sequence
1-3-4-2
1-5-3-6-2-4
Direction of rotation (seen from front)
Clockwise
Clockwise
Max. forwards inclination
10°
10°
Max. rearwards inclination in operation
20°
20°
Max. sideways inclination in operation
30°
30°
No. of cylinders
6
6
Bore
103 mm (4.06")
103 mm (4.06")
Stroke
110 mm (4.33")
110 mm (4.33")
Compression ratio
17.5:1
17.5:1
Volvo Penta IPS
system designation
Engine model/after Crankshaft power
market designation kW (hp)*
Propellershaft
power kW (hp)*
Dry weight with IPS
kg (lbs)
IPS 350
D4-260 D-B
191 (260)
182 (248)
780 (1720)
IPS 400
D4-300 D-A
221 (300)
212 (289)
780 (1720)
IPS 400
D6-310 D-B
228 (310)
217 (295)
780 (1720)
IPS 450
D6-330 D-B
243 (330)
231 (314)
863 (1903)
IPS 500
D6-370 D-B
272 (370)
259 (352)
887 (1956)
IPS 600
D6-435 D-A
320 (435)
307 (418)
901 (1986)
* According to ISO 8665
114
7748921 04-2008
Technical Data
Lubrication System
Engine:
D4
D6
for all allowed installation inclinations
12.5 liters (3.3 US gals)
20 liters (5.3 US gals)
volume difference MIN – MAX
1.5 liters (0.4 US gals)
3.5 liters (0.9 US gals)
idling
125 kPa (18.1 PSI)
125 kPa (18.1 PSI)
at full speed
450 kPa (65.3 PSI)
450 kPa (65.3 PSI)
SAE 15W/40 (See table)
SAE 15W/40 (See table)
Oil volume, (incl. oil filter)
Oil pressure, hot engine,
Oil, viscosity:
Compressor, oil
Oil volume
0.1 liters (0.2 US pint)
Oil grade
Volvo Penta, part no. 1141641
Sulphur content in fuel, by weight
Oil grade 1)
< 0.5 – 1.0%
more than 1.0% 2)
Oil change interval: Reached first in operation:
All engines:
VDS-2 and ACEA E7 3), 4)
or VDS-2 and Global DHD-1 3)
or VDS-2 and API CH-4 3)
or VDS-2 and API CI-4 3)
200 hr. or 12 months
100 hr. or 12 months
NOTICE! Mineral based oil, either fully or semi-synthetic, can be used on condition that it complies with the quality
requirements above.
1)
Lowest recommended oil grade. Engine oil with higher oil grade is always possible to use.
If sulphur content is > 1.0% by weight, use oil with TBN > 15.
3) When oil quality specifications are joined by ”and” the engine oil must fulfill both requirements.
4) ACEA E7 has replaced ACEA E5, but if available ACEA E5 can be used.
5) ACEA E3 can be replaced by ACEA E4, E5 or E7.
6) API CG-4 can be replaced by API CI-4.
2)
VDS
ACEA
Global DHD
API
TBN
=
=
=
=
=
7748921 04-2008
Volvo Drain Specification
Association des Constructeurs Européens d'Automobiles
Global Diesel Heavy Duty
American Petroleum Institute
Total Base Number
115
Technical Data
Viscosity
Select the viscosity according to the table.
The temperature values refer to stable ambient temperatures.
* SAE 5W/30 refers to synthetic or semi-synthetic oils.
Fuel System
Fuel specification
The fuel must comply with national and international standards for commercially supplied fuels, such as:
EN 590 (with national environment and cold requirements)
ASTM D 975 No 1-D and 2-D
JIS KK 2204
Sulfur content: Complying with legal requirements in each country.
Low density fuel (urban diesel in Sweden and city diesel in Finland) can cause a loss of up to 5% of power and
an increase in fuel consumption of about 2–3%.
Cooling System
Water Quality
ASTM D4985:
P0002094
116
Total solid particles
<340 ppm
Total hardness
<9.5° dH
Chloride
<40 ppm
Sulfate
<100 ppm
pH value
5.5–9
Silica (acc. ASTM D859)
<20 mg SiO2/l
Iron (acc. ASTM D1068)
<0.10 ppm
Manganese (acc. ASTM D858)
<0.05 ppm
Conductivity (acc. ASTM D1125)
<500 µS/cm
Organic content, CODMn (acc.
ISO8467)
<15 mg KMnO4/l
7748921 04-2008
Technical Data
Electrical System
System voltage
12V
24V
voltage/max. amperage
14V/115A
28V/80A
output, approx.
1610W
2240W
Alternator, rated power, max
Battery capacity
2 connected parallelly 12V, max. 2 connected in series 12V, max.
88Ah
88Ah
Battery electrolyte density at +25°C (77°F):
fully charged battery
1.28 g/cm3 = 0.0462 lb/in3 (1.24 1.28 g/cm3 = 0.0462 lb/in3 (1.24
g/cm3 = 0.0448 lb/in3)*
g/cm3 = 0.0448 lb/in3)*
battery recharged at
1.24 g/cm3 = 0.0448 lb/in3 (1.20 1.24 g/cm3 = 0.0448 lb/in3 (1.20
g/cm3 = 0.0434 lb/in3)*
g/cm3 = 0.0434 lb/in3)*
NOTICE! * Applies to batteries with tropical acid.
Sterndrive
Volvo Penta IPS system designation
IPS 350/400
Oil volume, approx.
14 liters (3.7 US gals) 14 liters (3.7 US gals) 14 liters (3.7 US gals)
Oil volume difference MIN – MAX
0.5 liters (0.13 US
gals)
Oil grade and viscosity
VP 1141634 (API GL5 SAE 75W/90) Synthetic
Gear ratio
2.08:1
7748921 04-2008
IPS 400/450/500
0.5 liters (0.13 US
gals)
1.94:1
IPS 600
0.5 liters (0.13 US
gals)
1.82:1
117
Technical Data
Identification Numbers
There are type plates on the engine and transmission, marked with identification numbers. This information must
always be used as reference when service and spare parts are ordered. You will probably find similar plates on
your boat and its equipment. Note this information below, make a copy of the page and store it in a safe place,
so that you can have the information available if the boat is stolen.
The appearance and location of the type plates is shown below. The figures in brackets refer to the location of
the identification number on the type plate.
Engine
Product designation (1*)
Product number (2*)
Serial number (3*)
A
...........................................
...........................................
...........................................
Propulsion Unit
Product designation (4*)
...........................................
Gear ratio (5*)
...........................................
Serial number (6*)
...........................................
Product number (7*)
...........................................
* The numbers refer to the position of the identification
numbers on the information decal/plate.
B
xxxxxx (1)
xxxxxx (2)
N . xxxxxxxxxx (3)
P0006167
C
A Warranty decal (Engine/Propulsion Unit)
Warranty decal, IMO decal, Exhaust Emission
certificate and EPA decal.
B Engine plate
C Propulsion unit plate
118
7748921 04-2008
Declaration of Conformity for Recreational Craft Propulsion Engines with the
sound and exhaust emission requirements of Directive 94/25/EC as amended by
2003/44/EC
VOLVO PENTA IPS
Body for sound and exhaust emission assessment
International Marine Certification Institute
Rue Abbé Cuypres 3
B-1040 Bruxells
Belgium
ID Number: 0609
Engine manufacturer
AB Volvo Penta
Gropegårdsgatan
405 08 Göteborg
Sweden
Module used for sound emission assessment . ....Aa
Internal production control
Test according to Annex VI
Modules used for exhaust emission assessment B+C
Other Community Directives applied ......................EMC 89/336/EEC
Description of engine(s) and essential requirements
Engine type....................................................................4 stroke diesel engine with stern drive
.................................................................................with integral exhaust
Engine(s) models covered by this declaration
EC Type certificate number Volvo Penta IPS 350 (D4-260)
Volvo Penta IPS 400 (D4-300).......................................SDVOLV005 (noise)
EXVOLV001 (exhaust)
Volvo Penta IPS 400 (D6-310)
Volvo Penta IPS 450 (D6-330)
Volvo Penta IPS 500 (D6-370)
Volvo Penta IPS 600 (D6-435).......................................SDVOLV004 (noise)
EXVOLV001 (exhaust)
Standards Used
Other normative document used
Volvo Penta std
Annex I.B.1
EN ISO 8178-1:1996
Annex I.B.2
Durability
Volvo Penta std
Annex I.B.3
Operator’s manual
ISO 10240:2004
Annex I.B.4
EN ISO 14509:2000/prA1:2004
Annex I.C.1
ISO 10240:2004
Annex I.C.2
Essential requirements
Annex I.B – Exhaust Emissions
Engine identification
Exhaust emission requirements
Annex I.C – Noise Emissions
Sound emission levels
Operator’s manual
EMC Directive
EN 61000-3-2, EN 61000-3-3,
CISPR 25
This declaration of conformity is issued under the sole responsibility of the manufacturer. I declare on behalf of the engine manufacturer
that the engine(s) mentioned above complie(s) with all applicable essential requirements in the way specified and is in conformity with
the type for which above mentioned EC type examination certificate(s) has been issued.
Name and function: Sam Behrmann, Laws and Regulations
(identification of the person empowered to sign on behalf of the
engine manufacturer or his authorised representative)
Signature and title:
(or an equivalent marking)
Date and place of issue: (yr/month/day) 2007/04/26 Göteborg
10
PL-101/07
Alphabetical index
ACP................................................................. 28, 106
Air Filter, Change.................................................... 69
Alarm handling........................................................ 41
Alarms..................................................................... 34
Orientation............................................................... 67
Battery, Charging.................................................. 87
Battery, Maintenance.............................................. 86
Bringing Out of Storage......................................... 101
Seawater System................................................... 80
Seawater System, Cleaning and Inhibiting.............. 82
Seawater System, Draining..................................... 80
Settnings menu..................................................... 102
Short Term Storage................................................. 98
Single Lever Control................................................ 22
Speed Factor......................................................... 109
Sport Fishing Mode................................................. 26
Starting Using Auxiliary Batteries............................ 58
Sterndrive.............................................................. 117
Synchronizing Engine Speed.................................. 37
Compressor, checking oil ................................... 71
Control Panel........................................................... 14
Controls................................................................... 22
Coolant Level, Checking and Topping Up............... 79
Cooling System..................................................... 116
Corrosion protection, checking and changing......... 91
Crankcase Ventilation, Filter Change...................... 69
Cruising Speed........................................................ 37
Declaration of Conformity.................................. 119
Depth Alarm.......................................................... 102
Display Contrast.................................................... 105
Docking Station Panel............................................. 15
Drive........................................................................ 90
Drive Belt, Check and Change................................ 70
Electrical Connections.......................................... 85
Electrical Installations.............................................. 88
Electrical System............................................. 84, 117
Emergency Alignment, Propulsion Unit................... 61
Emergency Shifting................................................. 59
Emergency steering with control levers................... 63
Engine Fuel Filter Replacement.............................. 74
Engine Oil, Change................................................. 72
Engine, General.............................................. 68, 114
Engines................................................................. 114
EVC Info................................................................ 106
EVC Menu............................................................... 20
EVC System Display............................................... 16
Propeller................................................................. 94
Reading the Instruments...................................... 34
Running Aground.................................................... 57
Trip Reset............................................................. 104
Units..................................................................... 106
Water Quality....................................................... 116
Volvo Penta IPS - Inboard Performance System.......................................................................... 10
Zinc Anodes, Check and Change........................ 81
Fault Tracing.......................................................... 44
Freshwater System................................................. 77
Freshwater System, Draining.................................. 79
Fuel Pre-filter, Change............................................ 75
Fuel System.................................................... 74, 116
Fuel system, bleeding............................................. 75
Fuel Tank.............................................................. 108
Fuses....................................................................... 84
Identification Numbers....................................... 118
Ignition Lock............................................................ 12
Impeller, Check and Change................................... 81
In Case of Emergency............................................. 57
Information Beep................................................... 107
Joystick.......................................................... 23, 110
Long Term Storage............................................... 99
Lubrication System.......................................... 72, 115
Main Switch............................................................ 84
My View................................................................. 105
Neutral Beep........................................................ 105
Oil Filter/By-pass Filter, Change.......................... 73
7748921 04-2008
120
NOTICE: The free-of-charge Operator’s Manual offer is valid for 12 months after delivery.
Fill in your name, postal address, email address and desired language.
Publication Reference: 7748921
Name:
Address:
Country:
E-mail:
English
Svenska
Deutsch
Français
Español
Italiano
Nederlands
Dansk
Suomi
Português
Ελληνικά
Русско
Türkçe
http://vppneuapps.volvo.com/manual/coupon/
Document & Distribution Center
Order Department
ARU2, Dept. 64620
SE-405 08 Göteborg
Sweden
Fax: +46 31 545 772
7748921 English 04-2008