1
SPH-i700 Series
Portable Digital Dual Band
Telephone
User’s Guide
Please read this manual before operating your phone, and
keep it for future reference.
LMi700_050803_F5
Intellectual Property
All Intellectual Property, as defined below, owned by or
which is otherwise the property of Samsung or its
respective suppliers relating to the SAMSUNG Phone,
including but not limited to, accessories, parts, or
software relating thereto (the “Phone System”), is
proprietary to Samsung and protected under federal
laws, state laws, and international treaty provisions.
Intellectual Property includes, but is not limited to,
inventions (patentable or unpatentable), patents, trade
secrets, copyrights, software, computer programs, and
related documentation and other works of authorship.
You may not infringe or otherwise violate the rights
secured by the Intellectual Property. Moreover, you
agree that you will not (and will not attempt to) modify,
prepare derivative works of, reverse engineer,
decompile, disassemble, or otherwise attempt to create
source code from the software. No title to or ownership
in the Intellectual Property is transferred to you. All
applicable rights of the Intellectual Property shall
remain with SAMSUNG and its suppliers.
2
Samsung Telecommunications America (STA), Inc.
Headquarters:
1130 E. Arapaho Road
Richardson, TX 75081
Tel: 972-761-7000
Fax: 972-761-7001
Customer Care Center:
1601 E. Plano Parkway
Suite 150
Plano, TX 75047
Tel: 888-987-HELP (4357)
Fax: 972-761-7501
Internet Address: http://www.samsungtelecom.com
©2002-2003 Samsung Telecommunications America.
All rights reserved. No reproduction in whole or in part
allowed without prior written approval. Samsung is a
registered trademark of Samsung Electronics America,
Inc. and its related entities.
3
Table of Contents
Chapter 1 - Getting Started ......................12
Turning the i700 On ...................................................... 13
Entering the Owners Information .........................................13
Setting up Voicemail ..................................................... 14
Contacting Customer Care ............................................ 14
Chapter 2 - Understanding your Phone ........15
Front View of the I700 .................................................. 16
Viewing the Phone Screen Icons .................................. 17
Features of the i700 ...................................................... 19
Battery and Charger Accessories .................................. 20
Battery Capacity ...................................................................20
Installing the Battery ............................................................21
Removing the Battery ..........................................................22
Charging the Battery ............................................................23
Displaying your Phone Number .................................... 24
Making and Answering Calls ......................................... 24
Making Calls ........................................................................24
One Handed Dialing .............................................................25
Answering Calls ...................................................................25
4
Chapter 3 - Personal Settings ..................26
Personal Settings .......................................................... 27
Buttons ................................................................................28
Input ....................................................................................29
Menus ..................................................................................34
Password .............................................................................36
Phone ..................................................................................37
Chapter 4 - Windows Applications and
Text Entry ..........................................44
Navigating your PDA ..................................................... 45
Start Menu ...........................................................................45
Shortcuts ...................................................................... 46
New Command ....................................................................46
Time & Appointments ..........................................................46
Chapter 5 - Phone Settings ......................47
Setting the Volume Levels ............................................ 48
Voice Volume .......................................................................48
Record Volume ....................................................................49
Ring Volume ........................................................................50
System Volume ....................................................................51
Setting the Tone Length ................................................ 52
Alert Sounds & Notifications ........................................ 53
Selecting a Ringer for Incoming, Missed Calls, or
Voice Mail ............................................................................53
Turning the Ringer Off .........................................................55
5
Chapter 6 - Security Settings ...................56
Accessing the Security Options .................................... 57
Special Numbers ..................................................................57
Locking the i700 ..................................................................58
Unlocking the i700 ...............................................................59
Chapter 7 - Understanding Roaming ..........60
Roaming ....................................................................... 61
Roaming Options .................................................................62
Chapter 8 - Messaging ...........................63
Message Types ............................................................. 64
Voicemail .............................................................................65
Text Messaging ....................................................................66
E-mail Messages ..................................................................68
Message Options .................................................................68
My Text Messages ...............................................................69
Editing My Text Messages ...................................................70
Performing a Spell Check ....................................................70
Language .............................................................................70
Cancel a Message ................................................................71
SMS Message ............................................................... 71
SMS Inbox ...........................................................................71
SMS Outbox ........................................................................71
SMS Sent Items ...................................................................73
SMS Drafts ..........................................................................73
SMS Deleted Items ..............................................................74
6
ActiveSync Mail ............................................................ 74
ActiveSync Inbox .................................................................74
ActiveSync Outbox ...............................................................75
ActiveSync Sent Items .........................................................75
ActiveSync Drafts ................................................................75
ActiveSync Deleted Items ....................................................76
Inbox Tools ................................................................... 77
Options ................................................................................78
Chapter 9 - Call Logs .............................81
Call Logs ....................................................................... 82
Making a Call from the Call Log ...........................................82
Call Log Options ..................................................................83
Creating a New Contact from the Call Log ...........................83
Deleting Call Log Entries ......................................................84
Sending a SMS Message from a Call Log Entry ...................84
Chapter 10 - Call Features ......................85
Caller ID ...............................................................................86
Call Waiting ..........................................................................86
Call Forwarding ....................................................................87
Three Way Calling ................................................................88
Chapter 11 - Contacts ............................89
Contacts ....................................................................... 90
Adding a New Contact ..........................................................91
Finding a Contact .................................................................91
7
Editing a Contact ..................................................................92
Deleting a Contact ................................................................92
Adding a Note ......................................................................92
Deleting a Note ....................................................................93
Making a Call from Contacts ................................................93
Speed Dialing .......................................................................94
Beaming Contacts ................................................................95
Chapter 12 - Calendar ............................96
Today ............................................................................ 97
Date and Time Settings ........................................................97
Scheduling an Alarm ............................................................98
Owner Information ...............................................................98
Data Call State .....................................................................99
Calendar ..................................................................... 100
Scheduling an Appointment ...............................................100
Scheduling a Timed Appointment ......................................101
Changing the Calendar View ..............................................102
Calendar Options ...............................................................103
Tasks .......................................................................... 104
Creating a new Task ...........................................................104
Marking a Task Complete ..................................................105
Task Options ......................................................................106
Task Entry Bar ...................................................................106
Editing a Task ....................................................................107
Beaming a Task .................................................................107
Adding a Note to a Task .....................................................108
Deleting a Task ..................................................................108
8
Chapter 13 - Notes .............................. 109
Notes .......................................................................... 110
Recording a Note ...............................................................110
Recording During a Call .....................................................111
Recording a Personal Note ................................................111
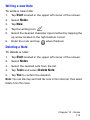
Writing a new Note ............................................................112
Deleting a Note ..................................................................112
Note Options ......................................................................113
Chapter 14 - ActiveSync ....................... 114
ActiveSync .................................................................. 115
Installing the ActiveSync Software .....................................115
Creating a New Partnership ...............................................116
Performing ActiveSync using IR ........................................117
Scheduling an ActiveSync ..................................................117
Chapter 15 - Microsoft Pocket
Applications ..................................... 119
Pocket Word ............................................................... 120
Creating a New Document .................................................120
Pocket Word Options .........................................................121
Attaching a Recording .......................................................122
Deleting a Document .........................................................122
Beaming a Document .........................................................123
Pocket Excel ............................................................... 124
Creating a new Workbook ..................................................124
Deleting a Workbook .........................................................125
9
Beaming a Workbook .........................................................125
Chapter 16 - Other Applications .............. 126
Program Application ................................................... 127
File Explorer .......................................................................128
Microsoft Reader ...............................................................128
MSN Messenger ................................................................129
Terminal Services Client ....................................................130
Games ...............................................................................130
Calculator ...........................................................................131
Infrared Receive .................................................................132
Find ....................................................................................133
Help ...................................................................................134
Chapter 17 - Managing Applications ........ 135
Application Management ............................................ 136
Installing New Applications ................................................136
Deleting an Application ......................................................137
Memory Allocation .............................................................138
Chapter 18 - Internet Explorer ................ 139
Pocket Internet Explorer ............................................. 140
Launching Internet Explorer ...............................................140
Saving Favorites ................................................................141
Internet Pass Through .......................................................141
Chapter 19 - Camera ........................... 142
Camera ....................................................................... 143
Launching the Camera Application ....................................143
Camera Settings ................................................................144
Sleep Mode ........................................................................145
Timer .................................................................................145
Viewing Pictures ................................................................146
Still View Navigation ..........................................................146
Thumbnail View .................................................................150
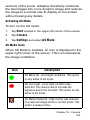
Adaptive Sensitivity (AS Mode) ..........................................154
Beaming Pictures ...............................................................156
Continuous Picture Mode ..................................................156
Chapter 20 - Windows Media Player ........ 157
Media Player ............................................................... 158
Launching the Media Player ...............................................158
Media Player Controls ........................................................158
Loading Media Player Files ................................................159
Playlist ...............................................................................160
Chapter 21 - Troubleshooting, Safety, and Warranty .................................................. 161
Troubleshooting ......................................................... 162
Resetting Your Handheld ...................................................163
Safety Information ...................................................... 165
Warranty ..................................................................... 174
STANDARD LIMITED WARRANTY .....................................174
Chapter 1 - Getting Started
The following topics are discussed in this Chapter:
• Turning the Phone On
• Entering the Owner Information
• Setting up Voicemail
• Contacting Customer Care
Turning the i700 On
To power up the i700, press
located on the upper
right side of the phone. Follow the steps on the display
screen to align or calibrate the device. This procedure
insures that when you press the screen using the
stylus, the desired action occurs properly.
Entering the Owners Information
The owners information identifies the owner or user of
the device. Name, company, address, phone number,
email address, and note information fields are
available. To enter the owners information:
1.
From the Today screen, use the stylus and tap on
Owner.
2.
Tap the Name box in the Owner Information screen.
3.
Use the stylus to tap the correct letters and spaces using
the on-screen keyboard. (To select the keyboard, tap the
up arrow located in the lower right corner of the screen
and select
.)
4.
Tap the other desired information boxes and enter the
information using the stylus and on-screen keyboard.
5.
When you are finished entering all the desired
information, tap
in the upper right corner of the
screen.
Chapter 1 - Getting Started
13
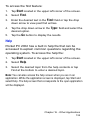
Setting up Voicemail
All unanswered calls to your phone are sent to
voicemail, even if your phone is in use or turned off.
Therefore, you will want to set up your voicemail and
personal greeting as soon as your phone is activated.
To set up voicemail:
1.
Press the
button located on the bottom front of
the phone to display the phone screen.
2.
Tap and hold
to dial the voicemail system.
Note: One has been automatically reserved in speed dial for your
voicemail. To dial voicemail without using speed dial, simply dial
your own phone number and when the system answers, press
and enter your password.
3.
When the system answers, tap
password.
and enter your
4.
Follow the system prompts to setup your voicemail.
Contacting Customer Care
If you are having problems with your new phone, call
the Customer Care Center at (888) 987-4357. Please
call using a phone other than your i700 in case any
troubleshooting needs to be performed.
Chapter 1 - Getting Started
14
Chapter 2 - Understanding your
Phone
The following topics are discussed in this Chapter:
• Front View of the i700
• Viewing the Phone Screen Icons
• Features of the i700
• Battery and Charger Accessories
• Displaying your Phone Number
• Making/Answering Calls
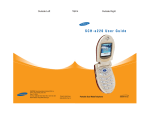
Front View of the I700
Chapter 2 - Understanding your Phone
16
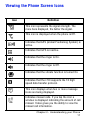
Viewing the Phone Screen Icons
Icon
Definition
This icon represents the signal strength. The
more bars displayed, the better the signal.
This icon is displayed when the phone is Off.
Indicates that GPS (Global Positioning System) is
active.
Indicates that GPS is inactive.
Indicates that the ringer is On.
Indicates that the ringer is Off.
Indicates that the vibrate function is turned On.
Indicates that the i700 supports the 1X high
speed data transfer protocol.
This icon displays when two or more message
icons are being displayed.
Indicates missed calls. If you tap the icon a
window is displayed indicating the amount of call
missed. It also gives you the ability to view the
missed call information.
Chapter 2 - Understanding your Phone
17
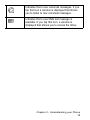
Indicates that a new voicemail messages. If you
tap this icon a window is displayed that allows
you to listen to new voicemail messages.
Indicates that a new SMS text message is
available. If you tap this icon, a window is
displayed that allows you to access the Inbox.
Chapter 2 - Understanding your Phone
18
Features of the i700
The i700 uses the Microsoft Windows CE operating
system, which supports thousands of applications.
Using the ActiveSync operation, you can keep your PC
and your i700 synchronized at all times. Some of the
i700 features are:
• Large 240x320 pixel, 65k color Transflective TFT screen
• Built in Camera
• CDMA 2000 1X Technology
• GPS Technology
• Microsoft Pocket PC 2002 Phone Edition Software
• 2 way SMS Messaging
• Voice Dialing
• Voice Memo
• Wireless Internet Capability
• Multi Media Card (MMC) / Secure Digital (SD) Expansion Card
Capability
• 16 Polyphonic Ringers.
Chapter 2 - Understanding your Phone
19
Battery and Charger Accessories
Your i700 comes with a standard battery, charger, and
headset. It is very important to use only Samsung
approved accessories to avoid damage to your phone.
Battery Capacity
Your phone is equipped with a standard rechargable
battery. The battery can be recharged before it is fully
drained without causing battery damage.
When the battery becomes low, a warning window is
displayed and the unit automatically turns off the LCD.
When there are approximately two minutes of talk time
left, the phone sounds an audible alert every 30
seconds and then powers down.
Note: Long backlight settings, searching for service, vibrate mode
and browser use affect the battery’s talk and standby times.
Chapter 2 - Understanding your Phone
20
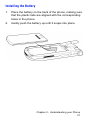
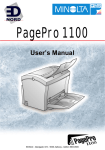
Installing the Battery
1.
Place the battery on the back of the phone, making sure
that the plastic tabs are aligned with the corresponding
holes in the phone.
2.
Gently push the battery up until it snaps into place.
Chapter 2 - Understanding your Phone
21
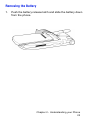
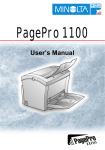
Removing the Battery
1.
Push the battery release latch and slide the battery down
from the phone.
Chapter 2 - Understanding your Phone
22
Charging the Battery
Your cellular Phone comes with a rechargeable battery.
You should charge the battery as soon as possible so
you can begin using your phone.
Keeping track of your battery’s charge is important. If
your battery level becomes too low, your phone
automatically turns off and you’ll lose everything you
were just working on. For a quick check of your phone’s
battery level, tap the time located in the upper right
corner of the screen. A battery icon is displayed in the
Time and Next Appointment window.
To perform a battery check using the drop down menu:
1.
Tap Start located in the upper left corner of the screen.
2.
Tap Settings.
3.
Tap System.
4.
Tap Power.
There is also an internal backup battery that saves all
the settings in the phone when the regular battery is
discharged. An internal backup battery needs to be
charged initially for 24 hours.
The internal battery will maintain data for about 4 hours.
You should perform ActiveSync operations or a backup
utility frequently to avoid loosing any information if the
battery is fully discharged. For more information see
“Scheduling an ActiveSync” on page 117.
Chapter 2 - Understanding your Phone
23
Displaying your Phone Number
To display your phone number:
1.
Press
to display the phone screen.
2.
Tap Tools and select Options.
3.
The Settings screen is displayed. Your phone number is
displayed at the top of the screen.
4.
Tap
to exit.
Making and Answering Calls
Making Calls
There are several different options that allow you to
make calls on your new i700. You can use speed dial,
voice dial, call history, or simply enter the desired
number and tap
.
Making a Call using the Keypad
1.
Press
to display the phone screen.
2.
Tap the desired number using the stylus. If you make a
mistake while dialing, tap
. Tap and hold
to
clear all the digits and start over.
Note: Always use the stylus when touching the screen to avoid
scratching or damage caused by other instruments.
3.
Tap
.
Chapter 2 - Understanding your Phone
24
One Handed Dialing
One handed dialing allows you to make a call while
using just one hand. To make a call:
1.
Press the Contacts
button.
2.
Press the OK/Navigation key up or down to select the
desired address book entry.
Note: If you press and hold the OK/Navigation key down, letters are
displayed that will automatically display the first entry beginning with
that letter.
3.
Press the OK/Navigation key to display the entry
information and phone number.
Note: To return to the Contacts screen, press the OK/Navigation
button while the entry is displayed.
4.
Press
to display the number in the phone screen.
5.
Press
again to dial the number.
Answering Calls
1.
Make sure that the phone is turned On.
2.
When you receive an incoming call, the Phone Incoming
screen is displayed. Tap Answer to answer the call or
Ignore to silence the ringer and let the call go to
voicemail.
Note: When you receive an incoming call, you can silence the ringer
by tapping
.
Chapter 2 - Understanding your Phone
25
Chapter 3 - Personal Settings
The following topics are discussed in this Chapter:
• Buttons
• Input
• Menus
• Password
• Phone
• Sounds & Notifications
Personal Settings
The personal settings allow you to set the following
options on your i700:
• Buttons
• Input
• Menus
• Password
• Phone
• Sounds and Notifications
• Today
• Owner Information
These settings allow you to control the look and feel of
the i700.
To access the Personal Settings:
1.
Tap Start located in the upper left corner of the screen.
2.
Tap Settings.
3.
Tap the Personal tab.
Chapter 3 - Personal Settings
27
Buttons
The Buttons setting allows you to configure which
application launches when the record, contacts, or
calendar buttons are pressed. The following table gives
you the default settings and available applications for
each button:
To access the Button settings:
1.
Tap Start located in the upper left corner of the screen.
2.
Tap Settings.
3.
Tap the Personal tab.
4.
Tap the Buttons icon.
Button
Applications
Input Panel
None
Scroll Down
Scroll Left
Scroll Right
Scroll Up
Start Menu
Today
ActiveSync
Calculator
Calendar
Camera
Contacts
File Explorer
Inbox
Infrared Receive
Internet Explorer
Microsoft Reader
MSN Messenger
Notes
Phone
Pocket Excel
Pocket Word
Record (default)
Solitaire
Tasks
Terminal Services Client
Windows Media
Chapter 3 - Personal Settings
28
(Same list as above)
Contacts (default)
(Same list as above)
Calendar (default)
Input
There are four different character input methods
available. They are:
• Block Recognizer
• Keyboard
• Letter Recognizer
• Transcriber
Each of these methods allow you to input alphanumeric
characters and symbols into the i700. In addition to the
input methods, there is Word Completion and other
options associated with the input selected.
To access the Input settings:
1.
Tap Start located in the upper left corner of the screen.
2.
Tap Settings.
3.
Tap the Personal tab.
4.
Tap the Input icon.
Chapter 3 - Personal Settings
29
Block Recognizer
This input method uses the traditional writing area box
split in the middle. The left side is used to write letters
and the right side is for number entry. Symbols and
common functions are located in other smaller boxes
located to the right of the writing box area. There are no
options associated with this type of input method.
Keyboard
This input method displays an on-screen keyboard that
can be used to input characters by tapping the screen
using the stylus. The keyboard entry method has the
following options:
• Large Keys
• Small Keys
• Use Gestures to Remove Keys from the Keyboard
To select larger or smaller keys, simply tap the button
next to the desired option.
The gestures feature allows you to replace keys used
on the keyboard for space, backspace, shift+key, and
enter by drawing a gesture or motion. The large key
option must be selected for this option to be available.
Chapter 3 - Personal Settings
30
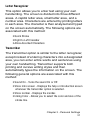
Letter Recognizer
This option allows you to enter text using your own
handwriting. The screen is divided into three different
areas. A capitol letter area, small letter area, and a
number area. Characters are entered by printing letters
in each area. The character is then analyzed and typed
on the screen automatically. The following options are
associated with this method:
• Quick Stroke
• Right to Left Crossbar
• Allow Accented Characters
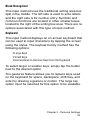
Transcriber
The transcriber option is similar to the letter recognizer,
except instead of entering characters into a designated
area, you can enter entire words and sentences using
your own handwriting. Transcriber supports both
printing and cursive writing styles and then
automatically types the information on the screen. The
following general options are associated with this
method:
• Sound On - Turns the sound On or Off.
• Show intro screen - Displays the help or introduction screen
whenever the transcriber option is selected.
• Show iconbar - Displays the iconbar.
• Inking Color - Allows you to select the color and size of the
stroke line.
Chapter 3 - Personal Settings
31
There are also some transcriber recognizer options.
They are:
• Add space after - Automatically adds a space after each
writing.
• Separate letters mode
• Speed of recognition vs Quality - Determines the speed at
which the writing sample is analyzed. The faster the setting
the less likely to get all words correct. Better quality is
achieved with longer processing.
• Recognition start time - Allows you to set the time of
recognition between new writings.
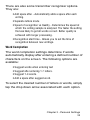
Word Completion
The word completion settings determine if words
automatically display after entering a defined number of
characters on the screen. The following options are
available:
• Suggest words when entering text
• Suggest after entering 1-7 letters.
• Suggest 1-4 words.
• Add a space after suggest word.
To select the desired number of letters or words, simply
tap the drop down arrow associated with each option.
Chapter 3 - Personal Settings
32
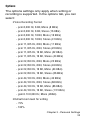
Options
The options settings only apply when writing or
recording is supported. In the options tab, you can
select:
• Voice Recording Format
- pcm 8,000 Hz, 8 Bit, Mono (8 KB/s)
- pcm 8,000 Hz, 8 Bit, Stereo (16 KB/s)
- pcm 8,000 Hz, 16 Bit, Mono (16 KB/s)
- pcm 8,000 Hz, 16 Bit, Stereo (31 KB/s)
- pcm 11,025 Hz, 8 Bit, Mono (11 KB/s)
- pcm 11,025 Hz, 8 Bit, Stereo (22 KB/s)
- pcm 11,025 Hz, 16 Bit, Mono (22 KB/s)
- pcm 11,025 Hz, 16 Bit, Stereo (43 KB/s)
- pcm 22,050 Hz, 8 Bit, Mono (22 KB/s)
- pcm 22,050 Hz, 8 Bit, Stereo (43 KB/s)
- pcm 22,050 Hz, 16 Bit, Mono (43 KB/s)
- pcm 22,050 Hz, 16 Bit, Stereo (86 KB/s)
- pcm 44,100 Hz, 8 Bit, Mono (43 KB/s)
- pcm 44,100 Hz, 8 Bit, Stereo (86 KB/s)
- pcm 44,100 Hz, 16 Bit, Mono (86 KB/s)
- pcm 44,100 Hz, 16 Bit, Stereo (172 KB/s)
- gsm 6.10 8,000 Hz, Mono (2KB/s)
• Default zoom level for writing
- 75%
- 100%
Chapter 3 - Personal Settings
33
- 150%
- 200%
- 300%
• Default zoom level for typing
- 75%
- 100%
- 150%
- 200%
- 300%
• Capitalize the first letter of a sentence
• Scroll upon reaching the last line
Menus
There are two menus available in the i700 menu
options. They are:
• Start Menu
• New Menu
The Start menu options allow you to configure what is
displayed when you tap the Start menu located in the
upper left corner of the screen.
The New menu options allow you to configure what is
displayed when you tap on the New menu located in
the bottom left corner of the screen.
Chapter 3 - Personal Settings
34
Start Menu
To access the Start menu:
1.
Tap Start located in the upper left corner of the screen.
2.
Tap Settings.
3.
Tap the Personal tab.
4.
Tap the Menus icon.
5.
Tap the Start Menu tab.
6.
Check the items that you want to be displayed in the
Start menu. Items that are not checked are displayed in
the Programs menu.
7.
Press
to exit.
New Menu
To access the New menu options:
1.
Tap Start located in the upper left corner of the screen.
2.
Tap Settings.
3.
Tap the Personal tab.
4.
Tap the Menus icon.
5.
Tap the New Menu tab.
Chapter 3 - Personal Settings
35
Password
The password option allows you to enable or disable a
password. The available settings are:
• No password - This setting disables the password.
• Simple 4-digit password - Allows you to set a four digit
password using the on-screen keypad.
• Strong alphanumeric password - Allows you to enter a
password that contains letters, numbers, or both.
When a password is configured, there is a “prompt if
device unused” option that allows a length of time
range from 0 minutes - 24 hours. When this option is
set, you can continue to use the i700 until the screen
turns off due to inactivity. If the device is inactive for a
greater amount of time than specified in the unused
setting, a password must be entered when you turn the
device back on. To set the password:
1.
Tap Start located in the upper left corner of the screen.
2.
Tap Settings.
3.
Tap the Personal tab.
4.
Tap the Password icon.
5.
Tap the desired password option and enter the
password.
6.
If desired, set the “Prompt if device unused” time by
tapping the drop down arrow and selecting the proper
time increment.
7.
Tap
.
Chapter 3 - Personal Settings
36
8.
Confirm the password setting by tapping Yes in the
Password dialog box.
Phone
The phone options displays all the available options for
the phone. The options are divided into the following
tabs:
• Phone - Allows you to configure a voicemail phone number.
View your existing phone number. Select the desired sounds
associated with the phone. Volume notification settings are
also included.
• Option - Allows you to configure the Roaming, Answer, and
Data/Fax settings.
• Sound - Allows you to turn on or off the minute beep,
connect tone, or disconnect tone.
• Security - Allows you to set special numbers, change the
password, or reset the phone to the factory default settings.
• Etc - Allows you to turn GPS on or off. Set the time to auto or
manual. Select the desired Voice privacy settings. Display
the current hardware and software version of the i700.
Chapter 3 - Personal Settings
37
Phone Tab
These options allow you to configure several different
settings that are specific to the phone including:
• Changing the Voicemail Dialup Number
• System Volume
• Notifications
• System Sounds
Voicemail settings
To access the voicemail settings:
1.
Tap Start located in the upper left corner of the screen.
2.
Tap Settings.
3.
Tap the Personal tab.
4.
Tap the Phone icon.
5.
Tap the Phone tab.
6.
The number to call your voicemail is displayed in the
Voicemail box. To change the number, tap the box and
enter the desired number.
Note: This number is automatically setup when you receive your
phone. You will probably not need to change it unless otherwise
instructed by your carrier.
Chapter 3 - Personal Settings
38
Option Tab
The option tab allows you to configure the following
settings:
• Answer Options - Allows you to set up how the phone is
answered. The Talk key or Any Key on the keypad can be
used to answer an incoming call.
• Auto (Carkit/Headset) - This option can only be used with the
optional carkit accessory. When using the carkit, the phone
is automatically answered after 3, 5, or 10 seconds.
• Data/Fax - The i700 can be used to receive an incoming fax
or data call.
• Roaming - Allows you to select a desired roaming option. For
more information, see “Roaming Options” on page 62.
To access the option settings:
1.
Tap Start located in the upper left corner of the screen.
2.
Tap Settings.
3.
Tap the Personal tab.
4.
Tap the Phone icon.
5.
Tap the Option tab.
Chapter 3 - Personal Settings
39
Sounds
These options allow you to configure the sounds for the
i700. These include the ring type, ring tone, keypad
sounds, and other sound settings. To access the sound
settings:
1.
Tap Start located in the upper left corner of the screen.
2.
Tap Settings.
3.
Tap the Personal tab.
4.
Tap the Phone icon.
5.
Tap the Phone tab.
6.
Tap the Ring Type drop down arrow and select one of
the following ring types:
7.
• Ring
• Increasing Ring
• Ring Once
• Vibrate
• Vibrate and ring
• Vibrate then ring
• None
Tap the Ring Tone drop down arrow and select one of
the following ring tones:
• BellDitty
• Chime
• DefaultRing
• Digital
• Guitar
Chapter 3 - Personal Settings
40
• OldPhone
• RoaringGuitar
• Trio
• Welcome
• Hopmix
• Nobeat
• Scratch
• Solo
• SpanishGuitar
• Techie
• Voice
Note: To hear the ring tone, use the player controls located to the
right of the ring tone box. Tap the arrow to play the tone and then tap
the square to stop.
8.
Tap the Keypad drop down arrow and select:
9.
• Short Tones - When the on-screen keypad for the phone is
tapped, a short tone is played.
• Long Tones - When the on-screen keypad for the phone is
tapped, a long tone is played.
• Off - No tones are played when the on-screen keyboard for
the phone is tapped.
Tap
to exit.
Chapter 3 - Personal Settings
41
Other Sound Settings
The other settings box located in the phone tab
contains the settings for volume and notifications. The
volume settings control the system volume and enable
sounds for common functions.
The notification settings allow you to select an
individual event and then add a sound to the function.
You can also select how to be notified when the event
occurs or performs the intended function. To change
the volume and select an event with notification:
1.
Tap Start located in the upper left corner of the screen.
2.
Tap Settings.
3.
Tap the Personal tab.
4.
Tap the Phone icon.
5.
Tap the Phone tab.
6.
Tap the Other Settings box.
7.
Tap the Volume tab.
8.
Tap the slider and select the desired System volume
between Silent and Loud.
9.
Tap the desired check boxes under “Enable sounds
for”.
Note: Some choices are greyed out unless the proper check box is
selected above the item.
10. Tap the Notifications tab.
11. Tap the event drop down arrow and select the desired
event.
Chapter 3 - Personal Settings
42
12. Tap the check box next to Play Sound to designate a
notification sound for that event.
13. Tap the drop down arrow next to the available sounds
and select the desired sound.
Note: Use the player controls to listen to the sounds.
14. Select the other desired choices by tapping the check
boxes. When finished, tap
to exit.
Chapter 3 - Personal Settings
43
Chapter 4 - Windows
Applications and Text Entry
The following topics are discussed in this Chapter:
• Navigating your PDA
• Shortcuts
Navigating your PDA
Your i700 provides the power of a personal computer
with exceptional portability and integration. Unlocking
its power begins with customizing the i700 so that it
becomes an extension of your desktop or laptop
computer.
The i700 is Pocket PC 2002 Windows Powered,
providing the power and familiarity of Windows that you
are used to. Pocket versions of popular Microsoft
applications such as Word, Excel, Windows Media
Player® and Outlook® eliminate the need to learn new
software.
Start Menu
The start menu contains links to all the applications and
settings information, similar to a Windows based PC
system. To access the start menu, simply use the
stylus to tap in the upper right corner of the screen on
the word Start. An immediate menu list is displayed.
From the pull down menu, all applications and settings
can be accessed.
Launching an Application
To launch an application:
1.
Tap Start located in the upper left corner of the screen.
2.
Look for the desired application listed in the Recent
Program list. If it is not found, tap Programs.
3.
Tap the desired program icon to launch the application.
Chapter 4 - Windows Applications and Text Entry
45
Shortcuts
New Command
The New command located in the bottom left side of
the screen allows you to create a new:
• Appointment
• Contact
• E-mail Message
• Excel Workbook
• Note
• Task
• Word Document
To access the new command:
1.
Tap New located in the bottom left corner of the screen.
2.
Select any of the choices to launch the application.
Time & Appointments
To view the next upcoming appointment and battery
indicator without launching the calendar or today
screen:
1.
Tap the time in the upper right corner of the screen.
2.
The Time and Next Appointment screen is displayed.
Chapter 4 - Windows Applications and Text Entry
46
Chapter 5 - Phone Settings
The following topics are discussed in this Chapter:
• Setting the Desired Volume Level
• Tone Length
• Alerts Sounds & Notifications
• Turning the Ringer Off
Setting the Volume Levels
There are several different volume levels that can be
configured on the i700. They are:
• Voice Volume
• Record Volume
• Ring Volume
• System Volume
Voice Volume
The voice volume determines the volume setting of the
incoming caller. This setting can be set quickly by
pressing the up or down volume button located on the
side of the phone. To access the voice volume settings
in the phone:
1.
Tap Start located in the upper left corner of the screen.
2.
Tap Settings.
3.
Tap the System tab.
4.
Tap Volume.
5.
Using the stylus, tap the desired level on the slider
located under Voice Volume.
Note: You can also press and hold the slider tab and move it back
and forth along the slider using the stylus.
6.
Tap
to exit.
Chapter 5 - Phone Settings
48
Record Volume
The record volume determines the recording levels for
voice memo’s, notes, or recorded conversations. The
higher the setting, the more sensitive the microphone.
To access the record volume settings:
1.
Tap Start located in the upper left corner of the screen.
2.
Tap Settings.
3.
Tap the System tab.
4.
Tap Volume.
5.
Using the stylus, tap the desired level on the slider
located under Record Volume.
6.
Tap
to exit.
Chapter 5 - Phone Settings
49
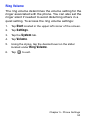
Ring Volume
The ring volume determines the volume setting for the
ringer associated with the phone. You can also set the
ringer silent if needed to avoid disturbing others in a
quiet setting. To access the ring volume settings:
1.
Tap Start located in the upper left corner of the screen.
2.
Tap Settings.
3.
Tap the System tab.
4.
Tap Volume.
5.
Using the stylus, tap the desired level on the slider
located under Ring Volume.
6.
Tap
to exit.
Chapter 5 - Phone Settings
50
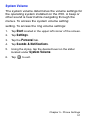
System Volume
The system volume determines the volume settings for
the operating system installed on the i700. A beep or
other sound is heard while navigating through the
menus. To access the system volume setting:
setting. To access the ring volume settings:
1.
Tap Start located in the upper left corner of the screen.
2.
Tap Settings.
3.
Tap the Personal tab.
4.
Tap Sounds & Notifications.
5.
Using the stylus, tap the desired level on the slider
located under System Volume.
6.
Tap
to exit.
Chapter 5 - Phone Settings
51
Setting the Tone Length
When dialing a phone number, tones are emitted each
time a key is tapped. These tones can be set up to be
short, long, or turned off. In some cases, longer tone
lengths may be required for accessing automated
systems or voicemail. To set the tone length:
1.
Tap Start located in the upper left corner of the screen.
2.
Tap Settings.
3.
Tap the Personal tab.
4.
Tap Phone.
5.
Tap the drop down arrow next to Keypad and select
Short Tones, Long Tones, or Off.
6.
Tap
to exit.
Chapter 5 - Phone Settings
52
Alert Sounds & Notifications
Alert sounds can be configured for the following events:
• ActiveSync: Begin sync
• ActiveSync: End sync
• Beam: Autoreceive
• Inbox: New e-mail message
• Inbox New SMS message
• MSN Messenger: Contact online
• MSN Messenger: New message
• Phone: Incoming call
• Phone: Missed call
• Phone: Voice mail
• Reminders
Selecting a Ringer for Incoming, Missed Calls, or
Voice Mail
To select a ringer for incoming calls:
1.
Tap Start located in the upper left corner of the screen.
2.
Tap Settings.
3.
Tap the Personal tab.
4.
Tap Phone.
5.
Tap Other Settings.
6.
Tap the drop down arrow under Select an event and
select Phone: Incoming Calls, Phone: Missed Calls,
or Phone: Voice Mail.
Chapter 5 - Phone Settings
53
7.
8.
If you selected Phone: Incoming Calls, tap the drop down
arrow next to Ring Type and select one of the following:
• Ring
• Increasing Ring
• Ring Once
• Vibrate
• Vibrate and ring
• Vibrate then ring
• None
If you selected Ring, Increasing ring, or Ring Once, tap
the drop down arrow next to Ring Tone and select the
desired ringer.
Note: To play the selected ringer, tap the play button arrow located
under the ring tone box.
9.
Tap
to exit.
Note: If you save .wav files in the windows/rings directory, the file
can be selected as a Ring Tone.
Chapter 5 - Phone Settings
54
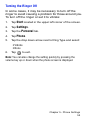
Turning the Ringer Off
In some cases, it may be necessary to turn off the
ringer to avoid causing a problem for those around you.
To turn off the ringer or set it to vibrate:
1.
Tap Start located in the upper left corner of the screen.
2.
Tap Settings.
3.
Tap the Personal tab.
4.
Tap Phone.
5.
Tap the drop down arrow next to Ring Type and select:
6.
• Vibrate
• None
Tap
to exit.
Note: You can also change the setting quickly by pressing the
volume key up or down when the phone screen is displayed.
Chapter 5 - Phone Settings
55
Chapter 6 - Security Settings
The following topics are discussed in this Chapter:
• Accessing the Security Options
• Special Numbers
• Locking the i700
• Unlocking the i700
Accessing the Security Options
The i700 has several security options associated with
the phone that help guard against unauthorized usage.
The security options allow you to configure special
numbers, change the password, and reset the phone.
Special Numbers
Special numbers are numbers that can be called when
the phone is placed in lock mode. Up to 10 numbers
can be assigned in the special numbers dialog box. To
set up the special numbers:
1.
Tap Start located in the upper left corner of the screen.
2.
Tap Settings.
3.
Tap the Personal tab.
4.
Tap Phone.
5.
Tap the Security tab.
6.
Tap the Special Number box.
7.
Double tap on one of the entries to edit or enter a new
number.
8.
Tap
to exit.
Chapter 6 - Security Settings
57
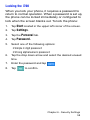
Locking the i700
When you lock your phone, it requires a password to
return to normal operation. When a password is set up,
the phone can be locked immediately or configured to
lock when the screen blanks out. To lock the phone:
1.
Tap Start located in the upper left corner of the screen.
2.
Tap Settings.
3.
Tap the Personal tab.
4.
Tap Password.
5.
Select one of the following options:
6.
• Simple 4 digit password
• Strong alphanumeric password
Tap the drop down arrow and select the desired unused
time.
7.
Enter the password and tap
8.
Tap
.
to confirm.
Chapter 6 - Security Settings
58
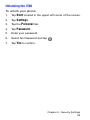
Unlocking the i700
To unlock your phone:
1.
Tap Start located in the upper left corner of the screen.
2.
Tap Settings.
3.
Tap the Personal tab.
4.
Tap Password.
5.
Enter your password.
6.
Select No Password and tap
7.
Tap Yes to confirm.
.
Chapter 6 - Security Settings
59
Chapter 7 - Understanding
Roaming
The following topics are discussed in this Chapter:
• Roaming Overview
• Roaming Options
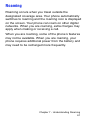
Roaming
Roaming occurs when you travel outside the
designated coverage area. Your phone automatically
switches to roaming and the roaming icon is displayed
on the screen. Your phone can roam on other digital
networks. When you are roaming, extra charges may
apply when making or receiving a call.
When you are roaming, some of the phone’s features
may not be available. When you are roaming, your
phone requires additional power from the battery and
may need to be recharged more frequently.
Chapter 7 - Understanding Roaming
61
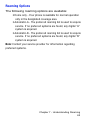
Roaming Options
The following roaming options are available:
• Home only - Your phone is available for normal operation
only in the designated coverage area.
• Automatic-A - The preferred roaming list is used to acquire
service. If no preferred systems are found, any digital “A”
system is acquired.
• Automatic-B - The preferred roaming list is used to acquire
service. If no preferred systems are found, any digital “B”
system is acquired.
Note: Contact your service provider for information regarding
preferred systems.
Chapter 7 - Understanding Roaming
62
Chapter 8 - Messaging
The following topics are discussed in this Chapter:
• Message Types
• Voicemail
• Text Messaging
Message Types
Your phone can send and receive the following types of
messages:
• Voicemail
• SMS Text Messages
• E-mail messages
• Numeric Pages
Messages are received at all times, even when the
phone is powered off or locked. When a new message
is received, a notification is displayed and a tone is
sounded.
Chapter 8 - Messaging
64
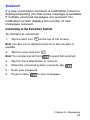
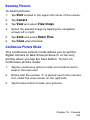
Voicemail
If a new voicemail is received, a notification screen is
displayed alerting you that a new message is available.
If multiple voicemail messages are received, the
notification screen displays the number of new
messages received.
Connecting to the Voicemail System
To connect to voicemail:
1.
Tap the alert icon
at the top of the screen.
Note: The alert icon is displayed when more than one alert is
available.
2.
Tap the voice mail icon
Note: You can also tap and hold
.
to speed dial voicemail.
3.
Tap the Voice Mail button to connect.
4.
When the voicemail system connects, tap
5.
Enter your password.
6.
Press to listen
.
to your messages.
Chapter 8 - Messaging
65
Text Messaging
The i700 allows you to create and send text messages
to other users with SMS capability. Text messaging,
also known as SMS (Short Message Service) allows
short text messages to be received and displayed on
your phone. 2-Way Text Messaging, also known as
MO-SMS (Mobile-Originated Short Message Service,)
allows messages to be sent from your phone.
Messages can be sent from one phone to another by
addressing the message to the recipient's phone
number.
Creating a New Message
1.
From the phone screen, tap Tools and select Send SMS.
2.
Enter the phone number of the message recipient(s) in
the To: field.(Up to ten people can be sent the same SMS
message at one time. For multiple numbers, use a semicolon).
Note: To select a number from contacts, tap
to display the text area.
. Tap the icon again
3.
Tap the Subj: field and enter a title for the message.
4.
Tap the message area and enter the desired message
using the desired input method. When finished, tap the
double drop down arrows to the right of the Subj: field.
5.
Tap the drop down arrow next to Service and make sure
that SMS is selected.
6.
If you would like a delivery confirmation that the message
was delivered, tap Edit and select Options. Tap the
Chapter 8 - Messaging
66
check box next to Request SMS text message delivery
notification.
7.
Tap Send to send the message.
Note: Please be advised that there is a 160-character limit for SMS
text messages. This 160-character limit applies only to messages
sent using the SMS function and not to messages sent using
Pocket Outlook or other Email clients. The SMS software does not
provide a character counter and you will not be alerted if you
exceed the 160-character limit. If you send an SMS messages that
contains more than 160 characters, the message will be truncated
after the first 160 characters and any remaining characters will be
sent in separate 160-character messages until all characters have
been sent. Charges will be applied for the delivery and receipt of
each of the 160-character SMS messages in accordance with the
sender's and the recipient's calling plans.
Chapter 8 - Messaging
67
E-mail Messages
E-mail messages can be sent and received using
Microsoft Outlook and ActiveSync. Messages are sent
and received using the desktop/laptop computer during
an ActiveSync operation. To send an e-mail message:
1.
From the phone screen, tap Tools and select Send SMS.
2.
Enter the e-mail address in the To: field.(Up to ten people
can be sent the same SMS message at one time. For
multiple e-mail addresses, use a semi-colon).
Note: To select an e-mail address from contacts, tap
icon again to display the text area.
. Tap the
3.
Tap the Subj: field and enter a title for the message.
4.
Tap the message area and enter the desired message
using the desired input method. When finished, tap the
double drop down arrows to the right of the Subj: field.
5.
Tap the drop down arrow next to Service and make sure
that ActiveSync is selected.
6.
Tap Send.
7.
Perform an ActiveSync operation to send the e-mail
message. For more information on performing an
ActiveSync operation, see “ActiveSync” on page 115.
Message Options
Several options are associated with sending an SMS
message. They are:
• Edit My Text Messages
• Spell Check
Chapter 8 - Messaging
68
• Language
• Cancel Message
My Text Messages
My Text Messages are default text messages that can
be used quickly to send common text (SMS) messages
without having to type the message. A total of 10
messages can be saved. The default messages are:
• Yes.
• No.
• I can’t talk right now.
• I’ll be right there.
• I’m running late.
• Where are you?
• Hi.
• Goodbye.
• Call me later.
• I love my Pocket PC!
Using My Text Messages
1.
Create a new SMS Message.
2.
Tap My Text and select the desired message from the
list.
3.
Tap Send to send the message.
Chapter 8 - Messaging
69
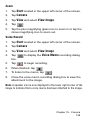
Editing My Text Messages
To edit My Text Messages:
1.
Open an SMS Message.
2.
Tap Edit and select Edit My Text Messages.
3.
Select the message that you would like to edit.
4.
Delete the old message from the box and enter the new
message.
5.
Tap
to save and exit.
Performing a Spell Check
To perform a spell check:
1.
Create a new SMS Message.
2.
Tap Edit and select Spell Check.
3.
When the spell check is finished, tap
4.
Tap Send to send the message.
.
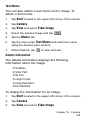
Language
There are several different languages available when
creating a new message. To select the desired
language:
1.
Create a new message from the Inbox.
2.
Tap Edit and select Language.
3.
Select the desired language from the list.
Chapter 8 - Messaging
70
Cancel a Message
To cancel a message:
1.
From the new message screen, tap Edit and select
Cancel Message.
SMS Message
SMS Inbox
SMS messages are saved in the SMS Inbox. If the
memory is full, new messages are rejected. Older
messages can be deleted to free up space for the
incoming messages. To access the SMS Inbox:
1.
Tap Start located in the upper left corner of the screen.
2.
Tap Inbox.
3.
Tap the drop down arrow next to Inbox and select Inbox
under the SMS directory.
Note: The i700 does not suppport the alert function when a repeated
message is received. If a duplicate message is received, “New
Message” instead of “Duplicate Message” is displayed on screen.
SMS Outbox
When you send a message, it is stored in the SMS
Outbox until sent. Messages are sent using the i700
and the SMS Outbox is cleared.
To access the SMS Outbox:
1.
Tap Start located in the upper left corner of the screen.
2.
Tap Inbox.
Chapter 8 - Messaging
71
3.
Tap the drop down arrow next to Inbox and select
Outbox under the SMS directory.
Chapter 8 - Messaging
72
SMS Sent Items
Sent Items keeps a record of all the SMS messages
sent from your phone.
To access sent items:
1.
Tap Start located in the upper left corner of the screen.
2.
Tap Inbox.
3.
Tap the drop down arrow next to Inbox and select Sent
Items under the SMS directory.
SMS Drafts
SMS Drafts contain all the SMS messages that were
not completed and saved to send at a later time. These
messages are accessed from the drafts folder in the
SMS Inbox. To access the stored folder:
1.
Tap Start located in the upper left corner of the screen.
2.
Tap Inbox.
3.
Tap the drop down arrow next to Inbox and select Drafts
under the SMS directory.
Chapter 8 - Messaging
73
SMS Deleted Items
SMS Deleted items keeps a copy of all the messages
that were deleted. Once the messages are removed
from the SMS deleted items folder, they are
permanently erased. To access the SMS deleted folder:
1.
Tap Start located in the upper left corner of the screen.
2.
Tap Inbox.
3.
Tap the drop down arrow next to Inbox and select
Deleted Items under the SMS directory.
ActiveSync Mail
ActiveSync Inbox
E-mail messages are saved in the ActiveSync Inbox. If
the memory is full, new messages are rejected. Older
messages can be deleted to free up space for the
incoming messages. To access the ActiveSync Inbox:
1.
Tap Start located in the upper left corner of the screen.
2.
Tap Inbox.
3.
Tap the drop down arrow next to Inbox and select Inbox
under the ActiveSync directory.
Chapter 8 - Messaging
74
ActiveSync Outbox
When you send a message, it is stored in the
ActiveSync Outbox until sent. When an ActiveSync is
performed, the messages are sent using the desktop
machine and the ActiveSync Outbox is cleared.
To access the ActiveSync Outbox:
1.
Tap Start located in the upper left corner of the screen.
2.
Tap Inbox.
3.
Tap the drop down arrow next to Inbox and select
Outbox under the ActiveSync directory.
ActiveSync Sent Items
Sent Items keeps a record of all the messages sent
from your phone.
To access sent items:
1.
Tap Start located in the upper left corner of the screen.
2.
Tap Inbox.
3.
Tap the drop down arrow next to Inbox and select Sent
Items under the ActiveSync directory.
ActiveSync Drafts
ActiveSync Drafts contain all the e-mail messages that
were not completed and saved to send at a later time.
These messages are accessed from the drafts folder in
the ActiveSync Inbox. To access the stored folder:
1.
Tap Start located in the upper left corner of the screen.
Chapter 8 - Messaging
75
2.
Tap Inbox.
3.
Tap the drop down arrow next to Inbox and select Drafts
under the ActiveSync directory.
ActiveSync Deleted Items
Deleted items keeps a copy of all the messages that
were deleted. Once the messages are removed from
the deleted items folder, they are permanently erased.
To access the deleted folder:
1.
Tap Start located in the upper left corner of the screen.
2.
Tap Inbox.
3.
Tap the drop down arrow next to Inbox and select
Deleted Items under the ActiveSync directory.
Chapter 8 - Messaging
76
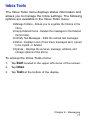
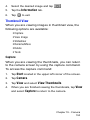
Inbox Tools
The Inbox Tools menu displays status information and
allows you to manage the Inbox settings. The following
options are available in the Inbox Tools menu:
• Manage Folders - Allows you to organize the folders in the
Inbox.
• Empty Deleted Items - Deletes the messages in the Deleted
Items folder.
• Edit My Text Messages - Edits the canned text messages.
• Status - Displays a list of how many messages sent, copied,
to be copied, or deleted.
• Options - Displays the services, message, address, and
storage options of the phone.
To access the Inbox Tools menu:
1.
Tap Start located in the upper left corner of the screen.
2.
Tap Inbox.
3.
Tap Tools at the bottom of the display.
Chapter 8 - Messaging
77
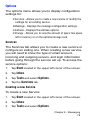
Options
The options menu allows you to display configuration
settings for:
• Services - Allows you to create a new service of modify the
settings for an existing service.
• Message - Displays the message configuration settings.
• Address - Displays the address options.
• Storage - Allows you to view the amount of space free space
left in memory or on the optional storage card.
Services
The Services tab allows you to create a new service or
configure an exiting one. When creating a new service,
you will need to know the type of email account,
incoming and outgoing servers, and login information
before going through the service set up. To access the
service options:
1.
Tap Start located in the upper left corner of the screen.
2.
Tap Inbox.
3.
Tap Tools and select Options.
4.
Tap the Services tab.
Creating a new Service
To create a new Service:
1.
Tap Start located in the upper left corner of the screen.
2.
Tap Inbox.
3.
Tap Tools and select Options.
Chapter 8 - Messaging
78
4.
Tap the Services tab.
5.
Tap the New button.
6.
Enter e-mail address in the space provided and tap Next.
7.
Allow the Auto-Configuration application to attempt to
automatically configure your e-mail settings and tap
Next.
8.
Enter Your Name, User Name, and Password and tap
Next.
Note: Tap the check box next to Save Password to allow you to enter
the e-mail account without having to enter a password each time.
9.
Select the service type and enter a name for the service.
Tap Next.
10. Enter the Incoming and Outgoing server information.
Enter the Domain name and tap Finish.
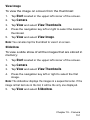
Message Options
To access the message options:
1.
Tap Start located in the upper left corner of the screen.
2.
Tap Inbox.
3.
Tap Tools and select Options.
4.
Tap the Message tab.
Chapter 8 - Messaging
79
Address Options
To access the message options:
1.
Tap Start located in the upper left corner of the screen.
2.
Tap Inbox.
3.
Tap Tools and select Options.
4.
Tap the Address tab.
Storage Options
To access the message options:
1.
Tap Start located in the upper left corner of the screen.
2.
Tap Inbox.
3.
Tap Tools and select Options.
4.
Tap the Storage tab.
Chapter 8 - Messaging
80
Chapter 9 - Call Logs
The following topics are discussed in this Chapter:
• Call Logs
Call Logs
When a call is received, made, or missed a record of
the call is saved with all the available information in a
call log. The call logs are:
• All - Displays all call received, sent, or missed.
• Missed - Displays any missed calls.
• Outgoing - Displays all outgoing calls made from your
phone.
• Incoming - Displays all the incoming comes that were
answered.
• By Caller - Allows you to select an entry from the contacts
and then displays any call information related to the contact.
If you tap the entry, the time, date, and duration of the
call is displayed.
Making a Call from the Call Log
To make a call:
1.
From the phone screen, tap
.
2.
Tap the drop down arrow in the upper left corner and
select the desired call log list.
3.
Tap the phone icon located to the left of the entry to
make a call.
4.
When finished, tap
.
Chapter 9 - Call Logs
82
Call Log Options
Call log options allows you to view the call times for all
calls and recent calls. You can also set the amount of
time to keep call log items before they are deleted. To
access the call log options:
1.
From the phone screen, tap
2.
Tap Tools and select Options.
3.
Tap the drop down arrow under Delete call log items
older than and select one of the following:
4.
.
• 1 week
• 1 month
• 2 months
• 3 months
• 6 months
• 1 year
• never
Tap
to exit.
Creating a New Contact from the Call Log
To create a new contact from a call log entry:
1.
From the phone screen, tap
.
2.
Tap the drop down arrow in the upper left corner and
select the desired call log list.
3.
Tap and hold on the desired entry. Select New Contact
from the menu.
4.
Enter the contact information. When finished, tap
.
Chapter 9 - Call Logs
83
Deleting Call Log Entries
To delete the call log entries:
1.
From the phone screen, tap
.
2.
Tap the drop down arrow in the upper left corner and
select the desired call log list to delete.
Note: To delete all call log entries, select All Calls.
3.
Tap Tools and select Delete All Calls.
4.
Tap Yes to confirm the deletion.
5.
Tap
to exit.
Sending a SMS Message from a Call Log Entry
SMS or Short Messages can be sent to other users that
support SMS capabilities.
Note: Contact your service provider fro more information on SMS
messaging services.
To send a new SMS message from a call log entry:
1.
From the phone screen, tap
.
2.
Tap the drop down arrow in the upper left corner and
select the desired call log list.
3.
Tap and hold on the desired entry. Select Send SMS
from the menu.
4.
Enter the subject and message in the spaces provided.
When finished, tap
.
Note: Make sure that SMS is selected in the Services field or else the
message cannot be sent.
Chapter 9 - Call Logs
84
Chapter 10 - Call Features
The following topics are discussed in this Chapter:
• Caller ID
• Call Waiting
• Call Forwarding
• Three-Way Calling
Caller ID
Caller ID alerts you to who’s calling by displaying the
phone number of the person calling when you receive
an incoming call. Similarly, if you call someone who has
this feature, your phone number displays on their
phone. If the caller’s name and number are already
stored in your Internal Phone Book, the corresponding
name appears with the number.
To block caller ID from displaying when you call
another user:
1.
Tap
and then dial the phone number.
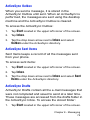
Call Waiting
You can answer an incoming call while on an existing
call. If you are on an existing call and another call is
received, a tone is heard and a call waiting message is
displayed on the screen. If the caller is stored in the
address book, their name is also displayed.
Answering a Waiting Call
1.
Tap the Answer button. The phone connects to the other
call while placing the existing caller on hold.
2.
Tap the
original caller.
button again to switch back over to the
Chapter 10 - Call Features
86
Call Forwarding
Call Forwarding allows you to forward all your incoming
calls to another phone number - even when your phone
is turned off. You can still make calls from your phone
with Call Forwarding activated.
To activate call forwarding:
1.
Tap
.
2.
Enter the area code and phone number where the
incoming calls are forwarded.
3.
Tap
. A confirmation recording confirms the
feature change.
To deactivate call forwarding:
1.
Tap
2.
A confirmation recording confirms the feature change.
Chapter 10 - Call Features
87
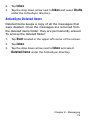
Three Way Calling
Three way calling allows you to talk to two different
people at the same time. When using this feature,
normal airtime rates apply for each of the two calls.
To use three way calling:
1.
Enter the number you wish to call and tap
.
2.
During the conversation, tap
3.
Dial the second person and tap
.
4.
When the person answers, tap
all three parties.
again to connect
.
If one of the people you called hangs up, you and the
remaining caller stay connected. If you initiated the call
and are the first one to hang up, all three calls are
disconnected.
Chapter 10 - Call Features
88
Chapter 11 - Contacts
The following topics are discussed in this Chapter:
• Contacts
• Notes
• Making calls from Contacts
• Speed Dialing
• Beaming Contacts
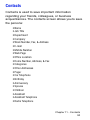
Contacts
Contacts is used to save important information
regarding your friends, colleagues, or business
acquaintances. The contacts screen allows you to save
the persons:
• Name
• Job Title
• Department
• Company
• Work Number, Fax, & Address
• E-mail
• Mobile Number
• Web Page
• Office Location
• Home Number, Address, & Fax
• Categories
• Other Addresses
• Pager
• Car Telephone
• Birthday
• Anniversary
• Spouse
• Children
• Assistant
• Assistant Telephone
• Radio Telephone
Chapter 11 - Contacts
90
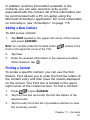
In addition to all the information available in the
contacts, you can also record or write a note
associated with the contact. All of this information can
be synchronized with a PC or Laptop using the
Microsoft ActiveSync application. For more information
on ActiveSync, see “ActiveSync” on page 115.
Adding a New Contact
To add a new contact:
1.
Tap Start located in the upper left corner of the screen
and select Contacts.
Note: You can also press the Contacts button
front on the upper left corner of the i700.
located in the
2.
Tap New.
3.
Enter the desired information in the spaces provided.
When finished, tap
.
Finding a Contact
To locate a specific contact, you can use the find
feature. Find allows you to enter the first few letters of
the contact entry and then have the results displayed
on the screen. The Find box is located in the upper
right corner of the contact screen. To find a contact:
to open Contacts.
1.
Press
2.
Tap the Find box and enter the first few letters of the
desired entry.
3.
Tap the entry from the list of possible matches to view
the summary screen
Chapter 11 - Contacts
91
4.
If the entry is not the one your looking for, tap
return to the list of possible matches.
to
Editing a Contact
To edit an existing contact entry:
to open Contacts.
1.
Press
2.
Locate the desired contact using find or scrolling through
the contact list with the navigation key.
3.
Tap the desired contact to view the summary screen.
4.
Tap Edit.
5.
Change or update the desired information.
6.
Tap
to save and exit.
Deleting a Contact
To delete a contact:
to open Contacts.
1.
Press
2.
Tap the desired contact from the list.
3.
Tap Tools and select Delete Contact.
4.
Tap Yes to confirm the deletion.
Adding a Note
The notes feature allows you to record or write a note
that is attached and saved with the contact entry. When
you view the summary screen on the contact, you can
view or listen to any notes that are associated with the
contact. To access the note for a contact:
Chapter 11 - Contacts
92
to open Contacts.
1.
Press
2.
Tap the desired contact from the list.
3.
Tap the Notes tab.
4.
To record a note, tap record icon
located in the
command bar. Tap
to begin the voice recording. Tap
when finished.
5.
To write a note, tap the pen icon
using the desired entry method.
6.
To exit and save, tap
and enter the note
.
Deleting a Note
To delete a note:
to open Contacts.
1.
Press
2.
Tap the desired contact from the list.
3.
Tap the Notes tab.
4.
Tap Edit and select Select All.
5.
Tap Edit and select Clear.
Making a Call from Contacts
To make a call from the contacts screen:
to open Contacts.
1.
Press
2.
Tap the desired contact from the list.
3.
From the summary screen, tap the phone number.
4.
The call is dialed automatically. To end the call, tap the
End button in the Phone-Connected screen.
Chapter 11 - Contacts
93
Note: If you tapped the Hide button, you can display the phone main
screen by tapping the phone signal strength icon located in the top
right of the screen.
Speed Dialing
Speed dial can be used to the dial contacts that you
talk to the most. Speed dial allows you to press either
one or two keys and connect to the contact. Memory
locations 2-99 are available for speed dialing. To speed
dial:
to open Contacts.
1.
Press
2.
Tap the desired contact from the list.
3.
Tap Tools and select Add Speed Dial.
4.
Tap the up or down arrows next to Location to select the
desired memory location.
5.
To save, tap
6.
To exit the contact summary screen, tap
.
again.
Chapter 11 - Contacts
94
Beaming Contacts
Your i700 is equipped with an infrared port (IR) which
allows you to send and receive information wirelessly
between two IR Pocket PC devices. To beam a contact:
to open Contacts.
1.
Press
2.
Tap the desired contact from the list to view the summary
screen.
3.
Tap Tools and select Beam Contact.
4.
Align the ports between the two devices.
5.
When the contact has been successfully transferred, tap
to exit.
Chapter 11 - Contacts
95
Chapter 12 - Calendar
The following topics are discussed in this Chapter:
• Today
• Scheduling an Alarm
• Calendar
• Scheduling an Appointment
• Changing the Calendar View
• Calendar Options
• Tasks
Today
The Today screen is used as a default information
screen on the Pocket PC. When the i700 is powered
on, the Today screen is displayed. Information
displayed relates to the current day. The today screen
displays the following information on the screen:
• Current Date and Time
• Owner Information
• Current Appointments
• Message Status
• Data Call State
• Enhanced Roaming Indicator
• Current Tasks
Date and Time Settings
The clock settings can be accessed from the Today
screen by tapping the clock icon next to the day and
date entry on the screen. The Clock settings allow you
to set the time zone, time, and date for your home or a
visiting location. To access the clock screen:
1.
From the Today screen, tap the clock icon
.
2.
Select either Home or Visiting.
3.
Set the time zone using the drop down arrow.
4.
Tap the up or down arrow to set the correct time.
Note: You can also tap the clock face and set the desired time.
5.
Tap the drop down arrow to set the correct date.
Chapter 12 - Calendar
97
6.
Tap
to save and exit.
Scheduling an Alarm
Your phone has four programable alarm clocks that
can be configured to ring daily at a desired time. To set
up the alarm clock:
1.
From the Today screen, tap the clock icon
.
2.
Tap the Alarms tab.
3.
Tap the box next to the desired alarm.
4.
Tap the day of the week.
5.
Tap the time to display the time settings. Tap the up or
down arrows to select the desired time.
Note: Tap the AM or PM to cycle between them.
6.
Tap
when finished.
7.
Tap
again to save and exit.
Owner Information
The owner information contains the personal
information about the individual that uses the device on
a constant basis. This information should be set up
when you first use your i700. For more information on
setting up the owner information, see “Entering the
Owners Information” on page 13.
Chapter 12 - Calendar
98
ERI
ERI (Enhanced Roaming Indictors) contains the
information for the custom text and roaming Icon.
Basically ERI displays nothing. This information should
be shown when the network sends a specific message
to your i700.
Data Call State
The data call state indicates the progress of a data
transmission. There are three states associated with
the data call:
• Green - Connecting to the network for transmission.
• Dark Grey with Light On - Dormant state. No activity.
• Dark Grey with Light Off - Disconnected.
There are RX (Receiving) and TX (Transmitting) status
bars located on the Today screen. If you tap on the RX
or TX status bar, you can select the desired USB path.
The available choices are:
• External Data Call
• ActiveSync
Chapter 12 - Calendar
99
Calendar
The calendar allows you to create appointments and
reminders for the day, week, month, or year.
Scheduling an Appointment
An entry in the calendar is called an appointment or
reminder. When you schedule something, a description
is displayed on the time line, and the duration is set to 1
hour by default. You can easily change the start time
and duration for any event.
You can schedule the following types of events in the
calendar:
• Timed appointments, such as meetings, that have a specific
date, start, and end time.
• Untimed reminders, such as birthdays, holidays, and
anniversaries. These occur on a particular date but have no
specific start or end times; they appear at the top of the list of
times in a shaded area. You can schedule more than one
untimed event on the same date.
• Repeating appointments, such as a weekly meeting that is held
on the same day at the same time each week.
• Continuous appointments, such as a vacation or three-day
conference.
• All day events, which reflect the default length of the day as set
by the user.
Chapter 12 - Calendar
100
Scheduling a Timed Appointment
You can schedule timed appointments for the current
date or for future dates.
To schedule a timed appointment for the current date:
1.
Press the Calendar button
on your phone to open
the calendar to the current schedule.
2.
Tap New.
3.
Enter the Subject of the appointment or tap the drop
down arrow and select a preset subject.
4.
Enter the Location if necessary.
5.
Tap the drop down arrow next to the Starts: and select
the desired starting time of the appointment.
6.
Tap the drop down arrow next to the Ends: and select the
desired ending time for the appointment.
7.
Select the type as either Normal or All Day.
Note: If All Day is selected the time is automatically removed in the
start and end times to indicate that there is no time limit.
8.
Tap the Occurs box and select the desired option
9.
Tap the Reminder box and select either None or
Remind Me. If Remind Me was selected, enter the
amount of time before you are reminded.
10. Tap Categories and select either Business or Personal.
When finished, tap
.
11. Tap the Attendees box to invite others to the
appointment from your contacts. Contacts must have an
e-mail address to be added as an attendee.
Chapter 12 - Calendar
101
12. Tap the Status box and select Free, Tentative, Busy, or
Out of Office.
13. Tap the Sensitivity box and select either Normal or
Private.
14. Tap
to save the new appointment.
Changing the Calendar View
When you open the calendar, you can change the view
to one of the following:
• Appointments - Displays a list of the current days
appointments.
• Day - Displays the day with times and any appointments.
• Week - Displays the week.
• Month - Displays the month.
• Year - Displays the year.
To change the view of the calendar:
1.
Press the Calendar button
the calendar.
on your phone to open
2.
Tap the row of calendar icons located on the bottom of
the screen to switch to the desired view.
Chapter 12 - Calendar
102
Calendar Options
The calendar options allow you to configure:
• 1st day of week - Allows you to select which day to begin the
calendar.
• Week View - Allows you to select a five, six, or seven day
week view.
• Show half hour slots - If this option is selected, half hour
increments are displayed on the calendar.
• Show week numbers - If this option is selected, the week
numbers are displayed in the calendar.
• Use large font - If this option is selected, a larger font is
displayed on the calendar screen.
• Set reminders for new items - If this option is selected, an
alert is automatically assigned to any new appointments or
reminders that are entered into the calendar. The default
amount of time is selected using the drop down arrow
located underneath the option.
• Show icons - If this option is selected, icons are displayed on
the calendar to indicate the various functions available.
• Send meeting requests via - Allows you to select the
communication method in which to send a meeting request.
To access the calendar options:
1.
Press the Calendar button
the calendar.
2.
Tap Tools and select Options.
on your phone to open
Chapter 12 - Calendar
103
Tasks
A task is something that needs to be done in a certain
amount of time that requires a reminder to inform the
user that the deadline has been reached. Once the task
has been completed, it can be checked off and another
task can be started. A task list can be set up to keep
track of all the tasks that need to be done. They can be
prioritized, so that higher priority items are finished first.
Creating a new Task
To create a new task:
1.
Tap Start located in the upper left corner of the screen
and select Programs.
2.
Tap Tasks.
3.
Tap New.
4.
Enter a Subject. You can also tap the drop down arrow
to select a default subject.
5.
Tap the Priority box and select:
6.
• High
• Normal
• Low
Tap the Status box and select Not Completed.
7.
Tap the Starts box and enter the starting date.
8.
Tap the Due box and enter the ending date.
9.
Tap the Occurs box and select how often the task
occurs.
Chapter 12 - Calendar
104
10. If you would like a reminder of when the task is due, tap
the Reminder box and select Remind Me.
11. Tap the Categories box and select Business or
Personal. Tap .
12. Tap the Sensitivity box and select Normal or Private.
13. Tap
to save the task.
When the task is saved, it is added to the task list. The
task list allows you to sort the tasks based on priority
level, subject, start date, due date, or status.
Marking a Task Complete
When a task is completed, a check is used to indicate
the item is done.
To mark a task complete:
1.
Tap Start located in the upper left corner of the screen.
2.
Select Tasks.
3.
Locate the desired task from the list and tap the check
box located to the left of the task entry.
Chapter 12 - Calendar
105
Task Options
The following task options are available in the task list:
• Set reminders for new items - If this option is selected, an
alert is automatically created when a new task is created.
• Show start and due date - If this option is selected, the start
and due date is displayed in the task list.
• Use large font - If this option is selected, a larger font is used
on screen.
To access the task options:
1.
Tap Start located in the upper left corner of the screen.
2.
Select Tasks.
3.
Tap Tools and select Options.
Task Entry Bar
The task entry bar option automatically places a bar at
the top of the screen to allow you to create a new task
without navigating through the menu. You simply tap
the bar and enter a name to create a new task. This
option does not put in any start or end times. To enter
any additional information you need to edit the task.
Activating the Entry Bar
To activate the task entry bar:
1.
Tap Start located in the upper left corner of the screen.
2.
Select Tasks.
3.
Tap Tools and select Entry Bar.
Chapter 12 - Calendar
106
Editing a Task
To edit a task:
1.
Tap Start located in the upper left corner of the screen.
2.
Select Tasks.
3.
Select the desired task from the task list.
4.
Tap Edit.
5.
When finished, tap
to save and exit.
Beaming a Task
You can beam a task to another Pocket PC using the IR
port. This operation requires that both users have the
Pocket PC software. To beam a task:
1.
Tap Start located in the upper left corner of the screen.
2.
Select Tasks.
3.
Select the desired task to beam.
4.
Tap Tools and select Beam Task.
5.
When the task is successfully transferred, tap Close.
Chapter 12 - Calendar
107
Adding a Note to a Task
To add a recorded or written note to a task:
1.
Tap Start located in the upper left corner of the screen.
2.
Select Tasks.
3.
Select the desired task from the task list.
4.
Tap Edit.
5.
Tap the Notes tab.
6.
When finished adding the note, tap
to save and exit.
Deleting a Task
When a task is competed, it can be deleted from the
task list. To delete the task:
1.
Tap Start located in the upper left corner of the screen.
2.
Select Tasks.
3.
Select the desired task from the task list.
4.
Tap Tools and select Delete Task.
5.
Tap Yes to confirm the deletion.
Chapter 12 - Calendar
108
Chapter 13 - Notes
The following topics are discussed in this Chapter:
• Recording a New Note
• Writing a New Note
• Saving Notes
Notes
Quickly capture thoughts, reminders, ideas, drawings,
and phone numbers with Notes. Notes can be attached
to contacts, appointments, messages, and tasks. Notes
can also be created in the Notes application. Notes can
be either recorded or written.
Recording a Note
To record a note:
1.
Tap Start located in the upper left corner of the screen.
2.
Select Notes.
3.
Tap New.
4.
Tap the recording icon
5.
Tap
to begin recording.
6.
Tap
to stop recording.
.
Note: To record quick note, press and hold
located on the side
of the phone to begin recording. When you release
the
recording will stop. If you press
once, the Notes screen is
displayed.
Chapter 13 - Notes
110
Recording During a Call
During a call you can record yourself speaking to the
caller to get directions or a phone number, without
looking at the device. To record:
1.
Make a call to the desired person.
2.
During the conversation, press and hold
recording.
3.
When finished, release the
4.
End the call.
to begin
to stop recording.
Note: The call needs to be disconnected to listen to the recording. If
the caller is still connected, there is no audio.
5.
To listen to the recording, tap the entry from the notes
list.
Recording a Personal Note
When you are located in the Notes application, you can
press and hold
to record a personal memo. When
you release the button, the recording stops and the
new note is displayed in the notes list.
Chapter 13 - Notes
111
Writing a new Note
To write a new note:
1.
Tap Start located in the upper left corner of the screen.
2.
Select Notes.
3.
Tap New.
4.
Tap the writing icon
5.
Select the desired character input method by tapping the
up arrow located in the right bottom corner.
6.
Enter the note and tap
.
when finished.
Deleting a Note
To delete a note:
1.
Tap Start located in the upper left corner of the screen.
2.
Select Notes.
3.
Select the desired note from the list.
4.
Tap Tools and select Delete Note.
5.
Tap Yes to confirm the deletion.
Note: You can also tap and hold the note in the notes list, then select
Delete from the menu.
Chapter 13 - Notes
112
Note Options
The following options are available for Notes:
• Default Mode - This option allows you to select a default
mode of Writing or Typing.
• Default Template - Allows you to select Blank Note,
Meeting Notes, Memo, Phone Memo, or To Do as
the default note.
• Save To - Allows you to select Main memory or a
Storage card (if available) as the default note storage
location.
• Record button action - This option allows you to configure
what happens when the record button is tapped when
creating a new note from any application. You can set the
option to Switch to Notes or Stay in the current
program.
To access the notes options:
1.
Tap Start located in the upper left corner of the screen.
2.
Select Notes.
3.
Tap Tools and select Options.
Chapter 13 - Notes
113
Chapter 14 - ActiveSync
The following topics are discussed in this Chapter:
• ActiveSync Setup Options
• Creating a Partnership
• IR ActiveSync Options
• Scheduling ActiveSync
ActiveSync
Microsoft ActiveSync is installed on your desktop/
laptop PC and the i700. It is used to synchronize data
between the two devices. The ActiveSync application is
already installed on your i700, but is required to be
installed on the desktop/laptop PC before any
synchronization can occur.
Installing the ActiveSync Software
The following requirements are necessary before
installing the ActiveSync software to the desktop/laptop
PC:
• Microsoft Windows XP, Windows 2000, Windows
Millennium Edition, Windows NT Workstation 4.0 with SP6
or later, or Windows 98
• Microsoft Outlook 98 or later required for synchronization to
the desktop or portable computer of e-mail, calendar,
contacts, tasks, and notes. (Outlook 2002 recommended)
• Microsoft Internet Explorer 4.01 SP1 or later
• Hard-disk drive with 12 to 65 MB of available hard-disk
space (actual requirements will vary based on selection of
features and user's current system configuration)
• Infrared port or USB port (available for Windows 98,
Windows Me, Windows 2000, and Windows XP only)
• One CD-ROM drive
• VGA graphics card or compatible video graphics adapter at
256 color or later
• Keyboard
Chapter 14 - ActiveSync
115
• Microsoft Mouse or compatible input device
To install to your desktop/laptop computer:
1.
Place the CD in the drive and wait for the Installation
window to display.
2.
Click on Install ActiveSync and USB Drivers.
3.
Reboot your system when the installation is finished.
Creating a New Partnership
After you install ActiveSync and the USB drivers
required for the i700 to connect properly, you need to
create a new partnership. You can setup a standard or
guest partnership.
A Standard partnership is used to synchronize data
between your device and the PC. The Guest
partnership is used to simply transfer files between
your device and the PC.
To create a new partnership:
1.
If this is the first time your i700 is connected to the PC,
the New Partnership screen is displayed when you
launch the ActiveSync application.
2.
Select the desired partnership and click Next.
3.
Select how you want to synchronize data and click Next.
4.
Enter a unique name for your device (i700) and click
Next.
5.
Select or deselect the desired applications that you want
to synchronize and click Next.
Chapter 14 - ActiveSync
116
6.
Click Finish.
The i700 and the PC should perform the first
ActiveSync. This may take some time, depending on
the amount of information that needs to be
synchronized. When the process is complete,
disconnect the data cable from the i700 and close
ActiveSync.
Performing ActiveSync using IR
If you do not have your data cable and you need to
perform a ActiveSync operation, you can use the IR
port. To use the IR port to perform an ActiveSync:
1.
On the PC, launch the ActiveSync application.
2.
Click File and select Connection Settings.
3.
Click the check box next to Allow serial cable or
infrared connection to this COM port.
4.
Click the drop down arrow and select Infrared Port (IR).
5.
Click OK to close the window.
6.
On the i700, tap Start located in the upper left corner of
the screen.
7.
Tap ActiveSync.
8.
Tap Tools and select Connect via IR.
9.
Aim the two devices at each other.
Scheduling an ActiveSync
You can also schedule the following ActiveSync
options:
Chapter 14 - ActiveSync
117
• When connected to my PC, synchronize with the server every
5 min, 15 min, 30 min, 60 min, 2 hours, or 4 hours.
• When not connected to my PC, synchronize with the server
every 5 min, 15 min, 30 min, 60 min, 2 hours, or 4 hours.
• When synchronizing remotely with my PC, disconnect when
complete.
These options are available on both the PC and i700.
To access the scheduling options on the i700:
1.
Tap Start located in the upper left corner of the screen.
2.
Tap ActiveSync.
3.
Tap Tools and select Options.
4.
Tap the Schedule tab.
Chapter 14 - ActiveSync
118
Chapter 15 - Microsoft Pocket
Applications
The following topics are discussed in this Chapter:
• Using Pocket Word
• Using Pocket Excel
Pocket Word
Pocket Word works with Microsoft Word on your
computer to give you easy access to copies of your
documents. You can create new documents or copy
documents from your computer to your i700.
Synchronize the documents between your computer
and your i700 to insure you have the most up-to-date
content in both locations.
Use Pocket Word to create documents, such as letters,
meeting minutes, and trip reports.
Creating a New Document
To create a new file:
1.
Tap Start located in the upper left corner of the screen.
2.
Select Programs.
3.
Tap Pocket Word.
4.
Tap New.
Note: If this is the first document being created, you will
automatically be in a new document screen.
5.
Enter text using the desired character input method.
6.
When finished, tap
to save and exit.
You can open one document at a time. If you try to
open a second document, you are asked to save the
first document. You can save a document in one of the
following formats:
• Pocket Word (.psw)
Chapter 15 - Microsoft Pocket Applications
120
• Word 97/2000 (.doc)
• Word 97/2000 (.dot)
• Rich Text Format (.rtf)
• Plain Text (.txt).
Pocket Word Options
The following options are available in Pocket Word:
• Default Template - Allows you to select Blank Document,
Meeting Notes, Memo, Phone Memo, and To Do as
the default document.
• Save To - Allows you to select Main memory or a
Storage card (if available) as the default document
storage location.
• Display in list view - Allows you to display Pocket Word
only, Pocket Word & Text, and Known Types in the
document list view.
To access the Pocket Word options:
1.
Tap Start located in the upper left corner of the screen.
2.
Select Programs.
3.
Tap Pocket Word.
4.
Tap Tools and select Options.
Chapter 15 - Microsoft Pocket Applications
121
Attaching a Recording
You can attach a recording to a word document using
the Record option. To attach a recording to an existing
document:
1.
Tap Start located in the upper left corner of the screen.
2.
Select Programs.
3.
Tap Pocket Word.
4.
Select the desired document form the list.
5.
Tap View and select Recording.
6.
Tap
7.
When finished, tap
8.
Tap
to start recording.
.
to save and exit.
Deleting a Document
To delete a Pocket Word document:
1.
Tap Start located in the upper left corner of the screen.
2.
Select Programs.
3.
Tap Pocket Word.
4.
Select the desired document from the list.
5.
Tap Tools and select Delete Document.
6.
Tap Yes to confirm the deletion.
Chapter 15 - Microsoft Pocket Applications
122
Beaming a Document
To beam a document to another Pocket PC user:
1.
Tap Start located in the upper left corner of the screen.
2.
Select Programs.
3.
Tap Pocket Word.
4.
Select the desired document from the list.
5.
Tap Tools and select Beam Document.
6.
When the document is transferred, tap Close.
7.
Tap
to exit the IR screen.
Chapter 15 - Microsoft Pocket Applications
123
Pocket Excel
Pocket Excel works with Microsoft Excel on your
computer to give you easy access to copies of your
workbooks. You can create new workbooks or copy
workbooks from your computer to your i700.
Synchronize workbooks between your computer and
your i700 to insure that you have the most up-to-date
content in both locations. Pocket Excel also provides
fundamental spreadsheet tools, such as formulas,
functions, sorting, and filtering.
Use Pocket Excel to create workbooks, such as
expense reports and mileage logs.
Creating a new Workbook
1. Tap Start located in the upper left corner of the screen.
2. Select Programs.
3. Tap Pocket Excel.
4. Tap New.
Note: If this is the first workbook being created, you will
automatically be in a new workbook screen.
5.
Enter text using the desired character input method.
6.
When finished, tap
to save and exit.
You can open one workbook at a time. If you try to
open a second, you are asked to save the first
workbook.
Chapter 15 - Microsoft Pocket Applications
124
Deleting a Workbook
To delete a Pocket Excel document:
1.
Tap Start located in the upper left corner of the screen.
2.
Select Programs.
3.
Tap Pocket Excel.
4.
Select the desired workbook from the list.
5.
Tap Tools and select Delete Workbook.
6.
Tap Yes to confirm the deletion.
Beaming a Workbook
To beam a document to another Pocket PC user:
1.
Tap Start located in the upper left corner of the screen.
2.
Select Programs.
3.
Tap Pocket Excel.
4.
Select the desired workbook from the list.
5.
Tap Tools and select Beam Workbook.
6.
When the workbook is transferred, tap Close.
7.
Tap
to exit the IR screen.
Chapter 15 - Microsoft Pocket Applications
125
Chapter 16 - Other Applications
The following topics are discussed in this Chapter:
• Using File Explorer
• Microsoft Reader
• MSN Messenger
• Terminal Services Client
• Calculator
• Infrared Receive
• Games
• Find
• Help
Program Application
There are several applications that come with Pocket
PC 2002. You can also download and install other
desired applications as needed. The i700 contains
60MB of memory to allow for continued expandability.
The following applications are installed with Pocket PC
2002:
• File Explorer
• Microsoft Reader
• MSN Messenger
• Terminal Services Client
• Games
• Calculator
• Infrared Receive
Chapter 16 - Other Applications
127
File Explorer
The file explorer application allows you to open an
explorer window similar to a desktop Windows based
system. The explorer window allows you to navigate
through the i700 to locate desired folders and files.
Launching the File Explorer
To launch the file explorer:
1.
Tap Start located in the upper left corner of the screen.
2.
Select Programs.
3.
Tap File Explorer.
Microsoft Reader
Use Microsoft Reader to read or listen to electronic
books. You can download books to your computer from
your favorite eBook website. Use ActiveSync to copy
the book files to your i700. The books are displayed in
the Reader Library.
Each book consists of a cover page, an optional table
of contents, and the pages of the book. Page through
the book by using the navigation key or tapping the
page number on each page. You can annotate the
book with highlighting, bookmarks, notes, and
drawings. You can also search for text and look up
definitions for words. The Reader Help book contains
all the information you'll need to use the software. To
open the Help book, tap Microsoft Reader Help from
the Library list.
Chapter 16 - Other Applications
128
To launch the Microsoft Reader application:
launch the file explorer:
1.
Tap Start located in the upper left corner of the screen.
2.
Select Programs.
3.
Tap Microsoft Reader.
MSN Messenger
MSN Messenger on your i700 provides the same chat
environment as MSN Messenger on your PC.
These features include:
• Seeing who is online.
• Sending and receiving instant messages.
• Having an instant message conversation with a group of
contacts.
• Telling contacts you are unavailable.
• Blocking contacts from seeing your status.
To launch:
1.
Tap Start located in the upper left corner of the screen.
2.
Select Programs.
3.
Select MSN Messenger.
Getting Started with MSN Messenger
To use MSN Messenger, you need a Microsoft
Passport account or an Exchange E-mail account.
Once you have the required account, you need to:
Chapter 16 - Other Applications
129
1.
Set up a connection on your mobile device that allows
you to connect to the internet.
2.
Set up an account in MSN Messenger.
3.
Sign in to MSN Messenger.
Note: To setup a Hotmail account, go to http://www.hotmail.com.
Terminal Services Client
The Terminal Services Client enables you to log on to a
desktop computer running terminal services or remote
desktop and use all the applications on the computer
from your mobile device. For more information, refer to
the help file in the Pocket PC.
Games
Pocket PC Solitaire is installed in the Games folder. To
open the solitaire game:
1.
Tap Start located in the upper left corner of the screen.
2.
Select Programs.
3.
Tap Games.
4.
Tap Solitaire.
Chapter 16 - Other Applications
130
Calculator
The calculator allows you to perform general
mathematical functions, such as addition, subtraction,
multiplication, and division.
You can use the calculator to:
• Perform basic calculations.
• Store and retrieve values.
• Display the last series of calculations.
To open the calculator:
the solitaire game:
1.
Tap Start located in the upper left corner of the screen.
2.
Select Programs.
3.
Tap Calculator.
Using the Calculator
The calculator includes several buttons to complete the
mathematical calculations.
• CE - The “CE” button clears the last number you entered.
Use this button if you make a mistake while entering a
number in the middle of a calculation. This button enables
you to re-enter the number without starting the calculation
over.
• C - The “C” button clears the entire calculation and enables
you to begin a fresh calculation.
• +/- - The “Plus/Minus” button toggles the current number
between a negative and positive value. If you want to enter a
Chapter 16 - Other Applications
131
negative number, enter the number first and then press the
+/- button.
• M+ - The “M+” button places the current number in
memory. Each new number you enter with the M+ button is
added to the total stored in memory. The number that you
add can be either a calculated value or any number you enter
by pressing the number buttons. Pressing this button has
no effect on the current calculation (or series of
calculations); it merely places the value into memory until it
is recalled.
• MR - The “MR” button recalls the stored value from memory
and inserts it in the current calculation.
• MC - The “MC” button clears any value that is stored in the
Calculator memory.
Infrared Receive
Infrared Receive or IR is used to receive files between
two IR devices. In most cases, you can also receive
files from your PC when it is equipped with an IR port.
The two devices are aimed at each other approximately
four inches apart.
If you have difficulty getting the two devices to send or
receive information, try the following:
• Transfer only one file at a time. No more than 25 contacts
should be done at once.
• Make sure that the IR port windows are clear and free of any
dirt or obstacles.
• Adjust the room lighting or move to another location. Some
types of lighting may interfere with the transmission.
Chapter 16 - Other Applications
132
Receiving a File
To receive a file:
1.
Prepare a file from another IR device and initiate a send
command.
2.
On the i700, tap Start located in the upper left corner of
the screen.
3.
Select Programs.
4.
Tap Infrared Receive.
5.
Aim the two devices at each other and wait for
confirmation that the file has been received.
6.
Tap Close.
Find
The find option allows you to search for the following:
• All Data
• Calendar
• Contacts
• Help
• Inbox
• Larger than 64 KB
• Notes
• Pocket Excel
• Pocket Outlook
• Pocket Word
• Tasks
Chapter 16 - Other Applications
133
To access the find feature:
1.
Tap Start located in the upper left corner of the screen.
2.
Select Find.
3.
Enter the desired text in the Find: field or tap the drop
down arrow to view past find entries.
4.
Tap the drop down arrow in the Type: field and select the
desired option.
5.
Tap the Go button to display the results.
Help
Pocket PC 2002 has a built in help file that can be
accessed to explain common questions regarding the
operating system. To access the help file:
1.
Tap Start located in the upper left corner of the screen.
2.
Select Help.
3.
Select the desired topic from the help contents or tap
Find at the bottom to enter a desired topic.
Note: You can also access the help screen when you are in an
application. While the application screen is displayed, tap Start and
select Help. The help screen that corresponds to the open application
will be displayed.
Chapter 16 - Other Applications
134
Chapter 17 - Managing
Applications
The following topics are discussed in this Chapter:
• Installing New Applications
• Deleting Applications
• Memory Allocation
Application Management
Your i700 is running the Pocket PC 2002 operating
system. This allows you to install or remove any Pocket
PC 2002 compatible application on your device. Pocket
PC applications can be downloaded from the web,
purchased at retail outlets, or beamed from a friend
using the IR feature.
Installing New Applications
Applications are installed using the ActiveSync
application. When a new application is downloaded
from the web or installed using a CD, the files are
transferred to the mobile device via ActiveSync. When
the ActiveSync is performed, the available memory is
checked and then the files are copied. If there is not
enough memory available, a warning message is
displayed. To free up memory, simply remove old
programs or delete older files.
To install a new application:
1.
Insert the CD into the desktop/laptop PC.
2.
Run the Setup program.
3.
Connect the i700 data connector to accessory connector
located on the bottom of the phone.
4.
Perform an ActiveSync operation.
Chapter 17 - Managing Applications
136
Deleting an Application
Some applications are large and take up space on your
i700. To help manage space and memory requirements
for other software that may need to be installed, you
can delete any application not stored in ROM. ROM
applications are those that were installed at the factory
and are required for the device to operate correctly. To
delete an application:
1.
Tap Start located in the upper left corner of the screen.
2.
Select Settings.
3.
Tap the System tab.
4.
Tap Remove Programs at the bottom of the screen.
5.
Select the program from the list and tap Remove.
Chapter 17 - Managing Applications
137
Memory Allocation
Memory is managed automatically, but can be
temporarily adjusted using the memory slider. Memory
is allocated to storage and programs. Usually the
amount given to each is divided into equal amounts. It
may become necessary to adjust one or the other to
install or use another application requiring higher
memory usage. To temporarily modify the memory
settings:
1.
Tap Start located in the upper left corner of the screen.
2.
Select Settings.
3.
Tap the System tab.
4.
Tap Memory.
5.
Tap and hold the slider left or right to allocate the desired
memory amounts.
6.
Tap
to save and exit.
Memory Card
The memory card can be used to backup or save data
to avoid accidental loss due to battery discharge or
other unforseen device data complications. The
memory storage card is inserted into the slot located on
the side of the unit. Once installed, the storage card is
displayed on the i700. When checking the memory
allocation as outlined above, the storage card can be
selected to get an accurate available memory setting.
The Safestore option allows you to backup and protect
data up to 5 MB using the backup utility.
Chapter 17 - Managing Applications
138
Chapter 18 - Internet Explorer
The following topics are discussed in this Chapter:
• Launching Internet Explorer
• Saving Favorites
• Internet Pass Through
Pocket Internet Explorer
You can use Internet Explorer to view web pages on
your i700 in two different ways:
• By downloading pages and then performing a ActiveSync
operation.
• By connecting to the Internet Directly.
While browsing you can also download new files and
programs. If you are using Microsoft Internet Explorer
version 4 or later, your favorites can be synchronized to
your i700.
Launching Internet Explorer
To launch Internet Explorer:
1.
Tap Start located in the upper left corner of the screen.
2.
Tap Internet Explorer.
Note: Microsoft Pocket I.E does not support all browser functions
supported by PC I.E, therefore, browser functions might not work in
some internet sites.
Chapter 18 - Internet Explorer
140
Saving Favorites
When you find a web page that contains useful or
interesting information, it can be saved as a favorite. To
save a favorite:
1.
Tap Start located in the upper left corner of the screen.
2.
Tap Internet Explorer.
3.
Navigate to the desired website.
4.
Tap the yellow folder icon in the command bar.
5.
Tap the Add/Delete tab.
6.
Select the desired folder and tap Add.
7.
Tap Add again.
8.
Tap
to save and exit.
Internet Pass Through
When the i700 is connected to your desktop/laptop
machine, it can access the Internet using Internet pass
through. If the desktop/laptop machine is connected to
the internet, then the i700 can also be used to display
online information using Pocket Internet Explorer. To
access the Internet using the i700:
1.
Connect the i700 to your desktop/laptop machine and
perform an ActiveSync operation.
2.
Tap Start located in the upper left corner of the screen.
3.
Tap Internet Explorer.
Chapter 18 - Internet Explorer
141
Chapter 19 - Camera
The following topics are discussed in this Chapter:
• Launching the Camera Application
• Camera Settings
• Sleep Mode
• Timer
• Still View Navigation
• Taking Pictures
• Zoom
• Voice Record
• Viewing Pictures
• Adaptive Sensitivity
• Beaming Pictures
Camera
The i700 comes with a built-in camera mounted on a
swivel integrated into the upper left corner of the
phone. To use the camera, simply use the thumb wheel
on the side and rotate to the desired angle. When you
take a picture, it is saved into the phone’s memory.
Pictures can also be saved on the desktop/laptop PC
using ActiveSync.
Launching the Camera Application
To launch the camera application:
1.
Tap Start located in the upper left corner of the screen.
2.
Tap Camera.
The camera screen is displayed with a window
reflecting an image of whet is being captured by the
lens.
Taking a Picture
1.
Locate the desired picture using the swivel on the
camera.
2.
Tap the big blue button to snap the picture.
Chapter 19 - Camera
143
Camera Settings
The following camera settings are available:
• Size - Allows you to select the desired image. The choices
are 640x480, 320x240, and 160x120. The smaller the image
size, the smaller the image file size.
• Quality - Allows you to select the quality of the image. The
choices are Normal, Fine, and Best.
• Whitebalance - Allows you to select the white balance or how
bright the image. The choices are Auto, Daylight, CoolWhite,
Horizon, TL84, and Incandescent.
• Exposure - Allows you to select the exposure settings of the
image. The choices are Brighter, Bright, Normal, Dark, and
Darker.
• AS Mode - Enables the camera to acquire and display images
with a wide range of illuminations. When you tap the capture
button, a full image with clear visible details both in bright
and dark areas of the photo is provided.
• Available Picture Counter - There is a counter located on the
menu bar next to the time and date that displays the amount
of available pictures. Each time a picture is taken, this
number decreases.
To open the camera settings:
1.
Tap Start located in the upper left corner of the screen.
2.
Tap Camera.
3.
Tap Settings.
Chapter 19 - Camera
144
Sleep Mode
The camera will automatically go to sleep and display a
blank screen with a camera icon. To wake up the
camera, tap anywhere on the screen.
Timer
The timer can be set to take pictures automatically after
3, 6, 9, or 12 seconds. When the timer reaches zero, a
picture is taken and saved into memory. To set the
timer:
1.
Tap Start located in the upper left corner of the screen.
2.
Tap Camera.
3.
Tap the timer button located to the right of the picture
button:
4.
• Once for three seconds.
• Twice for six seconds.
• Three times for nine seconds.
• Four times for twelve seconds.
When the desired amount of time is displayed, tap the
picture button.
5.
The countdown begins and a series of tones are heard.
6.
A click is heard when the picture is taken.
Chapter 19 - Camera
145
Viewing Pictures
To view your pictures:
1.
Tap Start located in the upper left corner of the screen.
2.
Tap Camera.
3.
Tap View and select:
• View Image - Views the images one by one.
• View Thumbnails - Views the entire library using small
thumbnail pictures.
Still View Navigation
When you are viewing images in still view, the following
options are available:
• Actual Size dialog box - Display the image in a full screen
format at regular size.
• Navigation Map - Allows you to navigate around the image
displayed in full view when the image is too large for the
screen.
• Goto Previous or Next Image - Allows you to move to the
next or previous image saved in memory.
• Zoom - Allows you to zoom in or out.
• Voice Record - Allows you to record a voice memo and
attach it to the image.
• Details Information - Displays the details of the image and
where it was saved.
Chapter 19 - Camera
146
Actual Size Dialog Box
The actual size dialog box allows you to view the
captured image on screen at the size it was taken. The
navigation screen is automatically displayed in the
lower right corner of the screen. A small red box
illustrates the viewable portion of the image. You can
move the box by sliding it around to display the other
portions of the image. To view the image in actual size:
1.
Tap Start located in the upper left corner of the screen.
2.
Tap Camera.
3.
Tap View and select View Image.
4.
Tap
5.
Tap the red box and drag to view the other portions of
the image.
.
Goto Previous or Next Image
1.
Tap Start located in the upper left corner of the screen.
2.
Tap Camera.
3.
Tap View and select View Image.
4.
Tap
5.
Tap the left or right arrow in the lower right corner of the
screen.
.
Chapter 19 - Camera
147
Zoom
1.
Tap Start located in the upper left corner of the screen.
2.
Tap Camera.
3.
Tap View and select View Image.
4.
Tap
5.
Tap the plus magnifying glass icon to zoom in or tap the
minus magnifying icon to zoom out.
.
Voice Record
1.
Tap Start located in the upper left corner of the screen.
2.
Tap Camera.
3.
Tap View and select View Image.
4.
Tap
box.
to display the Voice Memo recording dialog
5.
Tap
to begin recording.
6.
When finished, tap
7.
To listen to the memo, tap
8.
Close the voice memo recording dialog box to save the
attachment to the image.
.
.
Note: A speaker icon is now displayed in the lower right corner of the
image to indicate that a voice memo has been attached to the image.
Chapter 19 - Camera
148
Text Memo
You can also attach a text memo to the image. To
attach a text memo:
1.
Tap Start located in the upper left corner of the screen.
2.
Tap Camera.
3.
Tap View and select View Image.
4.
Select the desired image and tap
5.
Tap the Memo tab.
6.
Tap the area under Text Memo and enter the memo
using the desired input method.
7.
When finished, tap
.
to save and exit.
Details Information
The details information displays the following
information about the image:
• File Name
• Folder Path
• File Size
• Image Format
• Image Resolution
• Date Modified
To display the information for an image:
1.
Tap Start located in the upper left corner of the screen.
2.
Tap Camera.
3.
Tap View and select View Image.
Chapter 19 - Camera
149
4.
Select the desired image and tap
5.
Tap the Information tab.
6.
Tap
.
to exit.
Thumbnail View
When you are viewing images in thumbnail view, the
following options are available:
• Capture
• View Image
• Slideshow
• Rename/Move
• Delete
• Tools
Capture
When you are viewing the thumbnails, you can return
to the camera screen by using the capture command.
To access the capture command:
1.
Tap Start located in the upper left corner of the screen.
2.
Tap Camera.
3.
Tap View and select View Thumbnails.
4.
When you are finished viewing the thumbnails, tap View
and select Capture to return to the camera.
Chapter 19 - Camera
150
View Image
To view the image on screen from the thumbnail:
1.
Tap Start located in the upper left corner of the screen.
2.
Tap Camera.
3.
Tap View and select View Thumbnails.
4.
Press the navigation key left or right to select the desired
thumbnail.
5.
Tap View and select View Image.
Note: You can also tap the thumbnail to view it on screen.
Slideshow
To view a slide show of all the images that are stored in
memory:
1.
Tap Start located in the upper left corner of the screen.
2.
Tap Camera.
3.
Tap View and select View Thumbnails.
4.
Press the navigation key left or right to select the first
image.
Note: The slideshow displays the images in a sequential order. If the
image is that last one in the list, it will be the only one displayed.
5.
Tap View and select Slideshow.
Chapter 19 - Camera
151
Rename/Move
The rename/move command allows you to rename the
image and move it to a different folder. To rename/
move:
1.
Tap Start located in the upper left corner of the screen.
2.
Tap Camera.
3.
Tap View and select View Thumbnails.
4.
Tap Edit and select Rename/Move.
5.
Enter the new name and folder using the desired input
method. When finished, tap
to save and exit.
Deleting a Thumbnail
To delete a thumbnail:
1.
Tap Start located in the upper left corner of the screen.
2.
Tap Camera.
3.
Tap View and select View Thumbnails.
4.
Tap Edit and select Delete.
5.
Tap Yes to confirm the deletion.
Tools
The tools menu allows you to:
• Send an image using email or IR
• Sort Type
• Sort Order
• Refresh Thumbnails
• Change Folder
Chapter 19 - Camera
152
Sending an Image
Images can be beamed to another Pocket PC user
using the built-in IR port. Images can also be sent by
attachment using the email function. To access the
send menu:
1.
Tap Start located in the upper left corner of the screen.
2.
Tap Camera.
3.
Tap View and select View Thumbnails.
4.
Tap Tools and select Send.
Sort Type
Images can be sorted by name or date using the sort
type feature. To access sort type:
1.
Tap Start located in the upper left corner of the screen.
2.
Tap Camera.
3.
Tap View and select View Thumbnails.
4.
Tap Tools and select Sort Type.
Sort Order
Images can be sorted either ascending or descending
by using the sort order feature. To access sort order:
1.
Tap Start located in the upper left corner of the screen.
2.
Tap Camera.
3.
Tap View and select View Thumbnails.
4.
Tap Tools and select Sort Order.
Chapter 19 - Camera
153
Refresh Thumbnails
To refresh the thumbnail screen:
1.
Tap Start located in the upper left corner of the screen.
2.
Tap Camera.
3.
Tap View and select View Thumbnails.
4.
Tap Tools and select Refresh Thumb.
Change Folder
To change the folder where the thumbnail images are
saved:
1.
Tap Start located in the upper left corner of the screen.
2.
Tap Camera.
3.
Tap View and select View Thumbnails.
4.
Tap Tools and select Change Folder.
5.
Browse to the desired new folder or create a new one.
6.
When finished, tap
to save and exit.
Adaptive Sensitivity (AS Mode)
The Adaptive Sensitivity technology enables the
camera to acquire and display images with wide range
of illuminations, of more than 60 dB. When a picture is
taken, a full image with clear details in light and dark
areas is displayed.
The image is obtained by utilizing two images: one with
a short exposure time and the other with a long
exposure time. Each image captures the light and dark
Chapter 19 - Camera
154
sections of the scene. Adaptive Sensitivity combines
the two images into a one dynamic image and reduces
the image to a normal size to display on the screen
without loosing any details.
Activating AS Mode
To turn on the AS mode:
1.
Tap Start located in the upper left corner of the screen.
2.
Tap Camera.
3.
Tap Settings and select AS Mode.
AS Mode Icons
When AS Mode is enabled, an icon is displayed in the
upper right corner of the screen. This icon represents
the image conditions.
Icon
Description
AS Mode OK - Good light conditions. This option
is only active in AS mode.
AS Low Light - A low light condition was
detected. The camera cannot increase the
exposure due to the low light. This option is only
active in AS mode.
AS Motion Detected - High motion was detected.
The captured image will be in normal mode. This
option is always active.
Chapter 19 - Camera
155
Beaming Pictures
To beam pictures:
1.
Tap Start located in the upper left corner of the screen.
2.
Tap Camera.
3.
Tap View and select View Image.
4.
Select the desired image by tapping the navigation
arrows left or right.
5.
Tap Send and select Beam Files.
6.
Tap Close when finished.
Continuous Picture Mode
The continuous picture mode allows you to set the
digital camera to take three pictures in a row very
quickly when you tap the blue button. To turn on
continuous picture mode:
1.
Tap the continuous picture mode icon located next to
Help in the menu bar.
2.
Notice that the number “3” is placed next to the camera
icon under the view screen on the right side.
3.
Tap the blue button to take your pictures.
Chapter 19 - Camera
156
Chapter 20 - Windows Media
Player
The following topics are discussed in this Chapter:
• Launching the Media Player
• Media Player Controls
• Opening Media Files
• Creating a Playlist
Media Player
You can use the Microsoft Windows Media Player for
Pocket PC to play digital audio and video files that are
stored on your device or downloaded from the web.
You can play files in either Windows Media or MP3
format, including files with extensions .asf, .wma, .wmv,
and .mp3.
Launching the Media Player
To launch the Media Player:
1.
Tap Start located in the upper left corner of the screen.
2.
Tap Windows Media.
Media Player Controls
The following settings are available in the media player:
•
- Tap this icon to play a file.
•
- Pauses the file
•
- Stops the file.
•
- Skips to the beginning of the file or to the previous file.
•
- Skips to the next file.
•
- Adjusts the playback progress of the selected file.
•
- Adjusts the volume levels.
•
- Displays a video using the entire screen.
Chapter 20 - Windows Media Player
158
•
- Displays the WindowsMedia.com web page.
Loading Media Player Files
Media player files must be copied to the i700 using the
ActiveSync application. The files are copied to the
Local Content folder on the i700 after the ActiveSync
operation. To load a file:
1.
Tap Start located in the upper left corner of the screen.
2.
Tap Windows Media.
3.
Tap Select.
4.
Select the desired file from the list and tap
5.
Tap
.
to play the file.
Chapter 20 - Windows Media Player
159
Playlist
The Windows Media player allows you to configure
personal playlists with your favorite music or video files.
Playlists group media content and store the location of
media content, whether the location is your computer, a
network, or the Internet. Playlists typically have an .asx
or .m3u file extension.
To create a new playlist:
1.
Launch the Windows Media player application.
2.
Tap Select.
3.
Tap the drop down arrow next to Local Content and
select Organize Playlists.
4.
Tap New.
5.
Enter a name for the playlist and tap
6.
Tap the Plus sign at the bottom of the screen to open a
browse window.
7.
Tap the check box next to each supported media file to
add it to the new playlist. Tap
when finished.
.
Chapter 20 - Windows Media Player
160
Chapter 21 - Troubleshooting,
Safety, and Warranty
The following topics are discussed in this Chapter:
• Troubleshooting
• Safety Information
• Warranty
Troubleshooting
Before contacting Customer Service, try the following:
• Make sure that the battery is properly attached to your
phone.
• Make sure that the battery is fully charged.
• Make sure that there is no visible physical damage to your
phone or battery.
• Make sure that the cradle/charger is plugged in to a working
receptacle.
• Perform a soft or hard reset using the stylus or a paper clip
to press the reset button located on the back lower right
corner of your phone. For more information on resetting
your handheld, see “Resetting Your Handheld” on page 163.
• If you are using Windows 2000 or XP, make sure you have
the proper user rights. You must have Standard User rights
to install the i700 software.
Chapter 21 - Troubleshooting, Safety, and Warranty
162
Resetting Your Handheld
Under normal circumstances, you will not have to use
the reset button. On rare occasions, however your
handheld may no longer respond to buttons or the
screen. In this case, you need to perform a reset to get
your handheld running again.
Performing a Soft Reset
A soft reset interrupts the processing on your handheld.
All records and entries stored in your handheld
computer are retained with a soft reset. After a soft
reset, the main phone screen is displayed.
To perform a Soft Reset:
• Un-screw the stylus, or use the tip of an unfolded paper clip
(or similar object without a sharp tip), to gently press the
reset button inside the hole on the back lower right corner of
your phone.
Performing a Hard Reset
A hard reset erases all records and entries stored in
your handheld. Never perform a hard reset unless a
soft reset does not solve the problem. To restore your
data after a hard reset, you must perform an
ActiveSync operation.
Note: You can restore any data previously synchronized with your
computer during the next ActiveSync operation.
Note: With a hard reset, the current date and time are retained.
Formats, Preferences, and other settings are restored to their original
factory default settings.
Chapter 21 - Troubleshooting, Safety, and Warranty
163
To perform a Hard Reset:
• To perform a hard reset, press and hold the Handheld Power
button
, then press the reset button. Remove the stylus
or paperclip from the reset hole, then release the handheld
power button. A “Tap the screen to set up your Pocket PC”
screen is displayed confirming the hard reset. Tap the
screen to begin the set up process and follow the on-screen
instructions.
Note: Data saved in Safestore memory does not get deleted, even if a
hard reset is performed.
Chapter 21 - Troubleshooting, Safety, and Warranty
164
Safety Information
Battery Precautions
Your phone is powered by a rechargeable Li-polymer
standard battery. The read the following cautions
concerning the battery:
• Never use any charger or battery that is damaged in any way.
• Use the battery only for its intended purpose.
• If your phone has a strong signal, it uses less power; talk and
standby time are greatly affected by the signal strength on
the cellular network and the parameters set by the network
operator.
• Battery charging time depends on the remaining battery
charge and the type of battery and charger used. The battery
can be charged and discharged hundreds of times, but it will
gradually wear out. When the operation time, including talk
time and standby time, is noticeably shorter than normal, it
is time to purchase a new battery.
• If left unused, a fully charged battery will discharge itself
over time.
• Use only Samsung-approved batteries and chargers. When a
charger is not in use, disconnect it from the power source.
Do not leave the battery connected to a charger for more
than a 7 days, since overcharging may shorten its life.
• Extreme temperatures will affect the charging capacity of
your battery. The battery may require cooling or warming
before charging.
• Do not leave the battery in hot or cold places, such as in a
car. It will reduce the capacity and life-time of the battery.
Chapter 21 - Troubleshooting, Safety, and Warranty
165
• Always try to keep the battery at room temperature. A phone
with a hot or cold battery may not work correctly, even if the
battery is fully charged. Lilon batteries are sensitive to
temperatures below 0 °C (32 °F).
• Do not short-circuit the battery. Accidental short circuiting
can occur when a metallic object (coin, clip, or pen) causes
a direct connection between the positive and negative
terminals of the battery.
• Dispose of used batteries in accordance with local
regulations. Always recycle. Do not dispose of batteries in a
fire.
Road Safety
Your wireless phone gives you the powerful ability to
communicate by voice, almost anywhere, anytime. But
an important responsibility accompanies the benefits of
wireless phones, one that every user must uphold.
When driving a car, driving is your first responsibility.
When using your wireless phone behind the wheel of a
car, practice good common sense and remember the
following tips:
1.
Get to know your wireless phone and its features, such
as speed dial and redial. If available, these features help
you to place your call without taking your attention off the
road.
2.
When available, use a hands-free device. If possible,
add an extra layer of convenience and safety to your
wireless phone with one of the many hands-free
accessories available today.
Chapter 21 - Troubleshooting, Safety, and Warranty
166
3.
Position your wireless phone within easy reach. Be able
to access your wireless phone without removing your
eyes from the road. If you get an incoming call at an
inconvenient time, let your voice mail answer it for you.
4.
Let the person you are speaking with know you are
driving; if necessary, suspend the call in heavy traffic or
hazardous weather conditions. Rain, sleet, snow, ice and
even heavy traffic can be hazardous.
5.
Do not take notes or look up phone numbers while
driving. Jotting down a To Do list or flipping through your
phonebook takes your attention away from your primary
responsibility, driving safely.
6.
Dial sensibly and assess the traffic; if possible, place
calls when you are not moving or before pulling into
traffic. Try to plan calls when your car will be stationary. If
you need to make a call while moving, dial only a few
numbers, check the road and your mirrors, then
continue.
7.
Do not engage in stressful or emotional conversations
that may be distracting. Make the people with whom you
are talking aware that you are driving and suspend
conversations that have the potential to divert your
attention from the road.
8.
Use your wireless phone to call for help. Dial the
emergency number in the case of fire, traffic accident or
medical emergencies. Remember, it is a free call on your
wireless phone!
9.
Use your wireless phone to help others in emergencies.
If you see a car accident, crime in progress or other
Chapter 21 - Troubleshooting, Safety, and Warranty
167
serious emergency where lives are in danger, call the
emergency number, as you would want others to do for
you.
10. Call roadside assistance or a special non emergency
wireless assistance number when necessary. If you see
a broken-down vehicle posing no serious hazard, a
broken traffic signal, a minor traffic accident where no
one appears injured, or a vehicle you know to be stolen,
call roadside assistance or any other special nonemergency wireless number.
Operating Environment
Remember to follow any special regulations in force in
any area and always switch off your phone whenever it
is forbidden to use it, or when it may cause interference
or danger. When connecting the phone or any
accessory to another device, read its user’s guide for
detailed safety instructions. Do not connect
incompatible products. As with other mobile radio
transmitting equipment, users are advised that for the
satisfactory operation of the equipment and for the
safety of personnel, it is recommended that the
equipment should only be used in the normal operating
position (held to your ear with the antenna pointing over
your shoulder).
Electronic Devices
Most modern electronic equipment is shielded from
radio frequency (RF) signals. However, certain
electronic equipment may not be shielded against the
Chapter 21 - Troubleshooting, Safety, and Warranty
168
RF signals from your wireless phone. Consult the
manufacturer to discuss alternatives.
Pacemakers
Pacemaker manufacturers recommend that a minimum
distance of 15 cm (6 inches) be maintained between a
wireless phone and a pacemaker to avoid potential
interference with the pacemaker. These
recommendations are consistent with the independent
research and recommendations of Wireless
Technology Research.
Persons with pacemakers:
• Should always keep the phone more than 15 cm (6 inches)
from their pacemaker when the phone is switched on;
• Should not carry the phone in a breast pocket;
• Should use the ear opposite the pacemaker to minimize
potential interference.
If you have any reason to suspect that interference is
taking place, switch off your phone immediately.
Hearing Aids
Some digital wireless phones may interfere with some
hearing aids. In the event of such interference, you may
wish to consult your hearing aid manufacturer to
discuss alternatives.
Other Medical Devices
If you use any other personal medical devices, consult
the manufacturer of your device to determine if it is
Chapter 21 - Troubleshooting, Safety, and Warranty
169
adequately shielded from external RF energy. Your
physician may be able to assist you in obtaining this
information. Switch off your phone in health care
facilities when any regulations posted in these areas
instruct you to do so. Hospitals or health care facilities
may be using equipment that could be sensitive to
external RF energy.
Vehicles
RF signals may affect improperly installed or
inadequately shielded electronic systems in motor
vehicles. Check with the manufacturer or its
representative regarding your vehicle. You should also
consult the manufacturer of any equipment that has
been added to your vehicle.
Posted Facilities
Switch off your phone in any facility where posted
notices require you to do so.
Potentially Explosive Atmospheres
Switch off your phone when in any area with a
potentially explosive atmosphere and obey all signs
and instructions. Sparks in such areas could cause an
explosion or fire resulting in bodily injury or even death.
Users are advised to switch off the phone while at a
refuelling point (service station). Users are reminded of
the need to observe restrictions on the use of radio
equipment in fuel depots (fuel storage and distribution
areas), chemical plants or where blasting operations
are in progress. Areas with a potentially explosive
Chapter 21 - Troubleshooting, Safety, and Warranty
170
atmosphere are often but not always clearly marked.
They include below deck on boats, chemical transfer or
storage facilities, vehicles using liquefied petroleum
gas (such as propane or butane), areas where the air
contains chemicals or particles, such as grain, dust or
metal powders, and any other area where you would
normally be advised to turn off your vehicle engine.
Emergency Calls
This phone, like any wireless phone, operates using
radio signals, wireless and land line networks as well
as user-programmed functions, which cannot
guarantee connection in all conditions. Therefore, you
should never rely solely on any wireless phone for
essential communications (medical emergencies, for
example).
Remember, to make or receive any calls the phone
must be switched on and in a service area with
adequate signal strength. Emergency calls may not be
possible on all wireless phone networks or when
certain network services and/or phone features are in
use. Check with local service providers. If certain
features are in use (call barring, for example), you may
first need to deactivate those features before you can
make an emergency call. Consult this document and
your local cellular service provider. When making an
emergency call, remember to give all the necessary
information as accurately as possible. Remember that
your phone may be the only means of communication
Chapter 21 - Troubleshooting, Safety, and Warranty
171
at the scene of an accident; do not cut off the call until
given permission to do so.
Other Important Safety Information
• Only qualified personnel should service the phone or install
the phone in a vehicle. Faulty installation or service may be
dangerous and may invalidate any warranty applicable to the
device.
• Check regularly that all wireless phone equipment in your
vehicle is mounted and operating properly.
• Do not store or carry flammable liquids, gases or explosive
materials in the same compartment as the phone, its parts
or accessories.
• For vehicles equipped with an air bag, remember that an air
bag inflates with great force. Do not place objects, including
both installed or portable wireless equipment in the area
over the air bag or in the air bag deployment area. If wireless
equipment is improperly installed and the air bag inflates,
serious injury could result.
• Switch off your phone before boarding an aircraft. The use of
wireless phones in aircraft may be dangerous to the
operation of the aircraft, and is illegal.
• Failure to observe these instructions may lead to the
suspension or denial of telephone services to the offender,
or legal action, or both.
Care and Maintenance
Your phone is a product of superior design and
craftsmanship and should be treated with care. The
suggestions below will help you fulfill any warranty
Chapter 21 - Troubleshooting, Safety, and Warranty
172
obligations and allow you to enjoy this product for many
years.
• Keep the phone and all its parts and accessories out of the
reach of small children’s.
• Keep the phone dry. Precipitation, humidity and liquids
contain minerals that will corrode electronic circuits.
• Do not use or store the phone in dusty, dirty areas, as its
moving parts may be damaged.
• Do not store the phone in hot areas. High temperatures can
shorten the life of electronic devices, damage batteries, and
warp or melt certain plastics.
• Do not store the phone in cold areas. When the phone warms
up to its normal operating temperature, moisture can form
inside the phone, which may damage the phone’s electronic
circuit boards.
• Do not drop, knock or shake the phone. Rough handling can
break internal circuit boards.
• Do not use harsh chemicals, cleaning solvents or strong
detergents to clean the phone. Wipe it with a soft cloth
slightly dampened in a mild soap-and water solution.
Chapter 21 - Troubleshooting, Safety, and Warranty
173
Warranty
STANDARD LIMITED WARRANTY
What is Covered and For How Long?
SAMSUNG TELECOMMUNICATIONS AMERICA, L.P.
("SAMSUNG") warrants to the original purchaser
("Purchaser") that SAMSUNG's Phones and
accessories ("Products") are free from defects in
material and workmanship under normal use and
service for the period commencing upon the date of
purchase and continuing for the following specified
period of time after that date:
Phone
1 Year
Batteries
1 Year
Leather Case/Pouch
90 Days
Holster
90 Days
Other Phone Accessories
1 Year
What is Not Covered?
This Limited Warranty is conditioned upon proper use
of Product by Purchaser. This Limited Warranty does
not cover: (a) defects or damage resulting from
accident, misuse, abuse, neglect, unusual physical,
electrical or electromechanical stress, or modification
of any part of Product, including antenna, or cosmetic
damage; (b) equipment that has the serial number
removed or made illegible; (c) any plastic surfaces or
other externally exposed parts that are scratched or
Chapter 21 - Troubleshooting, Safety, and Warranty
174
damaged due to normal use; (d) malfunctions resulting
from the use of Product in conjunction with
accessories, products, or ancillary/peripheral
equipment not furnished or approved by SAMSUNG;
(e) defects or damage from improper testing, operation,
maintenance, installation, or adjustment; (f) installation,
maintenance, and service of Product, or (g) Product
used or purchased outside the United States or
Canada. This Limited Warranty covers batteries only if
battery capacity falls below 80% of rated capacity or
the battery leaks, and this Limited Warranty does not
cover any battery if (i) the battery has been charged by
a battery charger not specified or approved by
SAMSUNG for charging the battery, (ii) any of the seals
on the battery are broken or show evidence of
tampering, or (iii) the battery has been used in
equipment other than the SAMSUNG phone for which it
is specified.
What are SAMSUNG's Obligations?
During the applicable warranty period, SAMSUNG will
repair or replace, at SAMSUNG's sole option, without
charge to Purchaser, any defective component part of
Product. To obtain service under this Limited Warranty,
Purchaser must return Product to an authorized phone
service facility in an adequate container for shipping,
accompanied by Purchaser's sales receipt or
comparable substitute proof of sale showing the date of
purchase, the serial number of Product and the sellers'
name and address. To obtain assistance on where to
deliver the Product, call Samsung Customer Care at 1Chapter 21 - Troubleshooting, Safety, and Warranty
175
888-987-4357. Upon receipt, SAMSUNG will promptly
repair or replace the defective Product. SAMSUNG
may, at SAMSUNG's sole option, use rebuilt,
reconditioned, or new parts or components when
repairing any Product or replace Product with a rebuilt,
reconditioned or new Product. Repaired/replaced
leather cases, pouches and holsters will be warranted
for a period of ninety (90) days. All other repaired/
replaced Product will be warranted for a period equal to
the remainder of the original Limited Warranty on the
original Product or for 90 days, whichever is longer. All
replaced parts, components, boards and equipment
shall become the property of SAMSUNG. If SAMSUNG
determines that any Product is not covered by this
Limited Warranty, Purchaser must pay all parts,
shipping, and labor charges for the repair or return of
such Product.
What Are the Limits On SAMSUNG's Liability?
EXCEPT AS SET FORTH IN THE EXPRESS
WARRANTY CONTAINED HEREIN, PURCHASER
TAKES THE PRODUCT "AS IS," AND SAMSUNG
MAKES NO WARRANTY OR REPRESENTATION
AND THERE ARE NO CONDITIONS, EXPRESS OR
IMPLIED, STATUTORY OR OTHERWISE, OF ANY
KIND WHATSOEVER WITH RESPECT TO THE
PRODUCT, INCLUDING BUT NOT LIMITED TO:
·THE MERCHANTABILITY OF THE PRODUCT OR
ITS FITNESS FOR ANY PARTICULAR PURPOSE OR
USE;
Chapter 21 - Troubleshooting, Safety, and Warranty
176
·WARRANTIES OF TITLE OR NON-INFRINGEMENT;
·DESIGN, CONDITION, QUALITY, OR
PERFORMANCE OF THE PRODUCT;
·THE WORKMANSHIP OF THE PRODUCT OR THE
COMPONENTS CONTAINED THEREIN; OR
·COMPLIANCE OF THE PRODUCT WITH THE
REQUIREMENTS OF ANY LAW, RULE,
SPECIFICATION OR CONTRACT PERTAINING
THERETO.
NOTHING CONTAINED IN THE INSTRUCTION
MANUAL SHALL BE CONSTRUED TO CREATE AN
EXPRESS WARRANTY OF ANY KIND
WHATSOEVER WITH RESPECT TO THE PRODUCT.
ALL IMPLIED WARRANTIES AND CONDITIONS
THAT MAY ARISE BY OPERATION OF LAW,
INCLUDING IF APPLICABLE THE IMPLIED
WARRANTIES OF MERCHANTABILITY AND
FITNESS FOR A PARTICULAR PURPOSE, ARE
HEREBY LIMITED TO THE SAME DURATION OF
TIME AS THE EXPRESS WRITTEN WARRANTY
STATED HEREIN. SOME STATES/PROVINCES DO
NOT ALLOW LIMITATIONS ON HOW LONG AN
IMPLIED WARRANTY LASTS, SO THE ABOVE
LIMITATION MAY NOT APPLY TO YOU. IN
ADDITION, SAMSUNG SHALL NOT BE LIABLE FOR
ANY DAMAGES OF ANY KIND RESULTING FROM
THE PURCHASE, USE, OR MISUSE OF, OR
INABILITY TO USE THE PRODUCT OR ARISING
DIRECTLY OR INDIRECTLY FROM THE USE OR
Chapter 21 - Troubleshooting, Safety, and Warranty
177
LOSS OF USE OF THE PRODUCT OR FROM THE
BREACH OF THE EXPRESS WARRANTY,
INCLUDING INCIDENTAL, SPECIAL,
CONSEQUENTIAL OR SIMILAR DAMAGES, OR
LOSS OF ANTICIPATED PROFITS OR BENEFITS,
OR FOR DAMAGES ARISING FROM ANY TORT
(INCLUDING NEGLIGENCE OR GROSS
NEGLIGENCE) OR FAULT COMMITTED BY
SAMSUNG, ITS AGENTS OR EMPLOYEES, OR FOR
ANY BREACH OF CONTRACT OR FOR ANY CLAIM
BROUGHT AGAINST PURCHASER BY ANY OTHER
PARTY. SOME STATES/PROVINCES DO NOT
ALLOW THE EXCLUSION OR LIMITATION OF
INCIDENTAL OR CONSEQUENTIAL DAMAGES, SO
THE ABOVE LIMITATION OR EXCLUSION MAY NOT
APPLY TO YOU.
THIS WARRANTY GIVES YOU SPECIFIC LEGAL
RIGHTS, AND YOU MAY ALSO HAVE OTHER
RIGHTS, WHICH VARY FROM STATE TO STATE/
PROVINCE TO PROVINCE. THIS LIMITED
WARRANTY SHALL NOT EXTEND TO ANYONE
OTHER THAN THE ORIGINAL PURCHASER OF
THIS PRODUCT AND STATES PURCHASER'S
EXCLUSIVE REMEDY. IF ANY PORTION OF THIS
LIMITED WARRANTY IS HELD ILLEGAL OR
UNENFORCEABLE BY REASON OF ANY LAW,
SUCH PARTIAL ILLEGALITY OR
UNENFORCEABILITY SHALL NOT AFFECT THE
ENFORCEABILITY FOR THE REMAINDER OF THIS
LIMITED WARRANTY WHICH PURCHASER
Chapter 21 - Troubleshooting, Safety, and Warranty
178
ACKNOWLEDGES IS AND WILL ALWAYS BE
CONSTRUED TO BE LIMITED BY ITS TERMS OR AS
LIMITED AS THE LAW PERMITS.
THE PARTIES UNDERSTAND THAT THE
PURCHASER MAY USE THIRD-PARTY SOFTWARE
OR EQUIPMENT IN CONJUNCTION WITH THE
PRODUCT. SAMSUNG MAKES NO WARRANTIES
OR REPRESENTATIONS AND THERE ARE NO
CONDITIONS, EXPRESS OR IMPLIED, STATUTORY
OR OTHERWISE, AS TO THE QUALITY,
CAPABILITIES, OPERATIONS, PERFORMANCE OR
SUITABILITY OF ANY THIRD-PARTY SOFTWARE
OR EQUIPMENT, WHETHER SUCH THIRD-PARTY
SOFTWARE OR EQUIPMENT IS INCLUDED WITH
THE PRODUCT DISTRIBUTED BY SAMSUNG OR
OTHERWISE, INCLUDING THE ABILITY TO
INTEGRATE ANY SUCH SOFTWARE OR
EQUIPMENT WITH THE PRODUCT. THE QUALITY,
CAPABILITIES, OPERATIONS, PERFORMANCE
AND SUITABILITY OF ANY SUCH THIRD-PARTY
SOFTWARE OR EQUIPMENT LIE SOLELY WITH
THE PURCHASER AND THE DIRECT VENDOR,
OWNER OR SUPPLIER OF SUCH THIRD-PARTY
SOFTWARE OR EQUIPMENT, AS THE CASE MAY
BE.
This Limited Warranty allocates risk of Product failure
between Purchaser and SAMSUNG, and SAMSUNG's
Product pricing reflects this allocation of risk and the
limitations of liability contained in this Limited Warranty.
The agents, employees, distributors, and dealers of
Chapter 21 - Troubleshooting, Safety, and Warranty
179
SAMSUNG are not authorized to make modifications to
this Limited Warranty, or make additional warranties
binding on SAMSUNG. Accordingly, additional
statements such as dealer advertising or presentation,
whether oral or written, do not constitute warranties by
SAMSUNG and should not be relied upon.
Samsung Telecommunications America, L.P.
1130 East Arapaho Road
Richardson, Texas 75081
Phone: 1-800-SAMSUNG
Phone: 1-888-987-HELP (4357)
©2002 Samsung Telecommunications America. All rights
reserved. No reproduction in whole or in part allowed without
prior written approval. Specifications and availability subject
to change without notice.
Chapter 21 - Troubleshooting, Safety, and Warranty
180
Index
A
ActiveSync 115
ActiveSync - ActiveSync using IR 117
ActiveSync - Creating a New Partnership 116
ActiveSync - Installing 115
ActiveSync - Scheduling 117
Alert Sounds & Notifications 53
Application - Deleting 137
Application - Installing 136
Application - Memory Allocation 138
Application Management 136
B
Battery - Charging 23
Battery - Installing 21
Battery - Removing 22
Battery and Charger Accessories 20
Battery Capacity 20
C
Calendar 100
Calendar - Options 103
Calendar - Scheduling an Appointment 100
Calendar - View 102
Call Features - Call Forwarding 87
Call Features - Call Waiting 86
Call Features - Caller ID 86
Call Features - Three Way Calling 88
Call Log - Deleting 84
Call Log - Making a Call 82
Call Log - New Contact 83
181
Call Log - Options 83
Call Log - SMS Message 84
Call Logs 82
Calls - Making and Answering 24
Camera 143
Camera - Beaming Pictures 156
Camera - Launching 143
Camera - Settings 144
Camera - Viewing Pictures 146
Contacts 90
Contacts - Adding 91
Contacts - Adding a Note 92
Contacts - Beaming 95
Contacts - Deleting 92
Contacts - Deleting a Note 93
Contacts - Editing 92
Contacts - Finding 91
Contacts - Making a Call 93
Contacts - Speed Dialing 94
Customer Care 14
E
E-mail Messages - Sending 68
H
Hard Reset 163
I
i700 - Buttons 28
i700 - Features 19
I700 - Front View 16
i700 - Locking 58
i700 - Phone Screen Icons 17
182
i700 - Turning On 13
i700 - Unlocking 59
M
Media Player 158
Media Player - Controls 158
Media Player - Loading Media Player Files 159
Message Options 68
Message Types 64
Messages - ActiveSync Deleted Items 76
Messages - ActiveSync Drafts 75
Messages - ActiveSync Inbox 74
Messages - ActiveSync Outbox 75
Messages - ActiveSync Sent Items 75
Messages - Language 70
Messages - SMS Deleted Items 74
Messages - SMS Drafts 73
Messages - SMS Inbox 71
Messages - SMS Outbox 71
Messages - SMS Sent Items 73
Messages - Spell Check 70
N
Navigating your PDA 45
Notes 110
Notes - Deleting 112
Notes - Options 113
Notes - Recording 110
Notes - Recording a Personal Note 111
Notes - Recording during a call 111
Notes - Writing 112
183
O
One Handed Dialing 25
P
Password 36
Personal Settings 26
Phone Number - Displaying 24
Pocket Excel 124
Pocket Excel - Beaming a Workbook 125
Pocket Excel - Creating a new Workbook 124
Pocket Excel - Deleting a Workbook 125
Pocket Internet Explorer 140
Pocket Internet Explorer - Launching 140
Pocket Internet Explorer - Saving Favorites 141
Pocket Word 120
Pocket Word - Attaching a Recording 122
Pocket Word - Beaming a Document 123
Pocket Word - Deleting a Document 122
Pocket Word - New Document 120
Pocket Word - Options 121
Program Applications 127
Programs - Calculator 131
Programs - File Explorer 128
Programs - Games 130
Programs - Infrared Receive 132
Programs - Microsoft Reader 128
Programs - MSN Messenger 129
Programs - Terminal Services Client 130
R
Record Volume 49
Resetting Your Handheld 163
184
Ring Volume 50
Ringer - Selecting 53
Ringer - Turning Off 55
Roaming 61
Roaming - Options 62
S
Security Options 57
Security Settings 56
Shortcuts 46
Soft Reset 163
Special Numbers 57
Start Menu 45
System Volume 51
T
Tasks 104
Tasks - Beaming 107
Tasks - Creating 104
Tasks - Editing 107
Tasks - Entry Bar 106
Tasks - Marking Complete 105
Tasks - Options 106
Text Messages 69
Text Messages - Editing 70
Text Messaging 66
Today 97
Today - Date and Time 97
Today - Owner Information 98
Today - Scheduling 98
Tone Length 52
Troubleshooting 162
185
V
Voice Volume 48
Voicemail 65
Voicemail - Setting Up 14
Volume Levels 48
W
Warranty 174
186