1
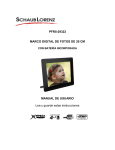
PFR8-29322 8" DIGITAL PHOTO FRAME WITH INTEGRATED BATTERY USER MANUAL Please read and keep these instructions Important safety instructions – please read carefully and keep for future reference To reduce the risk of fire or electric shock, do not expose this product to water, rain or moisture. To prevent the risk of electric shock, do not remove the cover or back of this product. In case of product failure, only qualified personnel can repair. There are no user-serviceable parts inside. CAUTION! Dangerous tension inside the product! Do not open. Risk of electric shock ! No parts can be repaired by the end-user. Only qualified personnel can repair and maintain this product. If the electric cord is damaged, it must be replaced by the manufacturer or qualified aftersales personnel in order to avoid any danger. The product must be installed in accordance with local laws. Damaged batteries must be properly disposed. In order to protect the environment, please dispose the batteries properly, in accordance with local laws (information is available at your reseller). Where to install the product - Place the product on a straight, rigid and stable place. Do not place the product on a carpet. - Do not place the product on top of another that may cause overheating (for example, a receiver or amplifier). - Do not place anything underneath the product (for example, CDs or magazines). Proper ventilation - Place the product in a sufficiently–aerated place to avoid overheating. Allow at least 10cm spacing at the back and top of the product, and 5cm spacing on both sides to prevent overheating. - Do not place items such as newspapers, tablecloth, curtains, in front of the ventilating openings. Do not expose the product to high temperatures, moisture, water and dust. - The apparatus shall not be exposed to dripping or splashing. No object filled with liquids, such as vases, shall be placed on the apparatus. - Do not place other items close to this product that may damage it (for example, objects containing water or lightened candles). - No naked flame sources, such as lighted candles, should be placed on the apparatus. Electric supply - Please unplug the product in case of prolonged non-use. 1 - - This product is intended to be used under temperate climate and should not be used under tropical climate. If the supply cable is damaged, it must be replaced by the manufacturer or qualified after-sales personnel to avoid any danger. This product must be connected to an electrical supply 230V ~ 50Hz. The mains plug is used as the disconnect device, so the disconnect device shall remain readily operable. Do not use the product with a battery different from the one provided. CAUTION: Explosion risk if the battery is not replaced correctly. Do not attempt to replace the battery with a different battery version. Batteries (battery pack or batteries installed) shall not be exposed to excessive heat such as sunshine or fire or any other heat sources. If after being charged, the battery autonomy is reduced by half, the user must supervise the next charge. Caution, a damaged battery may cause a dangerous thermal overheating. Only use this product with the AC adaptor provided. This product is compliant with directives 2006/95/CE (abrogating the directive 73/23/CEE modified by the directive 93/68/CEE) and 2004/108/CE (abrogating the directive 89/336CEE). - This logo set on the product means that the recycling of this apparatus comes within the framework of the directive 2002/96/EC of January 27, 2003 concerning the waste on electrical and electronic equipment (WEEE). - The presence of dangerous substances in the electrical and electronic equipments can have potential consequences on the environment and human health in the cycle of reprocessing this product. - Therefore, at the end of its lifetime, this product shall not be disposed with other nonrecycled waste. - As the end user, your role is of prime importance in the cycles of re-using, recycling, and other forms of valorization of this electrical and electronic equipment. Local authorities and resellers have set special procedures for the purpose of collecting and recycling this product. - You have the obligation to use the selective waste collection systems put in place by your local authorities. 2 Introduction: Thank you for your purchase of the Digital Photo Frame This product is designed for quick and easy display of photos taken with your digital camera or mobile phone via a USB stick or memory card. In addition, its multimedia function supports MP3 music and MPEG4 video playback. Finally, the integrated battery allows you to use this photo frame and view your pictures easily anywhere at home (battery autonomy between 40 and 105 minutes, depending on usage). Please read this User Manual carefully to learn the correct way to use the Digital Photo Frame. Features: - Built-in Li-battery 1000mm Ampere Supported picture format: JPEG(up to 12Mb) Support audio formats: Mp3& WMA Support video formats: MPEG4 Supported Memory card: SD/ SDHC /MS/ MMC USB interface: High speed 2.0. Auto Slideshow when insert Memory Card Picture &Music: Slideshow with background music Built-in Clock and calendar Image-display mode: slideshow, preview, zoom, rotate function. Adjustable slideshow speed and above 10 kinds of transition slideshow Adjustable brightness, contrast, saturation Slideshow mode: single window, four windows and tripe windows. OSD language:French, English, Spanish , Portuguese, Dutch Packaging Check List: 1. 2. 3. 4. 8 inch digital photo frame User manual AC adaptor Remote control 1 piece 1 piece 1 piece 1 piece 3 CONTENTS 1. Product Diagram ······················································································· 5 1.1 Remote Control ····················································································· 5 1.2 Back buttons·························································································· 6 1.3 Right Side of Frame ·············································································· 6 2. Installing & Replacing the Battery ·························································· 6 3. Getting Started··························································································· 6 4. Operating Instruction ··············································································· 7 4.1 Card and USB ······················································································· 7 4.2 Picture Mode ························································································· 8 4.3 Music Mode ··························································································· 8 4.4 Video Mode ··························································································· 8 5. File ··············································································································· 9 6. Copy & Delete function ············································································ 9 6.1 Copy Photos ·························································································· 9 6.2 Delete photos ························································································ 9 6.3 Delete file ····························································································· 10 6.4 Delete Music ························································································ 10 6.5 Delete Video ························································································ 10 7. Calendar ·····································································································11 8. Setup ··········································································································11 9. Stand Instruction ····················································································· 12 10. Rechargeable Battery Use ···································································· 12 11. Technical Specifications ······································································· 13 12. Troubleshooting Guide ········································································· 13 4 1 Product Diagram 1.1 Remote Control 1) POWER ─ To turn on and off the unit. 2) BGM ─Press BGM button to play the background music (In case an MP3 file is present; this function is not compatible with WMA files.) 3) MUTE ─ Press Mute button to silence the voice temporarily. 4) MENU ─ Go directly to the card select interface 5) ─ Functional selection button from the bottom to the top cursor. 6) RETURN ─ Return to upper page. 7) ─ Functional selection button from right to left cursor 8) ─ Functional selection button from left to right cursor 9) ─ Functional selection button from the top to the bottom cursor. 10) SETUP ─ Go directly to Setup mode. 11) ─ Play/pause: In the playing mode, press this button, it will pause; repress this button, it will play again. 12) OK ─ Press to confirm. Play/pause: In the playing mode, press this button, it will pause; repress this button, it will play again. 13) ZOOM ─ In the pause state of single picture, press ZOOM to magnify picture display size. 14 /15) VOL +/- ─ Turn up/down the volume. 16) ROTATE ─In the pause state of single picture, press this button to revolve the picture 90°in counterclockwise each time. 17) ─ Move back to previous music or video file. 18) ─ Move forward to next music or video file. 5 1.2 Back buttons 1. STANDBY SWITCH 2. PREVIOUS/UP 3. PLAY/PAUSE/OK 4. VOL-/ LEFT 5. VOL+/RIGHT 6. NEXT/DOWN 7. MENU/RETURN 1.3 Right Side of Frame 1. SD/MMC/MS CARD 2. EARPHONE 3. USB 4. MINI USB 5. DC IN 2. Installing & Replacing the Battery Place the upside of the remote control down, press down on the ridged area of the battery cover and pull towards you to remove the tray. Place one CR2025 lithium button-cell battery on the tray with the positive“+”side facing you. Reinsert the tray. 3. Getting Started 3.1 Extend the digital photo frame bracket on the back of the frame to the widest position for greatest stability, and then plug one end of the included AC adapter into a standard 110-240V AC electrical outlet and the other end into the right side the frame. Note: There are different positions for the digital photo frame stand. Please refer to "Stand Instruction". 6 3.2. Remove the protective film covering the LCD. 3.3. Remove the plastic battery insulator from the battery compartment and make sure the remote control has a battery inside. Please refer to “Installing & Replacing Battery” if you need a new battery. 3.4. Power on the unit by pressing the Power button on the remote control or on the back of the unit. 4. Operating Instruction After turning on the unit, it will show the startup picture, press MENU repeatedly to access to built-in memory. 4.1 Card and USB It supports SD/SDHC/MS/MMC and USB 2.0. After inserting a card or USB device, slideshow will play automatically, then press MENU twice to access to photo, music, video, file, calendar and setup. Press OK to confirm. Note: 1) Make sure there are supported picture, music and video files in the Card or USB device. 2) If there are supported picture and music files in the Card or USB Device, slideshow will play automatically with background music.( This feature is only for audio files in MP3 format.) 7 4.2 Picture Mode Press MENU back to the main menu. Highlight Photo, press OK to access to the nine-picture mode, use to choose the picture, press OK to play the picture in single window. Press MENU OK again back totothestart mainslideshow menu. pictures in the selected slide mode. Highlight Photo, press OK to access to Change slide mode follows: press the nine-picture mode,asuse to SETUP to choose SLIDE MODE choose the picture, press OK to play (single window/ four windows/ Triple the picture in single window. windows), select with , press OK to confirm. 4.3 Music Mode Press MENU back to the main menu. Choose Music, press OK to enter the music interface, press to select the music from the playlist, then press OK to confirm. Press VOL+/- to turn up/ down the volume. 8 4.4 Video Mode Press MENU to choose "MEMORY CARD" in the main menu. Choose Video, press OK to enter the video interface, press to select the video from the playlist, then press OK to confirm. Press VOL+/- to turn up/ down the volume. 5. File Press MENU back to the main menu. Choose File, then press OK to access to file interface. You can browse all the files in the memory card in this mode, and delete files in built-in memory or external device. 6. Copy & Delete function 6.1 Copy Photos In slideshow mode, use to select the picture you want to copy to the built-in memory, then press MENU for a few seconds to enter Save Picture interface, press OK to confirm. 9 6.2 Delete photos In nine - picture mode, use to select the picture you want to delete, then press MENU for a few seconds to enter delete interface, press OK to confirm. 6.3 Delete file In File mode, use to select the picture you want to delete , then press MENU for a few seconds to enter delete interface, press OK to confirm. 6.4 Delete Music In music mode, use to select the music you want to delete, then press MENU to enter Music as alarm/delete file/Exit interface, press OK to confirm. 10 6.5 Delete Video In video mode, use to select the video you want to delete, then press MENU to enter delete interface, press OK to confirm. 7. Calendar Select Calendar from the main menu, press OK to enter, use or to adjust year, month, or day. 8. Setup Select Setup from the main menu, and then press OK to access to Setup interface. Use to select the item you want to set up. Press OK to show the sub menu, select with , then press OK to confirm. 8.1 Language: English, French, Spanish, Portuguese, Dutch 8.2 Slide mode: Single window, Four windows, Triple windows 8.3 Slide speed: 3/5/15/30seconds, 1/5/15/30minutes and 1hour 8.4 Photo effect: color, mono, sepia 8.5 Slide effect: random, Split Horizontal in/out, Jalousie, Split Vertical in/out, Radiation, Surround, Fade, Right refresh, Next refresh, On Pan, Roll From Down To Up, Roll From Up To Down, Brick 11 8.6 Photo mode: Auto fit, Optimal, Full 8.7 Music Play Mode:Single Repeat, Circular, No Repeat, Single 8.8 Video Mode: Original, Screen 8.9 Display Contrast: Use to select between 0 (lowest) and 40 (highest). Brightness: Use to select between 0 (lowest) and 40 (highest). Saturation: Use to select a point between 0 (lowest) and 40 (highest). Tint: Use to select between 40 (most color) to 0 (least color). 8.10Set time/date: Press OK, choose setup items with as follows: Year, Month, Day, Hour, Minute, Second, press OK, use to set, Press Save Time to confirm. 8.11Set time format: 12/24, Press OK, select with , press OK, then use to set, press OK to confirm 8.12Alarm: Press OK, choose setup items with as follows: Status, Number, Hour, Minute, Mode, press OK, use to set, Press OK to confirm. 8.13 Auto Power On/Off: Press OK, choose setup items with as follows: Hour, Minute, Status, press OK, use to set, Press OK to confirm. 8.14 Format built-in memory: Press OK, choose No/ Yes with , Press OK to confirm. The photos stored in the photo frame will then be erased. 8.15 Reset setting: Press OK, choose No/ Yes with , Press OK to confirm 8.16 Exit: Press to exit setup interface. 9. Stand Instruction Please check and make sure the stand is locked in place before standing the photo frame up. Please refer to the illustration shown below. 10. Rechargeable Battery Use The photo frame built-in a rechargeable Lithium battery. The integrated battery allows you to use this photo frame and view your pictures easily anywhere at home (battery autonomy between 40 and 105 minutes, depending on usage). 10.1 Charge the battery - Connect the adaptor to the DC 5V IN jack, the set the unit in POWER ON mode, (the playing mode) for fully recharges. - Set in POWER OFF mode for fully charge. 10.2 Time to recharge the battery Recharge and playback time depends on battery pack capacity and the temperature condition. Generally speaking, the battery needs to be recharged about 2 hours in playing mode or power off mode. 12 10.3 Using and maintaining rechargeable battery - The normal working condition temperature is: 0~45. - Always unplug AC/DC power supply for the unit whenever not playing. Note: A new battery which has not been used or one which has not been used for more than a month, may not appear to nor be recharged enough, this is due to the characteristic of this battery and is not a malfunction. In this case, recharge it two or three times before the first use, and it needs more than 6 hours to recharge battery. Noises may be generated during recharging. In this case, use a more distant power socket. Do not recharge or discharge battery near a heating element such as a heater or direct sunlight. Remark: - Do not use the product with a battery different from the one provided. - CAUTION: Explosion risk if the battery is not replaced correctly. Do not attempt to replace the battery with a different battery version. - Batteries (battery pack or batteries installed) shall not be exposed to excessive heat such as sunshine or fire or any other heat sources. - If after being charged, the battery autonomy is reduced by half, the user must supervise the next charge. Caution, a damaged battery may cause a dangerous thermal overheating. 11. Technical Specifications Adapter: Input: AC 100-240V 50/60HZ Output: DC 5V/2A Picture Formats: JPEG Audio Formats: MP3, WMA Video Formats: MPEG4 Memory Cards: SD/SDHC/MS/MMC USB: USB Host( high speed 2.0) Screen Parameter: Screen Size: 8 inch TFT Aspect Ratio: 4:3 Resolution:800X600 Pixel Contrast: 400:1 Brightness: 350cd/m2 Response Time: 20ms Viewing Angle: 60°(left/right/vertical), 40°(horizontal) Working Temperature: 0℃~40℃, Humidity: 10-85% 12.Troubleshooting Guide If you are having problems with your player, please consult both this guide and manual.If you need further assistance, please contact Technical Support. No power: Please check whether the plug is inserted correctly. Cannot play the file: Please confirm if the file format is compatible with the player. 13 Display too bright or too dark: Please adjust the brightness or contrast in the setup menu. The color is light or no color: Please adjust the color and contrast setup. The unit cannot read my USB device. - Once you have plugged your device to the unit, you may need to switch on the USB device before it can operate. - This unit does not support a direct USB connection with a computer. You need to use a USB device, a MP3 player or a PMP (Portable Multimedia Player with hard disk). - If you are using a USB external hard disk: you need to connect your device simultaneously to an external power source and to the unit. If you are using a self powered PMP, make sure that the battery is sufficiently loaded. - Check that the files system of your USB device is formatted into the FAT or FAT 32 format. USB device formatted into NTFS are not compatible with this unit. Caution: if you attempt to modify your file system, formatting your device will erase all data. Please refer to your USB device’s instruction manual first. - Warning: Connect your USB device directly to the USB port of the device. Using an extension cable is not recommended and may cause interference and failure of data transfer. The unit cannot read my memory card. - Check firstly that your memory card is compatible with the unit. Supported memory cards are SD, SDHC, MS, MMC formats. We have tested this unit with most of the market’s memory cards ; we cannot however guarantee a full compatibility with all the cards in the market because of the multiple technology standards in use. Should you have a compatibility problem: please use a memory card with a lower capacity (2GB or lower) or else connect the unit through a USB device. The photo frame cannot read my photos. - Check the format under which you photos are saved. The photo frame can only read photos under JPEG format .Compressed JPEG or Zipped files are not supported. - Check the first extension: every photo’s name must ended with .jpg file extension, as the following pattern: <file name >.jpg - Check the photo resolution : the photo frame can support high resolution JPEG photos up to 12MB (4272X2848). Loading time between each photo is too long - The higher resolution your photo is, the bigger size of the JPEG file is. Reducing the size of your JPEG photos will allow you to: 1. Reduce the loading time between each photo; 2. Store a bigger quantity of photos on your memory card and USB device - To reduce the resolution of you photos: 1. Select the resolution parameter directly on your digital camera; 2. If you have already taken the photos, load the images on your personal computer with a photo editing software, and save each photo with a lower resolution. 14 Important remarks about reading MPEG-4 videos on this unit If you encounter any problems when playing MPEG4 videos, please check the below points: 1) There is a wide variety of codecs and compression methods in use. It is possible that some videos, including those downloaded from unofficial websites, are not fully compatible with this unit. 2) This player does not support MPEG4 videos recorded using a High Definition format. The MPEG-4 HD and H.264 formats are different from the standardresolution one. For the time being, videos encoded in High Definition are only readable on computers. 3) Maximum resolutions supported by MPEG-4 codecs 720x480@30fps / 720x576@25fps and this unit are: 4) Videos must be encoded with a soundtrack in MP3 format, since other formats, such as AC3, are not supported. If there is no sound, it means that the audio codec is not compatible. 5) If your MPEG-4 video file does not appear on the unit’s screen, check that the file name ends with the extension “.AVI”. If this is not the case, you can rename the file on your personal computer. SAV ADMEA / LOGISAV ZI du clos des charmes 26 rue du clos des charmes 77090 COLLEGIEN - FRANCE 15