1
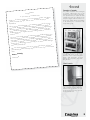
Utgåva 1.2006
w w w. c a m i n a . s e
Instructions for
assembly and use
Art Suprême
Art Grace
Art Moderne
39 53 03
These instructions are also valid for product-type and
environmental approval documentation purposes.
Art Etage
Art Pierre
Contents
Bear in mind that
certain parts of the
fireplace become
extremely hot in the
course of the combustion process, and
take suitable precautions if there are
children in the vicinity. You should also
take into account
that a space of at
least 1000 mm must
be allowed between the front of the
hearth and combustible furnishings.
General................................................... pages 3-4
-Receipt of goods
-Cool hands
-Manufacturer’s assurance
-Planning application
-Inspection
-Guarantee
-Chimney
-Distance from combustible surfaces
-Load-bearing structure
-Fireplace base
-What is included?
-Log compartment plates
-Base stone unit
Assembly................................................ pages 5-6
-Important
-The right location
-Order of assembly for top connection
-Top connection
-Transport attachments
-Connection to existing masonry chimney
-Ball/plummet stop
-Cutting hole in masonry chimney
-Design specifications
-Accessories/options
Technical information...............................pages 7-8
-Combustion air supply
-Air flow diagrammes
-Outdoor air connection
-Output control
-Controls
-Distance from wall surfaces
-Ash disposal
Dimensions and connection heights............ pages 9-11
-Camina Art Suprême
-Camina Art grace
-Camina Art Etage
-Camina Art Moderne
-Camina Art Pierre
Instructions for use and maintenance............ page 12
2
General
Receipt of goods
Congratulations
ve.
of a Camina sto
on your choice
n was almost
ultimate decisio
ur
Yo
.
us
in
ce
l your positive
having confiden
t to confirm al
an
w
e
w
Thank you for
d
an
ade overnight,
certainly not m
expectations.
n for a great
imum satisfactio
ax
m
ve
of
gi
to
red
a high degree
are manufactu
logy provides
no
ufacch
an
te
All our stoves
m
on
gh
sti
hi
ern combu
erials and
od
at
m
M
s.
ity
ar
al
ye
qu
y
h
en
man
y. Hig
But ev
ble operation.
heating econom
safety and relia
efficiency and
rmation
e,
fo
lif
in
ng
on
lo
d
re
se
ensu
ndling, ba
ha
d
an
turing standards
re
ca
r
require regula
the best stoves
.
ur
and know-how
fore lighting yo
ns carefully be
tio
uc
ls,
str
ve
in
le
e
at
es
th
ssive he
u should read
ble fuels, exce
This is why yo
such as unsuita
es
e which is not
ak
ag
ist
m
m
l
da
ia
e
spidly caus
ra
first fire. Potent
n
ca
ce
to the safety in
an
te mainten
cular attention
rti
e
pa
y
ag
m
pa
and inadequa
da
se
ea
ssible
r guarantee. Pl
you to avoid po
covered by ou
since they help
,
ge
pa
al
fin
tructions on the
tential risks.
a
and identify po
you will have
the hope that
in
ina
u
am
yo
C
to
w
er
ne
nt of your
r product ov
fro
ou
in
s
nd
ur
ha
ho
w
y
no
We
many happ
pleasure and
great deal of
stove.
rely,
Yours since
Camina AB
The product may have been damaged
in transport, although this may not be
apparent from the external packaging.
It is important that you inspect the stove
carefully and report any damage to the
transport company within seven days. You
should note visible damage immediately
on the delivery note, in connection with
receipt of the goods.
On delivery, the stove is attached to
a pallet with screws, under a wooden frame, and is covered with sheet
plastic. Take precautions to avoid
damage when unpacking and assembling the stove.
Cool hands
The stove glove supplied is equipped
with a practical magnetic attachment.
Always use the glove when you open
the door to put on more logs, since the
fire-door handle is hot.
3
General
Manufacturer’s assurance
This product has been manufactured in accordance with the type approval documentation, of which the instructions for assembly, use and maintenance form an intrinsic part.
Planning application
Before commencing a new installation of a stove and chimney in an area covered by
town planning, you must notify the local planning authority. The planning and building
office in your local municipality will provide further information.
Inspection
When installation has been completed, it must always be inspected by a chimney sweep
before the stove is used, irrespective of whether it is connected to a new or an existing
chimney.
In order to avoid condensation, insulation material should be inserted over the
connection hose. The next stage is to fit
the log-compartment plates (see photo
below).
Guarantee
Before using your stove, you should read the terms of the guarantee (see our website
and/or the inside cover of our product catalogue), indicating the requirements that must
be met if the guarantee undertakings are to apply.
Chimney
The diameter of the flue must be at least 150 mm, and we recommend a inimum flue
height of 3.5 metres, measured from the stove flue-connection point. Follow the chimney
supplier’s assembly instructions carefully.
If you intend to fit your stove to an existing masonry chimney, it should first be inspected
by a chimney sweep to check that it is in good order.
The stove can be connected at either a 450 angle, or at a 900 angle, straight-back with a
cleaning door, to a chimney approved for a maximum flue-gas temperature of 3500 C.
Fitting the log-compartment plates.
Distance from combustible wall surfaces
The minimum distance from a combustible wall surface is 500 mm at the sides and 100
mm at the rear (see diagrammes on page 9). The minimum distance from furnishings in
front of the stove is 1000 mm. If the stove is placed against a masonry chimney or a firewall installation, the space behind the stove may be reduced to 50 mm.
Load-bearing structure
A stove with a chimney does not normally require special foundations, and can be placed on an ordinary floor supported by wooden rafters. If you are uncertain, contact a
chimney sweep for further advice and instructions.
Fireplace base
The sopestone-base unit, and the castiron base unit, which are optional extras,
increases the connection height by 40 mm
(see illustrations for the various models).
Available for Camina Art Grace and
Camina Art Etage.
4
The stove must be placed on a fireplace base consisting of concrete, natural stone, brick
or glass with a thickness of at least 50 mm, or sheet metal with a thickness of 0.7 mm.
The base must cover the entire surface under the stove and extend at least 300 mm in
front of the stove and 100 mm at the sides. A fireplace base in sheet metal or glass is
available as an optional extra.
What is included?
The delivery includes the stove and inserts for a top or rear connection. Options include a
fireplace base and a connection kit for an existing chimney. An outside air-feed connection and a fan are also offered as optional extras.
Impotant!
Study the user instructions carefully before using the stove and
remember that the installation must be first approved by a chimney
sweep.
The right location
Assembly
Ball/plummet stop
When you are deciding where the stove is to be placed, it is important to select a central
location in your house in order to ensure even distribution of heat. If you are also planning to install a chimney, it is an advantage if the chimney exit point is as close to the
roof ridge as possible, since this entails both aesthetic and cost benefits. If there is a floorlevel above the stove, you should also think about how the chimney is to pass through it.
A cupboard or a corner area is often a good location for a flue shaft. The floor surface
on which the stove is to rest must be even and horizontal.
Order of assembly for top connection
Follow the chimney supplier’s instructions carefully. Assembly is accomplished
in the following order:
1. Prepare air-feed to the hearth (if required).
2. Cut hole in ceiling.
3. Install the fireplace base.
4. Lift the stove into position and fit the top stone unit in place (where
applicable).
5. Fit soapstone units and top grill (where applicable).
Assemble the chimney.
If a top connection is employed, it is
important to ensure that the plummet stop
is fitted inside the stove insert. The plummet
stop prevents damage to the flue baffle
during chimney-sweeping operations.
Top connection to the Camina NVI 2000 chimney kit
Start by fitting the adapter pipe, using
stove sealant (see photo). The next stage
is to fit the connection piece and the flue
modules, in accordance with the chimney
manufacturer’s instructions.
If there is a gap between the stove and
the connection piece, insulate it with carbwool, rockwool, or a similar material. Then
insert the flue pipes to achieve a tight fit
against the stove.
The top stone unit and the cast-iron grill
must be fitted before the flue pipes are
assembled. In the case of the Art Modern
model and the Art Pierre model , the entire
soapstone casing must be fitted at this
stage. The Art Étage and Moderne model
is equipped with a front grill and has no
top grill.
The Camina Art Pierre model with a top
connection to the NVI chimney, featuring
a grey-coated initial section and a curved
fireplace base in toughened glass.
5
Assembly
Cutting a hole in a
masonry chimney
Connection to an existing masonry chimney
The stove is approved for a rear connection to a chimney with a ½ brick connection point which is approved for a 3500 C flue-gas temperature.
1. Measure where the hole is to be made in the chimney. Mark the hole and chisel it out
so that it is slightly larger than the diameter of the chimney insert, allowing sufficient space
to cement the insert in place, using mortar. Cement the insert into the hole.
The stove is normally supplied
for a top connection. If you
intend to employ a rear connection, use the rear-connection
cover plate instead to replace
the insert on top of the stove.
Apply stove sealant to ensure
a good seal between the stove
and the cover plate.
Chimney insert
Fit the connection pipe which
is to be fitted into the chimney
insert over the stove connection
insert. Apply a thin layer of
stove sealant around the insert
before fitting the connection
pipe.
As an alternative to a straight
rear connection, you can use
a top/rear connection to a
masonry chimney. In this case,
the angle must have an inspection door to permit cleaning.
When connecting the stove to a proprietary modular chimney, follow the manufacturer’s
instructions.
1.
2.
Design
requirements
The stove and the chimney must be arranged in a
way that ensures that they
cannot start a fire in adjoining fixtures or parts of
the building. The flue must
be installed in a manner
which permits chimneysweeping for the full flue
length, and with ready
access to cleaning doors.
6
Place the floor plate/fireplace base in position.
If you are going to connect the stove from the top into the masonry chimney,
the loose top stone unit should be placed in position before the flue pipe is
fitted.
3. Apply stove sealant to the stove insert and push the flue pipe into position. The stove is then placed in position and the flue pipe is cemented in place. If you are using a chimney insert, tamp in packing fibre around the flue pipe. Check that the distances are correct.
Design specifications
Colour
Glass, ceramic
Door
Grate
Hearth base
Hearth lining
Senotherm
Withstands 7000 C
Sheet steel
Cast iron
Cast iron
Vermiculite
The hearth is approved for a chimney with a ½ brick connection (3500 C), and
the stove is designed for a chimney draught of at least 12 pa, as provided by a
chimney with a minimum length of 3.5 metres and a cross-section of 150-200
cm2 (diam. 150 mm).
Output
Nominal output
Efficiency (SS-EN 13240)
Weights:
Camina Art Suprême
Camina Art Grace
Camina Art Étage
Camina Art Moderne
Camina Art Pierre
2-8 kW
5.5 kW
70%
Flue-pipe diameter
Product-type and environmental approval
CE-approval
150 mm
39 53 03
0402
122
124
124
210
190
kg
kg
kg
kg
kg
Optional extras Outdoor air connection
Diam. 60 mm
Fan
240 V
Soapstone base (only for Grace/Etage)
15 kg
Cast iron base (only for Grace/Etage) Floor protection, straight or curved
Toughened glass
Floor protection, straight or curved
Grey sheet metal
The air consumed in the combustion process has Secondary air feed (unregulated)
to be replaced, particularly in well-insulated buildings. The air feed to the hearth may be direct,
via an outdoor air connection, or indirect, via a
3EKUNDËREJREGLE
RBARFÚRBRËNNING
SLUFT
vent in an external wall.
In the case of an
outdoor
air feed, the stove connection point has a diameter of 60 mm (see the diagrammes below for various configurations for outdoor air-feed solutions).
Combustion air
supply
If the air channel passes through a warm area
it should be insulated to prevent condensation.
The minimum mineral-wool insulation thickness
is 30 mm, with plastic foil on the outside. Anticondensation lagging may also be used.
The drawing to the right shows the way in which
air used in the combustion process passes through
the stove.
The combustion air feed is regulated by means of
a control located under the stove door. This is the
”primary” air-feed control, and it should be fully
or partially open during the combustion process
(see instructions on page 12). This ensures that air
passes over the glass surface and mixes with flue
0RIMËRREGLERBAR
FÚRBRËNNINGSLUFT
gases, and this in its turn contributes
to the combustion process.
The air feed to the after-burning process (secondary combustion) enters the stove at the bottom
of the stove, to the rear, and then passes to the
hearth backplate. The secondary air supply cannot be regulated.
Primary, regulated air feed
Integrally moulded
into concrete foundation slab.
Through the outer wall.
This involves making a
hole at the weak point
in the base.
Foundations with
under-floor ventilation.
Indirectly, via a vent in
the outer wall which
can be closed when not
in use.
Open
Outdoor air
connection
Output control
When the control is to the right, the primary air
feed is fully open.
Closed
When the control is to the left, the primary air
feed is closed.
Economy position
When the control is in this position, an economy
output of 3-4 kW is normally achieved.
Nominal position
With the control in this position, a nominal output of 5.5 kW will normally be achieved (1.5
kg birch wood in the form of 3 logs).
7
Distances from
wall surfaces
Fire barrier
Combustible wall, corner and straight-wall locations
Ash disposal
To access the ash tray, open the stove door by pulling the handle on the right towards you.
Open the grate by holding the front edge of the grate and pulling it towards you by about 1-2 cm.
When the grate is open you can rake the ash down into the ash tray.
When the ash tray is emptied, make sure that
there are no glowing embers. The ash must be
stored in a fireproof container for at least 24
hours before disposal.
8
448
157
91
The Art Suprême model has two side
glass panels to ensure a very broad
angle to allow firelight in the room.
This is a small, efficient stove which
calls for minimum floor space. It is finished in an elegant graphite-grey. A top
stone unit is supplied as standard.
311
861
1054
Camina Art Suprême
510
Placing the top stone unit and the top grill in
position.
The Art Grace model has a practical
warming compartment - for example for
heating up bread or defrosting buns.
This is a small, efficient stove which calls
for minimum floor space. It is finished in
an elegant graphite-grey. A top stone
unit is supplied as standard. A base
stone unit or the cast-iron base unit are
available as optional extras.
448
157
91
311
861
1184 (1224)
Camina Art Grace
506
Placing the top stone unit and the top grill in
position.
9
861
The Art Étage model has soapstone
panels on two levels, and a decorative
front grill. This is a small, efficient stove
which calls for minimum floor space. It
is finished in an elegant graphite-grey. A
top stone unit is supplied as standard. A
base stone unit or the cast-iron base unit
are available as optional extras.
1164 (1204)
Camina Art Etage
448
157
311
91
508
Place the lower top stone unit in position. Use the
screw kit to attach the front grill, and then place
the upper stone unit in position.
448
157
91
341
901
The Art Pierre model has a heat-storage
soapstone casing. This is a small,
efficient stove which calls for minimum
floor space. It is finished in an elegant
graphite-grey.
1094
Camina Art Pierre
Soapstone casing components
506
10
Start by fitting the
base stone unit, before lifting the stove
into position.
Assemble the sidepieces. They are held in
position with the pins
provided.
Place the top stone
unit in position, fastening the sides and
the top with the pins
provided.
The two front sidepieces rest on a spring
with an oval hole
which is adjustable
sideways.
Camina Art Moderne
The Art Modern model has a heatstorage soapstone casing. This is a
small, efficient stove which calls for
minimum floor space. It is finished in
an elegant graphite-grey.
Soapstone casing components
Start by fitting the base Assemble the sidepieces in
stone unit, before lifting the shown order. Applicate siliconen on stone/stone and stone/
stove into position.
stove unit.
The sidepieces will be held Assemble all the lower sidepie- The silicon should be about 3
in place by the silicon. Dont ces befor starting on the upper cm in diameter.
forget to put silicon on the pieces .
base stone unit.
Assemble the sidepieces all Place the lower top stone unit Use the screw kit to attach the
the way up and glue stone/ in position. Prepair the fluepipe front grill, and then place the
upper stone unit in position
stone and stone/stove unit.
and chimney connection!!
and glue stone/stone.
11
Instructions for
use and
maintenance
The key factors for satisfactory operation of your new stove are proper installation and compliance with the user instructions. If you use the stove in the right manner, it will last for many years.
Fuel
The best heating results are achieved if you use split birch logs (or most other types of deciduous
wood), since they burn more steadily than coniferous logs. If you use oak, beech or other type
of logs with a high heat content, you should always mix them with other types of wood to avoid
potential damage to the stove.
The logs should be dry (approx. 20% moisture content) and of the right size (about 320 mm long
with a diameter of 50-80 mm). In normal use, 1.5 kg of wood per hour is appropriate, with a
maximum permissible quantity of 1.8 kg per hour. The Swedish Testing and Research Institute (SP)
has concluded that optimum results are achieved at 1.3 kg of wood per 45 minutes. In the economy setting, an output of 3-4 kW is normally achieved when the stove is loaded with 1.5 kg
of wood in the form of 3 logs. Please note that this hearth is only designed for logs. It is
not appropriate to use alternative fuels such as pellets.
It should also be noted that it is forbidden to burn timber containing preservatives, paint or adhesives, chipboard, plastics, and coated paper such as colour brochures. During the combustion
process, these materials release substances which are hazardous to health and may damage the
stove. They can also attack the steel in the flue pipe and the mortar in a conventional masonry
chimney.
Lightning a fire
• Open the door and place the logs in a crosswise horizontal position. Start with small, dry
sticks, on a layer of firelighters or screwed-up newspaper. The grate should be in the closed position. Leave the door slightly open for 5-10 minutes until the fire has taken hold properly. This also
ensures pre-warming of the glass and helps to avoid soot formation.
• When the fire has taken hold, close the door and open the air- feed control fully to the right (see
page 8).
• Larger logs with a cross-section of 50-80 mm can then be inserted.
• After a while, when the fire has really got going, it may be necessary to reduce the heat.
Reduce the combustion rate using the air-feed control (see page 8, Output control)
• The volume of combustion air and the heat output depend on the type of wood used, the
moisture content, the type of chimney and the flue-draught (chimney length in relation to the
negative pressure in the building). It does not take long to learn how to use your stove to achieve
maximum benefit and optimum heating results.
Fuel replenishment
• When you put more logs on the fire, you should open the door slowly to avoid smoke gusts.
• Level out the embers before inserting new logs. This makes it easier for the new logs to catch
fire.
• Put on 2-3 logs, and do not reduce the air supply until the logs have caught fire. Never put on
fresh logs when the fire is already burning satisfactorily.
Everyday use
• Light the fire as before, and adjust the air feed to achieve the output required.
Worth knowing
• When the using the stove for the first time, a slightly unpleasant smell may be noted. This is due
to oil or paint residues in the hearth. The smell will disappear after the fire has been lit a few times.
• Check the door sealing gasket at regular intervals. If it is damaged, it should be replaced.
• Keep the hearth and the flue clean. If you use the stove frequently, you should sweep the chimney in the interval between regular visits by the chimney sweep.
• If the outside temperature is low when you light a fire, it is a good idea to set fire to some paper
and push it up into the chimney. This warms up the flue and improves the draught.
• A coating of soot on the glass surfaces probably means that the hearth has not reached the right
temperature. One reason may be damp wood. Wiping the glass with dry paper may be sufficient
in some cases. If the soot deposit has been there for some time, the best solution is to remove it
with detergent or a special soot-removal product. Alternatively, a normal oven-cleaning product
can also be used. Never use a cleansing agent that contains an abrasive compound since this
could damage the glass.
• When the ash tray is emptied, make sure that there are no glowing embers. The ash must be
stored in a fireproof container for at least 24 hours before disposal.
Box 225 · 591 23 Motala
www.camina.se
• If a chimney-fire occurs, or if there is a risk of a chimney-fire, close the air-feed control and the
door. If necessary, contact the fire brigade to have the fire extinguished. The chimney must always
be inspected by a chimney sweep after a chimney-fire has occurred.