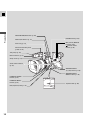
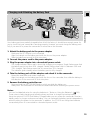
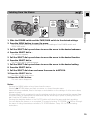
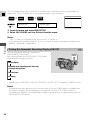
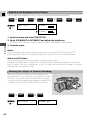
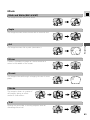
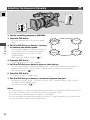
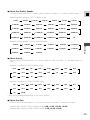
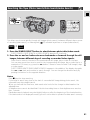
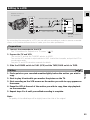
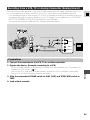
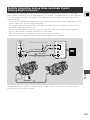
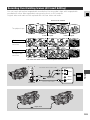
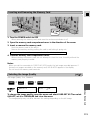
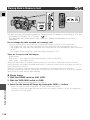
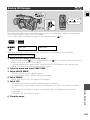
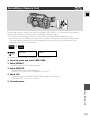
1
PUB. DIE-173 DIGITAL VIDEO CAMCORDER E Instruction Manual CANON INC. Introduction Canon Europa N.V. P.O. Box 2262, 1180 EG Amstelveen, the Netherlands Preparations Canon UK Ltd. Ribcon Way Luton Bedfordshire LU4 9UR Telephone 0870-241-2161 Canon Australia Pty. Ltd 1 Thomas Holt Drive, North Ryde, N.S.W. 2113, Australia Telephone 805-2000, Fax 887-4484 Recording Canon New Zealand Ltd Fred Thomas Drive, Takapuna, P.O. Box 33-336, Auckland, New Zealand Telephone 486-1570, Fax 486-6420 Canon Singapore Pte. Ltd 79 Anson Road #09-01/06, Singapore 079906 Telephone (65)-532-4400, Fax (65)-221-2939 Playback Canon Hongkong Company Ltd 9/F, The Hong Kong Club Building, 3A Chater Road, Central, Hong Kong Canon Latin America, Inc. Sales & Enquiries: 703 Waterford Way Suite 400 Miami, FL 33126 USA Editing Digital Video Cassette Using a Memory Card Mini Printed on 100% reused paper. PRINTED IN JAPAN IMPRIME AU JAPON PAL Additional Information © CANON INC. 2002 DY8-9020-112-000 PUB. DIE-173 0031W544 PUB.DIE-173 0000N/XXXX Important Usage Instructions WARNING: E TO REDUCE THE RISK OF ELECTRIC SHOCK, DO NOT REMOVE COVER (OR BACK). NO USER SERVICEABLE PARTS INSIDE. REFER SERVICING TO QUALIFIED SERVICE PERSONNEL. Introduction WARNING: TO REDUCE THE RISK OF FIRE OR ELECTRIC SHOCK, DO NOT EXPOSE THIS PRODUCT TO RAIN OR MOISTURE. CAUTION: TO REDUCE THE RISK OF ELECTRIC SHOCK AND TO REDUCE ANNOYING INTERFERENCE, USE THE RECOMMENDED ACCESSORIES ONLY. CAUTION: DISCONNECT THE MAINS PLUG FROM THE SUPPLY SOCKET WHEN NOT IN USE. For Users in the UK When replacing the fuse only a correctly rated approved type should be used and be sure to re-fit the fuse cover. CAUTION: CUSTOMERS IN THE U.K. SHOULD READ THIS BEFORE USING THIS PRODUCT. CHANGING THE FUSE THE MAINS LEAD ON THIS PRODUCT IS FITTED WITH A NON-REWIREABLE (MOULDED) PLUG, INCORPORATING A 3 AMP FUSE. SHOULD THE FUSE NEED TO BE REPLACED AN ASTA OR BSI APPROVED BS1362 FUSE OF THE SAME RATING MUST BE USED. ALWAYS REFIT THE FUSE COVER AFTER REPLACING THE FUSE. NEVER USE THE PLUG WITH THE FUSE COVER OMITTED. CHANGING THE PLUG IF THE FITTED PLUG IS NOT SUITABLE FOR YOUR SOCKET OUTLETS, IT SHOULD BE CUT OFF AND AN APPROPRIATE PLUG FITTED IN ITS PLACE. IF POSSIBLE FIT AN APPROPRIATE 3 AMP FUSE. IF THE NEW PLUG HAS NO FUSE, THEN FIT A 5 AMP FUSE AT THE DISTRIBUTION BOARD. AC POWER CORD CONNECTION The wires in the mains lead of this apparatus are coloured in accordance with the following cord. (IMPORTANT) Mains Lead BLUE ..................NEUTRAL BROWN. ..............LIVE As the colours of the wires in the mains lead may not correspond with the coloured markings identifying the terminals in your plug, proceed as follows: The wire which is coloured BLUE must be connected to the terminal which is marked with the letter N or coloured black. The wire which is coloured BROWN must be connected to the terminal which is marked with the letter L or coloured red. Neither Blue wire or Brown wire is to be connected to the Earth pin of a 3 pin plug. THE SEVERED PLUG MUST BE DESTROYED IMMEDIATELY TO AVOID ANY POSSIBLE ELECTRIC SHOCK HAZARD. CA-920 identification plate is located on the bottom. • Use of CV-150F/CV-250F DV cable is necessary to comply with the technical requirement of EMC Directive. 2 Operating Steps and Reference Guide Your camcorder is supplied with two manuals: the “Digital Video Camcorder XM2 Instruction Manual” and the “Digital Video Solution Disk Instruction Manual”. Preparations Introduction Digital Video Camcorder XM2 Instruction Manual E Recording Playback Editing Using the Memory Card Digital Video Solution Disk Instruction Manual Installing the Software Connecting the Camcorder to a Computer Downloading the Still Image to a Computer 3 Contents Introduction Introduction E Important Usage Instructions ........................ Operating Steps and Reference Guide .......... Thank You For Choosing a Canon ................ Introducing the XM2 .................................... 2 3 6 7 Preparations Finding Your Way Around the XM2 .............. 8 Preparing the Camcorder ............................ 12 Powering the Camcorder ............................ 14 Loading a Cassette...................................... 16 Using the Menus ........................................ 18 Using the Wireless Controller/Tally Lamp .... 27 Setting the Date and Time .......................... 30 Recording Basic Recording .......................................... Tips for Making Better Videos .................... Zooming .................................................... Using the LCD Screen ................................ Turning the Optical Image Stabilizer Off ...... Using the ND Filter...................................... Recording Still Images onto a Tape.............. Selecting the Movie Mode (Normal/Frame).. Searching and Reviewing While Recording .. Using the Various Recording Programs ........ Audio Recording ........................................ Using the Custom Key ................................ Using Digital Effects .................................... Using the Colour Bars ................................ Using a Canon Speedlite for Flash Photography (Optional) .............................. Recording with the Interval Timer .............. Recording with the Self-Timer .................... Using the DV Control.................................. Using the VL-3 Video Light (Optional) ........ Using the DM-50 Microphone (Optional) .... Using the MA-300 Microphone Adapter (Optional) .................................................. 4 33 38 40 41 44 45 46 48 49 50 54 56 60 65 66 67 69 70 71 72 73 Manual Adjustments Adjusting the Exposure Manually ................ 74 Adjusting the Focus Manually .................... 77 Setting the White Balance .......................... 78 Using the AE Shift ...................................... 80 Using the Custom Preset ............................ 81 Using the Zebra Pattern .............................. 83 Recording PC Screens and Other Screens Using CLEAR SCAN.................................... 84 Recording the Display Information................84 Playback Playing Back a Tape .................................... 85 Displaying Date, Time and Camcorder Data (Data Code) ...................................... 88 Searching the Tape (Photo Search/Date Search/Index Search) .................................. 91 Returning to a Pre-Marked Position (Zero Set Memory) .................................... 92 Connections for Playback on a TV Screen.... 93 Editing Editing to a VCR ........................................ 95 Dubbing to/from a Tape with Digital Video Equipment ...................................... 97 Recording from a VCR, TV or Analog Camcorder (Analog Line-in) ...................... 99 Digitally Outputting Analog Video and Audio Signals (Analog-Digital Converter).. 101 Recording Over Existing Scenes (AV Insert Editing) .................................... 103 Audio Dubbing ........................................ 106 Setting the Audio Mix .............................. 109 Connecting to a PC Using a DV Cable ...... 111 Using a Memory Card Memory Card Introduction........................ 112 Recording Still Images onto a Memory Card .............................. 116 Playing Back a Memory Card .................... 118 Additional Information 120 122 123 125 127 130 131 132 133 Notes on Using the Batteries .................... Maintenance ............................................ Troubleshooting ........................................ The XM2 System Diagram ........................ Optional Accessories ................................ Screen Displays ........................................ Caution Phrases ........................................ Specifications ............................................ Index ........................................................ Menu at a Glance .................................... E 134 137 141 145 146 148 151 153 155 157 Introduction Settings of the Still Images Recorded on a Memory Card .................................. Preventing Accidental Erasure (Protect)...... Marking a Still Image for Printing (Print Mark).............................................. Erasing Still Images .................................. Combining Images and Recording Them onto a Tape (Title Mix) ............................ Copying Still Images from Memory Card to Tape .................................................... Formatting a Memory Card ...................... Connecting to a PC Using a USB Cable .... Other Information and Precautions .......... Attaching the Ferrite Cores The Stereo Video cable STV-250N and the S-video cable S-150 with the ferrite core provided with the digital Video Camcorder must be used with this equipment in order to comply with the technical requirement of EMC Directive. Attach the enclosed ferrite cores before you connect the STV-250N Stereo Video Cable and S150 S-video Cable. Attach the ferrite core to the cable about 6 cm from the plug end (the plug to be connected to the camcorder) of the STV-250N Stereo Video Cable and S-150 S-video Cable. • Pass the cable through the centre of the core and wrap it around the core once, then close the unit until it clicks shut. • There are two kinds of ferrite cores; the small one for the S-150 S-video Cable and the large one for the STV-250N Stereo Video Cable. 6c m STV-250N Stereo Video Cable 6c m S-150 S-video Cable 5 Thank You For Choosing a Canon First, we’d like to thank you for purchasing this Canon camcorder. Its advanced technology makes it very easy to use — you will soon be making high-quality videos which will give you pleasure for years to come. Introduction E To get the most out of your new camcorder, we recommend that you read this manual thoroughly — there are many sophisticated features which will add to your recording enjoyment. Your camcorder is supplied with the following accessories: Lens Hood WL-D74 Wireless Large Eye Cup Two AA batteries Controller Lithium Button Battery WL-D77 Wireless CR2025 SS-600 Shoulder Strap Controller Lens cap and lens cap cord Symbols Used in This Manual : Reference page numbers : Functions that can be operated from the body of the camcorder : Functions that can be operated from the wireless controller : Supplementary notes for camcorder operation ` : Operation confirmation beeps ( 37) Capital letters are used to refer to settings displayed in the menus and buttons labelled on the camcorder itself (e.g. Press the MENU button). • When connecting the camcorder to a PC, use the optional CV-150F or CV-250F DV cable. When the PC is equipped with a USB terminal, use the supplied IFC-300PCU USB cable. Two AAA Batteries BP-511 Battery Pack S-150 S-video Cable Lithium button battery PC-A10 SCART Adapter (Europe, Asia) STV-250N Stereo Video Cable CA-560 Compact Power Adapter (including AC power cable) IFC-300PCU USB Cable* S-150 S-video Cable CA-920 Compact Power Adapter (incl. AC Power Cord) STV-250 Stereo Video Cable DC-920 DC Coupler BP-915 Battery Pack SDC-8M SD Memory Card Soft Case for SD Memory Card Software CD-ROM Digital Video Solution Disk* SS-650 Shoulder Strap * Required for transferring still images from a memory card to your computer. Please refer to the Software Instruction Manual for further details. 6 Introducing the XM2 3CCD System with Pixel Shift Technology L-Series Fluorite 20x Optical Zoom Lens The XM2 incorporates a 20x Professional L-Series Fluorite optical zoom lens. Fluorite provides outstanding resolution, contrast and colour reproduction and delivers the ultimate in clarity and image quality. Memory Card You can record still images onto a SD Memory Card or MultiMediaCard. The memory card enables easy transfer of still images to a PC. Use the supplied software to edit or attach still images to your e-mail. Image Stabilizer Canon’s optical technology stabilizes your recordings even in long telephoto shots. The DV terminal allows highquality transfer with virtually no deterioration in quality of images. You can edit and process images by connecting the camcorder to a PC with the IEEE 1394 terminal. Analog Line-in Recording E Introduction The Canon XM2 has three CCDs, delivering outstanding picture quality, highly accurate colour reproduction and a wide dynamic range with virtually no colour noise. On top of that, Canon uses a broadcast technology called Pixel Shift to produce greater picture quality than that of camcorders using CCDs with almost twice the number of pixels. IEEE 1394 DV Terminal Connect a VCR or analog camcorder and record onto a DV cassette in the XM2. Audio Dubbing/AV insert Digital Effects Show your creativity by using the special effects and digital faders. These digital effects and faders can add visual appeal and greater imaging variety. Recording Programs The XM2 has 7 recording programs: Easy Recording, Auto, Tv, Av, Manual, Sand & Snow and Spotlight. Custom Keys You can assign various functions to the custom key, independent for each operating mode. Custom Preset You can adjust colour gain, colour phase, sharpness and setup level and save the combination to the custom preset button. USB Terminal Allows high-speed transfer of memory card data to a PC with a built-in USB port. You can organize and edit still images on your PC using the supplied software. Interval Recording Interval recording allows for the capture of time elapsed motion videography. The XM2 can be programmed to record at various intervals for varying amounts of time. 7 Finding Your Way Around the XM2 E Preparations (play/pause) button (p. 85)/ Title Mix button (p. 128)/ SLIDE SHOW button (p. 119) (rewind) button (p. 85)/ CARD – button (p. 118) (stop) button (p. 85)/ INDEX SCREEN button (p. 119) PHOTO button (p. 46, 116) (fast forward) button (p. 85)/ CARD + button (p. 118) REC PAUSE button (p. 98,100) AUDIO DUB. button (p. 106) AV INSERT button (p. 103) START/STOP button (p. 33) Zoom controller (p. 40) Speaker (p. 87) Backup battery cover (p. 136) BATT. (battery) RELEASE button (p. 14) Viewfinder (p. 12) LCD screen (p. 41) AUDIO LEVEL dials (p. 55) LCD panel OPEN button (p. 41) MENU button (p. 19) CUSTOM KEY (p. 56) CUSTOM PRESET button (p. 81) Memory Card Compartment Cover 8 AUDIO REC LEVEL switch (p. 55) SELECT dial (p. 19) Program selector (p. 50) DISPLAY button (p. 36)/ DATA CODE button (p. 88) E Carrying handle Zoom controller (p. 40) PHOTO button (p. 46, 116) Preparations Strap mount (p. 13) Lock lever (p. 33) Eyepiece adapter (p. 12) Stereo microphone (p. 54) Lens hood (p. 12) Viewfinder focusing lever (p. 12) TAPE/CARD switch (p. 18, 33) Start/stop button (p. 33) Lens hood locking screw (p. 12) DC terminal MIC terminal (p. 55, 106) u (LANC) terminal (p. 96) USB terminal (p. 132) (phones) terminal (p. 87) DV IN/OUT terminal (p. 97, 101, 103, 111) AV (audio/video) IN/OUT terminal (p. 93, 95, 99, 101) S-video IN/OUT terminal (p. 93, 99, 101) Standby lever (p. 34) Cassette compartment (p. 16) Cassette compartment cover (p. 16) OPEN/EJECT switch (p. 16) Grip belt (p. 13) 9 Preparations E ND FILTER ON/OFF button (p. 45) FOCUS A/M button (p. 77) Focus ring (p. 77) Advanced accessory shoe (p. 66, 71-73) POWER switch (p. 33) REC (record) SEARCH button(p. 49)/ Record review button (p. 49) Tally lamp (p. 29) Remote sensor (p. 27) Strap mount (p. 13) Audio level indicator (p. 55) WHITE BALANCE W (set) button (p. 78) WHITE BALANCE SELECT button (p. 78) D.EFFECTS ON/OFF button (p. 61) D.EFFECTS SELECT button (p. 61) EXP (exposure) dial (p. 74) 10 Tripod socket (p. 38) E D.EFFECTS SELECT button (p. 61) MENU button (p. 19) Zoom buttons (p. 28, 40) START/STOP button (p. 33) START /STOP PHOTO SELF TIMER button (p. 69) ZOOM W SET button (p. 19) TV SCREEN DATA CODE DATA CODE button (p. 88) SET D.EFFECTS REC PAUSE – CARD + ST-2 SLIDESHOW REC PAUSE button (p. 98, 100) ZERO SET SEARCH MEMORY SELECT CARD buttons (p. 118) ZERO SET MEMORY button (p. 92) MIX BALANCE buttons (p. 109) SLIDE SHOW button (p. 119) Search buttons (p. 91) AUDIO DUB. REW PLAY FF AV INSERT –/ STOP +/ FF REMOTE SET PAUSE AUDIO DUB. button (p. 106) D.EFFECTS ON/OFF button (p. 61) ON/OFF MIX BALANCE AUDIO MONITOR ST-1 AUDIO MONITOR button (p. 109) Controller buttons (p. 19) T SELF TIMER MENU TV SCREEN button (p. 148) Preparations Transmitter PHOTO button (p. 46, 116) SLOW ×2 PLAY button (p. 85) button (p. 85) button (p. 86) SET WIRELESS CONTROLLER WL-D77 AV INSERT button (p. 103) × 2 button (p. 86) REMOTE SET button (p. 28) STOP SEARCH SELECT button (p. 91) SLOW REW PAUSE button (p. 85) button (p. 85) button (p. 86) button (p. 86) button (p. 86) 11 Preparing the Camcorder Attaching the Lens Hood Preparations E 1. Remove the lens cap. • When you purchase the XM2, the lens cap cord is attached to the middle of the Velcro grip belt. Open the Velcro and slide the lens cap cord to the position as shown in the illustration. 2. Align the hood to the lens with the Canon logo facing to the left. 3. Twist it into position (clockwise), so that the Canon logo is to the top. • You do not need to assert any pressure — screw the hood lightly into place. 4. Finally, tighten the locking screw. • To remove, reverse the above procedure. Since the lens hood cuts stray light that may cause flare and ghost images and protects the lens, be sure to attach the hood when you are recording. Adjusting the Viewfinder • In record pause mode, adjust the viewfinder focusing lever to suit your eyesight. • The viewfinder extends straight out and rotates upwards for comfortable viewing. Store the camcorder with the viewfinder flush with the body of the camcorder. • To view with the viewfinder, make sure the LCD panel is either turned so that the subject can monitor the screen, or totally closed with the screen facing inwards. • Be careful not to leave the viewfinder exposed to bright sunlight as it may melt. (The light is concentrated by the viewfinder lens.) 12 Adjusting the Grip Belt E • Adjust the length of the grip belt strap so that you can operate the start/stop button and zoom control effectively. Preparations Attaching the Shoulder Strap • For extra security and portability, attach the shoulder strap before using the camcorder. • Pass the ends through the strap mount and adjust the length as shown. • Be careful not to leave the viewfinder exposed to bright sunlight as it may melt. (The light is concentrated by the viewfinder lens.) Attaching the Large Eye Cup Use the supplied Large Eye Cup when recording in very bright surroundings or when wearing glasses. 1. Detach the eye cup from the camcorder. 2. Replace the eye cup with the Large Eye Cup. • You can attach it to the right or the left. 13 Powering the Camcorder Before operating your camcorder, you will need to use the power adapter to: E provide power from a household power socket or charge a battery pack Notes: Preparations • The power adapter converts current from a household power socket (100–240 V AC, 50/60 Hz) to the DC current used by your camcorder. • If the adapter is used next to a TV, it may cause the TV to emit noise — move the adapter away from the TV or the aerial cable. Using a Household Power Source 4 5 3 2 1 Use the power adapter and the DC coupler to provide your camcorder with instant power from an household power socket. 1. Connect the power cord to the power adapter. 2. Plug the adapter into a household power socket. 3. Connect the DC coupler to the power adapter. 4. Attach the DC coupler to the camcorder. • Extend the viewfinder and rotate it upwards. • Align the edge of the DC coupler with the line on the camcorder. • Slide the coupler down in the direction of the arrow until it clicks into place. 5 After use, turn the camcorder off, detach the DC coupler and disconnect the DC coupler from the power adapter. Unplug the power cord and disconnect it from the power adapter. • Press and hold the BATT. RELEASE button, while you slide the coupler up. • Always turn the camcorder off and raise the viewfinder before removing the power source. 14 Charging and Attaching the Battery Pack E 1 2 3 4 Your battery pack was partially charged before it left the factory. It should have enough power for you to check that your camcorder is working properly. However, you must charge the battery pack fully if you want it to power the camcorder for more than a few minutes. Preparations 5 1. Attach the battery pack to the power adapter. • Make sure the DC coupler is not connected. • Align the triangle on the battery pack with the line on the power adapter. • Slide the battery across until it clicks into place. 2. Connect the power cord to the power adapter. 3. Plug the power adapter into a household power socket. • The charge indicator flashes red to show that charging is in progress. Single flashes mean that the battery pack is less than 50% charged. Double flashes mean that it is between 50% and 75% charged. Triple flashes mean that it is more than 75% charged. • The indicator glows steadily when the battery pack is fully charged. 4. Take the battery pack off the adapter and attach it to the camcorder. • Extend the viewfinder and rotate it upwards. • Align the triangle on the battery pack with the line on the camcorder, then slide the battery in the direction of the arrow until it clicks into place. 5. Remove the battery pack after use. • Press and hold the BATT. RELEASE button, while you slide the battery up. • Always turn the camcorder off and raise the viewfinder before removing the power source. Notes: • You can find detailed notes for using the batteries in “Notes on Using the Batteries” ( 134). These notes include charging and recording times and how to charge the backup battery. • Using the optional CH-910 Dual Battery Charger/Holder you can power the camcorder from two battery packs for longer continuous recording. You can exchange the battery packs independently without cutting the power to the camcorder. In addition, the CH-910 can charge two batteries consecutively when it is connected to a household power socket. 15 Loading a Cassette Use only videocassettes marked with the DV logo.* Preparations E CLO SE TH IS FI RST . * D logo is a trademark. Loading and Unloading 1. Attach a power source. 2. Slide the OPEN/EJECT button and release the cassette compartment cover. • Wait for the cassette compartment to open automatically. • The confirmation beep sounds when it is fully opened. 3. Load or unload the cassette. • Insert the cassette gently with the window facing outward. • Remove the cassette by pulling it straight out. 4. Press the P mark on the compartment until it clicks. 5. Click the cover back into place. Notes: • Do not interfere with the cassette compartment while it is opening or closing, or attempt to close the cover. • Be careful not to get your fingers caught in the cassette compartment cover. • Do not leave the cassette in the camcorder after use — return it to its case and store it in a cool, clean, dry place. • When no cassette is loaded, v flashes in the display. • With some types of tapes, the remaining tape display may not give an accurate reading. 16 Protecting Tapes from Accidental Erasure E REC SAVE REC SAVE Preparations To protect your recording from accidental erasure, slide the tab on the cassette so that it exposes the hole. (This switch position is usually labelled SAVE or ERASE OFF.) If you load this cassette and put the camcorder in record pause mode ( 33), “THE TAPE IS SET FOR ERASURE PREVENTION” is displayed for approx. 4 seconds and then the v mark flashes in the display. The camcorder also shows the above phrase if you accidentally press the 2 (record) button with the camcorder switched to TAPE PLAY (VCR) mode. If you wish to record on the cassette again, slide the tab back so that the hole is closed. Cassette Handling Precautions • To protect the tape heads, transfer cassettes directly from the tape case to the camcorder — do not open the tape protect cover or touch the tape itself. • Do not use cassettes where the tape has been damaged or spliced — they may damage the camcorder. • Do not insert anything into the small holes on the cassette or cover them with cellophane tape. • Handle cassettes with care — dropping them or exposing them to external shocks may cause internal damage. • Store cassettes in the provided case, rewinding them to the start of the tape first, and then storing them upright. • A cassette with metal plated terminals may become dirty with use, affecting information transfer. Therefore, after using a tape around ten times, be sure to clean the terminals with a cotton swab. Cassette Memory Function The cassette memory function cannot be used with this camcorder. 17 Using the Menus Many of the camcorder’s advanced functions are selected from menus which appear in the display. E There are 4 main menus: CAM. MENU Camera menu VCR MENU VCR menu C.CAM. MENU Card camera menu C.PLAY MENU Card play menu Preparations 2 CAM. MENU TAPE CAM. MENU + VCR MENU SEL. SETSET MENUCLOSE TAPE VCR MENU + C. CAM. MENU SEL. SETSET MENUCLOSE CARD + SEL. SETSET MENUCLOSE C. PLAY MENU CARD OPER. VCR SET UP DISP. SET UP SYSTEM CUSTOM KEY RETURN 18 CARD + CARD TAPE CAMERA CAM. SET UP CSTM PRESET CARD SET UP DISP. SET UP SYSTEM CUSTOM KEY RETURN 2 C. PLAY MENU CARD TAPE PLAY (VCR) VCR SET UP DISP. SET UP SYSTEM CUSTOM KEY RETURN 2 C. CAM. MENU 20) 22) 23) 25) CAMERA CAM. SET UP CSTM PRESET VCR SET UP DISP. SET UP SYSTEM CUSTOM KEY TITLE MIX RETURN 2 ( ( ( ( CARD TAPE PLAY (VCR) SEL. SETSET MENUCLOSE CARD TAPE Selecting From the Menus E 2, 11 MENU TV SCREEN SET 3-10 2. Press the MENU button to open the menu. Preparations 1. Slide the POWER switch and the TAPE/CARD switch to the desired settings. • One of the main menus appears depending on the settings of the POWER switch and TAPE/CARD switch. 3. Pull the SELECT dial up and down to move the arrow to the desired submenu. 4. Press the SELECT dial in . • The submenu appears. 5. Pull the SELECT dial up and down to move the arrow to the desired function. 6. Press the SELECT dial in. • The function and its settings appear. 7. Pull the SELECT dial up and down to move the arrow to the desired setting. 8. Press the SELECT dial in. 9. Pull the SELECT dial down and move the arrow to bRETURN. 10.Press the SELECT dial in. • You return to the main menu. 11.Press the MENU button. • The main menu disappears. Notes: • Pressing the MENU button at any time closes the menu. • Selecting b RETURN takes you back one menu, or closes the main menu. • Items that are unavailable, due to the tape or card situation or the settings of other menu items, appear in purple. • You may often find it convenient to use the wireless controller to move around the menus. Press its MENU button to open/close the menu and use the arrow keys in place of pulling the SELECT dial. Push the SET button to select. • Pressing the start/stop button or the PHOTO button will close the menu and start recording. • You can display the menus on a connected TV screen by turning TV SCREEN ( 148) on through the menu or using the wireless controller’s TV SCREEN button. See p. 93 for TV connecting instructions. 19 List of Menus E Turn to the appropriate page for a detailed explanation of each function. 2 CAM. MENU Preparations Set the POWER switch to CAMERA and the TAPE/CARD switch to There are 7 submenus within the CAM. MENU. 1 2 3 4 5 6 7 8 Camera Set Up Submenu Custom Preset Submenu VCR Set Up Submenu Display Set Up Submenu System Submenu Custom Key Submenu Title Mix Submenu Close Main Menu TAPE . CAM. MENU 1 3 5 7 SEL. SETSET MENUCLOSE CAM. SET UP CSTM PRESET VCR SET UP DISP. SET UP SYSTEM CUSTOM KEY TITLE MIX RETURN 2 4 6 8 1 Camera set up Submenu q w e r t y u i o !0 !1 !2 !3 Digital Zoom .......................................... Movie Mode .......................................... Image Stabilizer ..................................... AE Shift ................................................. 16:9 Effect............................................. Zebra Pattern......................................... Zebra Pattern Level ................................ Grip Zoom Speed................................... Handle Zoom Speed .............................. Clear Scan ............................................. Self-Timer .............................................. Interval Timer......................................... Return 40 48 44 80 35 83 83 40 40 84 69 67 SEL. SETSET MENUCLOSE D. ZOOM••••••OFF •• MOVIE MODE NORMAL IMAGE S. i••ON AE SHIFT••••±0 16:9••••••••OFF ZEBRA•••••••OFF ZEBRA LEVEL•90 ZOOM GRIP•••VARIABLE CAM. SET UP q e t u SEL. SETSET MENUCLOSE ZEBRA•••••••OFF ZEBRA LEVEL•90 ZOOM GRIP•••VARIABLE ZOOM HANDLE•MEDIUM CLEAR SCAN••––– SELF-TIMER••OFF INTERVAL RETURN w r y i CAM. SET UP o !1 !3 !0 !2 2 Custom Preset Submenu !4 !5 !6 !7 !8 20 Colour Gain ........................................... Colour Phase ......................................... Sharpness .............................................. Setup Level ............................................ Return 81 81 81 82 CSTM PRESET !4 !6 !8 SEL. SETSET MENUCLOSE + R + + COLOR GAIN••– COLOR PHASE•G SHARPNESS•••– SETUP LEVEL•– RETURN !5 !7 3 VCR Set Up Submenu E !9 @0 @1 @2 @3 @4 Recording Mode .................................... Microphone ........................................... Microphone Attenuator ................. 55, Audio Mode .......................................... Power Save ............................................ Return 35 54 106 54 34 SEL. SETSET MENUCLOSE REC MODE••••SP ••••••••• NORMAL MIC MIC ATT•••••OFF AUDIO MODE••16bit PWR SAVE••••SHUT OFF RETURN VCR SET UP !9 @1 @3 @0 @2 @4 @5 @6 @7 @8 @9 #0 #1 #2 #3 #4 LCD Brightness ...................................... 42 Viewfinder Brightness ............................ 42 LCD Mirror Mode .................................. 42 16:9 Guides ........................................... 36 TV Screen ............................................ 148 Audio Level Indicator ............................. 55 Guide Information ................................. 32 Card Access Display ............................. 114 Demonstration Mode............................. 37 Return SEL. SETSET MENUCLOSE + LCD BRIGHT••– + – EVF BRIGHT•• LCD MIRROR••ON 16:9 GUIDES•OFF TV SCREEN•••OFF AUDIO LEVEL•ON GUIDE INFO••OFF CARD ACCESS•ON DISP. SET UP @5 @7 @9 #1 SEL. SETSET MENUCLOSE LCD MIRROR••ON 16:9 GUIDES•OFF TV SCREEN•••OFF AUDIO LEVEL•ON GUIDE INFO••OFF CARD ACCESS•ON DEMO MODE•••ON RETURN @6 Preparations 4 Display Set Up Submenu @8 #0 #2 DISP. SET UP #3 #4 5 System Submenu #5 #6 #7 #8 #9 $0 $1 $2 Wireless Controller................................. Tally Lamp.............................................. Beep ...................................................... Character Recording .............................. DV Control ............................................ Time Zone/Daylight Saving Time ............ Setting Date/Time ................................. Return 28 29 37 84 70 30 32 SEL. SETSET MENUCLOSE WL. REMOTE••• 1 TALLY LAMP••ON BEEP••••••••ON CHAR. REC••••OFF DV CONTROL••OFF T. ZONE/DST••––– D/TIME SET••––. –––. –––– ––:––:–– –– SYSTEM #5 #7 #9 $1 $2 #6 #8 $0 6 Custom Key Submenu $3 Custom Key ........................................... $4 Return 56 SEL. SETSET MENUCLOSE CUSTOM KEY••INDEX WRITE RETURN CUSTOM KEY $3 $4 21 7 Title Mix Submenu E Preparations $5 Selecting a Title ................................... $6 Creating a Title .................................... $7 Return 128 127 TITLE MIX $5 $7 SEL. SETSET MENUCLOSE TITLE SELECT CREATE TITLE RETURN $6 2 VCR MENU PLAY Set the POWER switch to (VCR) and the TAPE/CARD switch to There are 4 submenus within the VCR MENU. 1 2 3 4 5 VCR Set Up Submenu Display Set Up Submenu System Submenu Custom Key Submenu Close Main Menu TAPE . VCR MENU 1 3 5 SEL. SETSET MENUCLOSE VCR SET UP DISP. SET UP SYSTEM CUSTOM KEY RETURN 2 4 1 VCR Set Up Submenu q w e r t y u i o Recording Mode .................................... Output Channel................................... Audio Dubbing .................................... Microphone ........................................... Microphone Attenuator ................. 55, Audio Attenuator................................. Audio Mode .......................................... Analog-Digital Converter ..................... Return 35 110 106 54 106 106 54 102 SEL. SETSET MENUCLOSE REC MODE••••SP OUTPUT CH•••L/R AUDIO DUB. ••AUDIO IN MIC•••••••••NORMAL MIC ATT•••••OFF AUDIO ATT•••OFF AUDIO MODE••16bit AVaDV OUT•••OFF VCR SET UP q e t u o w r y i 2 Display Set Up Submenu !0 !1 !2 !3 !4 !5 !6 !7 22 LCD Brightness ...................................... 42 Viewfinder Brightness ............................ 42 Displays ............................................... 148 6-Second Auto Date .............................. 90 Data Code ............................................. 89 Selecting Date/Time ............................... 88 Custom Key Display ............................... 56 Audio Level Indicator ............................. 55 SEL. SETSET MENUCLOSE + LCD BRIGHT••– + EVF BRIGHT••– DISPLAYS••••ON 6SEC. DATE•••OFF DATA CODE•••DATE/TIME D/TIME SEL. •DATE & TIME CUSTOM KEY••ON AUDIO LEVEL•OFF DISP. SET UP !0 !2 !4 !6 !1 !3 !5 !7 3 System Submenu E !8 !9 @0 @1 @2 @3 Wireless Controller................................. Tally Lamp.............................................. Beep ...................................................... Time Zone/Daylight Saving Time ............ Setting Date and Time .......................... Return 28 29 37 30 32 SEL. SETSET MENUCLOSE WL. REMOTE••• 1 TALLY LAMP••ON BEEP••••••••ON T. ZONE/DST••––– D/TIME SET••––. –––. –––– ––:––:–– –– RETURN @3 SEL. SETSET MENUCLOSE CUSTOM KEY••TV SCREEN RETURN @5 SYSTEM !8 @0 @2 !9 @1 @4 Custom Key ........................................... @5 Return 56 CUSTOM KEY @4 Preparations 4 Custom Key Submenu 2 C. CAM. MENU Set the POWER switch to CAMERA and the TAPE/CARD switch to There are 6 submenus within the C. CAM. MENU. 1 2 3 4 5 6 7 Camera Set Up Submenu Custom Preset Submenu Card Set Up Submenu Display Set Up Submenu System Submenu Custom Key Submenu Close Main Menu CARD . C. CAM. MENU 1 3 5 7 SEL. SETSET MENUCLOSE CAM. SET UP CSTM PRESET CARD SET UP DISP. SET UP SYSTEM CUSTOM KEY RETURN 2 4 6 1 Camera set up Submenu q w e r t y u i Image Stabilizer ..................................... AE Shift ................................................. Zebra Pattern......................................... Zebra Pattern Level ................................ Grip Zoom Speed................................... Handle Zoom Speed .............................. Self-Timer .............................................. Return 44 80 83 83 40 40 69 SEL. SETSET MENUCLOSE IMAGE S. i••ON AE SHIFT••••±0 ZEBRA•••••••OFF ZEBRA LEVEL•90 ZOOM GRIP•••VARIABLE ZOOM HANDLE•MEDIUM SELF-TIMER••OFF RETURN CAM. SET UP q e t u w r y i 23 2 Custom Preset Submenu E Preparations o !0 !1 !2 !3 Colour Gain ........................................... Colour Phase ......................................... Sharpness .............................................. Setup Level ............................................ Return 81 81 81 82 CSTM PRESET o !1 !3 SEL. SETSET MENUCLOSE + R + + COLOR GAIN••– COLOR PHASE•G SHARPNESS•••– SETUP LEVEL•– RETURN !0 !2 3 Card Set Up Submenu !4 !5 !6 !7 !8 Image Quality ...................................... Image Resolution ................................. File Numbers........................................ Shutter Sound...................................... Return 113 114 115 115 SEL. SETSET MENUCLOSE QUALITY•••••FINE IMAGES RES. •1488×1128 FILE NOS. •••CONTINUOUS SHTR SOUND••ON RETURN CARD SET UP !4 !6 !8 !5 !7 4 Display Set Up Submenu !9 @0 @1 @2 @3 @4 @5 @6 LCD Brightness ...................................... 42 Viewfinder Brightness ............................ 42 LCD Mirror Mode .................................. 42 TV Screen ............................................ 148 Guide Information ................................. 32 Card Access Display ............................. 114 Demonstration Mode............................. 37 Return SEL. SETSET MENUCLOSE + LCD BRIGHT••– + EVF BRIGHT••– LCD MIRROR••ON ••• TV SCREEN OFF GUIDE INFO••ON CARD ACCESS•ON DEMO MODE•••ON RETURN DISP. SET UP !9 @1 @3 @5 @0 @2 @4 @6 5 System Submenu @7 @8 @9 #0 #1 24 Wireless Controller................................. Beep ...................................................... Time Zone/Daylight Saving Time ............ Setting Date/Time .................................. Return 28 37 30 32 SEL. SETSET MENUCLOSE WL. REMOTE••• 1 BEEP••••••••ON T. ZONE/DST••––– D/TIMR SET••––. –––. –––– ––:––:–– –– RETURN SYSTEM @7 @9 #1 @8 #0 6 Custom Key Submenu E #2 Custom Key ........................................... #3 Return 56 SEL. SETSET MENUCLOSE CUSTOM KEY•ZEBRA RETURN CUSTOM KEY #2 #3 PLAY Set the POWER switch to (VCR) and the TAPE/CARD switch to There are 5 submenus within the C. PLAY MENU. 1 2 3 4 5 6 Card Operation Submenu VCR Set Up Submenu Display Set Up Submenu System Submenu Custom Key Submenu Close Main Menu CARD . C. PLAY MENU 1 3 5 Preparations 2 C. PLAY MENU SEL. SETSET MENUCLOSE CARD OPER. VCR SET UP DISP. SET UP SYSTEM CUSTOM KEY RETURN 2 4 6 1-1 Card Operation Submenu (Single Image Display) q w e r t y u Copying from Card to Tape.................. Erasing All Print Marks ......................... Erasing Images..................................... Protecting a Title.................................. Erasing a Title ...................................... Formatting........................................... Return 130 124 125 128 129 131 SEL. SETSET MENUCLOSE [ ] COPY PRINT MARKS ALL ERASE IMAGE ERASE TITLE PROTECT TITLE ERASE FORMAT RETURN CARD OPER. q e t u w r y 1-2 Card Operation Submenu (Index Screen Display) i Protecting an Image............................. o Print Marking....................................... 122 123 CARD OPER. i PROTECT PRINT MARK RETURN SEL. SETSET MENUCLOSE o 25 2 VCR Set Up Submenu E Preparations !0 Recording Mode .................................... !1 Return 35 VCR SET UP !0 SEL. SETSET MENUCLOSE REC MODE••••SP RETURN !1 3 Display Set Up Submenu !2 !3 !4 !5 !6 !7 !8 LCD Brightness ...................................... 42 Viewfinder Brightness ............................ 42 Displays ............................................... 148 Selecting Date/Time ............................... 88 Custom Key Display ............................... 56 Card Access Display ............................. 114 Return SEL. SETSET MENUCLOSE + LCD BRIGHT••– + EVF BRIGHT••– DISPLAYS••••ON D/TIME SEL. •DATE & TIME CUSTOM KEY••ON CARD ACCESS•ON RETURN DISP. SET UP !2 !4 !6 !8 !3 !5 !7 4 System Submenu !9 @0 @1 @2 @3 @4 Wireless Controller................................. Tally Lamp.............................................. Beep ...................................................... Time Zone/Daylight Saving Time ............ Setting Date and Time .......................... Return 28 29 37 30 32 SEL. SETSET MENUCLOSE WL. REMOTE••• 1 TALLY LAMP••ON •••••••• BEEP ON T. ZONE/DST••––– D/TIME SET••––. –––. –––– ––:––:–– –– RETURN SYSTEM !9 @1 @3 @0 @2 @4 5 Custom Key Submenu @5 Custom Key ........................................... @6 Return 26 56 SEL. SETSET MENUCLOSE CUSTOM KEY••TV SCREEN RETURN CUSTOM KEY @5 @6 Using the Wireless Controller/Tally Lamp The supplied wireless controller can operate the camcorder from a distance of up to 5 m (16 feet). Point it at the camcorder’s remote sensor while you press the buttons. E ft) The tally lamp lights up to let you know that the camcorder is in range and responding to your commands. 5m (16 Preparations There are four functions which can only be operated using the wireless controller: • Special playback ( 86) • Photo/date/index search ( 91) • Zero set memory ( 92) • Audio mix ( 109) Inserting Batteries Insert two AA batteries, following the + and – markings. Be careful not to reverse the polarity of the batteries. Notes: • When using the wireless controller in brightly lit places or outdoors, the effective range will be less. • The camcorder may have difficulty picking up the remote control signals at extremely close range. • Do not leave the controller exposed to direct sunlight, or in hot or humid places. • When the batteries run out, replace them both together. • Make sure the shoulder strap does not obstruct the remote sensor. 27 When Operating 2 Canon DV Camcorders (Remote Sensor Mode) E To prevent interference from other Canon wireless controllers being used nearby, there are 2 remote sensor modes and an off setting. The wireless controller and the camcorder have to be set to the same mode in order to be compatible. ZOOM W T Preparations REMOTE SET The wireless controller and the camcorder have been preset to mode 1. If you change the mode on the camcorder, be sure to change the mode on the wireless controller to the same mode. TAPE + CAMERA , TAPE SYSTEM ( + PLAY (VCR) , CARD + WL.REMOTE••• A1 18) CAMERA , CARD + PLAY (VCR) A 1 : Mode 1 A 2 : Mode 2 OFFB : Sensor off To turn the remote sensor off: Open the menu and select SYSTEM. Then select WL.REMOTE, set it to OFF B and close the menu. •B appears in the display. To change the mode... ...on the camcorder: Open the menu and select SYSTEM. Then select WL.REMOTE, set it to A 1 or A 2 and close the menu. •The selected mode will appear on the display for 4 seconds. ...on the wireless controller: Press and hold the REMOTE SET button on the wireless controller. Simultaneously press the ZOOM W button for mode 1 or the ZOOM T button for mode 2. Continue to press simultaneously for over 2 seconds. •Be sure to set the wireless controller to the same mode as the camcorder. If your wireless controller is not working: Make sure the camcorder and the wireless controller are both set to the same mode. Check the mode the camcorder is set to by pushing any button other than the REMOTE SET button on the wireless controller. The camcorder’s mode appears in purple for about 4 seconds. Set the wireless controller’s mode accordingly by pressing the aforementioned button combinations. If the wireless controller still does not work, change the batteries. Notes: • The mode of the camcorder also appears for 4 seconds when you turn the power on. • When you replace the batteries, the wireless controller returns to mode 1. Change the mode again if necessary. 28 Turning Off the Tally Lamp E The tally lamp lets you know that the camcorder is recording. However, its flashing may be reflected into the lens during close-up recording, or when recording through glass. You may therefore decide to turn it off. + CAMERA SYSTEM ( , TAPE + PLAY (VCR) , CARD + PLAY (VCR) Preparations TAPE TALLY LAMP•• ON 18) 1. Open the menu and select TALLY LAMP. 2. Select the OFF setting and close the menu. • The tally lamp no longer flashes during recording, but it will still light up when the camcorder receives a signal from the wireless controller. 29 Setting the Date and Time Preparations E The date and/ time display forms part of the data code. You can choose to display or hide it during playback ( 88). Set the date and time display when you first start using your camcorder. Install the backup battery before you begin ( 136). • Before you start setting the date and time, select your home time zone from the menu. Setting the Time Zone/Daylight Saving Time TAPE + CAMERA , TAPE + SYSTEM ( PLAY (VCR) , CARD + CAMERA , CARD + PLAY (VCR) T.ZONE/DST•• N.Y. 18) 1. Press the MENU button. • The main menu appears. 2. Pull the SELECT dial up or down, select SYSTEM and press the SELECT dial in. • The SYSTEM submenu appears. 3. Pull the SELECT dial up or down, select T.ZONE/DST and press the SELECT dial in. • The time zone settings appear. • Your camcorder’s time zone is factory-preset to Paris. If you are at another time zone, select your time zone first and daylight saving time (DST) setting if necessary. 4. Move up or down the list of time zones by pulling the SELECT dial up or down. Press the SELECT dial in to set the time zone that represents your time zone. • If you are in daylight saving time, select the time zone with the daylight saving time mark U next to the area. 5. Press the MENU button. 30 E 16 1 19 18 24 20 4 2 3 17 6 7 10 9 15 8 5 21 23 14 12 11 13 14 15 16 17 18 19 20 21 22 23 24 No. Time zone LONDON PARIS CAIRO MOSCOW DUBAI KARACHI DACCA BANGKOK H. KONG (Hong Kong) TOKYO SYDNEY SOLOMON 1 2 3 4 5 6 7 8 9 10 11 12 13 Preparations 22 No. Time zone WELLGTN (Wellington) SAMOA HONOLU. (Honolulu) ANCHOR. (Anchorage) L.A. (Los Angeles) DENVER CHICAGO N.Y. (New York) CARACAS RIO (Rio de Janeiro) FERNAN. (Fernando de Noronha) AZORES Notes: • After you have selected your time zone and set the date and time, when you travel to another time zone, there is no need to reset the date and time. Just set the time zone to your destination and the camcorder’s clock will automatically change to display the correct time for your destination. • The camcorder automatically accounts for the number of days in a month and leap year. 31 Setting the Clock E After you set the date and time, the date/time and home time zone will be displayed for about 4 seconds each time you turn the power on (in TAPE CAMERA and CARD CAMERA mode). TAPE + CAMERA , TAPE + SYSTEM Preparations ( PLAY (VCR) , D/TIME SET•• 18) CARD + CAMERA , CARD + PLAY (VCR) 1.JAN.2002 12:00 AM 1. Press the MENU button. • The main menu appears. 2. Pull the SELECT dial up or down, select SYSTEM and press the SELECT dial in. • The SYSTEM submenu appears. 3. Pull the SELECT dial up or down, select D/TIME SET and press the SELECT dial in. • The year display starts to flash. 4. Pull the SELECT dial up or down to change the year. Press the SELECT dial in to move to another part of the display. • Once you move from the year, the next part of the display starts flashing. 5. Set the month, day, hours, and minutes in the same way. 6. Press the MENU button when finished to start the clock. • The date can be set to any year between 2002 and 2030. • When you press the MENU button during the setting, the seconds become set to zero, the menu closes and the clock starts. • If you press the SELECT dial in after having set the minutes, you can set date and time again from the start. Date and Time Display You can choose to display or hide the date and time display during recording. When the date and time display is set to ON, the date and time appear in the lower left-hand corner of the display but the time zone disappears in about 4 seconds. Date and time will not be superimposed on your recordings. TAPE + CAMERA , DISP.SET UP ( CARD + CAMERA GUIDE INFO•• OFF 18) To turn it on, open the menu and select DISP.SET UP. Then select GUIDE INFO, set it to D/T DISPLAY and close the menu. 32 Basic Recording 1CARD 1 4 STANDBY LOCK TAPE E START STOP 3 STANDBY LOCK 2 Before You Start Recording Attach a power source ( 14). Load a cassette ( 16). Fasten the grip belt ( 13). Attach the lens hood ( 12). Choose the display: viewfinder ( 12) or LCD screen ( Adjust the viewfinder or the LCD screen. 41). You may also want to install the backup battery ( 136) in order to set the date and time display ( 30). For setting the movie mode, see “Selecting the Movie Mode” ( 48). Recording • • • • • • Recording 1. Slide the POWER switch to CAMERA and the TAPE/CARD switch to TAPE. 2. Turn the standby lever to STANDBY. • The camcorder power indicator lights up red and PAUSE appears in the display — the camcorder is now in “record pause mode”. • For recording still images, see “Recording Still Images onto a Tape” ( 46) and “Recording Still Images onto a Memory Card” ( 116). 3. Turn the program selector to [ Easy Recording mode. • This selects the camcorder’s Easy Recording program. It allows you to simply point and shoot without making any manual adjustments ( 51). 4. Press the start/stop button to begin recording. • There are two start/stop buttons, to give you control from both gripping positions. • The tally lamp flashes rapidly and REC appears in the display. • When you start recording, the camcorder counts from 0 SEC. to 10 SEC. Recordings shorter than 10 seconds may be difficult to edit later. 5. Press the start/stop button again to pause recording. • The camcorder returns to record pause mode and PAUSE reappears in the display. • You can stop and restart recording as often as you like by pressing the start/stop button. Low-Angle Recording The camcorder is also designed for low-angle recording. The handle is equipped with start/stop button, PHOTO button and zoom controls. The speed of the zoom controls on the handle can be set to low, medium or fast in the menu ( 40). Slide the LOCK lever into the direction of the arrow to lock the handle controls to prevent accidental operation. 33 Using the STANDBY lever E As long as the POWER switch is set to CAMERA, you can use the STANDBY lever to turn the camcorder on and off. This saves battery power and prevents accidental operation of the start/stop button. Turn the STANDBY lever to LOCK or STANDBY to enter/leave the standby mode. The Power Save Function Recording The camcorder automatically turns off if you leave it in record pause mode for more than 5 minutes to protect tape and video heads. You can select whether to turn off the camcorder (SHUT OFF) or only the recorder section (VCR STOP). At VCR STOP, the camcorder remains turned on, so that the camcorder settings such as aperture and shutter speed are retained. Press the start/stop button to start recording from the VCR STOP state. Press the VCR STOP Custom Key to go into record pause mode ( 56). If you have selected SHUT OFF and the camcorder turns off, turn the standby lever to LOCK and back to STANDBY to turn the camcorder on. VCR STOP Select VCR STOP as the function for the Custom Key button in the menu. Pressing the Custom Key will then only turn off the recorder section while the camcorder remains on. This will enable you to change the camcorder settings without being interfered by the automatic shut off. To start recording, press the VCR STOP button and the camcorder will go into record pause mode. When You Have Finished Recording • • • • • • Close the LCD panel. Unload the cassette. Turn the standby lever to LOCK. Slide the POWER switch to OFF. Disconnect the power source. If you have used the viewfinder, return it to its lowered and retracted position. Notes: • To check that the camcorder is recording correctly, make a test recording first. • Before making important recordings, clean the video heads using a Canon DVM-CL Digital Video Head Cleaning Cassette or a commercially available digital video head cleaning cassette. • To close the LCD panel, rotate it vertically until the screen faces you, then push it in flat against the side of the camcorder. • You cannot monitor the sound from the speaker when recording. • For tips on how to make better videos, see page 38. • For extra recording time, see “Changing the Recording Time” ( 35) • The flashing of the tally lamp may be reflected into the lens during close-up recording, or when recording through glass. You may therefore decide to turn it off ( 29). 34 Changing the Recording Mode (SP/LP) E You can record and play back a tape in SP (standard play) and LP (long play) modes. LP extends the tape usage by 1.5 times. You cannot add sound (audio dubbing) or images (AV insert) to a tape that has been recorded in LP mode. If you plan to use either of these functions later, record in SP mode. TAPE + CAMERA , TAPE + VCR SET UP ( PLAY (VCR) , CARD + CAMERA REC MODE•••• SP 18) To change to LP mode, open the menu and select VCR SET UP. Then select REC MODE, set it to LP and close the menu. • When recording and playing back tapes in LP mode, the nature of the tape and usage conditions may affect recording, mosaic-like noise may appear in the image and the sound may be distorted during playback of tapes recorded in LP mode. For important recordings, therefore, set the camcorder to SP mode. • If you record in both modes on the same tape, the picture may become distorted during playback and the time code may not be written correctly. • When the camcorder is set to LP mode, pausing between recordings may produce mosaic-like noise. • A tape recorded in LP mode on another camcorder may produce mosaic-like noise when played back on this camcorder, and vice versa. Recording Notes: 16:9 (Wide-Screen TV Recording) Produces images in the 16:9 format for playback on wide-screen TVs. TAPE + CAMERA , CAM.SET UP ( TAPE + PLAY (VCR) 16:9•••••••• OFF 18) 1. Open the menu and select DISP. SET UP. 2. Select 16:9, set it to ON and close the menu. 35 The 16:9 guides allows you to view the 16:9 wide screen composition while in the standard 4:3 aspect ratio. The 16:9 guides will not be superimposed on your recordings. E TAPE + CAMERA , DISP.SET UP ( TAPE + PLAY (VCR) 16:9GUIDES•• OFF 18) 1. Open the menu and select DISP. SET UP. 2. Select 16:9 GUIDES, set it to ON and close the menu. Notes: Recording • “16:9” is shown in the display when you turn the 16:9 effect on. • If you play back a recording made for 16:9 on a normal TV screen, the image will appear to be vertically “squashed” (compressed). Turning the Camcorder Recording Displays ON/OFF You can change the display by pressing the DISPLAY/DATA CODE button. Each time you press the DISPLAY/DATA CODE button, the display will change as follows: DISPLAY/ DATA CODE Normal display Recording mode, operating mode, time code, warnings, date and time* Date and time* No display * Appears when GUIDE INFO is set to D/T DISPLAY in the DISP. SET UP submenu (CAMERA menu). Notes: • The display becomes reset when you turn the power off by the POWER switch or standby lever. • The same information will be displayed on a connected TV screen (TV SCREEN function). • The audio level indicator can be displayed or hidden through the menu independently from the DISPLAY/DATA CODE button. 36 Confirmation/Warning beeps E The camcorder’s short operation confirmation beeps are indicated by ` in the illustrations. Beeps sound upon certain camcorder operations such as when you turn the camcorder on, during the self-timer countdown, right before the camcorder’s automatic shut-off, and also upon any unusual condition of the camcorder. Beeps are not recorded on the tape. TAPE + CAMERA , TAPE + SYSTEM ( PLAY (VCR) , CARD + CAMERA , CARD + PLAY (VCR) BEEP••• ON 18) To turn the beep off, open the menu and select SYSTEM. Then select BEEP, set it to OFF and close the menu. You can see a demonstration of the camcorder’s main features. To see the demonstration, do either of the following: • With no cassette or memory card inserted, turn the DEMO MODE on in the CAM.MENU or C.CAM.MENU and close the menu. • Leave the camcorder with no cassette or memory card inserted for five minutes after turning it on. TAPE + CAMERA , DISP. SET UP ( CARD + Recording Demonstration Mode CAMERA DEMO MODE••• ON 18) To turn the demonstration mode off, open the menu and select DISP. SET UP. Then select DEMO MODE, set it to OFF and close the menu. Notes: • The opening animation will not appear when the demonstration mode is turned off. • To cancel the demo mode once it has begun: push any button, turn off the power, load a cassette or insert a memory card. 37 Tips for Making Better Videos Holding the Camcorder E For maximum stability, grip the camcorder in your right hand and keep your right elbow pressed against your body. If necessary support the camcorder with your left hand. With practice, you will be able to operate the controls by touch, without taking your eye off the action. Recording Using a Tripod To prevent any unwanted movement, you can mount the camcorder on a tripod, (or any flat surface at a suitable height) and operate it with the wireless controller. • When you are using a tripod, be careful not to leave the viewfinder exposed to bright sunlight as it may melt. (The light is concentrated by the viewfinder lens.) Change the angle of the viewfinder so that the sun does not shine into it. • Make sure that the fastening screw of the tripod is no longer than 5.5 mm (1/4 inch), as it will damage the camcorder. Sound Recording For greater creative control over audio recording, you can connect an external microphone to the camcorder via the MIC terminal. When using the MIC terminal, use a microphone with a built-in power supply (condenser microphone). It is possible to connect almost any stereo microphone with a plug diameter of 1/8 inch (3.5 mm), however, their audio levels will be different from that of the built-in microphone. 38 Composition E The most important element in the scene does not necessarily have to be centred. For a more interesting picture, try to position your subject slightly to one side. Leave some space on the side of the frame that the subject is facing or moving towards. Do not cut off the top of the subject’s head, and do not cut people off at the neck, hips or knees (move a little bit above or below). Watch out for distracting objects in the background. Picture Angle Remember that any camcorder movement or change in picture angle should have a definite purpose. Avoid unnecessary or half-hearted movements. Long shot Recording Instead of zooming while recording, try to choose your picture angle before you begin. A good way to tell a story with video is to begin with a long shot that establishes the situation, and then move in with medium shots and close-ups to show the details. Remember to change your viewpoint for each shot. Medium shot Close-up Camcorder Moves Use pans to record a landscape or follow a moving subject. Decide the area you wish to cover and stand facing the end of your panning angle. Without moving your feet, turn your waist to the starting position. Start recording, and after a few seconds begin to turn slowly from the waist. Hold the final image for a few seconds before you stop recording. Pan Tilt the camcorder up to exaggerate the height of the subject. Tilt down from the top of a building, for example, as an introduction to subjects at the bottom. Tilt 39 Zooming T Zoom in E ZOOM W Zoom out W W T T This camcorder is equipped with 20× optical zoom and 100× digital zoom. Optical zoom and digital zoom can be operated from either the side grip, the camcorder handle or the wireless controller. • Digital zoom cannot be used in CARD CAMERA mode. Recording 20× Optical Zoom Press the zoom control towards W to zoom out to wide-angle. Press it towards T to zoom in to telephoto. • The speed of the zoom controls on the camcorder can be changed in the CAMERA SET UP submenu (grip zoom: variable, low, medium and fast; handle zoom: low, medium and fast). • The speed of the zoom control of the wireless controller cannot be adjusted. 40×/100× Digital Zoom The digital zoom magnifies the camcorder’s zoom range by up to 5 times. TAPE + CAMERA CAM. SET UP ( D.ZOOM••• OFF 18) To change the digital zoom, open the menu and select CAM.SET UP. Then select DIGITAL ZOOM, set it to 40 × or 100 × and close the menu. The zoom control continues to work as usual. You can freely zoom in and out between 1× and 40× or 1× and 100x magnification — the camcorder automatically switches between optical zooming (up to 20×) and digital zooming (20× to 100×). Notes: • When zooming, as a rule, keep at least 1m (3 ft 3 3/8 in) between you and your subject. However when the zoom is at the wide-angle position, you can focus on a subject as close as 1 cm (3/8 in). • Image resolution decreases the further you zoom towards 100× in digital zoom range. • When the digital zoom is set to 40×, the zoom indicator extends (light blue). When the digital zoom is set to 100× zoom, the zoom indicator extends again (a darker blue). 40 Using the LCD Screen Opening the LCD Screen E Push the LCD panel OPEN button and open the panel by pulling it away from the camcorder. This automatically switches the LCD screen on and the viewfinder off. When you close the LCD panel, the LCD screen automatically switches off and the viewfinder switches back on. Changing the Angle of the LCD Screen First open out the LCD panel at a right angle (90°) to the camcorder. Recording You can now choose the angle of the panel that suits you best by rotating it backwards (up to 180°) and forwards (up to 90°) about its axis. If you rotate the panel backwards around to 180°, you can allow the subject to monitor the shot on the LCD screen or you can include yourself in the picture. The viewfinder is also activated when the panel is in this position. From this position you may also push the panel flat against the camcorder, with the screen facing outwards. Notes: • • • • Avoid touching the LCD screen when moving the LCD panel. Do not hold the camcorder by the LCD panel or the viewfinder. Make sure you open the LCD panel at 90°, before attempting to rotate it backwards or forwards. Always rotate the LCD panel vertically into place, before closing it or pushing it flat against the side of the camcorder. • Always fully close the LCD panel when it is not in use. • Be careful not to leave the LCD, viewfinder or lens exposed to direct sunlight outdoors or through a window. Doing so could cause damage. • Bright light falling on the LCD screen may cause glare that makes it difficult for you to view the image. In this case, switch to using the viewfinder. You can also adjust the brightness of the screen. 41 Adjusting the Brightness of the Display E You can adjust the brightness of the LCD screen and the viewfinder independently. TAPE + CAMERA , TAPE + DISP. SET UP ( PLAY (VCR) , + CARD LCD BRIGHT••– + EVF BRIGHT••– + CAMERA , CARD + PLAY (VCR) 18) 1. Open the menu and select DISP. SET UP. 2. Select LCD BRIGHT or EVF BRIGHT and adjust the brightness. Recording • Pull the SELECT dial up to make the display brighter, and down to make it darker. 3. Close the menu. Notes: • The camcorder retains your brightness setting even if you slide the POWER switch to OFF. • The brightness of the LCD screen/viewfinder does not effect that of the recorded images. About the LCD Screen The LCD screen built into this camcorder is a high precision product. However, small black dots or bright points of light (red, blue or green) may appear constantly on the LCD screen. This is not a malfunction of the LCD screen and they are not recorded on the tape. (Effective dots: more than 99.99%) Allowing the Subject to Monitor Recording When you turn the LCD panel so that it faces into the opposite direction, you can allow your subject to monitor the screen, or you can monitor yourself while recording. • You can choose the display style between reversed (LCD MIRROR ON) or not (LCD MIRROR OFF) in the menu. TAPE + CAMERA , DISP. SET UP ( 42 18) CARD + CAMERA LCD MIRROR••• ON To turn the mirror mode off, open the menu and select DISP.SET UP. E Then select MIRROR, set it to OFF and close the menu. • LCD MIRROR ON: The picture appears reversed like in a mirror. • LCD MIRROR OFF: The picture appears the same as the recording. • If you turn the LCD MIRROR ON, the recording itself is unaffected. Indicators that appear on the LCD screen when MIRROR is turned on: TAPE CAMERA mode : REC REC PAUSE EJECT Recording CARD CAMERA mode : No Card Recording to a memory card CARD CAMERA mode : Recording to a memory card The audio level indicator will be displayed as follows: On the LCD Screen: Automatic Manual On the Viewfinder: Automatic Manual 43 Turning the Optical Image Stabilizer Off E Recording With most camcorders, even the slightest hand movements will be noticeable during telephoto recording. However, the XM2’s Optical Image Stabilizer allows you to obtain steady recordings even at high magnification. Unlike electronic image stabilizers, it causes no loss of picture quality. The Optical Image Stabilizer can compensate for a wide range of camcorder movement — you can record stable images even if you are shooting from a moving car. TAPE + CAMERA , CAM.SET UP ( CARD + CAMERA IMAGE S.i••• ON 18) To turn the image stabilizer off, open the menu and select CAM.SET UP. Then select IMAGE S. i, set it to OFF and close the menu. • The i mark appears in the display when the stabilizer is on. • The image stabilizer cannot be turned off when the program selector is set to the [ (Easy Recording) program. Notes: • The camcorder retains your selection even if you turn the camcorder off. • The image stabilizer is designed to deal with a normal degree of camcorder shake. • Keep the image stabilizer turned off when the camcorder is mounted on a tripod. 44 Using the ND Filter E ND FILTER ON/OFF On bright days or when recording very bright scenes, despite the iris being at its smallest aperture, blurring of the image may occur. If this happens, using the ND filter should remove this problem. Turn the ND filter on by pressing the ND FILTER ON/OFF button. • ND is shown continuously in the display while the ND filter is turned on. – ND ON with the “ON” flashing advises you to fit an external ND filter* or that the light conditions are still too bright, despite having switched the ND filter on. Recording – ND ON flashes in the display to advise you to switch the ND filter on. (However it does not appear in the Manual mode or during exposure lock.) – ND OFF with the “OFF” flashing warns you that the ND filter is no longer suitable for the current conditions. If this warning appears, turn the ND filter off by pressing the ND FILTER ON/OFF button again. * When you don’t have an external ND filter, make the shutter speed faster in Tv mode or open the aperture in Av mode. Notes: • You cannot turn the ND filter on/off during exposure lock or while the PHOTO button is pressed halfway down. • The camcorder retains your selection if you turn the standby lever to LOCK. However, it resets to the OFF setting if you slide the POWER switch to OFF. 45 Recording Still Images onto a Tape For recording still images on a memory card, see p. 116. E Recording PHOTO You can record still images like photographs. The camcorder records the picture and sound to tape for several seconds. The exposure is automatically adjusted. Starting your shooting with a still image makes it easy to find the beginning again later with the Photo Search function ( 91). You can take a still image at any time during regular video recording, or you can put the camcorder into record pause mode first, then take a still image. TAPE + CAMERA During recording Press the PHOTO button fully down and the still image will be taken immediately. • The camcorder takes the image immediately, and then records the “photo” to the tape for approximately 6 seconds. During this time the camcorder also records the sound, and the display shows the still image. • A counter display appears, and counts up as the camcorder records the image. • The camcorder returns to record pause mode. During record pause mode 1. Press the PHOTO button halfway down and hold it: • “PHOTO” flashes at the bottom right of display. • Exposure is locked. • During autofocus F flashes white in the display as the camcorder adjusts the focus and it is displayed continuously as a green mark when the camcorder is ready to take the still image. • If the subject is unsuitable for autofocus ( 142), the camcorder may not be able to focus, and F may continue to flash white in the display. Continue to hold the PHOTO button halfway down, then adjust the focus manually with the focus ring. • If you are using manual focus ( 77), the F mark starts as a continuous green mark. Focus with the focus ring. 46 2. Press the PHOTO button fully down to take the still image E • The camcorder takes the image immediately, and then records the “photo” to the tape for approximately 6 seconds. During this time the camcorder also records the sound, and the display shows the still image. • A counter display appears, and counts up as the camcorder records the still image. F disappears from the display. • The camcorder returns to record pause mode. Notes: • The camcorder automatically returns to record pause mode after recording a still image for approximately 6 seconds. If you turn the POWER switch to OFF during that time, the camcorder will respond only after recording is complete. • The wireless controller’s PHOTO button has no half-way setting. Press the button fully and the camcorder immediately. Recording 47 Selecting the Movie Mode (Normal/Frame) The frame mode can be used when you wish to look at a video, scene by scene, free from field slippage (the “flicker” that normally occurs when you pause a video). The vertical resolution of the image is improved by 1.5×. During playback, pause the video at any time if you would like to view a crystal clear still image in the display or on a connected TV screen. It is also possible to transfer your favorite still pictures to a PC for image enhancement and print out. Since the frame rate is close to that of a movie, this mode can be used to create “cinematic-like appearance.” E TAPE + CAMERA CAM.SET UP ( MOVIE MODE•• NORMAL 18) 1. Slide the program selector to Q (program AE) mode. Recording 2. Open the menu and select CAM. SET UP. 3. Select MOVIE MODE, set it to FRAME and close the menu. • FRAME appears in the display. Notes: • To return to normal video shooting, you need to re-select NORMAL from MOVIE MODE in the CAMERA menu. • Frame mode cannot be used with the Easy Recording program. • Frame video may not appear completely smooth during normal playback. • The digital effects WIPE, OVERLAP, STROBE and TRAIL cannot be used when the MOVIE MODE is set to FRAME. 48 Searching and Reviewing While Recording Record Search When the camcorder is in record pause mode, you can use record search to play the tape forwards or backwards to find the point where you wish to start or restart recording. This is useful when you wish to add a new scene to a previously used cassette. By using record search, you can ensure a smooth, noise-free join between the new scene and the old one. TAPE + E REC SEARCH CAMERA 1. Press and hold the REC SEARCH + or – button while you check the picture in the display. • The + button plays the recording forwards and the – button plays it backwards. • The camcorder returns to record pause mode. Recording 2. Release the button when you find the point where you want to start recording. Record Review When the camcorder is in record pause mode, you can use record review to play back the last few seconds of your recording and then return automatically to record pause mode. You can quickly make sure that a scene has recorded properly and then go on to shoot the next scene, without producing any noise in the picture. TAPE + CAMERA 1. Press and release the c (record review) button while you check the picture in the display. • The camcorder rewinds the tape, plays back the last few seconds, and returns to record pause mode. Note: • Noise may appear on the screen during record search and record review. 49 Using the Various Recording Programs E The camcorder provides you with a choice of seven recording programs. They use different combinations of camcorder settings in order to adjust the exposure and other functions to match the recording situation. Availability of Functions in Each Recording Program Easy Recording EXP dial:Exposure lock i EXP dial:Aperture adjustment i EXP dial:Shutter speed i EXP dial:Gain adjustment i Recording Recording Program Auto Tv Av Manual i i h i1) h i h i1) i h h h i W. BALANCE SELECT button (Automatic) h W. BALANCE SET button Custom preset setting CSTM PRESET button FOCUS A/M button Focus ring CSTM KEY button i i i i i h h h h h h h i (Normal) h i (OFF) h Movie mode 16:9 Clear scan frequency Clear scan activation i i Digital effects (excl. color bars) i i i h2) h3) h2) h i i Sand & Snow Spotlight h i1) i1) i1) h i1) i i i i h Color Bars h Digital zoom (TAPE CAMERA mode only) h h = Available, i = Not available 1): Can be used when exposure is locked. 2): Frequency can be selected when clear scan is activated. 3): Shutter speed cannot be changed when the exposure is locked while clear scan is activated. 50 Setting the Program AE Mode TAPE + CAMERA , CARD + E CAMERA 1. Slide the program selector to Q (program AE) mode. 2. Press the SELECT dial in and display the program menu. 3. Pull the SELECT dial up or down and move the arrow up or down the menu. 4. Press the SELECT dial in to select the desired program. • The program will appear in the display. Notes: Easy Recording The simplest way to use the camcorder is with the program selector set to the [ position. The camcorder will take care of focus, exposure and other adjustments, leaving you free to point and shoot. [ Recording • The name of your selected recording program appears constantly on the left of the display, with the exception of AUTO which disappears after 4 seconds. • Avoid changing programs during recording as the brightness of the image may change suddenly. • The specialised AE programs are not suitable for all kinds of lighting. The image may flicker, or a bright line may appear on the screen if you use them in unsuitable lighting conditions. [ Auto In normal recording conditions, set the program selector to AUTO. This is the same as the Easy Recording program, except that you now have the option of using any of the camcorder’s manual functions. AUTO AUTO 51 Giving Priority to Shutter Speed (Shutter-Priority: Tv) E Use this program to select the shutter speed. Aperture and gain are adjusted automatically. Tv Tv Select Tv mode and set the shutter speed by pulling the EXP dial up or down. • Pull toward + for a slower shutter (the image becomes brighter) and to – for a faster shutter (the image becomes darker). Recording Shutter Speeds • You can choose from 12 shutter speeds between 1/6 and 1/16000. The available shutter speeds in CARD CAMERA mode are from 1/50 to 1/500. If you switch from TAPE CAMERA mode to CARD CAMERA mode, the shutter speeds will change automatically: - Shutter speeds of 1/1000 and above in TAPE CAMERA mode → 1/500. - Shutter speeds of 1/25 and below in TAPE CAMERA mode → 1/50 • When shooting outside on clear, bright days, the camcorder will often set a large F number to adjust the amount of light entering the camcorder, throwing the focus off. Setting a fast shutter speed or decreasing the amount of light with the ND filter can help correct this. • If you try to set a shutter speed that is either too high or too low for the shooting conditions, the indicator flashes in the display. In this case, increase or decrease the setting until the flashing stops. • The image may not appear smooth when a high shutter speed is set. Notes: • When recording in extreme low-light conditions, we recommend the use of a Canon Speedlite ( 66) or Video Light ( 71), both available as optional accessory. • The selected shutter speed will reset if you turn the power off, change the recording program or adjust the exposure. Giving Priority to the Aperture (Aperture-Priority: Av) Use this program to select the aperture (iris diameter) to give you maximum control over the depth of field. Select between 10 aperture values (f/1.6, f/2.0, f/2.4, f/2.8, f/3.4, f/4.0, f/4.8, f/5.6, f/6.7, f/8.0) in TAPE CAMERA mode and 9 aperture values in CARD CAMERA mode (f/2.0 to f/8.0). Shutter speed and gain are adjusted automatically. Av Av Select Av mode and set the aperture by pulling the EXP dial up or down. • Pull toward + to open the aperture (decrease the F number) and toward – to close the aperture (increase the F number). • If you try to set an F number that is too high/low for the shooting conditions, the indicator flashes in the display. In this case, increase or decrease the setting until the flashing stops. Notes: • The selected aperture value will reset if you turn the power off, change the recording program or adjust the exposure. • If the ND filter is set to ON, increasing the F number may darken the image. Set the ND filter to OFF and select your setting again. 52 Manual ( 74) E Select this program for total creative freedom when operating the camcorder. You can set aperture, shutter speed and gain independently to give you exactly the exposure you require. You can select between 30 shutter speed settings (1/6 to 1/16000), 19 aperture values (f/1.6 to f/8.0) and 4 gain values (0dB to +18dB) in TAPE CAMERA mode. MANUAL Select MANUAL mode and set the shutter speed, aperture and gain. • For further details, see “Adjusting the Exposure Manually” ( 74). Sand & Snow Use this program in places where the background is so SAND&SNOW bright that the subject appears underexposed in the display — a sunny beach or ski resort, for example. You may notice some shudder when recording moving subjects. SAND&SNOW Recording Spotlight This program is designed for recording spotlit scenes, such as on a stage. The exposure is automatically adjusted for glare-free recordings of subjects lit by a concentrated light source. SPOTLIGHT SPOTLIGHT 53 Audio Recording Selecting the Audio Mode E The XM2 can record sound in two audio modes: • 16-bit (48 kHz, 2 channel) for the highest sound quality • 12-bit (32 kHz, 2 from 4 channels) for recording on two channels (stereo 1), leaving two channels (stereo 2) free for you to add new sound at a later date. TAPE + CAMERA , TAPE + PLAY (VCR) * * Only available when AUDIO DUB. has been set to MIC. IN. VCR SET UP ( AUDIO MODE•• 16bit 18) 1. To switch the mode, open the VCR SET UP submenu and select AUDIO MODE. Recording 2. Select a mode and close the menu. • The name of the selected mode is displayed for 4 seconds. Note: • For audio output details and how to play back a tape with added sound on stereo 2, see p. 109. Selecting the Built-in Microphone Sound You can select the microphone sound to match the recording situation. TAPE + CAMERA , TAPE + PLAY (VCR) * * Only available when audio AUDIO DUB. has been set to MIC. IN. VCR SET UP ( MIC••••••••••NORMAL 18) 1. Open the VCR SET UP submenu and select MIC. 2. Select the setting and close the menu. NORMAL: VOICE: W. SCREEN: 54 General recording. When recording a person’s voice. In windy places such as the beach or near buildings. Note that low sound may be reduced together with the wind noise. Adjusting the Audio Recording Level E The camcorder sets the audio recording level automatically when the REC LEVEL switch is set to A. However, you can manually adjust the recoding level of the built-in microphone or an external microphone connected via the MIC terminal or advanced accessory shoe (including microphones connected via the optional MA-300 Microphone Adapter). The camcorder is equipped with a audio level indicator at the side. You can also display the audio level indicator on the LCD or viewfinder screen (open the menu, select DISPLAY SET UP and set AUDIO LEVEL to ON). Audio level indicator at the side of the camcorder: Set to automatic: Set to manual: MANU L -dB 50 40 R 30 20 12 6 2 0 L -dB 50 40 R 30 20 12 6 2 0 Set to automatic: Set to manual: Recording Audio level indicator on the LCD or viewfinder screen: 1. Slide the REC LEVEL switch to M. 2. Turn the L/R LEVEL dial to adjust the recording level. • Adjust the level so that it slightly exceeds the 12-point (the larger 2 on the LCD or viewfinder screen). • Adjust the balance by turning the L/R LEVEL dial if necessary. • Even if you turn down the LEVEL dial, the sound may be distorted if the input level is still too high. Turn on the microphone attenuator in such case. Microphone Attenuator Use the microphone attenuator if you need to lower the volume level or correct audio distortion of the input audio during recording or audio dubbing. Monitor the level of the input sound with headphones. If necessary, set the attenuator to ON in the VCR SET UP submenu of the CAMERA or VCR menu. 55 Using the Custom Key You can assign frequently used functions to the custom key (independently for TAPE CAMERA mode, TAPE PLAY (VCR) mode, CARD CAMERA mode and CARD PLAY (VCR) mode). This allows you to customize the camcoder to your recording situations. E Default settings: TAPE CAMERA mode: TAPE PLAY (VCR) mode: CARD CAMERA mode: CARD PLAY (VCR) mode: INDEX WRITE TV SCREEN ZEBRA PATTERN TV SCREEN To check the current CSTM KEY setting in TAPE CAMERA or CARD CAMERA mode, open the menu, select DISPLAY SET UP, GUIDE INFO and CUSTOM KEY. In TAPE PLAY (VCR) or CARD PLAY (VCR) mode, open the menu, select DISPLAY SET UP and set CUSTOM KEY to ON. The current setting will be displayed on the screen. Recording Functions listed below can be assigned to custom key. * Functions with an asterisk can be operated only by the custom key. TAPE + CAMERA TAPE + PLAY (VCR) Index Write* Zebra Pattern VCR Stop* TV Screen Microphone Microphone Attenuator Grip Zoom Speed Handle Zoom Speed Audio Level Indicator AE Shift Image Stabilizer TV Screen Microphone Microphone Attenuator Audio Attenuator Audio Level Indicator CARD + CAMERA CARD + PLAY (VCR) Zebra Pattern TV Screen Grip Zoom Speed Handle Zoom Speed AE Shift Image Stabilizer TV Screen Changing the Custom Keys Setting TAPE + CAMERA , TAPE + PLAY (VCR) , CUSTOM KEY ( 18) 1. Open the menu and select CUSTOM KEY. 2. Select the function. 3. Close the menu. 56 CARD + CAMERA , CARD + PLAY (VCR) Operating the CSTM KEY Button E • A function assigned to a custom key is referred to as a button of that effect (e.g. “INDEX WRITE” button). TAPE Index Write + CAMERA You can add an index signal to your recording for easy search in VCR mode. • You cannot add or erase the index signal later. • You cannot use the “INDEX WRITE” button during photo nor interval timer recording. • Index Write can be operated only by the CSTM KEY. • While in record mode Press the “INDEX WRITE” button and the index signal will be recorded for approximately 6 seconds. During this time, “INDEX” appears in the viewfinder. • While in record pause mode 2. Press the start/stop button to begin recording. • The index signal will be recorded for approximately 6 seconds. INDEX dissappears after that time. Zebra Pattern TAPE + CAMERA , CARD + Recording 1. Press the “INDEX WRITE” button and “INDEX” appears in the display. CAMERA The zebra pattern is a series of diagonal stripes that appear in the display to highlight areas of overexposure. Use it as a guide to set the aperture (iris) and shutter speed. This function can also be selected from CAM. SET UP in the CAMERA or CARD CAMERA menu (ZEBRA). The zebra pattern level can be adjusted in the same submenu (ZEBRA LEVEL) ( 83). Press the “ZEBRA” button to display the zebra pattern. Press the button again to eliminate the pattern. • The camcorder does not record the zebra pattern. It only appears in the display. VCR Stop TAPE + CAMERA You can turn the recorder section off and leave the camcorder section turned on. This allows you to adjust the camcorder regardless of the 5-minute timer. • VCR STOP can be operated only by the custom key. Press the “VCR STOP” button to turn the recorder section off. Press the button again to return to record pause mode. 57 TV Screen E TAPE + CAMERA TAPE , + PLAY (VCR) + CARD , CAMERA , CARD + PLAY (VCR) You can display the information on the LCD screen/viewfinder on a connected TV. Press the “TV SCREEN” button to display the information on the TV screen. Press the button again to cancel. Microphone + TAPE CAMERA + TAPE , PLAY (VCR) * * Only available when AUDIO DUB. has been set to MIC. IN. Press the “MIC” button. Select the sound quality (NORMAL, VOICE, W. SCREEN) by pulling the SELECT dial up or down and press the SELECT dial in. Recording Microphone Attenuator TAPE + CAMERA TAPE , + PLAY (VCR) * * Only available when AUDIO DUB. has been set to MIC. IN. Use the microphone attenuator if, during recording or audio dubbing, you need to lower the volume level or correct audio distortion via the microphone. Press the “MIC ATT” button. Select ON or OFF by pulling the SELECT dial up or down and press the SELECT dial in. Grip Zoom Speed TAPE + CAMERA , CARD + CAMERA Press the “ZOOM GRIP” button. Select the grip zoom speed (VARIABLE, LOW, MEDIUM, FAST) by pulling the SELECT dial up or down and press the SELECT dial in. Handle Zoom Speed TAPE + CAMERA , CARD + CAMERA Press the “ZOOM HANDLE” button. Select the handle zoom speed (LOW, MEDIUM, FAST) by pulling the SELECT dial up or down and press the SELECT dial in. 58 TAPE Audio Level Indicator + CAMERA , TAPE + PLAY (VCR) E Press the “AUDIO LEVEL” button to display the audio level indicator on the LCD screen/viewfinder. Press the button again to cancel. AE Shift TAPE + CAMERA CARD , + CAMERA • Only available when the recording program is set to AUTO, Tv or Av. Press the “AE SHIFT” button to display the AE SHIFT menu. Pull the SELECT dial up or down and select between –2.0 and +2.0. Press the SELECT dial in to close the menu. Image Stabilizer TAPE + CAMERA , CARD + CAMERA Press the “Image Stabilizer” button to turn the image stabilizer on/off. Audio Attenuator TAPE + CAMERA Press the “AUDIO ATT” button. Select ON or OFF by pulling the SELECT dial up or down and press the SELECT dial in. Recording Use the audio attenuator if, during recording or audio dubbing you need to lower the volume level or correct distortion of the input audio. 59 Using Digital Effects Show your creativity by using the special effects and digital faders. These digital effects and faders can add visual appeal and greater imaging variety. E Faders: Effects: Colour Bars: Start or end scenes on a tape with a fade to or from black ( 60). Fade Trigger, Wipe*, Overlap* Add flavor to your recordings ( 63). Black and White, Sepia, Art, Mirror, Mosaic, Strobe*, Trail* You can display and record industry standard SMPTE colour bars ( 65). * Cannot be selected when the movie mode is set to FRAME or when a slow shutter is set (1/8, 1/15, 1/30). Fader Effects Colour Bar TAPE CAMERA Movie Still Image h i h h h h CARD CAMERA Still Image i i i Recording h= Available, i= Not available Notes: • When you do not wish to use digital effects, press the D.EFFECTS/BARS SELECT button and select D.EFFECTS |. Press the D.EFFECTS/BARS ON/OFF button to close the menu. • The camcorder retains the selected digital effect setting even if you turn the camcorder off. • Digital effects can also be operated from the wireless controller. Faders Fade Trigger The image gradually fades in. It gradually fades out when you stop recording Wipe The camcorder retains the last recorded scene as a still image before entering the record pause mode. When you start recording, the movie appears from the right of the screen until it fills the whole screen. 60 Overlap E The camcorder retains the last recorded scene as a still image before entering the record pause mode. When you start recording, the still image gradually changes to the scene you are recording. Operating the Fade Trigger Sound and image fade together. When operating faders in TAPE CAMERA mode, make sure the program selector is set to Q. TAPE + CAMERA FADER••••••• FADE-T 18) 1. Press the D.EFFECTS/BARS SELECT button. Recording FADER ( • The digital effects menu appears. 2. Select FADER and press the SELECT dial in. • FADE-T, WIPE and OVERLAP settings appear. 3. Select the FADE-T and press the D.EFFECTS/BARS SELECT button. • The menu closes and FADE-T flashes in the display. 4. Press the D.EFFECTS/BARS ON/OFF button. • The name of your selection stops flashing. • Each time you press the D.EFFECTS/BARS ON/OFF button, the fader is activated (display lights continuously) or deactivated (display flashes). 5. Press the start/stop button. 61 Operating Wipe and Overlap E When operating faders in TAPE CAMERA mode, make sure the program selector is set to Q. TAPE + CAMERA FADER ( FADER••••••• OVERLAP 18) 1. Press the D.EFFECTS/BARS SELECT button. • The digital effects menu appears. 2. Select FADER and press the SELECT dial in. • FADE-T, WIPE and OVERLAP settings appear. 3. Select WIPE or OVERLAP and press the D.EFFECTS/BARS SELECT button. • The menu closes and the name of the selected fader flashes in the display. Recording 4. Press the D.EFFECTS/BARS ON/OFF button during recording. • The name of your selection stops flashing. • Each time you press the D.EFFECTS ON/OFF button, the chosen fader becomes activated (display lights continuously) or deactivated (display flashes). During recording 5. Press the start/stop button. • The last scene is memorized as a still image and the camcorder goes into record pause mode. 6. Press the start /stop button. • Recording starts, and the still image gradually changes to the scene you are recording. 62 Effects E Black and White (BLK & WHT) The image becomes black and white. Sepia The image becomes monochrome with a brownish tint. Art Recording The image becomes like a paint (solarization). Mirror Creates a symmetrical image as if there would be a mirror in the middle of the screen. Mosaic The image is blurred through enlarging the size of some pixels. Strobe The image is shown in a series of still images, giving an effect similar to slow-motion. Trail Moving the camcorder or moving subjects leave an afterimage like a trail. 63 Operating the Effects E TAPE + CAMERA EFFECT ( EFFECT•••••••BLK&WHT 18) 1. Press the D.EFFECTS/BARS SELECT button. • The digital effects menu appears. 2. Select EFFECT and press the SELECT dial in. • The settings appear. 3. Select the effect setting and press the D.EFFECTS/BARS SELECT button. • The menu closes and the name of the selected effect flashes in the display. Recording 4. Press the D.EFFECTS/BARS ON/OFF button. 64 • The name of your selection stops flashing and the effect is activated. • Each time you press the D.EFFECTS/BARS ON/OFF button, the effect becomes activated (display lights continuously) or deactivated (display flashes). Using the Colour Bars You can display and record industry standard SMPTE colour bars. E Activating the Colour Bars TAPE + CAMERA COLOR BARS ( 18) 1. Press the D. EFFECTS/BARS SELECT button. • The digital effects menu appears. 2. Select COLOR BARS and press the SELECT dial in. • The menu closes and COLOR BARS flashes in the display. 3. Press the D. EFFECTS/BARS ON/OFF button. Recording • The colour bars appear in the display. • Each time you press the D.EFFECTS/BARS ON/OFF button, the colour bars are activated or deactivated. 65 Using a Canon Speedlite for Flash Photography (Optional) For SLR-style flash photography, attach a Canon Speedlite 220EX, 420EX or 550EX to the camcorder’s accessory shoe. Refer also to the Speedlite instruction manual. E Attaching the Speedlite Turn the camcorder’s power off before attaching/detaching the Speedlite. Recording Slide the Speedlite onto the accessory shoe and tighten the shoe lock. Operating the Speedlite 1. Turn the power of the Speedlite on. • • • • Wait for the Speedlite to charge. While the Speedlite is charging, a white S flashes in the display. When the Speedlite is fully charged a green S lights up constantly in the display. Replace the battery of the Speedlite if the white S continues to flash. 2. Press the PHOTO button to record the still image. • Make sure that the Speedlite is charged before recording the still image. Although it is possible to record while the Speedlite is still charging, the flash will not operate. The Speedlite cannot charge while you are holding the PHOTO button halfway down. • S disappears from the display while the camcorder records the still picture. • If the S mark does not appear in the display when you turn the Speedlite on, make sure that the Speedlite unit is slid fully onto the accessory shoe. Notes: • Turn the Speedlite unit off when you do not require a flash. • You cannot use the Speedlite in following cases: - In the MANUAL recording program. - When exposure is locked (S turns off if you press the EXPOSURE dial in. It reappears when you turn the lock off by pressing the EXPOSURE dial in again.) • In the shutter-priority (Tv) mode, you can choose any shutter speed between 1/50 and 1/1000 and clear scan (card: between 1/50 and 1/500). • Off-Camera Shoe and Connecting Cord for EOS models cannot be used with the XM2. • The bounce flash on the 420EX and 550EX Speedlites cannot be used with the XM2. • The 420EX/550EX’s multiple Speedlite control and the Speedlite Transmitter ST-E2 cannot be used with the XM2. • In dark recording situations, during autofocus, a assist light may be sent out by the Speedlite to illuminate the subject while you hold the camcorder’s PHOTO button halfway down. 66 Recording with the Interval Timer With the interval timer, you can record images over a selected time with a selected interval. This function is useful when shooting flowers, animals, and other natural events. You can select an interval of 30 seconds, 1 minute, 5 minutes or 10 minutes, and a recording time of 0.5 seconds, 1 second, 1.5 seconds, or 2 seconds. E Example: 2 seconds recording time at a 5 minutes interval (= standby time of 5 minutes including the recording time of 2 seconds) 2 sec. 2 sec. 4 min. 58 sec. Record Interval time 5 min. 4 min. 58 sec. Record Interval time 5 min. Default setting: Recording time: 0.5 seconds Interval time: 30 seconds + CAMERA CAM.SET UP ( Recording TAPE INTERVAL INTERVAL T.• ON 18) INTERVAL•••• 30sec REC TIME•••• 0.5sec 1. Slide the POWER switch to CAMERA and the TAPE/CARD switch to TAPE. • Load a cassette. 2. Open the CAM. SET UP submenu and select a INTERVAL. • The interval timer menu appears. 3. Select INTERVAL T. and set it to ON. • You return to the interval timer menu. 4. Select INTERVAL and set the interval. • You return to the interval timer menu. 5. Select REC TIME and set the recording time. 6. Close the menu. 7. Press the start/stop button to start recording. • The interval recording starts and INT T. appears in the display. • When the interval time is set to 30 seconds or 1 minute, the camcorder enters into record pause mode between recordings. When it is set to 5 or 10 minutes, the camcorder stops between recordings. 67 Pausing the Interval Recording E Press the Start/Stop button. • The camcorder returns to record pause mode and INT T. flashes in the display. • Press the Start/Stop button again to restart recording. Ending the Interval Recording Set the camcorder to record pause mode and set INTERVAL T to OFF in the interval menu. Note: Recording • The remaining tape display may not appear. 68 Recording with the Self-Timer For stills E START /STOP PHOTO SELF TIMER MENU For movies STANDBY LOCK MENU This is useful when you wish to include yourself in the picture when recording movies or still images to tape or memory card. TAPE + CAMERA , CARD + CAMERA or press the SELF TIMER button on the wireless controller. • SELF T. appears in the display. • To have the subject monitor recording, rotate the LCD panel 180° ( Recording 1. Open the menu, select VCR SET UP and set the SELF-TIMER to ON 42). For movies 2. Press the start/stop button. • The camcorder starts to record after a 10-second countdown period (or after 2 seconds when you use the wireless controller). The time remaining counts down in the display (e.g. “5 SEC”). • SELF T. disappears from the display when recording begins. • The tally lamp starts flashing. 3. Press the start/stop button to end recording. For still images 2. Press the PHOTO button on the camcorder body or the wireless controller. • The camcorder automatically adjusts the focus 2 seconds before the countdown is complete. The F mark flashes white then turns green after the focus and exposure are set. If you are using the wireless controller, the F mark starts flashing immediately after you press the PHOTO button. • The camcorder takes the still image for approximately 6 seconds. • In TAPE CAMERA mode, the camcorder returns to record pause mode after recording to a tape. In CARD CAMERA mode, the currently recorded image appears after recording onto a memory card. Notes: • To cancel the self-timer setting, set the SELF-TIMER to OFF through the menu, or press the SELFTIMER button on the wireless controller. • To cancel the countdown of the self-timer, press the start/stop button (when recording a movie) or PHOTO button (when recording a still image). 69 Using the DV Control When another device such as a camcorder or a video recording device is connected to the XM2 via a DV cable, you can operate the other device (record and pause recording) by pressing the start/stop button on the XM2. E TAPE + CAMERA SYSTEM ( DV CONTROL•• OFF 18) 1. Open the menu and select SYSTEM. 2. Select DV CONTROL, set it to ON and close the menu. Pressing the start/stop button: A. When the XM2 is in record pause mode: Recording XM2: Recording Connected device: Recording B. When the XM2 is Recording: XM2: Record Pause Mode Connected device: Record Pause Mode C. When the XM2 is not ready for recording (no cassette loaded etc.) Connected device: Recording/Record pause mode D. After loading a cassette while the connected device is recording: XM2: Recording Pressing the start/stop button again: XM2: Record pause mode Connected device: Continues recording Connected device: Record pause mode When the connected device is recording, [REC] appears in the display of the camcorder. When it is stopped, [STOP] appears. When the other device is in any other mode than the recording, record pause or stop mode, [- - -] appears. [DV IF] flashes if DV CONTROL is set to ON and no device is connected via the DV cable. Notes: • When the XM2 stops recording without operating the start/stop button (e.g. tape has reached the end) while both the XM2 and the connected device are recording, the connected device continues recording. • When connecting two XM2s via a DV cable, make sure to set DV CONTROL of the “connected device” to OFF. • Only one device can be connected to the XM2 for DV control. • DV control may not work properly depending on the connected device. • The DV control setting is retained by the camcorder even if you turn the power off. Make sure to check the setting after use of the DV control function, as the tape in the connected device may be overwritten. • Do not use a DV cable longer than 4.5 m. 70 Using the VL-3 Video Light (Optional) 1 E LOCK 1 K LOC LOCK AU OF LO TO ON F CK 3 Using the optional Video Light enables you to record even in dark rooms. This VL-3 Video Light attaches to the camcorder’s advanced accessory shoe for cable-free operation and is powered by the camcorder’s power supply. Refer to the VL-3 Video Light instructions for further details. Turn the camcorder’s power off before attaching/removing the Video Light. • Insert the Video Light oriented in the direction indicated by the arrow on the bottom until it clicks. • Be careful not to pull off the Video Light when fastening the screw. Recording 1. Slide the Video Light onto the accessory shoe and tighten the shoe lock. 2. Set the camcorder to TAPE CAMERA mode or CARD CAMERA mode. 3. Turn the Video Light’s power switch to AUTO or ON. • C (Connection) appears in the display. • ON: The Video Light stays on. • AUTO: The Video Light turns on/off automatically according to the level of brightness of the shooting conditions. In MANUAL recording program: If the Video Light was on at the time you switched to MANUAL, it stays on. If it was off at the time you switched to MANUAL, it stays off. Cautions: • Be careful not to touch the bulb or the surrounding area during or immediately after use; it becomes very hot. Keep the Video Light away from flammable or plastic materials. • Do not look directly at the bulb while the Video Light is on. • Never carry the camcorder holding the Video Light. 71 Using the DM-50 Microphone (Optional) E The high sensitive Directional Stereo Microphone DM-50 attaches to the advanced accessory shoe for cable-free operation and is powered by the camcorder’s power supply. Use it when recording or dubbing audio. Refer to the DM-50 Microphone instructions for further details. Recording Turn the camcorder’s power off before attaching/removing the microphone. 1. Slide the microphone onto the accessory shoe and tighten with the shoe lock. • Insert the microphone oriented in the direction indicated by the arrow on the bottom until it clicks. • Be careful not to pull off the microphone when fastening the screw. 2. Set the camcorder to TAPE CAMERA mode. • C (Connection) appears in the display. 3. Set the microphone’s directivity switch. SHOTGUN: For recording clear sound from the front (monaural). STEREO 1: For recording sound from the front and surrounding area. STEREO 2: For recording surrounding sound in a wider range than in STEREO 1. Notes: • Never carry the camcorder holding the microphone. • The DM-50 will not pick up any sound if another microphone is attached to the camcorder’s MIC terminal. 72 Using the MA-300 Microphone Adapter (Optional) E The MA-300 Microphone Adapter enables you to input audio to the camcorder with XLR connector equipped microphones, and to convert video signals for the BNC connector. Refer to the MA-300 Microphone Adapter instructions for further details. Turn the camcorder off before attaching/detaching the microphone adapter. Recording Attaching the Microphone Adapter to the Camcorder 1. Slide the microphone adapter straight onto the camcorder’s accessory shoe. • Orient the microphone adapter in the direction indicated with an arrow on the bottom side and slide it in until it clicks. 2. Tighten the shoe lock in the direction of the arrow. Attaching the Microphone Microphone with a diameter of 25 mm can be attached directly to the microphone adapter. Depending on how you attach the microphone, it may pick up some vibration noise. 1. Loosen the microphone clamp screw and open the microphone clamp. 2. Place the microphone into the microphone clamp and tighten the clamp screw. • Position the microphone so that it does not appear on the camcorder’s LCD or viewfinder screen. 3. Connect the microphone to the audio input jack. 4. Turn the camcorder’s power on. • C (connection) appears on the camcorder’s LCD or viewfinder screen when the camcorder is in record or record pause mode. • The camcorder’s built-in microphone automatically turns off. Notes: • The accessory shoe of the microphone adapter is for exclusive use with microphones attached to a camera-mount. • To output video signals via the BNC connector, connect the supplied video cable to the VIDEO IN terminal and the camcorder’s AV terminal. 73 Adjusting the Exposure Manually E EXP 1. Set the recording program to MANUAL. 2. Press the EXP dial in. Recording • An arrow appears next to the shutter speed value. shutter speed iris no display gain 3. Pull the EXP dial up or down to increase or decrease the shutter speed. • You can select between 30 shutter speeds (1/6 to 1/16000) in TAPE CAMERA mode and 15 shutter speeds (1/50 to 1/700) in CARD CAMERA mode. • See “About the Shutter Speeds” ( 75). 4. Press the EXP dial in. • The arrow moves next to the F number. 5. Pull the EXP dial up or down to open or close the iris. • You can select between 19 aperture values (f/1.6 to f/8) in TAPE CAMERA mode and 17 aperture values (f/2.0 to 1/8) in CARD CAMERA mode, or close the iris completely. • See “About the Iris” ( 75). 6. Press the EXP dial in. • The arrow moves to the gain value. 7. Pull the EXP dial up or down to increase or decrease the gain. • Set the gain to 0 dB, +6 dB, +12 dB or +18 dB in TAPE CAMERA mode or 0 dB, +6 dB or +12 dB in CARD CAMERA mode. • See “About the Gain” ( 75). Notes: • The shutter speed, F number and gain values will be reset if you slide the POWER switch to OFF. If you use the standby lever, the camcorder retains your chosen values. • A bar showing the standard exposure appears in the display. • You can also adjust the exposure manually in the Auto, Tv and Av modes, but you have to first lock the exposure to adjust shutter speed and iris. 74 ● About the Shutter Speeds E Pull the EXP dial toward + for a slower shutter speed, or toward – for a faster shutter speed. Available shutter speeds in TAPE CAMERA mode: 1/6sec 1/12 sec 1/25 sec 1/50 sec 1/60 sec 1/75 sec 1/90 sec 1/300 sec 1/250 sec 1/210 sec 1/180 sec 1/150 sec 1/120 sec 1/350 sec 1/400 sec 1/500 sec 1/600 sec 1/700 sec 1/800 sec 1/2300 sec 1/2000 sec 1/1600 sec 1/1400 sec 1/1200 sec 1/1000 sec 1/2800 sec 1/3200 sec 1/4000 sec 1/8000 sec 1/16000 sec CS Available shutter speeds in CARD CAMERA mode: 1/60 sec 1/75 sec 1/90 sec 1/120 sec 1/150 sec 1/400 sec 1/350 sec 1/300 sec 1/250 sec 1/210 sec 1/180 sec 1/500 sec 1/600 sec 1/700 sec Recording 1/50 sec ● About the Iris Pull the EXPOSURE dial toward + for a shorter depth of field, or toward – for a greater depth of field. Available F numbers in TAPE CAMERA mode: F1.6* F1.8* F2* F2.2* F2.4* F2.6* F2.8 F3.2 F6.2 F5.6 F5.2 F4.8 F4.4 F4 F3.7 F3.4 F6.7 F7.3 F8 CLOSE Available F numbers in CARD CAMERA mode: F2* F2.2* F2.4* F2.6* F2.8 F3.2 F3.4 F3.7 F7.3 F6.7 F6.2 F5.6 F5.2 F4.8 F4.4 F4 F8 CLOSE * May not be available depending on the zoom position. ● About the Gain Pull the EXPOSURE dial toward + to increase the gain, or toward – to decrease the gain. Available gain values in TAPE CAMERA mode: 0 dB, +6 dB, +12 dB, +18 dB Available gain values in CARD CAMERA mode: 0 dB, +6 dB, +12 dB 75 Exposure Lock/Adjustment E ●Exposure lock Lock the exposure at the current level in order to control the brightness of the image. To lock the exposure, press the EXP dial in. Press it again to return to the automatically set exposure level. EXP Recording Notes: • You cannot lock the exposure in the [ (Easy Recording) or MANUAL recording program. • The standard exposure level depends on which recording program you have selected, but the shutter normally operates at 1/50 of a second. • The brightness of the subject may change if you zoom during exposure lock. • If you slide the POWER switch to OFF or the standby lever to LOCK, the camcorder resets to auto exposure. ●Exposure adjustment When the exposure is locked, you can adjust it manually, making the picture brighter or darker in order to deal with difficult lighting conditions, or to manipulate the mood of the scene. The camcorder’s iris can be manually set to any position from fully closed to fully open. To make the recorded image brighter, pull the EXP dial up (to a maximum of +11). This may be necessary if the background is very bright, or if the subject is lit from behind. To make the recorded image darker, pull the EXP dial down (to a minimum of –11). This may be necessary if the background is very dark, or if the subject is spotlit. 76 EXP E.LOCK ±0 E.LOCK +11 E.LOCK ±0 E.LOCK –11 Adjusting the Focus Manually The camcorder focuses automatically. All you have to do is point, and whatever is in the centre of the display will usually be in sharp focus. If it does not seem to be focusing well, it may be because the subject is not suitable for autofocus ( 142). Also, if you attach a filter other than UV or ND, the autofocus may not work effectively. E 1. Slide the program selector to Q. 2. Push the FOCUS A/M button so that MF appears in the display. 3. Using the zoom lever, zoom all the way in to the telephoto end. 4. Rotate the focusing ring to adjust the focus. FOCUS A/M 5. Use the zoom lever to reframe the subject. • To resume autofocus, press the FOCUS A/M button again. • The picture in the LCD screen may appear out of focus when shooting in dark conditions. • When zooming during manual focus, zoom out wide after setting the focus at the telephoto end. • The focus may be thrown off if you zoom into telephoto after setting the focus at the wide angle end. • Autofocus is recommended for zooming in to telephoto from the wide end. • If you slide the POWER switch to OFF or the standby lever to LOCK, the camcorder resets to auto focus. Recording Notes: 77 Setting the White Balance The camcorder’s auto white balance system compensates for a wide range of lighting conditions. Although slight variations are unavoidable, colours will appear natural in virtually every situation. E In some cases, you will get better results by setting the white balance yourself, or using one of the two preset modes: W.BALANCE SELECT Recording x Indoor Mode • Under halogen or studio/video lighting • Subject is of one dominant colour • Close-ups UOutdoor mode • In daylight, especially for close-ups and when the subject is of one dominant colour TAPE + CAMERA , CARD + CAMERA 1. Set the program selector to Q. 2. a) For auto, indoor or outdoor white balance, press the W. BALANCE SELECT button. • x/U appears in the display when you set the white balance to the indoor/outdoor mode. b) For setting the white balance manually: q Point the camcorder at a white object (such as a sheet of paper) and zoom in until it fills the display. w Press the W. BALANCE SELECT button. • W appears in the display. e Press the WHITE BALANCE W set button. • W flashes quickly in the display and then remains lit, to show that the camcorder has set the white balance. • Depending on the light source, the flashing may at times change to a slower speed, rather than remaining lit. The result will remain better than with the auto setting, and you can continue recording. 78 Setting the white balance manually will probably work better than auto white balance when shooting: E Subjects with one dominant colour, such as sky, sea or forest Close-ups In rapidly changing lighting conditions Recording In places lit by certain types of fluorescent or mercury vapor lights Notes: • Turn the digital zoom off (if necessary) to set a more accurate white balance. • If the lighting conditions change, reset the white balance by first returning to the auto setting, and then reselecting the manual balance. • Try to record with light from a single source. Correct white balance cannot be obtained for two types of lighting at once. • You cannot set the white balance manually or use the indoor/outdoor modes when the program selector is set to the [ (Easy Recording) program. • The camcorder returns to auto white balance when the program selector is set to [ (Easy Recording). • When you turn the camcorder on, the white balance returns to auto white balance. If you then press the WHITE BALANCE W button, the camcorder will remember your last setting. • If you shoot with studio/video lighting, use the x (indoor) mode. • During normal outdoor shooting, setting the camcorder to auto white balance may provide better results. 79 Using AE Shift By controlling the level of the automatic exposure (AE) function, you can lighten or darken the image slightly. This allows you to compensate for backlit, overexposed scenes. E Recording TAPE + CAMERA , CAM. SET UP ( CARD + CAMERA AE SHIFT•••• ±0 18) 1. Set the recording program to Auto, Tv or Av. 2. Open the menu and select AE SHIFT. 3. Pull the SELECT dial up or down and select the desired level. • Levels are from –2 to +2, in 0.25 intervals (excluding –1.75 and +1.75). • The higher the setting, the brighter the image. 4. Close the menu. Note: • AE shift cannot be operated in the Easy, Manual, Sand & Snow or Spotlight recording programs. 80 Using the Custom Preset You can adjust the colour gain, colour phase, sharpness and setup level for more creative recordings. E Setting the Custom Preset Functions When you adjust the custom preset functions, be sure to check the picture before you start recording. You can save these settings under the CSTM PRESET button. TAPE + CAMERA , CARD + CAMERA CSTM PRESET ( 18) 1. Open the menu and select CSTM PRESET. • The custom preset menu appears. 2. Select the function you wish to adjust. • See below details on each function. • Repeat steps 2 and 3 to adjust other functions as needed. 4. Close the menu. Recording 3. Adjust the selected function. • The settings are saved until new changes are made. Adjusting the Colour Gain CSTM PRESET ( COLOR GAIN•• - + 18) Adjust toward + for a deeper colour, and toward – for a lighter colour. Adjusting the Colour Phase CSTM PRESET ( COLOR PHASE• G R 18) Adjust toward R for a redder picture, and toward G for a greener picture. Adjusting the Sharpness CSTM PRESET ( SHARPNESS••• - + 18) Adjust toward + for a sharper picture, and toward – to soften the contour. 81 Adjusting the Setup Level E CSTM PRESET ( SETUP LEVEL• - + 18) Adjust toward + for a brighter picture, and toward – for a darker picture. Activating the Custom Preset Functions 1. Turn the program selector to Q. 2. Press the CSTM PRESET button. Recording • The picture reflects your preferences. 82 Using the Zebra Pattern E The zebra pattern is a series of diagonal stripes that appear in the viewfinder to highlight areas of overexposure. Use it as a guide to set the aperture (iris) and shutter speed. You can also select the pattern appearance level from 80, 85, 90, 95, and 100%. TAPE + CAMERA , CARD + CAM. SET UP ( CAMERA Recording Selecting the Zebra Pattern Level ZEBRA LEVEL• 90 18) 1. Open the menu and select CAM. SET UP. 2. Select ZEBRA LEVEL and select the level. 3. Close the menu. Activating the Zebra Pattern TAPE + CAMERA , CAM. SET UP ( CARD + CAMERA ZEBRA••••••• OFF 18) 1. Open the menu and select CAM. SET UP. 2. Select ZEBRA LEVEL and set it to ON. 3. Close the menu. Note: • The camcorder does not record the zebra pattern, it is only shown in the display. 83 Recording PC Screens and Other Screens Using CLEAR SCAN You can use the Clear Scan function to record PC screens or other screens without black bands caused by differences in the field frequencies of screens. E TAPE + CAMERA CAM. SET UP ( CLEAR SCAN•• 50.3Hz 18) 1. Set the recording program to Tv or MANUAL. 2. Pull the EXP dial down until CS appears in the display. 3. Open the menu and select CAM. SET UP. 4. Select CLEAR SCAN and adjust the frequency so that no black bands appear in the display. Recording • You can select between 170 frequencies between 50.3Hz and 200.0Hz. 5. Close the menu. Recording the Display Information You can record the information (such as date and time) displayed on the LCD screen/viewfinder superimposed on the picture. Unlike the data code, you cannot hide the display information at a later time. SYSTEM ( CHAR. REC••• OFF 18) TAPE + PLAY (VCR) 1. Open the menu and select SYSTEM. 2. Select CHAR. REC, set it to ON and close the menu. Note: • Once you set it to ON, the information will remain recorded with the picture until you select OFF. Note that you cannot hide the information at a later time. 84 Playing Back a Tape E / CARD TAPE You can use the LCD screen for instant, on-the-spot playback. The camcorder also plays back the sound track via the built-in speaker ( 87). • When you play back a tape, you can also close the LCD panel with its screen side facing outward. • When you’re using the viewfinder to view playback, close the LCD panel. For playing back your recordings on a TV, see p. 93. For using the wireless controller, see p. 27. Note: • To avoid accidental recording, make sure that you slide the tab on the cassette so that it exposes the hole (the switch position is usually labelled SAVE or ERASE OFF). + PLAY (VCR) 1. Slide the POWER switch to PLAY (VCR) and TAPE/CARD switch to TAPE. Playback TAPE • The power indicator lights up green. • The confirmation beep sounds. 2. Load the cassette. 3. Press the e (play) button to start playback. • • • • • Open the cover to use the buttons on the handle. To end playback, press the 3 (stop) button. To wind the tape forwards, stop playback and press the 1 (fast forward) button. To wind the tape backwards, stop playback and press the ` (rewind) button. If the playback picture is rough (mosaic-like noise), clean the video heads using a Canon DVMCL Digital Video Head Cleaning Cassette or a commercially available digital video head cleaning cassette. 85 Other Playback Modes E Playback pause Press the a (pause) button. To resume normal playback, press it again, or press the e (play) button. The camcorder automatically goes into stop mode after about 5 minutes’ playback pause. Fast forward playback To play back the recording at about 11.5 times normal speed, press and hold the 1 (fast forward) button during normal playback or press and hold the 1 (fast forward) button during normal fast forward. Rewind playback For reverse playback at about 11.5 times normal speed, press and hold the ` (rewind) button during normal playback or press and hold the ` (rewind) button during normal rewind. Special Playback Frame Advance Playback To play back frame by frame, press the +/ ae button repeatedly during playback pause. Press and hold to play back continuous frame advance. Frame Reverse REW PLAY FF –/ STOP +/ PAUSE SLOW ×2 To play back in reverse frame by frame, press the –/4a button repeatedly during playback pause. Press and hold to play back continuous frame reverse. Slow Forward Playback To play back at about 1/3 normal speed, press the SLOW M button during normal playback. Press the PLAY e button to return to normal playback. Slow Reverse Playback To play back in reverse at about 1/3 normal speed, press the –/4a button and then the SLOW M button during normal playback. Press the PLAY e button to return to normal playback. 86 Built-in Speaker and Headphone Terminal E The camcorder has a built-in speaker and a headphone terminal. You can listen to the sound during playback. Use the speaker or headphones when using the LCD screen for playback, and use headphones when using the viewfinder. The built-in speaker is monaural; use headphones for stereo sound. Built-in Speaker Adjust the speaker and headphone volume by pulling the SELECT dial up or down. Pull the SELECT dial up to increase the volume, and down to decrease the volume. A volume bar appears in the display to indicate the current volume. It disappears in 4 seconds. You can turn off the volume completely by pulling the SELECT dial down until OFF appears. You can also adjust the headphone volume separately from the built-in speaker. The levels you adjust for the built-in speaker and headphones are memorized separately. The camcorder retains the levels even if you slide the POWER switch to OFF. Playback • • • • • Notes: • The speaker turns off when you use headphones. • Sometimes audio may sound distorted when the volume is turned up high. If this happens, turn down the volume. 87 Displaying Date, Time and Camcorder Data (Data Code) A data code containing the date and time the recording was made and other camcorder data (shutter speed and exposure settings) is automatically recorded on a special data section of the tape. • Only the date and time appear in the data code when using a memory card. E DATA CODE During TAPE PLAY (VCR) mode, the data code can be displayed or hidden while the camcorder is in play, slow or still mode. Playback Camcorder data may be displayed as “– – –” during fast forward, rewind, reverse playback, forward and reverse ×2 playback. Press the DISPLAY/DATA CODE button. When using a cassette, press it while the camcorder is in play, slow or still mode. • Press it once to display, once more to hide it. Selecting Date/Time Select whether you want the date, the time, or both to show up on your data code display. TAPE + PLAY (VCR) , DISP.SET UP ( CARD + PLAY (VCR) D/TIME SEL.• DATE & TIME 18) To change the date and time combination, open the menu and select DISP.SET UP. Then select D/TIME SEL., set it to DATE, TIME or DATE & TIME and close the menu. 88 Setting the Data Code E You can also choose to display the camcorder data (shutter speed and exposure settings) in the data code. TAPE + PLAY (VCR) DISP.SET UP ( DATA CODE••• DATE/TIME 18) Open the menu and select DISP.SET UP. Then select DATA CODE, set it to DATE/TIME, CAMERA DATA or CAM. & D/T and close the menu. Available data code combinations in TAPE PLAY (VCR) mode : D/TIME SEL. DATA CODE (cassette only) Date/Time Date/Time & Camera data 12dB F11 1/250 12dB F11 1/250 1.JAN.2002 12:00:00 AM 12dB F11 1/250 12dB F11 1/250 12:00:00 AM 12:00 AM 1.JAN.2002 12dB F11 1/250 12dB F11 1/250 12:00 AM 1.JAN.2002 Time Only Date & Time display is available in CARD PLAY (VCR) mode. Playback 1.JAN.2002 Date Date & Time Camera data Notes: • The data code will read “– – –” in the following situations: – During playback of a blank section of tape. – If the tape was recorded before entering the date and time in the camcorder’s memory. – If the tape was recorded on a camcorder without a data code function. – If noise or tape damage prevents the data code from being read. • If a recording made on the XM2 is played back on a different DV camcorder, the data code may not be displayed correctly. • The data code will appear in the display even if DISPLAYS ( 148) has been set to OFF through the menu. 89 Six-second Auto Date E The date can be displayed for 6 seconds when you start playback, or to indicate that the date or time zone of the recording has changed. The 6-second auto date automatically adjusts to the time zone you have selected. TAPE + PLAY (VCR) DISP.SET UP ( 6SEC.DATE••• OFF 18) To turn the 6-second auto date on, open the menu and select DISP.SET UP. Select 6SEC. DATE, set it to ON and close the menu. Note: Playback • The 6-second auto date appears even if DISPLAYS is set to OFF in the menu and the data code is turned off. 90 Searching the Tape (Photo Search/Date Search/Index Search) E ZERO SET SEARCH MEMORY SELECT AUDIO DUB. AV INSERT REW PLAY FF –/ STOP +/ REMOTE SET PAUSE SLOW ×2 This allows you to move quickly through still images (photo search), between different days or areas of recording (date search), or index signals ( 57) recorded anywhere on a tape (index search). TAPE + PLAY (VCR) 1. Press the SEARCH SELECT button to select between photo/date/index search. • PHOTO SEARCH, DATE SEARCH or INDEX SEARCH appears for 4 seconds. 2. Press the - and + buttons to move backwards or forwards through the still images, between different days of recording or recorded index signals. Playback • Press once to move to the start of the previous/next still image, day or index on the tape. • You can press more than once to move to the corresponding still image, day or index (up to a maximum of 10 times), e.g. press the + button 5 times to move forward 5 still images, days or index signals. • PHOTO SEARCH/DATE SEARCH/INDEX SEARCH appears in the middle of the display alongside the - or + mark and number to search through. You can change the direction easily by pressing the button for the opposite direction. Notes: • Press 3 (stop) to stop searching. • If you begin a search very close to the start of a recorded still image during photo search, the camcorder may skip straight past it. • When you have set the time zone, date search also looks for the change in date based on the adjusted time. • A date/time zone cannot be identified if the total recording time on that day/time zone was less than 1 minute. • Date/index search playback may start slightly before or after the beginning of the located section. • If the data code is not displayed correctly you will not be able to operate the date search correctly. 91 Returning to a Pre-Marked Position (Zero Set Memory) E ZERO SET SEARCH MEMORY SELECT AUDIO DUB. REW PLAY FF AV INSERT –/ STOP +/ REMOTE SET PAUSE SLOW ×2 Use the wireless controller to mark a point on a tape to which you wish to return following the playback. TAPE + CAMERA , TAPE + PLAY (VCR) 1. Press the ZERO SET MEMORY button on the wireless controller during playback at a point you wish to return to later. Playback • The time code is replaced by a tape counter that is set to zero with the  indication. • Press the ZERO SET MEMORY button once more to cancel the zero set memory. 2. When you have finished playback, rewind or fast forward the tape. The tape stops automatically when it reaches the zero set position. • `RTN or RTN1 appears in the display. • The tape counter with  indication disappears from the display and the time code reappears. Notes: • The zero set memory may not function correctly when there is a break between recordings on the tape. • You can also use zero set memory to mark a position on a tape in TAPE CAMERA mode. When you then play back the tape, pressing rewind will take you back to the pre-marked position. • If you remove the tape while the zero set memory is set, the memory is cancelled and the tape counter reverts to time code. 92 Connections for Playback on a TV Screen For higher picture quality, we recommend playing back recordings on a TV with an S (S1) terminal. If you connect the camcorder to a TV with an S1 terminal or the Video ID-1 system, recordings made in the 16:9 mode for wide screen TVs will be automatically played back in wide screen mode on the TV screen. E See your TV or VCR instruction manual for further details. If your TV (or VCR) has a SCART terminal (without S (S1)-video) PC-A10 SCART Adapter AUDIO AUDIO VIDEO (R) (L/MONO) STV-250N Stereo Video Cable Playback • Connect the PC-A10 SCART adapter to the TV or VCR’s SCART terminal. • Connect the camcorder to the adapter. Connect the camcorder using the STV-250N Stereo Video Cable. Connect the white plug to the white audio terminal L (left). Connect the red plug to the red audio terminal R (right). Connect the yellow plug to the yellow video terminal VIDEO. • If you are connecting the camcorder to a TV, set the TV/VIDEO selector on the television to VIDEO. • If you are connecting the camcorder to a VCR, set the input selector on the VCR to LINE. If Your TV (or VCR) Has an S-video Input Terminal STV-250N Stereo Video Cable L AUDIO R VIDEO S-VIDEO S-150 S-video Cable • Use the S-150 S-video Cable to connect the S-video terminals. Use the STV-250N Stereo Video Cable to connect the AUDIO terminals. Connect the white plug to the white AUDIO terminal L (left). Connect the red plug to the red AUDIO terminal R (right). Do not connect the yellow plug. • Set the TV/VIDEO selector on the television to VIDEO. • If you are connecting the camcorder to a VCR, set the input selector on the VCR to LINE. 93 If Your TV (or VCR) Has Audio/Video Input Terminals E STV-250N Stereo Video Cable L AUDIO R VIDEO • Connect the camcorder using the STV-250N Stereo Video Cable. Connect the white plug to the white audio terminal L (left). Connect the red plug to the red audio terminal R (right). Connect the yellow plug to the yellow video terminal VIDEO. • Set the TV/VIDEO selector on the television to VIDEO. • If you are connecting the camcorder to a VCR, set the input selector on the VCR to LINE. Playback Notes: 94 • If you are going to use the TV as a monitor while you are shooting, remember to keep the TV volume turned down as long as the camcorder’s audio terminals are connected to prevent feedback. • If your TV is already connected to a VCR, you can connect the camcorder to the VCR instead of the TV. Follow the instructions above. Editing to a VCR E Playback the tape on the camcorder. STV-250N Stereo Video Cable L AUDIO R VIDEO S-150 S-video Cable S-VIDEO Record the scenes on the VCR. By connecting the camcorder to a VCR, you can edit your recordings in order to remove unwanted scenes, or to combine different shots to create your own video productions. Preparations 1. Connect the camcorder to the VCR. • See “Connections for Playback on a TV screen” ( 93). 2. Prepare the TV and VCR. • Turn on the TV and set the TV/VIDEO selector to VIDEO. • Turn on the VCR, and set its input selector to LINE. Load a blank cassette, and put the VCR in record pause mode. • See your TV and VCR instruction manuals for details. 3. Slide the POWER switch to PLAY (VCR) and the TAPE/CARD switch to TAPE. Editing 2. Start to play it back while you monitor the picture on the TV. Editing 1. Find a point on your recorded cassette slightly before the section you wish to copy. 3. Start recording on the VCR as soon as the section you wish to copy appears on the screen. 4. Pause the VCR at the end of the section you wish to copy, then stop playback on the camcorder. 5. Repeat steps 1 to 4 until your edited recording is complete. Note: • The quality of the edited tape will be slightly lower than that of the original. 95 m (LANC) terminal E The m terminal allows you to connect compatible devices such as remote controllers that are m LANC compatible. Some buttons on editing equipment may operate differently from those on the camcorder. Notes: Editing • m (LANC) is a trademark. It stands for Local Application Control Bus System. • We cannot guarantee the results when connecting to equipment not bearing the LANC m symbol. 96 Dubbing to/from a Tape with Digital Video Equipment Digital video equipment fitted with the DV terminal allows you to edit, copy and transfer data digitally, with virtually no generation loss in image and sound quality. The DV terminal is for both line-in and line-out, since a single DV cable can handle data in both directions. • If a digital VCR is connected and an anomalous signal is sent from the VCR, the images recorded on the tape may also be anomalous (although it may not appear so on the TV image), or not recorded at all. • You cannot dub tapes recorded with the copyright protective signal. E REC SEARCH PAUSE SELECT / ZERO SET MEMORY REW PLAY FF AUDIO DUB. STOP +/ –/ AV INSERT PAUSE SLOW ×2 : Signal flow Preparations Example dubbing to the camcorder 1. Connect the camcorder and the other digital device. • Connect the Canon CV-150F DV cable (optional). 2. Prepare the other device. • Turn on the power and load a recorded cassette. • DV IN appears in the display. Editing 3. Slide the camcorder’s POWER switch to PLAY (VCR) and the TAPE/CARD switch to TAPE. 4. Load a blank cassette. 97 Dubbing E 1. Find a point on your recorded cassette slightly before the section you wish to copy and set it to playback pause mode. 2. Press the camcorder’s REC PAUSE button. • The camcorder enters record pause mode. 3. Start playback on the other digital device while you monitor the picture. 4. Press the e/a (play/pause) button on the camcoder or the PAUSE a button on the wireless controller. • Recording starts. 5. When you get to the point where you wish to stop recording, press the stop button or the pause button. • Recording stops. 6. Stop playback on the other device. Notes: • If the cable is not connected properly, or if the cable is not connected when you press REC PAUSE, the camcorder displays the caution ‘‘CHECK THE DV INPUT.’’ An anomalous image may also flash onto the screen. • Blanks between recordings on the playback tape are recorded as anomalous images on the tape that is being recorded to. Concerning Copyrighting Copyright precaution Editing Certain pre-recorded video tapes, films and other materials, as well as some television programmes are copyrighted. Unauthorized recording of these materials may violate copyright protection laws. Copyright signals When playing back: If you try to play back a tape that contains copyright control signals for the protection of software, “COPYRIGHT PROTECTED PLAYBACK IS RESTRICTED” appears in the display for a few seconds and then the camcorder displays a blank blue screen; you cannot view the contents of the tape. When recording: If you try to record from software that contains copyright control signals for the protection of software, “COPYRIGHT PROTECTED DUBBING RESTRICTED” appears in the display; you cannot record the contents of the software. You cannot record copyright protection signals to a tape using this camcorder. 98 Recording from a VCR, TV or Analog Camcorder (Analog Line-in) You can record a video played on your VCR or analog camcorder (for digital camcorder, see p. 97) or a TV program onto a tape in the XM2, if the TV or other device has audio/video outputs. • If an anomalous signal is sent from the TV or VCR, the images recorded on the tape may also be anomalous (although it may not appear so on the TV image), not recorded at all, or COPYRIGHT PROTECTED DUBBING RESTRICTED may appear in the viewfinder. • You cannot dub tapes recorded with the copyright protective signal. E / STV-250N Stereo Video Cable L AUDIO R : Signal flow VIDEO S-VIDEO S-150 S-video Cable Preparations 1. Connect the camcorder to the VCR, TV or another camcorder. 2. Prepare the device. (Example connecting to a VCR) 3. Slide the camcorder’s POWER switch to PLAY (VCR) and TAPE/CARD switch to TAPE. Editing • Set the TV/Video selector on the television to Video. For further details, see “Connections for Playback on a TV Screen” ( 93). • Turn on the VCR. Load your recorded cassette, and put the VCR in playback pause mode. • See your TV and VCR instruction manuals for details. 4. Load a blank cassette. 99 Dubbing E 1. Find a point on your recorded cassette slightly before the section you wish to copy and set it to playback pause mode. 2. Press the REC PAUSE button. • S-video and audio IN/OUT terminals work as input terminals. • The camera enters record pause mode. 3. Start playback on the other device or turn on the TV to see the desired program while you monitor the picture. 4. Press the e/a (play/pause) button on the camcorder or the PAUSE a button on the wireless controller. • Recording starts. 5. When you get to the point where you wish to stop recording, press the stop button or the pause button. • Recording stops. 6. Stop playback on the other device. Note: Editing • You can monitor the picture on the LCD screen/viewfinder. 100 Digitally Outputting Analog Video and Audio Signals (Analog-Digital Converter) E Connecting the camcorder to your VCR or 8 mm video camera allows conversion of recorded analog video and audio signals to digital signals in an instant. The digital signals can be output to the other equipment with a DV terminal. The camcorder’s DV terminal works exclusively as an output terminal. • There may be cases where analog-digital conversion cannot be done properly, depending on the signals output from the connected equipment. For example: Signals that include the copyright protective signal, or anomalous signals such as ones that include ghost signals, etc. • You are recommended to use power from a household power source with a power adapter. • Do not operate with a cassette inserted to the camcorder. • Turn off the power of all equipment before performing connections. • Refer also to the instruction manuals of the other equipment connected. STV-250N Stereo Video Cable OUTPUT L AUDIO : Signal flow R VIDEO : Signal flow S-VIDEO S-150 S-video Cable IN/OUT Editing DV Side with arrow Signal flow : Above illustration shows the connection using a S-video cable. You can also connect the yellow plug to the VIDEO terminal instead. 101 Turning the Analog-Digital Converter On E TAPE + PLAY (VCR) VCR SET UP ( AV DV OUT••• OFF 18) To turn the analog-digital converter on, open the menu and select VCR SET UP. Then select AV \ DV OUT, set it to ON and close the menu. Caution: Editing • For normal use, set AV \ DV OUT to OFF through the menu. If it is set to ON, you cannot input digital signals through the camcorder’s DV terminal. • If you attempt to perform analog-digital conversion with a cassette inserted to the camcorder, the converted signals may not be output to the connected digital video equipment. • When connecting to a PC equipped with a DV terminal, you may not be able to transfer converted signals to your PC, depending on the software you are using, and the specifications of your PC and its settings. 102 Recording Over Existing Scenes (AV Insert Editing) You can insert and replace images/audio recorded on the camcorder’s tape with images/audio recorded with other video equipment using analog line-in or DV terminals. Original video and audio will be replaced with the new video and audio. E Scene to be inserted The playback tape Insert start point Insert end point Before inserting The tape in the camcorder After inserting The tape in the camcorder The video and audio of the new scene replace that of the old. STV-250N Stereo Video Cable L AUDIO : Signal flow VIDEO Editing R S-VIDEO S-150 S-video Cable : Signal flow 103 Preparations E The tape in the camcorder: When using the XM2’s AV insert function, only use to tapes recorded in SP mode with continuously recorded time codes. If there are non-recorded portions or portions recorded in LP mode on the tape, recording will stop. The playback tape: Use only tapes without non-recorded portions. If there are non-recorded portions or changes in the recording mode, you may not be able to insert AV correctly. You cannot insert AV in the following cases: • The playback tape has been poorly recorded. • During special playback: fast forward playback, rewind playback or slow playback etc. (analog only). TV: You cannot insert AV from a TV program with anomalous synchronized signals, such as when the program itself received poor signals. Example recording from a VCR 1. Connect the camcorder to the VCR. Editing 2. Prepare the VCR and TV. • Set the TV/Video selector on the television to Video. For further details, see “Connections for Playback on a TV Screen” ( 93). • Turn on the VCR and load a recorded cassette. • See your TV and VCR instruction manuals for details. 3. Slide the camcorder’s POWER switch to PLAY (VCR) and load a recorded cassette. • Make sure the REC/SAVE tab on the cassette has been slid to REC (closed position). 4. Slide the TAPE/CARD switch to TAPE. 104 Editing E 1. On the VCR, locate a point 3 seconds before the scene to be inserted. Set the VCR to playback pause mode. 2. On the camcorder, press PLAY and locate the recording start point. Set the camcorder to playback pause mode. • You can use the playback buttons on the body of the camcorder or the special playback functions on the wireless controller in the same way as in playback mode. 3. Press the AV INSERT button. • AV INSERT and 2a appear in the display. 4. Play back the tape in the VCR. 5. To start inserting, press the e/a (play/pause) button on the camcorder. • 2a changes to 2. 6. To stop inserting, press the STOP button on the camcorder. • Inserting stops and AV INSERT disappears from the display. The camcorder returns to stop mode. • If instead of pressing STOP you press e/a (play/pause), the camcorder returns to the AV insert pause mode. • If you set the zero set memory at the position on the tape where you wish to stop inserting, every time you return to that point, the camcorder will cancel its AV inserting and enter stop mode. 7. Stop playback on the VCR. Editing 105 Audio Dubbing You can add sound to the original sound on a pre-recorded tape from audio devices (AUDIO IN) or with the internal or external microphone (MIC. IN). The original sound will not be erased. If there are non-recorded portions on the tape, or portions recorded in a mode other than SP mode, or with 16-bit or 12-bit 4-channel sound, dubbing will stop. If your tape has not been recorded in SP mode with 12-bit sound, we recommend dubbing your original tape onto a blank tape using the XM2’s analog line-in function, then dubbing audio onto the new tape. Make absolutely sure to set the audio mode of the new tape to 12-bit and the recording mode to SP. E Add sound to tapes that have been recorded with this camcorder in SP mode with 12-bit sound. To connect other audio devices: : Signal flow STV-250N Stereo Video Cable OUTPUT AUDIO L An audio device (i. e. CD player) R Note: • No video picture will be output via the AV terminal. Check the picture on the LCD screen, viewfinder or a TV connected to the S-video terminal. Check the sound using the speaker or headphones. Editing To connect an external microphone: Notes: • When using the built-in microphone for dubbing, make sure that no cables are connected to the MIC terminal. • If you connect a TV to the S-video terminal, you can monitor the picture on the TV screen. Use headphones to check the sound. 106 Preparations E Turn the camcorder’s POWER switch to PLAY (VCR) and move the camcorder’s TAPE/CARD switch to TAPE. Load a recorded cassette. • Make sure the REC/SAVE tab on the cassette has been slid to REC (closed position). Dubbing / ZERO SET SEARCH MEMORY SELECT AUDIO DUB. REW PLAY FF AV INSERT –/ STOP +/ REMOTE SET PAUSE SLOW ×2 AUDIO REC LEVEL A M Do not connect/disconnect any cables to/from the camcorder when dubbing audio or preparing to dub audio. TAPE + PLAY (VCR) VCR SET UP ( AUDIO DUB.••• AUDIO IN 18) 1. Open the menu and select VCR SET UP. 2. Select AUDIO DUB. 4. Locate the point where you wish to start audio dubbing, then press the e/a button or the PAUSE button. Editing 3. Select AUDIO IN or MIC. IN and close the menu. • You can use the playback buttons on the camcorder or the special playback functions on the wireless controller in the same way as in playback mode. • The camcorder becomes set to playback pause mode. 5. Press AUDIO DUB. • AUDIO DUB. and 2a appear on the display. 107 6. Adjust the input signal level. E AUDIO IN Automatic adjustment: 1.Slide the REC LEVEL switch to A. Manual Adjustment: 1.Slide the REC LEVEL switch to M. 2.Turn the L/R LEVEL dials to adjust the recording level. • Adjust it that the level slightly exceeds the 12 point. • Adjust the balance by turning the L/R LEVEL dial if necessary. • Even if you turn down the LEVEL dial, the sound may be distorted if the input level is still too high. Set the audio attenuator (AUDIO ATT) to ON in the VCR SET UP submenu of the VCR MENU. MIC IN You can select the microphone sound and adjust the level when using the built-in microphone ( 106). You can only adjust the recording level when using an external microphone. 7. Press the PAUSE button (and start play on the other audio device if AUDIO IN). • Audio dubbing starts. • If MIC. IN, direct your voice into the microphone. • 2a changes to 2. 8. When you get to the point where you wish to stop dubbing, press the STOP button (and then stop play on the other audio device if AUDIO IN). • Audio dubbing stops and AUDIO DUB. disappears from the display. • The camcorder returns to stop mode. • You can also set zero set memory ( 92) at the place you wish to stop audio dubbing, then every time you return to that position, audio dubbing will stop. • If instead of pressing STOP you press PAUSE, the camcorder will return to the playback pause mode. Editing Notes: 108 • You cannot use the DV terminal while adding sound. • You might want to adjust the audio mix ( 109) when playing back a tape with added sound. • There may be a loss of sound quality if you add sound to a tape recorded on a camcorder other than the XM2. • After adding sound 3 or more times to the same place on a tape, there may be some loss in sound quality. Setting the Audio Mix E MIX AUDIO BALANCE MONITOR ST-1 ST-2 When you play back a tape that was recorded in 12-bit mode, you can set the audio output to stereo 1 (the original sound), stereo 2 (any new sound, dubbed to the tape after recording), or mix the balance between the two. • Audio from the 16-bit mode only contains stereo 1 sound and so you cannot/do not need to select the audio mix. The same applies to the 12-bit stereo 1 mode, unless new sound has been added post-recording. TAPE + PLAY (VCR) Select the output channel. • Press AUDIO MONITOR on the wireless controller. • Starting with the last selected setting, 4 settings appear as you push the button: – STEREO1 for just stereo 1. – STEREO2 for just stereo 2. – MIX/FIXED for an equal mix of stereo 1 and 2. – MIX/VARI. (mix variable) for when you want to mix the balance between stereo 1 and 2. • If you choose MIX/VARI., you can go on to mix the balance. • Use the ST-1/ST-2 buttons to mix the balance. A bar showing the balance appears on the screen for 4 seconds. • When you have chosen the output, STEREO1, STEREO2, MIX/FIXED or MIX/VARI. is shown in the top left of the display for a few seconds. If you turn the power off, the output becomes set to STEREO1. Editing Note: 109 Selecting Audio Output Channels E When you play back a tape whose audio has been recorded on multiple channels, you can change the output channels of that sound. TAPE + PLAY (VCR) VCR SET UP ( OUTPUT CH••• L/R 18) 1. Load a tape recorded with multiple-channel audio. 2. Open the menu and select VCR SET UP. Then select OUTPUT CH, set it to the desired setting and close the menu. • Refer to the following list. OUTPUT CH Setting Editing L/R L/L R/R 110 Playback Sound Tape Recorded With Tape Recorded On Stereo Sound Multiple Channels L+R channels main + sub L channel only main only R channel only sub only Connecting to a PC Using a DV Cable By using a DV cable and connecting the camcorder to a PC equipped with a DV terminal conforming to IEEE 1394/DV compatible capture board, you can transfer images taken with the camcorder to your PC. • While connected, it is recommended that you power your camcorder from a household power socket using the power adapter. • Turn off the power of both the camcorder and the PC before connecting. • Optional software necessary. • For transferring still images from a memory card to your PC using a USB cable, see p. 132. DV IN/OUT E CV-150F or CV-250F DV Cable (Optional) Notes: • Operation may not work correctly, depending on the software you are using, and the specifications of your PC and its settings. • Refer to the respective software instruction manual for further details. Caution: • Do not disconnect the DV cable while data is being transferred to the PC. Editing 111 Memory Card Introduction The camcorder can record, store and manage still images on 2 types of memory cards: the SD Memory Card (supplied with the camcorder) or the MultiMediaCard (commercially available). The SD Memory Card has the protect switch to protect your recordings from accidental erasure. The SD Memory Card and the MultiMediaCard fit into the same slot. E You can do the following with a memory card: • Record still images ( 116) • View still images: Single ( 118), Slide show ( 119), Index screen ( 119) • Select the quality of images ( 113) • Protect important still images against accidental erasure, print mark and erase still images ( 120-126) • Combine titles recorded onto the memory card with camcorder recordings (title mix) ( 127) • Copy multiple still images from card to tape ( 130) • Transfer memory card still images to a PC ( 132) SD Memory Card Back Front Terminals Protect switch You can use most of the camcorder’s functions when recording to a memory card, such as the various recording programs ( 50), self-timer ( 69), shutter speed ( 75), white balance ( 78) and other manual adjustments. Available functions are marked with the CARD + CAMERA or PLAY icons. CARD + (VCR) 2 If you use memory cards other than the supplied one, make sure to format them with the camcorder ( 131). Important • Inserting or removing the memory card without first setting the POWER switch to OFF can result in data damage. • This camcorder uses only SD Memory Cards ( *) or MultiMediaCards. You cannot use any other types of memory cards. Using a Memory Card * 112 logo is a trademark. Inserting and Removing the Memory Card E 1. Turn the POWER switch to OFF. • When removing the memory card, make sure the card access indicator is off. 2. Open the memory card compartment cover in the direction of the arrow. 3. Insert or remove the memory card. • Push the memory card all the way in. • Remove the memory card by pushing the card in and letting it spring out. Do not attempt to pull the memory card out without first pushing it in. 4. Close the memory card compartment cover. • When inserting the memory card, do not attempt to close the cover forcefully without the memory card properly inserted. Notes: • When you set the camcorder to CARD PLAY (VCR) mode, the last image recorded appears. If there are no images recorded on the memory card, NO IMAGES appears in the display. • Do not touch the memory card terminals. Selecting the Image Quality Still image Quality: Fine, Standard TAPE + PLAY (VCR) , CARD SET UP + CAMERA QUALITY••••• FINE 18) To change the image quality, open the menu and select CARD SET UP. Then select QUALITY, set it to STANDARD and close the menu. • The image quality may not differ between the settings depending on the still image. Using a Memory Card ( CARD 113 Selecting the Image Size E Image Size: 1488 × 1128 pixels/640 × 480 pixels CARD + CAMERA Still Images CARD SET UP ( IMAGES RES.• 1488×1128 18) To change the image size of a still image, open the menu and select CARD SET UP. Then select IMAGES RES., set it to “640 × 480” and close the menu. • “640” appears in the display. Maximum Number of Still Images on an 8 MB Memory Card and Their File Sizes Image Size Image Quality Fine Standard 1488 × 1128 No of Images File Size per Image Approx. 6 images 860 KB Approx. 10 images 580 KB 640 × 480 No of Images File Size per Image Approx. 47 images 125 KB Approx. 93 images 65 KB * The actual number varies on the shooting conditions and subjects. Notes: • Still images are compressed and recorded in the JPEG (Joint Photographic Experts Group) format. • Refer to p. 117 for memory card display. • The remaining number of images that can be recorded on the memory card may sometimes decrease by 2 images at once. Card Access Display The operating states of the memory card are shown in the centre of the display. Using a Memory Card TAPE 114 + CAMERA , DISP.SET UP ( CARD + CAMERA , CARD + PLAY (VCR) CARD ACCESS• ON 18) To turn the card access display off, open the menu and select DISP.SET UP. Then select CARD ACCESS, set it to OFF and close the menu. File Numbers E The still images are automatically assigned file numbers from 0001 to 9999 and stored in folders of 9999 images each. Each folder is numbered from 100 to 999 and recorded on the memory card. Set the image file numbers so that they reset each time a new memory card is inserted, or so that they count up continuously. 1 CONTINUOUS When the file numbers are set to CONTINUOUS, each image is assigned a different number, avoiding duplication of numbers. If a memory card already contains files, the lowest available number file will be assigned to the added file. This is convenient when you wish to manage your images on a PC. We recommend keeping the file 1 numbers set to CONTINUOUS. 100 Three images are recorded on the card. 100 100-0001 100-0002 100-0003 When you insert a new empty card and take a picture. 100-0004 100 2 100-0001 2 RESET Each time you insert a new memory card, the file number resets to its default value (100-0001). If the memory card already contains files, the lowest available file number in the folder with the highest number will be assigned to the added file. CARD + CAMERA CARD SET UP ( FILE NOS.••• CONTINUOUS 18) To change the file numbering, open the menu and select CARD SET UP. Then select FILE NOS., set it to RESET and close the menu. Turning Off the Shutter Sound CARD + CAMERA CARD SET UP ( SHTR SOUND•• ON 18) To turn the shutter sound off, open the menu and select CARD SET UP. Then select SHTR SOUND, set it to OFF and close the menu. Using a Memory Card Makes the sound of a shutter being released when a still image is recorded to a memory card. 115 Recording Still Images onto a Memory Card E CARD TAPE Card Access Indicator You can record still images onto the memory card. • Moving pictures cannot be recorded onto a memory card. • Memory cards cannot record audio. • When you are using an SD Memory Card, make sure the protect switch is set to allow recording. Make sure a memory card with enough memory available is inserted into the camcorder. While the card access indicator flashes, do not disconnect the power source or remove the memory card. Doing so could result in data damage. 1. Slide the POWER switch to CAMERA and the TAPE/CARD switch to CARD. • The remaining number of images that can be recorded on the memory card, and other information appear in the display. • The camcorder will turn itself off if you are using a battery and do not operate the camcorder for more than about 5 minutes. Set the Standby lever to STANDBY. 2. Press the PHOTO button halfway and hold it. • Exposure is locked. • During autofocus F flashes white in the display as the camcorder adjust the focus and it is displayed continuously as a green mark when the camcorder is ready to take the still image. 3. Press the PHOTO button fully down to record the still picture. • F disappears from the display. The shutter sound sounds and simultaneously the display appears to close for an instant as if it were a shutter releasing. • The card access indicator flashes and the card access display appears in the display. Using a Memory Card Notes: 116 • To use the self-timer ( 69), set the self-timer in the menu or on the wireless controller before step 3, and then press the PHOTO button fully down. • The wireless controller’s PHOTO button has no half-way setting. Press the button fully and the camcorder immediately takes the image. The indicators that appear in the display when recording to a memory card: E Image quality ( >>>> FINE 50 1488 Number of images that can still be recorded on the memory card Image size ( Backup battery ( 136) 113) 114) Remaining battery power ( 135) See also “The indicator that appear on the LCD screen when LCD mirror is turned on” ( 42). Memory Card Indication: 6 5 0 6 – flashing in red: No card in green: 6 or more images in yellow: 1 to 5 images in red: No more images flashing in red: SD memory card is protected flashing in red: Memory card cover is open • All indicators light in green when a memory card is played back. • The remaining capacity indication varies depending on the recording condition. The remaining number may sometimes not decrease or decrease by 2 images at a time. Using a Memory Card 117 Playing Back a Memory Card E / CARD SLIDE SHOW CARD TAPE Play back and view still images recorded on a memory card. (For details on connecting to a TV, see “Connections for Playback on a TV Screen” ( 93) • The camcorder may not be able to copy or play, etc., images recorded with a non-Canon camcorder. Do not change the data recorded on a memory card. • You may not be able to play back the following still images correctly on this camcorder: − Still images that have not been recorded with this camcorder but downloaded from a PC. − Still images that have been recorded with this camcorder but have subsequently been enhanced on a PC. − Still images whose image file names have been changed on a PC. There are 3 ways to view still images: • Single image • Slide show: One after the other automatically in order of recording • Index screen: Six images at once When the camcorder is in playback pause mode, you can use the card jump function to move quickly through still images recorded anywhere on a memory card to find a still image you wish to view (Card Jump function). Make sure a memory card that has images recorded on it is inserted into the camcorder. While the card access indicator flashes, do not disconnect the power source or remove the memory card. Doing so could result in data damage. 2 Single Image 1. Slide the POWER switch to PLAY (VCR). 2. Slide the TAPE/CARD switch to CARD. • The last image recorded appears in the display. Using a Memory Card 3. Search for the desired still image by pressing the CARD +/– buttons. 118 • Press + to view the next image and – to view the previous image. • Pressing + at the last image will take you to the first image. Pressing – at the first image will take you to the last image. 2 Card Jump Function E You can jump from the current image to the desired image of unadjacent image number without displaying the images one by one. The numbers shown in the upper right corner in CARD PLAY (VCR) mode indicate the image number of the current still image and the total number of still images on the memory card. CARD + PLAY (VCR) With a still image in the display, press and hold the CARD +/– button. • Press the + button to jump forwards through the images and press the – button to jump backwards. • The image number moves forwards or backwards. • When you release the button, the still image to which the currently shown number is assigned, appears in the display. 2 Slide Show CARD + PLAY (VCR) With a still image in the display, press the MIX/SLIDE SHOW button. • The still images are played back one after another. To stop the slide show, press the MIX/SLIDE SHOW button. • The slide show starts or stops each time you press the SLIDE SHOW button. 2 Index Screen Up to 6 images appear at once so you can search quickly for an image. CARD + PLAY (VCR) 1. With a still image in the display, press the INDEX SCREEN button. INDEX 1488 1488 100–0143 1488 1488 1488 1488 SEL. INDEXEND • Up to 6 images appear in the display. 2. Select a still image by pressing the SELECT dial or the CARD +/– buttons. 3. Press the INDEX SCREEN button with the frame on the selected image. • The selected image appears in full size of the display. Using a Memory Card • A red frame appears around the selected image. • Pull the SELECT dial up to move to the next image and down to move to the previous image. • Pulling the SELECT dial up at the last image displays the next index screen. Pulling the SELECT dial down at the first image displays the previous index screen. • You can also use the CARD +/– button to switch index screen. Press the CARD – button to display the previous index screen and the CARD + button to display the next index screen. 119 Settings of the Still Images Recorded on a Memory Card E / You can easily erase unwanted still images while viewing them, protect them from accidental erasure, or mark them for printing. (File Operation) ● Preventing Accidental Erasure (Protect ) Select important images and protect them from accidental erasure. • If a memory card is formatted, however, all images, including protected images, will be permanently erased. 1. 2. CARD CARD + + PLAY (VCR) PLAY (VCR) ➡ File Operation menu SINGLE ( 121) ➡ Card Operations submenu INDEX ( 122) ● Marking a Still Image for Printing (Print Mark ) An image on a memory card must be marked before it can be printed. The camcorder supports the DPOF (Digital Print Order Format) print format. Images can be automatically printed on a DPOFsupporting Canon printer. There are 3 ways to mark a still image for printing. To mark an image for printing or erase print marks one at a time 1. 2. CARD CARD + + PLAY (VCR) PLAY (VCR) ➡ File Operation menu SINGLE ( 121) ➡ Card Operations submenu INDEX ( 123) To erase all print marks 3. CARD + PLAY (VCR) ➡ Card Operations submenu SINGLE ( 124) ● Erasing Still Images Erase images singly or all at once. • You cannot erase protected images. Cancel image protection first in order to erase an image. • Erase images with caution. Once an image has been erased it cannot be restored. Using a Memory Card To erase images one at a time 120 1. CARD + PLAY (VCR) ➡ File Operation menu SINGLE ( 121) To erase images one at a time or erase all images on the memory card at once PLAY 2. CARD + (VCR) ➡ Card Operations submenu SINGLE ( 125) SINGLE INDEX : When playing back an image in CARD PLAY (VCR) mode : When displaying an index screen in CARD PLAY (VCR) mode File Operation (FILE OPER.) CARD + E PLAY (VCR) 1. With an image in the display, press the SELECT dial in to open the FILE OPER. menu. • PROTECT , PRINT MARK , and IMAGE ERASE settings appear. • If you select |RETURN, the menu disappears from the display. To protect an image 2. Select PROTECT • • • • and press the SELECT dial in. The protect mark appears on the image, and the image cannot be erased. Press the SELECT dial again to cancel it. If you select |RETURN, the menu disappears from the display. To cancel image protection, select PROTECT and press the SELECT dial in. and now you can erase this image. disappears To mark a image for Printing (Print Mark) 2. Select PRINT MARK • • • • and press the SELECT dial in. The print mark appears on the image. Press the SELECT dial again to cancel it. If you select |RETURN, the menu disappears from the display. To cancel a print mark, select PRINT MARK and press the SELECT dial in. disappears. To erase the image 2. Select IMAGE ERASE and press the SELECT dial in. • ERASE THIS IMAGE? NO YES appears in the display. • If you select |RETURN, the menu disappears from the display. 3. Select YES and press the SELECT dial in. • The image is erased. • One image after the erased image appears. Using a Memory Card 121 Preventing Accidental Erasure (Protect) E REC SEARCH CARD SLIDE SHOW This section describes how to protect the still image from the Card Operation submenu when displaying an index screen in CARD PLAY (VCR) mode (including the way to cancel the setting). You can also protect a still image through the File Operation menu ( 121). Protecting an Image While Viewing an Index Screen CARD + PLAY (VCR) CARD OPER. ( PROTECT 18) Make sure a memory card that has images recorded on it is inserted into the camcorder. 1. With an image in the display, press the INDEX SCREEN button. • Up to 6 images appear in the display. • Select the image that you wish to protect (Index Screen 119). 2. Open the menu and select CARD OPER. 3. Select \ PROTECT . 4. Press the SELECT dial in. • The protect mark appears on the image, and the image cannot be erased. • Press the SELECT dial again to cancel it. 5. Close the menu. Using a Memory Card Note: 122 • To cancel image protection, select the protected image and press the SELECT dial in. The protect mark disappears. Marking a Still Image for Printing (Print Mark) E This section describes how to mark a still image for printing from Card Operation submenu in CARD PLAY (VCR) mode (including the way to cancel the setting). – When displaying an index screen, you can mark the still image for printing. – When playing back a single image, you can erase all print marks. You can also mark a still image for printing through File Operation menu ( 121). Marking a Still Image for Printing While Viewing an Index Screen CARD + PLAY (VCR) CARD OPER. ( PRINT MARKS 18) Make sure a memory card that has images recorded on it has been inserted into the camcorder. 1. With a still image in the display, press the INDEX SCREEN button. • Up to 6 images appear in the display. • Select the image that you wish to mark for printing (Index Screen 119). 2. Open the menu and select CARD OPER. 3. Select \ PRINT MARK . 4. Press the SELECT dial in. • The print mark appears next to the image. • Press the SELECT dial again to cancel it. 5. Close the menu. Notes: Using a Memory Card • To cancel a print mark, select the print-marked image and press the SELECT dial in. The print mark disappears. • If there are a large number of images recorded on the memory card, it may take time for a print mark to appear on an image. 123 Erasing all Print Marks E CARD + PLAY (VCR) CARD OPER. ( PRINT MARKS ALL ERASE 18) Make sure a memory card that has images recorded on it has been inserted into the camcorder. 1. With a still image in the display, open the menu and select CARD OPER. 2. Select PRINT MARKS • ERASE ALL PRINT MARKS ALL ERASE. ? YES NO appears in the display. 3. Select YES. • The print mark disappears from the image. Using a Memory Card 4. Close the menu. 124 Erasing Still Images E REC SEARCH CARD SLIDE SHOW This section describes how to erase still images from the Card Operation submenu when playing back a single image in CARD PLAY (VCR) mode. You can also erase a still image through the File Operation menu ( 121). CARD + PLAY (VCR) CARD OPER. ( IMAGE ERASE 18) Make sure a memory card that has images recorded on it is inserted into the camcorder. To erase still images one at a time 1. Select the still image you wish to erase. • Use the index screen ( 119) or card jump function ( 119) if necessary and make sure the image you wish to erase fills the display. • If you are displaying the index screen, press the INDEX SCREEN button after selecting the image. The image you selected fills the whole display. 2. Open the menu and select CARD OPER. 3. Select IMAGE ERASE. • CANCEL, SINGLE and ALL settings appear. • To cancel erasing, select CANCEL and close the menu. 4. Select SINGLE. • ERASE THIS IMAGE? NO YES appears in the display. 5. Select YES. 6. Close the menu. Using a Memory Card • The image erases and the previous image appears for erasing. • To erase another single image, move to that image with the CARD +/– buttons, and select YES. • If the image you are trying to erase is a protected image, YES appears in purple and is unselectable. • If you select NO, you return to step 4. 125 To erase all still images in a folder E 1. Open the menu and select CARD OPER. 2. Select IMAGE ERASE. • CANCEL, SINGLE and ALL settings appear. • To cancel erasing, select CANCEL and close the menu. 3. Select ALL. • ERASE ALL IMAGES? [EXCEPT FOR IMAGES] NO YES appears in the display. 4. Select YES. • All images in the folder of the displayed image except the protected ones are erased. • If you select NO, you return to step 2. Using a Memory Card 5. Close the menu. 126 Combining Images and Recording Them onto a Tape (Title Mix) Combine a title image recorded on a memory card with camcorder recordings. You can change the colour of a title and adjust the mix level. E Creating a Title Image • Speedlite and video light cannot be used when creating a title. TAPE + CAMERA TITLE MIX ( 18) 1. Insert a memory card into the camcorder. 2. Slide the POWER switch to CAMERA and the TAPE/CARD switch to TAPE. 3. Open the menu and select \ TITLE MIX. • The title mix menu appears. 4. Select \ CREATE TITLE. • The CREATE TITLE menu appears. 5. Press the PHOTO button halfway. • F flashes white and turns green and glows steady. 6. Press the PHOTO button fully. • F disappears and the camcorder records the title. Selecting the Colour 1. Select COLOR SELECT from the CREATE TITLE menu. 2. Select the colour by pulling the SELECT dial up or down. 3. Press the SELECT dial in. Adjusting the Mix Level 1. Select MIX LEVEL from the CREATE TITLE menu. 2. Adjust the mix level by pulling the SELECT dial up or down. 3. Press the SELECT dial in. Recording the Title Image onto the Memory Card 1. Select RECORD from the CREATE TITLE menu. 2. Press the SELECT dial in. • The camcorder records the title onto the memory card. Note: • Title images may be assigned the same file number depending on the colour selection. Using a Memory Card • You have to record the title onto the memory card in order to use the title mix function. 127 Selecting a Title Image E TAPE + CAMERA 1. Slide the POWER switch to CAMERA and the TAPE/CARD switch to TAPE. 2. Open the menu and select \ TITLE MIX. • The title mix menu appears. 3. Select \ TITLE SELECT. • Up to 6 titles images are displayed. 4. Select the title you wish to combine. 5. Press the SELECT dial in. • You return to the title mix menu. Activating the Title Mix 1. Slide the program selector to Q and select a recording program. • Title mix cannot be used in the [ (Easy Recording) program. 2. Press the MIX/SLIDE SHOW button. • The selected title appears combined with your recording. Recording the Combined Image onto the Tape as Movie 1. Press the start/stop button. Recording the Combined Image onto the Tape as Still Image 1. Press the PHOTO button halfway. • F flashes white and turns green and glows steady. 2. Press the PHOTO button fully. • F disappears and the camcorder records the still image. Protecting a Title Image Using a Memory Card You can protect a title image to prevent accidental erasure. • If you format a memory card, all images including the protected ones will be erased. 128 1. Open the menu and select CARD OPER. 2. Select \ TITLE PROTECT and press the SELECT dial in. • The title protect index screen appears. 3. Select the title image you wish to protect and press the SELECT dial in. • The protect mark appears, and the title image cannot be erase. • Press the SELECT dial again to cancel it. Erasing a Title Image E 1. Open the menu and select CARD OPER. 2. Select \ TITLE ERASE and press the SELECT dial in. • The title erase index screen appears. 3. Select the title image you wish to erase and press the SELECT dial in. • Check the title image on the index screen when selecting. • Erase this title? NO YES appears and the title image flashes. 4. Select YES and press the SELECT dial in. • The title image is erased. • If you wish to erase another title image, select the next title image, select YES and press the SELECT dial in. • If you select NO, you return to the title erase index screen. Using a Memory Card 129 Copying Still Images from Memory Card to Tape E / You can copy multiple still images from the memory card to a tape. • The still images’ data codes will reflect the date and time the copies are made. CARD OPER. ( COPY[ ] 18) Make sure a memory card that has images recorded on it and a cassette that has enough recordable space have been inserted into the camcorder. TAPE + PLAY (VCR) 1. Locate the point on the cassette where you wish to start copying and set it to stop. CARD + PLAY (VCR) 2. Select the first image you wish to copy by using the CARD +/– buttons. • Still images on the memory card including and after that image will be copied onto the tape. • If you wish to copy all the still images on the memory card, select the first image. 3. Open the menu and select CARD OPER. ]. 4. Select COPY [ • CANCEL and EXECUTE settings appear. Using a Memory Card 5. Select EXECUTE. 130 • • • • • Select CANCEL to stop copying. Cassette and card information appear in the display and copying starts. ] appears in the display. NOW COPYING [ Each image is copied for about 6 seconds on the cassette. Copying stops when all the images have been copied or the tape is full. 6. Press the 7 button when your desired images have been copied. Formatting a Memory Card E Format new memory cards if you get the message CARD ERROR, or to permanently and quickly erase all still images on a memory card, including protected images. The SD Memory Card supplied with this camcorder has already been formatted for you. • Be cautious when formatting recorded memory cards. All images will be permanently erased. • If you use memory cards other than the supplied one, make sure to format them with the camcorder, not a PC or other device. CARD + PLAY (VCR) CARD OPER. ( FORMAT 18) Make sure a memory card is inserted into the camcorder. 1. Open the menu and select CARD OPER. 2. Select FORMAT. • CANCEL and EXECUTE settings appear. 3. Select EXECUTE. • Select CANCEL to cancel formatting. • FORMAT THIS CARD? NO YES appears to confirm. 4. Select YES. • Formatting starts and NOW FORMATTING appears in the display. • If you select NO, you return to step 3. 5. Close the menu. Using a Memory Card 131 Connecting to a PC Using a USB Cable You can download still images from a memory card to a PC connected to the camcorder via the USB interface. By using the supplied software, you can organize, store and print out still images. When printing still images, you can add titles and frames to them. Use the USB cable and the Canon Digital Video Solution Disk software supplied with the camcorder. E : Signal flow IFC-300PCU USB cable For details on how to connect the camcorder to a PC and install and operate the software, refer to the Canon Digital Video Solution Disk instruction manual. • Refer also to your PC manual. “PC CONNECT [USB]” appears to indicate that the camcorder is connected to the PC with an USB cable. PC CONNECT[USB] Cautions: • Do not disconnect the USB cable while data is being transferred (while the camcorder’s card access indicator is flashing). Doing so may damage the data on the memory. • The connection may not work properly depending on the specifications and settings of the software and PC. • The image files on your memory card and the image files you have stored (downloaded) to the hard disk drive of your computer are your valuable, original image files. If you wish to use image files on your computer, be sure to make copies of them first, and use the copied file, retaining the original. Using a Memory Card Notes: 132 While performing USB connection: • The buttons, excluding the POWER switch and TAPE/CARD switch on the camcorder cannot be used. Other Information and Precautions The camcorder formats memory cards in DCF (Design rule for Camera File system). Images recorded on a memory card with this camcorder can also be transferred to a PC with the use of the following products made for SD Memory Cards or MultiMediaCards: E PC Card Adapter: Holds a memory card and fits into a PC card slot found on most types of laptop PCs. FD Adapter: Holds a memory card and fits into a PC’s floppy disk drive. Memory Cards confirmed to operate with this camcorder (as of June 2002) SD Memory Card— Panasonic: 8 MB, 16 MB, 32 MB, 64 MB SanDisk: 8 MB, 16 MB, 32 MB, 64 MB MultiMediaCard— SanDisk: 8 MB, 16 MB, 32 MB, 64 MB • However, we cannot guarantee that all of these memory cards work properly. Memory Card Operating Precautions SDC-8M SD Memory Card Specifications Capacity Interface Operating Temperatures Dimensions Wight 8 MB SD Memory Card standard 0°C – 40°C (32°F – 140°F) 32 × 24 × 2.1 mm (1 1/4 × 1 × 1/8 in) 2 g (1/8 oz) Using a Memory Card • If you purchase additional memory cards, format them with the camcorder, not a PC or other device. Memory cards formatted with a PC or other device may not function properly. • We recommend saving backups of memory card images on your PC’s hard drive or other external memory device. Image data may be damaged or lost due to a defect in a memory card, or if a memory card is exposed to static electricity. Contents of a memory card cannot be compensated for should data become damaged or lost. • Do not remove the power source or the memory card while the card access indicator flashes. • Do not use memory cards in places subject to strong magnetic fields. • Do not disassemble memory cards. • Do not bend or drop memory cards, or expose them to strong vibrations or external shocks. • Do not get memory cards wet. • Do not remove the memory card’s label or affix other labels. Affix labels to the memory card’s case. • Do not leave memory cards in places subject to high temperature or high humidity. • Moving a memory card rapidly between hot and cold temperatures may cause condensation to form on it, leading to malfunctions. Avoid this problem by placing the memory card in a plastic bag and letting it slowly adjust to temperature changes before removing it from the bag. If condensation should occur, maintain the memory card at a constant temperature and let the moisture evaporate naturally. • Do not touch the memory card’s terminals or let dust or dirt come in contact with the terminals. Store and carry memory cards in their case to protect the terminal area. • There is only one correct way to insert memory cards into the camcorder. Do not forcefully insert the memory cards backwards or upside down. This could damage the memory card or the camcorder. 133 Notes on Using the Batteries E Charging and Recording Times • These times vary — the safest policy is always to have 2 or 3 times as many battery packs as you think you will need. • You will get more recording time if you turn the camcorder off between shots, instead of leaving it in record pause mode. • The charging time varies depending on the charging conditions. Battery Pack BP-915 BP-930 BP-945 Battery Pack BP-915 BP-930 BP-945 Charging Time 1 hr. 25 min. 2 hr. 25 min. 3 hr. 40 min. Typical Recording Time* Max. Recording Time Using the Viewfinder Using the LCD Screen Using the Viewfinder Using the LCD Screen 2 hr. 4 hr. 40 min. 7 hr. 1 hr. 35 min. 3 hr. 55 min. 5 hr. 55 min. 1 hr. 5 min. 2 hr. 35 min. 3 hr. 55 min. 55 min. 2 hr. 15 min. 3 hr. 25 min. * Typical Recording Time: Approximate times for recording with repeated operations such as start/stop, zooming and power on/off. The actual time may be shorter. • You can use the battery pack between 0° to 40°C (32° and 104°F), but it works best between 10° to 30°C (50° and 86°F). Operating time will be shorter than usual at low temperatures like a ski ground. For better operating results, the battery pack can be warmed in your pocket or someplace and then used. • If the battery pack starts to give you much less operating time than usual (at normal temperatures), it has reached the end of its life and must be replaced. Note: • These figures show how long you can view playback with the LCD, after attaching a fullycharged battery pack. Playback time will be shortened at low temperatures. Additional Information Battery Pack BP-915 BP-930 BP-945 134 Playback Time (Using the LCD Screen) 1 hr. 45 min. 4 hr. 15 min. 6 hr. 25 min. How Much Power Is Left? E The indicator in the display shows you approximately how much charge the battery pack has left: Notes: • When the power is completely exhausted, “CHANGE THE BATTERY PACK” appears in the display for 4 seconds and the empty battery mark starts to flash. The power indicator light also flashes. • The indicator is not constant — it varies with the condition under which battery pack and camcorder are used. ↓ ↓ ↓ ↓ 100% 75% 50% 25% CHANGE THE BATTERY PACK 0% When to Recharge You can recharge a lithium ion battery pack whenever it is convenient. Unlike a conventional battery pack, it does not have to be fully discharged first. However, as the battery pack will naturally discharge itself over time, it is best to charge it the same day you plan to use it, or the day before. Taking Care of the Battery Pack Always attach the terminal cover. • Do not allow any metal objects to touch the terminals, as this can cause a short circuit and damage the battery pack. Attach the terminal cover whenever the battery pack is not being used. Keep the terminals clean. • The camcorder adapter or battery pack will not work properly if the terminals are dirty. Attach the terminal cover whenever the battery pack is not being used. Storing the battery pack • Storing a charged battery pack for long periods of time (about 1 year) can shorten its lifecycle or affect performance. We recommend to discharge the battery pack in the camcorder fully and to store it in a dry place. If you do not use the battery pack for long periods of time, charge it fully and discharge it fully in the camcorder at least once a year before returning it to storage. Additional Information 135 E Installing the Backup Battery Open the backup battery cover and insert the CR2025 lithium battery with the + side facing outwards. Click the cover back into place. This backup battery allows the camcorder to retain the date and time and other settings when the main power source is removed. It has a life span of about a year. When it needs replacing (or if it has not been installed), the y mark flashes in the display. Remove the old battery by pushing it up, releasing and lifting it out. Make sure to attach a power source to the camcorder first, so it will retain your chosen settings when you change the battery. DANGER! Treat the battery pack with care. • Keep it away from fire (or it might explode). • Do not expose the battery pack to temperatures greater than 140°F (60°C). Do not leave it near a heater, or inside a car in hot weather, for example. • Do not try to disassemble or modify it. • Do not drop or knock it. • Do not get it wet. WARNING! • The battery used in this device may present a fire or chemical burn hazard if mistreated. Do not recharge, disassemble, heat above 100°C (212°F) or incinerate. • Replace the battery with a CR2025 made by Panasonic, Hitachi Maxell, Sony, Sanyo, or with Duracell DL2025. Use of other batteries may present a risk of fire or explosion. • The used battery should be returned to the supplier for safe disposal. Additional Information Cautions: 136 • Do not pick up the battery using tweezers or other metal tools — this will cause a short circuit. • Wipe the battery with a clean, dry cloth to ensure proper contact. • Keep the battery pack out of reach of children — if it is swallowed, contact a physician immediately, as the battery case may break down and the battery fluids damage the stomach and intestines. • Do not disassemble, heat or immerse the battery in water, to avoid the risk of explosion. Maintenance Cautions Avoid high temperatures and high humidity. • Do not leave the camcorder inside a car in hot weather, for example. • Be careful of heat radiating from video lighting equipment. • Do not take the camcorder into a humid room. E Avoid sudden changes in temperature. • If you take the camcorder from a cold place to a warm place, condensation may form on the lens and internal parts ( 140). Do not point the lens or viewfinder at strong light sources. • Never point it at the sun, and do not leave it aimed at a bright subject. • Be especially careful when leaving the camcorder on a tripod. Avoid magnetic or electric fields. • Do not use the camcorder close to TV transmitters, portable communication devices or other sources of electric or magnetic radiation. They may cause picture interference, or permanently damage the camcorder. Do not expose the camcorder to water. • Cover the camcorder when you are recording in rain or mist. • There is a risk of electric shock if water gets inside the camcorder — contact qualified service personnel as soon as possible. Protect the lens. • Sand and dust can damage the lens — be especially careful on windy days. Handle the camcorder gently. • Vibration or shock can cause damage. • Do not use the viewfinder or LCD panel as a carrying handle. Do not disassemble the camcorder. • This is very dangerous as there is a risk of electric shock — if the camcorder does not function properly, take it to qualified service personnel. Additional Information 137 E Storage If you do not intend to use the camcorder for a longer time, store it in a dry area free of dust, and at temperatures no higher than 30°C (86°F). After storage, check each part and function of your camcorder to make sure everything is still working properly. Note: • These cautions also apply to accessories such as battery packs and cassettes. Maintenance Viewfinder • Clean the viewfinder screen. Rotate the viewfinder upwards. Remove the viewfinder protect cover and clean it with a cotton swab etc. When finished, return it flush with the camcorder. • The viewfinder screen scratches easily. Be careful when cleaning. LCD • Clean the LCD screen using a commercially available cleaning cloth for glasses. • Moving the camcorder between hot and cold temperatures may cause condensation (water droplets) to form on the surface of the screen. Wipe the screen with a soft, dry cloth. • At low temperatures the display may appear to be much darker than usual. This is not a malfunction. As the screen warms up the display will return to normal. Additional Information Camcorder body and lens • Use a soft, dry cloth to clean the camcorder body or lens. Never use chemically treated cloth or volatile solvents such as paint thinner. 138 w q q w Video heads • When mosaic-like noise appears on the playback picture, the video heads may be dirty. When the video heads are badly contaminated, the camcorder may show a blank blue screen or a warning. • For the best picture possible, after using the camcorder for approximately 20 hours, clean the video heads using Canon’s DVM-CL Digital Video Head Cleaning Cassette. If the “noise” remains, repeat the cleaning (up to maximum of 5 times). • Do not use a wet-type cleaning cassette, as this can cause damage. E Using the Camcorder Abroad Power sources • You can use the compact power adapter to operate your camcorder and charge battery packs in any country/area where the electricity supply is between 100 and 240 V AC, 50/60 Hz. Contact your Canon dealer for information about plug adapters for overseas use. TV playback • Although you can always play back your recordings on the LCD screen, your camcorder can only be connected to TVs which use its PAL system. This TV system is used in the following countries/areas: Algeria, Australia, Austria, Bangladesh, Belgium, Brunei, China, Denmark, Finland, Germany, Hong Kong Special Administrative Region, Iceland, India, Indonesia, Ireland, Italy, Jordan, Kenya, Kuwait, Liberia, Malaysia, Malta, Mozambique, the Netherlands, New Zealand, North Korea, Norway, Oman, Pakistan, Portugal, Qatar, Sierra Leone, Singapore, South Africa, Spain, Sri Lanka, Swaziland, Sweden, Switzerland, Tanzania, Thailand, Turkey, Uganda, United Arab Emirates, United Kingdom, Yemen, former Yugoslavia, Zambia. Additional Information 139 E Condensation Condensation may form on the camcorder when it is moved from a cold place to a warm place. Using the camcorder while condensation is present can damage both the tape and the camcorder. Condensation may form: When you take the camcorder from a cold place to a warm room When a cold room is heated rapidly When the camcorder is left in a humid room When the camcorder is taken from an air-conditioned room to a warm, humid place Protecting the camcorder from condensation • Before you take the camcorder to a warm or humid place where condensation is likely to become a problem, unload the cassette and put the camcorder in a plastic bag. Wait until the camcorder reaches room temperature before you take it out of the bag. What happens when condensation is detected • “CONDENSATION HAS BEEN DETECTED” is displayed for approximately four seconds. The power indicator flashes and the h mark flashes in the display. If there is a cassette in the camcorder, it stops automatically and “REMOVE THE CASSETTE” is displayed for approximately 4 seconds and v flashes in the display. If you have the beep turned on, it will sound. Remove the tape, otherwise it may be damaged. • The camcorder may not detect the condensation immediately — the condensation warning may not start flashing for 10 to 15 minutes. • You cannot load a cassette when condensation is detected. Additional Information What you should do • Remove the cassette, leave the cassette compartment open, and turn the camcorder off. • Leave it in a dry place until the condensation evaporates. After the condensation warning stops flashing, wait at least another hour before trying to use the camcorder. 140 Troubleshooting Refer to this checklist first if you have any problems with your camcorder. Possible explanations are given for each problem on the list — turn to the page numbers in parentheses for more information. E Make sure that the camcorder is properly connected if you are using it with a TV or VCR. Consult your dealer or service outlet if problems persist. Recording/Playback Problem Cause and/or what to do about it ? Nothing happens when I press the buttons. • The camcorder is not set to the appropriate mode ( 33, 85). • The cassette is not loaded or is set for erasure prevention ( 16-17). • The cassette has reached the end. • The power source is not properly connected, or the battery pack is exhausted or not properly attached ( 14-15, 135). • The function cannot be used in that recording program ( 50). ? The camcorder turned itself off. • The camcorder was in record pause mode for more than about 5 minutes ( 34, 116). • The battery pack is exhausted ( 15, 135). ? The cassette compartment stopped midoperation while loading/unloading a cassette. • The battery pack’s power is exhausted. Recharge or change to a new battery pack ( 15). ? The start/stop button does not work. • The cassette is not loaded or is set for erasure prevention ( 16-17). • The cassette has reached the end. ? There is no picture in the display. • The camcorder is not set to the appropriate mode ( 33, 85). ? There is a blank blue screen in the display. • You are attempting to play back or record copyright protected material ( 98). • The video heads are badly contaminated ( ? The camcorder does not focus. 139). • The camcorder is on manual focus ( 77). • The viewfinder lens needs adjusting ( 12). • The lens is dirty ( 138). Additional Information 141 Note: E • Some subjects are not suitable for autofocus. In these situations, you will often get better results using manual focus ( 77). Focus on something which is about the same distance away, lock the focus, and then point the camcorder at your original, hard-to-focus subject. Horizontal stripes Many subjects at different distances Behind glass Without much contrast (e.g. a white wall) Reflective surfaces (e.g. shiny car surfaces) Fast moving objects Dark subjects Night scenes Additional Information Recording/Playback (Cont.) 142 Problem Cause and/or what to do about it ? Some/all of the digital effects do not work. • There are a number of restrictions on using the digital effects. ( 60). ? The e (play) button does not work. • The camcorder is not set to TAPE PLAY (VCR) mode ( 85). • The cassette is not loaded ( 16). • The cassette has reached the end. ? There is a bright stripe on the screen. • When recording in dark places a bright light in the scene may cause a vertical light bar (“smear”) to appear. This is a normal feature of camcorders. ? The playback picture is rough (with mosaic-like noise). • The video heads need cleaning ( ? There is no picture on the TV screen. • AV \ DV OUT (Analog-digital converter) is not set to OFF in the menu ( 101). ? There is no picture on the TV screen, even though the tape is moving. • The video heads need cleaning ( 139). • The TV/VIDEO selector on the TV is not set to VIDEO ( 93-94). ? There is no sound coming from the speaker during playback. • The speaker has been turned off with the selector dial ( 87). • Headphones are being used. 139). Memory Card Operations Problem Cause and/or what to do about it ? The memory card will not insert. • It is not turned the right way ( 113). Turn it the right way and try inserting again. ? The mark flashes red in the display even though a memory card has been inserted. ? Nothing happens when I press the buttons. ? The PHOTO button does not work. ? The image cannot be erased. E • Turn the camcorder’s power off and back on again and remove and reinsert the card. If the mark continues to flash, format the memory card. • The camcorder is not set to CARD CAMERA or CARD PLAY (VCR) mode ( 116, 118). • The memory card is not inserted ( 113). • You are using an SD Memory Card and it is set for erasure prevention. Change the position of the protect switch. • The memory card is full. Erase images ( 120) or insert a new memory card. • The power source is not properly connected, or the battery pack is exhausted or not properly attached ( 14-15, 135). • The function cannot be used in that recording program ( 50). • The memory card is not loaded ( 113). • You are using an SD Memory Card and it is set for erasure prevention. Change the position of the protect switch. • The memory card is full. Erase images ( 120) or insert a new memory card. • You have reached the maximum file number. Set the file numbering to RESET through the menu ( 115) and insert a new memory card. • You are using an unformatted memory card. Format the card ( 131). • The image is protected ( 120). • You are using an SD Memory Card and it is set for erasure prevention. Change the position of the protect switch. Additional Information 143 Additional Information E 144 Miscellaneous Problem Cause and/or what to do about it ? The wireless controller does not work. • The remote sensor mode is set to OFFB in the menu ( 28). • The remote sensor modes of the wireless controller and the camcorder itself are different ( 28). • The batteries are dead or not inserted. ? The power indicator is flashing. • Check the screen displays ( ? There are air bubbles inside the lens. • This is unlikely, but may happen if you use the camcorder in places where the air pressure is low, in an airplane for example. The bubbles will disappear a week or so after you return the camcorder to normal atmospheric pressure. ? The camcorder malfunctions. • External interference may cause the camcorder’s microprocessor to malfunction temporarily. If random letters appear in the display or if normal operation is interrupted, remove and then replace the power source. ? The DV cable is connected correctly, but there’s nothing in the display. • Remove the cable and then reconnect it or turn the power off and back on again. ? The camcorder becomes warm during use. • This is not a malfunction. 135). The XM2 System Diagram (Availability differs from area to area) E VL-3 Video Light SS-650 Shoulder Strap DM-50 Directional Stereo Microphone WL-D77 Wireless Controller MiniDV Video Cassette CB-920 Car Battery Adapter (Available soon) DC-920 DC Coupler BP-900 Series Battery Pack MA-300 Microphone Adapter CA-920 Compact Power Adapter WD-58H BP-900 Series Battery Pack CH-910 Dual Battery Charger/Folder S-150 S-video Cable ZR-1000 Zoom Remote Controller TV STV-250N Stereo Video Cable PC-A10 SCART Adapter 220EX/420EX/550EX Speedlight VCR CV-150F DV Cable Digital Device PC Card Adapter BP-900 Series Battery Pack VL-10Li Battery Video Light SD Memory Card or MultiMediaCard FD Adapter Stereo Microphone (commercially available) IFC-300PCU USB Cable CV-150F/CV-250F DV Cable Additional Information HC-4100 Sysytem Case Personal Computer 145 Optional Accessories BP-915, BP-930, BP-945 Battery Packs E Extra batteries for use with the XM2. CB-920 Car Battery Adapter Power your camcorder, or recharge battery packs on the move. The car battery adapter plugs into your car’s cigarette lighter socket and runs off a 12–24 V DC negative ground battery. CH-910 Dual Battery Charger/Holder This holds two battery packs and can charge them both consecutively. It can then be connected directly to the XM2 to give twice the recording/playback time. It can also make use of the high performance battery pack BP-945, to give up to 14 hrs. recording time. WD-58H Wide-converter This lens decreases focal length by a factor of 0.7, giving you a wide perspective for indoor shots or panoramic views. DM-50 Directional Stereo Microphone This highly sensitive, super-directional microphone attaches to a camcorder’s advanced accessory shoe. It is a highly sensitive microphone that can be switched between functioning as a directional microphone (monaural) or a stereo microphone that also clearly picks up sounds arriving from the front of the microphone, for full recorded sound. VL-3 Video Light Additional Information Attach the Video Light to a camcorder when recording in dark rooms. When on its automatic setting, the Video Light turns on/off automatically according to the brightness level of shooting conditions. 146 VL-10Li Battery Video Light E This compact yet powerful video light can be used for both indoor and outdoor shooting. • Use the BP-900 Series battery packs to power the light. Approximate usage times are as follows: BP-915: 60 min., BP-930: 120 min., BP-945: 170 min. 220EX/420EX/550EX Speedlite Attach them to the XM2 to give SLR-style flash photography. 220EX 420EX 550EX MA-300 Microphone Adapter The MA-300 Microphone Adapter enables you to input audio to the XM2 with XLR connector-equipped microphones, and to convert video signals for the BNC connector. HC-4100 System Case A solid, lockable case that provides safe and stylish protection for the camcorder during transportation and storage. O RY CA SO VI INE DE N GENU NO This mark identifies genuine Canon video accessories. When you use Canon video equipment, we recommend Canon-brand accessories or products bearing the same mark. Additional Information 147 ACCES Screen Displays E You can select to display or hide the operating state of the camcorder on the LCD screen/viewfinder. The display also appears on a TV connected to the camcorder. TV SCREEN DATA CODE TV Screen Displays Press the wireless controller’s TV SCREEN button or set TV SCREEN to OFF in the menu to hide the displays on the TV screen. You can also use the custom key if it is set to TV SCREEN ( 56). (The displays appear white on the screen.) Displays will not be superimposed to any recordings you make with the camcorder. DISP. SET UP ( TV SCREEN••• ON 18) To turn TV SCREEN off, open the menu and select DISP.SET UP. Then select TV SCREEN, set it to OFF and close the menu. For instructions on connecting to a TV, see p. 93. Turning Off the LCD Screen Displays You can turn off the displays to give you a clear screen for playback. DISP. SET UP ( DISPLAYS•••• ON 18) To turn the displays off, open the menu and select DISP. SET UP. Then select DISPLAYS, set it to OFF <PLAYBK> and close the menu. Additional Information • If you turn the displays off, the LCD screen will be completely blank (also the connected TV screen), but the camcorder will continue to show warning/caution displays. • When operating the camcorder, the operating state display appears for 2 seconds. However, the displays do not disappear when using an index screen. 148 Screen Displays in TAPE CAMERA Mode E qwert y #0 @9 @8 @7 @6 @5 @4 @3 @2 @1 T SP REC MANUAL 0:12:34 S1/500 10sec 60min F1.8 SELF–T 0dB j h A1 ON CP NDMF VOICE MF CHAR.REC 16bit [DV IF]16:9 FADE–T PHOTO U N.Y. 12:00 AM 15.JAN.2002F C W u i o !0 !1 !2 !3 !4 !5 !6 #2 @0 !9 !8!7 #1 q White Balance ( 78) w Recording Reminder ( 33)/ Self-Timer Countdown ( 69)/ Photo Recording Timer e Image Stabilizer ( 44) r Backup Battery ( 136) t Recording Mode ( 35) y Condensation Warning ( 140) u Operating Mode ( 33) [REC, PAUSE, EJECT, STOP, K (Rec Search)] i Tape Counter o Remaining Tape !0 Remaining Battery Charge ( 135) !1 Remote Sensor Mode ( 28) !2 Microphone ( 54)/ Microphone Attenuator ( 55) !3 Audio Mode ( 54) !4 Wide Screen Mode ( 35) !5 Photo ( 91), Index ( 91), Movie Mode ( 48) !6 Audio Level Indicator ( 55) !7 Self-Timer ( 69)/ Interval Timer ( 67) !8 Optional video light, microphone or microphone adapter connected !9 AF/AE Locked in Photo Mode ( 46, 116) @0 @1 @2 @3 @4 @5 @6 @7 @8 @9 #0 #1 #2 Character Recording ( 84) Data Code ( 88) Time Zone/DST ( 30) Digital Effects ( 60) Manual Focus ( 77) Custom Preset ( 81) Gain ( 74) F Number ( 74) Shutter Speed ( 75)/ Exposure Lock ( 76)/ AE Shift ( 80) Recording Program ( 50) Zoom ( 40) DV Control ( 70) ND Filter ( 45) Screen Displays in TAPE PLAY (VCR) Mode q w !8 !7 !6 !5 !4 SP STOP 0:00:00:00 ST–1 ST–2 60min INDEX SEARCH j h A1 TV SCREEN NORMAL 0dB 16bit F1.8 16:9 1/500 DV IN 12:00 AM SPEAKER 1.JAN.2002 MIX/VARI. e r t y u i o !0 !1 !2 !3 y Remaining Battery Charge ( 135) u Remote Sensor Mode ( 28) i Microphone ( 54) o Audio Mode ( 54) !0 Wide Screen Mode ( 35) !1 DV IN ( 97) !2 Speaker/ Headphones Volume ( 87)/ Audio Level Indicator ( 55) !3 !4 !5 !6 Backup Battery ( 136) Data Code ( 88) Custom Key ( 56) Photo Search/Date Search/ Index Search ( 91)/ Audio Dubbing ( 106)/ AV Insert ( 103) !7 Mix Balance ( 109) !8 Audio Mix ( 109) Additional Information q Recording Mode ( 35) w Condensation Warning ( 140) e Operating Mode ( 85) [REC, PAUSE, EJECT, STOP, Special Playback, Audio Dubbing, AV Insert, etc] r Tape Counter t Remaining Tape 149 E Screen Displays in CARD CAMERA Mode qw @2 @1 @0 !9 !8 !7 !6 !5 W White Balance ( 78) Self-Timer Countdown ( Image Stabilizer ( 44) Image Quality ( 113) Remaining Card Capacity ( 117) y Image Size ( 114) u Remaining Battery Charge ( 135) 69) FINE 9999 1488 T MANUAL S1/720 F2.0 0dB ON CP NDMF MF 10SEC SELF–T j h A1 r t y u i 12:00 AM 15.JAN.2002F !4 q w e r t e !3 !2!1 !0 o i Remote Sensor Mode ( 28) o Condensation Warning ( 140) !0 Backup Battery ( 136) !1 Self-Timer ( 69) !2 Recording to Card ( 116) !3 AF/AE Locked ( 46, 116) !4 ND Filter ( 45) !5 Date and Time ( 32) !6 !7 !8 !9 @0 Manual Focus ( 77) Custom Preset ( 81) Gain ( 74) F Number ( 74) Shutter Speed ( 75)/ Exposure Lock ( 76)/ AE Shift ( 80) @1 Recording Program ( 50) @2 Zoom ( 40) Screen Displays in CARD PLAY (VCR) Mode q w 101–0001 9999/9999 1488 !2 !1 TV SCREEN !0 12:00 AM 15.JAN.2002 j h A1 e r t y u oi q w e r Additional Information Print Mark ( 123) Protect Mark ( 122) File Number ( 115) Current Image/Total Images ( 119) t Image Size ( 114) 150 y Remaining Battery Charge ( 135) u Remote Sensor Mode ( 28) i Condensation Warning ( 140) o Backup Battery ( 136) !0 Date and Time ( 88) !1 Custom Key ( 56) !2 Reading from card Caution Phrases The camcorder displays various caution phrases for approx. 4 seconds. E SET THE TIME ZONE, DATE AND TIME Time zone, date and time are not set. This message appears each time you turn the power on until you set the time zone, date and time ( 30). Battery pack is exhausted. Replace or charge the battery pack. CHANGE THE BATTERY PACK Replace the tape or change the position of the protect switch THE TAPE IS SET FOR ERASURE on the cassette ( 16, 17). PREVENTION REMOVE THE CASSETTE CHECK THE DV INPUT CONDENSATION HAS BEEN DETECTED The camcorder stopped operating to protect the cassette. Remove the cassette and retry the operation from the beginning ( 140). DV cable is not connected, or the connected digital device is turned off ( 97). Condensation has been detected in the camcorder ( 140). Tape reached the end. Rewind or remove the tape ( 86). TAPE END CHECK THE CASSETTE [REC MODE] CHECK THE CASSETTE [AUDIO MODE] CHECK THE CASSETTE [BLANK] HEADS DIRTY, USE CLEANING CASSETTE Recording is made in 16-bit or 12-bit 4-channel mode. Audio dubbing not possible ( 106). Camcorder detected a blank section on the tape. Audio dubbing or AV insert not possible ( 103, 106). Displayed immediately after you start recording when the video heads are dirty. Clean the video heads ( 139). You attempted to playback a copyright protected tape ( 98). Additional Information COPYRIGHT PROTECTED PLAYBACK IS RESTRICTED Recording is made in a mode other than the SP mode. Audio dubbing or AV insert not possible ( 103, 106). 151 E COPYRIGHT PROTECTED DUBBING RESTRICTED You attempted to copy a copyright protected tape. May also be displayed when an anomalous signal is sent during Analog Line-in recording ( 98, 99). Memory Card Caution Phrases Memory card not inserted into the camcorder ( 113). NO CARD THE CARD IS SET FOR ERASURE PREVENTION The SD Memory Card is set for erasure prevention. Replace the card or change the position of the protect switch ( 112). No title image is recorded on the memory card. NO TITLES No images are recorded on the memory card ( 116). NO IMAGES CARD ERROR A memory card error occurred. The camcorder cannot record/play back. The error may be temporary. If CARD ERROR disappears after 4 seconds and flashes red, turn the camcorder’s power off, remove the card and reinsert the card. If changes to green, you can continue recording/playback ( 116, 118). CARD FULL No free space remaining on the memory card. Replace with another memory card or erase images ( 125). NAMING ERROR File or folder numbers have already reached the maximum value ( 115). UNIDENTIFIABLE IMAGE The image is recorded in a JPEG format or any format that is not compatible with the camcorder, or the image contains corrupted data. The marked file cannot be edited ( 123). PRINT MARK ERROR Additional Information IN CARD POSITION 152 MEMORY CARD COVER IS OPEN Appears when you press the start/stop button in CARD CAMERA mode to inform you that no image has been recorded. The cover of the memory card compartment is open. Specifications XM2 Power supply (rated): Power consumption (AF turned on): Television system: Video recording system: Audio recording system: Image sensor: Tape format: Tape speed: Maximum recording time (80 min. cassette): Fast forward/rewind time: Lens: Focusing system: Minimum focusing distance: Maximum shutter speed: Minimum illumination: Recommended illumination: Filter diameter: Viewfinder: LCD screen: Microphone: Recording media: Number of recording pixels: Image format: File format: Estimated SD Memory Card SDC-8M capacities*: USB terminal: DV terminal input/output: E 7.2 V DC 4.8 W (Using viewfinder), 5.7 W (Using LCD screen) CCIR standard (625 lines, 50 fields) PAL colour signal 2 rotary heads, helical scanning DV system (Consumer digital VCR SD system); Digital component recording PCM digital sound: 16 bit (48 kHz/2 ch); 12 bit (32 kHz/4 ch); 1/4” 3CCD (charge coupled device), approx. 3 × 470,000 pixels (3 × 440,000 effective pixels) Videocassettes bearing the “MiniDV” mark. SP: 18.83 mm/s (3/4 ips), LP: 12.56 mm/s (1/2 ips) SP: 80 min., LP: 120 min. Approx. 2 min. 20 sec. (with a 60 min. cassette) F/1.6-2.9, 20x power zoom, f=4.2-84 mm TTL autofocus, manual focusing possible 1 m (3 ft 3 3/8 in), 1 cm (3/8 in) on maximum wide angle 1/16,000 sec. (1/700 sec. when using a memory card) 0.37 lx (at 1/8 sec. slow shutter) More than 100 lx 58 mm 0.44 in, TFT colour LCD, approx. 180,000 pixels 2.5 in, TFT colour, approx. 200,000 pixels Stereo electret condenser microphone SD Memory Card, MultiMediaCard 1488 × 1128 pixels, 640 × 480 pixels Design rule for Camera File system (DCF), Exif 2.2 compliant*, Digital Print Order Format (DPOF) compliant (only still images marked for printing) * This camcorder supports Exif 2.2 (also called “Exif Print”). Exif Print is a standard for enhancing the communication between camcorders and printers. By connecting to an Exif Print-compliant printer, the camcorder’s image data at the time of shooting is used and optimized, yielding extremely high quality prints. JPEG (compression mode: Fine/ Standard) 1488 × 1128: Fine 6 images/Standard 10 images; 640 × 480: Fine 47 images/ Standard 93 images * The actual number varies depending on the images. mini-B Special 4-pin connector (IEEE 1394 compliant) Additional Information 153 A/V terminal input/output: E S-video terminal input/output: MIC terminal input: Headphone terminal: LANC terminal: Operating temperatures: Dimensions: Weight: ø3.5 mm minijack Audio input: 0 dBV (47 kohm load)/ 47 kohms (AUDIO ATT ON) -10 dBV (47 kohm load)/ 47 kohms (AUDIO ATT OFF) Audio output: 4 dBm (47 kohm load)/3 kohms or less Video: 1 Vp-p/75 ohms unbalanced 1 Vp-p (Y signal), 0.3 Vp-p (C signal) ø3.5 mm stereo mini-jack -35 dBV (with 600 ohm mic)/5.6 kohms (MIC ATT ON) -55 dBV (with 600 ohm mic)/5.6 kohms (MIC ATT OFF) ø3.5 mm stereo minijack ø2.5 mm mini minijack 0 - 40°C (32 - 104°F) 118 × 136 × 306 mm (4 5/8 × 5 3/8 × 12 in) 1.12 kg (2 lb 7 1/2 oz) CA-920 Compact Power Adapter Power supply: Power consumption: Rated output: Operating temperature: Dimensions: Weight: 100 - 240 V AC, 50/60 Hz 24W Adapter mode: 7.2 V DC, 2.0 A Charger mode: 8.4 V DC, 1.5 A 0 - 40°C (32 - 104°F) 75 × 99 × 51 mm (3 × 3 7/8 × 2 in) 215 g (7 5/8 oz) (without power cord) BP-915 Battery Pack Battery type: Rated voltage: Operating temperature: Battery capacity: Dimensions: Weight: Additional Information Weight and dimensions are approximate. Errors and omissions excepted. Subject to change without notice. 154 Rechargeable Lithium Ion Battery 7.2 V DC 0 - 40°C (32 - 104°F) 1500 mAh 38.2 × 20.5 × 70.5 mm (1 1/2 × 3/4 × 2 3/4 in) 96 g (3 3/8 oz) Index 16:9 Guides ···············································36 16:9 Wide Screen ······································35 6-Second Auto Date.··································90 ‰ Easy Recording ···········································51 Editing to a VCR ········································95 Effects························································60 Erasing a Title ··········································129 Erasing All Print Marks ·····························124 Erasing Still Images···································125 Å Abroad, Using the Camcorder··················139 Accessories ··········································6, 146 AE Shift······················································80 Analog Line-in············································99 Analog-Digital Converter··························101 Aperture-Priority Av····································52 Audio Attenuator·····································106 Audio Dubbing ········································106 Audio Level Indicator ···························43, 55 Audio Mix ················································109 Audio Mode···············································54 Audio Monitor ·········································109 Auto ··························································51 Autofocus ··················································77 AV Insert ··················································103 Ï Faders ························································60 Fast Forward ··············································85 File Numbers ············································115 File Operation ··········································121 Focusing ····················································77 Formatting ···············································131 Frame Mode ··············································48 Ì Gain···························································74 Grip Belt ····················································13 Grip Zoom ·················································40 Guide Information······································32 ı Backup Battery·········································136 Battery Charger··········································15 Battery Pack ·······································15, 134 Beep ··························································37 Brightness ··················································42 Ó Handle Zoom ·············································40 Headphones···············································87 È Image Quality···········································113 Image Resolution ·····································114 Image Stabilizer··········································44 Index Screen ············································119 Index Write ················································56 Interval Timer ·············································67 Ç Card Access Display ·································114 Character Recording ··································84 Clear Scan··················································84 Color Bar ···················································65 Color Gain ·················································81 Color Phase················································81 Condensation ··········································140 Connections ······························93, 111, 134 Copying Still Images·································130 Custom Key ···············································56 Custom Preset············································81 Ò LANC ·························································96 LCD Brightness···········································42 LCD Mirror Mode·······································42 LCD Screen ················································41 Lens Cap····················································12 Lens Hood··················································12 LP Mode ····················································35 Î ˜ Maintenance ············································137 Manual ······················································53 Manual Focus·············································77 Memory Card···········································112 Menus ·······················································18 Microphone ···············································54 Microphone Attenuator ·····························55 Mix Balance ·············································109 Movie Mode ··············································48 Additional Information Data Code ·················································88 Date and Time ···········································30 Date Search ···············································91 Daylight Saving Time··································30 DC Coupler················································14 Demonstration Mode ·································37 Digital Effects ·············································60 Digital Zoom ··············································40 DV Control·················································70 DV Dubbing ···············································97 E 155 Ê ˆ E ND Filter·····················································45 Tally Lamp ··················································29 Tape Protection ··········································17 Telephoto ···················································40 Time Code ···········································36, 92 Time Zone··················································30 Title Mix···················································127 Tripod ························································38 Troubleshooting ·······································141 TV Screen···················································93 Ø Output Channel ·······································109 ∏ Photo Search··············································91 Playback Tape·····················································85 Memory Card·····································118 Playback Pause···········································86 Power Adapter···········································14 Power Save ················································34 Print Mark················································123 Protecting a Title ·····································128 Protecting an Image ·································122 ◊ Video Head Cleaning ·······························139 Video ID-1 System································36, 93 Videocassettes ···········································16 Viewfinder ·················································12 Viewfinder Brightness ································42  Record Pause Mode ···································33 Record Review ···········································49 Record Search ············································49 Recording Tape···············································33, 46 Memory Card·····································116 Recording Mode ········································35 Recording Programs ···································50 Remote Sensor···········································28 Rewind ······················································85 Í Additional Information S1 Video Terminal ······································93 Sand & Snow ·············································53 Screen Displays ········································148 SD Memory Card ·····································112 Self-Timer ··················································69 Setup Level ················································82 Sharpness ··················································81 Shutter Sound··········································115 Shutter Speed ············································75 Shutter-Priority Tv·······································52 Slide Show ···············································119 SP Mode ····················································35 Speaker······················································87 Speedlite ····················································66 Spotlight ····················································53 Standby Lever ············································34 S-video/S1-video ································93, 101 156 „ White Balance············································78 Wide Screen···············································35 Wind Screen ··············································54 Wireless Controller·····································27 Û Zebra Pattern ·············································83 Zebra Pattern Level ····································83 Zero Set Memory ·······································92 Zoom Speed···············································40 Zooming ····················································40 Menu at a Glance Camcorder Setting Function h h h h h h h h h h h h h h h h h h h h h h h h h h h h h h h h h h h h h h h h h h h h h h h h h h h h h h h h h h h h h h h h h h h h h h h h h h h h h h h h CAM. SET UP DISP. SET UP DISP. SET UP CAM. SET UP VCR SET UP VCR SET UP VCR SET UP DISP. SET UP VCR SET UP SYSTEM DISP. SET UP SYSTEM CAM. SET UP CUSTOM PRESET CUSTOM PRESET CARD OPERATION CUSTOM KEY DISP. SET UP DISP. SET UP DISP. SET UP SYSTEM DISP. SET UP CAM. SET UP DISP. SET UP SYSTEM CARD OPERATION CARD OPERATION CARD OPERATION CARD SET UP CARD OPERATION CAM. SET UP DISP. SET UP CAM. SET UP CARD SET UP CARD SET UP CAM. SET UP CAM. SET UP DISP. SET UP DISP. SET UP VCR SET UP VCR SET UP CAM. SET UP VCR SET UP VCR SET UP CARD OPERATION VCR SET UP CAM. SET UP E Additional Information 16:9 Effect 16:9 Guides 6-Second Auto Date AE Shift Analog-Digital Converter Audio Attenuator Audio Dubbing Audio Level Indicator Audio Mode Beep Card Access Display Character Recording Clear Scan Color Gain Color Phase Copying from Card to Tape Custom Key Set Custom Key On/Off Data Code Date/Time Select Date/Time Set Demonstration Mode Digital Zoom Displays DV Control Erasing a Title Erasing All Print Marks Erasing an Image File Numbers Formatting Grip Zoom Speed Guide Information Handle Zoom Speed Image Quality Image Resolution Image Stabilizer Interval Timer LCD Brightness LCD Mirror Mode Microphone Microphone Attenuator Movie Mode Output Channel Power Save Protecting a Title Recording Mode Self-Timer Submenu 157 E Camcorder Setting Additional Information Setup Level Sharpness Shutter Sound Tally Lamp Time Zone/DST Title Mix TV Screen Viewfinder Brightness Wireless Controller Zebra Pattern Zebra Pattern Level 158 Submenu Function h h h h h h h h h h h h h h h h h h h h h h h h h h h CUSTOM PRESET CUSTOM PRESET CARD SET UP SYSTEM SYSTEM →TITLE MIX DISP. SET UP DISP. SET UP SYSTEM CAM. SET UP CAM. SET UP PUB. DIE-173 DIGITAL VIDEO CAMCORDER E Instruction Manual CANON INC. Introduction Canon Europa N.V. P.O. Box 2262, 1180 EG Amstelveen, the Netherlands Preparations Canon UK Ltd. Ribcon Way Luton Bedfordshire LU4 9UR Telephone 0870-241-2161 Canon Australia Pty. Ltd 1 Thomas Holt Drive, North Ryde, N.S.W. 2113, Australia Telephone 805-2000, Fax 887-4484 Recording Canon New Zealand Ltd Fred Thomas Drive, Takapuna, P.O. Box 33-336, Auckland, New Zealand Telephone 486-1570, Fax 486-6420 Canon Singapore Pte. Ltd 79 Anson Road #09-01/06, Singapore 079906 Telephone (65)-532-4400, Fax (65)-221-2939 Playback Canon Hongkong Company Ltd 9/F, The Hong Kong Club Building, 3A Chater Road, Central, Hong Kong Canon Latin America, Inc. Sales & Enquiries: 703 Waterford Way Suite 400 Miami, FL 33126 USA Editing Digital Video Cassette Using a Memory Card Mini Printed on 100% reused paper. PRINTED IN JAPAN IMPRIME AU JAPON PAL Additional Information © CANON INC. 2002 DY8-9020-112-000 PUB. DIE-173 0031W544 PUB.DIE-173 0000N/XXXX