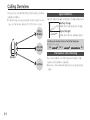
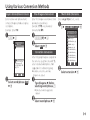
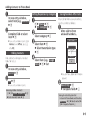
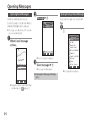
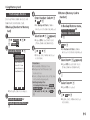
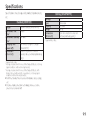
1
Thank you for purchasing WX01SH.
Read this guide thoroughly beforehand for proper usage.
Read Safety Precautions (P.13-1 - P.13-7) before using handset.
Before You Begin
Package Contents
. We are not liable for any damages resulting from use of
this product.
. Saved files and data may be lost/altered due to misuse or
malfunction of handset, after exposing handset to static
Battery (XN-BTWP01)
electricity or electrical noise, or during handset repair.
. Keep separate copies of important files and data; back up
to Memory Card as needed.
. This product and the information in this guide are subject
to change without prior notice.
. Unless noted otherwise, descriptions are based on default
settings in Standby. Operations and results may differ by
handset status.
. Sample screenshots, etc. are provided for reference
only; actual handset windows, menus, etc. may differ in
appearance.
i
Battery Cover
Handset (WX01SH)
. If any item is missing from the package, please contact
your dealer.
. AC Charger is not included in the package; purchase
XN-AAWP01 separately.
Table of Contents
1
Getting Started
Parts & Functions ・・・・・・・・・・・・・・・・・・・・・・・・・・・・・・ 1-1
Battery Installation ・・・・・・・・・・・・・・・・・・・・・・・・・・・・ 1-3
Charging Battery ・・・・・・・・・・・・・・・・・・・・・・・・・・・・・・ 1-4
Power On/Off ・・・・・・・・・・・・・・・・・・・・・・・・・・・・・・・・・ 1-5
Switching Interface Language to English ・・・・・・ 1-6
Display ・・・・・・・・・・・・・・・・・・・・・・・・・・・・・・・・・・・・・・・・・ 1-7
Main Indicators ・・・・・・・・・・・・・・・・・・・・・・・・・・・・・・・・ 1-8
Accessing Functions from Main Menu ・・・・・・・・ 1-10
Handset Phone Number ・・・・・・・・・・・・・・・・・・・・・・ 1-11
Mobile Manners ・・・・・・・・・・・・・・・・・・・・・・・・・・・・・・ 1-12
Security Codes ・・・・・・・・・・・・・・・・・・・・・・・・・・・・・・・・ 1-13
When Using Internet or Messaging for the First Time ・・ 1-15
2
Calling
Calling Overview ・・・・・・・・・・・・・・・・・・・・・・・・・・・・・・・ 2-1
Placing Calls・・・・・・・・・・・・・・・・・・・・・・・・・・・・・・・・・・・・ 2-2
Answering Calls ・・・・・・・・・・・・・・・・・・・・・・・・・・・・・・・・ 2-4
Engaged Call Operations ・・・・・・・・・・・・・・・・・・・・・・ 2-5
3
Text Entry
Text Entry Overview ・・・・・・・・・・・・・・・・・・・・・・・・・・・ 3-1
Entering Characters・・・・・・・・・・・・・・・・・・・・・・・・・・・・ 3-2
Using Various Conversion Methods ・・・・・・・・・・・ 3-4
Editing Characters ・・・・・・・・・・・・・・・・・・・・・・・・・・・・・ 3-5
4
Phone Book
Phone Book Overview ・・・・・・・・・・・・・・・・・・・・・・・・・ 4-1
Adding Contacts to Phone Book ・・・・・・・・・・・・・・ 4-2
Using Phone Book ・・・・・・・・・・・・・・・・・・・・・・・・・・・・・ 4-5
Using Speed Dial ・・・・・・・・・・・・・・・・・・・・・・・・・・・・・・・ 4-7
Editing Phone Book ・・・・・・・・・・・・・・・・・・・・・・・・・・・ 4-8
5
Messaging
Messaging Overview・・・・・・・・・・・・・・・・・・・・・・・・・・・ 5-1
Sending E-mail ・・・・・・・・・・・・・・・・・・・・・・・・・・・・・・・・・ 5-3
Sending Light Mail ・・・・・・・・・・・・・・・・・・・・・・・・・・・・・ 5-4
Opening Messages ・・・・・・・・・・・・・・・・・・・・・・・・・・・・ 5-5
Replying to/Forwarding Messages ・・・・・・・・・・・・ 5-7
Managing Messages ・・・・・・・・・・・・・・・・・・・・・・・・・・・ 5-8
6
Internet
Internet Overview ・・・・・・・・・・・・・・・・・・・・・・・・・・・・・ 6-1
Accessing the Internet ・・・・・・・・・・・・・・・・・・・・・・・・・ 6-2
Browsing Operations ・・・・・・・・・・・・・・・・・・・・・・・・・・ 6-4
Downloading Image & Sound Files ・・・・・・・・・・・・ 6-6
Using Bookmarks ・・・・・・・・・・・・・・・・・・・・・・・・・・・・・・ 6-7
Browser Settings ・・・・・・・・・・・・・・・・・・・・・・・・・・・・・・・ 6-9
ii
Table of Contents
7
Camera
Camera Overview ・・・・・・・・・・・・・・・・・・・・・・・・・・・・・・ 7-1
Capturing Images ・・・・・・・・・・・・・・・・・・・・・・・・・・・・・・ 7-2
Opening Captured Images・・・・・・・・・・・・・・・・・・・・・ 7-3
8
File Management & Connectivity
Data Folder ・・・・・・・・・・・・・・・・・・・・・・・・・・・・・・・・・・・・ 9-1
Using Files ・・・・・・・・・・・・・・・・・・・・・・・・・・・・・・・・・・・・・ 9-2
Managing Files & Folders ・・・・・・・・・・・・・・・・・・・・・・ 9-3
Using Infrared ・・・・・・・・・・・・・・・・・・・・・・・・・・・・・・・・・ 9-4
Using Memory Card ・・・・・・・・・・・・・・・・・・・・・・・・・・・ 9-6
10
Setting
Setting
Setting
Setting
Setting
iii
Settings
Handset Responses ・・・・・・・・・・・・・・・・・・・ 10-1
Operation Sounds ・・・・・・・・・・・・・・・・・・・・ 10-2
Display ・・・・・・・・・・・・・・・・・・・・・・・・・・・・・・・・ 10-3
Sub-display ・・・・・・・・・・・・・・・・・・・・・・・・・・・ 10-4
Date & Time ・・・・・・・・・・・・・・・・・・・・・・・・・・ 10-5
Services
Using Voicemail ・・・・・・・・・・・・・・・・・・・・・・・・・・・・・・・ 11-1
Using Call Forwarding ・・・・・・・・・・・・・・・・・・・・・・・・ 11-2
Using Split Billing Service ・・・・・・・・・・・・・・・・・・・・・ 11-3
Tools
Using Java™ Applications・・・・・・・・・・・・・・・・・・・・・・ 8-1
Using World Clock ・・・・・・・・・・・・・・・・・・・・・・・・・・・・・ 8-3
9
11
12
Appendix
Software Updates ・・・・・・・・・・・・・・・・・・・・・・・・・・・・ 12-1
Specifications ・・・・・・・・・・・・・・・・・・・・・・・・・・・・・・・・・ 12-2
Handset Materials ・・・・・・・・・・・・・・・・・・・・・・・・・・・・ 12-3
Menu List ・・・・・・・・・・・・・・・・・・・・・・・・・・・・・・・・・・・・・ 12-4
Customer Service ・・・・・・・・・・・・・・・・・・・・・・・・・・・・・ 12-7
13
Safety Precautions
Safety Precautions ・・・・・・・・・・・・・・・・・・・・・・・・・・・・ 13-1
General Notes ・・・・・・・・・・・・・・・・・・・・・・・・・・・・・・・・ 13-8
Parts & Functions
1
8
2
7
3
4
9
a
5
b
6
c
1 Earpiece
2 Display
3 Mic
1-1
4 External Device Port (with Port
Cover)
5 Notification Lamp
6 Sub-display
7 Infrared Port
8 Strap Eyelet
9 Camera (Lens Cover)
a Internal Antenna Area
b Speaker
c Battery Cover
Port Cover
. Close Port Cover after External Device
Port use.
Strap Eyelet
. Avoid metal Straps; may affect signal
reception.
Internal Antenna Area
. Do not cover or place stickers, etc.
over Internal Antenna area.
Sub-antenna
. Sub-antenna is attached inside handset
(see below). Be careful not to peel it
when removing Battery.
Battery
Sub-antenna
Handset Positions
■Handset Closed
Keep handset closed when not in
use.
■Handset Open
Open handset to place or answer
calls, enter text, etc.
Parts & Functions
Handset Keys
. Keys are indicated in this guide as
shown.
1
2
3
4
5
c
6
d
7
8
9
e
a
b
g
h
f
i
1 Multi Selector (right) d
Open Call Log (Dialed).
2 Multi Selector (up) a
Open Calendar. Long Press to
open Information window.
3 Center Key %
Open Main Menu. Long Press to
activate/cancel Keypad Lock.
4 Multi Selector (left) c
Open Call Log (Received). Long
Press to open profile (My Details).
5 Mail Key B
Open Messaging menu. Long
Press to open E-mail Composition
window.
6 Speed Dial & A/a Key '
Open Speed Dial/Mail.
7 Clear/Back Key $
Play Answer Phone messages.
Long Press to activate/cancel
Answer Phone.
8 Start Key !
Open dial window.
9 Dialpad 0 - 9
Enter numbers. Long Press to
open Phone Book.
a N Key (
Enter N and P. Long Press to send
Location Information.
b Mode & Manner Key )
Select handset mode. Long Press
to activate/cancel Manner mode.
c Web Key A
Open Browser menu. Long Press
to access home page.
d Camera & Text Key &
Activate Camera. Long Press to
open Camera menu.
e Multi Selector (down) b
Open Phone Book. Long Press to
open new entry window.
f Power & End Key "
Long Press to power off.
g # Key #
Enter #. Long Press to activate/
cancel Manner mode.
h Data Folder & Drive Key ~
Open Data Folder. Long Press to
active/cancel Drive mode.
i Shutter Key I
Handset Closed: Toggle Clock
view.
Handset Open: Long Press to
activate Camera.
Multi Selector
. In this guide, Multi Selector operations
are indicated as follows:
e Press a or b
f Press c or d
g Press a, b, c or d
1-2
Battery Installation
About Battery
. Charge Battery at least once every six
months; uncharged Battery may die
or affect files/settings.
. Depending on usage, bulges may
appear near end of battery life; this
does not affect safety.
. Replace Battery if operating time
shortens noticeably.
. Clean Battery terminals and charging
terminals with a dry cotton swab, etc.
Lithium-ion Battery
. Handset requires a lithiumion battery. Lithium-ion
batteries are recyclable.
. To recycle a used lithiumion battery, take it to
any shop displaying the
symbol to the right.
. To avoid fire or electric shock, do not
short circuit or disassemble Battery.
1-3
Inserting & Removing Battery
1 Remove Battery Cover
3 Replace Battery Cover
Battery
Cover
. Position and slide Battery Cover
gently as shown all the way.
. Press and slide as shown.
2 Insert Battery
. With logo side facing up, align
Battery terminals with contacts.
Removing Battery
. Power off and lift Battery as shown.
Charging Battery
AC Charger is not included in the
package; purchase XN-AAWP01
separately.
Notification AC 100 V Outlet
Lamp
External
Device Port
Release
Tabs
Port Cover
Charger
Arrows Up Connector
1 Open Port Cover as
shown
Important AC Charger Usage Notes
. Handset/AC Charger may become
warm while charging.
. Retract blades after charging. Do not
pull, bend or twist cord.
. Do not use commercial chargers that
allow headphone use while charging;
may cause malfunction.
retract blades
5 Remove Charger
connector from handset
Blades
AC Charger
4 Unplug AC Charger and
. Close handset after opening Port
Cover.
2 Insert Charger connector
to External Device Port
. Squeeze release tabs and pull
straight out.
6 Replace Port Cover
3 Extend blades and plug
AC Charger into AC outlet
1
2
. Notification Lamp illuminates red
while charging.
. Notification Lamp goes out when
Battery is full.
1-4
Power On/Off
Power On
1 " (Long Press)
2 After a while...
■Activating Keypad Lock
1 % (Long Press)
Keypad is locked:
press and hold
center key to
unlock.
OK
. Standby appears.
■When Carrying Handset
Keep handset closed; activate
Keypad Lock to prevent accidental
operation.
1-5
When Keypad Lock is Active
. Handset keys are locked (even for
powering off).
. Press ! to answer calls; Keypad Lock
reactivates after the call.
Canceling Keypad Lock
% (Long Press)
Powering Off
1 " (Long Press)
. After Power Off Graphics,
handset shuts down.
Switching Interface Language to English
1 % S 設定 S % S f 音・表示
2 Language S %
3 English S %
Switching Back to Japanese
% S Settings S % S f Sound/Display
S 言語選択 S % S 日本語 S %
1-6
Display
Standby
Most operations start from Standby.
Indicators appear at the top of
Display.
■Information Window
Opens at the bottom for missed
calls, new mail, etc.
. For more about indicators, see P.1-8.
Information
1 Message
Clear
◎
Exit
. Information label (e.g., Message)
and count appear. Select an item and
press % to open it.
Opening Unread Information
% S Phone S % S Information S
%
Display Saving
Display goes completely dark after
Display Saving time elapses. Press
any key (except " during a call) to
cancel Display Saving and reilluminate
Display.
Backlight
. Backlight turns off after Time Out time
elapses. Press 0 - 9 to illuminate it
(key press may affect active function).
In Box
. Display goes completely
Ueda Mikio dark during a
call. (Backlight does not turn off first.)
Softkeys
Functions/operations assigned to B,
% and A appear at the bottom of
Display.
Date ↓
Options
OK
B
%
1/1
Reply
A
Submenus
. When Options appears, press
corresponding key to open submenu
for related functions/settings.
1-7
Main Indicators
Display Indicators
■Basic Status
■Notifications
Unread Mail
Unreceived Mail
Signal Strength*
Battery Strength
* More bars indicate stronger signal.
■Function Status
Incoming Call
Call in Progress
Automatic Sending of Location
Information Active
■Transmissions
Answer Phone Active & Message
Recorded
SSL Browsing
Answer Phone Canceled &
Message Recorded
Receiving Mail
Packet Transmission Active
Software Update Result
Updating Software
Memory Card Unusable/
Misinserted
USB Cable Connected
■Settings
JavaTM Application Active
Offline Mode
JavaTM Application Paused
Answer Phone Active
Memory Card Inserted
Calendar/Task (Alarm Set)
Accessing Memory Card
Calendar/Task (Alarm Unset)
Reading Memory Card
Alarm Set
Formatting Memory Card
Manner Mode
USB Transmission Active
Infrared Transmission Active
Infrared File Transfer
Drive Mode
Original Mode
Keypad Lock Active
Ringtone (Silent)
Vibration Active
Function Lock (Once) Active
1-8
Main Indicators
Sub-display Indicators
■Basic Status
Signal Strength*
Battery Strength
* More bars indicate stronger signal.
■Notifications
Missed Call
Answer Phone Message
Recorded
Unread Mail
Unreceived Mail
Software Update Available
Message Delivery Failure
■Handset Status
Alarm
Calendar Alarm
Task Alarm
1-9
Activating Sub-display
I
Sub-display Clock
. Press I to toggle view.
Accessing Functions from Main Menu
1%
2 g Select menu item S %
Tools
PIM/Life
Connectivity
Calendar
Alarms
Tasks
Calculator
Notepad
Voice Recorder
World Clock
◎
. Main Menu opens.
SH-web
■Tabs
Menus/lists in a single window
appear on separate tabs; use f to
toggle tabs.
Tools
PIM/Life
Connectivity
Calendar
Alarms
Tasks
Calculator
Notepad
Voice Recorder
World Clock
◎
. Menu/window opens.
. If submenu opens, use e to
select an item and press %.
◎
Tabs
Reverse Navigation
. Press $. If confirmation appears,
follow onscreen prompts.
Returning to Standby
. Press ". If confirmation appears,
follow onscreen prompts.
1-10
Handset Phone Number
1% S 0
Editing Profile
1 In My Details, f (select
Tel/Email Details
Settings
070392XXXX5
[email protected]
<Add New Entry>
tab)
2 Select item S A
Edit My Details
Tel 1:
070392XXXX5
Add Phone Number:
Options
View
Email 1:
Infrared
. Handset number appears. (My
Details opens.)
[email protected]
Add Email Address:
Address:
Office:
Homepage:
◎
3 Select item S % S Edit
S%SA
1-11
Mobile Manners
Please use your handset responsibly.
Take care not to disturb others
when using handset.
. Power off in theaters, museums and
other places where silence is the norm.
. Refrain from use in restaurants, hotel
lobbies, elevators, etc.
. Observe signs and instructions
regarding handset use aboard trains,
buses, etc.
. Refrain from use that interrupts the
flow of pedestrian or vehicle traffic.
Manner Mode
Mute most handset function sounds.
1 ) (Long Press)
When Manner Mode is Active
. Ringtones and other sounds are
muted.
. Handset vibrates for incoming
transmissions, etc.
. Shutter click still sounds at fixed
volume.
Canceling Manner Mode
) (Long Press)
Drive Mode
Disable ringtones and Vibration for
incoming transmissions. The caller
will be notified that you are driving
and cannot answer.
1 ~ (Long Press)
Canceling Drive Mode
~ (Long Press)
Offline Mode
Suspend signal transmission and
reception.
. Handset will be unable to place/
receive calls, send/receive messages,
access the Internet, etc.
1 % S Settings S %
S f Network
2 Offline Mode S %
3 On S %
. Offline Mode activates.
Canceling Offline Mode
After 2, Off S %
Manner mode
selected.
OK
. Manner mode activates.
Drive mode
selected.
OK
. Drive mode activates.
1-12
Security Codes
Handset Code and Administrator
Code are required for handset use;
save both codes beforehand.
Handset
Code
Use or change some
functions.
Administrator Required for Reset
Code
Settings and Reset All.
. Do not forget Security Codes.
. Do not reveal Security Codes. We are
not liable for misuse or damages.
. Guide descriptions are given
assuming that Handset Code and
Administrator Code are saved.
If Security Code is Unsaved
. Code setup message/window appears
whenever Security Code is required.
Incorrect Code Entry
. Message appears for incorrect code
entries; retry.
Saving Handset Code
Enter four to eight digits.
1 % S Settings S %
S f Phone/
2 Locks S %
save S %
Changing Handset Code
After 3, enter current Handset Code
S % S From 4
■Need/UnNeed Setting
Locks
Function Lock
Off
Application Lock
Off
Handset Code Setti...
Remote Lock
Administrator Sett...
◎
. Locks menu opens.
For enhanced security, set Need/
UnNeed Setting to Need; then
Handset Code will be required to
delete all files/entries, etc.
. Guide descriptions are given
assuming that Need/UnNeed Setting
is set to UnNeed.
1 In Locks menu, Handset
Code Settings S %
3 Handset Code Settings
2 Need/UnNeed Setting
4 Enter Handset Code to
3 Enter Handset Code S %
S % S Save Handset Code
S%
save S %
1-13
5 Re-enter Handset Code to
S % S Need or UnNeed
S%
Security Codes
Saving Administrator Code
Enter four to eight digits.
1 In Locks menu,
Administrator Setting
S%
2 Register Administrator
Code S %
3 Enter Administrator Code
to save S %
4 Re-enter Administrator
Code to save S %
Changing Administrator Code
After 2, enter current Administrator
Code S % S From 3
1-14
When Using Internet or Messaging for the First Time
If this is your first use of Internet
or messaging, perform online signup to establish access to CLUB
AIR-EDGE (WILLCOM's Internet
connection point).
. Online sign-up also provides
WILLCOM mail address.
. Transmission fees do not apply.
1A
Browser
Willcom Site
Home
Bookmark
Internet Search
Open Web page
History
Page memo
Online sign up
Settings
◎
. Browser menu opens.
. Alternatively, press B to open
Messaging menu and proceed.
1-15
2 Online sign up S %
. Online sign-up window
(Japanese) opens.
3 Complete setup
S これで設定を行う S %
. Online sign-up starts. Follow
onscreen instructions.
Important Online Sign-up Notes
. Confirm signal strength before starting
online sign-up.
. Online sign-up may be unavailable
depending on your contract
conditions.
Messaging Settings on Server
. After completing first online signup, use online sign-up for messaging
settings on Server (automatic message
retrieval, rejection settings, etc.) as
needed. See onscreen instructions for
setting items and procedures.
Advanced
S Deleting information provided
through online sign-up
In online sign-up window, Delete
S % S Yes S %
Calling Overview
Place/receive calls to/from WILLCOM handsets, landlines
and other mobiles.
. Calling charges vary depending on the other party's device
type, etc. For details, contact WILLCOM Service Center.
Other
Mobiles
WILLCOM
Handsets
Handset
Landlines
2-1
Calling
Signal Conditions
Confirm signal strength and Battery charge beforehand.
Battery Charge
More bars indicate greater charge.
Signal Strength
More bars indicate stronger signal.
Switching to Another Antenna for Better Reception
. Follow these steps:
% S Settings S % S f Network S Re-search Signal S %
International Calls & Roaming
Place international calls from Japan on handset. (No
separate subscription is required.)
. Handset is not available for placing/receiving calls outside
Japan.
Placing Calls
Entering Number Directly
1 Enter number with area
code S !
Dialing from Call Log
Dialing from Phone Book
1 c (Received) or d (Dialed) 1 b S f Select tab
Call Log
All
Calling...
Dialed
Dialed
(Ranking)
Received
Ueda Mikio
XX/XX/XX 15:05
(hiragana row, alphabet
or *) for first character of
last name
070392XXXX6
XX/XX/XX 11:05
ま や ら わ A *
Ueda Mikio
Kimura Tetsuya
Kondo Koichi
Ota Ken
Ueda Mikio
070392XXXX1
Cancel
. Wait for receiver to accept the
call.
2 " S Call ends
After Calls to Unsaved Numbers
. Save to Phone Book confirmation
appears. Select New Entry or New
Detail and press % to save number;
new entry window or contact search
window opens, respectively.
Options
View
2 Select record S %
3%
. Wait for receiver to accept the
call.
4 " S Call ends
Ueda Mikio
070392XXXX1
:[email protected]
Options
View
Switch
2 Select contact S %
3 Select number S !
. Wait for receiver to accept the
call.
4 " S Call ends
2-2
Placing Calls
Placing International Calls
Place international calls easily
through WILLCOM's international
calling service.
1 Enter number S B
S Int'l Call S %
Int'l Calling
Enter Code
イギリス(GBR)
イタリア(ITA)
スイス(CHE)
スペイン(ESP)
ドイツ(DEU)
ポルトガル(PRT)
オランダ(NLD)
フランス(FRA)
モナコ(MCO)
◎
. Country code list appears.
2 Select country code S %
3!
. Wait for receiver to accept the
call.
4 " S Call ends
2-3
■Direct Entry
1 Enter 010 (access
number)
2 Enter country code (e.g.,
1)
3 Enter number (with area
code) S !
. Omit the first 0 of the number
except when calling some
countries/regions.
. Wait for receiver to accept the
call.
4 " S Call ends
Answering Calls
Answering Calls
1 When a call arrives...
Voice Calling
When You Cannot Answer
■Placing Calls on Hold
1 When a call arrives, "
. Call connects while the call is on
hold.
. Press ! to answer the call on
hold.
■Recording Caller Messages
Ueda Mikio
070392XXXX1
Options Answer
. Incoming Call window opens.
2!
1 When a call arrives, B S
Record Message S %
. Answer Phone is set.
Playing Messages
$ S Select record S %
. Call connects.
3 " S Call ends
2-4
Engaged Call Operations
Adjusting Earpiece Volume
1 During a call, e
Sending Touch Tone Signals
Muting Microphone
1 During a call, A
Recording Caller Voice
1 During a call, B
>>
090392XXXX1
◎
. Recording starts. To stop, press
%.
2-5
2 Enter touch tone digits
. Touch tone signal is sent.
Sending Touch Tone Signals via Phone
Book
After 1, B S Send Tone by
Phonebook S % S Select contact S
% S Select number S %
CallTime 0:03
2 Voice Record S %
1 During a call, B
S Dial number S %
. Press A again to cancel.
Options
Phonebook
My Details
Check Messages
Dial number
Voice Record
Playing Recorded Messages
$ S Select record S %
Text Entry Overview
Text Entry Windows
When available, text entry window
(such as the one shown to the right)
opens while messaging or using
Phone Book.
Text Entry Basics
Message:
0/XX K
1
. Unless noted otherwise, descriptions
in this chapter are for text entry
windows.
こんにちは お疲れさま
これから 最近 どう
ねぇ ありがとう 今
うん お疲れ お疲れ様
ゴメン 大丈夫 はい
ホント 本当 了解 明日
Options Done Add Art
Message:
0/XX K
こんにちは お疲れさま
これから 最近 どう
ねぇ ありがとう 今
うん お疲れ お疲れ様
ゴメン 大丈夫 はい
ホント 本当 了解 明日
Options Done Add Art
&
0/XX K
Input Mode
○○Kanji
○○アイウ
○○アイウ
○○Abc
●●Abc
○○123
◎
Use e to select modeS%
3-1
/
. Press ! to reverse-toggle options.
1
!
@
!
_
1
■Entering Characters Assigned to the Same Key
After entering a character, press d or Long Press that
key.
2
d
a
22
a
444 4 (Long Press)
i
Pred. Beginning
1
.
Pred. Beginning
Enter hiragana, kanji, katakana (double-byte and singlebyte), alphanumerics (double-byte and single-byte),
symbols and pictograms. Switch entry modes as needed.
1
@
Character Types & Entry Modes
Message:
Use Dialpad to enter characters. Multiple characters are
assigned to each key. Press a key to toggle character
options for that key.
Opening Help
B S Help S %
i
ab
44
ih
Entering Characters
Hiragana
Enter すずき in Kanji (Hiragana)
mode.
1 333 (す) S d
S 333 (す) S ( (ず)
S 22 (き)
Message:
すずき
0/XX K
Mode
鈴木 スズキ 鈴城 鈴置
すずき 鱸 寿松木
SUZUKI スズキ Ffb Ffb
FFB FFB ffbffb
33333322
33333322
No Pred. Confirm Kana
2 % (Confirm)
3%
Kanji
Convert すずき to 鈴木.
1 Enter すずき
Message:
鈴木
. Word suggestions change as
hiragana are entered. (Predictive)
. Long Press & to toggle
suggestion mode between
Standard, Literary, Spoken and
Automatic. (Personal Mode)
2 b S Select 鈴木
Message:
鈴木
0/XX K
Predict
1/XX
鈴木 スズキ 鈴城 鈴置
すずき 鱸 寿松木
SUZUKI スズキ Ffb Ffb
FFB FFB ffb ffb
33333322
33333322
←Range Confirm No Pred.
. To exit suggestion list, press $.
4/XX K
PrevUsage
の は に 、 。 ? が
を です と で ! も
って か っての だ ね
よ から だけど ですか
でしょ でしょう でも
だった でした
Options Done Add Art
. Words likely to follow the entry
appear. (Previous Usage)
Segmenting Hiragana to Convert
Separately
Before confirming entry, B or A
Toggling Conversion Method
. Before confirming entry, press A to
toggle Predictive and Non-Predictive
suggestions.
Deleting Words/Phrases from Entry Log
Enter hiragana S b S Select word/
phrase S & (Long Press) S Yes S %
3-2
Entering Characters
Katakana
Switch to Double-byte Katakana
mode and enter ジュン.
1 & S アイウ S %
2 33 (シ) S ( (ジ)
S 88 (ユ) S ' (ュ)
S 000 (ン) S %
. Entry window for pictograms,
Decorative pictograms and symbols
opens. (Log appears if any of
these characters has been used.)
2 & (toggle tabs) S B or A
(toggle lists)
Message:
Message:
ジュン
1(
Web Pict
All
Pict 6
Options
Done
Add Art
Pictograms, Decorative Pictograms & Symbols
. May be unavailable depending on
entry mode.
. Decorative pictograms are available
for E-mail message text only.
3-3
0/XX K
6/XX K
Deco Pict
◎
Symbols
Pict 2
. List of pictograms, Decorative
pictograms or symbols appears.
. While entering message text,
press ' in pictogram list to
toggle Web pictograms and all
pictograms.
3 Select pictogram,
Decorative pictogram or
symbol S %
. To exit, press $.
Emoticons
1 B S Emoticons S %
Emoticons
(^O^)
o(^-^)o
(^O^)/
p(^^)q
(>_<)
(N_N)
m(__)m
f^_^;
(:_;)
(-.-;)
◎
2 Select emoticon S %
Alternative Emoticon Entry Method
. In Kanji (Hiragana) mode, enter かお
or a descriptive word such as わーい or
うーん, then convert the entry.
Using Various Conversion Methods
Hiragana to Katakana/Alphanumeric Conversion
Enter katakana or alphanumerics
in Kanji (Hiragana) mode using key
inscriptions.
Example: Enter PM
1 76 S A
Message:
まは
0/XX K
One-Hiragana Conversion
Enter first hiragana and convert it to
previously entered kanji.
Example: すずき was previously
converted to 鈴木.
1 333 (す) S b
2 Select 鈴木 S %
Correction Conversion
Kanaei
1/XX
まは マハ マハ Pm Pm
PM PM pm pm 76
76 76分 7時6分 76年
7月6日 7/6
←Range Confirm No Pred.
2 Select word/phrase (PM)
S%
After mistyping hiragana assigned to
the same key (e.g., い instead of う),
enter intended word/phrase from
suggestion list without retyping.
. Available when three or more
hiragana are typed.
Mail & Web Extensions
Enter .co.jp, http://, etc., easily.
1 B S Quick Addr. List S %
Quick Address List
@willcom.com
@pdx.ne.jp
@softbank.ne.jp
@ezweb.ne.jp
@docomo.ne.jp
@d.vodafone.ne....
@h.vodafone.ne....
@t.vodafone.ne....
@c.vodafone.ne....
@k.vodafone.ne....
◎
2 Select extension S %
1 Type hiragana S Before
selecting word/phrase, a
. Corrected word suggestions
appear.
2 Select word/phrase S %
3-4
Editing Characters
Deleting & Editing
Correct また、お願いします to また明日
お願いします.
1 Select character
3 Select target location
S Enter characters
Message:
20/XX K
また明日お願いします
Message:
Copy/Cut & Paste
1 B S Cut or Copy S %
S Select first character
S%
Cut
18/XX K
また、お願いします
20/XX K
お願いしますまた明日
PrevUsage
の は 以降 こそ
どうする どこに から
暇 学校 まで 休み
午前中 仕事 に 、 。
? が を です と で !
も
って か っての
Options Done Add Art
Options
Done
Add Art
2$
. Highlighted character is deleted.
3-5
Recovering Deleted Characters
. Press ! to recover characters deleted
with $.
Deleting All Characters
. Long Press $ at text end. To delete
characters on and after cursor, select
the first character of text and Long
Press $.
End
Quit
. To cancel and start over, press A.
2 Highlight text range S %
Editing Characters
3 Select target location
S ( (Long Press)
Message:
20/XX K
また明日お願いします
Options
Done
Add Art
. Text is entered.
3-6
Phone Book Overview
Save phone numbers, mail addresses and other
information, set handset responses to incoming calls/
new messages, and more.
Name
Save first and last names with reading.
Phone Number Save up to five phone numbers.
Split Bill
Set whether to use Split Billing service for
all calls to the number.
Mail Address
Save up to five mail addresses.
Category
Classify contact into selected category.
Address
Save postal code, country, state/province,
city, etc.
Office
Save company name, department and
title.
Picture
Save an image that appears for incoming
calls.
Ringtone &
Set responses to incoming transmissions.
Vibration
Secret
Hide contact and require Handset Code for
access.
. Save homepage, memo, blood type, birthday and star sign
as needed.
Incoming Calls from Saved Contacts
Name saved in Phone Book appears; image appears and
handset responds with ringtone/Vibration according to
settings.
Voice Calling
Saved
Contact
Handset
Ueda Mikio
070392XXXX1
Options Answer
Exchanging Files with Memory Card & Other Devices
Back up contacts to Memory Card on handset or transfer
them to other devices using Infrared transmission.
. For more about file backup, see P.9-8.
. For more about Infrared transmission, see P.9-4.
Back Up Important Information
If handset is left with no Battery inserted or an
exhausted one, contacts may be altered/lost; handset
damage may also affect information recovery. Keep
separate copies of contacts, etc.
4-1
. We are not liable for any damages resulting from loss/
alteration of contacts.
Memory
Card
Infrared
Devices
Handset
Adding Contacts to Phone Book
Saving Basic Items
Enter a name, phone number and
mail address (enter at least one of
these items) and classify the contact.
1 % S Phone S % S Add
New Entry S %
3 Add Phone Number: S %
S Enter number S %
S Select icon S %
S Select line type S %
S Select category S %
New Entry
Add Phone Number:
Email 1:
New Entry
[email protected]
First Name:
. New entry window opens.
2 Last Name: S %
Add Email Address:
Mikio
Reading-Last Name:
Category:
Ueda
Friends
Reading-FirstName:
Address:
Mikio
Tel 1:
S Enter last name S %
S First Name: S %
S Enter first name S %
Office:
070392XXXX1
Split Bill:
Homepage:
Off
◎
Add Phone Number:
Add Email Address:
◎
New Entry
Save
. To save additional numbers,
repeat 3.
Last Name:
Ueda
First Name:
4 Add Email Address: S %
Mikio
Reading-Last Name:
Ueda
S Enter mail address S %
S Select icon S %
Reading-FirstName:
Mikio
Add Phone Number:
Add Email Address:
Category:
◎
5 Category: S %
Save
. Characters entered for names
(reading for kanji) appear.
. To save additional mail
addresses, repeat 4.
Save
. Set handset responses to
incoming calls/new messages
and save other information as
needed. For details, see P.4-3.
6A
. Contact is saved.
Enabling/Disabling Split Billing Service
After 3, Split Bill: S % S On or Off
S % S From 4
. A separate subscription is required to
use service. For details, see P.11-3.
4-2
Adding Contacts to Phone Book
Setting Responses to Transmissions
To set handset responses to
incoming transmissions after setting
basic items, follow these steps
before saving contact.
New Entry
Tone-Voice Call:
1 In new entry window,
2 Switch On/Off S % S On
Tone-New Message:
Vibration-Call:
S % S Vibration Pattern
S%
Off
Vibration-Message:
Off
Secret:
Off
Save
■Ringtones
1 In new entry window,
Tone-Voice Call: or ToneNew Message: S %
2 Assign Tone S %
S Select folder S %
S Select tone/file S %
. New entry window returns.
4-3
■Vibration
Vibration-Call: or
Vibration-Message: S %
Picture:
◎
Canceling Ringtone Setting
After 1, Remove Tone S % S Yes
S%
3 Select pattern S % S $
. New entry window returns.
Canceling Vibration Setting
After 1, Switch On/Off S % S Off
S%S$
2 Pictures S %
S Select image S %
. New entry window returns.
Capturing Image for Setting
After 1, Take a Photo S % S
Frame subject on Display S % S %
Canceling Image Setting
After 1, Remove Picture S % S Yes
S%
Saving Additional Information
To save additional information after
saving basic items, follow these
steps before saving contact.
New Entry
Address:
Office:
Homepage:
■Image
Note:
1 In new entry window,
Birthday:
Picture: S %
Constellation:
No Setting
Blood Type:
◎
Save
Adding Contacts to Phone Book
1 In new entry window,
select item (e.g., Address:)
S%
2 Complete field or select
item S %
. New entry window returns. (For
Address: and Office:, press A
after 2.)
Hiding Contacts
Hide contact and require Handset
Code for access.
1 In new entry window,
Secret: S %
2 On S %
. New entry window returns.
Accessing Hidden Contacts
b S B S Unlock Temporarily S %
S Enter Handset Code S %
Setting Responses by Category
1 % S Phone S %
S Set Category S %
2 Select category S B
3 Select item S %
S Select transmission type
S%
4 Select item (e.g., Assign
Tone) S % S Set
Saving Numbers After Calls
After calls to/from unsaved numbers,
save the number as follows.
1 After calls to/from
unsaved numbers...
Call Ended
Save this number
to your Phone Book
?
New Entry
Detail
Call New
Time:
No
00:10:02
◎
. Save to Phone Book confirmation
appears.
2 New Entry S %
S Complete fields S A
Saving to an Existing Contact
In Save to Phone Book confirmation,
New Detail S % S Select contact S
% S Complete fields S A
4-4
Using Phone Book
Dialing from Phone Book
1b
. Contact search window (By あか
さたな) opens.
2 f Select tab (hiragana
row, alphabet or *) for
first character of last name
S Select contact S %
Sending Messages from Phone Book
1 In contact details window,
select mail address S %
E-mail
Opening from Other Functions
Example: Enter a recipient from
Phone Book when sending E-mail.
1 B S Create E-mail S %
2 Select recipient field S %
[email protected]
Kimura Tetsuya
S % S Open Phone Book
S%
Text
ま や ら わ A *
Kimura
Tetsuya
Tel/Email Details
Settings
070392XXXX4
[email protected]
<Add New Entry>
Options
OK
Send
. E-mail Composition window
opens.
2 Complete message S A
Options
Edit
. Contact details window opens.
3 Select phone number S
!
. Omit number selection step if
only one number is saved.
4-5
Sending Light Mail
In contact details window, select
phone number S % S Create
Message S % S Complete message
S Send S %
Ueda Mikio
Kimura Tetsuya
Kondo Koichi
Ota Ken
Ueda Mikio
070392XXXX1
:[email protected]
Options
◎
Switch
. Contact search window opens.
3 Select contact S %
4 Select mail address S %
. Recipient is entered.
. Omit 4 if only one address is saved.
Using Phone Book
Setting Contact Search Method
1 In contact search window,
B S Ph.Book Settings S
%
2 Sort Entries S %
ま や ら わ A *
Ueda Mikio
Kimura Tetsuya
Kondo Koichi
Sort Entries
Oota Ken
●●By あかさたな
○○By Category
○○By Reading
伊藤 純
090392XXXX7
◎
3 Select method S %
Changing Search Method Temporarily
In contact search window, A (press
to toggle)
4-6
Using Speed Dial
Save phone numbers to Speed
Dial/Mail list for easy dialing and
messaging.
Saving Entries
4 Select mail address S %
. To complete entry without
saving a mail address, select Do
not Assign and press %.
1 % S Phone S % S Speed 5
A
Dial/Mail S %
Speed Dial/Mail
<Empty>
<Empty>
<Empty>
<Empty>
<Empty>
<Empty>
<Empty>
<Empty>
<Empty>
<Empty>
Assign
. Speed Dial/Mail list appears.
2 <Empty> S % S Select
contact S %
3 Select phone number S
%
. Select mail address prompt
appears.
4-7
. Entry is saved.
Placing Calls
1 0 - 99 (entry number)
2!
Sending Messages
1 0 - 99 (entry number)
2 B S Create and send
message
Editing Phone Book
Editing Contacts
1 b S Select contact S B
2 Edit S %
3 Select item S % S Edit S
%
4A
. Edit reading after editing names.
Deleting Contacts
1 b S Select contact S B
ま や ら わ A *
Ueda Mikio
Kimura Tetsuya
Kondo Koichi
Options
Oota Ken
Edit
Add New Entry
Send Entry
>>
Ph.Book Settings
>>
木村
哲也
Manage Entries
>>
090392XXXX2
Unlock
Temporarily
:[email protected]
◎
2 Delete S %
3 Yes S %
4-8
Messaging Overview
■Light Mail
E-mail & Light Mail
Use E-mail and Light Mail for messaging on handset.
■E-mail
Exchange short messages with Light Mail compatible
WILLCOM handsets.
Exchange messages with E-mail compatible WILLCOM
handsets, other mobiles, PCs, etc. Attach images, or create
messages with decorative effects (Decorative Mail).
Text
Image
Other
Mobiles
WILLCOM
Handsets
Handset
Effect
Long Message
PCs
. WILLCOM Mail Server stores sent/received E-mail
messages before delivering them to recipient devices.
. To use E-mail, perform online sign-up (P.1-15) to obtain a
mail address beforehand.
5-1
Text
Short Message
WILLCOM
Handsets
Handset
. Light Mail messages are directly exchanged between
handsets using handset numbers as addresses; cannot be
received when handset is off/out-of-range.
When Using Messaging (or Internet) for the First Time
Perform online sign-up to obtain WILLCOM mail address
beforehand. For details, see P.1-15.
. Online sign-up also establishes access to CLUB AIR-EDGE
(Internet connection point).
Online Sign-up
WILLCOM
Handset
Internet Access Provided
Mail Address Provided
Messaging Overview
Internet Mail Supported
Send/reply to Internet mail on handset.
. ISP subscription is required.
. Internet mail may be unavailable on handset or contract
may need to be changed to use it. For details, contact your
ISP.
Connection Points
For messaging, access the Internet via CLUB AIR-EDGE
(Internet connection point provided by WILLCOM) or via
network of a private ISP, in your office, etc. For details,
contact WILLCOM Service Center.
WILLCOM
Internet
Handset
Private
ISP
5-2
Sending E-mail
Sending Text Messages
1 B (Long Press)
4 Select subject field S %
S Enter subject S %
5 Select message text field
E-mail
S % S Enter message S
%
[email protected]
Text
OK
. E-mail Composition window
opens.
2 Select recipient field S %
S % S Direct Entry S %
. To specify recipient from Phone
Book, select Open Phone Book
or Phone Book Category.
3 Enter mail address S %
SA
. To specify multiple recipients,
select recipient field and press %.
5-3
Options
OK
. Message is created.
6A
. Message is sent.
recipient, subject and
message
2 Select attachment field
3 Add Attachment S %
Text
Please bring a camera an
d a tripod to Mr.Yamamot
o and Miss Kawahashi's w
edding next Sunday.
I will bring a camcorder
.
Send
1 B (Long Press) S Enter
S%
E-mail
[email protected]
[email protected]
Wedding
Options
Sending Messages with Images
Send
4 Data Folder S % S
Pictures S % S Select file
S%
. File is attached. To attach more
files, repeat 3 ‒ 4.
5A
. Message is created.
6A
. Message is sent.
Main Supported File Formats
. Image: .jpg, .jpeg, .gif, .png, .bmp
. Sound: .mid, .midi, .dxm
. Other: .txt, .html, .htm
Sending Light Mail
1 B S Create Light Mail
S%
Light Mail
4 Select message text field
S % S Enter message
S%
Light Mail
070392XXXX6
See you at the meeting
today.
Emoticon
Emoticon
Preview
Send
Options
OK
Back
. Light Mail Composition window
opens.
2 Select recipient field S %
S Direct Entry S %
. To specify recipient from Phone
Book, select Open Phone Book.
3 Enter phone number S %
-
Preview
Send
Options
OK
Back
. Light Mail is created.
5 Send S %
. Light Mail is sent.
Using Animation Pictograms
In Light Mail Composition window,
Emoticon S % S Select pictogram
S%
Previewing Message
After 4, Preview S %
5-4
Opening Messages
Opening New Messages
Handset automatically receives
E-mail messages sent to mail address
provided through online sign-up.
2 Message S %
Opening Previously Received Messages
New mail
1B
Ueda Mikio
. Messages sent to private ISPs are not
received automatically.
1 When E-mail message
arrives...
Date ↓
Options
OK
1/1
Reply
. New message list appears.
3 Select message S %
Information
1 Message
. Message window opens.
Retrieving New Messages Manually
BSB
Clear
◎
Exit
. Ringtone sounds and Information
appears.)
window opens. (
5-5
Received messages are saved in In
Box.
Messaging
In Box
Out Box
Unsent Box
Create E-mail
Retrieve New Mail
Template
Create Light Mail
Settings
Status
Online sign up
Receive
◎
. Messaging menu opens.
Opening Messages
2 In Box S %
In Box
In Box (0)
User In Box1
User In Box2
User In Box3
User In Box4
User In Box5
User In Box6
User In Box7
User In Box8
(0)
(0)
(0)
(0)
(0)
(0)
(0)
(0)
1Item
Options
OK
1/9
Back
. In Box menu opens.
3 Select folder S %
. Message list appears.
4 Select message S %
. Message window opens.
Important
. If In Box is full, handset automatically
deletes oldest received messages,
opened/unprotected ones first.
5-6
Replying to/Forwarding Messages
Replying to Messages
1 B S In Box S %
. In Box menu opens.
. For new messages, select
Message in Information window
and press %.
2 Select message S %
. Message window opens.
3A
. Mail Composition window
opens.
4 Enter message/edit
subject S % S A
. Message is sent.
Replying to Sender & All Recipients
After 2, B S Reply All S % S 4
5-7
Forwarding Messages
1 In message window, B
2 Forward S %
. Mail Composition window
opens.
3 Enter recipient/edit
subject and message S %
SA
. Message is sent.
Managing Messages
Messages are organized in Boxes
by type. Delete/protect messages,
edit drafts, and more.
Messaging
In Box
Out Box
Unsent Box
Create E-mail
Retrieve New Mail
Template
Create Light Mail
Settings
Status
Online sign up
Receive
Opening Messages
1B
. Messaging menu opens.
2 In Box, Out Box or Unsent
Box S %
Sending Unsent Messages
1 B S Unsent Box S %
2 Select message S B
3 Send S %
. To edit, select Edit.
Out Box
[email protected]
◎
Sending All Unsent Messages
After 1, B S Send All S %
Editing Draft Messages
1 B S Unsent Box S %
Date ↓
Options
OK
1/1
Back
. Message list appears.
. For In Box, select a folder and
press %.
3 Select message S %
. Message window opens.
2 Select message S B
3 Edit S %
. Mail Composition window
opens.
. To send edited message, press A.
5-8
Managing Messages
Deleting Messages
■One Message
1 In message list, select
message S B
2 Delete S % S One S %
3 Yes S %
■Multiple Messages
1 In message list, B
2 Delete S % S Select S %
3 Select message S % (
appears)
. Repeat 3 as needed.
4 B S Yes S %
5-9
Protecting Messages
1 In message list, select
message S B
2 Protect On/Off S %
Canceling Protection
In message list, select protected
message S B S Protect On/Off S %
Internet Overview
Access the Internet to browse WILLCOM official site and
PC Internet sites.
. For more about Internet services (packet transmission fees,
etc.), contact WILLCOM Service Center.
WILLCOM
Sites
Connection Points
Access the Internet via CLUB AIR-EDGE (Internet
connection point provided by WILLCOM) or via network
of a private ISP, in your office, etc. For details, contact
WILLCOM Service Center.
WILLCOM
Internet
PC
Sites
Handset
When Using Internet (or Messaging) for the First Time
Perform online sign-up to establish access to CLUB
AIR-EDGE (Internet connection point) beforehand. For
details, see P.1-15.
. Online sign-up also provides WILLCOM mail address.
Online Sign-up
WILLCOM
Handset
6-1
Internet Access Provided
Mail Address Provided
Internet
Handset
Private
ISP
Security
Handset supports browsing of SSL/TLS-enabled sites.
SSL and TLS are encryption protocols that secure
transmissions of important/sensitive information,
providing a highly secured connection over the Internet.
. When handset connects to the Internet via SSL or TLS (upon
appears at the top of
opening SSL/TLS-enabled sites),
Display.
. Certificates are required to access SSL/TLS-enabled sites.
Open corresponding certificates on handset and enable/
disable them as needed.
. There is no guarantee of safety on the Internet even when
browsing SSL/TLS-enabled sites. We are not liable for any
associated damages.
Accessing the Internet
Opening WILLCOM Official Site
1A
4 To end, "
. Then, press " twice to return to
Standby.
Browser
Willcom Site
Home
Bookmark
Internet Search
Open Web page
History
Page memo
Online sign up
Settings
◎
. Browser menu opens.
2 Willcom Site S %
. Handset connects to the Internet
and WILLCOM official site opens.
3 Select item (link) S %
. Corresponding page opens.
. Repeat 3 to open additional
links.
Navigating Back/Forward
c (back) or d (forward)
. Forward navigation is available after
opening previous page with c.
User Authentication
Enter user ID or password S % S B
Opening Home
1 A (Long Press)
. Page set as Home opens.
Additional Operations
Confirming Accessed URLs
In History menu, select record S B
S Address view S %
■Entering URLs Directly
1 In Browser menu, Open
Web page S %
2 Enter address S %
. Select Last address to use URL
of last visited page. Select Input
history to use previously entered
URLs.
3 Enter URL S %
■Using History
1 In Browser menu, History
S%
. History menu opens.
2 Select record S %
6-2
Accessing the Internet
■Searching the Internet
1 In Browser menu,
Internet Search S %
Internet search
Keyword
Search engine
Google
Search
OK
Back
. Internet search window opens.
2 Enter search text S %
S Select Search engine
field S % S Select search
engine S % S B
6-3
Browsing Operations
■Switching Browsing Modes
Main Key Assignments
Select Item or Scroll Page
Navigate Back/Forward (Mobile
mode), Select Item or Scroll Page
Execute Item
Open Options Menu
Navigate Back or Exit Browser
Scroll Down by Page
Scroll Up by Page
Navigate Back or Exit Browser
e
f
%
B
A
&
'
$
Browsing Modes
Use the following three modes.
■Mobile Mode
Pages fit Display width. Use e to
select items or scroll up/down.
■Smart-Fit Mode
Pages are restructured to fit Display
width. Pointer ( ) is available; use
g to select items or use e to scroll
up/down.
■Desktop Mode
1 In a page, B
2 Browsing mode S %
S Select mode S %
■Using Toolbar
In Smart-Fit mode and Desktop
mode, use Toolbar to perform some
operations easily.
. Wait one second without operation
(pointer changes to ) first.
1 While
appears, %
. Toolbar appears. Use f to select
an icon and proceed.
Tabbed Browsing
■Opening New Tabs
1 In a page, select item S B
S Tab operations S %
. Tab options window opens.
2 Open in new tab S %
■Switching Tabs
1 In tab options window,
Select tab S %
2 f Select tab S %
Closing Current Tab
In tab options window, Close this
tab S %
Closing Other Tabs
In tab options window, Close other
tabs S %
Pages appear in the same layout as
on PC. Pointer ( ) is available; use
g to select items or scroll vertically
and horizontally.
6-4
Browsing Operations
Switching Frames
In framed pages, select frame as
follows.
1 In a framed page, g
Viewing Selected Frame
In tab options window, View
selected frame S %
Page Operations
■Updating Page Content
1 In a page, B S Reload
S%
■Jumping to Page Top/Bottom
1 In a page, B
S Page operations S %
2 Jump to S %
3 Top or Bottom S %
■Zooming on Pages
1 In a page, B
S Page settings S %
2 Zoom S % S Select scale
S%
6-5
Downloading Image & Sound Files
Saving Linked Files
Save files linked from pages to
handset Data Folder.
. Procedure may vary by file type, etc.
Follow onscreen instructions.
1 In a page, select link S %
2 Download S %
. For sounds, select Open to play
them.
3 Enter name S %
4 Save here S %
Saving Files on Current Page
Save images, etc. on current page
to handset Data Folder.
1 In a page, B
2 Page operations S %
S Select object S %
. Icons of available files appear at
Display bottom.
3 f Select file S B S Save
S%
. To open file properties, select
Properties.
4 Enter name S %
5 Save here S %
6-6
Using Bookmarks
Adding Bookmarks
1 Open target page S B
S Bookmark S %
Back
. Bookmark options window
opens.
2 Add bookmark S %
3 Check/edit title S %
6-7
Bookmark
■Creating Folders
1 In Bookmark list, B
Bookmark
→ニュース(総合)
→ニュース(スポーツ)
→ニュース(芸能)
→天気
→占い
Tab operations
Forward
Reload
Page operations
Bookmark
Open Web page
PageAdd
memobookmark
Bookmark
Browsing
mode
S Yes S %
1 A S Bookmark S %
Managing Bookmarks
サイトメニュー
サイトメニュー
OK
Opening Bookmarks
サイトメニュー
XX/XX
Options
OK
1/1
Back
. Bookmark list appears.
2 Select bookmark S %
. To open bookmarks in a folder,
select a folder and press % then
proceed.
Opening Bookmarks while Browsing
In bookmark options window,
Bookmark S % S Select bookmark
S%
Create folder
Edit
Move
Move up
Move down
Delete
XX/XX
1/1
OK
Back
. Bookmark menu opens.
2 Create folder S %
3 Enter name S %
Using Bookmarks
■Moving Bookmarks & Folders
1 In Bookmark list, select
bookmark or folder S B
. Bookmark menu opens.
2 Move S %
. To move bookmarks to a folder,
select a folder and press %.
3 Select target location
S%
Moving Up/Down by One Position
In Bookmark menu, Move up or
Move down S %
■Deleting Bookmarks &
Folders
1 In Bookmark list, select
bookmark or folder S B
2 Delete S %
. Delete options window opens.
3 Delete S % S Yes S %
■Deleting Multiple Bookmarks
& Folders at Once
1 In delete options window,
Delete selected S %
2 Select bookmark or folder
S%(
appears)
. Repeat 2 as needed.
3 B S Yes S %
Deleting All Bookmarks within a Folder
In delete options window, Delete all
in folder S % S Yes S %
6-8
Browser Settings
5 Display or Do not display
View
■Images & Animation
S%
1 A S Settings S %
. Select On demand (in Images)
to start loading images when
image display areas appear.
2 Options S %
■Pointer Navigation
Options
View
BGM
Page memo
Pointer
HTTP
Certificates
Check settings
Home
Reset
OK
ON
ON
3 View S %
4 Images or Animation
S%
6-9
ON or OFF S %
1 In Options list, View S %
Back
1 In Options list, HTTP S %
. HTTP menu opens.
2 Cookie S %
1 In Options list, Pointer S % 3 Cookie mode S %
4 Accept all, Reject all or
2
JavaScript & Tables
. Options list appears.
Cookies
2 JavaScript or Tables S %
3 Enable or Disable S %
Prompt S %
Deleting All Cookies
After 2, Delete cookies S % S Yes
S%
Browser Settings
Electronic Certificates
1 In Options list, Certificates
S%
. Certificates menu opens.
2 Root certificates or
CA certificates S %
3 Select certificate S % S B
4 Enable or Disable S %
6-10
Camera Overview
Capture up to 2 megapixel images with built-in Camera.
. Open captured images, send them as mail attachments,
and more.
Send via Mail
Mobiles
& PCs
Handset
Options
Capture Image
Viewfinder
Viewfinder appears after activating Camera. See below
for indicator descriptions.
Memory
Save Location
Image Quality
White Balance
Image Size
Brightness
Continuous Shoot
Self-timer
Scene
Options
7-1
Important Camera Usage Notes
Keep these points in mind when using Camera.
. Mind etiquette when using Camera.
. Test Camera before shooting special moments.
. Do not use Camera in places where shooting is prohibited.
. Captured images may not be used/transferred without
copyright holder (photographer, etc.) permission, except
for personal use.
. Clean dust/smudges from Camera area with a soft dry
cloth before use.
. Camera is a precision instrument; however, some pixels
may remain on/off.
. Capturing/saving images while handset is hot may affect
image quality.
. Exposing Camera area to direct sunlight may damage
Color Filter and affect image color.
Automatic Shutdown
. Camera shuts down after a period of inactivity and Standby
or Camera menu returns.
Shutter Click
. Shutter click and Self-timer sound play at fixed volume
regardless of handset settings.
Capturing Images
1 & or I (Long Press)
3%
. Image is saved; Viewfinder
returns.
. To exit Camera, press ".
Opening Last Saved Image
In Viewfinder, B S Review S %
Sending Images as Mail Attachments
In captured image window, A S
Complete message S A
Options
. Viewfinder appears.
2 Frame subject on Display
S % or I
Main Viewfinder Operations
■Adjusting Zoom
1 In Viewfinder, a or b
■Adjusting Brightness
1 In Viewfinder, c or d
■Setting Image Size
1 In Viewfinder, B
2 Picture Size S %
S Select size S %
■Selecting Scene Option
1 In Viewfinder, B
2 Scene S % S Select option
S%
Options
. Shutter clicks; captured image
window opens.
. To start over, press $.
7-2
Opening Captured Images
■Handling Open Images
1~
. Data Folder opens.
2 Pictures S %
Pictures
XXXXXX_XXXXXX.jpg
Zoom in
%
Open Next Image
#
Open Previous Image
(
Rotate 90 Degrees
Clockwise
A
Opening Images on Memory Card
Date:XX/XX/XX 15:05:55
Size:XXXKB
Options
View
MultiSelect
. File list appears.
. To open images in a subfolder,
select a subfolder and press %.
3 Select image S %
. Image appears.
. To return to file list, press $.
4 Select image S %
Sending Images as Mail Attachments
. Data Folder opens.
SB
S%
. Follow onscreen instructions.
2 B S Change to MemoryCard 2 As Message S %
Data Folder
Pictures
DCIM
Decorative Picto...
Sounds
Flash®
Templates
Other Documents
Memory Status
Options
◎
. Memory Card Data Folder opens.
7-3
. To open images in a subfolder,
select a subfolder and press %.
1 In file list, select image
1~
Download
3 Pictures or DCIM S %
Using Java™ Applications
Installing JavaTM Applications
1 % S Java™ S %
JavaTM
JavaTM Library
Search the Offic...
Profile Setting
CLUB AIR-EDGE
Auto Start
On
Sounds
Normal Settings
Information
◎
TM
. Java
menu opens.
2 Search the Official Site
S%
3 Select application S %
. Follow onscreen instructions.
Installing Applications Using .jad Files
. When a .jad file is saved in Data
Folder (Other Documents), JavaTM
applications can be installed as follows.
Select .jad file S % S Follow
onscreen instructions
8-1
Activating & Exiting JavaTM Application
JavaTM Application Settings
■Activating JavaTM Applications
■Automatic Activation
1 In Java
1 In Java
TM
menu,
Java™ Library S %
. JavaTM application list appears.
2 Select application S %
. Follow onscreen instructions.
■Exiting JavaTM Application
1"
TM
menu, Auto Start
S % S On or Off S %
■Sound Playback
1 In Java
TM
menu, Sounds
S % S Always On or
Normal Settings S %
■Connection Point
2 Exit S %
TM
. Java
application closes.
1 In Java
TM
menu, Profile
Setting S % S Select
connection point S %
Using Java™ Applications
Managing JavaTM Applications
■Updating Java
TM
Applications
1 In Java
TM
application list,
select application S B
2 Update S % S Yes S %
. Follow onscreen instructions.
■Deleting JavaTM Applications
1 In Java
TM
application list,
select application S B
2 Delete S %
3 Delete S % S Yes S %
Creating Folders
Organize applications in folders.
1 In Java
TM
application list,
B S Create folder S %
S Enter name S %
Moving Applications to Folders
In JavaTM application list, select
application S B S Move S % S
Select folder S %
Renaming Folders
In JavaTM application list, select
folder S B S Rename folder S %
S Enter name S %
Deleting Folders
In JavaTM application list, select
folder S B S Delete S % S Delete
folder S % S Yes S %
Deleting Multiple Applications at Once
After 2, Delete selected S % S
Complete selection S B S Yes S %
Deleting All Applications
In JavaTM application list, B S Delete
S % S Delete all S % S Yes S %
8-2
Using World Clock
Setting World Clock
1 % S Tools S % S
f PIM/Life
2 World Clock S %
. World Clock window opens.
3%
. Set Time Zone window opens.
4 f Select city S %
World Clock
Tokyo
15:05
XXXX/XX/XX Wed
Hong Kong
14:05
XXXX/XX/XX Wed
Edit
. Time zones are set. (Top: local
time zone, bottom: world time
zone)
8-3
5"
. World Clock closes.
Advancing One Hour (Daylight
Saving)
In Set Time Zone window, A S %
. Press A to toggle setting on/off.
Adding Custom Time Zone
In Set Time Zone window, B S Enter
city name S % S e Select + or −
S d S Enter time difference S %
Showing World Clock in Standby
XX/XX/XX[Wed]
XX/XX/XX[Wed]
15:05
14:05
1 % S Settings S %
S f Sound/Display
2 Display S %
3 Clock/Calendar S %
4 World Clock (S) or World
Clock (L) S %
Data Folder
Supported Files
Files created on handset or obtained
from messages or the Internet are
organized in folders by file format.
Pictures
Captured or obtained
images
DCIM
Captured images
saved in DCIM folder
Decorative
Pictograms
Pictograms for
Decorative Mail
Sounds
Downloaded/
recorded sounds
Flash®
Downloaded Flash®
animations
Templates
Templates for
Decorative Mail
Other
Documents
Other files
. DCIM folder is available when
Memory Card is inserted.
. Contacts and messages are not
accessible from Data Folder; open
from Phone Book and Messaging.
9-1
Opening Data Folder
1~
Data Folder
Pictures
DCIM
Decorative Picto...
Sounds
Flash®
Templates
Other Documents
Memory Status
Options
◎
. Data Folder opens.
2 Select folder S %
. File list appears.
Using Files
Opening Images
1~
. Data Folder opens.
2 Pictures or DCIM S %
■Handling Open Images
%
Open Next Image
#
Open Previous Image
(
. Sound plays.
. To return to file list, press $.
Rotate 90 Degrees
Clockwise
A
Attaching Files to Messages
Playing Sounds
Pictures
XXXXXX_XXXXXX.jpg
Download
1 In Data Folder, Sounds S
%
Voice001
Date:XX/XX/XX 15:05:55
Size:XXXKB
View
XXXKB
&QYPNQCF 8QKEG
MultiSelect
. File list appears.
. To open images in a subfolder,
select a subfolder and press %.
3 Select image S %
. Image appears.
. To return to file list, press $.
1 In file list, select file S B
Sounds
Voice001
XXXKB
&QYPNQCF 8QKEG
Sounds
Options
2 Select sound S %
Zoom in
Options
Change to MemoryCard
Move
>>
Copy
>>
As Message
Record Voice
Set as Ringtone
◎
2 As Message S %
Options
Play
MultiSelect
. Follow onscreen instructions.
. File list appears.
. To play sounds in a subfolder,
select a subfolder and press %.
9-2
Managing Files & Folders
Creating Subfolders
. Not available in DCIM folder.
1~
Moving & Copying Files
1 In file list, select file S B
Pictures
. Data Folder opens.
XXXXXX_XXXXXX.jpg
2 Select folder S %
Download
Options
Change to MemoryCard
Move
>>
Copy
>>
As Message
Take Picture
日時:XX/XX/XX 15:05
Set asサイズ:XXXKB
Wallpaper
Pictures
XXXXXX_XXXXXX.jpg
Download
◎
Date:XX/XX/XX 15:05:55
Size:XXXKB
Options
View
MultiSelect
. File list appears.
3 B S Manage Items S %
S Create Folder S %
4 Enter name S %
. Subfolder is created.
9-3
2 Move or Copy S %
S Phone or Memory Card
S%
. Some files may not be moved/
copied, or procedure may vary by
file. Follow onscreen instructions.
3 Move here or Copy here
S%
Deleting Files & Subfolders
1 In file list, select file or
subfolder S B
. When a subfolder is selected, all
files within the subfolder will also
be deleted.
2 Delete S % S Yes S %
Using Infrared
Overview
Wirelessly exchange Phone Book
contacts, bookmarks, and profiles
(My Details) with Infrared devices.
. Transfer may be unavailable
depending on the other device and
file content. Some settings may be
lost, or transferred files may not be
saved properly.
■Infrared Precautions
Align Infrared Ports of both devices.
Authorization Code
. Four-digit code required for all file
transfers via Infrared. Transfers
are possible when codes match.
(Authorization Code is changeable for
each transfer.)
3 When a connection
request arrives...
Receive Infrared
Receiving Files
XXXX
received.
Save to
Phone Book?
1 % S Infrared S %
Yes
No
Infrared
Receive Infrared
Send All
◎
4 Yes S %
. Subsequent operations vary by
received file(s). Follow onscreen
instructions.
◎
. Keep Infrared Ports aligned during
transfer.
. Do not look into Infrared Port during
Infrared transmissions. Eyesight may
be affected.
. Infrared menu opens.
2 Receive Infrared S %
All File Transfer Caution
. For Delete All & Save, all
corresponding files are deleted before
received files are saved.
. Infrared activates. Handset
receives files if sent within three
minutes.
9-4
Using Infrared
Sending Files
■Single File (e.g., Phone Book)
1 b S Select contact S B
ま や ら わ A *
Ueda Mikio
Kimura Tetsuya
Kondo Koichi
Options
Oota Ken
Edit
Add New Entry
Send Entry
>>
Ph.Book Settings
>>
木村
哲也
Manage Entries
>>
090392XXXX2
Unlock
Temporarily
:[email protected]
◎
2 Send Entry S %
3 Via Infrared S %
. Transfer starts when the other
device is ready. When complete,
contact search window returns.
9-5
■All Files
1 In Infrared menu, Send
All S %
2 Enter Handset Code S %
3 Select item S %
4 Enter Authorization Code
S%
. Subsequent operations vary
by file type. Follow onscreen
instructions.
Using Memory Card
Overview
Use microSD/microSDHC Memory
Card to save files or back up Phone
Book contacts and bookmarks.
Memory Card Cautions
. Do not force Memory Card into or out
of handset.
. Keep Memory Card out of infants'
reach; may cause choking if
swallowed.
. Do not touch terminals or expose
them to metal objects.
. We are not liable for any damages
resulting from accidental loss/
alteration of information. Keep a copy
of contacts, etc. in a separate place.
. Never power off or remove Battery
while files are being accessed.
. Be careful not to erase or overwrite
files accidentally.
Inserting Memory Card
1 Power off
2 Remove Battery (P.1-3)
3 Inserting Memory Card
5 Power on
.
appears when Memory Card
is inserted properly.
Removing Memory Card
. Always power off first.
. Gently push in Memory Card and
release it; Memory Card pops out.
Carefully remove Memory Card
without bending it.
. Insert Memory Card (terminals
facing down) all the way until it
clicks.
. Do not insert other objects.
4 Insert Battery, then replace
Battery Cover (P.1-3)
9-6
Using Memory Card
Formatting Memory Card
When using a new Memory Card
for the first time, format it on the
handset before trying to save files,
etc.
. Formatting deletes all SD Card files.
1 % S Settings S % S
f Phone/
2 Memory Card S %
Memory Card
Format Card
Memory Status
3 Format Card S % S Yes
S%
. Offline Mode activates; signal
transmission and reception are
suspended until formatting is
complete.
4 Yes S %
Precaution
. Never power off or remove Battery
while formatting; may damage
Memory Card or handset.
Opening Memory Card Files
1~
. Data Folder opens.
2 B S Change to MemoryCard
S%
Data Folder
Pictures
DCIM
Decorative Picto...
Sounds
Flash®
Templates
Other Documents
Memory Status
Options
◎
. Memory Card Data Folder opens.
◎
. Memory Card menu opens.
3 Select folder S %
. To open files in a subfolder,
select a subfolder and press %.
4 Select file S %
9-7
Using Memory Card
File Backup & Restore
Back up Phone Book contacts and
bookmarks to Memory Card.
■Backup (Handset to Memory
Card)
1 % S Settings S % S
f Phone/
2 Backup/Restore S %
Backup/Restore
Backup All Items
Backup Selected It...
Restore All Items
Restore Selected I...
Packup(Backed File...
◎
. Backup/Restore menu opens.
3 Backup All Items or
Backup Selected Items S
%
4 Enter Handset Code S %
S Yes S %
. For Backup All Items, follow
onscreen instructions to proceed.
5 Select item S % (
appears)
. Repeat 5 to select both items
(Phone Book and Bookmark).
6 A S Yes S %
. Backup starts. Follow onscreen
instructions.
Precautions
. Not available if Battery is low.
. Backup may fail if Memory Card
memory is low.
. Some settings may be lost, or files may
not be backed up properly.
Deleting Backup Files
In Backup/Restore menu, Packup
(Backed Files) S % S Select item S
% S Select file S % S A S Yes S
%
■Restore (Memory Card to
Handset)
1 In Backup/Restore menu,
Restore All Items or
Restore Selected Items
S%
2 Yes S %
. For Restore All Items, follow
onscreen instructions to proceed.
3 Select item S % (
appears)
. Repeat 3 to select both items
(Phone Book and Bookmark).
4A
5 Select item S %
. Repeat 5 as needed.
6 A S Yes S %
. Restore starts. Follow onscreen
instructions.
9-8
Setting Handset Responses
Setting Ringtones
1 % S Settings S % S f
Sound/Display
2 Sounds & Alerts S %
Sounds & Alerts
Volume
Ringtones
System Sounds
Vibration
Event Light
Status Light
Any Key Answer
◎
. Sounds & Alerts menu opens.
3 Ringtones S %
4 Select item S %
. For For New Message, select
Sound and press %.
10-1
5 Preset Sounds or Sound
S % S Select tone/file
S%
Setting Vibration
1 In Sounds & Alerts menu,
Vibration S %
Setting Ringtone Volume
1 In Sounds & Alerts menu,
Volume S %
2 Select item S % S e
Adjust Volume S %
Setting Keys to Answer Calls
2 Select item S % S Switch 1
In Sounds & Alerts menu,
On/Off S %
3 On S %
. To disable Vibration, select Off
and press %.
4 Vibration Pattern S %
5 Select pattern S %
Vibration Caution
. Disable Vibration when placing
handset on a desk, etc. to prevent it
from falling off upon receiving calls/
messages.
Any Key Answer S %
2 On, Only Mute or Off S %
. Select On to answer calls with
!, Dialpad, etc.
. Select Only Mute to mute ringer
with $, Dialpad, etc.
Setting Operation Sounds
Setting Key Press Sounds
Setting Sound Effects
1 % S Settings S % S
1 In System Sounds menu,
2 Sounds & Alerts S %
2 Tone or Sound S %
f Sound/Display
. Sounds & Alerts menu opens.
3 System Sounds S %
System Sounds
Keypad Tones
Off
Warning Tone
XXXXX
select item S %
3 Preset Sounds or Sound
S % S Select tone/file
S%
Disabling Sound Effect
After 2, Off S %
Power On Sound
Off
Power Off Sound
Off
Handset Open
Off
Handset Close
Off
Out of Range
◎
. System Sounds menu opens.
4 Keypad Tones S %
5 Select tone S %
. To disable key press sounds,
select Off and press %.
10-2
Setting Display
Setting Wallpaper
1 % S Settings S % S
f Sound/Display
2 Display S %
Setting Fonts
1 In Display menu, Font
Settings S %
Font Settings
Font Size
Display
Wallpaper
Font Weight
Normal
XXXXX
System Graphics
Font Settings
Clock/Calendar
Off
Sub-Display
◎
5 sec.
Backlight
Display Saving
◎
. Display menu opens.
3 Wallpaper S %
4 Select folder S % S
Select file S %
. Procedure may vary by folder or
file. Follow onscreen instructions.
10-3
Disabling Wallpaper
After 3, Blank S %
. Font Settings menu opens.
2 Font Size S %
3 Select item S % S Select
size S %
Setting Font Weight
1 In Font Settings menu,
Font Weight S %
2 Select weight S %
Setting Sub-display
Setting Backlight time
Setting Clock View
1 % S Settings S % S
1 In Sub-Display menu,
2 Display S %
2 Select type S %
f Sound/Display
3 Sub-Display S %
Sub-Display
Duration
5 sec.
Display Date&Time
Large Clock
Clock Type
Pattern 1
Caller Display
Display Date&Time S %
Showing/Hiding Caller Info
1 In Sub-Display menu,
Caller Display S %
2 On or Off S %
On
◎
. Sub-Display menu opens.
4 Duration S % S
Select time S %
10-4
Setting Date & Time
Setting Clock Manually
Clock is set by default. Adjust it
manually as follows.
1 % S Settings S % S f
Sound/Display
2 Date & Time S %
Date & Time
Set Date/Time
Auto Time Correcti...
On
Daylight Saving
Off
Set Time Zone
Tokyo
Clock/Calendar
Off
World Clock
Alarms
◎
. Date & Time menu opens.
3 Set Date/Time S %
4 Enter the year S Enter
the month S Enter the
day S Enter the time S %
10-5
Setting Auto Time Correction
1 In Date & Time menu,
Auto Time Correction S
%
2 On or Off S %
Note
. Date and time are corrected
automatically when there is a difference
of 30 seconds or more between local
standard time and handset Clock.
Using Voicemail
Divert all/unanswered calls to
Voicemail Center; access messages
afterward.
. A separate subscription is required.
. Not available when Call Forwarding is
set.
. Message playback charges apply for
playing messages.
Initiating/Canceling Voicemail
1 % S Settings S % S f Call
2 Service Center S %
3 Call Forwarding Center
(143) S %
. You will be connected to the
center for service settings.
. Follow voice guidance
(Japanese).
Accessing Messages via Notices
Voicemail Center sends Light Mail
(from 070-696-1000) to handset
after a message is stored.
Clear
11-1
. You will be connected to
Voicemail Center.
. Follow voice guidance
(Japanese).
Checking for Messages
1 Dial 141 S !
◎
. Voicemail appears when a
message is stored.
Playing Messages
In Service Center menu, Voicemail
Center (N931) S %
. You will be connected to Voicemail
Center.
. Follow voice guidance (Japanese).
Information
Voicemail
. Service Center menu opens.
3 Yes S %
1 After a message is stored... 2
After hearing a beep, "
Service Center
Service Center(116)
Voicemail Center(N...
Call Forwarding Ce...
◎
2 Voicemail S %
Exit
. Information window opens.
Using Call Forwarding
Divert all/unanswered calls to a
preset number.
. No separate subscription is required.
. You will be charged for the
forwarded part of the call.
. Not available when Voicemail is set.
Initiating/Canceling Call Forwarding
3 Call Forwarding Center
(143) S %
. You will be connected to the
center for service settings.
. Follow voice guidance
(Japanese).
1 % S Settings S % S f Call
2 Service Center S %
Service Center
Service Center(116)
Voicemail Center(N...
Call Forwarding Ce...
◎
. Service Center menu opens.
11-2
Using Split Billing Service
Have two separate bills issued for
calls placed from handset. Charges
for calls placed using Split Billing
service will be billed to preset
secondary billing contact.
. A separate subscription is required.
. Split Billing service does not apply to
Light Mail transmission or Internet
use (and messaging) via CLUB AIREDGE.
Calling via Split Billing Service
1 Enter number with area
code S B
2 Split Bill S %
. Wait for receiver to accept the
call.
3 " S Call ends
Hiding Caller ID
After 1, Split Bill (Hide My ID 184)
S%
Showing Caller ID
After 1, Split Bill (Show My ID 186)
S%
11-3
Software Updates
Check for firmware updates and
download as required.
. Packet transmission fees do not
apply to updates (including checking,
downloading and overwriting).
. Confirm Battery charge beforehand.
Precautions
. Handset is disabled until update is
complete. Update may take up to
approximately 30 minutes.
. Update will not start if another
function is in use. Before updating
software, end all active functions.
. Disconnect USB Cable beforehand to
reduce failure risk.
. Saved files and data may be lost
depending on handset status. Back
up important files and data before
updating software. We are not
liable for any damages from lost
information, etc.
Software Updates
1%
S Settings S % S
f Phone/
2 Software Update
3 Update
S %
S %
Update
Update software in a
place where signal
conditions are
strong/stable. All
incoming and
outgoing signals
will be disabled
for the duration of
this update.
Continue?
Yes
No
4B
. Follow onscreen instructions.
Opening Update Result
After 2, Update Result S %
12-1
■When Update is Complete
Update success notification appears
and handset reboots.
. After reboot, completion message
appears and Information window
opens.
. If handset does not reboot after
update, reinsert Battery and try
powering on. If it still does not power
on, contact WILLCOM Service Center
or Sharp Customer Assistance Center.
Opening Update Result
While Information window is open,
Update Result S %
Specifications
Specifications may change with product improvements,
etc.
Handset (WX01SH)
Weight
Continuous Talk
Time2
Continuous Standby
Time3
Charging Time
(power off)
Dimensions
(W x H x D)
93 g with Battery (XN-BTWP01)1
9 hours1
580 hours1
Battery (XN-BTWP01)
Voltage
Type
Capacity
Weight
Dimensions
(W x H x D)
1
3.7 V
Lithium-ion
770 mAh
16.7 g1
35.4 mm x 46.3 mm x 4.6 mm
(without protruding parts)1
Approximate value.
150 minutes using AC Charger
(XN-AAWP01)1
50 mm x 102 mm x 17.4 mm
(handset closed, without protruding
parts)1
1
Approximate value.
Average measured with a new, fully charged Battery, in strong
signal conditions without moving handset.
3
Average measured with a new, fully charged Battery, with
handset closed without calls or operations, in strong signal
conditions without moving handset.
2
. Talk Time/Standby Time may vary with location, status, settings,
etc.
. Display employs precision technology; however, some
pixels may remain on/off.
12-2
Handset Materials
Parts
Housing, hinge cover,
Battery Cover
Display window, Camera
window
Sub-display window
Materials/Finishing
ABS resin/UV painting
Acrylic resin
Acrylic resin/In-mold
decorating
Infrared Port
ABS resin
Multi Selector (Cursor Keys), PC resin/Back printing
Center Key
Mail Key, Speed Dial & A/a PC resin/UV painting
Key, Web Key, Camera &
Text Key, Start Key, Clear/
Back Key, Power & End
Key, Dialpad, N Key, # Key,
Mode & Manner Key, Data
Folder & Drive Key
Shutter Key, External Device PC resin; elastomer/UV
Port Cover
painting
Housing stop pads
Urethane resin
Screw cover
PET
Charging Terminals
Brass; LCP/Gold plating
Screws
SWCH16A (iron/chrome
plating)
Battery
PC and ABS resin/Gold plating
12-3
Menu List
Function
Messaging
Web
In Box
Out Box
Unsent Box
Create E-mail
Retrieve New Mail
Template
Create Light Mail
Settings
Account Settings
Send/Recv. Settings
Connection Point
Options
Status
Online sign up
Willcom Site
Home
Bookmark
Internet Search
Open Web page
History
Page memo
Online sign up
Settings
Options
Connection
Browsing mode
Function
Java™
Infrared
Camera
Data Folder
Tools
PIM/Life
Java™ Library
Search the Official Site
Profile Setting
Auto Start
Sounds
Information
Receive Infrared
Send All
Photo Camera
Review
Pictures
DCIM
Decorative Pictograms
Sounds
Flash®
Templates
Other Documents
Memory Status
Calendar
Alarms
Tasks
Calculator
Notepad
Voice Recorder
World Clock
12-4
Menu List
Function
Tools
Connectivity Card Reader Mode
USB Charge
Memory Card
Backup/Restore
Phone
Phone Book
Add New Entry
Information
Call Log
Play Messages
My Details
Set Category
Speed Dial/Mail
Settings/
Ph.Book Settings
Call Log Setting
Manage
Manage Entries
Settings Sound/
Mode
Normal
Manner
Display
Settings
Drive
Original
Display
Wallpaper
System Graphics
Font Settings
Clock/Calendar
Sub-Display
Backlight
Display Saving
12-5
Function
Settings Sound/
Display
Sounds &
Alerts
Volume
Ringtones
System Sounds
Vibration
Event Light
Status Light
Any Key Answer
Date & Time Set Date/Time
Auto Time Correction
Daylight Saving
Set Time Zone
Clock/Calendar
World Clock
Alarms
Set Holiday
Time Format
Date Format
Calendar Format
言語選択 (Language)
Ringer Output
Earpiece Volume
Menu List
Function
Settings Phone/
Call
User Dictionary
Set Key Shortcut
Set Key Light
Memory Card
Backup/Restore
Locks
Function Lock
Application Lock
Handset Code Settings
Remote Lock
Administrator Setting
Software
Update
Update Result
Update
Master Reset Reset Settings
Reset All
Call Time/
Call Timers
Data Counter Data Counter
Call Time Counter
Answer Phone Switch On/Off
Answer Time
Outgoing Message
Volume
Service Center Service Center (116)
Voicemail Center
(N931)
Call Forwarding
Center (143)
Function
Settings Call
Network
Caller ID
Int'l Calling
Call Barring
Restrict Destinations
Reject Numbers
Auto Answer
Missed Call
Re-search Signal
Offline Mode
Ll
Dial-up Settings
12-6
Customer Service
◆Handset Operations◆
■Sharp Corporation
Customer Assistance Center
0120-606-512
* May not be accessible from some IP phones.
Business hours: 9:00 AM to 6:00 PM, Monday through
Friday
(Excluding national holidays, New Year holidays and
other company holidays)
◆Repairs of Handsets & Optional Accessories◆
■Sharp Corporation
Communication Systems Group
Mobile Telecommunication Services Business
Promotion Center
Repair Service Promotion Dept. Kinki Center 2
(PHS)
0570-081010
* Flat rate from anywhere in Japan.
* From an IP/PHS phone, dial 06-6794-9708.
Business hours: 9:00 AM to 5:40 PM, Monday through
Friday
(Excluding national holidays, New Year holidays and
other company holidays)
Address: 3-1-72 Kita Kamei-cho, Yao-shi, Osaka
12-7
◆WILLCOM Services◆
Contact WILLCOM Service Center for information about
the following.
. Contract details (price plan subscription/change, change
in address, etc.)
. Monthly fees, transmission fees, etc.
. Optional services
. Service areas
. Handset repairs
. Lost handsets
. Communication services not mentioned above
■WILLCOM Service Center (General Information)
From a WILLCOM handset, dial toll free at 116
From a landline, payphone or mobile phone, dial
toll free at 0120-921-156
Operators available 9:00 AM to 8:00 PM, 7 days a week
* Our automated voice response system is available 24
hours a day for subscription and some services.
■My WILLCOM (WILLCOM STORE)
https://store.willcom-inc.com/my/
* Link to user support page (Japanese); change contract
details, etc.
Safety Precautions
Read Safety Precautions before using handset.
. Observe precautions to avoid injury to self or others, or
damage to property.
. We are not liable for any damages resulting from use
of this product.
These labels show degree of risk from improper
use; learn them before reading on:
DANGER
WARNING
CAUTION
13-1
Great risk of death or
serious injury
Risk of death or serious
injury
Risk of minor injury or
damage to property
These symbols signify prohibited/compulsory
actions; learn them before reading on:
$
%
&
'
(
)
Prohibited actions
Disassembly prohibited
Exposure to liquids prohibited
Use with wet hands prohibited
Compulsory actions
Unplug from outlet
Safety Precautions
Handset, Battery, AC Charger
(Optional Accessory) &
Memory Card (Sold Separately)
DANGER
Use specified Battery and
AC Charger only.
Non-specified equipment
use may cause Battery to
leak, overheat, burst or
ignite, and may cause AC
Charger to overheat, ignite,
malfunction, etc.
Do not disassemble,
modify or solder handset
or related hardware.
May cause fire, injury,
electric shock or malfunction.
Battery may leak, overheat,
burst or ignite. Modifying
handsets is prohibited by the
Radio Law and subject to
penalty.
(
%
Do not expose handset or
related hardware to liquids.
Do not let exposed handset/
related hardware remain wet;
do not charge wet Battery.
May cause overheating,
electric shock, fire, injury
or malfunction. Use only as
directed.
Do not charge Battery in or
expose handset or related
hardware to extreme heat
(fire, heat sources, direct
sunlight, inside vehicles, etc.).
Do not charge, leave, use, or
be carrying handset or related
hardware in a warm place or
where heat collects, such as
under a kotatsu (blanketed
warming table) or electric
blanket, next to a kairo
(worn warming patch), etc.
May cause warping/
malfunction; Battery may
leak, overheat, ignite or burst.
Handset or related hardware
may become hot to the touch,
leading to burn injuries, etc.
&
$
Do not force Battery/
AC Charger into handset.
Confirm terminal/
connector orientation;
retry.
Battery may leak, overheat,
burst, ignite, etc.
WARNING
Do not place handset,
Battery or AC Charger
in/on ovens, microwave
ovens, pressure cookers,
induction stoves or other
cooking appliances.
Battery may leak, overheat,
burst or ignite. Handset/AC
Charger may overheat, emit
smoke, ignite, malfunction,
etc.
$
$
13-2
Safety Precautions
Keep handset off and AC
Charger disconnected near
gas stations or places with
fire/explosion risk.
Handset use near
petrochemicals or other
flammables may cause fire/
explosion.
Do not drop/throw or
subject to strong impact.
Battery may leak, overheat,
burst or ignite, resulting
in fire, electric shock,
malfunction, etc.
For unusual sound/
odor, smoke or other
abnormality:
Continued use may cause
fire, electric shock, etc.;
grasp AC Charger plug to
disconnect from the outlet,
power off, then remove
Battery, being careful not to
burn or injure yourself.
13-3
(
$
(
Keep liquid (water, pet
urine, etc.) or conductive
material (pencil lead, metal
strip/jewelry, etc.) away
from External Device Port.
May cause short circuit, resulting
in fire, malfunction, etc.
CAUTION
Do not place handset or
related hardware on
unstable surfaces.
Handset or related hardware
may fall, resulting in injury,
malfunction, etc.; take
added care when Vibration
is set or while charging.
Keep handset and related
hardware out of infants' reach.
Infants may choke from
swallowing handset or
related hardware or be
injured, etc.
For use of handset/related
hardware by child, explain
instructions and supervise use.
Misuse may cause injury, etc.
$
$
(
(
Handset
WARNING
Do not use handset while
driving or cycling.
Accidents may result. Phone
use while driving or cycling
is prohibited by law and
subject to penalty; park
legally beforehand.
Power off near electronic
devices that employ high
precision control systems
or weak signals.
May cause electronic
malfunctions, etc. Take
added care near these
devices: Hearing aids,
implanted pacemakers/
defibrillators and other
electronic medical
equipment; fire alarms,
automatic doors and other
automatic control devices.
$
(
Safety Precautions
Keep handset off aboard
aircraft or in hospitals, etc.
where mobile phone use is
prohibited.
Handset use may affect
electronic medical equipment
and other electronic devices.
For mobile phone use in
medical facilities, obey
corresponding medial facility
rules. Conducting prohibited
acts such as using mobile
phone aboard aircraft is subject
to penalty by law. However,
if mobile phone use aboard
aircraft is allowed under certain
conditions (signal transmitting
functions are disabled, etc.),
follow airline instructions.
Users with a heart condition
should adjust ringtone
Vibration and Volume as
needed.
May cause heart damage.
If thunder is audible while
outdoors, power off; find cover.
There is a risk of lightning
strike or electric shock.
(
Do not look into Infrared
Port during Infrared
transmissions.
Eyesight may be affected.
CAUTION
Do not use handset when
it may affect a vehicle's
electronic equipment.
Handset use inside vehicles
may cause electronic
equipment to malfunction,
resulting in accidents.
(
(
For any skin irritation associated
with use, discontinue use and
consult a doctor.
Metal and other materials
(P.12-3) may cause skin
irritation, rashes, or itchiness
depending on your physical
condition.
Keep handset away from
magnetic cards, etc.
Data on bank cards, credit
cards, telephone cards,
floppy disks, etc. may be
lost.
$
$
(
$
Do not swing handset by
Strap.
May harm self or others;
Strap may break, resulting
in injury or handset
malfunction/breakage.
Handset may become hot
while in use, especially in
high temperature.
Prolonged contact with skin
may cause burn injuries.
Always maintain some
distance from Speaker
while ringtones, music or
other handset sounds play.
Excessive volume may
damage ears or hearing.
Keep fingers, Straps, etc.
outside when opening/
closing handset.
May cause injury, breakage,
etc.
Moderate handset Volume
when using Headphones.
Excessive volume may
damage ears or hearing.
$
(
$
(
(
13-4
Safety Precautions
Battery
Read Battery label to confirm
battery type; use/dispose of
Battery accordingly.
Symbol on Label
Li-ion00
Battery Type
Lithium-ion
DANGER
Do not dispose of Battery
in fire.
Battery may leak, burst,
ignite, etc.
Do not damage (nail,
hammer, stomp, etc.)
Battery or subject it to
strong impact.
Battery may leak, overheat,
burst, ignite, etc.
Keep wire or other metal
objects away from Battery
terminals. Do not carry/store
Battery with conductive
material (pencil lead, metal
strip/jewelry, etc.).
Battery may leak, overheat,
burst, ignite, etc.
13-5
$
$
$
If battery fluid gets in eyes,
do not rub; rinse with
water and consult a doctor
immediately.
Eyes may be severely
damaged.
WARNING
If battery fluid contacts
skin or clothes, discontinue
handset use and rinse with
clean water immediately.
May cause skin damage.
If Battery does not charge
properly, stop trying.
Battery may leak, overheat,
burst, ignite, etc.
(
(
(
For abnormal odor,
excessive heat,
discoloration or distortion,
remove Battery, being
careful not to burn or
injure yourself. Avoid
sources of flame.
Continued use may cause
Battery to leak, overheat,
burst, ignite, etc.
Keep Battery away from pets.
Pet bites may cause Battery
to leak, burst, overheat,
ignite, etc.
CAUTION
Do not dispose of an
exhausted Battery with
ordinary refuse.
Battery may ignite or
damage the environment.
Insulate Battery by taping
over Battery terminals before
disposal. Take Battery to a
WILLCOM Plaza/WILLCOM
Counter, or follow the local
disposal regulations.
(
(
$
Safety Precautions
AC Charger (Optional Accessory)
WARNING
Do not cover/wrap AC
Charger while charging.
AC Charger may overheat,
resulting in fire, malfunction,
etc.
Use only the specified
voltage.
Non-specified voltages may
cause fire, malfunction, etc.
•AC Charger: AC 100 V 240 V Input
Do not use power adapters.
Transformer use may
cause fire, electric shock or
malfunction.
Unplug AC Charger for
periods of disuse; grasp
plug to disconnect.
May cause electric shock, fire
or malfunction.
$
$
)
If liquid (water, pet urine,
etc.) gets inside, grasp
plug to disconnect it
immediately.
May cause electric shock,
smoke or fire.
To remove debris, grasp plug
to disconnect AC Charger,
then clean with a dry cloth.
Fire may result.
Plug AC Charger firmly into
the outlet, keeping plug
and terminals away from
conductive material (pencil
lead, metal strip/jewelry,
etc.).
May cause electric shock,
short circuit, fire, etc.
Do not touch plug with
wet hands.
May cause electric shock,
malfunction, etc.
Do not touch AC Charger if
thunder is audible.
May cause electric shock,
etc.
)
(
(
'
$
CAUTION
Grasp plug to disconnect
AC Charger before
cleaning.
May cause electric shock,
etc.
Always grasp plug (not
cord) to disconnect AC
Charger.
Pulling plug by cord may
damage cord; may cause
electric shock, fire, etc.
Do not subject AC Charger
to strong impact while it is
plugged in.
May cause malfunction or
injury.
)
(
$
13-6
Safety Precautions
Handset Use & Electronic
Medical Equipment
This section is based on
"Guidelines on the Use of
Radio Communications
Equipment such as Cellular
Telephones and Safeguards for
Electronic Medical Equipment"
(Electromagnetic Compatibility
Conference, April 1997) and
"Report of Investigation of
the Effects of Radio Waves
on Medical Equipment, etc."
(Association of Radio Industries
and Businesses, March 2001).
WARNING
Persons with implanted
pacemaker/defibrillator
should keep handset more
than 22 cm away.
Radio waves may interfere
with implanted pacemakers
or defibrillators.
13-7
(
Before using electronic
medical equipment
other than implanted
pacemaker/defibrillator
outside medical facilities,
consult the vendor on
radio wave effects.
Radio waves may interfere
with electronic medical
equipment.
Observe these rules inside
medical facilities to avoid
effects of radio waves
on electronic medical
equipment:
•Do not enter an operating
room or an Intensive or
Coronary Care Unit while
carrying a handset.
•Keep handset off in
hospitals.
•Even in lobbies or other
places, keep handset off
near electronic medical
equipment.
•Obey medical facility rules
on mobile phone use.
(
(
Power off in crowds or
trains where persons with
implanted pacemaker/
defibrillator may be near.
Radio waves may interfere
with implanted pacemakers
or defibrillators causing such
devices to malfunction.
(
General Notes
General Use
. We are not liable for any damages
resulting from accidental loss/
alteration of handset/Memory Card
files or settings. Keep separate
copies of contacts, etc.
. Handset transmissions may be
disrupted inside buildings, tunnels
or underground, or when moving
into/out of such places; may affect
calls.
. Use handset without disturbing
others.
. Handsets are radios as stipulated
by the Radio Law. Under the Radio
Law, handsets must be submitted
for inspection upon request.
. Handset use near landlines, TVs or
radios may cause interference.
. For proper usage of Memory Card,
read the manual beforehand.
. Beware of eavesdropping.
Because this service is completely
digital, the possibility of signal
interception is greatly reduced.
However, some transmissions may
be overheard.
, Deliberate/accidental
interception of communications
constitutes eavesdropping.
. Beware of harmful/malicious
websites. Take added care when
posting personal information, etc.
. An export license may be required
to carry handset into other
countries if it is to be used by or
transferred to another person.
However, no such license is
required when taking handset
abroad for personal use on a
vacation or business trip and then
bringing it back. Export control
regulations in the United States
provide that an export license
granted by the US government
is required to carry handset into
Cuba, Iran, North Korea, Sudan or
Syria.
Handset & Hardware Care
. Handset is not water proof. Avoid
moisture.
, Keep handset away from
precipitation.
, Cold air from air conditioning,
etc. may condense causing
corrosion.
, Avoid leaving handset in damp
places (restroom, bath/shower,
etc.).
, On the beach, keep handset
away from water and direct
sunlight.
, Perspiration may get inside
handset causing malfunction.
. If handset is left with no Battery
inserted or an exhausted one, files
and data may be altered/lost. We
are not liable for any resulting
damages.
13-8
General Notes
. Use handset within 5oC - 35oC and
35% - 85% humidity.
. Avoid extreme temperature or direct
sunlight.
. Handset/Battery may become
warm during operation or while
charging. This is normal.
. Warranty does not cover
malfunctions resulting from
misuse.
. Exposing Camera area to direct
sunlight may damage Color Filter
and affect image color.
. Battery may not charge properly if
Port/terminals are obstructed by
dust, etc. Clean with a dry cloth,
cotton swab, etc.
. Clean handset with a soft dry
cloth. Alcohol/solvent use may
fade color/print.
. Avoid scratching Display.
13-9
. Avoid heavy objects or excessive
pressure. May cause malfunction
or injury.
, Do not sit on handset in back
pants pocket.
, Do not place heavy objects on
handset inside handbags, packs,
etc.
. Connect only specified products to
External Device Port. Other devices
may malfunction or cause damage.
. Always power off before removing
Battery. If Battery is removed while
saving data or sending mail, data
may be lost, changed or destroyed.
. Do not power off while using
Memory Card; may result in data
loss or malfunction.
. When walking outside, moderate
handset Volume to avoid
accidents.
. Avoid covering Speaker while
using handset.
Camera
. Mind etiquette when using
Camera.
. Test Camera before shooting
special moments.
. Do not use Camera in places
where shooting is prohibited.
. Captured images may not be used/
transferred without copyright
holder (photographer, etc.)
permission, except for personal
use.