1
®
DRAFT
Sybase, Inc.
One Sybase Drive
Dublin, CA 94568
www.sybase.com
Data
Integration
with Sybase
Avaki Studio
Release 7.0 • August 24, 2006
DOCUMENT ID: DC00574-01-0700-01
LAST REVISED: August 2006
Copyright © 2002 – 2006 Sybase, Inc. All rights reserved.
This publication pertains to Sybase software and to any subsequent release until otherwise indicated in new editions or technical notes. Information in this document is subject
to change without notice. The software described herein is furnished under a license agreement, and it may be used or copied only in accordance with the terms of that
agreement.
To order additional documents, U.S. and Canadian customers should call Customer Fulfillment at (800) 685-8225, fax (617) 229-9845.
Customers in other countries with a U.S. license agreement may contact Customer Fulfillment via the above fax number. All other international customers should contact their
Sybase subsidiary or local distributor. Upgrades are provided only at regularly scheduled software release dates. No part of this publication may be reproduced, transmitted, or
translated in any form or by any means, electronic, mechanical, manual, optical, or otherwise, without the prior written permission of Sybase, Inc.
Sybase, SYBASE (logo), ADA Workbench, Adaptable Windowing Environment, Adaptive Component Architecture, Adaptive Server, Adaptive Server Anywhere, Adaptive Server Enterprise, Adaptive
Server Enterprise Monitor, Adaptive Server Enterprise Replication, Adaptive Server Everywhere, Advantage Database Server, Afaria, Answers Anywhere, Applied Meta, Applied Metacomputing,
AppModeler, APT Workbench, APT-Build, APT-Edit, APT-Execute, APT-Translator, APT-Library, ASEP, Avaki, Avaki (Arrow Design), Avaki Data Grid, AvantGo, Backup Server, BayCam, Beyond
Connected, Bit-Wise, BizTracker, Certified PowerBuilder Developer, Certified SYBASE Professional, Certified SYBASE Professional Logo, ClearConnect, Client-Library, Client Services, CodeBank,
Column Design, ComponentPack, Connection Manager, Convoy/DM, Copernicus, CSP, Data Pipeline, Data Workbench, DataArchitect, Database Analyzer, DataExpress, DataServer, DataWindow,
DataWindow .NET, DB-Library, dbQueue, Dejima, Dejima Direct, Developers Workbench, DirectConnect Anywhere, DirectConnect, Distribution Director, Dynamic Mobility Model, e-ADK,
E-Anywhere, e-Biz Integrator, E-Whatever, EC Gateway, ECMAP, ECRTP, eFulfillment Accelerator, EII Plus, Electronic Case Management, Embedded SQL, EMS, Enterprise Application Studio,
Enterprise Client/Server, Enterprise Connect, Enterprise Data Studio, Enterprise Manager, Enterprise Portal (logo), Enterprise SQL Server Manager, Enterprise Work Architecture, Enterprise Work
Designer, Enterprise Work Modeler, eProcurement Accelerator, eremote, Everything Works Better When Everything Works Together, EWA, ExtendedAssist, Extended Systems, ExtendedView, Financial
Fusion, Financial Fusion (and design), Financial Fusion Server, Formula One, Fusion Powered e-Finance, Fusion Powered Financial Destinations, Fusion Powered STP, Gateway Manager, GeoPoint,
GlobalFIX, iAnywhere, iAnywhere Solutions, ImpactNow, Industry Warehouse Studio, InfoMaker, Information Anywhere, Information Everywhere, InformationConnect, InstaHelp, Intelligent
Self-Care, InternetBuilder, iremote, iScript, Jaguar CTS, jConnect for JDBC, KnowledgeBase, Legion, Logical Memory Manager, lrLite, M2M Anywhere, Mach Desktop, Mail Anywhere Studio,
Mainframe Connect, Maintenance Express, Manage Anywhere Studio, MAP, M-Business Anywhere, M-Business Channel, M-Business Network, M-Business Suite, MDI Access Server, MDI Database
Gateway, media.splash, Message Anywhere Server, MetaWorks, MethodSet, mFolio, Mirror Activator, ML Query, MobiCATS, MobileQ, MySupport, Net-Gateway, Net-Library, New Era of Networks,
Next Generation Learning, Next Generation Learning Studio, O DEVICE, OASiS, OASiS logo, ObjectConnect, ObjectCycle, OmniConnect, OmniQ, OmniSQL Access Module, OmniSQL Toolkit,
OneBridge, Open Biz, Open Business Interchange, Open Client, Open ClientConnect, Open Client/Server, Open Client/Server Interfaces, Open Gateway, Open Server, Open ServerConnect, Open
Solutions, Optima++, Partnerships that Work, PB-Gen, PC APT Execute, PC DB-Net, PC Net Library, Pharma Anywhere, PhysicalArchitect, Pocket PowerBuilder, PocketBuilder, Power++, Power
Through Knowledge, power.stop, PowerAMC, PowerBuilder, PowerBuilder Foundation Class Library, PowerDesigner, PowerDimensions, PowerDynamo, Powering the New Economy, PowerScript,
PowerSite, PowerSocket, Powersoft, PowerStage, PowerStudio, PowerTips, Powersoft Portfolio, Powersoft Professional, PowerWare Desktop, PowerWare Enterprise, ProcessAnalyst, Pylon, Pylon
Anywhere, Pylon Application Server, Pylon Conduit, Pylon PIM Server, Pylon Pro, QAnywhere, Rapport, Relational Beans, RemoteWare, RepConnector, Report Workbench, Report-Execute, Replication
Agent, Replication Driver, Replication Server, Replication Server Manager, Replication Toolkit, Resource Manager, RFID Anywhere, RW-DisplayLib, RW-Library, SAFE, SAFE/PRO, Sales Anywhere,
Search Anywhere, SDF, Search Anywhere, Secure SQL Server, Secure SQL Toolset, Security Guardian, ShareLink, ShareSpool, SKILS, smart.partners, smart.parts, smart.script, SOA Anywhere
Trademark,SQL Advantage, SQL Anywhere, SQL Anywhere Studio, SQL Code Checker, SQL Debug, SQL Edit, SQL Edit/TPU, SQL Everywhere, SQL Modeler, SQL Remote, SQL Server, SQL Server
Manager, SQL SMART, SQL Toolset, SQL Server/CFT, SQL Server/DBM, SQL Server SNMP SubAgent, SQL Station, SQLJ, Stage III Engineering, Startup.Com, STEP, SupportNow, S.W.I.F.T.
Message Format Libraries, Sybase Central, Sybase Client/Server Interfaces, Sybase Development Framework, Sybase Financial Server, Sybase Gateways, Sybase Learning Connection, Sybase MPP,
Sybase SQL Desktop, Sybase SQL Lifecycle, Sybase SQL Workgroup, Sybase Synergy Program, Sybase Virtual Server Architecture, Sybase User Workbench, SybaseWare, Syber Financial, SyberAssist,
SybFlex, SybMD, SyBooks, System 10, System 11, System XI (logo), SystemTools, Tabular Data Stream, The Enterprise Client/Server Company, The Extensible Software Platform, The Future Is Wide
Open, The Learning Connection, The Model For Client/Server Solutions, The Online Information Center, The Power of One, TotalFix, TradeForce, Transact-SQL, Translation Toolkit, Turning
Imagination Into Reality, UltraLite, UltraLite.NET, UNIBOM, Unilib, Uninull, Unisep, Unistring, URK Runtime Kit for UniCode, Viafone, Viewer, VisualWriter, VQL, WarehouseArchitect, Warehouse
Control Center, Warehouse Studio, Warehouse WORKS, Watcom, Watcom SQL, Watcom SQL Server, Web Deployment Kit, Web.PB, Web.SQL, WebSights, WebViewer, WorkGroup SQL Server,
XA-Library, XA-Server, XcelleNet, XP Server, XTNDAccess and XTNDConnect are trademarks of Sybase, Inc. or its subsidiaries. 07/06
Unicode and the Unicode Logo are registered trademarks of Unicode, Inc.
All other company and product names used herein may be trademarks or registered trademarks of their respective companies.
Use, duplication, or disclosure by the government is subject to the restrictions set forth in subparagraph (c)(1)(ii) of DFARS 52.227-7013 for the DOD and as set forth in FAR
52.227-19(a)-(d) for civilian agencies.
Set in Arial, Courier New, and Times New Roman. Stanley Morison, the creator of Times New Roman, said of it: “By the vice of Mammon and the misery of the machine,
it is bigoted and narrow, mean and puritan.”
Credits
This product includes software developed by the Apache Software Foundation (http://www. apache.org). This product includes Hypersonic SQL and ANTLR. This product
includes code licenses from RSA Security, Inc. Some portions licensed from IBM are available at http://oss.software.ibm.com/icu4j/. Contains IBM® 64-bit Runtime
Environment for AIX™, Java™ 2 Technology Edition Version 1.4 Modules © Copyright IBM Corporation 1999, 2000 All Rights Reserved. Contains the SAXON XSLT
Processor from Michael Kay, which is available at http://saxon.sourceforge.net. This product includes software developed by the Proxool Project
(http://proxool.sourceforge.net).
Data Integration with Sybase Avaki Studio
Written by Beth Thoenen, Luis Valdez, Stephanos Bacon, and Kelly Parr Soli
Sybase, Inc., One Sybase Drive, Dublin, CA 94568.
Table of contents
Preface
vii
Audience vii
Organization viii
Related documentation ix
How to contact Avaki support at Sybase, Inc.
Chapter 1
View models in Avaki Studio
x
1
Background: Avaki concepts 2
What is a view model? 2
Avaki Studio vs. writing your own data service plug-in
Schemas 3
Data flow 4
Parameters and control variables 4
Expressions in operators 4
Performance 5
Operators 6
Chapter 2
Getting started with Avaki Studio
3
9
Installing Avaki Studio 9
Starting Avaki Studio 10
Specifying a workspace directory 10
The Resource perspective 12
Background: Eclipse Workbench concepts 12
Creating a project 14
The Avaki perspective: A tour 17
The toolbar 17
The navigator 17
The data catalog view 18
Browsing for input sources 18
Creating and managing input sources 19
Managing the data catalog 20
Data Integration with Sybase Avaki Studio
i
The palette 20
The view model editor 21
Adding and removing objects
View model tabs 21
The metadata model editor 22
The bottom pane 22
Table schema view 22
Dependencies view 22
Console view 22
View Model Parameters view
Setting preferences 23
Working with Avaki Studio 26
Chapter 3
Creating view models
21
23
29
The exercise 30
The HR data service 30
The database connectors 31
Tasks in this tutorial: the to-do list 31
Creating database connectors 32
Creating database operations 38
Using the view model wizard 43
Configuring input sources 44
Joining result sets 45
Using Projection to combine columns 47
Testing the view model 50
Deploying the view model as a data service 51
Thinking ahead: load sharing for data service execution
Chapter 4
The view model editor
53
Common features of view model components 54
Creating components 54
Creating elements using the palette 54
Creating Input Source elements using drag and drop
Selecting and moving elements 56
Creating connections between elements 57
Properties dialogs 58
Element names 58
Element descriptions 59
ii
52
Data Integration with Sybase Avaki Studio
55
Red borders: Errors in your view model 60
Working with schemas 60
Showing and hiding elements’ schemas 60
Specifying schemas for operators 60
Using global parameters 63
Displaying global parameters 63
Adding global parameters 64
Modifying global parameters 65
Deleting global parameters 65
Reordering global parameters 65
Using expressions within Avaki Studio 66
Simple expressions 66
Boolean expressions 66
Complex expressions 67
Expressions and JavaScript 67
JavaScript resources 67
Accessing columns from incoming result sets 68
Accessing global parameters 68
Working with variables 69
Updating variables—some caveats 69
Allowed types for variables 70
The expressions menu 71
Global Parameters 71
Columns from the input element 71
Downstream Variables 71
Operators 72
Avaki Functions 73
Result set accessors 73
Current user methods
74
Propagating name changes through the view model
Advanced topics 75
Using a .jsi file to enhance your model 75
Performance of sort-based operators 76
Sort chunk size 76
Providing enough space for temporary sort files
Data Integration with Sybase Avaki Studio
75
76
iii
Chapter 5
Metadata modeling
77
About metadata models 78
Importing metadata models 79
Creating and editing metadata models 85
Mapping metadata models to Avaki objects
Deploying metadata models 91
Deriving metadata models 93
Deleting metadata models 94
Undeploying metadata models 95
Chapter 6
Managing the data catalog
88
97
Modifying ACLs 98
Managing attributes 101
Managing categories 104
Creating and displaying categories 104
Adding objects to categories 105
Removing objects from categories 106
Deleting categories 106
Chapter 7
Operator reference
107
Aggregate 108
Connections 108
Aggregate properties 109
Defining aggregate columns 109
Aggregate functions 110
Custom 111
Connections 111
Custom properties 112
Specifying the output schema 112
Entering custom code 113
Example: Making a lookup table using a Custom operator and a .jsi file
The problem 114
One possible solution 114
Solving the problem with a Custom operator 115
Generator 117
Connections 117
iv
Data Integration with Sybase Avaki Studio
114
Generator properties 118
Entering iteration control code 118
Defining the output columns 119
Group By 121
Connections 121
Performance notes 122
Group By properties 122
Specifying groups 122
Specifying aggregate columns 123
Input Source 125
Connections 125
Input Source Properties 126
Configuring the source 126
Configuring the transform 136
Configuring error handling 143
Mapping input parameters 144
Intersection 148
Connections 148
Performance notes 148
Intersection properties 148
Iterator 149
Connections 150
Iterator properties 150
Example: Iterating over the elements of an array parameter
The problem 152
The solution 152
Join 154
Connections 154
Join properties 154
Inner and outer tables 155
Join algorithms 155
Join types 156
Defining join columns 156
Multiplexer 157
Connections 157
Multiplexer properties 158
Order By 159
Connections 159
Performance notes 159
Data Integration with Sybase Avaki Studio
152
v
Order By properties 160
Specifying the sort criteria 160
Projection 161
Connections 161
Performance notes 161
Projection properties 162
Defining projection columns 162
Removing duplicates 163
Result 164
Connections 164
Result properties 164
Select 165
Connections 165
Select properties 165
Splitter 166
Connections 166
Splitter properties 167
Caching result sets 167
Union 168
Connections 168
Performance notes 168
Union properties 169
Removing duplicates 169
Update 169
Connections 170
Performance notes 170
Update properties 171
Choosing a database operation 172
Mapping update parameters 172
Specifying the output 173
Glossary
vi
175
Data Integration with Sybase Avaki Studio
Preface
This guide, Data Integration with Sybase Avaki Studio, explains how to use Avaki Studio software. With Studio, you can provision data sources into the Avaki data catalog
and create data services that combine and transform your data. You can also manage
your data catalog.
Note This book and the product’s user interfaces refer to Sybase Avaki EII software as Avaki or Avaki Data Grid.
Audience
This book is written for readers with an understanding of Avaki provisioning and integration tools, including database connectors, database operations, and data services.
These tools are described in the Sybase Avaki EII Overture, which you should read
before using Avaki Studio.
We recommend that Studio users know how to use a reporting tool such as Crystal
Reports or Excel.
Knowledge of SQL is necessary if you want to create your own database operations. It
is helpful but not necessary for understanding view model operators, many of which
are based on SQL concepts.
Familiarity with the JavaScript language is helpful for Avaki Studio users, but not
always necessary. Some view models can be completed by users with no JavaScript at
Data Integration with Sybase Avaki Studio
vii
Preface
all, while others require partial to full working knowledge. In Avaki Studio, you can
employ JavaScript in the following circumstances:
• Several operators allow or require you to enter JavaScript control expressions. In
many cases, however, you can construct the expression you need using elements
provided in the menus. See Chapter 7, “Operator reference,” for details on the operators that accept JavaScript expressions.
• With some working knowledge of Javascript, you can write Javascript functions in
JavaScript include files and call the functions from the JavaScript expressions in
your operators.
• To write a custom operator, you need full working knowledge of JavaScript.
Organization
This book is organized as follows:
viii
Chapter 1
View models in Avaki Studio
Provides an overview of view models, which represent
data flows in Avaki Studio, and their components.
Chapter 2
Getting started with Avaki Studio
Explains how to start Avaki Studio for the first time and
provides a tour of the tools you can use.
Chapter 3
Creating view models
A tutorial that walks you through the process of creating
a view model and deploying it as a data service.
Chapter 4
The view model editor
Shows how to use the view model editor and how to use
JavaScript expressions with operators.
Chapter 5
Metadata modeling
Provides an overview of metadata modeling and
describes tools for creating and using metadata models.
Chapter 6
Managing the data catalog
Describes tasks you can perform in Avaki Studio’s data
catalog view, including modifying access control lists,
creating and modifying attributes, and creating categories and adding objects to them.
Chapter 7
Operator reference
Provides detailed information on how Avaki Studio’s
operators, Input Source elements, and Result elements
work.
Glossary
Defines terms used in this guide
Data Integration with Sybase Avaki Studio
Related documentation
Related documentation
These manuals make up the Avaki documentation set:
• Sybase Avaki EII Overture
• Sybase Avaki EII Administration Guide (includes installation instructions)
• Data Integration with Sybase Avaki Studio
• Sybase Avaki EII Provisioning and Advanced Data Integration Guide
• Sybase Avaki EII API Guide
• Sybase Avaki EII Command Reference
The manuals are included, in PDF format, on the CD with Avaki software. They are
stored in the docs subdirectory of the Avaki installation directory. Data Integration
with Sybase Avaki Studio is also accessible in Avaki Studio.
To access the manuals via Avaki’s web user interface, log in to your Avaki domain and
click the Help link at the top right corner of any page of the web UI.
Data Integration with Sybase Avaki Studio
ix
Preface
How to contact Avaki support at Sybase, Inc.
For general information about Sybase technical support, see the Customer Service Reference Guide at
http://www.sybase.com/support/aboutsupport/guide/csrg
Please contact us with any questions or difficulties you encounter.
By telephone
In North America, call toll free: 1-800-8SYBASE
Outside North America, follow the link below to see a list of Sybase offices and phone
numbers around the world.
http://www.sybase.com/contactus/support
On the web
If you are a designated contact for a technical support plan, you can log and track cases
on the web using the Case Express application. At www.sybase.com, mouse over the
Support and Services tab and select Case Management from the dropdown list. Use
the email address and password for your mysybase account to log in.
x
Data Integration with Sybase Avaki Studio
Chapter 1
View models in Avaki Studio
Avaki Studio is a graphical, metadata-driven modeling tool for data integration that
lets you combine data from heterogeneous data sources. With Avaki Studio, you can
build view models by dragging and dropping input sources, operators, and output targets. A view model is a sequence of operations that combine or transform data from
one or more sources. This chapter introduces Avaki Studio and the tools it provides for
provisioning data sources, building view models, and deploying them as Avaki data
services.
In this chapter:
• “Background: Avaki concepts,” below
• “What is a view model?” on page 2
• “Operators” on page 6
Data Integration with Sybase Avaki Studio
1
View models in Avaki Studio
Background: Avaki concepts
Before tackling the task of creating a view model, you should be familiar with some
Avaki concepts and terminology. This information can be found in the Sybase Avaki
EII Overture. You’re ready to use Avaki Studio when you know the answers to these
questions:
• What is a database connector?
• What is a database operation?
• What is a data service and what is it good for?
• How do data services interact with database operations and with other data ser-
vices?
• What are data service dependencies and database operation dependencies?
• What is a result set?
What is a view model?
A view model is the abstract, graphical representation of the processing performed by
a particular Avaki data service. The view model represents the flow of data from one
or more input sources through a number of operators to an output result. You create a
view model and deploy the resulting data service(s) using Avaki Studio.
The inputs to a view model can be relational result sets produced by Avaki database
operations or data services; XML results produced by data services; data catalog files
in CSV or XML format; HTTP operations; and web services calls.
A view model is not required to have any inputs; it can generate its own data. Nor is it
required to have any operators—though there would be no point to a view model that
has neither inputs nor operators.
Outputs are also in result set format. Most operators produce a single output (the
exception is the Splitter operator). Every view model includes a Result element, but a
view model need not produce output. View models can produce at most one output
result set.
2
Data Integration with Sybase Avaki Studio
What is a view model?
Thus, a view model consists of
• Zero or more input sources
• Zero or more operators to manipulate the data
• Exactly one Result element
Avaki Studio vs. writing your own data service plug-in
Because of its graphical nature and rich user interface, Studio is the preferred way to
create many data services. However, data services created in Studio are fundamentally
relational in nature; while they can take in nonrelational data, the first step in doing so
in Studio is to specify a transformation on that data that yields a relational result. If
you want your data service to work or produce results outside the relational paradigm,
you’ll need either to use one of the built-in plug-ins provided by Sybase or to build a
data service plug-in of your own. (You might use the built-in no-operation plug-in to
provision a web service’s data as XML, or the XSLT plug-in to use XSLT to process one
or more XML inputs.) For another format—a data service that does image processing,
perhaps—you’d write your own plug-in.
For information on Avaki’s built-in data service plug-ins and on writing your own
plug-ins in Java, JavaScript, or XSLT, see the Sybase Avaki EII Provisioning and
Advanced Data Integration Guide.
Schemas
Each result set in a view model, from the inputs to the result, is defined by a schema
consisting of an ordered set of typed columns. The output schema of the view model is
the schema of the operator that is directly connected to the Result element.
Studio lets you display the schema information for any element in a view model. By
manipulating the properties of some operators, you can also alter the output schema.
Schemas are shown in the Table Schema tab of the bottom pane of the Avaki perspective.
Studio looks for schemas (.xsd files) for input sources in the Avaki domain’s /Metadata directory. Note, however, that newly created database operations and data services have no metadata. To create metadata, you must either execute the database
operation or data service, or use Studio’s “generate schema” feature. For information
on generating schemas, see “The data catalog view” on page 18.
Data Integration with Sybase Avaki Studio
3
View models in Avaki Studio
Data flow
Discussions of view model operators and especially of variables rely on the notion that
in a view model, data flows toward the result—and generally from left to right. We use
the terms upstream and downstream to indicate direction in a view model:
• Upstream: away from the Result element
• Downstream: towards the Result element
Thus, in a view model with two Select operators, the downstream Select is the one
closer to the Result element.
Parameters and control variables
View models can have variables, which can be used by the various operators. Variables include global parameters (that is, parameters to the entire view model/data service) and control variables introduced by some operators (such as Iterator and
Custom). These variables, along with the values of columns in the inputs to an operator, can be referenced in the expressions that control the behavior of the operators.
Some examples are the where expression in a Select operator and the column definitions in a Projection operator.
Control variables introduced by various operators are accessible only to expressions in
upstream operators—that is, in operators to the left, whose output directly or indirectly
flows into the operator that introduces the control variable.
View model parameters are accessible from any place in the view model where you
can enter expressions. View model parameter values can be singletons or arrays. To
see a list of data types you can use for parameters, click in the Type column of the
parameters tab and pull down the menu.
You can view, enter, and modify view model parameters on the Parameters tab in the
bottom pane of Studio’s Avaki perspective. See “Using global parameters” on page 63.
Expressions in operators
Several view model operators allow or require you to enter JavaScript expressions that
control the behavior of the operator. For example, to use Projection to combine two
columns, you might write an expression that concatenates the columns, multiplies
them, or filters out the larger of two values.
4
Data Integration with Sybase Avaki Studio
What is a view model?
Everywhere you can enter JavaScript expressions, you have access to an object called
variables, which in turn gives you access to parameters, control variables for downstream operators, and columns in the input result sets.
Studio provides contextual menus for constructing JavaScript expressions. The menus
let you click to select elements like column names, operators, global parameters, and
predefined functions. For many expressions, no knowledge of JavaScript—or touch
typing—is required.
For more information, see “Using expressions within Avaki Studio” on page 66.
Performance
Two important points affect the performance of data services deployed from Avaki
Studio:
• The operators are all implemented in Java, and all the significant data manipulation
happens in Java. JavaScript is used only to tie the operations together and to provide a way to evaluate expressions (for example, the where clause in a Select operator).
• The runtime model is implemented in a “lazy,” or “pull,” fashion that defers any
computation until a result is requested by the next step in the model. Even when a
result is requested (with a couple of exceptions), an operator performs only as much
computation as necessary to produce the next row before returning. Thus, a model
consisting only of a Select operator and a Projection operator will run through the
input result set exactly once and will not create any intermediate result sets that
need to be copied.
Exceptions to this rule are operators that need to examine all rows of one or more of
their inputs. These include Order By and all the operators that depend on sorted
values such as Join, Group By, Aggregate, and Intersection, as well as any operator that uses the Distinct option to eliminate duplicate rows.
Data Integration with Sybase Avaki Studio
5
View models in Avaki Studio
Operators
Avaki Studio provides a selection of elements and operators you can use to manipulate
data in a view model. The operators are described briefly here. For details on how the
operators work and how to use them, see Chapter 7‚ “Operator reference.”
Beginning and ending data flows. Two important elements identify the beginnings
and the end of the flow in a view model:
• Input Source
Use Input Source elements to specify where the data for you view model comes
from, such as existing view models (data services), database operations, or grid
files. A view model can have zero or more input sources.
• Result
Studio puts a Result element at the end of each view model’s data flow. A view
model has one result.
Relational operations. These operators let you perform SQL-style operations:
• Select
Given one input result set and a Boolean where expression, Select produces a new
result set containing the input rows for which the where expression evaluates to
true.
• Projection
Projection lets you modify the schema—you can remove columns, add computed
columns, or apply formulas to alter existing column values.
• Order By
Given one input result set and your specification of which column(s) to sort on and
whether to sort in ascending or descending order, Order By produces a new result
set in which the content of the input is sorted.
• Aggregate
Avaki provides a number of predefined aggregation functions (including sum,
count, average, minimum, maximum). Given one input result set, Aggregate produces a new, single-row result set by applying aggregate functions to the input.
• Group By
Group By uses the same aggregation functions used in Aggregate. Given one input
result set, Group By applies aggregate functions to the input and groups the rows
in the result set according to input columns you specify.
6
Data Integration with Sybase Avaki Studio
Operators
• Join
Given two input result sets that share a common column, Join combines rows and
produces a new result set. Join supports Inner, Outer-left, Outer-right, and
Outer-full join types, as well as three join algorithms: Sort Merge Join, Hash Join,
and Nested Loop Join.
• Union
Given two input result sets with identical schemas, Union generates a single result
set that includes everything in both inputs.
• Intersection
Given two input result sets with identical schemas, Intersection generates a result
set containing only rows that are present in both inputs.
Advanced operations. Additional operators let you perform more powerful manipu-
lations:
• Multiplexer
Given up to five inputs and a conditional expression for each, Multiplexer generates a result set in which all the input result sets whose conditional expressions
evaluate to true are concatenated. You can use Multiplexer to select from among
several choices and to concatenate the selected result sets into a single result set.
• Iterator
Iterator executes its primary input repeatedly; the number of iterations is determined by an input parameter or by an optional secondary input. For example, you
can perform a computation once for every date in a range, or get account numbers
and balances for every social security number in a list. You can also specify a condition to terminate the iteration. Iterations may be nested.
• Splitter
Given one input result set, Splitter routes input to multiple, identical output result
sets without necessarily recomputing its input. It can also cache its output.
• Generator
Generator creates a new result set based on JavaScript expressions and a schema
that you supply.
• Update
Using an Avaki database operation, Update inserts data into an external database.
Each update is a transaction separate from the data service itself.
Write your own operator. A final operator lets you define your own operation:
• Custom
Using JavaScript logic that you supply, Custom performs an operation of your design.
Data Integration with Sybase Avaki Studio
7
View models in Avaki Studio
8
Data Integration with Sybase Avaki Studio
Chapter 2
Getting started with Avaki Studio
Read this chapter for instructions on starting Avaki Studio for the first time and for
general information about the tools Studio provides.
In this chapter:
• “Installing Avaki Studio,” below
• “Starting Avaki Studio” on page 10
• “Creating a project” on page 14
• “The Avaki perspective: A tour” on page 17
• “Setting preferences” on page 23
• “Working with Avaki Studio” on page 26
Installing Avaki Studio
Avaki Studio runs on Windows 2003 and Windows XP. You install Studio from the
standard Avaki installer. When you reach the installer’s component selection screen,
deselect any unwanted components—but be sure to leave Avaki Studio selected.
If you need more information on running the installer, see the Sybase Avaki EII Administration Guide.
Data Integration with Sybase Avaki Studio
9
Getting started with Avaki Studio
Starting Avaki Studio
You can launch Avaki Studio using the Avaki program group or shortcut that was created during installation. By default, the installer creates an Avaki Data Grid program
group in the Programs portion of your Windows Start menu.
To start Studio, select Start > Programs > Avaki Data Grid 7.0 > Avaki Studio
You can also start Studio from the command line. In the Avaki installation directory,
enter
C:\AvakiDataGrid70> avaki_studio
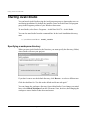
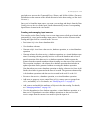
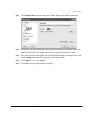
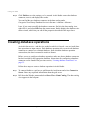
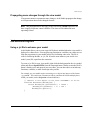
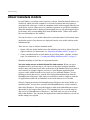
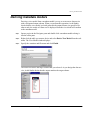
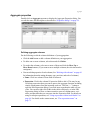
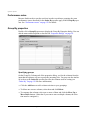
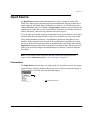
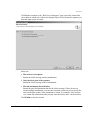
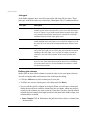
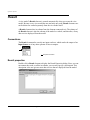
Specifying a workspace directory
When you start Avaki Studio for the first time, you must specify the directory (folder)
where Studio will store your projects:
If you don’t want to use the default directory, click Browse... to select a different one.
Click the checkbox for “Use this as the default and do not ask again.”
You can change the workspace directory from within Studio if you change your mind
later: select Switch Workspace from the File menu. Note, however, that changing the
workspace causes Studio to shut down and restart.
10
Data Integration with Sybase Avaki Studio
Starting Avaki Studio
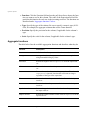
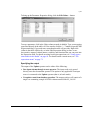
In the workspace directory, Studio creates a subdirectory for each project. Files of the
following types can be found in the workspace project directories:
Filename extension
Purpose
.avm
Studio creates an Avaki view model (.avm) file for
each view model.
.amm
Studio creates an Avaki metadata model (.amm) file
for each metadata model.
.js
Studio creates a JavaScript (.js) file for each model; the
.js file has the same base name as the model’s .avm
file. This is the executable form of the view model;
when the view model is deployed as a data service, the
JavaScript file is sometimes called the data service
plug-in. JavaScript plug-in files are stored in the \bin
subdirectory of the workspace project directory.
.jsi
You create a JavaScript include (.jsi) file if you have
JavaScript functions that you want to invoke in your
view model. Give the .jsi file the same base name as
the model’s .avm file.
.project
Eclipse Workbench creates a .project file for each
project in the project directory. (Files whose names
begin with a . might not be visible to you, depending
on your Eclipse filter settings.)
Data Integration with Sybase Avaki Studio
11
Getting started with Avaki Studio
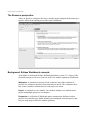
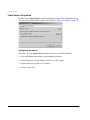
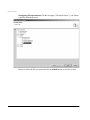
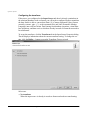
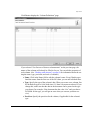
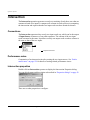
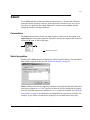
The Resource perspective
After you specify a workspace directory, a window opens to display the Resource perspective, which is the opening screen for Eclipse Workbench.
Background: Eclipse Workbench concepts
Avaki Studio is built on the Eclipse Workbench platform, version 3.1.2. Some of the
tools and concepts you’ll use to work on Avaki view models originate in Workbench:
Workspace. A container for projects. Each workspace stores files related to its
projects in a workspace directory whose location you specify. The workspace directory, in turn, contains a subdirectory for each project you create.
Project. A container for view models. You can have multiple view models in one
project and multiple projects in a workspace.
Perspective. A collection of Workbench panes customized to facilitate work on
projects of a particular type. Studio includes a preconfigured Avaki perspective that
lets you create projects and view models right away.
12
Data Integration with Sybase Avaki Studio
Starting Avaki Studio
We strongly recommend that you look at the Eclipse documentation, which is available in Studio. Some common tasks, including importing and renaming Studio
projects, are performed using Eclipse tools.
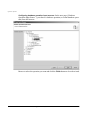
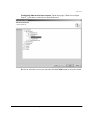
To view Eclipse’s Workbench User Guide, select Help Contents from the Help menu.
In the Contents pane on the left side of the resulting help window, click Workbench
User Guide.
Data Integration with Sybase Avaki Studio
13
Getting started with Avaki Studio
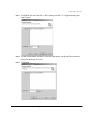
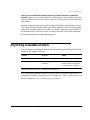
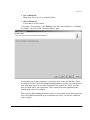
Creating a project
To use the tools provided by Avaki Studio, you must open the Avaki perspective. In
the Avaki perspective, you can create a project and start working on your first view
model.
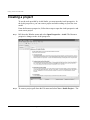
From the Resource perspective, follow these steps to open the Avaki perspective and
create a new project:
14
Step 1
Pull down the Window menu and select Open Perspective > Avaki. The Resource
perspective changes to the Avaki perspective.
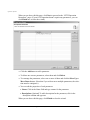
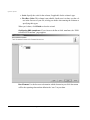
Step 2
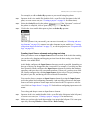
To create a project, pull down the File menu and select New > Studio Project.... The
Data Integration with Sybase Avaki Studio
Creating a project
New Avaki Studio Project wizard appears.
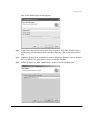
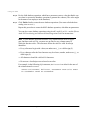
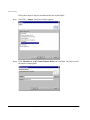
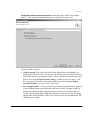
Step 3
In the Project name field, enter a name for your project. By default, Studio creates a
subdirectory with this name in your workspace directory—this is your project directory.
Step 4
(Optional) To specify an alternative location for the project directory, click to uncheck
the “Use default” box, then enter or browse to the new location.
Step 5
In the File Name box, enter a name for the model (.avm) file for the project.
Data Integration with Sybase Avaki Studio
15
Getting started with Avaki Studio
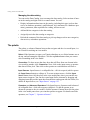
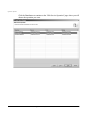
Step 6
Click Finish to create the project. The project includes a starter view model consisting
of a result.
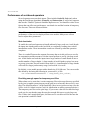
Red borders. When an element (an input source, operator, or result) in the view
model is not properly set up or connected to other elements, Studio outlines the problem element in red. If you mouse over the element, Studio displays an explanation of
the problem. For example, you see the following when you mouse over an unconnected Result element in a new view model:
Error: Model is not valid. Result has no inputs.
16
Data Integration with Sybase Avaki Studio
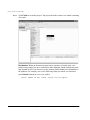
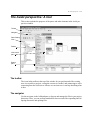
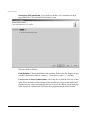
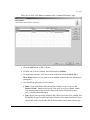
The Avaki perspective: A tour
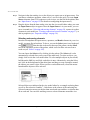
The Avaki perspective: A tour
This section explains the purposes of the panes and other elements in the Avaki perspective window.
Toolbar
Navigator
Data Catalog
View
Palette
View model
pane
Bottom
pane
The toolbar
The icons in the toolbar at the top of the window let you perform tasks like creating
new view models or projects, saving the current view model, and connecting to or disconnecting from the Avaki server. Mouse over an icon to see a tool tip describing what
it does.
The navigator
Use the navigator, in the left-hand pane, to browse and manage the files in your project
directories. Here, you can perform standard file-browser tasks like expanding and collapsing directories and opening files.
Data Integration with Sybase Avaki Studio
17
Getting started with Avaki Studio
To open a saved view model, expand the view model’s project folder in the navigator
and double-click on the .avm file (myviewmodel.avm, for example). The view model
opens in a new tab in the view model pane; to close it, click the X on the tab. To save
the view model, select Save or Save As... from the File menu, or enter Ctrl–s.
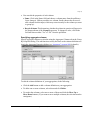
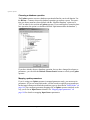
The data catalog view
The data catalog view shares the left-hand pane with the Navigator. To display it, pull
down the Window menu and select Show View > Data Catalog. Click Yes when Studio asks whether to connect to the Avaki server, and provide any requested Avaki login
information.
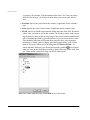
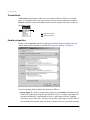
Browsing for input sources
When Studio is connected to an Avaki domain, you can use the data catalog view to
browse the domain’s Avaki directories for relational and nonrelational input sources.
Relational input sources. Of interest in most domains is the Categories folder, where
you can browse for relational input sources such as database operations, data services,
and SQL views:
Categories/ViewLibrary/...
Contents
DatabaseServices/<dbconn>/
Database operations stored in folders
named for their database connectors
DatabaseServices/<dbconn>/ProvisionedSQL- SQL views provisioned from tables in
Views
external databases
DatabaseServices/<dbconn>/VirtualSQLViews SQL views generated from database
operations
DataServices
Data services
DataServices/VirtualSQLViews
SQL views generated from data services
VirtualDatabaseServices/Operations
Virtual database operations
VirtualDatabaseServices/Services
Reserved for system use
VirtualDatabaseServices/VirtualSQLViews
SQL views generated from virtual database operations
Nonrelational input sources. The location of nonrelational input sources such as
XML files, CSV files, and WSDL files can vary from one Avaki domain to another;
18
Data Integration with Sybase Avaki Studio
The Avaki perspective: A tour
good places to start are the /GeneratedViews, /Shares, and /WSDLs folders. (For more
information on the contents of the default directories in the data catalog, see the Avaki
Overture.)
Once you’ve found the input source you want, you can drag and drop it from the Data
Catalog view to the view model pane. Studio automatically creates a corresponding
Input Source element in the view model.
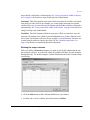
Creating and managing input sources
You can also use the Data Catalog view to create input sources (both provisioned and
generated SQL views) and to manage input sources. Select an item of interest in the
catalog and right-click for a context menu. You can:
• Provision a SQL view from a database table.
• View database schemas.
• Generate a SQL view from a data service, database operation, or a virtual database
operation.
• Generate schema for a data service, a database operation, or a virtual database oper-
ation. Generating schema generally involves a call on the database and at least a
partial execution of the data service or database operation. Studio extracts the
schema from the returned metadata without iterating over the rows of the result set.
The exception is updates—the schema for a database operation that includes an
update operation can be generated without executing the database operation.
Note that when you create a database operation or deploy a data service from Avaki
Studio, the schema is generated at the time of creation. The generate schema utility
is for database operations and data services created in the web UI or the CLI.
• Execute a data service, a database operation, or a virtual database operation.
• Add users or groups to access control lists (ACLs), remove users or groups from
ACLs, and modify ACLs. For details, see “Modifying ACLs” on page 98.
• Add, remove and modify the attributes of objects in the data catalog. For details,
see “Managing attributes” on page 101.
• View the dependencies for a database operation, a virtual database operation, or a
data service. Dependencies are other database operations or data services that
receive output from the current view model or provide input to it.
Data Integration with Sybase Avaki Studio
19
Getting started with Avaki Studio
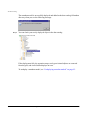
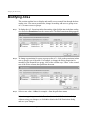
Managing the data catalog
You can use the Data Catalog view to manage the data catalog. Select an item of interest in the catalog and right-click for a context menu. You can:
• Display information about items in the catalog, including their type (such as data
service or database operation), qualified name, SQL statement (for a database oper-
ation), parameters, data expiration for caching, and run-as user.
• Add and delete categories in the data catalog.
• Assign objects in the data catalog to categories.
• Refresh the contents of the data catalog to pick up changes such as new categories,
data services, or database operations.
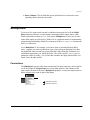
The palette
The palette, a column of buttons between the navigator and the view model pane, is a
set of tools for working on view models:
Select. If the Operators are open, you’ll notice that there are two Select buttons: one at
the top, and one among the Operators. Click the top Select button when you want to
select something in the view model.
Connection. To draw arrows that show how data will flow from one element in the
view model to another, click Connection. Next, click on the input source or operator
that data will flow from. Then click on the operator or result that data will flow to.
Input Sources. Input Sources is a collapsible list—click it to open it (which exposes
the Input Source button) or collapse it. To create an input source, click the Input
Source button, then click the place in the view model pane where you want the new
input source to appear. (You can also create Input Source elements by dragging and
dropping items that provide input data from the data catalog pane into the editor.) For
details on Input Sources, see “Input Source” on page 125.
Operators and Advanced Operators. Like Input Sources, Operators and Advanced
are collapsible lists—click one to open or collapse it. To add an operator or an
advanced operator to the view model, click the operator’s button, then click the point
in the view model pane where you want the operator to appear. For details on all the
operators, see Chapter 7‚ “Operator reference”.
20
Data Integration with Sybase Avaki Studio
The Avaki perspective: A tour
The view model editor
The view model editing pane lets you create, display, and manipulate the view models
in the current project. For detailed information on creating and editing view models,
see Chapter 4‚ “The view model editor”.
Adding and removing objects
Use the buttons in the palette to add objects to the view model. (See “The palette,”
above.) To remove an object, select it and click right. Choose Delete from the menu.
View model tabs
If you create multiple view models in a project, you’ll see a tab for each view model
above the view model pane, as shown here. An asterisk indicates that the view model
has been modified since it was saved.
Data Integration with Sybase Avaki Studio
21
Getting started with Avaki Studio
The metadata model editor
The metadata model editing pane lets you create, display, and manipulate the metadata
(schema) models in the current project. For detailed information on creating and editing metadata models, see Chapter 5‚ “Metadata modeling”.
The bottom pane
The bottom pane of the Avaki perspective window displays view model parameters,
the console, dependencies, and table schemas.
Table schema view
The table schema view displays the schema—the column definitions—of a database
table or an Avaki SQL view. To display a schema, select a table or SQL view in the data
catalog view, click right to open the popup menu, and select View Table Schema.
Dependencies view
The Dependencies view displays information about data services and database operations that provide input to or receive output from another data service or database
operation. To display dependencies, select a data service or database operation in the
data catalog view, click right to open the popup menu, and select View Dependencies.
Console view
The console view displays results and execution traces when you test a view model. To
display the console view, pull down the Window menu and select Show View > Console. To remove output from the console, click the Clear Console button
.
To test a view model, pull down the Avaki menu and select Execute Model. For more
information, see “Testing the view model” on page 50.
22
Data Integration with Sybase Avaki Studio
Setting preferences
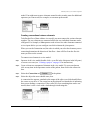
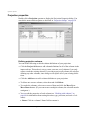
View Model Parameters view
The View Model Parameters tab lets you create and manipulate global parameters for
the current view model. Use the buttons (upper right) to add
, remove
, or mod-
ify
global parameters, or to move parameters up
or down
in the list. For
details on working with parameters, see “Using global parameters” on page 63.
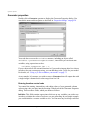
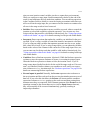
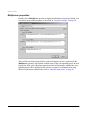
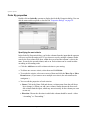
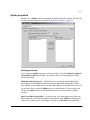
Setting preferences
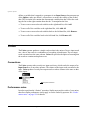
This section explains how to set preferences in Avaki Studio. Preferences specify
which Avaki grid server Studio connects to (when you browse for an input source or
when you test a view model, for example) and how Studio logs in to the Avaki domain.
You can also control the color and font Studio uses to display your projects.
Step 1
In the Window menu, select Preferences. The Preferences dialog opens.
Step 2
In the browsing pane on the left, select Avaki. The server preferences dialog appears.
Step 3
In the Avaki Domain Controller field, enter the name of the grid domain controller
(GDC) for your Avaki domain.
Step 4
If the GDC does not use the default connect port, enter the GDC’s connect port number
in the Domain Controller port field.
Step 5
Click Apply to save your changes.
Data Integration with Sybase Avaki Studio
23
Getting started with Avaki Studio
Note Be sure to click Apply on each page of the Preferences dialog when you
make changes. If you don’t, you’ll lose any changes to that page.
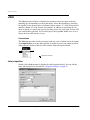
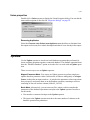
Step 6
Expand the Avaki entry in the browsing pane and select Authentication. Studio connects to your GDC (if possible) and displays the authentication preferences dialog.
Note Fill in the Authentication Service, Username, and Password fields only if
you want to use the same values every time Studio logs in to the grid. If you want
to use two or more different user accounts, leave some or all of these fields
empty. Studio will prompt you for any needed information when it logs in to the
Avaki domain.
24
Step 7
Use the Authentication Service pull-down to select the authentication service for the
user account you want Studio to use to log in to the data grid. (If Studio was unable to
reach the GDC, the pull-down is empty.) Enter the name of the account in the Username field, and enter the account’s password in the Password field.
Step 8
Click Apply to save your changes.
Data Integration with Sybase Avaki Studio
Setting preferences
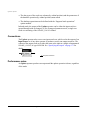
Step 9
Click Model Editor in the browser pane. Studio displays the Model preferences.
Step 10
The Base Color field controls the color of the tabs at the top of elements in the view
model. Click on the color sample to select from a palette of alternative colors.
Step 11
The Code Font field controls the font in which Studio displays JavaScript code. Click
on the Change button to select from a list of alternative fonts.
Step 12
Click Apply to save your changes.
Step 13
Click OK to exit from the preferences dialog.
Data Integration with Sybase Avaki Studio
25
Getting started with Avaki Studio
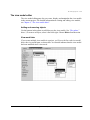
Working with Avaki Studio
This section provides an overview of one kind of workflow in Avaki Studio. The process of building and deploying a view model is as follows:
1.
2.
3.
Create a new view model. The view model is where you specify how your data service
combines and transforms data. For instructions on creating view models, see “Using
the view model wizard” on page 43.
Create a database connector. To extract data from a relational database, your view
model needs a pair of Avaki services: a database operation to select the data, and a
database connector to access the database. For instructions on creating database connectors, see “Creating database connectors” on page 32.
Specify input sources for the view model. An Avaki data service—and the view model
on which it is based—can use Avaki database operations, data services, and other
objects as input sources. The process for specifying an input source is as follows:
• Create database operations or data services. For instructions about creating database operations, see “Creating database operations” on page 38. For instructions
about creating data services, see Chapter 3‚ “Creating view models”.
• Check dependencies. The Dependencies view displays information about data ser-
vices and database operations that provide input to or receive output from another
data service or database operation. For more information, see “Dependencies view”
on page 22.
• Create an input source and specify its schema. See “Configuring input sources” on
page 44 and “Input Source” on page 125.
4.
5.
6.
26
Specify parameters. You often will want to provide parameters to your model that
affect the way it functions. Parameters to the view model are called global parameters
because they are available to all of the operators and other elements within the model.
For information about specifying, viewing, and editing global parameters, see “Using
global parameters” on page 63.
If your input source has parameters, you must map them to global view model parameters. For more information, see “Mapping input parameters” on page 144.
Specify operators. Avaki Studio provides elements and operators you can use to
manipulate data in a view model. The process for specifying an operator is as follows:
• Create operators. A Join operator combines the result sets from two input sources.
For more information, see “Joining result sets” on page 45. A Projection operator
lets you modify a schema—you can remove columns, add computed columns, or
apply formulas to alter existing column values. For more information, see “Using
Data Integration with Sybase Avaki Studio
Working with Avaki Studio
Projection to combine columns” on page 47. For additional information about operators, see Chapter 7‚ “Operator reference”.
7.
Enter JavaScript expressions where needed, including control variables.
• Most of the operators in Avaki Studio allow you to specify expressions that are
evaluated at runtime to configure how your view model works. For more information, see “Using expressions within Avaki Studio” on page 66.
• (Optional) Create a JavaScript include file. If you have JavaScript functions that
you want to invoke in your view model, create a JavaScript include (.jsi) file. See
“Using a .jsi file to enhance your model” on page 75.
• A Custom operator can perform any operation that you define, using arbitrary
JavaScript code that you supply. For information about writing custom operators,
see “Custom” on page 111.
8.
Test the view model. See “Testing the view model” on page 50.
9.
Deploy the view model. See “Deploying the view model as a data service” on page 51.
Data Integration with Sybase Avaki Studio
27
Getting started with Avaki Studio
28
Data Integration with Sybase Avaki Studio
Chapter 3
Creating view models
This chapter is a tutorial that walks you through the process of creating a view model
in Avaki Studio and deploying your view model as a data service.
In this chapter:
• “The exercise,” below
• “Creating database connectors” on page 32
• “Creating database operations” on page 38
• “Using the view model wizard” on page 43
• “Configuring input sources” on page 44
• “Joining result sets” on page 45
• “Using Projection to combine columns” on page 47
• “Testing the view model” on page 50
• “Deploying the view model as a data service” on page 51
Data Integration with Sybase Avaki Studio
29
Creating view models
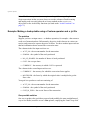
The exercise
In this tutorial, we’ll create a data service for the human resources department of a
large organization. The HR coordinators who answer employees’ questions about compensation, benefits, and transfers need quick access to information about each person
they talk to, and the information is located in two different relational databases. We’ll
use Avaki Studio to set up the required Avaki database operations, construct and test a
view model, and deploy the view model as a data service. An HR application accepts
data from the data service and displays it.
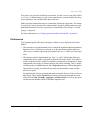
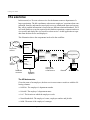
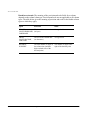
This illustration shows the components involved in the workflow.
getAllDepts
dept_db
select *
from dept
Department
database
HR application
getEmpGiven
Name
emp_db
select *
from emp
where
ENAME = ?
Employee
database
Database
connector
Database
operation
View model
deployed as
a data service
D# DNAM LOC
422
Bos
fileAcct
file file
A B C
Result
The HR data service
Given the name of an employee, the data service must return a result set with the following columns:
• DEPTNO: The employee’s department number
• DNAME: The employee’s department name
• LOC: The location at which the employee works
• NameNumberJob: The employee’s name, employee number and job title
• MGR: The name of the employee’s manager
30
Data Integration with Sybase Avaki Studio
The exercise
• HIREDATE: The date the employee was hired
• SAL: The employee’s salary
• COMM: The employee’s commission rate
The database connectors
The required information resides in two databases. The following database connectors
are needed:
• dept_db
Connects to the department database, which has a table, EMP, with these columns:
DEPTNO, DNAME, LOC
• emp_db
Connects to the employee database, which has a table, DEPT, with these columns:
EMPNO, ENAME, JOB, MGR, HIREDATE, SAL, COMM, DEPTNO
The emp_db connector has been configured by the database administrator; we’ll configure dept_db.
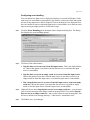
Tasks in this tutorial: the to-do list
To set up the HR data service, we must complete the tasks listed here. The tutorial
takes about an hour to complete.
1.
2.
3.
4.
5.
6.
7.
8.
9.
Configure the dept_db database connector.
Configure two database operations—one to extract data from each database.
Create a new view model.
Within the view model, set up two input sources—one for each of the database operations in task 2.
Create a view model parameter to accept the name of an employee and map the input
source parameter to the new view model parameter.
Use a Join operator to combine the two input result sets.
Use a Projection operator to combine the EMPNO, ENAME, and JOB columns into a
single NameNumberJob column.
Test the view model.
Deploy the view model as a data service in the Avaki data grid.
Data Integration with Sybase Avaki Studio
31
Creating view models
Creating database connectors
To extract data from a relational database, your view model needs a pair of Avaki services: a database operation to select the data, and a database connector to access the
database. Database connectors are typically configured by database administrators.
Follow these steps to create a database connector in Avaki Studio.
32
Step 1
To connect Studio to a grid server, pull down the Avaki menu and select Connect to
Server. Enter any requested information about the grid server.
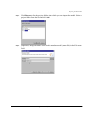
Step 2
Pull down the File menu and select New > Database Connector. The New Database
Connector window appears.
Data Integration with Sybase Avaki Studio
Creating database connectors
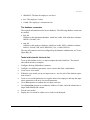
Step 3
Fill in the form:
• Connector Name: Enter a name for this database connector. For this tutorial, we’ll
use the name dept_db. Note: Do not include spaces in the name.
• Description: Optional. Enter some descriptive information about this database connector and the database it accesses.
• Avaki Server: Select the Avaki grid server on which this database connector will
run.
• JDBC Driver Class: Enter the class name of your database JDBC driver. (The database connector won’t work until this driver is copied into the drivers directory of
the local Avaki installation directory.) For example:
oracle.jdbc.driver.OracleDriver
• JDBC Connection String: Enter the URL for your JDBC driver. For more information, see the documentation for your database. Here is a sample connection string:
jdbc:oracle:thin:@gallium:1521:test1
• Database Name: Optional. Enter the name of the database.
• Default User Name: Enter the name of a database user account. The database connector will use this account to authenticate the database connection. All database
operations will use this username when executed.
• Default Password: Enter the password to use to authenticate the database connection. All database operations will use this password when executed.
Data Integration with Sybase Avaki Studio
33
Creating view models
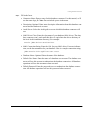
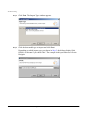
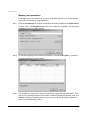
Step 4
Click Next. The second page of the form appears:
Step 5
Fill in the form:
• Name: Optional. Enter the database administrator’s first and last name.
• Email: Optional. Enter the database administrator’s email address.
• Phone: Optional. Enter the database administrator’s telephone number.
• Organization: Optional. Enter the name of the department or group to which the
database administrator belongs.
34
Data Integration with Sybase Avaki Studio
Creating database connectors
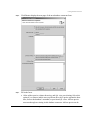
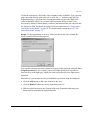
Step 6
Click Next to display the next page of the new database connector form.
Step 7
Fill in the form:
• Allow ad-hoc queries, schema browsing, and SQL view provisioning: Select this
option if you want to enable users to perform direct SQL queries against the database, browse the database’s metadata, or provision SQL views. Ad-hoc queries
must run through an existing Avaki database connector. Ad-hoc queries can be
Data Integration with Sybase Avaki Studio
35
Creating view models
thought of as single-use database operations. You can run an ad-hoc query using
either the CLI or the JDBC driver. For information about using the CLI to run an
ad-hoc query, see the Sybase Avaki EII Command Reference. For information about
using a JDBC driver to run an ad-hoc query, see the Sybase Avaki EII API Guide.
• Allow database identity mappings: Check this box if database identity mappings
are allowed on this database connector. A database identity mapping is a special-purpose user alias. It allows operations performed by some Avaki user on a
particular database connector to be executed in the name of an alternate user/password combination. For details about configuring database identity mappings, see
the Sybase Avaki EII Administration Guide.
• JDBC fetch size: This parameter can be used to fine-tune performance of database
operations. When an application uses the JDBC driver to execute a database operation, it typically processes the rows that are returned one after another, but the
driver applies a buffering optimization by fetching rows in batches; the fetch size is
the number of rows to be fetched in such a batch. In most circumstances, the
driver’s default fetch size will be optimal, so you’ll want to keep the Default setting. But if you decide that database operations executed through this database connector should generally use a nondefault fetch size, enter the relevant number of
rows in the Custom field. Note: you can also set the fetch size for individual database operations. See the Sybase Avaki EII Provisioning and Advanced Data Integration Guide for details.
• Properties: Optional. Specify any connection properties that are required for your
database. For information about database-specific properties, see your database
documentation.
• Connection pooling: Specify whether to enable Avaki connection pooling. When
connection pooling is enabled, database connections can be reused, which typically
improves performance for JDBC applications. By default, Avaki connection pooling
will keep up to 15 connections open to a back-end database. If your driver has
built-in connection pooling, it may not be necessary to use Avaki connection pooling. Select one of the following options:
— Use Avaki connection pooling with the default pool size (15).
— Use Avaki connection pooling with a custom pool size: Enable connection pooling and specify the desired connection pool size.
— Don’t use Avaki connection pooling.
• XA driver (optional): Specify an XA driver class if you plan to use this database
connector to support distributed transactions. This class must reside in the JAR file
36
Data Integration with Sybase Avaki Studio
Creating database connectors
for the database vendor’s JDBC driver. (For purposes of the tutorial, leave this field
blank.)
These XA drivers have been tested with Avaki:
— For Sybase ASE: com.sybase.jdbc3.jdbc.SybXADataSource
(ASE 15.0 with jConnect 6.05)
— For Oracle 10g: oracle.jdbc.xa.client.OracleXADataSource
(Oracle 10g release 10.1.0.2.0 with JDBC driver version 10.2.0.1.0)
— For MySQL: com.mysql.jdbc.jdbc2.optional.MysqlXADataSource
(MySQL 5.0 with MySQL Connector/J 5.0)
• XA connection properties (optional): Some XA connection properties might be
required by your XA driver. (For purposes of the tutorial, leave this field blank.)
Here are some that are typically specified:
— For Sybase ASE:
ServerName=<database-host-name>
PortNumber=<database-port> (e.g. 5000)
ResourceManagerType=2
ResourceManagerName=connection
DatabaseName=<database-name>
NetworkProtocol=Tds
User=<db-user-name>
Password=<db-user’s-password>
— For Oracle 10g:
URL=jdbc:oracle:thin:@<db-host-name>:<db-port>:<db-name>
User=<db-user-name>
Password=<db-user’s-password>
— For MySQL:
URL=jdbc:mysql://<db-host-name>[:<db-port>]/<db-name>
User=<db-user-name>
Password=<db-user’s-password>
Note For details on configuring your XA-compliant JDBC driver, including the
particular XA connection properties to use, refer to the documentation for the
driver.
Data Integration with Sybase Avaki Studio
37
Creating view models
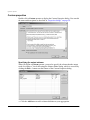
Step 8
Click Finish to save the settings you’ve entered. Avaki Studio creates the database
connector, tests it, and displays the results.
You can find the new database connector in the data catalog under
Categories/ViewLibrary/DatabaseServices/<dbconn>/<domain>.<dbconn>.
Later, if you want to modify the database connector, find it in the data catalog view,
right-click it, and select Edit from the context menu. Studio displays the database connector wizard, which lets you edit all the properties described in the steps above.
Creating database operations
An Avaki data service—and the view model on which it is based—can use Avaki database operations as input sources. Each database operation relies on an Avaki database
connector to connect to a relational database, from which the database operation
extracts data; the data is returned in result set format.
Before you try to configure a database operation, make sure that a database connector
has been created for the appropriate database. Instructions for configuring a database
connector can be found in the previous section, “Creating database connectors” on
page 32.
Follow these steps to create a database operation in Avaki Studio.
38
Step 1
To connect Studio to a grid server, pull down the Avaki menu and select Connect to
Server. Enter any requested information about the grid server.
Step 2
Pull down the Window menu and select Show View > Data Catalog. The data catalog
view appears in the left pane.
Data Integration with Sybase Avaki Studio
Creating database operations
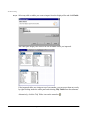
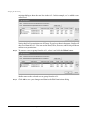
Step 3
(Optional) To locate your database connectors in the data catalog view, expand Categories > ViewLibrary > DatabaseServices. The database connectors appear as folders—here they’re called dept_db and emp_db.
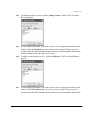
Step 4
To launch the Database Operation Wizard, pull down the File menu and select New >
Database Operation.
Step 5
From the Domain pull-down, select the Avaki domain in which the database connector
you want to use resides.
Data Integration with Sybase Avaki Studio
39
Creating view models
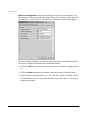
Step 6
In the Database Connector field, select a database connector, then click Next.
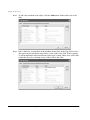
Step 7
In the Name field, enter a name for the database operation you’re creating.
Step 8
(Optional) In the Description field, enter a description of the database operation.
Step 9
In the SQL Statement field, enter the query that this database operation will execute:
• For getAllDepts, enter select * from dept
• For getEmpGivenName, enter select * from emp where ENAME = ?
40
Step 10
In the Modifies Database field, leave the No button checked. (Click the Yes button
when you create a database operation that performs an update.)
Step 11
In the Caching field, choose the caching behavior for the results of this database operation. (It’s ok to keep the default, “Don’t cache.”)
Step 12
(Optional) In the Run as field, specify the user account under which this database
operation will run.
Data Integration with Sybase Avaki Studio
Creating database operations
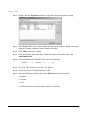
Step 13
Click Next. (Do not check the “Calls a stored procedure” or “Supports batch operations” boxes.)
Step 14
For the EMP database operation, which has a parameter, use the pull-down menu to
choose the data type VARCHAR.
Step 15
Click Next.
Data Integration with Sybase Avaki Studio
41
Creating view models
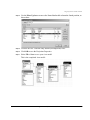
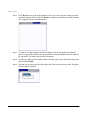
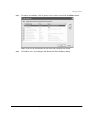
Step 16
For the EMP database operation, which has a parameter, enter a value that Studio can
use when it executes the database operation to generate the schema. (The value might
be the name of an employee in the database.)
Step 17
Click Finish. Studio creates the new database operation. (You must refresh the data
catalog view to see it.)
Repeat this procedure to create the DEPT database operation, which has no parameters.
You can also create database operations using Avaki’s web UI or CLI—see the Sybase
Avaki EII Provisioning and Advanced Data Integration Guide for instructions.
Note If your database operation includes a SQL statement that involves aggregate functions such as SUM, you must use an alias for any column names to
which the function refers. The alias must follow the rules for valid JavaScript
identifiers:
• Every alias must begin with a letter, an underscore (_), or a dollar sign ($).
• Every character after the first character may be a letter, number, underscore (_), or
dollar sign ($).
• All characters should be valid ASCII characters.
• Do not use a JavaScript reserved word as an alias.
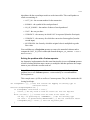
For example, in the following SQL statement, dollarsum is an alias for the sum of
the column named DOLLARS.
SELECT sum(DOLLARS) dollarsum, CUSTOMERID FROM sales GROUP
BY CUSTOMERID ORDER BY CUSTOMERID
42
Data Integration with Sybase Avaki Studio
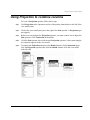
Using the view model wizard
Using the view model wizard
If you haven’t created a Studio project yet, see “Creating a project” on page 14. To
complete this procedure, you must have a project to which you can add your view
model.
The view model is where you specify how your data service combines and transforms
data. To set up a new view model, follow these steps.
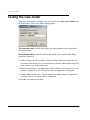
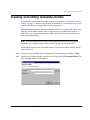
Step 1
Pull down the File menu and select New > View Model. The view model wizard
appears.
Step 2
In the Container field, enter the name of an existing project directory for this view
model, or use the Browse button to search for one.
Step 3
(Optional) Enter a new name in the File name field.
Step 4
Click Finish. Studio displays the new view model, which contains only a Result element.
Step 5
Use the mouse to drag the Result element to the right side of the view model pane.
Data Integration with Sybase Avaki Studio
43
Creating view models
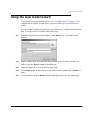
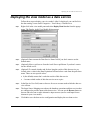
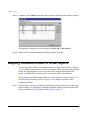
Configuring input sources
In our view model, Input Source elements represent the database operations that provide input to the data service. Follow these steps to configure input sources.
Step 1
To create an Input Source element, drag the database operation from the data catalog
view into the view model pane. Studio creates an Input Source element with the same
name as the database operation.
Step 2
Double-click the Input Source element to open the Input Source Properties dialog.
Step 3
Click in the Name field and change the name to the name of the database operation—
getAllDepts or getEmpGivenName.
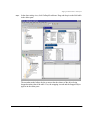
Step 4
If the dialog reports any unmapped parameters, click Edit Values to display the
Parameter Properties dialog. You must map the getEmpGivenName database operation’s input parameter, EmployeeName, to a new global parameter of type VARCHAR.
For instructions on mapping parameters, see “Input Source Properties” on page 126.
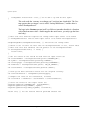
Repeat this procedure to configure an Input Source element for another database
operation. When you’ve configured Input Source elements for both the getAllDepts
and GetEmpGivenName database operations, your view model looks like this.
44
Data Integration with Sybase Avaki Studio
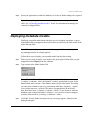
Joining result sets
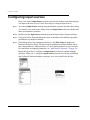
Joining result sets
To create a Join operator to combine the result sets from the two input sources, follow
these steps.
Step 1
Click Join in the Operators section of the palette (immediately to the left of the view
model pane).
Step 2
Click in the view model pane just to the right of the two Input Source elements. A
Join operator appears.
Step 3
Before you can configure the Join operation, you must connect it to the input sources.
Click Connection in the palette.
Step 4
Click the getAllDepts input source, then click the new Join operator. A line connecting the two elements appears in the view model.
Step 5
Click Connection, getEmpGivenName, and the Join operator to connect the second
input source. The connecting line must touch the unused connection point on the Join
operator. Now the view model looks like this.
Data Integration with Sybase Avaki Studio
45
Creating view models
Step 6
Double-click the Join operator to open the Join Properties dialog.
Step 7
Select the Sort Merge Join algorithm, the Inner join type, and set the outer table to
getEmpGivenName.
Step 8
In the Columns area of the properties dialog, specify one or more pairs of columns
whose values will be tested for equality. Each pair must include one column from the
outer table and one from the inner table. In this case, the common column is called
DEPTNO in both tables. Click Add to add a column. Use the pull-down menus to
select DEPTNO for both the inner and outer columns
Step 9
Click OK.
For more information on the Join operator, see “Join” on page 154.
46
Data Integration with Sybase Avaki Studio
Using Projection to combine columns
Using Projection to combine columns
To create a Projection operator, follow these steps.
Step 1
Click Projection in the Operators section of the palette (immediately to the left of the
view model pane).
Step 2
Click in the view model pane just to the right of the Join operator. A Projection operator appears.
Step 3
Before you can configure the Projection operator, you must connect it to its input, the
Join operator. Click Connection in the palette.
Step 4
Click the Join operator, then click the new Projection operator. A line connecting the
two operators appears in the view model.
Step 5
To connect the Projection operator to the Result element, click Connection again,
click the Projection operator, then click the Result element. Now the view model
looks like this.
Data Integration with Sybase Avaki Studio
47
Creating view models
Step 6
Double-click the Projection operator to open the Projection Properties dialog.
Step 7
Click Project All to carry in the columns from the input result set. Studio creates and
displays an output column for each column in the input.
Step 8
Click Add to add a new column.
Step 9
Click in the Name field of the new column and replace the default name with
NameNumberJob.
Step 10
In NameNumberJob’s Definition field, enter the following:
ENAME + " (" + EMPNO + "), " + JOB
Step 11
Leave the Type field set at VARCHAR, the default.
Step 12
Set the precision for NameNumberJob to 50.
Step 13
Select the following columns and use the Delete button to remove them:
• EMPNO
• ENAME
• JOB
• DEPTNO (remove only the bottom instance of DEPTNO)
48
Data Integration with Sybase Avaki Studio
Using Projection to combine columns
Step 14
Use the Move Up button to move the NameNumberJob column the fourth position, as
shown here:
Step 15
Click the box for “Generate only distinct (non-duplicate) rows”.
Step 16
Click OK to save the Projection Properties.
Step 17
Select File > Save to save your view model.
This is the completed view model:
Data Integration with Sybase Avaki Studio
49
Creating view models
Testing the view model
When your view model is complete, you can test it by selecting Execute Model from
the Avaki menu. The Execute Model dialog appears.
The Parameters tab provides fields where you enter parameter values required for
the test execution.
Debug Options tab provides checkboxes that enable you to control which debug
options are displayed.
• Enable tracing of model execution: Controls whether information about the text
execution will be displayed. If you check the box, the trace information is displayed
in the Console view in the bottom pane.
• Include each operator’s row output data: Controls whether each operator’s row output data is displayed. If you check the box, the row output data is displayed.
• Display debug console view: Controls whether the debug console is displayed. If
you check the box, the debug console is displayed.
Click OK to start the test execution.
50
Data Integration with Sybase Avaki Studio
Deploying the view model as a data service
Deploying the view model as a data service
Follow these steps to deploy your view model. After it’s deployed, you can find it in
the data catalog viewer under Categories > ViewLibrary > DataServices.
Step 1
Right-click in the view model pane and select Deploy Data Service from the popup
menu. The Deploy Avaki View Model dialog appears.
Step 2
(Optional) Enter a name the Data Service Name field if you don’t want to use the
default name.
Step 3
(Optional) Select a grid server from the Avaki Server pull-down if you don’t want to
use the default server.
Step 4
(Optional) To control whether and for how long the results of this data service are
cached, enter a value in the Data Expiration field and select a unit from the pull-down
menu. There are two special values:
• 0 (the default) means don’t cache the results of this data service
• –1 means cached results of this data service never expire
Step 5
In the Run As User field, enter or browse for a user account under which the data service will run.
Step 6
The Input Source Mappings area shows the database operations and data services that
are configured to provide input to this data service. You can use the Browse button to
browse and select one or more alternative input sources (one for each Input Source
element in your view model).
Step 7
Click OK to save the data service configuration and deploy the new data service.
Data Integration with Sybase Avaki Studio
51
Creating view models
Thinking ahead: load sharing for data service execution
By default, a data service runs on the grid server where it was deployed. If you want
data service execution to be shared among several grid servers, you or your grid
administrator must configure execution service pooling. For instructions, see the
Sybase Avaki EII Administration Guide.
52
Data Integration with Sybase Avaki Studio
Chapter 4
The view model editor
Consult this chapter for general information on using Avaki Studio’s view model editor to create view models.
In this chapter:
• “Common features of view model components” on page 54 describes features common to all of the elements—input sources, operators, and result elements.
• “Using global parameters” on page 63 describes how to add parameters to your
model.
• “Using expressions within Avaki Studio” on page 66 explains how to manipulate
data within your model’s operators using scripting expressions.
• “The expressions menu” on page 71 describes how Avaki Studio’s context-sensitive menu will help you easily configure your model.
• “Advanced topics” on page 75 discusses more esoteric topics such as using a .jsi
file to enhance your model’s capabilities and tuning your model’s performance.
Data Integration with Sybase Avaki Studio
53
The view model editor
Common features of view model components
This section discusses features common to the various operators, input sources, and
result elements.
Creating components
To build view models, you use the view model editor to create and manipulate objects
that represent the elements in your model. These include input sources, various operators, and result elements. When you create a new view model, Studio automatically
includes a Result. You create any other elements you require either by using the tools
in the palette or by dragging and dropping from the data catalog view. Finally, you
connect the elements together, using connection arrows, to define the flow of data
within your model.
Creating elements using the palette
The palette contains tools for creating the elements that you can use in an Avaki view
model. The palette works similarly to palettes in many graphical editor applications—
you click in the palette to select the tool you wish to use and then you click in the document to place an instance of that object.
The tools in the palette are separated into four sections:
• The first group contains the Select tool, used to select elements in the view model
in order to edit them (see “Selecting and moving elements” on page 56) and the
Connection tool, used to connect elements together into a flow (see “Creating connections between elements” on page 57).
• The second group contains the Input Source tool.
• The third, the “Operators,” group, contains basic relational algebra operations.
• The final group, “Advanced,” contains more advanced operators.
54
Data Integration with Sybase Avaki Studio
Common features of view model components
For example, to add an Order By operator to your model using the palette:
Step 1
Open an Avaki view model file (double-click a .avm file in the Navigator in the left
pane) or create a new one (see “Creating a project” on page 14 for instructions).
Step 2
Select the Order By tool in the palette.
If the “Operators” section of
the palette is collapsed, click to open it, exposing the Order By tool.
Step 3
Click in the view model editor pane to place an Order By operator.
Once the operator is in your model, you can move it around (see “Selecting and moving elements” on page 56), connect it to other elements in your model (see “Creating
connections between elements” on page 57), or edit its properties (see “Properties dialogs” on page 58).
Creating Input Source elements using drag and drop
When you want to create an Input Source based on an item in the Avaki data catalog,
you can do so by dragging and dropping an icon from the data catalog view directly
into the view model editor.
Avaki Studio configures the Input Source element as much as possible, depending on
the type of object you dropped into the view model. For example, if you drop in a database operation, Studio configures the Input Source element to point to that database
operation, and not to have any associated transform. If, however, you drop in an XML
file, Studio configures the resulting Input Source object to be a file type pointing to
the path of your file, and having an XML-to-Result-Set transform.
You can also always construct an Input Source element by using the Input Source
tool in the palette and configuring it manually. And note that you must use the Input
Source tool in the palette to create input sources based on HTTP requests or web services. Refer to “Input Source” on page 125 for details on configuring input source elements.
To use drag and drop to create an Input Source element:
Step 1
Open an Avaki view model (double-click a .avm file in the Navigator in the left pane)
or create a new one (see “Creating a project” on page 14 for instructions).
Step 2
Make sure you have the Avaki data catalog view open in the left pane. If it is not open,
open it by choosing Window > Show View > Data Catalog.
Data Integration with Sybase Avaki Studio
55
The view model editor
Step 3
Navigate in the data catalog view to the object you want to use as in input source. You
can choose a database operation, a data service, or a file in the grid. (To create Input
Source elements from HTTP requests or web services, use the tool in the palette, then
see “Input Source” on page 125 for details on configuring the input source.)
Step 4
Drag the object from the data catalog view into the view model editor where you want
the Input Source object to appear. Once the Input Source is in your model, you can
move it around (see “Selecting and moving elements” on page 56), connect it to other
elements in your model (see “Creating connections between elements” on page 57), or
edit its properties (see “Properties dialogs” on page 58.).
Selecting and moving elements
In order to manipulate the input sources, operators, and Result elements in your view
model, you must first select them. To do so, you use the Select (arrow) tool in the palette.
Note that this is the tool at the top of the palette, not the Select
tool in the Operators section of the palette, which is used to filter out rows from a
result set (see “Select” on page 165).
You can choose the Select tool by clicking it in the palette. The Select tool is also
automatically selected after you use one of the other tools. To select an object, you
simply click on it in the view model editor. To select multiple objects in your model,
hold down the Shift key and click each object in turn. Alternatively, using the Select
tool, click in the background of the editor pane and drag to create a marquee around
the objects you want to select. When you have enclosed them all, release the mouse
button and the objects will be selected.
Selected objects are indicated in the view model editor by a rectangle enclosing them
as well as four selection “handles”—little boxes at the corners of the enclosing box.
Selected connection arrows are thicker than unselected ones and have a selection handle at each end. You can click and drag to move selected elements around the view
56
Data Integration with Sybase Avaki Studio
Common features of view model components
model. You might want to move elements around in order to make room for additional
operators you want to add, for example, or to neaten up the model.
Creating connections between elements
To define the flow of data within a view model, you must connect the various elements
together. The way elements are connected affects the way individual elements can be
configured. For example, a Join operator needs to have two other elements connected
to it as inputs before you can configure on which columns the join operates.
When you use the Connection tool, the order in which you select the elements you are
connecting determines the direction of data flow—data will flow from the first element you select to the second.
To connect two elements in a view model:
Step 1
Open an Avaki view model (double-click a .avm file in the Navigator in the left pane)
or create a new one (see “Creating a project” on page 14 for instructions).
Step 2
Create at least two unconnected elements in the view model. To create an element,
click on any item in the Operators section of the palette, then click in the editor window.
Step 3
Select the Connection tool
Step 4
Select the object the arrow should come from.
in the palette.
A connection line appears, attached to the output of the object you clicked and follows
the cursor as you move it. The cursor has an plug-shaped icon attached to it indicating
that you are making a connection. If the cursor isn’t over something that can be connected, there is also a circle with a slash through it indicating this.
Data Integration with Sybase Avaki Studio
57
The view model editor
Step 5
Click on the object the arrow should go to. If this object has more than one input connection point, make sure that the arrow is snapped to the correct one before you click.
Step 6
If you decide you don’t want to connect the objects after all, press Escape or click a
different tool in the palette to abort the connection.
Properties dialogs
Each element in your view model can be configured by accessing its properties dialog.
You edit the properties of an Input Source using the Input Source Properties dialog,
those of an Aggregate operator using the Aggregate Properties dialog, and so on. To
open these dialogs, do either of the following:
• Double-click the element in the view model editor
• Select the element, right-click to display the context menu, and choose Edit.
Properties dialogs all have two items in common, for setting the name and description
of the element. (The only exception is the Result Properties dialog, which only has a
description field since you cannot rename the Result element.)
Element names
The names of the elements in your view model are important because you refer to elements by name in the expressions you use in configuring the model. (For more information on expressions in Avaki Studio, see “Using expressions within Avaki Studio”
on page 66.) Element names must be unique within each model, and must meet the
same constraints as other variable names: they must start with a letter or underscore,
and must contain only letters, numbers, and underscores. Other characters (including
spaces, punctuation, accented characters, and so forth) are not allowed. If an element’s
name is invalid, or if the same name is used for more than one element, Studio displays a red border around the element in question and you will not be able to execute
or deploy the model. See “Red borders: Errors in your view model” on page 60 for
details.
58
Data Integration with Sybase Avaki Studio
Common features of view model components
To edit an element’s name:
Step 1
Open the element’s properties dialog box by double-clicking or by right-clicking and
choosing the Edit command.
Step 2
Type a new name in the Name field.
Step 3
Click OK to close the properties dialog box.
Element descriptions
You can annotate your model by adding descriptions to the elements it contains. This
can help make the model easier to understand, especially if multiple people work with
it. When you move your mouse over an element in the view model editor, Studio displays the element’s description in a tool tip. (If the element has an error, however, Studio displays the error in the tool tip instead of the description. See “Red borders:
Errors in your view model” on page 60.)
To change an element’s description:
Step 1
Open the element’s properties dialog box by double-clicking or by right-clicking and
choosing the Edit command.
Step 2
Click the Edit… button next to the description.
Step 3
Edit the description in the resulting Edit Description dialog.
Step 4
Click OK to close the Edit Description dialog.
Step 5
Click OK to close the properties dialog box.
Data Integration with Sybase Avaki Studio
59
The view model editor
Red borders: Errors in your view model
Your view model may have errors in it. Some of these may be because certain elements are not properly configured or connected. If Studio detects an error, it notifies
you by making the border around the affected elements red. You can see what the
problem is by moving your cursor over the element in question—Studio displays the
error message in a tool tip. You must resolve all of these errors before you can execute
or deploy the view model. (Note that if an operator with an error is not actually connected to the Result element in any way, then you may still be able to execute and
deploy the model even if it shows an error.)
Working with schemas
Many of the operators in Avaki Studio allow you to define or transform the schema of
the data passing through them. The visual representation of each element in the view
model can optionally display the schema of your data at that point in the flow.
Showing and hiding elements’ schemas
Every element in your Avaki view model, from the input sources to the result, has a
schema associated with it. Objects are created initially with the schema showing, but
you may wish to hide them to make your model easier to read. You can show or hide
the list of column names for any given element by clicking the triangle next to the
“Schema” label.
Specifying schemas for operators
A schema is defined as an ordered list of columns where each column has the properties name, type, precision, and scale:
Name. Since they are used within expressions to access their data, names for columns
must meet the same constraints as other variables: they must start with a letter or
underscore, and must contain only letters, numbers, and underscore characters. Other
60
Data Integration with Sybase Avaki Studio
Common features of view model components
characters (including spaces, punctuation, accented characters, and so forth) are not
allowed. The name of each column in a given schema should be unique—having two
columns in the same schema with the same name can cause Studio difficulty when trying to access the columns by name.
Note If your schema has column names that do not conform to these norms, you
must use the methods in the ResultSet object to access them by position (using a
1-based index). We suggest setting up your database operations to alias any columns with questionable names so that they are not confusing within Studio.
Type. The data types of your columns correspond to common SQL types of the same
name. The types available within Studio are ARRAY, BIGINT, BINARY, BIT, BOOLEAN, BLOB, CHAR, CLOB, DATE, DECIMAL, DISTINCT, DOUBLE, FLOAT, INTEGER,
JAVA_OBJECT, LONGVARBINARY, LONGVARCHAR, NULL, NUMERIC, OTHER,
REAL, REF, SMALLINT, STRUCT, TIME, TIMESTAMP, TINYINT, VARBINARY, VARCHAR, and ORACLE_CURSOR. For information about these types, consult any SQL
reference.
Advanced Studio users will note that the standard JDBC type mappings are used to
construct the Java representations of the column values that they can manipulate in
Studio. For information about the Java types to which these map, refer to the Sun
JDBC documentation:
http://java.sun.com/j2se/1.4.2/docs/guide/jdbc/getstart/map
ping.html#996857
Data Integration with Sybase Avaki Studio
61
The view model editor
Precision and scale. The meaning of the precision and scale fields for a column
depends on the column’s data type. Precision and scale are not applicable to all column
types. The table below gives the meaning of precision and scale for the Studio column
types to which they apply.
Types
62
Precision
Scale
BINARY,
The size of the column data
LONGVARBINARY, (in bytes)
VARBINARY
Not applicable
CHAR,
LONGVARCHAR,
VARCHAR
The size of the column data
(in characters)
Not applicable
DECIMAL,
NUMERIC
The total number of digits in
the column data (includes
digits on both sides of the
decimal point)
The number of digits to the
right of the decimal point
Data Integration with Sybase Avaki Studio
Using global parameters
Using global parameters
Some view models obtain all necessary input from database operations, data services,
and other input sources. However, you will often want to provide parameters to your
model that affect the way it functions. For example, a model that processes sales figures might require a parameter specifying the sales region you’re interested in.
Parameters to the view model are called global parameters because they are available
to all of the operators and other elements within the model. This section shows how to
display, add, modify, and delete global parameters.
Displaying global parameters
To see and manipulate your model’s global parameters, use the View Model Parameters tab, which appears in the bottom pane in Studio. If it is not currently visible, you
can access it using the Window > Show View > View Model Parameters command.
Data Integration with Sybase Avaki Studio
63
The view model editor
Adding global parameters
To add a parameter to your model, click the Add Parameter button
Global Parameter Properties dialog.
to open the
The fields are as follows:
• Name: A name for the parameter. Make sure it conforms to the variable naming
conventions (see “Element names” on page 58).
• Type: Choose a type from the popup. Types are expressed in the SQL format, rather
than as Java objects.
• Parameter is an array: Check this if you want the parameter to be an array of the
selected type.
• Description: (Optional) Enter a description here, if you like.
• Validation Expression: (Optional) Enter a Boolean expression here that will be
evaluated to determine the validity of the value passed for this parameter. If the
expression evaluates to false, the data service will not execute and an error message will be returned (see the next field for details). Refer to the value of the variable being validated by its fully qualified name: variables.global.<name>.
For example, to ensure that the length of the State variable is two characters, you
could use this expression:
64
Data Integration with Sybase Avaki Studio
Using global parameters
variables.global.State.length == 2
If you leave the Validation Expression field blank, Studio performs no validation
for this parameter.
• Validation Error Expression: (Optional) enter an expression that evaluates to an
error message. The error message is returned whenever an invalid parameter value
causes the validation expression to evaluate to false. Enclose any strings in double
quotes. Refer to the value of the variable being validated by its fully qualified
name: variables.global.<name>. For example, for a variable called State,
you might enter
"Please enter a 2-letter state code for the " +
"variable \'State.\' You entered: " +
variables.global.State
If you leave the Validation Error Expression field blank, Studio uses a generic error
message.
Click OK to create the parameter.
Modifying global parameters
To edit global parameters, select one in the View Model Parameters tab and click the
Edit button
. You can also double-click the variable in the table. This opens the
same Global Parameter Properties dialog, where you can edit the parameter’s properties.
Deleting global parameters
To delete parameters, select them in the list and click the Delete Parameter button.
Reordering global parameters
You can change the order of parameters in the list. To move a parameter, select it and
click the Move Up
or Move Down
button.
Note The order in which the parameters appear in the View Model Parameters
tab is the same order in which they will appear to calling applications.
Data Integration with Sybase Avaki Studio
65
The view model editor
Using expressions within Avaki Studio
Most of the operators in Avaki Studio allow you to specify expressions that are evaluated at runtime in order to configure how your view model works. For the majority of
cases, simple expressions that evaluate to a single value will suffice. Some of these are
generic, while others must evaluate to a Boolean value. Studio’s more advanced operators, however, require more complex, multi-line expressions.
Simple expressions
Some examples of expressions that evaluate to simple values are:
• SALARY
“SALARY” is the name of a column in the single incoming result set.
• Join01.LAST_NAME
“Join01” is one of the result sets that feed into the operator where the expression is
defined, and “LAST_NAME” is one of the columns in that result set.
• "Name: " + toUpperCase(variables.global.UserName)
Concatenates the string “Name: ” and the value of the model parameter “UserName” after first converting the parameter to uppercase.)
• getDoubleValue(Join01RS, 6)
Returns the value of the sixth column in the result set coming from the input called
“Join01” as a Double object.
Boolean expressions
Certain expression fields within Studio require expressions that evaluate to Boolean
(true or false) values. An example of this is for the “Where” parameter to the Select
operator. Some examples of Boolean expressions are:
• PRICE > 1000
“PRICE” is the name of a column in the single incoming result set. This evaluates to
“true” when the value of the PRICE column is greater than 1000.
• SalesDBOP.SALES_TERRITORY == "EAST"
“SalesDBOP” is the name of an input to this operator and “SALES_TERRITORY” is
the name of a field in that input. Note that when testing for equality, you need to
have two equals signs together. Here, the value evaluates to “true” when the value
in the SALES_TERRITORY column is the character string “EAST.”
66
Data Integration with Sybase Avaki Studio
Using expressions within Avaki Studio
• CurrentUser.isMemberOf("myDomain", "DefaultAuthService",
"Grid", "Administrators")
Check to see if the user executing the data service is a member of the Administrators group.
Complex expressions
Certain expression fields in Studio accept more complex expressions. These can span
multiple lines and can contain multiple simpler expressions, each ending with a semicolon character (;). These are generally used in the more advanced operators, such as
Iterator, Generator, and Custom.
Here’s an example of a complex expression; it comes from the Increment field of an
Iterator operator:
globals.Iterator03.counter++;
globals.Iterator03.currentZipCode =
zipcodes[globals.Iterator03.counter];
globals.Iterator03.currentState =
getStateForZipCode(globals.Iterator03.currentZipCode);
This expression consists of three separate statements that increment a variable and
then use it to determine the values for two other variables. (Note that the variable “zipcodes,” an array, and the function “getStateForZipCode” are not defined directly
within the expression.)
Expressions and JavaScript
The expressions used within Studio are written in JavaScript. Don’t worry if you don’t
know JavaScript. As you can see from the examples above, most of the expressions
you will need to create are simple enough that knowledge of JavaScript is unnecessary.
When your models begin requiring the more advanced features of Studio, however,
you may need to better understand JavaScript and how it works. JavaScript is a powerful and flexible tool. The links below point to resources to help you acquaint yourself
with the basics.
JavaScript resources
JavaScript tutorial:
• http://www.wdvl.com/Authoring/JavaScript/Tutorial/
JavaScript expression tester:
• http://www.arachnoid.com/javascript/interactiveJavaScript.html
Data Integration with Sybase Avaki Studio
67
The view model editor
JavaScript references:
• http://www.devguru.com/Technologies/ecmascript/quickref/javascript_intro.html
• http://www.topxml.com/javascript
Accessing columns from incoming result sets
When you connect one or more other elements to an operator in Studio, you can access
the values in the incoming result sets’ columns from expressions that you define in the
operator. For example, if you have an Input Source feeding into a Select operator, in
the Select’s “Where” field, you can refer to the Input Source’s columns. To do so, you
simply specify the column by name. You can enter column names by hand, or you can
use Studio’s expressions menu to paste them in for you. For example, the expression
you enter for the “Where” field might be COLOR == "Red" if “COLOR” is the name
of a column in the Input Source’s schema.
If an operator has more than one input feeding into it, you must qualify the name of the
column using the name of the upstream element. For example, if you have an Iterator
operator which has inputs from “Aggregate1” and “Aggregate2,” refer to the “Total”
column from the first input as Aggregate1.Total and the “Total” column from the
second input as Aggregate2.Total.
Advanced Users In the case of the Custom operator (where you cannot use the
simple column name), or if, for some reason, you cannot uniquely refer to a column by its name in another type of operator (perhaps the column name is not a
valid variable name or two columns have the same name), you can use the accessor methods in the ResultSet class to access the columns by their position. The
result sets are in variables named after the incoming element’s name with the suffix “RS” appended. For example, in the Iterator example above, there would be
two result set variables accessible, named Aggregate1RS and Aggregate2RS.
In addition, Avaki provides a set of utility functions you can call to ensure that
null values are properly handled. See “Result set accessors” on page 73 for
details.
Accessing global parameters
The view model parameters you’ve defined for your model can be referenced in the
form variables.global.<globalName>. You can use Studio’s expressions menu
to insert references to global parameters into your expressions. See “The expressions
menu” on page 71 for details on using the expressions menu.
68
Data Integration with Sybase Avaki Studio
Using expressions within Avaki Studio
Working with variables
Often you will need to create variables when constructing view models, particularly as
the complexity of the model grows or as you use more advanced operators such as
Iterator. Studio provides you with a JavaScript object named variables, which lets
you store any variables you wish to use across multiple operators. Refer to any variables using the form variables.<operatorInstanceName>.<variableName>
to guarantee their uniqueness across your model. The “operatorInstanceName”
referred to should be the name of the operator where the variable is declared.
You can either enter the variable names directly in the expressions, or you can use Studio’s expressions menu to enter the name of any downstream variable. See “The
expressions menu” on page 71 for details on using the expressions menu.
Note Variables that you declare in a given operator are only available (are only
in scope) to operators that are upstream in the flow from that operator. Operators
that are downstream from that operator or on a different branch of the flow cannot access your variable. If you need to use a variable across multiple branches,
for example, you can declare it in your model’s .jsi file.
Updating variables—some caveats
In the expressions that you enter, it’s fine to update variables defined downstream that
are not control variables. However:
• Don’t try to update variables that are defined upstream—you may see unexpected
results if you change a variable outside of the operator that creates the variable. (All
downstream variables appear in Studio’s expressions menu.)
• If you use a control variable—a counter introduced in and maintained by an Iterator operator, for example—don’t update the control variable inside any operator
other than the one that introduces it.
Data Integration with Sybase Avaki Studio
69
The view model editor
Allowed types for variables
All values in the variables structure must be of one of the types listed here. Note
that global parameters, while defined using SQL types, are accessed in your expressions using the corresponding Java types, according to JDBC conventions. The
allowed types are:
BigDecimal
BigDecimal[]
BigInteger
BigInteger[]
Boolean
Boolean[]
Byte
Byte[]
Date
Date[]
Double
Double[]
Float
Float[]
Integer
Integer[]
Long
Long[]
Short
Short[]
String
String[]
Cloneable
ScriptableScope
Serializable
70
Data Integration with Sybase Avaki Studio
The expressions menu
The expressions menu
You don’t need to know any JavaScript to write simple expressions in Avaki Studio. In
any field where you can enter an expression, you can use Studio’s expressions menu to
choose the parameters, variables, logical operators, predefined functions and input column names with which you construct your expression. To display the menu, click in
the expression field, then right-click.
The submenus in the expressions menu are described below.
Global Parameters
The Global Parameters submenu lists the global parameters defined in this view
model. Select a parameter to enter it in the expression. For more on global parameters,
see “Using global parameters” on page 63.
Note If there are no global parameters in your model, the Global Parameters
submenu contains a disabled menu item: No Global Parameters.
Columns from the input element
There is one Columns from submenu for each input connected to the operator whose
expression you are editing. The names of these submenus include the names of the
upstream operators—for example, there might be Columns from Select1 and Columns from SalesFiguresDS. Each submenu lists the columns in the upstream operator’s output result set. Select a column name to enter it in the expression.
Note If no inputs are connected to the current operator, the expressions menu
contains a disabled menu item: No Inputs.
Downstream Variables
The Downstream Variables submenu lists variables defined in operators downstream
of (that is, closer to the Result than) the current operator. Select a variable to enter it in
the expression.
Note If no variables are declared downstream of the current operator, the
Downstream Variables submenu contains a disabled menu item: No Downstream Variables.
Data Integration with Sybase Avaki Studio
71
The view model editor
Operators
The Operators submenu lists JavaScript operators that you can use to modify your
expression. If you have done any scripting or other programming, you will probably
be familiar with many of these already. The most basic arithmetic operators are not
included in the menu. They are addition (+), subtraction (-), multiplication (*), and
division (/). To enter an operator into your expression, simply choose it from the submenu.
The table below lists the operators in the menu and describes their functionality. Note
that in the descriptions, the terms “LHS” and “RHS” refer to the subexpressions on the
Left Hand Side and Right Hand Side of the operator, respectively.
72
Menu Item
Description
Assign (=)
Assigns the RHS value to the LHS variable.
Equal (==)
Evaluates to true if the LHS and RHS are equal.
Not equal (!=)
Evaluates to true if the LHS and RHS are not equal.
Greater than (>)
Evaluates to true if the LHS is greater than the RHS.
Greater than or equal to
(>=)
Evaluates to true if the LHS is greater than or equal to the RHS.
Less than (<)
Evaluates to true if the LHS is less than the RHS.
Less than or equal to
(<=)
Evaluates to true if the LHS is less than or equal to the RHS.
Logical AND (&&)
Evaluates to true if the LHS and RHS are both true.
Logical OR (||)
Evaluates to true if either the LHS or RHS is true. (Note that if the
LHS is true, the RHS isn’t even evaluated.)
Logical NOT (!)
Evaluates to true if the RHS is false. Note that there is a unary
operator—there is no LHS.
Bitwise AND (&)
Produces a new value whose bits are set when the corresponding
bits in the LHS and RHS are both set. 0xf0a6 & 0xcd0f evaluates to 0xc006, for example.
Bitwise OR (|)
Produces a new value whose bits are set when either of the corresponding bits in the LHS and RHS is both set.
0xf0a6 | 0xcd0f evaluates to 0xfdaf, for example.
Data Integration with Sybase Avaki Studio
The expressions menu
Menu Item
Description
Bitwise XOR (^)
Produces a new value whose bits are set when only one (but not
both) of the corresponding bits in the LHS and RHS is set.
0xf0a6 ^ 0xcd0f evaluates to 0x3da9, for example.
Bitwise NOT (~)
Produces a new value whose bits are inverted with respect to the
RHS. Note that there is a “unary” operator—there is no LHS.
~0xcd0f evaluates to 0x32f0, for example.
Shift left (<<)
Produces a new value by shifting the bits of the LHS n positions
to the left, where n is the value of the RHS. The new rightmost
bits will be 0s. 0xcd0f << 1 evaluates to 0x19a1e, for example.
Shift right (>>)
Produces a new value by shifting the bits of the LHS n positions
to the right, where n is the value of the RHS. The new leftmost
bits will be 0s. 0xcd0f >> 1 evaluates to 0x6687, for example.
Modulus (%)
Returns the remainder you would have if you had performed a
division of LHS by RHS. 8 % 5 evaluates to 3, for example (8
divided by 5 is 1 with the remainder 3).
In-line conditional (?:)
Used in the form cond ? expr1 : expr2 where cond is an
expression that evaluates to a Boolean value. Evaluates to expr1
if cond is true, or expr2 if cond is false. For example, the
expression x > 5 ? 2 : 1 evaluates to 2 when x is greater than
5 and evaluates to 1 when x is not greater than 5.
This is sometimes referred to as a ternary conditional, since it has
three operands.
Avaki Functions
The Avaki Functions submenu provides utility functions that you can use in your
expressions. It contains several functions you can use to retrieve values from result
sets as well as functions to add logic about who the current user is.
Result set accessors
The utility functions in the Avaki Functions submenu that operate on result sets automatically deal with the case where the column value is null. Each function takes two
parameters:
• resultSet: the ResultSet object from which you want to extract the data, and
Data Integration with Sybase Avaki Studio
73
The view model editor
• column: the column whose data you want. You can specify the column either using
a 1-based integer index or a string containing its name.
Note The names of the result set variables are the incoming operator’s name
with “RS” appended. For example, the result set object for an incoming operator
named “Join1” would be named Join1RS.
The result set accessor functions are:
• getSmallIntValue(resultSet, column)
• getIntValue(resultSet, column)
• getBigIntValue(resultSet, column)
• getRealValue(resultSet, column)
• getDoubleValue(resultSet, column)
• getBooleanValue(resultSet, column)
• getBigDecimalValue(resultSet, column)
Current user methods
Studio also provides two functions that can be used to check (and therefore apply conditional logic based on) the identity of the user running the data service deployed from
your model. You can either check whether the user is a particular individual or whether
the user belongs to a particular group. You can use these, for example, to limit access
to certain rows of data based on the user’s membership in a certain group. The functions both take the Avaki domain name, authorization service name, and authorization
service type where you wish to authenticate the user. The is function also takes the
username you wish to check for, and the isMemberOf function takes the name of the
group you wish to check against.
• CurrentUser.is(domain, authSvc, authSvcType, username)
• CurrentUser.isMemberOf(domain, authSvc, authSvcType, group)
74
Data Integration with Sybase Avaki Studio
Advanced topics
Propagating name changes through the view model
If an operator name or a parameter name changes, Avaki Studio propagates the change
to all expressions that use the changed element.
Note This propagation does not apply to the code inside Custom operators, nor
does it apply to operator control variables. This issue will be addressed in an
upcoming release.
Advanced topics
Using a .jsi file to enhance your model
Avaki Studio allows you to create a special file that is included when the view model is
deployed as a data service. You can place any functions or variables you wish to access
from the expressions in your model in this file, facilitating code reuse. The file is
called a JavaScript Include, or .jsi, file. It has the same name as your Avaki view
model (.avm) file, apart from the extension.
To create a .jsi file for your view model, right-click the background in the view model
editor and choose Open JSI File from the contextual menu. Studio creates the file if it
doesn’t already exist, and opens it in a text editor. You can then edit it to include any
functions, variables, or other JavaScript code you like.
For example, say your model requires converting Date objects into integers of the format
“yyyymmdd.” You could create a function as follows, and then call it from multiple places
within your model (such as Projection column definitions):
// Convert a Date object to the form "YYYYMMDD" as an int
function dateToInt(dateObject) {
return dateObject.getFullYear() * 10000 +
(dateObject.getMonth() + 1) * 100 +
dateObject.getDate();
}
Data Integration with Sybase Avaki Studio
75
The view model editor
Performance of sort-based operators
Several operators must sort their inputs. These include Order By, Join (only when
using the Sort Merge algorithm), Group By, and Intersection, as well as any operator
that uses the “Distinct” option to eliminate duplicate rows. You should be aware of two
factors that can affect sort performance: sort chunk size and the location of temporary
files for sorts. These are discussed below.
Note This section is for more advanced users who wish to try to increase the
performance of data services deployed from view models. Many users will not
need to adjust these parameters.
Sort chunk size
To enable the sort-based operators to handle arbitrarily large result sets, Avaki breaks
the inputs into chunks and uses the local disk as a temporary backing store to hold
intermediate results. These intermediate results are cleaned up when the operation
completes.
There is a tradeoff between the amount of memory that an Avaki grid server uses for
its computation and the amount of I/O that it must perform to sort or join large result
sets. Avaki Studio can break the inputs into a large number of small chunks or into a
smaller number of larger chunks. A large number of small chunks requires less memory at any given time, but will result in more disk I/O. A small number of large chunks
will result in a larger peak memory usage, but less disk I/O overall.
By default, a view model operates with a chunk size of 10,000 rows. You can override
this default by declaring the following in your model’s .jsi file:
var overrideSortChunkSize = <new_chunk_size_value>;
Providing enough space for temporary sort files
When a data service sorts data, it writes temporary files to the temp directory specified
by the java.io.tmpdir system property on the grid server where the data service is running. The default location is <Avaki-install-dir>/jboss/server/grid-server/tmp. (See the
Sybase Avaki EII Administration Guide for information on setting system properties.)
The temporary sort files can be quite large. If you create a data service that sorts large
result sets, be sure that the temp directory has enough disk space to write large sort
files. If there isn’t enough disk space, the data service execution will fail because the
sort operation is unable to finish.
76
Data Integration with Sybase Avaki Studio
Chapter 5
Metadata modeling
This chapter describes how to create metadata models, import them into Avaki Studio,
and apply the models to Avaki objects.
In this chapter:
• “About metadata models,” below
• “Importing metadata models” on page 79
• “Creating and editing metadata models” on page 85
• “Mapping metadata models to Avaki objects” on page 88
• “Deploying metadata models” on page 91
• “Deriving metadata models” on page 93
• “Deleting metadata models” on page 94
• “Undeploying metadata models” on page 95
Data Integration with Sybase Avaki Studio
77
Metadata modeling
About metadata models
In Avaki Studio, a metadata model expresses a schema. Metadata models define a set
of tables in which each table contains a set of named columns and each column is
associated with a data type. A table in a metadata model can be mapped (linked) to an
Avaki object, such as a data service or a database operation, or to a table in a database.
When the metadata model is deployed, the mapping lets you call each mapped object
by the name of the corresponding table in the metadata model. (Tables in the model
have no relationships to one another.)
You can also derive a view model schema from a metadata model, which means ensuring that the results of any data service deployed from the view model conform to the
metadata model.
There are two ways to obtain a metadata model:
• Import a file into Avaki Studio from a data modeling tool such as Sybase PowerDesigner or ERwin. For instructions, see “Importing metadata models” on page 79.
• Create a metadata model in Avaki Studio by specifying tables, columns, and data
types. For instructions, see “Creating and editing metadata models” on page 85.
Metadata modeling in Avaki has two important benefits:
You have easier access to Avaki objects like data services. When you map a
metadata model to an Avaki object, you can access the object using the metadata
model’s name, which may be the same as the name of the database table from which it
was created. For example, suppose you have a Crystal Reports application that
accesses a table called HumanResources.Employee in a relational database. You are
building an Avaki data service, emp.DS, that selects and transforms data from the
HumanResources.Employee table, and you would like to make it simple to point the
CR application at either the real database or the Avaki data service for its data.
Solution: Import the schema for HumanResources.Employee into Avaki Studio as a
metadata model. You now have a model called HumanResources, which contains a
table called Employee. Next, map the Employee table in the HumanResources metadata model to your emp.DS data service. This mapping lets you access the emp.DS
data service as HumanResources.Employee—the same name you use to access the
table in the database. You can point your application at either the database or Avaki; no
further changes are required.
78
Data Integration with Sybase Avaki Studio
Importing metadata models
You can ensure that Avaki data services you create conform to a particular
schema. Suppose you created a schema in a modeling tool, such as Sybase PowerDesigner or ERwin, and you want to create a data service that produces results matching
your schema.
Solution: Import the schema into Avaki Studio as a metadata model and derive a new
view model from the metadata model. As you add operators to the view model, Studio
monitors the schema and alerts you if the view model’s schema diverges from that of
the metadata model. Any data services you deploy from this view model will match
the schema you imported from the modeling tool.
Importing metadata models
You can import several kinds of data model (schema) files into Avaki Studio. The following are the supported formats:
Format
Sources
ERwin XML
ERWin 7.0.1
JDBC
An existing Avaki database
connector
Physical data model (.pdm)
Sybase PowerDesigner 12.0
Notes
You can specify one table,
multiple tables, or all tables
to import into the database.
You’ll import the metadata model into a project folder. If you don’t want to use an
existing project folder, create a new one by selecting File > New > Studio Project. For
detailed instructions, see “Creating a project” on page 14.
Data Integration with Sybase Avaki Studio
79
Metadata modeling
Follow these steps to import a metadata model into Avaki Studio:
80
Step 1
Select File > Import. The Select window appears.
Step 2
Click Metadata as Avaki Virtual Schema Model and click Next. The first screen of
the import wizard appears.
Data Integration with Sybase Avaki Studio
Importing metadata models
Step 3
Click Browse to list the project folders into which you can import the model. Select a
project folder from the list and click OK.
Step 4
(Optional) Change the name of the Avaki metadata model (.amm file) in the File name
field.
Data Integration with Sybase Avaki Studio
81
Metadata modeling
Step 5
Click Next. The Import Type window appears.
Step 6
Click the data model type to import and click Next.
Depending on which import type you choose in Step 5, the dialogs display PDM,
ERWIN, or DBconn if you chose JDBC. The example in this procedure uses PowerDesigner.
82
Data Integration with Sybase Avaki Studio
Importing metadata models
Step 7
Click Browse to navigate to the location of your metadata model, select the file to
import and click Next. The Catalog Chooser window appears.
Step 8
Select the catalog to import from the Catalog Chooser and click Next. The Schema
Chooser window appears.
Note If your external schema contains no catalogs, you will see “No catalogs”
in the Catalog Chooser window.
Step 9
Select the schema to import from the list and click Next. The Table Chooser window
appears.
Note If the external schema contains no schema, you will see “No schemas” in
the Schema Chooser window. In this instance, schema refers to a database user
who owns a set of tables.
Data Integration with Sybase Avaki Studio
83
Metadata modeling
Step 10
Select any table or tables you want to import from the displayed list and click Finish.
The editor pane displays the tables from the metadata model you imported.
If the imported tables are sitting on top of one another, you can space them out evenly
by right-clicking inside the editor pane and selecting Tidy Tables from the submenu.
Alternatively, click the Tidy Tables icon on the menu bar
84
Data Integration with Sybase Avaki Studio
.
Creating and editing metadata models
Creating and editing metadata models
It’s generally easier to import metadata models (as described in “Importing metadata
models” on page 79) than to create them in Avaki Studio. If you don’t have access to a
suitable modeling tool, though, follow the steps given here.
Editing metadata models is similar to using the Avaki view model (AVM) editor. It is,
however, much simpler because there is only one type of element in the model—a
table. There are no connections between tables. Every table has a name and zero or
more column definitions.
Note To edit a metadata model after it’s been deployed, you must first undeploy
the model. See “Undeploying metadata models” on page 95 for instructions.
Follow these steps to create a metadata model. If you want to edit an existing model,
start with Step 4.
Step 1
To create a new metadata model, pull down the File menu and select New > Other.
Step 2
In the Select a Wizard window, open the Avaki folder and click Metadata Model. The
New Metadata Model wizard appears.
Data Integration with Sybase Avaki Studio
85
Metadata modeling
86
Step 3
Click Browse to navigate to the container where you want your new model to reside,
optionally rename the file, and click Finish. An editor pane displays beneath the name
you assigned your new metadata model.
Step 4
To open an existing metadata model for editing, click the Navigator tab in the left
pane. Navigate to the folder where your model is stored and double-click the .amm file
for the model. The model opens in the editor pane.
Step 5
To add a new table to the metadata model, click the palette to the left of the editor pane
and click New Table.
Step 6
Position your cursor inside the editor pane and click to insert the new table. It appears
with no columns defined.
Data Integration with Sybase Avaki Studio
Creating and editing metadata models
Step 7
To edit the table, double click it and the Schema Editor window appears.
Step 8
Replace NewTable with a table name of your choosing by typing a name in the Name
field.
Step 9
(Optional) Click Edit to type a description for your table.
Step 10
Click Add to add a new column to your table, and then position your cursor in the column fields to edit their names and values.
Columns are numbered to help you quickly pinpoint schema errors, which appear at
the bottom of the Schema Editor window as in the following example.
Data Integration with Sybase Avaki Studio
87
Metadata modeling
Step 11
Continue to click Add and enter data until your table contains all the columns you need.
To reposition a column, select its row and click Move Up or Move Down.
Step 12
When you have finished adding and editing columns, click OK.
Mapping metadata models to Avaki objects
You can map (link) a table in a metadata model to an Avaki object, such as a data service or a database operation, or to a table in a database. When you deploy the metadata
model, this mapping allows you to access the object using the table name in the
model—probably the same name you use to access the table in the database.
This procedure maps the metadata model we created in the previous procedure, “Creating and editing metadata models” on page 85, to a database operation called
GetEmpGivenName.
Step 1
88
Click the data catalog view in the left pane and navigate to the object you want to map.
In this example, we will map the GetEmpGivenName database operation to the EMP
table we imported in “Importing metadata models” on page 79.
Data Integration with Sybase Avaki Studio
Mapping metadata models to Avaki objects
Step 2
In the data catalog view, click GetEmpGivenName. Drag and drop it on the EMP table
in the editor pane.
The metadata model editor checks to ensure that the schema of the object being
dropped matches that of the table. If so, the mapping is made and the mapped object
appears in the editor pane.
Data Integration with Sybase Avaki Studio
89
Metadata modeling
If the schemas do not match—for example, if you drop the GetEmpGivenName database operation onto the PFIZER_1M table, the mapping is invalid and Studio returns an
error similar to the following:
Step 3
To resolve schema errors, click OK, and you are left with an invalid mapped object
displaying a red state. To correct the mapping:
• Edit the target schema, update the Avaki object (for example, database operation or
data service), and regenerate the schema.
Right-clicking the schema and selecting Refresh from the submenu revalidates the
tables in the editor pane. If the connection to the grid server has been lost, Refresh
will attempt to connect.
• Alternatively, drag a new Avaki object over the target schema to create a new map-
ping.
If you make a mapping error, right click the table and select Remove Mapping from
the submenu.
Step 4
90
Now you must deploy the model before you can point your application at Avaki Studio. Simply right-click the table and select Deploy Metadata Model from the submenu. Alternatively, click the Deploy button on the toolbar
Data Integration with Sybase Avaki Studio
Deploying metadata models
Step 5
Point your application at either the database or Avaki; no further changes are required.
Note Pointing the application at Avaki means you are connecting to Avaki via
JDBC. See “Deploying metadata models,” below, for information on naming con-
ventions for mapped tables.
Deploying metadata models
Deploying a metadata model makes the data services, database operations, or provisioned tables that are mapped to the model’s tables accessible by the table names in the
model through JDBC.
Note When you deploy a metadata model, the mapped tables are deployed and
any unmapped tables are silently ignored.
Follow these steps to deploy your metadata model into the data catalog.
Step 1
When you are ready to deploy your model to the grid, right-click the table you just
mapped and select Deploy from the submenu.
Step 2
Type a name in the Model Name field.
Note The Model Name field accepts two-part names of the form
[<catalog>.]<schema>, where the optional <catalog> part defaults to your Avaki
domain name and <schema> is the arbitrary name you give this model. The string
you enter must contain no spaces or punctuation other than - (hyphen), _ (underscore), and at most one . (period). The names of mapped tables in the model,
then, have three parts: [<catalog>.]<schema>.<table>. If you choose to enter the
database name as the model name (<schema>), you can refer to objects mapped
to tables in this model as [<catalog>.]<database>.<table>.
Step 3
Click OK. If Avaki Studio encounters errors, a message appears. Otherwise the
deployment begins.
Data Integration with Sybase Avaki Studio
91
Metadata modeling
The metadata model is successfully deployed and added to the data catalog’s Metadata
directory when you see the following message:
Step 4
You can check your newly deployed object in the data catalog:
If the deployment fails, the operation stops, newly provisioned objects are removed
from the grid, and Avaki Studio displays an error.
To undeploy a metadata model, see “Undeploying metadata models” on page 95.
92
Data Integration with Sybase Avaki Studio
Deriving metadata models
Deriving metadata models
Deriving a view model from a metadata model is a way to create a new data service
with a designated output schema. When you perform this operation, Avaki Studio
checks that the view model you built generates the output schema you specified. In
other words, the results of a data service deployed from the view model will conform
to the metadata model.
Step 1
Open a project in the Navigator pane and double click a metadata model to bring it
into the editor pane.
Step 2
Right-click the table you want to derive and select Derive View Model from the submenu. The View Model window displays.
Step 3
Specify the container and file name and click Finish.
The result icon shows the target schema that you selected. As you design the data service, Avaki Studio checks that the output matches the target schema.
Data Integration with Sybase Avaki Studio
93
Metadata modeling
Step 4
Create a data service where you connect input to output.
Step 5
In the editor pane, click Connection, then click the Input Source table and then click
the Result table.
As you add other operators to the view model, Avaki Studio monitors the schema and
alerts you if the view model’s schema diverges from that of the metadata model.
Deleting metadata models
Do not manually delete individual deployed mappings (components of a deployed
metadata model) by browsing the data catalog and deleting the corresponding files and
directory. Delete mappings using the Undeploy Metadata Model option in Avaki Studio. See “Undeploying metadata models” on page 95.
94
Data Integration with Sybase Avaki Studio
Undeploying metadata models
Undeploying metadata models
Undeploying a metadata model reverses the results of deploying it, which means that
you can no longer access the tables in the model through JDBC using the specified
names.
To edit a deployed model, you must first undeploy it.
Step 1
Right-click inside the editor pane and choose Undeploy Metadata Model from the
submenu.
Alternatively, click the Undeploy Metadata Model from the Avaki Server button on
the toolbar, directly above the editor pane
.
Data Integration with Sybase Avaki Studio
95
Metadata modeling
96
Data Integration with Sybase Avaki Studio
Chapter 6
Managing the data catalog
This chapter describes tasks you can perform in Avaki Studio’s data catalog view;
these include:
• Modifying access control lists (ACLs)—page 98
• Creating and modifying attributes—page 101
• Creating categories and adding objects to them—page 104
Avaki Studio provides a limited set of tools for managing the data catalog. The complete tool set is available in the web UI, where in addition to the tasks described here,
you can move, link, and rename objects; create directories and shares; manage caching; and search the Avaki domain. For information on using the web UI, see the Sybase
Avaki EII Administration Guide.
Data Integration with Sybase Avaki Studio
97
Managing the data catalog
Modifying ACLs
This section explains how to display and modify access control lists through the data
catalog view. You can set permissions, change ownership, add users or groups to an
ACL, or remove users or groups.
Step 1
To display the ACL for an item in the data catalog, right-click the item in the data catalog
view and select Permissions from the context menu. The Edit Permissions dialog appears.
Step 2
To change a permission for a user or group on the ACL, click on the permission in that
user or group’s row of the table. For example, to change the Write permission for
members of the DomainUsers group, click on the cell that says “Unset” in the second
row of the Write column, then pull down the menu.
Step 3
Select a new value—Allow, for example—from the pull-down menu.
Note At any point, you can click Cancel to dismiss the Edit Permissions dialog
without saving your changes, or click OK to dismiss the Edit Permissions dialog
and save your changes.
98
Data Integration with Sybase Avaki Studio
Modifying ACLs
Step 4
To change the object’s owner, click the Change Owner... button. The User/Group
Browser appears.
Step 5
Use the Domain pull-down if you want to select a user or group from another Avaki
domain. Click the Group button if you want to select a group. Choose a user or a
group from the list and click OK to dismiss the browser. Studio updates the Edit Permissions dialog to show the object’s new owner.
Step 6
To add a user or group to the ACL, click the Add button. The User/Group Browser
appears.
Step 7
Use the Domain pull-down if you want to select a user or group from another Avaki
domain. Click the Group button if you want to select a group. Choose a user or a
group from the list and click OK to dismiss the browser. Studio updates the Edit Per-
Data Integration with Sybase Avaki Studio
99
Managing the data catalog
missions dialog to show the new line in the ACL. In this example, we’ve added a user
called Fred.
Notice that Fred’s permissions are all Unset. If you leave them in that state, Studio will
drop Fred from the ACL. You can use the Read, Write, Execute, and Delete pull-down
menus to set permissions.
Step 8
To remove a user or group from the ACL, select it and click the Delete button.
Studio removes the selected user or group from the ACL.
Step 9
100
Click OK to save your changes and dismiss the Edit Permissions dialog.
Data Integration with Sybase Avaki Studio
Managing attributes
Managing attributes
Read this section for instructions on displaying, creating, modifying, and deleting the
attributes associated with objects in the data catalog.
Step 1
To display the attributes for an item in the data catalog view, right-click the item and
select Attributes from the context menu. The Edit Attributes dialog appears.
Notice that the Attribute Name and Type fields and many of the Value fields are
grayed out and uneditable (above). You cannot change the name or data type of any
attribute. Nor can you edit the values of system attributes; system attributes are displayed only for information. What can you edit? Only the values that are not grayed
out—the values of user attributes. And only an administrator or the owner of an object
can edit the values of its user attributes.
Step 2
To edit an attribute value, click it and type a new value. Be sure to respect the type. If
you enter a word for an attribute that calls for an integer value (for example), Studio
will suffer existential angst and display an error.
Note At any point, you can click Cancel to dismiss the Edit Attributes dialog
without saving your changes, or click OK to dismiss the Edit Attributes dialog
and save your changes.
Data Integration with Sybase Avaki Studio
101
Managing the data catalog
102
Step 3
To add a new attribute to the object, click the Add button. Studio adds a row to the
table.
Step 4
Enter a name for your attribute in the Attribute Name field. In the Type field, select a
data type from the pull-down menu. Enter a value in the Value field. In this example,
we add an attributed called searchTerms whose type is string. Other users will be able
to find this object by searching on any of the words in the value.
Data Integration with Sybase Avaki Studio
Managing attributes
Step 5
To remove an attribute, click its pencil icon to select it and click the Delete button.
Studio removes the attributed from the table and redisplays the dialog.
Step 6
Click OK to save your changes and dismiss the Edit Attributes dialog.
Data Integration with Sybase Avaki Studio
103
Managing the data catalog
Managing categories
This section provides instructions on displaying, creating, and deleting categories in
the data catalog view, and on adding data catalog objects to and removing them from
categories.
Creating and displaying categories
104
Step 1
To display categories in the data catalog view, expand the Categories folder. Within
Categories is ViewLibrary, and within ViewLibrary are subcategories where Avaki
places database connectors, database operations, virtual database operations, SQL
views, and data services. (For details, see “Browsing for input sources” on page 18.)
Step 2
To add a category, select the parent category. In a data catalog where no categories
have been added yet, there are only two possibilities: Categories and ViewLibrary.
Data Integration with Sybase Avaki Studio
Managing categories
Step 3
Right-click on the parent category and select Add Category from the menu. The Add
Category dialog appears.
Step 4
In the Name field, enter a name for the new category. Enter a description of the category in the Description field (optional). Studio will display the description as a tool tip
whenever a user mouses over your category’s name in the data catalog view.
Step 5
Click OK to create the category. Studio reports the success or failure of the category
creation; click OK again to dismiss the notification. The new category appears in the
data catalog view.
Adding objects to categories
Step 1
To add a data catalog object (a data service, a folder, or a file, for example) to a category, browse to the object in the data catalog view.
Step 2
Right-click the object and select Add to Category from the menu. The Add to Categories dialog appears.
Notice that the root category, Categories, is not listed—you cannot add objects to it
(though you can add categories).
Data Integration with Sybase Avaki Studio
105
Managing the data catalog
Step 3
Select one or more categories.
Step 4
Click OK to add the object. Studio reports the success or failure of the category creation; click OK again to dismiss the notification. If any of the containing categories are
open, the object appears in its new categories.
Removing objects from categories
Step 1
In the data catalog view, right-click the object to be removed and select Remove from
Categories from the context menu. The Remove From Categories dialog appears.
Step 2
Select the categories from which to remove the object.
Step 3
Click OK to remove the object. Studio reports the success or failure of the removal;
click OK again to dismiss the notification. If any of the containing categories are open,
the object disappears from them.
Deleting categories
Step 1
To delete a category, right-click it and select Delete from the menu. Studio displays a
confirmation dialog.
Click OK to delete the category. If the containing category is open, the object disappears.
106
Data Integration with Sybase Avaki Studio
Chapter 7
Operator reference
Consult this chapter for detailed information on the workings of the elements that
make up a view model: operators, Input Source elements and Result elements. You
should already be familiar with the material in Chapter 4, ”The view model editor.”
Each element is covered in its own section, which includes a description of the element, information about how it can be connected, details on configuring it, and in
some cases, performance notes and usage examples. They are listed alphabetically:
• “Aggregate” on page 108
• “Custom” on page 111
• “Generator” on page 117
• “Group By” on page 121
• “Input Source” on page 125
• “Intersection” on page 148
• “Iterator” on page 149
• “Join” on page 154
• “Multiplexer” on page 157
• “Order By” on page 159
• “Projection” on page 161
• “Result” on page 164
Data Integration with Sybase Avaki Studio
107
Operator reference
• “Select” on page 165
• “Splitter” on page 166
• “Union” on page 168
• “Update” on page 169
Aggregate
The Aggregate operator condenses a multi-row result set into one with a single row by
applying any of a number of functions to the data. These functions perform calculations such as totalling or counting the values for each row. The output row has one column containing the result of each function defined. The functions are commonly used
to operate on the contents of a single column from the input result set, but the parameter passed to them can actually be the result of an arbitrary JavaScript expression,
allowing more complex calculations. The functions which Studio supports for aggregation are Sum, Average, Maximum, Minimum, Count, First, Last, Population Variance, Sample Variance, Population Standard Deviation, and Sample Standard
Deviation.
For example, if you have a result set with a column called SALARY containing each
employee’s salary, you can define a new column using an Aggregate operator which
calculates the total salary for all rows in the result set using the Sum function and passing the value SALARY as the corresponding expression.
Note that the original columns from the input result set are not carried through to the
output of the Aggregate operator, only the newly computed ones.
Connections
The Aggregate operator takes exactly one input result set, which can be the output of
an Input Source or of any other operator. It produces exactly one output result set
whose schema is defined by the operator.
Required Connection
108
Data Integration with Sybase Avaki Studio
Aggregate
Aggregate properties
Double-click an Aggregate operator to display the Aggregate Properties dialog. You
can edit the name and description as described in “Properties dialogs” on page 58.
Defining aggregate columns
Do the following to edit the column definitions of your aggregation.
• Click the Add button to add a column definition to your aggregation.
• To delete one or more columns, select them and click Delete.
• To reorder the columns, select one or more of them and click the Move Up or
Move Down buttons. (If you want to move multiple columns, the selection must be
contiguous.)
• You can edit the properties of each column. (See “Working with schemas” on page 60
for information about the setting the name, type, precision, and scale of columns.)
Name: Click in a column’s Name field to rename it.
Expression: Click in the column’s Expression field to edit it. This may be any
JavaScript expression that you want to pass to the aggregate function, including
simple column names from the incoming result set. Click the “…” button to
open the Edit Expression dialog if you need more room than the table cell provides. You can also right click (either in the table cell directly, or in the Edit
Expression dialog) to show a context-sensitive menu of column names, variables, and functions that you can paste into the Expression field. For details on
using JavaScript expressions, see “Using expressions within Avaki Studio” on
page 66. For details on the context menu, see “The expressions menu” on
page 71.
Data Integration with Sybase Avaki Studio
109
Operator reference
Function: Click the Function field and use the pull down list to choose the function you want to use for this column. The value of the Expression field will be
passed to this function for each row in the incoming result set. The functions are
described under “Aggregate functions” below.
Type: Specify the type of the column. Be sure to specify a numeric type (INTEGER, for example) for aggregate columns that use the Count function.
Precision: Specify the precision for the column, if applicable for the column’s
type.
Scale: Specify the scale for the column, if applicable for the column’s type.
Aggregate functions
The table below lists the available aggregation functions and describes what they do.
Function
Description
Sum
Adds the value of expression for each row to obtain a total.
Average
Averages the values of expression for each row—equivalent to
using Sum and dividing by Count.
Maximum
Returns the highest value of expression from the input result
set.
Minimum
Returns the lowest value of expression from the input result
set.
Count
Returns the number of rows in the input result set. The value of
expression is ignored. Note that this will return an integer
regardless of the type of the expression.
110
First
Returns the value of expression for the first row in the input
result set.
Last
Returns the value of expression for the last row in the input
result set.
Population variance
Returns the population variance for the values of expression in
the input result set.
Sample variance
Returns the sample variance for the values of expression in the
input result set.
Data Integration with Sybase Avaki Studio
Custom
Function
Description
Population standard
deviation
Returns the population standard deviation for the values of
expression in the input result set.
Sample standard deviation
sion in the input result set.
Returns the sample standard deviation for the values of expres-
Custom
A Custom operator can perform any operation that you define, using arbitrary JavaScript code that you supply.
To implement a Custom operator, you first define the output schema you will generate. Then you write JavaScript code for the body of a function that will be called once
for each output row it is expected to produce. Your code can iterate over the operator’s
input result sets (there may be zero or more of these) and insert values for each column
in the output row according to the defined schema. Your code must return a Boolean
value. A return value of true indicates that it has produced a row. It will then be
invoked again to produce the next row when the runtime needs it. If your code returns
false, it indicates that it has no more rows to produce.
Beyond that, you’re free to set up your code as you want—you can precompute the
output when the function is called the first time and then feed out the results one by
one, simply act as a filter on the input, or do whatever you decide will work best for
the functionality you need.
Connections
The Custom operator takes anywhere from zero to five input result sets, each of which
can be the output of an Input Source or of any other operator. It produces exactly one
output result set whose schema is defined by the operator.
Required Connection
Optional Connection
Data Integration with Sybase Avaki Studio
111
Operator reference
Custom properties
Double-click a Custom operator to display the Custom Properties dialog. You can edit
the name and description as described in “Properties dialogs” on page 58.
Specifying the output schema
When you define a Custom operator, you need to specify the schema that the output
result set will have. You do this using the Schema Editor dialog, which is accessed by
clicking the Edit… button near the bottom of the Custom Properties dialog.
• Click the Add button to add a column definition to your aggregation.
112
Data Integration with Sybase Avaki Studio
Custom
• To delete one or more columns, select them and click Delete.
• To reorder the columns, select one or more of them and click the Move Up or
Move Down buttons. (If you want to move multiple columns, the selection must be
contiguous.)
• You can edit the properties of each column. (See “Working with schemas” on
page 60 for information about the setting the name, type, precision, and scale of
columns.)
Name: Click in the a column’s name field to rename it.
Type: Specify the type of the column.
Precision: Specify the precision for the column, if applicable for the column’s
type.
Scale: Specify the scale for the column, if applicable for the column’s type.
Entering custom code
Enter and edit your custom code directly in the Custom Properties dialog. The code
you enter forms the body of the function that is called when your Custom operator is
asked for its next row of data. You can enter any JavaScript code here that would be
valid inside a function body. See “Using expressions within Avaki Studio” on page 66
for details on using JavaScript code within Studio.
Your code has access to the variables structure, including an object called
variables.<yourCustomOperatorName>, into which you can insert state variables, using expressions such as:
variables.myOperator.foo = 5;
In addition, you have access to all the incoming result sets from objects connected to
your operator. They are named <precedingOperatorName>RS (for example, if an
input source is named “CustomerInfo” there will be a variable named
CustomerInfoRS available to access it). Finally, you have access to the output
ResultSet object for your operator, which is named outputRS. This is actually a
subclass of java.sql.ResultSet on which you can only set values for the columns
in the current row. The runtime architecture takes care of incrementing the row each
time your operator is called.
If your code needs to call external functions or if you need to import other Java classes
in order to do your custom processing, you can add these to the .jsi file for your model.
For details, see “Using a .jsi file to enhance your model” on page 75.
Data Integration with Sybase Avaki Studio
113
Operator reference
Note The Custom operator is an exception to the guidelines regarding Java-
Script expressions in that you must always access the columns of both incoming
and output result sets using either the accessor methods on the ResultSet
object itself or the Avaki utility functions (as listed under “Avaki Functions” on
page 73).
Example: Making a lookup table using a Custom operator and a .jsi file
The problem
Suppose you have an input source—a database operation, for example—that returns a
result set of transaction data. Unfortunately, the prices in this data are in various currencies, and you need to express the prices in Euros. You have another input result set
that has information about current Euro conversion rates.
The columns in the first input result set are:
— ACCT_NO - the account number for the transaction
— SYMBOL - the symbol of the stock purchased
— NO_OF_SHARES - the number of shares of stock purchased
— COST - the cost per share
— CURRENCY - the currency in which COST is expressed
The columns in the second input result set are:
— CURRENCY - the currency for which the conversion factor applies
— MULTIPLIER - the factor by which the original value is multiplied to get the
Euro value
Your goal is to produce a result set consisting of:
— ACCT_NO - the account number for the transaction
— SYMBOL - the symbol of the stock purchased
— COST_IN_EURO - the cost in Euros of the transaction
One possible solution
One way to produce the result that you need (and probably the most straightforward
way to use Studio) would be to use a Join operator, employing the “Inner Loop Join”
114
Data Integration with Sybase Avaki Studio
Custom
algorithm with the second input result set as the inner table. This would produce a
result set consisting of:
— ACCT_NO - the account number for the transaction
— SYMBOL - the symbol of the stock purchased
— NO_OF_SHARES - the number of shares of stock purchased
— COST - the cost per share
— CURRENCY - the currency in which COST is expressed (from the first input)
— CURRENCY - the currency for which the conversion factor applies (from the
second input)
— MULTIPLIER - the factor by which the original value is multiplied to get the
Euro value
You could then use a Projection operator to remove the unneeded columns and to
compute the COST_IN_EURO column (the formula being NO_OF_SHARES * COST *
MULTIPLIER).
Solving the problem with a Custom operator
An alternative implementation for this same functionality is to use a Custom operator
to build a lookup table that maps currency to multiplier and then performs the computation as you read in the account result set.
Note This technique is presented here to illustrate, using a relatively simple
problem, how to use Custom operators—not necessarily as a recommendation
for best practices.
This example uses a .jsi file as well as a Custom operator. The .jsi file contains the following JavaScript:
var lookupTable = {}; // This will contain the mapping of currency type to
conversion factor.
function setUpLookupTable(rs) {
if (lookupTable.initialized == true) {
return; // We only need to read the result set into the map once
}
while (rs.next()) { // Iterate over the rows in the result set
var key = rs.getString(rs, "CURRENCY"); // Get the currency type
var value = rs.getRealValue("MULTIPLIER"); // Get the conversion factor
lookupTable[key] = value; // Save the key/value pair
}
Data Integration with Sybase Avaki Studio
115
Operator reference
lookupTable.initialized = true; // So we don't try and do this again
}
This code reads the “currency to exchange rate” result set into a hash table. The Custom operator has two inputs—one is called “LookupTableSource,” and the other is
called “DataInputSource.”
The logic in the Custom operator itself is as follows (remember that this is a function
with a Boolean return value—Studio supplies the outer braces, you only type the function body):
// Note that this function requires the lookup table input source to be named
// "LookupTableSource" and the main input source to be named "DataInputSource"
setUpLookupTable(LookupTableSourceRS); // Initialize the lookup table
// Check to see if there are more rows in DataInputSourceRS. If not, return false
// Note that this also advances the row pointer to the DataInputSourceRS
if (DataInputSourceRS.next() == false) {
return false;
}
// Get the values of the fields we need from the input result set
var accountNumber = DataInputSourceRS.getInt("ACCOUNT_NO");
var symbol = DataInputSourceRS.getString("SYMBOL");
var currencyType = DataInputSourceRS.getString("CURRENCY");
var numShares = DataInputSourceRS.getInt( "NO_OF_SHARES");
var costPerShare = DataInputSourceRS.getFloat("COST");
// Look up the Euro conversion factor for the original currency
var conversionFactor = lookupTable[currencyType];
// Compute the value of the transaction, in Euros
var totalValue = numShares * costPerShare * conversionFactor;
// Store the values in the output result set
outputRS.updateInt("ACCOUNT_NO", accountNumber);
outputRS.updateString("SYMBOL", symbol);
outputRS.updateString("COST_IN_EURO", totalValue);
return true; // Let the runtime know we provided another row
116
Data Integration with Sybase Avaki Studio
Generator
Generator
A Generator operator produces a result set without input. Like an Iterator, a Generator lets you specify JavaScript expressions for initializing variables, updating variables, and testing for termination. Unlike an Iterator, a Generator does not accept
inputs. Like a Projection operator, a Generator allows you to specify the names and
types of the output columns, as well as JavaScript expressions for computing the values in each row.
When a Generator is first called, it executes the Initialize expression you supply to
initialize variables. On each call, Generator
1.
2.
3.
Tests the termination condition
If the termination condition has not been met, it generates a row with the designated
schema by executing all of the user-specified JavaScript expressions
Executes the Increment expression you supply to update variables.
The output of the Generator is the sequence of rows created in these iterations.
Connections
The Generator operator takes zero input result sets. It produces exactly one output
result set whose schema is defined by the operator.
Required Connection
Data Integration with Sybase Avaki Studio
117
Operator reference
Generator properties
Double-click a Generator operator to display the Generator Properties dialog. You
can edit the name and description as described in “Properties dialogs” on page 58.
Your code has access to the variables structure, including an object called
variables.<yourGeneratorOperatorName>, into which you can insert state
variables, using expressions such as:
variables.myOperator.foo = 5;
If your code needs to call external functions or if you need to import other Java classes
in order to do your custom processing, you can add these to the .jsi file for your model.
For details, see “Using a .jsi file to enhance your model” on page 75.
As an example, let’s assume you wish to create a Generator that will output data with
a single integer column whose values range from 0 to 100.
Entering iteration control code
You control the starting, intermediate, and ending values of your generated column
values using code you enter into the Iteration Controls tab in the Generator Properties
dialog. There are three fields, which you define as follows:
Initialize: This field contains expressions which set up any variables you wish to use
in order to calculate the values of each row you are generating. In our simple example,
you would initialize a counter variable to zero. You can enter any JavaScript code here
118
Data Integration with Sybase Avaki Studio
Generator
that would be valid inside a function body. See “Using expressions within Avaki Studio” on page 66 for details on using JavaScript code within Studio.
Increment: This field contains expressions which increment the variables you initialized in the previous field. In our example, we would simply increment our counter
variable. Here, too, you can enter any JavaScript code here that would be valid inside a
function body. See “Using expressions within Avaki Studio” on page 66 for details on
using JavaScript code within Studio.
Condition: This field contains a Boolean expression. While it evaluates to true, the
operator will continue to be called to provide additional rows of data. When it evaluates to false, the iteration will cease. In our example, we would want to check for our
counter being less than or equal to the value 100. See “Boolean expressions” on
page 66 for details on constructing Boolean expressions.
Defining the output columns
When you define a Generator operator, you need to specify the schema that the output result set will have, as well as the values the columns will have for each iteration
through the loop. You do this using the Column Definitions tab in the Generator Properties dialog.
• Click the Add button to add a column definition to your schema.
• To delete one or more columns, select them and click Delete.
Data Integration with Sybase Avaki Studio
119
Operator reference
• To reorder the columns, select one or more of them and click the Move Up or
Move Down buttons. (If you want to move multiple columns, the selection must be
contiguous.)
• You can edit the properties of each column. (See “Working with schemas” on
page 60 for information about the setting the name, type, precision, and scale of
columns.)
Name: Click in the a column’s name field to rename it.
Definition: Click in a column’s definition field to enter an expression that will be
evaluated each time through the loop to set the value of the column. The expression should evaluate to a value that’s appropriate for the column type you
choose. For our example, we would simply put the variable (fully qualified) in
the Definition field. When run, this column would have the values 0, 1, 2, 3, and
so on. For details on writing expressions, see “Using expressions within Avaki
Studio” on page 66.
Type: Specify the type of the column. For our example, we would choose a
numeric type such as INTEGER.
Precision: Specify the precision for the column, if applicable for the column’s
type.
Scale: Specify the scale for the column, if applicable for the column’s type.
120
Data Integration with Sybase Avaki Studio
Group By
Group By
The Group By operator is very similar to the Aggregate operator. Its output includes
columns generated with the same aggregation functions. The difference is that
whereas the Aggregate operator applies these functions to the entire set of input rows,
the Group By divides the input rows up into groups based on criteria you specify and
then applies the aggregation functions to the subset of rows in each group. This creates
one row for each group rather than the Aggregate operator’s single row of output for
the entire result set.
The aggregate columns in the Group By operator are defined identically to those in
the Aggregate operator. See “Aggregate” on page 108 for details. To define the column or columns that will determine the grouping, you simply pick one or more of
them from the input source. A group consists of all rows of the input where the values
for these columns are identical. For example, if your input, which describes employee
information, contains a column named DEPT_NO which is that employee’s department
number, you can group by that column and then obtain aggregate information for the
employees in each department. If you specify more than one group-by column, the
values for those columns must be the same throughout all rows of the group.
You also have the option when defining the group-by rows of including that column in
the output result set. In the example above, therefore, we could choose to include the
DEPT_NO column in our result set. Otherwise, only the columns calculated based on
the aggregate functions are included.
The aggregate functions available for use are the same as in the Aggregate operator:
Sum, Average, Maximum, Minimum, Count, First, Last, Population Variance, Sample
Variance, Population Standard Deviation, and Sample Standard Deviation. They are
described in detail under “Aggregate functions” on page 110.
Connections
The Group By operator takes exactly one input result set, which can be the output of
an Input Source or of any other operator. It produces exactly one output result set
whose schema is defined by the operator.
Required Connection
Data Integration with Sybase Avaki Studio
121
Operator reference
Performance notes
Because Studio needs to sort the result set in order to perform a grouping, the same
performance issues described for the Order By operator apply to the Group By operator. See “Performance notes” on page 159 for details.
Group By properties
Double-click a Group By operator to display the Group By Properties dialog. You can
edit the name and description as described in “Properties dialogs” on page 58.
Specifying groups
On the Group By Columns tab of the properties dialog, you list the columns from the
input that the operator will use to group the incoming rows. You may note the similarity to the way the Order By operator specifies the columns used for sorting (see
“Order By” on page 159 for more information).
• Click the Add button to add a column criterion to your groupings.
• To delete one or more columns, select them and click Delete.
• To rearrange the columns, select one or more of them and click the Move Up or
Move Down buttons. (Note that if you want to move multiple columns, the selection must be contiguous.)
122
Data Integration with Sybase Avaki Studio
Group By
• You can edit the properties of each column:
Name: Click in the Name field and choose a column name from the pull down
list to change it. (When you add a new column, Studio chooses the next available column from the input, which may not necessarily be the column you want
to group by).
Keep in Schema: This determines whether the column in question will appear in
the output schema of the Group By operator. To change its value, click in the
field and choose either “Yes” or “No” from the pull down.
Specifying aggregate columns
Specify aggregate columns to calculate using the Aggregate Columns tab in the Group
By Properties dialog. This tab functions exactly the same as the column definition section in the Aggregate Properties dialog (see “Aggregate” on page 108 for details).
To edit the column definitions of your aggregation, do the following:
• Click the Add button to add a column definition to your aggregation.
• To delete one or more columns, select them and click Delete.
• To reorder the columns, select one or more of them and click the Move Up or
Move Down buttons. (If you want to move multiple columns, the selection must be
contiguous.)
Data Integration with Sybase Avaki Studio
123
Operator reference
• You can edit the properties of each column. (See “Working with schemas” on
page 60 for information about setting the name, type, precision, and scale of columns.)
Name: Click in the a column’s name field to rename it.
Expression: Click in the column’s Expression field to edit it. This may be any
JavaScript expression that you want to pass to the aggregate function, including
simple column names from the incoming result set. Click the “…” button to
open the Edit Expression dialog if you need more room than the table cell provides. You can also right click (either in the table cell directly, or in the Edit
Expression dialog) to show a context-sensitive menu of column names, variables, and functions that you can paste into the Expression field. For details on
using JavaScript expressions, see “Using expressions within Avaki Studio” on
page 66. For details on the context menu, see “The expressions menu” on
page 71.
Function: Click the Function field and use the pull down list to choose the function you want to use for this column. The value of the Expression field will be
passed to this function for each row in the incoming result set. The functions are
described under “Aggregate functions” on page 110.
Type: Specify the type of the column. Be sure to specify a numeric type (e.g.
INTEGER) for aggregate columns which use the Count function.
Precision: Specify the precision for the column, if applicable for the column’s
type.
Scale: Specify the scale for the column, if applicable for the column’s type.
124
Data Integration with Sybase Avaki Studio
Input Source
Input Source
An Input Source element represents input from a source external to your model.
While some input sources take their input from nonrelational data, all of them have a
single output in which their data is formatted as a result set, as if it had come from a
relational database query. To configure an Input Source element, you must specify the
original source of the data, set up a transformation if the data isn’t already in result set
format, and specify values for any parameters the input requires.
To create input sources that are based on elements in your Avaki domain, you can drag
and drop items directly from the Data Catalog View in Studio into your view model.
These include database operations, virtual database operations, other data services,
and files. Studio attempts to do as much of the configuration as possible. (For example, if you drag a data service that takes no parameters into your model, the resulting
Input Source element will be fully configured. If you drag an XML file into your view
model, you must still configure the transformation to construct a result set from the
XML data.)
Note If you need to create input rows that don’t come from an external input
source, use the Generator operator—see “Generator” on page 117.
Connections
The Input Source element takes zero input result sets. It produces exactly one output
result set whose schema is defined either by the source itself (for relational inputs) or
by the transform you define (for non-relational inputs).
Required Connection
Data Integration with Sybase Avaki Studio
125
Operator reference
Input Source Properties
Double-click an Input Source element to display the Input Source Properties dialog.
You can edit the name and description as described in “Properties dialogs” on page 58.
Configuring the source
The source for your Input Source element can be any one of the following:
• An Avaki database operation or virtual database operation
• An Avaki data service that produces result set or XML output
• A data catalog file in XML or CSV format
• A web services call
126
Data Integration with Sybase Avaki Studio
Input Source
You specify the source for your Input Source element using the Input Source tab.
The tab provides a summary of the current settings. To change the values, click the
Choose… button to launch the Input Source Chooser wizard.
Choose the type of input you want to use and click Next. Depending on the type you
choose, you will see a different series of pages in the wizard.
Data Integration with Sybase Avaki Studio
127
Operator reference
Configuring database operation input sources. On the next page (“Database
Operation Input Source”), you choose a database operation (or virtual database operation) from the browser.
Browse to select the operation you want and click the Finish button to close the wizard.
128
Data Integration with Sybase Avaki Studio
Input Source
Configuring data service input sources. On the next page (“Data Service Input
Source”), you choose a data service from the browser.
Browse to select the service you want and click the Finish button to close the wizard.
Data Integration with Sybase Avaki Studio
129
Operator reference
Configuring file input sources. On the next page (“File Input Source”), you choose
a grid file from the browser.
Browse to select the file you want and click the Finish button to close the wizard.
130
Data Integration with Sybase Avaki Studio
Input Source
Configuring HTTP input sources. On the next page (“HTTP Operation Input
Source”), you specify information about the HTTP server you wish to contact.
Fill in the fields as follows:
• URL: Enter the URL for to the HTTP source.
• HTTP Method: The method determines how parameters to the HTTP request get
sent. Choose GET to encode the parameters as part of the URL or choose POST to
include the parameters in the HTTP headers. For most HTTP requests, you will want
to choose the default GET method.
• Username: (Optional) Enter the name to use when logging in to the HTTP server if
the server requires it. If the server requires no authentication, leave this blank.
• Password: (Optional) Enter the password for the user account specified in the
Username field. If the username is blank, this field is ignored.
Data Integration with Sybase Avaki Studio
131
Operator reference
When you are done with this page, click Next to proceed to the “HTTP Operation
Parameters” page. (If your HTTP operation doesn’t require any parameters, you can
click Finish now to close the wizard.)
• Click the Add button to add a parameter.
• To delete one or more parameters, select them and click Delete.
• To rearrange the parameters, select one or more of them and click the Move Up or
Move Down buttons. (Note that if you wish to move multiple parameters, the selection must be contiguous.)
• You can edit the properties of each parameter:
Name: Click in the Name field and type a name for the parameter.
Description: (Optional) To add a description for the parameter, click in the
description column and type one.
When you are done with this page, click Finish to close the wizard.
132
Data Integration with Sybase Avaki Studio
Input Source
Configuring web service input sources. On the next page (“Web Service Input
Source”), you specify information about the web service you want to call.
Fill in the fields as follows:
• WSDL Location: This is the URL to the WSDL (Web Service Description Language) file for the web service you want to call. The file may be on an HTTP server
(you would specify it by typing an “http://” URL), in the Avaki domain (you would
browse for it using the Browse Data Catalog… button or type an “avaki://” URL
for it), or on your local file system (you would browse for it using the Browse
Local File System… or type a “file://” URL for it).
• Use ‘wrapped’ mode…: If your web service uses the document/literal (as opposed
to rpc/encoded) format, you would check this box to use the ‘wrapped’ mode for
passing the parameters. Most document/literal web services will expect this—if
you are experiencing trouble calling your document/literal web service, try changing the value of this checkbox. If the web service uses the rpc/encoded format, this
checkbox has no effect.
Data Integration with Sybase Avaki Studio
133
Operator reference
Click the Next button to continue to the “Web Service Operation” page where you will
choose the operation you want.
134
Data Integration with Sybase Avaki Studio
Input Source
Click Next to continue to the “Web Service Response” page, where the wizard asks
you to indicate which part of the SOAP (Simple Object Access Protocol) response you
want this input source to return.
Select one:
• The entire SOAP response
Return the SOAP message and any attachments.
• Only the SOAP part of the response
Return the SOAP message with no attachments.
• The nth attachment (0-based index)
Return the specified attachment but not the SOAP message. If the web service
returns multiple attachments, you can enter a number in the text box to specify the
zero-based index number of the attachment to return. For example, if the web service returns four attachments and you only want the fourth, enter 3 in the text box.
Click Finish to close the wizard.
Data Integration with Sybase Avaki Studio
135
Operator reference
Configuring the transform
If the source you configured on the Input Source tab doesn’t already contain data in
the relational database result set format, you will need to configure Studio to transform
the data. Studio is able to convert data from CSV (Comma-Separated Values) format
(actually, comma-, pipe- (‘|’), or tab-separated files) and XML (Extensible Markup
Language) into result set format. Data coming from database operations, virtual database operations, and data services which are already in result set format do not need to
be transformed.
To set up the transform, click the Transform tab in the Input Source Properties dialog.
The tab displays information about the current transform setting. To change the setting, click the Define… button to open the Transform Chooser wizard.
Select one:
• No transform
When the input source is already in result set format and needs no transforming.
136
Data Integration with Sybase Avaki Studio
Input Source
• CSV to Result Set
When your data is in CSV or a similar format.
• XML to Result Set
If your data is in XML format.
If you chose “No transform,” click Finish to close the wizard. Otherwise, click Next
to continue. You will see the “Parameter Values” page.
If your input source takes parameters, you need to enter values for them here. These
are only used in the course of defining the transformation, in order to get sample data
from your input source to use in the remainder of the wizard. The values you enter
here are literal values, not expressions. There is no need to place quotation marks
around string values, for example.
When you are done entering parameter values, or if your input source takes no parameters, click Next. Based on the type of transform you chose, you will see a different
series of pages.
Data Integration with Sybase Avaki Studio
137
Operator reference
Configuring CSV transforms. If you choose to define a CSV transform, the next
page will be the “CSV to Result Set Transform” page.
Fill in the fields as follows:
Field Delimiter: Choose the delimiter that separates fields in the file. Studio can process files separated not only by commas (‘,’), but also by “pipes” (‘|’) and tabs.
Use first row of data as column names: Check this box to treat the first row of data
in the file as the names of the columns. If this checkbox is selected, then Studio will
skip the first row when converting the file to a result set. In addition, on the next page
in the wizard, the column names will already be populated based on the file data.
138
Data Integration with Sybase Avaki Studio
Input Source
Click Next to display the “Column Definitions” page.
If you selected “Use first row of data as column names” on the previous page, the
names of the columns will already be filled in for you. You can edit the properties of
each column. (See “Working with schemas” on page 60 for information about the setting the name, type, precision, and scale of columns.)
Name: Click in the Name field to edit the column’s name. Even if Studio populated the names from the first row of the file’s data, you can still edit them here.
Type: Specify the type of the column’s data. When you create a new column, Studio defaults its type to VARCHAR since CSV data is by nature text-based. If you
change this, make sure that the data in the document can be parsed as the type
you choose (for example, if the document has the value “foo” and you choose
INTEGER for the type, you will get an error when you execute your data service).
Precision: Specify the precision for the column, if applicable for the column’s
type.
Data Integration with Sybase Avaki Studio
139
Operator reference
Scale: Specify the scale for the column, if applicable for the column’s type.
First Row Value: This column is not editable. Studio uses it to show you the values in the first row of your file, to help you decide when naming the columns or
specifying their types.
When you’re done, click Finish to close the wizard.
Configuring XML transforms. If you choose to define an XML transform, the “XML
to Result Set Transform” page appears.
Row Element: Use the browser to determine which element in your XML document
will be the repeating element that delimits the “rows” in your data.
140
Data Integration with Sybase Avaki Studio
Input Source
When you’re done, click Next to continue to the “Column Definitions” page.
• Click the Add button to add a column.
• To delete one or more columns, select them and click Delete.
• To reorder the columns, select one or more of them and click the Move Up or
Move Down buttons. (If you want to move multiple columns, the selection must be
contiguous.)
• You can edit the properties of each column:
Name: Click in the Name field and edit the column’s name. If you use the
Browse XPath… button to choose the XML node for a given column, Studio
will automatically set the column’s name to the name of that node (unless
you’ve already edited the name).
Type: Specify the type of the column’s data. When you create a new column, Studio defaults its type to VARCHAR since XML data is by nature text-based. If you
change this, make sure that the data in the document can be parsed as the type
Data Integration with Sybase Avaki Studio
141
Operator reference
you choose (for example, if the document has the value “foo” and you choose
INTEGER for the type, you will get an error when you execute your data service).
Precision: Specify the precision for the column, if applicable for the column’s
type.
Scale: Specify the scale for the column, if applicable for the column’s type.
XPath: Specify an XPath expression that defines the node of the XML document
whose value you want to use for this column. The XPath is relative to the repeating element you chose on the previous page of the wizard. Studio simplifies the
task of choosing the XPath by providing a browser you can use to choose a node.
This should be sufficient in all but the most complex cases, only requiring a
knowledge of XPath syntax for highly specialized applications. To access the
browser, select the column you’re defining and click Browse XPath… to
choose the node. Make sure you choose the text node (with the
icon) if that’s
what you want. In the XPath Browser dialog, Studio shows the values of the first
row’s data next to each node to help you decide what to pick.
When you’re done with this page, click Finish to close the wizard.
142
Data Integration with Sybase Avaki Studio
Input Source
Configuring error handling
You can choose how data services deployed from this view model will behave if this
input source is unavailable or unresponsive. By default, a data source fails and returns
an error if any input source fails to respond. If you want data services deployed from
this view model to run even when this input source is unavailable, or to return an error
upon receiving an empty result set, follow these steps.
Step 1
Click the Error Handling tab in the Input Source Properties dialog box. The dialog
box displays the error handling options.
Step 2
Click one of the radio buttons:
• Stop the data service on errors from this input source. This is the default behavior. Choose this option if you don’t want the data service to run when this input
source is unavailable.
• Stop the data service on an empty result set or errors from this input source.
Choose this option if you don’t want the data service to run when it receives an
empty result set from this input source, or when this input source is unavailable.
• Don’t stop the data service on errors from this input source; return an empty
result set. Choose this option if you want the data service to run with an empty
result set for this input source when this input source is unavailable.
Step 3
(Optional) If you chose Stop the data service on an empty result set..., you can enter
your own error message in the Empty result set message field. If you chose Stop the
data service on an empty result set... and you don’t enter an error message here, Studio uses a default error message that says “<data-source> returned no rows.”
Step 4
Click OK to save your changes.
Data Integration with Sybase Avaki Studio
143
Operator reference
Mapping input parameters
If the input source has parameters, you must map them to global view model parameters. Follow these steps to map parameters.
144
Step 1
Click the Parameters tab to show information about the parameters the Input Source
requires, if any. The Parameters tab shows you a summary, including a warning if any
parameters haven’t yet been mapped.
Step 2
To edit the mappings of the element’s parameters, click the Edit Values… button to
open the Parameter Properties dialog.
Step 3
Use an arbitrary expression to map each parameter required by an input source. This
may involve global parameters to the model, variables defined downstream, such as in
Iterator operators, constants (make sure string constants are enclosed in quotation
marks), or a combination of these.
Data Integration with Sybase Avaki Studio
Input Source
To edit the expressions, click in the Value column to make it editable. Type your mapping expression directly in the table cell, or click the “…” button to open the Edit
Expression dialog if you need more room than the table cell provides. Right click
(either in the table cell directly, or in the Edit Expression dialog) to show a context-sensitive menu of column names, variables, and functions that you can paste into
the Expression field. For details on using JavaScript expressions, see “Using expressions within Avaki Studio” on page 66. For details on the context menu, see “The
expressions menu” on page 71.
Arrays. If a given parameter is an array, when you click in the Value column, the
Array Parameter Values dialog appears.
You can enter an expression that evaluates to an array of the same type using the JavaScript Expression tab. For example, your model might already have a parameter
that’s an array of the right type, which you want to map directly to the input source
parameter.
Alternatively, you can enter an array of individual expressions using the Array tab.
• Click the Add button to add a new element to the array.
• Click the Remove button next to any element to remove it.
• Edit the expression next to any element in the array. Remember that string constants must be surrounded by quotation marks.
Data Integration with Sybase Avaki Studio
145
Operator reference
Web service parameters. Parameters defined by web services are arbitrarily complex structures. When you click in the Value column for a parameter of this type (the
type appears as “AROM Value”), the Web Service Parameter Values dialog appears.
For many of these parameters, you simply enter expressions in the individual fields.
Some more complicated structures have additional controls:
• Click the Add button to add a new element to an array within the complex parameter.
• Click the Remove button next to an array element to remove it from the array.
• If the parameter is defined so that null is a valid value for one of its fields, there is
a Null checkbox next to it. Select this checkbox to pass the value null instead of
typing an expression.
146
Data Integration with Sybase Avaki Studio
Input Source
The Map Unmapped shortcut. Studio provides a shortcut for mapping parameters to
the global parameters of your model. To access it, click the Map Unmapped… button
in the Parameter Properties dialog. Studio displays the Map Unmapped Parameters
dialog.
This dialog walks you through the parameters in your Input Source that haven’t yet
been mapped. For each one you can:
• Map this parameter to a new global parameter: Choose this option to create a
new global parameter to your view model and assign this Input Source parameter
to it, all in one step. Just type the new global parameter’s name in the text field provided.
• Map this parameter to an existing global parameter: Choose this option to
choose an existing global parameter for your mapping. The pull-down list shows
the global parameters that have the same type as the parameter you’re mapping.
Choose one from the list. This option is not available if no existing global parameters match the type of the parameter you’re mapping.
• Leave this parameter unmapped: Do nothing with this parameter for now. Note
that you will need to map it at some point, before you can deploy your model as a
data service.
You can move forward and backward in the list of unmapped parameters by clicking
the Previous and Next buttons. Click the Done button to close the dialog.
Note You can’t use the Map Unmapped Parameters dialog to map parameters
whose type is AROM Value. You must map these explicitly, as described in “Web
service parameters” on page 146.
Data Integration with Sybase Avaki Studio
147
Operator reference
Intersection
The Intersection operation generates a result set consisting of only those rows that are
common to both of its inputs. It compares all columns in each result set in computing
the intersection and requires that the two input result sets have identical schemas.
Connections
The Intersection operator takes exactly two input result sets, which can be the output
of Input Source elements or of any other operators. The schema of the two input
result sets must be the same. It produces exactly one output result set whose schema is
the same as that of the two inputs.
Required Connection
Performance notes
Computation of an intersection involves sorting the two input sources. See “Performance notes” on page 159 for details of sorting-related performance issues.
Intersection properties
Double-click an Intersection operator to display the Intersection Properties dialog.
You can edit the name and description as described in “Properties dialogs” on page 58.
There are no other properties to configure.
148
Data Integration with Sybase Avaki Studio
Iterator
Iterator
The Iterator operator provides a looping construct for view models. Based on criteria
you specify, an Iterator repeatedly executes the portion of the flow upstream from its
position and accumulates the results. You might use an Iterator if, for example, you
need to execute a parameterized input source once for each of a series of dates, sales
regions, or customer IDs. You can use the Iterator operator in two ways:
Like a for loop. In this approach, which is similar to for loops in most program-
ming languages, the iteration is controlled by a set of expressions specifying the
starting and ending conditions, as well as how to increment the loop variables.
When you configure the upstream operators (those farther from the Result), you
can use variables defined in any Iterator operator downstream from them. In our
example, if you have an Input Source that takes a date parameter, you could map
the parameter to a Date variable that the Iterator operator increments.
Like a for each loop. Studio’s Iterator operator also gives you the option of
controlling the iteration with the results of another branch of the flow, referred to as
the range input. This approach is similar to the for each constructs in many programming languages; it allows you to execute the main branch once for each row in
the range result set, which resembles a lookup table. (For example, a database operation might return a list of employee IDs, allowing you to execute the main branch
of the flow once per employee.) You use expressions to define variables based on
the values of each row in the range input source, and you can also use an expression
to trigger the premature termination of the loop.
Note You can create nested iterations (for example, a SELECT within a
SELECT) by incorporating multiple Iterator operators into your flow. In a pair of
Iterator operators, the downstream one forms the outer loop and the upstream
one forms the inner loop.
Data Integration with Sybase Avaki Studio
149
Operator reference
Connections
The Iterator operator takes either one or two input result sets. If there is a second
input, it is designated the range input and its rows are used to perform the iteration.
Iterator produces exactly one output result set and its schema is the same as that of
the primary input.
Required Connection
Optional Connection
Iterator properties
Double-click an Iterator operator to display the Iterator Properties dialog. You can
edit the name and description as described in “Properties dialogs” on page 58.
Use the remaining fields to define the iteration as follows:
• Range Input: If you have connected two inputs to your Iterator, designate one of
them as the range input using this pull-down list. If you’re using a range input, the
operator automatically loops through each row in the range result set, stopping
when there are no more rows. You must set up other expressions to set the value of
any variables based on the range result set’s columns. However, you need not main150
Data Integration with Sybase Avaki Studio
Iterator
tain your own iteration control variables (such as a counter that you increment).
When you configure a range input, Studio automatically checks for the end of the
result set and terminates the loop under that condition. You can add an expression
in the Condition field (see below) to cause the looping to terminate while there are
still rows left in the range input, but you cannot cause the iteration to continue after
all rows in the range result set have been used.
• Initialize: Enter expressions that set up any variables you need, either to control the
iteration or to be made available to upstream operators. You can enter any JavaScript code here that would be valid inside a function body. See “Using expressions
within Avaki Studio” on page 66 for details on using JavaScript code within Studio.
• Increment: Enter expressions that update the variables you initialized in the previous field. If you’re using a variable to control the iteration, increment its value here.
If you’re using any other variables that upstream operators need to access, update
their values here as well. If you’re using a range input, you can update the variables
based on the values of the columns in the current row of the range input. Here, too,
you can enter any JavaScript code that would be valid inside a function body. See
“Using expressions within Avaki Studio” on page 66 for details on using JavaScript
code within Studio.
• Condition: Enter a Boolean expression. (Optional.) While the Boolean expression
evaluates to true, the operator continues to iterate, re-executing its primary input.
When the Boolean expression evaluates to false, the iteration ceases. If you’re
using a range input, Studio first checks for the end of the range result set. If its rows
aren’t yet exhausted, Studio evaluates your condition as well, and if your expression evaluates to false, iteration stops. See “Boolean expressions” on page 66 for
details on constructing Boolean expressions.
• Execute inputs in parallel: Normally, the Iterator operator waits to advance to
the next iteration until the result set from the previous iteration has no more rows of
data left. If you select this checkbox, the Iterator will iterate until the condition
expression evaluates to false, queuing up the result sets and then passing them
downstream as they are requested. If the elements upstream of the Iterator involve
operations external to the current data service (such as Input Source elements),
they will essentially all be executed simultaneously, generally resulting in
improved performance.
Data Integration with Sybase Avaki Studio
151
Operator reference
Example: Iterating over the elements of an array parameter
The problem
Suppose you want to create a data service that summarizes account information for a list
of customers. The data service must take a parameter containing the array of account
numbers and must produce a result set with a row for each account that includes:
• ACCOUNT_NUMBER
• LAST_TRANSACTION_DATE
• BALANCE
• NOTES
For simplicity, assume that there is already a database operation named “GetAccountInfo” that returns the LAST_TRANSACTION_DATE, BALANCE, and NOTES values for a single account, given the account’s number.
The solution
Using Avaki Studio, you create a model with a parameter named “Accounts” of type
INTEGER[] (array of integers). Then, you use the GetAccountInfo database operation
to create an input source (see “Input Source” on page 125), connecting its output to a
new Projection, the output of which goes into an new Iterator and then, finally, to the
Result element.
Configure the Iterator as follows:
• Name: Enter “AccountIterator” for the operator’s name. The name must match the
name used in specifying the variables in the three fields below.
• Initialize: Enter the following code:
// Set up the counter we'll use to index the array
variables.AccountIterator.x = 0;
// Get the first array element
variables.AccountIterator.current =
variables.global.Accounts[variables.AccountIterator.x];
• Increment: Enter the following code:
// Increment the counter
variables.AccountIterator.x++;
// Get the next array element
variables.AccountIterator.current =
variables.global.Accounts[variables.AccountIterator.x];
152
Data Integration with Sybase Avaki Studio
Iterator
• Condition: Enter the following code:
// Check to see if we’re at the end of the array
variables.AccountIterator.x <
variables.global.Accounts.length
Configure the Projection operator next (see “Projection” on page 161 for details). Use
the Project All button to pass the results of the input source straight through. Then add
a new column, named ACCOUNT_NUMBER that references the current variable in
the Iterator (you can use the expressions menu to enter it if you like). The expression
should be:
variables.AccountIterator.current
Finally, configure the Input Source parameter mapping (see “Mapping input parameters” on page 144 for details). For the “AccountNumber” parameter, use the expression:
variables.AccountIterator.current
When you execute this model, the Iterator operator will iterate over the values in the
Accounts array and execute the GetAccountInfo database operation once for each
value, passing the next account number as a parameter. The Projection operator will
then add the ACCOUNT_NUMBER column to the schema. The results of these executions will be concatenated together and returned as the overall result of the model.
Data Integration with Sybase Avaki Studio
153
Operator reference
Join
The Join operator performs a relational join operation on its two input result sets,
matching up corresponding rows from the inputs. It does this matching by checking
for equality of one or more pairs of columns (where column “A” of the first result set
matches column “B” of the second, for example). In addition to specifying the columns to match, you specify the type of join (inner, outer left, outer right, or outer full)
you want Studio to perform. You can also specify the algorithm Studio uses, or let it
choose the most efficient one for you.
Connections
The Join operator takes exactly two input result sets, each of which can be the output
of an Input Source or of any other operator. It produces exactly one output result set
whose schema consists of the all of the columns from both input schemas.
Required Connection
Join properties
Double-click a Join operator to display the Join Properties dialog. You can edit the
name and description as described in “Properties dialogs” on page 58.
154
Data Integration with Sybase Avaki Studio
Join
Inner and outer tables
The algorithm and join type choices refer to inner and outer tables. Studio doesn’t
require you to specify which is which when you connect your inputs to the Join operator. Instead, you can choose which of the two connected inputs will be the inner table
by using the Inner Table popup.
Note The terms “inner table,” “inner result set,” and “inner input” are used
interchangeably in the discussion of join operations. Similarly, “outer table,”
“outer result set,” and “outer input” are equivalent.
Join algorithms
You can choose the algorithm that Studio uses to process the join operation. Generally,
we recommend the “Automatic” option, which causes Studio to choose the algorithm
based on the actual data with which it is presented at runtime. However, if you know
specifics about the size and shape of the two inputs, you can decide to choose an algorithm yourself. The algorithms are as follows:
Algorithm
Description
Automatic
Studio automatically determines the most appropriate algorithm
based on the size of the incoming result sets. It starts by trying to perform a hash join. If the data in the inner table is too large to fit in
memory, Studio tries to read the outer table into memory. If the outer
table fits, Studio performs a hash join with the tables reversed. If neither table fits, Studio switches to the sort-merge algorithm.
Sort Merge
This is a scalable algorithm that works well with data sets of any
size. Studio breaks the data into chunks in order to sort it before performing the join.
Nested Loop
The nested loop algorithm processes each row in the inner table once
for each row in the outer table. It is scalable, and uses less disk space
than the sort-merge algorithm. If one of the tables being joined fits in
memory, however, the hash algorithm will generally be more efficient.
Hash
Studio reads the inner table into memory and hashes it, allowing very
quick lookup as it reads each row of the outer table. This is very efficient if the inner table is small enough to easily fit into memory.
Data Integration with Sybase Avaki Studio
155
Operator reference
Join types
Avaki Studio supports inner, outer-left, outer-right, and outer-full join types. These
join types work in the same way as their SQL counterparts. They’re summarized here:
Join Type
Description
Inner
Inner joins find the intersection between the two result sets. If no
matches appear in the outer input for a given row in the inner input,
no row is output. If a given inner input matches multiple outer input
rows, then the data from the inner input is repeated for each mach,
combined with each of the outer input’s rows.
Outer Left
In the case of the outer left join, if a row in the inner input doesn’t
match anything in the outer input, a row will still be output, but with
the value NULL for each of the columns which comes from the outer
input.
Outer Right
As you might expect, this is the opposite of the outer left join. In the
case of the outer right join, if a row in the outer input doesn’t match
anything in the inner input, a row will still be output, but with the
value NULL for each of the columns which comes from the inner
input.
Outer Full
This is a combination of the outer left join and the outer right join
types. If a row from either input result set doesn’t have a matching
row in the other result set, it is still included, but with NULL values
for the missing columns.
Defining join columns
Studio needs to know which columns to match in order to join your input result sets.
You tell it using the table at the bottom of the Join Properties dialog.
• Click the Add button to add a column pair to your join.
• To delete one or more column pairs, select them and click Delete.
• You can edit the specific columns in each pair (When you add a new column pair,
Studio chooses the next available column from the two inputs, which may not necessarily be the columns you want to join on). Note that if you have already defined
columns and you change which input result set is the inner table, Studio swaps your
column choices to match.
Inner Column: Click in field and use the pull-down list to choose a column from
the inner table.
156
Data Integration with Sybase Avaki Studio
Multiplexer
Outer Column: Click in field and use the pull-down list to choose the corresponding column from the outer table.
Multiplexer
Given up to five input result sets and a conditional expression for each, the Multiplexer operator generates a result set that concatenates all the inputs whose conditional expressions evaluate to true. You can use Multiplexer to select one or more
inputs from among several choices. Think of it as a graphical means of implementing
programming functionality afforded by constructs such as if/then/else statements
and case statements.
Use a Multiplexer if, for example, you want to treat recent and older data differently—suppose you want to perform one type of processing on data that’s less than
one month old, and a second type on any data that’s older than that. Within the two
conditional expressions, you would check the value of the model’s startingDate
parameter relative to today—if it is older than a month, one input path would be executed, if not, the other would.
Connections
The Multiplexer operator takes between one and five input result sets, each of which
can be the output of an Input Source or of any other operator. The schemas of the
input result sets must be the same. Multiplexer produces exactly one output result set
whose schema is the same as that of the inputs.
Required Connection
Optional Connection
Data Integration with Sybase Avaki Studio
157
Operator reference
Multiplexer properties
Double-click a Multiplexer operator to display the Multiplexer Properties dialog. You
can edit the name and description as described in “Properties dialogs” on page 58.
There will be one Expression field for each of the inputs you have connected to the
Multiplexer operator, each labeled with the name of the corresponding input. In each
Expression field, enter a Boolean expression which will determine whether the corresponding input will be included in the operator’s output. For information on using
Boolean expressions within Studio, refer to “Boolean expressions” on page 66.
158
Data Integration with Sybase Avaki Studio
Order By
Order By
The Order By operator sorts its input based on the criteria you specify. Order By
does not affect the result set’s schema or the number of rows it contains.
Connections
The Order By operator takes exactly one input result set, which can be the output of
an Input Source or of any other operator. It produces exactly one output result set
whose schema is the same as the input.
Required Connection
Performance notes
Avaki Studio uses an O(n log n) algorithm for performing all its sorting operations.
This algorithm writes temporary data to disk if the result set to be sorted is too large to
fit into memory; thus it scales to accommodate arbitrarily large result sets.
When operators in your model sort their data, Studio remembers which columns the
data was sorted by and passes that information along. This way, operators that need
sorted data don’t have to re-sort data unnecessarily. This can dramatically increase the
performance of Studio-generated data services.
Data Integration with Sybase Avaki Studio
159
Operator reference
Order By properties
Double-click an Order By operator to display the Order By Properties dialog. You can
edit the name and description as described in “Properties dialogs” on page 58.
Specifying the sort criteria
In the Order By Properties dialog, you list the columns from the input that the operator
will use to sort the incoming rows. If you choose to sort by multiple columns, Studio
sorts by the first column first; then, within the rows where that column’s value is the
same, it sorts by the second column, and so on. Each column can be sorted in either
ascending or descending order.
• Click the Add button to add a column criterion to your sorting.
• To delete one or more criteria, select them and click Delete.
• To reorder the criteria, select one or more of them and click the Move Up or Move
Down buttons. (If you want to move multiple sort criteria, the selection must be
contiguous.)
• You can edit the properties of each criterion.
Name: Click in the Name field and choose a column name from the pull down
list to change it. (When you add a new column, Studio chooses the next available column from the input, which may not necessarily be the column you want
to sort on).
Direction: Choose the direction in which this column should be sorted—either
“Ascending” or “Descending.”
160
Data Integration with Sybase Avaki Studio
Projection
Projection
The Projection operator lets you modify a schema. You can pass certain columns
through, unaltered, you can remove columns completely, and you can create new columns using arbitrary JavaScript expressions.
By default, Projection produces one row of output for every row of input. However,
you have the option of omitting duplicate rows from the output result set.
Connections
The Projection operator takes exactly one input result set, which can be the output of
an Input Source or of any other operator. It produces exactly one output result set
whose schema is defined by the operator.
Required Connection
Performance notes
In order to perform the “distinct” operation, Studio must sort the results of your projection, therefore similar performance issues apply as for the Order By operator. See
“Performance notes” on page 159 for details.
Data Integration with Sybase Avaki Studio
161
Operator reference
Projection properties
Double-click a Projection operator to display the Projection Properties dialog. You
can edit the name and description as described in “Properties dialogs” on page 58.
Defining projection columns
You can do the following to edit the column definitions of your projection.
• Click the Project All button to add column definitions for all of the columns in the
input result set. This makes it easy to create your new set of columns if you only
want to tweak the existing schema. If you want to project all columns, do so before
defining any other columns, since doing so will replace all of your existing definitions.
• Click the Add button to add a column definition to your projection.
• To delete one or more columns, select them and click Delete.
• To reorder the columns, select one or more of them and click the Move Up or
Move Down buttons. (If you want to move multiple columns, the selection must be
contiguous.)
• You can edit the properties of each column (see “Working with schemas” on
page 60 for information about setting the name, type, precision, and scale of columns):
Name: Click in a column’s Name field to rename it.
162
Data Integration with Sybase Avaki Studio
Projection
Expression: Click in the column’s Expression field to edit it. This can be any
JavaScript expression, including simple column names from the incoming result
set. Click the “…” button to open the Edit Expression dialog if you need more
room than the table cell provides. You can also right click (either in the table cell
directly, or in the Edit Expression dialog) to show a context-sensitive menu of
column names, variables, and functions that you can paste into the Expression
field. For details on using JavaScript expressions, see “Using expressions within
Avaki Studio” on page 66. For details on the context menu, see “The expressions
menu” on page 71.
Type: Specify the type of the column. Be sure to specify a type that will match
the result of evaluating the column’s expression.
Precision: Specify the precision for the column, if applicable for the column’s
type.
Scale: Specify the scale for the column, if applicable for the column’s type.
Removing duplicates
Select the Generate only distinct (non-duplicate) rows checkbox to eliminate from
the output result set any rows whose data duplicates that of a row already in the output.
Data Integration with Sybase Avaki Studio
163
Operator reference
Result
A view model’s Result element is created automatically when you create the view
model. Because every view model has one and only one result, Result elements cannot be deleted or created separately from the view model itself.
A Result element takes its schema from the element connected to it. The schema of
the Result element is also the schema of the model as a whole, and therefore, of any
data services deployed from the model.
Connections
The Result element takes exactly one input result set, which can be the output of an
Input Source or of any other operator. It has no outputs.
Required Connection
Result properties
Double-click a Result element to display the Result Properties dialog. Since you cannot rename the result, or affect its schema, you can only specify a description. This
description is the one given to new data services that are deployed from the model.
164
Data Integration with Sybase Avaki Studio
Select
Select
Use a Select operator to filter rows from an input result set. You provide a Boolean
expression that is tested for each row. If the expression evaluates to true for a given
row, the row is passed to the output. Otherwise it is thrown away. Select does not
change the schema of its input result set.
Connections
The Select operator takes exactly one input result set, which can be the output of an
Input Source or of any other operator. It produces exactly one output result set whose
schema is the same as that of the input.
Required Connection
Select properties
Double-click a Select operator to display the Select Properties dialog. You can edit the
name and description as described in “Properties dialogs” on page 58.
Where: Define your select by supplying a Boolean expression for this field. When this
expression evaluates to true for a given row, that row will be included in the output;
rows for which this expression evaluates to false will not be included. See “Boolean
expressions” on page 66 for information on using Boolean expressions in Studio. For
example, if you want to list only those employees in your data whose salary (the
Data Integration with Sybase Avaki Studio
165
Operator reference
ANNUAL_SALARY column in the input result set) is $100,000 or less, you could use
the expression below:
ANNUAL_SALARY <= 100000
Splitter
Given one input result set, the Splitter operator produces one or more identical output
result sets. Use Splitter if you need to operate on the same data in multiple execution
paths within your view model.
You can configure the Splitter to cache the data. If you enable caching, the operator
caches its input the first time you call it. On subsequent calls, the Splitter returns the
cached data instead of re-executing upstream operators. If you configure an Iterator
operator downstream of the Splitter, the scope might change across successive calls,
and it might be necessary for the Splitter to re-execute its input in order to provide
valid results. In such cases you can specify a list of variables for the Splitter to track—
Splitter returns cached results as long as these variables remain constant; when any of
the tracked variables change, the Splitter flushes its cache and re-executes its input.
Connections
The Splitter operator takes exactly one input result set, which can be the output of an
Input Source or of any other operator. It produces one or more output result sets
whose schema is the same as the input.
…
Required Connection
Optional Connection
166
Data Integration with Sybase Avaki Studio
Splitter
Splitter properties
Double-click a Splitter operator to display the Splitter Properties dialog. You can edit
the name and description as described in “Properties dialogs” on page 58.
Caching result sets
If you want your Splitter operator to cache its result set, check the Enable caching of
intermediate result sets checkbox. If you check this, you can configure the other
fields in the dialog.
Maintain cached result sets…: In this field, you can specify the threshold below
which Studio will maintain the results in memory rather than writing them to disk.
Note that this is the number of rows of data, rather than the size of the data in bytes. If
you set this value too high, the Splitter uses too much memory. If you set this value
too low, the Splitter writes to disk (and thus runs more slowly) when it could be
avoided.
Specify variables which affect…: In this section, you can designate any of the variables defined in your model by operators downstream of the Splitter as affecting the
value of the cached results. For example, if you have an Iterator downstream that
Data Integration with Sybase Avaki Studio
167
Operator reference
defines a variable that’s mapped to a parameter in an Input Source element upstream
of the Splitter, make sure that it’s selected here, to ensure the validity of the cached
data. The list on the left contains the downstream variables that don’t affect the caching; the list on the right contains those that do. To manipulate the lists:
• To move one or more selected variables to the right-hand list, click Add.
• To move all of the variables to the right-hand list, click Add All.
• To move one or more selected variables back to the left-hand list, click Remove.
• To move all of the variables back to the left-hand list, click Remove All.
Union
The Union operator produces a single result set that is the union of its two input result
sets—that is, the result is a combination of everything in both inputs. The two input
result sets must have the same schema. Union also provides the option of ensuring that
the result set contains no duplicate rows.
Connections
The Union operator takes exactly two input result sets, which can be the output of an
Input Source or of any other operator. The schema of the input result sets must be the
same. Union produces exactly one output result set whose schema is the same as that
of the inputs.
Required Connection
Performance notes
In order to perform the “distinct” operation, Studio must sort the results of your union;
therefore similar performance issues apply as for the Order By operator. See “Performance notes” on page 159 for details.
168
Data Integration with Sybase Avaki Studio
Update
Union properties
Double-click a Union operator to display the Union Properties dialog. You can edit the
name and description as described in “Properties dialogs” on page 58.
Removing duplicates
Select the Generate only distinct (non-duplicate) rows checkbox to eliminate from
the output result set any rows whose data duplicates that of a row already in the output.
Update
Use the Update operator to invoke an Avaki database operation that performs SQL
insert or update operations against a connected database. The database operation must
have the “Modifies Database” option set in order for it to work with an Update operation.
There are two ways to use an Update operator:
Mapped Parameter Mode. You can use an Update operator to perform single-row
updates based on parameter values. In this mode, it behaves analogously to an Input
Source, in that it has no input result set—it just takes the parameter values/expressions
that you specify and passes them on to the database operation, returning a result set
consisting of one row and one column (UPDATE_COUNT).
Batch Mode. Alternatively, you can route any flow whose result set matches the
parameters of the database operation as an input to the Update operator. In order to
use this mode,
• You must have connected an input to the Update operator
• The input to the Update operator must have the same number of columns as the
database operation has parameters
Data Integration with Sybase Avaki Studio
169
Operator reference
• The data types of the result set columns (by ordinal position) and the parameters of
the database operation (by ordinal position) must match.
• The database operation must be defined with the “Supports batch operations”
option enabled.
In batch mode, the output of the Update operator can be either the input result set
(passed through with no changes) or, like in mapped parameter mode, a single-row
result set consisting of the UPDATE_COUNT column.
Connections
The Update operator takes zero or one input result sets, which can be the output of an
Input Source or of any other operator. It produces exactly one output result set. The
schema of the output result set is either the same as the input or a single column named
UPDATE_COUNT, of type INTEGER. See “Specifying the output” on page 173 for
details.
Required Connection
Performance notes
An Update operator produces no output until the update operation is done, regardless
of the mode.
170
Data Integration with Sybase Avaki Studio
Update
Update properties
Double-click an Update operator to display the Update Properties dialog. You can edit
the name and description as described in “Properties dialogs” on page 58.
Data Integration with Sybase Avaki Studio
171
Operator reference
Choosing a database operation
The Update operator executes a database operation defined in your Avaki domain. Use
the Browse… button to choose the database operation you want to execute. The operation you choose must have been defined with the “Modifies Database” option set to
“Yes” in order for it to work in an Update operator. (If you used Studio to create the database operation, the option is a checkbox labelled “Operation modifies the database”.)
If you have already chosen a database operation, but you have changed its schema or
parameters, you can click the Refresh Schema Source button to refresh your Update
operator.
Mapping update parameters
If you’re using your Update operator in mapped parameter mode, you must map its
parameters. (If you are using batch mode, you don’t need to explicitly map parameters,
but the input schema must match the parameter types as described in “Batch Mode” on
page 169.)You configure parameter mappings for an Update operator similarly to the
way you do for an Input Source element. See “Mapping input parameters” on
page 144 for details on mapping Input Source parameters.
172
Data Integration with Sybase Avaki Studio
Update
To bring up the Parameter Properties dialog, click the Edit Values… button.
To map a parameter, click in the Value column to make it editable. Type your mapping
expression directly in the table cell. You can also click the “…” button to open the Edit
Expression dialog if you need more room than the table cell provides. Right click
(either in the table cell directly, or in the Edit Expression dialog) to show a context-sensitive menu of column names, variables, and functions that you can paste into
the Expression field. For details on using JavaScript expressions, see “Using expressions within Avaki Studio” on page 66. For details on the context menu, see “The
expressions menu” on page 71.
Specifying the output
The output of the Update operator can be either of the following:
• Pass input schema through to next operator: The input result set is passed
directly on to the downstream operator. This option is only applicable if an input
source is connected to the Update operator (that is, in batch mode).
• Use update count from database operation: The output result set will consist of a
single row containing a single INTEGER column named UPDATE_COUNT.
Data Integration with Sybase Avaki Studio
173
Operator reference
174
Data Integration with Sybase Avaki Studio
Glossary
Terms printed in italics are defined in the glossary.
access control list
(ACL) A list, for a given file, directory, or other Avaki object, of permissions—read, write, execute,
delete, and owner—that control which users and groups can view, modify, invoke, and remove the
object, and edit the object’s ACL.
ACL
See access control list.
ad-hoc query
A mechanism that lets you directly query a database in SQL. The query must run through an existing
Avaki database connector. You can run an ad-hoc query using either the CLI or a JDBC driver.
Ad-hoc queries can be thought of as single-use database operations.
attribute
A property of an Avaki directory, file, service, or other object. Each attribute has a name, a type (string,
integer, float, date, time, or timestamp) and a value. System attributes are read-only; you can change
the values of other attributes. You can also create new attributes and add them to objects as needed.
authentication service
A service associated with an Avaki domain that authenticates an Avaki user’s identity and provides
security credentials each time the user logs in. Avaki can be configured to use third-party directory
services as authentication services for login; for user accounts created directly in the Avaki domain,
Avaki uses its own default authentication service.
Data Integration with Sybase Avaki Studio
175
Glossary
Avaki directory
Avaki software creates a single, unified namespace that is accessible (subject to Avaki access control
lists) to all users in the Avaki domain. The namespace, called the data catalog, is arranged as a hierarchy of Avaki directories (folders). The catalog directory structure is stored by the domain’s grid servers and its GDC, while the physical files remain in their original locations in your local file systems.
When you work with directories, it’s important to distinguish between Avaki directories, which are
part of the data catalog, and local directories, which reside in your local file system.
Avaki domain
The basic administrative unit of the Avaki EII system. An Avaki domain consists, at a minimum, of
one grid domain controller and may also include one or more grid servers, share servers, proxy servers, data grid access servers, and command clients. See also domain name.
Avaki group
A set of users who have the same permissions on one or more Avaki objects. You can use the group
name in place of a user name when you set permissions or create access control lists.
Avaki installation directory
The directory in your local file system where Avaki software is installed. This is not a data catalog
directory.
Avaki share
(Also shared directory.) A pointer in the Avaki data catalog to a directory or file in the underlying
local file system. When you browse the data catalog, Avaki shares look like—and can be accessed
like—other Avaki directories. Contrast with CIFS share.
Avaki server
A service that starts, stops, and monitors other Avaki services on a particular computer. Every server
is part of an Avaki domain. A server is permanently attached to the computer where it is started. There
are several types of server: data grid access servers, grid domain controllers, grid servers, share
servers, and proxy servers.
176
Data Integration with Sybase Avaki Studio
Avaki Studio
A graphical, metadata-based data integration tool that lets you
• Build data flows by dragging and dropping input sources, operators, and output targets. You can
deploy your data flows as Avaki data services.
• Import or create metadata models and apply them to Avaki objects or use them to build new data
services.
In addition, you can use Studio to perform provisioning tasks (creating database connectors, database operations, virtual database operations, and SQL views), manipulate categories, and edit ad-hoc
queries and attributes.
cache service
(Formerly proxy cache service.) A staging service that stores copies of files, database operation
results, and data service results. Caching improves retrieval performance. To ensure that an object is
stored in the cache, you can pin a file or directory in the data catalog, or schedule a database operation
or data service. A cache service can provide remote caching, local caching, or both. The freshness of
cached data is controlled by a data expiration interval that determines how long cached data is considered valid and by a cache coherence window that tells the cache service how often to check whether
cached data is still valid. If cached data is too old to satisfy a new request (or is not stored in this
cache), the cache service does one of the following:
• If the database operation or data service that produced the data is local to this cache service, the
cache service triggers execution of the database operation or data service.
• If the database operation or data service that produced the data is remote from this cache service,
this cache service requests the data from the data source’s local cache service.
A cache service can be associated with a data grid access server, a grid server, or a local user in a CLI
session. See also local cache, remote cache, on-demand caching, and scheduled caching.
category
A mechanism for classifying and organizing the contents of the data catalog. Like Avaki directories,
categories serve as containers for objects in the data catalog. Anything in the data catalog—views,
data services, shared files, even Avaki directories themselves—can be assigned to a category. Categories are hierarchical, they have attributes, and Avaki access control lists regulate access to them.
CIFS client
A machine that mounts files or directories from the Avaki data catalog by connecting to a CIFS share
through an Avaki data grid access server. A CIFS client need not have Avaki software installed.
(CIFS—Common Internet File System—is a file-sharing protocol based on the file system implemented by Windows.)
Data Integration with Sybase Avaki Studio
177
Glossary
CIFS share
A directory or file that has been exported (shared) from the Avaki data catalog. A CIFS share can be
mapped into a Windows file system like a network drive. When you browse the Windows file system,
CIFS shares look like—and can be accessed like—other files and directories. CIFS shares are created
through a data grid access server. Contrast with Avaki share.
client
Avaki supports several types of client: Avaki Studio, CIFS clients, command clients, JDBC/ODBC clients, NFS clients, web clients, and WS clients.
command client
A machine that can issue Avaki commands but does not contribute resources to the Avaki domain.
connect port
The connect port on a grid domain controller, grid server, data grid access server, proxy server, or
share server accesses the JNDI naming service or RMI registry for the underlying application server.
The connect port is one of many ports that a GDC or server uses to communicate with other Avaki
objects. You must supply the connect port number of a target grid server or GDC whenever you connect a new object (another server, a copy of Avaki Studio, or a command client, for example) to an
Avaki domain. When you interconnect two Avaki domains, you must supply each domain’s connect
port number to the other one.
data catalog
A hierarchical structure similar to a file system that encompasses all objects in an Avaki domain. The
data catalog contains Avaki directories and files, Avaki shares, Avaki servers, SQL views, database
operations and data services, and other objects.
data grid access server
(DGAS) An Avaki server that makes Avaki directories and their contents available to CIFS clients and
NFS clients.
178
Data Integration with Sybase Avaki Studio
data service
An operation that transforms data obtained from sources in the data catalog. Input data can come
from any number of sources, including:
• other data services
• data catalog files (which can be generated views)
• Avaki database operations (which in turn extract the data from relational databases)
• HTTP requests
• Web service invocations
You can generate the code that manipulates the data by creating a view model in Avaki Studio, or by
writing a custom data service plug-in using Java, JavaScript, or XSLT. Data service output can be in
rowset or XML format. Data services are run by the execution services on grid servers, they can be
scheduled, and their results can be cached.
data service plug-in
The logic for a data service, written in Java, JavaScript, or XSLT. Data service plug-ins are modular—
you can use the same plug-in for multiple data services. Avaki Studio creates data services and
plug-ins simultaneously, so if you use Avaki Studio to create data services, you don’t have to worry
about plug-ins. You can also use the Avaki Plug-in Wizard to create data service plug-ins.
database connector
A mechanism that enables one or more database operations, SQL views, or ad-hoc queries to connect
to a relational database.
database operation
(DBOP) A mechanism that can
• extract data from a relational database and deliver it on demand to a view generator or a data
service, or
• modify data in a relational database.
A database operation can be a SQL statement or a stored procedure call.
dependency
A relationship in which an Avaki object requires input from other Avaki objects. A data service might
require input from one or more database operations or from other data services. A view generator
might depend on a database operation for input. A database operation can serve as an input source for
one or more data services or view generators. Generated SQL views depend on database operations,
virtual database operations, or data services. You can use Avaki Studio, the web UI, or the CLI to list
input and output dependencies for any data service, database operation, or view.
Data Integration with Sybase Avaki Studio
179
Glossary
DGAS
See data grid access server.
distributed transaction
A set of related operations (typically SQL operations such as SELECT, INSERT, UPDATE, DELETE,
and CALL) that
• involve one or more databases, and
• might lead to unwanted results (such as leaving participating databases in an inconsistent state
or producing inconsistent reads) if some of the operations complete and others do not, and therefore
• must all be executed at once, as a single transaction.
The individual operations that make up a distributed transaction are performed by database operations that use database connectors configured with XA-capable JDBC drivers; all the database operations are executed, using the two-phase commit protocol, by a specially configured data service. The
two-phase commit protocol is designed to ensure that the participating databases will be left in a consistent state—that is, that all the operations in the distributed transaction will be completed, or none of
them will.
domain name
A unique alphanumeric identifier for an Avaki domain. The domain name is assigned by the Avaki
administrator when the Avaki domain is initialized. The domain name has a maximum length of 30
characters.
enterprise information integration
(EII) A software system that
• enables applications and users to access, without replication, both raw and integrated data from
multiple heterogeneous distributed data sources while hiding the complexity of the data sources,
and
• provides tools enabling users and data owners to further integrate and transform data.
exclusion
See schedule exclusion.
execution service
Execution services execute data services. There is an execution service on every grid server, and you
can configure a pool of execution services for load-sharing. When a pool is in place, a data service
can be run by any execution service in its grid server’s pool.
180
Data Integration with Sybase Avaki Studio
failover
The transition of control from a failing or unreachable primary grid domain controller to a secondary
grid domain controller.
federated data access
A scheme that allows independently controlled elements to be shared into a single namespace. Files,
user accounts, and other objects maintain their separate identities and remain under the control of
their owners, but—subject to access controls—the objects can be accessed, managed, and viewed as
if they were part of a single system.
GDC
See grid domain controller.
generated view
A file created by a view generator; it may contain data obtained from a database operation, a data
service, a file, or an HTTP source. Like other files, generated views exist in a local file system and are
shared into the data catalog.
grid
A heterogeneous group of networked resources that appears and functions as one operating environment. A data grid like the Avaki Enterprise Information Integration (EII) system provides secure,
shared access to data.
grid directory
See Avaki directory.
grid domain
See Avaki domain.
grid domain controller
(GDC) The first server in an Avaki domain is the grid domain controller. The GDC maintains a portion
of the Avaki domain’s namespace and provides authentication services. It can also run Avaki commands, share data, and monitor other servers. (That is, the GDC functions as a grid server.) If the
domain is configured for failover, it has both a primary GDC and a secondary GDC; the secondary is
updated at regular intervals and takes over management of the domain if the primary fails. Any Avaki
shares managed by the primary are read-only on the secondary.
Data Integration with Sybase Avaki Studio
181
Glossary
grid server
An Avaki server that maintains a portion of the Avaki domain’s namespace, runs Avaki services such
as shares, execution services, caches, and searches, and allows you to run Avaki’s web UI and execute
Avaki commands.
group
See Avaki group.
hard link
Provides an alternate name for an item in the data catalog. Changes to the object’s other names have
no effect on the hard link: you can move or change a file’s original name and the hard link will still
know where to find the file. To delete a hard-linked object, you must remove its original name. Contrast with soft link.
interconnect
To create a unidirectional link from one Avaki domain to another. Interconnecting lets an Avaki
domain make its data catalog visible to users in another domain (subject to Avaki access controls).
JDBC driver
JDBC (Java Database Connectivity) drivers allows application programmers to access database data
shared in the data catalog. When a JDBC driver accesses data, it returns a JDBC result set that’s
immediately available to your program. JDBC drivers can:
• Call any data service in the data catalog
• Call any database operation in the data catalog
• Perform SQL select operations against SQL views in the data catalog
Sybase offers three JDBC drivers for use with Avaki EII software:
• The included Avaki JDBC driver
• jConnect, Sybase’s standard JDBC driver
• An XA-capable driver for use with database connectors that support distributed transactions
link
See hard link and soft link.
local cache
A cache service that runs on the same grid server as a database operation or a data service that generates cachable data. The local cache stores results produced by local database operations and data
services so they don’t have to execute for every new request. See also remote cache.
182
Data Integration with Sybase Avaki Studio
metadata model
A construct in Avaki Studio that expresses a schema by defining a set of tables. A table in a metadata
model can be mapped (linked) to an Avaki object such as a data service or a database operation, or to
a table in a relational database. The mapping lets you address each mapped object by the name of the
corresponding table in the metadata model. You can also derive a view model schema from a metadata
model. When you do this, you ensure that the results of any data service deployed from the view
model will conform to the metadata model’s schema.
NFS client
A machine that mounts the Avaki data catalog (or a portion of it) as a directory by connecting to an
Avaki data grid access server. An NFS client need not have Avaki software installed. (NFS—Network
File System—lets you add file systems located on a remote computer to the directory structure on
your own computer.)
ODBC
ODBC (Open DataBase Connectivity) is an API for databases on Windows. An ODBC driver (such as
the the Sybase Organic ODBC driver included with Sybase ASE) allows Avaki to communicate with
Windows database applications.
on-demand caching
A scheme by which an object is cached only if it’s used—for example, results are cached when a
database operation or a data service is executed, or a file is cached when a user or application reads
it. On-demand caching uses a fixed expiration interval to determine data freshness. On-demand caching is suitable for objects that are rarely accessed or that change at irregular intervals. Contrast with
scheduled caching.
pin
To mark an Avaki directory or file for scheduled caching. See also cache service.
plug-in
See data service plug-in.
primary GDC
See grid domain controller.
proxy server
An Avaki server that allows Avaki domains on opposite sides of a firewall or a Network Address
Translator (NAT) to communicate with one another.
Data Integration with Sybase Avaki Studio
183
Glossary
queries
See ad-hoc query.
query engine
An Avaki service that executes SQL queries against the SQL views (tables) that make up the Avaki virtual database. A query engine analyzes queries, pushes as much of the work as possible down to the
underlying relational database (if there is one), and performs the remaining operations (such as joins
across tables from different databases) itself. There is a query engine on each grid server.
remote cache
A cache service that runs on a grid server that is remote from an Avaki service (a database operation
or a data service) that generates cachable data. The remote cache stores results produced by distant
services so the results don’t have to be fetched over the network to satisfy every new request. Users
and applications that access remote data through the cache may have access to cached copies even
when the remote data source is unavailable. See also local cache.
secondary GDC
See grid domain controller.
scheduled caching
A scheme by which an object is cached according to a schedule that you create. The schedule specifies
when the object is first cached and how often (or following what trigger event, such as a change to a
file) the cache is refreshed. If the object is a data service or a database operation, the schedule runs it
to put fresh results in the cache. Scheduled caching, which overrides other types of caching, is suitable
for objects that are updated frequently or on a regular basis. Contrast with on-demand caching.
schedule exclusion
A named period of time during which scheduled activities can be prevented from running. You can
apply an exclusion to as many schedules as you want. Scheduled activities include refreshing Avaki
shares and imported user accounts, and caching files, directories, and the results of database operations, data services, and generated views.
service
An Avaki object that performs a function in the domain (stores data or authenticates users, for example). Services provided in Avaki software include Avaki directories, Avaki shares, Avaki servers,
authentication services, execution services, and user accounts.
share
A point of connection between the Avaki data catalog and a native file system or file system tool.
Avaki supports two kinds of shares: Avaki shares and CIFS shares.
184
Data Integration with Sybase Avaki Studio
share server
An Avaki server whose only task is to manage Avaki shares—local directories that are exported
(shared) into the data catalog. (Grid servers can also manage shares.)
shared directory
See Avaki share.
soft link
A pointer to a particular location (name) in the Avaki data catalog. If the object at that location is
moved, deleted, or renamed, the soft link leads nowhere. Soft links can be created only in the CLI.
Contrast with hard link.
SQL view
A virtual table—a data catalog entry that represents a table in a relational database, a database operation, or a data service. SQL views can be created in three ways:
• Provisioned directly from a table in an underlying database
• Generated from a database operation or data service
• Mapped from a database table, a database operation, or a data service, using the Avaki Studio
metadata model editor
Every SQL view is part of the Avaki virtual database. SQL views are treated as relational tables by the
Avaki query engine. SQL view data can be accessed using standard SQL statements by connecting to
Avaki with ODBC or JDBC, or via an Avaki virtual database operation.
update notification
A message issued when a generated view is updated. A view that receives data from another view can
be configured to regenerate itself (using the new data) upon receipt of an update notification.
view generator
A mechanism that does one of the following: extracts data from a file or an HTTP source, obtains data
from an Avaki data service, or uses an Avaki database operation to extract data from a relational
database. The view generator can display the data, perform an XSLT transform, save the data as a generated view file, and/or update a database. Contrast with data service.
view model
The graphical representation of a data flow that you can build in Avaki Studio. A view model typically
includes one or more input sources (such as database operations or data services), one or more operations to combine or transform the data, and an output target. When you deploy a view model, it
becomes an Avaki data service.
Data Integration with Sybase Avaki Studio
185
Glossary
virtual database
The set of all SQL views in an Avaki domain, including those provisioned from external databases and
those generated from data services and database operations. You can execute SQL queries on the
SQL views in the virtual database as if they were tables in a single database.
virtual database operation
A database operation whose source database is the Avaki virtual database itself. Use virtual database
operations if you want to encapsulate and reuse SQL SELECT queries against SQL views (provisioned
or generated).
web services client
See WS client.
WS client
(Also web services client.) A tool or a piece of code that is part of a customer application and that
makes SOAP calls to web services on an Avaki grid server. The SOAP calls can request data from the
Avaki data catalog, from a database operation, or from a data service.
186
Data Integration with Sybase Avaki Studio
Master Index
In electronic copies of this book, the index links to other
books in the documentation set work only as long as the
PDF files are stored in the same directory.
Key
AD: Administration Guide
API: API Guide
C: Command Reference
O: Overture
P: Provisioning & Advanced Data Integration Guide
S: Data Integration with Avaki Studio
Symbols
* asterisks in command syntax AD:xvi, C:xv, P:xi
- hyphens in command syntax AD:xvi, C:xvi, P:xii
+ plus signs in command syntax AD:xvi, C:xv, P:xi
.amm files S:11
.avm files S:11
.js files S:11
.jsi files S:11, S:75
sample S:115
.NET
AvakiAPI.disco WSDL discovery file API:3
sample web services client API:9
SSL certificates API:9
.project files S:11
< > angle brackets in command syntax AD:xvi, API:vii, C:xv,
P:xi
= equal signs in command syntax AD:xvi, C:xvi, P:xii
[ ] square brackets in command syntax AD:xv, C:xv, P:xi
_ (underscore) characters in Avaki names API:81
{ } curly brackets in command syntax AD:xv, C:xv, P:xi
| vertical bars in command syntax AD:xv, C:xv, P:xi
A
About My Domain screen AD:98
AbstractTransformer class P:243
AbstractTransformerFactory class P:244
access control in view models S:74
access control lists, See ACLs
accessibleDBOp SOAP operation API:42
accessibleDS SOAP operation API:36
accessiblePath SOAP operation API:19
accounts for grid users, See users AD:167
ACLs
about O:45
adding users and groups AD:243
ACLs (continued)
defined AD:349, API:83, C:307, O:61, P:289, S:175
deny permissions ineffective for owners, admins O:46
displaying AD:237, C:186
for database operations P:22, P:36
for SQL views P:46
granting or denying access to everyone O:44
in grid groups O:43
interpreting O:48
modifying AD:239, C:41, S:97
on cached objects O:50
on new Avaki shares AD:261
on new files O:49
ownership AD:242, O:46
permissions in AD:242, AD:307
removing users and groups from AD:242
sample O:45
setting for a grid object AD:171
setting for database operations P:14
using interconnect IDs to add users and groups to AD:304
Active Directory AD:148
domain users group AD:157, AD:159, C:155
See also authentication services, LDAP AD:148
addInputParameter JavaScript method for data service
plug-ins P:202
addInputStream JavaScript method for data service
plug-ins P:202
ad-hoc queries
as web services
AdHocDBOPExecutionParams complex type API:13
executeAdHocDBOp SOAP operation API:43
executeAdHocDBOpWithOutput SOAP operation API:44
executeAdHocDBOpWithOutputAttach SOAP
operation API:46
executeAdHocDBOpWithOutputString SOAP
operation API:47
Master Index
Index-1
AD: Administration Guide
API: API Guide
C: Command Reference
ad-hoc queries (continued)
code samples API:74
defined AD:349, API:83, C:307, O:61, P:289, S:175
enabling C:66
enabling on a database connector P:4
executing C:63
on virtual database
executing C:282
parameter types, specifying C:283
parameter types, specifying C:65
using JDBC driver to run API:69, API:74
AdHocDBOPExecutionParams complex type API:13
administrative user accounts, setting up AD:44
Administrators group O:43
about AD:45
permissions for AD:240
admission policies AD:332
about AD:85
adding C:91
creating AD:87
deleting AD:88, C:97
displaying C:114
displaying Windows domains for C:114
setting default policies C:112
setting Windows domain info C:111
unsetting Windows domains for C:116
aggregate functions S:110
in SQL statements, aliasing column names for P:25
Aggregate operator S:108
AIX requirements AD:3
algorithms for join operator S:155
aliases
for column names P:25, S:42
aliases for GDC machines AD:10
Allow permission in ACL AD:243, O:48
angle brackets in command syntax AD:xvi, API:vii, C:xv, P:xi
Apache Ant for compiling data service plug-ins P:184
Apache Axis API:5
data catalog example API:18
data service example API:35
database operations example API:42
APIs
data catalog API:18
data services API:34
database operations API:40
for data service plug-ins
about P:185
distributed transaction API P:188
general data service API P:186
TrAX (Transformation API for XML) P:243
web services
about API:2
data service API:35
reference API:11
AROMValue parameters P:212
As is permission in ACL AD:242
ASE, see Sybase ASE
Index-2
O: Overture
asterisks in command syntax AD:xvi, C:xv, P:xi
attribute --delete command C:19
attribute --list command C:19
attribute --update command C:21
attributes
about AD:245
configuring for SQL views P:44
creating AD:248
and modifying S:100
defined AD:349, API:83, C:307, O:61, P:289, S:175
deleting AD:254, C:19
displaying AD:246
displaying details about C:19
ldap/importOnDemand AD:158
nis/importOnDemand AD:164
of cache services C:291
of grid servers C:290
of patches C:290
searching on AD:233
setting values AD:252, C:21
system attributes AD:248
types of AD:250, C:22, S:101
user-defined attributes AD:248
who can edit S:101
audit logging
about O:14
configuring AD:319
events captured by AD:322
audit logs AD:108
authentication in Avaki O:41
using AvakiPrincipal API:13
authentication services
configuring default groups C:218
configuring default users C:220
configuring GIDs C:217, C:221
configuring UIDs C:219, C:222
defined AD:349, API:83, C:307, O:61, P:289, S:175
deleting AD:166
displaying information about AD:166
grid, creating groups on C:141
LDAP
adding schedule exclusions for refreshing C:152
adding search bases C:160
deleting authentication services C:153
deleting import schedules C:154
deleting search bases C:160
displaying information about C:157
enabling users C:250
importing groups from AD:159, C:155
importing users from AD:157, C:155
integrating into the grid AD:148, C:157
listing import schedules C:158
scheduling refreshes AD:185
scheduling user imports C:149
setting page size for imports AD:145
updating C:160
Master Index
P: Provisioning & Advanced Data Integration Guide
authentication services (continued)
NIS
adding schedule exclusions for refreshing C:180
deleting authentication services C:181
deleting import schedules C:181
displaying info about C:183
enabling users C:250
importing groups from AD:165, C:182
importing users from AD:164, C:182
integrating into the grid AD:162, C:184
listing import schedules C:184
scheduling user imports C:177
updating C:185
refreshing imported accounts AD:185
specifying for JDBC connections API:69
types O:41
specifying for JDBC connections API:69
authentication using AvakiPrincipal API:9
auto-restart
about AD:37, C:5
configuring for a DGAS C:5
configuring for a GDC AD:38, C:9
configuring for a grid server AD:51, C:9
configuring for a proxy server C:12
configuring for a share server C:15
avaki attribute --delete C:19
avaki attribute --list C:19
avaki attribute --update C:21
avaki backup C:23
avaki cache --evict C:24, C:32
avaki cache --evict --all C:25
avaki cache --evict --deleted C:26
avaki cache --get C:27
avaki cache --invalidate C:27
avaki cache --invalidate --all C:28
avaki cache --invalidate-dataservice-results C:29
avaki cache --invalidate-dbop-results C:30
avaki cache --list C:31
avaki cache --set C:33
avaki cache --unset C:34
avaki cat C:35
avaki categories --add-to-category C:35
avaki categories --create C:36
avaki categories --delete C:37
avaki categories --describe C:37
avaki categories --list C:38
avaki categories --remove-from-category C:38, C:40
avaki categories --set-description C:39
avaki cd C:41
avaki chmod C:41
avaki chown C:42
avaki client C:45
avaki client --connect command AD:94
avaki cp C:46
avaki database operation --list-schedules C:88
avaki dataservice --add-schedule C:48
avaki dataservice --create C:52
S: Data Integration with Avaki Studio
avaki dataservice --delete C:52
avaki dataservice --delete-schedule C:54
avaki dataservice --depends C:54
avaki dataservice --execute C:55
avaki dataservice --generate-sql view C:56
avaki dataservice --info C:57
avaki dataservice --list-schedules C:58
avaki dataservice --update C:58
avaki dbconn --allow-dbop-creation C:59
avaki dbconn --delete C:61
avaki dbconn --disallow-dbop-creation C:62
avaki dbconn --execute C:63
avaki dbconn --info C:64
avaki dbconn --jdbc C:66
avaki dbconn --provision-tables C:71
avaki dbconn --show-tables C:73
avaki dbconn --test C:72
avaki dbop --add-schedule C:73
avaki dbop --delete C:78
avaki dbop --delete-schedule C:78
avaki dbop --depends C:79
avaki dbop --execute C:80
avaki dbop --generate-sql view C:82
avaki dbop --info C:83
avaki dbop --jdbc C:83
avaki dbop --jdbc --create-virtual-dbop C:87
avaki dgas --add-admission-policy C:91
avaki dgas --add-group-mapping C:92
avaki dgas --add-user-mapping C:94
avaki dgas --cifs-share-info C:95
avaki dgas --clear-cached-credentials C:95
avaki dgas --create-cifs-share C:96
avaki dgas --delete-admission-policy C:97
avaki dgas --delete-cache C:98
avaki dgas --delete-cifs-share C:99
avaki dgas --delete-group-mapping C:99
avaki dgas --delete-user-mapping C:100
avaki dgas --disconnect-cifs-client C:101
avaki dgas --get-cache-size C:101
avaki dgas --get-cache-statistics C:102
avaki dgas --get-free-disk-space C:102
avaki dgas --get-properties C:103
avaki dgas --get-property C:103
avaki dgas --get-property-list C:104
avaki dgas --initialize C:104
avaki dgas --list-cifs-clients C:105
avaki dgas --list-cifs-shares C:105
avaki dgas --list-group-mappings C:106
avaki dgas --list-user-mappings C:106
avaki dgas --modify-cifs-share C:107
avaki dgas --read-log-properties C:107
avaki dgas --reset-cache-statistics C:108
avaki dgas --save-cache C:109
avaki dgas --self-map C:109
avaki dgas --self-unmap C:111
avaki dgas --set-admission-policy-domain C:111
avaki dgas --set-default-admission-policy C:112
avaki dgas --set-property C:113
Master Index
Index-3
AD: Administration Guide
API: API Guide
C: Command Reference
avaki dgas --show-admission-policies C:114
avaki dgas --show-admission-policy-domain C:114
avaki dgas --sync-cache C:115
avaki dgas --unset-admission-policy-domain C:116
avaki dgas --unset-property C:117
Avaki directories, See directories, Avaki
avaki directory --add-schedule C:117
avaki directory --cache C:122
avaki directory --delete-schedule C:122
avaki directory --do-not-cache C:126
avaki directory --list-schedules C:126
avaki domain --create C:127
avaki domain --disconnect C:127
avaki domain --info C:128
avaki domain --interconnect C:128
Avaki domains, See domains, Avaki
Avaki EII software
overview O:1
typical deployment O:17
avaki executionservice --info C:129
avaki executionservice --set C:129
avaki file --add-schedule C:130
avaki file --cache-on-demand C:134
avaki file --delete-schedule C:135
avaki file --do-not-cache C:136
avaki file --list-schedules C:136
avaki file --pin C:137
Avaki functions S:73
Avaki Functions menu S:74
avaki group --add --user C:138
avaki group --create C:141
avaki group --delete C:143
avaki group --delete --user C:144
avaki group --info C:145
avaki group --list-user C:147
avaki help C:148
avaki id C:149
Avaki installation directory AD:350, API:84, C:308, O:62,
P:290, S:176
avaki ldap --add-schedule C:149
avaki ldap --delete C:153
avaki ldap --delete-schedule C:154
avaki ldap --import C:155
avaki ldap --info C:157
avaki ldap --integrate C:157
avaki ldap --list-schedules C:158
avaki ldap --searchbase C:160
avaki ldap --update C:160
avaki ln C:161
avaki locks --clear C:163
avaki locks --list C:164
avaki login C:164
avaki logout C:165
avaki ls C:166
avaki mkdir C:167
avaki monitor --add C:167
avaki monitor --clear C:168
avaki monitor --create C:170
Index-4
O: Overture
avaki monitor --delete C:171
avaki monitor --list C:172
avaki monitor --result C:172
avaki monitor --start C:173
avaki monitor --stop C:174
avaki mv command C:176
avaki nis --add-schedule C:177
avaki nis --delete C:181
avaki nis --delete-schedule C:181
avaki nis --import C:182
avaki nis --info C:183
avaki nis --integrate C:184
avaki nis --list-schedules C:184
avaki nis --update C:185
avaki passwd C:185
avaki permissions C:186
Avaki perspective in Studio S:13
avaki plugin command P:184
avaki plugin --generate C:187
avaki proxy --add C:191
avaki proxy --delete C:191
avaki proxy --list C:192
avaki pwd C:193
avaki replica --add C:193
avaki replica --config command C:193
avaki replica --delete C:194
avaki replica --info C:194
avaki replicate --synch C:195
avaki rm C:195
Avaki rowset XML
class-name element P:279
column-display-size element P:279
column-index element P:279
core schema P:277
rowset-specific schema P:279
sample schema P:280
schema overview P:277
avaki schedule --delete C:196
avaki schedule --info C:197
avaki schedule --list C:197
avaki schedule --print-iterations C:198
avaki scheduleexclusion --create --custom C:198
avaki scheduleexclusion --create --daily C:199
avaki scheduleexclusion --create --monthly C:201
avaki scheduleexclusion --create --weekly C:203
avaki scheduleexclusion --create --yearly C:205
avaki scheduleexclusion --delete C:207
avaki scheduleexclusion --info C:208
avaki scheduleexclusion --list C:209
avaki search (execute) C:211
avaki search --create command C:209
avaki search --delete C:210
avaki search --get-rehash-level C:212
avaki search --info C:214
avaki search --rehash C:215
avaki search --set-rehash-level C:215
avaki security --config C:216
avaki security --default-gid C:217
Master Index
P: Provisioning & Advanced Data Integration Guide
avaki security --default-group C:218
avaki security --default-uid C:219
avaki security --default-user C:220
avaki security --gid C:221
avaki security --info C:222
avaki security --uid C:222
avaki server --dgas --connect C:223
avaki server --dgas --destroy C:224
avaki server --dgas --stop C:225
avaki server --grid --connect C:225
avaki server --grid --destroy C:226
avaki server --grid --stop C:227
avaki server --proxy C:228
avaki server --share --connect C:228
avaki server --share --disconnect C:229
avaki server --share --stop C:230
Avaki servers
distribution of data catalog among O:38
hardware and operating system requirements for O:16
qualified names for O:32
avaki share --add-rehash-schedule C:231
avaki share --add-share-servers C:232
avaki share --create C:235
avaki share --delete-rehash-schedule C:236
avaki share --disconnect C:238
avaki share --get-local-path C:238
avaki share --get-status C:239
avaki share --list-rehash-schedules C:239
avaki share --list-share-servers C:240
avaki share --rehash C:240
avaki share --remove-share-servers C:241
avaki share --set-local-path C:241
avaki share --set-share-servers C:242
avaki share --set-status C:243
avaki share --update-share-servers C:244
Avaki shares
about AD:257
adding schedule exclusions for rehashes C:234
adding share servers C:232
behavior during failover AD:112
bringing on line AD:286
changing configuration of AD:266
changing encryption levels AD:279
changing permissions AD:239
changing the owner AD:261
configuring exclusions for refresh schedules AD:274
copying into, out of, and within AD:213
creating AD:258, C:235
defined AD:350, API:84, C:308, O:62, P:290, S:176
deleting C:195
disconnecting C:238
disconnecting permanently AD:287
forcing refresh AD:262
icon for O:29
linking AD:217
local paths for, obtaining C:238
modifying load balance factor C:244
moving AD:210
S: Data Integration with Avaki Studio
Avaki shares (continued)
moving source directories AD:283
naming of files and directories in AD:207
online status, setting C:243
organizing O:37
permissions on new files in O:49
refresh schedules
adding C:231
deleting C:236
listing C:239
refresh schedules for AD:266
refreshing C:240
removing entries from refresh schedules AD:278
removing share servers from AD:265
renaming AD:212
setting load balancing factor AD:280
setting local paths C:241
setting names AD:260
share servers
listing C:240
removing C:241
replacing C:242
shutting down AD:287, C:238
status, displaying C:239
taking off line AD:285
uploading files to AD:282
with multiple share servers AD:263
write access and user accounts AD:12
See also share servers
avaki shell C:245
avaki sql view --delete C:246
avaki sql view --get-description C:246
avaki sql view --set-description C:247
avaki status C:248
Avaki Studio
about O:9, O:17, S:1
Avaki perspective, about S:16
defined AD:350, API:84, C:308, O:62, P:290, S:176
getting started S:9
installing in Windows AD:24
limitations of data services created in P:78, S:3
log properties file for AD:317
metadata models, See metadata models
operators S:5, S:107
projects, creating S:13
requirements for running AD:3
setting system properties for AD:129
starting S:9
time required to upgrade AD:341
view models
about S:2
configuring input sources S:43
creating S:29
deploying as data services S:50
sample workflow for S:29
testing S:49
workflow S:25
Master Index
Index-5
AD: Administration Guide
API: API Guide
C: Command Reference
avaki upgrade C:249
avaki upgrade --info C:250
avaki user C:250
avaki user --create C:251
avaki user --db-mapping --add C:252
avaki user --db-mapping --delete C:253
avaki user --db-mapping --list C:255
avaki user --delete C:257
avaki user --info C:258
avaki user --list-group C:258
avaki view --add-schedule C:259
avaki view --create --database C:263
avaki view --create --data-service C:266
avaki view --create --file C:267
avaki view --delete C:272
avaki view --delete-schedule C:272
avaki view --depends C:272
avaki view --garbage-collect C:273
avaki view --info C:274
avaki view --list-schedules C:274
avaki view --regenerate C:273
avaki view --set-property C:275
avaki view --update C:279
avaki virtualdatabase --allow-dbop-creation C:280
avaki virtualdatabase --disallow-dbop-creation C:281
avaki virtualdatabase --execute C:282
avaki virtualdatabase --show-tables C:283
avaki virtualschema --deploy C:285
avaki virtualschema --undeploy C:286
avaki whoami C:286
Avaki_JDBCStandAlone.jar file API:66
Avaki_JDBCStandAlone_Minus3rd.jar file API:66
AvakiAPI.disco file API:3
AvakiAPIDocLit.wsdl file API:3
AvakiAPIRpcEnc.wsdl file API:3
AvakiAPIWithMIMEDocLit.wsdl file API:3
AvakiAPIWithMIMERpcEnc.wsdl file API:3
avakijdbc.properties file API:67
AvakiPrincipal complex type API:13
Axis, See Apache Axis
C
B
backup command C:23
backups on Avaki servers AD:113
batch mode, JDBC API:77
configuring database operations for P:27, P:250
bindings.xml file
copying during upgrade AD:344
on grid servers AD:50
on proxy servers AD:300
on share servers AD:59
block size file attribute C:290
blocks file attribute C:290
bootstrapping
in Unix AD:16
in Windows AD:23
brackets, See curly brackets, square brackets, angle brackets
Index-6
O: Overture
browsers, See web browsers
build.xml file for data service plug-ins P:184, P:197
BusinessObjects software unable browse Avaki objects with
underscores API:81
cache --evict --all command C:25
cache --evict command C:24, C:32
cache --evict --deleted command C:26
cache --get command C:27
cache --invalidate --all command C:28
cache --invalidate command C:27
cache --invalidate-dataservice-results command C:29
cache --invalidate-dbop-results command C:30
cache --list command C:31
cache services
about P:119
associating with data grid access servers P:113
associating with grid servers P:111
coherence windows P:107
configuring P:116
configuring per file P:117
defined AD:351, API:85, C:309, O:63, P:291, S:177
disassociating from data grid access servers P:114
disassociating from grid servers P:112
evicting cached files and directories P:135
invalidating cached items P:136
listing P:116
listing cached data services P:163
listing cached database operations P:148
listing cached virtual database operations P:148
listing pinned files and directories P:134
on-demand caching P:119
on-demand caching of database operation and data service
results P:108
on-demand caching of files P:107
overriding default settings P:117
pinning data services P:152
pinning database operations P:139
pinning files and directories P:120
pinning virtual database operations P:139
scheduled caching P:119
scheduled caching of database operation and data service
results P:109
scheduled caching of files P:107
tagging files and directories P:129
unmarking cached items P:135
unscheduling cached files and directories P:135
viewing details about P:116
See also caches and caching
cache --set command C:33
cache --unset command C:34
caches
adding schedules for data services C:48
adding schedules for database operations C:73
adding schedules for directories C:117
adding schedules for files C:130
Master Index
P: Provisioning & Advanced Data Integration Guide
caches (continued)
bad port, properties for AD:141
configuring associated server or user C:33
configuring threads for AD:131
data service plug-in, properties for AD:137
deleting schedules for data services C:54
deleting schedules for database operations C:78
deleting schedules for directories C:122
deleting schedules for files C:135
DGAS
clearing user credentials AD:117
clearing user credentials from C:95
configuring block size for reads AD:81
configuring frags per block for reads AD:81
configuring location of AD:73
controlling cache size AD:124
deleting files and directories AD:119
deleting objects from C:98
displaying cache statistics C:102
displaying current size C:101
displaying free disk space on cache machine C:102
forcing a refresh AD:121
managing AD:117
mapping cache AD:336
resetting statistics C:108
saving a copy C:109
saving copies AD:120
setting remote caches for AD:90
syncing AD:121
viewing and resetting statistics AD:123
warming and updating C:115
displaying associated server or user C:27
displaying tagging information C:31
for tables in virtual database, property for AD:144
listing schedules for data services C:58
listing schedules for database operations C:88
listing schedules for directories C:126
listing schedules for files C:136
local S:182
local and remote API:63
marking directories for no caching C:126
marking files for no caching C:136
remote object stub, properties for AD:144
schedule exclusion, properties for AD:144
scheduled caching S:184
settable attributes of C:291
setting invalidate queue for AD:135
setting local directory for AD:135
setting remote caches for command clients AD:95
uncoupling associated server or user C:34
See also cache services and caching
caching
about O:13
and JDBC programs O:55
benefits to performance O:54
configuring ACLs for O:50
S: Data Integration with Avaki Studio
caching (continued)
configuring Avaki clients for O:55
data service results P:108, S:51
tagging for on-demand caching P:159
database operations P:108
defined AD:351, API:85, C:309, O:63, P:291, S:177
files O:56, P:107
JDBC and caching of database operation results API:62
local AD:356, API:90, C:314, O:14, O:53, O:68
local vs. remote O:59
local, defined P:296
of data service results O:57
of database operation results O:57
on DGAS O:54
on-demand AD:357, API:91, C:315, O:69, P:296, S:183
permissions and access control O:59
remote O:14, O:53
defined AD:357, API:91, C:315, O:69, P:297, S:184
scheduled AD:357, API:91, C:315, O:69
scheduled, defined P:297
turning off for specified files and directories P:132
See also caches and cache services
callable statements API:72, API:73
case sensitivity in Avaki naming AD:206
cat command C:35
catalog browser S:18
categories
about AD:221
adding objects to AD:226, C:35, S:105
adding SQL views P:47
and permissions AD:222–AD:223
browsing AD:222
contents of S:18
creating AD:224, C:36
default, contents of S:18
defined AD:351, API:85, C:309, O:63, P:291, S:177
deleting AD:230, C:37, S:106
displaying S:104
for logging AD:318
icon for O:29
listing categories in domain C:38
managing S:103
permissions in O:48
removing objects from AD:228, C:38, C:40, S:106
setting descriptions for C:39
showing descriptions C:37
using to organize data O:36
using to solve access problems O:49
categories --add-to-category command C:35
categories --create command C:36
categories --delete command C:37
categories --describe command C:37
Categories directory O:35
categories --list command C:38
categories --remove-from-category command C:38, C:40
categories --set-description command C:39
cd command C:41
certificates, SSL, See SSL certificates
Master Index
Index-7
AD: Administration Guide
API: API Guide
C: Command Reference
change time file attribute C:290
characters
in column aliases in database operations S:42
in command syntax AD:xv, C:xv
in cron schedules C:298
in domain names, restrictions on AD:41
in JavaScript identifiers S:42
in metadata model names, restrictions on S:91
in names of Avaki objects, restrictions on AD:207
wildcards in searches AD:235
CHARSET JDBC property for ASE and IQ AD:7
chmod command C:41
chmod SOAP operation API:19
chown command C:42
chown SOAP operation API:20
chunk size for sorting, controlling AD:139, S:76
CIFS
accessing data grid through AD:338
releasing CIFS ports on a DGAS AD:66
CIFS clients
defined AD:351, API:85, C:309, O:63, P:291, S:177
disconnecting C:101
displaying connected clients C:105
requirements for O:17
setting up AD:93
CIFS shares
accessing AD:203
creating AD:125, C:96
defined AD:351, API:85, C:309, O:63, P:291, S:177
deleting C:99
displaying connected clients C:105
displaying information about C:95
listing C:105
managing AD:125
mapping to a network drive AD:204
modifying C:107
class element P:261
class-name element P:279
classpath, configuring for JDBC drivers API:67
client attribute caching AD:336
client command C:45
client system properties AD:128
clients
about O:17
hardware and operating system requirements for O:16
message timeout properties for AD:133
setting size of write invalidation queue of cache for AD:136
setting system properties for AD:129
See also Avaki Studio, CIFS clients, command clients, NFS
clients, web clients, WS clients
code samples
ad-hoc queries API:74
data catalog API API:18
data services API API:35
database operations API API:42
Java data service plug-ins P:190
JDBC batch mode API:77
using JDBC drivers API:77
Index-8
O: Overture
coherence window cache attribute C:291
coherence window property, remote AD:141
coherence windows for caching P:107
coherenceWindow element P:261
colors in Studio display, setting S:23
column-display-size element P:279
column-index element P:279
columns
aliasing P:25
combining with Projection operator S:46
from input elements, menus of S:71
from input result sets, accessing S:68
name property S:60
precision property S:61
scale property S:61
type property S:61
com.avaki.badPortCacheSize system property AD:141
com.avaki.badPortExpiration system property AD:141
com.avaki.cache.cacheDir system property AD:135
com.avaki.cache.maxReaderThreads system property AD:131
com.avaki.cache.writeInvalidationQueueSize system
property AD:136
com.avaki.content.encryptionLevel system property AD:139
com.avaki.dataservice.pluginCacheSize system
property AD:137
com.avaki.dataservice.styleSheetCachePoolSize system
property AD:137
com.avaki.dataservice.styleSheetCacheSize system
property AD:137
com.avaki.DBOProtocolSoTimeout system property AD:134
com.avaki.generatedXMLIndentSize AD:142
com.avaki.HttpPort system property AD:140
com.avaki.HttpsPort system property AD:140
com.avaki.jobStatusExpiration system property AD:145
com.avaki.lasInvoker.cacheSize system property AD:144
com.avaki.lasInvoker.poolSize system property AD:144
com.avaki.ldap.resultPageSize system property AD:145
com.avaki.maxActiveCachables system property AD:136
com.avaki.mux.channelSoTimeout system property AD:135
com.avaki.mux.connectTimeout system property AD:134
com.avaki.mux.maxParallelChannels system property AD:142
com.avaki.mux.maxWriteChunk system property AD:142
com.avaki.mux.sendBufferSize system property AD:143
com.avaki.proxy.retryDelay system property AD:133
com.avaki.proxy.retryTimeout system property AD:133
com.avaki.proxyIOProtocolSoTimeout system property AD:134
com.avaki.proxyKeepAliveParams system property AD:140
com.avaki.queryEngine.sortChunkSize AD:139
com.avaki.remoteconfig.coherenceWindow system
property AD:141
com.avaki.result.gcInterval system property AD:136
com.avaki.retryDelay system property AD:133
com.avaki.retryTimeout property AD:133
com.avaki.rmiRegistrySoTimeout system property AD:134
com.avaki.rpcTimeout system property AD:134
com.avaki.scheduleExclusionCacheExpiration system
property AD:145
Master Index
P: Provisioning & Advanced Data Integration Guide
com.avaki.scheduleExclusionCacheSize system
property AD:145
com.avaki.shareIOProtocolSoTimeout system property AD:134
com.avaki.shareReadBufferSize system property AD:138
com.avaki.shareReadbufPoolSize system property AD:138
com.avaki.shareServerCircularLinkChecking system
property AD:138
com.avaki.shareServerThreadPoolSize system property AD:138
com.avaki.vaultStateCacheSize system property AD:137
com.avaki.VirtualDbTableCacheSize system property AD:144
com.sybase.avaki.tdsPort system property AD:50, AD:145,
API:71
command clients
connecting C:45
defined AD:352, API:86, C:310, O:64, P:292, S:178
disconnecting C:45
installing in Windows AD:24
installing on Unix AD:18
obtaining information about C:45
setting up AD:94
commands
listing C:148
syntax conventions for AD:xv, C:xiv, P:x
viewing online usage information C:148
compatibility properties, setting for Windows 2003 AD:22
complex types API:12
AdHocDBOPExecutionParams API:13
AvakiPrincipal API:13
DataCatalogAttribute API:14
DataCatalogEntry API:15
DataCatalogPermission API:15
DataServiceExecutionParams API:16
DBOPExecutionParams API:16
SearchQuery API:17
SearchResult API:17
condition field for Iterator operators S:151
connect ports
default AD:6, AD:9, AD:10
defined AD:352, API:86, C:310, O:64, P:292, S:178
for DGAS C:224
changing AD:74
for GDCs C:127
changing AD:50
for grid servers C:226
changing AD:50
for proxy servers C:228
changing AD:300
for share servers C:229
changing AD:60
connectinfo.txt file AD:131
connection pooling S:36
connection properties
for JDBC drivers API:68
for XA drivers C:70, P:7, S:37
connection strings
for databases AD:3
for JDBC drivers API:71
S: Data Integration with Avaki Studio
connections in view models, creating S:57
console view S:22, S:50
conventions
for command syntax C:xiv
for commands AD:xv
for screen examples AD:xv, API:vi, C:xv, P:xi
cp command C:46
cron expressions in schedules AD:185, AD:267, AD:273
cron schedules
configuring C:297
values for C:298
cross-domain messaging
disabling AD:313
enabling AD:311
curly brackets in command syntax AD:xv, C:xv, P:xi
CurrentUser functions S:74
Custom operator S:111
example S:114
custom types API:12
D
data access O:11
using WS API API:2
data catalog
about O:27
defined AD:352, API:86, C:310, O:64, P:292, S:178
distribution among Avaki servers O:38
names of objects in O:24
organizing O:33
Avaki shares O:37
using categories O:36
using links O:36
ownership of objects in O:46
top-level directories O:32
types of entries O:6
data catalog API API:18
data catalog SOAP operations API:18
accessiblePath API:19
chmod API:19
chown API:20
fileRead API:21
fileReadAttach API:21
fileReadString API:22
fileWrite API:23
getAttributes API:23
getSystemAttributes API:24
getUserAttributes API:24
listDomains API:25
listSearches API:25
ls API:26
lsSize API:26
mkdir API:27
mkdirParents API:27
mkdirParentsServer API:28
mkdirServer API:29
mv API:29
permissions API:30
Master Index
Index-9
AD: Administration Guide
API: API Guide
C: Command Reference
data catalog SOAP operations (continued)
removeAttribute API:31
rm API:31
search API:32
setAttribute API:32
tester API:33
whoami API:33
data catalog view S:18
data expiration intervals P:108, S:51
data grid access servers
associating with cache services P:113
disabling auto-restart C:8
disassociating from cache services P:114
enabling auto-restart C:5
registering C:5
starting C:5, C:6
stopping C:7, C:8
unregistering C:8
See also DGAS
data grids
about O:1
defined AD:355, API:89, C:313, O:67, P:294, S:181
typical deployment O:17
data integration O:21, O:23
data integrity and HTTPS API:8
data representation O:11
data security O:10
data service plug-ins
about P:76, P:175
addInputParameter JavaScript method P:202
addInputStream JavaScript method P:202
build.xml file P:184, P:197
choice of Java, JavaScript, or XSLT P:176
closing streams P:186
command for generating C:187
configuring P:81
creating in Java with the Plug-in Wizard P:183
creating in JavaScript P:200
creating in XSLT P:180
DbopGroupWorkUnit class P:189
DbopPipeWorkUnit class P:190
defined AD:352, API:86, C:310, O:64, P:292, S:179
examples
DBOP and CSV merge Java plug-in P:193
distributed transaction Java plug-in P:191
rowset input and output Java plug-in P:192
Execute JavaScript function P:203
input sources and output streams P:177
InputSource interface P:186
JAR files for P:180
logging errors P:196
manifest files for P:180, P:197
modularity and reusability of P:175
parameters
about P:178
specifying for Java plug-ins C:188
specifying for XSLT plug-ins P:181
Index-10
O: Overture
data service plug-ins (continued)
ParameterSpec interface P:187
Plugin interface P:186
prerequisites for writing in Java P:183
relationship to .js files in Studio S:11
RowSetFactory class P:188
setOutputStream JavaScript method P:202
StreamingRowSet interface P:187
using Java classes and interfaces in JavaScript plug-ins P:200
when to use P:78, S:3
XAWorkHandler class P:189
XAWorkUnit interface P:189
data service XML schema
class element P:261
coherenceWindow element P:261
dataService element P:262
description element P:263
initParameter element P:263
inputParameter element P:264
inputSource element P:265
inputStream element P:266
isList element P:266
jarurl element P:267
logicBox element P:268
name element P:269
outputStream element P:269
ref element P:270
target element P:270
type element P:270
urlLogicBox element P:271
value element P:272
values element P:272
data services
about O:8, O:23, P:49, P:74
adding schedule exclusions C:51
and distributed transactions P:78
caching of results O:57, P:77
permissions O:50
caching results S:51
calling via JDBC API:72
components of P:76
configuring caching P:108
created in Avaki Studio, limitations of P:78, S:3
creating C:52, P:80, P:207
defined AD:352, API:86, C:310, O:64, P:292, S:178
deleted, purging from cache C:26
deleting schedules C:54
dependencies for S:22
deploying from view models in Avaki Studio S:50
displaying dependency lists C:54
displaying information about C:57, S:20
displaying status of C:248
evicting from cache P:164
execution services, configuring AD:109
generating schema for C:55, P:98
generating SQL views from C:56, P:100
importing descriptors P:92
input parameters, configuring P:84
Master Index
P: Provisioning & Advanced Data Integration Guide
data services (continued)
input streams, configuring P:87
invalidating all in cache C:28
invalidating one in cache C:27
invalidating results in cache C:29
listing P:93
listing caching schedules for C:58
listing in cache P:163
location in categories S:18
marking for scheduled caching P:152
modifying C:58
modifying permissions AD:239
modifying settings P:94
names in data catalog O:24
nesting operations S:149
output streams, configuring P:86
provisioning web services as P:205
purging all from cache and unscheduling C:25
purging one from cache and unpinning C:24
qualified names for O:31
refreshing cached results C:32
removing P:103
rowsets as input of P:275
rowsets as output of P:274
running C:55
sample workflow for S:29
scheduling for caching C:48
schema P:257
searching for AD:233
setting cache sizes for plug-ins AD:137
setting up to run distributed transactions P:80
specifying grid servers P:213
specifying input parameters P:207
specifying input streams P:208
specifying output streams P:208
specifying plug-ins P:207
tagging for on-demand caching P:159
testing P:102, P:214
unscheduling P:164
using for distributed transactions O:25
viewing P:98
viewing dependencies P:97
writing your own vs. using Avaki Studio O:24
See also data service plug-ins
See also view models
data services API API:34
data services SOAP operations API:34
accessibleDS API:36
executeDS API:36
getDSOutput API:37
getDSOutputAttach API:38
getDSOutputString API:38
getDSParameters API:39
isDSAvakiXML API:40
listDSs API:40
data structures, SOAP complex types API:12
data type mappings for SQL views P:39
S: Data Integration with Avaki Studio
data types
for JDBC API:76
mapping
about type mapping files C:301
command to specify mapping file C:68
format of type mapping files C:301
inconsistencies C:302
logging of mapping decisions C:304
setting source data type C:302
specifying for ad-hoc query parameters C:65
specifying for database operation parameters C:85
specifying for parameters for ad-hoc queries on the virtual
database C:283
specifying for virtual database operation parameters C:88
See also type
database connectors
about O:22, P:3
adding groups P:16
adding users P:15
configuring advanced settings P:247
configuring JDBC driver JAR file path P:247
configuring permissions C:59, C:62
creating C:66, P:3, S:31
data type mappings for P:39
defined AD:353, API:87, C:311, O:65, P:293, S:179
deleting C:61
displaying information about C:64
displaying SQL views provisioned from C:73
editing S:38
executing ad-hoc queries C:63, C:66
finding in catalog S:38
getting information about through JDBC API:75
JDBC fetch size P:5
location in categories S:18
managing SQL views P:20
modifying C:66, P:8
provisioning SQL views from C:71
removing P:21
removing groups P:18
removing users P:18
searching for AD:233
setting JDBC fetch size S:36
testing C:72, P:19
viewing P:8
viewing associated database operations P:13
database drivers
copying during upgrade AD:341
tested with Avaki AD:3
database identity mappings P:6, S:36
about AD:176
adding C:252
deleting AD:183, C:253
displaying AD:180
listing C:255
modifying AD:182
setting up AD:177
database operation --list-schedules command C:88
Master Index
Index-11
AD: Administration Guide
API: API Guide
C: Command Reference
database operation SOAP operations API:40
database operations
about O:7, O:22, P:1
access permissions P:22
adding schedule exclusions C:76
allowing groups to create P:16
allowing users to create P:15
caching of results API:62, O:57
permissions O:50
calling with JDBC API:73
calling with ODBC, JDBC, or SOAP P:38
configuring advanced settings P:247
configuring batch mode settings P:250
configuring caching P:108
configuring permissions C:59, C:62
configuring SQL calls P:251
configuring timeouts P:253
creating C:83, P:22, S:38
defined AD:353, API:87, C:311, O:65, P:293, S:179
deleted, purging from cache C:26
deleting C:78
deleting schedules C:78
dependencies for S:22
displaying dependency lists C:79
displaying information about C:83, S:20
displaying status of C:248
evicting from cache P:150
executing P:36
exposing results as SQL view P:34
generating schema for C:80, P:31
generating SQL views from C:82
invalidating all in cache C:28
invalidating one in cache C:27
invalidating results in cache C:30
listing caching schedules for C:88
listing in cache P:148
location in categories S:18
managing P:21
managing metadata P:30
marking for scheduled caching P:139
modifying C:83, P:28
modifying permissions AD:239
names in data catalog O:24
parameter types, specifying C:85, C:88
preventing groups from creating P:18
preventing users from creating P:18
purging all from cache and unscheduling C:25
purging one from cache and unpinning C:24
qualified names for O:31
refreshing cached results C:32
removing P:38
removing SQL views generated from P:35
restricting row output P:248
rowsets as output of P:274
running C:80
sample XML schema P:280
scheduling for caching C:73
searching for AD:233
Index-12
O: Overture
database operations (continued)
setting JDBC fetch size for P:254
setting permissions P:14
SQL statements in C:86
tagging for on-demand caching P:146
transactional behavior of P:79
unscheduling P:150
uses of P:2
viewing P:13, P:28
viewing dependencies P:32
viewing details about P:29
See also virtual database operations
database operations API API:40
database service SOAP operations
accessibleDBOp API:42
executeAdHocDBOp API:43
executeAdHocDBOpWithOutput API:44
executeAdHocDBOpWithOutputAttach API:46
executeAdHocDBOpWithOutputString API:47
executeDBOp API:48
executeDBOpBytesInput API:49
executeDBOpGridFileInput API:50
executeDBOpWithOutput API:50
executeDBOpWithOutputAttach API:52
executeDBOpWithOutputString API:53
getDBOpOutput API:54
getDBOpOutputAttach API:55
getDBOpParameters API:56
getDBOpSchema API:56
getDBOpSchemaAttach API:57
getDBOpSchemaString API:58
getOutputString API:55
getSQL API:58
listDBConns API:59
listDBOps API:59
listDBOpsByDBConn API:60
database, virtual, See virtual database
DatabaseAdministrators group O:44
DatabaseMetaData interface API:75
databases
Avaki tools for working with O:21
connecting to P:3
for Avaki servers, backing up C:23
protecting O:9
schemas, viewing P:9
supported for connecting to Avaki AD:3, AD:5
DataCatalogAttribute complex type API:14
DataCatalogEntry complex type API:15
DataCatalogPermission complex type API:15
DataProviders group O:44
dataservice --add-schedule command C:48
dataservice --create command C:52
dataservice --delete command C:52
dataservice --delete-schedule command C:54
dataservice --depends command C:54
dataService element P:262
dataservice --execute command C:55
dataservice --generate-sql view command C:56
Master Index
P: Provisioning & Advanced Data Integration Guide
dataservice --info command C:57
dataservice --list-schedules command C:58
dataservice --update command C:58
DataServiceExecutionParams complex type API:16
DB2, versions and JDBC drivers for use with Avaki AD:6
dbconn --allow-dbop-creation command C:59
dbconn --delete command C:61
dbconn --disallow-dbop-creation command C:62
dbconn --execute command C:63
dbconn --info command C:64
dbconn --jdbc command C:66
dbconn --provision-tables command C:71
dbconn --show-tables command C:73
dbconn --test command C:72
DBOPs, See database operations
dbop --add-schedule command C:73
dbop --delete command C:78
dbop --delete-schedule command C:78
dbop --depends command C:79
dbop --execute command C:80
dbop --generate-sql view command C:82
dbop --info command C:83
dbop --jdbc command C:83
dbop --jdbc --create-virtual-dbop command C:87
DBOPExecutionParams complex type API:16
DbopGroupWorkUnit class for data services P:189
DbopPipeWorkUnit class for data services P:190
db-path option (DGAS) AD:74
debug mode, enabling in an Avaki shell C:245
delimiter character for JDBC schema names API:69
Deny permission in ACL AD:243, O:47
dependencies S:22
defined AD:353, API:87, C:311, O:65, P:293, S:179
listing for data services C:54, P:97
listing for database operations C:79, P:32
listing for view generators C:272, P:228
listing for virtual database operations P:59
description element P:263
descriptors for data services P:92
development tools for web services
Apache Axis API:5
Microsoft Visual Studio API:5
SOAP::Lite API:5
VB .NET API:5
DGAS
about AD:62
adding user self mappings C:109
admission policies AD:332
about AD:85
adding AD:87, C:91
deleting AD:88, C:97
displaying C:114
displaying Windows domains for C:114
admission policies
setting defaults C:112
setting Windows domains for C:111
unsetting Windows domains for C:116
S: Data Integration with Avaki Studio
DGAS (continued)
changing permissions and ownership AD:334
CIFS access to data grid AD:338
clearing cached credentials AD:117, C:95
configuring associated cache service C:33
configuring location of internal caches AD:73
configuring to use nondefault ports AD:74, AD:75
configuring users and groups AD:67
connect port C:224
connecting to a domain AD:79, C:223
controlling cache size AD:124
create CIFS shares C:96
default name for AD:73
default users, groups, UIDs and GIDs AD:333
defined AD:352, API:86, C:310, O:64, P:292, S:178
deleting cached objects C:98
deleting CIFS shares C:99
deleting files and directories from cache AD:119
deleting user mappings C:111
destroying C:224
disconnecting CIFS clients C:101
displaying associated cache C:27
displaying cache size C:101
displaying cache statistics C:102
displaying connected CIFS clients C:105
displaying free disk space on cache machine C:102
displaying information about CIFS shares C:95
displaying property descriptions C:104
displaying property values C:103
dynamic and nondynamic properties AD:83
file locking in Unix, interference with AD:64
forcing cache to refresh AD:121
installing in Unix AD:18
installing in Windows AD:24
listing CIFS shares C:105
listing properties and their values C:103
managing cache AD:117
mappings
default, adding and displaying AD:71
for groups, adding AD:70, C:92
for groups, deleting C:99
for groups, displaying C:106
for users, adding AD:70, C:94
for users, deleting C:100
for users, displaying C:106
users and groups, per-DGAS AD:88
users, groups, and defaults, domain-wide AD:68
modifying CIFS shares C:107
NFS clients, not running with AD:64
NFS daemons, shutting down before running DGAS AD:66
per-DGAS user mappings AD:333
ports used by AD:9
preparing to start AD:65
properties file for AD:76, C:293
reading log properties C:107
releasing CIFS ports before running AD:66
resetting cache statistics C:108
Master Index
Index-13
AD: Administration Guide
API: API Guide
C: Command Reference
DGAS (continued)
restarting AD:84
saving a copy of the cache C:109
saving copies of cache AD:120
server logs AD:317
setting a cache service AD:90
setting location of state database AD:74
setting properties AD:82, C:113
setting up NFS clients AD:91
starting AD:73, C:104
stopping C:225
syncing cache AD:121
time required to upgrade AD:341
uncoupling associated cache C:34
unsetting properties C:117
viewing and resetting cache statistics AD:123
warming and updating the cache C:115
See also data grid access servers
dgas --add-admission-policy command C:91
dgas --add-group-mapping command C:92
dgas --add-user-mapping command C:94
dgas --cifs-share-info command C:95
dgas --clear-cached-credentials command C:95
dgas command
example AD:74
syntax AD:73
dgas --create-cifs-share command C:96
dgas --delete-admission-policy command C:97
dgas --delete-cache command C:98
dgas --delete-cifs-share command C:99
dgas --delete-group-mapping command C:99
dgas --delete-user-mapping command C:100
dgas --disconnect-cifs-client command C:101
dgas --get-cache-size command C:101
dgas --get-cache-statistics command C:102
dgas --get-free-disk-space command C:102
dgas --get-properties command C:103
dgas --get-property command C:103
dgas --get-property-list command C:104
dgas --initialize command C:104
dgas --list-cifs-clients command C:105
dgas --list-cifs-shares command C:105
dgas --list-group-mappings command C:106
dgas --list-user-mappings command C:106
dgas --modify-cifs-share command C:107
dgas --read-log-properties command C:107
dgas --register command C:5
dgas --reset-cache-statistics command C:108
dgas --save-cache command C:109
dgas --self-map C:109
dgas --self-unmap C:111
dgas --set-admission-policy-domain command C:111
dgas --set-default-admission-policy command C:112
dgas --set-property command C:113
dgas --show-admission-policies command C:114
dgas --show-admission-policy-domain command C:114
dgas --start command C:6
Index-14
O: Overture
dgas --stop command C:7
dgas --sync-cache command C:115
dgas --unregister command C:8
dgas --unset-admission-policy-domain command C:116
dgas --unset-property command C:117
directories
adding schedule exclusions for caching C:121, C:125
adding to cache service C:122
Avaki directories, defined AD:349, API:83, C:307, O:61,
P:289, S:175
Avaki installation API:84, P:290, S:176
Avaki installation directory AD:350, C:308, O:62
changing C:41
changing ownership C:42
changing permissions for AD:239
copying AD:213, C:46
creating AD:208, C:167
deleted, purging from cache C:26
deleting AD:219, C:195
deleting caching schedules C:122
displaying name of current directory C:193
evicting from cache P:135
exporting from the data grid AD:125
home, creating AD:169
icon for O:29
invalidating all in cache C:28
invalidating from cache P:136
invalidating in cache C:27
linking AD:217, C:161
listing C:166
listing schedules C:126
listing those pinned for caching P:134
marking for no caching C:126, P:132
marking for scheduled caching P:120
moving AD:210, C:176
NFS-mounting AD:92
permissions in O:48
purging all from cache and unpinning C:25
purging from cache and unpinning C:24
refreshing in cache C:32
renaming AD:212
scheduling for caching C:117
searching for AD:233
setting ACLs for AD:171
shared, See Avaki shares
tagging for on-demand caching P:129
temp, setting for grid servers AD:135
top-level, described O:32
unscheduling from cache P:135
directory --add-schedule command C:117
directory --cache command C:122
directory --delete-schedule command C:122
directory --do-not-cache command C:126
directory --list-schedules command C:126
disk space
available, displaying for DGAS cache C:102
requirements for Avaki software AD:4, AD:16
Master Index
P: Provisioning & Advanced Data Integration Guide
distributed transactions
about O:25, P:78
API for executing P:188
configuring database connectors for P:7, S:36
defined AD:353, API:87, C:311, O:65, P:293, S:180
requirements for P:79
setting up P:80
supported DBMSes P:79
two-phase commit protocol P:79
DNS aliases for GDC machines AD:10
DNS name, setting for a server AD:32
document/literal web services API:3, API:5
documentation
Avaki, list of AD:xii, API:vi, C:xii, O:vi, P:viii, S:viii
for Eclipse Workbench S:12
domain --create command C:127
domain --disconnect command C:127
domain --info command C:128
domain --interconnect command C:128
domain names, defined AD:354, API:88, C:312, O:66, P:294,
S:180
Domain Users group in Active Directory C:155
domains, Avaki
creating C:127
defined AD:350, API:84, C:308, O:62, P:290, S:176
disconnecting C:127
displaying information about AD:98
getting information about through JDBC API:75
interconnecting AD:289, C:128
joining together AD:289
naming AD:41, AD:354, API:88, C:312, O:66, P:294, S:180
obtaining information about C:128
planning before install AD:1
providers and consumers AD:289
remote, logging in to AD:201
specifying for JDBC connections API:69
DomainUsers group O:44
downstream variables menu S:71
downstream, defined S:3
drivers, See JDBC drivers
drivers directory AD:341
dynamic and nondynamic properties (DGAS) AD:83
dynamic user mappings
creating C:109
deleting C:111
E
Eclipse Workbench S:12
EII, See enterprise information integration
elements
connecting S:57
descriptions of S:59
Input Source S:125
moving S:56
S: Data Integration with Avaki Studio
elements (continued)
names of S:58
operators S:5
properties dialogs S:58
Result S:164
selecting S:56
with red borders S:60
encryption and HTTPS API:8
encryption levels for Avaki shares
changing AD:279
displaying C:222
setting at share creation AD:261
encryption of grid objects AD:139
enterprise information integration, defined AD:354, API:88,
C:312, O:66, P:294, S:180
equal signs in command syntax AD:xvi, C:xvi, P:xii
error handling S:143
errors in view models S:60
everyone group O:44, O:48
examples
conventions used in C:xv
data catalog web service API:18
data services API API:35
database operations API API:42
web services clients
Java API:9
Perl API:9
VB .NET API:9
exclusions, See schedule exclusions
execute inputs in parallel field for Iterator operators S:151
Execute JavaScript function for data service plug-ins P:203
executeAdHocDBOp SOAP operation API:43
executeAdHocDBOpWithOutput SOAP operation API:44
executeAdHocDBOpWithOutputAttach SOAP
operation API:46
executeAdHocDBOpWithOutputString SOAP operation API:47
executeDBOp SOAP operation API:48
executeDBOpBytesInput SOAP operation API:49
executeDBOpGridFileInput SOAP operation API:50
executeDBOpWithOutput SOAP operation API:50
executeDBOpWithOutputAttach SOAP operation API:52
executeDBOpWithOutputString SOAP operation API:53
executeDS SOAP operation API:36
execution services
about AD:109, P:77, S:51
configuring AD:109, C:129
configuring threads for AD:131
defined AD:354, API:88, C:312, O:66, P:294, S:180
displaying information about C:129
executionservice --info command C:129
executionservice --set command C:129
executionServiceHint JDBC property API:70
exiting from an Avaki session C:165
expressions in operators S:4
expressions menu, using S:71
externalCacheService JDBC property API:62, API:70
Master Index
Index-15
AD: Administration Guide
API: API Guide
C: Command Reference
F
failover
defined AD:354, API:88, C:312, O:66, P:294, S:180
managing AD:112
setting up a secondary GDC AD:43
fake_metadata JDBC connection property for ASE API:70
FAKE_METADATA JDBC property for ASE AD:7
federated data access AD:354, API:88, O:66, P:294, S:181
fetch size, See JDBC fetch size
file --add-schedule command C:130
file --cache-on-demand command C:134
file --delete-schedule command C:135
file --do-not-cache command C:136
file --list-schedules command C:136
file locking AD:64
suppressing in NFS mount command AD:93
file --pin command C:137
file size attribute C:290
fileRead SOAP operation API:21
fileReadAttach SOAP operation API:21
fileReadString SOAP operation API:22
files
.amm files S:11
.avm files S:11
.js JavaScript files S:11
.jsi JavaScript include files S:11, S:75
sample S:115
adding schedule exclusions for caching C:133, C:140
Avaki_JDBCStandAlone.jar API:66
Avaki_JDBCStandAlone_Minus3rd.jar API:66
avaki_studio.properties AD:129
AvakiAPI.disco WSDL discovery file API:3
AvakiAPIDocLit.wsdl API:3
AvakiAPIRpcEnc.wsdl API:3
AvakiAPIWithMIMEDocLit.wsdl API:3
AvakiAPIWithMIMERpcEnc.wsdl API:3
avakijdbc.properties API:67
bindings.xml
copying during upgrade AD:344
on grid servers AD:50
on proxy servers AD:300
on share servers AD:59
build.xml for data service plug-ins P:184, P:197
cached, permissions on O:50
caching of O:56
changing ownership C:42
changing permissions for AD:239
clearing locks C:163
configuring caching P:107
configuring encryption level C:216
connectinfo.txt AD:131
copying AD:213, C:46
copying locally AD:215
data type mapping
about C:301
command to specify location C:68
format of C:301
Index-16
O: Overture
deleted, purging from cache C:26
deleting AD:219, C:195
deleting pin schedules for C:135
DGAS properties AD:76
dgas_log.xml, DGAS log properties file AD:317
displaying C:35
evicting from cache P:135
for data service plug-ins P:180
icon for O:29
in the data grid O:8
install.exe AD:22, AD:24
invalidating all in cache C:28
invalidating one in cache C:27, P:136
JAR files for data service plug-ins P:180
jboss-service.xml, request log properties file AD:328
jdbc-log4j.properties API:66
join.properties file on proxy servers AD:300
krb5.conf AD:152
linking AD:217, C:161
listing C:166
listing locks C:164
listing schedules C:136
listing those pinned for caching P:134
log4j.xml,
Avaki Studio log properties file AD:317
server log properties file AD:317
manifest files for data service plug-ins P:180, P:197
marking for no caching C:136, P:132
marking for scheduled caching P:120
moving AD:210, C:176
permissions on new files O:49
pinning for scheduled caching C:137
properties files for DGAS C:293
purging all from cache and unpinning C:25
purging from cache and unpinning C:24
readme AD:12, AD:15, AD:339
refreshing in cache C:32
renaming AD:212
rendering results into O:25
scheduling for caching C:130
searching for AD:233
shareserver.ports
on grid servers AD:50
on share servers AD:60
system.properties AD:129
tagging for on-demand caching C:134, P:129
temporary, for sorting large result sets S:76
unscheduling cached files P:135
uploading to the data catalog AD:282
Workbench .project S:11
fileWrite SOAP operation API:23
Firefox
version requirements AD:5
setting for selecting run-as users P:27, P:54, P:92, P:224,
P:227
fonts in Studio display, setting S:23
Master Index
P: Provisioning & Advanced Data Integration Guide
functions
in expressions S:73
used with Aggregate operator S:110
G
garbage collection for views C:273
GDCs, See grid domain controllers
generated views
about O:25, P:217, P:240
defined AD:354, API:88, C:312, O:66, P:294, S:181
running P:240
scheduling updates P:231
transactional consistency of P:217
GeneratedViews directory O:33
generating schemas S:19
Generator operator S:117
getAttributes SOAP operation API:23
getCatalogs method API:75
getCatalogTerm method API:75
getDBOpOutput SOAP operation API:54
getDBOpOutputAttach SOAP operation API:55
getDBOpParameters SOAP operation API:56
getDBOpSchema SOAP operation API:56
getDBOpSchemaAttach SOAP operation API:57
getDBOpSchemaString SOAP operation API:58
getDSOutput SOAP operation API:37
getDSOutputAttach SOAP operation API:38
getDSOutputString SOAP operation API:38
getDSParameters SOAP operation API:39
getOutputString SOAP operation API:55
getSchemas method API:75
getSchemaTerm method API:75
getSQL SOAP operation API:58
getSystemAttributes SOAP operation API:24
getUserAttributes SOAP operation API:24
GIDs, configuring AD:68, C:217, C:221
Global Parameters menu S:71
grid directories, See directories, Avaki
grid domain controllers
backing up and restoring AD:113
creating C:127
defined AD:355, API:89, C:313, O:67, P:295, S:181
DNS aliases for AD:10
loading AD:14
ports used by AD:6, AD:8
primary AD:355, API:89, C:313, O:67, P:295, S:181
secondary AD:43
starting AD:14
stopping AD:38, C:11
stopping and restarting GDCs registered as services AD:39
grid domains
See domains, Avaki
grid servers
associating with caches P:111
backing up and restoring AD:113
choosing for web services API:5
configuring AD:48, AD:52
S: Data Integration with Avaki Studio
grid servers (continued)
configuring associated cache service C:33
configuring cache service threads AD:131
configuring nondefault ports AD:50
connecting C:225
connection info, setting S:23
defined AD:355, API:89, C:313, O:67, P:295, S:181
destroying C:226
disabling auto-restart on C:12
disassociating from caches P:112
displaying associated cache C:27
displaying status of operations on C:248
enabling auto-restart C:9
finding connect ports AD:53
finding server names AD:53
installing JDBC drivers on AD:49
monitoring AD:99
obtaining upgrade information C:250
ports used by AD:6, AD:8
registering C:9
request logs for AD:327
server logs AD:317
settable attributes of C:290
setting location of temp directory for AD:135
setting plug-in cache size properties AD:137
setting up command clients on AD:94
starting AD:50, C:9, C:10
stopping AD:51, C:11, C:12, C:227
stopping and restarting AD:52
time required to upgrade AD:340
uncoupling associated cache C:34
unregistering C:12
upgrading C:249
grid user accounts, See users
grid-server --register command C:9
grid-server --start command C:10
grid-server --stop command C:11
grid-server --unregister command C:12
group --add --user command C:138
Group By operator S:76, S:121
group --create command C:141
group --delete command C:143
group --delete --user command C:144
group --info command C:145
group --list-user command C:147
group mappings, adding for a particular DGAS C:92
groups
about O:43
activating privileges for newly added users AD:192, AD:243
adding to ACLs AD:243, S:97
adding users to AD:191, C:138
Administrators AD:45, O:43
configuring default mappings C:218
creating AD:191, C:141
DatabaseAdministrators O:44
DataProviders O:44
default grid groups O:43
default groups for DGAS AD:333
Master Index
Index-17
AD: Administration Guide
API: API Guide
C: Command Reference
groups (continued)
defined S:176
deleting AD:198, C:143
deleting users from C:144
displaying information about AD:195, C:145
enabling interconnection access AD:304
everyone group O:44
imported groups O:43
from LDAP AD:159
from NIS AD:165
refreshing AD:195
in Avaki, defined AD:350, API:84, C:308, O:62, P:290
listing C:144
listing users in C:147
making account changes take effect immediately for DGAS
access AD:117
MessagingUsers O:44
modifying AD:195
removing from ACLs AD:242
removing users from AD:193
setting up for DGAS AD:67
UserAdministrators AD:45, O:44
using in ACLs for cached objects O:50
H
hard links
about O:36
broken, to generated views P:240
creating AD:217, C:161
defined AD:355, API:89, C:313, O:67, P:295, S:182
hardware requirements for Avaki AD:2
help command C:148
help, online, for command line AD:xiii, C:xiii, P:ix
hideCatalogs JDBC property API:70
home directories AD:169
host names
aliasing for GDCs AD:10
setting for servers AD:32
HTTP and HTTPS ports
default AD:8, AD:9, AD:10
properties for AD:140
HTTP and web services API:7, API:8
HTTP POST problem in web browsers AD:5
HTTP request logs, See request logs
HTTPS and web services API:7, API:8
hyphens in command syntax AD:xvi, C:xvi, P:xii
I
IATEMPDIR environment variable AD:16
IBM AIX O:16
IBM AIX requirements AD:3
IBM DB2, versions and JDBC drivers for use with Avaki AD:6
icons for grid objects in the data catalog O:29
id command C:149
identity mapping P:6, S:36
imported groups, See groups
Index-18
O: Overture
imported user accounts AD:167
increment field for Iterator operators S:151
indent size property for XML files AD:142
initialize field for Iterator operators S:151
initParameter element P:263
inner join S:156
input parameters
creating P:88
for data services
configuring P:84
deleting P:86
Input Source element S:125
input sources
accessing columns from S:68
browsing for in data catalog view S:18
configuring for view models in Avaki Studio S:43
creating S:55
error handling S:143
finding S:18
input streams, for data services, configuring P:87
inputParameter element P:264
inputSource element P:265
InputSource interface for data services P:186
inputStream element P:266
installation directory AD:350, API:84, C:308, O:62, P:290,
S:176
installing Avaki
about AD:13
in Unix AD:16
in Windows AD:23
preparation and planning AD:1
system requirements AD:2
integration, See data integration
interconnection IDs
creating AD:295, C:149
using in permissions AD:304, C:43
using to provide cross-domain data access AD:295
interconnections between grid domains
about AD:289
breaking C:127
creating AD:291
defined AD:355, API:89, C:313, O:67, P:295, S:182
disconnecting domains AD:314
enabling access AD:299
prerequisites for AD:94
setting up C:128
two-way, exposing users AD:308
user access methods AD:294
viewing interconnected domains AD:310
Interconnects directory O:33
Internet Explorer
Avaki version requirements AD:5
setting for selecting run-as users P:27, P:54, P:92, P:224,
P:227
Intersection operator S:148
performance S:76
IP address, setting for a server AD:32
isDSAvakiXML SOAP operation API:40
Master Index
P: Provisioning & Advanced Data Integration Guide
isList element P:266
Iterator operator S:149
example S:152
J
JAR files
for Avaki JDBC driver API:66
configuring path for second JAR on one grid server P:247
for data service plug-ins P:180
for jConnect API:67
jarurl element P:267
Java
data service plug-in code samples P:190
sample web services client API:9
writing data service plug-ins in P:183
Java transformers
error logging P:246
implementing P:243
installing P:245
referring to other documents P:245
using P:245
java.io.tmpdir system property AD:135
java.protocol.handler.pkgs system property AD:141
java.rmi.server.hostname system property AD:32
java.security.krb5.conf system property AD:143, AD:153
java.security.krb5.kdc system property AD:153
java.security.krb5.realm system property AD:153
java.sql.DatabaseMetaData interface API:75
Javadoc, Avaki, accessing P:185
JavaScript
files S:11
include files S:11, S:75
sample S:115
methods on data service plug-in objects P:201
resources for learning about S:67
using Java classes and interfaces in data service plugins P:200
writing data service plug-ins in P:200
JavaScript expressions
about S:4, S:66
menu for constructing S:71
uses of in Avaki Studio S:vii
jConnect, See JDBC drivers
JDBC
accessing data catalog through O:24
and caching of database operation results API:62
connection properties API:68
data types API:76
directing queries to a particular grid server API:70
result set types API:75
JDBC drivers
about API:61
Avaki
choosing version of API:66
connection properties API:68
JAR files for API:66
S: Data Integration with Avaki Studio
JDBC drivers (continued)
Avaki
setting classpath for API:67
when to use API:65
batch mode API:77
choosing API:65
configuring for a database connector P:5
configuring two versions on one grid server P:247
connection strings API:71
defined AD:356, API:90, C:314, O:68, P:295, S:182
for supported DBMSes AD:3
installing AD:49
jConnect
changing default port API:71
setting classpath for API:67
using with Sybase databases AD:6
when to use API:65
loading API:68
prerequisites for using API:64
sample code API:77
setting system properties for API:67
supported features API:74
JDBC fetch size
setting for database connectors P:5, S:36
setting for database operations P:254
JDBC schema names API:69
jdbc-log4j.properties file API:66
join algorithms S:155
Join operator S:154
in tutorial S:44
performance S:76
join types S:156
join.properties file on proxy servers AD:300
JRE versions supported by Avaki AD:5
K
keepalive properties for HTTP ports AD:140
Kerberos
configuring with LDAP authentication services AD:152
system properties for AD:143
krb5.conf Kerberos configuration file AD:152
L
last access time file attribute C:290
LBF AD:280
LDAP
authentication services AD:148
See also authentication services, LDAP
authentication through DGAS AD:86
configuring for Kerberos access AD:152
disabling import on login AD:157
host port, default and nondefault AD:149
importing users on login AD:157
specifying a nondefault host port C:158
ldap --add-schedule command C:149
Master Index
Index-19
AD: Administration Guide
API: API Guide
C: Command Reference
ldap --delete command C:153
ldap --delete-schedule command C:154
ldap --import command C:155
ldap --info command C:157
ldap --integrate command C:157
ldap --list-schedules command C:158
ldap --searchbase command C:160
ldap --update command C:160
links
command for creating C:161
uses of in data catalog O:36
See also hard links, soft links
Linux requirements AD:3
listDBConns SOAP operation API:59
listDBOps SOAP operation API:59
listDBOpsByDBConn SOAP operation API:60
listDomains SOAP operation API:25
listDSs SOAP operation API:40
listSearches SOAP operation API:25
ln command C:161
load balancing factor for share servers AD:280, C:244
local caches AD:356, API:90, C:314, O:14, O:68, P:296, S:182
locks command C:163
locks on files
clearing C:163
obtaining a list C:164
log properties file, sample AD:323
log4j AD:318, P:196
logging
audit logs AD:108
categories of loggable events AD:318
configuring audit logging AD:319
for data service plug-ins P:196
for JDBC API:66
for TrAX transformers P:246
for type mapping C:304
HTTP request logs AD:108
log4j properties files for servers and Studio AD:317
properties files for request logs AD:327
viewing the server log AD:107
logging in AD:199, C:164
logical operators S:72
logical operators in searches AD:234
logicBox element P:268
login command C:164
login info, setting S:23
logout command C:165
ls command C:166
ls SOAP operation API:26
lsSize SOAP operation API:26
M
manifest files for data service plug-ins P:180, P:197
mappings
between Avaki and local users/groups for DGAS AD:68
between Avaki users and database users, See database identity
mappings
Index-20
O: Overture
mappings (continued)
database identity
adding C:252
deleting C:253
listing C:255
default, setting up AD:71
DGAS default AD:69, C:220
DGAS domain-wide
for groups, setting up AD:70
for users, setting up AD:70
users, groups, and defaults AD:68
DGAS dynamic C:109
for data types in SQL views C:68, C:301
for users and groups for DGAS C:94, C:109
per-DGAS
adding for groups C:92
adding for users C:94
deleting C:100
deleting for groups C:99
per-DGAS, users and groups AD:88
self mappings for users C:109
See also data type mappings
maximum concurrent data services setting for execution
services AD:109
memory requirements for Avaki software AD:3
message tests in monitor services AD:101
message timeout properties for Avaki servers and
clients AD:133
MessagingUsers group and user accounts O:44
metadata O:13, S:3
Metadata directory O:33
metadata models
about S:77
creating S:84
defined AD:356, API:90, C:314, O:68, P:296, S:182
deleting S:94
deploying C:285, S:91
deriving S:92
editing S:84
files associated with S:11
importing S:79
mapping to Avaki objects S:88
naming scheme S:91
undeploying C:286, S:94
Microsoft SQL Server, versions and JDBC drivers for use with
Avaki AD:6
Microsoft Visual Studio API:5
MicroSoft Windows O:16
MIME in Avaki web services API:3
minus signs in command syntax AD:xvi, C:xvi, P:xii
mkdir command C:167
mkdir SOAP operation API:27
mkdirParents SOAP operation API:27
mkdirServer SOAP operation API:29
mkdorParentsServer SOAP operation API:28
models, See metadata models and view models
modification time file attribute C:290
Master Index
P: Provisioning & Advanced Data Integration Guide
monitor --add command C:167
monitor --clear command C:168
monitor --create command C:170
monitor --delete command C:171
monitor --list command C:172
monitor --result command C:172
monitor services
monitor --start command C:173
monitor --stop command C:174
monitoring
about AD:99
adding tests C:167
configuring AD:101
creating monitor services C:170
deleting monitor services AD:106, C:171
deleting tests AD:105
disabling and enabling tests AD:104
listing active tests C:172
logging AD:107
message tests AD:101
ping tests AD:100
removing tests C:168
restarting tests AD:105, C:173
stopping tests AD:105, C:174
viewing results AD:103, C:172
mount port for DGAS AD:81
mount protocol port, default AD:9
Mozilla, Avaki version requirements AD:5
Multiplexer operator S:157
multiplexing socket properties AD:142
mv command C:176
mv SOAP operation API:29
MySQL
configuring XA driver for P:7, S:36
versions and JDBC drivers for use with Avaki AD:6
S: Data Integration with Avaki Studio
NFS (continued)
port, default AD:9
shutting down before starting a DGAS AD:65
NFS clients
attribute caching for AD:336
defined AD:356, API:90, C:314, O:68, P:296, S:183
older, accessing data grid through AD:337
requirements for O:16
setting up AD:91
NFS URLs AD:93
NIS
disabling import on login AD:163
importing users on login AD:163
See also authentication services, NIS
nis --add-schedule command C:177
nis --delete command C:181
nis --delete-schedule command C:181
nis --import command C:182
nis --info command C:183
nis --integrate command C:184
nis --list-schedules command C:184
nis --update command C:185
NLM AD:64
NLM protocol port, default AD:9
notifications, See update notifications
O
N
name element P:269
name property for columns S:61
names of Avaki objects
about O:29
avoiding underscores in when using BusinessObjects API:81
case sensitivity and restrictions AD:206
changing AD:212
metadata models and mapped tables S:91
of elements S:58
qualified names O:30
restrictions on AD:41
three-part O:24
navigator in Studio S:17
nesting operations in data services S:149
.NET, See .NET under Symbols at the beginning of the index
Netscape requirements AD:5
NFS
and permissions AD:12
configuring NFS port for DGAS AD:81
object host name grid server attribute C:290
octothorpe AD:33, AD:129
ODBC
accessing data catalog through O:24
defined AD:356, API:90, C:314, O:68, P:296, S:183
support for API:80
ODBC drivers, using with Avaki API:80
offline expiration cache attribute C:291
on-demand caching
about P:119
defined AD:357, API:91, C:315, O:69, P:296, S:183
of database operation and data service results O:57, P:108
of files O:56, P:107
online help for command line AD:xiii, C:xiii, P:ix
operating systems supported by Avaki O:16
operations, monitoring AD:99
operators
about S:5
adding to a view model S:55
Aggregate S:108
connecting S:57
Custom S:111
descriptions of S:59
Generator S:117
Group By S:121
in searches AD:234
Input Source S:125
Intersection S:148
Iterator S:149
Join S:154
Master Index
Index-21
AD: Administration Guide
API: API Guide
C: Command Reference
operators (continued)
logical, in expressions S:72
moving S:56
Multiplexer S:157
names of S:58
Order By S:159
performance considerations S:5
Projection S:161
properties dialogs S:58
Result S:164
Select S:165
selecting S:56
sort-based, performance of S:76
Splitter S:166
Union S:168
Update S:169
with red borders S:60
Oracle 10g
configuring XA driver for P:7, S:36
versions and JDBC drivers for use with Avaki AD:6
Order By operator S:159
performance S:76
os arch grid server attribute C:290
os name grid server attribute C:290
outer-full join S:156
outer-left join S:156
outer-right join S:156
output streams, for data services, configuring P:86
outputStream element P:269
ownership of objects in the data catalog
about O:46
setting AD:242
P
palette in Avaki Studio view model editor S:20, S:54
parameters
accessing in expressions S:71
adding S:64
deleting S:65
displaying S:63
for data service plug-ins
about P:178
specifying for Java plug-ins C:188
specifying for XSLT plug-ins P:181
for testing view models S:50
in Avaki Studio, about S:4
input, for data services, configuring P:84
mapping input parameters S:144
modifying S:65
reordering S:65
validating S:64
ParameterSpec interface for data services P:187
passwords
changing AD:175, C:185
specifying for JDBC connections API:69
patches, settable attributes of C:290
Index-22
O: Overture
performance S:5, S:76
benefits of caching O:54
tracking, enabling in an Avaki shell C:245
Perl, sample web services client API:9
permissions
about O:45
changing AD:239, C:41
granted by grid groups O:43
hiding objects with O:49
on new Avaki shares AD:261
on shared data AD:12
setting in ACLs S:97
values for AD:242, O:47
viewing for Avaki services C:186
See also ACLs
permissions command C:186
permissions SOAP operation API:30
perspectives in Avaki Studio
Avaki S:13
defined S:12
Resource S:11
pin for caching, defined AD:357, API:91, C:315, O:69, P:297,
S:183
ping tests in monitor services AD:100
planning an Avaki deployment AD:1
platforms supported by Avaki O:16
plugin command P:184
plugin --generate command C:187
Plugin interface for data services P:186
Plug-in Wizard and creating data service plug-ins P:183
plug-ins, See data service plug-ins
plus signs in command syntax AD:xvi, C:xv, P:xi
ports
bad port cache AD:141
changing, See ports, nondefault
CIFS, releasing before running a DGAS AD:66
default, for Avaki servers AD:6
HTTP and HTTPS, See HTTP and HTTPS ports
LDAP host
default and nondefault AD:149
specifying C:158
NFS, default AD:9
nondefault
configuring for DGAS AD:74, AD:75
configuring for grid servers AD:50
configuring for proxy servers AD:300
configuring for share servers AD:59
RMI, See RMI ports
SMB, default AD:9
specifying in WSDL API:6
SSL, See SSL ports
TDS AD:8, AD:50, AD:145, API:71
ports, connect, See connect ports
POST problem in web browsers AD:5
precision property for columns S:61
preferences for Avaki Studio, setting S:23
primary GDCs AD:357, C:315, O:69
Master Index
P: Provisioning & Advanced Data Integration Guide
privacy and HTTPS API:8
Projection operator S:161
in tutorial S:46
projects
creating S:13
defined S:12
properties
cache sizes for data service plug-ins AD:137
DGAS
configuring AD:82
controlling cache size AD:124
displaying AD:124, C:103
displaying descriptions C:104
listing C:103
properties file C:293
setting C:113
unsetting C:117
for cache services AD:135
for encryption of grid objects AD:139
for HTTP and HTTPS ports AD:140
for HTTP keepalives on proxy servers AD:140
for JDBC clients AD:128
for JDBC connections API:68
for Kerberos AD:143
for multiplexing sockets AD:142
for remote object stub cache AD:144
for schedule exclusion cache AD:144
for server request logs AD:327
for servers acting as clients AD:128
for share servers AD:138
for virtual database table cache size AD:144
for XA connections C:70, P:7, S:37
Java system properties, providing to JDBC driver API:67
JDBC, specifying for a database connector C:67
Kerberos default realm AD:153
Kerberos key distribution center AD:153
location of Kerberos configuration file AD:153
message timeouts for Avaki servers and clients AD:133
remote coherence window for configurations AD:141
setting server’s host name or IP address AD:33
system. See system properties.
views
displaying C:274
setting C:275
XML indent size AD:142
properties dialog boxes S:58
provisioning data O:21
proxy --add command C:191
proxy --delete command C:191
proxy --list command C:192
proxy routing tables
about AD:289
configuring AD:292, C:191
displaying C:192
S: Data Integration with Avaki Studio
proxy servers
about AD:289
configuring AD:299
configuring nondefault ports AD:300
connecting C:228
defined AD:357, API:91, C:315, O:69, P:297, S:183
deleting from the routing table C:191
destroying C:228
disabling auto-restart C:14
enabling auto-restart AD:300, C:12
finding connect port numbers AD:303
finding server names AD:303
installing in Windows AD:24
installing in Unix AD:18
ports used by AD:10
registering for auto-restart AD:302, C:12
request logs for AD:327
server logs for AD:317
setting HTTP keepalive properties for AD:140
setting up C:191
starting AD:301, C:12, C:13
stopping C:14, C:228
stopping and restarting AD:301
time required to upgrade AD:341
unregistering C:14
when to deploy AD:290
proxy-server --register command AD:302, C:12
proxy-server --start command C:13
proxy-server --stop command C:14
proxy-server --unregister command C:14
pwd command C:193
Q
qualified names
about O:30
for data services, specifying API:35, C:51, C:267
for database connectors, specifying C:254
for database operations, specifying C:25, C:264
for groups, specifying C:43, C:142, C:145, C:147, C:148
for users, specifying C:42, C:53, C:60, C:86, C:89, C:141,
C:145, C:165, C:251, C:266, C:280
queries, See ad-hoc queries
query engine
defined AD:357, API:91, C:315, O:69, P:297, S:184
mapping data types for C:301
sort chunk size property AD:139
queryCacheTTL JDBC property API:71
R
RAM requirements for Avaki software AD:3
range input for Iterator operators S:151
readme file AD:12, AD:15, AD:339
red borders on operators in Studio S:60
Red Hat Linux requirements AD:3
ref element P:270
Master Index
Index-23
AD: Administration Guide
API: API Guide
C: Command Reference
refresh schedules
for Avaki shares AD:266, C:231
advanced AD:272
calendared AD:271
exclusions for AD:274
listing C:239
one-time AD:269
periodic AD:270
removing AD:278, C:236
for data services P:152
advanced P:157
calendared P:155
one-time P:155
periodic P:157
for database operations P:139
advanced P:144
calendared P:142
one-time P:142
periodic P:144
for files or directories P:120
advanced P:127
calendared P:125
one-time P:125
periodic P:127
for generated views P:231
advanced P:236
calendared P:234
one-time P:233
periodic P:236
for LDAP authentication services AD:185
for virtual database operations P:139
advanced P:144
calendared P:142
one-time P:142
periodic P:144
refreshing users on login AD:149
reindex interval for search services AD:232
remote caches AD:357, API:91, C:315, O:14, O:69, P:297,
S:184
removeAttribute SOAP operation API:31
replica --add command C:193
replica --config command C:193
replica --delete command C:194
replica --info command C:194
replica --synch command C:195
request logs
configuring AD:327
viewing AD:108
requirements, pre-installation AD:2
Result element S:164
result sets
accessor functions S:73
combining S:44
large, providing space for sorting S:76
types in JDBC API:75
Index-24
O: Overture
rm command C:195
rm SOAP operation API:31
RMI ports
default AD:8, AD:9, AD:10
linked to grid server connect ports AD:50
linked to share server connect ports AD:60
routing tables, configuring AD:292, C:191
row-level access control S:74
RowSetFactory class for data services P:188
rowsets O:11, P:273
rpc/encoded web services API:3, API:5
rpcinfo command AD:66
Rudi port AD:352, C:310, O:64
run-as users, See users and user accounts
S
Saxon C:265, C:268, C:271, P:220, P:224, P:227
scale property for columns S:61
schedule --delete command C:196
schedule exclusions
about AD:274, P:166
adding for Avaki share rehashes C:234
adding for data services C:51
adding for directories C:125
adding for files C:133, C:140
adding for LDAP authentication services C:152
adding for NIS authentication services C:180
adding for views C:262
adding to Avaki directories C:121
adding to database operations C:76
applying to schedule entries P:168
caching properties for AD:144
configuring AD:274, P:166
creating custom C:198
creating daily C:199
creating monthly C:201
creating weekly C:203
creating yearly C:205
defined AD:358, API:92, C:316, O:70, P:298, S:184
deleting C:207
displaying information about C:208, P:171
listing names C:209
schedule --info command C:197
schedule --list command C:197
schedule --print-iterations command C:198
scheduled caching
about P:119
defined AD:357, API:91, C:315, O:69, P:297, S:184
of database operation and data service results O:59, P:109
of files O:57, P:107
scheduleexclusion --create --custom command C:198
scheduleexclusion --create --daily command C:199
scheduleexclusion --create --monthly command C:201
scheduleexclusion --create --weekly command C:203
scheduleexclusion --create --yearly command C:205
scheduleexclusion --delete command C:207
scheduleexclusion --info command C:208
Master Index
P: Provisioning & Advanced Data Integration Guide
scheduleexclusion --list command C:209
schedules
adding for data services C:48, P:152
adding for database operations C:73, P:139
adding for directories C:117
adding for files C:130
adding for LDAP user importation C:149
adding for NIS user importation C:177
adding for views C:259
adding for virtual database operations P:139
creating cron specifications C:297
creating custom exclusions C:198
creating daily exclusions C:199
creating monthly exclusions C:201
creating weekly exclusions C:203
creating yearly exclusions C:205
cron expressions in AD:185, AD:273
deleting C:196
deleting exclusions C:207
deleting for data services C:54
deleting for database operations C:78
deleting for directories C:122
deleting for files C:135
deleting for LDAP user importation C:154
deleting for NIS user importation C:181
deleting for views C:272
displaying exclusion information C:208
displaying information about C:197
exclusions, see also schedule exclusions
execute permissions required O:59
for refreshing LDAP authentication services AD:185
for view generators and generated views P:231
listing C:197
listing execution times C:198
listing for data services C:58
listing for database operations C:88
listing for directories C:126
listing for files C:136
listing for LDAP authentication services C:158
listing for NIS authentication services C:184
listing for views C:274
listing names of exclusions C:209
refresh, See refresh schedules
types of AD:185, AD:267
schemas
about S:3, S:60
enabling browsing on a database connector P:4
expressed in metadata models S:77
for Avaki data services API:75
for operators, column properties of S:60
for virtual database operations and their SQL views API:75
for virtual database operations, generating P:57
generating S:19
generating for data services C:55, P:98
generating for database operations C:80, P:31
getting information about through JDBC API:75
getting via JDBC API:75
S: Data Integration with Avaki Studio
schemas (continued)
JDBC schema names API:69
modifying S:161
types in Avaki domains P:51, P:64
viewing for databases P:9
See also metadata models
search (execute) command C:211
search --create command C:209
search --delete command C:210
search --get-rehash-level command C:212
search --info command C:214
search --rehash command C:215
search --set-rehash-level command C:215
search SOAP operation API:32
searches O:13
configuring rehash intervals C:215
creating search services AD:231, C:209
deleting AD:236
deleting search services C:210
displaying search service information C:214
performing AD:233, C:211
rehashing search services C:215
reindex interval, setting AD:232
viewing rehash intervals C:212
SearchQuery complex type API:17
SearchResult complex type API:17
secondary GDCs AD:43
adding C:193
deleting C:194
forcing updates C:195
setting refresh intervals C:193
setting update interval C:195
viewing C:194
See also grid domain controllers
security
.NET API:9
about O:10
ACLs O:45
authentication O:41
configuring encryption levels C:216
displaying encryption levels C:222
for web clients API:8
HTTPS API:8
setting permissions C:41
SSL certificates API:8
user accounts and groups O:43
viewing permissions C:186
security --config command C:216
security --default-gid command C:217
security --default-group command C:218
security --default-uid command C:219
security --default-user command C:220
security --gid command C:221
security --info command C:222
security --uid command C:222
Select operator S:165
server connect ports, See connect ports
server --dgas --connect command C:223
Master Index
Index-25
AD: Administration Guide
API: API Guide
C: Command Reference
server --dgas --destroy command C:224
server --dgas --stop command C:225
server --grid --connect command C:225
server --grid --destroy command C:226
server --grid --stop command C:227
server logs
configuring AD:317
viewing AD:107
server --proxy command C:228
server --share --connect command C:228
server --share --disconnect command C:229
server --share --stop command C:230
servers, backing up databases for C:23
servers, Avaki
defined AD:350, API:84, C:308, O:62, P:290, S:176
displaying software version of AD:99
finding names of AD:131
in a typical deployment O:18
monitoring AD:99
ports used by AD:6
problems communicating with AD:32
setting cache service properties for AD:135
setting host name or IP address to advertise AD:32
setting message timeout properties for AD:133
See also DGAS, grid domain controllers, grid servers, share
servers, and proxy servers
servers, proxy, See proxy servers
services, Avaki
copying C:46
defined AD:358, API:92, C:316, O:70, P:298, S:184
icon for O:29
setAttribute SOAP operation API:32
setOutputStream JavaScript method for data service plugins P:202
share --add-rehash-schedule command C:231
share --add-share-servers command C:232
share --create command C:235
share --delete-rehash-schedule command C:236
share --disconnect command C:238
share --get-local-path command C:238
share --get-status command C:239
share --list-rehash-schedules command C:239
share --list-share-servers command C:240
share --rehash command C:240
share --remove-share-servers command C:241
share servers
about AD:54
adding to Avaki shares AD:263
backing up and restoring AD:115
before disconnecting AD:54, C:230
configuring a machine with one share server AD:55
configuring multiple share servers on one machine AD:59
configuring to use nondefault ports AD:59
connecting to grid servers C:228
defined AD:358, API:92, C:316, O:70, P:298, S:184
disabling auto-restart C:17
disconnecting from grid servers C:229
Index-26
O: Overture
share servers (continued)
enabling auto-restart C:15
finding connect ports AD:59
finding server names AD:59
installing in Windows AD:24
installing on Unix AD:18
local path AD:261
modifying load balance factor C:244
multiple AD:55, AD:263
obtaining upgrade information C:250
ports used by AD:9
registering C:15
registering for auto-restart AD:57
removing from Avaki shares C:241
removing from shares AD:265
replacing for Avaki shares C:242
server logs for AD:317
setting for Avaki shares AD:260
setting load balancing factor AD:280
setting system properties for AD:138
starting AD:56, C:15, C:16
stopping C:17, C:230
stopping and restarting AD:57
time required to upgrade AD:341
unregistering C:17
upgrading C:249
write access and user accounts AD:12
share --set-local-path command C:241
share --set-share-servers command C:242
share --set-status command C:243
share --update-share-servers command C:244
shared directories, See Avaki shares
shares, See Avaki shares and CIFS shares
Shares directory O:34
shares, CIFS AD:125
share-server --register command AD:57, C:15
share-server --start command C:16
share-server --stop command C:17
share-server --unregister command C:17
shareserver.ports file
on grid servers AD:50
on share servers AD:60
shell command C:245
shells, Avaki, accessing C:245
shortcuts created in Windows installations AD:27
SMB ports, default AD:9
SOAP
formal definition API:1
learning about API:1
over HTTP API:8
over HTTPS API:8
standards compliance API:1
SOAP clients, See web services clients
SOAP complex types API:12
AdHocDBOPExecutionParams API:13
AvakiPrincipal API:13
DataCatalogAttribute API:14
Master Index
P: Provisioning & Advanced Data Integration Guide
SOAP complex types (continued)
DataCatalogEntry API:15
DataCatalogPermission API:15
DataServiceExecutionParams API:16
DBOPExecutionParams API:16
SearchQuery API:17
SearchResult API:17
SOAP operations
accessibleDBOp API:42
accessibleDS API:36
accessiblePath API:19
chmod API:19
chown API:20
components of web service API:4
data catalog API:18
data services API:34
database operations API:40
executeAdHocDBOp API:43
executeAdHocDBOpWithOutput API:44
executeAdHocDBOpWithOutputAttach API:46
executeAdHocDBOpWithOutputString API:47
executeDBOp API:48
executeDBOpBytesInput API:49
executeDBOpGridFileInput API:50
executeDBOpWithOutput API:50
executeDBOpWithOutputAttach API:52
executeDBOpWithOutputString API:53
executeDS API:36
fileRead API:21
fileReadAttach API:21
fileReadString API:22
fileWrite API:23
getAttributes API:23
getDBOpOutput API:54
getDBOpOutputAttach API:55
getDBOpParameters API:56
getDBOpSchema API:56
getDBOpSchemaAttach API:57
getDBOpSchemaString API:58
getDSOutput API:37
getDSOutputAttach API:38
getDSOutputString API:38
getDSParameters API:39
getOutputString API:55
getSQL API:58
getSystemAttributes API:24
getUserAttributes API:24
isDSAvakiXML API:40
listDBConns API:59
listDBOps API:59
listDBOpsByDBConn API:60
listDomains API:25
listDSs API:40
listSearches API:25
ls API:26
lsSize API:26
mkdir API:27
mkdirParents API:27
S: Data Integration with Avaki Studio
SOAP operations (continued)
mkdirParentsServer API:28
mkdirServer API:29
mv API:29
permissions API:30
removeAttribute API:31
rm API:31
search API:32
setAttribute API:32
tester API:33
whoami API:33
SOAP::Lite API:5
sockets, multiplexing AD:142
setting maximum channels AD:142
setting maximum write AD:142
setting send buffer size for AD:143
soft links
about O:36
creating AD:217, C:161
defined AD:358, API:92, C:316, O:70, P:298, S:185
not used in searches AD:233
software requirements for Avaki AD:2
Solaris requirements AD:3
sort chunk size
controlling S:76
for query engine AD:139
spaces
in Windows install pathnames, avoiding AD:26
to separate arguments in Avaki commands AD:xvi, C:xvi,
P:xii
SPARC/Solaris requirements AD:3
Splitter operator S:166
SQL
aggregate functions and aliasing columns S:42
as prerequisite for Avaki Studio users S:vii
statements
in database operations C:86, P:251
in virtual database operations C:90
SQL Server, versions and JDBC drivers for use with
Avaki AD:6
sql view --delete command C:246
sql view --get-description command C:246
sql view --set-description command C:247
SQL views
about O:8, O:22, P:38
adding to categories P:47
configuring attributes P:44
data type mappings for C:68, C:301, P:39
defined AD:358, API:92, C:316, O:70, P:298, S:185
deleting C:246
displaying descriptions C:246
displaying tables provisioned from database connectors C:73
enabling provisioning on a database connector P:4
from data service results, generating P:60, P:100
generated from database operations, removing P:35
generating from data services C:56
generating from database operations C:82, P:34
location in categories S:18
Master Index
Index-27
AD: Administration Guide
API: API Guide
C: Command Reference
SQL views (continued)
managing P:20
modifying P:43
modifying descriptions C:247
names in data catalog O:24
provisioning P:39
provisioning from database connectors C:71
qualified names for O:31
removing P:44
schema types for P:51, P:64
schemas for S:22
searching for AD:233
table types for API:75
viewing P:42
viewing and modifying ACLs P:46
square brackets in command syntax AD:xv, C:xv, P:xi
SSL certificates
about API:8
generating AD:33
installing AD:39
planning for AD:8
SSL ports, default AD:8, AD:9, AD:10
status command C:248
status of grid operations, monitoring AD:99
stored procedures API:73
StreamingRowSet interface for data services P:187
streams, closing in data service plug-ins P:186
Studio, See Avaki Studio
style sheet engines
for data service view generators P:227
for database operation view generators P:224
for file view generators P:220
style sheet engines for database view generators C:265, C:268
style sheet engines for file view generators C:271
Sun JDK for compiling data service plug-ins P:184
Sun ONE Directory Server AD:148
See also authentication services, LDAP AD:148
Sun Solaris requirements AD:3
SuSE Linux requirements AD:3
Sybase ASA, versions and JDBC drivers for use with
Avaki AD:6
Sybase ASE
configuring XA driver for P:7, S:36
connection property required for API:70
versions and JDBC drivers for use with Avaki AD:7
Sybase contact information AD:xvi, API:vii, C:xvi, O:vi, P:xii,
S:ix
Sybase IQ, versions and JDBC drivers for use with Avaki AD:7
syntax conventions for commands AD:xv, C:xiv, P:x
system attributes AD:248, S:101
System directory O:34
system properties
about AD:128
descriptions of AD:131
setting on Avaki Studio AD:129
setting on clients AD:129
setting on servers AD:129
using with JDBC driver API:67
Index-28
O: Overture
system requirements for Avaki software AD:2, O:16
system.properties file AD:33, AD:129
T
table schema view S:22
table types for SQL views API:75
tables
deleting SQL views C:246
displaying descriptions C:246
generating from data services C:56
generating from database operations C:82
in metadata models S:77
arranging in editor S:84
making accessible via JDBC S:91
mapping to Avaki objects S:88
naming scheme for S:91
in virtual database, displaying C:283
mapping data types for C:301
modifying descriptions C:247
provisioned from database connectors, displaying C:73
provisioning as SQL views O:22
provisioning from database connectors C:71
qualified names for O:32
schemas for, displaying S:22
See also SQL views
tabs for view models S:21
target element P:270
TCP channel sockets AD:142
TDS port
changing AD:50, AD:145, API:71
default AD:8
technical support contact information AD:xvi, API:vii, C:xvi,
O:vi, P:xii, S:ix
temp directories for grid servers, setting AD:135
Templates class P:244
tester SOAP operation API:33
testing an upgraded grid domain AD:346
testing function for WS clients API:33
text conventions C:xiv
timeout properties for Avaki server communications AD:133
timeouts, configuring for database operations P:253
transactions, See distributed transactions P:78
TrAX API P:243
two-phase commit protocol P:79
type element P:270
type mapping, See data types, mapping
type property for columns S:61
TypeMapping log4j category C:304
types for variables S:70
U
UID attribute in LDAP authentication services AD:150
UIDs, configuring AD:68, C:219, C:222
underscore characters in Avaki names API:81
Union operator S:168
Unix file mode semantics, setting AD:337
Master Index
P: Provisioning & Advanced Data Integration Guide
Unset permission in ACL AD:242, O:47
update intervals for GDCs, setting C:195
update notifications
configuring P:238
defined AD:359, API:93, C:317, O:71, P:299, S:185
enabling AD:311
Update operator S:169
upgrade command C:249
upgrade --info command C:250
upgrading Avaki software
interoperability of different versions AD:339
preparation steps AD:341
upgrade planning AD:340
upgrade steps AD:342
upstream, defined S:3
urlLogicBox element P:271
user attributes AD:248, S:101
user command C:250
user --create command C:251
user --db-mapping --add command C:252
user --db-mapping --delete command C:253
user --db-mapping --list command C:255
user --delete command C:257
user groups, See groups
user --info command C:258
user --list-group command C:258
UserAdministrators group AD:45, O:44
users and user accounts
about O:43
adding database identity mappings C:252
adding to ACLs AD:243, S:97
adding to groups AD:191, C:138
administrative accounts, setting up AD:44
changing passwords AD:175, C:185
clearing credentials from DGAS cache AD:117
configuring associated cache service C:33
configuring default mappings C:220
configuring dynamic mappings C:109
configuring self mappings C:109
creating accounts AD:168, C:251
creating home directories AD:169
default users for DGAS AD:333
deleting accounts AD:189, C:257
deleting database identity mappings C:253
deleting from groups C:144
disabling import on login (LDAP) AD:157
disabling import on login (NIS) AD:163
displaying and changing account information AD:187
displaying associated cache C:27
displaying full names and contact information C:258
displaying names C:286
enabling interconnection access AD:304
enabling on authentication services C:250
exposing in a two-way interconnect AD:308
giving access to other domains AD:294
grid accounts AD:167
imported accounts AD:167
S: Data Integration with Avaki Studio
users and user accounts (continued)
importing from LDAP services AD:157
importing from NIS services AD:164
importing on login (LDAP) AD:157
importing on login (NIS) AD:163
listing database identity mappings C:255
listing group membership for C:258
logging in AD:199
logging out when newly added to groups AD:192, AD:243
making account changes take effect immediately for DGAS
access AD:117
managing AD:167
mapping Avaki users to database users, See database identity
mappings
MessagingUser O:44
qualified names for O:32
querying whether enabled in LDAP AD:151
refreshing imported accounts AD:185
refreshing on login (LDAP) AD:149
removing from ACLs AD:242
removing from groups AD:193
roles for O:43
run-as users
browser setting for selecting P:27, P:54, P:92, P:224, P:227
for data service views P:227
for data services P:92
for database operation views P:223
for database operations P:26
for virtual database operations P:54
setting run-as user for views C:279
setting up for DGAS AD:67
setting up local accounts for Avaki AD:11
specifying for JDBC connections API:69
uncoupling associated cache C:34
V
validation error expressions S:65
validation expressions S:64
value element P:272
values element P:272
variables
about S:69
allowed types for S:70
downstream, menu of S:71
in Avaki Studio, about S:4
updating S:69
VB .NET, See .NET
versions
of Avaki software, displaying AD:99, C:148, C:250
SOAP API:1
TrAX P:243
WSDL API:1
vertical bars in command syntax AD:xv, C:xv, P:xi
view --add-schedule command C:259
view --create --database command C:263
view --create --data-service command C:266
Master Index
Index-29
AD: Administration Guide
API: API Guide
C: Command Reference
view --create --file command C:267
view --delete command C:272
view --delete-schedule command C:272
view --depends command C:272
view --garbage-collect command C:273
view generators
about O:8, O:25, P:217
caching of input files P:241
configuring update notifications for P:238
defined AD:359, API:93, C:317, O:71, P:299, S:185
for data services
setting up P:225
specifying a style sheet engine P:227
for database operations
setting up P:221
specifying a style sheet engine P:224
for files
setting up P:218
specifying a style sheet engine P:220
for large data sets and unsupported formats P:242
listing dependent operations P:228
modifying P:229
non-XSLT-based P:242
removing P:239
rowsets as inputs of P:275
running P:240
scheduling updates P:231
troubleshooting P:240
using TrAX transformers P:242
view --info command C:274
view --list-schedules command C:274
view models
about O:23, S:2
configuring input sources S:43
creating S:42
defined AD:359, API:93, C:317, O:71, P:299, S:185
deploying as data services S:50
error handling S:143
files associated with S:11
opening, saving and closing S:17
red borders showing errors S:60
sample workflow for S:29
schemas S:3
tabs for, in a project S:21
testing S:49
view model editor S:20
view --regenerate command C:273
view --set-property command C:275
view --update command C:279
ViewLibrary category, contents of S:18
views
adding generation schedules C:259
adding schedule exclusions C:262
configuring values for SQL parameters C:275
configuring with database sources C:263
configuring with data-service sources C:266
configuring with file sources C:267
Index-30
O: Overture
views (continued)
deleting C:272
deleting generation schedules C:272
listing generation schedules for C:274
obtaining information about C:274
regenerating C:273
removing old results C:273
setting run-as user C:279
showing dependencies C:272
specifying a style sheet engine C:265, C:268, C:271
updating C:279
See also generated views, SQL views, view generators, view
models
virtual database
about O:22
configuring attributes P:70
defined AD:359, API:93, C:317, O:71, P:299, S:185
displaying SQL views C:283
executing ad-hoc queries on C:282
schema
browsing catalogs P:64
browsing schemas P:64
browsing tables P:64
table cache size system property AD:144
types of schemas P:51, P:64
viewing and modifying ACLs P:72
virtual database operations
about O:23, P:49
access permissions P:50
allowing creation of C:280
allowing groups to create P:67
allowing users to create P:65
creating C:87, P:50
defined AD:359, API:93, C:317, O:71, P:299, S:186
evicting from cache P:150
executing P:61
generating SQL views from P:60
listing in cache P:148
location in categories S:18
managing P:50
marking for scheduled caching P:139
modifying P:55
preventing creation of C:281
preventing groups from creating P:69
preventing users from creating P:68
qualified names for O:31
removing P:63
schemas for, generating P:57
SQL statements in C:90
tagging for on-demand caching P:146
unscheduling P:150
viewing P:55, P:57, P:59
viewing dependencies P:59
viewing details P:56
virtual database service, configuring access permissions P:65
virtualdatabase --allow-dbop-creation command C:280
virtualdatabase --disallow-dbop-creation command C:281
virtualdatabase --execute command C:282
Master Index
P: Provisioning & Advanced Data Integration Guide
virtualdatabase --show-tables command C:283
virtualschema --deploy command C:285
virtualschema --undeploy command C:286
virutal schema models, See metadata models
W
web browsers
requirements for Avaki software AD:5
setting for selecting run-as users P:27, P:54, P:92, P:224,
P:227
web services API:2, API:8
about API:2
access permissions API:9
client examples API:9
data catalog API:18
data services API:34
database operations API:40
development framework API:5
document/literal API:3, API:5
provisioning, about P:205
rpc/encoded API:3, API:5
security API:8
with MIME API:3
web services clients
defined AD:359, API:93, C:317, O:71, P:299, S:186
requirements for API:4
web services description language, See WSDLs
whoami command C:286
whoami SOAP operation API:33
wildcard characters in searches AD:235
Windows
avoiding install pathnames with spaces AD:26
installing Avaki in AD:23
installing on Windows 2003 AD:22
requirements for AD:3
services, running under avaki local user account AD:11
shortcuts for AD:27
update for HTTP POST problem in web browsers AD:5
versions supported by Avaki O:16
Windows domains
displaying for DGAS admission policies C:114
setting for DGAS admission policies C:111
unsetting for DGAS admission policies C:116
Windows Services list C:5
Workbench S:12
workspace directory for Avaki Studio
described S:12
setting S:10
WS API
accessibleDBOp API:42
accessibleDS API:36
accessiblePath API:19
authentication API:9
authorization API:9
chmod API:19
chown API:20
data access API:2
S: Data Integration with Avaki Studio
WS API (continued)
data services SOAP operations API:34
executeAdHocDBOp API:43
executeAdHocDBOpWithOutput API:44
executeAdHocDBOpWithOutputAttach API:46
executeAdHocDBOpWithOutputString API:47
executeDBOp API:48
executeDBOpBytesInput API:49
executeDBOpGridFileInput API:50
executeDBOpWithOutput API:50
executeDBOpWithOutputAttach API:52
executeDBOpWithOutputString API:53
executeDS API:36
fileRead API:21
fileReadAttach API:21
fileReadString API:22
fileWrite API:23
getAttributes API:23
getDBOpOutput API:54
getDBOpOutputAttach API:55
getDBOpParameters API:56
getDBOpSchema API:56
getDBOpSchemaAttach API:57
getDBOpSchemaString API:58
getDSOutput API:37
getDSOutputAttach API:38
getDSOutputString API:38
getDSParameters API:39
getOutputString API:55
getSQL API:58
getSystemAttributes API:24
getUserAttributes API:24
grid server API:6
HTTP API:7, API:8
HTTPS API:7, API:8
isDSAvakiXML API:40
listDBConns API:59
listDBOps API:59
listDBOpsByDBConn API:60
listDomains API:25
listDSs API:40
listSearches API:25
ls API:26
lsSize API:26
mkdir API:27
mkdirParents API:27
mkdirParentsServer API:28
mkdirServer API:29
mv API:29
permissions API:30
ports API:6
removeAttribute API:31
rm API:31
search API:32
setAttribute API:32
tester API:33
whoami API:33
WS clients, See web services clients
Master Index
Index-31
AD: Administration Guide
API: API Guide
C: Command Reference
WSDLs
about API:2
as SOAP contracts API:3
AvakiAPI.disco discovery file for .NET clients API:3
AvakiAPIDocLit.wsdl API:3
AvakiAPIRpcEnc.wsdl API:3
AvakiAPIWithMIMEDocLit.wsdl API:3
AvakiAPIWithMIMERpcEnc.wsdl API:3
choosing API:5
document/literal API:3
editing API:6
locations of API:6
provided by Avaki API:11
rpc/encoded API:3
standards compliance API:1
WSDLs directory O:35
X
X Window System libraries required for Avaki install on
Unix AD:16
XA drivers, configuring for database connectors C:69, P:7, S:36
Xalan C:265, C:268, C:271, P:220, P:224, P:227
XAWorkHandler class for data services P:189
XAWorkUnit interface for data services P:189
XML data in Avaki O:11, P:273
XML indent size property AD:142
XML schema
Avaki rowset
class-name element P:279
column-display-size element P:279
column-index element P:279
Index-32
O: Overture
XML schema (continued)
core schema P:277
overview P:277
rowset-specific schema P:279
sample schema P:280
data service
class element P:261
coherenceWindow element P:261
dataService element P:262
description element P:263
initParameter element P:263
inputParameter element P:264
inputSource element P:265
inputStream element P:266
isList element P:266
jarurl element P:267
logicBox element P:268
name element P:269
outputStream element P:269
ref element P:270
target element P:270
type element P:270
urlLogicBox element P:271
value element P:272
values element P:272
XSLT
in view generators, when not to use P:242
using in data service plug-ins P:180
See also Xalan, Saxon
Master Index