1
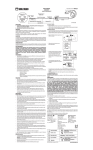
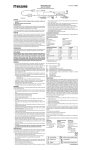
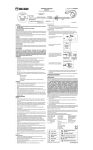
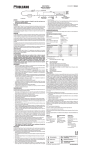
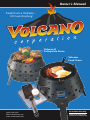
Owner’s Manual
Cook It on a Volcano…
It’ll Cook Anything!
Volcano II
Collapsible Stove
Volcano
Cook Stove
(888) 320-2005
[email protected]
www.volcanocorp.net
For Outdoor Use Only
Shown with optional leg
extensions and utility tray.
Congratulations on your decision to buy
a Volcano Cook Stove. Your Volcano is a portable,
lightweight, durable, efficient and versatile unit designed
with quality in mind. Any type of cooking is easy and fun
with this new and unique stove. Now you can fry eggs,
braise meat, roast a prime rib, steam vegetables, deep-fry
fish and chips, cook stew, chili or spaghetti sauce, boil a
lobster, stir-fry your favorite oriental dish, barbecue a prime
sirloin or bake bread. You will be able to do all this on your
patio or in a camping environment. Use your imagination!
Great for...
• Camping
• Tailgate Party
• Picnic Fun
• Table Top Safe
•
•
•
•
Patio Entertainment
Beach Party
Perfect for RVs
Emergency Preparedness
“I first created the Volcano Cook Stove to let
outdoor chefs cook virtually anything, anywhere.
When I invented the new Volcano II Collapsible
Stove, I knew I had created the perfect compliment
to the original Volcano.”
Table of Contents
Volcano II Collapsible Stove ....................................4
Patented Collapsible Design....................................5
Features ................................................................6
Fuel Sources ..........................................................7
Volcano Cook Stove.................................................8
Features ...........................................................9-10
Leg Extension Kit & Utility Tray ............................ 11
Cleaning & Storing Your Volcano or Volcano II ..... 12
Using Different Fuel Sources.............................13-15
Cooking Tips.....................................................16-17
Volcano & Volcano II Accessories ....................18-19
Important Safe Guards
• Always use your Volcano in a well-ventilated area with
adult supervision.
• Be sure that briquettes are fully extinguished before
storing your Volcano.
• For best results, do not use more than 25 briquettes.
• Be sure that your Volcano is free of ash prior to use.
• Keep your Volcano as dry as possible. Dry out the fire
basket with a paper towel prior to storing.
• Safety precautions must be observed for various
fuel sources. Refer to pages 12-15 for more safety
information.
– Richard Boetcker, Volcano Inventor
Read all instructions carefully before using your Volcano
3
For Outdoor Use Only
Cook It on a Volcano… It’ll Cook Anything!
Volcano Collapsible Stove #20-200
Patented Collapsible Design
Easy Setup:
1. Remove from storage bag.
Place on level surface.
2. Lift handle to expand Volcano II
Collapsible Stove, until locked.*
“I first created the Volcano Cook
Stove to let outdoor chefs cook
virtually anything, anywhere.
When I invented the new
Volcano II Collapsible Stove, I
knew I had created the perfect
compliment to
the original Volcano.“
Easy Take Down:
1. Lift lower section of Volcano II
Collapsible Stove. (Keep fingers
away from legs while lifting)
2. Stove will collapse. Place in
storage bag. (Storage bag included)
– Richard Boetcker, Volcano Inventor
The Most Versatile Multi-Purpose
Cook Stove in the Great Outdoors
U.S. Patent
#6,314,955
“I’ve been cooking on Volcano cook stoves since 1992. There is
no other stove on the market that is as versatile, economical or
convenient. It is like owning a portable fire pit. I pack it into
the back country, cook with it on my boat, at home and on the
go. All I add is a little love and the Volcano does the rest.”
– Colleen Sloan, Log Cabin Cookbooks
4
* Preparing the Unit for Use
To set up your Volcano Cook Stove gently lift the handle. The legs
should come down automatically and the unit will be ready to use.
(If the unit has accumulated a great amount of ash the legs may not
extend fully. In this circumstance, gently shake the unit until it opens
up all the way and locks.) If the stove does not open fully, do not
try to force any of the supporting legs. Gently work the legs and try
again. Prying on any of the legs may damage the internal mechanism
and could damage the stove permanently. As the stove is used more
and more, it will open properly every time.
5
For Outdoor Use Only
Volcano Collapsible Stove #20-200
Volcano Collapsible Stove #20-200
Fuel Sources
Features:
Volcano II Collapsible Stove
Patented Heat Chamber
Conducts heat more efficiently than conventional stoves.
Designed for use with 12˝ dutch ovens, any size wok, skillet,
griddle or pot. Patent #6,314,955
Double Wall
Minimizes heat transfer to the outer body and to the bottom
of the stove, allowing your Volcano to be used on any surface.
Collapsible Body
Collapses to 5˝ tall for convenient portability and storage.
Propane*
Wood
Great for...
Instant Setup
Lifting the handle raises the upper
body while the legs swing out and
lock in place. Lifting the lower
section of the body collapses the
stove for storage.
•
•
•
•
Adjustable Vents
Adjust how fast your fuel burns.
Insures maximum heat efficiency
and versatility.
Charcoal
Camping
Tailgate Party
Picnic Fun
Table Top Safe
•
•
•
•
Patio Entertainment
Beach Party
Perfect for RVs
Emergency Preparedness
Storage Bag Included
The Perfect Emergency Companion
A vital necessity in an emergency
situation. A method to cook,
sterilize and heat. This is key to
proper sanitation and nutrition.
Your Volcano Cook Stove just may be the
most important device you have should
an emergency occur in your household.
6
7
* For Volcano Accessories, see pages 18 and 19.
Charcoal Propane
Volcano Cook Stove #10-100
Wood
Prepare Breakfast, Lunch, Dinner and More...
• Grill
• BBQ
• Roast
• Wok
• Pan Fry
• Deep Fry
• Stir Fry
• Boil
• Broil
• Bake
• Skewer
• Steam
• Smoke
• Dutch Oven
s t o v e
c o o k
The Most Versatile Multi-Purpose
Cook Stove in the Great Outdoors
Features:
• Comes fully assembled and ready to cook
• Rough, rugged and stable design
• Change from charcoal to propane or wood in seconds
• Portable and lightweight with easy-carry handle
• Super efficient for disaster relief
• Full one year warranty
The Perfect Emergency Companion
A vital necessity in an emergency
situation. A method to cook,
sterilize and heat. This is key to
proper sanitation and nutrition.
Your Volcano Cook Stove just may be the
most important device you have should
an emergency occur in your household.
U.S. Patent #4,909,235
For Outdoor Use Only
Shown with optional leg
extensions and utility tray.
8
9
For Outdoor Use Only
Volcano Cook Stove #10-100
Chromeplated top
“No trace”
grill
camping
Volcano Cook Stove #10-100
Snap-on Legs & Utility Tray
Adjustable
bolts hold
cooking pot
above the coals
Vent
control
lever
Powder
coated
body
Chrome
carrying
handle
Legs*: set of 3 that “snap on”
your Volcano Cook Stove.
To Attach Legs
1
Utility
tray
(optional)
Utility Tray*: perfect for setting
your salt, pepper, spices and
Volcano seasoning on.
Cool air
enters
here
10
Double wall
Remove construction
bottom
is durable
grate
and safe
to use
propane
Insert metal tabs into
holes directly above
Volcano leg.
2
Put a little downward pressure
on end of leg and slide upward
to a locked position. Bottom
of Volcano leg should be
completely inserted into leg slot.
To Remove Legs
1
Pull downward on leg and
move from side to side.
After legs have been attached
a few times they will become
easier to remove and attach.
11
* For Volcano Accessories, see pages 18 and 19.
Cleaning and Storing your Volcano
or Volcano II
Fuel Sources
Volcano Multi-Purpose Stoves
After cooking, remove any hot coals and debris and let your stove
cool before continuing.
It is important that your Volcano be relatively free of all
charcoal dust and foreign debris.
1. Close the vents.
2. For Volcano owners…Remove the top grill and bottom grate.
For Volcano II Collapsible Stove owners…Collapse the stove
by lifting the lower section, which also closes the vents.
(Keep fingers away from legs while lifting)
3. Turn the stove upside down and shake.
4. Turn the stove right side up and wipe out any remaining ash.
Return the Volcano II Collapsible Stove unit to the operating
position by lifting on the carrying handle exposing the entire
fire chamber and wipe out any remaining ash.
We recommend after each use that all inside surfaces be wiped
with a small amount of vegetable oil. This will help prevent
rusting of the internal chambers.
5. Place in storage bag. (Optional with Volcano)
Store horizontally.
Enjoy.
Follow
these guidelines
and your stove will
provide many years of service.
12
Charcoal
Propane
Wood
Using with PROPANE
Optional Propane Attachment – Installation and Removal
The Volcano Propane Attachment comes complete with a
burner/cradle, 4” nipple, male connector, hose, valve, regulator
and female quick connect.
TO INSTALL:
• Begin by removing all grills and grates from stove.
• Place the propane burner/cradle on the bottom of the fire
chamber, inserting the 4” nipple with connector through
the predrilled hole in the Volcano body.
• Using the female quick connect, couple the hose to the
male adapter on the burner.
• Place the Heat Deflector Plate on top of the propane
burner cradle.
• Install top grill.
You are now ready to connect the hose to a 5 gallon propane bottle,
or use the optional Propane Valve Adapter* for 1 lb. propane bottles.
13
* For Volcano Accessories, see pages 18 and 19.
Using with CHARCOAL or WOOD
...PROPANE Continued
TO LIGHT:
1. Open vents completely.
2. Place fire source (matches, lighter, striker) at lip of burner.
3. Slowly turn on gas supply.
If stove does not light, turn off gas supply, wait at least
30 seconds and try again.
TO EXTINGUISH:
1. Turn off gas supply completely.
TO REMOVE:
1. Ensure your propane source is completely turned off.
2. Let your stove cool completely.
3. Uncouple the quick connector.
4. Remove top grill.
5. Remove the heat deflector plate.
6. Lift the burner/cradle out of the Volcano.
The Volcano Heat Deflector Plate is designed to assist in
generating even heat and preventing flare-ups. Use when
grilling, using a frying pan or baking. However the
Heat Deflector Plate is not necessary when using a wok,
Dutch oven, stockpot or to steam or boil.
FOR YOUR SAFETY: Do not store or use gasoline or any other
flammable liquids or vapors in the vicinity of your Volcano Stove.
If you smell gas, turn off the gas supply and extinguish all
open flames.
14
All Volcanoes come equipped with a top grill and a bottom
grate for holding charcoal briquettes or wood.
1. If changing from Propane, remove the top grill, Heat Deflector
Plate, propane cradle and burner.
2. Install the bottom grate.
3. Place charcoal or wood on the bottom grate.
4. Place your Volcano on a level surface, using the tripod footing
to ensure your unit is sturdy and fairly level.
5. For Charcoal, we recommend placing 15-25 coals (one layer only)
on the bottom grate, touching charcoal to charcoal. Apply a
small amount of lighter fluid to each briquette and light. Charcoal
should be ready within 15 minutes. For best results, allow charcoal
to turn grey before cooking.
Charcoal General Tips:
• Place a paper towel under the coals before adding the lighter fluid. The paper
towel absorbs the lighter fluid and makes it easier to start the charcoal.
• We recommend using Kingsford Charcoal for best results. It burns longer, hotter
and cleaner than any other charcoal we have tested. It is best to leave charcoal
in its original packaging to protect it from moisture.
6. For Wood, place wood pieces that fit inside the fire chamber on
top of the bottom grate. Ensure your Volcano is level and secure.
Light the wood.
Caution: Your Volcano was designed for small wood fires.
Do not overfill the Volcano with wood. Too much wood will
void your warranty.
FOR YOUR SAFETY: Do not store or use gasoline or any flammable
liquids or vapors in the vicinity.
Your Volcano is equipped with a very efficient draft system using vents, which
allows temperature control. Use the vent control handles, to open or close the side
vents for varying temperatures. The first time you use your new Volcano, you may
notice some smoke coming from the fire chamber. This is normal and is the result
of burning off the coating that protects the stoves during shipment.
15
Cooking Tips
c o o k
Dutch Oven Cooking
s t o v e
When cooking with a Dutch oven, arrange the coals in a circle on the bottom. This will
provide even heating to both the sides and the bottom of the Dutch oven. Using more
than the suggested number of briquettes will generate unnecessary heat and may cause
food to over cook or burn. Only use 8, 10, or 12 inch Dutch ovens.
Wok Cooking
The Volcano stove gives you the ability to stir-fry outdoors like a professional.
With the top grill removed, any size wok from 12-inch and larger, can be used on
the Volcano. The wok will sit securely on the rim or adjustable bolts.
Lowering the cooking temperature can be accomplished by closing the vents.
Normally 12-14 briquettes will supply enough heat for Dutch oven cooking and will
give you 1 to 1-1/2 hours of cooking time depending on the settings of the vents.
Control of the vents is important and by using the vent you can extend the total
cooking time. Usually no top heat is required unless you are baking, stacking Dutch
ovens or browning. (Many Dutch oven recipes require top heat. This depends on the
type of food you are preparing).
The temperature of the wok is also dependent on the distance from the fuel sources.
If the temperature is too high, simply remove the wok from the unit temporarily. Higher
temperatures can be reached by placing the Heat Deflector Plate in the center position in
the stove and placing the coals on the Heat Deflector Plate.
Stacking Dutch ovens is common on a Volcano stove, and ovens of various sizes can be
stacked. When stacking ovens, charcoal is placed on the top of the inserted oven and
the heat is radiated to the second oven above. You can then put coals on the top of the
second oven to more evenly distribute heat. Don’t place more than two Dutch ovens
on top of the inserted oven as this will effect stability. You will find that the Volcano
will allow you to use fewer coals than called for in recipes. Cooking in a Dutch oven will
require some practice in determining the exact number and placement of the coals in the
Volcano fire pit.
Follow starting procedure using 20-25 briquettes. They will be ready in about 15
minutes. Place a large cast iron frying pan on top of the top grill. Depending on the
type of pan used, it will take 3-5 minutes for the pan to pre-heat. Preheating the pan
prior to cooking will reduce sticking by searing the surface of the food. Adjusting
the vents during cooking controls the temperature for normal pan-frying. Higher
temperatures can be reached by placing the Heat Deflector Plate in the center position
in the stove and placing the coals on the Heat Deflector Plate.
Pan Frying
Grilling
Boiling and Steaming
Other variations of preparation are boiling and steaming food in a large pot or wok.
A large pot can be placed inside the unit on the heat deflector plate or on the top grill.
Selecting a pot of the proper size will allow the pot to sit on the plate and still allow
proper airflow. The flat surface of the Heat Deflector Plate will provide you with a very
stable platform.
Barbecuing
Follow starting procedure using 20-25 briquettes. Any size grill can be used. A large
grill such as 4’ X 2’ can be used by placing it across 2 Volcanoes.
Preheating the grill prior to cooking will reduce sticking by searing the surface of the
food. Adjusting the vents during cooking controls the temperature for normal grilling.
Higher temperatures can be reached by placing the Heat Deflector Plate in the center
position in the stove and placing the coals on the Heat Deflector Plate.
Place 20-25 coals evenly in the Volcano, add the lighter fluid and ignite. Wait until the
coals are white. This should take about 15 minutes. Lay the food to be cooked on the
top grill. The food will be less likely to stick if a small amount of oil is applied just prior
to putting the food on the grill.
Hint: Covering the food near the end of the cooking process will enhance flavor and help
to reduce moisture loss.
16
*Go to www.volcanocorp.net for great recipes!
17
Volcano & Volcano II Accessories
Propane Attachment ............................ #30-301
Upgrade your Volcano to propane today. No
modifications or tools required. Change from charcoal
or wood to propane in seconds. Kit contains burner,
cradle, heat deflector plate, quick connection hose
and regulator.
Volcano Legs 20” ................................. #30-011
(For Volcano #10-100 only)
Strong, snap-on steel legs are powder coated to match
your Volcano. Raises your Volcano to a cooking
height of 25.5”. Perfect for cooking while seated.
Utility Tray 7” x 10” ............................ #30-411
(For Volcano #10-100 only)
Mounts in the holes on the side of your Volcano.
Chrome frame with aluminum tray holds spices,
cooking tools and more.
Volcano Seasoning 8 ounces .................. #30-040
All purpose Seasoning. A unique blend of herbs and
spices adds great flavor to any recipe. Contains
no MSG.
Log Cabin Cook Books ............ #30-601 - #30-607
A variety of cookbooks for your individual taste.
Choose from: #30-601 “Dutch Oven for beginners,”
#30-603 “Back to basics,” #30-604 “Holidays &
Traditions,” #30-605 “Campfire Cookin’,” #30-606
“Lewis & Clark” and #30-607 “1 Potato 2 Potato.”
Heavy Duty Trivet 8” ........................... #30-010
Use inside pots, pans and Dutch ovens. Elevates food
off pan bottom to circulate heat around your food
for excellent results. Prevents food from scorching or
sticking to the bottom of pan.
Propane Valve Adapter ......................... #30-390
Adapts the propane connector from full-size bottle to
small one pound bottle.
18
#10-100
#20-200
Volcano Apron 30” x 33” ...................... #30-070
Commercial quality apron with screen printed logo.
65% polyester / 35% cotton blend white fabric.
Stacking Ring 11” x 2” ......................... #30-045
Stainless steel stacking ring provides an additional
cooking surface when placed on a Dutch oven lid
(with or without coals inside.) Place grill or cooking
pot on top.
Big Dutch 12” ...................................... #30-060
Lightweight and durable Dutch oven is made of foodgrade aluminum. 14 quart capacity and weighs about
12 pounds.
Volcano Storage Bag ............................. #30-510
(For Volcano #10-100 only)
Water repellent, heavy-duty storage bag is ideal for
transporting your Volcano and other accessories.
Wind Guard 15.5” x 8” ........................ #30-520
(For Volcano #10-100 only)
Use in windy or drafty conditions. Notches fit over
adjustable bolts. Maintains and distributes heat evenly.
Handy Handle...................................... #30-020
Combination lid lifter and holder. Allows you to hang
a Dutch oven lid on the side of your Volcano.
Roast Rack.......................................... #30-050
Use to cook chickens, roast, ham, turkey breast and
more. Place in bottom of large pan or Dutch oven.
19
Some items made in China
Volcano Warranty
Your Volcano Cook Stove is covered by a one (1) year limited warranty from the original
date of purchase against any manufacturing or material defects (excluding paint). During
this period of time, manufacturer will correct any defects or flaws associated with your cook
stove by replacing or repairing defective parts. Freight charges will be the responsibility of
the customer. Manufacturer will not be responsible for repair or replacement of equipment,
which has been misused, abused or altered. This product is warranted to perform as
described in its labeling and Volcano Corporation literature. Volcano Corporation disclaims
any implied warranty of merchantability or fitness for a particular purpose and in no event
shall Volcano Corporation be liable for consequential damages. Prior approval and a return of
goods authorization (RGA) number are required for all returned merchandise. Any returned
merchandise must be accompanied by a copy of the original purchase receipt.
Your Volcano Distributor
Rev. 06 2005
(888) 320-2005
[email protected]
www.volcanocorp.net