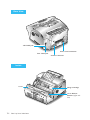
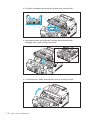
1
Laser Printer,
Scanner
User’s Guide
Msys 5200
ELECTRONICS
Internet Home Page: http://www.samsungtelecom.com
P/N: JC68-00146A Rev.1.00
Thank you for purchasing Samsung Msys 5200Ñthe multifunction
office product for your home office and the whole family. We are sure
that Samsung Msys 5200 will provide all you need in one machine.
Samsung Msys 5200 combines these office machines:
- Plain paper fax
- Copier
- Laser printer
- Scanner
This booklet contains instructions for Laser Printer and Scanner.
Refer to the UserÕs Guide for Laser Facsimile and Copier to use your
machine as a plain paper fax and copier.
Enjoy your new Samsung Msys 5200!
Trademarks
¥ Windows is a trademark of Microsoft Corporation.
¥ IBM is a trademark of International Business Machines.
¥ Centronics is a trademark of Centronics Data Computer.
¥ Other names and trademarks mentioned in this manual are trademarks of their respective
holders.
Contents
1 Installing Software
Chapter 1
Installing SmarThru Software
2 Printing
About SmarThru Software ___________________________ 1.1
MFP Driver _________________________________________ 1.2
SmarThru Software __________________________________ 1.2
OCR software _______________________________________ 1.2
Bonus Software _____________________________________ 1.2
System Requirements _______________________________ 1.3
Installation Procedure _______________________________ 1.3
Install the Samsung Software _________________________ 1.3
Install Bonus Software _______________________________ 1.6
Uninstalling SmarThru Software _____________________ 1.6
In Windows 9x, NT __________________________________ 1.6
In Windows 3.x ______________________________________ 1.7
Using the SmarThru CD-ROM_________________________ 1.8
3 Scanning
Chapter 2
Printing
4 Troubleshooting
Printing a Document ________________________________ 2.1
Printer Settings _____________________________________ 2.2
Basic Tab ___________________________________________ 2.2
Print Quality Tab ____________________________________ 2.3
Advanced Tab ______________________________________ 2.3
About Tab __________________________________________ 2.4
Using Help _________________________________________ 2.4
Changing Printer Settings for All Documents __________ 2.4
i
Chapter 3
Scanning
Overview___________________________________________ 3.1
Scanning the Image _________________________________ 3.2
Samsung TWAIN for Scan Windows __________________ 3.3
Using On-Line Help _________________________________ 3.3
Scanner Control Tabs _______________________________ 3.4
Basic Tab ___________________________________________ 3.4
Job Type ____________________________________________ 3.4
Image Type _________________________________________ 3.4
Resolution __________________________________________ 3.5
Image Area _________________________________________ 3.6
Reduce/Enlarge _____________________________________ 3.6
Balance Tab_________________________________________ 3.8
Color Channel_______________________________________ 3.8
Highlight ___________________________________________ 3.8
Shadow ____________________________________________ 3.8
Midtone ____________________________________________ 3.9
Advanced Selection __________________________________ 3.9
Effects Tab__________________________________________ 3.14
Rotate Image ________________________________________ 3.14
Flip Image __________________________________________ 3.14
Sharpness___________________________________________ 3.15
Descreen____________________________________________ 3.16
Preview Window ____________________________________ 3.17
Image Control Tools__________________________________ 3.18
Chapter 4
Troubleshooting
Fixing Problems_____________________________________ 4.1
Printer Problems ____________________________________ 4.1
Printer Quality Problems _____________________________ 4.3
ii
Installing
SmarThru Software
About SmarThru Software
You must install the SmarThru CD-ROM to print, scan, or send or receive
electronic faxes. The SmarThru includes the followings:
¥ MFP Driver
¥ SmarThru Software
¥ OCR Software (AnyPage)
¥ Bonus software (Acrobat Reader 3.xx)
For details on the drivers, refer to each itemÕs description.
Installing SmarThru Software
1.1
MFP Driver
To use the machine as your printer, or scanner, or to send or receive
electronic faxes, you must install the MFP driver.
SmarThru Software
The SmarThru software contains:
ScanThru
It lets you scan documents and images quickly and easily. With the
ScanThru, you can set image type and resolution for the scanner, adjust
brightness and contrast, perform a color correction, and so on.
CopyThru
It lets you make a copy of the scanned documents or images. With
CopyThru, you can change resolution and image type used for copying,
and so on.
FaxThru
It helps you to create fax cover and send electronic faxes.
DocuThru
General form to work with messages. With DocuThru, you can perform all
the operation of the SmarThru system.
ImageThru
It is an image database manager and image editor program. With the
ImageThru, you can search the database for images, adjust parameters of
an image, such as brightness, contrast and saturation, and apply different
effects, such as sharpening, emboss, posterize, mosaic etc. You can also send
images by fax or mail
MailThru
With MailThru you can send, receive and easily organize your work with
e-mail messages. The system provides you with convenient tools which let
you sort and find messages using a number of criteria; operate on messages
using scenatios.
OCR Software (AnyPage)
OCR (Optical Character Recognition) is a software that has the ability to
recognize most character formats. So that a scanned document can be read
and edited on your word processor.
Bonus Software
Acrobat Reader 3.x is installed. With Acrobat Reader 3.x, you can view and
print the SmarThru UserÕs Guide contained in the SmarThru CD-ROM.
1.2
Installing SmarThru Software
System Requirements
¥ Windows 3.x, or Windows 9x: 486SX 33MHz or higher processor with 8
MB or higher RAM
¥ Windows NT 4.0 (Service Pack 3): Pentium 90 or higher CPU with 32 MB
or higher RAM
¥ Free disk space of at least 50MB for full installation
¥ CD-ROM drive
Installation Procedure
à Make sure the machine is plugged in and connected to your computer. Turn
your computer and the machine on.
à If Windows 95/98 users see the ÒNew Hardware FoundÓ screen, close it by
clicking Cancel.
Install the Samsung Software
1. Insert the supplied CD-ROM into your CD-ROM drive.
The SmarThru program is automatically running and the Samsung
SmarThru Installation screen will appear.
If the Samsung SmarThru Installation screen does not appear:
1) Windows 95/98 users should select Run from the Start menu.
Windows 3.x users should select Run from the File menu.
2) Type D:\Autorun (where ÔDÔ represents the letter designation of your
computerÕs CD ROM drive), and click OK to start the installation
program.
Installing SmarThru Software
1.3
1 Installing Software
Before you start, make sure you have the following minimum computer
setup:
2. The SmarThru program will begin. Click Install the Samsung Software
on your PC.
3. Follow the on-screen instructions and click Next.
The SmarThru installation supports two types of setup. Typical setup will
be installed with the most common options. Recommended for most
user. In Custom setup, you can select components to be installed.
1.4
Installing SmarThru Software
If you select Custom installation, you may choose the options you
want to install.
SmarThru soft to work with
scanned images, and electronic
documents.
AnyPage software to enable
OCR.
4. When the installation is completed, you must shut down and restart your
computer.
If your computer does not shut down and restart automatically, you must shut
it down manually and restart it before the changes you have made will be in
ineffect.
5. After Windows restarts, the Select Service dialog box will appear. You can
select the system service you want to use.
6. Click Next and follow the on-screen instructions.
Installing SmarThru Software
1.5
1 Installing Software
MFP driver to print, scan, or
send or receive electronic faxes.
Install Bonus Software (Acrobat Reader 3.xx)
1. Insert the SmarThru CD-ROM into your CD-ROM drive.
The SmarThru installation program will begin. If the program does not
start, select Run from the Start menu for Wondows 95/98. For Windows
3.1x, select Run from the File menu, then type D (or E) : \Autorun, and
click OK to start the program.
2. When the Samsung SmarThru Installation screen appears, click Install
bunus software on your PC, and follow the on-screen instructions.
Uninstalling SmarThru Software
Uninstallation is only required if you are upgrading the software, or if your
installation fails.
In Windows 9x, NT
1. Start Windows if not already started.
2. If you find the SmarThru icon and/or the SmarThru engine icon on the
right corner of the taskbar at the bottom of your screen, the Smarthru
application and the SmarThru engine are woking. Close the application
and the engine as follows:
Right-click the icon. When the pop-up menu opens, select Close.
1.6
Installing SmarThru Software
3. From the Start menu, select Programs.
In Windows 3.x
1. Start Windows if not already started.
2. If you find the SmarThru icon and/or the SmarThru engine icon at the
bottom of your screen, the Smarthru application and the SmarThru
engine are woking. Close the application and the engine as follows:
Click the icon. When the pop-up menu opens, select Close
3. From the Program Manager, double click the Samsung SmarThru.
4. In the SmarThru windows, double click the Uninstall icon. The
Uninstall dialog box appears. Follow the on-screen instructions to
complete uninstallation.
Installing SmarThru Software
1.7
1 Installing Software
4. Select Samsung SmarThru, then Uninstall. The uninstall dialog box
appears. Follow the instructions on the screen to complete uninstallation.
Using the SmarThru CD-ROM
You can uninstall the MFP driver and the SmarThru software with the
CD-ROM you have used to install the software.
1. Insert the SmarThru CD-ROM into your CD-ROM drive.
The SmarThru installation program will begin. If the program does not
start, select Run from the Start menu (for Wondows 95/98. For Windows
3.1x, select Run from the File menu), then type D (or E) : \Autorun, and
click OK to start the program.
2. When the Samsung SmarThru Installation screen appears, click Uninstall
the Samsung software your PC, and follow the on-screen
instructions.
3. Click on the checkboxes to select the components you wish to
uninstall. Click on Next.
The selected components are uninstalled. You must shut down and restart
your computer to complete the uninstallation process. If your computer
does not shut down and restart automatically, you must shut it down
manually and restart it before the changes you have made will be in effect.
1.8
Installing SmarThru Software
Printing
Printing a Document
This procedure describes the general steps required for printing from
various Windows applications. The exact steps for printing a document
may vary depending on the application program you are using. Refer to
your software applicationÕs documentation for the exact printing
procedure.
1. Make sure that your machine is properly connected to the computer, and
the On/Off Line lamp light is steadily on (if it is not, press the On/Off
Line button).
Make sure that you have installed the MFP driver contained on the
supplied setup CD-ROM. See ÔInstalling SmarThru SoftwareÕ on page 1.1.
2. Create or open the document you want to print.
3. Choose Print or Print Setup from the File menu. Make sure that your
printer is selected as the default printer.
4. Click on the Properties or Setup button if you want to make any
adjustments that are appropriate for printing your document. (See
ÔPrinter SettingsÕ on page 2.2.)
5. Select OK to close the Properties dialog box.
6. After making any necessary changes to the printing parameters, select
OK to start the printing job.
Printing
2.1
Printer Settings
You can use your machine with all your Windows 3.x or Windows 9x, or
Windows NT applications. Be sure to set your printer as the default printer
for all your Windows operations.
Most Windows software applications allow you to make changes to the
printer settings. This changes the number of copies, sequence of the pages,
and paper orientation.
If you click Properties, Setup, or Options in the Print dialog box, youÕll
access the printer driverÕs dialog box. It allows you to change additional
printer settings. Settings changed in the software application will usually
override settings made in the printer driver.
Your printer driverÕs Properties dialog box includes three tabs (four tabs on
Windows NT only).
Basic Tab
This tab allows you to specify number of copies, paper orientation, paper
source, paper size, and image scaling size.
If you load paper into
the manual feeder slot,
select ‘Manual Feed.’
This setting allows
you to enlarge or
reduce the image
on the print page.
2.2
Printing
Print Quality Tab
This tab allows you to specify the print resolution.
In general, higher
resolution looks better
but takes longer to print
and requires more
memory.
If you want to save toner
when you are printing,
select ‘ON’.
2 Printing
Advanced Tab
If you are Windows NT user, you can see ÔAdvanced TabÕ, if you want to
know more about ÔAdvanced TabÕ, click on the help button. The help screen
gives detailed information about each menu.
Printing
2.3
About Tab
This tab shows the printer software version.
Using Help
Your printer driver includes comprehensive screen help. For detailed
information about each setting, press F1 key except Windows 3.x.
Changing Printer Settings for All Documents
Changing the printer settings from your application program will change
them for one document. If you want to change for all documents you print
on this printer, open the printer Properties dialog box as shown below, then
change the printer settings.
✔ Windows NT users should select properties via ApplicationÕs Print
Menu.
Windows 9x users should select Start, Settings, Printers. Then from the File
menu, click Properties.
Windows 3.x users should select Program Manager, Main, Control Panel,
Printers. Then click Setup.
2.4
Printing
Scanning
Overview
Scanning converts a photo or paper document into a computer image.
Types of documents that you can scan include photos, drawings, magazine
pages, newspaper articles, and just about any other type of single page
image. You put the paper into the scanner, and then the computer and
scanner work together to create a computer image.
After you have installed the supplied CD-ROM, you can use the machine as
a black and white scanner. The CD-ROM contains the SmarThru program
which is easy and convenient tool to manage your work with a scanned
image. With SmarThru, you can quickly scan and save the image, make
copies of part of the image, and use the image in creative projects, like
newsletter, brochures, letterhead, and more. You can also share the scanned
images electronically through E-mail, and fax. For details on how to use the
SmarThru program, use the on-line help, or refer to the UserÕs Guide which
is contained in the CD-ROM.
You can also use other TWAIN-compliant image editing software
application like SoftScan Pagies SE, Text Bridge, or Adobe Photoshop. The
Samsung TWAIN for Scan window will be displayed when you choose
Samsung TWAIN for Scan to scan documents or photographs from the
TWAIN-compliant image editing application.
Scanning 3.1
Scanning the Image
This section describes the basic procedures for scanning with a
TWAIN-compliant image editing application.
1. Turn on your machine and PC, then start Windows.
2. Open your TWAIN-compliant image editing application.
3. Choose Select Source from the File menu.
4. Select Samsung TWAIN for Scan in the Select Source dialog box.
5. Open the File menu, and select Acquire. The Samsung TWAIN for Scan
window will appear. For the window, see the next page.
6. Select the appropriate scanning options for the document or
photograph you want to scan.
For more information on scanning controls, preview options, and other
advanced scanning features, see page 3.4.
7. Load the document or photo in the document feeder of your machine.
8. Click on Scan. The document will be scanned and displayed in the
image editing application.
3.2 Scanning
Samsung TWAIN for Scan Window
The Samsung TWAIN for Scan window is used to view and modify the
scanned image. Using the features of this window, various images
processing options can be applied to the scanned image.
Scanner Control Tabs
For more information, see
page 3.4.
Preview window
For details on the tools in
the preview window,
see page 3.17.
3 Scanning
Using On-Line Help
You can refer to the Samsung TWAIN for Scan on-line help function for
assistance. To access the on-line help, roll the course over the feature of the
window the help is desired for. A yellow popup dialog box will appear.
Click on the dialog box to access on-line help.
On-line Help contains information about using the menus and commands.
Use Help anytime you need information on how to use a particular menu
or command.
Scanning
3.3
Scanner Control Tabs
You can adjust the settings for the document or photograph to be scanned
prior to capturing the image using the features of the Scanner Control tabs.
Each of the tabs is described in detail in the following sections:
-for Basic tab, see page 3.4.
-for Balance tab, see page 3.8.
-for Effects tab, see page 3.14.
The About tab shows the version of the Samsung TWAIN for Scan
application.
Basic Tab
Job Type
This menu allows you to select the job type.
Image Type
This menu specifies the mode in which the image is to be scanned in.
The following pictures show examples of the various scan modes.
Gray 256 scales
3.4 Scanning
Halftone, B/W
Lineart, B/W
Gray 256 Scales
Images scanned in this mode will show up to 256 shades of gray. If high
quality copies of photographs or other continuous tone originals are
desired, Gray 256 Scales is the best choice.
Gray 256 Scales provides accurate representation of black and white, and
intermediate gray shades between black and white, for each individual
pixel. It actually provides 256 shades, representing white by the value 255
and black by the value zero, with progressively lighter intermediate shades
of gray by values from 1 through 254.
Halftone B/W
This scan mode uses various combinations of black and white pixels to
simulate gray scales. While not the same level of image quality as the Gray
256 Scales image type, this image type is good for continuous tone images
where smaller file size is more important than ideal image quality.
Lineart B/W
✔ In both Halftone and Lineart modes, the resolution can only be set to
150, 200, or 300 dpi.
Resolution
The resolution setting determines the amount of information the scanner
will capture in a resulting scanned image.
Scanning
3.5
3 Scanning
Lineart B/W mode is generally the best choice for printed text or pen-andink drawings. Like the Halftone B/W image type, this image type defines
the state of each pixel in the image with one bit that is either on or off. For
this reason, files created in this mode will require approximately the same
amount of disk space as a Halftone B/W file.
The resolution can be measured in dpi (dots per inch). The higher the
resolution is, the finer the image detail and the bigger the image file size is.
See the examples of images at 75 and 300 dpi.
300 dpi
75 dpi
You can select any one of the resolutions shown on the Resolution menu,
or specify your own resolution by selecting the Custom option which
invokes the Custom Resolution dialog box.
To use the Custom Resolution dialog box, type the desired resolution (in
dpi), and click OK. The custom resolution created will be displayed in the
Resolution menu.
✔ The Resolution settings can be restored by clicking Defaults at the
bottom of the Basic tab.
Image Area
You can select any size of scanning area on the image area menu. This
reflects the selection frame on Preview window.
Reduce/Enlarge
This feature allows an image to be automatically enlarged or reduced as it
is scanned. The default scale factor is 100%. The selected scaling factor, the
range of which is dependent on the selected image type, affects the printed
scan output.
3.6 Scanning
✔ When scanning a printed image for screen display only, scale the
image down to increase processing speed and decrease the file size.
Scaling 100%
Scaling 50%
Fixed scaling options are displayed in percentages of reduction or
enlargement. Image width and height are scaled proportionally when fixed
scaling factors are used. To scale to a size other than the fixed sizes, select
the Custom option in the Scaling menu. The Custom Scaling dialog box
will appear.
1. Insert the desired height or width value into the Height or Width edit
boxes.
2. The units of measurement may be changed to inches, centimeters,
millimeters, pixels, picas or percentages of the original image dimensions
by selecting the desired unit of measurement from the Units drop-down
list boxes to the right of the Height and Width text boxes.
3. To prevent distortion of the image when changing height and width
values, the height and width values are automatically linked - you need
only enter one value, either a Height or Width value. The other value will
be computed and the image will resize proportionately.
✔ You can also change Height and Width values by directly adjusting the
selection frame.
✔ Output image file size is proportional to both Height and Width. If
both Height and Width values are doubled, then the image area and
image file size will increase four-fold.
✔ Once you have confirmed or changed the size, resolution, and final
scan boundary settings, the scanning software determines the size of
the resulting scanned image and displays this information along with
available hard disk space.
Scanning 3.7
3 Scanning
To change Height or Width text box values:
Balance Tab
Color Channel
The Color Channel radio buttons are used to specify the color channel in
which to change the Highlight, Shadow and Midtone values.
The only channel available to be selected when using your machine to scan
is the Gray channel. Red, Green and Blue are used for scanners capable of
scanning documents in color.
Highlight
The Highlight value represents the lightest value in an image. All pixels
above this point will be rendered as pure white. If you subsequently
broaden the highlight points on the Level Adjustment graph, the pixels
will be remapped within the new range, thus allowing you to see more
detail in the image.
The Highlight scroll bar allows you to manually set a highlight level. The
default for the Highlight settings is 255. You can increase or decrease the
highlights in a particular image as needed by adjusting this scroll bar. The
value in the adjacent box will change in the range 1 to 255 as the slider
moves.
Shadow
The Shadow value represents the darkest value in an image. All pixels
below this point will be rendered as pure black. If you subsequently
broaden the shadow points on the Level Adjustment graph, the pixels will
be remapped within the new range thus allowing you to see more detail
in the image.
The default value for Shadow is 0. You can increase or decrease the
shadows in a particular image as needed by adjusting this scroll bar.
3.8 Scanning
Midtone
All optical devices such as monitors and scanners have some differences
in their light sensitivity characteristics. Samsung TWAIN provides
Midtone adjustment for you to compensate for these differences in your
scanner, and it produces better scanned images.
To change the Midtone value, move the slider to the left or right to change
the values in the adjacent text box. The value in the adjacent box will
change in the range 0.1 to 10.0 as the slider moves.
Ordinarily, good results can be obtained from your machine by leaving
the slider at its default value of 1.00.
Advanced Selection
The advanced selection will present features that allow you to modify the
Level Adjustment and the Tonal Map of the document.
To activate the Level Adjustment or Tonal Map functions, click on the
Advanced... button at the bottom of the Balance tab.
When this button is selected, the Level Adjustment window is displayed
by default.
Scanning 3.9
3 Scanning
For both the Level Adjustment and the Tonal Map functions, the window
displayed contains small representations, known as thumbnail views, of
the original and enhanced images (Samples 1 and 2).
Level Adjustment
The Level Adjustment dialog box shows the distribution of brightness
levels in your image. To adjust the histogram plot, drag the triangles,
located below the horizontal bar to the desired values. The left (black)
triangle changes the shadow levels. The right (white) triangle changes the
highlight levels. The middle (gray) triangle controls the midtone levels.
Level Adjustment tab
Highlight control
Shadow control
Midtone (Gamma)
control
By varying the Shadow and Highlight points you can change the relative
shades and highlights of the image. The Shadow point represents the
darkest value and the Highlight point is the brightest value.
The Midtone point represents the Gamma setting for your particular screen.
On the histogram, the Shadow and Highlight scales are divided into 255
units.
Therefore, all pixels in the original that are darker than the current shadow
point are now completely black in the enhanced image. Conversely, all
pixels in the original that are brighter than the current highlight point are
now completely white in the processed image.
Setting the highlight point to 200 renders all pixels greater than or equal to
200, on the original, completely white in the processed image. Similarly
setting the Shadow point to 200 renders all points less than or equal to 200,
on the original, completely black in the enhanced image. Photographers
often refer to these effects as Òhigh-keyÓ or Òlow-keyÓ. High-key is an image
pushed to the white end, and low-key is an pushed to the black end of the
tone curve.
3.10 Scanning
The Midtone is a relative measure of the gamma of your monitor. The scale
for Midtone ranges from 0 to 255. The gamma curve is a geometric series.
This means that at a value of 255 it tends to infinity.
The Midtone is bound by the Shadow and Highlight terms and cannot
exceed them at any time. So, if the Highlight is set to 255 and the Shadow is
set to 0, a gamma of 1 is equal to a Midtone of 128. Similarly, if the Shadow
is set at 200 (lower boundary) and the Highlight is set at 220 (upper
boundary), a gamma of 1 is equal to a Midtone of 210.
Operation:
1. Select the Advanced... button on the Balance tab. This will display the
Level adjustment window.
2. On the histogram, use the mouse key to click on the black, gray ,or white
triangles to make changes to the Shadow, Midtone and Highlight
respectively.
3. To see the changes and compare them to the original previewed image,
click on Sample 1 to see the enhanced image.
4. To make a second enhancement for comparison, click on Sample 2. Make
new enhancements to the original. Compare the images of Sample 1 and
2.
5. Click OK to save the changes and close the Enhancement dialog box. If
you do not want to save the changes, click on the Cancel button to close
the Enhancement dialog box. Click Auto button to allow the software to
make appropriate highlight and shadow adjustments.
Scanning 3.11
3 Scanning
5. After completing enhancement settings, click on the desired sample to
choose the image
Tonal Map
If you select the Tonal Map tab, the following dialog box will be displayed.
Tonal Map tab
The Tonal Map is yet another way to adjust Highlight, Midtone, or Shadow
levels in your images. When you open the Tonal Map dialog box, a tonal
map consisting of a diagonally straight line appears. Notice that at every
point on the default tonal map, the output shadow, midtone, and highlight
brightness levels are equal to the input shadow, midtone, and highlight
brightness levels.
The shape and slant of the tonal map represent brightness level ratios
between the input of the original image and the output image data. By
clicking on the tonal map line, a hand-shaped cursor will appear which can
be dragged to change the shape of the tonal map line.
The horizontal axis represents the original input brightness and the vertical
axis represents the enhanced brightness. Values on either scale range from 0
to 255.
As shown in the figure below, if the curve is changed into a convex shape
above the original diagonal, the enhanced image will be brighter than the
original.
Normal Image
3.12 Scanning
Lightened Image
If the curve is changed into a concave shape below the original diagonal, the
enhanced image will be darker than the original.
Normal Image
Darkened Image
1. Click on the Tonal Map icon in the Preview window or the Tonal Map tab in
the Enhancement dialog box. The Tonal Map dialog box will appear.
2. Click on the Tonal Map curve, an indicator appears which can then be
dragged to change the shape of the curve.
a) If a previously saved Tonal Map is desired, select the Load button. An
Open dialog box appears for you to open the desired file.
b) Or, click on the Reset button to return the Tonal Map to the default
diagonal as in the original.
c) Click the Save button to save the changes as a customized setting. A Save
As dialog box will appear upon selection of this button. Enter the name
for the customized curve and click on the OK button.
3. Select the Histogram button to see a histogram of the changes made.
4. Select the OK button to accept all the changes or the Cancel button to
abandon all unsaved changes.
Scanning 3.13
3 Scanning
Operation:
Effects Tab
The features of this tab are used to apply various visual modifications to
the scanned image.
Rotate Image
This selection provides the ability to rotate an image. The rotation
mechanism rotates an image clockwise in 90 o increments.
Flip Image
This selection provides the ability to flip an image. The flipping mechanism
flips an image about the horizontal or vertical axis.
3.14 Scanning
Sharpness
Sharpness is typically useful for high-contrast images which soften or
sharpen edges and boundaries of an image.
No Filter
This is the default filter option. No filtering will take place when using this
option.
Sharpen
Sharpen More
This option further emphasizes the edges of an image. This option
produces a much stronger contrast than the Sharpen option.
Blur
This selection softens the image by smoothing out any sharp transitions in
intensity between two adjacent pixels.
Blur More
This option further softens the image by performing the same function as
the Blur option, but to a greater extent.
✔ If you blur the image too much, you will risk losing texture and depth
in the image.
Scanning 3.15
3 Scanning
This selection emphasizes the edges of an image. It sharpens the image
boundaries by increasing the relative contrast between adjacent pixels. In
general, sharpen filters should only be used when you want to accentuate
the differences between one area and another.
Descreen
This selection is used to eliminate moire patterns from the output image.
Moire occurs as a result of differences in the screen pattern used to print
document and the scanner electronics. Moire may appear as checkered
patterns bands or dots. Descreen preprocessing can minimize the transfer of
moire patterns into your image file.
Besides a default setting of No Descreen, The Descreen selector provides
three grades of descreen preprocessing as described below.
No Descreen
No descreening.
Art print (175 lpi)
The Art print selection is used to smooth the fine dot pattern found in high
quality art prints and magazines made in resolution higher than 200 dpi.
Magazine (133 lpi)
The Magazine selection is used to smooth the fine dot pattern found in
glossy magazines made in resolution higher than 200 dpi.
Newspaper (88 lpi)
The Newspaper selection smooth the coarse grain pattern commonly found
in newspaper images made in resolution higher than 200 dpi.
Invert Image
This function inverts all the tone values, providing a photographic negative
of the original. This effect is similar to using the Tonal Map to tonally invert
the image.
Normal image
3.16 Scanning
Invert image
Preview Window
After adjusting the settings in the Scanner Control window, choose any one
of the tools in the Preview window to further enhance the image. The
following is detailed information about the tools available in the Preview
window.
Image Control tools
For information, see page 3.18.
Preview window
Used to view the prescanned
document.
Prescan and Scan buttons
For information, see page 3.20.
Scanning 3.17
3 Scanning
Any changes made to the
document are seen here.
Image Control Tools
The Image Control tools are used to control the image displayed in the
preview window. The functions of these tools are described below.
Frame Tool
After a preview image has been created, you can define the boundaries of
the area to be included in your final scan by using the Frame tool.
Use the Frame tool to select a rectangular portion (selection frame), or select
the entire preview screen, for the final scan boundaries. When you select
the Scan button, only the area within the selection frame will be included in
the final scan.
To use the Frame tool:
1. Select the Frame tool by clicking the Frame tool icon.
2. Drag the cursor to the preview area and release the mouse button when
the selection frame is in the desired position.
3. To adjust the selection frame size or shape, drag any edge or corner of the
frame in or out. Alternatively, hold down the Shift key and the mouse
key on one of the sides of the frame and then move the cursor
accordingly. This action will contract or expand the entire frame.
4. To move the selection frame to a different area of the image without
changing its size or shape, place the cursor within the selection frame
and drag it to the desired location.
5. To create an entirely new selection frame, place the cursor outside the
existing selection frame and drag diagonally. The first selection frame
will disappear while the second one remains.
✔ If you hold down the Shift key and drag the mouse diagonally, the
sides of the selection frame will resize proportionally.
3.18 Scanning
Zoom In and Out Tools
The Zoom In and Out tools allow you to zoom in or out on an image within
the Preview window; zooming in (the + sign appears on the zoom cursor)
enlarges the view of the active image so that you can work on small details
in an image. Zooming out (the - sign appears on the zoom cursor) reduces
the view of the active image.
To use the Zoom In tool:
1. Select the Zoom tool by clicking the Zoom In tool icon.
2. Drag the cursor to the preview area. The cursor will change to a
magnifying glass whenever it is in the preview space.
3. Zoom in (magnify an area) by positioning the cursor on an area of
interest in the preview area and clicking the left mouse button. The
preview area will be doubled in size. Click again and the area will again
be enlarged by a factor of 100%. By repeating this process, you can
enlarge the preview display of the image up to 800% of its original size.
As an alternative to the method outlined above, select the Zoom tool and
then, while holding the mouse key down, drag the cursor over the area
you want to enlarge. A solid frame, defining the area of enlargement, will
appear while the mouse key is being held down. Upon release of the
mouse key, the defined area will be enlarged.
To use the Zoom Out tool:
1. Select the Zoom Out tool by clicking the Zoom Out tool icon.
2. Drag the cursor to the preview area. The cursor will change to a
magnifying glass whenever it is in the preview space.
3. Zoom out by positioning the cursor in the preview area and clicking the
left mouse button.
✔ The Zoom In and Out tools do not affect the image produced by the
Scan control. It only affects the Preview display.
Scanning 3.19
3 Scanning
4. Use the scroll bars to view hidden areas of the displayed preview image.
Width and Height Indicators
The Width and Height indicators will display the width and height of the
frame defined with the Frame tool.
File Size Indicator
The fils size indicator will display the file size that will result for the
scanned image defined with Frame tool.
Prescan Button
The Prescan button is used to obtain a low resolution preview of the
document. The prescanned document will appear in the Preview Window.
Scan Button
The Scan button is used to obtain the final scan of the document after all of
the enhancement features have been applied to the prescanned document.
When Scan is selected, the scanned image does not appear in the Preview
Window. It appears in the TWAIN compliant application from which the
scan was originated.
3.20 Scanning
Troubleshooting
Fixing Problems
Below are the problems you can solve by yourself. If not, call for
service.
Printer Problems
Symptom
Cause and Solution
¥ The printer cable is not connected properly. Check the
printer cable connection.
¥ The printer cable is defective. Swap the cable with one
known to work.
The printer does not
print.
¥ The port setting is incorrect. Check the Windows printer
settings to make sure that the print job is being sent to the
correct port (for example, LPT1).
¥ The image cartridge is not installed properly. Remove and
reinsert the image cartridge.
¥ The printer may be configured incorrectly. Check the
application to make sure that all print settings are correct.
¥ The printer driver may be incorrectly installed. Uninstall
the MFP driver and reinstall the MFP driver. Then try
printing a test page. Refer to ÔUninstalling SmarThru
SoftwareÕ on page 1.6
¥ A paper jam has occurred. Remove the jammed paper.
If there is resistance to the paper, and it does not move
immediately when you pull, or if the paper is jammed
inside the machine, stop pulling.
1. Pulling the cover release button
toward you, open the cover, then
remove the image cartridge.
2. Gently pull the paper toward you.
Check that there is no other paper in
the printer.
Troubleshooting
4.1
Printer Problems (Continued)
Symptom
The paper is not fed into
the printer.
Cause and Solution
¥ Paper has not been inserted correctly. Remove and reinsert
the paper correctly (refer to ÔLoading PaperÕ on page 1.13).
¥ There is too much paper in the automatic paper feeder.
Remove some of the paper from the automatic paper feeder.
Half of the page is blank.
¥ The page layout is too complex. Simplify the page layout
and remove any unnecessary graphics from the document if
possible.
¥ The page orientation setting may be incorrect. Change the
page orientation in the Printer Properties dialog box.
¥ The paper size and the software paper size settings do not
match. Insert the correct paper into the printer or change
the software paper size settings.
¥ Scaling may be set to less than 100%. Change the Scaling
setting in the Printer Properties dialog box.
¥ The printer cable specifications may be incorrect. Use or
replace the cable with an IEEE-1284 rated cable.
The printer prints the
wrong data, or it prints
incorrect characters.
¥ The printer cable might not be connected properly. Check
the printer cable connection.
¥ There may be a problem with the printer driver software.
Exit Windows and reboot the computer. Turn the printer off
and then back on again.
¥ The printer cable specifications may be incorrect. Use or
replace the cable with an IEEE-1284 rated cable.
The paper keeps
jamming.
¥ There is too much paper in the automatic paper feeder.
Remove some of the paper from the automatic paper feeder.
(If printing onto transparencies, or labels, insert them one at
a time in the manual feeder.
¥ The paper setting method may be incorrect. If printing onto
envelopes, insert the envelopes so that there is a gap of
approximately 1 mm (1/32Ó) between the left and right
edge of the envelopes at the paper guide.
4.2
Troubleshooting
Symptom
Cause and Solution
¥ If using Windows 3.x, Print Manager may be disabled.
From the Control Panel Printers menu, check the Use Print
Manager box.
Printing is too slow.
¥ If using Windows 3.1x, the Background Printing item in the
Option menu of Print Manager may be set incorrectly.
Select Background Printing from the Option menu in the
Print Manager.
¥ If using Windows 9x, the Spooling Setting may be set
incorrectly. From the Start menu, select Settings and
Printers. Click your printer icon with the right mouse
button, select Properties, click the Details tab, and then
click the Spool Settings button. Select the desired spool
setting from the available choices.
4 Troubleshooting
¥ If you are using Windows NT, the Scheduling setting may
be set incorrectly. From the Start menu, select Settings and
Printers. Click your printer icon with the right mouse
button, select Properties, click the Scheduling tab. Then,
select the desired scheduling setting from the available
choices.
Print Quality Problems
Symptom
Cause and Solution
White page or printout
too light to read
¥ Toner is low or empty. Replace the image cartridge.
Irregular faded patches
of print
¥ There is a paper quality problem. Use only paper that meets
the specifications required by the printer.
¥ Toner may be unevenly distributed. Remove the image
cartridge and shake it gently to evenly distribute the toner.
Then replace the image cartridge.
Troubleshooting
4.3
Symptom
Black staining
Cause and Solution
¥ There is a paper quality problem. Use only paper that meets
printer specifications.
¥ An image cartridge from another printer has been installed.
Always use the same image cartridge with the same printer.
Using a cartridge that has already been used in another
printer may not give satisfactory results.
Character voids
¥ The paper may be too dry. Try printing with a different
batch of paper.
Background scatter
¥ The paper may be too damp. Try printing with a different
batch of paper. Do not open packages of paper until
necessary so that the paper does not absorb too much
moisture from the air.
¥ Printing over uneven surfaces. If printing onto envelopes,
change your printing layout to avoid printing over areas
that have overlapping seams on the reverse side.
Missing characters
¥ The paper may be too damp. Try printing with a different
batch of paper. Do not open packages of paper until
necessary so that the paper does not absorb too much
moisture from the air.
Back of printout dirty
¥ The transfer roller may be dirty. Print a few blank pages
to clean the transfer roller.
Incorrect fonts
¥ True Type fonts may be disabled (Windows 3.x). Use the
Fonts dialog box in the Control Panel to enable True Type
fonts.
Faded graphics
4.4
Troubleshooting
¥ Toner may be low. Remove the image cartridge and shake
it gently to evenly distribute the toner. Then replace the
image cartridge. Have a spare image cartridge in
preparation for the toner running out.
Others Problems
Symptom
¥ There was an error writing to
LPT1: for the printer: The
parameter is incorrect.
¥ COM port initialization failed.
Check COM port parameters in
Modem properties dialog
¥ Modem initialization failed.
Switch on the modem and
check cable connection.
¥ Device canÕt be set to the H/W
mode you want.
¥ Port is disabled. Check if the
port is properly connected, or
power is on then restart your
computer
¥ TWAIN error occurred
¥ [Critical]: TWAIN is not
available.
¥ There were critical errors.
Program will not continue.
Cause and Solution
¥ While an application use LPT1 or SmarThru Fax
Port, the other application canÕt use them
concurrently.
So if ÒAutomatically answer for incoming calls
after (rings):Ó option is checked of Fax Gate
Properties,
You canÕt scan images or print documents.
If you want to scan or print, uncheck the option
and restart SmarThru.
If ÒAutomatically answer for incoming calls
after(rings):Ó option is not checked, one of printing,
scanning, faxing may be already processing and
another job try to process.
Then cancel one of them, redo canceled job after
another job is finished.
¥ The MFP does not allow dual job, so printing,
scanning faxing canÕt process concurrently.
Cancel and redo later job after the MFP finishes
current processing.
Troubleshooting
4.5
LASER Facsimile
User’s Guide
Setup and Operation
Msys 5200
ELECTRONICS
Internet Home Page: http://www.samsungtelecom.com
P/N: JC68-00145A Rev.1.00
Thank you for purchasing Samsung Msys5200Ñthe multifunction
office product for your home office and the whole family. We are sure
that Samsung Msys5200 will provide all you need in one machine.
Samsung Msys5200 combines these office machines:
- Plain paper fax
- Copier
- Laser printer
- Scanner
Enjoy your new Samsung Msys5200!
Trademarks
¥ Windows is a trademark of Microsoft Corporation.
¥ IBM is a trademark of International Business Machines.
¥ Centronics is a trademark of Centronics Data Computer.
¥ Other names and trademarks mentioned in this manual are trademarks of their respective
holders.
Contents
Chapter 1
Getting Started
Set Up Your Machine _______________________________ 1.2
Unpacking _________________________________________ 1.2
Control Locations and Functions ______________________ 1.3
Front View ______________________________________ 1.3
Rear View _______________________________________ 1.4
Inside ___________________________________________ 1.4
Choosing a Location _________________________________ 1.5
Setting Up Your Machine _____________________________ 1.5
Document Tray ___________________________________ 1.5
Document Exit Tray _______________________________ 1.5
Printer Exit Tray __________________________________ 1.6
Telephone Line ___________________________________ 1.6
Extension Phone __________________________________ 1.7
AC Power Cord __________________________________ 1.7
Printer Cable _____________________________________ 1.8
Installing the Image Cartridge ________________________ 1.9
Loading Paper ______________________________________ 1.11
Using the Automatic Paper Feeder __________________ 1.11
Using the Manual Feeder __________________________ 1.14
Paper Guidelines ____________________________________ 1.15
System Setup _______________________________________ 1.16
Ringer Volume ___________________________________ 1.16
Home Resolution and Home Contrast _______________ 1.16
Sound Control ___________________________________ 1.18
Remote Diagnosis Protection _______________________ 1.18
Select Language __________________________________ 1.19
Econo Mode Setting ______________________________ 1.19
Adjusting Speaker Volume ___________________________ 1.20
Setting the Date and Time ____________________________ 1.20
Setting the System ID (Your Number and Name) _____________ 1.22
i
1
Getting Started
Chapter 2
Operation
2
Using the Control Panel ______________________________ 2.2
Using the Number Keypad ___________________________ 2.4
Entering Alphanumeric Characters __________________ 2.4
Entering Numbers ________________________________ 2.6
Editing Numbers or Name _________________________ 2.6
Inserting Pause ___________________________________ 2.6
Troubleshooting
Appendix
ii
3
Receiving a Fax _____________________________________ 2.17
Receiving a Fax _____________________________________ 2.17
Receiving Automatically in FAX Mode _________________ 2.18
Receiving Automatically in TEL/FAX Mode ____________ 2.18
Receiving Manually in TEL Mode _____________________ 2.19
Operation
Sending a Fax ______________________________________ 2.7
Preparing Documents for Faxing or Copying ___________ 2.7
Setting Document Resolution and Contrast _____________ 2.8
Resolution _______________________________________ 2.8
Contrast _________________________________________ 2.8
Loading Document __________________________________ 2.9
Sending a Fax Automatically _________________________ 2.10
Canceling Transmission ____________________________ 2.10
Confirming Transmission __________________________ 2.10
Automatic Redial __________________________________ 2.11
Voice Request _______________________________________ 2.12
Sending a Voice Request ___________________________ 2.12
Answering a Voice Request _________________________ 2.12
Delayed Transmission _______________________________ 2.12
Memory Transmission (Broadcasting) ____________________ 2.14
Priority Transmission ________________________________ 2.15
Adding Documents To a Standby Operation ____________ 2.16
Canceling a Standby Operation _______________________ 2.16
Chapter 2
Operation
(Continued)
Receiving Automatically in ANS/FAX Mode ___________ 2.19
If Your Machine is Out of Paper
When it Receives a Fax-Receiving into Memory _______ 2.20
If You Get a Fax Printed Too Light To Read ___________ 2.20
Distinctive Ring Pattern Detection (DRPD) ___________ 2.20
Polling _____________________________________________ 2.21
What is Polling? __________________________________ 2.21
Being Polled By a Remote Machine __________________ 2.21
Adding Documents To the Job to be polled ___________ 2.22
Polling One or More Remote Machines ______________ 2.23
Making a Copy _____________________________________ 2.25
Making a Copy _____________________________________ 2.25
Automatic Dialing __________________________________ 2.27
One-Touch Dialing __________________________________ 2.27
Storing a Number for One-Touch Dialing ____________ 2.27
Sending a Fax Using a One-Touch Number __________ 2.28
Using Address Label ______________________________ 2.28
Speed Dialing _______________________________________ 2.29
Storing a Number for Speed Dialing ________________ 2.29
Sending a Fax Using a Speed Number _______________ 2.29
Group Dialing (for Multi-Address Transmission) ________ 2.30
Storing One-Touch or Speed Dial Numbers for
Group Dialing ___________________________________ 2.30
Storing a Group into a One-Touch Button ____________ 2.31
Sending a Fax Using Group Dialing
(Multi-Address Transmission) ______________________ 2.31
Searching for a Number in Memory ___________________ 2.32
Searching Sequentially through Memory ____________ 2.32
Searching for a Particular First Letter _______________ 2.32
iii
Other Functions ____________________________________ 2.33
Using Function Buttons ______________________________ 2.33
Redial ___________________________________________ 2.33
Tone ____________________________________________ 2.34
Flash ____________________________________________ 2.34
Chain Dialling ___________________________________ 2.35
Status ___________________________________________ 2.35
Printing Reports ____________________________________ 2.36
User Options _______________________________________ 2.38
Setting an Option _________________________________ 2.38
Selectable Options ________________________________ 2.38
Maintenance ________________________________________ 2.43
Cleaning Fuser ___________________________________ 2.43
Make Shading ____________________________________ 2.43
iv
Chapter 3
Troubleshooting
Troubleshooting ____________________________________ 3.2
Clearing Jams _______________________________________ 3.2
Document Jams While Sending a Fax _______________ 3.2
Paper Jams While the Machine is Printing ____________ 3.3
Tips for Avoiding Paper Jams _______________________ 3.5
LCD Error Messages _________________________________ 3.6
Fixing Problems _____________________________________ 3.8
Fax Problems _____________________________________ 3.8
Maintenance _______________________________________ 3.10
Clearing Memory ___________________________________ 3.10
Cleaning the Document Scanner ______________________ 3.11
Managing Image Cartridge ___________________________ 3.13
Expected Cartridge Life ___________________________ 3.13
Replacing Image Cartridge ________________________ 3.13
Appendix
FCC Regulations ____________________________________ 4.2
Canadian Radio Interference Regulations _______________ 4.2
Laser Safety Statement _______________________________ 4.3
Safety Information __________________________________ 4.4
Power Saver ________________________________________ 4.4
Specifications _______________________________________ 4.5
v
Important Safety Information
Always be careful when using the machine. To reduce the risk of fire, electrical shock,
and other injuries, keep these safety considerations in mind when installing, using,
and maintaining your machine:
¥ Stability. Place the machine on a secure, stable surface. The machine can cause serious
damage if it falls.
¥ Power Supply. Provide the correct power to the machine, as listed on its back. If you
arenÕt sure of the type of power thatÕs supplied to your home or office, call your electric
company.
¥ Grounding. If the plug has three prongs, it must be plugged into a grounded (three
hole) outlet. Grounded plugs and outlets are designed for your safetyÐdonÕt try to make
a three-prong plug fit into a two-prong outlet by modifying the plug or outlet in any
way. If you canÕt insert the plug into your wall outlet easily, the outlet should be
inspected by a qualified electrician.
¥ Overload. DonÕt plug too many electrical devices into a wall outlet or extension cord.
An overloaded outlet is a fire and electrical shock hazard.
¥ Cleaning. Before cleaning the machine, unplug it from both the power outlet and the
telephone jack. Clean exposed parts with a soft cloth slightly dampened with water.
DonÕt use aerosol cleaners.
¥ Thunderstorms. Unplug electrical appliances during thunderstorms. Avoid using any
telephone (except a cordless model) during a thunderstorm, since thereÕs a small chance
you could get an electrical shock from lightning.
¥ Gas Leaks. Never use any telephone close to a gas leak. If you think gas is leaking, call
the gas company immediately, but use a telephone far away from the leak area.
A small electrical spark in the telephone could cause a fire.
vi
1
Getting Started
1.1
Set Up Your
Machine
Unpacking
Machine
Toner cartridge
Document exit tray
01
02
03
04
05
06
07
08
09
10
11
12
13
14
15
16
17
18
19
20
One-touch Label
Telephone line cord *1
UserÕs Guide
(Setup and Operation)
Document tray
AC power cord *1
UserÕs Guide
(Application)
*1 These parts may look different. The appearance varies according to country.
1.2
Set Up Your Machine
Printer exit tray
Printer Cable
CD-ROM
1
Control Locations and Functions
Front View
Paper Extension
Paper Guides
Document Tray
Automatic Paper Feeder
Manual Paper Feeder
Control Panel
Document Guides
Document
Exit Tray
Print Exit Tray
Note: Your machine may look slightly different than the illustration.
Set Up Your Machine
1.3
Getting Started
Take a moment to familiarize yourself with the main components and
understand their functions.
Rear View
TEL LINE Jack
Power Cord Connector
EXT. LINE Jack
Printer Connector
Inside
Cover
Image Cartridge
Cover Release
Buttons (right and
left)
1.4
Set Up Your Machine
1
Choosing a Location
Do not place your machine:
- In direct sunlight.
- Near heat sources or air conditioners.
- In dusty or dirty environments.
Setting Up Your Machine
Document Tray
Insert two tabs on the tray into the slots as shown. Fold out the
extender on the tray, if necessary.
Document Exit Tray
Insert the two tabs on the document exit tray into the slots on the
front of your machine. Fold out the extender, if necessary.
Extender
Insert one end first, then the other end by pulling this
leg inward to make the tray easy to insert.
Set Up Your Machine
1.5
Getting Started
To help guarantee trouble-free operation of your machine, place it on a
flat, stable surface near your workstation. Leave enough space to allow
for easy paper loading, paper out and opening the front cover.
Printer Exit Tray
Holding the flexible side end, insert two tabs on the side ends into
the corresponding slots. Fold out the extender, if necessary.
Extender
Telephone Line
Plug one end of the telephone line cord into the TEL LINE jack and
the other end into a standard phone wall jack.
LINE
TEL
To a standard
phone wall jack
1.6
Set Up Your Machine
E
. LIN
EXT
1
Extension Phone
Getting Started
If you want to use a regular phone or answering machine with your
machine, connect the phone into the EXT.LINE jack.
Plug the cord of your extension phone or answering machine into the
socket marked EXT.LINE on the back of the machine.
LINE
TEL
To a regular phone
E
. LIN
EXT
AC Power Cord
Plug one end of the cord into the back of the machine and the other
end into a standard AC power outlet.
The machine turns on. If there is no cartridge installed, or no paper, the
display shows ÔDOOR OPEN OR NO TONERÕ or [NO PAPER].
To AC
outlet
If you want to turn it off, unplug the power cord.
Set Up Your Machine
1.7
Printer Cable
Your Machine has a parallel interface port, which allows you to use it
with IBM PCs and compatible computers. You have to purchase a
Centronics parallel interface cable that supports bi-directional
communications (IEEE standard 1284). Ask your dealer for assistance if
you need help selecting the right cable.
To connect the printer to the computer, follow the steps below:
1. Make sure that both the machine and the computer are turned off.
2. Plug the cable into the connector on the back of the machine. Push
the metal clips down to fit inside the notches on the cable plug.
3. Connect the other end of the cable to the parallel interface port on
your computer. See your computer documentation if you need help.
1.8
Set Up Your Machine
1
Installing the Image Cartridge
Getting Started
1. Pulling the cover release button toward you, open the cover.
2. Unpack the image cartridge, then carefully remove the sealing tape.
3. Shake the cartridge from side to side 5 or 6 times to distribute the
toner evenly inside the cartridge.
Set Up Your Machine
1.9
4. Find the cartridge slots inside the printer, one on each side.
5. Grasp the handle and slide the cartridge down between the
cartridge slots, until it drops into place.
6. Close the cover. Make sure that the cover is securely closed.
1.10 Set Up Your Machine
1
Loading Paper
Using the Automatic Paper Feeder
You can stack paper, envelopes, card stocks, labels, or transparencies in
the automatic paper feeder to feed automatically. The automatic feeder
can hold a maximum of 150 sheets of plain paper, and 5 envelopes or
other print media. The maximum capacity may reduce, depending on
the thickness.
Note: If you experience feeding problems, try printing one at a time from the
manual feeder. See page 1.14.
1. Pull the extender on the automatic paper feeder all the way up.
Extender
Automatic feeder
Manual feeder
2. Prepare the print material for loading.
¥ For paper and envelopes:
- Flex paper or fan envelopes back and forth. Do not fold or crease
the paper. Straighten the edges on a level surface.
Note: If envelopes jam while printing, try reducing the number of envelopes in
the automatic feeder.
Set Up Your Machine 1.11
Getting Started
For best results, use high quality xerographic copier paper.
¥ For transparencies:
- Hold the transparencies by the edges and avoid touching the
print side.
- Fan the stack of transparencies to prevent feeding failures. Be
careful not to scratch or leave fingerprints on the print sides.
3. Load the print material in the automatic feeder. Do not load too
much print material. Do not mix types. See the following directions
to load each type of print material.
¥ Load paper or transparencies with the print side facing you.
Place the print side
facing you.
1.12 Set Up Your Machine
¥ Load letterhead paper with the design facing you. The top edge of the
sheet with the logo should enter the printer first.
D
RHEA
LETT
E
4. Adjust the paper guides to the width of the print material. Slide
the guides until they lightly touch the stack of print material. Do not
bend the print material.
Paper guide
Note: If you print a job from PC, make sure that you select the correct paper
size and feed source in your application before printing.
Set Up Your Machine 1.13
Getting Started
Notes:
¥ Do not feed stamped envelopes. The stamp is shown for placement only.
¥ Never use envelopes with clasps, snaps, windows, coated linings, or self-stick
adhesives. These envelopes may severely damage the machine.
¥ Depending on the thickness of your envelopes, the multipurpose paper feeder
can hold up to 5 envelopes. If you experience envelope feeding problems, try
placing envelopes one at a time into the manual paper feeder.
1
¥ Load envelopes with the flap side facing away from you. The stamp
area is on the left side. The end of the envelope with the stamp area
enters the feeder last.
Using the Manual Feeder
Use the front manual feeder in order to feed paper one sheet at a time
into your machine.
Manual paper feeder
Note: When you print a file from PC, make sure that you select the manual
feeding source and the correct paper size from your software application
before starting your print job.
1. Place the paper in the manual feeder and adjust the paper guides
to the width of the print material.
Refer to the instructions to load each type of material on page 1.13.
2. Make sure that the paper is as far down as it will go.
3. Press Start to start manual feeding. If you have more than one page
to print, press Start for each page.
1.14 Set Up Your Machine
1
Paper Guidelines
¥ Attempting to print on damp, curled, wrinkled, or torn paper can
cause paper jams and poor print quality.
¥ Use cut-sheet paper only. You cannot use multipart paper.
¥ Use only high quality, copier grade paper. Avoid paper with
embossed lettering, perforations, or texture that is too smooth or too
rough.
¥ Colored paper should be of the same high quality as white photocopy
paper. The pigments must withstand the printerÕs fusing temperature
of 392 oF (200 oC) for 0.1 second without deterioration. Do not use
paper with a colored coating that was added after the paper was
produced.
¥ Pre-printed forms must be printed with non-flammable, heat-resistant
inks that do not melt, vaporize, or release hazardous emissions when
subject to the printerÕs approximately 392 oF (200 oC) fusing
temperature for 0.1 second.
¥ Store paper in its ream wrapper until ready to use. Place cartons on
pallets or shelves, not on the floor. Do not place heavy objects on top
of the paper, whether it is packaged or unpackaged. Keep it away
from moisture, or other conditions that can cause it to wrinkle or curl.
¥ During storage, moisture-proof wrap (any plastic container or bag)
should be used to prevent dust and moisture from contaminating
your paper.
¥ Always use paper and other media that conform with those listed
under ÔSpecificationsÕ on page 4.5.
¥ When you choose envelopes, use only well-constructed envelopes
with sharp, and well creased folds.
- DO NOT use envelopes with clasps and snaps.
- DO NOT use envelopes with windows, coated linings, self-stick
adhesives, or other synthetic materials.
- DO NOT use damaged or poorly made envelopes.
Set Up Your Machine 1.15
Getting Started
When selecting or loading paper, envelopes, or other special media,
keep these guidelines in mind:
System Setup
Ringer Volume
You can adjust the volume of the ringer to the desired loudness.
1. Press Menu, then press System Setup on the one-touch keypad.
The display shows ÔRINGER VOLUME?.Õ
2. Press Enter, then use ¹ or
ringer.
to choose the desired loudness of the
The selected ringer sounds and the display shows the loudness level
with > symbol. The more, the louder.
No > symbol turns the ringer off. The machine will work normally
even if the ringer is set to off.
RINGER VOLUME
[>>>>>>>> ]
3. Press Enter when the desired volume level is selected. The display
shows the next setup menu ÔDEFAULT SETTINGS?Õ For details on
menu, see below.
4. To return to Standby mode, press Stop.
Home Resolution and Home Contrast
The print resolution and contrast can be set to their most frequently
used modes. Whenever a document is sent or copied, the home
contrast and resolution mode will be activated unless otherwise
changed by using Resolution or Contrast button on the control
panel. See page 2.8 for details.
1. Press Menu, then press System Setup on the one-touch keypad.
The display shows ÔRINGER VOLUME?Õ.
2. Press ¹ or
1.16 Set Up Your Machine
until you find ÔDEFAULT SETTINGS?Õ.
4. Press à or ¨ repeatedly until you find the desired mode:
¥STANDARDÐuse with most documents.
¥FINEÐuse for documents with fine detail, such as small print.
¥SUPER FINEÐuse for documents that have extremely fine detail.
5. Press Enter when you find the mode. The display asks you to
choose the home contrast mode.
HOME CONTRAST
[ NORMAL ]
6. Press à or ¨ repeatedly until you find the desired mode:
¥NORMALÐuse with documents of average or normal contrast.
¥DARKENÐuse with documents with low contrast or light images.
¥LIGHTENÐuse with documents with high contrast or dark images.
¥PHOTOÐfor obtaining maximum image quality with documents
that contain pictures or photographs with shades of gray.
7. Press Enter when you find the mode. The display shows the next
setup menu ÔSOUND CONTROL?.Õ For details on ÔSound ControlÕ
menu, see the following page.
8. To return to Standby mode, press Stop.
Set Up Your Machine 1.17
Getting Started
HOME RESOLUTION
[ STANDARD ]
1
3. Press Enter. The display asks you to choose the home resolution
mode.
Sound Control
You can choose an alarm tone to sound when an error occurs (ALARM
SOUND) or any key is pressed (KEY SOUND).
1. Press Menu, then press System Setup on the one-touch keypad.
The display shows ÔRINGER VOLUME?.Õ
2. Press ¹ or
until you find ÔSOUND CONTROL?.Õ
3. Press Enter. The display prompts you to turn ON or OFF the alarm
sound.
4. Press 1 to turn the sound ON, or 2 to turn it OFF. You can also use
à or ¨ button to choose ÔONÕ or ÔOFFÕ, then press Enter to confirm.
5. The display asks you to turn ON or OFF the key sound. Press 1 to
turn the sound ON, or 2 to turn it OFF.
6. The display shows the next setup menu. To return to Standby mode,
Press Stop.
Remote Diagnosis Protection
Remote diagnosis feature allows your machine to be checked out by
service company at a remote place through phone line.
If you do not want to use the remote diagnosis feature and want to
protect your machine from being open by an unauthorized person, you
can enable this remote diagnosis protection feature.
1. Press Menu, then press System Setup on the one-touch keypad.
The display shows ÔRINGER VOLUME?.Õ
2. Press ¹ or
until you find ÔREMOTE DIAGNOSIS
PROTECTION?Õ, then press Enter.
3. The display asks you to turn the feature ON or OFF. Press 1 to turn
it ON, or 2 to turn it OFF.
4. The display shows the next setup menu. To return to Standby mode,
Press Stop.
1.18 Set Up Your Machine
Select Language
1
1. Press Menu, then press System Setup on the one-touch keypad.
The display shows ÔRINGER VOLUME?.Õ
2. Press ¹ or
until you find ÔSELECT LANGUAGE?Õ, then
press Enter.
3. Press ¹ or
to choose the desired display language, then
press Enter. You can also press the number of the language in the
display.
4. The display shows the next setup menu. To return to Standby mode,
Press Stop.
Econo Mode Setting
To get the most from your toner supply, set the Econo mode to On. If
set to On, you can preserve the toner supply. The print quality may be
reduced.
1. Press Menu, then press System Setup on the one-touch keypad.
The display shows ÔRINGER VOLUME?.Õ
2. Press ¹ or
until you find ÔECONO MODE SETTING?Õ, then
press Enter.
3. The display asks you to set the mode to ON or OFF. Press 1 to set
ON, or 2 to set OFF.
4. The display shows the next setup menu. To return to Standby mode,
Press Stop.
Set Up Your Machine 1.19
Getting Started
You can select the LCD display language between English, French.
Adjusting Speaker Volume
1. Press OHD to adjust the speaker volume. If you cannot hear dial
tone, check the phone line connection.
2. Press ¹ or
repeatedly until you find the desired loudness (1~7).
The display shows the current volume level.
3. After choosing the desired volume level, press OHD.
Setting the Date and Time
The current date and time are shown in the display when the machine
is on and ready for use (Standby mode). The date and time are printed
on all faxes you send.
1. Press Menu, then press Date & Time on the one-touch keypad.
The display shows the currently set date and time.
11-27-1998
08:36 (PM)
e.g. 12 HOURS format
11-27-1998
20:36
e.g. 24 HOURS format
1.20 Set Up Your Machine
= 01~31
= 01~12
= four digits (1990~2089)
= 00~23 (24 HOURS format)
= 01~12 (12 HOURS format)
MM (Minute)
= 00~59
AM (Ante Meridiem)
PM (Post Meridiem)
3. Press Enter when the date and time in the display is correct.
If you enter an invalid number, the machine beeps and doesnÕt
proceed to the next step. If this happens, just reenter the correct
number.
The display shows the date and time you have set, then returns to
Standby mode.
Set Up Your Machine 1.21
Getting Started
DD (Day)
MM (Month)
YY (Year)
HH (Hour)
1
2. Enter the correct date and time using the number keypad.
Setting the System ID (Your Number and Name)
The System ID will be printed at the top of each page sent from your
machine.
1. Press Menu, then press System ID on the one-touch keypad.
The display asks you to enter the telephone number.
If there is a number previously registered, the number appears.
2. Enter the telephone number (up to 20 digits) which your machine is
connected to. You can include + and - symbol by pressing
and #
respectively.
If you make a mistake, press à or ¨ to move the cursor under the
wrong digit, then enter the correct number to change or press Delete
to delete the number.
3. Press Enter when the number in the display is correct. The display
asks you to enter your ID name.
4. Enter your ID name (up to 20 characters).
You can enter alphanumeric characters using the number keypad,
and include special symbols by pressing 0 repeatedly.
For details on how to use the number keypad to enter alphanumeric
characters, see page 2.4.
If you want to enter the same letter or number in succession (e.g. SS,
AA, 777), enter one digit, then move the cursor by pressing ¨, and
enter the next digit.
If you want to insert a space in the name, you can also use ¨ button
to move the cursor to skip the position.
5. Press Enter when the name in the display is correct.
Note: If there is a number and name previously registered, the number and
name appears in the upper line and ÔED:1 DEL:2 NXT:3Õ in the bottom
line.
Press 1 to edit the existing number. Press 2 to delete the number. The
machine deletes the number and continues next step. Press 3 to keep the
number and continue.
1.22 Set Up Your Machine
2
Operation
2.1
Using the Control Panel
LCD Display
The display shows the current status of
your machine and guides you through
various tasks using a menu system for
each of operation.
On/Off Line and Lamp
Turn your machine On-line or Off-line.
The lamp lights while the machine is
on-line, indicating the machine is ready
for printing a PC file.
On/Off Line
Print Priority
Use to give print priority to PC file
while the machine prints
a received fax.
Print Priority
Multi Function Laser Facs
Menu
01
02
System Data
06
System ID
07
Delay TX
11
Memory TX
12
Add/Cancel
16
TX Confirm
03
04
05
Date & Time
System Setup
Memory Clear
08
09
10
Priority TX
Stop
Polling
13
Group Dial
14
Maintenance
17
18
Schedule Job
Phone Book
15
Journal
19
Help List
20
System List
Copy
One-Touch Dial and
Special Function Buttons
Use to call most frequently used
numbers with one button. Also, use
these buttons with Menu button to set
up special functions or print lists.
¹ and
Use to display the next or last menu item.
Also, use to adjust audible volume.
Menu
Use to choose special functions.
à and ¨
Use to move cursor left or right
through the display.
Stop
Use to stop an operation at any time.
Copy
Use to copy a document.
Start/Enter
Use to start a job. Also use to activate the
selection shown in the display.
2.2
Volume
Search/Delete
Use to search for numbers in memory.
Or use to delete digits in the edit mode.
Rcv.Mode (Receive Mode)
Use to choose the receive mode you
want to use. See page xx. The selected
mode is displayed.
Resolution
Use to choose the resolution of
transmitted documents.
Resolution
Contrast
ABC
DEF
1
2
3
GHI
JKL
MNO
Speed/Status
Redial/Pause
Recall
4
5
6
PQRS
TUV
WXYZ
7
8
9
Contrast
Use to choose the contrast of copied or
transmitted documents.
Operation
Rcv.Mode
simile
2
Search/Delete
Number Keypad
Use to dial numbers manually or to
enter letters.
OHD/V.Req.
Start/
Enter
0
Speed/Status
Use to dial calls and send fax documents by entering a 2-digit number.
Also use to switch the LCD while performing dual jobs.
Redial/Pause
Use to redial the last phone number called. You can also use it to add a pause
when storing a number in memory.
Flash
Use to perform a switch-hook operation such as call waiting.
OHD (On-Hook Dial) / V.Req (Voice Request)
Use to dial numbers without picking up the handset. Also use it
to make a voice call after sending or receiving a fax.
2.3
Using the Number Keypad
As you perform various tasks, you will need to enter names and
numbers. For example, when you set up your machine you enter your
name (or your companyÕs name) and telephone number. When you use
the one-touch dial or speed dial, you also enter the telephone numbers
and names.
When the display asks you to enter a name, the LCD display reads:
ID)_
You can then use the procedures described below to enter up to 20
letters and special characters, numerals, or spaces.
Entering Alphanumeric Characters
You can include special characters (space, plus sign, etc.) in the name by
using 0 key. See `KEYPAD CHARACTER ASSIGNMENTSÕ on page 2.5.
1. Locate the button labeled with the letter you want Ð then press the
button repeatedly until the correct letter appears in the display.
ABC
Speed/Status
Redial/Pause
Recall
DEF
1
2
3
GHI
JKL
MNO
4
5
6
PQRS
TUV
WXYZ
7
8
9
OHD/V.Req.
0
For example, to enter an O, press 6 (labeled MNO). Each time you
press 6 the display shows a different letterÐfirst M, then N, and O,
and finally 6.
The letter appears in the display.
ID)O
2.4
2. When the letter you want appears in the display, press another
number key labeled with the next letter you want.
If the next letter is printed on the same number button, move the
cursor by pressing ¨, then press the button.
The blinking cursor moves right and the next letter appears in the
display.
ID)OP
2
Operation
3. Select additional letters in the same way. When youÕre finished
entering letters, press Enter.
KEYPAD CHARACTER ASSIGNMENTS
Key
Assigned numbers, letters, or characters
1
1
2
A ➝ B ➝ C ➝ 2
3
D ➝ E ➝ F ➝ 3
4
G ➝ H ➝ I ➝ 4
5
J ➝ K ➝ L ➝ 5
6
M ➝ N ➝ O ➝ 6
7
P ➝ Q ➝ R ➝ S ➝ 7
8
T ➝ U ➝ V ➝ 8
9
W ➝ X ➝ Y ➝ Z ➝ 9
0
Space ➝ , ➝ . ➝ / ➝ + ➝
➝ & ➝ 0
2.5
Entering Numbers
You can enter the number of the remote fax machine manually by using
the number keypad. The number you pressed appears in the display.
TEL)95551212_
When the display asks you to enter a number, you can also use a onetouch dial button (including Group dial) and 2-digit speed dial number.
Your machine lets you send the same document to more than one
location. When you enter a fax number, if the display reads ÔANOTHER
FAX NUMBER?Õ you are allowed to enter another fax number. To enter
ANOTHER FAX NUMBER, you can enter the number manually, or use
one-touch or 2-digit speed dial number. Note that you can not use
Group dial button for ANOTHER FAX NUMBER.
Editing Numbers or Name
If you make a mistake while entering a number or name, move the
cursor under the wrong digit by using à or ¨. Then press the correct
number to change, or press Delete to delete the number.
Inserting Pause
With some private telephone systems, you must dial an access code (9,
for example) and listen for a second dial tone before dialing an outside
number. In such cases, you must insert a pause in the number. Insert a
pause in a number when you are setting up a one-touch or speed dial
number, or when you dial a number without lifting the handset.
To insert a pause, press Pause while entering the number.
When you dial a number, the dialing process pauses for about 3
seconds at the point where you pressed Pause.
If you require a longer pause time, press Pause twice.
2.6
Sending a Fax
2
Operation
Preparing Documents for Faxing or Copying
You can use the machine to fax, or copy documents that are printed on
standard letter, legal, or A4 size paper. Follow these guidelines to
prepare your documents.
¥ Do not attempt to feed the following types of documents into the
machine. Instead, make copies and insert the copies into the
document tray.
- wrinkled or creased paper
- curled or rolled paper
- torn paper
- carbon-paper or carbon-backed paper
- coated paper
- onion skin or thin paper
¥ Remove all staples, paper clips, and the like before feeding the
document.
¥ Make sure any glue, ink, or correction fluid on the paper is
completely dry before feeding the document.
¥ Do not feed documents with pages that are different sizes or of
different thicknesses.
Sending a Fax
2.7
Setting Document Resolution and Contrast
We recommend sending documents printed using a typewriter, felt tip
pen, black ink, or laserwriter. The paper should be white or very light,
and of normal weight-not cardboard. Blue lines on a ruled pad donÕt
fax well.
When you send normal documents, you need not adjust the resolution
and the contrast.
If you send documents with unusual contrast characteristics, including
photographs, you can adjust the resolution and contrast to send a highquality transmission of the documents.
Resolution
Press Resolution button to increase sharpness and clarity. By pressing
Resolution button repeatedly after loading a document, you can
choose between STANDARD, FINE, or SUPER FINE mode.
STANDARD works well for documents with normal sized characters.
FINE is good for documents containing small characters or thin lines, or
print from a dot-matrix printer.
SUPER FINE works well for documents containing extremely fine
detail. SUPER FINE works only if the remote machine also has the
SUPER FINE feature.
Contrast
Press Contrast button to compensate for the brightness or darkness
of your faxed document. By pressing Contrast button repeatedly after
loading a document, you can choose between NORMAL, DARKEN,
LIGHTEN, or PHOTO.
NORMAL works well for normal documents.
DARKEN works with light print or faint pencil markings.
LIGHTEN works with dark print.
PHOTO is used when faxing photographs or other documents
containing color or shades of gray. Although your machine wonÕt
transmit color, it will print and send up to 64 shades of gray.
Note: You can set the default resolution and contrast. The default mode
will be effective when a document is sent or copied unless you
change the setting for individual operation. Once the current
operation is completed, the setting will revert to their preset defaults
for the next operation. For details on how to set the default
resolution and contrast, see page 1.16.
2.8
Sending a Fax
Loading Document
1. Turn the page face down.
2. Adjust the document guides to match the width of the document.
3. Slide the sheet down into the document tray until itÕs gripped by
the machine.
2
Operation
document guide
The automatic document feeder seizes and pulls in the page. The
display shows ÔDOCUMENT READYÕ and the remaining memory
capacity alternatively.
You can insert up to 30 sheets (75 g/m2 Paper) at a time. If you insert
more than one sheet, make sure the bottom sheet enters first. Stagger
the leading edge of the sheets slightly, and insert the sheets with a
slight push to ensure smooth feeding.
To add pages while the fax is sending, insert them into the loading
slot on top of the already loaded sheets.
4. If necessary, use the Resolution button to change the resolution and
the Contrast button to change the contrast (see page 2.8).
Sending a Fax
2.9
Sending a Fax Automatically
1. After loading a document, enter the number of the remote fax
machine using the number keypad.
You can store one-touch or speed dial numbers so that you can dial
your most frequently used numbers with one touch of a button or 2digit speed dial number. For information on storing and using
numbers in memory, see page 2.27.
If you make a mistake while entering a number, move the cursor
under the wrong digit by using à or ¨, and correct the number or
press Delete to delete the number.
2. Press Start when the number appears correctly in the display. The
machine dials the number and begins to transmit.
Canceling Transmission
Press Stop any time during transmission. The machine continues to
send the fax and the display shows a message warning you that the
machine is in use. Press Stop again.
Confirming Transmission
When the last page of your document has been sent successfully, the
machine beeps and returns to Standby mode.
If something went wrong during your fax transmission, an error
message appears in the display. For a listing of error messages and their
meanings, see page 3.6.
If you receive an error message, press Stop to clear the message and try
to send the document again.
You can set your machine to print out a confirmation report
automatically each time sending is completed. For more information,
see `User OptionsÕ on page 2.40.
2.10 Sending a Fax
Automatic Redial
When you send a fax, if the number you have dialed is busy or there is no
answer, the machine hangs up, waits for the specified retry term and
redials the number. If after the specified number of retry attempts (retry
count), the machine fails to connect, the machine returns to Standby
mode.
While the machine is redialing, the display shows ÔRETRY REDIAL?.Õ If
you want to redial the number immediately, press Start. To stop
redialing, press Stop.
You can select the number of retries and the retry term between each
redial attempt.
2
Operation
Sending a Fax 2.11
Voice Request
If youÕre sending or receiving a document and need to speak to the
other person during the same phone call, use Voice Request to alert the
person at the remote site. You can also respond to a Voice Request made
by the person at the remote end.
Sending a Voice Request
1. Press V.Req while a document is being sent or received. Voice
Request signal is stored and then sent to the remote fax machine after
the document has been sent or received.
2. When the phone rings, pick up the handset and answer it.
You can cancel a Voice Request by pressing V.Req again while you
are sending or receiving a document.
Answering a Voice Request
When the phone rings after sending or receiving a fax, pick up the
handset and answer it.
If you donÕt answer the Voice Request, the machine prints out the
number that made the Voice Request, and the time and date the request
was made.
Note: If your machine is not equipped with handset, you should pick up
the handset of the extension phone connected to EXT.LINE jack,
then press Stop.
Delayed Transmission
You can set your machine to send a fax at a later time when you will
not be present. A maximum of 30 transmission jobs can be reserved in
your machine.
1. Load the document face down. If necessary, adjust Resolution, or
Contrast. For details, see page 2.8.
2. Press Menu, then press Delay TX on the one-touch keypad.
3. Enter the number of the remote machine, then press Enter.
To enter the number, you can also press a one-touch button including
Group dial button. Otherwise, press Speed/Status, enter a 2-digit
speed dial number, then press Enter. The stored number (and name)
appears in the display. Press Enter to confirm the number.
2.12 Sending a Fax
4. The display asks you to enter another fax number to send the
document to another location.
ANOTHER
FAX NUMBER ?
5. If you want to send to more than one location, press Enter and enter
another fax number using the number keypad, one-touch dial, or 2digit speed dial number. Note that you cannot use Group dial number
for another fax number.
The number appears in the display. Press Enter to confirm the number.
2
Or
6. The display asks you to enter a name. If you want to assign a name to
the transmission, enter the name. If not, skip over this step.
For details on how to enter letters using the number keypad, see page
2.4.
7. Press Enter. The display shows the current time on the upper line and
asks you to enter the time in the bottom line when the fax is to be sent.
CURRENT [12:30]
START [12:30]
8. Enter the time by using the number keypad, then press Enter.
Enter the time in 24-hour format or 12-hour format. For example, enter
2230 for 10:30 P.M. If you set a time earlier than the current time, the
document will be sent at that time on the following day.
9. The machine returns to Standby mode and the display shows a
reminder that a Delayed Transmission is set.
Note: If you want to cancel the Delayed Transmission, see ÔCanceling a Standby
OperationÕ on page 2.16.
Sending a Fax 2.13
Operation
To send to one location or when you complete the last fax number
setting, press Stop.
Memory Transmission (Broadcasting)
With Memory Transmission, documents are automatically stored in
memory and sent to a remote station. Use this feature to send your
documents to multiple locations. After sending, the documents are
automatically erased from memory.
1. Load the document face down. If necessary, adjust Resolution, or
Contrast. For details, see page 2.8.
2. Press Menu, then press Memory TX on the one-touch keypad.
3. Enter the number of the remote machine, then press Enter.
To enter the number, you can also press a one-touch button including
group dial button. Otherwise, press Speed/Status, enter a 2-digit
speed dial number, then press Enter. The stored number (and name)
appears in the display. Press Enter to confirm the number.
4. The display asks you to enter another fax number to send the
document to another location.
ANOTHER
FAX NUMBER ?
Note: The machine displays the ÔANOTHER FAX NUMBER?Õ message
repeatedly, each time you enter a fax number using manual dialing,
One-Touch, 2-digit Speed Dialing, or Group Dialing. If you already
used a group number at step 3, you cannot use another group number
any more. You can use only one group number at this transmission job.
If you have used this multi-address transmission feature in other
operation(s) currently registered in memory, the machine does not
display ÔANOTHER FAX NUMBER?Õ.
5. If you want to send to more than one location, press Enter and
enter another fax number using the number keypad, one-touch
dial, or 2-digit speed dial number. Note that you cannot use Group
dial number for another fax number.
The number appears in the display. Press Enter to confirm the
number.
Or
To send to one location or when you complete the last fax number
setting, press Stop.
6. The document will be scanned into memory before transmission. The
display shows the memory capacity and the number of pages, then
the machine begins sending the document.
2.14 Sending a Fax
Priority Transmission
When priority transmission is enabled, a high priority document can be
transmitted ahead of reserved operations. The document is scanned
into memory, then transmitted when the current operation concludes. In
addition, a priority transmission will interrupt a broadcast operation
between stations (i.e., when transmission to station A ends, before
transmission to station B begins) or between redial attempts.
1. Load the document face down. If necessary, adjust Resolution, or
Contrast. For details, see page 2.8.
2. Press Menu, then press Priority TX on the one-touch keypad.
2
3. Enter the number of the remote machine, then press Enter.
Operation
To enter the number you can also press a one-touch button.
Otherwise, press Speed/Status, enter a 2-digit speed dial number,
then press Enter. The stored number (and name) appears in the
display. Press Enter to confirm the number. Note that you can not use
Group dial number.
4. The display asks you to enter a name. If you want to assign a name
to the transmission, enter the name. If not, skip over this step.
For details on how to enter letters using the number keypad,
see page 2.4.
5. Press Enter. The display shows the number being dialed, then the
machine begins sending the document.
Sending a Fax 2.15
Adding Documents To a Standby Operation
You can add documents to the delayed transmission previously
reserved in your machineÕs memory.
1. Load the document face down. If necessary, adjust Resolution, or
Contrast. For details, see page 2.8.
2. Press Menu, then press Add/Cancel on the one-touch keypad.
The display asks you to select ÔADDÕ or ÔCANCELÕ.
OPERATION
1.ADD 2.CANCEL
3. Press Enter to confirm ÔADDÕ. The display shows operation
currently reserved in memory.
24-hour format
22:00 DELAY TX
SAMSUNG
12-hour format
10:00 PM DELAY TX
SAMSUNG
(e.g. Delay transmission is
scheduled to be sent at
10:00 PM.)
4. Press
or ¹ repeatedly until you find operation you want to add
documents, then press Enter.
The machine automatically stores the documents in memory, and
displays the number of total pages and added pages, then returns to
Standby mode.
Canceling a Standby Operation
1. Press Menu, then press Add/Cancel on the one-touch keypad. The
display asks you to select ÔADDÕ or ÔCANCELÕ.
2. Press 2 to choose ÔCANCELÕ. The display shows operation currently
reserved in memory.
3. Press
or ¹ repeatedly until you find the operation you want to
cancel, then press Enter when you find the operation.
2.16 Sending a Fax
Receiving a Fax
2
Your multi-function machine has four reception modes:
¥ In FAX mode, the machine answers an incoming call and immediately
goes into receive mode, waiting for a fax to be sent.
¥ In TEL/FAX mode, the machine answers an incoming call expecting
to receive a fax. If the machine does not sense a fax signal, it will
continue to sound the ringing tone to tell you it is a phone call. If you
do not lift the handset during the ringing, the machine will switch to
automatic fax reception mode.
¥ In ANS/FAX mode, the answering machine answers an incoming call,
and the caller can leave a message on the answering machine. If the
fax machine senses a fax tone on the line, the call automatically
switches over to the fax machine. To use the ANS/FAX mode, you
have to attach an answering machine to the EXT socket on your fax
machine (see page 1.8).
¥ In TEL mode, automatic fax reception is turned off. You can receive a
fax only by manually picking up the handset and pressing Start.
The current reception mode is displayed in the bottom line of the
display window when the machine is in Standby mode.
JUL-18-1998 100%
10:30
FAX
Receiving mode
If you seldom use the fax line for voice conversations, set the fax
machine to receive a fax automatically by selecting either FAX mode or
TEL/FAX mode.
Note: While you print a PC file with this machine, an incoming fax will be
received and stored in memory. If you have a lot of pages to print, we
recommend stopping PC printing to prevent memory from becoming full.
Receiving a Fax 2.17
Operation
Receiving a Fax
Receiving Automatically in FAX Mode
1. Press Rcv.Mode until the display shows ÔFAX.Õ
2. When you get a call, the machine answers the call on the default
ring and receives a fax automatically. You can change the number of
rings.
To adjust ringer volume, press Menu, System Setup on the one-touch
keypad, Enter to access the ringer volume mode, then use ¹ or
to
choose the desired loudness.
Receiving Automatically in TEL/FAX Mode
1. Press Rcv.Mode until the display shows ÔTEL/FAX.Õ
2. When you get a call, the machine answers the call on the default
ring and receives a fax signal automatically. You can change the
number of rings.
If the machine does not sense a fax signal, your machine will give
another ringing tone to tell you it is a phone call.
3. Lift the extension phone to answer the call. If you do not pick up
the extension phone within a specified time, the machine will switch
to automatic fax reception mode.
Note: If your machine is not equipped with handset, youÕll pick up the
handset of the extension phone connected to EXT.LINE jack. In the
case, pick up the handset, then press Stop.
2.18 Receiving a Fax
Receiving Manually in TEL Mode
1. Press Rcv.Mode until the display shows ÔTEL.Õ
2. When the telephone rings, pick up the handset and answer it.
3. If you hear a fax tone, or if the person on the other end asks you to
receive a document, press Start on the machine.
Or, press the buttons Ô
telephone.
9
Õ (star-nine-star) on the extension
Note: If your machine is not equipped with handset, youÕll pick up the
handset of the extension phone connected to EXT.LINE jack.
Receiving Automatically in ANS/FAX Mode
To use this mode, you must attach an answering machine to the
EXT.LINE jack on the back of your machine (see page 1.8).
1. Press Rcv.Mode until the display shows ÔANS/FAX.Õ
2. When you get a call, the answering machine answers it. If the caller
leaves a message, the answering machine stores the message normally.
If your machine hears a fax tone on the line, the fax receive mode is
activated.
Notes:
¥If you have set your machine to ANS/FAX mode and your answering machine
is switched off, or no answering machine is connected to the machine, the
machine will automatically go into fax receive mode after several rings.
¥If your answering machine has a Ôuser-selectable ring counterÕ, set the
machine to answer incoming calls within 4 ring.
¥If you are in TEL mode (manual reception) when the answering machine is
connected to your machine, you must switch off the answering machine, or
the outgoing message from the answering machine will interrupt your phone
conversation.
Receiving a Fax 2.19
Operation
4. Replace the handset. The machine begins receiving and returns to
Standby mode when reception is complete.
2
Ô
9
Ô is the remote receive start code preset at the factory. The
first and the last asterisks are fixed, but you can change the middle
character to whatever you choose. For more information, see page
2.37.
If Your Machine is Out of Paper When it Receives a Fax Receiving into Memory
If your machine is set to receive a fax automatically and the recording
paper has run out, a paper jam has occurred, or you are making a copy
or printing a list, the incoming documents are automatically stored in
the fax machineÕs memory. After receiving documents, the machine
displays ÔMEMORY RECEIVEDÕ and the cause, ÔNO PAPERÕ, for
example.
You must clear the problem by loading new paper or clearing the jam.
Then your machine will automatically print the fax stored in memory.
If you clear the problem while the machine is receiving documents into
memory, it will print the stored document immediately after you clear
the problem.
Distinctive Ring Pattern Detection (DRPD)
ÒDistinctive RingÓ is a telephone company service which enables a user
to use a single telephone line to answer several different telephone
numbers. The particular number someone uses to call you on is
identified by a distinctive ringing pattern consisting of various
combinations of long and short ringing sounds. This feature is often
used by answering services who answer telephones for many different
clients and need to know which number someone is calling in on to
properly answer the phone.
Using the Distinctive Ring Pattern Detection feature (DRPD), this
machine can ÒlearnÓ the ring pattern you designate to be answered by
the fax machine. Unless you change it, this ringing pattern will continue
to be recognized and answered as a fax call, and all other ringing
patterns will be forwarded to the telephone or answering machine
plugged into the EXT.LINE jack. You can easily suspend or change
Distinctive Ring Pattern Detection at any time.
With the DRPD feature active, ÔDRPDÕ appears in the display and the
previously set reception mode is ignored. If you turn DRPD off, the
machine returns to any previously set reception mode.
2.20 Receiving a Fax
Polling
What is Polling?
Polling is used when one fax machine requests another to send a
document. This is useful when the person with the original document to
be sent is not in the office. The person who wants to receive the document
calls the machine holding the original and requests that the document be
sent. In other words, it ÒpollsÓ the machine holding the original.
Being Polled By a Remote Machine
2. Press Menu, then press Polling on the one-touch keypad. The display
prompts that you can choose the two polling options; TX POLL and
DELAY RX POLL.
3. Press Enter to confirm Ô1.TX POLL.Õ The display asks you to enter a
4-digit poll code. The poll code is preset to 0000 at the factory, which
represents no Poll code.
TX-POLL CODE
[0000]
4. If you want to use a Poll code, enter the 4-digit code (except for
0000), then press Enter.
Or
If you do not want to secure the transmission with a Poll code, press
Enter when the display shows 0000 for TX-POLL CODE, or press 0000.
5. The display asks you to store the document in the machineÕs bulletin
memory.
If you store the document in the bulletin board memory, more than one
remote station can poll that document from your machine. If not, the file
will be automatically erased after being polled by a remote machine.
To store the document in the bulletin board memory, press Enter.
Or
If you do not want to store in the memory, press Stop.
Receiving a Fax 2.21
Operation
1. Load the document face down. If necessary, use Resolution, or
Contrast. For details, see page 2.8.
2
You can program your fax machine to send documents in your absence
when polled by a remote fax machine. It is possible to use a Poll code to
prevent unauthorized polling of your fax machine. When you secure
your machine in this manner, only those who know the Poll code can
poll your machine.
6. The machine stores the document in memory. The display counts the
number of pages being stored in memory and the memory capacity
remaining.
The machine returns to Standby mode and the display shows a
reminder that a Polling Transmission is set. The machine
automatically switches to FAX mode (automatic receiving) when set to
be polled.
Adding Documents To the Job to be polled
If you want to add documents to the original documents waiting in
memory to be polled, load the additional documents face down into the
feeder and then follow the procedure below.
1. Press Menu, then press Polling, on the one-touch keypad. The LCD
displays the polling options.
2. Press 1 to select Ô1.TX POLLÕ. The display asks you to enter the Poll
code.
TX-POLL CODE
[0000]
The last used Poll code is displayed. Poll code Ô0000Õ represents no
code.
3. Enter the 4-digit Poll code you have previously set, then press Enter.
The display asks you to select ÔADDÕ or ÔCANCEL.Õ
TX POLL
1.ADD 2.CANCEL
4. To add documents to the previously stored documents, press 1.
The machine stores the document in memory and returns to Standby
mode.
If you want to cancel the adding job and return to Standby mode,
press 2. The display asks you to confirm it. Press 1.
2.22 Receiving a Fax
Polling One or More Remote Machines
You can set your machine up to automatically receive documents from
one or more unattended remote fax machines now, or at a later time.
This feature permits unattended polling in the evening hours when
telephone rates are lower.
Note: The remote machine must be ready for polling.
1. Press Menu, then press Polling on the one-touch keypad. The
display shows the polling options.
You can press a one-touch button including Group dial button.
Otherwise, press Speed/Status, enter a 2-digit speed dial number,
then press Enter. The stored number (and name) appears in the
display. You can use only one Group number at the polling job. Press
Enter when the number appears correctly in the display.
4. The display asks you to enter another fax number to receive
documents from another location.
To poll more than one location, press Enter and repeat steps 3-4.
Or
To poll one location or when you enter all locations, press Stop.
Note: The ANOTHER FAX NUMBER? prompt does not appear if any
broadcasting currently set up in your fax machine has not executed.
One operation can be set to call up to 10 other fax numbers in a
single operation.
5. The display asks you to enter a name for the job. To assign a name to
the polling job, enter the name. If not, skip over this step.
Receiving a Fax 2.23
Operation
3. Enter the number of the remote fax machine, then press Enter.
2
2. Press 2 to select ÔDELAY RX POLL.Õ The display asks you to enter
the number of the remote fax machine.
6. Press Enter when the name appears correctly or without entering a
name. The display asks you to enter a 4-digit code. Poll code Ô0000Õ
represents no code.
If the remote machine is secured with a Poll code, you must enter
the correct code, and press Enter.
Or
If the remote machine is not secured with a Poll code, press Enter
to accept [0000] which represents no code, or press 0000.
7. The display asks you to enter the time when your machine calls the
remote machine. Enter the time in 24-hour format or 12-hour format.
For example, enter 2030 for 08:30 P.M. If you set a time earlier than
the current time, your machine call the number at that time on the
following day.
Or
To call the remote machine immediately, skip over this step.
8. Press Enter when the time appears correctly in the display or
without entering the time. If you have entered a specific start time,
the machine will dial, and receive a document from the remote
machine at the time.
If not, the machine dials the remote machine immediately.
2.24 Receiving a Fax
Making a Copy
2
Operation
Making a Copy
The resolution is automatically set to S.FINE while the copy feature is in
use, however, the contrast can be changed to produce the best copy
quality for the particular document containing faint markings, dark
image, photographs, or other halftone images.
When you make a copy, your machine provides several option features
you can choose as follows:
-Multiple copies : 1 to 99 copies of the document can be made.
-Copy rate : You can reduce or expand the image size by 1% increments
from 50% to 200%.
-Collation : When COPY COLLATE menu is set to ON, the machine
sorts the print job. For example, if you copy a three-page job to print 2
copies, the machine prints page3, page2, page1, page3, page2, page1.
To make a direct single copy without setting any option:
1. Load a document with the print side facing down. If necessary,
adjust Contrast button to change the contrast. For details on the
Contrast, see page 2.8.
2. Press Copy twice or press Copy then Enter. The machine starts
copying.
Receiving a Fax 2.25
To set copy options:
1. Load a document with the print side facing down. If necessary, adjust
Contrast button to change the contrast. For details on the Contrast, see
page 2.8.
2. Press Copy. The display asks you to enter the number of copies (1 to 99).
COPY
[01-99]
<01>
4. If you need two or more copies, enter the desired number using the
dial keypad, then press . You can also press
without setting the
number of copies. The display shows the next option; copy rate menu.
REDUCE/ENLARGE
1:AUTO 2:MANUAL
5. If you want to reduce or expand the image size, press 2, enter the
number of the desired copy rate, then press . Go to step 7.
ENTER RATE
[50-200] <100>
If not, press 1.
6. The display asks you to choose how to collate. There are two ways to
collate multiple copies; OFF and ON.
[COPY COLLATE]
1:ON 2:OFF
The ÔOFFÕ is the stacking method. This will make ÔnÕ copies of page
one, ÔnÕ copies of page two, and so on. These will all be stacked on top
of each other. The second method ÔONÕ is the sorting method. This will
make 1 copy of page 1, 2, 3, 4, in order, then makes a second copy of 1,
2, 3, 4 until a total of ÔnÕ copies has been made.
ON
OFF
1
2
1
1
1
2
2
1
2
3
2
3
Press 1 or 2 to choose the desired collation method. You can also
press
without setting the collation. The LCD display scrolls back
and shows the first option; number of copies.
7. Press Copy to begin the copy operation.
Note: When you set the copy options, pressing Copy anytime begins the copy
operation immediately without displaying the remaining options.
2.26 Making a Copy
Automatic
Dialing
2
Operation
One-Touch Dialing
One-Touch dialing lets you use any one of the 20 One-touch buttons
located on the left of the machineÕs control panel to automatically dial a
number.
Storing a Number for One-Touch Dialing
1. Press and hold the one-touch button (01 through 20) for 2 seconds
that you want to assign. The display shows `Txx:Õ, where `xxÕ
represents the selected one-touch button.
2. Enter the number up to 46 digits you want to store by using the
number keypad, then press Enter.
To insert a pause between numbers, press Redial/Pause;
a Ô-Õ(hyphen) symbol appears in the display.
If you make a mistake while entering a number, use à or ¨ to move
the cursor under the wrong digit, then enter the correct digit, or press
Delete.
Automatic Dialing 2.27
3. The display asks you to enter a name. Enter the desired name (up to
20 digits). For information on how to enter names, see page 2.4.
Or
If you donÕt want to assign a name, skip this step.
If you assign a name to the number, the name appears in the display
when you press the one-touch button.
4. Press Enter when the name appears correctly or without entering a
name.
5. To set another one-touch number, press the desired one-touch
button and repeat steps 2 through 5.
Or
To return to Standby mode, press Stop.
Sending a Fax Using a One-Touch Number
1. Load a document you want to send a fax.
2. Press the one-touch button (01 through 20) to which you stored a
number. The number will be automatically dialed, then the document
begins to transmit when the remote fax machine answers the phone.
Using Address Label
A One-touch label sheet is included with your machine. As you store
numbers in one-touch dial buttons, make a note of the numbers on the
label to remind you which number is stored in each position.
1. Remove the clear cover and
label using an instrument
with a pointed end, as
shown at right.
2. Write information on the
label and replace the label
and cover.
You may want to use pencil
in case you wish to change
these numbers later.
2.28 Automatic Dialing
Speed Dialing
Msys 5200 :
You can store up to 80 numbers in 2-digit Speed Dial locations (01-80).
Msys 5150 :
You can store up to 50 numbers in 2-digit Speed Dial locations (01-50).
Storing a Number for Speed Dialing
1. Press and hold Speed/Status for 2 seconds.
3. Enter the number you want to store, then press Enter.
4. To assign a name to the number, enter the desired name. For
information on how to enter names, see page 2.4.
Or
If you donÕt want to assign a name, skip this step.
5. Press Enter when the name appears correctly or without entering a
name.
6. To store more telephone numbers, repeat steps 2 through 5.
Or
To return to Standby mode, press Stop.
Sending a Fax Using a Speed Number
1. Load a document you want to send a fax.
2. Press Speed/Status, then enter a 2-digit speed dial location
number.
3. Press Start to dial the number. The number will be automatically
dialed, then the document begins to be transmitted when the remote
fax machine answers the phone.
Automatic Dialing 2.29
Operation
If a number is already stored in the location you chose, the display
shows the number in the upper line and `ED:1 DEL:2 NXT:3Õ in the
bottom line. Press 1 to edit that number, 2 to delete that number, or 3
to keep that number and choose another location.
2
2. Enter a 2-digit location number to which you want to store a
number, then press Enter.
Group Dialing (for Multi-Address Transmission)
Numerous one-touch and speed dial numbers can be registered as a
Group. By using the Group number, you can send a document to
multiple parties in a single operation. Your machine will dial the remote
numbers in stored sequence. If the number is busy, your machine will
dial the next stored number and after dialing all of the stored numbers,
will automatically redial any number previously busy. Before you can
use this feature, you must coordinate and store the Group numbers
desired.
Storing One-Touch or Speed Dial Numbers for Group
Dialing
1. Press Menu, then press Group Dial on the one-touch keypad.
2. Enter a 2-digit location number you want to use for group dial,
then press Enter.
The display asks you to press a one-touch button or enter a speed
dial number you wish to include in the group.
ENTER ONE-TOUCH
/ SPEED DIAL> ##
3. Press a one-touch button to which the fax number you wish to
include in the group is stored.
Or
Enter a 2-digit speed dial location to which the fax number you
wish to include in the group is stored.
4. Press Enter. Repeat steps 3 and 4 to enter more destination numbers
into the selected group.
5. Press Stop when you have entered all the desired destinations. The
display asks you to enter a name.
6. To assign a name to the Group, enter the desired name.
Or
If you donÕt want to assign a name, skip this procedure.
7. Press Enter. If you want to store another group dial number, repeat
steps 2 through 7.
Or
To return to Standby mode, press Stop.
2.30 Automatic Dialing
Storing a Group into a One-Touch Button
You can use a Group number as One-touch dialing. Before you can use
this feature, you must first register the Group number (see ÔStoring a
Number for One-touch DialingÕ on page 2.27), and then store the
registered Group number into an empty One-touch button.
1. Press and hold the One-touch button that you want to assign (01
through 20) for 2 seconds.
Sending a Fax Using Group Dialing
(Multi-Address Transmission)
You can use Group Dialing for Memory Transmission, or Delayed
Transmission.
Follow the procedure of the desired operation (Memory Transmission p. 2.14, Delayed Transmission - p. 2.12). When you come to a step in
which the display requests you to enter the remote fax number, press
the one-touch button to which you stored the group number. You can
use only one group number at one operation. Then continue the
procedure to complete the desired operation.
Your machine automatically scans the document loaded in the
document tray into memory, and the machine will dial each of the
numbers included in the Group.
Automatic Dialing 2.31
Operation
3. If you want to store another One-touch Group Dial numbers, repeat
steps 1-3. If you want to return to Standby mode, press Stop.
2
2. Enter the 2-digit Group number, then press Enter. The group
number is stored in the selected one-touch button, and the display
asks you to enter one-touch button for another group dial if you
wish.
Searching for a Number in Memory
There are two ways to search for a number in memory. You can either
scan from A to Z sequentially, or you can search using the first letter of
the name associated with the number.
Searching Sequentially through Memory
1. Press Search, then press
to move downward through the
memory until you find the number you want. To move upward,
press ¹.
Pressing
allows you to search downward through the entire
memory in alphabetical order (from A to Z), and ¹ allows you to
search upward in reverse alphabetical order (from Z to A).
Each time you press
stored in memory.
or ¹, the display shows the next number
While searching through the machineÕs memory, youÕll see that each
entry is preceded by one of three letters: ÔTÕ for one-touch dial, ÔSÕ for
speed, or ÔGÕ for group dial number. These letters tell you how the
number is stored.
2. When the number you want appears in the display, press Start to
dial.
If a document is loaded, the document begins to be transmitted when
the remote fax machine answers the phone.
Searching for a Particular First Letter
1. Press Search, then press the button labeled with the letter you
want to search for. A name beginning with the letter appears in the
display.
For example, if you want to find the name ÔMOBILE,Õ press the Ô6Õ
button, which is labeled with ÔMNO.Õ
2. Press
to display the next name in the list, or ¹ to display the
previous name.
3. When the name and number you want appear, press Start to dial.
2.32 Automatic Dialing
Other Functions
2
Operation
Using Function Buttons
Redial
TO REDIAL THE NUMBER LAST CALLED
Press Redial. If a document is loaded in the document tray, the machine
automatically begins to send.
TO SEARCH THROUGH REDIAL MEMORY
1. Press and hold Redial for 2 seconds. The Redial memory in your
machine retains the last 10 numbers called. If you have dialed the
same number multiple times, the machine does not count the
duplicates.
2. Press
or ¹ to search through memory until you find the number
you want.
3. When the number you want appears in the display, press Start to
dial. If a document is loaded in the document tray, the machine
automatically begins to send.
Other Functions 2.33
Tone
You may often need to use Touch Tone dial signals to perform special
operations by phone. Bank-by-phone and voice mail are two examples of
systems that require these signals. If you have pulse service, you can still
send Touch Tone signals by following these steps.
1. Dial the number using pulse dialing.
2. When the remote phone answers, press . Any numbers you now press
will be sent as Touch tones for the remainder of the call.
3. Dial the remaining numbers required by the service. The machine
returns to the pulse mode after you finish the call.
Flash
Some special phone services require a switch-hook signal for proper
operation. For example, if you have call waiting, you can put a call on hold
and take a second call on the same line by pressing the switch-hook button.
Pressing Flash performs the equivalent of a switch-hook operation.
1. When you are on the telephone and hear the call waiting signal, press
Flash once. The first caller is on hold and you are speaking to the
second caller.
2. Press Flash again to talk to the first caller again.
Note: If you do not have a special service that uses the switch-hook signal, donÕt
press Flash during a call. If you do, you could disconnect the line.
2.34 Other Functions
Chain Dialling
When using special computer services, such as alternate long distance
carriers, credit card calls, or bank-by-phone, you must dial the telephone
number of the service and wait for the computer to answer before
continuing. The length of time before the computer answers can vary, so
using a pre-programmed pause after a service number is not advised.
However, you can store your ID number, for example, in one memory
location and the rest of the information, such as your card number, in
another memory location.
Note: You can not use 2-digit Speed Dialling, Group Dialling, and /or redial
number for Chain Dialling.
Status
Your machine can perform more than one of the many functions at the
same time. For example, you can simultaneously:
¥ Receive a fax into memory while making a copy.
¥ Store a fax document for later transmission while printing an incoming
fax.
¥ Print an incoming fax document while scanning a document to the PC.
¥ Receive a fax into memory while printing a PC document.
¥ Print a PC document while sending a fax.
When the machine performs dual tasks, Press Speed/Status to toggle the
display between the current operation and new operation.
Other Functions 2.35
Operation
You can combine regular dialing using the dial keypad and/or One-Touch
Dialling for a Chain Dialling
2
Dial the phone number of the special service first. Then, when the
computer answers, dial the rest of the information, such as a long-distance
number. We call this procedure Chain Dialling.
Printing Reports
Your fax machine can print reports containing useful information Schedule Job, System Data, etc. The following reports are available:
Help List
This list shows the machineÕs basic functions and commands to use as a
quick reference guide.
Message Confirmation Report
This report shows the fax number, the number of pages, elapsed time of the
operation, the communication mode, and the communication results.
You can set up your machine to print the message confirmation report
(see page 2.38):
¥ Automatically after each transmission (ON)
¥ Automatically only if an error occurs during transmission (ERR)
¥ No report printed at all (OFF). You can print this report manually at
any time you want.
Schedule Information List
This list shows the document currently stored for delayed transmission ,
priority transmission, memory transmission, and TX polling. The list shows
the starting time, type of operation, etc.
Telephone Numbers List
This list shows all of the numbers currently stored in the fax machineÕs
memory as One-Touch Dial numbers, Speed Dial numbers, and Group Dial
numbers.
System Data List
This list shows the status of the user-selectable options. After you change
any setting, print this list to confirm your changes.
Transmission or Reception Journal
This report shows information concerning transmission or reception
activities. It can be printed on command, or if the machine is set to do so
(see page 2.39). It will automatically print after every 50 transmissions or
receptions.
Multi-Communication Report
This report is printed automatically after sending to or receiving from more
than one location.
2.36 Other Functions
Call Back Message
This report is printed out automatically when you do not respond to a
remote operatorÕs Voice Request.
Power Failure Report
This report is printed out automatically when data in memory was
erased. This report shows data (if any) erased by the power failure.
Note: The list you have set to print out automatically will not print out in
case of no paper, paper jam, or PC print.
2
TO PRINT LIST
2. Press the desired list button on the one-touch keypad.
On the one-touch keypad, press Journal for Transmission or
Reception Journal, Help List for Help List, TX Confirm for Message
Confirmation Report, Schedule Job for Schedule Information List,
Phone Book for Telephone Numbers List, System List for System
Data List.
The selected list will be printed out.
Other Functions 2.37
Operation
1. Press Menu.
User Options
Your fax machine has various user-selectable features. These options are
preset at the factory, but you may need to change them. To find out how
the options are currently set, print the System Data List. For more
information on printing the list, see page 2.36 ~ 2.37.
Setting an Option
1. Press Menu, then press System Data on the one-touch keypad.
The display shows the first option menu.
2. Scroll through the options by pressing
or ¹ repeatedly.
3. When the option you want appears in the display, enter the number
for the desired status. Or, You can use à or ¨ button to select the
desired status, then press Enter after choosing.
You can exit from setup mode at any time by pressing Stop. When
you press Stop, the machine stores the options youÕve already
changed and returns to Standby mode.
Selectable Options
These instructions assume youÕve followed the steps above under
ÔSetting an OptionÕ and the machine is prompting you to change one of
the options listed here.
¥ PAPER SIZEÑSelect the paper size you will use for the recording
paper.
Press 1 for letter (LTR), 2 for A4 size, or 3 to use legal (LGL) size paper.
¥ MESSAGE CONF.ÑA message confirmation report shows whether
the transmission was successful or not, how many pages were sent,
etc.
Press 1 to print a confirmation report automatically each time you
send a fax (ON).
Press 2 to turn this feature off (OFF).
Press 3 to print only when an error occurs and the transmission was
not successful (ERR).
2.38 Other Functions
¥ AUTO JOURNALÑA journal shows specific information concerning
transmission or reception activities, the time and dates of up to 50 of the
most recent transmissions or receptions.
Press 1 to print journal automatically after every 50 transmissions or
receptions (ON).
Press 2 to print journal manually (OFF).
¥ REMOTE CODEÑThe remote receive start code allows you to initiate
fax reception from an extension phone plugged into the EXT.LINE jack on
the back of your machine. If you pick up the extension phone and hear
fax tones, enter the remote code and the machine will start receiving. The
password is preset to
9
at factory.
Press 1 to turn the feature ON. The display asks you to determine the
length of time the printer waits after a job is printed before it goes to a
reduced power state:
Press 1 for 10 minutes, 2 for 15 minutes, 3 for 30 minutes, 4 for 45
minutes, or 5 for 60 minutes.
If your printer is used constantly, press 2 to turn the feature OFF. It keeps
the printer ready to print with the minimum warm-up time.
¥ DIAL MODEÑSelect the type of dial system your fax machine is
connected to.
Press 1 if the fax machine is connected to a tone (Touch Tone) dial line.
Press 2 if the fax machine is connected to a pulse (Rotary) dial line.
¥ ECM MODE (Error Correction Mode)ÑThis mode compensates for poor
line quality and ensures accurate, error-free transmission with any other
ECM-equipped facsimile machine. If the line quality is poor, transmission
time may be increased when ECM is enabled.
Press 1 to turn the Error Correction mode on.
Press 2 to turn the Error Correction mode off.
Other Functions 2.39
Operation
¥ POWER SAVEÑThe power saving menu item lets you reduce power
usage when the printer is idle.
2
Enter the desired code 0 to 9 on the number keypad.
¥ RX REDUCTIONÑWhen receiving a document as long as or longer than
the paper installed in your machine, the machine can reduce the data in
the document to fit into your recording paper size.
Turn on this feature if you want to reduce an incoming page that may
otherwise need to be divided into two pages with only a few centimeters
on the second page. If the fax machine cannot reduce the data to fit into
one page with the feature enabled, the data is divided and printed in
actual size on two or more sheets if needed.
Press 1 to turn this feature on. Note that this feature does not apply to the
copy mode.
Press 2 to turn this feature off. The overflow data will be printed out on a
second page.
- H.(Horizontal) REDUCTIONÑIf you turn the RX reduction feature on,
you are allowed to set the horizontal reduction feature on or off. When
you set the horizontal reduction to be on, the machine will reduce an
incoming page containing overflow data only in vertical as shown below.
Original
Received data
If you want to reduce both in vertical and horizontal at the same rate in
order to maintain height to width relationships, turn the horizontal
reduction feature off. If you turn off this feature, the machine reduces the
data as shown below.
Original
Received data
Press 1 to turn this feature on.
Press 2 to turn this feature off.
¥ DISCARD SIZEÑWhen receiving or copying a document as long as or
longer than the paper installed in your fax machine, you can set the fax
machine to discard any excess image at the bottom of the page to fit into
the recording paper size.
If the received page is outside the margin you set, it will be printed on
two sheets of paper at the actual size.
If the data is within the margin, and the Auto Reduction feature is turned
on, it will be reduced to fit into the appropriate size paper (Discard does
not take place). If the Auto Reduction feature is turned OFF or fails, the
data within the margin will be discarded.
Enter the desired discard size using the number keypad, and press Enter.
2.40 Other Functions
¥ REDIAL INTERVALÑYour machine can automatically redial a remote
fax machine if it was busy or does not answer the first call.
Enter the number of minutes (from 01 to 15) using the number keypad.
¥ REDIALSÑEnter the number of attempts (from 0 to 9) to redial the
number before giving up.
If you enter 0, the machine will not redial.
¥ ANSWER ON RING ÑYou can select the number of times your machine
rings before answering an incoming call. If you are using your machine
as both a telephone and a fax machine, we suggest you set the ring count
to at least 4 to give you time to answer.
Using the Distinctive Ring Pattern Detection feature, your fax machine
can ÔlearnÕ the ring pattern you designate to be answered by the FAX
machine. Unless you change it, this ringing pattern will continue to be
recognized and answered as a FAX call, and all other ringing patterns
will be forwarded to the extension telephone or answering machine
plugged into the EXT.LINE jack.
You can easily suspend or change Distinctive Ring Pattern Detection at
any time.
Before using the Distinctive Ring Pattern Detection option, Distinctive
Ring service must be installed on your telephone line by the telephone
company. To setup Distinctive Ring Pattern Detection, you will need
another telephone line at your location, or someone available to dial your
FAX number from outside.
Press 1 to turn this feature on.
Press 2 to turn this feature off.
Press 3 to setup the Distinctive Ring Pattern Detection. The LCD displays
ÔWAITING RINGÕ. Call your fax number from another telephone. It is not
necessary to place the call from a fax machine. When your machine
begins to ring, do not answer the call. The machine requires several rings
to learn the pattern.
When the machine completes ÔlearningÕ, the LCD displays ÔEND DRPD
SETUPÕ.
Other Functions 2.41
Operation
¥ DRPD (Distinctive Ring Pattern Detection) MODEÑ ÕDistinctive RingÕ
is a telephone company service which enables a user to use a single
telephone line to answer several different telephone numbers. The
particular number someone uses to call you on is identified by different
ringing patterns, which consist of various combinations of long and short
ringing sounds. This feature is often used by answering services who
answer telephones for many different clients and need to know which
number someone is calling in on to properly answer the phone.
2
Enter a number from 1 through 7 on the number keypad.
With the DRPD feature active, ÔDRPDÕ appears in the display and the
previously set reception mode is ignored. If you turn DRPD off, the
machine returns to any previously set reception mode.
Notes:
¥ DRPD must be set up again if you re-assign your fax number, or connect the
machine to another telephone line.
¥ After DRPD has been set up, call your fax number again to verify that the
machine answers with a fax tone, then have a call placed to a different
number assigned to that same line to be sure the call is forwarded to the
extension telephone or answering machine plugged into the EXT.LINE jack.
¥ SEND FROM MEMORY ÑIf you are annoyed that you have to wait
until documents in the feeder are sent out when you try to send or
reserve another fax, turn this feature on. This feature enables all
transmission documents are automatically scanned into memory before
transmission.
Press 1 to turn this feature on.
Press 2 to turn this feature off.
¥ LOCAL IDÑThis feature allows the machine to automatically print the
page number, and the date and time of the reception at the bottom of
each page of a received document.
Press 1 to turn this feature on.
Press 2 to turn this feature off.
¥ PRIORITY TERMÑWhen you want to print a PC document while the
machine prints a received fax on the recording paper, you can interrupt
the printing and print the PC document. Press the Print Priority button to
enable the feature. The interrupted fax data will be stored in memory. To
disable, press the Print Priority button again.
You can set your machine to turn the feature off automatically if there is
no further data printed within 30 minutes or 8 hours after PC printing.
Press 1 to select 8 hours. The machine turns the feature off automatically
8 hours after PC printing is completed.
Press 2 to select 30 minutes. The machine turns the feature off
automacally 30 minutes after PC Printing is completed.
¥ CLOCK MODEÑThis feature is to select the time format.
Press 1 to select 12 hour format.
Press 2 to select 24 hour format.
2.42 Other Functions
Maintenance
If you are getting streaks or spots on your print, you may run the
maintenance.
Cleaning Drum
This procedure removes excess toner on the OPC drum.
1. Make sure that paper is loaded in the automatic feeder.
2. Press Menu, and Maintenance on the one-touch keypad.
2
3. Press Enter. The machine automatically pulls in a sheet of paper, and
prints out. The toner particles on the OPC drum surface is fixed to
the paper.
Adjust Shading
This procedure makes a new shading reference value.
1. Make sure that white paper is loaded in the automatic feeder. It is
recommended to load a letter-sized paper (216 ✕ 279 mm).
2. Press Menu, and Maintenance on the one-touch keypad.
3. Press ¹ or
to select `ADJUST SHADING?Õ option.
4. Press Enter.
5. Press 1 to confirm your selection.
Other Functions 2.43
Operation
CLEAN DRUM ?
3
Troubleshooting
3.1
Troubleshooting
Clearing Jams
Document Jams While Sending a Fax
If a document jams while you are sending it, ÔDOCUMENT JAMÕ
appears in the display. Do not pull the document out of the slot. If you
do this, it could harm your machine.
1. Open the control panel with hand.
2. Carefully remove the jammed document. Then close the control
panel firmly until it clicks into place.
3.2
Troubleshooting
Paper Jams While the Machine is Printing
By carefully selecting paper type and loading them properly, you
should be able to avoid most paper jams. If paper jams occur, an error
message appears in the display. Follow the steps below to clear jam. To
avoid tearing paper, pull the jammed paper out gently and slowly.
IF JAMMED IN THE PAPER FEED AREA
1. Remove the jammed paper as shown below.
3
Adjust the paper guide to match the width of the paper.
Troubleshooting
3.3
Troubleshooting
2. After you have removed the jammed paper, load the paper with the
print side facing you.
IF JAMMED IN THE PRINTER OUTPUT AREA
1. If the paper jams as it exits to the printer exit tray and a long
portion of the paper is visible, pull the paper straight out.
If there is resistance to the paper, and it does not move immediately
when you pull, stop pulling. Continue with the next step.
IF JAMMED INSIDE THE MACHINE
1. Pulling the cover release button toward you, open the cover.
2. Remove the image cartridge.
3.4
Troubleshooting
3. Gently pull the paper toward you.
4. Check that there is no other paper in the machine.
5. Reinstall the image cartridge, then close the cover.
3
Tips for Avoiding Paper Jams
¥ Follow the procedures in ÒLoading PaperÓ on page 1.11 to load paper
properly. Make sure that the adjustable guides are positioned
correctly.
¥ Do not overload the paper. Make sure that the paper can be loaded
up to 150 sheets at a time.
¥ Flex, fan, and straighten the paper before loading it.
¥ Do not load wrinkled, creased, damp, or highly curled paper.
¥ Do not mix paper types.
¥ Use only recommended print materials.
¥ Make sure that the recommended print side is facing up when
loading in the feeder.
¥ Keep print materials stored in an acceptable environment.
Troubleshooting
3.5
Troubleshooting
By carefully selecting print materials and loading them properly, you
should be able to avoid most paper jams. If jams do occur, follow the
steps outlined in ÒClearing JamsÓ starting on page 3.2. If jams occur
frequently, make sure that you are following these tips to avoid jams.
LCD Error Messages
Display
Meaning
Solution
RETRY REDIAL?
The machine is waiting for the
programmed interval to
automatically redial a previously
busy station.
You can press Start to
immediately redial, or Stop to
cancel the redial operation.
COMM. ERROR
A problem with facsimile
communications has occurred.
Try again.
Remote party did not have the
requested feature, such as polling.
Reconfirm your remote partyÕs
feature.
INCOMPATIBLE
This also occurs if the remote machine
has insufficient memory to complete
the operation you are attempting.
DOCUMENT JAM
The loaded document has jammed
in the feeder.
Clear the document jam.
DOOR OPEN OR
NO TONER
The cover is not securely latched, or
the image cartridge is not installed.
Press down on the cover until it
clicks in place, or install the
cartridge.
GROUP NOT
AVAILABLE
You have tried to select a group
location where only a single
location number can be used.
LINE ERROR
Your unit cannot connect with the
remote machine, or has lost contact
because of a problem on the phone line.
Try again. If failure persists, wait
an hour or so for the line to clear,
then try again.
Or, turn the ECM mode on. See
ÔUser Options.Õ
You have attempted to set up a
sending operation with no document
loaded.
Load a document and try again.
The memory has become full.
Either delete unnecessary
documents, or retransmit after
more memory becomes available,
or split the transmission into
more than one operation.
LOAD DOCUMENT
MEMORY FULL
NO ANSWER
3.6
Troubleshooting
The remote machine has not answered
after all the redial attempts.
Try again.
Make sure the remote machine is
operational.
Display
Meaning
Solution
NO PAPER
The recording paper has run out.
Load the recording paper.
OVERHEAT
The printer part in your unit has
overheated.
Please wait until it cools down. If
you cannot solve the problem,
please call service.
PAPER JAM 0
OPEN/CLOSE DOOR
Recording paper has jammed in
paper feeding area.
Clear the jam.
PAPER JAM 1
OPEN/CLOSE DOOR
Recording paper has jammed inside
the unit.
Clear the jam.
PAPER JAM 2
CHECK INSIDE
The jammed paper still remains
inside the unit.
Clear the jam.
The remote fax machine you want to
poll is not ready to respond to your
poll.
The remote operator should know
in advance that you are polling
and have their fax unit loaded
with the original document.
POLLING ERROR
Or
When setting up to poll another fax
machine, you have used an incorrect
poll code.
WARMING UP
PLEASE WAIT
The machine is warming up and is
off-line.
Take out the toner cartridge
machine and gently shake it. After
printing a few pages, ÔTONER
EMPTY, REPLACE[CARTRIDGE]Õ
appears in the display, and the
printer system stops. Replace with
new one.
The toner cartidge has run out .
The machine stops.
Replace with a new toner
cartridge, and cleaning felt
simultaneously.
There is a problem in the Fuser unit
Unplug the power code and plug
it in again. If you cannot solve the
problem, please call service.
There is a problem in the LSU
(Laser Scanning Unit)
Unplug the power code and plug
it in again. If you cannot solve the
problem, please call service.
FUSER ERROR
ENGINE ERROR
Wait until the machine is on-line.
The toner is almost empty.
TONER LOW
TONER EMPTY, REPLACE [CARTRIDGE]
Enter the correct poll code.
Troubleshooting
3.7
Troubleshooting
Dial the number manually with the
keypad, or assign the number.
3
NO. NOT ASSIGNED
The One-Touch or Speed Dial
location you tried to use has no
number assigned to it.
Fixing Problems
Your problem may be listed on page 3.6 in the ÔLCD Error
MessagesÕ section. Below are other problems you can solve
by yourself. If not, call for service.
Fax Problems
Symptom
The machine is not working,
there is no display and the
buttons are not working.
Cause and Solution
¥ Unplug the power cord and plug it in again.
¥ Check your socket is live.
¥ Check the phone line is connected properly.
No dial tone.
The numbers stored in the
memory do not dial correctly.
¥ Check the phone socket in the wall by plugging in
another phone.
¥ Make sure that the numbers are stored in memory
correctly.
¥ Print a Telephone Numbers List. See page 2.39.
The document does not feed
into the machine.
¥ Make sure that the document is not wrinkled and you
are putting it in correctly. Check the document is the
right size, not too thick or thin.
¥ Make sure that the cover is firmly closed.
You cannot receive faxes
automatically.
¥ The FAX or TEL/FAX mode should be selected.
¥ Is there paper in the machine?
¥ Check if the display shows ÔMEMORY FULL.Õ
The machine cannot receive
faxes manually.
¥ Did you hang up the handset before you pressed Start?
Note: It will be applied when you have Work Centre with
handset or you have a phone connected to the EXT.LINE
jack on the bottom of the machine.
¥ Make sure that the document is loaded face down.
The machine will not send
anything.
3.8
Troubleshooting
¥ ÔTXÕ should show up in the display.
¥ Check the other machine you are sending to, to see if
it can receive your fax.
Symptom
You cannot poll another
machine.
The fax you receive has got
blank spaces or you received
poor-quality copy.
Cause and Solution
¥ The fax machine you are polling may be using a poll
code.
¥ The machine sending you the fax may be faulty.
¥ The fax machine sending you a fax may have a dirty scan
glass.
¥ A noisy phone line can cause line errors.
¥ Check your machine by making a copy.
¥ The cartridge toner may be empty.
¥ You may run the Adjust Shading in Maintenance.
Are some of the words on the
fax you receive stretched?
¥ The machine sending you the fax had a temporary
document jam.
There are lines on copies or
documents you send.
¥ Check your scan glass for marks, and clean it. See
page 3.11.
The machine dials a number,
but fails to make a
connection with another fax
machine.
¥ The other fax machine may be turned off, out of paper,
or cannot answer incoming calls. Speak with the other
machine operator and ask them to sort out the problem.
You cannot store a document
in memory.
¥ There may not be enough memory to store the
document. If the display shows a ÔMEMORY FULLÕ
message, delete any documents you no longer need
from the memory, then restore the document.
Blank areas appear at the
bottom of each page or on
other pages, with only a small
strip of text printed at the top.
¥ You may have chosen the wrong paper settings in the
user options set up. See page 2.38 to choose the proper
paper size.
3.9
Troubleshooting
Troubleshooting
3
Poor-quality Copy
Maintenance
Clearing Memory
You can selectively clear information stored in your machineÕs memory.
1. Press Menu, then press Memory Clear on the one-touch keypad.
The display shows the options you can choose to clear.
1. SYSTEM ID : your System ID number and name are cleared from
the machineÕs memory.
2. SYSTEM DATA : restores user-selectable options to the default
value.
3. PHONEBK&MEMORY : clears the one-touch, speed dial, or group
dial numbers stored in memory. In
addition, all the Schedule Job operations
you have reserved are also canceled.
4. TX-RX JOURNAL : clears all records of transmissions & receptions.
3. Move to the options by pressing ¹ or
you want to clear is blinking.
repeatedly until the one
4. Press Enter. The display asks you to confirm your selection.
5. Press 1 to confirm. Or use à or ¨ to choose ÔYESÕ, then press Enter.
The selected memory is cleared.
3.10 Maintenance
Cleaning the Document Scanner
To keep your machine working properly, occasionally clean the white
roller, ADF rubber, and the scanning glass. If they are dirty, documents
sent to another fax machine will not be clear.
Note: Do not turn the power off to clean the scanner, as documents stored in
memory will be lost.
1. Open the control panel with hand.
A
busing
3. Wipe the roller surface with a soft cloth dampened with water.
Maintenance 3.11
Troubleshooting
B
3
2. Disassemble the white roller as follows:
Both ends of the white roller have plastic bushings that are snapped
shut with small tabs on them. Pull the bushing slightly inward (A) ,
then rotate the bushing (B) until it reaches a slot. Then pull the roller
upward.
4. Clean the ADF rubber piece also.
5. Carefully wipe the scanning glass with a soft, dry cloth.
If the glass is very dirty, first wipe it with a slightly dampened cloth,
then with a dry cloth. Be very careful not to scratch the glass surface.
6. Replace the roller in reverse order, and then close the control panel
firmly until it clicks into place.
3.12 Maintenance
Managing Image Cartridge
Expected Cartridge Life
The life of your image cartridge depends on the amount of toner used
in each print job. For instance, when you print a typical business letter
with about 5% page coverage, you can expect a print cartridge life of
approximately 5,000 pages. The actual number may vary according to
the print density of the page you print. If you print a lot of graphics,
you may need to change the cartridge more often.
You can extend the life of your print cartridge by using Econo Mode
setting. Econo Mode uses approximately 50% less toner than normal
printing. The printed image is much lighter, and is adequate for
printing drafts or proofs.
Replacing Image Cartridge
2. Gently shake the cartridge to distribute the toner evenly inside the
cartridge.
3. Reinstall the cartridge and close the cover.
This is typically successful one time only. When the toner will
eventually run out, white pages will be printed when a print job is sent,
or when a fax is received. The print cartridge needs to be replaced. See
the following page.
Maintenance 3.13
Troubleshooting
1. Open the cover and remove the image cartridge.
3
When the image cartridge is near the end of its life, white streaks or hue
changes will occur. You can temporarily re-establish print quality by
redistributing the remaining toner in the cartridge.
To replace the image cartridge:
1. Pulling the cover release button toward you, open the machine
cover.
2. Remove the old image cartridge. Follow the instructions printed on
the cartridge box to recycle the used cartridge.
3. Unpack a new image cartridge, and carefully remove the sealing
tape.
3.14 Maintenance
4. Shake the cartridge from side to side 5 or 6 times to distribute the
toner evenly inside the cartridge.
5. Find the cartridge slots inside the machine, one on each side. Grasp
the handle and slide the cartridge down between the cartridge slots
until it drops into place.
3
Troubleshooting
6. Close the cover firmly.
Maintenance 3.15
Memo
3.16 Maintenance
Appendix
4.1
Appendix
FCC Regulations
This equipment has been tested and found to comply with the limits for a Class B digital
device, pursuant to Part 15 of the FCC Rules. These limits are designed to provide
reasonable protection against harmful interference in a residential installation. This
equipment generates, uses and can radiate radio frequency energy and, if not installed and
used in accordance with the instructions, may cause harmful interference to radio
communications. However, there is no guarantee that interference will not occur in a
particular installation. If this equipment does cause harmful interference to radio or
television reception, which can be determined by turning the equipment off and on, the user
is encouraged to try to correct the interference by one or more of the following measures:
¥ Reorient or relocate the receiving antenna.
¥ Increase the separation between the equipment and receiver.
¥ Connect the equipment to an outlet on a circuit different from that to which the receiver
is connected.
¥ Consult the dealer or an experienced radio/TV technician for help.
Do not make any changes or modifications to the equipment unless specified in the manual.
If such changes or modifications should be made, you could be required to stop operation of
the equipment.
Use of shielded cable is required to comply with Class B limits in Subpart B of Part 15 of
FCC Rules.
Canadian Radio Interference Regulations
This digital apparatus does not exceed the Class B limits for radio noise emissions from
digital apparatus as set out in the interference-causing equipment standard entitled ÒDigital
ApparatusÓ, ICES-003 of the Industry and Science Canada.
Cet appareil numŽrique respecte les limites de bruits radioŽlectriques applicables aux
appareils numŽriques de Classe B prescrites dans la norme sur le matŽriel brouilleur:
ÒAppareils NumŽriquesÓ, NMB-003 ŽdictŽe par lÕIndustrie et Sciences Canada.
4.2
Appendix
Laser Safety Statement
The printer is certified in the U.S. to conform to the requirements of DHHS 21 CFR
Subchapter J for Class I(1) laser products, and elsewhere is certified as a Class I laser
product conforming to the requirements of IEC 825.
Class I laser products are not considered to be hazardous. The laser system and printer are
designed so there is never any human access to laser radiation above a Class I level during
normal operation, user maintenance, or prescribed service condition.
WARNING Never operate or service the printer with the protective cover removed from
the Laser/Scanner assembly. The reflected beam, although invisible, can
damage your eyes.
CAUTION
-INVISIBLE LASER RADIATION WHEN THIS COVER IS OPEN.
DO NOT OPEN THIS COVER
VORSICHT
-UNSICHTBARE LASERSTRAHLUNG, WENN ABDECKUNG
GEÖFFENT. NICHT DEM STRAHL AUSETZEN.
ATTENTION
-RAYONNEMENT LASER INVISIBLE EN CAS D’OVERTURE.
DANGEREUSE AU FAISCEAU.
ATTENZIONE
-RADIAZIONE LASER INVISIBILE IN CASO DIAPERTURA.
EVITARE L’ESPOSIZIONE AL FASCIO.
PRECAUCION -RADIACION LASER IVISIBLE CUANDO SE ABRE. EVITAR EXPONERSE AL
RAYO.
ADVARSEL
-USYNLIG LASERSTRÅLNING VED ÅBNING NÅR SIKKERHEDSBRYDERE
ER UDE AF FUNKTION UNDGÅ UDSAETTELSE FOR STRÅLNING.
ADVARSER
-USYNLIG LASERSTRÅLNING NÅR DEKSEL ÅPNES. STIRR IKKE INN I
STRÅLEN. UNNGÅ EKSPONERING FOR STRÅLEN.
VARNING
-OSYNLIG LASERSTRÅLNING NÄR DENNA DEL ÄR ÖPPAND OCH SPÄRREN
ÅR URKOPPLAD. BETRAKTA EJ STRÅLEN STRÅLEN AR FARLIG.
VARO
-AVATTAESSA JA SUOJALUKITUS OHITETTAESSA OLET ALTTIINA
NÄKYMÄTTÖMÄLLE LASERSÄTEILYLLE ÄLÄ KATSO SÄTEESEEN.
Appendix
4.3
Laser product labels are located above the print cartidge.
CLASS 1 LASER PRODUCT
LASER KLASSE 1
LUOKAN 1 LASERLAITE
APPAREIL À LASER DE CLASSE 1
TO IEC 825
Safety Information
PRODUCT SAFETY
USA
UL 1950 (UL LISTING)
CANADA
CSA C22.2 No. 950 & UL 1950 (CSA Certification)
EEC (Europe)
IEC 60950/EN 60950 (TÜV GS Certification)
CB
IEC 60950
LASER SAFETY
EEC (Europe)
HD 194. & EN 60825
USA
21 CFR, Chapter 1, Subchapter J (CDRH Certified)
Power Saver
This printer contains advanced energy conservation technology that reduces power
consumption when it is not in active use.
When the printer does not receive data for an extended period of time, power consumption
is automatically lowered. For potentially faster printing of the first page, you may turn the
power save off from the Remote Control Panel setting.
The energy star emblem does not represent EPA endorsement of any product or service.
4.4
Appendix
Specifications
Applicable line
Public Switched Telephone Network (PSTN) or behind PABX
Compatibility
CCITT Group 3
Data coding
MH/MR/MMR
Modem speed
14400/12000/9600/7200/4800/2400 bps
Transmission speed
Approx. 6 sec.
Effective scanning width
8.3 inches (210 mm)
(V.17 ECM: 14.4 kbps)
Effective printing width
8.2 inches (202 mm)
Scanning method
Sheet-fed Contact Image Sensor (CIS)
Memory
2 MByte
Halftone
256 levels
Printing speed
8 PPM
Automatic document feeder
30 pages (based on 20 Ib or 75 g/m2)
LCD
16 characters ✕ 2 lines
Dimension (H ✕ W ✕ D)
238 ✕ 355 ✕ 415 mm
Weight
9 Kg
Power requirements
120 VAC, 60 Hz
Power consumption
Environmental conditions
(Standby) 13 W
Temperature : 50¡F to 86¡F (10¡C to 30¡C)
Humidity : 30% to 80% RH
Auto dialer
One-touch dialing (registration for 20 numbers)
Speed dialing
- Registration for 80 numbers
Document size Ð Width
Ð Length
5.8 to 8.5 inches (148 to 216 mm)
Single page : 5 to 59 inches (128 to 1,500 mm)
Multi pages : 8.3 to 11.7 inches (279 to 297 mm)
Single page : 50 to 100g/m2 (0.07 to 0.20 mm)
20 pages : 50 to 90g/m2 (0.07 ti 0.13 mm), Uncoated paper
30 pages : 75g/m2 (0.1 mm), Uncoated paper
- Weight
(thickness)
Recording paper size
- for automatic feeder
Ð for manual feeder
Letter : 8.5 ✕ 11 inches (216 ✕ 279 mm)
A4
: 8.3 ✕ 11.6 inches (210 ✕ 297 mm)
Legal : 8.5 ✕ 14 inches (216 ✕ 356 mm)
weight : 60 to 90 g/m2
thickness : 0.08 to 0.12 mm
min. : 4 ✕5.9 inches (100 ✕ 149 mm)
(weight : 60 to 130 g/m2)
Recording paper capacity
Paper : 150 sheets (based on 75g/m2 paper)
Other media : Up to 5 sheets (OHP, envelopes, labels)
Printing method
Laser Scanning Unit
Scanning density Ð Horizontal
Ð Vertical
300 dpi
Standard : 3.85 lines/mm (98 Lpi)
Fine
: 7.7 lines/mm (196 Lpi)
Super fine
: 11.8 lines/mm (300 Lpi)
Super fine
: 15.4 lines/mm (392 Lpi)
Image cartridge life
5,000 @ 5 % coverage(A4)
Appendix
4.5