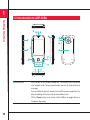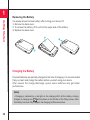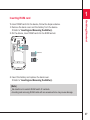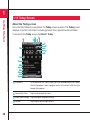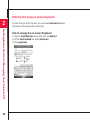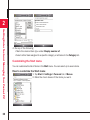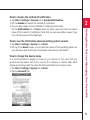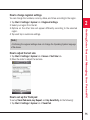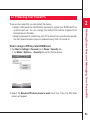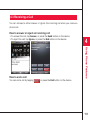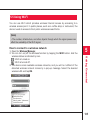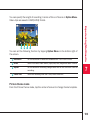
1
Thank you for purchasing our Pocket PC Phone, ASP-505A ASP-505A is Pocket PC Phone which supports Microsoft® Windows MobileTM 6.1 software and CDMA technology. This allows you to use PDA, mobile phone, multi-media and GPS functions. The ASP-505A reflects the thought "AnyTime AnyPlace AnyWireless Data SolutionTM", the goal to which AnyDATA.NET., INC (AnyDATA) moves forward. And it is intended to be used as a wireless communication device which you can easily use your important information in anywhere and at any time. The main features of ASP-505A are as following q PDA (Personal Digital Assistants) This product implemented Microsoft® Windows MobileTM 6.1 as the operating system and allows you to manage your personal information, such as appointments, contacts, tasks, memos and messages. With this wireless terminal device, you can also download or upload various data from PC. q EVDO Rev.A Wireless Technology ASP-505A is the Pocket PC Phone which supports EVDO Rev.A. This product provides the voice call, SMS and the Internet service. In addition, it uses EVDO Rev.A during connection for a fast data transfer. The ideal speed for the maximum data transfer is 3.1Mbps(downlink) and 1.8Mbps(uplink). T he actual data transfer rate can vary depending on radio waves or communication circumstances. 1 q Multi-Media Using the built-in 2.0 mega pixels Camera, you can take a photo or a video clip. The device also supports multi-media files such as WAV, MP3, 3GP, WMA, and WMV. q Wi-Fi You can use high-speed internet within a specific distance from wireless connection device (AP). q Bluetooth Bluetooth, a short-distance wireless communication technology, allows you to exchange information anywhere within limited range. q microSD Card for External Memory microSDTM card is a compatible storage card in where you can save and make a backup copy of the data that are used for the phone. q Built-In GPS Module 24 GPS (Global Positioning System) satellites orbit above the earth. ASP-505A has the built-in GPS Module, which analyzes the signal beamed from those satellites and allows you to catch a user’s location or navigate to the desired destination. It has Sirf-III GPS Engine which is small and able to calculate the location information accurately. Since it has the built-in GPS antenna, you don’t need to carry GPS antenna with you. Also, it does not support external GPS antenna. 2 Contents Please Read Before Using This Pocket PC Phone Safety Precautions Handling and Care 1. Getting Started 1.1 Checking the Components 1.2 Introduction to ASP-505A 1.3 About the Battery 1.4 About the RUIM Card 1.5 microSD Memory Card 1.6 About LED Features 1.7 Start Wizard 1.8 Power On/Off 1.9 Soft Reset and Hard Reset 1.10 Today Screen 1.11 Start menu 2. Entering Text and Managing Your Pocket PC 2.1 Entering Text 2.2 Customizing Your Pocket PC 2.3 Adding and Removing Programs 2.4 Managing Memory 2.5 Backing Up Data 2.6 Searching Information 26 28 31 35 38 39 42 43 44 46 52 60 63 77 78 80 82 3 2.7 Protecting Your Pocket PC 2.8 AnyDATA Settings 83 87 3. Synchronizing Your Pocket PC and Setting Up E-mail Security 3.1 Installing ActiveSync 3.2 Synchronizing Information 3.3 Synchronizing via Bluetooth 3.4 Synchronizing Music, Video, and Pictures 3.5 Setting Up E-mail Security 4. Using Phone Features 4.1 Using the Phone 4.2 Making a Call 4.3 Receiving a Call 4.4 Incoming Call Options 4.5 Additional Dialing Information 92 93 96 97 98 102 106 111 112 113 5. Getting Connected 5.1 Connecting to the Internet 5.2 Internet Explorer Mobile 5.3 Using Wireless Manager 5.4 Using Bluetooth 5.5 Using Wi-Fi 5.6 Using Internet Sharing 5.7 Using Terminal Services Client 4 116 121 125 126 135 139 140 6. Exchanging Messages and Using Outlook 6.1 E-mail and Text Messages 6.2 Calendar 6.3 Contacts 6.4 Tasks 6.5 Notes 7. Experiencing Multimedia 7.1 Using Camera 7.2 Using Pictures & Videos 7.3 Using Windows Media Player Mobile 8. Using Other Applications 8.1 Word Mobile 8.2 Excel Mobile 8.3 Viewing Slide Shows with PowerPoint Mobile 8.4 OneNote Mobile 8.5 Windows Live Appendix A.1 ASP-505A Specification A.2 PC Requirement for running ActiveSync 4.x 144 153 155 158 160 166 170 175 182 183 184 186 191 206 210 5 Please Read Before Using This Pocket PC Phone Before using this Pocket PC Phone, read "Safety Precautions" and "Handling and Care" carefully so that you can use it properly. Using the device following those instructions can avoid or reduce risks such as bodily injury, electric shock, fire or damages to the product or property. Damages or trouble on the device due to improper usage are not covered by warranty. Since Pocket PC Phone is a communication device, each country may have their own laws and regulations regarding communication devices. Be sure to obey the appropriate laws and regulations. AnyDATA will not be liable for problems which are occurred due to a customer’s disobey. After reading the safety precautions, keep this manual in a safe place for later reference. [Note] pixel may incur during the product manufacturing process. AnyDATA • Malfunctioning uses LCD component with three or less malfunctioning pixels only. • If LCD screen of your purchased product appeared that four or more malfunctioning pixels are found, you may request replacement of the LCD screen within seven days from the purchased date. 6 Safety Precautions (Always Follow These Precautions) The signs below indicate the levels of danger or damage that may occur if the particular precautions are not observed. This sign indicates that incorrect handling has a high DANGER possibility of causing death or serious injury. This sign indicates that incorrect handling poses a risk WARNING of causing death or serious injury. This sign indicates that incorrect handling poses a risk CAUTION of causing injury or damage to the product or property. “Safety Precautions” are explained in the following 6 sections. General Precautions...........................................................................................8 Precautions for the Pocket PC Phone...............................................................10 Precautions for the Battery................................................................................12 Precautions for the AC Adapter.........................................................................14 Precautions for the RUIM card...........................................................................16 Using near by the Electronic Medical Equipment............................................17 7 General Precautions DANGER q Use only the products and accessories (battery, AC adapter, etc.) provided or approved from AnyDATA. ● Using the products and accessories which are not provided or approved from AnyDATA can cause fire, burn, electric shock or trouble on the device. q Do not disassemble, reassemble, and repair the device or accessories. In case that the device or accessories have some trouble on them, go to the designated repair office and get them repaired. ● Doing so may cause fire, burn, electric shock or trouble on the device. q Do not use or leave device in places with high temperature such as in cars under the blazing sun. ● Doing so may cause transformation, trouble, heat-generation, fire, or reduced performance or durability, on the device or accessories. q Do not expose to water or other liquids. ● Doing so may cause fire, burn, electric shock or trouble on the device. WARNING q Stop using the device when unusual conditions like smell, heat, discoloration or transformation occur while using it. ● Continuing to use the device in such cases can cause fire or burn. q Do not use the device or accessories in gas stations, fuel storages, chemical factories or other areas in which explosion risk exist. 8 ● Using the device or accessories in areas in which explosion risk exist may cause fire, burn or explosion. q Do not impact upon the device or throw it. ● Doing so may cause explosion or trouble on it. q Keep the electro-conductive foreign substances (metal pieces, pencil leads, etc.) from touching the battery section or a part to be connected to external electric source. ● Fire or other malfunctions may result from a short circuit. q Do not put the product or the battery in microwave ovens or other heating. ● Doing so may cause explosion of the internal parts of the device. ● Battery can be exploded and cause fire. CAUTION q Keep out of reach of babies and infants. ● Accidental swallowing or injury may result. q If children use the product, a guardian should explain the safety instructions and correct operations. The guardian should also make sure that the instructions are followed during use. ● Injury may result. q Do not store the product in humid or dusty places, or in hot areas. ● Malfunction may result. q Do not place the product on unstable locations such as wobbly tables or slanted locations. ● The product may fall, resulting in injury or malfunction. 9 Precautions for the Pocket PC Phone WARNING q Turn off the product in places where use is prohibited such as airplanes or hospitals. ● Electronic and electronic medical appliances may be adversely affected. ● For use inside medical facilities, make sure that you comply with their regulations. ● You may be punished for using the product in airplanes, which is prohibited by law. q Turn off the product in places near high-precision electronic devices or devices using weak electronic signals. ● The product may possibly cause these devices to malfunction. ● If you are using an implanted cardiac pacemaker, implanted defibrillator or any other electronic medical device, consult the manufacturer or retailer of the device for advice regarding possible effects from radio waves. Examples for electronic devices to which you need to pay attention: Hearing aids, implanted cardiac pacemakers, implanted defibrillators, other medical electronic devices, fire alarms, automatic doors, and other automatically controlled devices. q If it thunders while using the product outside, immediately turn off the product, and then move to a safe location. ● Lightning strike and electric shock may result. q Do not use the product while driving a vehicle. Before using it, park your vehicle at a safe place first. ● Using while driving may cause accidents. 10 q Do not put the product in place where it could be affected by an expanded airbag, e.g. on the dashboard. ● If the airbag expands, the product could hit you and others, causing accidents such as injury and the product could get malfunction or damaged. q Do not place the product in breast or inner pocket when electronic medical equipment is near by. ● Using the product closed to electronic medical equipment may result malfunction. CAUTION q Electronic devices in some types of cars can be affected by use of the product. ● For safety's sake, do not use the product inside such cars. q I tching, rash or eczema may be caused depending on your physical conditions or predisposition. ● If an abnormality occurs, stop using the product immediately, and then seek medical attention. q Do not allow liquids such as water or foreign materials, metal pieces or flammable materials to get into the product. ● Fire, electronic shock or malfunction may result. q Do not place magnetic cards or the like near the product. ● Information on magnetic cards such as cash cards, credit cards, telephone cards and floppy disks may be lost. q Do not use the product when hearing thunder. ● Contact with the product could cause you lightning strikes or electric shock. 11 Precautions for the Battery Check the battery type indicated on the battery label. The specification for the battery that AnyDATA provides is Lithium-ion battery with the capacity of 1270mAh. DANGER q If electrolyte from the battery gets in yours eyes, do not rub; instead, rinse immediately with copious amounts of clean water and seek medical attention. ● Failure to do so could cause the loss of vision. q Keep the battery contacts away from metal substances. ● Failure to do so could cause the battery to leak, overheat, rupture or catch fire. q Do not impact upon the battery, or perforate it with a sharp object. ● Doing so could cause a leakage of the interior substances of the battery, explosion or fire. q Avoid excessive force while inserting the battery into the device. ● Check the proper direction in which the battery should be inserted, and insert it properly. WARNING q Should any electrolyte from the battery come into contact with 12 your skin or clothing, immediately stop using the battery and rinse with clean water thoroughly. ● Failure to do so may cause skin injuries. q When the battery is fully charged within defined time, do not charge more. ● Failure to do so may cause the battery to leak, overheat, rupture or catch fire. q If the battery leaks or emits strange odors, immediately stop using it, and always keep it away from sources of fire. ● Failure to do so may cause the battery liquid to catch fire, and the battery itself to rupture. q D o not remove the battery from the product while you are charging it. ● Doing so may cause trouble on the device or electric shock. CAUTION q Do not dispose of the battery with other regular household waste. ● Failure to properly dispose of the battery in an environmentally sensitive manner may cause the battery to catch fire and damage the environment. ● Recycle or dispose of used battery in accordance with the local regulations. 13 Precautions for the AC Adapter DANGER q Use the designated power source and correct voltage. ● Use of incorrect voltage may cause fire, injury, electric shock or equipment failure. q While charging the device, do not short-circuit AC adapter by touching it with wet hands or a metallic object. ● Doing so may cause fire, equipment failure, electric shock or other injury. q P lace AC adapter at a stable location while the device is in charging. And do not put clothes or blanket over AC adapter. ● Failure to do so may cause fire. WARNING q Do not use the AC adapter in bathrooms or other potentially high humidity locations. ● Doing so could cause electric shock. q When the AC adapter is not to be used for a prolonged period, disconnect the power plug from the wall outlet. ● Failure to do so may result in electric shock, fire, or equipment failure. 14 q Never use the AC adapter when it has a damaged power cord. ● Failure to do so may result in electric shock, overheat, or fire. q If the AC adapter is exposed to water or other liquid, immediately disconnect the power plug from the wall outlet. ● Failure to do so may result in electric shock, smoke, or fire. q Be sure the power plug is free of dust. ● Failure to do so may cause the equipment to catch fire. q Do not use the AC adapter when hearing thunder. ● Contact with the AC adapter may cause you lightning strikes or electric shock. CAUTION q Disconnect the power plug from the wall outlet before beginning any maintenance. ● Failure to do so may cause electric shock. q Disconnect the AC adapter from the wall outlet by pulling the adapter, not the adapter cord or the power cord. ● Pulling the cord could damage the cord, resulting in electric shock or fire. q Do not put heavy objects on AC adapter while the device is in charging. ● Doing so may cause electric shock or fire. 15 Precautions for the RUIM card WARNING q P ay attention to keep electro-conductive foreign substances (metal pieces, pencil leads, etc.) from getting into a gap between CDMA socket and RUIM card. ● Failure to do so may cause fire, explosion or trouble on the device. CAUTION q Be careful when removing the RUIM card (IC portion). ● Your hands or fingers may get injured. q I nsert RUIM card into the appropriate socket in the correct direction. ● Inserting it into the opposite direction with excessive force could hurt your hands or fingers. 16 Using near by the Electronic Medical Equipment WARNING q Turn off the device in crowded trains or other public places where implanted cardiac pacemaker or defibrillator wearers could be nearby. ● S ignals from the device may affect the operation of implanted cardiac pacemakers or defibrillators. q Be sure to adhere to the following regulations inside medical facilities. ● Keep the device out of operating rooms (ORs), intensive care units (ICUs) or coronary care units (CCUs). ● Turn off the device in hospital wards. ● Turn off the device in hospital lobbies and corridors if electrical medical devices are nearby. ● If the medical facility has specific zones where use or possession of mobile terminals is prohibited, follow those regulations. If the function that turns on the device automatically is set, cancel the setting before turning off your device. q I f you use an implanted cardiac pacemaker or implanted defibrillator, use the mobile terminal 22cm or more away from the implanted cardiac pacemaker or implanted defibrillator. ● Operation of an implanted cardiac pacemaker or implanted defibrillator may be affected by radio waves. q Patients using electronic medical equipment other than implanted cardiac pacemakers or implanted defibrillators (using outside medical facilities for treatment at home, etc.) should check the influence of radio waves upon the equipment by consulting the manufacturer. ● Operation of electronic medical equipment may be affected by radio waves. 17 Handling and Care "Handling and Care" are explained in the following 5 sections. General Usage Guideline.............................................................................19 Usage Guideline for the Pocket PC Phone................................................20 Usage Guideline for the Battery..................................................................22 Usage Guideline for the AC Adapter..........................................................23 Usage Guideline for the RUIM Card............................................................24 18 General Usage Guideline q Keep the product away from water. ● The product is not waterproof. Do not use the product in places with high humidity such as a bath or where rain may get it wet. If you carry the product close to your body, moisture from sweat may corrode the internal parts causing a malfunction. Note that malfunctions deemed to be caused by water are not covered by the warranty, and may be impossible to repair. Since these malfunctions are not under warranty, even when repair is possible, it will be done at the user's expense. q Clean the product with a dry and soft cloth (Lens cleaning Cloth). ● If the product is wiped with alcohol, paint thinner, benzene or detergent, the printing may disappear or color may fade. q Do not place the product near air conditioner outlets. ● Condensation may form due to rapid changes in temperature, and this may corrode internal parts and cause malfunction. q Do not place the product where excessive force will be applied to it. ● If the product is inserted to a full bag, or placed in a pocket and sat on, its internal PCBs may be damaged or malfunction. Such damage is not covered by warranty. q Keep the connector contacts clean with a dry and soft cloth. ● Dirty contacts can result in intermittent connections. q Dropping down the device can cause a critical damage on LCD part. ● AnyDATA will not be liable for trouble which arose from user’s carelessness. q Be sure to keep a separate note of the information registered to the product and the RUIM card. ● AnyDATA will not be liable for a loss of the data that you recorded. 19 Usage Guideline for the Pocket PC Phone q Avoid using in extremely high or low temperatures. ● The product should be used within a temperature range from -20°C to 50°C and a humidity range from 0% to 90%. q The product may affect fixed phones, televisions or radios in use nearby. Use the product as far as possible from such appliances. q Do not sit down when the product is in the back pocket of your pants. Also, do not place it at the bottom of a full bag, or where it will encounter excessive force. ● Malfunction or damage may result. q It is normal for the product to become warm during use. You can continue to use it even when it is warm. ● The product may cause heating with high temperature if the product has been used for a long time. q Do not use the device at too high sound volume. ● Doing so for a long time can stimulate your ears and may cause a hearing loss. ● Doing so during walking or driving can distract your attention and may cause accidents. q Do not put an excessive force on the stylus as the edge of it is sharp and hard. ● Malfunction or damage may result. 20 q Be careful when using the stylus. Do not prick human body with it. ● As the edge of the stylus is sharp and hard, it could cause a wound on your body. q Do not put an excessive force on the device and the connecting part of AC adapter while the device is in charging. ● Malfunction or damage may result. q When cleaning LCD of the device, make sure to use soft clothes. ● Turn the device off before cleaning LCD. q When using glass cleaner, make sure to use small amount of the cleaner on a soft cloth and rub LCD part only. ● Cleaning another part may cause discoloration or transformation on the device. 21 Usage Guideline for the Battery q The battery will gradually wear out. ● Battery life depends on how you use the battery. It is time to replace it when the usage time is very short even though you fully charge it. The specified battery can be purchased separately. q When using the battery for the first time or the battery has not been used for a long time, be sure to fully charge the battery before. q The battery lasting time depends on the ambient conditions and the condition of the battery itself. q Depending on usage, the battery may swell as it nears the end of its life, but this will not cause a problem. q Do not expose to the direct sunlight and high temperature. Please keep your battery in an airy and cool place. ● When you are not using the product for a long period of time, remove the battery from the product, put it into the packing plastic bag or other container, and keep it. q Giving strong shocks such as dropping may deform or damage the battery. ● If there is any problem with the battery, bring it to a repair center. q When Low Battery Warning message appears, save your current data immediately and turn off the device. Then you need to charge the device as soon as possible. ● Your current data stored in the device could be deleted or lost. 22 Usage Guideline for the AC Adapter q Recharge the battery in a location where the ambient temperature is between 5°C to 35°C. q Do not recharge in the following location: ● Locations that are subject to high humidity, dust or excessive vibration. ● Near to general subscriber phones, TVs or radios. q It is normal for the adapter to become warm during recharging. You may continue to charge when the adapter is warm. q When an outlet with falling prevention mechanism is used, check the instruction manual for the outlet before use. q Do not expose to the strong shock and deform the recharging terminal. ● Giving strong shock to an adapter may cause damage. 23 Usage Guideline for the RUIM Card q Do not put an excessive force on the RUIM card when inserting or removing it. q It is normal for the RUIM card to become warm during use. You can continue to use it even when it is warm. q Note that AnyDATA will not be liable for malfunctions incurred as the result of inserting and using a RUIM card with unrecommended IC card reader/writer. q Always keep the IC contacts of the RUIM card clean. q Clean the RUIM card with a soft, dry cloth (Lens cleaning cloth). q Avoid extreme temperature. q Do not scratch, touch carelessly or short-circuit the IC portion. ● Data loss or malfunction may result. q Do not drop or give shock to the RUIM card ● Malfunction may result. q Do not bend or put heavy things on the RUIM card. ● Malfunction may result. q Do not put heavy things on the modified RUIM card. ● Malfunction may result. 24 Chapter 1 Chapter 1 Getting Started 1.11 Start menu 1.1 Checking the Components 1.2 Introduction to ASP-505A 1.3 About the Battery 1.4 About the RUIM Card 1.5 microSD Memory Card 1.6 About LED Features 1.7 Start Wizard 1.8 Power on/off 1.9 Soft Reset and Hard Reset 1.10 Today Screen 1.11 Start menu 26 28 31 35 38 39 42 43 44 46 52 1 Getting Started 26 1.1 Checking the Components Open and check the purchased product that includes items as shown below. ASP-505A (Pocket PC Phone) Battery Stylus Pen [2EA] USB Data Cable AC Adapter Stereo Headset 1 Getting Started microSD Card Getting Started CD Quick User Manual User Manual AnyDATA CD [Note] images above may be different from the product that you purchased. In some • The cases, some items may be changed. 27 1 Getting Started 1.2 Introduction to ASP-505A 1 2 3 4 16 5 17 18 19 6 7 20 15 14 8 13 9 10 1 Power Button Press 11 12 to turn off the display temporarily. This button turns the device into Suspend mode. During suspend mode, you can still receive calls and messages. Press and hold (for about 5 seconds) to turn off the power completely. The phone including all functions will not be available to use. Press Power button twice shortly (within 500ms) to toggle Mouse or Navigation Key mode. 28 2 Charging LED This (bi-color) LED shows red and blue lights for indicating the battery Listen to audio media or phone call. 4 CDMA Status LEDThis (bi-color) LED shows Green and Blue lights for indicating CDMA status. For details, refer to "1.6 About LED Features”. 5 Volume Button Slide up or down to adjust the sound volume during a call or while playing music. 6 Touch Screen Tap the screen with the stylus to select a command or write. 7 Memory CardSlot Allows you to use external microSD card for memory expansion. 8 Send Button Press to run the phone program, or to answer an incoming call. 9 Notification LED This LED is blinking when Notifications (new message arrived, missed call, Getting Started charging status. For details, refer to "1.6 About LED Features". 3 Receiver 1 voice mail receiving, etc.) occur. It is also turned on when you press Send, End, Volume, or Camera button. 10 Reset Button Press the Reset button using stylus to reset the device. 11 Multi-function Jack Connect the USB data cable to synchronize data or the stereo headset for hands-free conversation or for listening to audio media. Plug in the AC adapter to charge the battery. 12 Microphone With the microphone you can receive or make a phone call or make a voice recording. 13 Track pad Drag your finger across the Track pad to move the cursor. Press to confirm your selection or execute the selected application. 14 End Button Press to finish a call or to go back to the Today screen. 15 Camera Button Press to run the camera program; press again to take a photo or a video clip, depending on the specified capture mode. Press and hold down the button for 2 seconds to operate. 29 1 16 Stylus On the touch screen, you can tap the desired point or item or write using Getting Started stylus. 17 Speaker A speaker is built in the device for audio media and speakerphone function. 18 Camera Use the camera function. 19 Self-portrait Mirror Use it when taking self-portrait shot. 20 Back cover To install the battery or the RUIM card, you need to remove the back cover from the device. To remove the back cover, slide the back cover upward. 30 1 Your device has a rechargeable lithium-ion battery. Only manufacturer-specified original batteries and accessories can be used on this device. Battery may perform differently depending on various factors, such as your wireless service provider’s network configuration, items putted on connecting ports, signal strength, the temperature of the environment in which you use the device, the settings in use and other program usage patterns including your voice and data. Getting Started 1.3 About the Battery Inserting and removing the Battery Inserting the Battery 1.You should remove back cover by pushing it as shown below until you hear tick. Do not push it with excessive force. 2. Insert the bottom side of the battery first. 3. Insert the upper side of the battery. 4. Replace the back cover. 3 4 2 1 31 1 Removing the Battery Getting Started You always should remove battery after turning your device off. 1. Remove the back cover. 2. To remove the battery, lift it up from the upper side of the battery. 3. Replace the back cover. 2 3 1 Charging the Battery Provided batteries are partially charged at the time of shipping. It is recommended that you insert and charge the battery before you start using your device. After several full charge/discharge cycles, some batteries may get better performance. [Note] • Charging is indicated by a red light on the charging LED. As the battery is being charged, a charging icon ( ) will be shown on the title bar of the Today screen. After the battery has been fully charged, the charging LED becomes blue. 32 Charging with AC adapter 1 Getting Started Charging with USB data cable [Note] • To charge your device with USB data cable, you need to enable the USB Charging Mode by tapping Settings > System tab > AnyDATA Settings > USB Charging tab. 33 1 Getting Started Checking the remaining battery power 1. Tap Start > Settings > System tab > Power. 2. The Power Settings screen appears. [Note] • You can also view the Power Settings screen by tapping Today screen. 34 (battery icon) on the You can set PIN codes (Personal Identification Number) for RUIM card. The PIN code is 4 to 8-digit security code to be entered every time the device is turned on for user verification to prevent any unauthorized use by others. If your RUIM card is set to require a PIN code, you cannot use voice call, SMS and the Internet service through CDMA until PIN is entered. Changing the PIN code 1 Getting Started 1.4 About the RUIM Card You can change the PIN code to any number. To prevent any unauthorized use by third parties, change it to your own number. If you improperly enter the PIN code 3 times in a row, further entry is locked automatically (PIN lock), so be sure to keep a separate note of the numbers you set. [Note] • Changing PIN code is allowed only if PIN Lock is enabled and you have completed PIN Code Verification. You cannot change the PIN code when PIN lock is disabled. 35 1 Getting Started PIN Unblocking Code The PIN unblocking code is the number used to unblock the PIN code. You are notified of your PIN Unblocking Code when you purchase your device. Entering the Unblocking Code (8-digit) unblocks the PIN lock. If you improperly enter the PIN Unblocking Code 10 times in a row, the RUIM card lock automatically, so be sure to keep a separate note of the number. Contact a SkyLink shop if you forget the Unblocking PIN code or you cannot unblock the PIN lock. The PIN code Verification Enter PIN code Incorrect entry for 3 times Enter Unblocking PIN code Incorrect entry OK for 10 times You can set a new PIN code 36 Contact a SkyLink shop 1 Inserting RUIM card Getting Started To insert RUIM card into the device, follow the steps as below. 1. Remove the back cover and the battery from the device. Refer to "Inserting and Removing the Battery". 2. On the device, insert RUIM card into the RUIM socket. Cutcorner IC 3. Insert the battery and replace the back cover. Refer to "Inserting and Removing the Battery". [Note] • Be careful not to scratch RUIM card's IC contacts. • Inserting and removing RUIM cards with an excessive force may cause damage. 37 1 Getting Started 1.5 microSD Memory Card microSDTM (Secure Digital) memory card is a compatible storage card in where you can save and make a backup copy of the data that are used for the device. Inserting microSD memory card Pull out the slot cover on the left side of the device, and push microSD card into the device until it clicks. [Note] • Pull out the slot cover slightly. If you strongly pull it out, it may get removed from the device. 38 The device has 3 LED parts, which consists of Charging LED, CDMA status LED, and Notification LED. Charging LED is a bi-color LED which shows Red and Blue Lights indicating the battery charging status. CDMA status LED is a bi-color LED which shows Green and Blue lights indicating CDMA mode. Notification LED is blinking when Notifications (new message arrived, missed call, Voice Mail receiving, etc.) occur. It is also turned on when you press Send, End, Volume, or Camera button. 1 1 Getting Started 1.6 About LED Features 2 3 39 1 1 Charging LED (Red/Blue) Getting Started State Operation Descriptions Not Charging OFF The device is not in charging. •Regardless of Power up/down state. Charging Red ON The device is in charging •Charging is possible when the device is powered down. Fully Charged Blue ON The device is fully charged. • Charging is possible even if the device is powered down. 2 CDMA status LED (Green/Blue) State 40 Operation Descriptions Power Down or OFF Suspend State The device is in power down state or suspend state. Limited State Green Blinking 600ms on/600ms off Limited network service. •Network search in progress or No RUIM card inserted or No PIN entered. IDLE State Green Blinking Network acquisition is completed. 75ms on/5sec off Service is available. 75ms on/10sec off 75ms on/15sec off Connected State Blue ONData call or Voice call is connected. 1 3 Notification LED (White) Operation Descriptions Notification Blinking Notification will be incurred when the following • Suspend State: cases occurred. 100ms on/5sec off • New Message is arrived. • Resume State: • Missed call is existed. 250ms on/250msoff • New Voice Mail is received. • Speaker phone mode is enabled or other notifications from the OS (Alarm etc.). Getting Started State 41 1 Getting Started 1.7 Start Wizard When you provide the device with electric source or perform a hard reset for the first time, the initial Windows Mobile screen will appear. Follow the Start Wizard on LCD screen to set up the device. 1. The initial Windows Mobile screen Press the screen softly one time using stylus. 2. Aligning the screen • Set the align screen. • Press accurately the center of the target using stylus. • Press the target which moves through up, down, left and right accurately. 3. Finish The Today screen will appear. 42 How to turn on the power The device will be turned on when you press the Power button for 1 sec or more. Power button 1 Getting Started 1.8 Power On/Off How to turn off the power The following messages will appear when the device is powered on and pressing Power button more than 5 seconds. The device will be turned off when you press Yes. [Note] • The device will enter to suspend mode when the device is powered on and pressing Power button less than 1 second. 43 1 Getting Started 1.9 Soft Reset and Hard Reset In case that the device doesn’t perform properly or run slower than usual, you may need to perform a soft reset. A soft reset is needed after installing some programs. Once you performed a soft reset, any unsaved work will not be restored. In case that the device does not start up, you may need to perform a hard reset. After a hard reset, all personal data (such as contacts, tasks, calendar appointments, and any additionally installed programs/configurations) which are stored in the device will be lost and the device is restored to its factory default settings. Therefore, you should save the data on PC to reduce data loss due to a hard reset. How to perform a soft reset 1. Pull off the built-in stylus from the bottom of the device. 2. Press the Reset button with the stylus. 3. After a soft reset is successfully completed, the device is rebooted and the Today screen is displayed. Reset button 44 How to perform a hard reset 1 1 1 2 Getting Started 1. Pull off the built-in stylus from the bottom of the device. 2. Press the Send button and the End button at the same time while pressing the Power button and then press the Reset button at the bottom right of the device by using the stylus. 3. Press all the buttons and wait for few seconds. Release them only when you see the following message “Cleaning…“on the device screen. 4. After a hard reset is successfully completed, the initial Windows Mobile screen appears. Follow the Start Wizard to set up. See “1.7 Start Wizard” 1 45 1 Getting Started 1.10 Today Screen About the Today screen Once the Start Wizard is completed, the Today screen appears. The Today screen displays important information including present time, appointments and tasks. To access to the Today screen, tap Start > Today. 5 3 1 2 4 6 8 7 9 10 11 12 13 14 15 16 17 18 19 1 Start menu At the top left of the Today screen, you’ll see the Start menu which shows the list of programs. Select a program on the list and tap it with the stylus to open the program. 2 Connectivity status Tap to view connectivity status. 3 Radio signal strength Tap to configure the phone settings. 4 Volume 46 Tap to adjust device/ringer volume. Tap to open the Power Settings screen. 6 Title bar Status icons indicate your phone’s current status 7 Current date and time Tap to set up date, time, alarm, etc. 8 Unread messages Tap to open the associated program. 9 Phone profiles Tap to adjust the following phone profiles on your device. Select On, Vibrate or Off from the profiles. 10 Call history Tap to view call history. 11 AnyToday Settings Tap AnyToday Settings to open Launcher and Setting tab screen. 12 AnyToday Launcher You can register programs to be used regularly. If you tap icons (registered 1 Getting Started 5 Battery power status programs), the program will appear. 13 Wireless Manager Tap 14 Getting Started Tap to open the associated program. 15 Owner information Tap to set owner information. 16 Active tasks Tap to open the associated program. to view and set up the connection status for Phone, Wi-Fi and Bluetooth. 17 Windows Live Search Tap to open the associated program. 18 Device Lock The icon changes to the status. To unlock again, tap Unlock on the Today screen. 19 Menu bar Tap to open the associated menu. 47 1 About AnyToday Getting Started AnyToday is a Today screen plug-In which makes you easier to use ASP-505A. AnyToday includes Time part and Launcher part. 1 2 1 Time part Time part includes current date and time, missed call, new message, phone profile and AnyToday Settings. 2 Launcher part You can open the regular program easily. If you have many programs, press to see other registry programs. How to set up the AnyToday 1. Tap and then tap Launcher tab. 2. Check boxes of the program you want to add. • Use and to arrange programs in order. • The added programs are sorted from the left of the Launcher part in order. 48 1 Getting Started 3. Tap the Setting tab and then select your preferred Display Type and Time Show. • Display Type : You can select Display Type among Time, Launcher, or both (Time and Launcher) together. • Time Show : Set time format either 12 or 24 hours. 4. Tap ok. [Note] • To display Setting tab screen, do any of the following: - Tap in Launcher part and then tap Setting tab. - Tap and hold and then tap Setting. - Tap and hold a program icon added in Launcher part and then tap Setting. • To delete program added in Launcher part, tap and hold a program icon added in Launcher part and then tap Delete. 49 1 Getting Started About Status Indicators You may see on the device many status indicators as following. Icon Description Appears when a new SMS message has been received. Appears when a new e-mail message has been received. Notification of Voice Message New MSN message There are more notifications. Tap the icon to view all. Speakerphone on Dialing while no RUIM card is inserted. Voice call in progress Missed call Maximum signal strength No signal Phone is turned off No phone service Searching for phone service CDMA2000 1x available 50 CDMA2000 1x connecting CDMA2000 1x in use EVDO available EVDO Rev. 0 connecting EVDO Rev. 0 in use EVDO Rev. A connecting EVDO Rev. A in use Roaming Connection is active Connection is not active Synchronization in progress Wi-Fi function enabled, but device not connected to a wireless network yet Wireless network(s) detected Connecting to wireless network (arrows moving); Connected to wireless network Vibration mode Sound on Sound off Alarm No RUIM card inserted Battery is fully charged Battery power is low Battery power is very low Battery charging Device is unlocked Device is locked Bluetooth headset detected Tap the icon to exit the current screen. 1 Getting Started 51 1 Getting Started 1.11 Start Menu About the Start menu You can view the programs on the Start menu by tapping the Start menu icon. You can open a program by tapping the icon or the name of programs, and you can also change the display of the Start menu. 1 2 3 4 5 1 To return to the Today screen, tap Today. 2 Shows the list of the programs on the Start menu. Tap a program you want to use. 3 Shows the recently used programs. To open one of those programs again, tap the program. 4 To open other programs installed, tap Programs. 5 To open various preference settings program, tap Settings. 52 1 Programs Programs in the Start Menu Icon Name Office Mobile Description If you tap Office Mobile, Microsoft Office applications (Excel Mobile, OneNote Mobile, Power Mobile, and Word Mobile) will be displayed. Excel Mobile Allows you to create, view, or edit Excel documents. OneNote Mobile Allows you to create, view, or edit notes. PowerPoint Mobile Allows you to view PowerPoint slides and presentations. Word Mobile Allows you to create, view, or edit Word documents. Calendar Reminds you of appointments, and enables you to create meeting requests. Contacts Display the list of your people. Internet Explorer Getting Started The following are the programs which have been already installed on your device. Allows you to browse Web and WAP sites to download new programs and files from the Internet. Messaging Allows you to send/receive e-mail, and text messages. Phone Allows you to make/receive calls and switch between the calls. Help Allows you to Help topics for a program on the device. 53 1 Getting Started 54 Programs screen Icon Name Description Games Allows you to play two pre-installed games: ActiveSync Synchronizes data between the device and a PC or the Exchange Server. Calculator Helps File Explorer Allows you to organize and manage files on the device. Getting Started is an application framework that presents short plug-in tutorials on It how a user can accomplish common tasks such as Make a call, Set date and time, Transfer contacts, and so on. Internet Sharing Allows you to connect a notebook computer to the Internet through Messenger Allows Notes Allows you to write, type, draw or record notes. Pictures & Videos Allows you to view and organize picture or video files on the device or Search Allows you to search information including contacts and data on the device. Bubble Breaker and Solitaire. you to perform basic arithmetic and calculations, such as addition, subtraction, multiplication, and division. the device's data connection. you to send / receive instant messages with your MSN Messenger. a storage card. You can view the photos and video clips you took in the My Pictures folder. Task Manager The new Task Manager program makes it possible for a user to stop Tasks Reminds you of your tasks. Windows Live Windows Windows Media Player Allows you to play media files. programs that are running on the device. The user also can view a list of active programs or processes and monitor memory and CPU usage. Live is a service that enables the user to communicate through a collection of features. 1 Getting Started Settings You can adjust the device settings to your most suitable way. Tap Start > Settings, and tap the Personal, System, or Connections tabs at the bottom of the screen to see all available settings. Personal tab Icon Name Description Buttons Assigns a program to a hardware button. Input Sets options for each of the input methods. Lock Sets a password for the device. Menus Allows you to set what programs will appear in the Start menu. Owner Information Allows you to enter your personal information on the device. 55 1 Getting Started Phone Sets sounds for various notifications. You can set the type of Sounds & Notificationsnotification for different events. Allows you to adjust phone settings and set a PIN number for RUIM card. Today Allows you to adjust how the Today screen appears and shows information. System tab Icon Name Description Allows About you to enter a device name. It provides information about Windows Mobile version and copyright. AnyDATA Settings You can set up for 4 tabs; USB to PC, USB charging, MIC AGC, and Wakeup Key. Backlight Sets the backlight timeout and brightness. Certificates Provides information of certificates that are installed on your device. Clock & Alarms Adjust the device clock to the local date and time. You can also set You can make Windows Mobile software better by participating in the CustomerFeedback Customer Experience Improvement Program. Encryption alarms for specific times and days. Allows you to set encrypt files placed on storage cards. Error Reporting 56 Sets the device's error reporting function. If you enable the function, technical data about the program status and the computer will be logged in a text file when a program error occurs. Then you can choose whether or not you deliver it to Microsoft’s technical support team. By External GPS tapping GPS icon, you can set up GPS Hardware port, GPS Program port and Baud rate on Programs, Hardware and Access screens respectively. Managed programs allows the system administrator of the domain one is part Managed Programs of (such as a corporate server) to install applications remotely on the phone. Memory Shows the information about the device memory allocation status and Power Shows the current battery power status. You can also set the timeout Regional Settings Adjusts the device to the regional numbers, currency, date, and time. Remove Programs Allows you to remove programs that are installed in the device. Screen Allows you to change the screen orientation, re-calibrate the screen, Task Manager The new Task Manager program makes it possible for a user to stop Track pad Allows you to set the function of Track pad. Version InformationShows the version information of BOOT, OS, Radio, and CDMA which are loaded on the device. Windows Update memory card. It allows you to stop the programs that are running. 1 Getting Started period for turning off the display. and change the screen text size. programs that are running on the device. The user also can view a list of active programs or processes and monitor memory and CPU usage. Windows Update for Windows Mobile Service enables all Windows Mobile end users to keep their devices secure and up to date with the latest firmware. 57 1 Connections tab Getting Started Icon Name Description Beam Enables the device to receive incoming Bluetooth beams. Bluetooth Enables Bluetooth and sets the device to visible mode. You can also Connections Sets up one or more types of modem connections. It enables the device Allows you to select modem connections, RUIM account, and Data Call Account Authentication Mode. Domain Enroll Wi-Fi scan for other Bluetooth devices. to connect to the Internet or a private local network. Enrolling in a domain will connect your device with company resources. Allows the device to search for available wireless networks. You can also set up a network card in case that you have inserted one to your device. Allows you to select the Wi-Fi Channel for using. Wi-Fi Channel Settings The default value is USA FCC (Ch1~Ch11). 58 Wireless Manager Allows you to view and set up the connection status for Phone, Wi-Fi and Bluetooth. Chapter 2 Entering Text and Managing Your Pocket PC 2.1 Entering Text 2.2 Customizing Your Pocket PC 2.3 Adding and Removing Programs 2.4 Managing Memory 2.5 Backing Up Data 2.6 Searching Information 2.7 Protecting Your Pocket PC 2.8 AnyDATA Settings 60 63 77 78 80 82 83 87 2 Getting Enter Text and Managing Your Pocket PC 60 2.1 Entering Text About Input Panel The Input Panel icon appears on the menu bar when the program in use requires you to input text or numbers. 1 On-screen Keyboard 2 Input Panel Icon 3 Input Selector Arrow 1 2 3 After selecting a text input method, the corresponding Input Panel is then displayed and you can use it to enter the text. You can show and hide the Input Panel by tapping the Input Panel icon. Icon Input Method on-screen keyboardYou can enter the text by tapping key as using a computer keyboard. Description Adjusting Input Options How to adjust input options 2. Customize the Input Method, Word Completion and Options on each tab. 2 Getting Enter Text and Managing Your Pocket PC 1. Tap Start > Settings > Personal tab > Input, or tap the Input Selector Arrow (▲) > Options… as shown below. 61 2 Getting Enter Text and Managing Your Pocket PC 62 Entering Text using on-screen Keyboard In case that you enter the text, the on-screen Keyboard appears. Tap keys on the keyboard to enter text. How to enlarge the on-screen Keyboard 1. Tap the Input Selector arrow, and then tap Options. 2. In the Input method list, select Keyboard. 3. Tap Large keys. 2.2 Customizing Your Pocket PC Customizing the Today screen How to customize the Today screen 1. Tap Start > Settings > Personal tab > Today. 2. Select the desired theme on the Appearance tab and tap ok. 3. Check the desired items on the Items tab and tap ok. Getting Enter Text and Managing Your Pocket PC You can customize the Today screen which shows appointments, tasks, and messages. 2 63 [Note] 2 Getting Enter Text and Managing Your Pocket PC 64 • Tap Move Up or Move Down to change the order of items displayed on the Today screen. How to add a custom background image You can use your own picture as the background image on the Today screen. The pictures will affect the readability of text on the Today screen. 1. Tap Start > Settings > Personal tab > Today. 2. Mark the Use this picture as the background check box. 3. Tap Browse to view a list of your picture files. 4. Tap the file name you want to use and tap ok. How to set options for displaying appointments on the Today screen How to set options for displaying tasks on the Today screen You can specify the kind of tasks that are displayed on the Today screen. 1. Tap Start > Settings > Personal tab > Today. 2. Tap the Items tab. 3. Select Tasks and tap Options. 2 Getting Enter Text and Managing Your Pocket PC If you have a large number of appointments, you may want to specify the kind of appointments that are displayed on the Today screen. 1. Tap Start > Settings > Personal tab > Today. 2. Tap the Items tab. 3. Select Calendar and tap Options. • If you select Next appointment, only the next appointment will be displayed and if you select Upcoming appointments, multiple appointments will be displayed. • If you don’t want to display all-day events, then dismiss the Display all day events check box. 65 2 Getting Enter Text and Managing Your Pocket PC 66 4. Do any of the following: • Mark the desired task type under Display number of. • Select either task assigned to a specific category or all tasks in the Category list. Customizing the Start menu You can customize the list of items in the Start menu. You can select up to seven items. How to customize the Start menu 1. Tap Start > Settings > Personal tab > Menus. 2. Mark the check boxes of the items you want. Personal and System Settings How to reassign programs or shortcuts How to adjust the scrolling speed You can adjust the scrolling speed of the Volume button. 1. Tap Start > Settings > Personal tab > Buttons > Up/Down Control tab. 2. Do one of the following: •M ove the slider to shorten or lengthen the time that elapses before scrolling under Delay before first repeat. •Y ou can also change speed of scroll from one item to the next by moving slider under Repeat rate. How to choose the ring type To choose the ring type to be used for incoming calls, do the following: 1. Tap Start > Settings > Personal tab > Phone > Phone tab, or tap Menu > Options… > Phone tab on the Phone screen. 2. Tap the type you want to use in the Ring type list. 2 Getting Enter Text and Managing Your Pocket PC Your device may come with programs already assigned to hardware buttons. You can customize these buttons to open the frequently-used programs or menus. 1. Tap Start > Settings > Personal tab > Buttons. 2. On the Program Buttons tab, a list of buttons and their current assignments are displayed. 3. Tap the button you want to reassign. You can identify the original function of that button by its number and icon. 4. In the Assign a program box, tap the program or shortcut you want to assign and tap ok. 67 2 Getting Enter Text and Managing Your Pocket PC 68 How to choose the ring tone To choose the ring tone to be used for incoming calls, do the following: 1. Tap Start > Settings > Personal tab > Phone > Phone tab, or tap Menu > Options… > Phone tab on the Phone screen. 2. Select the sound you want to use in the Ring tone list. [Note] • To use *.wav, *.mid, *.mp3, *.wma, or other types of sound files as ring tones, you can download these files to your phone from the internet or your PC. • To use downloaded sound files as ring tones, you should save the file to the My Device / Windows / Rings folder on your device. How to choose the keypad tone To choose the keypad tone to be used, do the following: 1. Tap Start > Settings > Personal tab > Phone > Phone tab or tap Menu > Options > Phone tab on the Phone screen. 2. In the Keypad list, tap the option you want. [Note] • If you set the keypad tone to Long tones, you can hear the tone for as long as you are pressing the number. If set to Short tones, the tone is heard only for one or two seconds. If set to Off, no tone will be heard. How to choose Phone services Phone services, such as Call Forwarding, Call Waiting, and Voice Mail enable you to choose how to handle all incoming calls on the device 1. Tap Start > Settings > Personal tab > Phone > Services tab. 2. Select the service you want to use and tap. 2 How to set connection during suspend mode When the phone enter the suspend mode during data connection, you can keep or close data connection. 1.Tap Start > Settings > Personal tab > Phone > Data Call tab, or tap Menu > Options > Data Call tab on the Phone screen. 2. Select Enable to keep the data connection and select Disable to close the data connection. Getting Enter Text and Managing Your Pocket PC • Call Forwarding : If you are unable to take calls, you can use this service to forward your incoming calls to another phone number. • Call Waiting : Activate or Inactivate Call Waiting. • Voice Mail : Allows you to set the voice mail number. 69 2 Getting Enter Text and Managing Your Pocket PC 70 How to configure Phone miscellaneous features 1. Tap Start > Settings > Personal tab > Phone > Misc. tab or tap Menu > Options > Misc. tab on the Phone screen. 2. To configure the phone miscellaneous features, do the following: • Select the blinking interval of LED : Set the blinking interval of CDMA status LED from None, 5 sec, 10 sec, or 15 sec, while the Phone is in idle state. • Select the mode preferred : Change the mode to 1x only, EVDO only or 1x + EVDO. • Enable Network Identity Time : Retrieve local network time by default. [Note] • You only can configure the phone setting when the phone is powered-on state. How to choose the method of notification How to see the information about operating system version 1. Tap Start > Settings > System tab > About. 2. On top of the About screen, you can see the version of the operating system on your device as well as the type of processor and memory information. How to change the device name It is recommended to assign a name to your device for the case that you synchronize the device with a PC, connect to a network or restore data. Each device synchronized with the same PC will be identified by its unique name. 1. Tap Start > Settings > System tab > About. 2. Tap the Device ID tab. 2 Getting Enter Text and Managing Your Pocket PC 1. Tap Start > Settings > Personal tab > Sounds & Notifications. 2. On the Sounds tab, select the method of notification. 3. You can also assign various methods of notifying to each event. On the Notifications tab, in Event, select an event name and mark the check boxes of the method of notification. Note that you can save battery power if you turn off the sound and the flash light. 71 3. Enter a name that starts with a letter and contains the characters _ , A ~ Z, or 0 ~ 9. 2 Getting Enter Text and Managing Your Pocket PC 72 [Note] • You cannot enter the device name with spaces. How to adjust the backlight settings 1. Tap Start > Settings > System tab > Backlight. 2. Move the slider to adjust the brightness on the Brightness tab. How to set the backlight to dim after a time delay 1. Tap Start > Settings > System tab > Backlight. 2. Tap the Battery power tab, or the External power tab. 3. Adjust the time delay after marking the Turn off backlight if device is not used for check box. How to set the correct time 1. Tap Start > Settings > System tab > Clock & Alarms > Time tab. 2. Set the time zone, date, or time according to your use. [Note] • When the device is being synchronized with the PC, the time will be updated with the time on the PC. How to set the time and date for a different location 1. Tap Start > Settings > System tab > Clock & Alarms > Time tab. 2. Tap Visiting. 3. Select the time zone, time and date. 2 1. Tap Start > Settings > System tab > Clock & Alarms > Alarms tab. 2. Tap Description to enter a name for the alarm. 3. Tap each day on which you want to set the alarm. 4. Tap the time and set the time on a clock. 5. To specify the type of alarm you want, tap the alarm icon ( ). You can choose one or more, or all of Play sound, Flash light, or Vibrate. Getting Enter Text and Managing Your Pocket PC How to set an alarm 73 2 Getting Enter Text and Managing Your Pocket PC 74 How to set the GPS 1. Tap Start > Settings > System tab > External GPS. 2. The following 3 setup tabs appear as shown below. [Note] • AnyDATA does not provide GPS or Navigation-related program. How to save battery power 1. Tap Start > Settings > System tab > Power, or tap the battery icon ( ) on the Today screen. 2. Tap the Advanced to set up when the device turns off. [Note] • It is recommended to set 3 minutes or less for optimum conservation. Also note that it is recommended to use the AC adapter especially when a microSD card or a modem is in use. How to change regional settings [Note] • Performing the regional settings does not change the Operating System language of the device. How to adjust the text size 1. Tap Start > Settings > System tab > Screen > Text Size tab. 2. Move the slider to adjust the text size. How to set up the Track pad 2 Getting Enter Text and Managing Your Pocket PC You can change the numbers, currency, dates, and times according to the region. 1. Tap Start > Settings > System tab > Regional Settings. 2. Select your region from the list. 3. Options on the other tabs will appear differently according to the selected region. 4. Tap each tap to customize settings. To set up Track Pad mode, key Repeat, and Key Sensitivity, do the following: 1. Tap Start > Settings > System tab > Track Pad. 75 2 Getting Enter Text and Managing Your Pocket PC 76 2. Tap the option you want. • Track Pad: Select mode you want to choose from Mouse pointer mode and Navi. key mode(Navigation key mode). • Key Repeat: Set Key Repeat of Navi. key. When you select Enable, Navi. key will be entered repeatedly as you drag your finger. • Key Sensitivity: Set speed of Navi. key or sensitivity. • Mouse Sensitivity: Set the speed of Mouse pointer. [Note] • Key Repeat and Key Sensitivity only can be selected in Navi. key mode • Mouse Sensitivity only can be selected in Mouse pointer mode. • Press Power button twice shortly (within 500ms) to toggle Mouse pointer mode and Navi. key mode. 2.3 Adding and Removing Programs How to add programs 1. Download the program to your PC or insert the program CD into your PC. The file versions will vary depending upon your device types and processors. Be sure to select a program designed for your device and processor type. 2. Follow the provided installation instructions or documentation. 3. Connect your device to the PC. 4. Double-click the *.exe file. • In case that the file is the Start wizard, follow the instructions on the screen. The wizard will automatically install the program to your device. • In case that an installation wizard does not appear, you will see an error message stating that the program is valid but that it is designed for a different type of computer. You will need to copy this program directly to your device. You can use ActiveSync to copy the program file to the Program Files folder on your device when you cannot find any installation instructions for the program. How to remove programs Note that the programs which are already installed cannot be removed. You can only remove programs that are installed by yourself. 1. Tap Start > Settings > System tab > Remove Programs. 2. In the Programs in storage memory list, select the program you want to remove, and tap Remove. 3. Tap Yes. If another confirmation message appears, tap Yes again. 2 Getting Enter Text and Managing Your Pocket PC In case of purchasing additional programs for the device, you can get help from the information about the model name, Windows Mobile software version and the processor type. After you purchased programs, run a setup program on the PC and add programs by using ActiveSync or directly from the Internet. 77 2 Getting Enter Text and Managing Your Pocket PC 78 2.4 Managing Memory To get information of remaining memory in use for memory and storage, tap Start > Settings > System tab > Memory. On the Main tab, you can find how much memory is available. Also you can find the amount of memory allocated to file and data storage versus program storage is displayed, as well as the amount of memory in use versus the available memory. On the Storage Card tab, you can find how much memory is available on a storage card inserted. [Note] • If you have previously inserted more than one storage card, tap the list box and then the storage card whose information you want to see. How to free up program memory • Close programs you are not currently using. • Move e-mail attachments to a storage card. • Move files to a storage card. Tap Start > Programs > File Explorer. Tap and How to manually close a program To close a program manually, do the following: 1. Tap Start > Settings > System tab > Task Manager, or tap Start > Programs > Task Manager. 2. Select the program you want to close and tap End task. 2 Getting Enter Text and Managing Your Pocket PC hold the file, and tap Cut. Browse to the storage card folder and tap Menu > Edit > Paste. • Delete unnecessary files. Tap Start > Programs > File Explorer. Tap and hold the file, and tap Delete. • Delete large files. To find your largest files, tap Start > Programs > Search. In the Type list, tap Larger than 64 KB, and tap Search. • In Internet Explorer Mobile, delete temporary Internet files and clear history information. For more information, see “5.2 Internet Explorer Mobile”. • Remove programs you no longer use. • Reset your device. 79 2 Getting Enter Text and Managing Your Pocket PC 80 2.5 Backing Up Data You can copy files to and from your PC using ActiveSync, or copy files to a storage card you insert into your device. Your device has an expansion slot for inserting a microSD card. There will be a difference on the version between the copied files on your device and PC. If you make changes to one file, this will not affect the other until the files are synchronized. [Note] • You can update information on both your device and PC via synchronization. To get more information, please refer to ActiveSync Help on your PC. How to copy files to a storage card 1. Insert the storage card into the storage card slot. Make sure that it clicks into place and does not protrude from the base. 2. Tap Start > Programs > File Explorer and open the appropriate folder. 3. Tap and hold the desired file and tap Copy. 4. Tap the folder list (labeled My Documents by default) and tap Storage Card. 5. Tap Menu > Edit > Paste. How to copy a file between your device and the PC 1. Connect your device to the PC. 2. Click Explore in ActiveSync, which opens the Mobile Device folder of your device. 3. To copy a file from your device to your PC: • In the Mobile Device folder, go to the file that you want to copy. • Right-click the file, then click Copy. How to automatically save files on a storage card It may be helpful to save new documents and notes on a storage card in the programs like the Word Mobile, Excel Mobile, and Notes programs. 1. From the program file list, tap Menu > Options. 2. In the Save to box, select the storage card you want to automatically save new files and tap ok. Be sure to insert a storage card at first. [Note] • In the file or note list, a storage card symbol is displayed next to the names of files saved on a storage card. 2 Getting Enter Text and Managing Your Pocket PC • Locate the destination folder on your PC. Right-click the folder, then click Paste. 4. To copy a file from your PC to your device: • On your PC, navigate to the folder that contains the file you want to copy. • Right-click the file, then click Copy. • Right-click the destination folder under Mobile Device, then click Paste. 81 2 Getting Enter Text and Managing Your Pocket PC 82 2.6 Searching Information You can search for files and other items in the device by using file name or words exist in the item. You can search in My Documents folder or on an installed storage card. You can search in e-mail messages, notes, appointments, contacts, and tasks, as well as in online Help. How to search for a file or an item 1. Tap Start > Programs > Search. 2. In the Search for field, do the following: • Enter the file name or word. • Tap the down arrow icon (▼) and select one item from the list. 3. In the Type field, tap the down arrow icon (▼) to select a data type for narrowing your search. 4. Tap Search to start searching in the My Documents folder and subfolder. 5. Tap the item in the Results list. 2.7 Protecting Your Pocket PC How to assign a PIN to protect RUIM card 1. Tap Start > Settings > Personal tab > Phone > Security tab, or tap Menu > Options… > Security tab on the Phone screen. 2. Select the Require PIN when phone is used check box. Then, the PIN Enter screen will appear. 2 Getting Enter Text and Managing Your Pocket PC There are two ways that you can protect the device. • Assign a PIN (personal identification number) to protect your RUIM card from unauthorized use. You can change the default PIN number supplied from Internet Service Provider. • Assign a password to protect any part of the device from unauthorized access. You can make the device require a password every time it is turned on. 83 2 Getting Enter Text and Managing Your Pocket PC 3. You can change the PIN at any time by tapping Change PIN. < Enter the current PIN > < Enter a new PIN > [Note] • Emergency calls do not require a PIN. 84 < Confirm the new PIN > How to assign a password to protect the device [Note] • Whenever the incorrect password is entered, the device response time gets longer until the device appears to be not responding. • In case that you forget your password, clear the memory on the device following the instructions in this user guide. How to change your password 1. Tap Start > Settings > Personal tab > Lock. 2. Enter new password in the Password box. 3. On the Hint tab, you can enter a hint to remember the password, which will be displayed after the wrong password is entered four times. 4. Tap ok. How to display owner information on the 'my info' screen It is helpful to enter owner information for identification of the device in case of loss. 1. Tap Start > Settings > Personal tab > Owner Information > Identification tab. 2 Getting Enter Text and Managing Your Pocket PC 1. Tap Start > Settings > Personal tab > Lock. 2. Select the Prompt if device unused for check box. You can specify the time the device can remains idle before a password is required. You can also choose the password type in the Password type box. For a better security, it is recommended to use an alphanumeric password if your device is configured to connect to a network. 3. On the Hint tab, you can enter a hint to remember the password, which will be displayed after the incorrect password has been entered four times. 4. Tap ok. You must enter your password next time when the device is turned on. 85 2 Getting Enter Text and Managing Your Pocket PC 86 Then enter your name, address, telephone number, etc. 2. If you want your contact information displayed on the 'my info' when the device is turned on, mark the Identification information check box on the Options tab, and then tap ok. 3. You can let the additional text be displayed by tapping the Notes tab, and enter the text. After that, mark the Notes check box on the Options tab, and then tap ok. [Note] • You can have owner information to be displayed on the Today screen by tapping Start > Settings > Personal tab > Today and selecting the Owner Info check box on the Items tab. 2.8 AnyDATA Settings How to configure the AnyDATA Settings USB to PC tab • When the built-in CDMA module is turned on, you can use it as a USB CDMA Modem. • If you use CDMA module as a USB CDMA Modem, then you cannot use ActiveSync function. USB Charging tab • To charge your device using USB data cable, you need to enable the USB charging mode in advance. • When the device is in charging through USB data cable, do not use Voice call or Data call. 2 Getting Enter Text and Managing Your Pocket PC You can configure 4 tabs; USB to PC, USB charging, MIC AGC, and Wakeup Key. 1. Tap Start > Settings > System tab > AnyDATA Settings. 2. Adjust settings according to your use for each 4 tabs. 87 2 Getting Enter Text and Managing Your Pocket PC Microphone AGC (Automatic Gain Control) tab • When using voice recording, you can control the Microphone AGC. • If your voice is too quite, it will adjust it up, and vice-versa, to create an even level. Wakeup Key tab • Set up the key to wakeup the device when the device is in suspend mode. 88 • If Wakeup when power key is pressed is checked, the device will be waked up only by pressing the Power button. • If Wakeup when any application key is pressed is checked, the device will be waked up by pressing any application button. • Application key are Camera button, Send button and End button. Getting Enter Text and Managing Your Pocket PC [Note] 2 89 Chapter 3 Synchronizing Your Pocket PC and Setting Up E-mail Security 3.1 Installing ActiveSync 3.2 Synchronizing Information 3.3 Synchronizing via Bluetooth 3.4 Synchronizing Music, Video, and Pictures 3.5 Setting Up E-mail Security 92 93 96 97 98 3.1 Installing ActiveSync 3 Synchronizing Your Pocket PC and Setting Up E-mail Security 92 With ActiveSync, you can synchronize information on the device with information on PC. ActiveSync can also synchronize over a wireless or cellular network with Microsoft Exchange Server, if your company or service provider is running Microsoft Exchange Server with Exchange ActiveSync. With ActiveSync, you can do the following: • Synchronize information including Outlook E-mail, Contacts, Calendar, Tasks, and media files between the device and the PC. • Synchronize Outlook E-mail, Contacts, Calendar appointments, and Tasks on the device directly with Exchange Server in order that you can stay up-to-date even when PC is turned off. • Copy files between the device and PC without synchronizing. • Choose types and amount of synchronization. You can choose for how long your appointments to be synchronized. You should install ActiveSync before you set up synchronization between PC and the device. Once ActiveSync is installed in PC and you set up synchronization on the PC, then synchronization begins automatically the next time you connect the device to PC. ActiveSync is installed in the device by default. How to install and set up ActiveSync 1. Install ActiveSync on your PC, as described in the Getting Started CD. Once ActiveSync is installed in PC, the Synchronization Setup Wizard begins automatically the next time you connect the device to PC. 2. Follow the instructions on the screen and finish the Wizard. In Synchronization Setup Wizard, perform one or more of the following tasks. • Set up the synchronization relationship between the device and PC. • Set up the Exchange Server connection to synchronize directly with the Exchange Server. 3. Select the type of synchronization. [Note] 3.2 Synchronizing Information While the device is connected to the PC with a USB data cable connection or Bluetooth connection, ActiveSync immediately synchronize. ActiveSync synchronizes every time you make a change on either the PC or your device while connected. How to manually start and stop synchronization 1. Connect the device to the PC. • Connect the device to the PC via a USB data cable or Bluetooth to synchronize Outlook information and other local information on the PC. • In case that you are synchronizing directly with Exchange Server, you can use this connection to the PC to "pass through" to the network or you can synchronize without connecting to the PC over the mobile phone network. 2. Tap Sync to start synchronization in ActiveSync. 3. Tap Stop to end synchronization before it completes. 3 Synchronizing Your Pocket PC and Setting Up E-mail Security • When the Wizard is completed, ActiveSync automatically starts to synchronize the device with PC. • Once synchronization is completed, you can disconnect the device from PC. 93 Synchronize Outlook information with the PC 3 Synchronizing Your Pocket PC and Setting Up E-mail Security 94 If a synchronization relationship has been set up between the device and the PC, synchronization keeps Outlook information up-to-date on both the device and PC. Synchronization can be set up with more than one PC or with a combination of one or more PCs and Exchange Server. When you synchronize with multiple computers, the items that you synchronize will appear on all of the computers with which they are synchronized. In case that you have set up synchronization with two PCs (PC1 and PC2), for example, and you synchronize Contacts and Calendar on the device with both computers, the result is as follows: Location New State PC1 All Outlook contacts and calendar appointments that were on PC2 are now also on PC1. PC2 All Outlook contacts and calendar appointments that were on PC1 are now also on PC2. Pocket PC Phone All Outlook contacts and calendar appointments from both PC1 and PC2 are on the device. [Note] • Outlook e-mail can be synchronized with only one computer. How to change which information is synchronized By default, a limited amount of information can be synchronized via ActiveSync to save storage space on the device. To change the amount of information that is synchronized, do the following steps. 1. In ActiveSync, tap Menu > Options. 2. Do one or both of the following: • Select the check box for any items you want to synchronize. If you cannot select a check box, you might have to clear the check box for the same information type elsewhere in the list. • Clear the check box for items you want to stop synchronizing. 3. If you want to stop synchronizing with one PC completely, tap the PC and tap Delete. [Note] Synchronize Directly with Exchange Server Through your company or wireless service provider, you can set up synchronization with Exchange Server. Though, you should know Exchange Server name, domain name, your user name, and password first, and follow the steps. 1. In ActiveSync on the device, tap Menu > Configure Server. If you have not yet set up sync with Exchange Server, this will say Add Server Source. 2. Enter the name of the server running Exchange Server in Server address, and tap Next. 3. Enter your user name, password, and domain, and tap Next. Tap Advanced to change the rules for resolving synchronization conflicts. 4. Select the check boxes for the types of information items that you want to synchronize with Exchange Server. 5. To change available synchronization settings, select the type of information, and tap Settings. Synchronizing Your Pocket PC and Setting Up E-mail Security • Disconnect the device from PC first before changing synchronization settings on the device. • You can change available synchronization settings by selecting the type of information and tapping Settings. 3 95 6. Tap Finish. [Note] 3 Synchronizing Your Pocket PC and Setting Up E-mail Security 96 • You can also use the Sync Setup Wizard to set up the device to synchronize remotely with Exchange Server. This wizard is started when you connect your mobile device to your PC after installing ActiveSync on the PC. If your PC is running Windows Vista, the pre-installed Windows Mobile Device Center is used to synchronize your PC with your device, and you don't need ActiveSync. 3.3 Synchronizing via Bluetooth You can connect your device to a PC to synchronize using the local wireless technologies, such as Bluetooth. How to synchronize with a PC via Bluetooth 1. Follow the instructions in ActiveSync or WMDC Help on the PC for configuring Bluetooth on your PC to support ActiveSync or the Windows Mobile Device Center. 2. Tap Start > Programs > ActiveSync on the device. 3. Tap Menu > Connect via Bluetooth. Be sure to turn on Bluetooth function of both the device and the computer, and let them be within close range. 4. When you have connected the device to this computer via Bluetooth for the first time, you must complete the Bluetooth wizard on the device first and set up a Bluetooth partnership between the device and the computer. To get more information about creating a Bluetooth partnership, refer to “Bluetooth partnerships” in Chapter 5.4. [Note] • Turning off Bluetooth when not in use can preserve battery power. • The computer must have a Bluetooth adapter or dongle to connect and synchronize the device with a computer via Bluetooth. ActiveSync works with Windows Media Player to synchronize music, video, and pictures with the device in order for you to carry digital media along with you while you travel. All media synchronization settings must be set in Windows Media Player, except the Media information type in ActiveSync to be synchronized. Before you synchronize media, do the following: • Install Windows Media Player Version 10 on the PC. (Windows Media Player 10 works only in Windows XP or later versions). • Connect the device to the PC with a USB cable. In case that the device is currently connected via Bluetooth, you must end that connection before media can be synchronized. • Insert a storage card into the device (32MB or larger recommended). • Set up a sync partnership between the storage card and Windows Media Player. Change Media synchronization settings After selecting the Media information type in ActiveSync to be synchronized, you can synchronize your favorite music, video, and picture files in Windows Media Player Playlists. 3 Synchronizing Your Pocket PC and Setting Up E-mail Security 3.4 Synchronizing Music, Video, and Pictures 97 How to set up a sync relationship with a storage card 3 Synchronizing Your Pocket PC and Setting Up E-mail Security 98 1. On the PC, open Windows Media Player. 2. Click the Sync tab. 3. Select the storage card. 4. Click Set up Sync. 5. Select the synchronization method, either auto or manual. To get more information about Windows Media Player on your device, refer to “7.3 Using Windows Media Player Mobile”. 3.5 Setting Up E-mail Security Windows Mobile on your device allows you to protect your Outlook e-mails through Secure/Multipurpose Internet Mail Extension (S/MIME). You can digitally sign and encrypt your messages. To prove your identity to the recipients, you can use authorization keys and certificates. You can also improve privacy and prevent undue tampering or hacking of your messages with Authorization keys. You can encrypt a message with or without a certificate. Yet, you need a valid certificate to decrypt it to read an encrypted message. [Note] • S/MIME encryption and digital signatures for Windows Mobile-based devices are available only with Exchange Server 2003 Service Pack 2 or a later version that supports S/MIME. If you are not using one of these products, or have not yet synchronized, these options are unavailable. Digitally sign and encrypt all messages 3 Synchronizing Your Pocket PC and Setting Up E-mail Security With ActiveSync you can set up S/MIME e-mail encryption and signing. You should obtain a valid certificate to sign and encrypt e-mail messages successfully. 1. Tap Start > Programs > ActiveSync. 2. Tap Menu > Options. 3. Select the E-mail information type, and tap Settings. Tap Advanced on the E-mail Sync Options screen. 4. Do one or both of the following: • Select the Sign all outgoing e-mail messages check box to sign all your outgoing e-mail messages. By doing this, recipients can be certain that the messages were sent by you and have not been altered in any way. • Select the Encrypt all outgoing e-mail messages check box to encrypt all your outgoing e-mail messages. By doing this, the contents of your messages are protected from being viewed by anyone besides the intended recipients. 5. Tap Choose Certificate to select a certificate for signing or encrypting outgoing e-mail messages. You can select certificates to sign or encrypt e-mail messages individually if you do not choose to sign or encrypt all outgoing e-mail. Refer to “Individually sign and encrypt a message” in Chapter 6.1 to get information about signing and encrypting individual messages. 99 Chapter 4 Using Phone Features 4.1 Using the Phone 4.2 Making a Call 4.3 Receiving a Call 4.4 Incoming Call Options 4.5 Additional Dialing Information 102 106 111 112 113 4.1 Using the Phone You can make, receive, and keep track of calls and send SMS messages with the device. You can dial by using Contacts. You can also copy phonebook from RUIM card to Contacts on the device. 4 Using Phone Features 102 The Phone screen To use the Phone screen, tap Start > Phone or press the Send button. You can use Call History, Speed Dial, and Phone settings. Enter your PIN Whenever you turn on your device, you always need to enter the PIN to use the device. PIN is a personal identification number that is provided by your wireless service provider. 1. Enter the preset PIN assigned by your wireless service provider. 2. Tap Enter. [Note] • If you want to disable PIN and avoid above procedure, do the following. 1) Tip Start > Settings > Personal tab > Phone > Security tab. 2) Do not select the Require PIN when phone is used check box. • If you entered PIN incorrectly three times in a row, the RUIM card will be blocked. In that case, unblock it with the PUK (PIN Unblocking Key) obtained from your wireless service provider. In many countries, you are required by law to turn off your phone while on board an aircraft. To turn off the phone function, do one of the following: • Tap the Wireless Manager icon ( ) on the Today screen. On the Wireless Manager screen, tap the Phone button to turn off the phone function. To resume call function, turn on the phone function by tapping the Phone button again on the Wireless Manager screen. • Tap the Wireless Manager icon ( ) on the Today screen. On the Wireless Manager screen, tap All. This disables all wireless radios on your device, which include the phone function, Bluetooth, and Wi-Fi. To resume call function, tap the All button again on the Wireless Manager screen. This restores the previous states of phone function and Bluetooth. 4 Using Phone Features Turn the phone function on and off 103 Adjust the device volume 1. Tap the Speaker icon ( ). 2. Under Volume, do the following: • Move the slider to adjust the phone volume ( ) or device volume ( ). • You can change the system volume settings by tapping On, Vibrate, or Off. 4 Using Phone Features [Note] • You can adjust the conversation phone volume only when you are in phone conversation. When you adjust the volume at other times, it will affect the phone ring and sounds. • In Vibrate mode, sound will be muted when there is an incoming call. The Vibrate icon ( ) appears in the title bar to indicate that Vibrate mode is activated. Turn off selected phone sounds 1. Tap Start > Settings > Personal tab, and then tap Sounds & Notifications. 104 2. Tap the Notifications tab. 3. In the Event field, scroll to and tap one of the following: • Phone: Incoming call • Phone: Missed call • Phone: Voice mail 4. Do one of the following: • If you select Phone: Incoming call, select None in the Ring type field. • If you select Phone: Missed call or Phone: Voice mail, clear the Play sound check box. 5. Tap ok. If you have a sound file saved to the My Music folder on the device, you can set it as a ring tone. You must copy the file to the My Ringtones folder to make it available through Settings, where you can assign it to contacts or use it as a notification. 1. Tap My Documents, and then tap My Music. 2. Navigate to the sound file that you want, and then tap Menu, tap Edit, and then tap Copy. 3. Tap Menu, and then tap My Documents. 4. Scroll to and tap the My Ringtones folder. 5. Tap Menu, tap Edit, and then tap Paste. Using Phone Features Save a sound file as a ring tone 4 105 4.2 Making a Call You can use Phone, Contacts, Speed Dial and Call History on the Phone screen. Making a call from the Phone screen 1. Tap Start > Phone. 4 Using Phone Features 106 2. On the Phone screen, tap the desired phone number and then tap . [Note] on the Phone screen. • You can erase a wrong digit of a number using • As you enter the phone number, numbers you have previously called will appear on the screen. You can scroll to the number that you want to call, and then press the Send button to dial that number. Making a call from Contacts Making a call from Call History 1. Tap Call History on the Phone screen. 2. Scroll to the phone number or contact name that you want to call, and then press Send button. 4 Using Phone Features 1. Tap Start > Contacts. 2. Tap the desired contact in the contacts list, and do one of the following: • If you have entered only one phone number for the contact, tap Call or press the Send button. • If you have entered multiple phone numbers for the contact, select to the number you want to call. And then tap Call or press the Send button. [Note] • If Call History appears to be empty, you may have turned on a filter, and no calls fitting that filter have been logged. To see all calls, tap Menu > Filter > All Calls. 107 Making a call from Speed Dial You can use Speed Dial to dial frequently-used numbers. On the Phone screen, tap and hold the digit key which is corresponding to the Speed Dial entry location. Be sure to record the phone number first in Contacts before you create a Speed Dial entry. How to create a Speed Dial entry 4 Using Phone Features 1. Tap Menu > Speed Dial on the Phone screen. 2. Tap Menu > New. 3. Tap a contact. Select the desired phone number in the Number box. 4. Select an available location in the Location box. [Note] • Location 1 is generally reserved for your voicemail. If you place new Speed Dial entry to a location that is already occupied, the new number will replace the number that is already there. • To delete a Speed Dial entry, in the Speed Dial list, tap and hold the desired entry, and tap Delete. Making a call by using a recently dialed phone number 1. Tap Start > Phone. 2. In the list above the keypad, scroll to the recently dialed number and then press Send button. You can scroll down the list. To see more of the list, tap Hide Keypad. 108 4 A phone number in a text message appears on your device as a hyperlink that you can select to make a phone call. 1. Tap Start > Messaging, and then tap Text Messages. 2. Scroll to the message that contains the phone number, and then tap the message. 3. Scroll to and then tap the phone number. 4. Verify that the phone number is correct. If it is necessary, add the country code or area code. 5. Tap Call. Using Phone Features Making a call from a text message Making a call from an e-mail A phone number in an e-mail appears on your device as a hyperlink that you can select to make a phone call. 1. Tap Start > Messaging, and then scroll to and tap an e-mail account. 2. Scroll to the e-mail that contains the phone number, and then tap the e-mail. 3. Tap the phone number. 109 4. Verify that the phone number is correct. If it is necessary, add the country code or area code. 5. Tap Call. Making a call while using the media player 4 Using Phone Features If you are listening to music or watching a video on your device and want to make a phone call, you do not have to stop or pause the player. You will not hear any sound from the media file while conducting your phone call. 1. Tap Start > Phone. 2. Enter the phone number, and then tap or press Send button. After you press the Send button, the media player will stop playing. After you end the call, the media player will resume playing. [Note] • To return to the media player after a phone call, tapping Saving a phone number to Contacts by using call history You can save the phone numbers of incoming and outgoing calls to your contacts, or create a new contact from a recently dialed call. 1. Tap Start > Phone, and then tap Call History. 2. Scroll to the phone number you want to save, and then tap Menu > Save to Contacts. 3. To add a new contact, tap Select. 4. Enter contact information. In the Number type field, select the phone type for the number you are saving (for example, Work, Mobile, or Home), enter additional information as needed, and then tap Save. [Note] • You cannot save a call to Contacts while you are on a call. 110 on the Phone screen. 4.3 Receiving a Call You can choose to either answer or ignore the incoming call when you receive a phone call. How to answer or reject an incoming call • To answer the call, tap Answer, or press the Send button on the device. • To reject the call, tap Ignore, or press the End button on the device. Using Phone Features How to end a call You can end a call by tapping 4 or press the End button on the device. 111 4.4 Incoming Call Options You can choose to either reject or accept another incoming call during a call. You can switch between the two parties. How to put a call on hold 4 1. Tap Answer to take the second call, and put the first one on hold. 2. Tap or press the End button on the device to end the second call and return to the first call. Using Phone Features How to switch between two calls • Tap Swap. How to turn on and off the Speakerphone The built-in Speakerphone on your device allows you to talk hands-free or lets other people listen to the conversation. • During a call, tap Speaker On or tap Menu > Turn Speakerphone on. The speakerphone icon ( ) appears in the title bar. • To turn off the speakerphone, tap Speaker Off or tap Menu > Turn Speakerphone off. [Note] • To avoid damage to your hearing, do not hold your device against your ear when the Speakerphone is turned on. How to mute a call You can turn off the microphone during a call, so that you can hear the caller but the caller cannot hear you. • During a call, tap Mute. When the microphone is turned off, the mute icon ( ) appears on the screen. • Tap Unmute to turn on the microphone again. 112 4.5 Additional Dialing Information How to make an emergency call Enter the international emergency number for your region, and tap . [Note] •Additional emergency numbers will be supplied by service provider for CDMA network. Contact your service provider for details. 1. Tap and hold on the Phone screen until the sign appears. The replaces the international prefix of the country that you are calling. 4 Using Phone Features How to make an international call 2. Enter the full phone number you want to dial, and tap . Be sure to remove the leading zero of country code, area code and phone number. 113 Chapter 5 Getting Connected 5.1 Connecting to the Internet 5.2 Internet Explorer Mobile 5.3 Using Wireless Manager 5.4 Using Bluetooth 5.5 Using Wi-Fi 5.6 Using Internet Sharing 5.7 Using Terminal Services Client 116 121 125 126 135 139 140 5.1 Connecting to the Internet 5 Getting Connected 116 You can connect to the Internet through Wi-Fi or the mobile phone network. It takes no cost to connect through a private or free wireless network. However, the battery will be drained faster when you use Wi-Fi. To get more information, please refer to “5.5 Using Wi-Fi”. You can also connect to the Internet through phone dial-up when you are not within the coverage of a Wi-Fi. There are two groups of connection settings. The My ISP settings are used to connect to the Internet, while My Work Network settings can be used to connect to any private, corporate network. If you connect to the Internet using dial-up connection (EVDO network), you need to connect with My ISP. With My Work Network, the Internet dial-up connection is not supported. How to connect to the Internet through the mobile phone network You can connect to the Internet through the mobile phone network. You will be billed per KB (Kilobyte) by your mobile phone service provider when you are sending or receiving information. Please check out that before use. You may need to get a user name and password from your mobile phone service provider. 1. Tap Start > Settings > Connections tab > Connections. 2. Under My ISP, tap Add a new modem connection. 3. Enter a name for the connection on the Make New Connection screen. 5 Getting Connected 4. Enter the #777 for Dial Number and tap Next. 117 5. If required, enter the user name and password and tap Finish. 5 Getting Connected [Note] • All CDMA(EVDO) service providers use #777 for the Dial Number. When you use CDMA(EVDO) network, enter #777 in the Dial Number Field. to view help information for any screen. • Tap the help icon • Tap Manage existing connections on the Connections screen and complete the connection wizard to modify connection settings. • When you use SkyLink network (CDMA/EVDO service provider) to connect to the internet, you need to enter mobile for a user name and internet for a password, but you don't need to enter a domain. User name and password differs from the service provider's policy. Please consult your service provider. How to set RUIM Account to the Internet through the CDMA network You can also set the user name and password from Data Call Account (RUIM Account - CDMA only) as below. 1. Tap Start > Connections tab > Data Call Account. 118 2. To use data connection through the CDMA network, set Modem Connections, RUIM Account, and Authentication Mode. 5 • You can set up RUIM Account only if RUIM card is supported to set RUIM Account. How to set up a dial-up connection to your ISP You can dial up to your ISP to connect to the Internet by using the same settings that you normally use. Fee for dialing-up will be counted per minute that you use. 1. Tap Start > Settings > Connections tab > Connections. 2. Under My ISP, tap Add a new modem connection. 3. Enter a name for the connection on the Make New Connection screen. 4. Select Cellular Line in the Select a modem list and tap Next. 5. Enter the ISP server phone number and tap Next. 6. Enter your user name, password, and other information if required. 7. Tap Finish. Getting Connected [Note] 119 How to set up a connection to a private network 1. You need to obtain Server phone number, User name, Password, Domain and other settings, such as IP address, if required, from your network administrator. 2. Tap Start > Settings > Connections tab > Connections. 3. Follow the instructions in My Work Network, for each type of connection. 4. Complete the connection wizard and tap Finish. How to start a connection 5 Getting Connected 120 When you start Internet Explorer Mobile, the device will start connection automatically once you set up a connection such as phone dial-up or ISP dialup on your device. Also you can manually start a connection if you have set up multiple types of connections. 1. Tap Start > Settings > Connections tab > Connections. 2. Tap Manage existing connections. 3. Tap and hold the connection name you want and tap Connect. [Note] • Disconnect the mobile phone network if you are not using Internet. or icon on the title bar, and then tap • To disconnect EVDO network, tap Disconnect on a message window. 5.2 Internet Explorer Mobile You can browse Internet by using Internet Explorer Mobile. To start the Internet Explorer, tap Start > Internet Explorer. How to Navigate to a Web page 1. Tap Start, and then tap Internet Explorer. 2. In the address field at the top of the screen, enter a Web address, and then tap the go icon ( ). How to Refresh a Web page How to set a Home page 1. Enter the Web page address in the address bar on top of the screen and tap to open the Web page. 2. Tap Menu > Tools > Options… > General tab. 3. You can set the Home page either to the current page or the default Home page. Also tap Menu > Home to go to your Home page. • Tap Use Current to use the displayed page as the Home page. • Tap Use Default to use the default Home page. 5 Getting Connected If the Web page that you are viewing does not load correctly or contains changing information, you can refresh the page to re-load the content. From an open Web page, tap Menu > Refresh. How to transfer favorites from PC To transfer favorites from PC to the device, synchronize the Internet Explorer favorites on PC with the device. 121 1. On the Tools menu in ActiveSync on your PC, click Options and select Favorites. 2. Click Favorites > Add to Favorites in Internet Explorer on your PC, and save the links to the Mobile Favorites subfolder. 3. Connect the device to your PC. Click Sync if synchronization does not start automatically. How to add a favorite 5 1. Open a Web page in Internet Explorer Mobile. 2. Tap and hold the page, and tap Add to Favorites. 3. After selecting a folder and confirm or change the name, then tap Add. How to delete a favorite or folder Getting Connected 1. Tap Menu > Favorites > Add/Delete tab in Internet Explorer Mobile. 2. Select the item and tap Delete. Use the Web Search function 1. Tap Start > Internet Explorer. If the browser displays another Web page, tap Menu > Home. 2. In the search field, enter your keyword(s) and then press ENTER. 3. In the list of results, scroll to and tap the item you want. How to Zoom in or out in a Web page When you are viewing a Web page, you can zoom in to look more closely at a section of the page, or zoom out to see more of the page at a reduced magnification. • On a Web page, tap Menu > View > Zoom Level, and then tap Largest, Larger, Default, Smaller, or Smallest. 122 How to adjust the text size of Web site • Tap Menu > Zoom in Internet Explorer Mobile, and adjust the size. How to change Web pages layout 5 Getting Connected You can change the way that you view Web pages in Internet Explorer to minimize scrolling and increase the page download speed. If a Web page does not display correctly, choose a different view. 1. Tap Menu > View in Internet Explorer Mobile. 2. You can select one of the following options: • One Column: Arranges the page into a column as wide as the screen. This means that you will rarely have to scroll horizontally. This view usually downloads more quickly than other views. • Fit to Screen: Maintains a layout similar to what you see on a desktop computer. This makes items smaller and arranges the page so that you can see most of it without having to scroll horizontally. • Desktop: Keeps the same layout and size as on a desktop computer. This will require both horizontal and vertical scrolling. • Full Screen: This hides the menu bar and title bar and uses the whole screen to display the Web page. A check mark to the left of the option indicates that Web pages will display in full-screen mode. • Show Pictures: A check mark to the left of the option indicates that pictures will display on Web pages. [Note] • To return to the default screen view, tap and hold screen, and then tap Full Screen. 123 How to save a picture from a Web page 1. Tap and hold the picture, and tap Save Image. 2. You can choose the location on which the picture is saved, either to the device or a storage card. • Tap Yes to save the picture in My Pictures folder on your device. • Tap Save As to save the picture in another location, such as a storage card. How to clear temporary files, cookies, or history 5 Getting Connected 124 If you delete the temporarily internet files, the storage space will be freed up. 1. Tap Start > Internet Explorer. 2. Tap Menu > Tools > Options… > Memory tab, and then tap Clear History and Delete Files. 3. Tap Security tab, and then tap Clear Cookies. 4. Tap ok. How to Enable or disable cookies 1. Tap Menu > Tools > Options… > Security tab in Internet Explorer Mobile. 2. Mark or unmark the Allow cookies check box. 3. Tap ok. How to browser security settings The browser can warn you when you are moving from a secure page to a nonsecure page, and also when content has been blocked by the browser's security settings. 1. Tap Menu > Tools > Options > Security tab in Internet Explorer Mobile. 2. Mark or unmark the check boxes for Warn when changing to a page that is not secure and Warn when page content is blocked because of security settings. 3. Tap ok. 5.3 Using Wireless Manager The Wireless Manager lets you enable or disable phone features as well as manage your data connections easily. How to use the Wireless Manager 1. Tap the Wireless Manager icon ( ) on the Today screen. 2. Tap the button to enable or disable a feature. 1 You can turn on or off Wi-Fi, Bluetooth, and Phone at once by 2 3 4 tapping All. 2 Tap to turn Wi-Fi on or off. To configure Wi-Fi on the device, tap Menu > Wi-Fi Settings. ☞ Refer to "5.5 Using Wi-Fi" for details. 3 Tap to turn Bluetooth on or off. To configure Bluetooth on your device, tap Menu > Bluetooth Settings. ☞ Refer to "5.4 Using Bluetooth" for details. 4 Tap to enable or disable the phone. [Note] • When you connect the device to PC via ActiveSync while Wi-Fi is turned on, the Wi-Fi menu disappears from the Wireless Manager. When you disconnect the device from PC, Wi-Fi menu appears again at the bottom of the Wireless Manager screen. 5 Getting Connected 1 125 5.4 Using Bluetooth You can exchange information with Bluetooth enabled device. Devices with Bluetooth capabilities can even beam information to a device in a different room if it is within the Bluetooth signal coverage range. You can use the internal Bluetooth functions as following: 5 Getting Connected • You can beam information including files, appointments and tasks between Bluetooth-enabled devices. • You can synchronize information between your device and PC via Bluetooth. • You can have hands-free phone conversations with a Bluetooth-enabled headset. • Once you connect to another Bluetooth-enabled device, you can locate and use any of the services available on that device. • You can create a connection between your device and another Bluetooth enabled phone to use that phone as a modem. How to turn Bluetooth on and make your device visible 1. On your device, tap Start > Settings > Connections tab > Bluetooth. 2. Tap Mode tab, and then mark the Turn on Bluetooth and Make this device visible to other devices check boxes 3. Tap ok. [Note] • If you no longer want your device to be visible, unmark the Make this device visible to other devices check box. • You can also turn Bluetooth on or off by using Wireless Manager. 126 Bluetooth modes Bluetooth has the following three different modes. Mode Description On Bluetooth is turned on and your device can detect other Bluetooth enabled Off Visible devices. Bluetooth is turned off and you cannot send/receive information. You can save battery power on the Off mode. Bluetooth is turned on, and all other Bluetooth-enabled devices can detect your device. [Note] Bluetooth partnerships For a secure exchanging, a Bluetooth partnership between your device and another Bluetooth-enabled device is needed. By entering the same Bluetooth passcode on both devices, you can set a partnership. And once a partnership is created, the devices don’t require you to enter a passcode again. Be sure that Bluetooth is turned on and set to visible mode on two devices. Getting Connected • Bluetooth is set off by default. When you set it on and then turn off your device, Bluetooth also turns off. When you turn on the device again, Bluetooth automatically turns on. • When you are in places where using wireless device is prohibited, such as hospitals or airplanes, you might want to turn the radio off. 5 127 How to create a Bluetooth partnership 5 Getting Connected 1. Make sure both Bluetooth devices are set to Visible and are within range. 2. On your device, tap Start > Settings > Connections tab > Bluetooth. 3. Tap Add new device on the Devices tab. Other Bluetooth devices searched will be displayed. 4. Tap the desired device name in the box and tap Next. 5. For a secure connection, specify a passcode. A passcode can be made of 1 up to 16 characters. 6. Tap Next. 7. Then wait for the paired device to accept the partnership. Enter the same passcode on the receiving party. 8. You can specify a new name for the paired device. 9. Select the desired services of the paired device. 10. Tap Finish. How to accept a Bluetooth partnership 1. Make sure both Bluetooth devices are set to Visible and are within range of one another. 2. Tap Yes when prompted to establish a partnership with the other device. 3. Enter a passcode (the same passcode that is entered on the device requesting the partnership) to establish a secure connection. The passcode must be between 1 and 16 characters. 4. Tap Next. 5. Tap Finish. You can now exchange information with the paired device. How to rename a Bluetooth partnership If you have multiple Bluetooth partnerships on your device, you can give each partnership a unique name to identify it, such as My PC or Bob's Phone. 128 1. Tap Start > Settings > Connections tab > Bluetooth. 2. On the Devices tab, tap and hold the partnership. 3. On the shortcut menu, tap Edit. 4. Enter a new name for the partnership and tap Save. How to delete a Bluetooth partnership 1. Tap Start > Settings > Connections tab > Bluetooth. 2. On the Devices tab, tap and hold the partnership and tap Delete. Connect a Bluetooth hands-free or stereo headset How to connect a Bluetooth hands-free or stereo headset 5 Getting Connected You can have hands-free phone conversations with a Bluetooth hands-free headset such as a car kit. If your device supports A2DP (Advanced Audio Distribution Profile) which is for stereo audio over Bluetooth, you can use a Bluetooth stereo headset for listening to stereo music as well as having hands-free phone conversations. You need to enter a passcode for connecting to a Bluetooth hands-free or stereo headset, as for connecting to any Bluetooth device. You cannot change the passcode on a Bluetooth headset. Before you connect it to your device, check for the proper passcode in the manufacturer’s documentation. 1. Turn on the device and the Bluetooth headset, and set the headset visible. For information about setting the headset to visible mode, please refer to the manufacturer’s documentation. 2. Tap Start > Settings > Connections tab. 3. Tap Bluetooth > Devices tab > Add new device. Your device searches for other Bluetooth-enabled devices and displays them in 129 the list. 5 Getting Connected 4. Tap the name of the Bluetooth headset and tap Next. 5. Enter the passcode of the Bluetooth headset and tap Next. 6. Make sure the Hands Free check box is selected. If you have a Bluetooth stereo headset, select the Wireless Stereo check box. 7. Tap Finish. 130 Beam information with Bluetooth With Bluetooth, you can beam information, such as contacts, calendar items and tasks, from the device to PC or to another Bluetooth-enabled device. [Note] • You need to connect a Bluetooth adapter or dongle on PC in case that the computer has no built-in Bluetooth capability. How to beam information from the device to a PC 5 Getting Connected 1. Turn on Bluetooth on the device, and set it visible. To get information, please refer to “How to turn Bluetooth on and make your device visible” in Chapter 5.4. 2. Set Bluetooth on a PC to visible mode: • If your computer has Windows XP SP2 and that supports the computer’s builtin or external Bluetooth adapter, open Bluetooth Devices from the Control Panel. Select the Options tab, then select the Turn discovery on and the Allow Bluetooth devices to connect to this computer options. • In case that you installed the Bluetooth adapter using a third-party provided driver, open the Bluetooth software which corresponds to the Bluetooth adapter. The software normally has a Bluetooth Configuration utility, which you can open from the Control Panel. Open the Bluetooth Configuration and click the Accessibility tab, then select Let other Bluetooth devices to discover this computer. To get information about this, please refer to the Bluetooth adapter’s documentation. 3. Create a Bluetooth partnership between the two devices. Refer to “Bluetooth partnerships” in Chapter 5.4 to get more information about this. You can receive Bluetooth beams once a partnership has been created. 131 4. Tap and hold an item such as a tasks or a file to beam on your device. 5. Tap Menu > Send Contact > Beam to beam a contact. Tap Menu > Beam [type of item] to beam other types of information. 6. Tap the device name to which you want to send the beam. 7. You can manually add an Outlook item that you beamed in case that it’s not automatically added to Outlook. Click File > Import and Export in Outlook. To beam information to a Bluetooth-enabled device such as another Pocket PC, follow steps 3 to 6 in the above procedure. 5 [Note] • If the computer or device you want to beam does not appear in your device's Bluetooth list, make sure that its Bluetooth is turned on and set to visible mode. Getting Connected How to receive a Bluetooth beam You need to set the device to detect incoming Bluetooth beams. 1. Tap Start > Settings > Connections tab > Beam. 2. Select the Receive all incoming beams check box. 3. Make your device be turned on and within close range of the device that is beaming the information. 4. Tap Yes when prompted to receive an incoming beam. Using the device as a Bluetooth modem You can use the device as a modem for your PC through Bluetooth by connecting the device to the PC. 132 [Note] • You need to connect a Bluetooth adapter or dongle on PC in case that the computer has no built-in Bluetooth capability. 5 Getting Connected To use the Internet connection of your device, activate Internet Sharing on your device for the computer to use. Then set up a Bluetooth Personal Area Network (PAN) between the computer and your device. 1. On the device, turn on Bluetooth and set it to visible mode. 2. Follow the steps in “How to create a Bluetooth partnership“ to start a Bluetooth partnership. Or, follow these steps to start a Bluetooth partnership. (based on Windows XP SP2): 1) Open the Control Panel or System Tray, and double-click the Bluetooth Devices icon. 2) In the Bluetooth Devices window, click Add. 3) You will see the Add Bluetooth Device Wizard. Select the My device is set up and ready to be found check box, then click Next. 4) Then the wizard will show the name of your device in the dialog box. Select the device name, then click Next. 5) You can specify a passcode which enables a secure connection between your device and the PC. Select Let me choose my own passkey, then enter a passcode (1 up to 16 digits) and click Next. 6) Tap Yes when a confirmation message appears on your device. Then enter the same passcode and tap Next. 7) To exit the wizard, click Finish on the computer. 8) To change the name for the computer, tap Finish on the device’s Partnership Settings screen. 3. Then, tap Start > Programs > Internet Sharing to open the Internet Sharing 133 5 Getting Connected 134 program on your device. 4. Select Bluetooth PAN as the PC Connection. 5. From the Network Connection list, select the name of the connection that your device uses to connect to the Internet. 6. Tap Connect. 7. On your computer, set up a Bluetooth Personal Area Network (PAN) with the device: 1) Tap Start > Control Panel > Network Connections. 2) Click the Bluetooth Network Connection icon under Personal Area Network. 3) Click View Bluetooth network devices under Network Tasks. 4) Select your device in the Bluetooth Personal Area Network Devices dialog box and click Connect. 8. If a connected status is displayed on the Internet Sharing screen on the device, then your computer has succeeded to connect to the Internet using your device as a Bluetooth modem. 5.5 Using Wi-Fi You can use Wi-Fi which provides wireless Internet access by accessing to a wireless access point. In public places, such as a coffee shop or restaurant, the device needs to access to their public wireless access Points. [Note] • The number, infrastructure, and other objects through which the signal passes can affect the availability of the Wi-Fi signal. How to connect to a wireless network 5 Getting Connected 1. Open the Wireless Manager. 2. You can turn on/off the wireless function by tapping the Wi-Fi button. And the wireless status is indicated by icon. : Wi-Fi is turned on. : Wi-Fi is turned off. 3. The device scans available wireless networks, and you will be notified of the detected wireless network names by a pop-up message. Select the desired wireless LAN and tap OK. 135 4. Select The Internet if the wireless LAN connects your device to the Internet. Otherwise, select Work if the wireless LAN connects your device to a private network. 5 Getting Connected 136 5. Enter a network key if required and tap Connect. [Note] • Next time you use your device to detect wireless networks, you will not see the above pop-up messages, and you don’t have to enter the network key of the previously accessed wireless network. • You don’t need to take additional steps to connect the device to a Wi-Fi network since Wi-Fi networks are self-discoverable. How to check the Wi-Fi status There are two way to check the current wireless connection status on the device. • Configure Wireless Networks screen 1) Tap Start > Settings > Connections tab > Wi-Fi > Wireless tab. This screen displays the wireless networks currently available. You can see here the name, the configuration and signal quality of the wireless network that your device is currently connected to. 2) Tap and hold a network if you want to connect to a wireless network in the list, then tap Connect. 3) To view or make change to a connection setting of a wireless network, tap the wireless network in the list. 4) Tap Add New if you want to new wireless networks. 5 Getting Connected • Title bar The Wi-Fi ON icon ( ) will appear on the title bar when you enable Wi-Fi on your device. Once Wi-Fi is turned on, the wireless signal icon ( ) appears which indicates that the device scans for available wireless networks. The arrows will move back and forth during scanning for a wireless LAN signal. The arrows stop moving once your device successfully connects to a wireless LAN. 137 Setting up Wi-Fi Channel for your country The frequency bands and operation channel of Wi-Fi differs from country. It should be configured appropriately. 1. Tap Start > Settings > Connections tab. 2. Tap Wi-Fi Channel Setting. 5 Getting Connected 138 3. Select the channel for your country, and then tap ok. • If you change WIFI channel, the device will be reset. [Note] • The default value for Channel Selection is USA FCC(Ch1~Ch11), and it is used for most countries. • If you cannot connect to USA FCC(Ch1~Ch11) via Wi-Fi, change to the another channel. 5.6 Using Internet Sharing With Internet Sharing, you can connect your PC or notebook computer to the Internet by using your device’s data connection. You can connect via USB or Bluetooth. To set up the device as a USB modem, follow the procedure in this section. Refer to “Using the device as a Bluetooth modem” in Chapter 5.4 set up your device as a Bluetooth modem. [Note] How to set up the device as a USB modem 1. Tap Start > Programs > Internet Sharing. 2. Select USB in the PC Connection list. 3. Select the name of the connection that the device uses to connect to the Internet in the Network Connection list. 4. Plug in the USB cable between the device and the computer. 5. Tap Connect. [Note] • To end the Internet connection, tap Disconnect on the Internet Sharing screen. 5 Getting Connected • You need to install a RUIM card and set up a phone dial-up modem connection on the device. Tap Menu > Connection Settings on the Internet Sharing screen to set up the device with a data connection. Refer to "How to connect to the internet through the mobile phone network" and "How to set up a dial-up connection to your ISP" to get more information. • You need first to install Microsoft ActiveSync version 4.5 or later on the computer in case that you choose a USB cable connection. • Before using Internet Sharing, disable ActiveSync on your computer. 139 5.7 Using Terminal Services Client The Terminal Services Client allows you to log on to a PC running Terminal Services or Remote Desktop, and use all the resources available on that PC. For example, instead of running Word Mobile on your device, you can run the PC version of Word and access the .doc files available on that PC. How to connect to a Terminal Server 5 Getting Connected 140 1. Tap Start > Programs > Terminal Services Client. 2. Enter the server name. 3. If you have recently connected to a server, select a server name in Recent servers. 4. If you want to use programs which exactly fit in size with the device, select the Limit size of server desktop to fit on this screen check. 5. Tap Connect. How to navigate within Terminal Services Client The screen will display more than one horizontal and vertical scroll bar when connected. With scroll bars, you can either scroll the contents on the PC, or scroll the PC display through the Terminal Services Client window. Use the five directional buttons at the bottom of the Terminal Services Client window to verify that you are scrolling the PC display through Terminal Services Client. Select the Limit size of server desktop to fit on this screen check box to better fit information on the screen. You can get the best results by maximizing the programs on the desktop PC. How to disconnect without ending a session 1. From the Terminal Services Client screen on your device, tap Start > Shutdown. 2. Tap Disconnect. [Note] • Do not use the Start menu on your device. • In case that a network administrator has configured Terminal Services Client on your device to reconnect to disconnected sessions, and you previously disconnected from a Terminal Server without ending the session, the Terminal Services Client reconnects to that session. How to disconnect after ending a session 5 Getting Connected 1. From the Terminal Services Client screen on your device, tap Start > Shutdown. 2. Tap Log Off. 141 Chapter 6 Exchanging Messages and Using Outlook 6.1 E-mail and Text Messages 6.2 Calendar 6.3 Contacts 6.4 Tasks 6.5 Notes 144 153 155 158 160 6.1 E-mail and Text Messages Exchanging Messages and Using Outlook 6 You can make use of all of your e-mail accounts and your text message account at Messaging. You can send and receive Outlook e-mail, Internet e-mail through an Internet service provider (ISP), as well as SMS (Short Messaging Service) text messages using your mobile phone network. You can also access e-mail from work using a VPN connection. Set up Outlook e-mail When you start ActiveSync on computer for the first time, the Synchronization Setup Wizard guides you to set up a synchronization relationship. With this, you can synchronize Outlook e-mail and other information between the device and computer or the Exchange Server. Once you set up synchronization through the wizard, then you’re ready to send and receive Outlook e-mail. If you have not set up a synchronization relationship yet, do the following to synchronize Outlook e-mail: 1. To synchronize remotely, you need to set up and connect to an over-the-air connection. To know details, refer to the procedures in “5.1 Connecting to the Internet”. 2. Disconnect the device from computer or LAN. (In case that you have an overthe-air connection, then you don’t need to disconnect). 3. Tap Start > Programs > ActiveSync. 4. You can synchronize e-mails directly with the Exchange Server on a private network such as your corporate network. To do so, follow the steps in “Synchronize Directly with Exchange Server” in Chapter 3.2. 5. Choose which information types to synchronize. Be sure to select E-mail. For 144 Set up a POP3/IMAP4 e-mail account In case that you have an email account with an Internet service provider (ISP) or an account that you access using a VPN server connection (typically a work account), you can set up a POP3 or IMAP4 e-mail account on the device. 1. Tap Start > Messaging. 2. Tap Setup E-mail. 3. Enter your e-mail address and password, select Save password, and then tap Next. 4. Do one of the following: • If Auto Setup finds settings for your e-mail provider immediately, you only need to perform the next four steps to complete e-mail setup: 1) Tap Next. 2) Enter your name and then tap Next. 3) In the Automatic Send/Receive field, select how frequently you want the device to synchronize with your Internet e-mail account. 4) Tap Finish. • If Auto Setup does not find settings immediately for your e-mail provider, go to step 4. 5. To obtain e-mail server settings automatically, select Try to get email settings automatically from the Internet, and then tap Next. Auto Setup tries to download necessary e-mail server settings so that you do Exchanging Messages and Using Outlook details, follow the steps in “How to change which information is synchronized” in Chapter 3.2. Whenever you want to manually send or receive Outlook e-mail on the device, just connect the device to computer, LAN, or over-the-air connection, then tap Sync on the ActiveSync screen or tap Menu > Send/Receive in Outlook on your device. 6 145 Exchanging Messages and Using Outlook 6 not have to enter them manually. 6. When Auto Setup has finished, tap Next. If you chose not to use Auto Setup, or Auto Setup did not find the settings, go to step 6. If Auto Setup found the settings and completed successfully, go to step 11. 7. In the Your e-mail provider field, select Internet e-mail, and then tap Next. 8. Enter your name and then tap Next. 9. Enter your Incoming mail server and Account type information, and then tap Next. 10. Enter your user name and password. By default, the Save password check box is selected and the device saves your password so that you do not have to enter it every time that you re-connect. If you do not want the device to save your password, clear the check box, and then tap Next. 11. Enter your Outgoing (SMTP) mail server information, and then tap Next. 12. In the Automatic Send/Receive field, select how frequently you want the device to synchronize with your Internet e-mail account. 13. Tap Finish. Send and receive e-mail How to compose and send e-mail 1. Tap Start > Messaging, and then scroll to and tap an e-mail account. 2. Tap Menu > New. 3. In the To field, enter the recipient's e-mail address, or to insert an e-mail address from your contacts, tap Menu > Add Recipient, and then select a name. 4. In the Subject field, enter a brief description of the message content. 5. Scroll to or tap the message area and enter your message. 6. Tap Send. 146 • To cancel a message before you send it, tap Menu, tap Cancel Message, and then tap No. How to reply to or forward a message 1. Open the message and tap Reply, or Menu > Reply All, or Menu > Forward. 2. Enter your response. You can add common messages by tapping Menu > My Text. 3. You can check the spelling by tapping Menu > Spell Check. 4. Tap Send. [Note] • Scroll up to see more header information. • You can set to include the original message. From the list view, tap Menu > Tools > Options > Message tab, and select the When replying to e-mail, include body check box. • In the Outlook E-mail account, you will send less data if you do not edit the original message. • This lets you reduce data transfer costs based on your rate plan. Exchanging Messages and Using Outlook [Note] 6 How to exclude your e-mail address when replying to all When you reply to all the recipients of an e-mail, your own e-mail address will also be added to the recipient list. Customize ActiveSync in order that your e-mail address is excluded from the recipient list. 1. Tap Menu > Options in ActiveSync on the device. 2. Select the E-mail information type and tap Settings. 3. Tap Advanced. 147 Exchanging Messages and Using Outlook 6 4. In the Primary e-mail address text box, enter your e-mail address. 5. Tap ok. How to add an attachment to a message 1. Tap Menu > Insert in a new message, and tap the item, such as Picture, Voice Note, or File. 2. Select the file you want to attach, or record a voice note. How to receive attachments Below the subject of an e-mail message, an attachment sent with the message or downloaded from server appears. If the attachment has been fully downloaded, you can open the attachment by tapping it. You can also mark the attachment for download the next time you send and receive e-mail. In case that you have an Exchange Server mail account, you can also download attachments automatically with your messages. If you have an Outlook e-mail account, do the following: 1. Tap Start > Programs > ActiveSync. 2. Tap Menu > Options. 3. Tap E-mail > Settings, and then select Include file attachments. [Note] • If you want to store attachments on a storage card rather than on the device, tap Menu > Tools > Options > Storage tab, and select the Store attachments on storage card check box. 148 Download messages How to download messages from the server You first need to connect to the Internet or your corporate network, depending on the account, to send and receive e-mail messages for an e-mail account that you have with an ISP or that you access using a VPN server connection (typically a work account). 1. Tap Menu > Go To and tap the desired account. 2. Tap Menu > Send/Receive. The messages on the device and e-mail server are now synchronized: new messages are downloaded to the device Inbox folder, messages in the device Outbox folder are sent, and messages that have been deleted from the server are removed from the device Inbox folder. Exchanging Messages and Using Outlook Your type of account affects the manner in which you download messages: • First, you need to begin synchronization via ActiveSync to send and receive e-mail for an Outlook e-mail account. To get more information, refer to “Set up Outlook e-mail” in Chapter 6. • If you have an e-mail account with an ISP or an account that you access using a VPN server connection, download messages through a remote e-mail server to send and receive e-mail messages for the e-mail account. To get more information, refer to “How to download messages from the server”. • When the phone is turned on, text messages are automatically received. When the phone is turned off, messages are held by your service provider until the next time the phone is turned on. 6 [Note] • To read the entire message, tap Menu > Download Message while in the message window. If you are in the message list, tap and hold the message, and tap Download Message. The next time you send and receive e-mail the message will download. This will also download message attachments in case that you selected those options when you set up the e-mail account. 149 Copy text messages from and to the RUIM card Exchanging Messages and Using Outlook 6 1. Tap Start > Messaging. 2. Tap Menu > Go To > Text Messages. 3. Select the desired text message in the message list. 4. Do one of the following: • To copy a text message to the RUIM card, tap Menu > Copy to SIM. • To copy a text message from the RUIM card to your device, tap Menu > Copy to Inbox. [Note] • Text messages stored on your RUIM card are automatically displayed in the Inbox folder. When you copy them to your device, messages in the Inbox folder are duplicated while your RUIM card is in use. Individually sign and encrypt a message You can protect the privacy of the message by encrypting an Outlook e-mail message. This converts it from plain, readable text into cipher (scrambled) text. Only the recipient who has the authorization key can decipher the message. When you digitally sign a message, it applies your certificate with the authorization key to the message. This ensures that the recipient that the message is from you and not from an imposter or a hacker, and that the message has not been altered. How to digitally sign and encrypt a new message 1. In the message list, tap Menu > Go To > Outlook E-mail. 2. Tap New. 3. Tap Menu > Message Options. 4. Select the Encrypt message and Sign message check boxes, and tap ok. 150 Verify the digital signature on a signed message you receive [Note] • A digital signature may not be valid by several reasons. For example, the sender’s certificate may have expired or it may have been canceled by the certificate authority. Or, the server that verifies the certificate may be unavailable. To report the problem, contact the sender. Manage folders There are five default Messaging folders: Inbox, Outbox, Deleted Items, Drafts, and Sent Items in each Messaging account. When you receive and send messages, they are stored in these folders of each account. You can also create additional folders for each account. In the Deleted Items folder are messages that have been deleted on the device. The Messaging options that have been chosen affect the behavior of the Deleted Items and Sent Items folders. If you use an Outlook e-mail account, e-mail messages in the Inbox folder in Outlook will be synchronized automatically with your device. To synchronize additional folders, designate them for synchronization. The folders you create and the messages you move will then be mirrored on the e-mail server: When you move two messages from the Inbox folder to a folder named Friends, and you have designated Friends for synchronization, then the server creates a copy of the Friends folder and copies the messages to that folder so that you can read the messages away from PC. Exchanging Messages and Using Outlook 1. Open the Outlook e-mail message that has been digitally signed. 2. At the top of the message, tap View Signature Status. 3. Tap Menu > Check Certificate. To see the details of the certificate in the message, tap Menu > View Certificate. 6 151 Exchanging Messages and Using Outlook 6 152 When you use a text message account, messages are stored in the Inbox folder. When you use a POP3 account and e-mail messages are moved to a folder you created, then the link is broken between the messages on the device and their copies on the e-mail server. The next time you connect, the e-mail server will detect that the messages are missing from the Inbox folder on the device and will delete them from the e-mail server. By doing this, you can prevent having duplicate copies of a message, but at the same time you will no longer have access to the messages that you move to the folders created from anywhere except the device. When using an IMAP4 account, the folders created and the moved e-mail messages are mirrored on the e-mail server. So you can read the messages anytime you connect to your e-mail server, whether it is from the device or PC. When connected, this synchronization of folders occurs whenever you connect to your e-mail server, create new folders, or rename/delete folders. You can also set different download options for each folder. 6.2 Calendar How to schedule an appointment 1. Tap Start > Calendar. 2. Tap Menu > New Appointment. 3. Enter a name, and start and end times for the appointment. 4. If you want to schedule an all-day event, in the All Day box, tap Yes. 5. Tap ok to finish and return to the calendar. Exchanging Messages and Using Outlook You can schedule appointments, such as meetings and other events by using Calendar. Your appointments for the day can be displayed on the Today screen. If you use Outlook on PC, you can synchronize appointments between your device and PC. You can also set reminder of appointments. Appointments can be seen in various ways, such as Day, Week, Month, Year, and Agenda. Tap the appointment to see detailed appointment information. 6 [Note] • All-day events do not occupy blocks of time in Calendar; instead, they appear in banners at the top of the calendar. • If you want to cancel an appointment, select the appointment and tap Menu > Delete Appointment. • To have the time entered automatically in Day view, tap the time slot for the new appointment, and tap Menu > New Appointment. How to send a meeting request You can schedule meetings via e-mail with contacts who use Outlook or Outlook Mobile. 1. Tap Start > Calendar. 153 Exchanging Messages and Using Outlook 6 154 2. Create a new appointment, or open an existing one and tap Edit. 3. Tap Attendees. 4. Tap the name of the contact you want to invite. 5. Tap Add and tap the name to invite each additional attendee. 6. Tap ok. 7. The meeting request will be sent to the attendees the next time you synchronize your device with your PC. [Note] • When attendees accept your meeting request, the meeting is automatically added to their schedules. When their response is sent back to you, your calendar is updated as well. How to set a default reminder for all new appointments You can set a reminder automatically to turn on for all new appointments. 1. Tap Start > Calendar. 2. Tap Menu > Options > Appointments tab. 3. Select the Set reminders for new items check box. 4. Set the time you want to be alerted. 5. Tap ok to return to the calendar. 6.3 Contacts How to create a contact on your device 1. Tap Start > Contacts. 2. Tap New and enter the contact information. 3. When finished, tap ok. [Note] • Within Call History, you can add a new phone number to contacts. Tap and hold a phone number and tap Save to Contacts from the shortcut menu. • You can also save a phone number that is contained in a message. Tap the phone number, then tap Menu > Save to Contacts. • You can add a picture or assign a ring tone to a contact in the list of contact information. Exchanging Messages and Using Outlook Contacts contains the e-mail addresses, home addresses, anniversaries and more of your people and businesses. It lets you quickly communicate with those people. You can add a picture or assign a ring tone to a contact. Tap a contact in the list for a summary of contact information to call or send a message. If you use Outlook on your PC, you can synchronize contacts between your device and PC. 6 How to create a contact on RUIM card 1. Tap Start > Contacts. Tap Menu > New SIM Contact to create a contact on RUIM card. 2. Enter Name and Mobile Telephone number, then tap ok. 155 How to change contact information Exchanging Messages and Using Outlook 6 1. Tap Start > Contacts. 2. Tap the contact. 3. Tap Menu > Edit and enter the changes. 4. When finished, tap ok. How to work with the contact list You can use and customize the contact list by several ways. Follow the next tips: 1. Tap Start > Contacts. 2. In the contact list, do any of the following: • Enter a name or number, or use the alphabetical index to search for a contact. To view by name, tap Menu > View By > Name. • Tap the contact to see a summary of information about a contact. You can make a call or send a message from there. • Tap and hold the contact to see a list of available actions for a contact. • Tap Menu > View By > Company to see a list of contacts of a specific company, then select the company name. How to copy RUIM contacts to the device You can copy contacts which are stored in RUIM card to the device. 1. Tap Start > Contacts. Select contacts stored in RUIM card that you want to copy to the device. The contacts stored in RUIM card appears as icon ( ), while the contacts stored in the device appears as icon ( ). 2. Select the desired item. To select all, tap Menu > Select All. 3. Tap Menu > Save to Contacts. 156 How to copy contacts to the RUIM card How to find a contact on the device You can find a contact by several ways. 1. Tap Start > Contacts. 2. If you want to view by name, tap Menu > View By > Name. 3. You can do one of the following: • You can enter a name or phone number in the text box at the top. Tap the text box and clear the text, or tap the arrow to the right of the text box to show all contacts again. • You can use the alphabetical index displayed at the top of the contact list. • You can filter the list by categories. Tap Menu > Filter in the contact list, then tap a category you’ve assigned to a contact. Exchanging Messages and Using Outlook You can store only one phone number per contact name on a RUIM card. 1. Tap Start > Contacts. Select contacts stored in the device that you want to copy to RUIM card. The contacts stored in the device appear as icon ( ), while the contacts stored in RUIM card appears as icon ( ). 2. Select the desired item. To select all, tap Menu > Select All. 3. Tap Menu > Save to SIM. 6 How to send contact information via text messaging 1. Tap Start > Contacts, and then select a contact. 2. Tap Menu > Send Contact > Text Message. 3. Select the contact information you want to send, and then tap Done. 4. In the new text message, enter the mobile phone number of the recipient, and then tap Send. 157 6.4 Tasks Exchanging Messages and Using Outlook 6 You can use Tasks to remind yourself of things you need to do. You can let a task occur once or repeatedly, set reminders and organize them with category. Tasks which are overdue are displayed in red. How to create a task 1. Tap Start > Programs > Tasks. 2. Tap Menu > New Task, Enter information for the task such as a subject, start and due dates, priority, and etc. 3. When finished, tap ok. [Note] • Tap the Tap here to add a new task box to create a simple type task. Enter a subject, and tap the Enter button on the on-screen keyboard. To see the task entry box, tap Menu > Options and select the Show Tasks entry bar check box. How to change the priority of a task If you specified a priority for each task, you can sort them by priority. 1. Tap Start > Programs > Tasks. 2. Open the task you want to change the priority for. 3. Tap Edit, and in the Priority box, tap a priority level. 4. Tap ok to return to the task list. [Note] • All new tasks are assigned a Normal priority by default. 158 How to set a default reminder for all new tasks [Note] • You need to set due dates for the new tasks for a reminder. How to show start and due dates in the task list 1. Tap Start > Programs > Tasks. 2. Tap Menu > Options. 3. Select the Show start and due dates check box. 4. Tap ok. Exchanging Messages and Using Outlook You can have a reminder automatically turned on for all new tasks you create. 1. Tap Start > Programs > Tasks. 2. Tap Menu > Options. 3. Select the Set reminders for new items check box. 4. Tap ok to return to the task list. 6 How to sort a task You can sort and filter tasks to quickly find a task which belongs to a specific category. 1. Tap Start > Programs > Tasks. 2. Do one of the following in the task list,: • Tap Menu > Sort By, and select a sort option. • Tap Menu > Filter, and select the category Filter you want. [Note] • You can filter further your tasks by tapping Menu > Filter > Active Tasks or Completed Tasks. 159 6.5 Notes Exchanging Messages and Using Outlook 6 Notes help you to quickly capture thoughts, questions, reminders, to-do lists, and meeting notes. You can create handwritten and typed notes, record voice notes, convert handwritten notes to text for easy readability, and send notes to others. Enter information in Notes You can use the on-screen keyboard or handwriting recognition software as a typing method. You can write or draw directly on the screen with the stylus. How to set the default input mode for Notes As the default input mode, you can set Writing or Typing. 1. Tap Start > Programs > Notes. 2. In the note list, tap Menu > Options. 3. In the Default mode box, tap one of the following: • Writing if you want to create a handwritten note. • Typing if you want to create a typed note. 4. Tap ok. How to create a note 1. Tap Start > Programs > Notes. In the note list, tap New. 2. Tap the Input Selector arrow next to the Input Method icon, and select the desired input method. 3. Tap the Input Method icon if the Input Selector arrow is not displayed. 4. Tap ok to finish the note and return to the note list. 160 [Note] How to draw in a note 1. Tap Start > Programs > Notes. 2. Tap New in the note list. 3. With the stylus, draw on the screen. Exchanging Messages and Using Outlook • If you want to select handwritten text, tap and hold next to the writing. As soon as dots appear, and before they form a complete circle, quickly drag across the writing. If a letter crosses three ruled lines, it is treated as a drawing rather than text. 6 4. Once you make a drawing, a selection box appears around your drawing. 5. To finish and return to the note list, tap ok. [Note] • You can select a drawing to copy or delete it. When you tap and hold the drawing inside the selection box and lift the stylus, the drawing is selected. 161 Record a voice note Exchanging Messages and Using Outlook You can create a stand-alone recording (voice note) or add a recording to a note. How to create a voice note 1. Tap Start > Programs > Notes. 2. You can do one of the following: • You can record from the note list to create a stand-alone recording. • You can add a recording to a new or existing note. 3. Tap Menu > View Recording Toolbar to see the Recording toolbar. 6 4. To begin recording, tap the Record icon ( ). 5. Hold your device’s microphone near source of sound. 6. When you finish, tap the Stop icon ( ). • When you create a stand-alone recording, the recording file appears in the note list. • When you record in an open note, icon appears in the note. 162 How to change recording formats 3. Tap ok. Exchanging Messages and Using Outlook 1. Tap Start > Settings > Personal tab > Input. 2. Tap the Options tab, and in the Voice recording format list, select the desired format. 6 [Note] • Within Notes list, there is a link which you can change recording formats. Tap Menu > Options… > Global Input Options link, and then tap the Options tab. 163 Chapter 7 Experiencing Multimedia 7.1 Using Camera 7.2 Using Pictures & Videos 7.3 Using Windows Media Player Mobile 166 170 175 7.1 Using Camera Experiencing Multimedia 7 ASP-505A has the built-in 2.0 mega pixel CMOS camera. With this camera, you can take high resolution pictures and video clips. [Note] • It is recommended that you choose a still object for target. • When taking a photo at night or a cloudy day, adjust the Brightness to capture a brighter picture. • If you want to take a clearer and sharper photo, please use another camera which supports higher resolution. • Be careful not to drop the camera as it is vulnerable to a shock. • When cleaning the lens part, be sure to use soft clothes. • Note that using the camera will largely consume the battery. How to open the Camera screen • Tap Start > Programs > Pictures & Videos > Camera icon. It may take few seconds for the preview screen to appear. • Press and hold the Camera button for 2 seconds on your device. Camera button 166 [Note] Still Mode When you use Still mode, you can capture still image(s) by pressing Camera button on the device or the Track pad. Still images will be saved in JPG format. 2 1 7 3 4 6 5 1 Mode Switching control It indicates current modes (Still, Video or Picture theme) and you can 2 Resolution It indicates the resolution of image to be saved when photo is taken. 3 Zoom Zoom In/Out by tapping Up/Down arrow. 4 Review Check the photo you have taken. 5 Brightness Adjust the brightness by tapping Back/Forward arrow. 6 Option Menu Displays the set up menu. 7 Exit Exit the camera application. Experiencing Multimedia • Press and hold down the camera button for 2 seconds for proper operation and this is to avoid mistakenly pressing the button. on the screen or press the End button. • To exit the Camera, tap 7 change the mode by tapping icon. 167 You can set the following function by tapping Option Menu on the bottom right of the screen. Experiencing Multimedia 1 2 3 4 1 Resolution Select 2 Effect Select 5 the resolution to be saved from 176x144, 320x240, 640x480, 800x600, 1280x960, or 1600x1200. the image effect from Normal, Sepia, Blue, Negative and Black & White. 7 Select the one from Auto, Sunny, Cloudy, Glow or Fluorescent to adjust 3 White Balance 4 Quality You can select quality of image among Normal, Fine and Super fine. 5 Option Menu Set the location of image storage folder and sound of shutter. White Balance. Video mode When you use the Video capture mode, you can press Camera button or the Track pad to start recording a video clip. To stop recording, press the Camera button or the Track pad. 168 You can specify the length of recording in terms of time or file size in Option Menu. Video clips are saved in 3GP(H.263) format. 2 3 4 1 Resolution 2 Effect Select visual effect from Normal, Sepia, Red, Blue, Negative or Black & White. 3 Option Set the location of recording storage folder and set the start or exit tone for 4 Video Time Set the resolution of video to be recorded from 176x144 or 352x288. recording. Experiencing Multimedia 1 You can set the following function by tapping Option Menu on the bottom right of the screen. 7 Select the recording time from 15sec, 30sec or No limit. Picture theme mode From the Picture theme mode, tap the center of screen to change theme template. 169 7.2 Using Pictures & Videos Experiencing Multimedia 7 The Pictures & Videos program collects, organizes, and sorts images and video clips in the following formats on your device. File Type File Extensions Picture *.bmp, *.jpg, *.gif, *.png Video *.wmv, *.asf, *.3gp You can do many things with the captured images; view several images as a slide show, beam, send via e-mail, edit, or set them as the background on the Today screen. How to copy pictures and video clips to your device You can copy pictures and video files from your PC and view them on your device. • Copy the pictures and video files from PC or a storage card to the My Pictures folder on the device. To get more information about copying files, refer to ActiveSync Help on your PC. [Note] • You can also copy pictures and video files from PC to the device with a storage card. After inserting the storage card into the storage card slot on the device, then copy the files from your PC to the folder you created on the storage card. How to view pictures 1. Tap Start > Programs > Pictures & Videos. By default, the images in the My Pictures folder appear as thumbnails. 2. Select a picture and tap View. If you cannot find a picture in the default My 170 Pictures folder, go to another folder by tapping the down arrow ( ). How to play videos How to view slide shows You can view your pictures as a slide show on your device. Pictures are shown in full-screen view with 5-second intervals between slides. 1. Tap Start > Programs > Pictures & Videos. 2. Tap Menu > Play Slide Show. Experiencing Multimedia 1. Tap Start > Programs > Pictures & Videos. The contents of the My Pictures folder will be shown by default. 2. Tap the desired video and play it in Windows Media Player. 7 [Note] • To specify the display scale of pictures, tap Menu > Options… > Slide Show tab, and tap Portrait pictures or Landscape pictures. • During a slide show, tap anywhere on the screen to display the Slide Show toolbar ( ), which you can use to stop or pause the slide show, rotate the view, and more. 171 How to sort pictures and video clips Experiencing Multimedia 7 172 If you store a large number of pictures or video clips on your device, you may find it helpful to sort them to quickly find a specific picture or clip. You can sort by name, date, and size. 1. Tap Start > Programs > Pictures & Videos. 2. At the top right, tap the sort list (Date by default), and choose the item you want to sort by (Name, Date, or Size). How to delete a picture or video clip To remove a picture or a video clip, do any of the following: • Tap the desired picture or video clip on the Pictures & Videos screen, and tap Menu > Delete, and then tap Yes to confirm the deletion. • Tap and hold the thumbnail of the picture, then tap Delete, and then tap Yes to confirm the deletion. How to edit a picture You can rotate, crop, and adjust the brightness and contrast levels of the pictures. 1. Tap Start > Programs > Pictures & Videos. 2. Tap the picture you want to edit. 3. Tap Menu > Edit. You can do the following: • Tap Rotate to rotate a picture 90 degrees clockwise. • To crop a picture, tap Menu > Crop. Next, tap and drag to select the area to crop. Tap inside the box to crop. To cancel to crop, tap outside the box. • Tap Menu > Auto Correct to adjust the brightness and contrast levels of a picture. [Note] How to set a picture as the Today screen background You can set a picture as the background on the Today screen. 1. Tap Start > Programs > Pictures & Videos. 2. Select the desired picture. 3. Tap Menu > Set as Today Background… 4. Select a Transparency level. A higher percentage results in a more transparent picture, and a lower percentage results in a more opaque picture. 5. Tap ok. How to send pictures and video clips via e-mail You can send pictures and video clips to other devices via e-mail. 1. Before sending, set up Messaging to send and receive messages. 2. From the screen, select the desired item. 3. Tap Menu > Send…, and select one account to send the attached item. 4. A new message screen appears with the item attached. 5. Enter the recipient name and subject, and tap Send. The message will be sent the next time you synchronize the device. Experiencing Multimedia • You can undo an edit by tapping Menu > Undo. • Also, you can cancel all unsaved edits by tapping Revert to Saved. • You can also rotate a picture 90 degrees counterclockwise. Tap Start > Programs > Pictures & Videos and tap Menu > Tools > Options…. Then, on General tab, check Left under when rotating a picture, rotate 90 degrees: and tab ok. 7 [Note] • Before sending, pictures and video clips are saved automatically. 173 How to beam a picture or video clip Experiencing Multimedia 7 174 You can beam a picture or video file to another mobile device using Bluetooth. 1. Tap Start > Programs > Pictures & Videos. 2. Tap the desired picture or video file. 3. Tap Menu > Beam… 4. Choose a device to beam the file to. 5. Tap ok. How to assign pictures to contacts You can assign a picture to a contact so that you can easily identify the contact at any point of time. 1. Tap Start > Programs > Pictures & Videos. 2. Tap the picture you want to assign to a contact. 3. Tap Menu > Save > Save to Contact… 4. Tap the contact name and tap Select. 7.3 Using Windows Media Player Mobile Video File Format Supported File Extensions Windows Media Video *.wmv, *.asf H.263 *.3gp Audio File Format Supported File Extensions Windows Media Audio *.wma MP3 *.mp3 Wave *.wav About the controls The following are available controls on the Windows Media Player. 1 Experiencing Multimedia With Microsoft Windows Media Player 10 Mobile for Pocket PC, you can play digital audio and video files that are stored on the device or on a Web site. The Windows Media Player on the device supports the following file formats. 7 9 2 3 4 5 6 7 8 175 Experiencing Multimedia 7 1 Adjusts the playback progress of a selected file. 2 Displays the video in full screen. 3 Displays a Web site where you can find music and videos to play. 4 Skips to the beginning of the current file or to the previous file. 5 Plays/Pauses a file. 6 Skips to the next file. 7 Decreases the volume level. 8 Increases the volume level. 9 Turns the sound on or off. Screens and menus Windows Media Player has three primary screens. Playback screen Displays Now Playing screen Displays the Now Playing Playlist. This special playlist indicates the current the playback controls, such as Play, Pause, Next, Previous and Volume, and the video window. You can change the skin of this screen. file being played and any files that are “queued up” to play next. Library screen The screen where you can find audio files, video files, and playlists. It consists of categories such as My Music, My Videos, My TV, and My Playlists. You can open a Menu at the bottom of each screen. The commands on this menu vary depending upon the screen in use. To get more information about the commands, refer to Help on your device. 176 About licenses and protected files [Note] • Check the file properties by tapping Menu > Properties to view the protection status. Copy media files to your device To synchronize digital media files to your device, use the latest version of the desktop Player (Windows Media Player 10 or later). You need to synchronize the files to a storage card inserted into the device. Do not synchronize to a storage card that is inserted into a storage card reader. Also, do not synchronize to the internal storage location (RAM) in your device. Experiencing Multimedia Some content such as digital media files downloaded from the Internet, CD tracks, and videos are protected against illegal distribution or sharing. They have licenses which are created and managed by digital rights management (DRM). You may not be able to play files that have been copied to the device. Files that have licenses associated with them are called “protected files”. If you want to copy a protected file from your PC to the device, do not drag the file from a folder on the PC to a folder on the device, but synchronize the file to the device with a desktop player. This can let the license be copied along with the protected file. To get more information about synchronizing files, refer to desktop Player Help. 7 How to synchronize content to the device automatically 1. Turn the power off on the device. Insert a 32-MB or larger storage card into the device, and turn the power back on. 177 Experiencing Multimedia 7 2. On PC, launch Windows Media Player. 3. Connect the device to PC. 4. The Device Setup Wizard opens on your PC in case that you have not set up synchronization between the device and PC. 5. In the wizard, click Automatic, select the Customize the playlists that will be synchronized check box, and then select the desired playlists. 6. Click Finish. 7. Synchronization begins to the device. The next time you connect the device to PC while the desktop version of Windows Media Player is running, synchronization will start automatically. How to synchronize and copy content manually to the device 1. If you have not set up synchronization between the device and PC, follow steps 1 to 6 in “How to synchronize content to the device automatically”, except that you should click Manual synchronization. 2. To select files to synchronize and copy to the device, do the following: • Click the Library tab. • Click the drop-down list in the rightmost pane, and select Sync List. • Select a desired playlist in the Playlist which is the leftmost pane. • Multi-select desired files in the File List which is the middle pane, then drag them to the Sync List. • Click the Start Sync button at the bottom of the Sync List. [Note] • If the desktop Player is configured to automatically set the quality level for audio files copied to your device, then audio files copy faster. To get more information, refer to desktop Player Help on the PC. 178 Play media How to play items on your device [Note] • To add a file stored on the device to a library, tap Menu > Open File on the Library screen. Tap and hold the desired item, and tap Play. Experiencing Multimedia You can find and play songs, videos, and playlists stored on the device or removable storage card by using the library on Windows Media Player Mobile. 1. To open the Library screen, tap Menu > Library. 2. On the Library screen, tap the Library arrow (near the top of the screen), then tap the media storage that you want to use, for example, Storage Card. 3. Though Windows Media Player Mobile automatically updates the library, yet you can manually update the library to make sure that it contains recently copied files. To manually update the library list, tap Menu > Update Library. 4. Select a category (for example, My Music or My Playlists). 5. Tap and hold the item that you want to play (such as a song, album, or artist name), then tap Play. 7 How to play an item on a network With the Open URL command, you can play a song or video that is on the Internet or a network server. 1. To open the Library screen, tap Menu > Library. 2. Tap Menu > Open URL. 3. Do one of the following: • Enter a network address in the URL box. • Tap a URL that you have previously used in the History box. 179 [Note] Experiencing Multimedia 7 • You must be connected to a network to play an item on a network. To get more information about creating a remote connection between your device and a network, see Connections Help on your device. Use Playlists With Playlists, you can group digital media files together in a specified order for convenient playback. In the desktop Player, you can create a playlist and synchronize the desktop Player with the device. To get more information about synchronizing media, see “Copy media files to your device” in Chapter 7.3. In the Library under the My Playlists category on Windows Media Player on the device, you can view your Playlists. In Now Playing, currently playing files and files that have been queued up to play next are displayed. You can create a new playlist on the device by saving the current Now Playing Playlist and by giving it a new name. How to save a new playlist 1. To open the Library screen, tap Menu > Library. 2. Tap to select a category (for example, My Music or My Playlists). 3. Select the desired media file, then tap Menu > Queue Up. The file is added to the Now Playing list. You can repeat this step until you have added all desired media files to the Now Playing list. 4. After adding the media files, tap Menu > Now Playing. 5. On the Now Playing screen, tap Menu > Save Playlist. 6. Enter the playlist name then tap Done. 7. To play back the playlist you created, tap My Playlists in the Library, select your playlist, then tap Play. [Note] • Multi-selecting file is not available on the step 3. 180 Chapter 8 Using Other Applications 8.1 Word Mobile 8.2 Excel Mobile 8.3 Viewing Slide Shows with PowerPoint Mobile 8.4 OneNote Mobile 8.5 Windows Live 182 183 184 186 191 8.1 Word Mobile Using Other Applications 8 182 Word Mobile is a streamlined version of Microsoft Word. You can open and edit Word documents created on PC on the device, and you can also save them as *.doc, *.rtf, *.txt, *.docx and *.dot files. Only one document can be opened at a time, and the first one is saved and closed automatically when you open a second document. How to create a Word file 1. Tap New In Word Mobile. You will see either a blank document or template, depending on the default template selected. 2. Enter text. 3. Tap Menu to set the font, paragraph alignment and indentation, insert the date, do a spelling check, and more. 4. Tap ok to save and close the file. When close a new document, it is automatically named after the first several words in the document and placed in the Word Mobile document list. You can easily rename the document and move it to another folder or a storage card. [Note] • Some features of Microsoft Word such as revision marks and password protection may not be supported. When you save the document on the device, some data and formatting may be lost. • To see a complete list of features that are not supported in Word Mobile, refer to Help on your device. 8.2 Excel Mobile With Excel Mobile, you can easily open and edit Excel workbooks and templates created on your PC, and also create new workbooks and templates on the device. How to create an Excel file [Note] • To see as much of your workbook as possible, select the full-screen mode. • You can easily read the worksheet by tapping View > Zoom and selecting a percentage. • Some features such as formulas and cell comments may not be supported. When you save the workbook on the device, some data and formatting may be lost. To see a complete list of features that are not supported in Excel Mobile, refer to Help on your device. Using Other Applications 1. Tap New in Excel Mobile. You’ll see either a blank worksheet or template, depending on the default template selected. 2. Tap a cell to select it. Enter your data with the on-screen keyboard, then tap the Enter key. 3. Tap Menu to insert cells, charts, symbols or functions, format rows and columns, and more. 4. Tap ok to save and close the file. 8 183 8. 3 Viewing Slide Shows with PowerPoint Mobile Using Other Applications 8 184 With PowerPoint Mobile, you can open and view slide show presentations created on your PC. You can see Slide shows in *.ppt, *.pps, and *.pptx format created using PowerPoint '97 and later in PowerPoint Mobile. The device shows many presentation elements built into the slide shows such as slide transitions and animations. In case that presentation is set up as a timed slide show, then one slide will advance to the next automatically. The device also supports Links to URLs. PowerPoint Mobile on the device does not support the following functions. PowerPoint presentations created on a computer can be viewed but not edited in PowerPoint Mobile. All file content is preserved and will be displayed if the presentation is later transferred to a computer. Content types not supported by Microsoft Office PowerPoint 2007 Mobile: • Custom animations and transitions: Custom animations and transitions continue to work in versions of Microsoft Office prior to Microsoft Office 2007. • SmartArt layouts: PowerPoint Mobile will replace a SmartArt layout with one of the following supported layouts: Basic Bending Process, Vertical Bullet List, Horizontal Bullet List, Basic Cycle, Radial Cycle, Organization Chart, or Basic Target. • Text boxes, images, and shapes: PowerPoint Mobile 2007 does not support the Reflection, Glow, Bevel, 3D Rotation, and Transform effects. • WordArt styles and text effects: Content types not supported in all PowerPoint Mobile files: • Fonts and font sizes: Fonts not supported by the device are mapped to the closest font available. • Audio/video content: Only embedded .wav files supported. • Protection settings: If you must have a password to open a presentation, you cannot open and view the presentation in PowerPoint Mobile. If you must have a password to modify a presentation, you can open and view the presentation in PowerPoint Mobile but not save it. 1. Tap Start > Programs > PowerPoint Mobile. 2. Tap the desired slide show in the presentation list. 3. To advance to the next slide, tap the current slide. 4. To navigate between slides, tap > Next or Previous, or tap Go to Slide and tap the desired slide. In case that the presentation is set up as a timed slide show, slides will advance automatically. [Note] • While zoomed in, you need to zoom out to navigate to another slide. • Tapping Next or Previous may play an animation on a slide rather than navigate to another slide. How to stop a slide show Tap End Show in a PowerPoint Mobile presentation. Using Other Applications How to view a slide show presentation 8 185 8. 4 OneNote Mobile Using OneNote Mobile Using Other Applications 8 Although OneNote Mobile is not intended to duplicate the full feature set of Microsoft Office OneNote 2007, it does offer much of the basic functionality for taking notes on your mobile device. The basic OneNote Mobile features that are available to you are listed below. Remember, the main benefit of OneNote Mobile is to take notes on the go. Use the Notes Browser to manage your mobile notes Whenever you start OneNote Mobile on your device, the Notes Browser is displayed. It lists all available notes on your device. You can use the Notes Browser to create, open, rename, delete, sort, and manage notes that you take with OneNote Mobile. Create and save a new note 1. In the Notes Browser, select New. 2. Start typing notes on your device. 3. When you finish taking notes, select Done. OneNote Mobile returns to the Notes Browser list. [Note] • While taking notes, you can undo a mistake by selecting Menu and then selecting Undo. • The first line of text that you type is the file name for this note. You can change the file names in the Notes Browser by renaming the notes in the list. 186 Open or close a note How to open a note for reading or editing In the Notes Browser list, select the note that you want to open, and then press the Action key on your device. While reading or editing a note, select Done. [Note] • Just like in the full version of Office OneNote 2007, it is not necessary to explicitly save your notes. OneNote Mobile continuously saves changes to the current note while you are editing it, and changes are also saved when you close a note. Rename a note 1. In the Notes Browser list, select the note that you want to rename. 2. Select Menu, and then select Rename. Delete a note 1. In the Notes Browser, select the note that you want to delete. 2. Select Menu and then select Delete. Using Other Applications How to close a note and return to the Notes Browser 8 Sort your notes When you finish reading or editing a note, you can close it and return to the Notes Browser. 1. To close a note and return to the Notes Browser, select Menu, and then select Options. 2. Using the right and left directional keys on your device's keypad, select the sort criteria that you want (Name or Date modified), and then select Done. 187 Add text formatting to your mobile notes In OneNote Mobile, you can format text as bold, italic, underline, and strikethrough, just as you can in a word-processing program. You can also create bulleted and numbered lists and insert hyperlinks to Web sites. Using Other Applications 8 Format text 1. Place the cursor in the middle of the word that you want to format. 2. Select Menu, select Format, and then select the formatting style that you want. [Note] • To clear all formatting for the selected text, select Clear All on the Format menu. Create a numbered list 1. Place the cursor where you want the list to begin. 2. Click Menu, select List, and then select Numbered. [Note] • To clear the numbered list formatting, place the cursor on any list item, and then select Clear on the List menu. Create a bulleted list 1. Place the cursor where you want the list to begin. 2. Select Menu, select List, and then select Bulleted. [Note] • To clear the bulleted list formatting, place the cursor on any list item, and then select Clear on the List menu. 188 Create a hyperlink While editing a note, type the Internet address that the hyperlink should point to. For example, to create a hyperlink to the Microsoft Web site, type http://www. microsoft.com. [Note] Add a picture or an audio recording to your mobile notes In OneNote Mobile, you can insert into your notes any images that you have captured with (or transferred to) your mobile device, and you can record audio notes and place them in your written notes. Insert a picture You can add to your notes any pictures that you have captured with the camera in your device, or that you have transferred to your device from your computer. 1. Click Menu, and then select Insert Picture. 2. Press the directional keys on your device's keypad to select the picture that you want to insert, and then select Insert. Using Other Applications • To open a hyperlink in a note, place the cursor anywhere in the link, and then press the Action key on your device. 8 [Note] • To cancel, select Menu, and then select Cancel. • You can zoom in and out of inserted pictures to view detail. Move the cursor over the picture to select it, press the Action key on your device, and then press the directional keys on your keypad to control the zoom level. 189 Insert an audio recording Using Other Applications 8 190 You can take audio notes by using the microphone in your mobile device and link the audio notes to your written notes. This is especially useful when you need to capture a lot of information, but typing on your mobile device proves too cumbersome. 1. Click Menu, and then select Insert Recording. 2. To begin recording audio notes, select Record. [Note] • To cancel, select Menu, and then select Cancel. Play back an audio recording 1. In your notes, position the cursor over the audio recording icon to select it. Selected objects are shown with a thick, red border. 2. Press the Action key on your device. 8.5 Windows Live The Windows Live application incorporates a horizontal scrolling menu. This lets you scroll left or right to the Windows Live service that you want to use. The Windows Live services menu and the Search bar can also appear on your Today screen for easy access. You can select that option during setup, or select it later from the Windows Live options menu. [Note] • You must have a Windows Live ID and password to use this service. Using Other Applications Windows Live on your device lets you wirelessly access many of the features of the Windows Live Web site. • You can access your Windows Live Hotmail. • You can access your Windows Live Messenger and contacts. • You can merge your Messenger contacts with the contacts on your device. From the device contact list, you can access the contacts’ Windows Live Spaces and you can initiate an e-mail or an instant message to any contact. • The Windows Live Search bar can help you find local services, images, and information on the Internet. • You can send a photo to your Windows Live Space. 8 Windows Live basics Set up Windows Live Windows Live on your device lets you view your contacts and Windows Live Hotmail e-mail, and chat with contacts using Windows Live Messenger. 191 [Note] • You must have a Windows Live ID and password to use this service. Using Other Applications 8 1. Tap Start, tap Programs, and then tap Windows Live. 2. Tap Sign in to Windows Live. 3. Tap Accept. 4. Enter your e-mail address and password, and then tap Next. 5. Clear the Save password check box if you do not want the device to remember your password. 6. Select or clear the Live Search bar and Windows Live services check boxes, and then tap Next. 7. If you want to synchronize information, make sure the check boxes next to Contacts and Messenger and E-mail are selected. If you want your Messenger contacts to show in your device Contact list, make sure the Merge duplicates with Outlook check box is selected. 8. Tap Next. 9. Tap Done. Sign in to the Windows Live Web site You can use the Windows Live Web site services from your device. [Note] • You must have a Windows Live ID and password to use this service. 1. Tap Start, and then tap Internet Explorer. 2. Tap Menu, tap Favorites, and then tap Windows Live. 3. Tap Sign In. 192 4. You may have to tap More if Sign In does not appear on the first screen. 5. Enter your e-mail address and password. 6. Tap Log In. [Note] • To sign out, tap Sign Out > Go. The Windows Live Search bar and the Windows Live services menu can be displayed on your Today screen to allow quick access to these programs. 1. Tap Start, tap Programs, and then tap Windows Live. 2. Tap Menu, tap Options, and then tap Today screen options. 3. Select or clear the check boxes next to Live Search bar and Windows Live services, and then tap Done. Search the Internet for information by category Use the Windows Live Search bar to search the Internet for images, news articles, maps, and other specific types of content related to the search topic. 1. Tap Start, tap Programs, and then tap Windows Live. 2. In the Search bar, near the top of the screen, enter the text that you want to search for and then press ENTER. 3. Do one of the following: • To find a local service related to the text that you entered, scroll to Local, and then scroll to the name of a service. When you find what you are looking for, tap the name to view a map or tap Call to call. Note: The first time that you use Local, you must tap Set location to enter your location. To change the location, tap Change, enter the name of the new location, and then tap Find. Using Other Applications Change the Windows Live Home screen options 8 193 Using Other Applications 8 • To see images related to the text that you entered, scroll to and tap Images. • To search the Internet for the text that you entered, scroll to and tap Web. • To see news articles related to the text that you entered, scroll to and tap News. • To see a map of the area related to the text that you entered, scroll to and tap Map. • To see a list of Windows Mobile Spaces that contain information related to the text that you entered, tap Spaces. [Note] • If you chose to have the Live Search bar appear on the Today screen, you can quickly access the Search bar from there. Scroll down to the Search bar, enter the text you want to search for, and then press ENTER. Search for city information by category For information about the services, cultural highlights, and entertainment venues available in a particular city, use Live Search to: • find local businesses and restaurants • get maps and directions • view traffic information (in selected U.S. cities only) [Note] • Live Search for mobile is currently available only in the United States and the United Kingdom. 1. Tap Start, tap Programs, and then tap Live Search. 2. In the location bar, which is below the Search bar, tap the left or right arrow to scroll to the name of the city for which you want local information. 194 [Note] • To select the country you are interested in, tap Menu, and then tap Settings. In the country bar, tap the left or right arrow to select United States or United Kingdom. Using Other Applications 3. To search for a business or organization, do one of the following: • In the Search bar, near the top of the screen, enter the text that you want to search for and then press ENTER. • Tap Categories, tap a category, tap a subcategory, and then tap the name of a business or organization. • To call the business or organization, tap the phone number. • To obtain directions, view a map, search for another local business, save the information to Contacts, or SMS the information to a friend, tap one of the options at the bottom of the screen. 4. To view a map that shows the selected city, tap Map. 5. To obtain directions between two locations within either the United States or the U.K., tap Directions. 6. To view traffic conditions within the selected city, tap Traffic (U.S. only). To change the view, tap Menu, and then tap Zoom Out, Zoom In, or View, and then one of the view options. 7. To view a list of movies playing in the selected city, tap Movies (U.S. only). 8 Windows Live Messenger Set up Windows Live Messenger You can use Windows Live Messenger on your device to chat with friends or co-workers. But first you must set up the device to work with an existing Windows Live ID. 195 Using Other Applications 8 196 1. Tap Start, tap Programs, and then tap Messenger. 2. Tap Sign in. 3. Tap OK to confirm. 4. Tap Accept, to accept the terms of the Windows Live agreement. 5. Enter your Windows Live ID and password, and then tap Next. 6. Select or clear the Live Search bar and Windows Live services check boxes, and then tap Next. 7. If you want to display your Messenger contacts in the device contact list, make sure the Merge duplicates with Outlook check box is selected. If you want to synchronize your Windows Live Mail, make sure that the E-mail check box is selected. 8. Tap Next. 9. Tap Done. You are now signed in to Windows Live Messenger and ready to chat. [Note] • To sign out of Windows Live Messenger, tap Menu, and then tap Sign out. Sign in to Windows Live Messenger Before you can sign in to Windows Live Messenger, you must set up Windows Live Messenger on your device. 1. Tap Start, tap Programs, and then tap Messenger. 2. Do one of the following: • If this is the first time you are signing in since you turned on your device, scroll left or right in the Sign in as field to select the status that other Windows Live users will see, such as Online or Busy, and then tap Sign in. • If you have already signed in to Messenger since you turned on your device, tap Sign in. To change the status that other Windows Live Messenger users see, tap Menu, tap Change status, and then tap the status you want. [Note] • To sign out of Windows Live Messenger, tap Menu, and then tap Sign out. Chat with your Messenger contacts by using Windows Live Messenger on your device. 1. Tap Start, tap Programs, and then tap Messenger. 2. If you are not already signed in, tap Sign in. 3. Scroll to the online contact you want, and then tap Send IM. 4. Enter the message text in the message area, and then tap Send. 5. To end the IM session, tap Menu, and then tap End conversation. [Note] • In case of the step 3, you can only send an IM to contacts who are online. The Messenger icon next to online contacts will appear green. The messenger icon next to offline contacts will appear gray, and you will see Send e-mail instead of Send IM. • If you chose to have Windows Live services appear on the Today screen, you can quickly access Messenger from there. Scroll left or right in the Windows Live services menu to Messenger and press ENTER. Using Other Applications Send an Instant Message from Messenger 8 Send an Instant Message from Contacts If you chose to merge duplicate contacts with Outlook during the Windows Live or Messenger setup, you can initiate a chat with your Messenger contacts from the device contact list. 1. Tap Start, and then tap Contacts. 197 2. Scroll to the online contact you want and press ENTER. 3. Tap Instant Message. 4. Enter the message text and then tap Send. 5. To end the IM session, tap Menu, and then tap End conversation. [Note] Using Other Applications 8 • In case of the step 3, the Messenger icon will be green for those contacts who are online. If you have not signed in to Windows Messenger, the icons for all Messenger contacts will be gray, and you will need to sign in. Add a new Messenger contact 1. Tap Start, tap Programs, and then tap Messenger. 2. If you are not already signed in, tap Sign in. 3. Tap Menu, and then tap Add new contact. 4. Enter the contact's e-mail address and tap OK. [Note] • If you chose to merge duplicate contacts with Outlook during the Windows Live or Messenger set up, you can add a new Windows Live contact from the device contact list. On the Today screen, tap Start, tap Contacts, and then tap Windows Live. • If you chose to have Windows Live services appear on the Today screen, you can quickly access Messenger from there. Scroll left or right in the Windows Live services menu to Messenger and press ENTER. Change Messenger settings You can control voice clip settings, the type of notification you receive for new instant messages (IM), and the font size for IM conversations. 1. Tap Start, tap Programs, and then tap Messenger. 198 2. If you are not already signed in, tap Sign in. 3. Tap Menu, and then tap Options. 4. Make the changes that you want and tap Done. [Note] Windows Live Spaces Introduction to Spaces Windows Live Spaces gives you a personalized place on the Web where you can share your interests, blog entries, and photos. With Windows Live on your device, you can send photos to your Windows Live Space and you can access your contacts’ Spaces from the Messenger contact list or the device contact list. Add a photo to your Space If you have a Windows Live Space, you can add a photo to your Space. 1. Tap Start, tap Programs, and then tap Pictures & Videos. 2. Scroll to the photo you want to add to your space. 3. Tap Menu, and then tap Send to your space. Using Other Applications • If you chose to have Windows Live services appear on the Today screen, you can quickly access Messenger from there. Scroll left or right in the Windows Live services menu to Messenger and press ENTER. 8 [Note] • You must have a Windows Live Space to use this option. 199 View a Space from Contacts Using Other Applications 8 If you chose to merge duplicate contacts with Outlook during the Windows Live or Messenger setup, you can visit the Windows Live Space of a Messenger contact by using the device contact list. 1. Tap Start, and then tap Contacts. 2. Scroll to the contact whose Space you want to view and press ENTER. 3. Tap View space. [Note] • If a Space has changed since your last visit, you will see a yellow “gleam” next to the contact who owns that Space. • The View space option will only appear if the contact has a Windows Live Space. View a Space from Messenger If a Messenger contact has a Windows Live Space, you can visit that Space by using the contact list. 1. Tap Start, tap Programs, and then tap Messenger. 2. If you are not already signed in, tap Sign in. 3. Scroll to the contact whose Space you want to view. 4. Tap Menu, tap Contact options, and then tap View contact’s space. [Note] • If a Space has changed since your last visit, you will see a yellow “gleam” next to the contact who owns that Space. • The View contact’s space option will be unavailable if the contact does not have a Windows Live Space. 200 Windows Live Hotmail Use Windows Live Hotmail [Note] • If you chose to have Windows Live services appear on the Today screen, you can quickly access Mail from there. Scroll left or right in the Windows Live services menu to Mail and press ENTER. Change e-mail settings You can manage the size of the e-mail preview by adjusting the number of characters, and also control whether e-mail is sent immediately or held until you manually synchronize with Windows Live Hotmail. 1. Tap Start, tap Programs, and then tap Windows Live. 2. Scroll down to the Windows Live services menu, and then scroll left or right to Mail. If Mail does not appear, you may need to tap Menu, tap Options, tap Sync options, select the E-mail check box, and then tap Done two times. 3. Tap Menu, tap Options, and then tap E-mail. Using Other Applications You can manage your Windows Live Hotmail on your device. 1. Tap Start, tap Programs, and then tap Windows Live. 2. Scroll down to the Windows Live services menu, scroll left or right to Mail, and then press ENTER. If Mail does not appear, you may need to tap Menu, tap Options, tap Sync options, select the E-mail check box, and then tap Done two times. 3. Tap Menu, and then tap Send/Receive. 4. If you have set the device to remember your Windows Live password, it will automatically synchronize with your Windows Live Hotmail account and display your e-mail. Otherwise, you might have to enter your password and tap Sign in. 8 201 4. Make the changes that you want and then tap Done. [Note] • If you chose to have Windows Live services appear on the Today screen, you can quickly access Mail from there. Scroll left or right in the Windows Live services menu to Mail and press ENTER. Using Other Applications 8 Change message options when composing or replying to e-mail When composing or replying to an e-mail, you can change the priority and language settings. 1. Tap Start, tap Programs, and then tap Windows Live. 2. Scroll down to the Windows Live services menu, scroll left or right to Mail, and then press ENTER. 3. Tap Menu, and then tap New, or scroll to the e-mail to which you want to reply, and then tap Menu, tap Reply, and then tap Reply. 4. Enter the To, Subject, and body text, tap Menu, and then tap Message Options. 5. Change the settings as you want, and then tap OK. 6. Tap Send. [Note] • If you chose to have Windows Live services appear on the Today screen, you can quickly access Mail from there. Scroll left or right in the Windows Live services menu to Mail and press ENTER. Change message sending options You can select whether to include the original message when replying to e-mail and whether to save copies of sent items. 1. Tap Start, tap Programs, and then tap Windows Live. 202 2. Scroll down to the Windows Live services menu, scroll left or right to Mail, and then press ENTER. 3. Tap Menu, tap Tools, and then tap Options. 4. Tap the Message tab. 5. Change options as you want, and then tap OK. • If you chose to have Windows Live services appear on the Today screen, you can quickly access Mail from there. Scroll left or right in the Windows Live services menu to Mail and press ENTER. Windows Live Sync Sync with Windows Live You can use Windows Live Sync to synchronize your Windows Live Messenger, contacts, and Windows Live Hotmail. 1. Tap Start, tap Programs, and then tap Windows Live. 2. Scroll down to the Windows Live services menu, scroll left or right to Sync, and then press ENTER. If you have set the device to remember your password, it will automatically synchronize. Otherwise, you must enter your password and tap Sign in. Using Other Applications [Note] 8 [Note] • If you chose to have Windows Live services appear on the Today screen, you can quickly access Sync from there. Scroll left or right in the Windows Live services menu to Sync and press ENTER. 203 Change sync options Using Other Applications 8 204 You can choose to synchronize your Windows Live Messenger contacts and Windows Live Hotmail e-mail on your device. 1. Tap Start, tap Programs, and then tap Windows Live. 2. Scroll down to the Windows Live services menu, and then scroll left or right to Sync. 3. Tap Menu, tap Options, and then tap Sync options. 4. Make the changes that you want and then tap Done. Change your sync schedule You can control the frequency with which your device synchronizes Windows Live Hotmail and Windows Live Messenger contact information. 1. Tap Start, tap Programs, and then tap Windows Live. 2. Scroll down to the Windows Live services menu, and then scroll left or right to Sync. 3. Tap Menu, tap Options, and then tap Sync schedule. 4. Make the changes that you want and then tap Done. Appendix A.1 ASP-505A Specification A.2 PC Requirement for running ActiveSync 4.x 206 210 A.1 ASP-505A Specification System Information Items Descriptions Operating System Microsoft® Windows MobileTM 6.1 Professional CPU Samsung® SC32442A 400MHz Memory ROM Size RAM Size 128Mbyte NAND 64Mbyte SDRAM Physical Specifications Appendix A 206 Items Descriptions Size (L x W x H) 102mm x 59.5mm x 14.3mm Weight 115g with battery Display Items Descriptions Type Transmissive TFT-LCD, Touch screen Size 2.8'' Resolution 240 x 320 Colors 65535 Supported Orientation Horizontal/Vertical Power Supply Items Descriptions Battery Type Capacity Charging Time Standby Time Lithium-ion 1270mAh Up to 2.5 hours Up to 200 hours Talk Time (Screen off) Media Playback Time Up to 4.5 hours Up to 15 hours @ audio, Up to 12 hours @ video AC Adapter AC Input/Frequency DC Output 100~240 VAC, 50/60Hz 5V, 2A CDMA Module Items Frequency Mode Antenna Descriptions 450MHz 1x, EVDO Rev.A Built-in GPS Module Items Descriptions Type Sirf-III Antenna Built-in Appendix CDMA A 207 Camera Module Items Type Resolution Descriptions 2 Mega pixel CMOS 1600x1200(UXGA), 1280x9600 (SXGA), 800x600(SVGA), 640x480 (VGA), 320x240 (QVGA), 176x144(QCIF) Maximal Frame rate 15 fps Digital Zoom 1.5x LED Lights Items Charge LED Charging Full Charge Appendix A 208 Descriptions Red Blue CDMA Traffic status LED Idle Blue Green Notification White Connections Items Descriptions I/O Port 20pin receptacle connector Wireless Connections Bluetooth, Wi-Fi Operating Environment Items Descriptions Temperature -20° C ~ 50° C Relative Humidity 0% ~ 90% Appendix A 209 A. 2 PC Requirement for running ActiveSync 4.x To connect the device to PC, Microsoft® ActiveSync® program should be installed in the PC. The ActiveSync 4.5 is included in the Getting Started CD. Appendix A 210 ActiveSync 4.x is compatible with the following operating systems and applications: Microsoft® Windows® 2000 Service Pack 4 Microsoft® Windows® Server 2003 Service Pack 1 Microsoft® Windows® Server 2003 IA64 Edition Service Pack 1 Microsoft® Windows® Server 2003 x64 Edition Service Pack 1 Microsoft® Windows® XP Professional Service Packs 1 and 2 Microsoft® Windows® XP Home Service Packs 1 and 2 Microsoft® Windows® XP Tablet PC Edition 2005 Microsoft® Windows® XP Medial Center Edition 2005 Microsoft® Windows® XP Professional x64 Edition Microsoft® Outlook® 98, Microsoft® Outlook® 2000 and Microsoft® Outlook® XP, and Microsoft® Outlook® 2003 messaging and collaboration clients Microsoft® Office 97, excluding Outlook Microsoft® Office 2000 Microsoft® Office XP Microsoft® Office 2003 Microsoft® Internet Explorer 4.01 or later (required) Microsoft® Systems Management Server 2.0